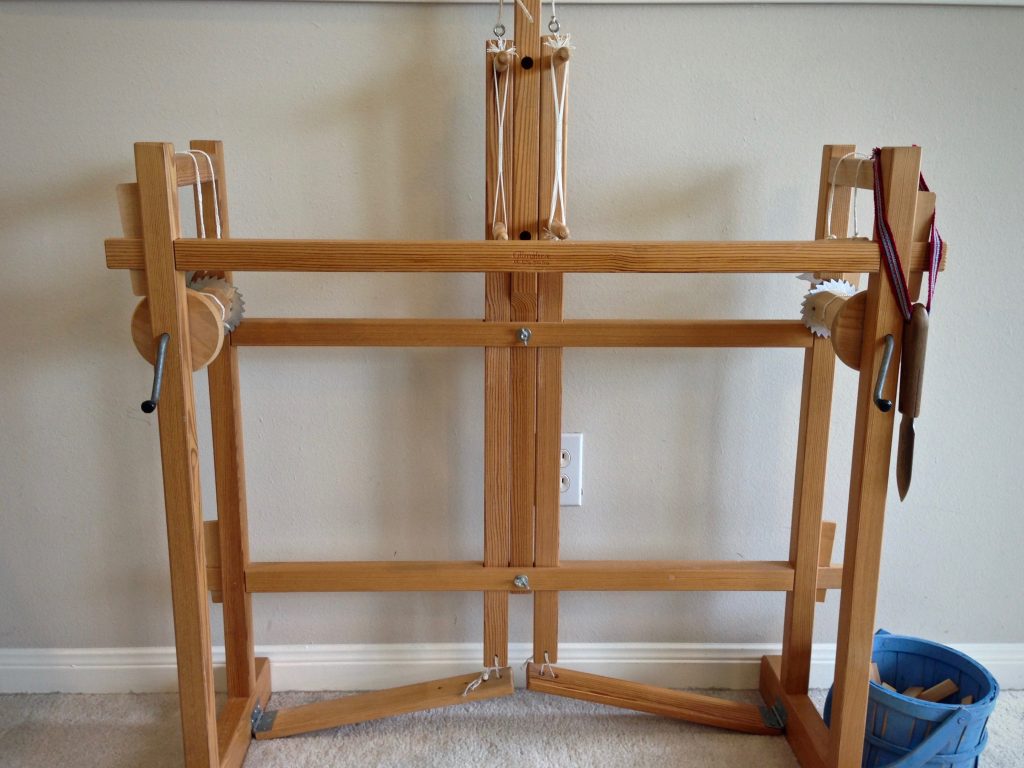
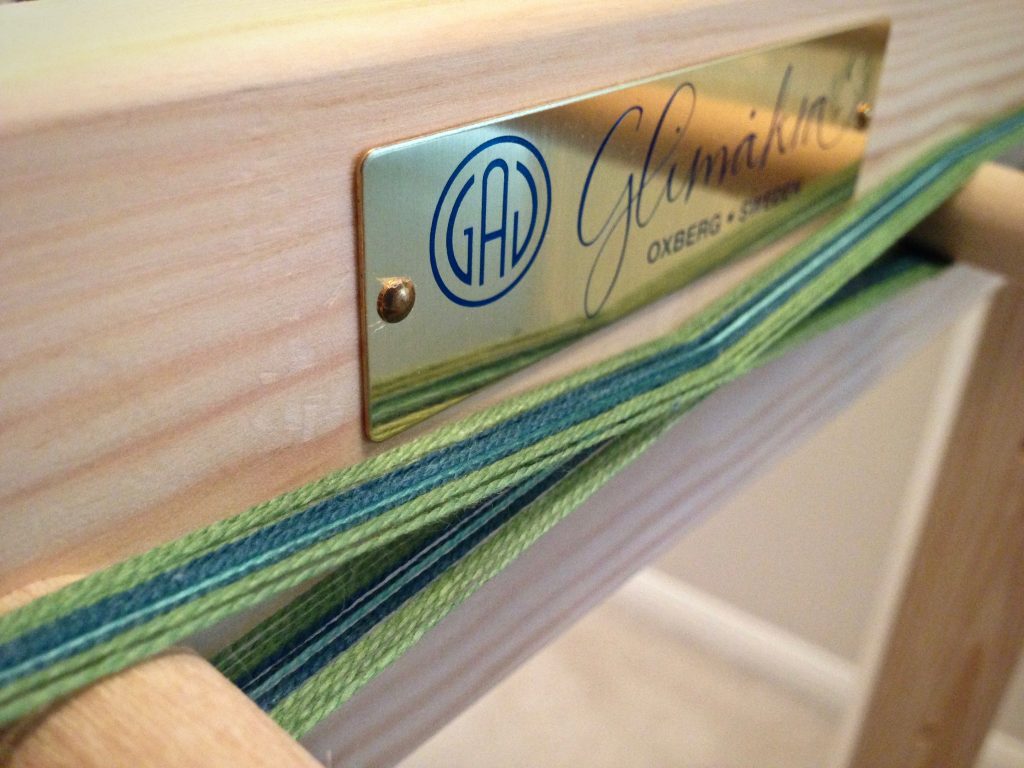
My two-treadle Glimåkra band loom is called into action. I don’t have to add hanging tabs for the towels that I am weaving on the Ideal loom. But I want to. A little band weaving here and there, and I will have this special detail ready for the towels when they come off the loom. (Watch me weave on the band loom in the video below.)
How I Warp the Band Loom:
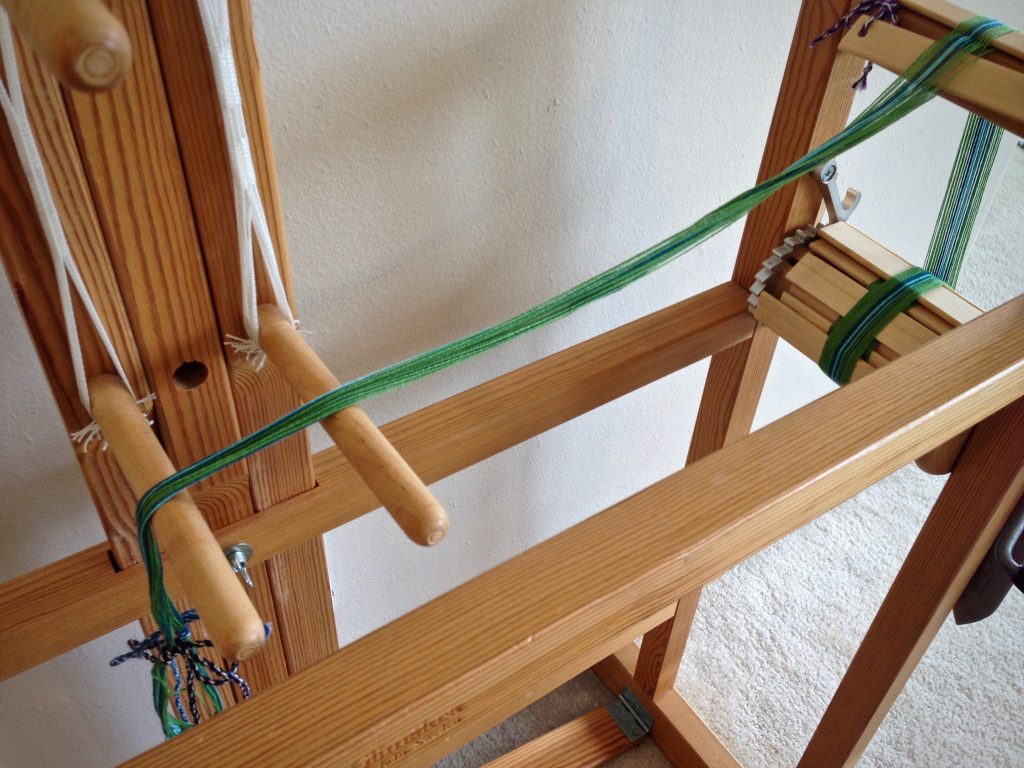
- Wind a narrow warp. Tie the lease cross. For a long warp, tie a choke tie about every meter.
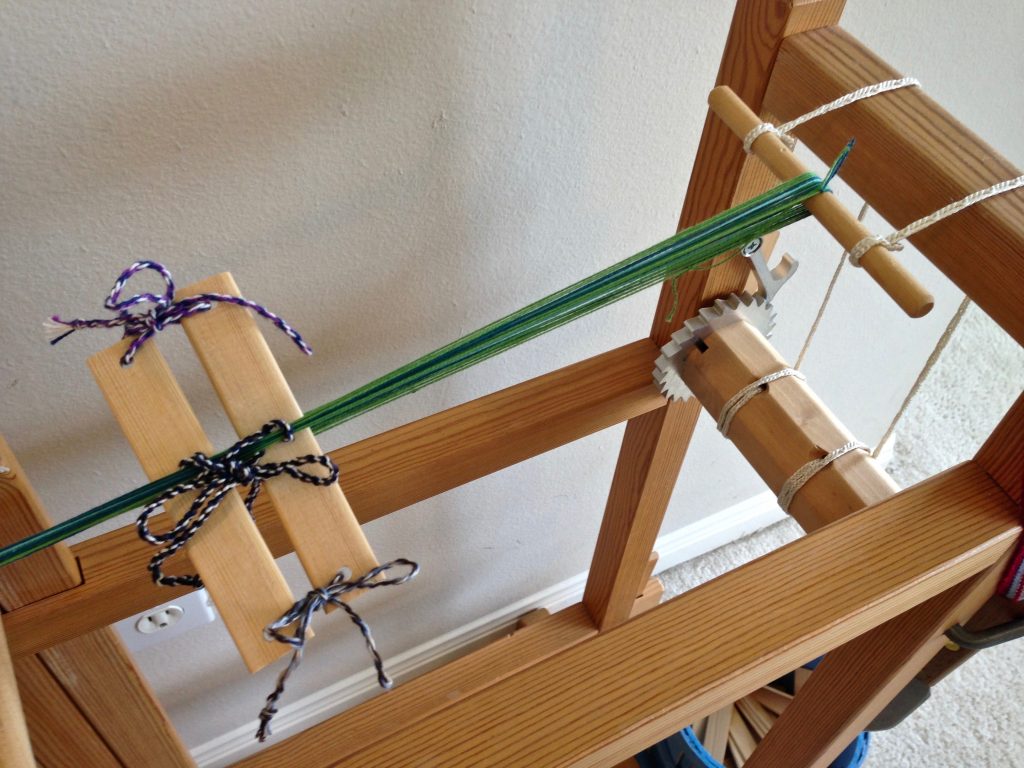
- Put the end loop of the warp on the warp beam tie-on bar. Insert lease sticks in the cross. Tie the sticks together; or tape them together with masking tape.
- Remove tie around lease cross. Hold the warp taut with the left hand while winding on with the right hand. Insert warping slats around the beam the first time around, and then every other time around after that.
- Wind on until the beginning of the warp is a few inches in front of the heddles.
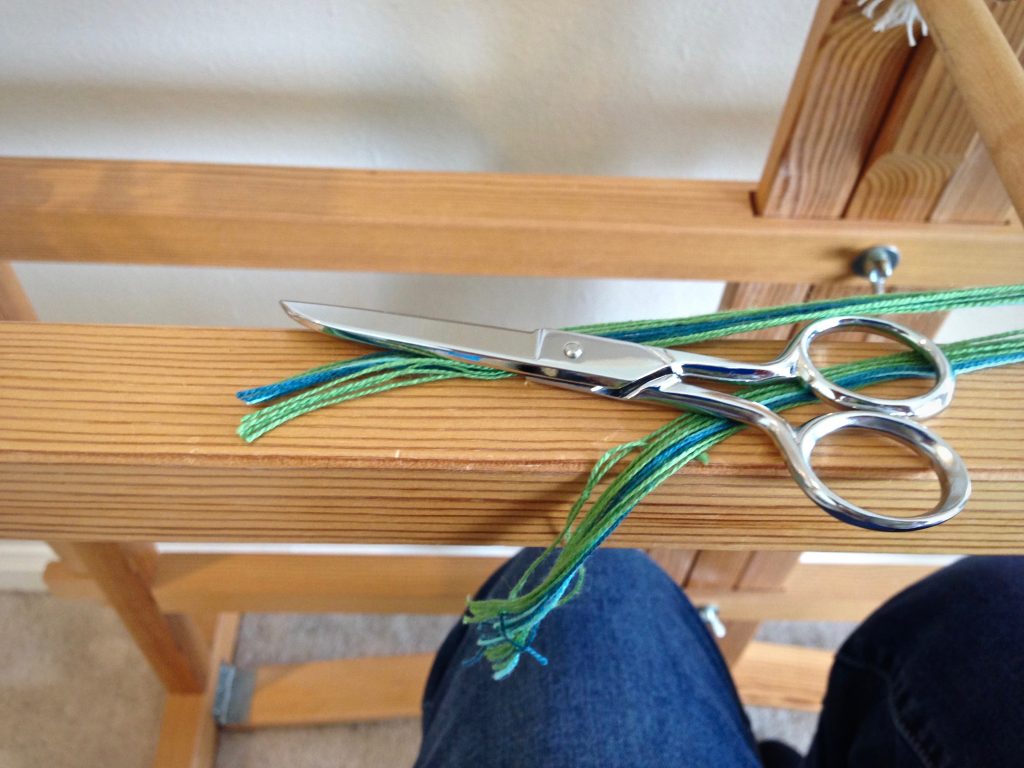
- Tie or tape the lease sticks to the back beam. Cut the loops at the front end of the warp.
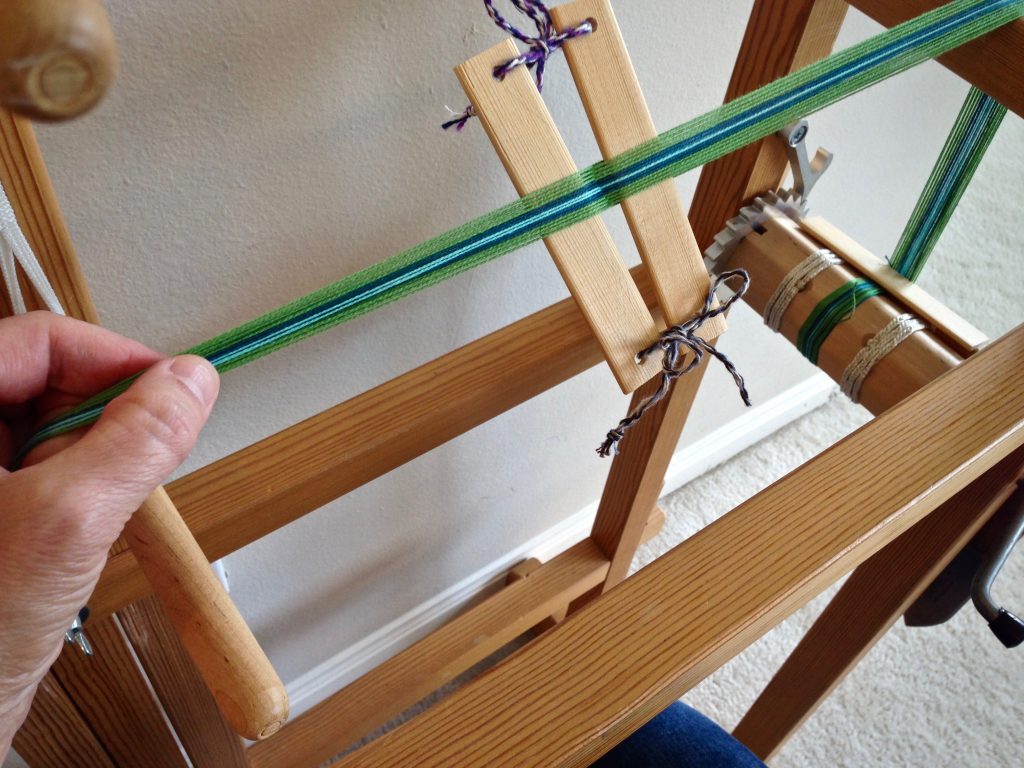
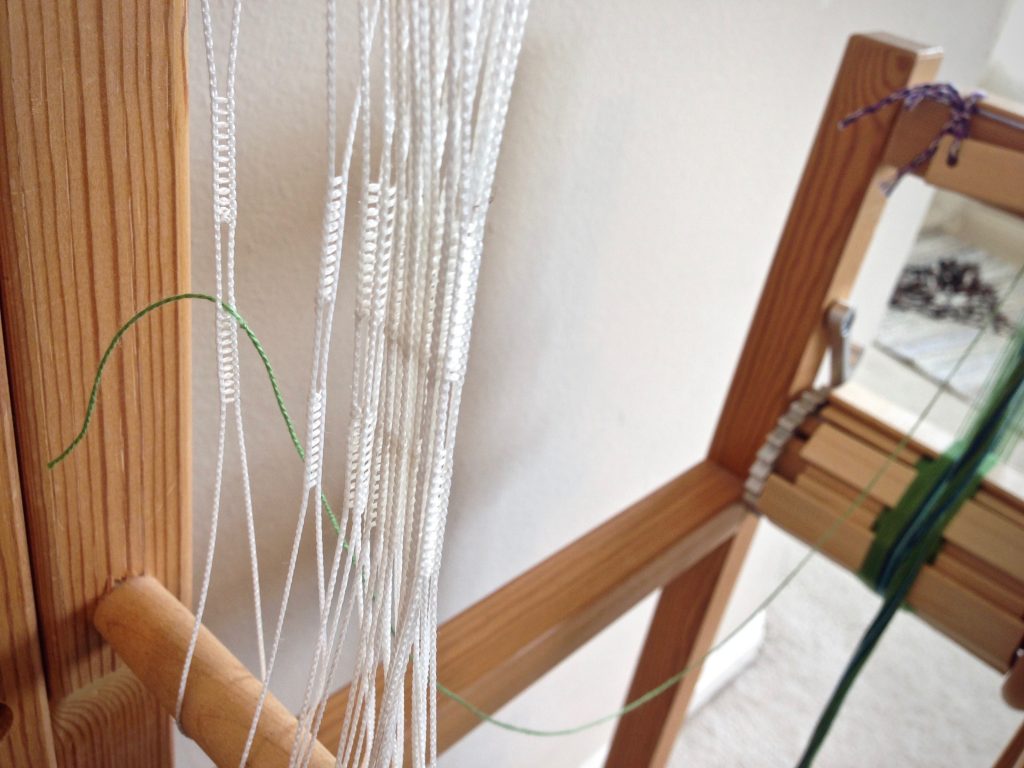
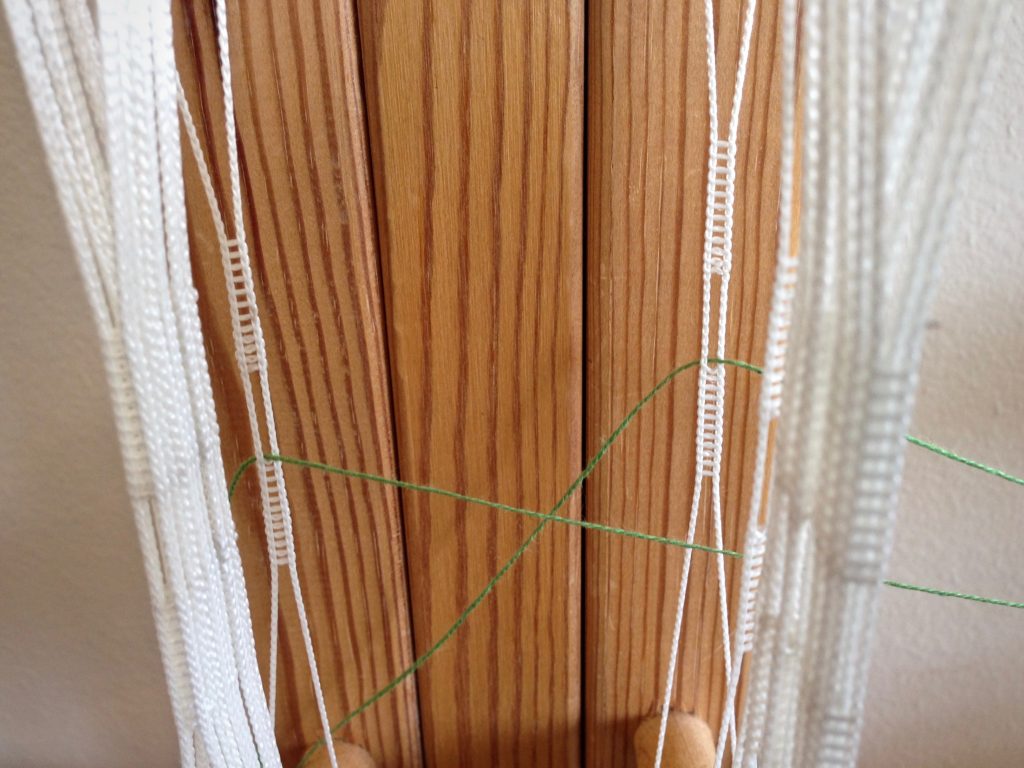
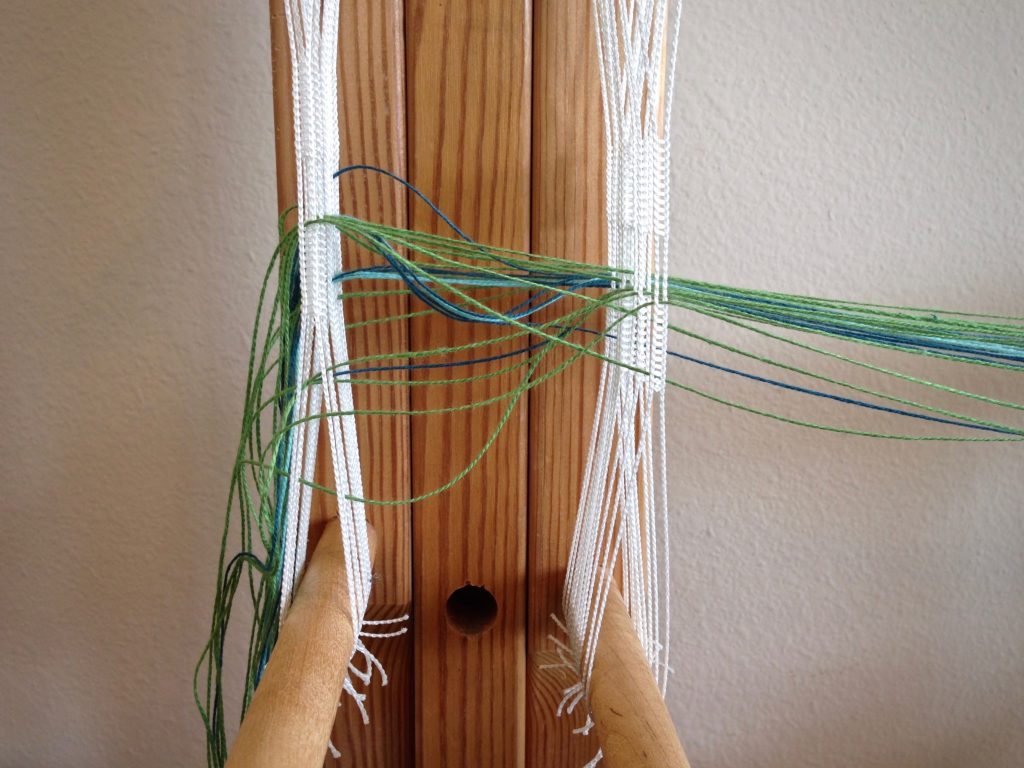
- Thread the heddles, alternating between the heddles on the right and on the left.
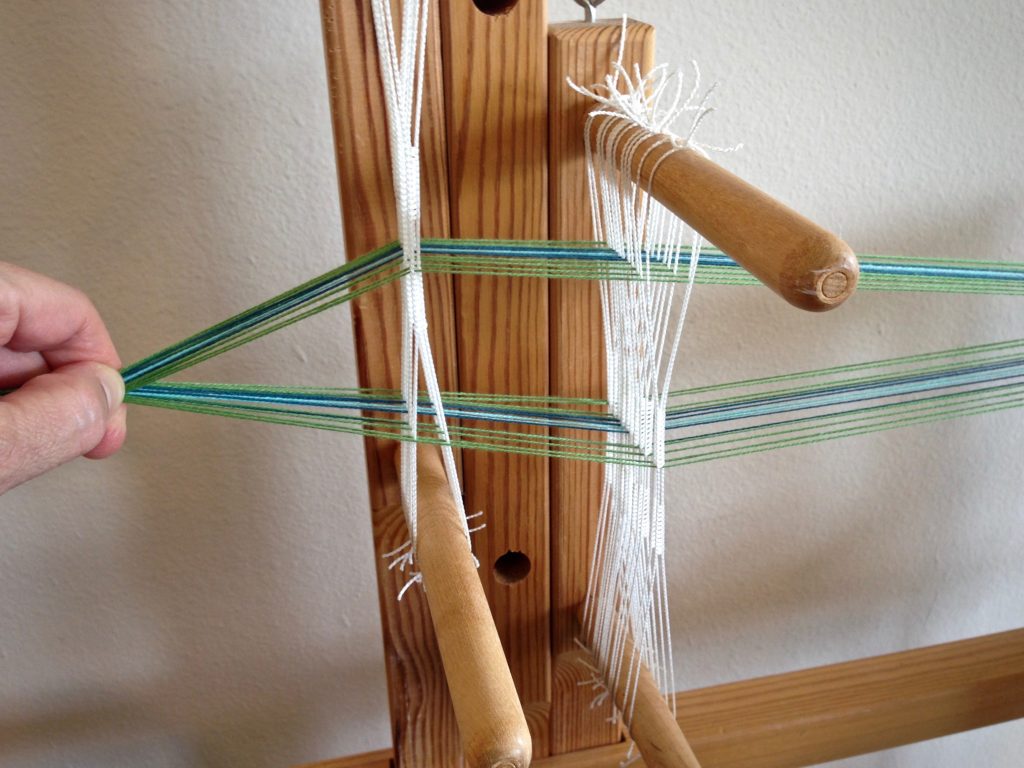
- Hold the warp taut and depress each treadle to check for any crossed threads.
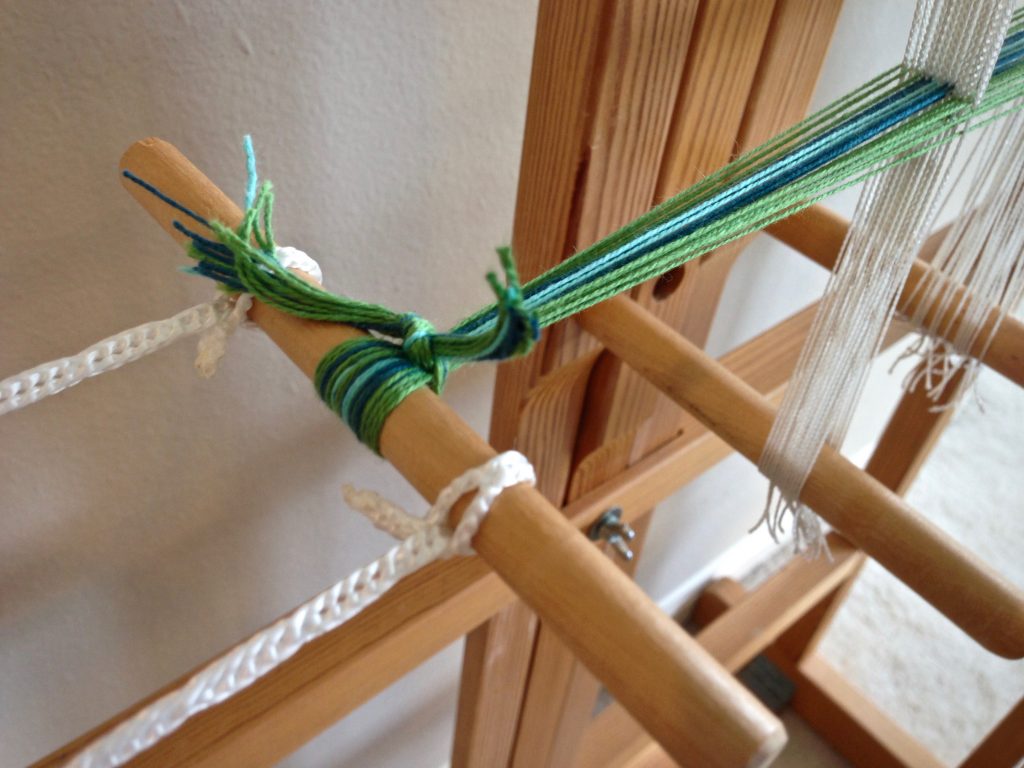
- Tie the warp onto the front tie-on bar.
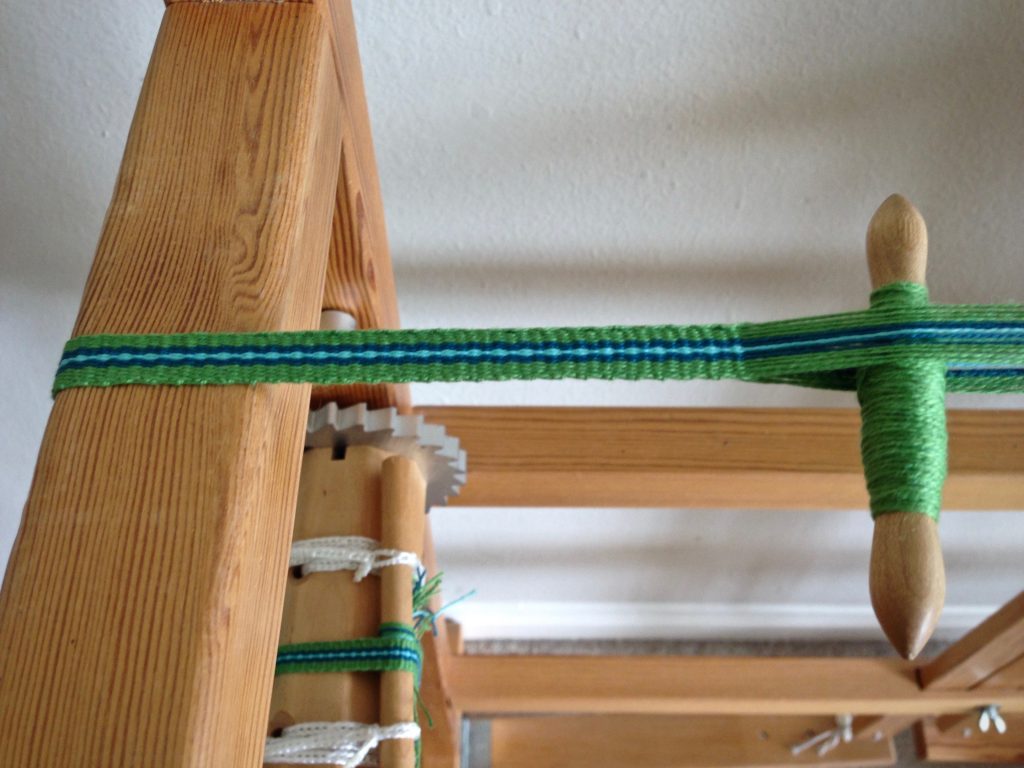
- Tighten the tension; wind your shuttle; and weave to your heart’s content! (A short cardboard quill can be used as a shuttle.)
May you go the extra mile to add special little details.
Happy band weaving,
Karen

Thanks for posting this, Karen. It was really interesting and informative. I like the added little touches like a woven tab for hanging too.
Hi Alaa, It makes me happy to know this was interesting and informative to you. Adding special touches is one of the great advantages of making things by hand!
Karen
Hi Karen! Your post and video came at the perfect time as we just finished Vavstuga Basics today. I have a band loom at home that I haven’t used yet, and 2 students purchased theirs today before leaving Vavstuga. Your wonderful blog was discussed several times around the dorm table this past week. Even Bettie said how timely today’s blog posting was! Thank you for sharing with us!!
Wow, Geri, Are you serious?! What a wonderful co-incidence! I am delighted beyond measure that I could have some small part in bringing a helpful tidbit to Vavstuga Basics.
Thank you for letting me know.You and your Vavstuga Basics friends have totally made me smile.
Happy, Happy weaving,
Karen
What a great loom! I can imagine advantages over the more traditional designs: standing, treadles, cloth and warp beams. How interesting that you weave on it what I would consider sideways.
Hi Weaver Grace, Good observations. (I do weave on the band loom sitting down. You probably can’t tell that from the video.) The two primary reasons I prefer this band loom over my inkle loom is 1) I can weave much faster and 2) I can put on a longer warp (I’ve done up to 10 meters).
Weaving sideways is quite awkward at first; but, with practice, your hands become fluent.
Karen
I always enjoy your blog posts. You are inspirational both in weaving and spirituality.
I’m trying to convince myself that I do not need a band loom 🙂 If you have time, would you tell me some advantages over the inkle loom (which I have). It just looks so much cleaner on the band loom. I know you can weave longer warps on it. It looks faster than weaving on an inkle…
Thank you so much for your posts.
Annie
Hi Annie,
I have a feeling we just cross posted. See my reply to Weaver Grace about weaving speed and length of warps. 🙂
Far be it from me to convince you that you *need* something you want. I have a hunch you will be able to convince yourself.
The advantage of an inkle loom is that you can travel with it, which I do. So, one for travel, and a stationary one for home. More weaving over all. That can’t be a bad thing!
Thanks for your incredibly kind words. That really touches me!
Happy weaving,
Karen
I see you have one of the “new” band looms Glimåkra has changed the band loom slightly since I purchased mine…nothing of consequence excepting the heddles—mine are string not Texsolv. My question is where did you get the delightful shuttle?
I bought my band loom second hand. I’m not sure what year it was made, but I know the newer Glimåkra band looms have ratchets that are a little different than mine. String heddles? That’s interesting.
My husband carved the shuttle for me. It’s modeled after an old Swedish band loom shuttle that we had seen.
Karen
Mine uses string because it predates Texsolv!! As do I 🙂 I also carve so I guess I guess I will go the same route. I really like the idea of one handed operation so that the ‘dance’ involves all four limbs.
Hugh, it is a great “dance” for the hands and feet.
I will send you an email with specs for the shuttle in case you decide to carve one for yourself.
Karen
Karen: I always enjoy your posts. I use a 2 shaft table/band loom my brother in law made for me for my bands; higher tension and longer warps. However, I watched your video and was mesmerized by the “dance.” Anyway, any chance I could get the dimensions for the shuttle. I turn wood and would like some of these.
I’ll be happy to send you the specs for the shuttle. I need your email address to do that. You can click here: Get in Touch and send me an email through the contact form. Turned wood is a great idea for making these little shuttles!
Karen
I also wondered where you got the shuttle! Would you be willing to share specs with others? I just started using my band loom and your pictures in this post have been very helpful ! The glimakra directions are quite challenging.
Hi Elle, I am very happy to send you the shuttle specs. I will send you an email shortly.
Have a great day!
Karen
Like Geri, who commented earlier, I was at Vavstuga last week! I bought a band loom like yours and then, the next morning, we saw this post about how to use it! Such serendipity! Thanks for the clear instructions!
Hi Kerry, I couldn’t be more pleased that my instructions came at such an opportune time! You are going to enjoy that new band loom!
Happy weaving,
Karen
Wow – very fun! I haven’t seen a band loom used before. I guess it’s what the Shakers use/d to weave the bands for their chairs. That is a very lovely detail…
Hi Debbie, if I remember correctly, the Shaker tape looms were a different design, but similar function. And they certainly produced miles and miles of bands!
Karen
Thank you Karen! I want to use my band loom more but it was a little daunting. This post really helped. I think the only thing I need to work with is how tight to have the warp. I think I have it too tight. I will put on a warp this week and just sit and practice!
Hi Anne, I am so happy that this post was helpful to you! You are right–practice is the best way to learn this. It takes a while before it’s comfortable. But once it takes off for you, it’s a lot of fun.
Happy practice,
Karen
Hi Karen,
I am the other Vavstuga student who purchased a band loom which coincided with your post! I can’t express how happy I am it happened that way. Directions with the loom were sooo… minimal! Yesterday I got together with the other band loom buyer from Vavstuga and we helped each other get started. We referred to your post as we warped and then began to weave. What fun! I don’t think we could have done it without you. Great directions, photos and video!
My mind is stirring up other uses for the bands.
Thanks again!
Ann
Wow, Ann, that’s fantastic! I couldn’t be more thrilled that things worked out this way! Thank you so much for telling me your story. It makes my heart sing.
Happy band weaving,
Karen
Hi Karen
Awesome little machine and great video, it was great to see some one using one of these looms.
I just got into inkle looming and the thing that up sets me is the amount of yarn that goes to waste when it reaches the heddles is this loom any better in that respect?
Hi Chris,
Good question! I think I end up with about 10 inches/25 cm of loom waste at the end, which is probably not much better than the inkle loom. However, I can put on a much longer warp, so the percentage of loom waste overall is much less. I’ve done as long as 10 yards/9 meters. In that case, the loom waste didn’t count for much.
Karen
Hi Karen,
I want to thank you for this post. I was inspired to purchase a band loom after reading this post several months ago. Without your instructions and video I would have really struggled to figure out the easiest way to warp this loom. As Ann commented the instructions that come with the loom are very minimal to state it kindly. I looking forward to bands to use for straps and tabs! Bless you for sharing your knowledge!
Hi Ruth, I’m so glad! I hope you enjoy weaving on your band loom as much as I do on mine. There are so many uses for the bands!
Karen
Hello Karen,
I’m just starting out in band weaving with a small band heddle (backstrap method). If I enjoy it I hope to buy a loom like this one day.
Could you tell me about the weaving band/sword that you are using? It looks like an antique. Did it come with the loom?
Thank you for the post and video,
Sarah
Hi Sarah, I use a band “knife” that I purchased from Vavstuga.com. It’s made for this purpose and works really well.
Happy weaving,
Karen
In a few weeks, a very similar bandloom from Glimakra will move in with me. Your comments on how to prepare the warp, come to me as called (I also found another, but it seems to me more complicated). Thanks a lot for this.
Hi Julia, Hooray! You have much to look forward to with your band loom.
Happy weaving,
Karen
Thank you so much for writing this post. I am new to band weaving and your tutorial will provide me with guidance as I get my new loom warped! I would also love the specs for your band shuttle if you still have them. Thank you again and again!
Hi Ashlee, I’m so glad you found what you need here! I’m happy to send you the specs for the band shuttle. Watch for an email from me.
Happy weaving,
Karen
Hello Karen,
I am interested in receiving the specs for your shuttle to use with the Glimakra band loom.
Thank you.
Hi Kelly, I’ll be happy to send it to you. Look for an email from me.
Karen
Thank you for all this information. So generous! I finally assembled this band loom I inherited from my mother. It also has string heddles. My son could make me a little shuttle like yours – what an efficient way of working! May I also ask for the shuttle dimensions?
Hi Katia, That is wonderful that you will be able to put your mother’s band loom to use. That makes it very meaningful.
I am happy to send you the shuttle dimensions. I will send you an email.
Happy weaving,
Karen
Hello, I found your informative post and video and wondered what weaving sword are you using? Or perhaps it is a knife of some kind? I am waiting for my loom from Glimakra and have woven on inkle looms before. I am so excited to get started!
Hi Elle, I am using the band knife that I purchased from Vavstuga.com. It’s a perfect tool for the band loom. It has nice weight in the hand, and is like a knife, except the blade edge is rounded.
I’m excited for you! I hope you enjoy weaving on your new band loom as much as I do on mine.
Happy weaving,
Karen
Thank you so much for this description. It is just what I needed to get me started.
Hi Elaina, Good! I’m so glad you found it helpful.
Happy weaving,
Karen
Hi, Karen, I just purchased a second- hand Glimakra band loom and, after making some repairs, I am pleased to say it twirling very well! I too am interested in making a little shuttle like yours. Please share your dimensions if you would. Thanks so much for the video! I have two smaller inkle looms for traveling, but this one is tops! Just finished a 6 1/2 yd. band in a couple of days.
Ellen
Hi Ellen, I’m excited for you with your band loom adventures! I will be happy to send you the specs for the shuttle via email.
Happy weaving,
Karen
I wish I’d read this before warping my band loom! I did get it on but your sequence is so much easier! (I threaded first which meant a lot of extra winding). How do you get a nice loop at the end with an odd number of threads?
Hi Alison, I’m glad you ended up here. Next time you will have an easier way to thread your band loom. But HOORAY for getting the warp on any way! When I wind a warp with an odd number of threads, to keep a complete loop at the end, I measure off one full length of thread separately and then I tie it along with a pair of threads as I’m winding the warp. The knot will be at the end peg of the warping reel or warping board.
Thanks for stopping by,
Karen
Thank you for this post! I was just at Vavstuga at the beginning of this month for Basics. Loved it! I have a Glimakra Standard but had never woven on a band loom, and today was a rabbit hole / research day! I so appreciate the step-by-step warping pics — I love that it’s pretty much like warping a floor loom. And when I saw your video with the through, tug, step, whack mantra, I was like what? That’s so Vavstuga! I think the note on the loom currently is stuff, tug, step, whack — lol. I also love your shuttle. I may have to try a hand at carving one for myself if I move ahead with the band loom purchase. Thanks again!
Hi Dee Dee, Congratulations on experiencing Vavstuga Basics! The Glimakra band loom certainly is handy. I’m glad you landed here in your research! You’re right, warping the band loom is very straightforward, like warping a floor loom.
Enjoy!
Karen
I have a Swedish Band loom like yours. I’m refreshing my memory. Is the resulting band warp-faced? I’m planning a short project with Angora and I have been away from this loom for a while. If I remember correctly, the entire design is already in the warp, and like Repp weave, the weft only shows at the edges. Am I remembering correctly ? And THANK YOU for the warping instructions. I realized when I pulled this loom out of my closet that I couldn’t remember if it was direct warping or indirect. You clearly showed that I wind the warp separately and attach it to the loom.
Ginny, You are correct! The bands are warp-faced, and the weft only shows at the edges. You could probably use direct warping for this loom, but I’ve always wound the warp separately because it seems easier.
Enjoy your band weaving time!
Karen