
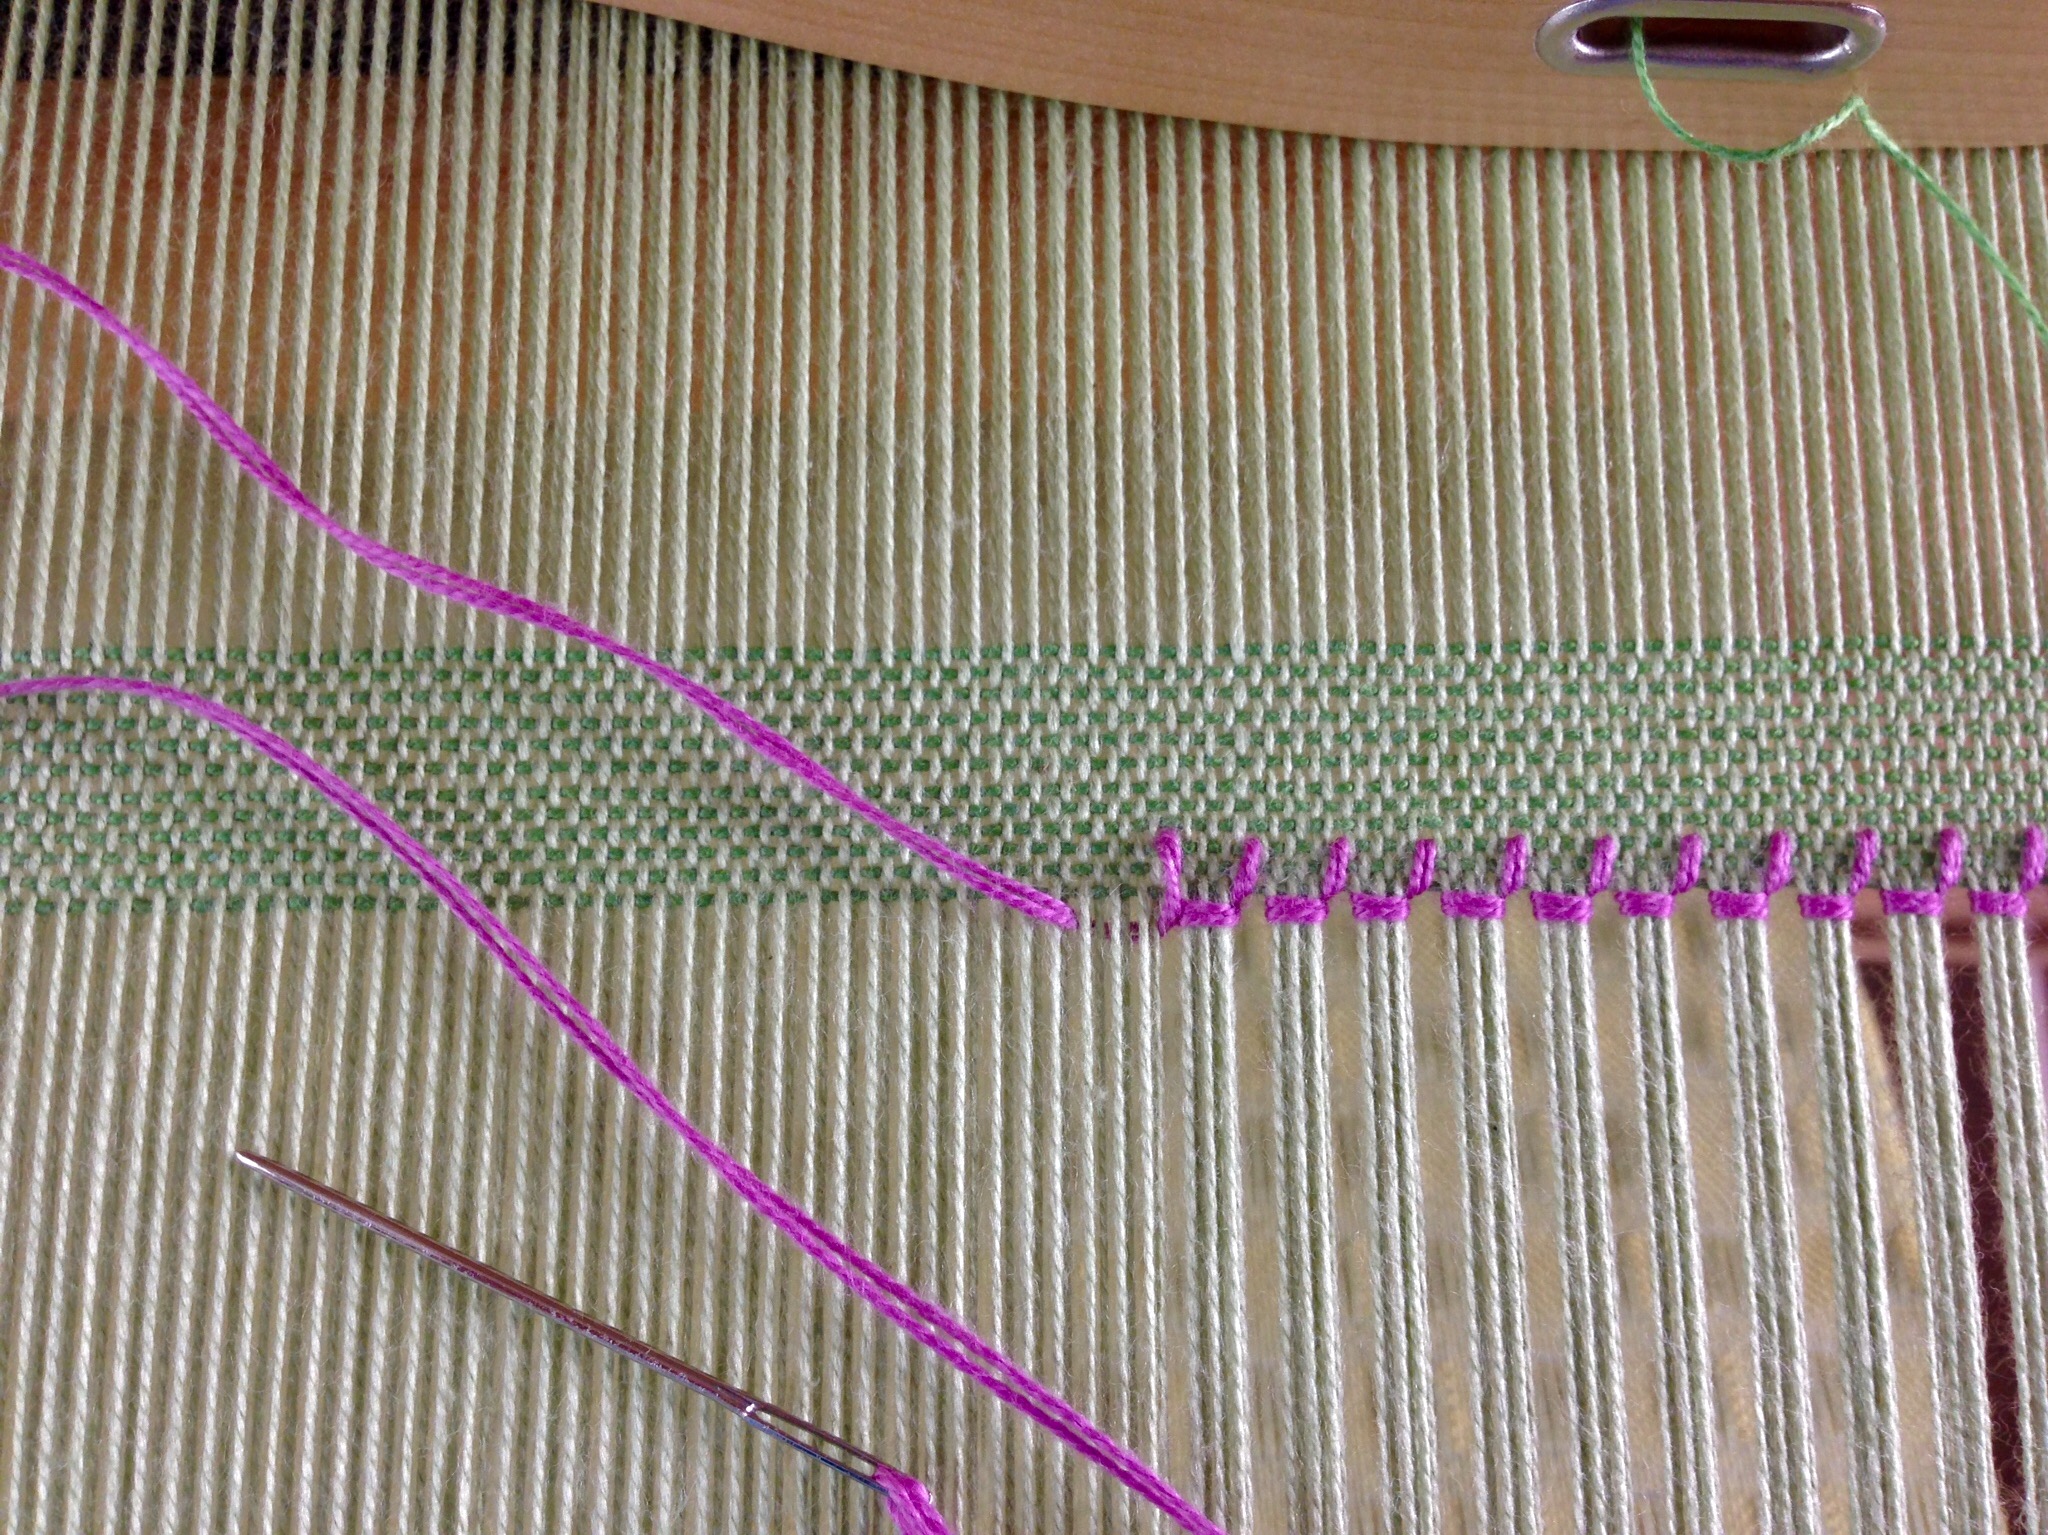
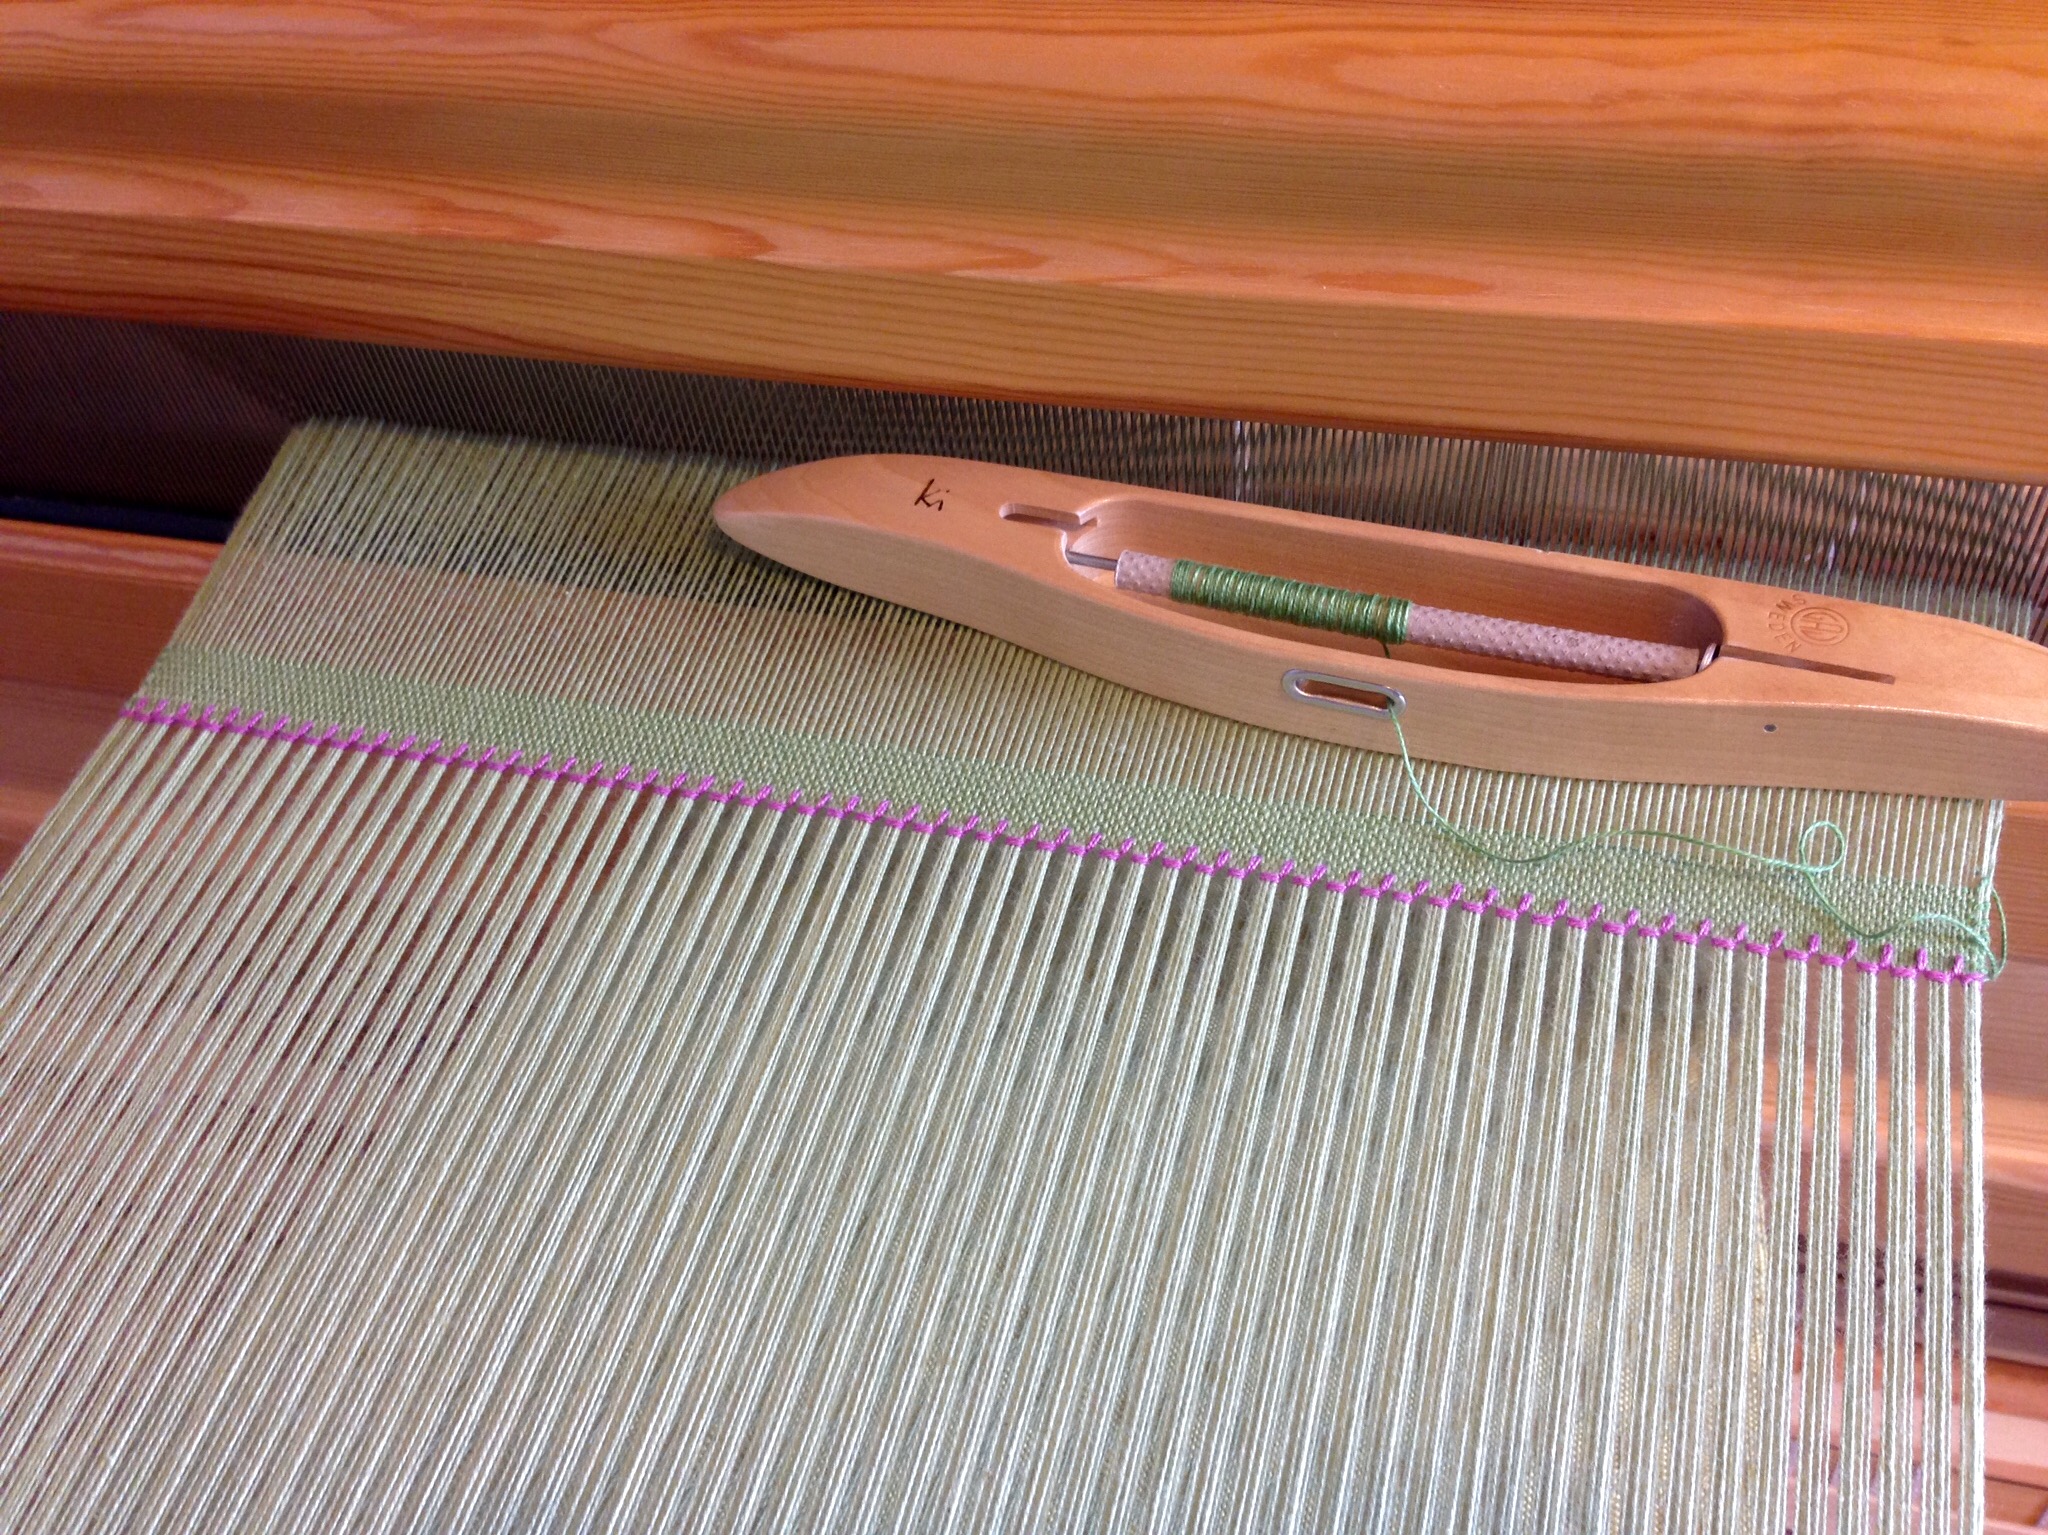
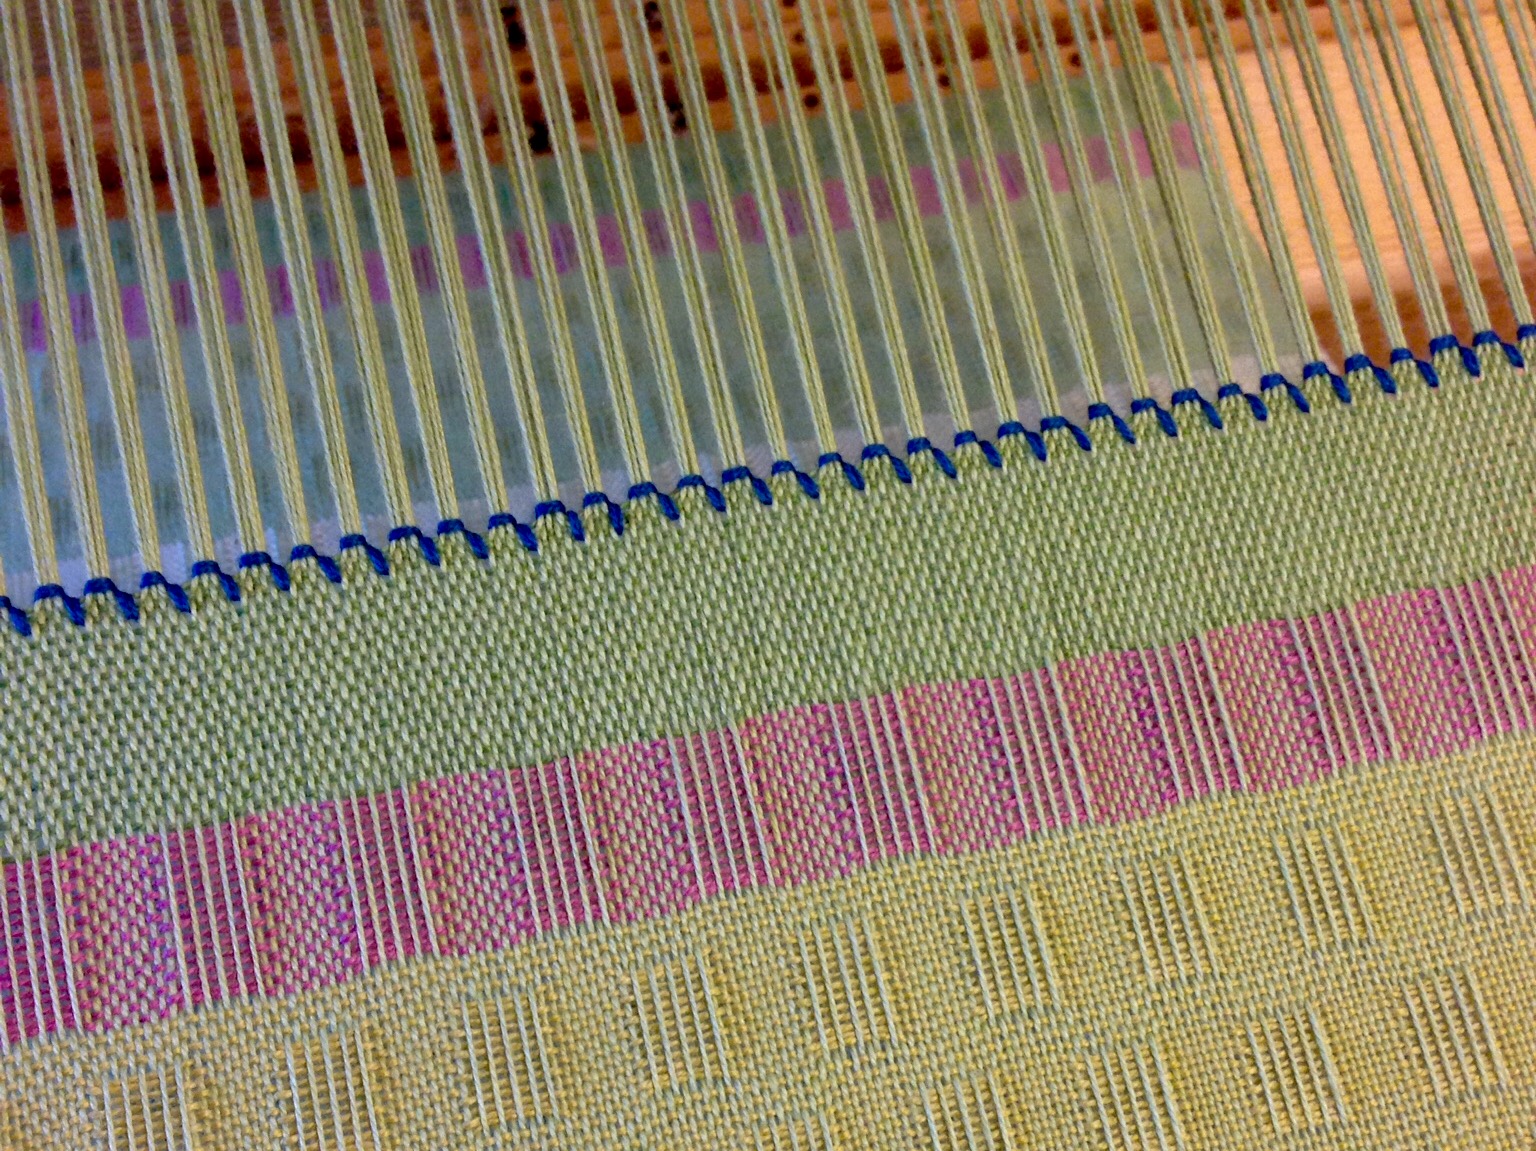
An embroidered trim is what I have in mind for this scarf. Hemstitching is just that. Instead of the usual single strand, I am using two strands of the 8/2 cotton weft in a contrasting color to accentuate the embroidered look. The hemstitching marks the beginning and the end. You can make hemstitching barely noticeable if you want, or you can make it so bold it can’t be missed, like I am doing with this one.
Hemstitching, with Contrasting Color:
Preliminary
- Weave an inch/2.5 cm or more of fabric for a header.
- Thread a blunt tapestry needle with a single or doubled strand of weft thread four times the weaving width.
- Starting an inch/2.5 cm away from the right-hand selvedge, weave the needle over and under, next to the first weft thread in the weaving, going toward the selvedge.
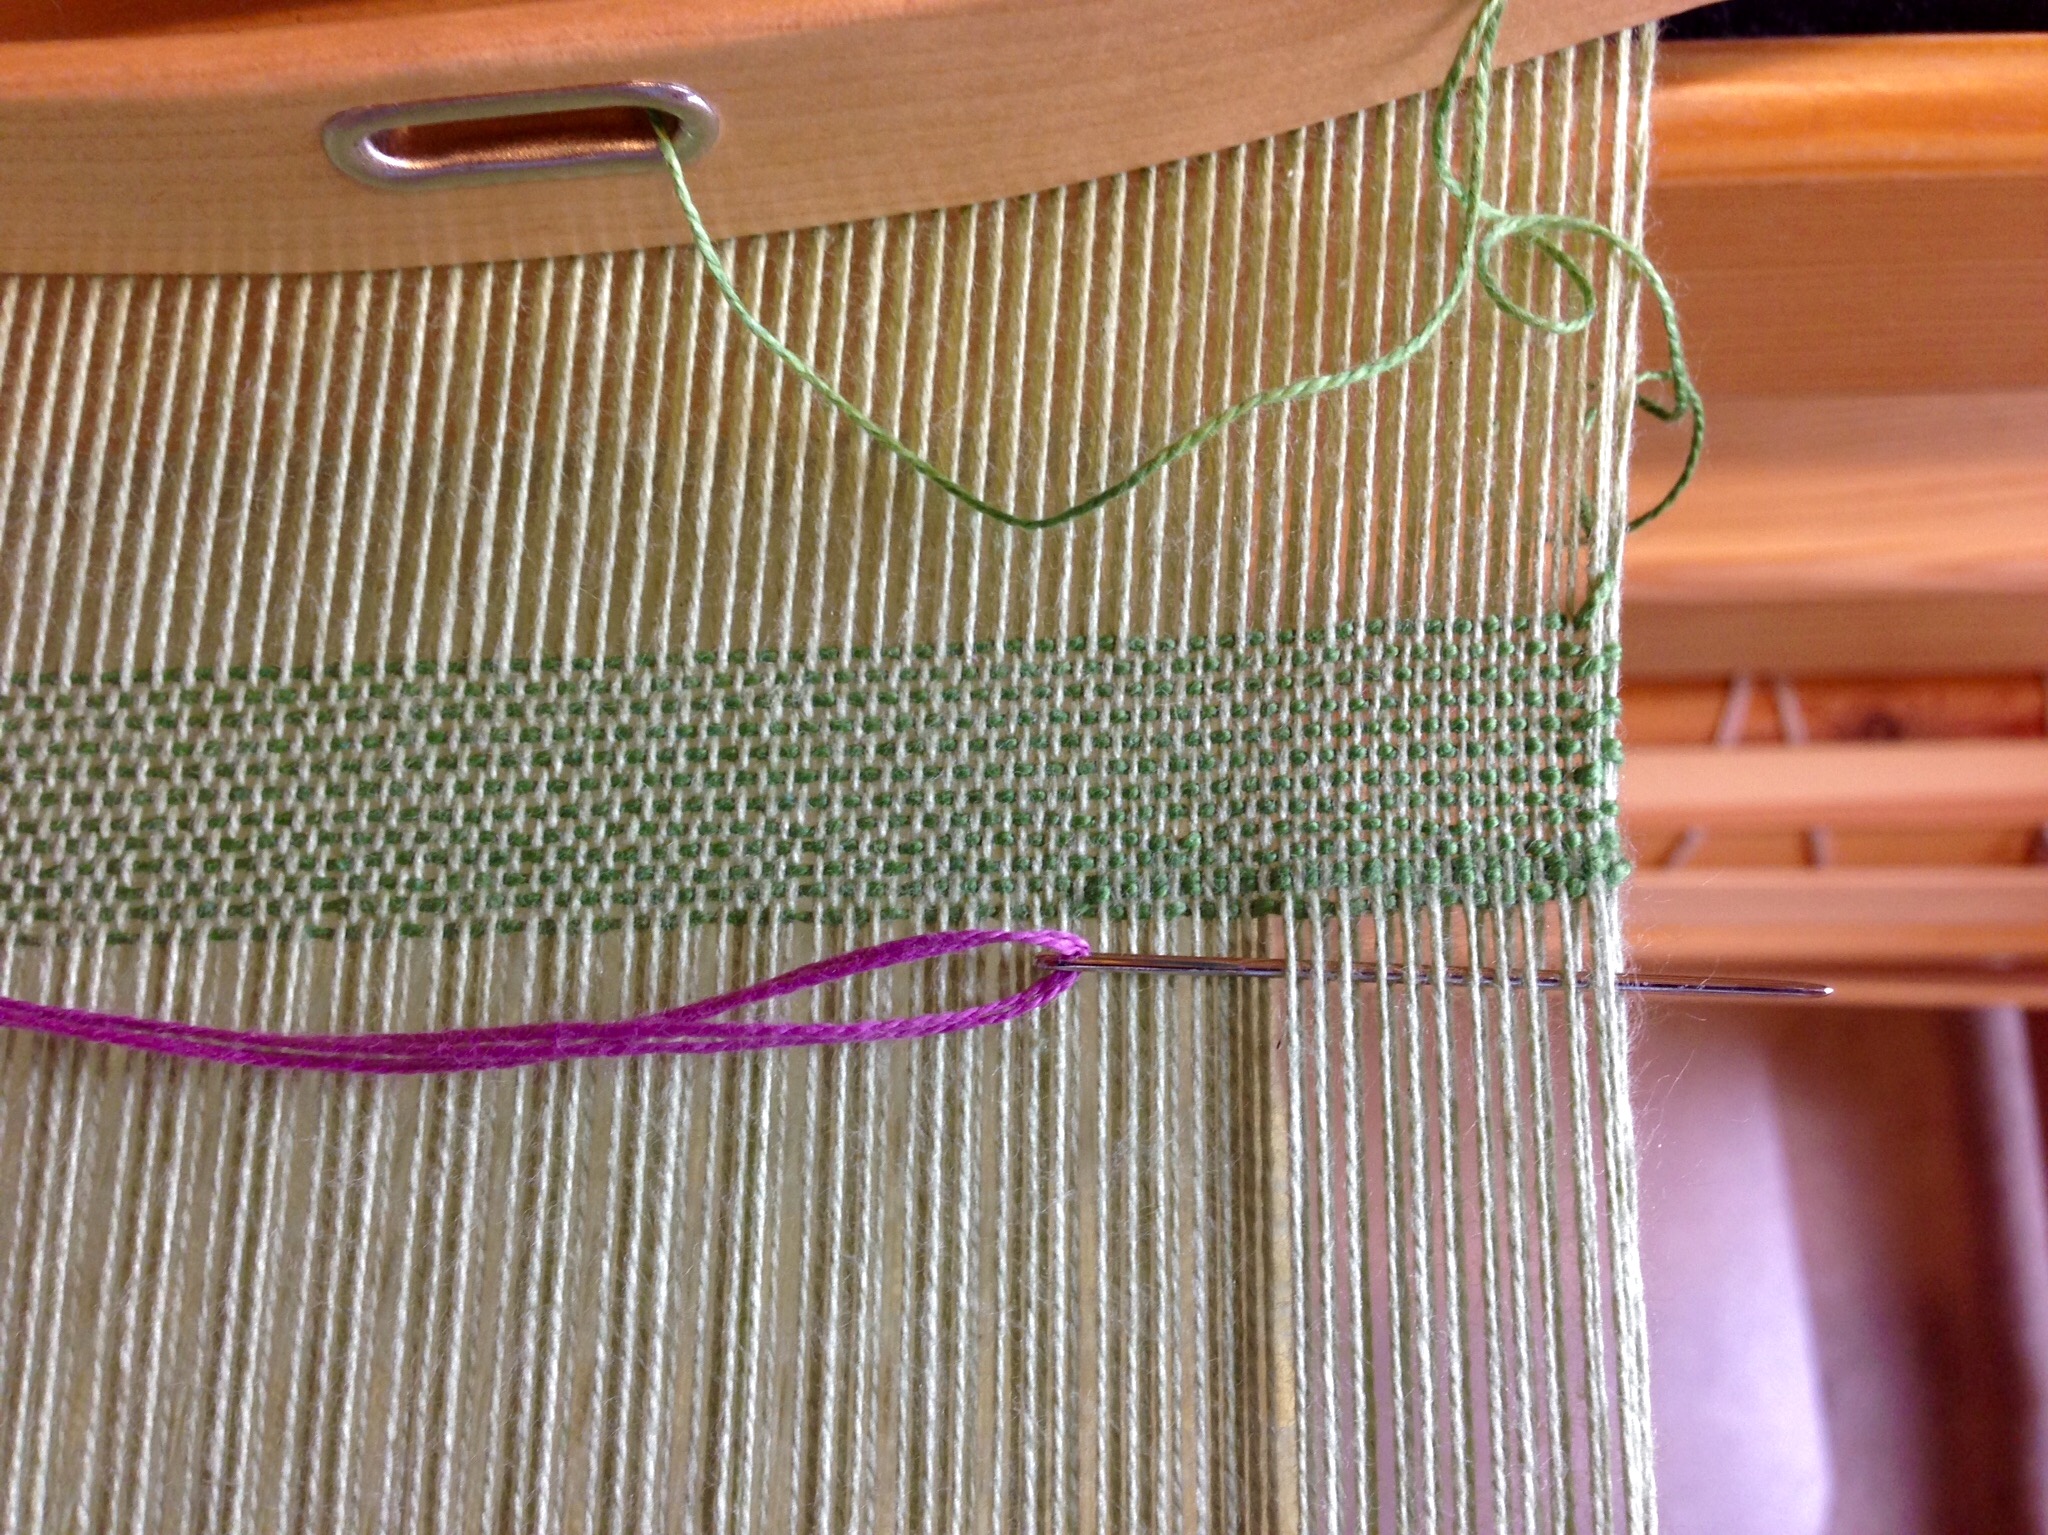
- Pull the stitching thread almost all the way, leaving the end woven into the selvedge. Capture the woven end within the first several stitches of the hemstitching.
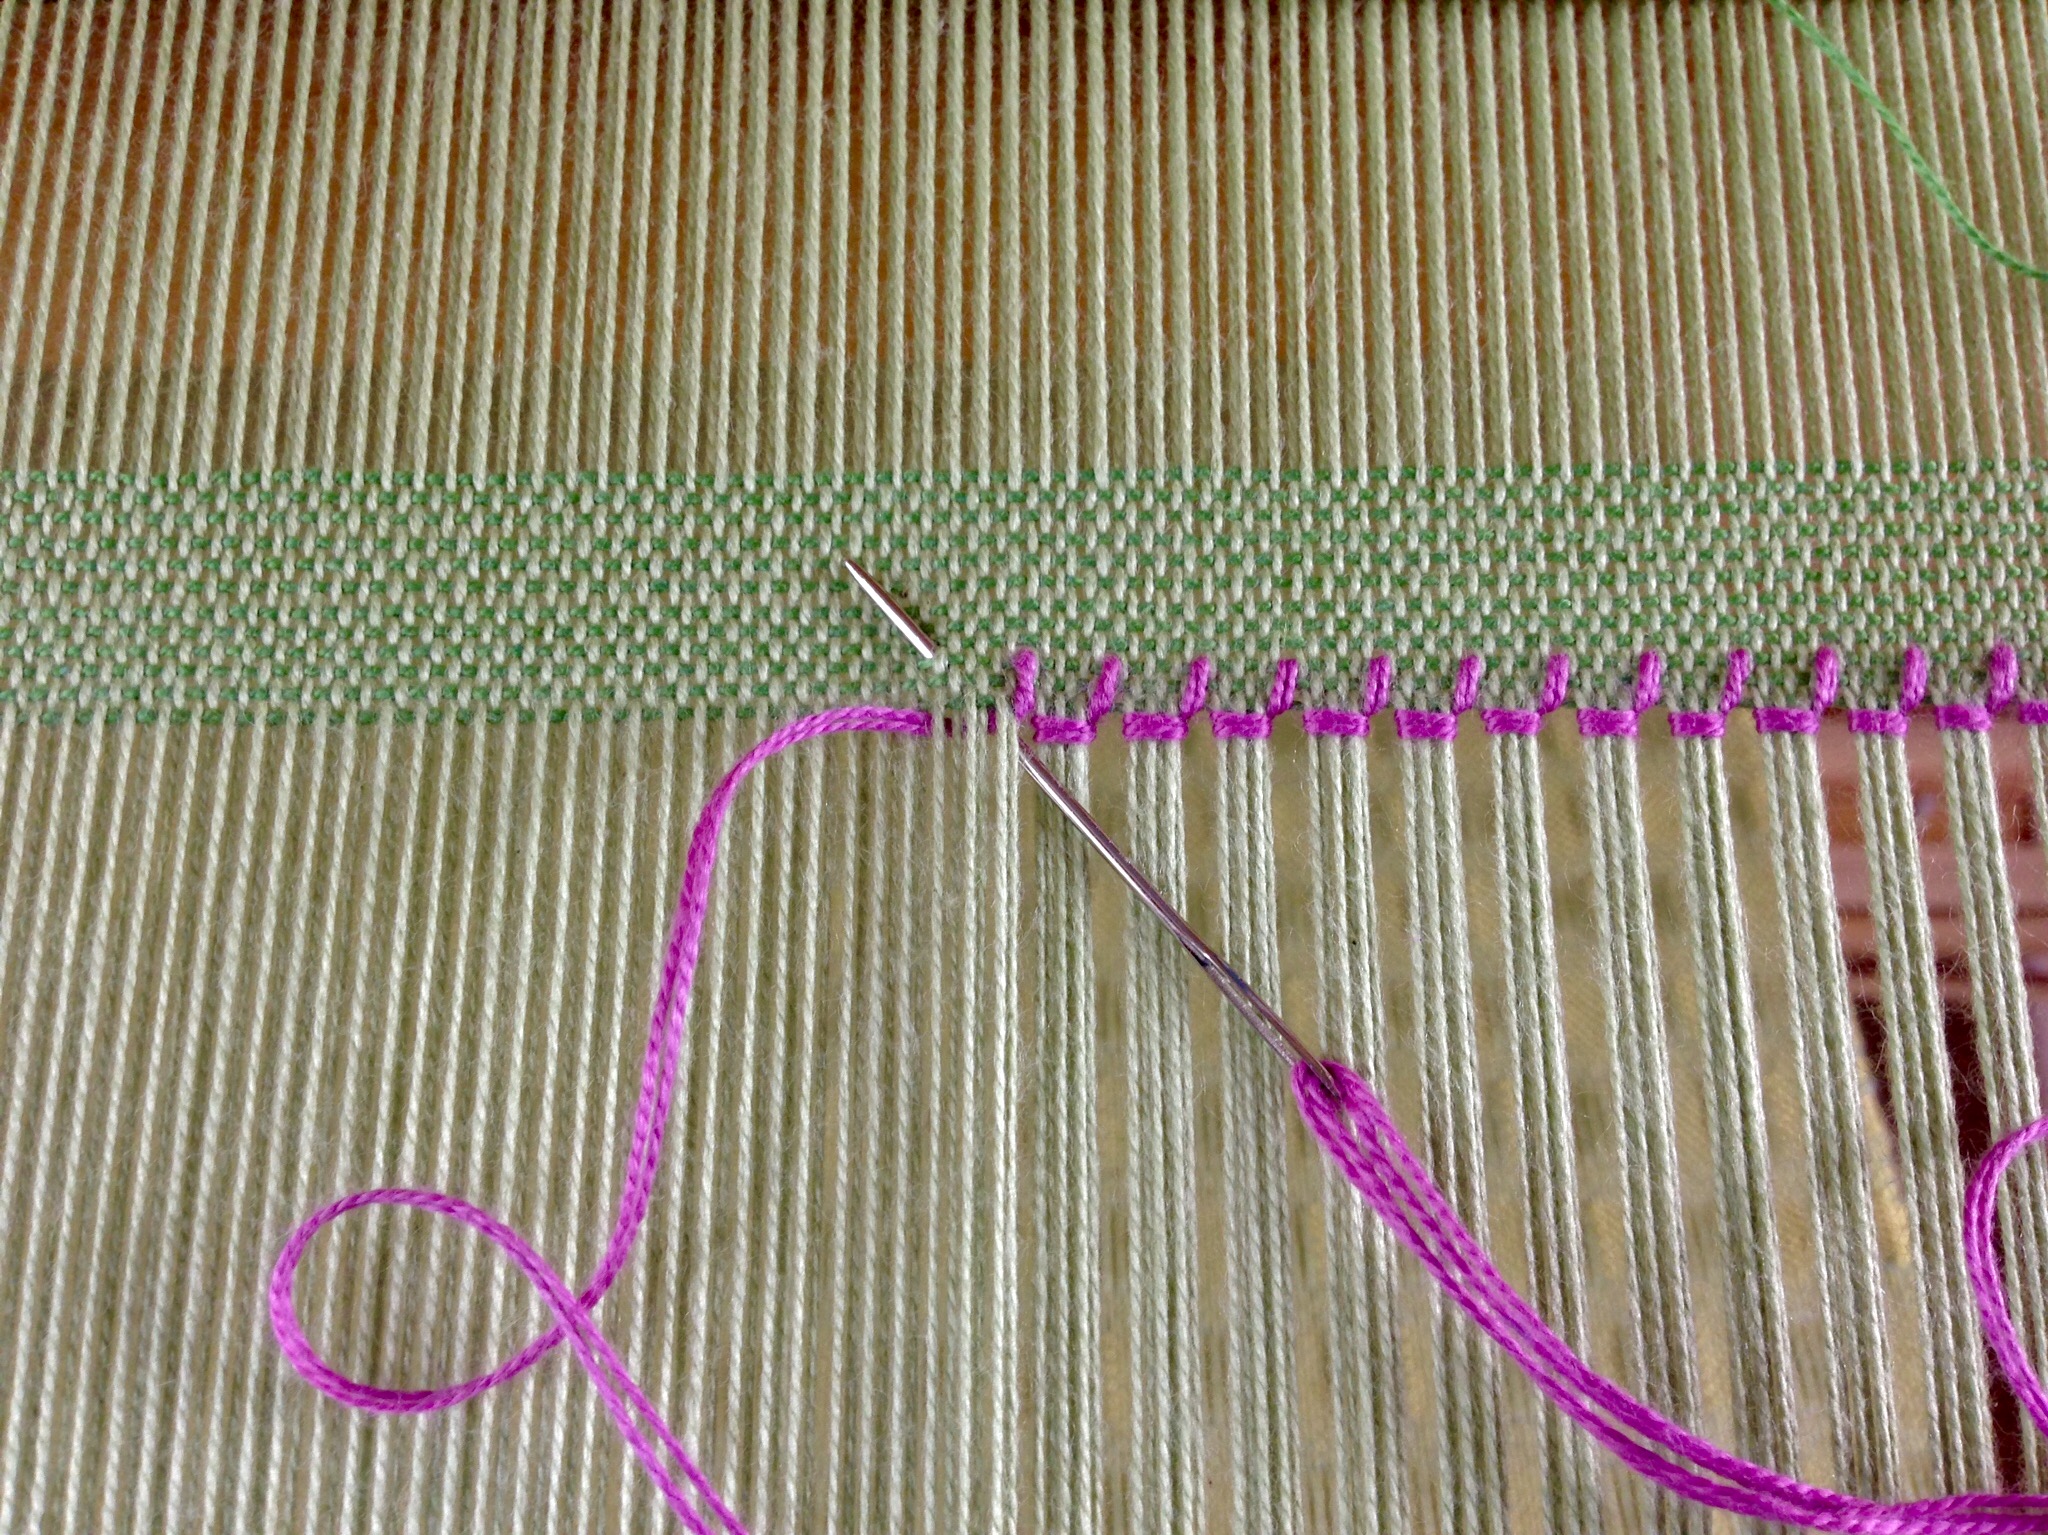
Step 1
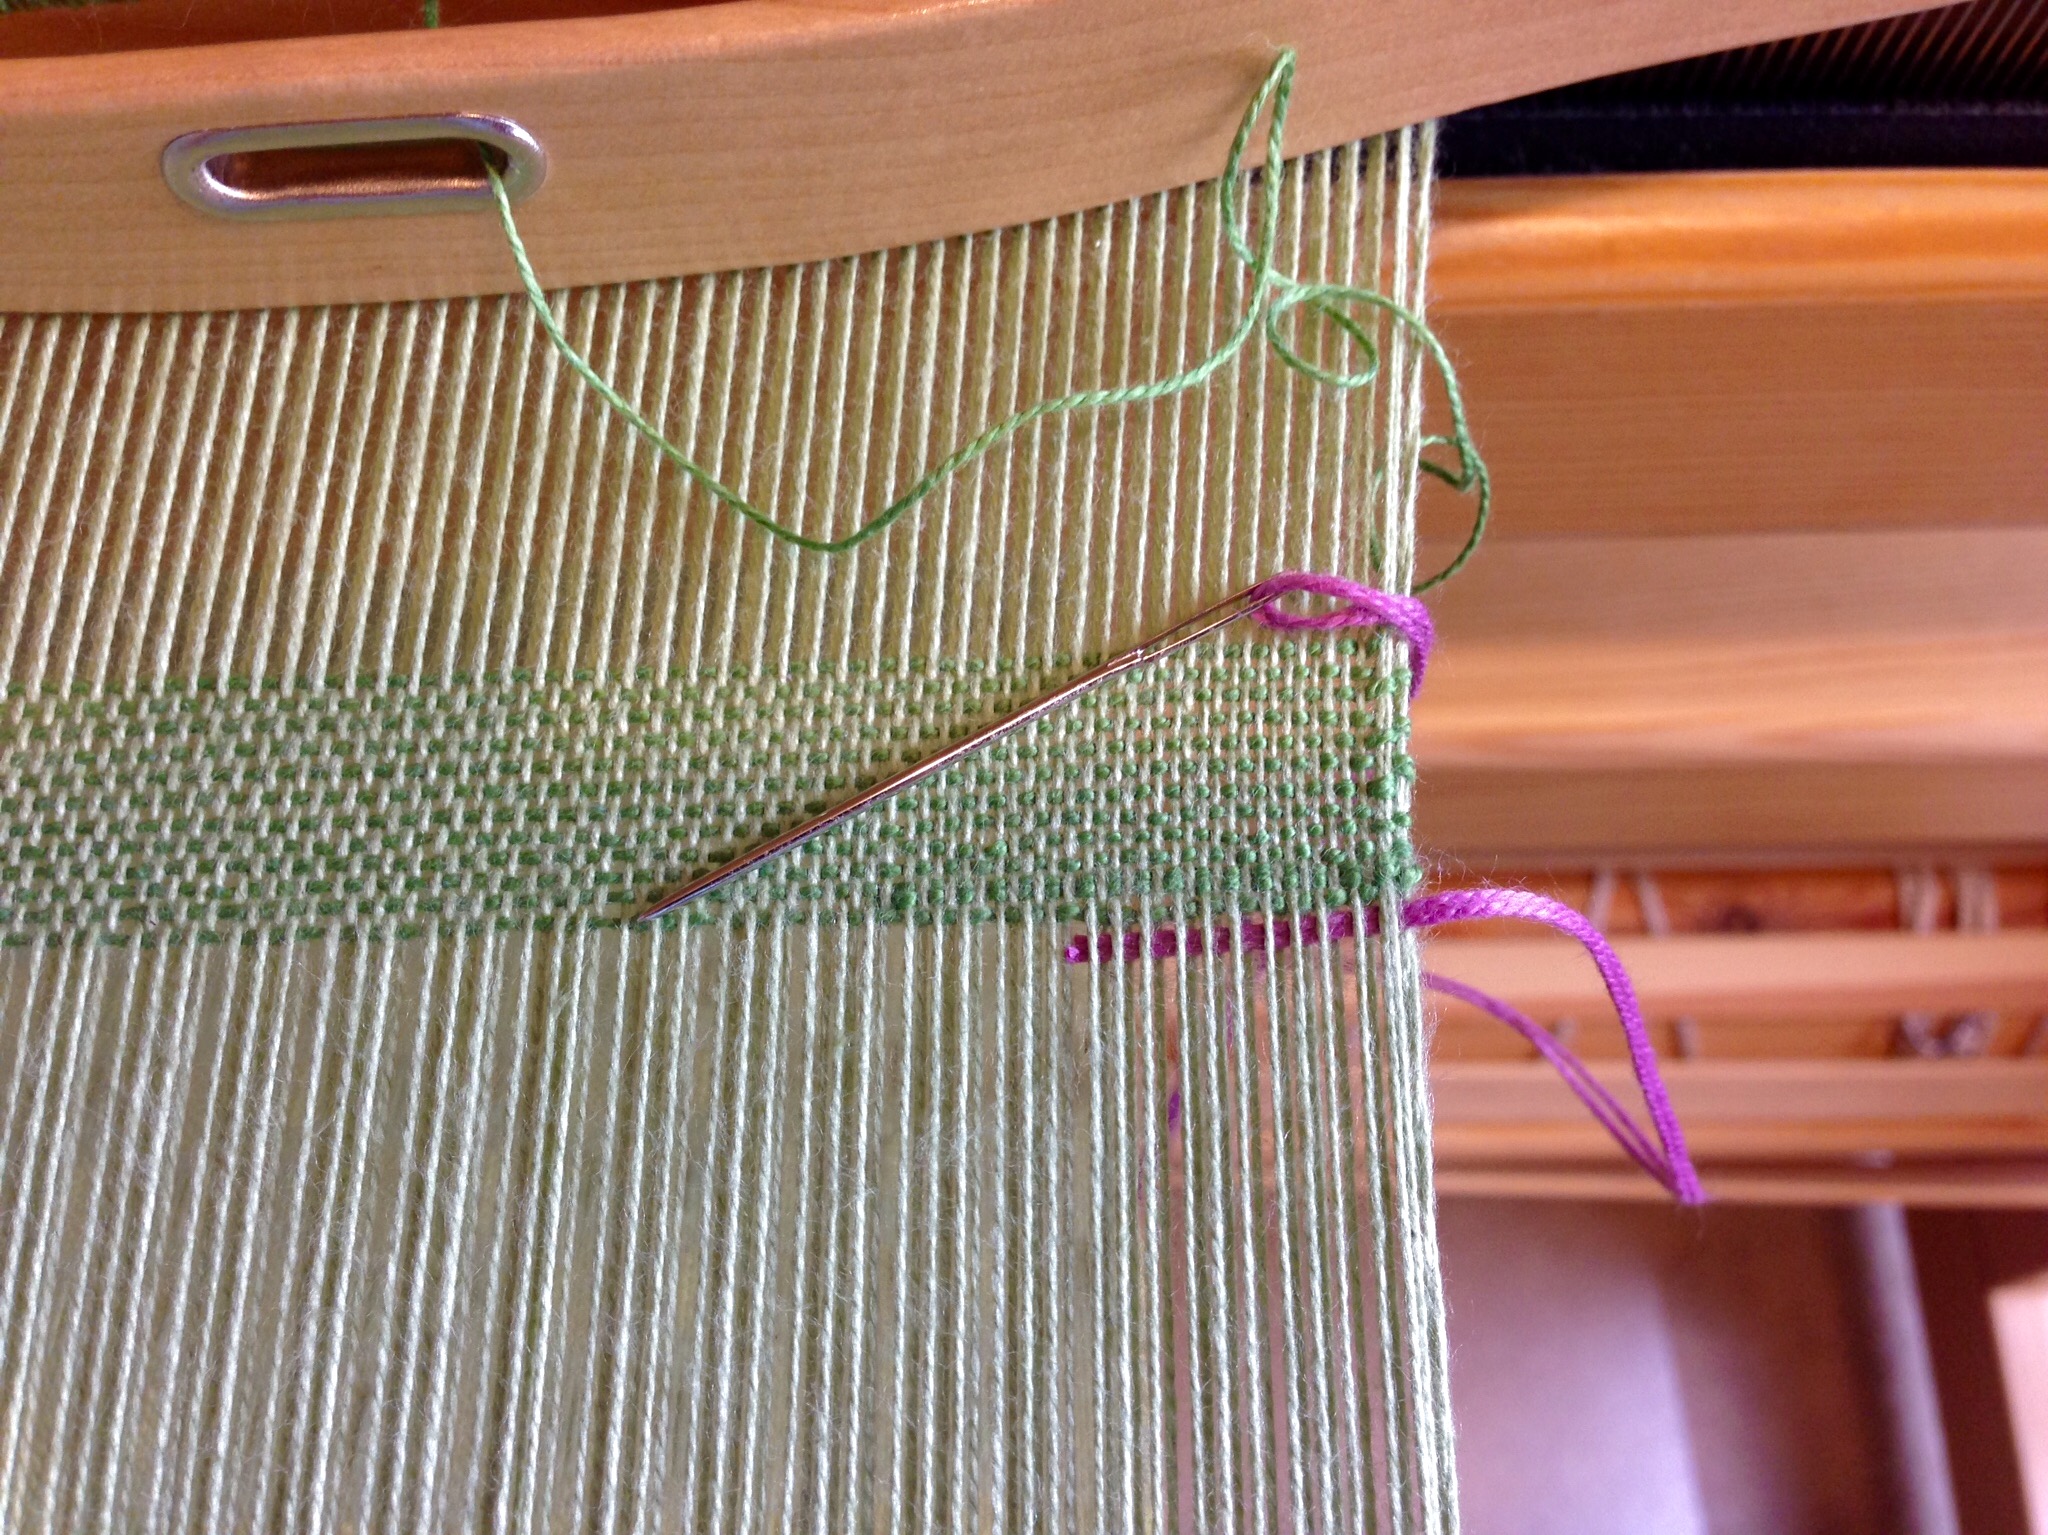
- From right to left, take the needle under several warp ends. In this example, the needle goes under six ends.
Step 2
- Pull the thread all the way through, keeping it taut at the woven edge.
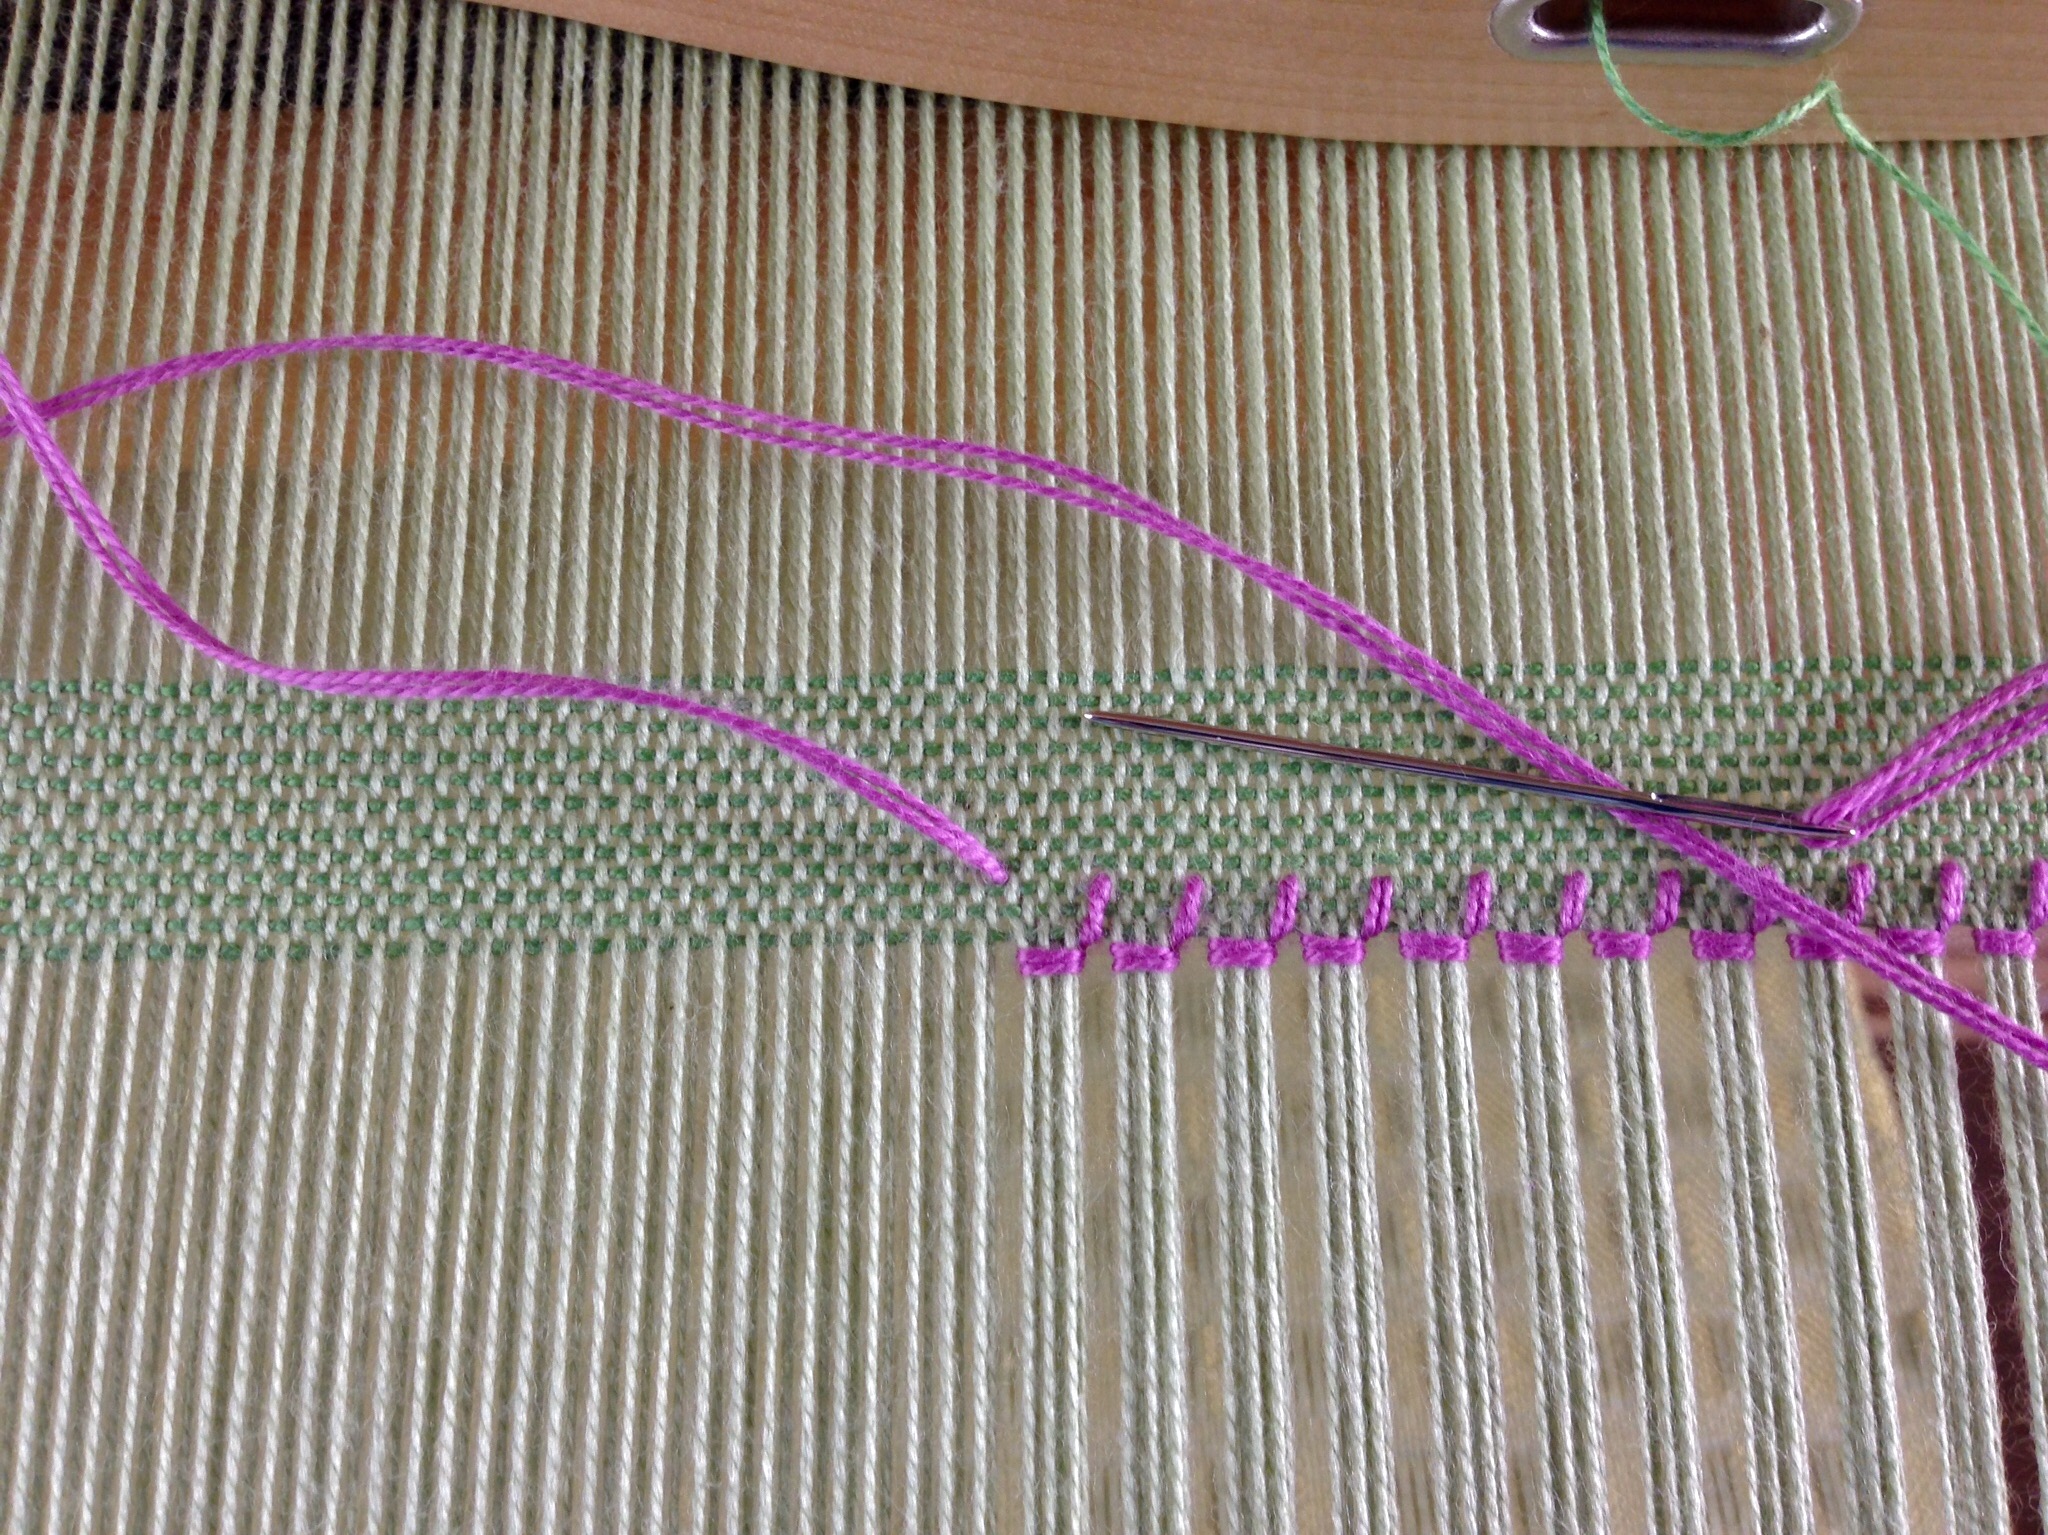
Step 3
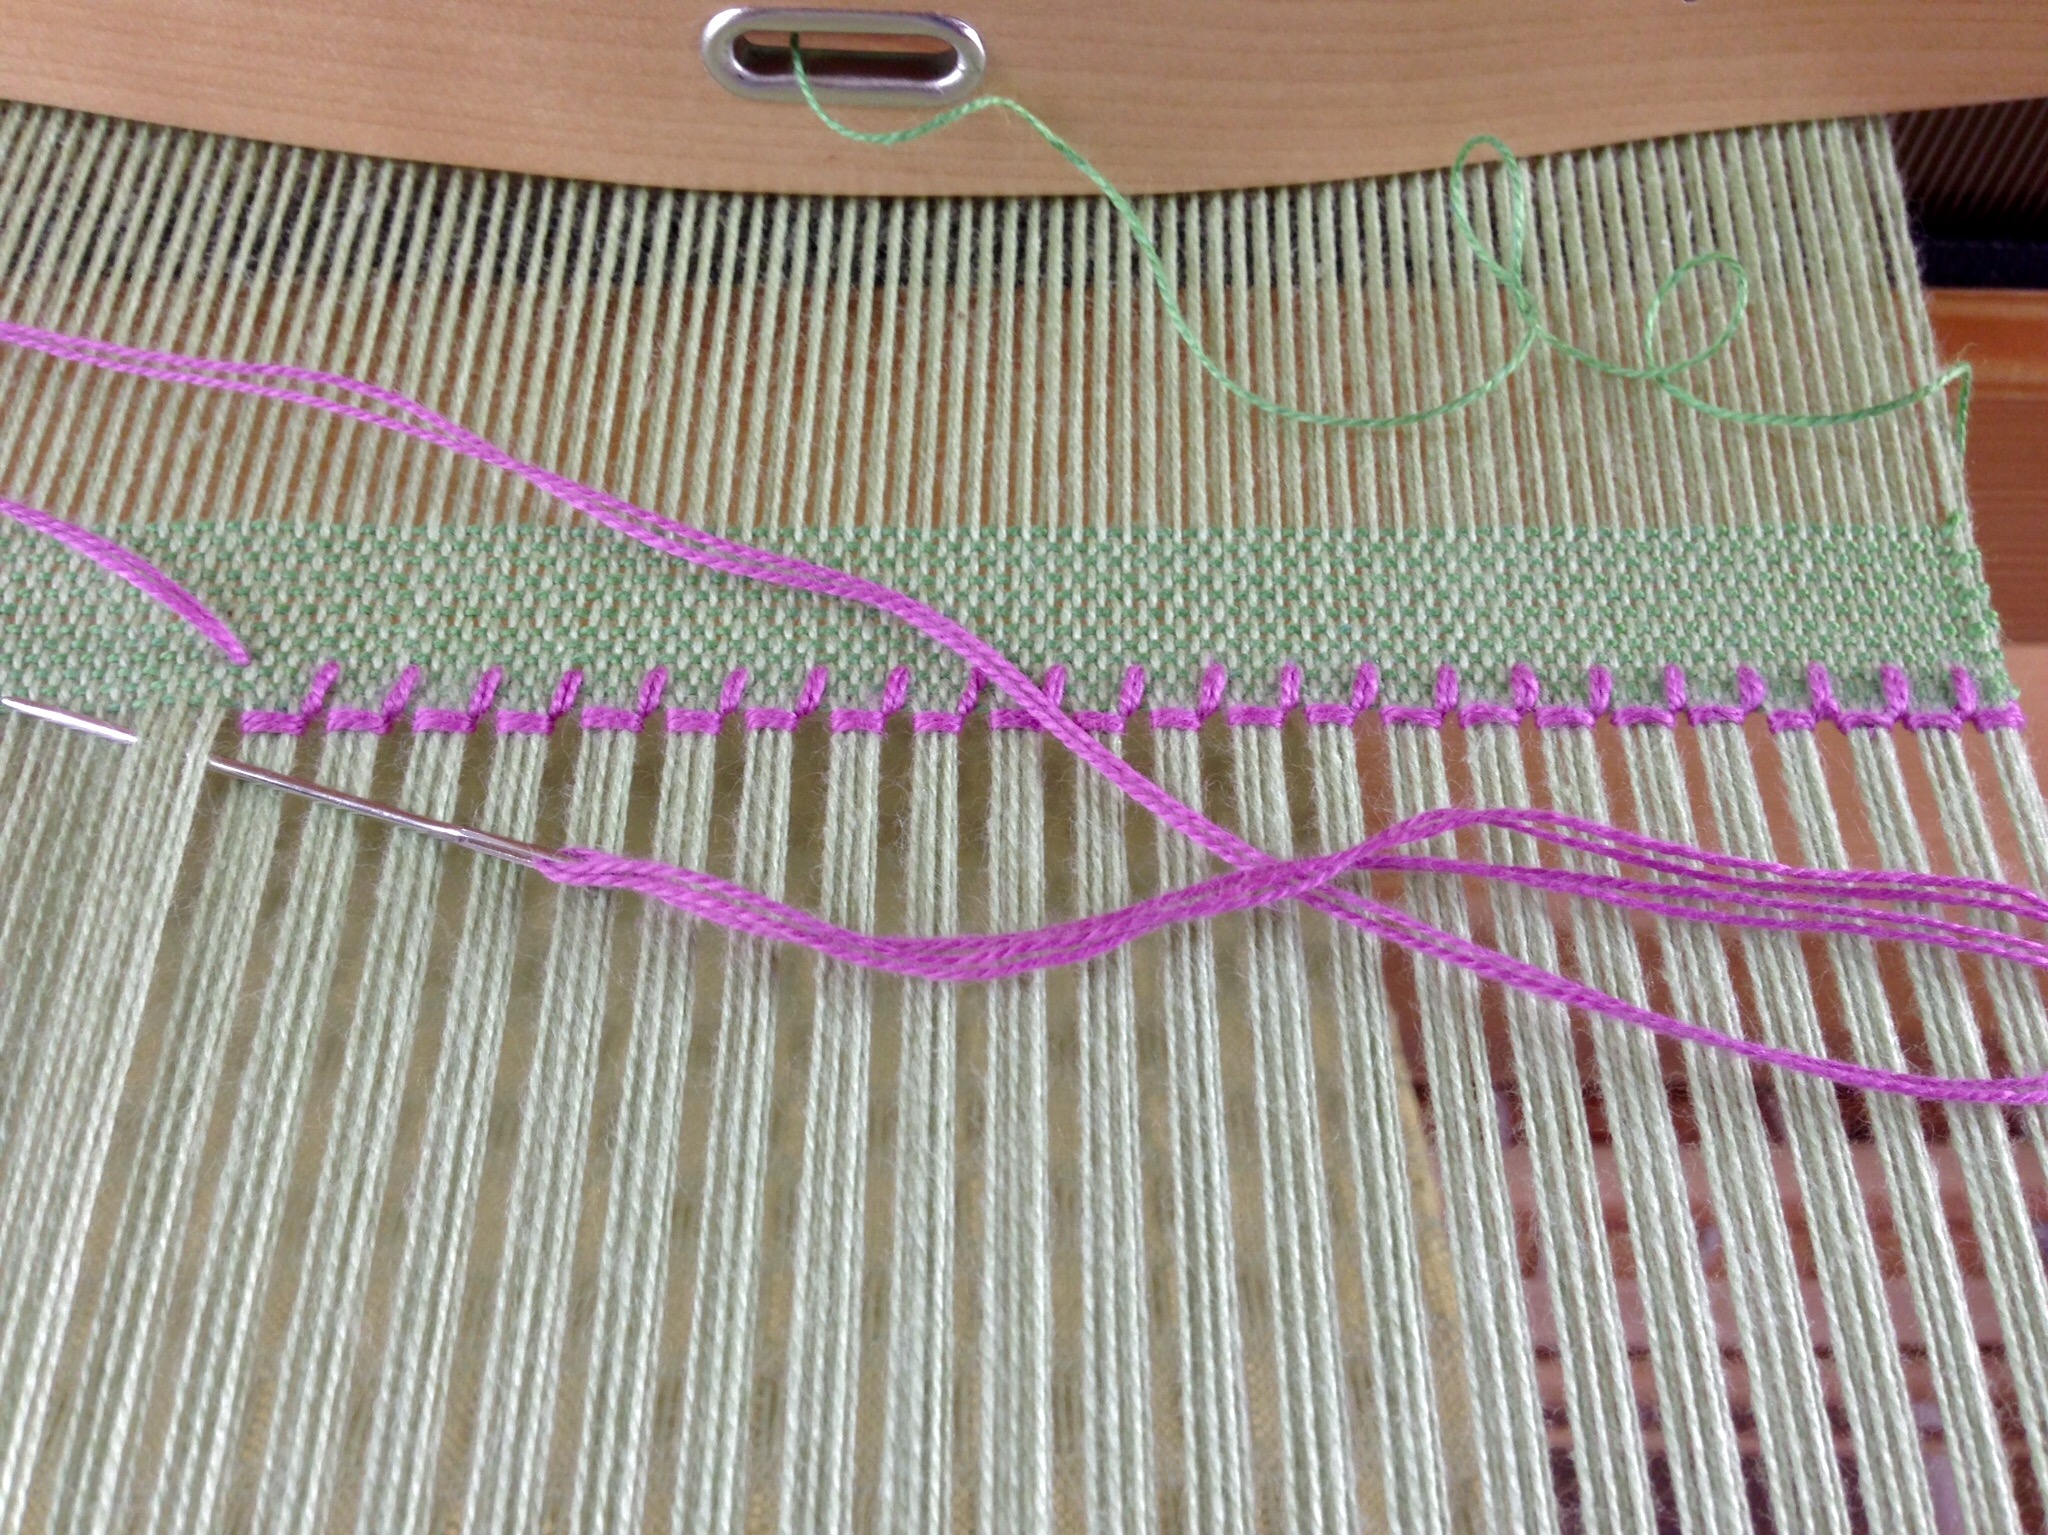
- Take the needle back over the same (six) warp ends, and go under the same (six) warp ends, bringing the point of the needle back up between wefts, two or more rows away from the woven edge. In this example, the needle comes up between the third and fourth rows of weft.
Step 4
- Pull the thread all the way through, keeping it taut at the woven edge.
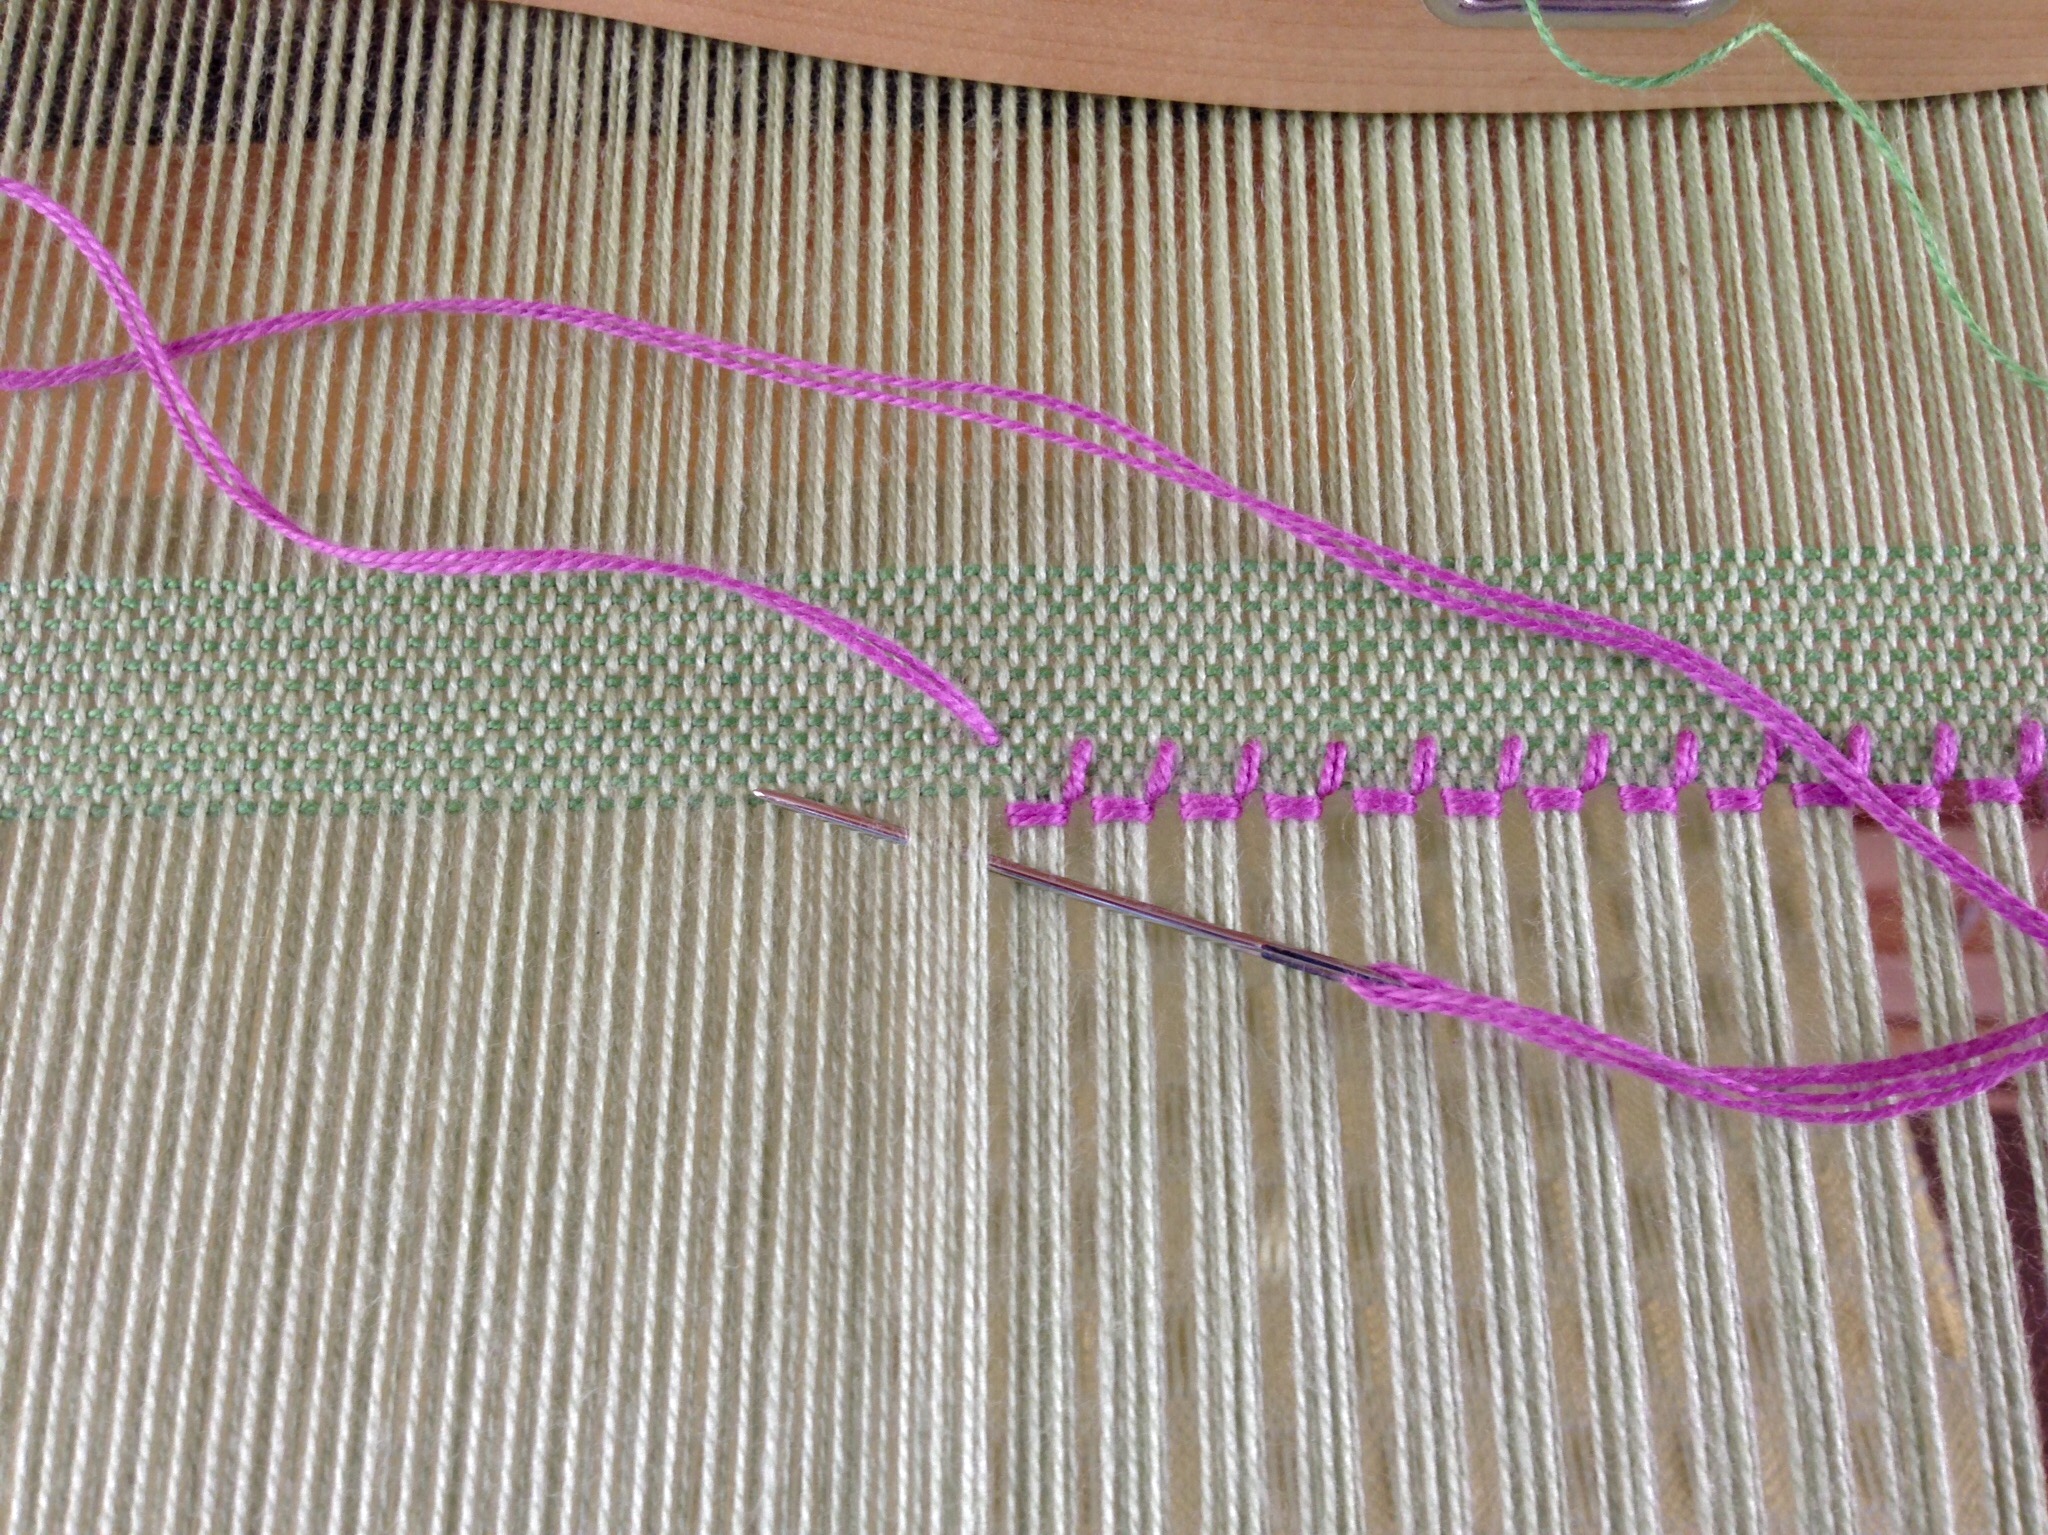
Finishing
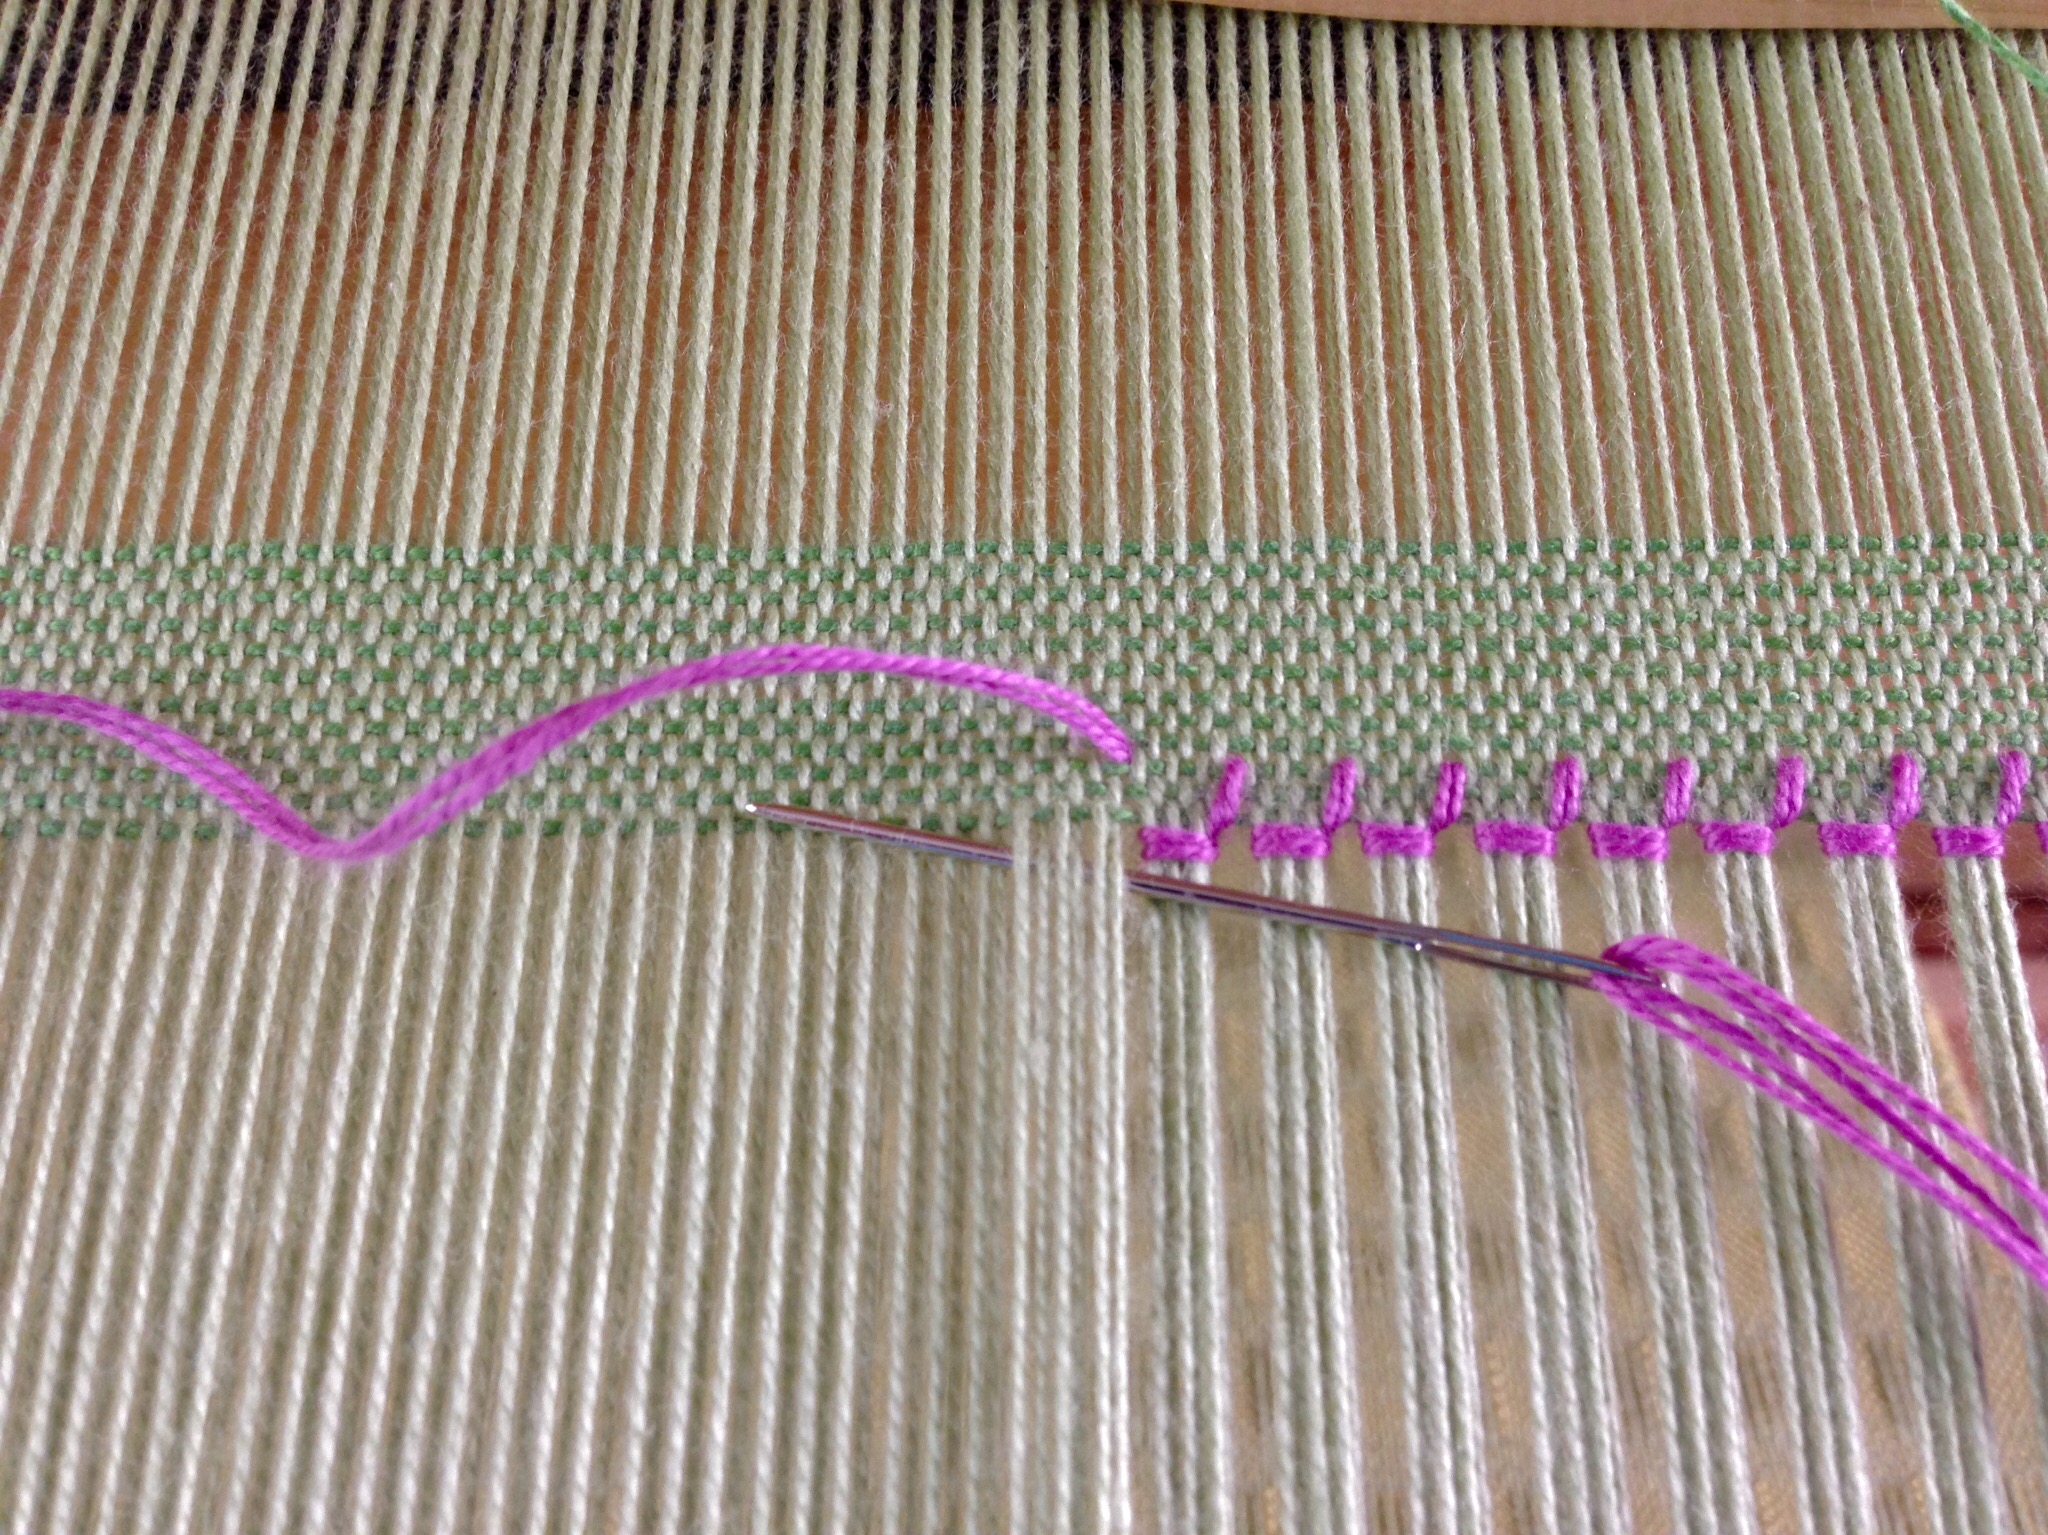
- Repeat Steps 1 – 4 across the entire width.
- Finish by needle weaving the stitching thread back into the selvedge for an inch/2.5 cm. Trim off the remaining stitching thread end.
Hemstitching at the end of the woven fabric:
Starting on the right-hand side, secure the end of the stitching thread as before, and follow Steps 1 – 4 for hemstitching across the width. The only difference is that the needle comes toward you under the cloth in Step 3, instead of away from you.
Everything that has a beginning has an end. Since the beginning of time, and through the ages, our Maker has been unfolding His mystery of life and love. There will come a day, though, when the mystery is finished. Certainly, there will be bold hemstitching at the end of the cloth as the Maker, the Grand Weaver himself, brings time as we know it to a close.
May your days begin and end with an embroidered edging of love.
By hand,
Karen