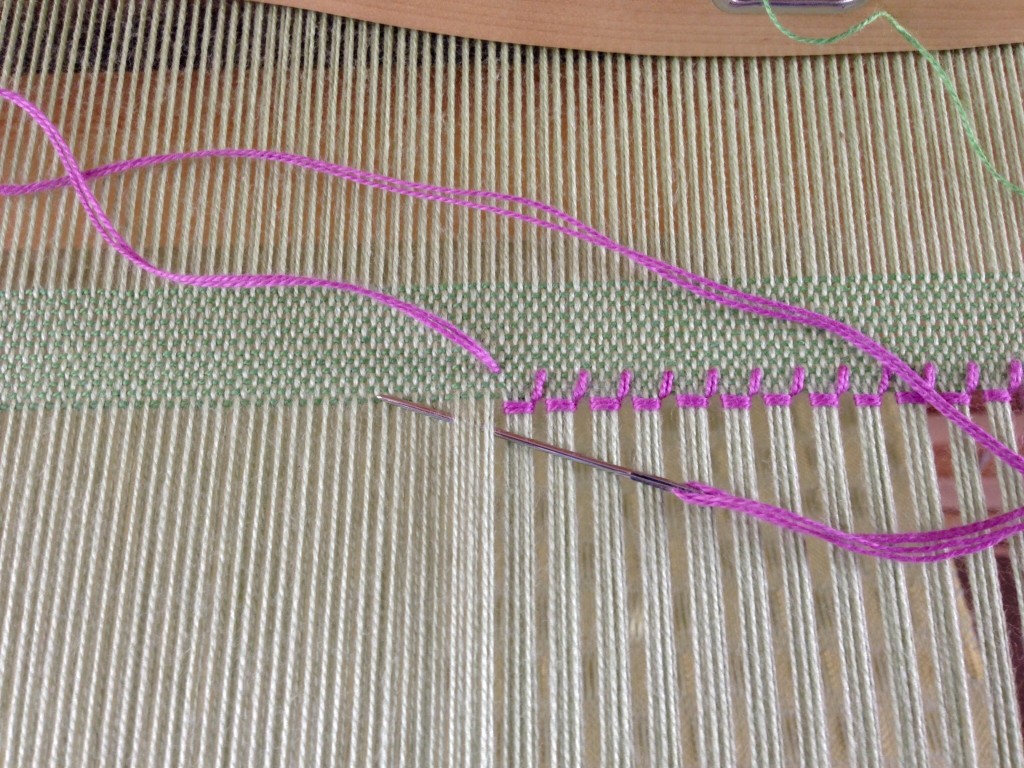
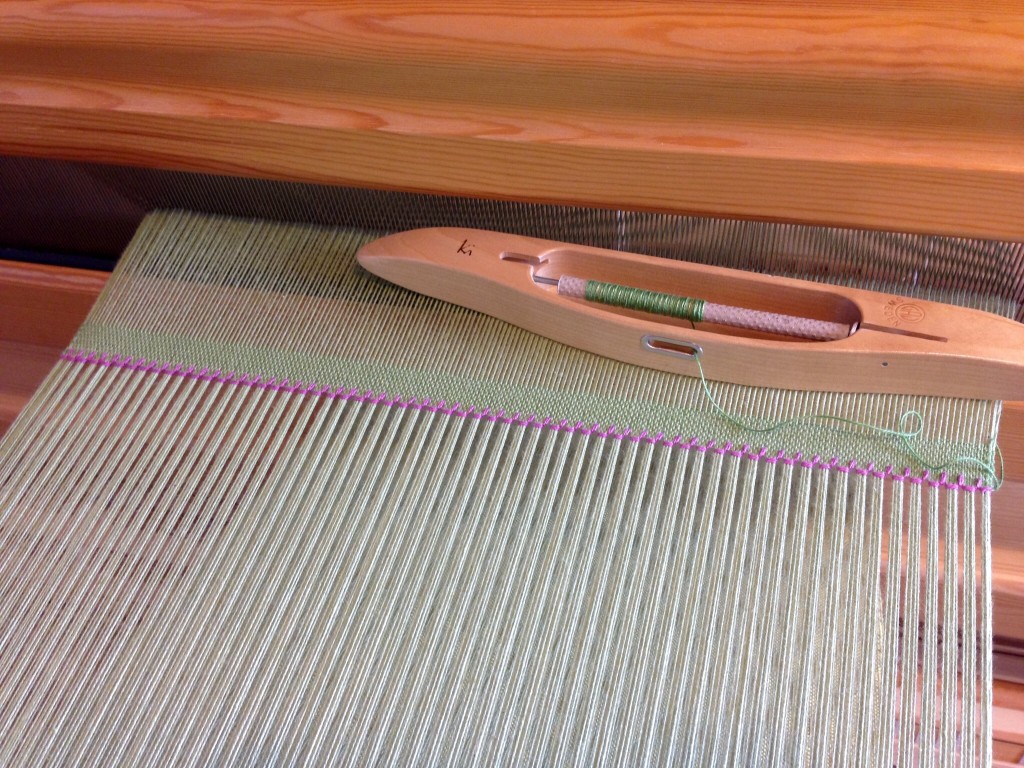
An embroidered trim is what I have in mind for this scarf. Hemstitching is just that. Instead of the usual single strand, I am using two strands of the 8/2 cotton weft in a contrasting color to accentuate the embroidered look. The hemstitching marks the beginning and the end. You can make hemstitching barely noticeable if you want, or you can make it so bold it can’t be missed, like I am doing with this one.
Hemstitching, with Contrasting Color:
Preliminary
- Weave an inch/2.5 cm or more of fabric for a header.
- Thread a blunt tapestry needle with a single or doubled strand of weft thread four times the weaving width.
- Starting an inch/2.5 cm away from the right-hand selvedge, weave the needle over and under, next to the first weft thread in the weaving, going toward the selvedge.
- Pull the stitching thread almost all the way, leaving the end woven into the selvedge. Capture the woven end within the first several stitches of the hemstitching.
Step 1
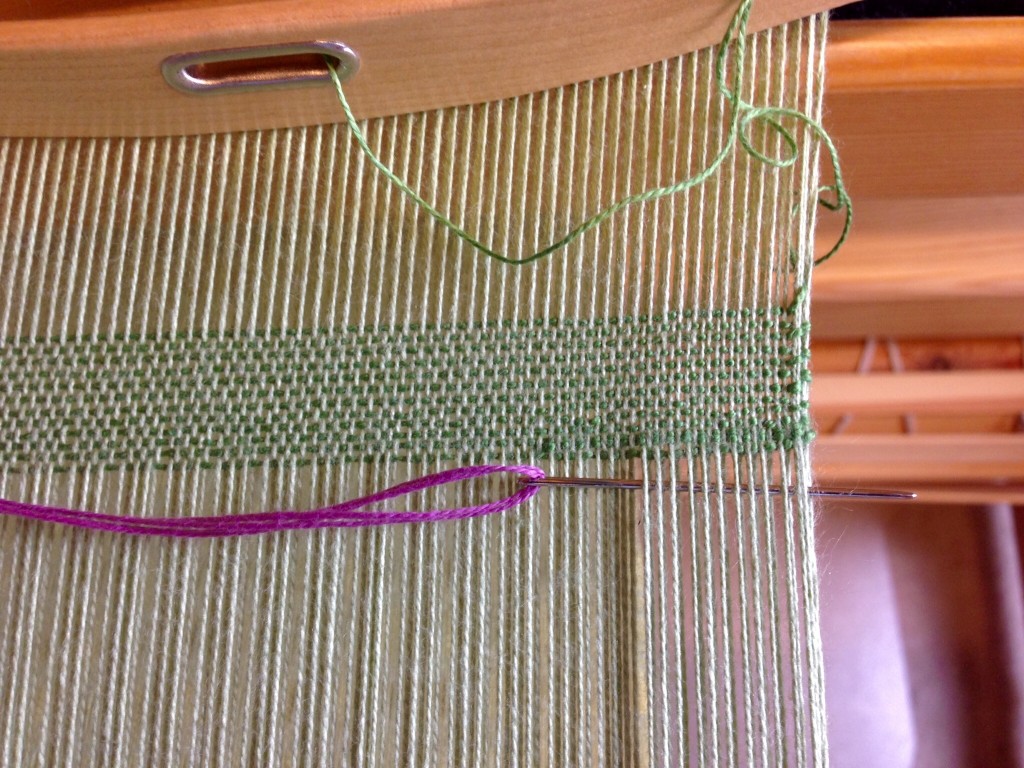
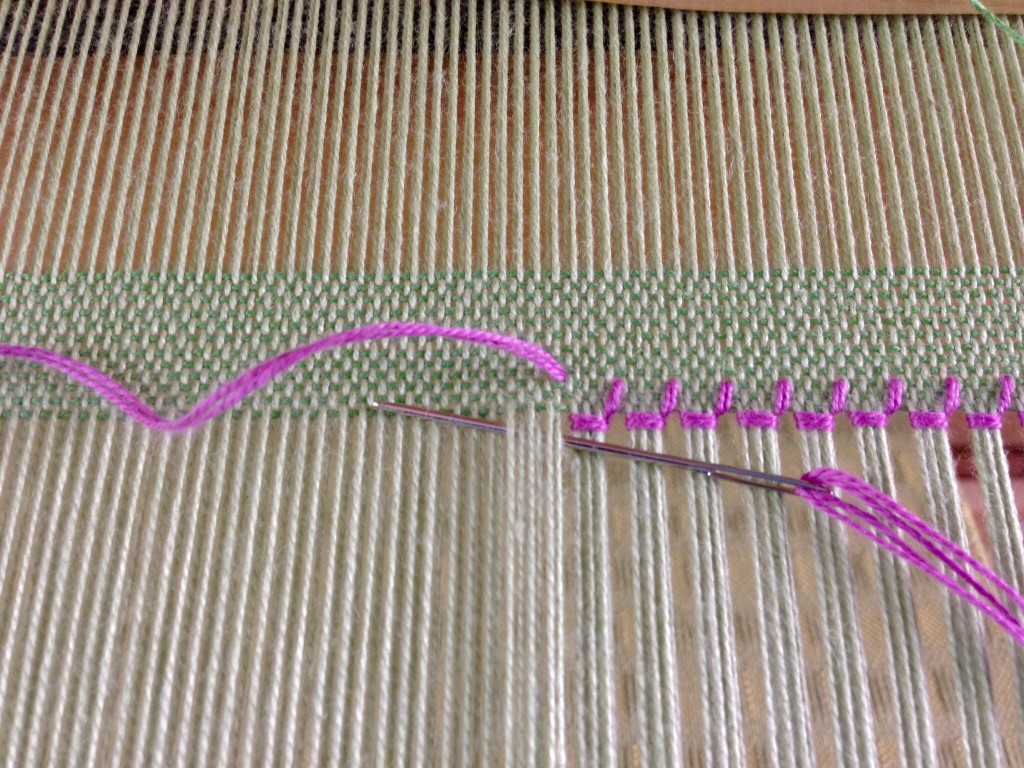
- From right to left, take the needle under several warp ends. In this example, the needle goes under six ends.
Step 2
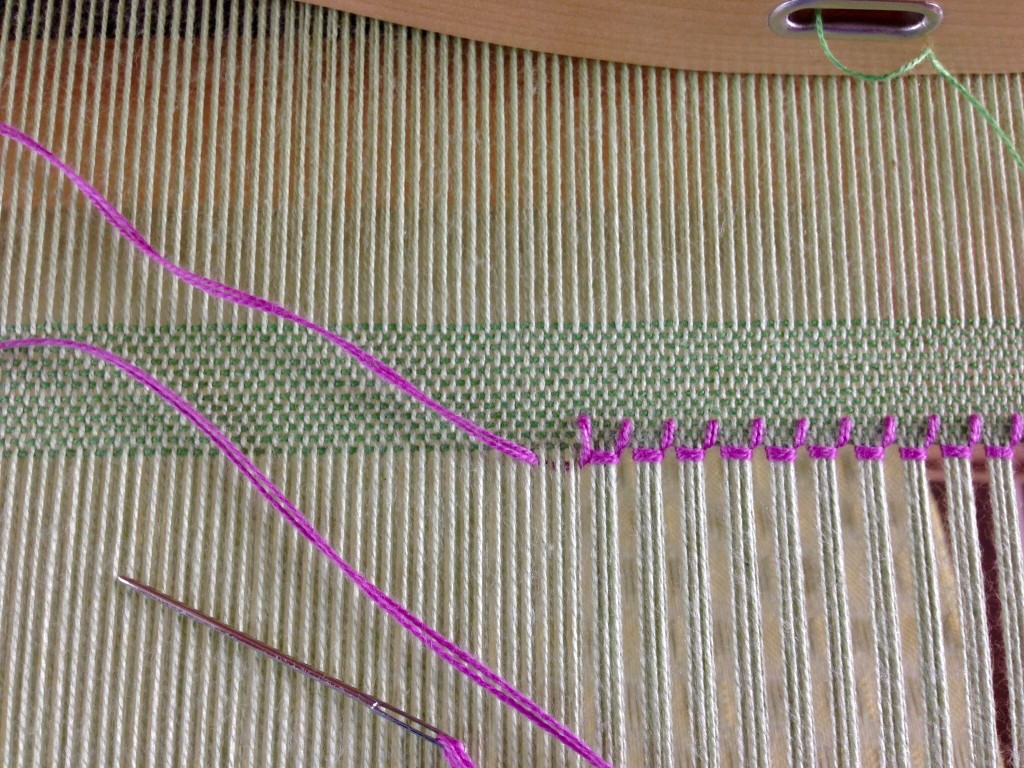
- Pull the thread all the way through, keeping it taut at the woven edge.
Step 3
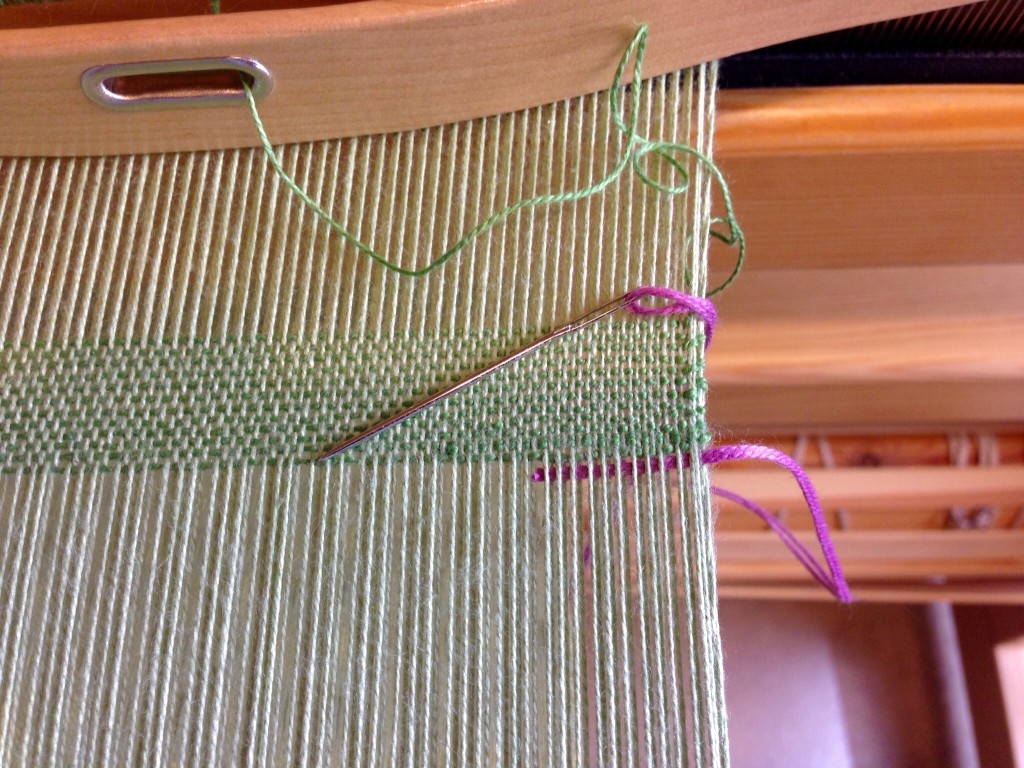
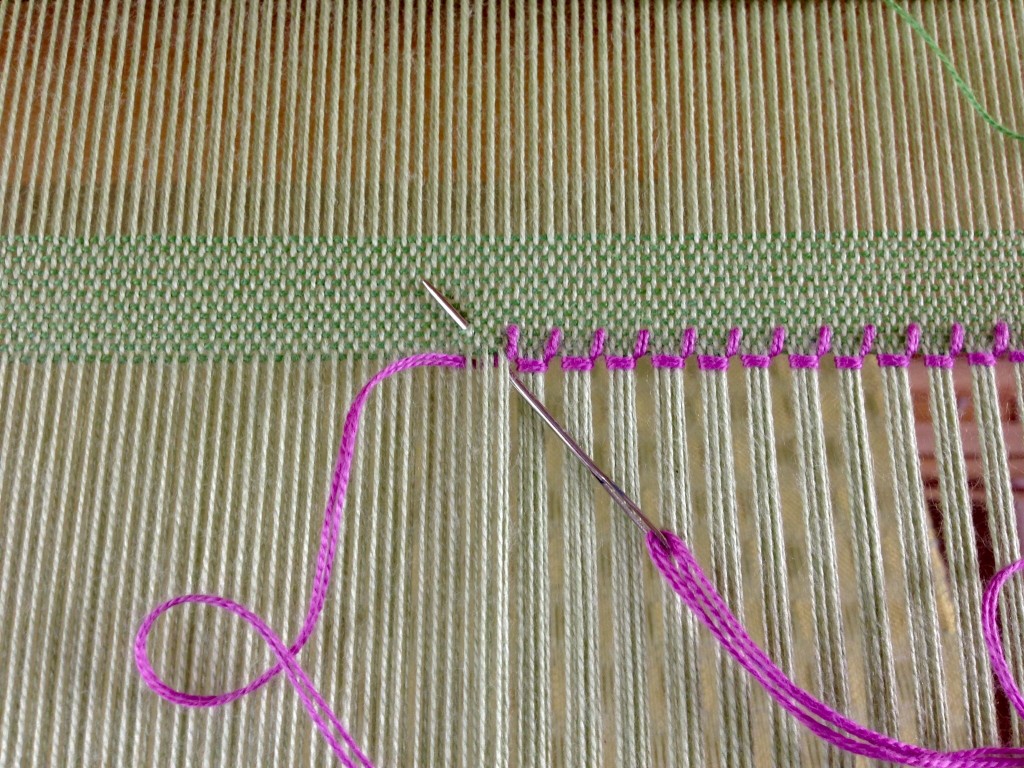
- Take the needle back over the same (six) warp ends, and go under the same (six) warp ends, bringing the point of the needle back up between wefts, two or more rows away from the woven edge. In this example, the needle comes up between the third and fourth rows of weft.
Step 4
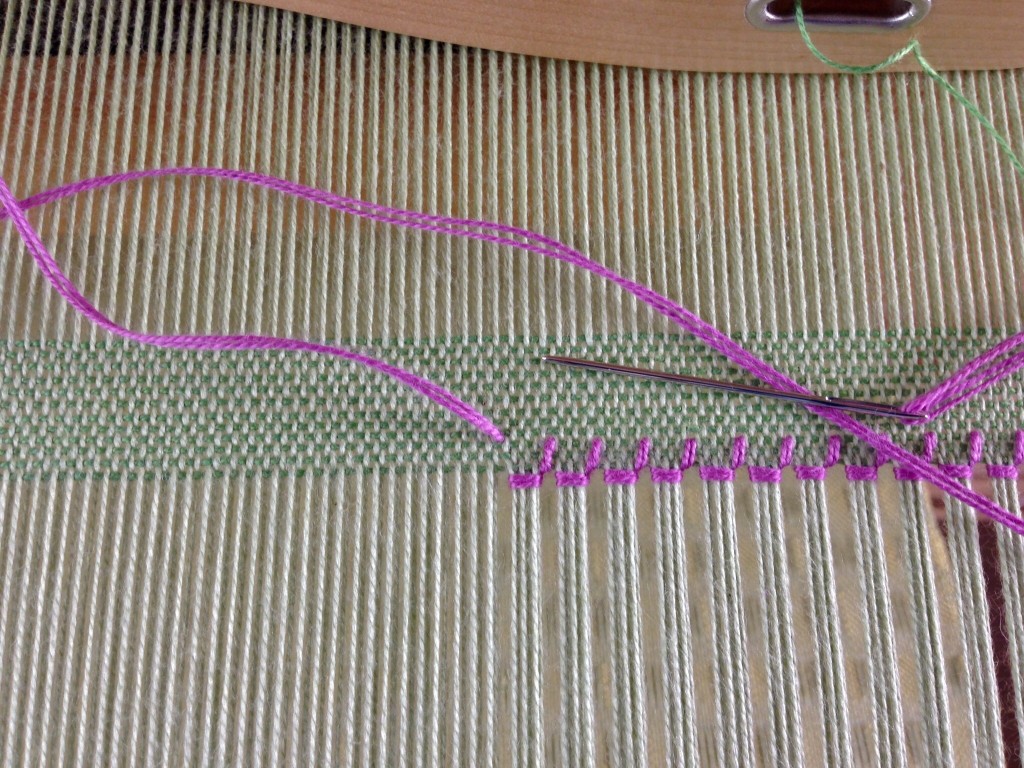
- Pull the thread all the way through, keeping it taut at the woven edge.
Finishing
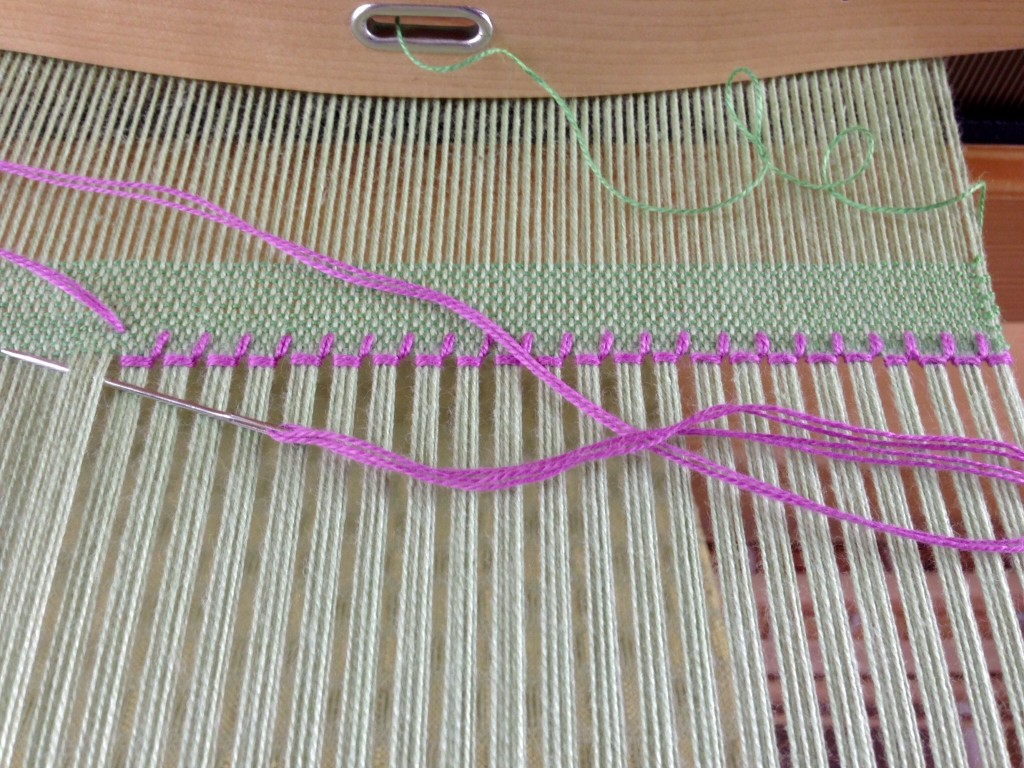
- Repeat Steps 1 – 4 across the entire width.
- Finish by needle weaving the stitching thread back into the selvedge for an inch/2.5 cm. Trim off the remaining stitching thread end.
Hemstitching at the end of the woven fabric:
Starting on the right-hand side, secure the end of the stitching thread as before, and follow Steps 1 – 4 for hemstitching across the width. The only difference is that the needle comes toward you under the cloth in Step 3, instead of away from you.
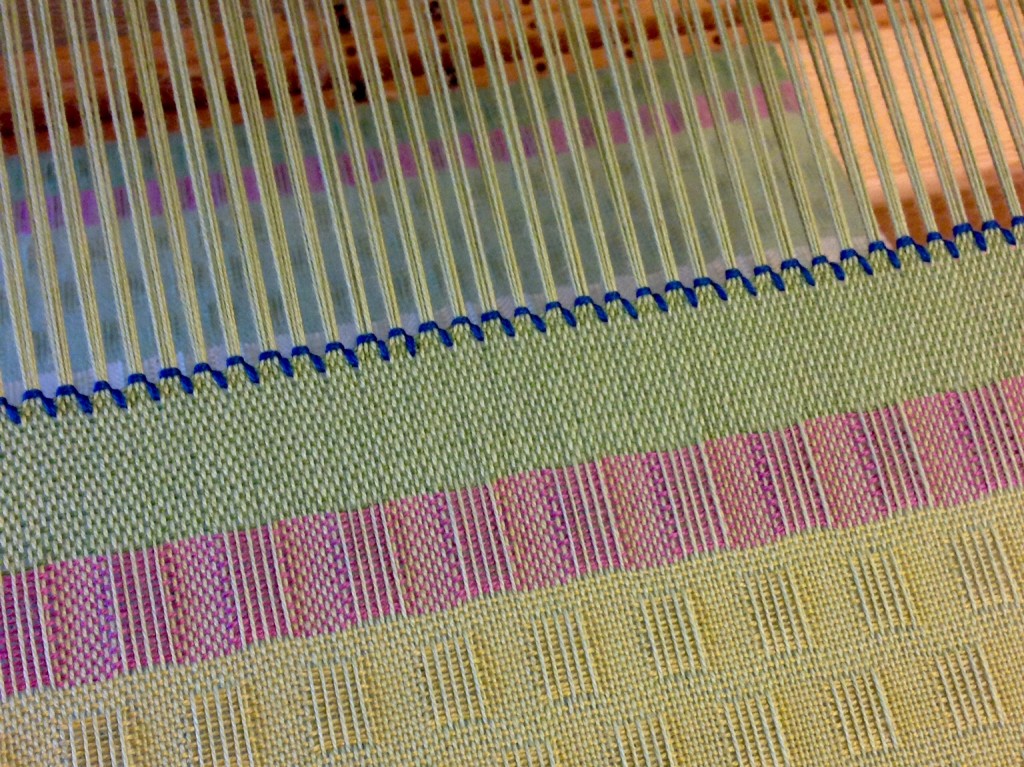
Everything that has a beginning has an end. Since the beginning of time, and through the ages, our Maker has been unfolding His mystery of life and love. There will come a day, though, when the mystery is finished. Certainly, there will be bold hemstitching at the end of the cloth as the Maker, the Grand Weaver himself, brings time as we know it to a close.
May your days begin and end with an embroidered edging of love.
By hand,
Karen

This scarf is so pretty, both its design and edging. Will you let us see it off the loom too? I look forward to your amazing posts!
Sue, I will most certainly show you the scarf off the loom, before and after wet-finishing. I am eager to see how it turns out, myself! I’m so happy you like it!
All the best,
Karen
I was going to ask the same thing (to see it off the loom)! I’ve only completed one project on my loom, with another that is on right now but still has a ways to go before I finish. For some reason, my brain just imagines that when the warp ends are cut and the project is taken off, that the whole thing will start to unravel! I know it comes from years of sewing with store bought fabric, and how easily some fabrics can unravel compared with others.
I’m also unsure of wet-finishing and if it’s done each and every time you take a project off. I didn’t do that with my first project; I just hemmed it quick, then threw it in the washer (true beginner fashion, I guess, haha).
Can’t wait to see the scarf!
Suzie
Hi Suzie, Yay for completing that project on your loom! I know the uncomfortable feeling of wondering if the handwoven fabric will immediately fray when I cut it from the loom. I’ve done it often enough now that I know that the fabric will be okay if I just take my time and be careful. I find it helps to make sure to release the tension from the loom before I cut. If the fabric is more apt to fray than usual, I take it straight to my serger and serge the ends. You could zig-zag them if you don’t have a serger. But most handwoven fabric won’t unravel that easily.
Hemstitching is another plus, because it actually keeps the fabric from unraveling, so it’s perfect for scarves, or table runners, or other decorative items that will have fringe.
I wet-finish almost everything. There is a lot of trial and error, though, so it’s good to try your procedure on a sample before you wet-finish the real thing. I normally wet-finish before hemming (making sure to secure the ends first, with serging or zig-zag), because I want the cloth to do its thing before hemming; but not everyone does it that way. Some people hem first, like you did. Pretty soon, you’ll find what works best for you.
With these scarves, my next step is to twist the fringe, and then I will do the wet-finishing. I will take you along with me as I finish them out!
Thanks for your interest! That makes it fun for me.
Happy Weaving,
Karen
I’ve just learned how to do hemstitching and your instructions help everything gel in my mind. I like the idea of using the contrasting thread!
Kerry, Thanks for letting me know! I have been confused by hemstitching instructions several times, so I am very happy this made sense to you.
Yours truly,
Karen
Love the contrasting color.
Thanks, Kate! I did it on a whim, and I really like the results, too.
I just commented that I, too, want to see the scarf off the loom, but I didn’t include my name and info, so it says ‘Anonymous’. Sorry bout that!
Thank you for the pics and information. I need to know more about stitching when my scarf or rug is finished appreciate your info. Thanks again
Hi Joyce, I’m glad you found it helpful!
Happy weaving,
Karen
Love your work, it’s extraordinary……
Looking forward to more of your projects.
Thank you Polly! I appreciate your very kind words!
Karen