
I am dressing the big loom with linen. This flaxen thread brings a worthwhile challenge I find hard to resist. Beaming the warp was slow and deliberate. It pays to be attentive to everything at this stage. Threading for this dice weave could not be simpler; it was finished before I knew it. Now, it is time to sley the reed.
Tools:
- Reed I am using a 12-dent reed for this project.
- Texsolv cord for hanging the reed in front of the shafts
- Tape measure I remove the metal ends.
- Reed hook Mine is from Vävstuga.
- Bench, set at comfortable height for threading and sleying With my Glimåkra Standard, I get to put the bench “in” the loom. It’s like going into my own little playhouse.
- Good lighting I use a small Ott Lite Task Lamp when natural light in the room is dim.


- Form two loops of Texsolv cord that hang down from the top of the loom, one on the right and one on the left, to hold the reed for sleying. My Texsolv loops hang from the countermarch frame.
- Adjust the length of the Texsolv loops so that the reed will fall just below the eyes of the heddles.
- Rest the reed horizontally in the Texsolv holders.
- Use the tape measure to find the center of the reed. I mark the center of my reeds permanently by tying a small piece of 12/6 cotton seine twine at the center.
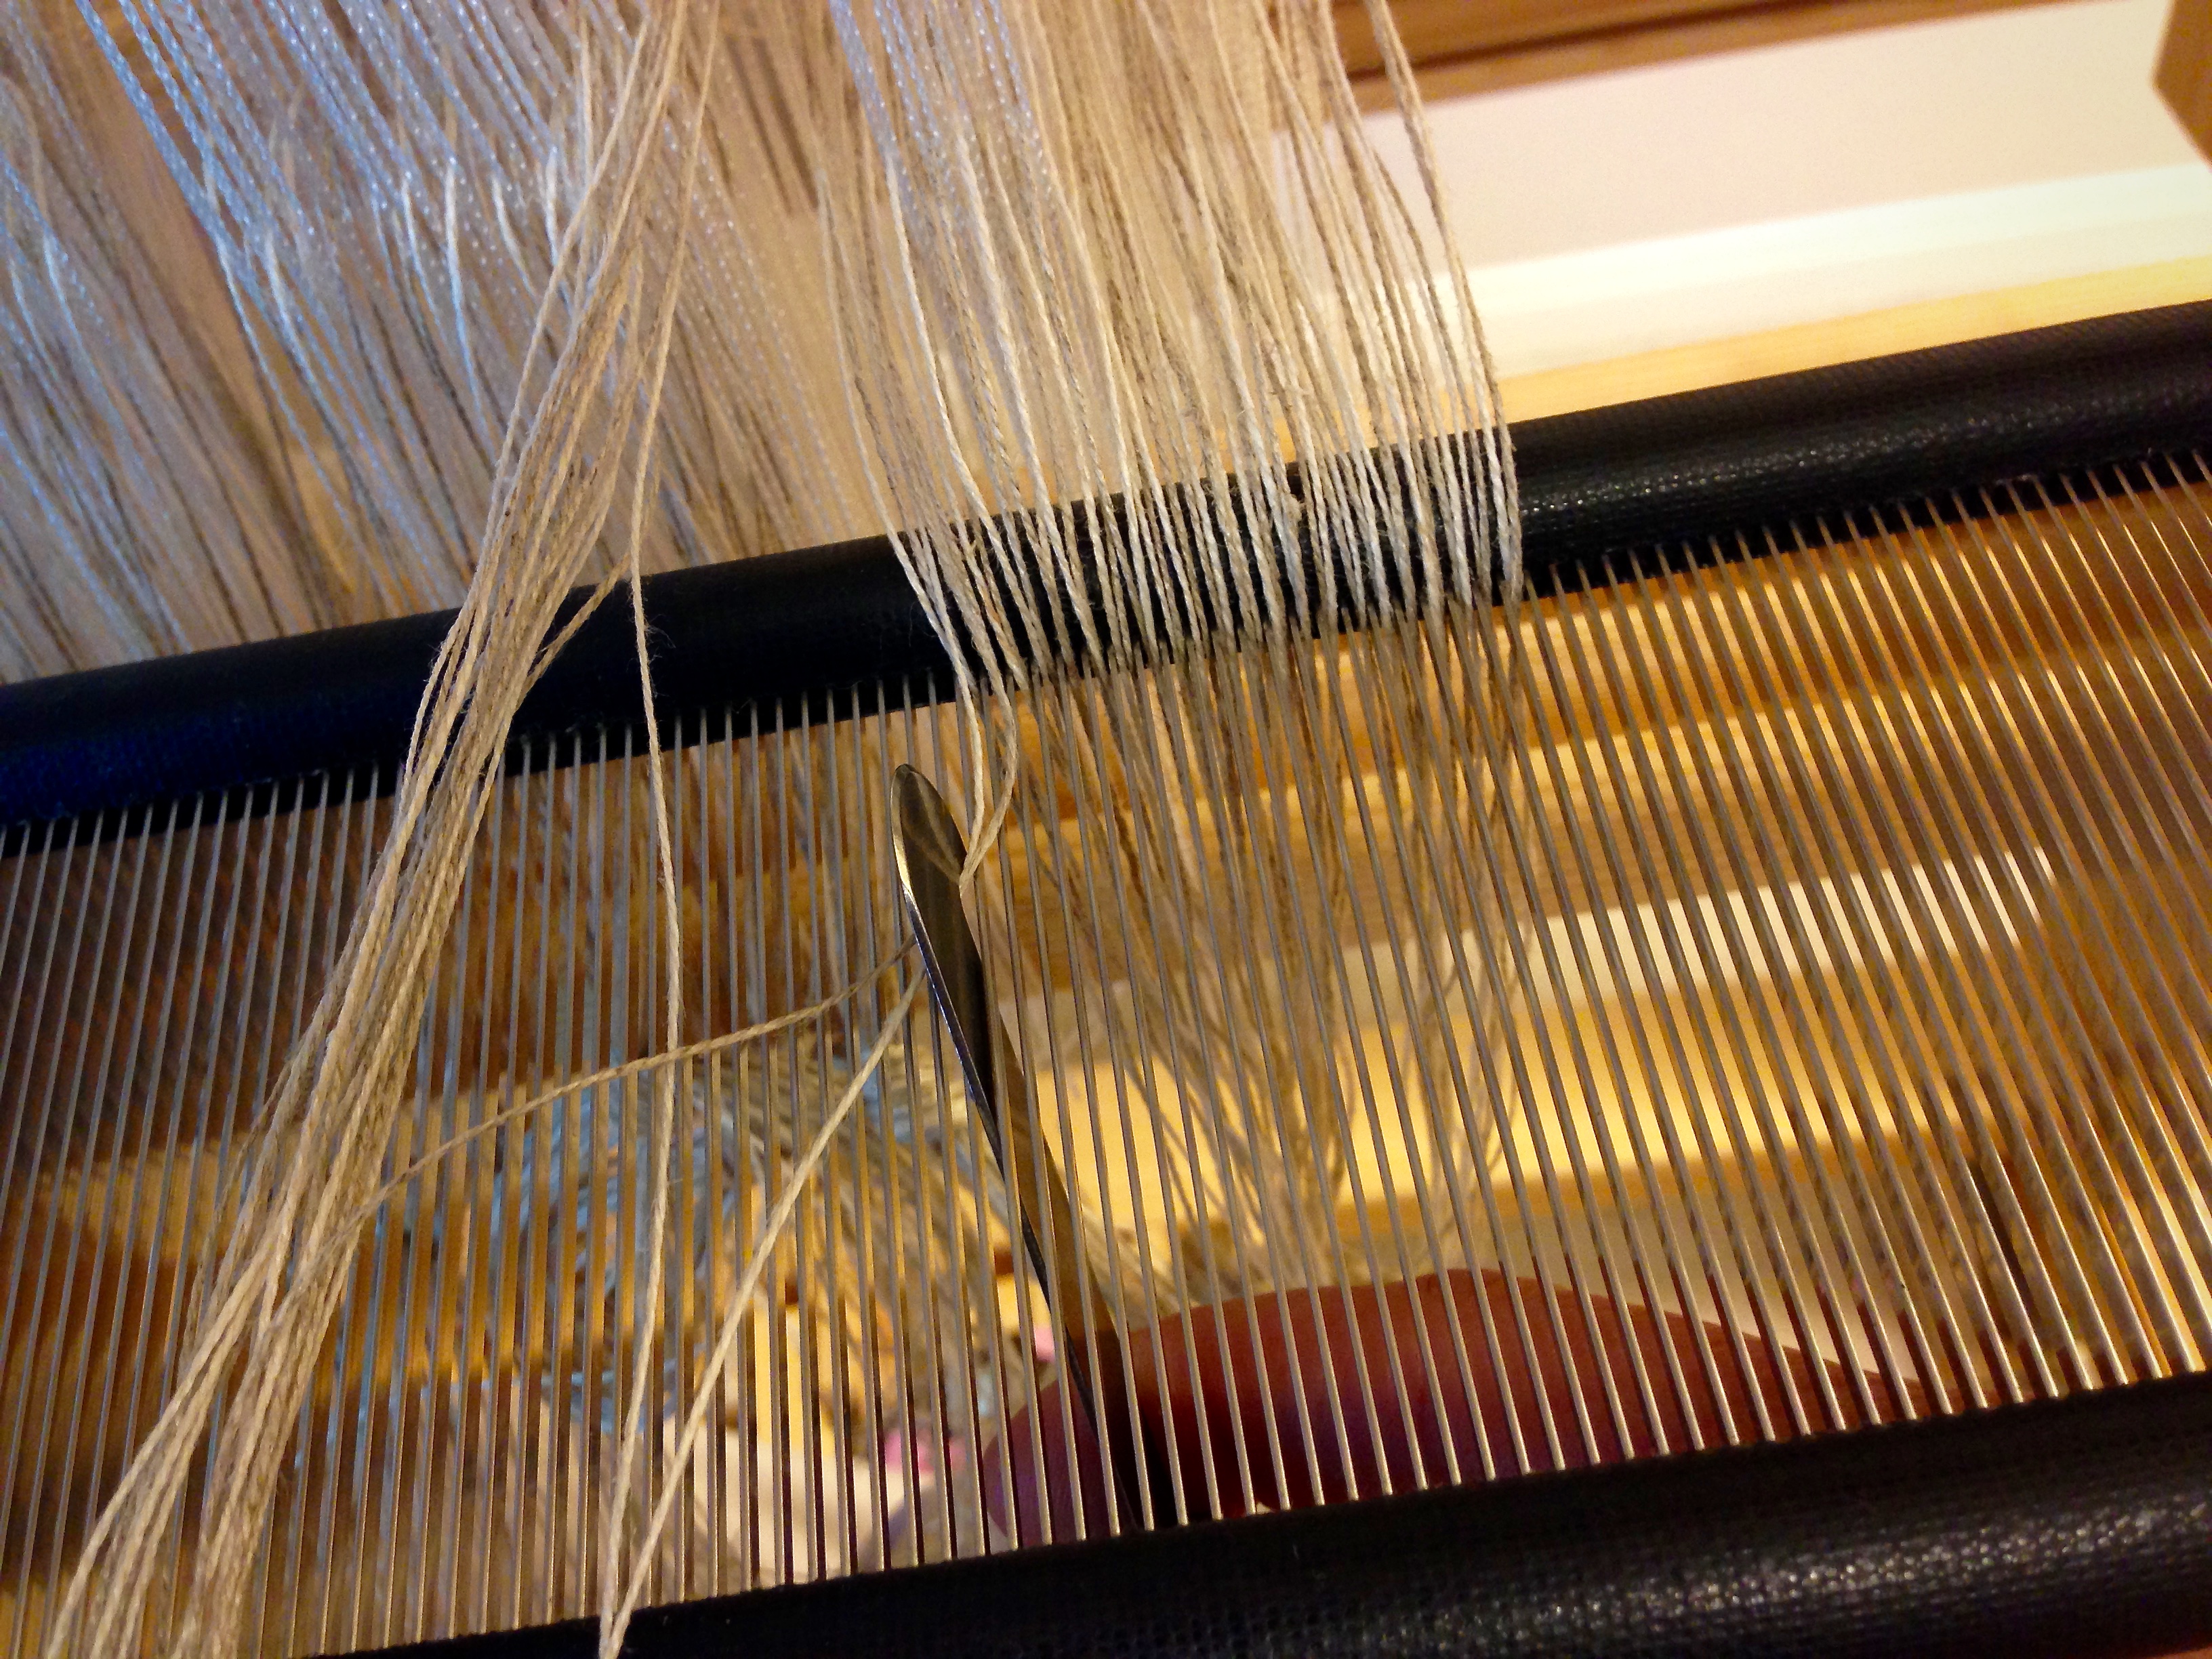
- Find your weaving width measurement on the tape measure. Fold that measurement in half and place the folded tape measure at the center point on the reed, to the right, to find the starting dent for sleying the reed. Place one end of the tape measure in that starting-point dent to keep your place. Some people use the reed hook as a place holder, but when I pick up the reed hook to sley the first dent, I invariably loose my place.
- Pull ends through the reed with the reed hook, referring to your draft for the correct number of ends per dent, starting at the dent on the right hand side that has the place holder in it. Good lighting helps to prevent errors. This is especially true with finer dents and darker threads.
- After sleying each group of warp ends, visually examine the sleyed dents to look for missed dents or extra ends in dents.
- Tie the sleyed group of ends into a slip knot.
- Finish sleying all the ends; and smile, knowing you are a step closer to weaving fabric.
May all your looms be dressed.
Happy Dressing,
Karen