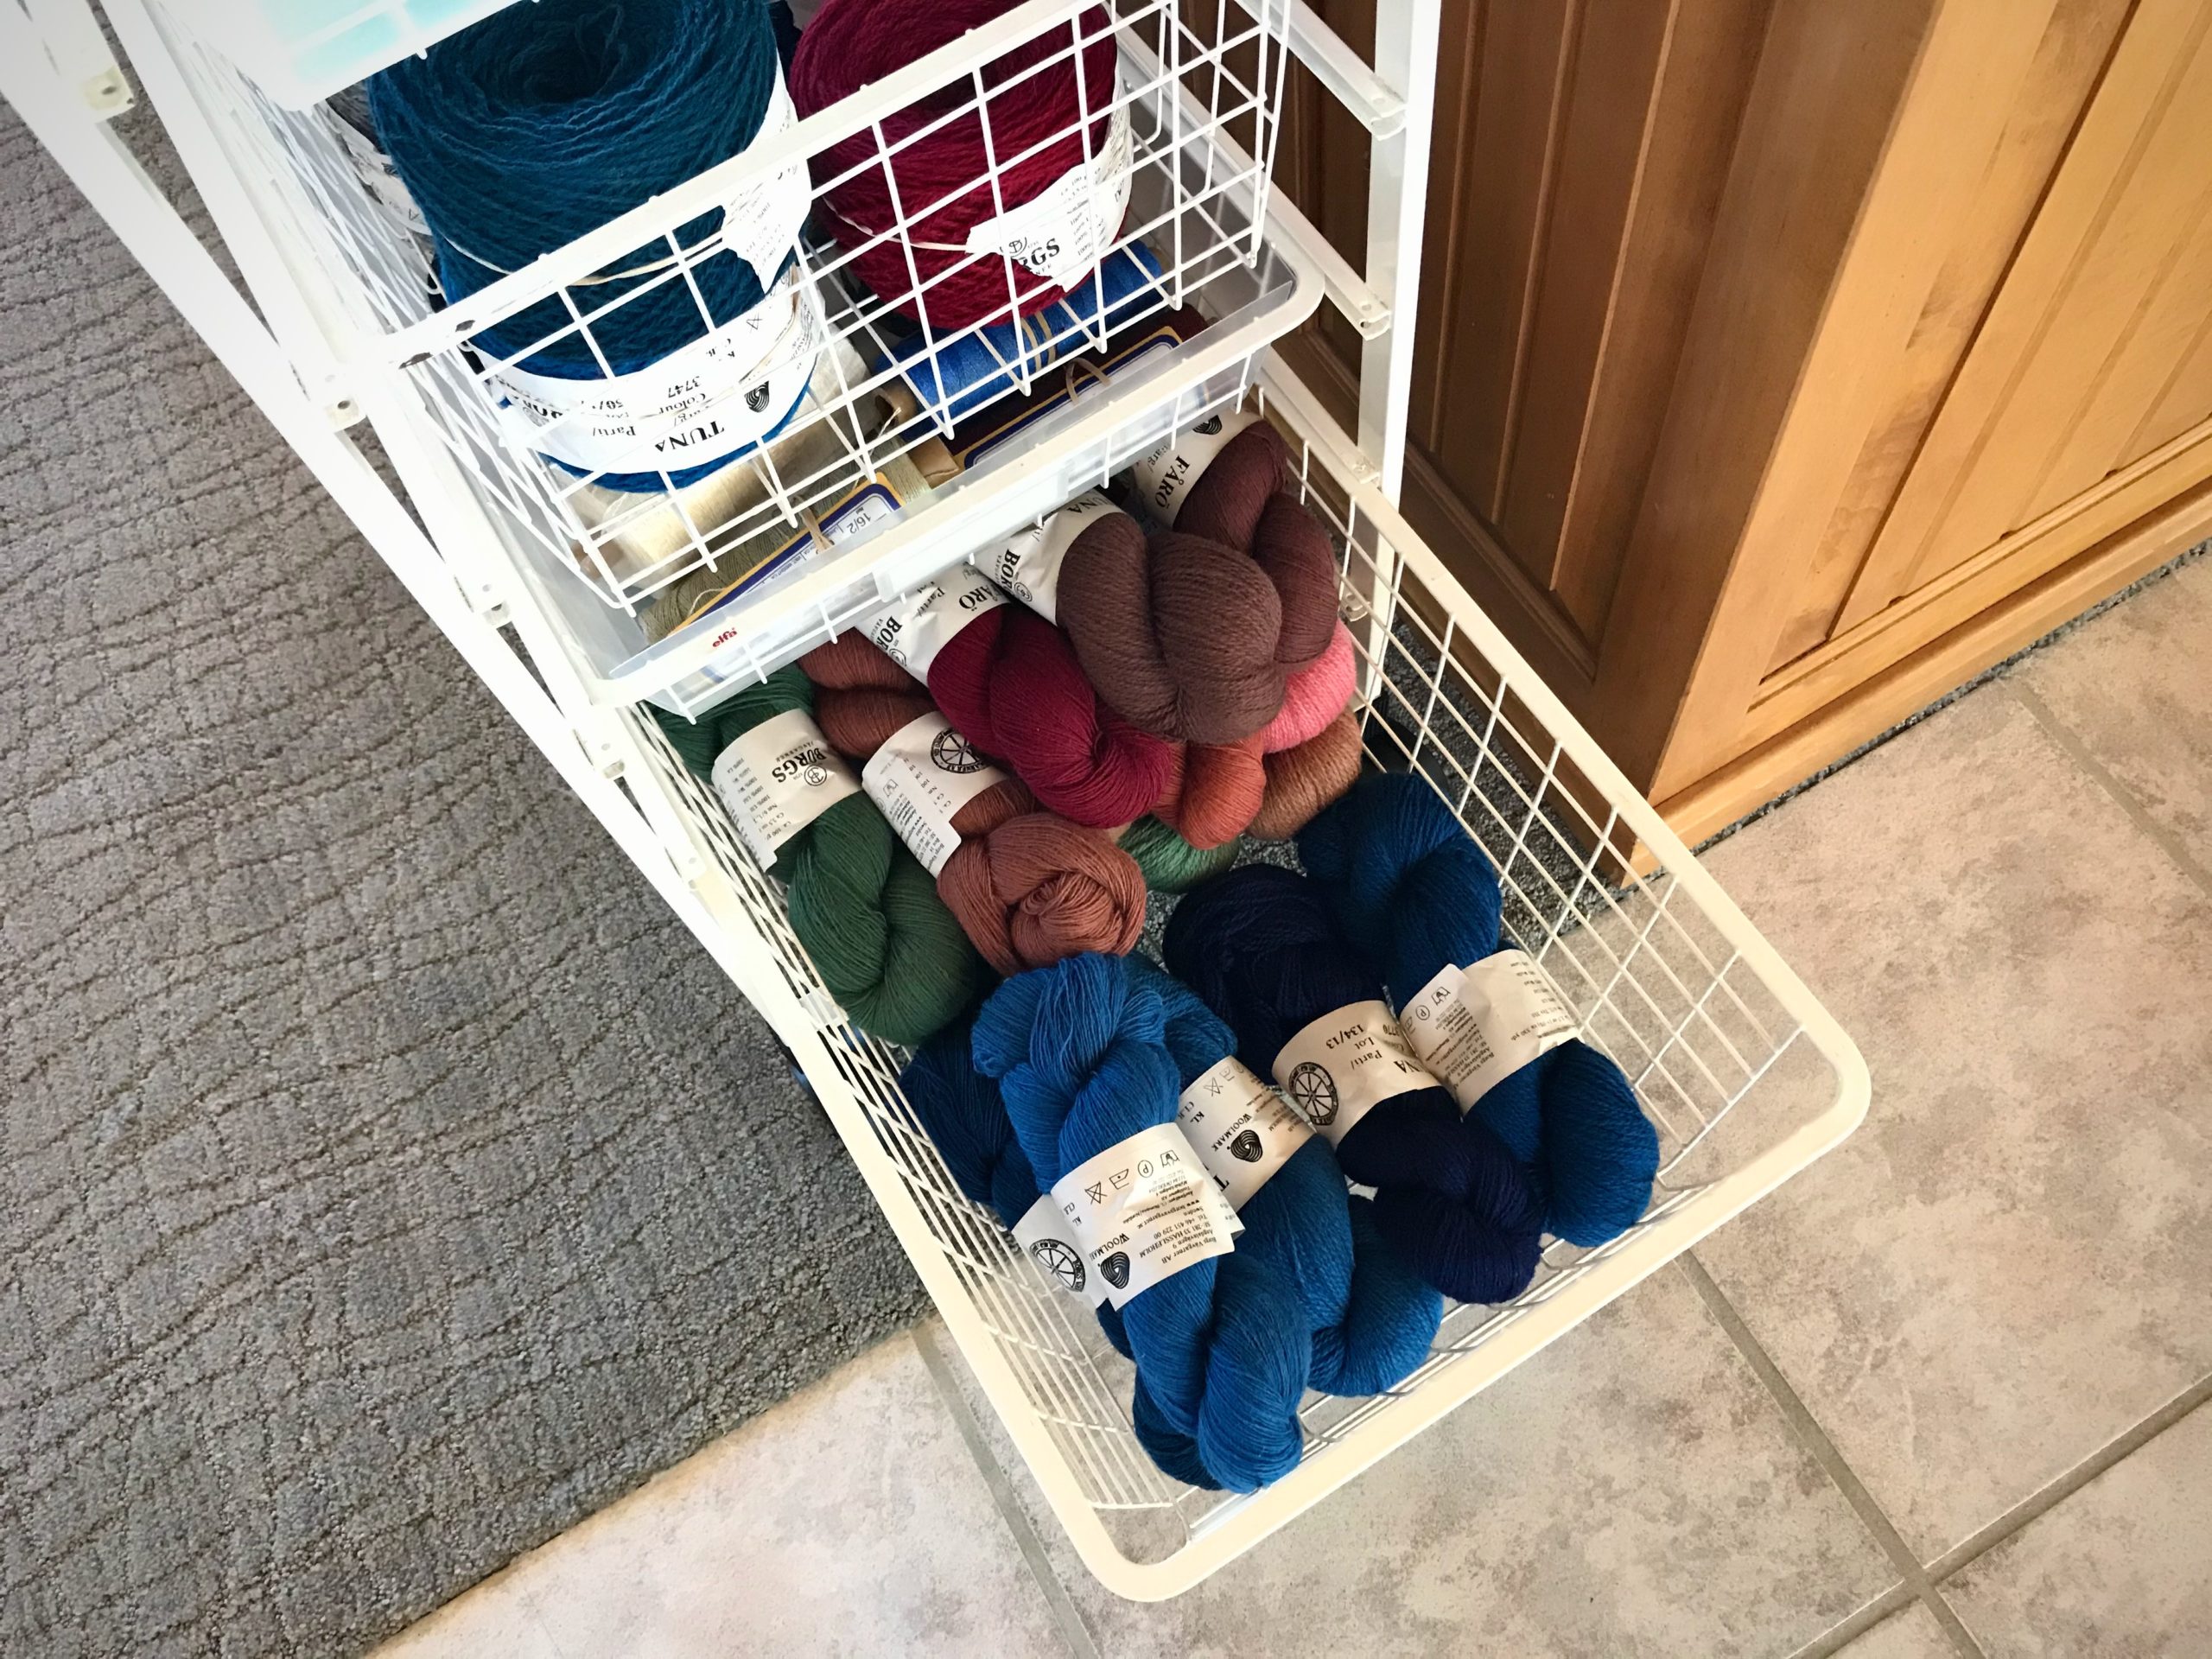
I am adding about thirty more skeins to my yarn supply to get the colors I need for a new tapestry. At this rate, maybe I will have every single color of Borgs 6/2 Tuna and 6/1 Fårö wool on my shelves some day. That’s wishful thinking… But I do have what I need for now to make the butterflies for this special pictorial tapestry.
Beautiful colors of wool skeins of yarn.
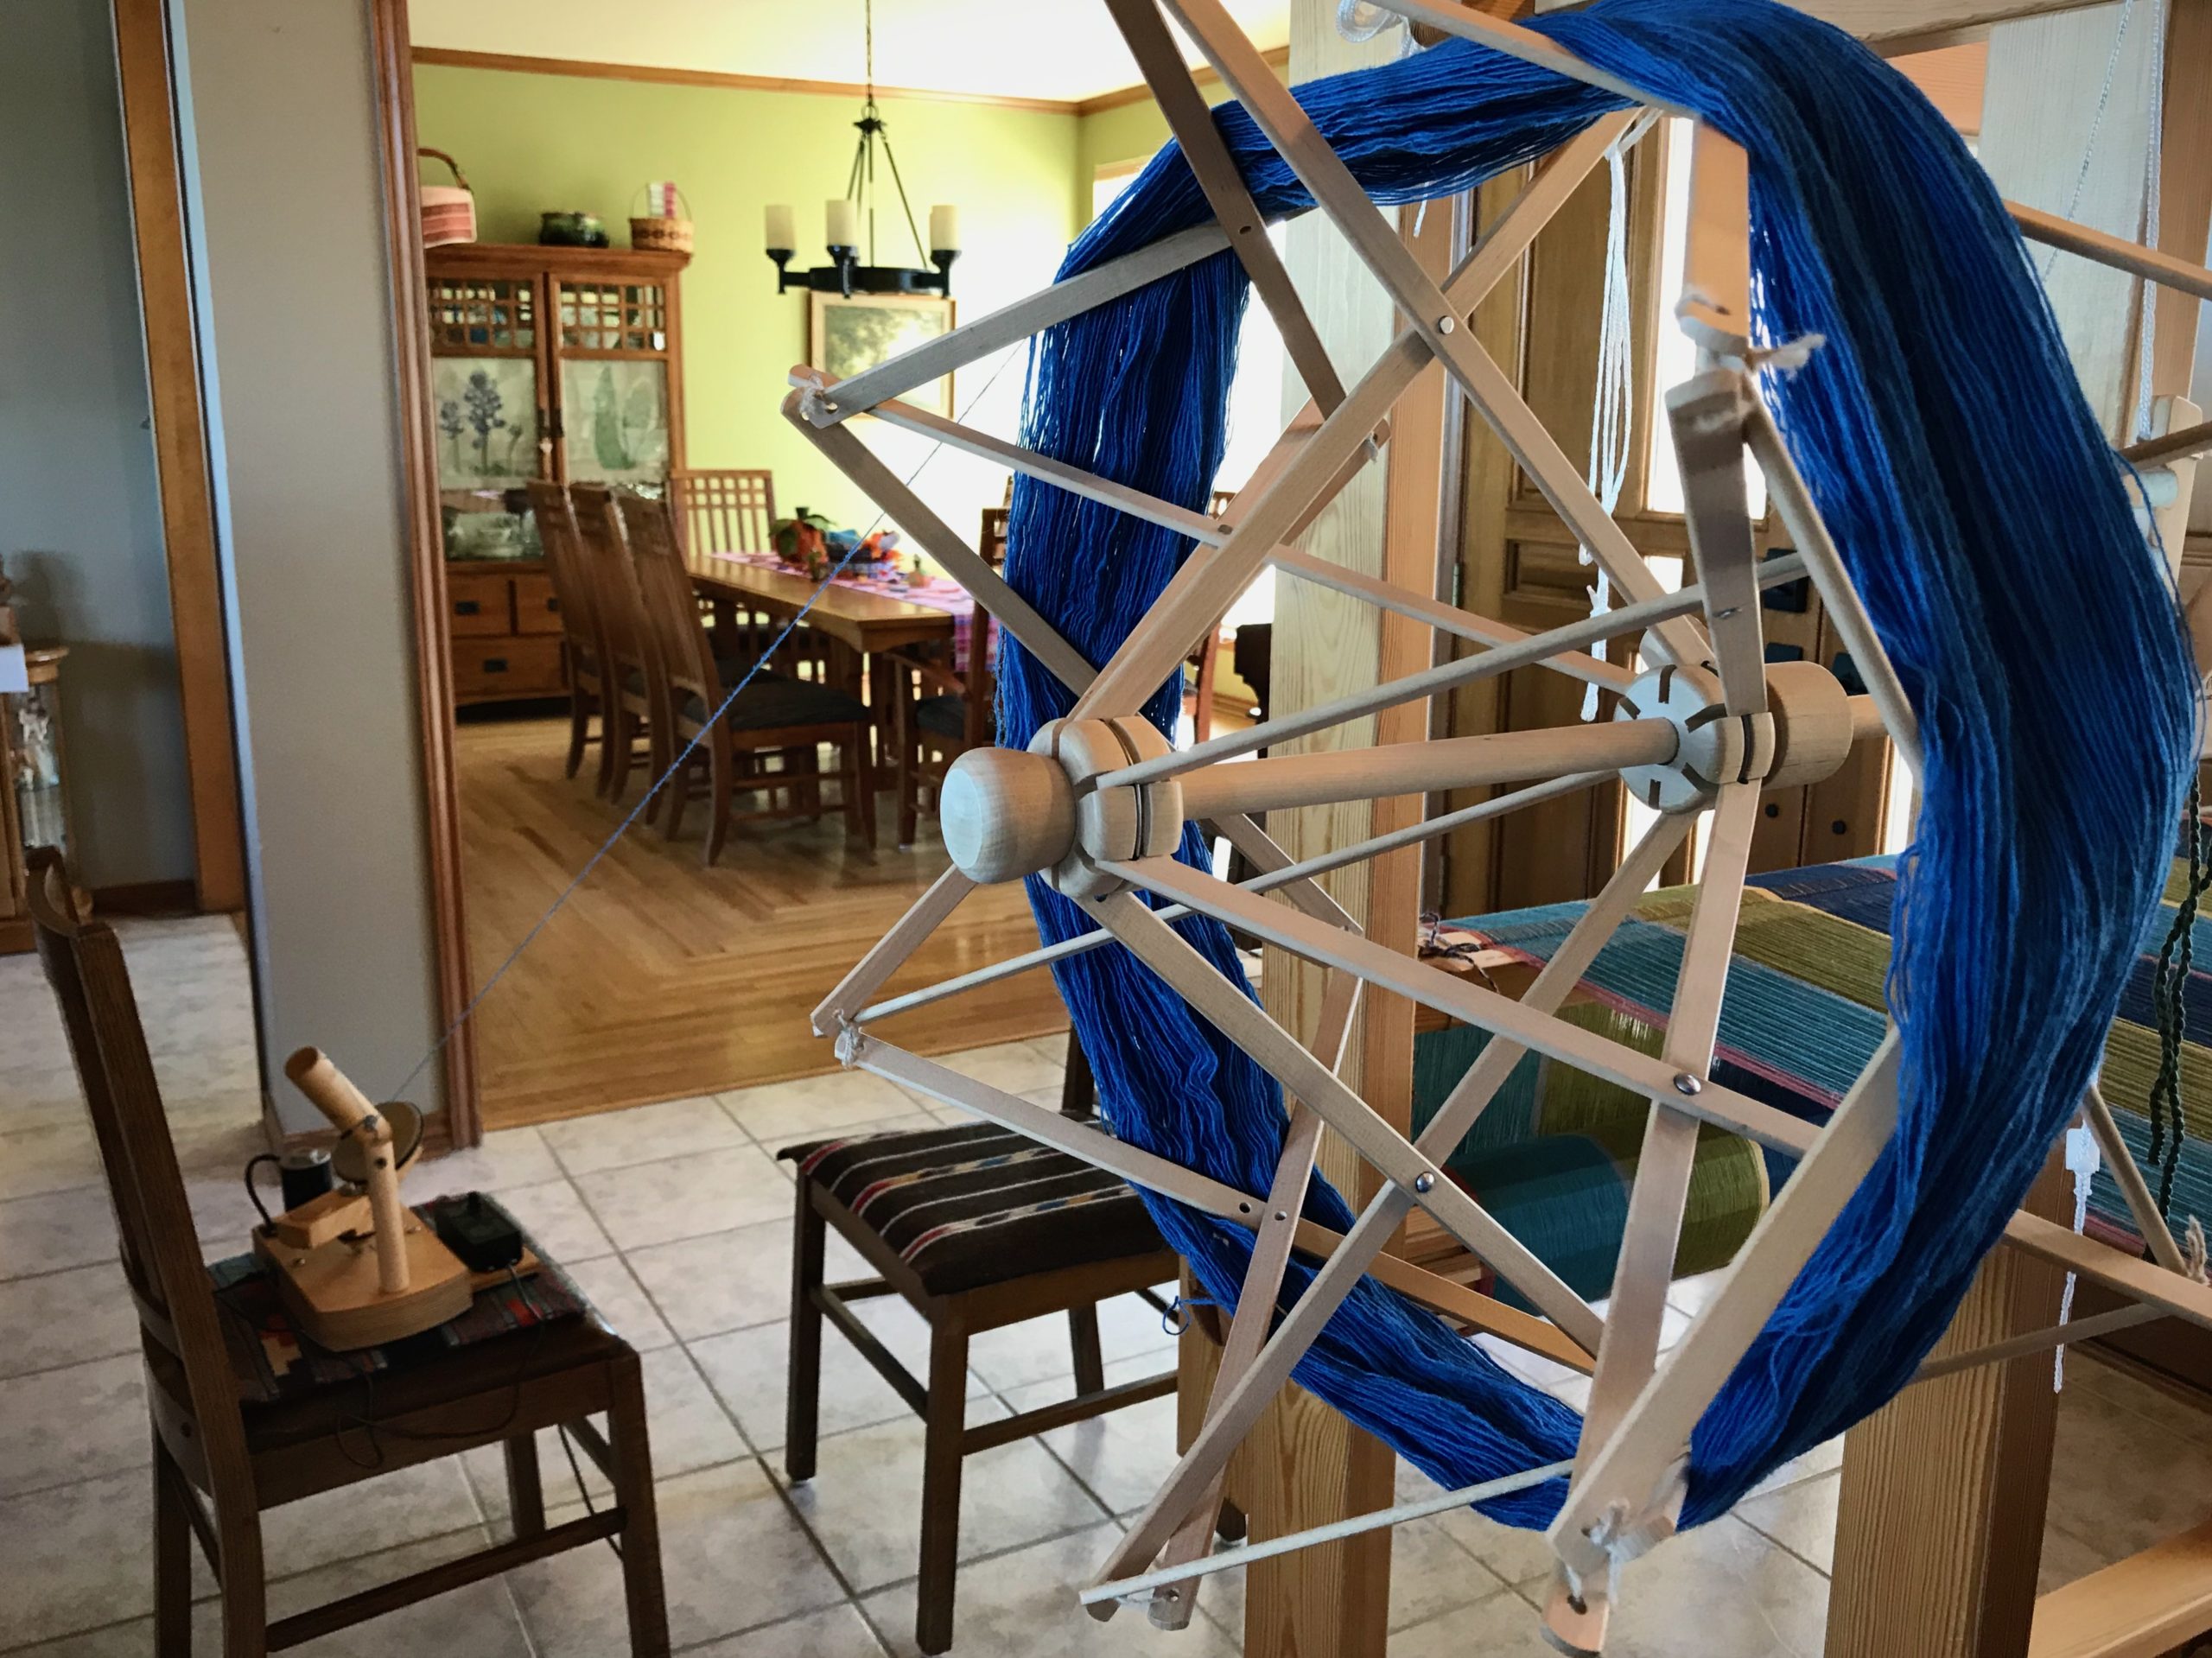
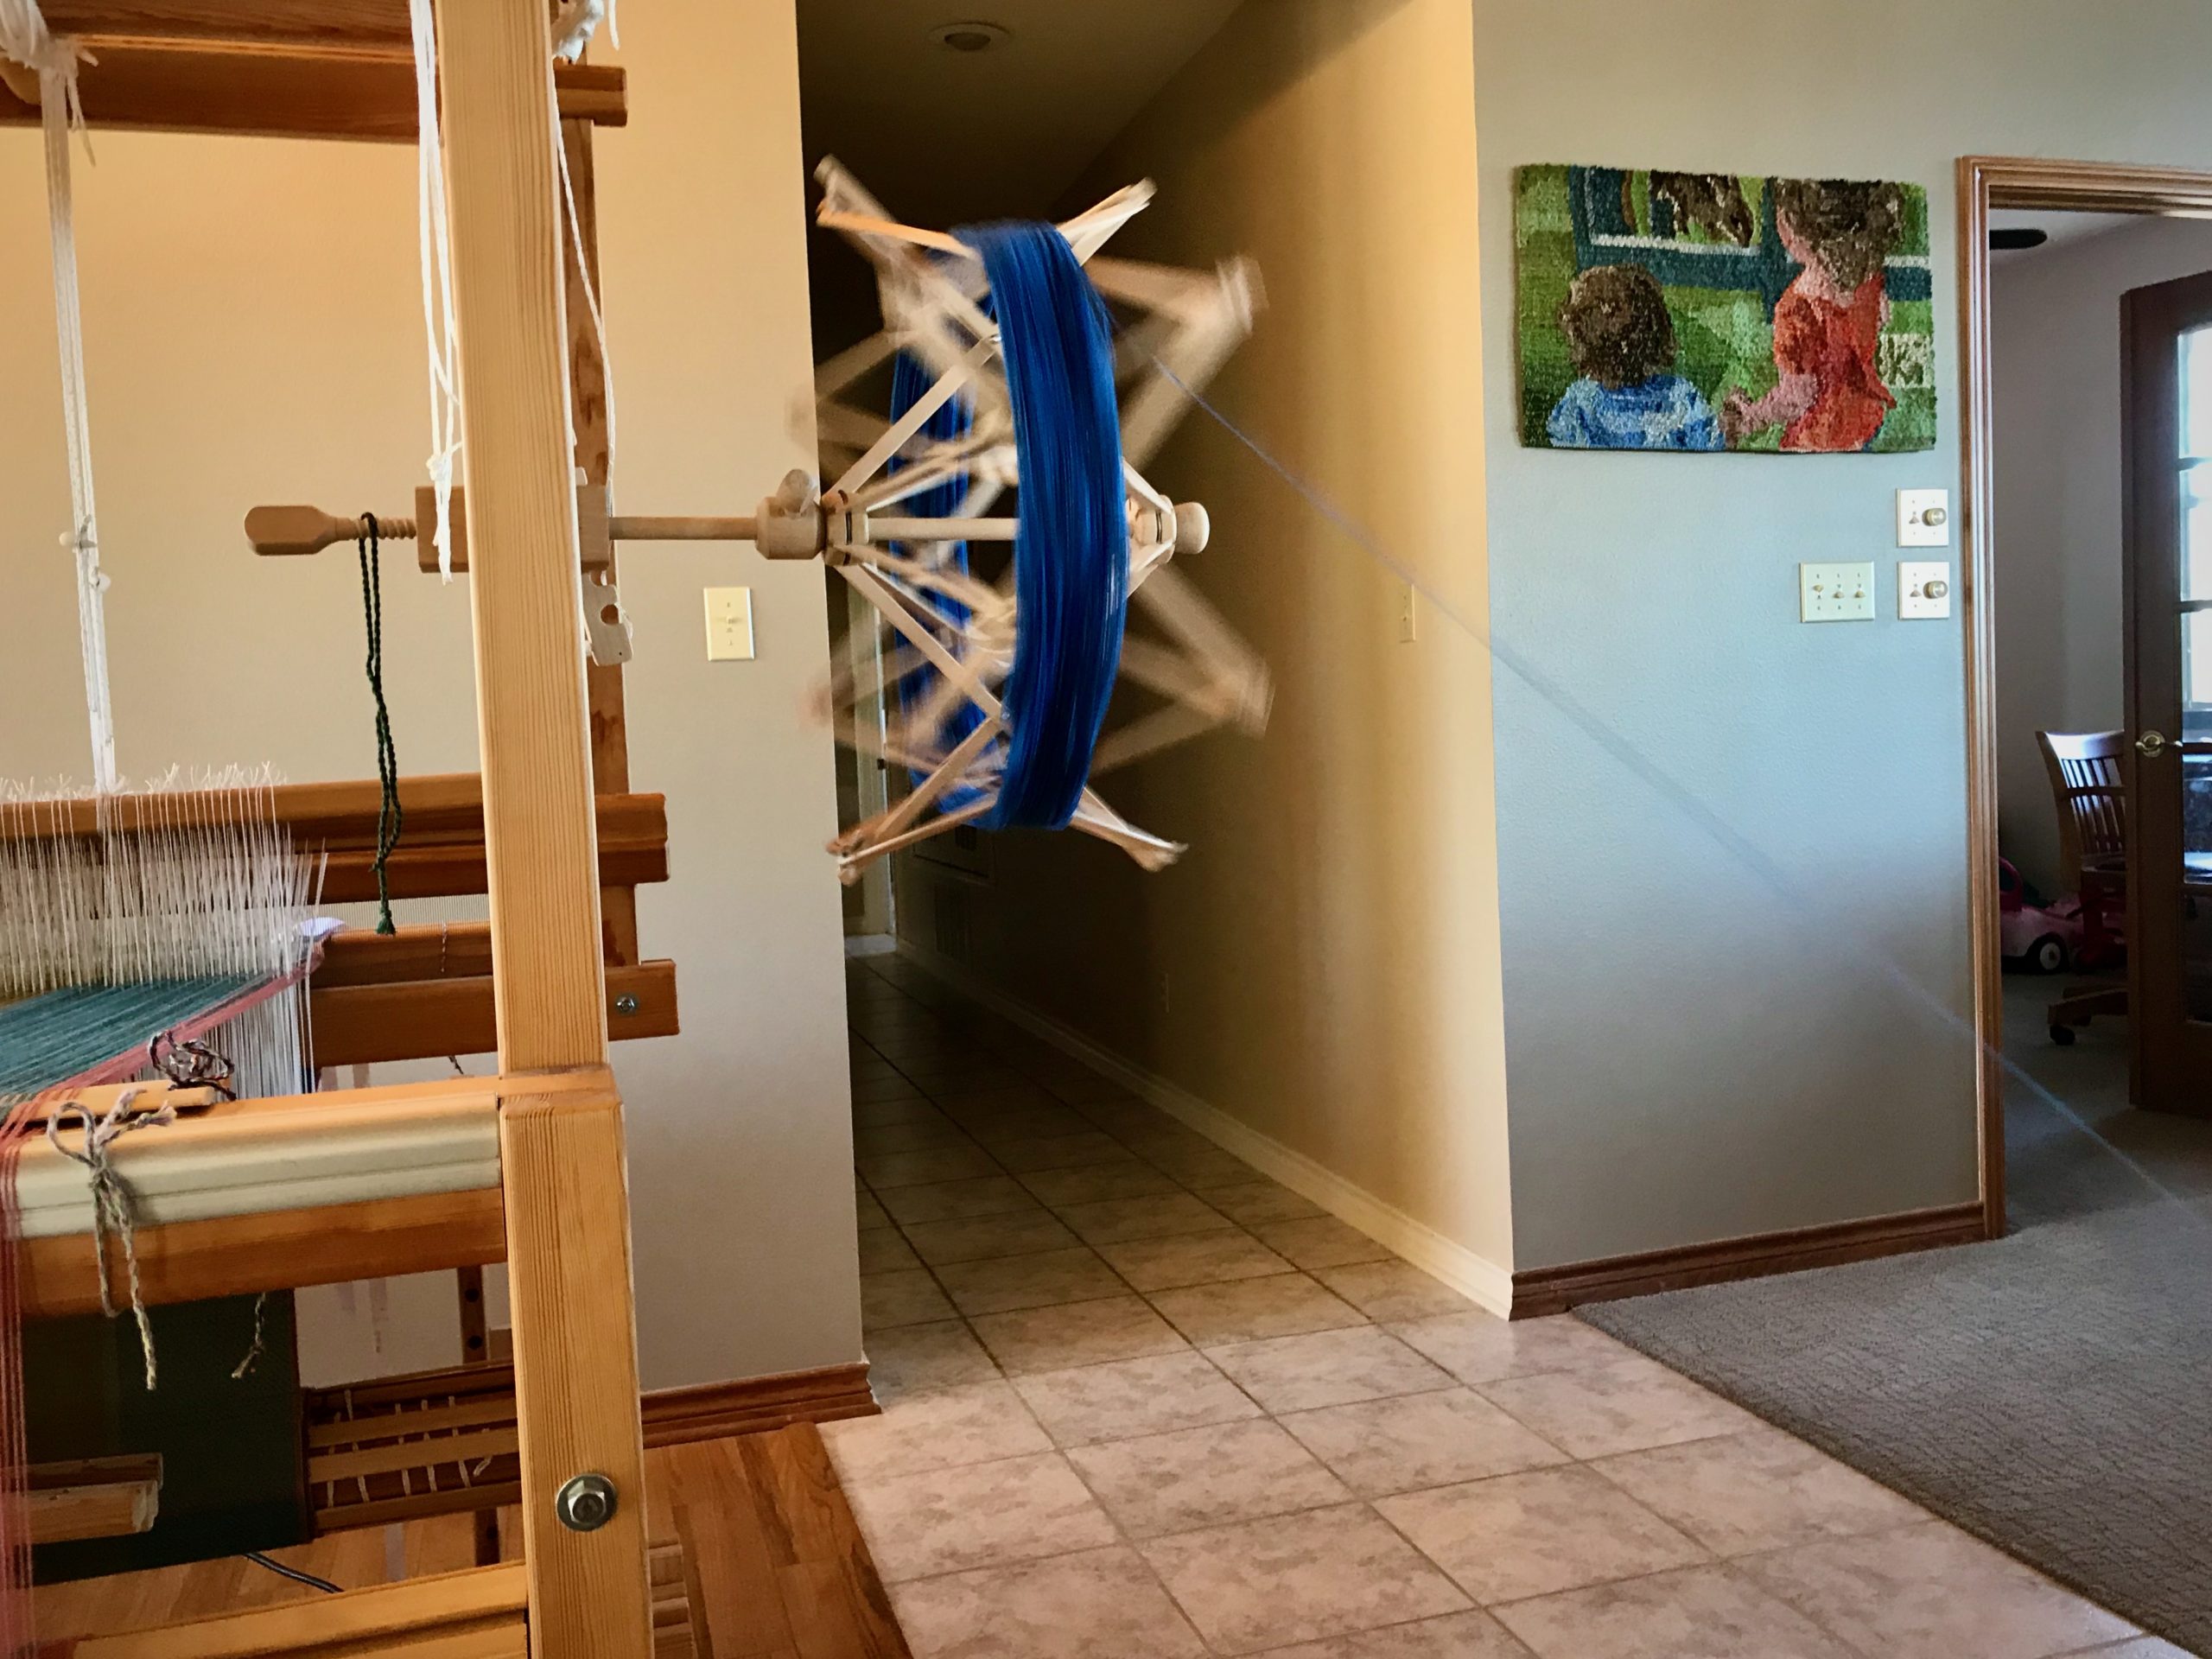
All these new skeins of yarn need to be wound into balls using my Swedish umbrella swift and a ball winder. In the past, I have used a manual ball winder. That means a lot of handle turning, but eventually all the yarn is wound into balls.
Skein of yarn is opened and placed on the umbrella swift.
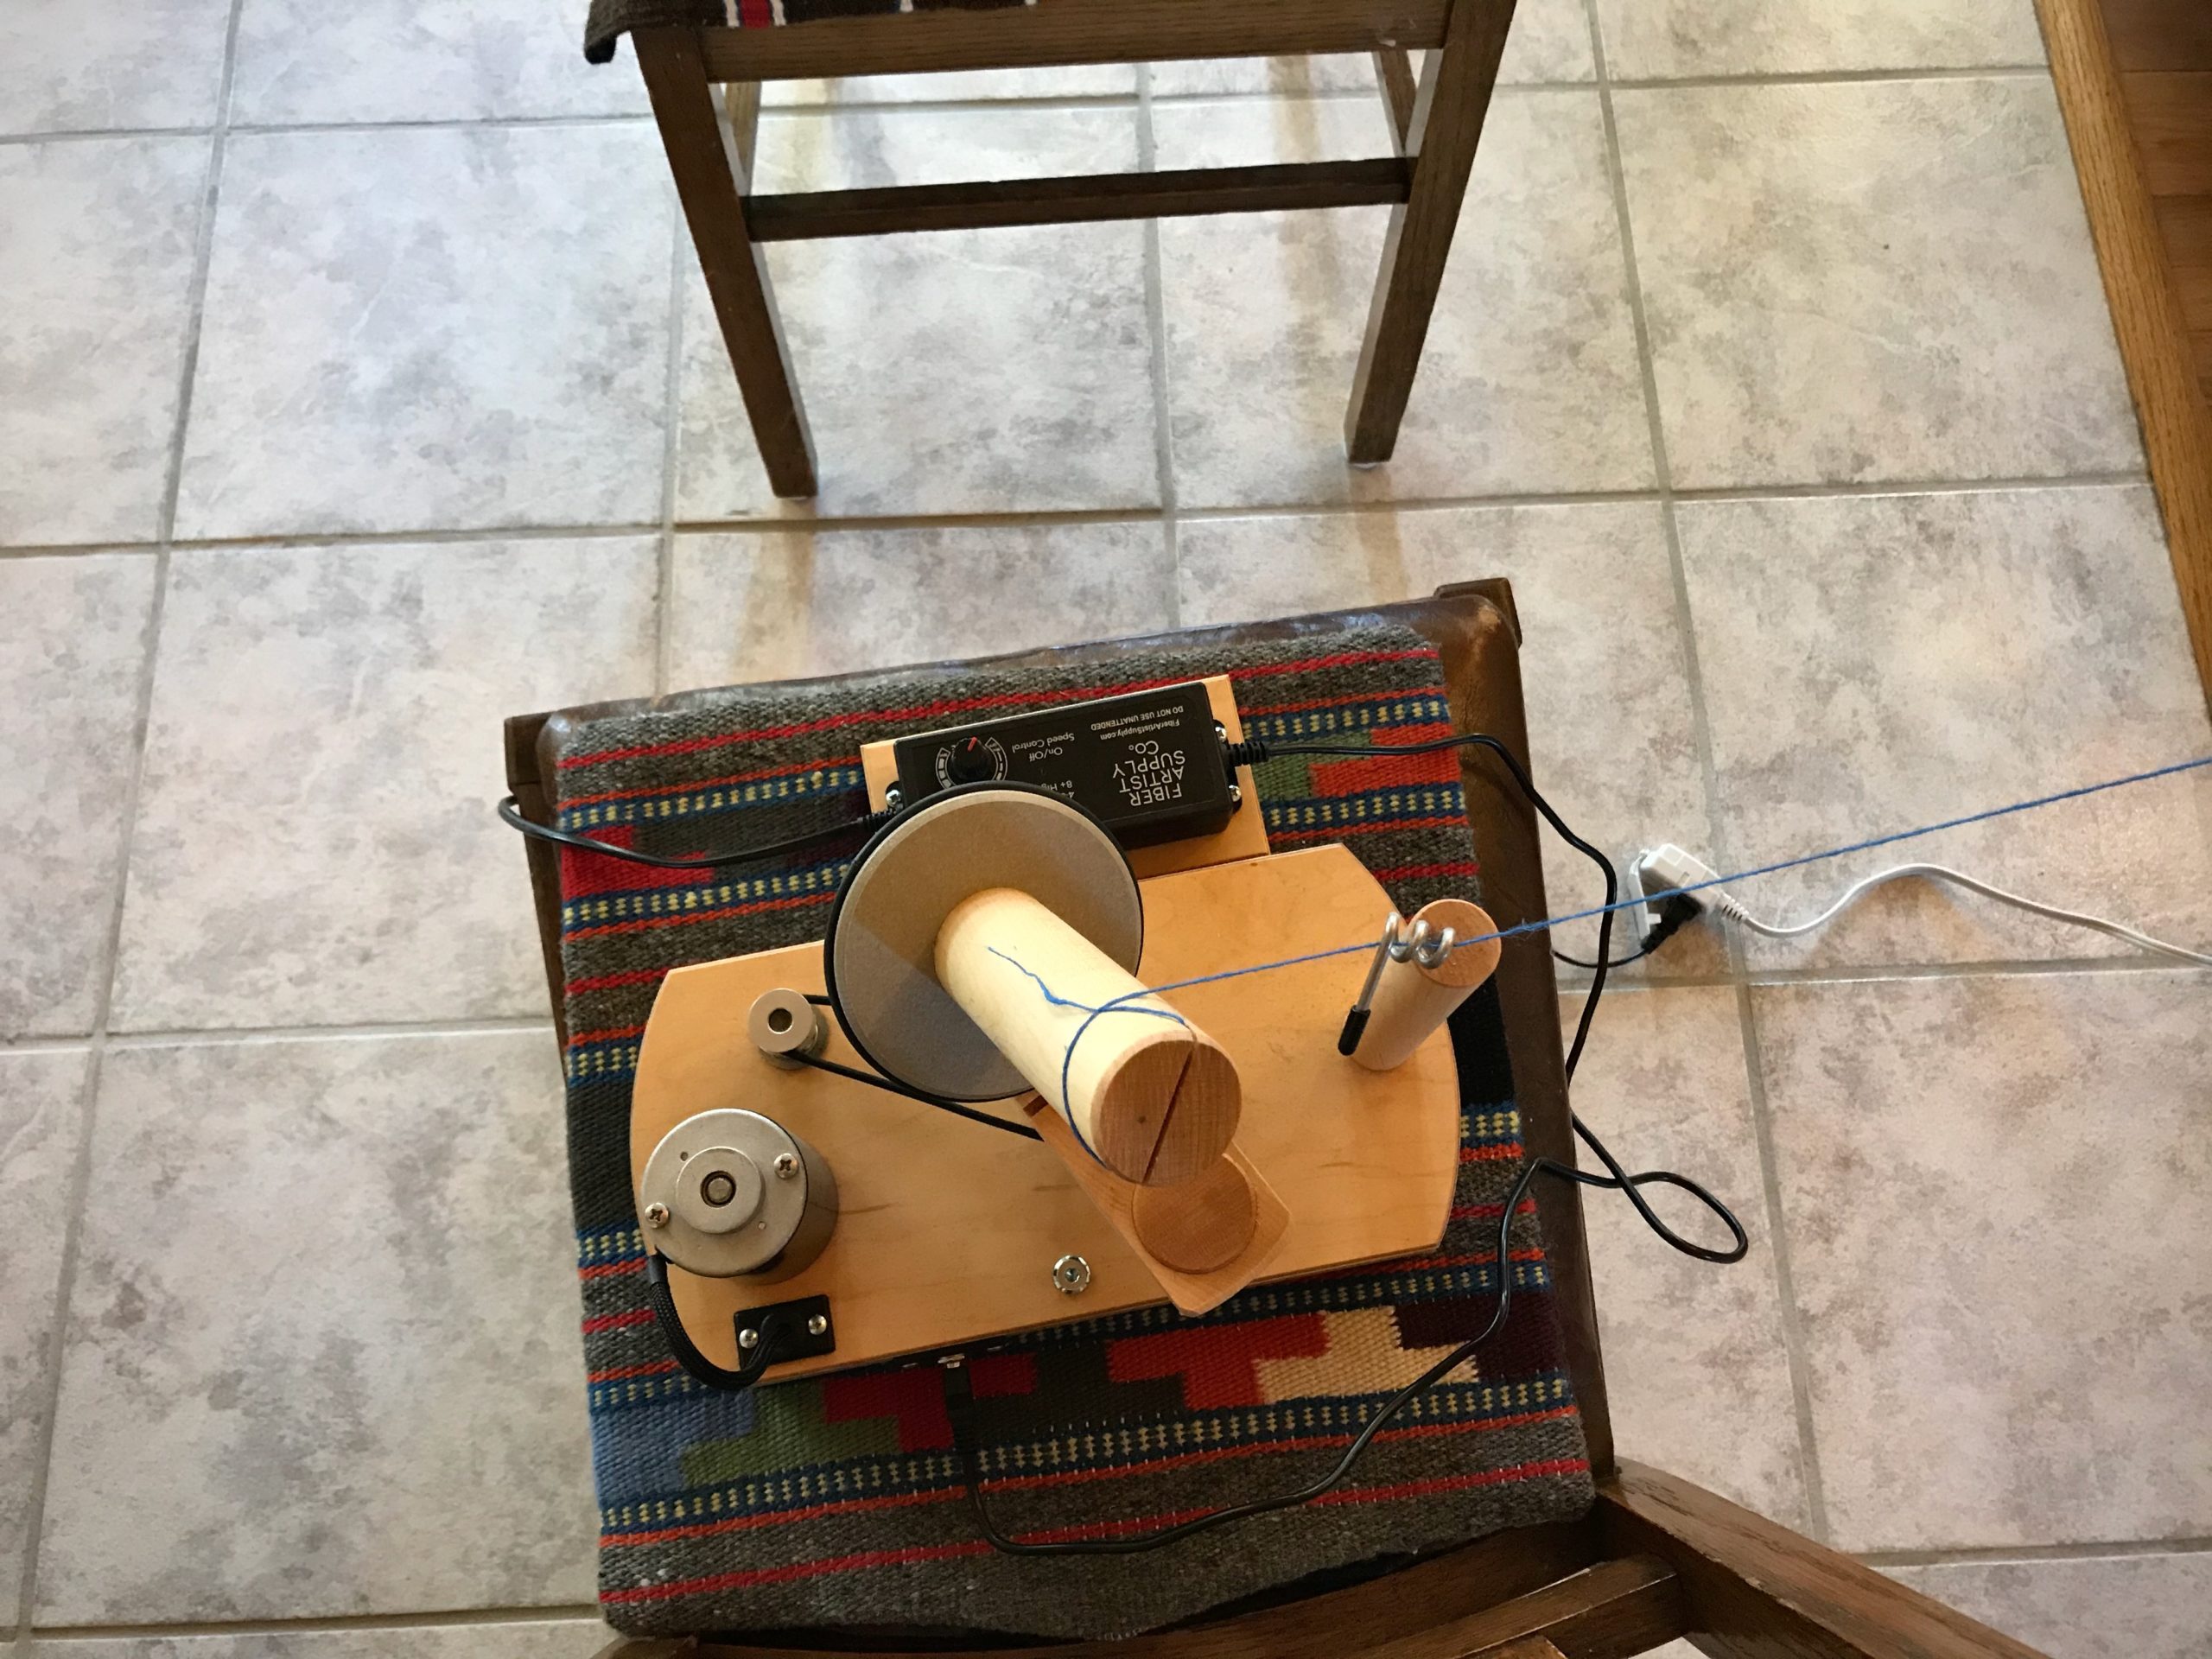
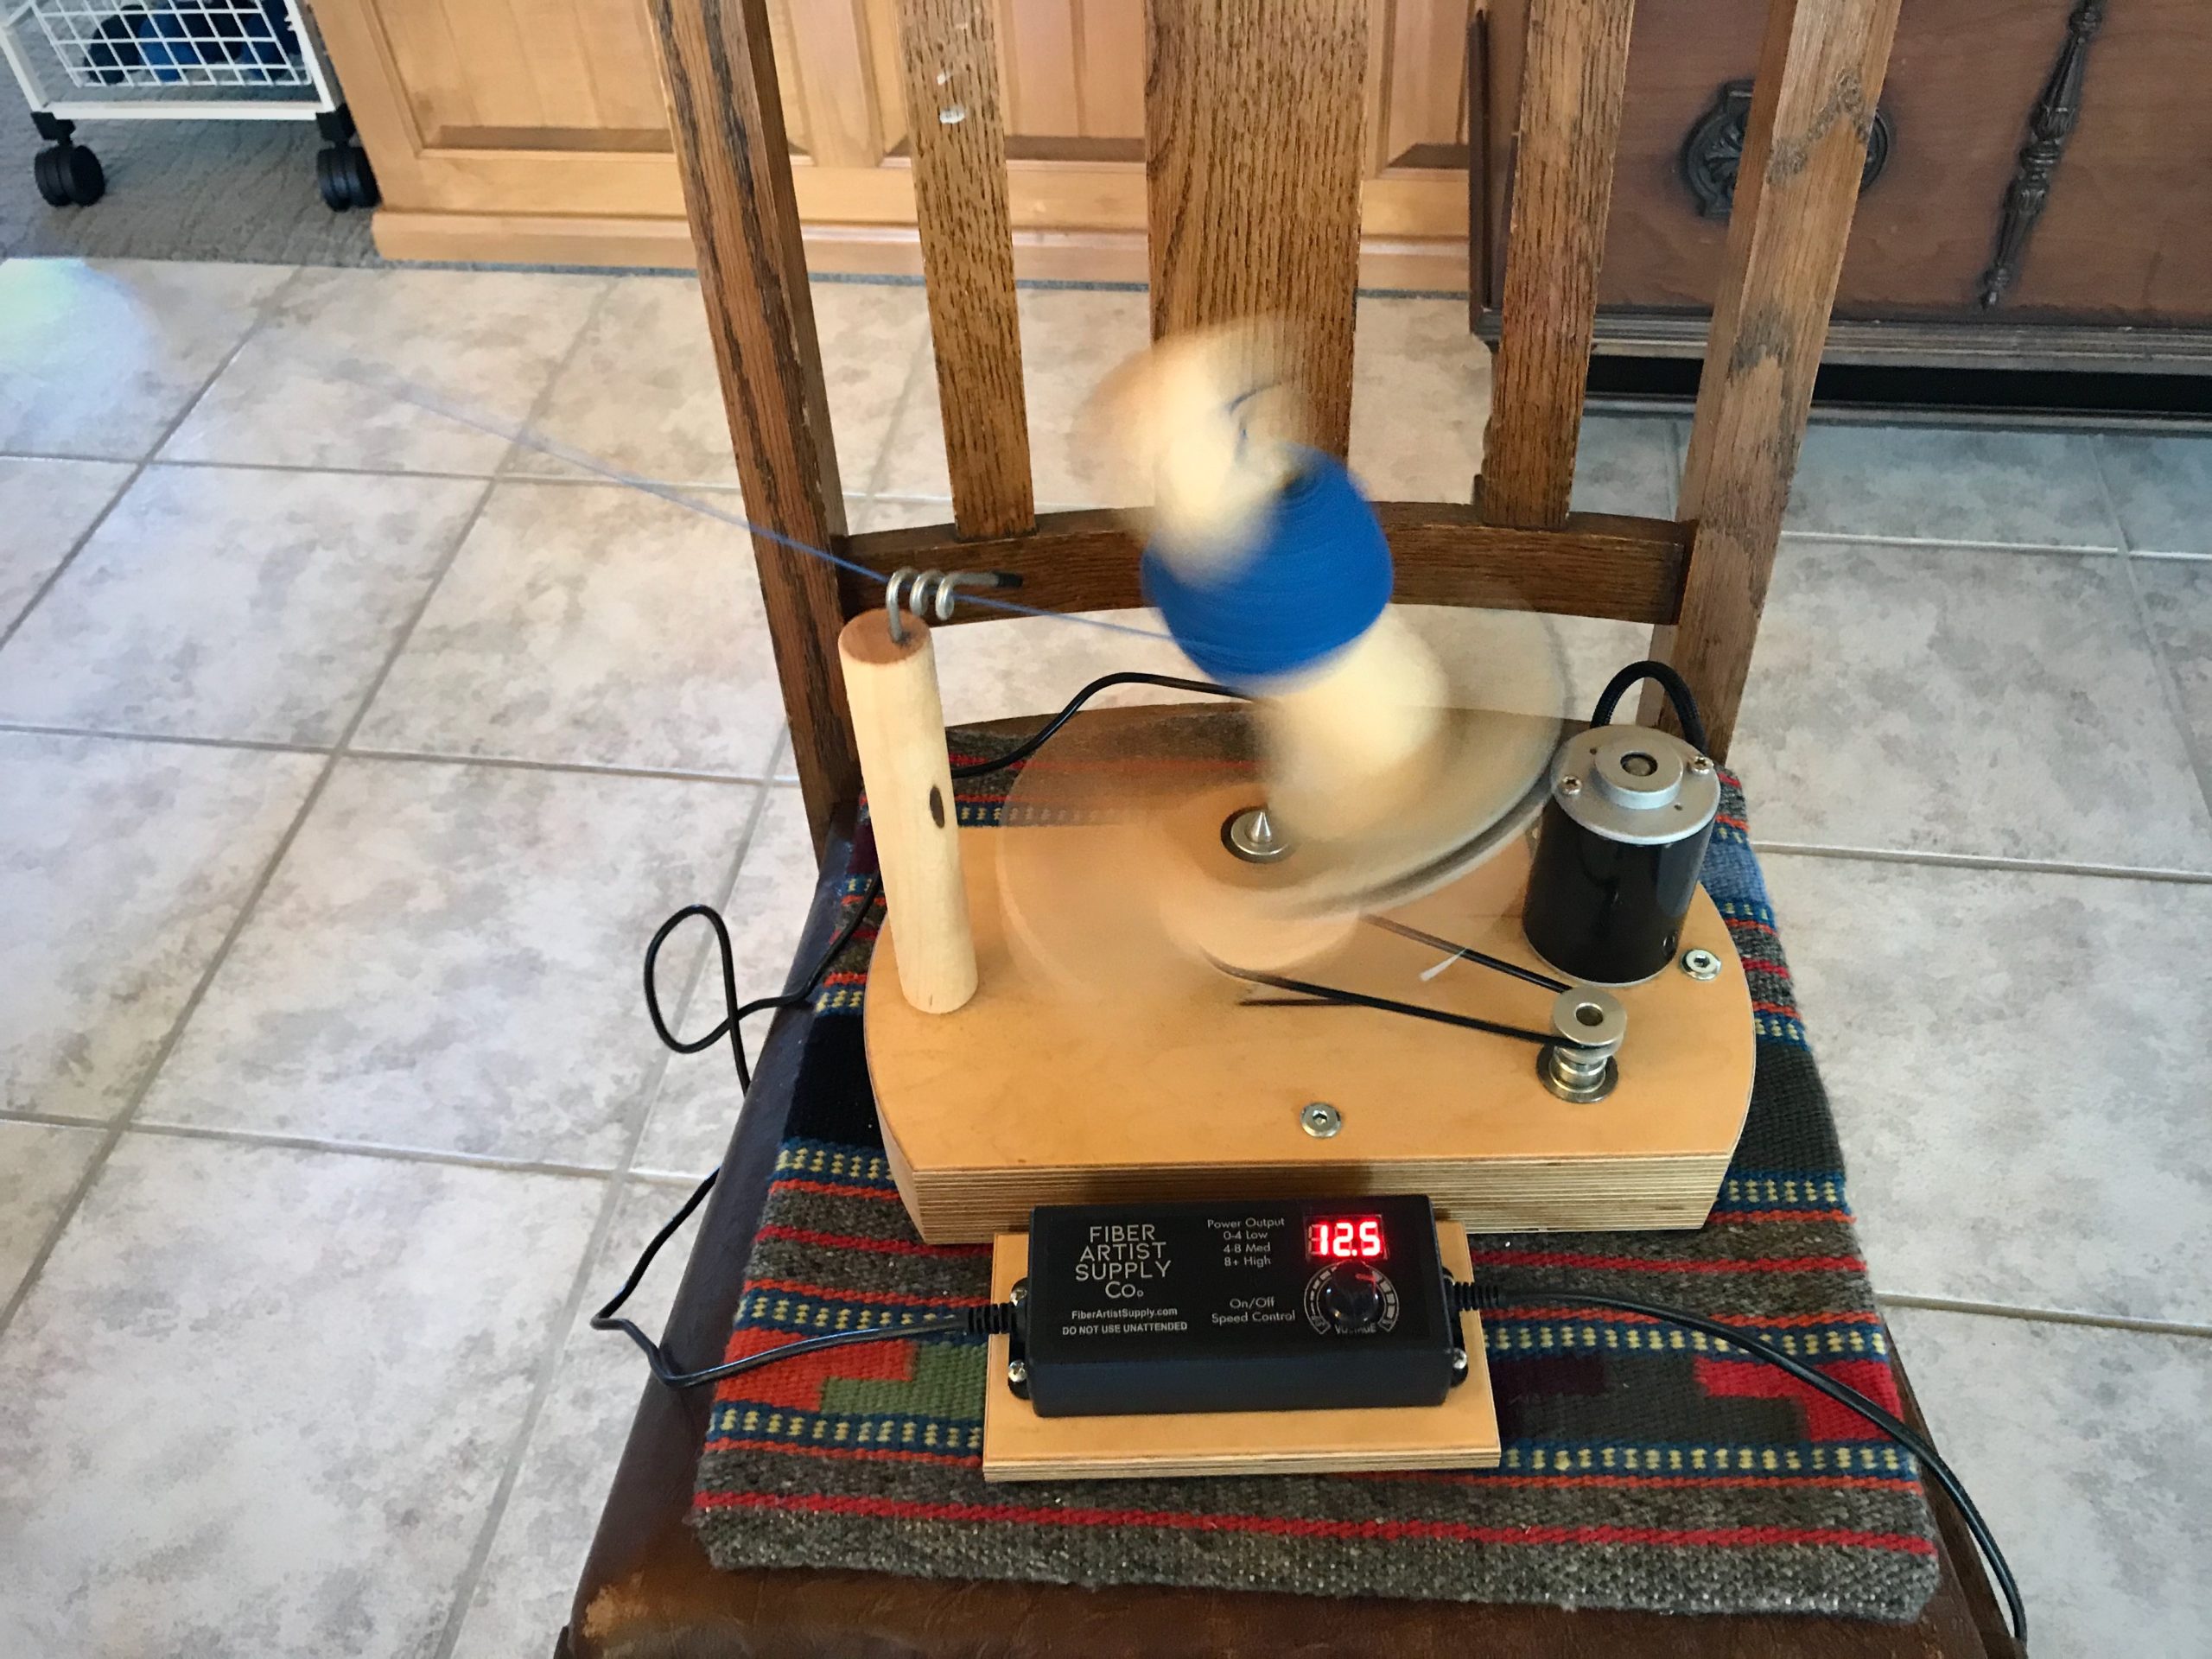
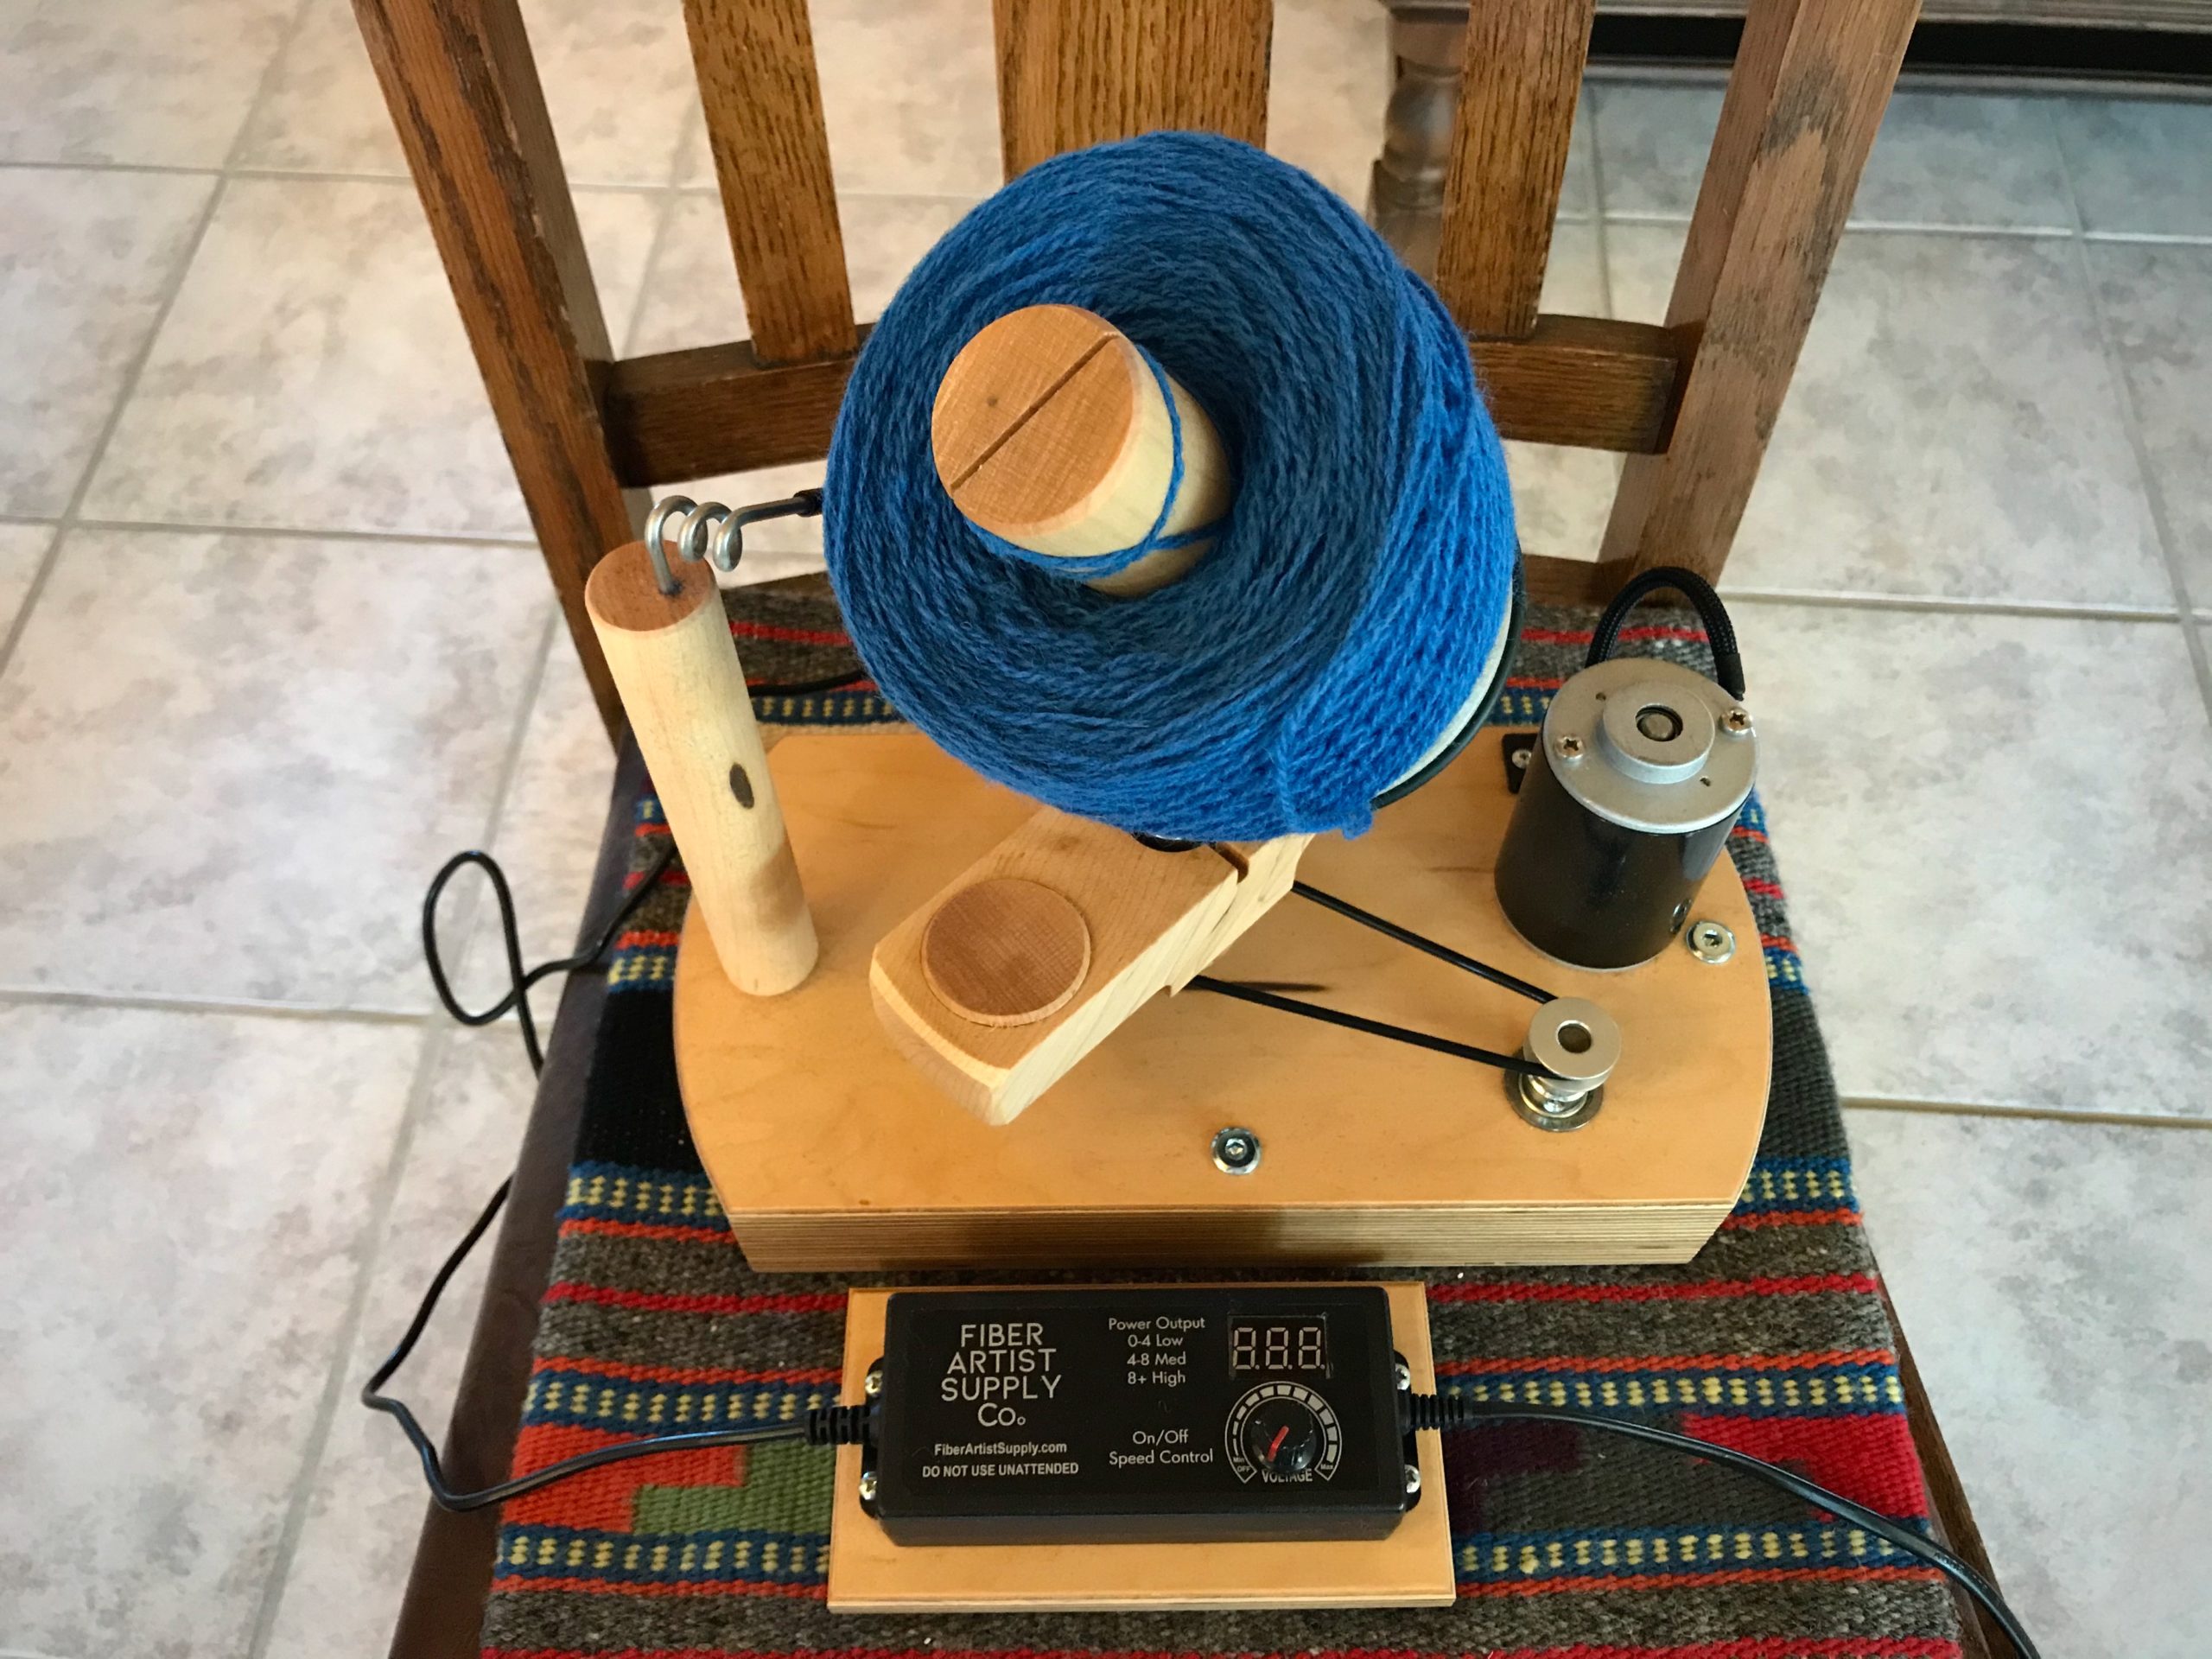
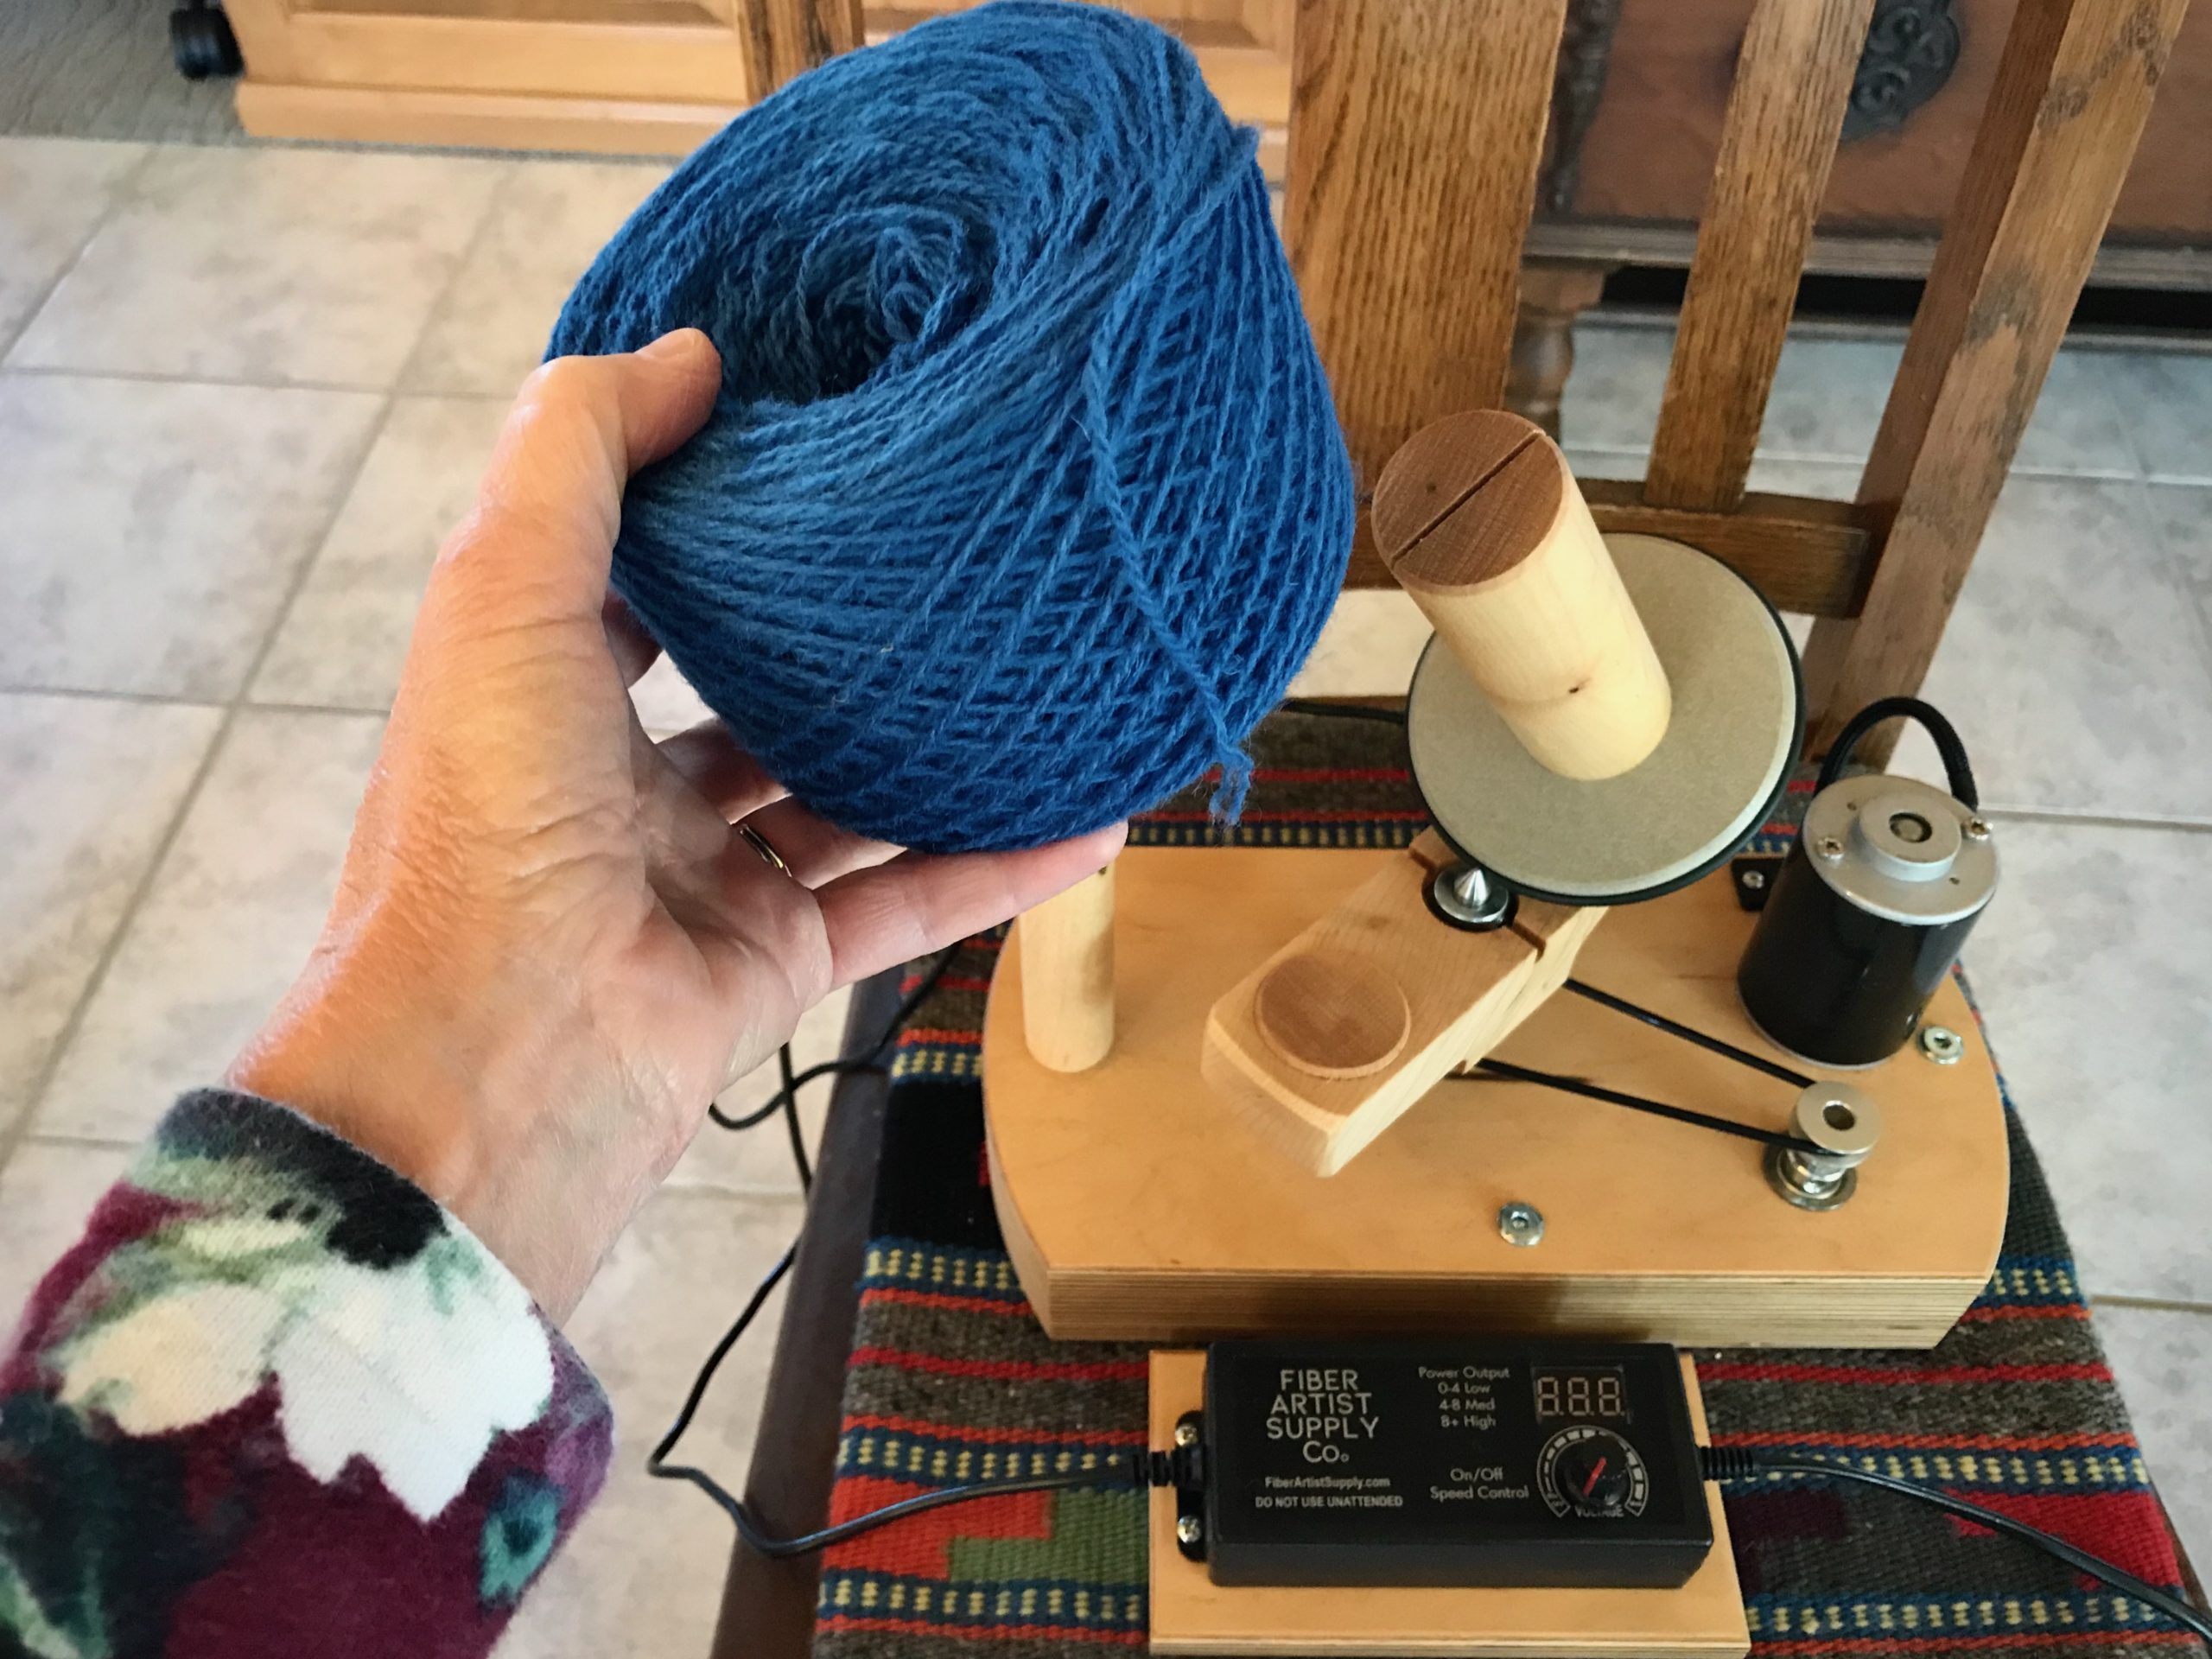
This time is different. I found a new time-saving and arm-saving tool. It’s an electric ball winder, made by Fiber Artist Supply Company. I put the skein on the swift, cut the ties, secure the loose end of yarn to the ball winder, and then turn it on, gradually increasing the speed. In less than two minutes, I have another beautiful ball of yarn to use for making tapestry butterflies.
End of yarn is secured on the post of the ball winder.Dial on the winder allows me to gradually increase the speed. When I see that the skein is unwinding properly, I turn the dial to full speed.Maybe this is why it’s called a yarn “swift.” Previous pictorial tapestry, Siblings, is seen on the wall.One minute, fifty-four seconds later, and we have a ball of yarn.I will wrap the label on this ball of yarn and it will join the yarn collection for this tapestry.Linen warp is ready for beaming. Wool weft yarn is being sorted and organized for making butterflies.
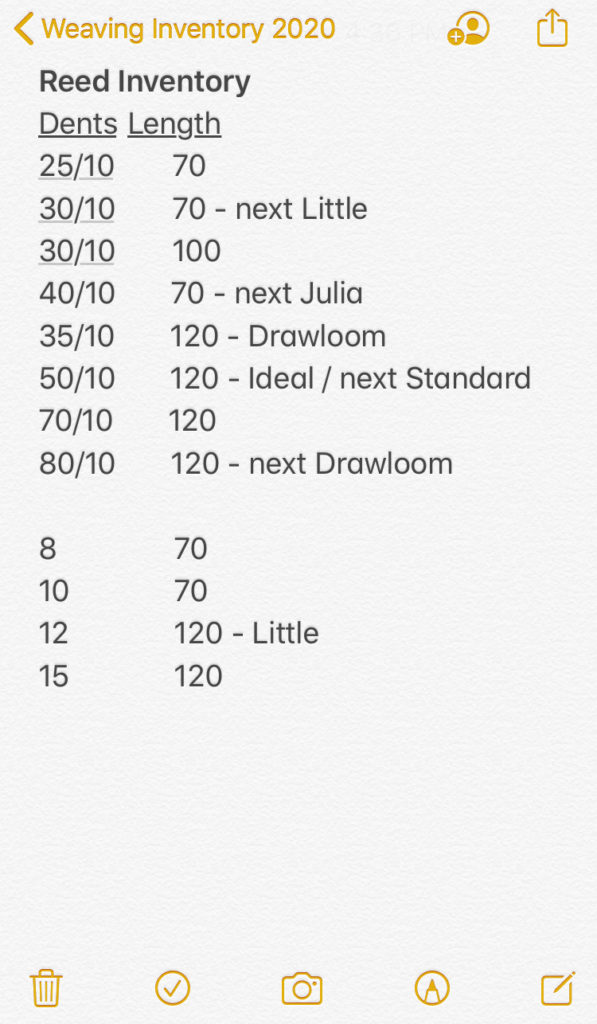
My weaving history includes very fine threads all the way to heavy-duty rug warps. As a result, I have acquired a wide selection of reeds over time. All five of my looms have beaters that will accommodate any length or height of reed. When I plan a project, one of the first things I consider is whether I have the size reed that is needed. To keep my reeds organized, I need two things. One, a simple method to manage the reeds I have, tracking the reeds as they go in and out of use. Two, a place to store all the reeds, arranged in order by dents per cm and dents per inch.
Reed Organization
Reed Inventory
I keep a list in my Notes app on my phone with the sizes and lengths of reeds that I have. If a reed is in use, I note which loom. If a reed will be needed for a planned project, I also note that. As soon as I remove a reed from the beater at the end of a project, I put the reed away and update my Reed Inventory list.
Sample Reed Inventory note. When I am planning, I look at the note on my phone to see what reeds I have that are available. “Next” reserves the reed for the loom that needs it next.
Reed Holder
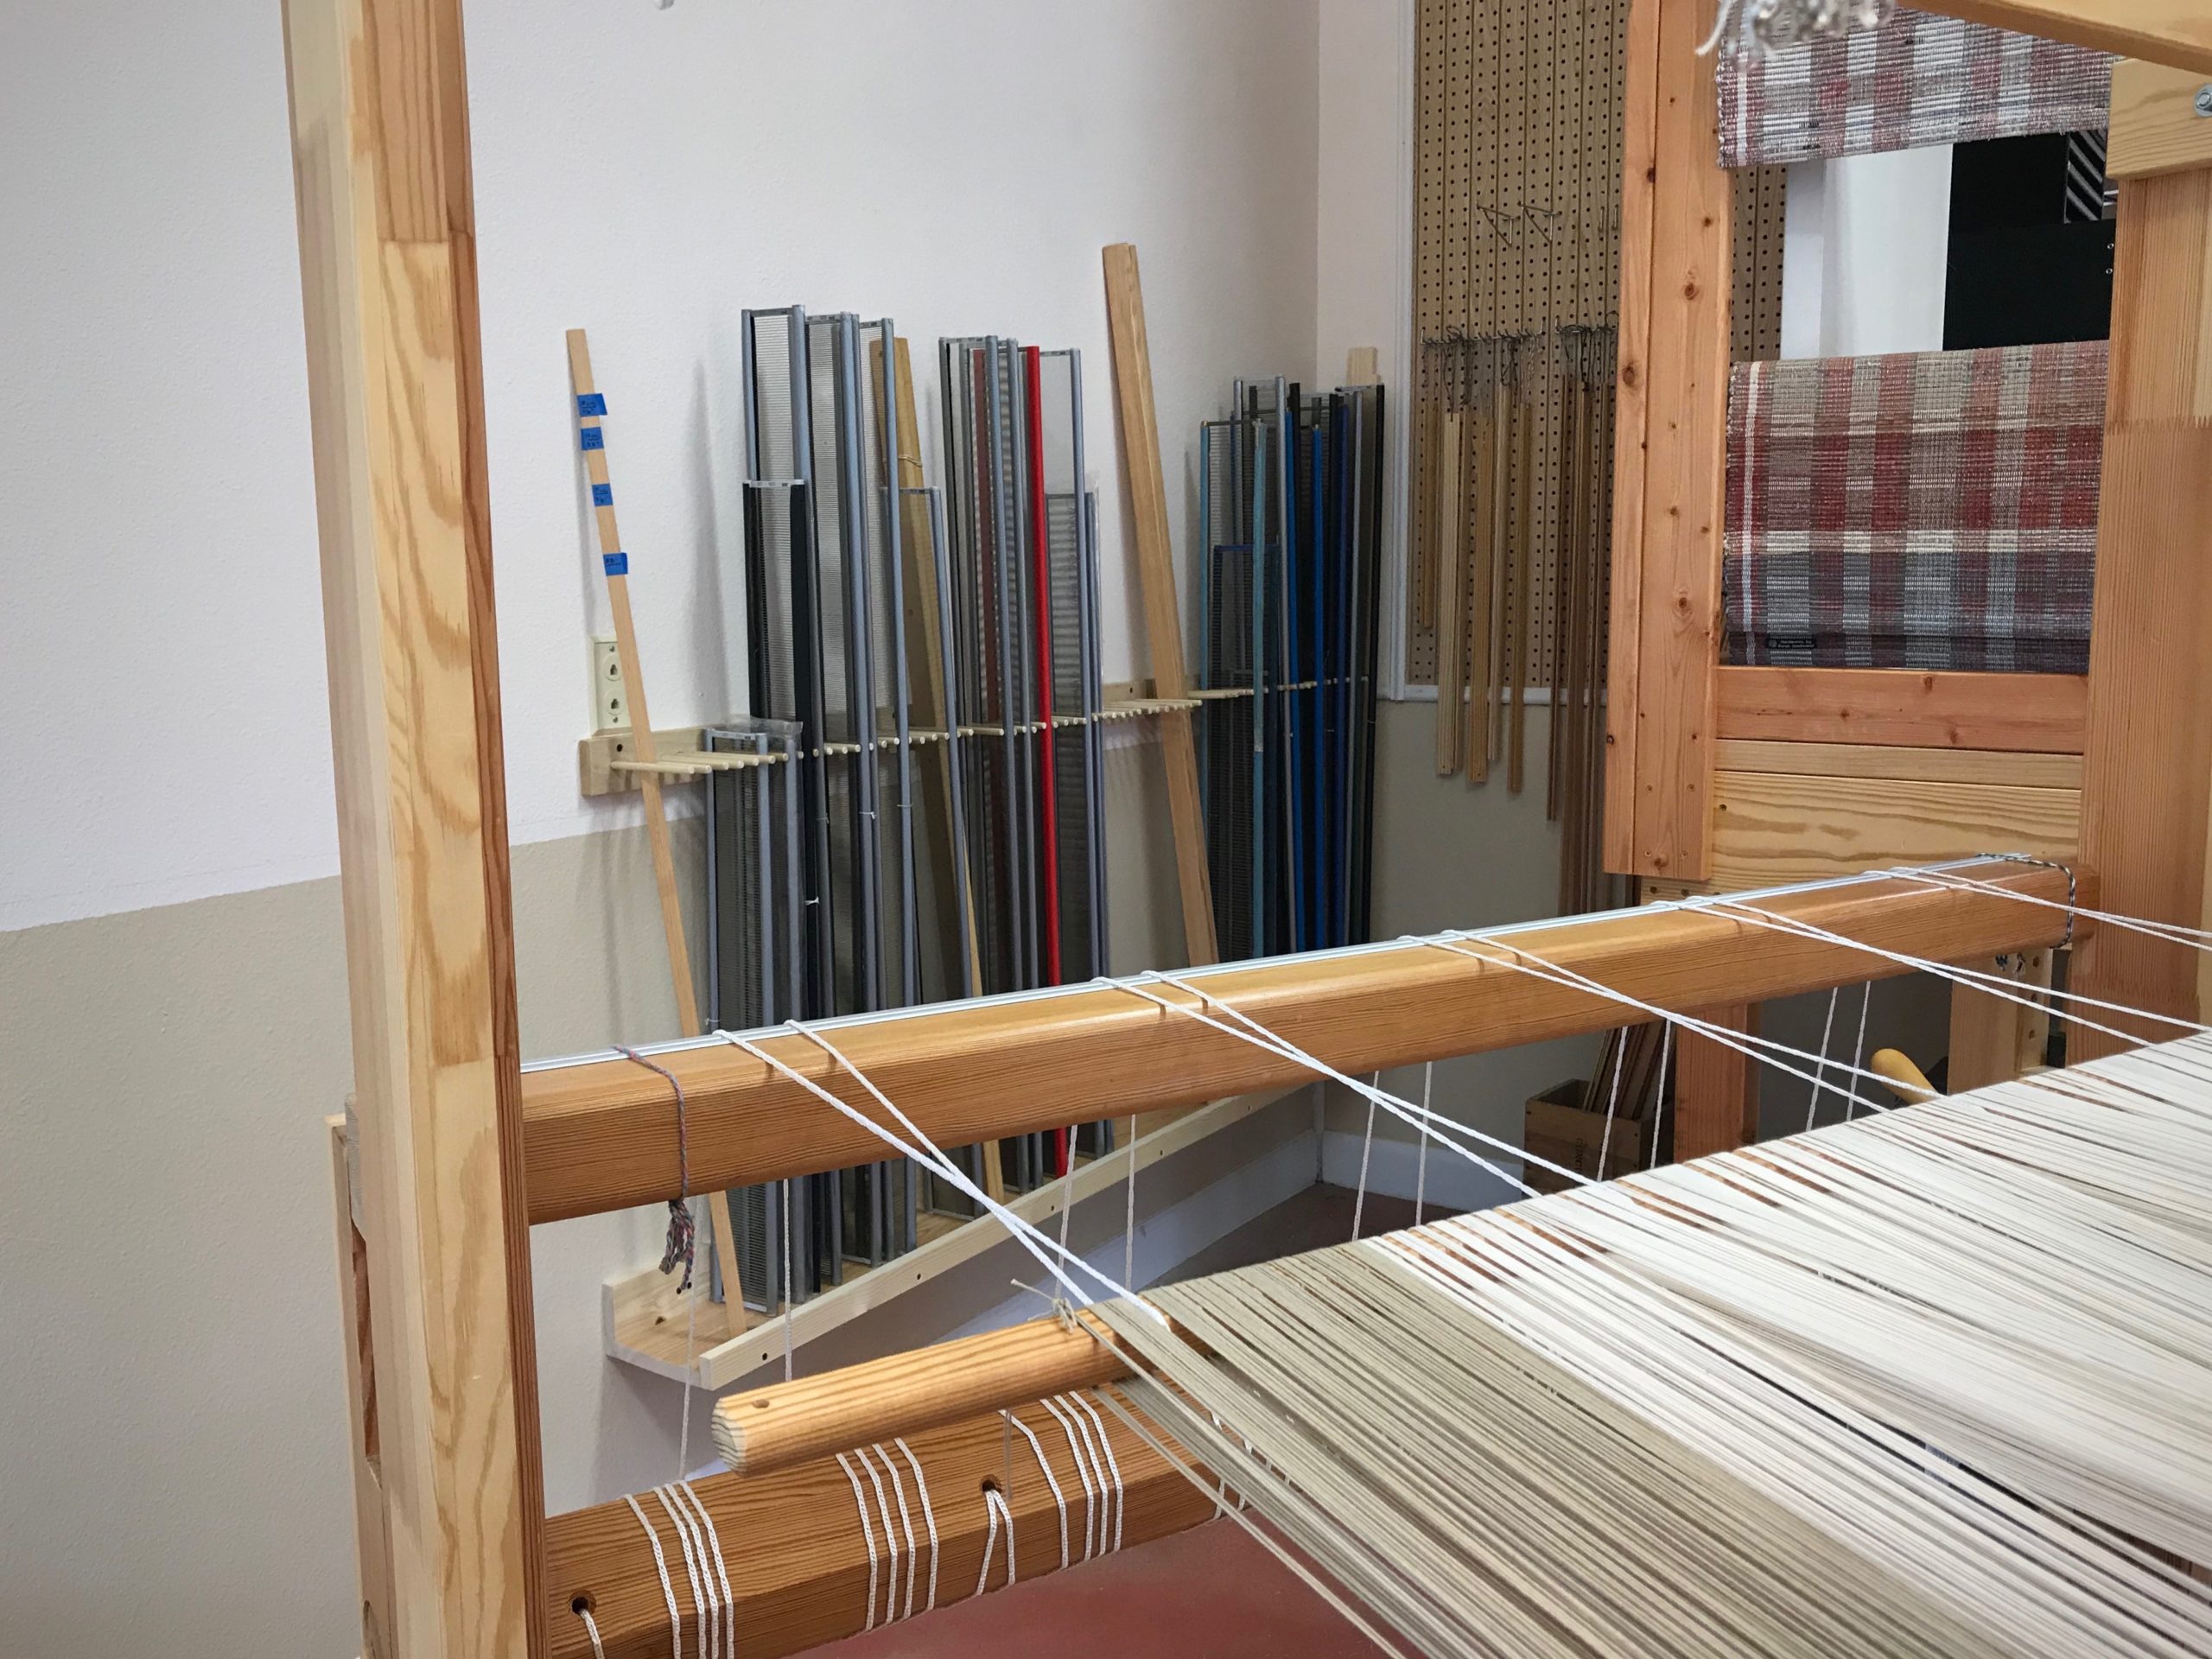
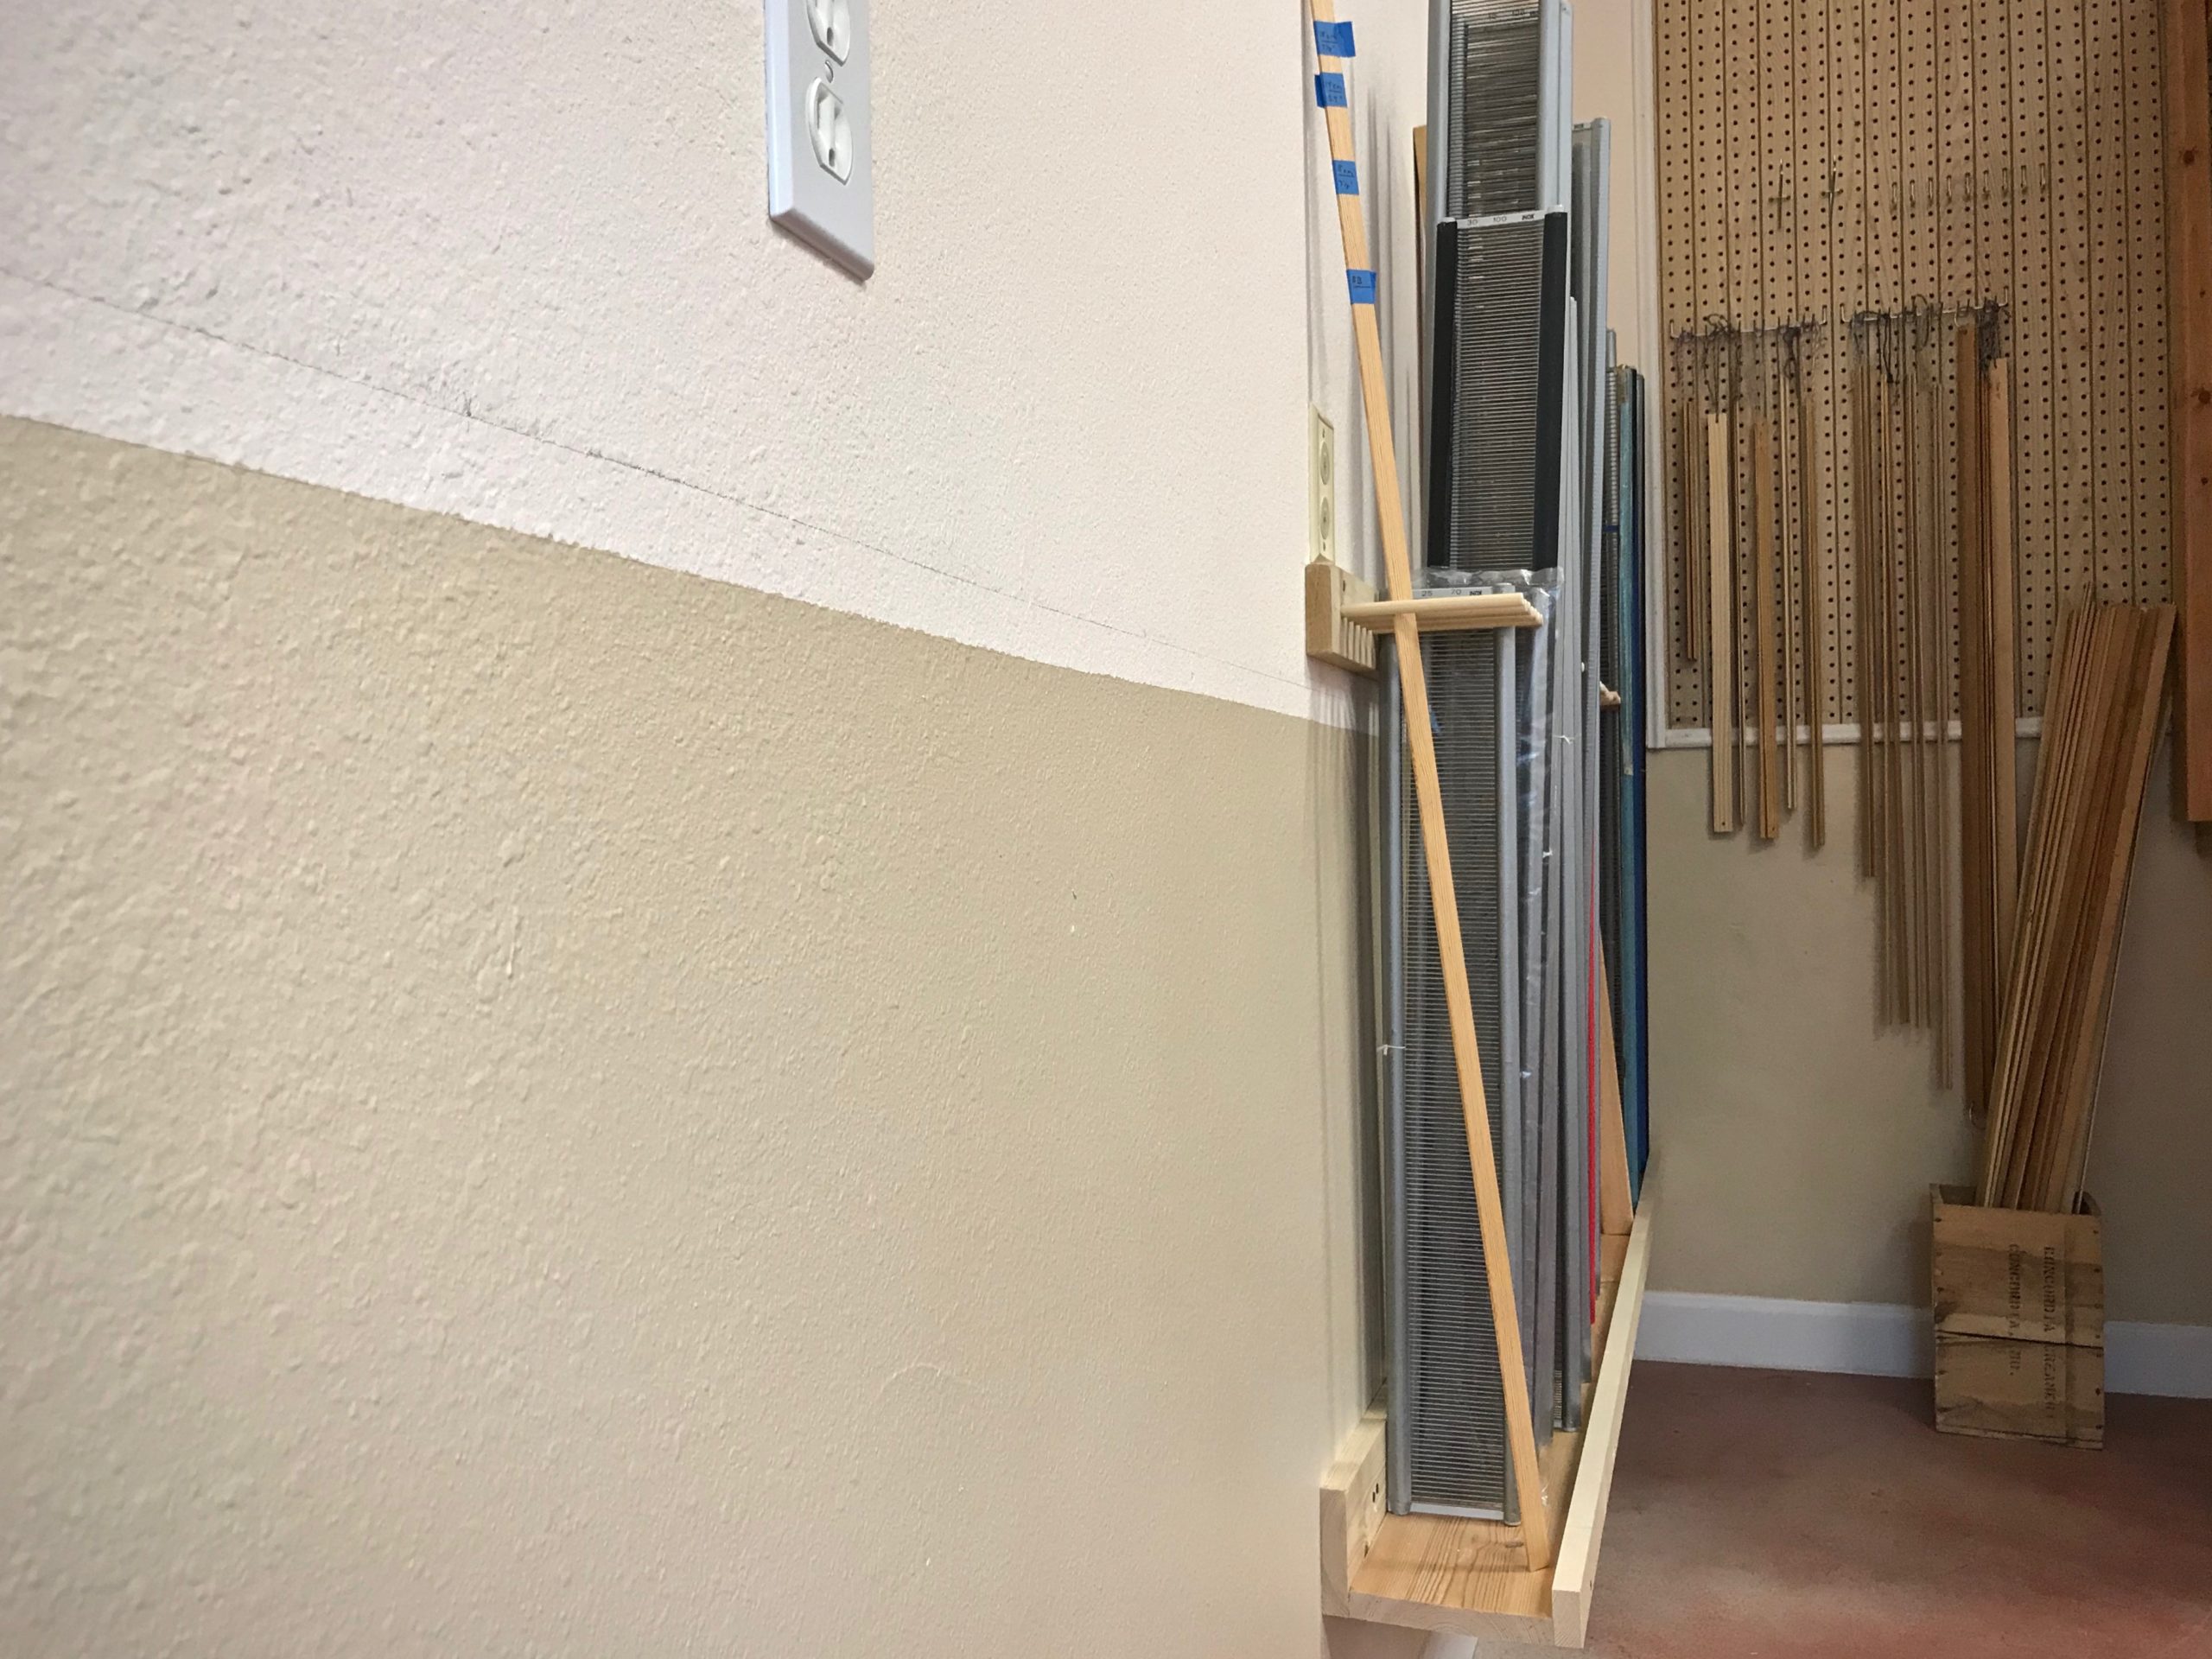
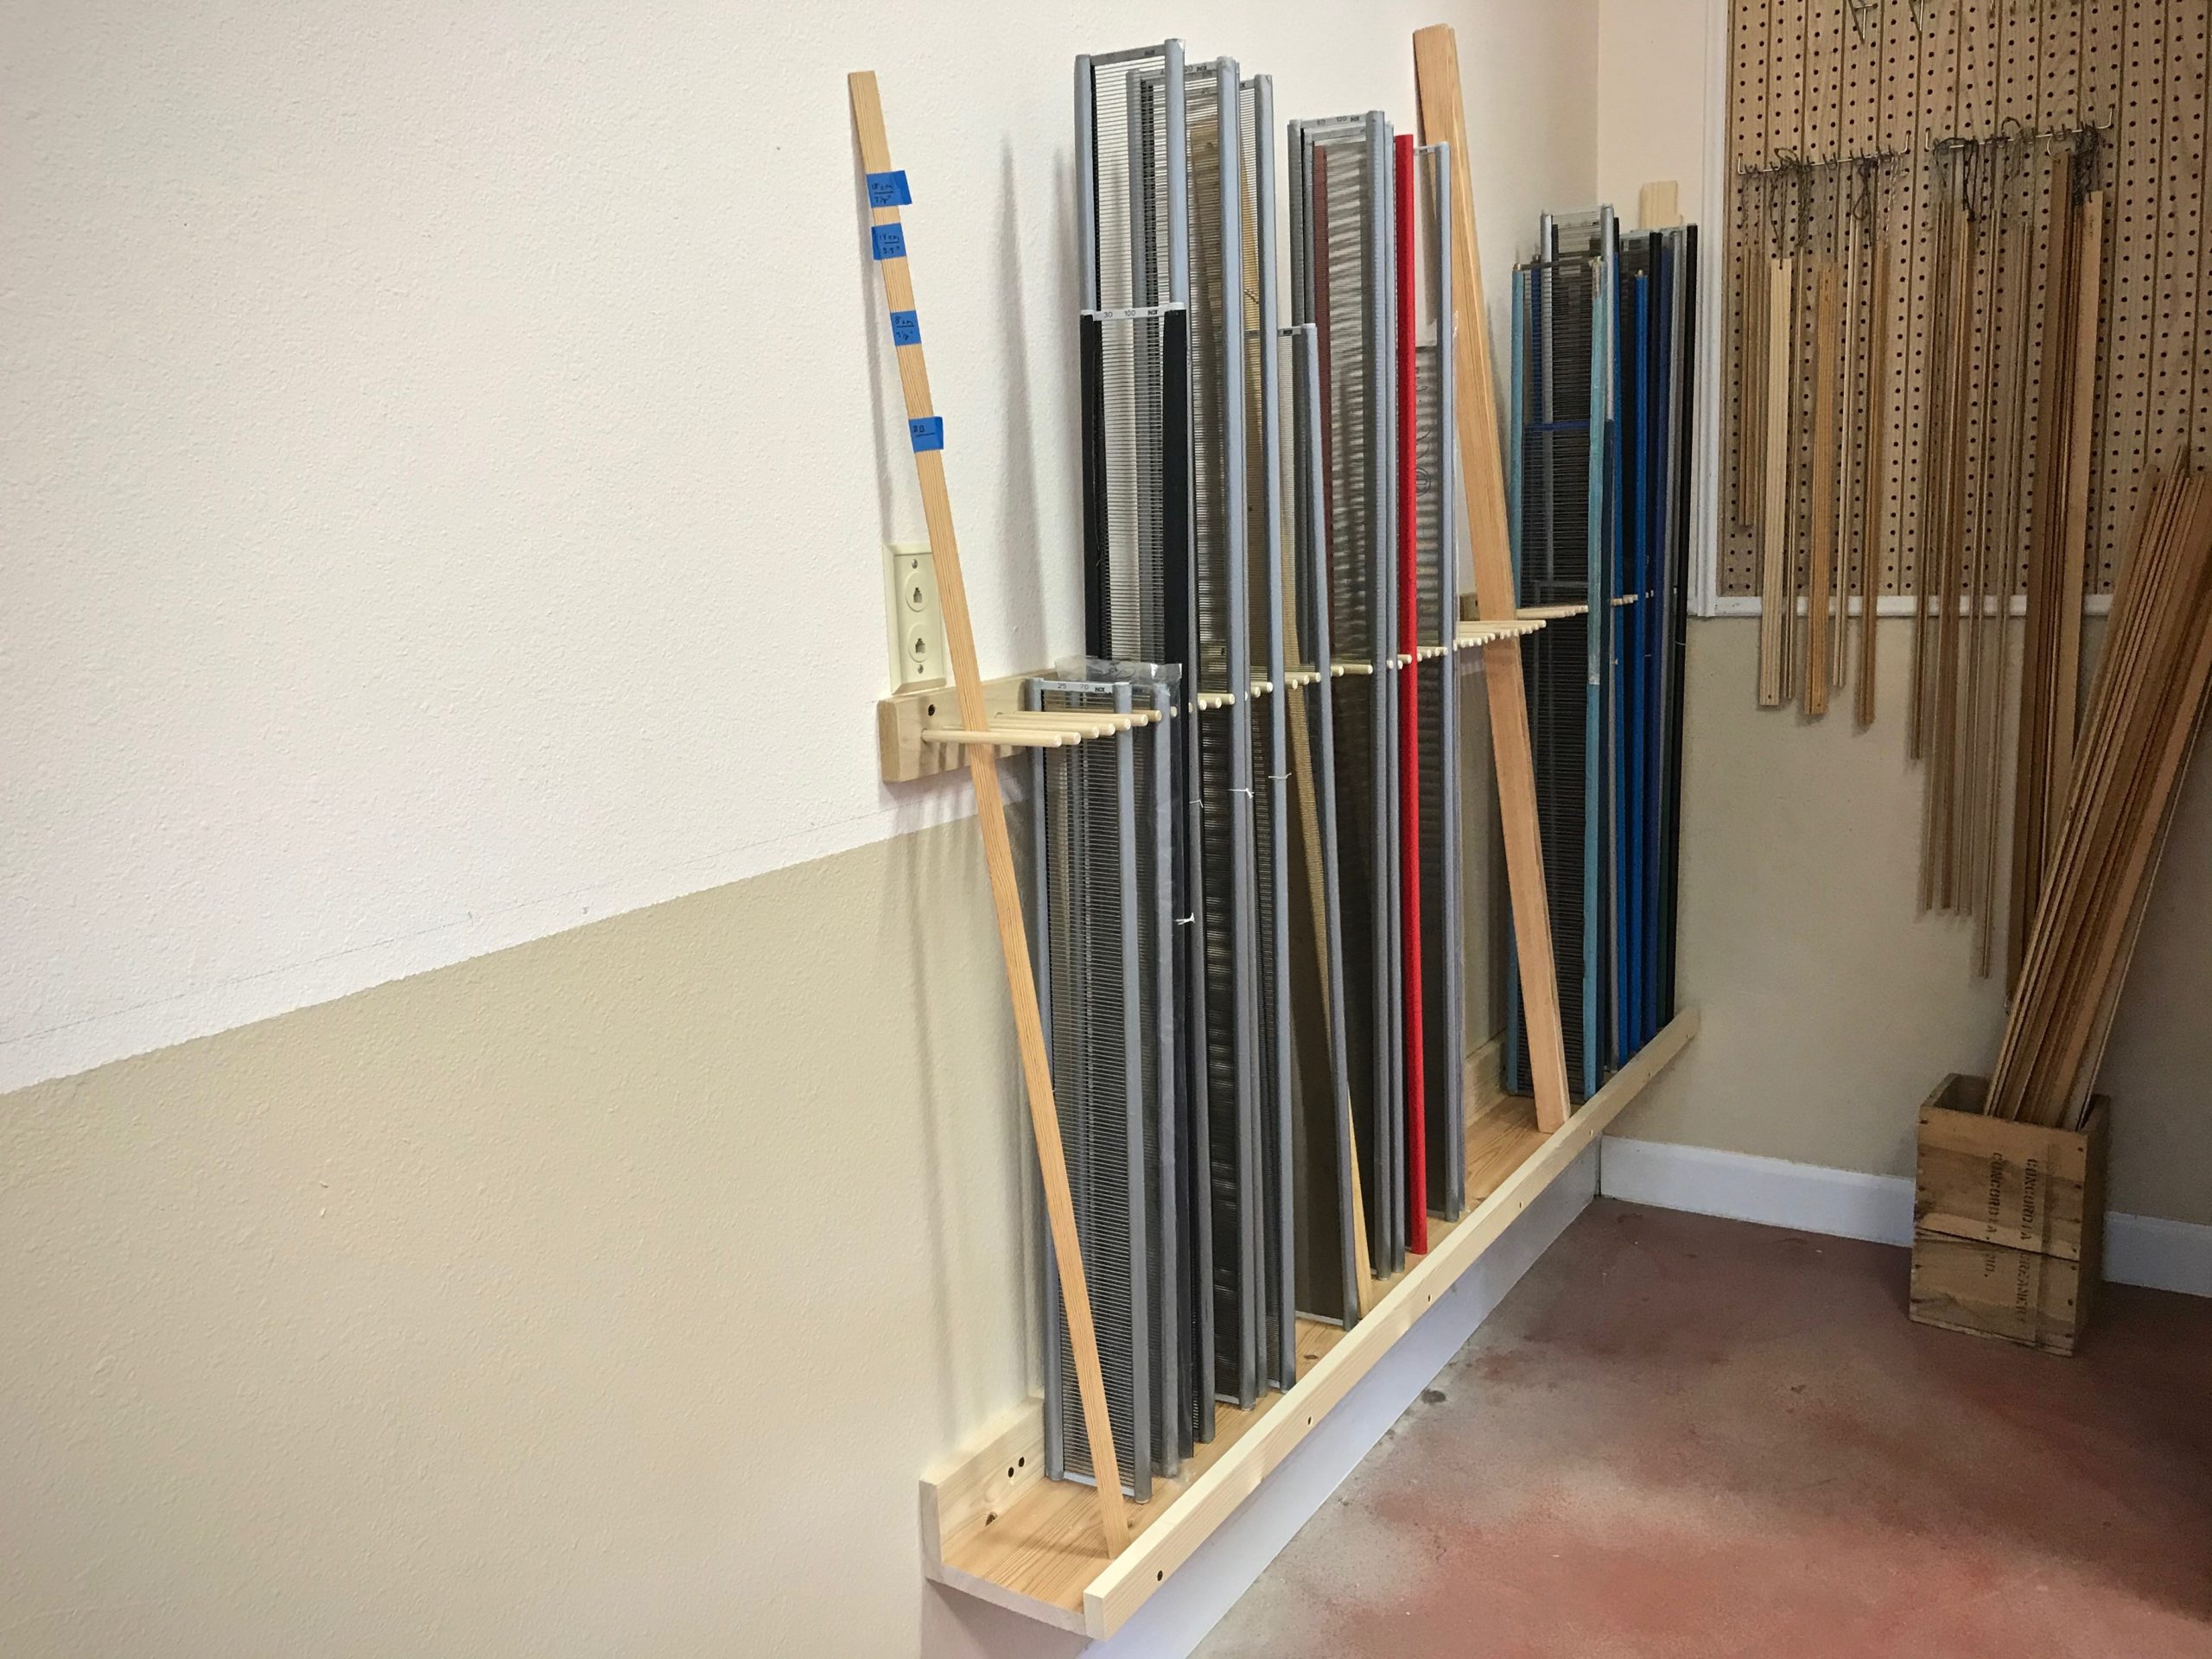
Steve created a storage solution for my reeds. The holder goes along the back wall of my drawloom studio for about six feet. Here are the details, using nominal board sizes. The reeds sit on a 1” x 6” board at the base, which is supported against the wall by a 1” x 4” board. The base, with a 1” x 2” lip, sits about 12” off the ground. The reed dividers are 3/8” x 5 3/4” dowels that are sunk into a 1” x 3” board that is attached to the wall, which sets the dowels about 27” above the base.
Reed holder is fastened to the wall behind the drawloom. (Notice that the drawloom rag rug warp has come over the back beam…)The dowels are placed at a height that will hold even my shortest reeds.Reeds are in order by dent size. Metric reeds are separate from those with dents per inch.
If you would like a PDF copy of Steve’s diagram that shows all the dimensions, click HERE to send me an email request.
May you have a place for everything, and everything in it’s place.
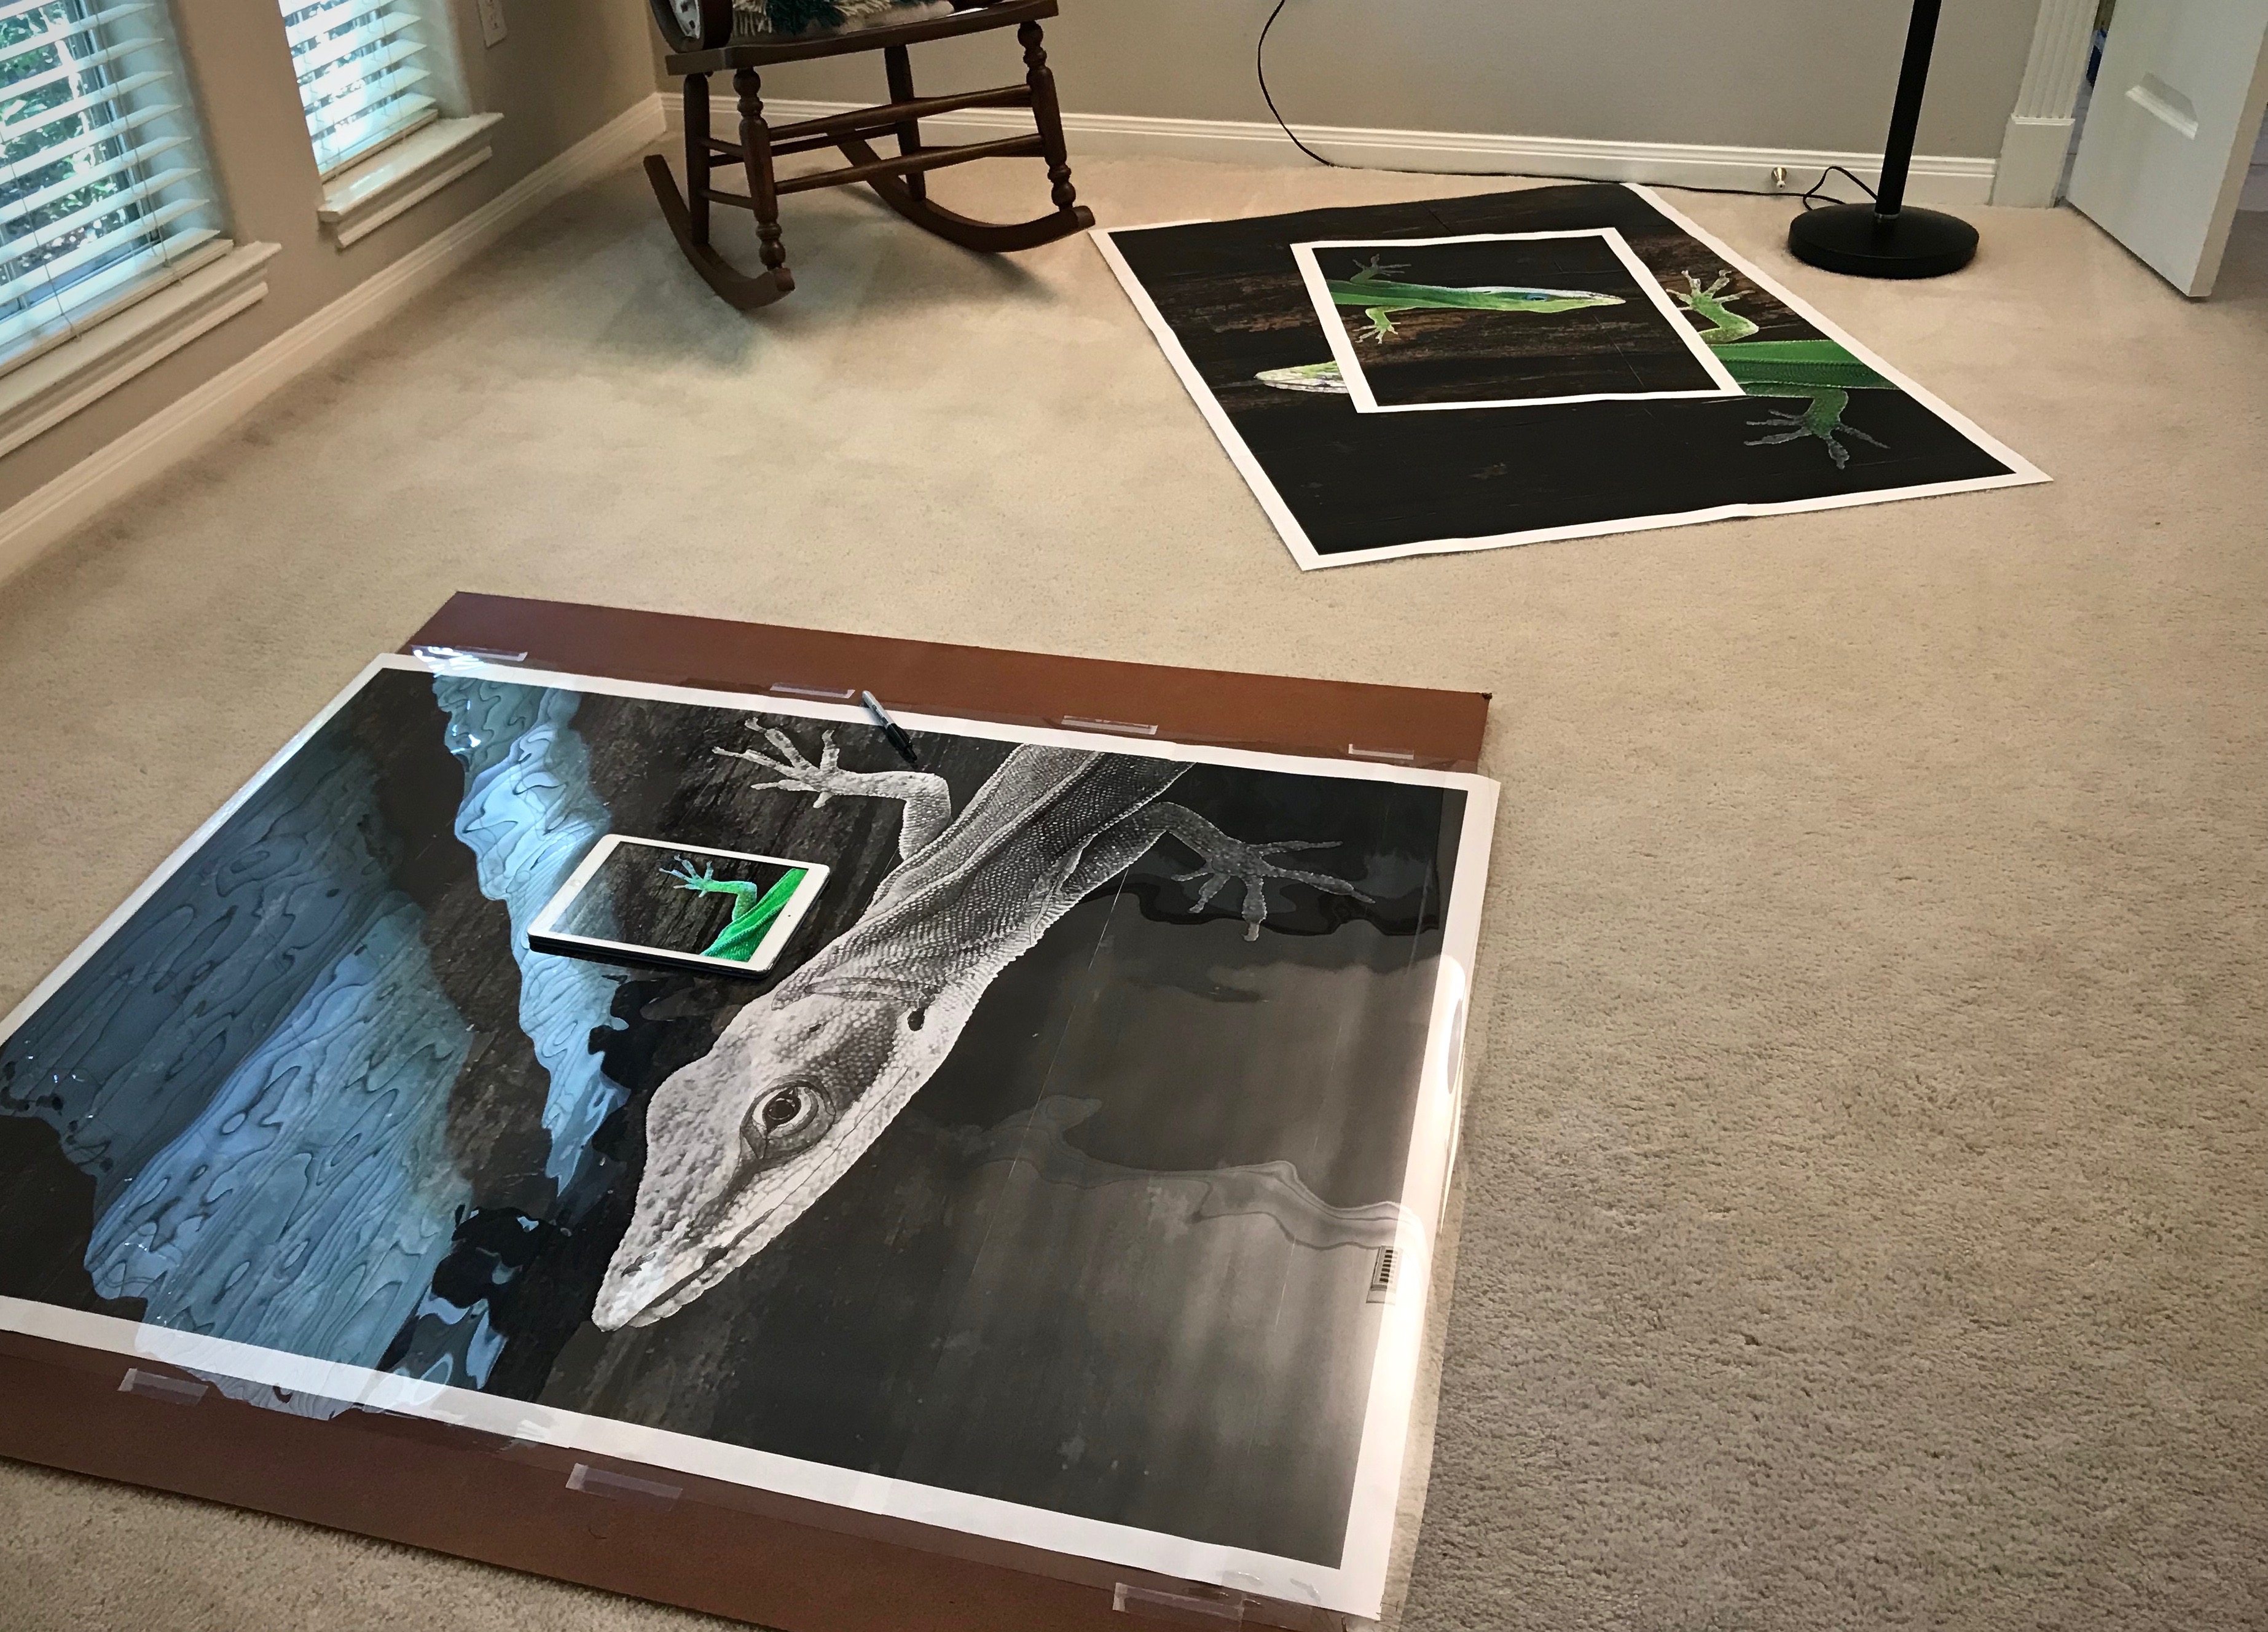
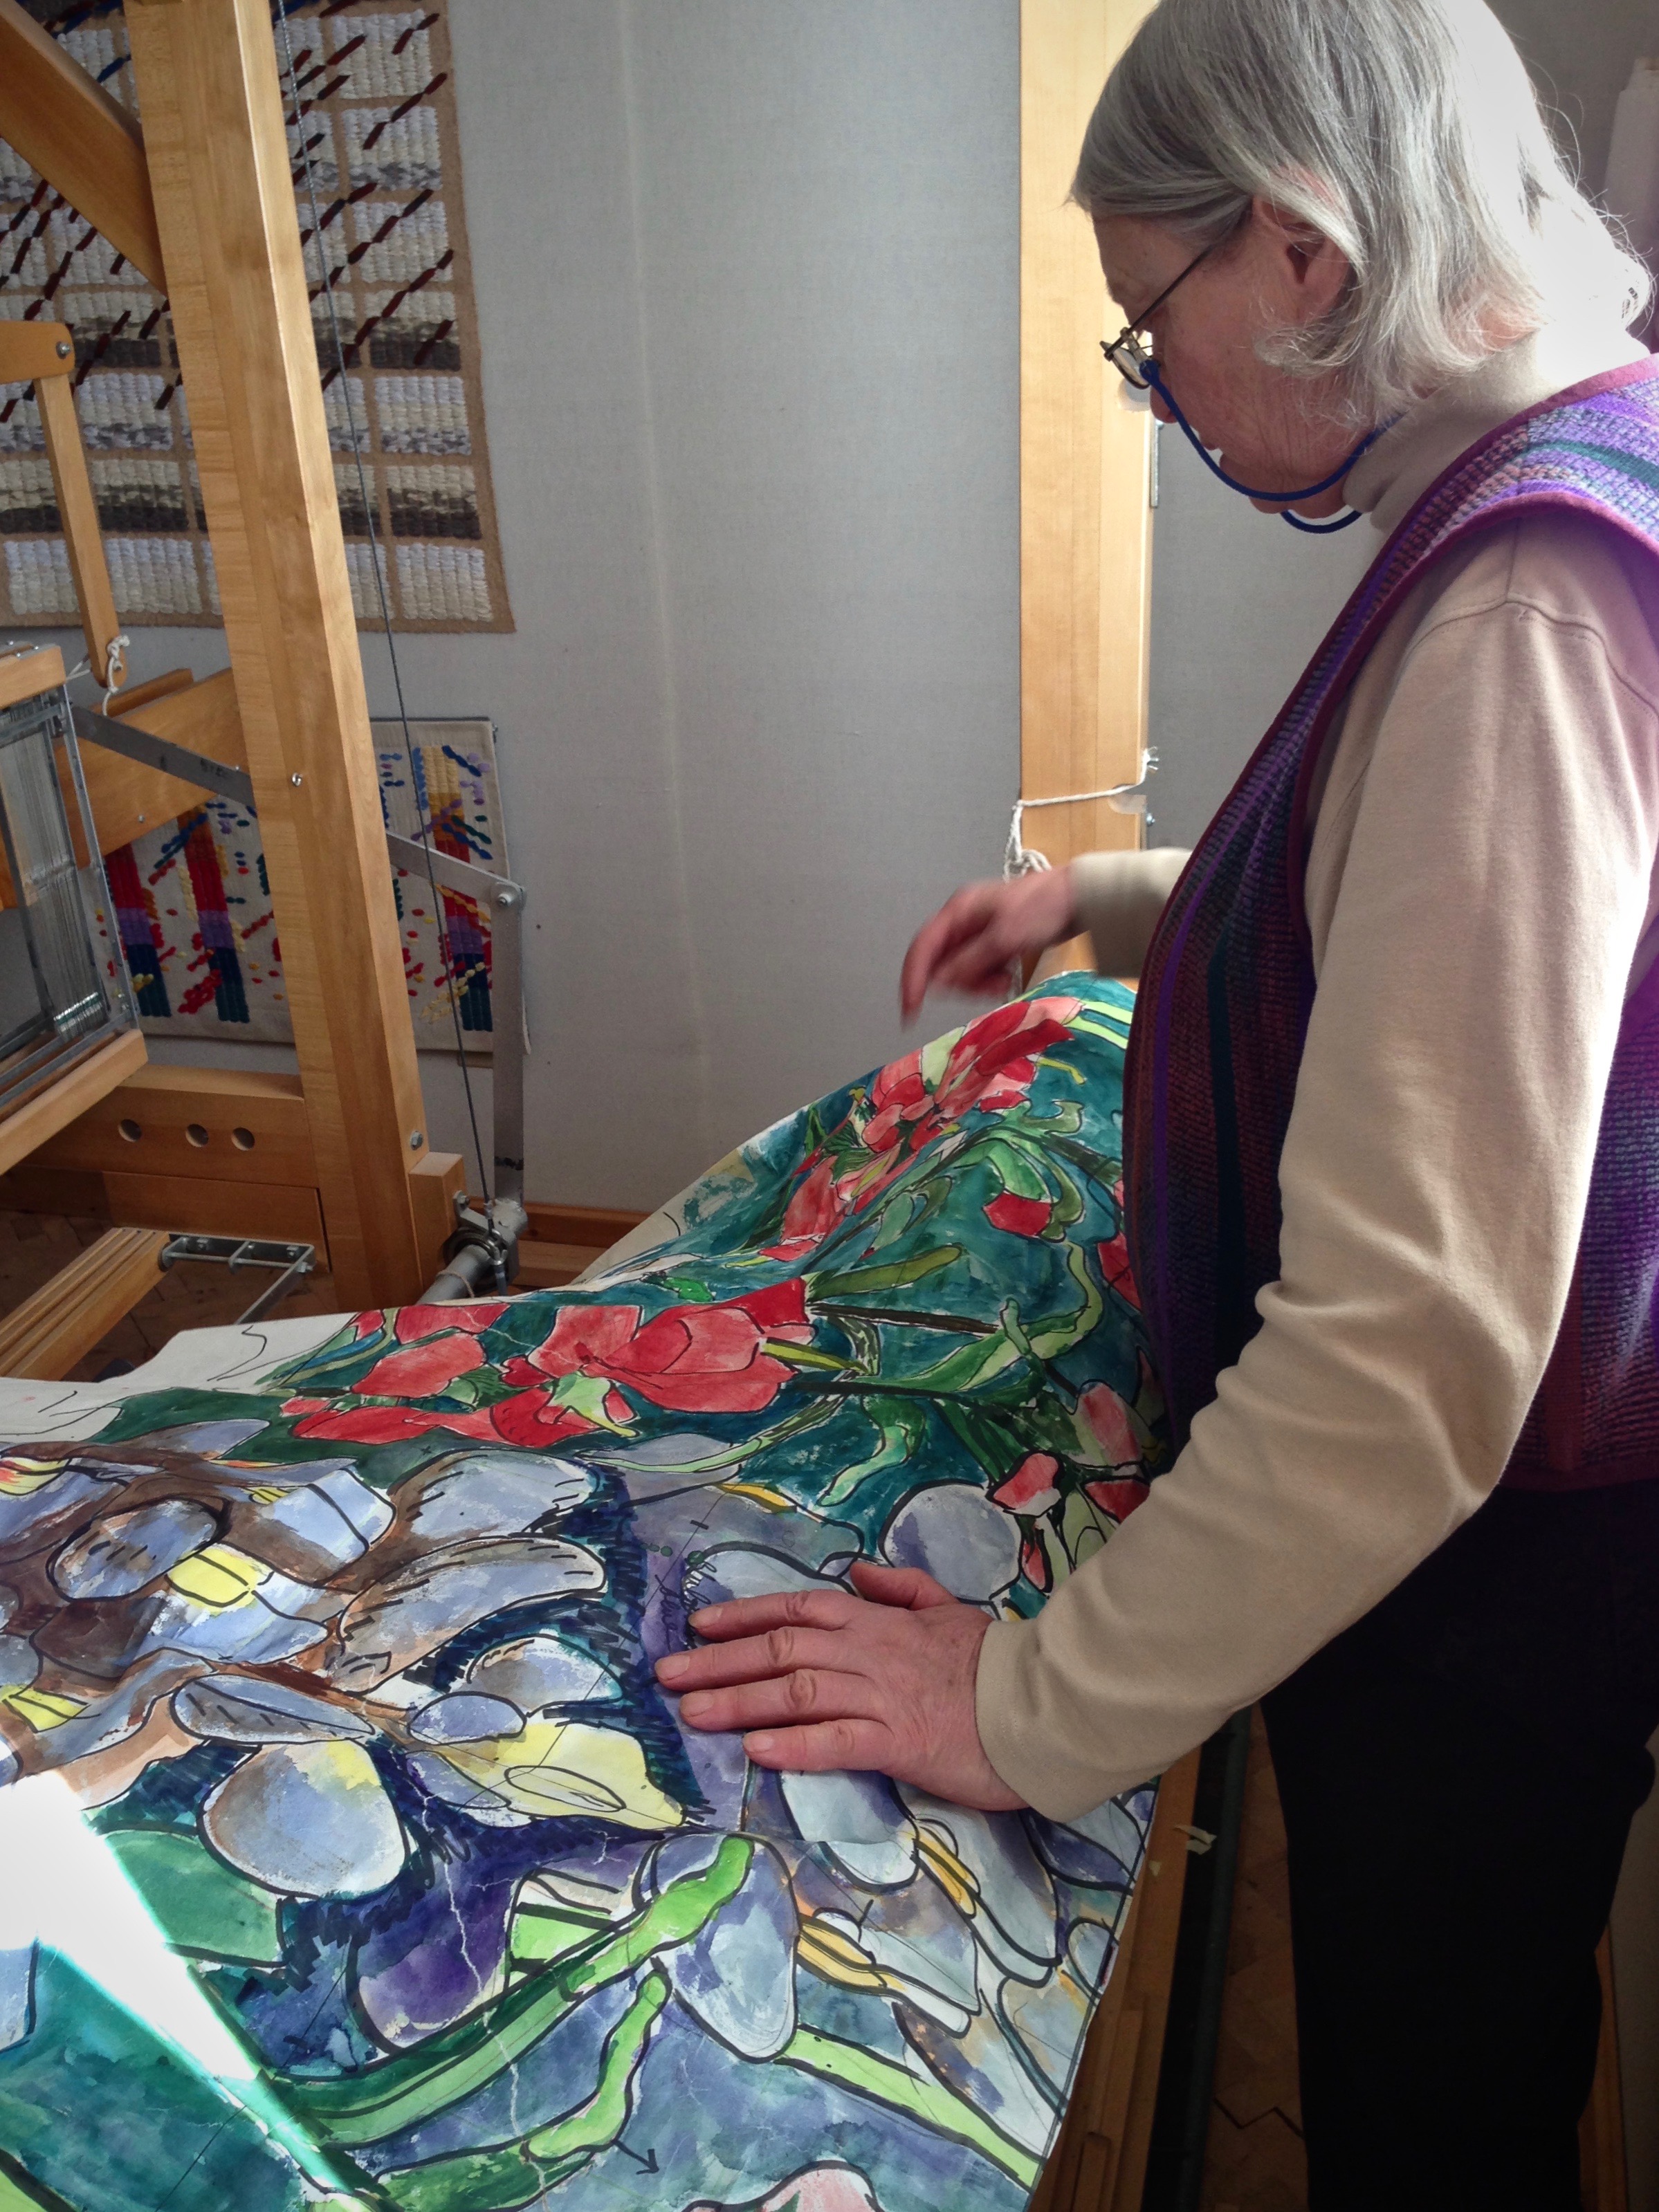
Making a cartoon for a lizard tapestry this size is quite a process. First, I enlarge the photograph. Then, I trace the outlines of the details onto a sheet of clear acetate. Next, to make the cartoon, I trace the bold Sharpie lines of the acetate image onto interfacing material meant for pattern making. But next time, it will be different.
Tracing outlines from the enlarged photograph onto the sheet of acetate. Photo image on the iPad helps clarify which distinctive lines to draw.
White poster board under the acetate makes the Sharpie lines visible. The interfacing material lays on top of the acetate so I can trace the lines to make my cartoon.
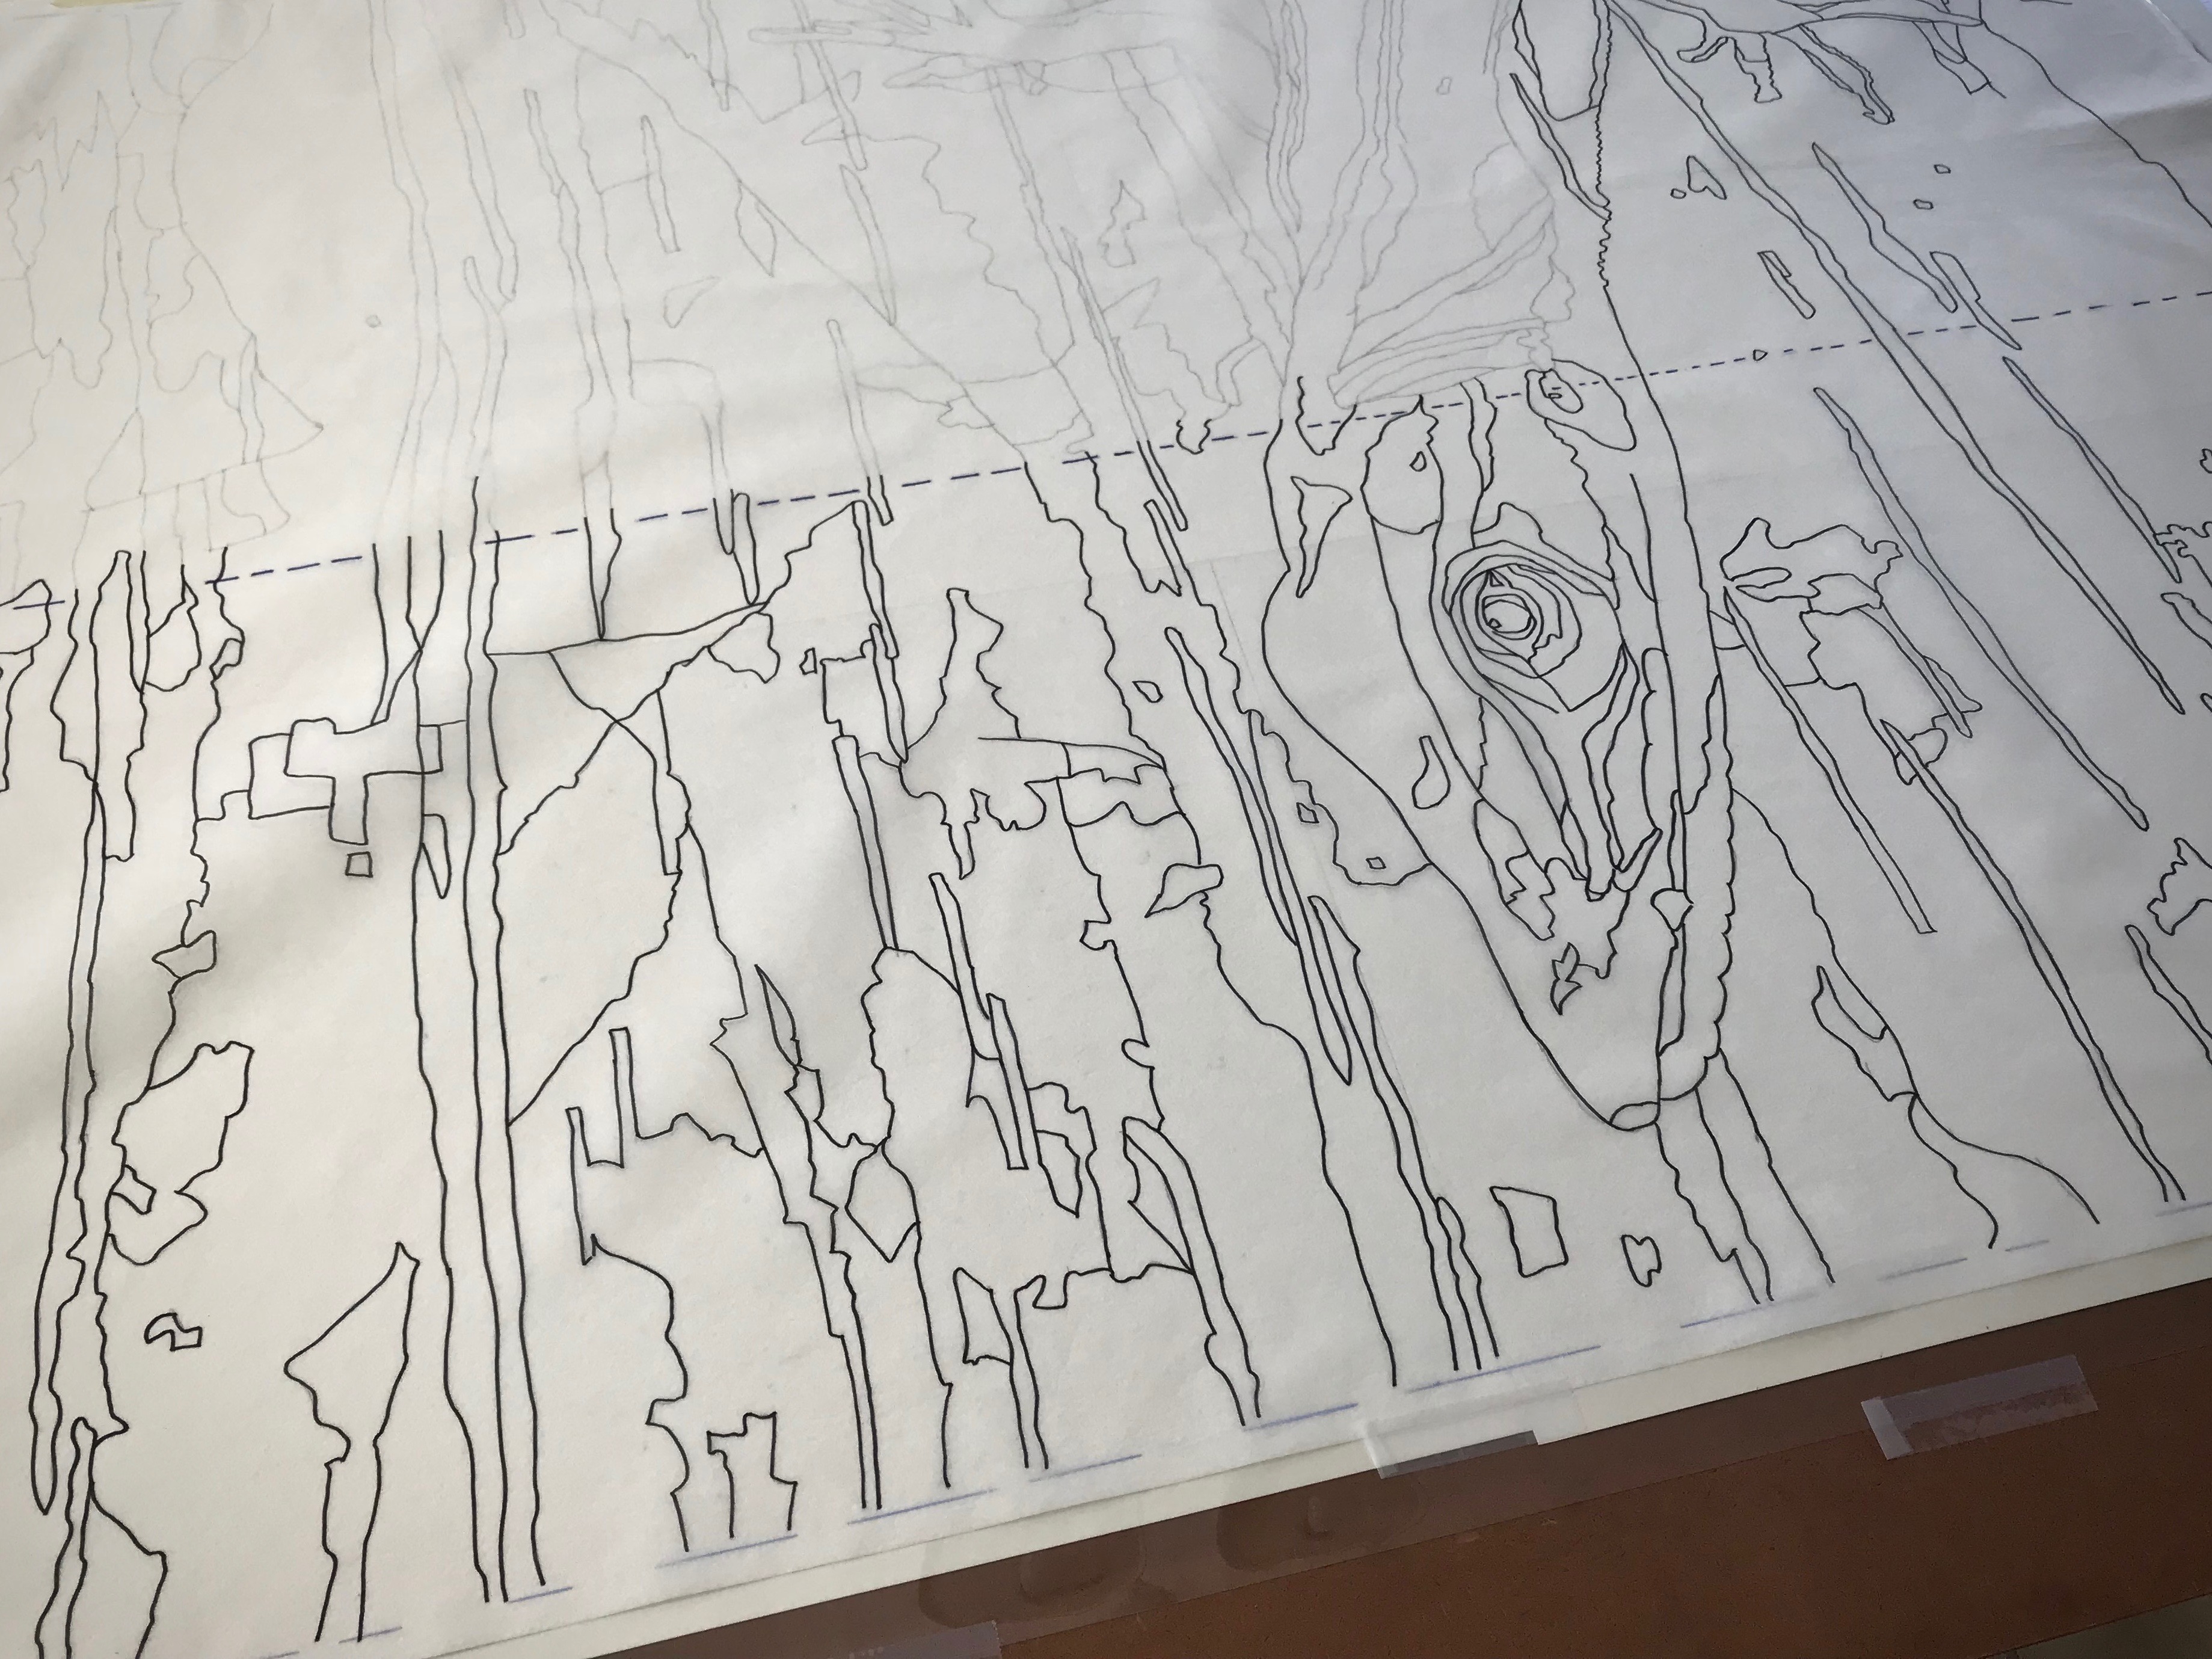
I don’t plan to use this interfacing material again for a cartoon. It is not stiff enough. As the tapestry progresses it becomes more and more difficult to keep the cartoon from puckering and creasing in places. A better option would have been stiffer buckram, like I used for my transparencies. (See – Quiet Friday: Painting with Yarn and Animated Images.) But I am not able to find buckram in sufficient width.
Interfacing material is susceptible to puckers and creases. Unevenness in the cartoon can result in a distorted woven image on the tapestry.
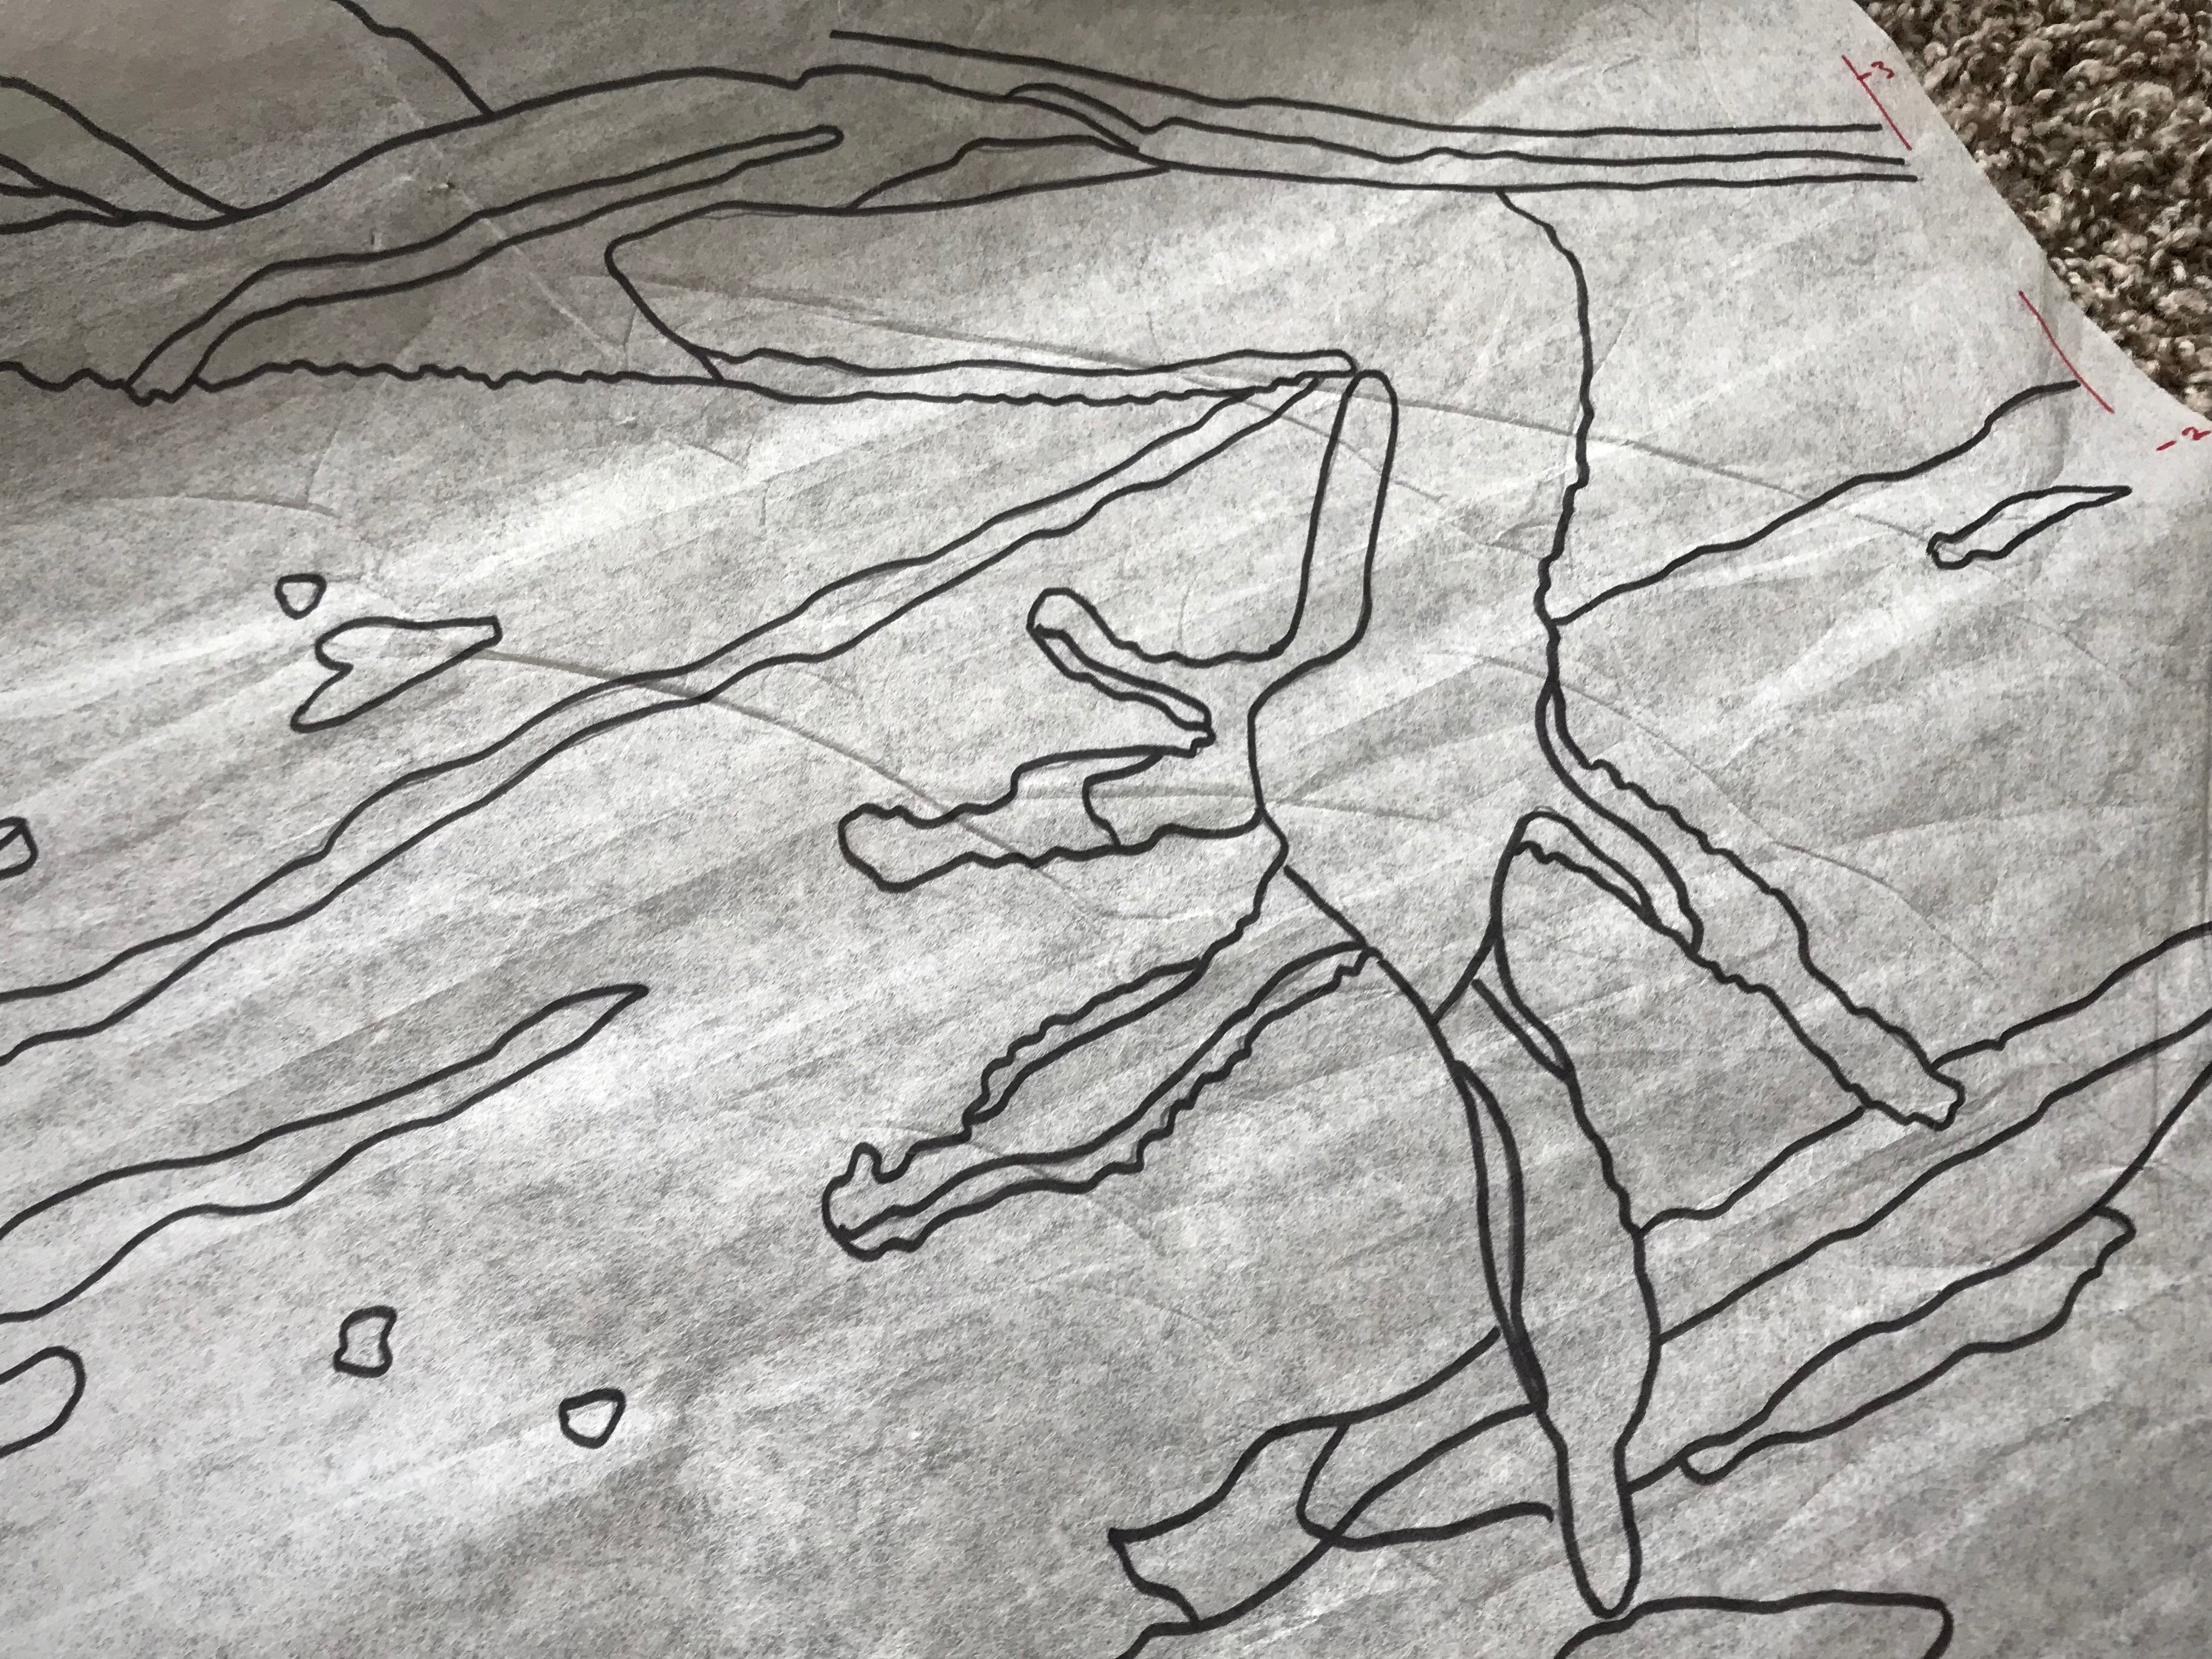
After I finished weaving the lizard portion of the tapestry, I decided to experiment. I removed the interfacing cartoon and switched to the acetate sheet instead. There’s no puckering with this one! It is much easier to line up the cartoon with the weaving. It has drawbacks, though. Noisy! When I beat in the weft it makes thunderstorm sound effects. (Not so great for our temporary apartment life.) It’s also harder to see the cartoon lines. And the magnets I use to hold the cartoon slip out of place too easily.
Slat holds the cartoon up to the warp. To beat the weft, I move the slat out of the way of the beater, just under the fell line. The sheet of plastic would be a good prop for making sounds effects for a film about a thunderstorm.
Next time... White paper, like the gorgeous tapestry cartoon I have seen in Joanne Hall’s studio. That’s what I’ll use. Next time…
Joanne Hall in her Montana studio. This is the cartoon she made for her impressive Bluebonnets tapestry that hangs on display in a Dallas hospital.
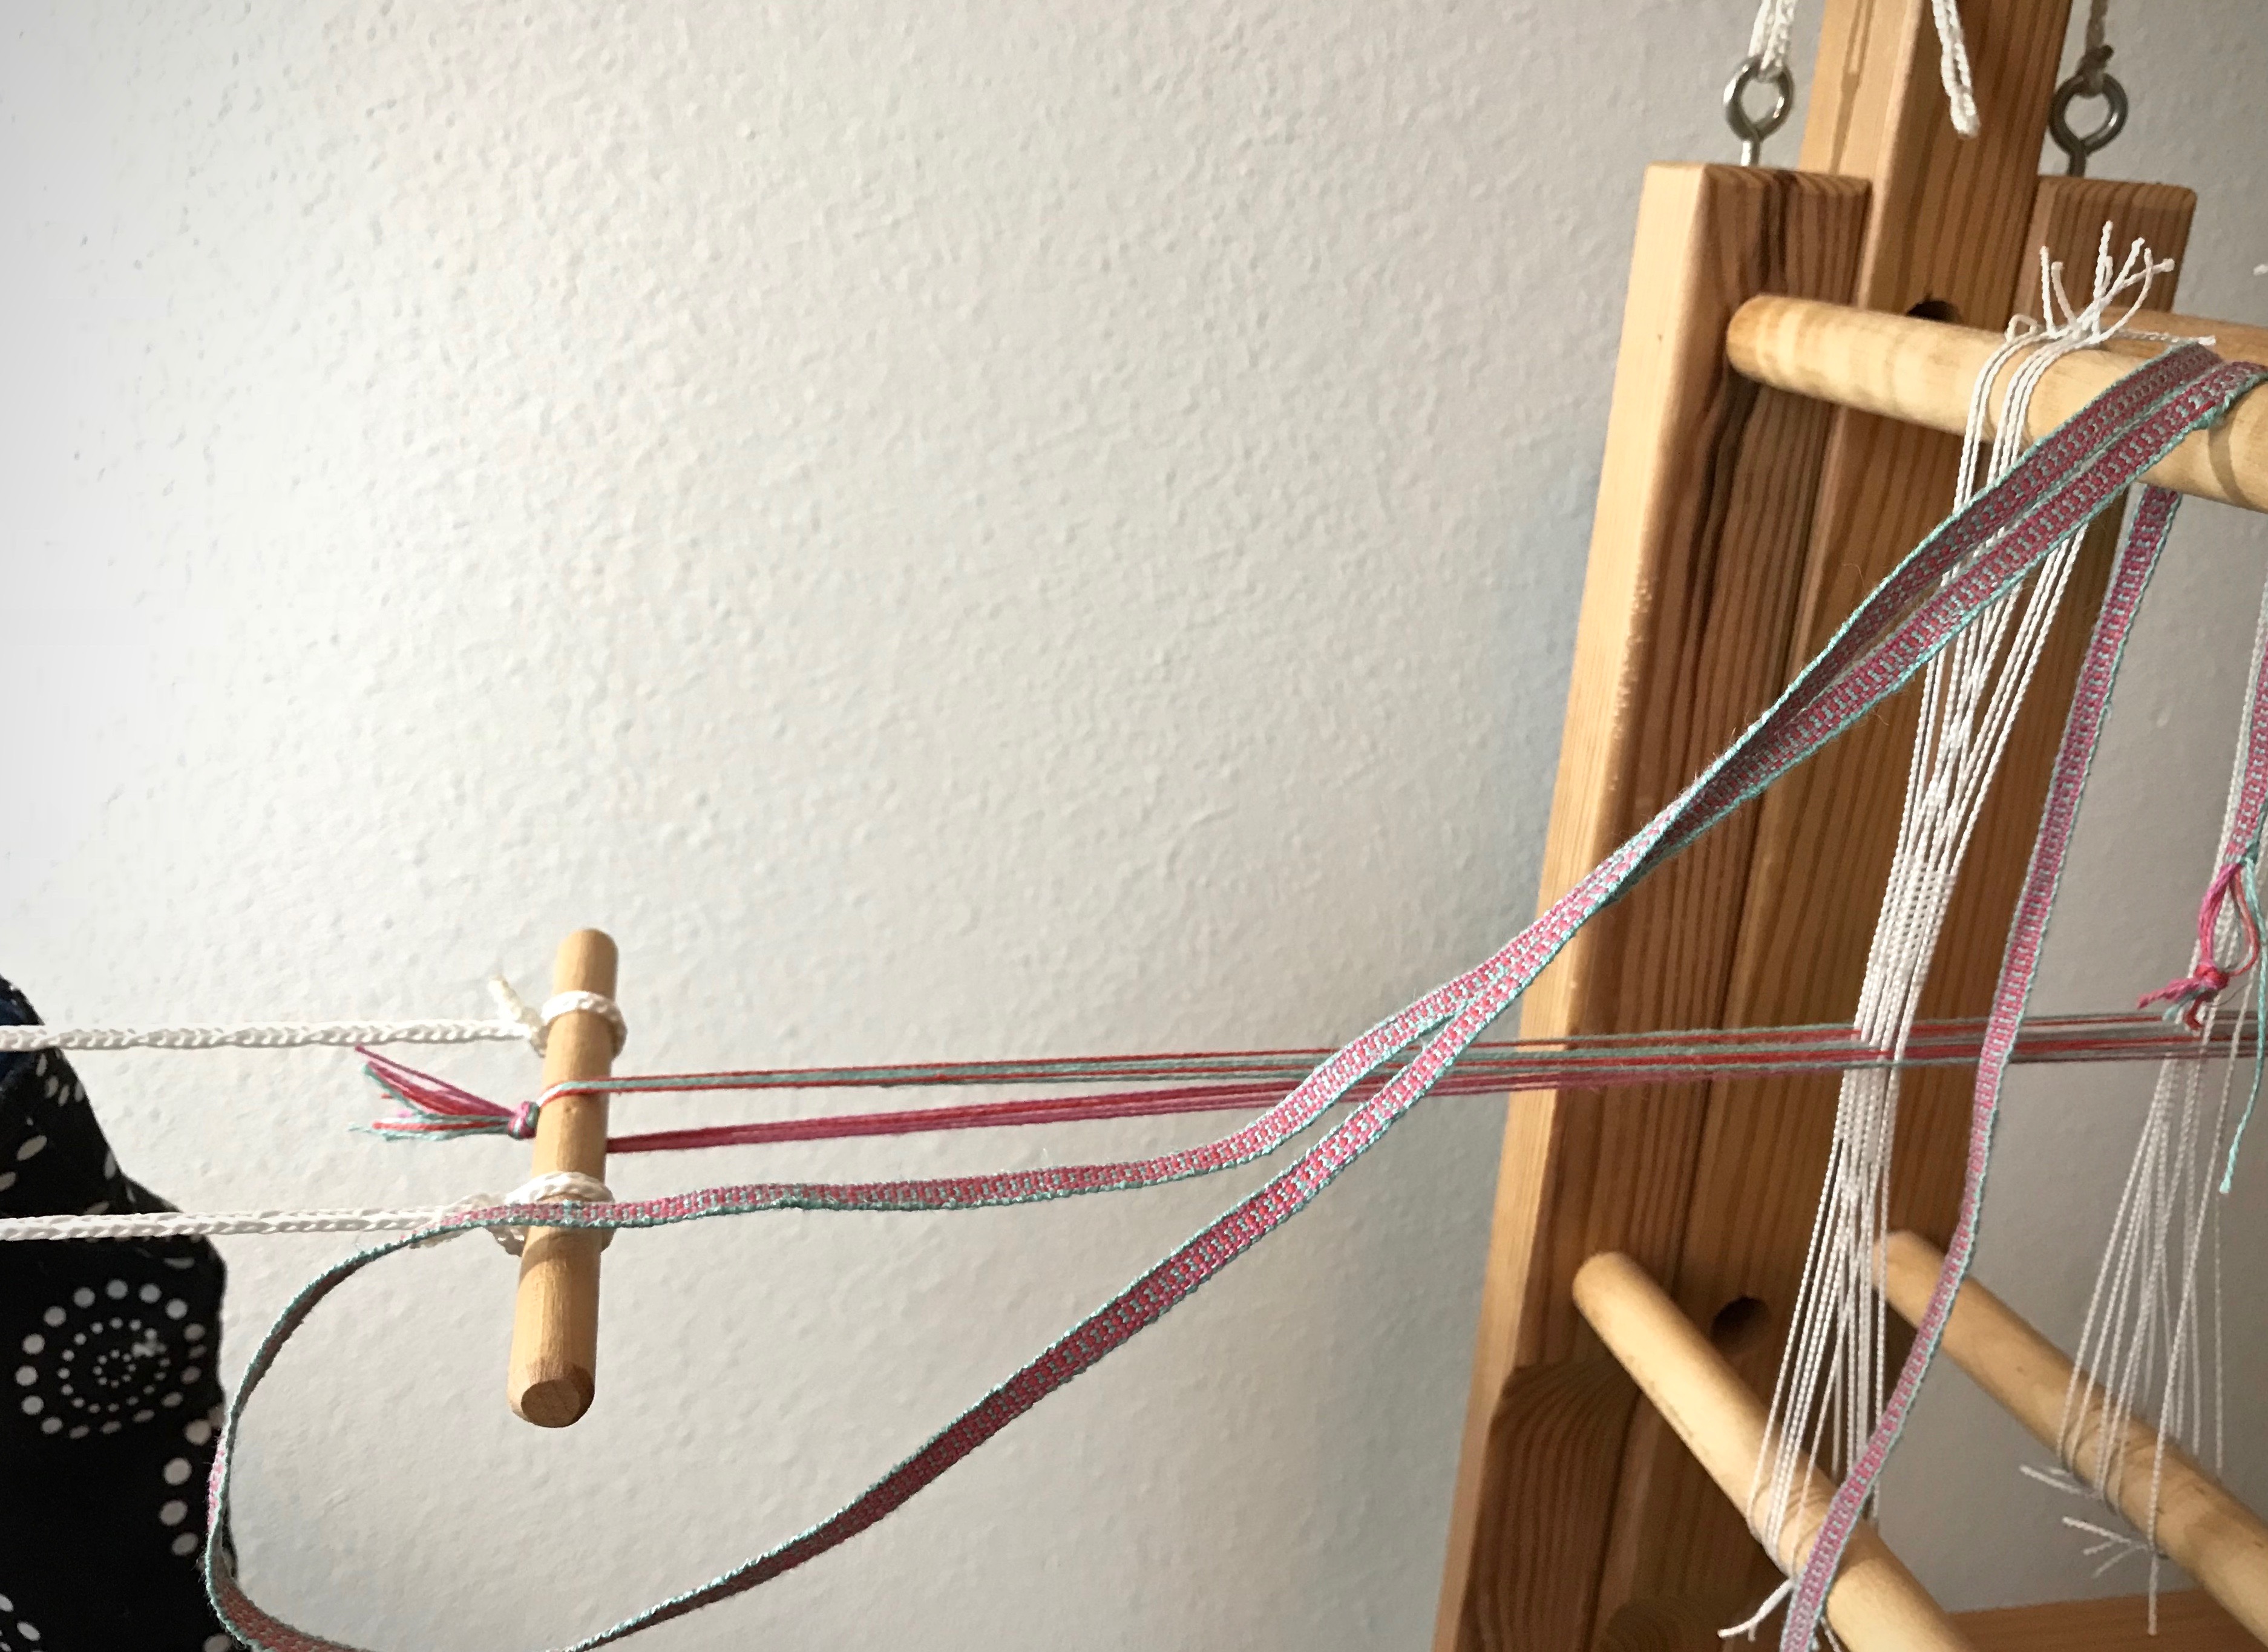
It is almost effortless to make a short warp for the band loom. All you need is a peg at the beginning and a peg at the end. You can use a spoke of the warp beam wheel, for instance, at one end, and the leg of an upside-down stool at the other. I normally use my warping reel, though, for even a simple warp, because the reel is so handy. However, I don’t have my warping reel here at the apartment, so I am turning my band loom into a handy warping board for this band loom project.
Using the Glimåkra band loom to measure a narrow cottolin warp.
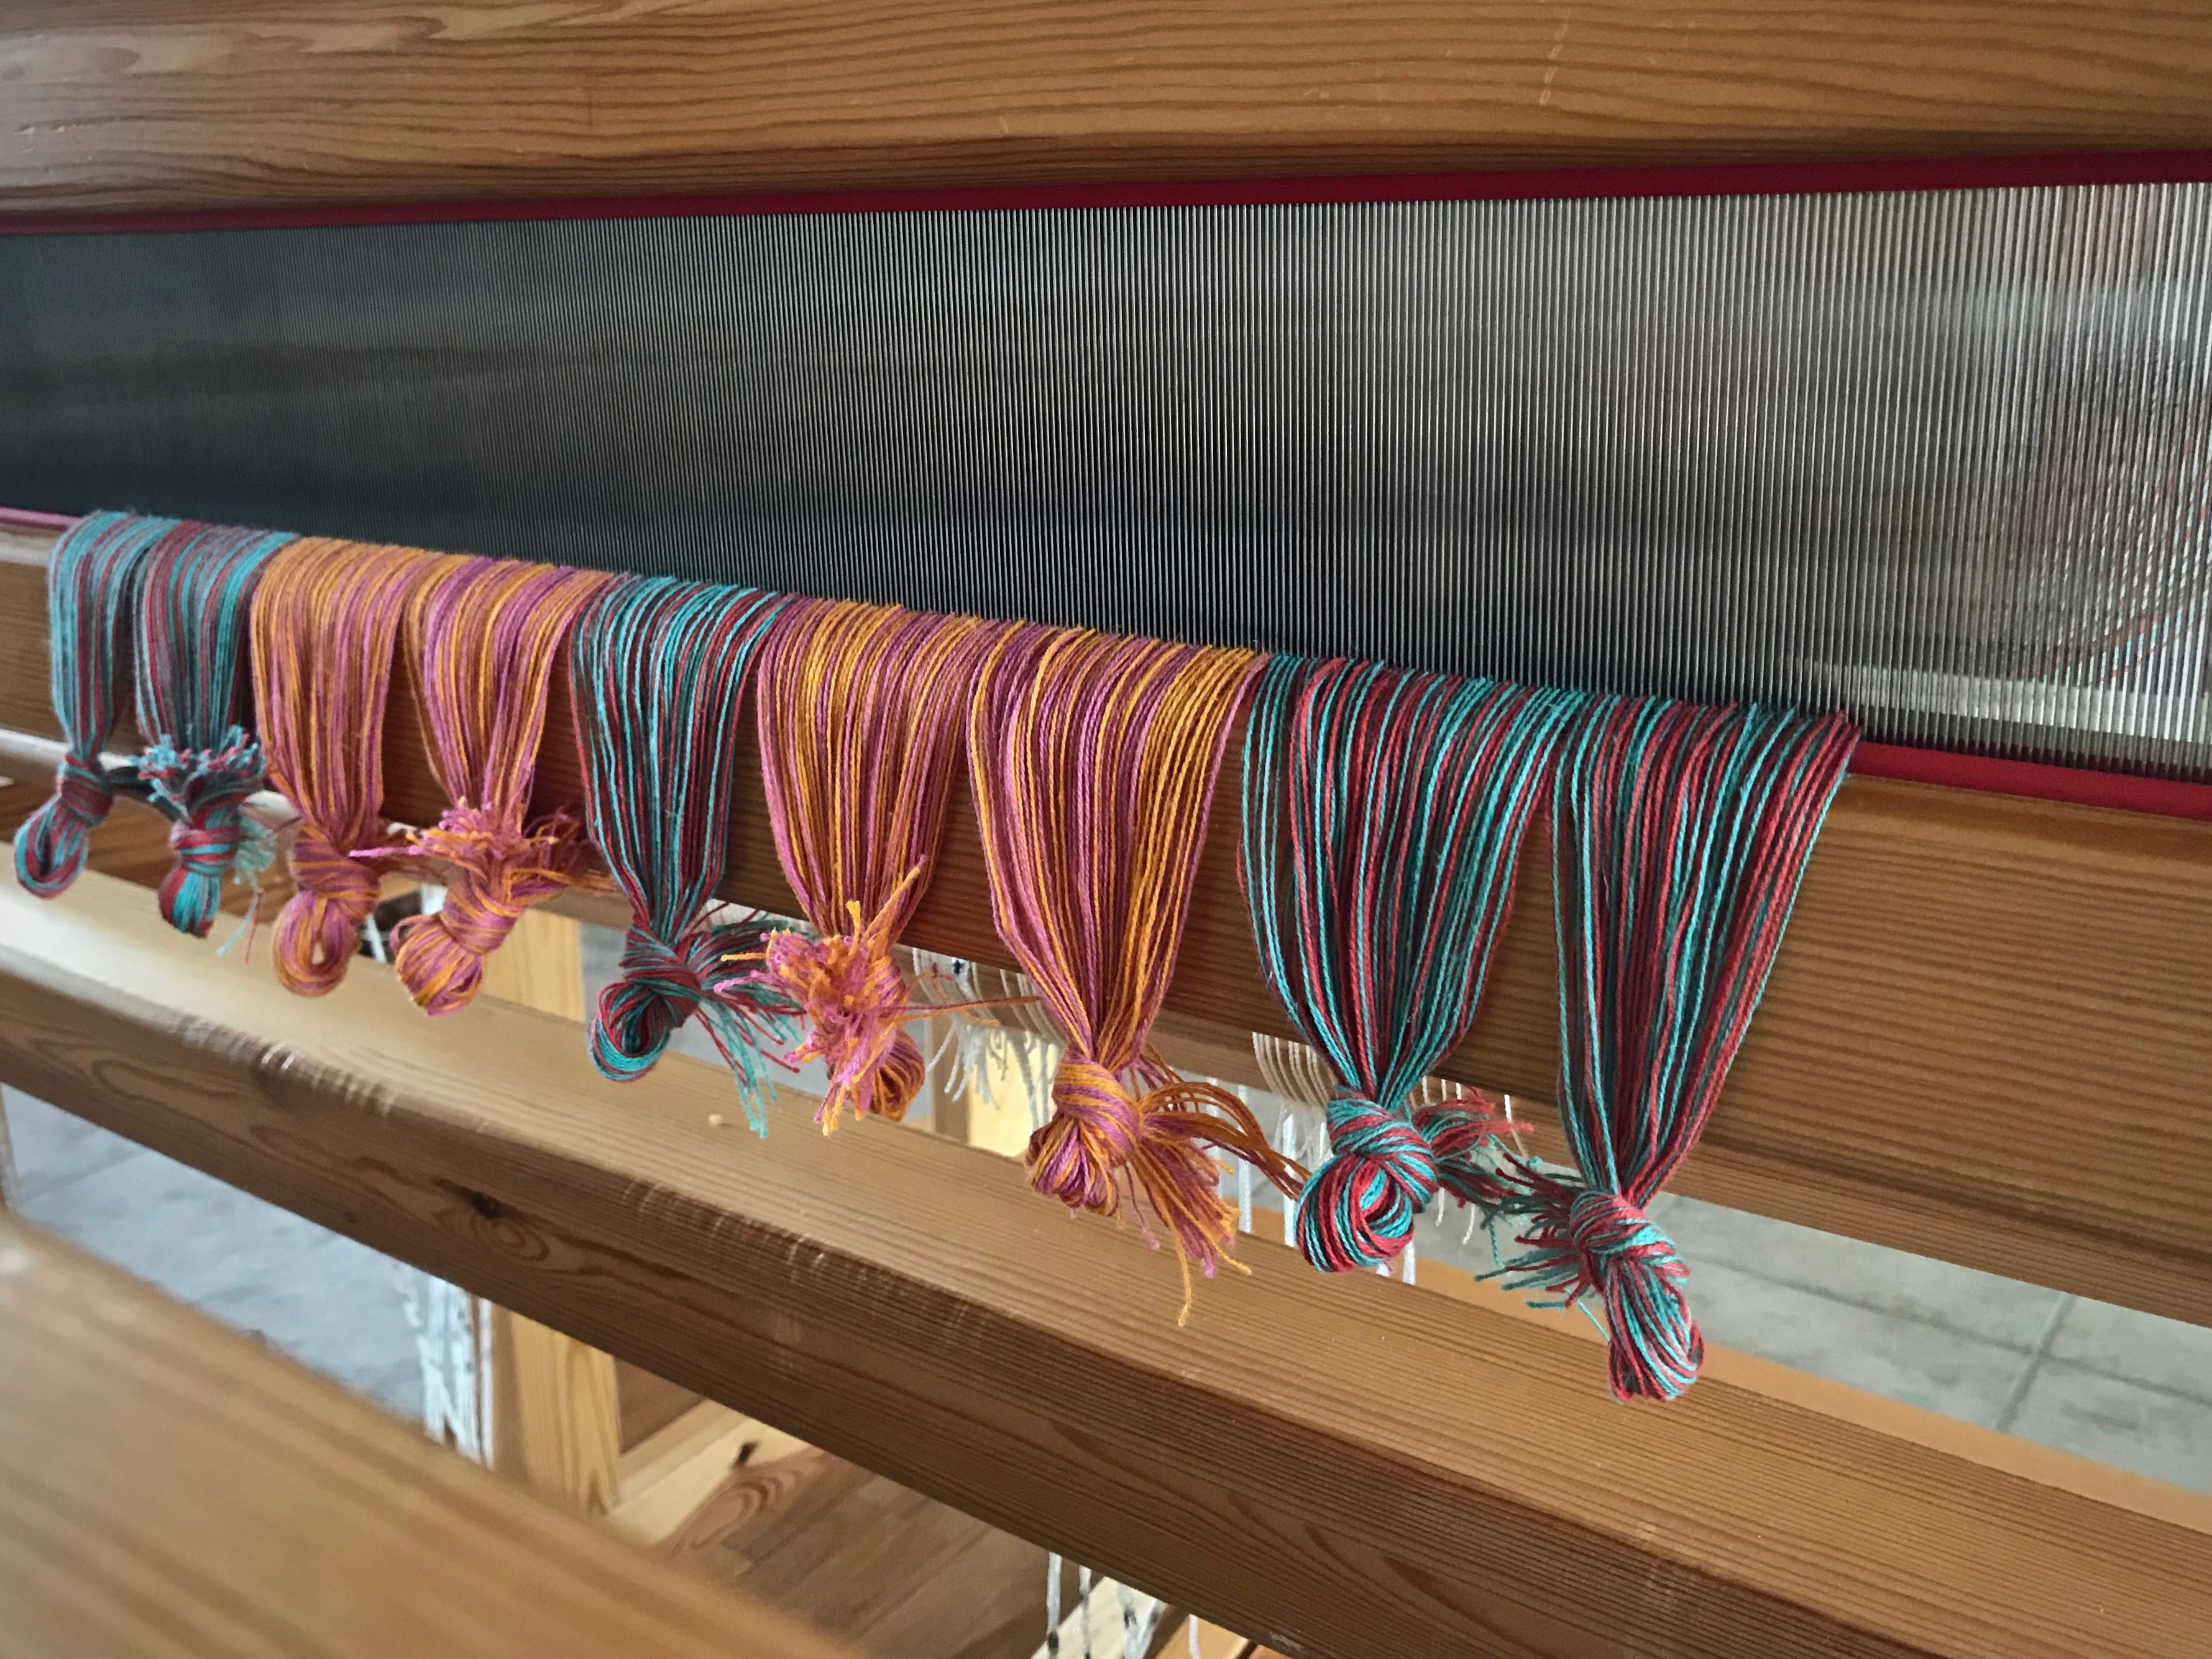
It is not easy to see sleying errors in this fine-dentreed. I unknowingly quadrupled the ends in four of the dents, instead of the specified two ends per dent. When I check as I go, I find the errors while they are still easy to fix.
How to check and double-check for sleying errors:
Tie ends into threading groups, using a loose slip knot. (I do this before threading the heddles.)
Sley one threading group. (I sley right to left.)
Visually check the sleyed group of ends for skipped dents and crowded dents.
Do a Click Test. Use the hook end of the reed hook to count the dents by running the hook along the reed…click, click, click… Make sure the number of clicks matches the number of dents needed for that group of ends.
—This is how I caught my errors. When the dents came up short in the Click Test, I knew I had some crowded dents that I had failed to catch in the visual check.
Move ends and re-sley as needed.
Sley each remaining group of ends, checking as you go, visually and with the reed-hook Click Test.
Two ends per dent in this 70/10 metric (equivalent to an 18-dent imperial) reed.