I planned a small tapestry project to take with me on our travels to Grand Canyon North Rim last month. I was rushed in the planning of the cartoon and in the selection of the yarn colors. Sitting by our travel trailer at the campground, with the rim of Grand Canyon in view, I had an inspiring environment for weaving.
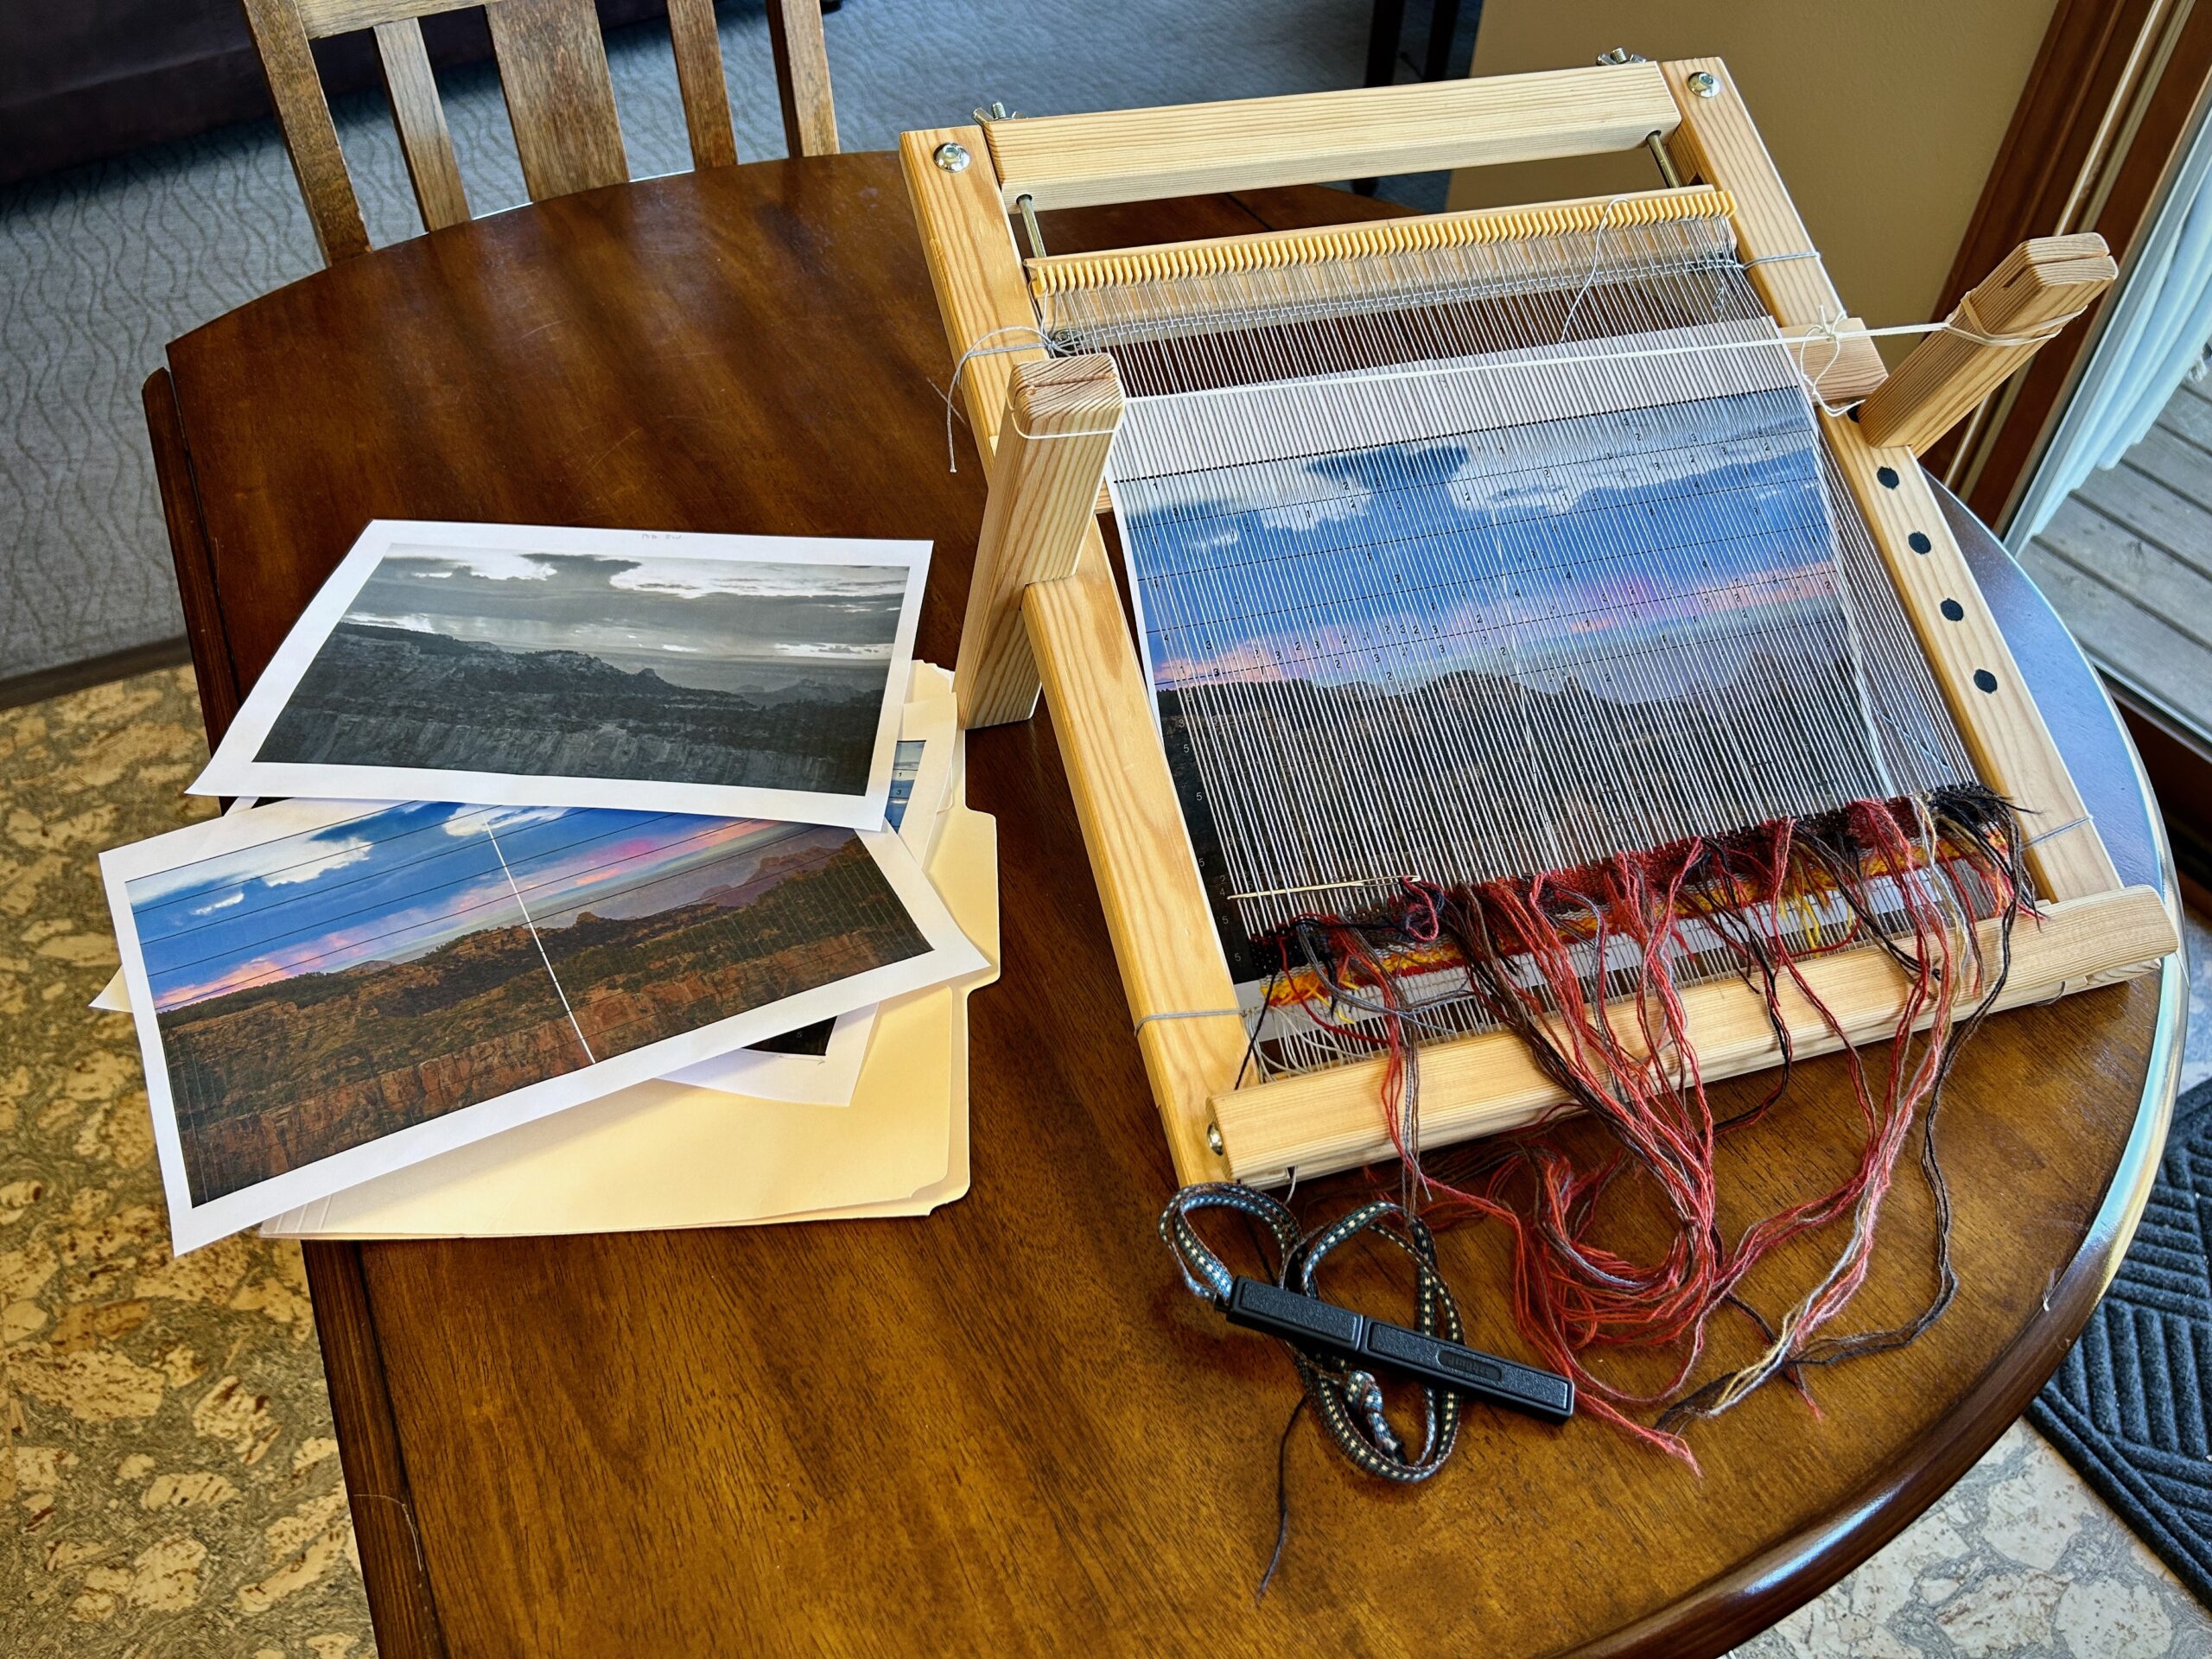
After returning home, I could see changes I’d like to make in the cartoon, and some adjustments needed in the hues and values of my yarn selection. The cartoon is a photo of a Grand Canyon North Rim sunset from our visit there two years ago. I reworked the cartoon in Photoshop and edited my yarn selection. Then I undid everything that I had already woven. I’m starting over and it is looking better already!
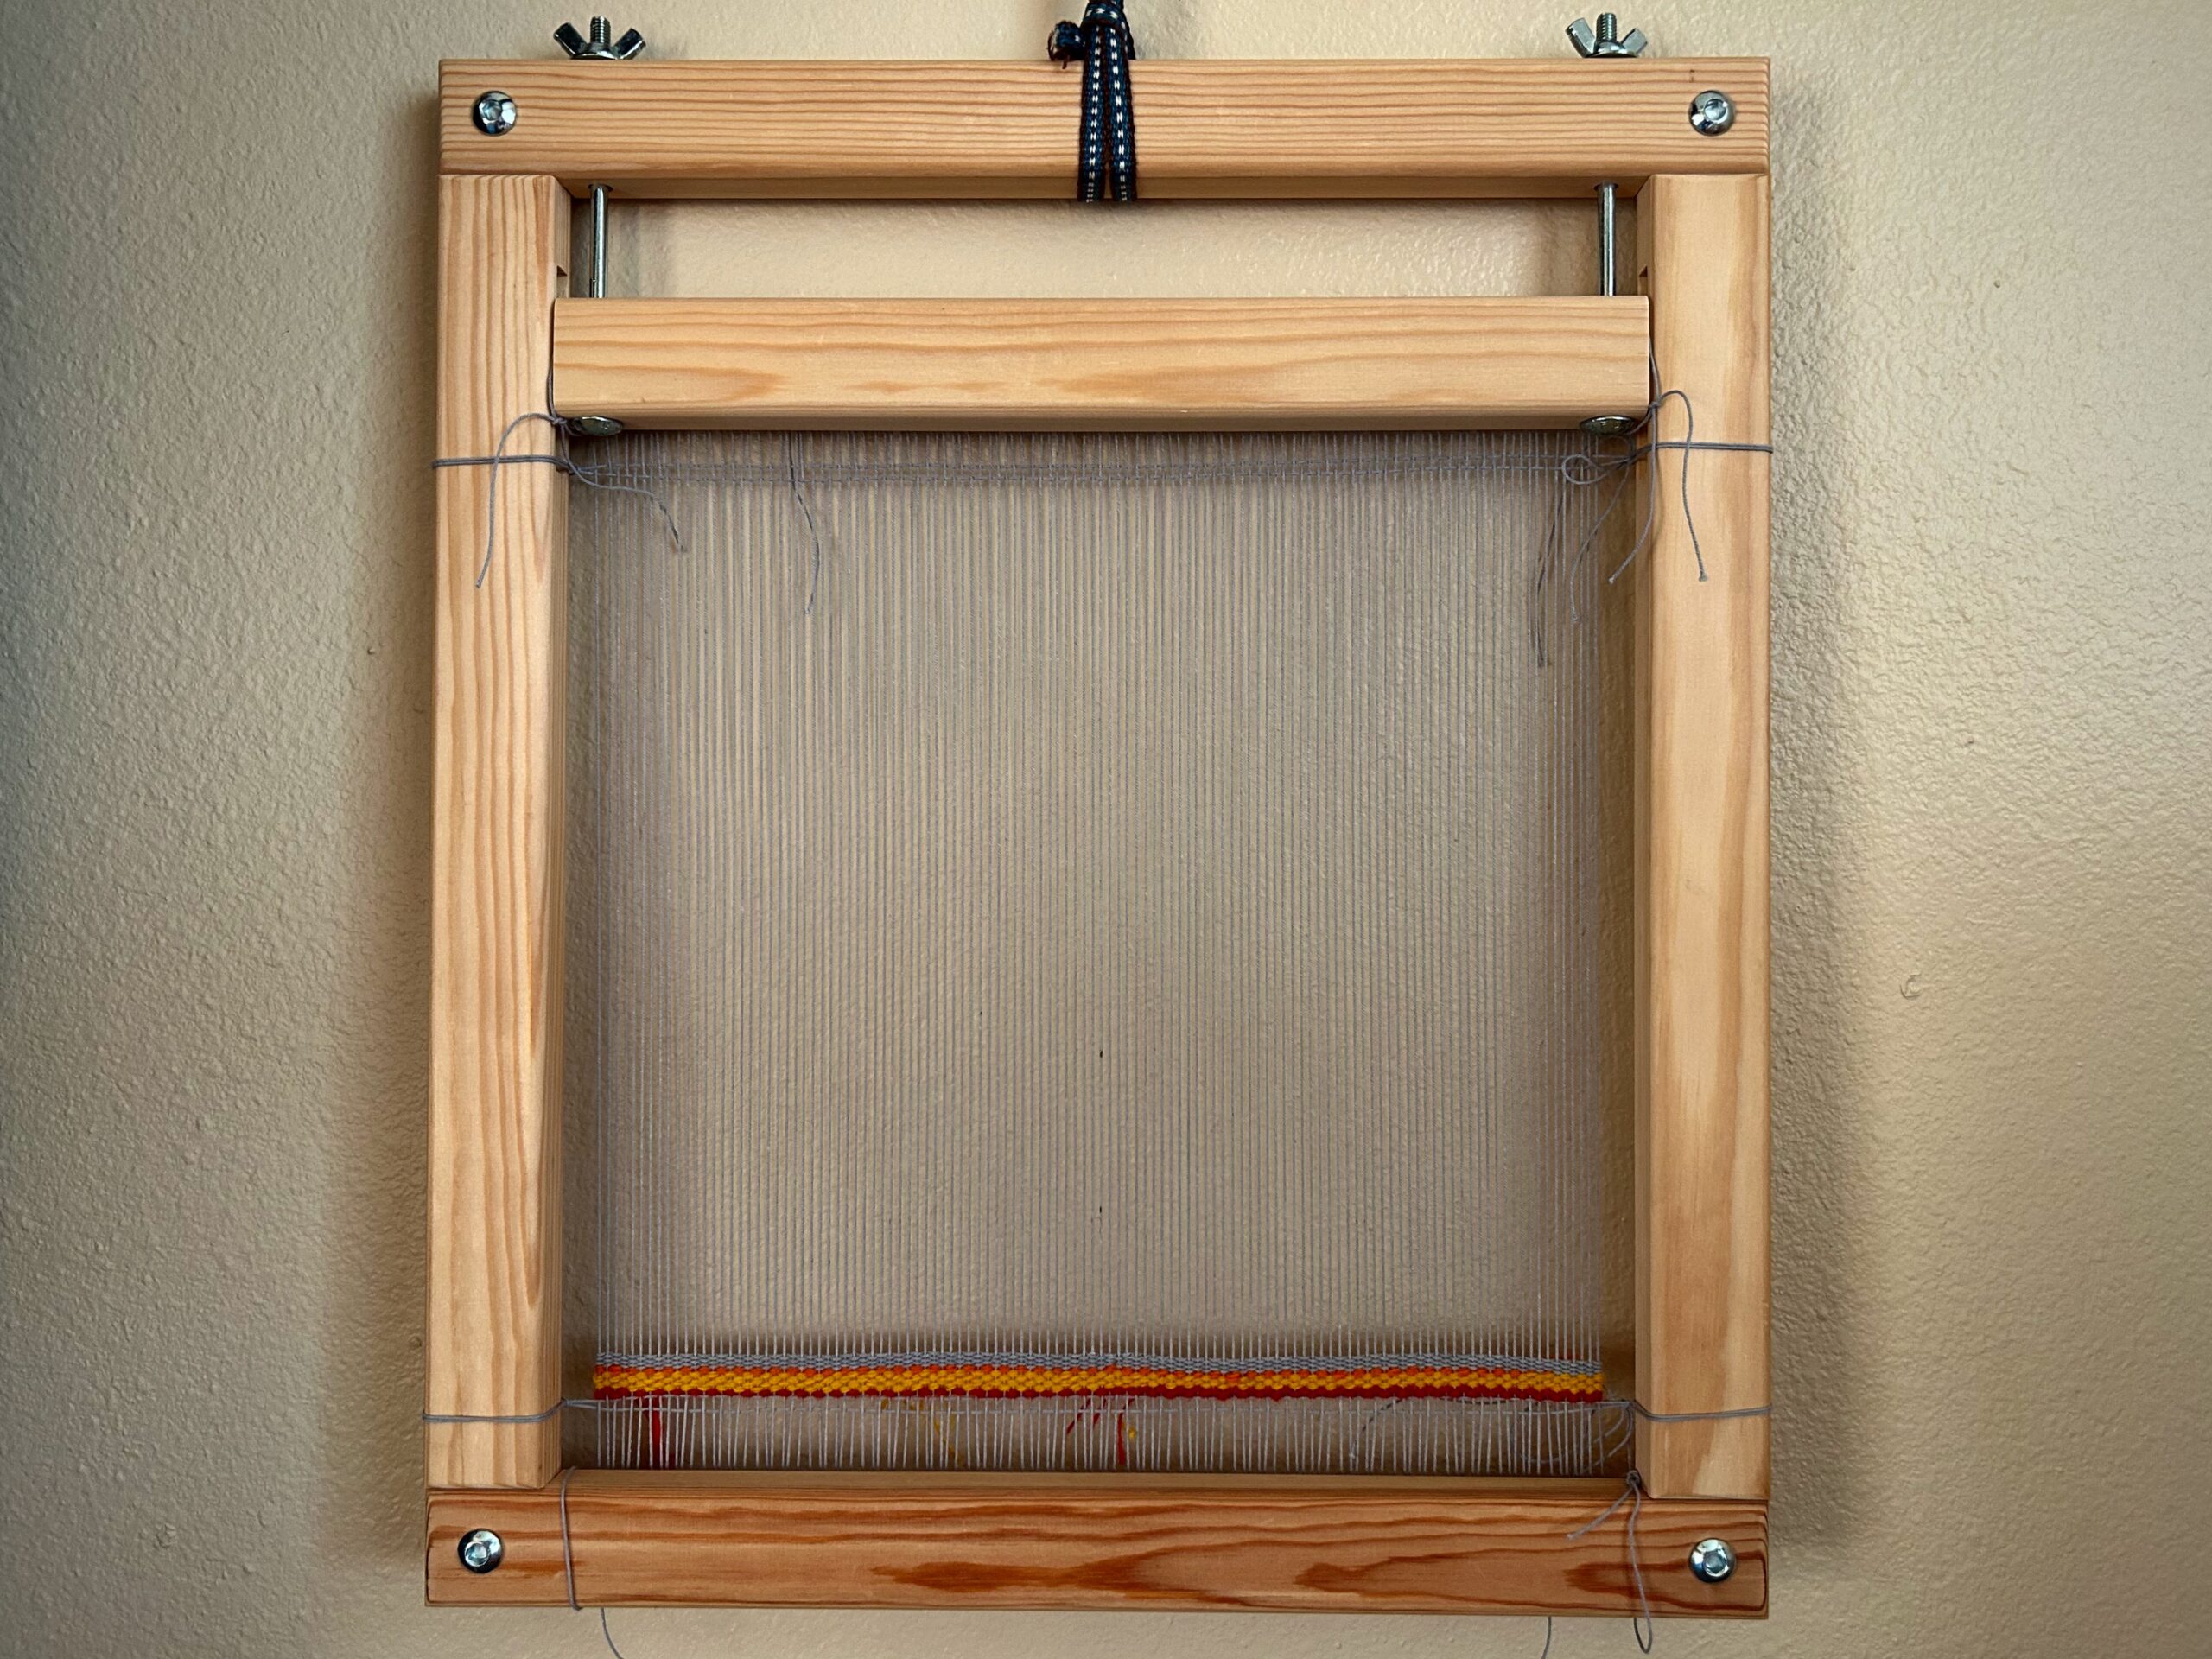
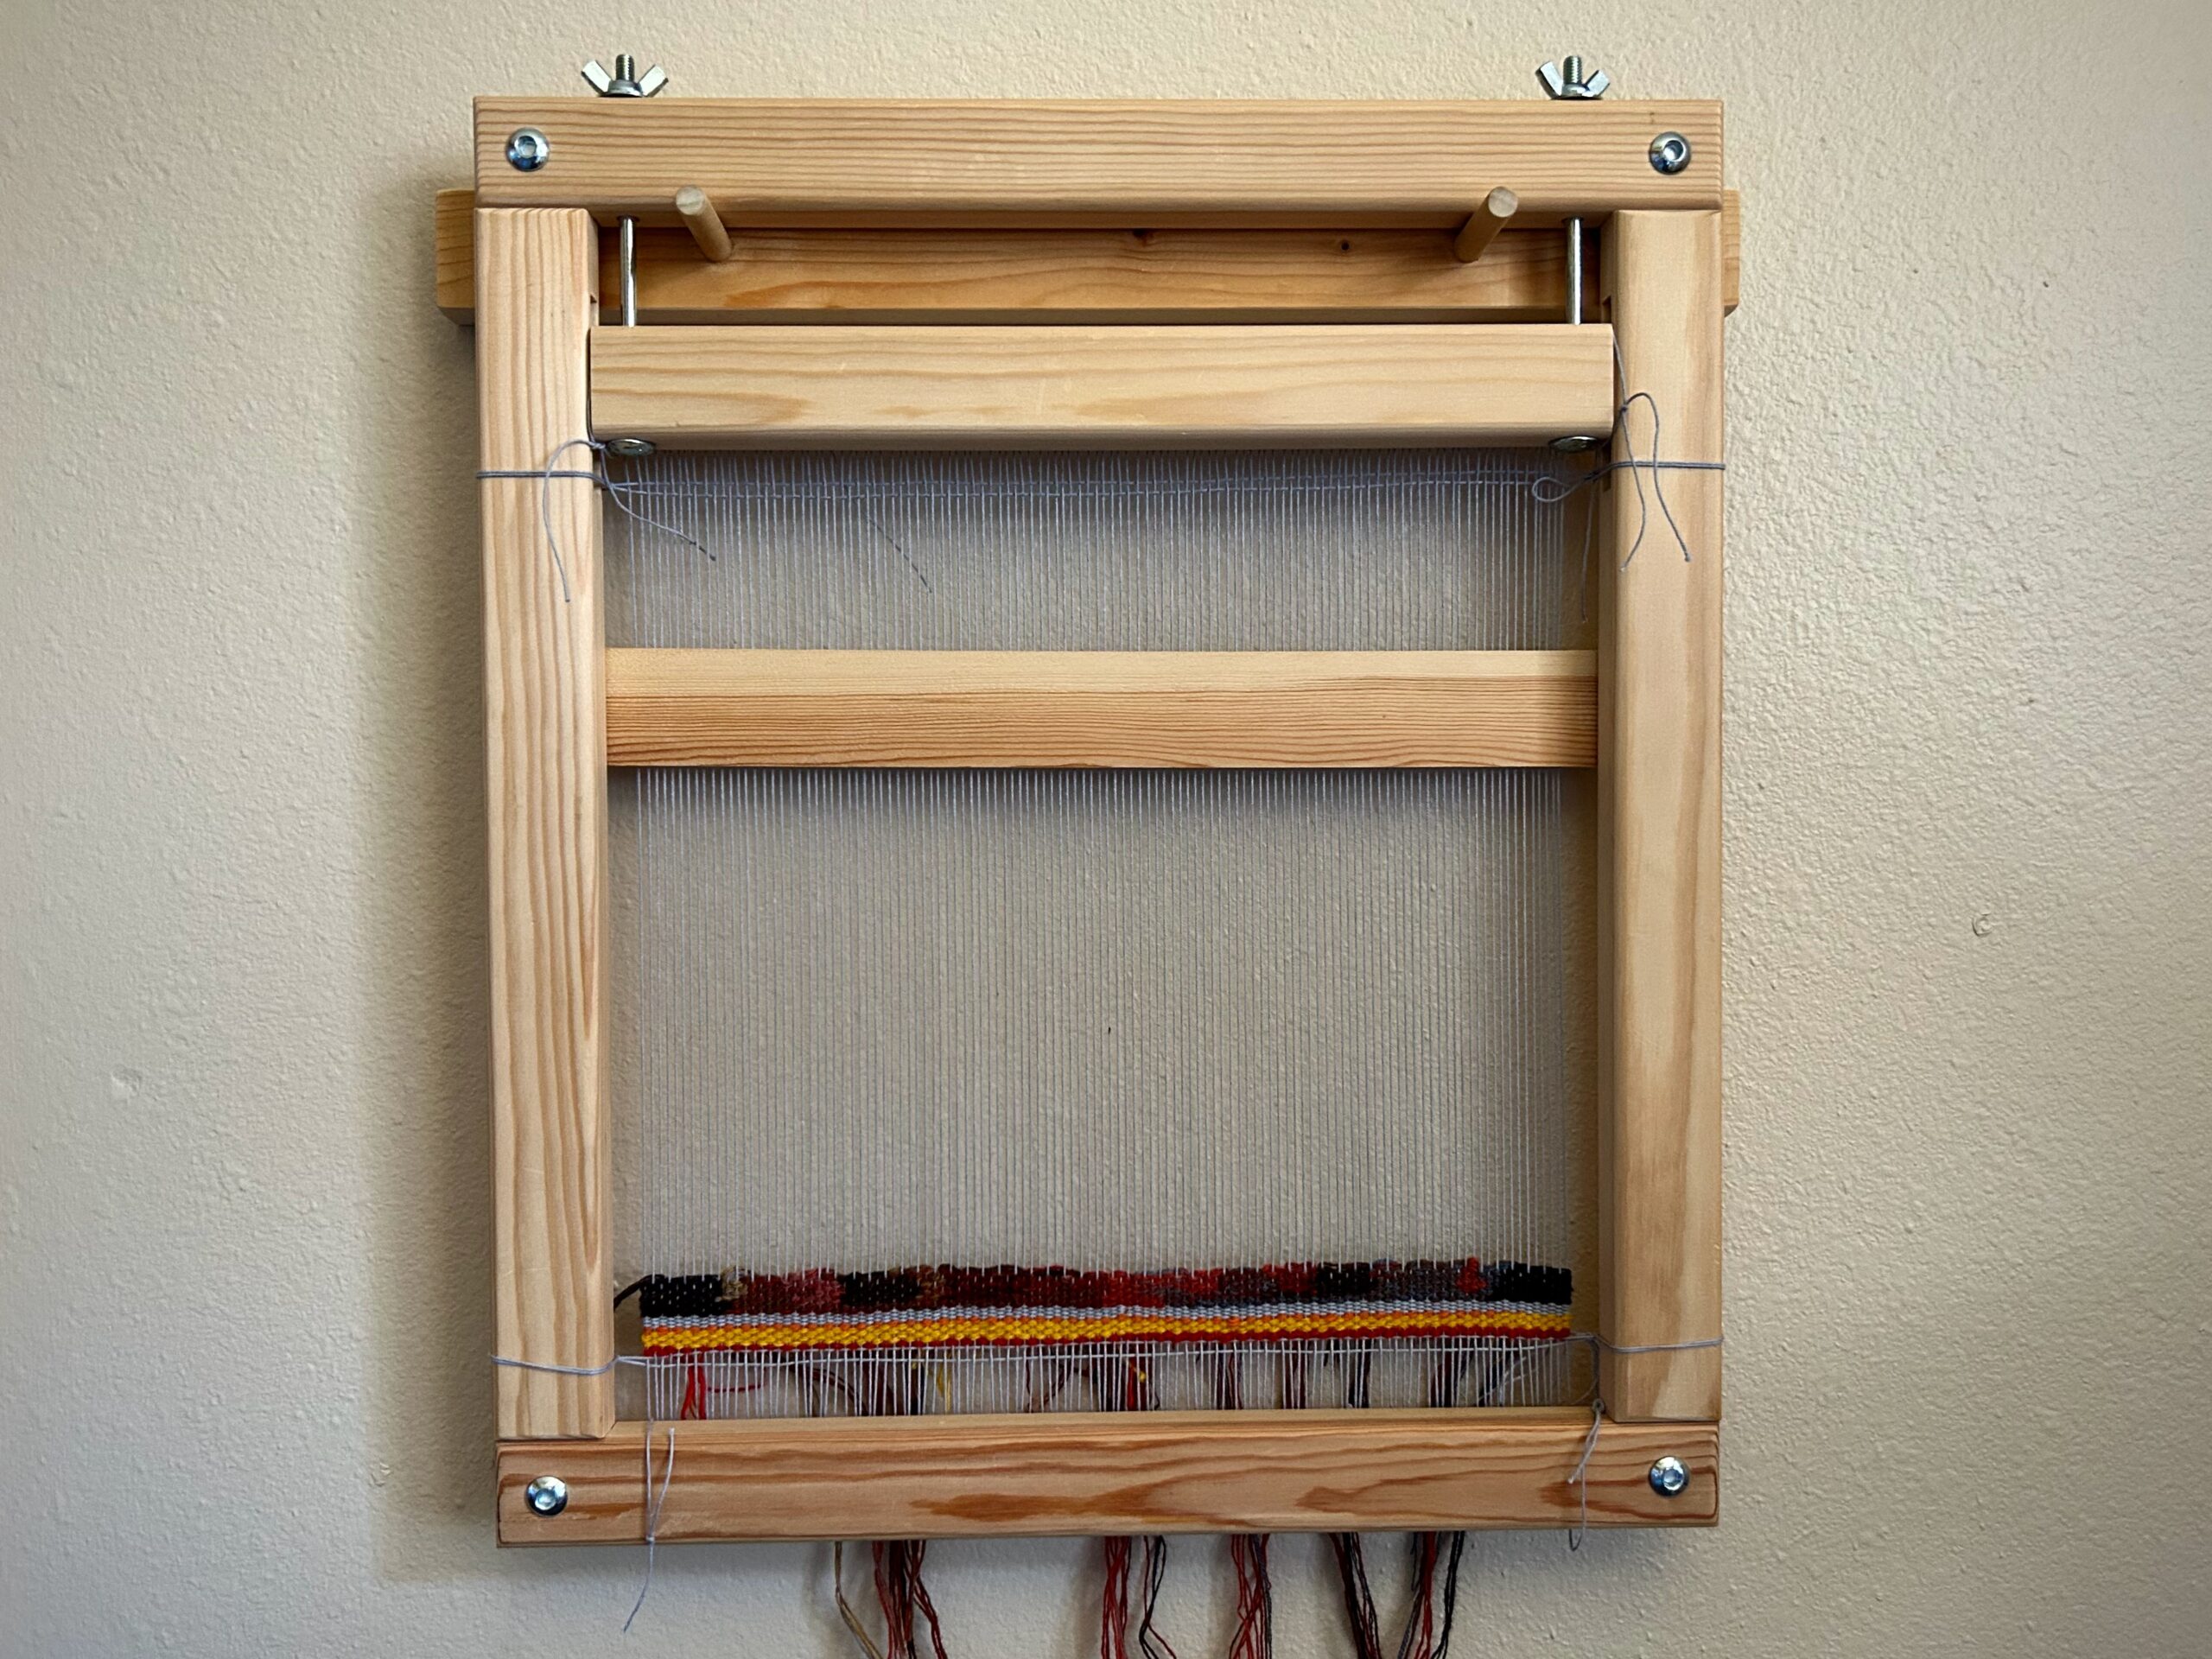
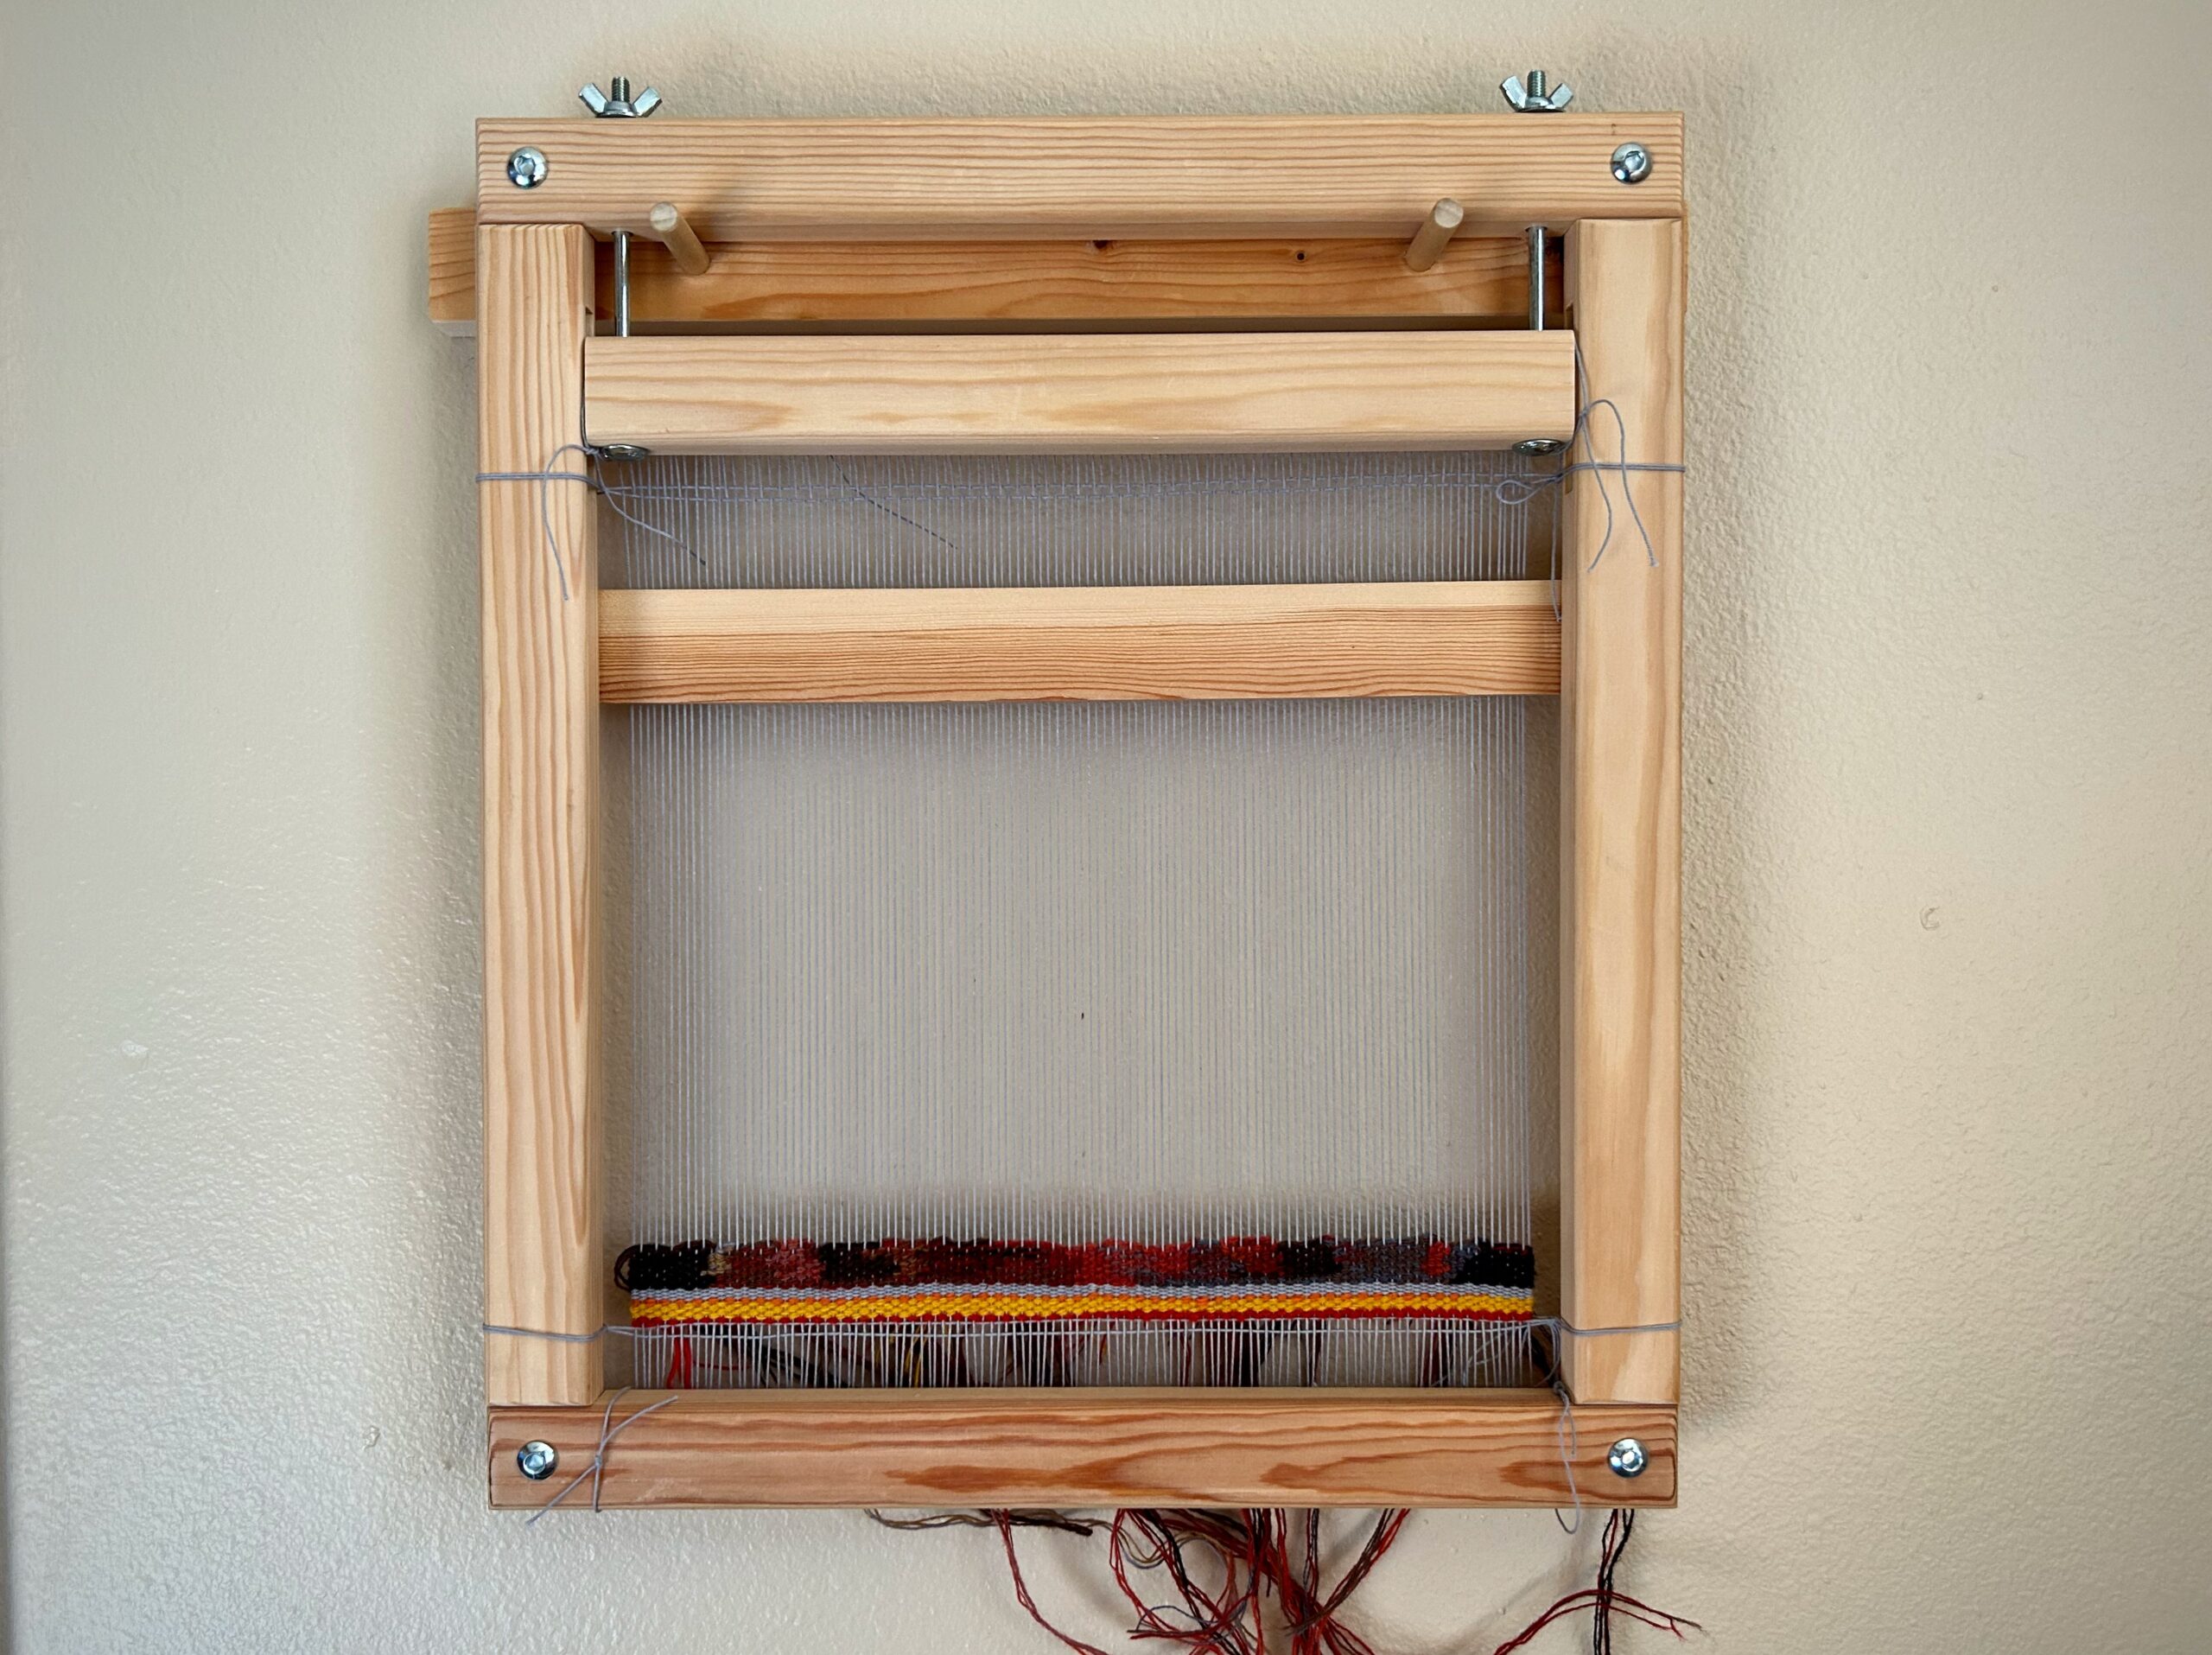
Every evening, now, I bring my Freja Tapestry Frame to our small breakfast table in the kitchen and weave for a little while. Steve made a holder for me to hang the tapestry frame on a wall in the study. I take a picture every morning. I will end up with a series of photos that show how the tapestry grows, row by row, over time. This daily tapestry weaving gives me a constant reminder of how beautifully creative the Creator of our universe is, and how His planning is never rushed, nor His selection of colors short sighted. His work is perfect from the start.
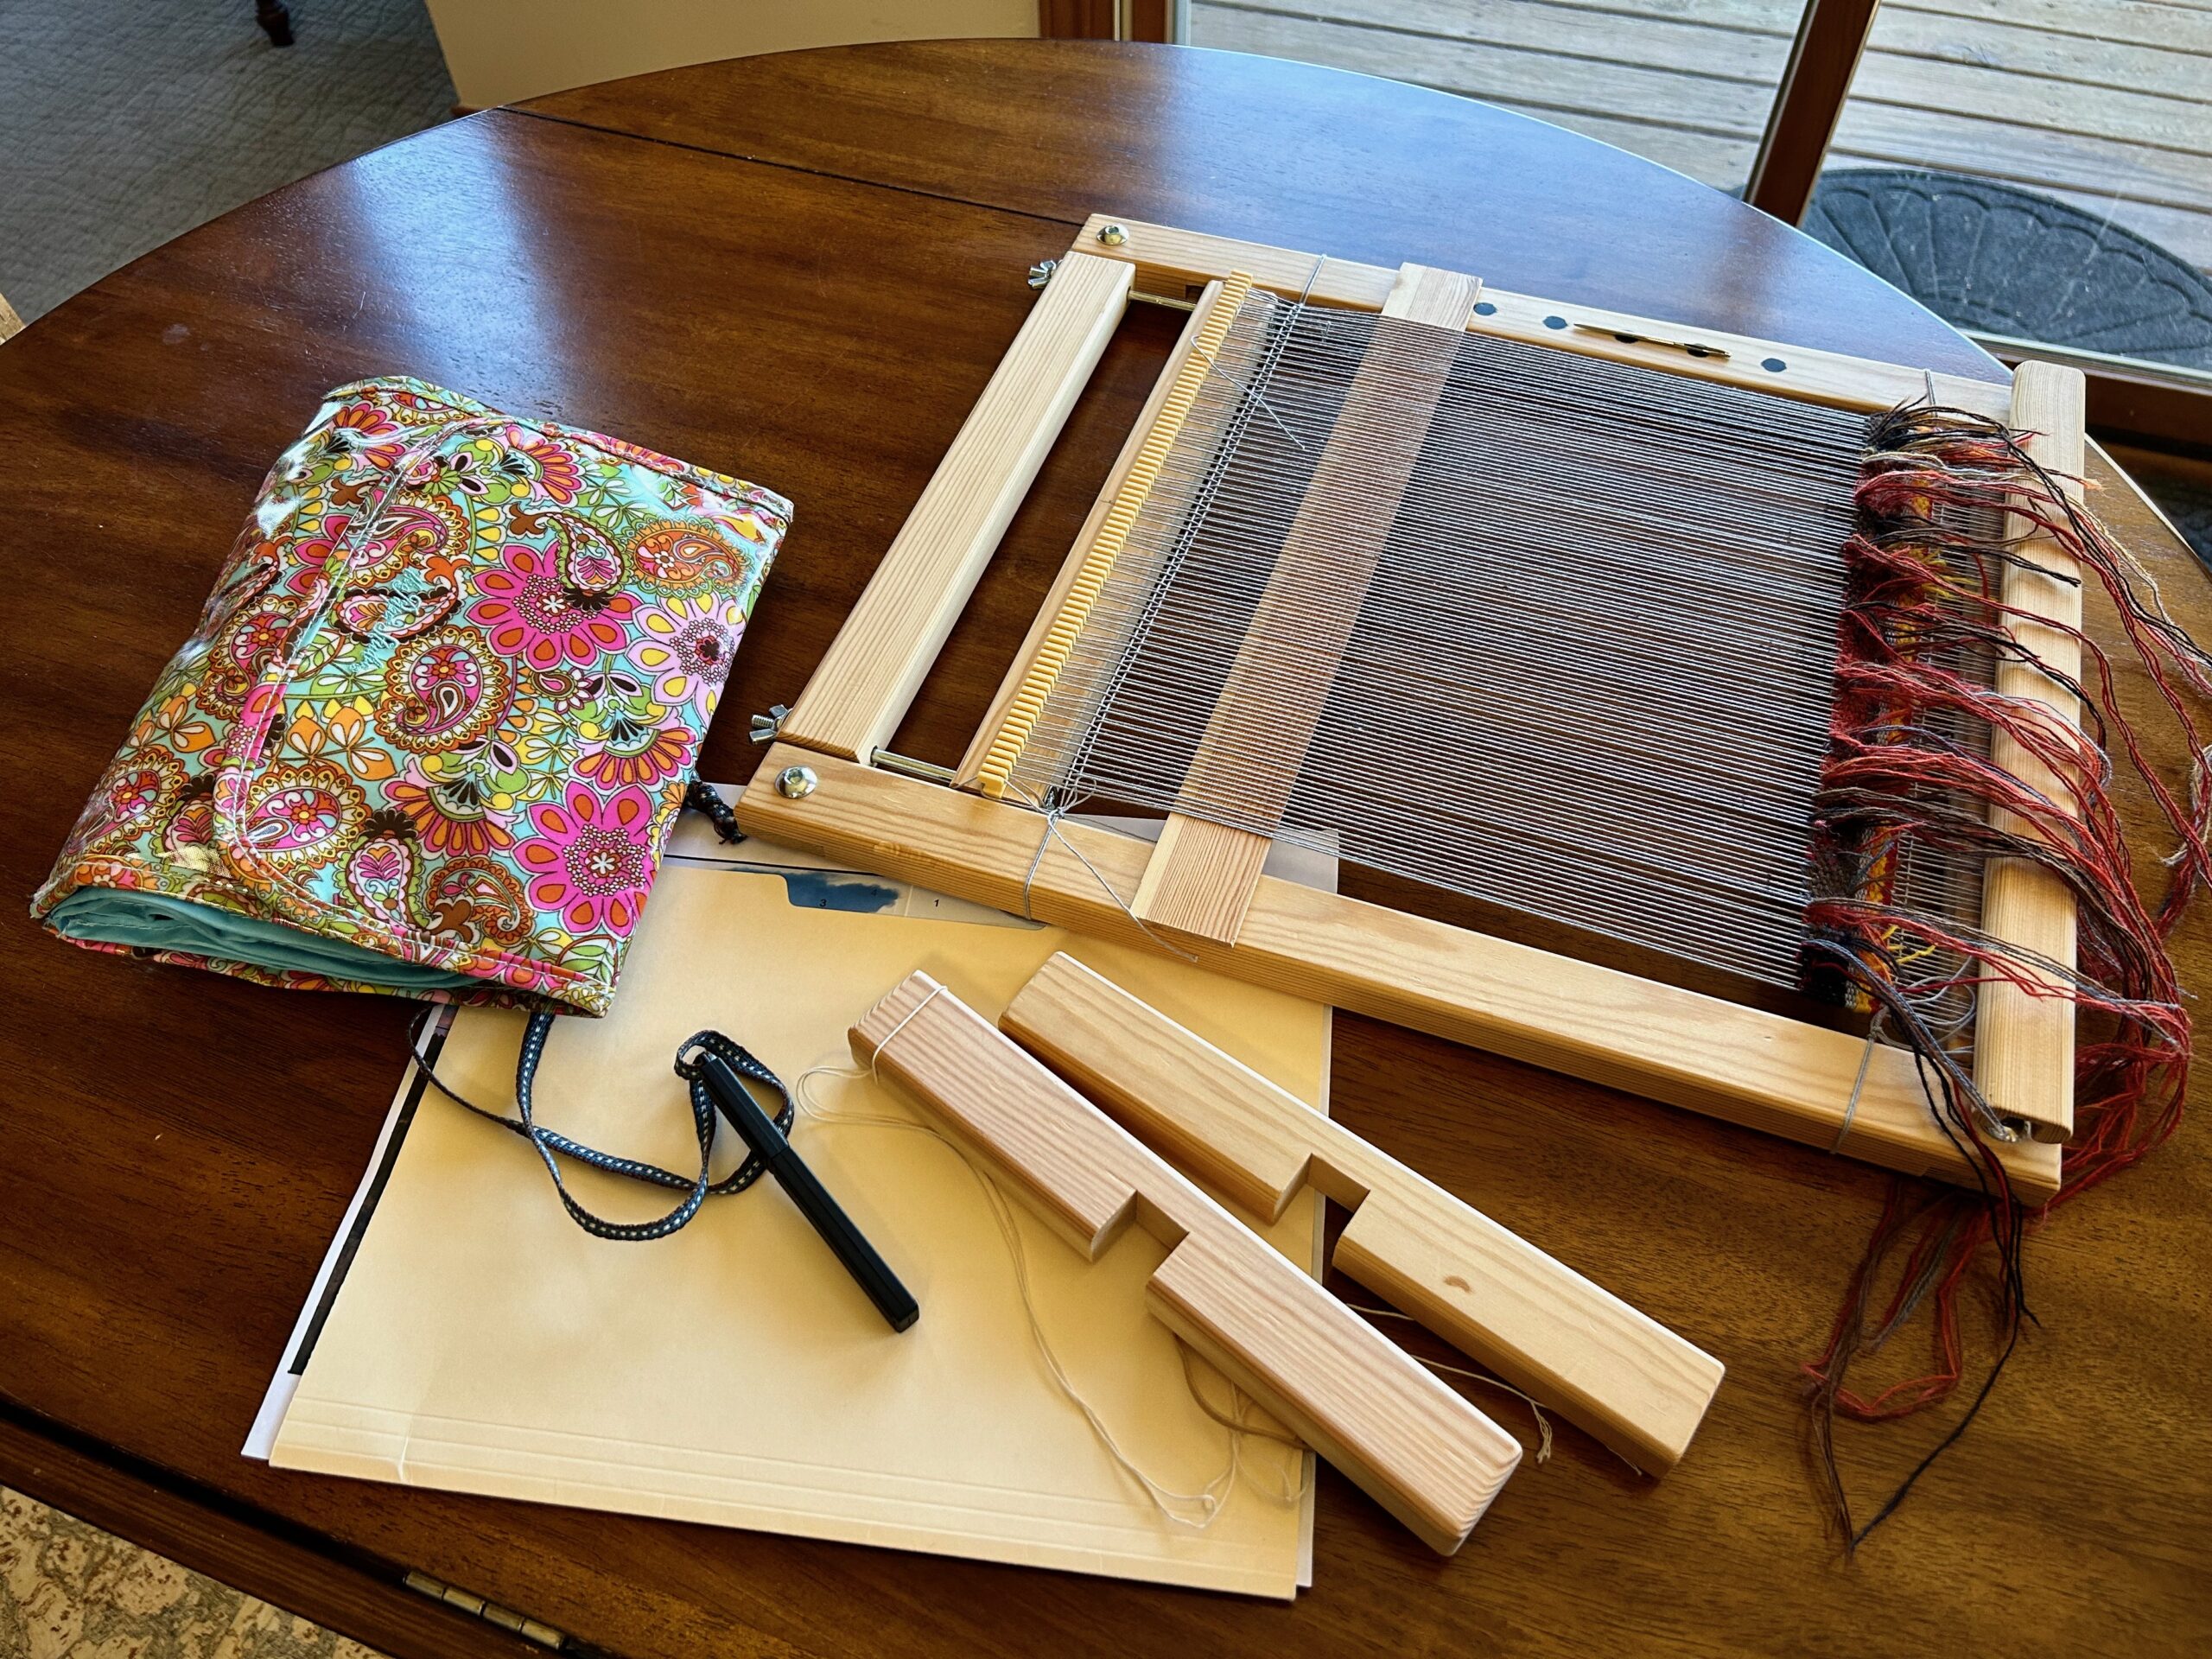
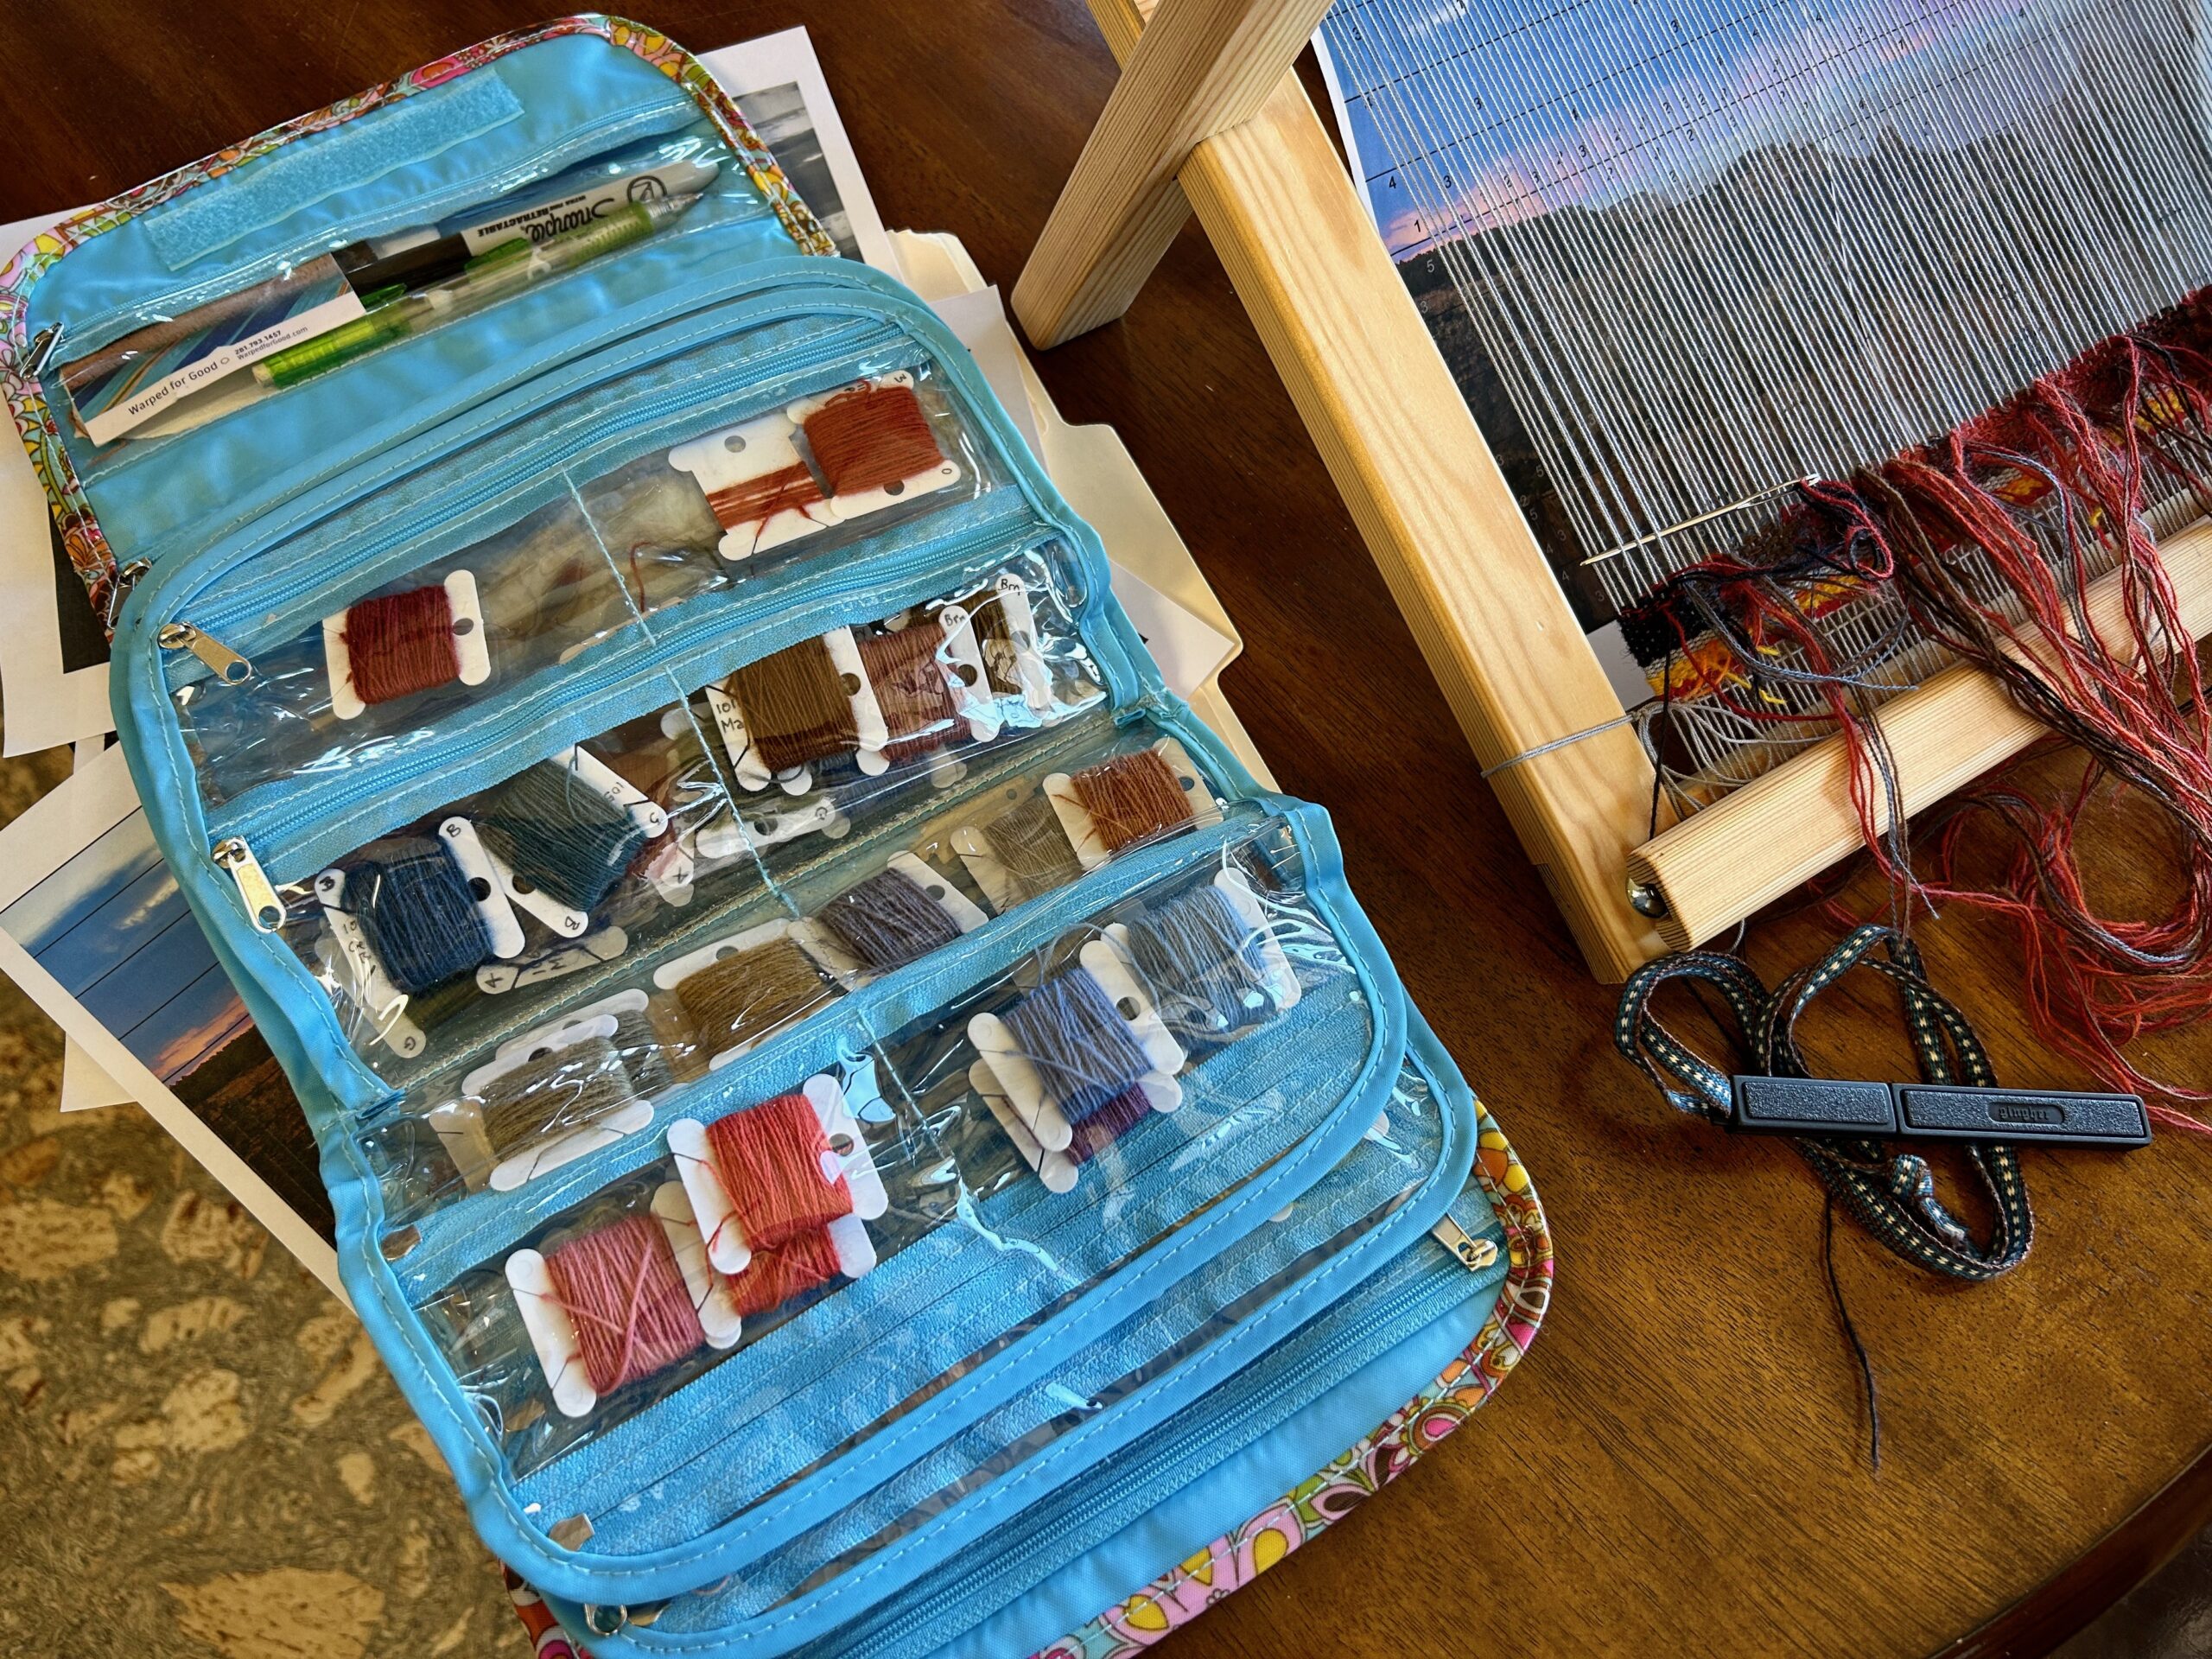
First, we found a place to hang this Freja Tapestry frame on the wall. Bright yarn is the scrap yarn for beginning to space the warp. Six rows of 12/6 cotton warp thread finish the job of spreading the warp evenly. I also added two quick rows at the top to help keep uniform spacing from bottom to top of the warp.Steve’s simple mounting rack is just right for holding the tapestry frame. I can view the right (or wrong) side of the tapestry and watch it grow day by day. I completed these six rows in the first couple days back home.Detail view of the right side of the first six rows. This tapestry is being woven from the back.Adding rows two at a time.So far, this is simply colors and shapes.Sitting down in the evening and completing one pass (two rows) is a satisfying way to wind down for the day.Pouch with yarn, Gingher snips on a handwoven band to wear around my neck, legs to hold the tapestry frame at a comfortable angle on the table, folder with tapestry cartoon and a few go-by’s. And, the Freja Tapestry frame, with slat that holds the cartoon, and tapestry needle held by earth magnets that Steve inlayed into the face of the right side of the frame, and a wood cover that slips over the bottom teeth on the frame that keeps anything from snagging on the teeth.This is my simple setup. Most evenings I take my place here at our small breakfast table and set up my tapestry frame. I have a black-and-white, and a full-color go by. I refer to these constantly as color reference and value reference.This is my “crayon box” of colors, carefully selected by value and hue. Most of the weft yarn is 6/1 Fårö wool, with a few colors of 20/2 Mora wool added in. I have the yarn sorted by value. There are five sleeves in the pouch, so 1, 2, 3, 4, 5 – for a five-point value scale. The yarn is wound on floss bobbins left over from my counted cross-stitch days. This makes the whole project very travel friendly.
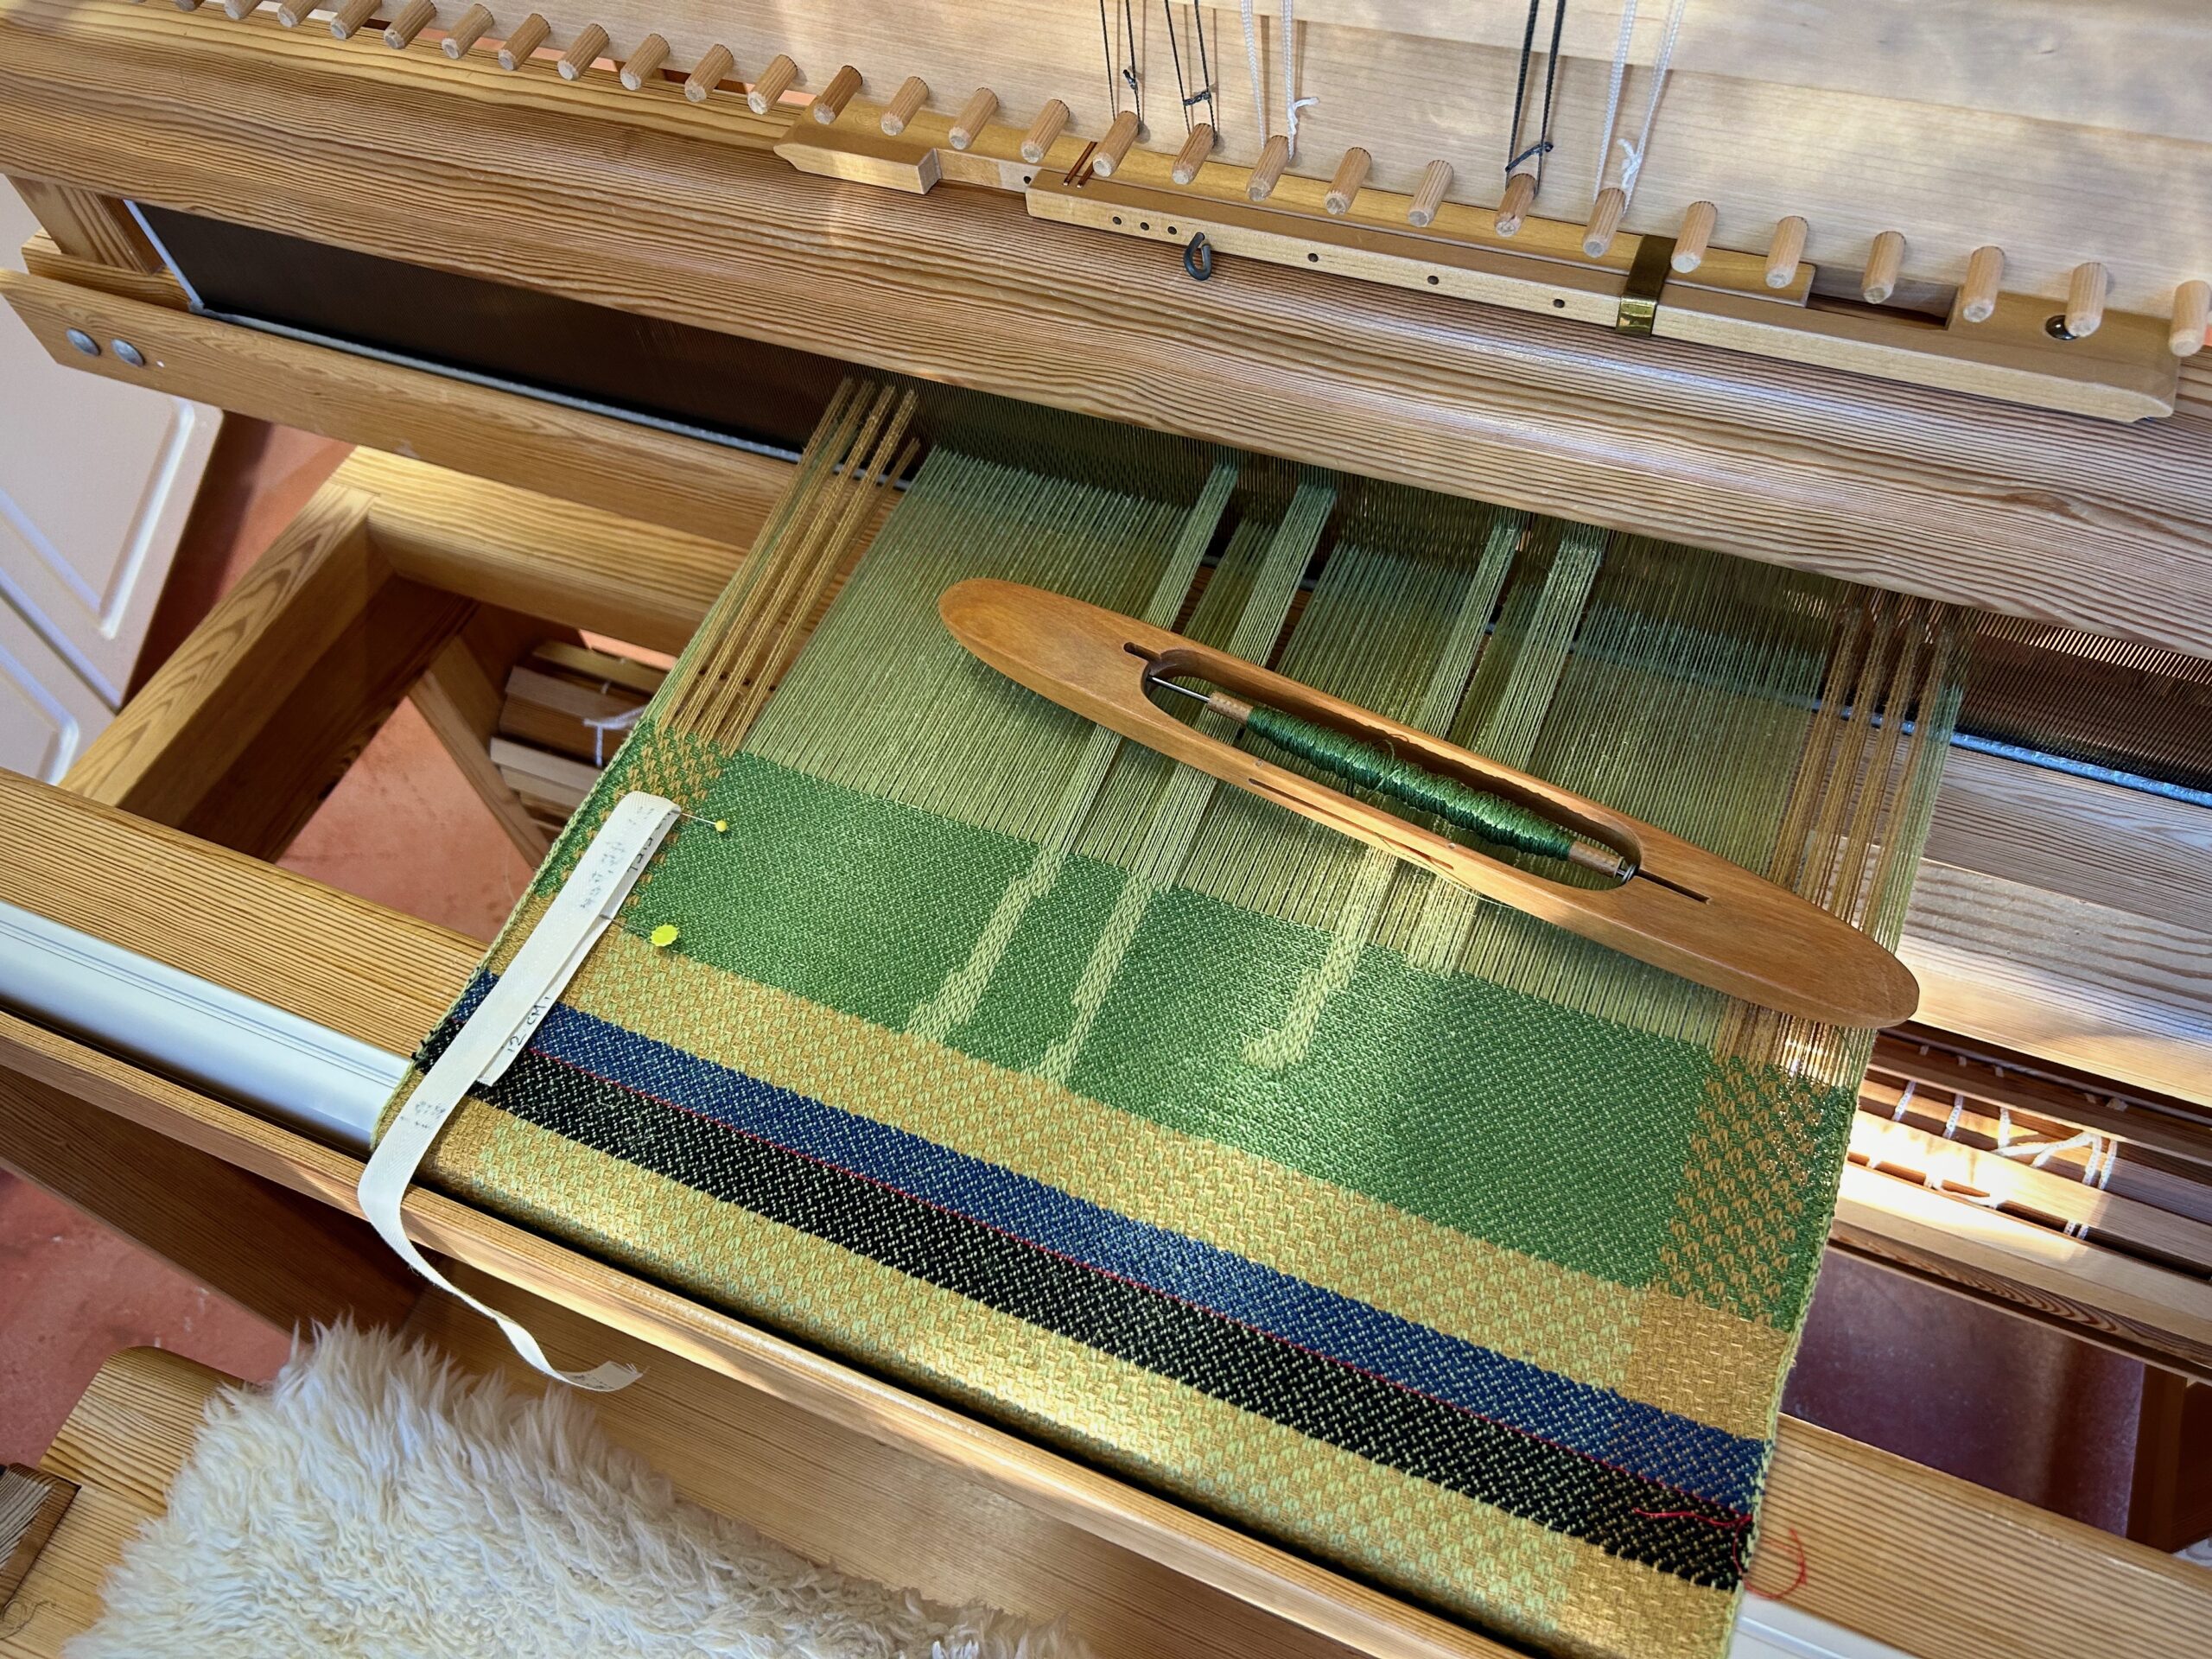
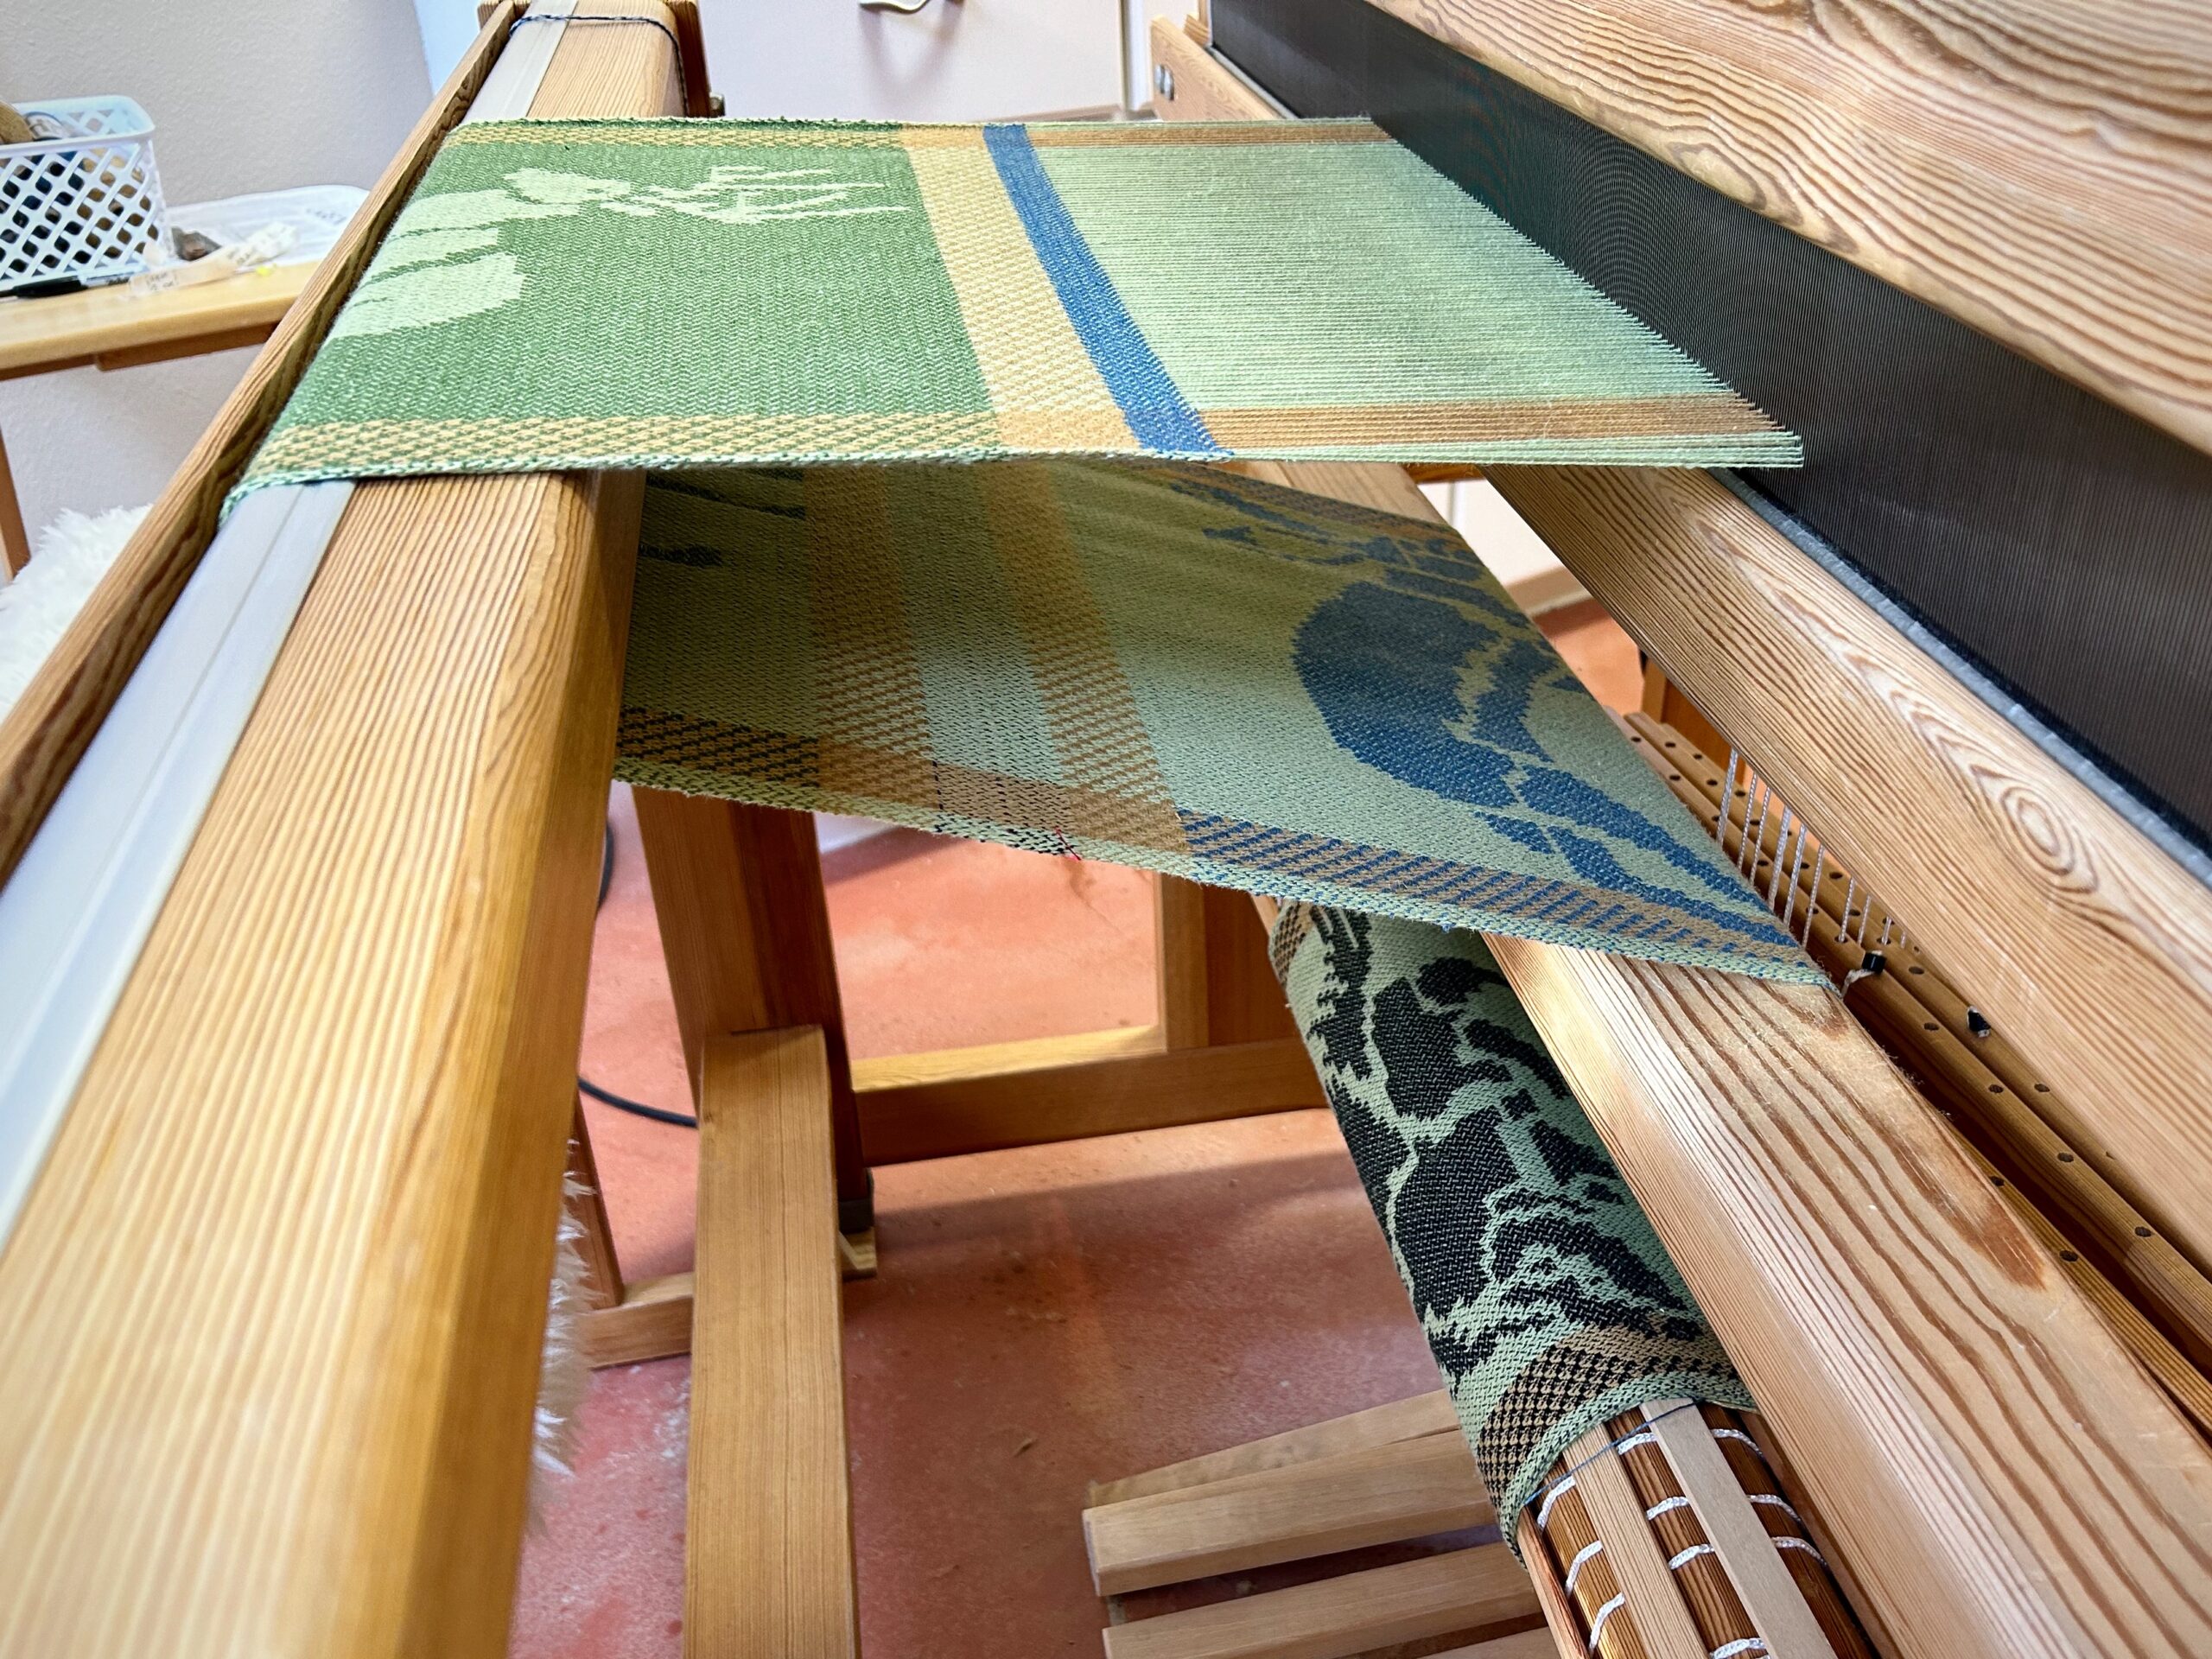
Armadillo, fox, porcupine, jackrabbit, and deer are leading the critter parade. The twelve napkins will include the most common, the most interesting, and the most unusual animals that visit our backyard here in Texas Hill Country. The white-tailed deer are the most common, by far.
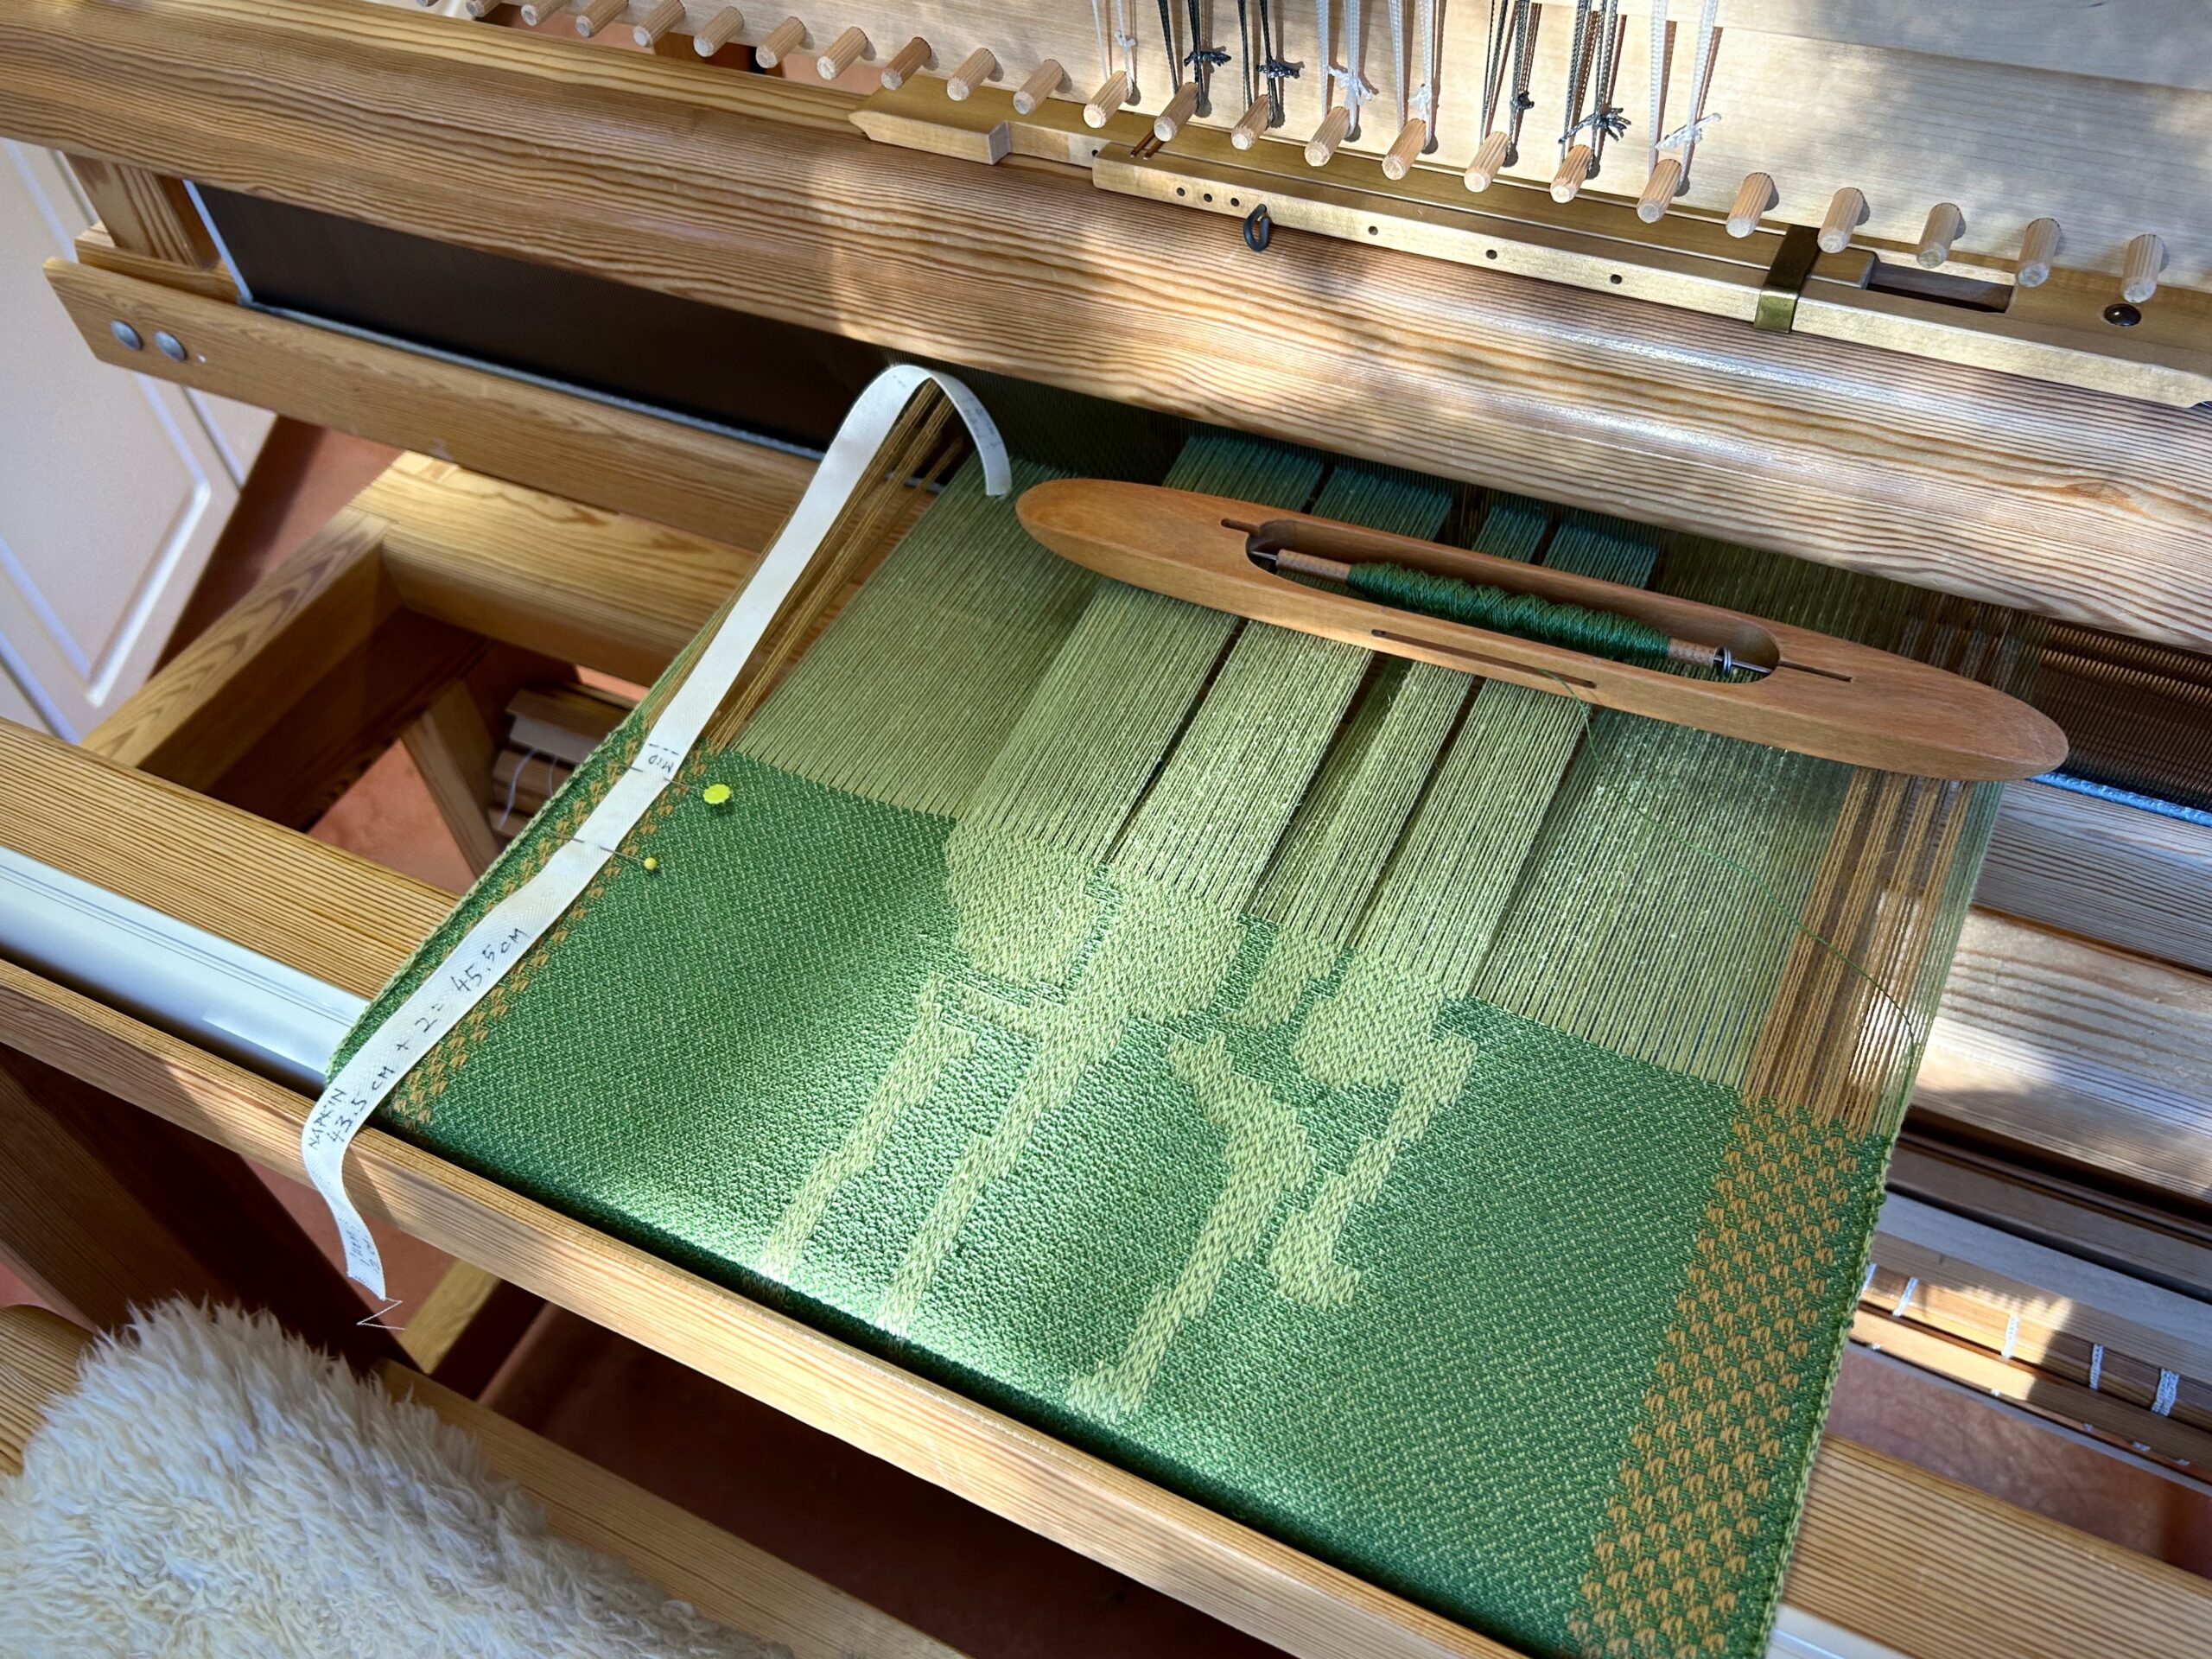
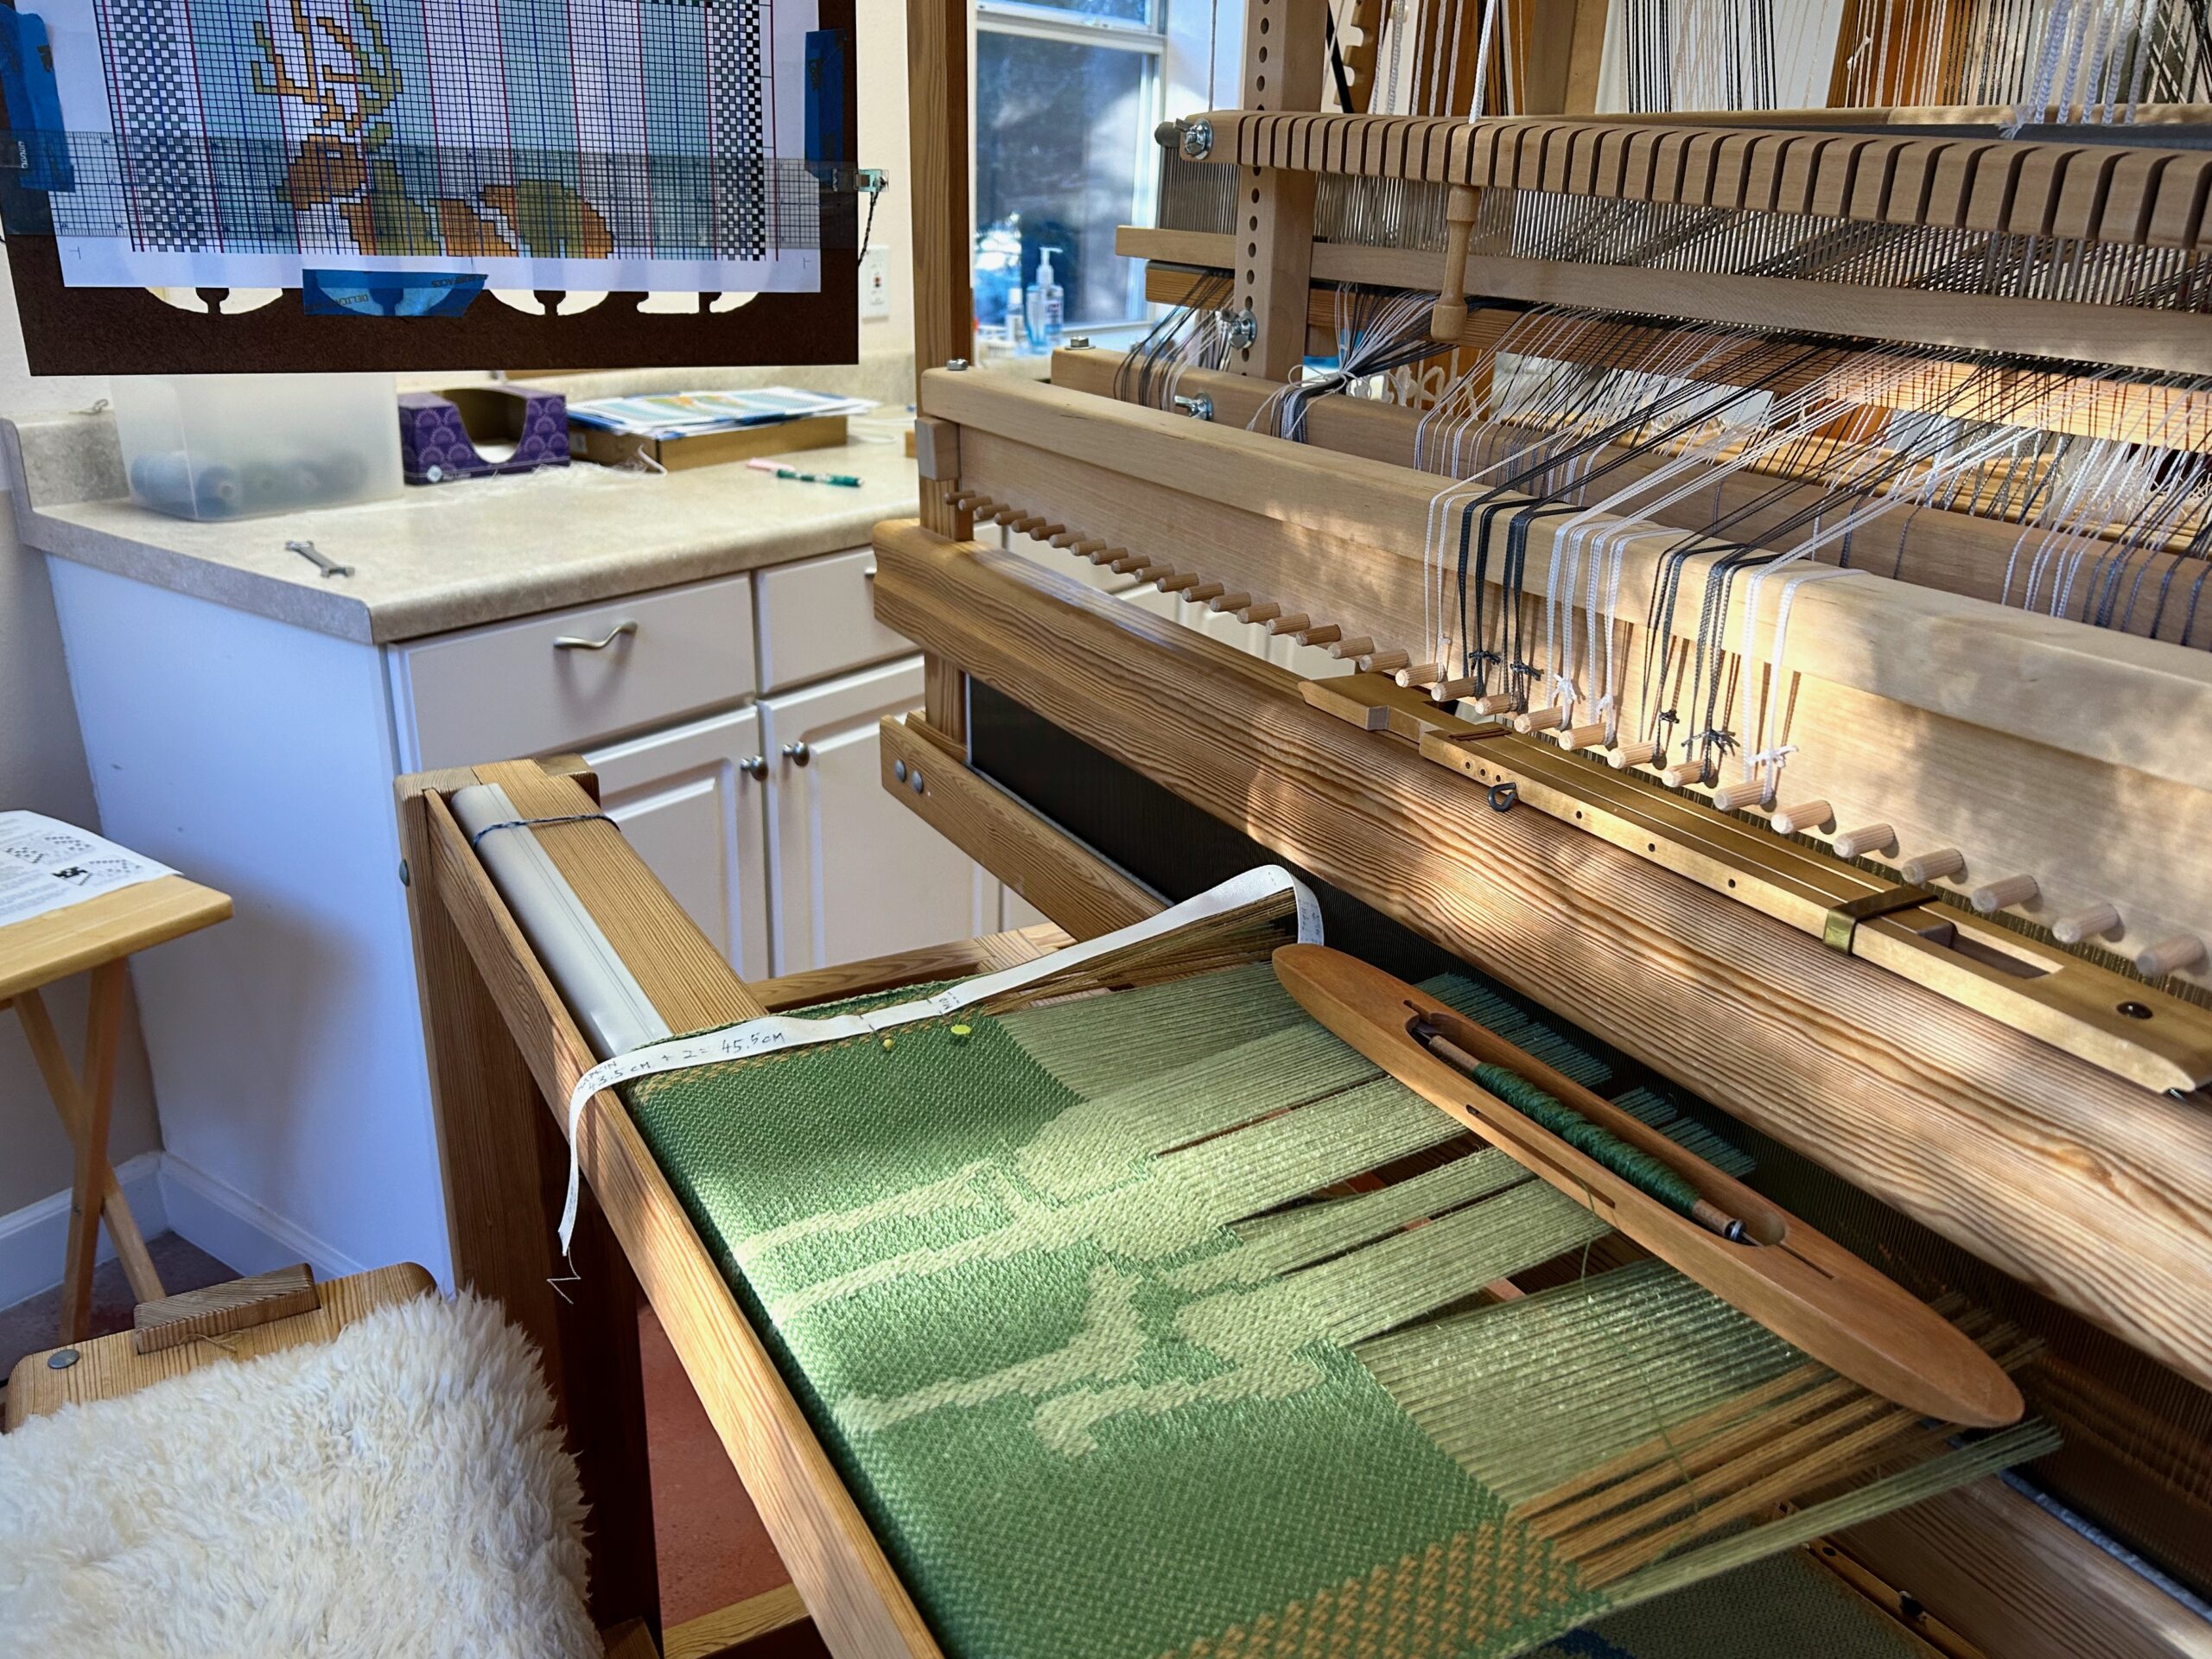
Feet first. The white-tailed buck is taller than he is wide, so his feet touch the bottom border. Pulled single-unit draw cords are seen on the hook bar pegs above the beater.Just past the midway mark on this napkin, as seen on the measuring ribbon pinned on the side.Having a large chart beside the loom helps me keep track of each row as the weaving progresses. One pattern shaft draw handle is pulled, which forms the pattern on the side borders. The single unit draw cords form the center image.
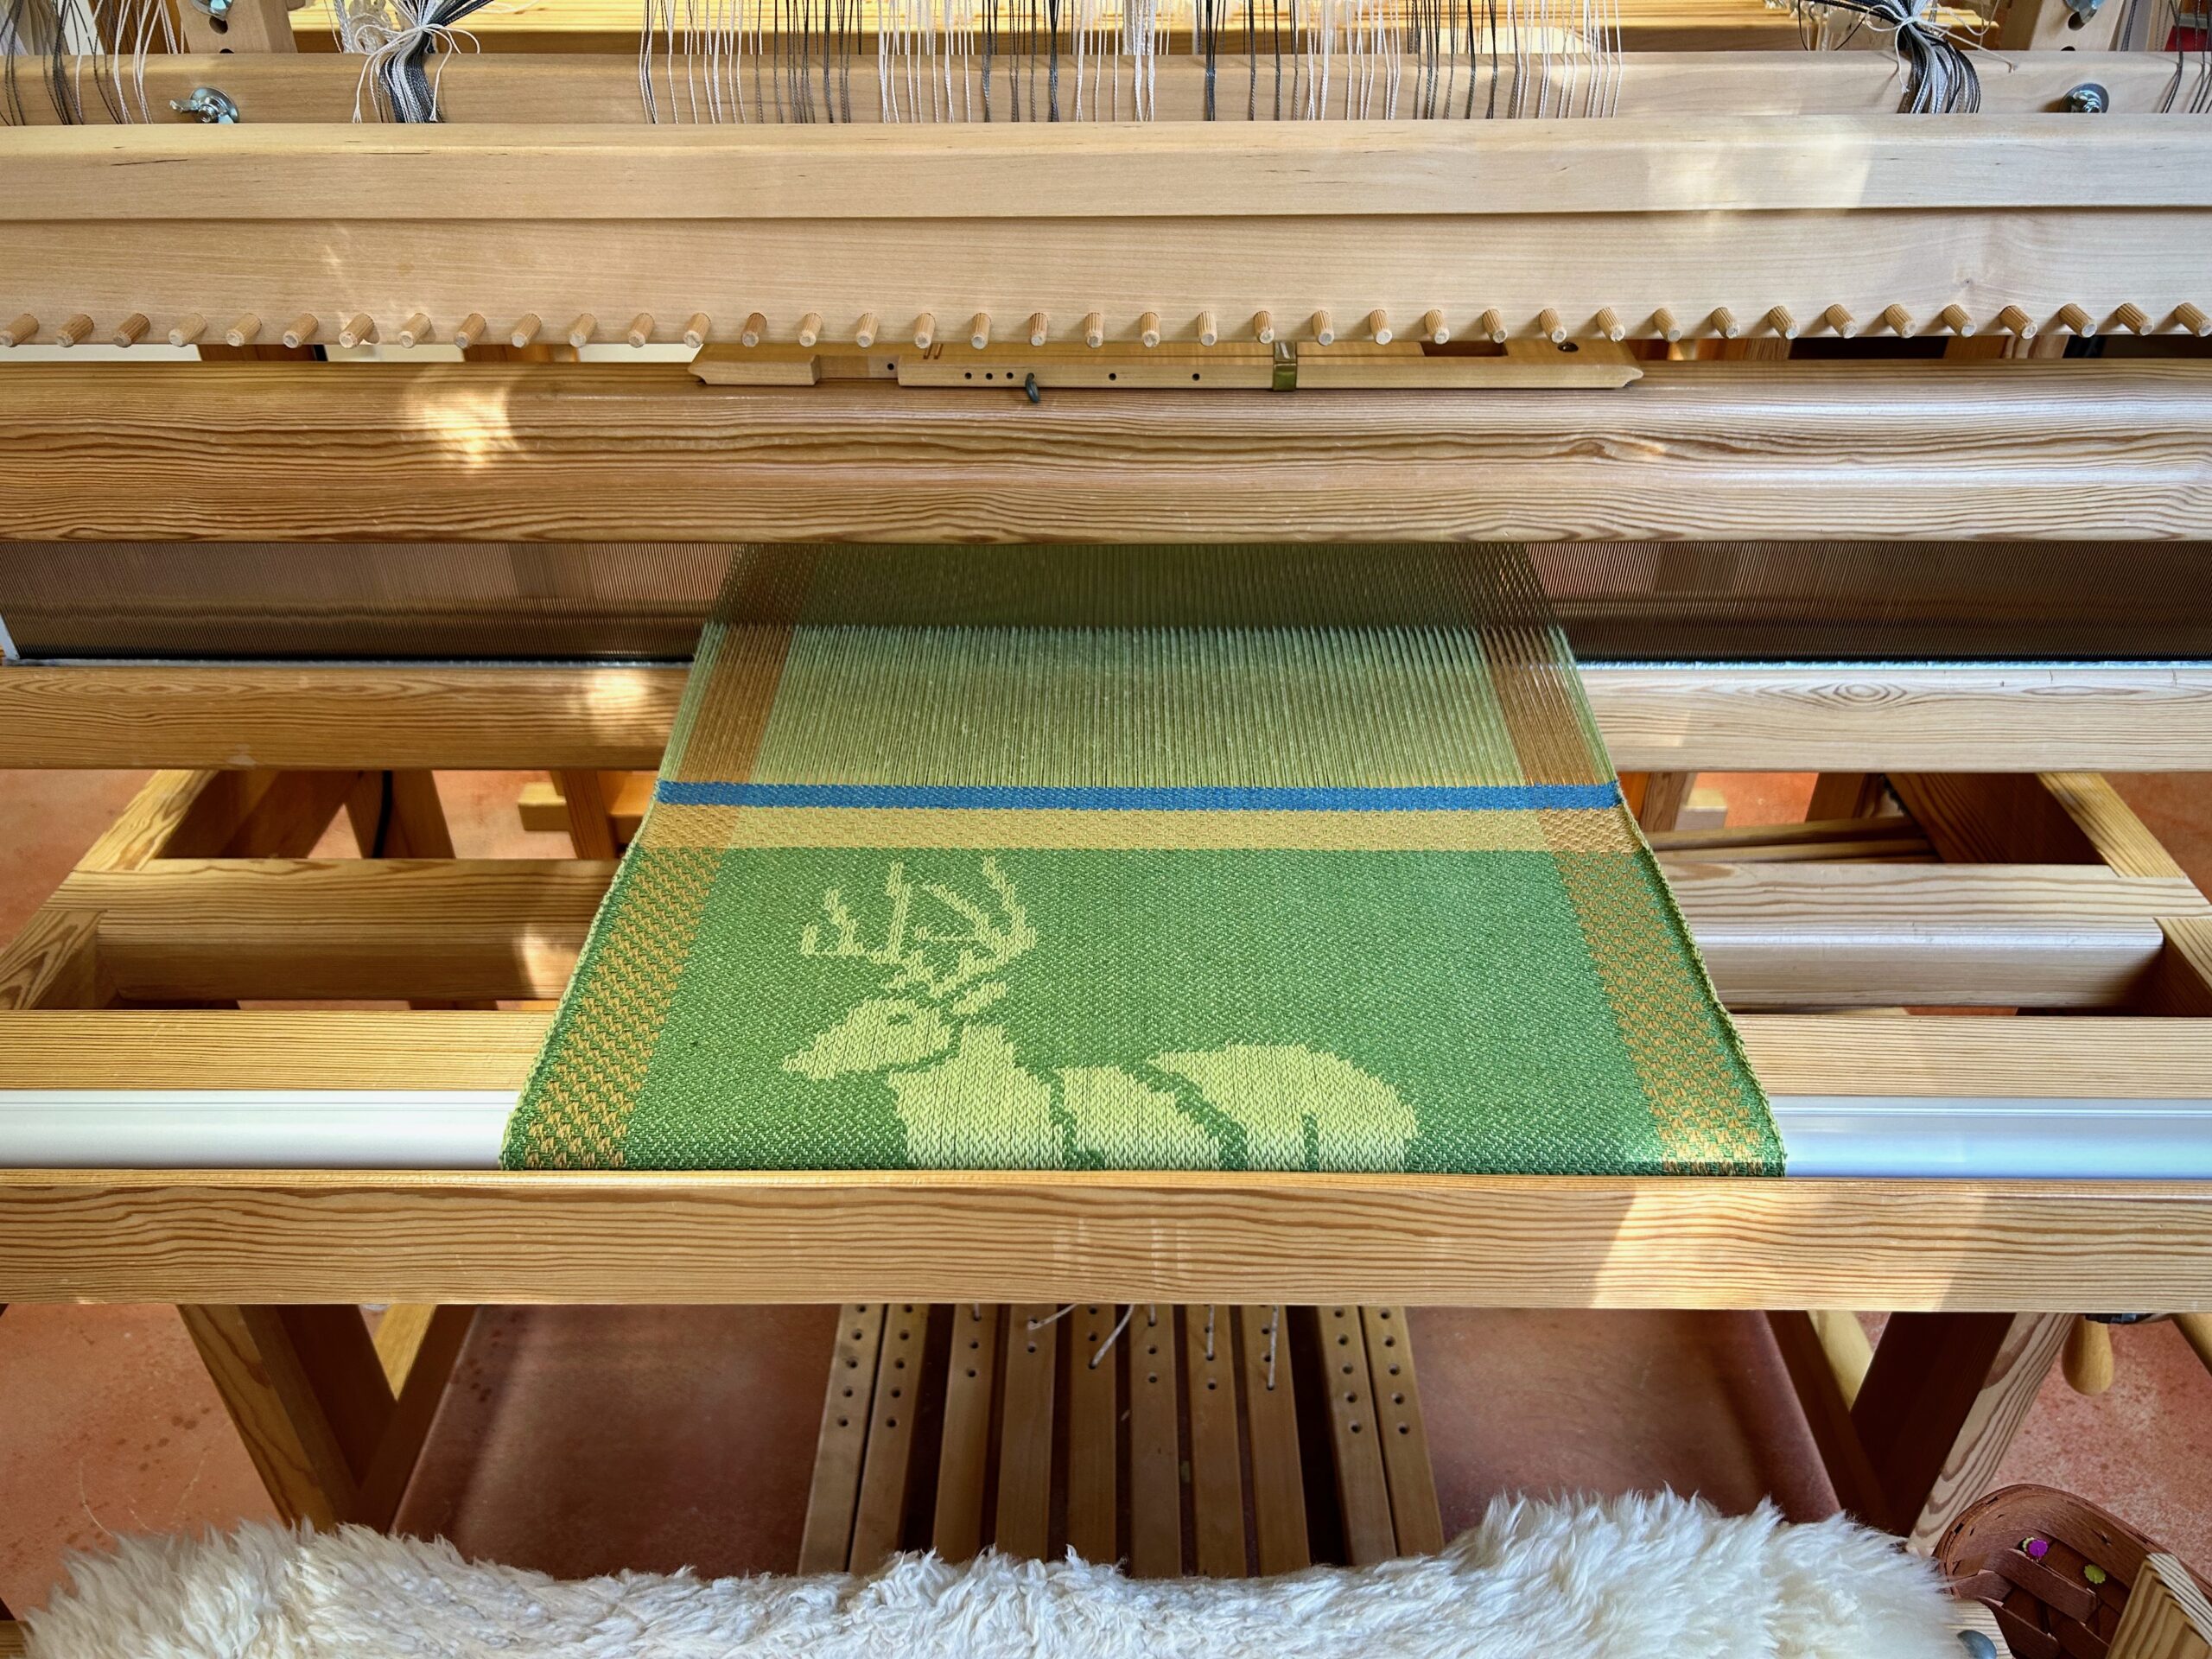
This white-tailed buck is one that Steve photographed on our property. I use Affinity Designer on my computer to turn a photo into a silhouette that I can use for my drawloom chart. It is a thrill to see the image emerge in the threads on the loom. From animal in our yard, to photo, to graphic chart, to threads on the loom! The common is made extraordinary.
The draw handles are pulled for the checkerboard pattern that goes across the bottom and top borders of the napkin.Antlers of the buck reach nearly to the top border. Hem area is teal blue.Before the buck, there is the jackrabbit. And before the jackrabbit is the porcupine. And the fox and armadillo before that are in hibernation on the cloth beam.
Even more extraordinary is what our Lord Jesus does with a common human like you or me who puts faith in him. As you look at the threads on his loom, you begin to see that it is his image being woven in you.
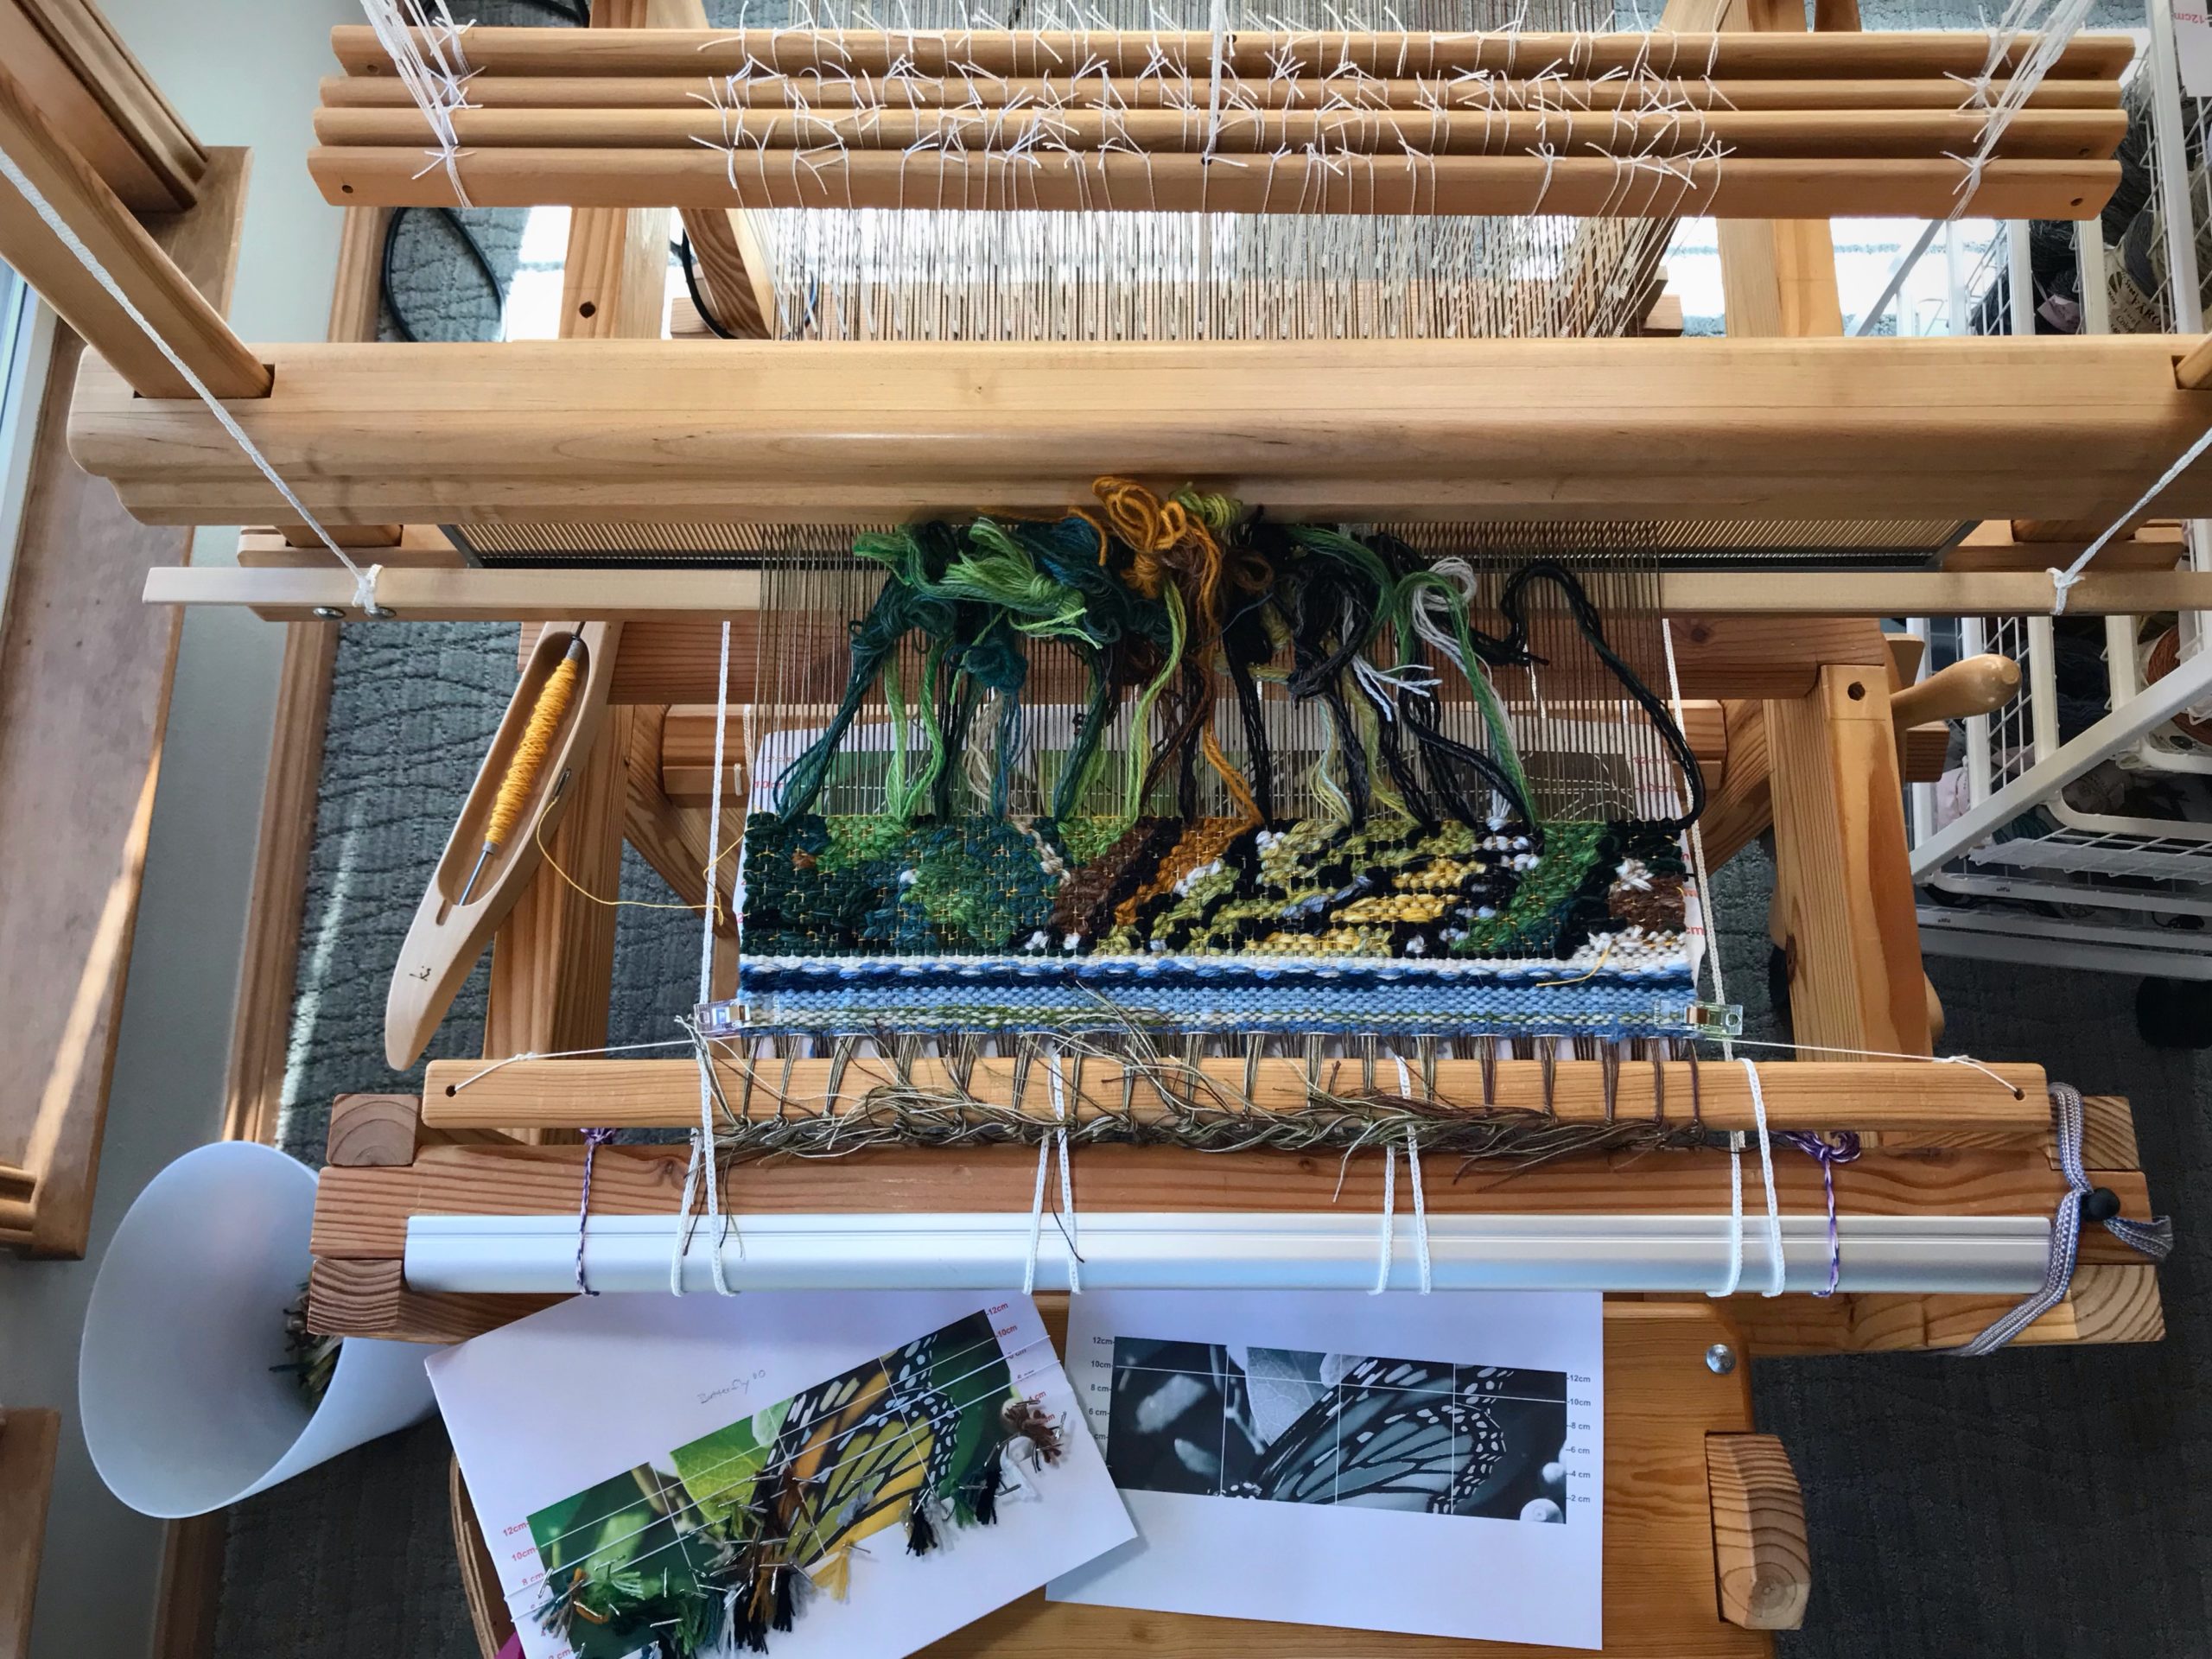
For this second butterfly sample I am zooming way in, to expose more detail of the delicate stained-glass wing. Transforming the photograph into a weaveable cartoon is a fascinating task in itself. In real life, when do we ever get this close a look at the intricacy of the fluttering wing?
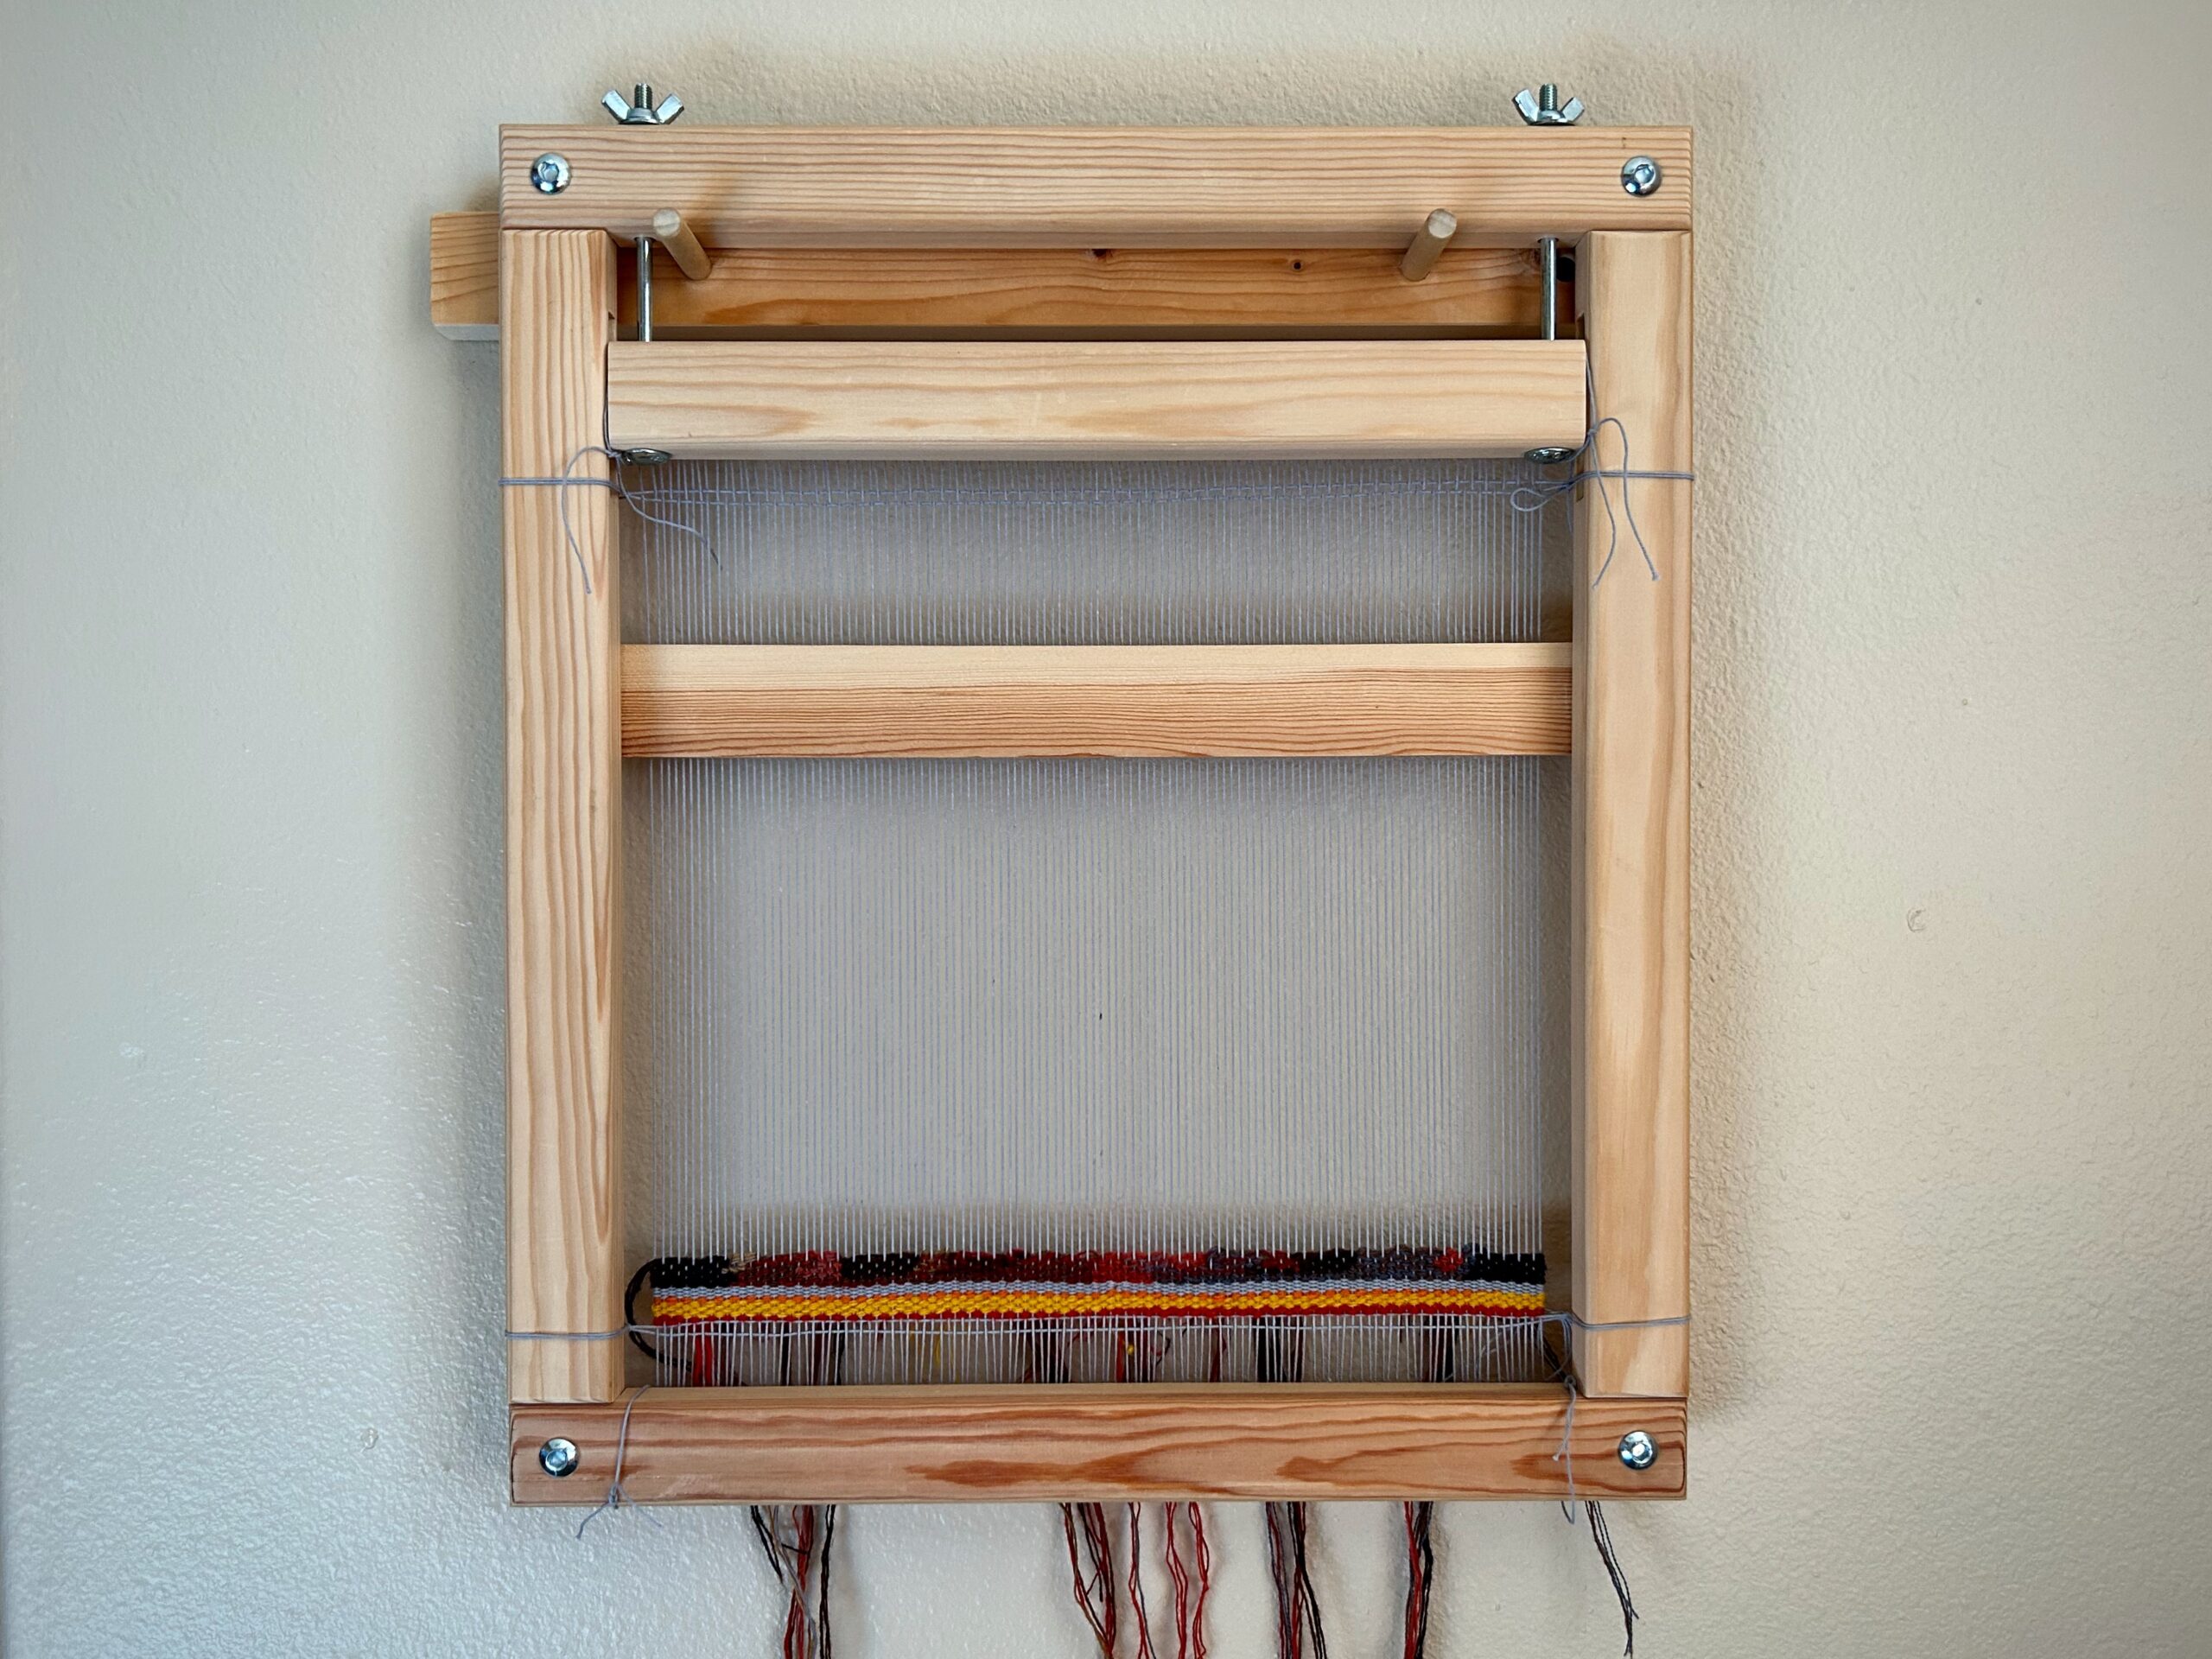
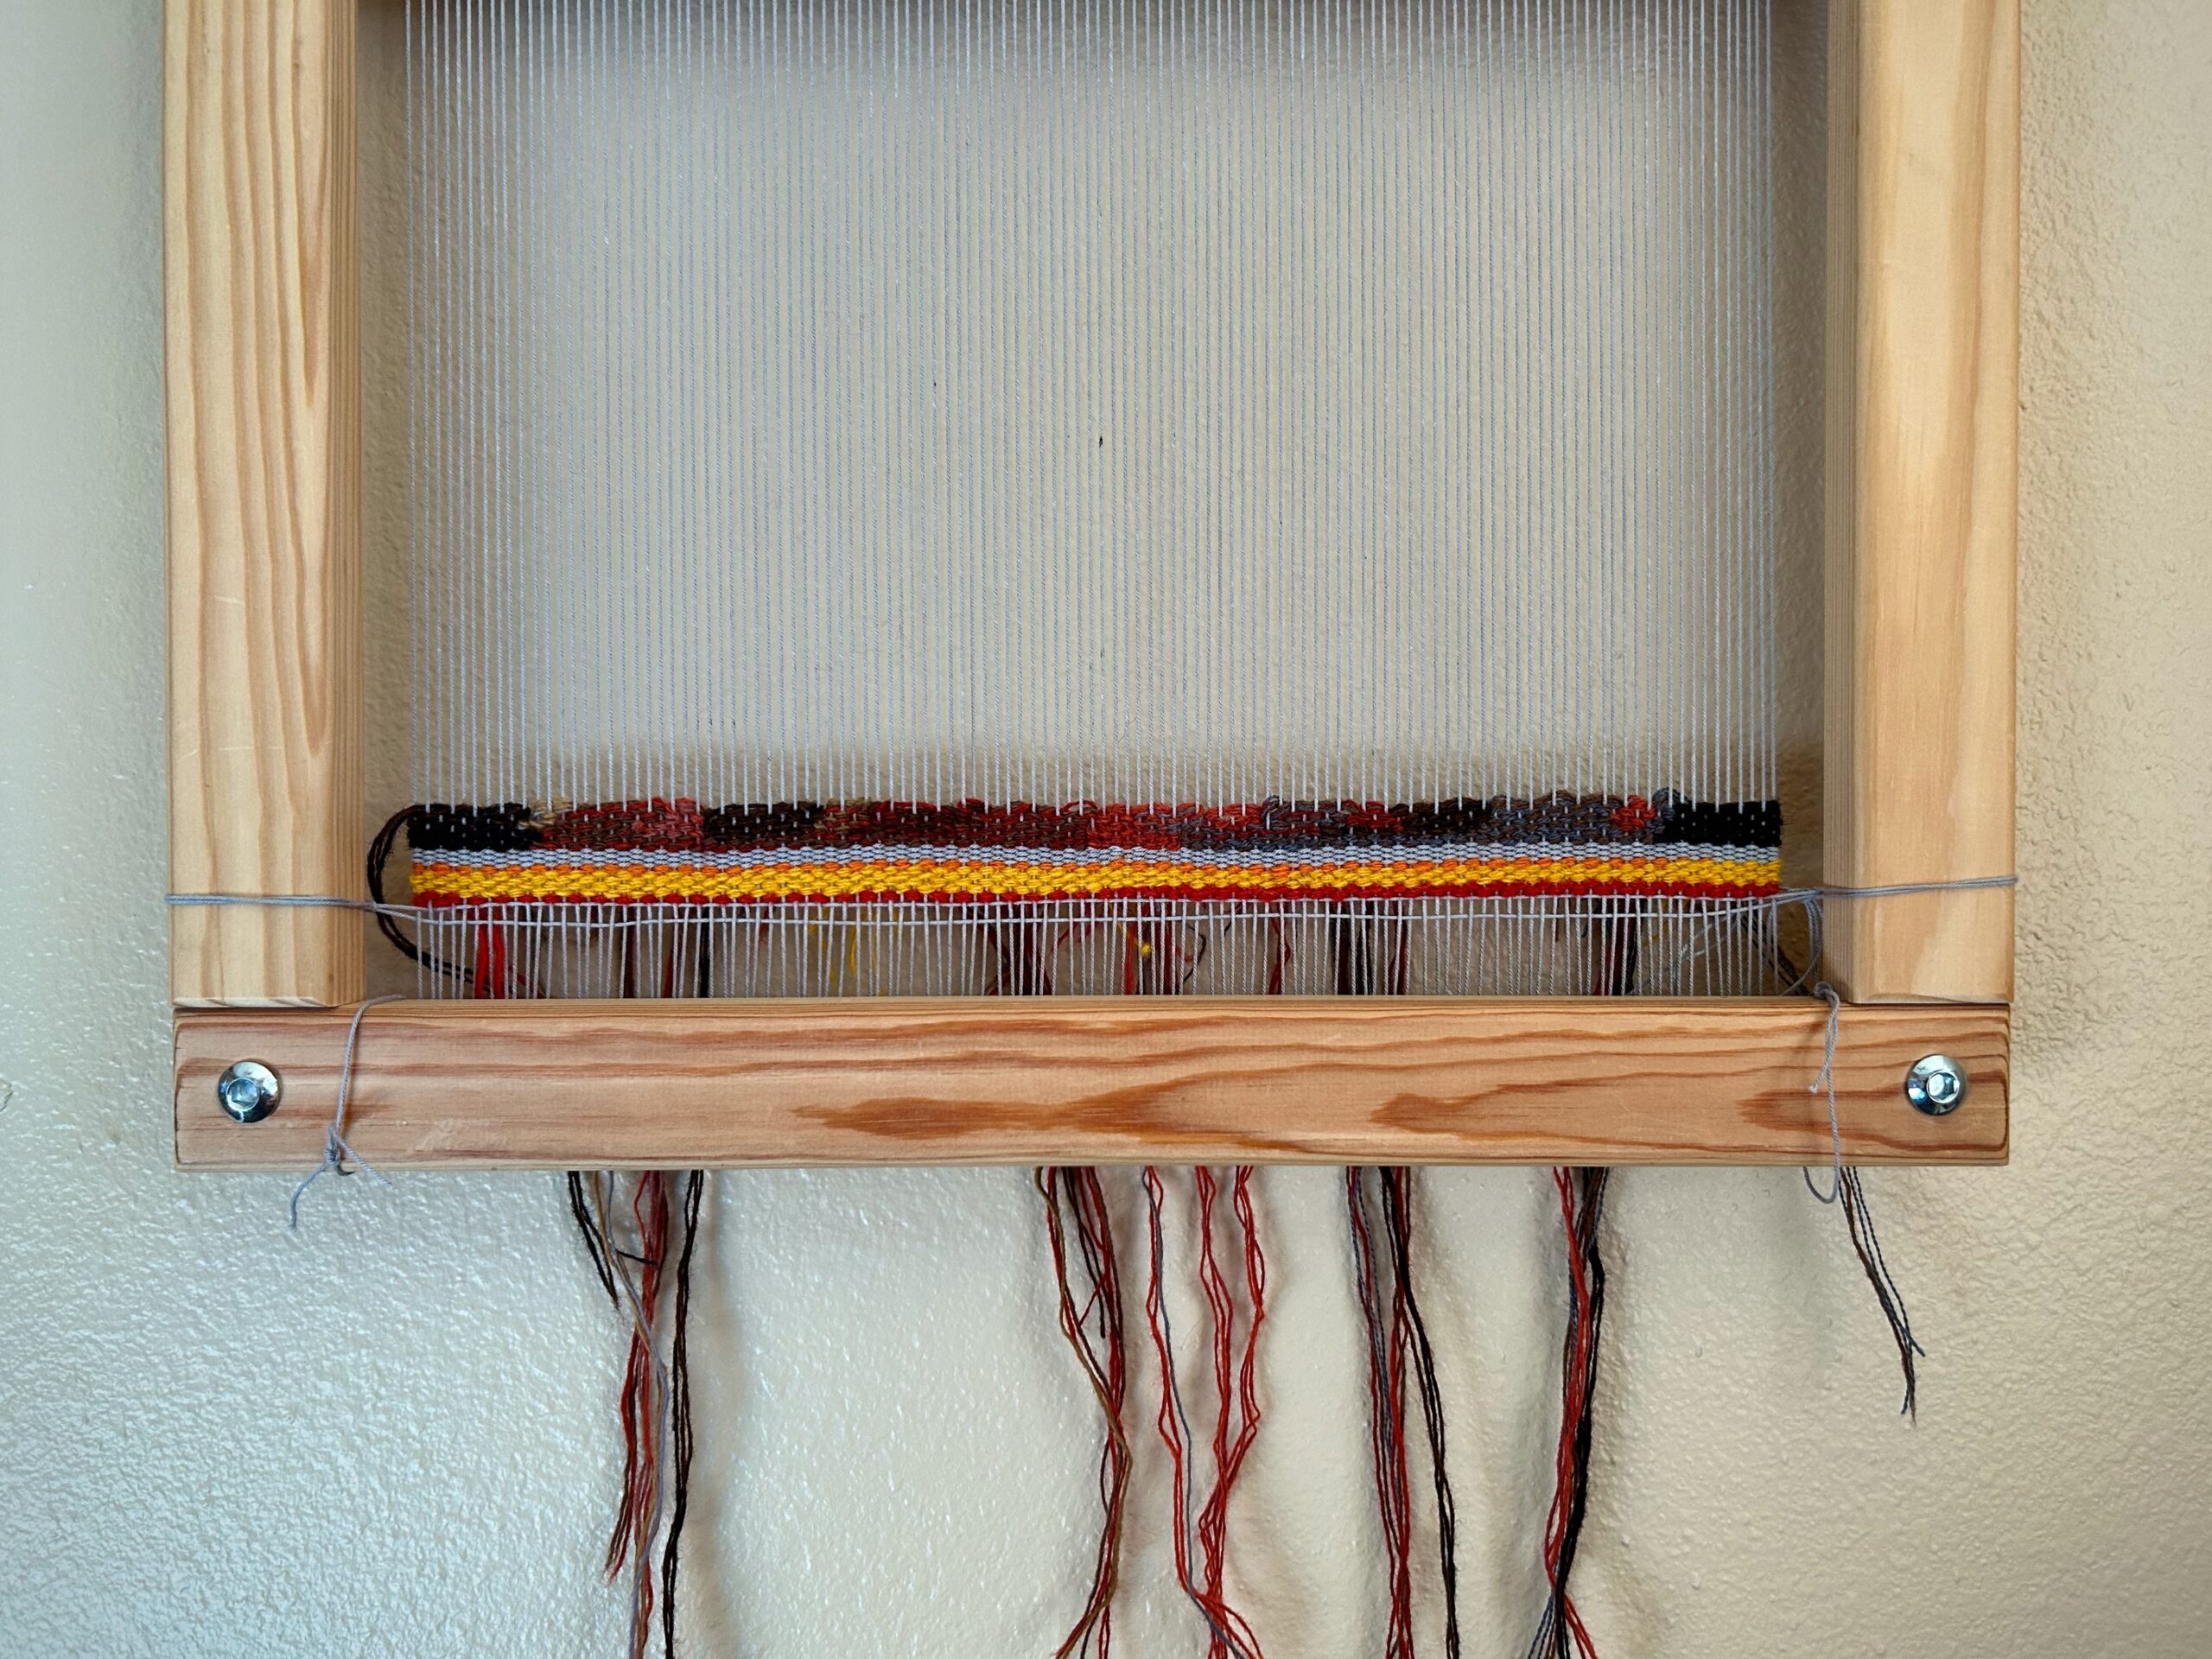
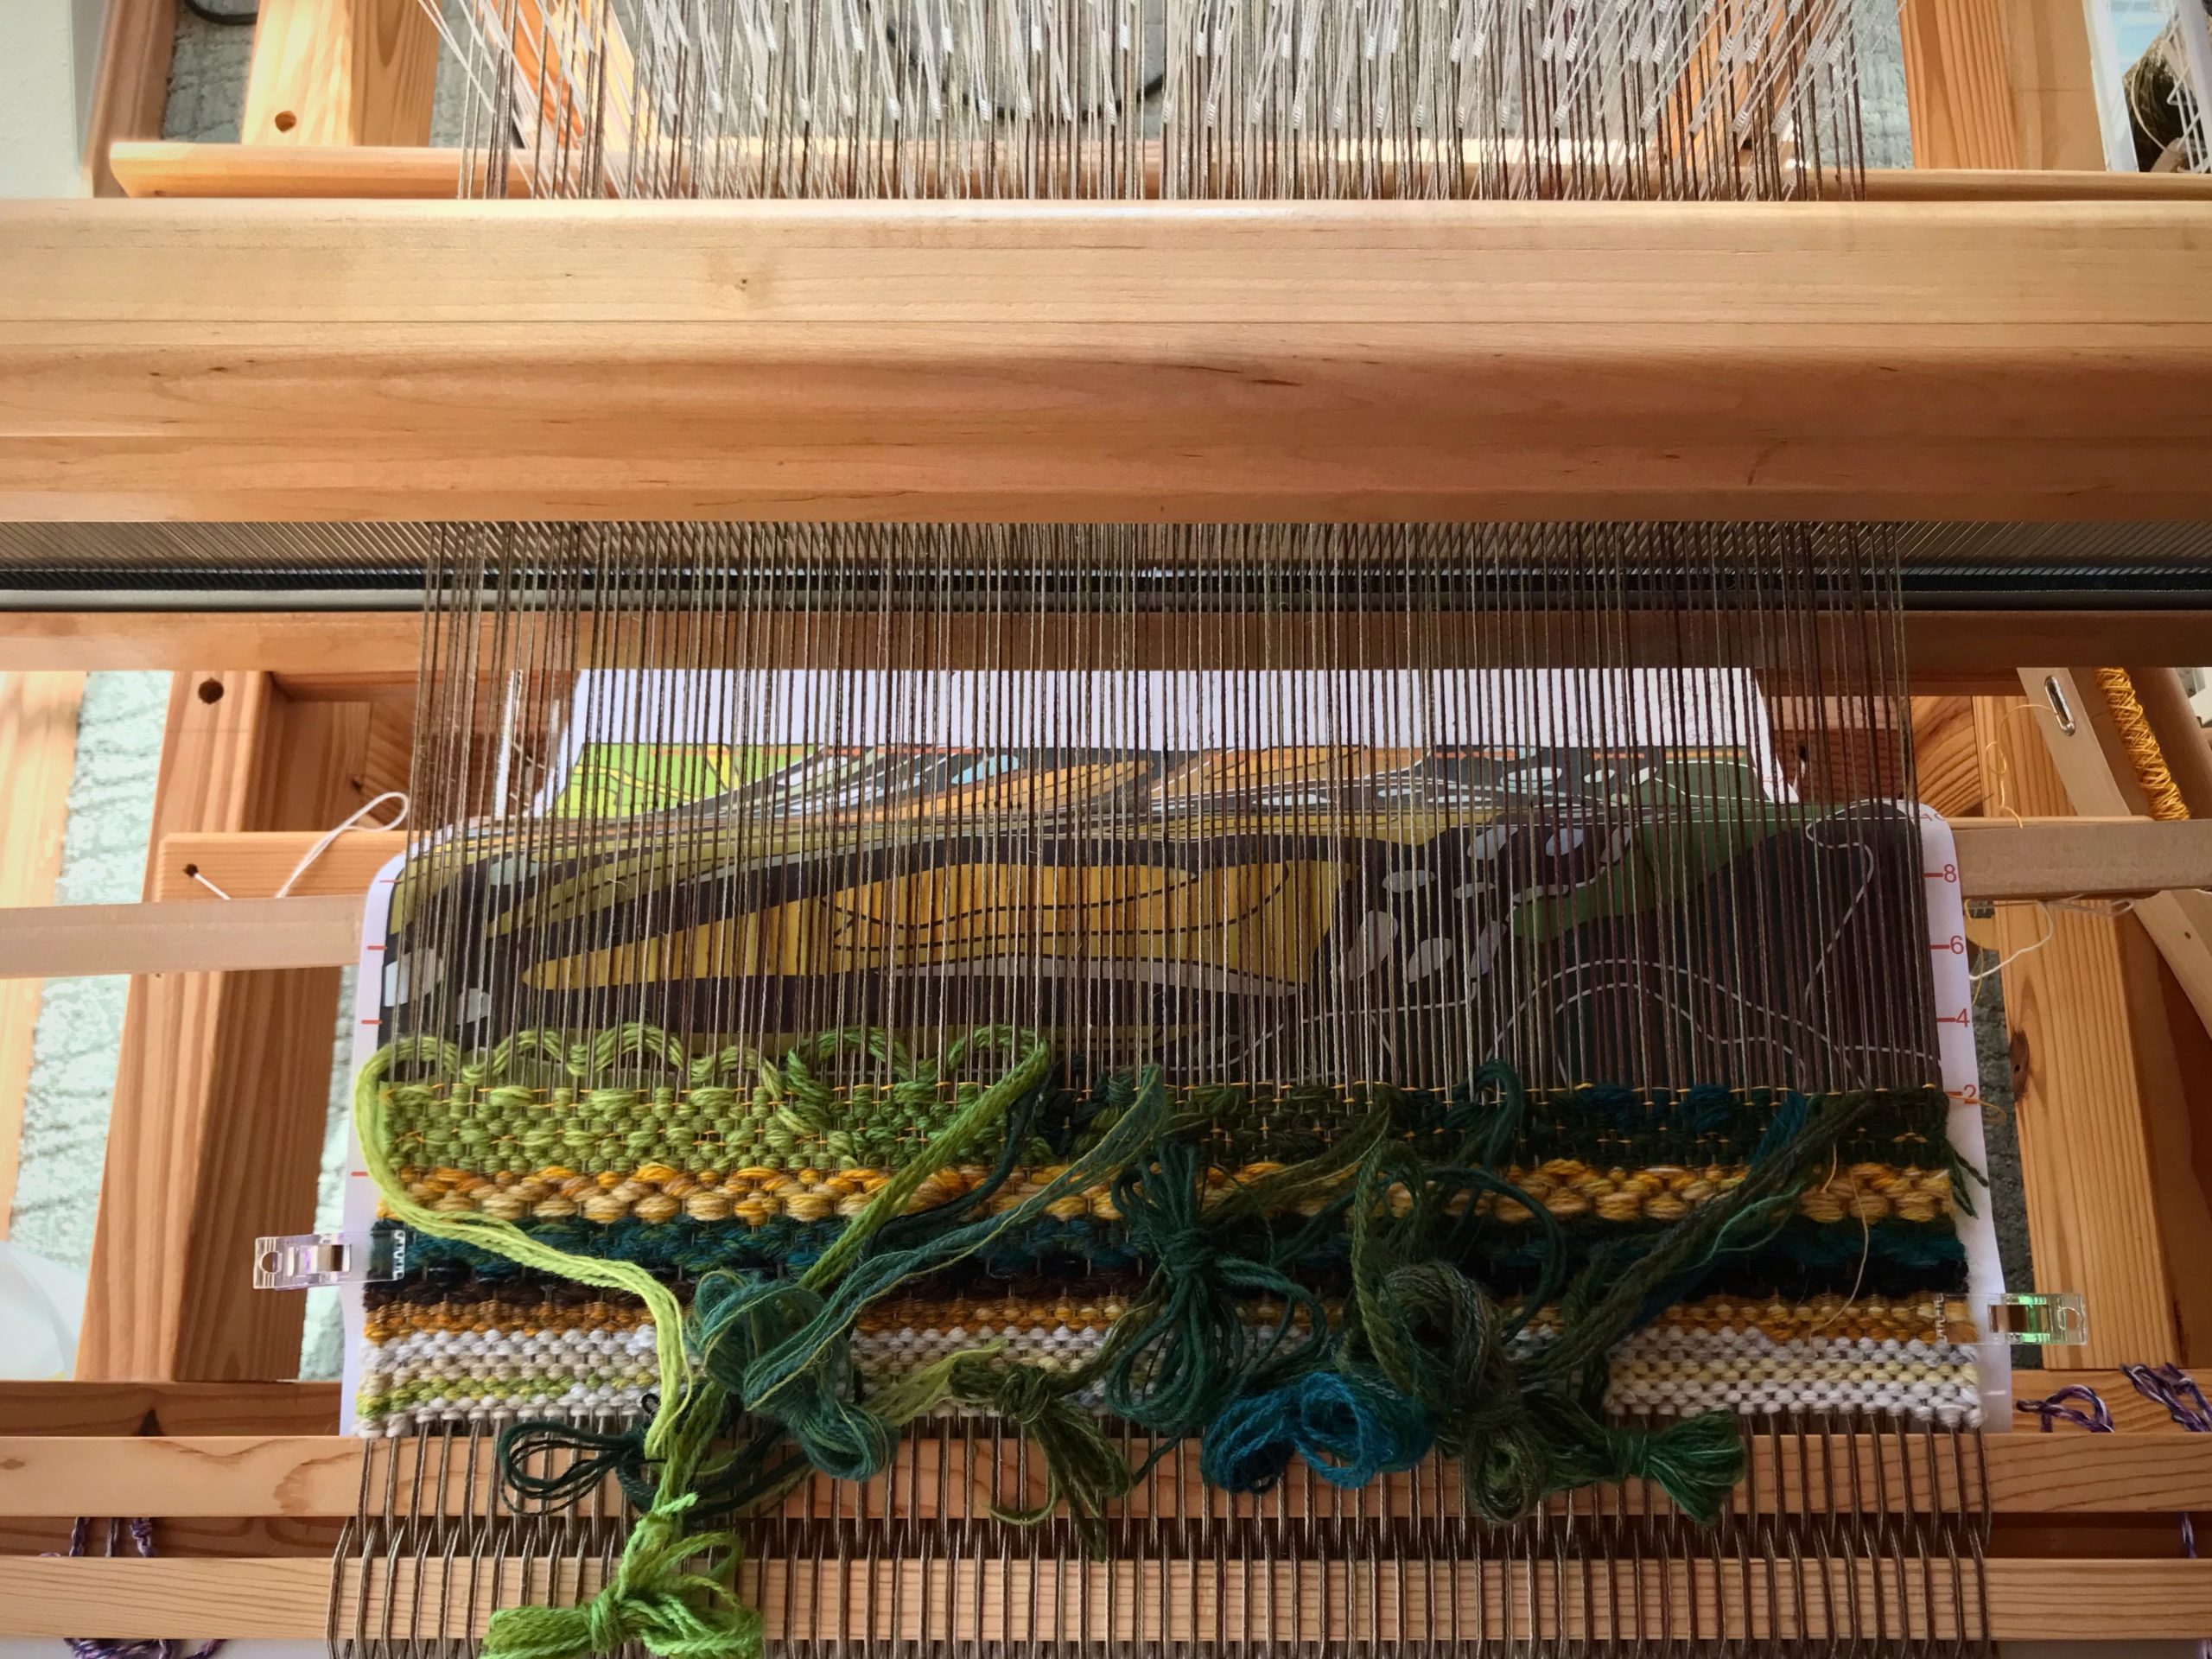
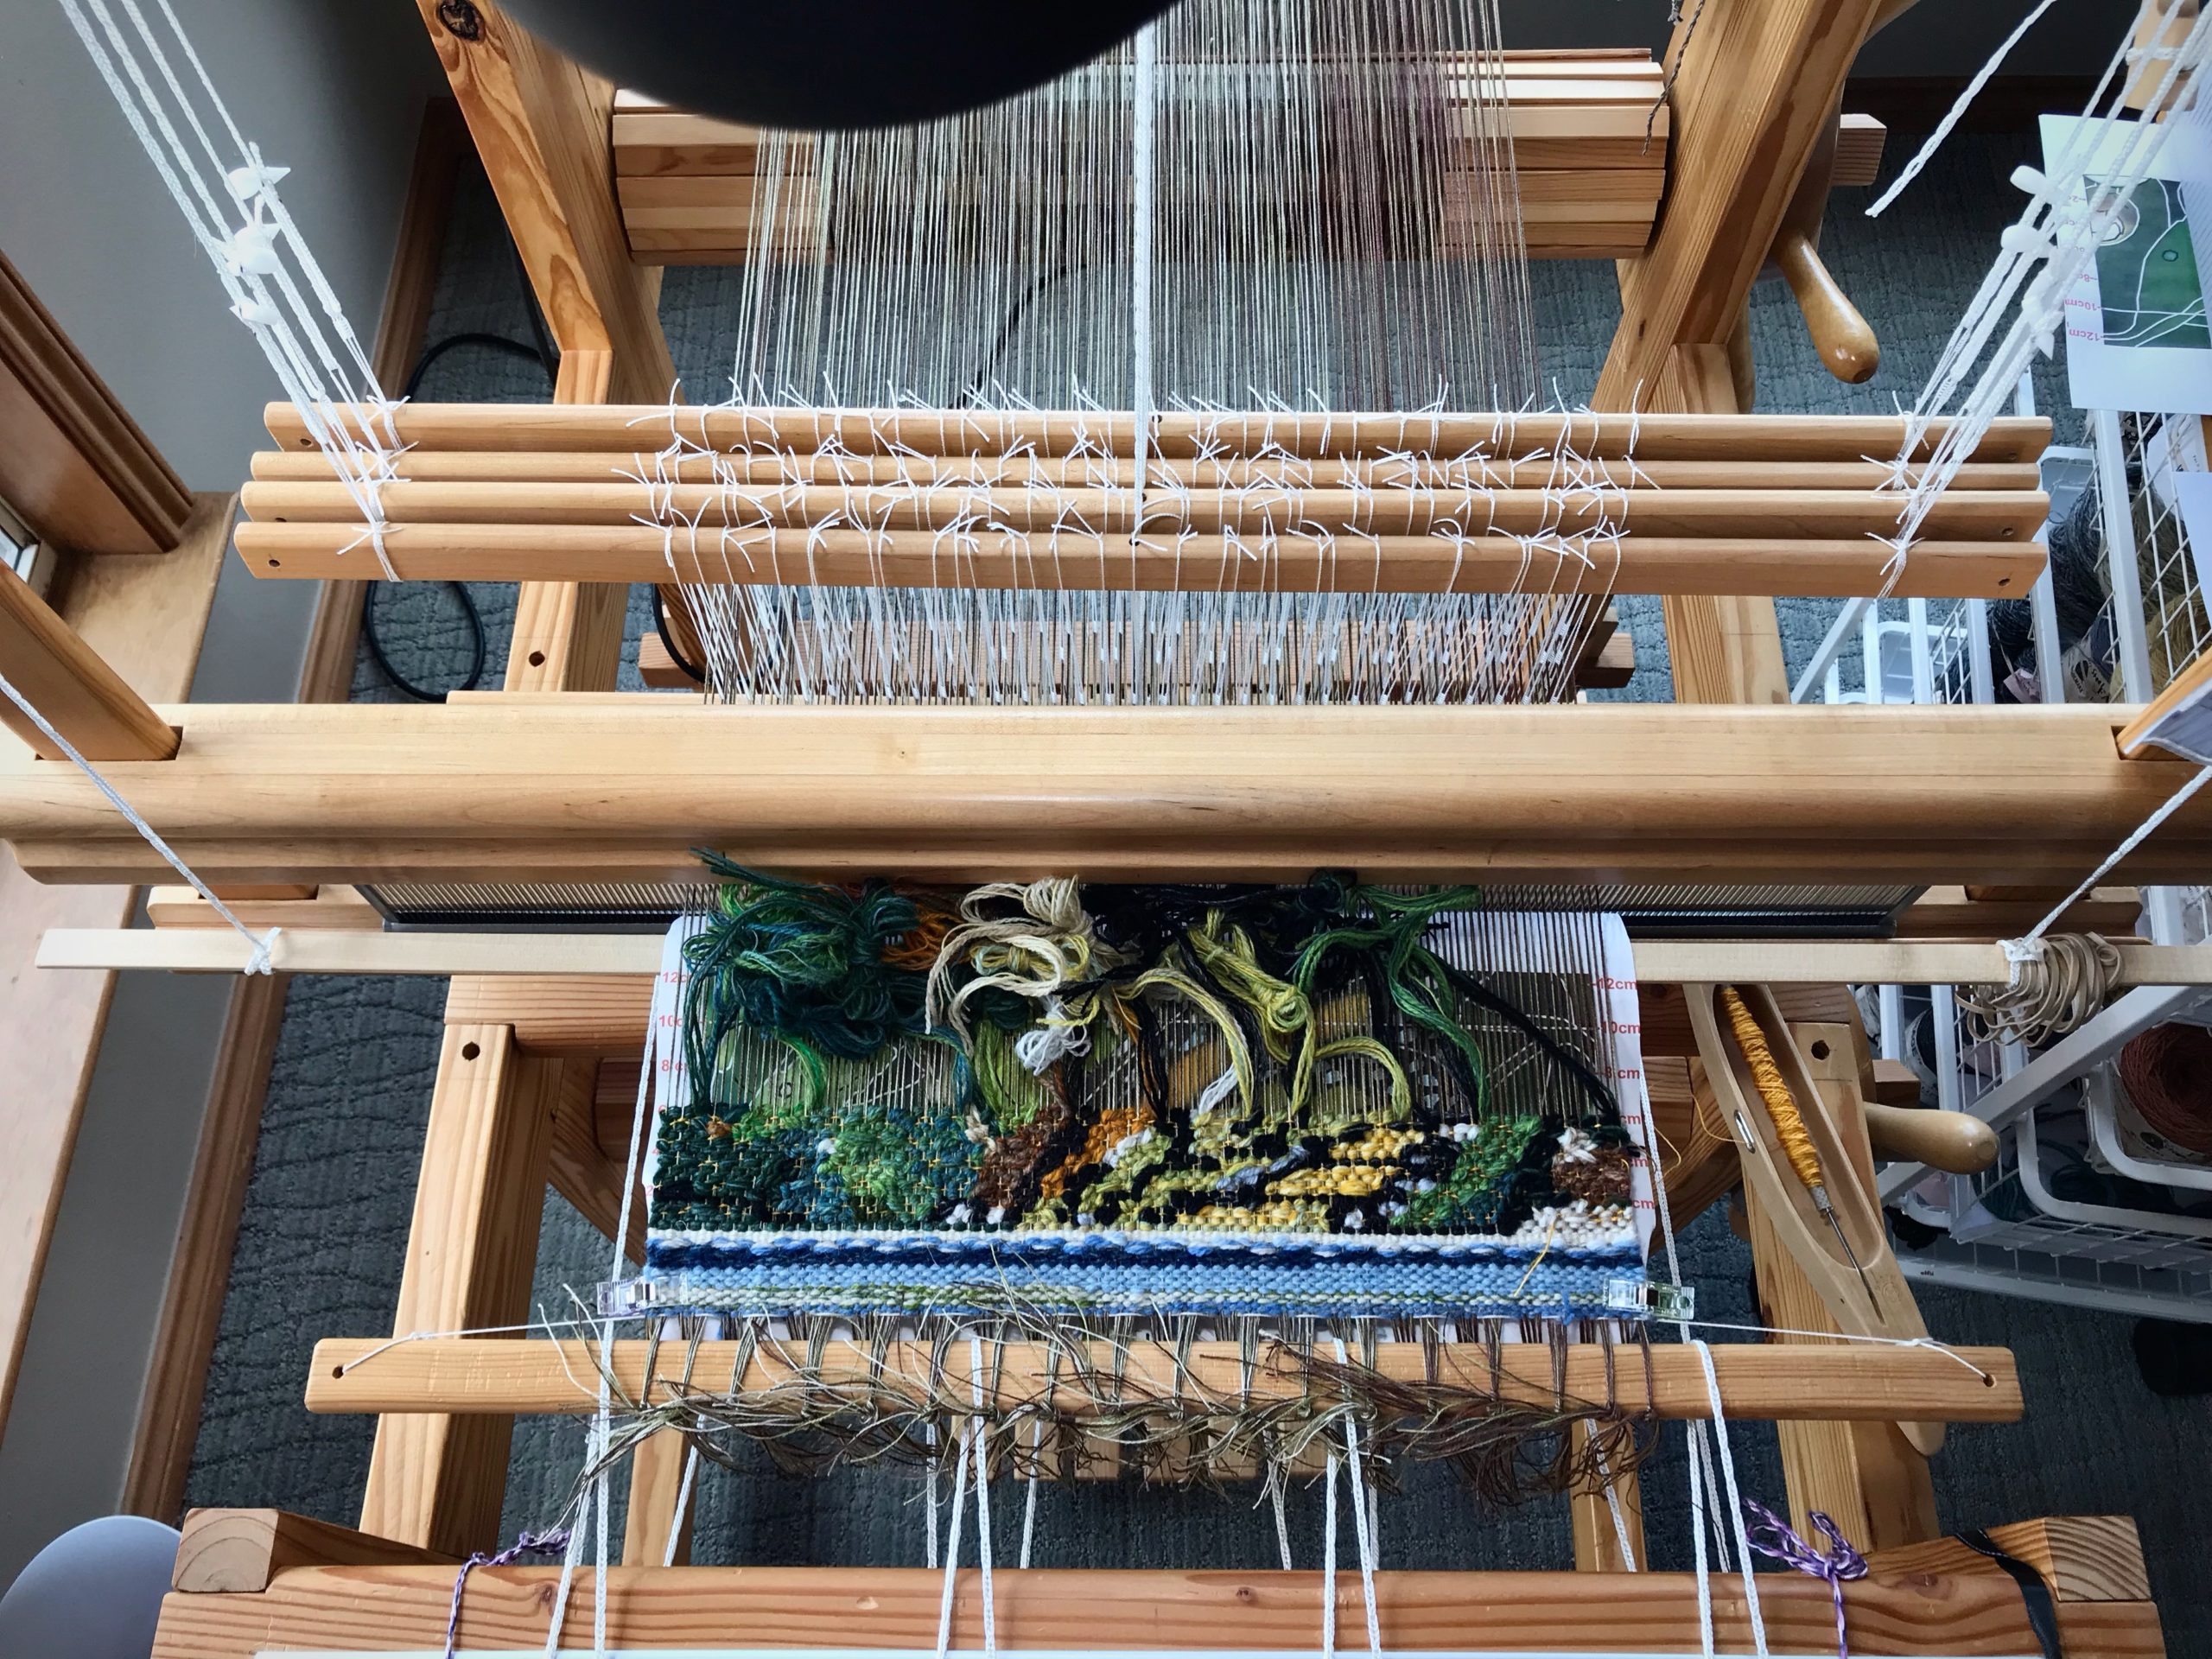
Color rows of black, green, yellow, and gold wool weft are woven in a rosepath pattern to frame the beginning of the tapestry. My “go-by” is a smaller replica of the cartoon that is under the warp.
The primary reason for these butterfly samples is for me to gain a better understanding of how the details of the cartoon image relate to the sett of the warp on the loom. My goal is to thoroughly explore this style of tapestry. So, I aim to become adept in creating well-suited cartoons.
In progress. You can see the cartoon under the warp.
Let’s zoom in to the familiar scene of baby Jesus generations ago. The child born in a Bethlehem stable drew the attention of lowly shepherds, not impressive celebrities. Announced by angels, not by stately heralds. The detail clearly depicts something out of the ordinary: There is a kingdom that is not of this world. A King who shows up, not cloaked in royalty, but wrapped in the cloth on hand. What an intricate plan it is that a babe named Jesus would become our Savior King! And, that he transforms the image of those whose hearts invite him in.
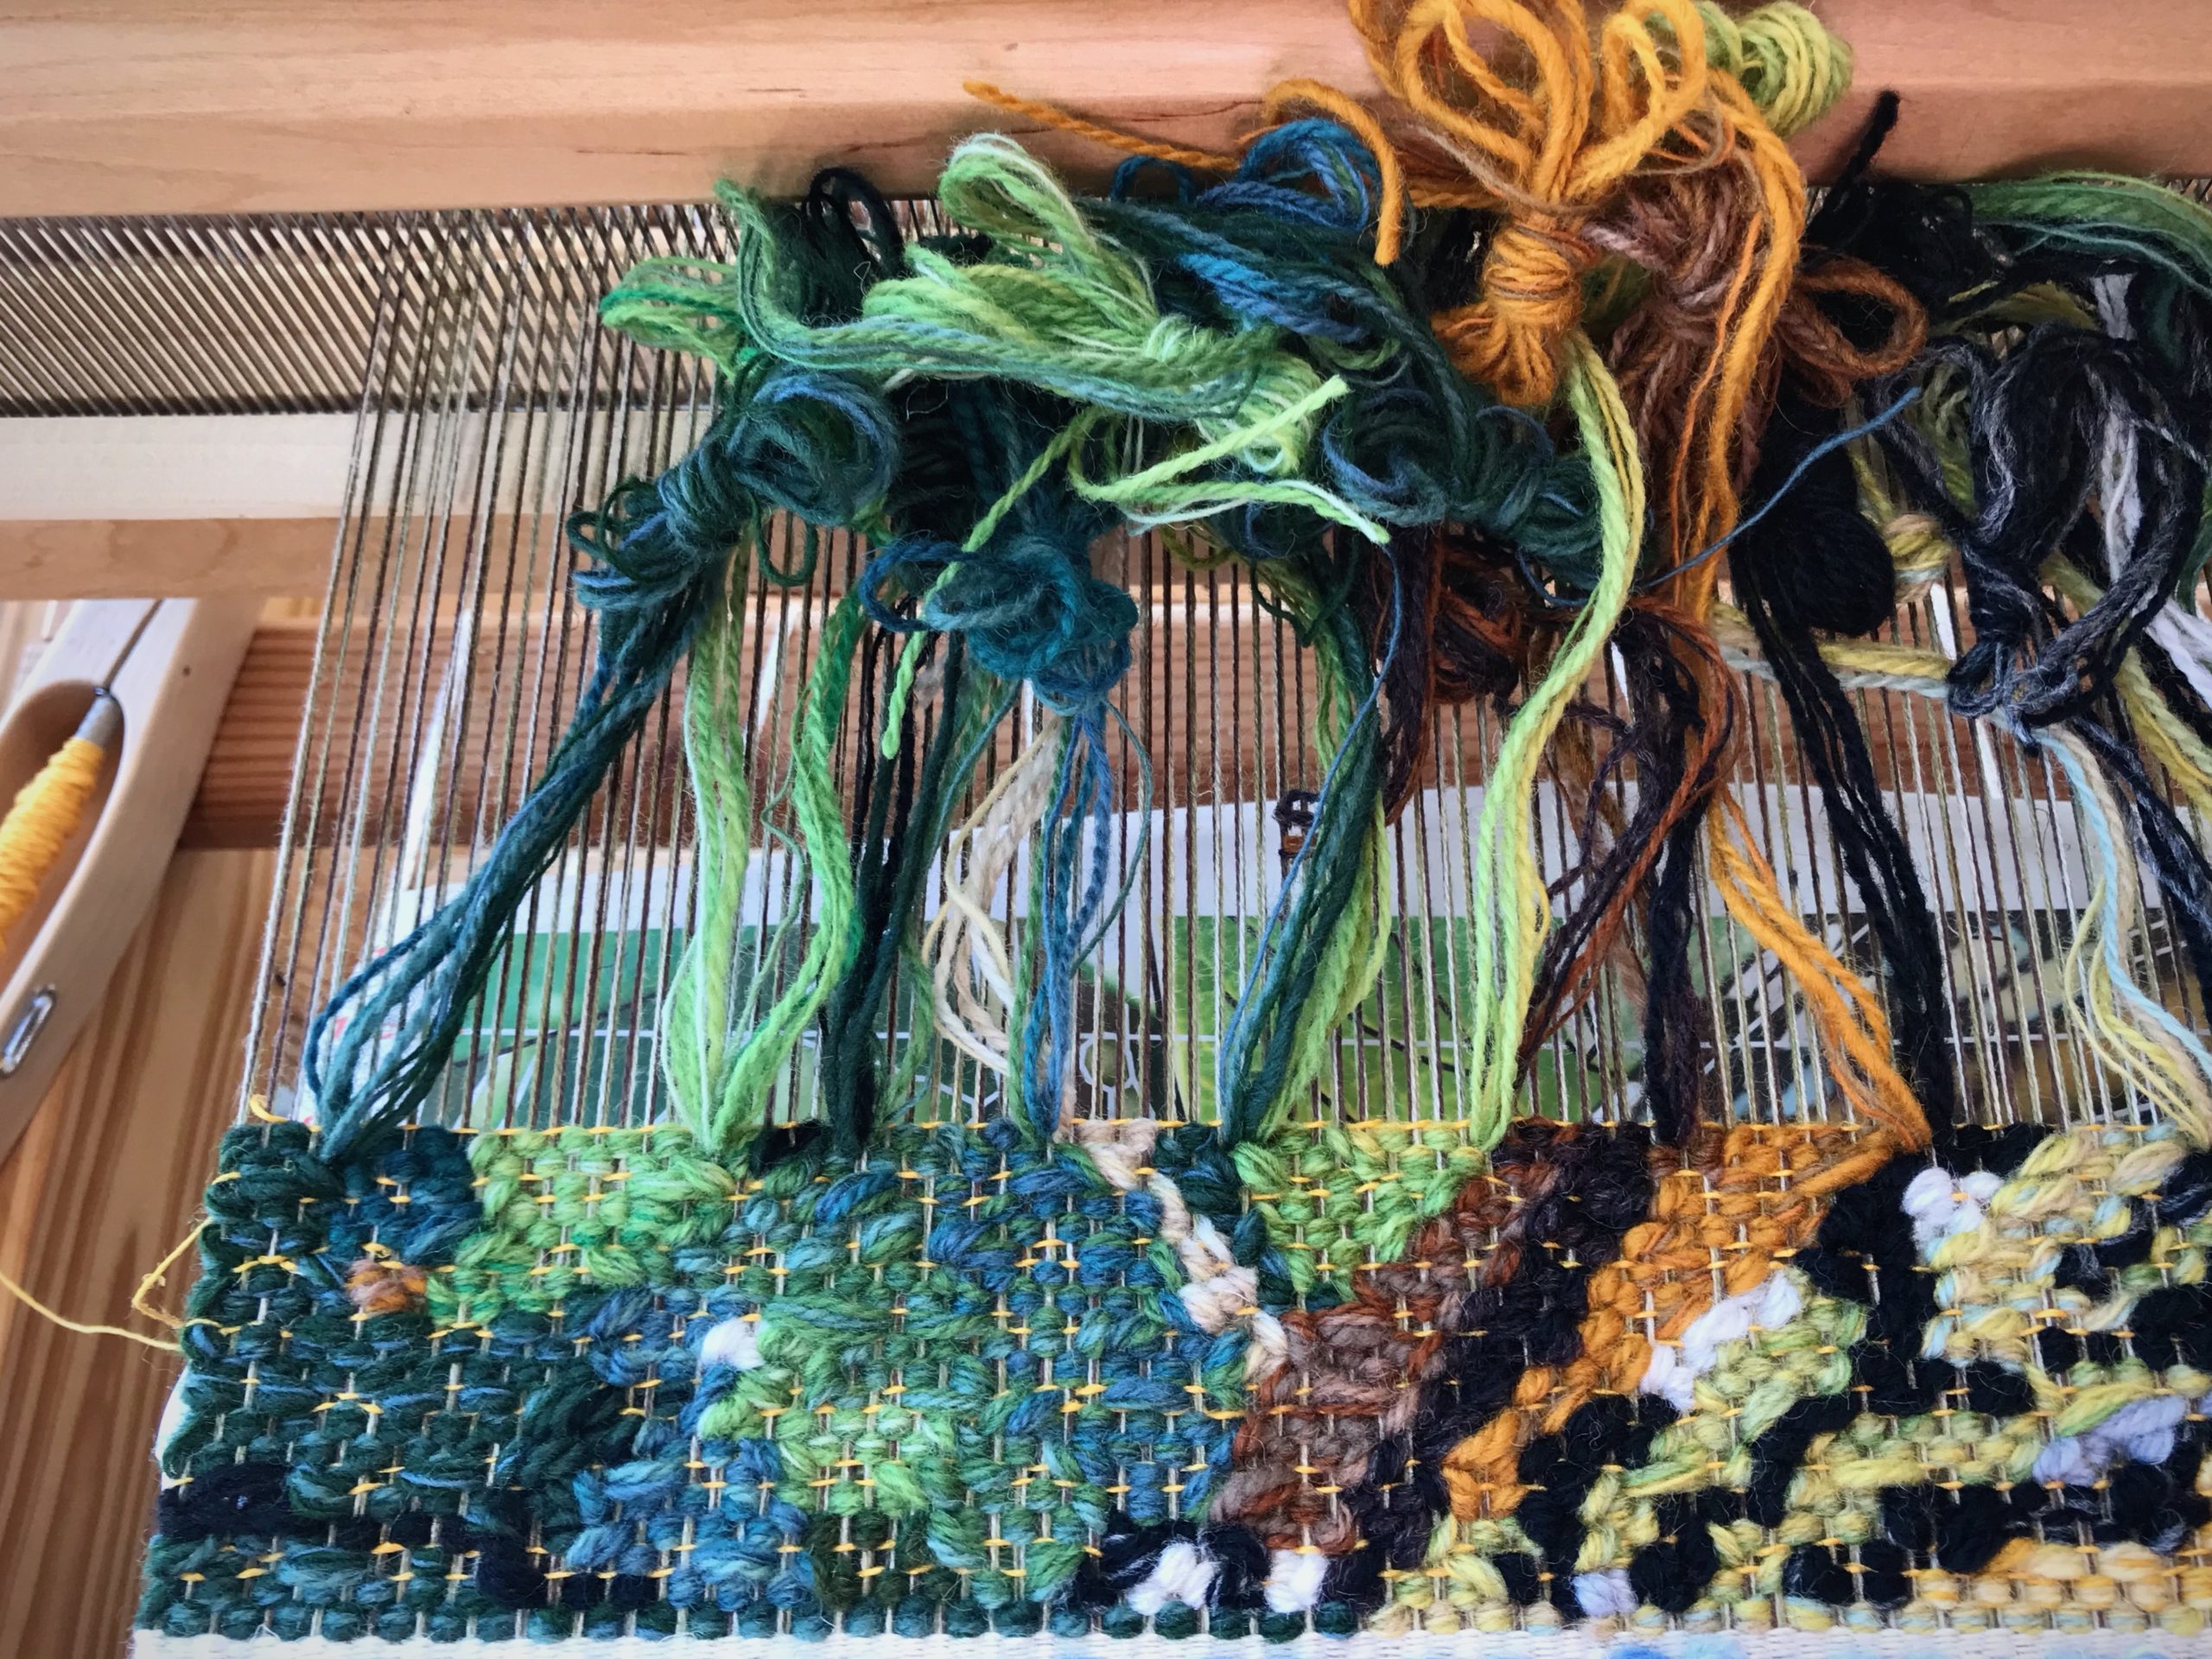
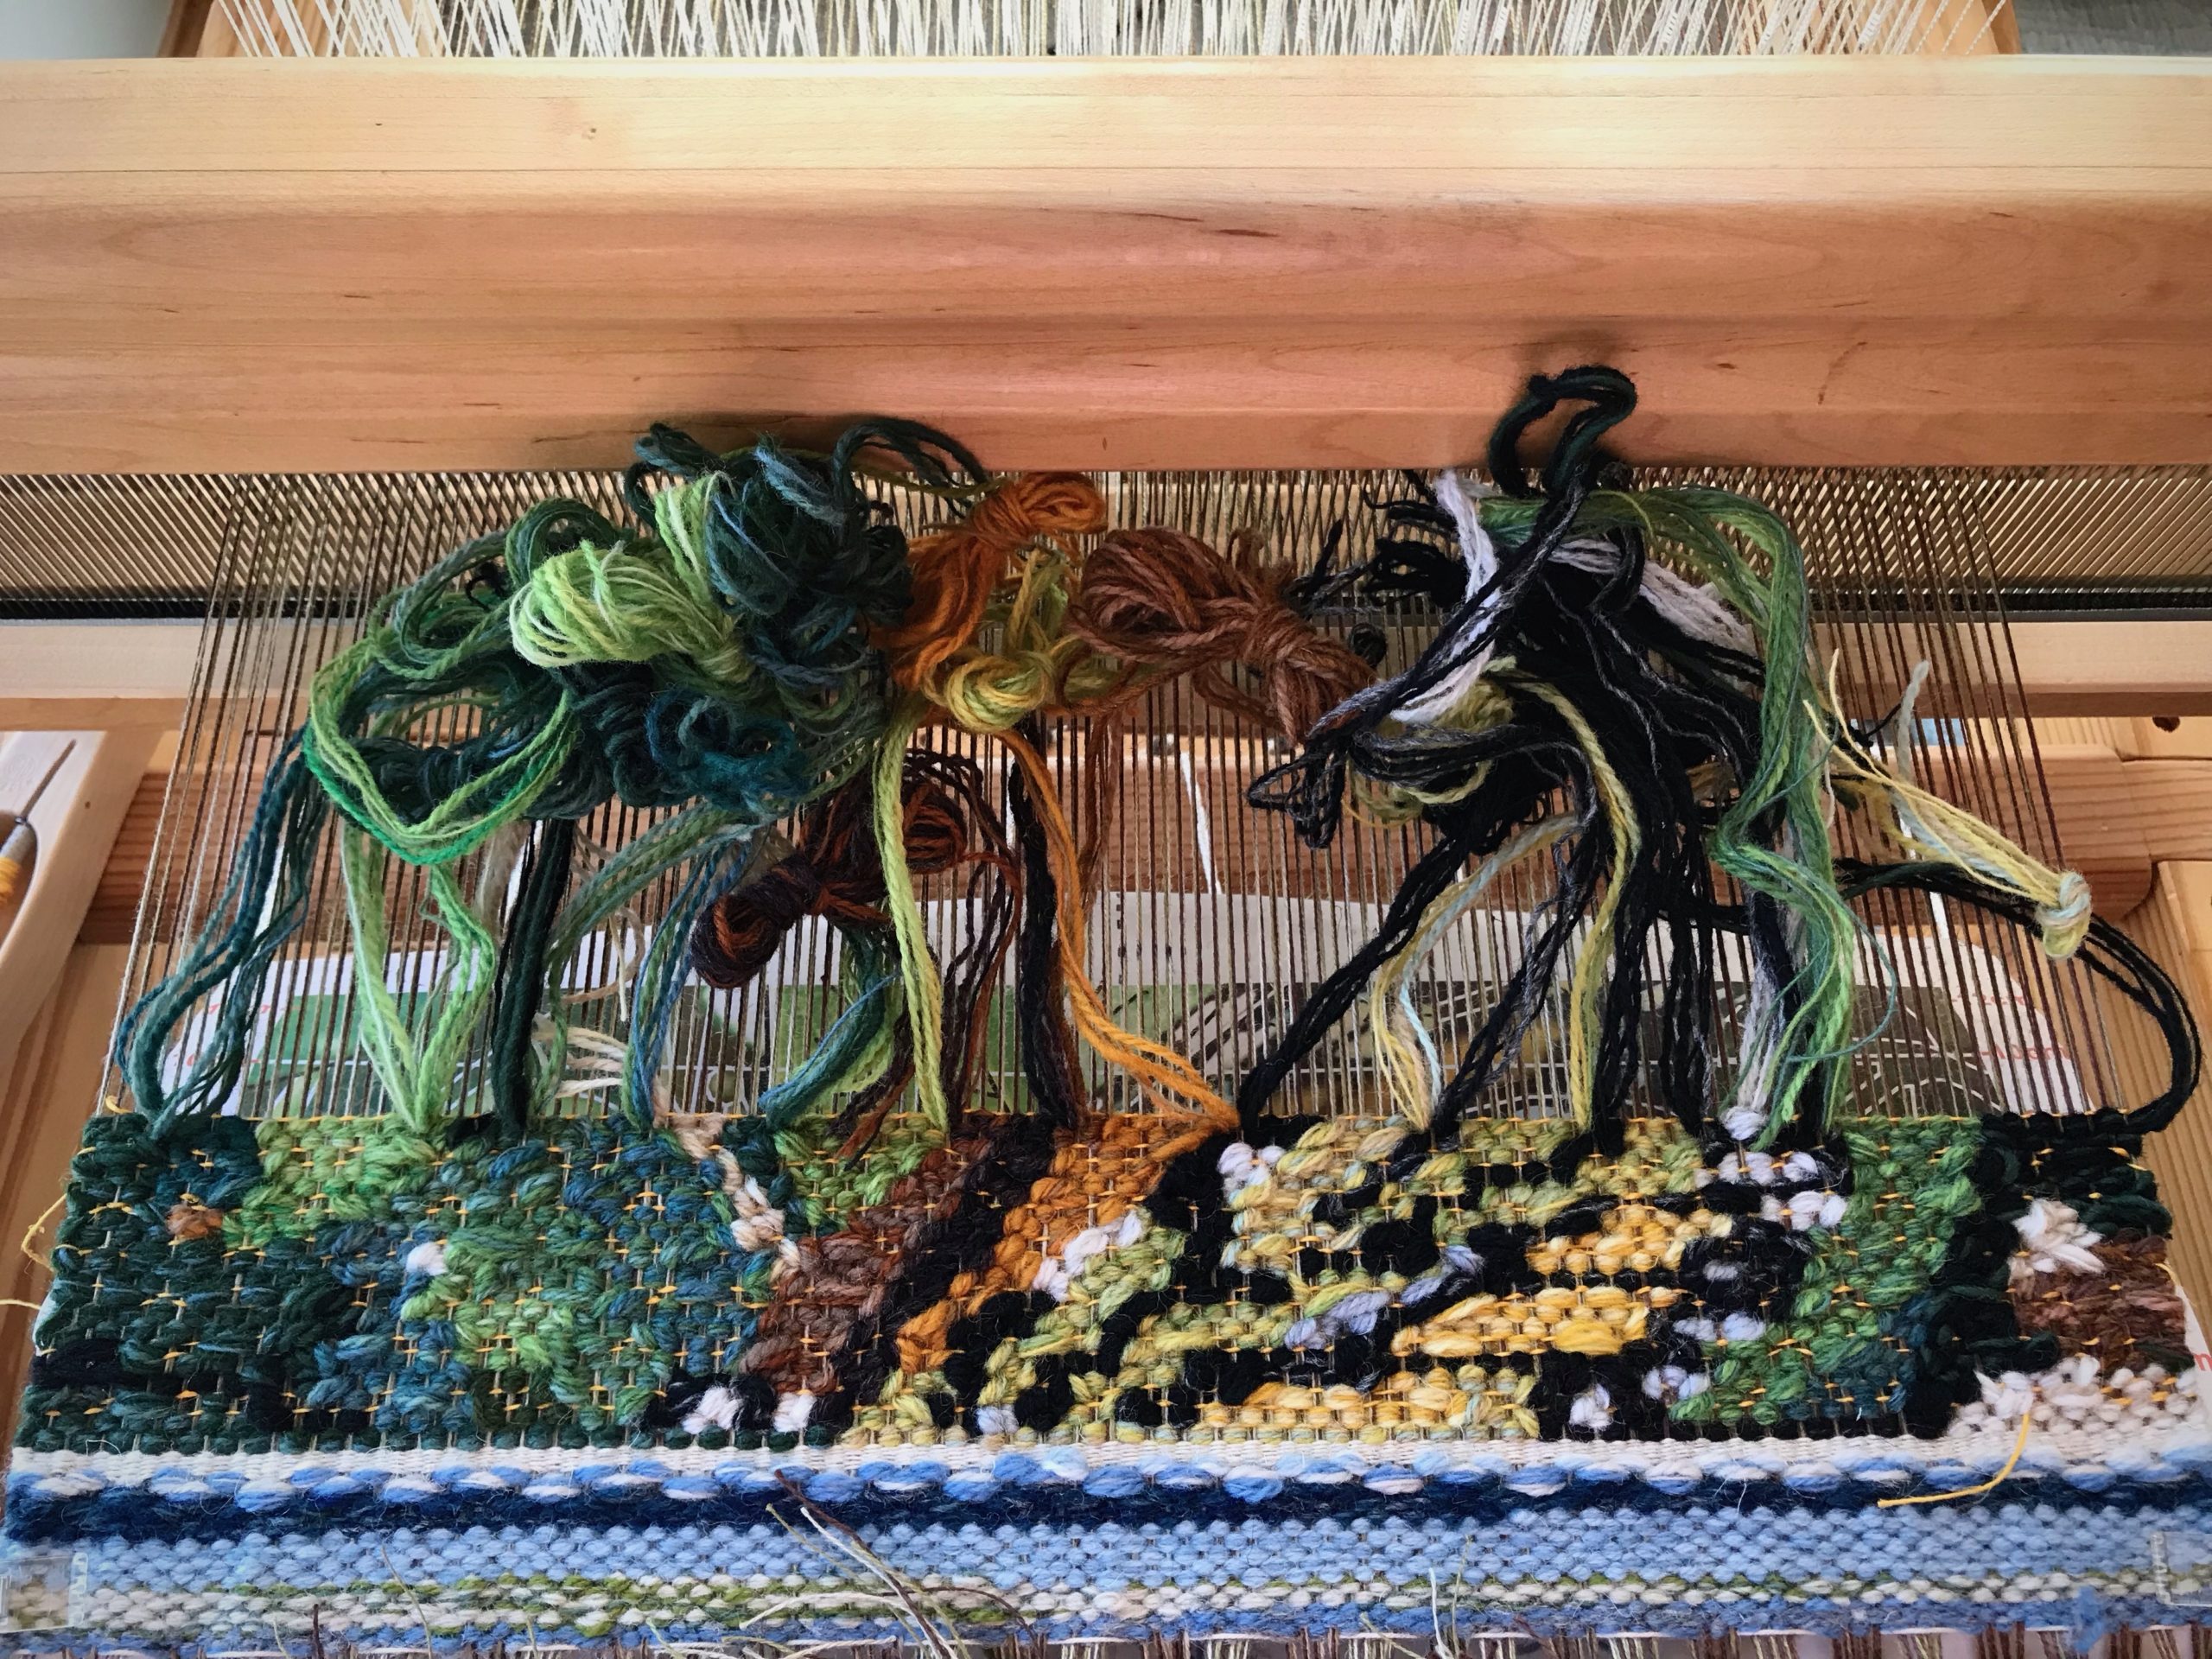
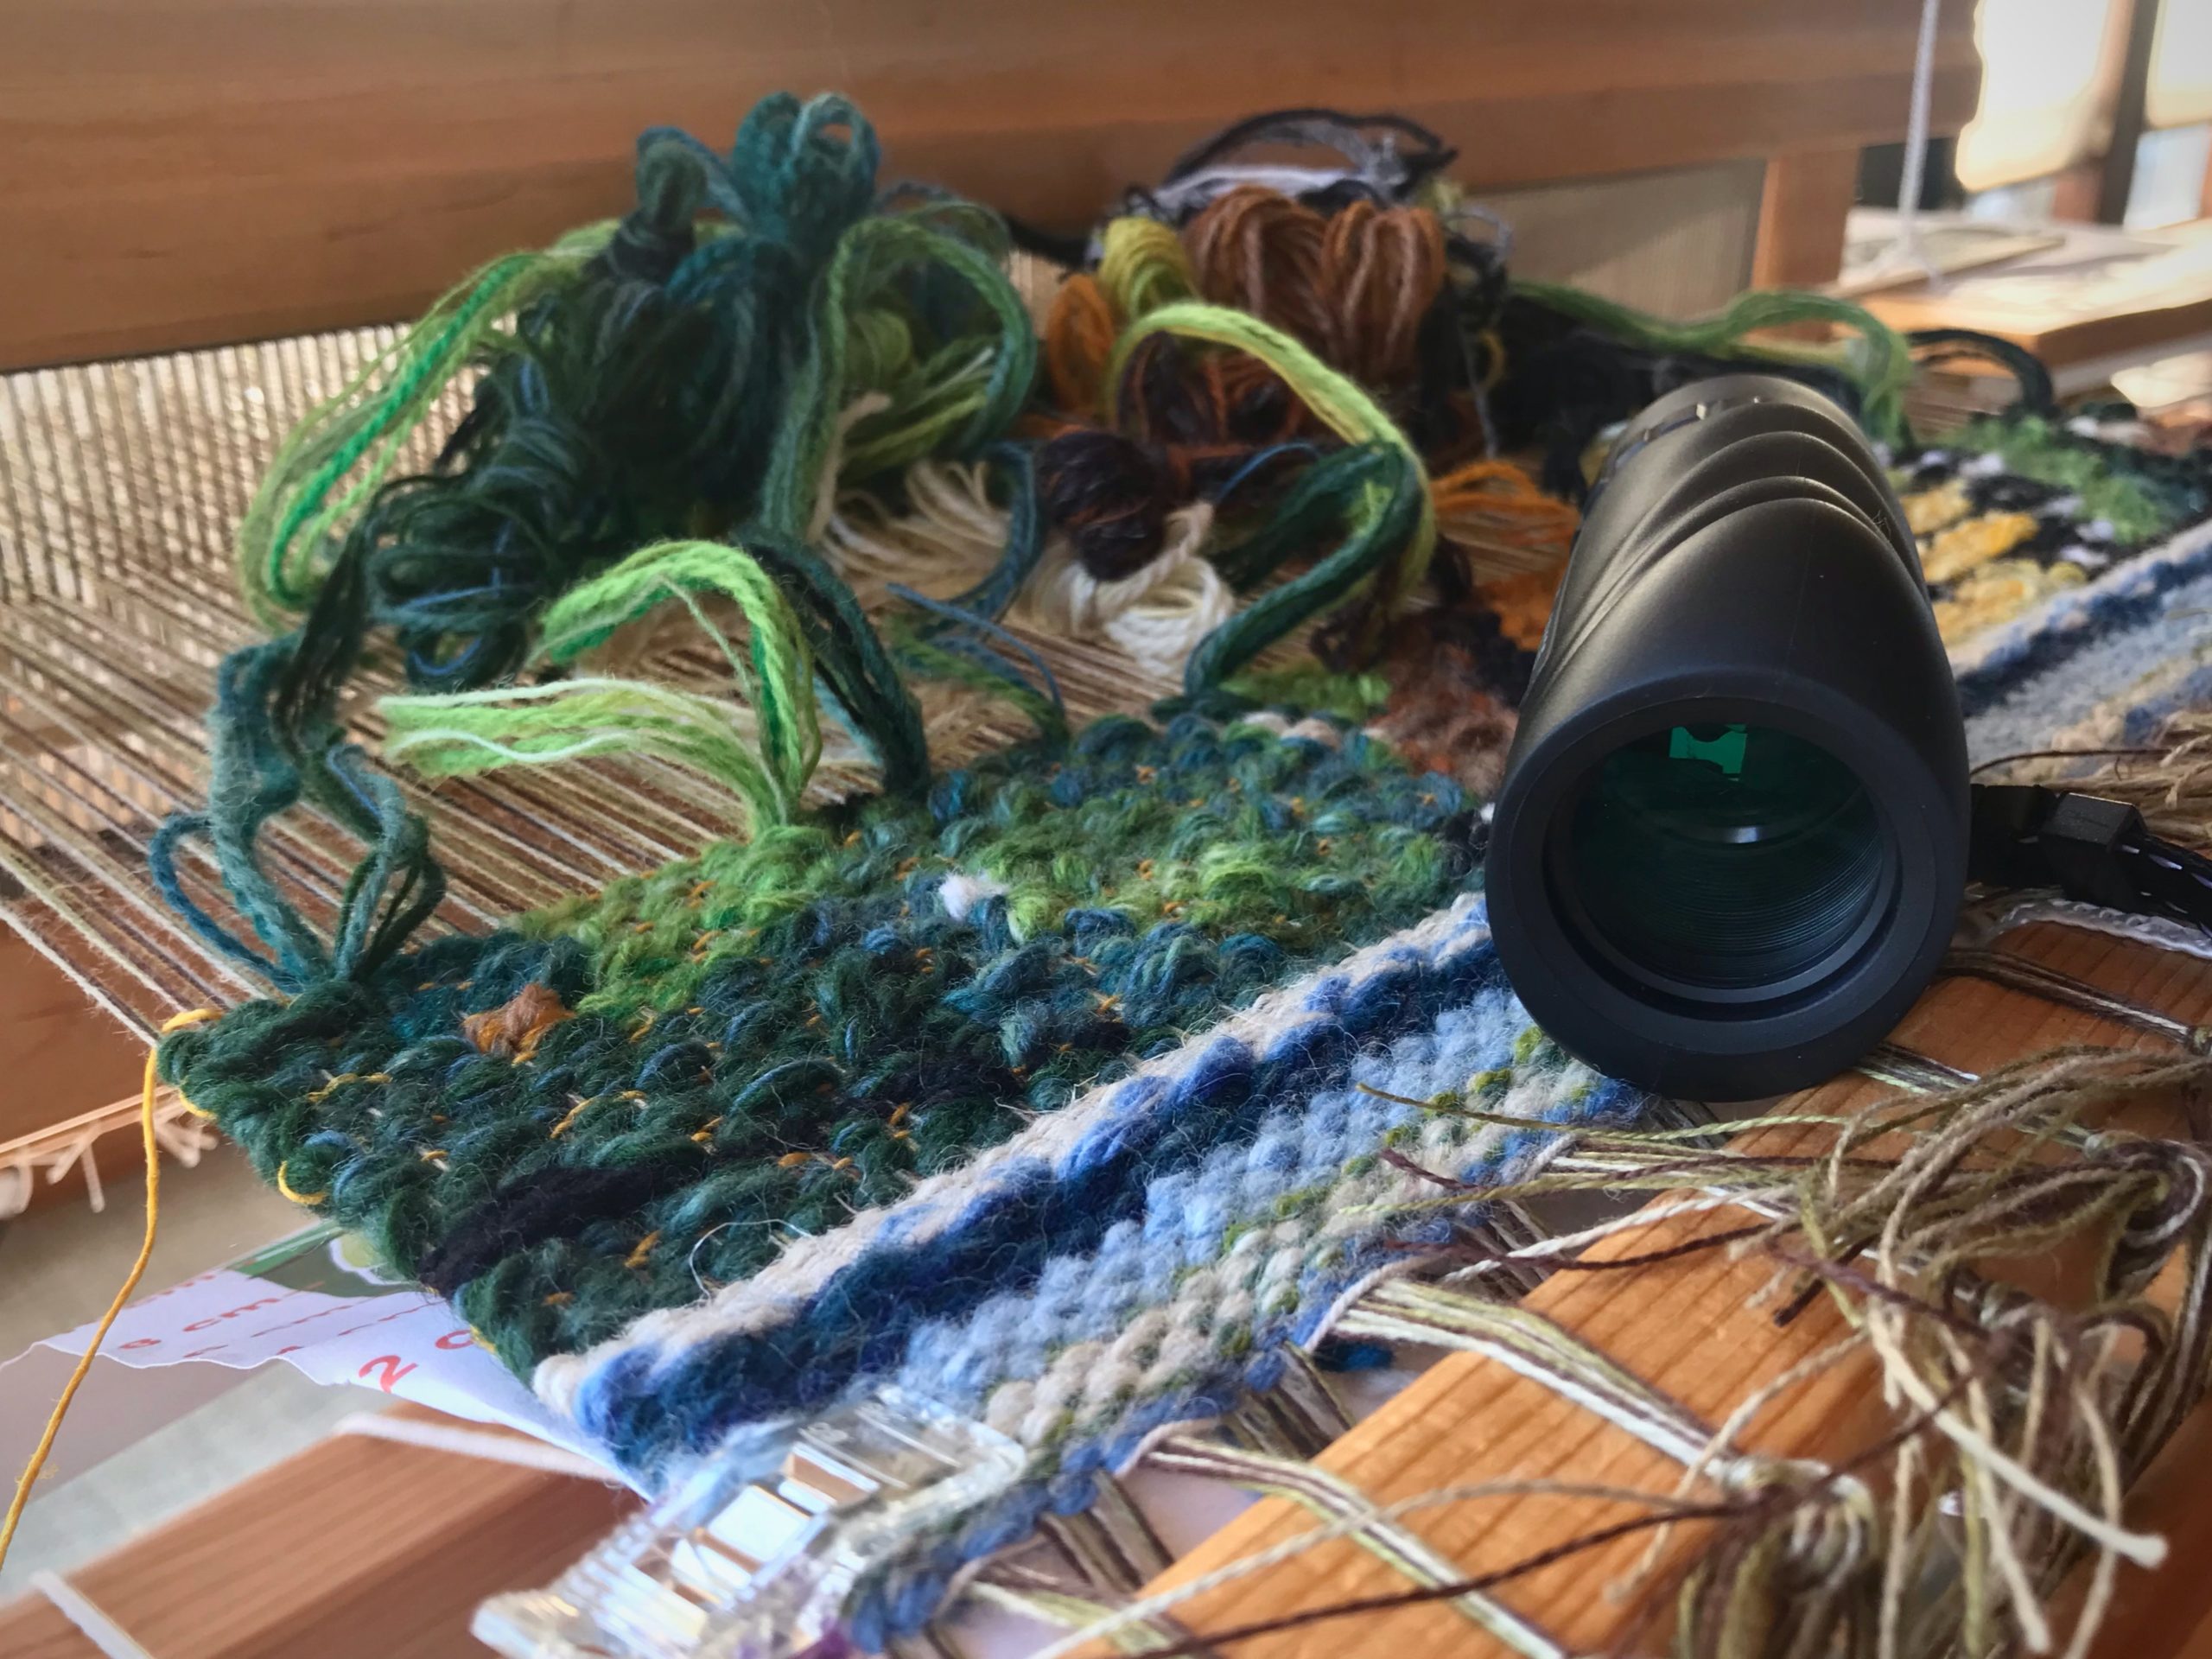
The jumble of yarn looks like a random play of colors. But if you look a little closer, and push the yarn butterflies out of the way, you can tell that the color choices are deliberate. You see only a hint of the image, though, until you look through the back end of the monocular, or step up on the step stool to have a look from up above the weaving. That’s when you get an overview of what’s on the loom.
Yarn butterflies each have a mix of wool, mostly 6/2 Tuna and 6/1 Fårö yarn.The mix of colors in each yarn butterfly is a deliberate selection for the specific hues, values, and intensities I want to portray.View from my seat on the loom bench.
This warp is a study project. I want to test some tapestry techniques to help me develop my style. I made the cartoon by cropping and enlarging a photograph I took years ago. The butterfly had just emerged from its chrysalis! The subject for my study: the butterfly’s intricate wing.
Peering through the *wrong* end of the monocular gives me a distant view of the tapestry in progress.I stand on a stepstool near the loom to get an even broader view of the tapestry from a distance. This perspective shows me how effective my yarn selections are (or are not) for the image I want to create.Cartoon in a reduced size helps me see the color distinctions. Photo in black and white helps me see value contrasts.
Who designed the butterfly wing? A stained-glass artist may conceive it. A tapestry weaver may copy it. A silk dyer may imagine it. But only our Creator could bring it to life. God makes himself known. Push the obstacles out of the way. Look for design. Gain a higher perspective. With each woven row, the image becomes more and more clear. When the butterfly wing begins to flutter you know you are witnessing something from the mind of God.
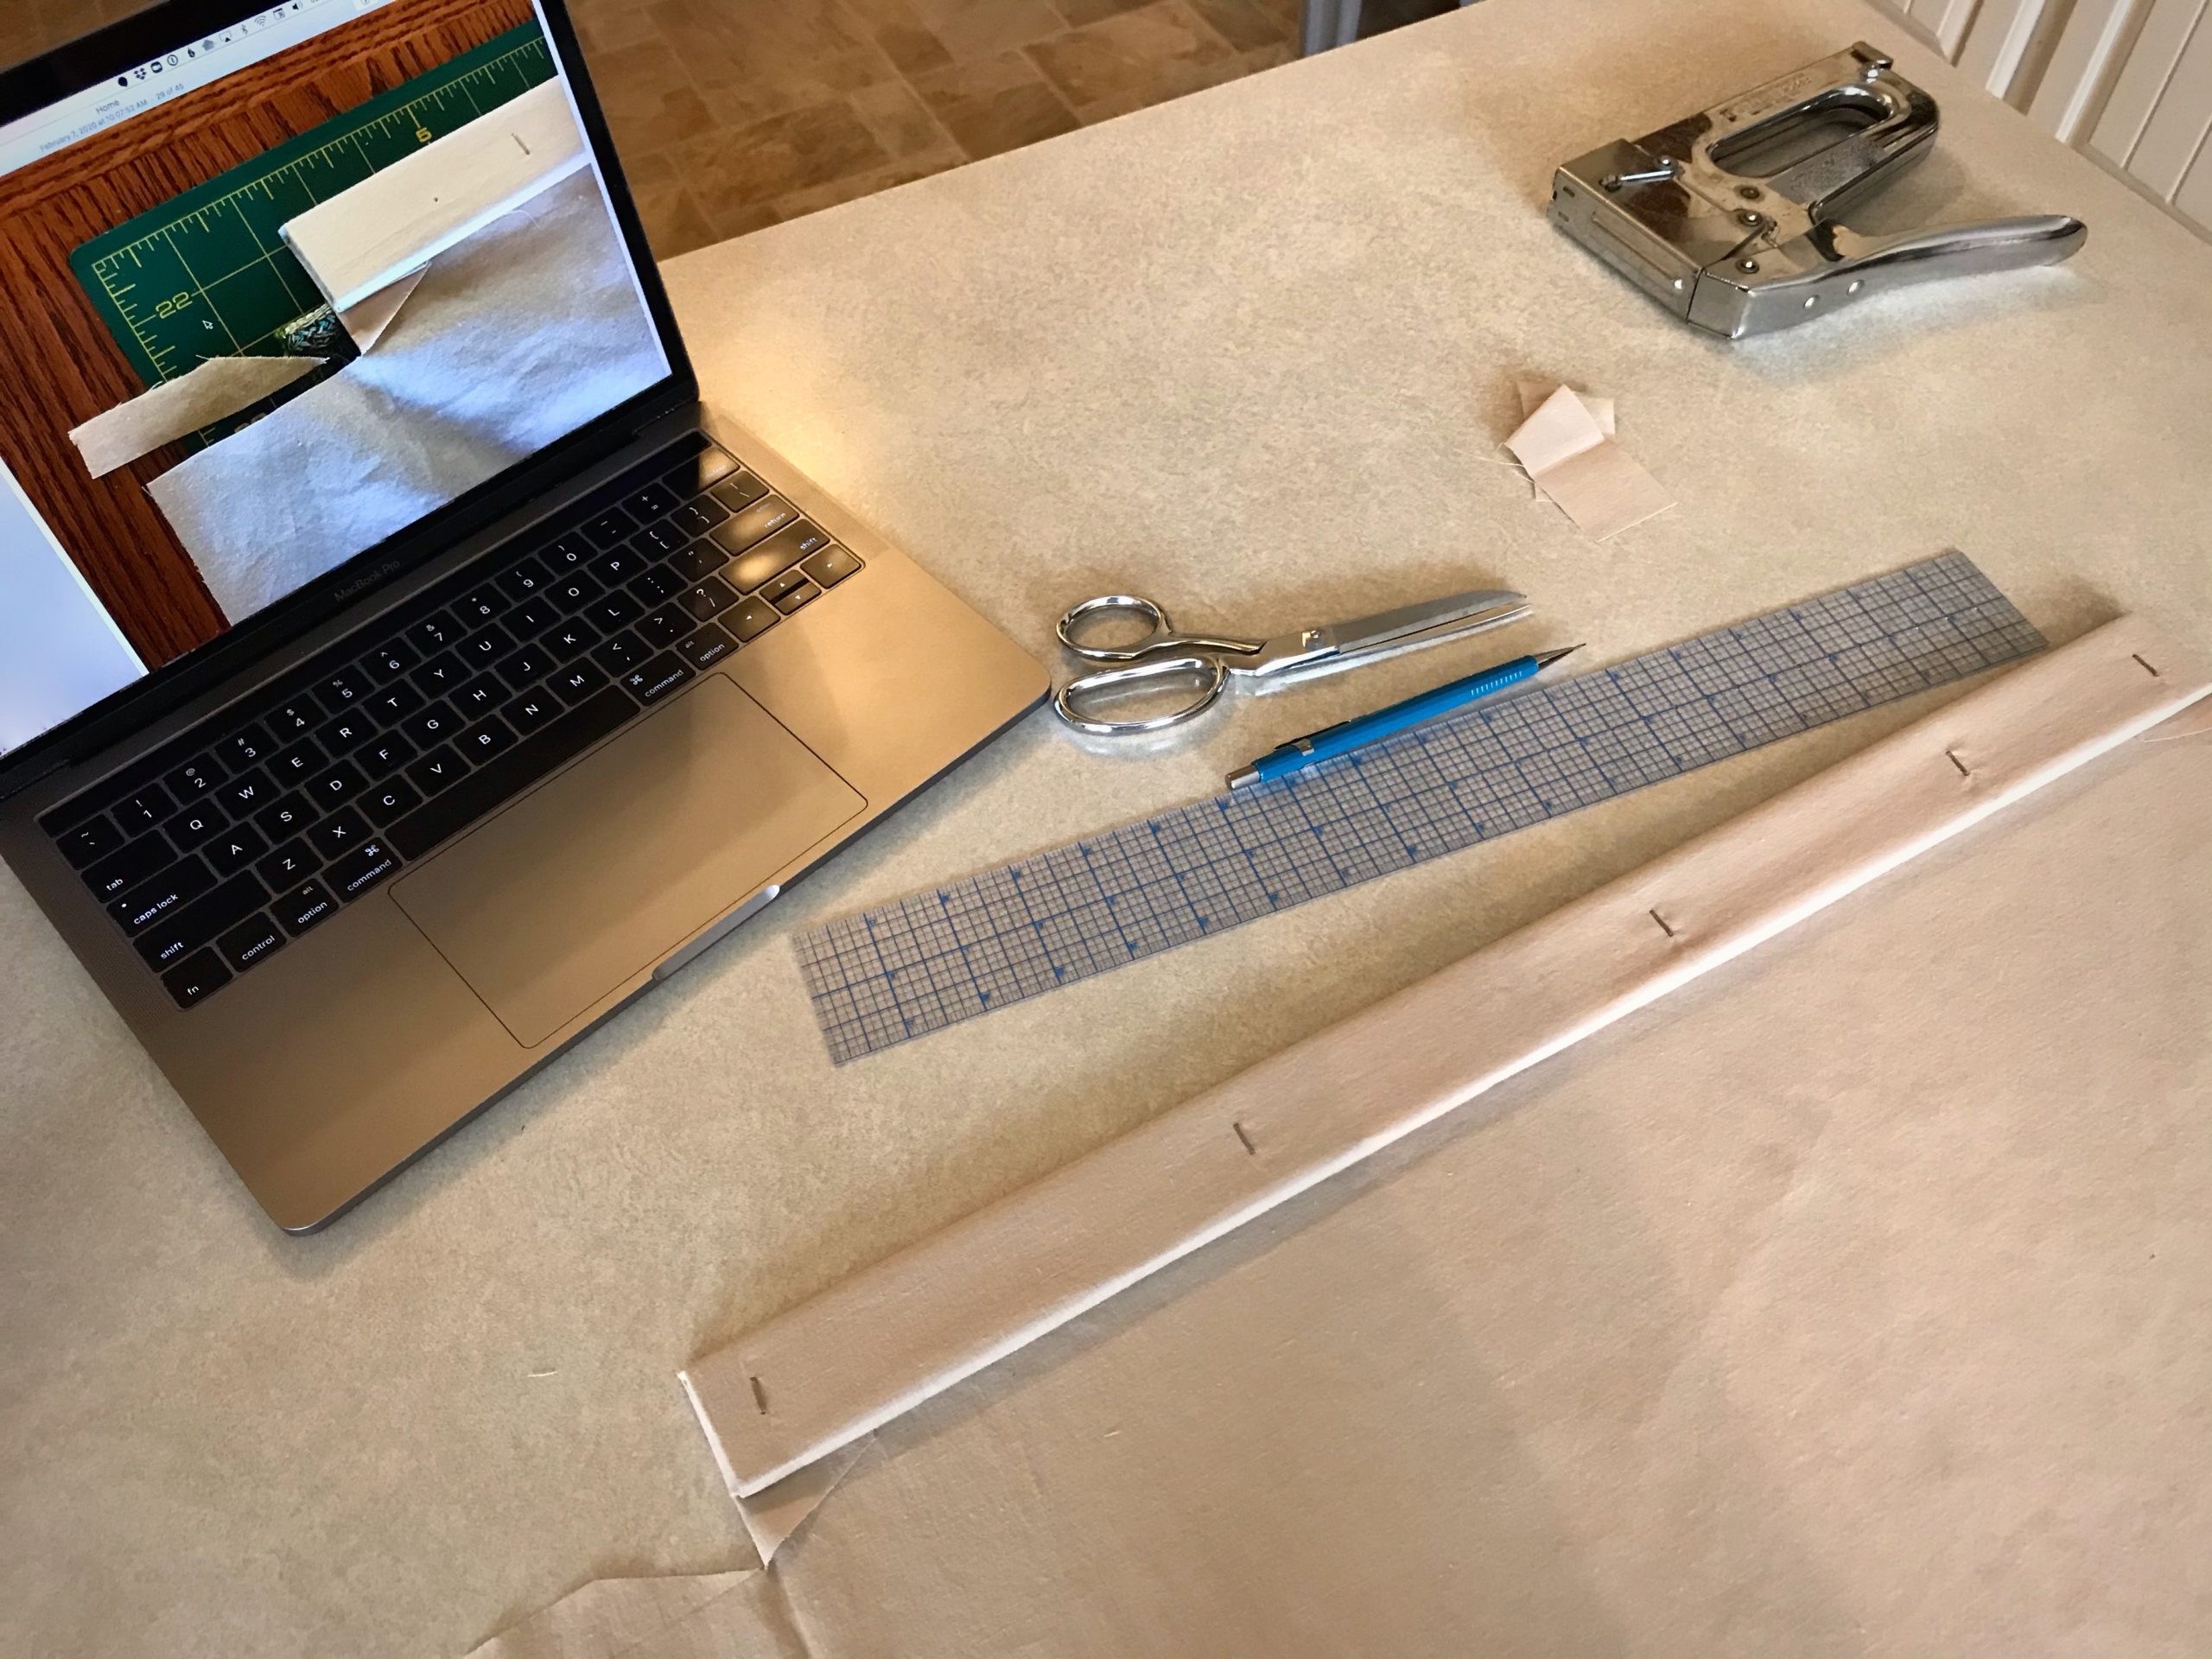
Documenting your work for repeatability is valuable for any any step-by-step process. With the Lizardtapestry I learned how to do the finishing, including the backing. By the time I was ready to put a backing on the Siblings tapestry, I had limited recall of that first experience. Now that Eye of the Beholder is ready for backing, I need help again. Fortunately, I made note of every detail while constructing the backing for the Siblings tapestry. So, this time I have the benefit of written and photo documentation. No guesswork!
How to Document Your Steps
Photo guidance on the computer corresponds with enumerated steps on my phone. This removes guesswork for the next part of the process.
Do research. Gather your notes, search resources, and get advice from experienced weavers regarding the process you want to document.
Outline the steps. Write out and number all the steps as you understand them. Doing this before you start helps you think through the entire process.
Refine the steps. Begin working through the steps in order. Adjust the steps as you go. You may need to add or eliminate steps, or change the order in which they are done.
Make it visual. Take a photo of any step that benefits from visual clarification.
Finalize. Simplify and clarify the instructions in every step as if they are meant for someone who knows less about this process that you do. Remove redundant and/or unnecessary photos.