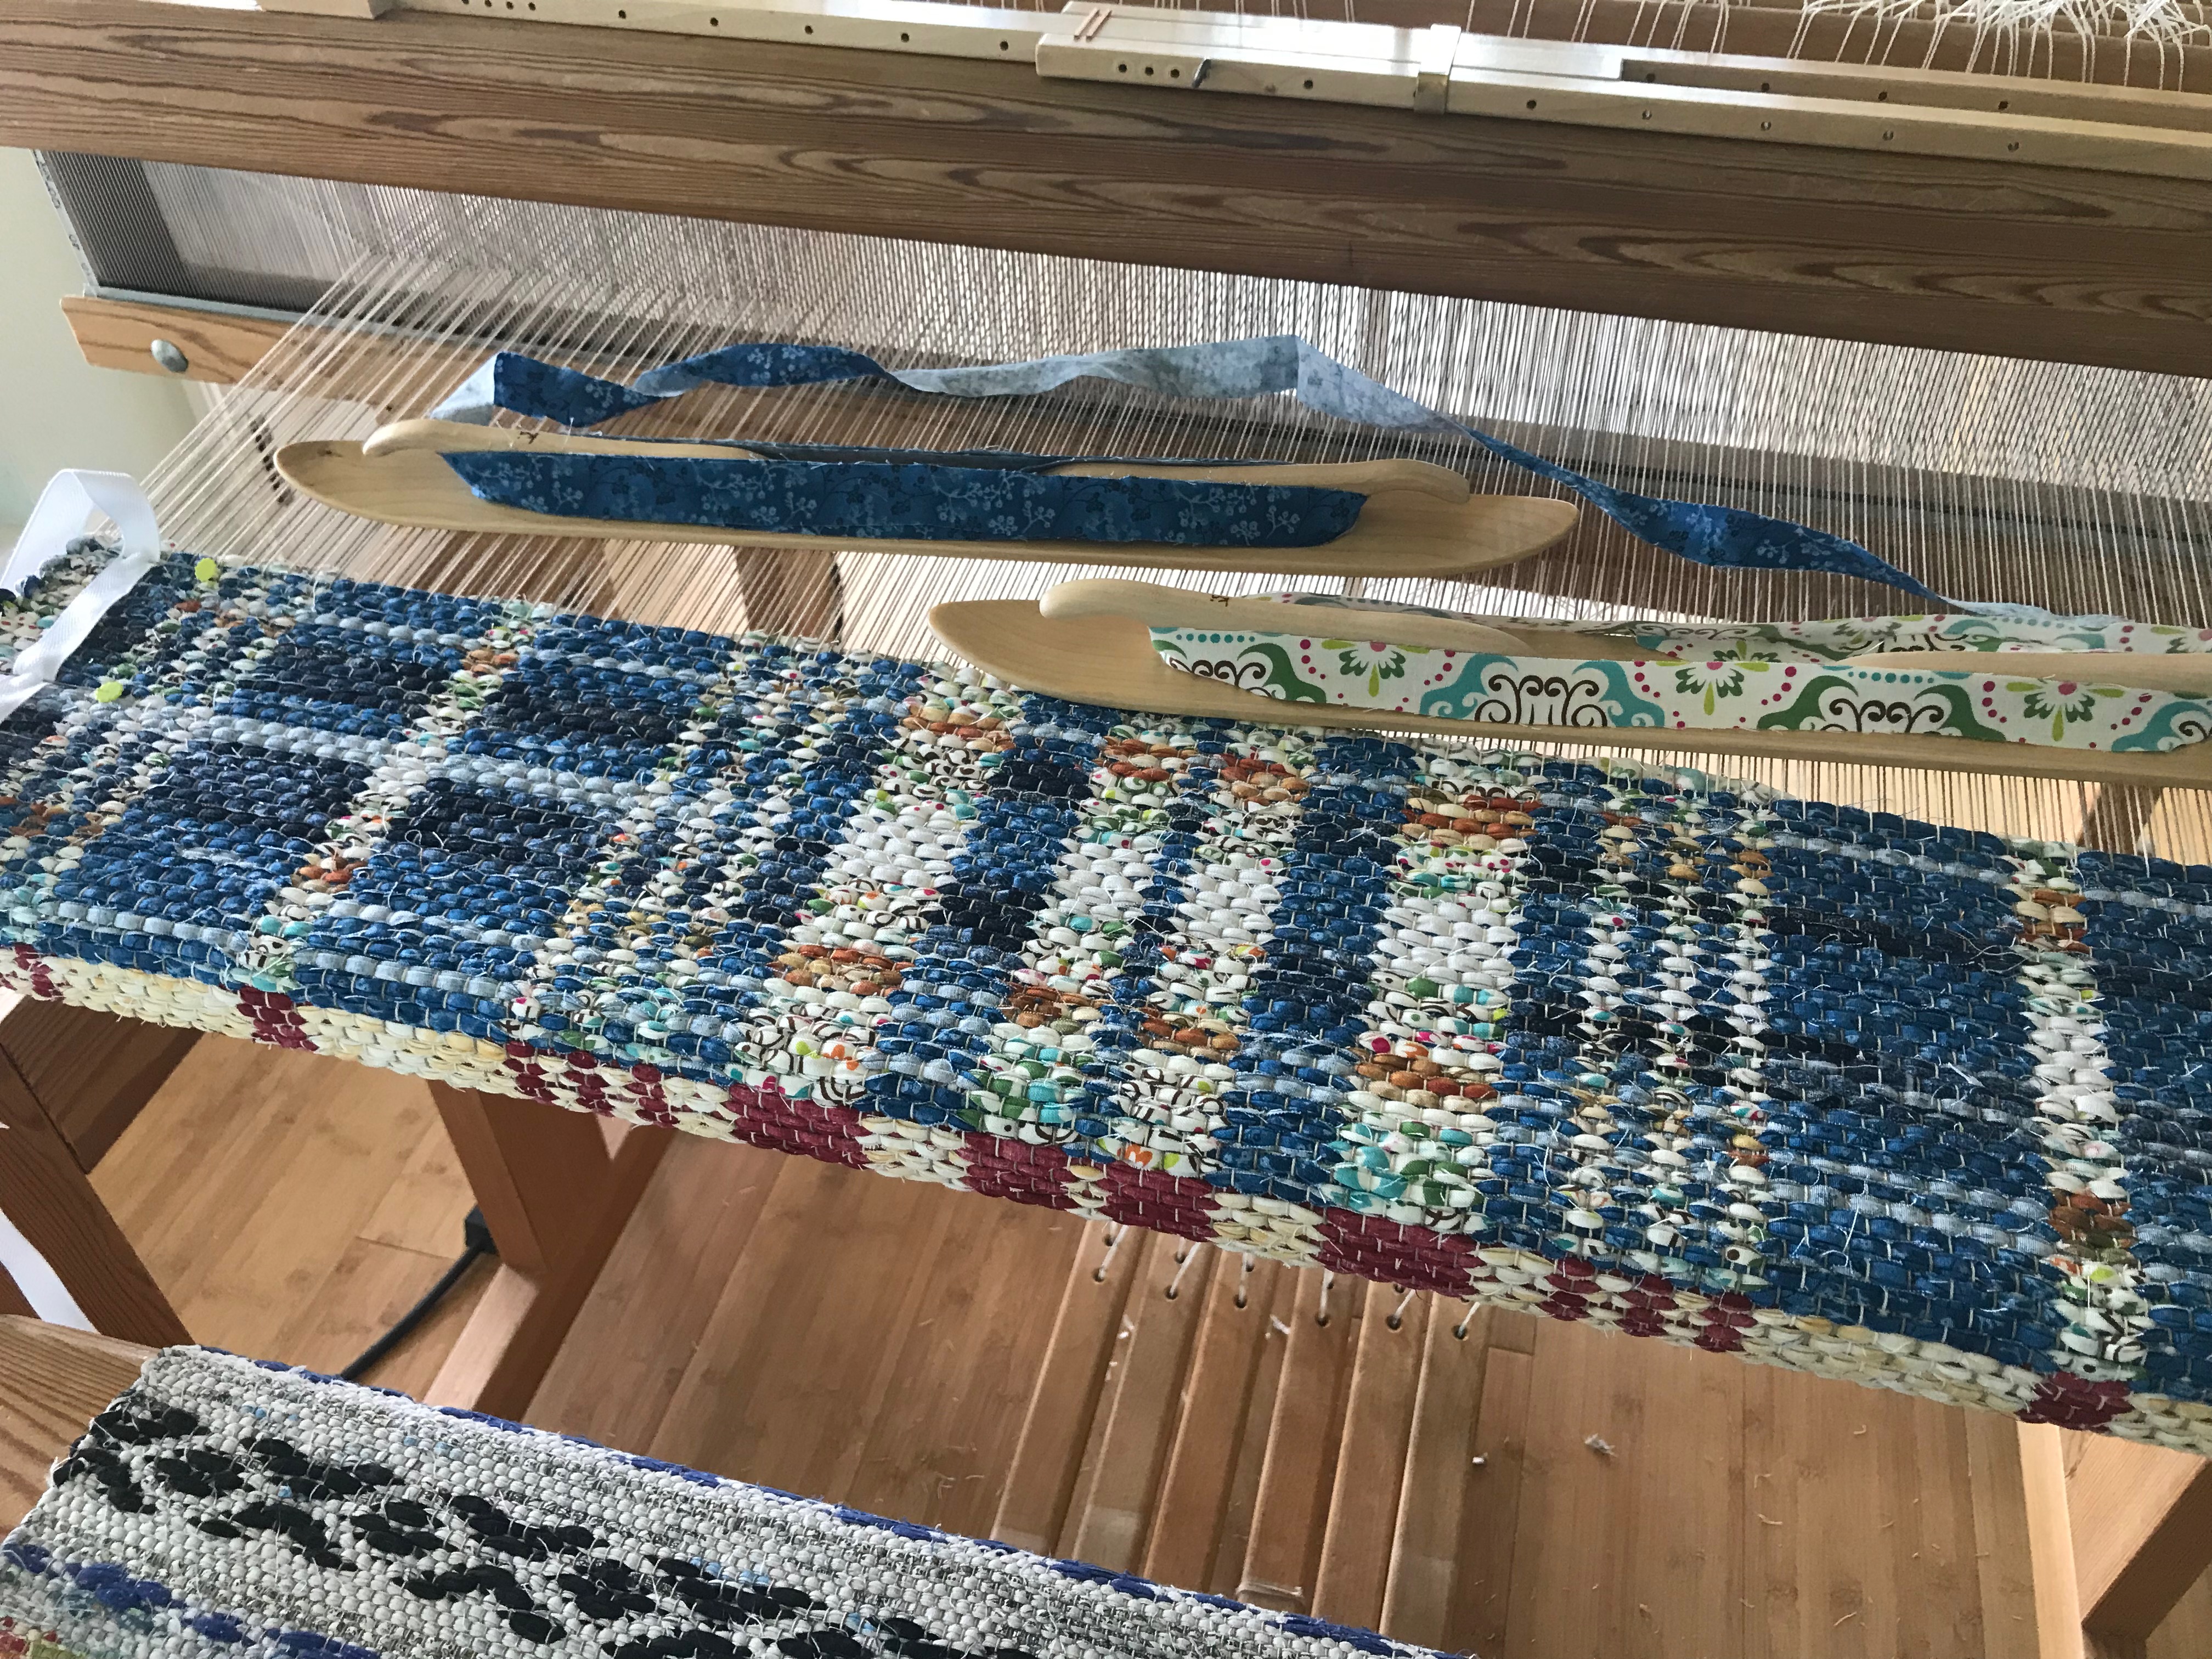
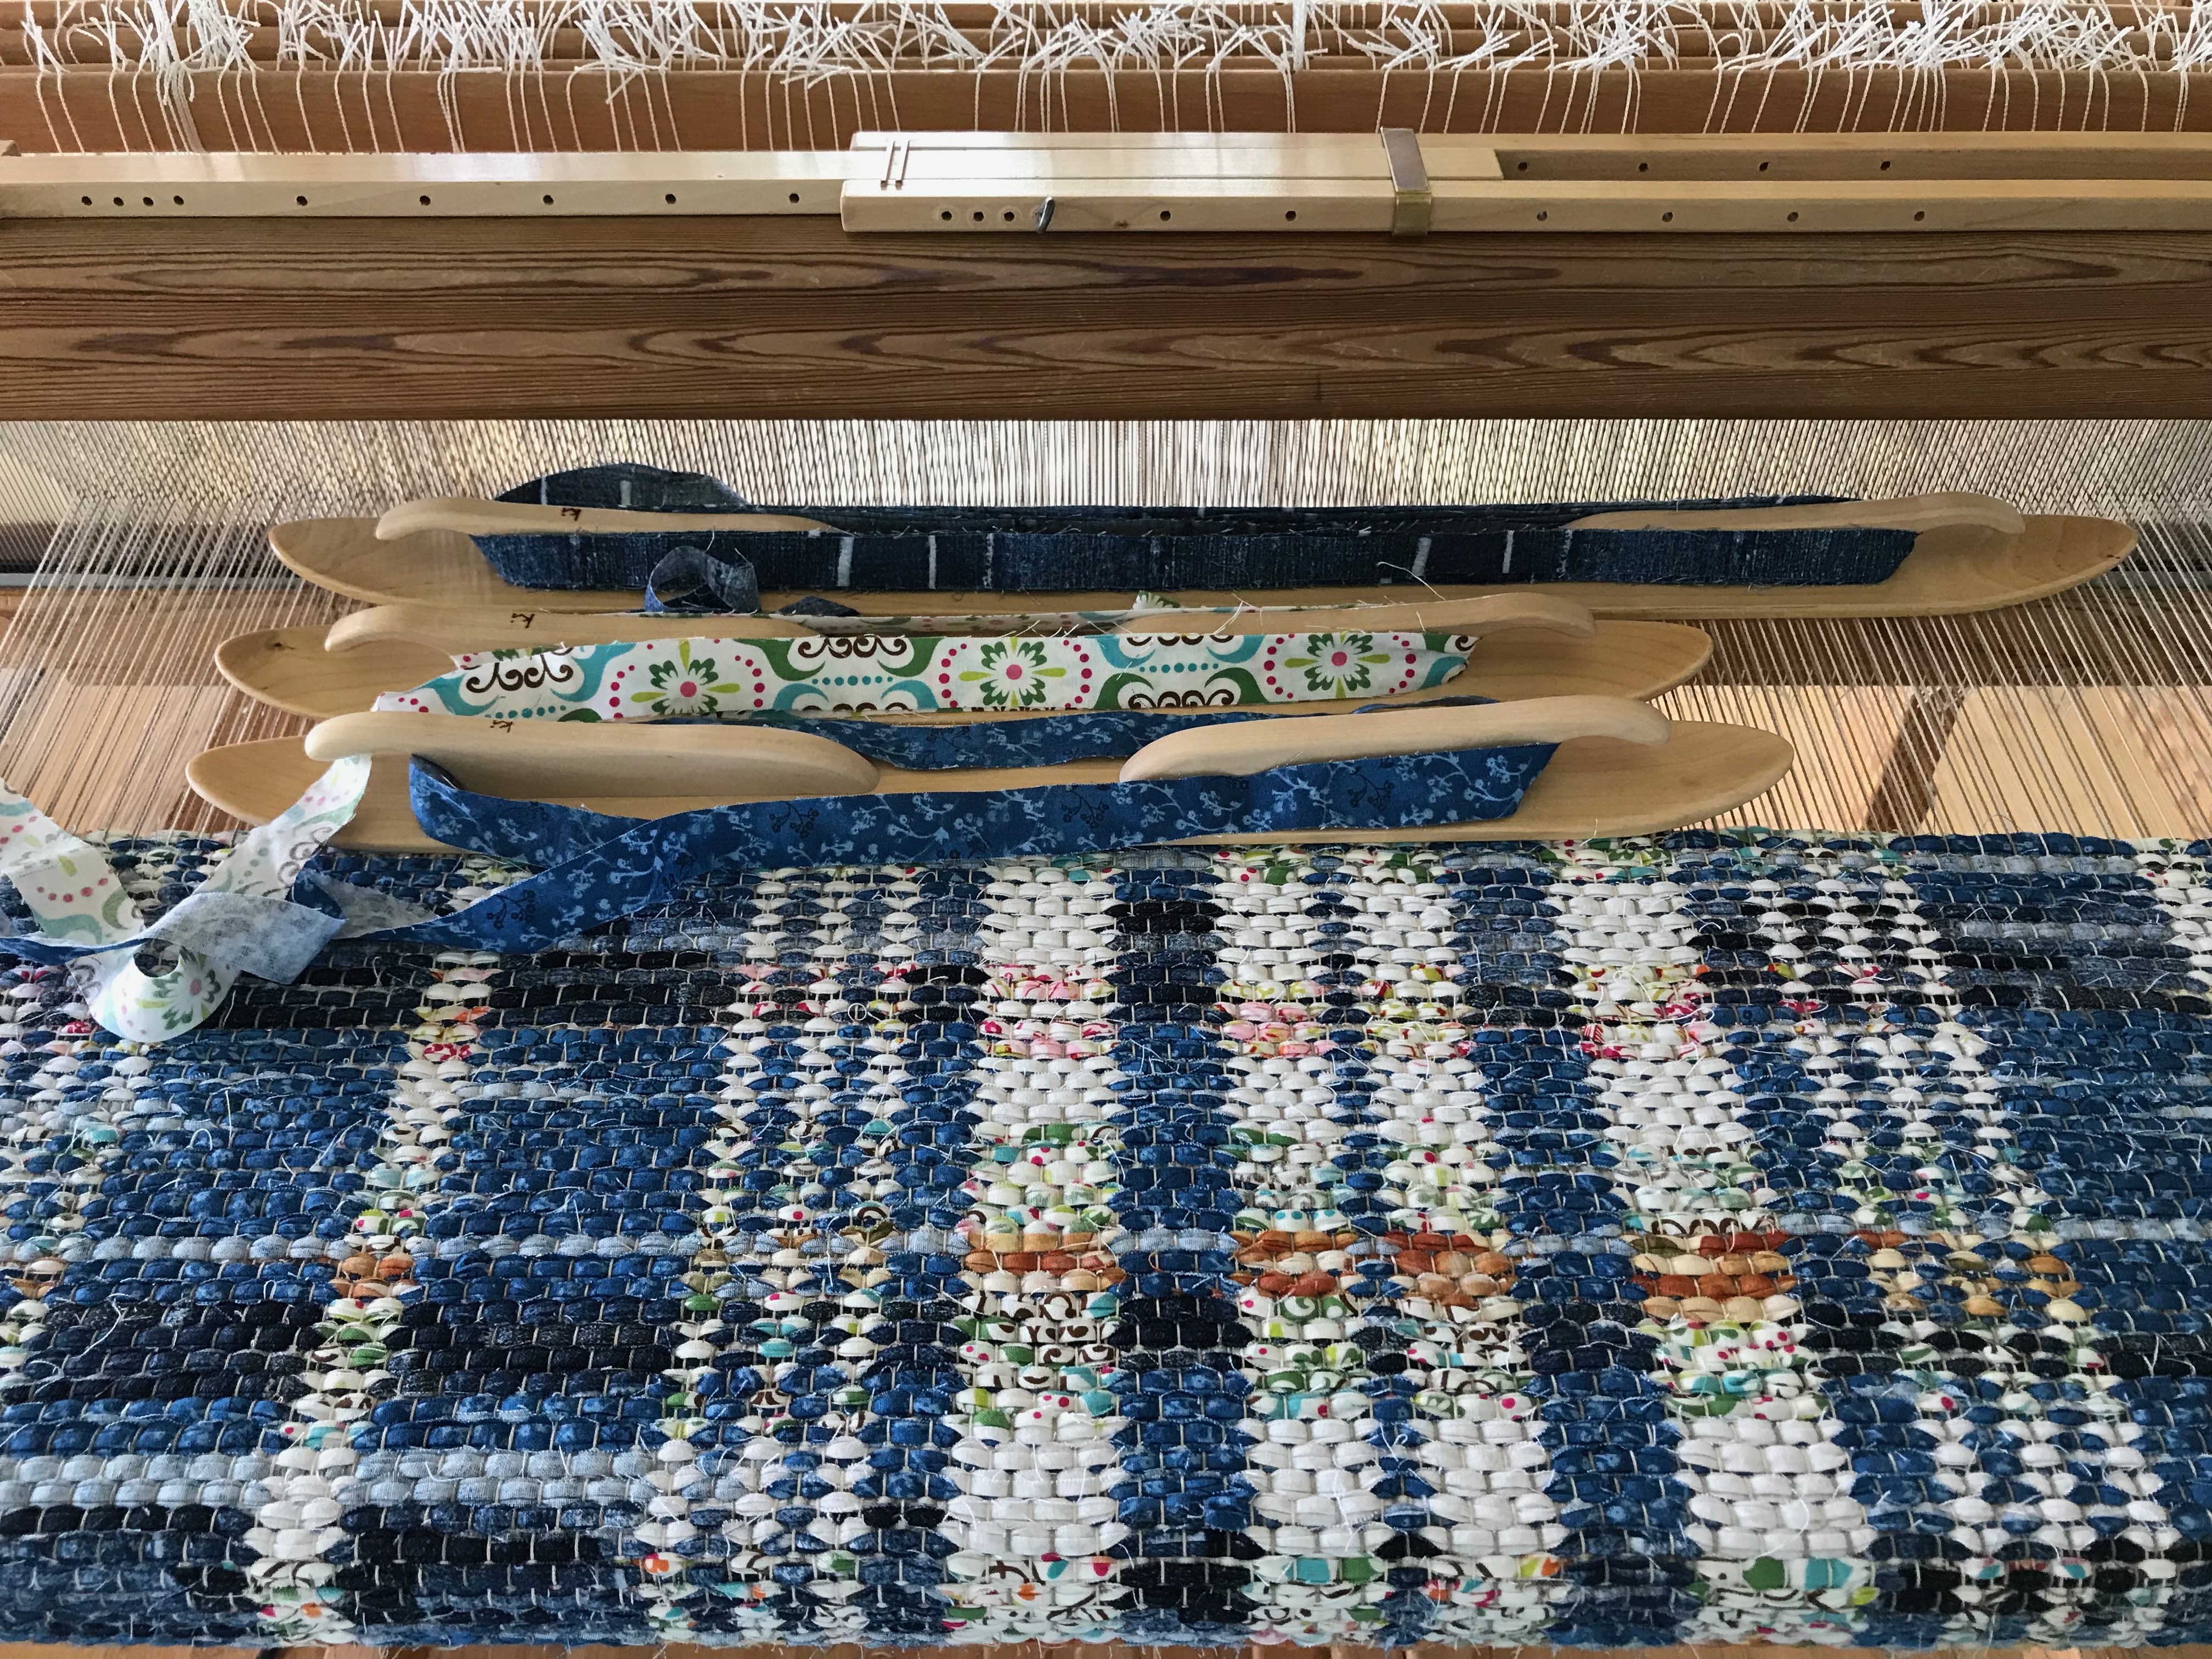
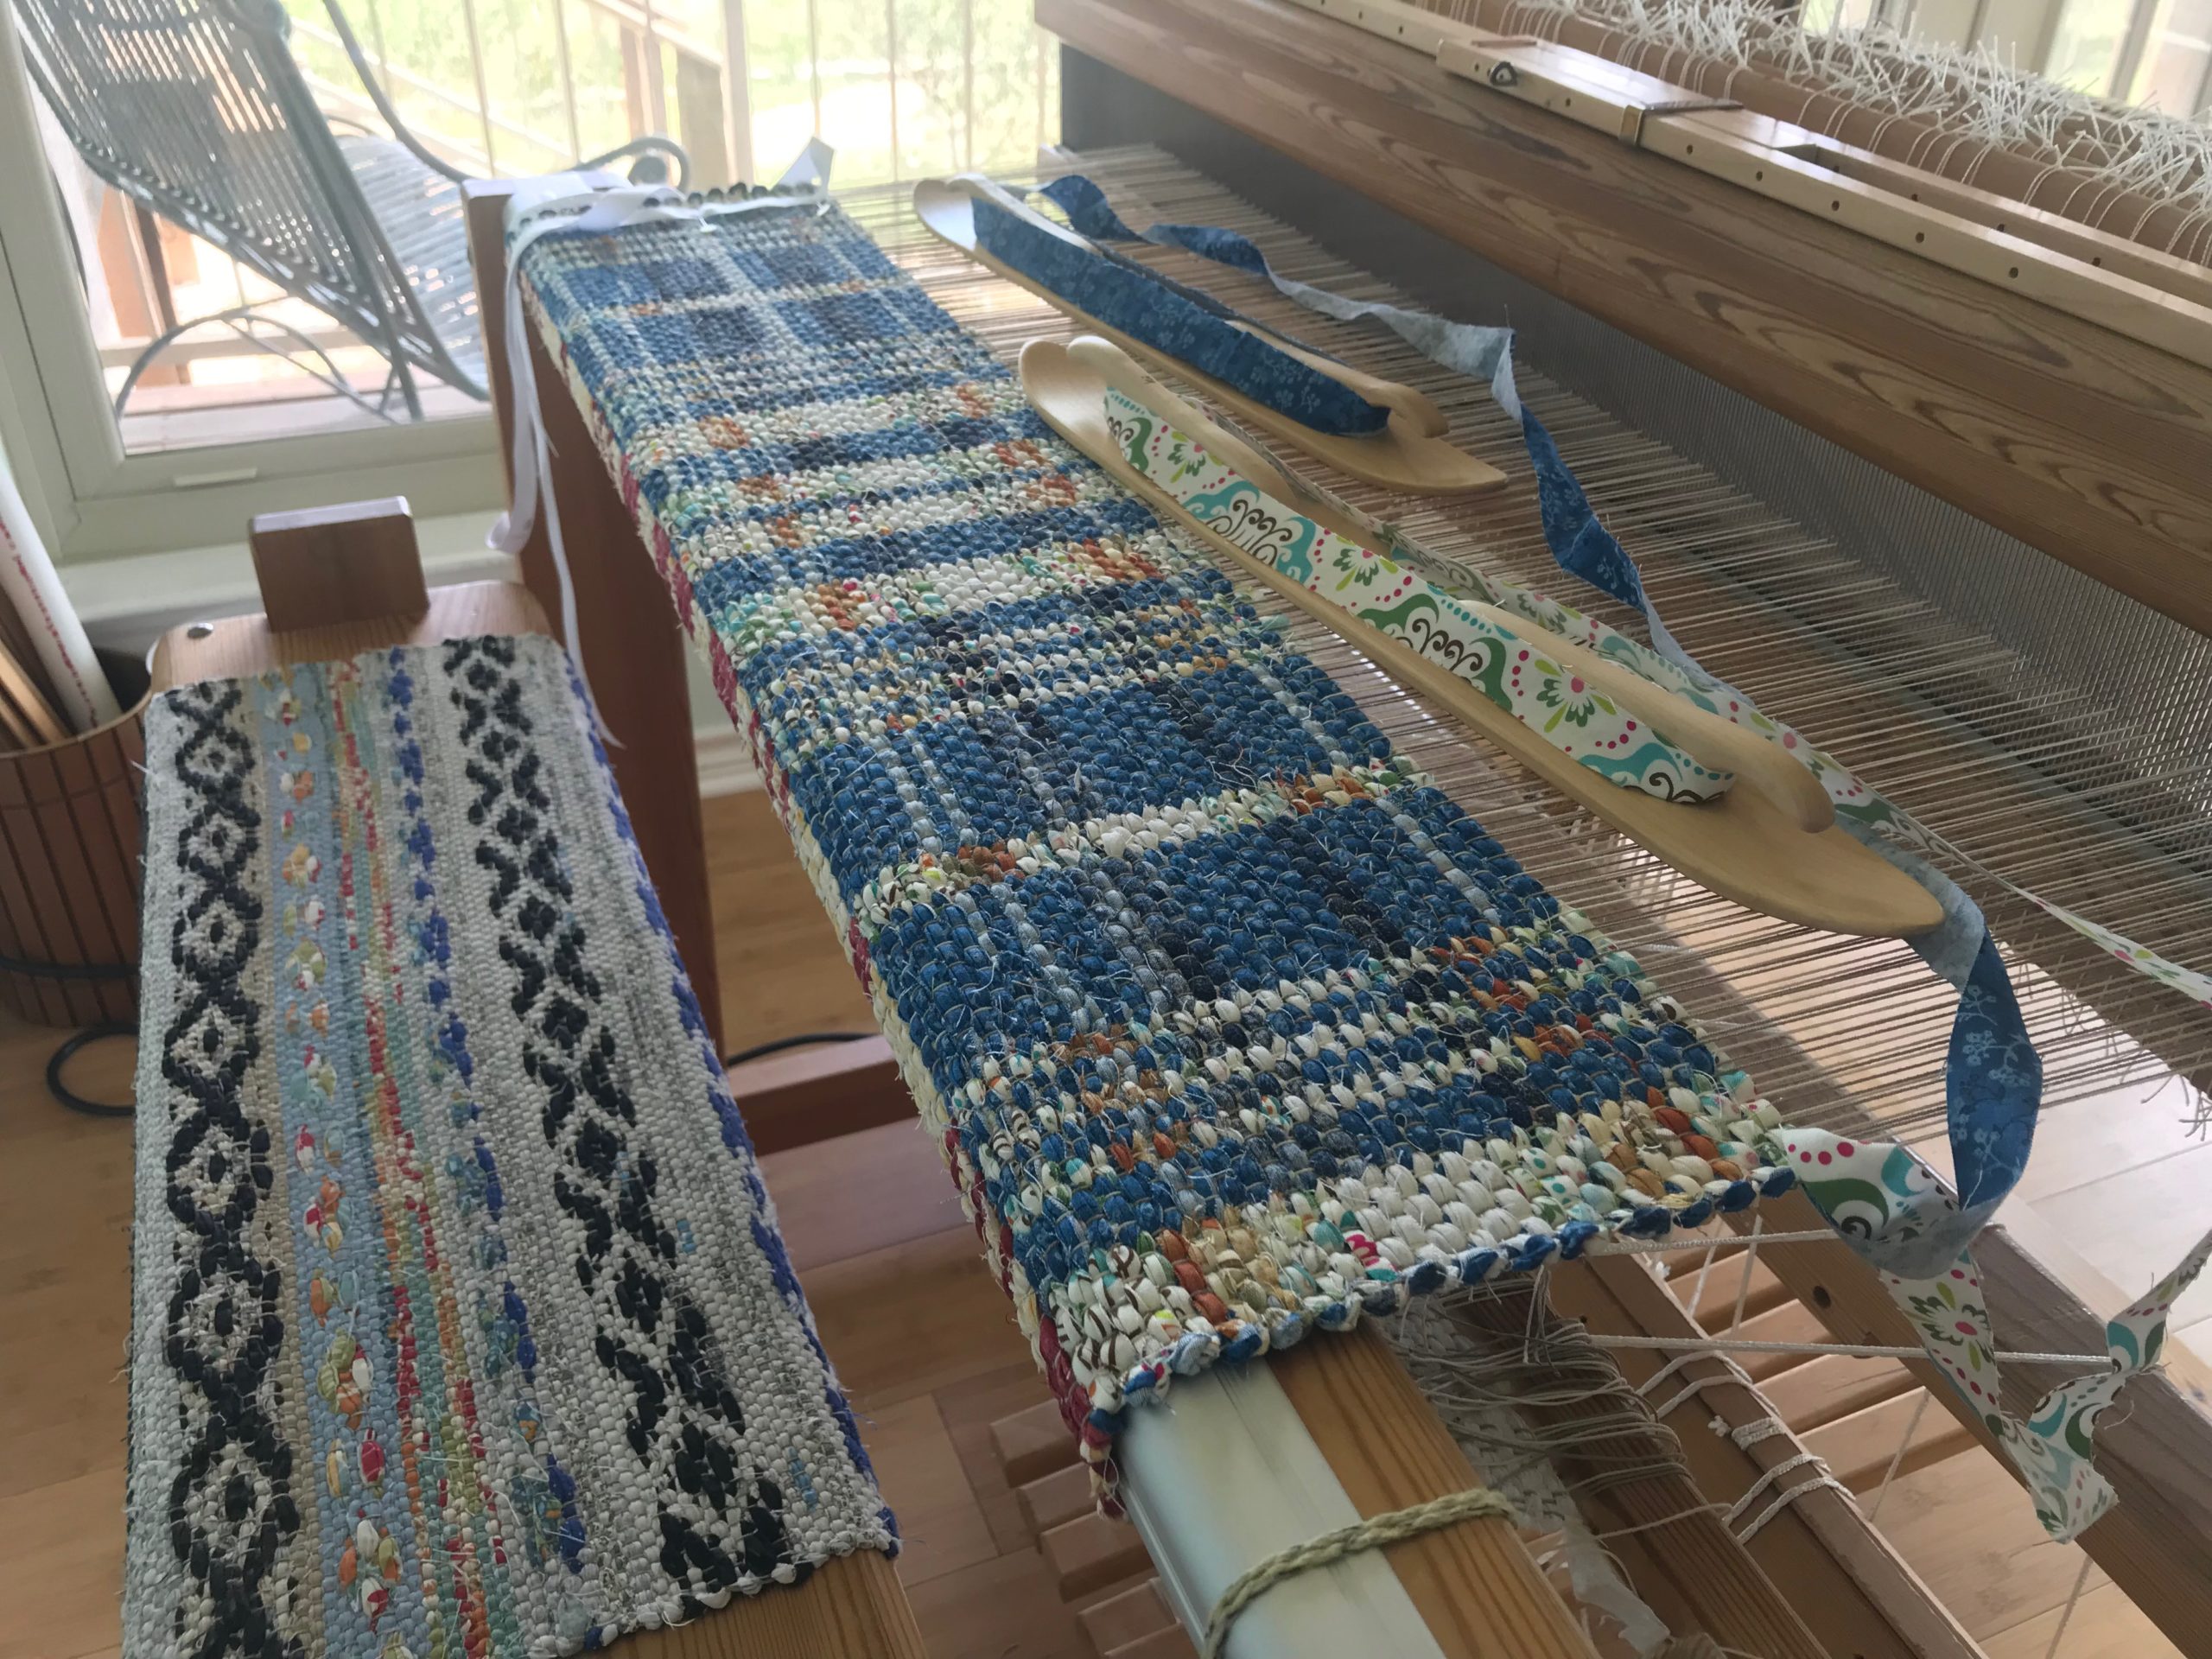
Ski shuttles are a rag-rug weaver’s best friends. A few simple tips for using a ski shuttle make rag-rug weaving even that much more fun.
Ski shuttles are fun tools to use for weaving rag rugs.In the video I explain why I don’t use the longer ski shuttle very much.
In the video below I tell you why I prefer Glimåkra ski shuttles, and how I wind the weft fabric on my shuttle. And I share two quick tips to make weaving with a ski shuttle a bit more manageable. If you are an experienced rag-rug weaver you probably already know these things. Watch to the end to see a short demo, plus a little blooper. Enjoy!
Ski shuttles by Glimåkra are just right for me. They fit nicely in my hands, have a low profile that slides easily through the shed, and are artistic in design.
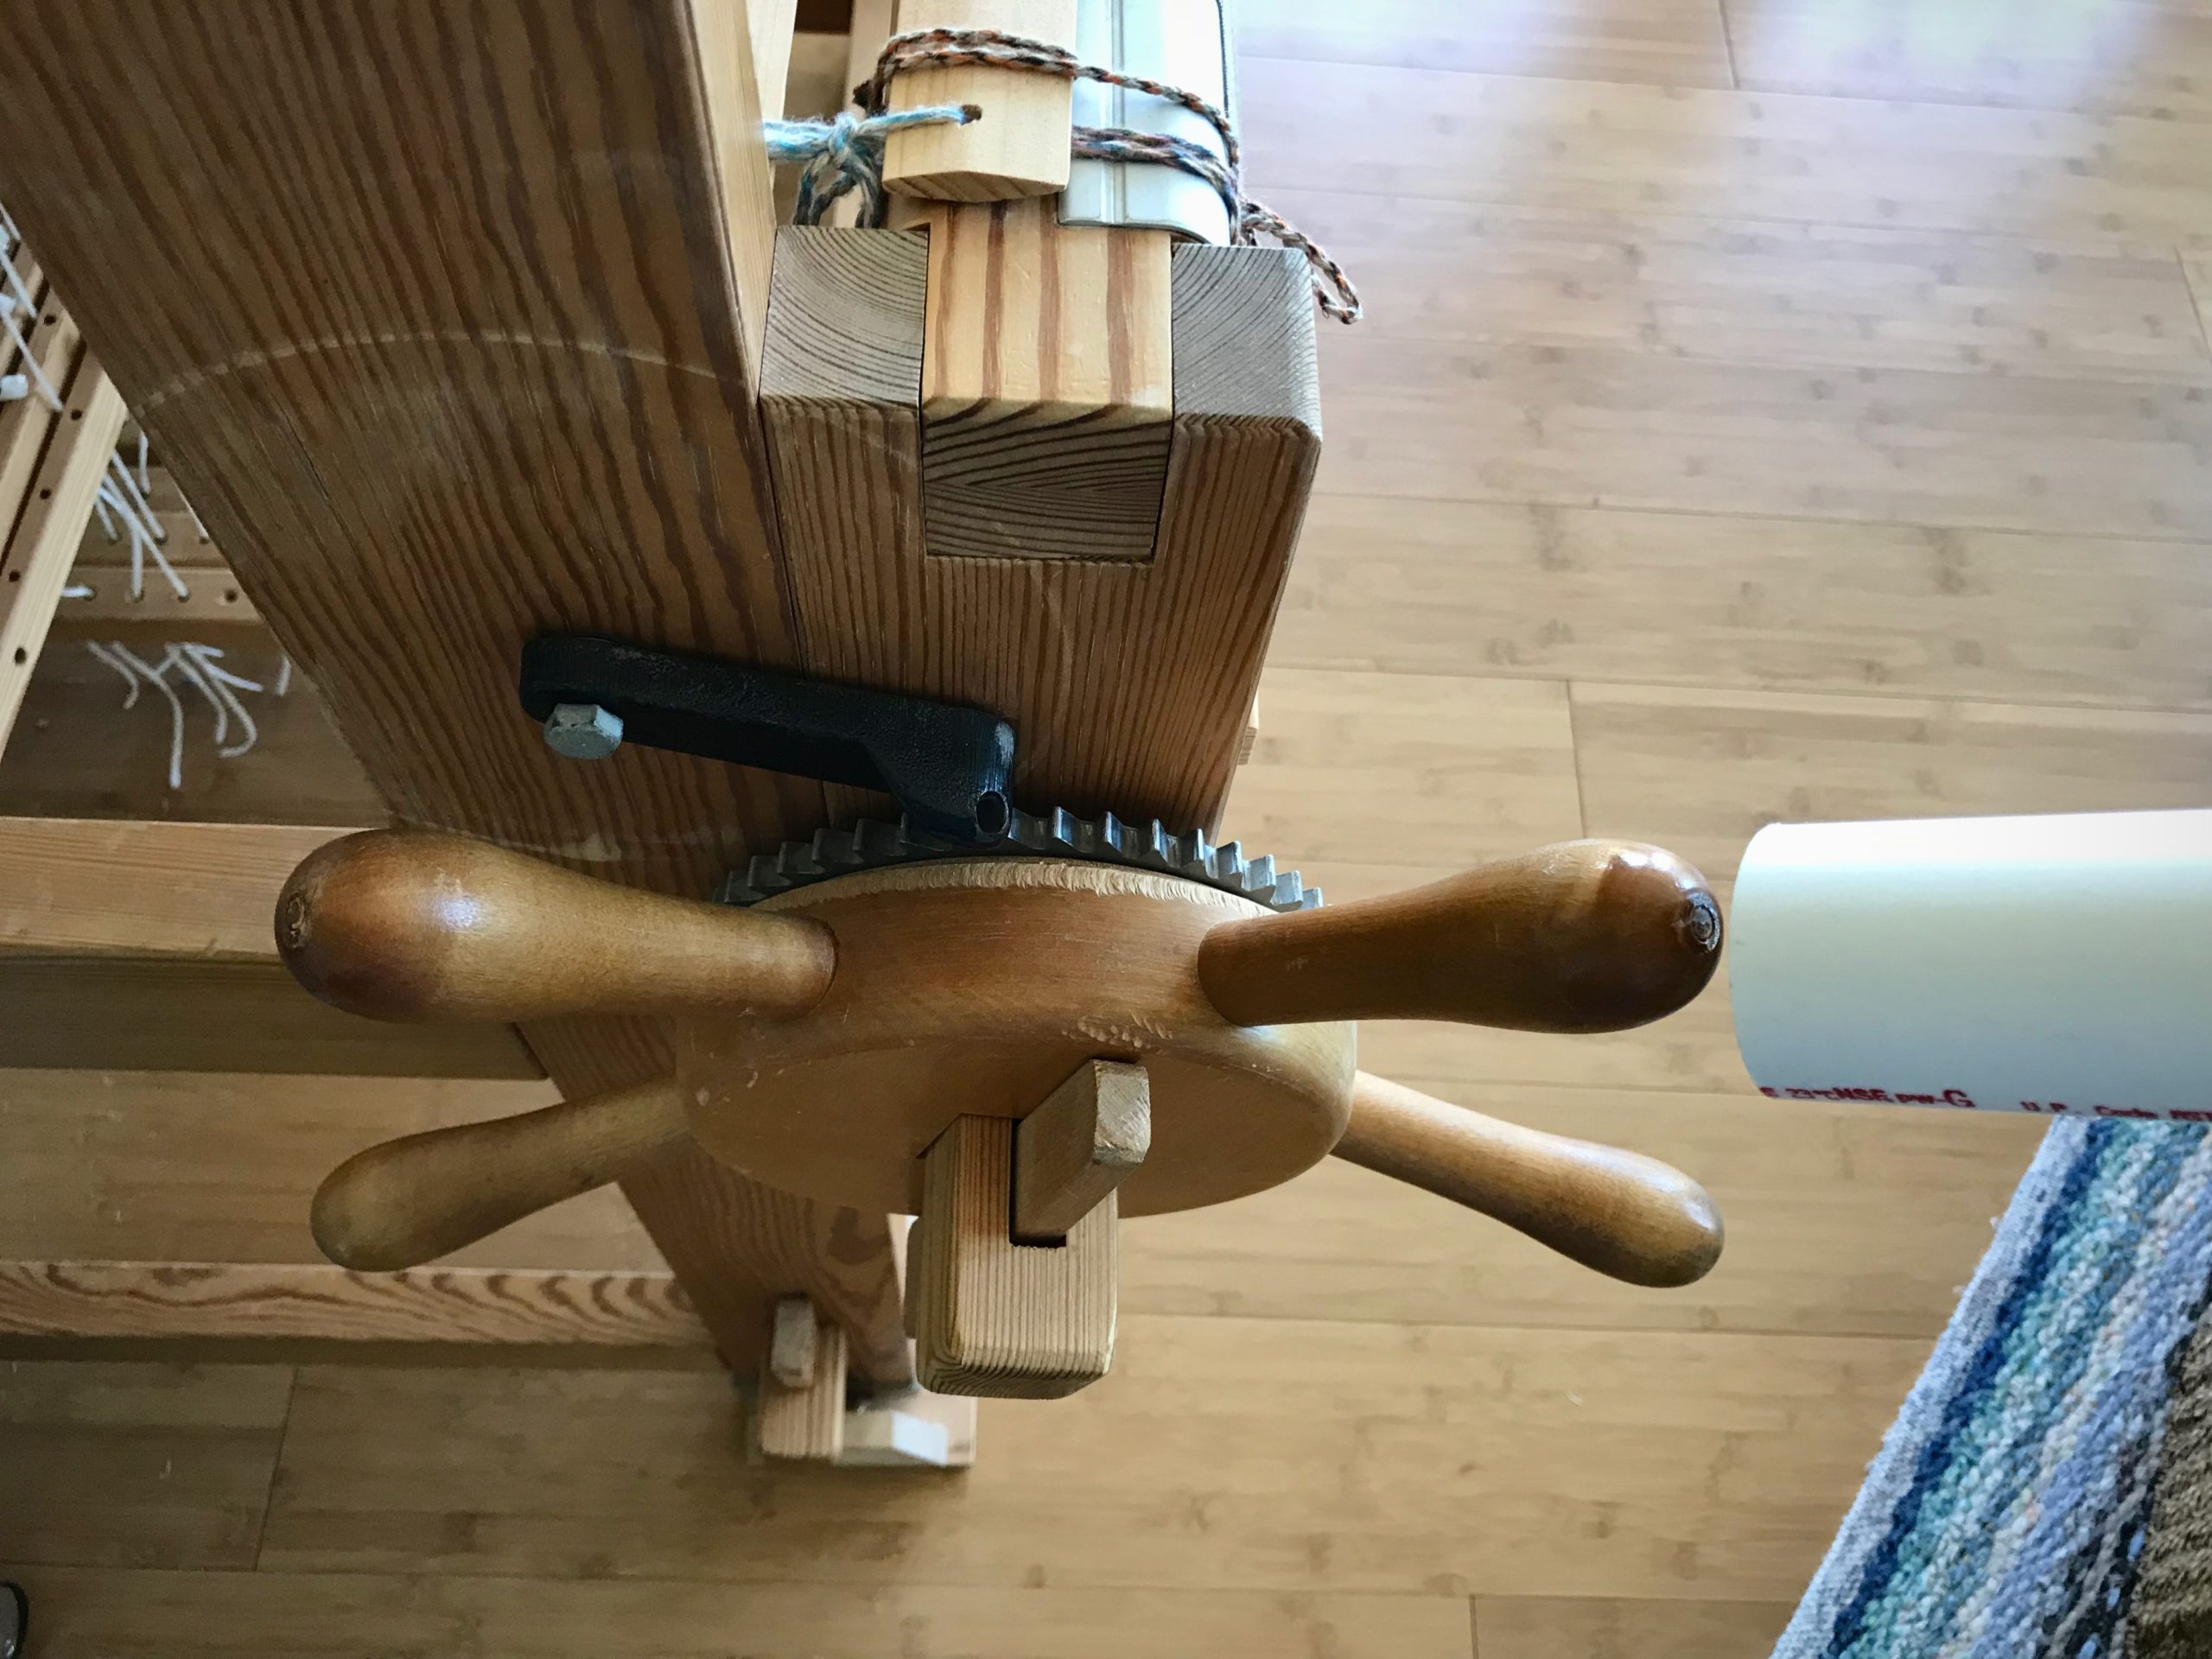
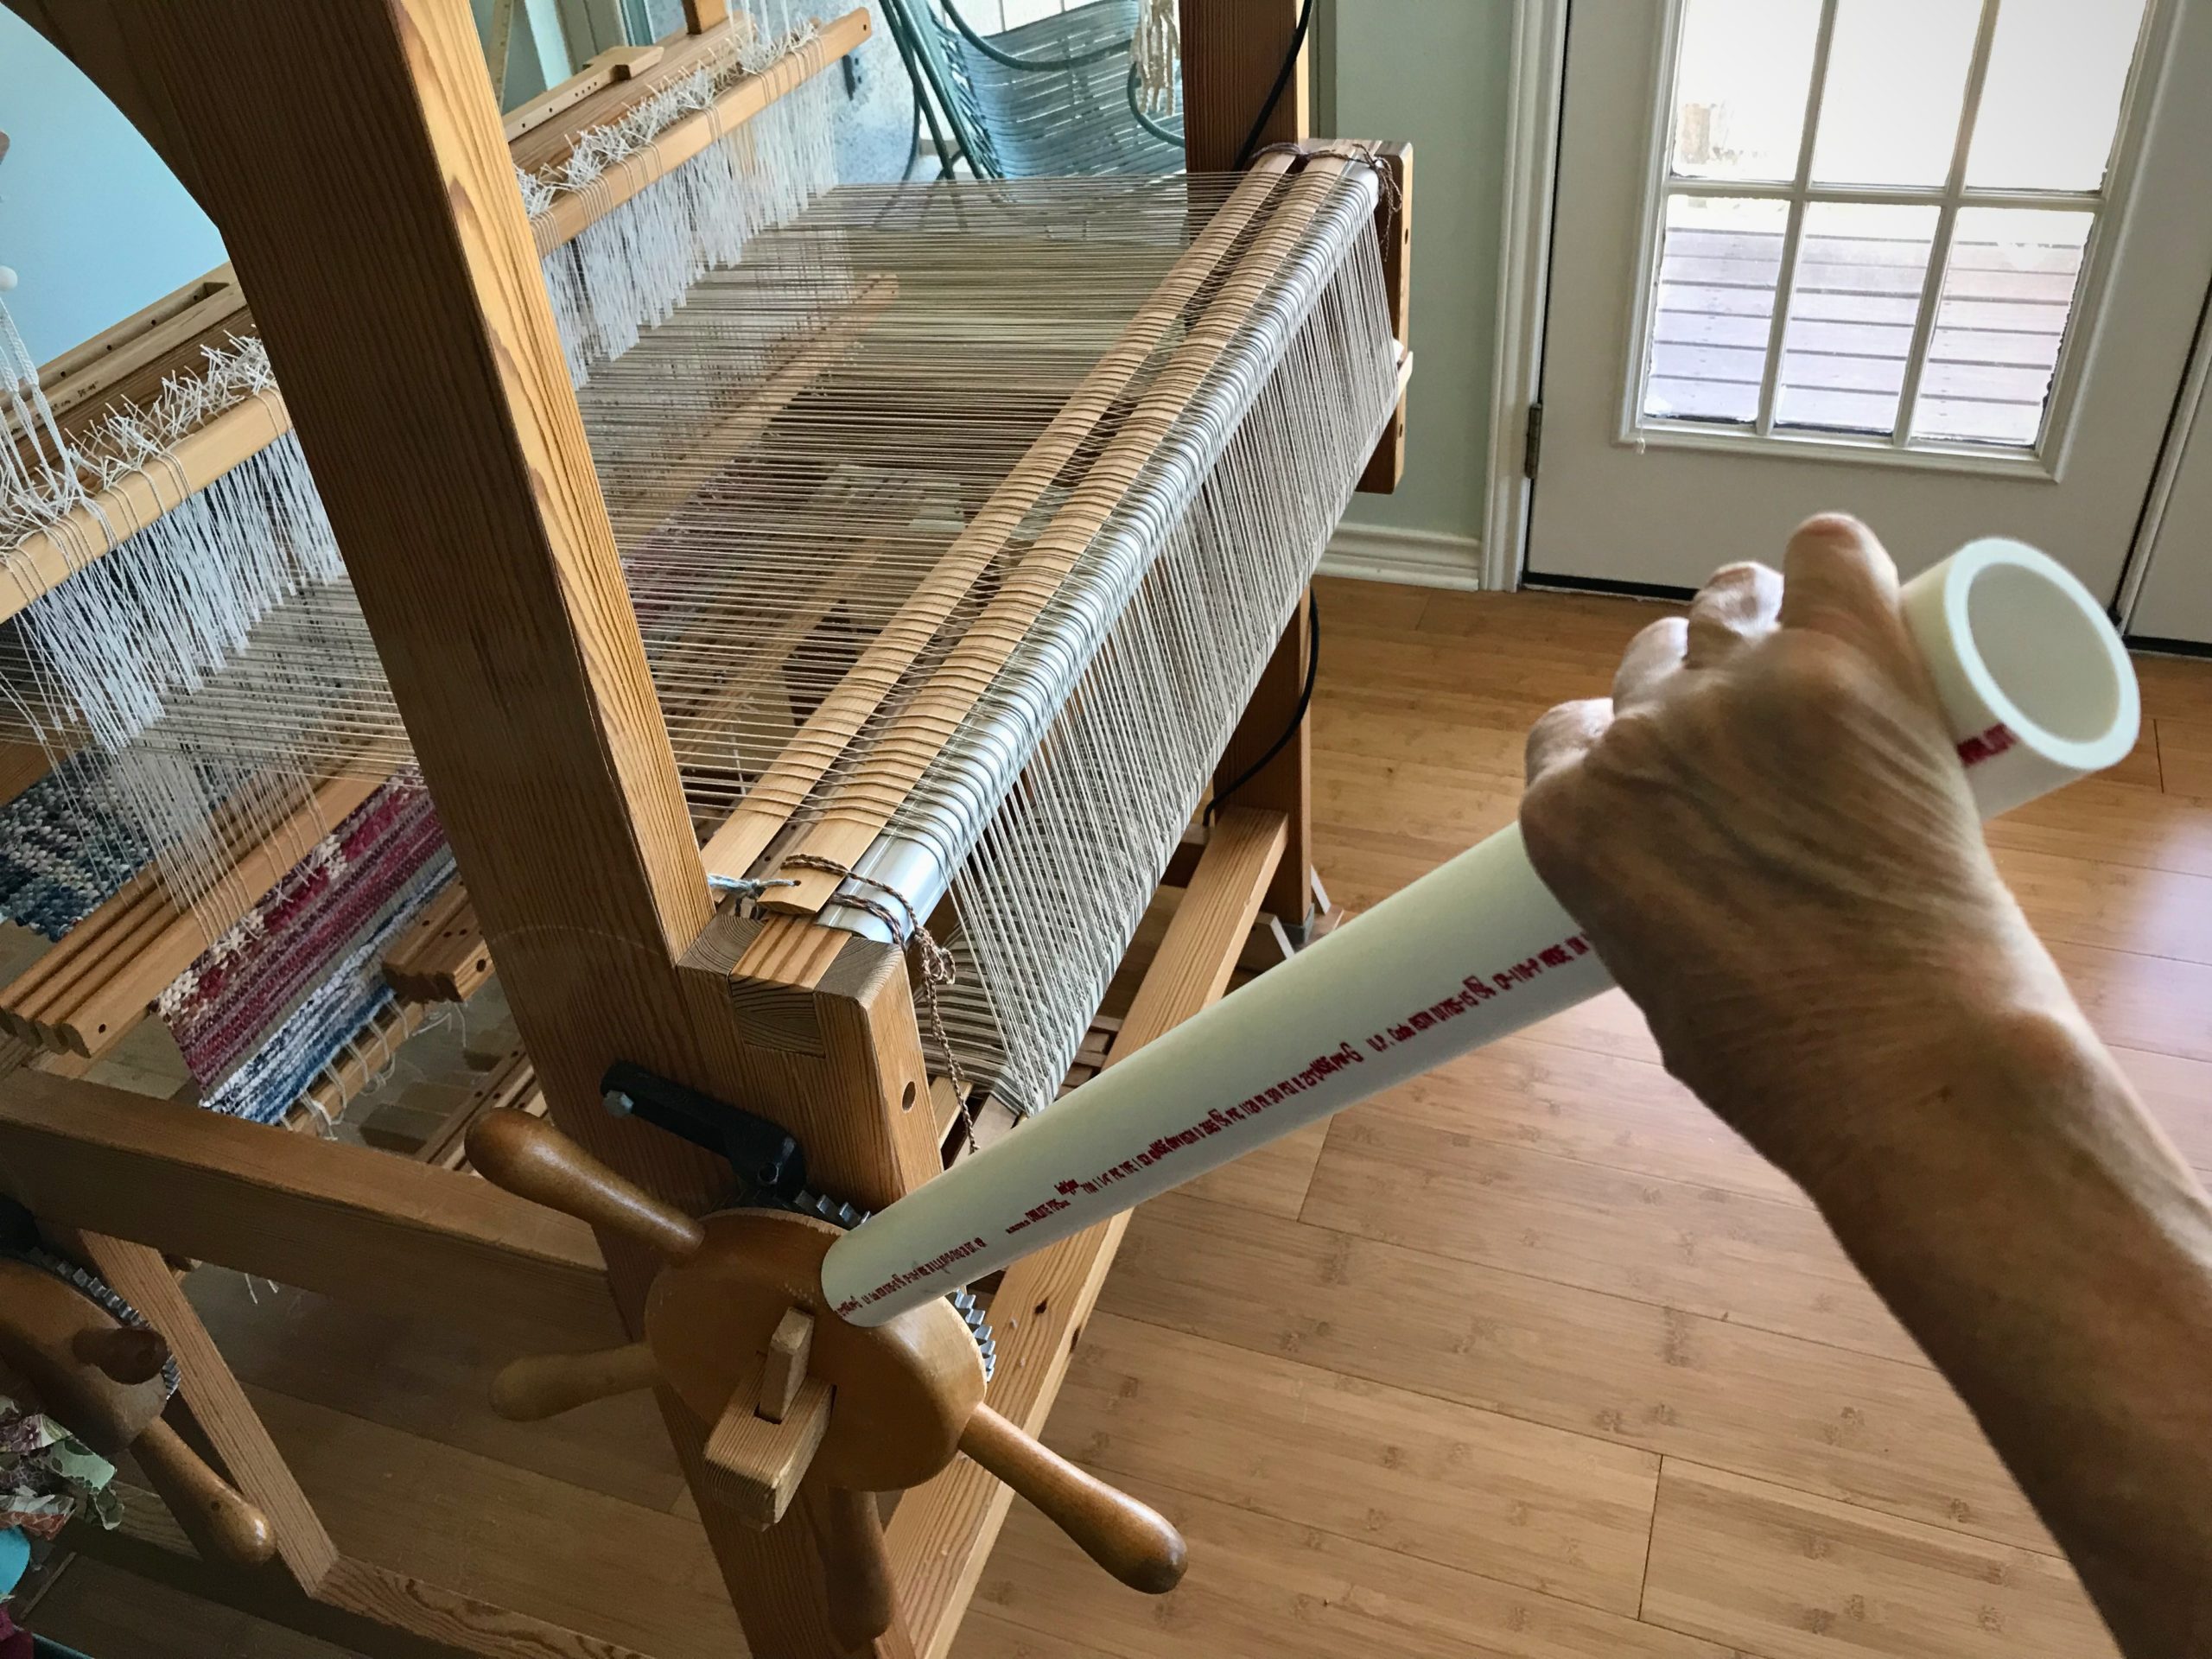
UPDATE: I no longer use the cheater bar, as it could put too much force on the loom parts. Instead, I loosen the front ratchet first, and then I am able to loosen the back ratchet.
I have a tool that makes me stronger than I naturally am. Warp tension is extremely tight on my loom when I am weaving rugs. After advancing the warp, and locking the pawl on the cloth beam, I tighten the ratchet on the warp beam as much as I can. Then, I put all my weight into tightening the cloth beam. And then, with a bit of oomph, I lean into the handles on that cloth beam wheel to turn it one more notch on the ratchet. I pat myself on the back for exhibiting such strength. But wait, I have just created a problem. The next time I need to advance the warp, I’m not nearly strong enough to release those front and back pawls.
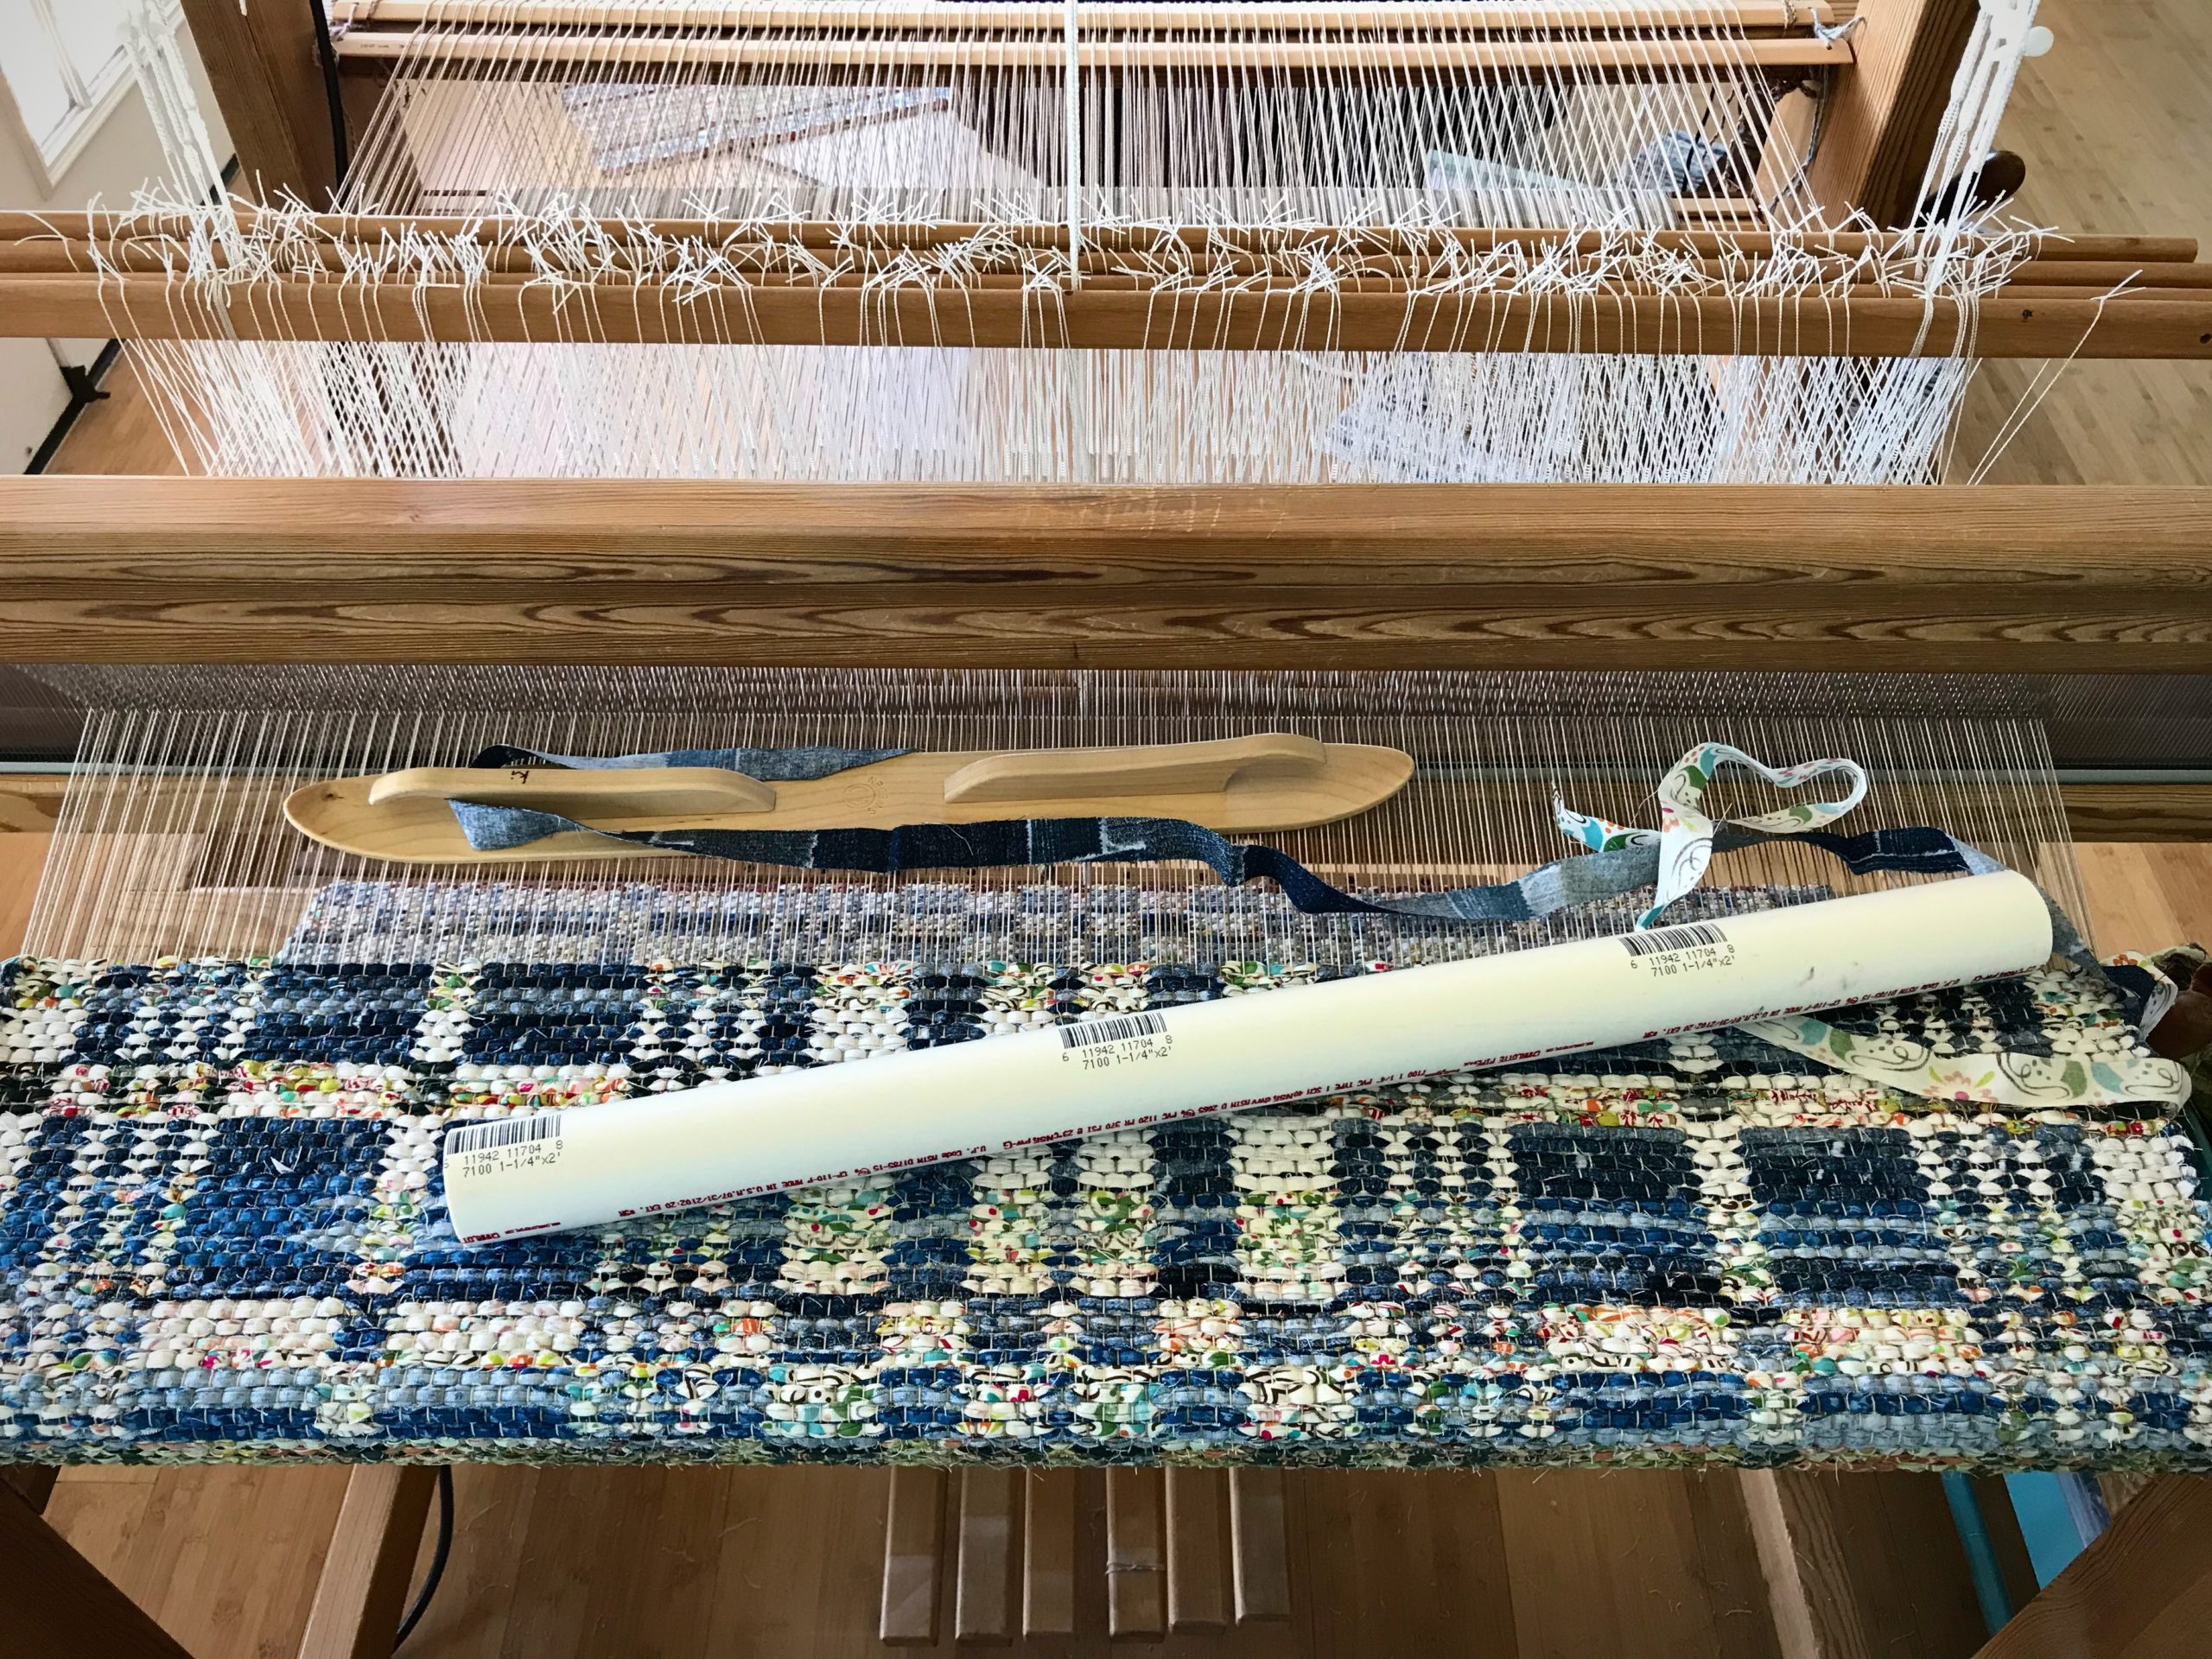
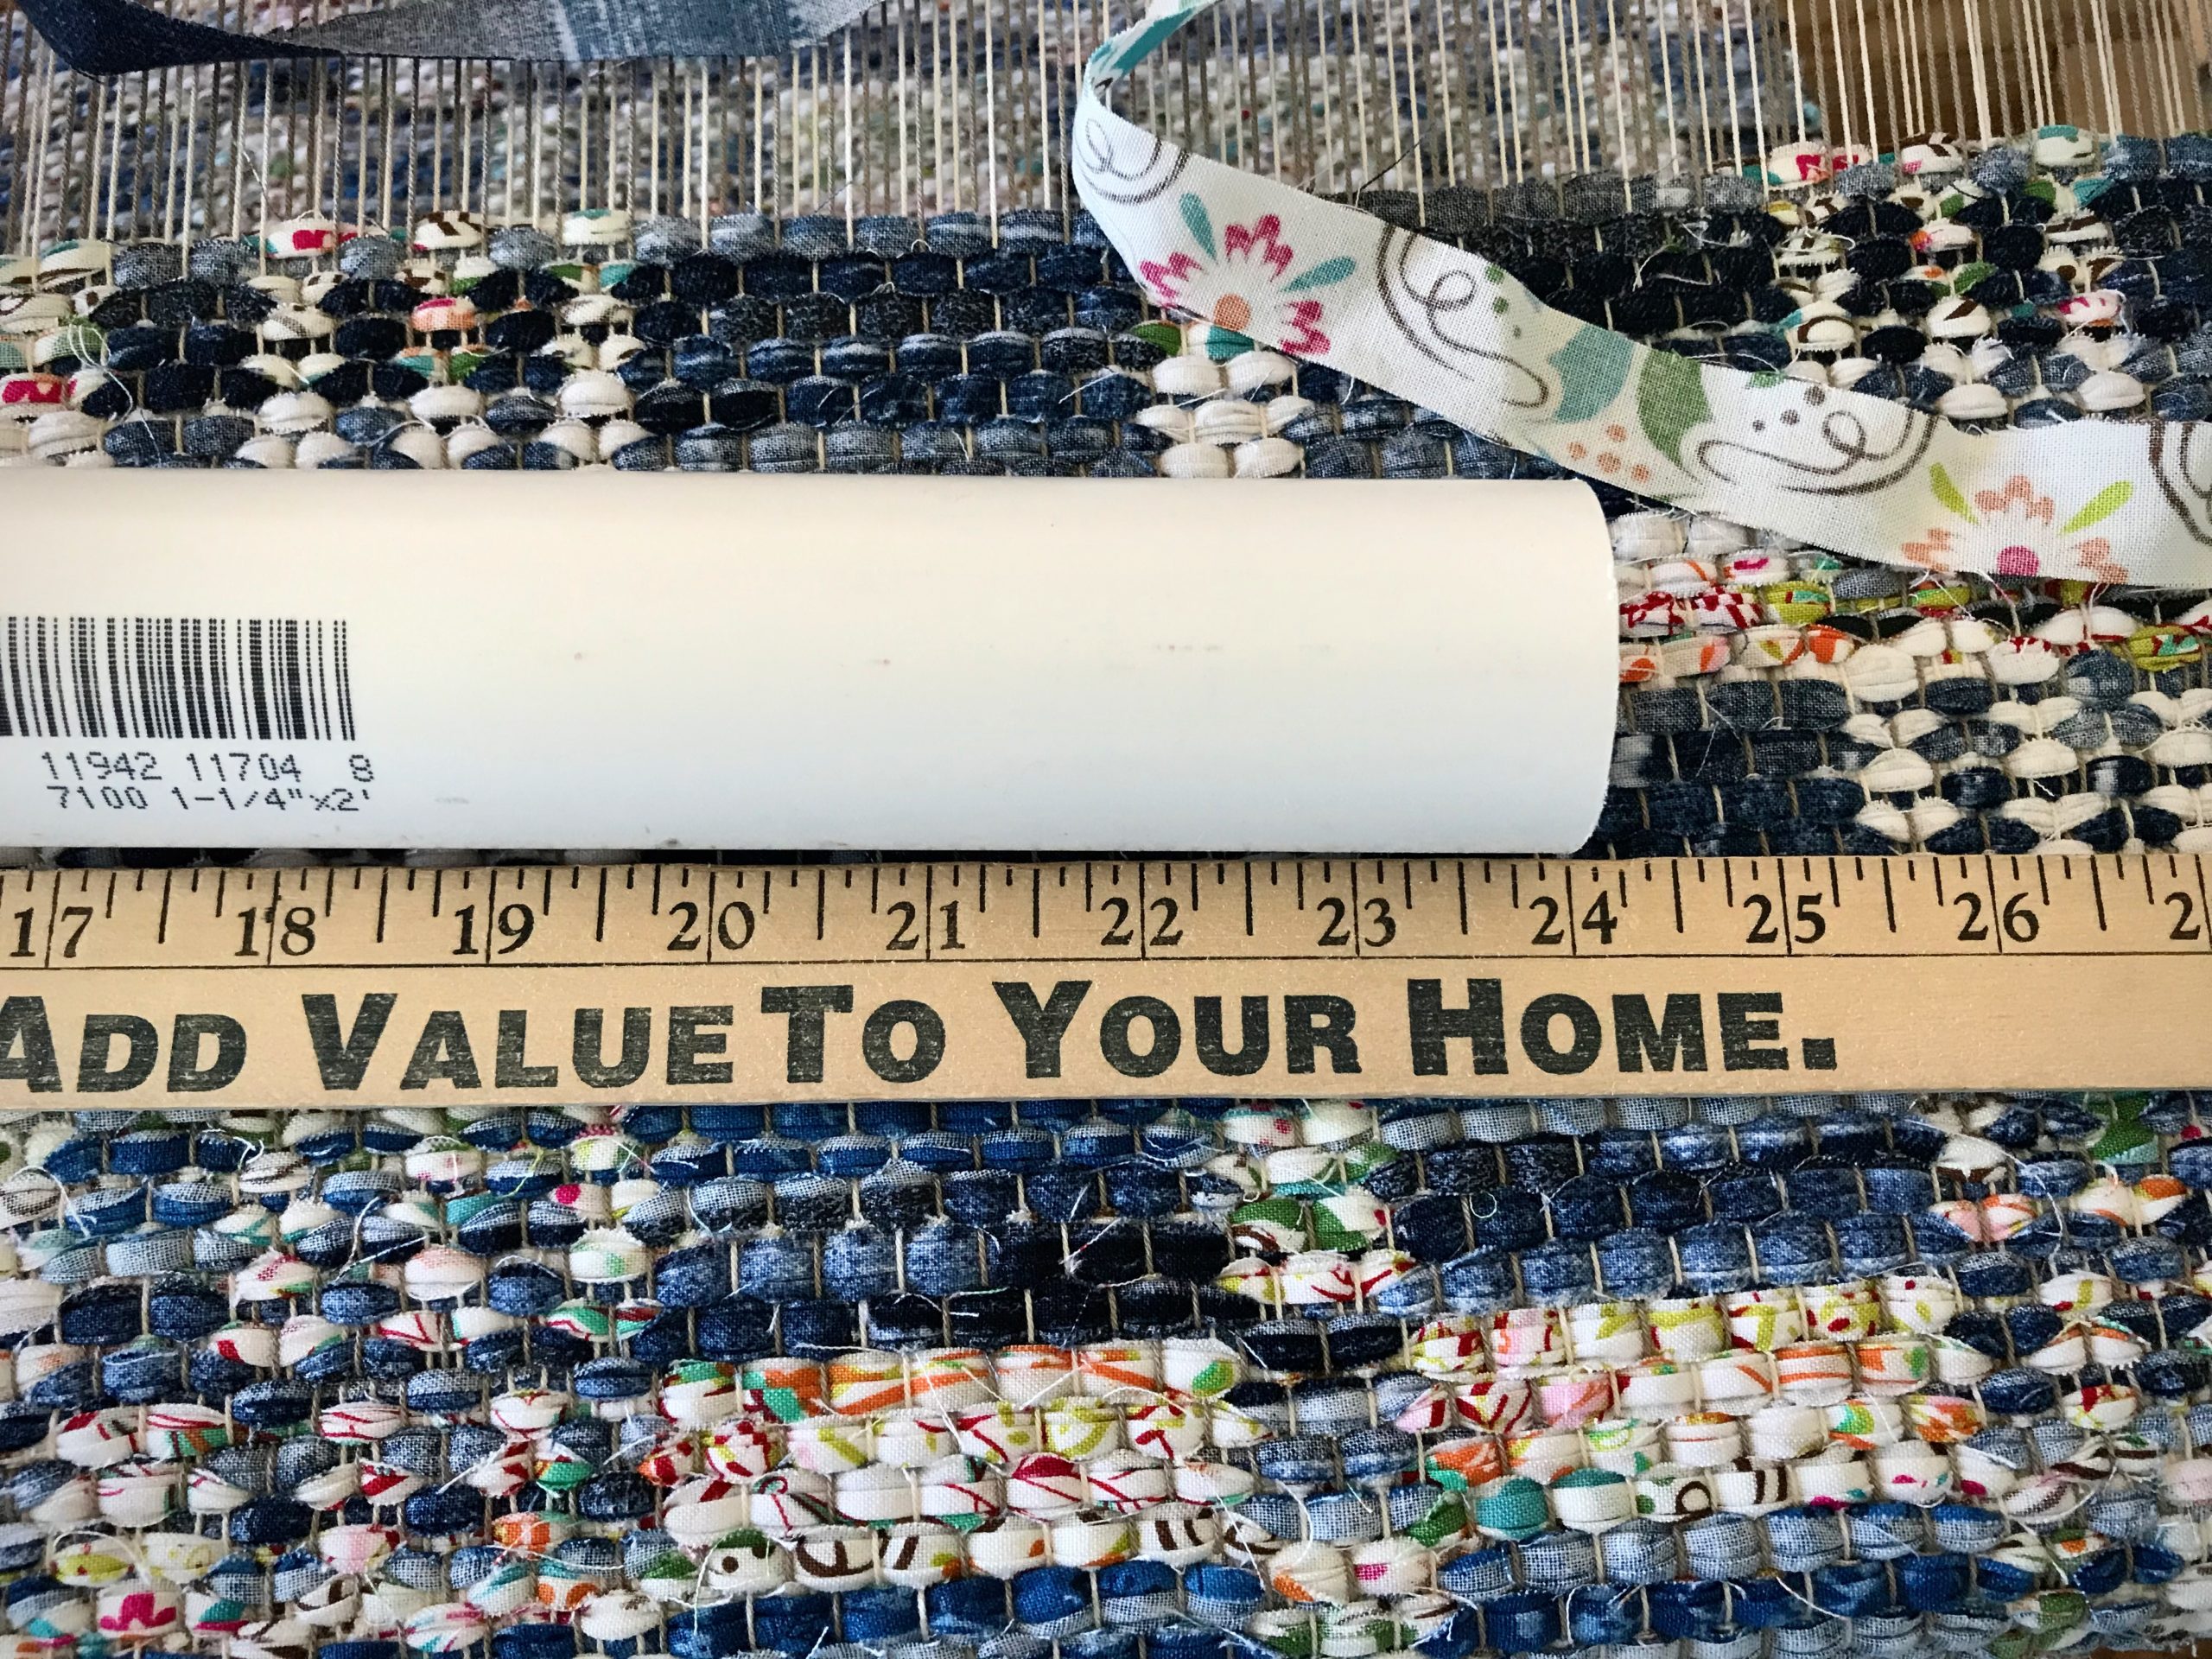
Meet my simplest tool: The Cheater Bar.
Cheater Bar is PVC pipe to use as a lever.PVC pipe, 1 1/4″ x 24″
With this amazing helper, I can safely release even the most extremely tight warp tension. (But NEVER use the Cheater Bar to tighten the warp.)
Slip the end of the pipe over a handle on the ratchet wheel.Force of the lever makes it easy to release the ratchet. CAUTION! Do not use the lever to tighten the warp beam or cloth beam. You could easily tighten it more than the loom is made to handle.
I never knew I could be this strong. Celebrate the moment! (A play on words. Steve tells me “moment” is a physics term that has to do with a force’s tendency to cause something to rotate about a specific point or axis.)
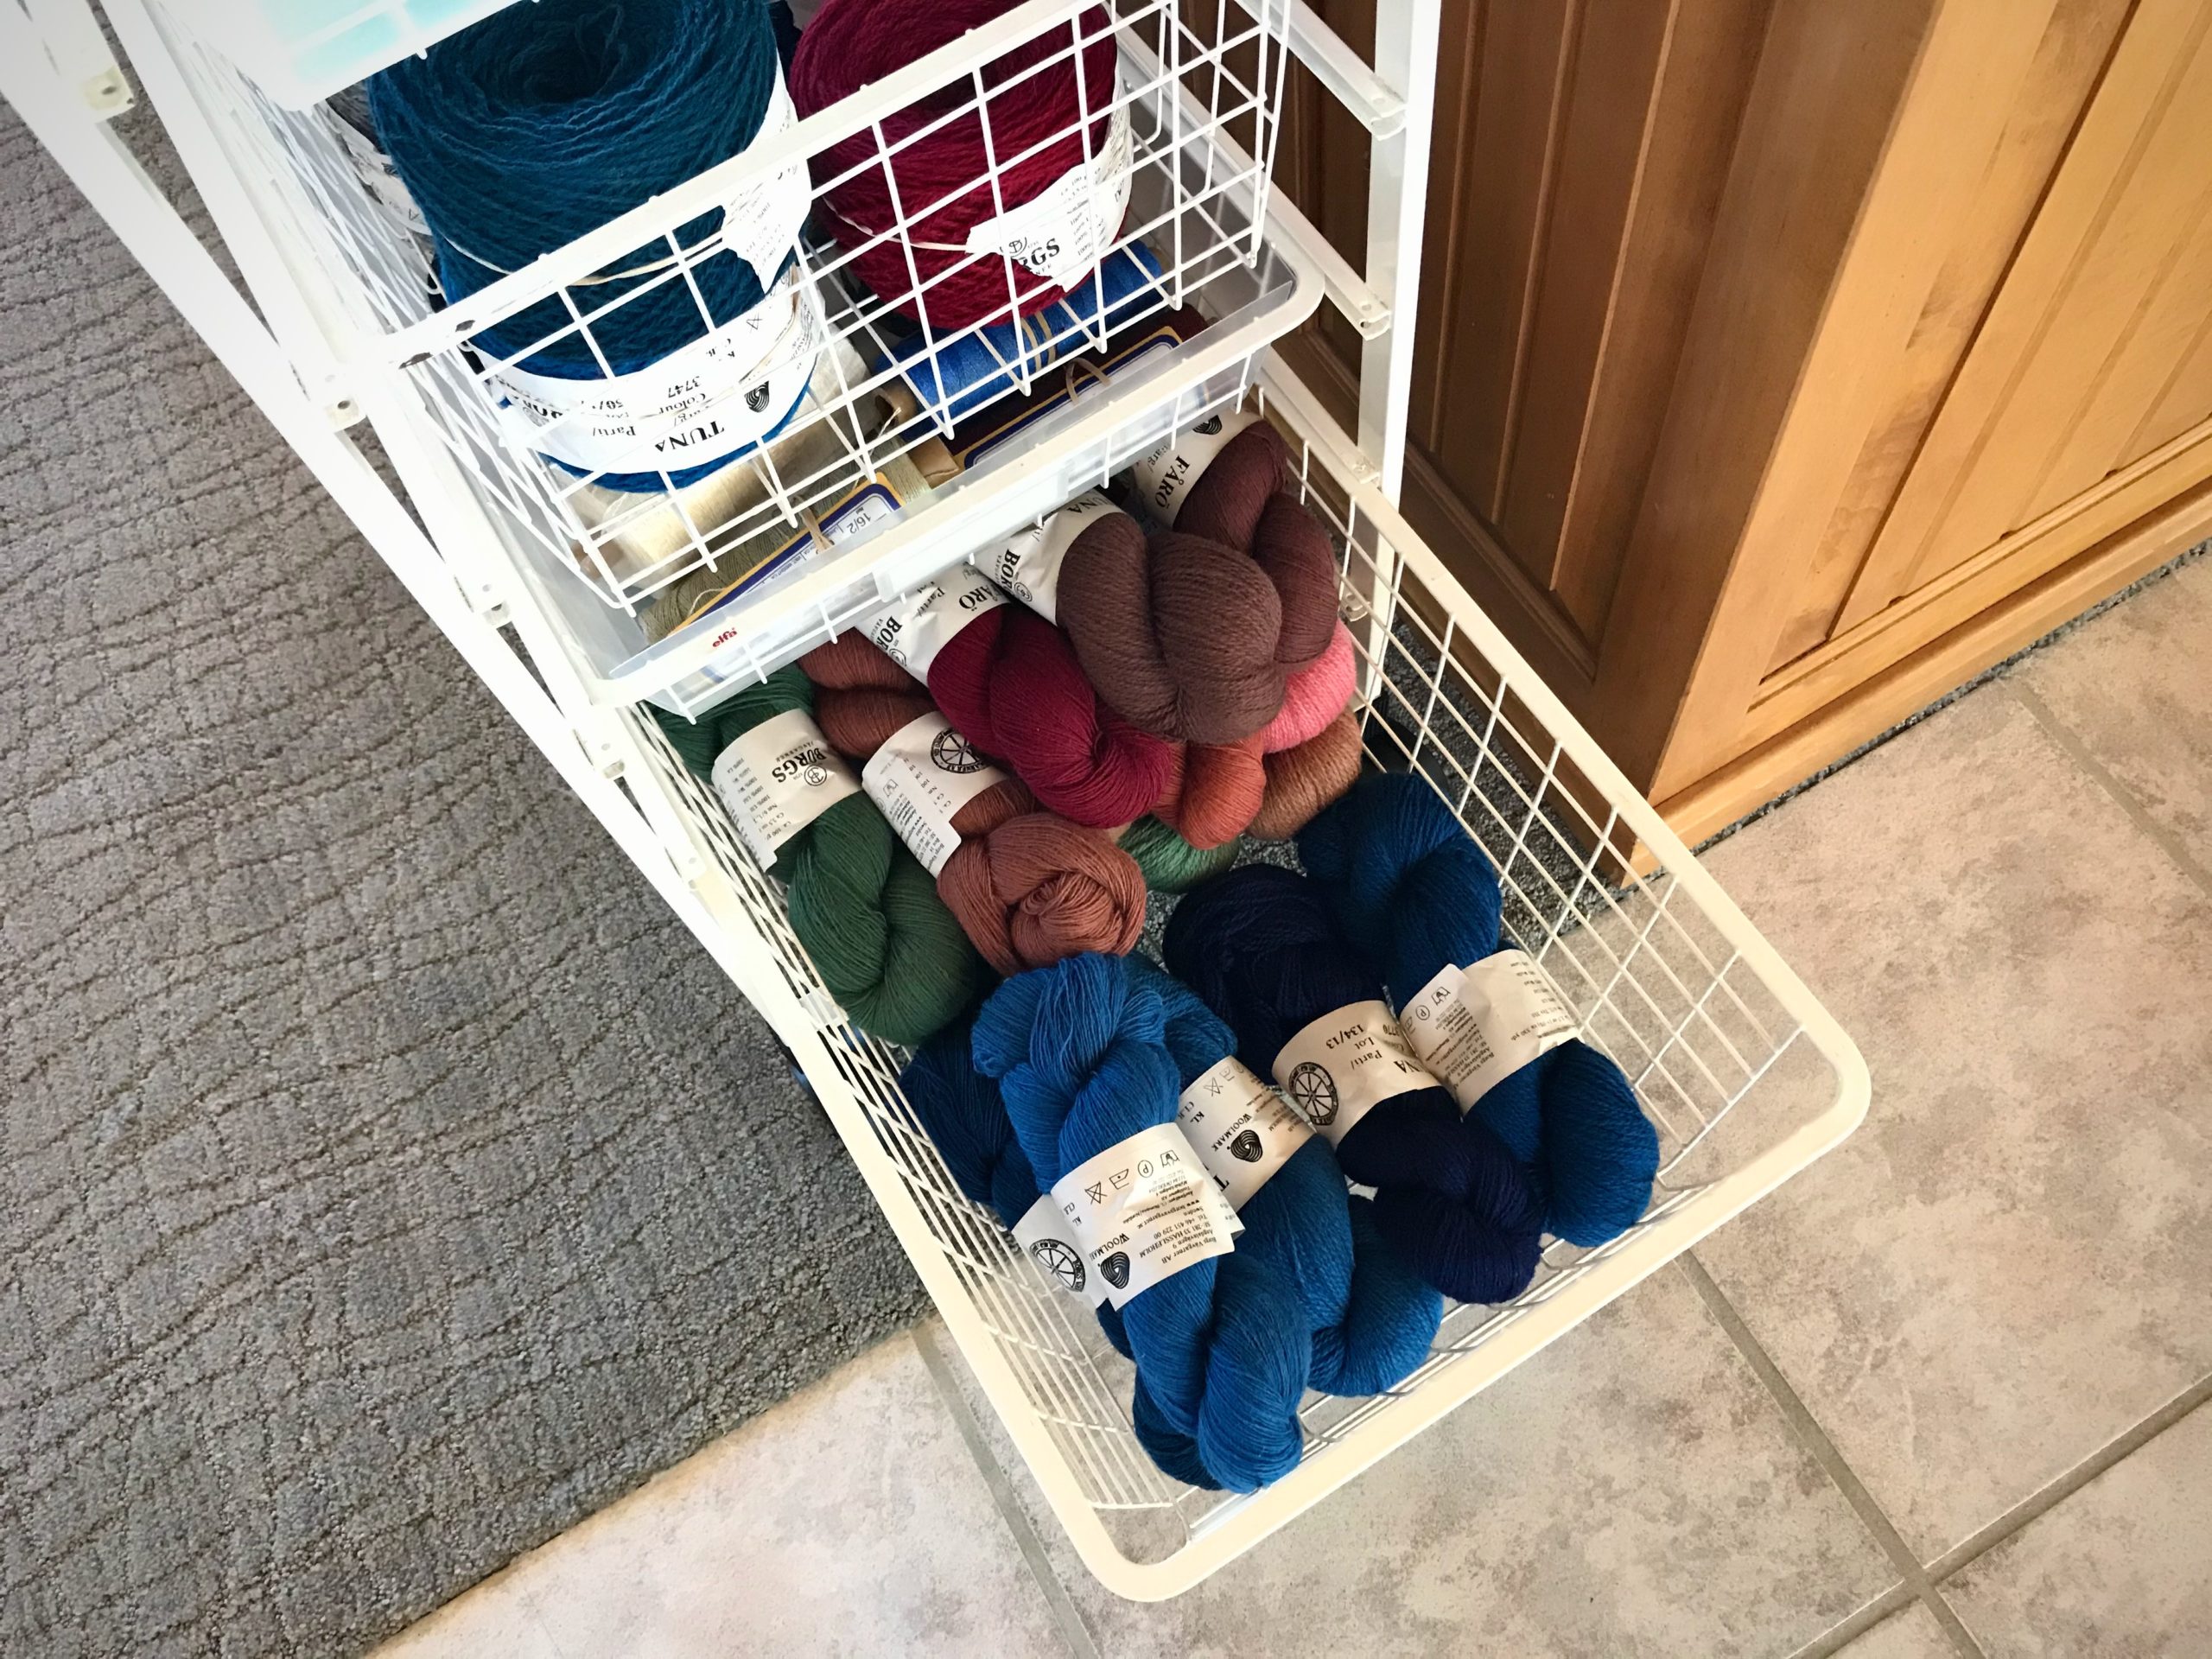
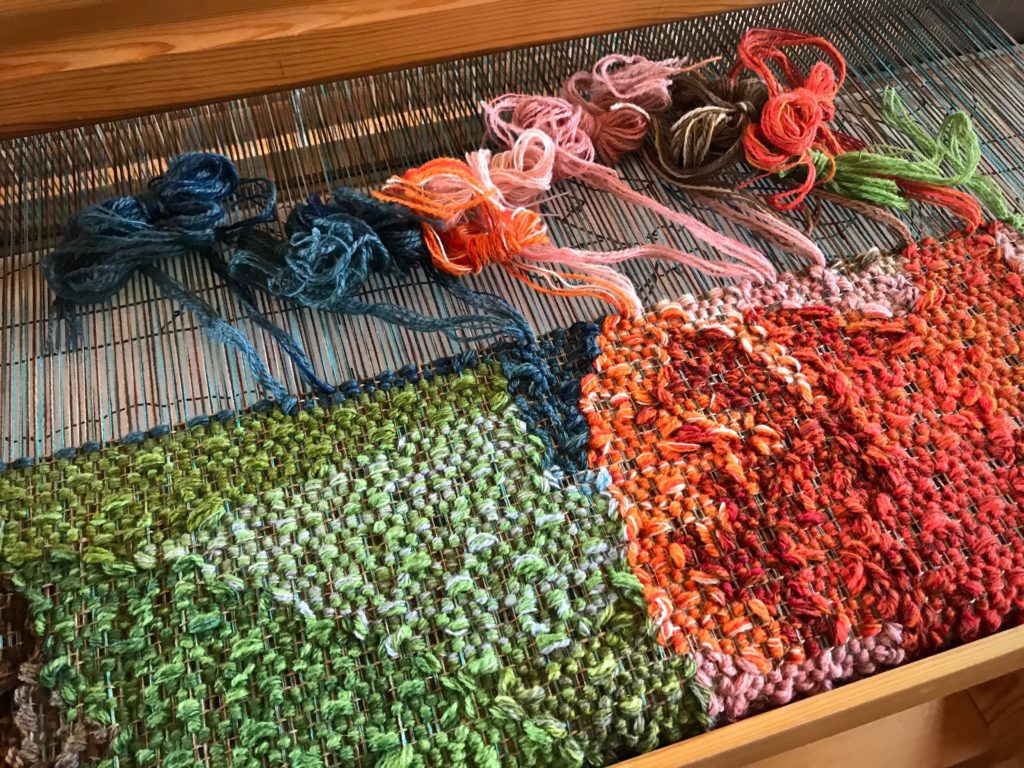
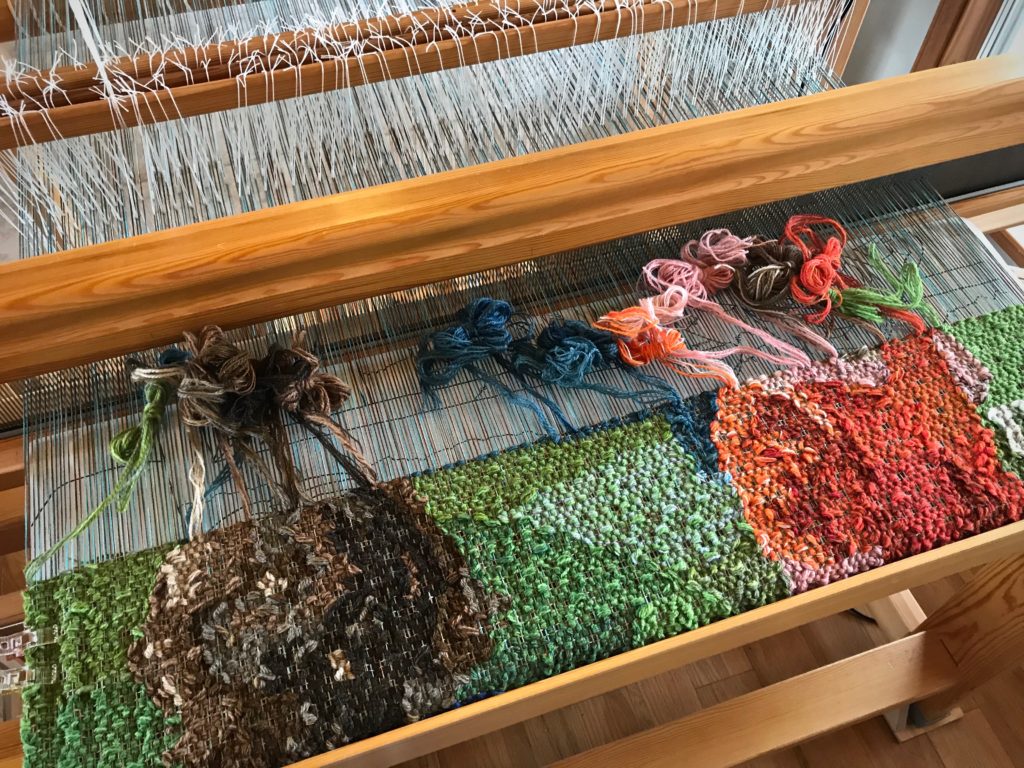
I am adding about thirty more skeins to my yarn supply to get the colors I need for a new tapestry. At this rate, maybe I will have every single color of Borgs 6/2 Tuna and 6/1 Fårö wool on my shelves some day. That’s wishful thinking… But I do have what I need for now to make the butterflies for this special pictorial tapestry.
Beautiful colors of wool skeins of yarn.
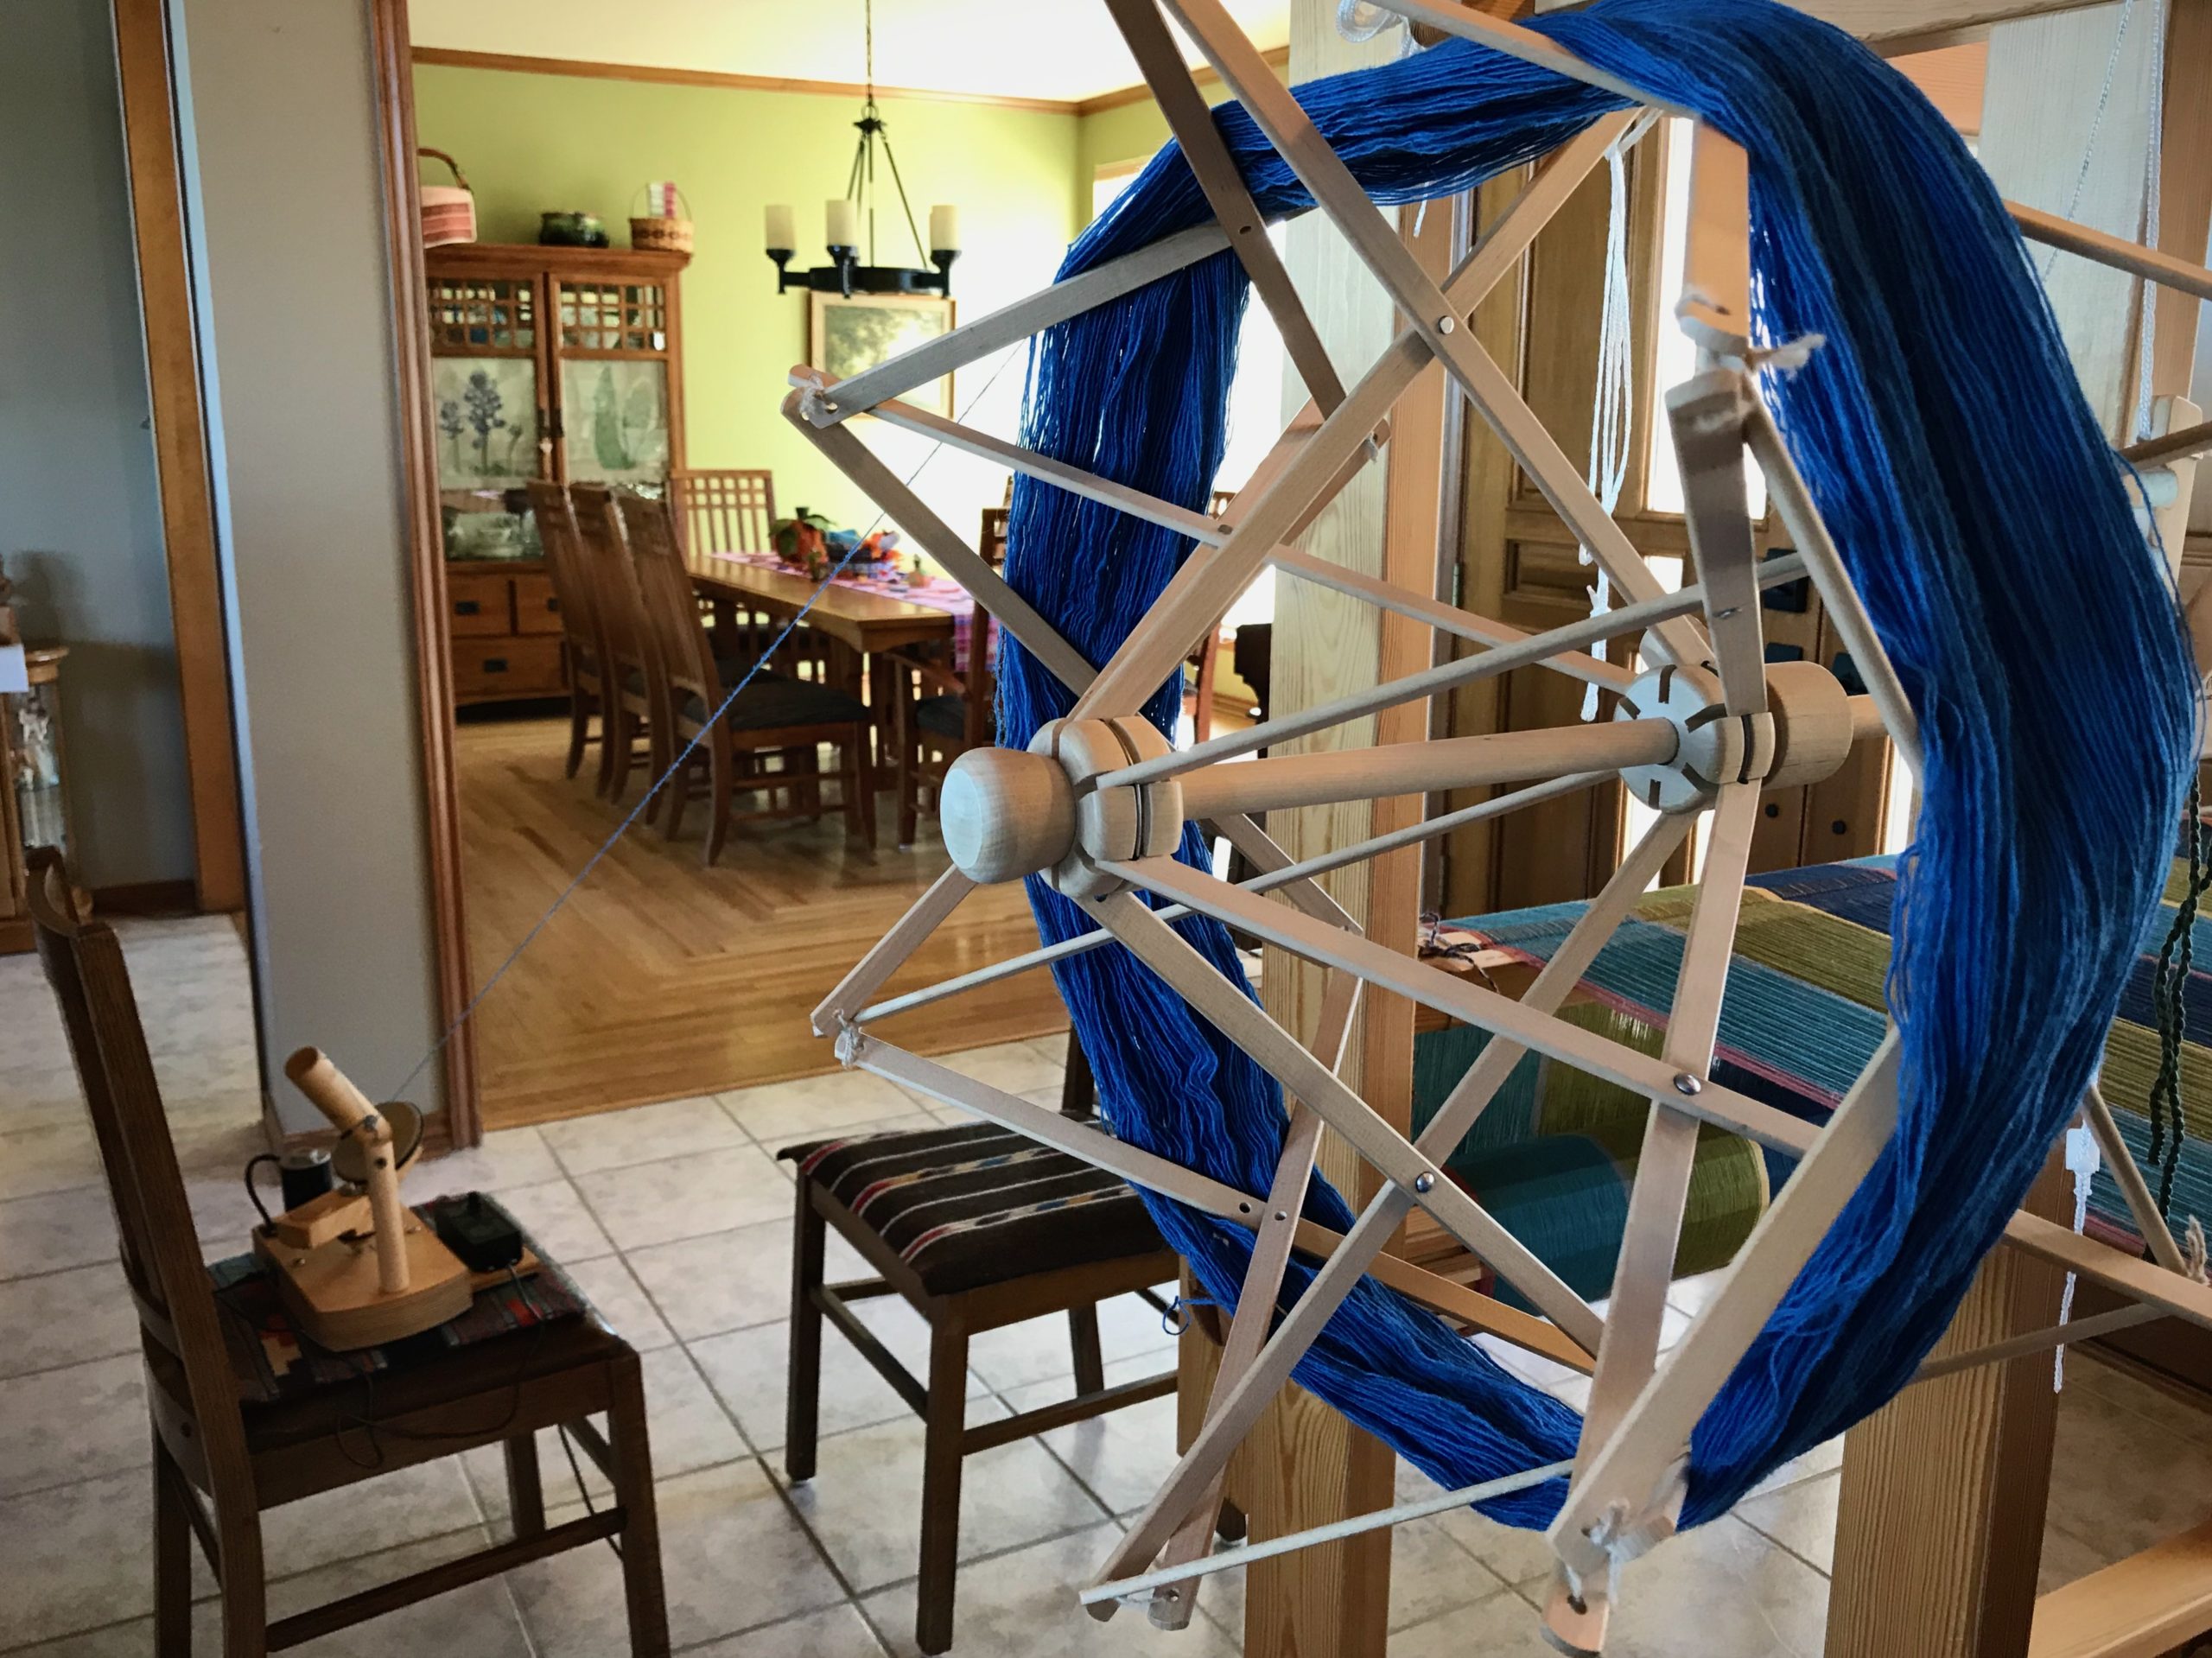
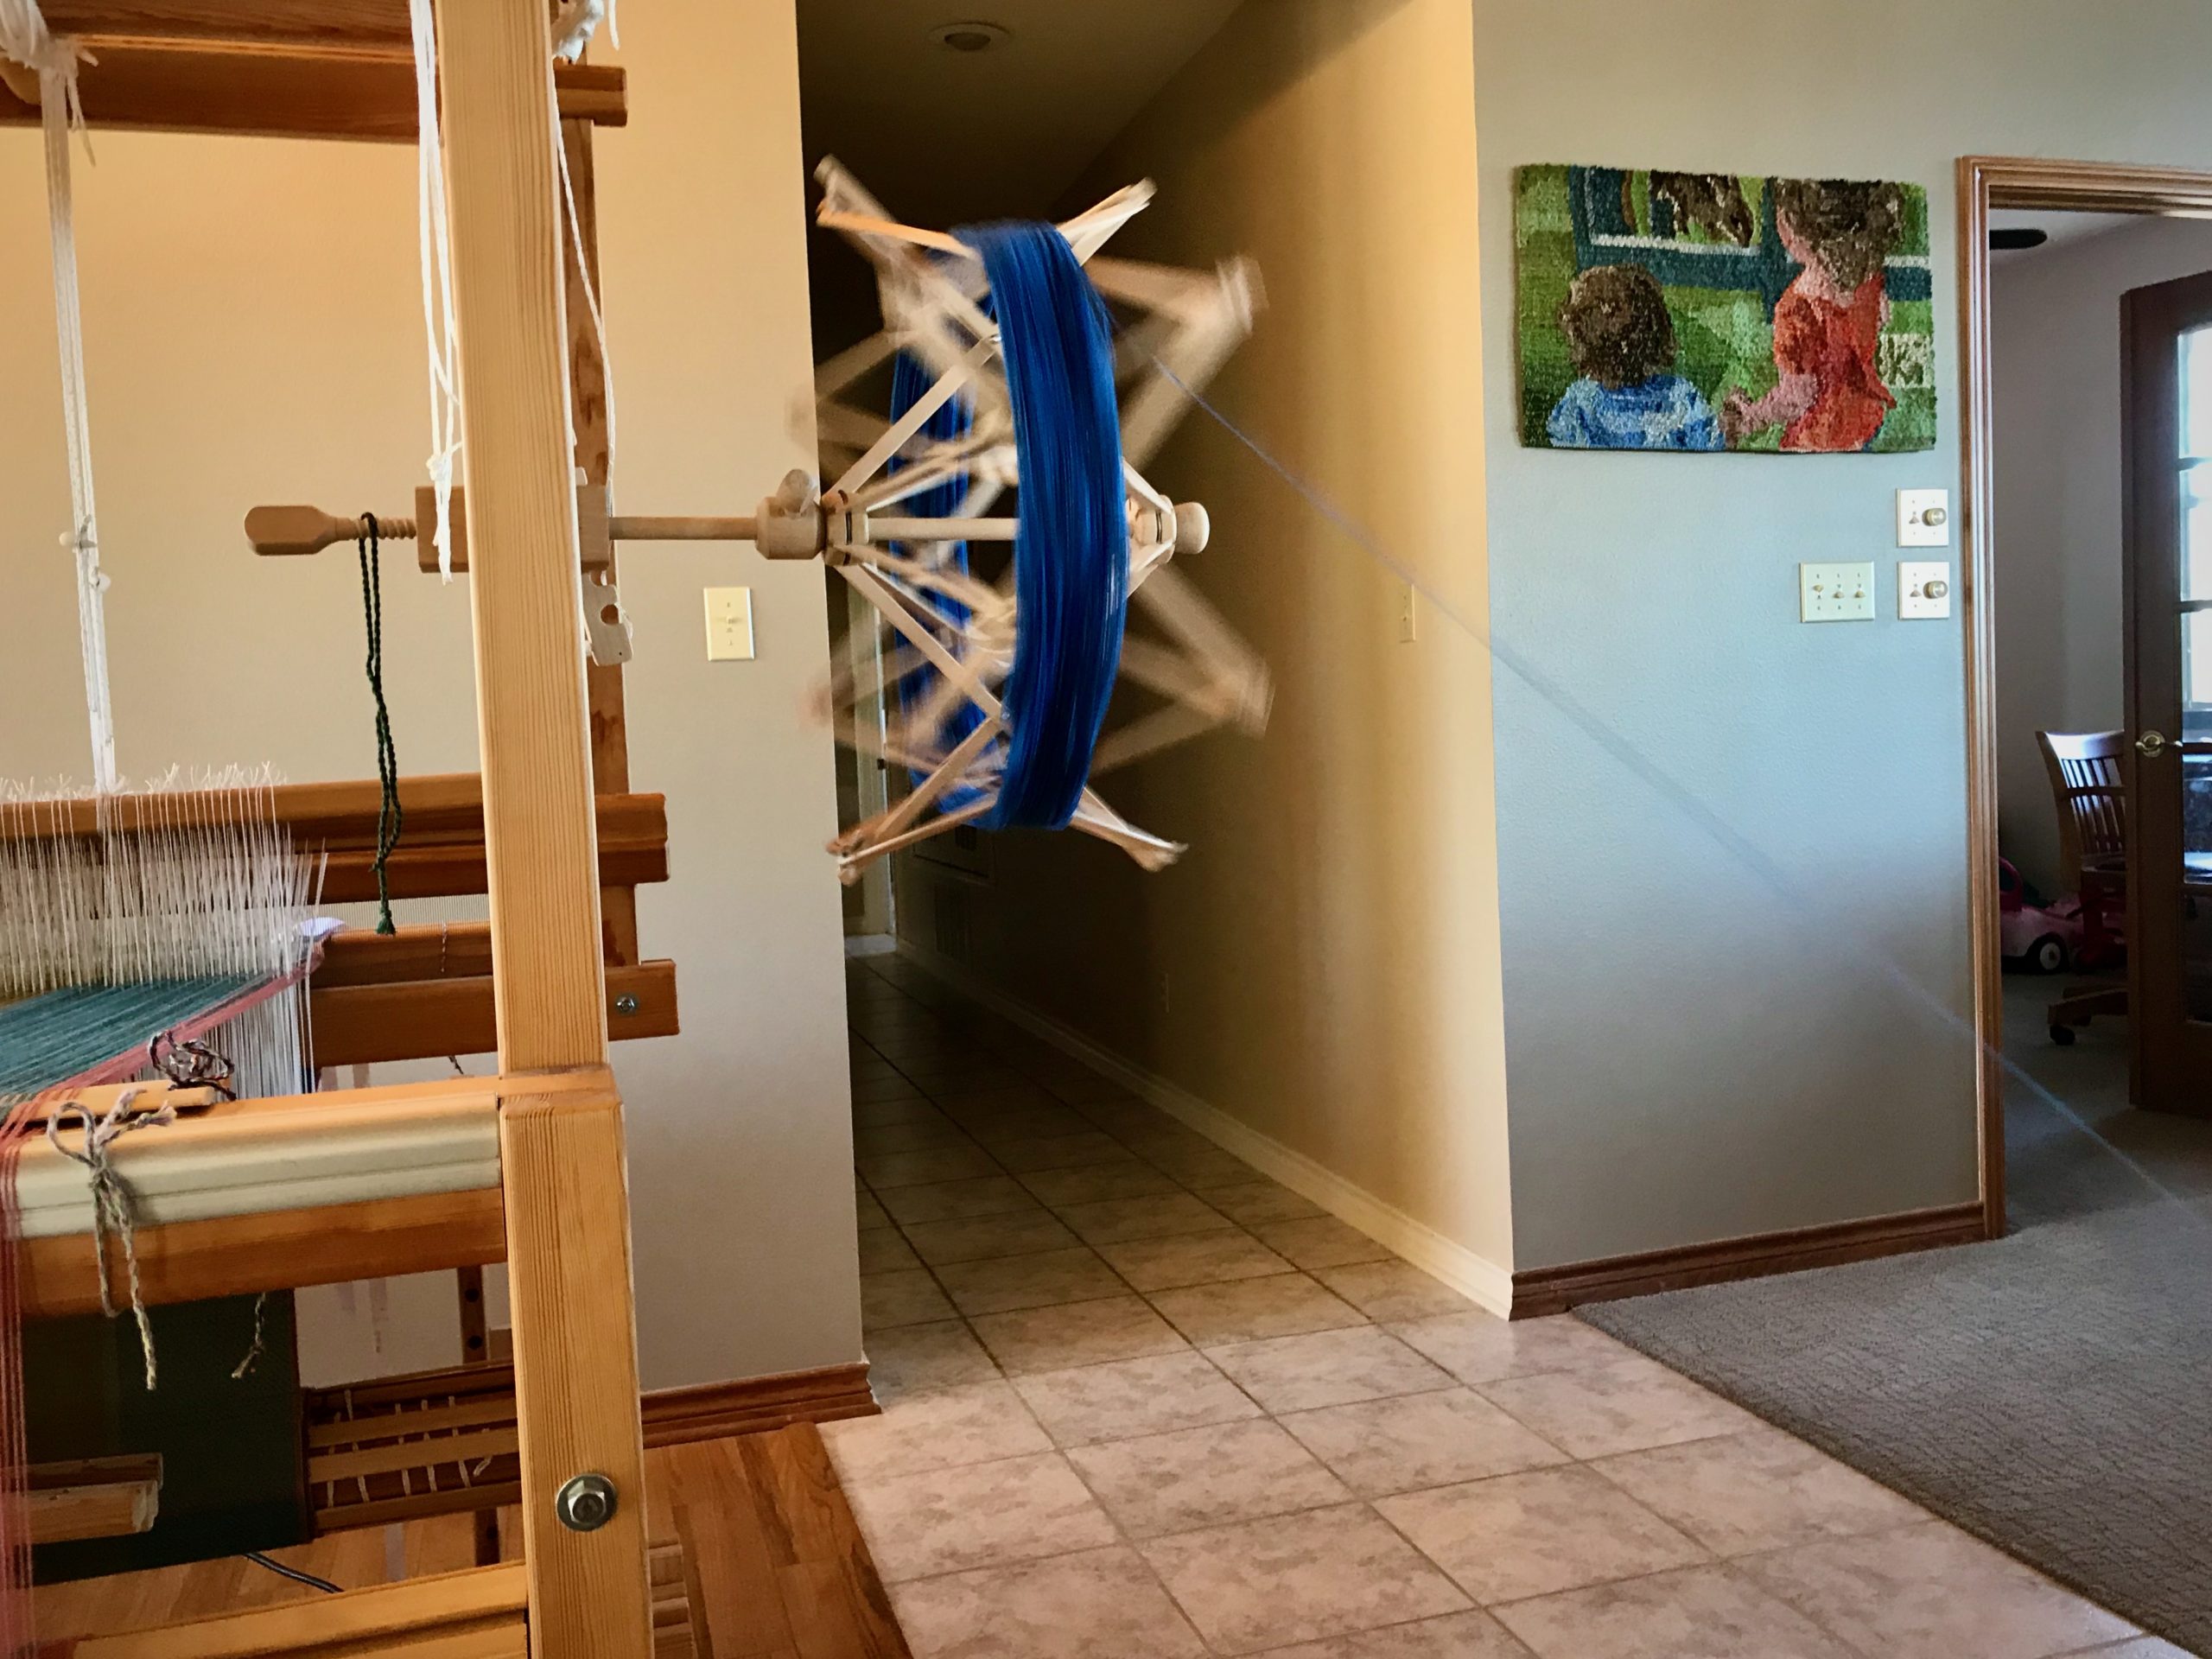
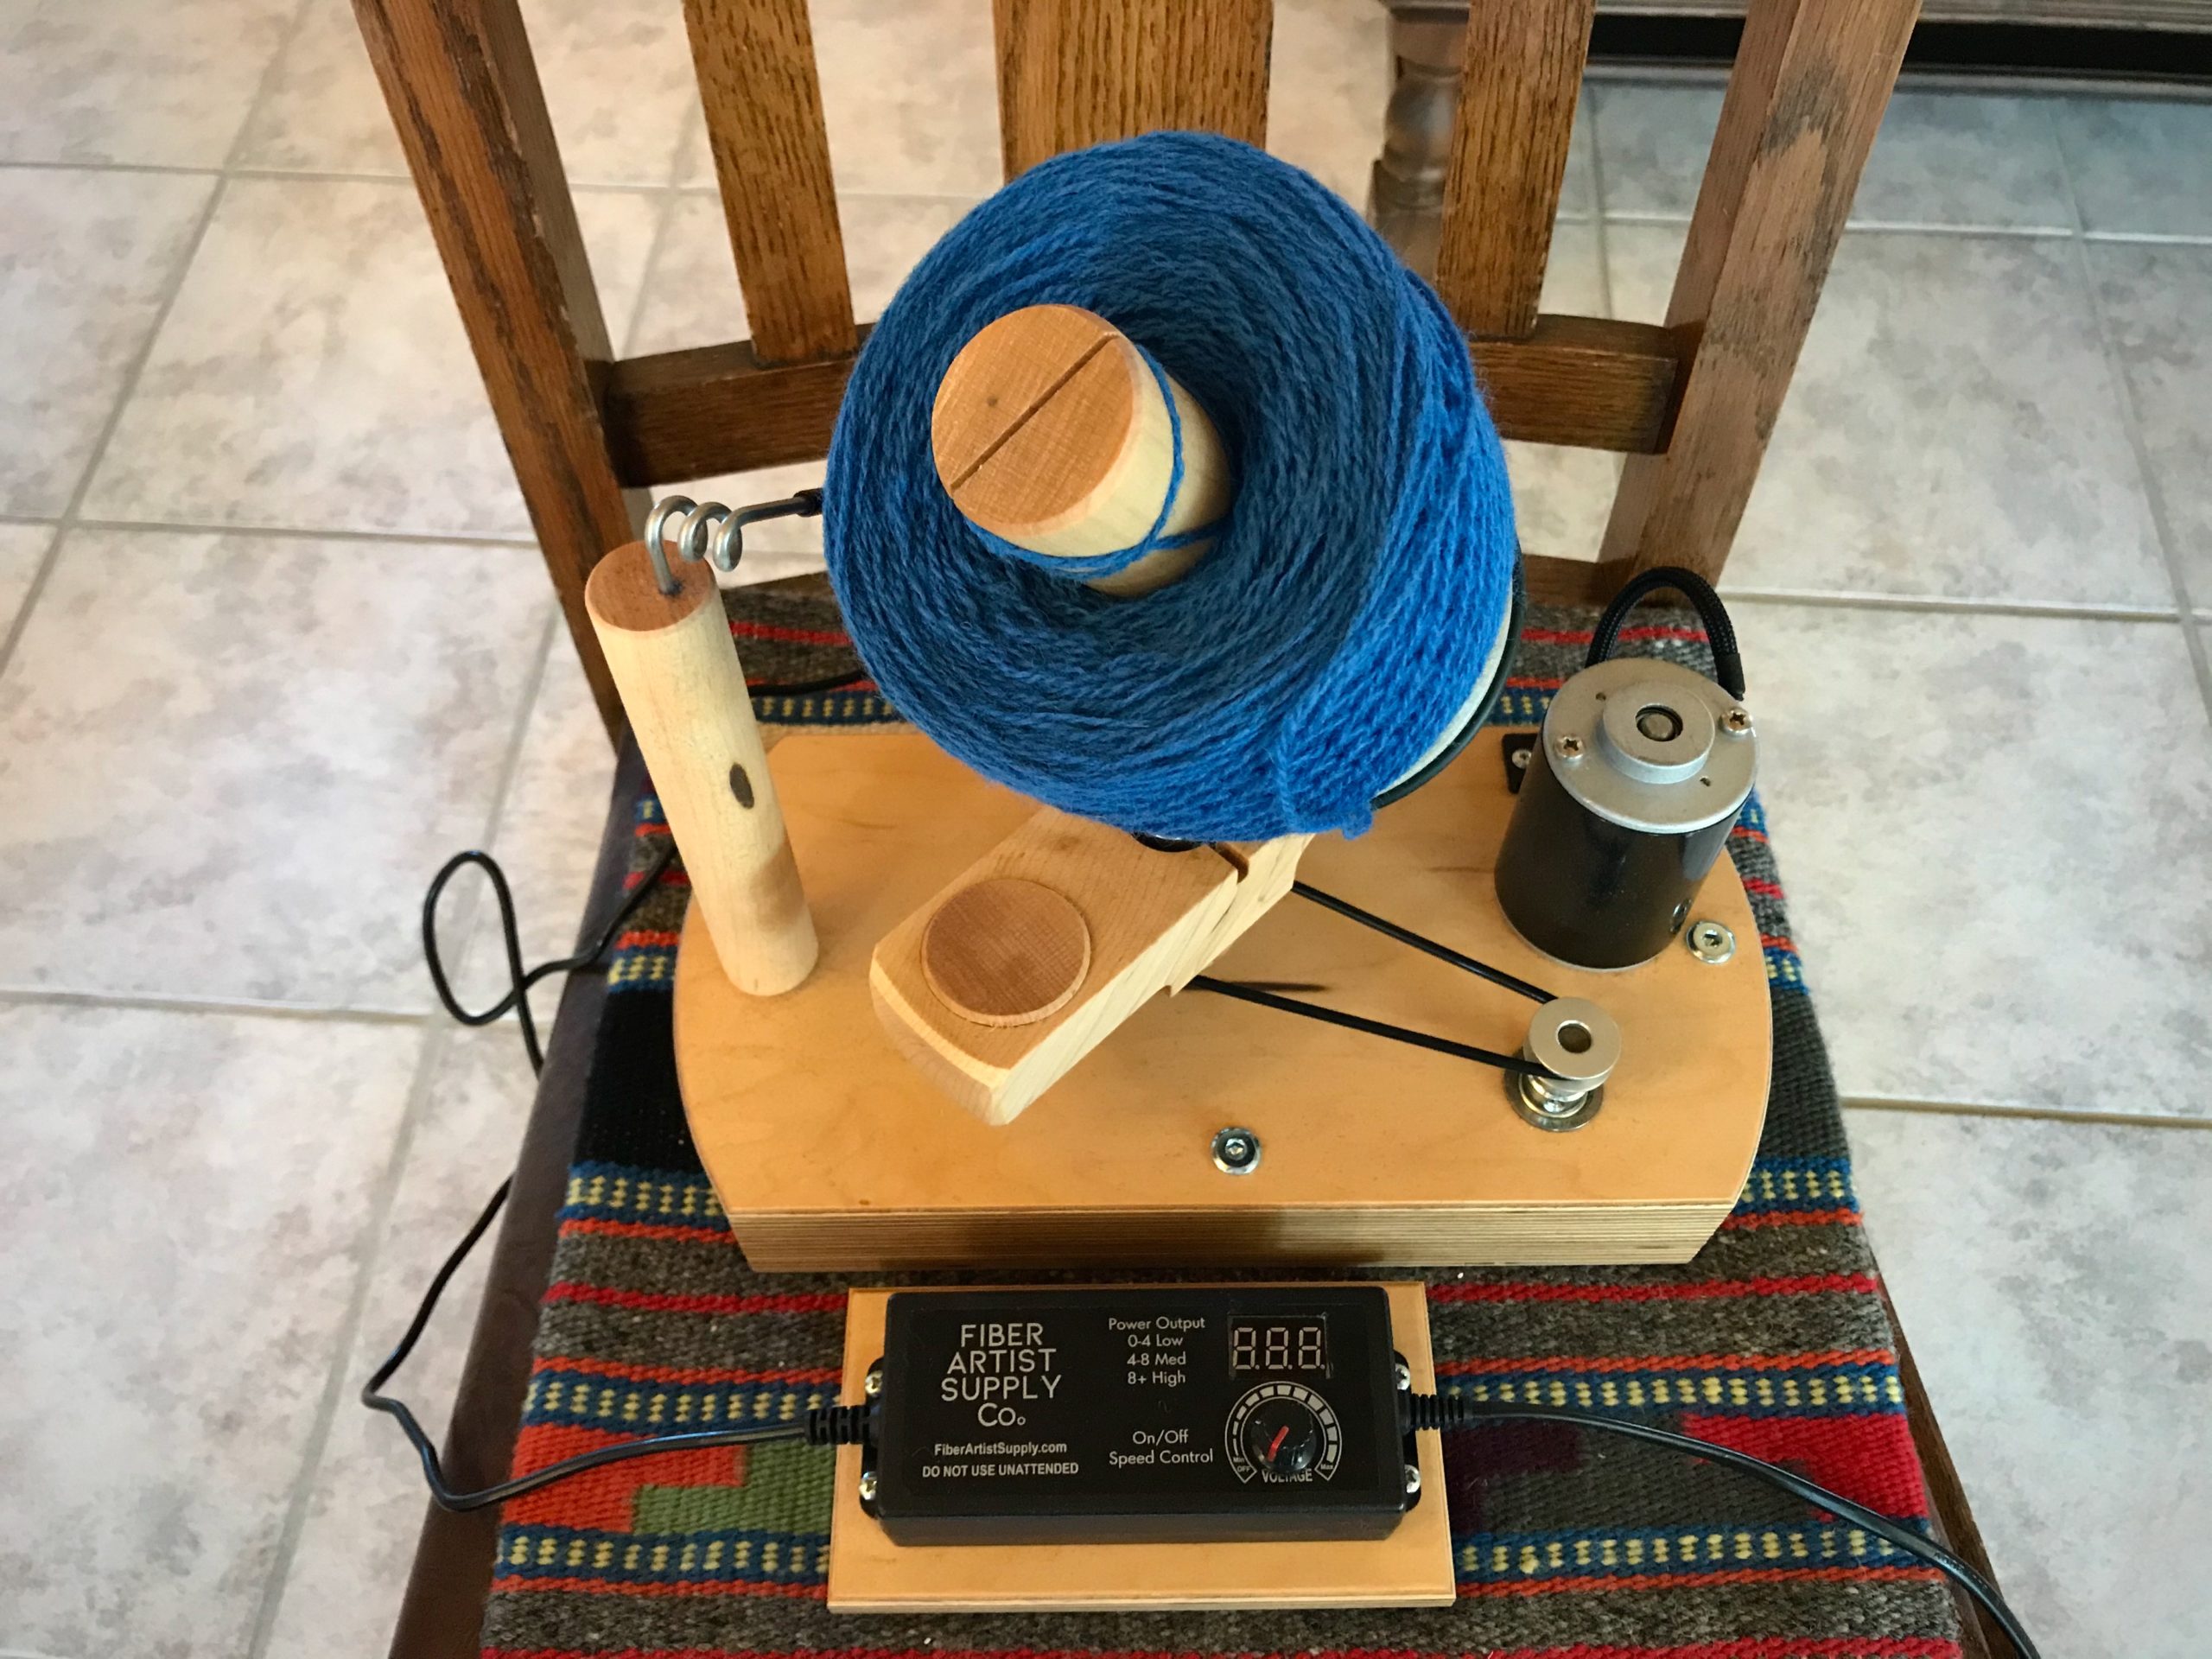
All these new skeins of yarn need to be wound into balls using my Swedish umbrella swift and a ball winder. In the past, I have used a manual ball winder. That means a lot of handle turning, but eventually all the yarn is wound into balls.
Skein of yarn is opened and placed on the umbrella swift.
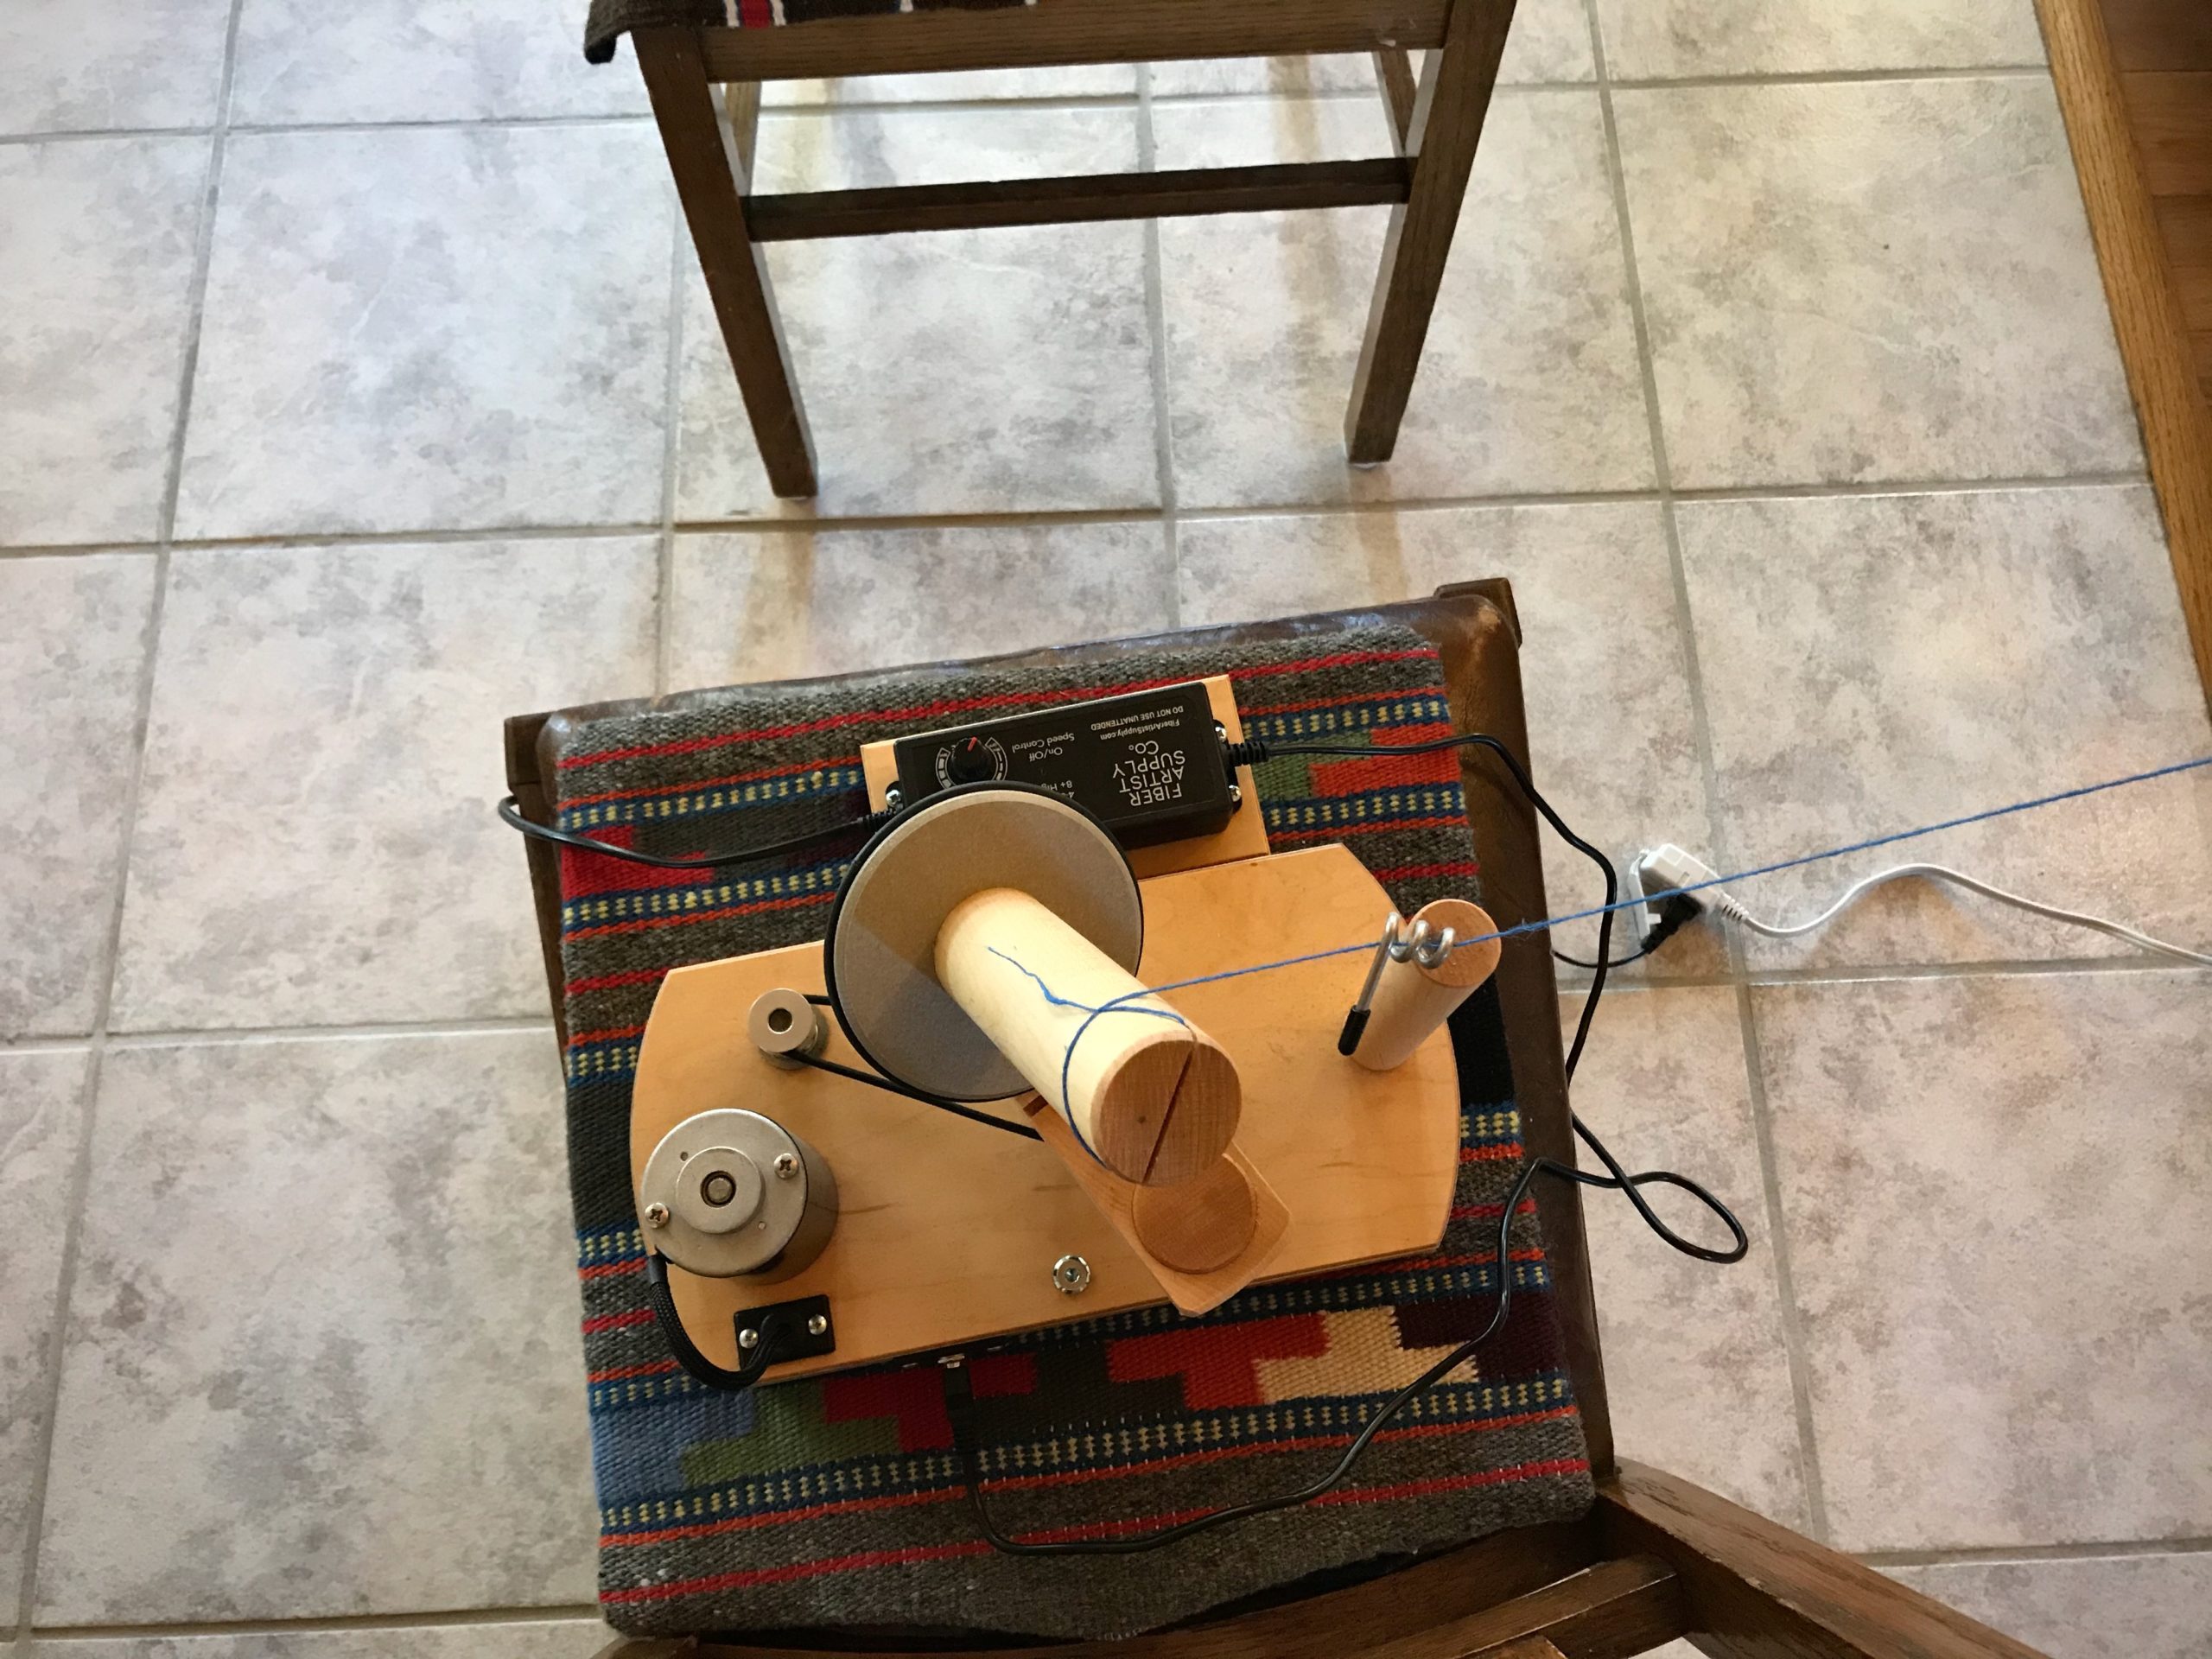
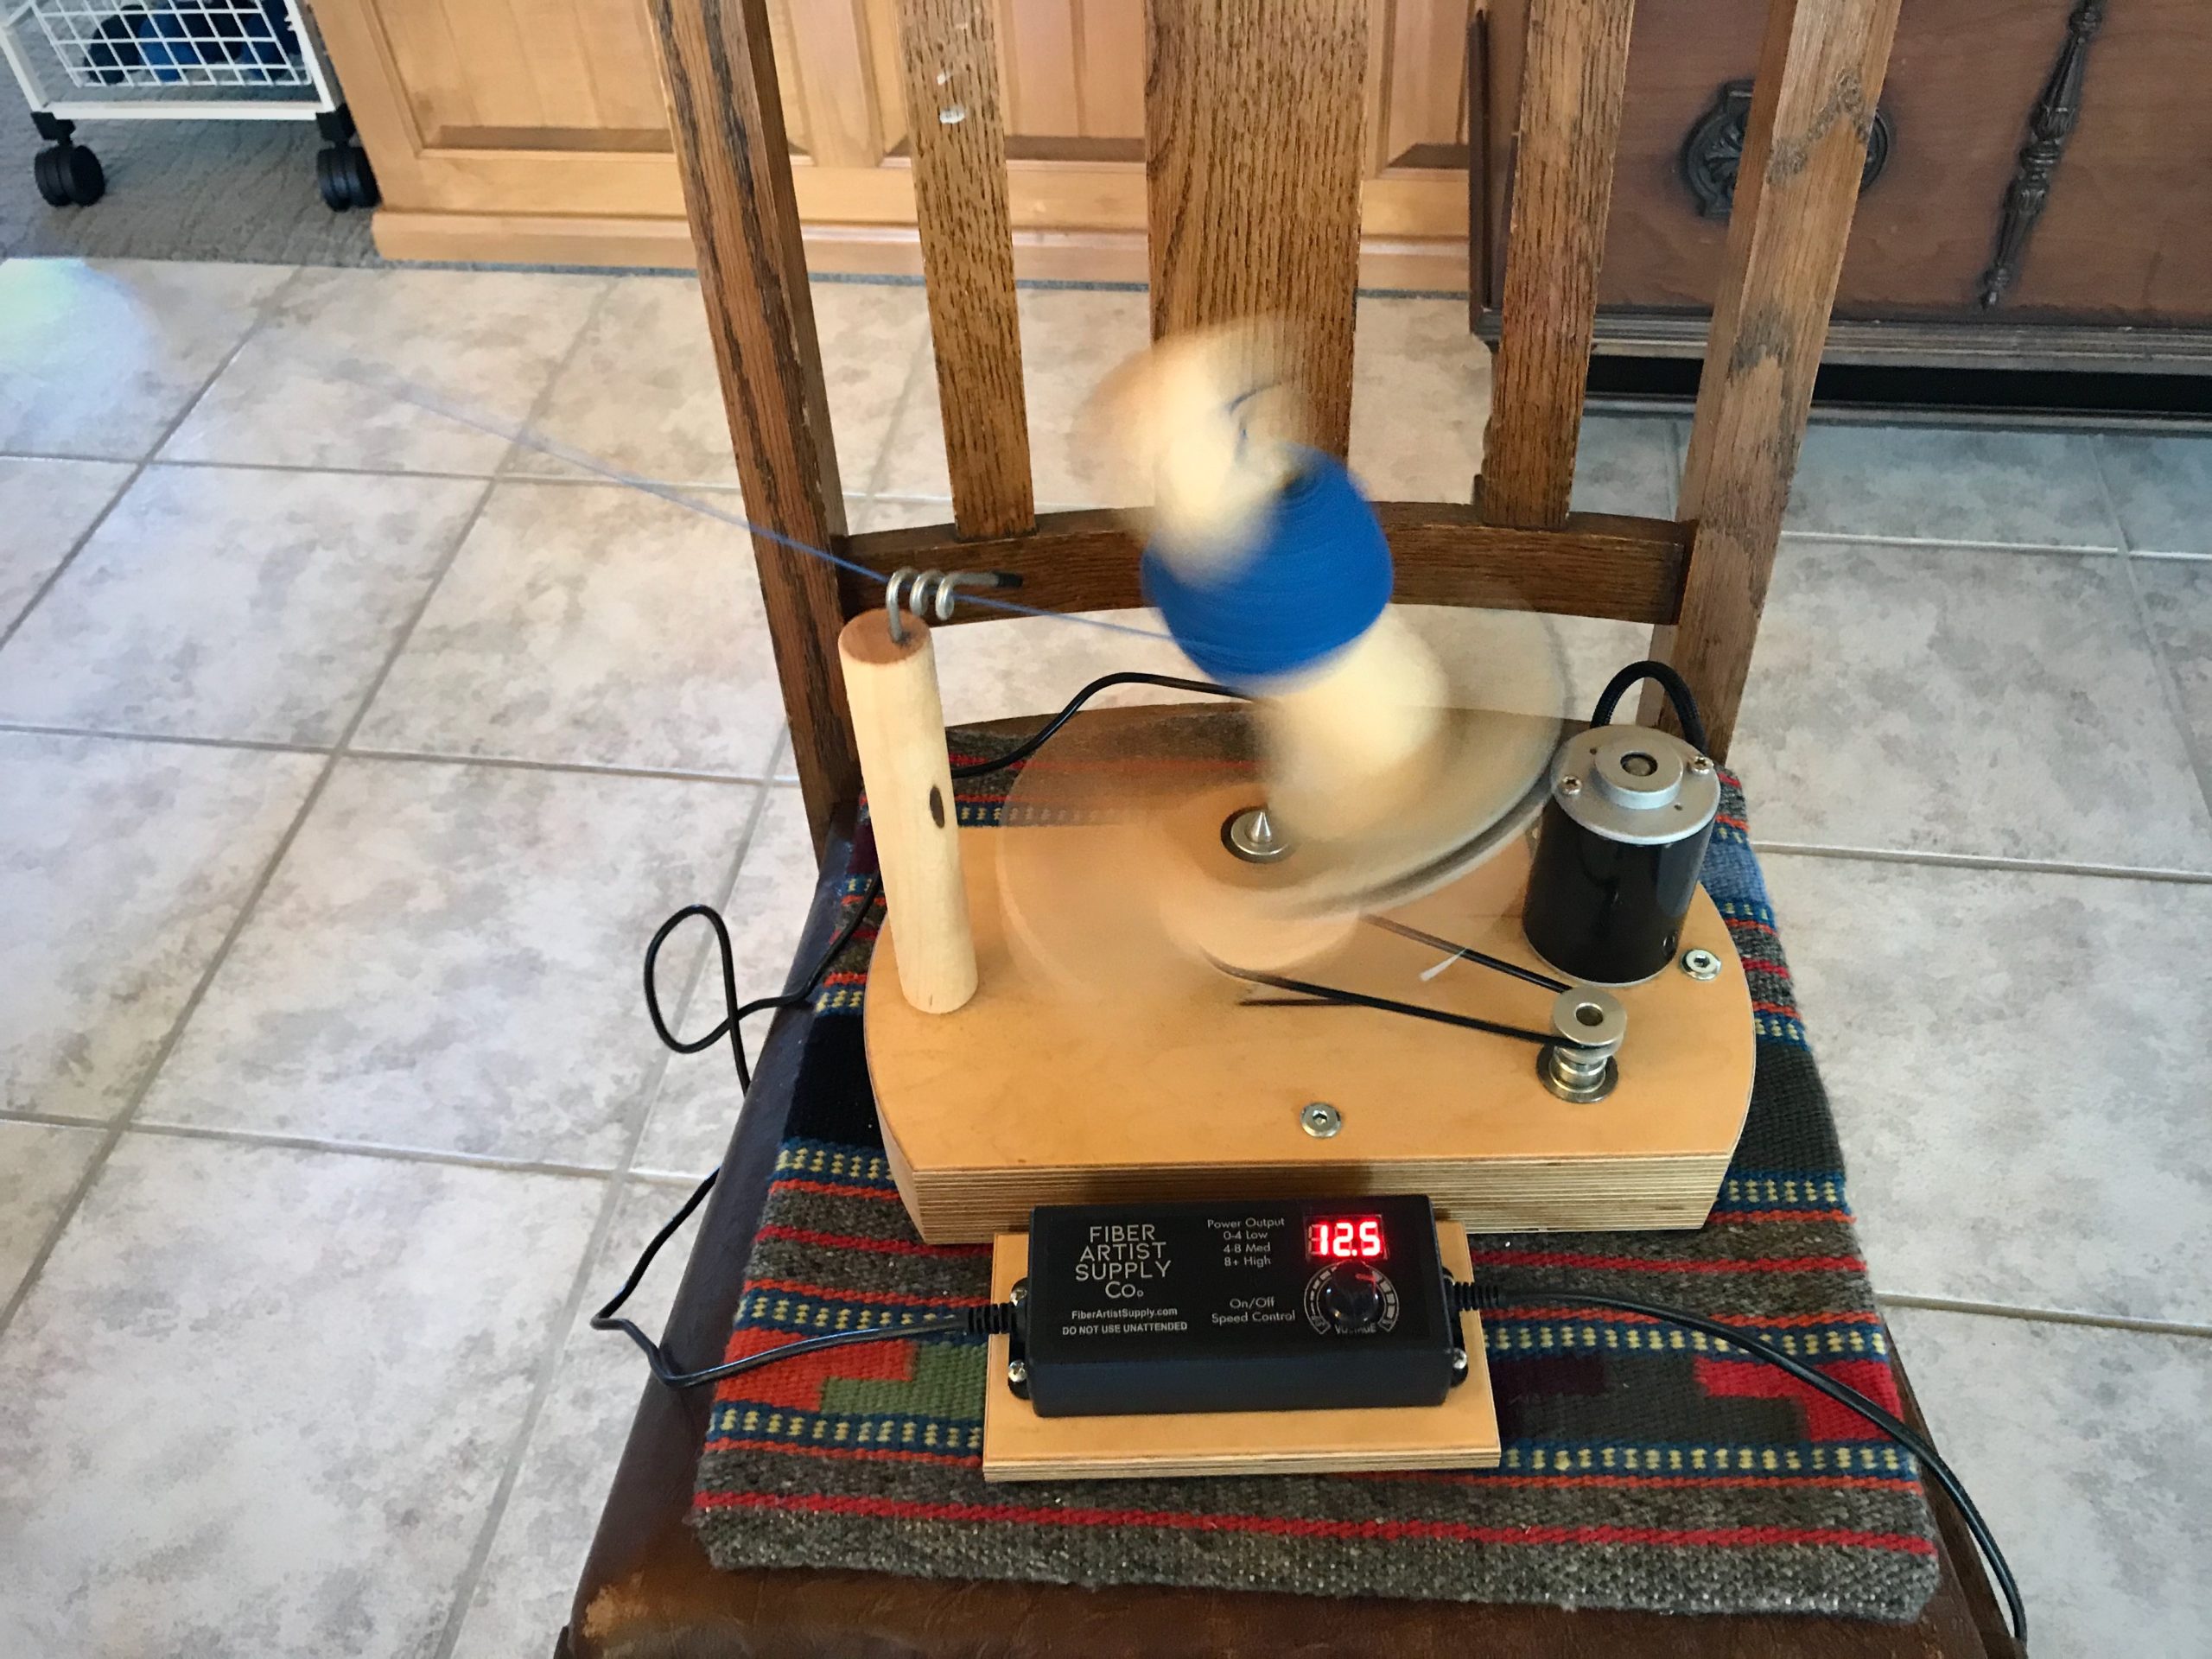
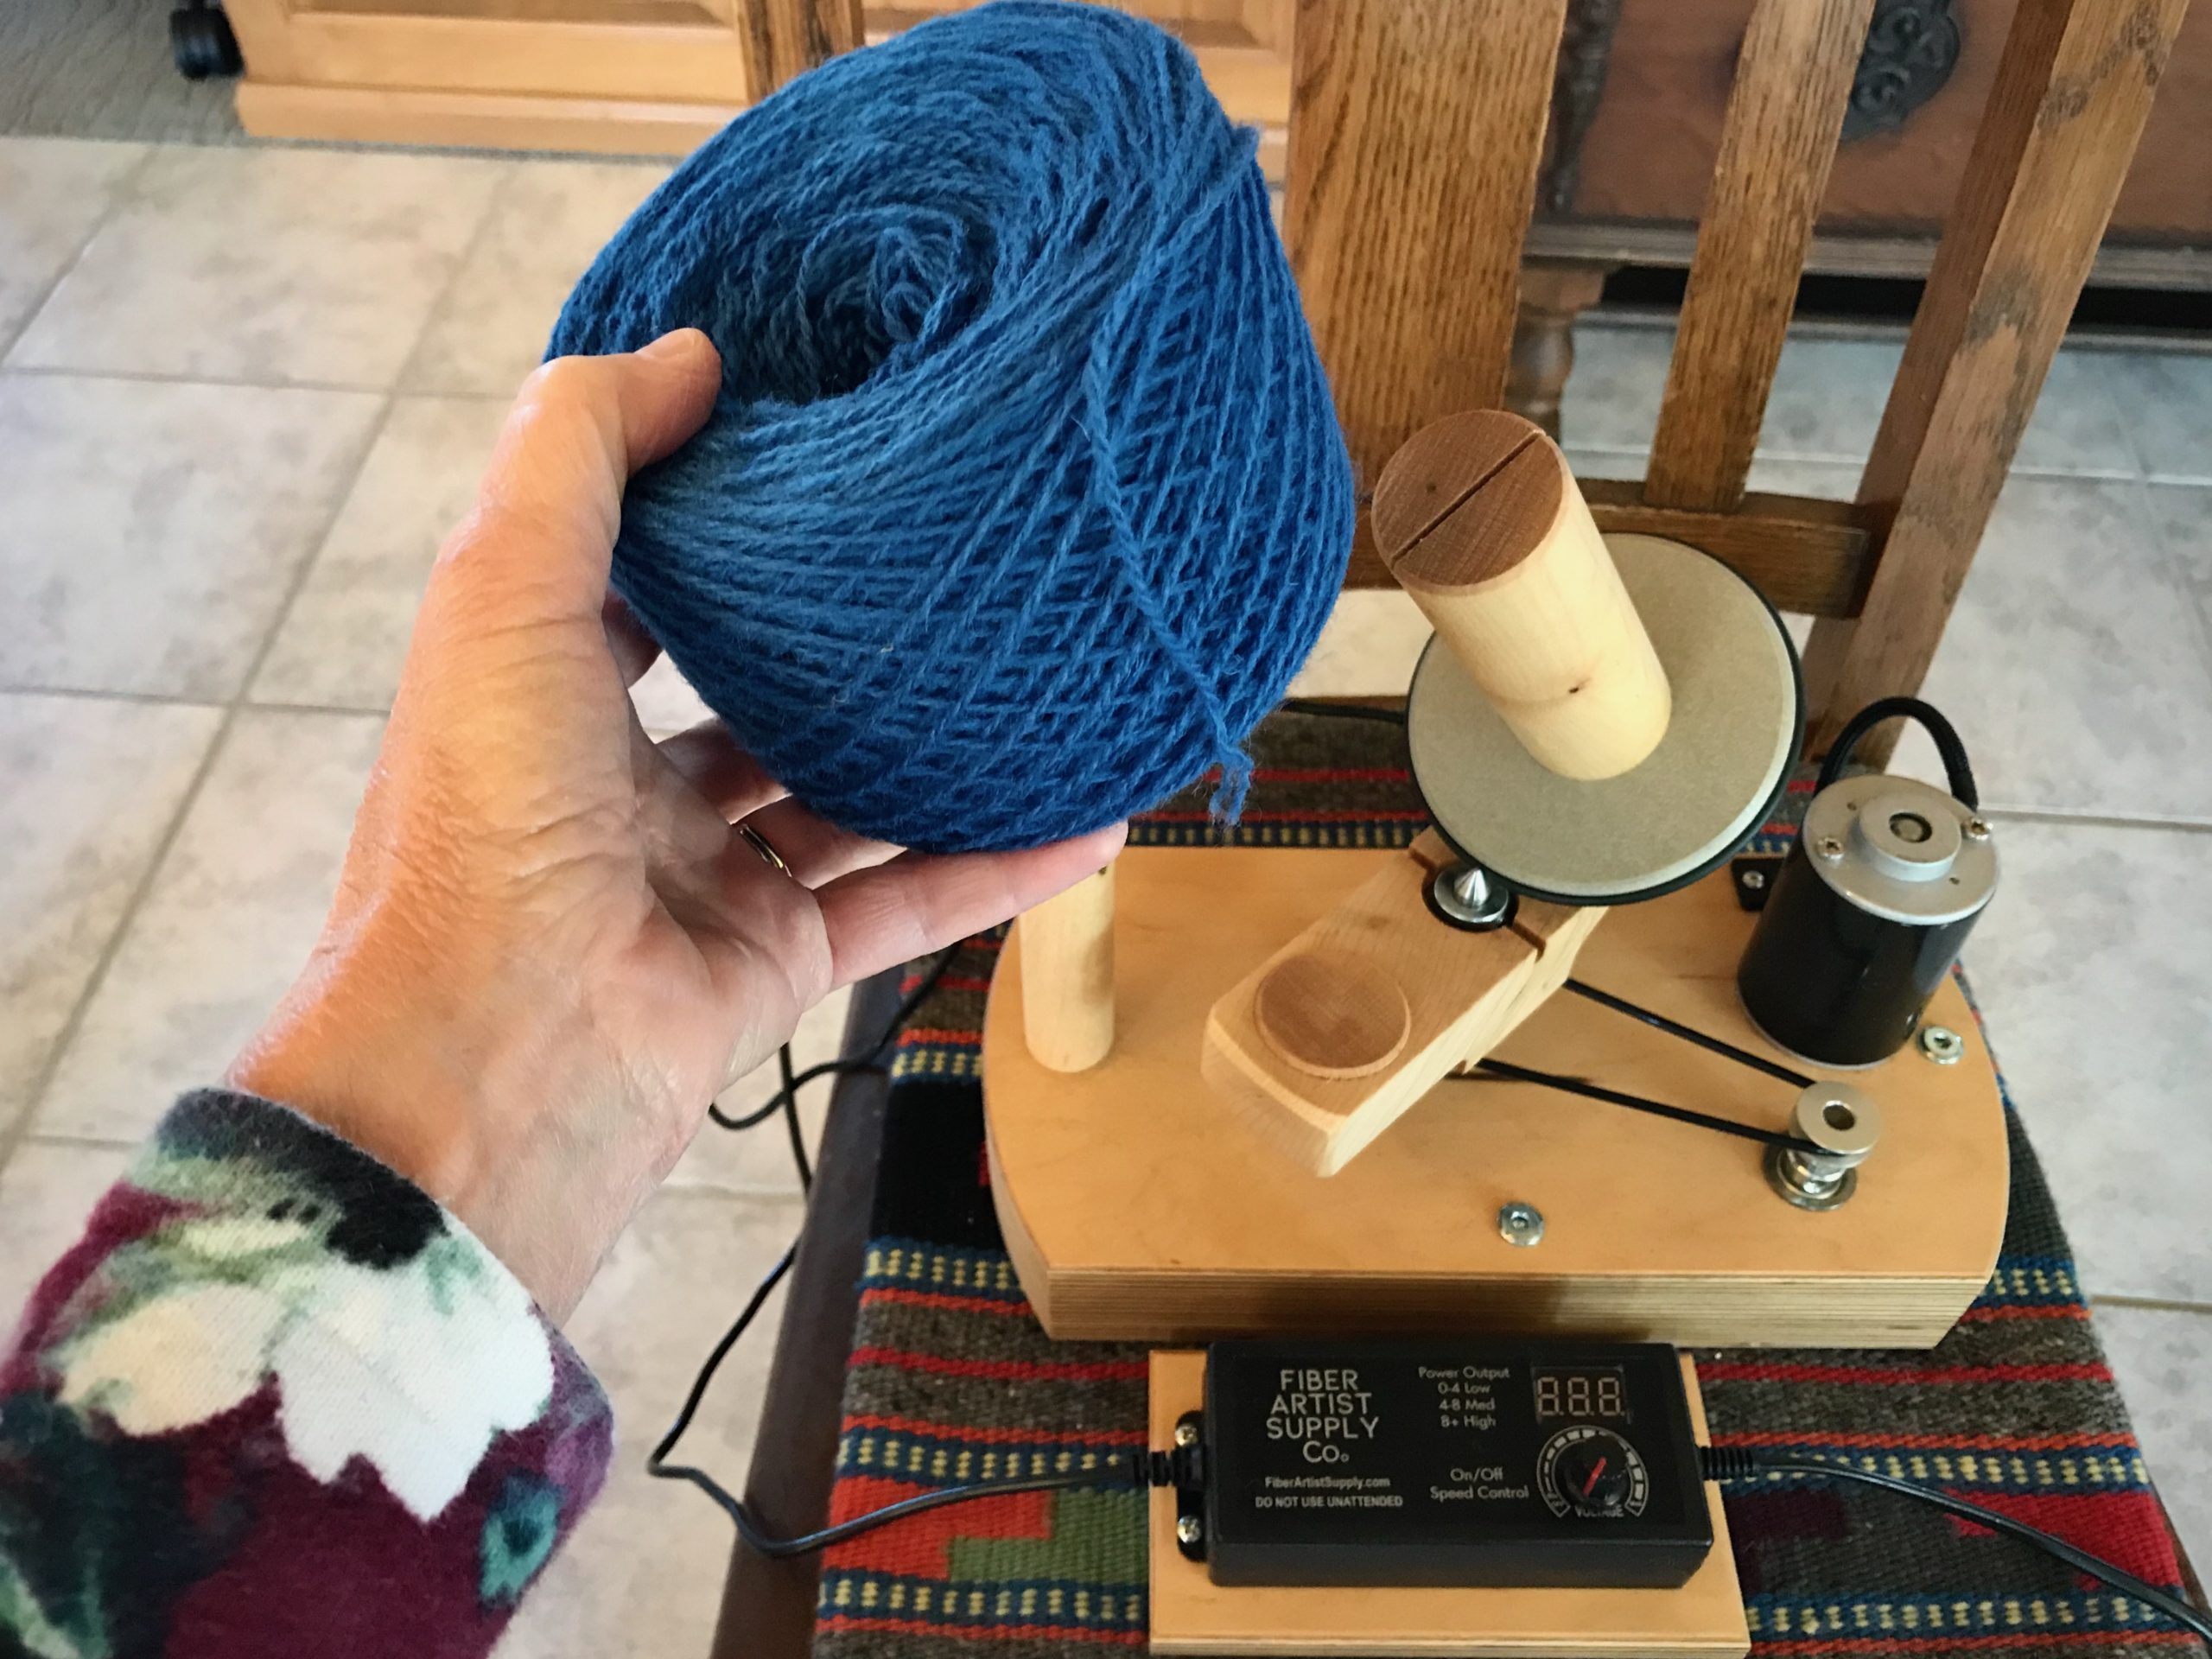
This time is different. I found a new time-saving and arm-saving tool. It’s an electric ball winder, made by Fiber Artist Supply Company. I put the skein on the swift, cut the ties, secure the loose end of yarn to the ball winder, and then turn it on, gradually increasing the speed. In less than two minutes, I have another beautiful ball of yarn to use for making tapestry butterflies.
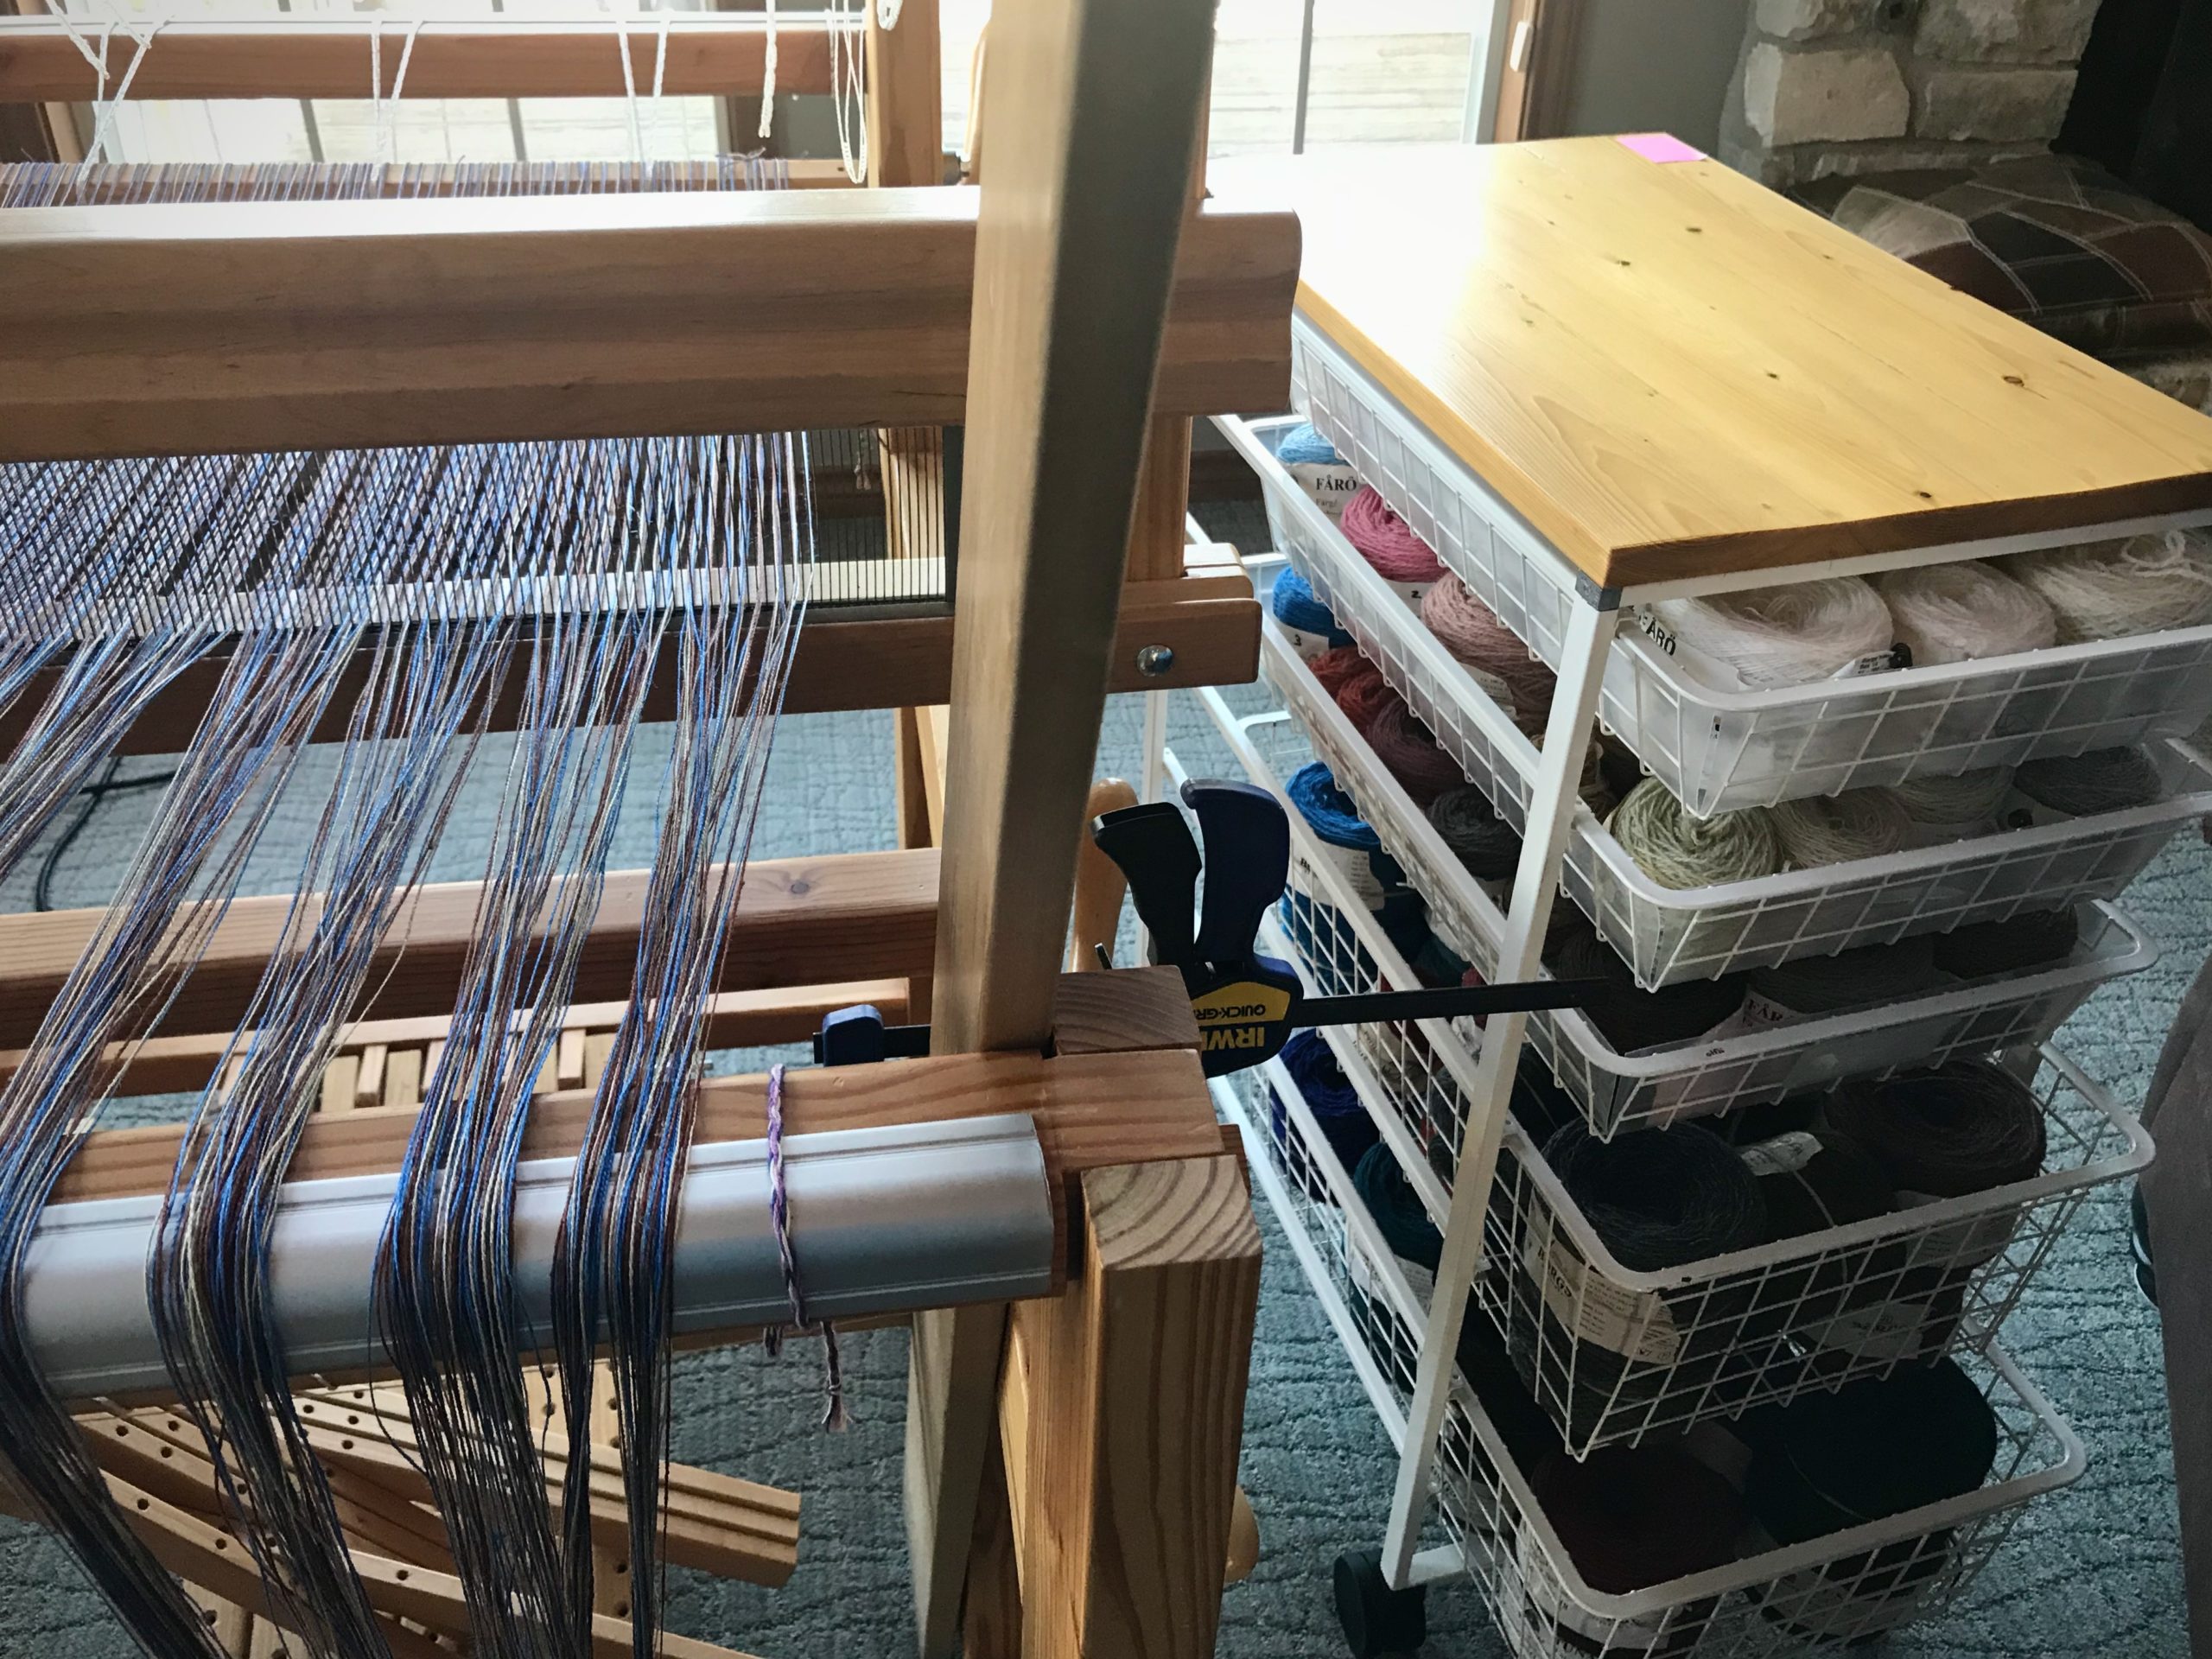
End of yarn is secured on the post of the ball winder.Dial on the winder allows me to gradually increase the speed. When I see that the skein is unwinding properly, I turn the dial to full speed.Maybe this is why it’s called a yarn “swift.” Previous pictorial tapestry, Siblings, is seen on the wall.One minute, fifty-four seconds later, and we have a ball of yarn.I will wrap the label on this ball of yarn and it will join the yarn collection for this tapestry.Linen warp is ready for beaming. Wool weft yarn is being sorted and organized for making butterflies.
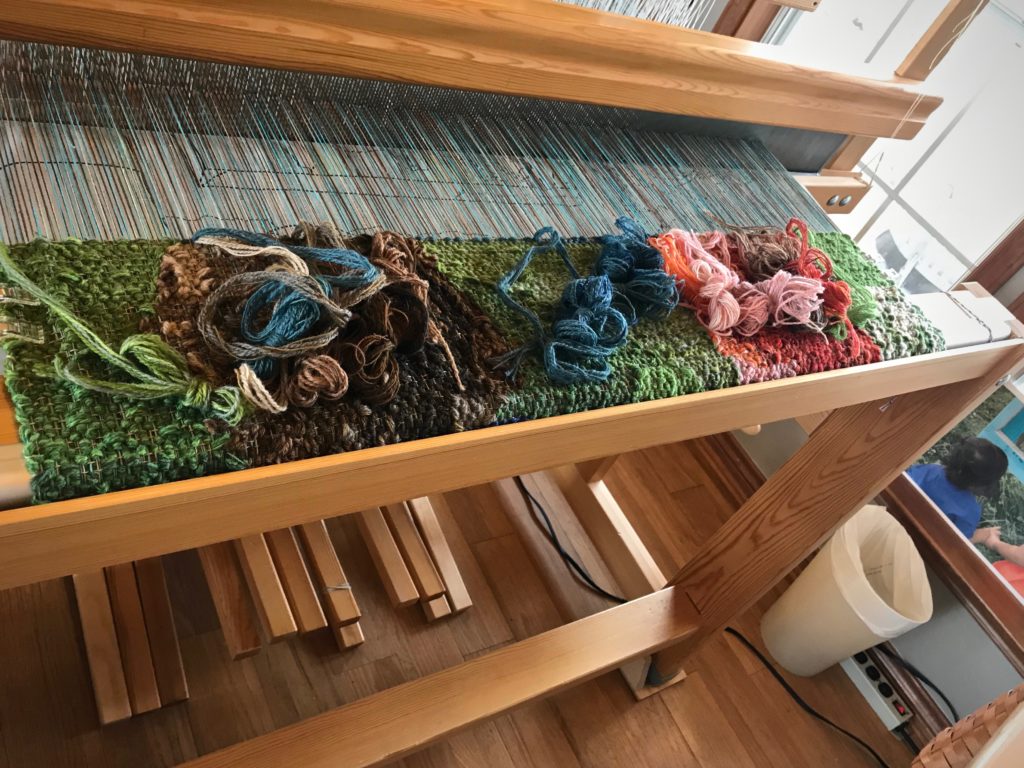
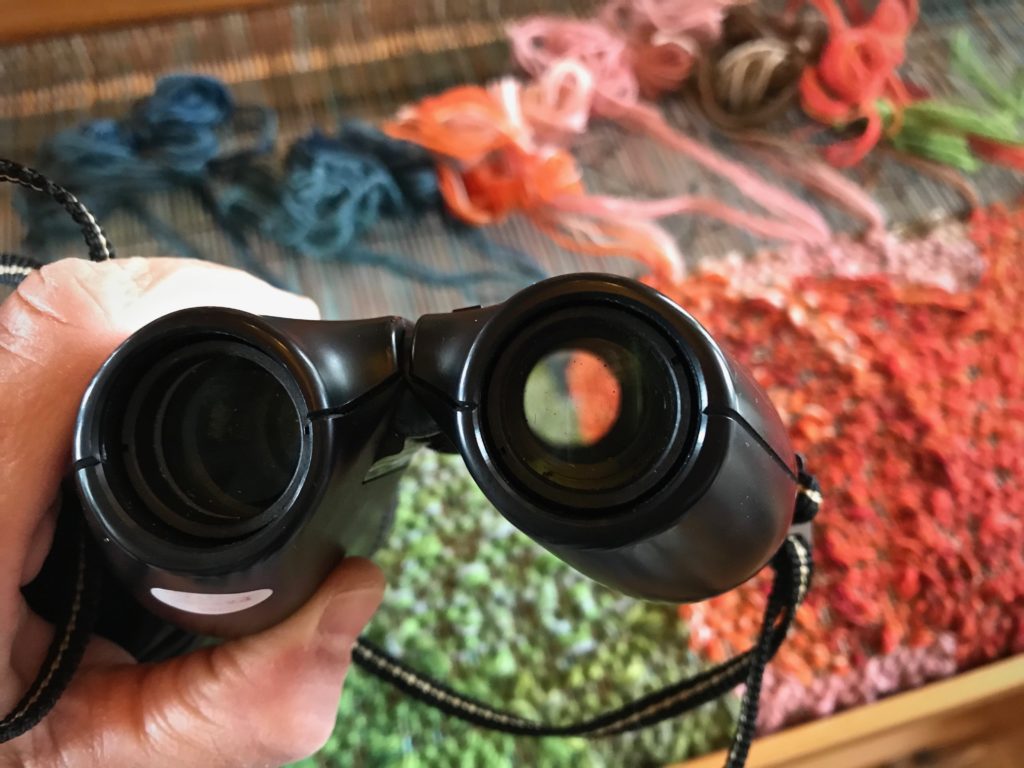
Suddenly, I am able to see the tapestry on the loom from a distant vantage point. Aha! I can see that the left shoulder of Lucia is nicely defined, and that her shoulder appears to be in front of the turquoise rabbit hutch. What I am not able to discern up close becomes crystal clear from a distance. I have an unusual tool in the basket at my loom bench that gives me this advantage. Binoculars! I use them whenever I want to get a better sense of the overall context, color, and definition of what I am weaving in the tapestry. By peering through the WRONG side of the binoculars I am able to view the tapestry as if from a great distance. It is just the help I need to keep pursuing this mystery of weaving wool butterflies on a linen warp to make a recognizable, memorable image.
Each row is a new adventure.Photo image of the complete scene sits in the windowsill by my loom. I frequently refer to the photo as I weave.I wish I could show you what I can see through the wrong end of the binoculars. It always surprises me how the image is clearly shaped at a distance.Skin tones blend for the area of Lucia’s neck that is coming into focus. Before long, I will get to play with her flyaway hair. Greater distance from the tapestry provides more clarity of context. But still, we only get to see the slice of the image that is in view on the loom. It takes faith and patience for the rest.
In my memories, I always picture Grandma wearing an apron, whether doing housework, gardening, or baking coffee cake in her kitchen. Maybe that is part of the magic I feel when I put on my weaving apron.
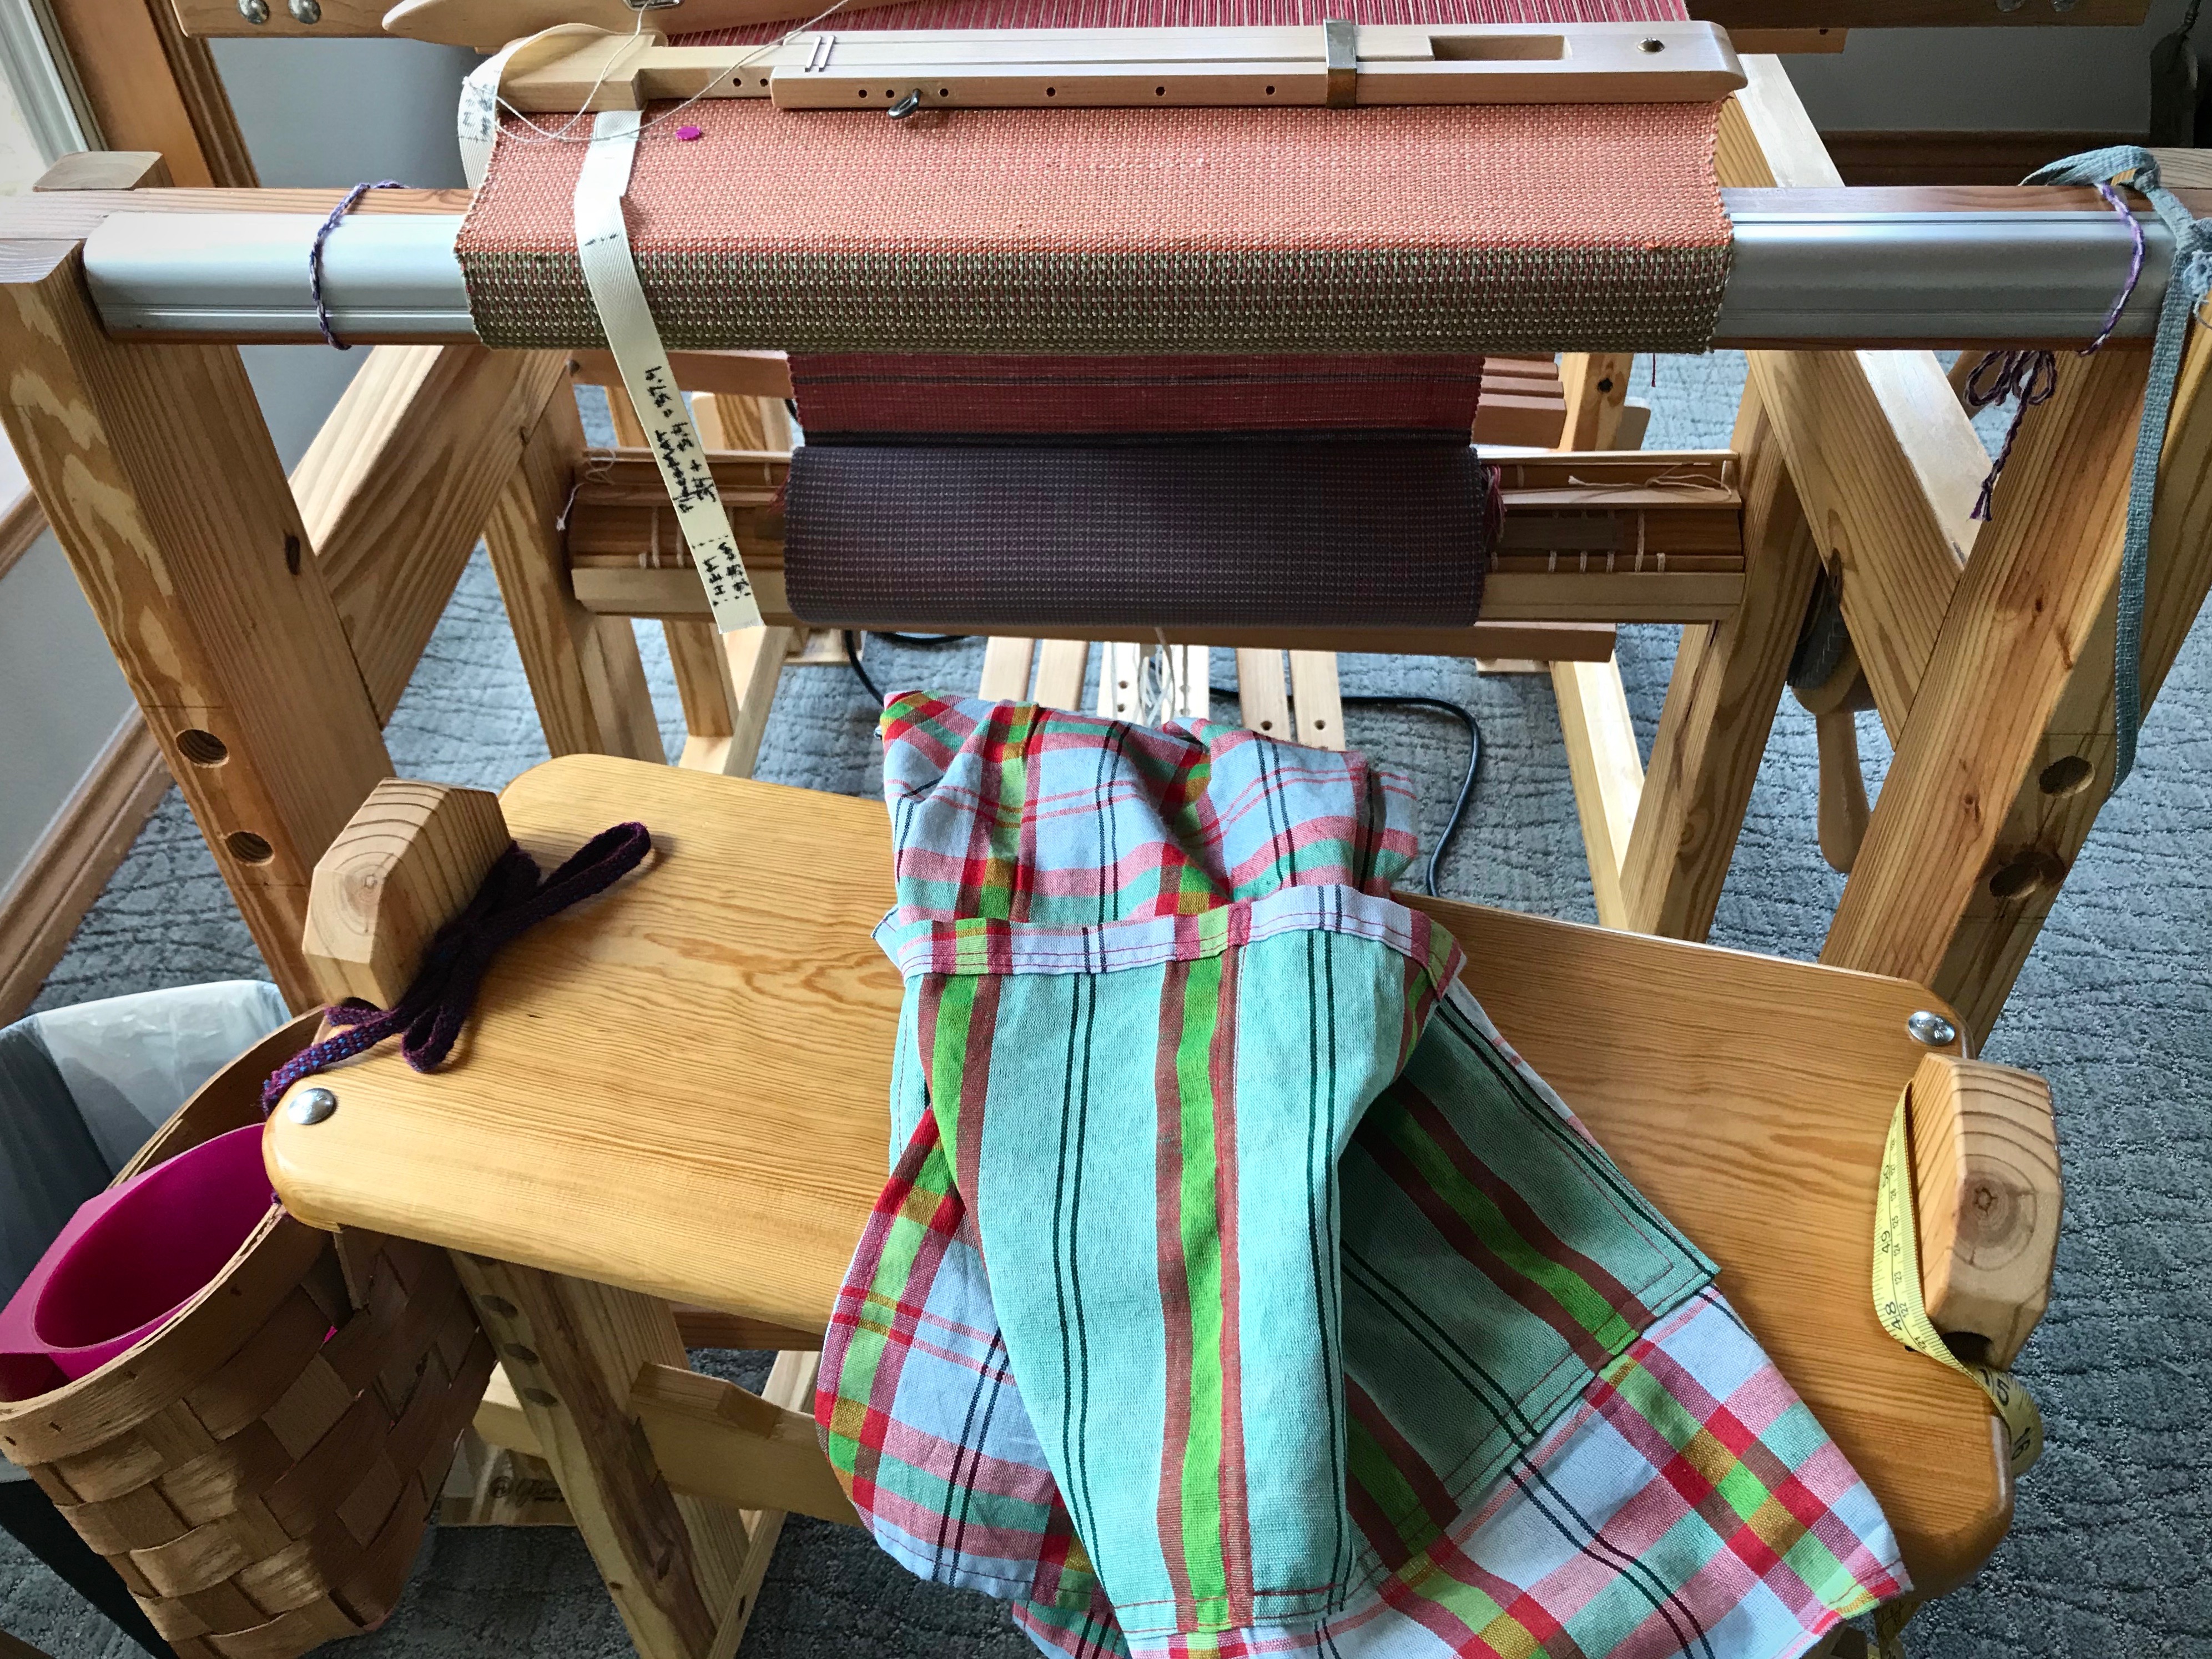
Weaving apron is ready for my next session at the Glimåkra Standard loom. Fabric protection board protects the fabric on the loom, but without an apron my clothing suffers from rubbing up against the board.
I sit right up to the breast beam when I weave, which helps my posture and my reach. This makes the fabric on the loom vulnerable, especially to buttons, buckles, or zippers. It also gives my clothes undue wear, even creating small holes in some of my shirts. My Glimåkra Standard loom has the fabric protection board, aka “belly board,” but that is not in place until the knots from the beginning of the warp go under the breast beam. So, the first inches of weaving go unprotected. My other looms don’t have a fabric protection board.
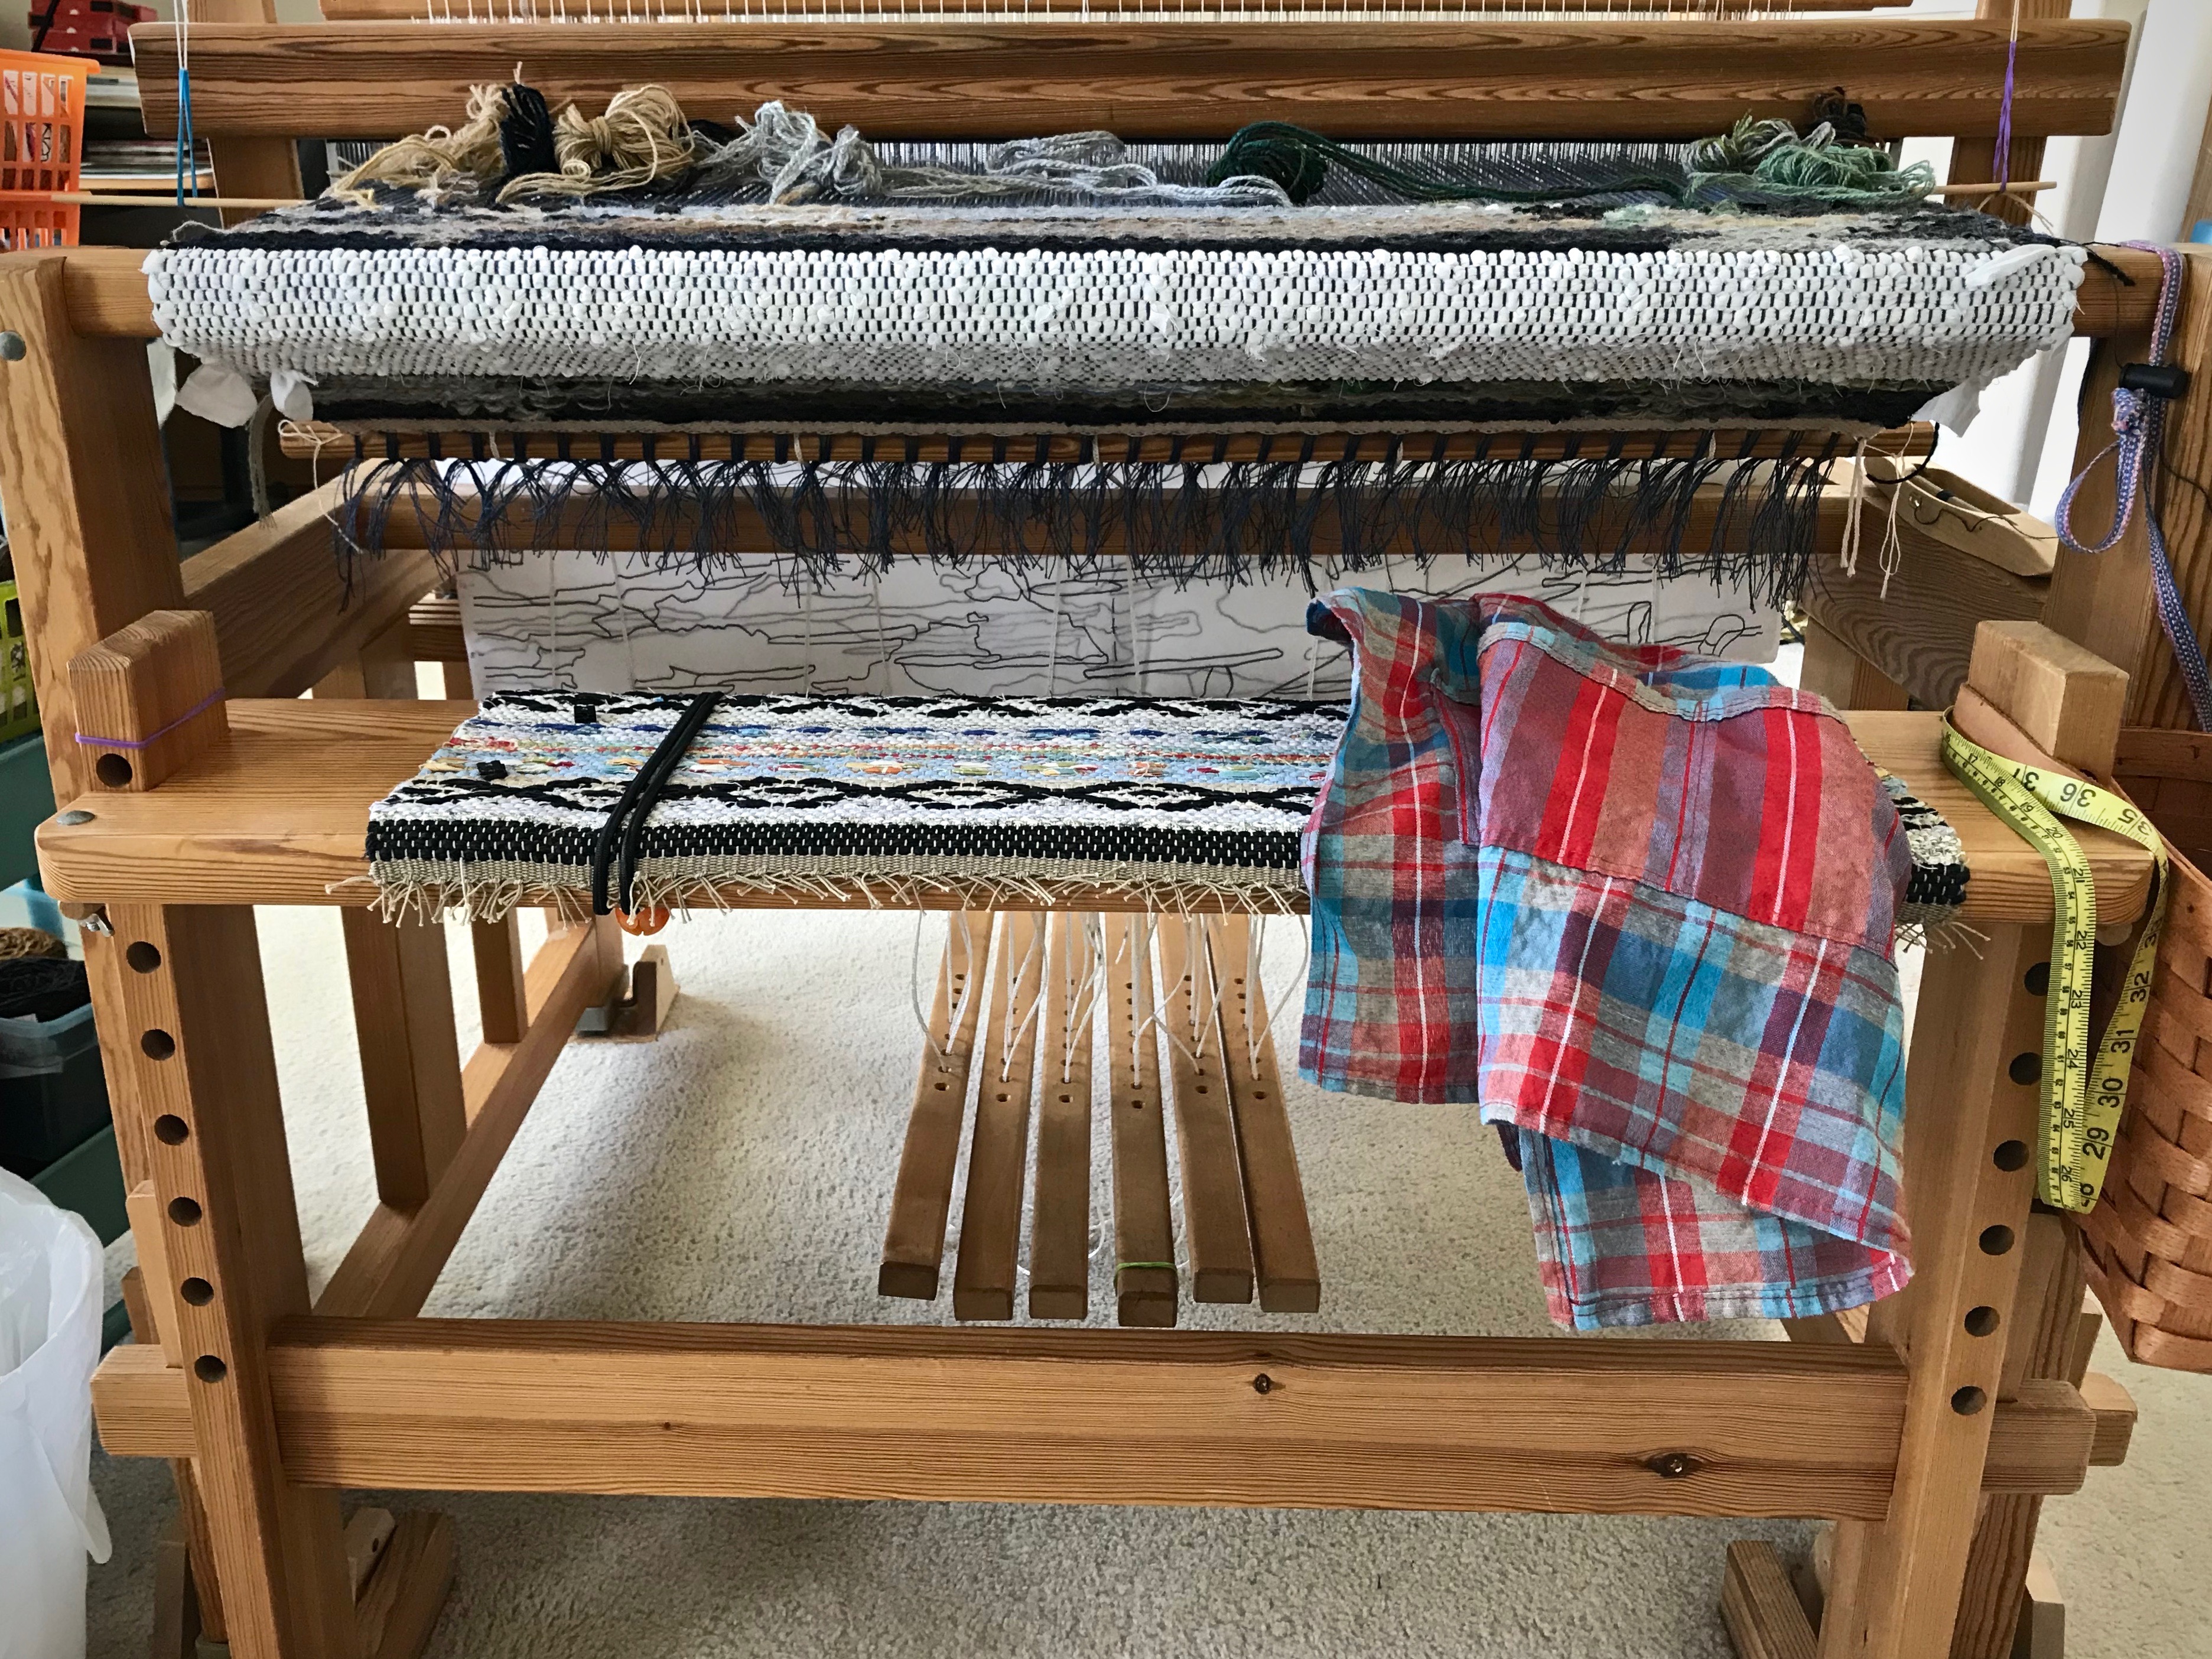
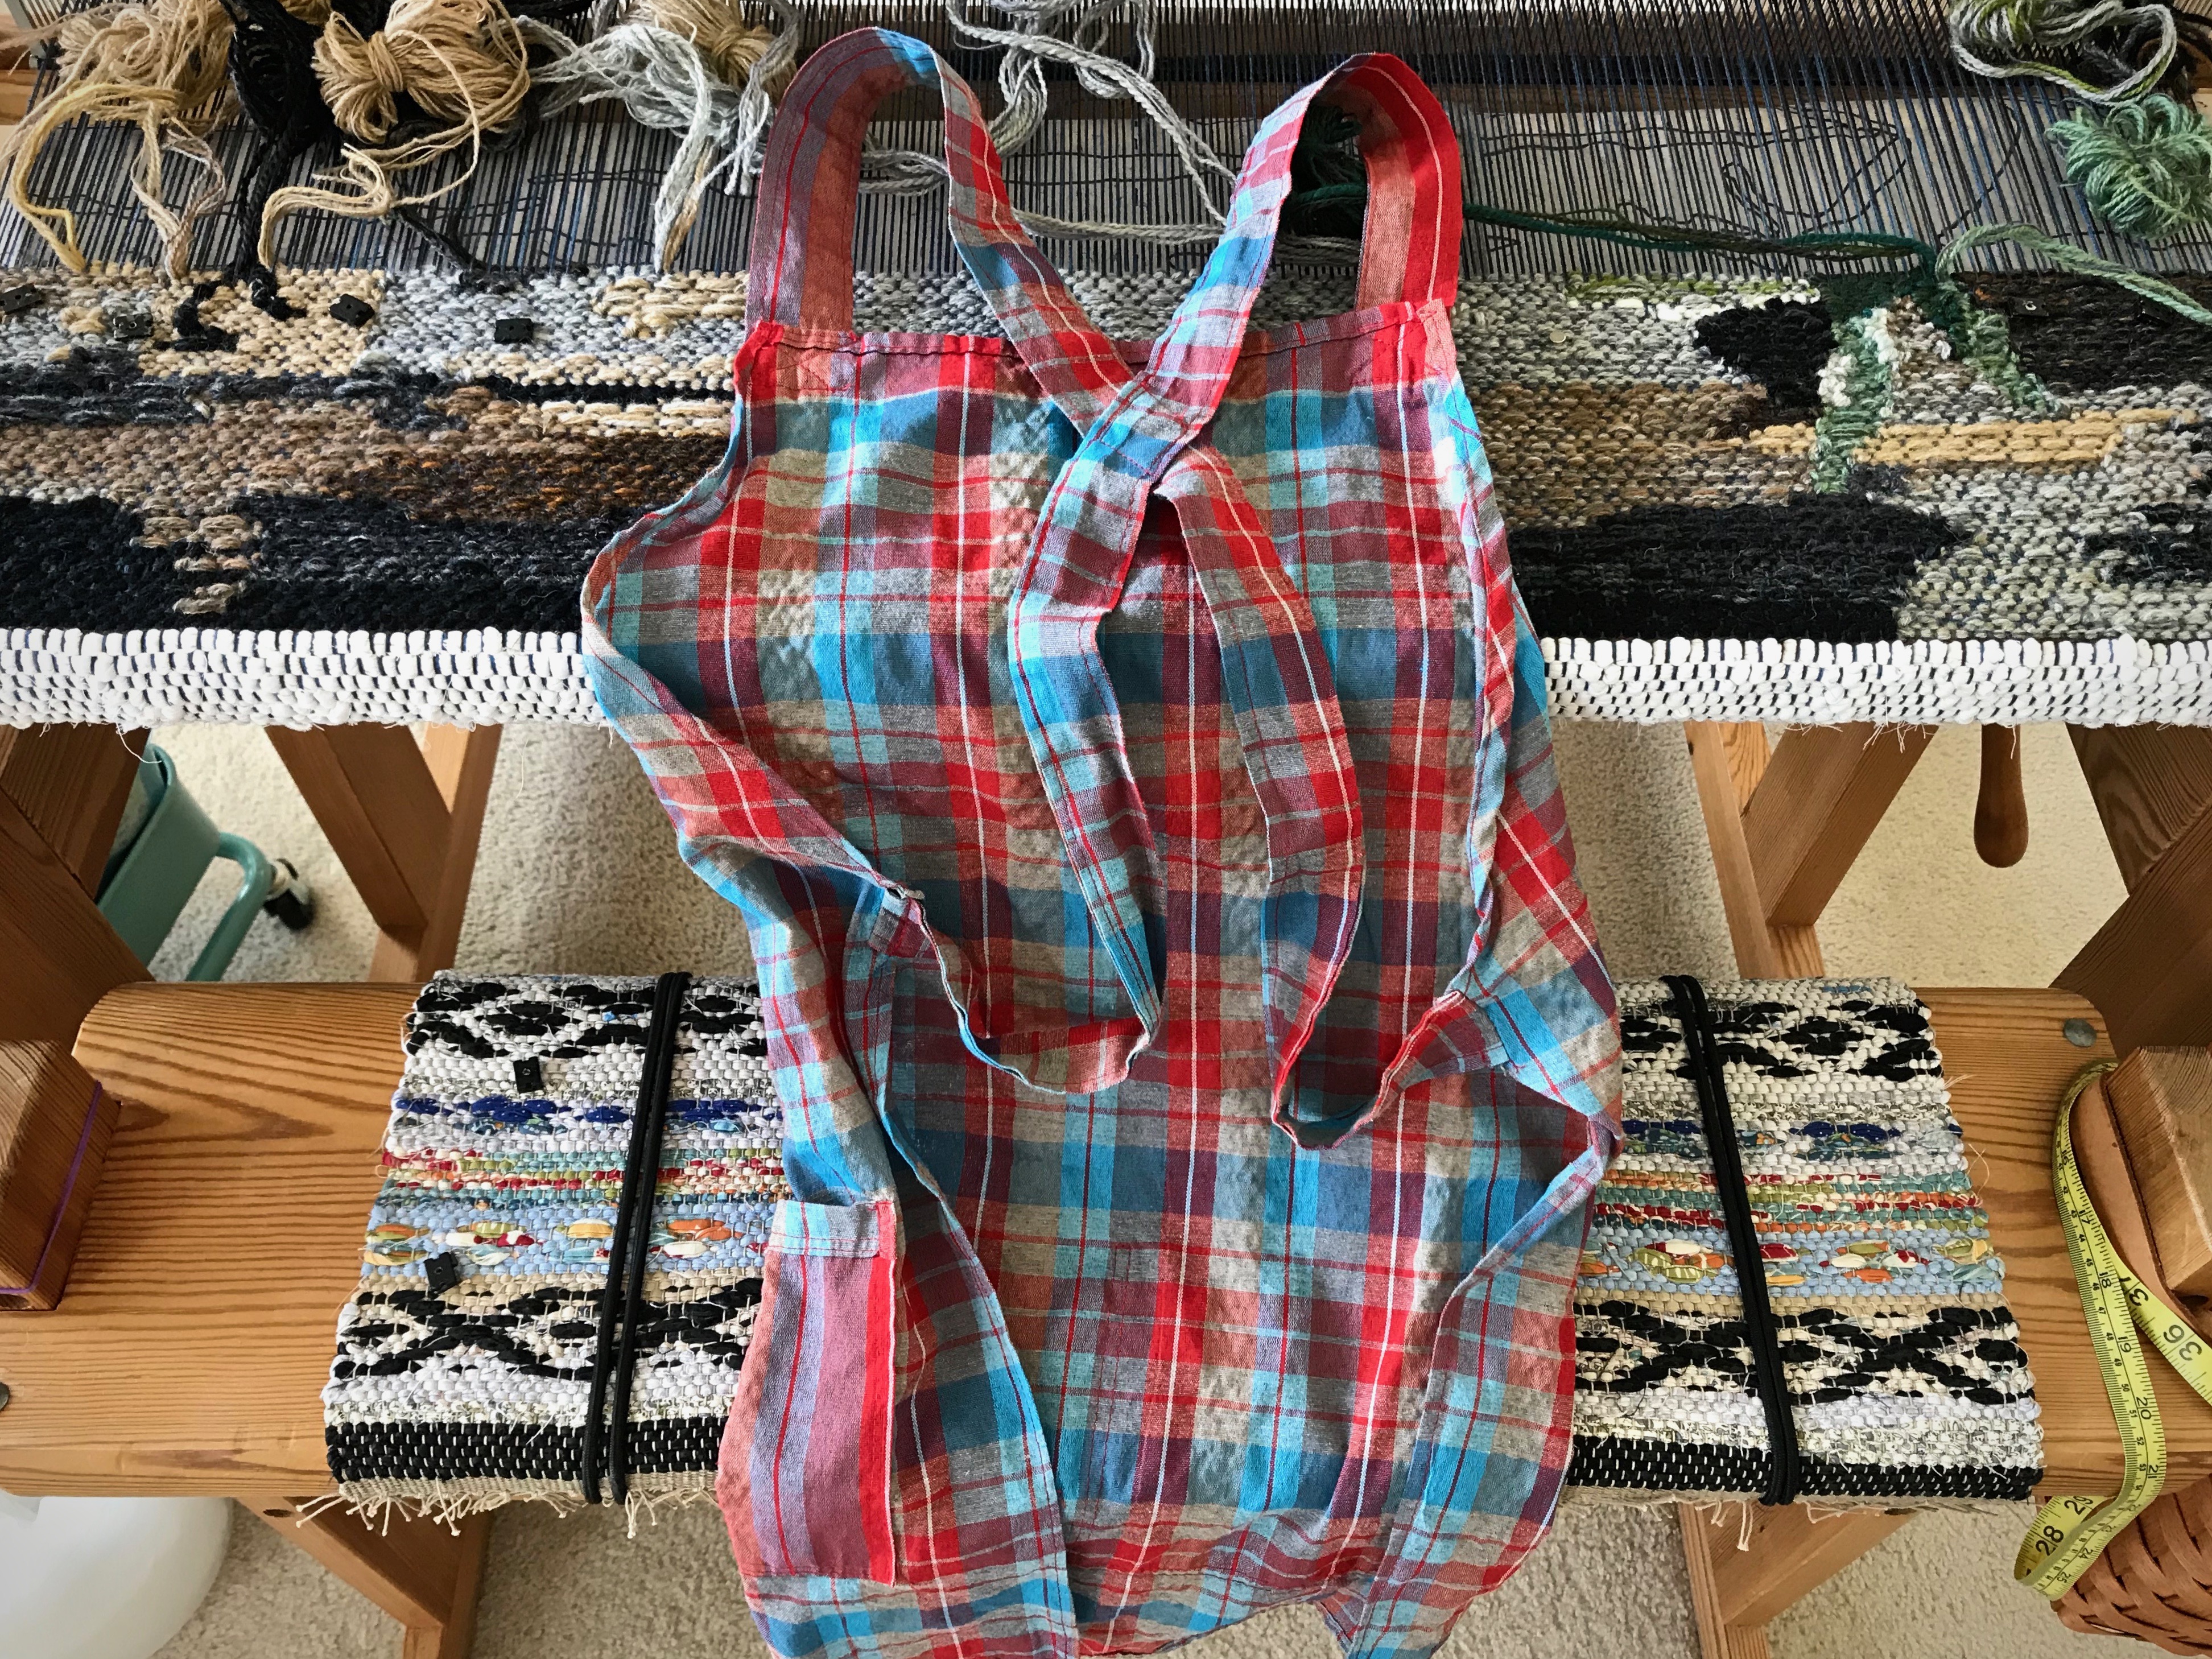
Apron is kept on the loom bench for easy access. There is no fabric protection board on this loom, so without an apron, the tapestry being woven and the clothing I wear are both susceptible to damage from repeated contact.
Apron pockets keep things handy.
With simple criss-cross straps at the back, this weaving apron fits just about anybody. And there is no bow to tie in the back, like my Grandma’s aprons had.
A weaving apron guards both the fabric on the loom and my clothes. The apron also gives me ample pockets, good for countless things—dropping in a few wound quills to take back to the loom, keeping a tape measure handy, separating one wool butterfly from the rest, and other things you wouldn’t think of if you didn’t have them.
Texas hill country loom has its weaving apron ready for my next visit there.
An apron like this would be easy to make. However, I was fortunate to come across the perfect weaving apron (not labeled as such), pockets and all, at a quaint little shop in Texas hill country. So, now I keep one at each loom. And when you put one of these aprons on to weave, something magical happens…