
You can measure what you are weaving. A set of towels will all be the same length. A table runner will fit the table as planned. A rug will be the right size for the designated floor space. All it takes is a dependable way to measure. (Thanks to Elisabeth S. for writing me, “I’d love to have a better way to measure my work as I’m weaving it.”)
Measurement Tape (accompanying video below)
Supplies:
- Calculator
- Project notes
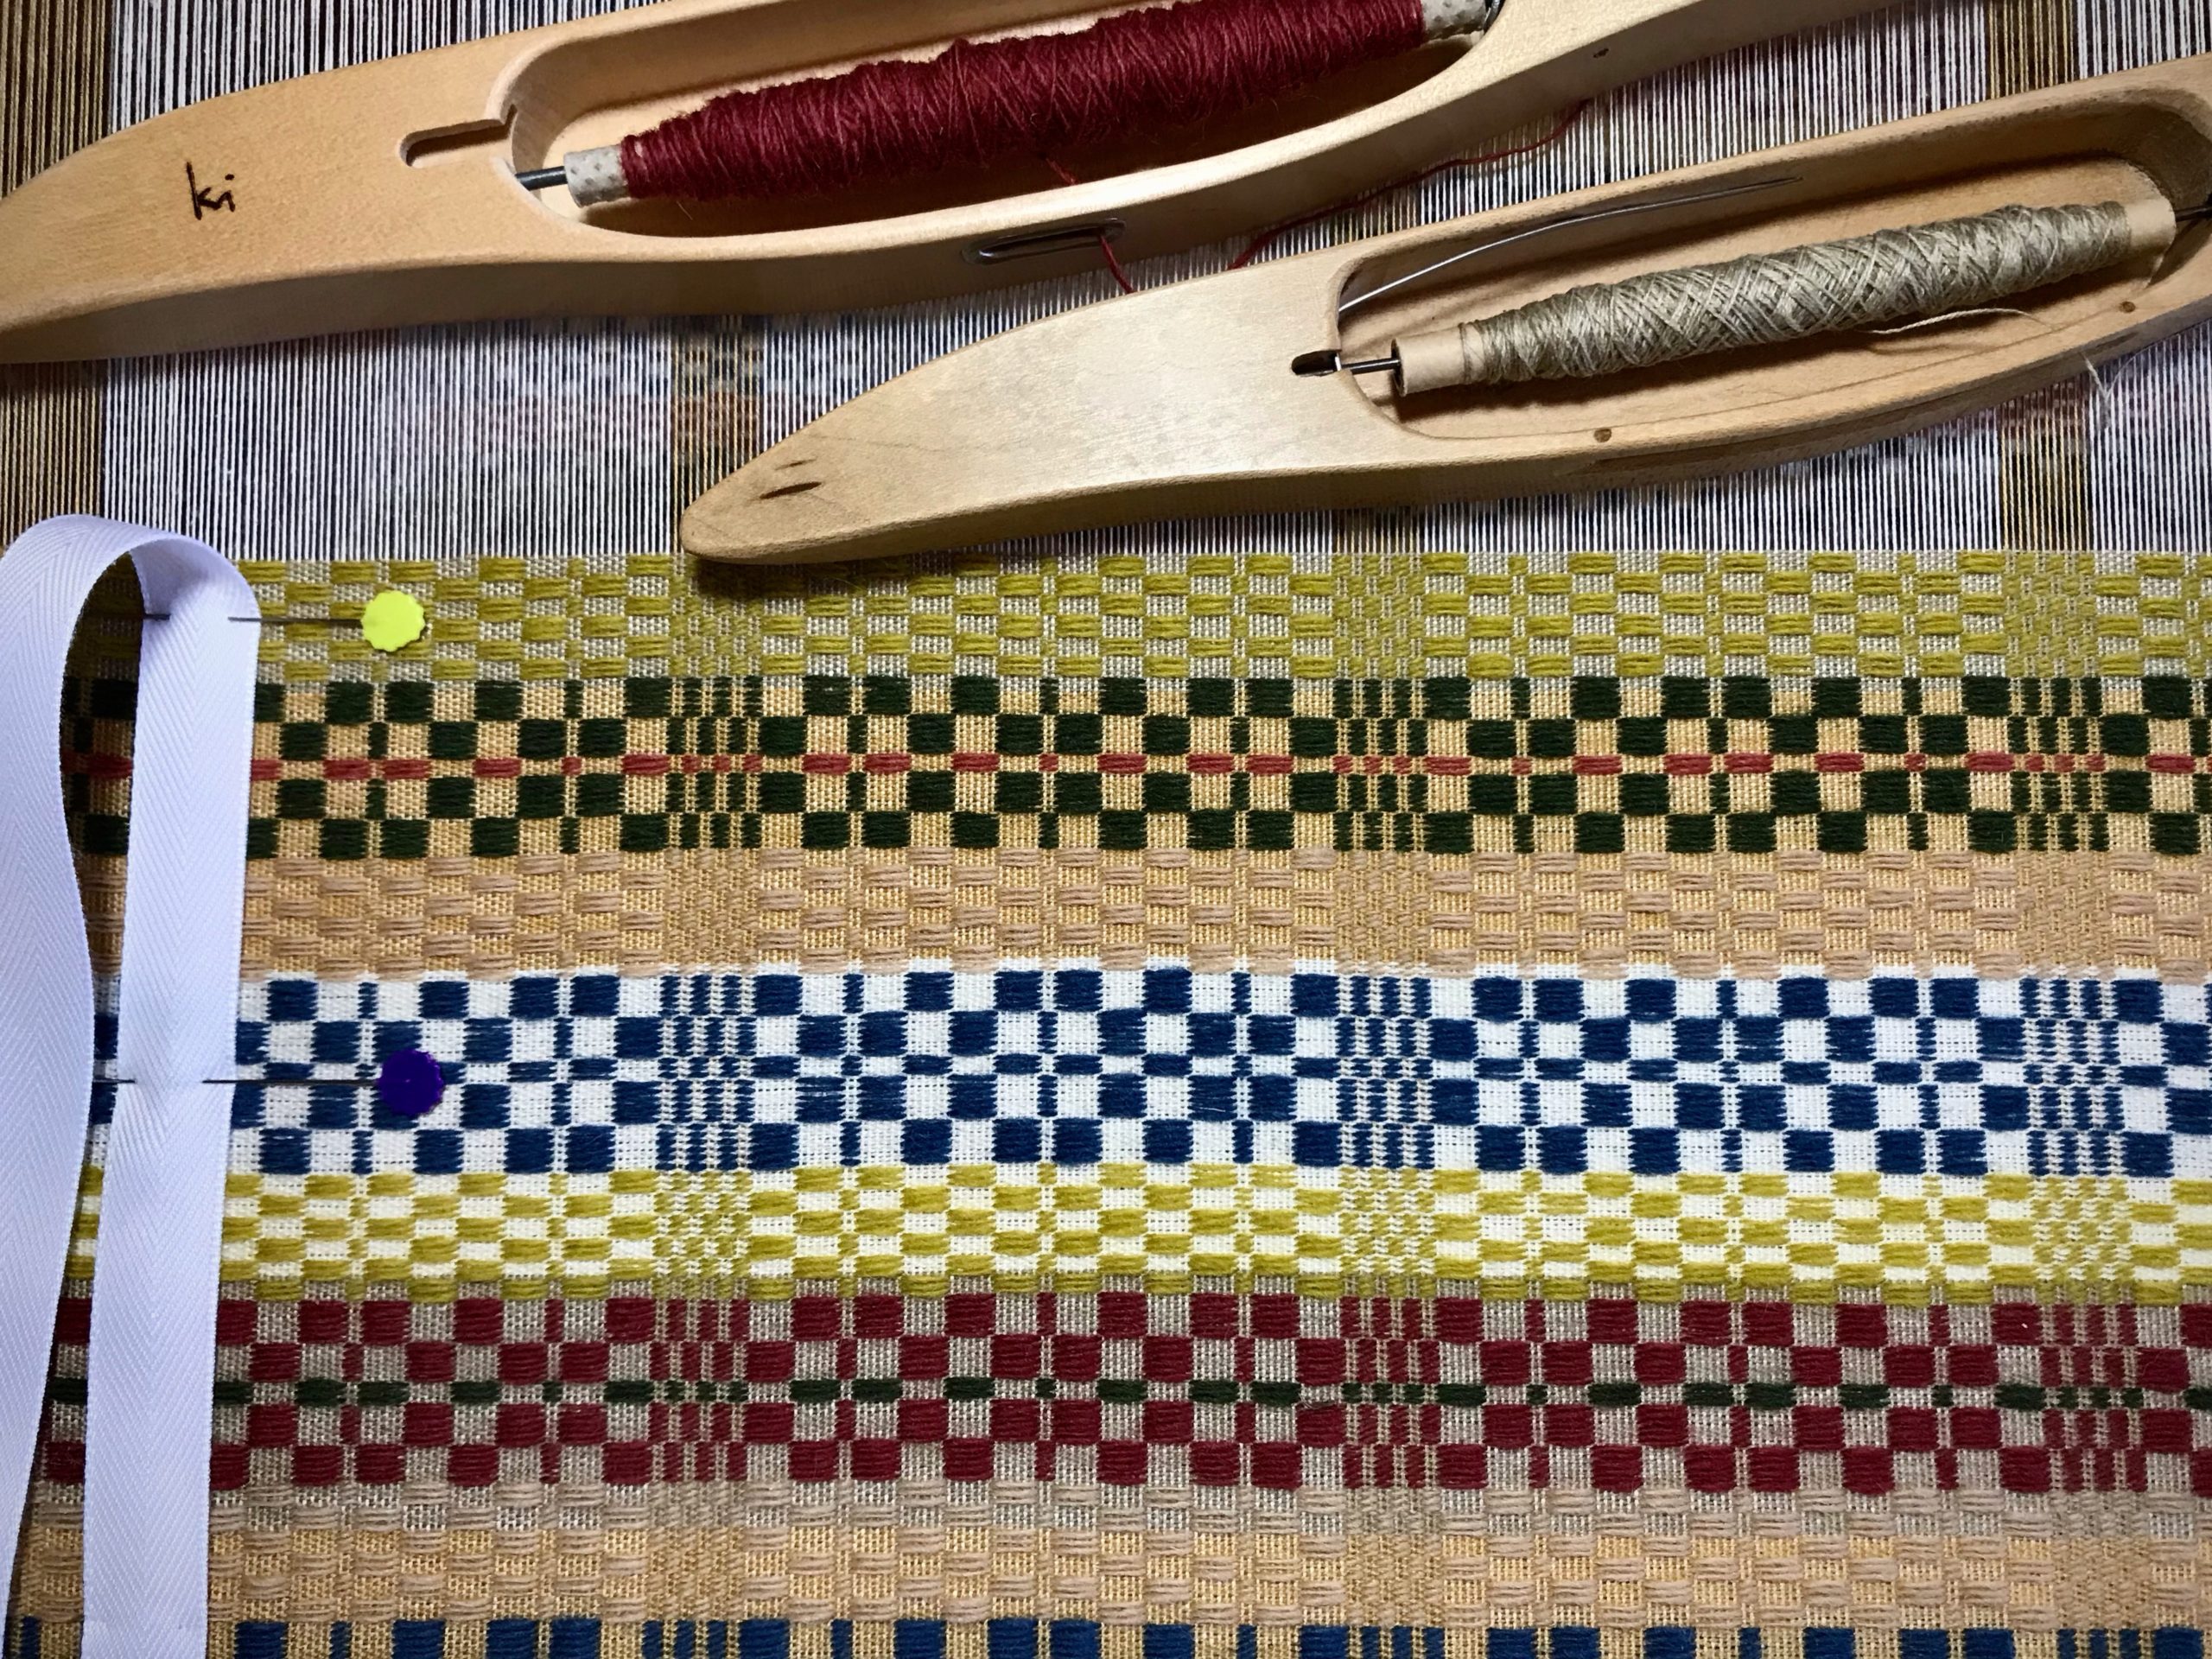
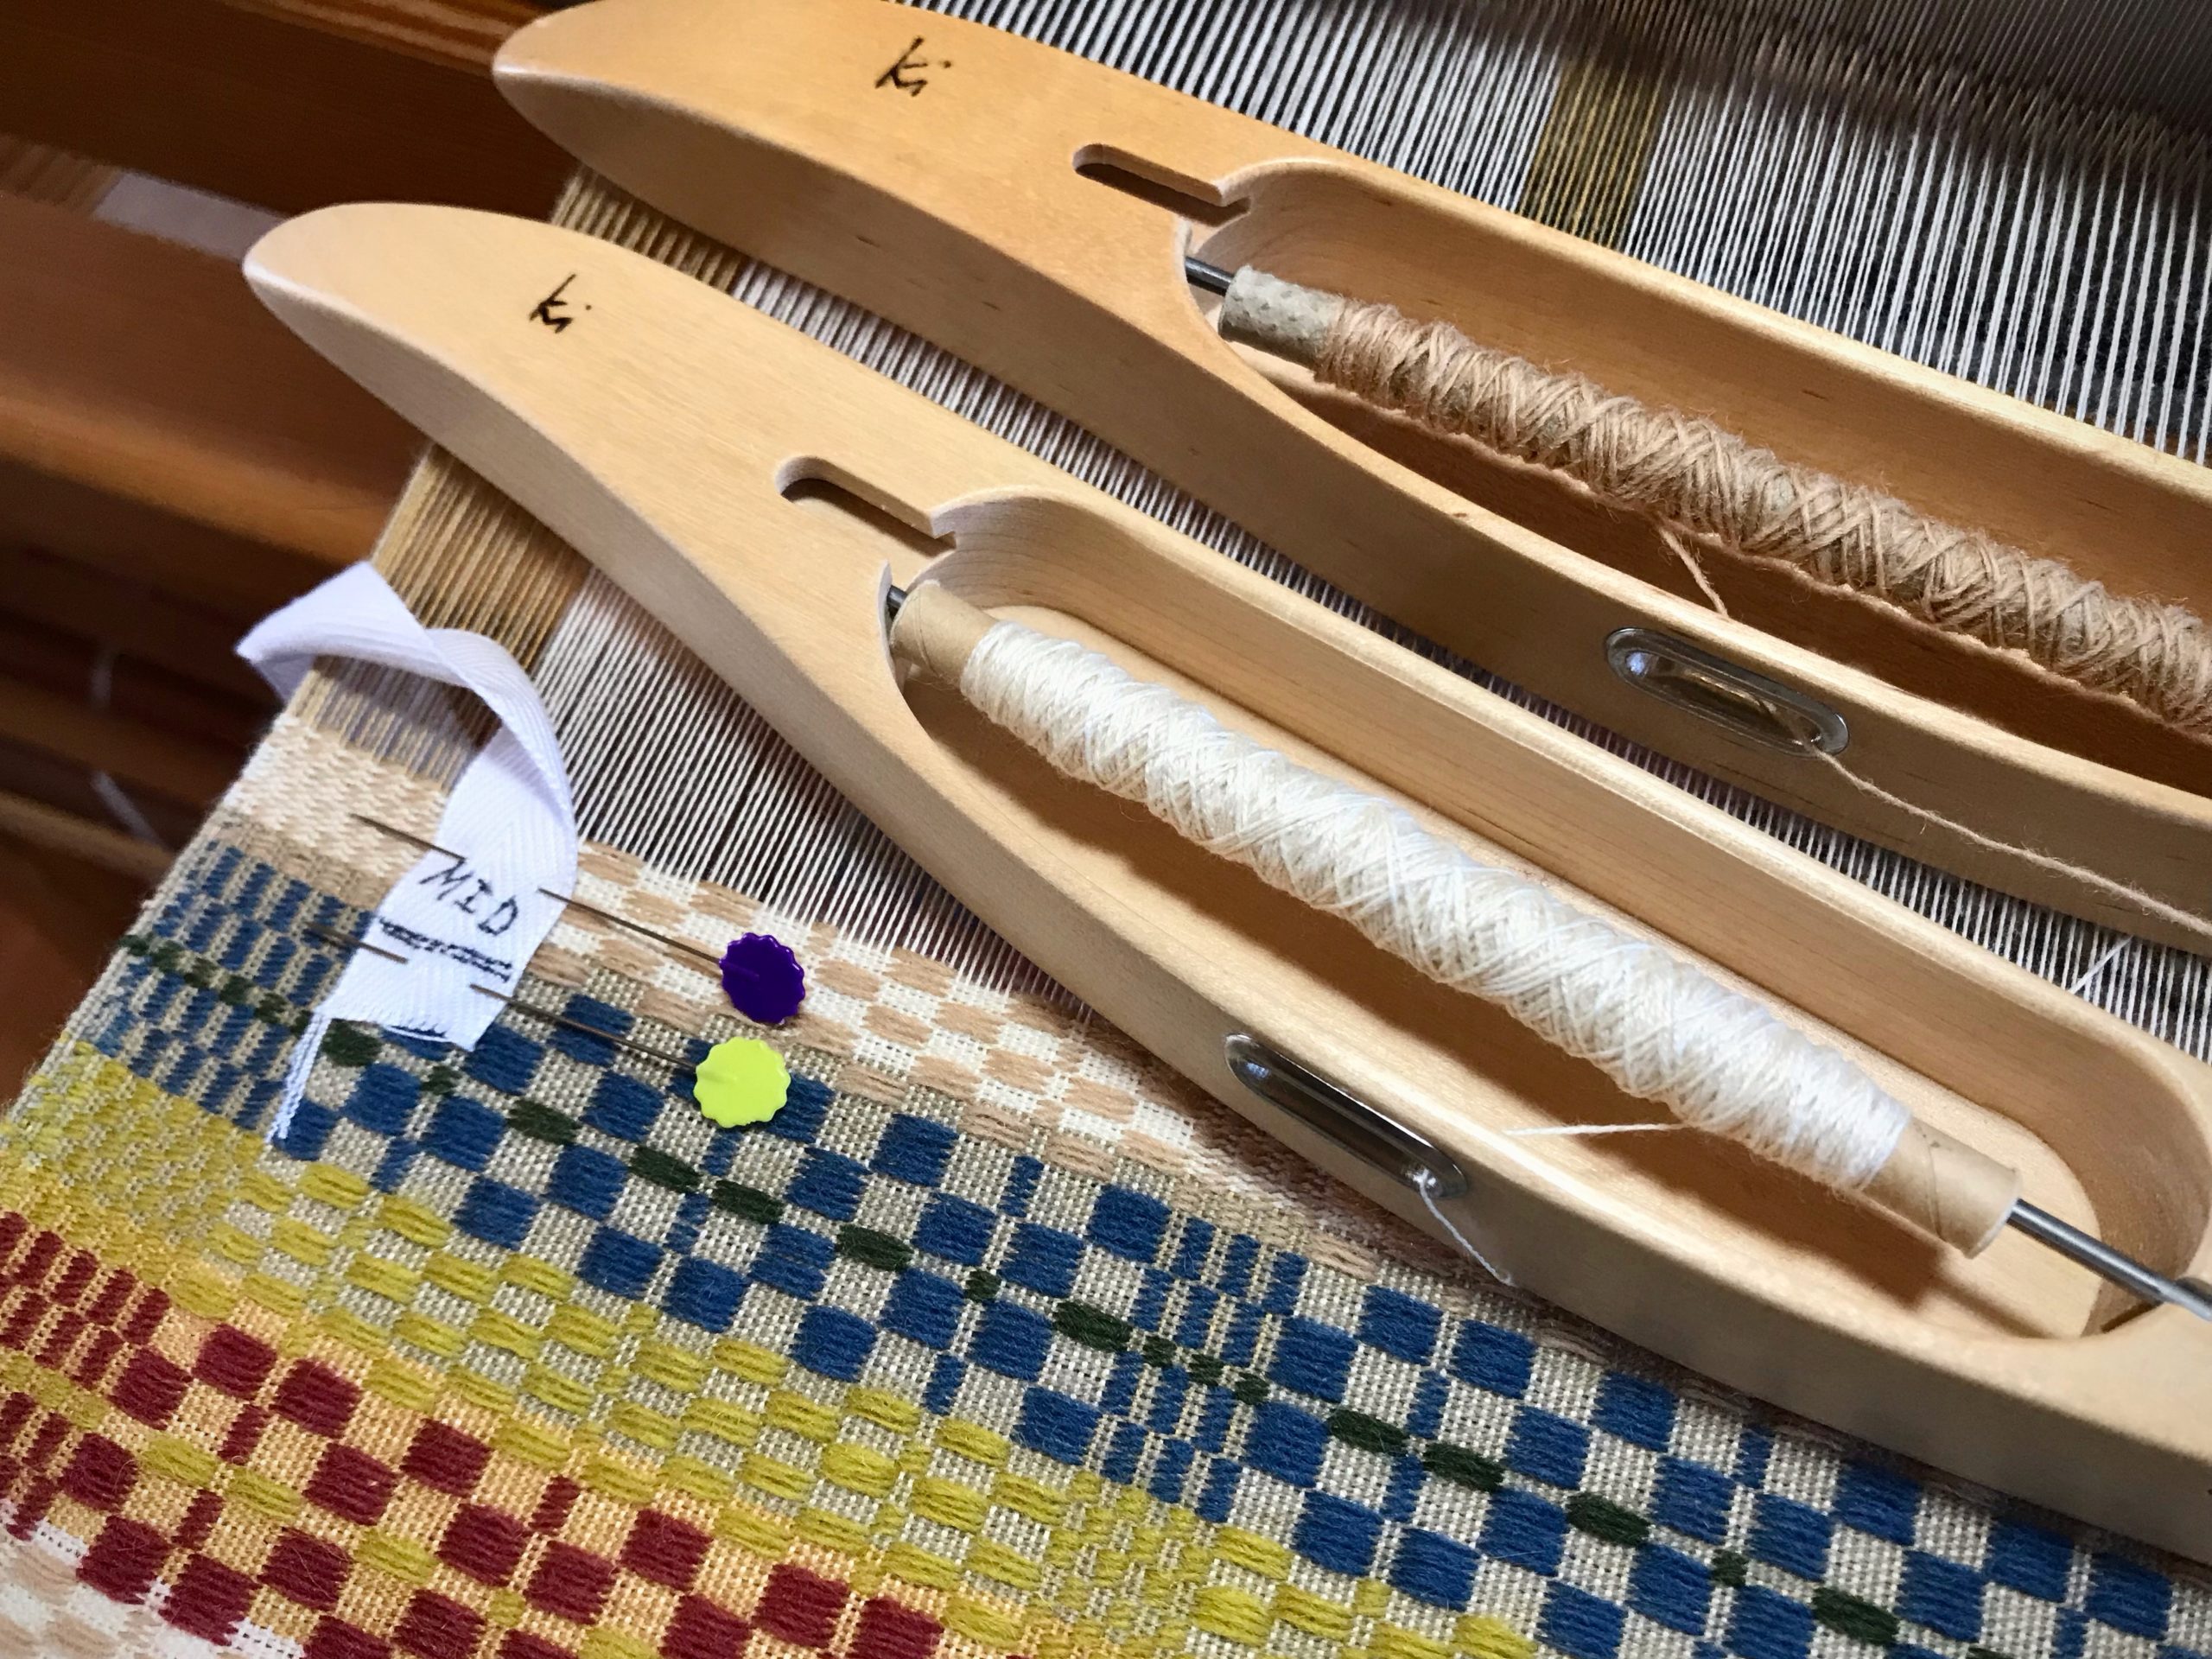
- 5/8” polyester twill tape
- Fine point indelible marker
- Tape measure
- 2 flat-head straight pins
Make Calculations
- Determine the finished length.
- Consider the Golden Ratio, 1:6.
- Consider where the finished textile will be placed.
- Estimate take-up and shrinkage.
- Include these measurements in your project notes.
Prepare a Measurement Tape
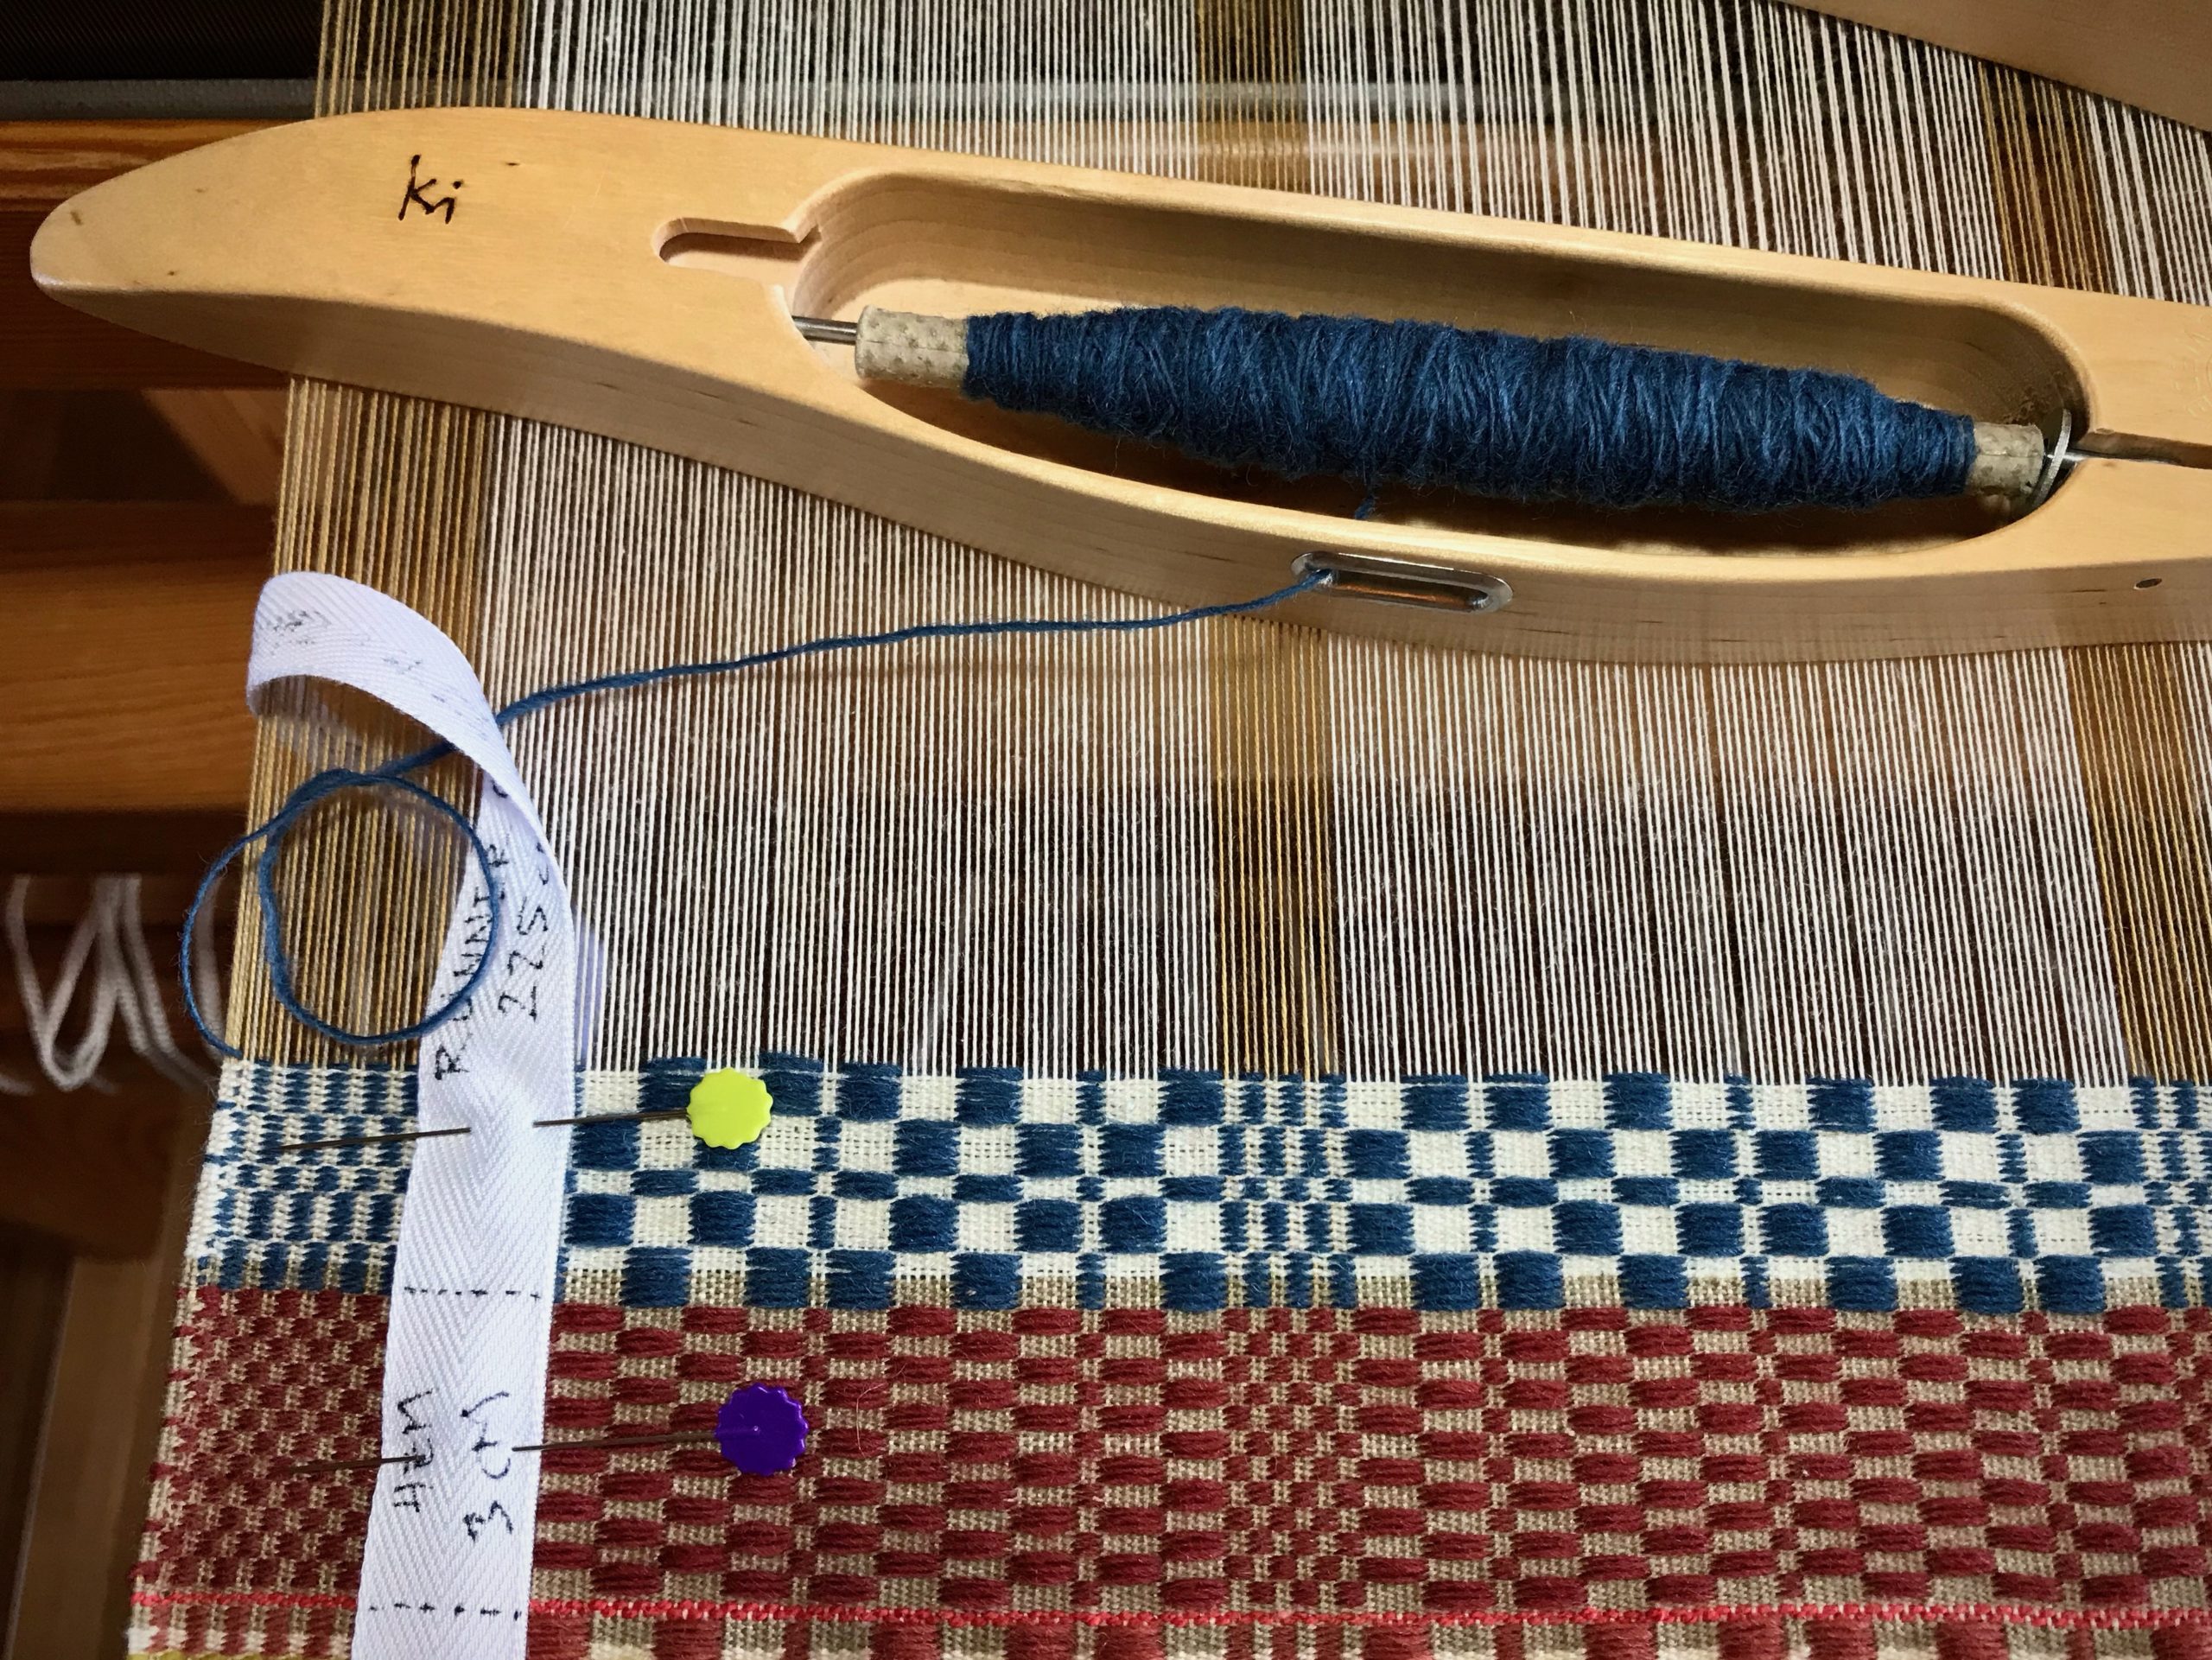
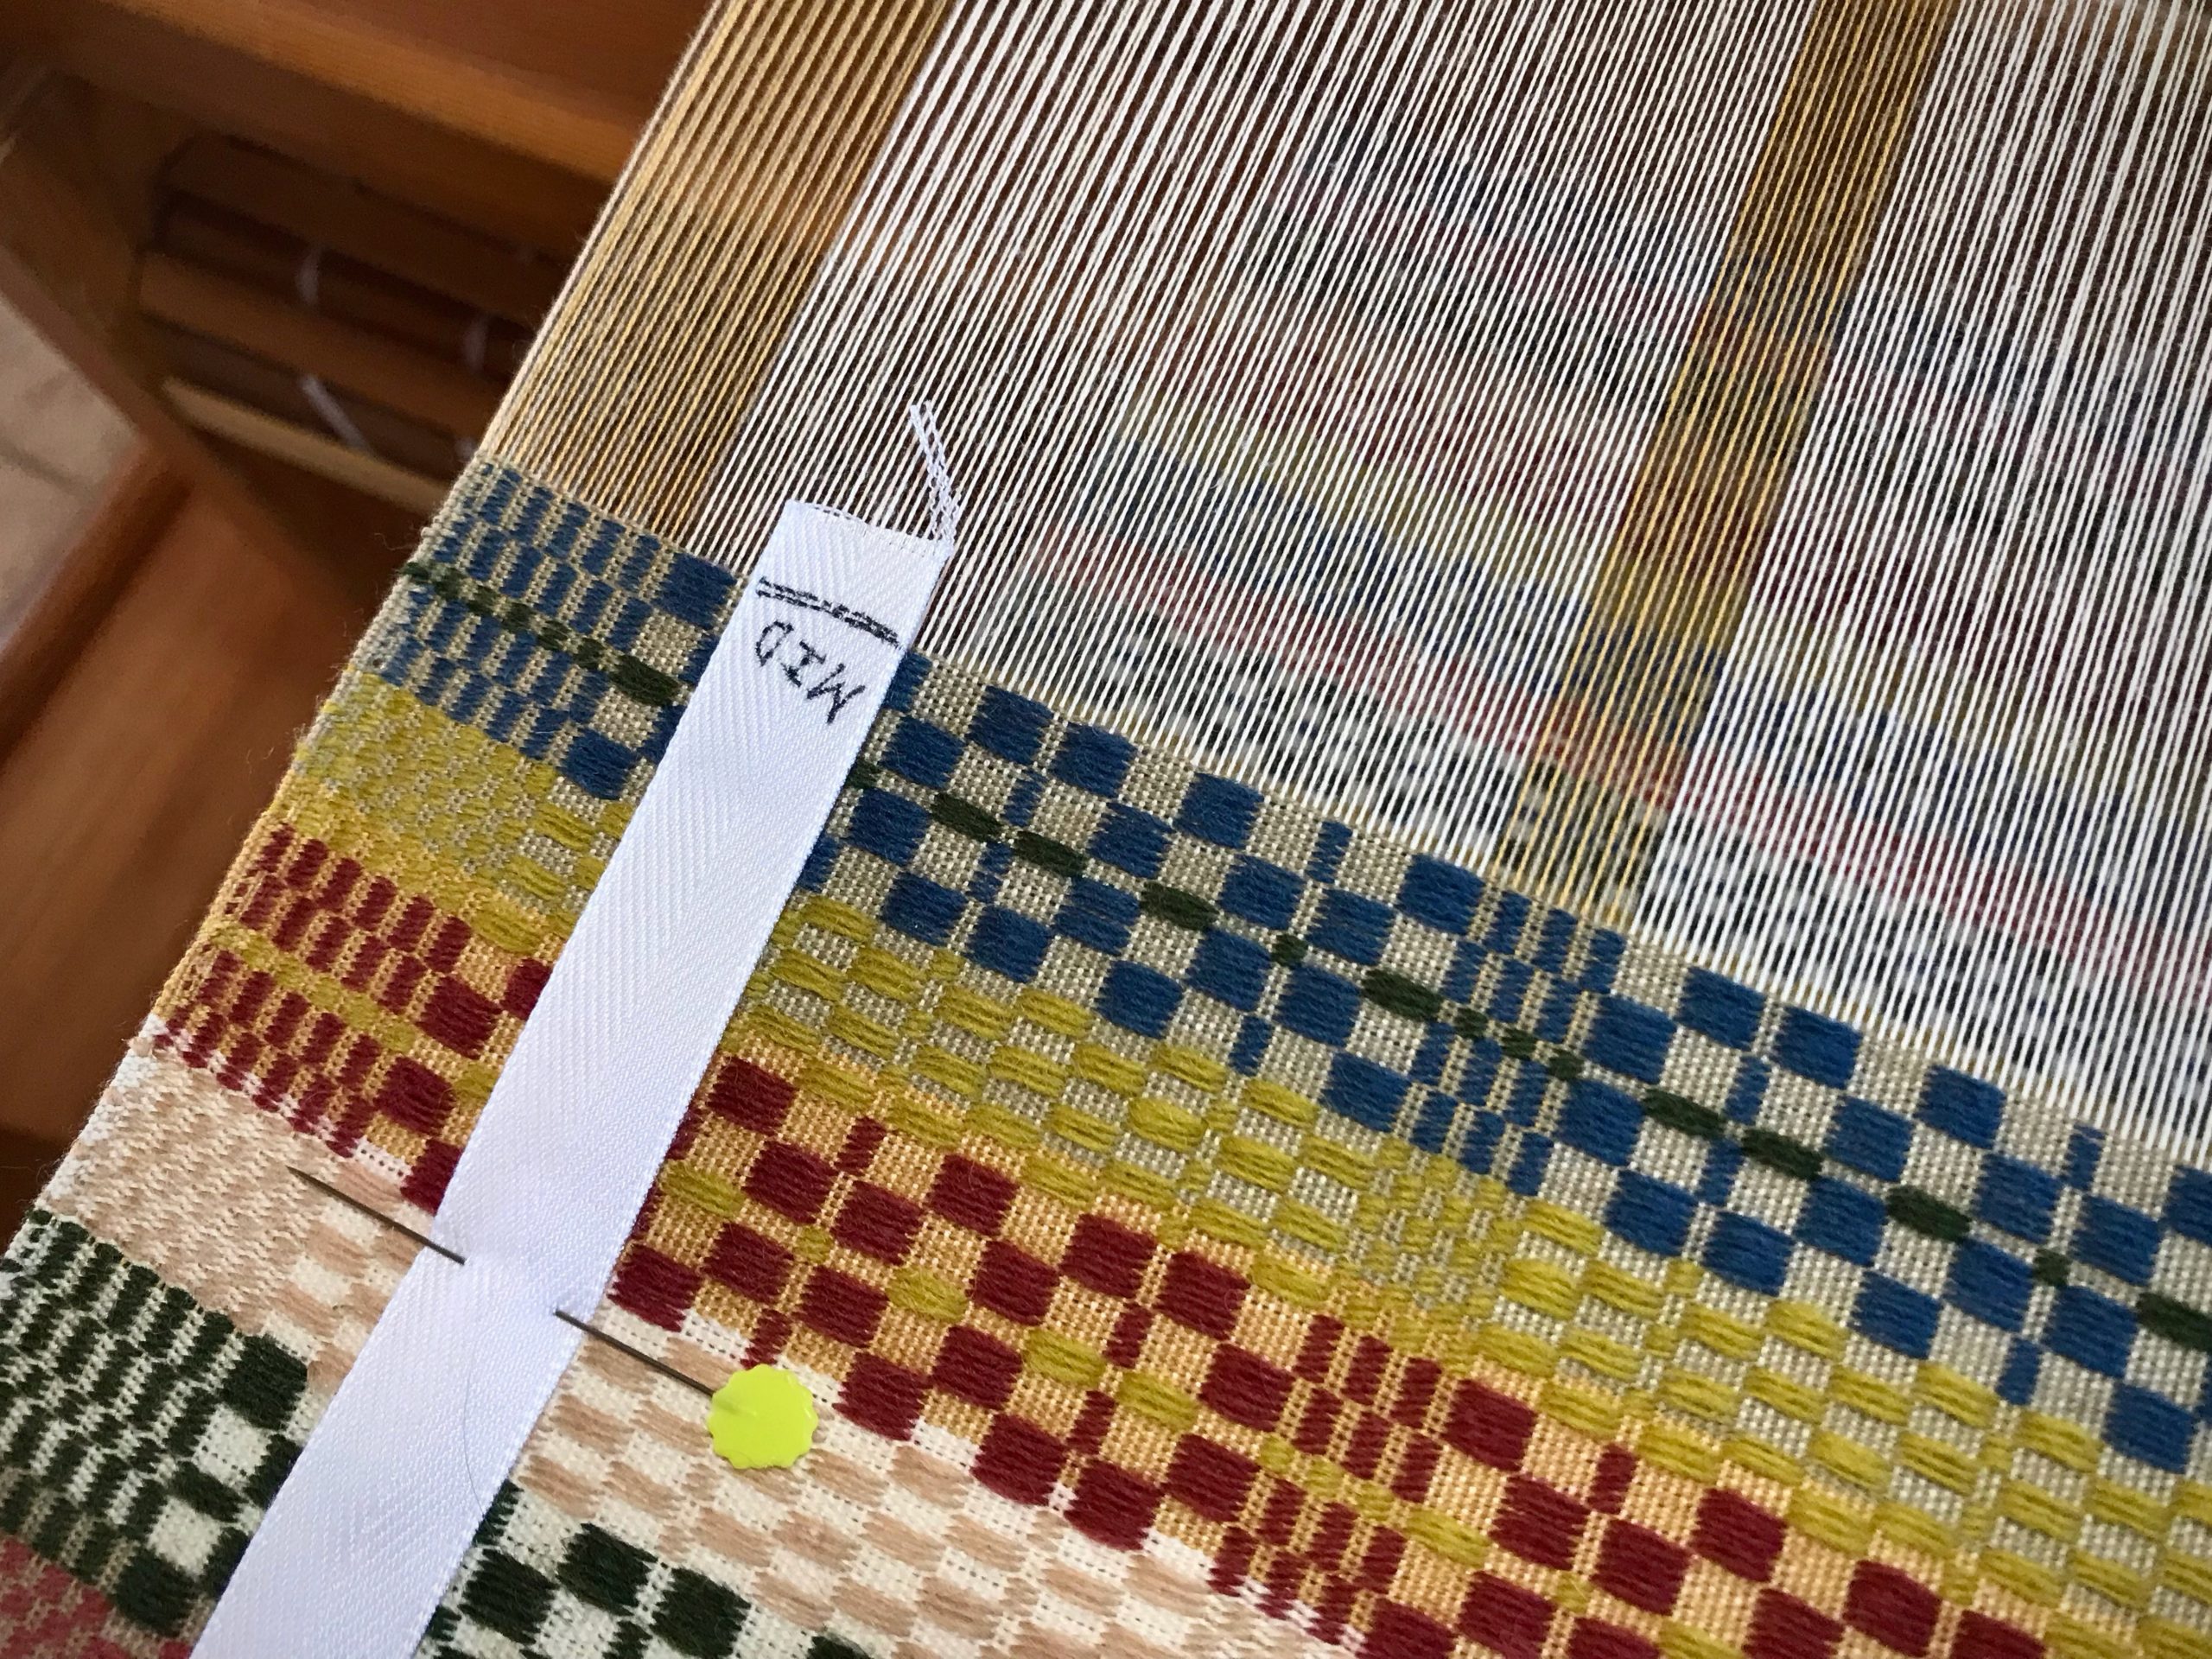
- Draw the beginning line about 2 cm from the end of the tape. If there is a hem, draw a second line to mark the hem’s length.
- Write the item description on the tape.
- Write ” ___ (finished length) + ___ (take-up and shrinkage) = ___ (total length)” on the tape.
- Measure the total length from the first line (or from the hem) on the tape. Draw a line at the end (add hem, if needed).
- Cut the tape about 2 cm after the ending line.
- Find the middle of the tape. Draw a line and write “MID”.
Prepare a Half Measurement Tape
- Do the same as for a full-length measurement tape, except divide the total length measurement in half. Draw a line on the tape at the halfway point. Write “MID” before the line.
- Cut the tape about 2 cm after the MID line.
Weave and Measure (Always with the warp under tension)
- Use two straight pins to pin the measurement tape to the weaving near one selvedge. Place the beginning line of the tape directly over the beginning of the woven article.
- As weaving progresses, remove the pin closest to the breast beam. Leapfrog over the remaining pin. Reinsert the removed pin through the tape near the fell line.
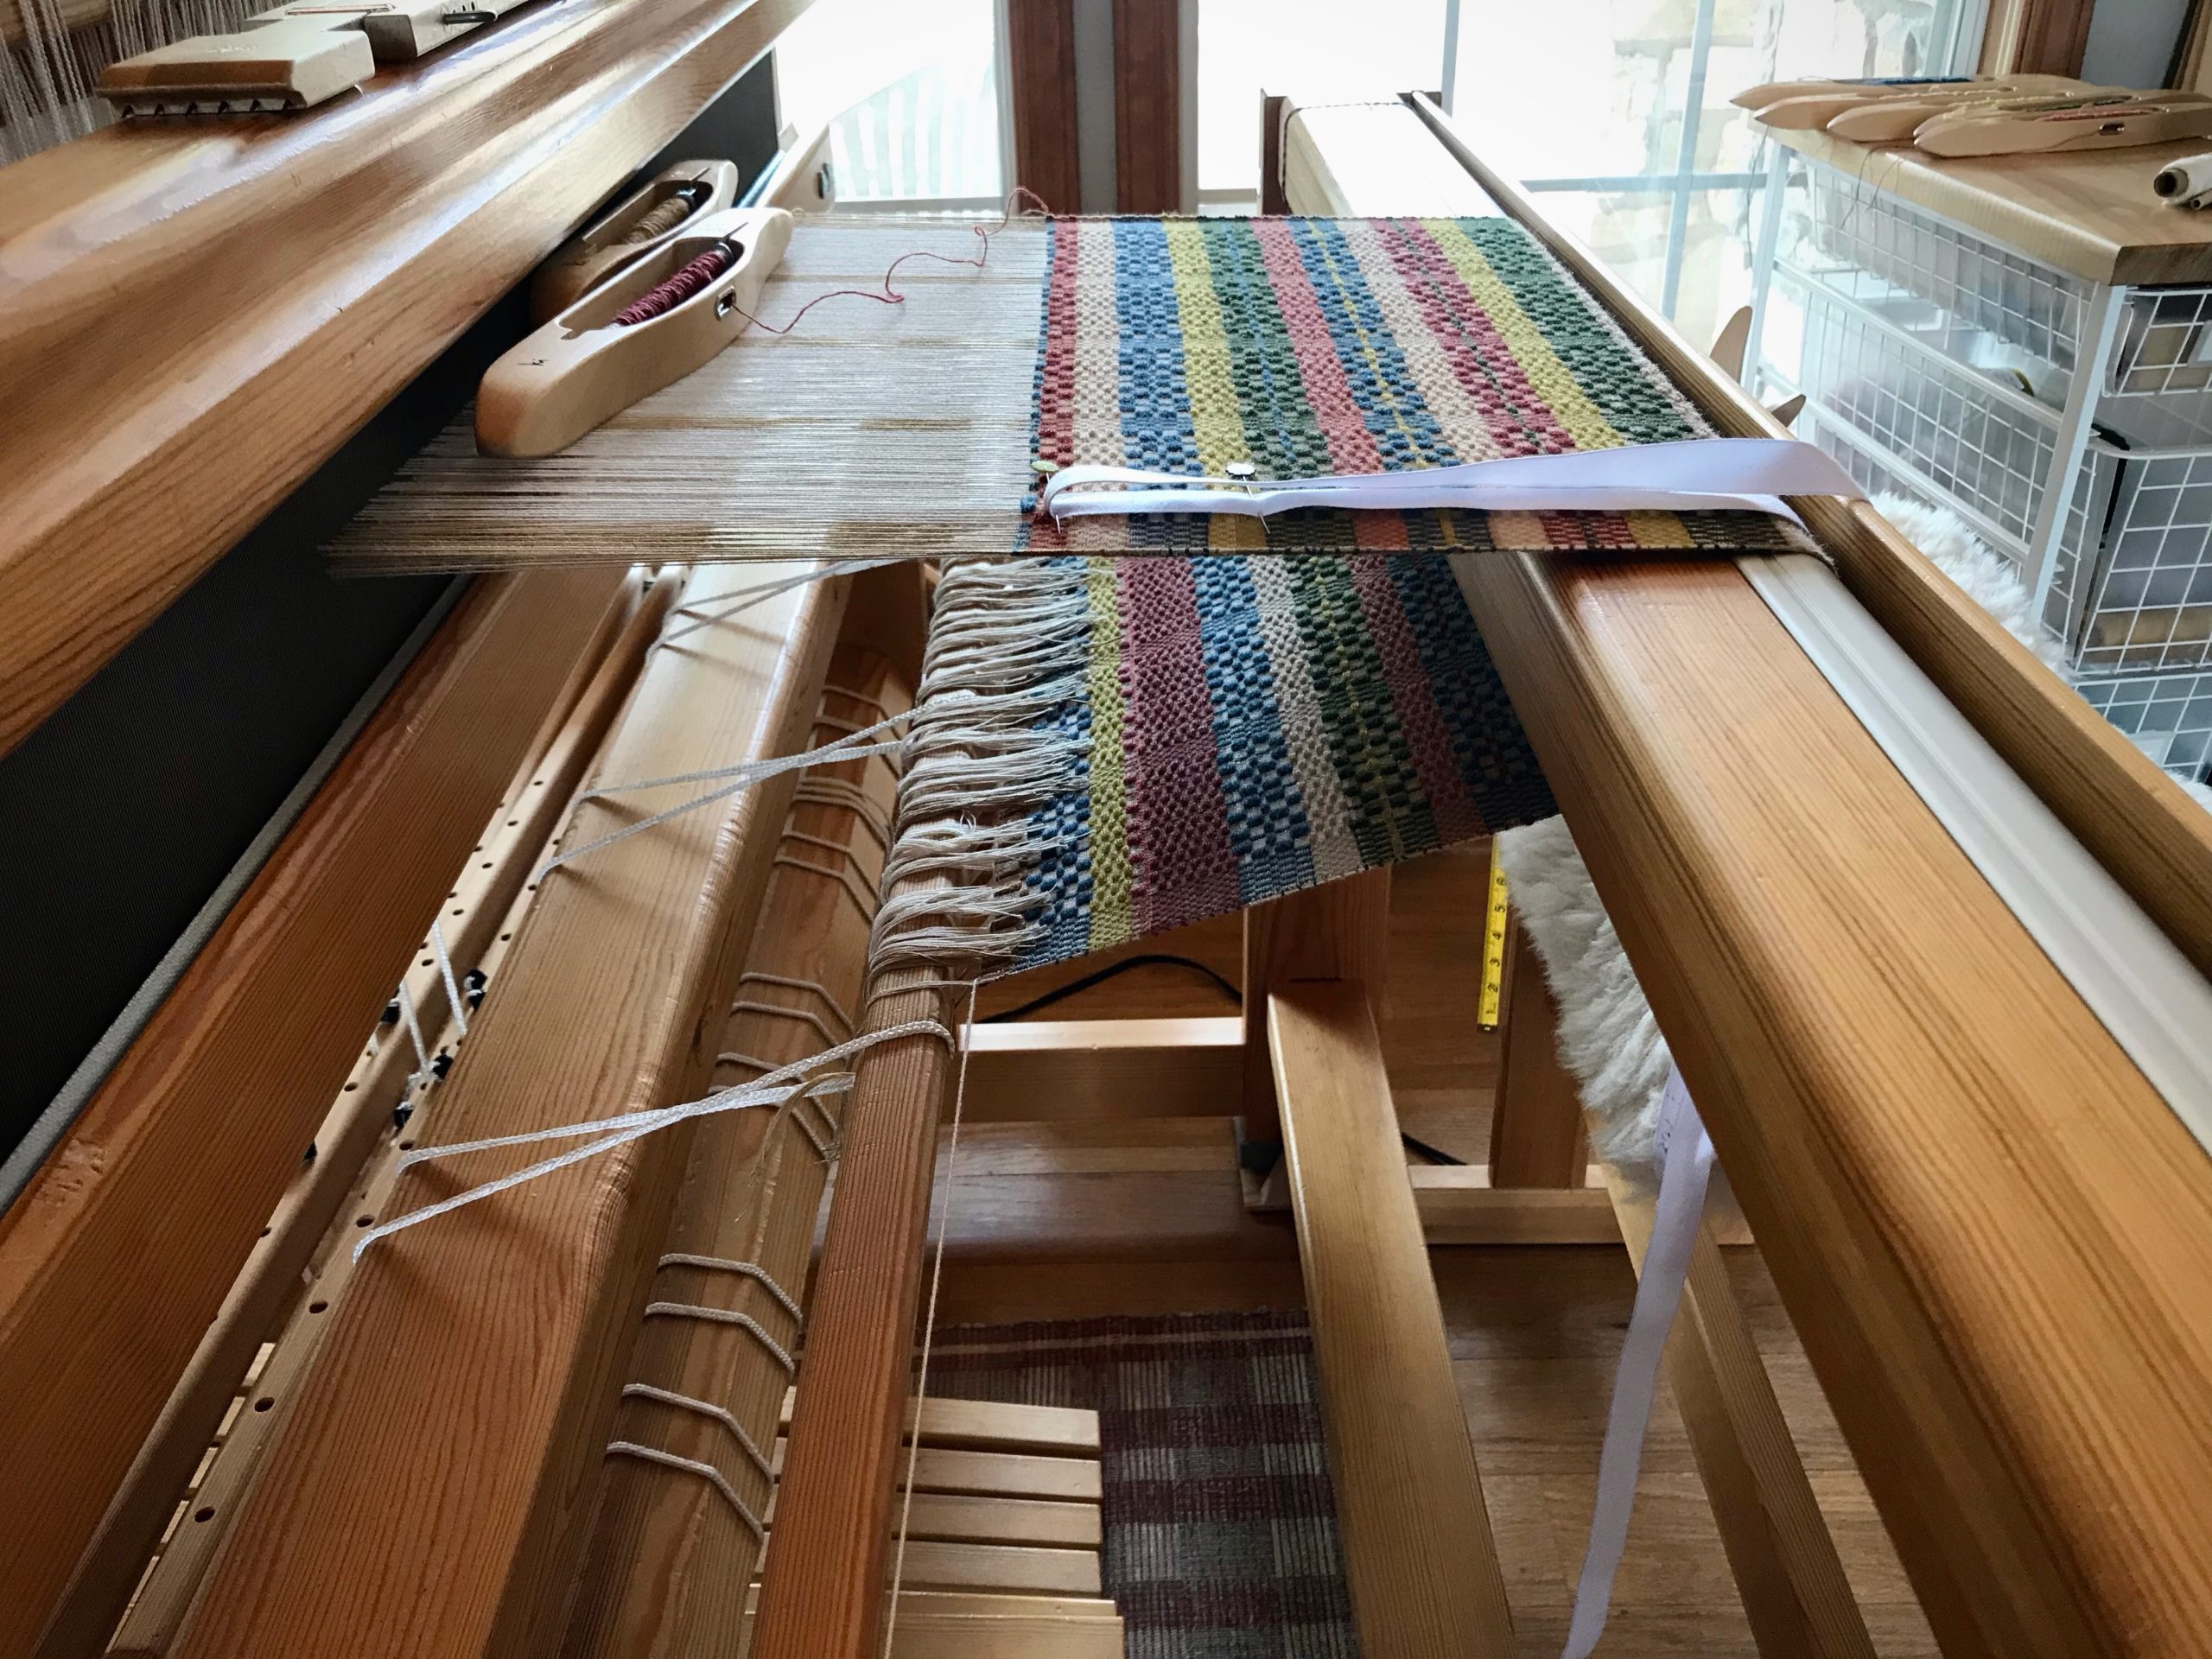
- If using a half measurement tape, weave past the MID line. Mark the spot with a pin. Remove the measurement tape. Turn the tape and pin into place to weave the second half.
Here’s a demonstration of making and using a measurement tape:
(For a previous discussion of this topic, see Tools Day: Measured Weaving.)
Since you can measure what you are weaving, do relax and enjoy the ride.
May you reach the mid point at just the right time.
Happy Weaving,
Karen
Good morning Karen,
Thank you, Elisabeth S and video support for this post. You covered what I had been doing, but not considered (measuring under tension).
My go-to tape to write on has been my handy rolls of seam binding. It does bleed.
Otherwise, I’ve been pinning over a 100″ tape measure. It does creep a little.
A legible tape exclusive to the project solves both issues.
It is -6°F at the moment. Too cold to snow. But, oh so beautiful when the sun comes up in an hour or so. Squeaky snow weather.
Praise God!
I’ll share my trick to enjoying the outside: wool socks, snuggle duds and a long hooded jacket with a windbreaker type barrier. It keeps body heat where it belongs and the breezes from infiltrating.
I do love the seasons.
Hi Nannette, Brrr… Using a tape specifically made for a project keeps the pertinent information right at hand. It also allows me to repeat a project at a later date, using the same detail specifics.
Happy Weaving,
Karen
Thank you for sharing your technique using the measuring tape! Very descriptive and I love how neat yours looks. Mine always bleeds. I will try the twill tape.
Hi Renee, I think this is a common technique, so there are several ways to approach it. The polyester twill tape works best for me. Cotton twill tape is good for other things – not so great for this.
Happy Weaving,
Karen
I could not find any polyester tape so I bought cotton. Why won’t’ this work as well?
Hi Kate, I have used cotton tape in a pinch. You can make it work, but the cotton tape had some give (stretch) to it and was harder to write on legibly. I prefer the polyester because there is little or no give to it, so my measurements will be more accurate.
Thanks for asking,
Karen
Thanks, Karen. I love knowing the why behind things. I’ll use the cotton I have until I can find some polyester tape. The cotton is. a little difficult to write on.
I needed this yesterday.lol. My friend sent it to me today, so my dish towel morphed into a table runner,, this info I valuable and will be , used in the future, next project, Thank you.
Hi Lori, There’s always room for another table runner. 🙂 I am happy you will be able to use this measuring information in the future.
Happy Weaving,
Karen
Hi Karen…Since you are using a polyester twill tape, you can sear your cut edges with a candle…the ends won’t ravel.
Hi Jane, Excellent tip. Thanks!
Karen