I decided to make another visit this week to the Kerr Arts and Cultural Center gallery in Kerrville, Texas that is exhibiting some of my fiber fine art. And I am greeted by a pleasant surprise:
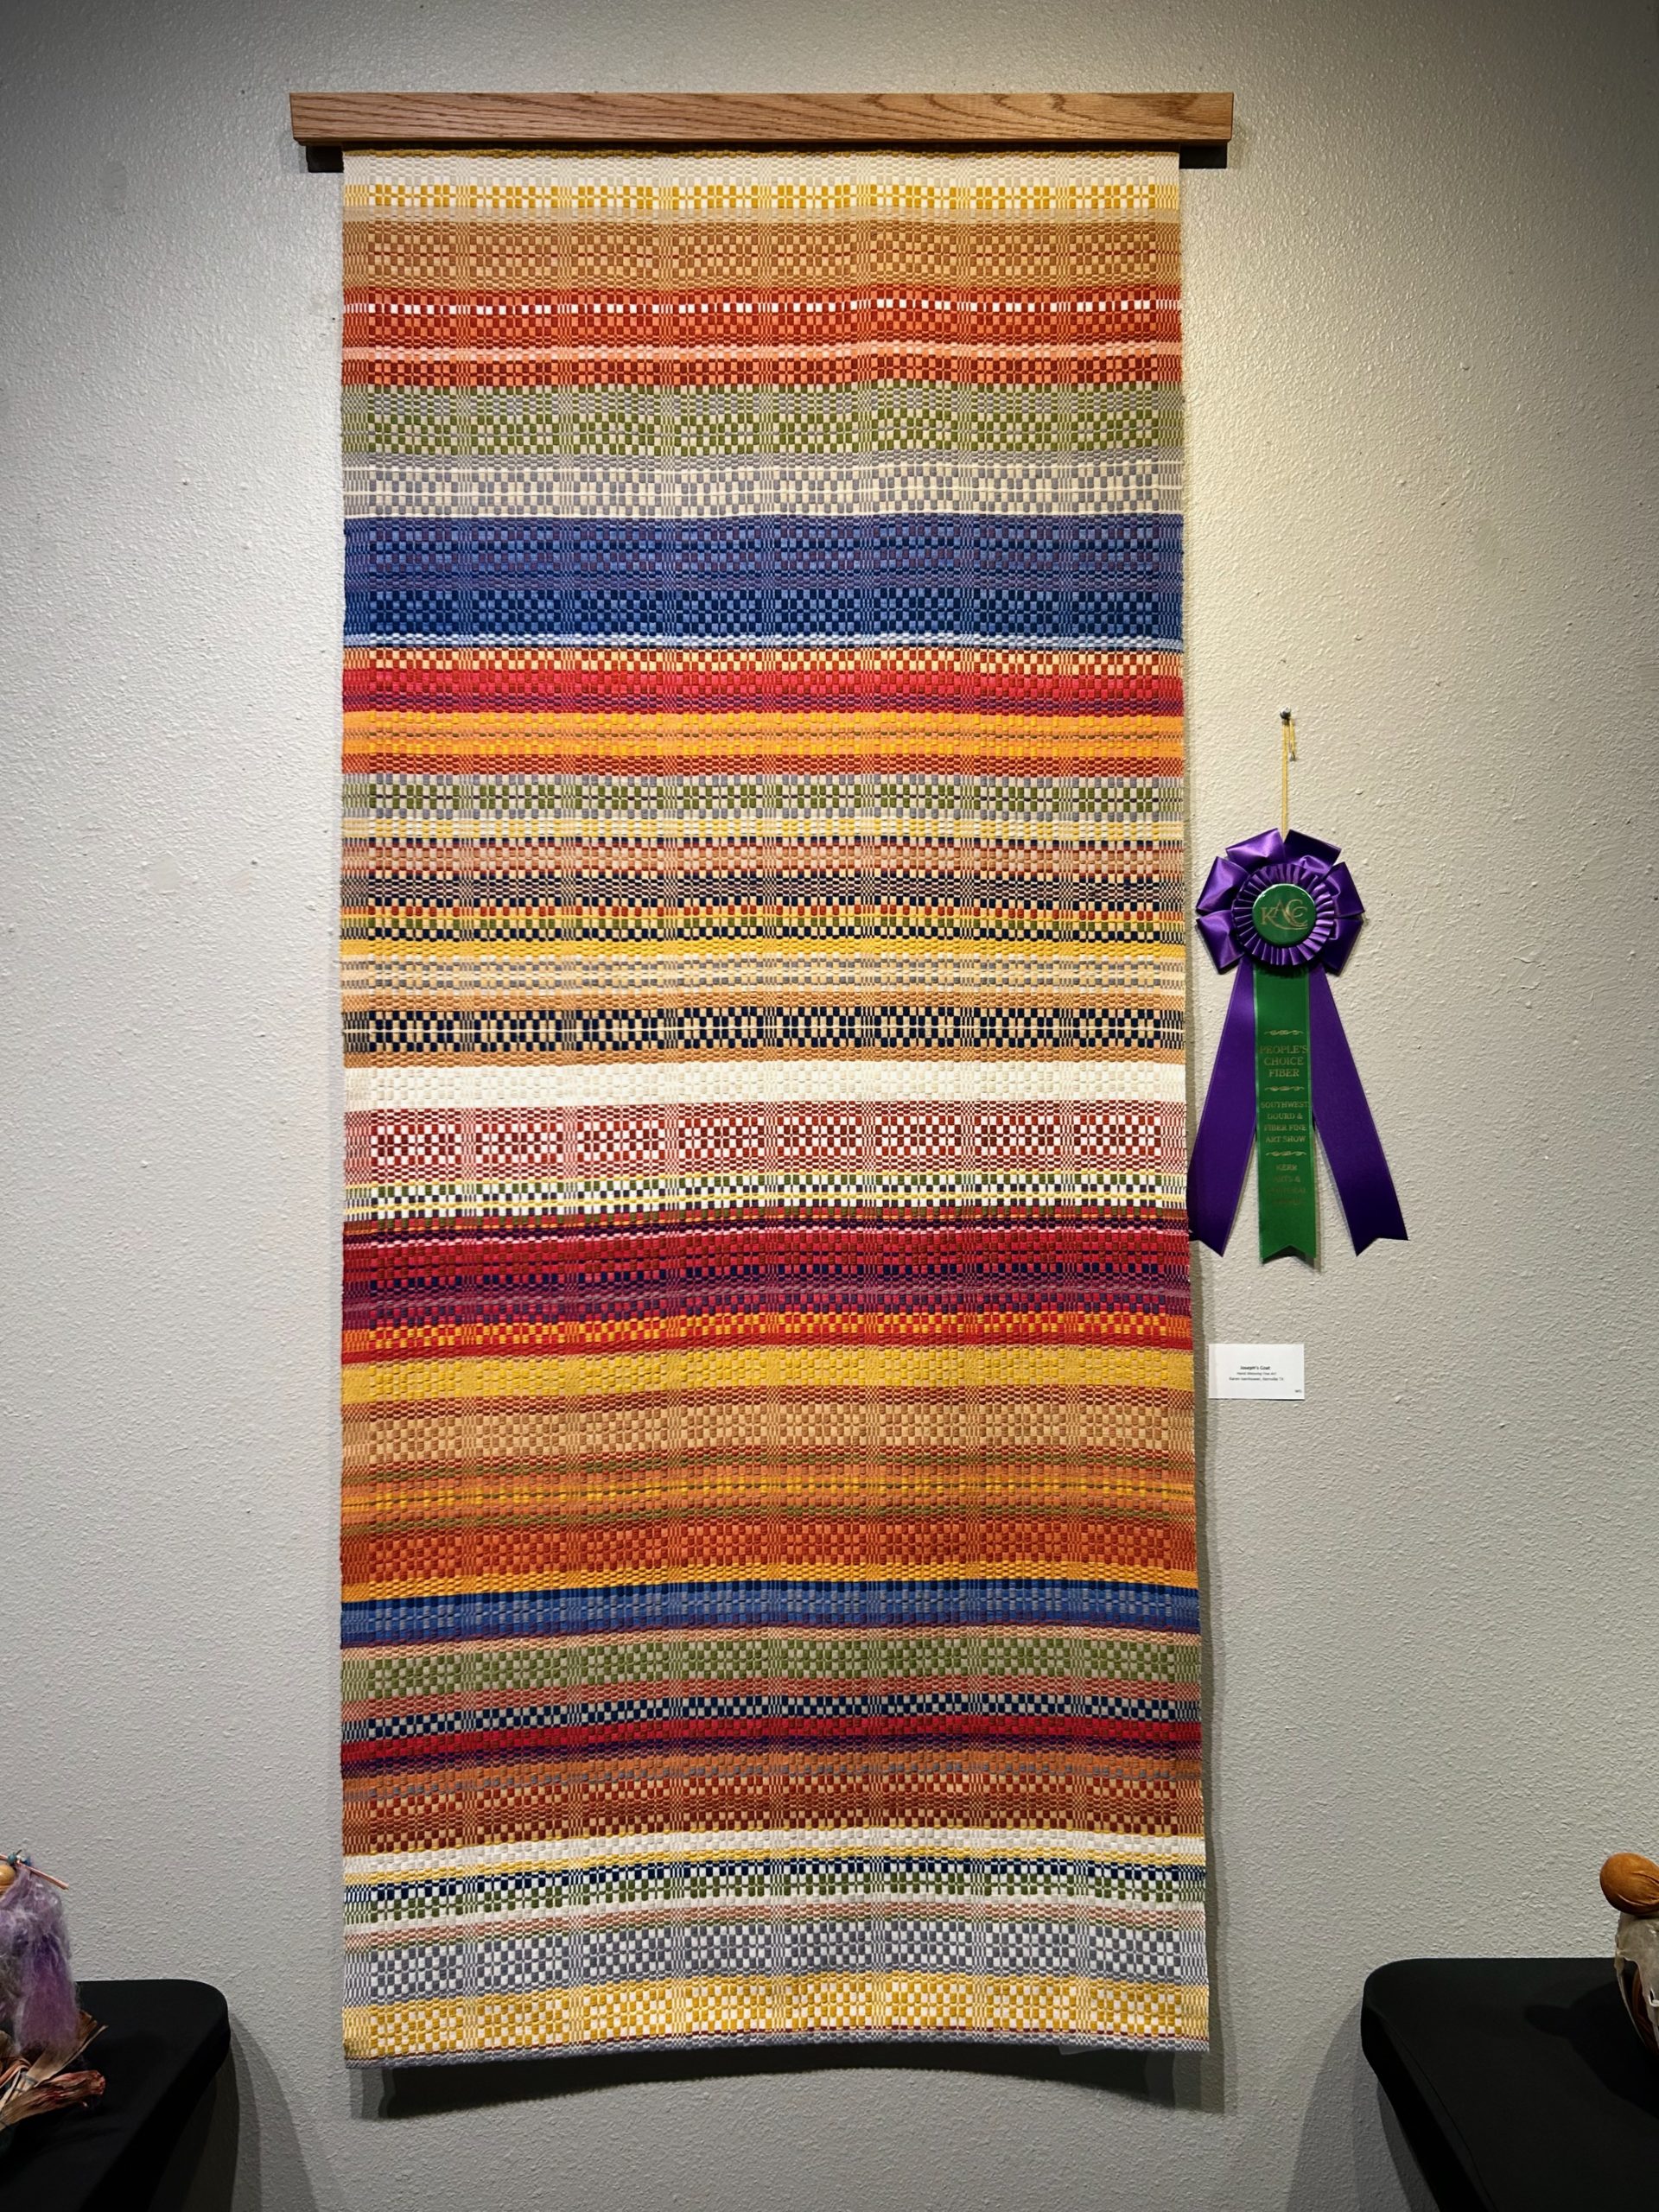
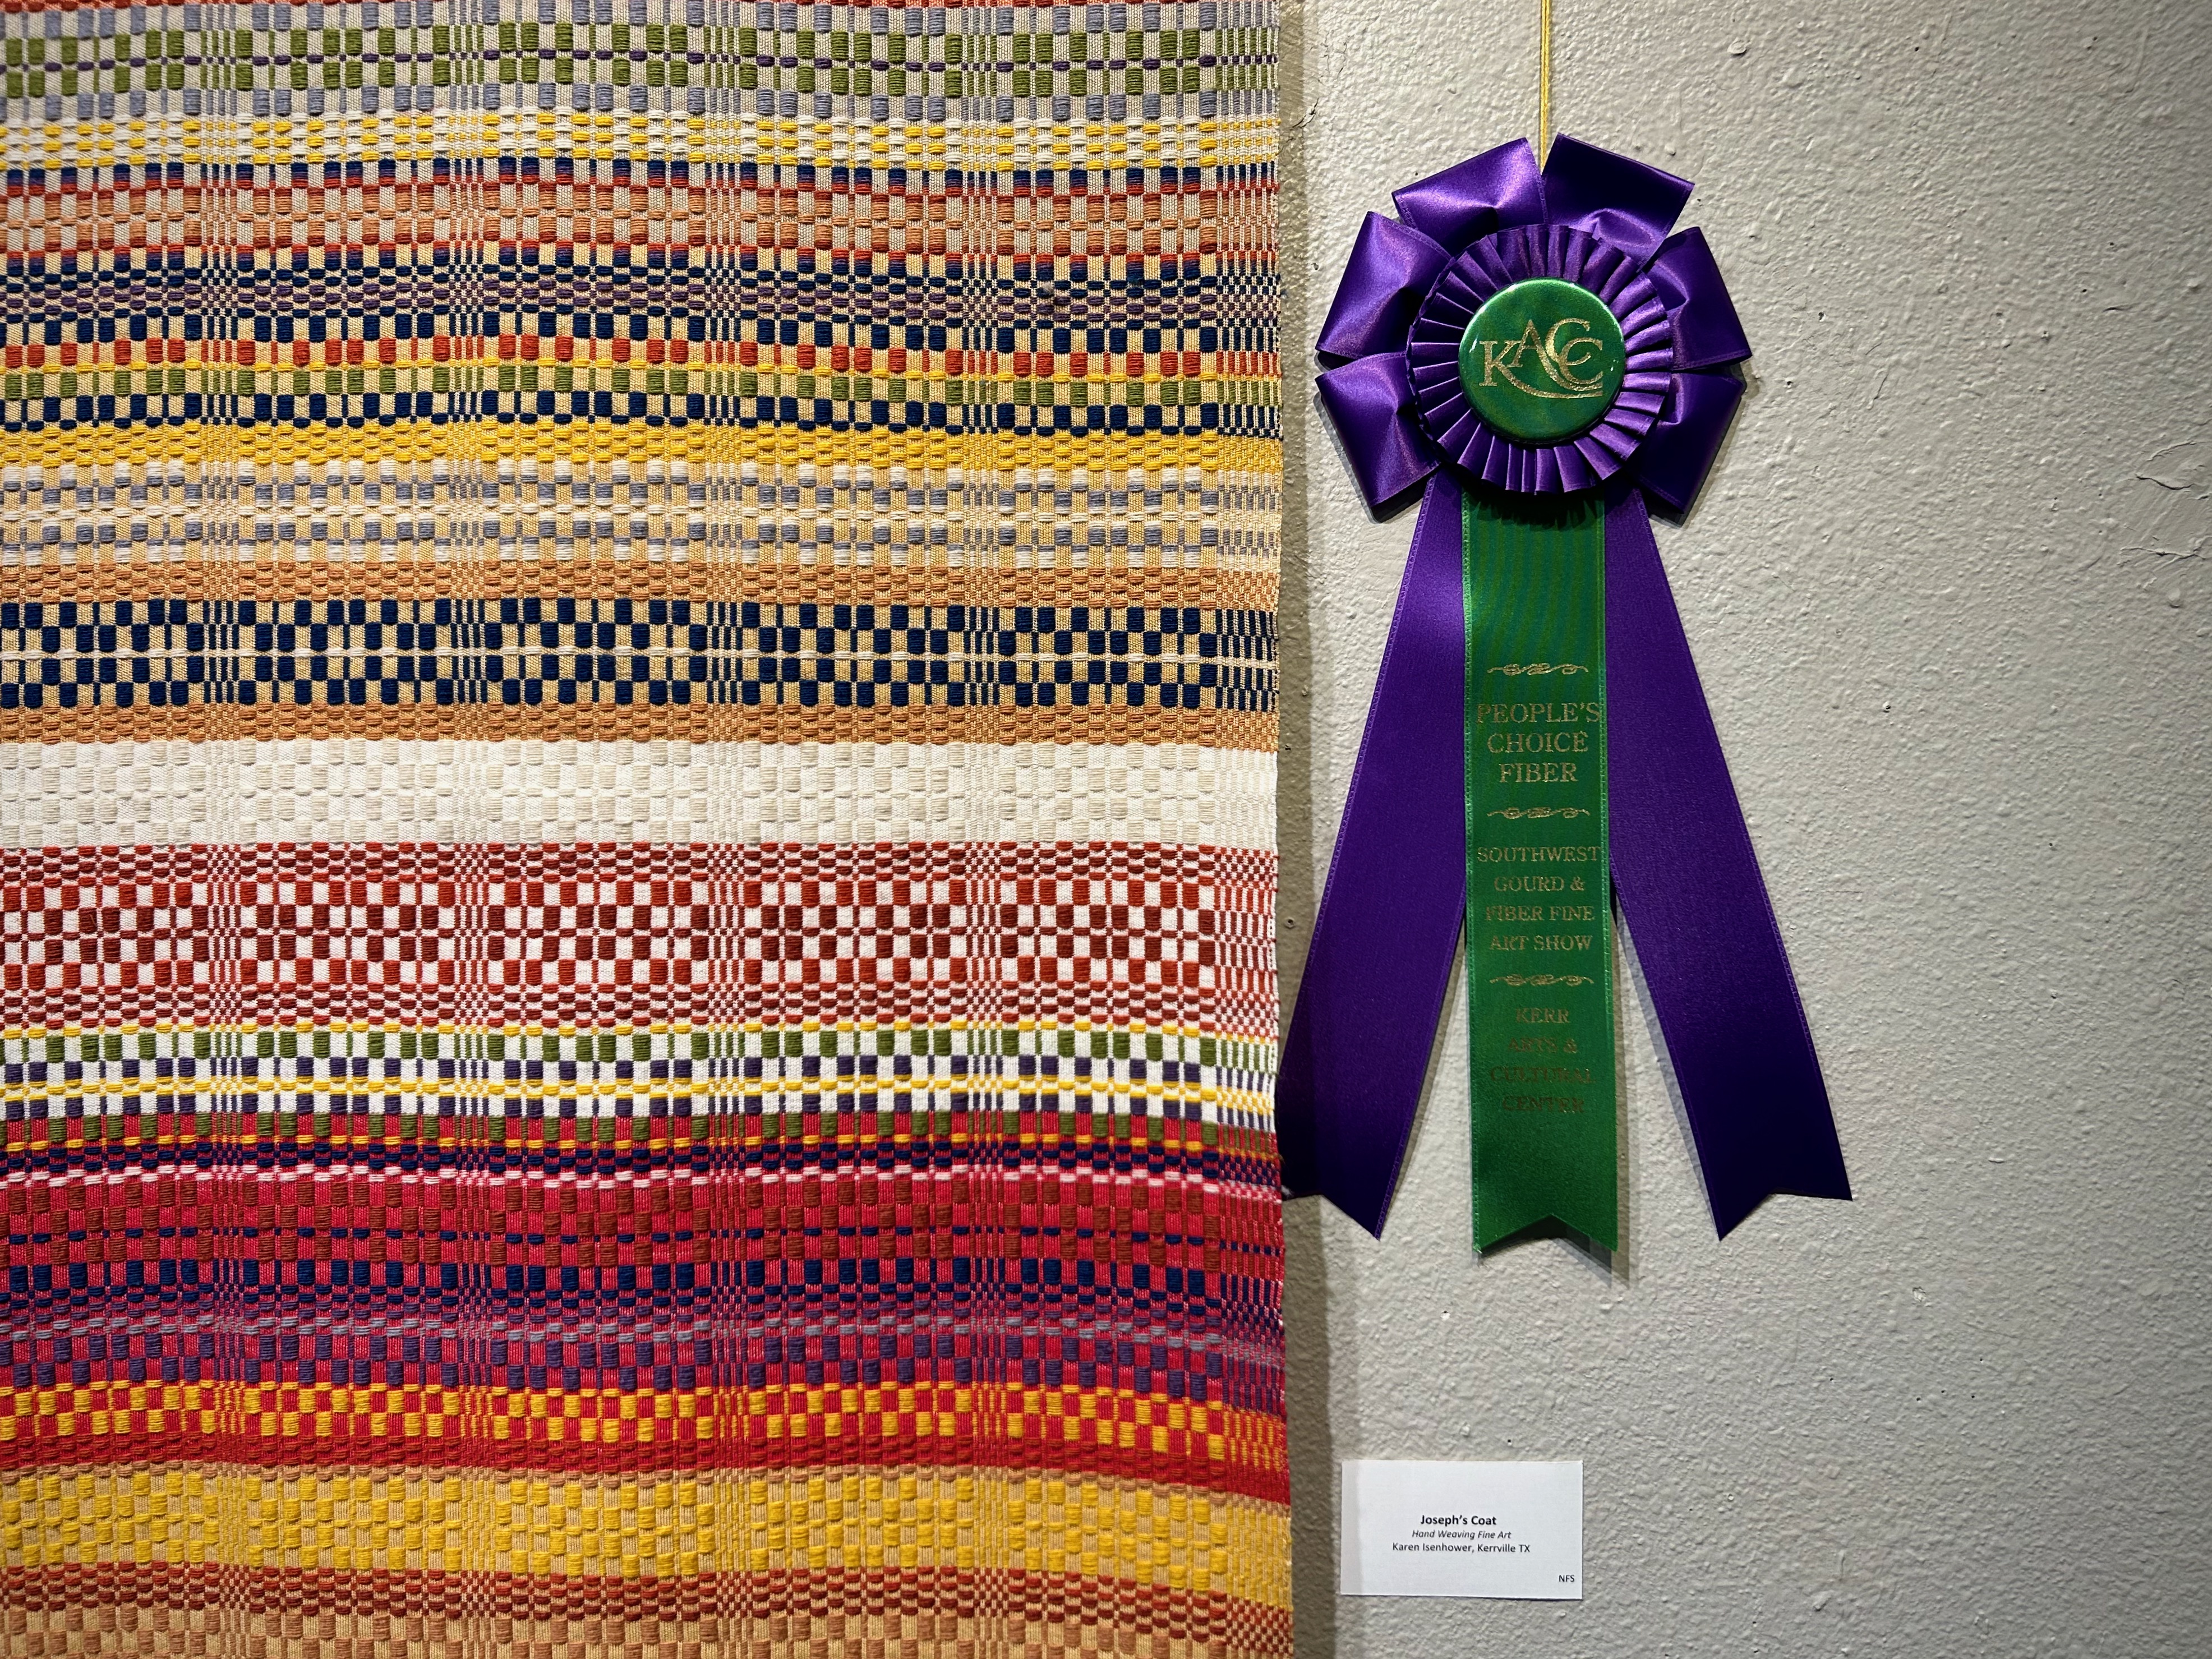
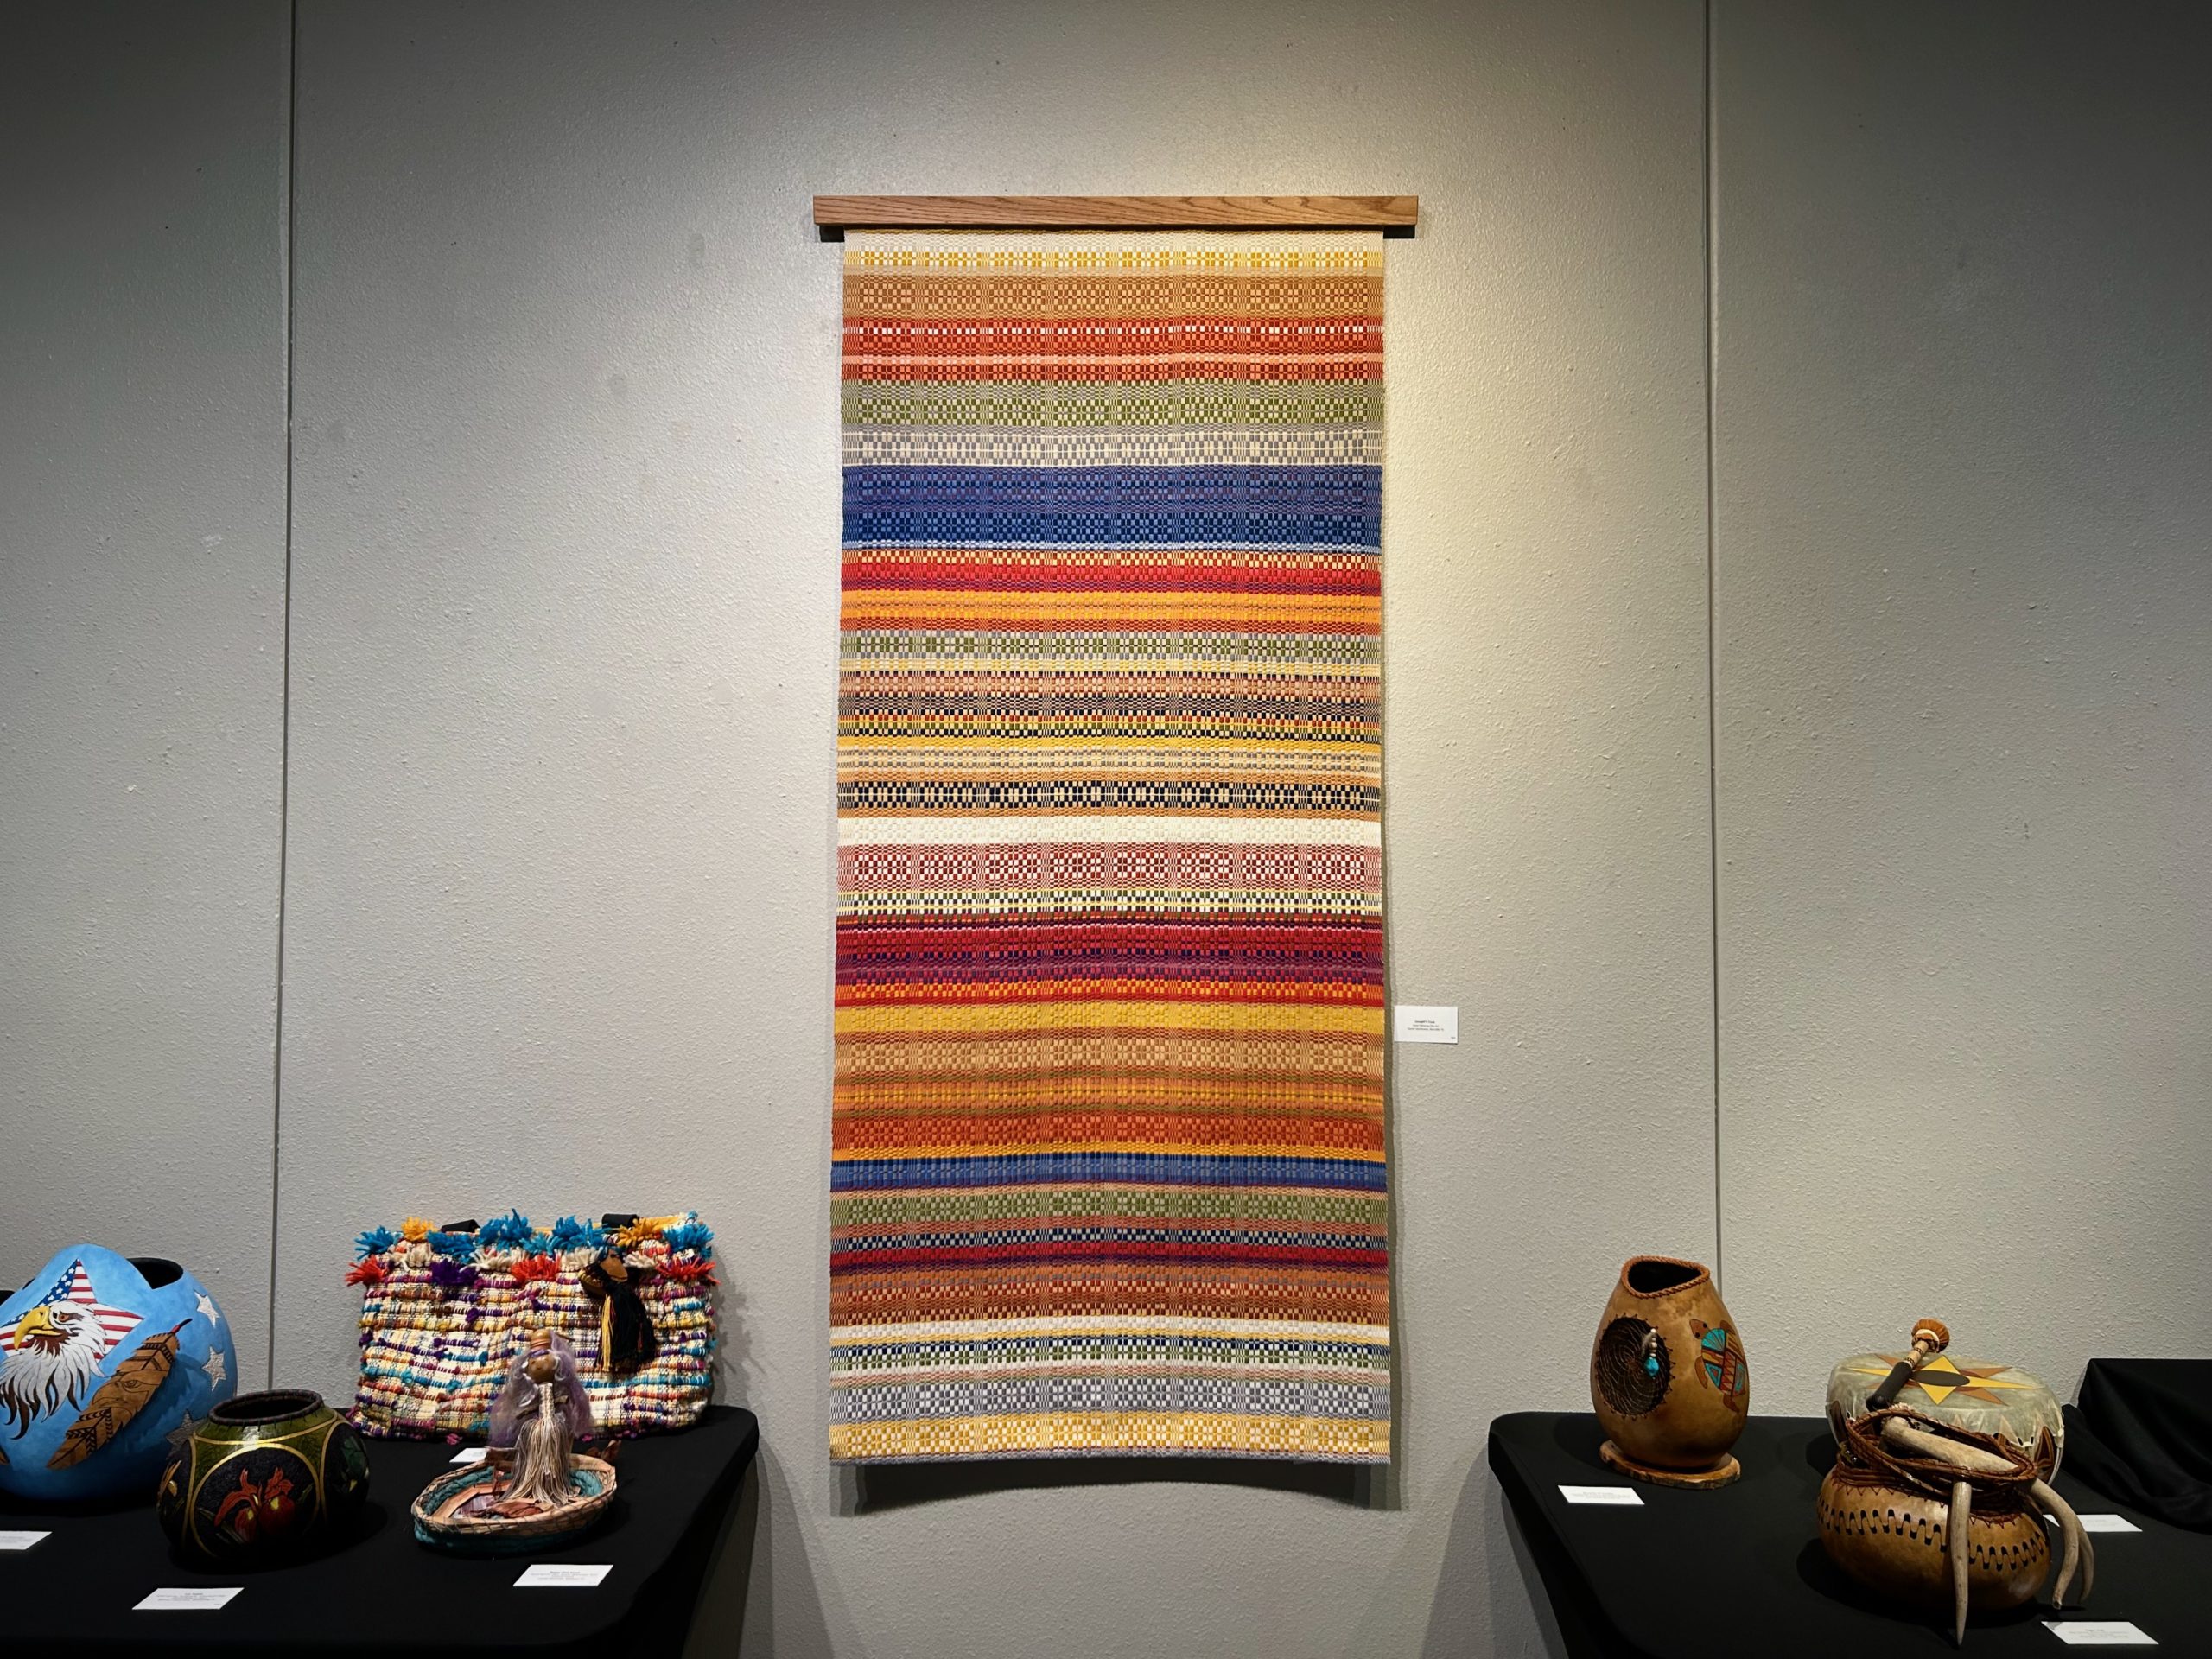
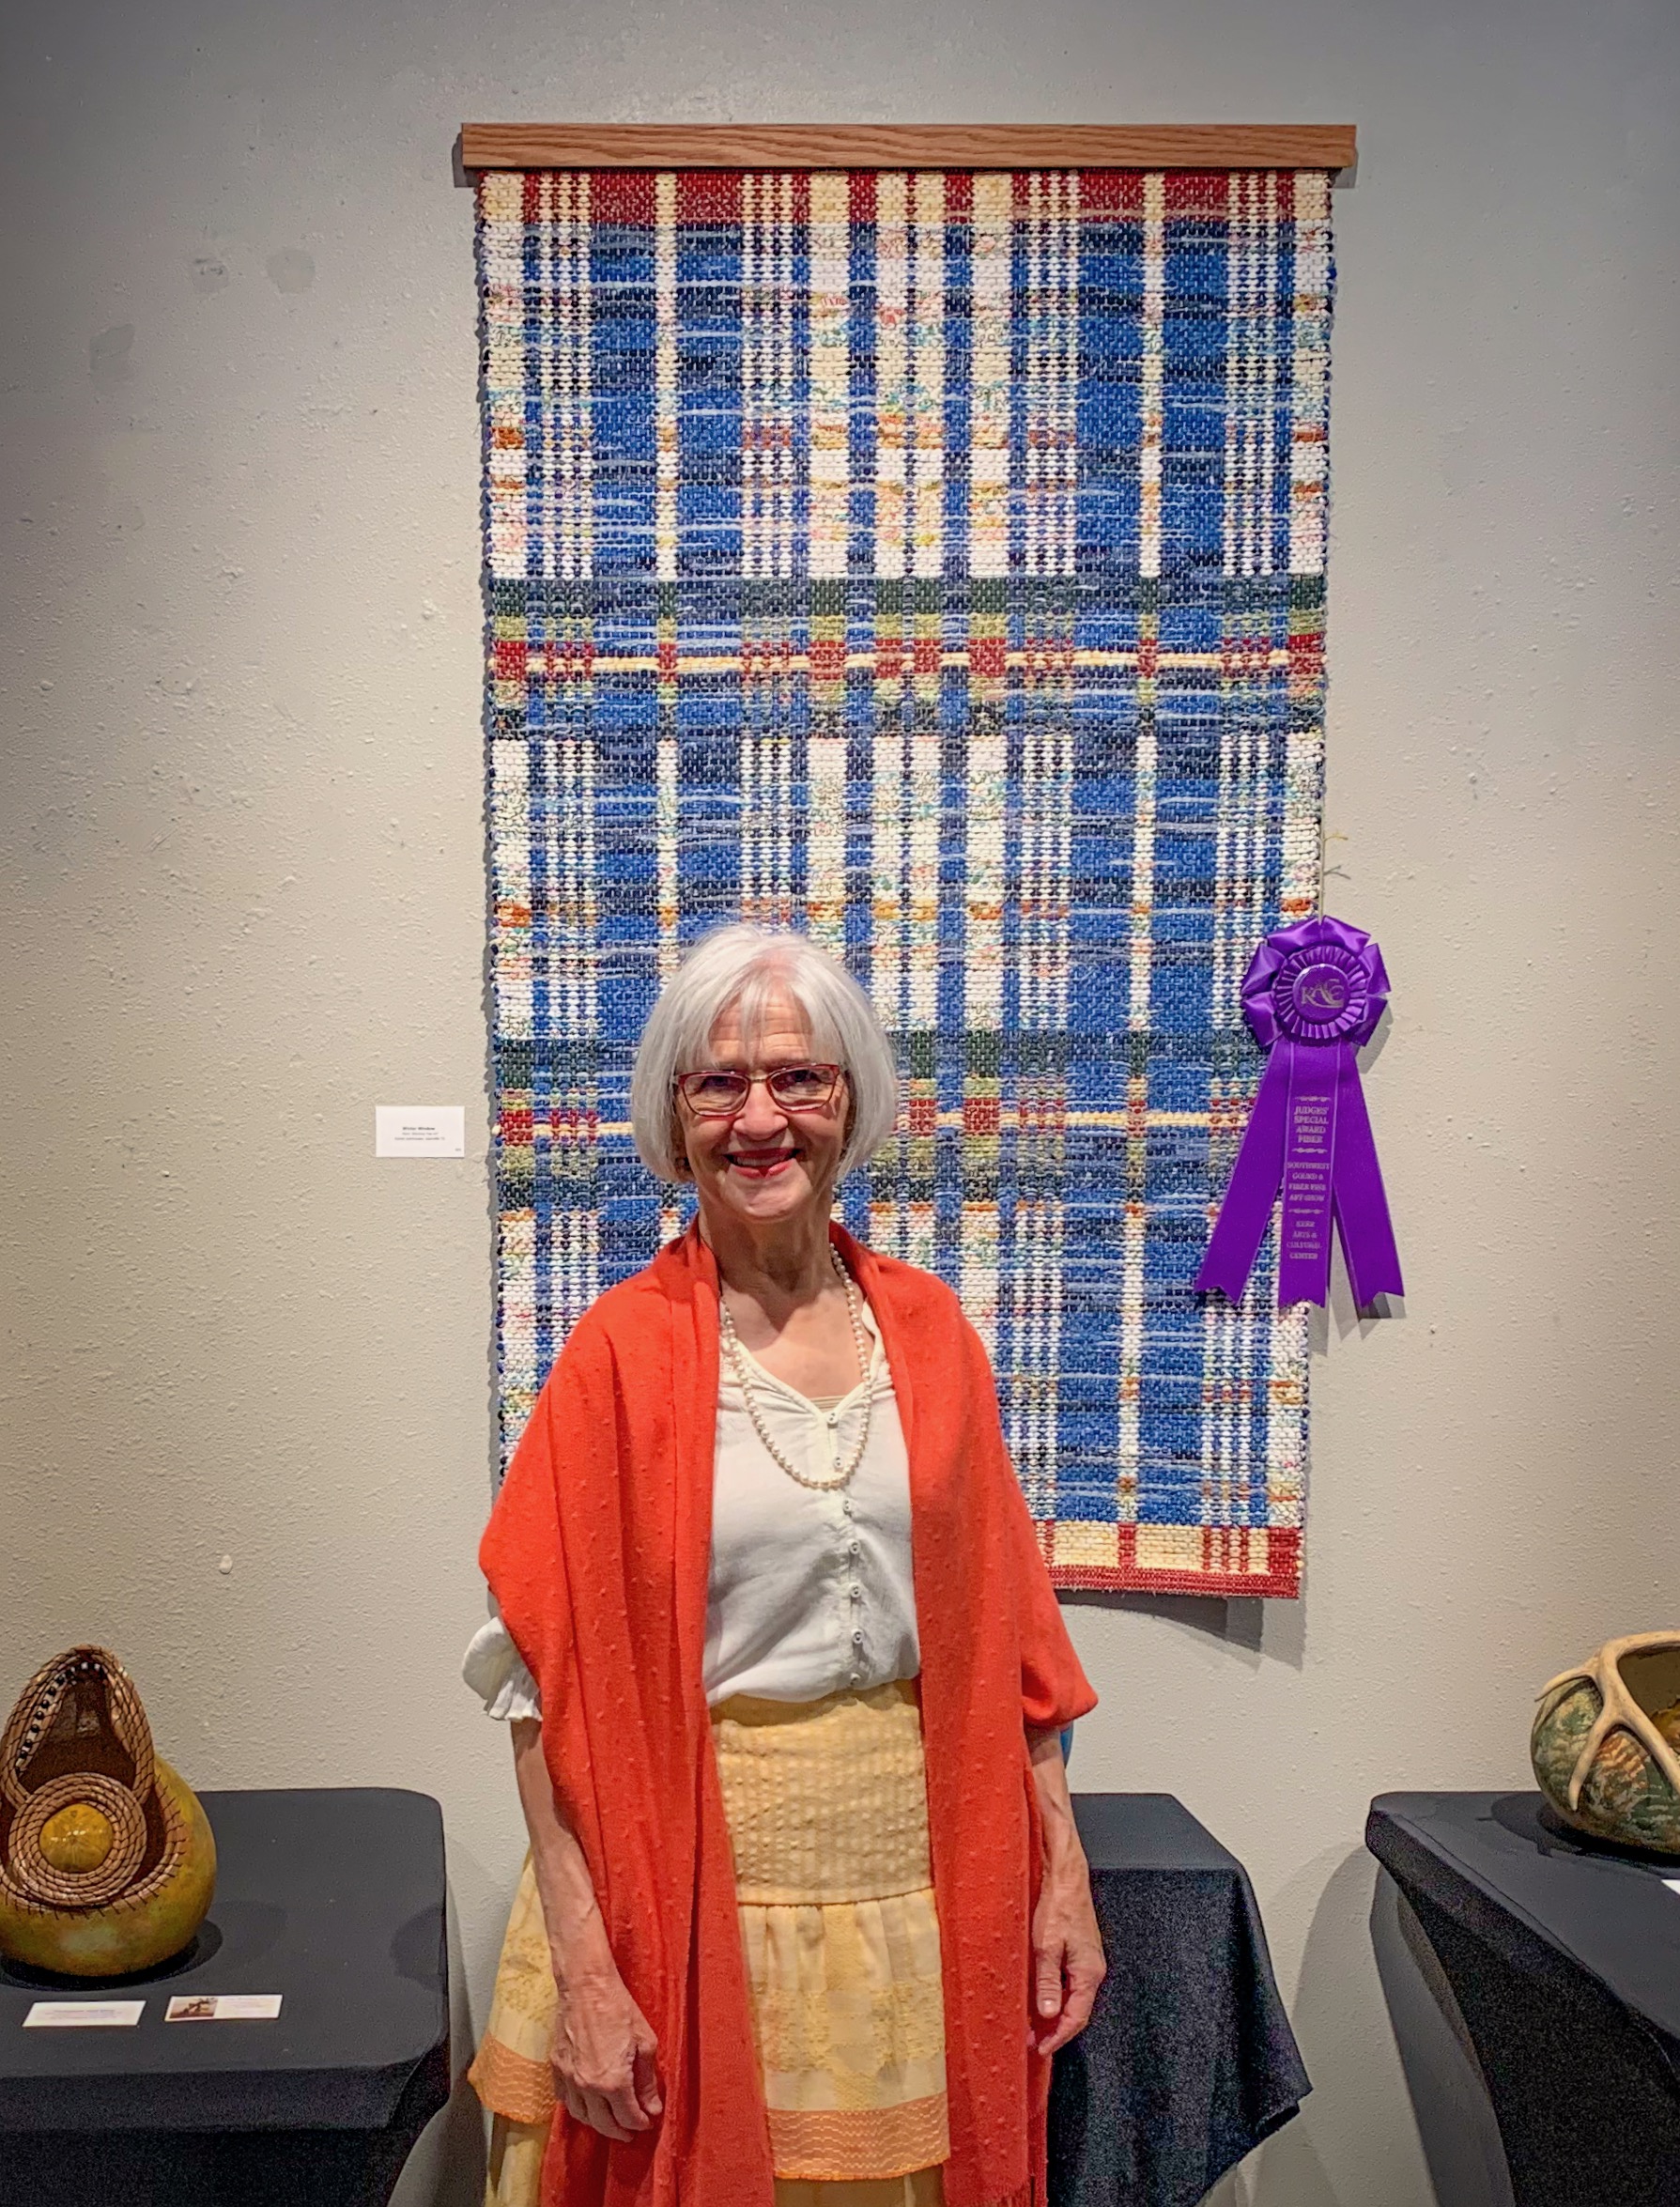
Joseph’s Coat receives “People’s Choice” Award for Fiber Fine Art.
When you want people to enjoy seeing what you enjoy making, there’s nothing better than being awarded “People’s Choice!”
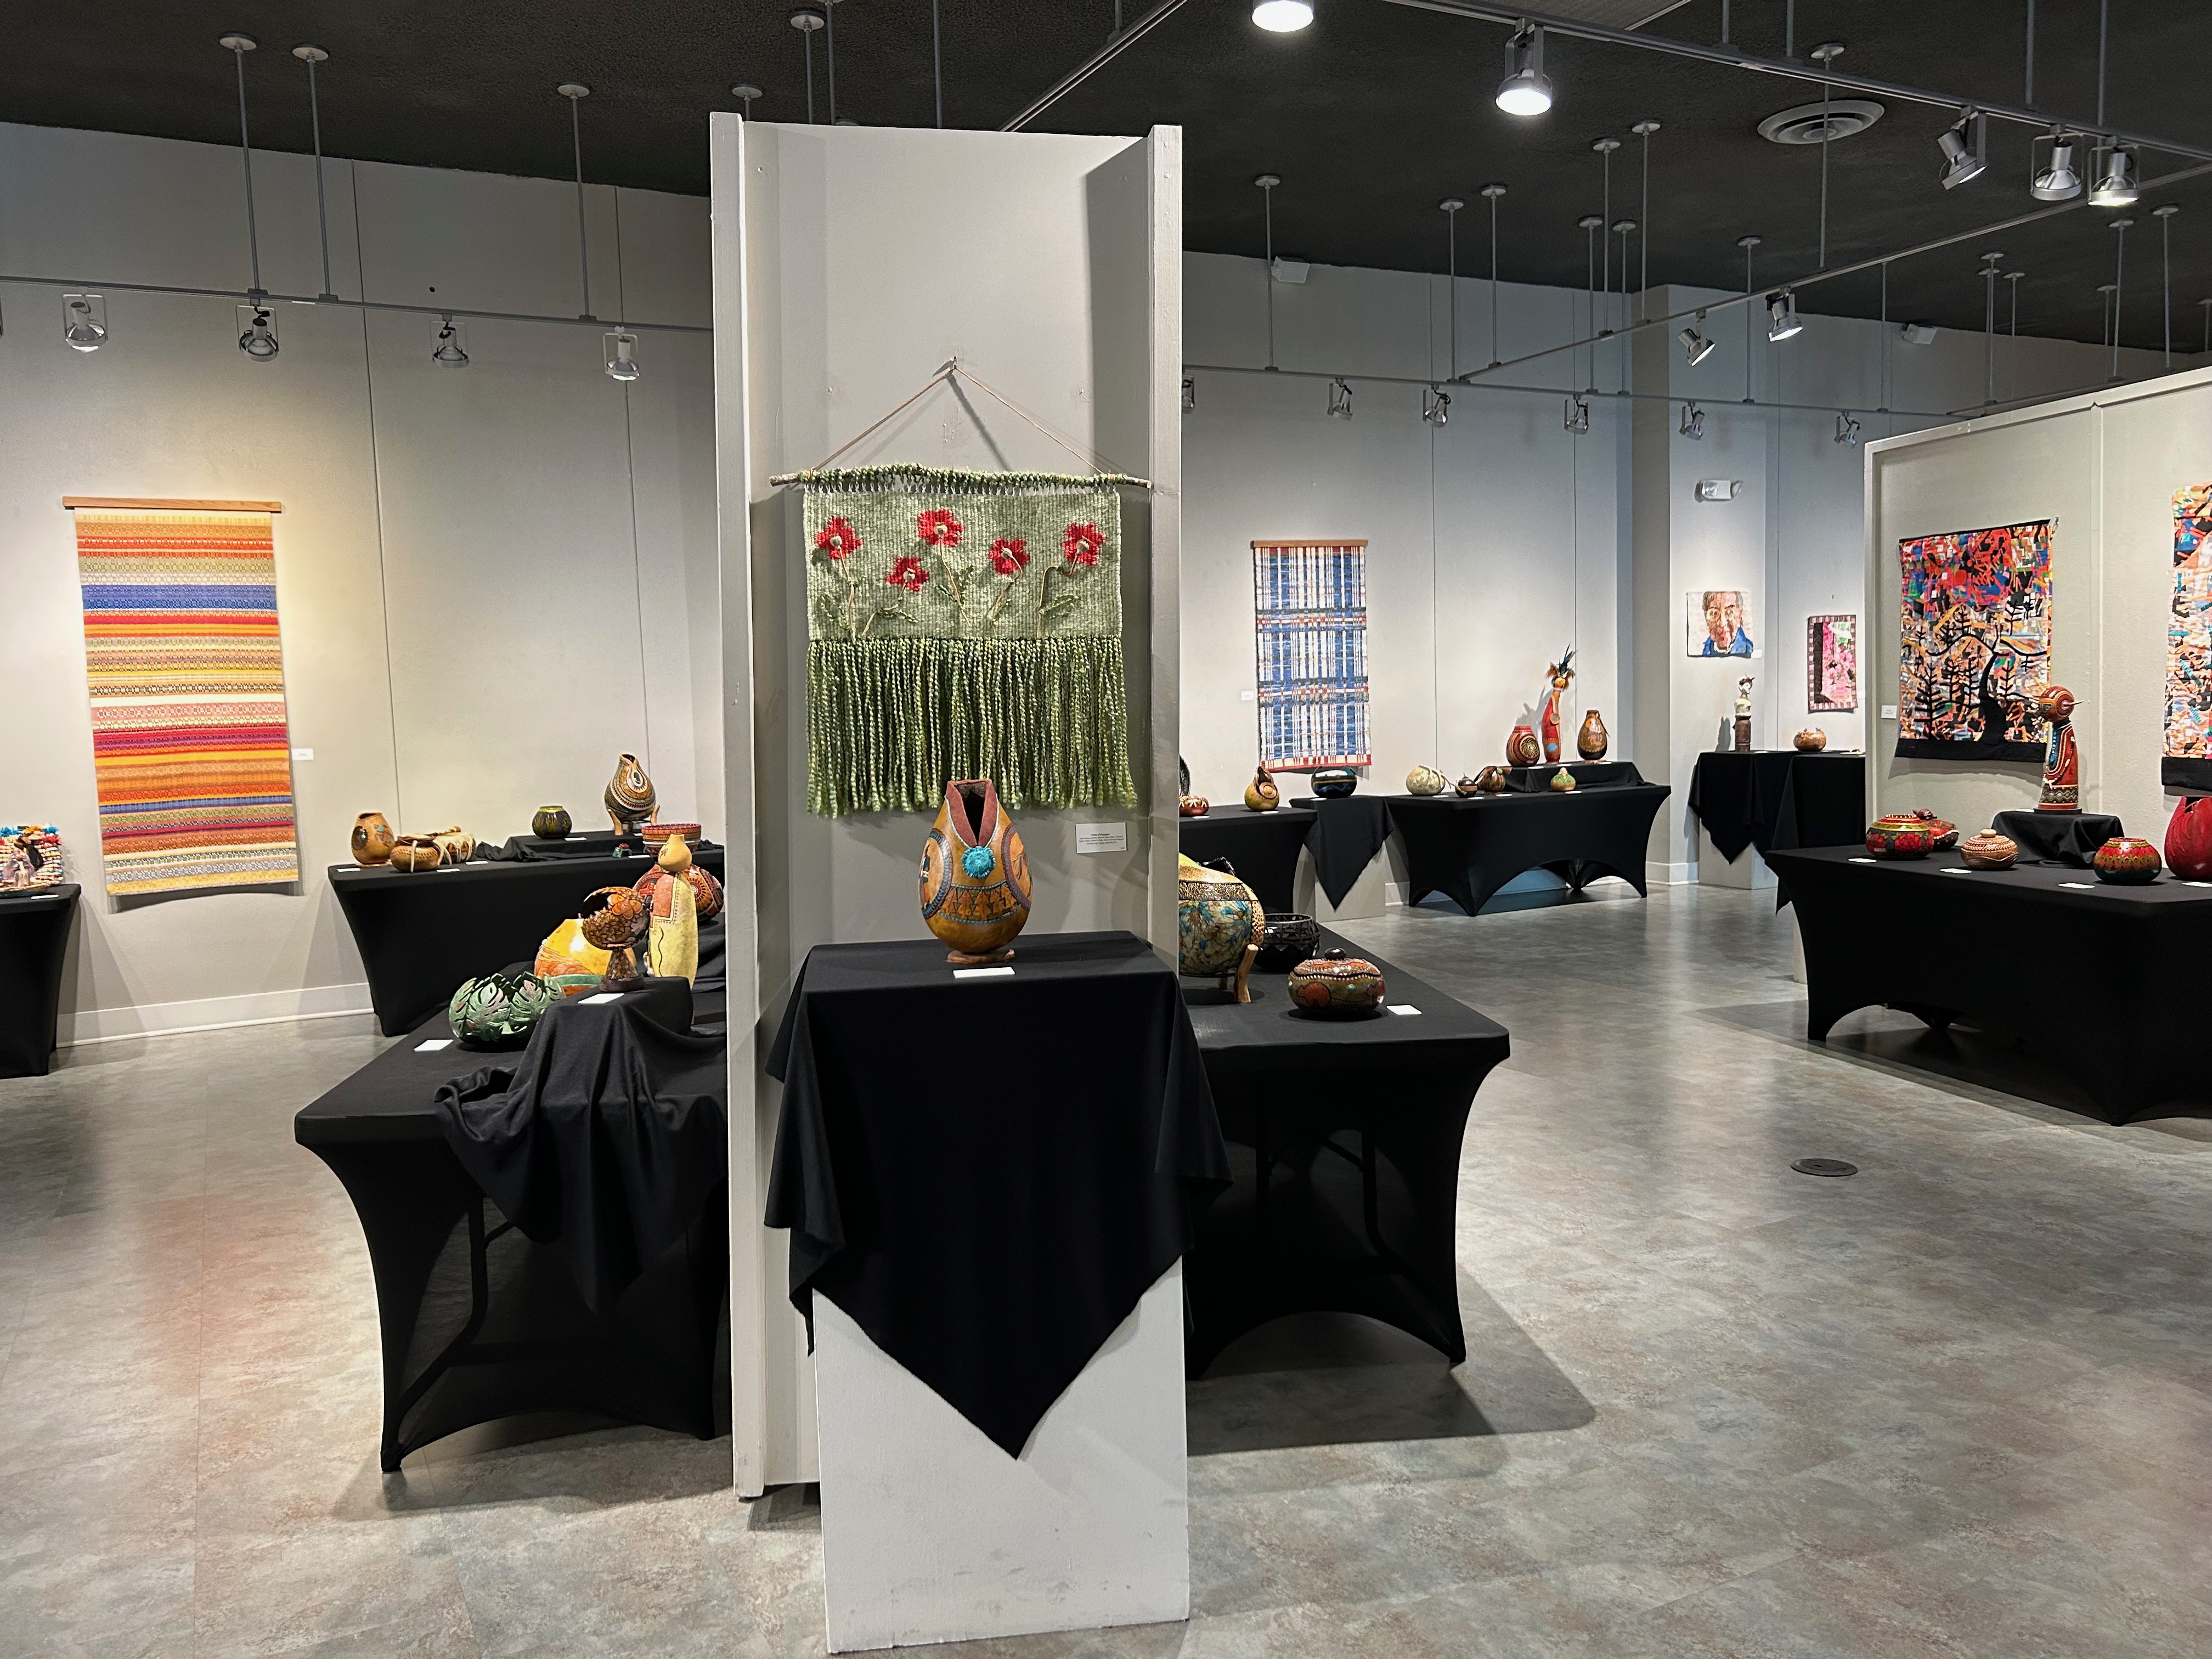
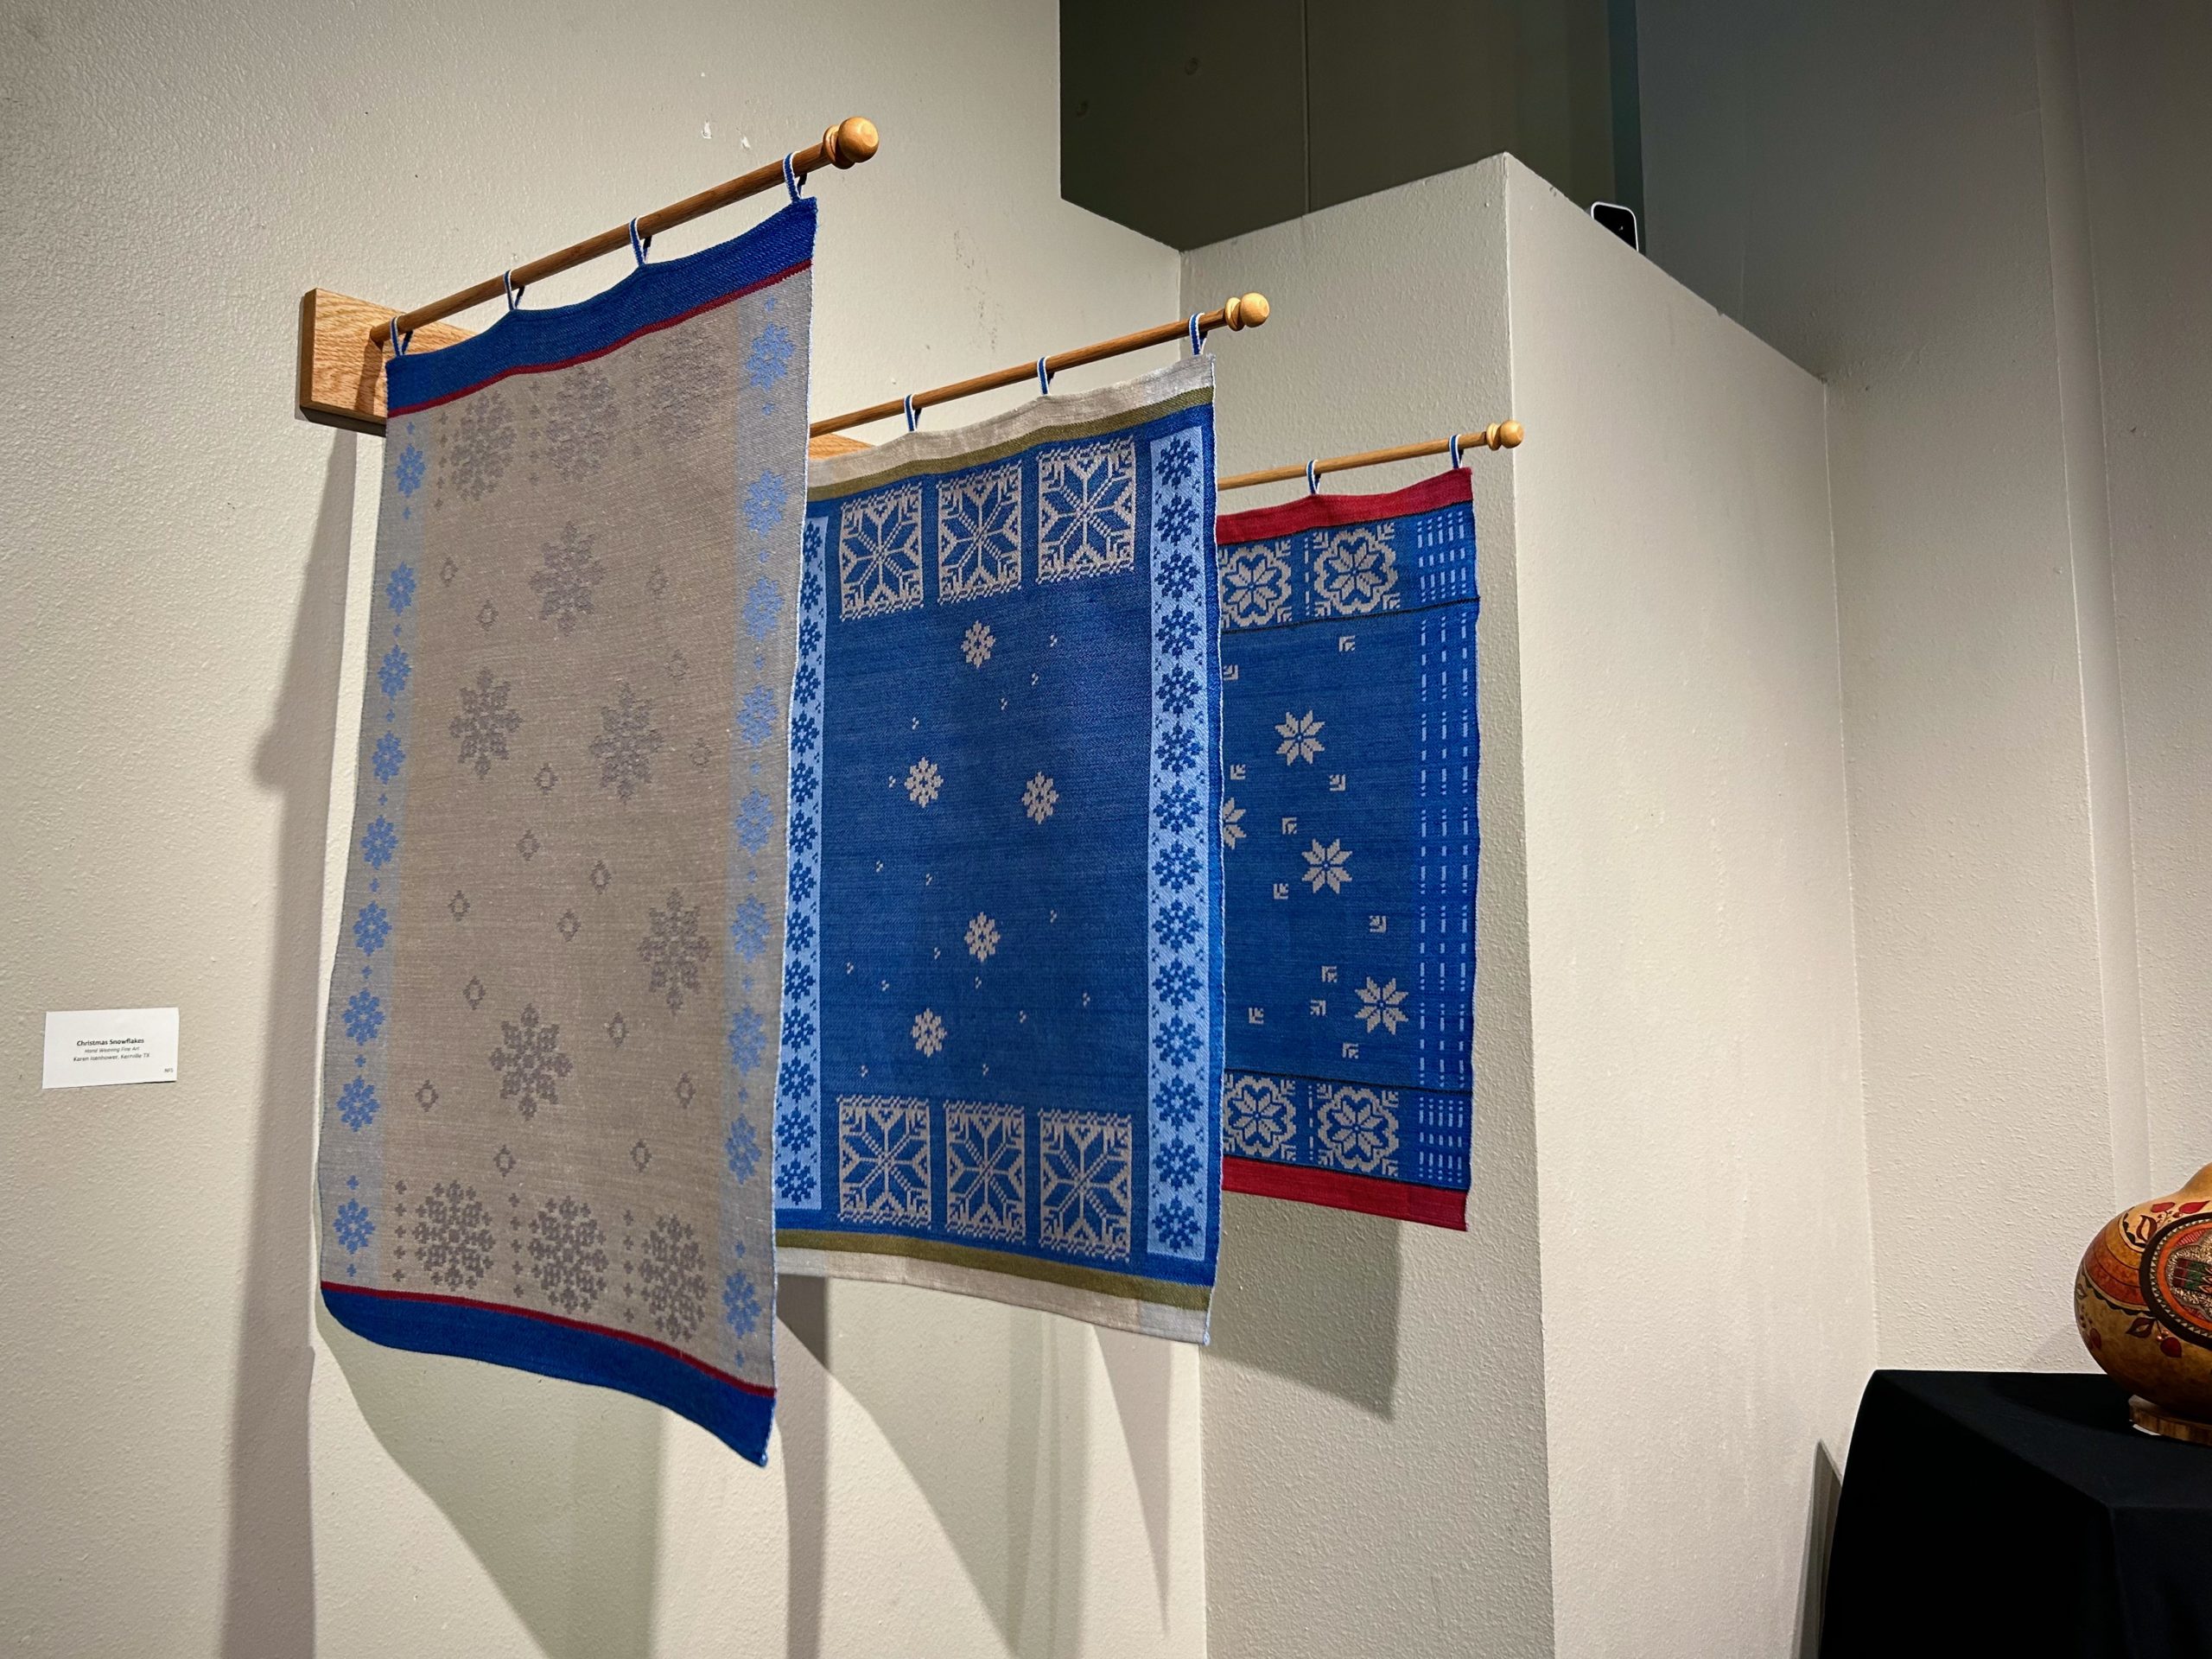
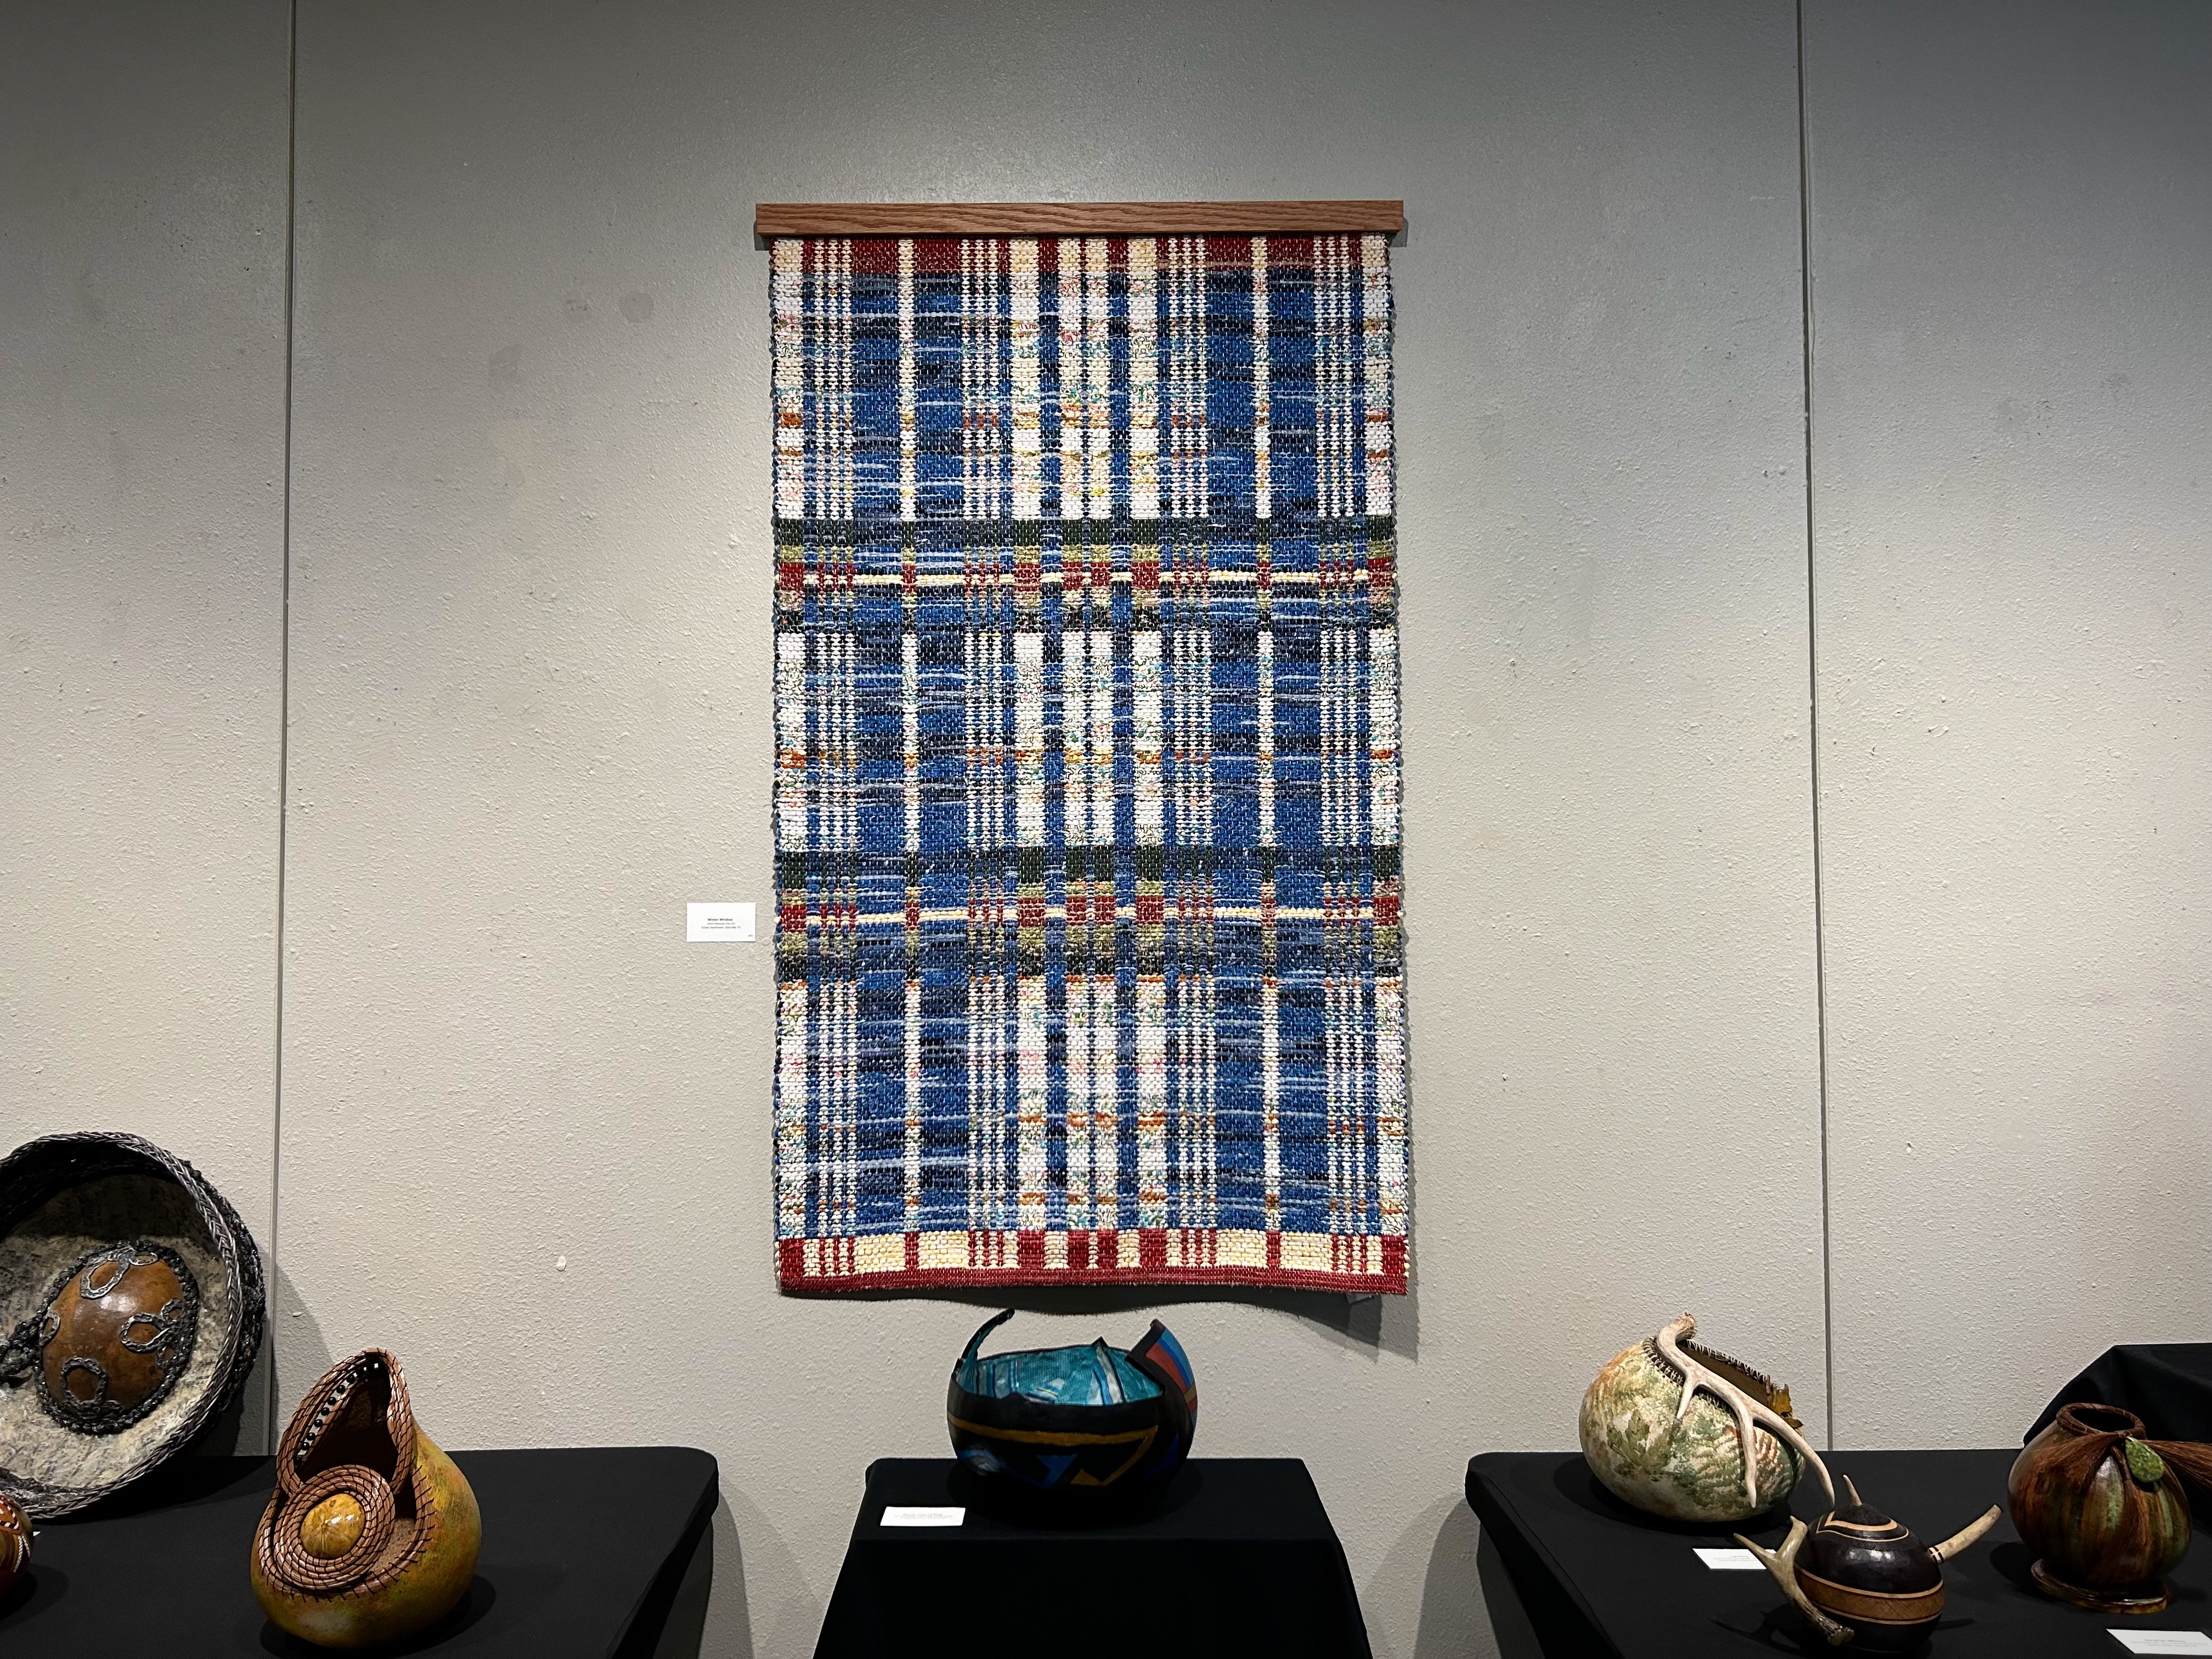
Five of my favorite handwoven works are on display in a local exhibit. The Southwest Gourd and Fiber Fine Art Show is the current exhibit (through July 1) at the Kerr Arts and Cultural Center in Kerrville, Texas. This is a competitive show featuring artists from across the US. Steve made beautiful wooden hanging and mounting devices for my pieces. Winter Window is a double-binding rag rug that is displayed as a wall hanging. I thoroughly enjoyed the design process for this rag rug, so I am happy that Winter Window received a Judge’s Special Award.
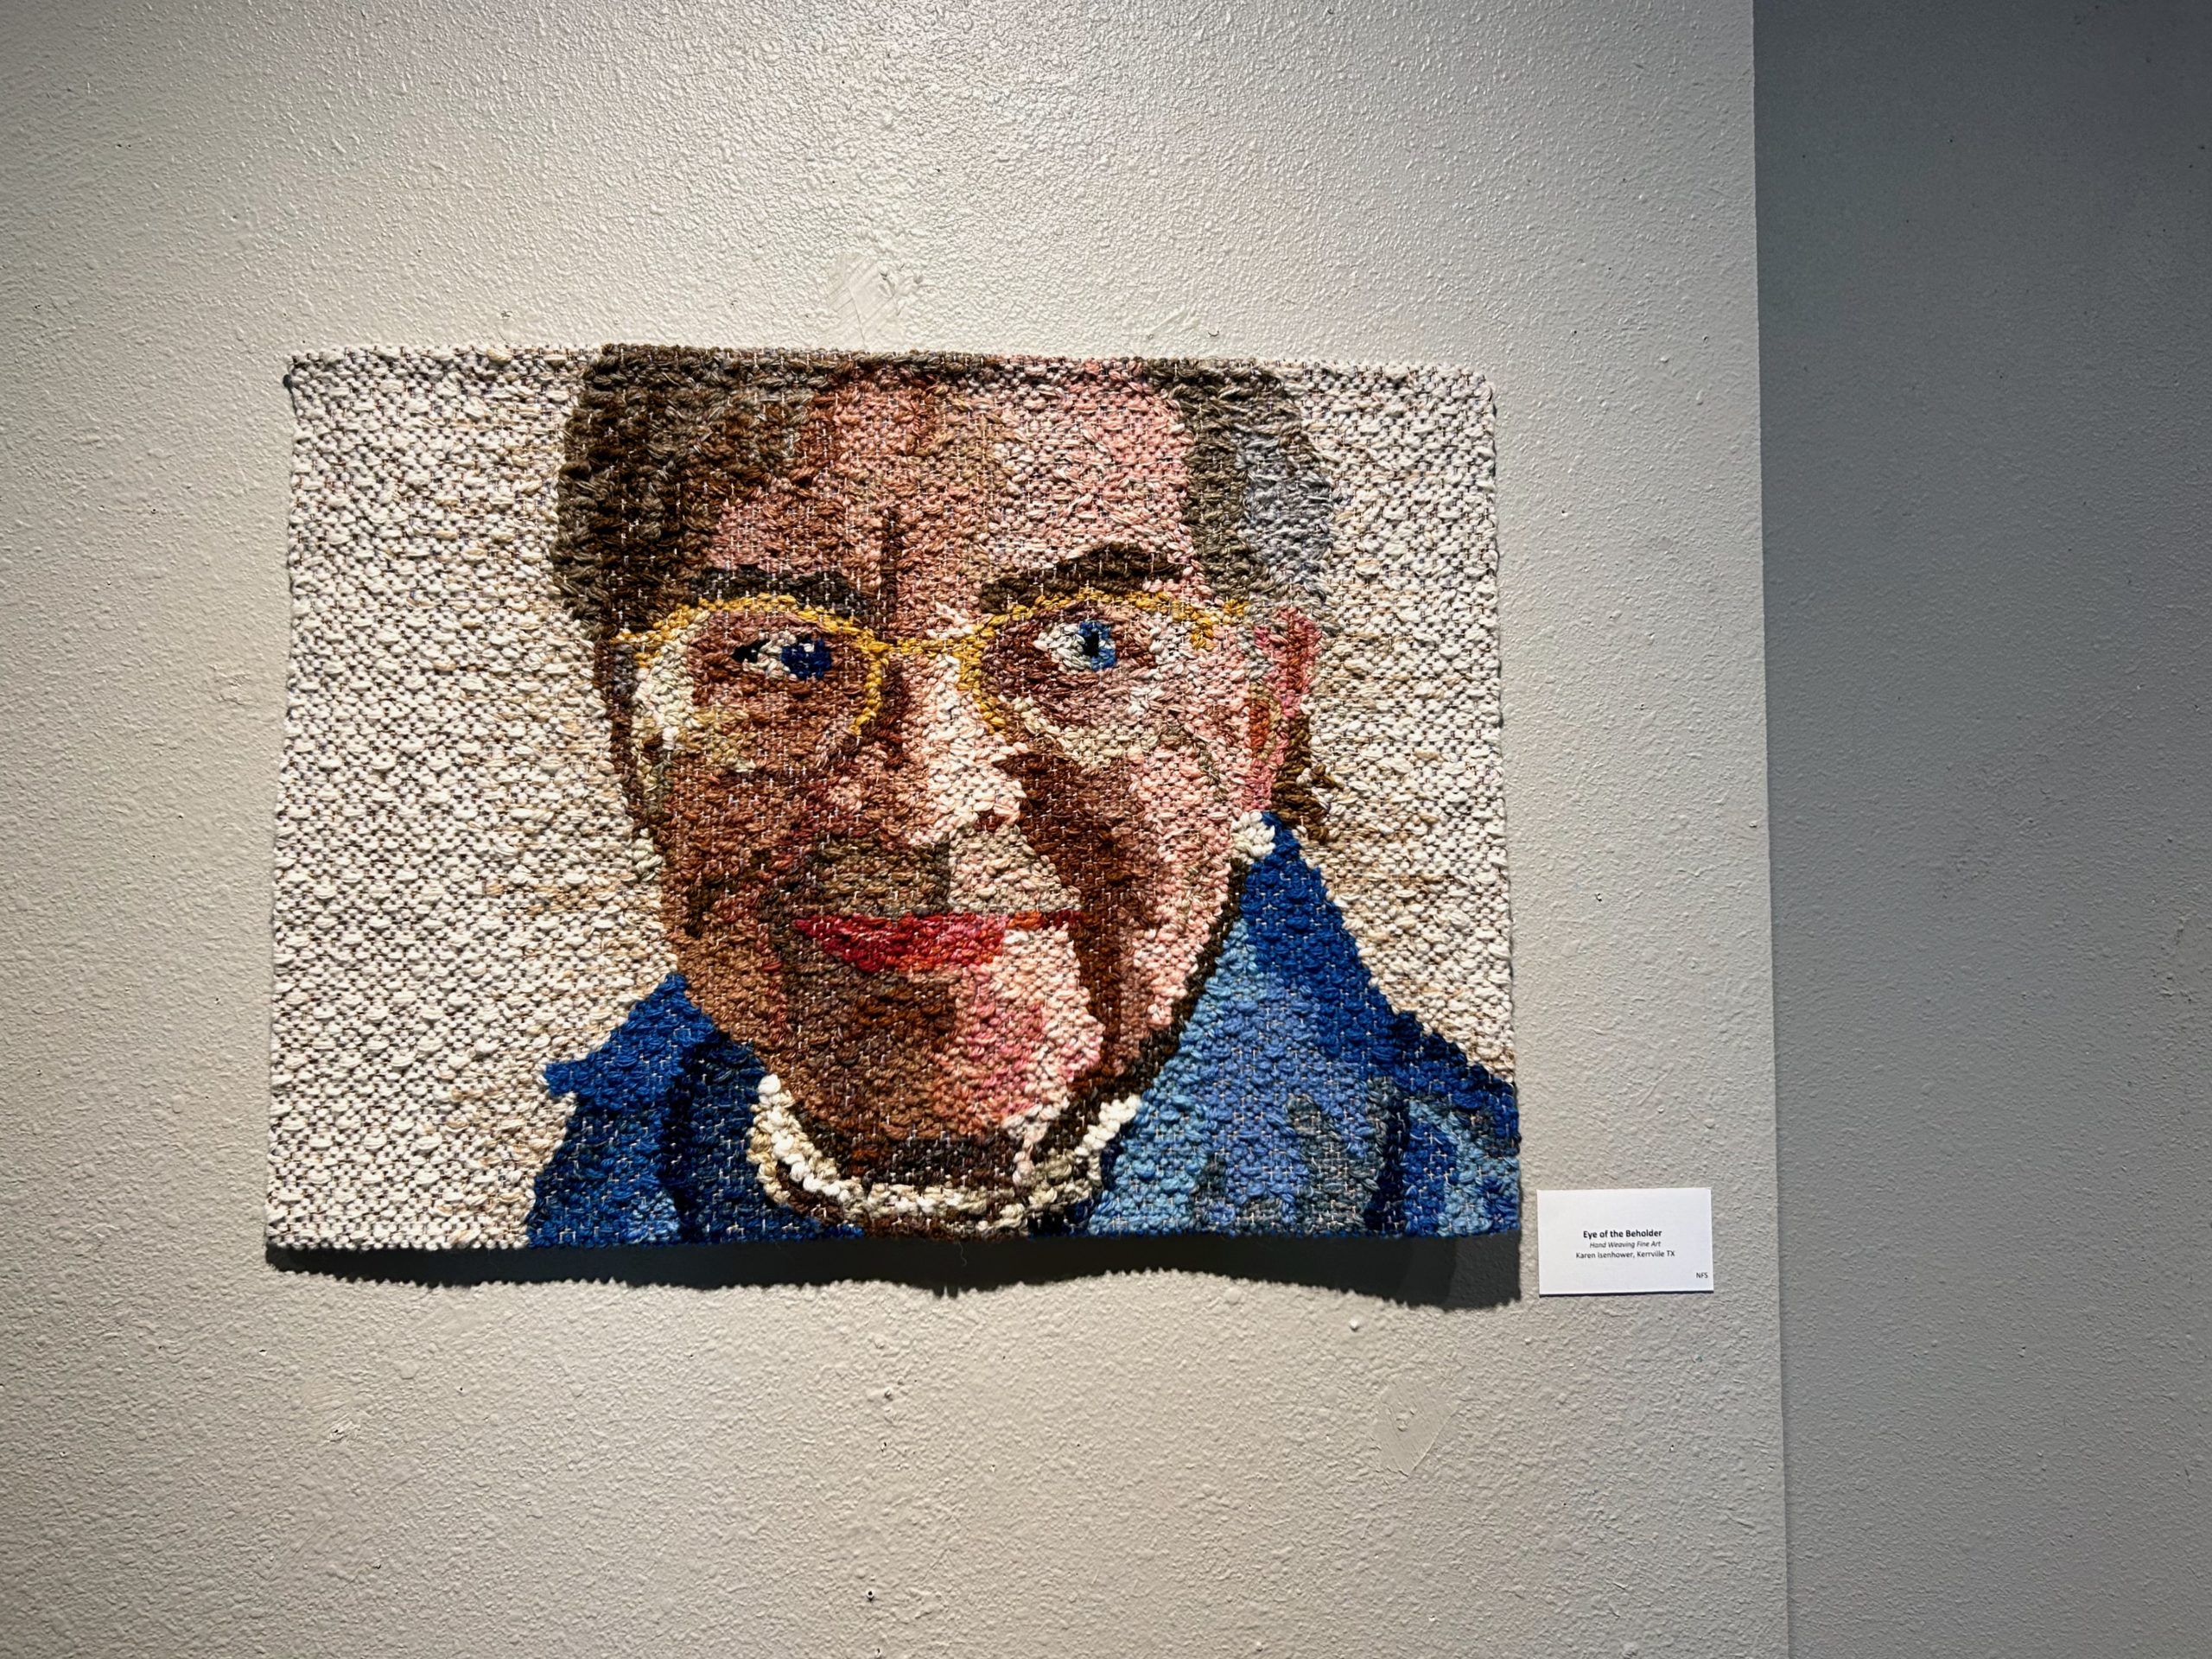
Southwest Gourd and Fiber Fine Art Show at Kerr Arts and Cultural Center in Kerrville, Texas.Light as Air Lace Draped Lace in Three-ShaftLace Weave Warp: Linen Weft: LinenChristmas Snowflakes Triptych Banners in Six-Shaft Irregular Satin, Drawloom 30 pattern shafts, 148 single units Warp: Linen/Cotton blend Weft: LinenJoseph’s Coat Wall Hanging in Four-Shaft Swedish Monksbelt Warp: Cotton Weft: Wool and CottonWinter Window Rag Rug in Four-Shaft Double Binding Warp: Cotton Weft: Cotton fabric stripsEye of the Beholder Pictorial Tapestry in Four-Shaft Rosepath Warp: Linen Weft: Wool and LinenArtist Reception and Awards evening. Winter Window receives a Judge’s Special Award.
If you hang a rag rug on the wall it becomes fine art. And I’m ok with that.
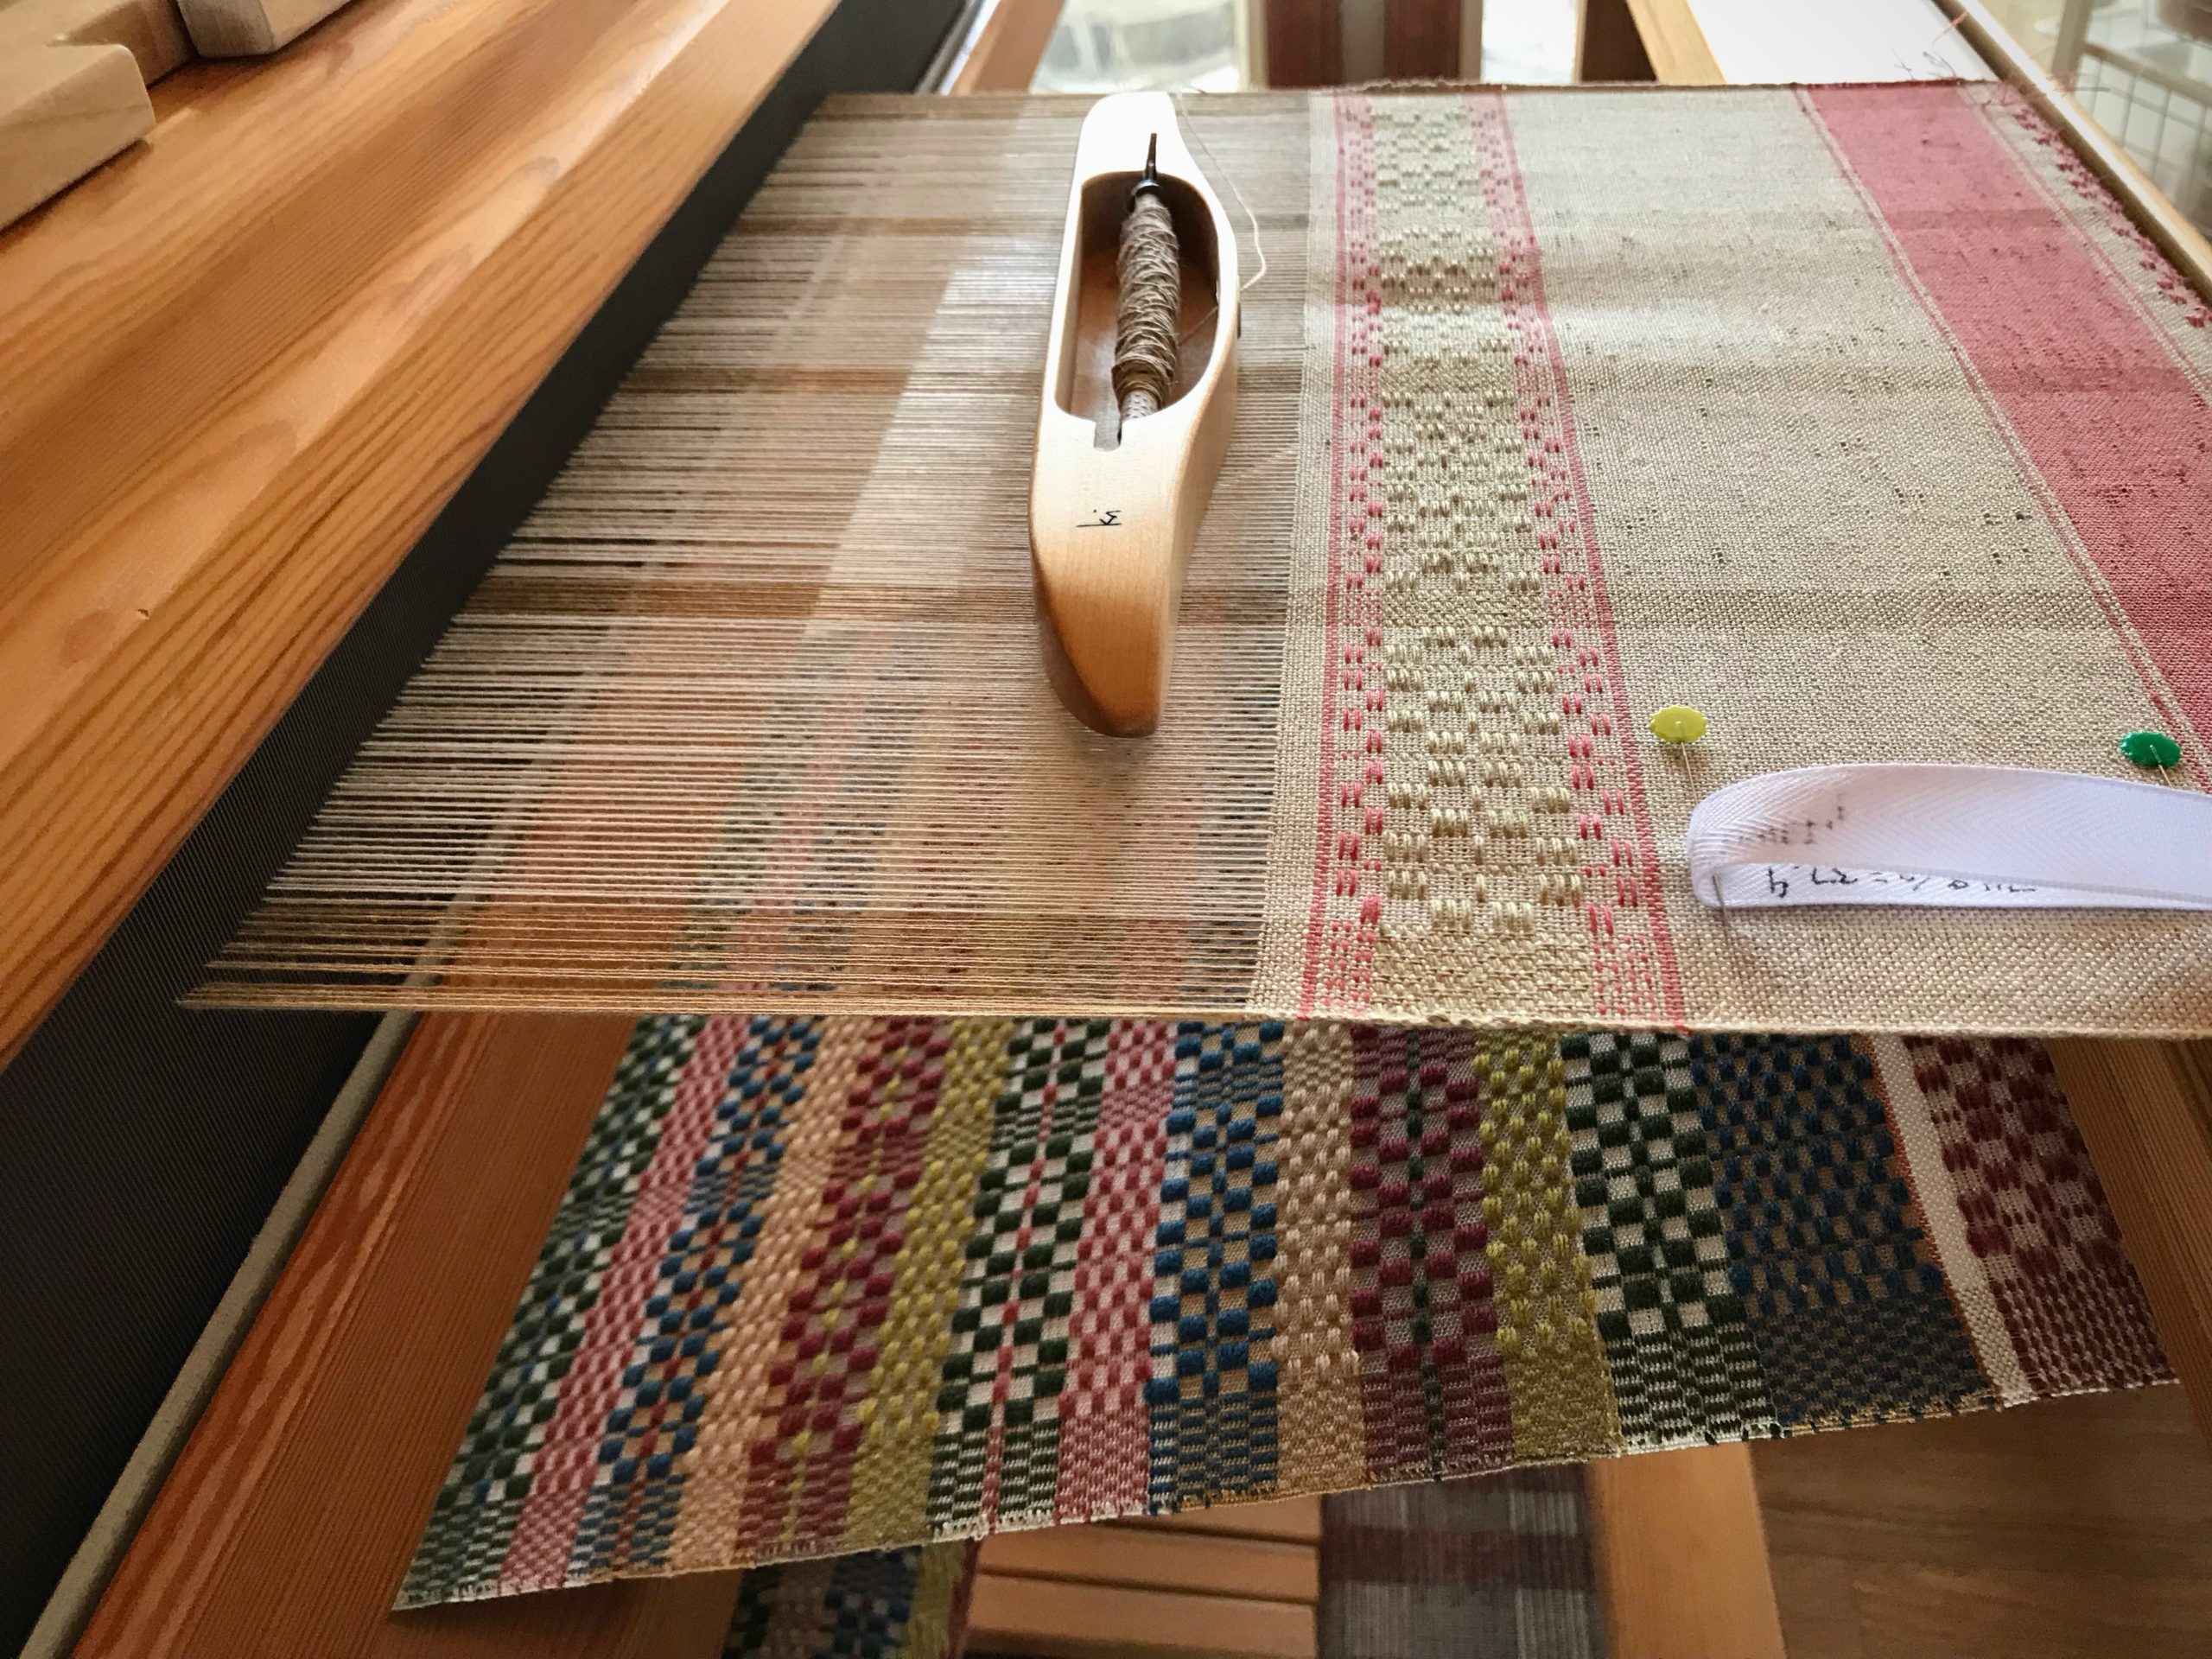
Talk about exciting! When something has been on the loom this long it is indeed exciting when the back tie-on bar comes over the back beam. I finish weaving the final “bonus” towel. And then, I use up all the quills to make a little piece of scrap fabric (because scrap fabric is always better than leftover quills). And then! Then, I start my cutting-off checklist.
After all this time, the moment we’ve been waiting for is here!
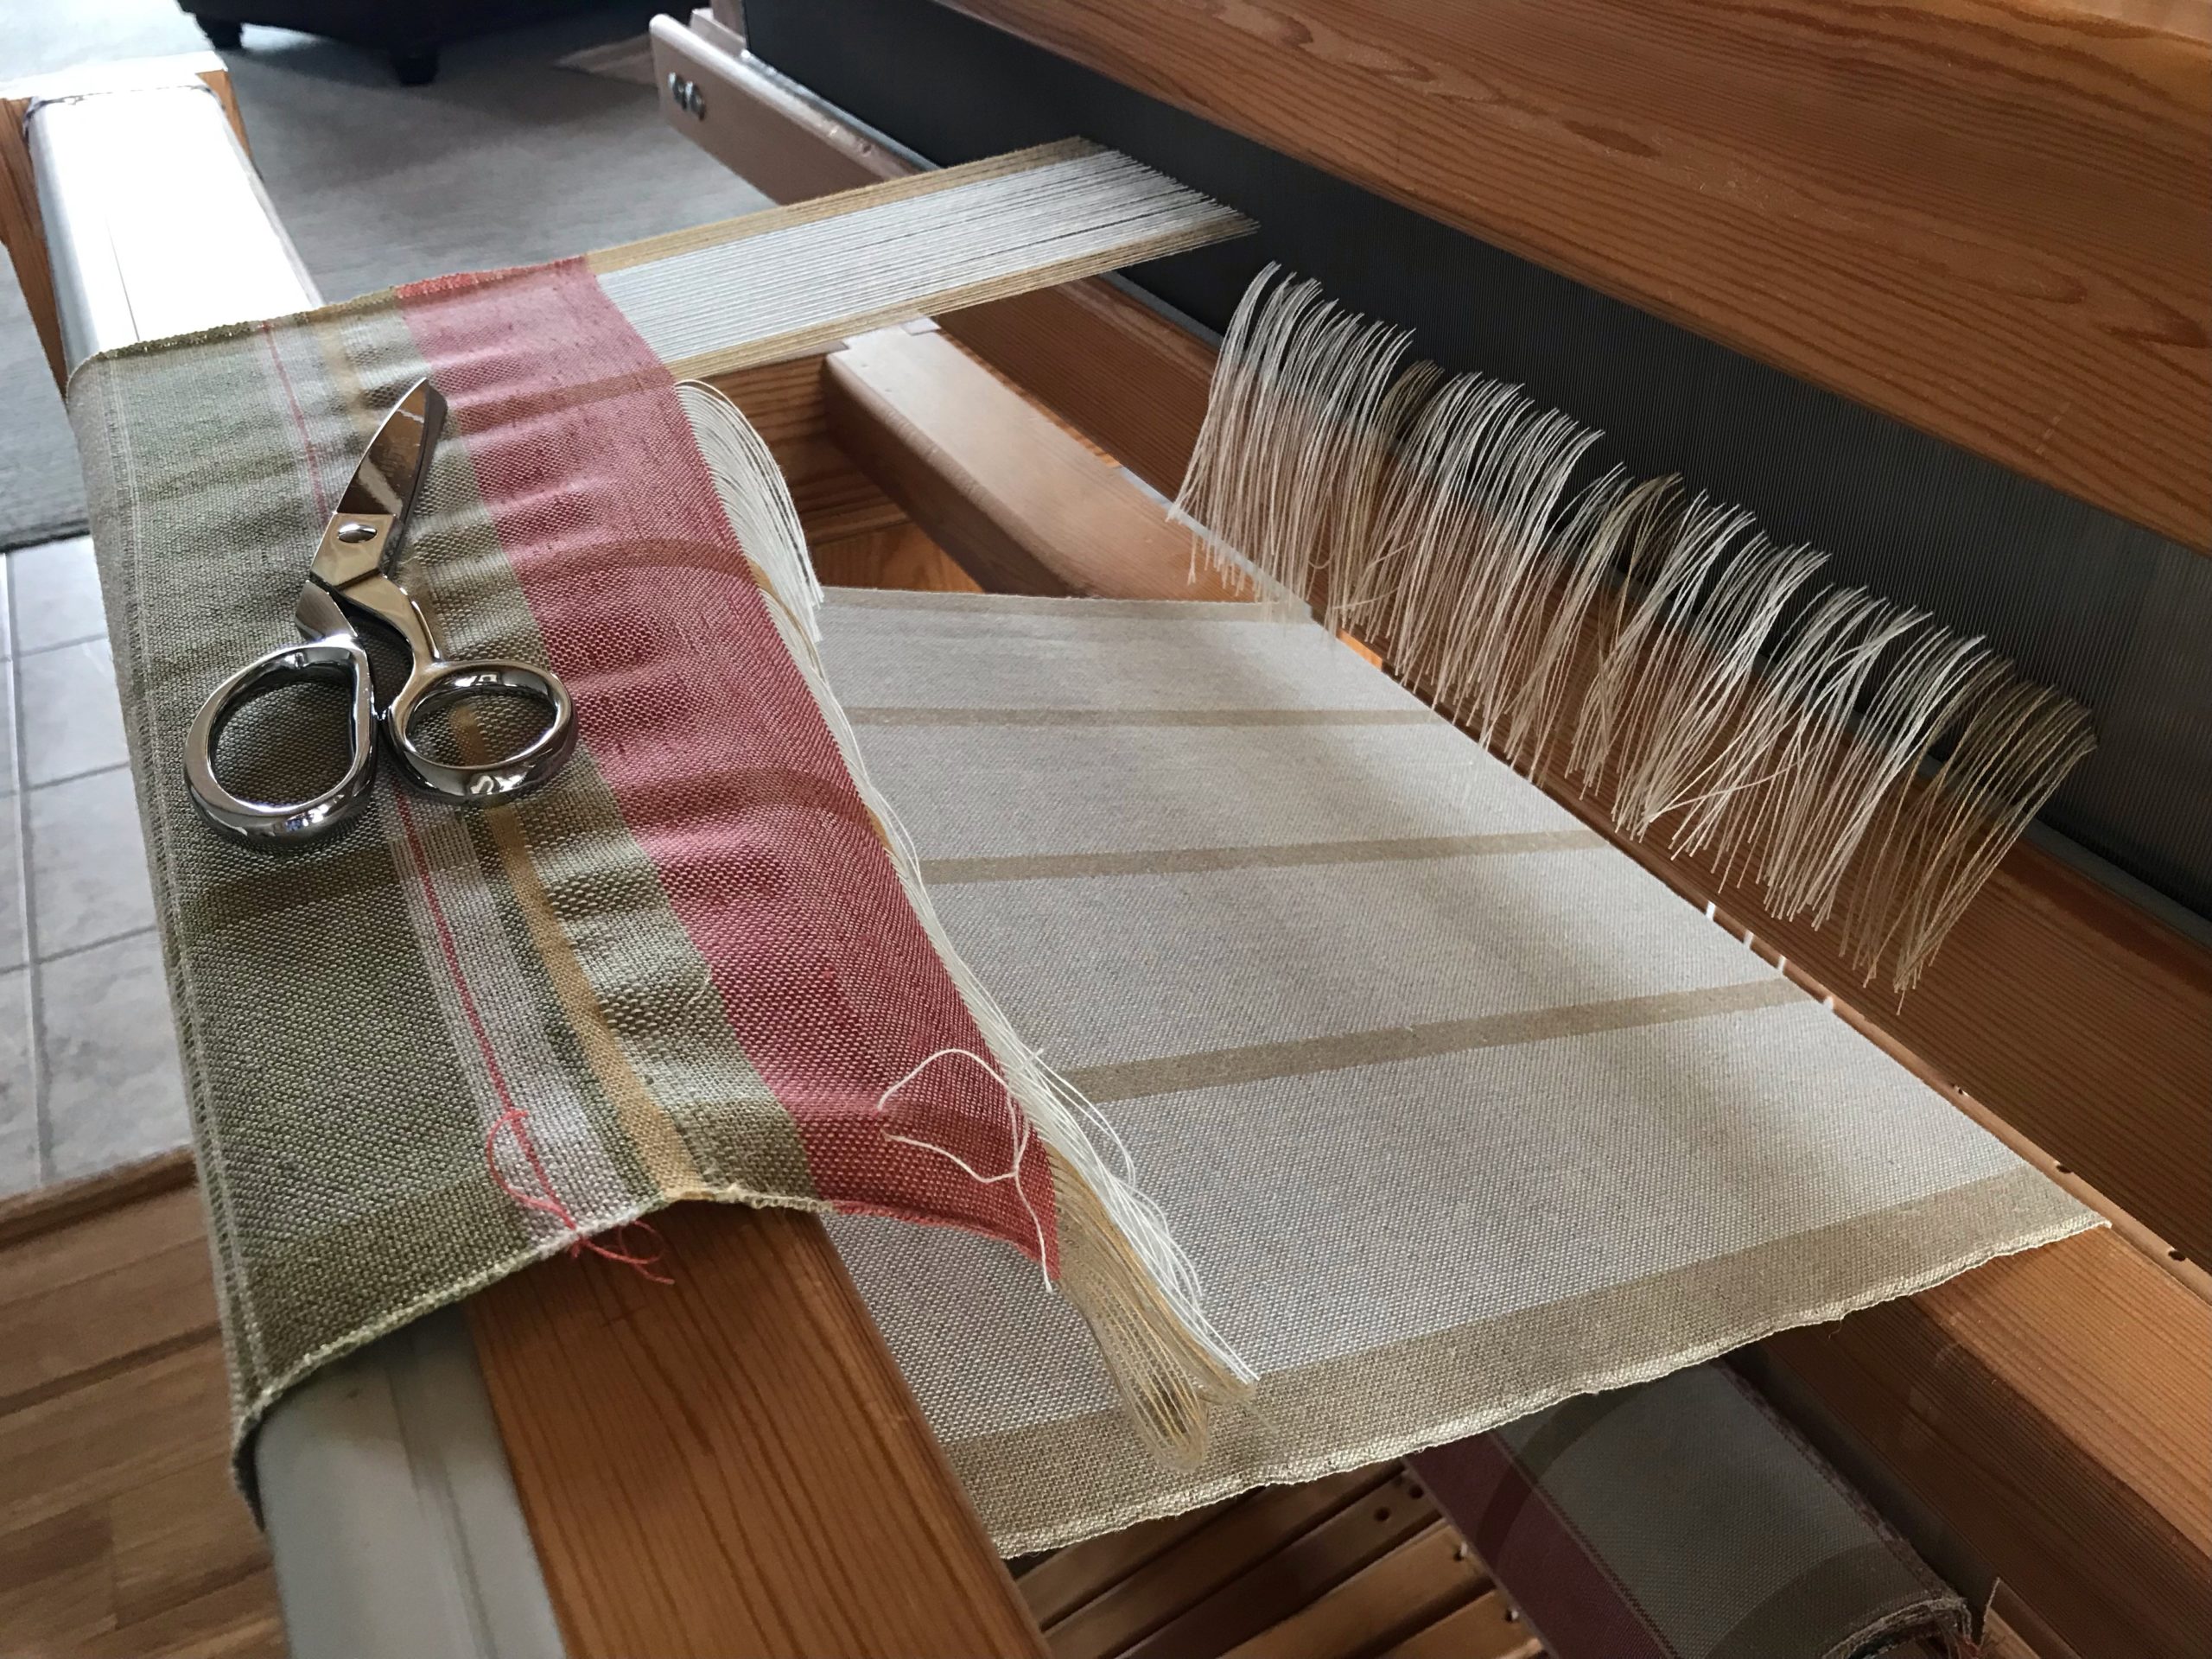
After weaving a short scrap fabric with thread left on quills, it is time for cutting off the long monksbelt runner and two bonus towels.
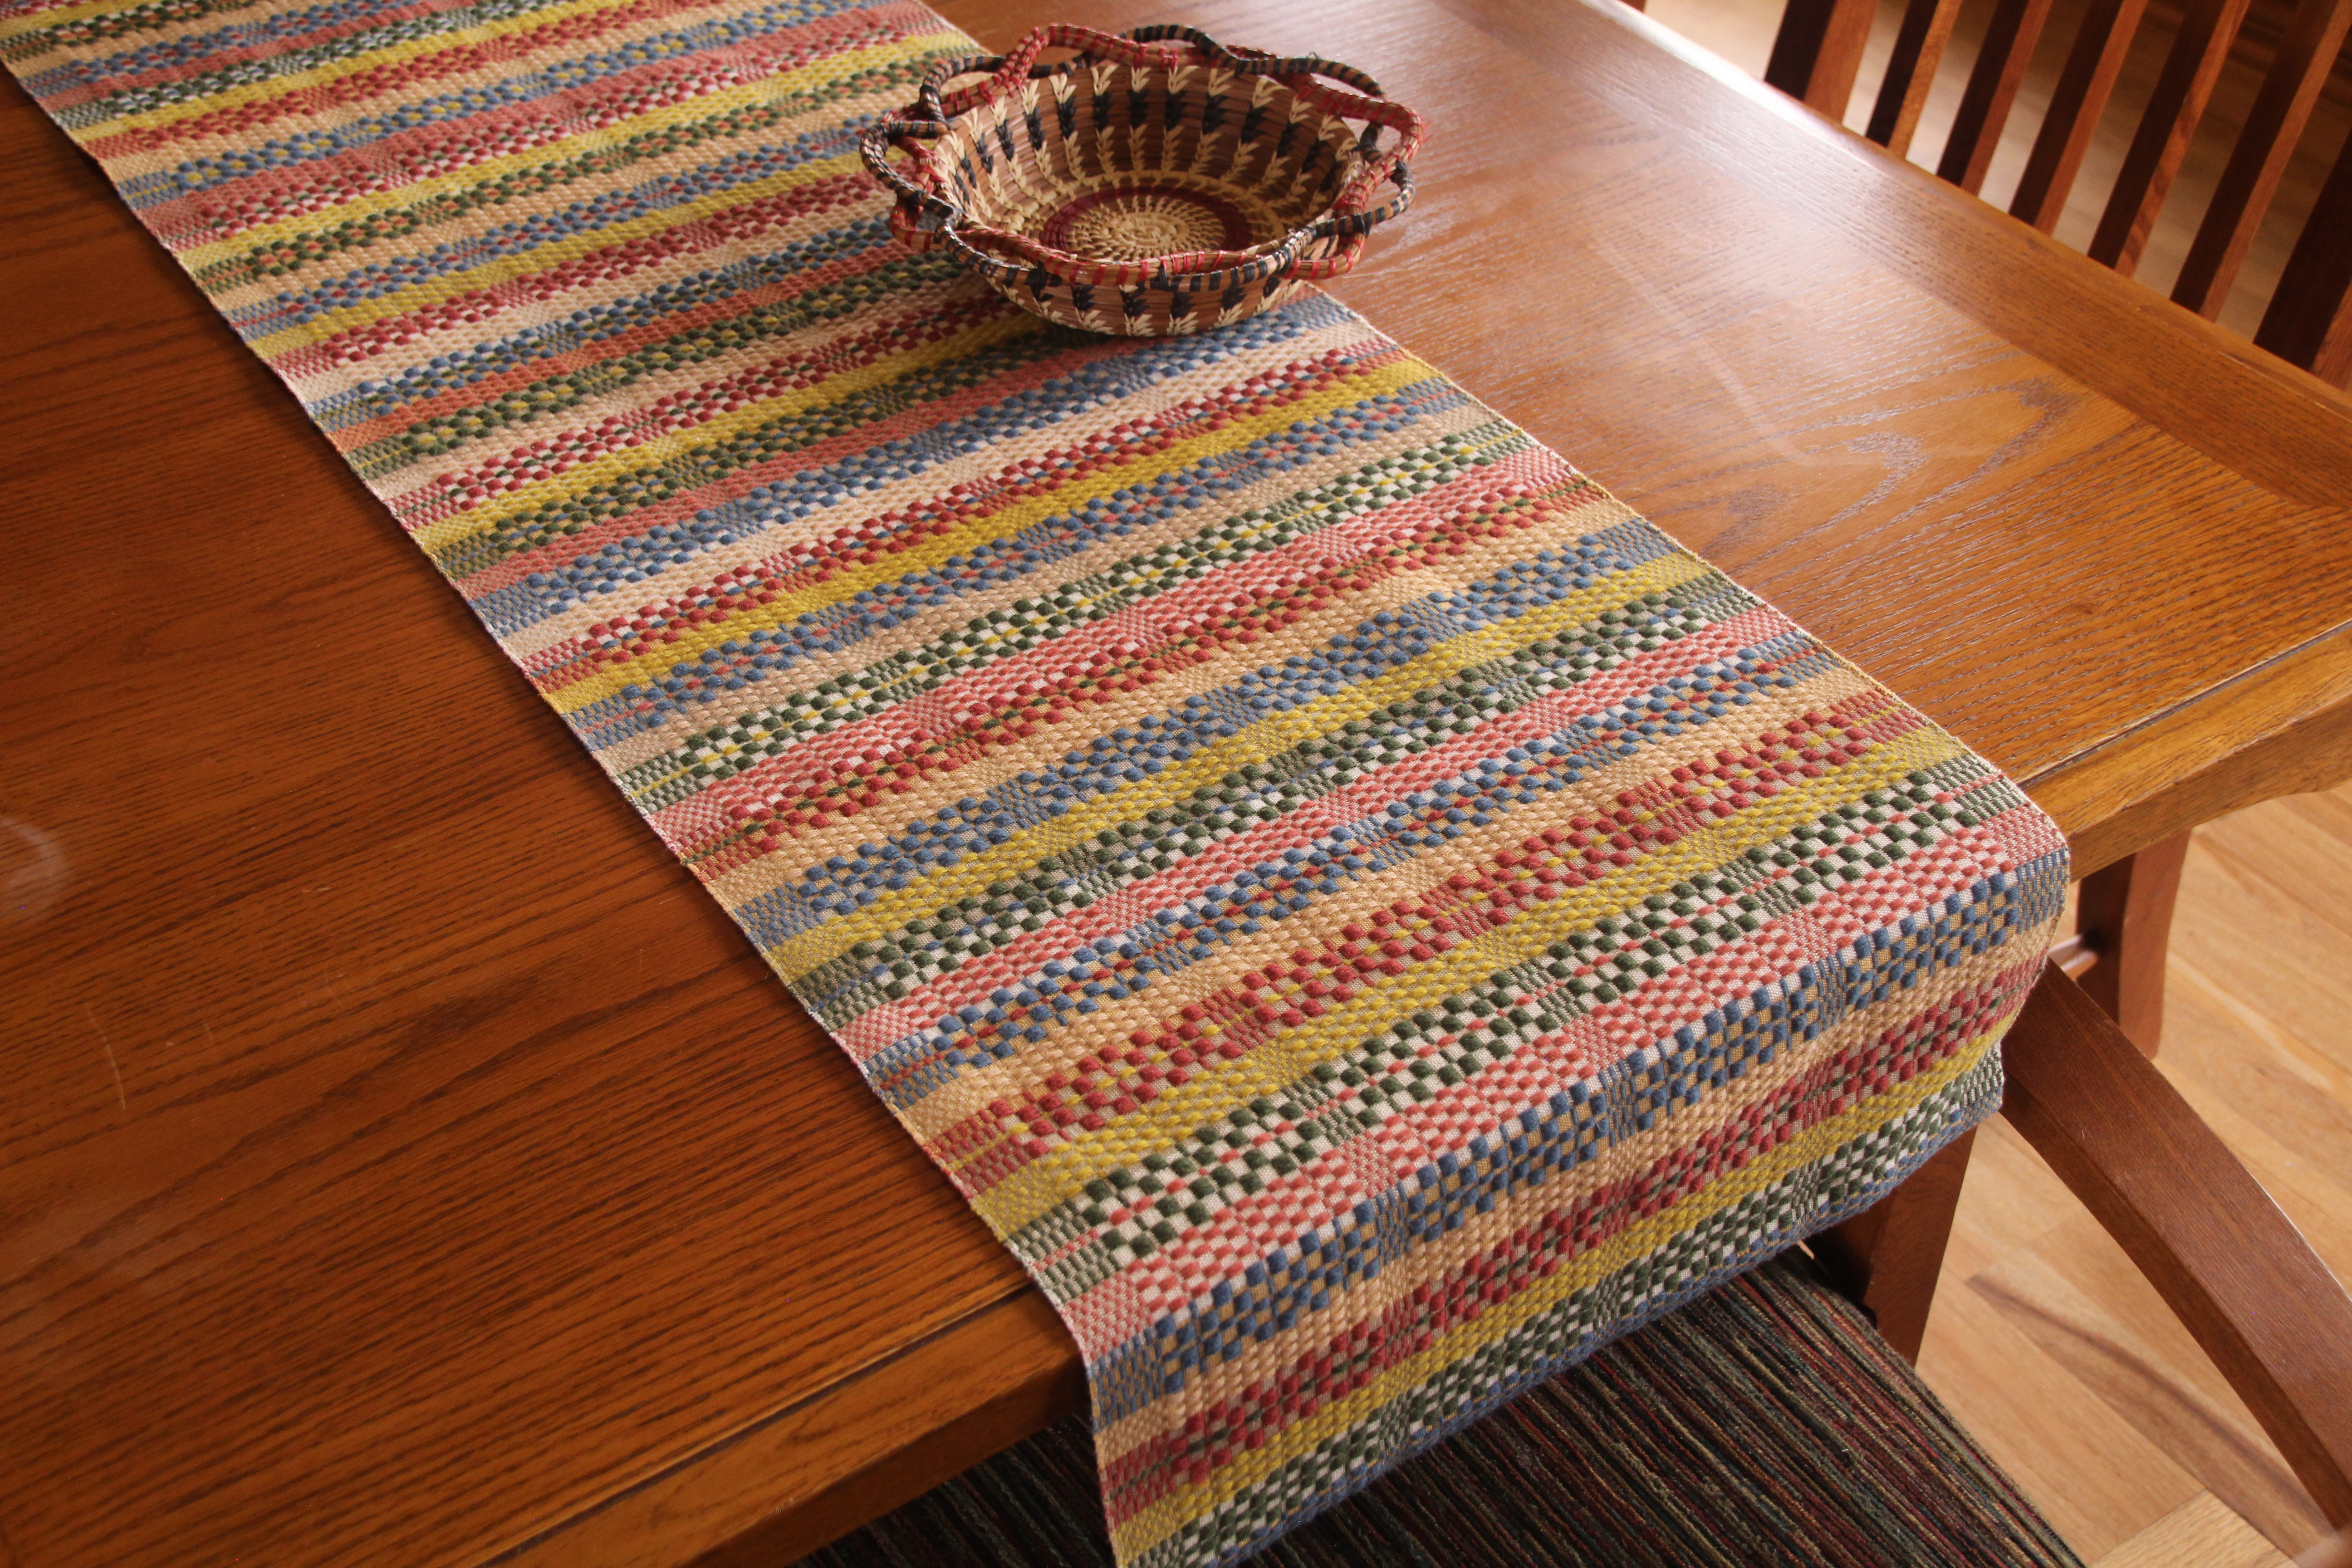
I cut off the warp. And as I unroll the cloth, I am mesmerized by the tactile intricacy that passes through my fingers–Fårö wool for the pattern weft, and 16/2 cotton for slow-as-molasses weft repground cloth. Finishing proves to be the easiest and quickest part of this project. I like the crisp pristine state of the monksbelt runner, so I am not going to wet finish this article. I examine for errors (none found!), wet finish the two towels, hem the table runner and towels, and press. The Priceless Monksbelt Runner now graces our dining room table.
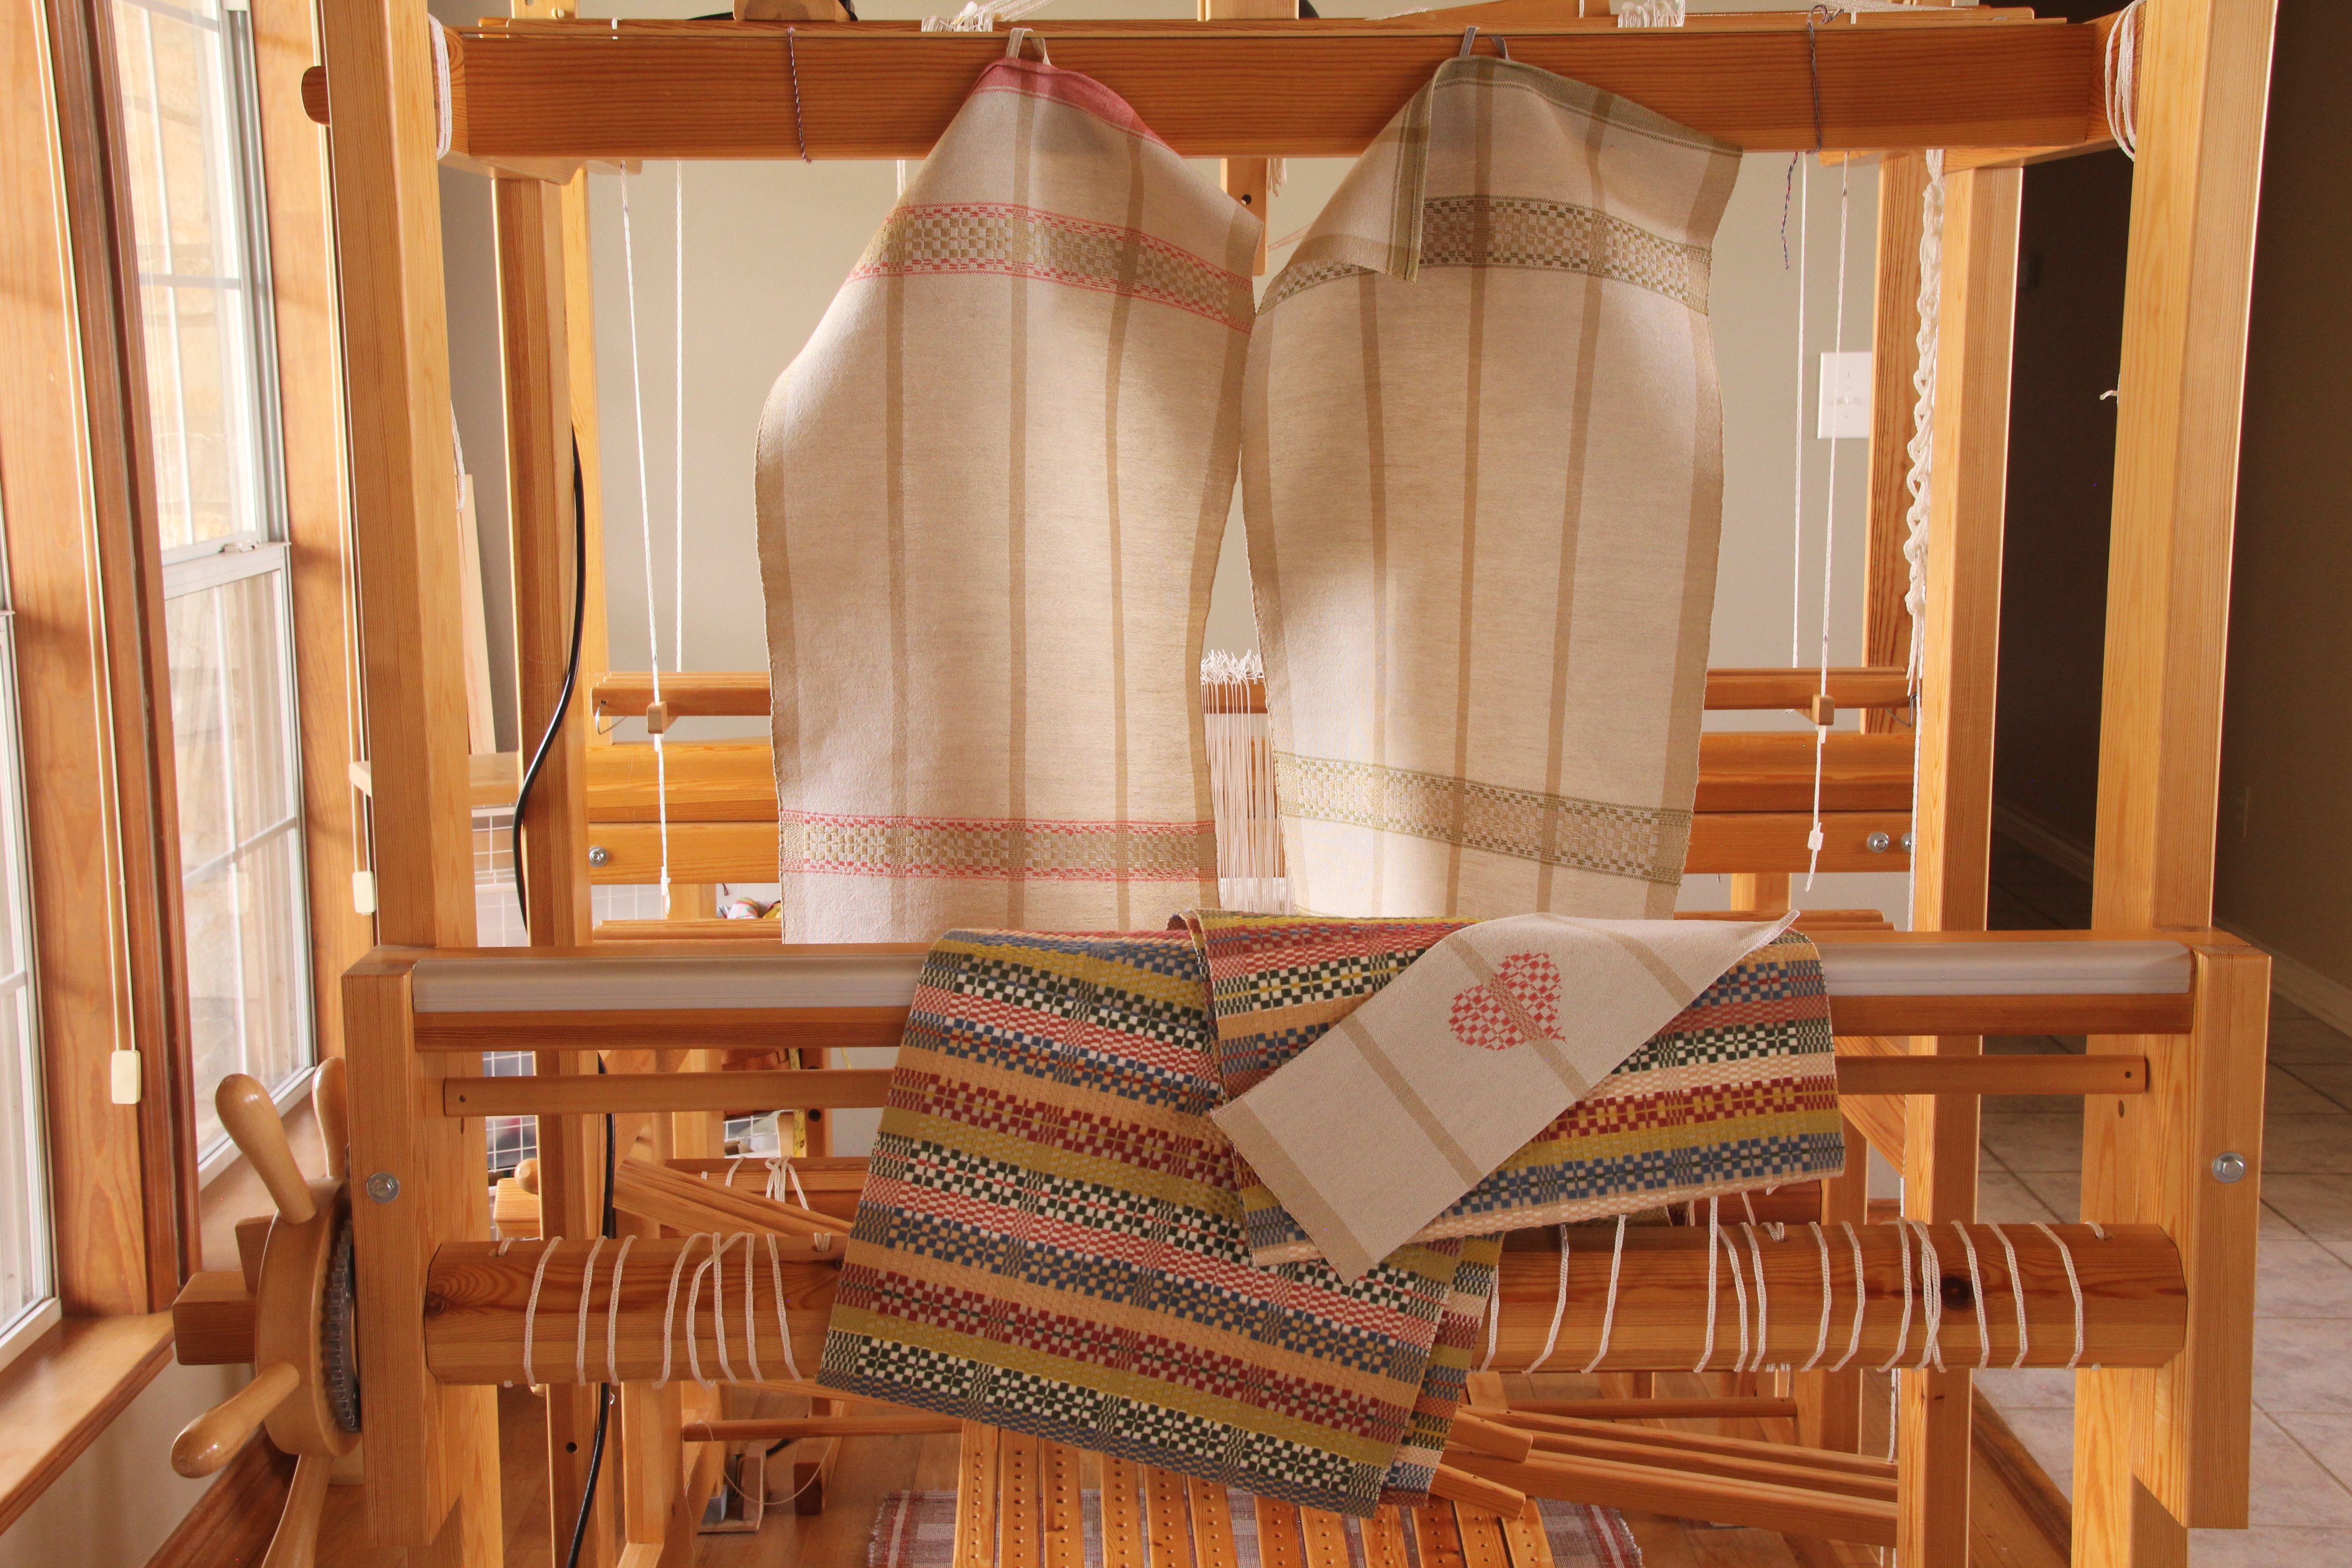
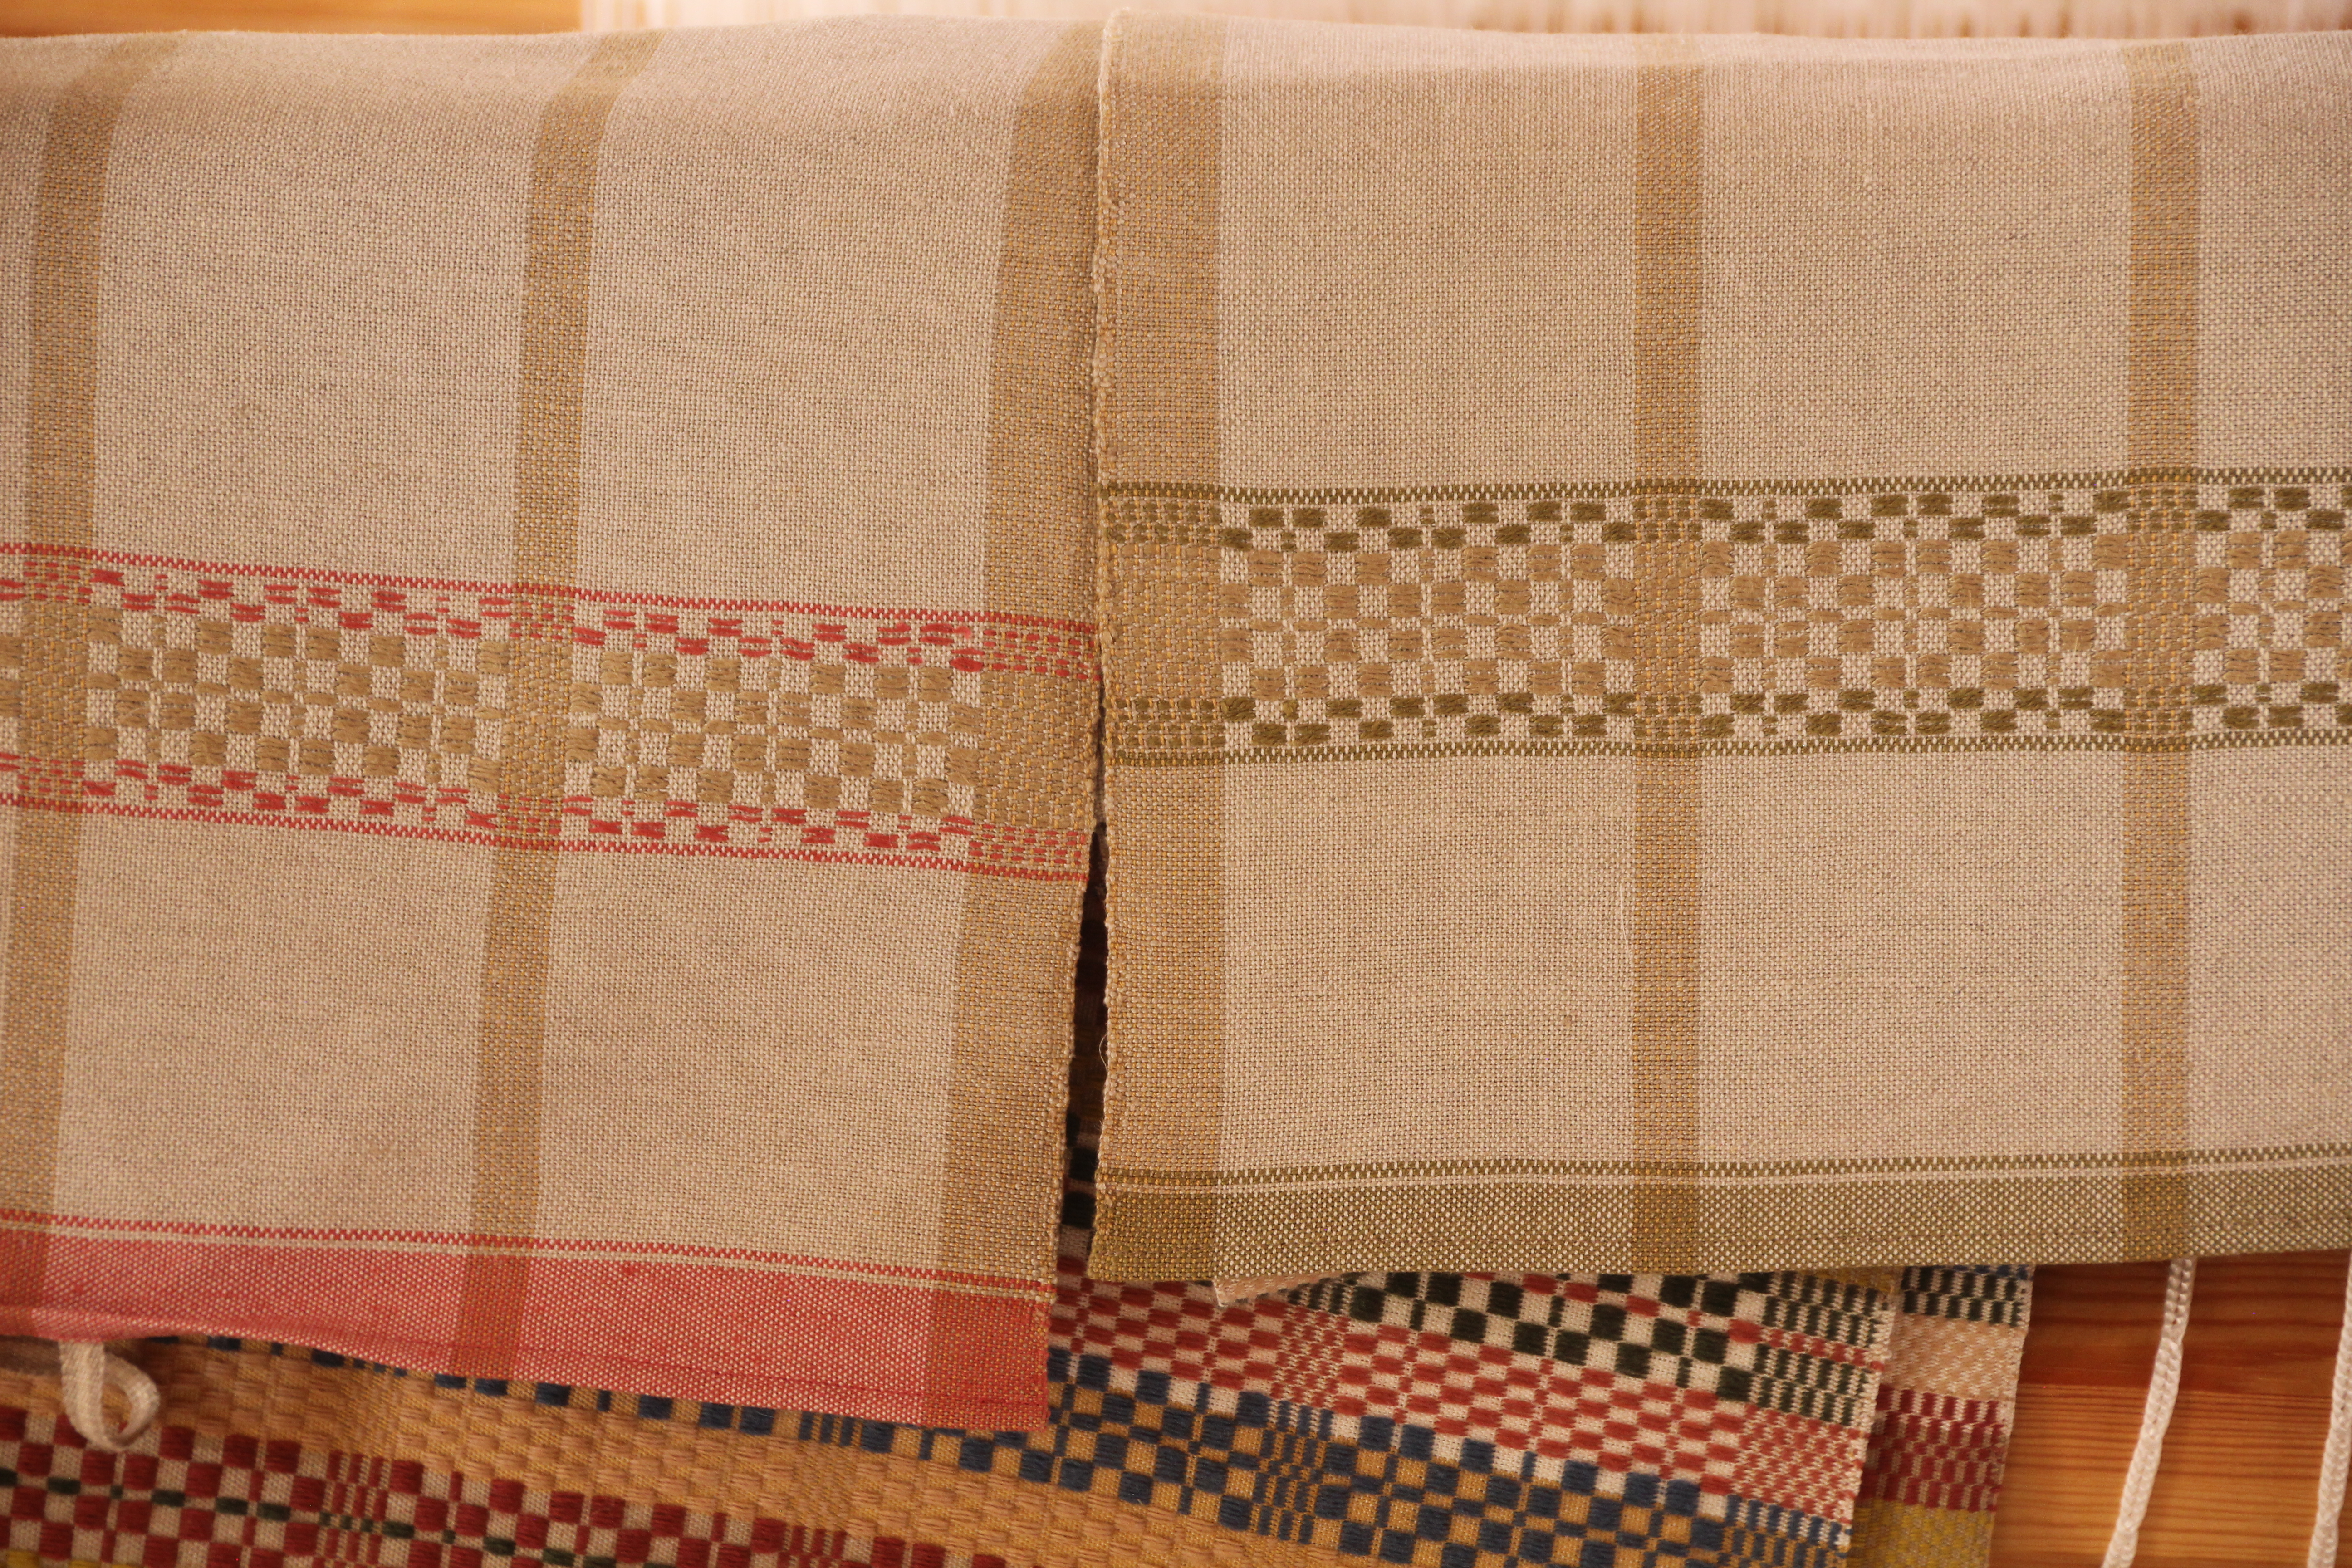
After the Priceless Monksbelt Runner I had enough warp to weave two bonus towels with monksbelt borders. In between the towels I did a small heart-shaped inlay just for play.Two simple plain weave towels, with monksbelt borders. The tabby weft is 16/2 golden bleached linen. The coral pattern weft and green pattern weft is doubled 16/1 linen. The ecru center pattern weft is doubled 6/1 tow linen. Warp is 16/2 cotton. With only one washing so far, the towels still have a wonderful crisp linen hand.
The exceptional value of handwoven textiles makes your home a welcoming place. Time is one of our most valuable assets. That makes the textiles we create priceless!
Our dining table is just to the right as you walk through the front door of our home. May all who enter know they are welcome here!
Please enjoy this video review of weaving the Priceless Monksbelt Runner.
May the works of your hands bring exceptional value to your home.
Monksbelt has been on the Glimåkra Standard for months. I expect the table runner to be fabulous when it finally comes off the loom, so I’m not complaining. The time spent weaving only adds to its worth. The runner is finished, so why not cut it offnow and count the remaining warp as excess thrums? That shows how eager I am to put this monksbelt runner to use!
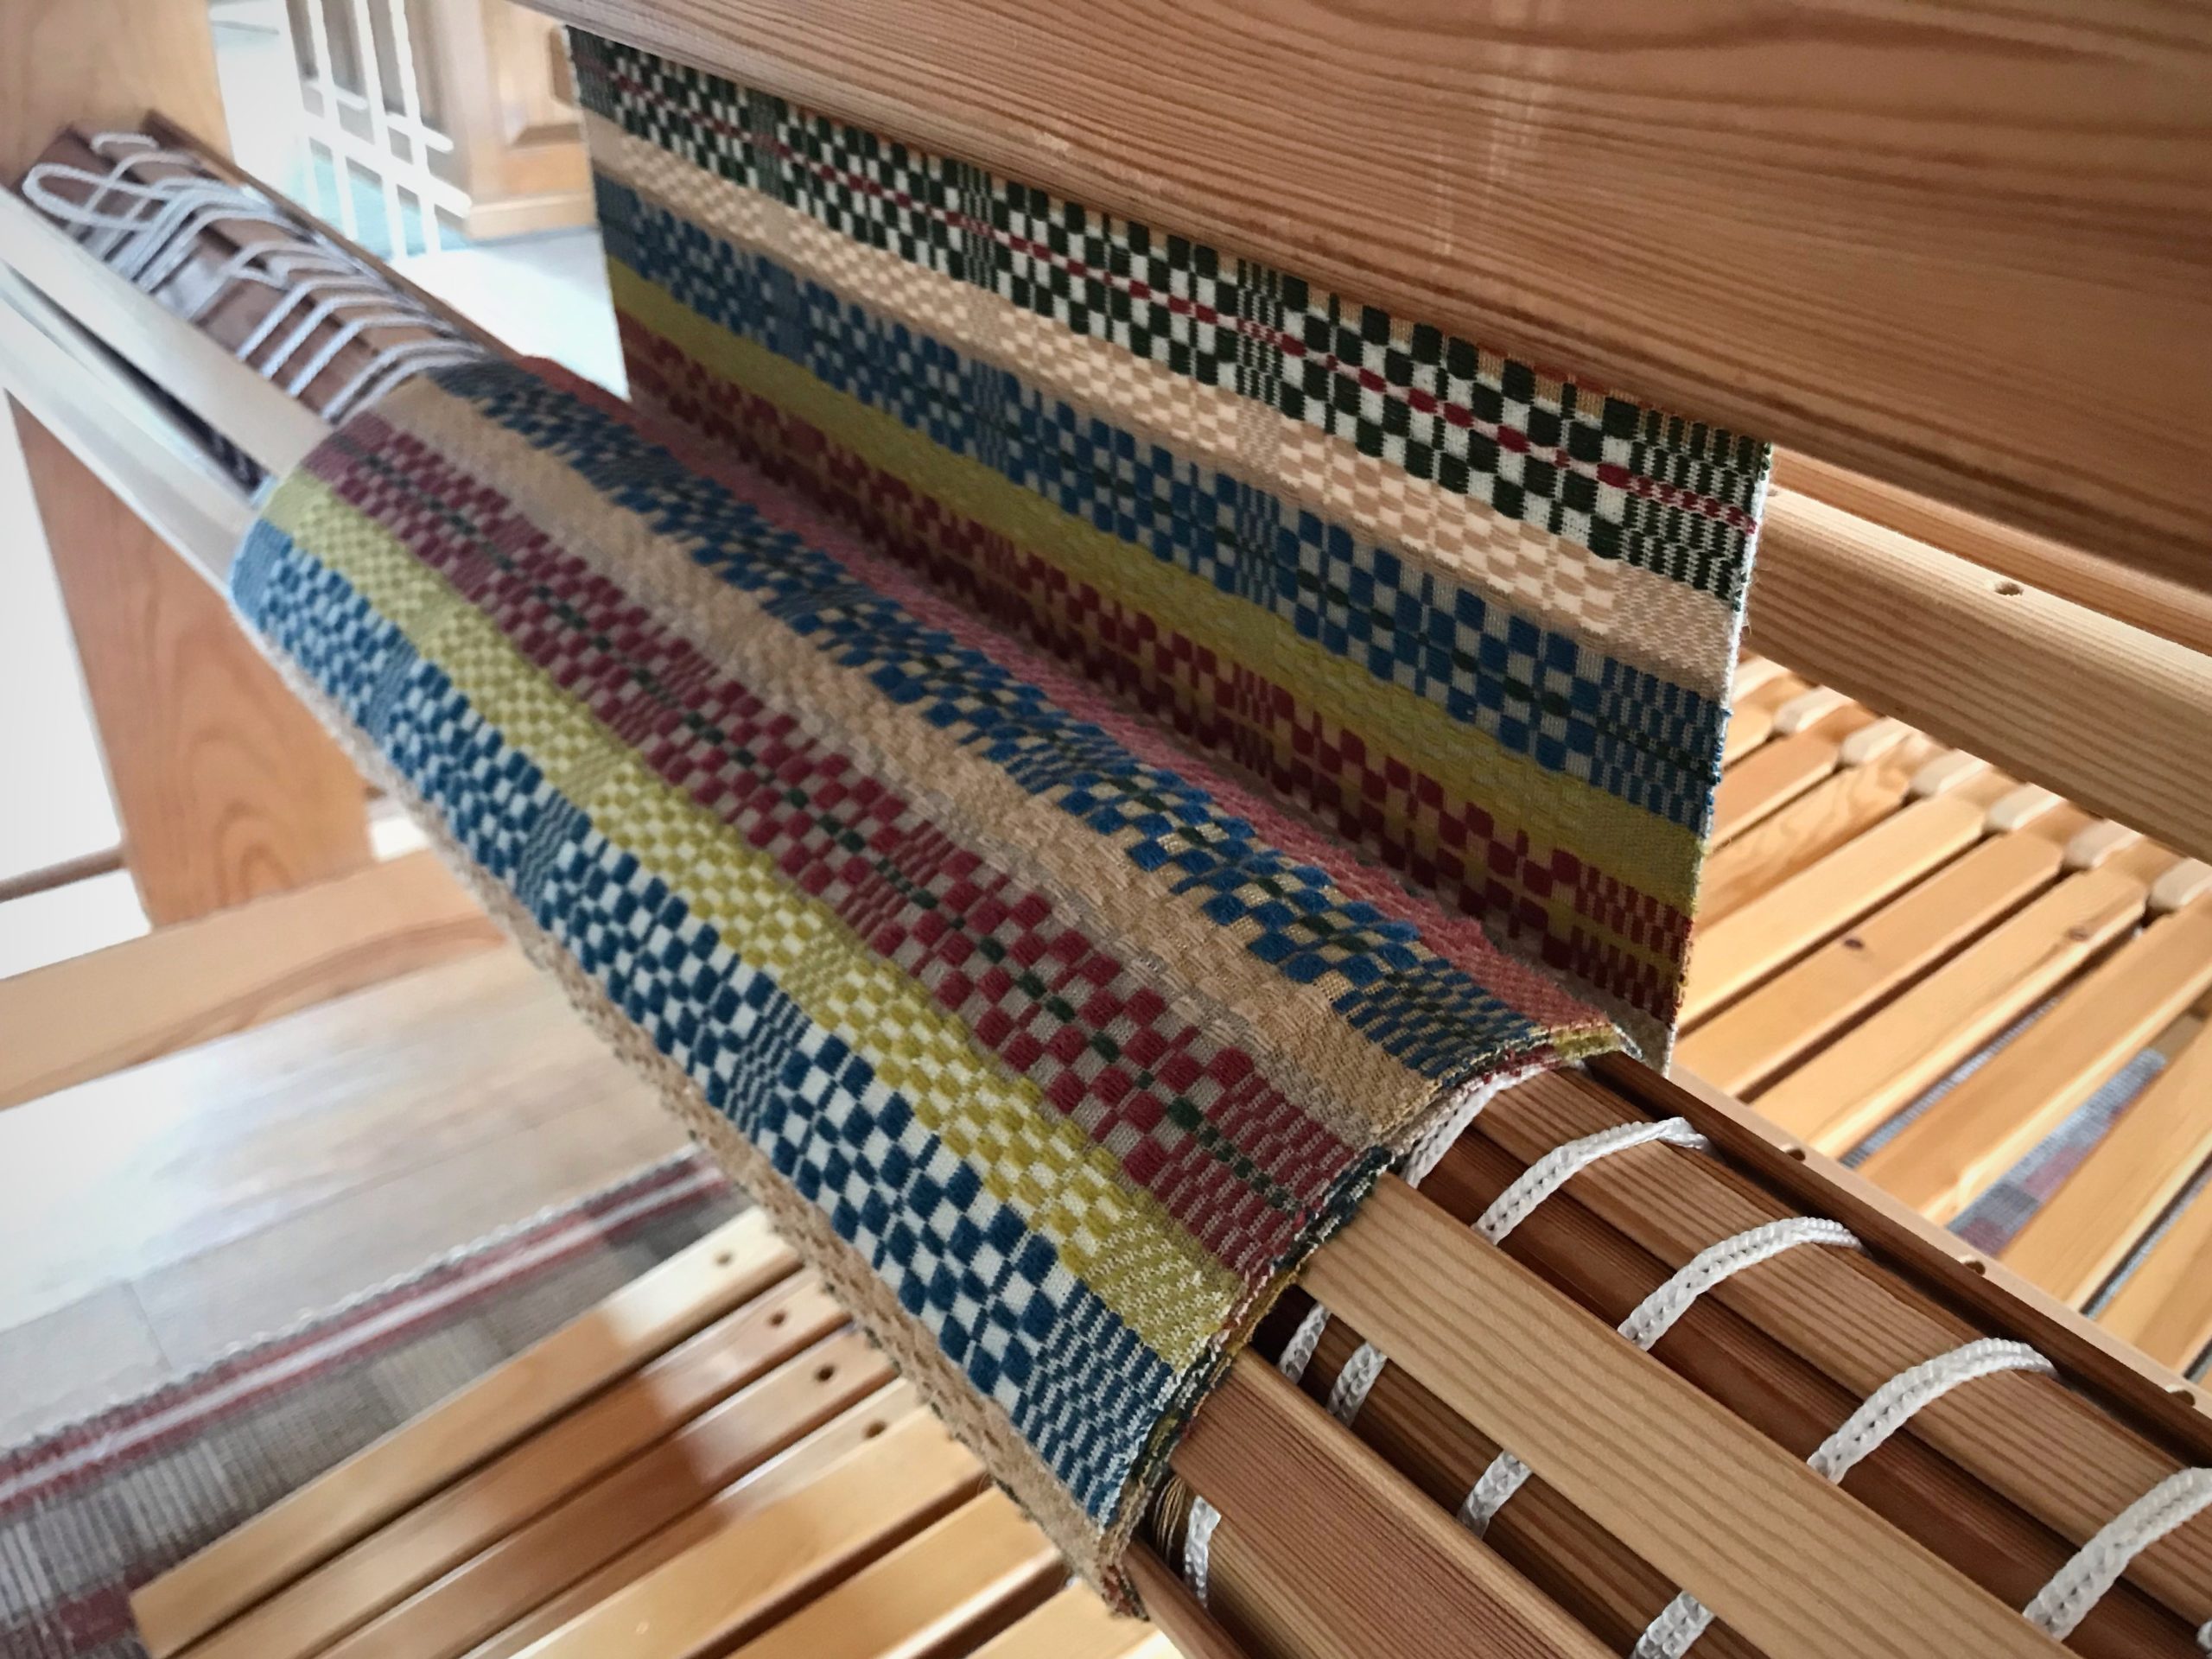
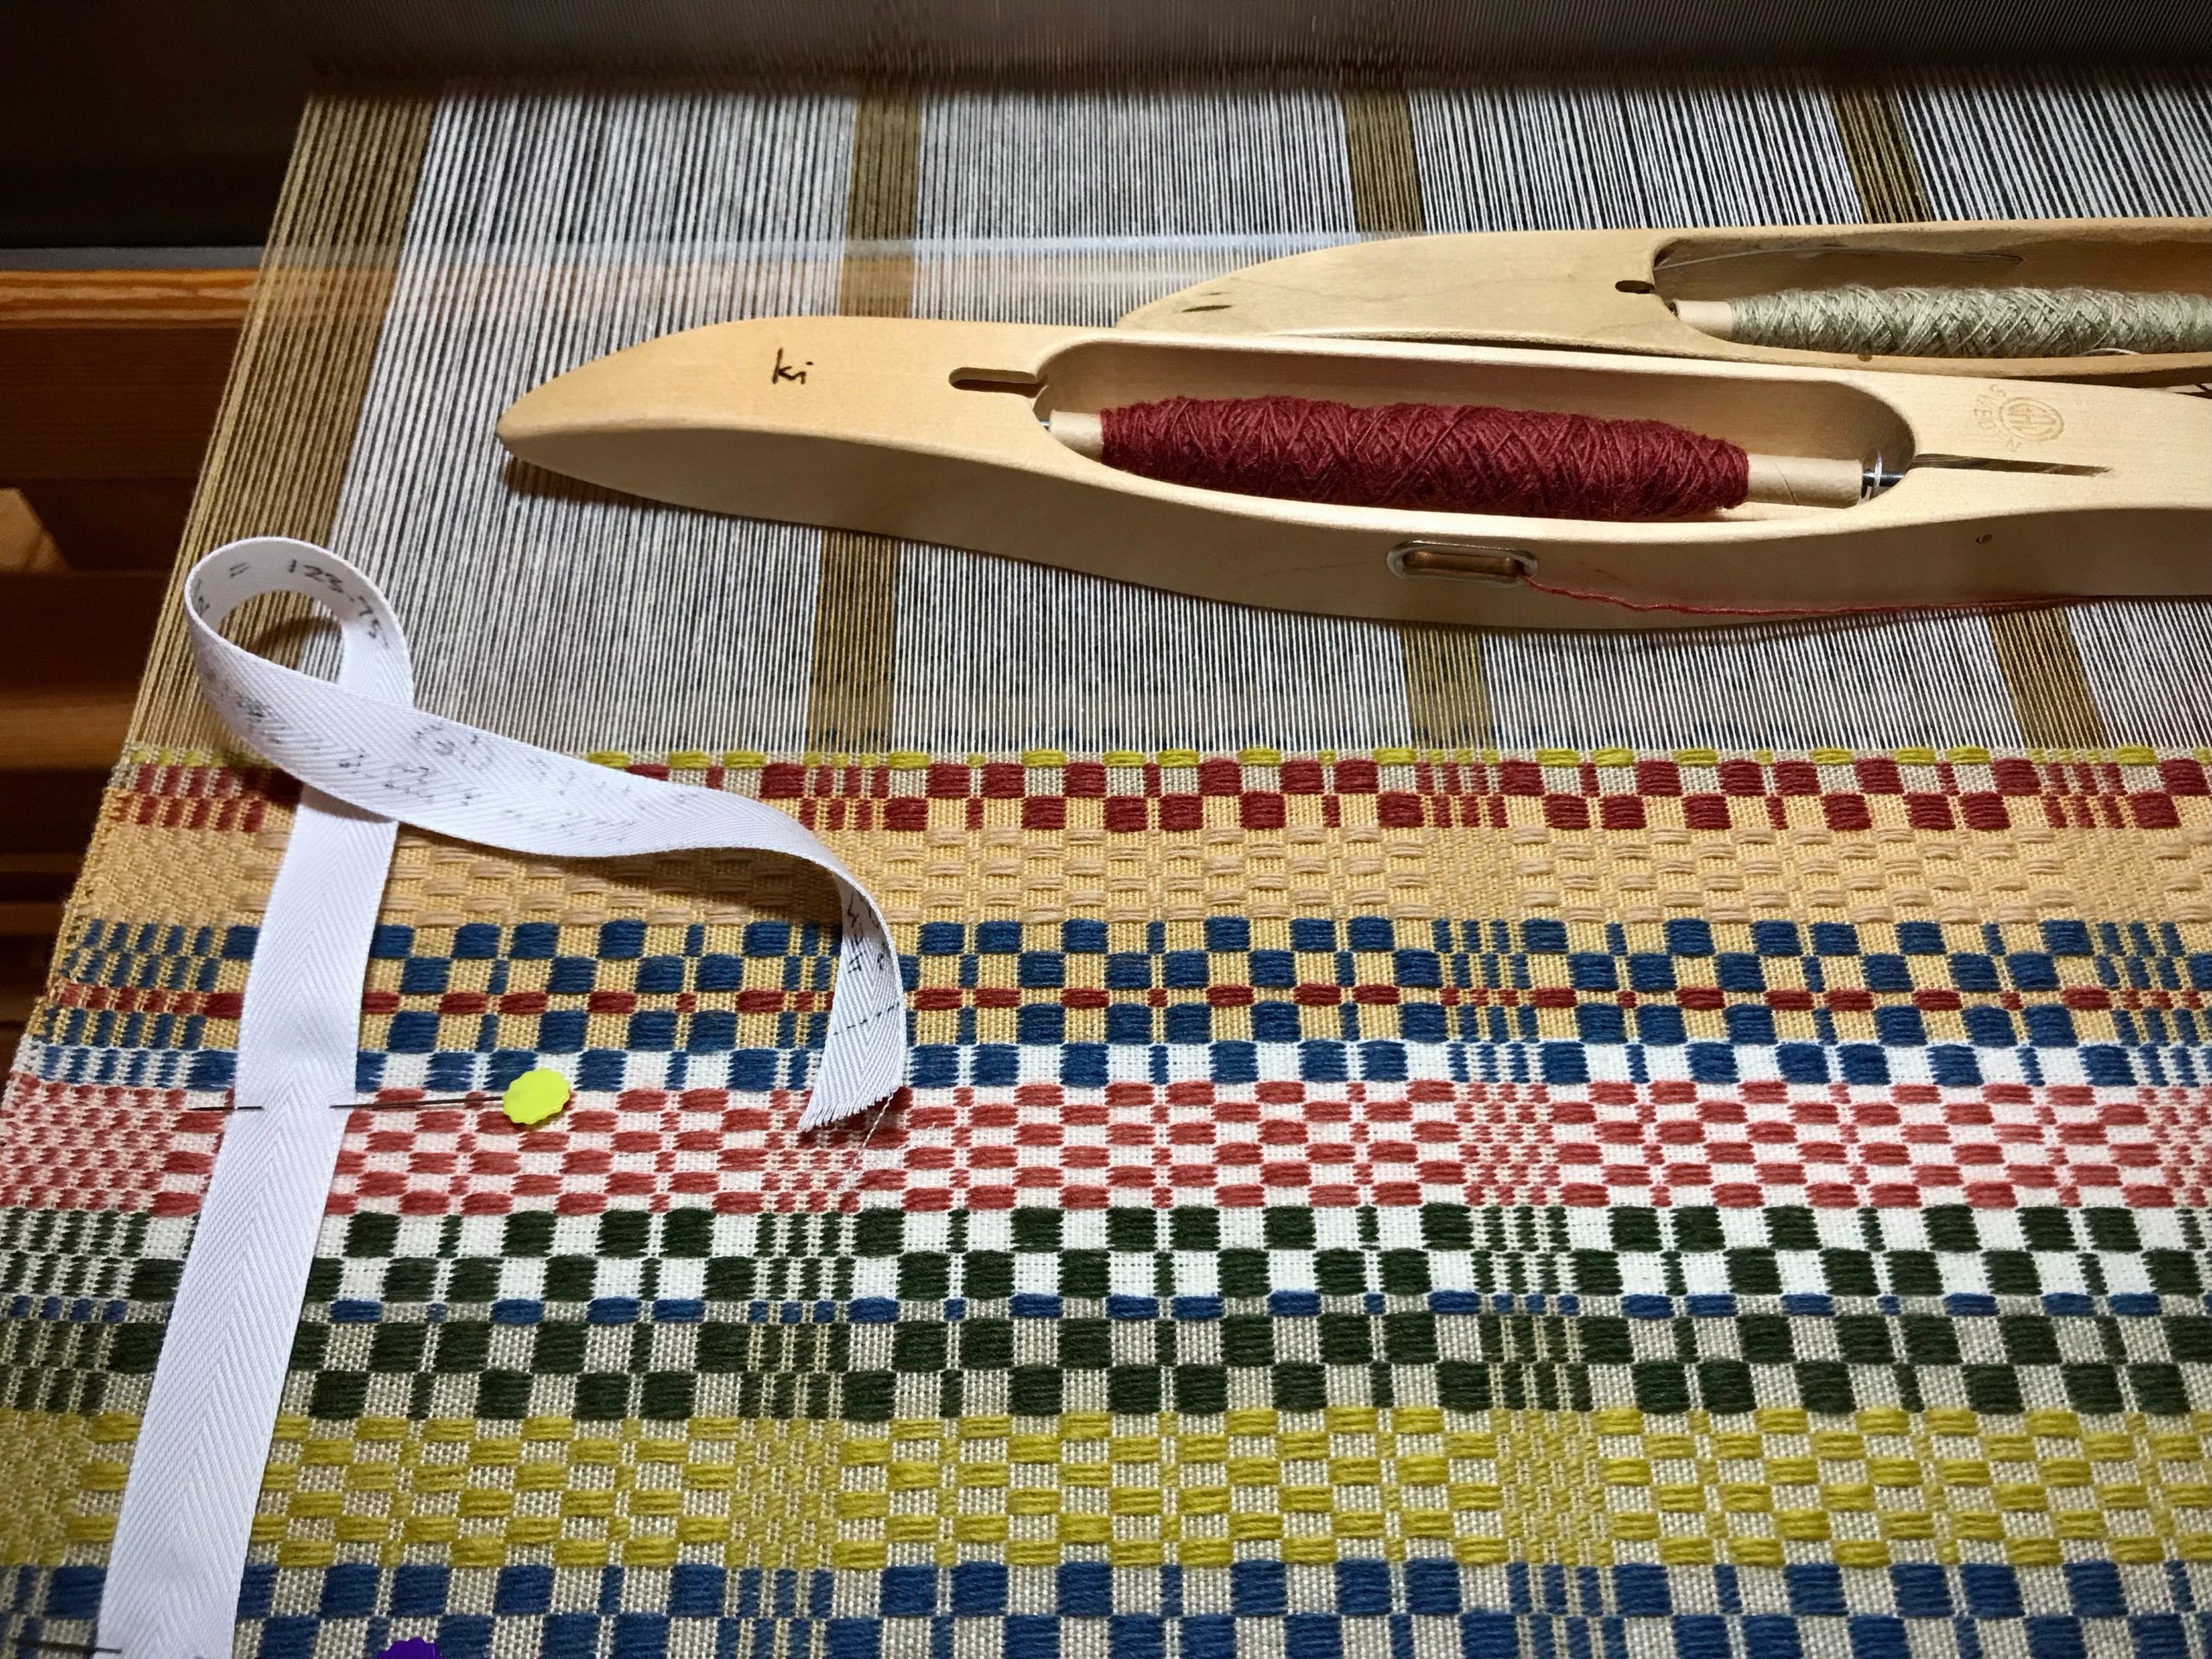
Long monksbelt runner is woven. End of warp has room for two plain weave towels with a monksbelt accent.16/2 cotton warp. Coral 16/1 linen hem. Unbleached 16/2 linen ground weft. Coral 16/1 linen, doubled, outline pattern weft. Camel 6/1 tow linen, doubled, pattern weft.
The truth is, there is enough warp left for one, or maybe two, tea towels. After experimenting with several weft ideas, I am excited about weaving to the very end of the warp! Monksbelt gives us a surprise ending. A plain weave towel with a monksbelt border—this is a happy ending to a good long story.
Day after day, pick after pick, this fabric lengthens and becomes ever more significant. As daylight dims, I stay at the loom a while longer. The rhythmic series of weaving motions is soothing. A handweaver finds calm in the complexity and delight in the detail. Challenges that arise are seen as problems to be solved.
Weaving for a short while in the evening helps wind down the day.
This monksbelt table runner has been a good long conversation between the loom and me. In fifteen more centimeters (six inches) I will put the closing exclamation point at the end of this lengthy runner. The warp that remains will be my playground for some creative experimentation.
Long monksbelt table runner wraps around the cloth beam.Monksbelt pattern with weft repground weave. 16/2 cotton warp. 6/1 Fårö wool pattern weft in six colors. 16/2 ground weft in three colors.
When our patience is stretched thin, when we forget why we do what we do, when hard times go on longer than we ever anticipated, we need hope. We need more than what we can gain by ourselves alone. Relationship with our heavenly Father brings hope into the fabric of our days. He beckons us to walk with him through Jesus Christ. He wants to sustain us through the long stretches of this day-by-day life. The time will come when we look back with wonder, seeing the colorful threads that have become fabric for a beautiful purpose.