How Much Further Can I Weave With a Longer Quill?

How much more thread will a 13cm quill hold than an 11cm quill? In other words, how much further can I weave with the longer quill? I decided to do a simple test to find out. Which size quill should I use for the rest of this project?

Red threads give me precise start and stop points for measuring how far I could weave with one quill. I will pull the red threads out when I cut the fabric from the loom.

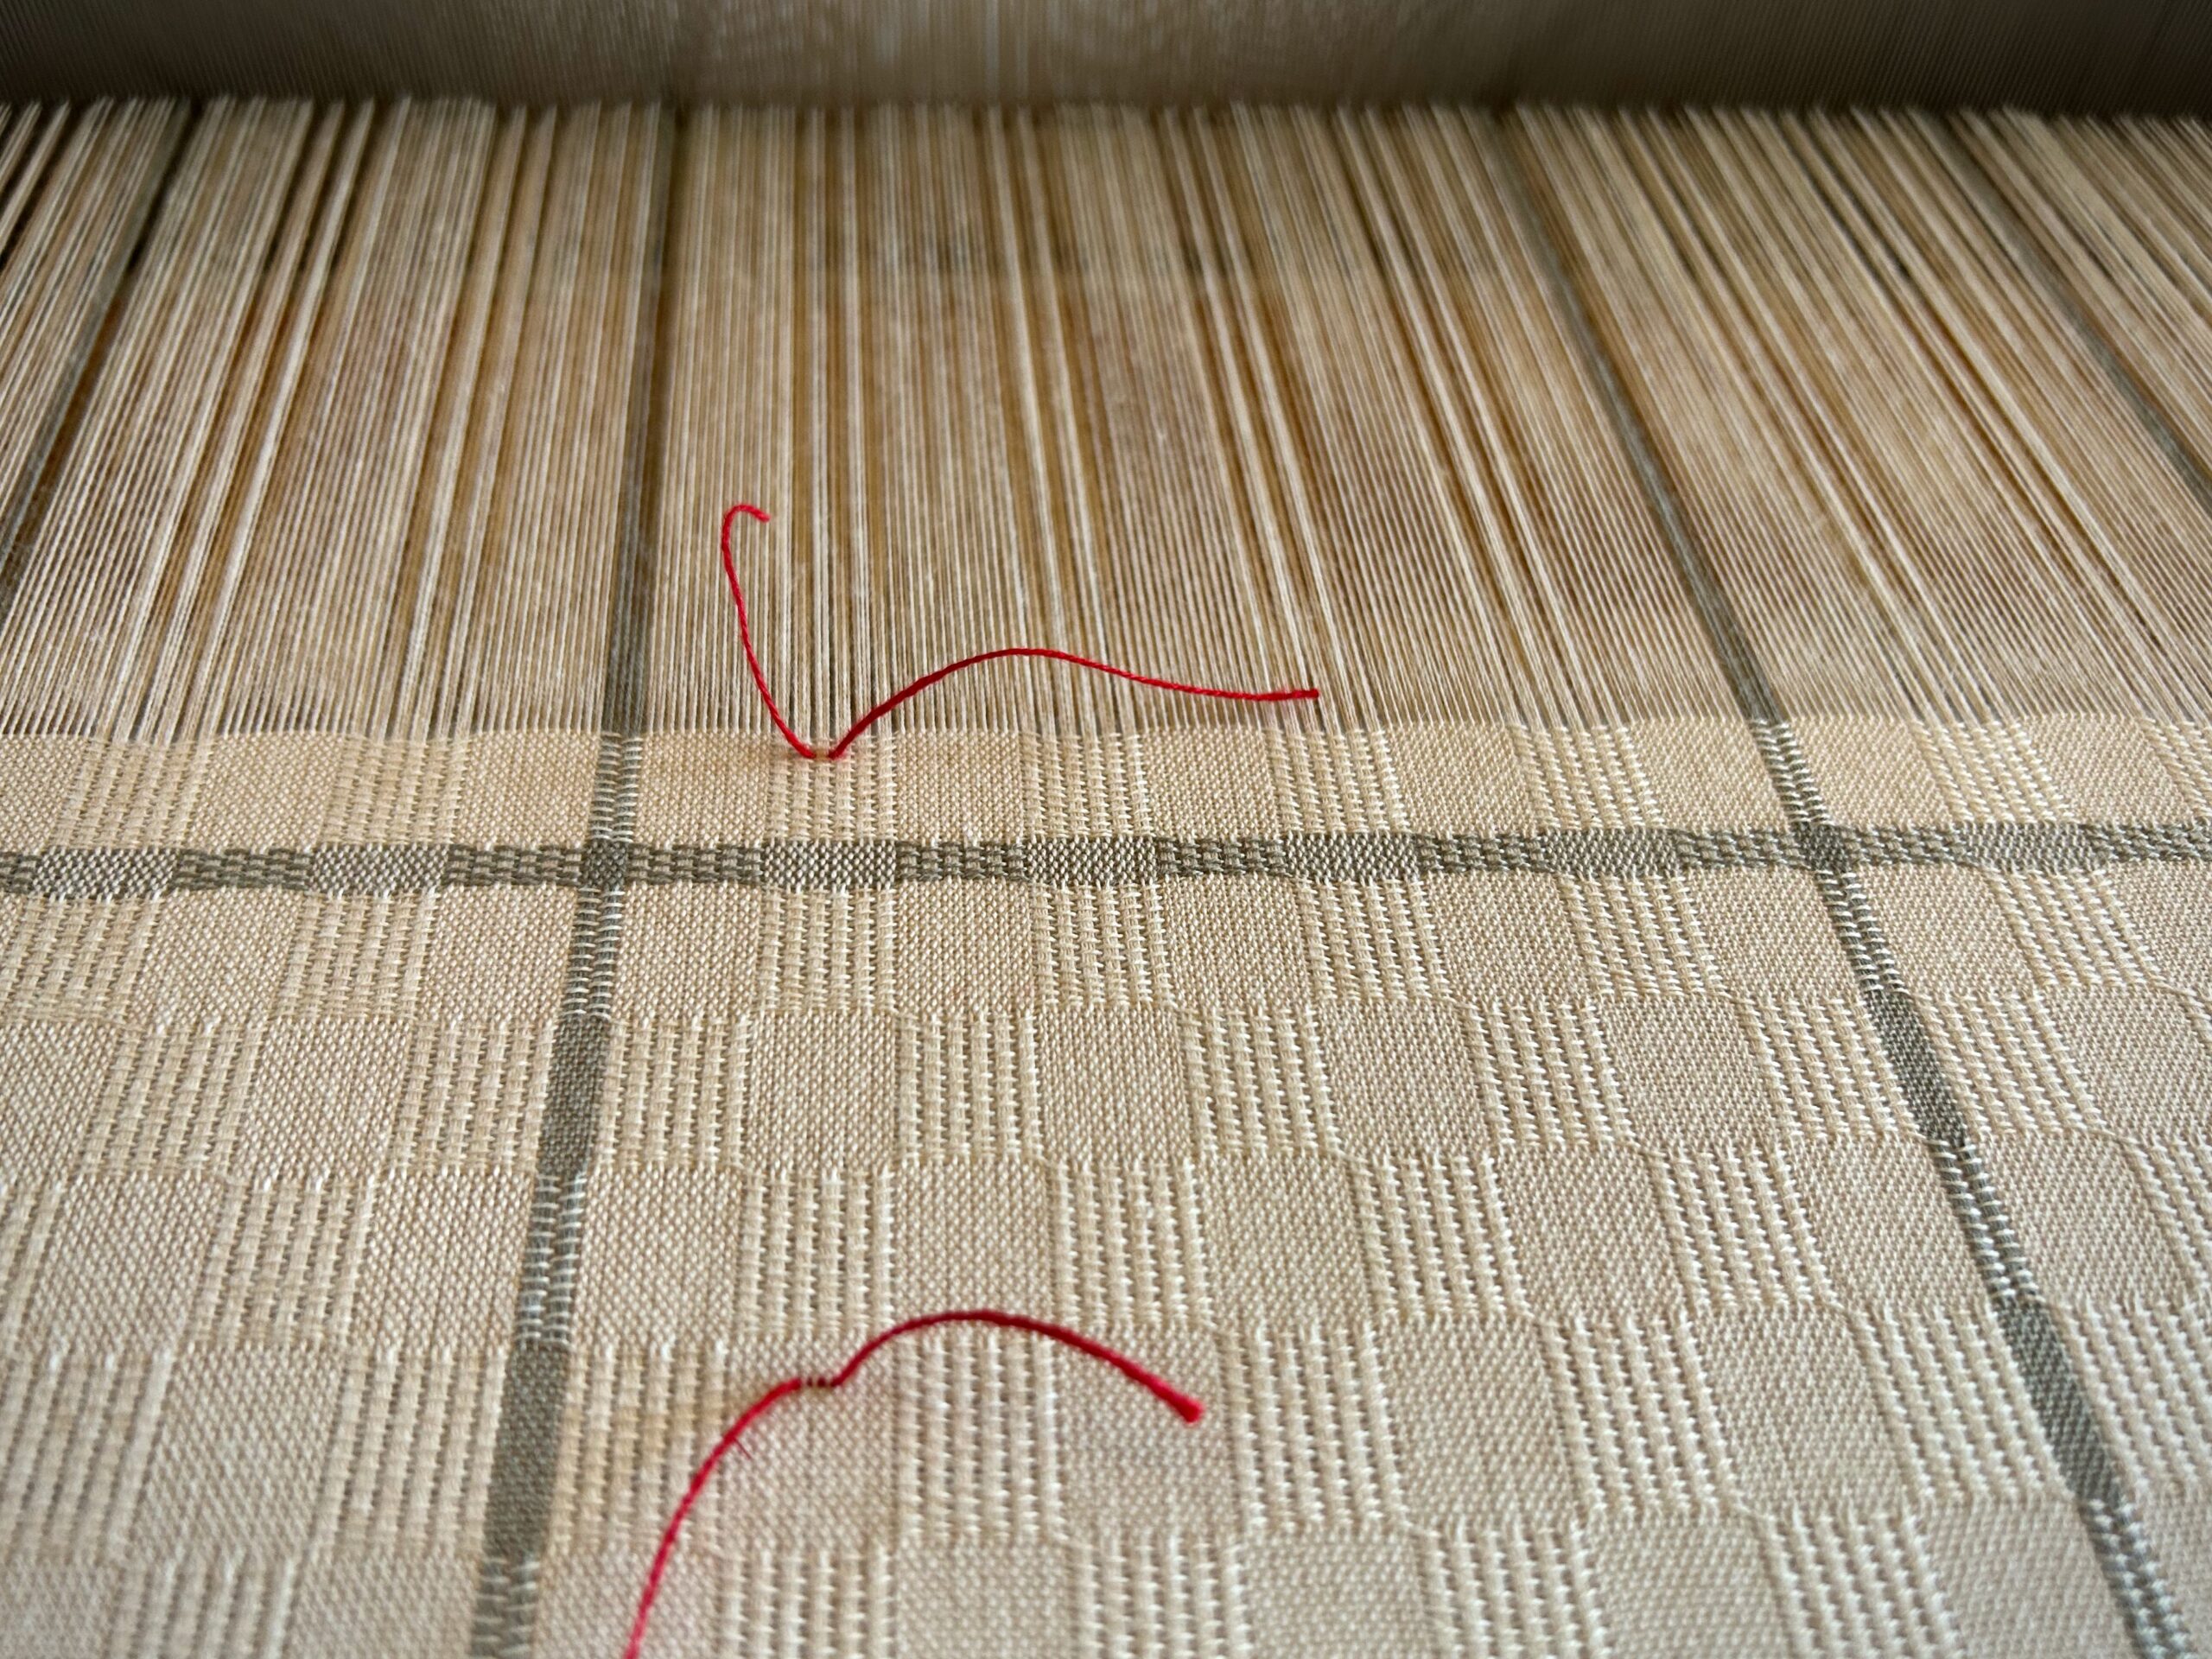
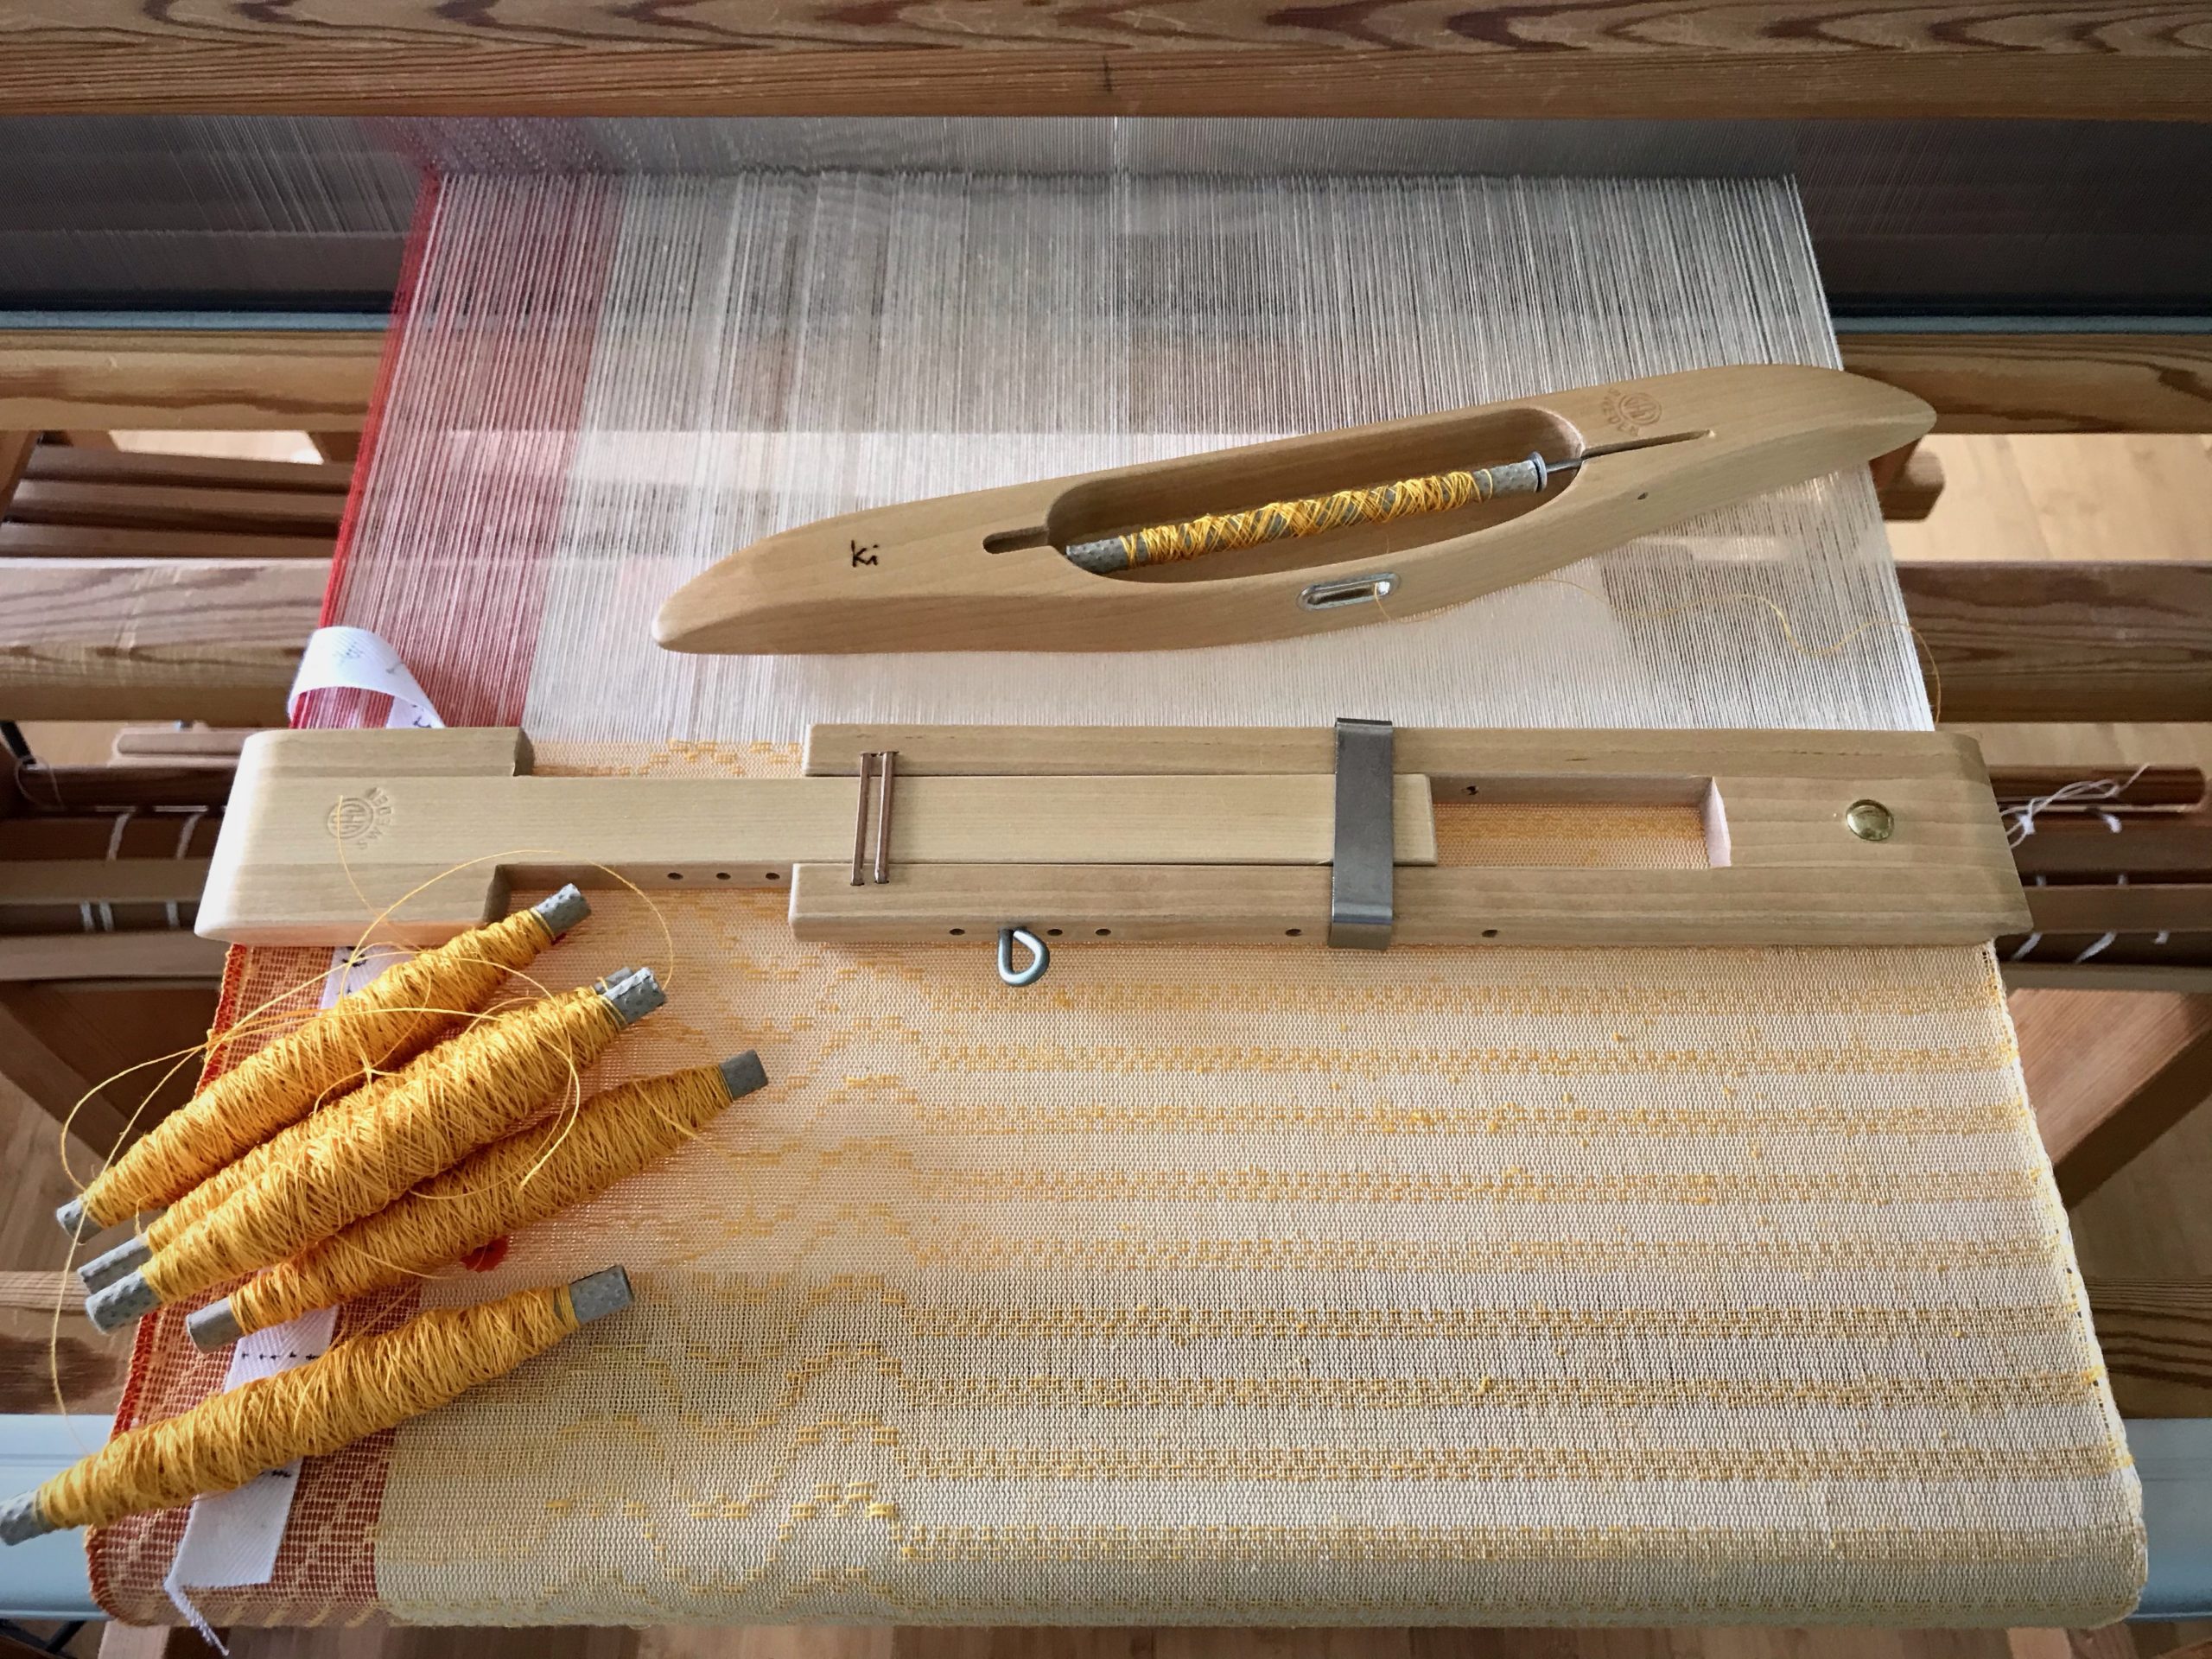
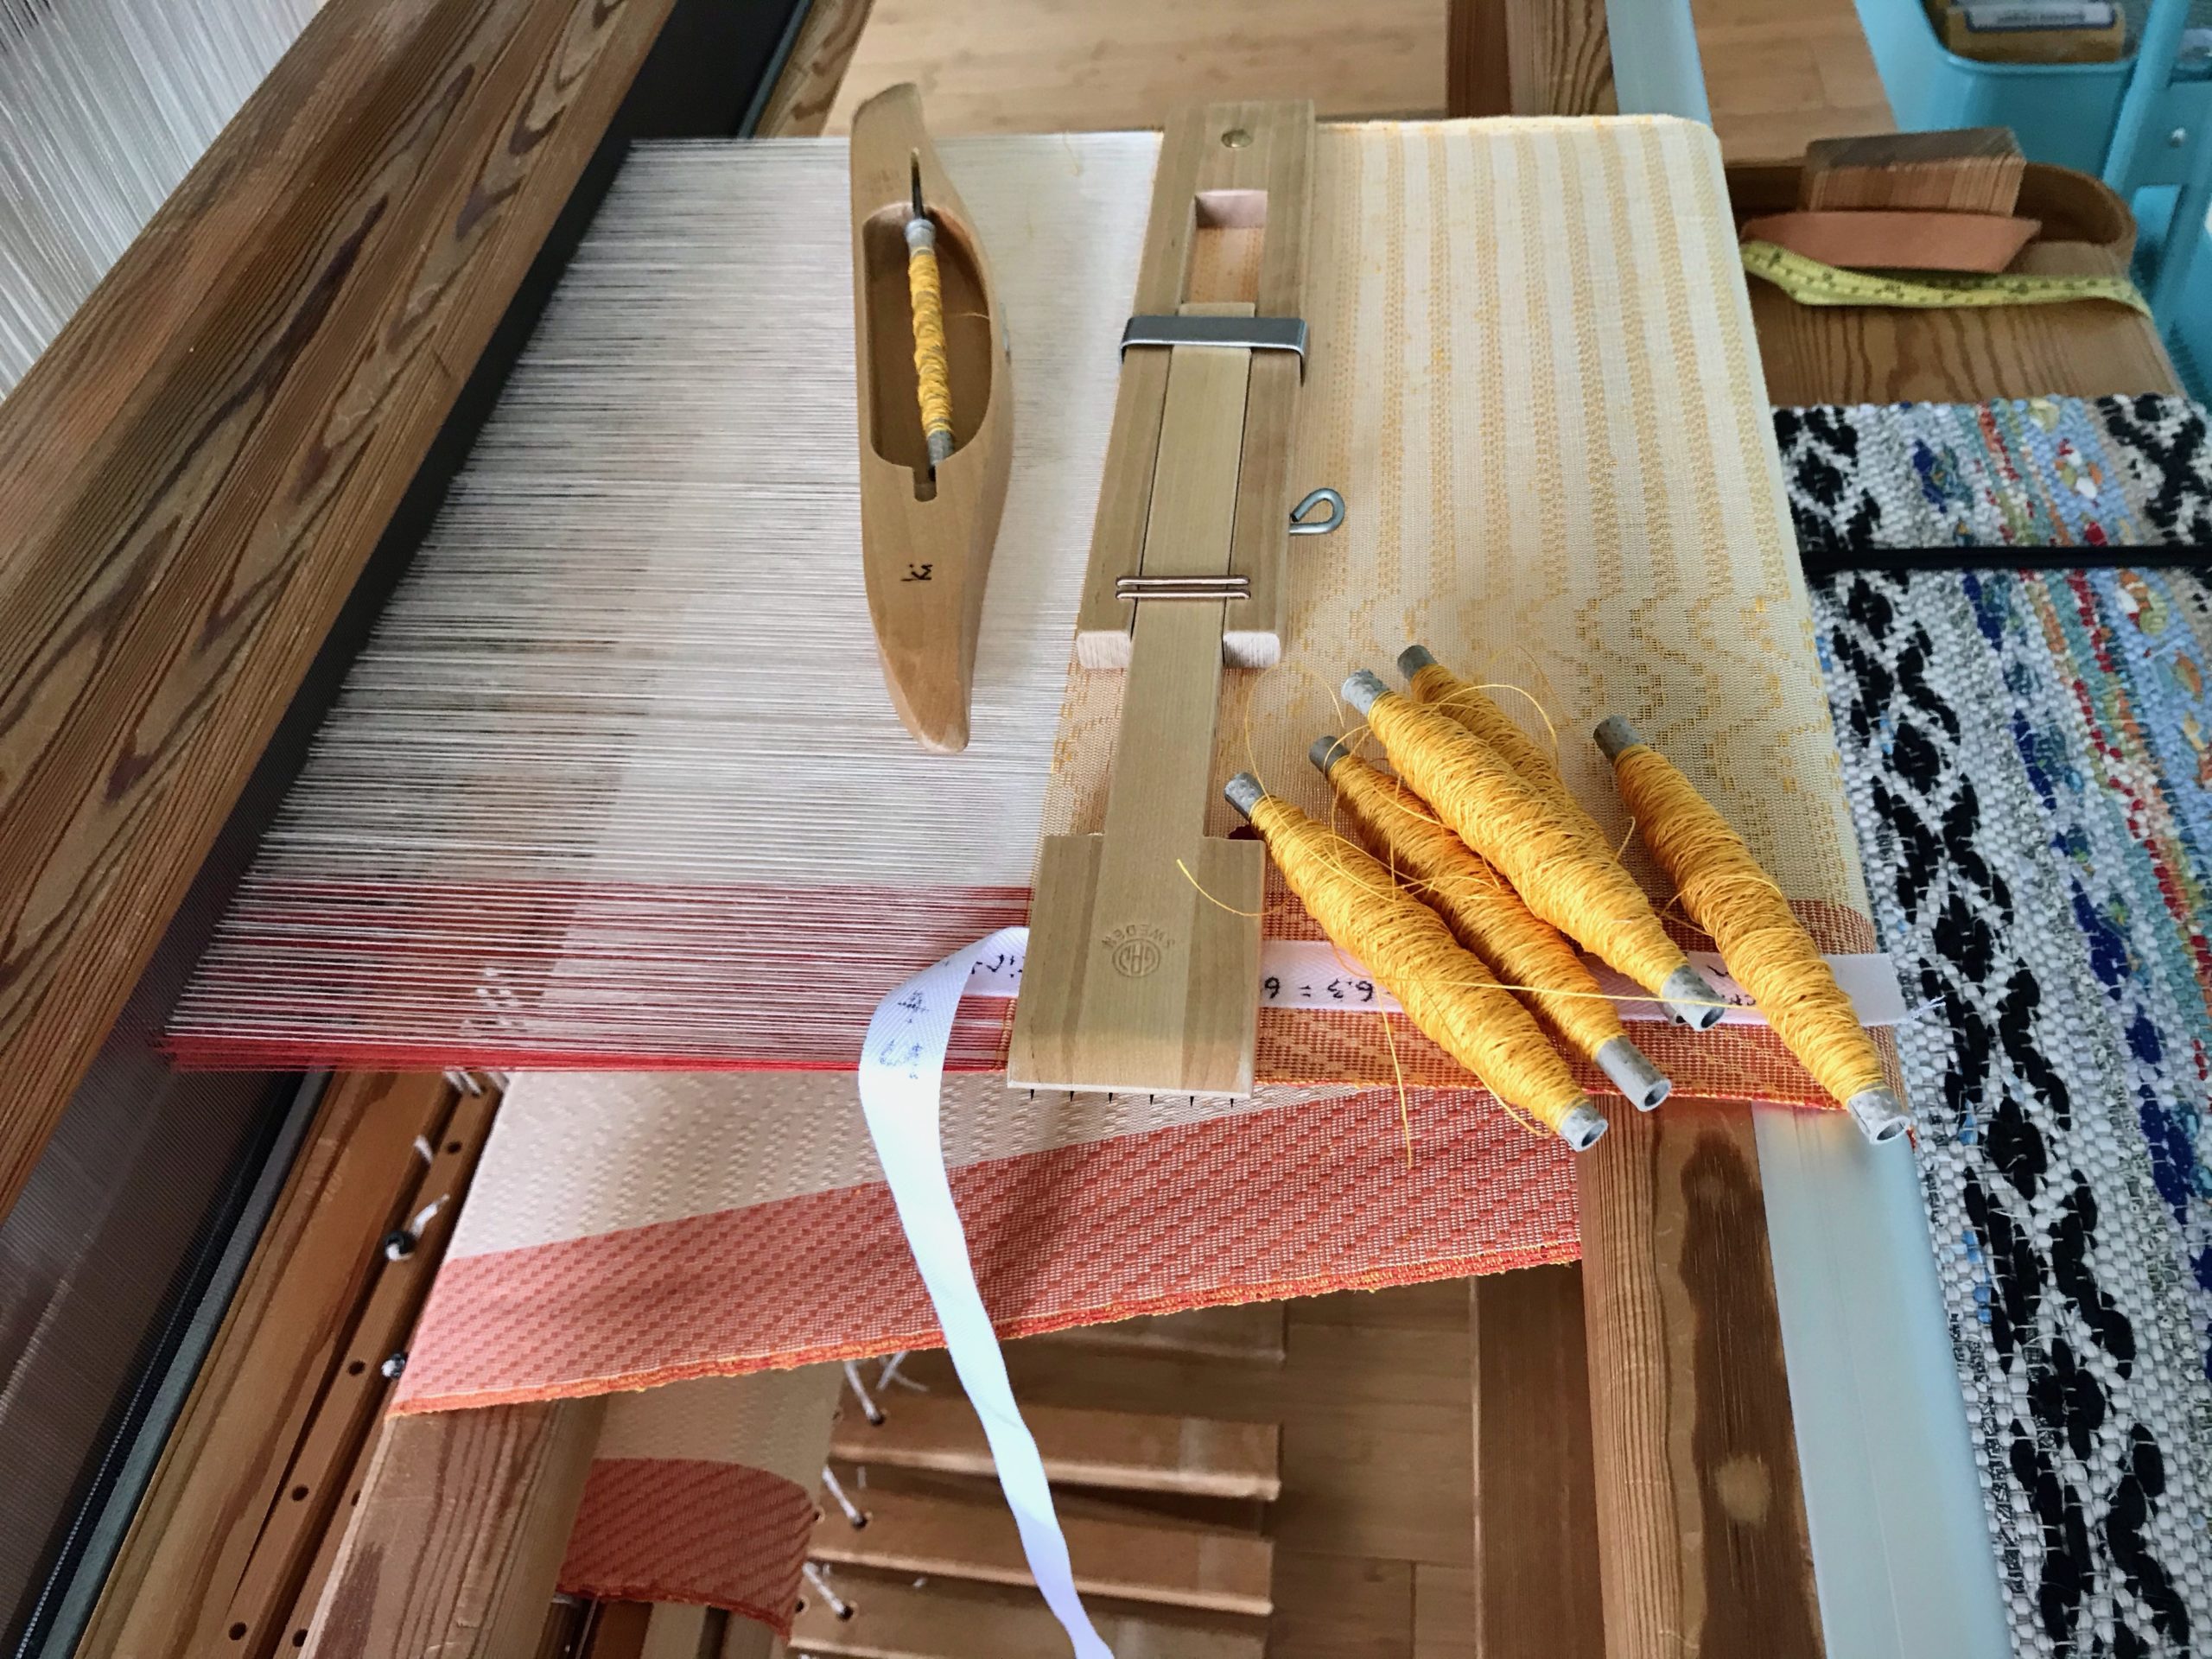
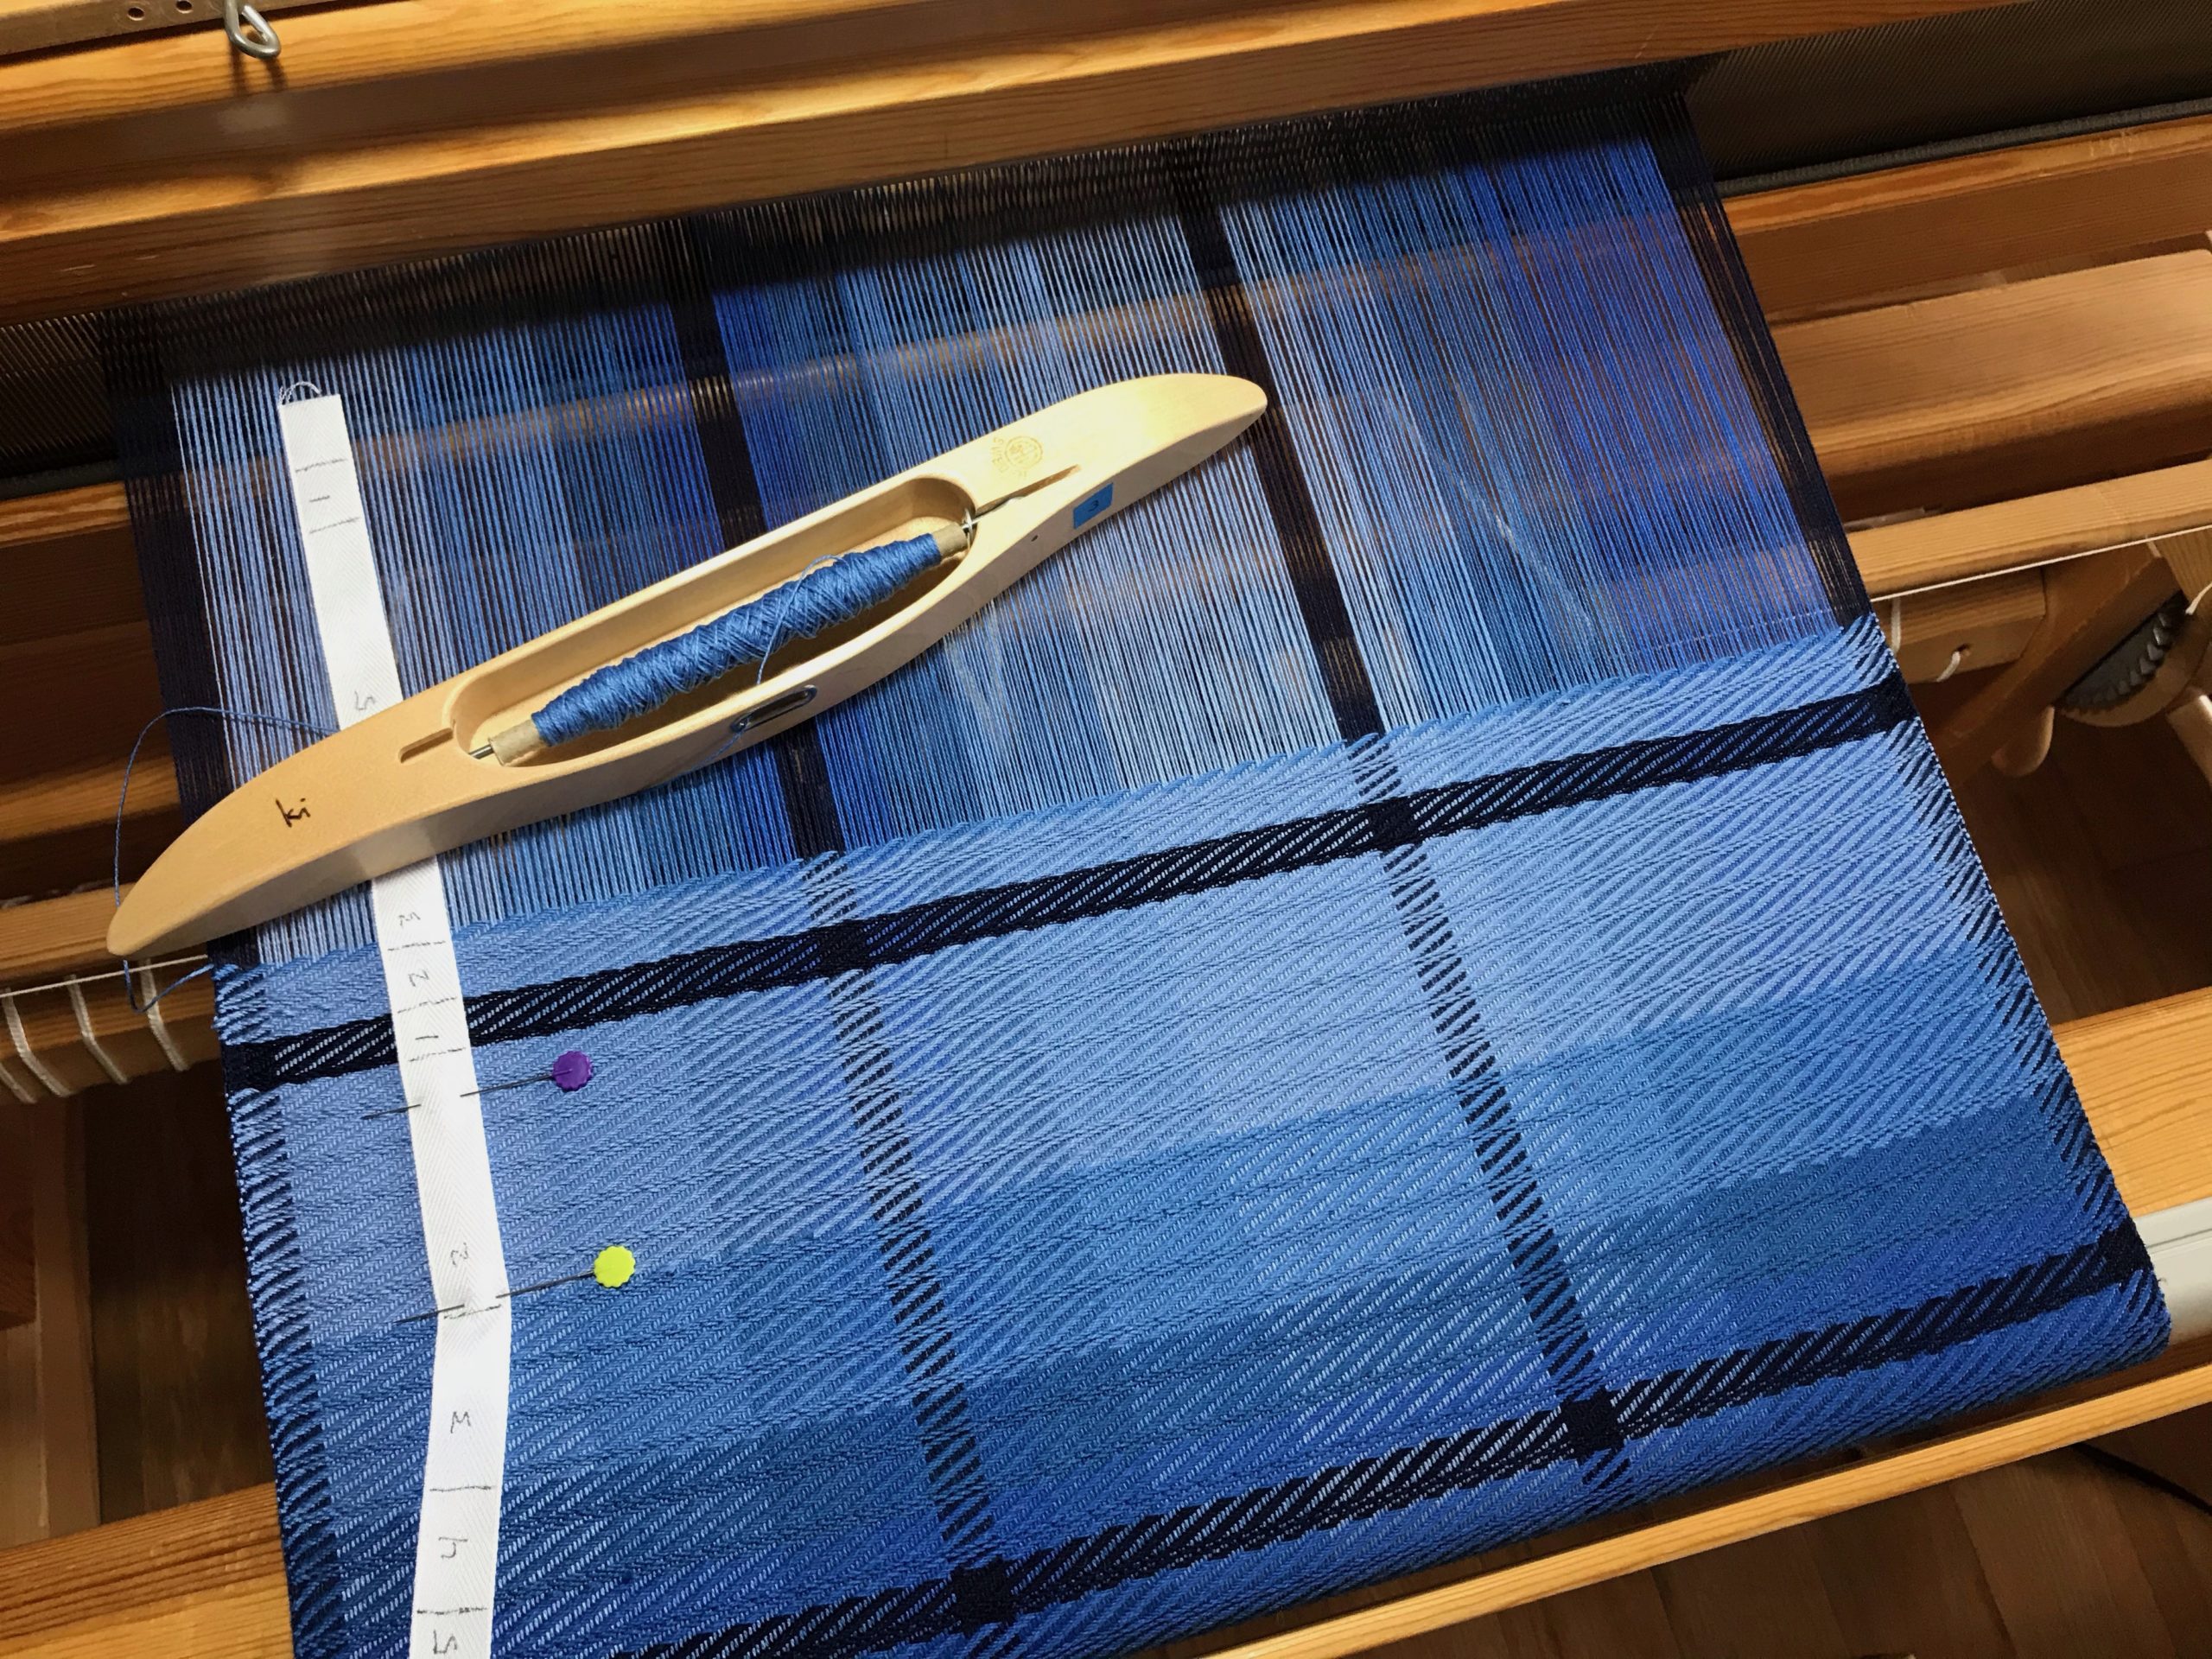
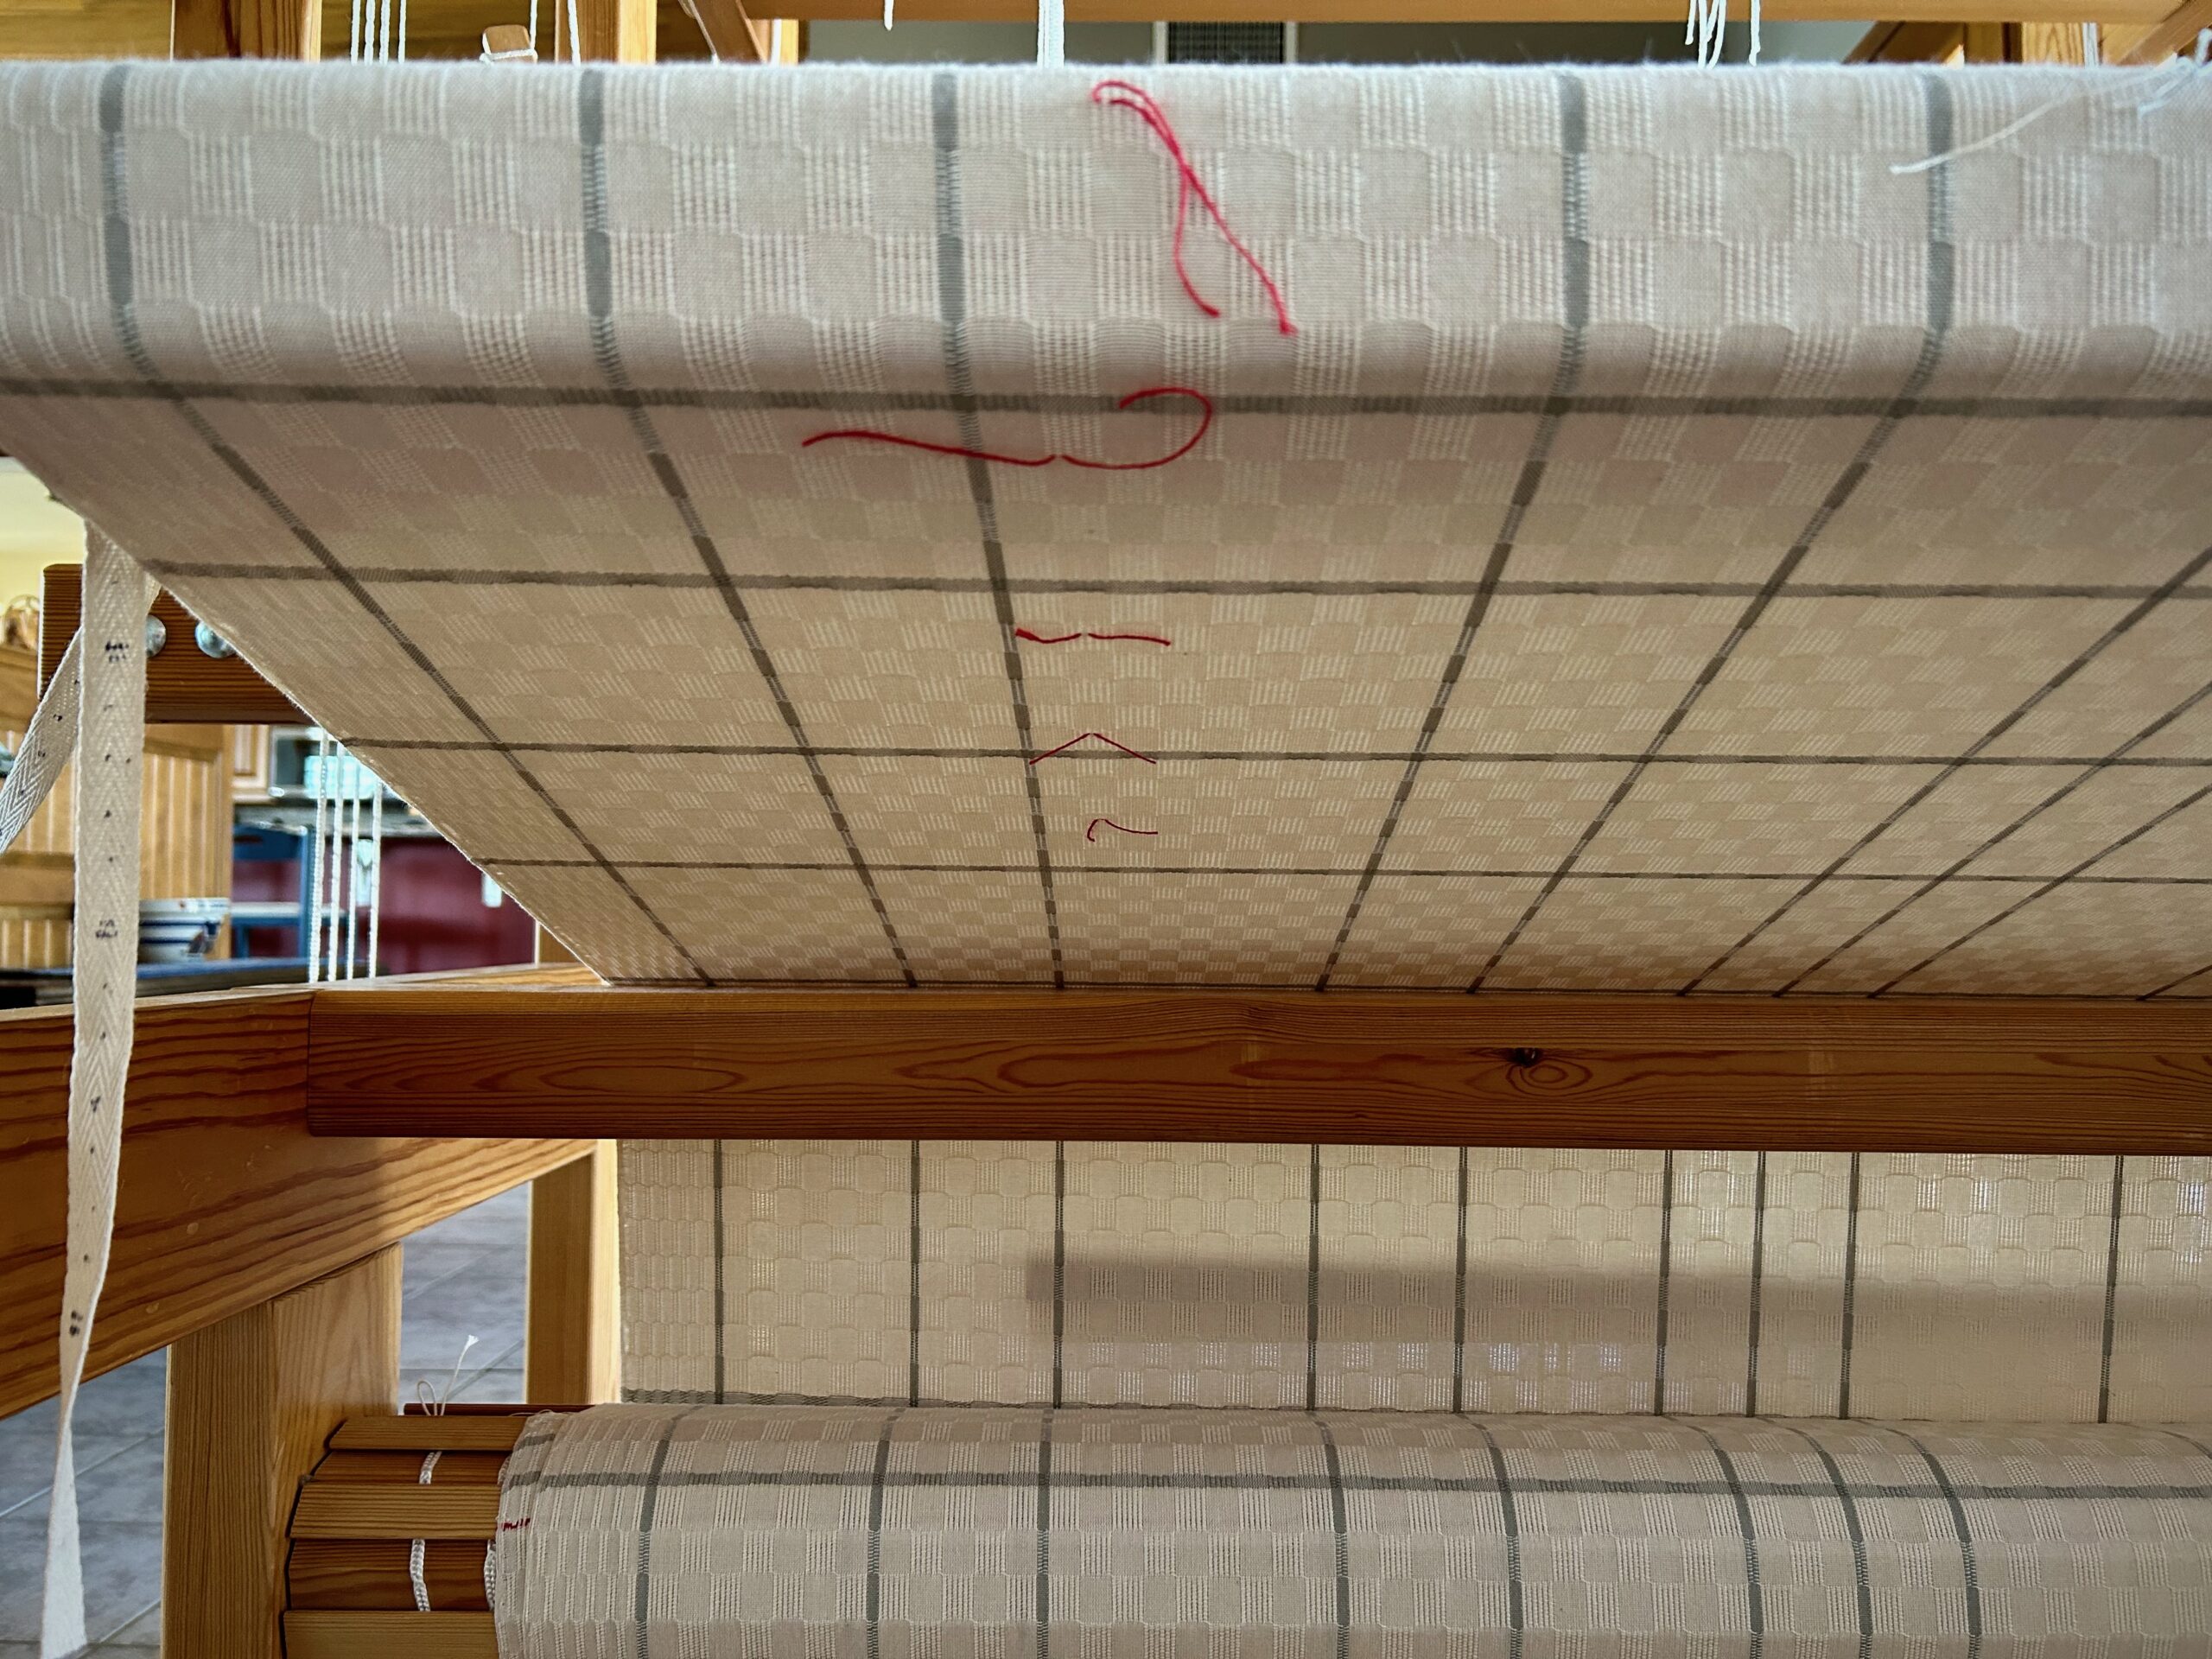
First, I mark the beginning of the 11cm quill with a short red thread woven through a few ends on the same row as the first row of weft from that quill. I weave off the thread from that quill and weave in another short red thread on the final row of the quill, putting the second red thread directly above the first red thread. Now, I can measure the distance that the quill’s weft covered the warp, minus the gray weft stripe. I repeat the test with another quill so I can average the difference, if any. I find that both quills cover exactly 6 cm of warp. How’s that for consistency in winding my quills?

I started with 11cm quills because that is the size that fits the shuttle I wanted to use.

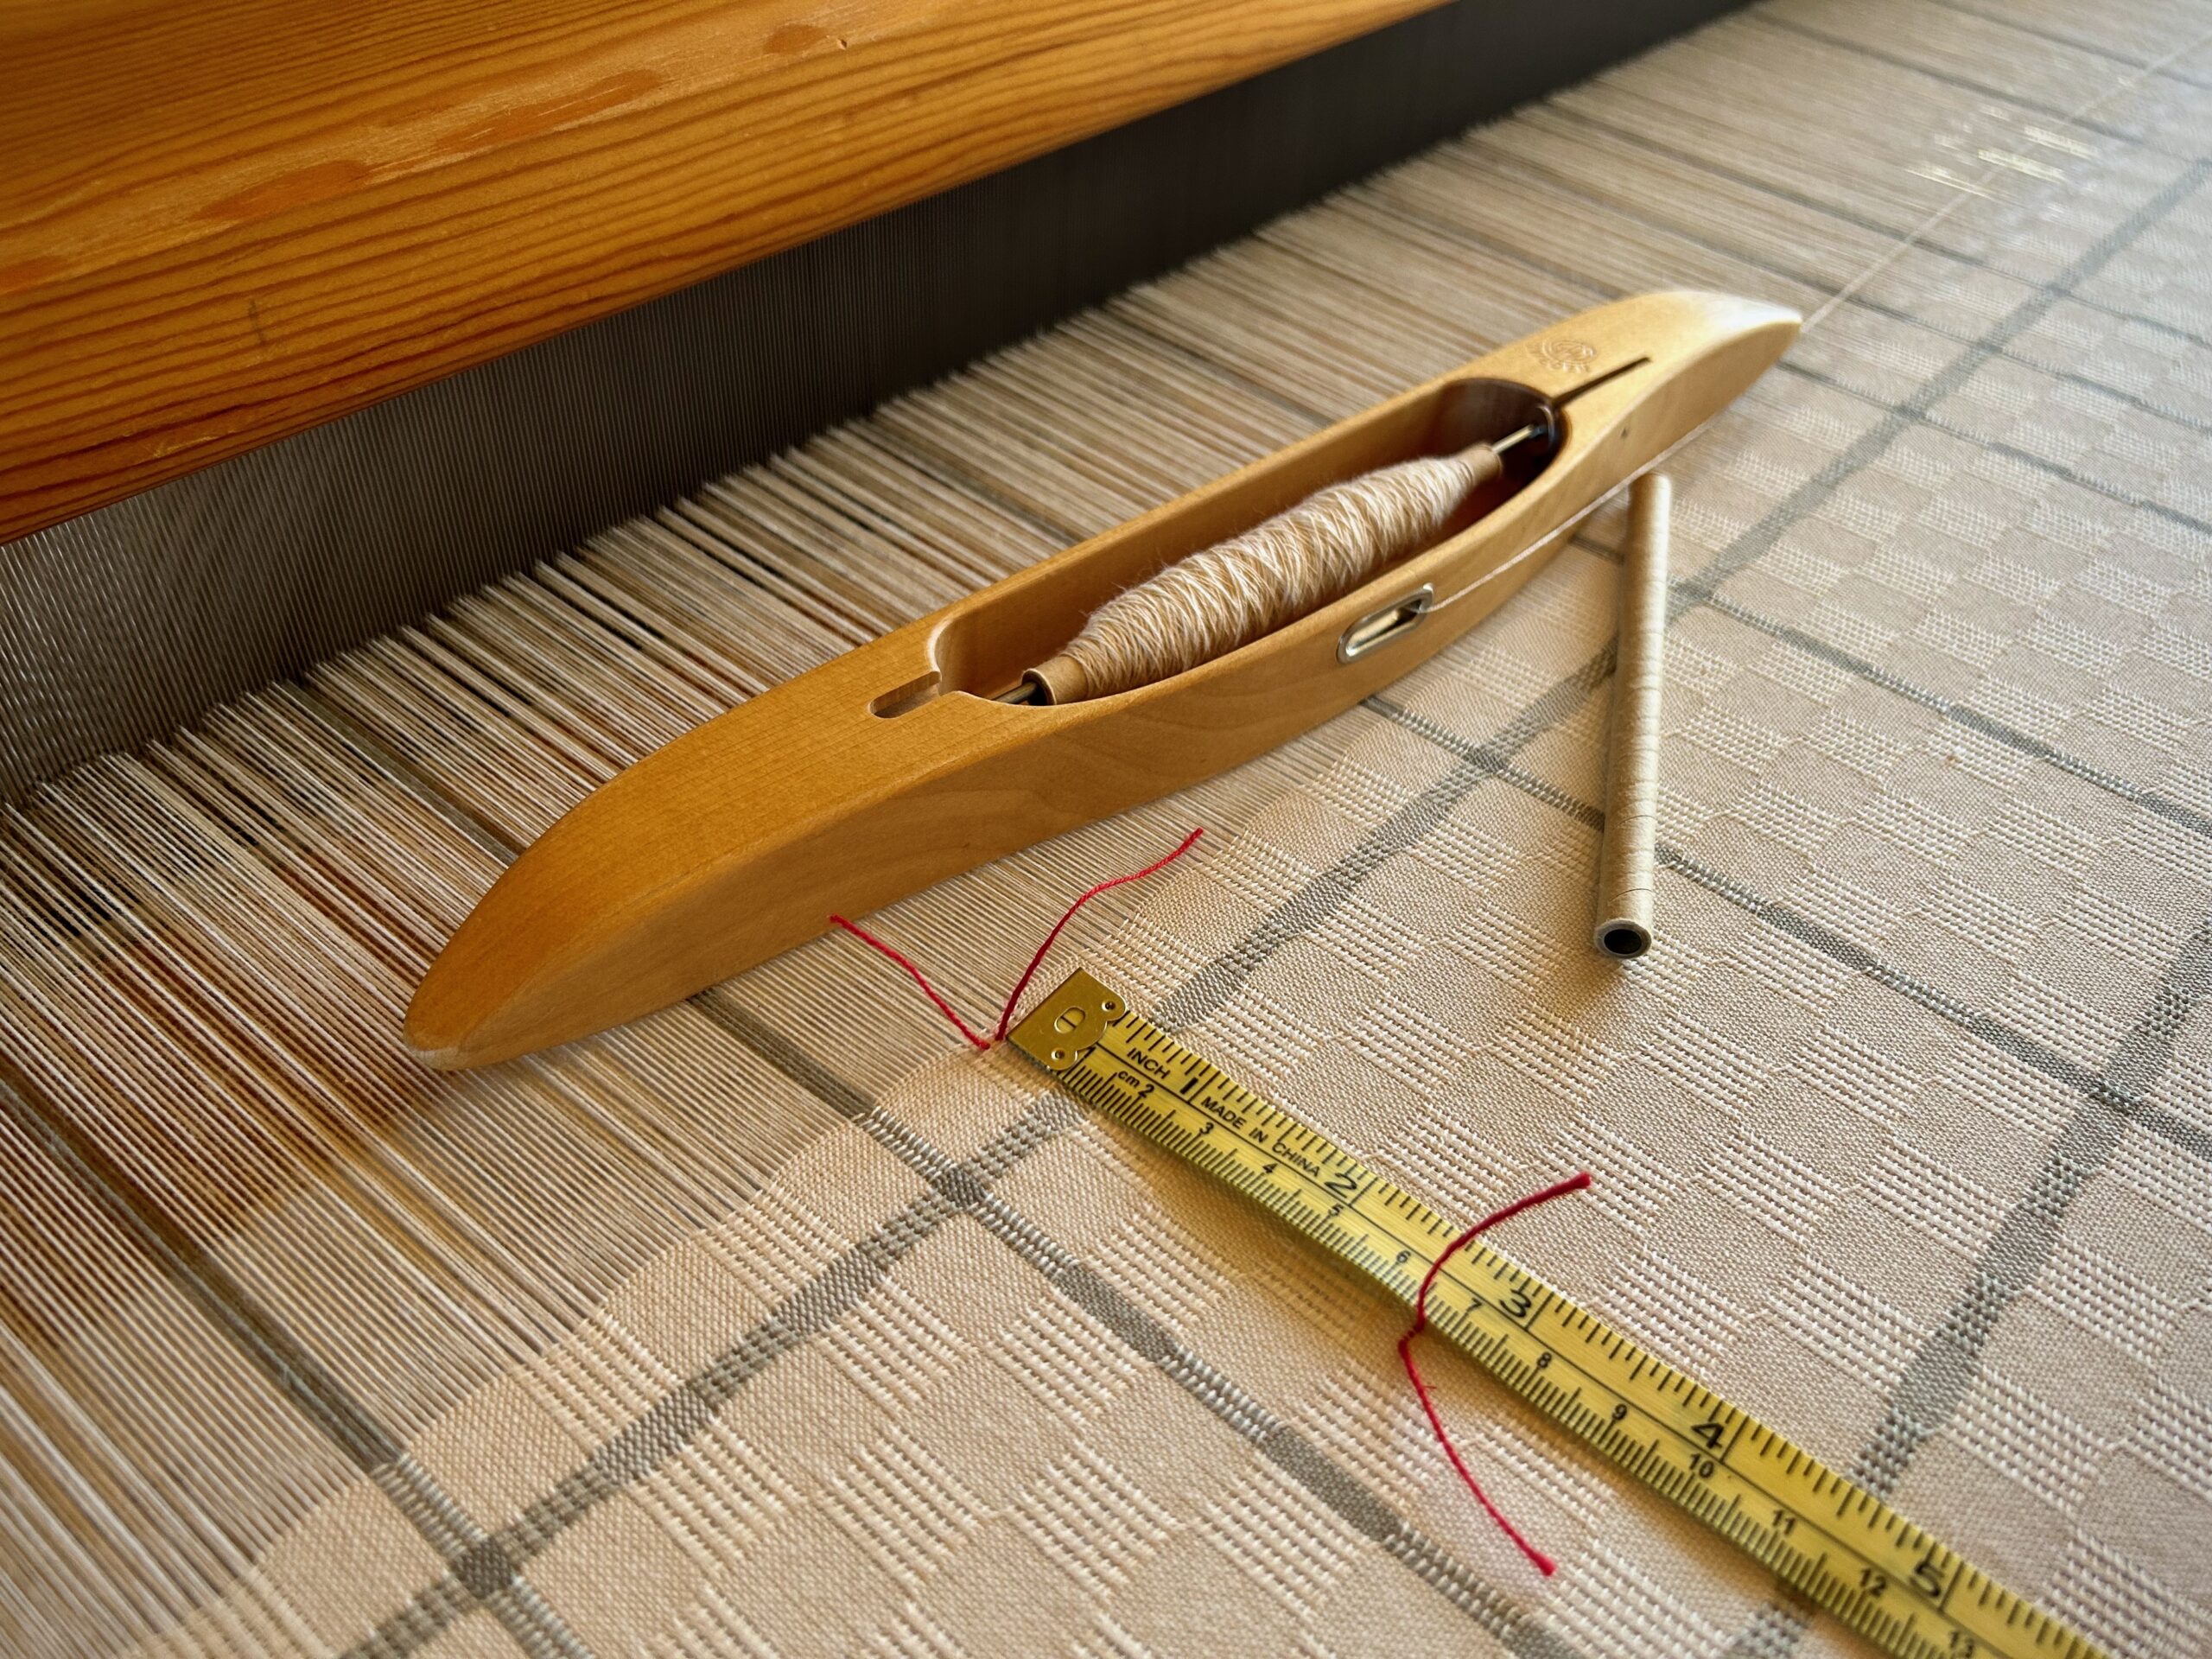
Time to test the 13cm quill. I do this exactly the same way, including the repeat test. The result? The 13cm quill covers 7.2 cm of warp. So there is 1.2 cm difference between the shorter quill and the longer quill.

Each quill measured twice. This view is from below the breast beam since I forgot to take a photo before I advanced the warp. This perspective also gives a view of more of the M’s and O’s cloth and the potential for specially-made curtains.

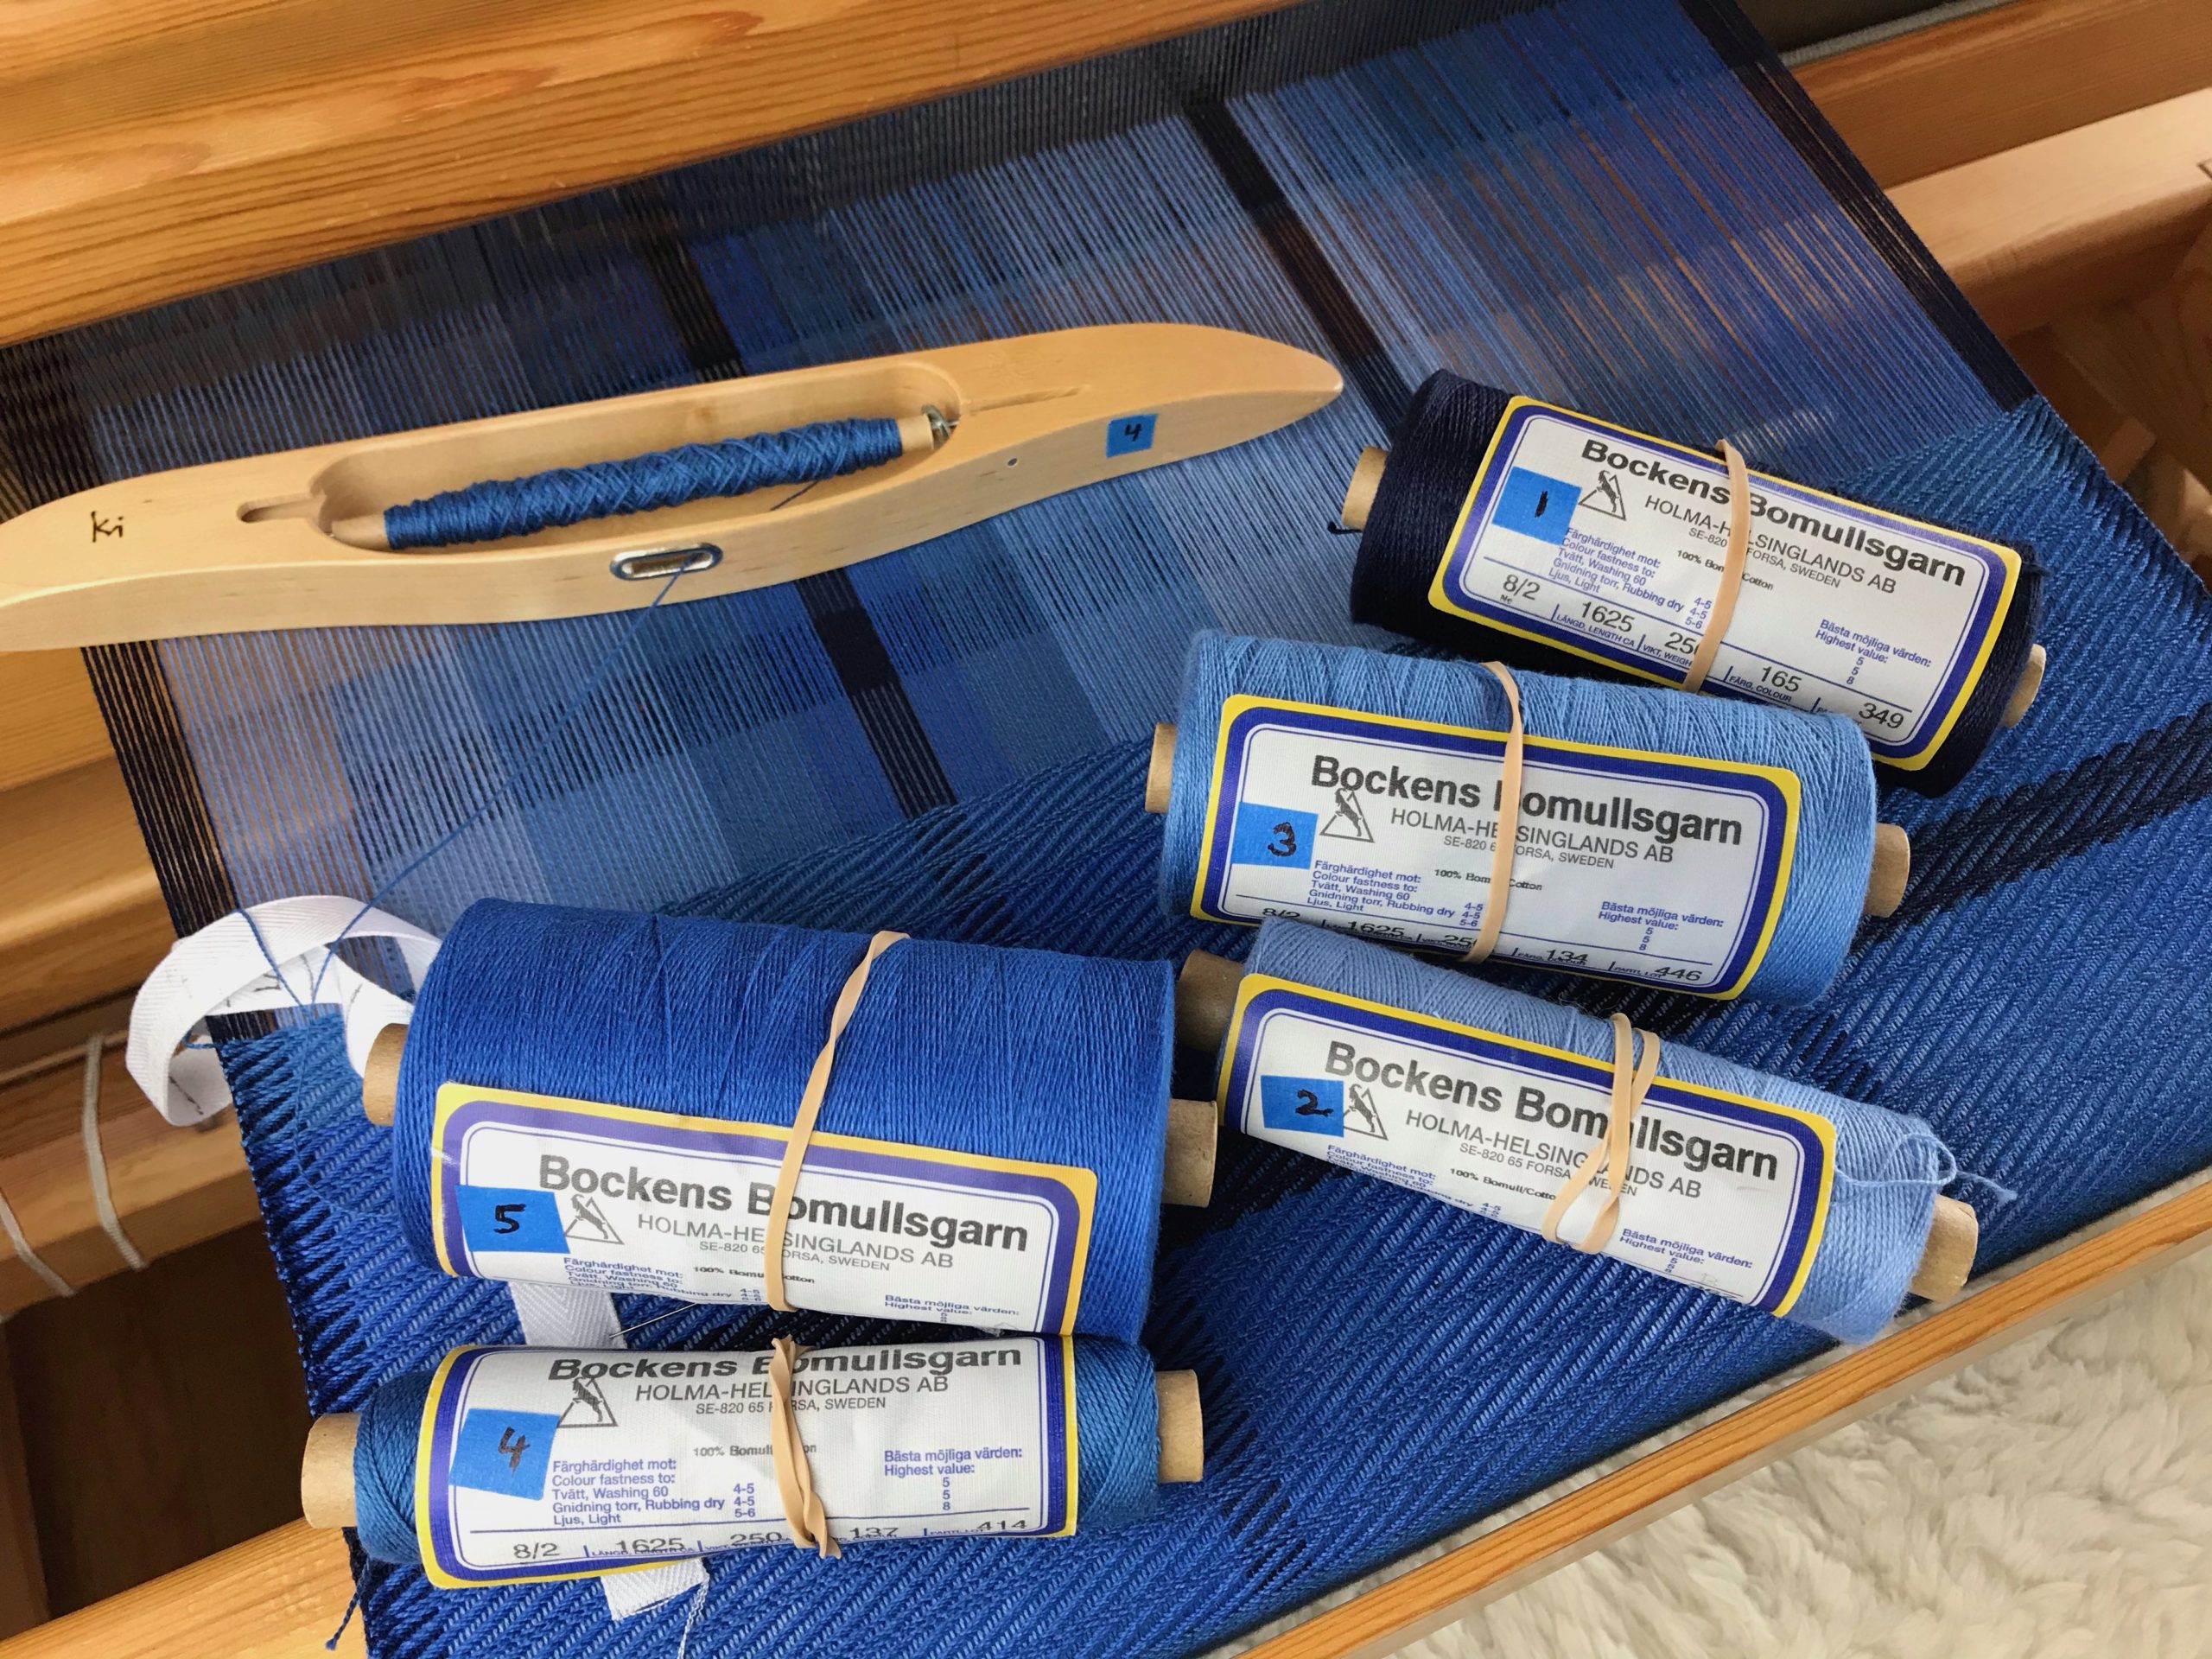
I have a total of 8.6 meters to weave on this curtain fabric (about 1.5 meters already woven). That means winding about 143 quills (11cm), or 119 quills (13cm). Not much difference, really. Still, I’m in favor of winding 24 fewer quills of 24/2 cotton. Aren’t you?

May the math work in your favor.

Happy Weaving, Karen

Look at that Cloth Beam!

There is nothing quite as satisfying as seeing a cloth beam filled up with cloth. There are eleven placemats rolled up on there, plus one more stretching from the breast beam on down. All that’s left to do is cut them off, wash, hem, and press. We’ll have new placemats on our dining room table in no time. Yippee!

Twelve placemats are woven. Now it’s time for some pattern play at the end of the warp.
Empty quills at the end of a weaving project are such a happy sight! This is another reason I enjoy playtime at the end of every warp–I can use up thread on the quills.
Look at that cloth beam! Woo Hoo, cutting off will be fun. And hemming all those placemats…I don’t mind.

May your efforts bring satisfying results.

Happy Weaving,

Karen

Process Review: Priceless Monksbelt and Video

Talk about exciting! When something has been on the loom this long it is indeed exciting when the back tie-on bar comes over the back beam. I finish weaving the final “bonus” towel. And then, I use up all the quills to make a little piece of scrap fabric (because scrap fabric is always better than leftover quills). And then! Then, I start my cutting-off checklist.

After all this time, the moment we’ve been waiting for is here!

After weaving a short scrap fabric with thread left on quills, it is time for cutting off the long monksbelt runner and two bonus towels.

I cut off the warp. And as I unroll the cloth, I am mesmerized by the tactile intricacy that passes through my fingers–Fårö wool for the pattern weft, and 16/2 cotton for slow-as-molasses weft rep ground cloth. Finishing proves to be the easiest and quickest part of this project. I like the crisp pristine state of the monksbelt runner, so I am not going to wet finish this article. I examine for errors (none found!), wet finish the two towels, hem the table runner and towels, and press. The Priceless Monksbelt Runner now graces our dining room table.

After the Priceless Monksbelt Runner I had enough warp to weave two bonus towels with monksbelt borders. In between the towels I did a small heart-shaped inlay just for play.
Two simple plain weave towels, with monksbelt borders. The tabby weft is 16/2 golden bleached linen. The coral pattern weft and green pattern weft is doubled 16/1 linen. The ecru center pattern weft is doubled 6/1 tow linen. Warp is 16/2 cotton. With only one washing so far, the towels still have a wonderful crisp linen hand.

The exceptional value of handwoven textiles makes your home a welcoming place. Time is one of our most valuable assets. That makes the textiles we create priceless!

Our dining table is just to the right as you walk through the front door of our home. May all who enter know they are welcome here!

Please enjoy this video review of weaving the Priceless Monksbelt Runner.

May the works of your hands bring exceptional value to your home.

Happy Weaving,
Karen

Quills of Summer Yellow

Yellow is everywhere right now. A profusion of wildflowers stretches across our backyard, and much of it is yellow. The bright yellow linen weft fits right in! This is skirt fabric in the making. Wearing the skirt will be as if I’m wearing my own little summer flower garden.

Five more wound quills ready to go!

One shuttle, one color. There are no decisions to make about the weft. Just keep these quills full of glowing yellow thread. When the last of the filled quills is in the shuttle, I weave until I find a good stopping place. Then, it’s time to get up and wind a handful of quills again. Replenish before the quill in the shuttle is bare.

Huckaback skirt fabric. Linen weft.
24/2 cotton warp, 16/1 linen weft, 5-shaft Huckaback.

To be full of faith is to be faithful. We say we trust Jesus. But can Jesus trust us? Faith-ful means you not only believe in him, you abide in him. You believe, and you live what you believe. Day, after day, after day. Quill, after quill, after quill. Replenish regularly to keep getting filled up. Never depleted. Always ready for the next pick.

May you never be depleted.

Happy Weaving,
Karen

Tried and True: Simplify Subtle Color Changes

When I pick up a color of thread I don’t want to have to guess if it’s the right color. Four of the five blues in the weft sequence are close neighbors in value. The one color that is easy to identify is the navy blue, which provides a good contrast among the blues.

Five blues in 8/2 cotton. 8-shaft twill.
Weft color order follows the sequence of the warp color order. Five blues for this 8-shaft twill in 8/2 cotton.

The weft order matches the warp order, and is marked out on a ribbon. I am using a separate boat shuttle for each shade of blue. But how do I know which color is which, when the difference is subtle from one color to the next?

Simplify Subtle Color Changes

  • Give each color a number. Write the numbers next to the colors of the warp order on the Project Notes.
Project Notes for weaving with 5 blues.
Weft colors are the same as the warp colors. The Project Notes show all the details. “1, 2, 3, 4, 5” is added to the sheet to give each color a simple number.
  • Label the thread tubes with a small piece of blue painter’s tape. Each tube of thread is numbered to correspond with the numbers on the Project Notes.
Make removable labels with blue painter's tape.
Handy blue painter’s tape is used to make removable labels.
Five blues are labeled for simplicity.
Thread tubes are labeled with their identifying number.
  • Label each boat shuttle with its assigned color number, using a small piece of blue painter’s tape.
There are five blues for this 8-shaft twill.
Each boat shuttle holds its own color.
  • Place wound quills under the rubber band of their respective thread tubes.
Simplify subtle weft color changes.
When I wind an extra quill I place it with its thread tube so I don’t accidentally pick up the wrong color quill.

It is easy to keep track of these five numbers as I follow the weft sequence that is marked on my reference ribbon. Now, it’s shuttle #4’s turn…

Simplify subtle weft color changes.
Next in line…

May you find a way to simplify.

Happy Weaving,
Karen