Quiet Friday: Christmas Textiles

Grateful for a few quiet days before the new year begins, I reflect on the trials and treasures from 2013 and wonder what 2014 will bring. I encourage you to take time to ponder. If you weave some quiet into your schedule you will hear things you’ve never heard before. You will see things you have never noticed. You will love more because you won’t always be at your frazzled end. Even when the world around you is full of noise, you can be quiet on the inside.

Weaving and pondering go well together. All the more reason to weave.

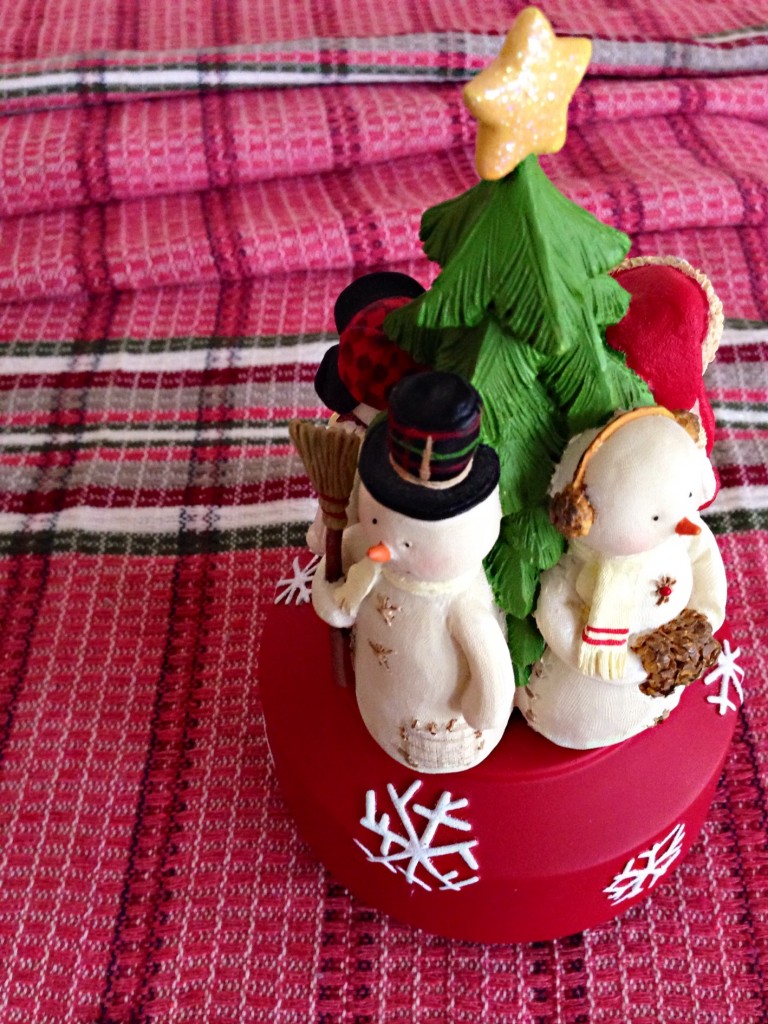
Handwoven mohair throw for softness under the Christmas tree.
Mohair throw, woven in hound’s tooth twill, creates a soft setting under the Christmas tree.
Handwoven cotton towel from The Philippines.
Traditional Filipino cotton towel used as decorative cloth on a side table.
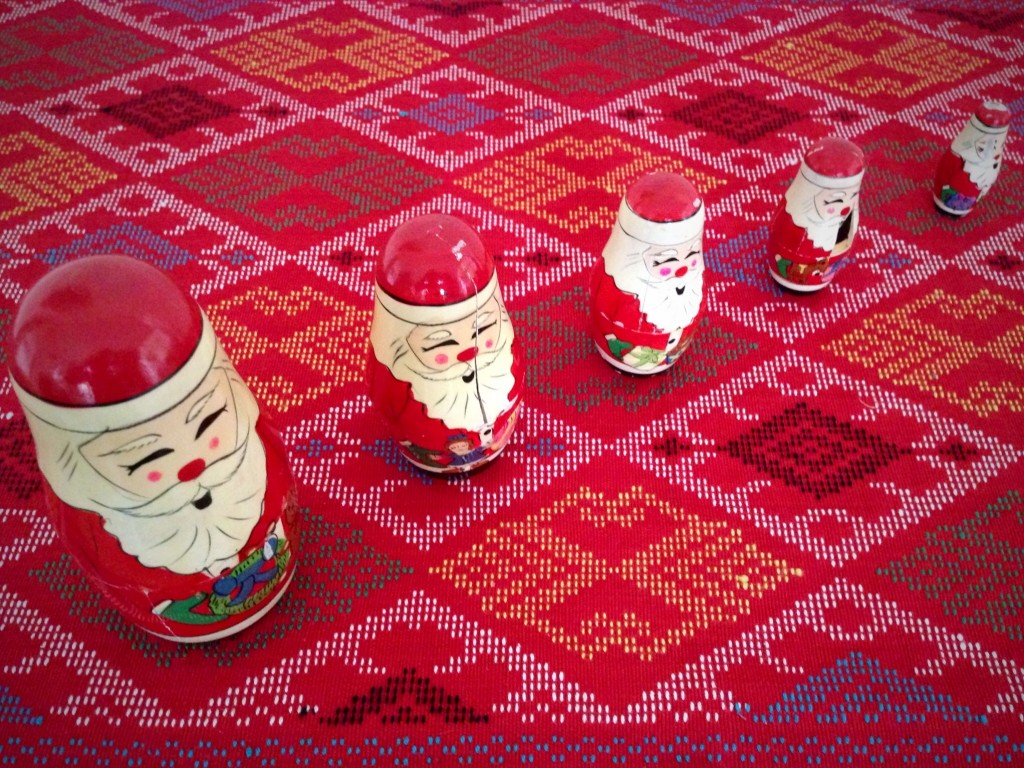
Handwoven design, unique to the Philippines, holds vintage Santa display.
Well-worn and well-used stacking Santas adorn the colorful cloth. The unique Filipino handwoven design of this cloth brings special Christmas cheer to the front room in our home.
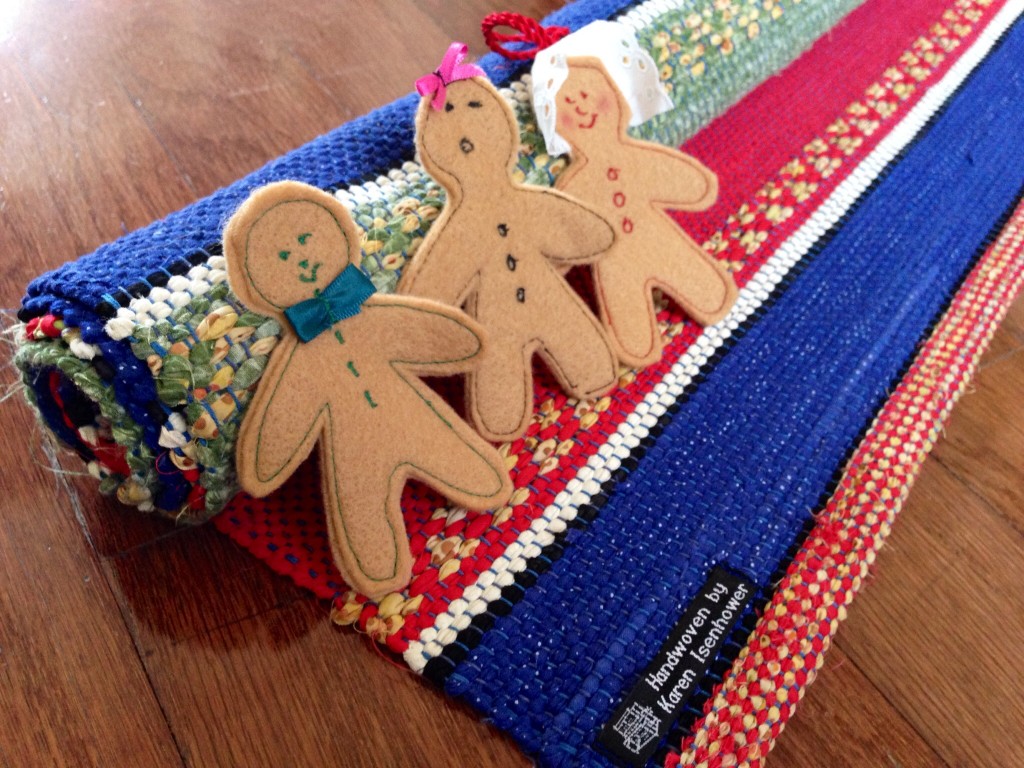
Rosepath rag rug and gingerbread boy and girls.
With another Christmas rolled up, gingerbread boy and girls rest on the rosepath rag rug.

May your new year bring dreams come true.

Quietly,
Karen

Christmas Eve Is Here

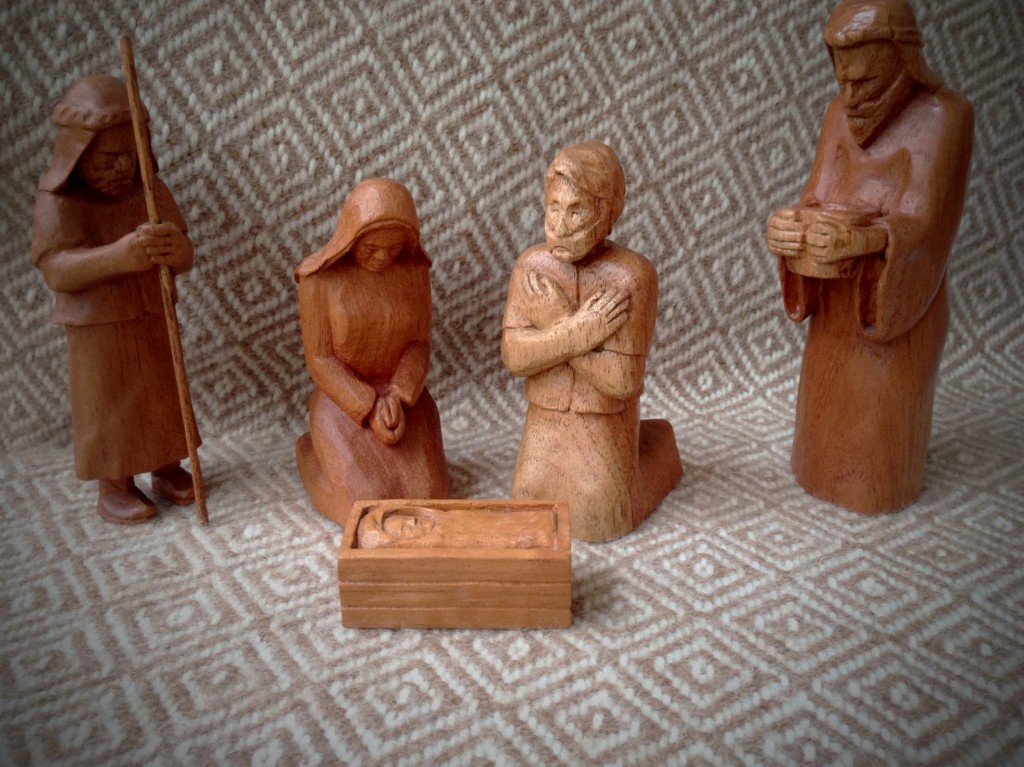
This is the season to give thought to the wonder of life, to be grateful for unconditional love, and to recount the story of Christmas. Four years ago Steve began carving wooden figures for a Nativity scene. Every year, each of the five women in his life (daughter and daughters-in-law, his mother, and me) receive a new figure. The new Nativity figure this year is a king bearing gifts for the infant king.

Hand-carved Nativity from Spanish Cedar, backdrop of handwoven goose-eye throw.
Nativity carved from Spanish cedar, by Steve Isenhower. Seen on backdrop of handwoven alpaca throw, in goose-eye twill.

May your days be filled with peace.

Good Christmas Eve to you,
Karen

The Secret to Making Lattice Fringe

First, a short tutorial for tying perfect lattice fringe, and then some thoughts about keeping our eyes open to reality. I decided to tie three rows of knots with this fringe for a pretty lattice effect, knowing the results are worth the time it takes.

How to Tie Lattice Fringe – Step-by-Step Tutorial

Supplies:

  • 7/8″ (2 cm) blue rigid foam insulation (mine is Dow Styrofoam Residential Sheathing Insulation, found at The Home Depot or Lowes), cut to 32 x 36″ (81 x 91 cm) (This great idea came from Thrums, one of my favorite weaving blogs.)
  • 16 straight pins
  • 7/8″ (2 cm) warping slat (or template of desired width)

1. The first row of overhand knots has been tied. (More detail HERE.) Lay the fabric over the foam board, with the fringe laying toward you at the front of the board.
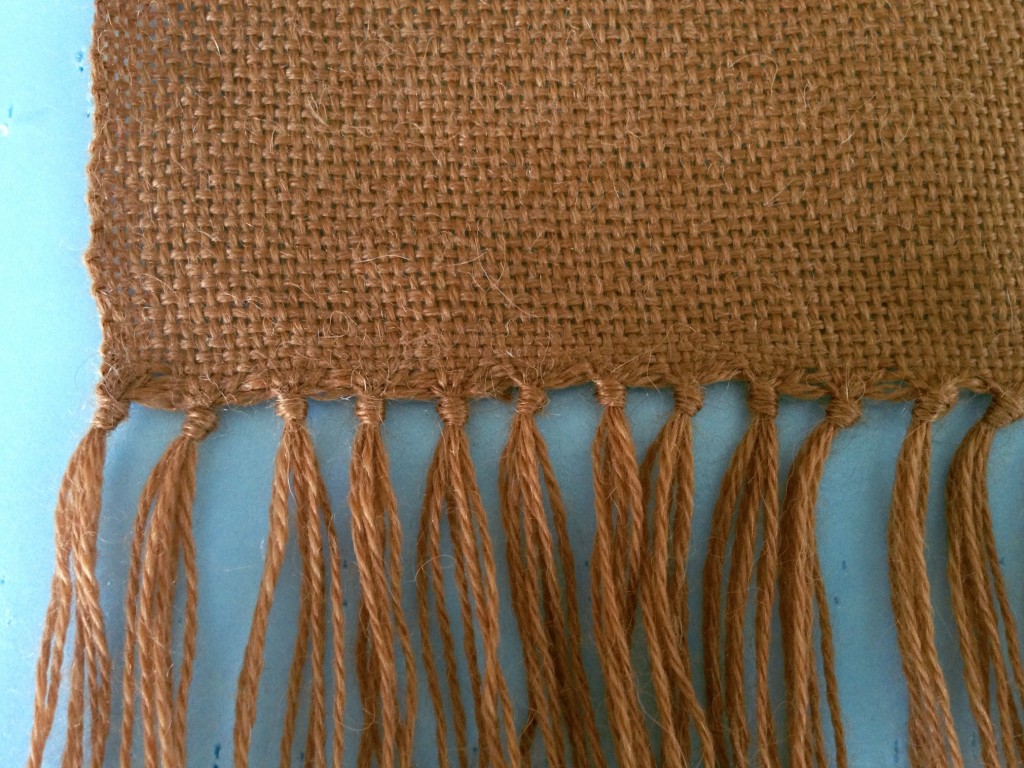
How to add lattice fringe to a row of knotted fringe. Step-by-step tutorial with pics.


2. Place a straight pin through the top thread of each of several knots in a row, into the foam board under the fabric.
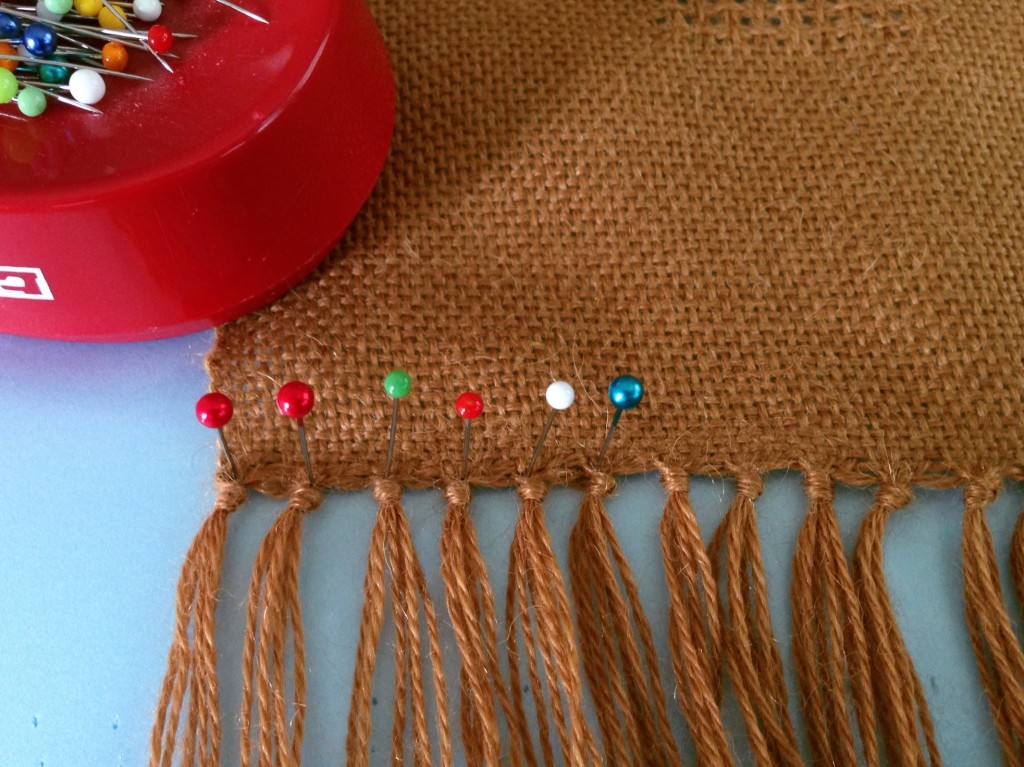
Lattice Fringe Tutorial. Step-by-step, with pics.


3. Use warping slat (or other template) as as spacing guide for the second row of knots. Lay warping slat flat, and place it flush against the row of pins. Using the width of the warping slat as a spacer, place a pin in the second row just below the slat, at the point where the knot will be formed.
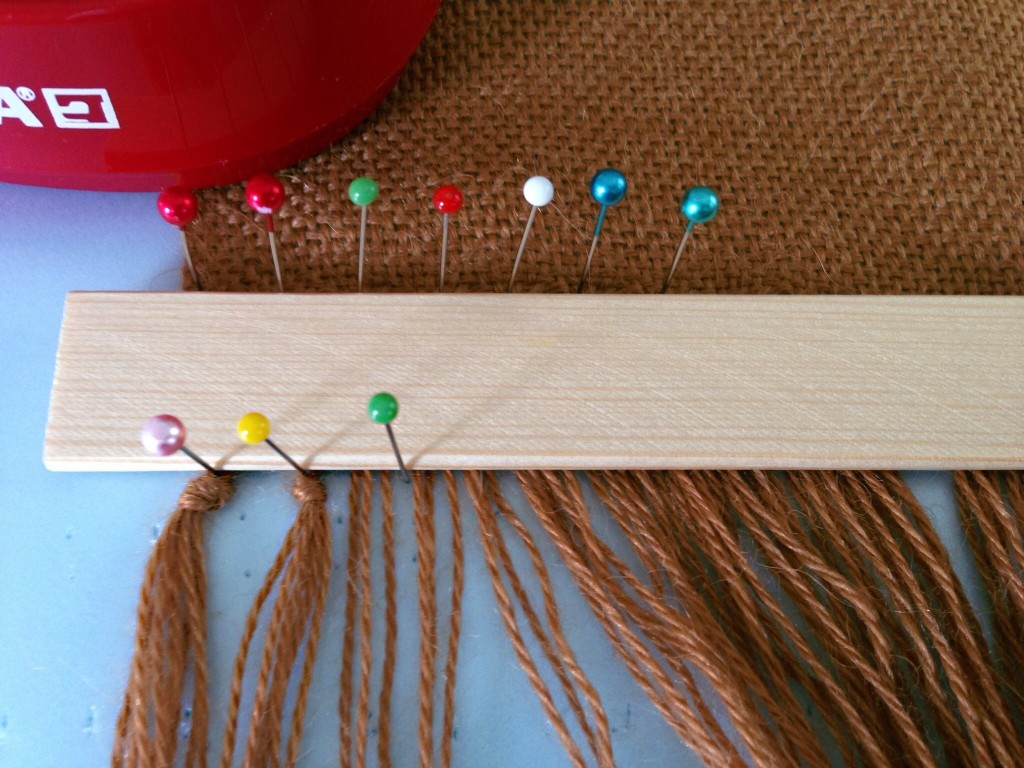
Lattice Fringe Tutorial. Step-by-step with pics.


4. Remove warping slat. Loosely tie an overhand knot below the just-placed pin in the second row, leaving the center of the knot wide open.
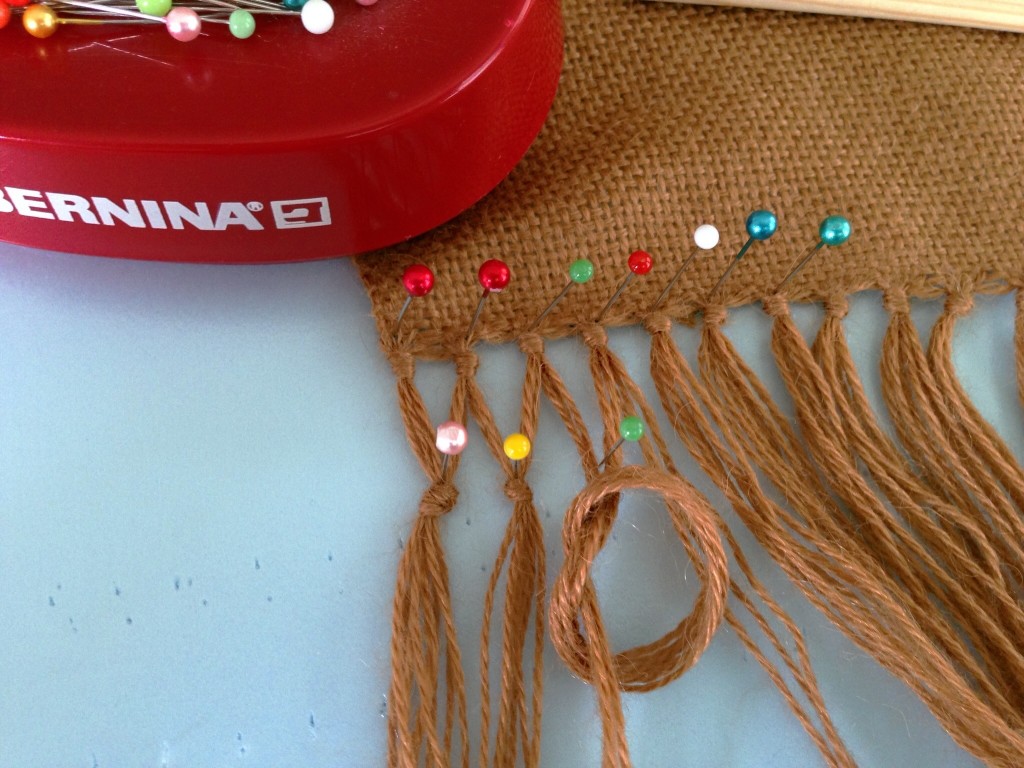
Overhand knot in lattice fringe tutorial. Step-by-step with pics.


5. Insert another pin through the center of the knot just a fraction below the point of the first pin.
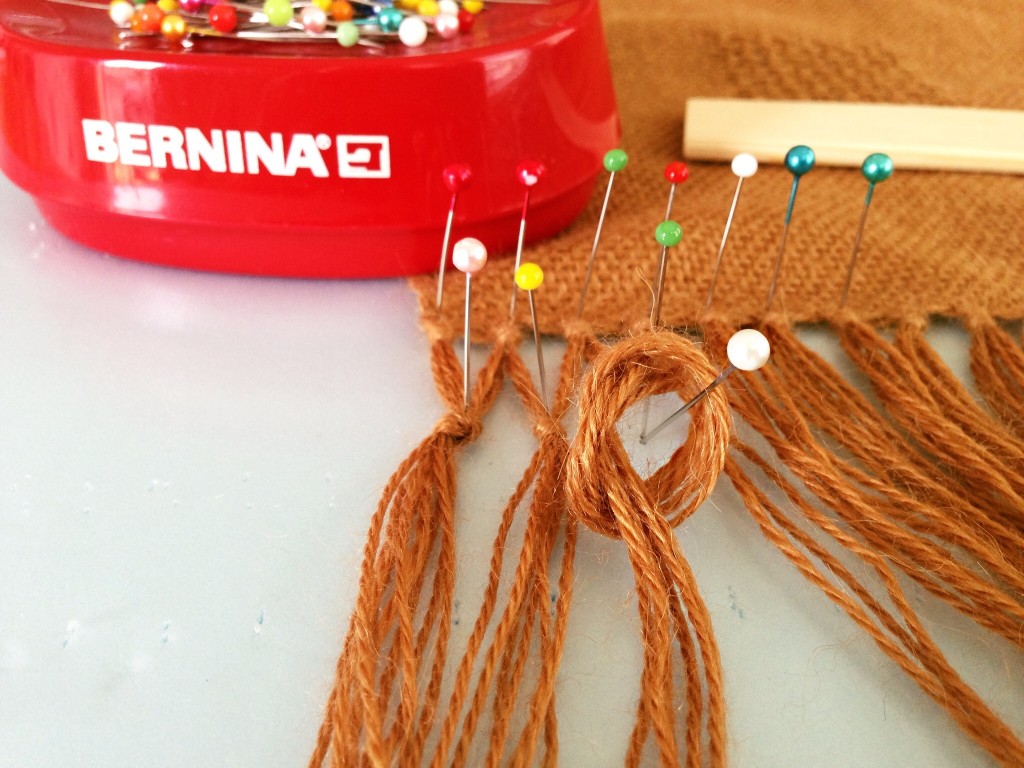
Making Lattice Fringe. Step-by-step tutorial with pics.


6. Slowly pull the knot to cinch it up to the point of the second pin.
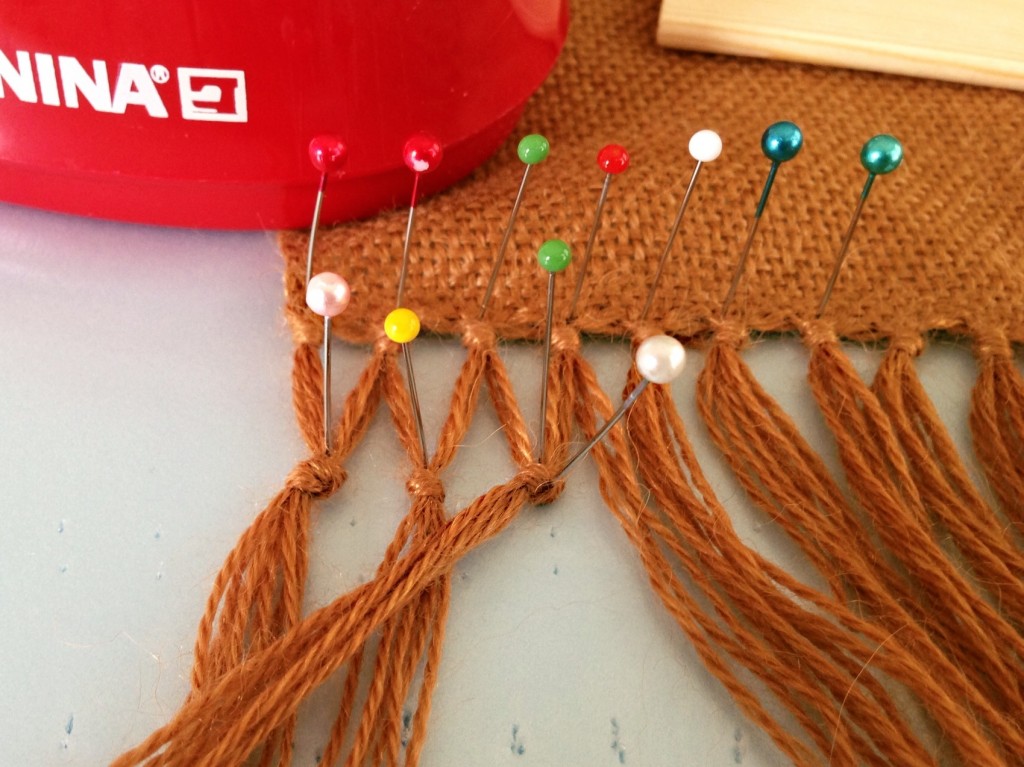
Cinching the knot for lattice fringe. Tutorial with pics.


7. Holding the knot firmly between the fingers of one hand, with your other hand gently tug each strand of the knot to its full length.
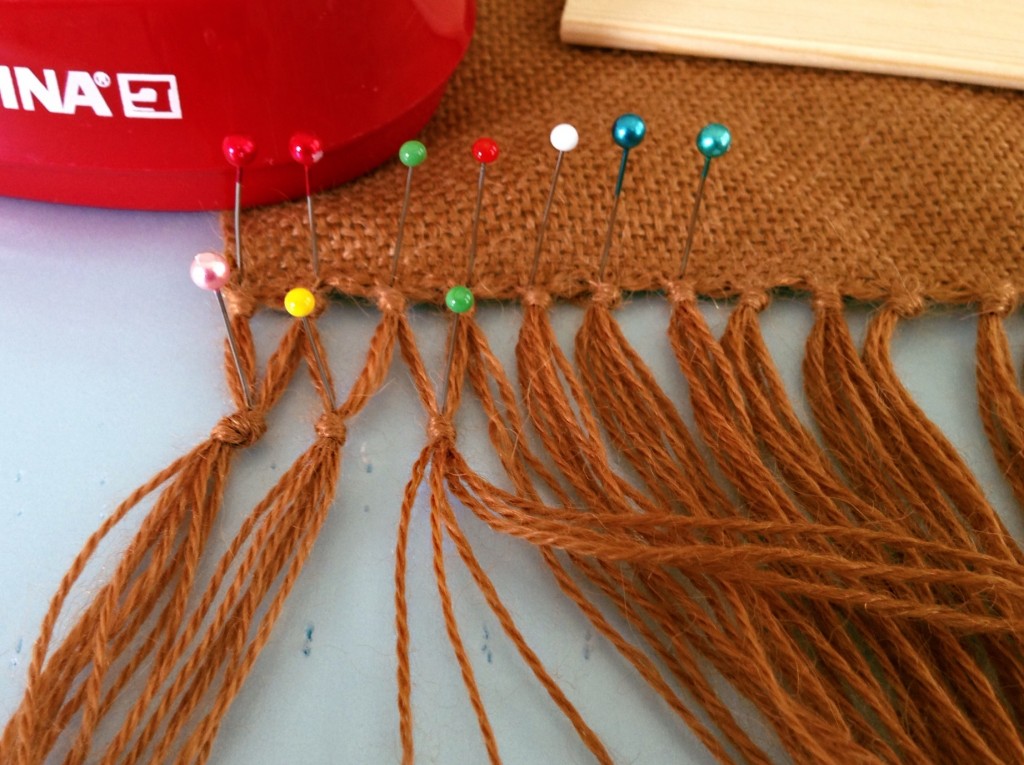
Making lattice fringe - tutorial with pics.


8. Continue tying knots across the entire row.
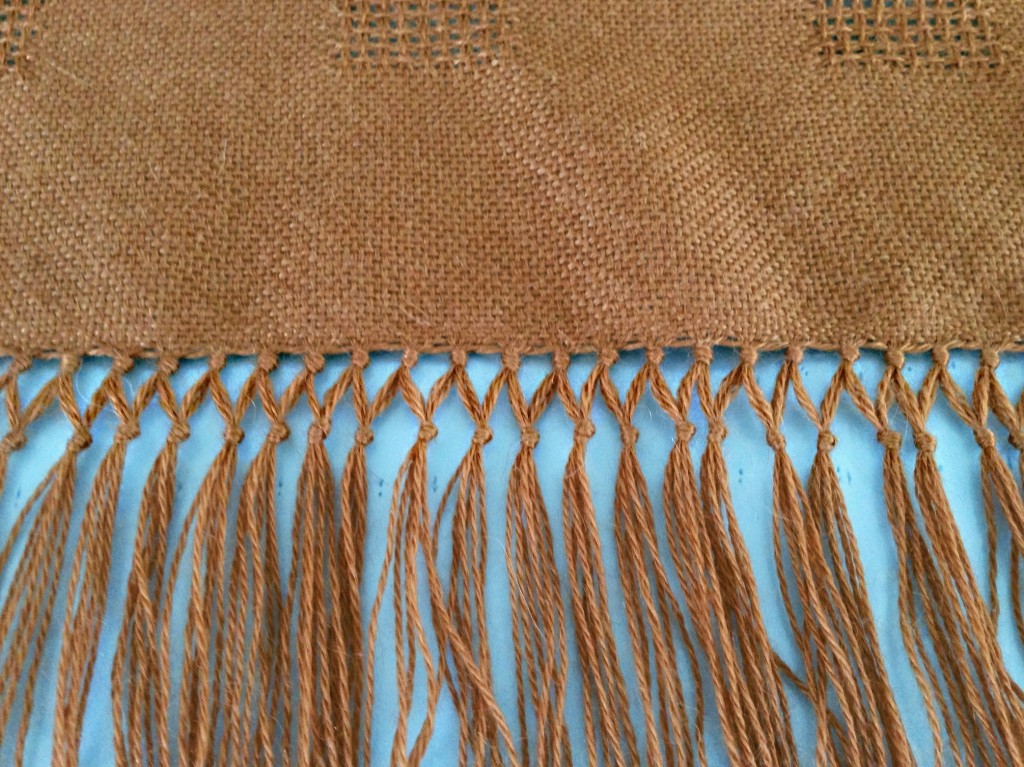
First row of lattice fringe. Tutorial step-by-step with pics.


9. Repeat the process to add another row of knots.
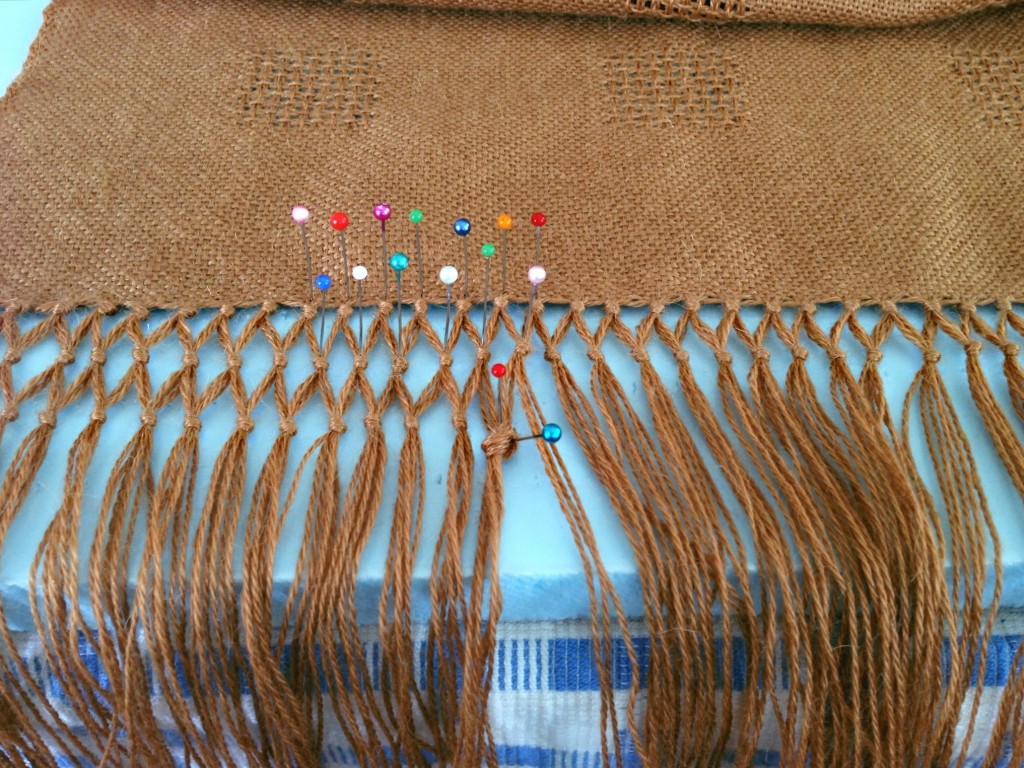
Tutorial for Making Lattice Fringe. Step-by-step with pics.


My confidence in my ability to tie these knots can drift into careless thinking. Maybe I’m good enough at this that I can leave out some steps. Do I really need that guide stick for spacing the rows? I think I can eyeball it. Pulling each strand to close the knot takes too much time. Why don’t I just skip that part? And soon, I am blind to the haphazard results I am creating. Pride is like that. In relationships and in life circumstances, though, the consequences are more severe than in fringe-tying.

Pride keeps me from seeing my own vulnerabilities. Pride puts me in harm’s way because it blinds me to the reality of my own shortcomings, and makes me think I’m above it all. I want to keep my eyes open to my need to learn and grow. Who wants to drift into haphazard results in life? Not I. Not you, either?

May you never be blind to the things that matter.

Feeling vulnerable,
Karen
You Thought You Were Finished?

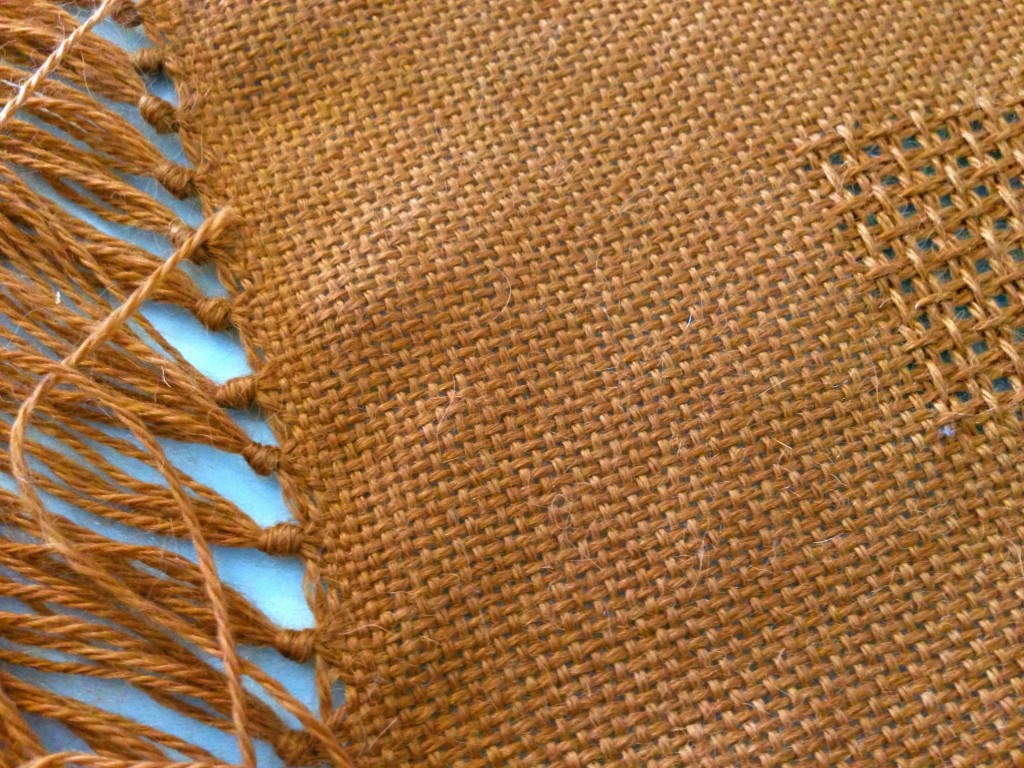
Tying the fringe into careful overhand knots is taking longer than the time it took to weave the three-yard-plus length of fabric. I would rather just do the weaving part. But without clearly defining the edges of the woven cloth by securing the ends, the whole fabric is at risk of unravelling. (To view this alpaca/Tencel throw on the loom, click HERE and HERE.)  We form distinct edges on our life’s fabric through the interactions we have with people around us.

Tying fringe on handwoven lace weave alpaca shawl.
Each knot of six warp ends were carefully tied around a straight pin, snuggling the knot right up to the edge of the fabric. As the knot is tied, I gentle pull each strand individually, which secures the knot and gives an even finish.

With relationships, it is tempting to take the easy way out. Quicker, painless, and less stressful. But it is the challenges from other people that help define who we are. Without the clarity of knowing what we stand for, we are at risk of falling for anything. Don’t avoid the often tedious work of making sure all your ends are secure.

Our challenges to each other sharpen us, finishing us for a greater purpose. Like iron sharpening iron, it is the abrasion that sharpens us, defines our edges, and brings the point of our lives into focus. All those loose ends tied into knots–ahh, the process is worth it.

May your finishing edges be as beautiful as you are.

With a few more loose ends,
Karen

You Need a Boat Shuttle for This

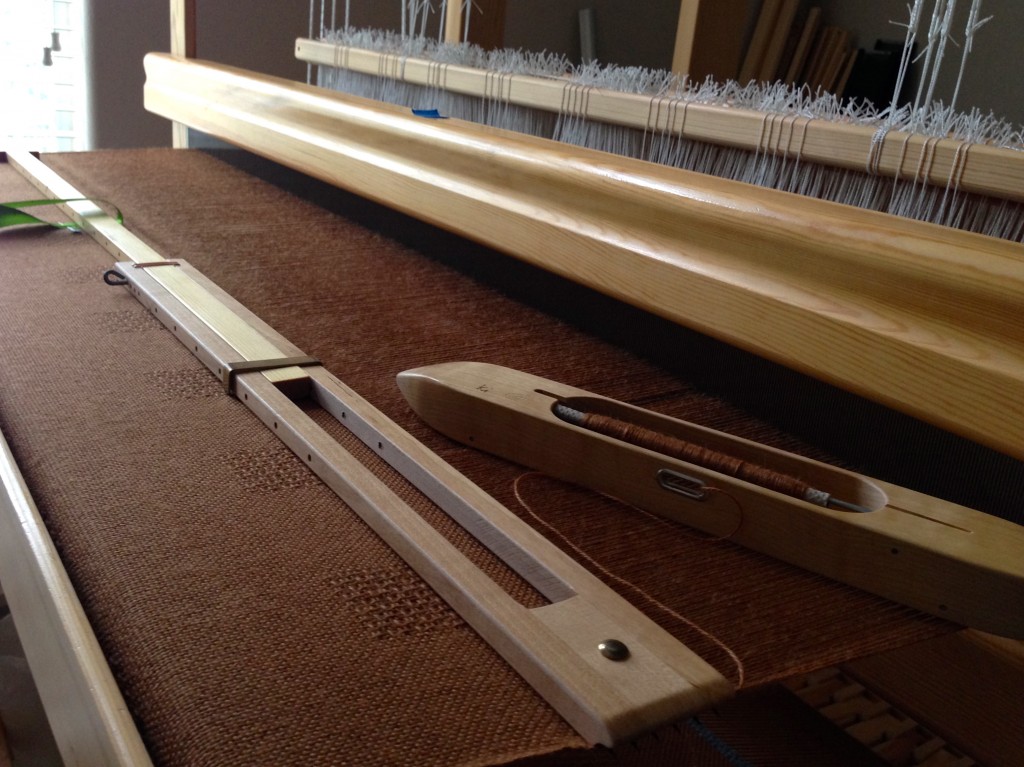
A boat shuttle is clearly the best way to send weft thread across a 45-inch (114 cm) warp. The pleasing rhythm of weaving is possible because of this very simple tool. Even so, the shuttle is merely a vehicle for the thread. Music is another kind of vehicle.

Alpaca/Tencel throw on the loom. Plain weave, with lace weave squares.
Plain weave, with evenly-spaced lace weave squares. The alpaca/Tencel yarn is soft, yet very easy to work with.

I doubt there is a more effective vehicle for carrying a message than music. Surely you have noticed how ideas spread across the culture via songs, and how easily we retain words that are attached to a tune. Boat shuttles were invented because handweavers needed a way to send weft thread across a distance. Maybe music was invented because we needed a way to send messages that matter.

I would like to send a message across time and space. I’ll wrap the words around a quill, and insert it in the boat shuttle. And then, momentarily holding the shuttle just so, I’ll release the song with a flick of my wrist, sending the message to the one who means the most to me. A joyful pronouncement of my creator’s goodness and love, set to musical expression. Brings a smile from heaven, don’t you think? And as that shuttle continues, in the rhythm of the weaving, the thread of the simple song ends up leaving a pattern in the cloth.

May you have a reason to sing.

Making melody,
Karen