Time Lapse: Windmill and Taildragger on the Drawloom

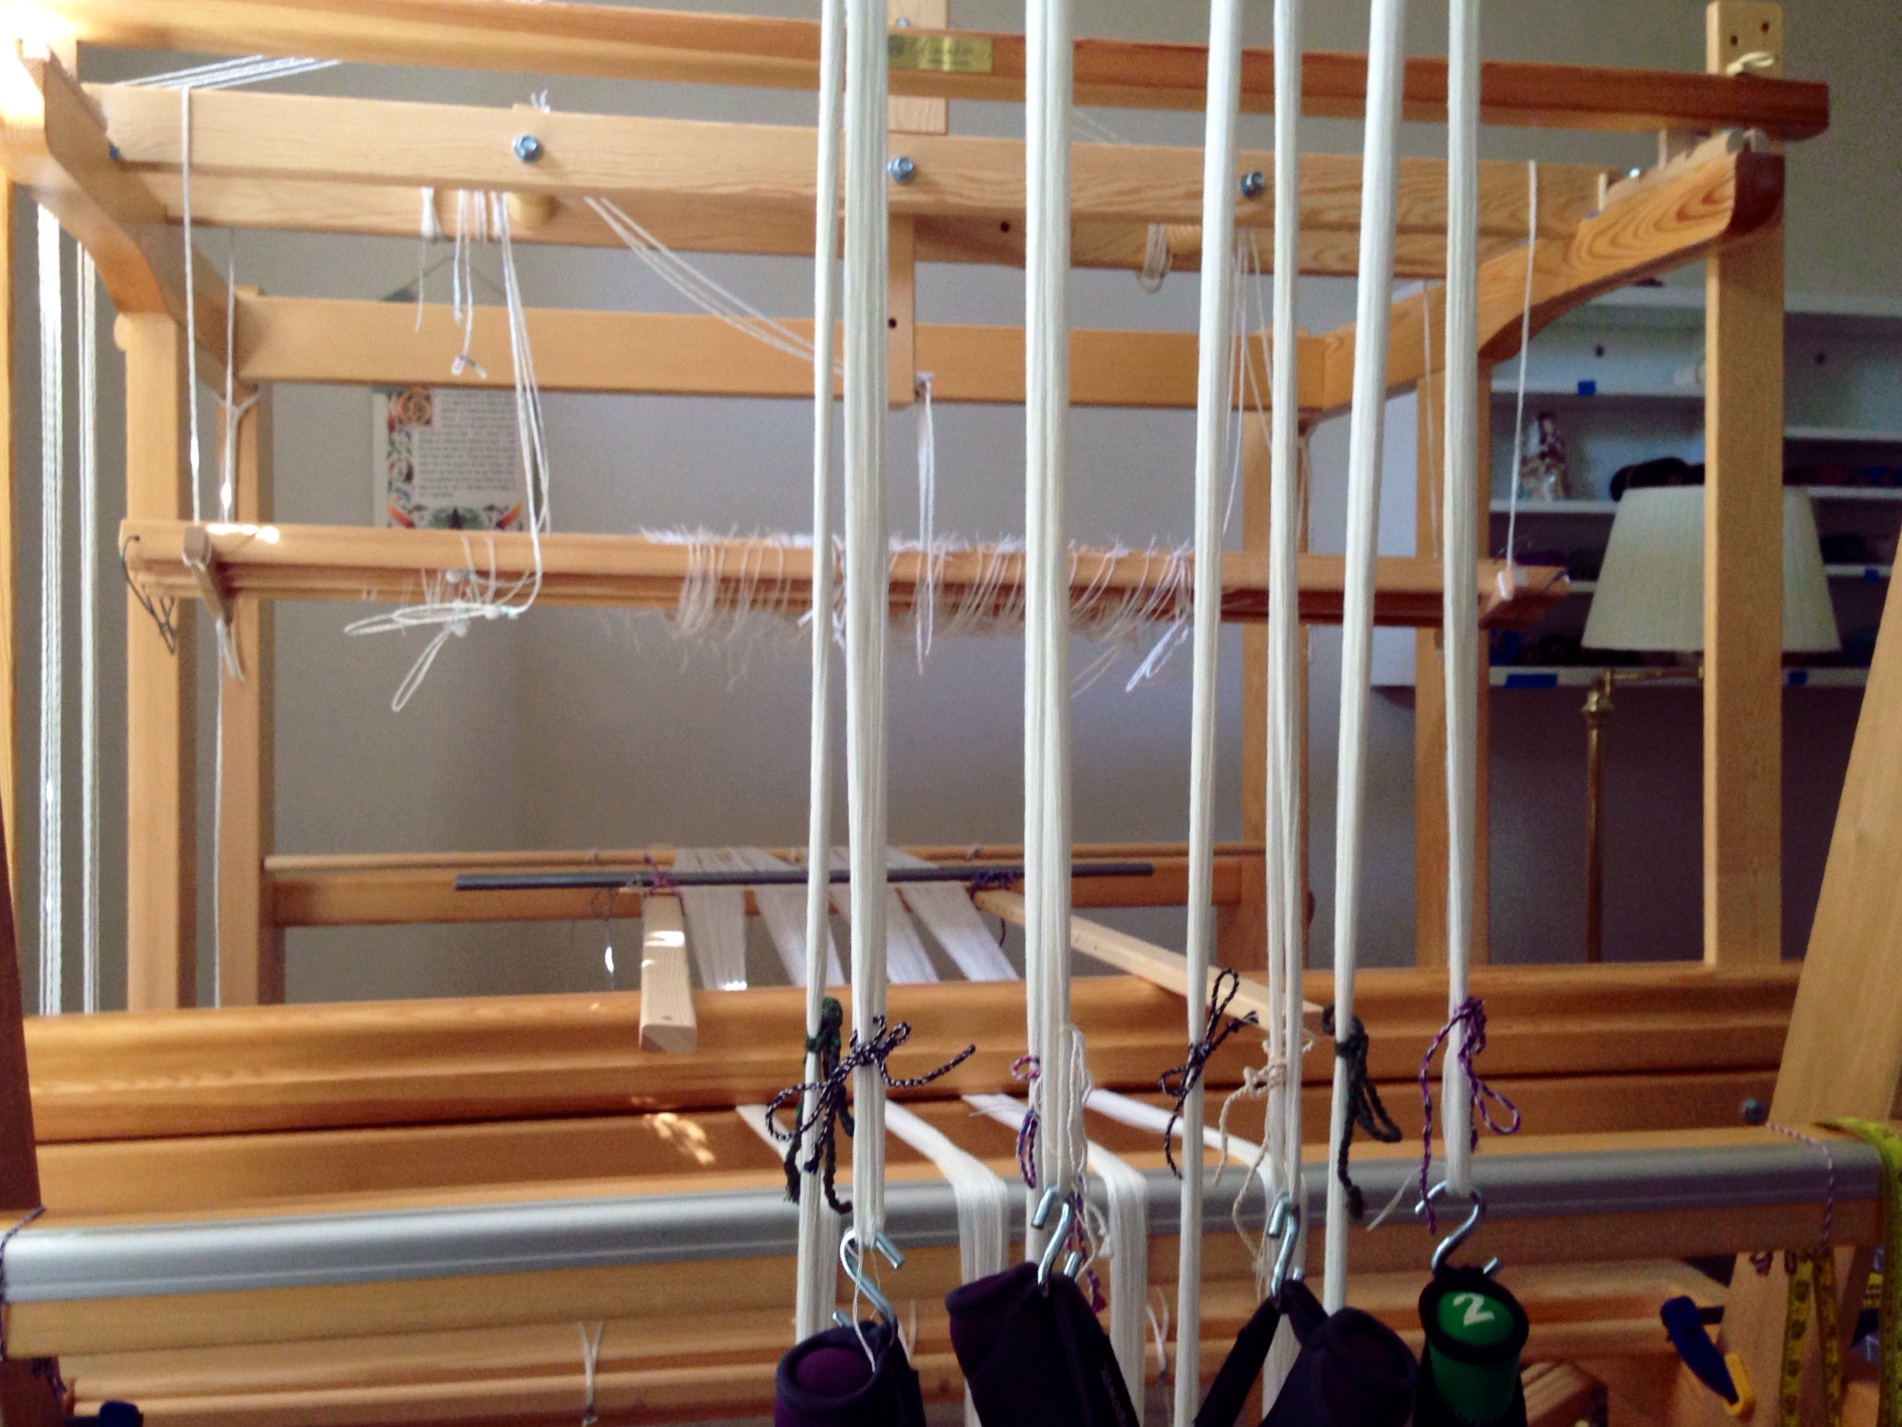
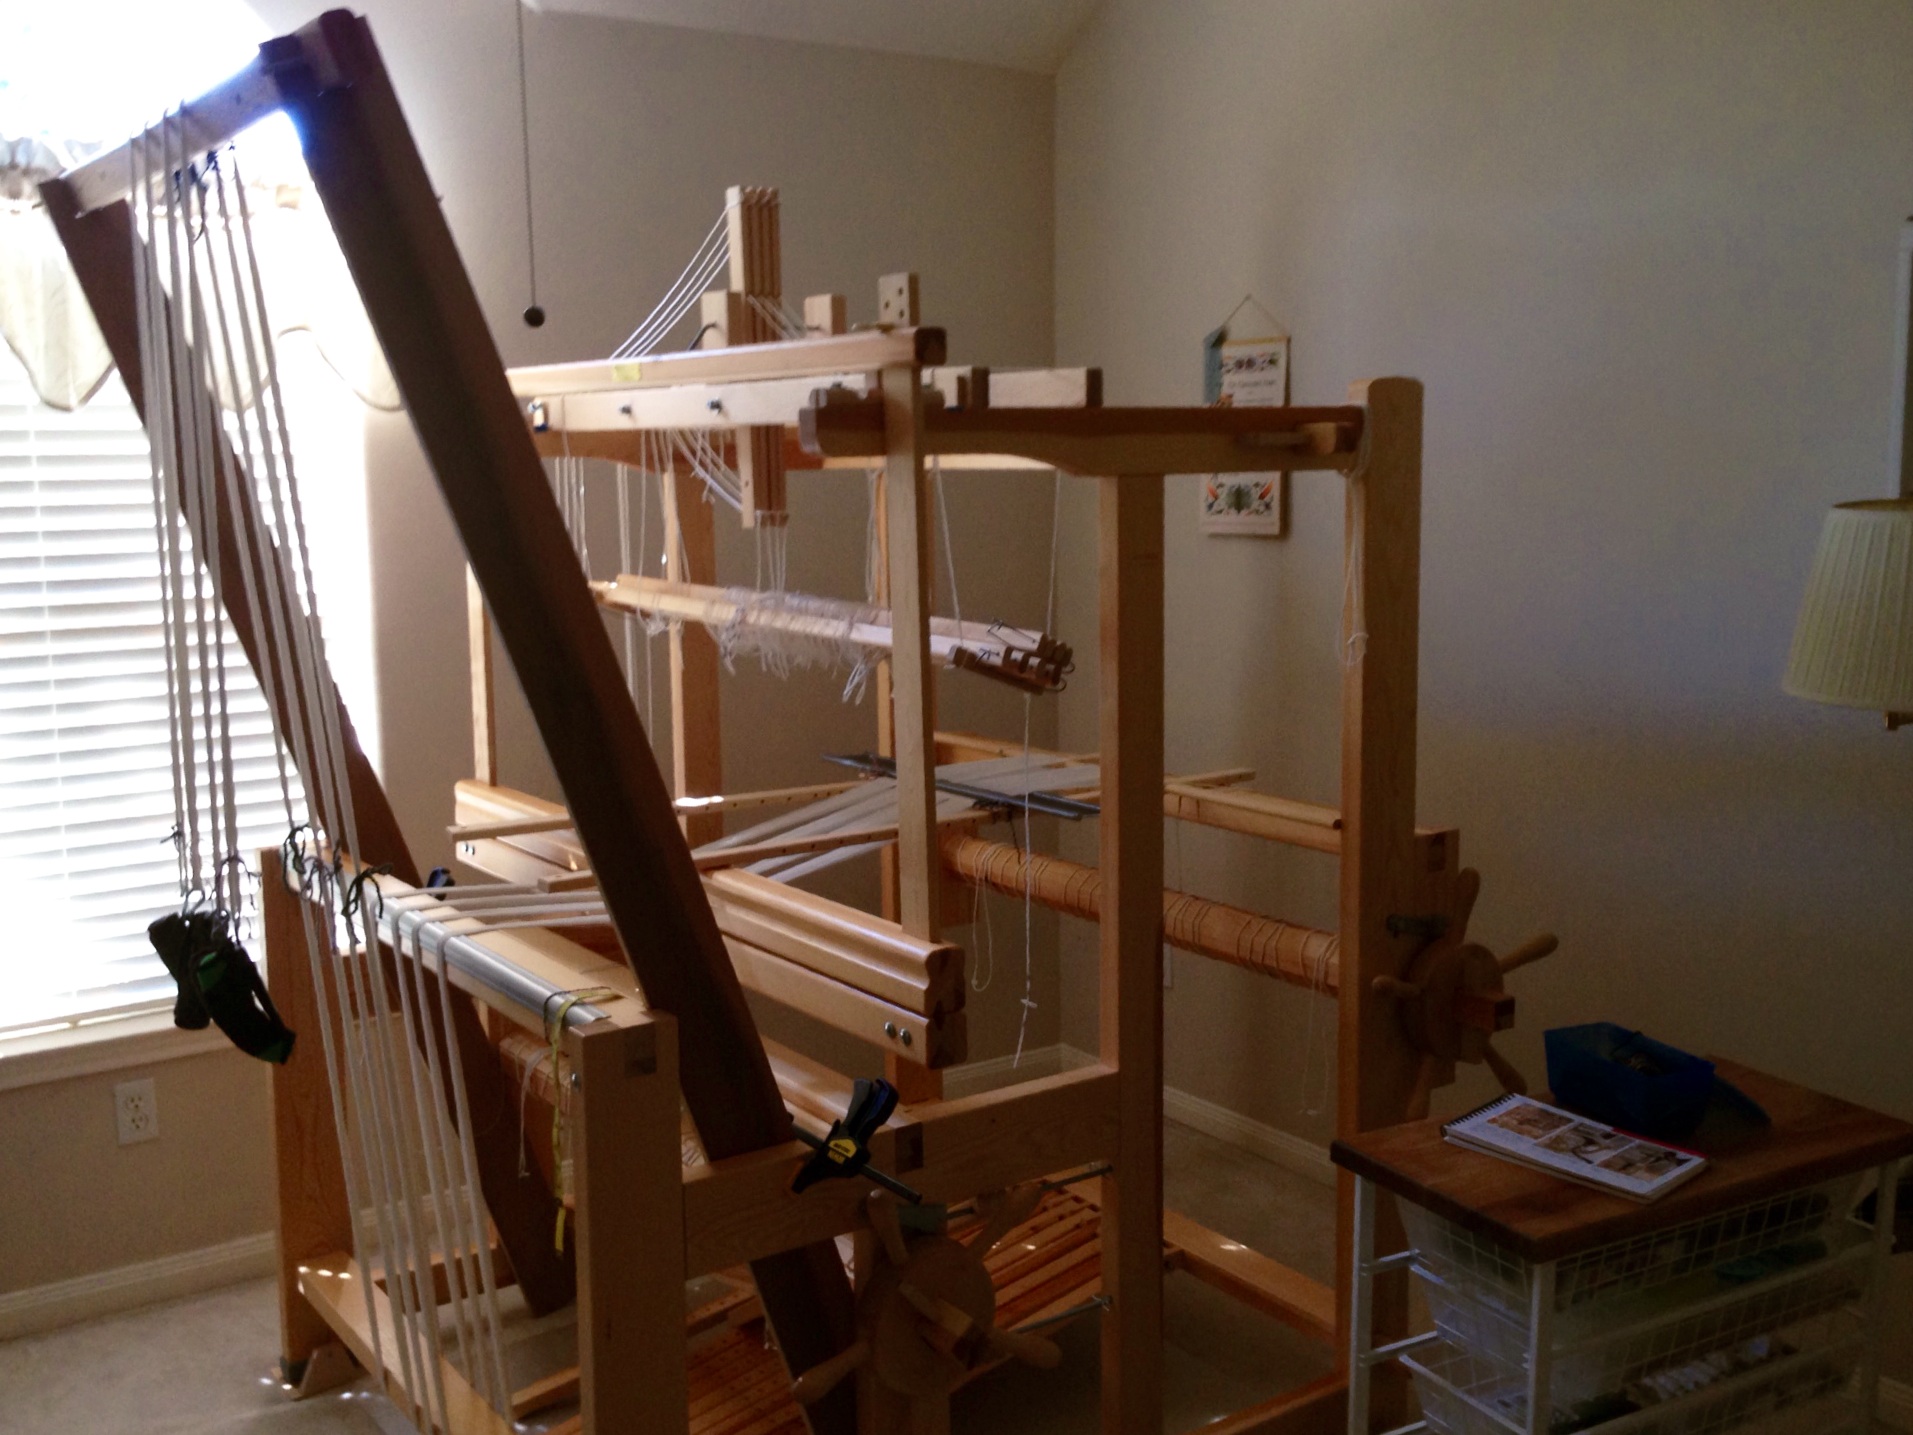
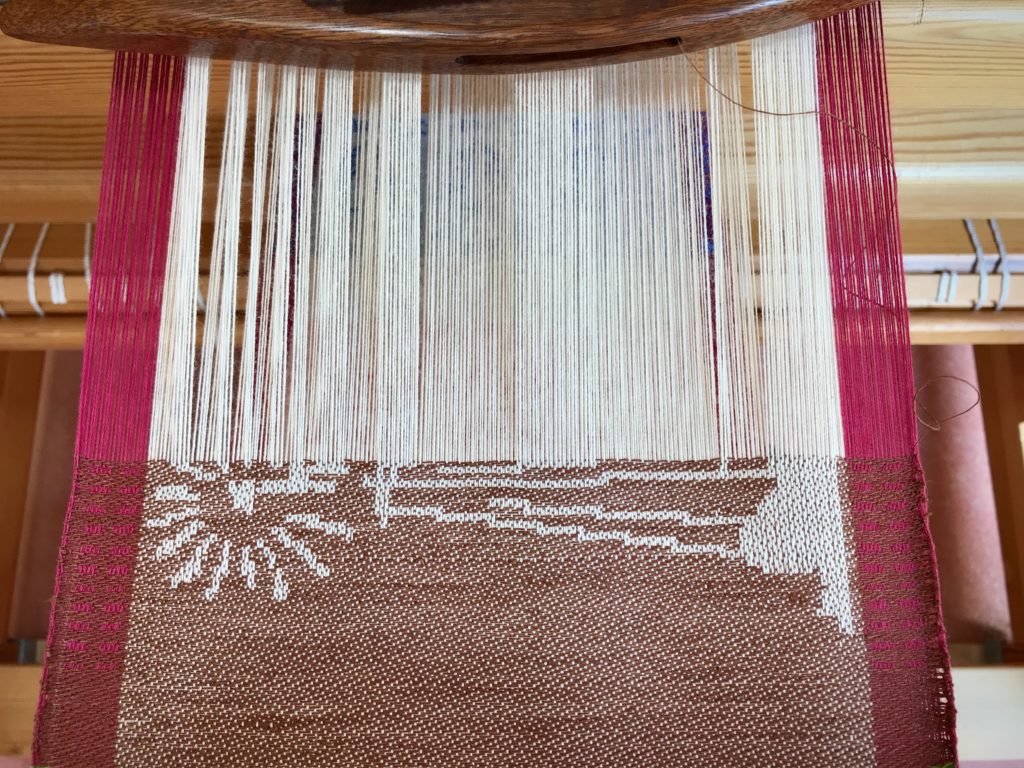
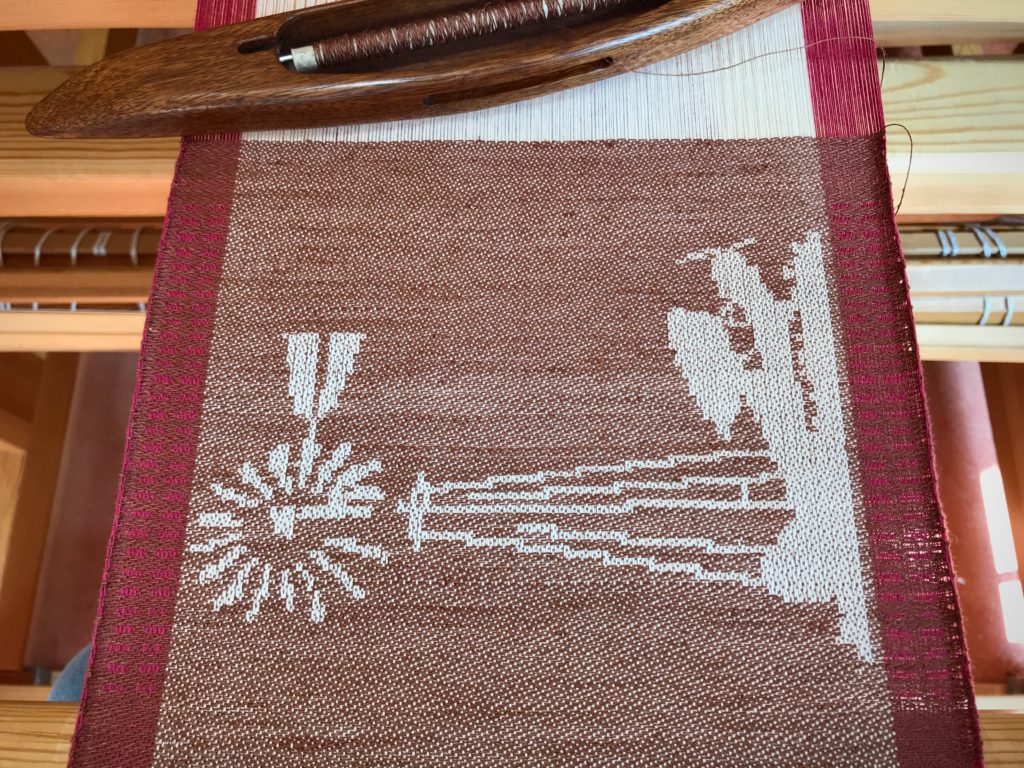
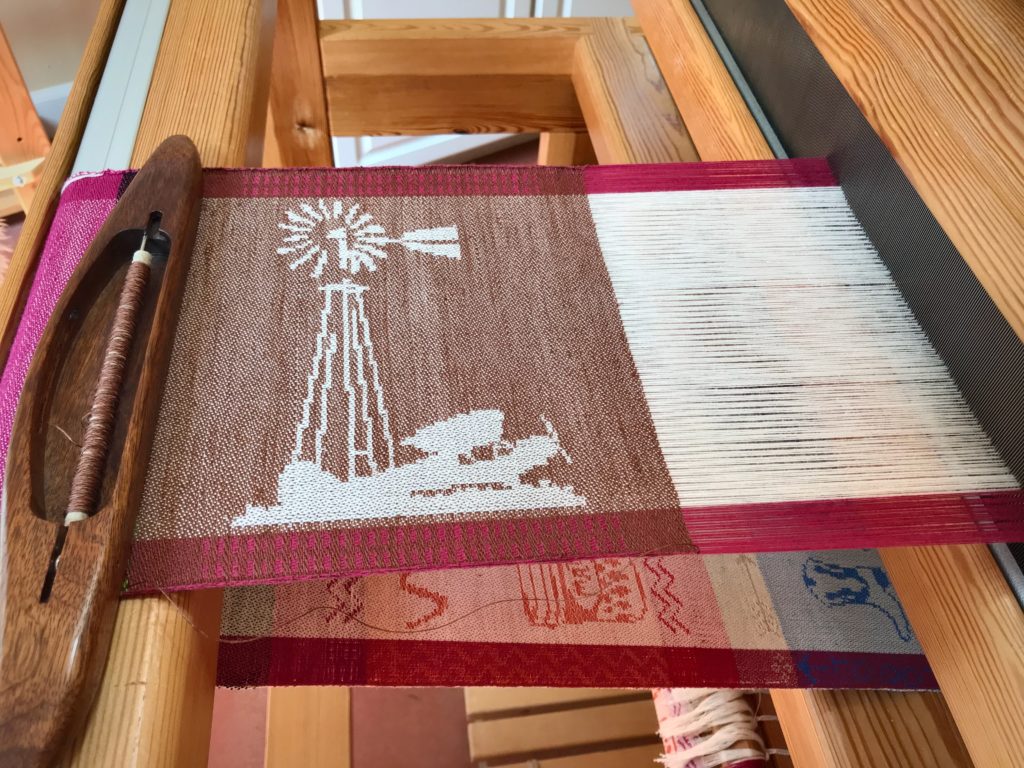
Come, look over my shoulder as I weave a windmill and taildragger image on the drawloom. The central design is woven using 103 single-unit draw cords. I have a simple motif for the borders that uses only three pattern shafts. In the video below, watch as the three draw handles for those pattern shafts appear and disappear throughout the weaving.

Drawloom weaving, with time-lapse video.
Draw cords are used to raise single units of threads to create the image, one row at a time.
Windmill and taildragger woven on the drawloom.
Woven from the side.

I recorded my weaving in time-lapse form so you can watch three hours of effort compressed into three-and-a-half minutes. In the video you will see my hand pulling the draw cords, and then touching all the pulled cords from right to left to double check my work. That double checking saved me from dreaded do-overs.

Windmill and Taildragger Silhouette from an old "Flying" magazine.

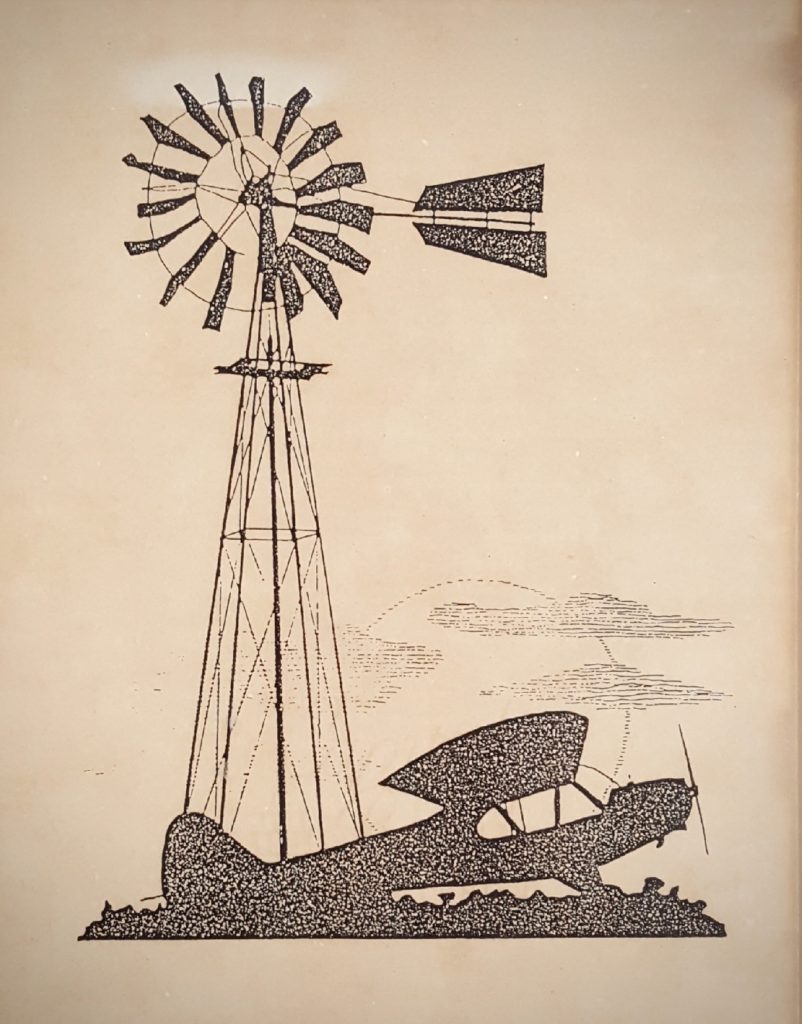
When our good friends, Jerry and Jan, saw my drawloom they brought this picture to my attention. — Forty years ago Jerry discovered the silhouetted windmill and airplane tucked away on a back page in an old issue of Flying magazine. Because of his affinity for airplanes and windmills he cut out the tiny picture and saved it. Years later, Jan found the picture and had it enlarged and framed. — After learning about my loom’s pictorial capability, Jerry and Jan wondered aloud if this special image could be woven on a drawloom…

Windmill and Taildragger woven on the drawloom. With time-lapse video.

Enjoy the video, and hold on to your hat!

May you ride the wind.

Happy Weaving,
Karen

Quiet Friday: Unroll the Cloth Beam

If you are a weaver, you know this thrill. I weave the very last pick, and then I hold my breath as the finished cloth is unrolled from the cloth beam. All ten meters / eleven yards of it! I don’t usually have an audience for the unrolling, but this time I want to share the experience with you, my friends.

If you stay to the end, you will see the cap I made from the sample pieces at the beginning and end of the warp.

And, one more thing, I added a little 3 1/2-minute time-lapse video at the very end. I hope it makes you smile.

Just finished weaving 10 meter warp.
Final pick in place.

Release warp tension before cutting off the warp.
Release ratchets on cloth and warp beams to loosen warp tension.

Cutting off the finished cloth.
Get out the big Gingher shears and start cutting.

Cutting the fabric from the loom.
First good view of the last towel on the warp. The last shall be first…

Unrolling the towels...
The Nine Color Towel.

Unrolling more towels...
Keep unrolling.

More towels...
Still more to come..

Red striped towel coming off the loom.
Each one is different.

Now for the brown towels...
Seeing brown now, so we know we are getting near the end/beginning.

Now we see the beginning of the warp!
Finally, we made it to the tie-on bar!

Slats on the floor after unrolling the cloth beam.
I love the final sound–warping slats falling to the floor as the last round of cloth is pulled from the cloth beam.

Empty cloth beam. Love it!
There it is. Now I want to get something else on the loom so I can do this all over again!

Goose eye towels just off the loom. Karen Isenhower
Ta da!

Cap made from handwoven pieces of goose eye twill.


And now I invite you to join me as I weave the Nine Color Towel. Remember that this is time lapse–I really do not weave this fast.

May you be filled with joy.

Very Happy Weaving,
Karen

Quiet Friday: Warping Trapeze

When I was a girl I dreamed of being a flying trapeze artist. No fooling! I practiced stunts on our backyard swingset, including hanging from my toes. I grew out of that. My new stunt now, is with a different kind of trapeze. A warping trapeze. (Some people call it a warping valet, but let’s call it a trapeze, okay?)

The warping trapeze is used for beaming the warp. The warp comes over the breast beam, under the foot beam, and then over the cross bar of the trapeze. I use two-pound walking weights and S-hooks to weight the warp bouts, since the warp needs to be under sufficient tension as it is wound onto the warp beam. The warping trapeze makes it easy to single-handedly beam a warp with even tension.

Warping trapeze set up for beaming the warp.
Warping Trapeze: Two tall boards set into place just inside the sides of the loom, angled at the base, between the cloth beam and the breast beam. I clamp them on the sides for extra security. The top piece slips into a cut-out opening at the top of the side boards. Reed will be moved to the beater before beaming.

Walking weights are used to weight the warp bouts for beaming the warp.
Two-pound walking weights are perfect for hanging from S-hooks to weight the warp bouts. I can easily increase the amount of weight by adding more walking weights, as needed. For a longer warp, I tie a piece of texsolv cord in a slip knot around the warp bout, and hang the S-hooks and weights on that cord, moving it down as the warp is wound on.

Warping trapeze explained. Karen Isenhower
The trapeze is ready, with the warp weighted. Next steps: Remove the support sticks; move the lease sticks to behind the reed; straighten warp ends; place reed in the beater; slide lease sticks toward the reed. Okay, go! Wind the warp onto the beam.

(Did you notice Becky Ashenden’s flippy book, Dress Your Loom the Vävstuga Way: A Bench-Side Photo Guide on my cart? I still like to follow her step-by-step instructions to make sure I’m not missing anything.)

Enjoy this little time-lapse video I created of myself dressing the loom using the warping trapeze. (You will not see me hanging from my toes.)

I fly through the air with the greatest of ease, my threads all in place with the warping trapeze…

Thank you to Becky Ashenden for introducing me to a warping trapeze at Vävstuga Weaving School.
Many thanks to my talented husband for creating my very own warping trapeze. He’s the best!

May you come up with fantastic new stunts.

Happy Weaving,
Karen