Zebra Warp

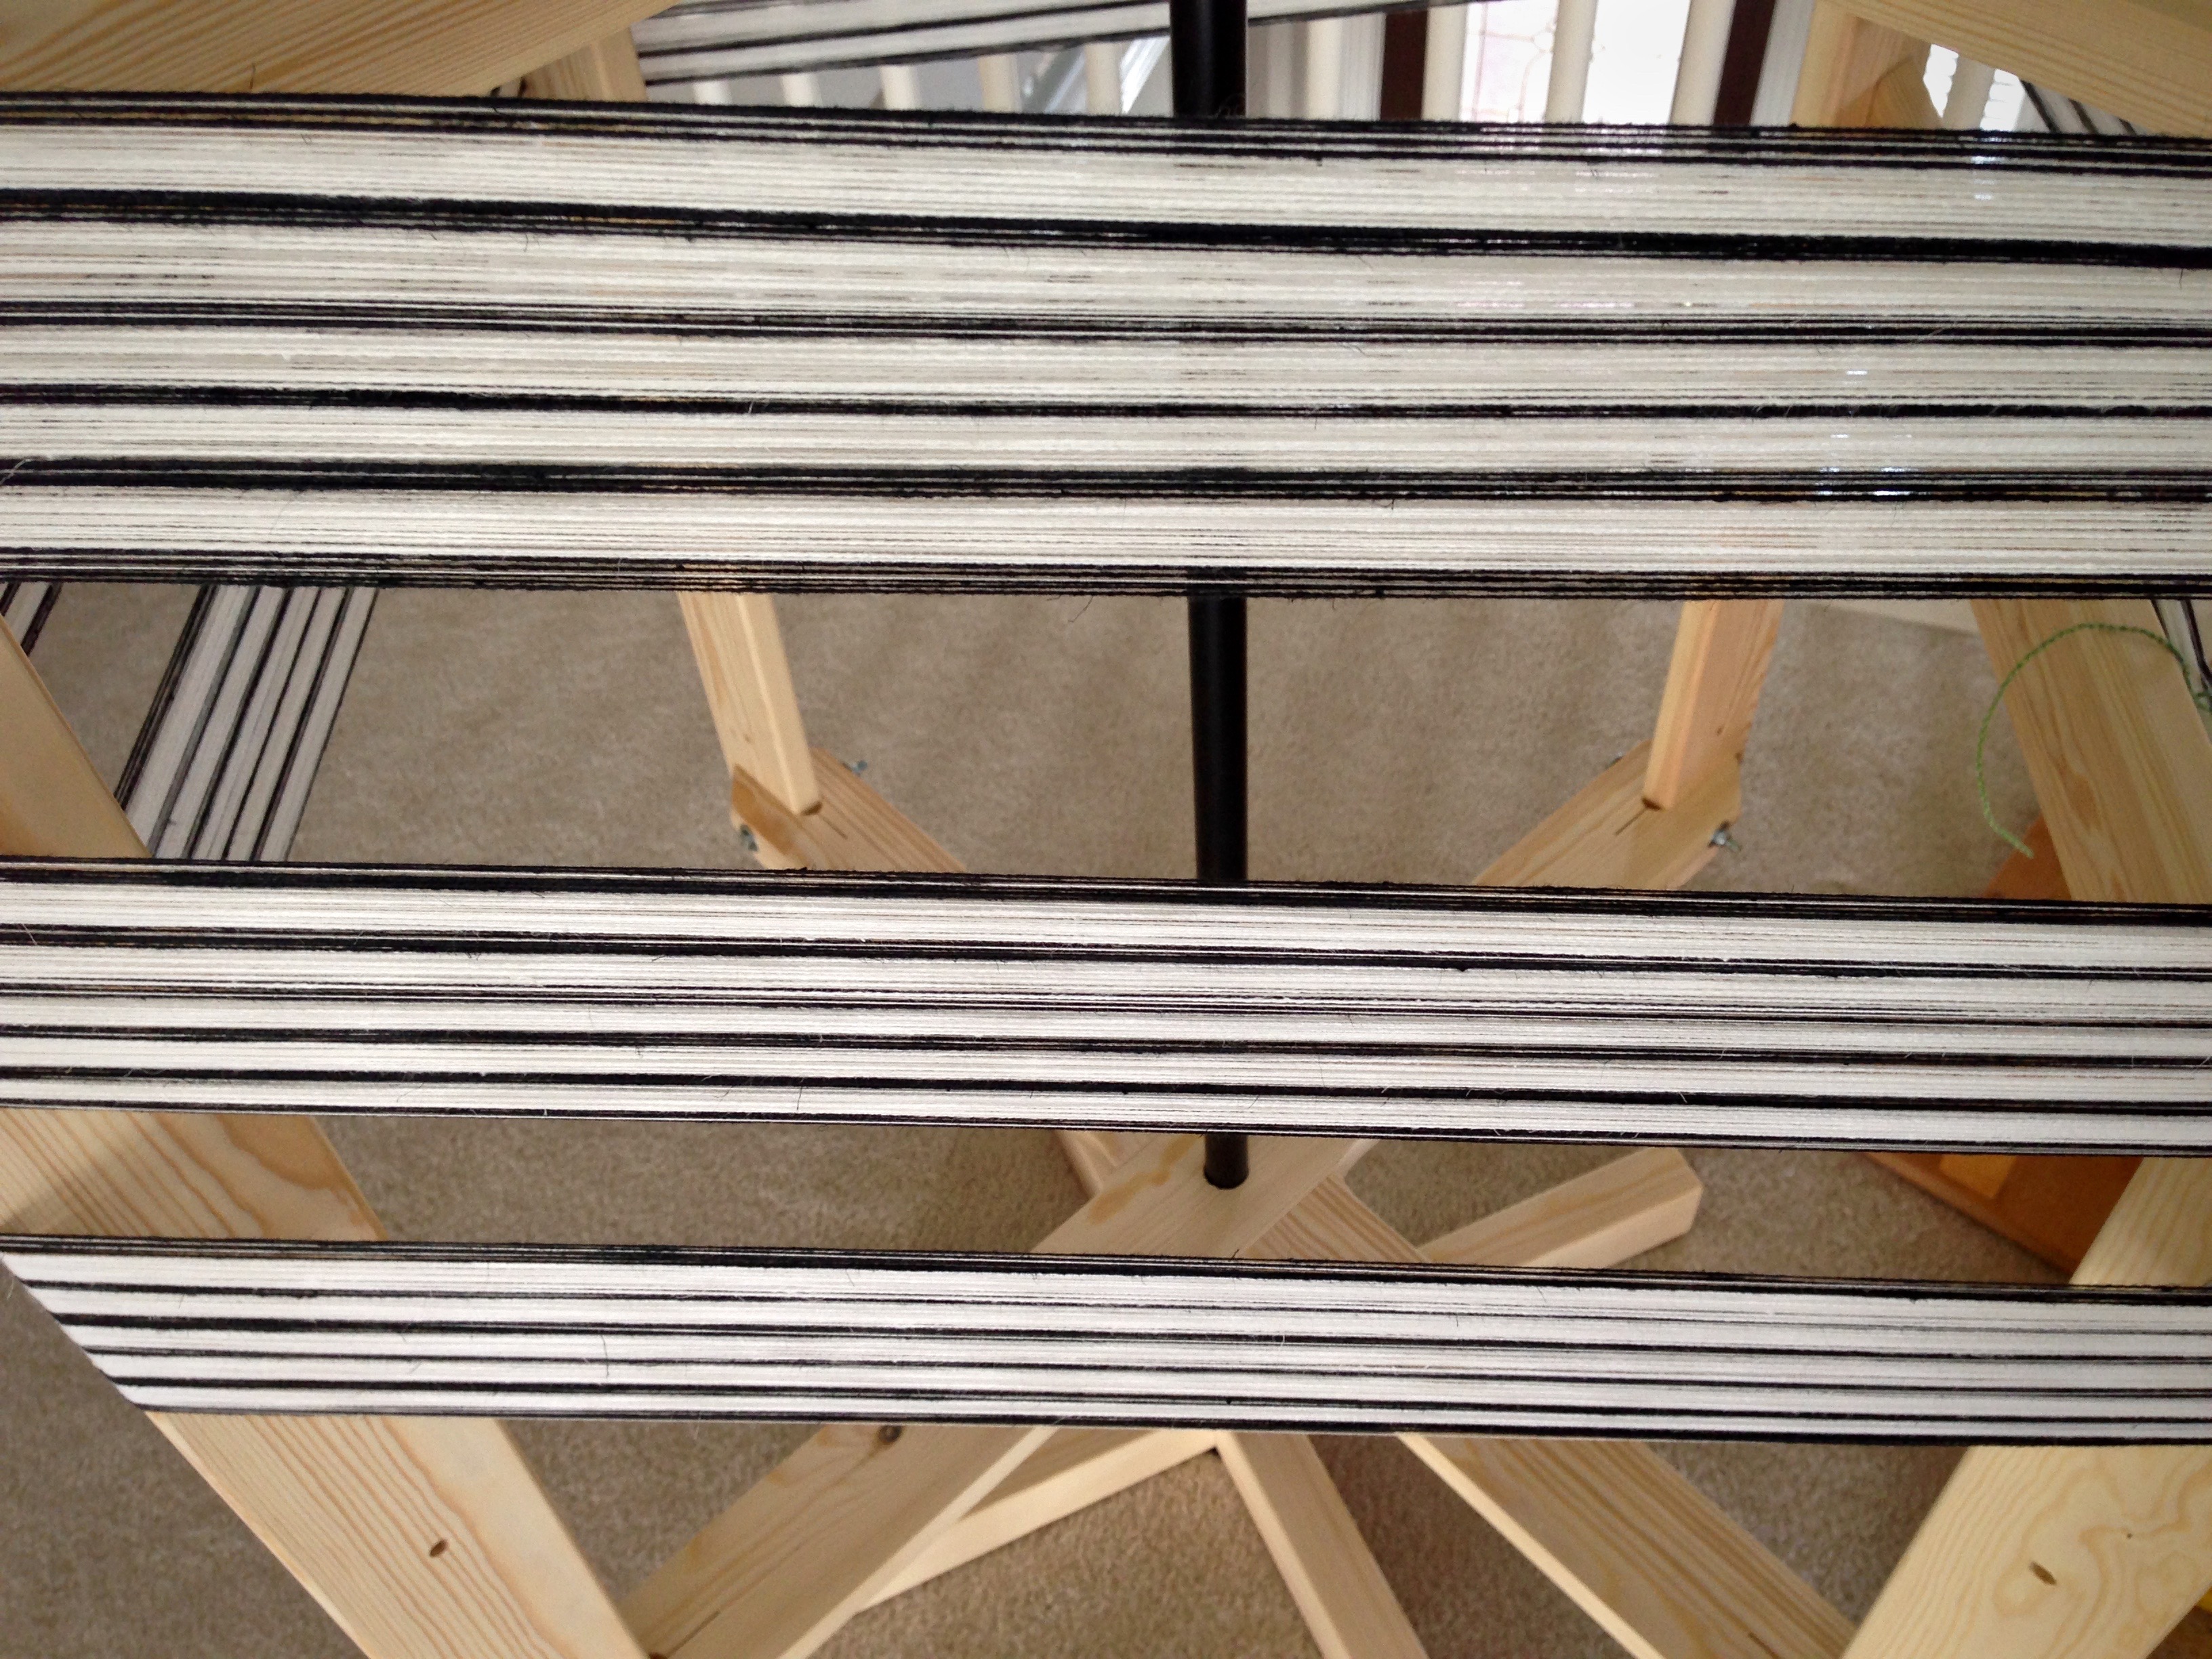
I changed my mind. A long zebra warp (formerly known as black and white) will not be boring. When I come to the end I’m certain I will wish I had an even longer warp. The first few picks are already amazing. Design possibilities are flying through my mind!

Zebra warp on Glimakra Ideal loom.
Zebra warp has taken over my Glimåkra Ideal loom. There are 10 1/2 meters (11 1/2 yards) of thick and thin threads.

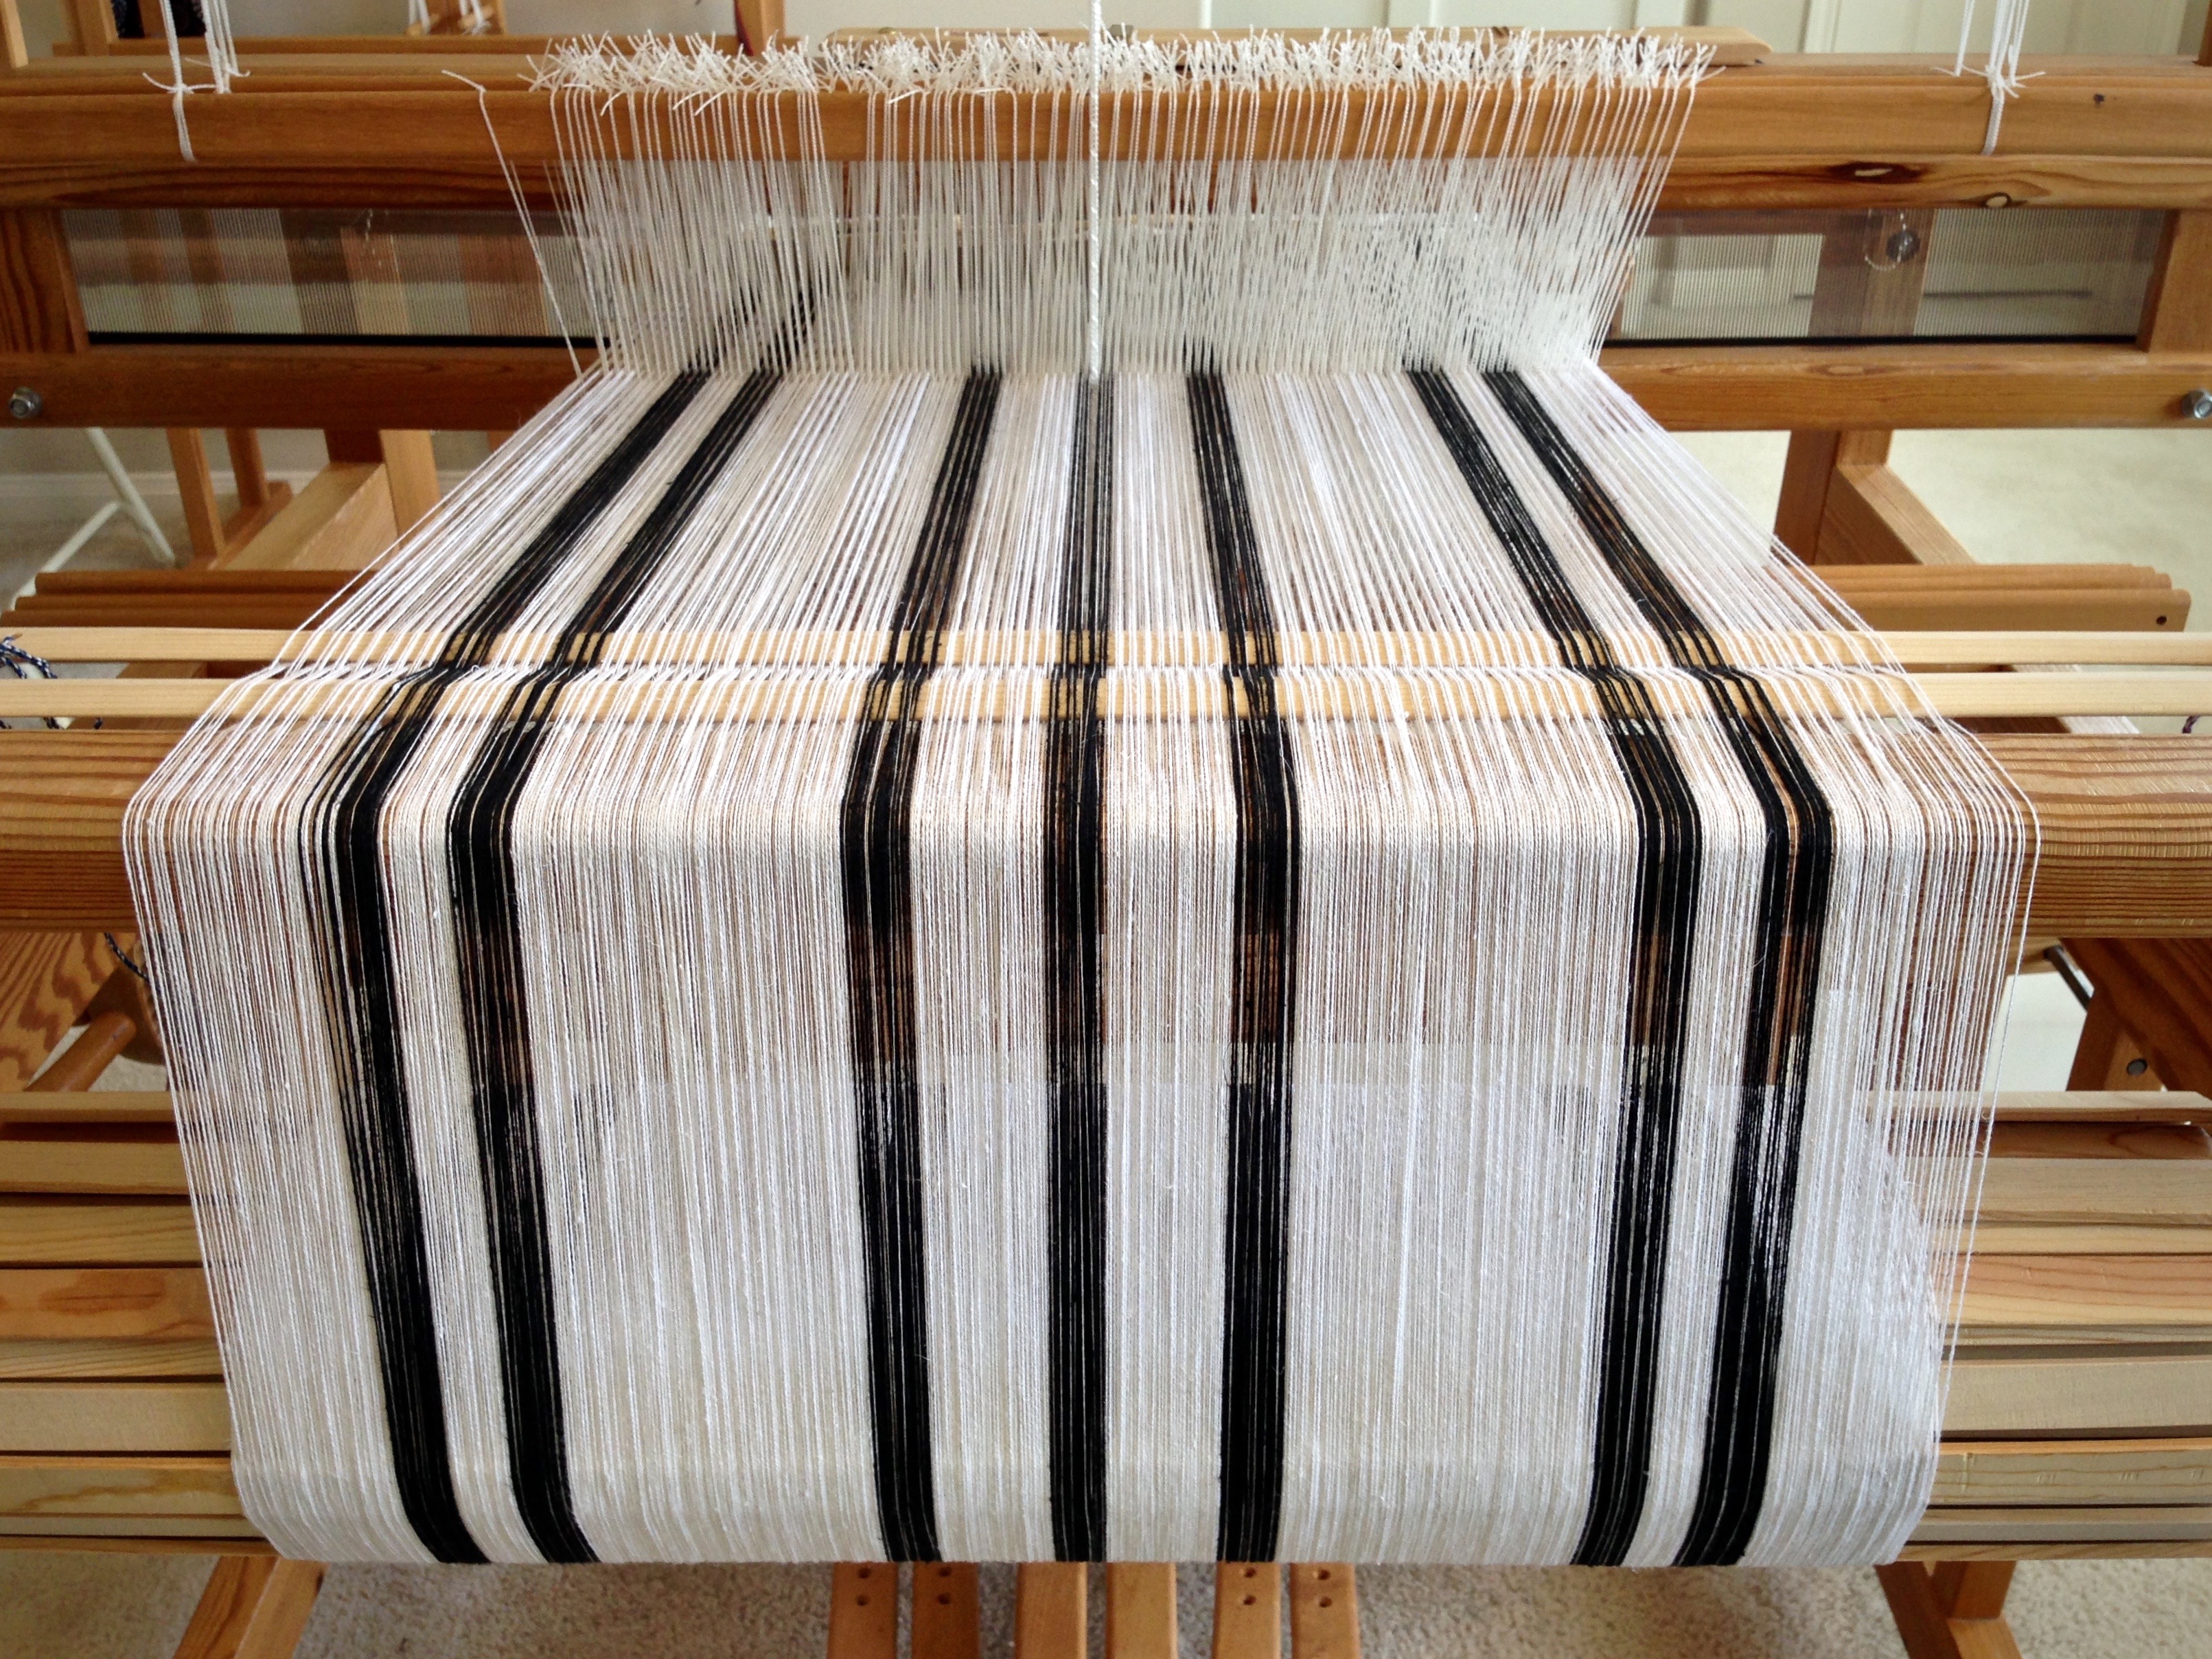
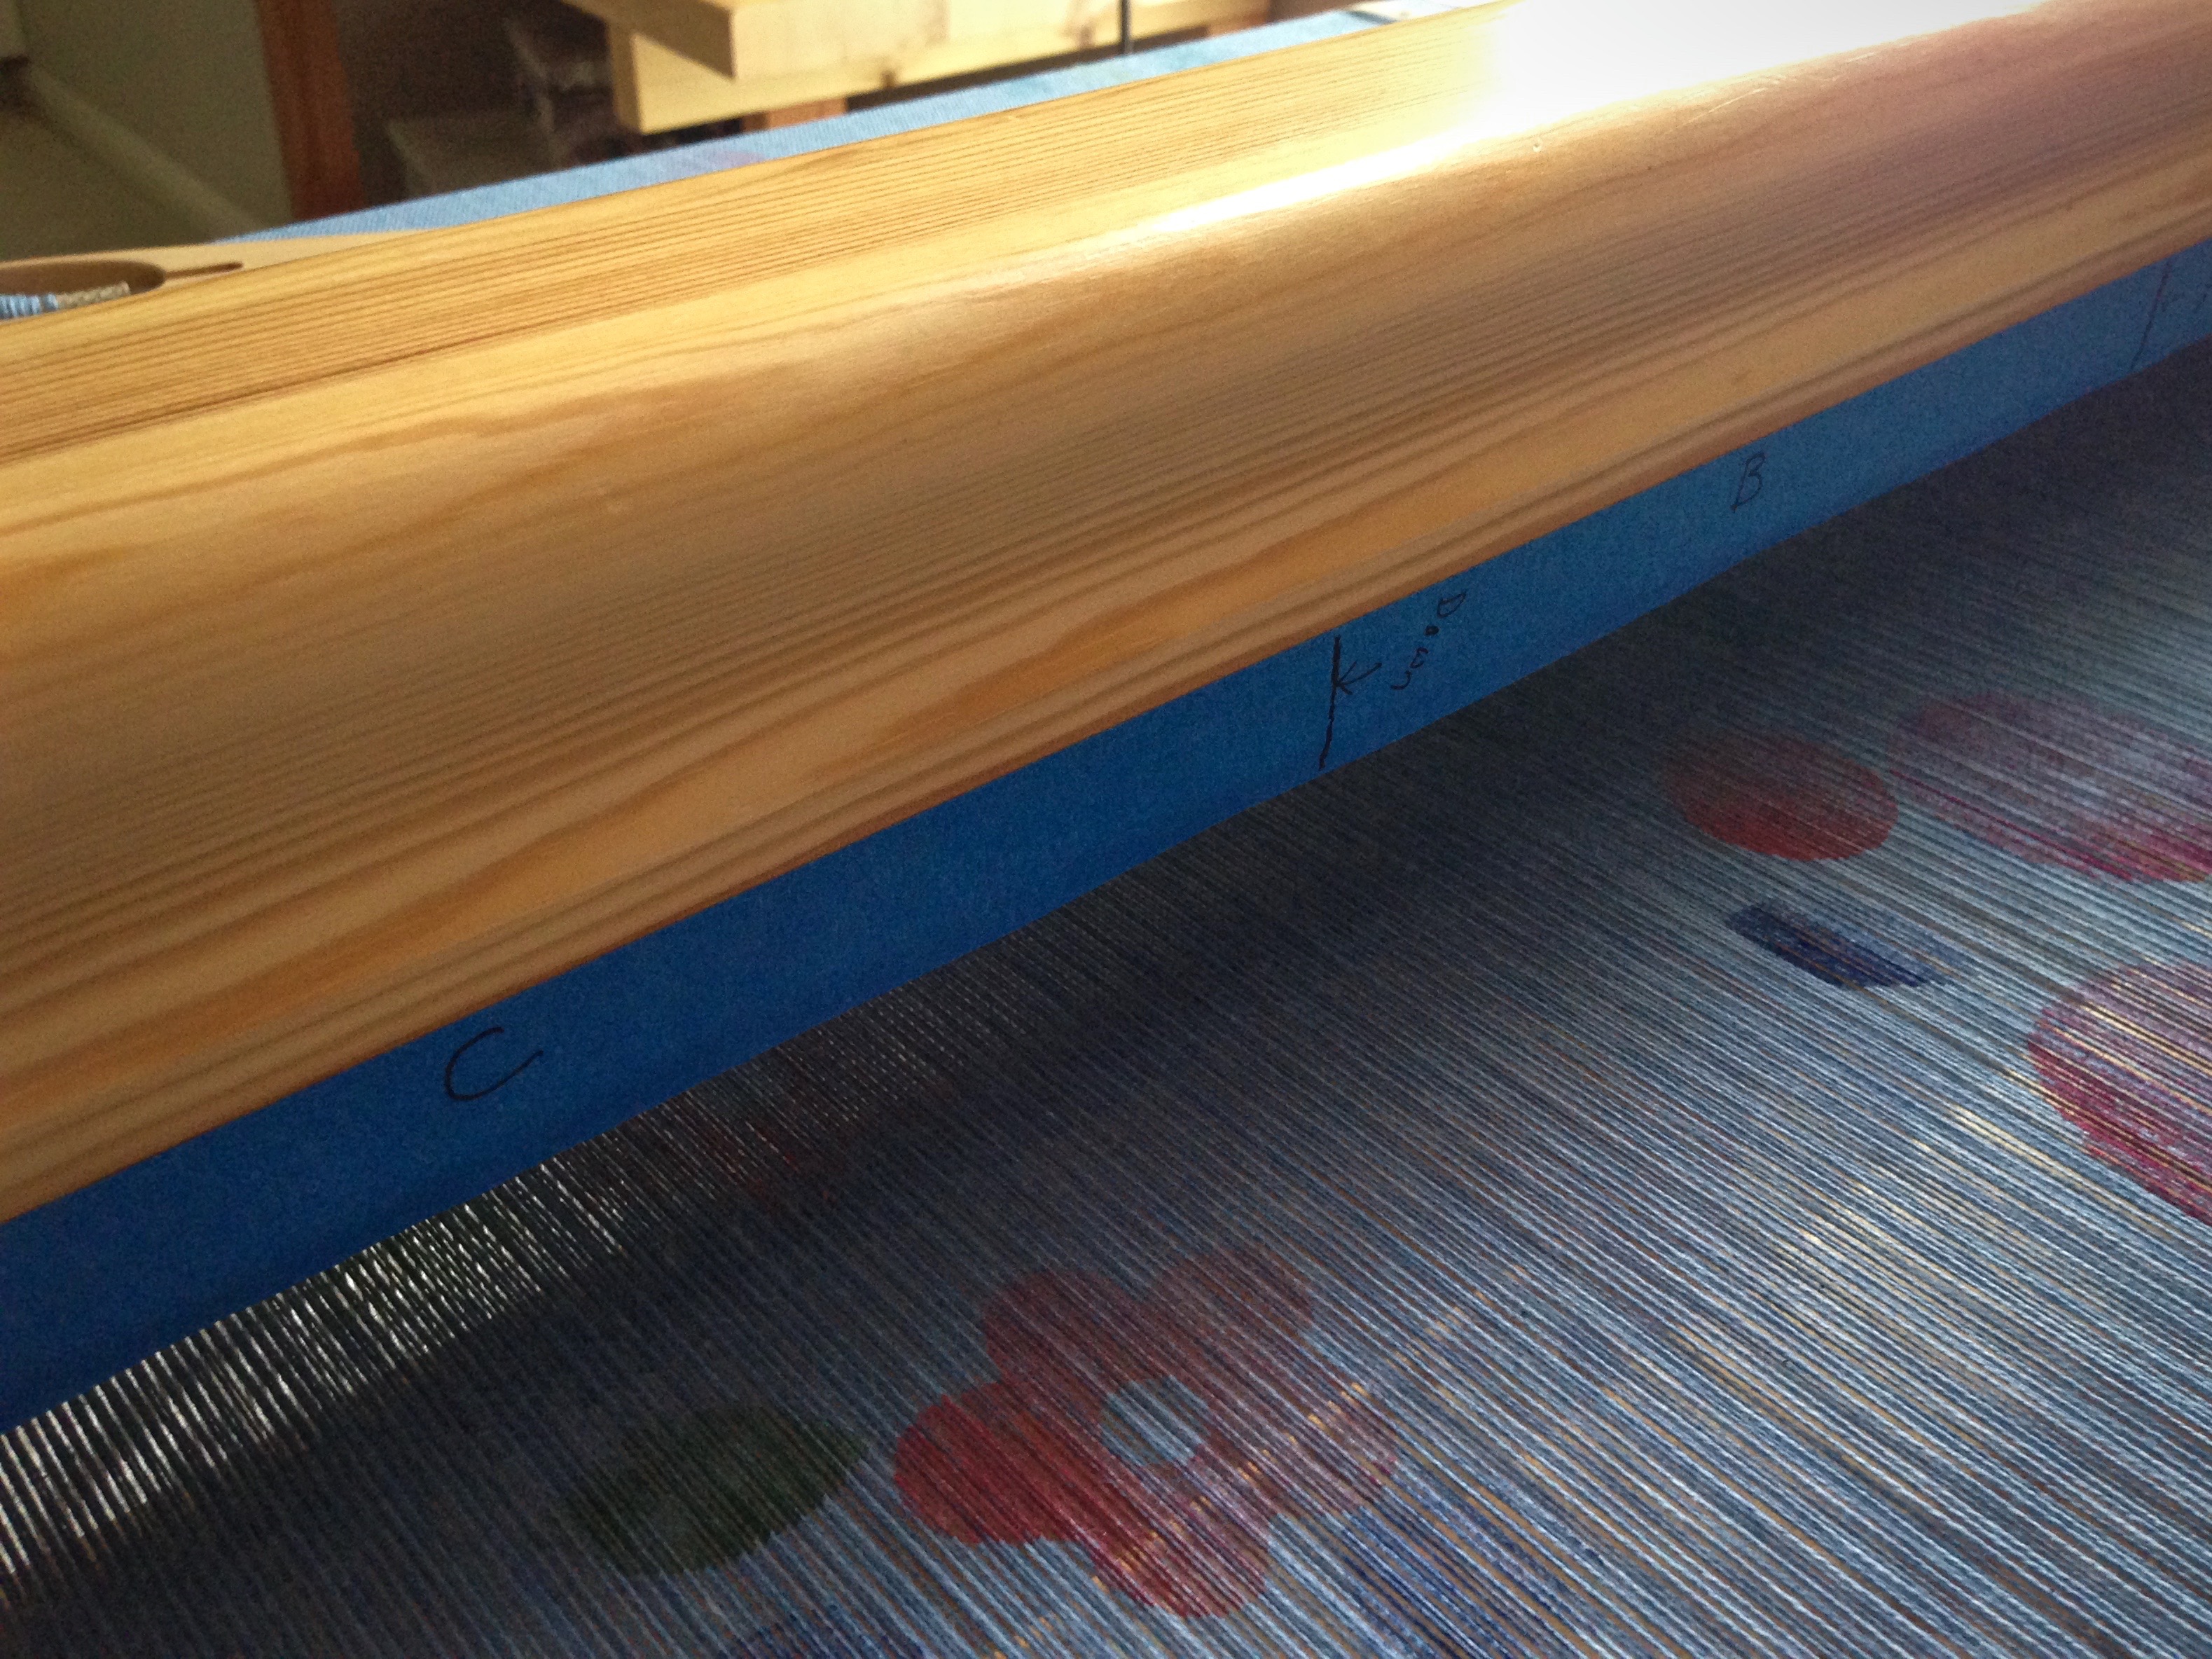
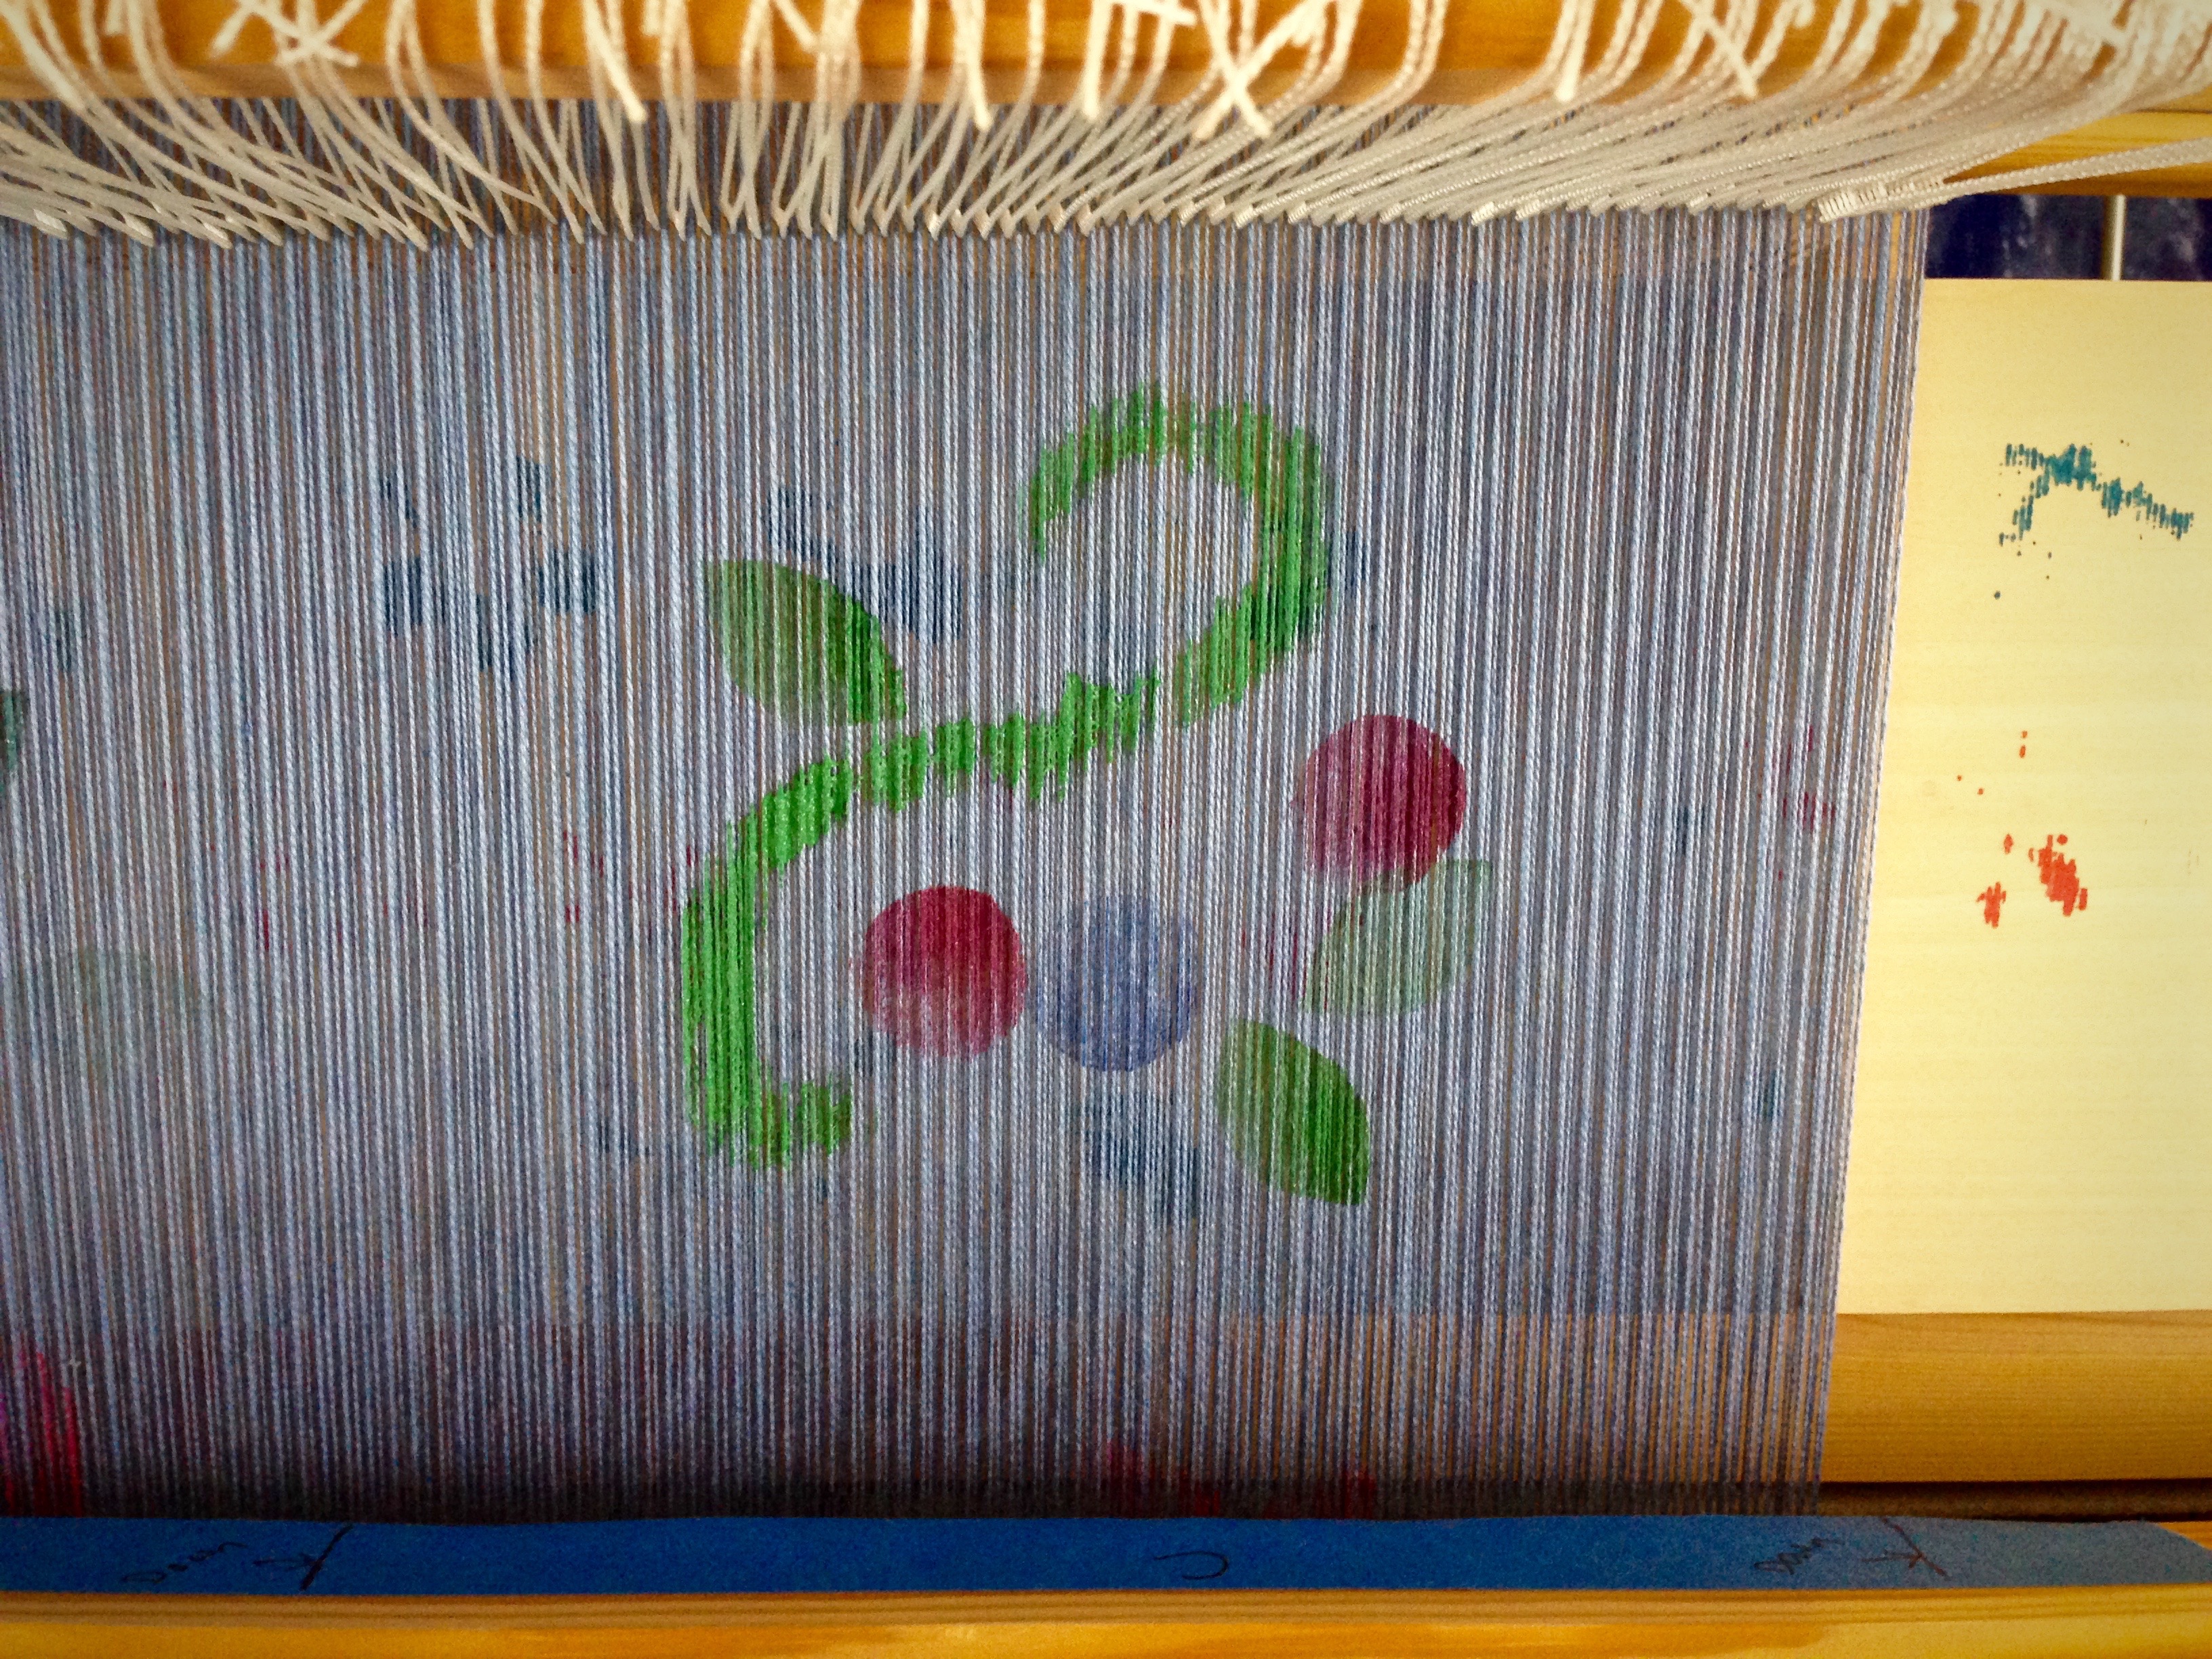
This is plain weave. But here, the plain weave is transformed with thick and thin threads–in warp and weft. Combining thick (doubled 22/2 cottolin) and thin (30/2 cotton) gives me two blocks to work with. I am using two shuttles, one of which is a double bobbin shuttle. As always, weaving feels like magic. All I do is dress the loom and throw the shuttles, and exquisite cloth magically appears!

Black and white towels on the loom.
First few picks reveal interesting design options. Leveling string across the beginning of the warp eliminates the need to weave scrap yarn to spread the warp.
Black and white towels on the loom. Karen Isenhower
First towel has a border design–one element that sets a handwoven towel apart.

God’s faithfulness is like a long zebra warp. It doesn’t seem elaborate or noticeably fancy. It’s been there forever. His faithfulness is known among the angels and all of heaven. God’s faithful love is as constant as day and night. We take notice when we see beauty appear, like kindness from a stranger, or love from a friend, or inner peace from doing the right thing. As the shuttles of life traverse the threads, the evidence of God’s faithful love is revealed. Always and forever.

May you enjoy endless design possibilities.

Happy weaving,
Karen

Quiet Friday: Custom Lining for a Handwoven Bag

Every good bag deserves a good lining, with pockets inside and a zipper on top. This handwoven rag rug bag is no exception. The lining fabric is some of the same fabric that is woven in the bag. The polka dot pocket fabric is a cheery piece from a visit to The Philippines. The completed zippered tote is a perfect fit for my small tapestry frame, and goes with me when I travel. Quiet Friday: Weave a Bag with Handles shows how I made the bag.

How to add zippered lining to a bag.

How to Add a Custom Zippered Lining to a Bag

Tools

  • Sewing machine
  • Zipper foot
  • Walking foot (recommended, but not required)
  • Steam iron
  • Straight pins
  • Tool for pushing out corners
  • Needle and sewing thread
  • Disappearing ink fabric marker
  • Fabric scissors

Supplies

  • Fabric for lining. Lay bag on top of folded lining fabric, with bottom of bag aligned with the fold of the lining fabric. Cut the folded fabric a generous 1 1/2″ wider and 1 1/2″ taller than the bag.
  • Fabric for pocket. Mark two pieces of fabric (or use a folded piece of fabric) the desired pocket size. Add 1/4″ seam allowance. Cut along the marked lines. Stitch, right sides together, leaving an opening for turning. Turn right side out, pushing out corners. Press. Topstitch all four sides.
  • Fabric for zipper insert pieces. Cut two pieces of fabric 4 1/2″ wide by the length of the zipper plus 1″.
  • Tabs for ends of zipper tape. Cut from handwoven band or piece of fabric with sides folded under.
  • Zipper. Regular, non-separating zipper, as long as, or longer than, bag opening

Steps

  1. Sew bottom three sides of pocket onto lining fabric. Stitch a dividing line on pocket.Adding pocket to lining for bag.
  2. Stitch sides of lining, right sides together. Fold and stitch box corners.Box corners on lining for a bag.
  3. With lining seated in bag, fold down top edge of lining, so that folded edge fits just inside top edge of bag. Pin folded edge of lining and remove from bag. Set aside. Fitting lining for a handwoven bag.
  4. Bar tack top ends of zipper tape together. Bar tack over end of desired zipper length. Cut off excess. Cut a tab from a woven band, or from fabric with sides folded in, to fold over each end of zipper tape. Use zipper foot to stitch tabs over zipper tape ends. Preparing zipper to add to bag.
    Handwoven tabs for ends of zipper tape.
  5. For zipper insert, cut two pieces of complementary fabric 4 1/2″ wide by the length of the zipper, plus 1″. Making zipper insert for top of bag. Tutorial with pics.
  6. Fold each zipper insert piece lengthwise in half, right sides together. Draw stitching line that matches length of zipper. Zipper insert for top of bag. Tutorial.
  7. Stitch both short ends of zipper insert pieces. Clip corners and trim seams. Making zipper insert for top of bag.
  8. Turn zipper insert pieces right side out. Push corners out. Press. Making zipper insert for top of bag.
  9. Pin folded edge of zipper insert fabric to right side of zipper tape, centered lengthwise, 1/8″ away from zipper teeth. Open zipper partway. With zipper foot, starting at top end of zipper, topstitch close to folded edge. After stitching a third of the way, with needle down, close zipper, and then continue topstitching to bottom of zipper. Repeat for other side of zipper insert. Press. Making zippered lining for handwoven bag. Tutorial.
    Adding zippered top to handwoven bag.
  10. With zipper opened, and zipper tab down (picture shows zipper tab up, after having pinned both sides), center and pin one side of zipper insert under one side of folded top edge of lining, so that lining overlaps insert 1/2″. Repeat with other side of zipper insert and lining. Making zippered lining for handwoven bag. How to pics.
  11. Insert lining into bag, matching side seams and mid points on bag and lining, with top folded edge of lining 1/4″ below top edge of bag. (Edge of zipper insert is sandwiched between lining fold and bag.) Make sure bag handles are up and out of the way of stitching. From inside of bag, use walking foot to stitch 1/8″ from lining fold, all the way around top of lining, keeping zipper insert up and out of the way of stitching. (Walking foot helps ensure even feed of fabric layers.) Adding zippered lining to handwoven bag. Instructions.
    Pinning lining into handmade bag. Instructions.
    Sewing lining into Handmade bag. How to.
  12. Fold zipper inserts down into bag. Press. Stitch across zipper inserts 1/2″ below top of lining on inside of bag. Press again.Last step of tutorial for inserting lining in bag.

Give your new bag a special purpose.

Handwoven bag with custom lining. Karen Isenhower

May your lining on the inside be as attractive as your handbag on the outside.

Happy Creating,
Karen

When Black and White Take Over Your Loom

Some things are black and white. Piano keys, penguins, old movies, and this new cottolin warp. Other things are not black and white. Petunias, peacocks, sunsets, and most of my weaving. Black and white is uncomfortable for someone like me who prefers to engage with color. Ten-and-a-half meters is a loooong time to be weaving without a colorful palette.

Warping reel with black and white warp.
Second bout of three. New Glimåkra warping reel is used to wind 10.5 meters of cottolin (60% cotton; 40% linen) in black and white.

I need to add more towels to my Etsy shop, so I did some Google “research” to find popular kitchen colors. Black and white is one of the current trends. I decided to go for it. Using color for some of the weft should be enough to remind me that the black and white is temporary, and that a colorful warp will eventually be on the loom again.

When we need reminders that everything will be okay, the Lord brings something or someone into our lives to show us that he cares. God is good. Even a small sign of his goodness is enough to help and comfort us. A touch of color on a long black and white warp may, in fact, be color at its greatest impact.

May goodness cross your path.

Warped for good,
Karen

Little Chapel Tapestry

This little chapel tapestry is growing line by line. I am weaving from the back, left to right, a single line at a time, following a cartoon. I create shades of color by blending three strands of soft Fåro wool in seemingly thousands of combinations.

Weaving small tapestry while traveling.
Weaving small chapel while waiting for my delayed flight at the airport. Chapel steeple in cartoon presents a challenge.

I knew all along that the slim spire of the steeple would be a challenge. Will I have to leave off the uppermost thin line and cross? Honestly, leave the cross off the chapel? I don’t think so. Maybe wrap around a single warp end with half-hitches, and weave the short horizontal line over just three warps… Hmm, that doesn’t work–too robust for this little chapel spire.

First steeple cross attempt fails.
First attempt to weave the steeple cross. Bulky and distracting.

Take it out.

Working on the steeple cross.
Black yarn that formed the cross is removed, leaving a gap.

Weave through the empty spaces.

Undoing part of the tapestry.
Some of the sky is removed in order to sufficiently weave over the gap.
Weaving small tapestry from the back.
Closing the gap by weaving existing threads across, and weaving removed threads back in.

Study the scene…

Adding a cross to the small chapel steeple.
Chapel steeple without a cross.

Aha! …Embroider a single-thread cross.

Embroidery on a small tapestry.
Single strand of Fåro wool is used to backstitch a cross on the steeple top.

Yes, that works.

Small tapestry chapel. Karen Isenhower
Elevated cross on the chapel’s steeple gives meaning to the woven scene.

Keep your eyes on the destination. If a cross is needed on the tip of the spire, keep trying until you find a way. With your heart set on the destination, the Lord gives strength for the journey. Don’t give up when things are not working out. Take a step back to view the whole scene, and you will see how the cross completes the picture.

May you have strength for the journey.

With love,
Karen

How Hard Is it to Stamp the Warp?

To stamp the warp, I stand on the foot beam at the front of the loom and reach over the beater. A six-inch board hangs just below the warp on loops of Texsolv cord, behind the beater, as the platform for the stamping and painting. A strip of blue painter’s tape stuck onto the backside of the beater divides the warp into three sections–A, B and C. The sections denote three tiers of a tiered skirt for which this fabric is intended to be used.

Warp painting and stamping on the loom.
Back of the beater is marked with blue tape that shows the A, B, and C sections of the warp.

I was concerned that this would be hard to do–thinning the paint, reaching over, stamping in sections, letting it dry before advancing the warp, and so on. But it is not nearly as hard as I anticipated. It’s not actually hard at all.

Painting and stamping warp on the loom. Karen Isenhower
When I step on the foot beam at the front of the loom, and reach over the beater, with paint palette (disposable plastic picnic plate) in one hand, and stamp or paintbrush in the other, this is my view.

Similarly, at times it seems hard to do the right thing, even though I know that loving God means walking in his ways. Simply thinking something is hard to do, though, is not reason enough to avoid doing it. And, more often than not, we find that doing the right thing is not hard to do, after all.

May you do the right thing.

Love,
Karen