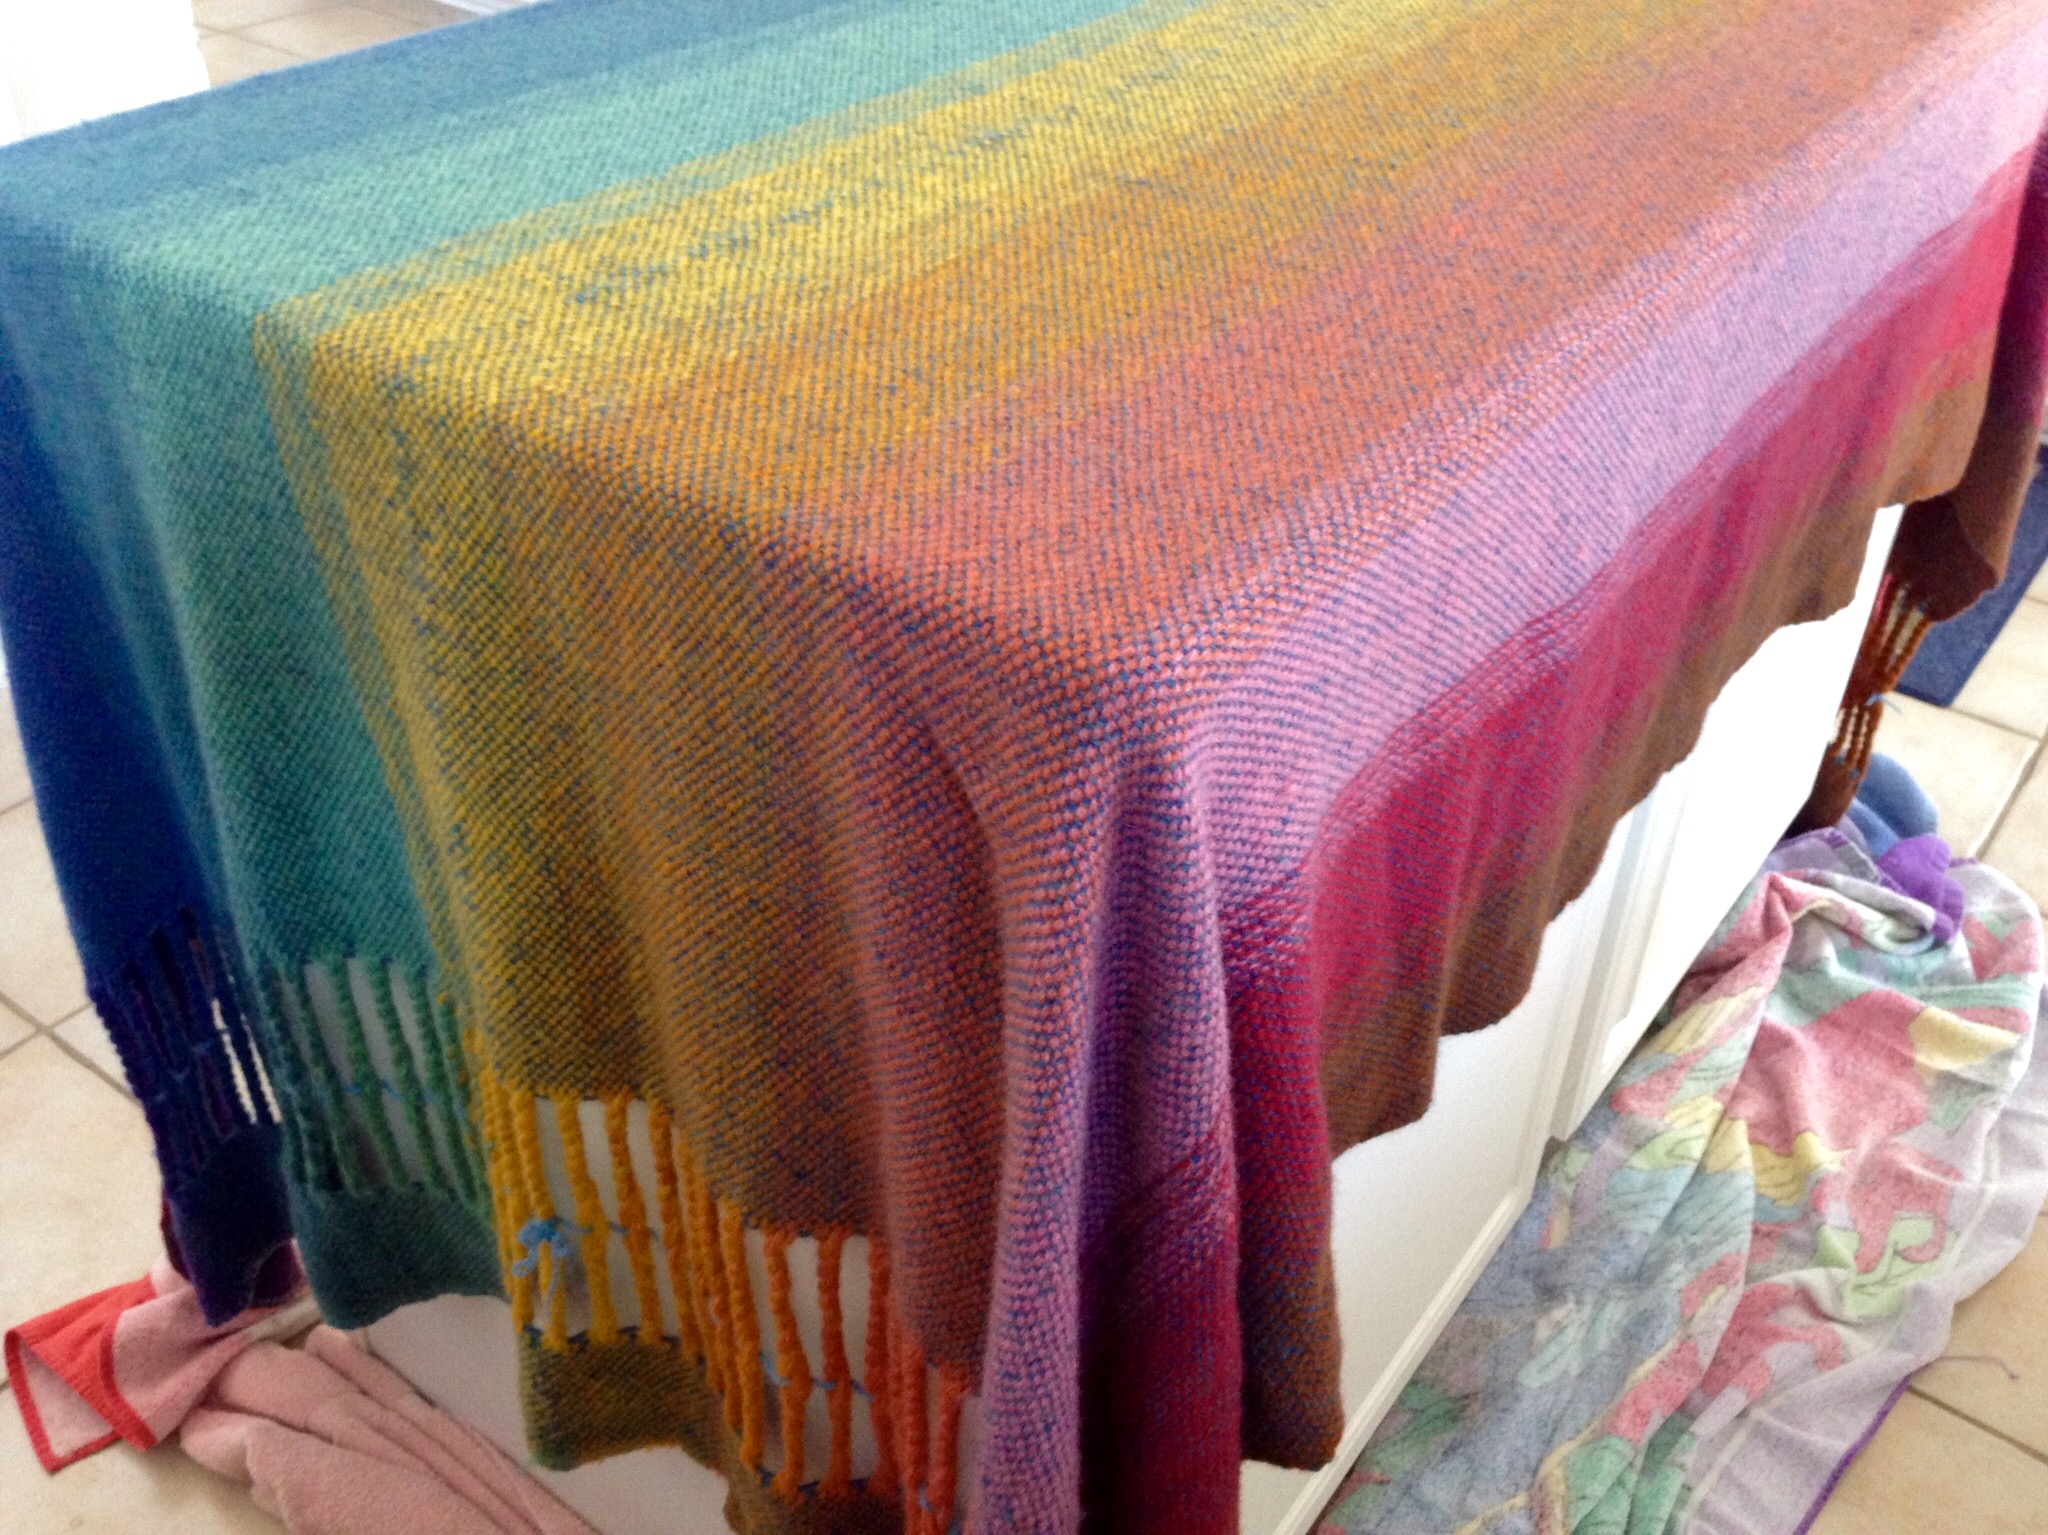
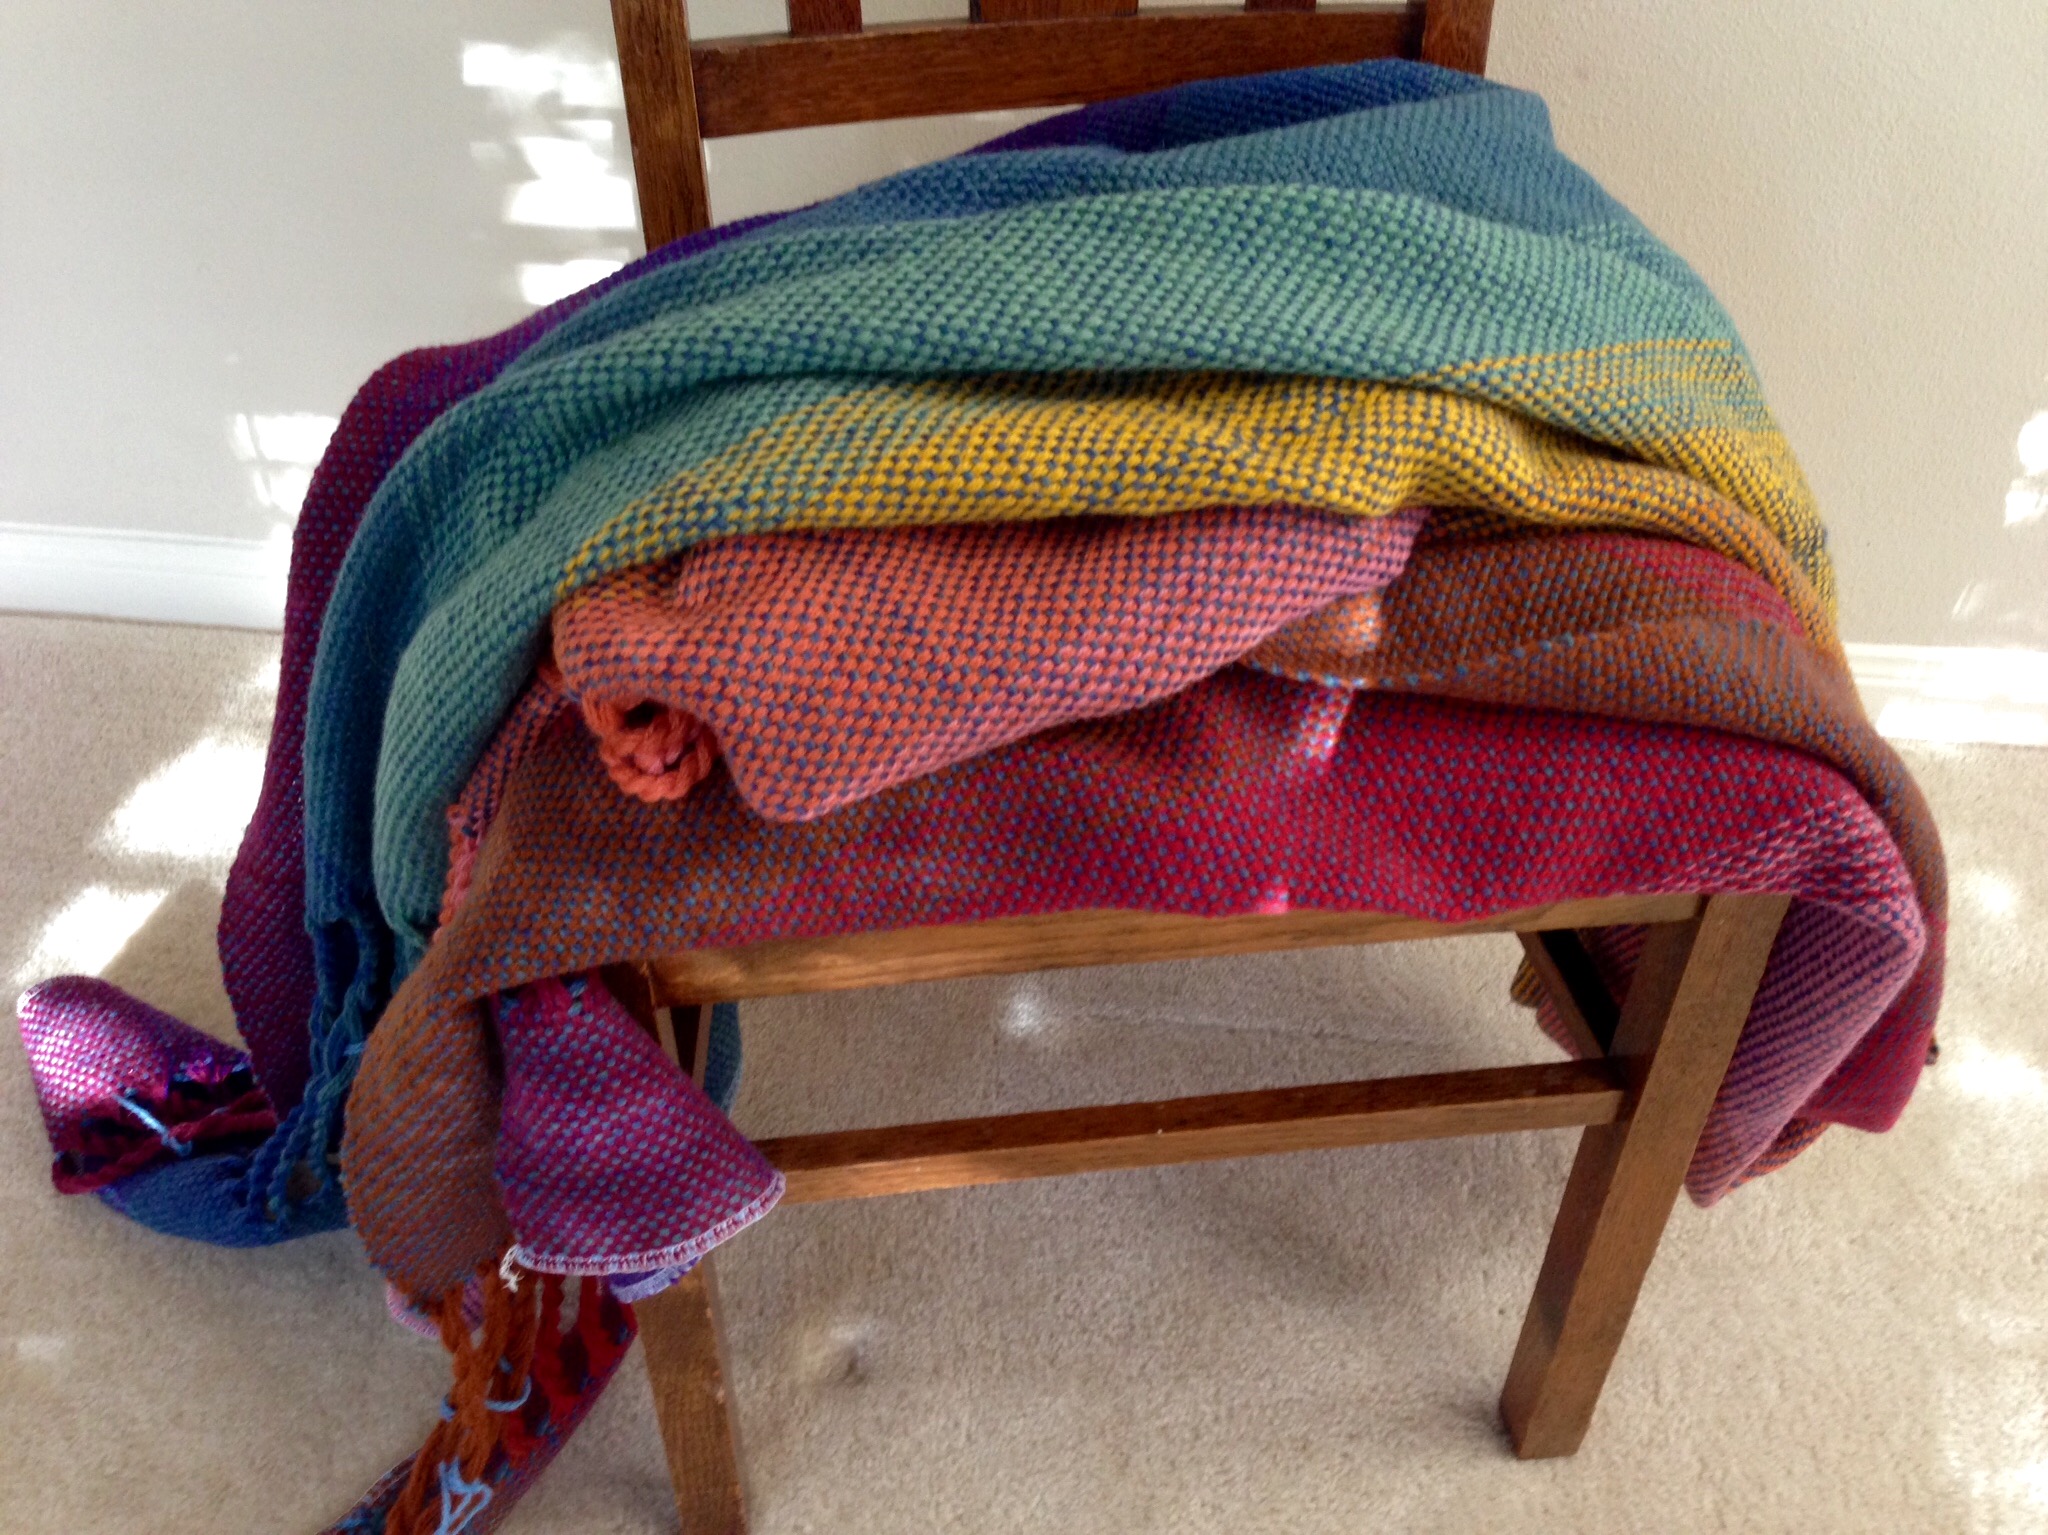
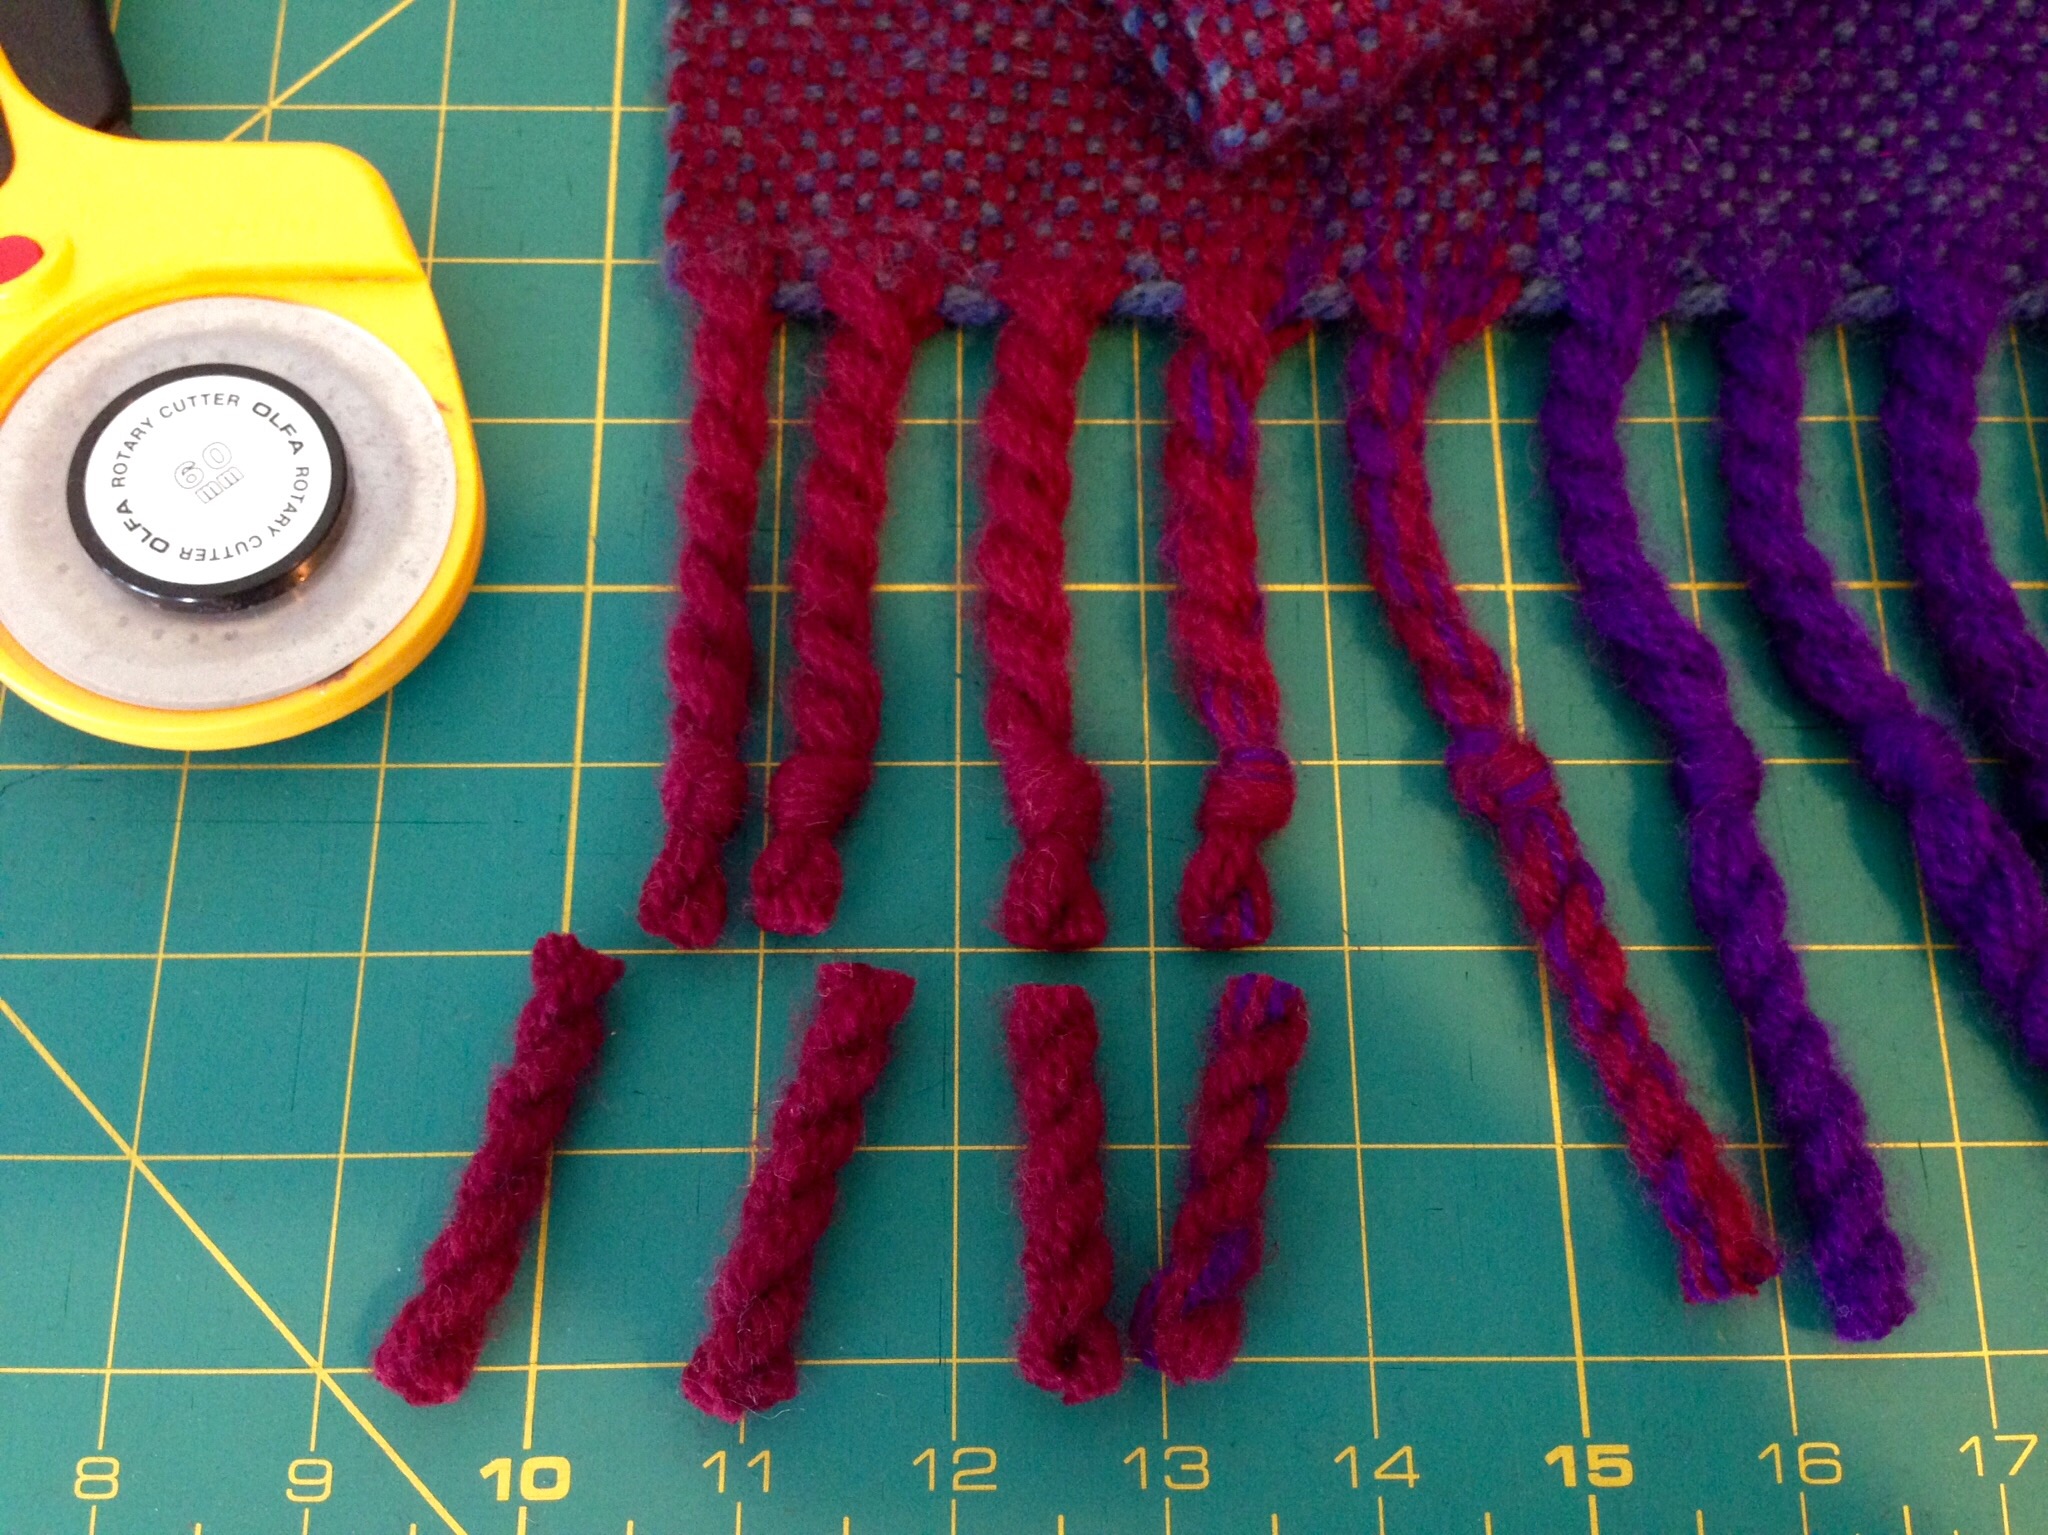
Quiet Friday: Wool Blanket Finishing

As wonderful as it is to weave two wool double width blankets, the truth is, they are not finished until they are finished. The thrill of completion comes when you finally sew your “Handwoven by” label on the woven accomplishment. But, for me, just as great is the joy of sharing what I made, and how I made it, with friends like you.

I have divided the finishing process for this blanket into four segments. Steve and I created little videos to take you along with me through each step.

Very end of the warp.
Woven as far as possible, and then cut off. Careful planning is needed to be able to weave the header following the 25cm of warp that is kept empty for twisting the fringes.
  • The next video segment covers everything that happens before wet finishing.
Woven wool blanket ready for wet finishing.
Woven blanket ready for wet finishing.

Please return next week to continue the Wool Blanket Finishing video series with me. The two remaining segments are about wet finishing and final finishing.

May you enjoy the thrill of completion.

Happy weaving,
Karen

Trash the Warp or Try Again?

This band was giving me fits! First, the 12/6 cotton (rug warp) is a little heavy for a band. Secondly, I created tension problems by adding two green stripes of 22/2 cottolin. Thirdly, a wider band like this is unwieldy to weave with my small hands. Fourth, I goofed in the threading. And, lastly, I couldn’t see the goof in my threading because I was pulling the weft too tight. Nothing was going right.

How NOT to weave on the band loom.

Cut it off and throw the whole thing away. It’s only three yards. Hold on… I don’t want to give up that easily. Yes, cut off the woven mess. But why not correct the threading and at least try weaving a little bit? As it turns out, the threading error had contributed to most of the problems. Times like this remind me to carefully examine what I am doing.

Weaving a sturdy strap on Glimakra band loom.
After making threading corrections, adjusting my beat and how tightly to pull the weft, the true pattern emerges. At 1 3/4″ / 4.5cm, it will be the right width for a nice sturdy strap–a shoulder strap for a bag, or a guitar strap, perhaps.

Examine everything. Hold on to what is good; and abandon evil. We need to practice the good, even when the good seems difficult and we want to take the easy way out. Repeat the good; don’t let the good slip away. And you will find yourself making progress in the right direction.

May you not give up too easily.

P.S. Many of you have shared my Twisting Fringe on the Loom tutorial video! Thank you!!
In answer to your requests about my finishing process for the wool blanket, including the fringe, look for a series of short videos in my Quiet Friday post at the end of this week!

(If you have not signed up to receive my posts by email, now is a good time. Sign up at Follow Along on the right sidebar.)

Learning,
Karen

Beautiful to the Last Inch

This blanket won’t be as long as I wanted it to be. My sample at the beginning used more warp than I had expected. But the sample was necessary. I will squeeze out the last possible inch, throwing (or pushing) the shuttle as far as I can. The warp will come over the back beam before I know it, and the end will be the end. (Quiet Friday: Blanket Sample Thanksgiving)

Double-width blanket no.2 on the loom.
Changing the weft color every 18 centimeters / 7 inches produces blocks of color across the warp for the first half of the blanket.

This blanket on the second half of the warp will be more colorful than the first. For the weft, I decided to use the bits of remaining wool warp yarn, combining pairs of colors, to weave blocks of color across the blanket. It is satisfying to use up the yarn, even though it feels like a risk to step away from the usual in order to be original. The remaining fragments of wool will be used at some other time, like memories that are held, and then woven into new things.

Wool warp leftovers.
All that is left of eleven colors (22 skeins) of wool warp yarn, after using it up for the blanket weft.

Make the most of life now. That means using up your best efforts. Be original. Make every day count by giving of yourself. Look carefully at the life that has been given to you, and be who God created you to be.

In loving memory of Linda Kemper, dear friend and fellow handweaver, who made the most of life here. We will miss her. Home with Jesus.

May you fully live.

Assured,
Karen

Tools Day: Texsolv Secrets

I am upgrading my “baby loom” from four shafts to six shafts. My woodworker husband fashioned the new pieces for this 100 cm / 39″ Glimakra Ideal countermarch loom. Since I need to add new Texsolv cords to the two new pairs of shafts and accompanying horizontal jacks, I decided to replace the thirty-year-old cords that are on the original pieces at the same time.

Tips for preparing Texsolv cord.
Measuring, marking, and cutting Texsolv cord for new six-shaft shaft holders. Tools, from top to bottom: Cord threader, rotary cutter, black Sharpie, Thread Zapp II.

Tools:

  • Spool of Texsolv cord
  • Rotary cutter with sharp blade, and cutting mat; or, sharp scissors
  • Permanent marker
  • Cordless thread zapper (I got my Thread Zap II at Hobby Lobby)
  • Cord threader (Steve made mine; GlimakraUSA carries a similar one)
Adding new Texsolv cord to updated countermarch loom. Texsolv tips.
Upgrade to six shafts from four meant adding two pairs of shaft bars, two upper lamms, and two lower lamms, plus expanding the jacks at the top of the loom. New Texsolv cord was measured, marked, and cut the same for all six shafts. The cords seen on the lower shaft bars connect to the center hole in the upper (shorter) lamms when the loom is tied up.
Top of Glimakra Ideal horizontal countermarch.
Viewed from above, the horizontal countermarch now has 8-shaft capability. Steve guessed I might eventually want a total of eight shafts, and decided to get the hard part out of the way now. The six jacks in use are connected via a long center Texsolv cord to the lower lamms below when the loom is tied up. The outer ends of the jacks in view have cords that connect to the top shaft bars. Countermarch is a nifty mechanism. Simple, really.

Texsolv Tips:

  • Measure length of Texsolv cord. “Measure twice; cut once.”
  • Cut with very sharp blade on the “line” between holes. A sharp blade reduces the cord’s tendency to fray apart when cut.
  • Use thread zapper tool to melt the cut ends. Roll melted end between fingers to form a firm tip at the cut end.
  • Especially for countermarch looms: This one tip greatly simplifies countermarch loom tie-ups because it eliminates guessing about getting everything even. Use permanent marker to make consistent marks on like cords, to enable even tie-ups; e.g., with the marker, put a mark on the second hole from the top, and on four holes (alternate with unmarked holes) near the bottom end of shaft-to-lamm cord, so that when you attach shafts to lamms, all the cords can be precisely aligned. (All my cords are measured and marked. I keep one of each marked cord in a labeled Baggie as a sample to make it easy to replace or add any cord.)
  • Use threader, if needed, to thread cord through holes in the loom parts.

Quiet Friday: Cutest Loom Ever is a look back to the first renovation this little old loom experienced.

May you find new ways to do old things.

Getting ready,
Karen

Colorful Cozy Blanket and a Video

Blanket is finished! I am calling it a success. Double width, decent results in the fold, perfectly coiled fringe (twisted on the loom), and stellar colors. I wish I could do it again. Did I tell you I put on enough warp for two blankets? Wish come true!

Double width blanket, just off the loom!
First time to see the blanket opened up! All eleven colors showing off.

Weaving Details
Warp: 6/2 Tuna Wool, eleven colors
Weft: 6/2 Tuna Wool, doubled
Reed: 30/10 metric [8/in]
EPC: 6 on each layer = 12 ends altogether [EPI: 16 on each layer = 32 altogether] Total number of warp ends: 922
Warp width on the loom (1/2 of full width): 77 centimeters / 30 1/4 inches
Weave length on the loom: 220 centimeters / 86 1/2 inches + fringe

After Wet Finishing, Air Drying, and Brushing
Finished full width: 138.5 centimeters / 54 1/2 inches
Finished length: 186 centimeters / 73 1/4 inches, plus fringe, 10 centimeters / 4 inches on each end

Richly colored handwoven double width wool blanket. Karen Isenhower
Just in time for a cold winter evening. This richly colored wool blanket is cozy and warm.

Are you interested in seeing how I twisted the fringe on the loom? This Twisting Fringe on the Loom tutorial video shows you how I did it. See the finished blanket at the end of the video, too.

May you get to do more of what you love to do.

Back to the loom,
Karen