Weaving Favorites

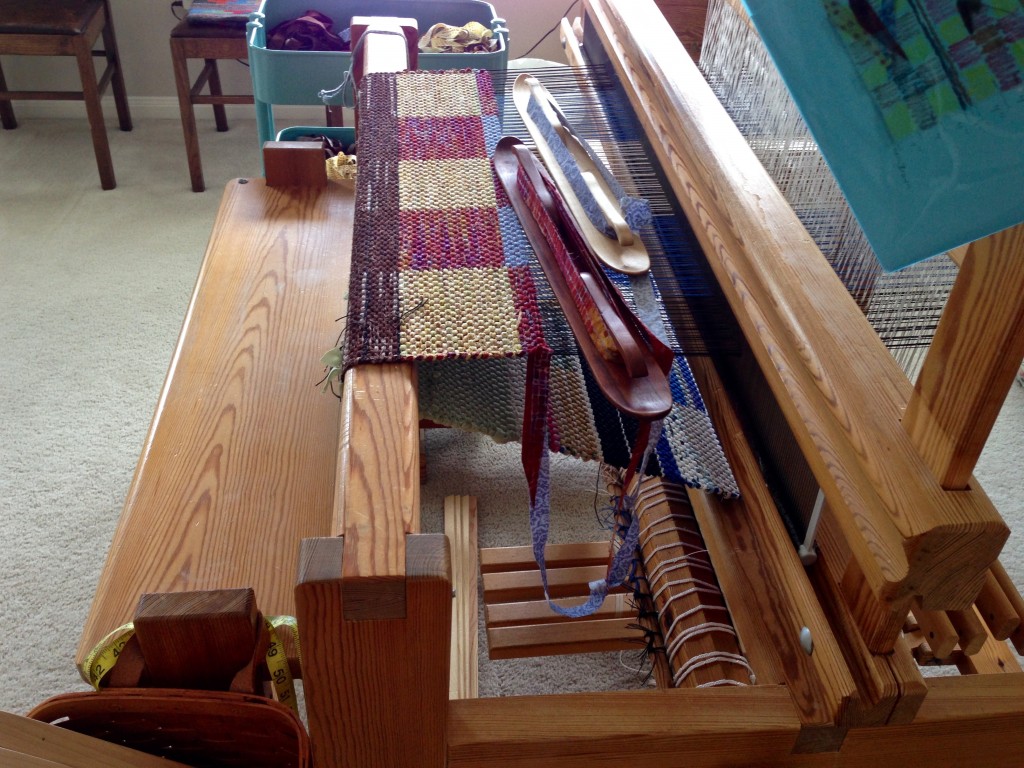
I normally pin a measuring ribbon to the cloth being woven, moving the pins as I advance the warp. This rug is different. I am using a graph paper sketch; and beside each block on the sketch I have written the number of inches to weave. The tape measure that hangs at the end of my weaving bench makes it easy to follow the plan, measuring frequently as I go. This requires mindfulness as I weave, paying attention to the pattern.

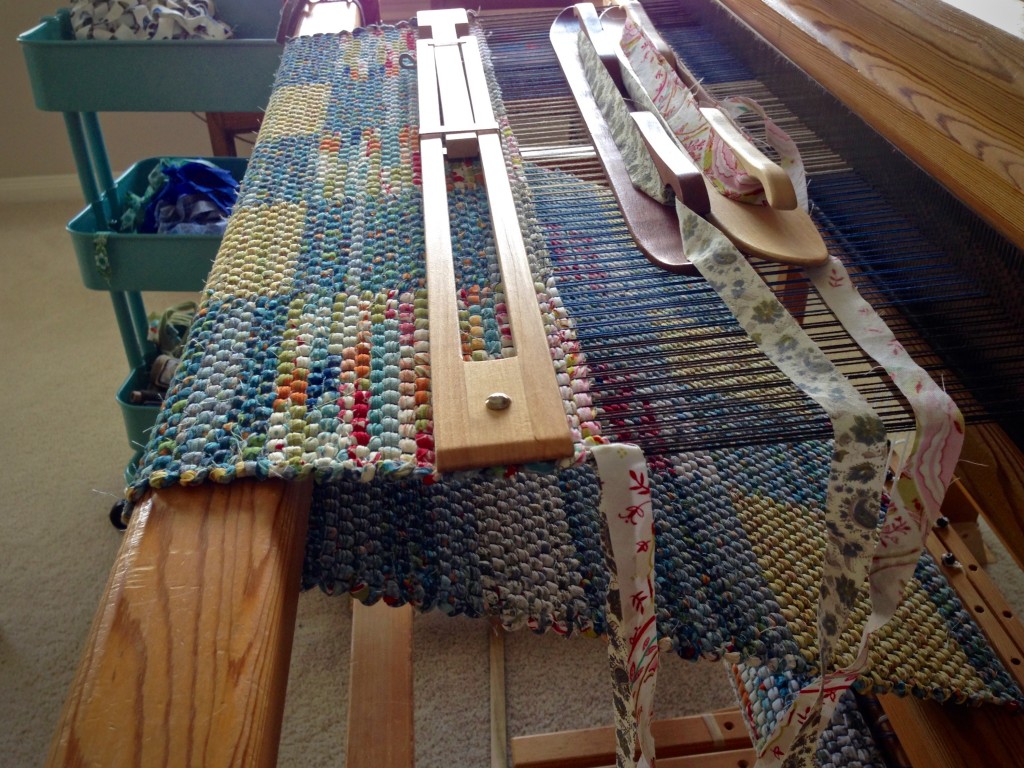
Patterned rag rug on the loom
Two cotton batik prints are used for the first section of blocks in this double binding rag rug. The graph paper pattern hangs with the weaving draft in a plastic page holder on the end of the loom for quick reference.

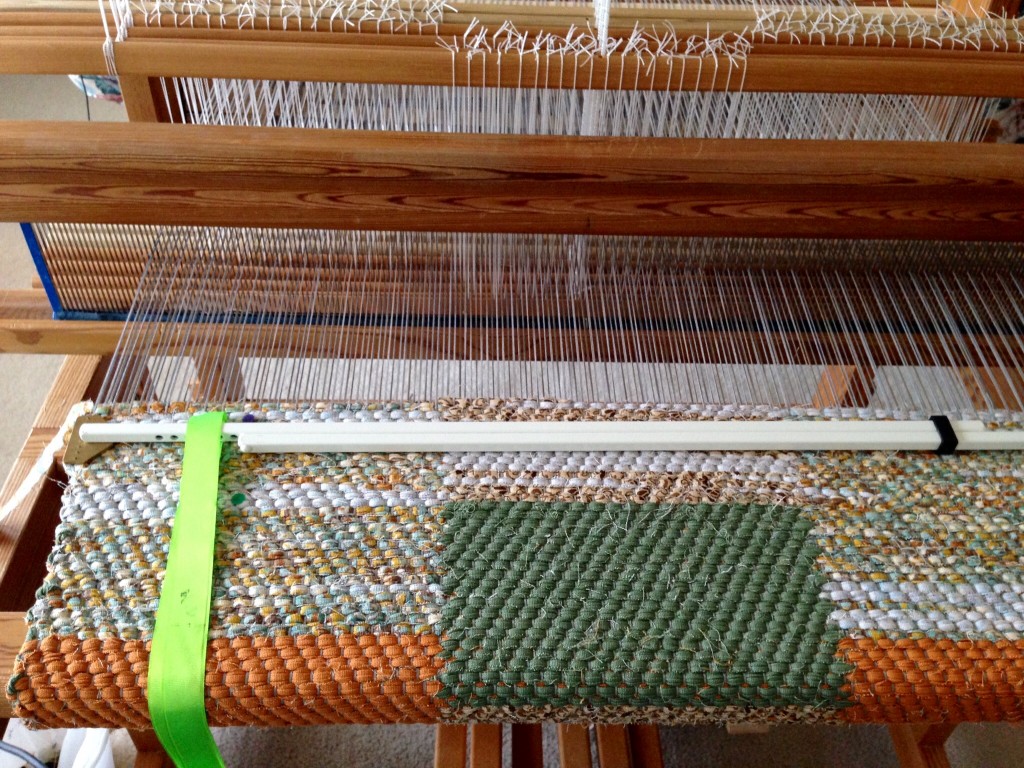
I have the end in mind, and this may turn out to be my favorite rag rug ever! (Have I said that before?) It is true that my favorite thing to weave is usually that which is currently on the loom…

Double binding rag rug on the loom.
Tape measure hangs on the right end of the weaving bench. This tape measure records inches and centimeters. I use both imperial and metric units, depending on what I am measuring.

The Maker of heaven and earth is mindful of you. Cherishes you as his favorite. I know that seems incredible; but as a weaver, I understand it. When you create, you care about the process and the results. As the ones created, we find ourselves in his story. The living Creator God invites us to himself. So, we come to his studio to meet the Mastermind behind the marvelous creations.

May your hands find favorite things to make.

Happy Weaving,
Karen

This Rug in Particular

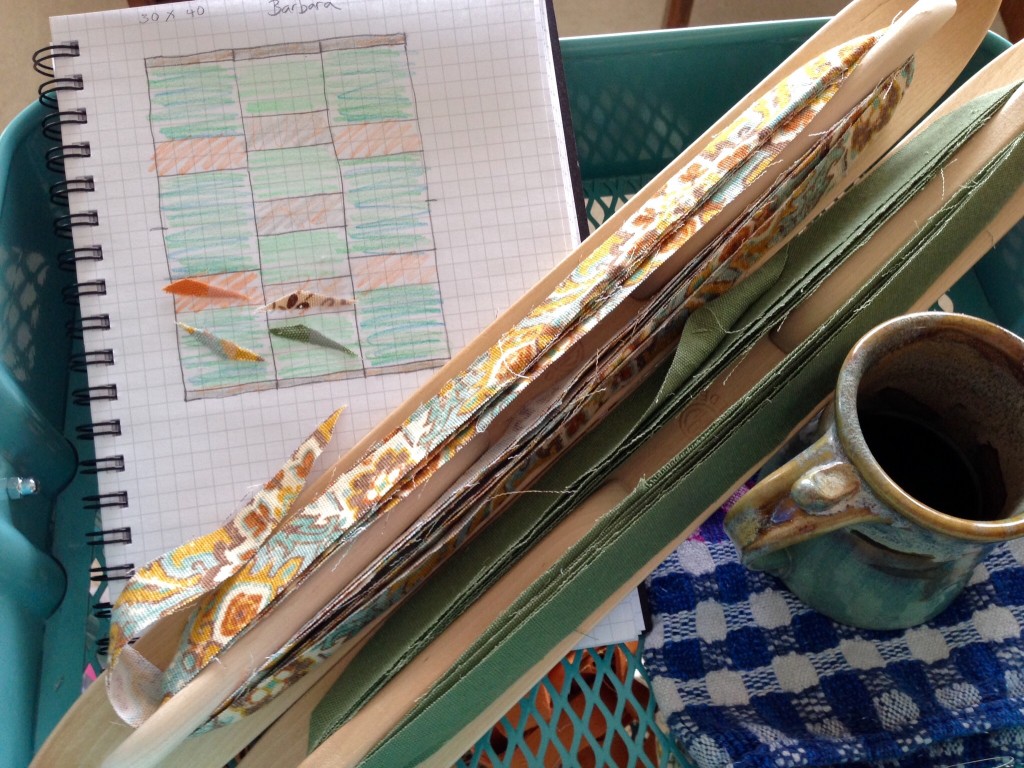
No improvising this time. Creating a rug to fit a particular space means staying true to the plan. In my measured design, each graph square represents two inches (5 cm) of woven length. So, I am not playing around with shortened or lengthened blocks. And no surprise colors, either. Every element has been determined in advance. I am paying close attention, being sure to measure accurately as I go. I keep thinking of my sister’s entryway, hopeful that this rug will be just right. (Sometimes I do play around with the design as I weave, like I described in Tools Day: Graph Paper)

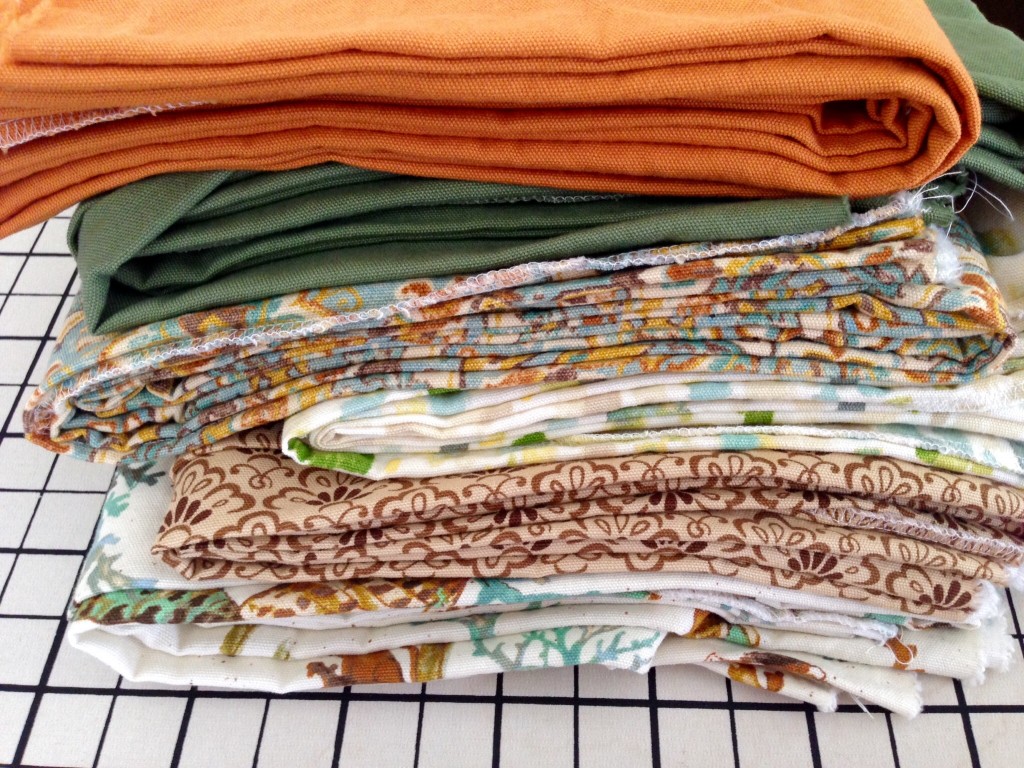
Cotton yardage ready to cut for weaving rag rugs.
New cotton yardage is ready for cutting into strips for weaving double binding twill rag rugs. I am choosing four out of these six fabrics for this rug design.
Design graph for weaving a patterned rag rug.
Design graph sits on the cart next to my loom. A sliver of each selected fabric is scotch-taped to its color block on the graph for reference.

If I only consider the fun of weaving another rag rug, and fail to keep in mind the intended destination, I may create an interesting rug, but it won’t end up inside my sister’s doorway. The “fun” will be short-lived, and will produce disappointment or regret instead of finished satisfaction. That reminds me of something C.S. Lewis once said:

Aim at Heaven and you will get earth ‘thrown in’: aim at earth and you will get neither.

Double-binding twill rag rug on the loom.

Dream of heaven. It’s the place where God Himself removes every cause of tears. No death, no mourning, or crying, or pain. Every thread and every color will be in place, as it should be. Just imagine the Grand Weaver, making preparations for our home coming, as He places the final handwoven rug on the floor. Perfect fit.

May you dream big.

To the Finish,
Karen

Bold Hemstitching

An embroidered trim is what I have in mind for this scarf. Hemstitching is just that. Instead of the usual single strand, I am using two strands of the 8/2 cotton weft in a contrasting color to accentuate the embroidered look. The hemstitching marks the beginning and the end. You can make hemstitching barely noticeable if you want, or you can make it so bold it can’t be missed, like I am doing with this one.

Hemstitching, with Contrasting Color:

Preliminary

  • Weave an inch/2.5 cm or more of fabric for a header.
  • Thread a blunt tapestry needle with a single or doubled strand of weft thread four times the weaving width.
  • Starting an inch/2.5 cm away from the right-hand selvedge, weave the needle over and under, next to the first weft thread in the weaving, going toward the selvedge.

Begin contrast hemstitching.

  • Pull the stitching thread almost all the way, leaving the end woven into the selvedge. Capture the woven end within the first several stitches of the hemstitching.

Thread secured at beginning of hemstitching. Hemstitching how-to.

First step of hemstitching. Tutorial.

Step 1

  • From right to left, take the needle under several warp ends. In this example, the needle goes under six ends.

Hemstitching in four easy steps!

Step 2

  • Pull the thread all the way through, keeping it taut at the woven edge.

Hemstitching step two.

Step 3

  • Take the needle back over the same (six) warp ends, and go under the same (six) warp ends, bringing the point of the needle back up between wefts, two or more rows away from the woven edge. In this example, the needle comes up between the third and fourth rows of weft.

Hemstitching in 4 easy steps. How-to with pics.

Step 4

  • Pull the thread all the way through, keeping it taut at the woven edge.

Hemstitching instructions.

Finishing

  • Repeat Steps 1 – 4 across the entire width.
  • Finish by needle weaving the stitching thread back into the selvedge for an inch/2.5 cm. Trim off the remaining stitching thread end.

Continue hemstitching, back to step one.

Hemstitching as embroidery.  How-to with pics.

Hemstitching at the end of the woven fabric:

Starting on the right-hand side, secure the end of the stitching thread as before, and follow Steps 1 – 4 for hemstitching across the width. The only difference is that the needle comes toward you under the cloth in Step 3, instead of away from you.

Bold hemstitching at end of cotton lace weave scarf. Karen Isenhower
Cotton lace-weave scarf in springtime colors. Bold hemstitching at the end.

Everything that has a beginning has an end. Since the beginning of time, and through the ages, our Maker has been unfolding His mystery of life and love. There will come a day, though, when the mystery is finished. Certainly, there will be bold hemstitching at the end of the cloth as the Maker, the Grand Weaver himself, brings time as we know it to a close.

May your days begin and end with an embroidered edging of love.

By hand,
Karen

Shuttles at Work

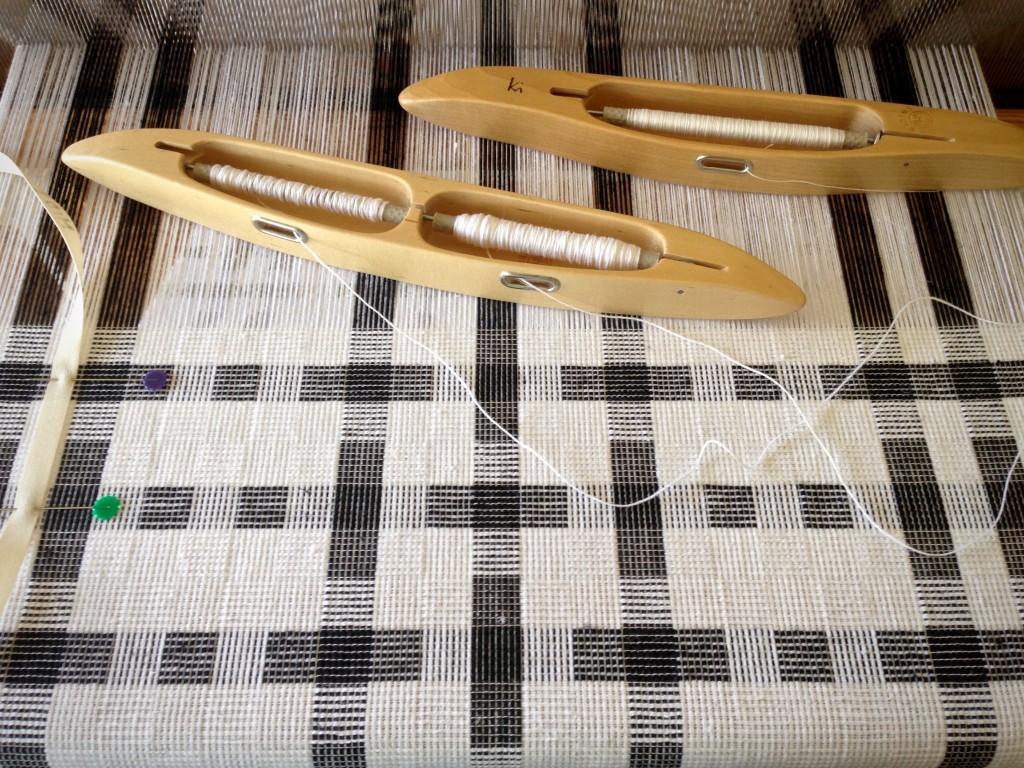
With a flick of the wrist, the shuttle glides across the warp. The curved, narrow end of a traditional Swedish boat shuttle slides right into my hand. This dice weave uses one shuttle for the plain weave background, and a second shuttle for the pattern weft.

Dice weave on the loom, with the luster of linen in the warp and weft.
Dice weave with 16/2 linen warp and weft. The blue plain weave weft and the brown pattern weft are woven on alternating picks in the pattern blocks.

From my bin of shuttles I choose the ones best suited for the warp that is on the loom. When a shuttle fits my hand, as the Swedish ones do, that’s even better. As the weaver, I am usually the only one who sees the shuttles at work, but that makes them no less important. The one purpose of a weaving shuttle is to carry weft thread across the warp, by the weaver’s hand.

How do you find your purpose? Discover your calling by putting others first. Like most people, I would rather put my own self first. But our grand weaver calls us to be last. He calls us to be servants of each other. In that role where we carry the thread without being noticed, we do our most important work. And that is where we finally find our great value in the weaver’s hands.

May your shuttles glide effortlessly.

On purpose,
Karen

Nine Color Towel

It may look like there is no rhyme or reason, but there is a thoughtful pattern behind this arrangement of weft colors. …Okay, it is somewhat random; and, truthfully, I am making up the pattern as I go. It is refreshing to have the freedom to use up bobbins of color. I consider it a welcome challenge to create a visually vibrant fabric that is not a cluttered cloth.

Nine quills of 16/2 cotton. Colorful towel up next.
Nine quills of 16/2 cotton. Trying out different arrangements of colors.

Our prayers can be like the assorted quills with varying amounts of thread in an array of colors. These are the needs, small and big, that we bring to the Lord. Can he make anything good out of all of this? What can he do about my concerns? Does he even hear me? Do my needs or hopes make a difference to Him? Am I saying my prayers in the “right” way?

Nine-color towel on the loom. Karen Isenhower
Wide, narrow, dark, light. Nine colors are purposefully arranged in this cotton towel. Treadling variations help complete the multi-color composition.

It takes courage to have faith when you pray. In a world where “seeing is believing,” the eye of faith says, “believing is seeing.” Faith is expecting something to happen when you pray. It’s trusting the grand weaver to know how to arrange this assortment of leftover threads and make something good out of it.

May you take courage.

With you,
Karen

~The Etsy coupon on my About Page is good for two more days. It’s my ThankYou to you.~