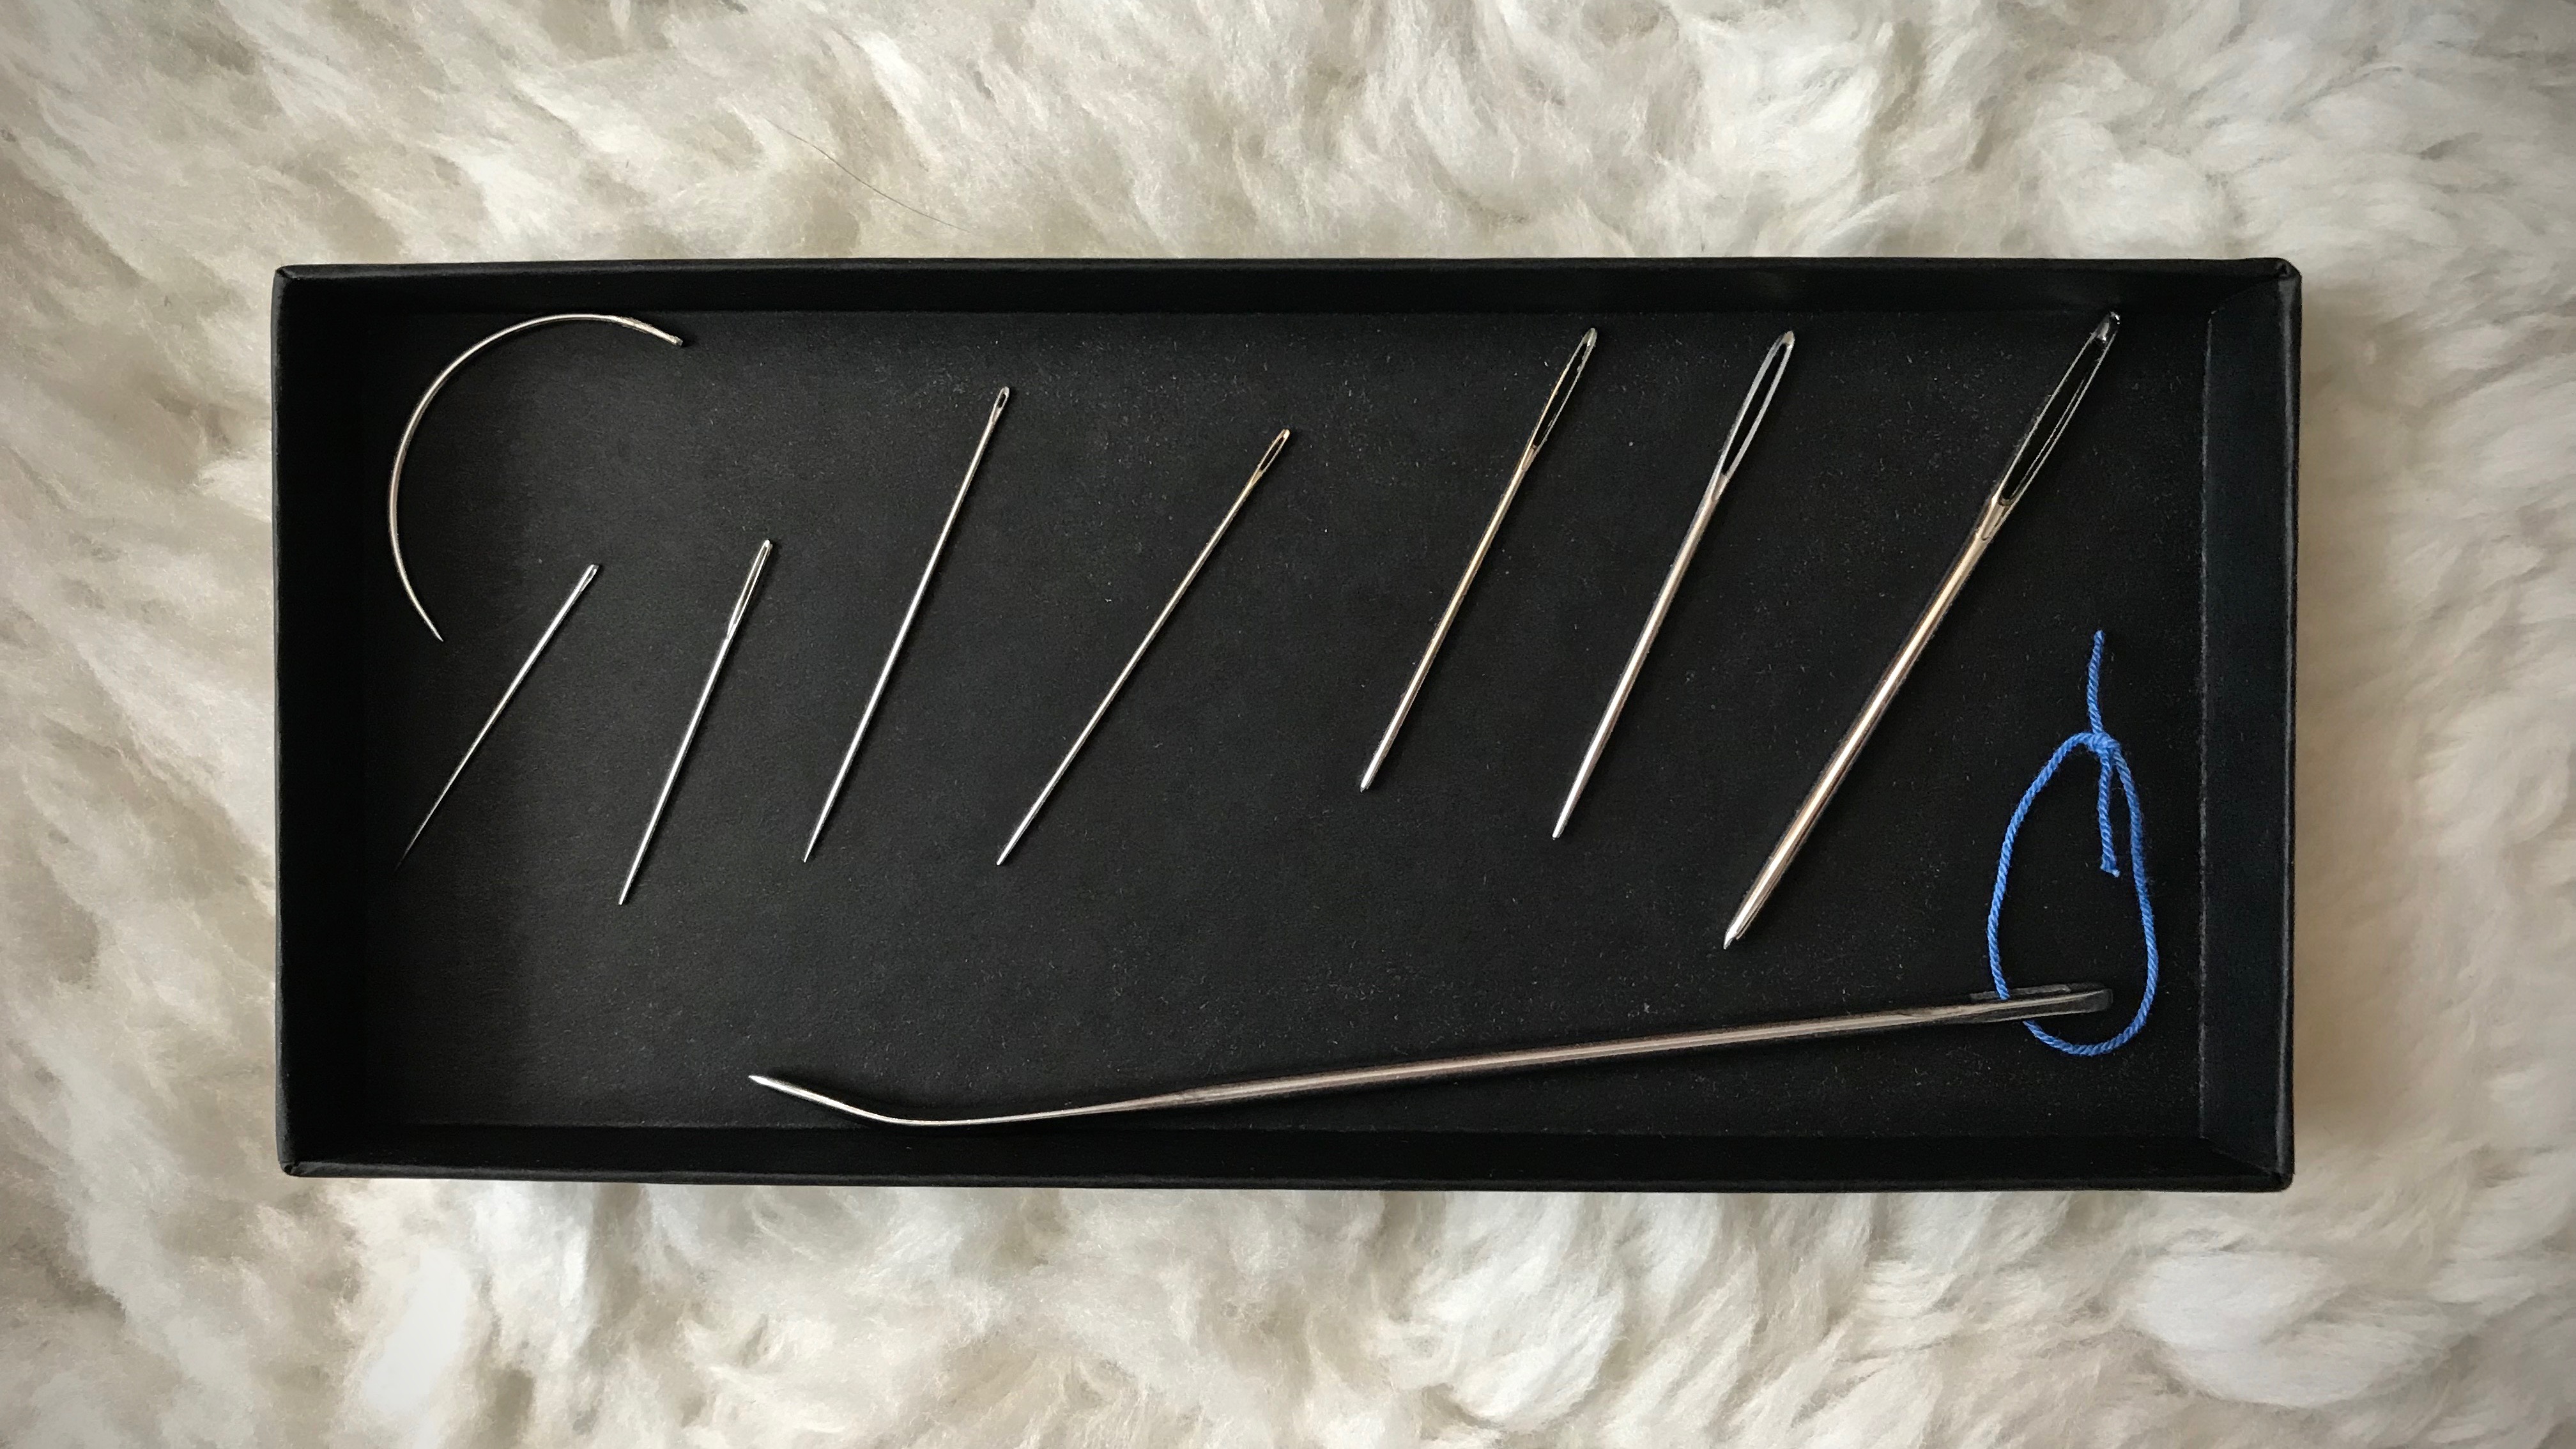
Even though there are dozens of needles in and around my weaving and sewing spaces, nine stand out from the rest. These go-to needles have earned special favor. As essential tools, these needles have specific holders and permanent homes.
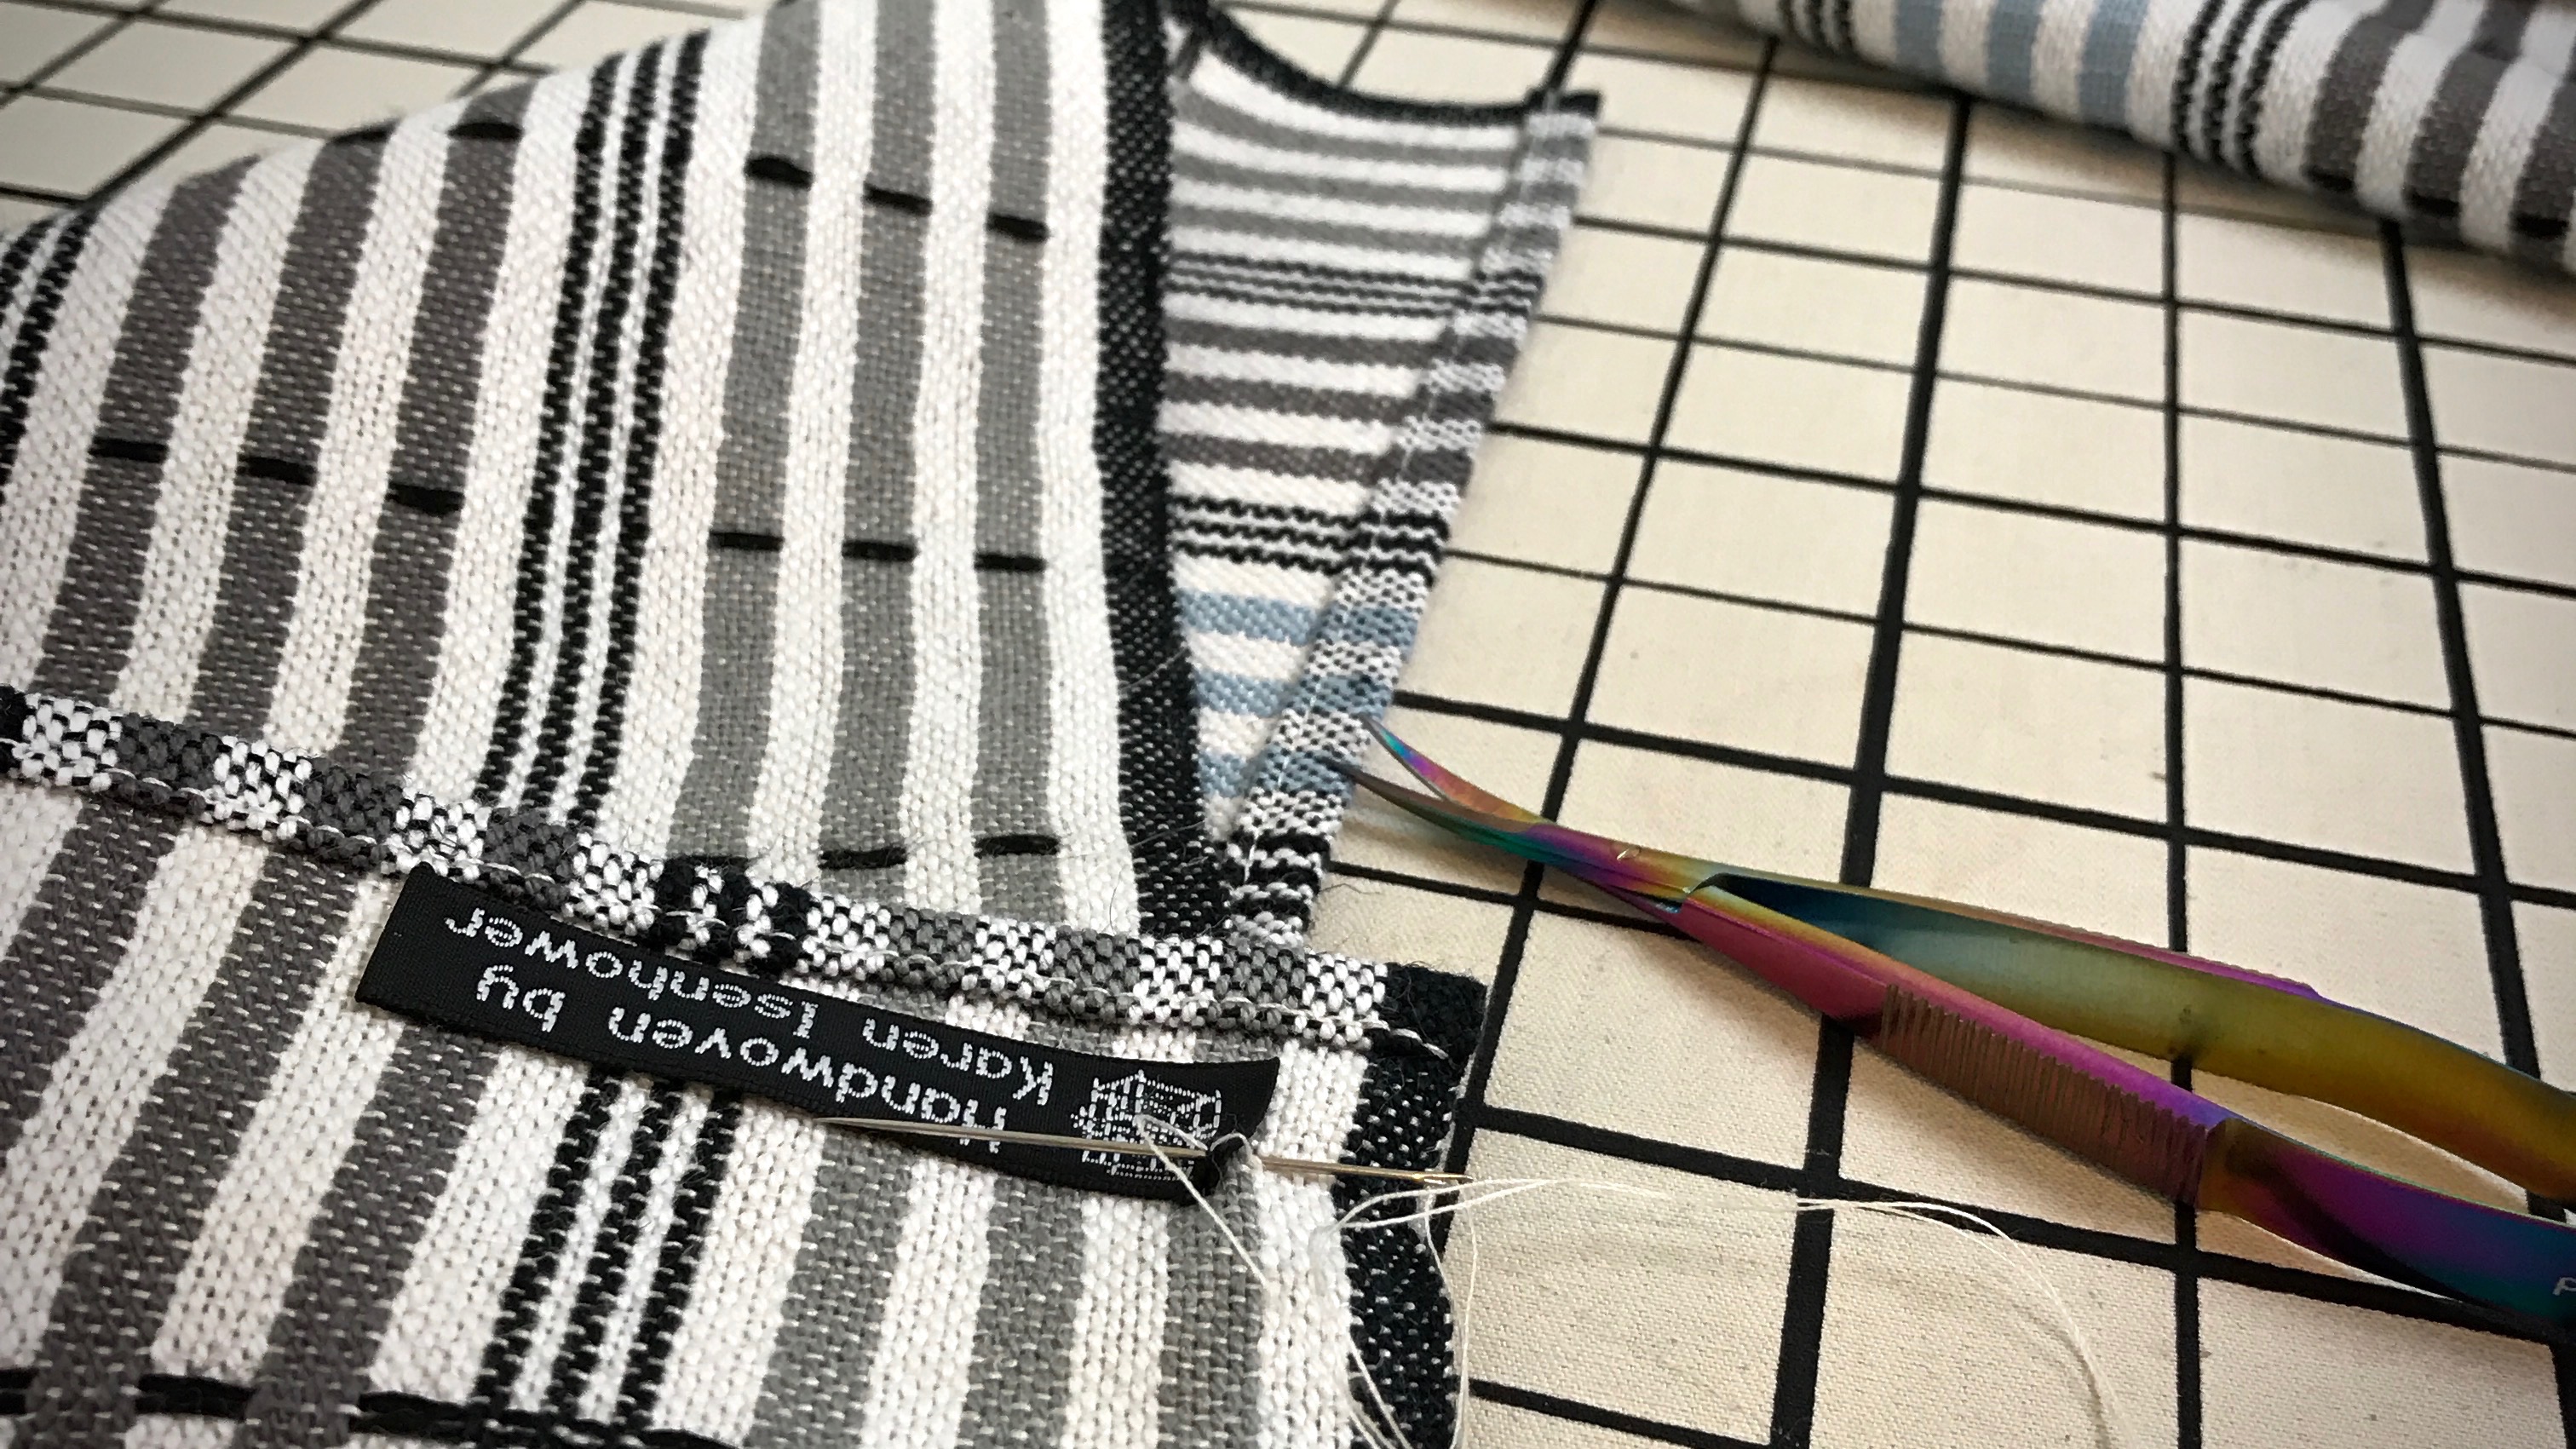
Sharp needles: hand-hemming, hand-sewing, stitching on labels, and stitching a tapestry to a linen mat for mounting (curved needle)
HOLDER: Pincushion I made in 1980
HOME: Sewing supply closet, “Needles and Pins” drawer
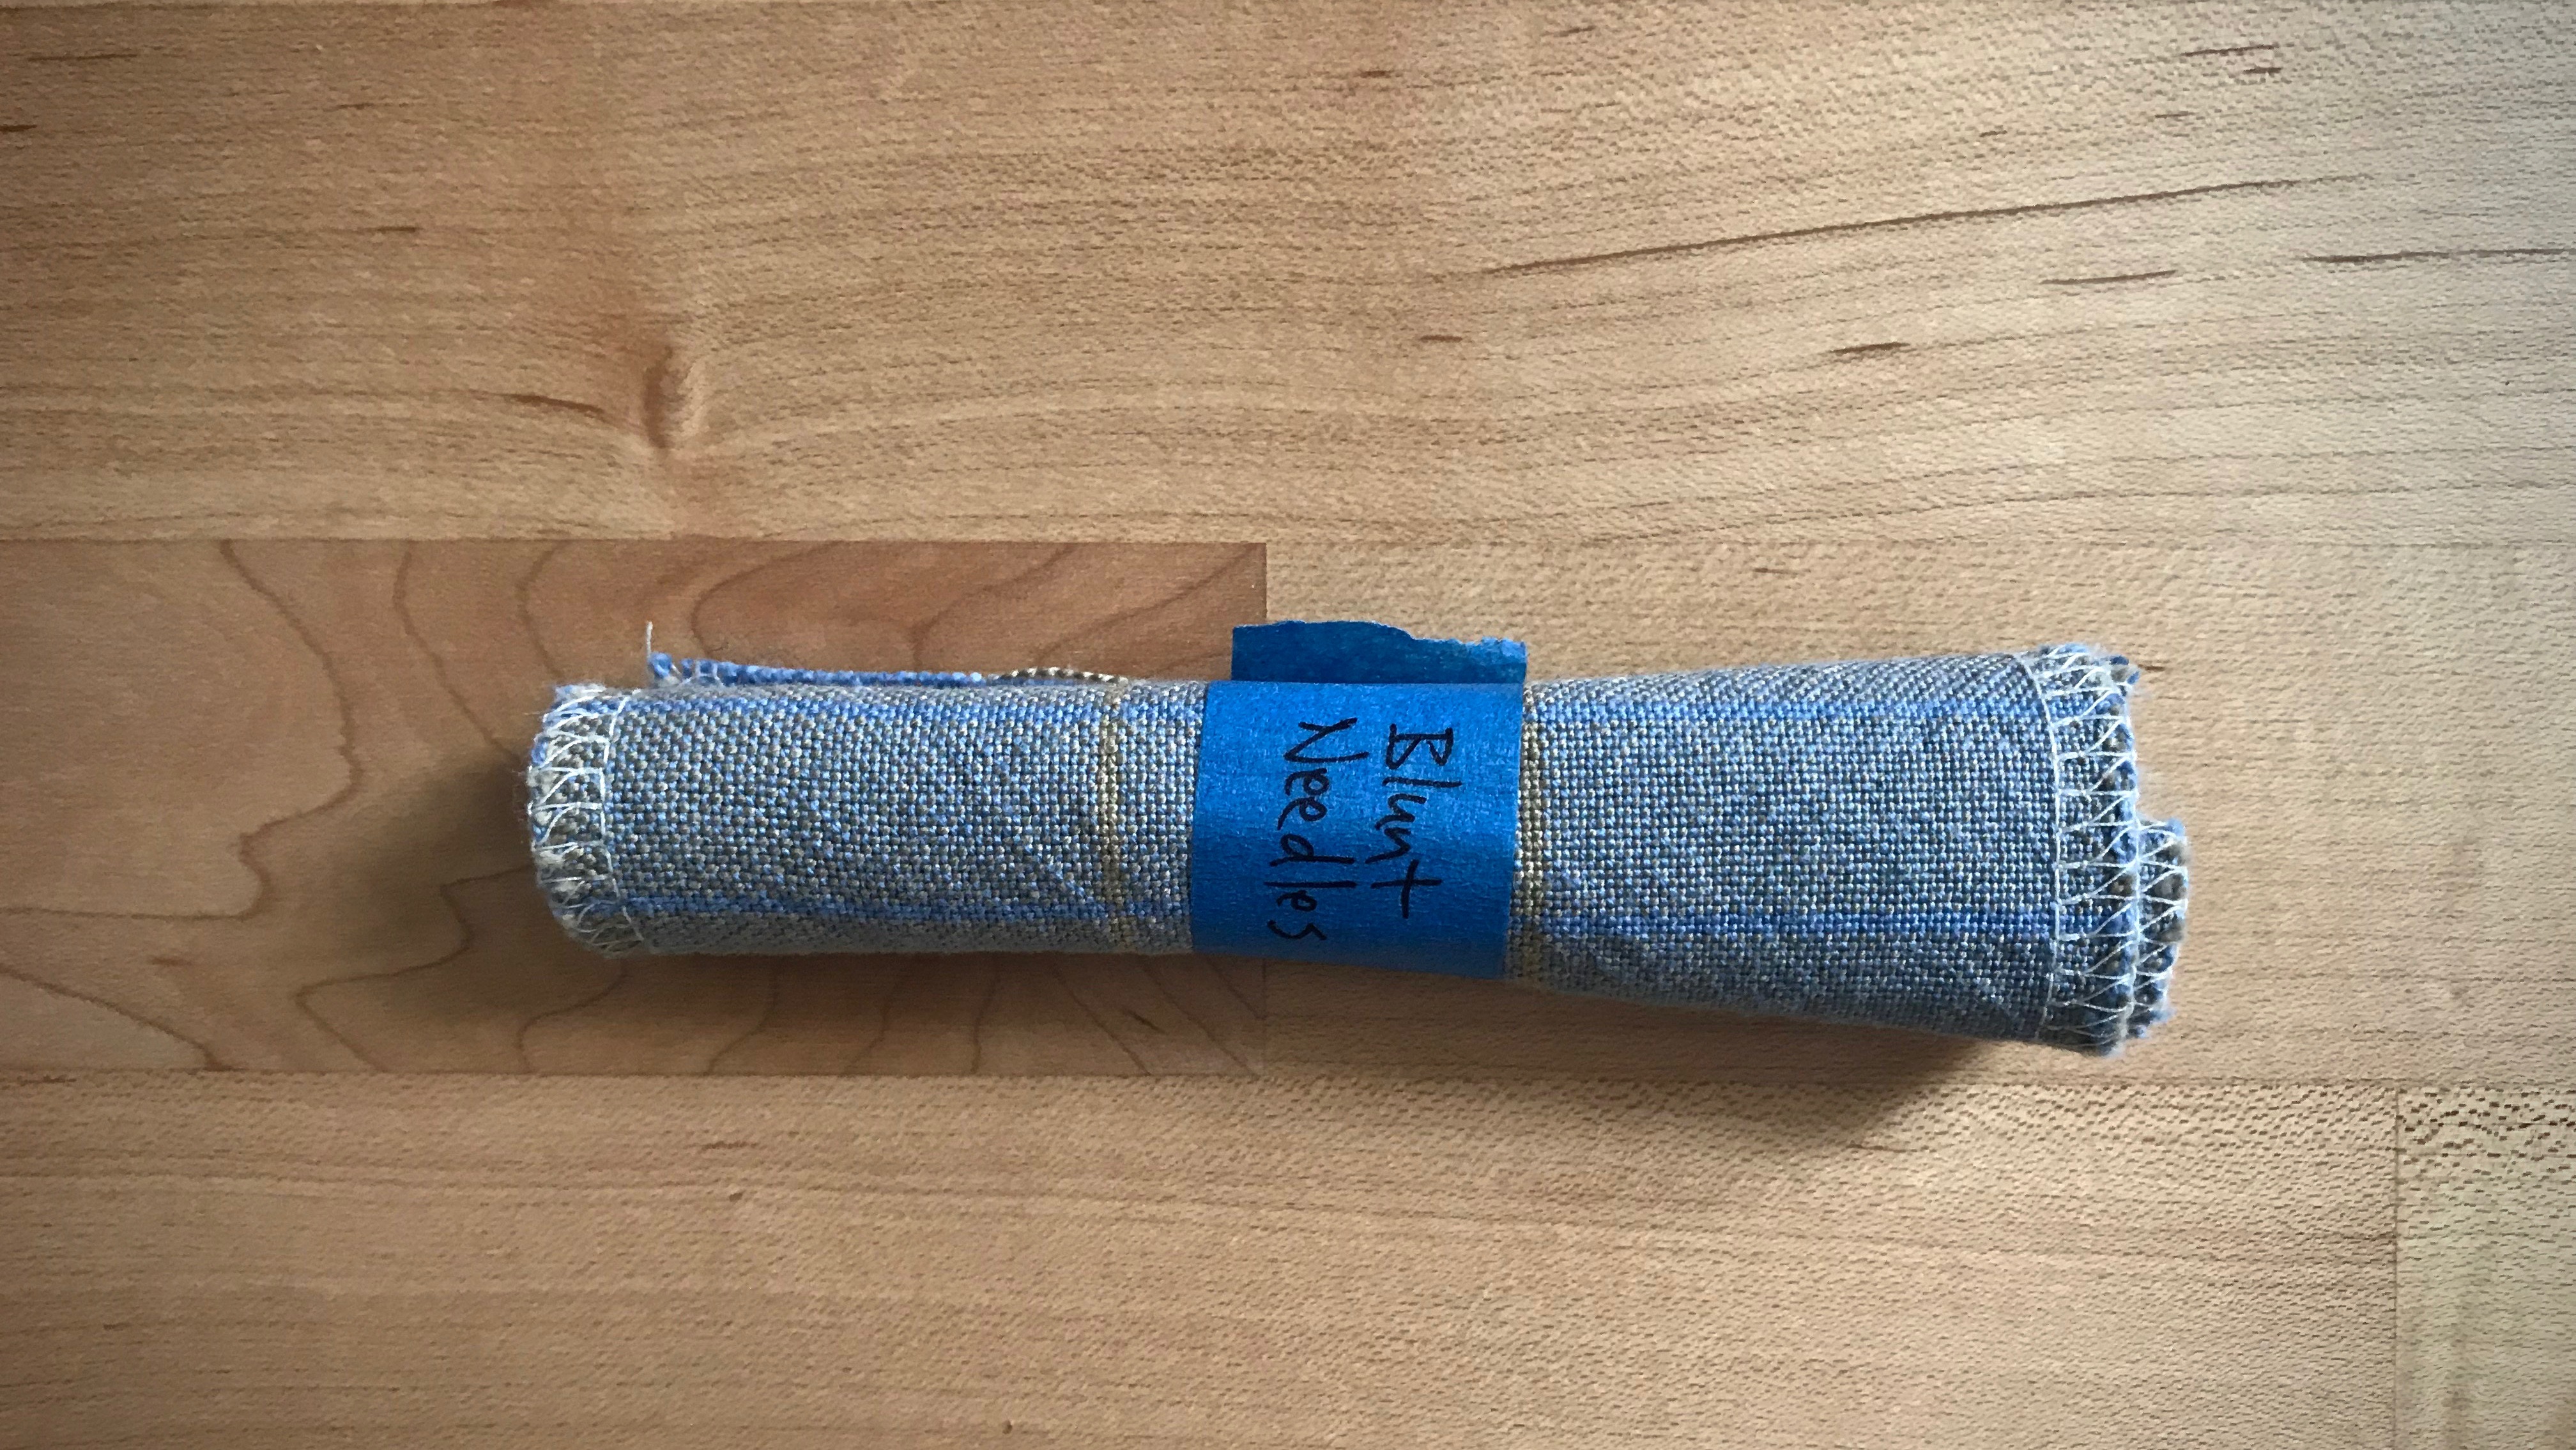
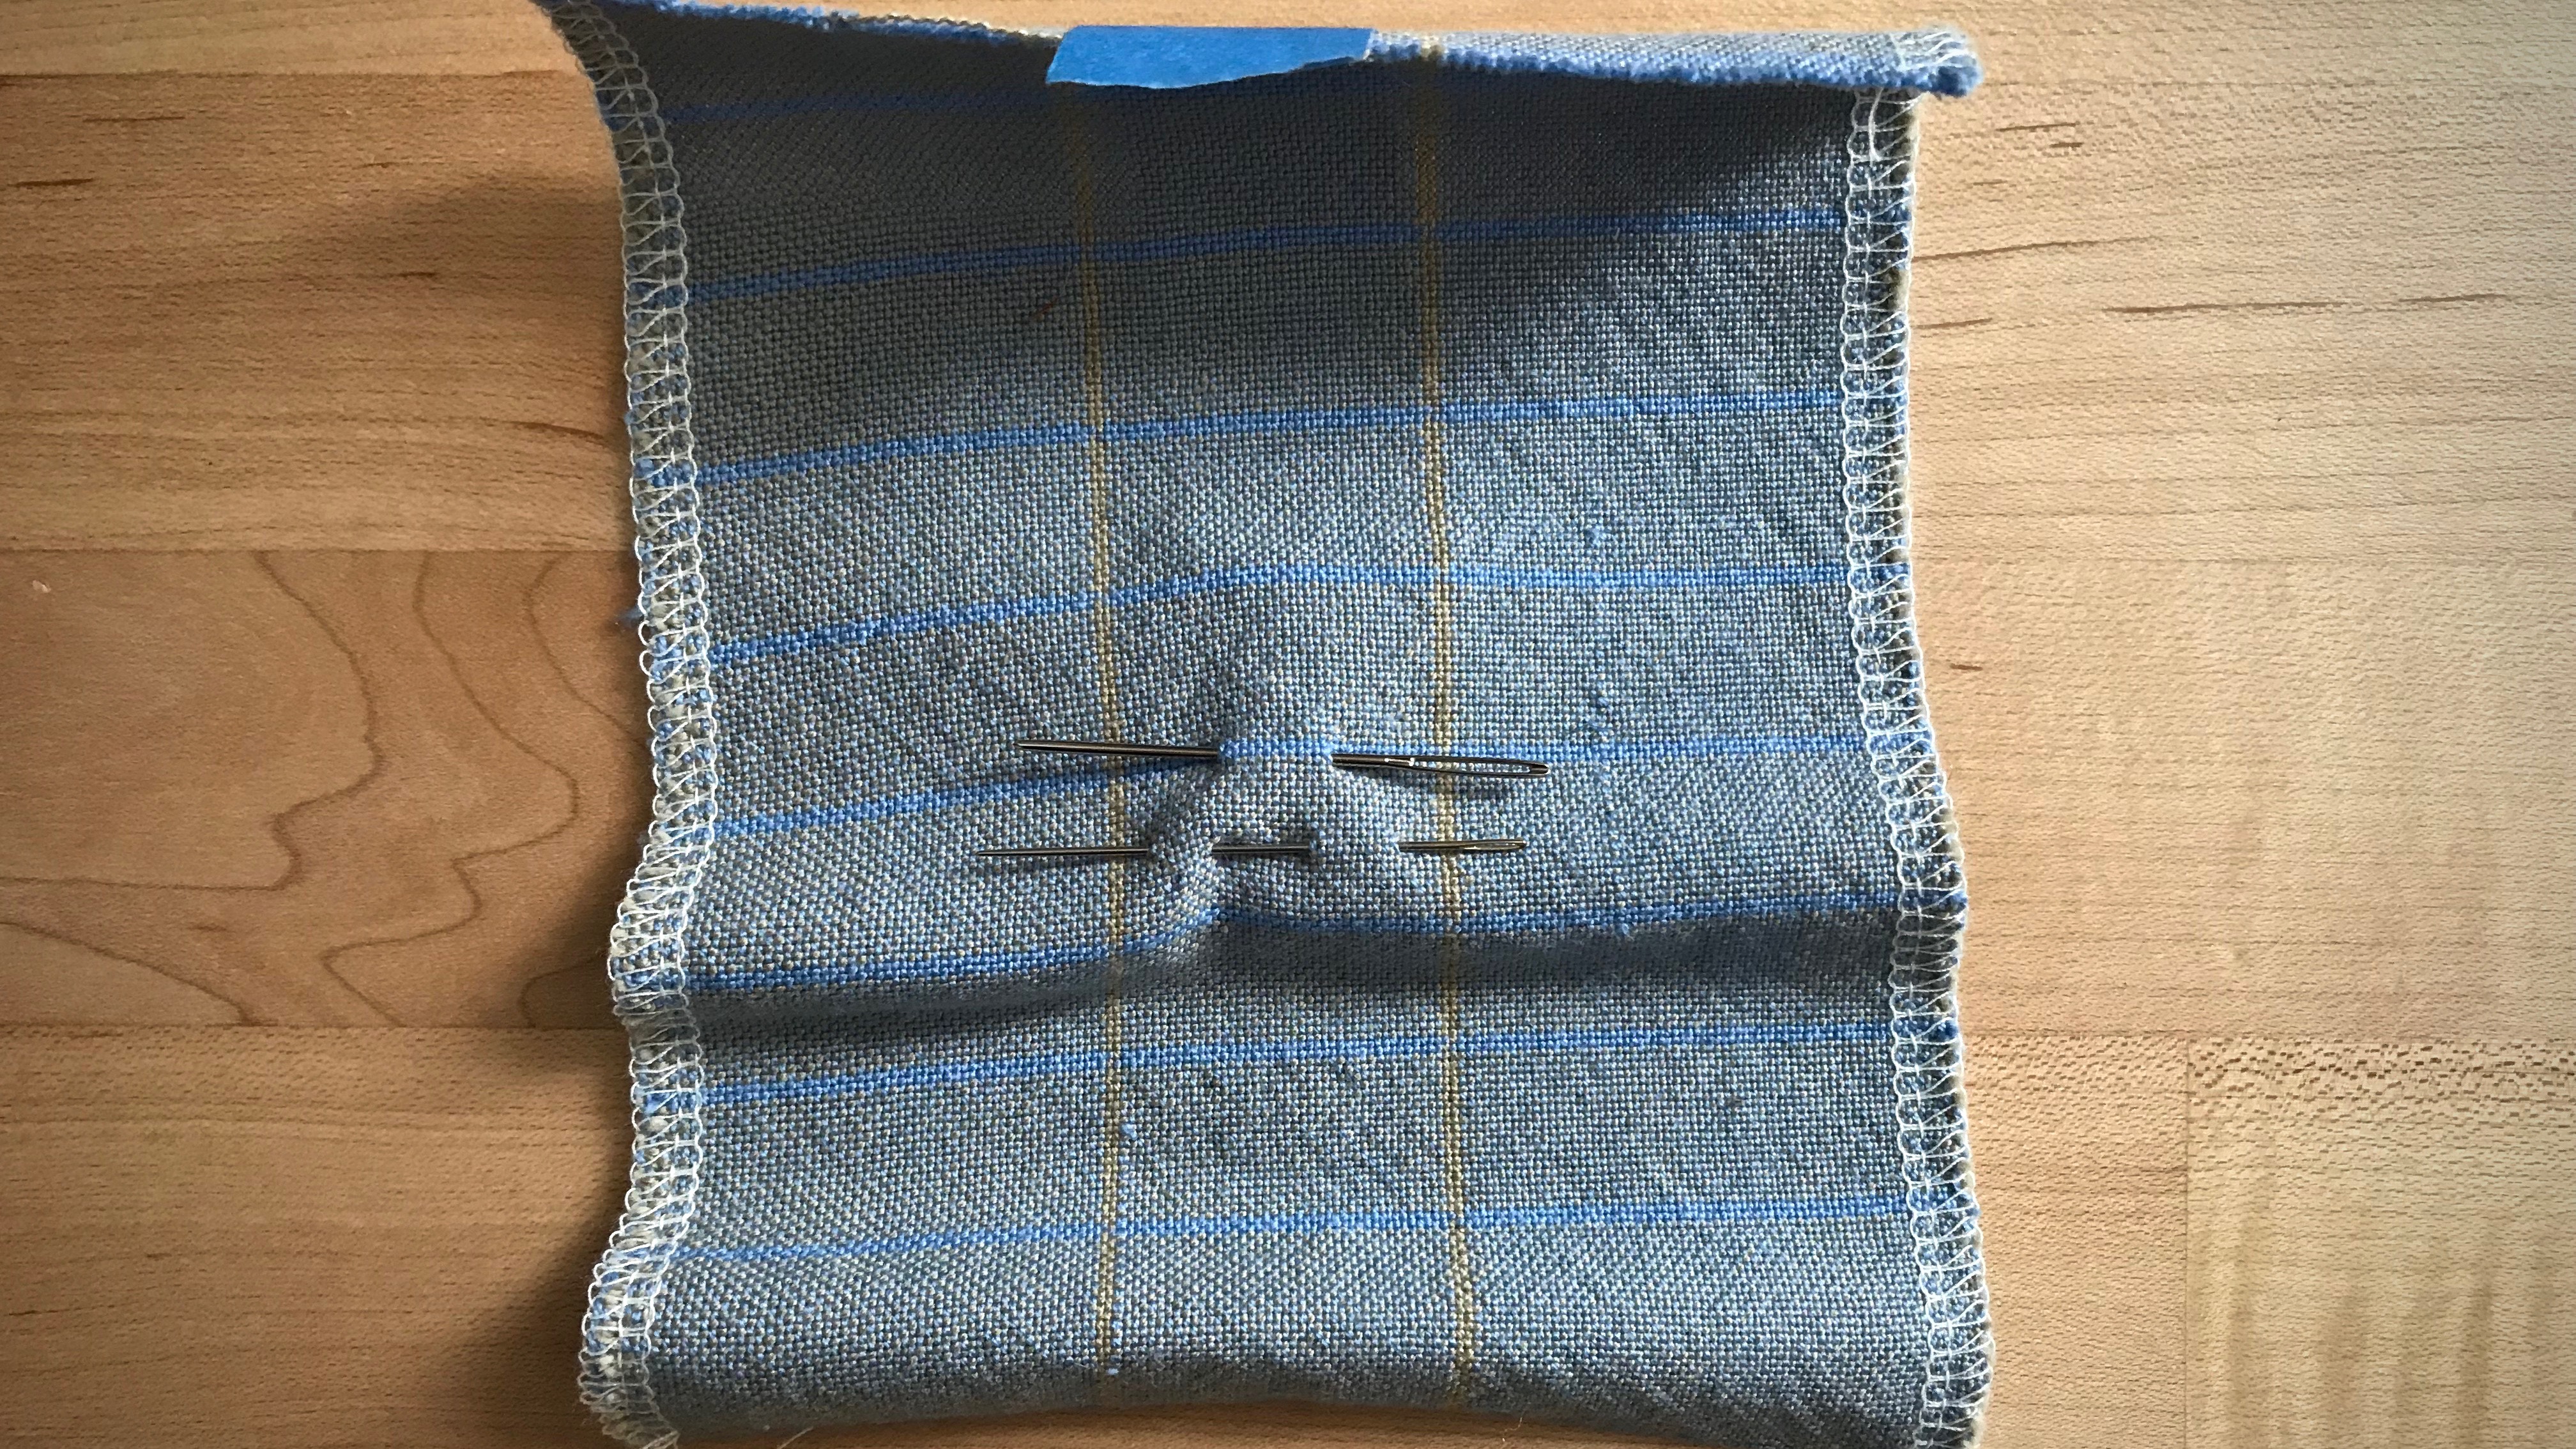
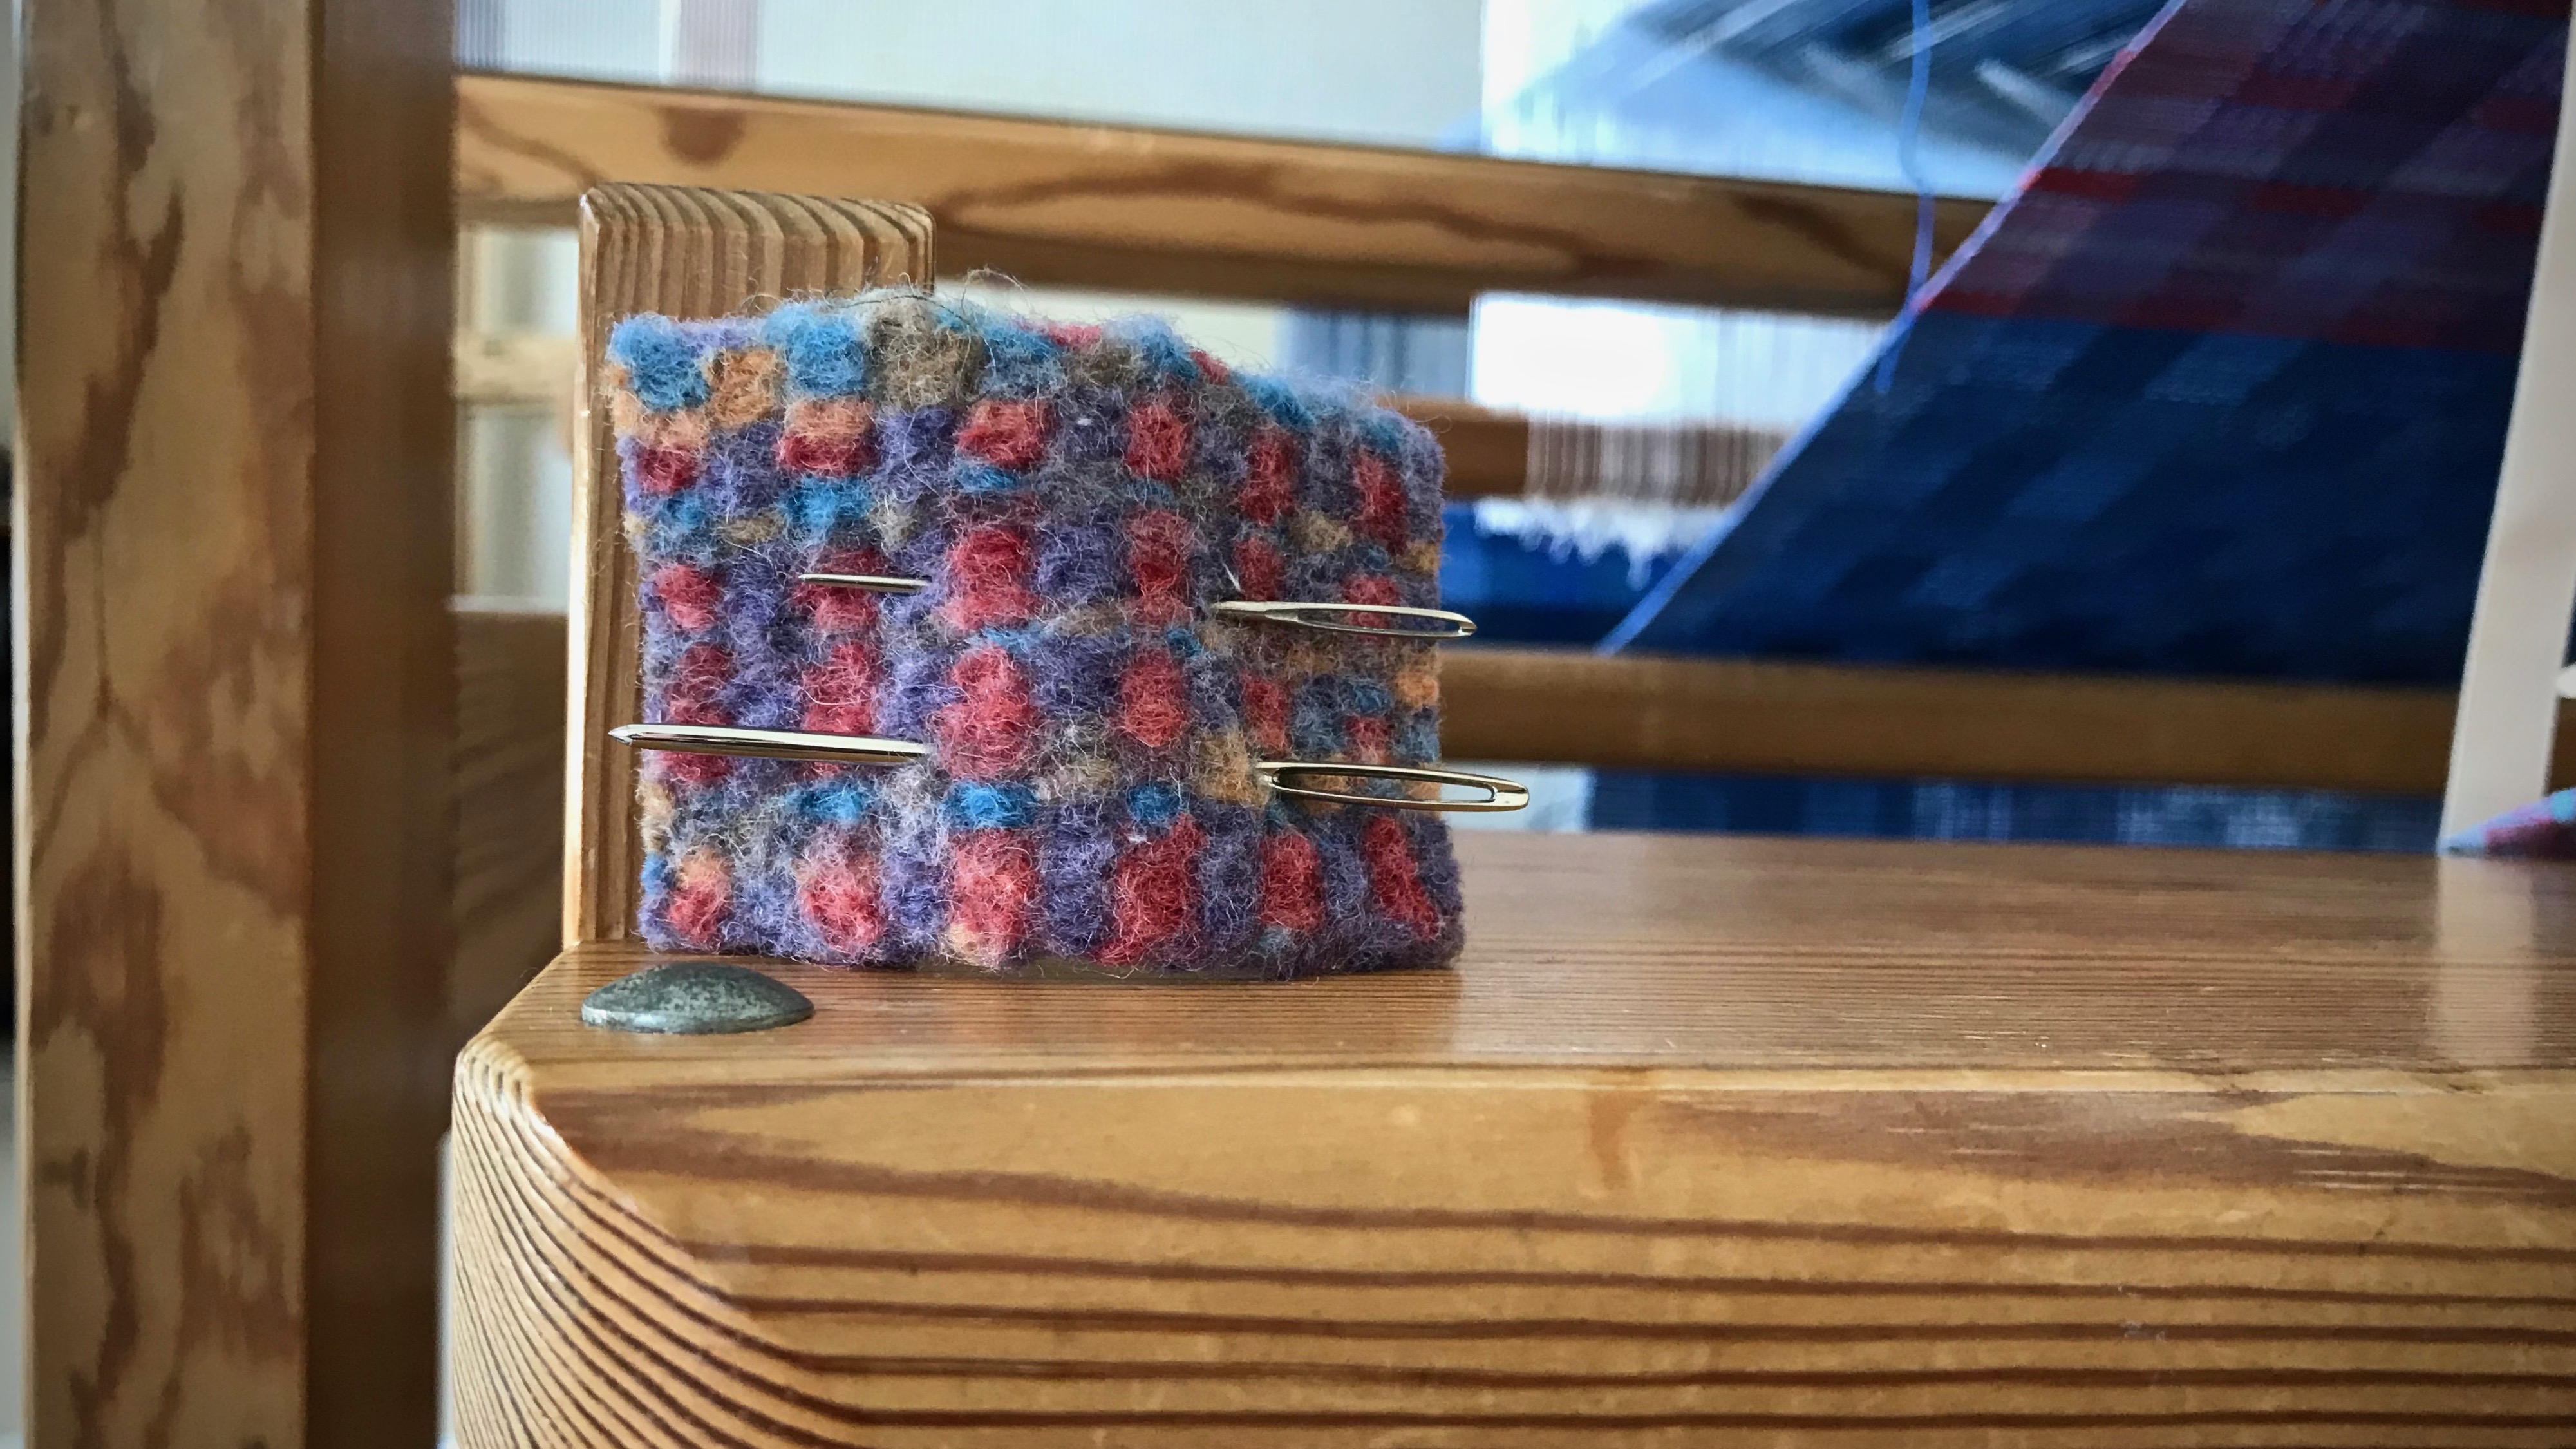
Blunt tapestry needles, small and medium: hemstitching, stitching a thread mark to the right side of the fabric, sewing in tapestry weft tails, finishing work—needle-weaving for corrections and repairs
HOLDER: Remnant of cotton handwoven plain weave fabric
HOME: Loom-side cart, top drawer
Steve sanded and rounded the tips of the needles to make them blunt. A needle with a rounded tip won’t pierce and split the threads.
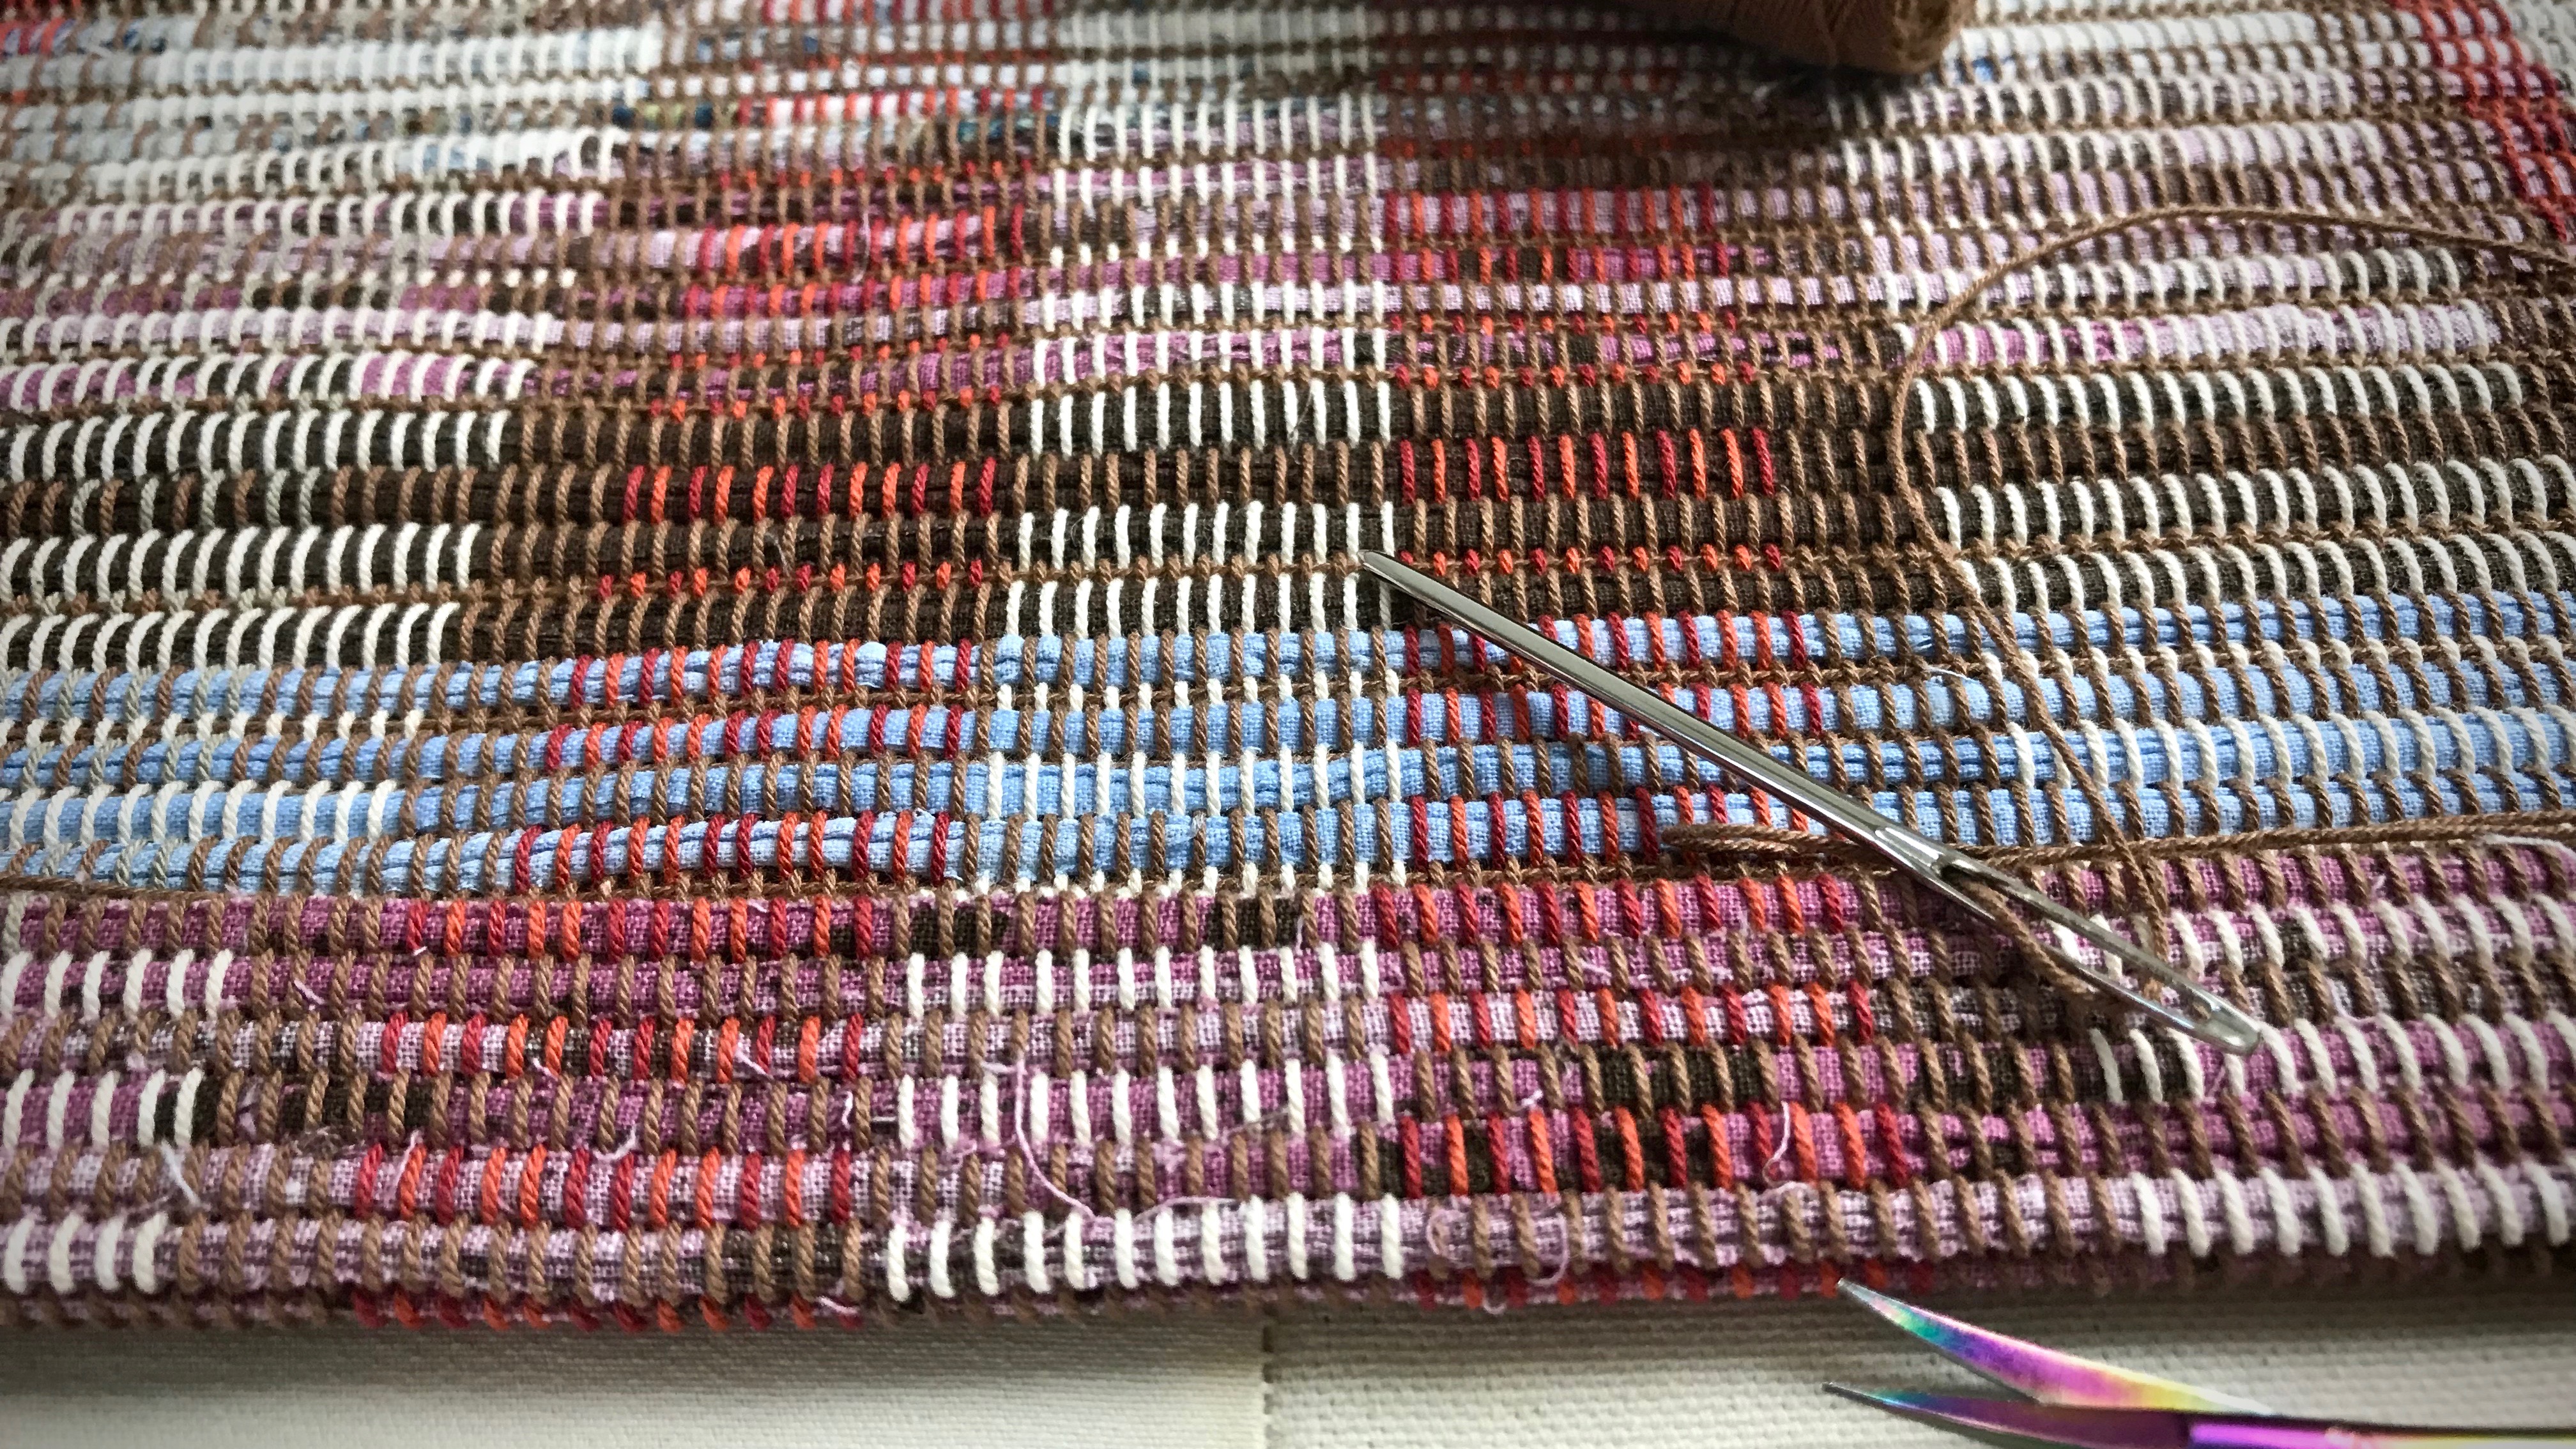
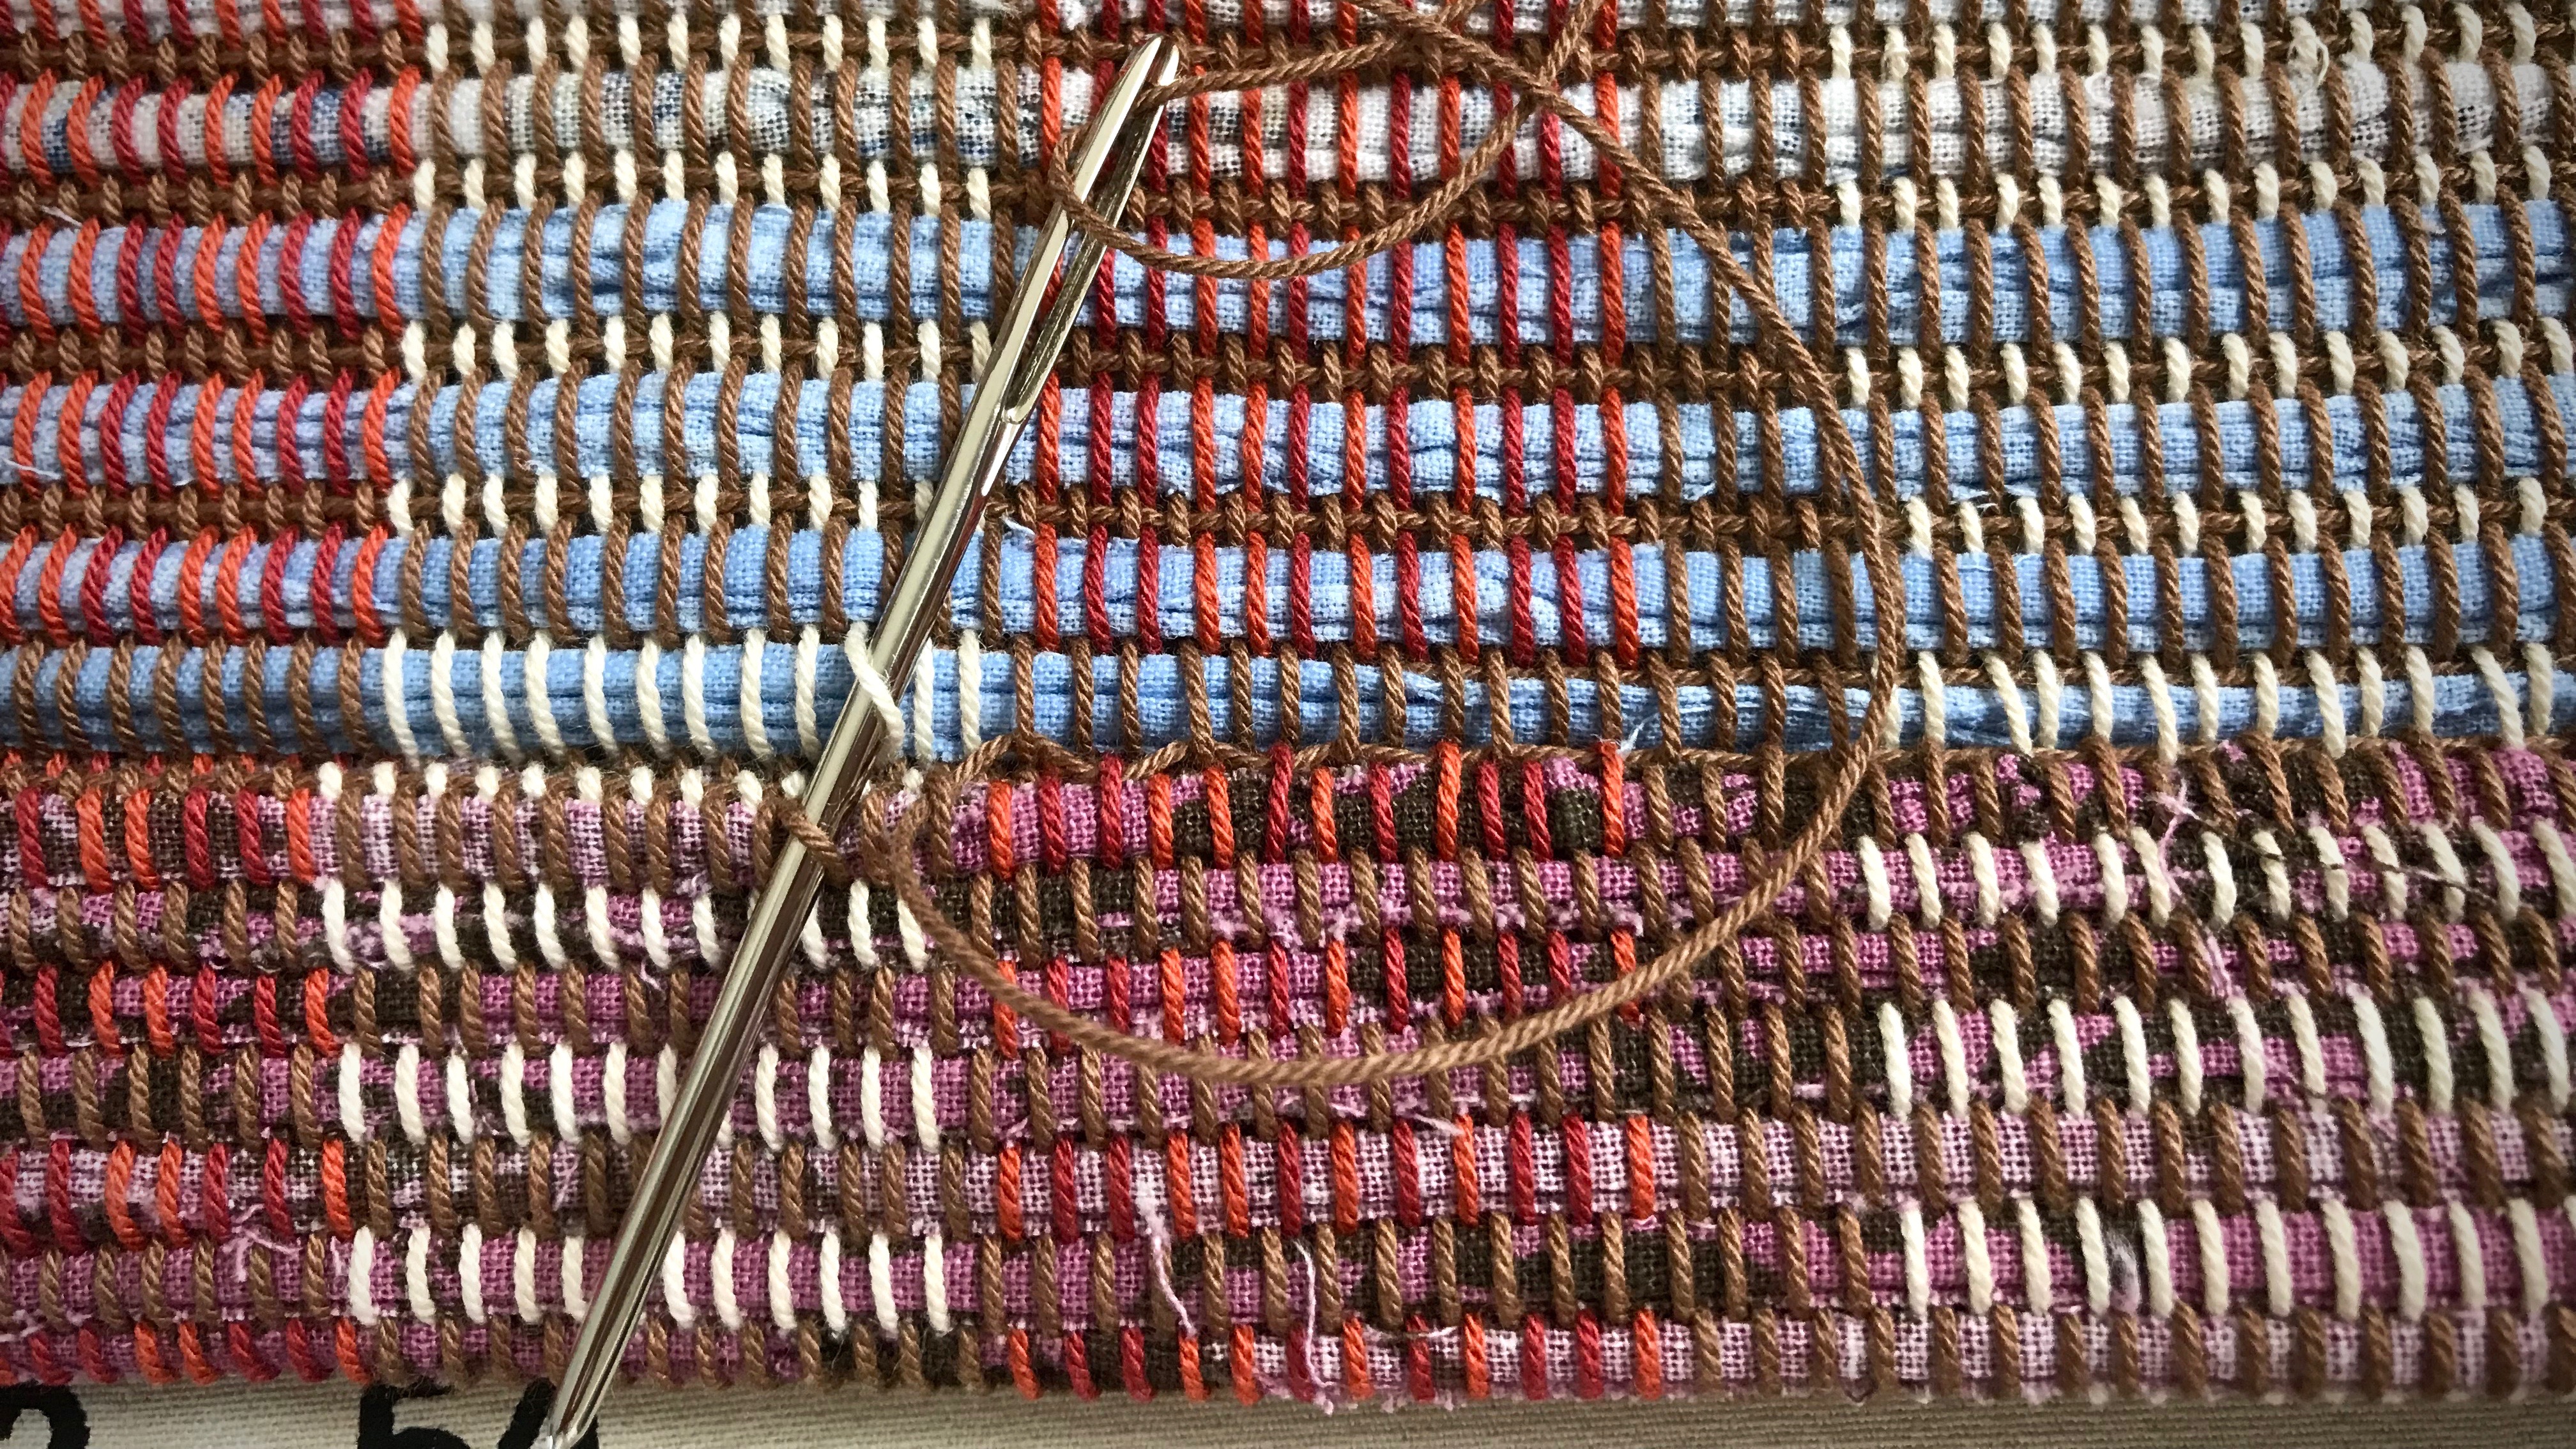
Blunt tapestry needles, large: hemstitching, hand-hemming rugs, weaving small tapestries
HOLDER: Felted inkle-woven tape
HOME: cutting/work table, Grandma’s old sewing tin
Sacking needles: pulling rag rug warpends out of scrap weft, threading warp ends back into a wool rug (I did this…once)
HOLDER: straw-woven pouch from a trip to The Philippines
HOME: weaving supply closet, top drawer on the left
May you find the needle you need when you need a needle.
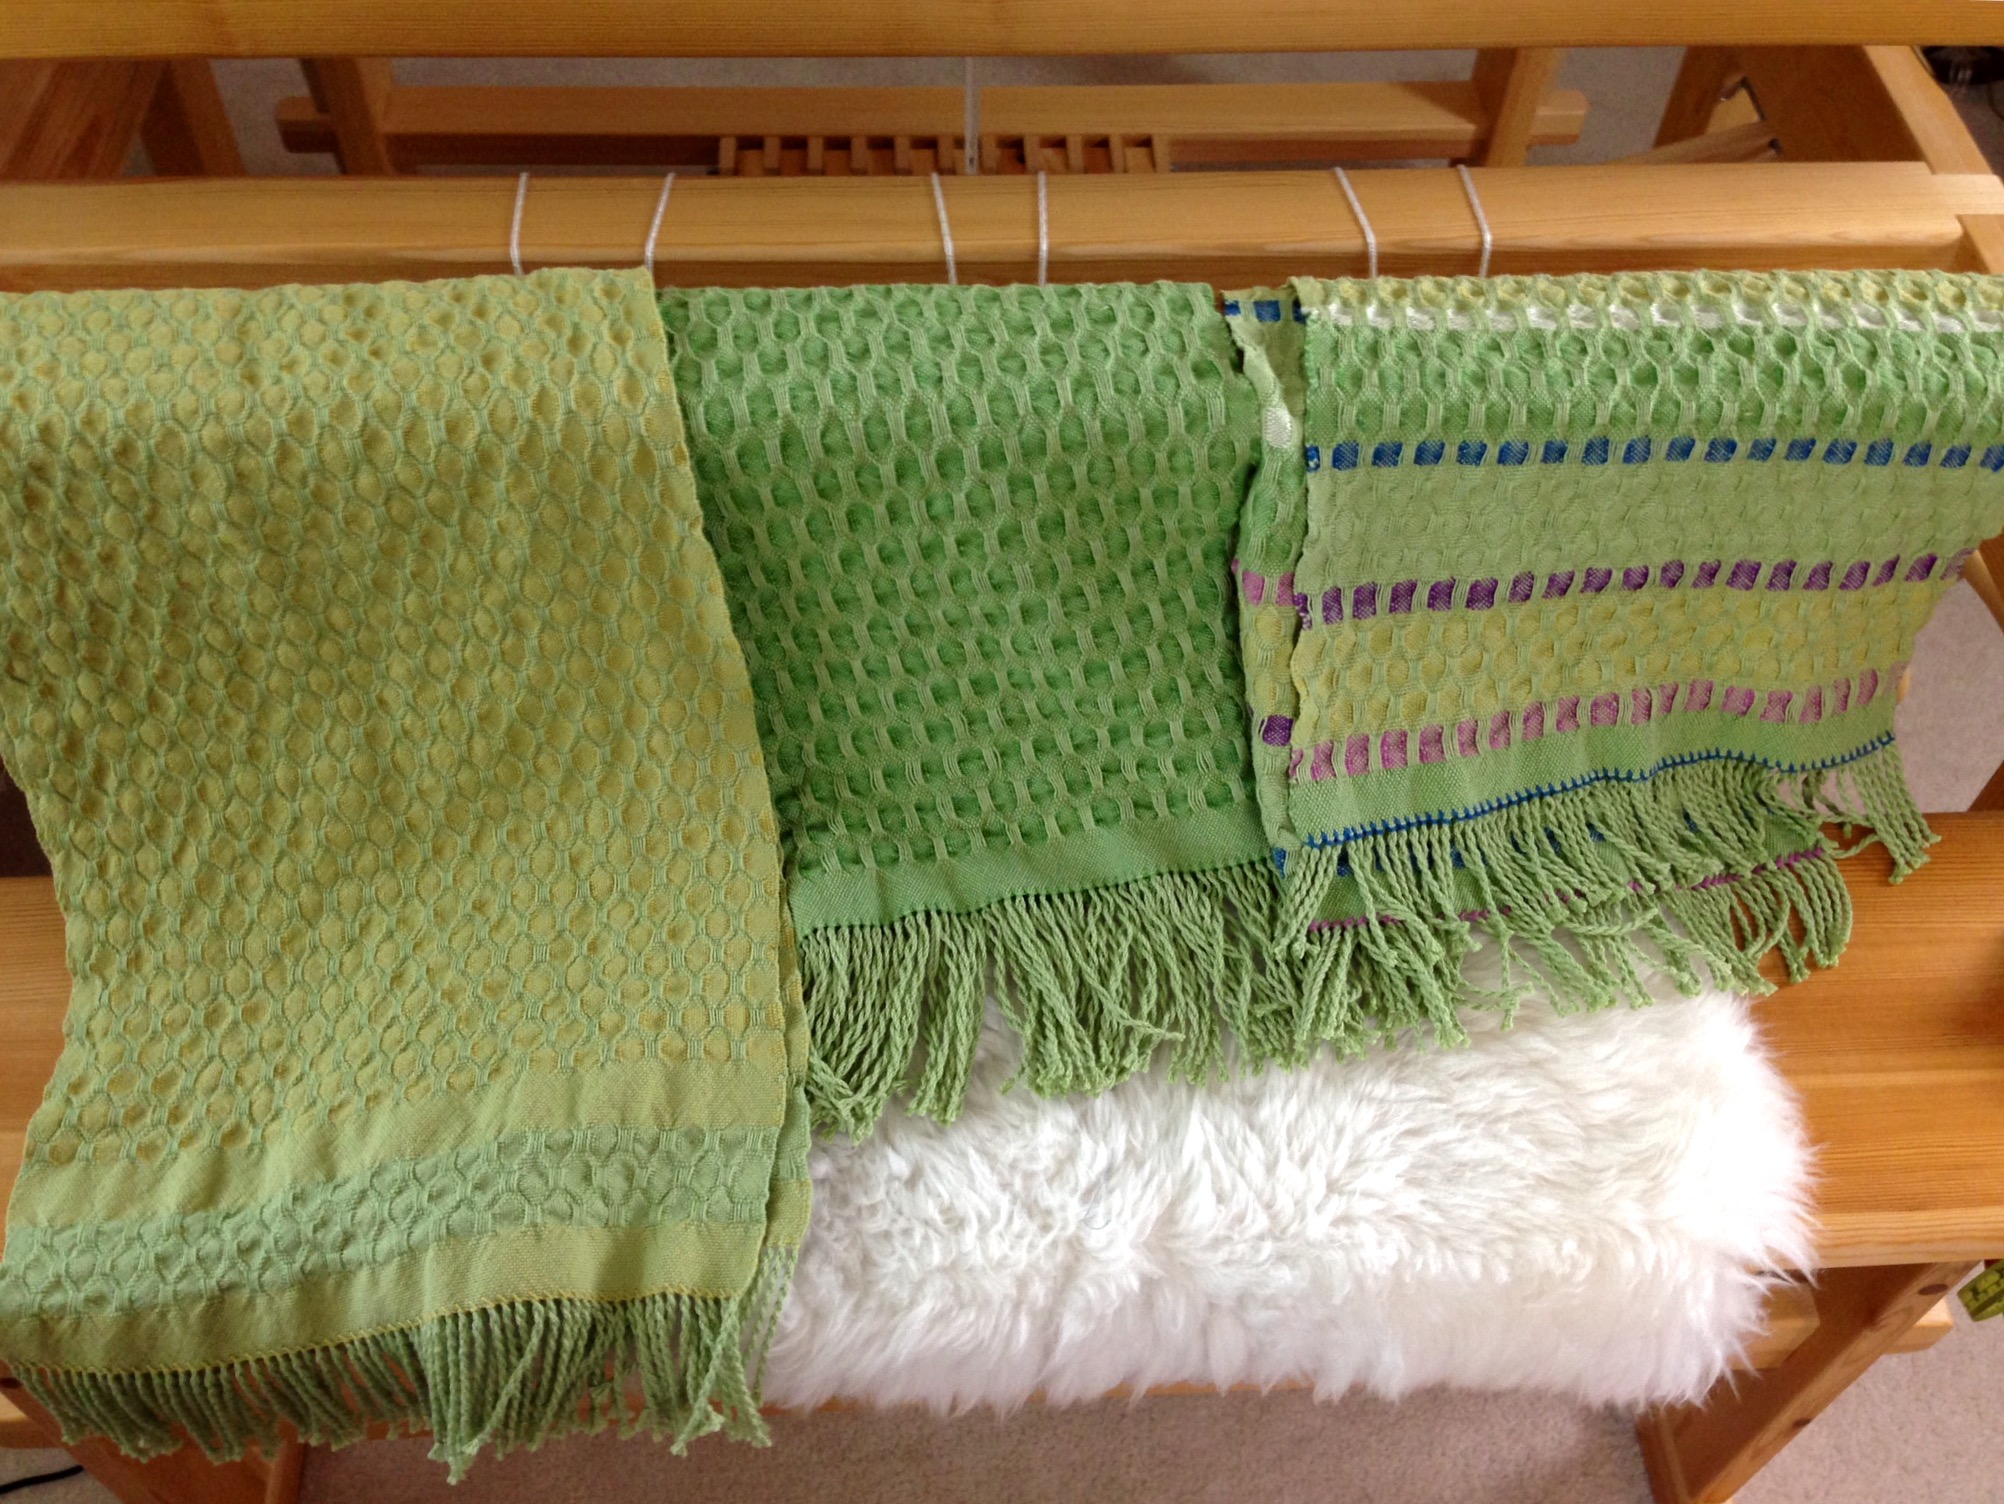
One thing I learned is the scarf with the longest warpfloats has the greatest shrinkage rate. Another thing I learned – again – is to plan a longer warp than what I think I need. The third scarf is significantly shorter than the first two because I ran out of warp. Table runner, anyone? I always include length for sampling, but I need to include more, more, more. Still, I am very happy with the finished results. And, you have a new video to watch! (Scroll down to see it.)
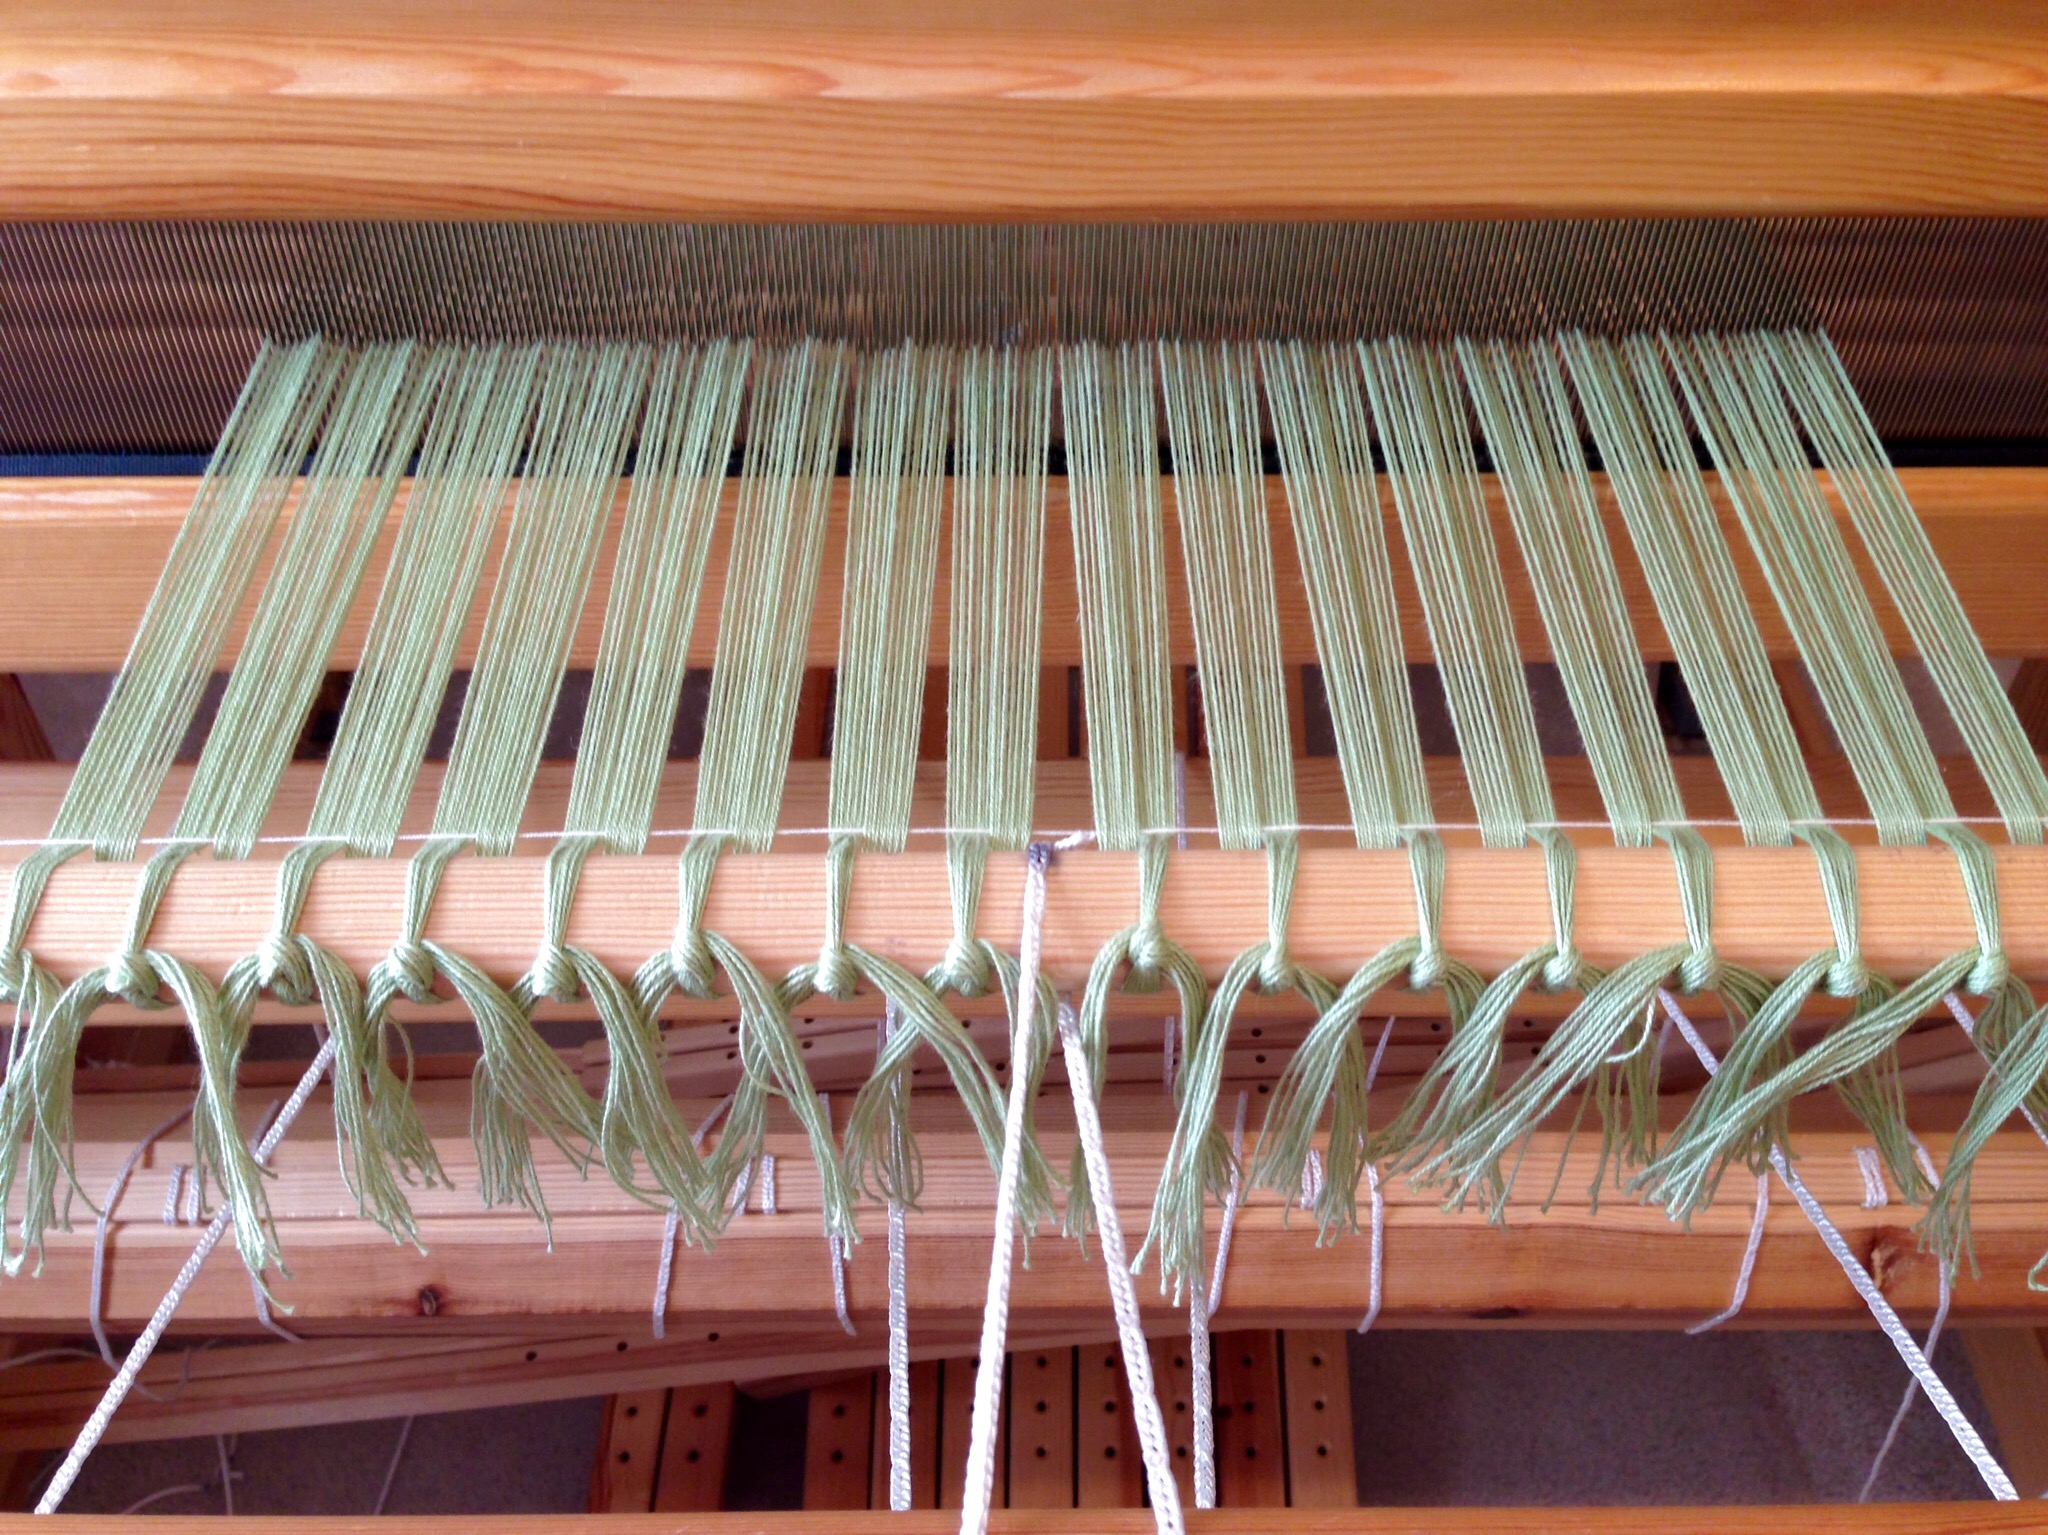
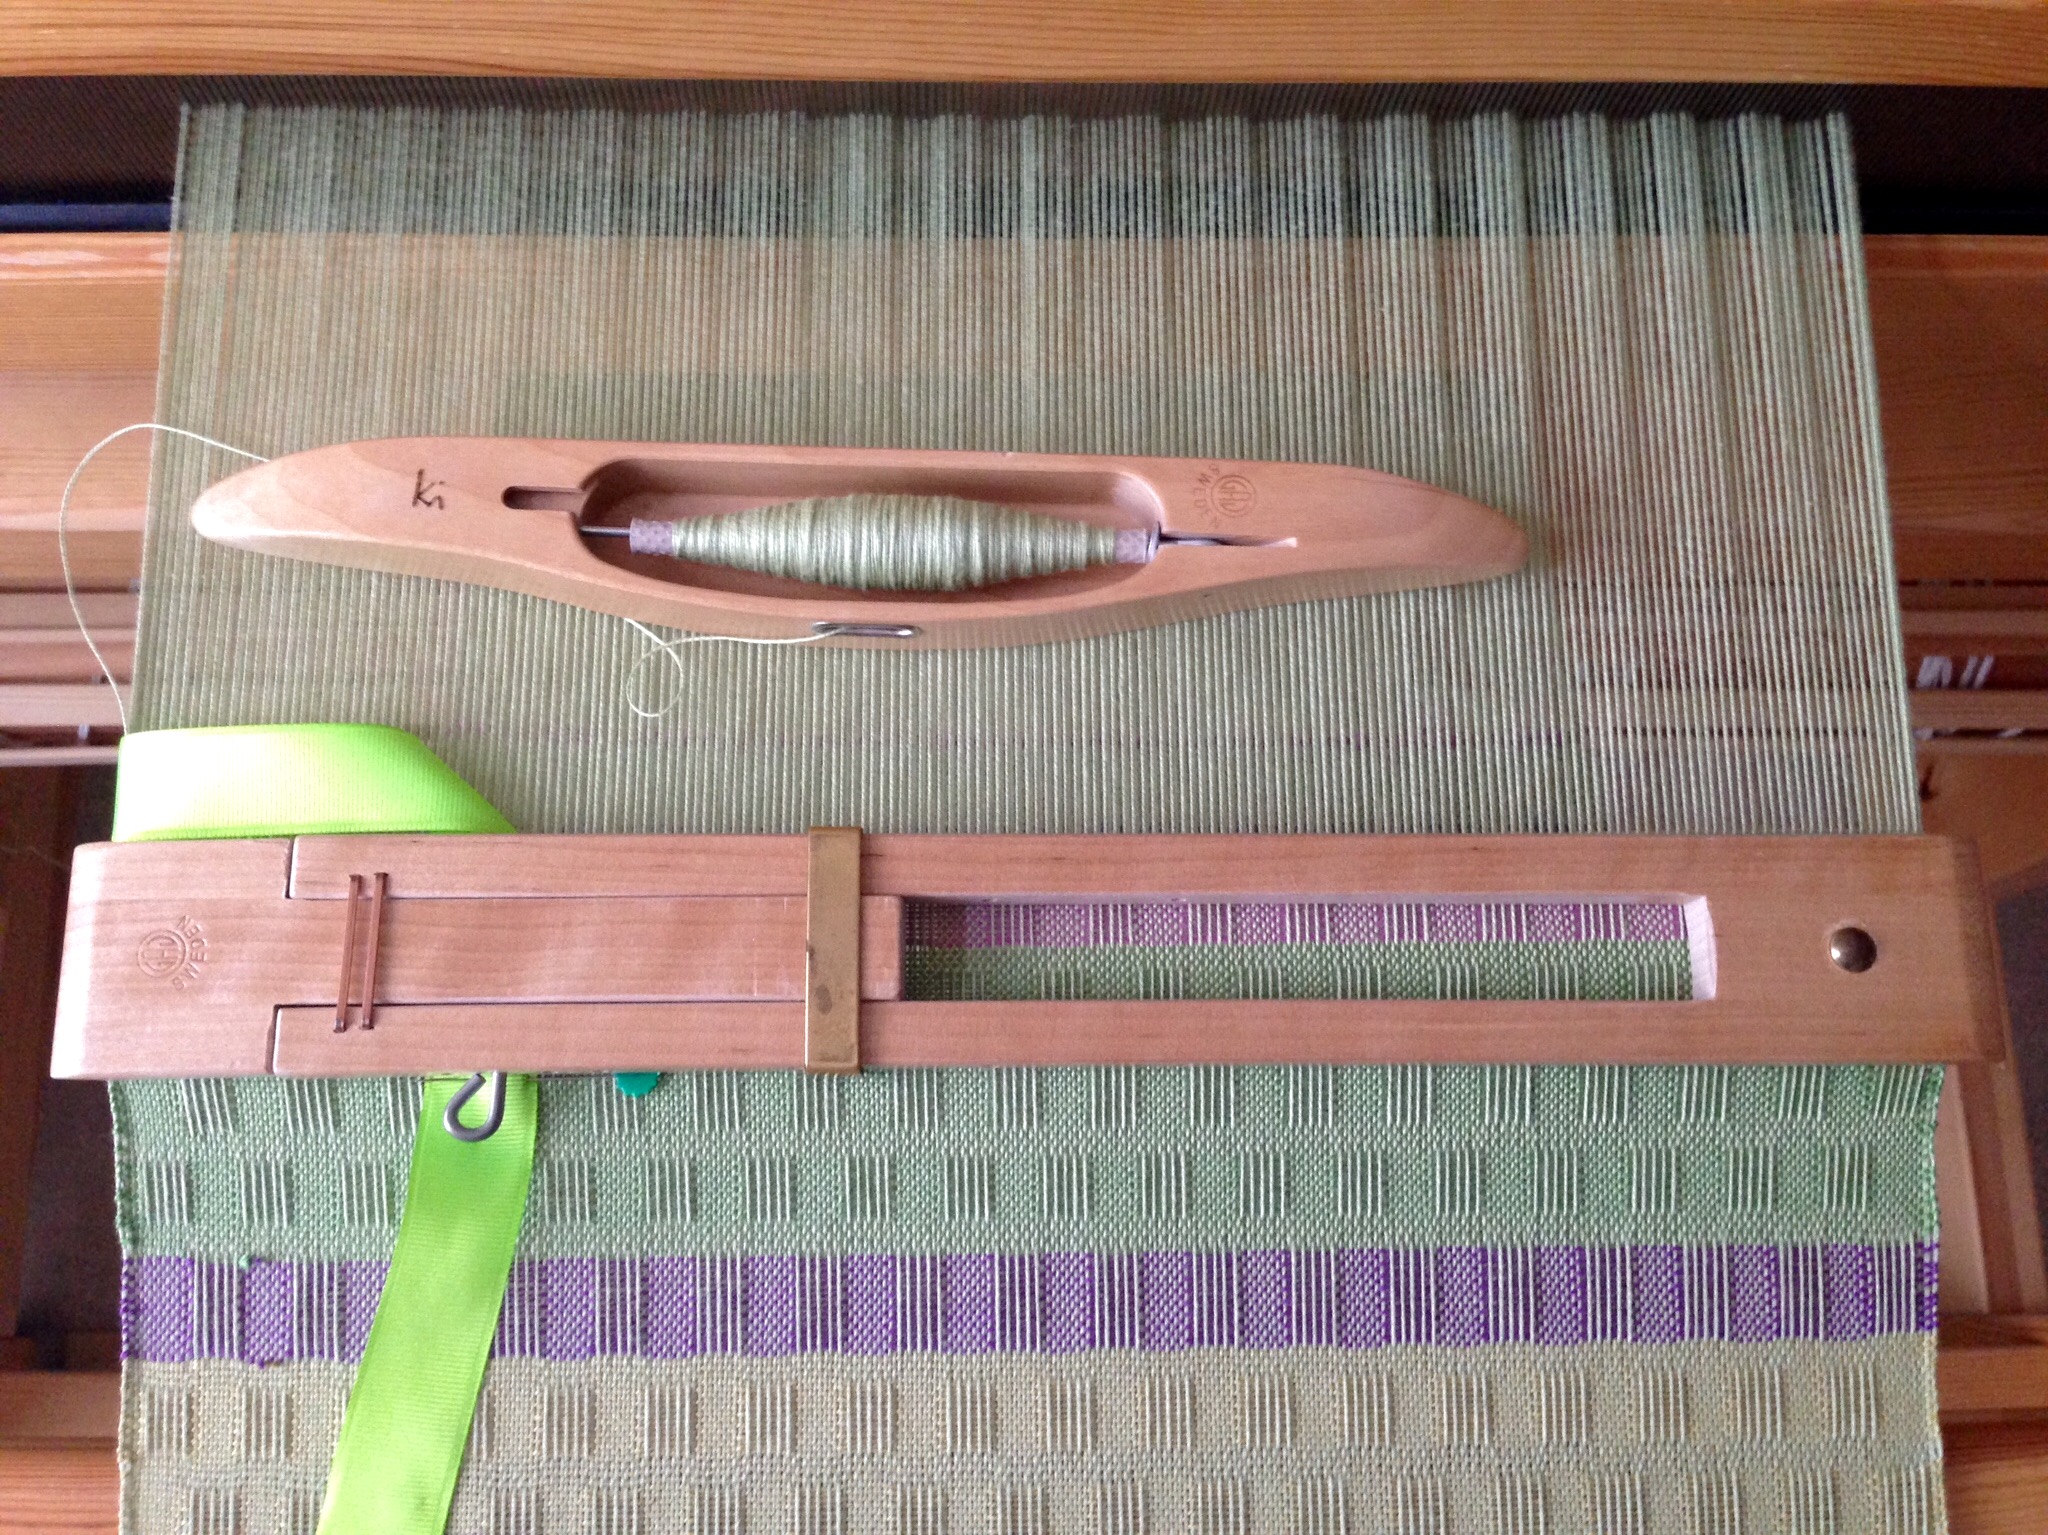
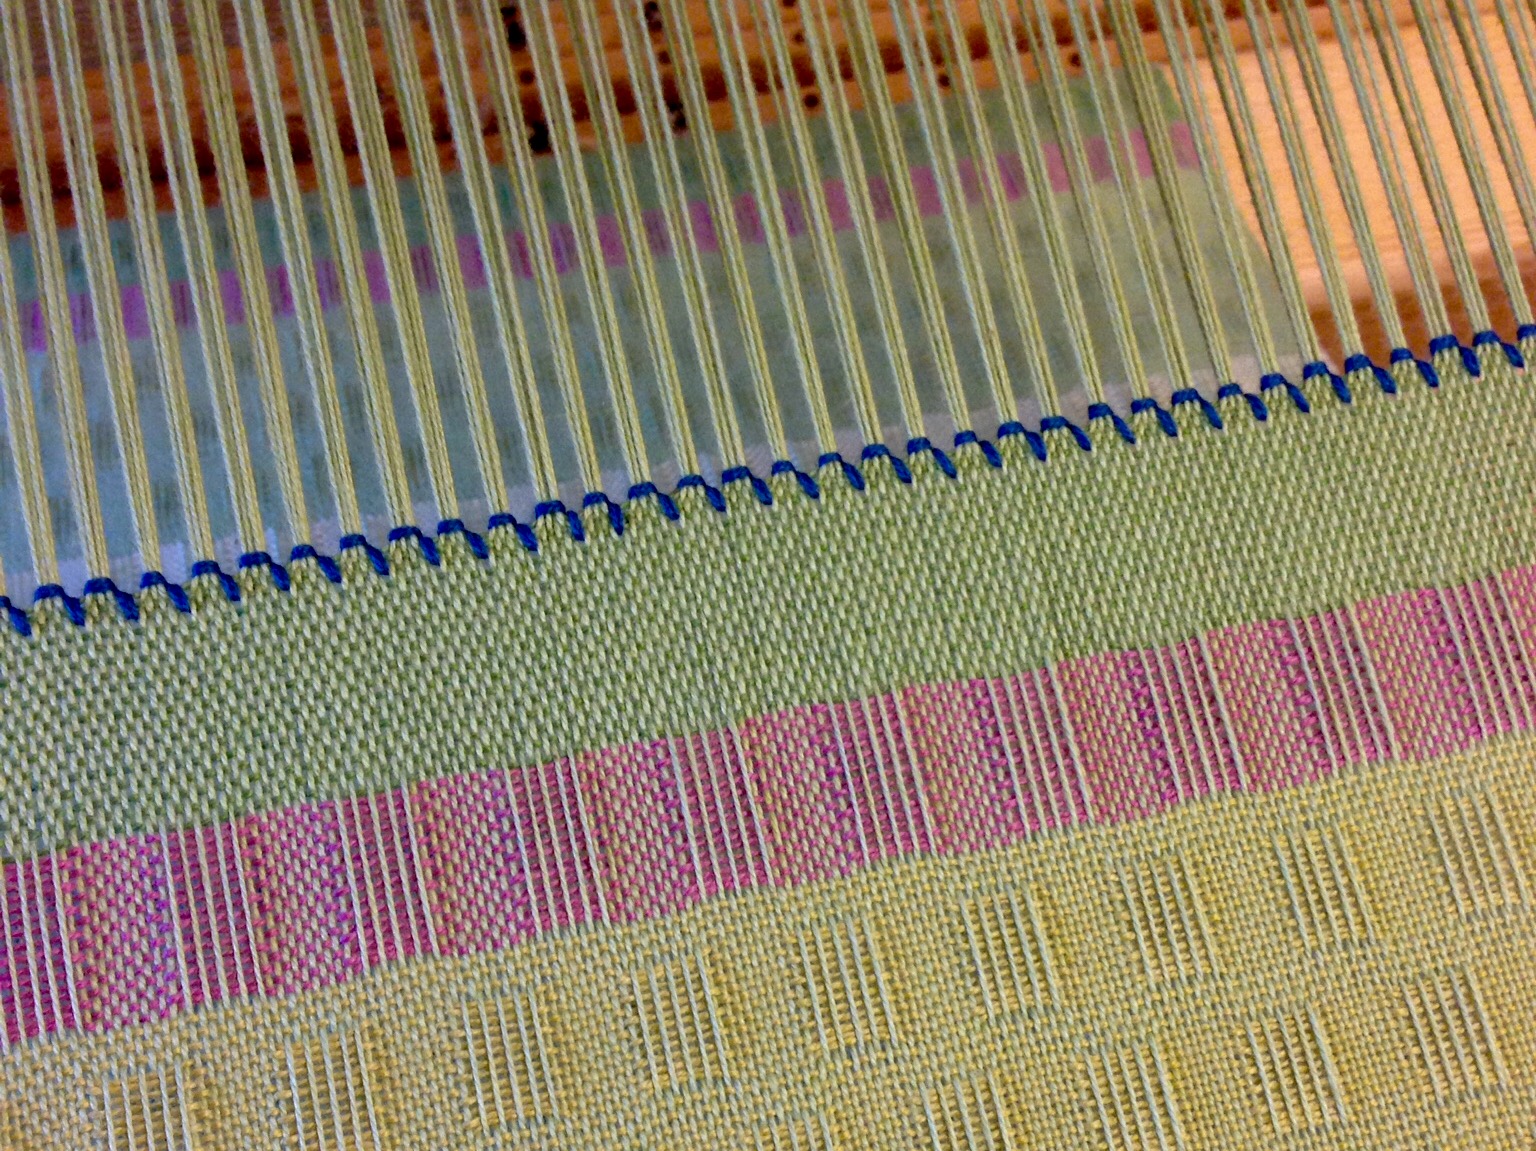
Warp of 8/2 cotton is tied on in 1-inch/2.5 cm sections. The leveling string evens out the warp for immediate weaving.First scarf, with dark green weft, has the longest warp floats. This scarf ended up shorter than the second scarf, even though the first scarf’s length on the loom was longer than the second scarf.Second scarf, with citrine weft, has a border element created with light green weft (same as the warp), including warp floats. The plain weave before and after the border element helps create a natural ruffle at each end of the finished scarf.Saving the best for last, I used a series of springtime colors to create this scarf. The varied lengths of the floats give an illusion of colored ribbons crossing the scarf.
I wet finished the scarves in the washing machine, adding a small amount of Eucalan, on the gentle cycle, with warm wash and warm rinse, and very short spin. They went in the dryer on low heat until damp, and then hung to dry the rest of the way. The scarves came out lightly puckered, which is exactly what I had hoped for. I could have washed them in hot water and left them in for a longer amount of time if I had wanted the scarves more dramatically puckered.
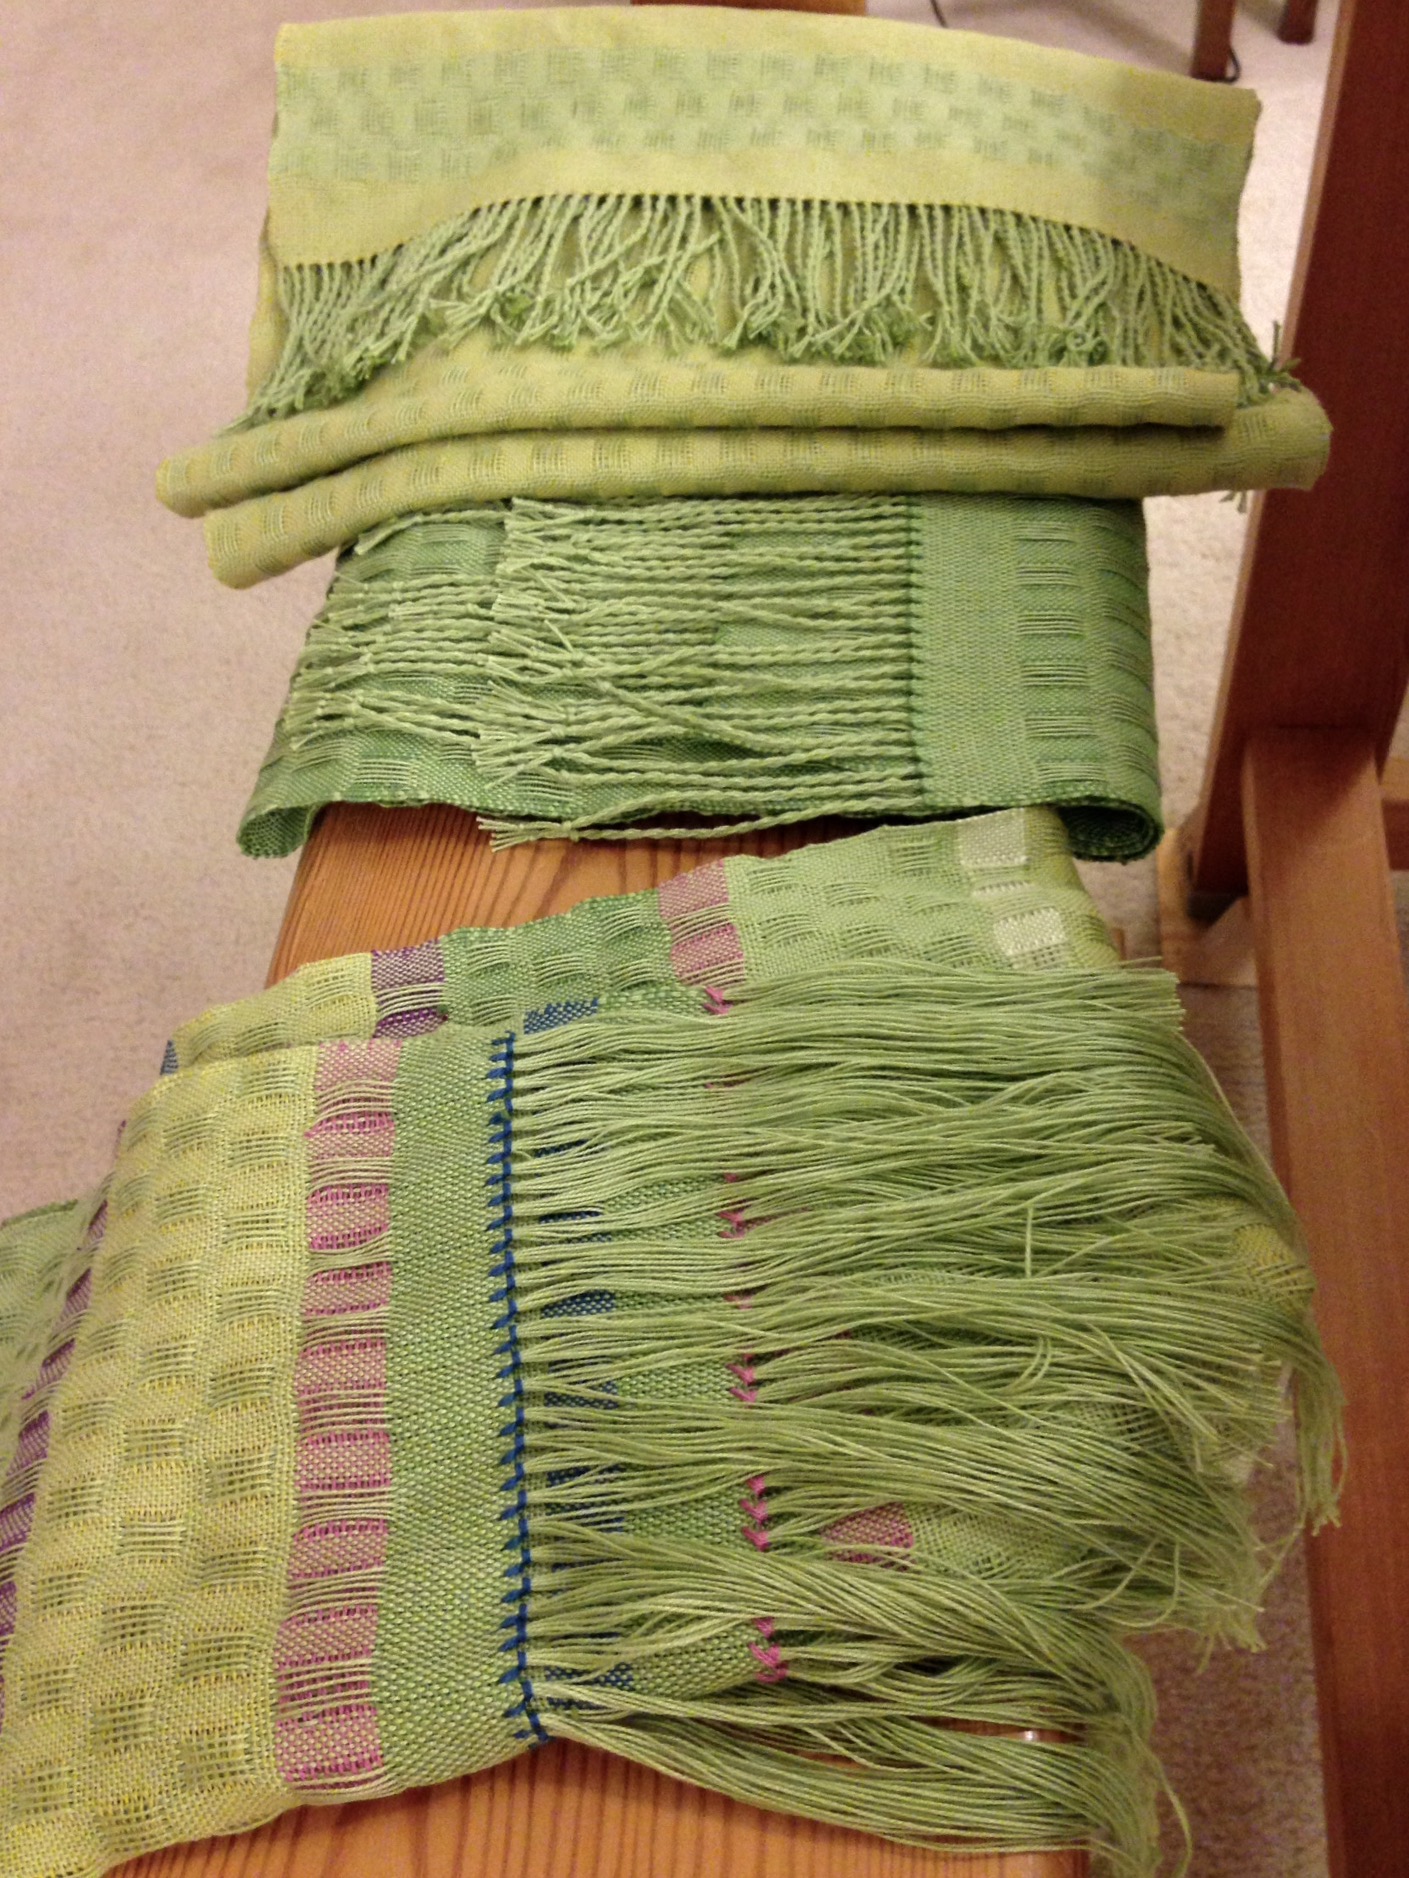
Two scarves with fringes twisted. One waiting to be a film star in “Using a Fringe Twister.” This is before wet finishing.Wet finishing happens after the fringe has been twisted. These scarves have done it all. They are finished.First seen on Instagram @celloweaver #warpedforgood
There’s nothing like finishing a fun project! Clearly, I know what to do next… Dress the big loom and keeping on weaving.
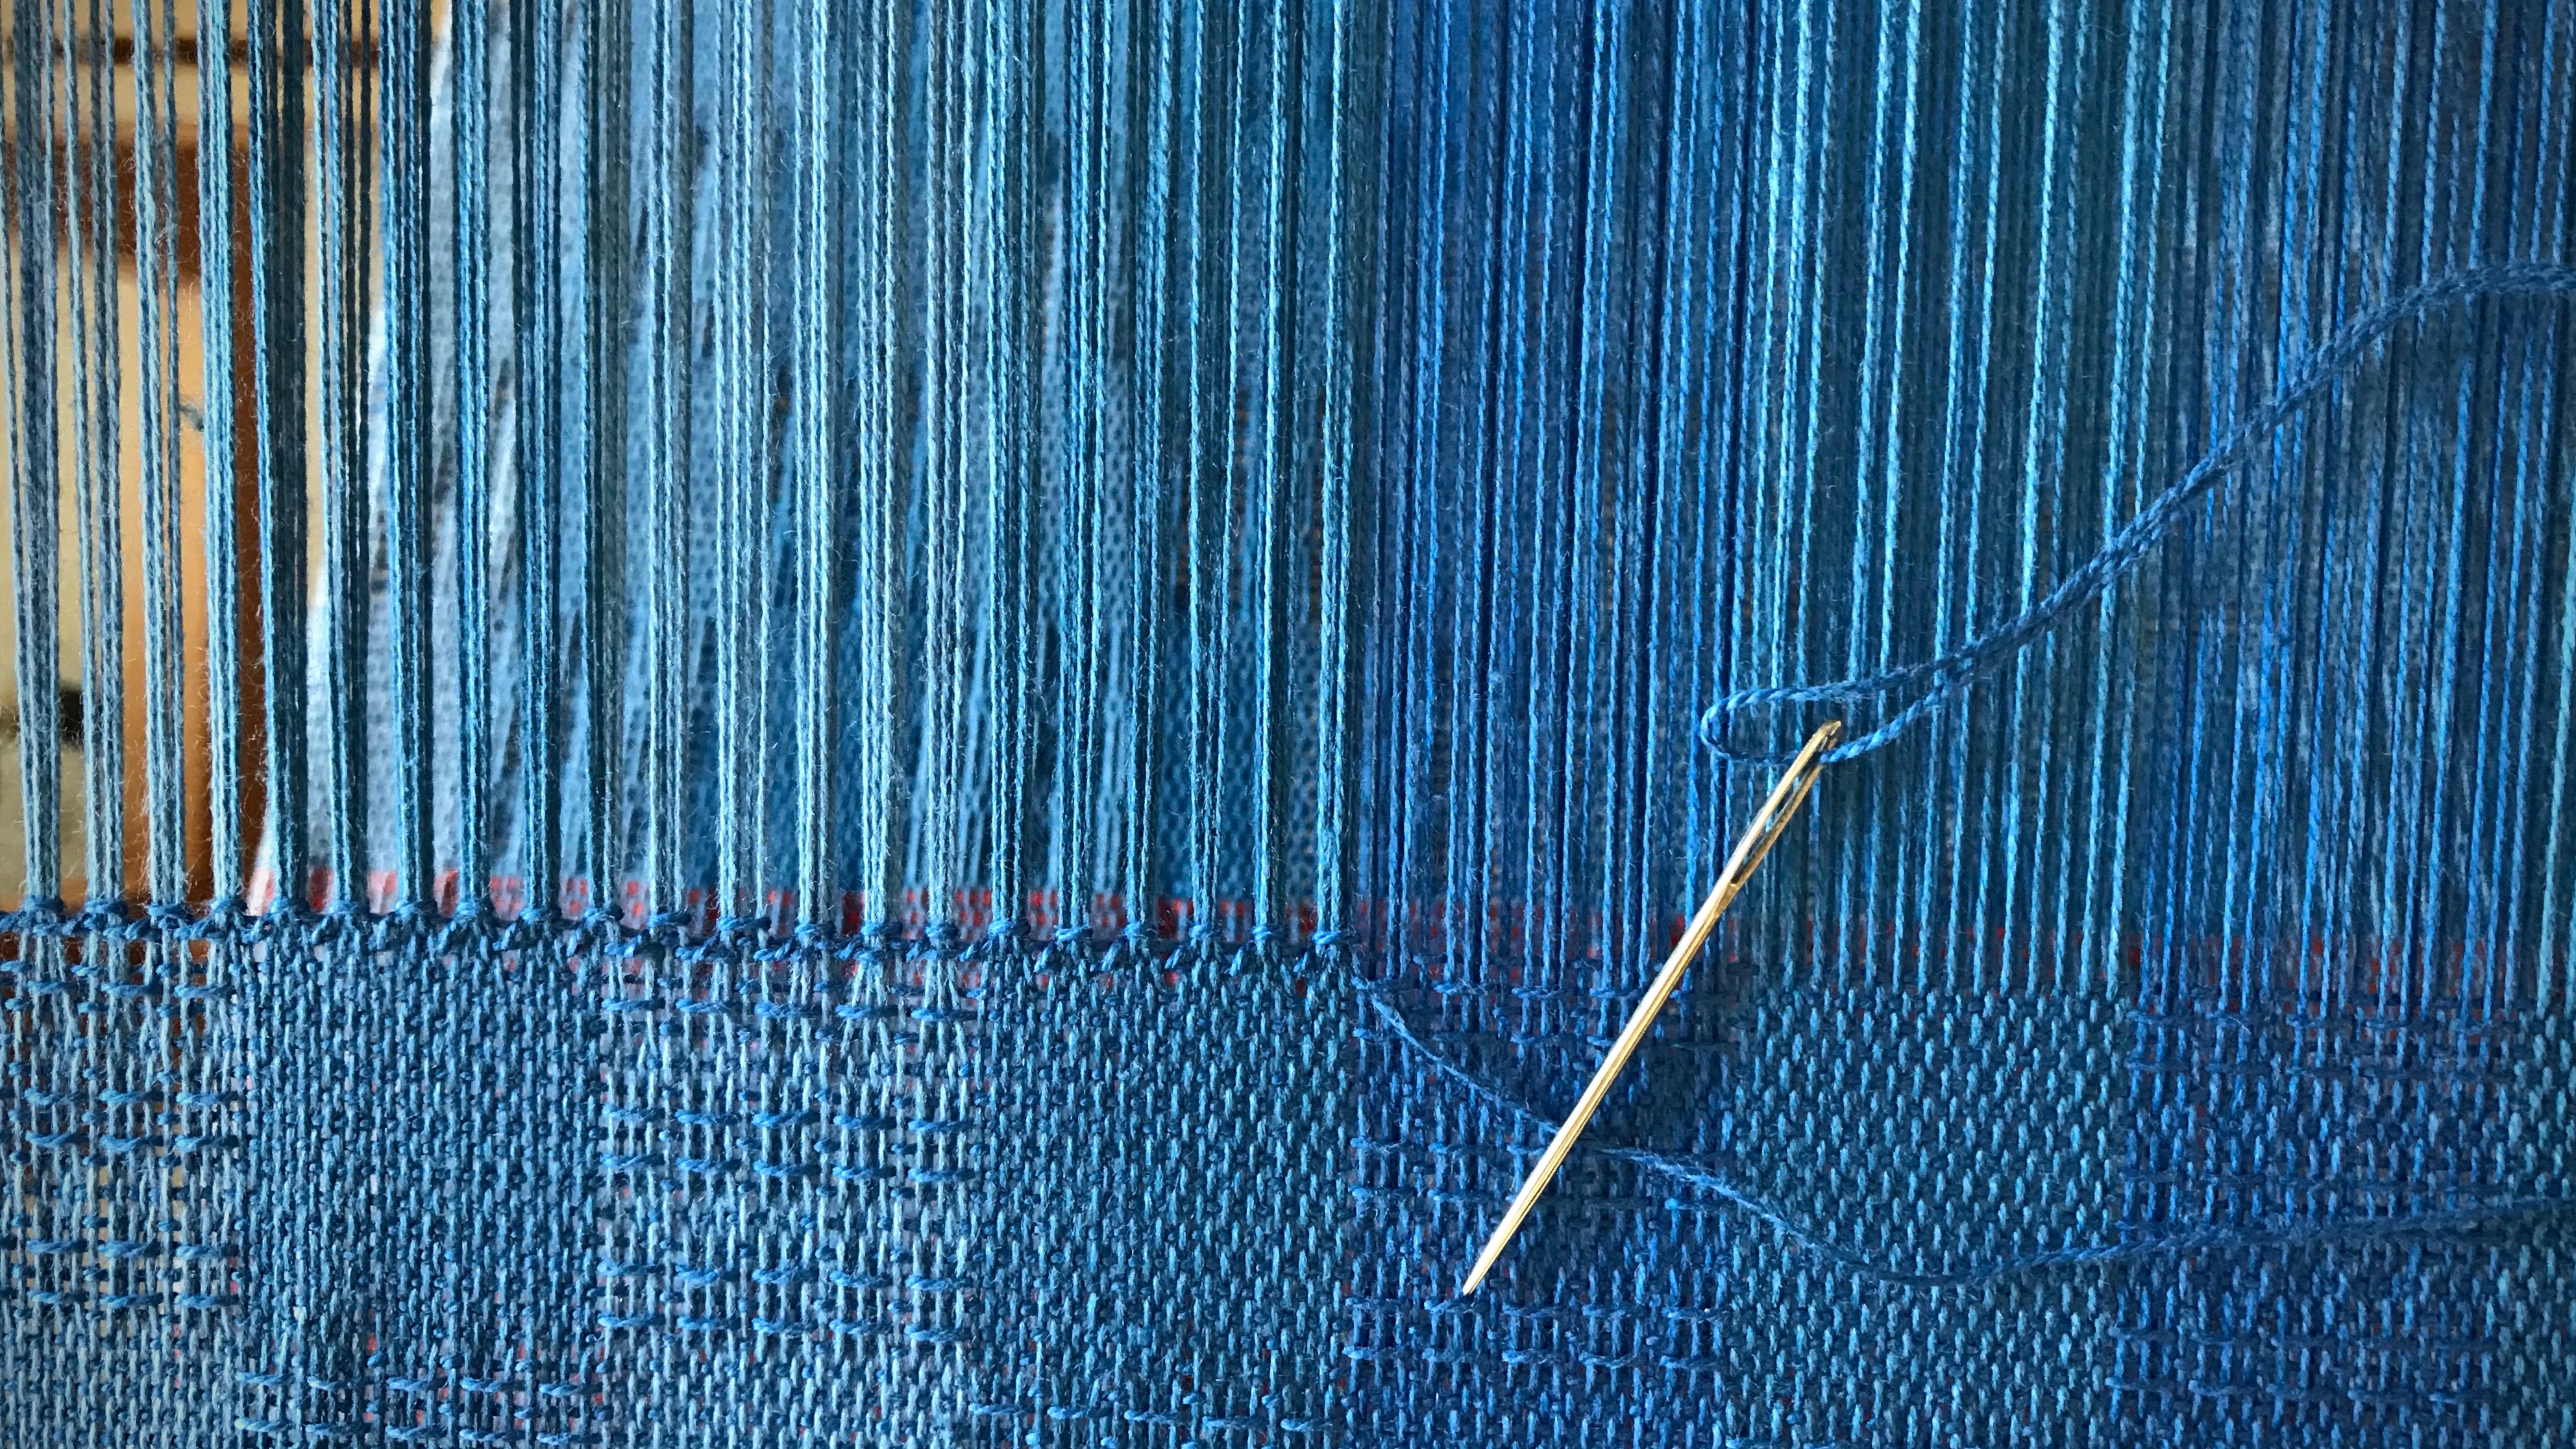
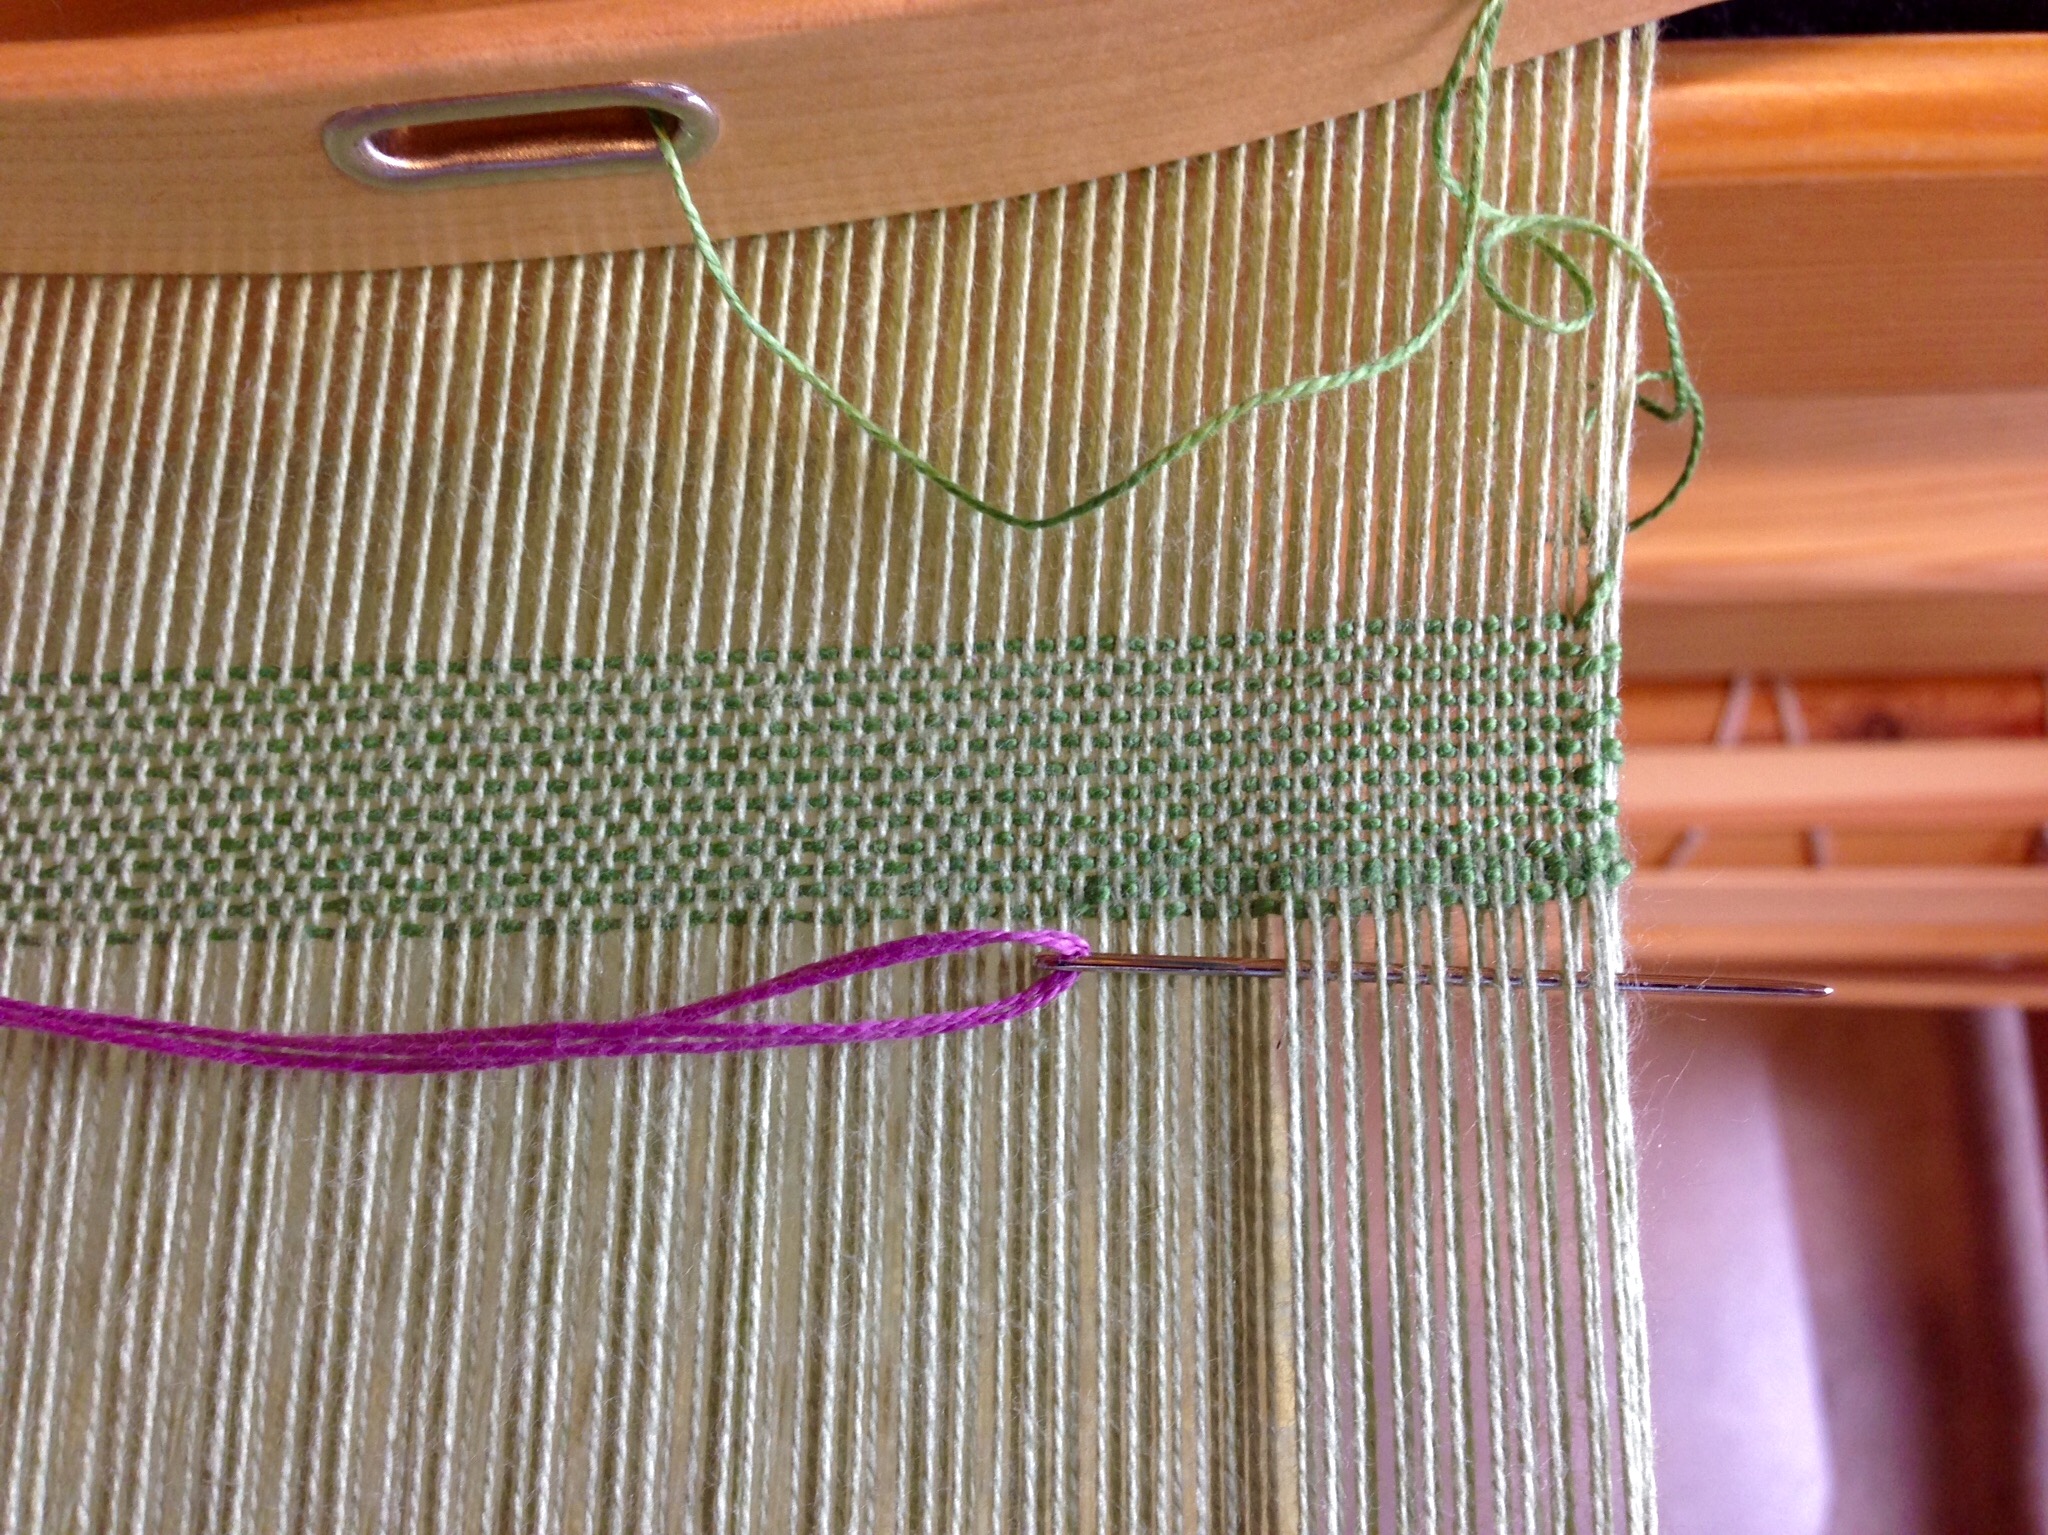
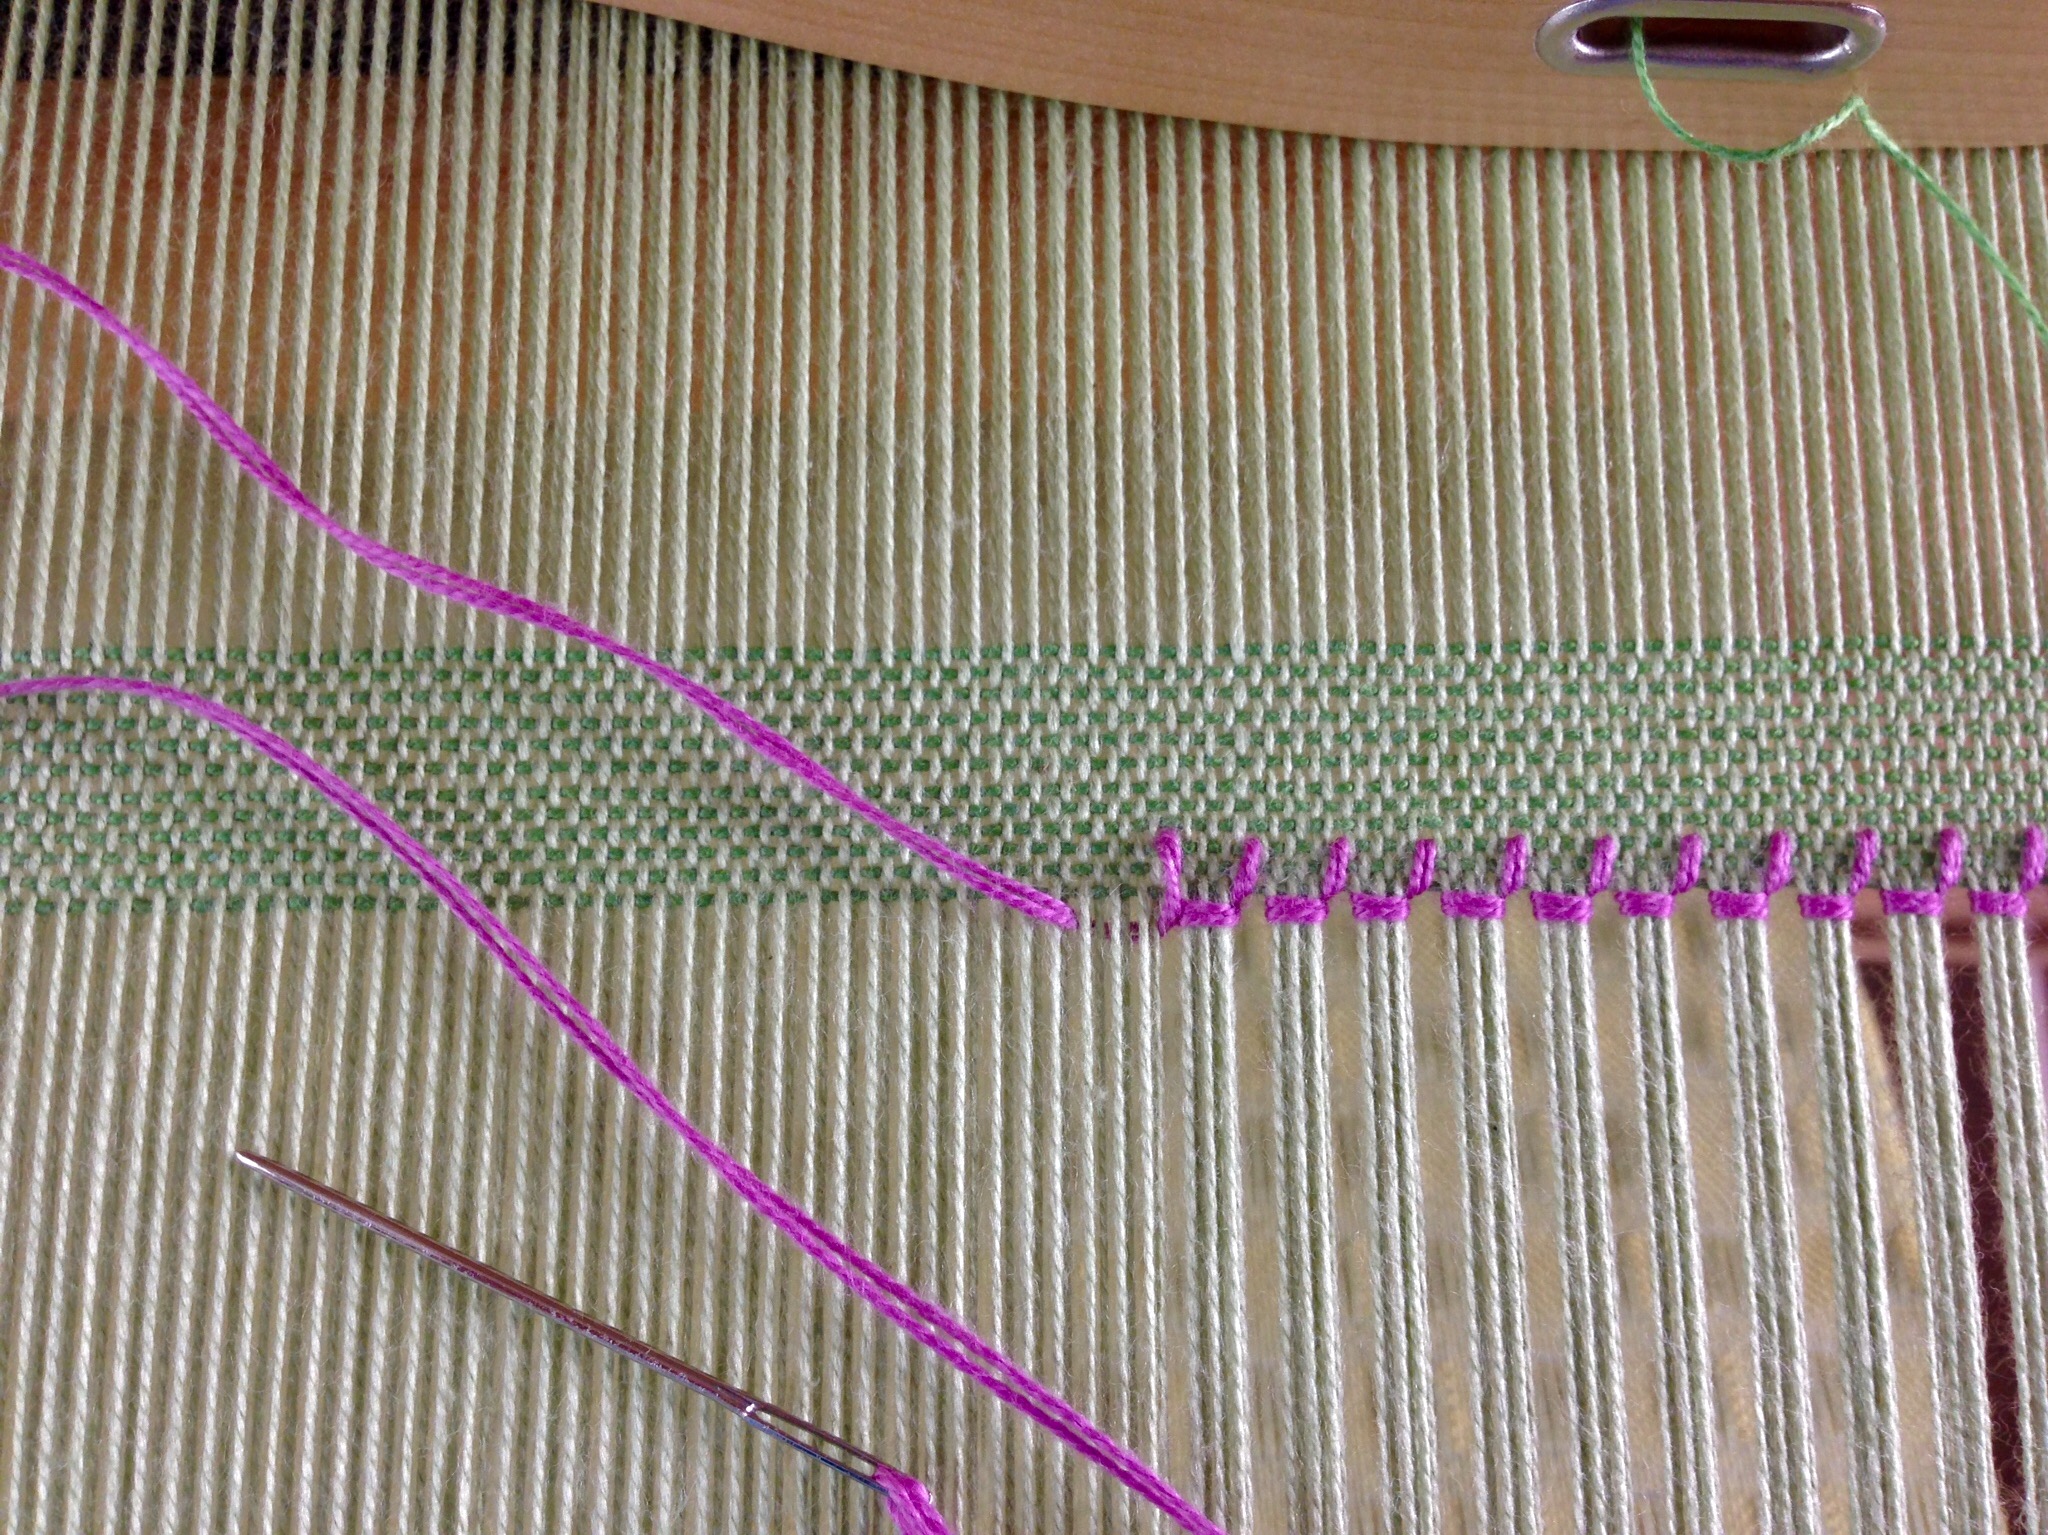
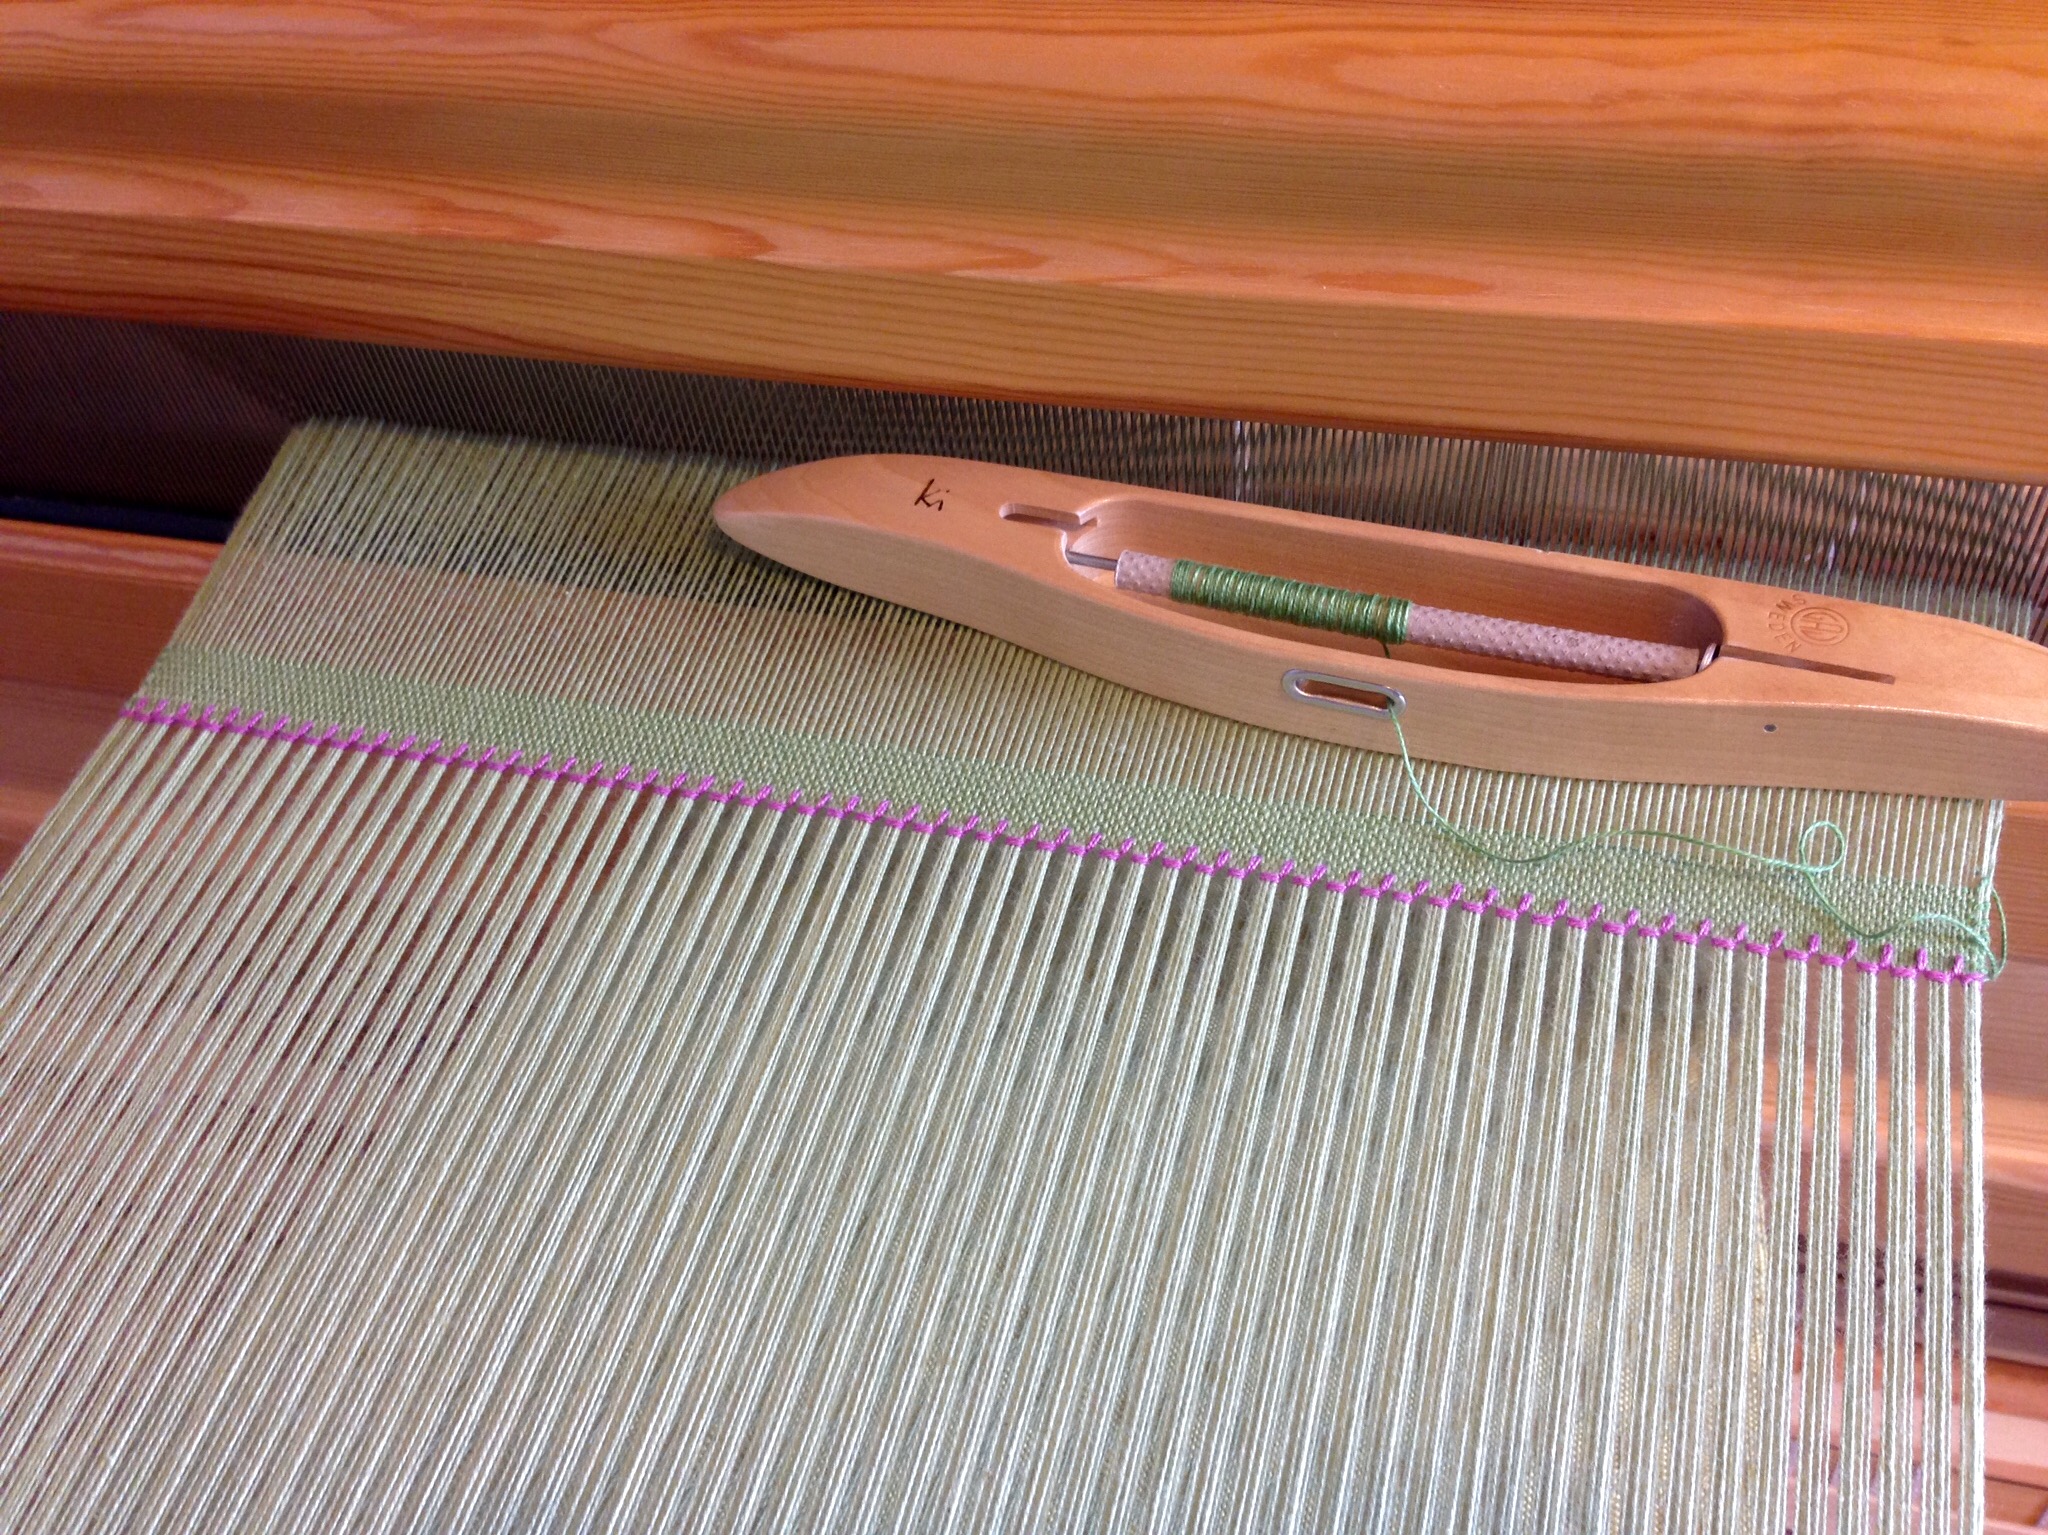
An embroidered trim is what I have in mind for this scarf. Hemstitching is just that. Instead of the usual single strand, I am using two strands of the 8/2 cotton weft in a contrasting color to accentuate the embroidered look. The hemstitching marks the beginning and the end. You can make hemstitching barely noticeable if you want, or you can make it so bold it can’t be missed, like I am doing with this one.
Hemstitching, with Contrasting Color:
Preliminary
Weave an inch/2.5 cm or more of fabric for a header.
Thread a blunt tapestry needle with a single or doubled strand of weft thread four times the weaving width.
Starting an inch/2.5 cm away from the right-hand selvedge, weave the needle over and under, next to the first weft thread in the weaving, going toward the selvedge.
Pull the stitching thread almost all the way, leaving the end woven into the selvedge. Capture the woven end within the first several stitches of the hemstitching.
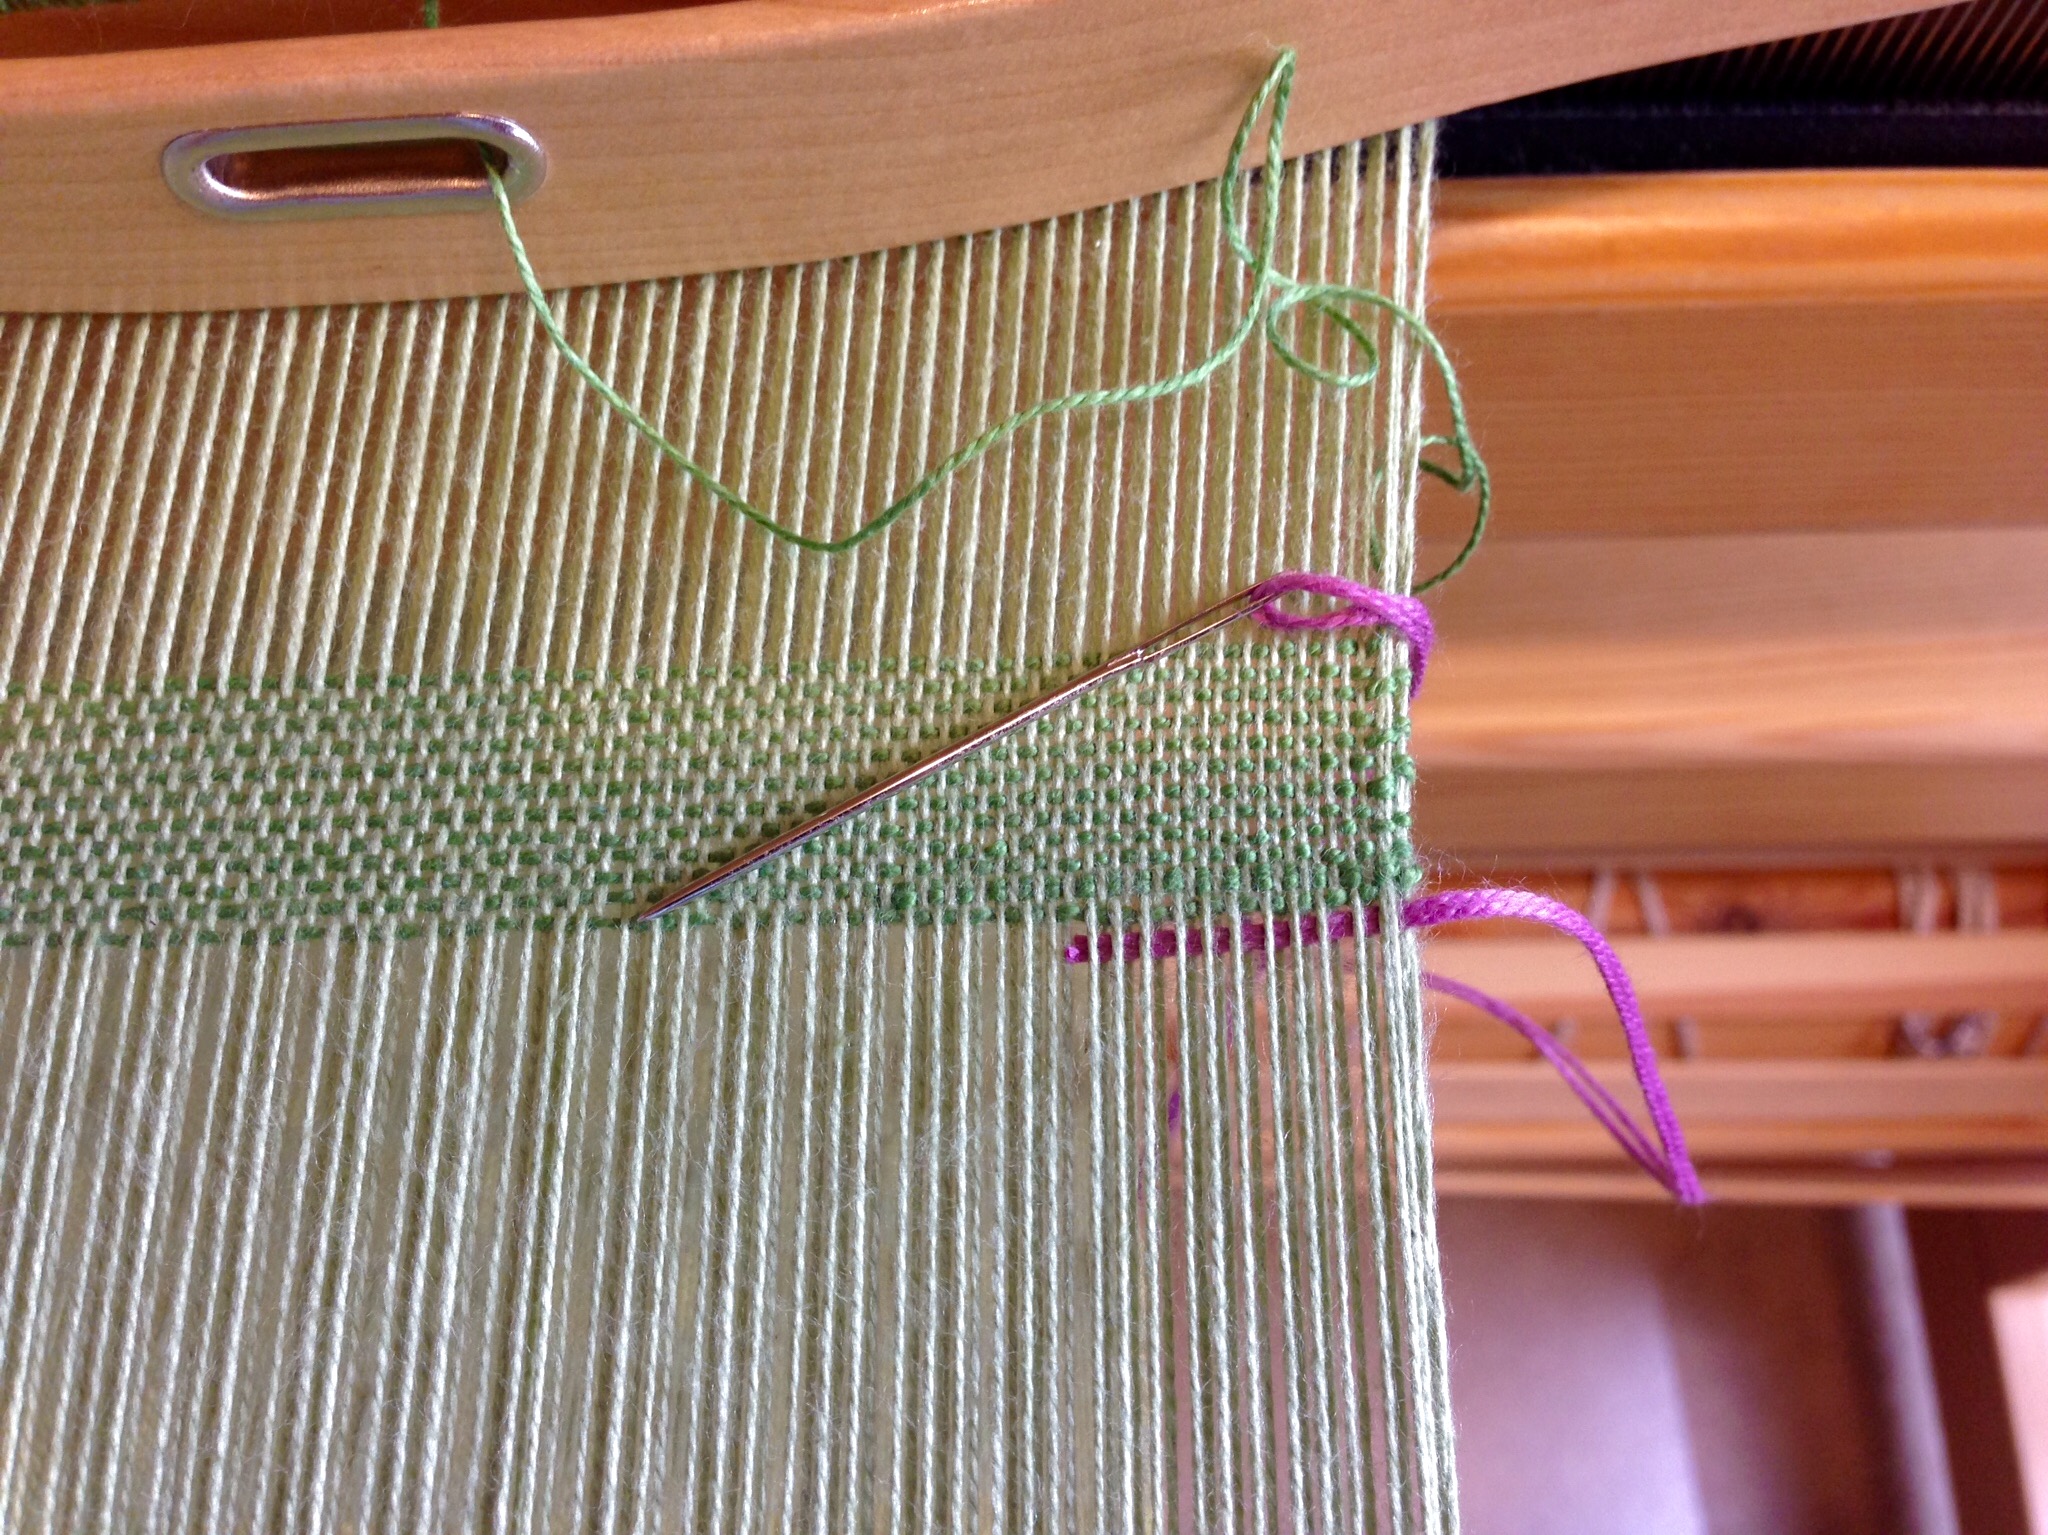
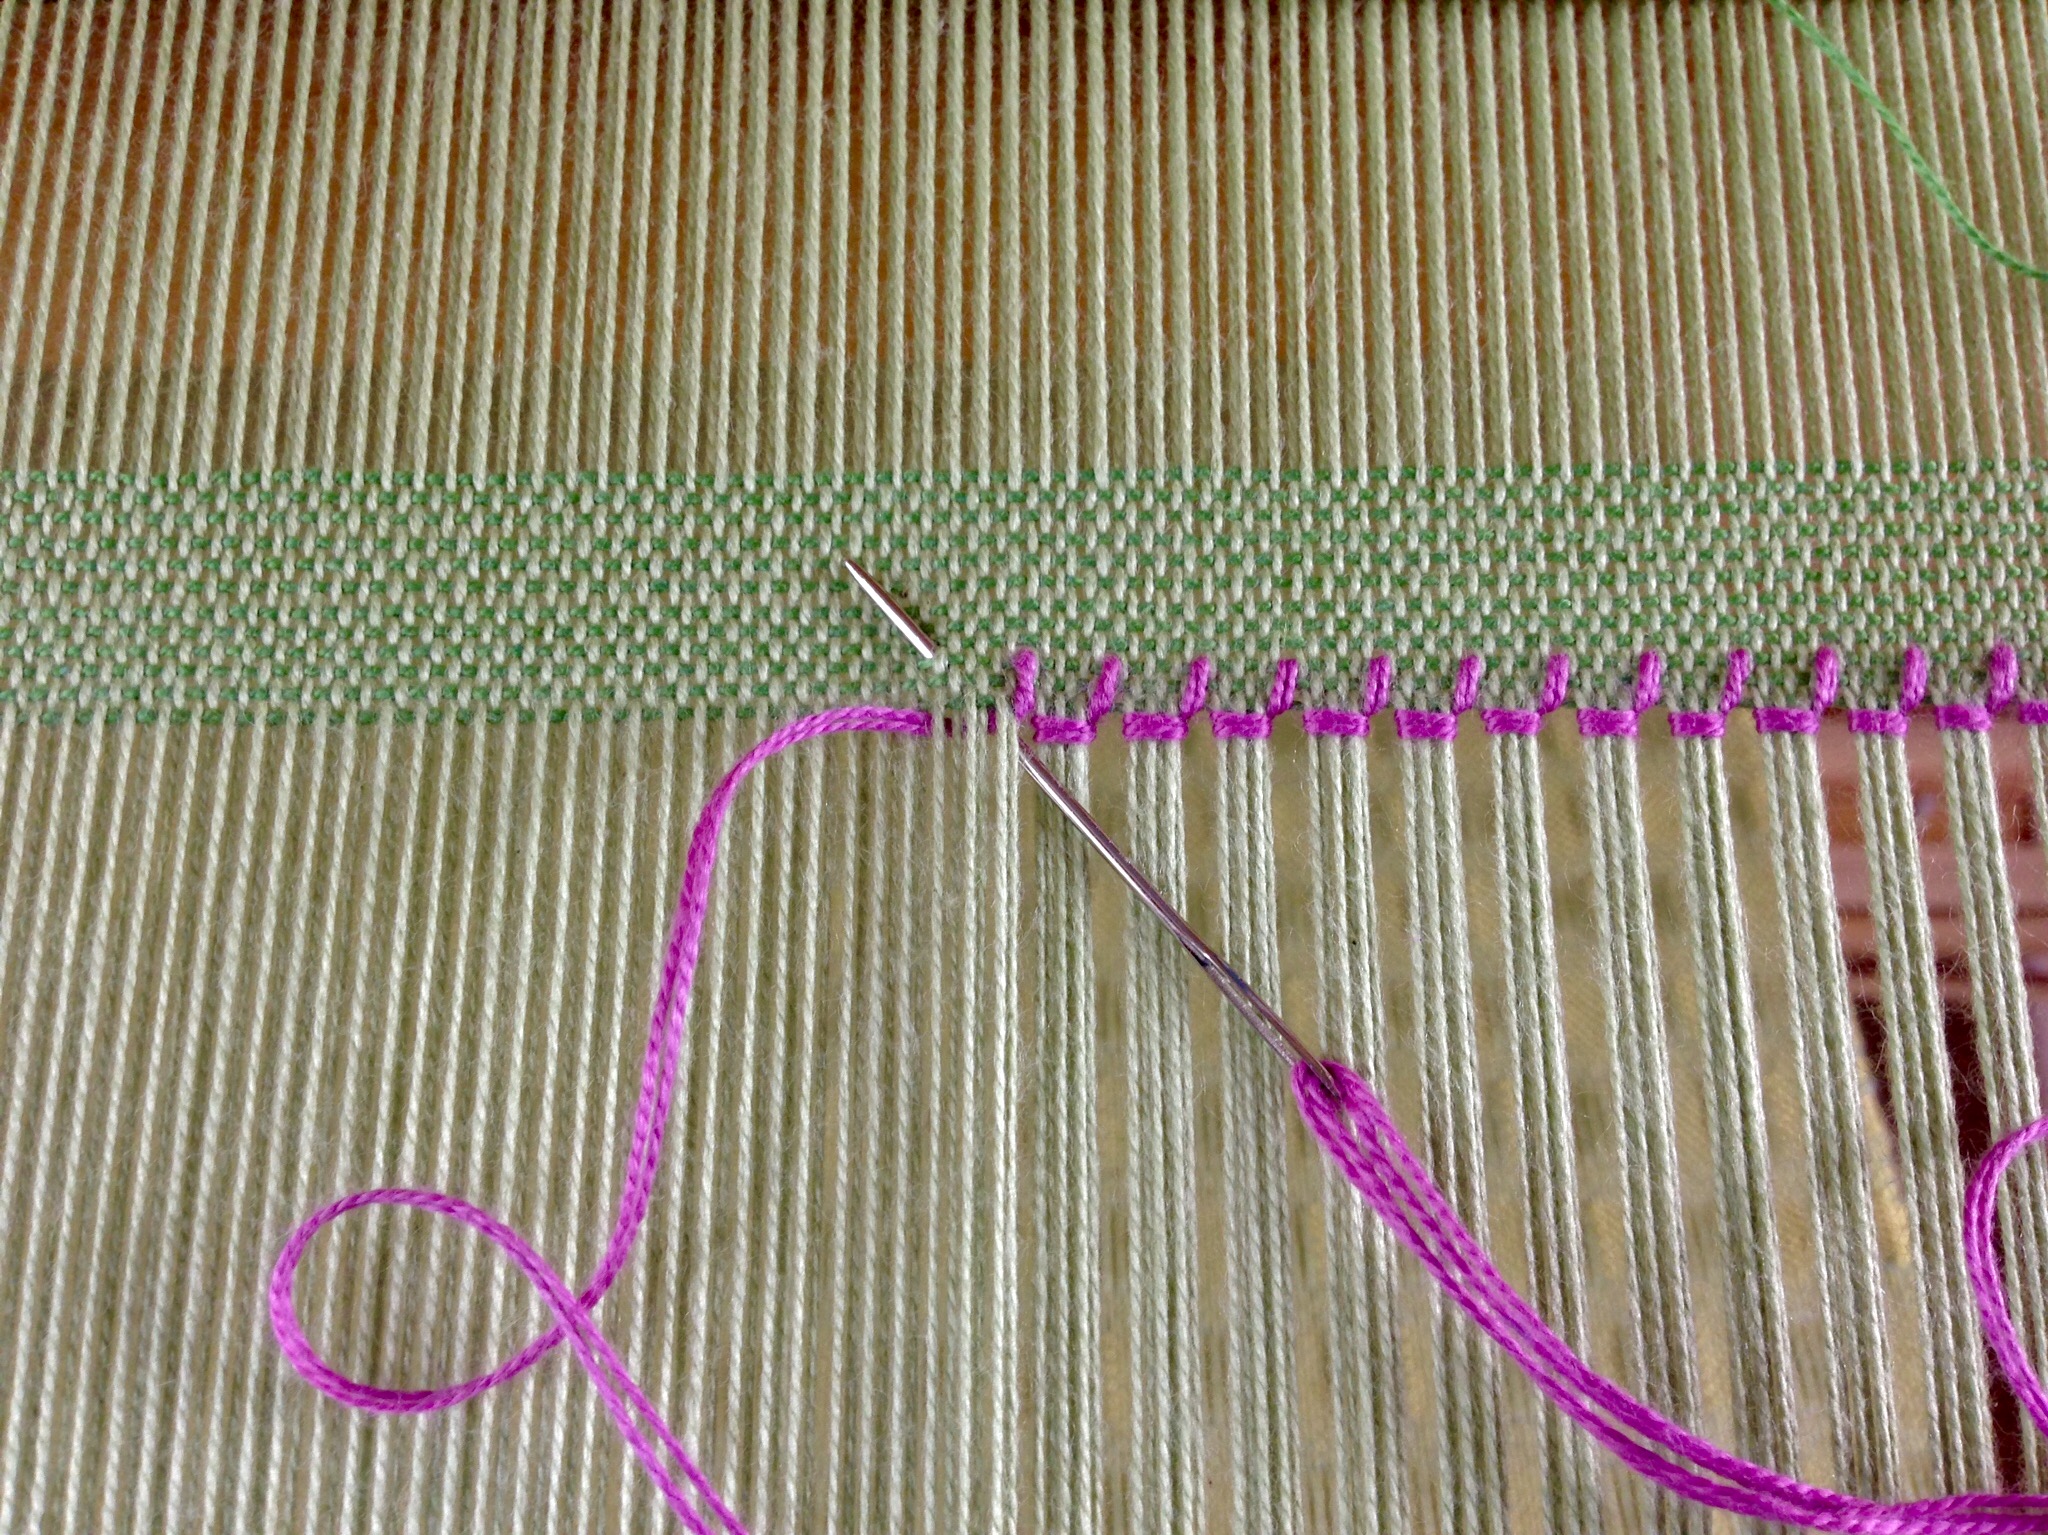
Step 1
From right to left, take the needle under several warpends. In this example, the needle goes under six ends.
Step 2
Pull the thread all the way through, keeping it taut at the woven edge.
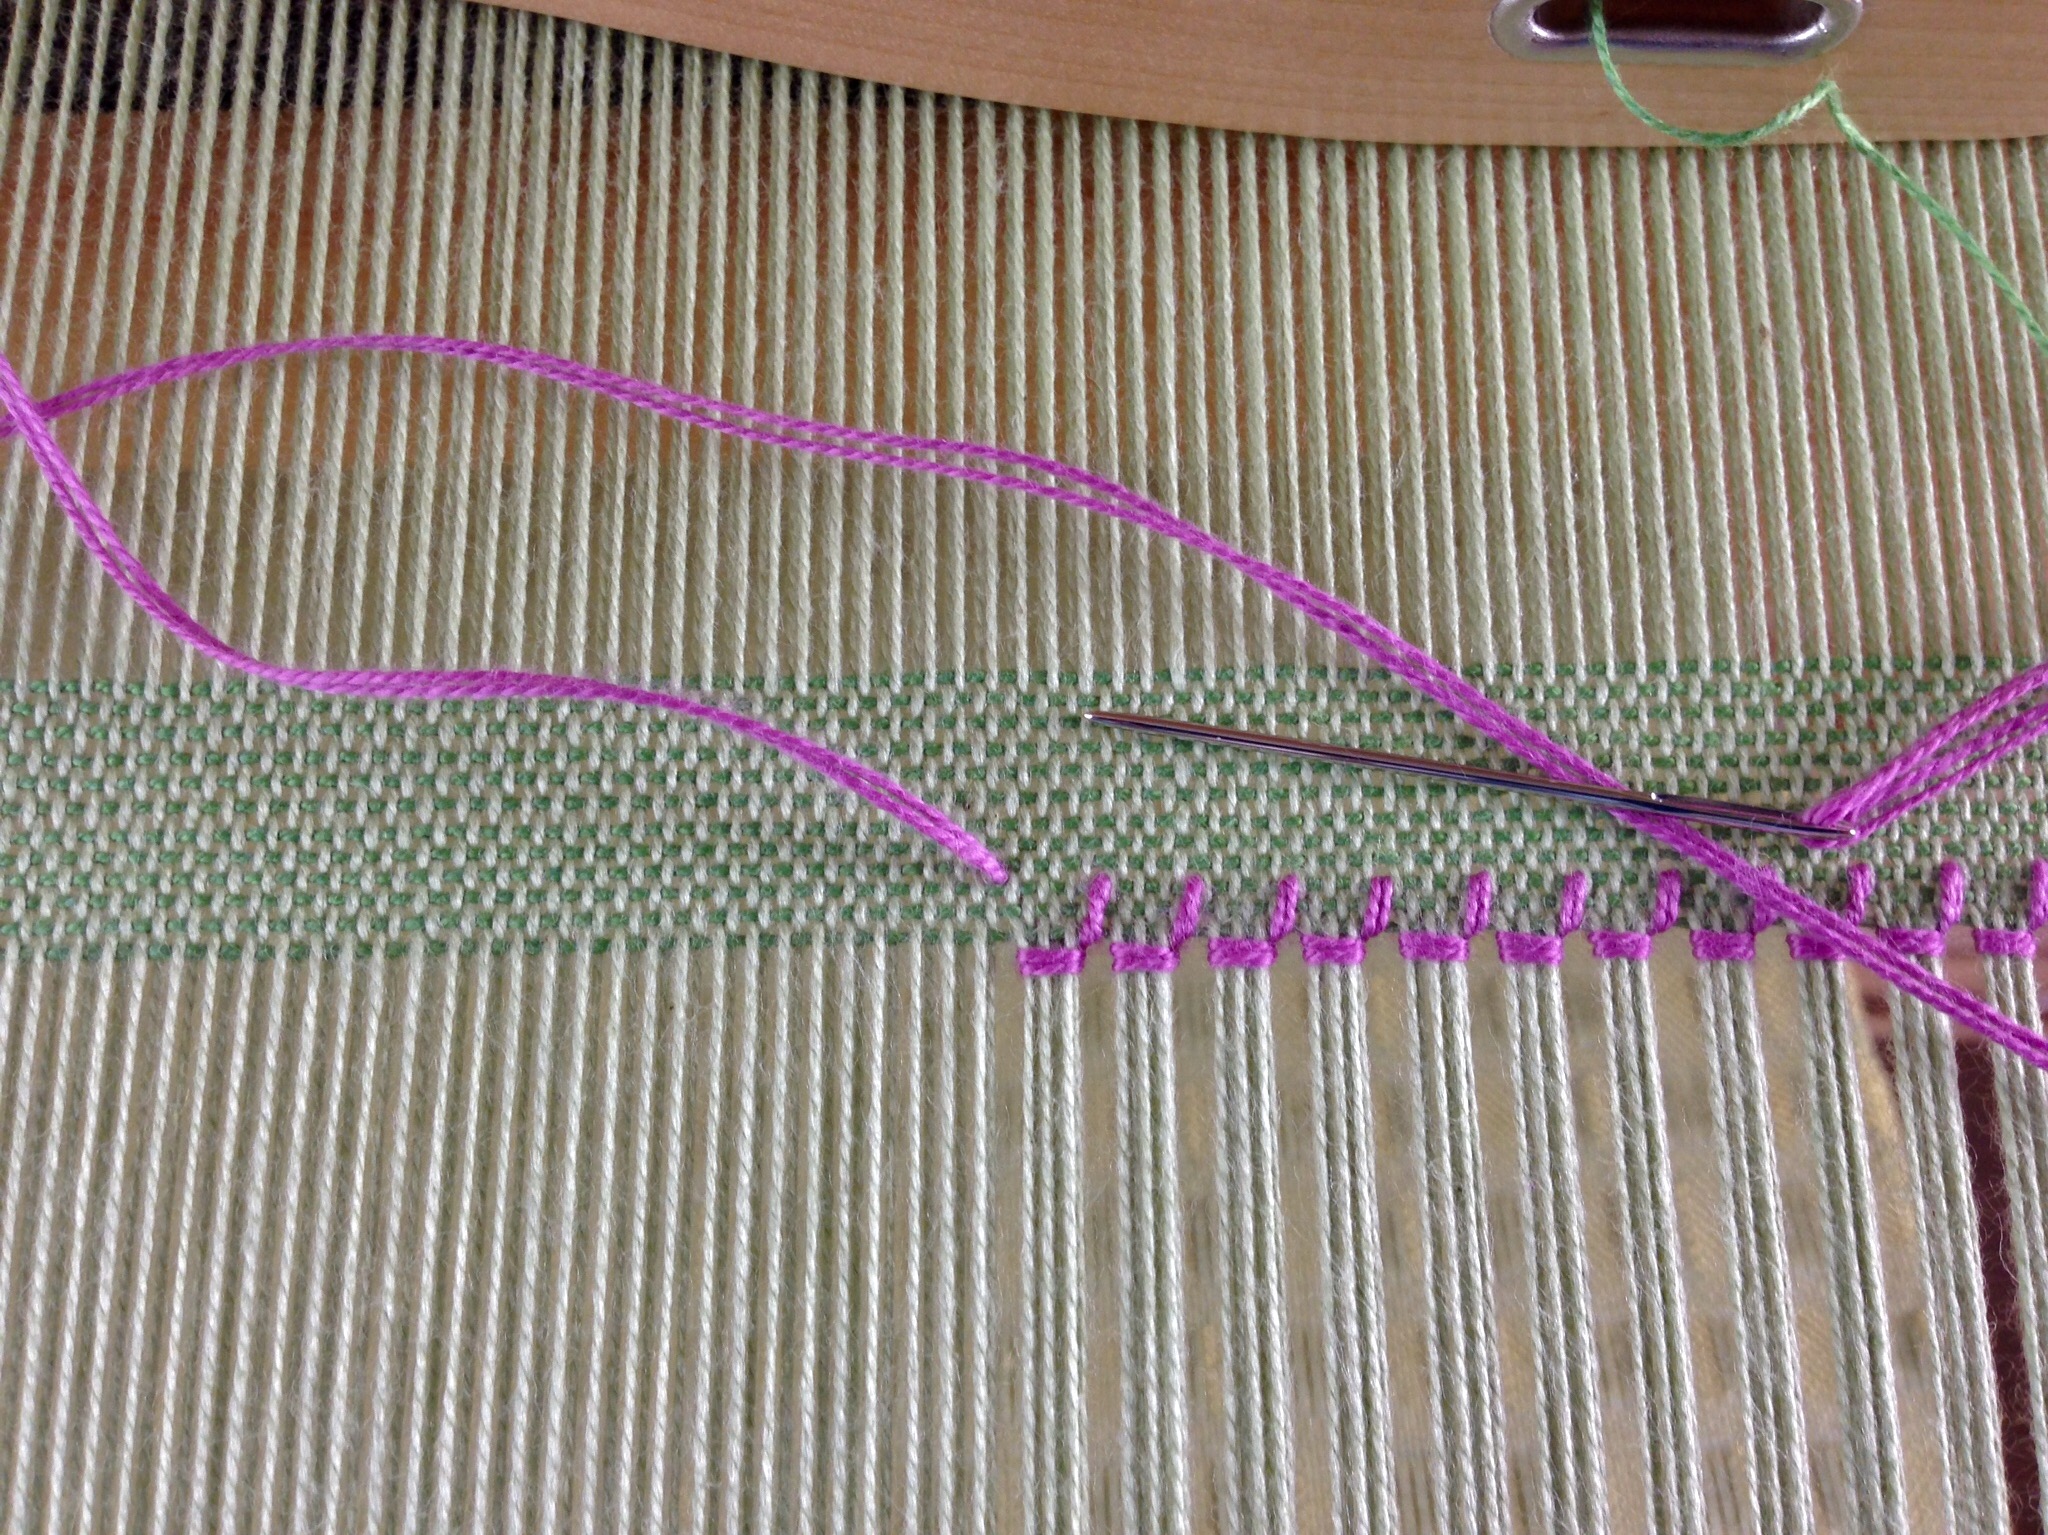
Step 3
Take the needle back over the same (six) warp ends, and go under the same (six) warp ends, bringing the point of the needle back up between wefts, two or more rows away from the woven edge. In this example, the needle comes up between the third and fourth rows of weft.
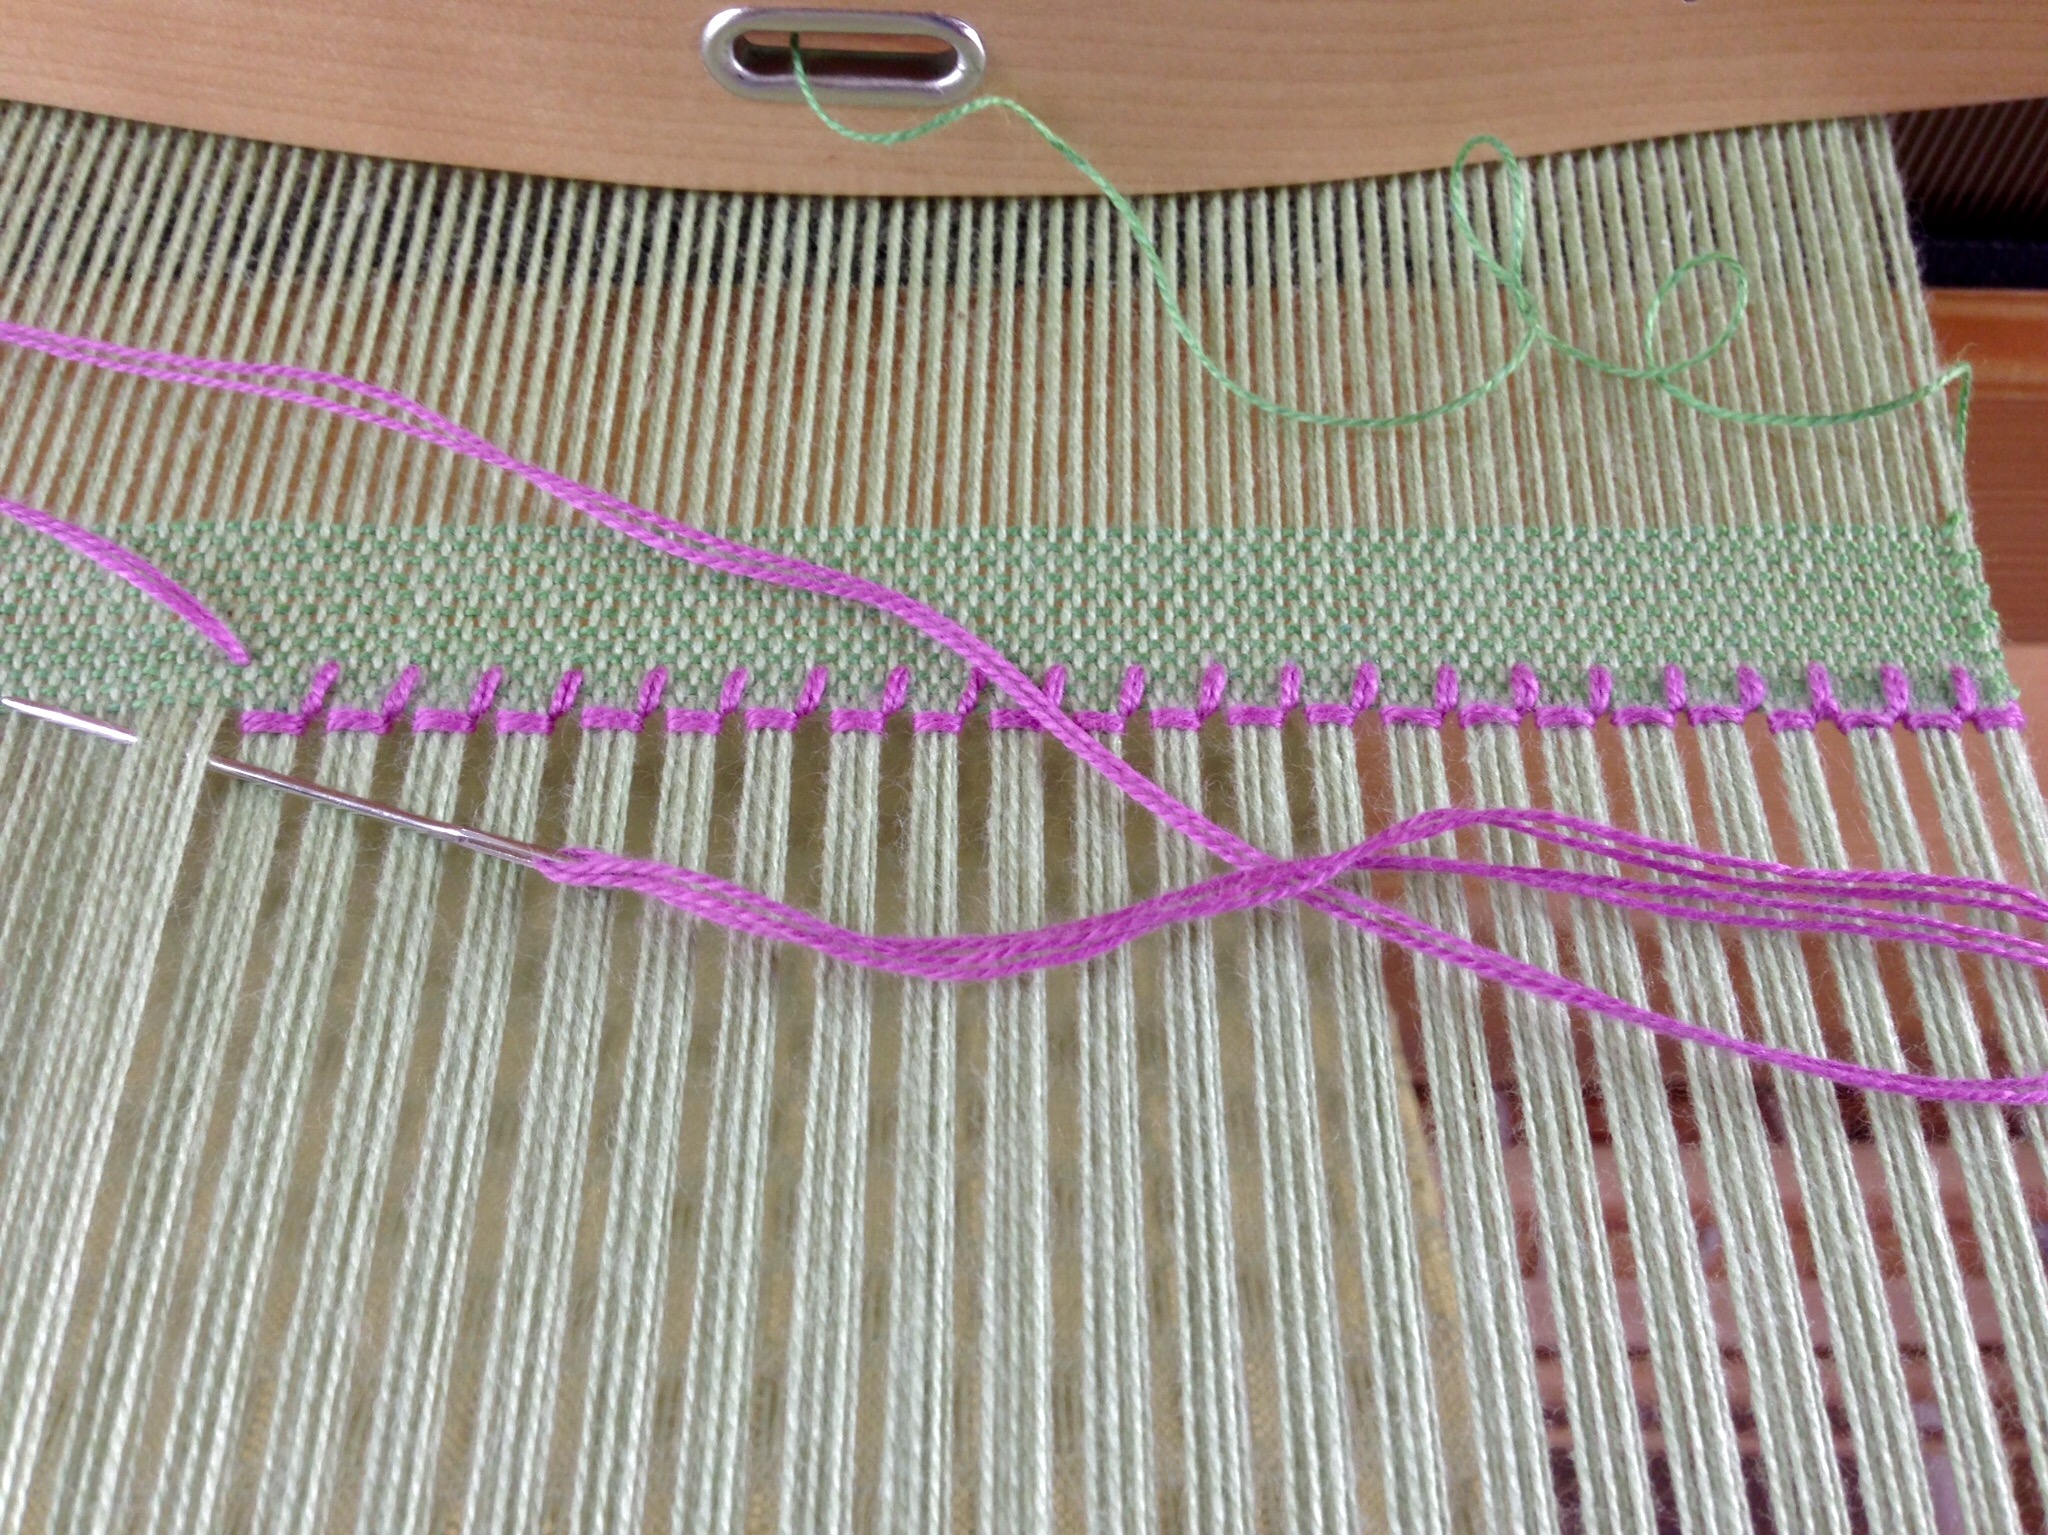
Step 4
Pull the thread all the way through, keeping it taut at the woven edge.
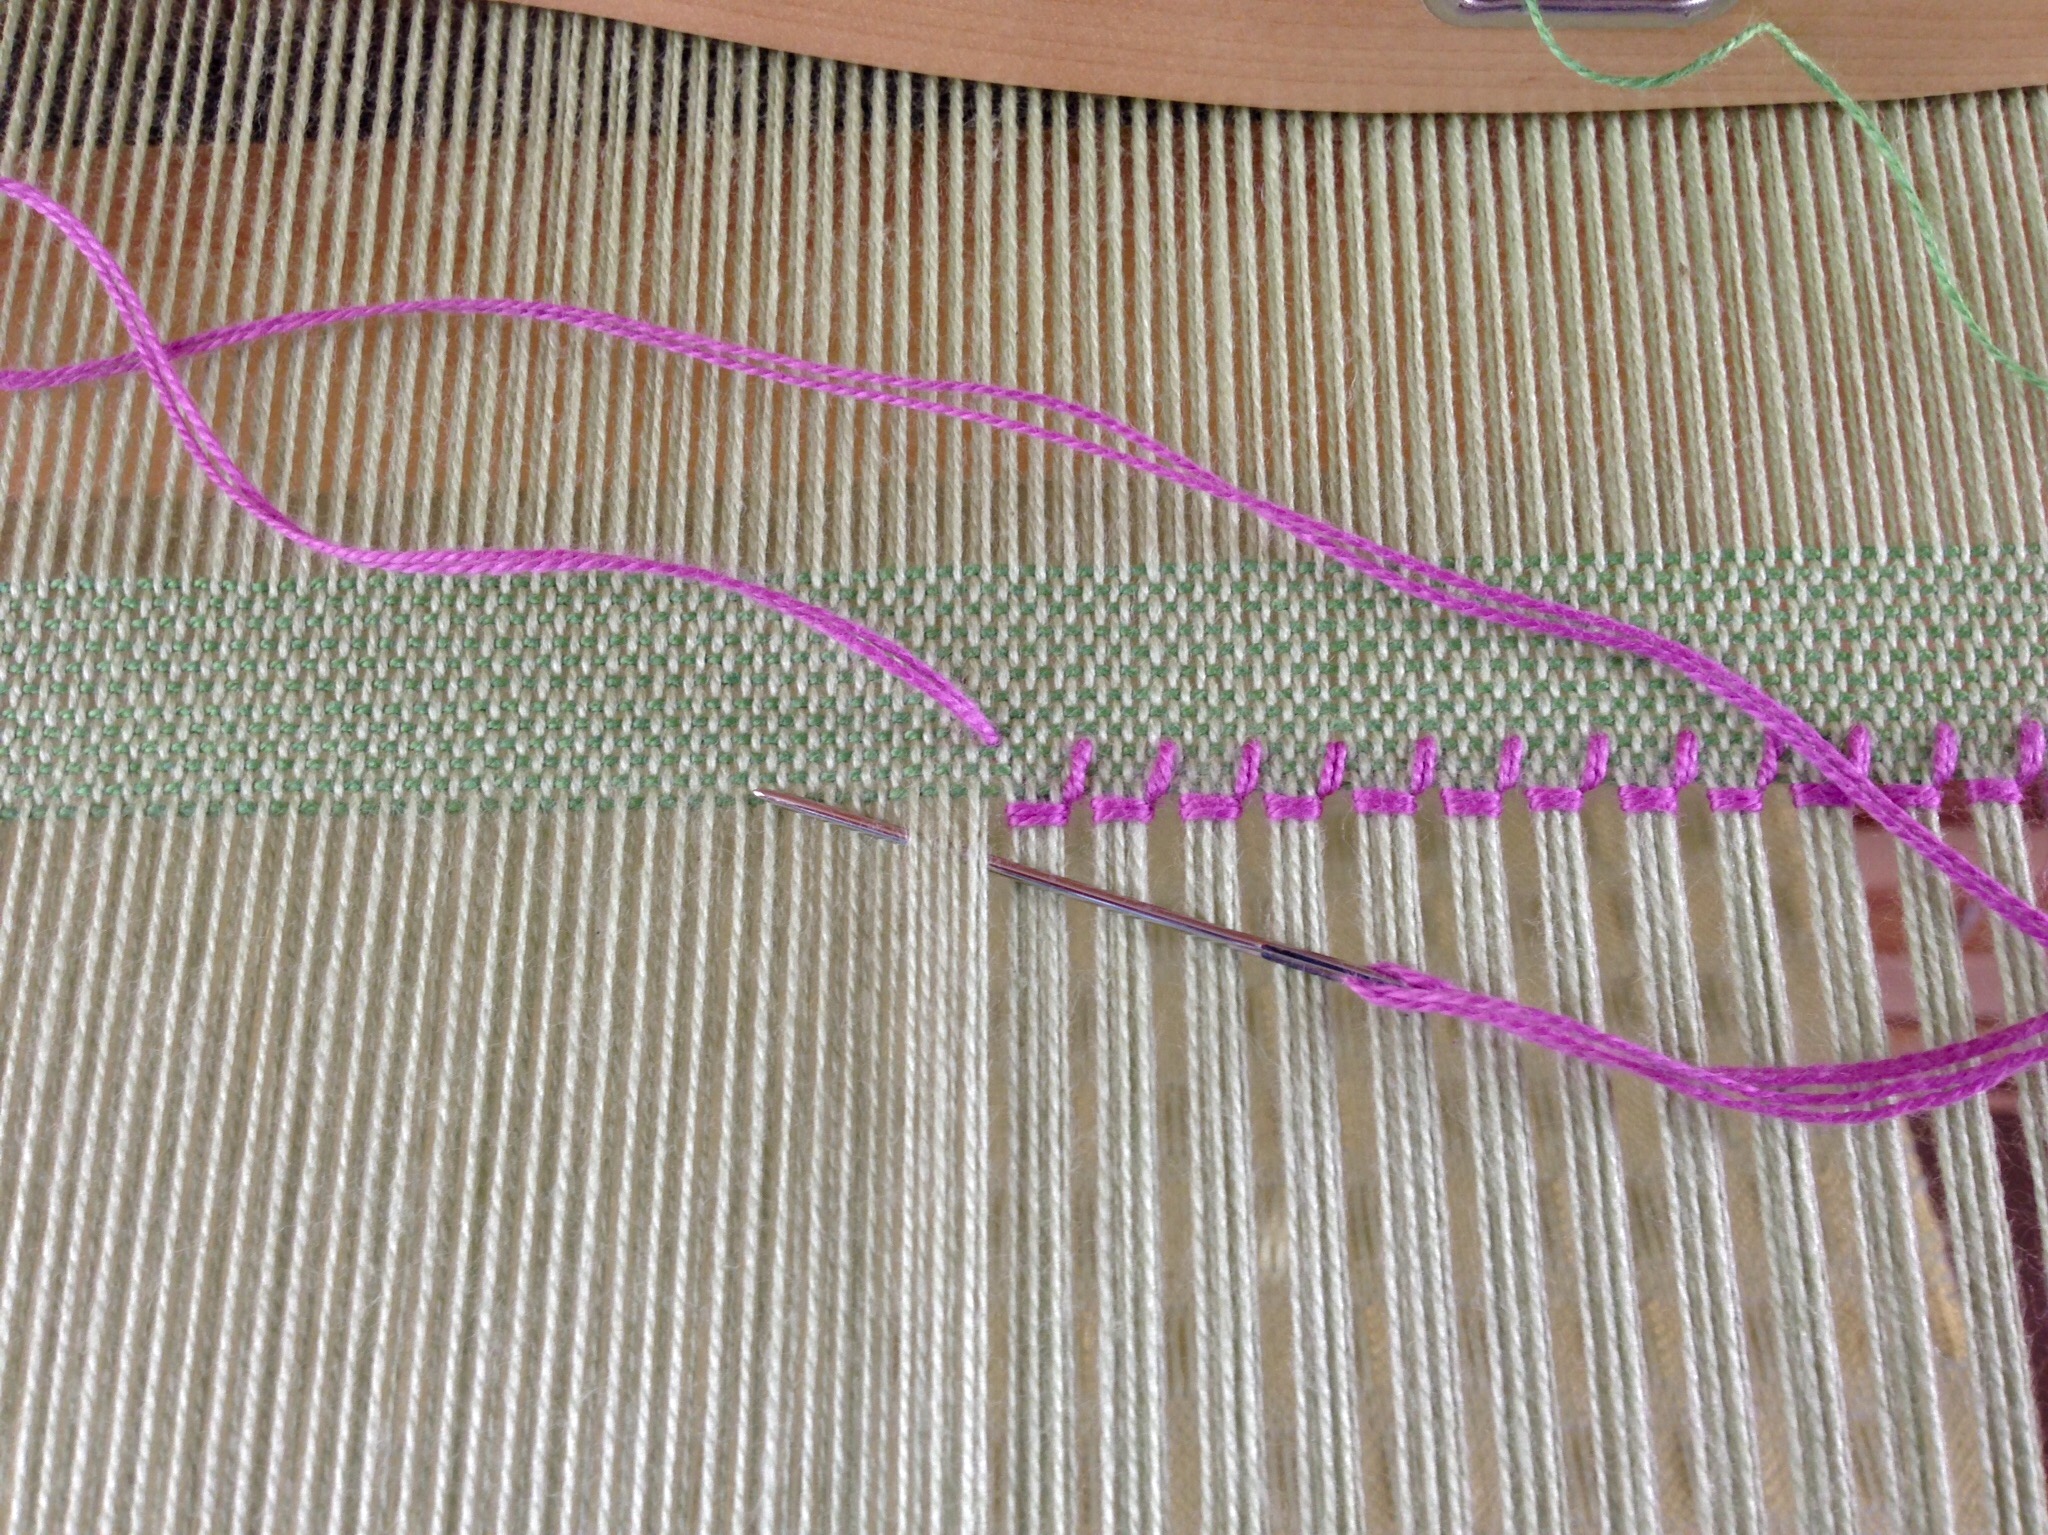
Finishing
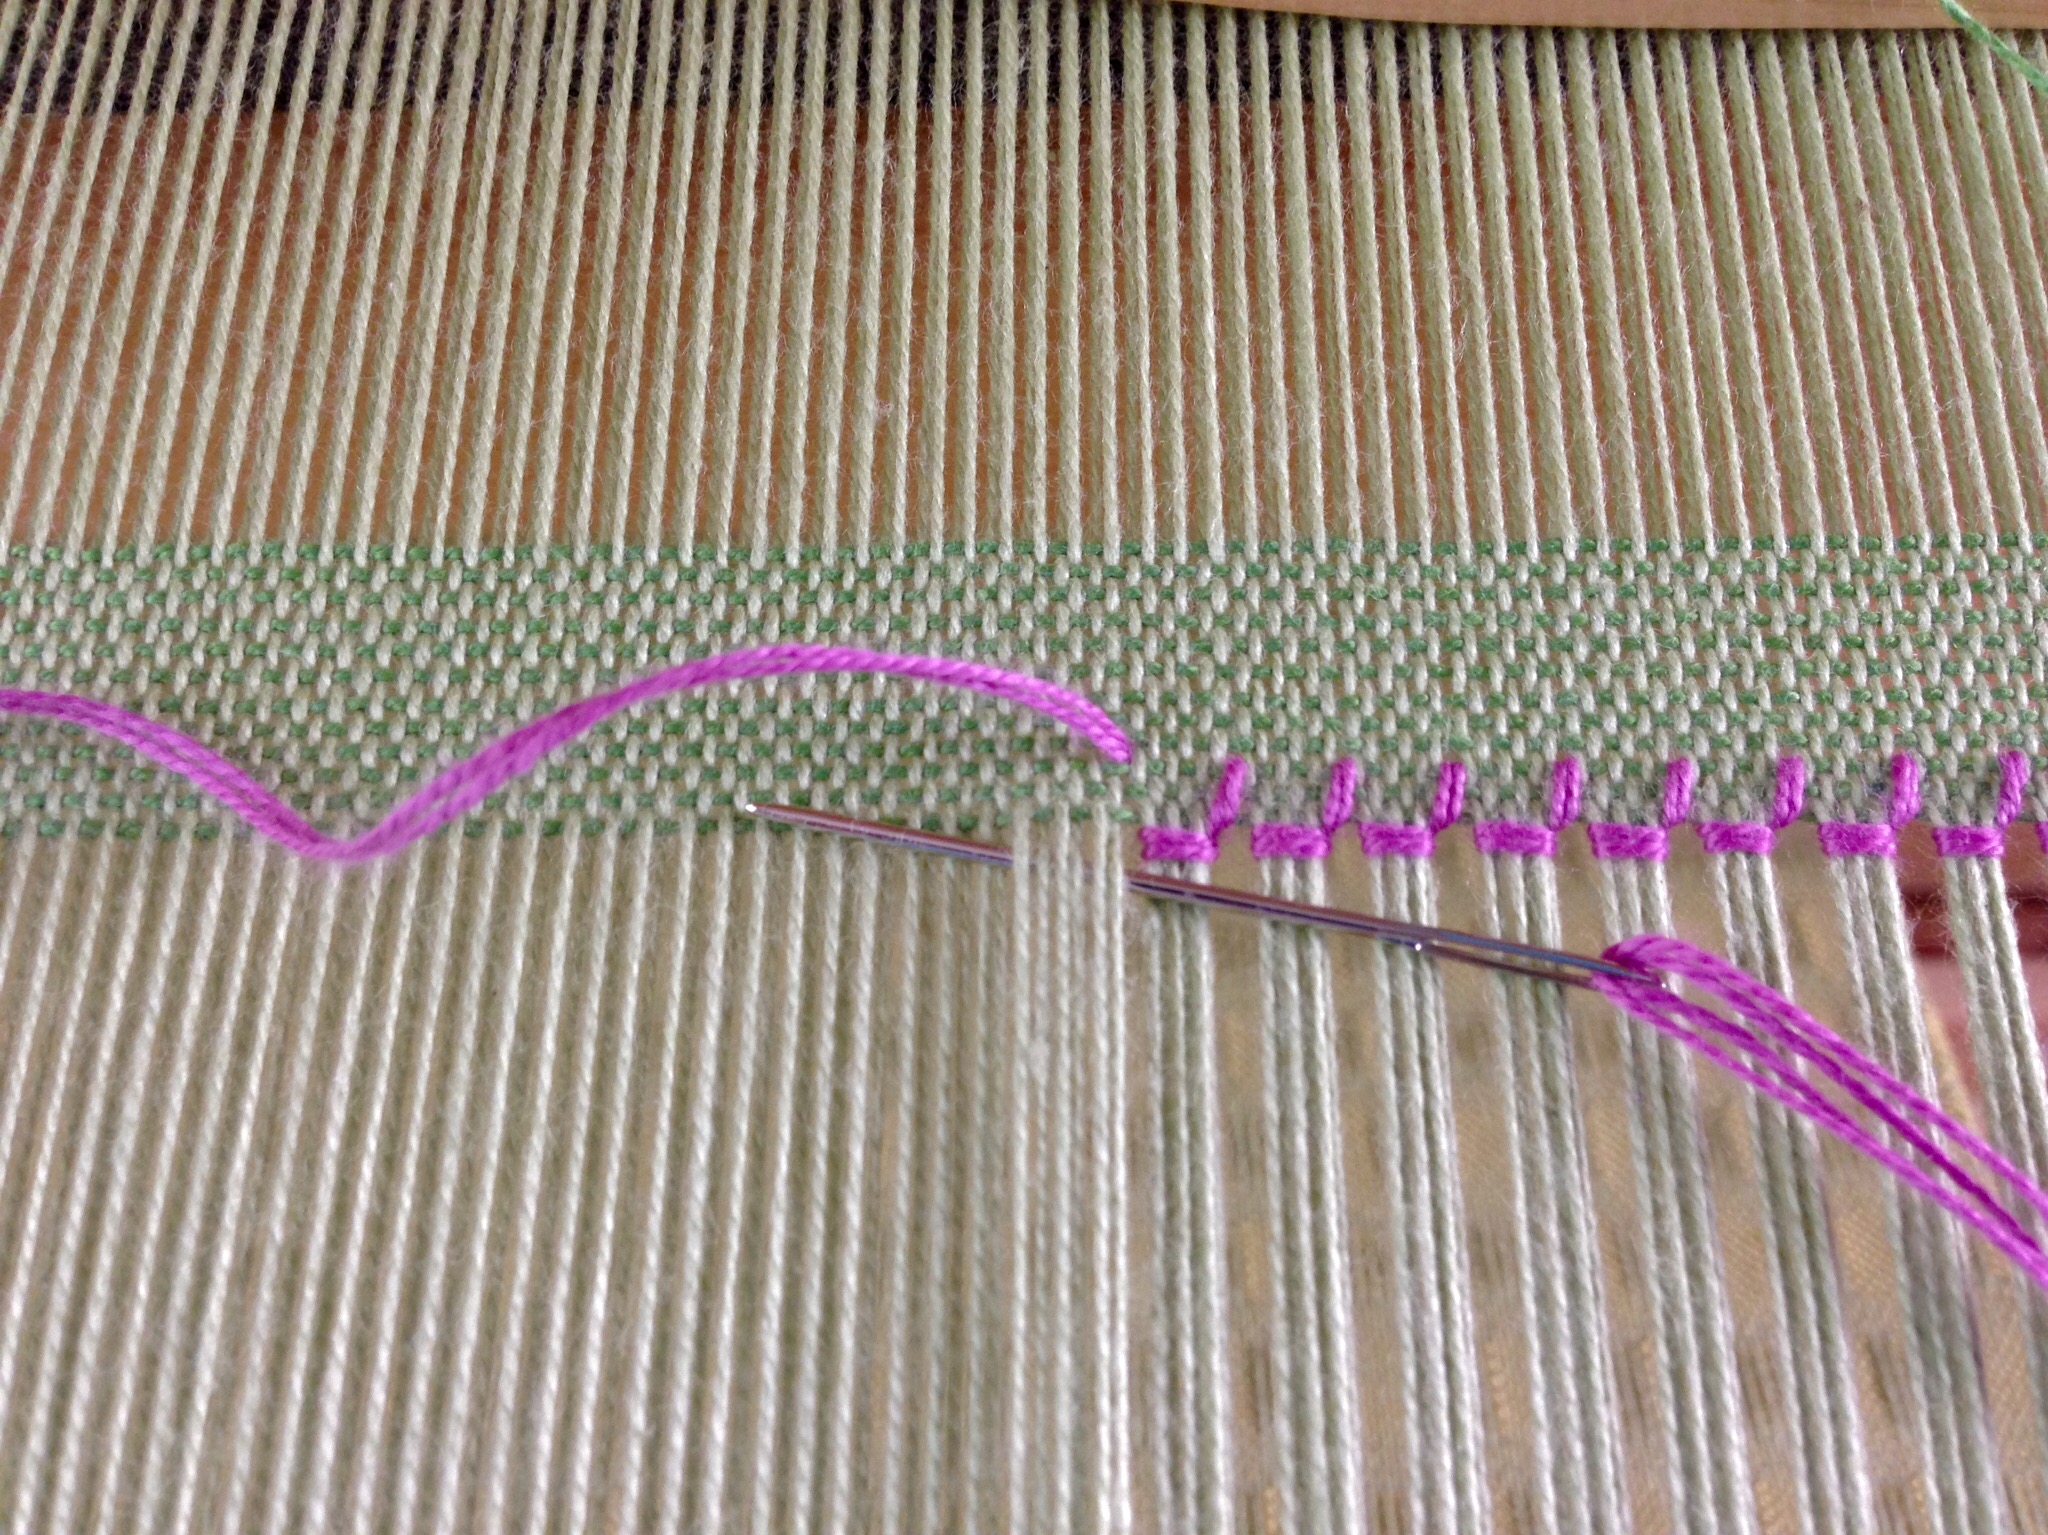
Repeat Steps 1 – 4 across the entire width.
Finish by needle weaving the stitching thread back into the selvedge for an inch/2.5 cm. Trim off the remaining stitching thread end.
Hemstitching at the end of the woven fabric:
Starting on the right-hand side, secure the end of the stitching thread as before, and follow Steps 1 – 4 for hemstitching across the width. The only difference is that the needle comes toward you under the cloth in Step 3, instead of away from you.
Cotton lace-weave scarf in springtime colors. Bold hemstitching at the end.
Everything that has a beginning has an end. Since the beginning of time, and through the ages, our Maker has been unfolding His mystery of life and love. There will come a day, though, when the mystery is finished. Certainly, there will be bold hemstitching at the end of the cloth as the Maker, the Grand Weaver himself, brings time as we know it to a close.
May your days begin and end with an embroidered edging of love.
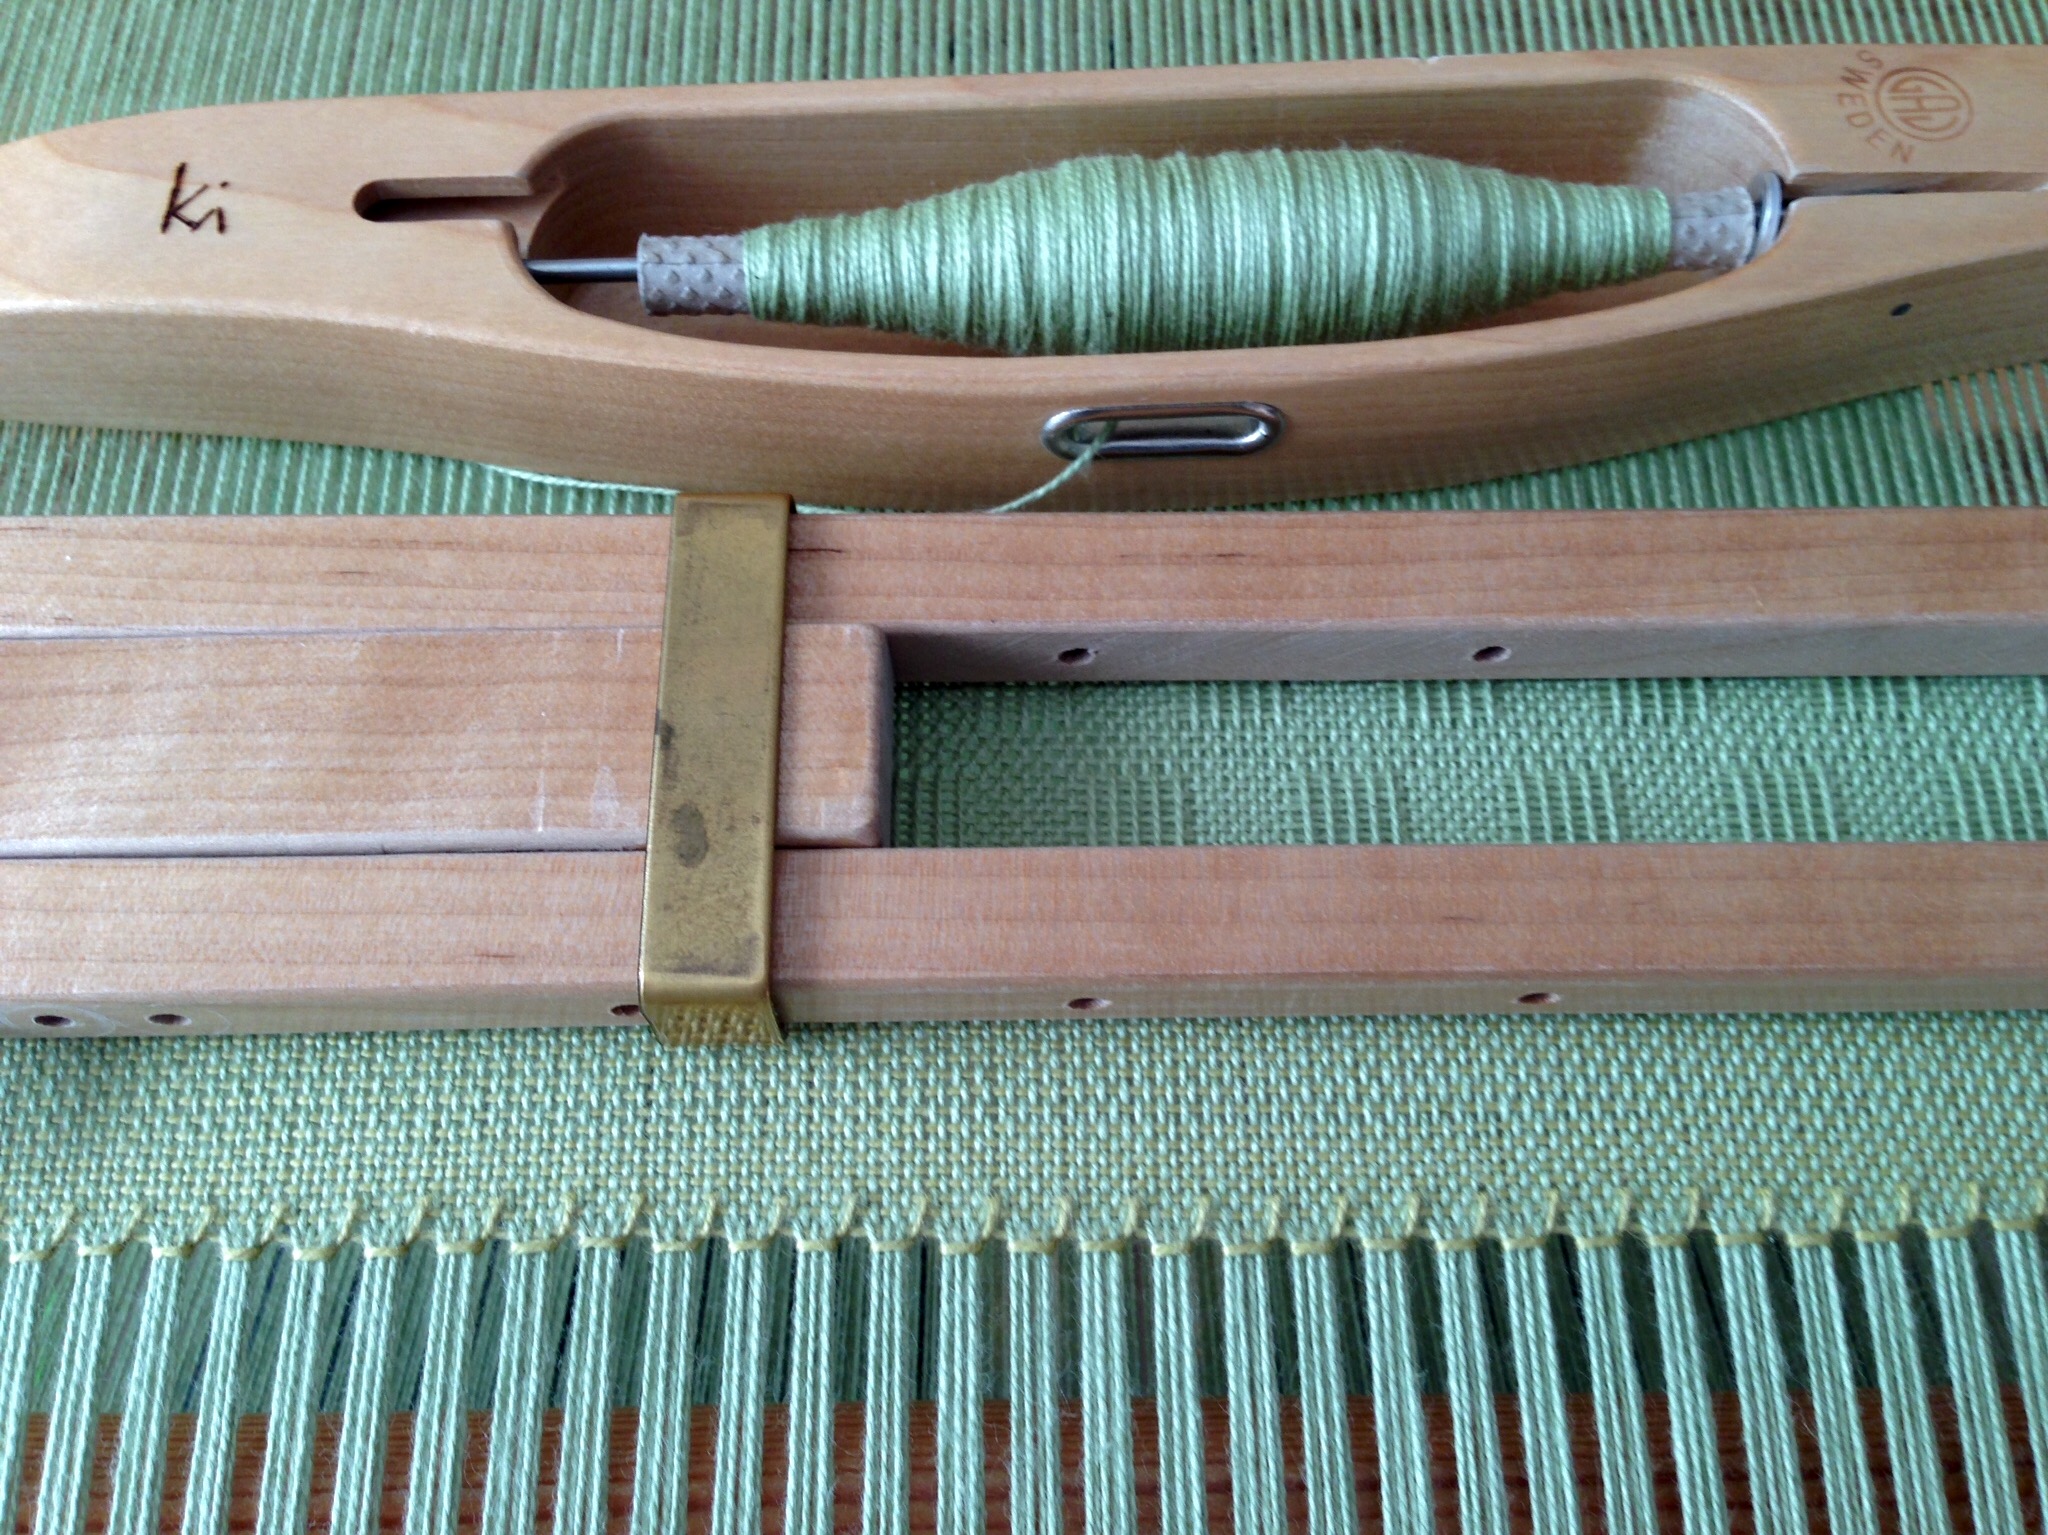
As a classically trained musician, I tend to approach my time at the loom as practice. This means being mentally alert–for every little gesture, the synchronization of movements, and the quality being produced. Little by little, with this mindfulness, I see improvement in releasing and catching the shuttle, treading my feet on the treadles, and efficiency of movement overall. I still struggle with getting an even beat and with keeping my place in the treadling pattern. My pace of weaving is increasing, though.
Hemstitching begins another cotton lace scarf. The ease of weaving with only one shuttle allows ample opportunity to focus on improvement of weaving technique.
Will I ever reach perfection in these skills? I don’t think so. I have come a long way, but have you noticed that learning never ends? My practice won’t make me perfect, but it does provide a way for me to grow as a weaver.
Faith is more than a belief, it is a practice. Faith in Jesus is always the entrance door into the Kingdom of heaven. And don’t think of heaven simply as a destination. Think of heaven as a Kingdom where everything is right. The day will come when that Kingdom is no longer a mystery. In the meantime, let’s practice weaving worthwhile cloth.
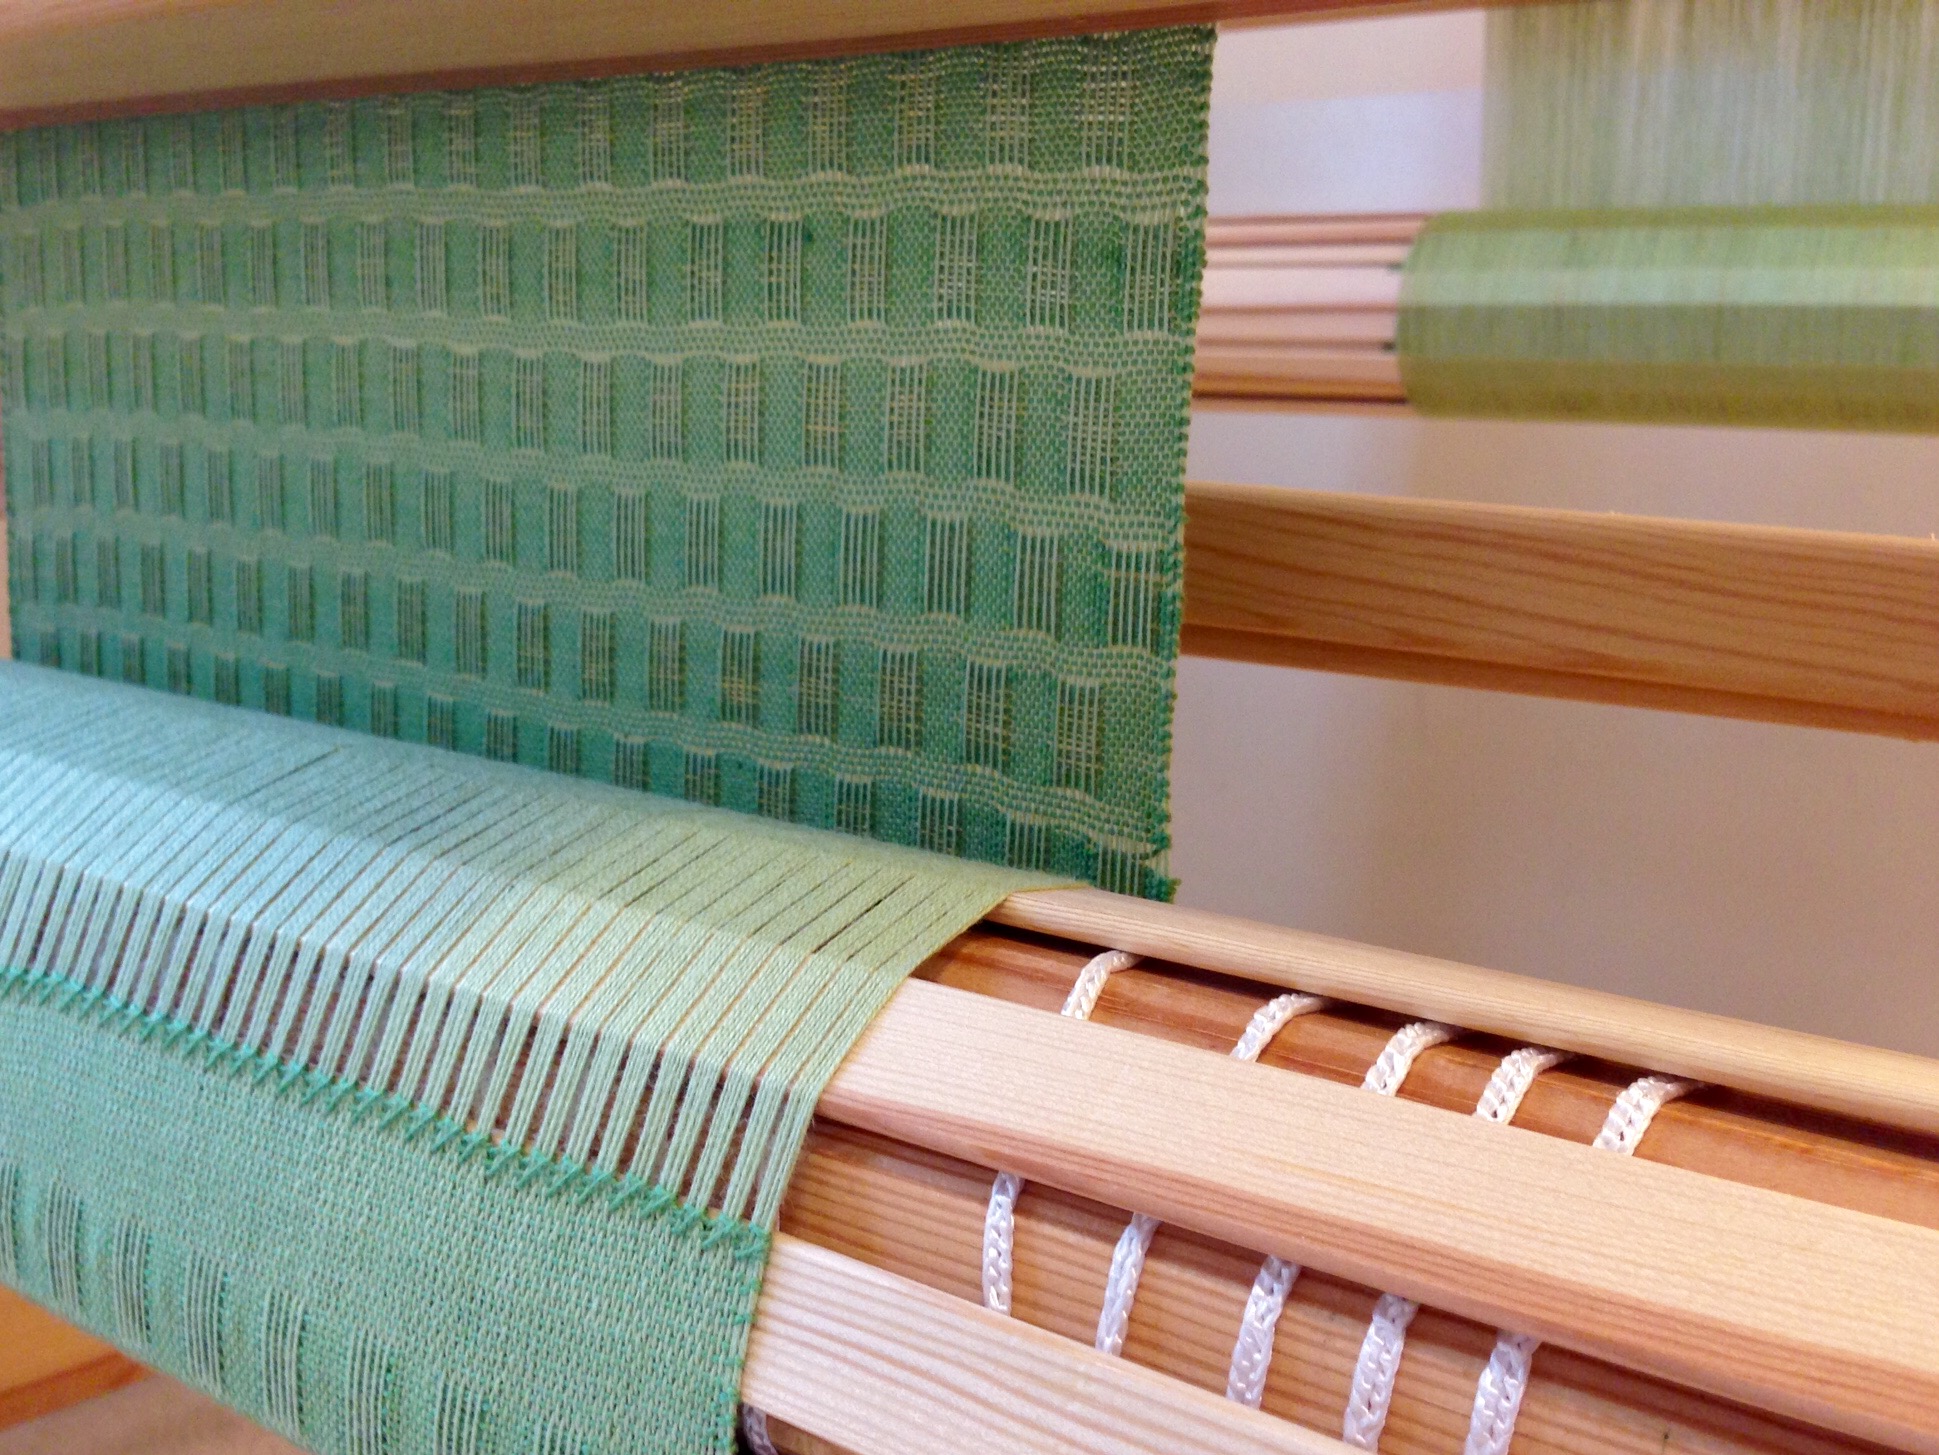
I am looking forward to the end product–soft and squishy scarves! I have finished weaving the first scarf, and hemstitched both ends at the loom. The long warpfloats don’t worry me, because I know that wet finishing will give me what I wish for–soft, puckered cloth. (You can see how the sample turned out in Puckered Sample.)
Warping slats on the cloth beam, the first time around, give the fabric a smooth surface to roll onto. Hemstitching separates the fringe area from the woven cloth that will become a scarf.
Some things you wish for are simply out of your control. That is how I felt two weeks ago when my mother went to the hospital with life-threatening illness. Wishful thinking is nice, but it doesn’t actually change anything. Prayer does change things. I’m not saying that prayer will necessarily keep someone alive if their body has worn out. I am saying that prayer makes a difference in how things play out in any circumstance.
Things happen when you pray. In this case, my mother beat the odds and left the hospital. Alive! You and I need each other. When we humble ourselves and ask for help, help comes. When we pray and ask God for help, sometimes sick people get better, and weak people get stronger. Our prayers for each other are heard and answered. This is better than wishes come true.
May you have the benefit of someone else’s prayers.