Tools Day: Teeny Tiny Temple

What if you start weaving a project and realize your smallest temple is too big? And that your smallest temple is the smallest one they make. I am aware that most people do not use a temple for something this narrow, 16.7 cm/6.5 in. width in the reed, but this is a rag rug. A miniature rosepath rag rug. And draw-in is inevitable, which leads to weaving headaches like broken selvedge warp ends. A temple helps prevent all that.

Smallest temple is too big. How I solved this dilemma.
Smallest Glimåkra temple is two inches wider than my weaving width.

I have seen makeshift temples that I could try, but my genius husband has a better idea. Why not cut down my little temple to the size I need? So he takes the tiny temple out to his workshop in the garage and turns it into a teeny tiny temple! (He does this knowing full well that I will need to replace the temple being cut.)

Cutting a temple down to make a teeny tiny temple.
Measure twice; cut once. Steve marks his cutting lines on the original temple parts.
Small temple is cut down to teeny tiny size.
Happy with the first cut, Steve is now ready to let the second piece meet the saw blade.
Small temple is cut down to teeny tiny size. It works!
Once cut apart, we wonder if a temple this tiny will work? Will there be enough length for the pieces to pivot as needed? There’s one way to find out…

Perfect! It works! And holes for the locking pin line up, too!

Teeny tiny temple in place on miniature rag rug. (6 1/2")
Teeny tiny temple does its job. Yay!
Start of a mini rosepath rag rug. Karen Isenhower
Start of a miniature rosepath rag rug.

Mini rosepath rag rug in the making.

May you cut your problems down to size.

A little weaving,
Karen

Quiet Friday: Custom Lining for a Handwoven Bag

Every good bag deserves a good lining, with pockets inside and a zipper on top. This handwoven rag rug bag is no exception. The lining fabric is some of the same fabric that is woven in the bag. The polka dot pocket fabric is a cheery piece from a visit to The Philippines. The completed zippered tote is a perfect fit for my small tapestry frame, and goes with me when I travel. Quiet Friday: Weave a Bag with Handles shows how I made the bag.

How to add zippered lining to a bag.

How to Add a Custom Zippered Lining to a Bag

Tools

  • Sewing machine
  • Zipper foot
  • Walking foot (recommended, but not required)
  • Steam iron
  • Straight pins
  • Tool for pushing out corners
  • Needle and sewing thread
  • Disappearing ink fabric marker
  • Fabric scissors

Supplies

  • Fabric for lining. Lay bag on top of folded lining fabric, with bottom of bag aligned with the fold of the lining fabric. Cut the folded fabric a generous 1 1/2″ wider and 1 1/2″ taller than the bag.
  • Fabric for pocket. Mark two pieces of fabric (or use a folded piece of fabric) the desired pocket size. Add 1/4″ seam allowance. Cut along the marked lines. Stitch, right sides together, leaving an opening for turning. Turn right side out, pushing out corners. Press. Topstitch all four sides.
  • Fabric for zipper insert pieces. Cut two pieces of fabric 4 1/2″ wide by the length of the zipper plus 1″.
  • Tabs for ends of zipper tape. Cut from handwoven band or piece of fabric with sides folded under.
  • Zipper. Regular, non-separating zipper, as long as, or longer than, bag opening

Steps

  1. Sew bottom three sides of pocket onto lining fabric. Stitch a dividing line on pocket.Adding pocket to lining for bag.
  2. Stitch sides of lining, right sides together. Fold and stitch box corners.Box corners on lining for a bag.
  3. With lining seated in bag, fold down top edge of lining, so that folded edge fits just inside top edge of bag. Pin folded edge of lining and remove from bag. Set aside. Fitting lining for a handwoven bag.
  4. Bar tack top ends of zipper tape together. Bar tack over end of desired zipper length. Cut off excess. Cut a tab from a woven band, or from fabric with sides folded in, to fold over each end of zipper tape. Use zipper foot to stitch tabs over zipper tape ends. Preparing zipper to add to bag.
    Handwoven tabs for ends of zipper tape.
  5. For zipper insert, cut two pieces of complementary fabric 4 1/2″ wide by the length of the zipper, plus 1″. Making zipper insert for top of bag. Tutorial with pics.
  6. Fold each zipper insert piece lengthwise in half, right sides together. Draw stitching line that matches length of zipper. Zipper insert for top of bag. Tutorial.
  7. Stitch both short ends of zipper insert pieces. Clip corners and trim seams. Making zipper insert for top of bag.
  8. Turn zipper insert pieces right side out. Push corners out. Press. Making zipper insert for top of bag.
  9. Pin folded edge of zipper insert fabric to right side of zipper tape, centered lengthwise, 1/8″ away from zipper teeth. Open zipper partway. With zipper foot, starting at top end of zipper, topstitch close to folded edge. After stitching a third of the way, with needle down, close zipper, and then continue topstitching to bottom of zipper. Repeat for other side of zipper insert. Press. Making zippered lining for handwoven bag. Tutorial.
    Adding zippered top to handwoven bag.
  10. With zipper opened, and zipper tab down (picture shows zipper tab up, after having pinned both sides), center and pin one side of zipper insert under one side of folded top edge of lining, so that lining overlaps insert 1/2″. Repeat with other side of zipper insert and lining. Making zippered lining for handwoven bag. How to pics.
  11. Insert lining into bag, matching side seams and mid points on bag and lining, with top folded edge of lining 1/4″ below top edge of bag. (Edge of zipper insert is sandwiched between lining fold and bag.) Make sure bag handles are up and out of the way of stitching. From inside of bag, use walking foot to stitch 1/8″ from lining fold, all the way around top of lining, keeping zipper insert up and out of the way of stitching. (Walking foot helps ensure even feed of fabric layers.) Adding zippered lining to handwoven bag. Instructions.
    Pinning lining into handmade bag. Instructions.
    Sewing lining into Handmade bag. How to.
  12. Fold zipper inserts down into bag. Press. Stitch across zipper inserts 1/2″ below top of lining on inside of bag. Press again.Last step of tutorial for inserting lining in bag.

Give your new bag a special purpose.

Handwoven bag with custom lining. Karen Isenhower

May your lining on the inside be as attractive as your handbag on the outside.

Happy Creating,
Karen

My Mistake that Made Rug Warp Snap

Draw-in can wreck your weaving. Avoid it at all costs. Did you know that draw-in can cause even 12/6 cotton rug warp to break? First, two ends on the right, and then, an inch later, two more in the middle. I had ten broken warp ends in all. Strong, sturdy, Swedish rug warp! I was weaving miniature rugs. Between the absence of a temple, and my failure to place in enough weft, the drawn-in warp ends could not stand the abrasion they got from the reed. What started out as a bright idea ended up a “learning experience.”

Miniature rag rugs, side by side.
Double binding warp is divided into four sections to weave individual mini rag rugs.
Four mini rag rugs on the loom. Draw in was a problem.
Draw-in happened gradually, and didn’t seem to pose a problem until near the end. Then warp ends started snapping.
Finishing miniature rag rugs.
Mini rag rugs off the loom. After making all repairs and finishing the ends, they will be hemmed and ready for use as mug rugs and hot pads.

Words reveal a person’s core. When abrasive thoughts continue time and again, words eventually break loose from the tongue. The warp end breaks, and the stability of the rug is compromised. It may seem like the warp end is the problem, but the problem is the abrasion that led up to the breakage. Fortunately, broken warp ends can be fixed, with time and effort. But learning to eliminate the abrasion in the first place is the tactic I want to employ.

May you strengthen your core.

Your friend,
Karen

Quiet Friday: Weave a Bag with Handles

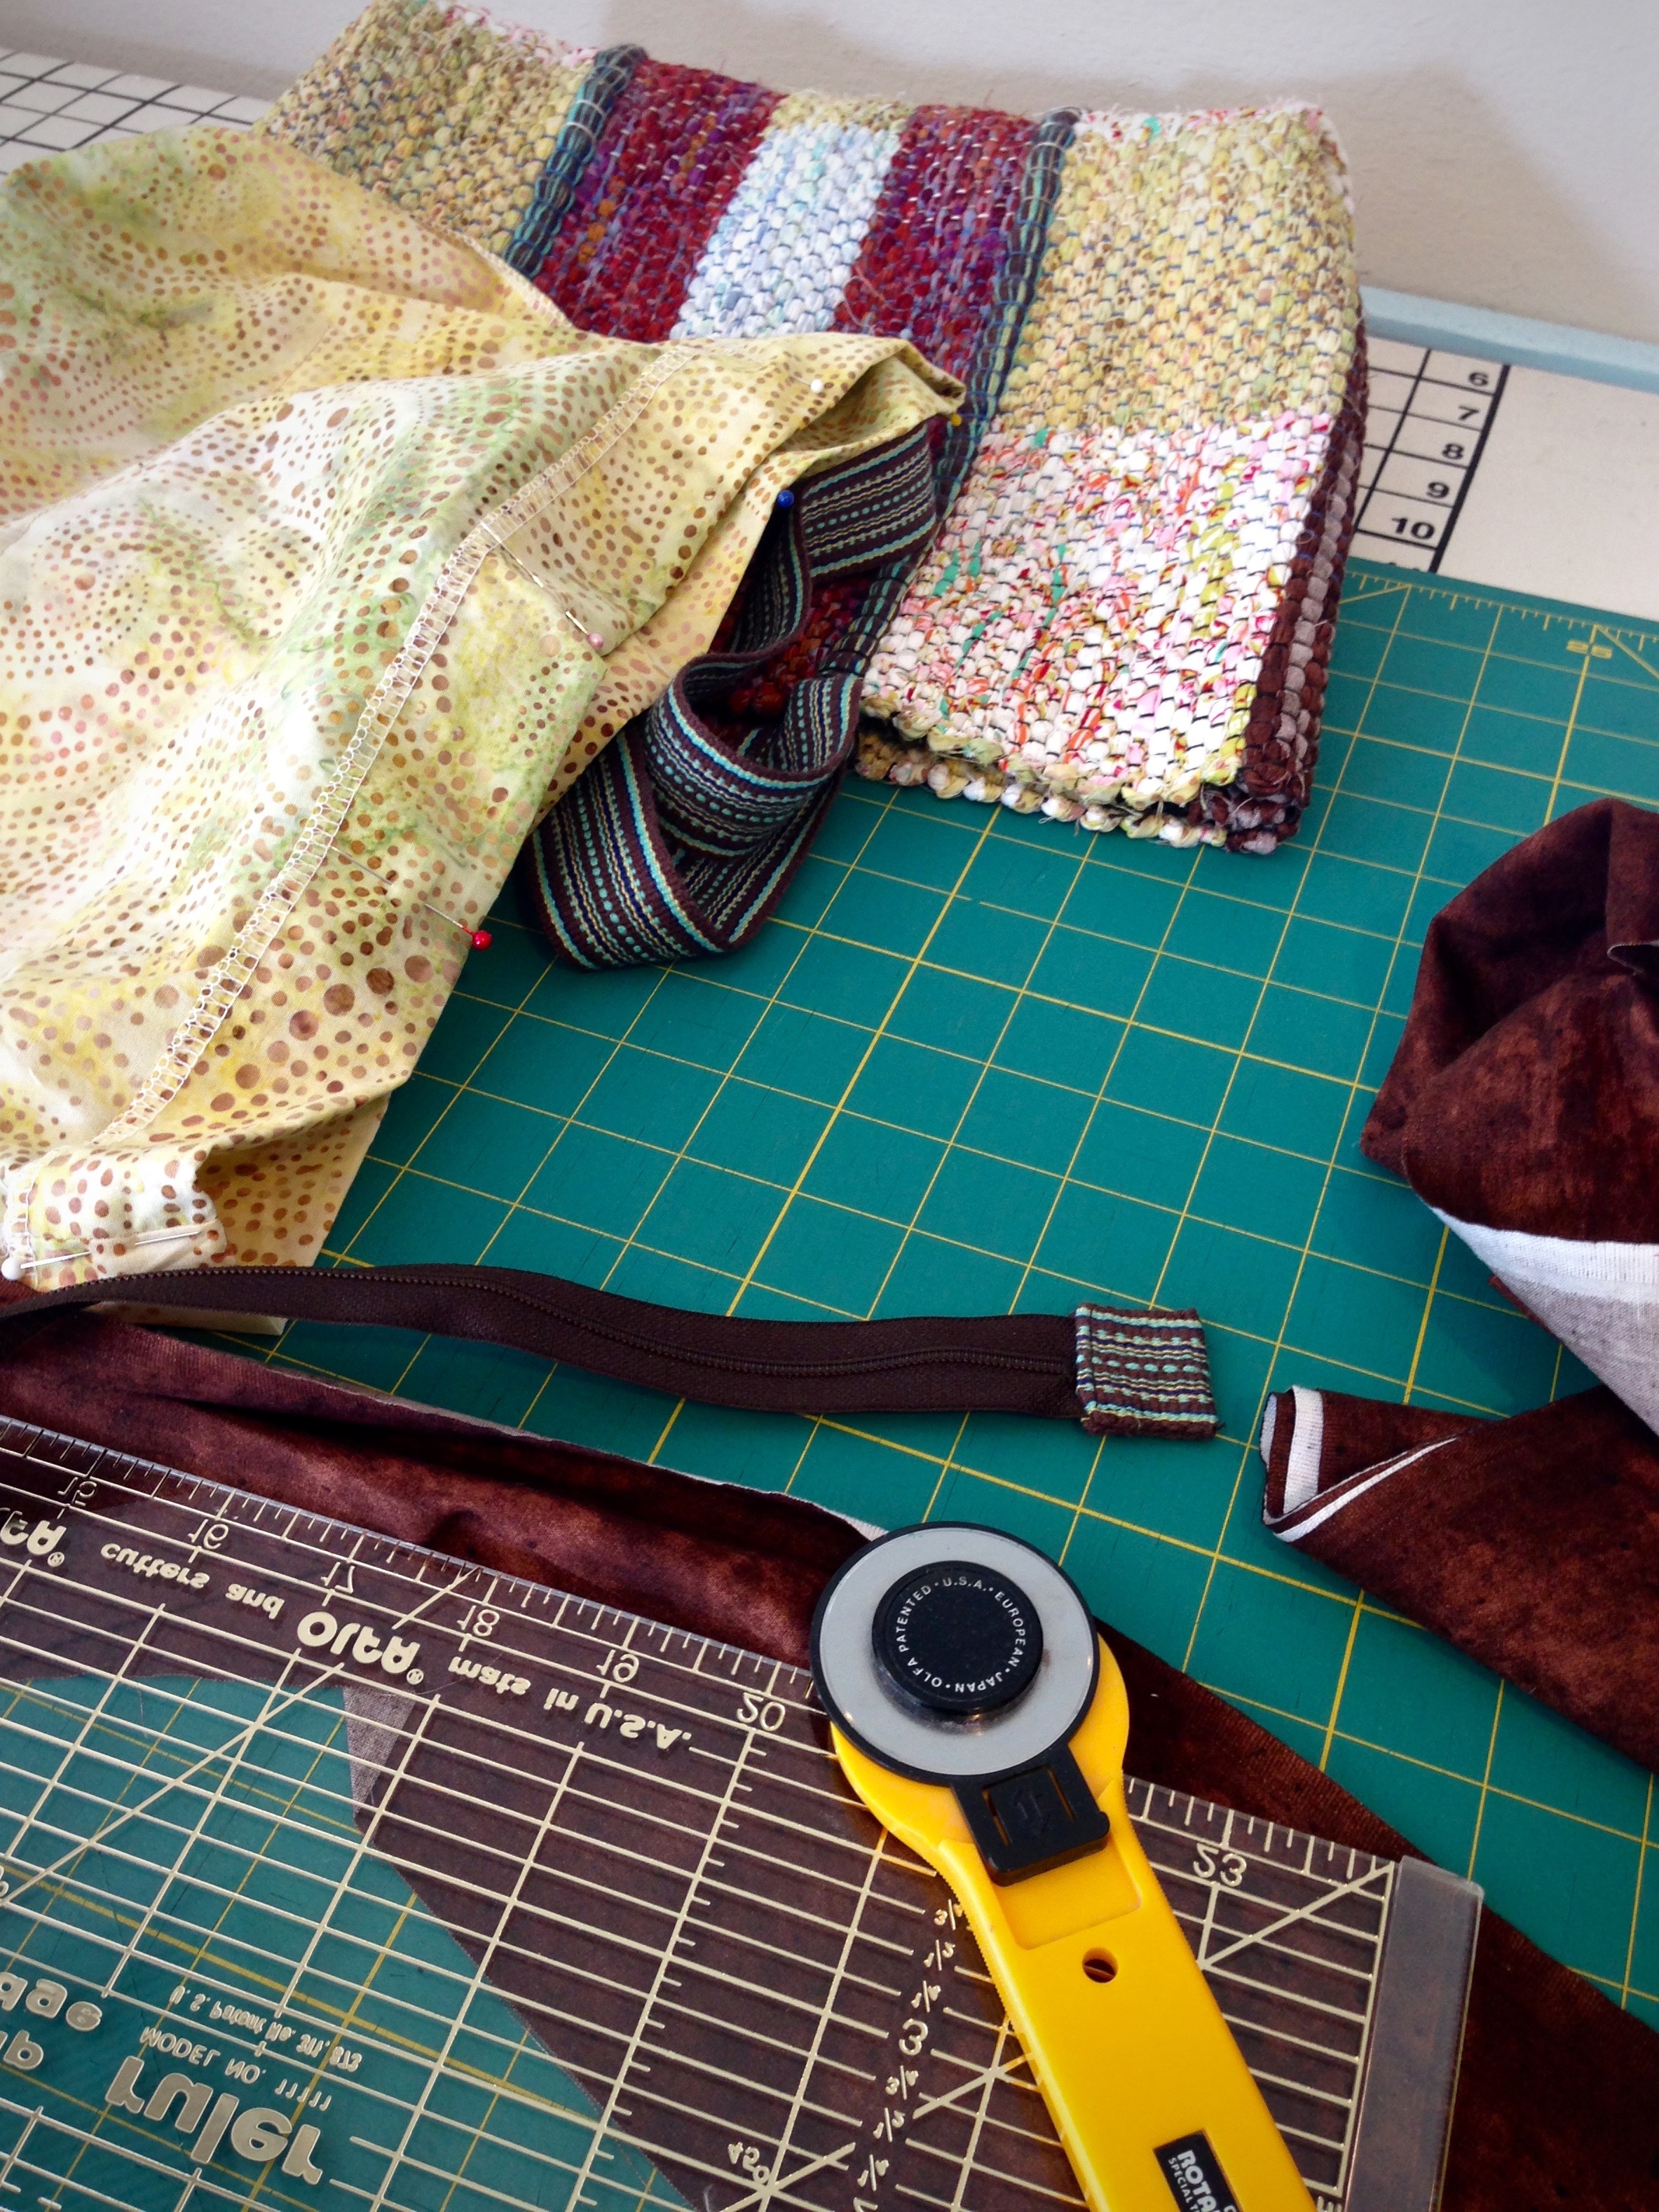
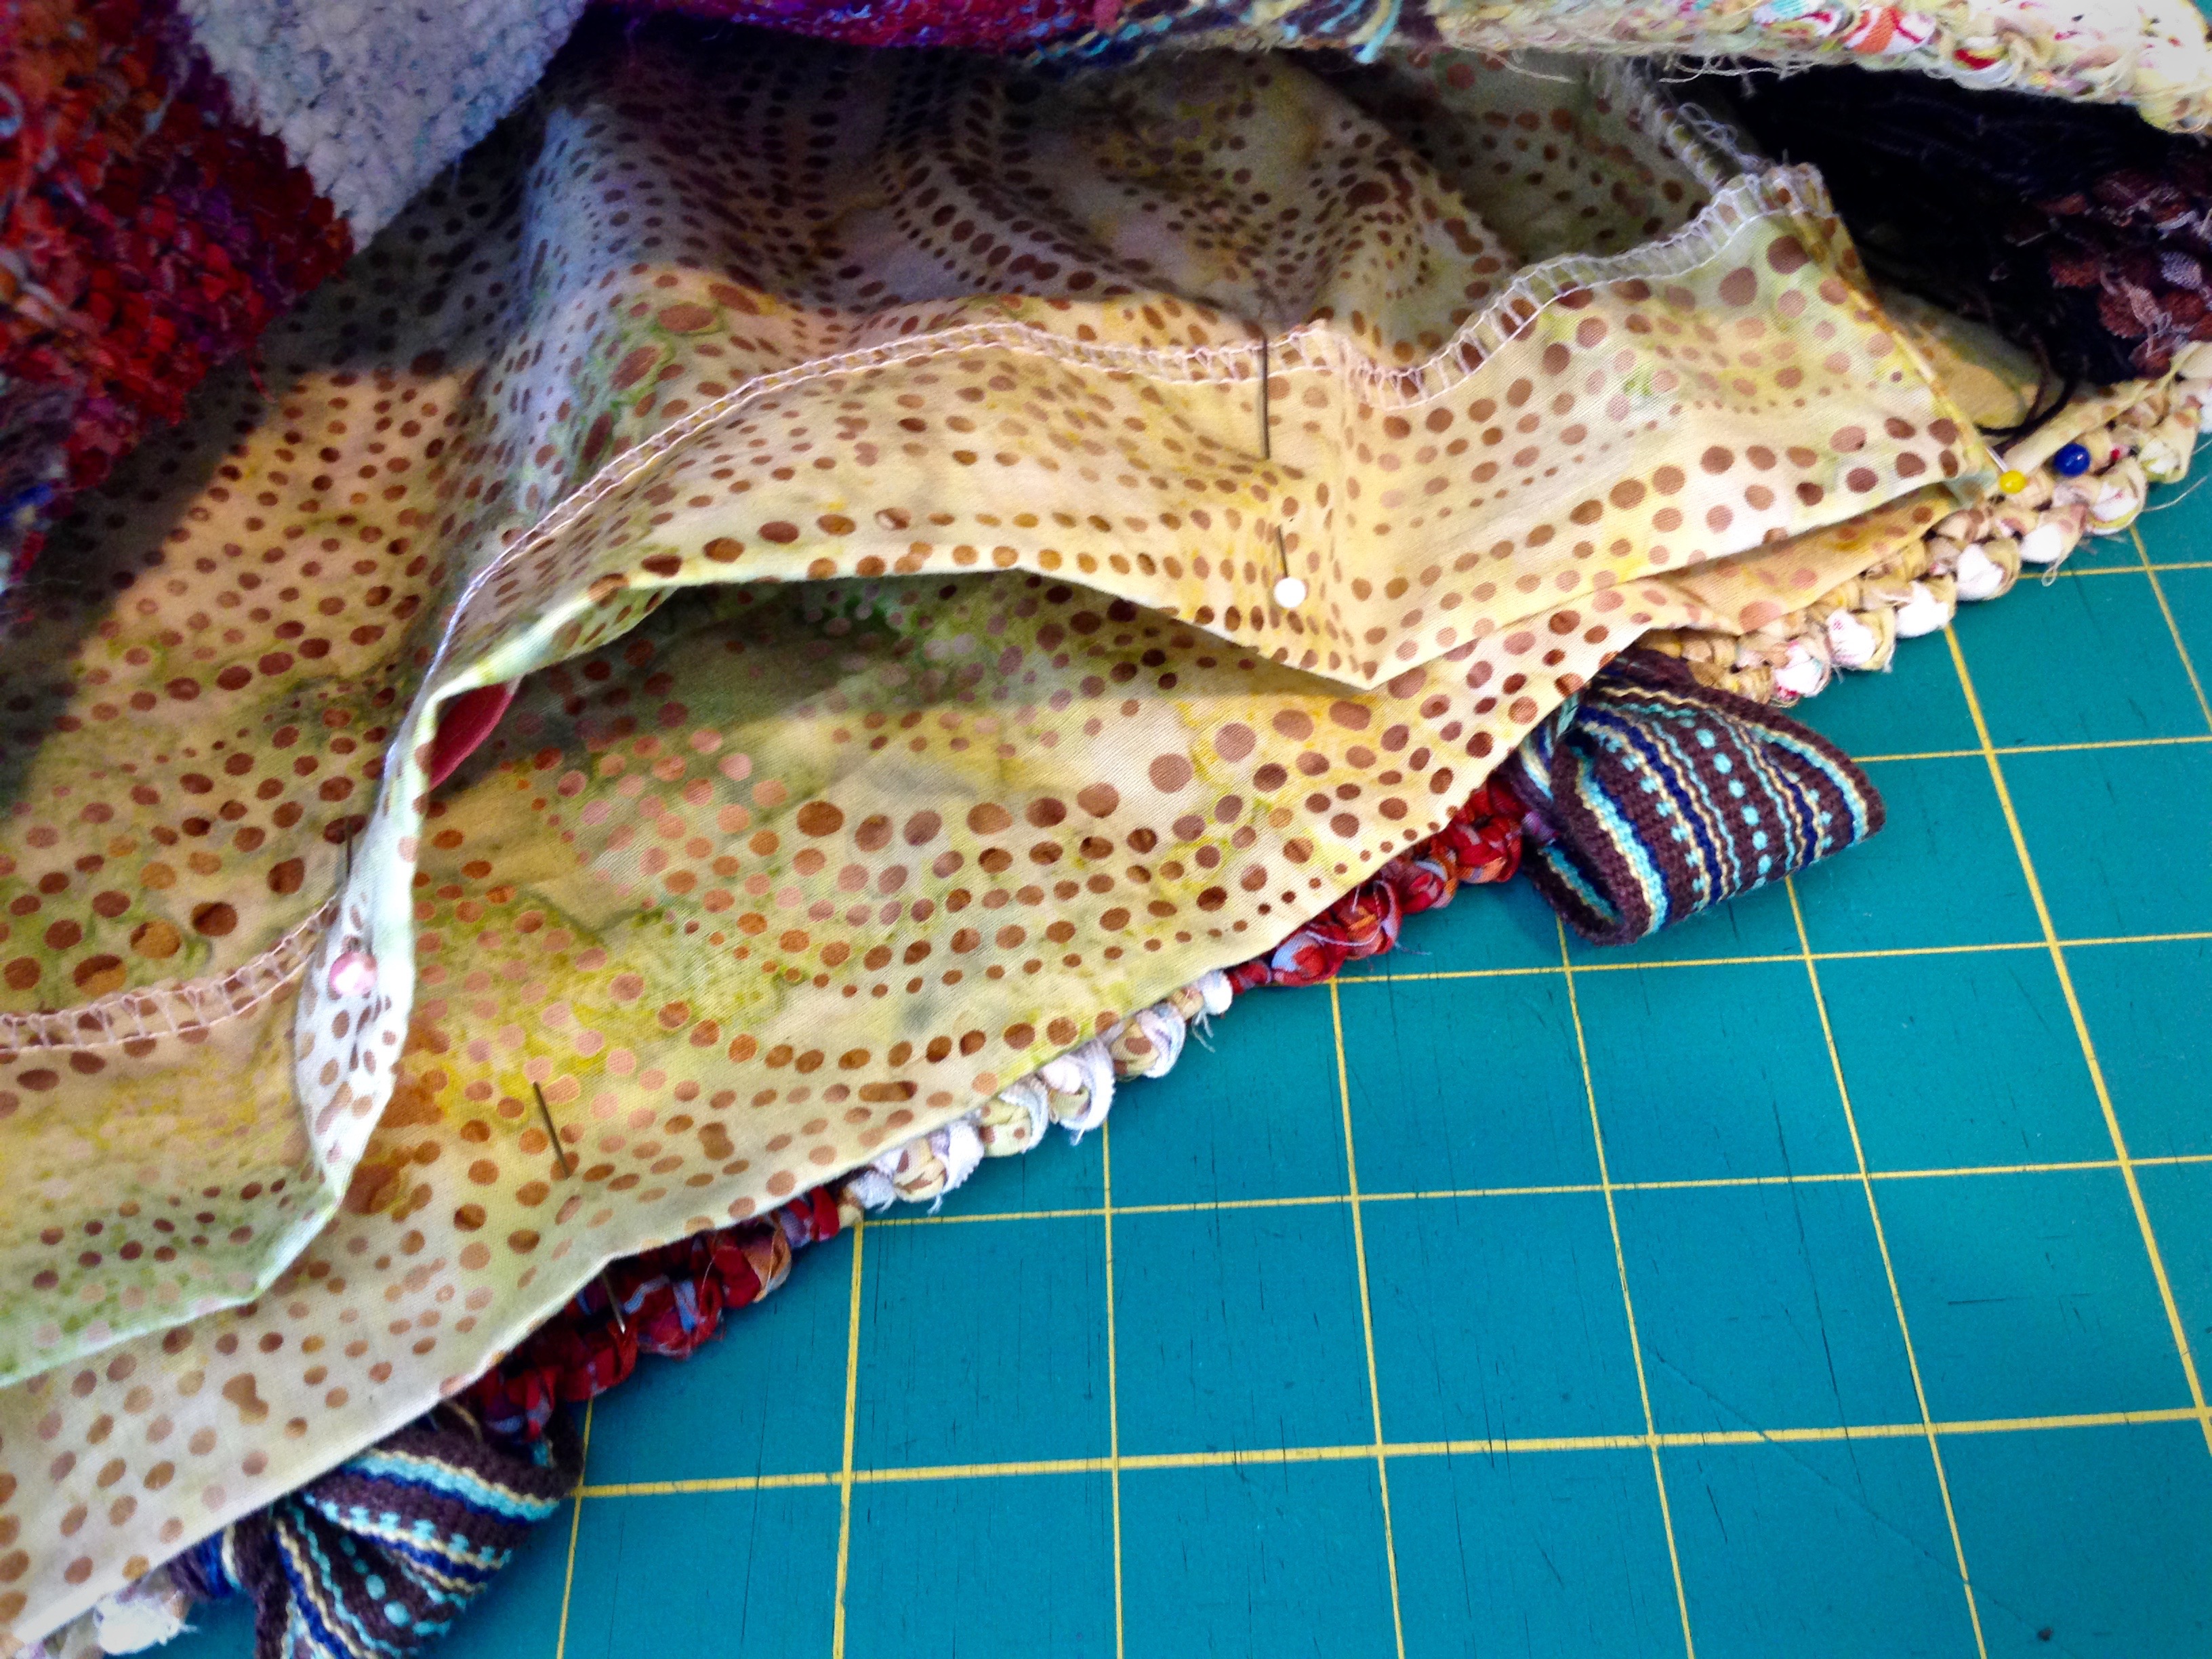
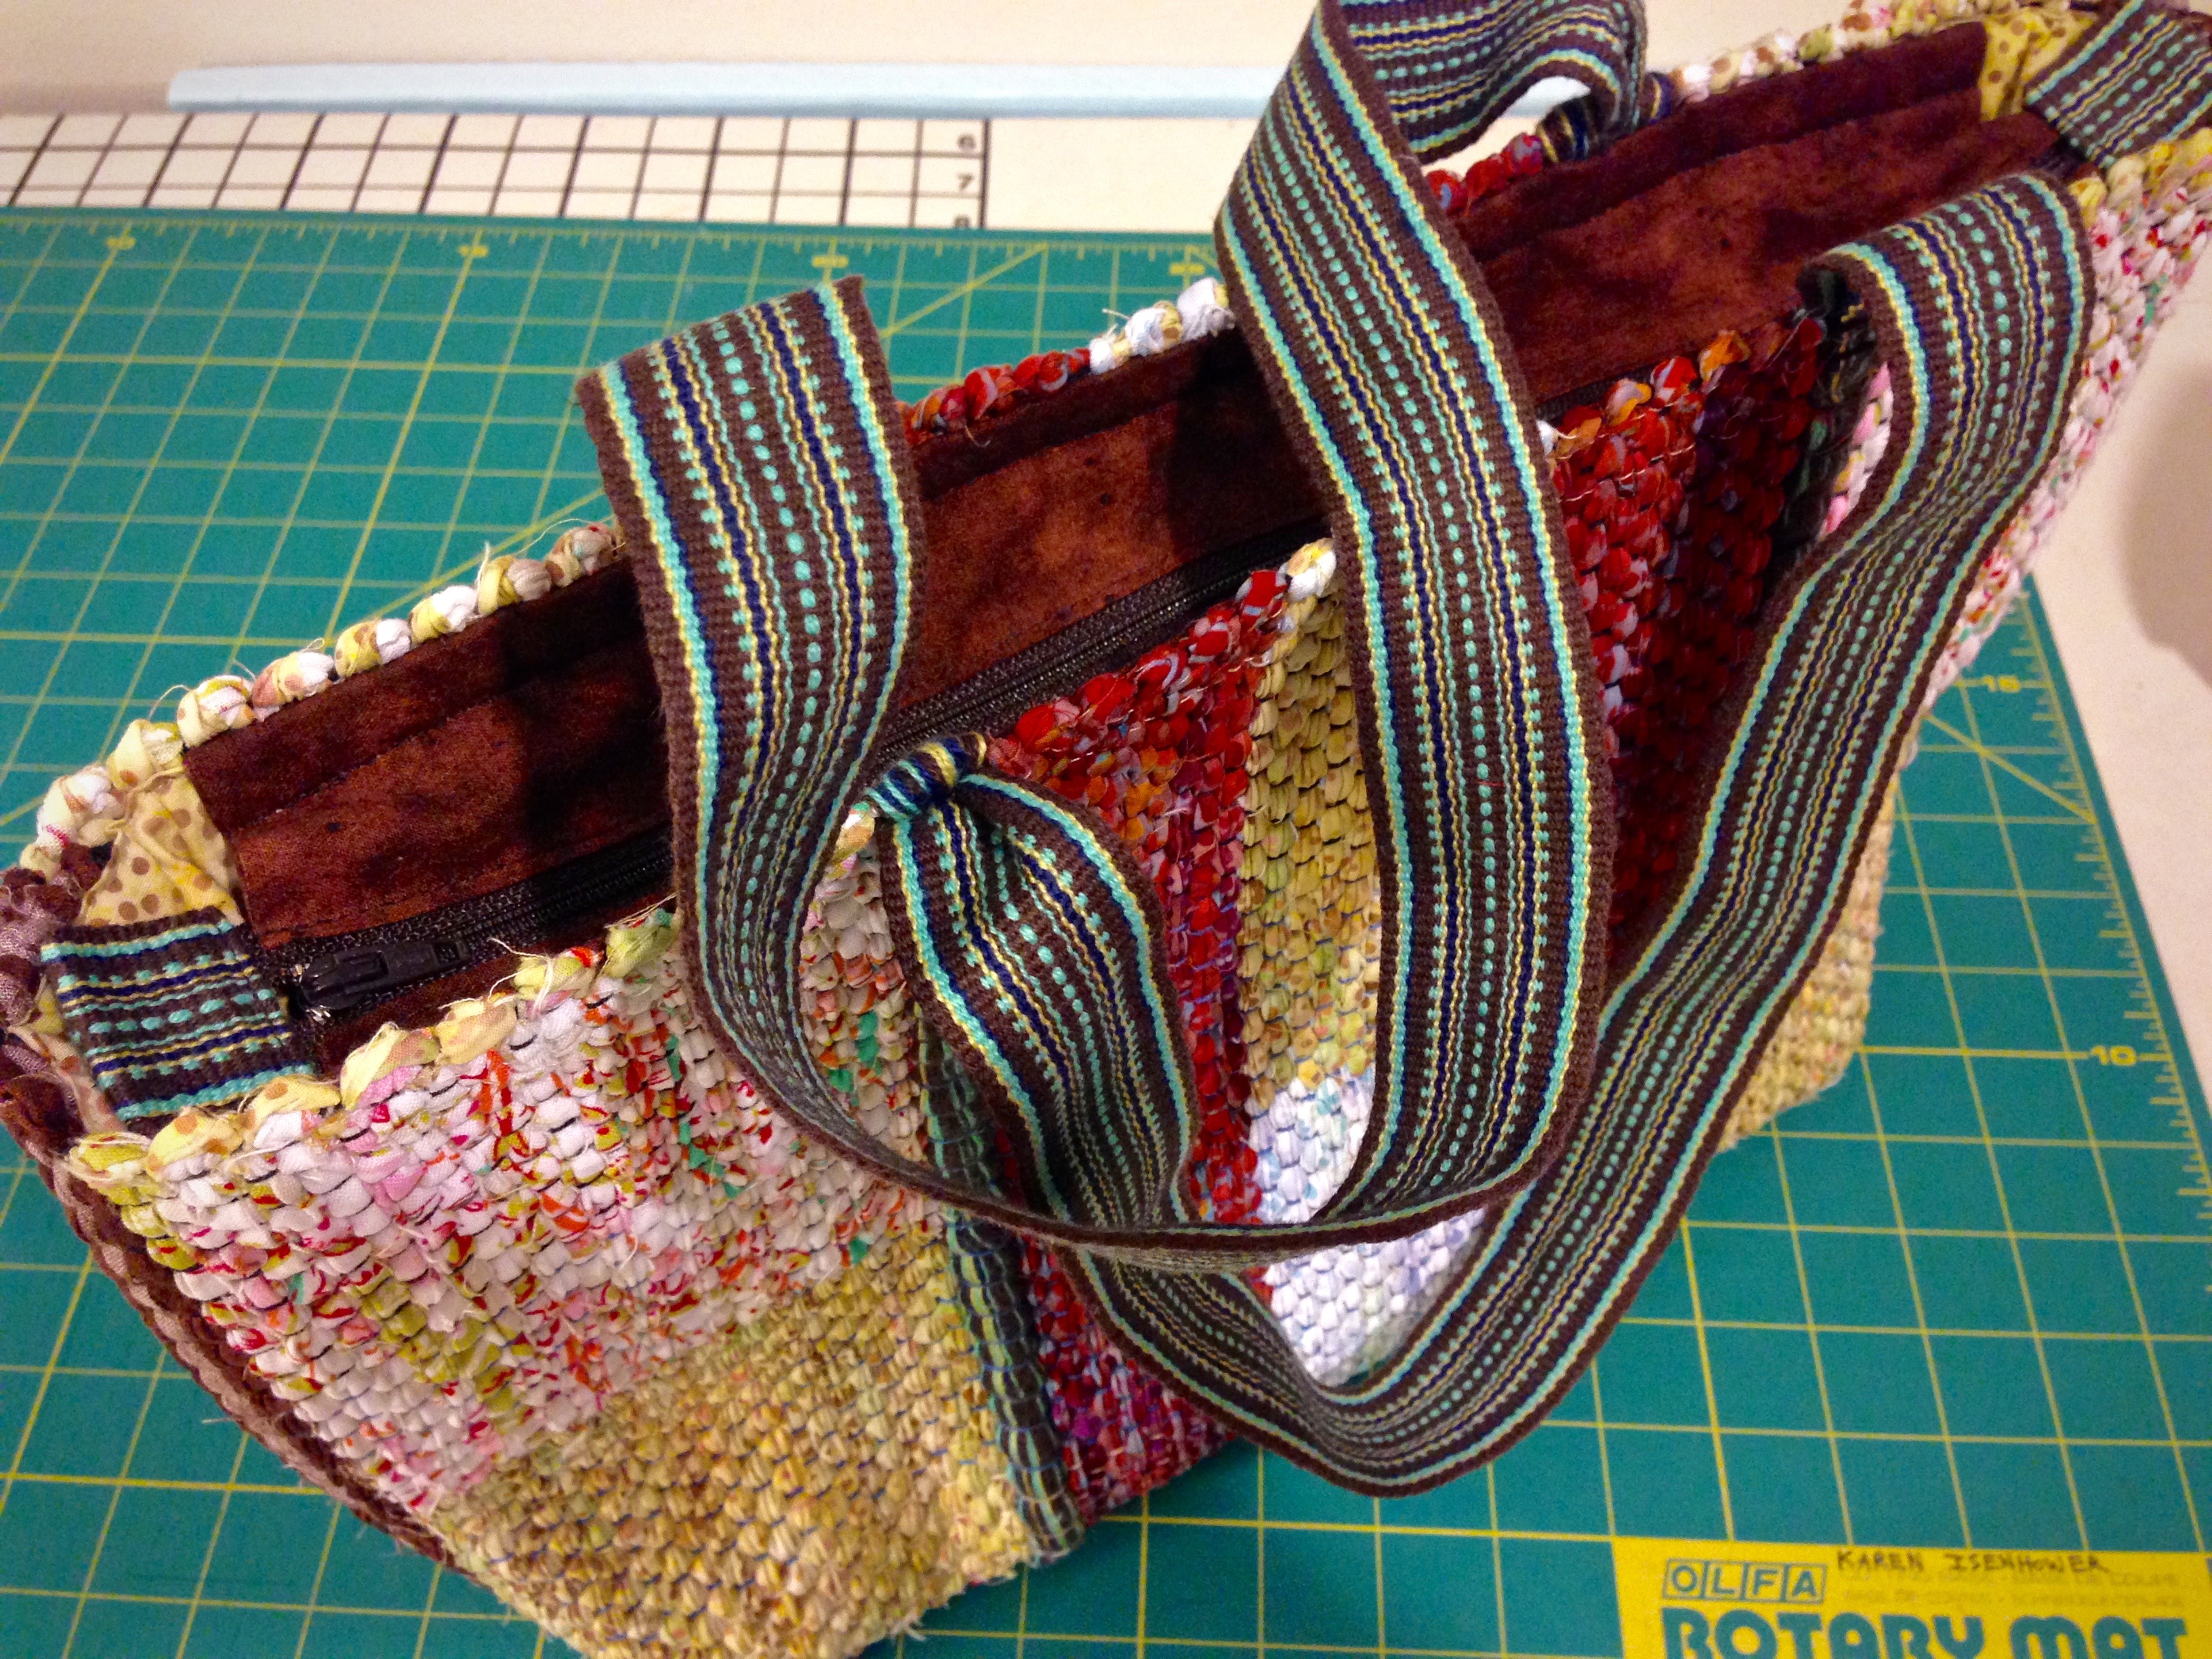
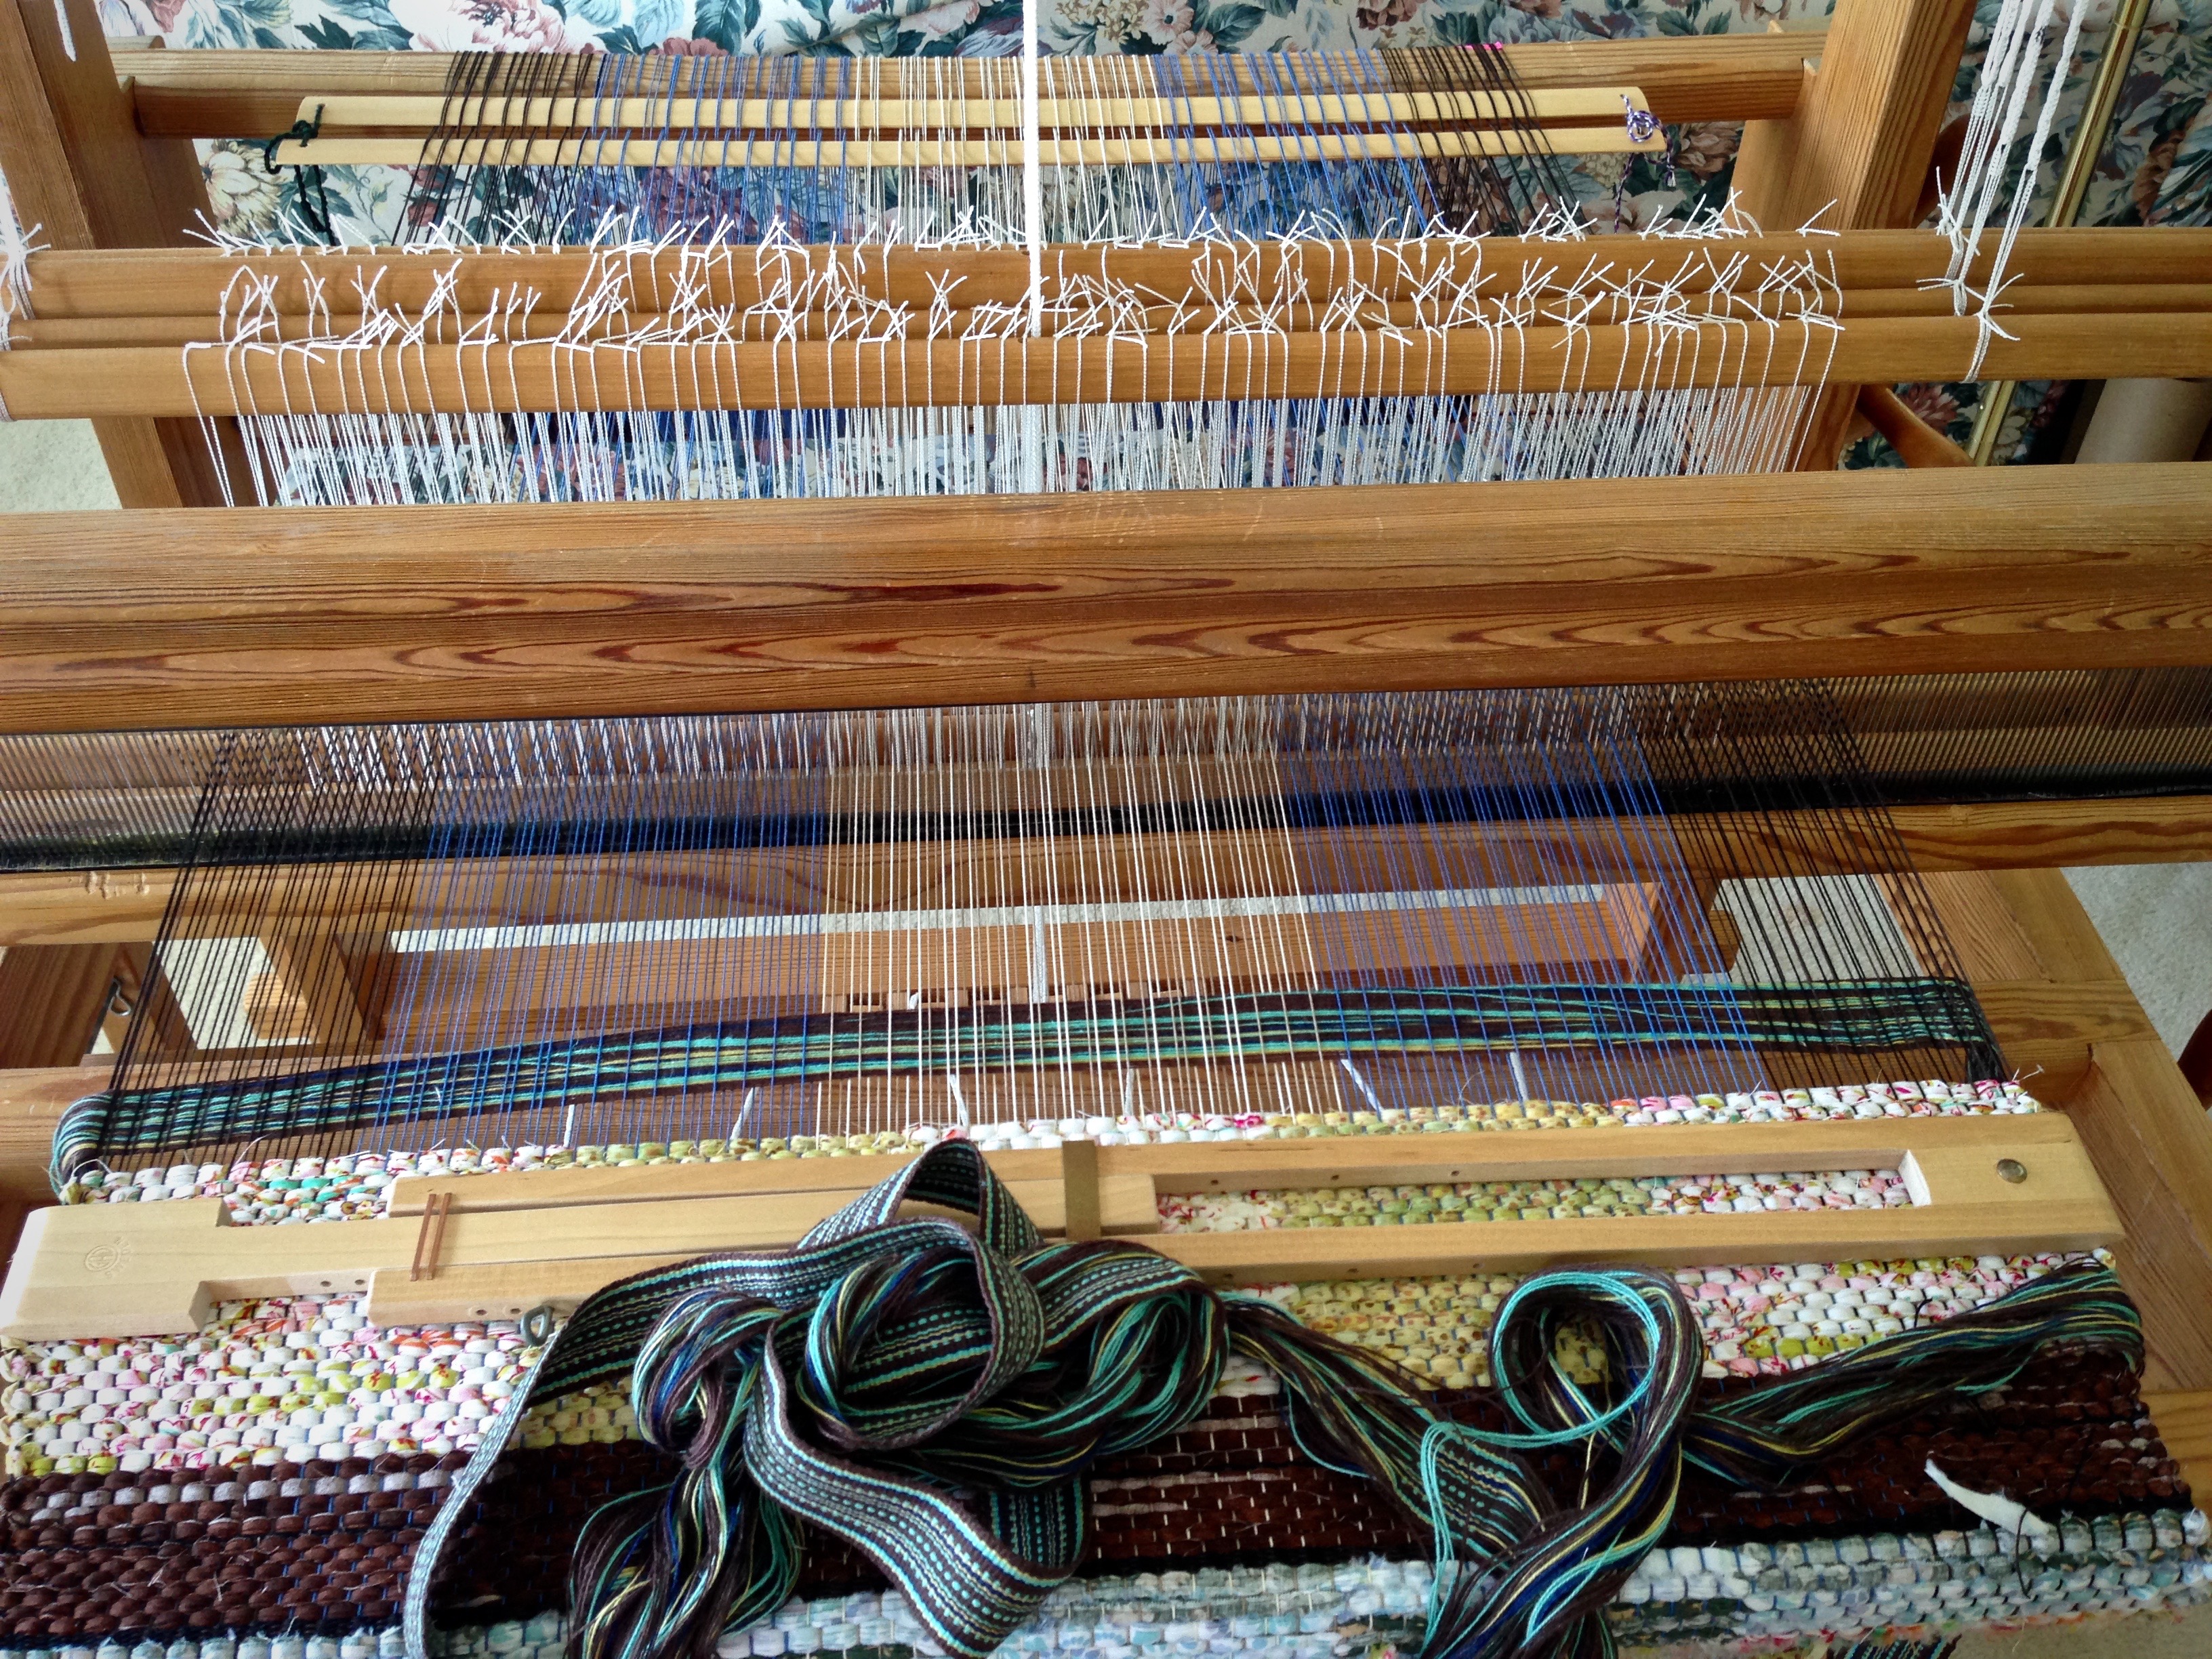
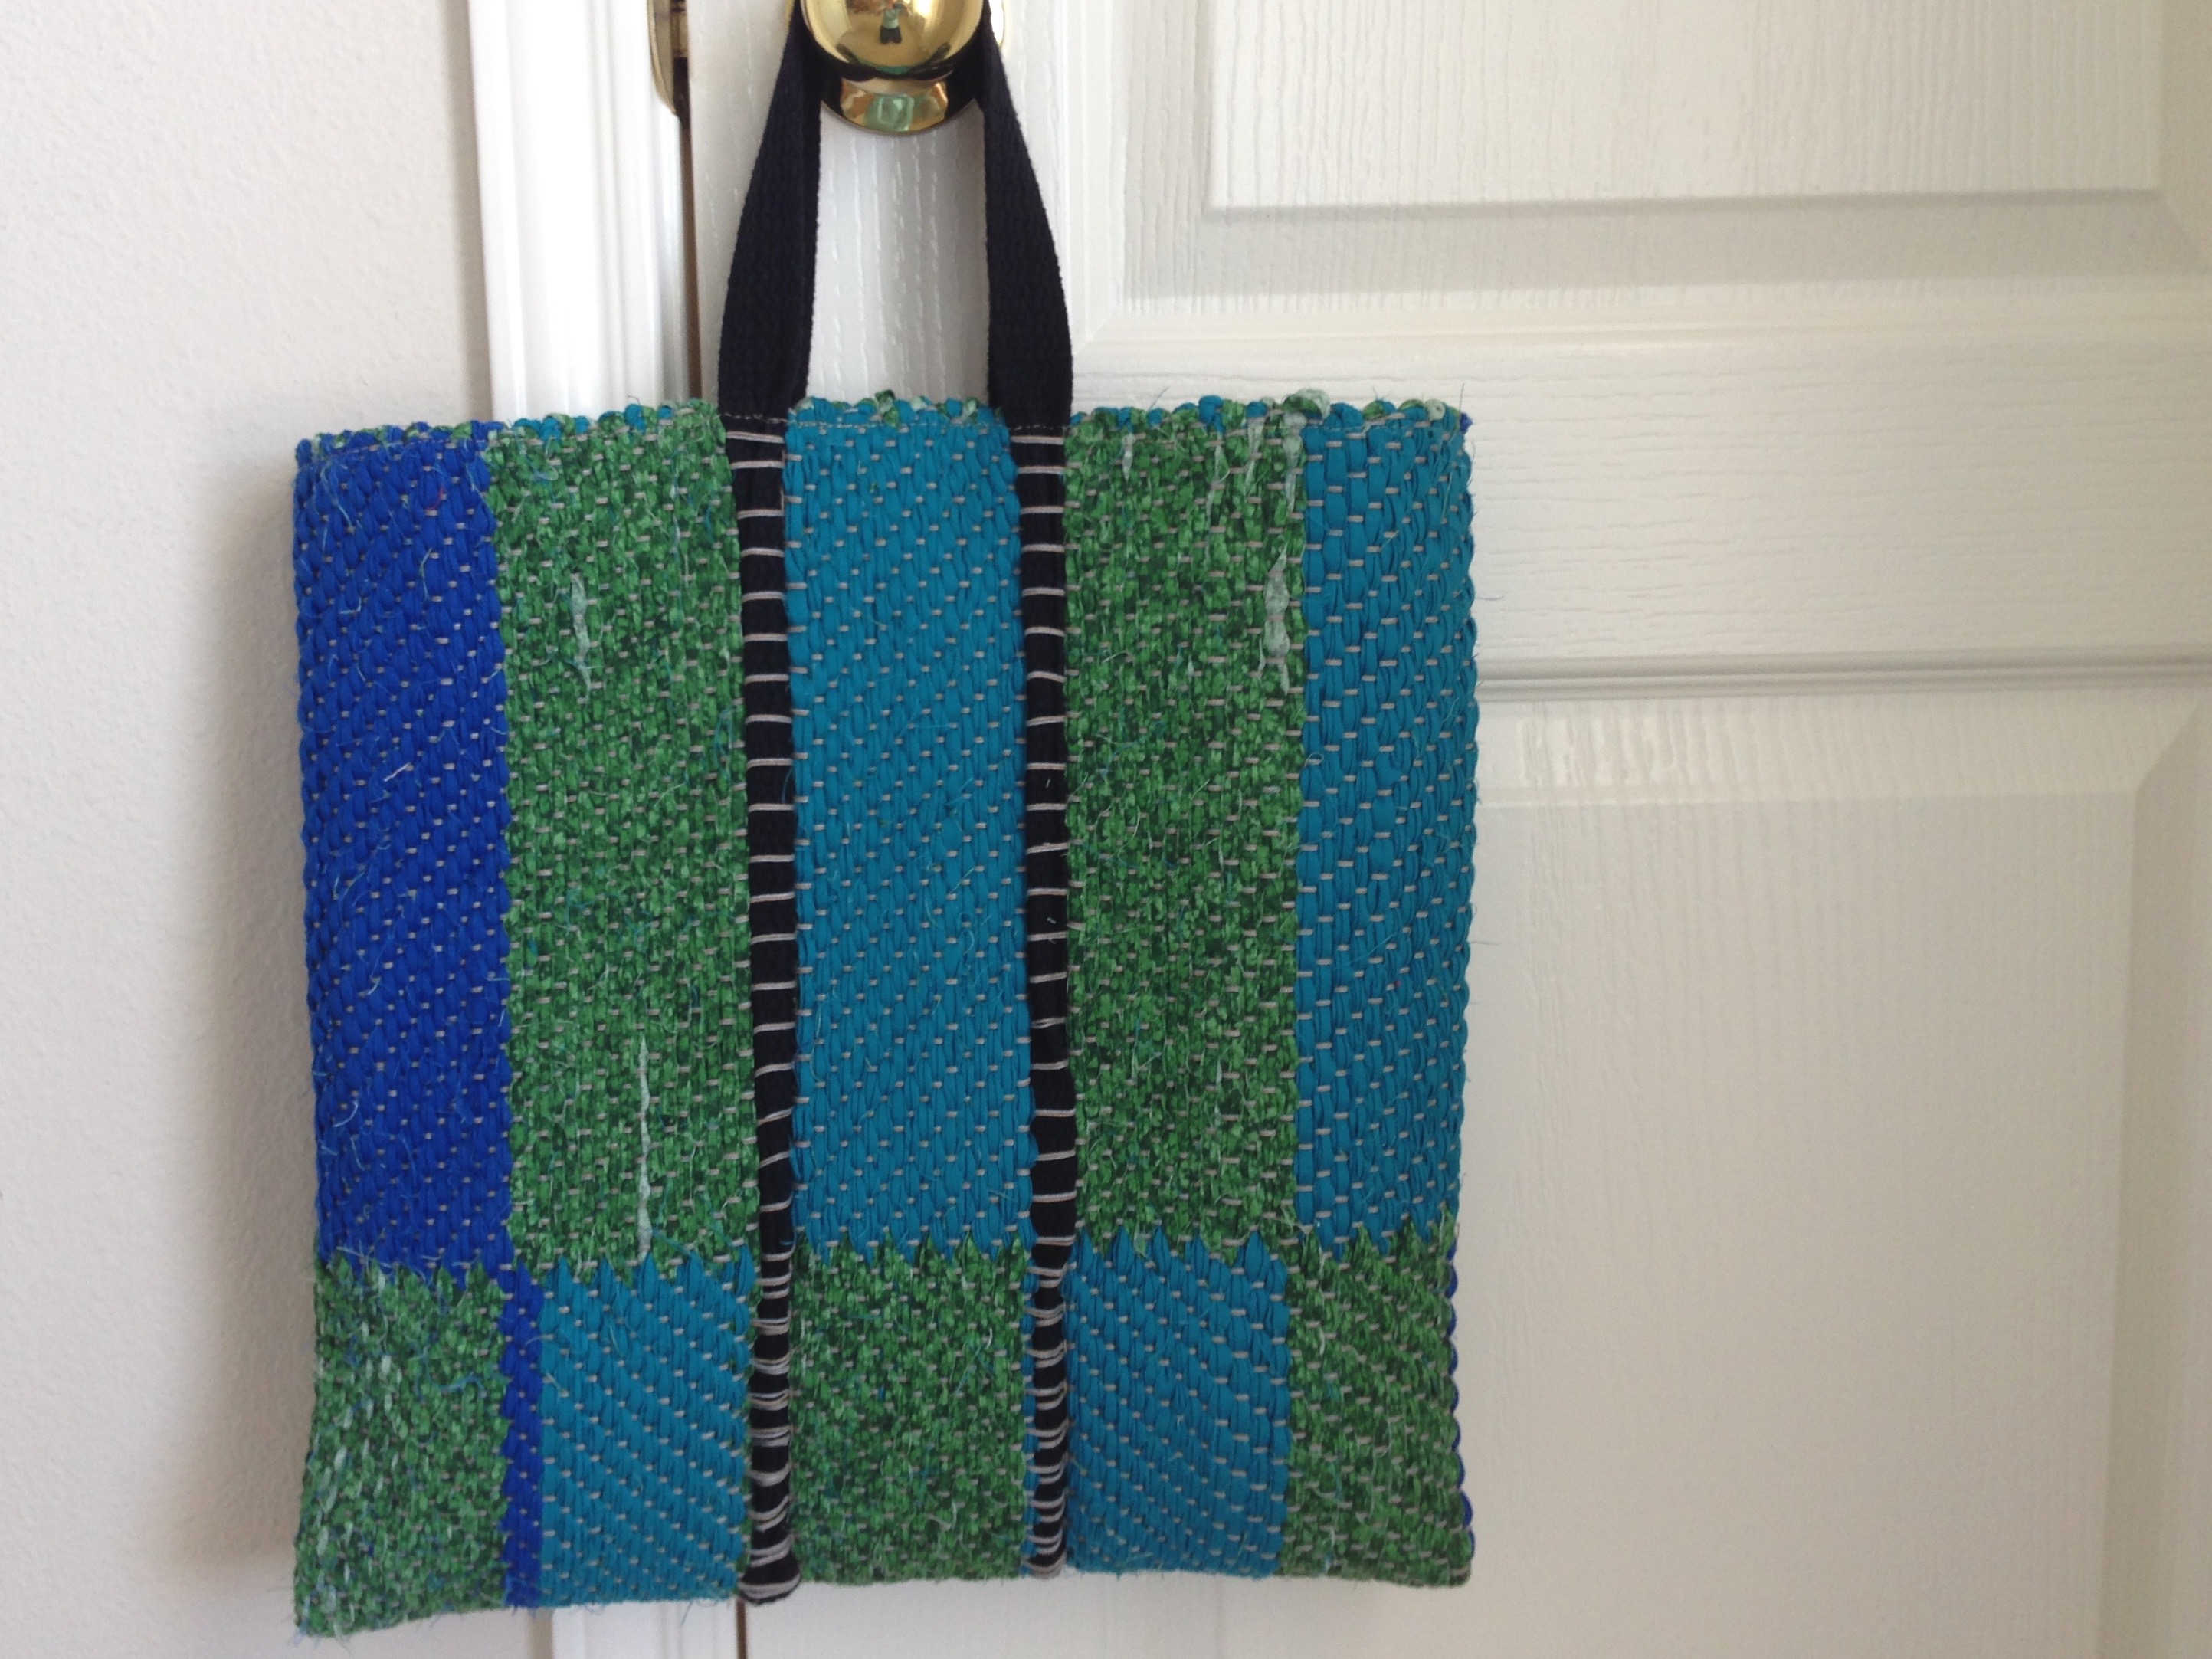
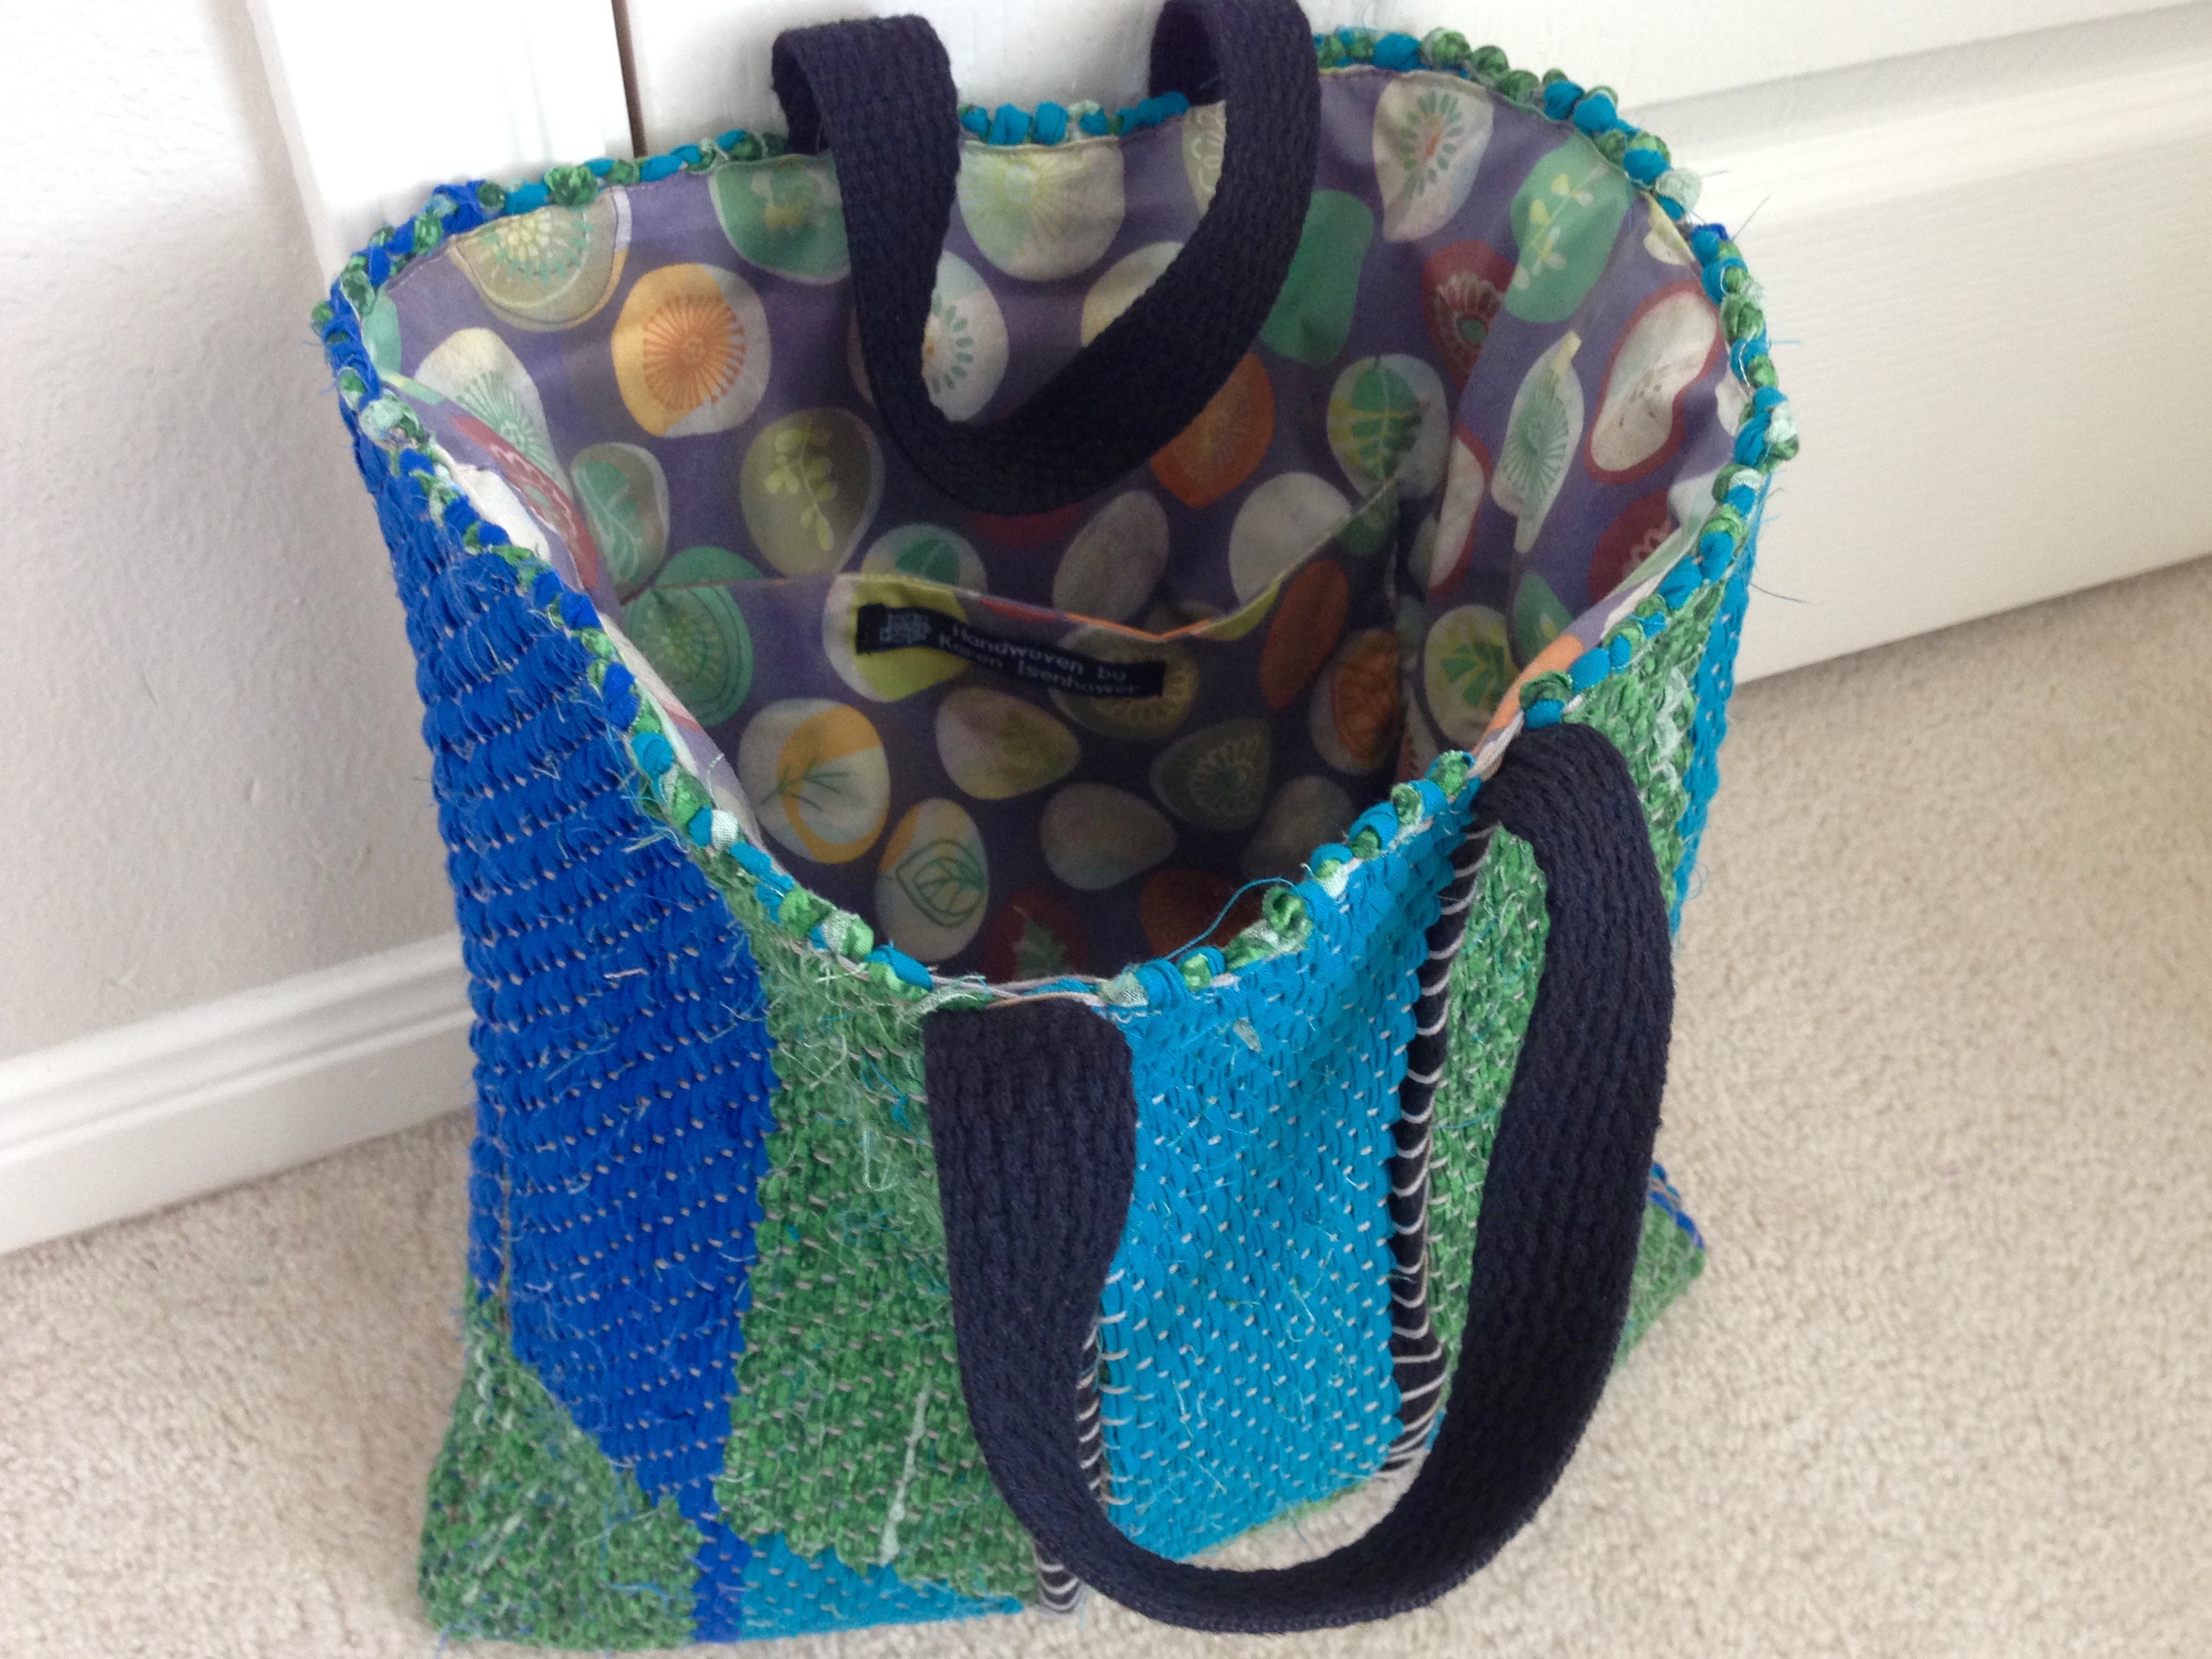
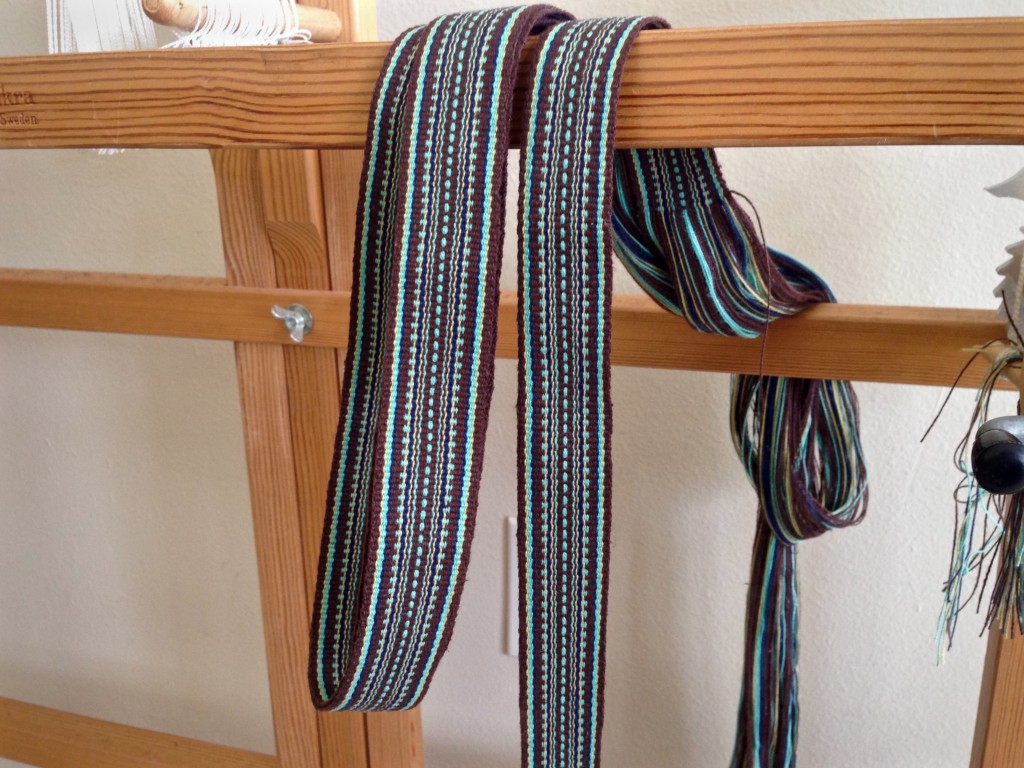
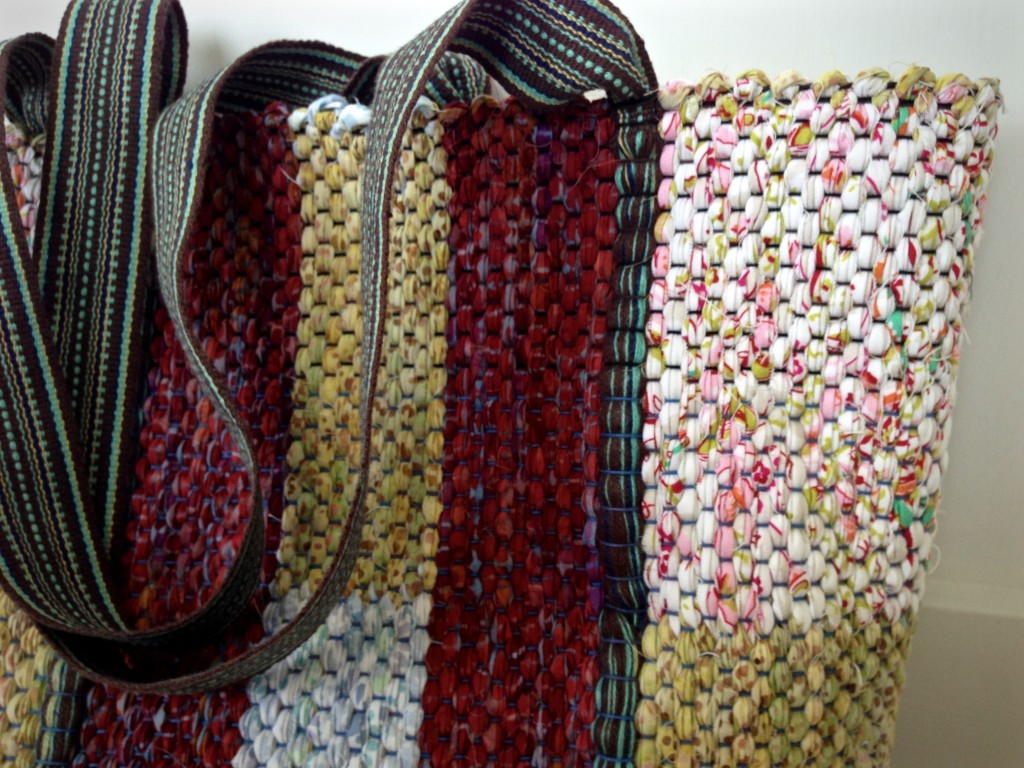
Voila! A rag-weave bag with the handles woven in. First, the handle straps were woven on my band loom. And then, I wove the straps into the rag-weave bag on my floor loom. Lastly, I cut the weaving from the loom and sewed the bag together. This is a warp for double binding rag rugs. I take advantage of this double cloth structure to make handles that are extremely secure. The pictures show how it all comes together. (Quiet Friday: Rag Rug Bag shows my first attempt at this feat. Be sure to read the comments. My amazing readers helped me develop the idea for this workable solution.)

As a bonus, at the end of this post you will see a new video that demonstrates my method of cutting fabric strips for weaving rag rugs.

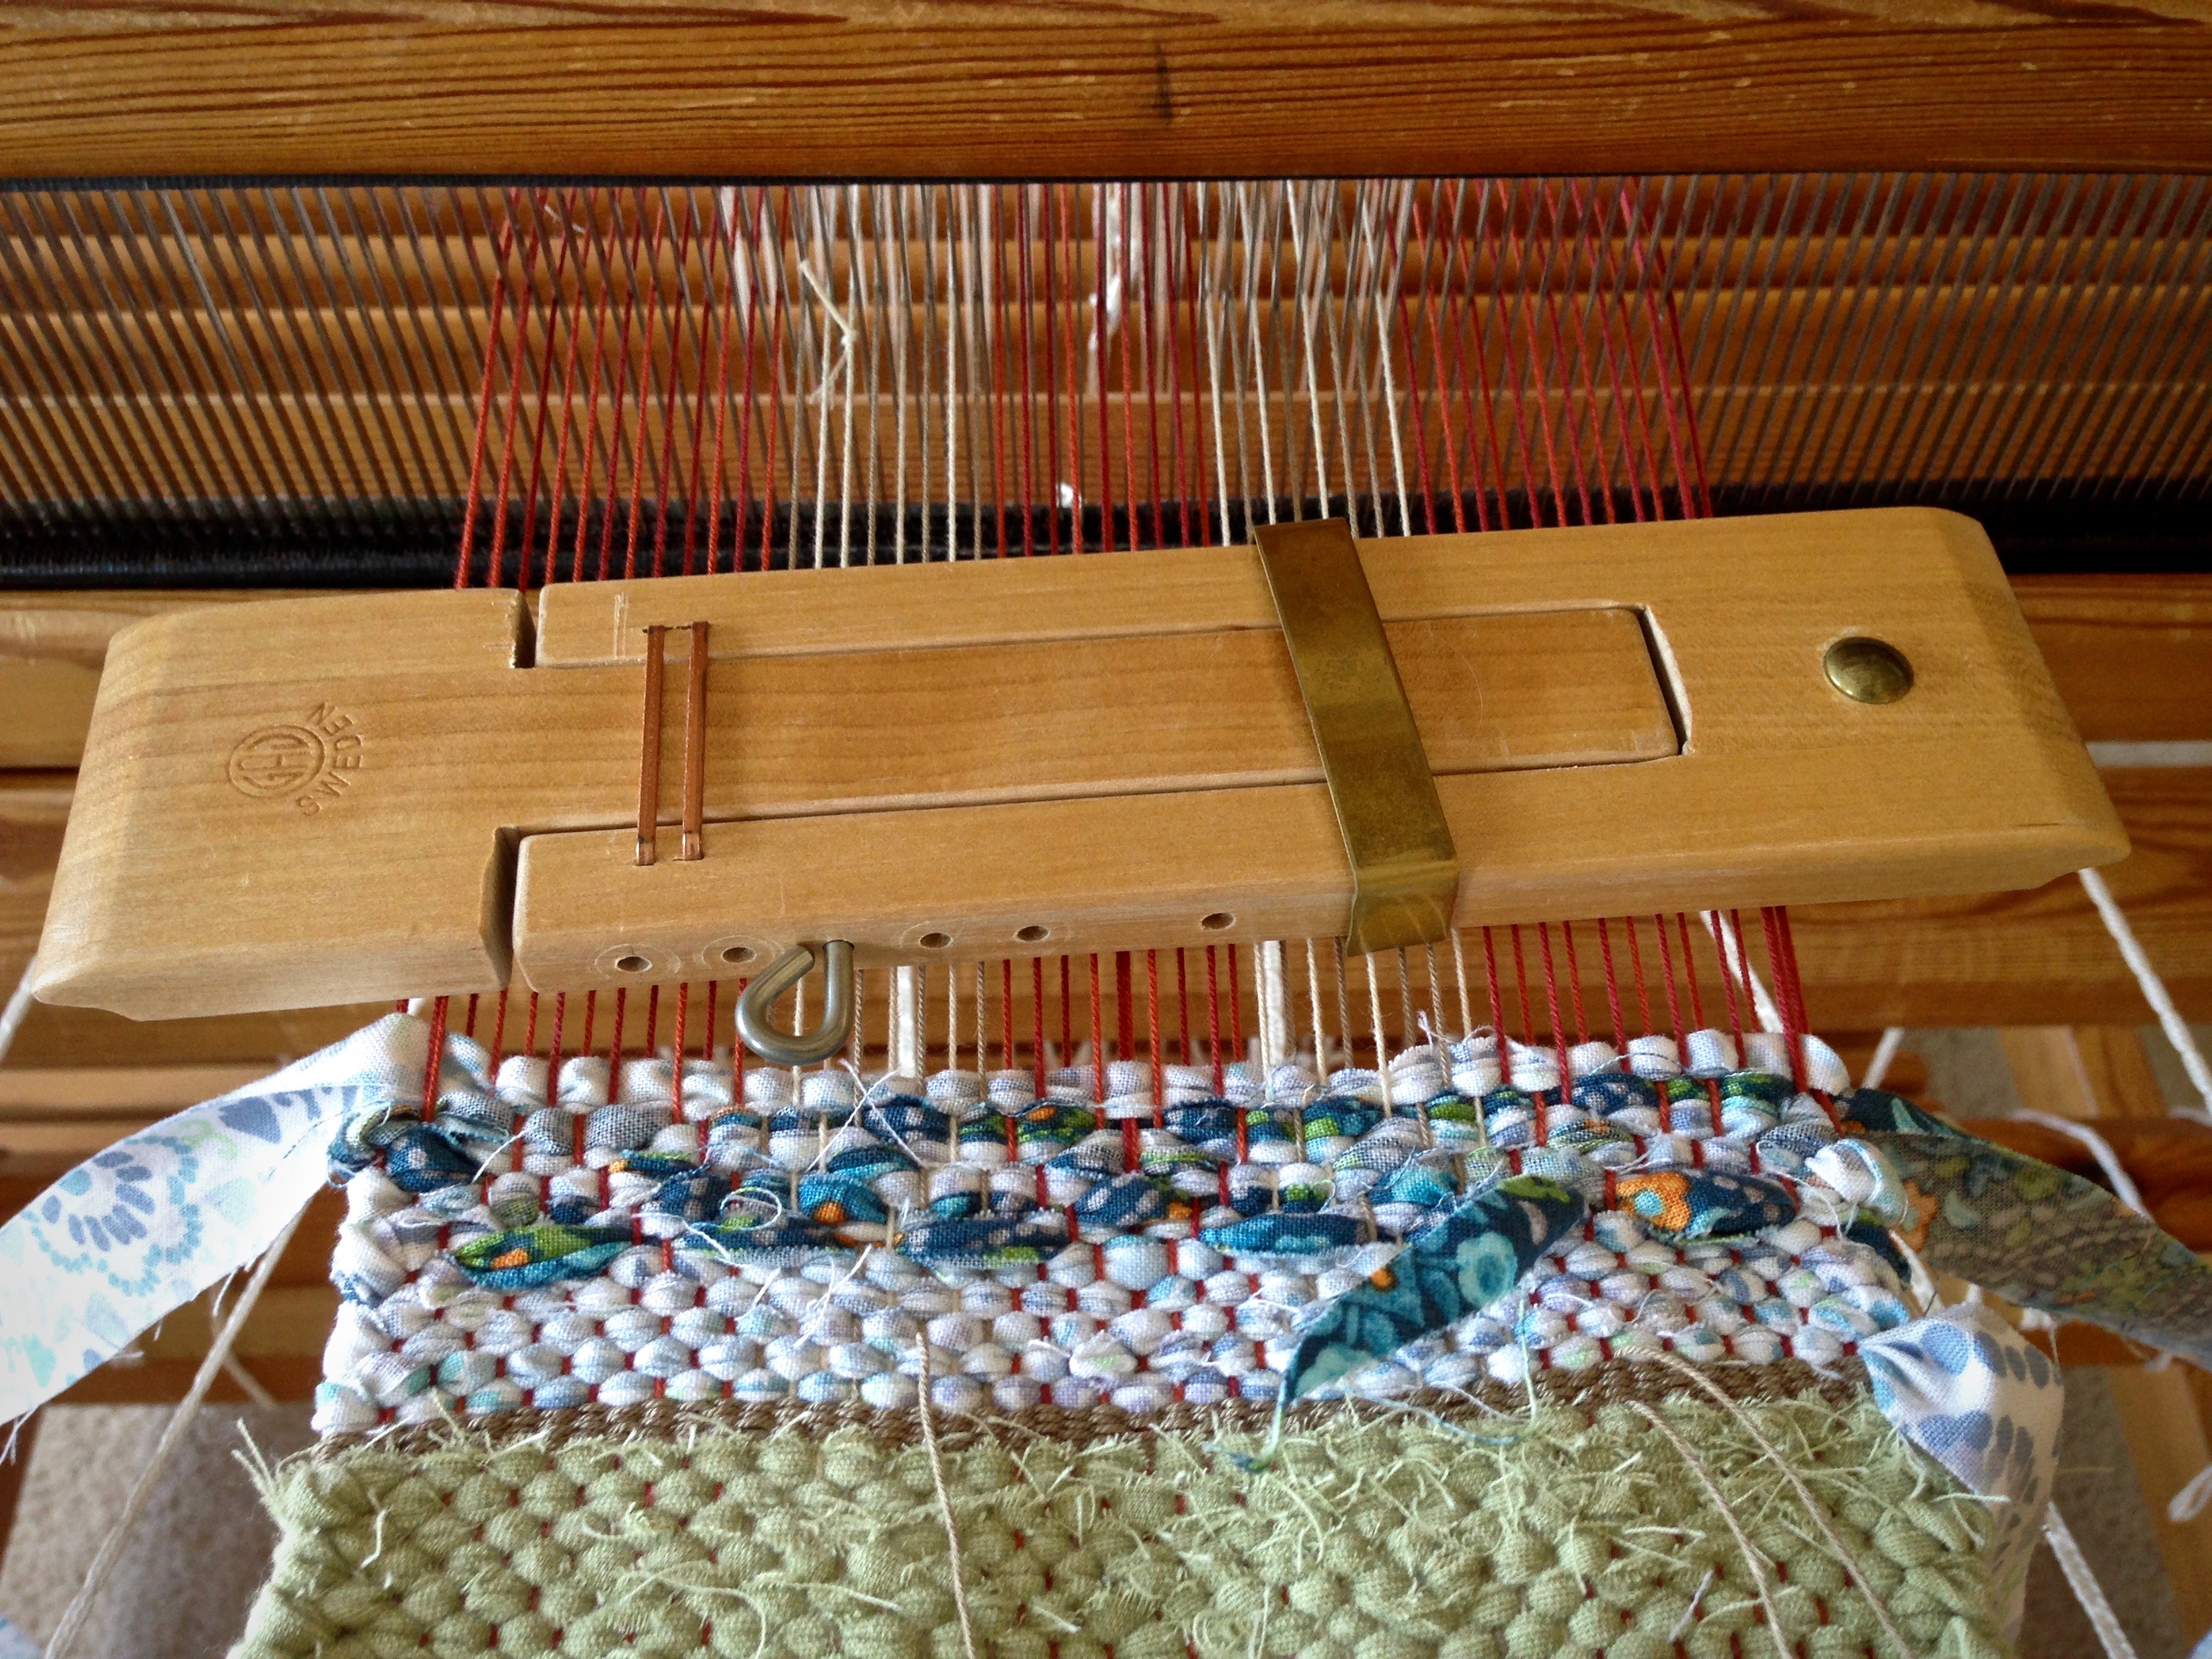
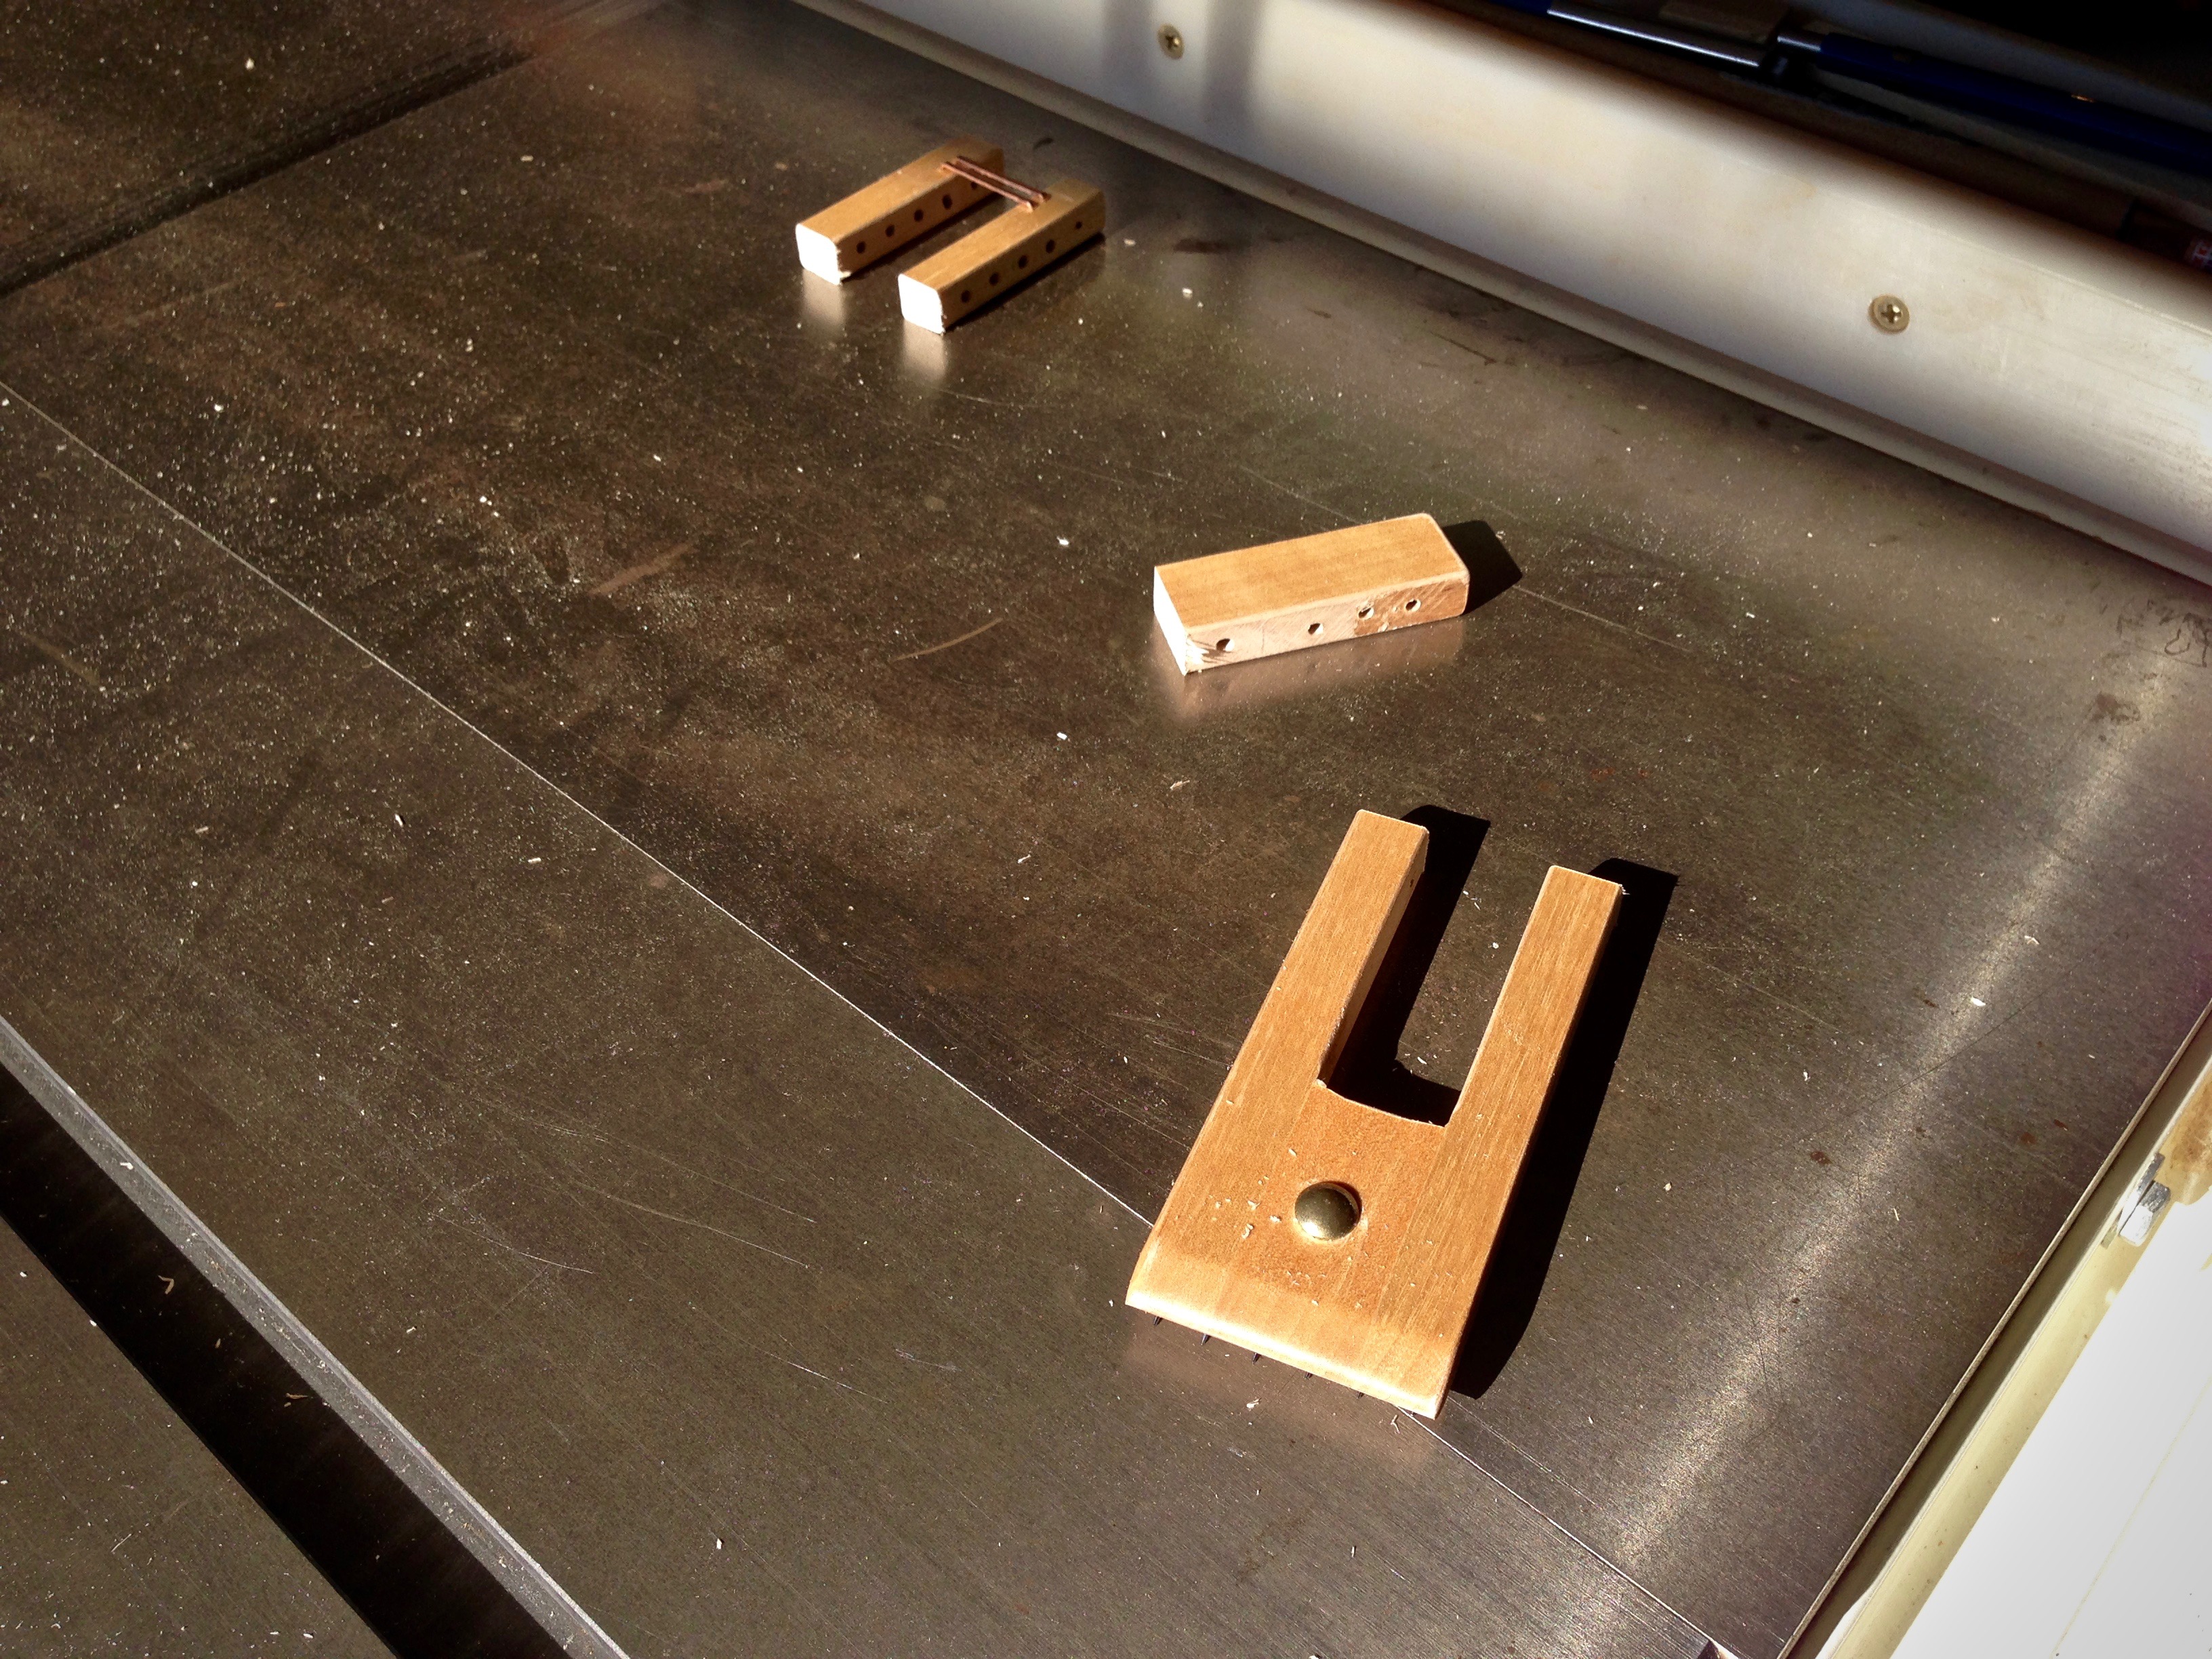
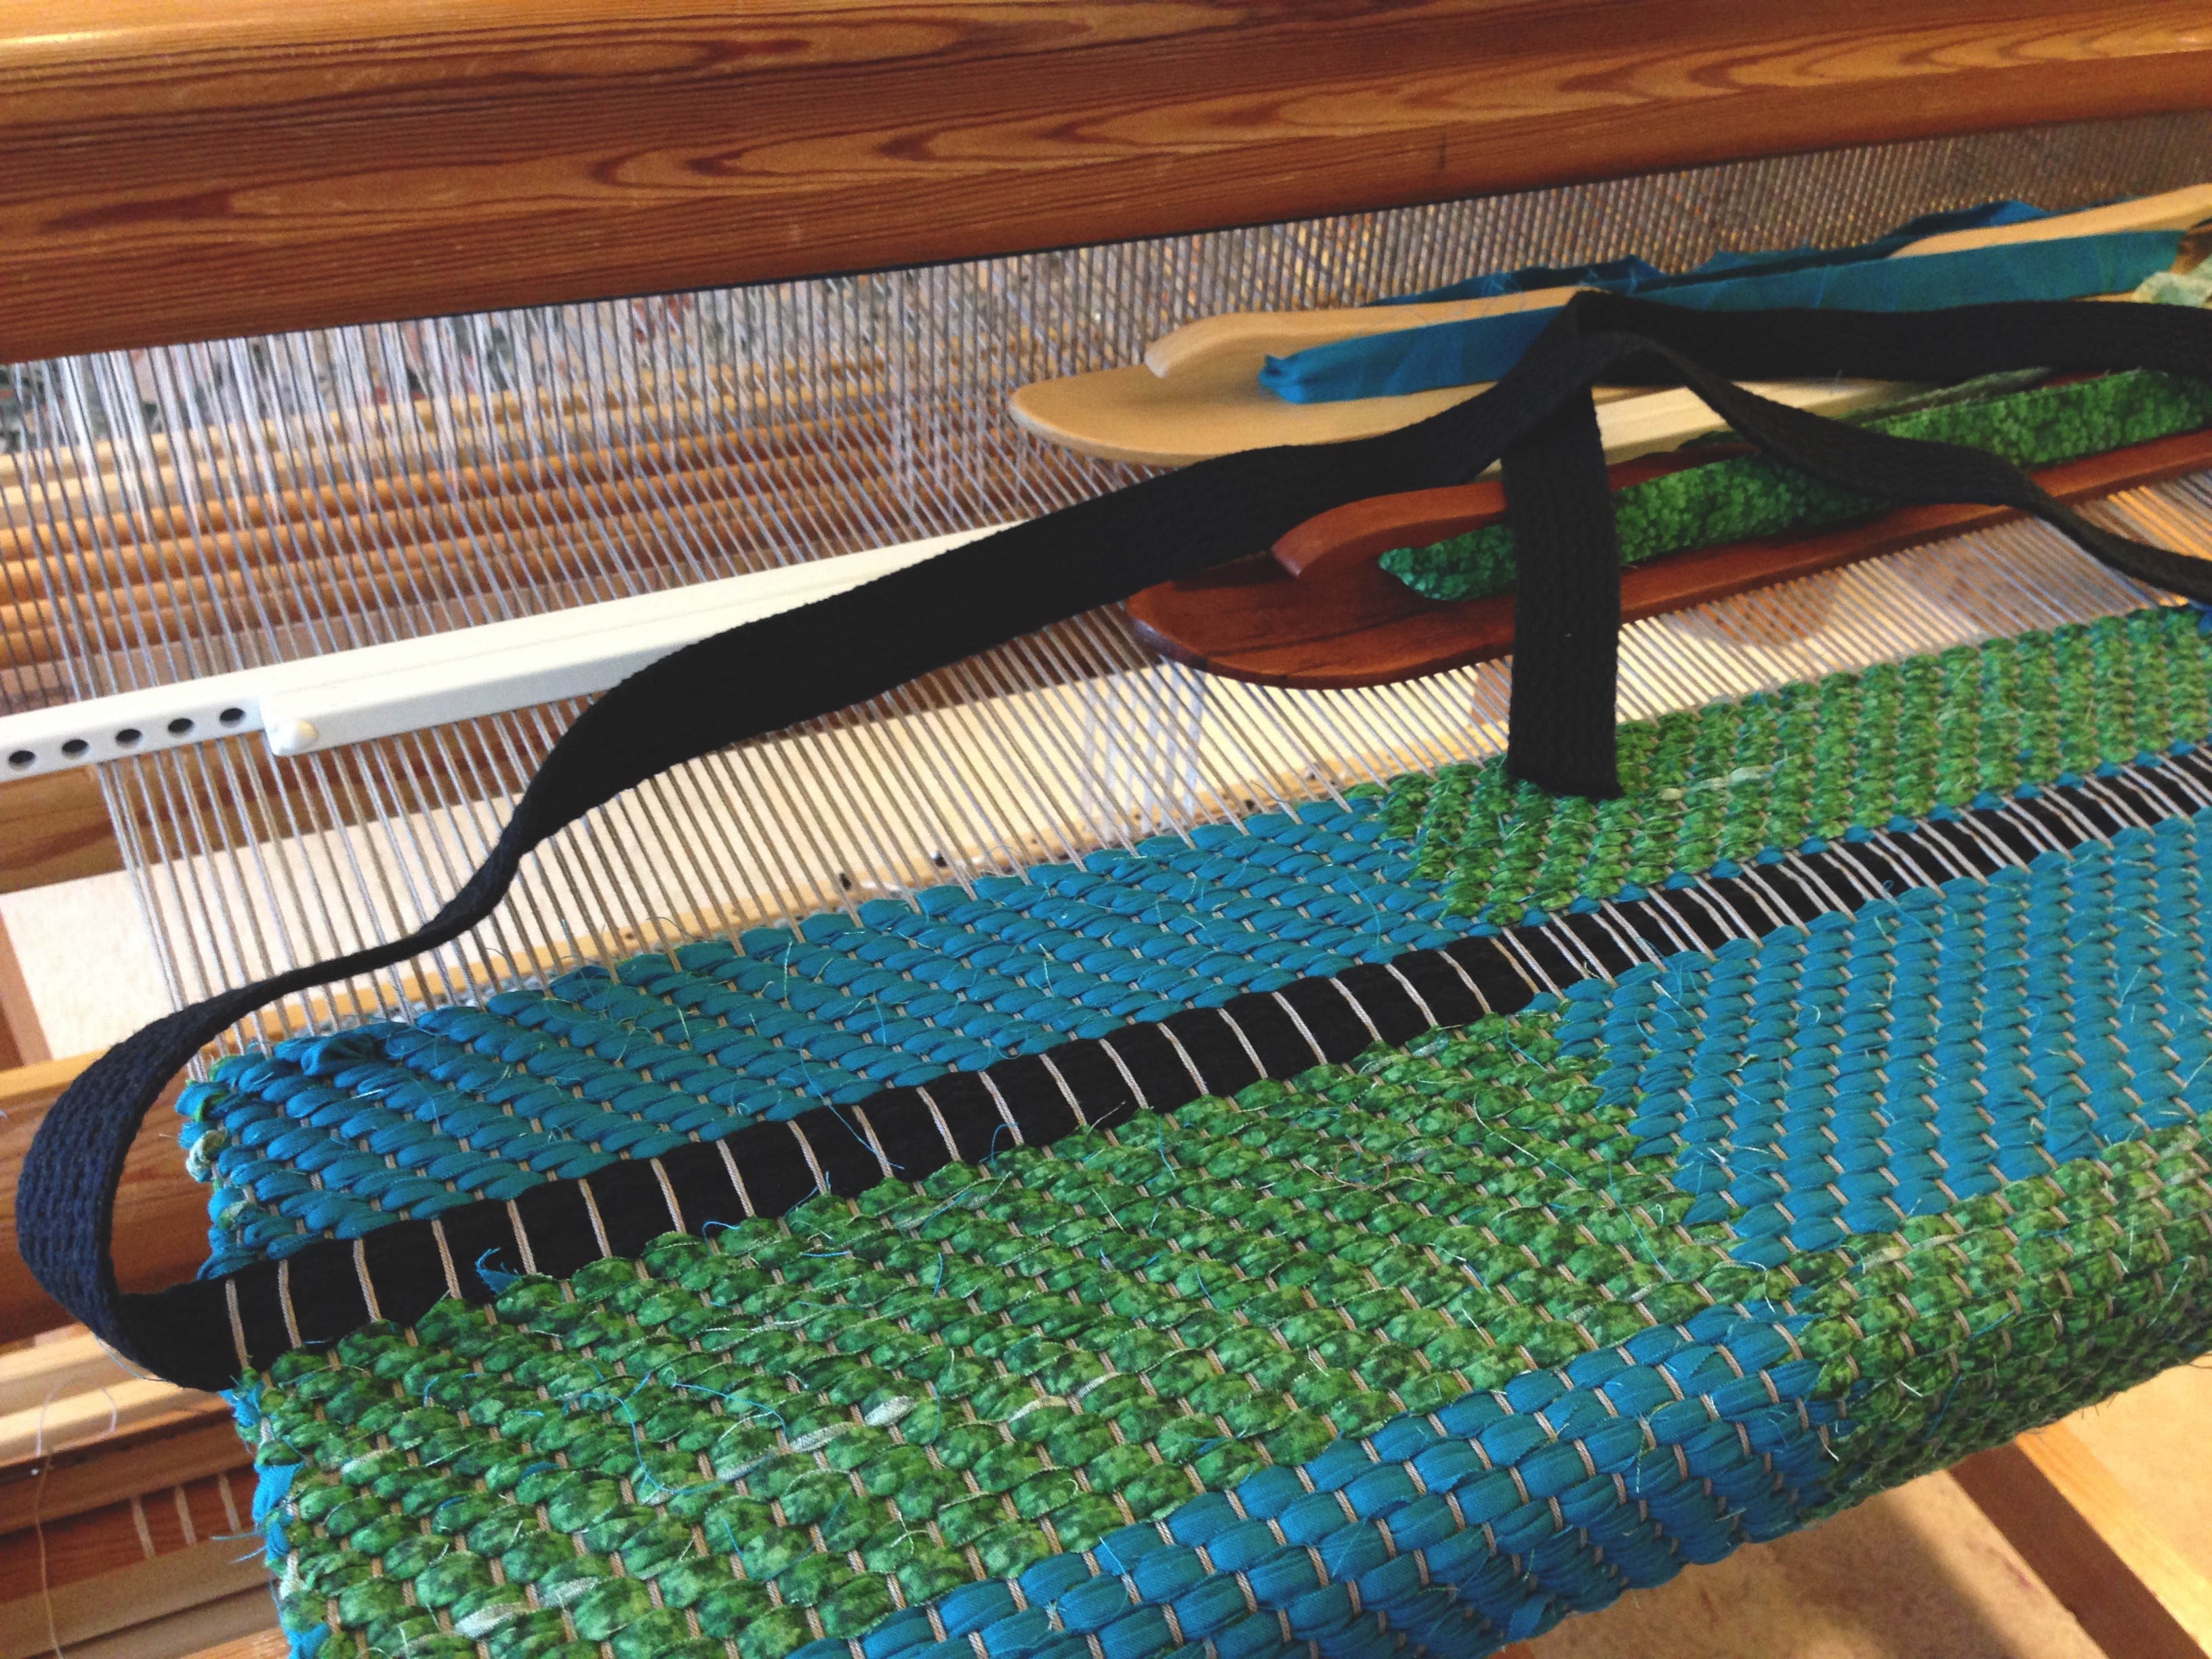
1. Weave bag handles. (First seen on Is My Weft Showing?)

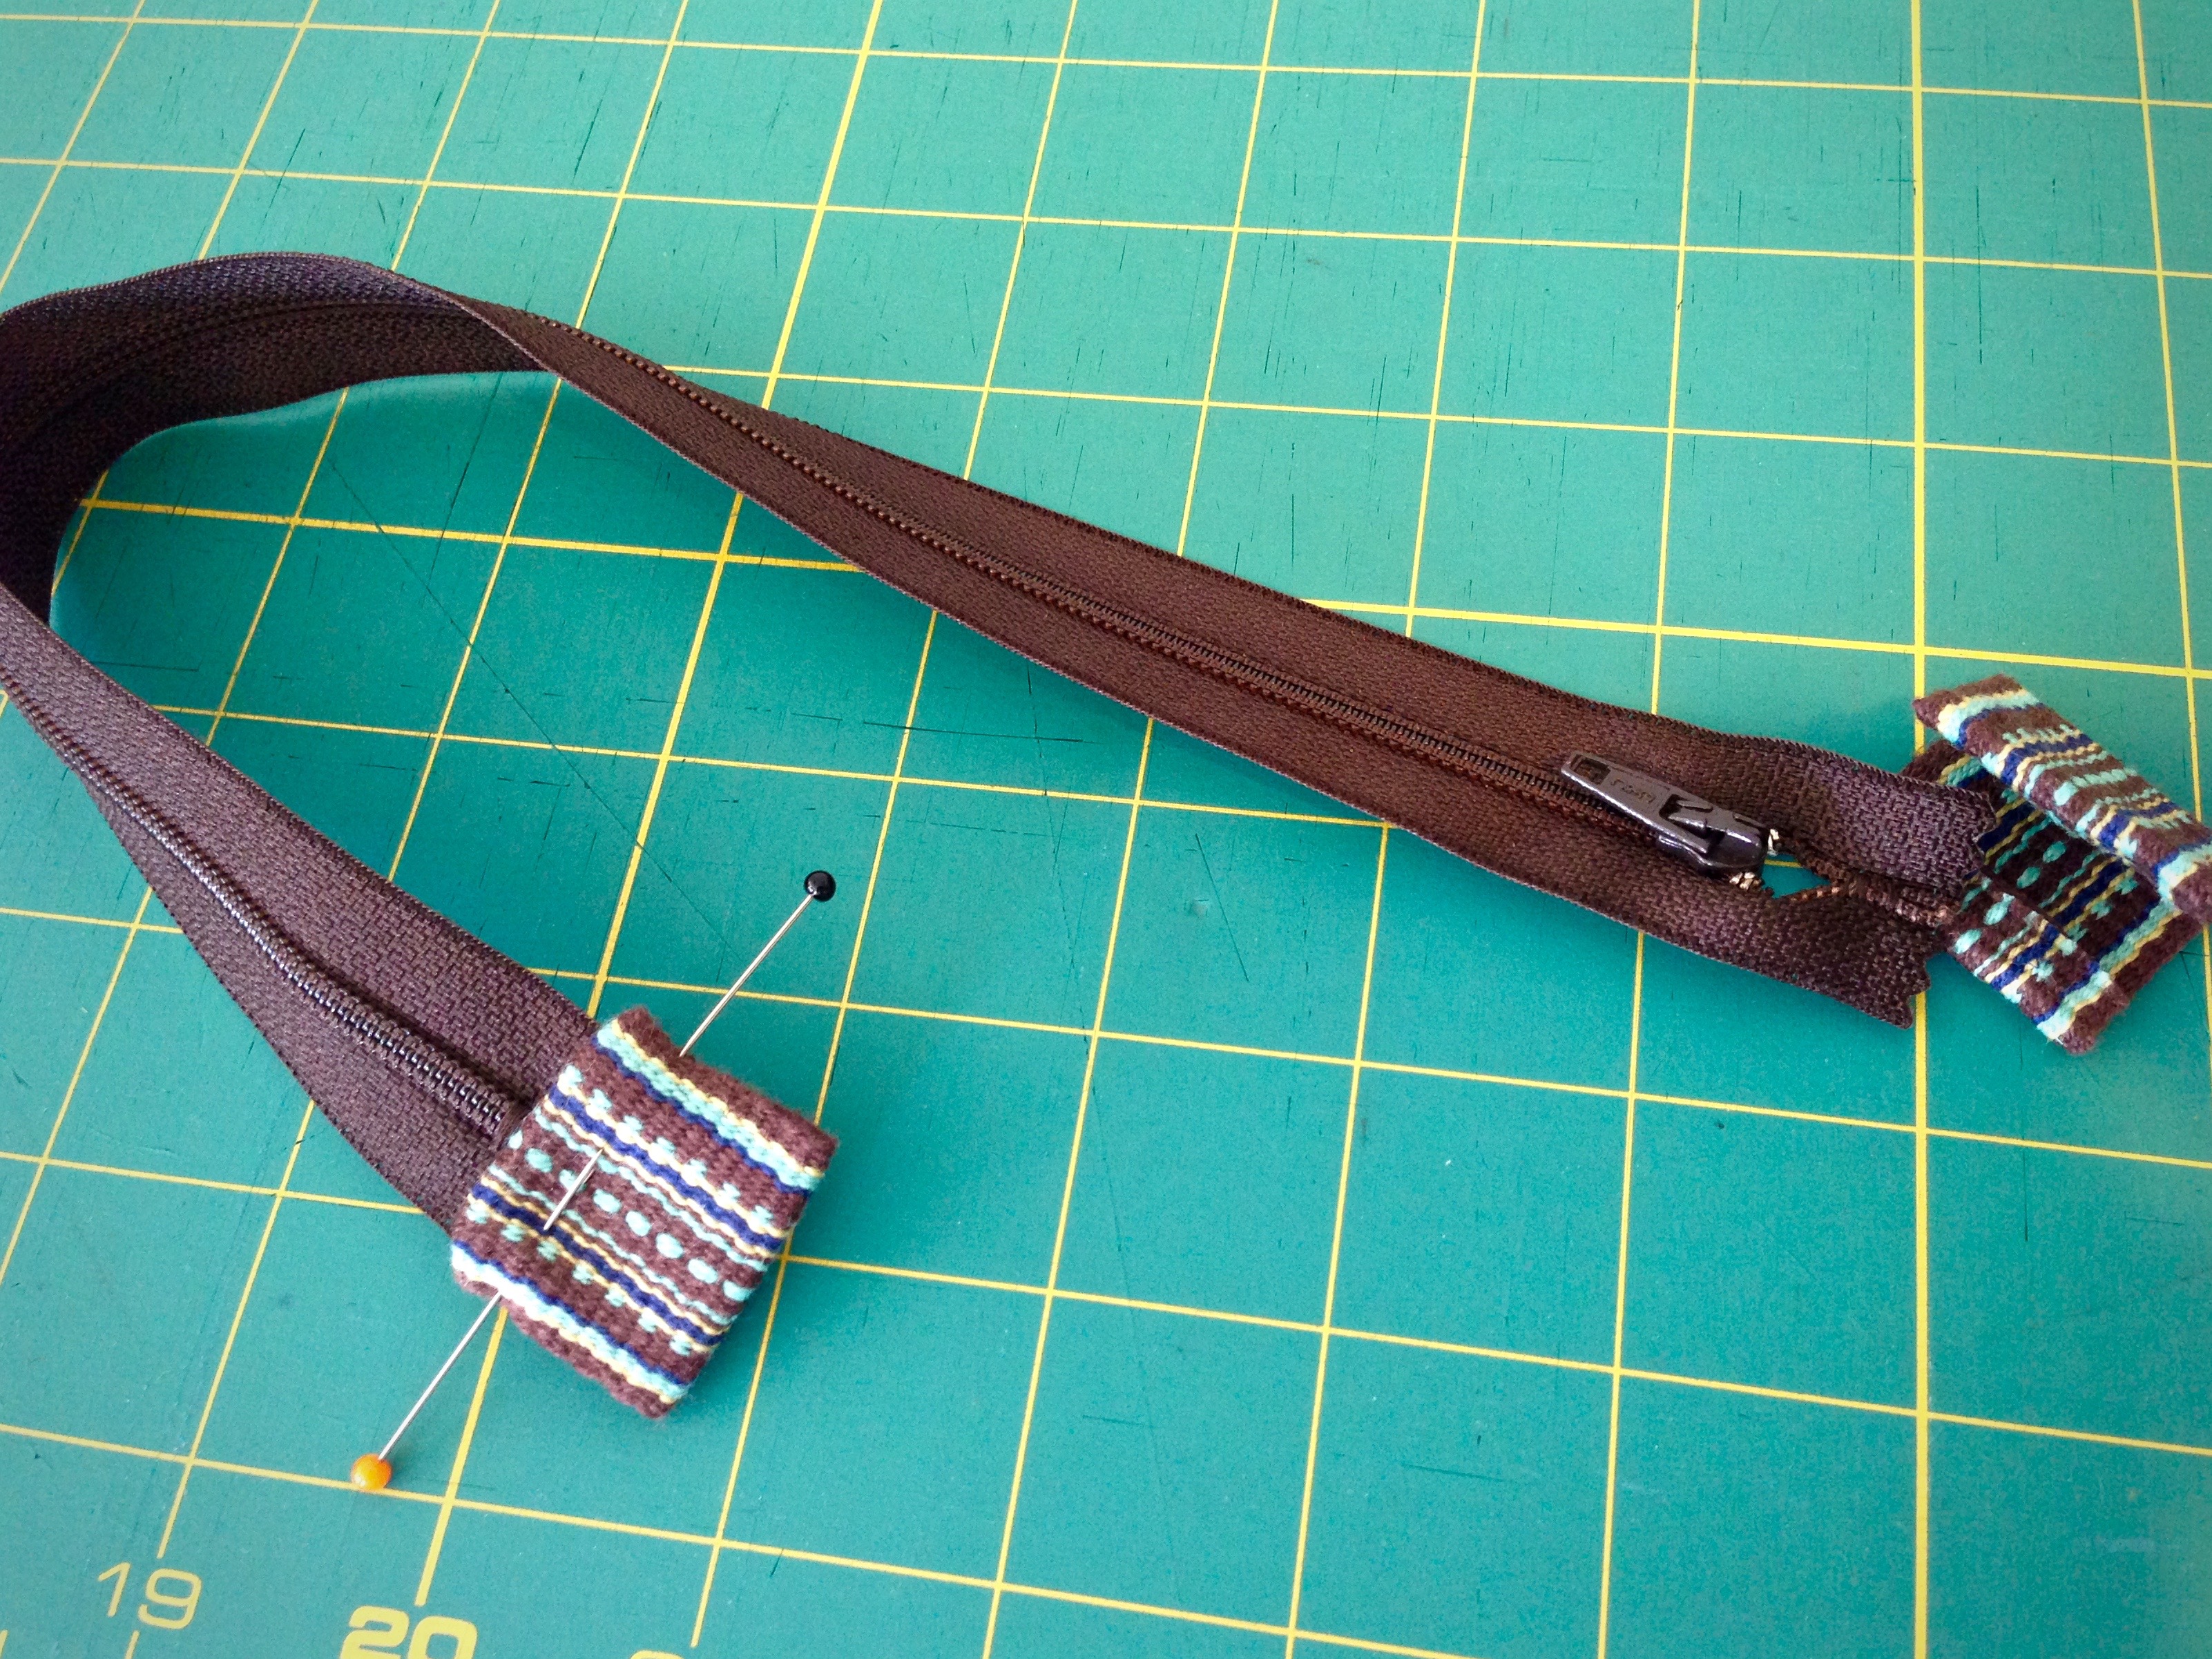
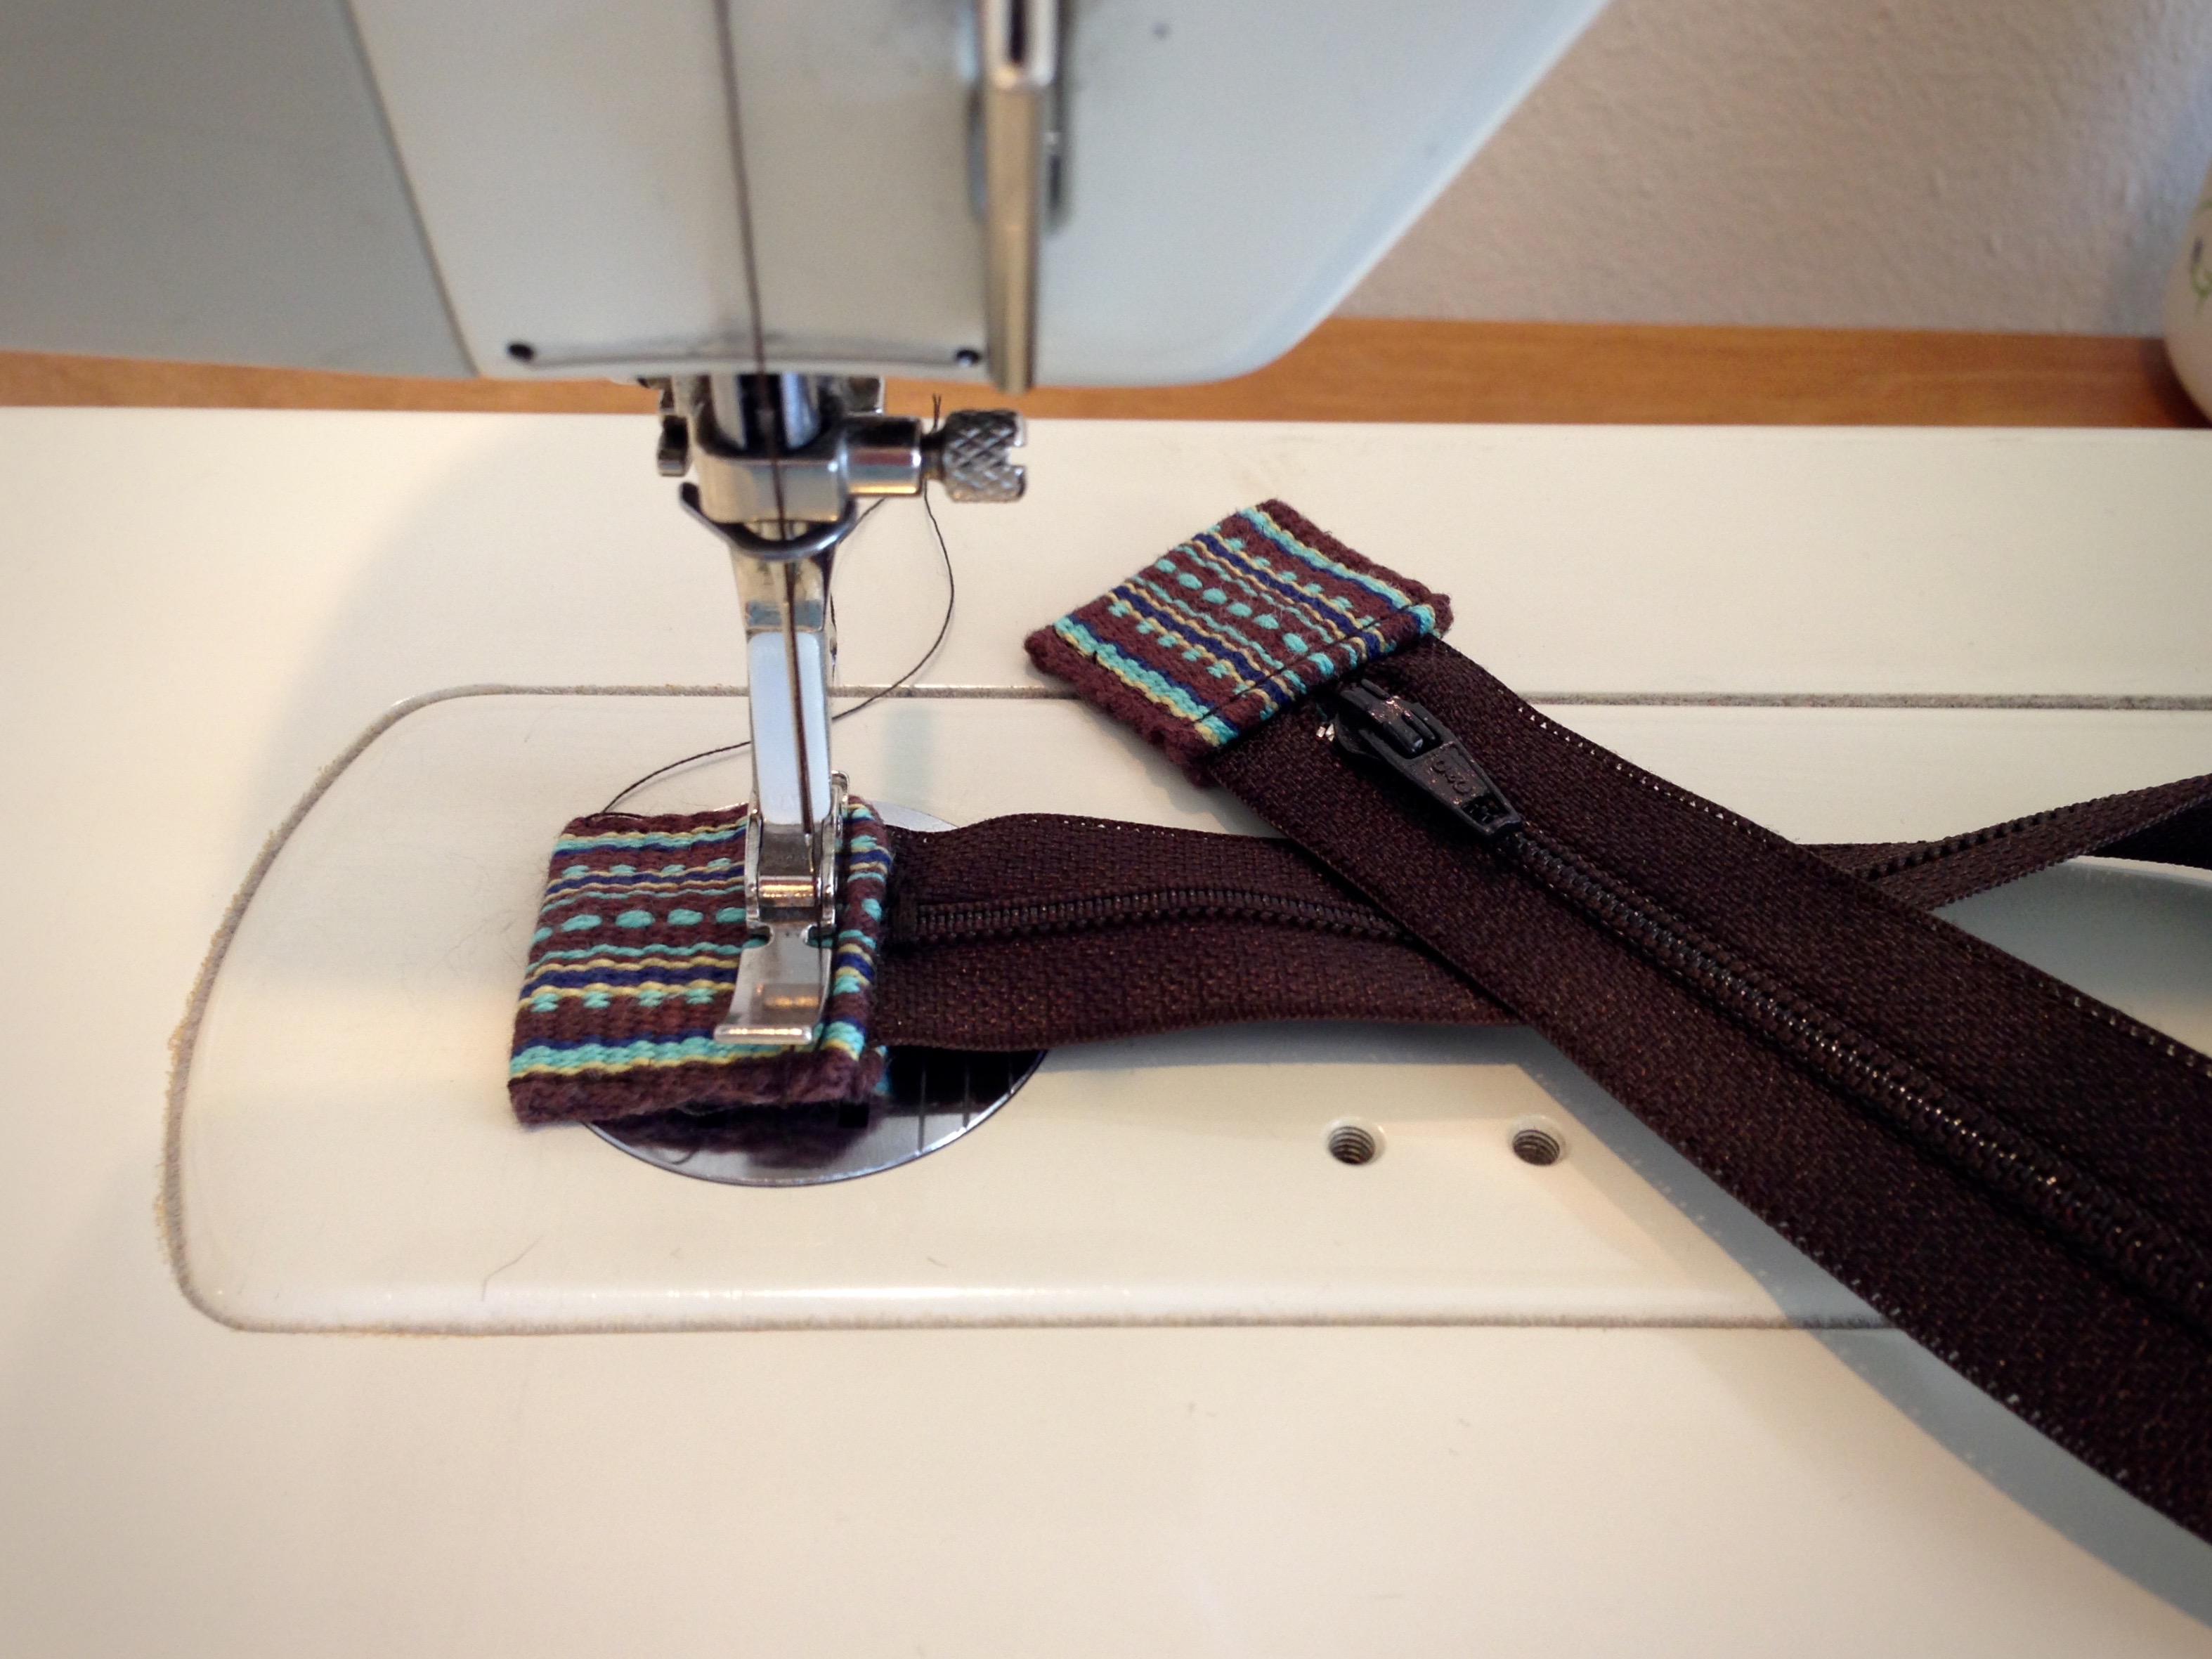
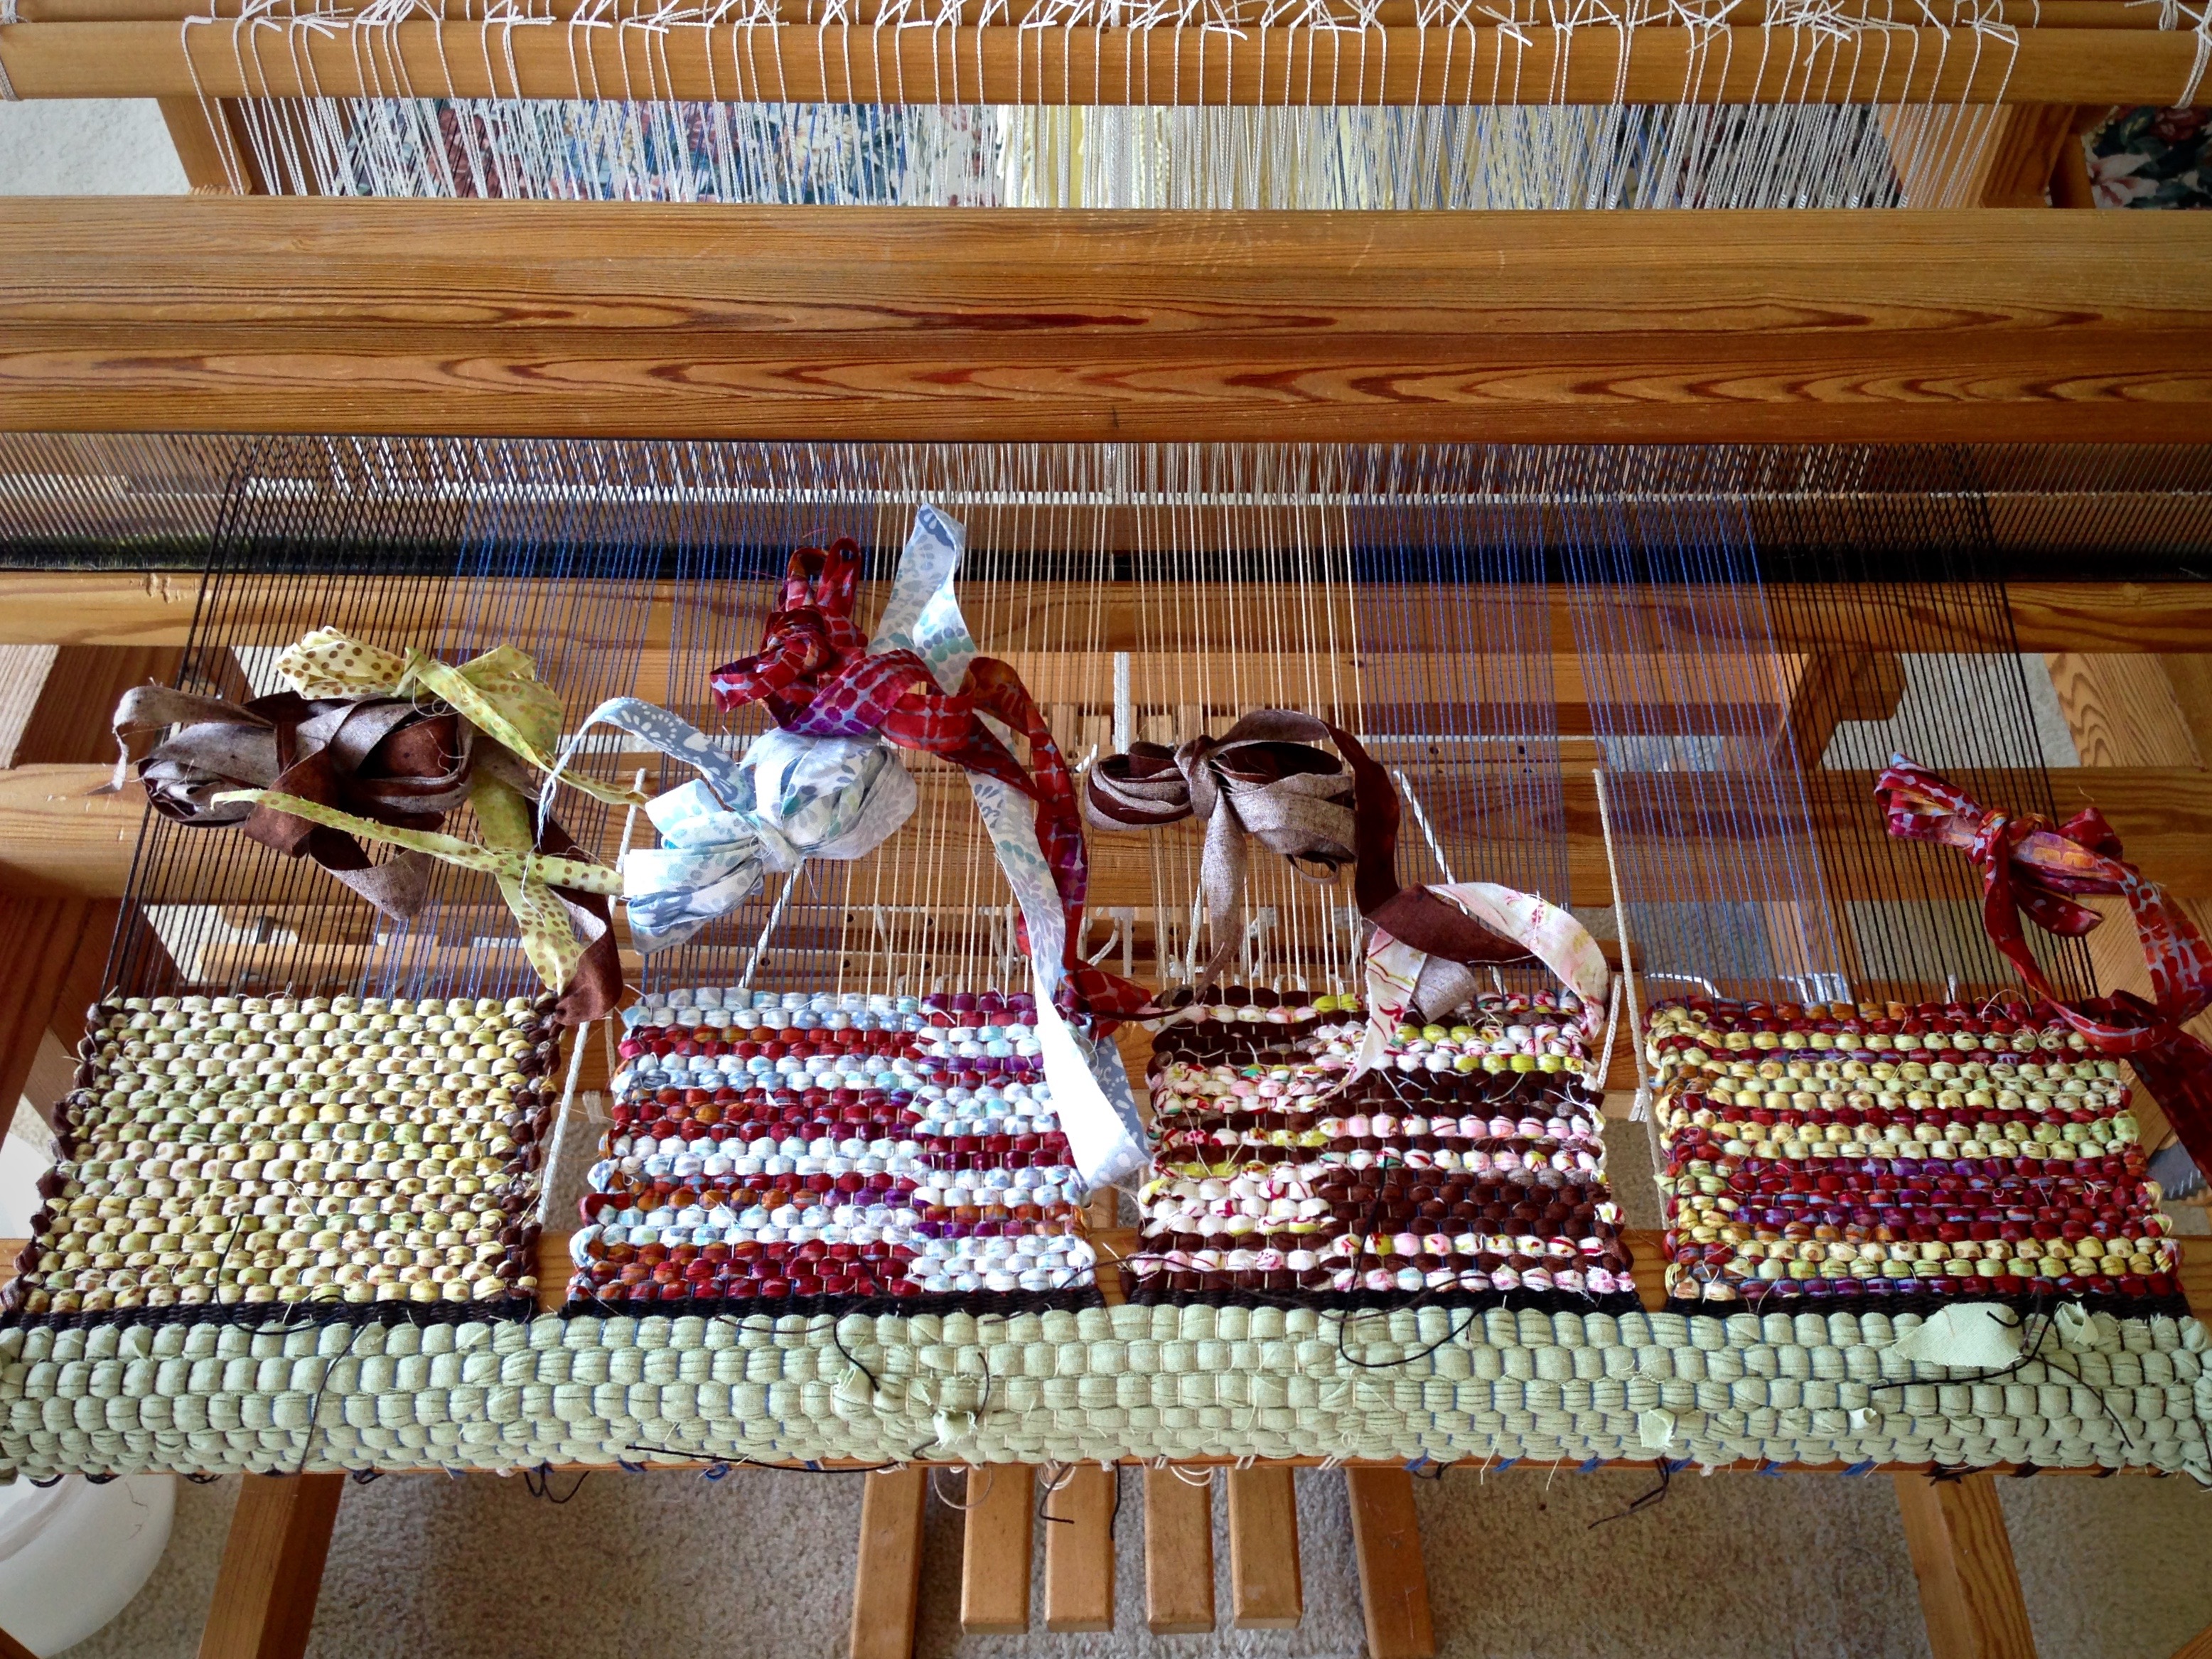
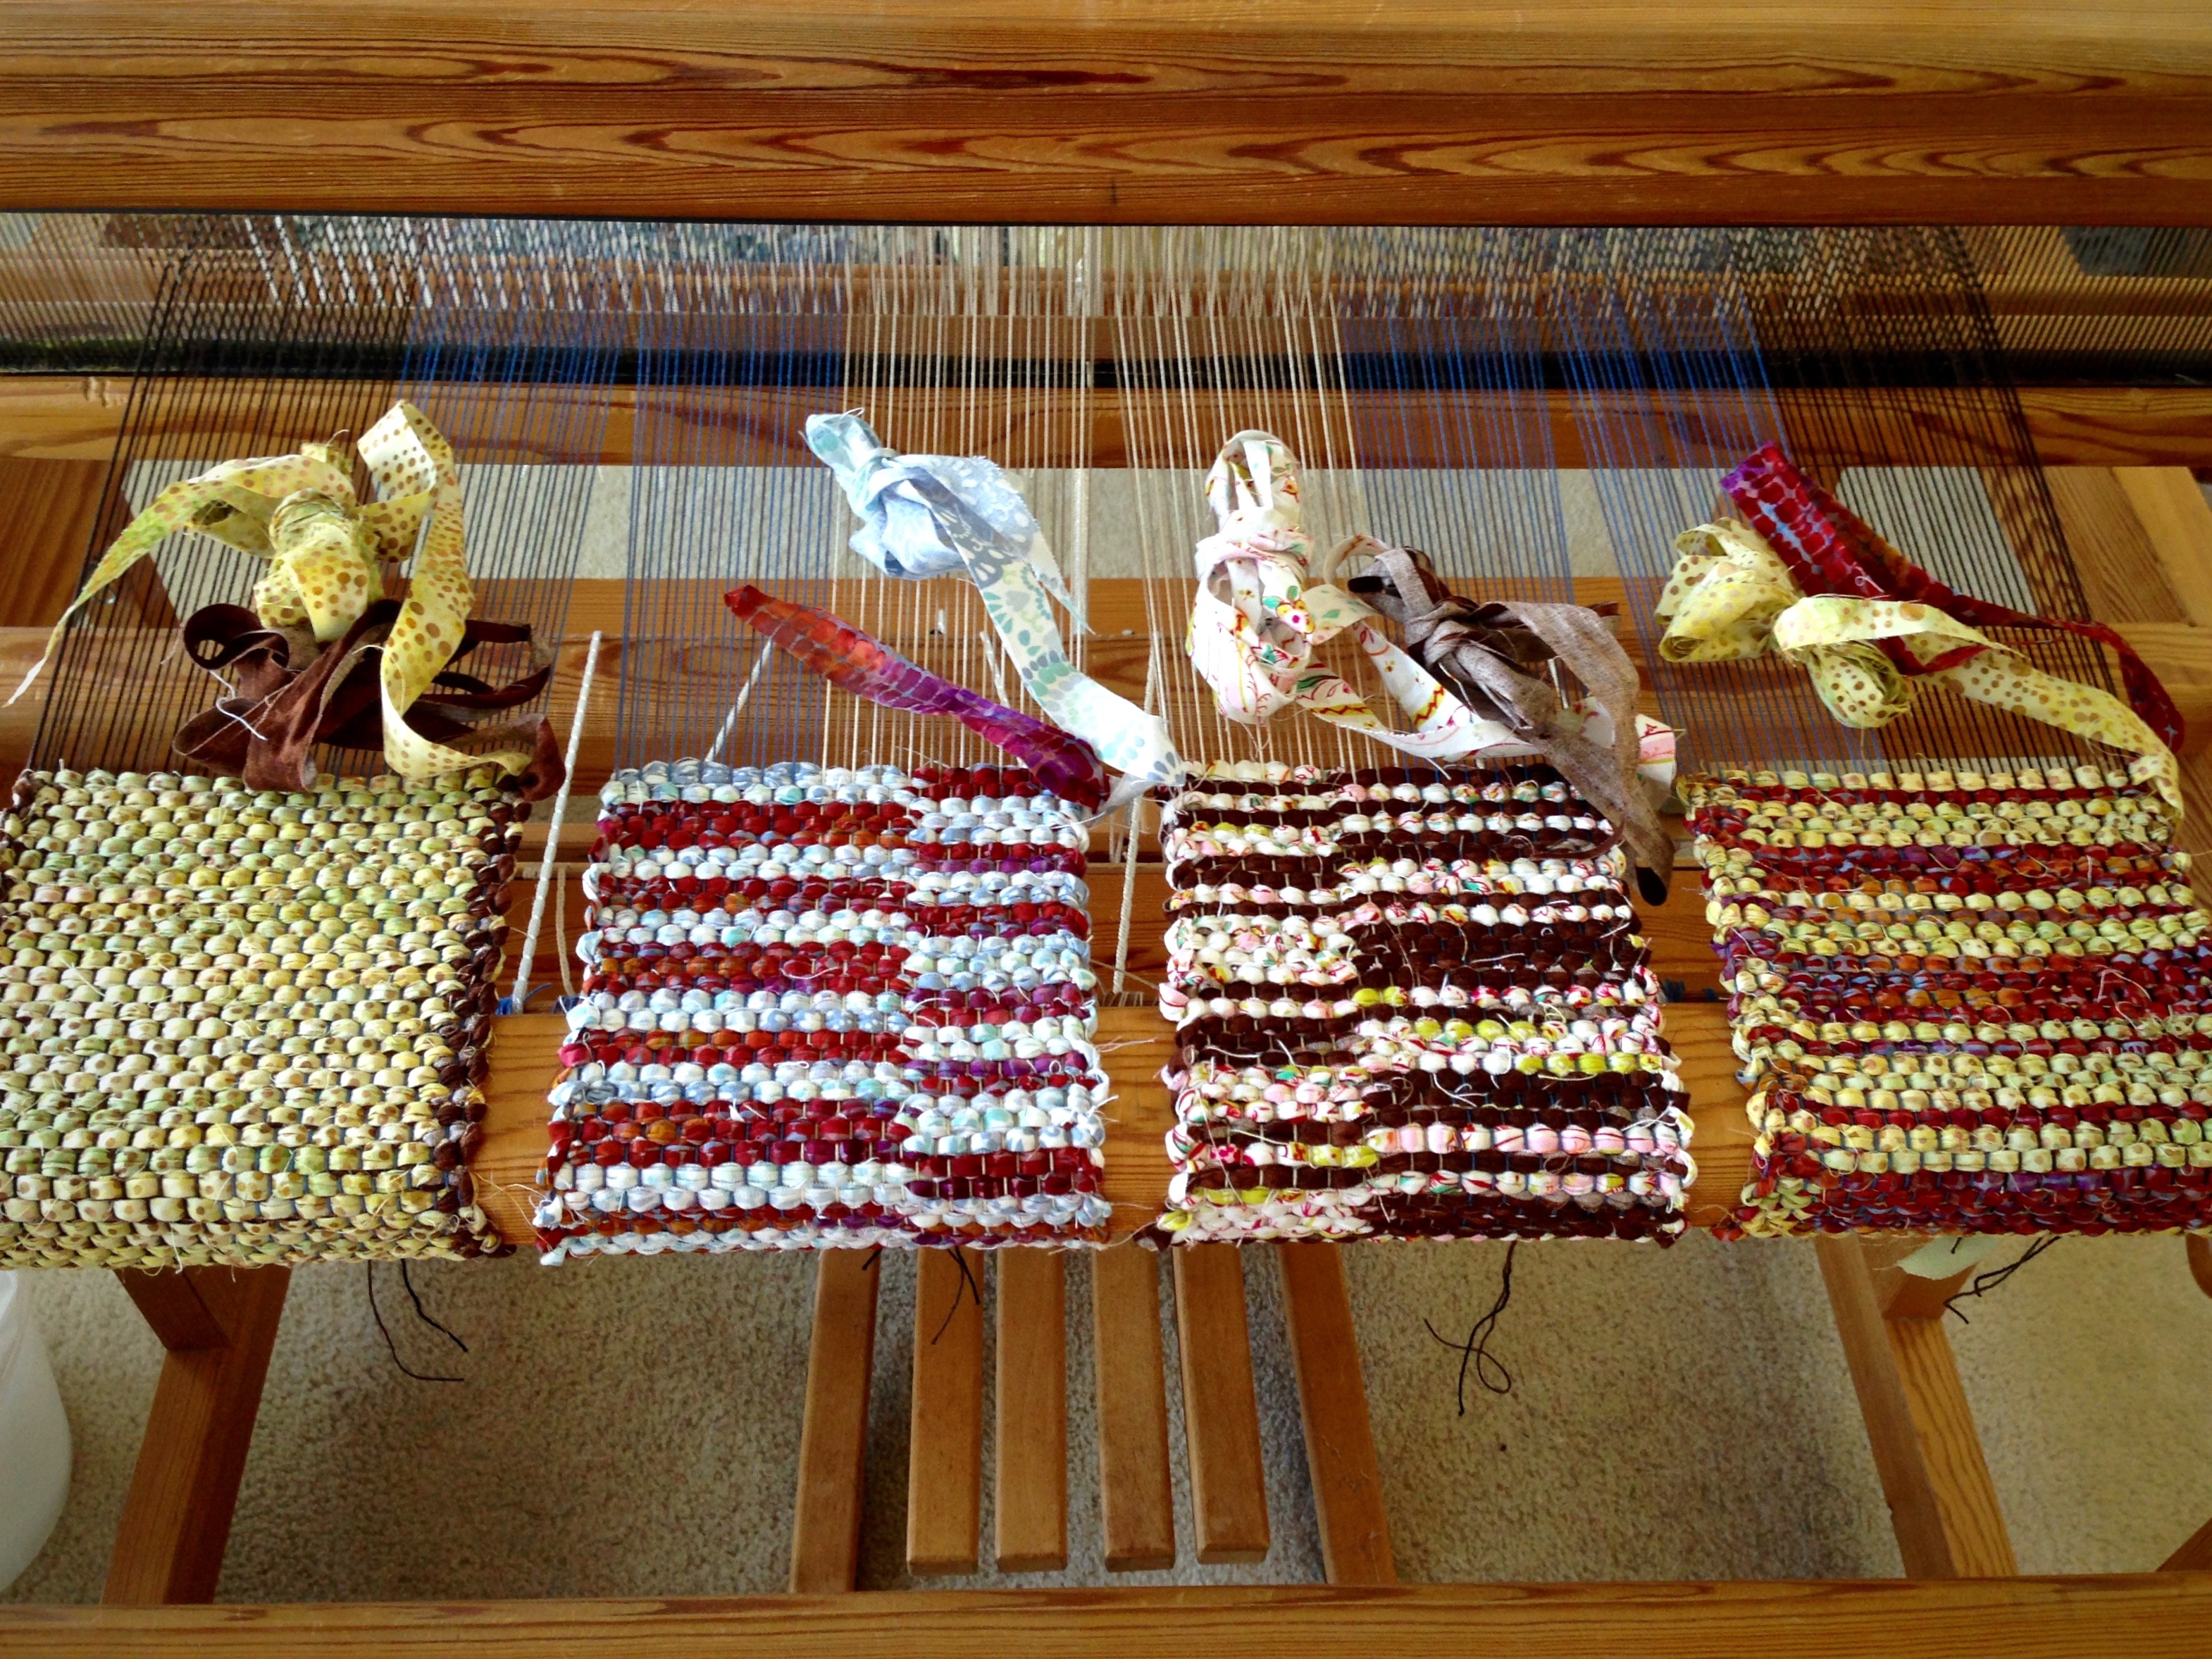
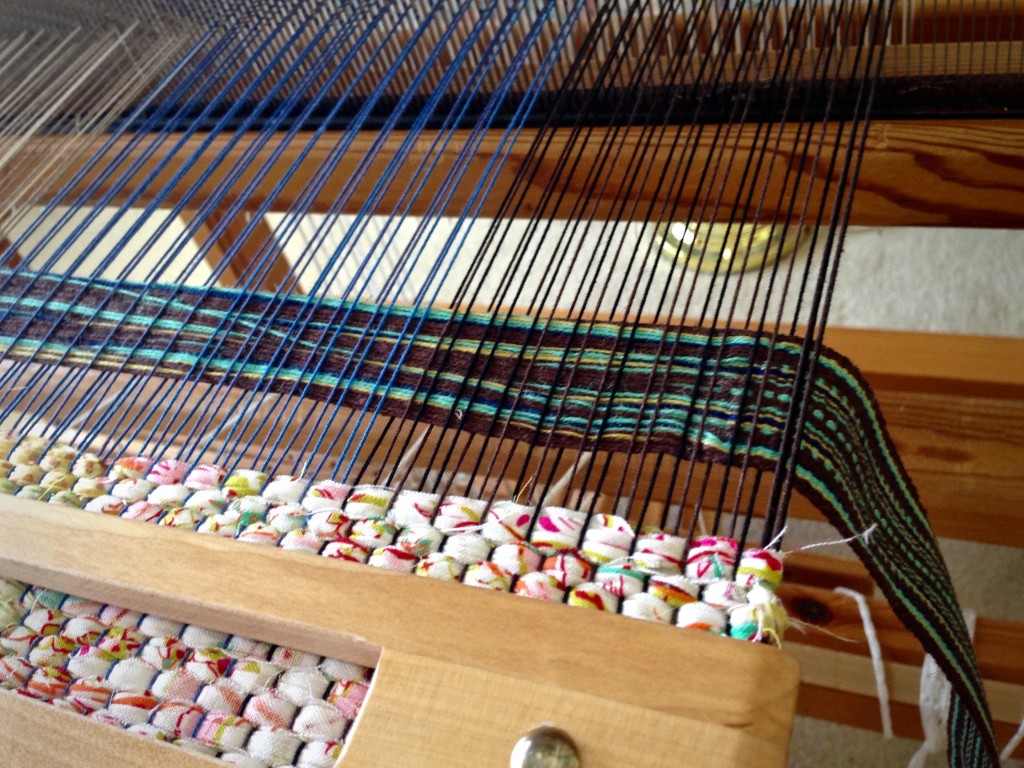
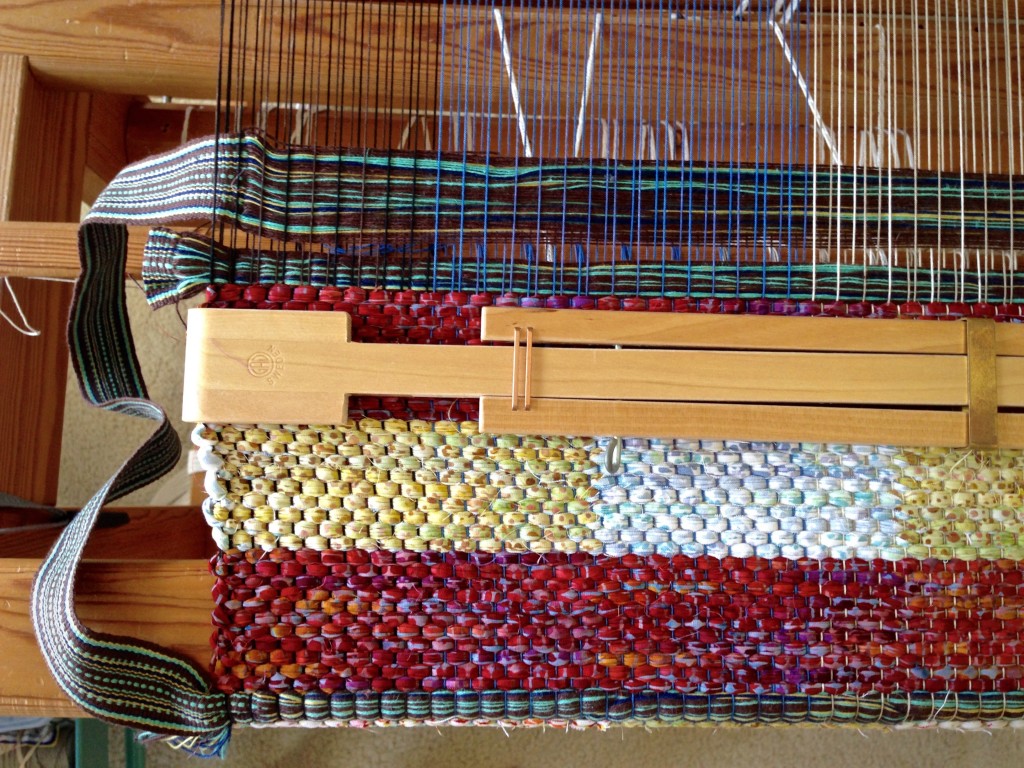
Unwoven warp (length equal to the rag rug warp width on the loom, plus 2″/5cm) comes before and after each of two bag handles, which are woven to desired length. Unwoven warp is held together at the beginning, and in between the two handles, and at the end, with 1″/2.5cm of woven band.

Bag handle woven on band loom. Karen Isenhower

2. Insert unwoven band warp for one handle.

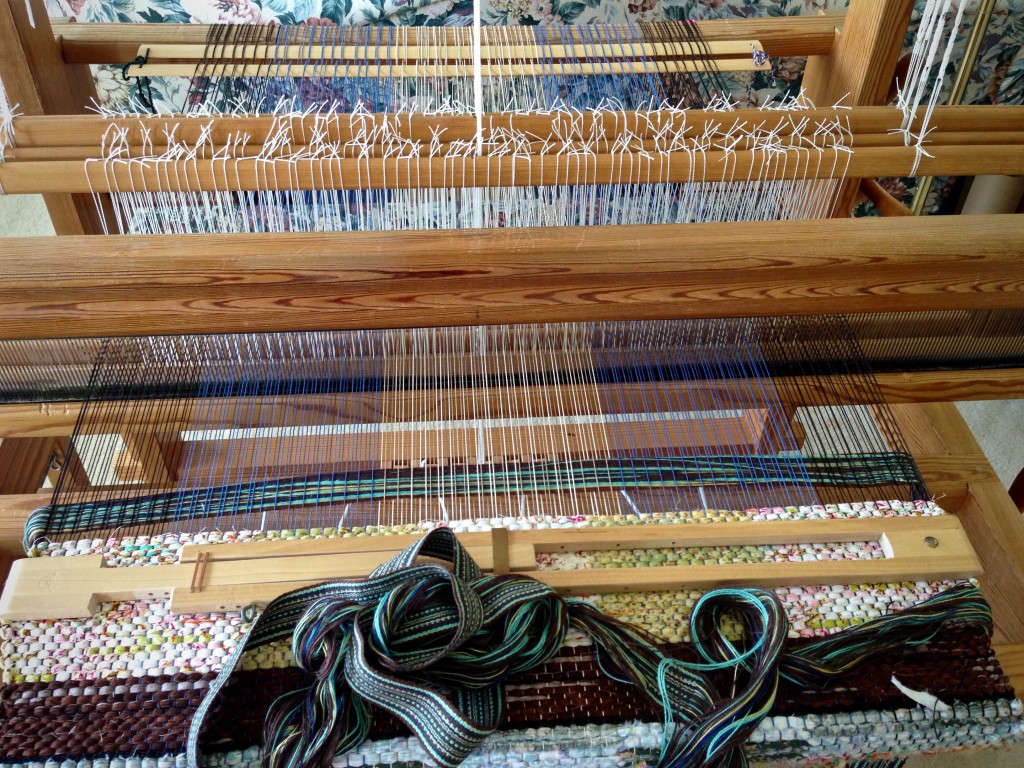
Weave approximately 1/3 of the bag.

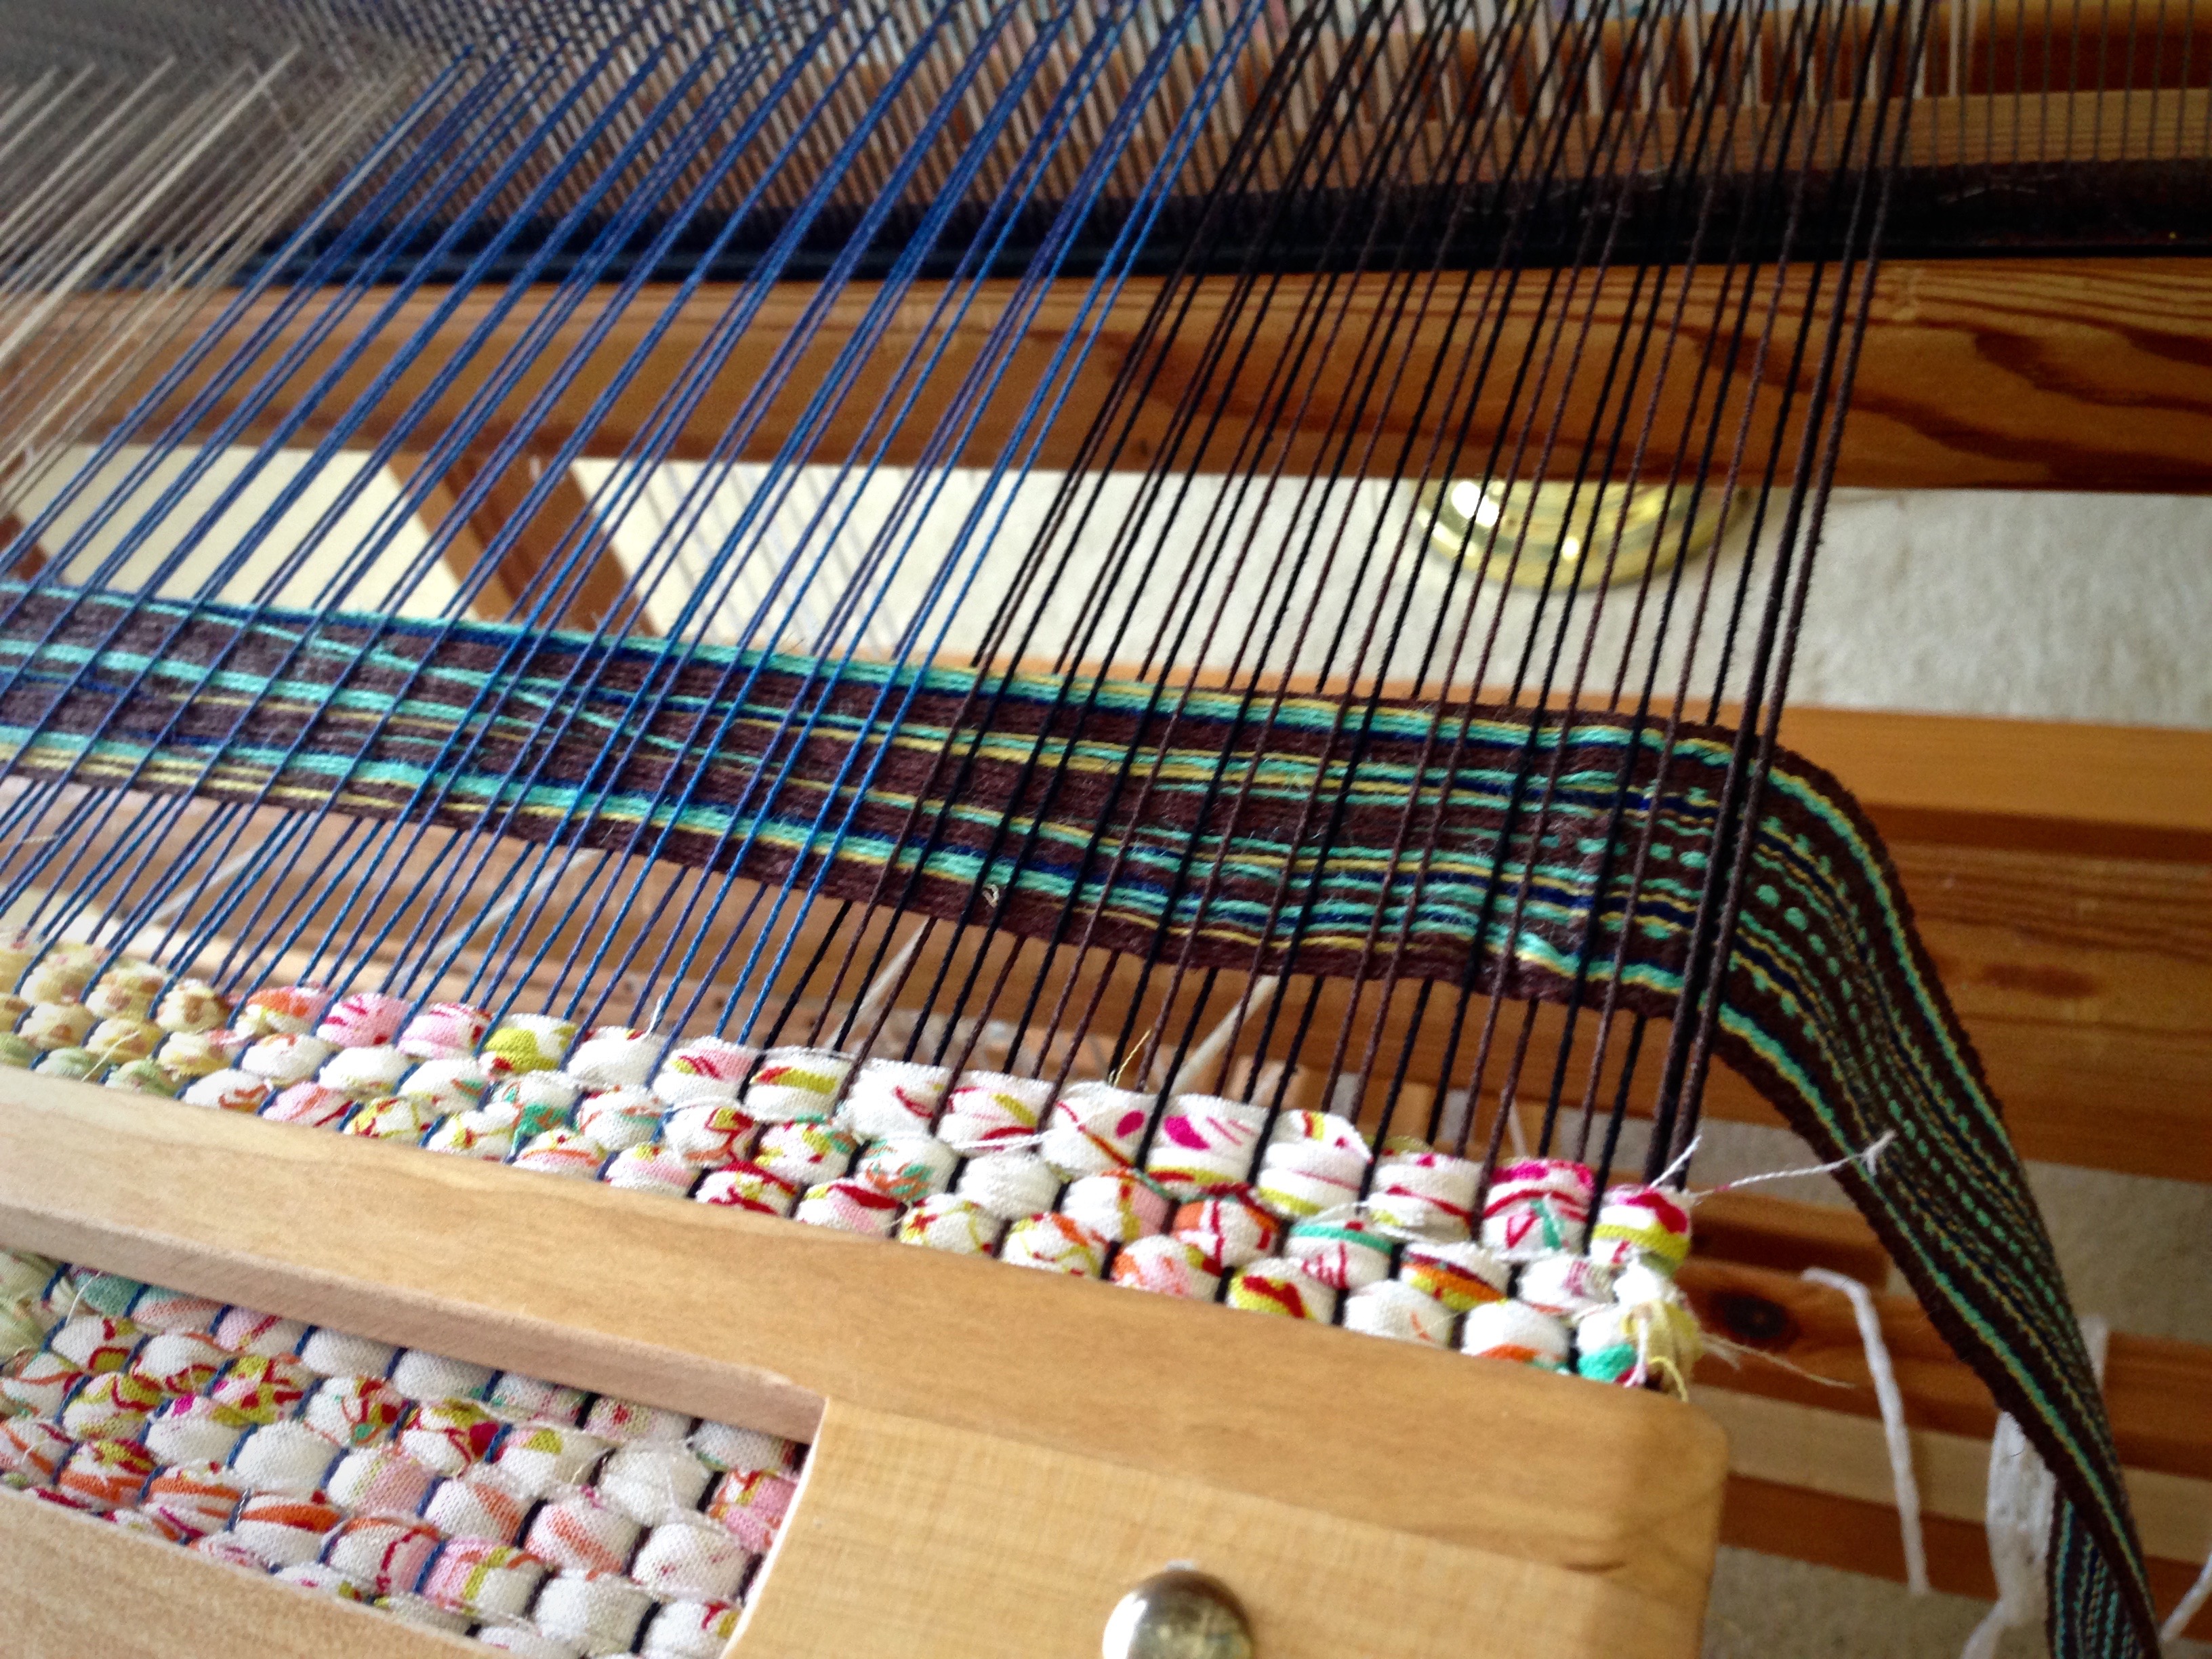
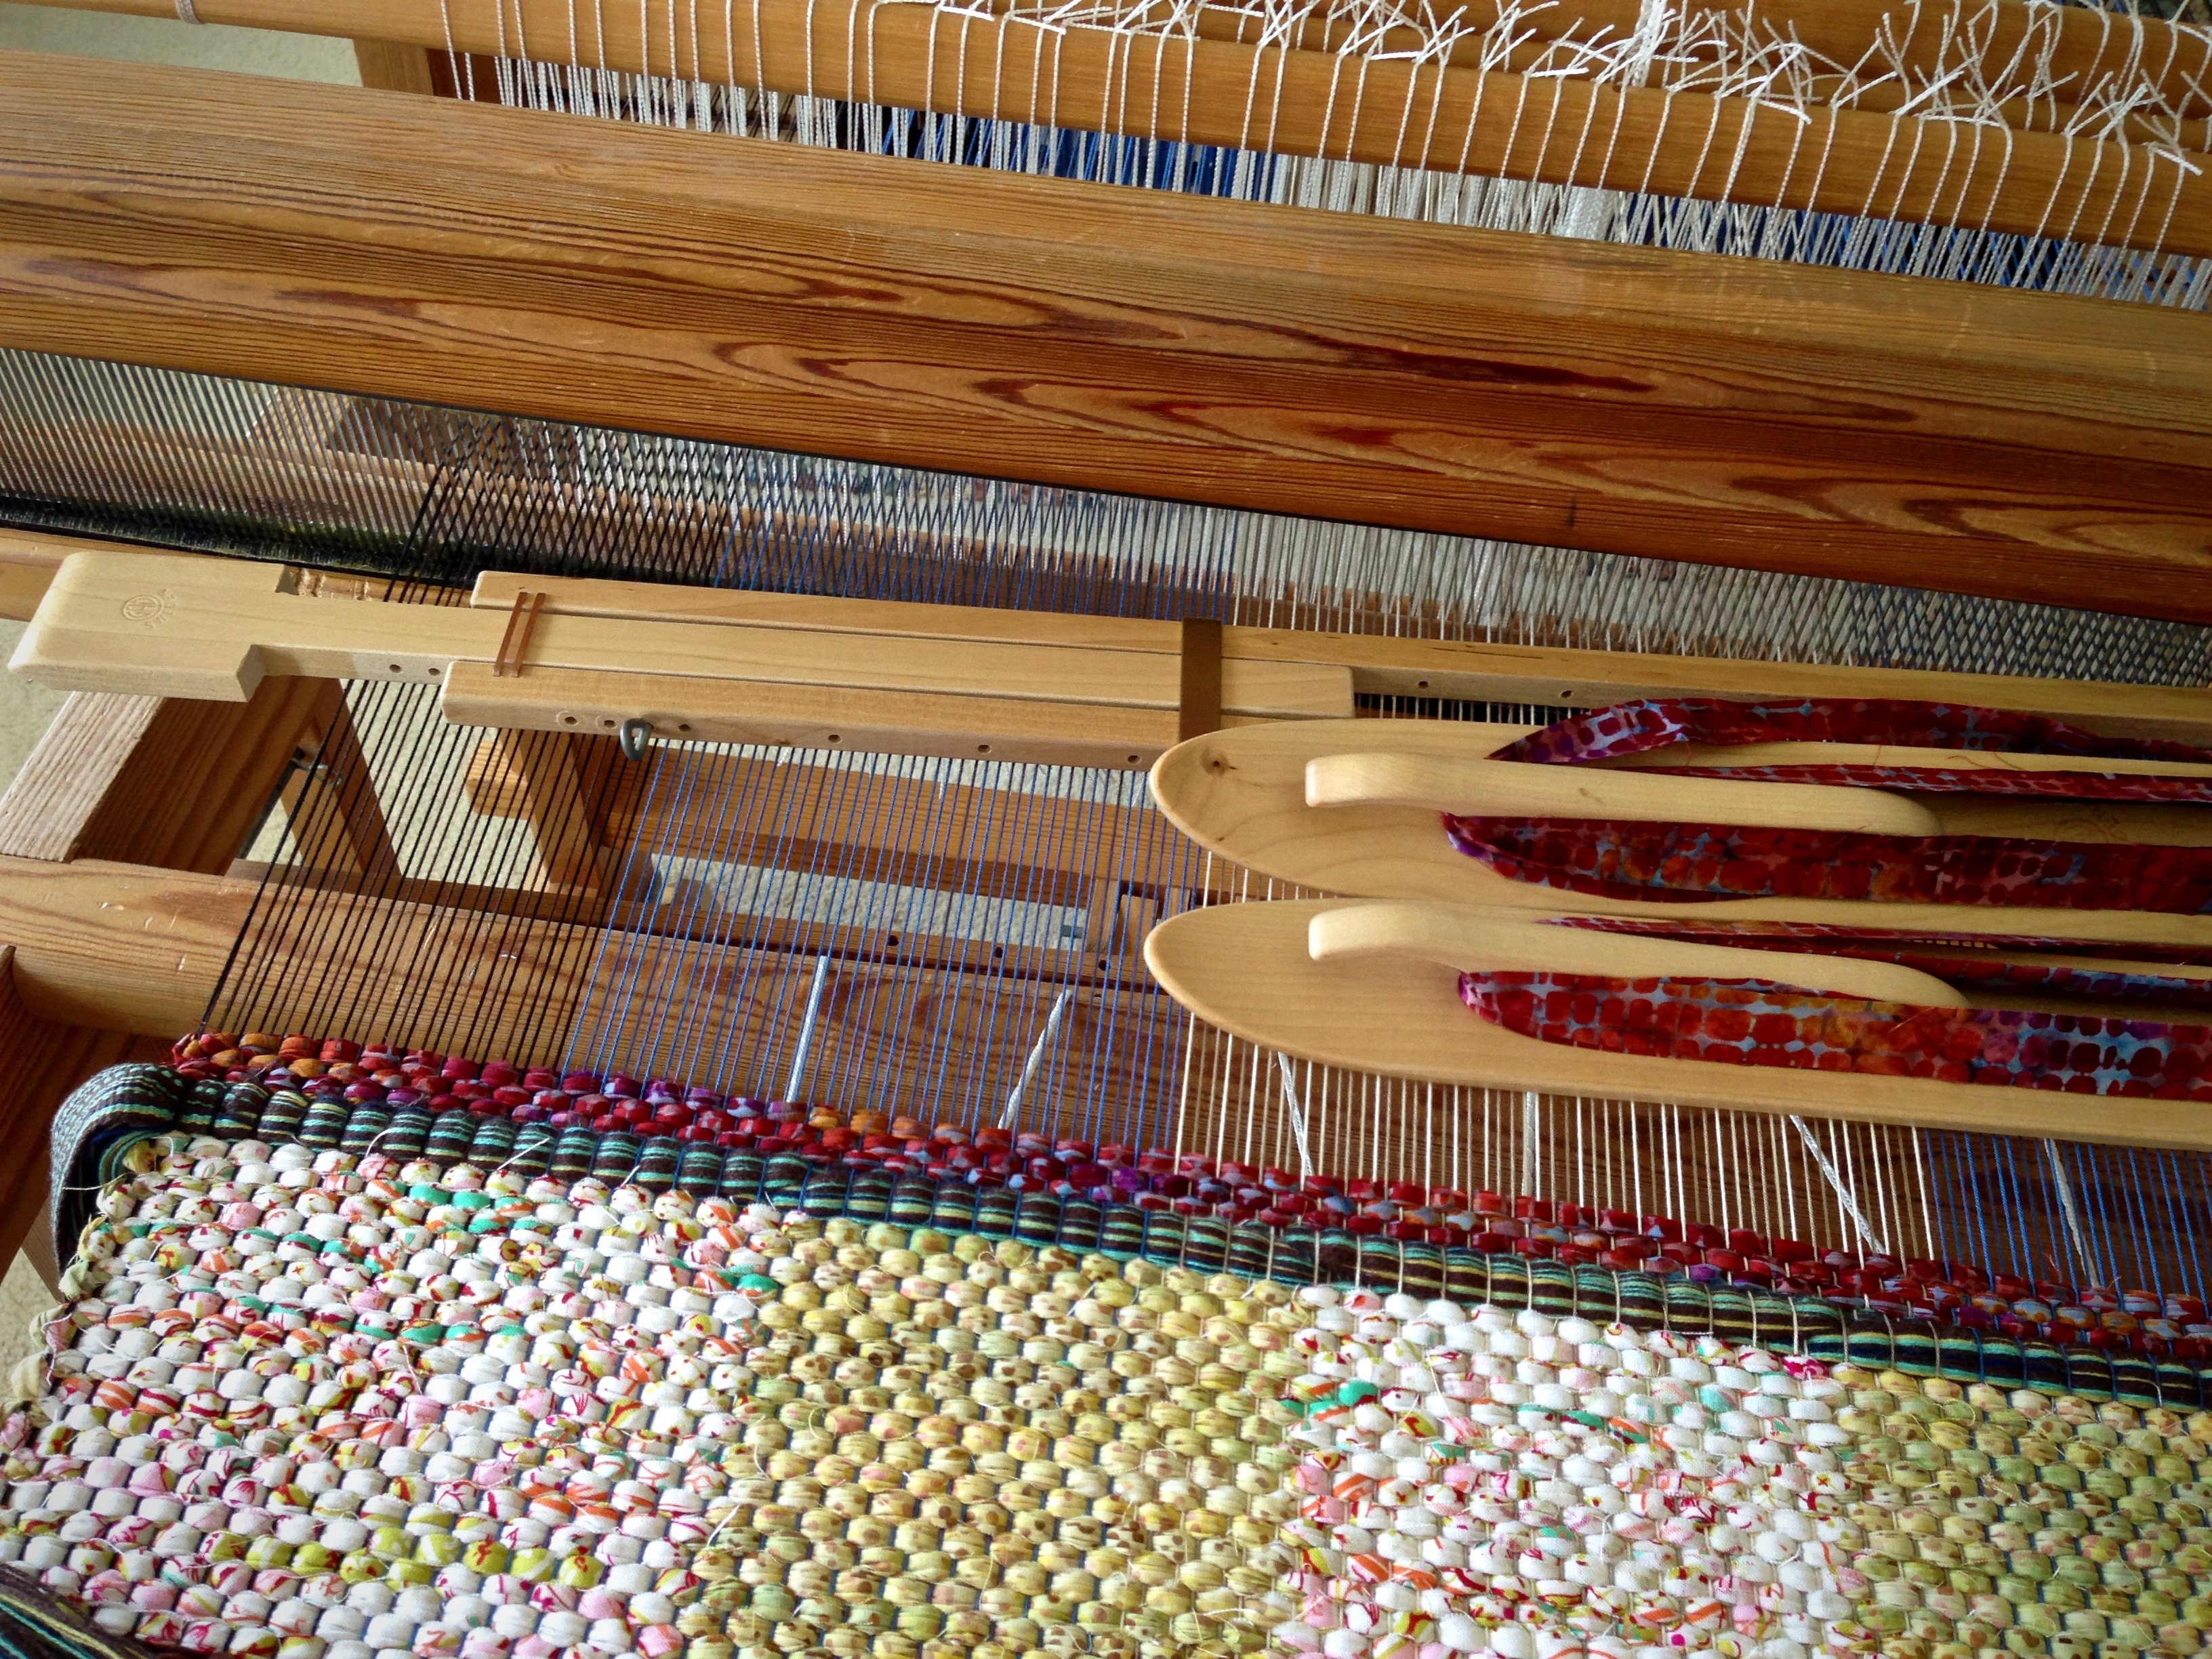
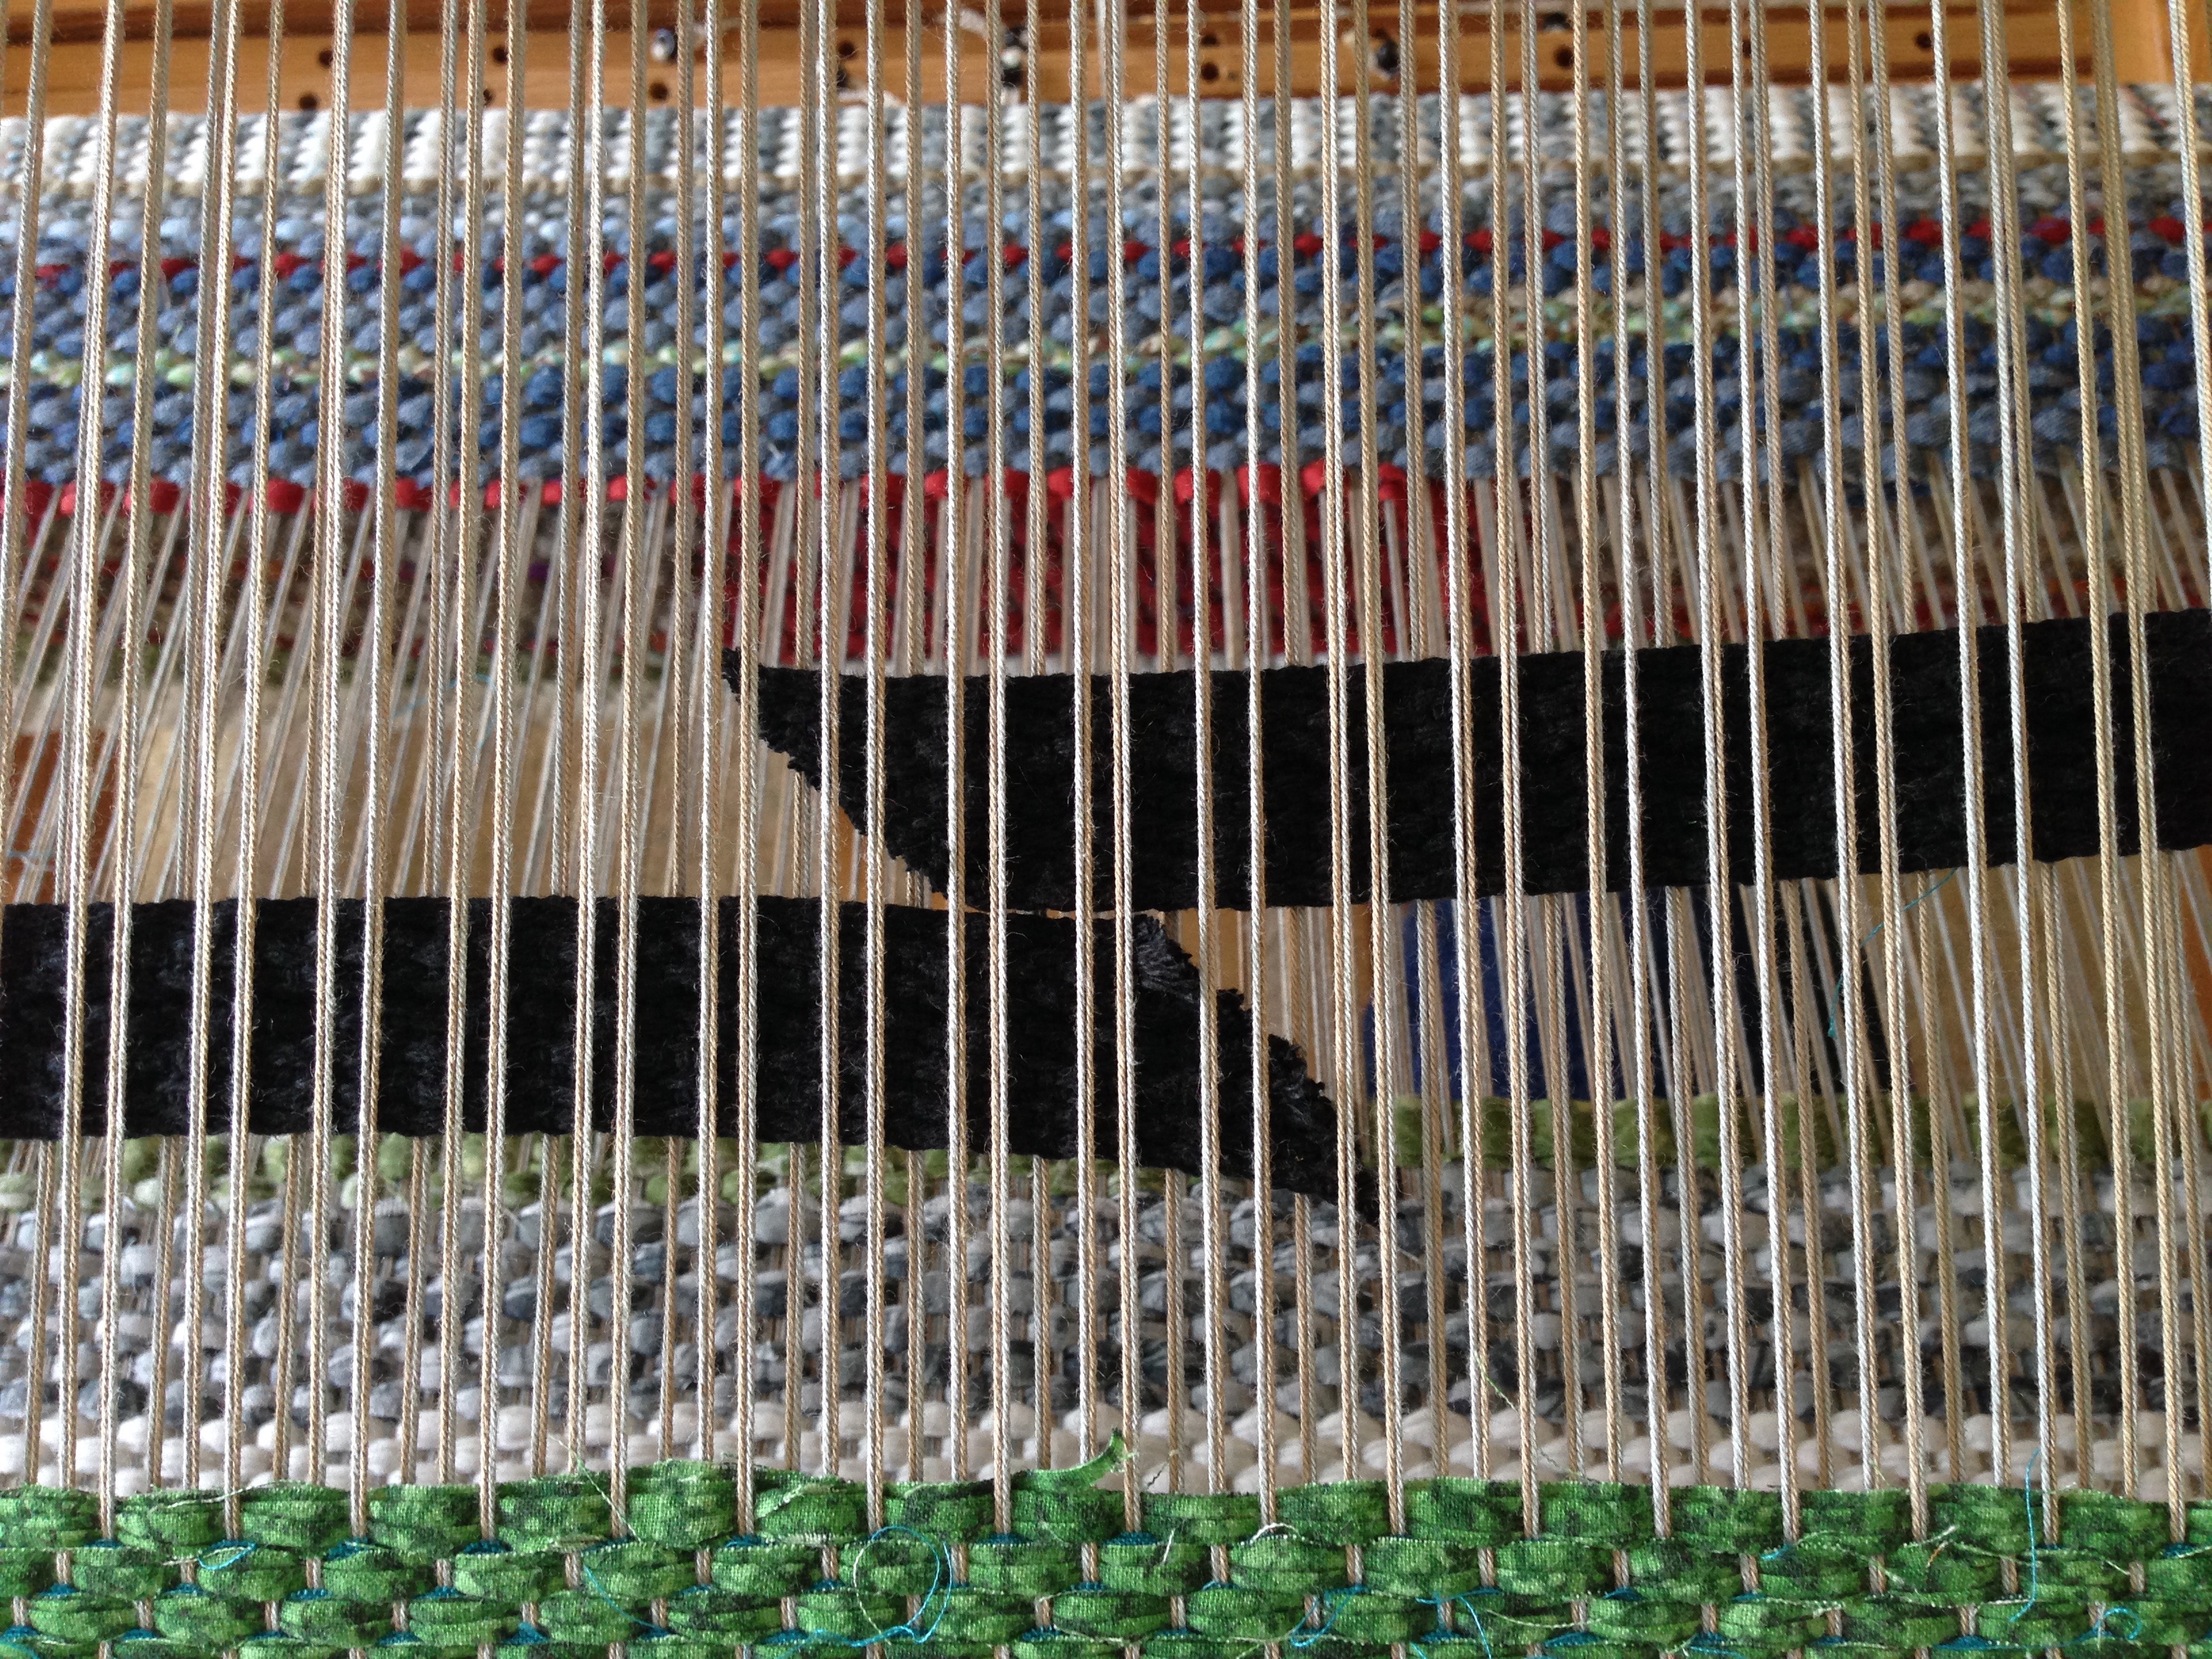
Cut the two handle straps apart in the middle of the 1″/2.5cm woven section that separates the two lengths of unwoven band warp. Entering from the right-hand side, insert one unwoven band warp, used here as weft, into the first shed of the double binding weave, with 1/2″/1cm of the band-woven handle strap reaching into the shed. Tap the weft in with the beater, but do not beat it in firmly, yet.

Steps for weaving handle into rag weave bag.

Weave handle into rag weave bag. How to.

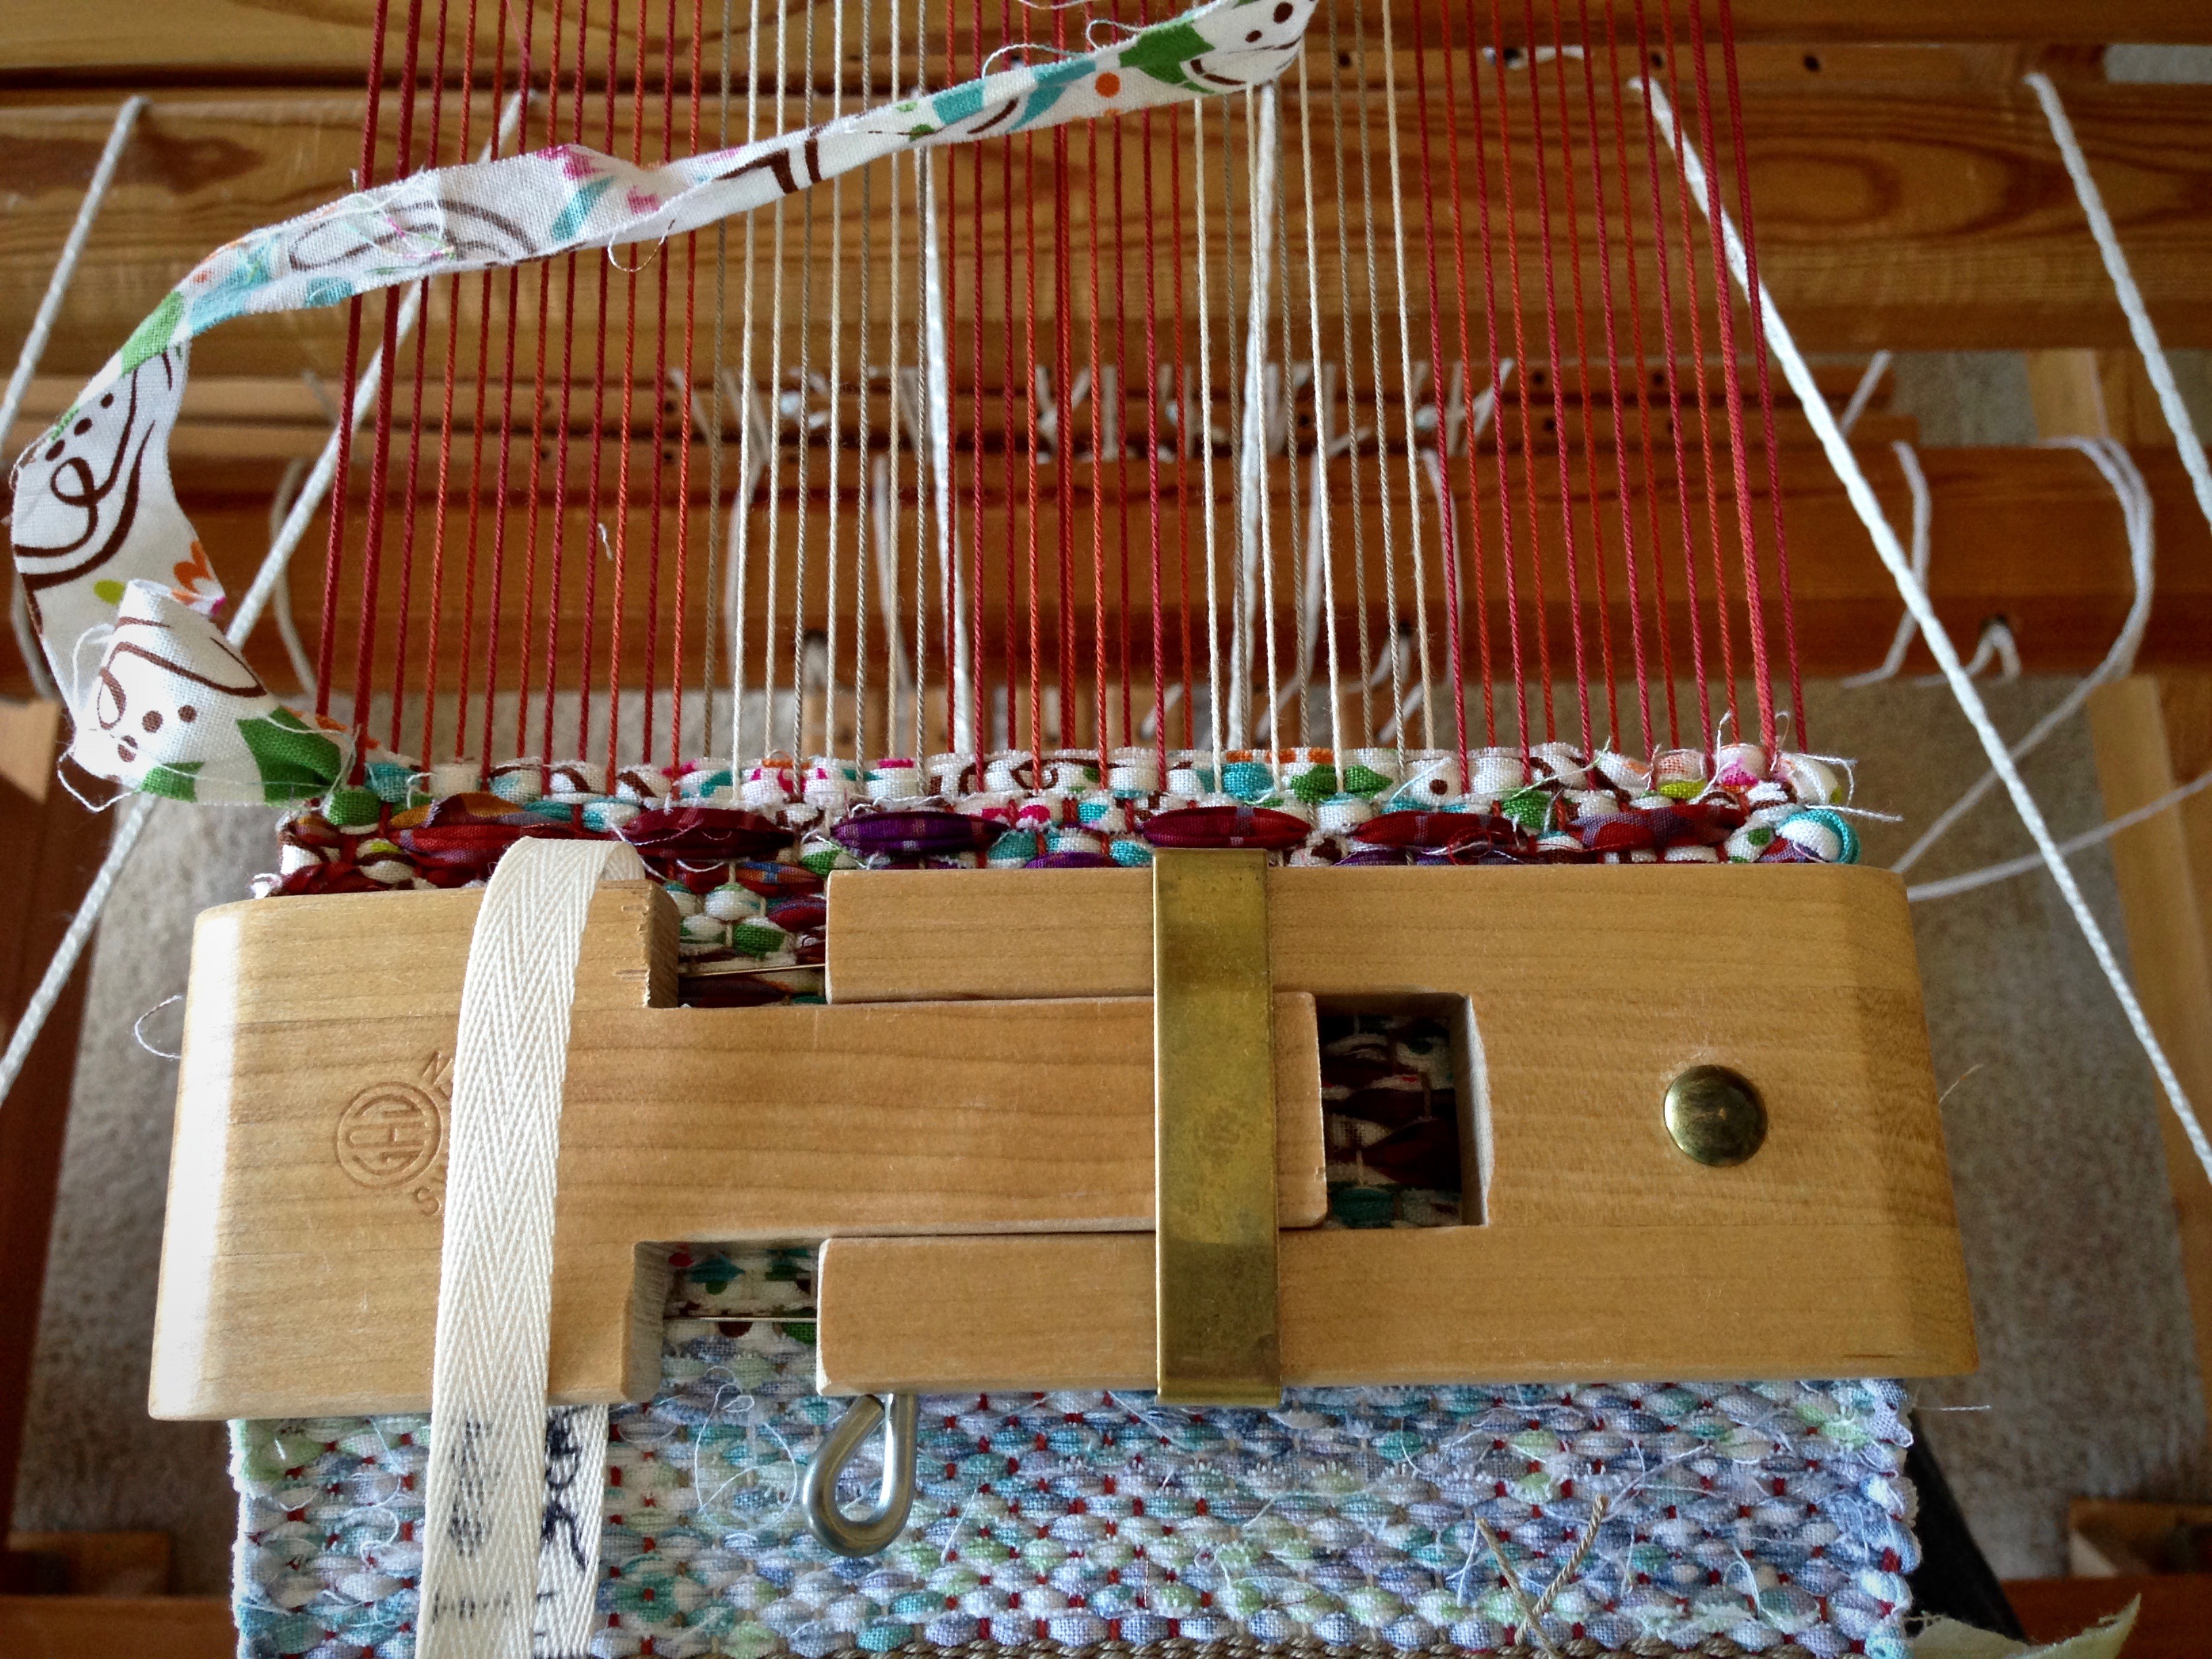
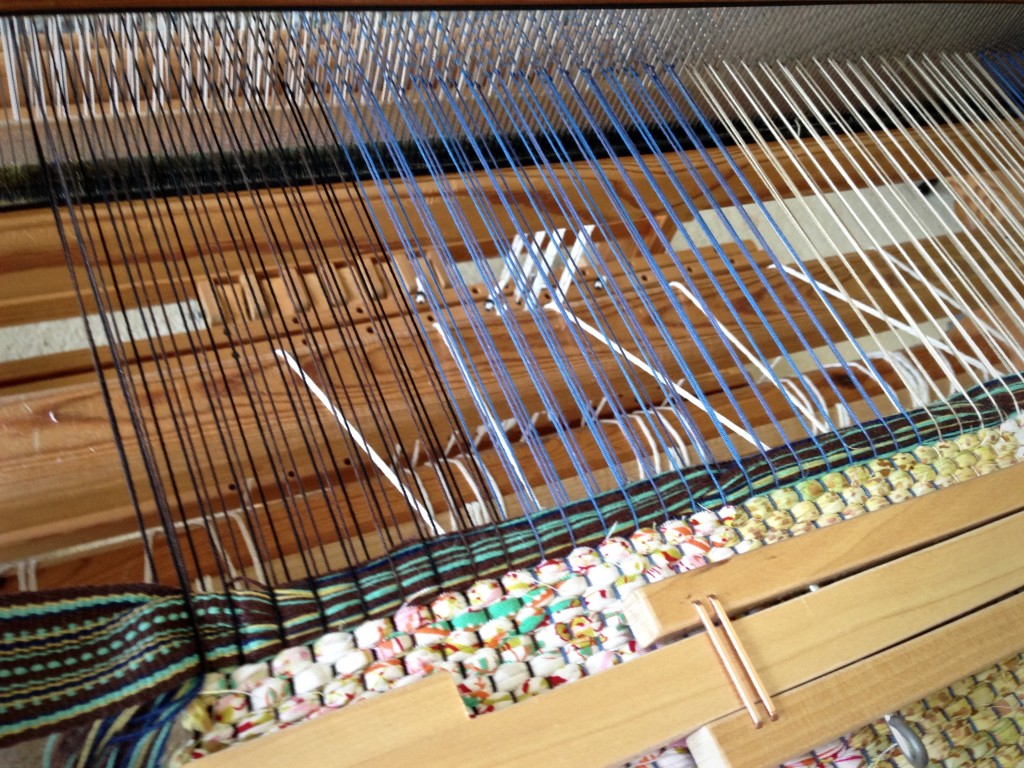
3. Insert unwoven band warp for the second handle.

Entering from the left-hand side, insert the unwoven band warp, used as weft, from the second handle strap into the second shed of the double binding weave, with 1/2″/1cm of the band-woven handle strap reaching into the shed. Beat firmly, packing in both layers of weft together.

Weave handle into rag weave bag on the loom.

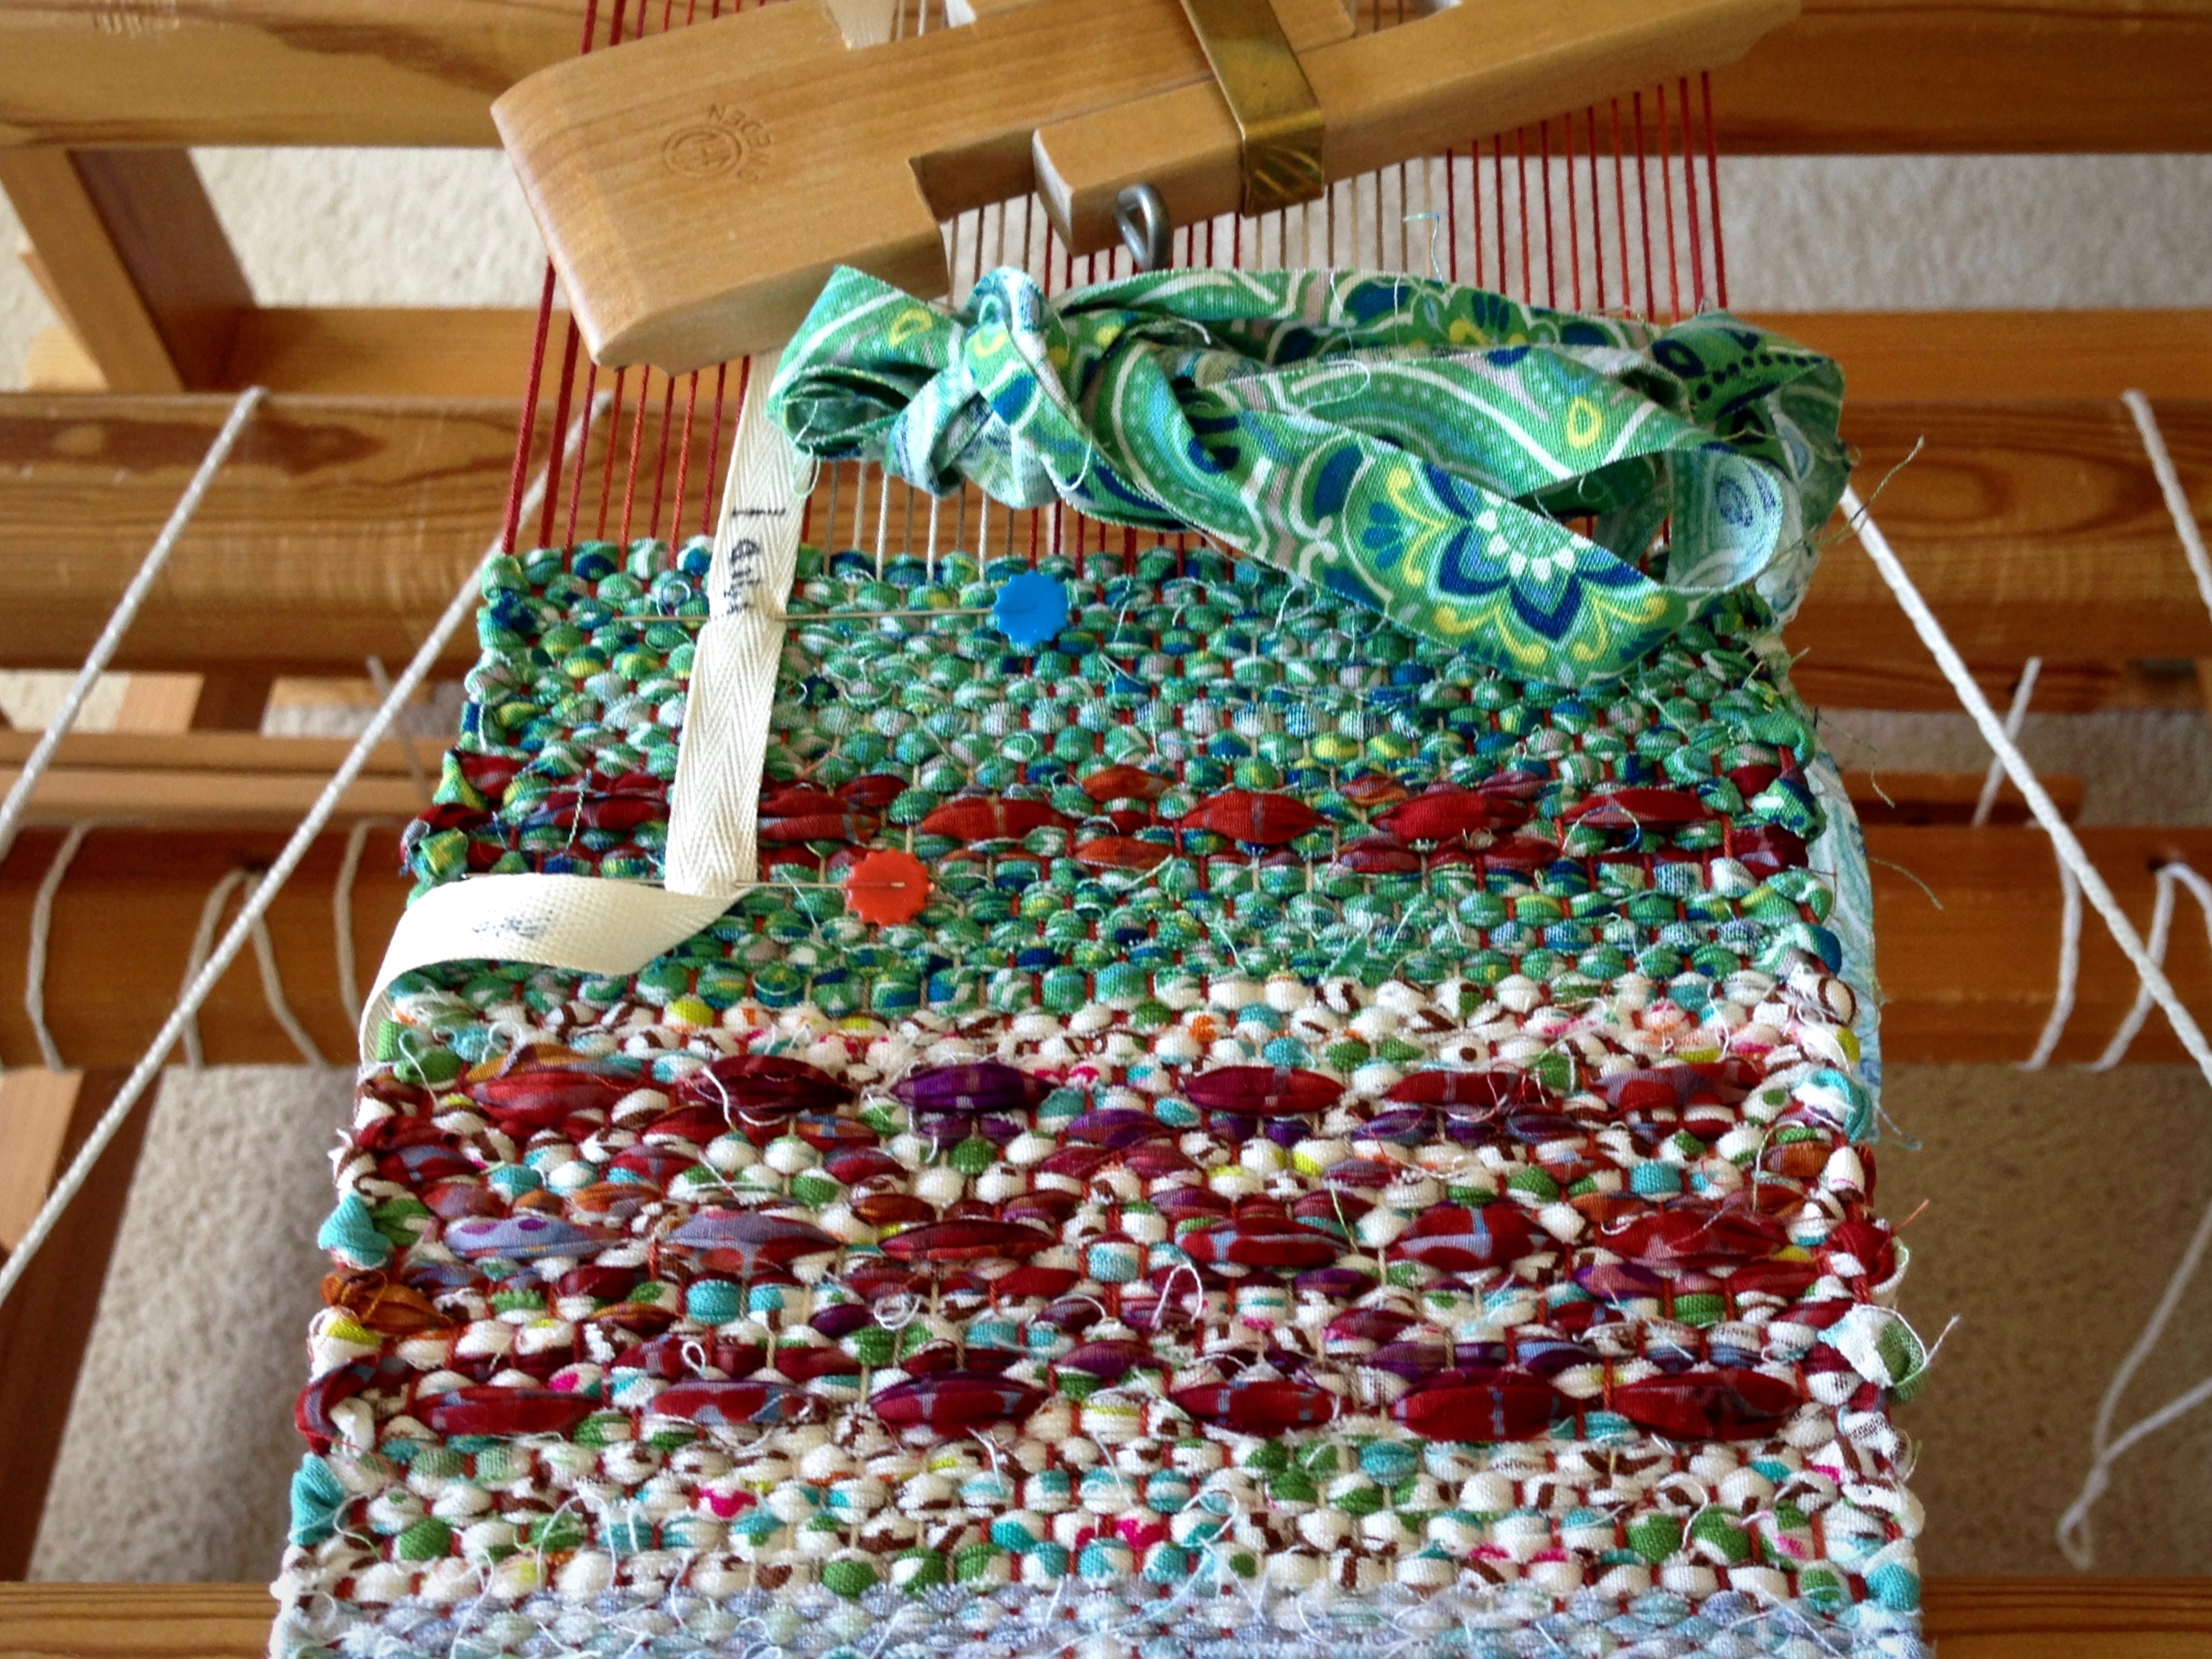
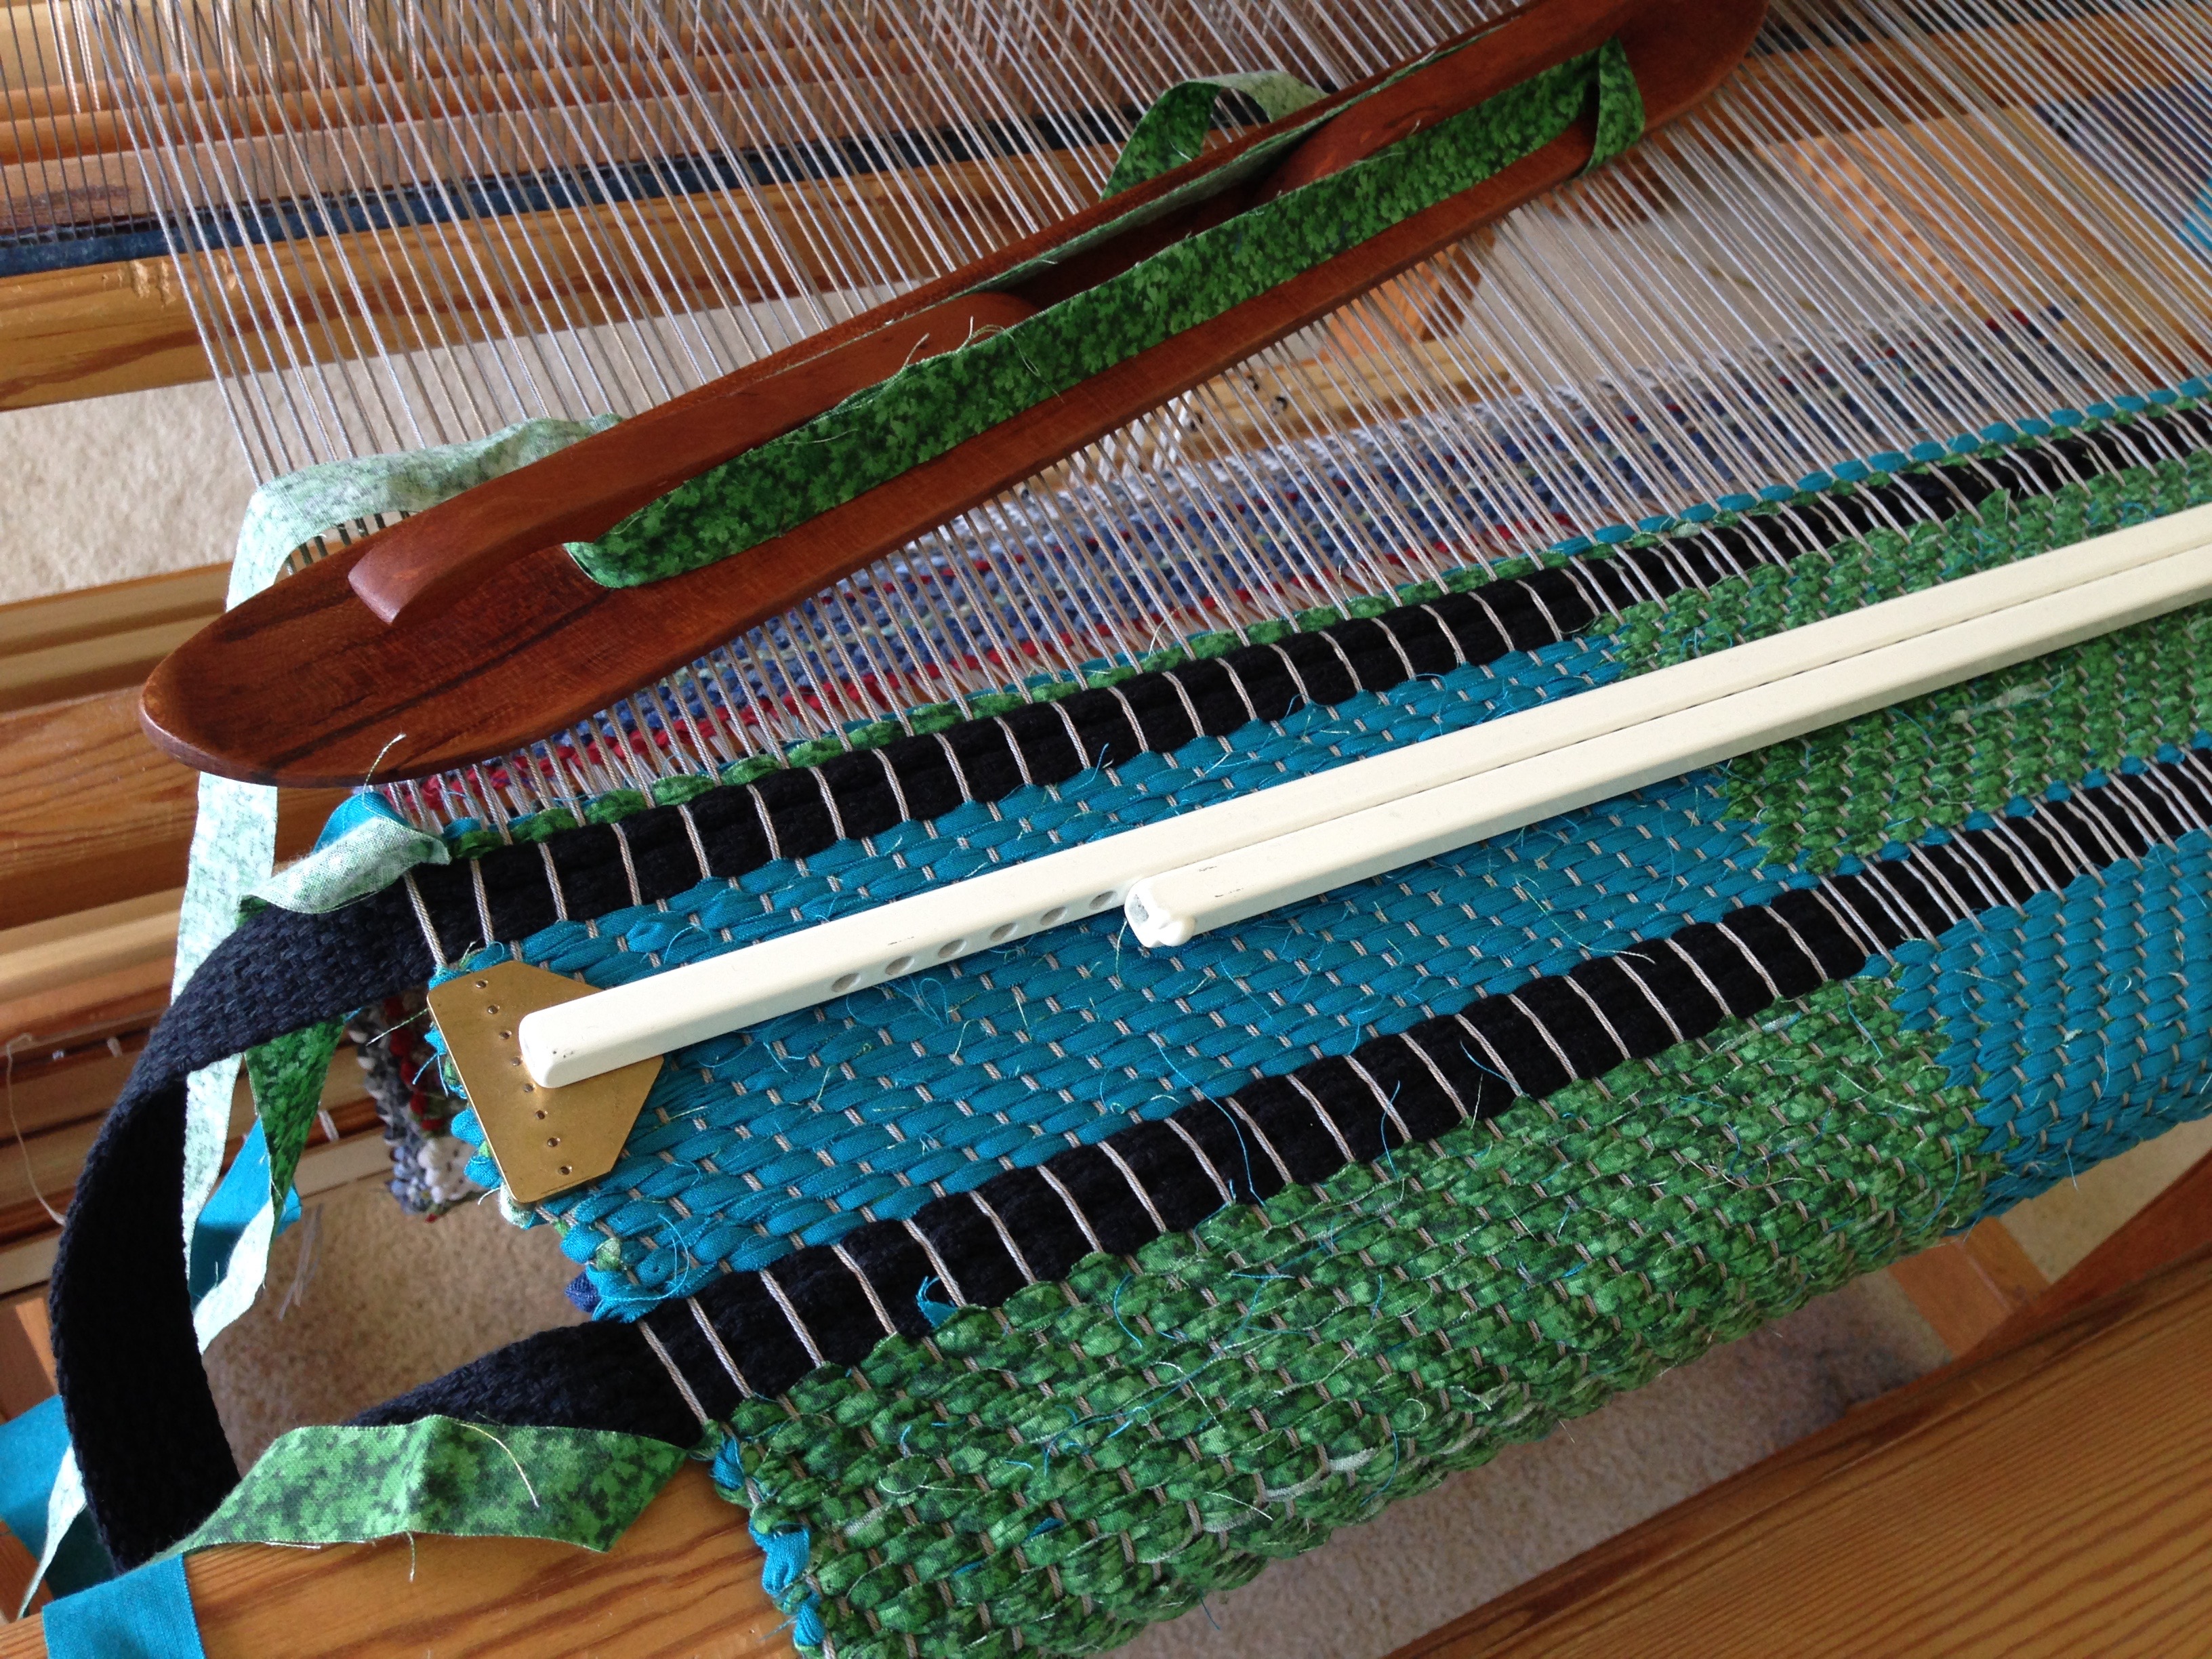
4. Weave the center 1/3 of the bag.

Step-by-step weaving handle into bag.

5. Insert remaining unwoven warp of first handle.

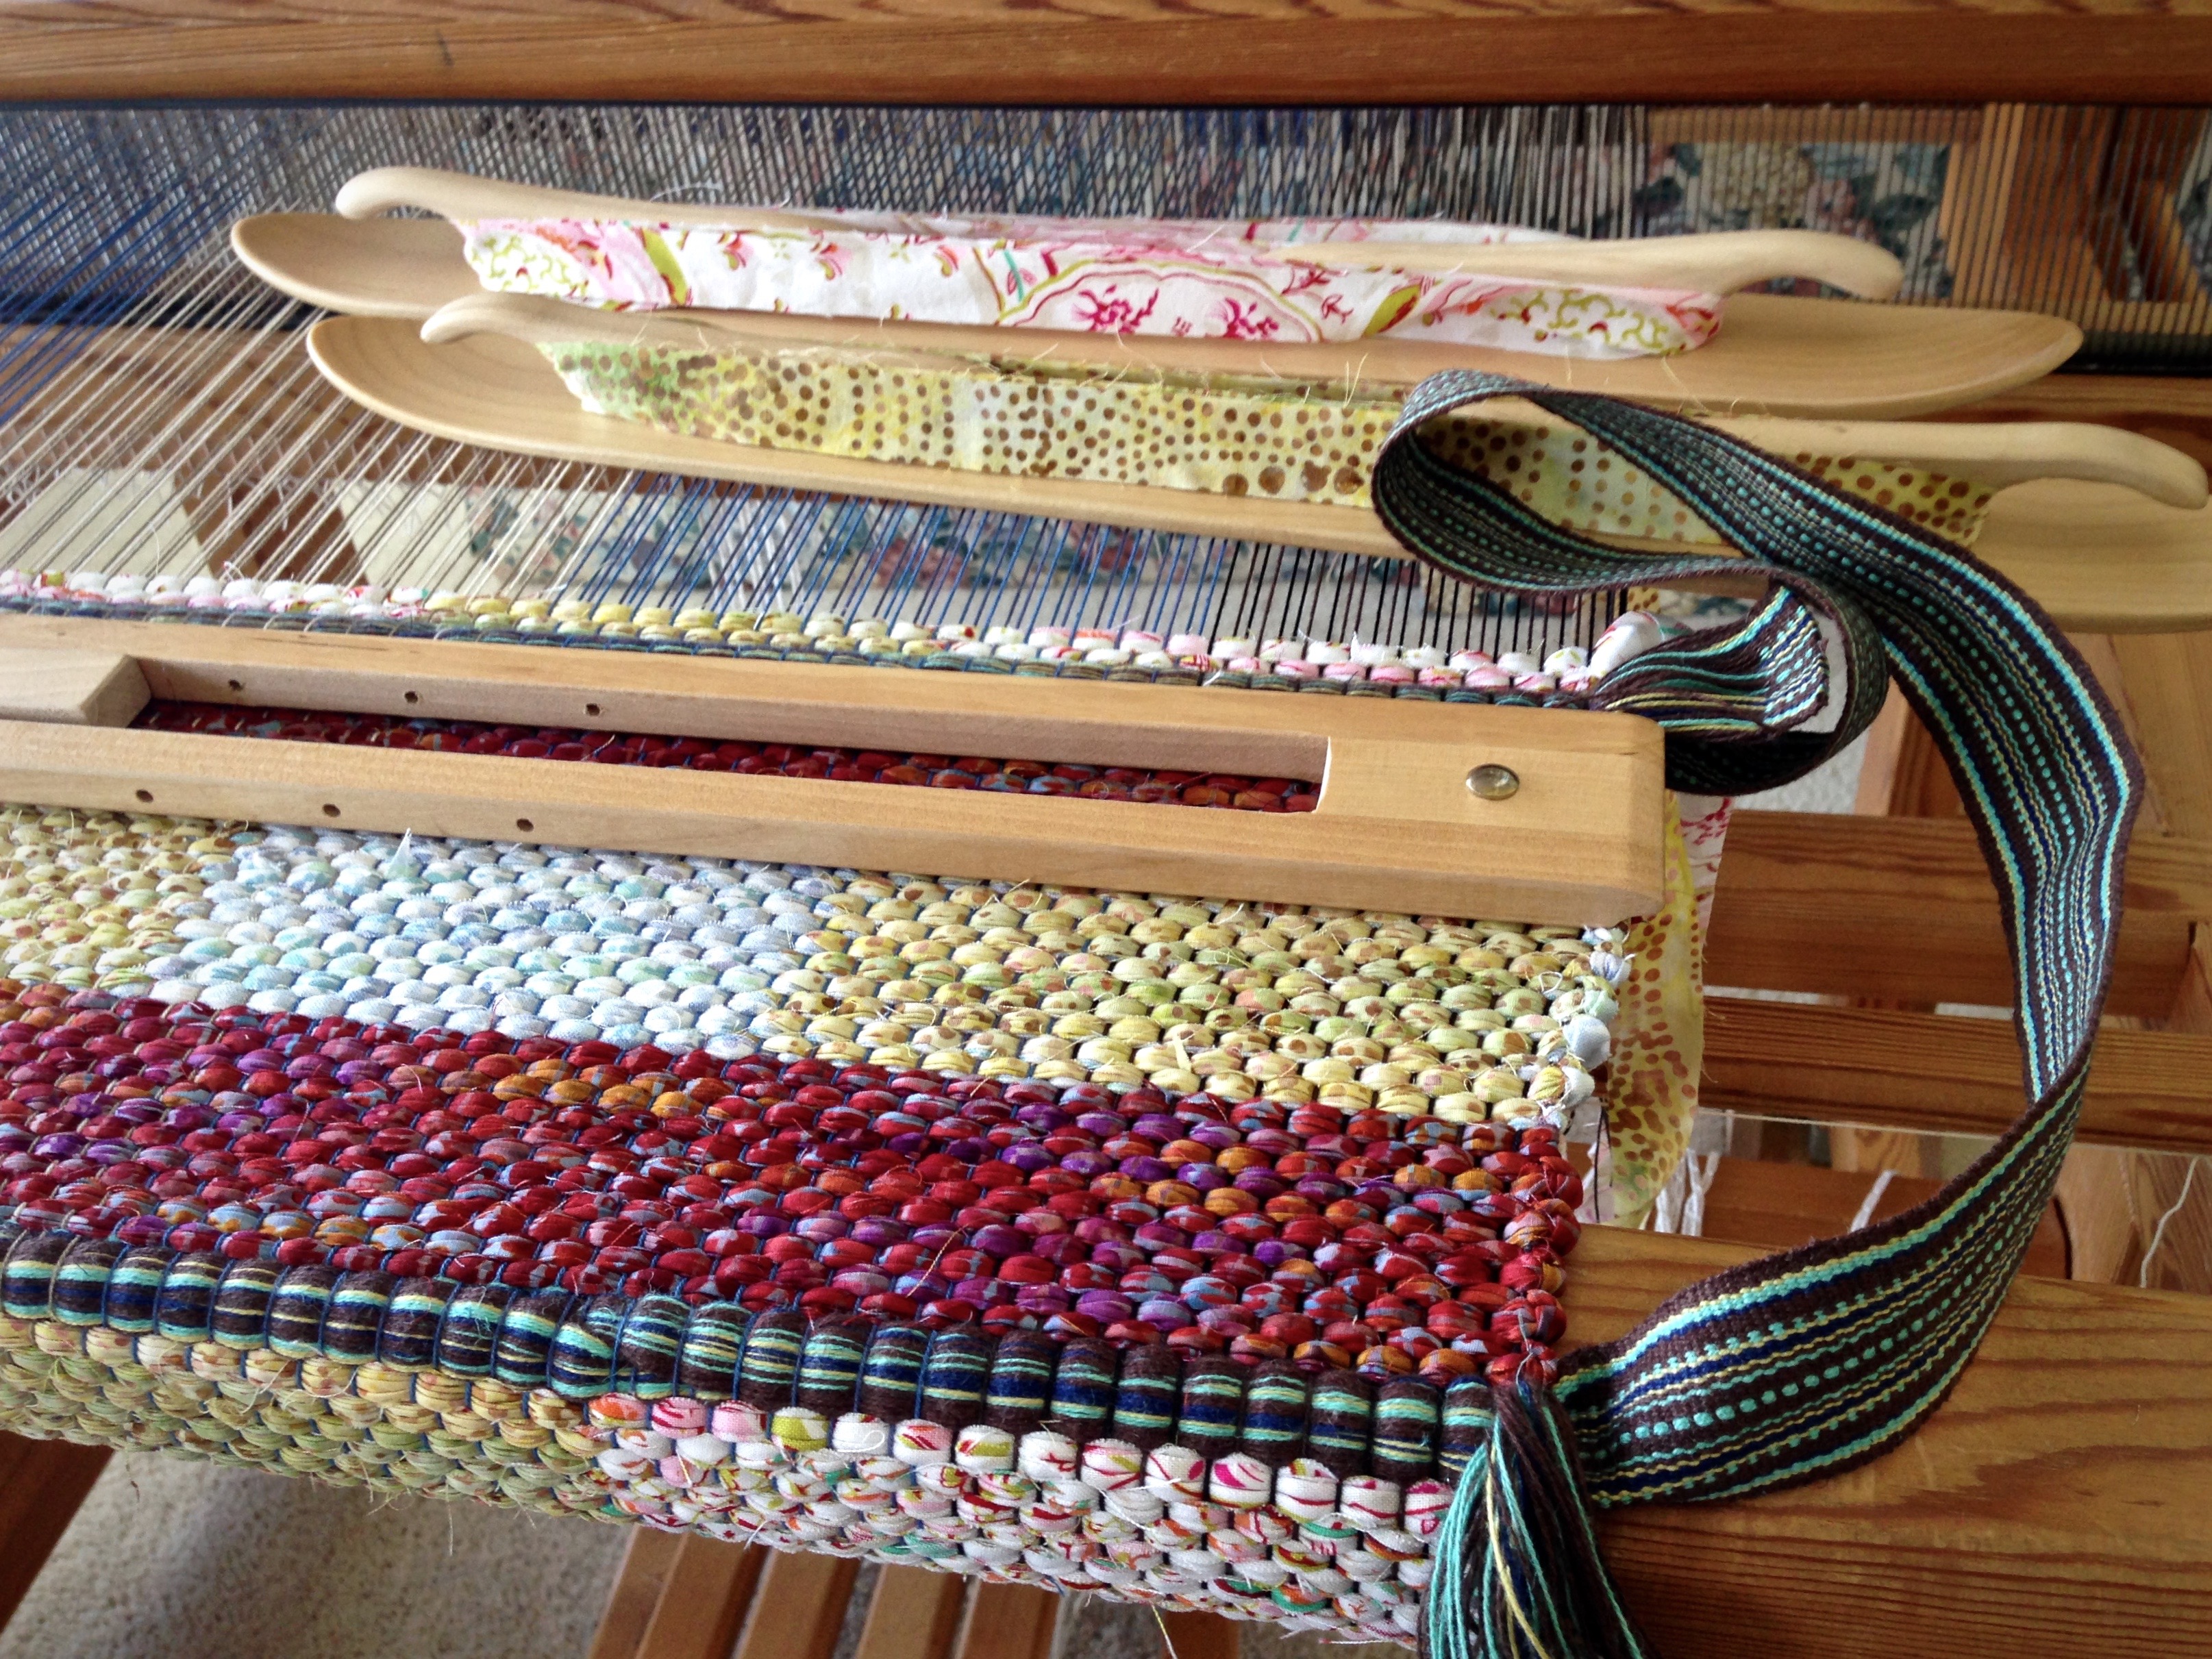
Repeat Step 2 with the unwoven band warp attached to the handle on the right-hand side. Make sure the handle strap is not twisted.

Inserting bag handles during weaving. Tutorial.

6. Insert remaining unwoven warp of second handle.

Repeat Step 3 with the unwoven band warp attached to the handle on the left-hand side. Make sure the handle strap is not twisted.

How to insert bag handles into the weaving.

7. Weave the final 1/3 of the bag.
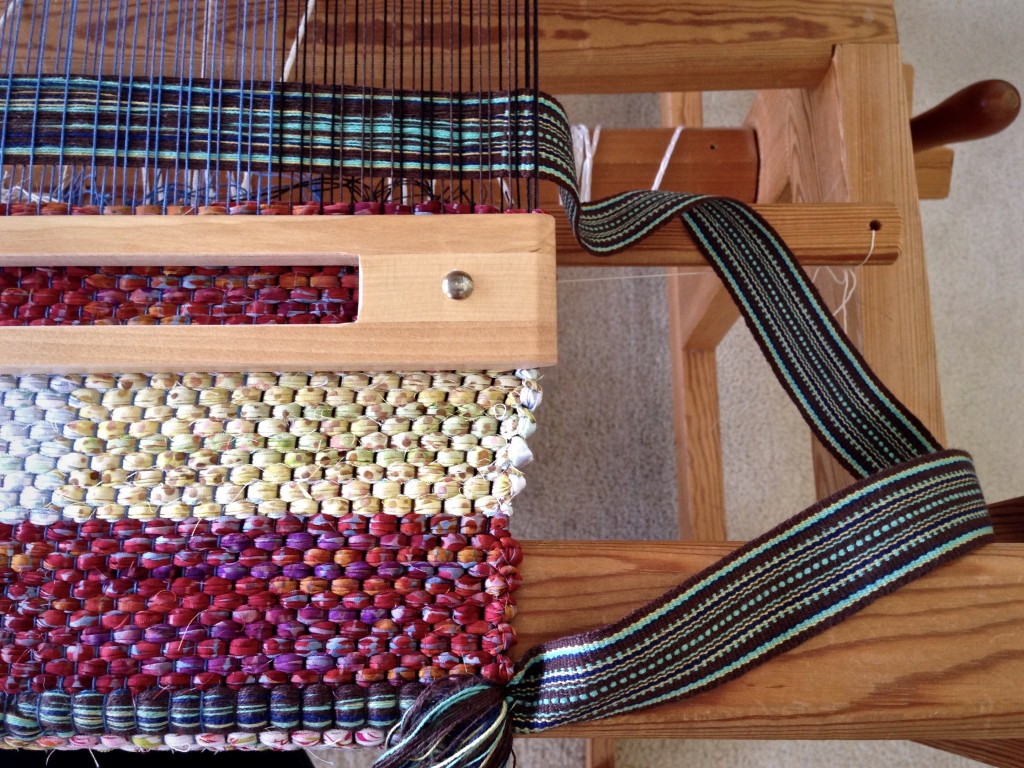
Double binding rag rug bag.

8. Finishing work.

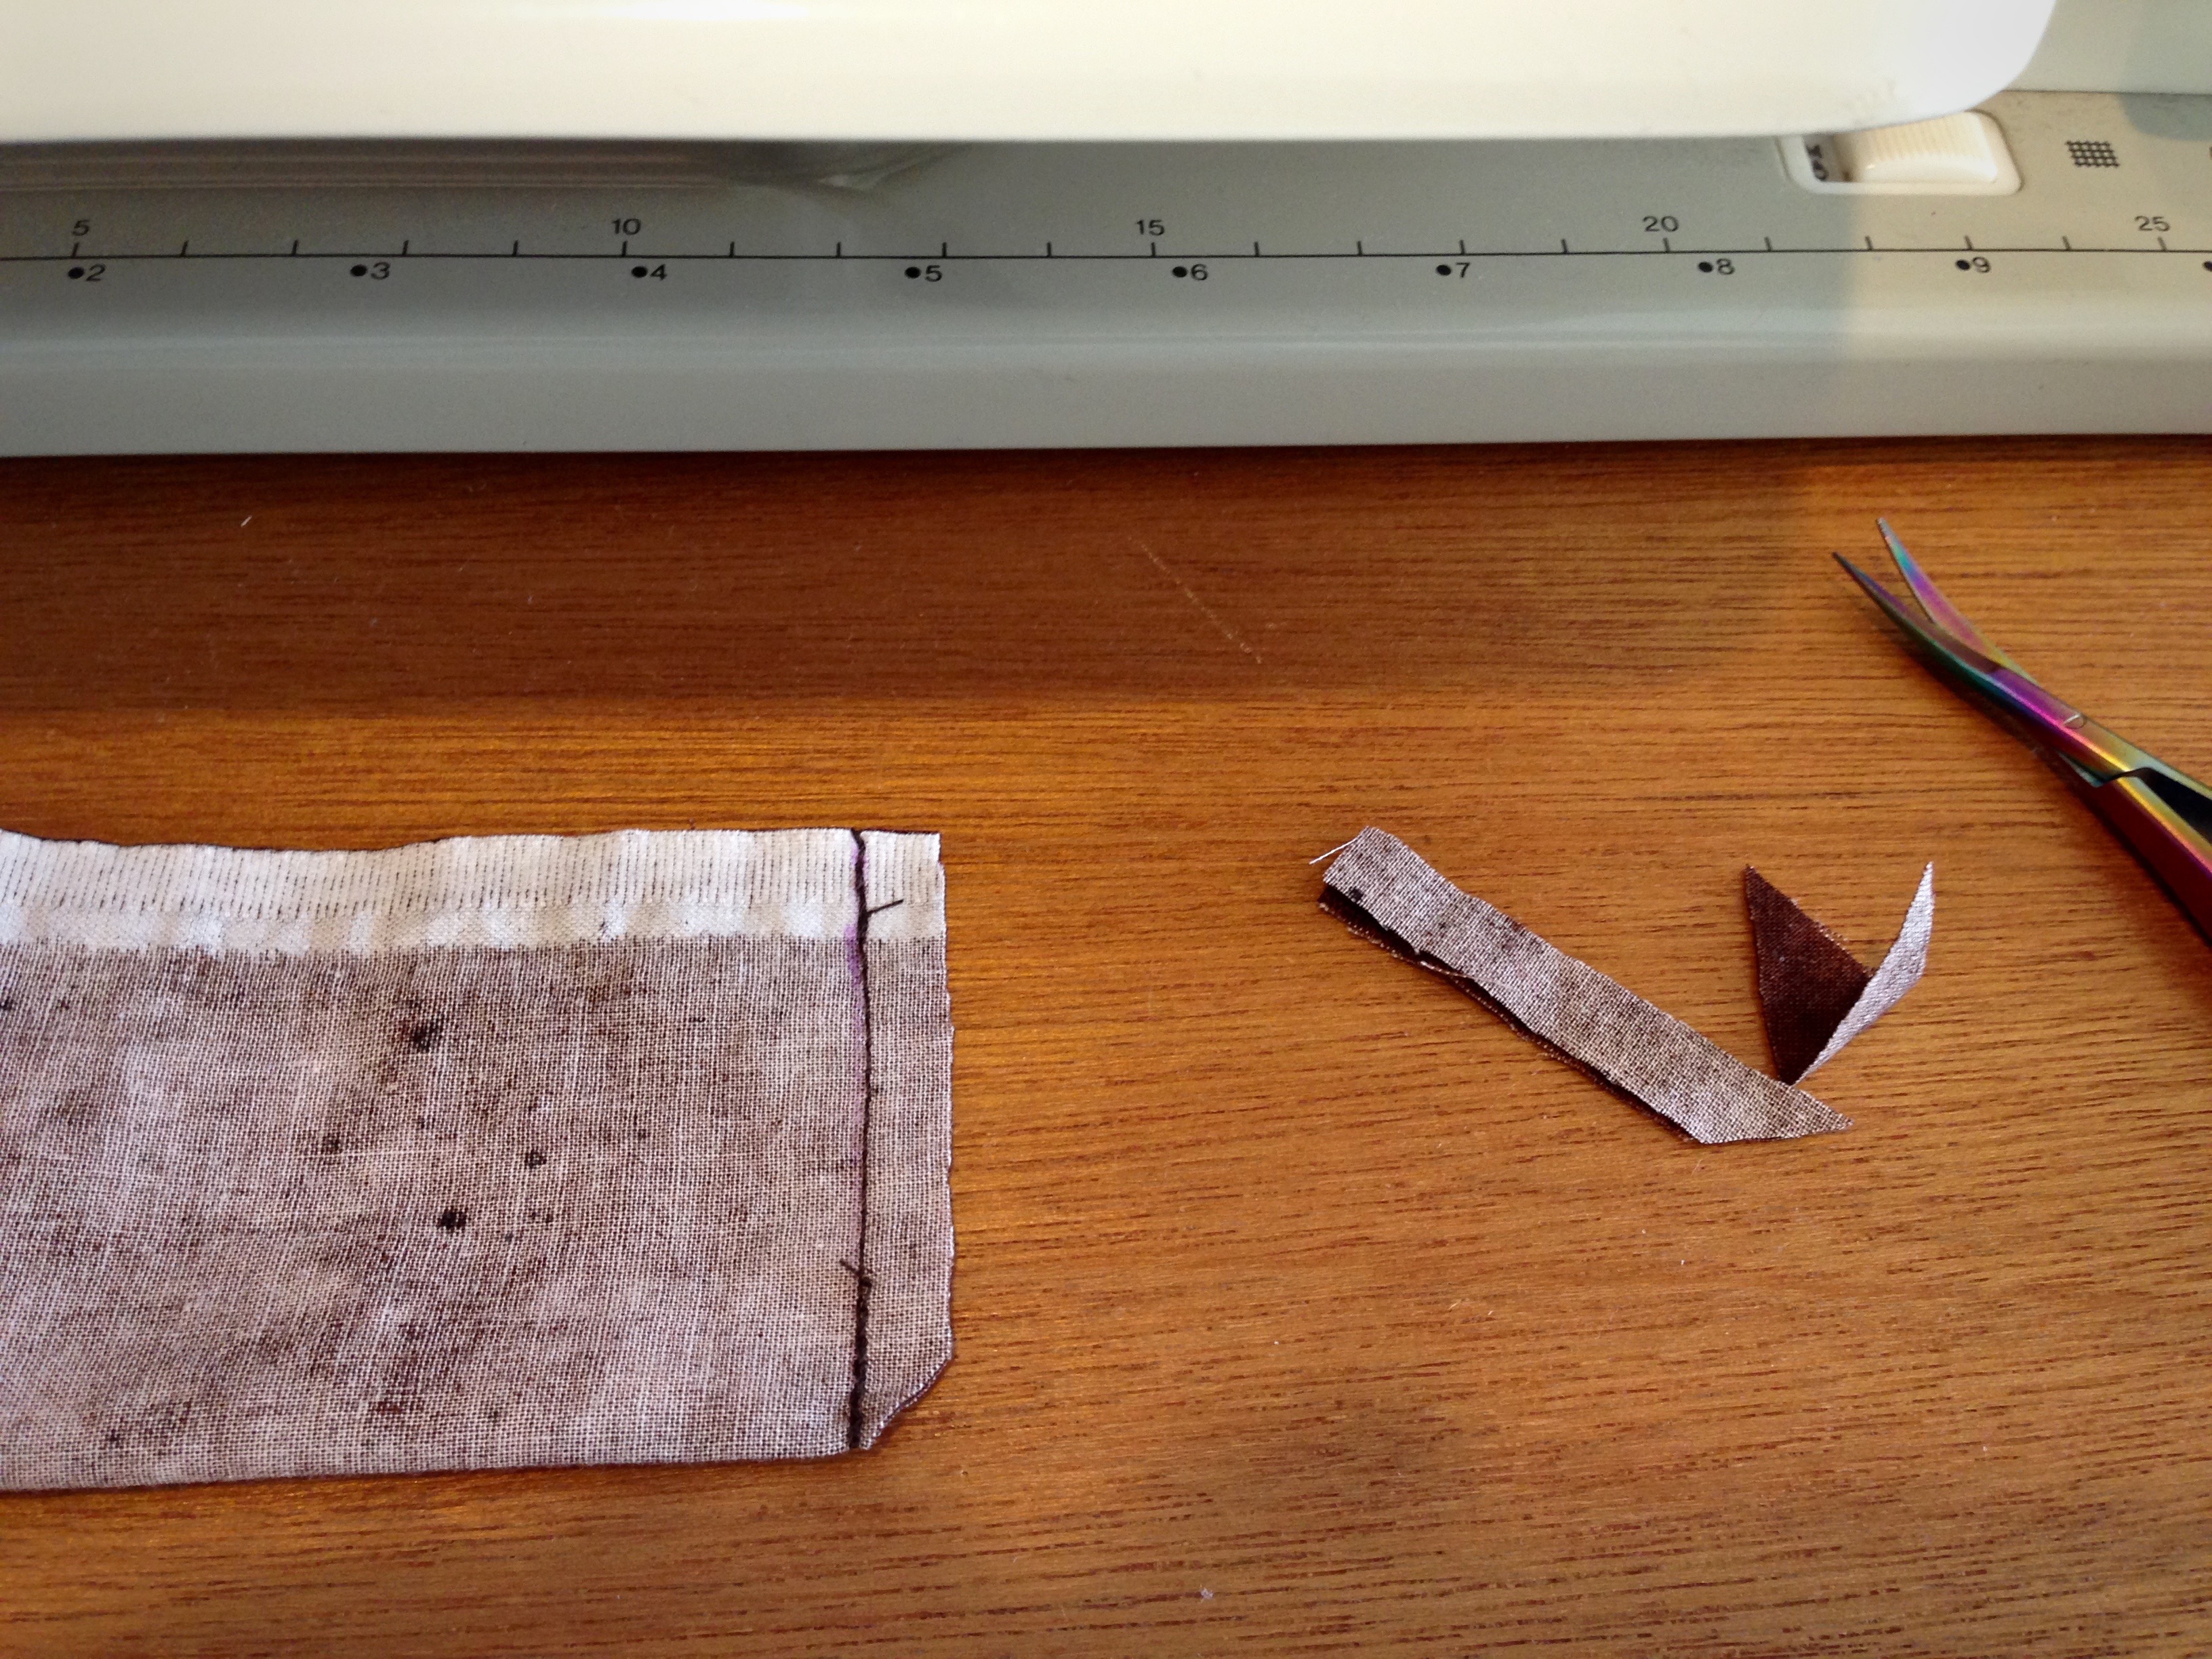
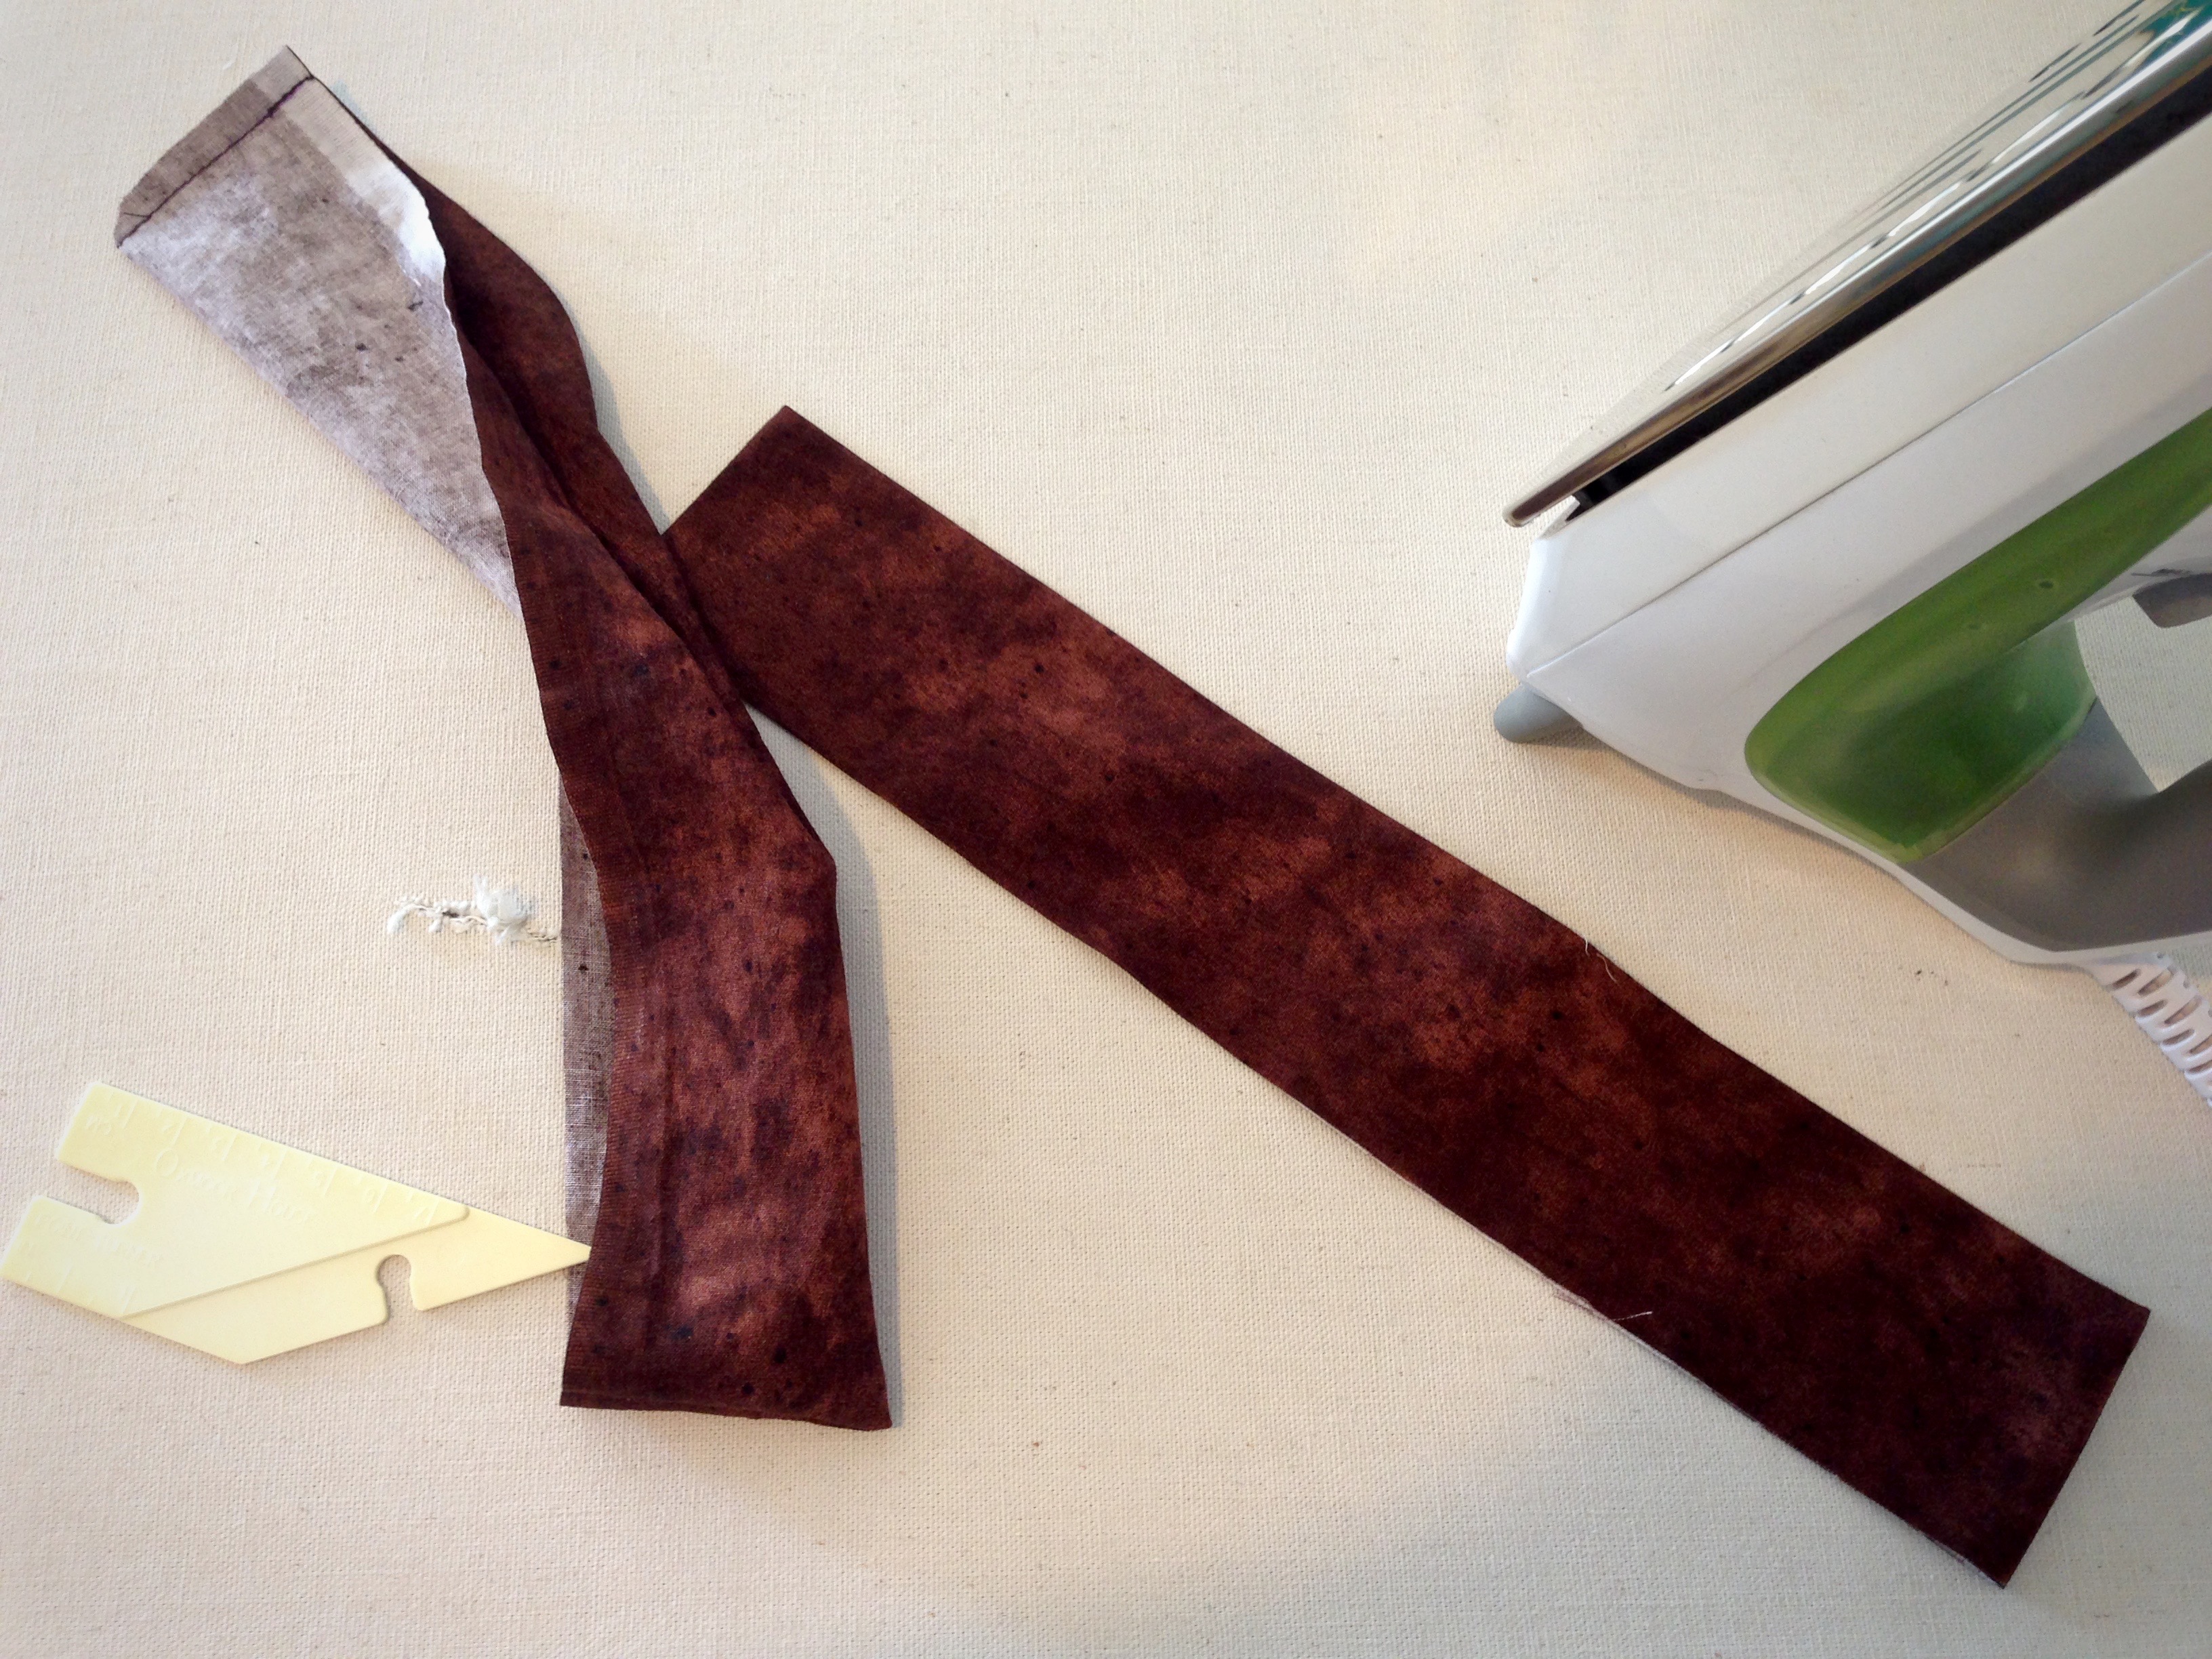
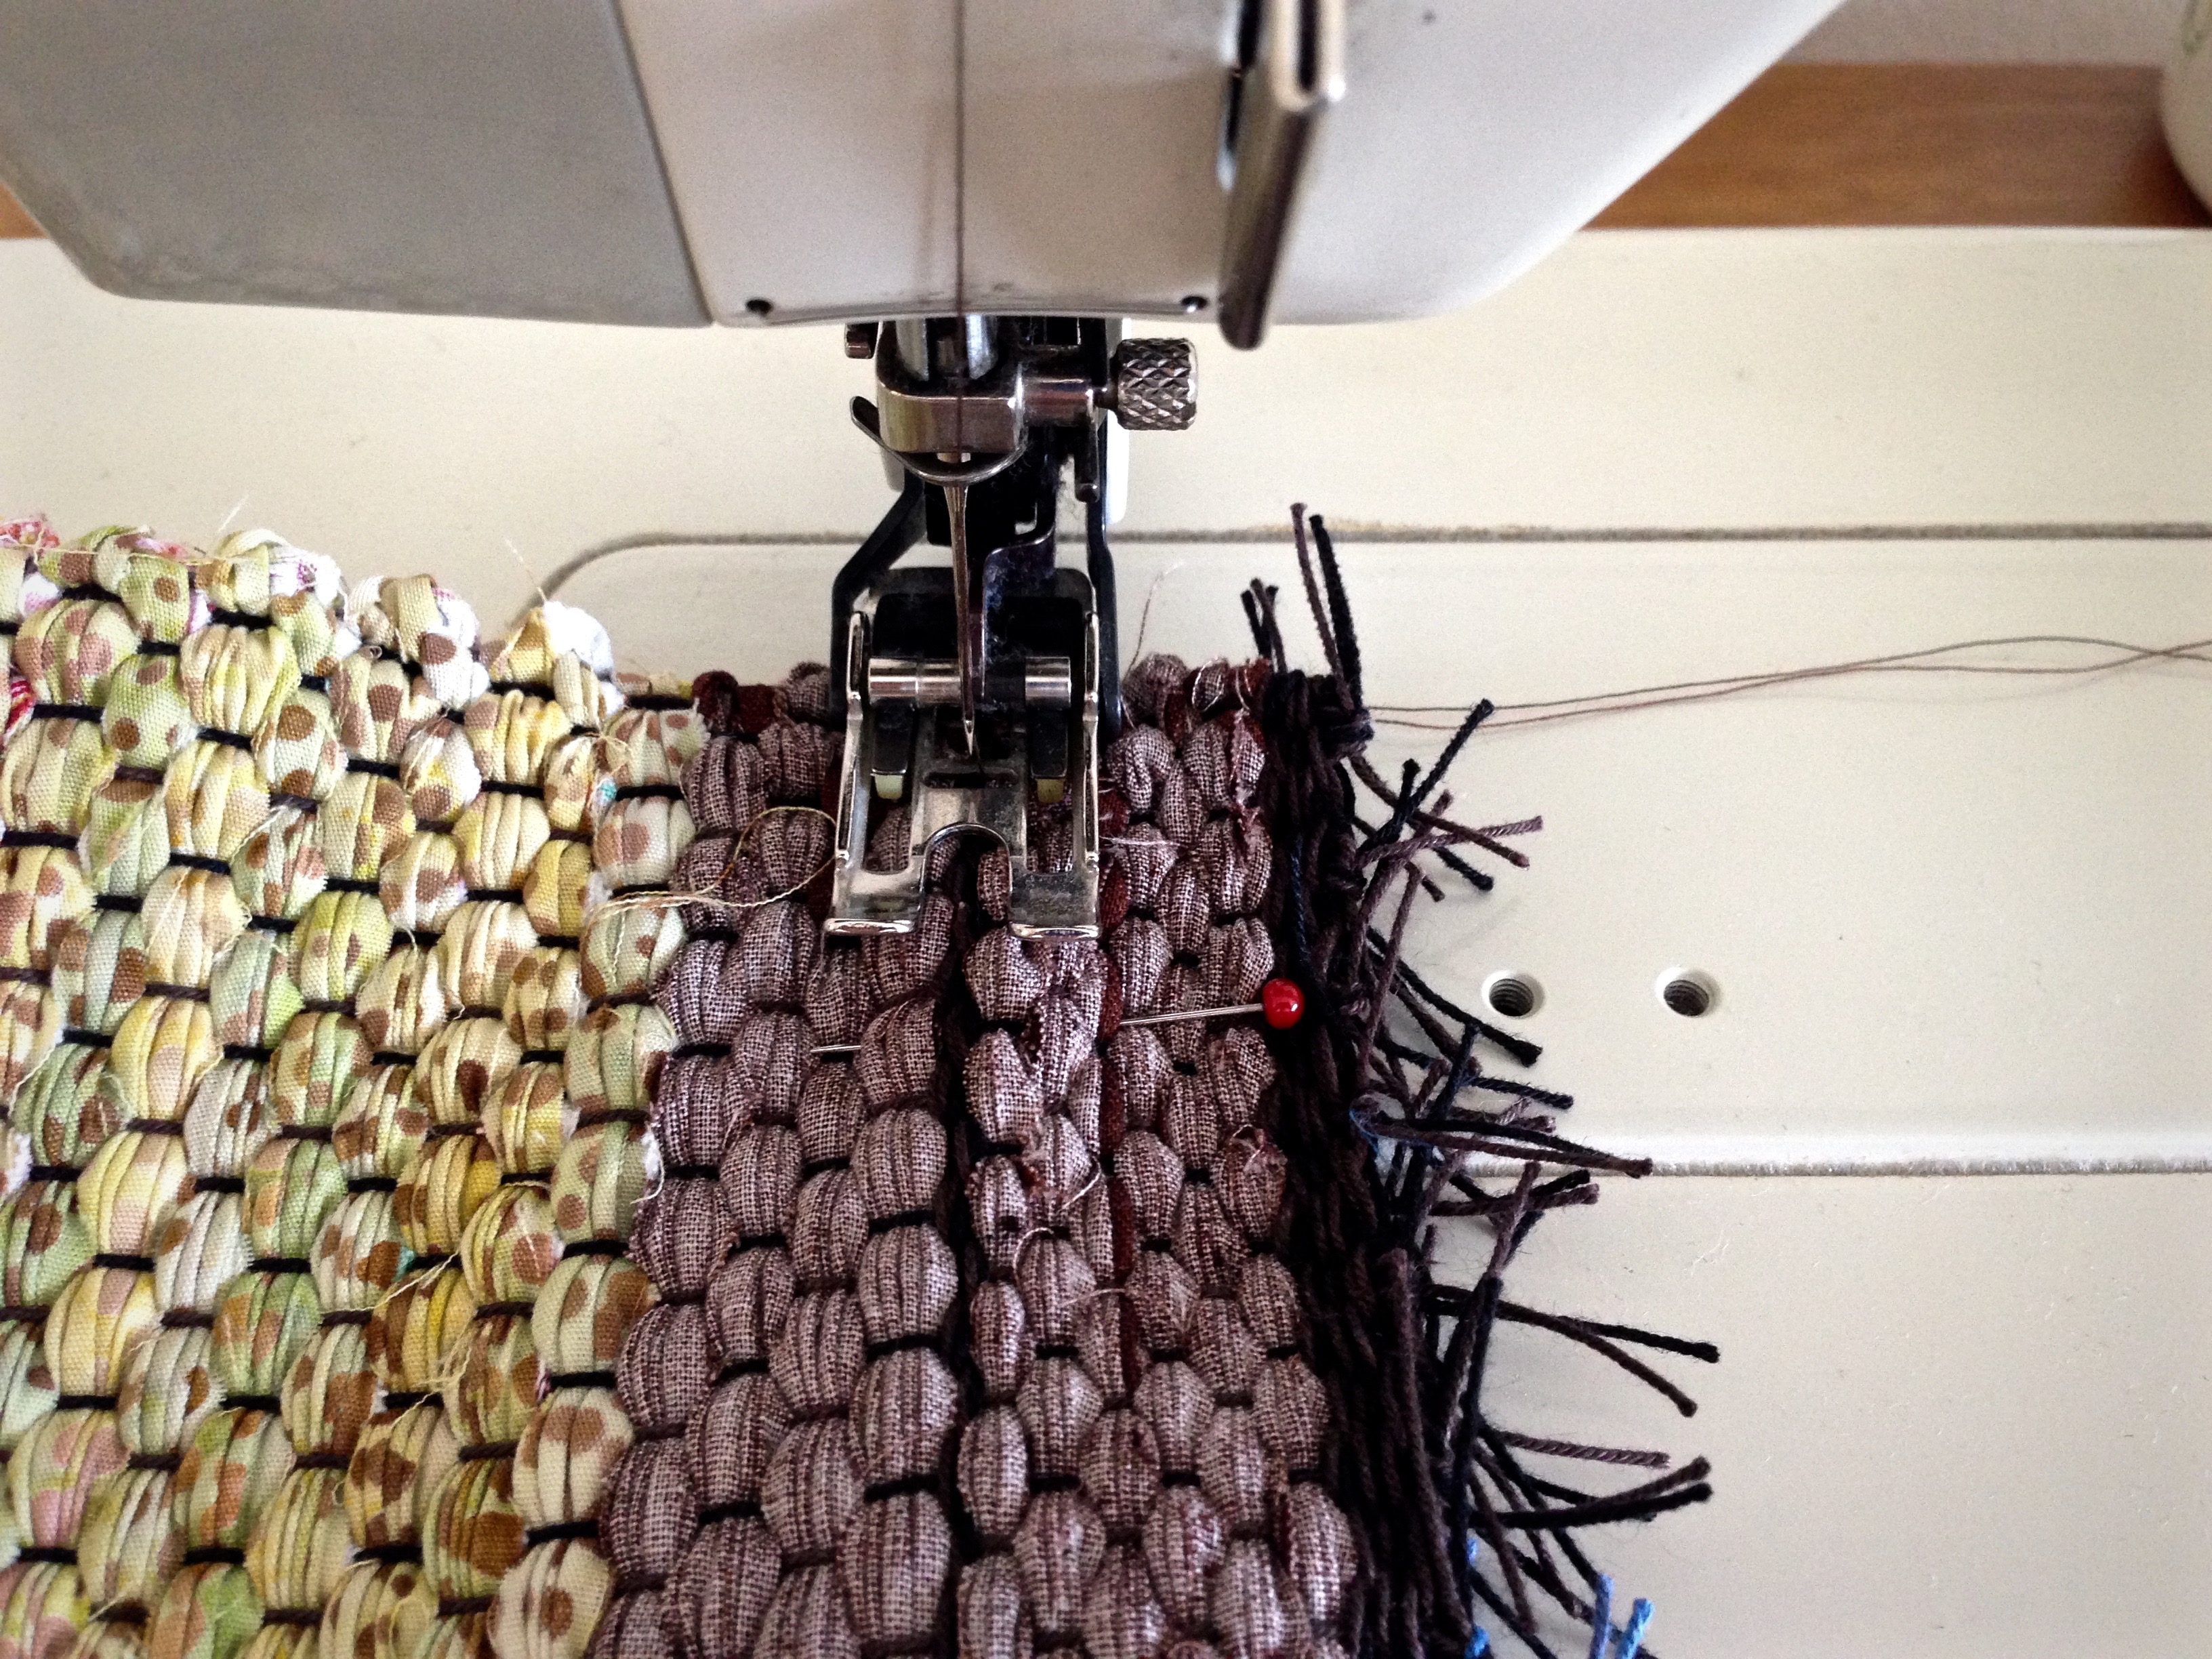
Cut rag-weave bag from the loom. Remove header and knot the ends. Press. (For more about finishing the ends, see Quiet Friday: Rag Rug Finishing and Wear and Tear Rag Rugs)
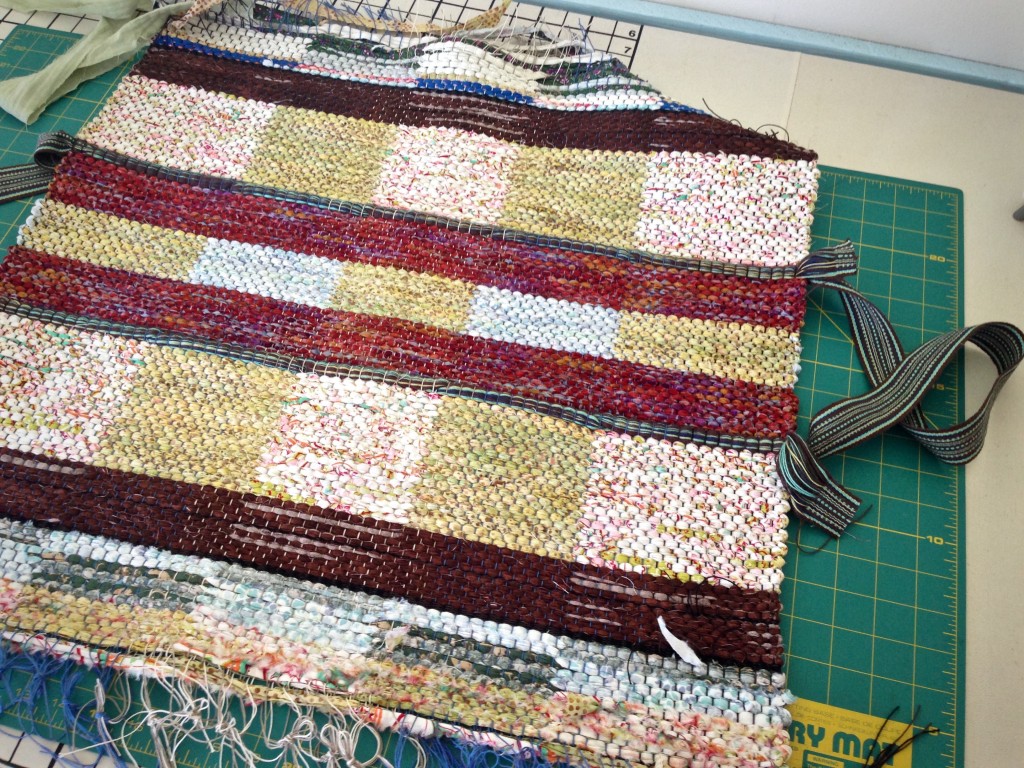
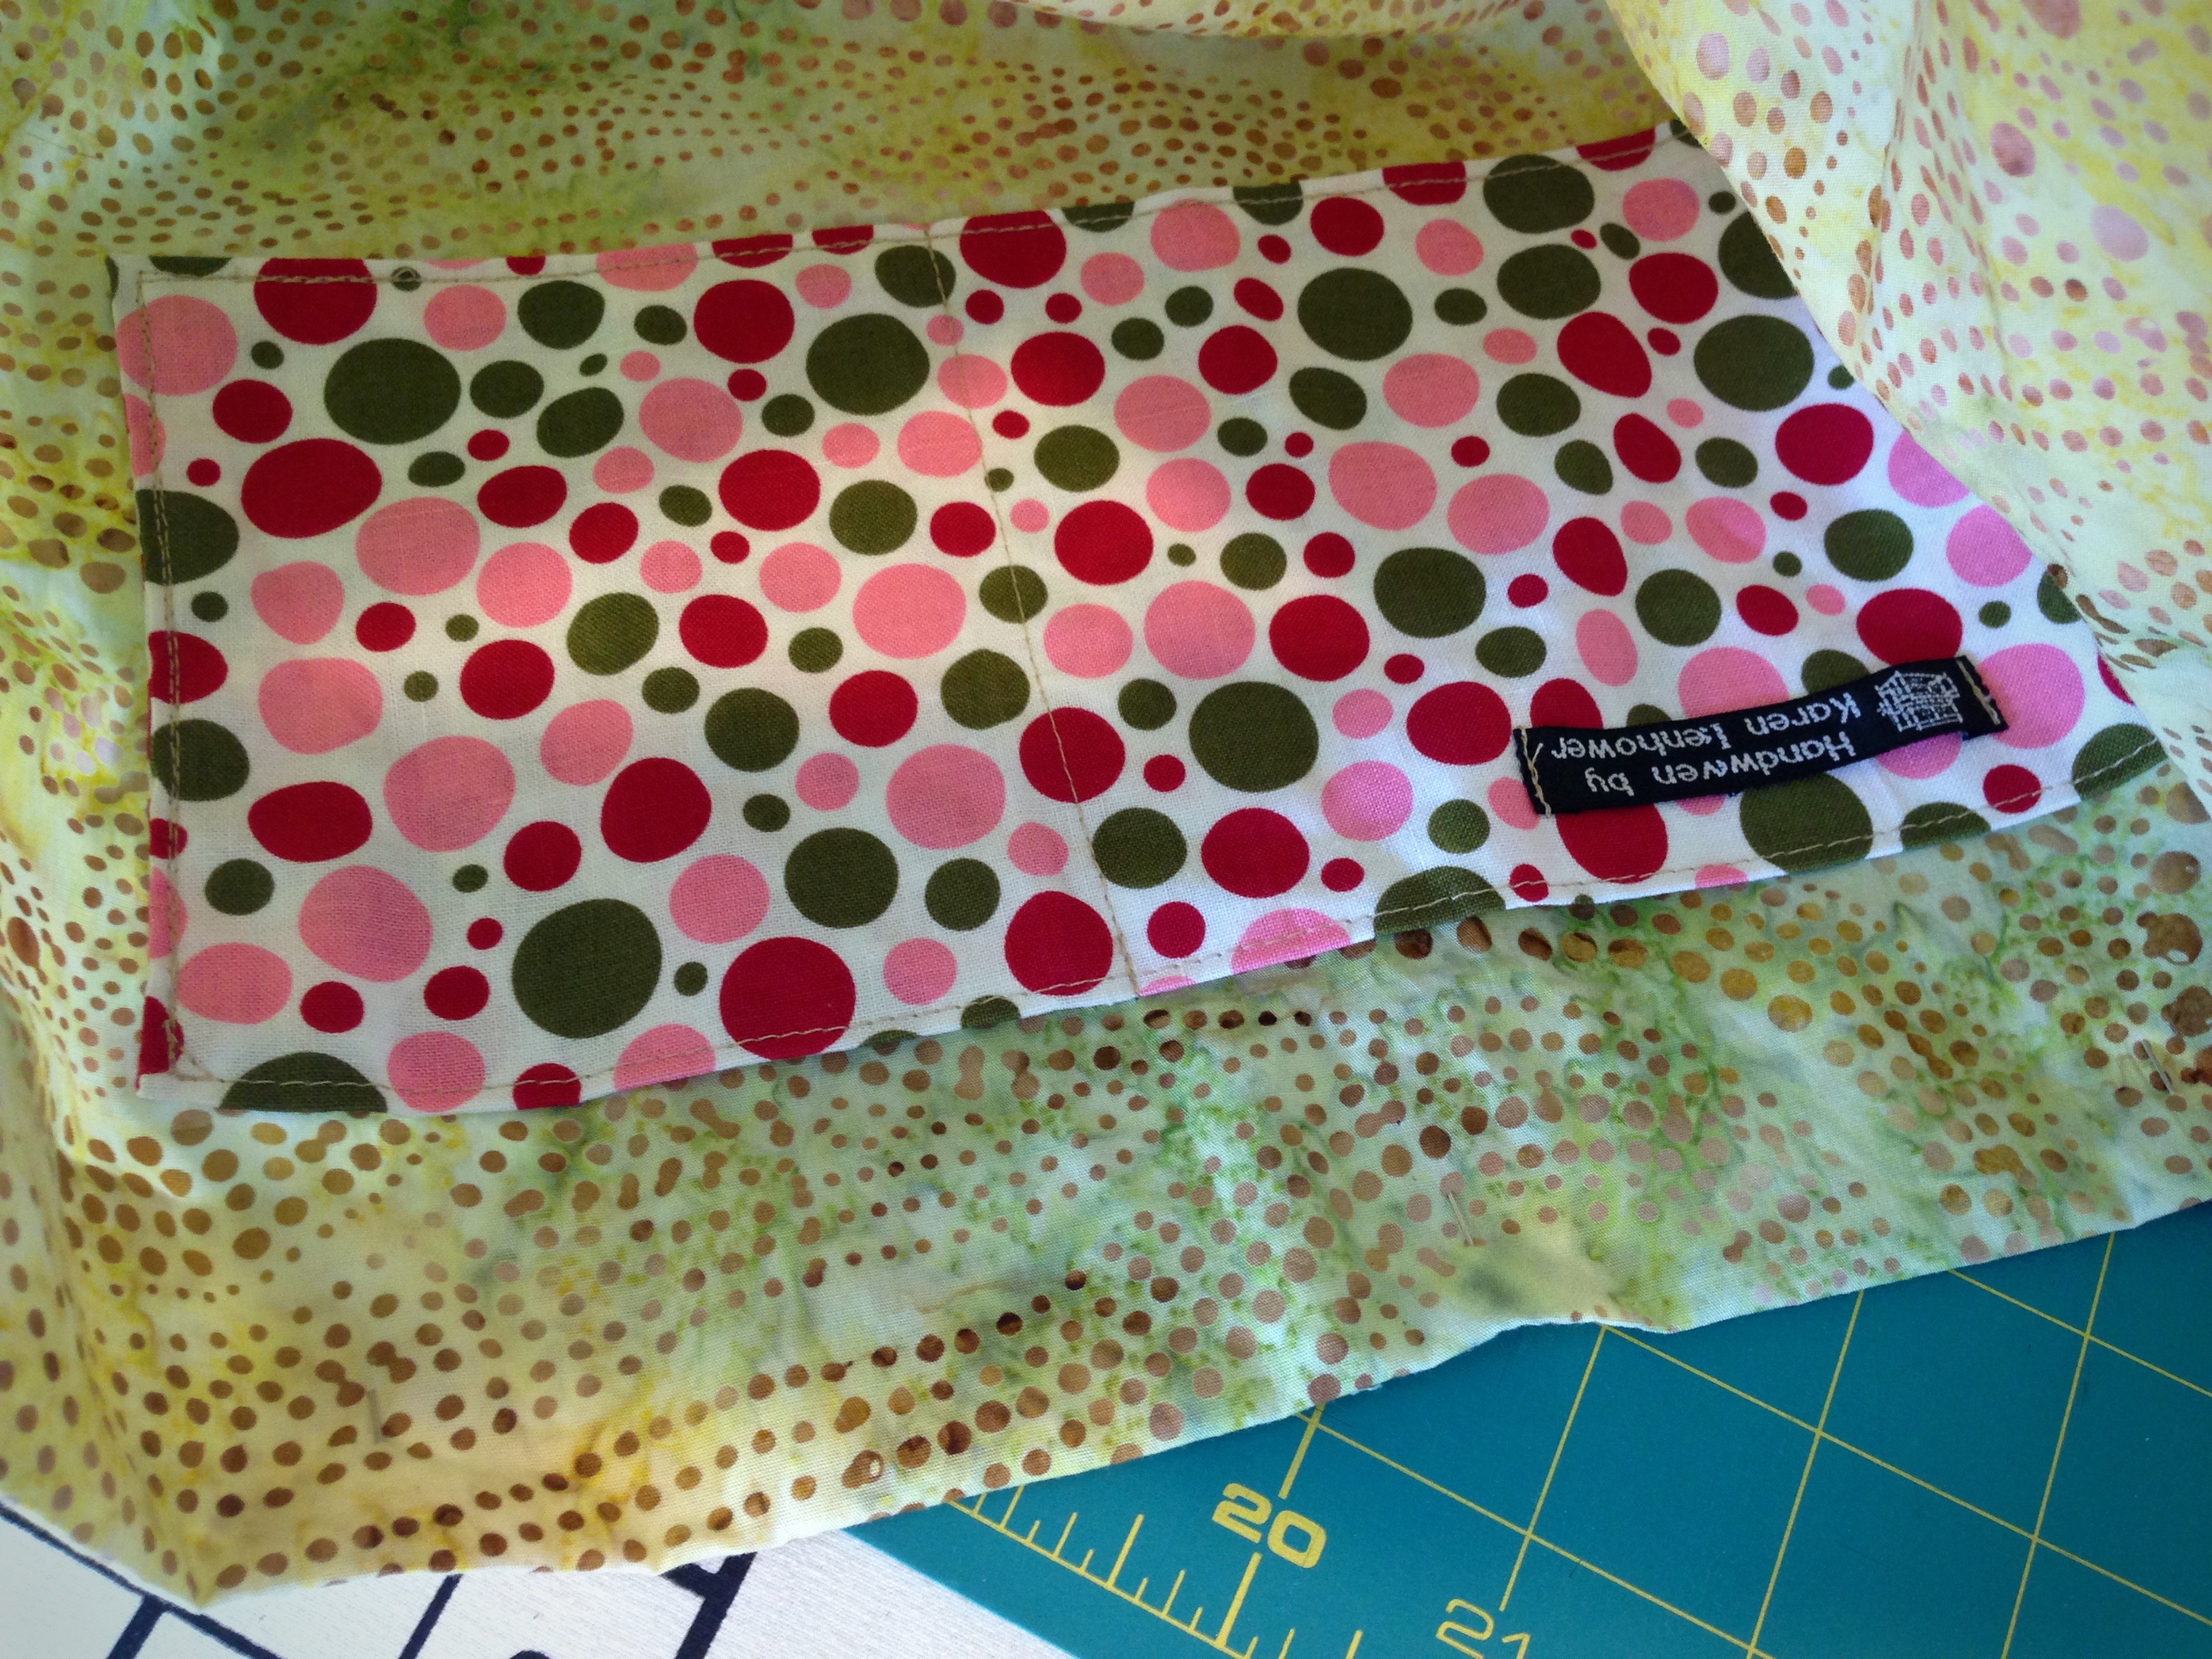
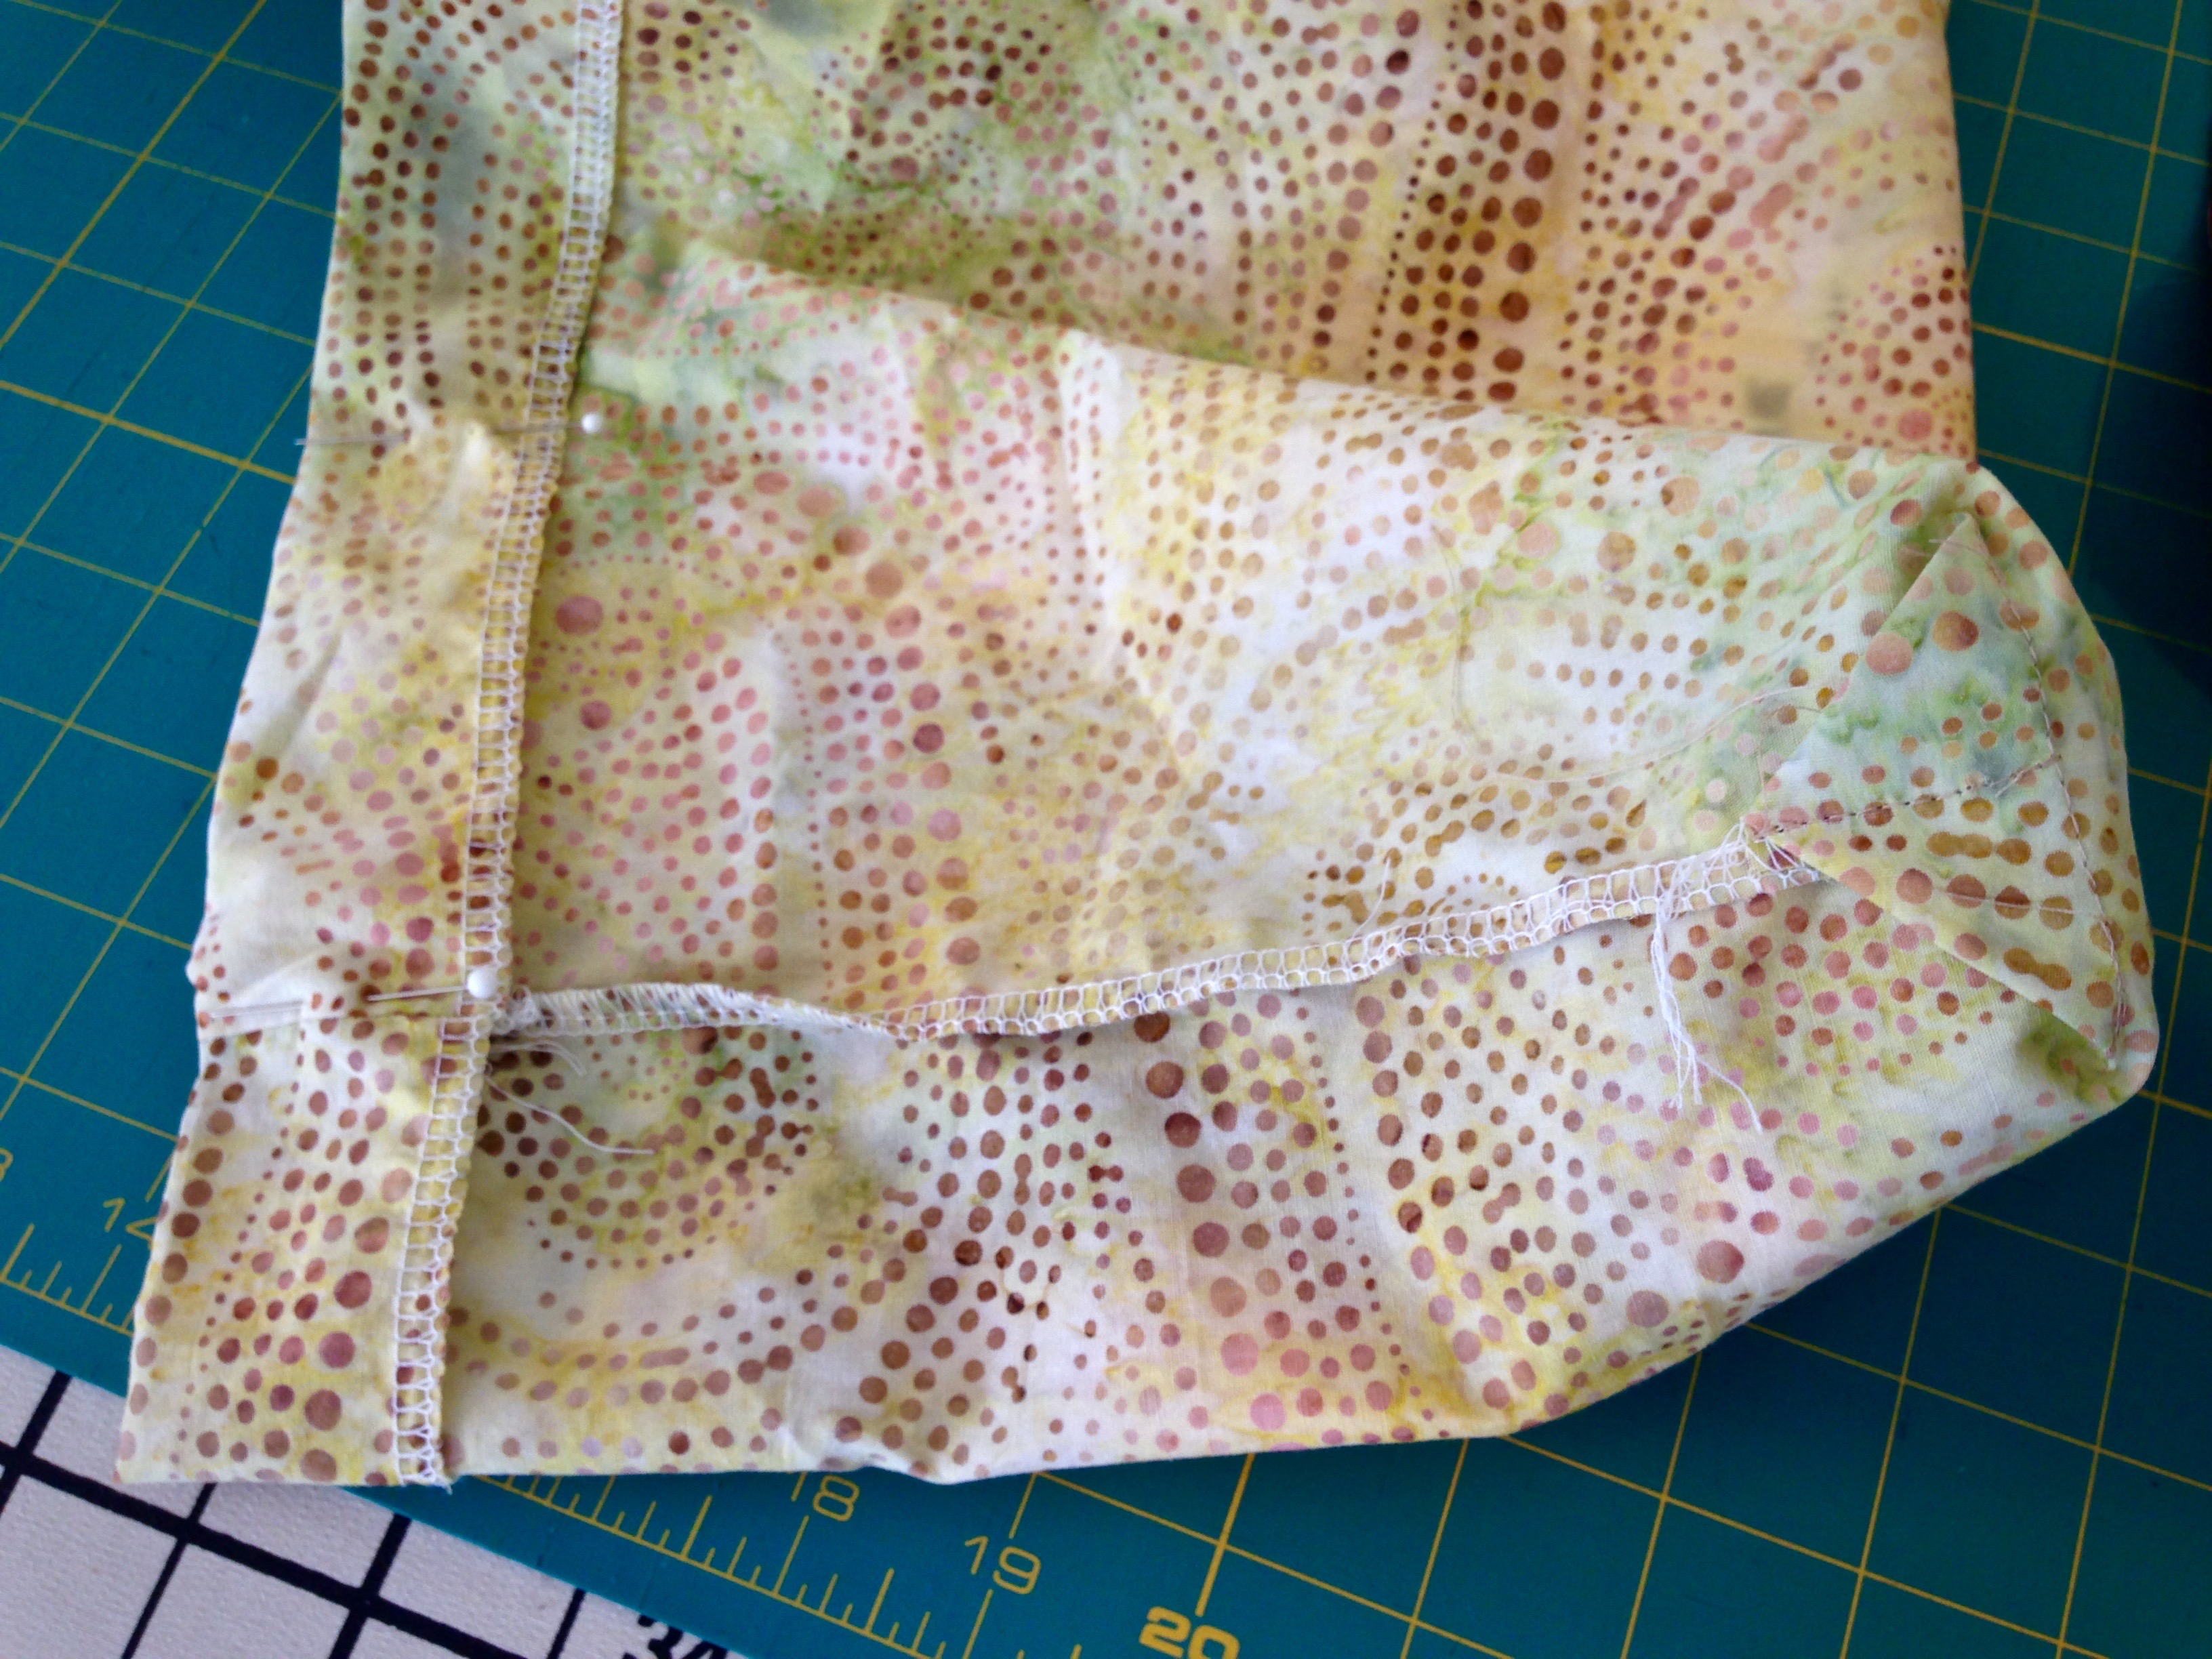
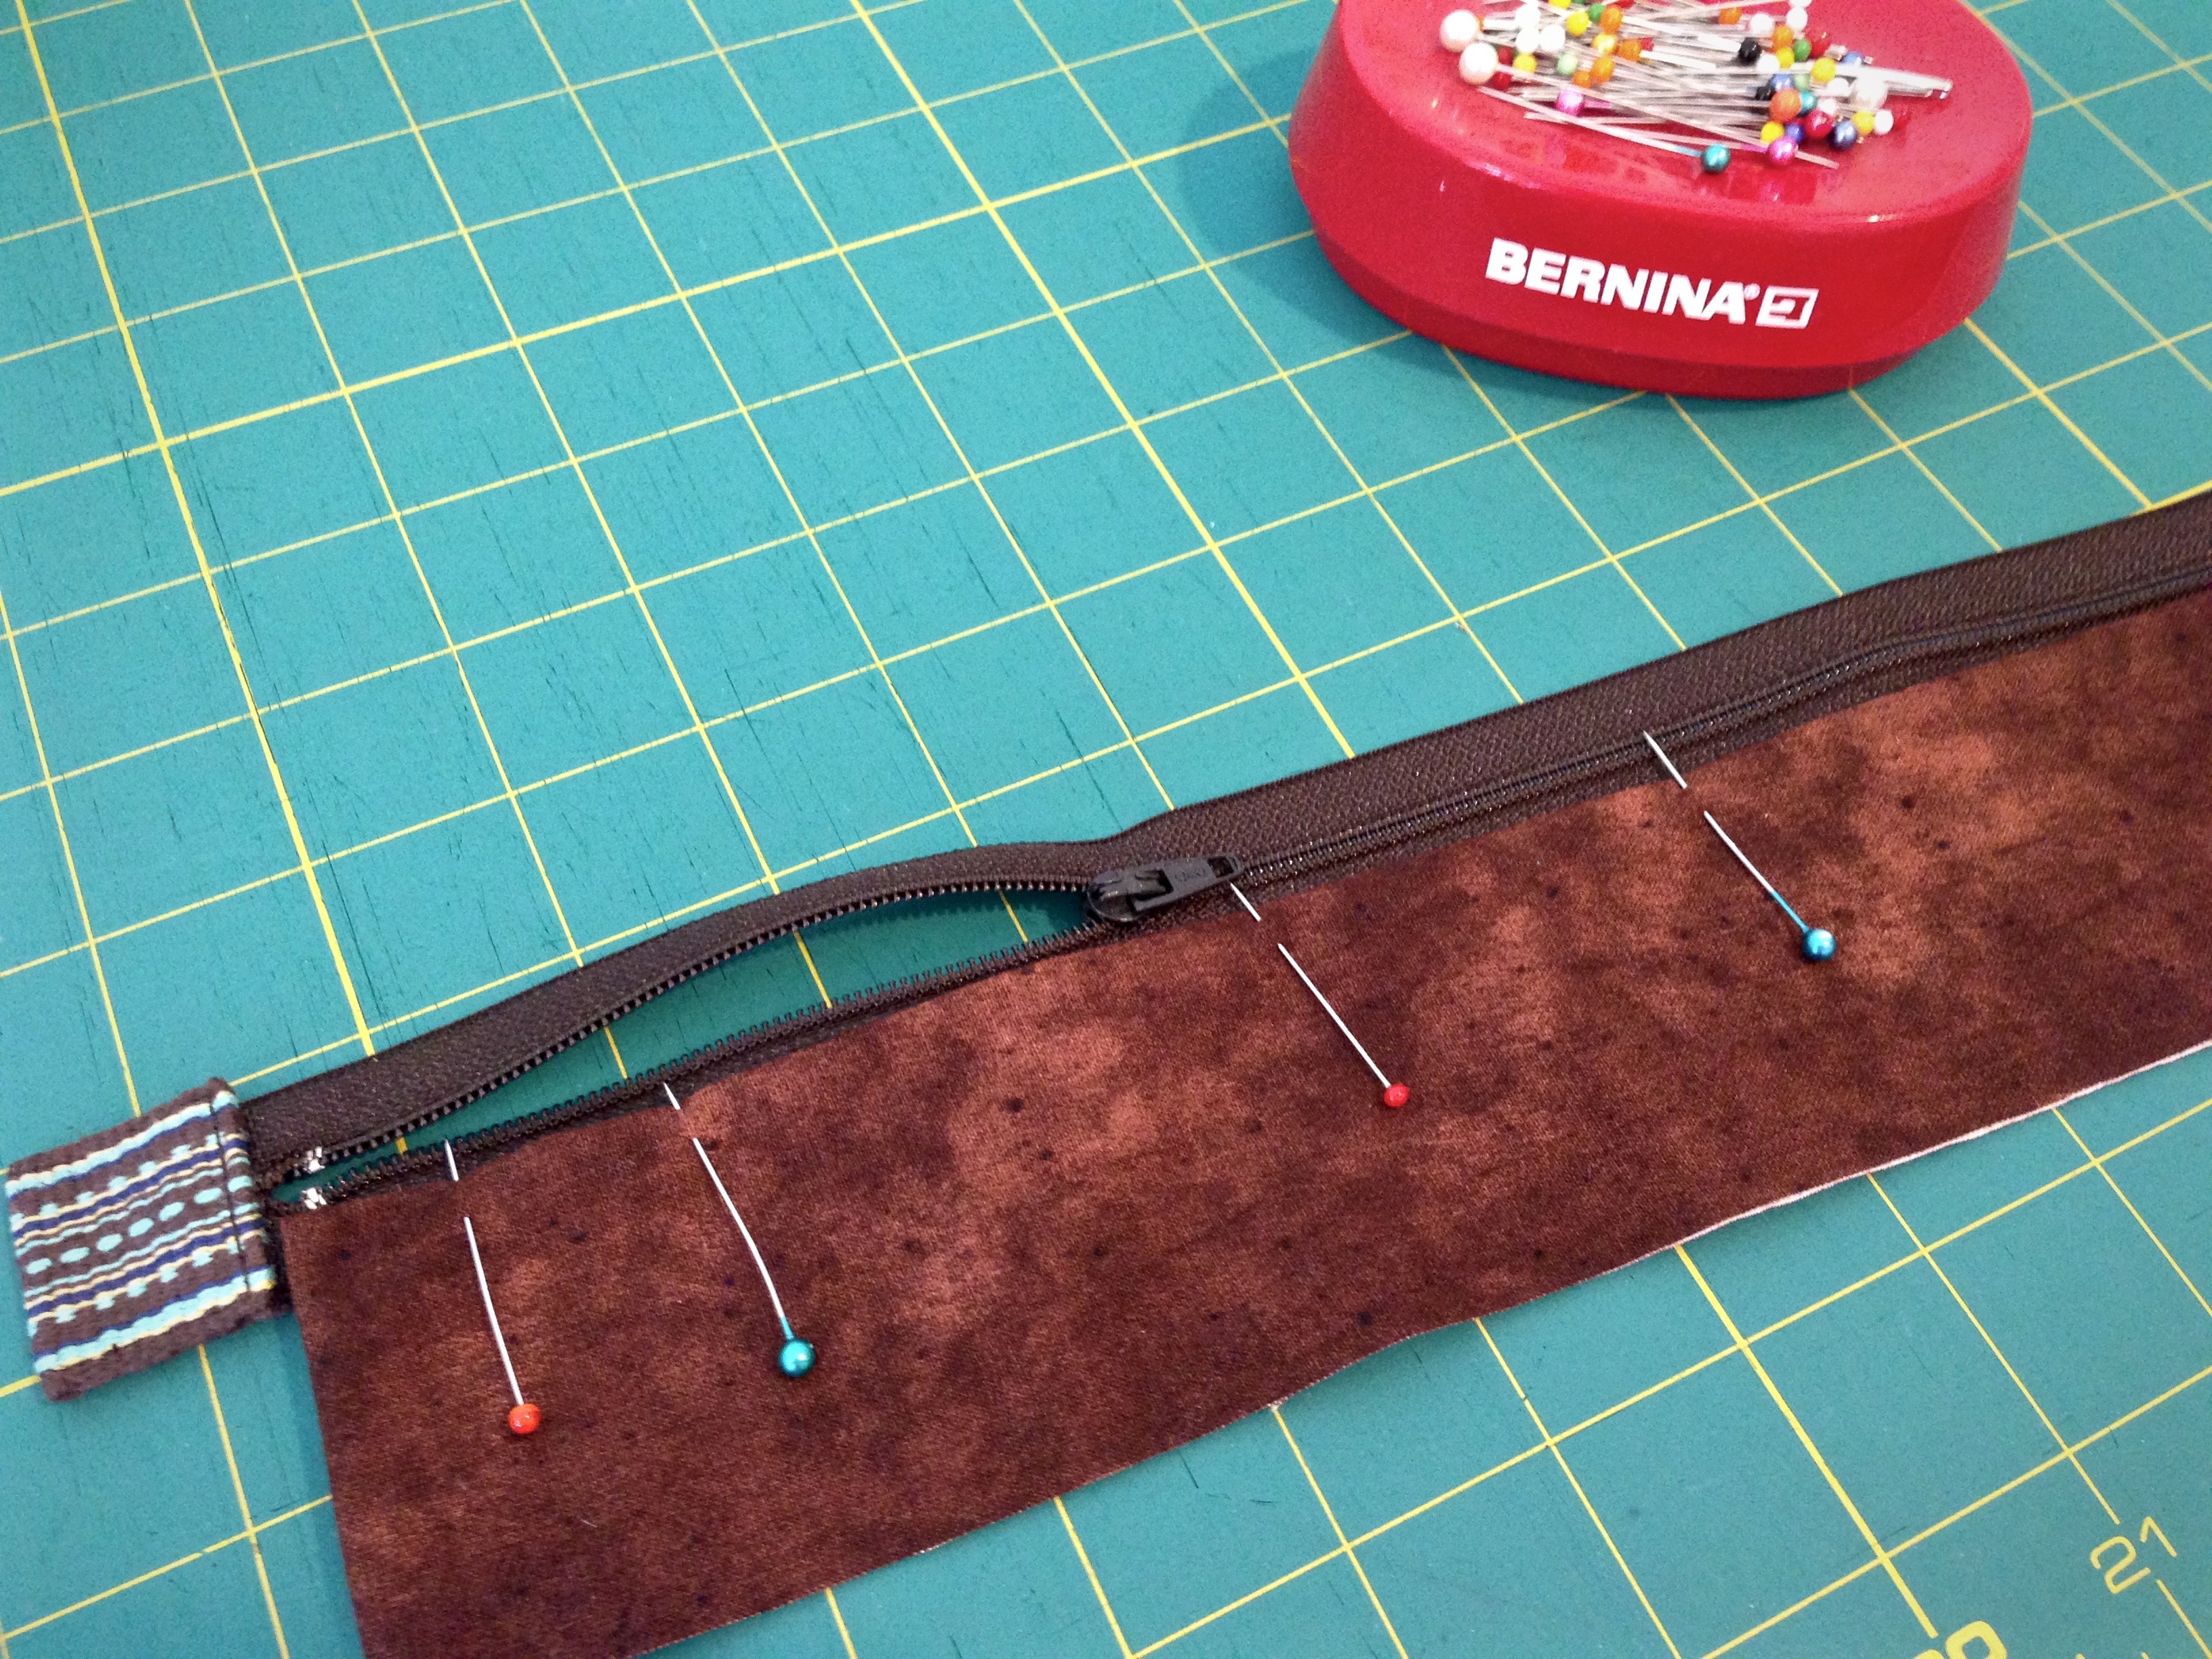
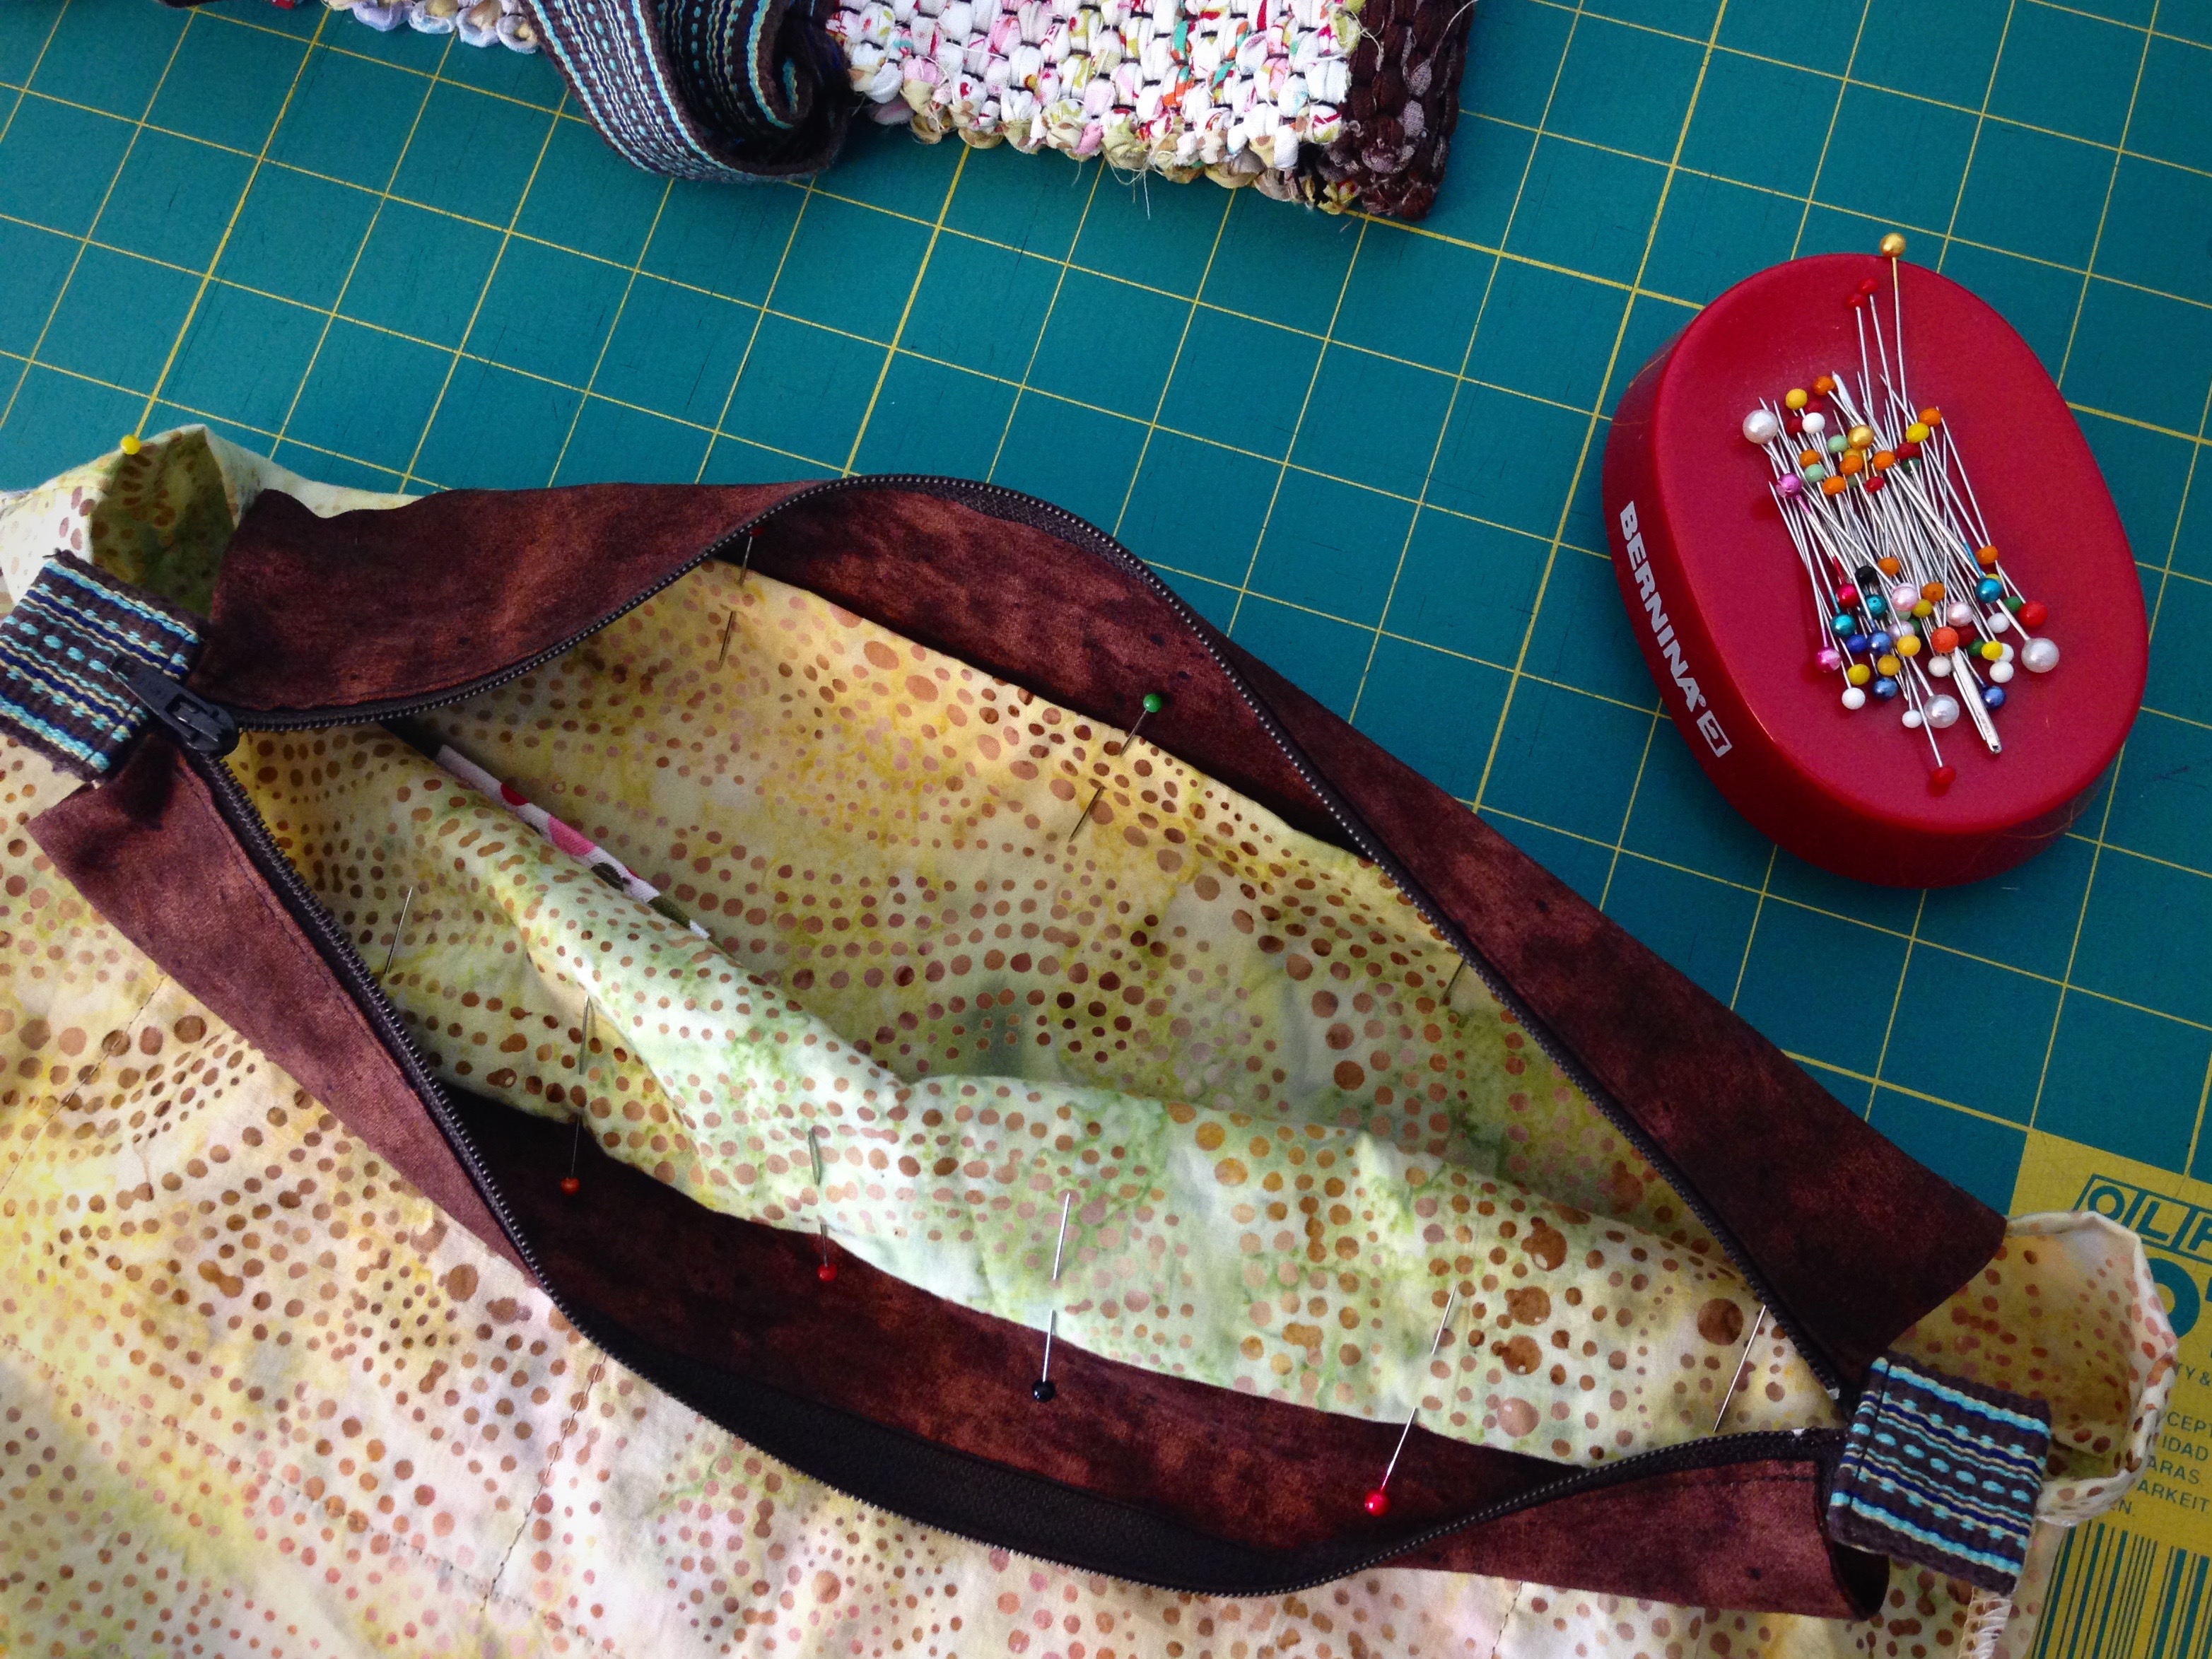
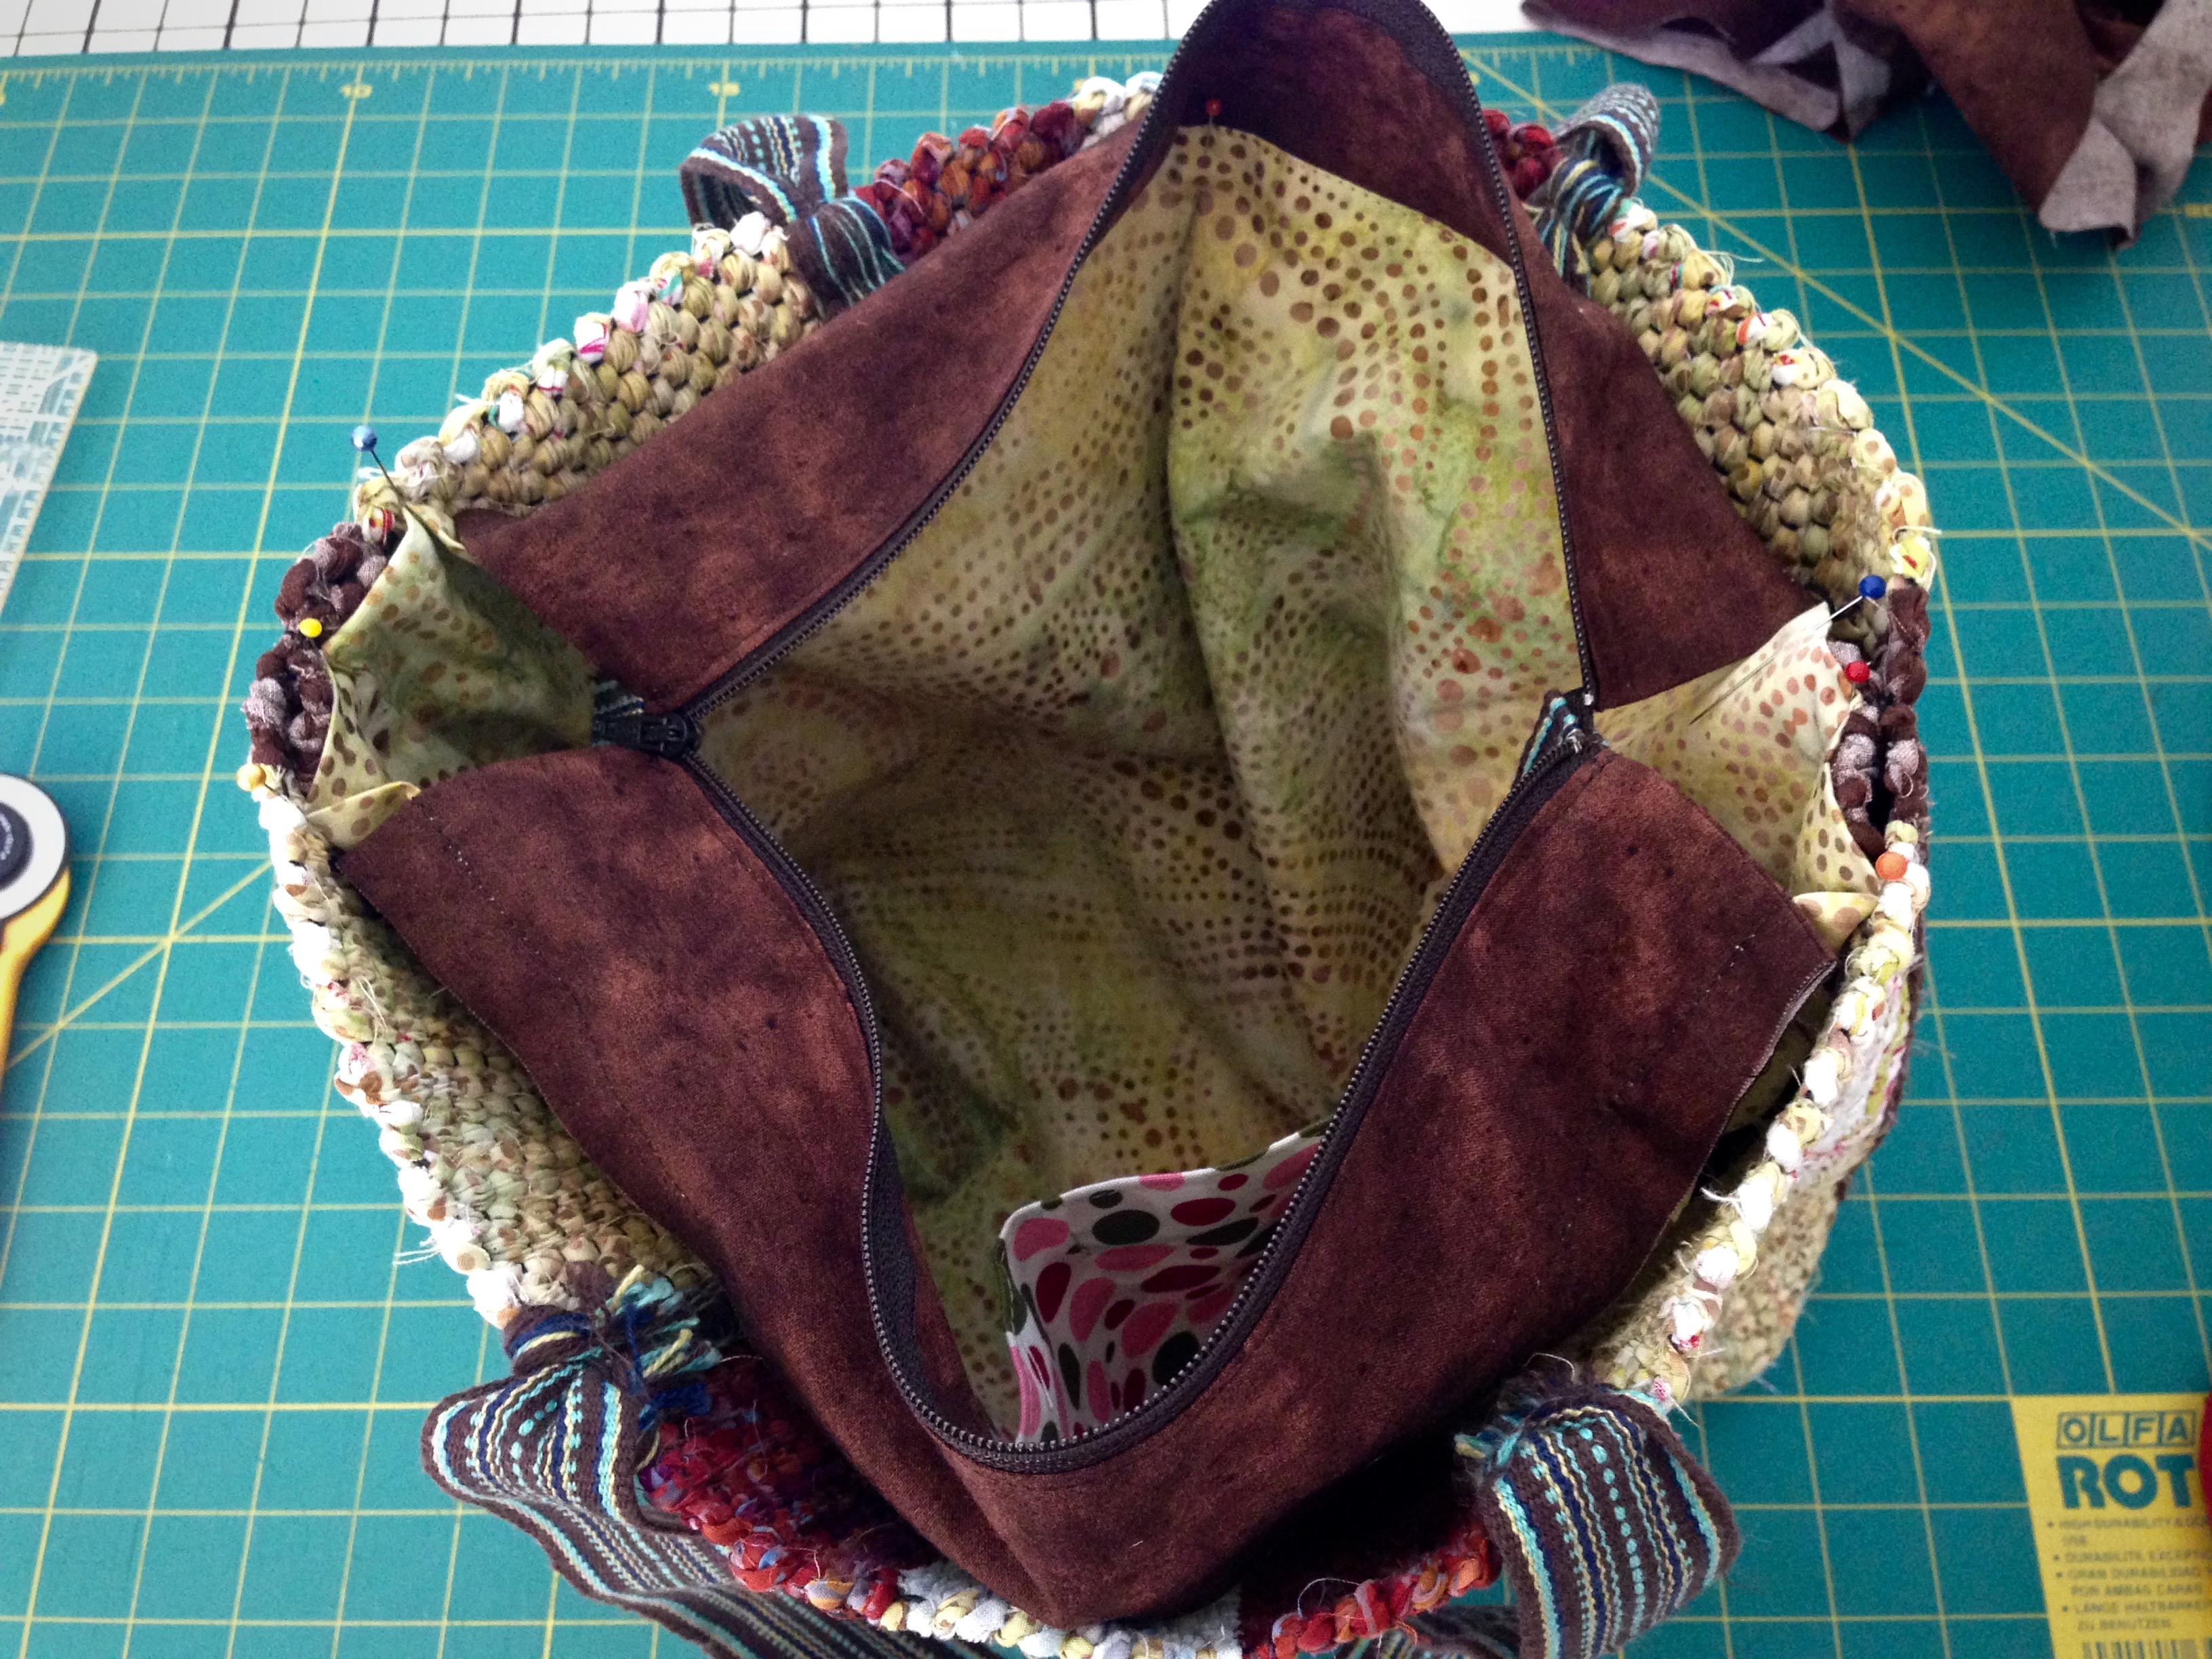
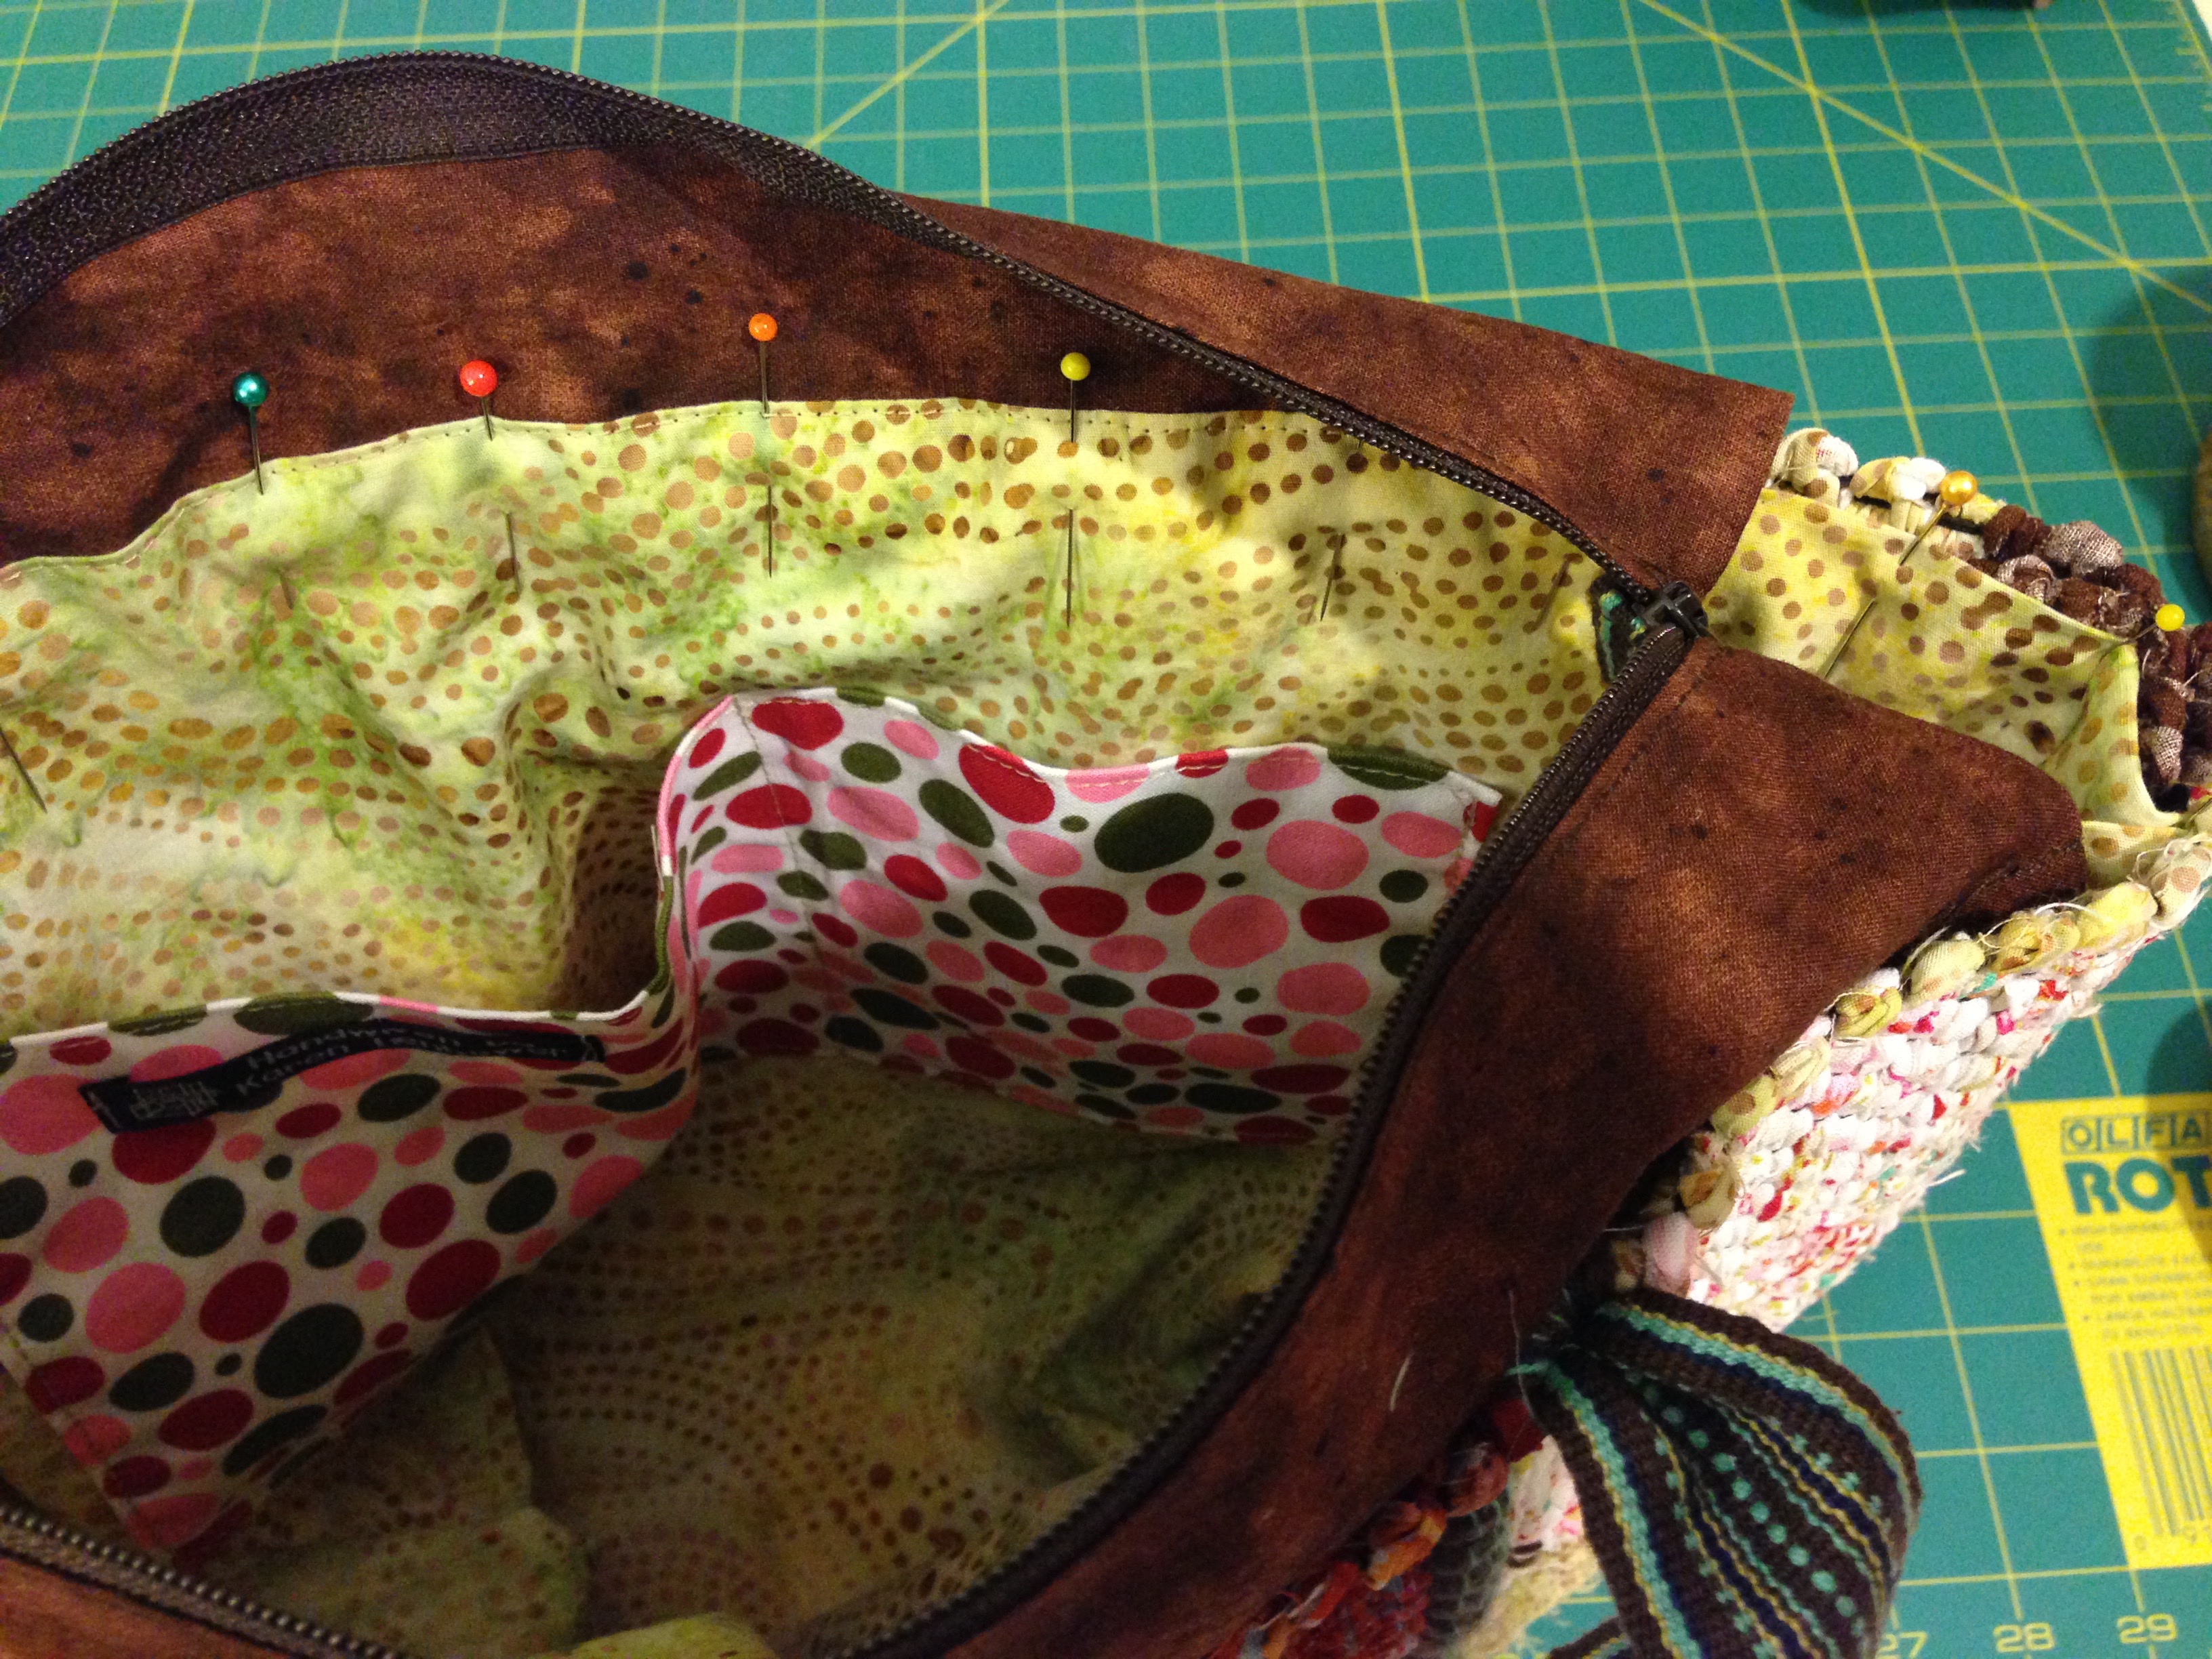
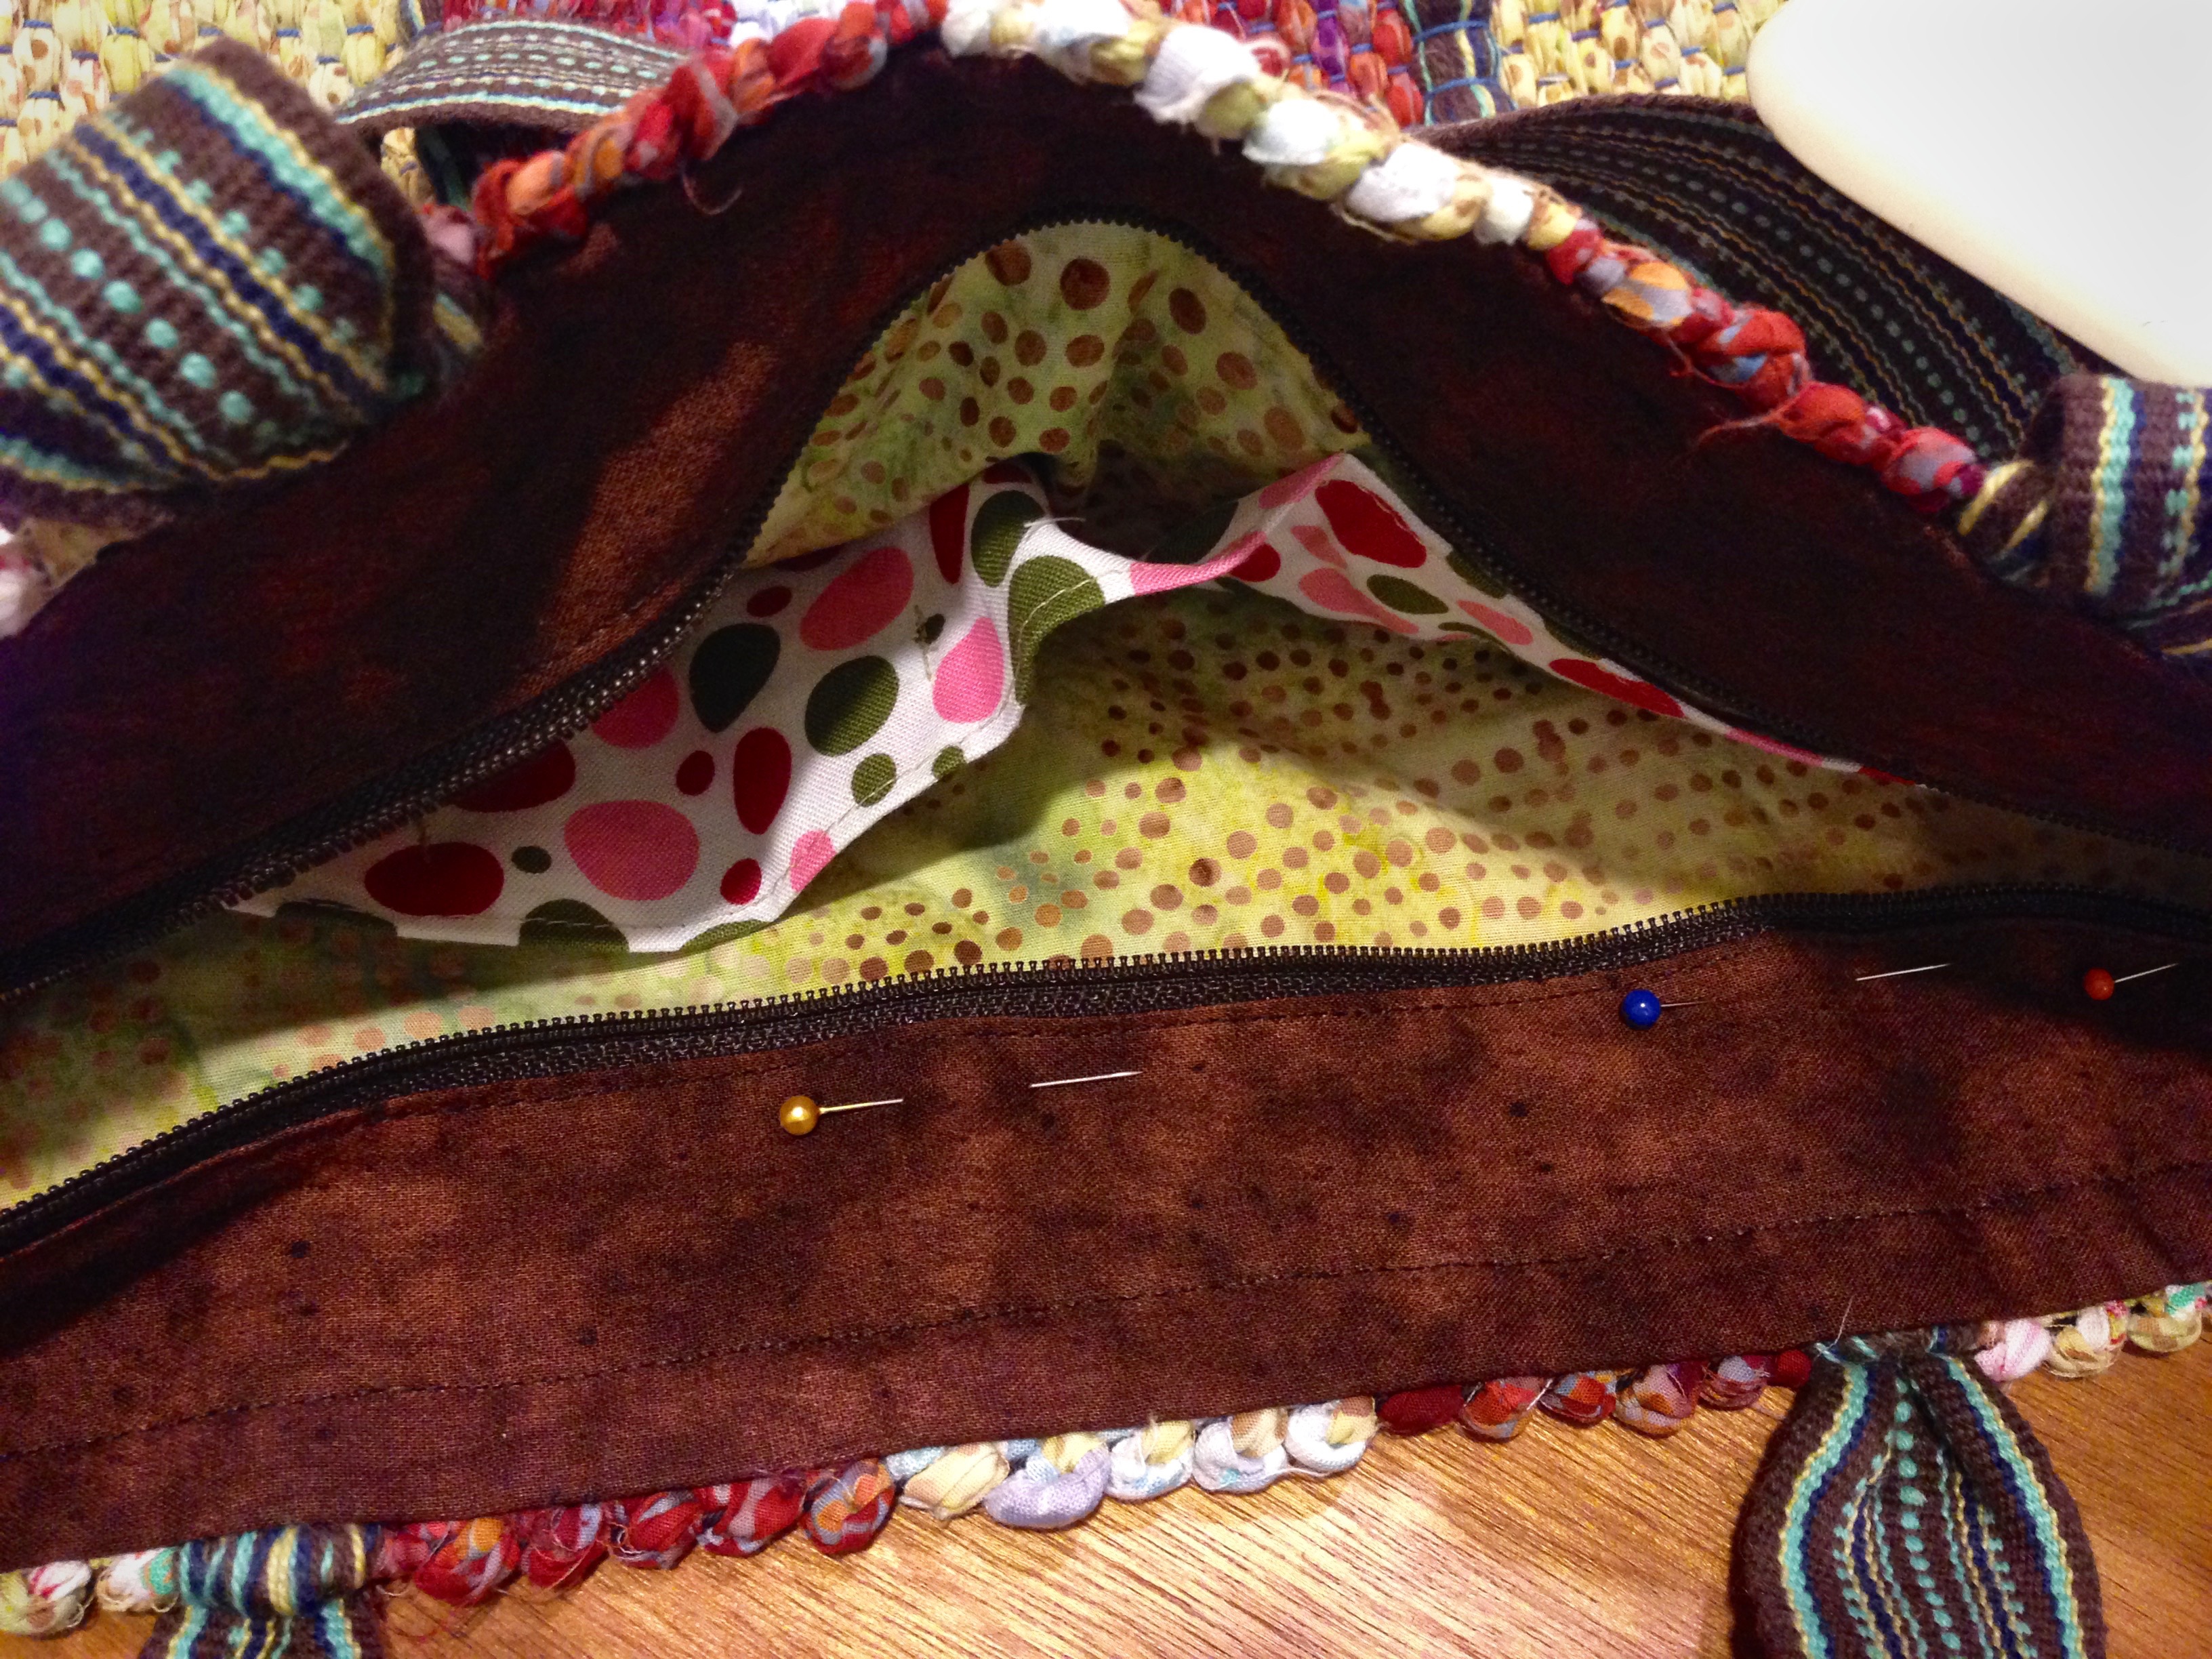
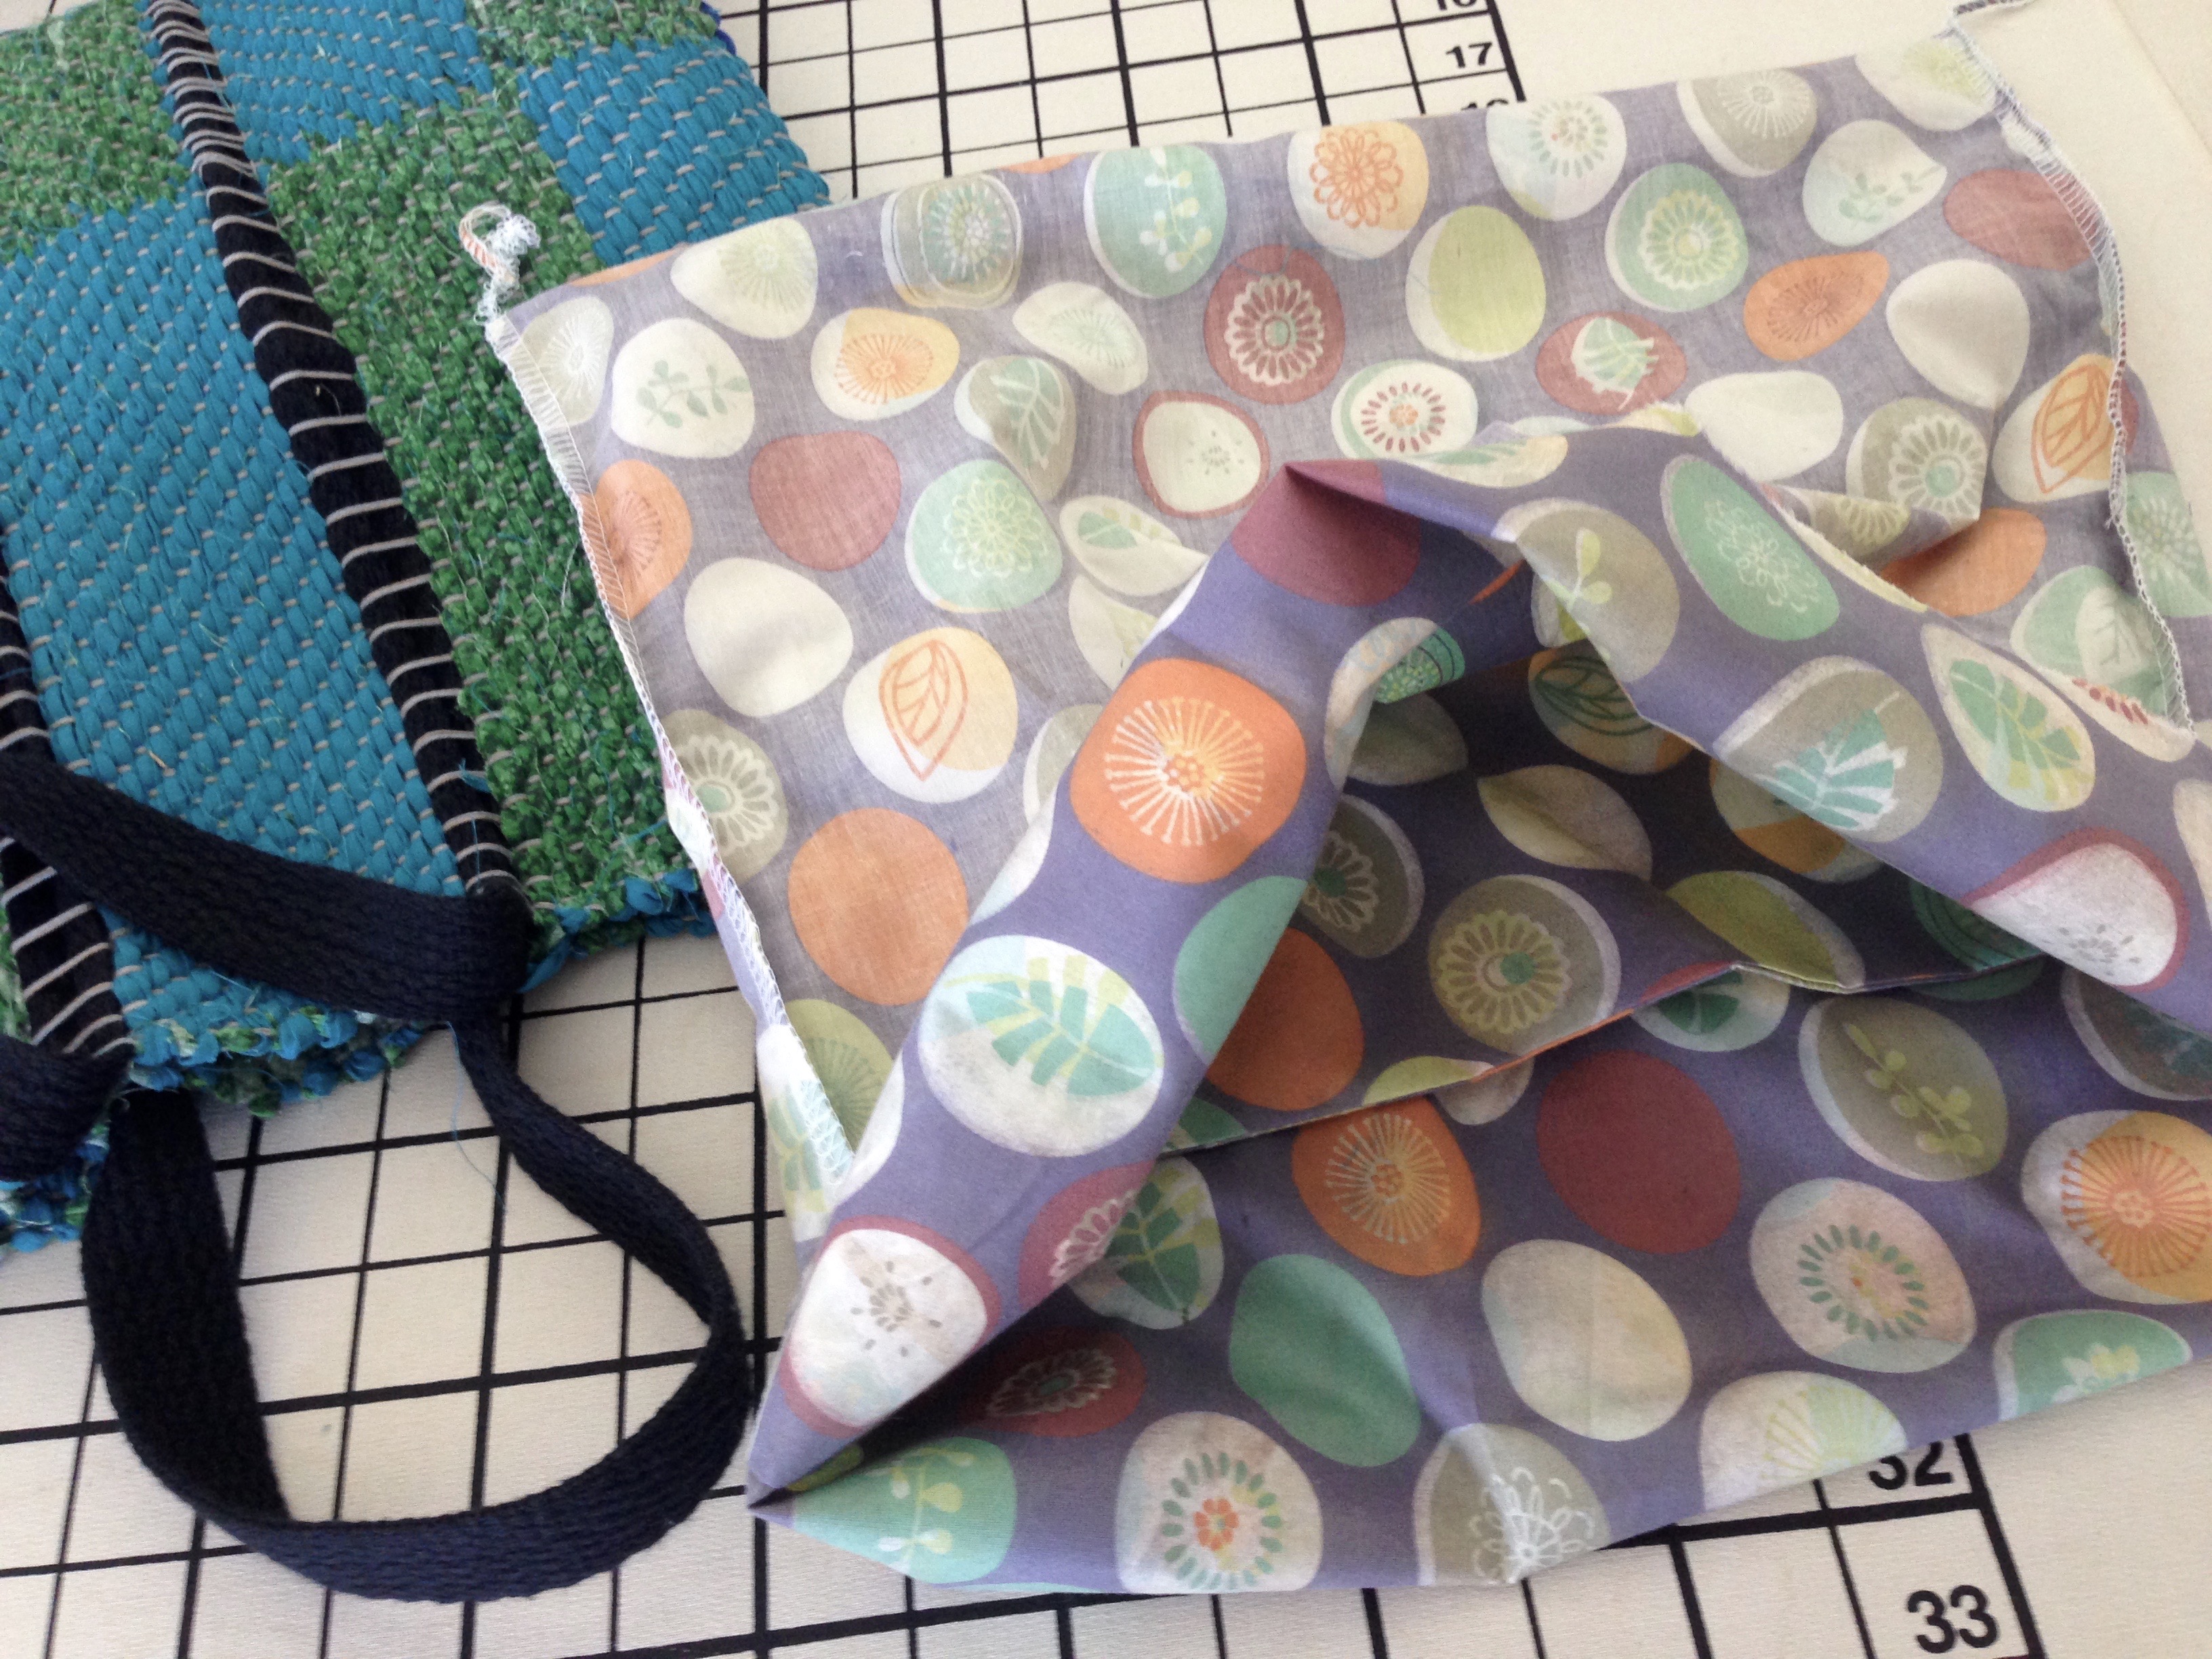
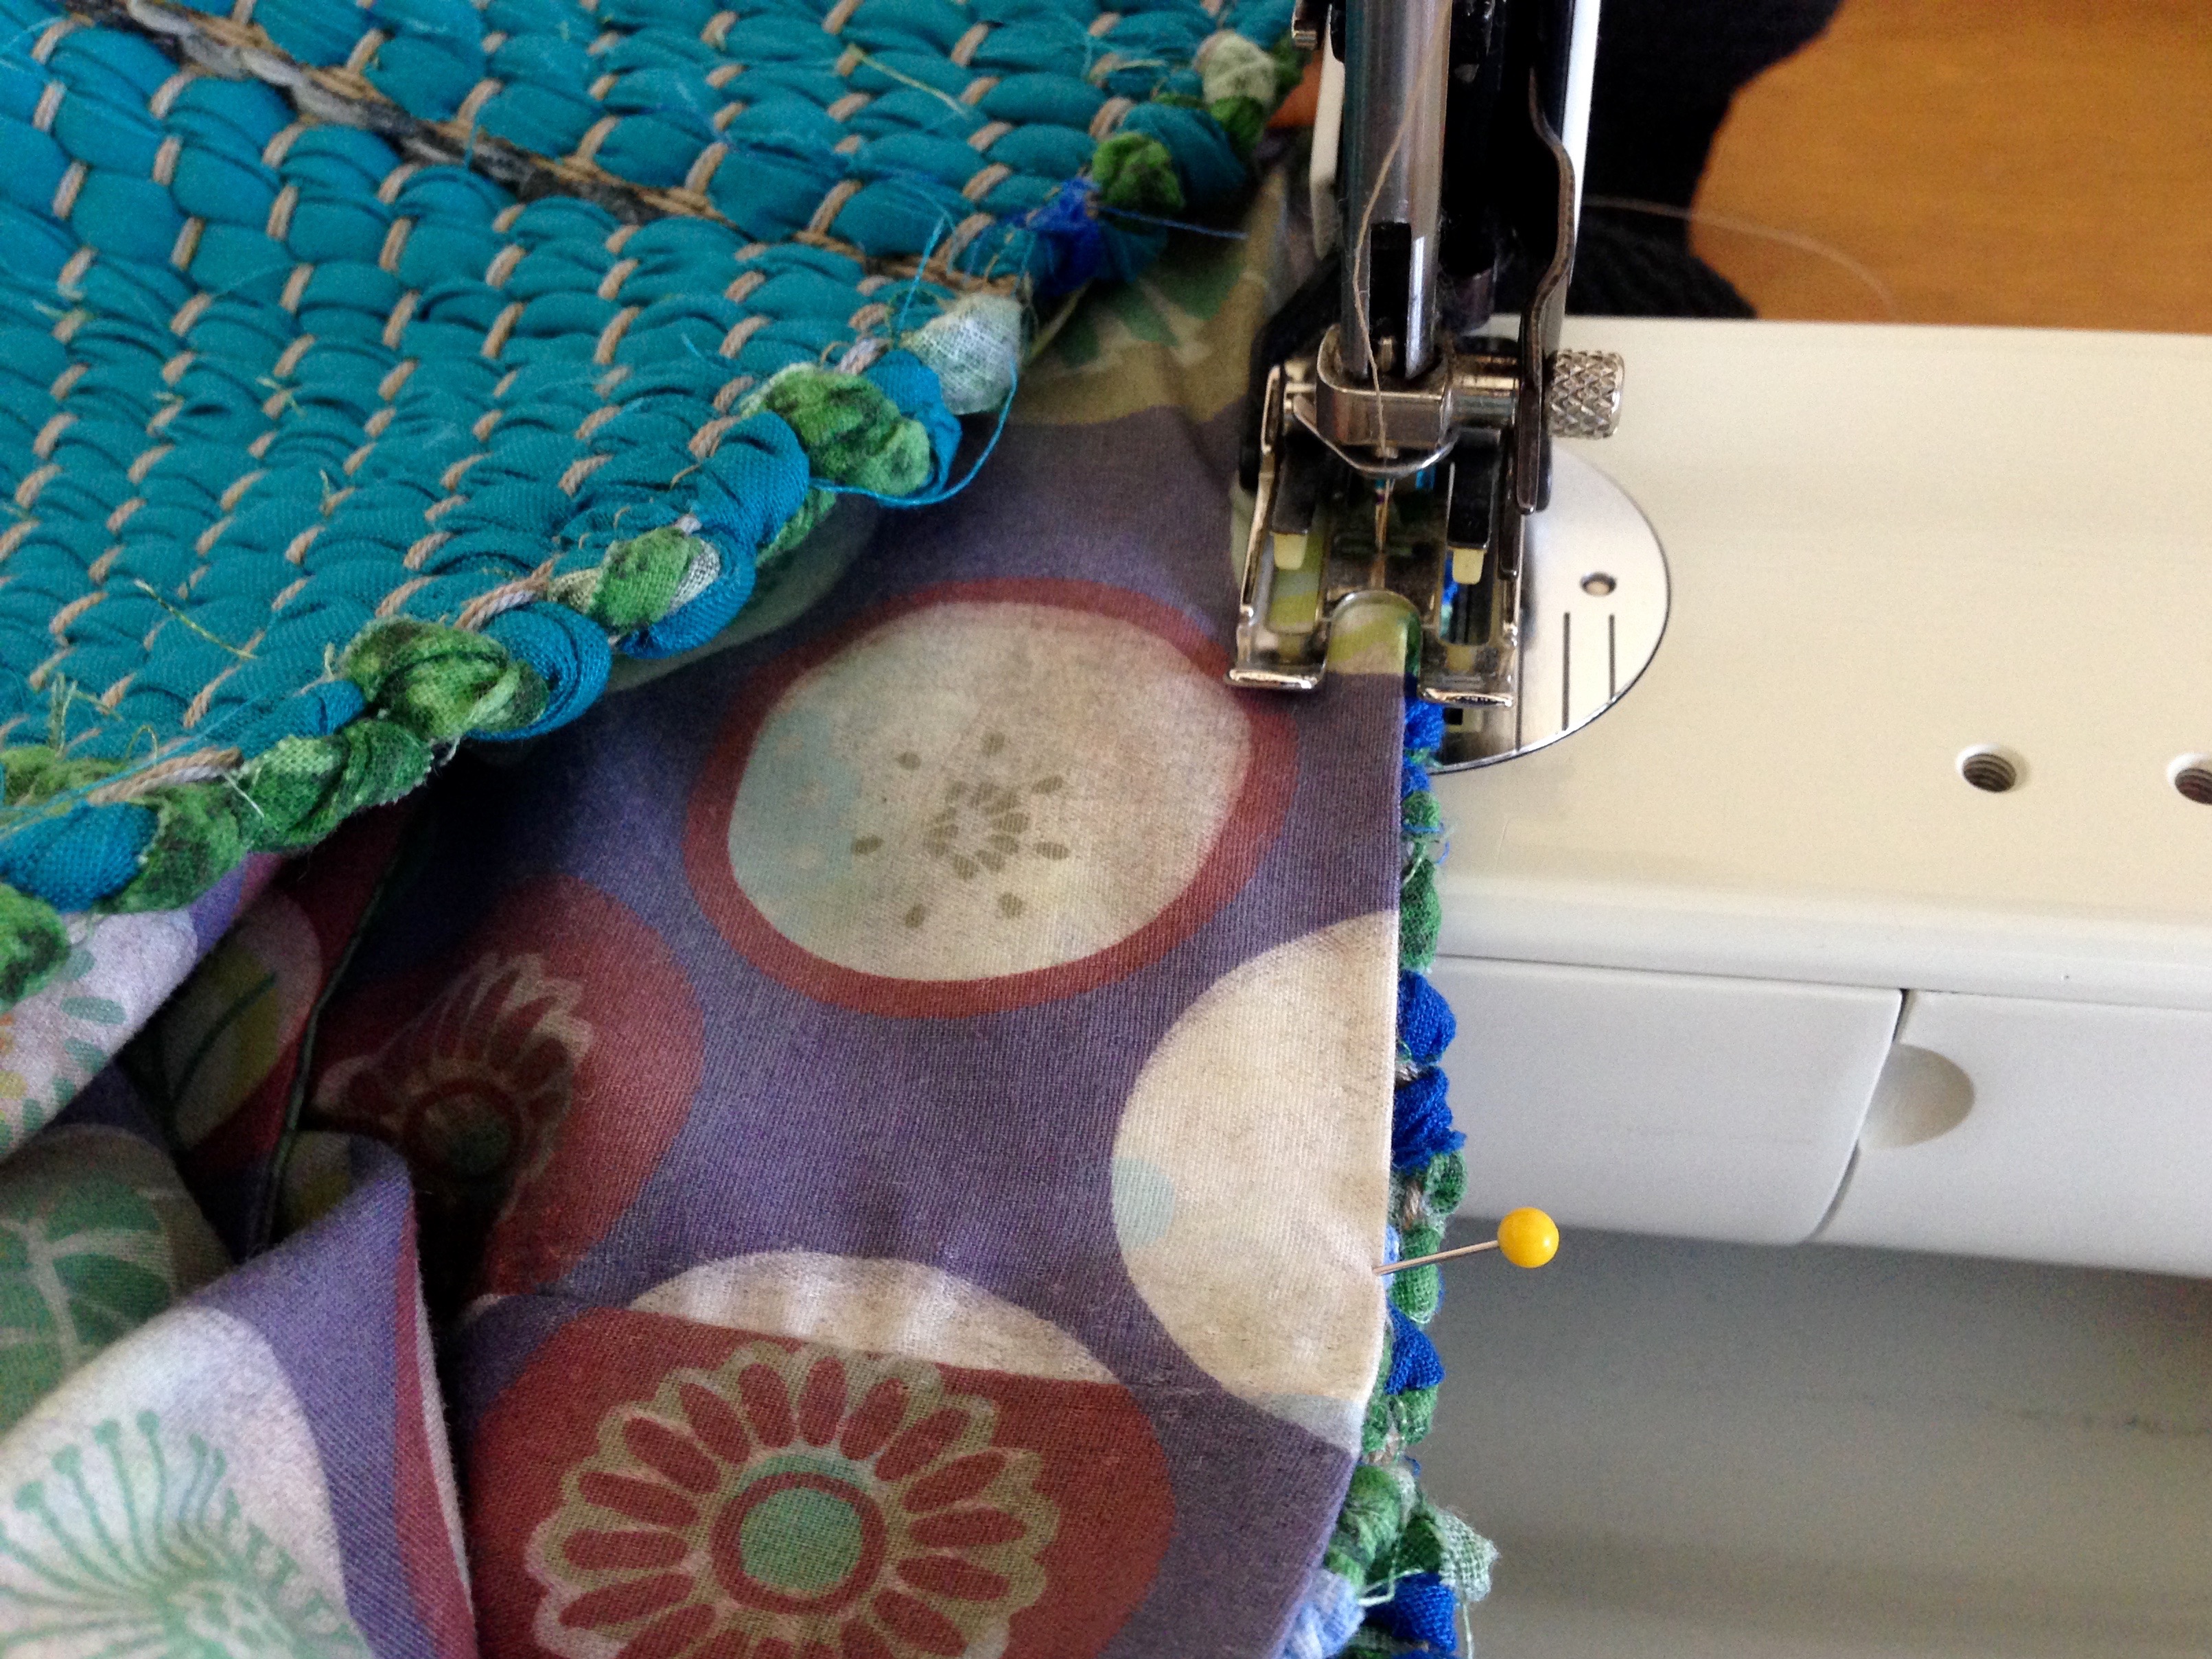
Finishing ends to make bag.

9. Stitch the bag.

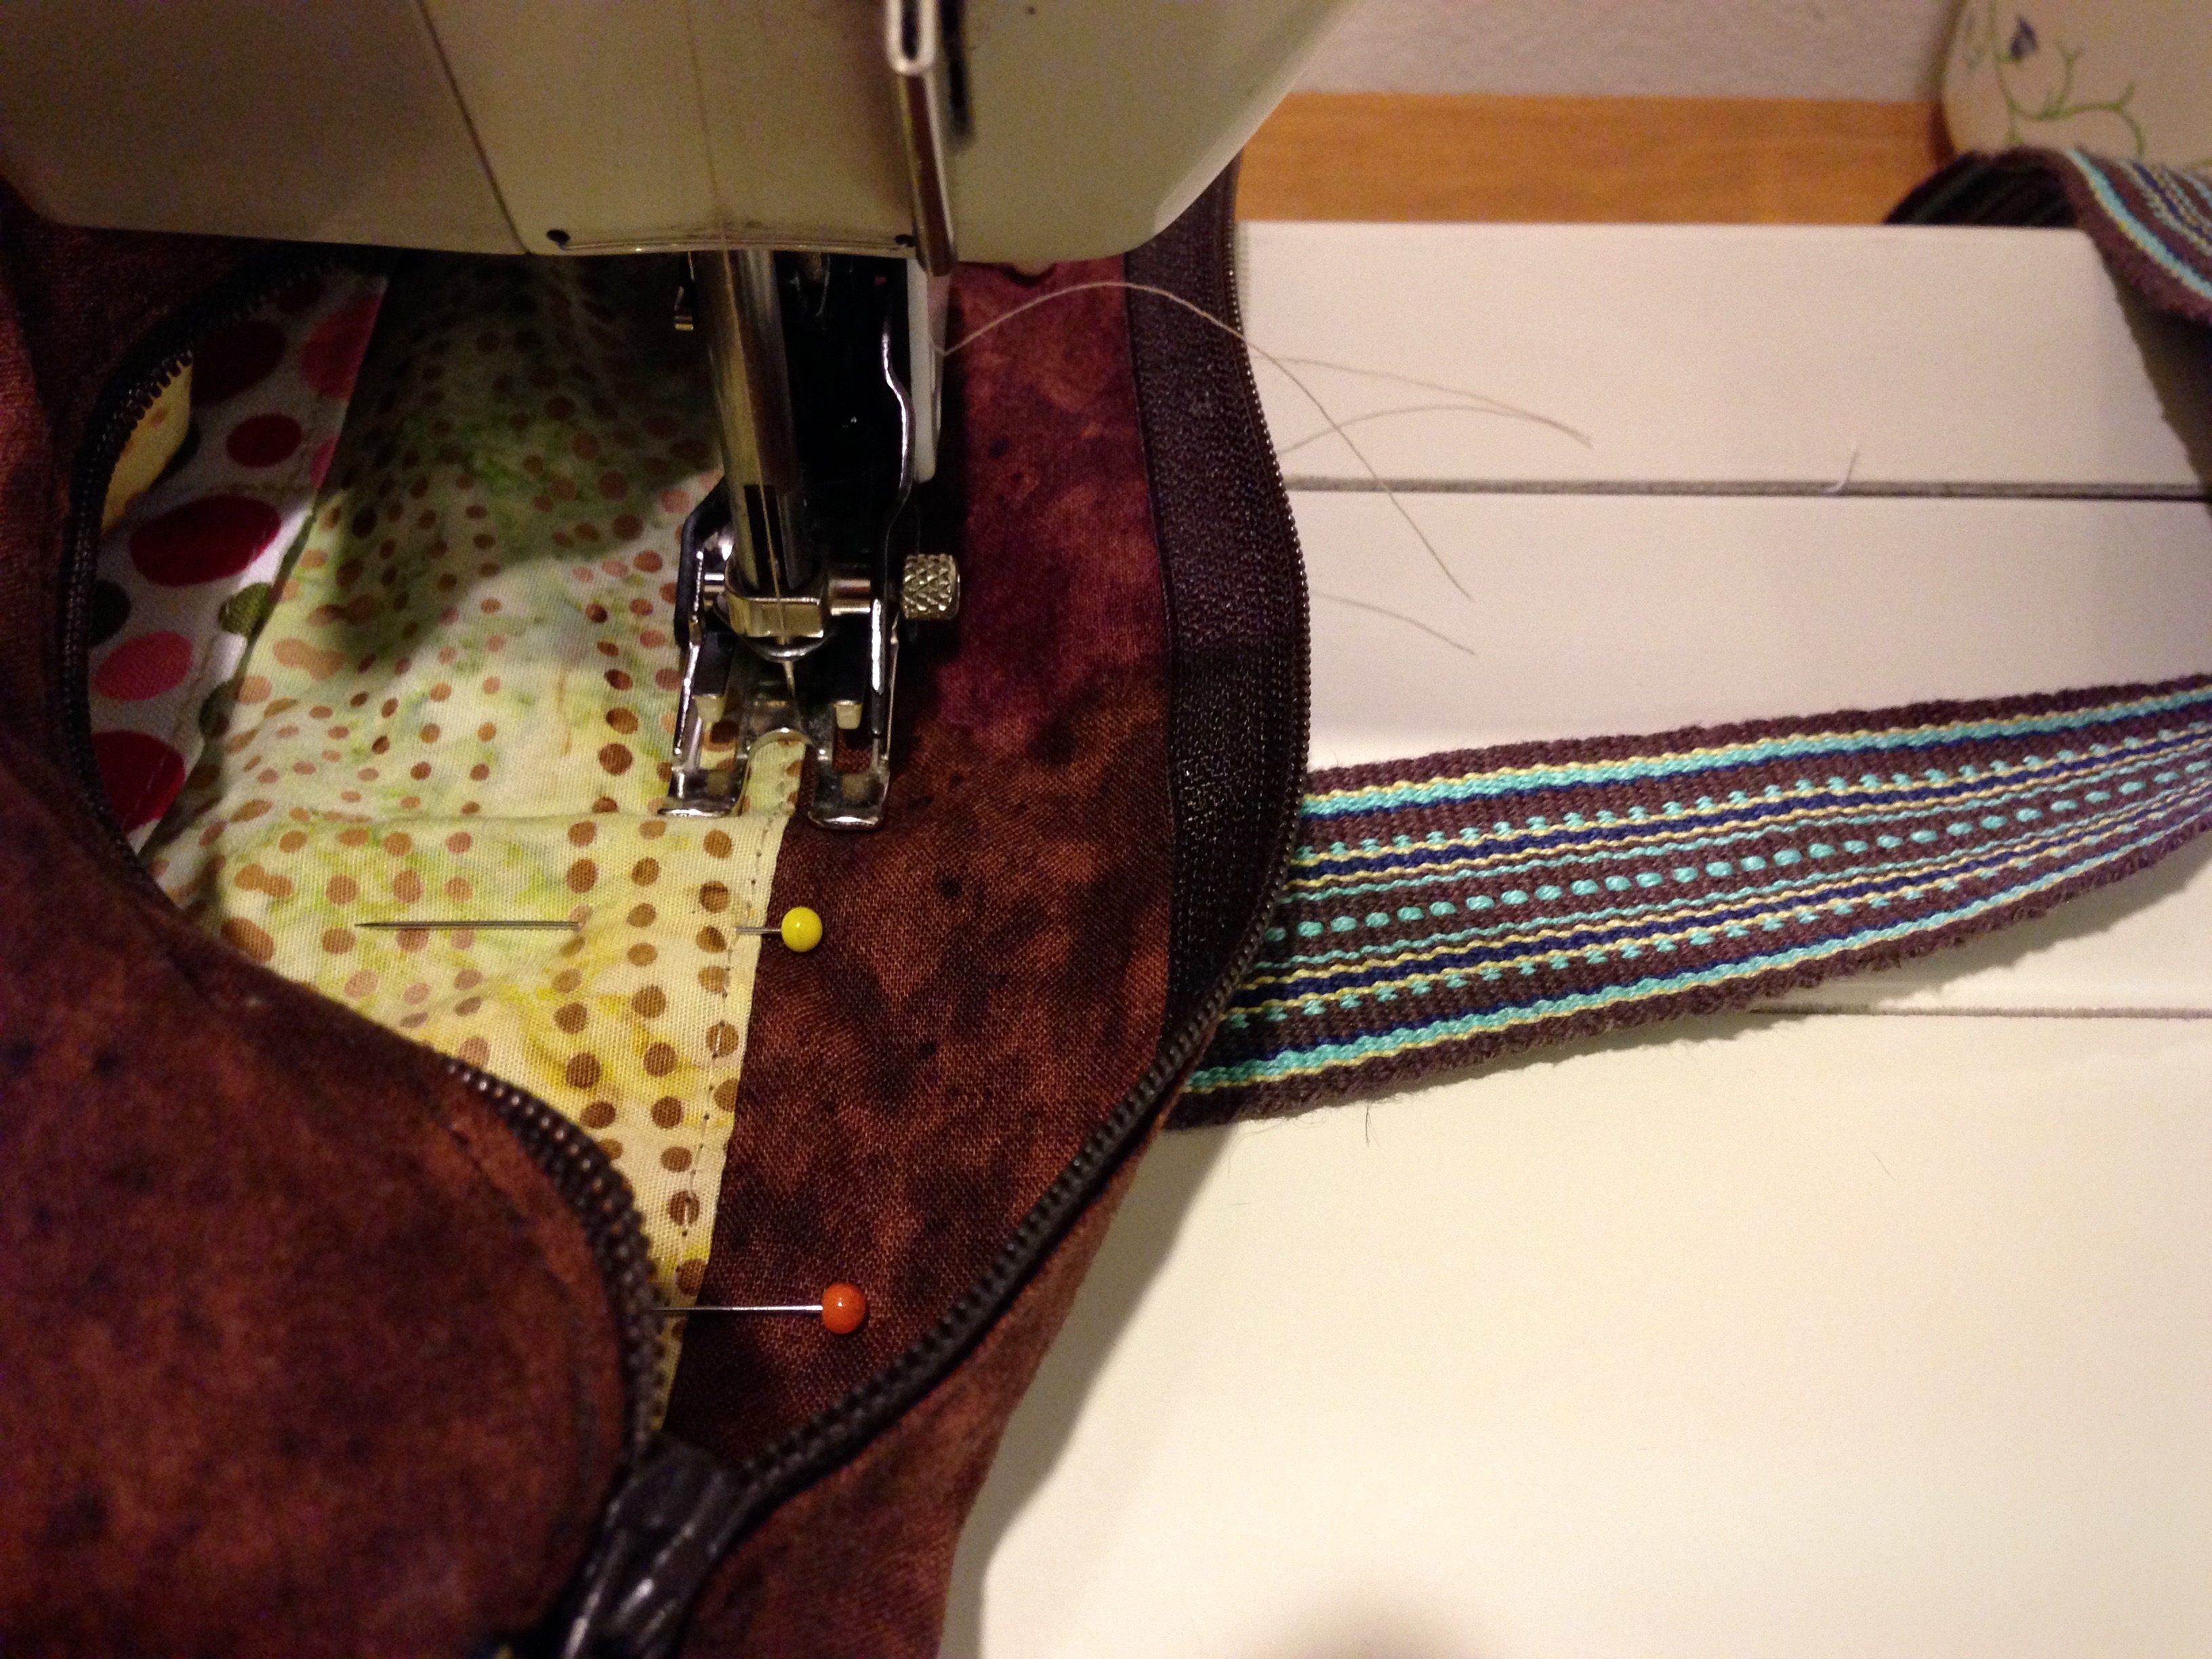
Fold the bag, right sides together. Stitch side seams. Turn right side out. For whimsical detail, form box corners on the outside, and stitch in place by hand with warp thread. (You could form box corners on the inside just as well, stitching flattened corners by machine or by hand.)

Creating a rag rug bag.

10. Take your bag with you wherever you go.

Rag rug bag with woven handles. Karen Isenhower

Rag rug bag detail. Karen Isenhower

May your ideas turn into fruitful efforts.

Happy weaving,
Karen

Quiet Friday: Rag Rug Bag

Think of this as an experiment. A first try. A specimen with which to work out procedures and details. I like the bag, and I will certainly use it; however, there are a few things that I will do differently when I make the next one. And I do intend to make another one, or two, or three. Experiments are like that. One idea leads to another. This warp was all about double binding rag rugs. As always, though, it is delightful to have some warp left at the end for play.

Weaving bag handles into the rag rug bag.
Length of 1-inch/2.5 cm black cotton webbing is woven in. The webbing that extends beyond both selvedges will form the bag handle. Rag weaving continues for a few inches before placing the webbing ends back into the shed.
Placing bag strap ends in the shed.
Both ends of the webbing strap are tapered, and then overlapped in the shed before beating them in.
Temple maintains the weaving width.
Temple maintains the weaving width as the rag weave continues past the woven-in handle straps.
Securing warp ends of rag rug.
Warp ends are secured, as usual. First, square knots, and then cut off to 1/2 inch/1 cm.
Stitching up a rag rug bag.
Sewing the sides of the bag, right sides together. I am using the four rows of woven rug warp at the beginning of the woven hem as my stitching line.
Creating lining for rag rug bag.
After turning the bag right-side out, and pressing the seams open, I created a simple flat lining, with added pocket, to fit inside the bag.
Pinning lining into the rag rug bag.
Lining is pinned into the bag, matching seams and mid-points at front and back.
Lining is inserted into the rag rug bag.
Lining is stitched into place with narrow topstitching.
Rag rug bag, with handle woven in. Karen Isenhower
Voila!
Finished rag rug tote bag! Karen Isenhower
Fun tote bag to carry to and fro.

Next time… Find a strap that is not as stiff, so it will beat in better. Weave in a strap that is the same color as the warp. Make the strap longer. Find a way to secure the cut ends of the strap (this is the biggest issue). Possibly use a band woven on my inkle or band loom for the strap.

What would you use for the strap? Can you think of a good way to secure the ends of the strap together? What other suggestions or thoughts do you have to improve a bag like this? I would love to hear your ideas.

May your experiments lead to fresh ideas.

Always trying new things,
Karen