Think of this as an experiment. A first try. A specimen with which to work out procedures and details. I like the bag, and I will certainly use it; however, there are a few things that I will do differently when I make the next one. And I do intend to make another one, or two, or three. Experiments are like that. One idea leads to another. This warp was all about double binding rag rugs. As always, though, it is delightful to have some warp left at the end for play.
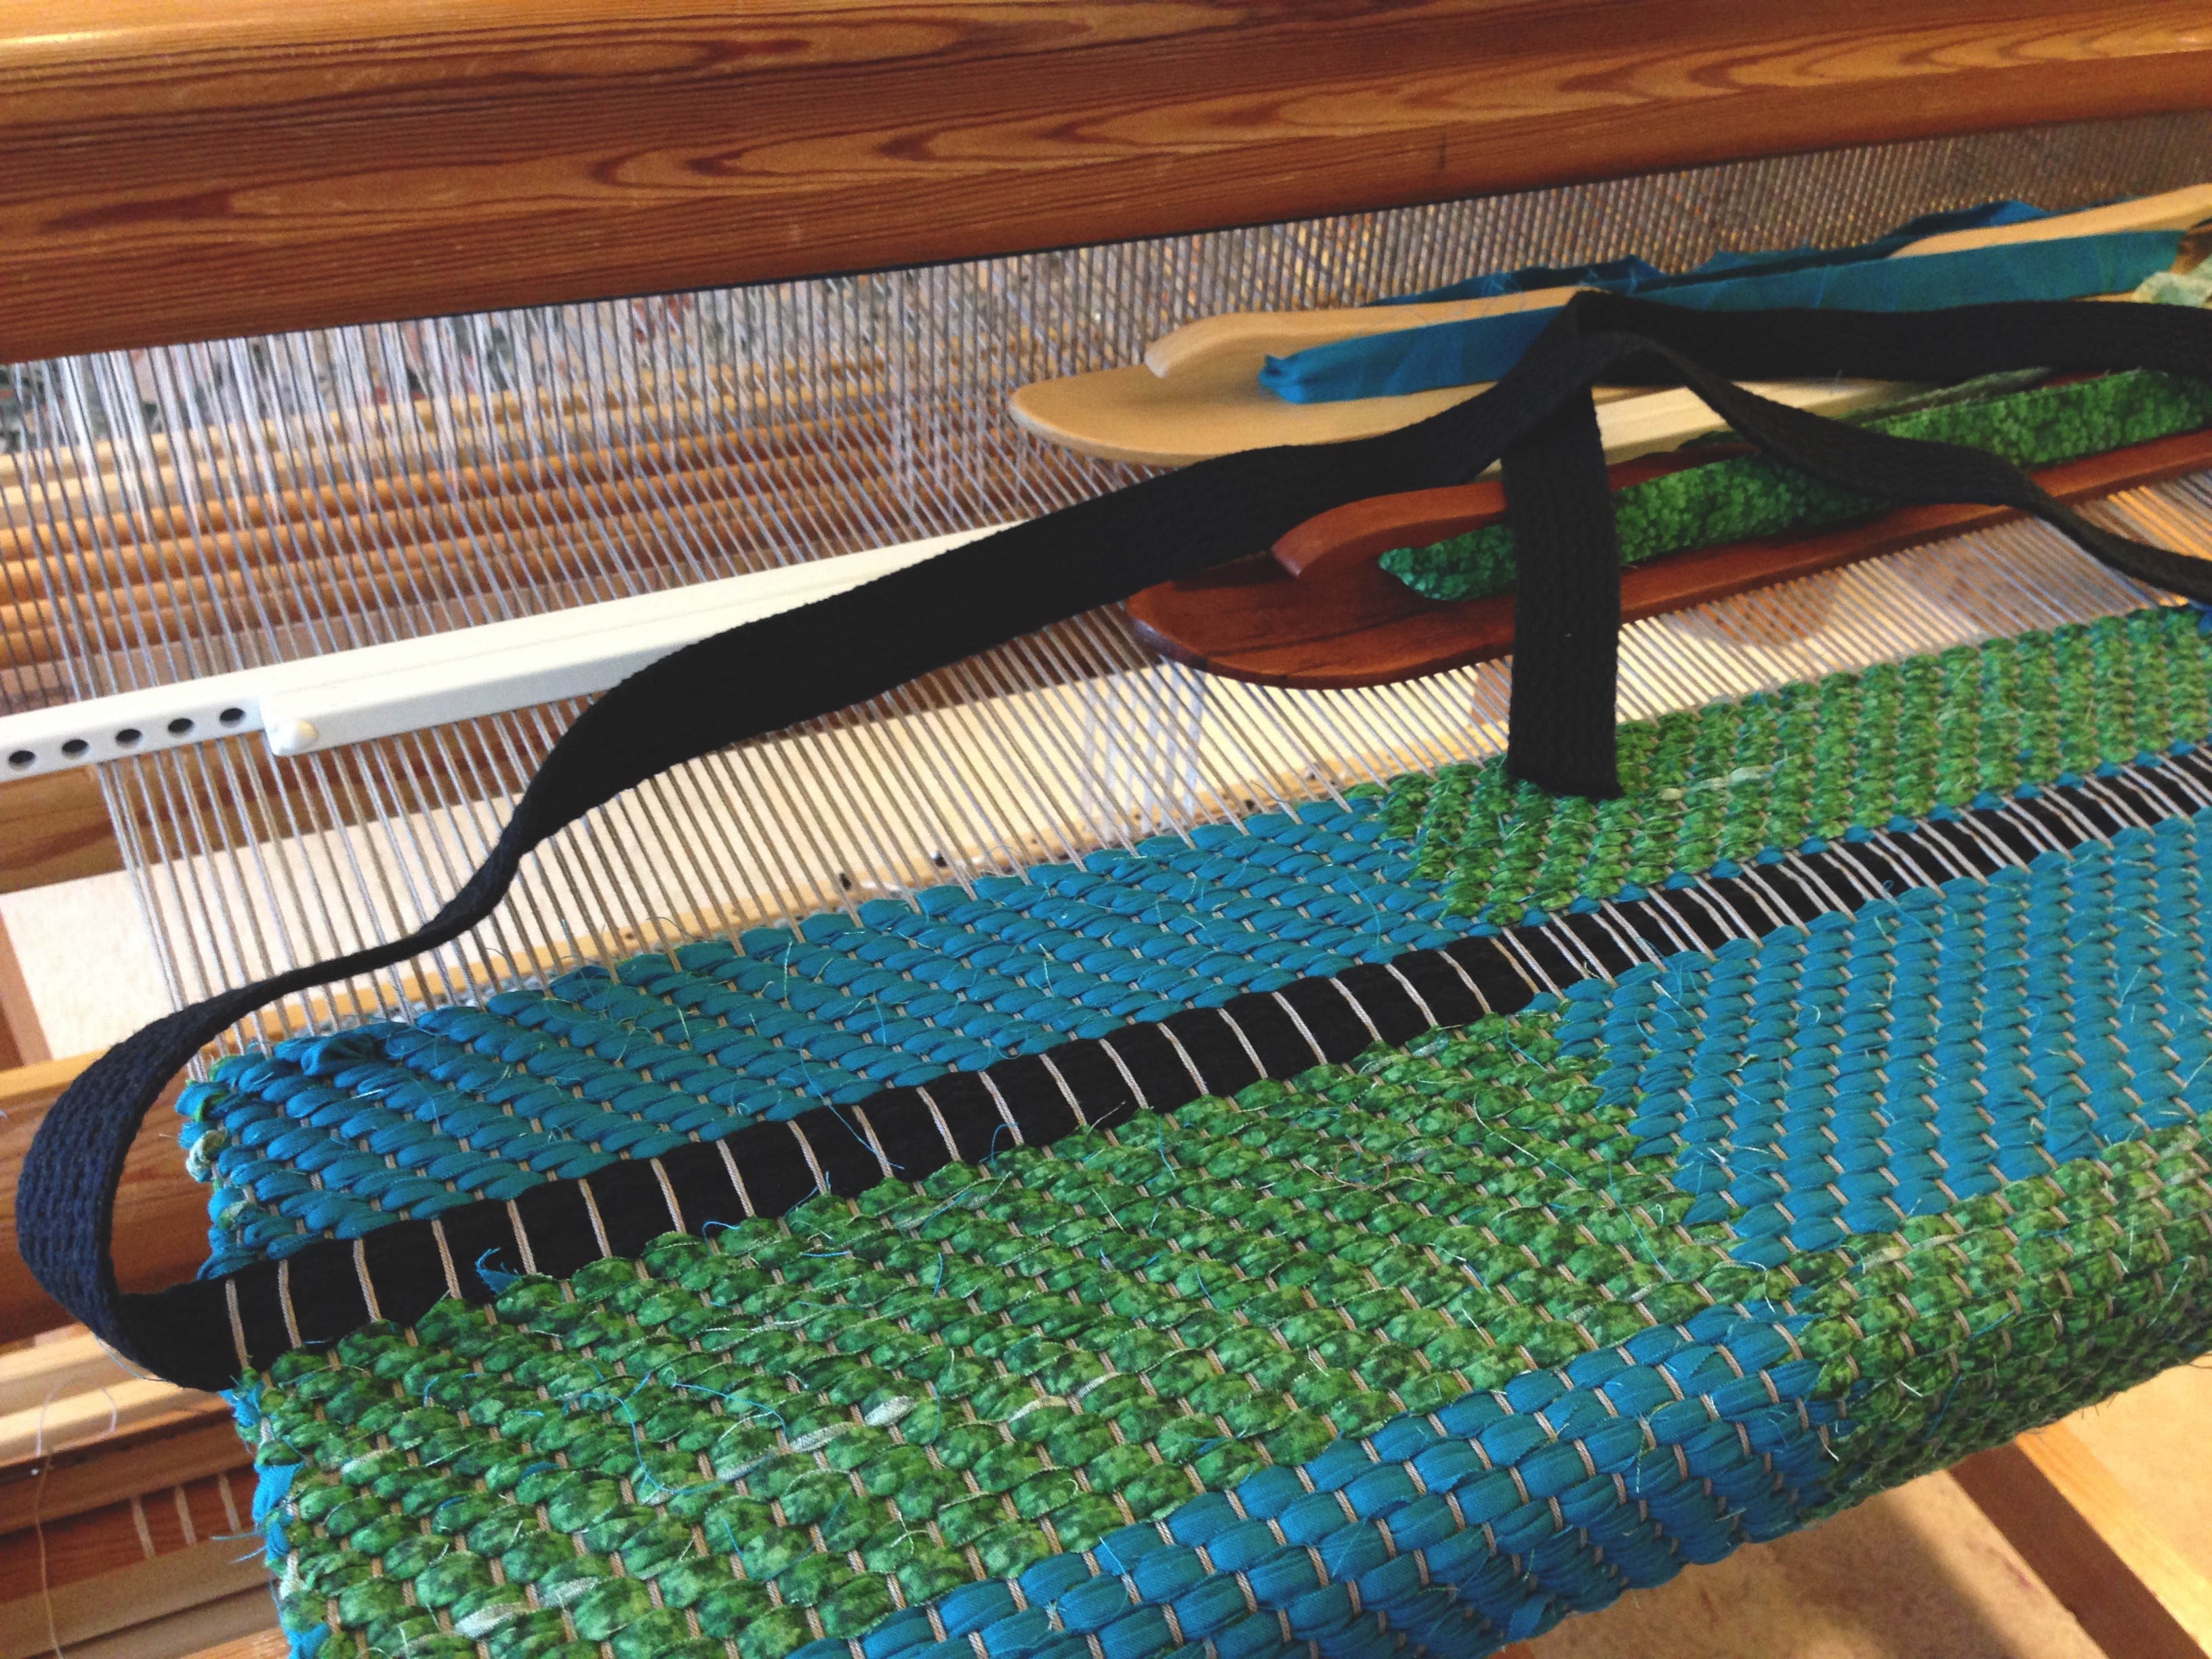
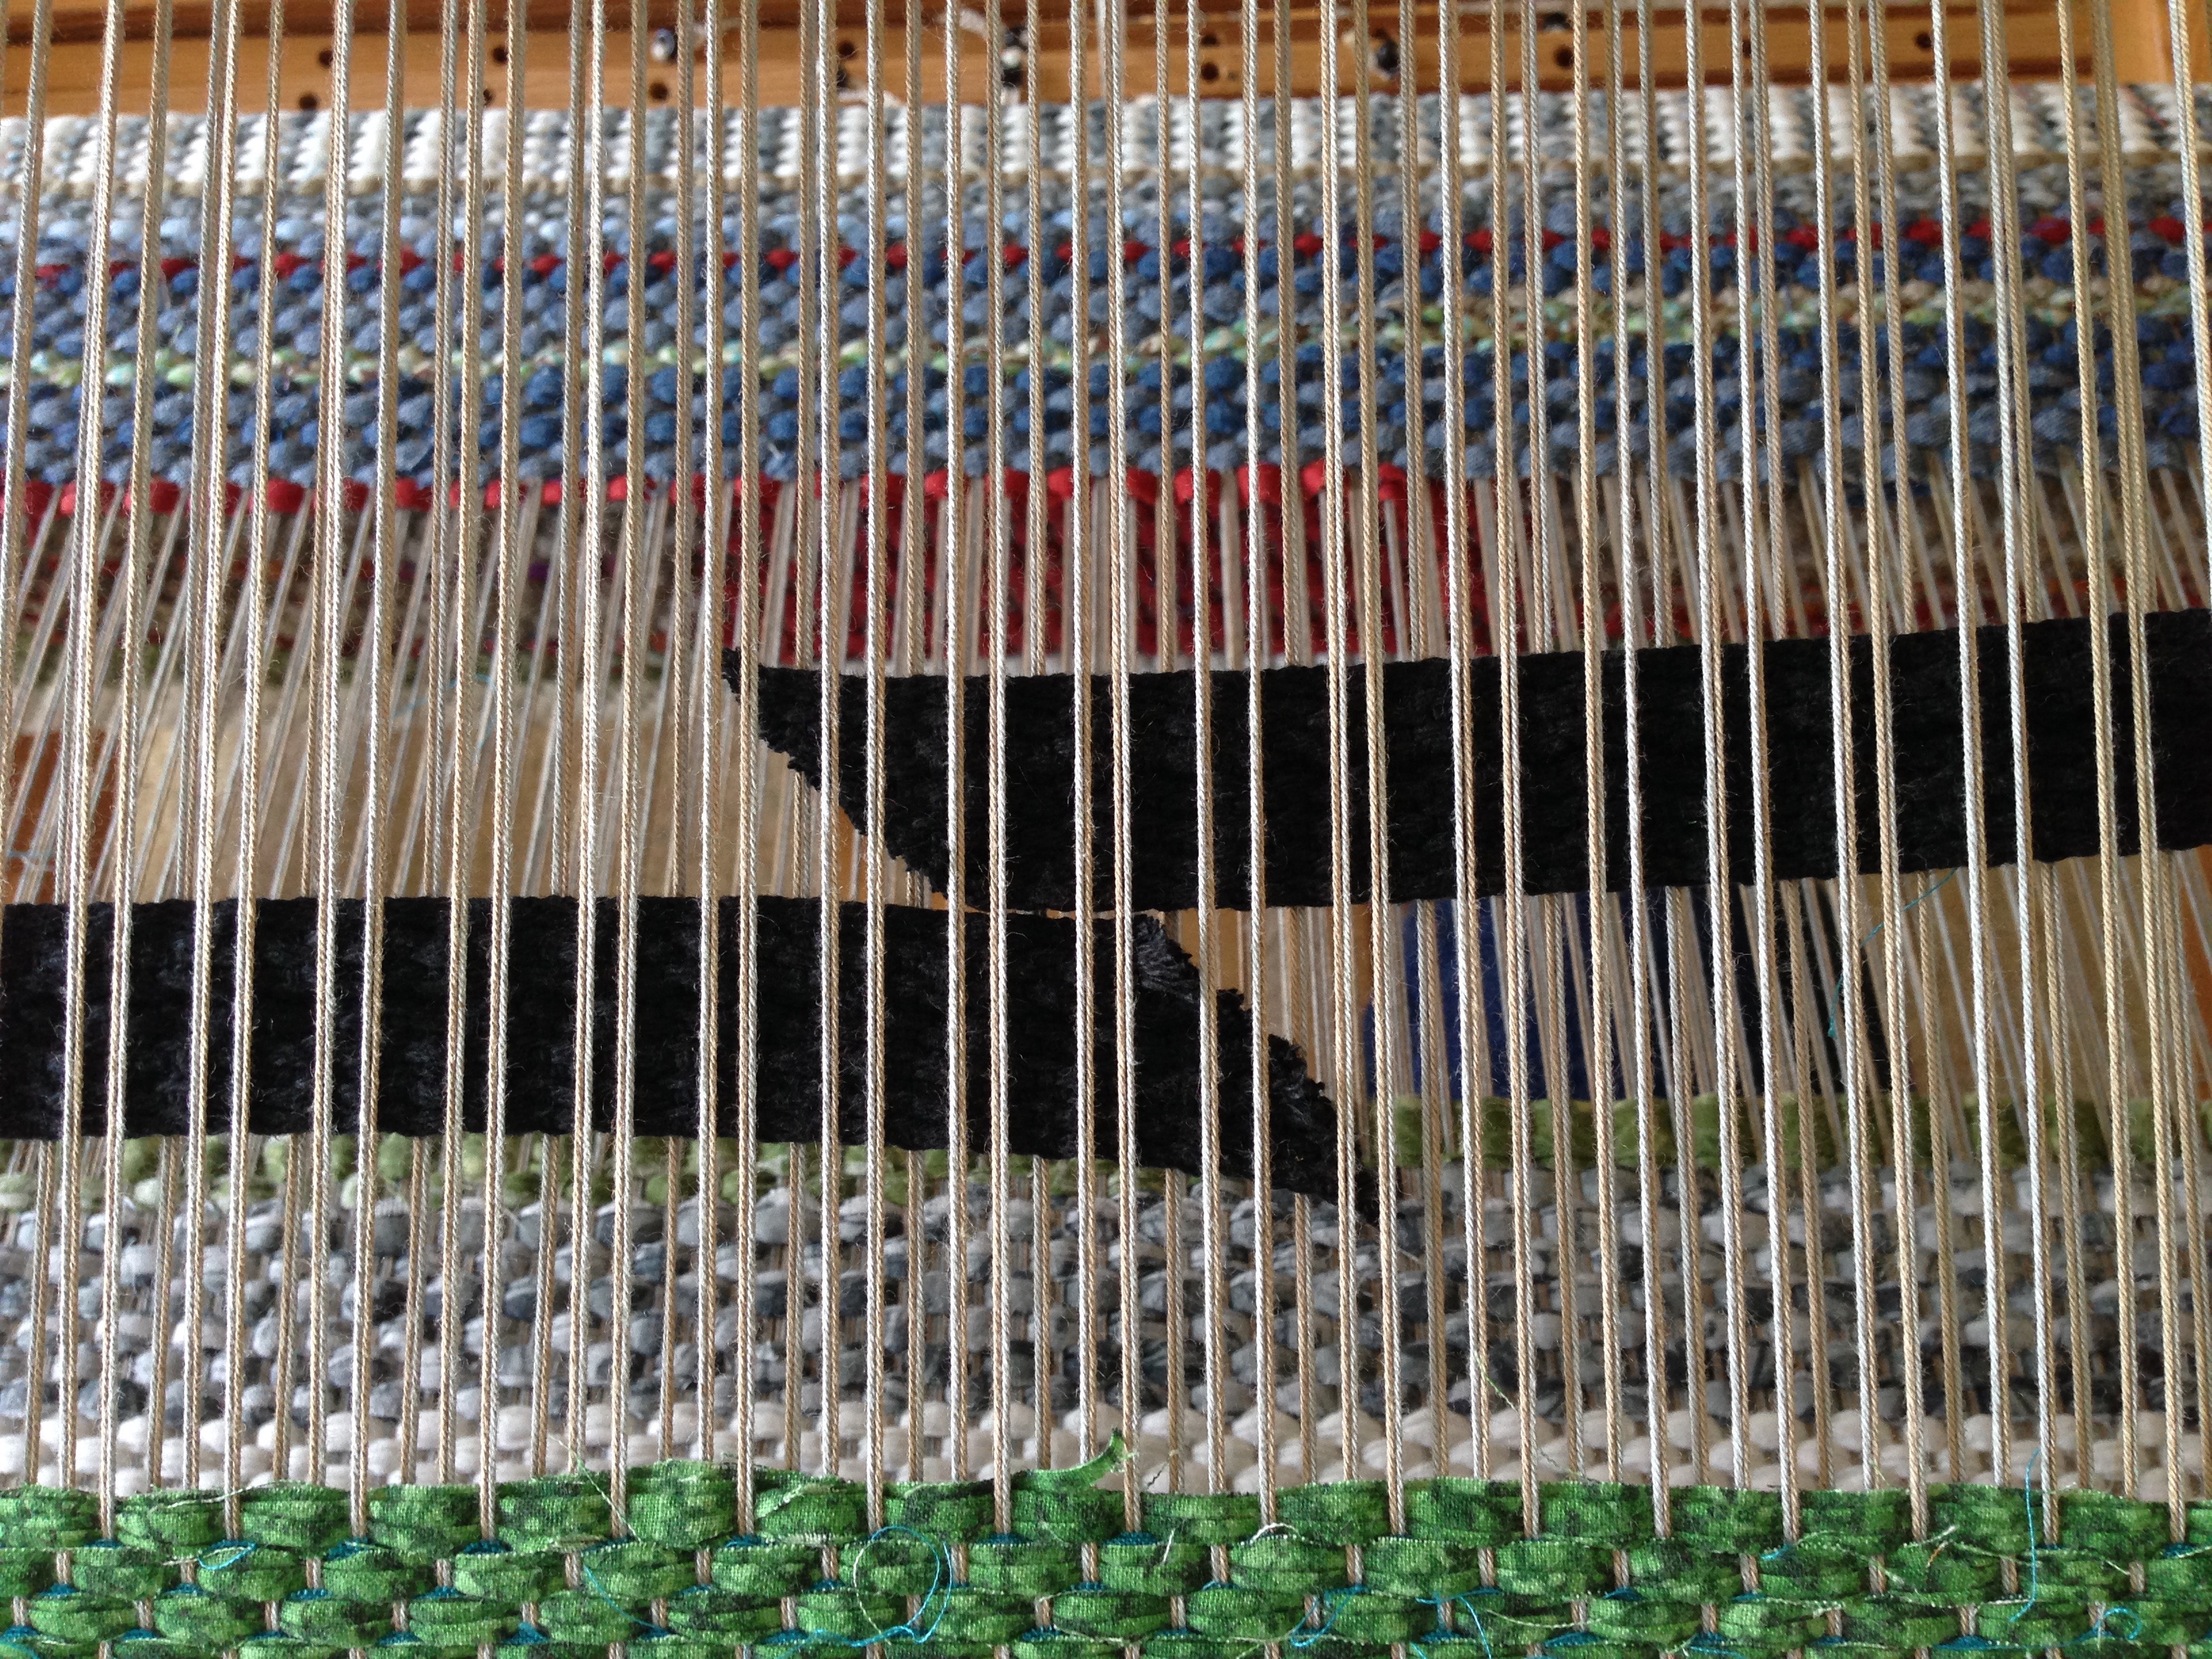
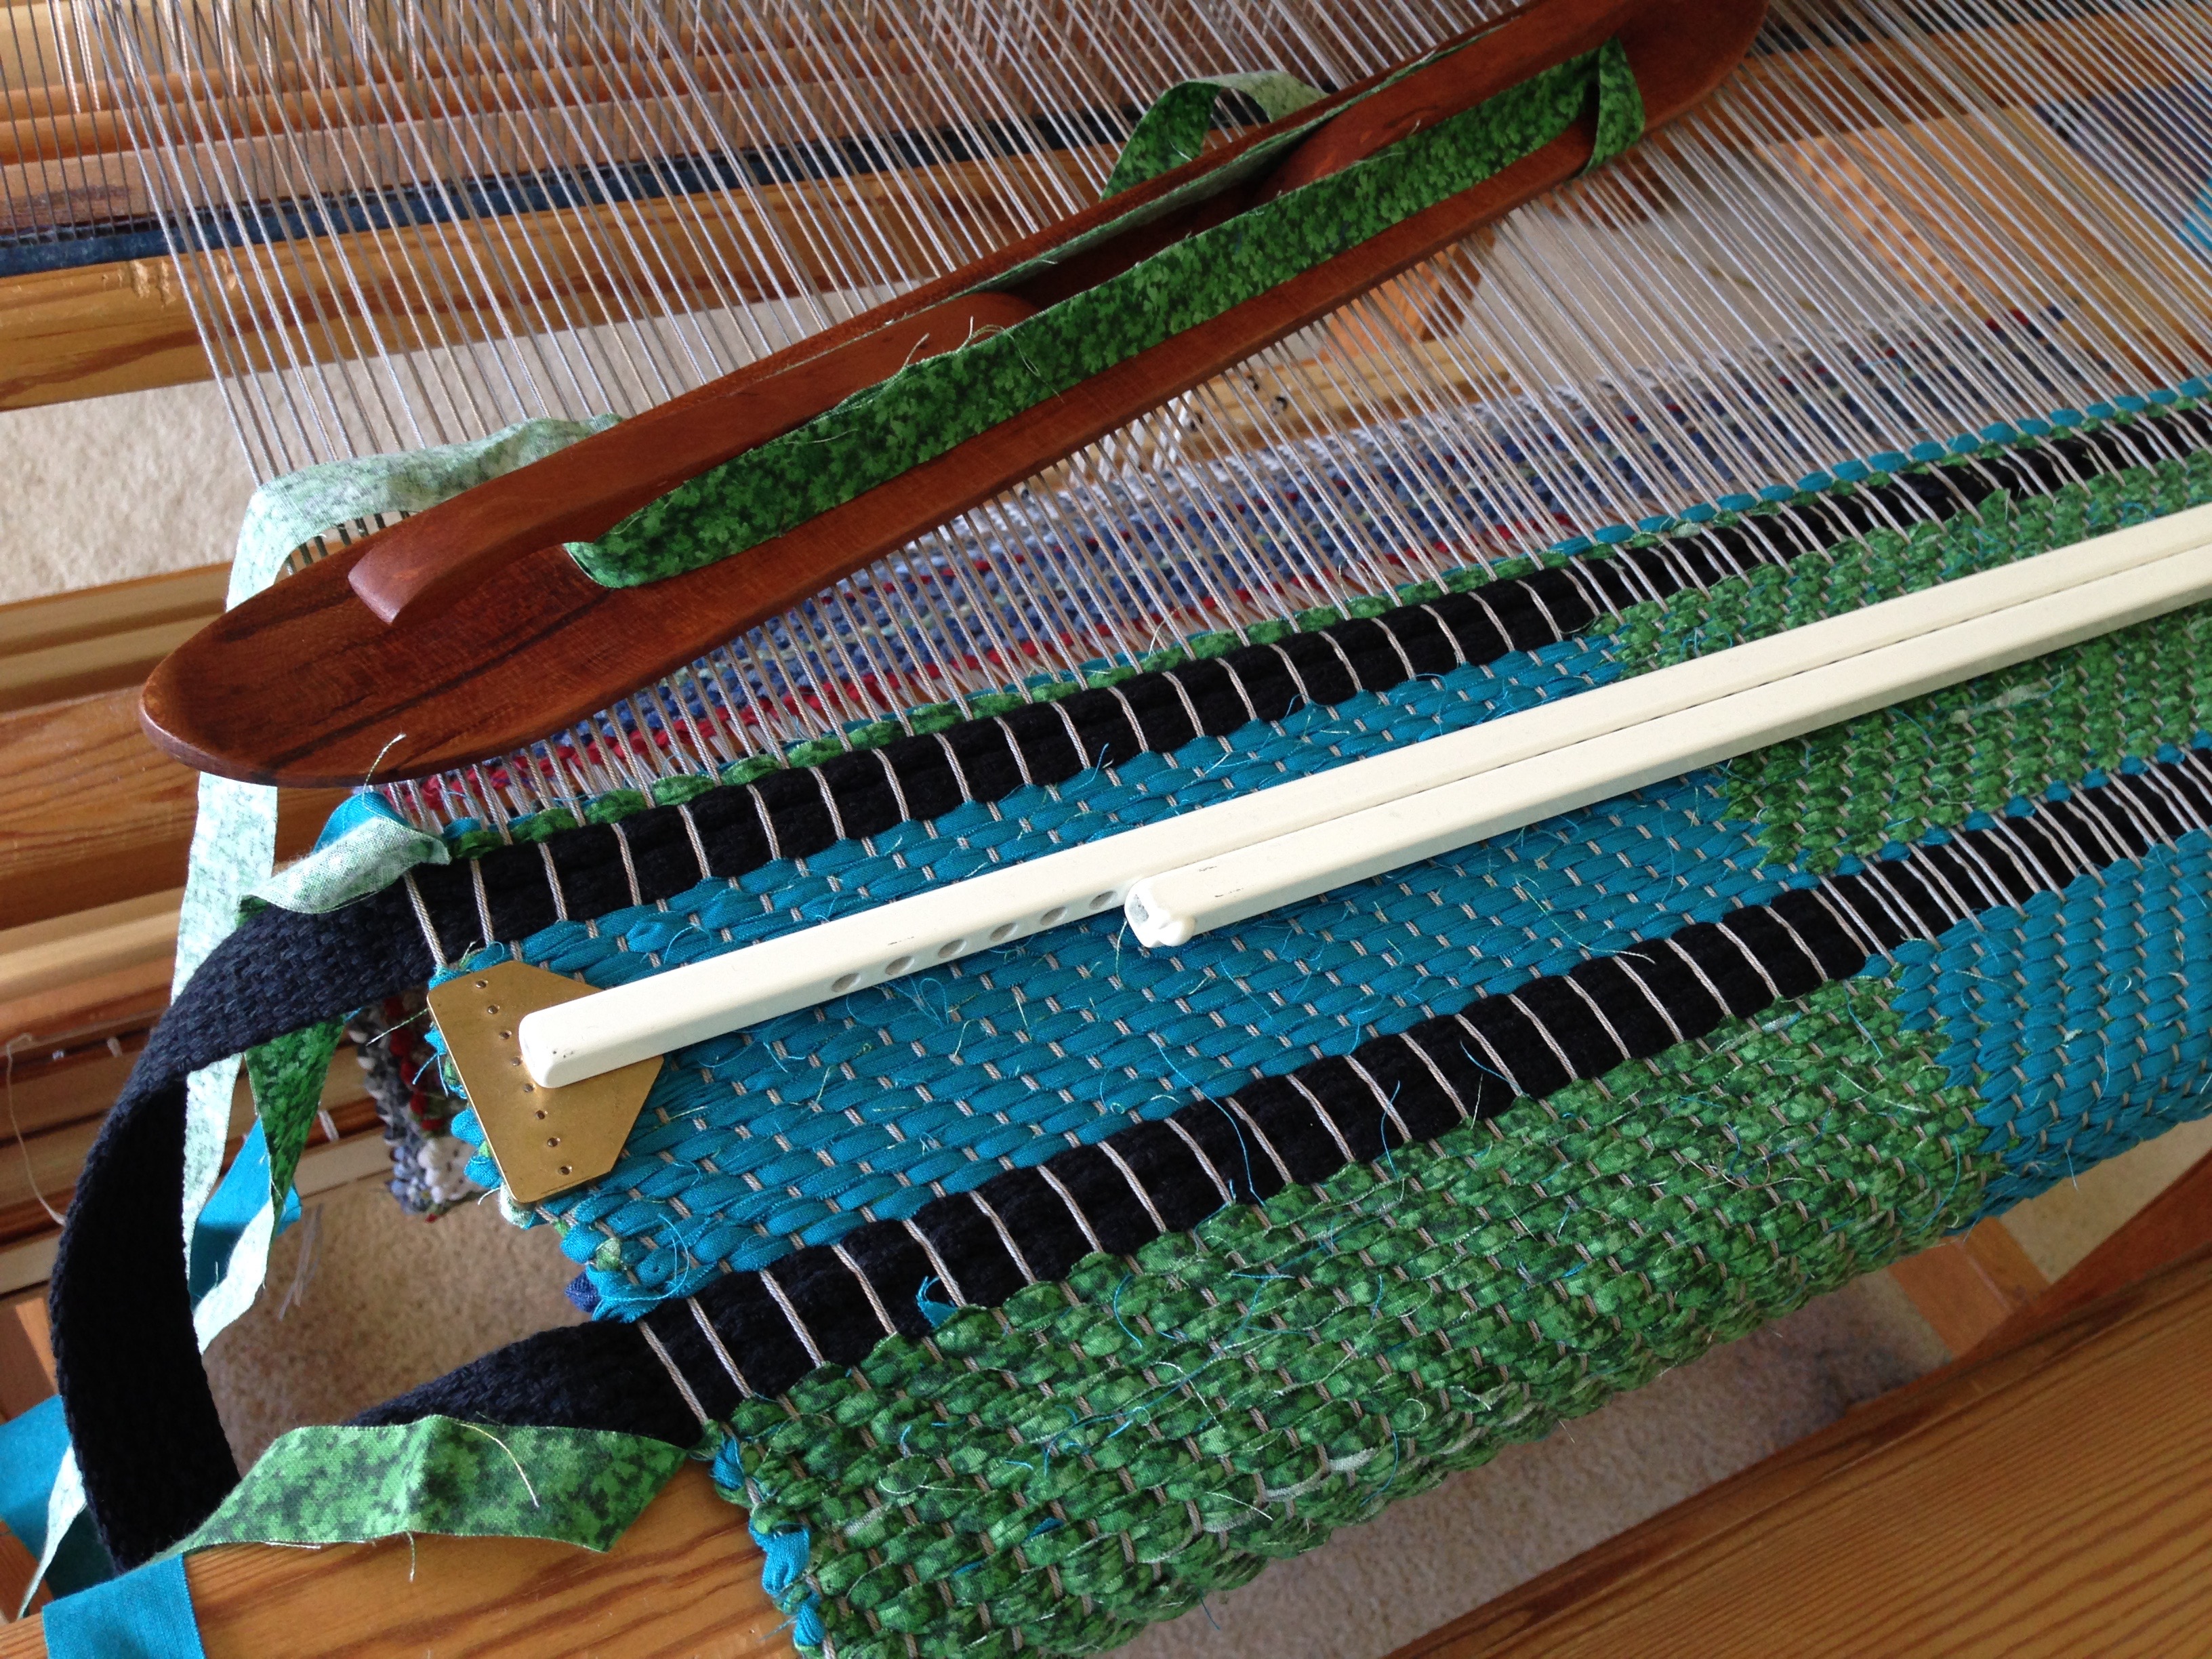
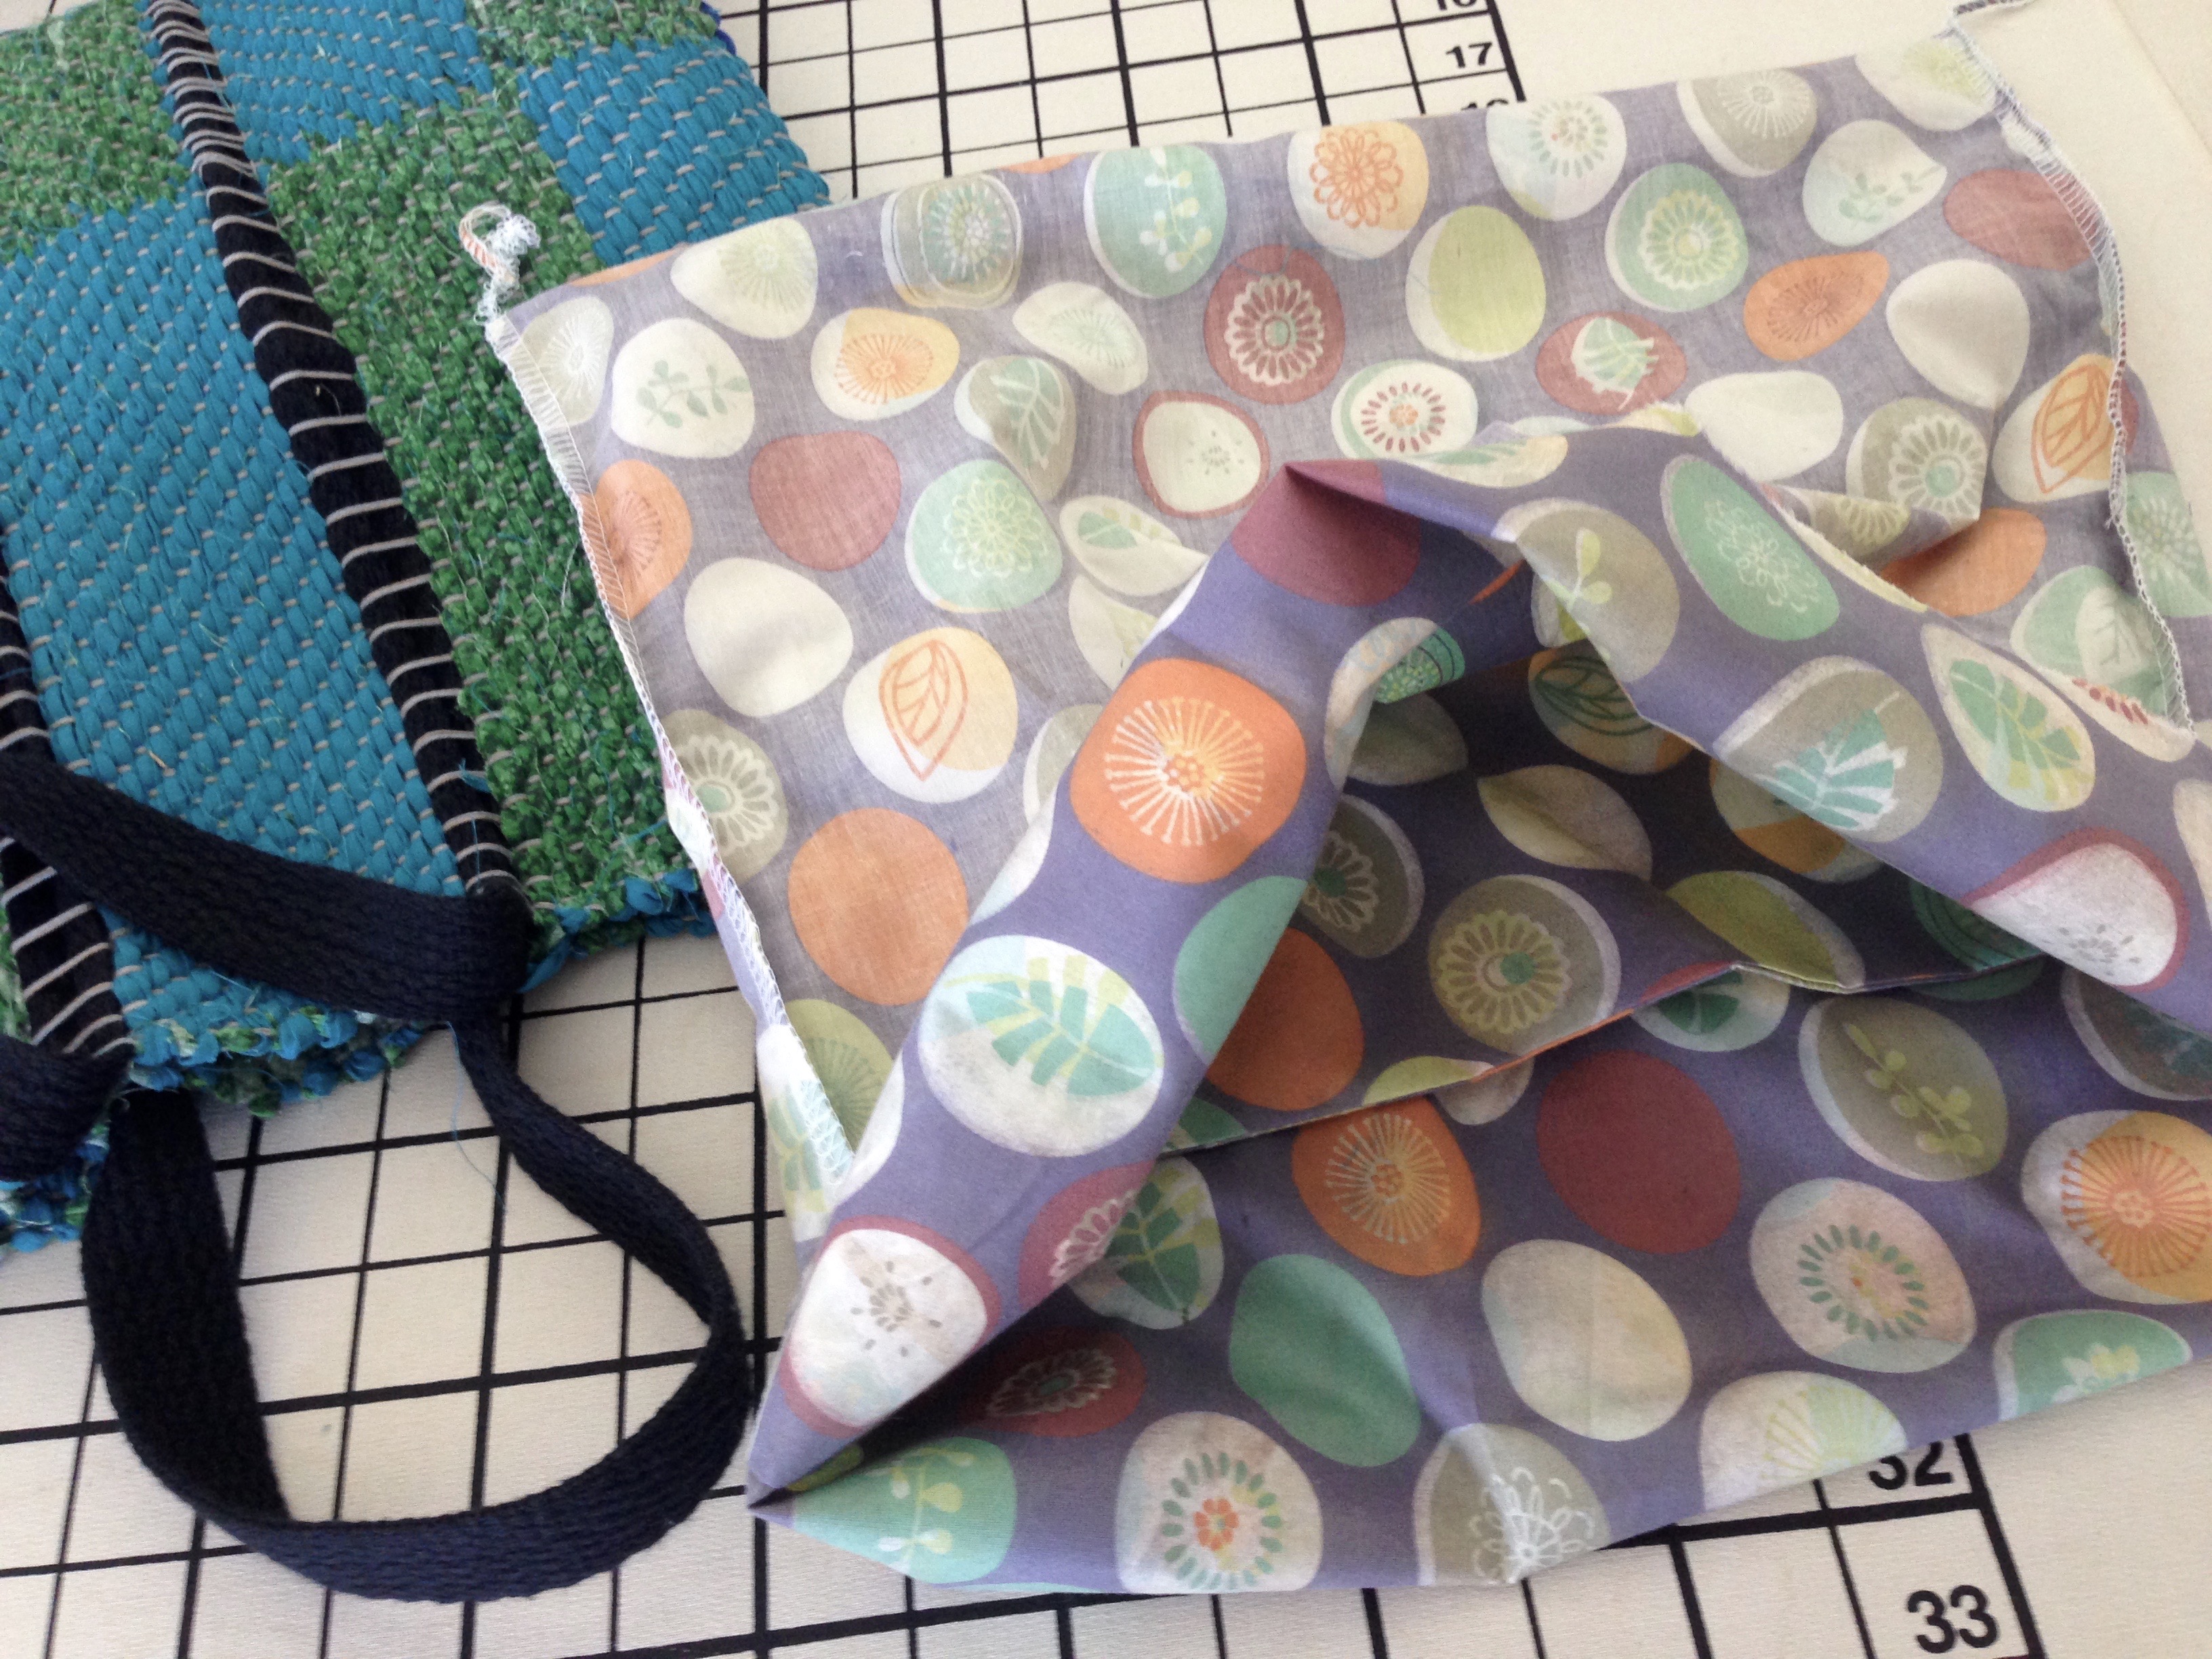
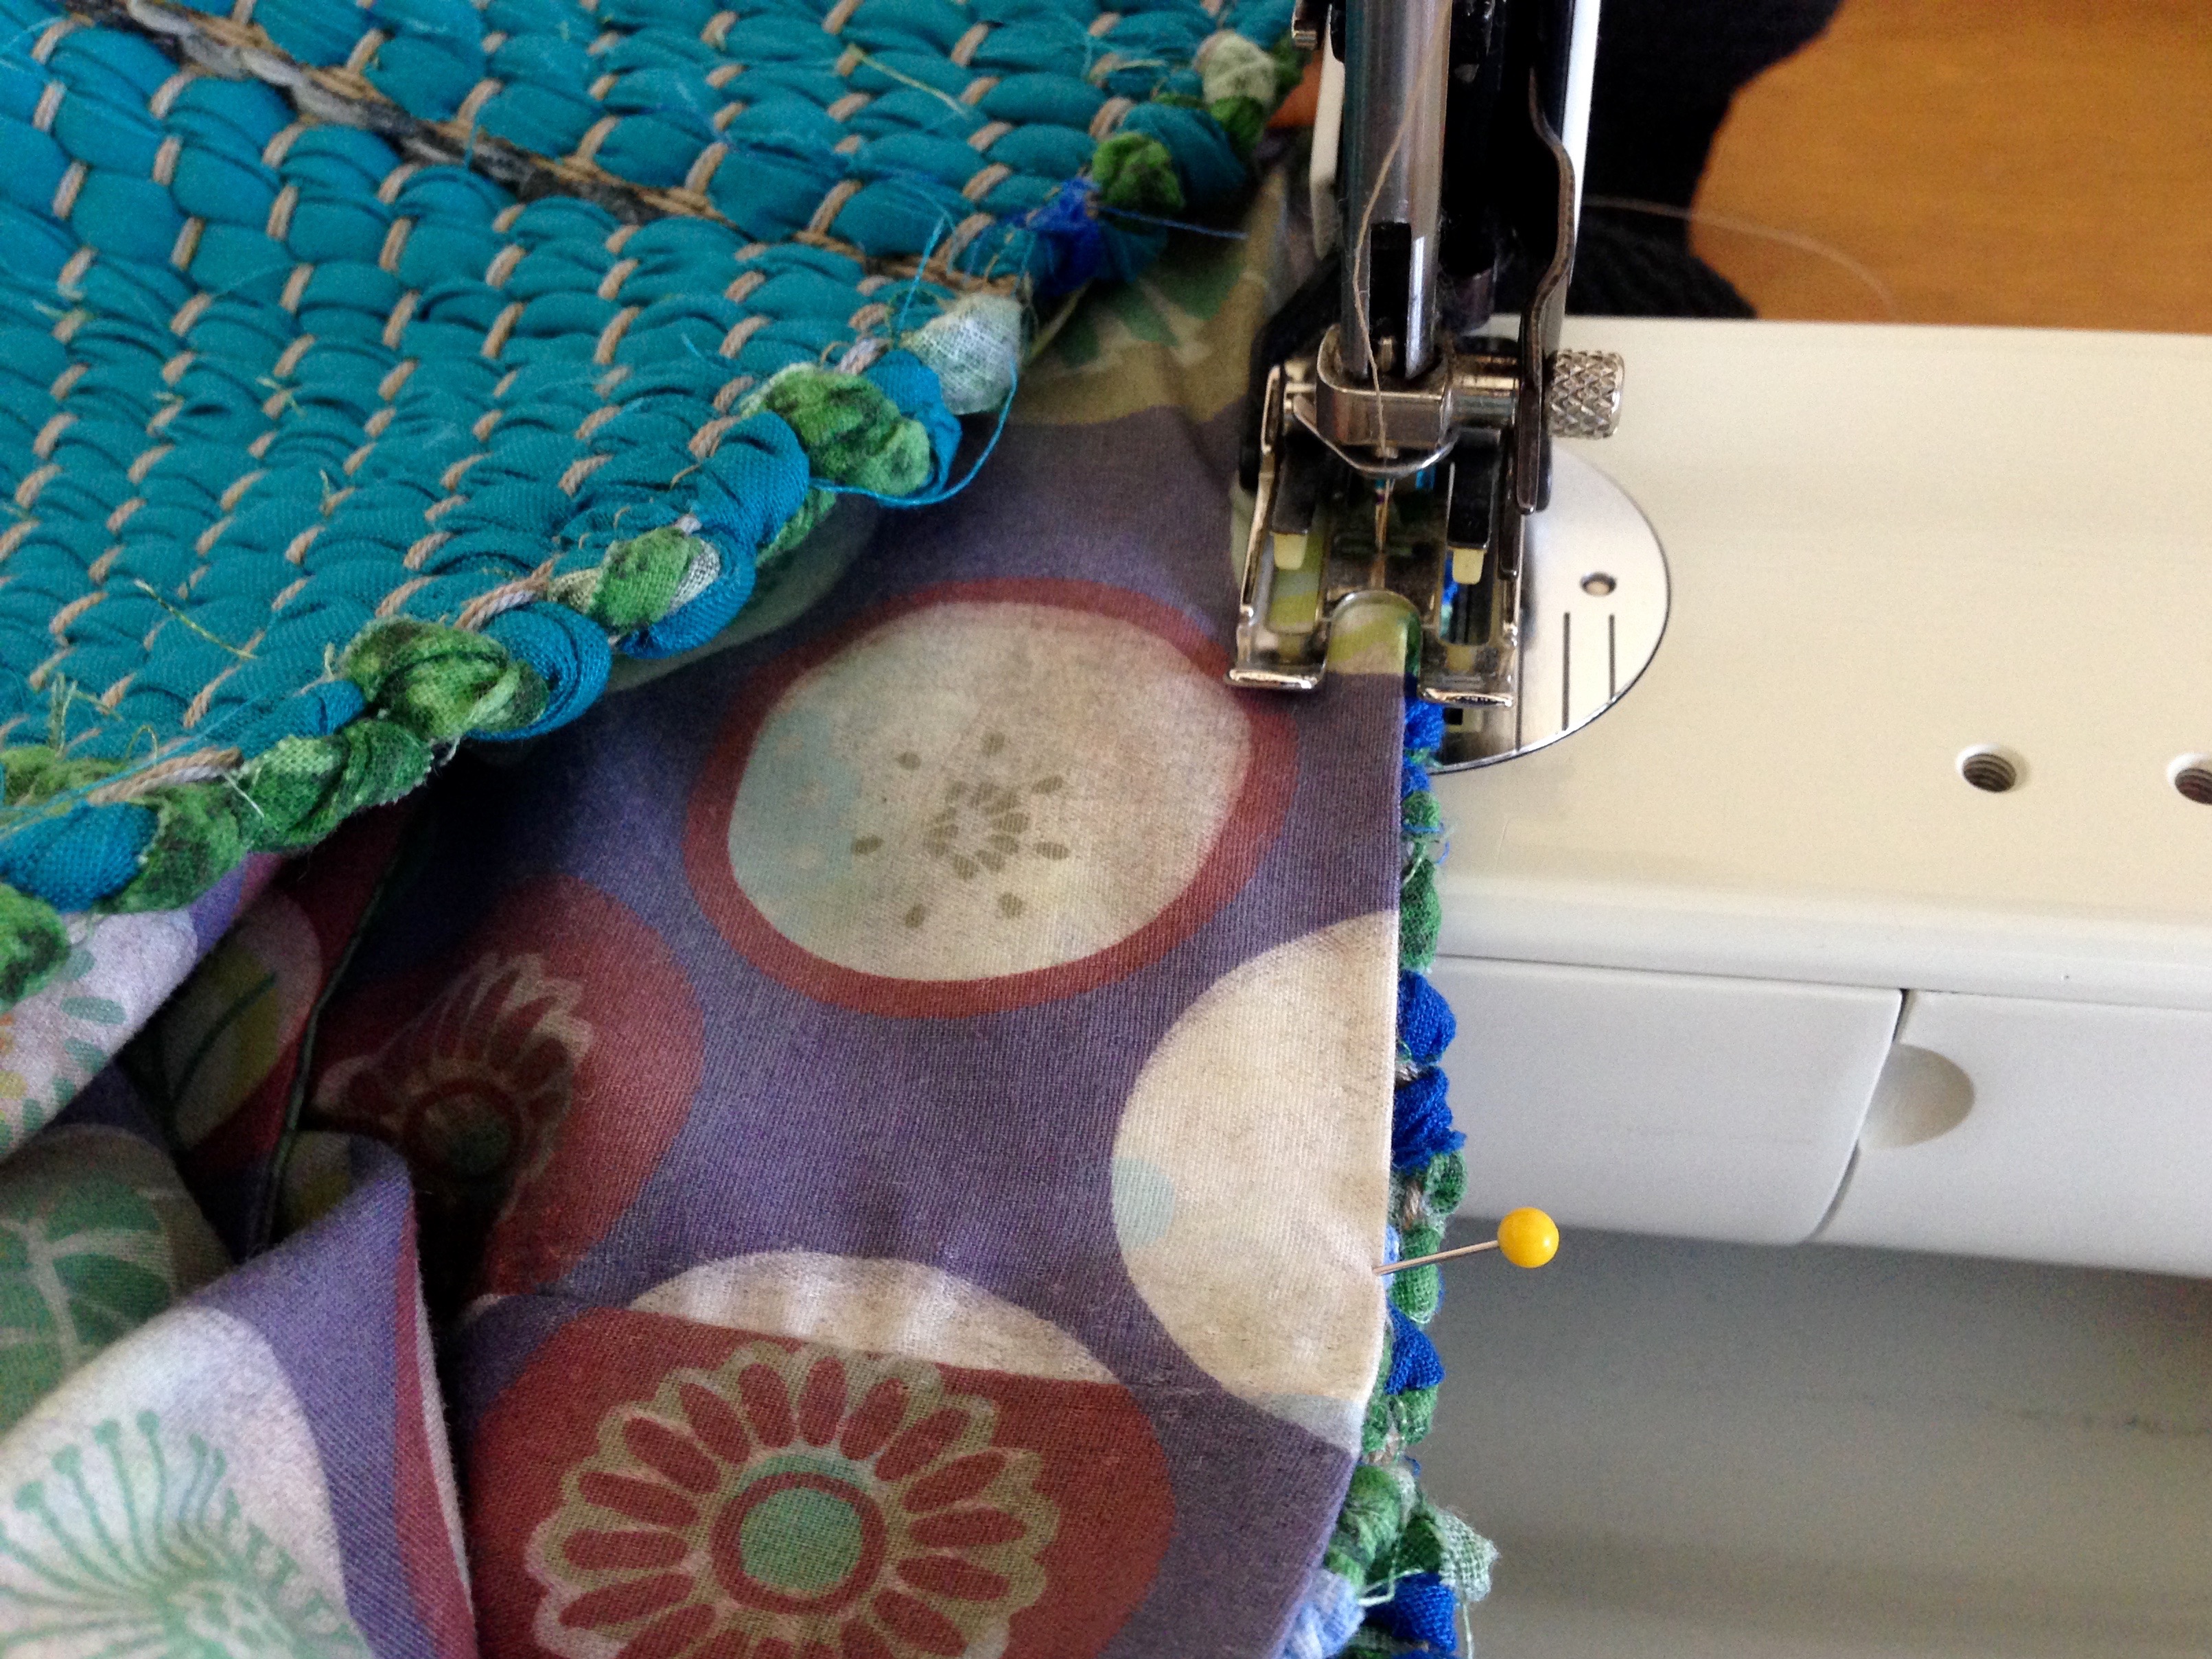
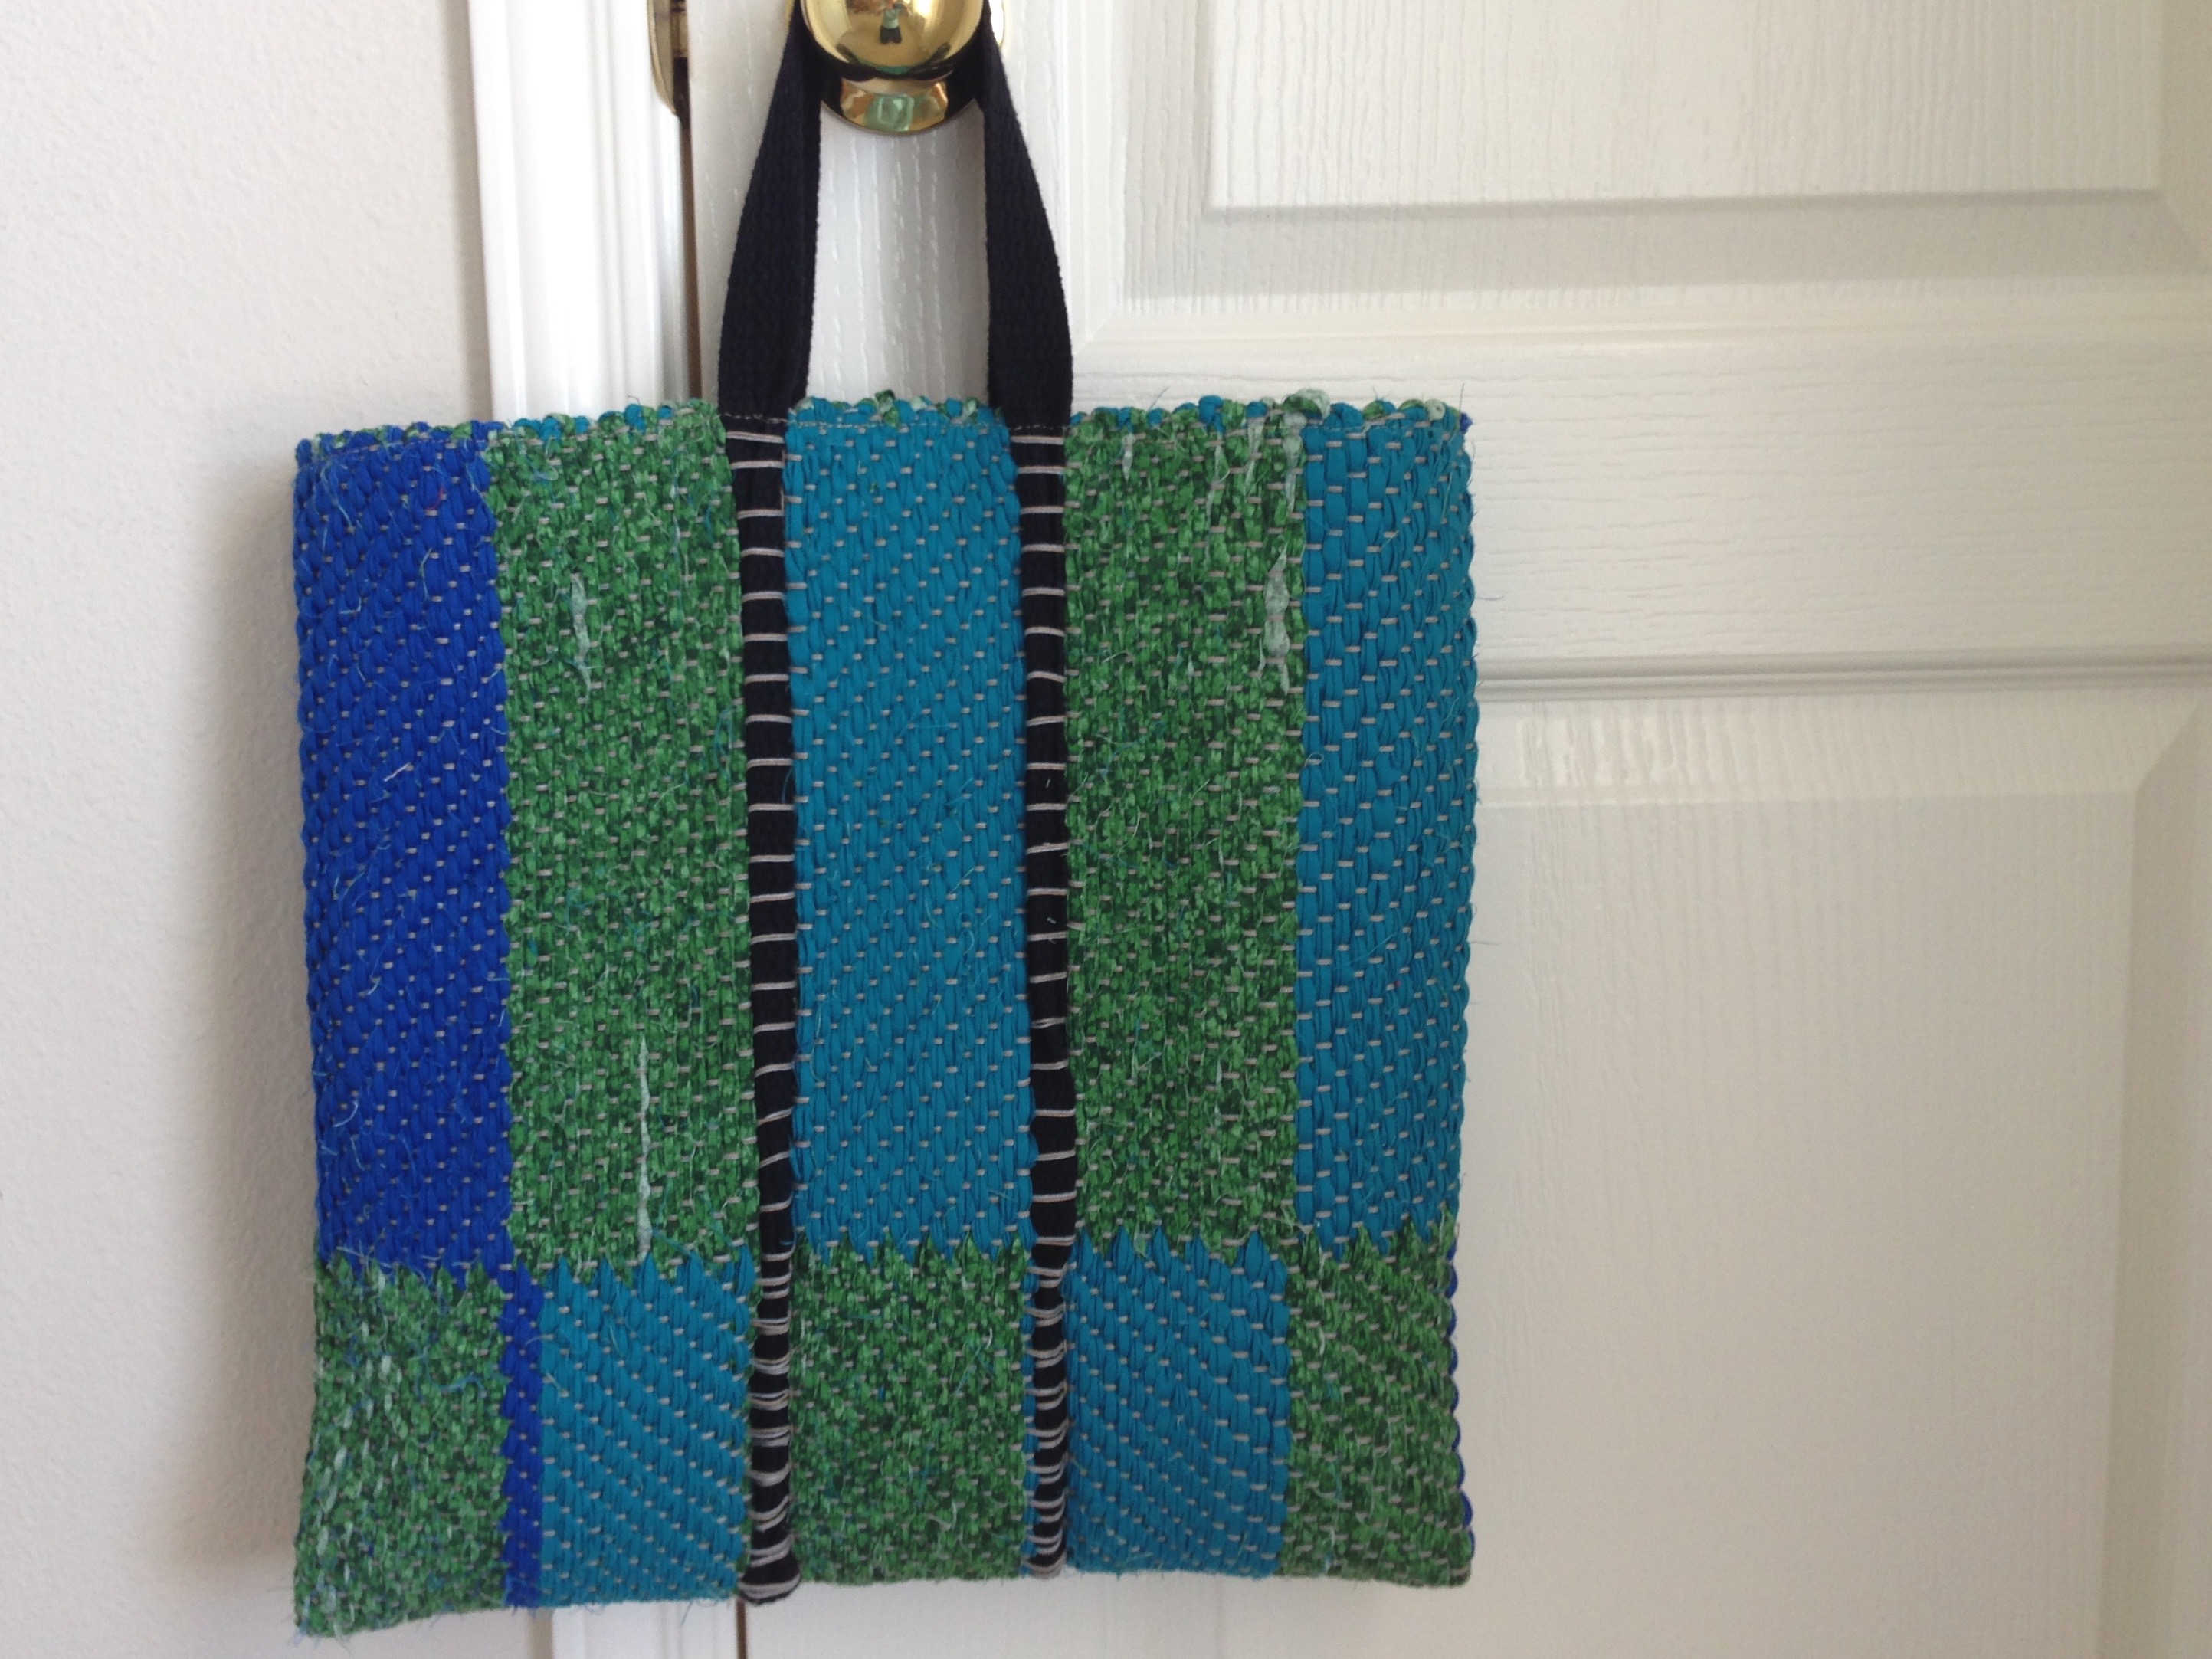
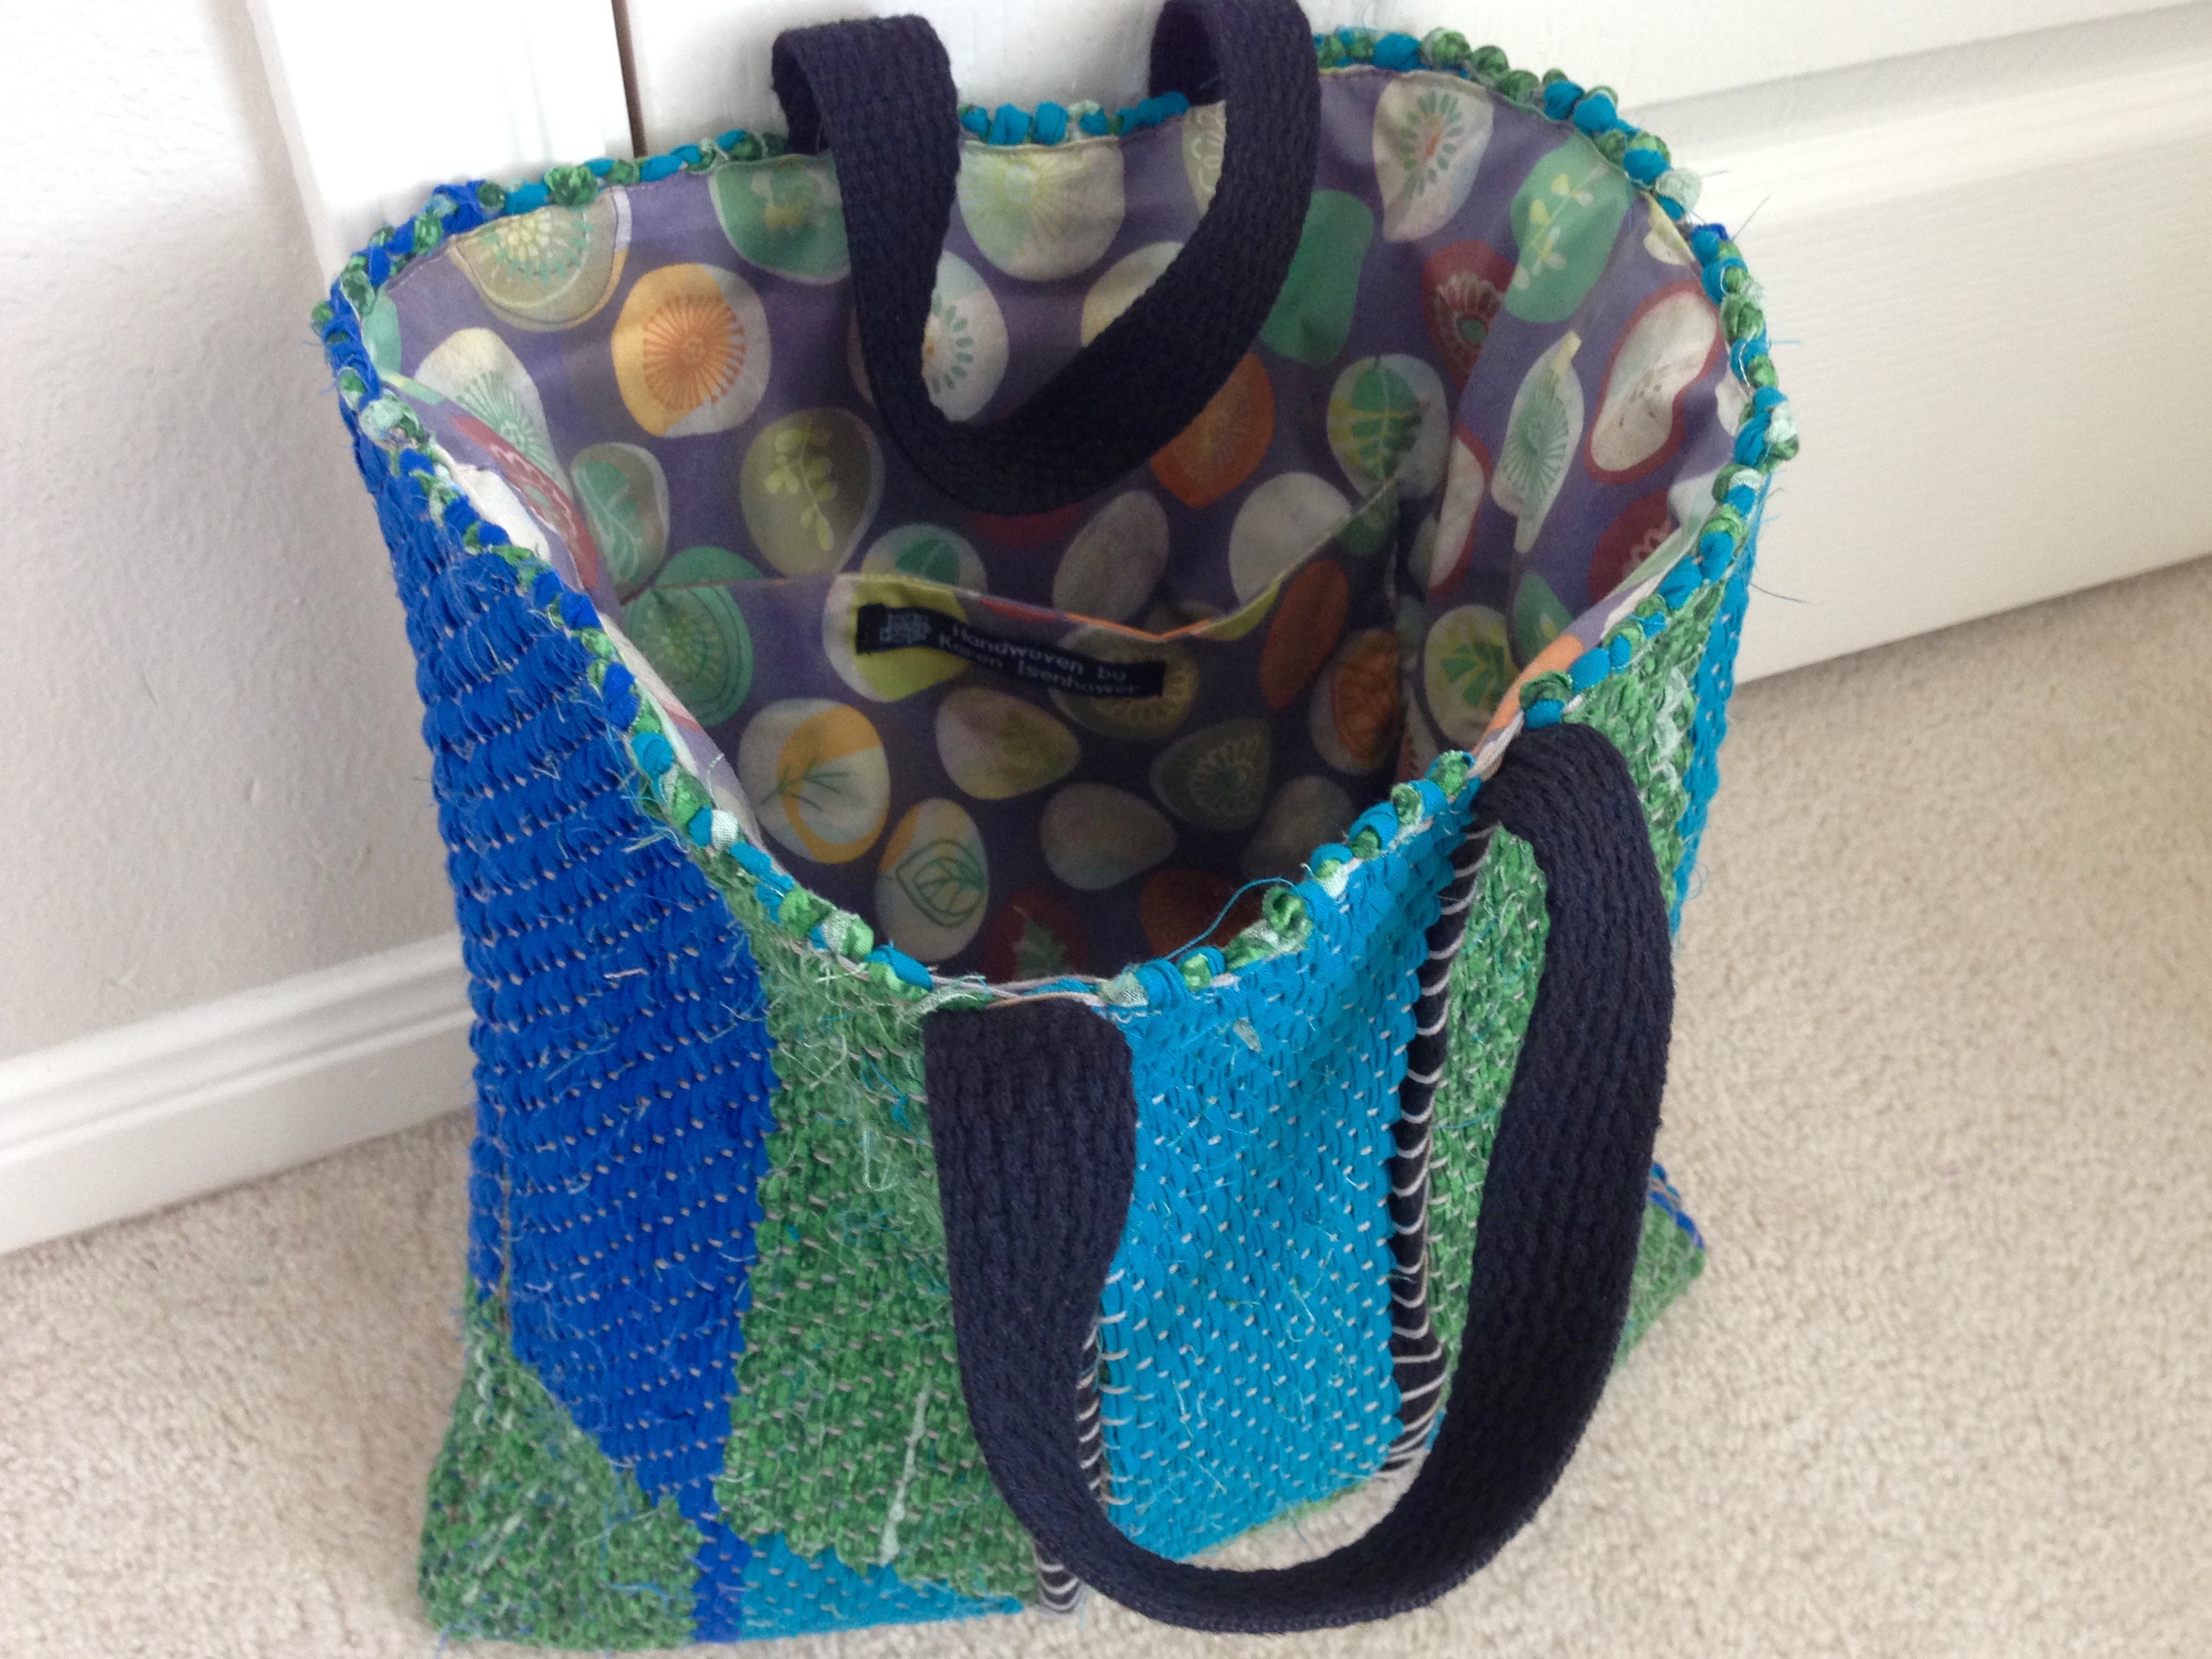
Length of 1-inch/2.5 cm black cotton webbing is woven in. The webbing that extends beyond both selvedges will form the bag handle. Rag weaving continues for a few inches before placing the webbing ends back into the shed.Both ends of the webbing strap are tapered, and then overlapped in the shed before beating them in.Temple maintains the weaving width as the rag weave continues past the woven-in handle straps.Warpends are secured, as usual. First, square knots, and then cut off to 1/2 inch/1 cm.Sewing the sides of the bag, right sides together. I am using the four rows of woven rug warp at the beginning of the woven hem as my stitching line.After turning the bag right-side out, and pressing the seams open, I created a simple flat lining, with added pocket, to fit inside the bag.Lining is pinned into the bag, matching seams and mid-points at front and back.Lining is stitched into place with narrow topstitching.Voila!Fun tote bag to carry to and fro.
Next time… Find a strap that is not as stiff, so it will beat in better. Weave in a strap that is the same color as the warp. Make the strap longer. Find a way to secure the cut ends of the strap (this is the biggest issue). Possibly use a band woven on my inkle or band loom for the strap.
What would you use for the strap? Can you think of a good way to secure the ends of the strap together? What other suggestions or thoughts do you have to improve a bag like this? I would love to hear your ideas.
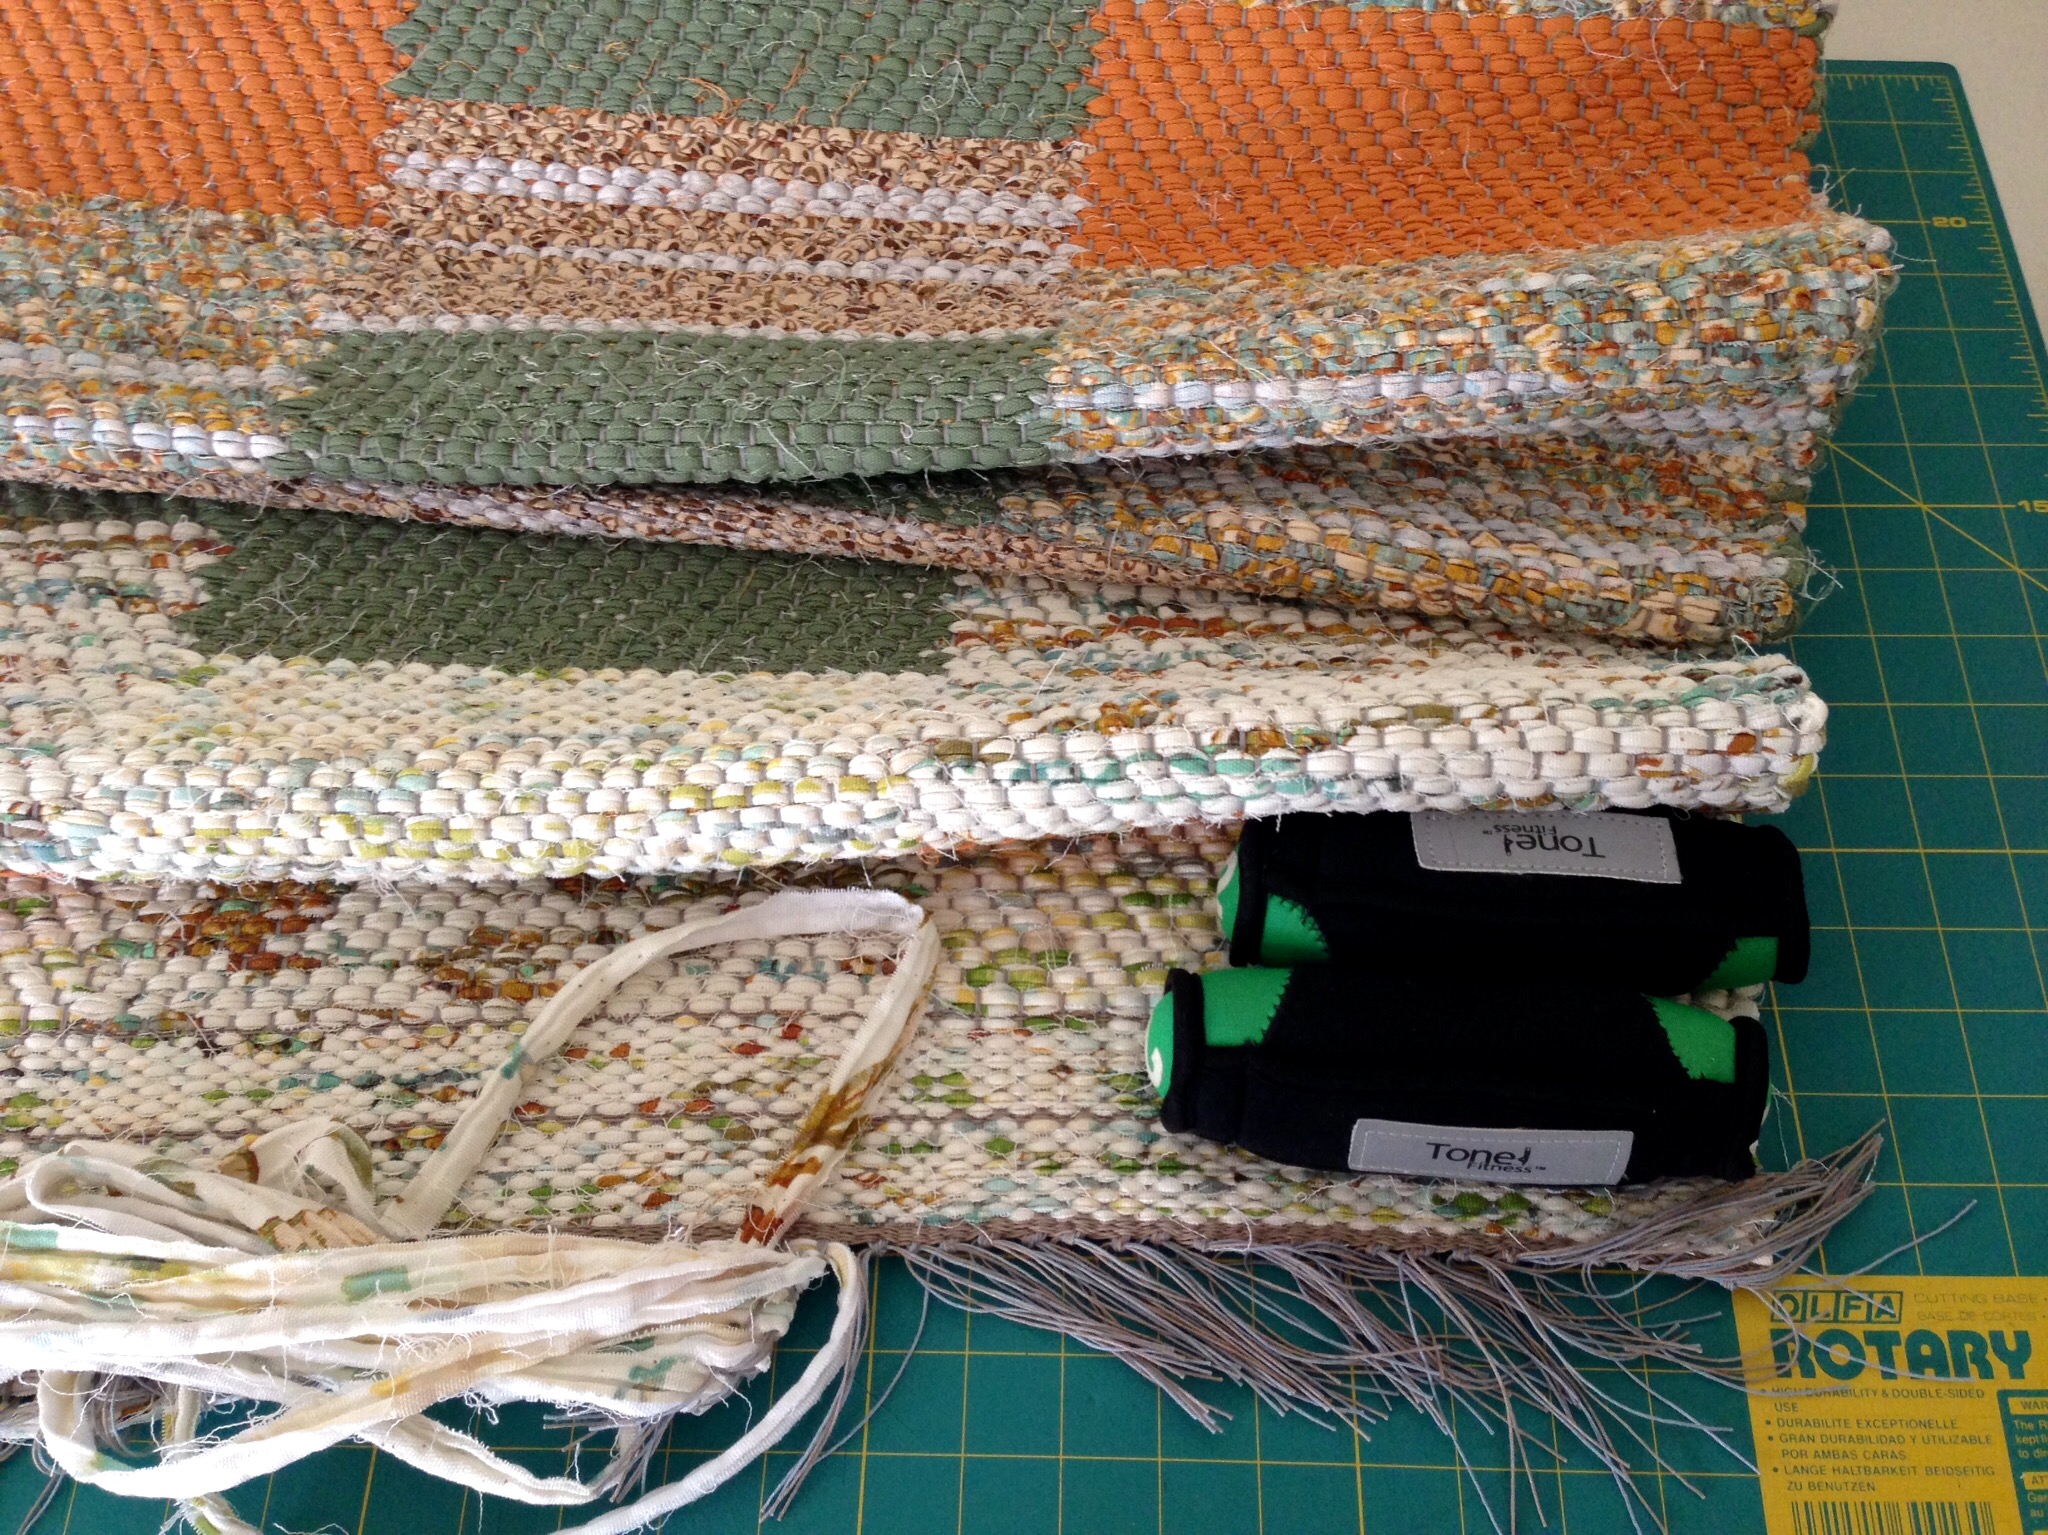
If the ends are not secured first, before hemming, the rug will unravel. Therefore, I end the weaving with ten rows of rug warp, and then three inches/eight cm of a scrap fabric header. When I cut the rug from the loom I leave four inches/ten cm of warp for tying knots.
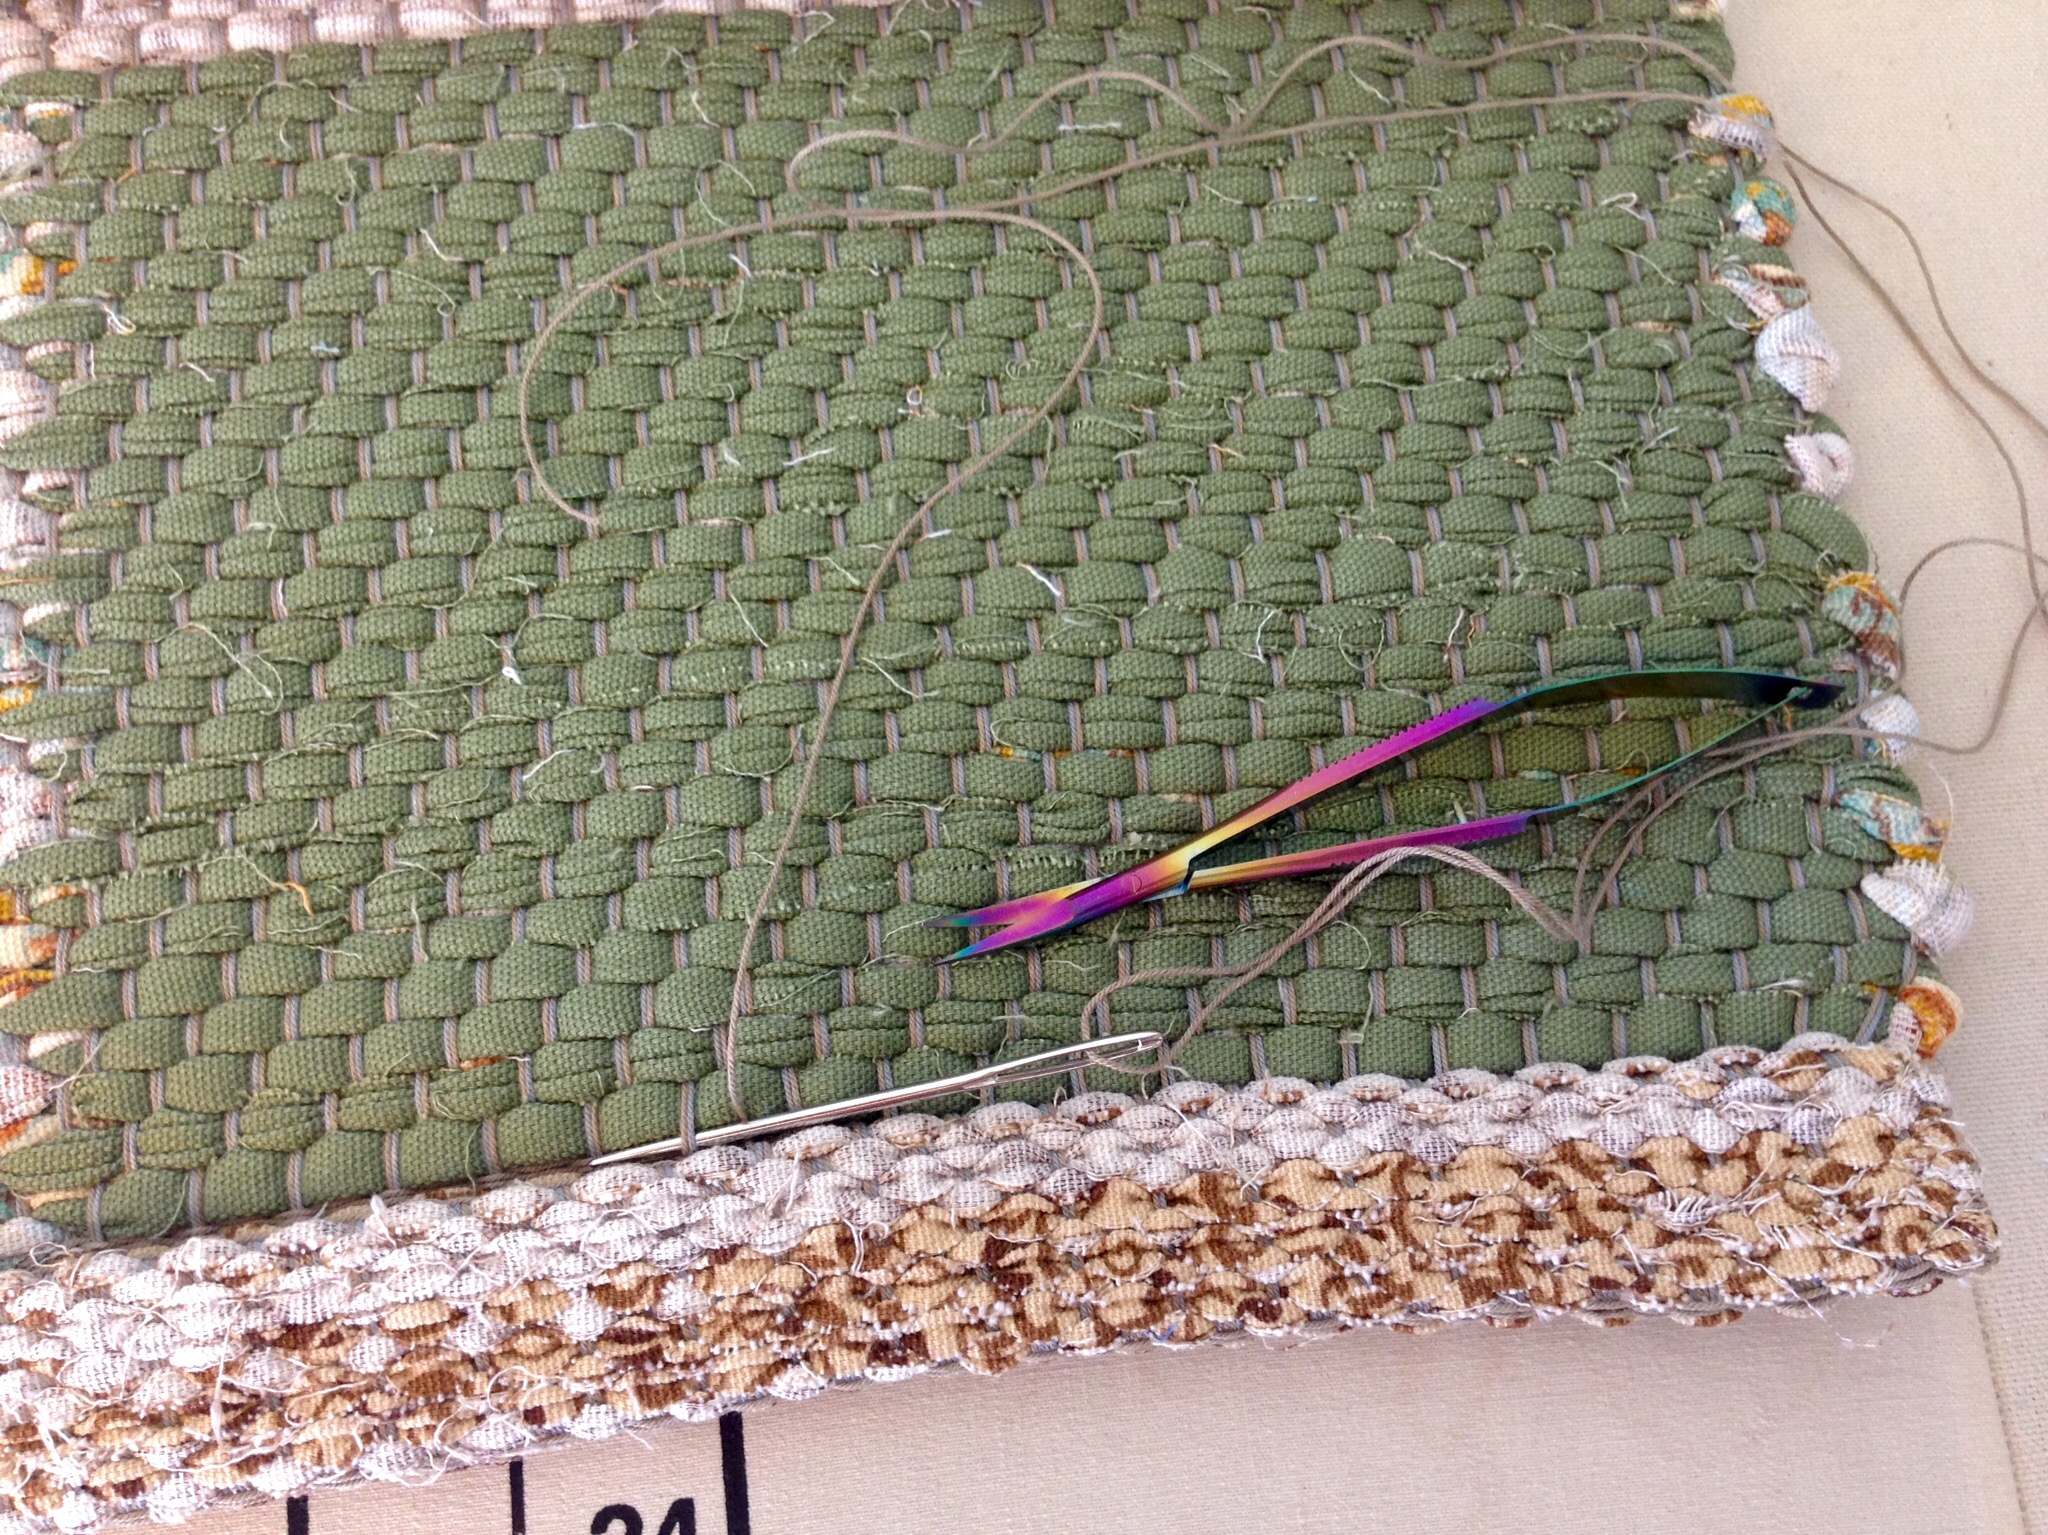
Walking weights hold the rug in place while I carefully remove the header and tie knots.
The header is removed little by little as I make my way across the rug, tying pairs of warp ends into square knots, and cinching them up to the edge of the rug. I trim the ends to 1/2 inch/1 cm. Next, I fold and steam press the hem. With a blunt tapestry needle and a length of warp yarn 1 1/2 times the width of the rug, I stitch the hem closed by catching the warp threads. The warp ends are fully secured and closed up in the hem. This rug will endure through years and years of wear and tear.
First I stitch the side of the hem closed, and then I stitch the hem, catching the warp ends with a blunt tapestry needle. This creates a nearly invisible hem seam, making the rug completely reversible.
Guard what you believe. It is what you believe that determines what you think, from which your behavior is formed. When beliefs are convictions, rather than mere philosophical ideas, they are firmly knotted in place, hemmed in by wisdom and truth. Nothing will unravel this cloth.
Efficiency isn’t always faster. I cut these two rugs off even though there is still warp on the loom, because an empty cloth beam enables me to get optimum warp tension for the next rug. It does take additional time and effort to tie back on, but I get better results in the long run. So I call it efficient.
Listening is like that. Most of us think we are too busy to learn new things. But listening well increases our learning capacity. It does take effort, but it is the kind of effort that brings rewards. Good listening habits increase learning efficiency.
How do you hear? Since listening is key to learning and growing, consider these four ways of listening.
Casual listening. In one ear and out the other.
Convenient listening. Interested only as long as it is easy.
Distracted listening. Divided attention.
“Receiving” listening. Fully engaged attention, with fertile soil for seeds of learning to grow.
“Receiving” listening takes effort and attentiveness, but is the most efficient kind of listening because it produces the best results. None of the effort is wasted, and little by little you see the seeds of learning begin to grow into fruit to share with others.
I would love to have you join me in Eureka Springs, Arkansas, August 27-29, 2015. I will be at Red Scottie Fibers at the Shoppes at Fleece ‘N Flax to teach a Double Binding (Dubbelbindning) Rag Rug Workshop. I will take you through the steps to design and weave one of these beautiful rag rugs of your own. Small class size; few openings left. Contact me if you would like more information.
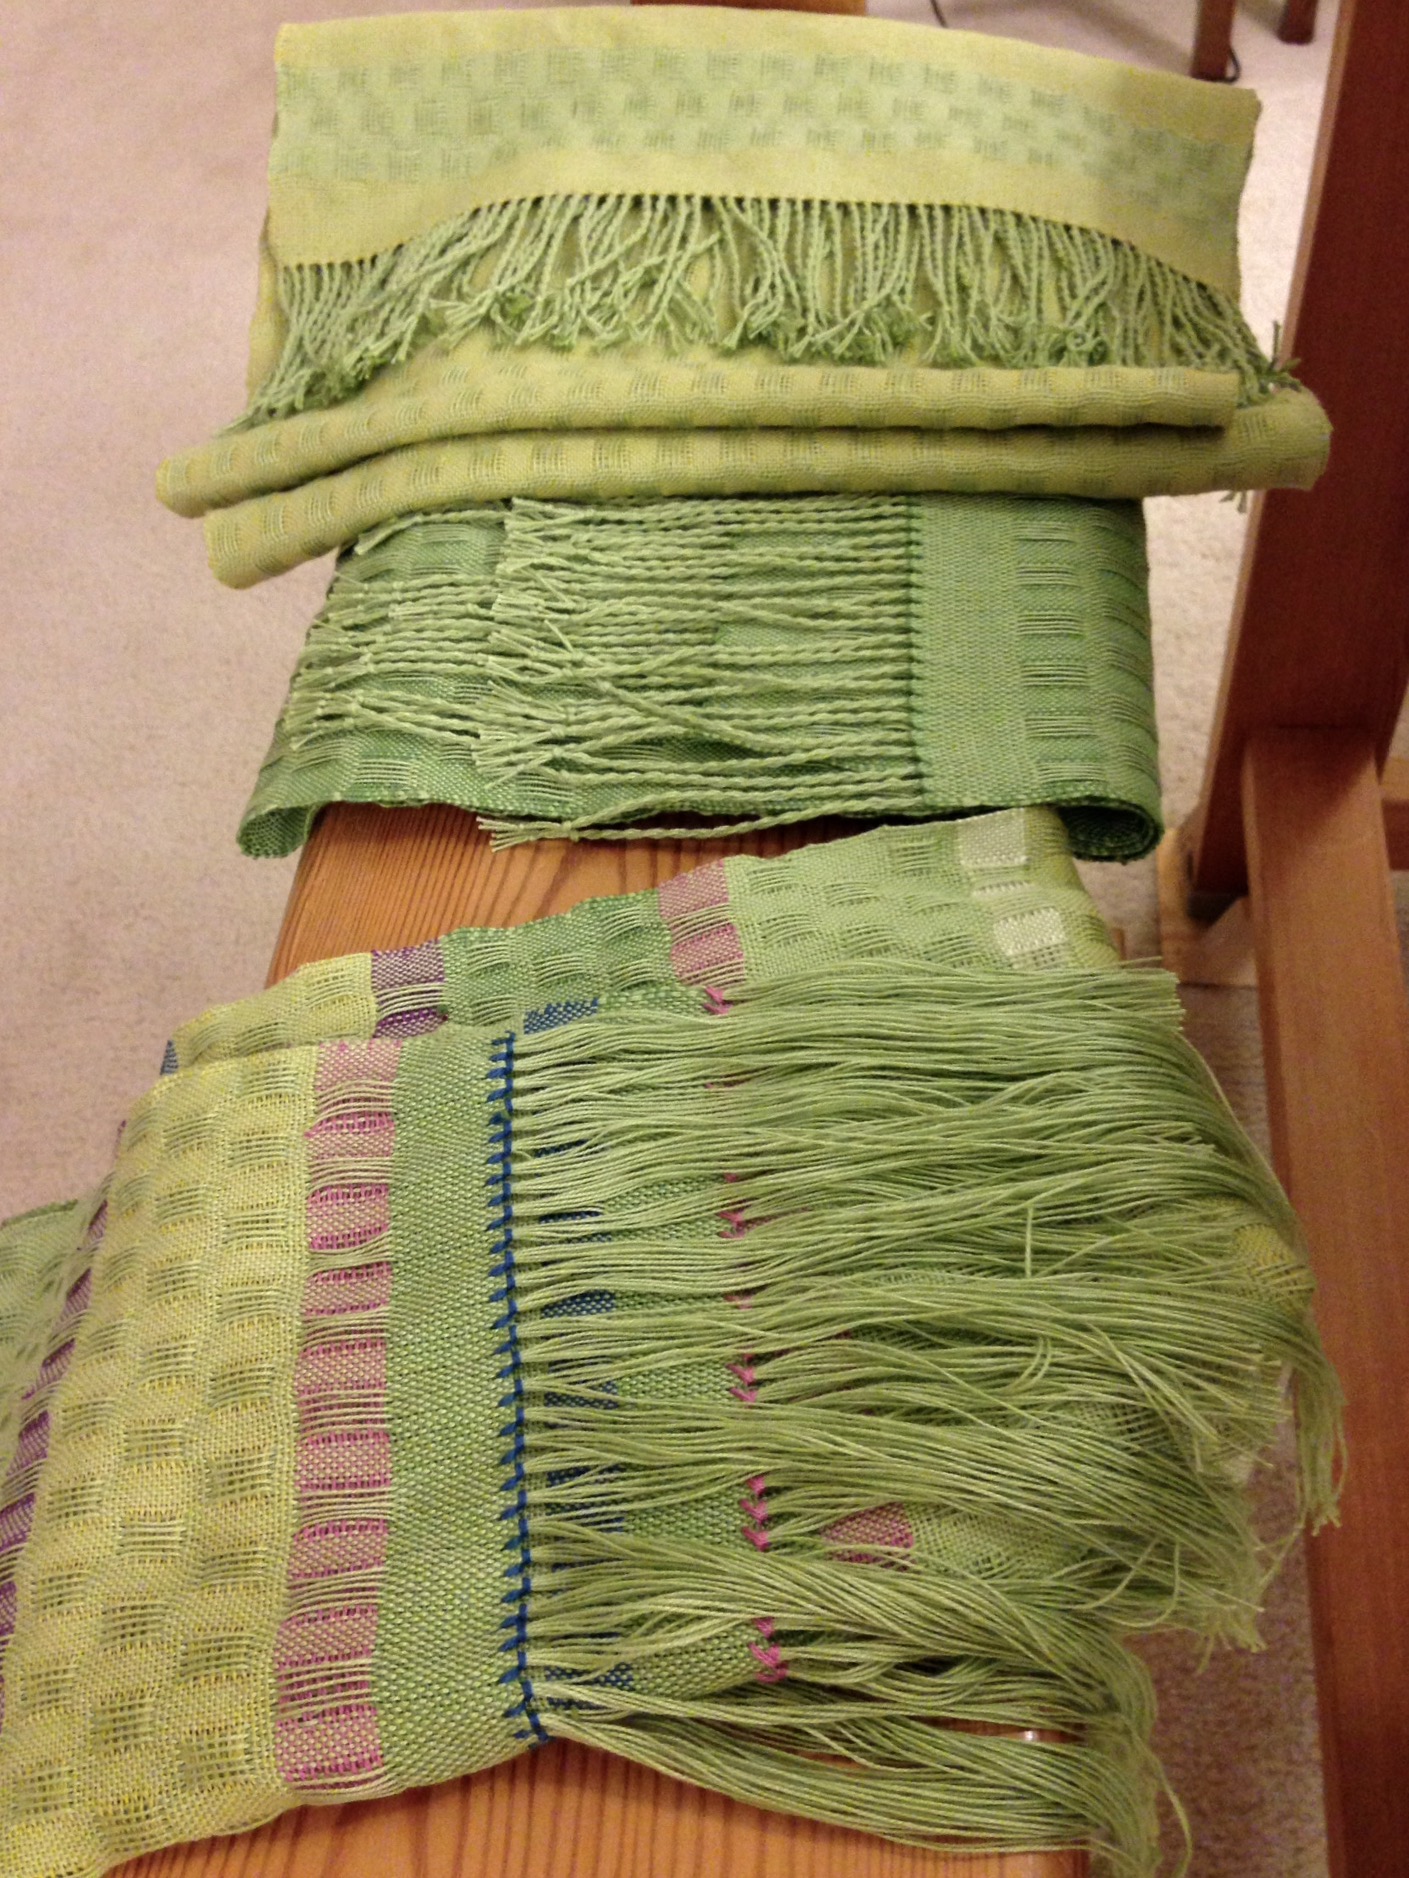
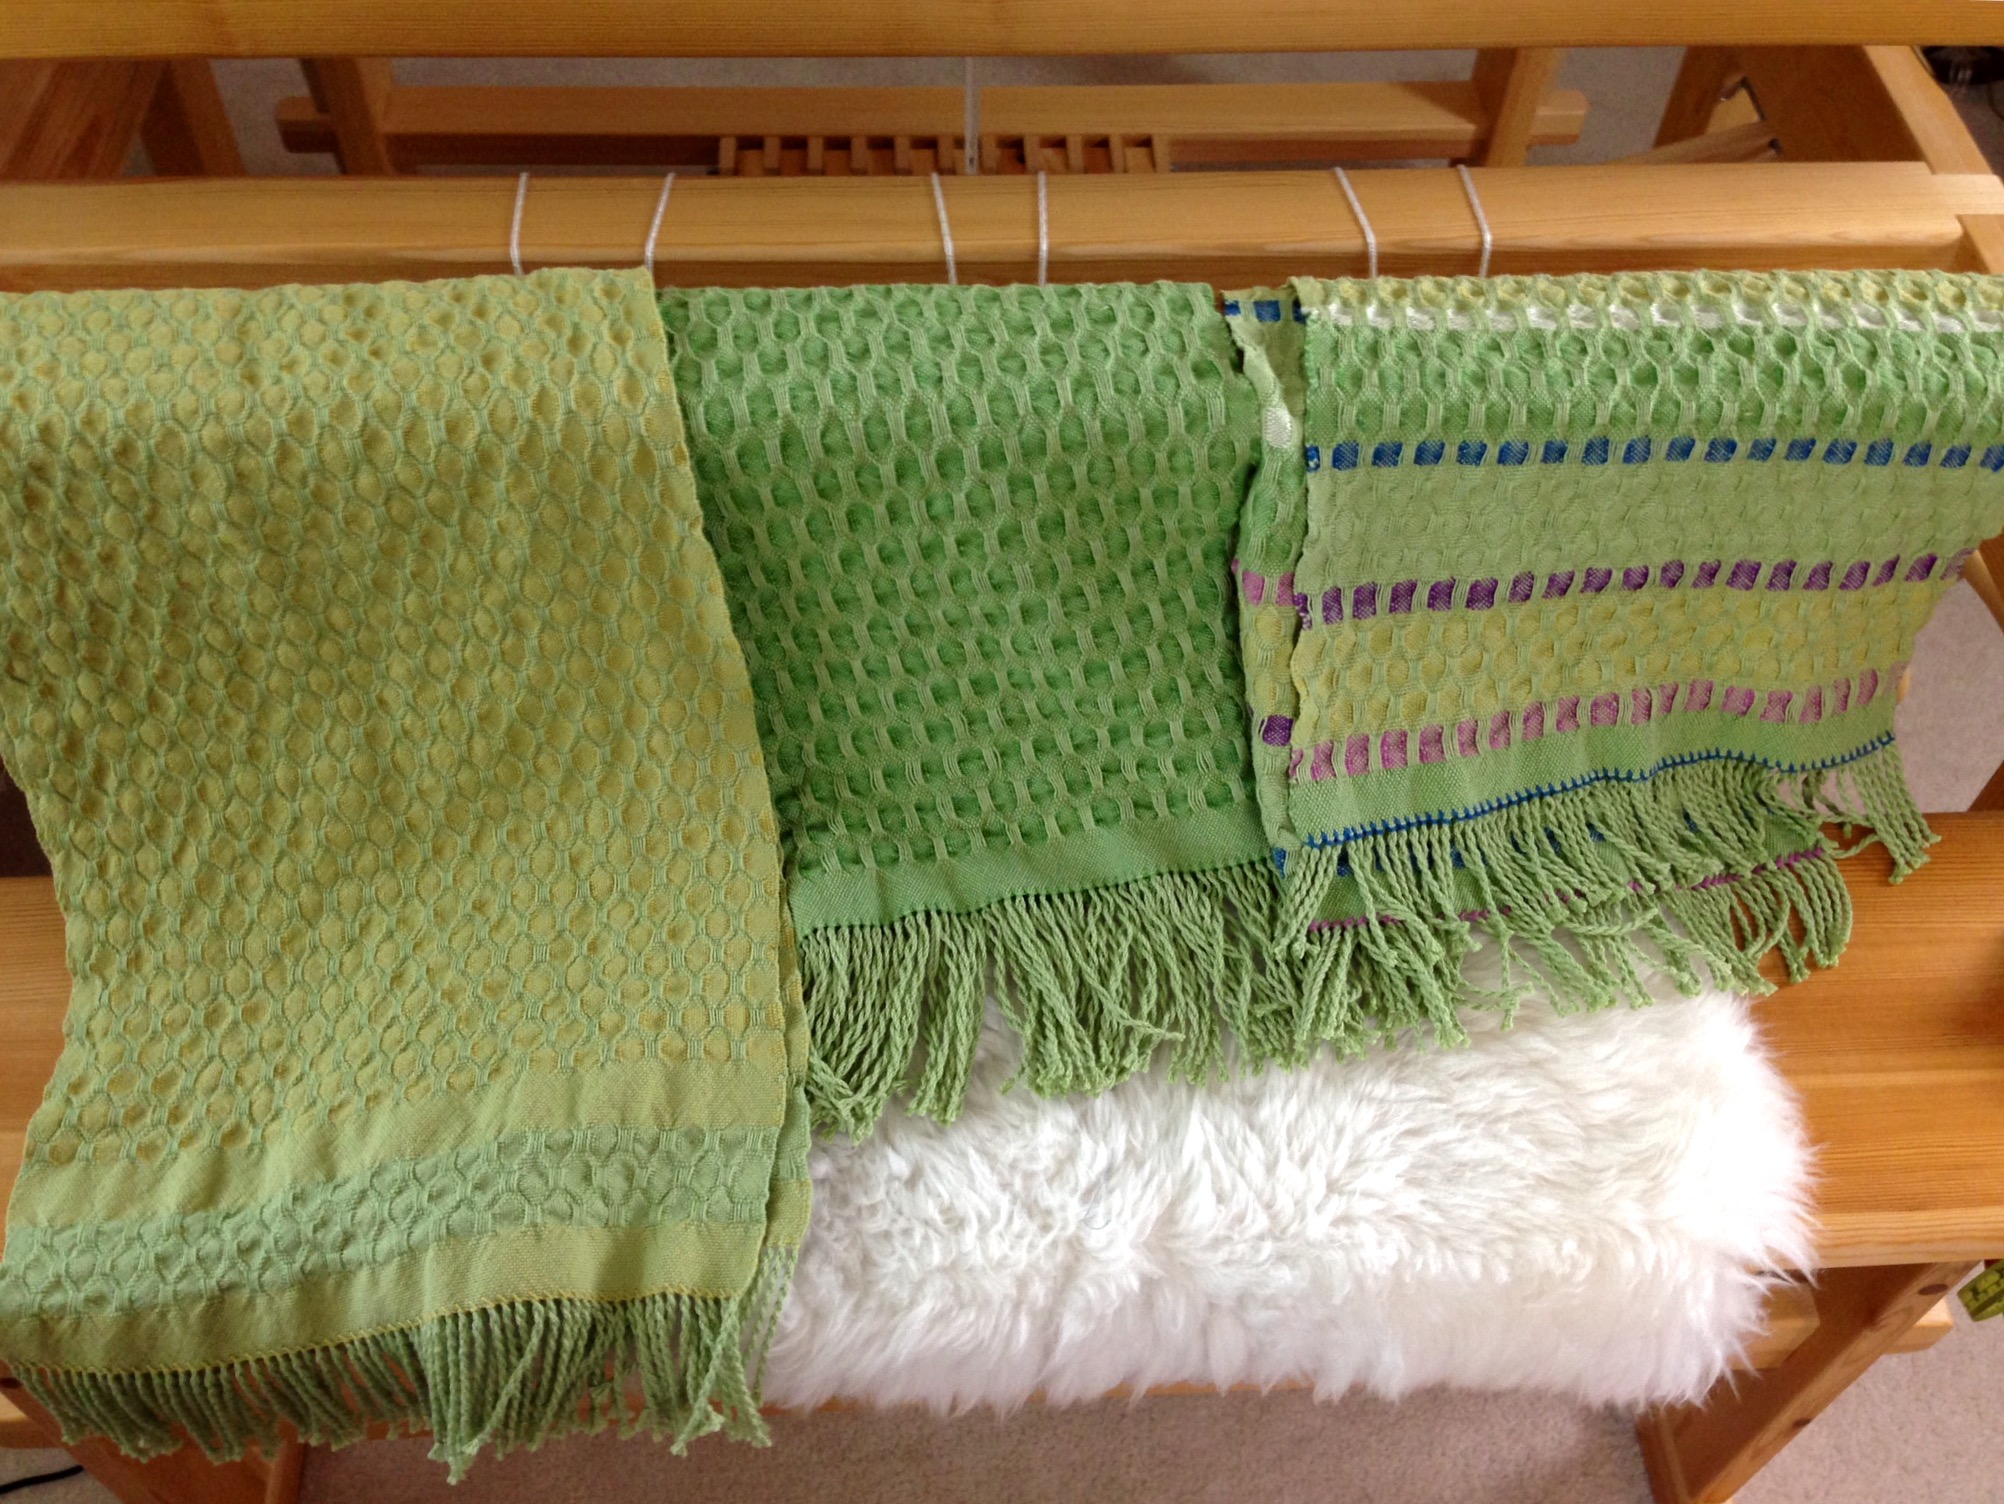
One thing I learned is the scarf with the longest warpfloats has the greatest shrinkage rate. Another thing I learned – again – is to plan a longer warp than what I think I need. The third scarf is significantly shorter than the first two because I ran out of warp. Table runner, anyone? I always include length for sampling, but I need to include more, more, more. Still, I am very happy with the finished results. And, you have a new video to watch! (Scroll down to see it.)
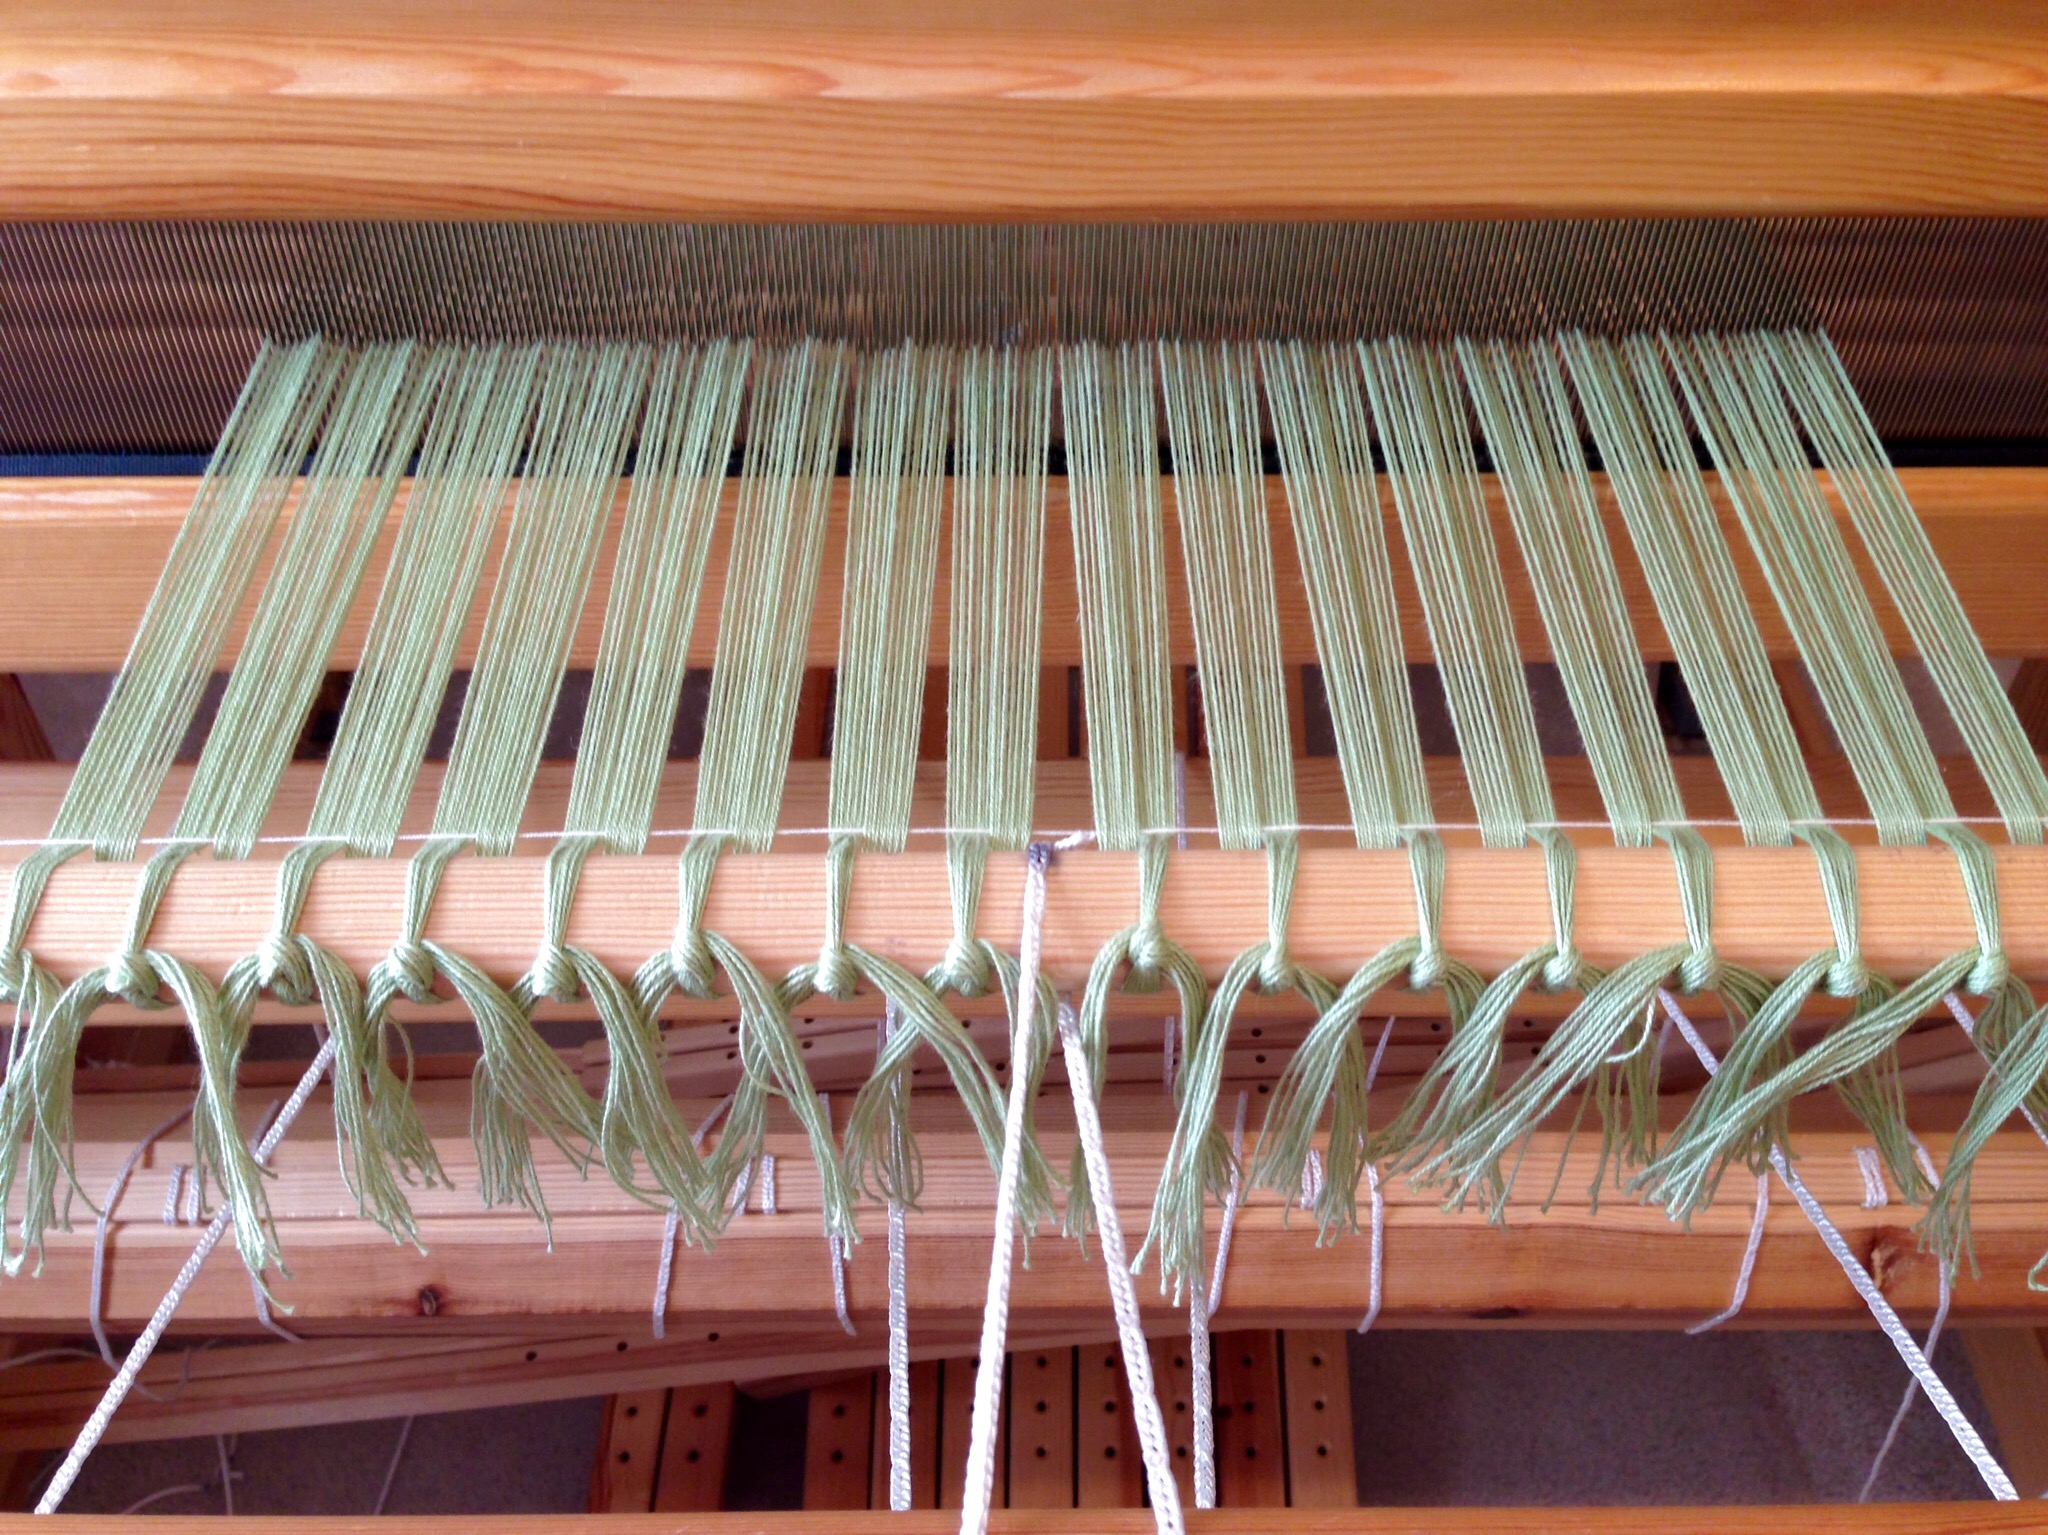
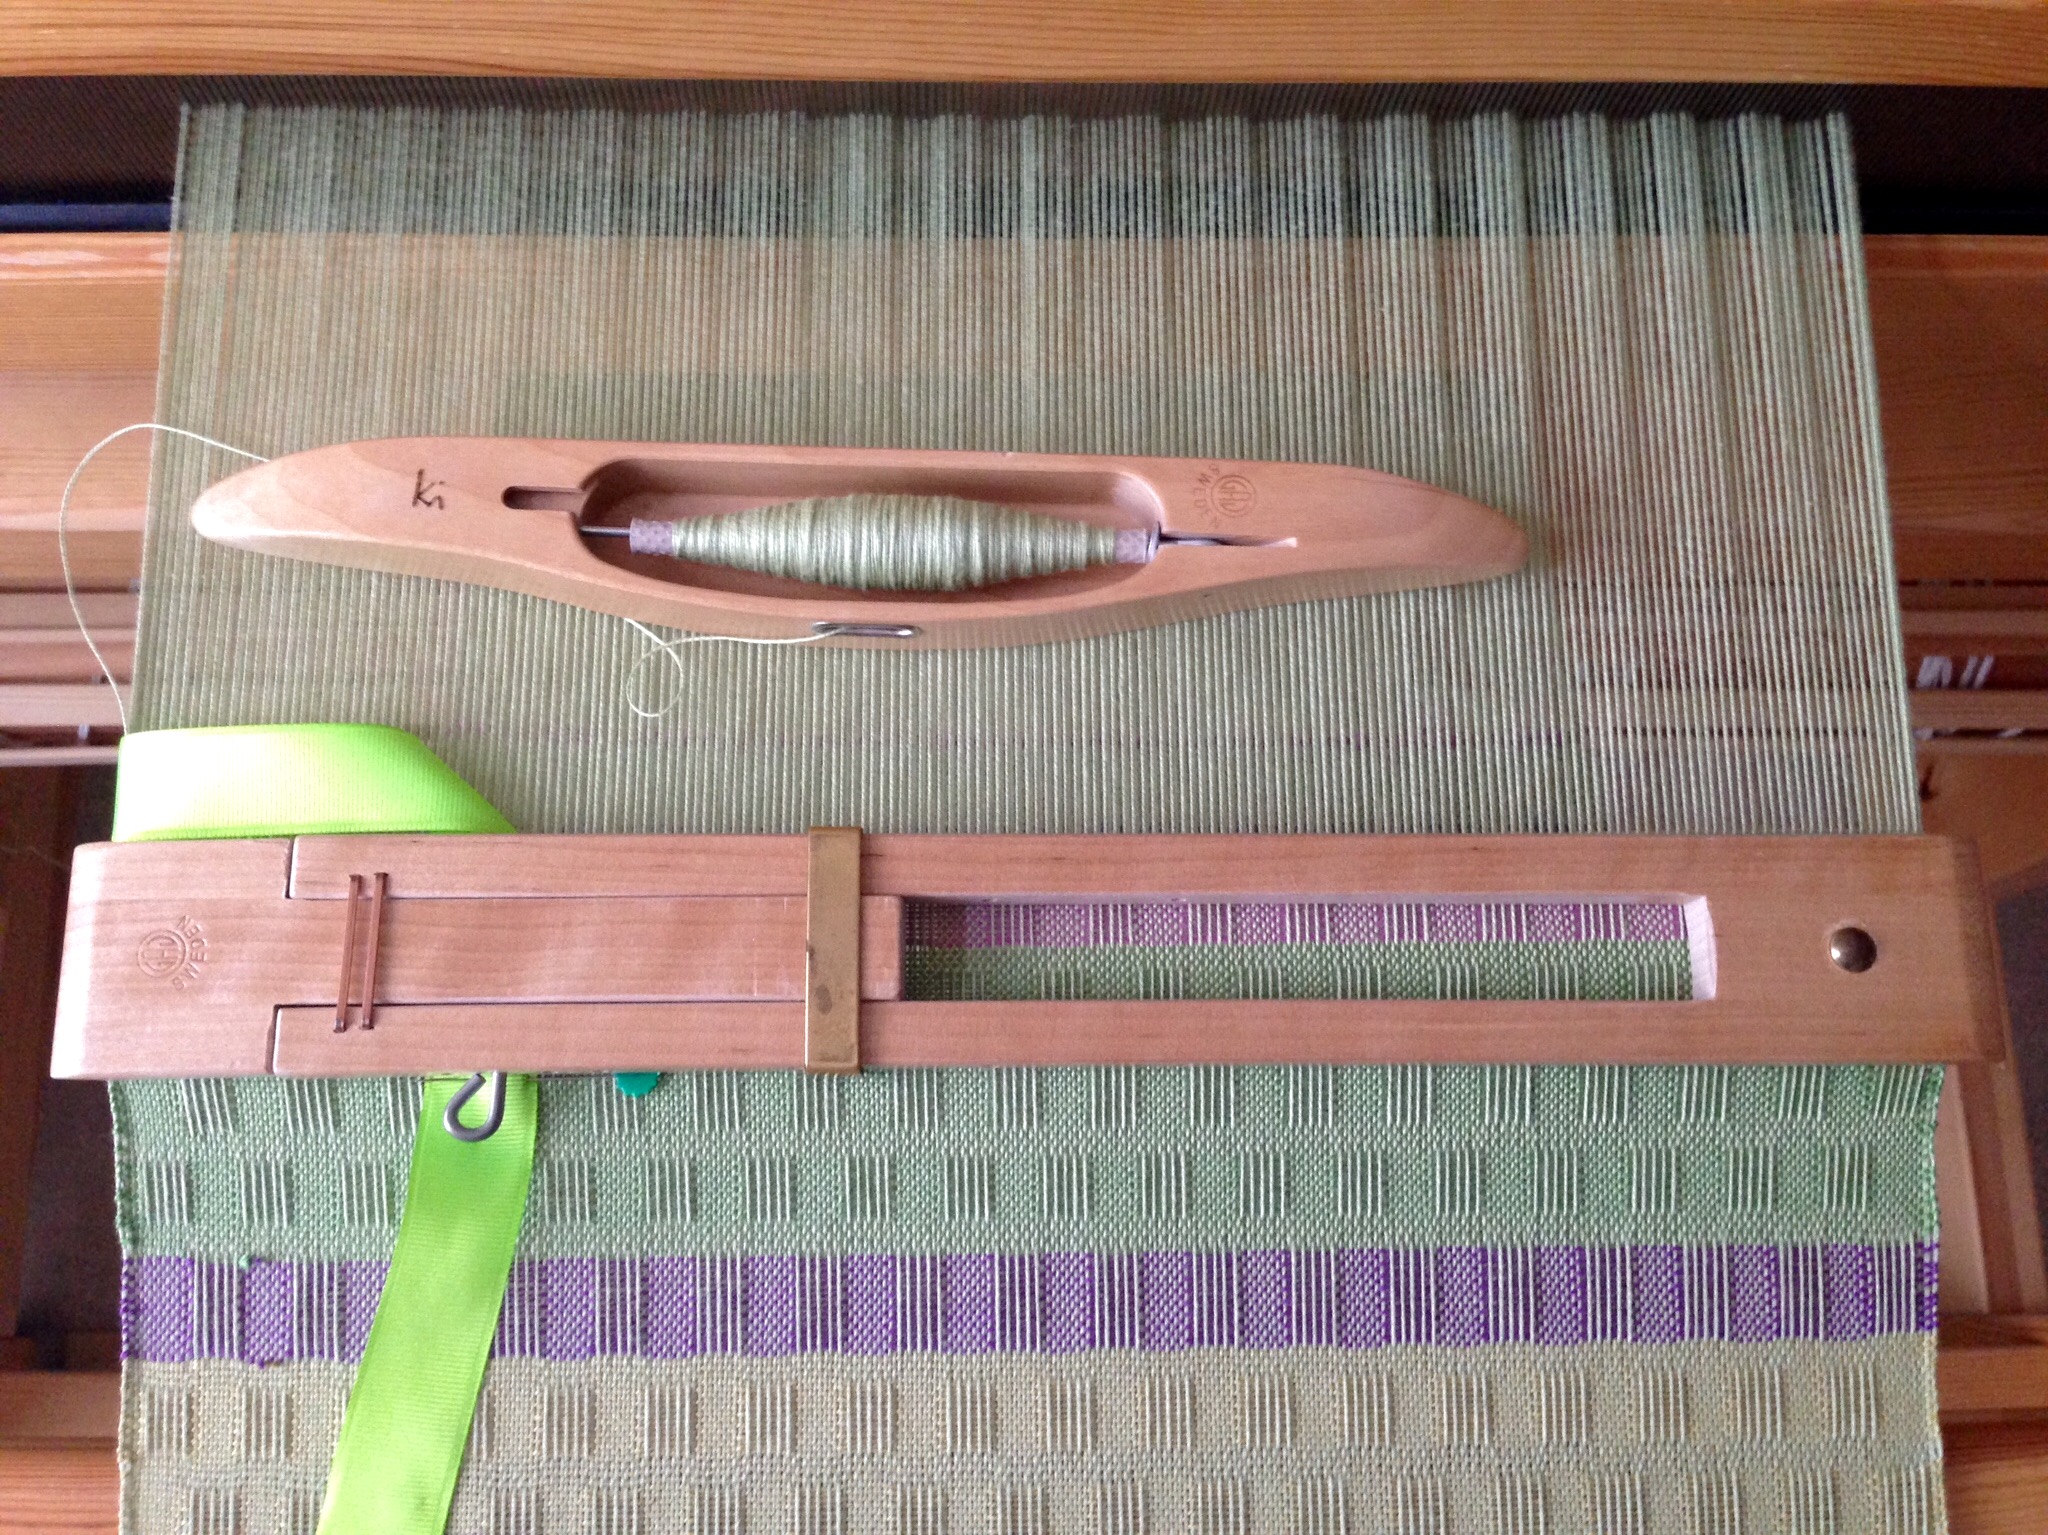
Warp of 8/2 cotton is tied on in 1-inch/2.5 cm sections. The leveling string evens out the warp for immediate weaving.First scarf, with dark green weft, has the longest warp floats. This scarf ended up shorter than the second scarf, even though the first scarf’s length on the loom was longer than the second scarf.Second scarf, with citrine weft, has a border element created with light green weft (same as the warp), including warp floats. The plain weave before and after the border element helps create a natural ruffle at each end of the finished scarf.Saving the best for last, I used a series of springtime colors to create this scarf. The varied lengths of the floats give an illusion of colored ribbons crossing the scarf.
I wet finished the scarves in the washing machine, adding a small amount of Eucalan, on the gentle cycle, with warm wash and warm rinse, and very short spin. They went in the dryer on low heat until damp, and then hung to dry the rest of the way. The scarves came out lightly puckered, which is exactly what I had hoped for. I could have washed them in hot water and left them in for a longer amount of time if I had wanted the scarves more dramatically puckered.
Two scarves with fringes twisted. One waiting to be a film star in “Using a Fringe Twister.” This is before wet finishing.Wet finishing happens after the fringe has been twisted. These scarves have done it all. They are finished.First seen on Instagram @celloweaver #warpedforgood
There’s nothing like finishing a fun project! Clearly, I know what to do next… Dress the big loom and keeping on weaving.
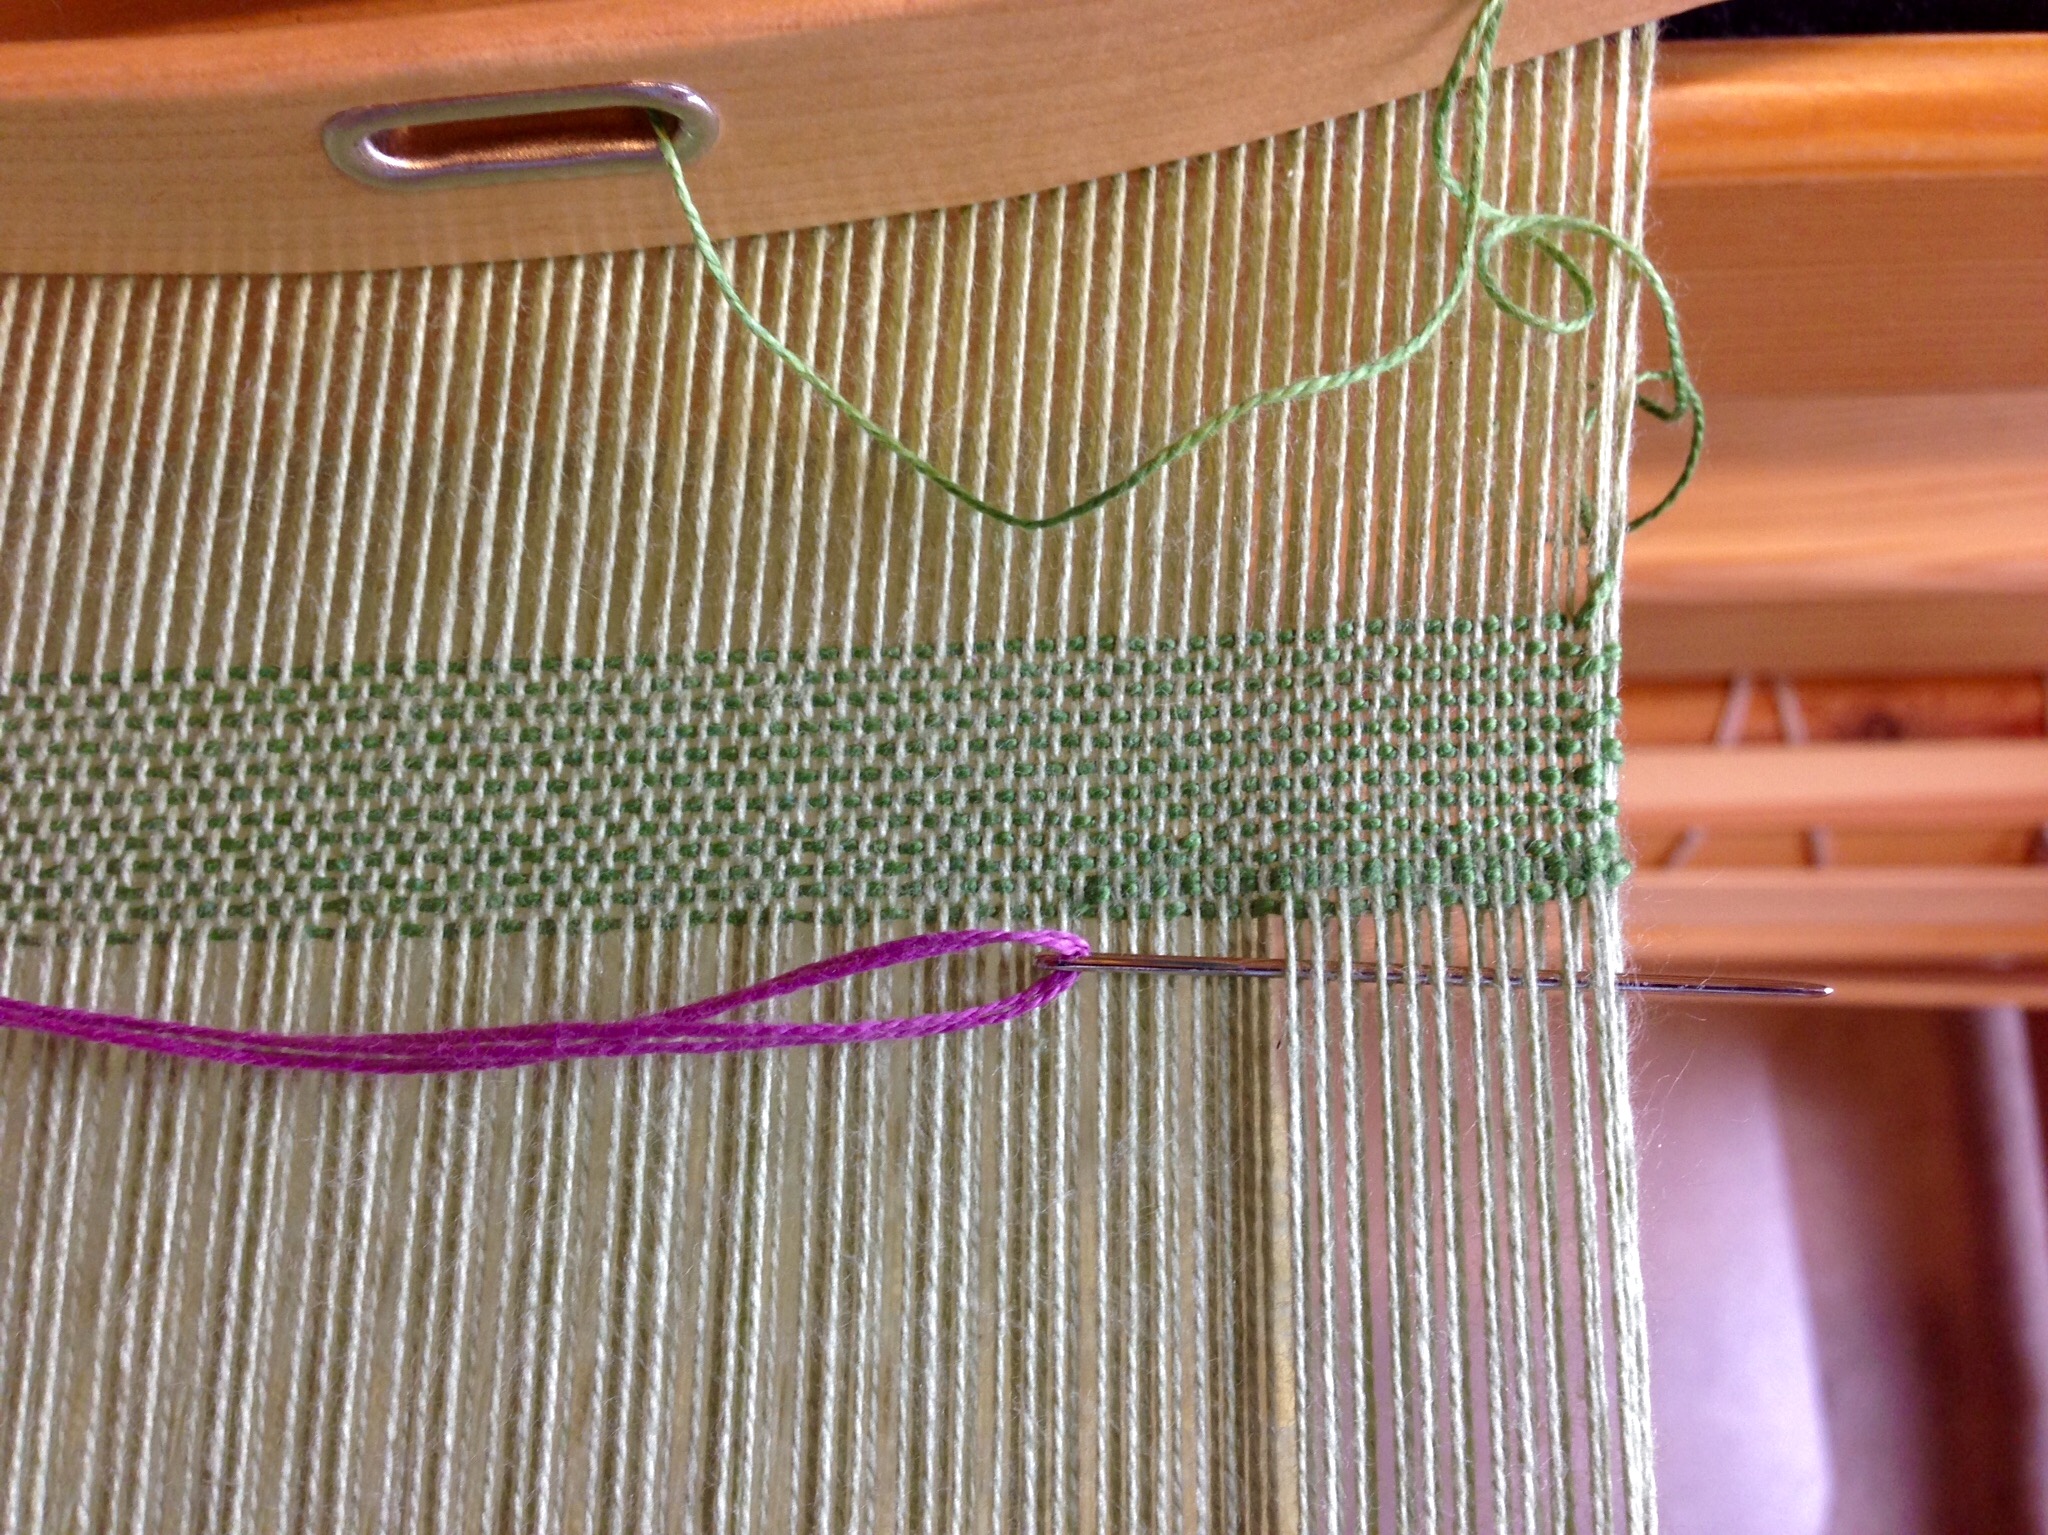
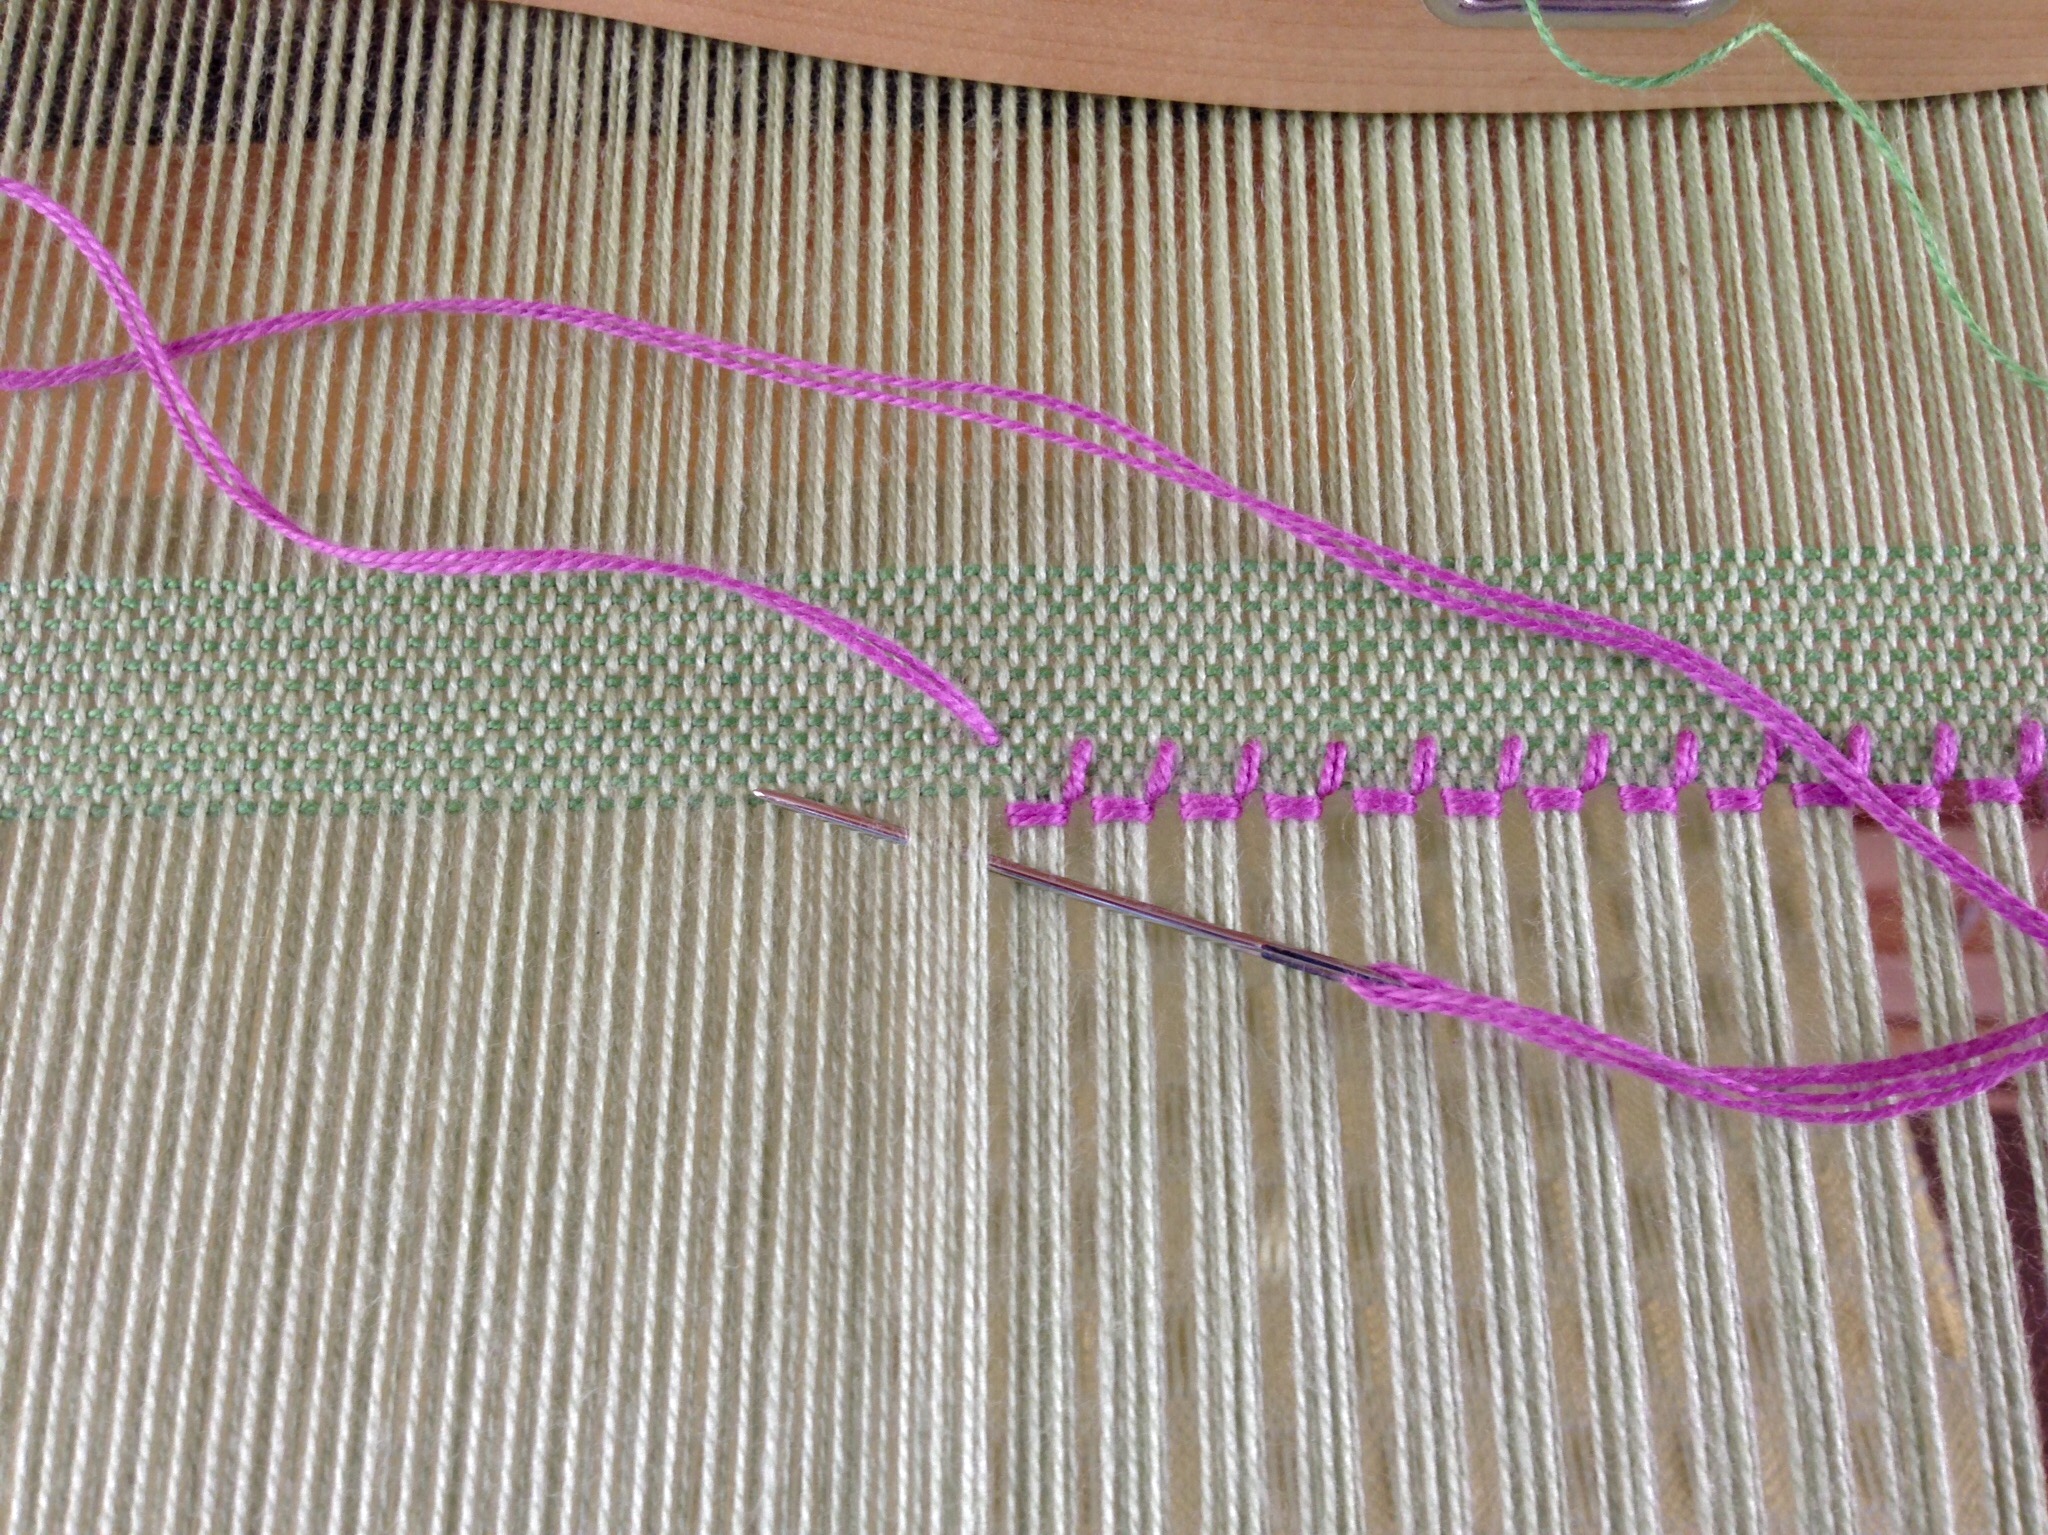
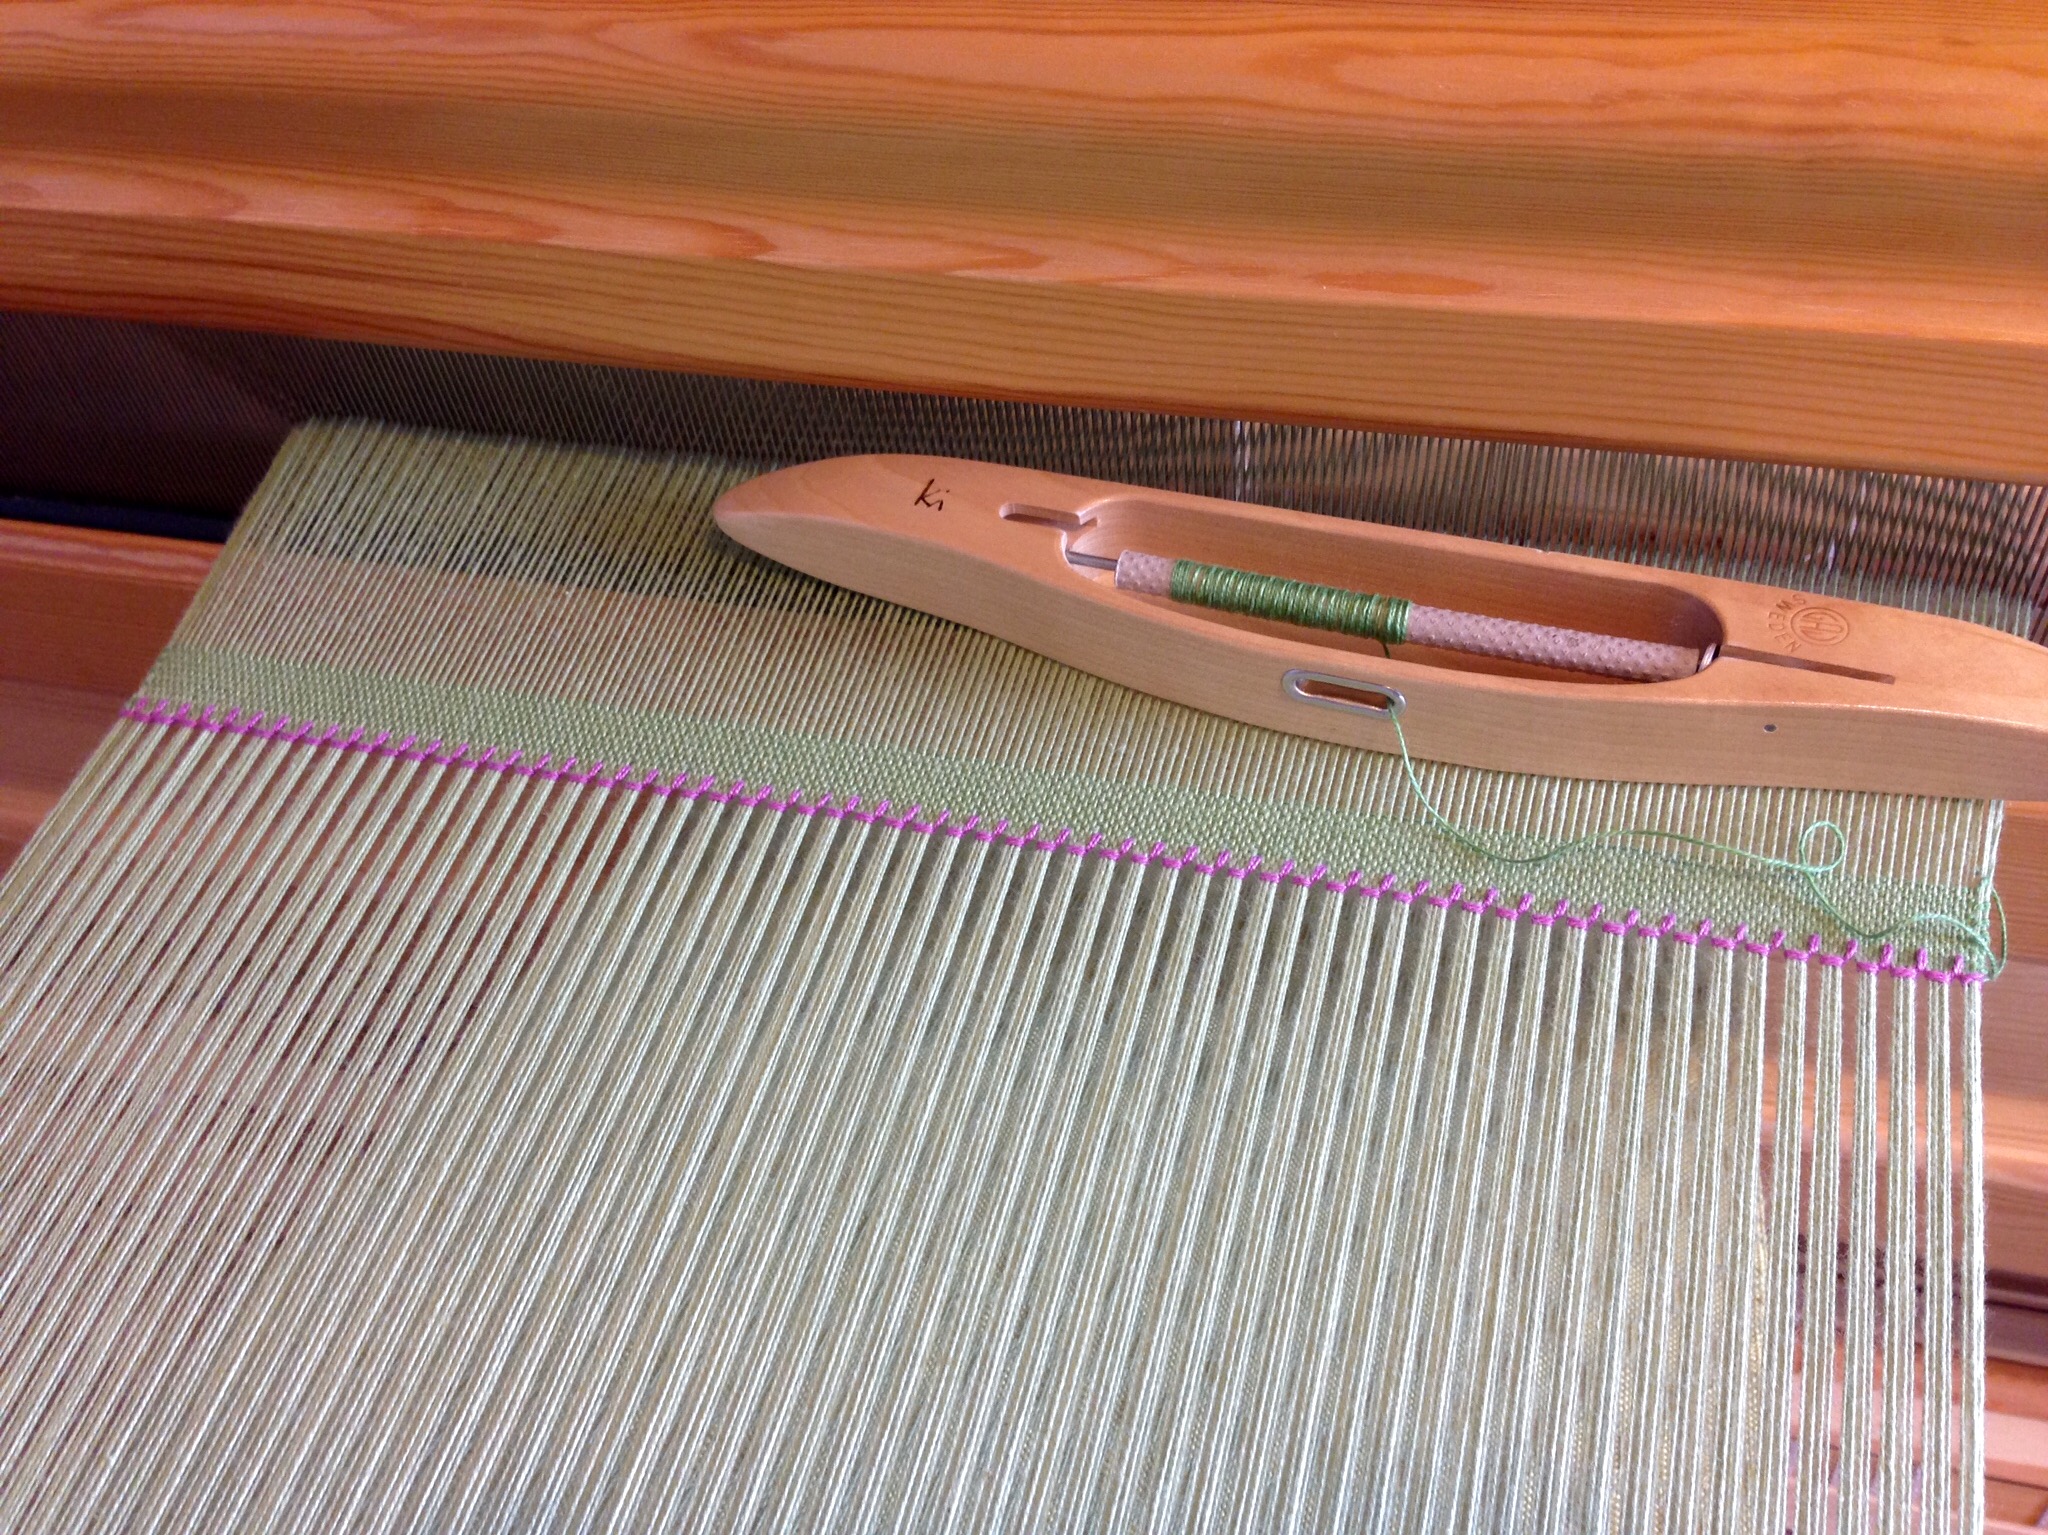
An embroidered trim is what I have in mind for this scarf. Hemstitching is just that. Instead of the usual single strand, I am using two strands of the 8/2 cotton weft in a contrasting color to accentuate the embroidered look. The hemstitching marks the beginning and the end. You can make hemstitching barely noticeable if you want, or you can make it so bold it can’t be missed, like I am doing with this one.
Hemstitching, with Contrasting Color:
Preliminary
Weave an inch/2.5 cm or more of fabric for a header.
Thread a blunt tapestry needle with a single or doubled strand of weft thread four times the weaving width.
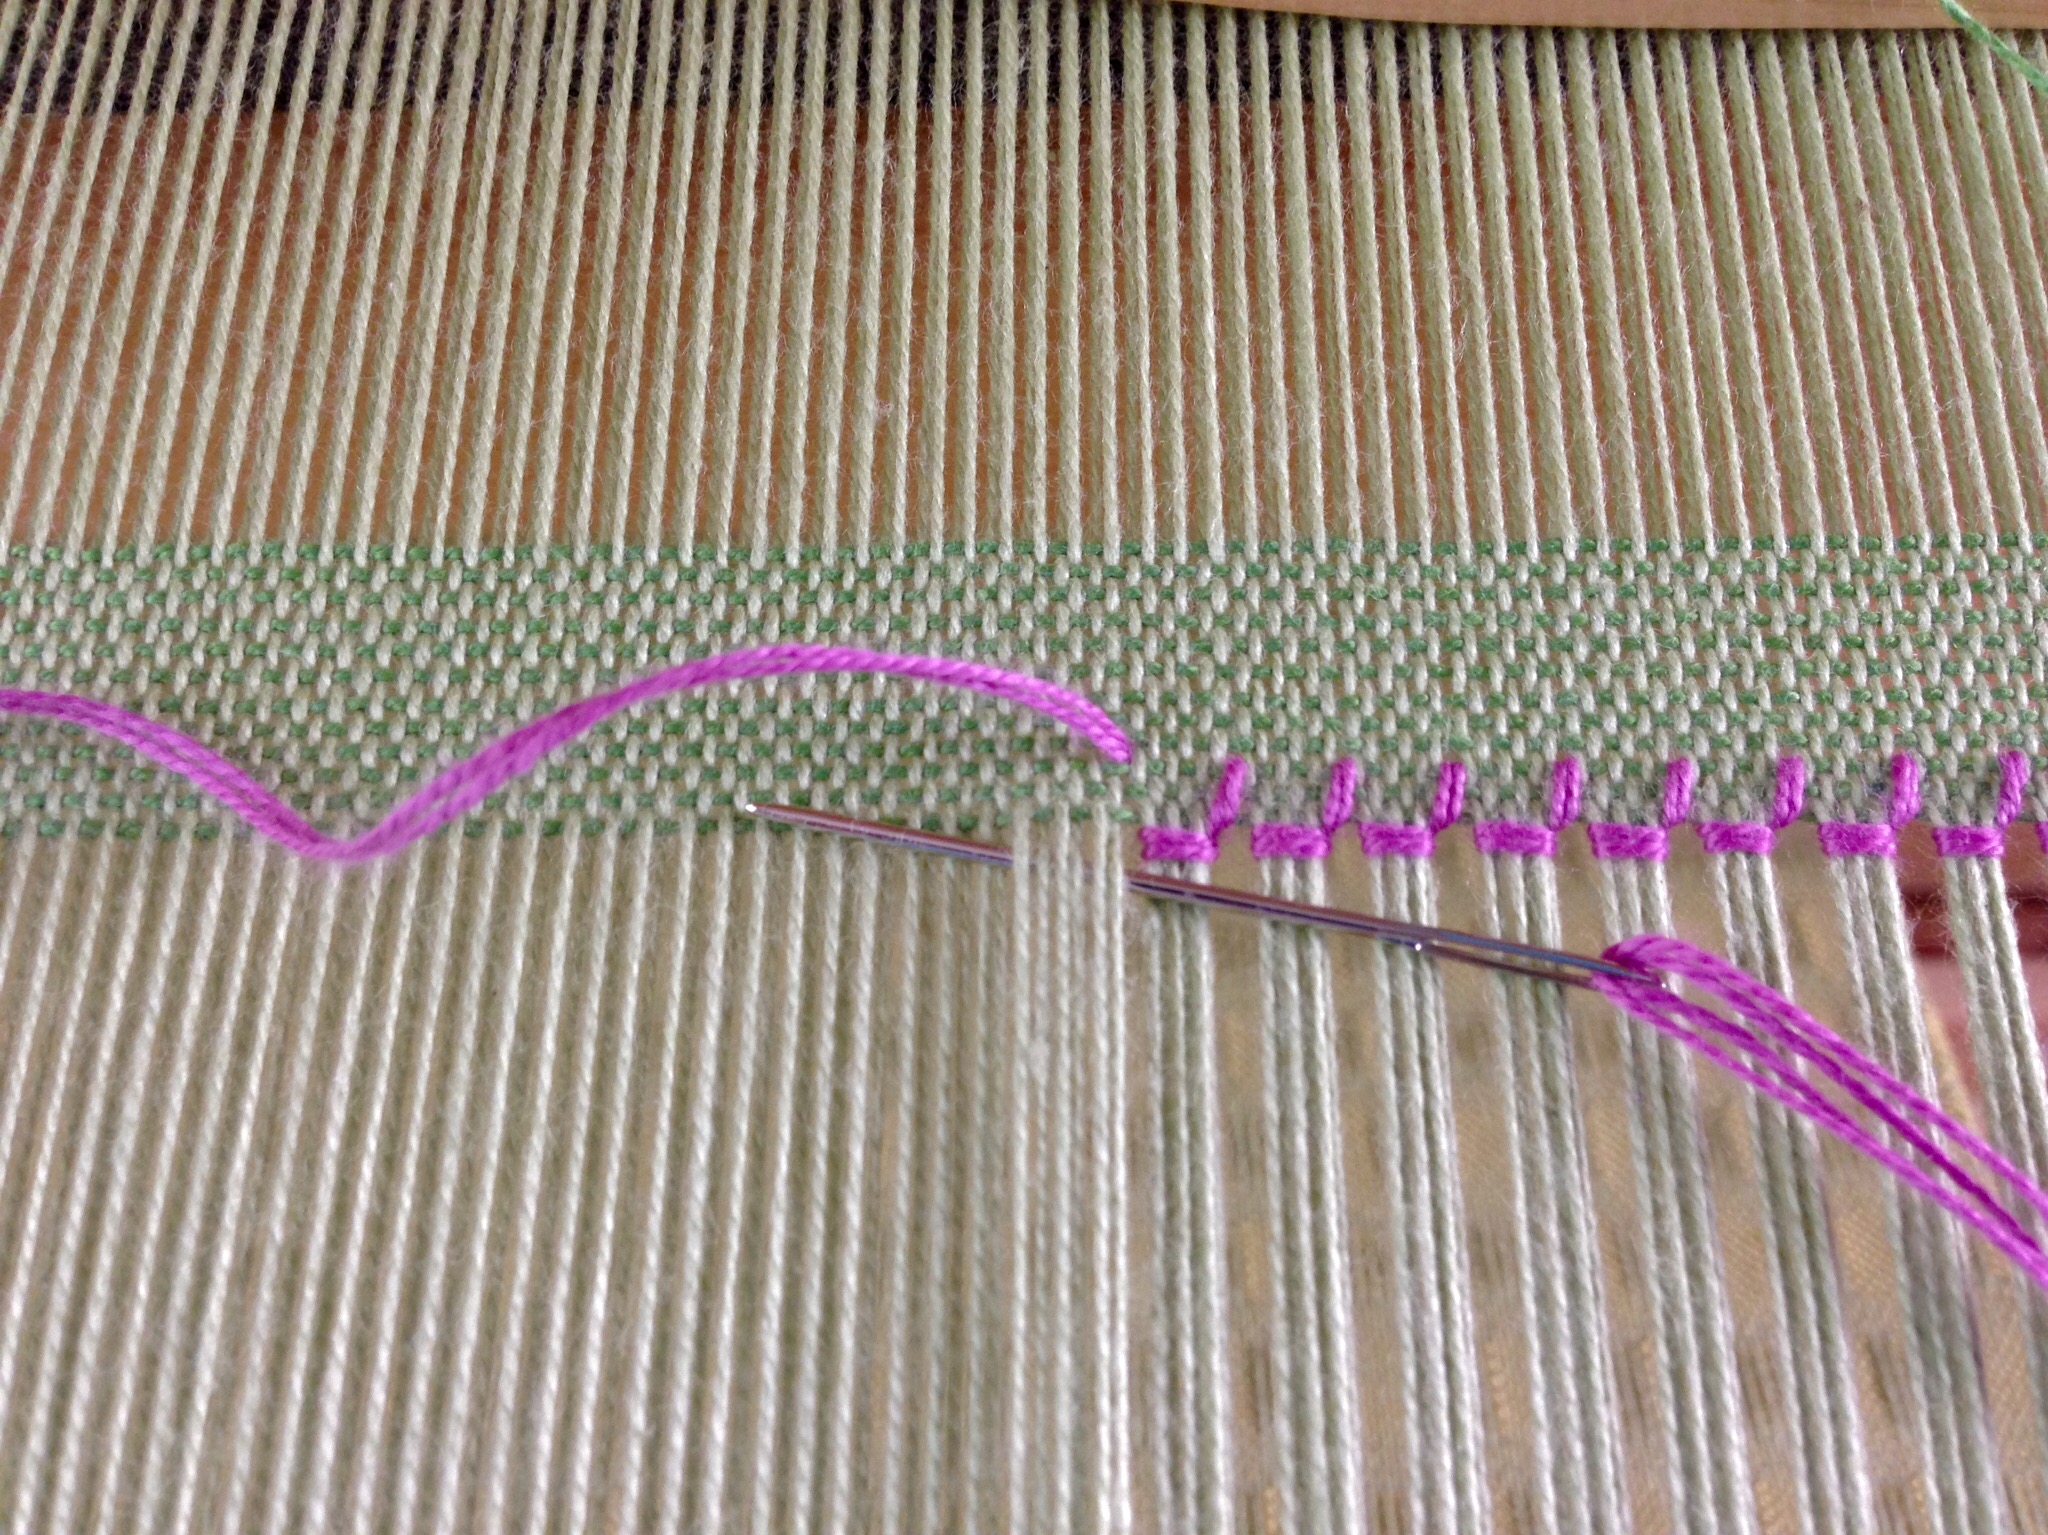
Starting an inch/2.5 cm away from the right-hand selvedge, weave the needle over and under, next to the first weft thread in the weaving, going toward the selvedge.
Pull the stitching thread almost all the way, leaving the end woven into the selvedge. Capture the woven end within the first several stitches of the hemstitching.
Step 1
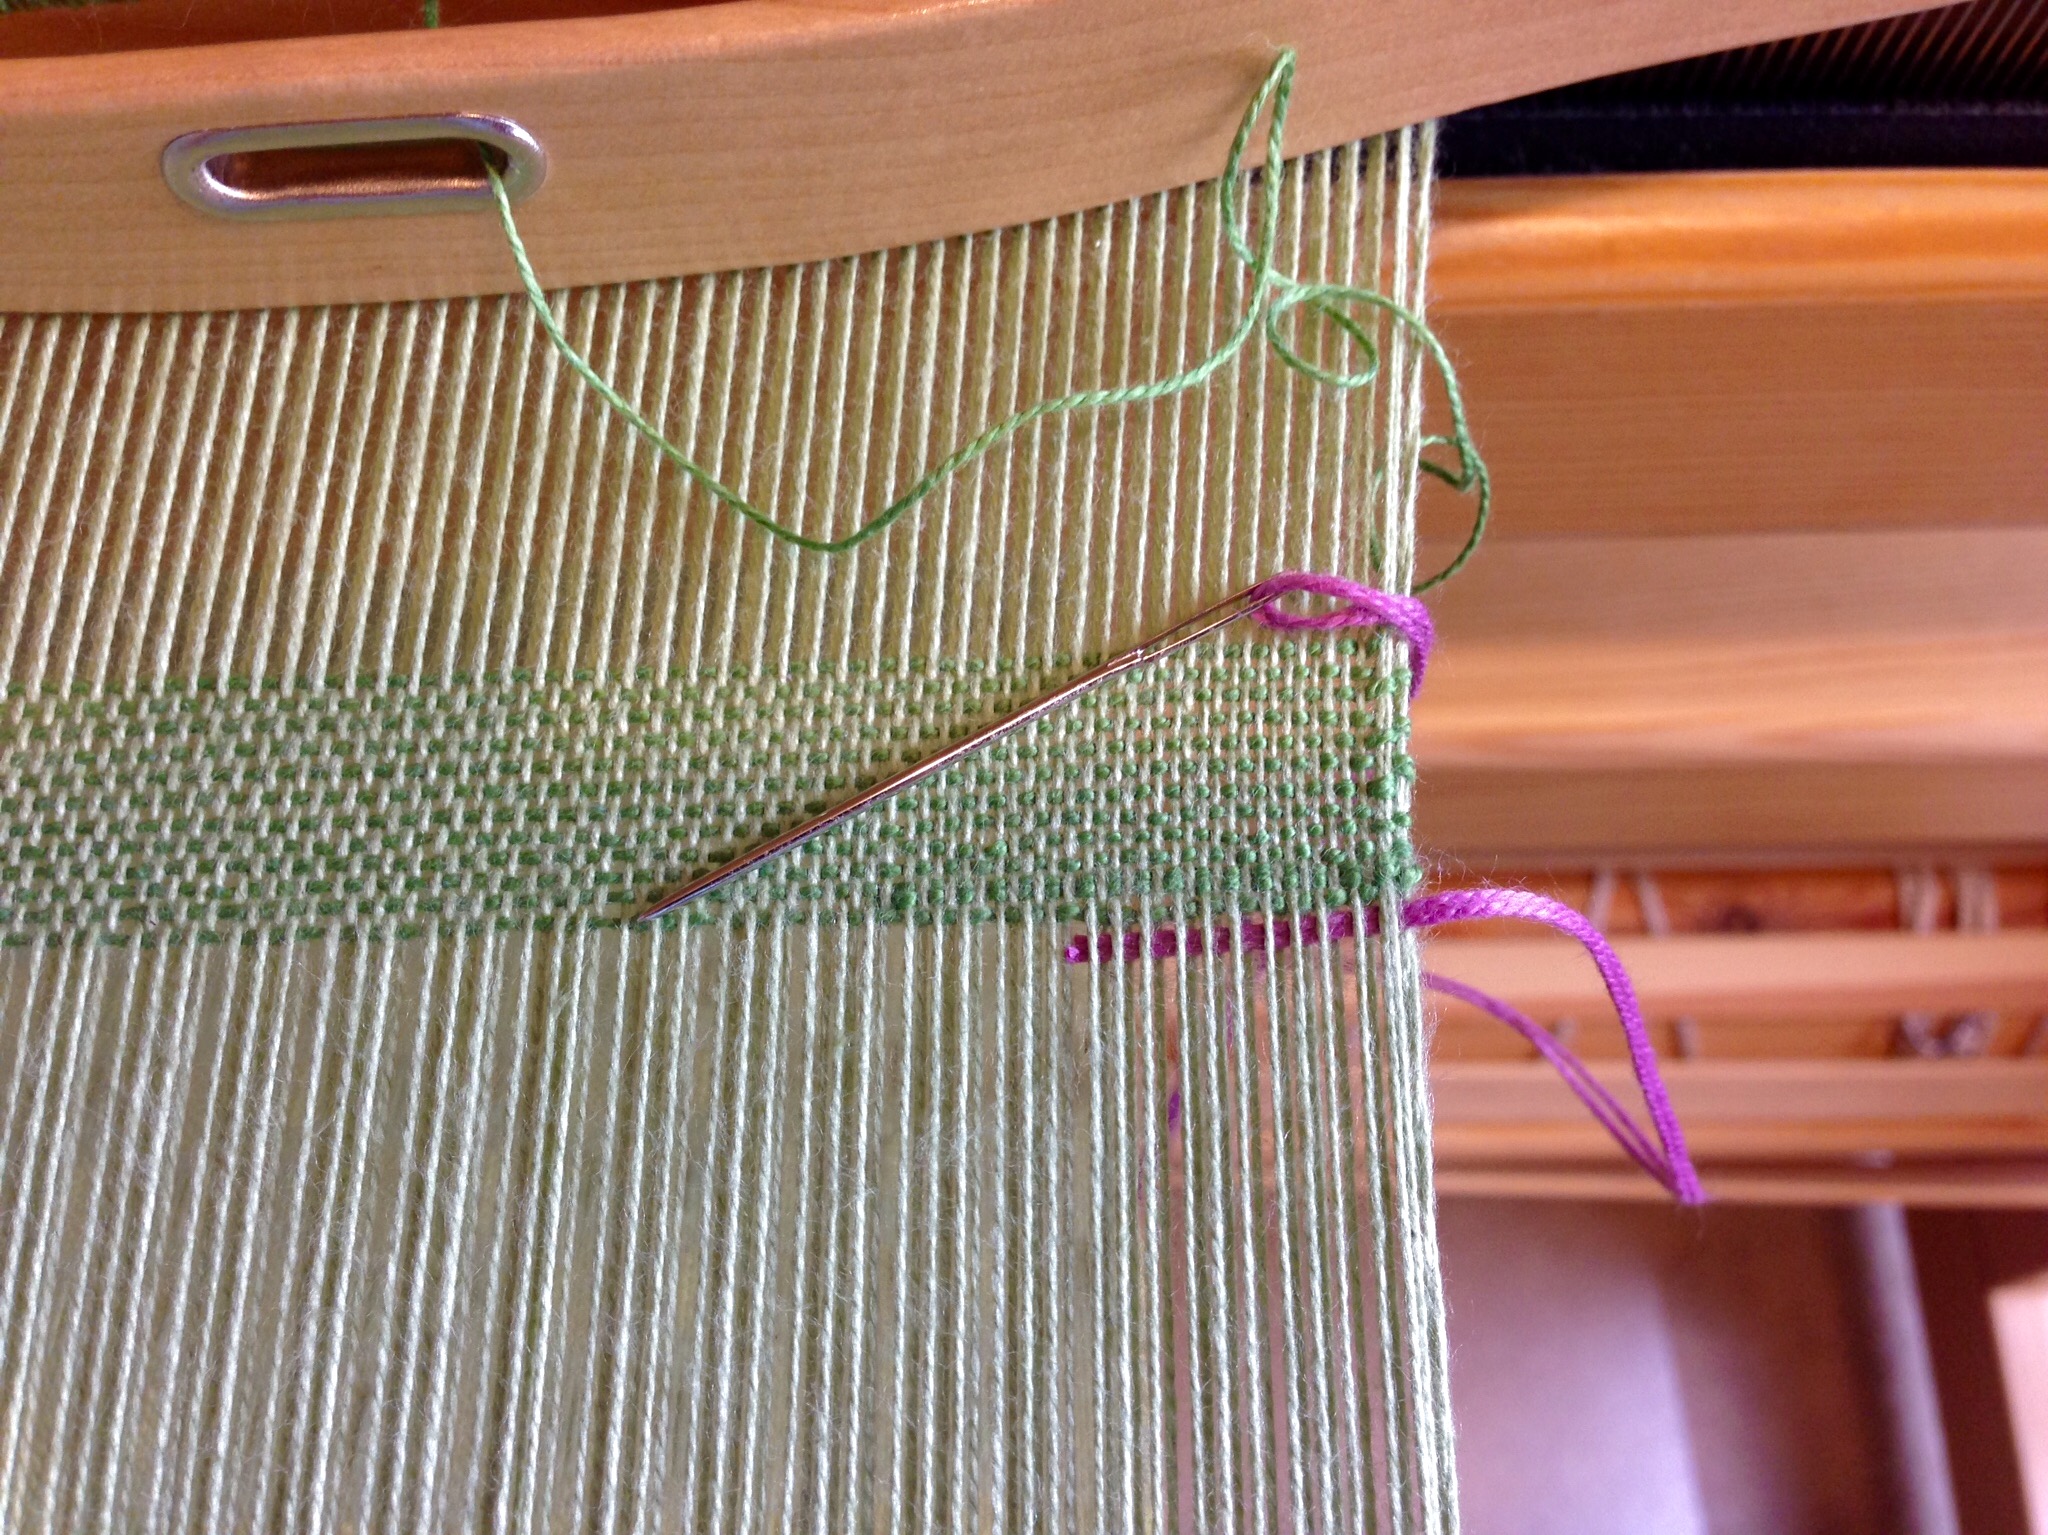
From right to left, take the needle under several warpends. In this example, the needle goes under six ends.
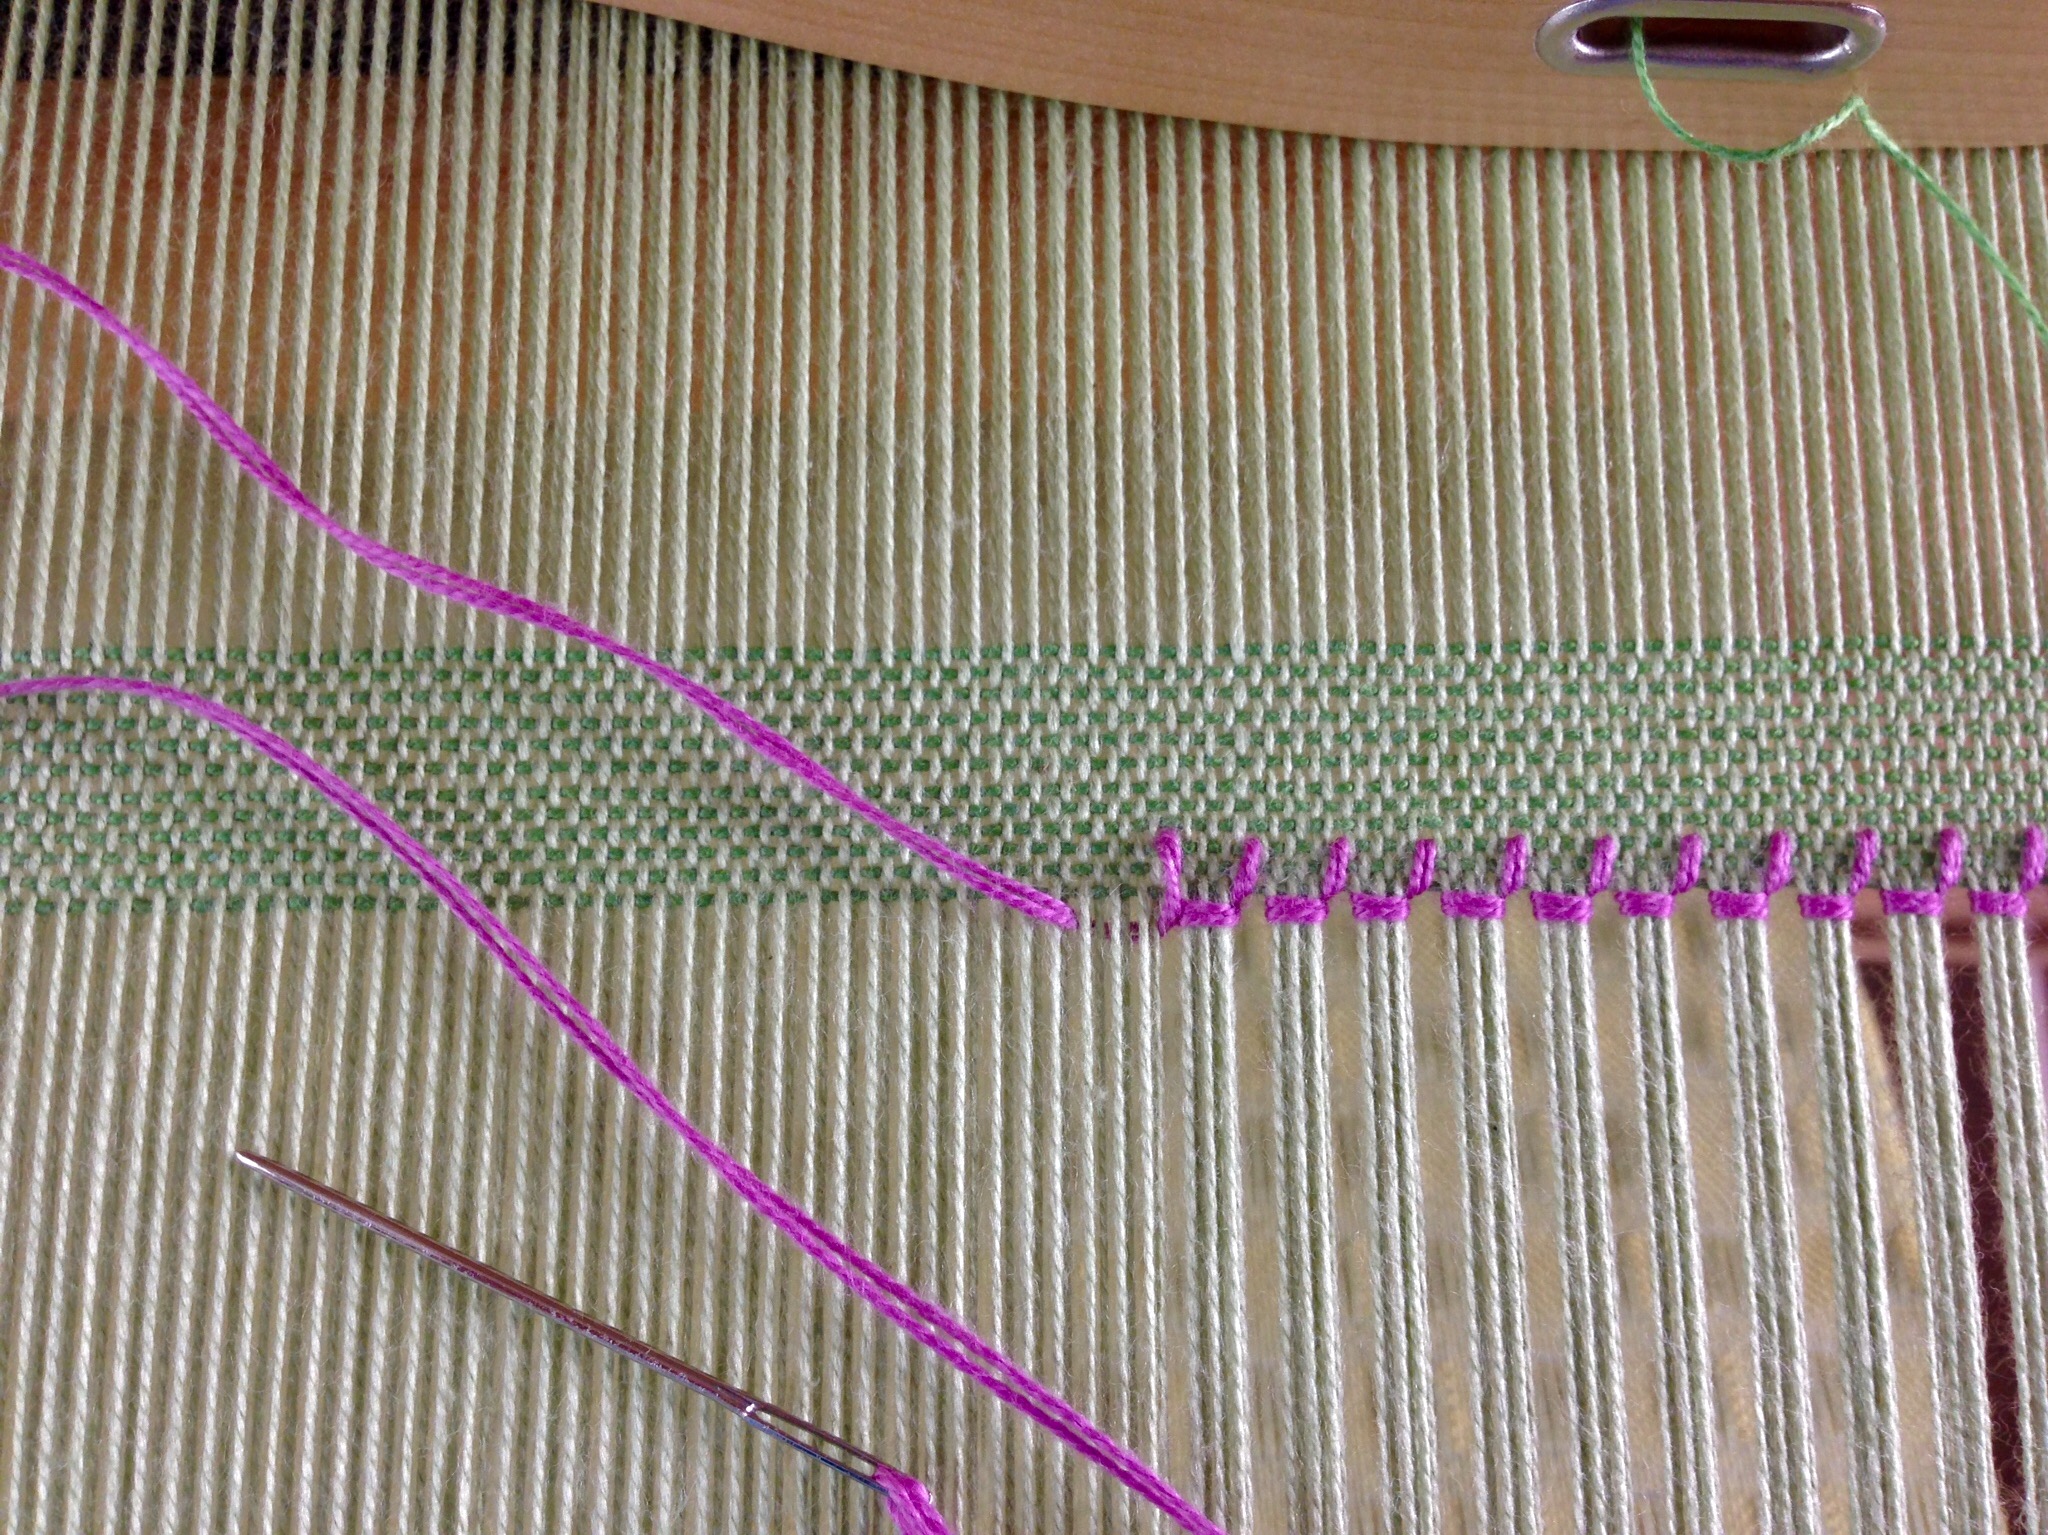
Step 2
Pull the thread all the way through, keeping it taut at the woven edge.
Step 3
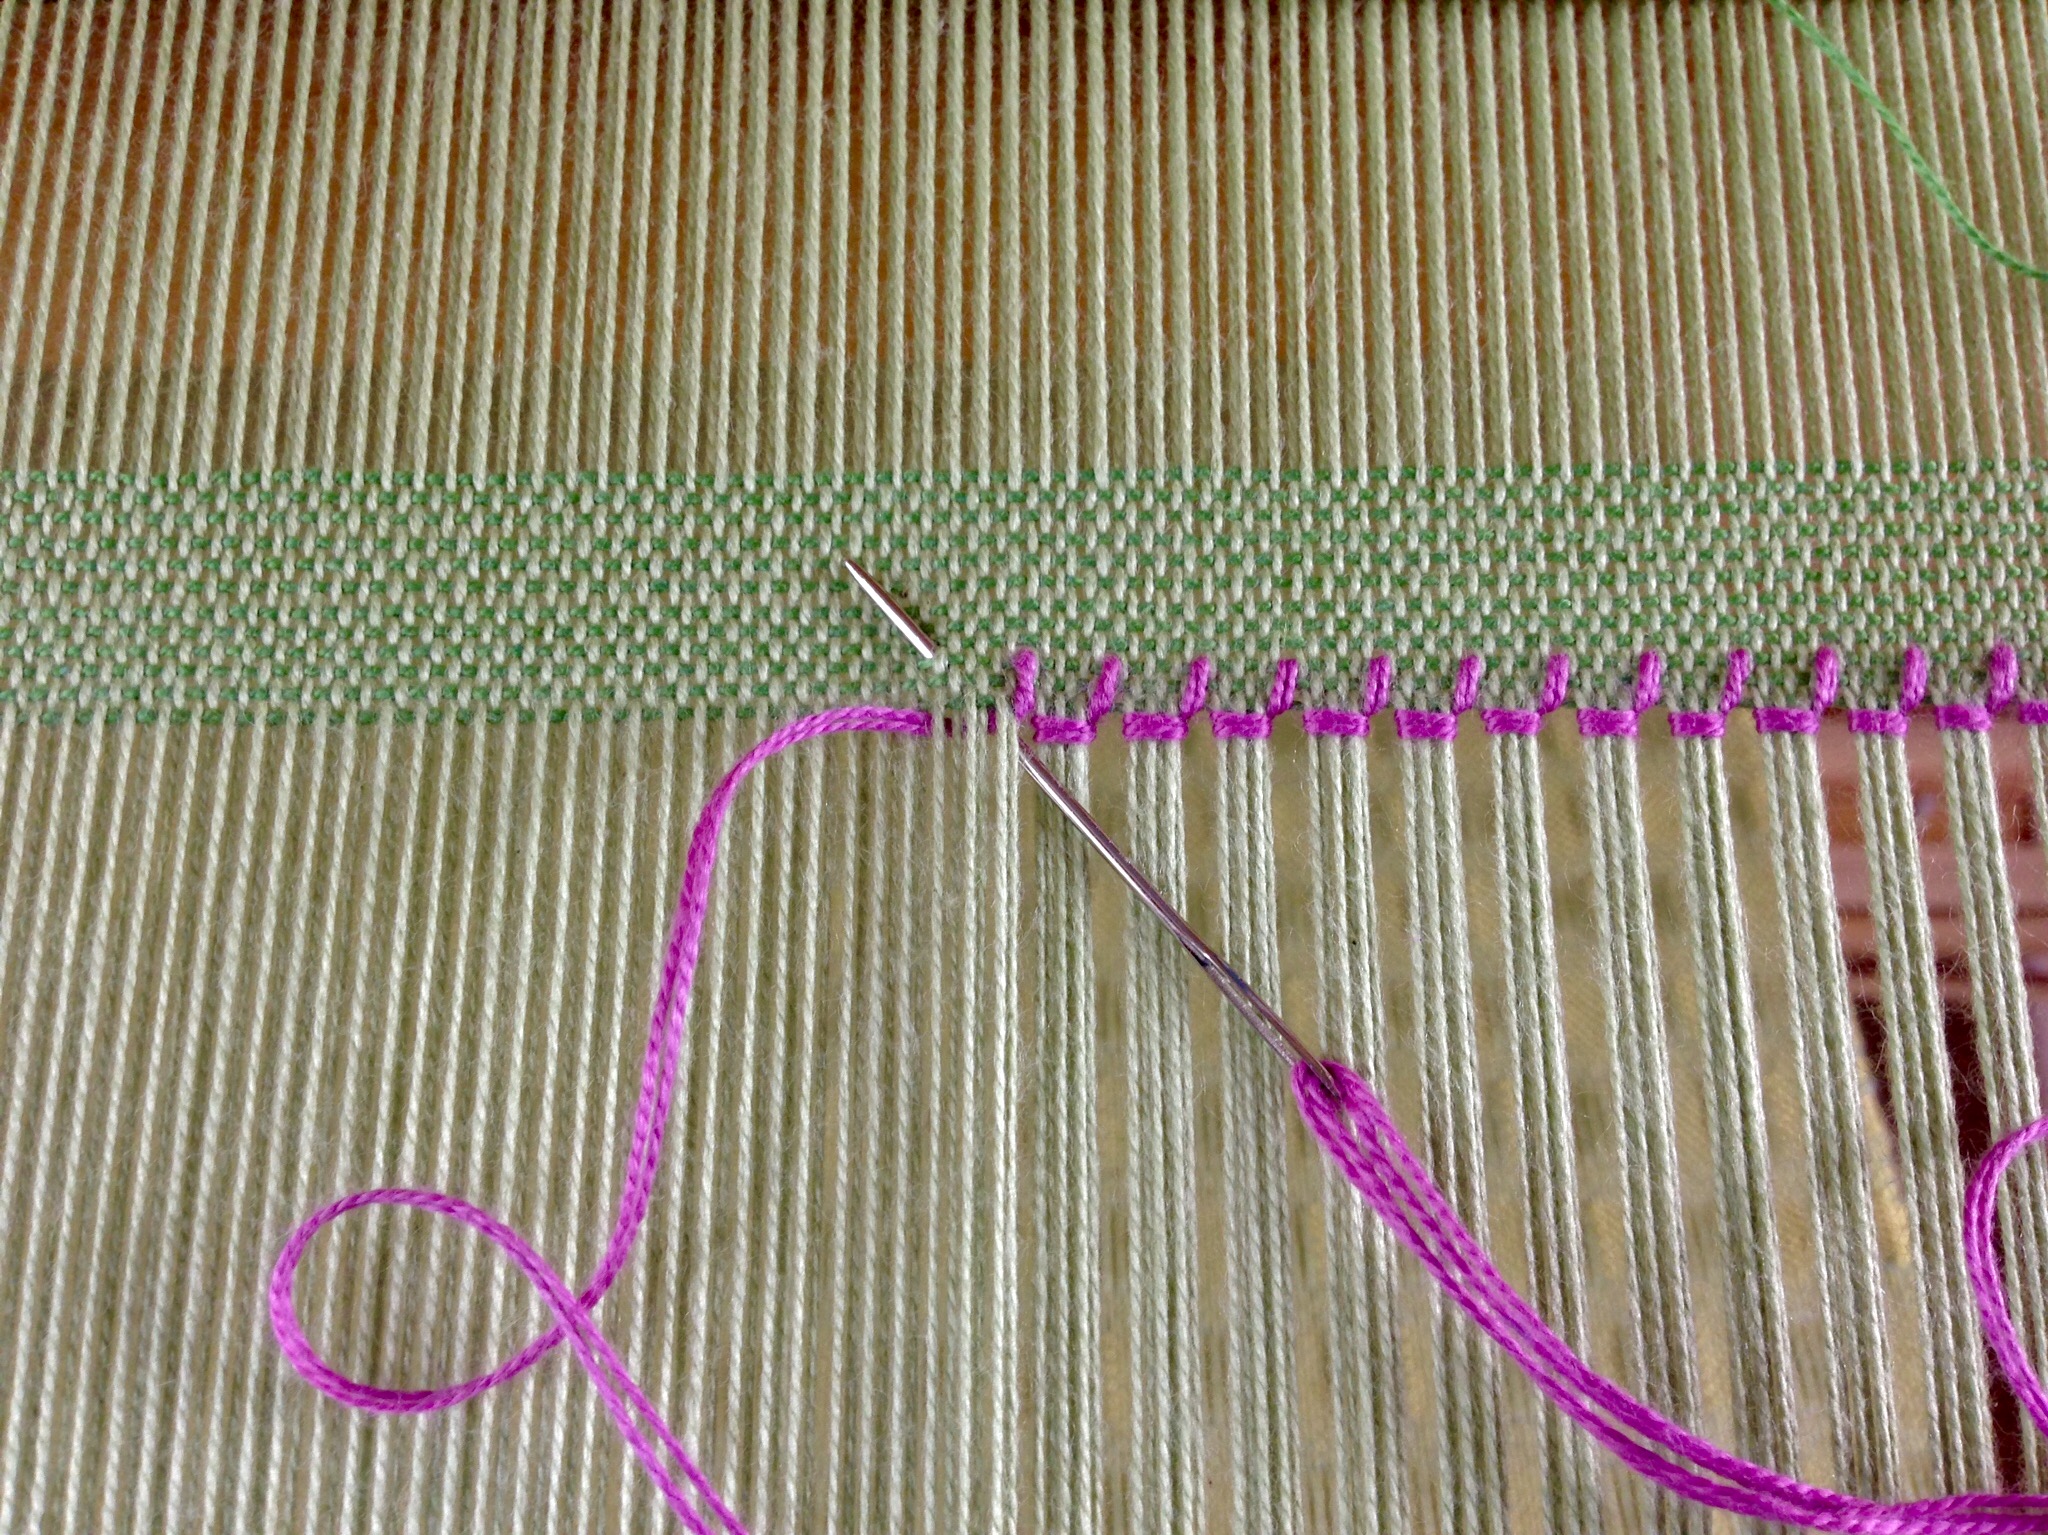
Take the needle back over the same (six) warp ends, and go under the same (six) warp ends, bringing the point of the needle back up between wefts, two or more rows away from the woven edge. In this example, the needle comes up between the third and fourth rows of weft.
Step 4
Pull the thread all the way through, keeping it taut at the woven edge.
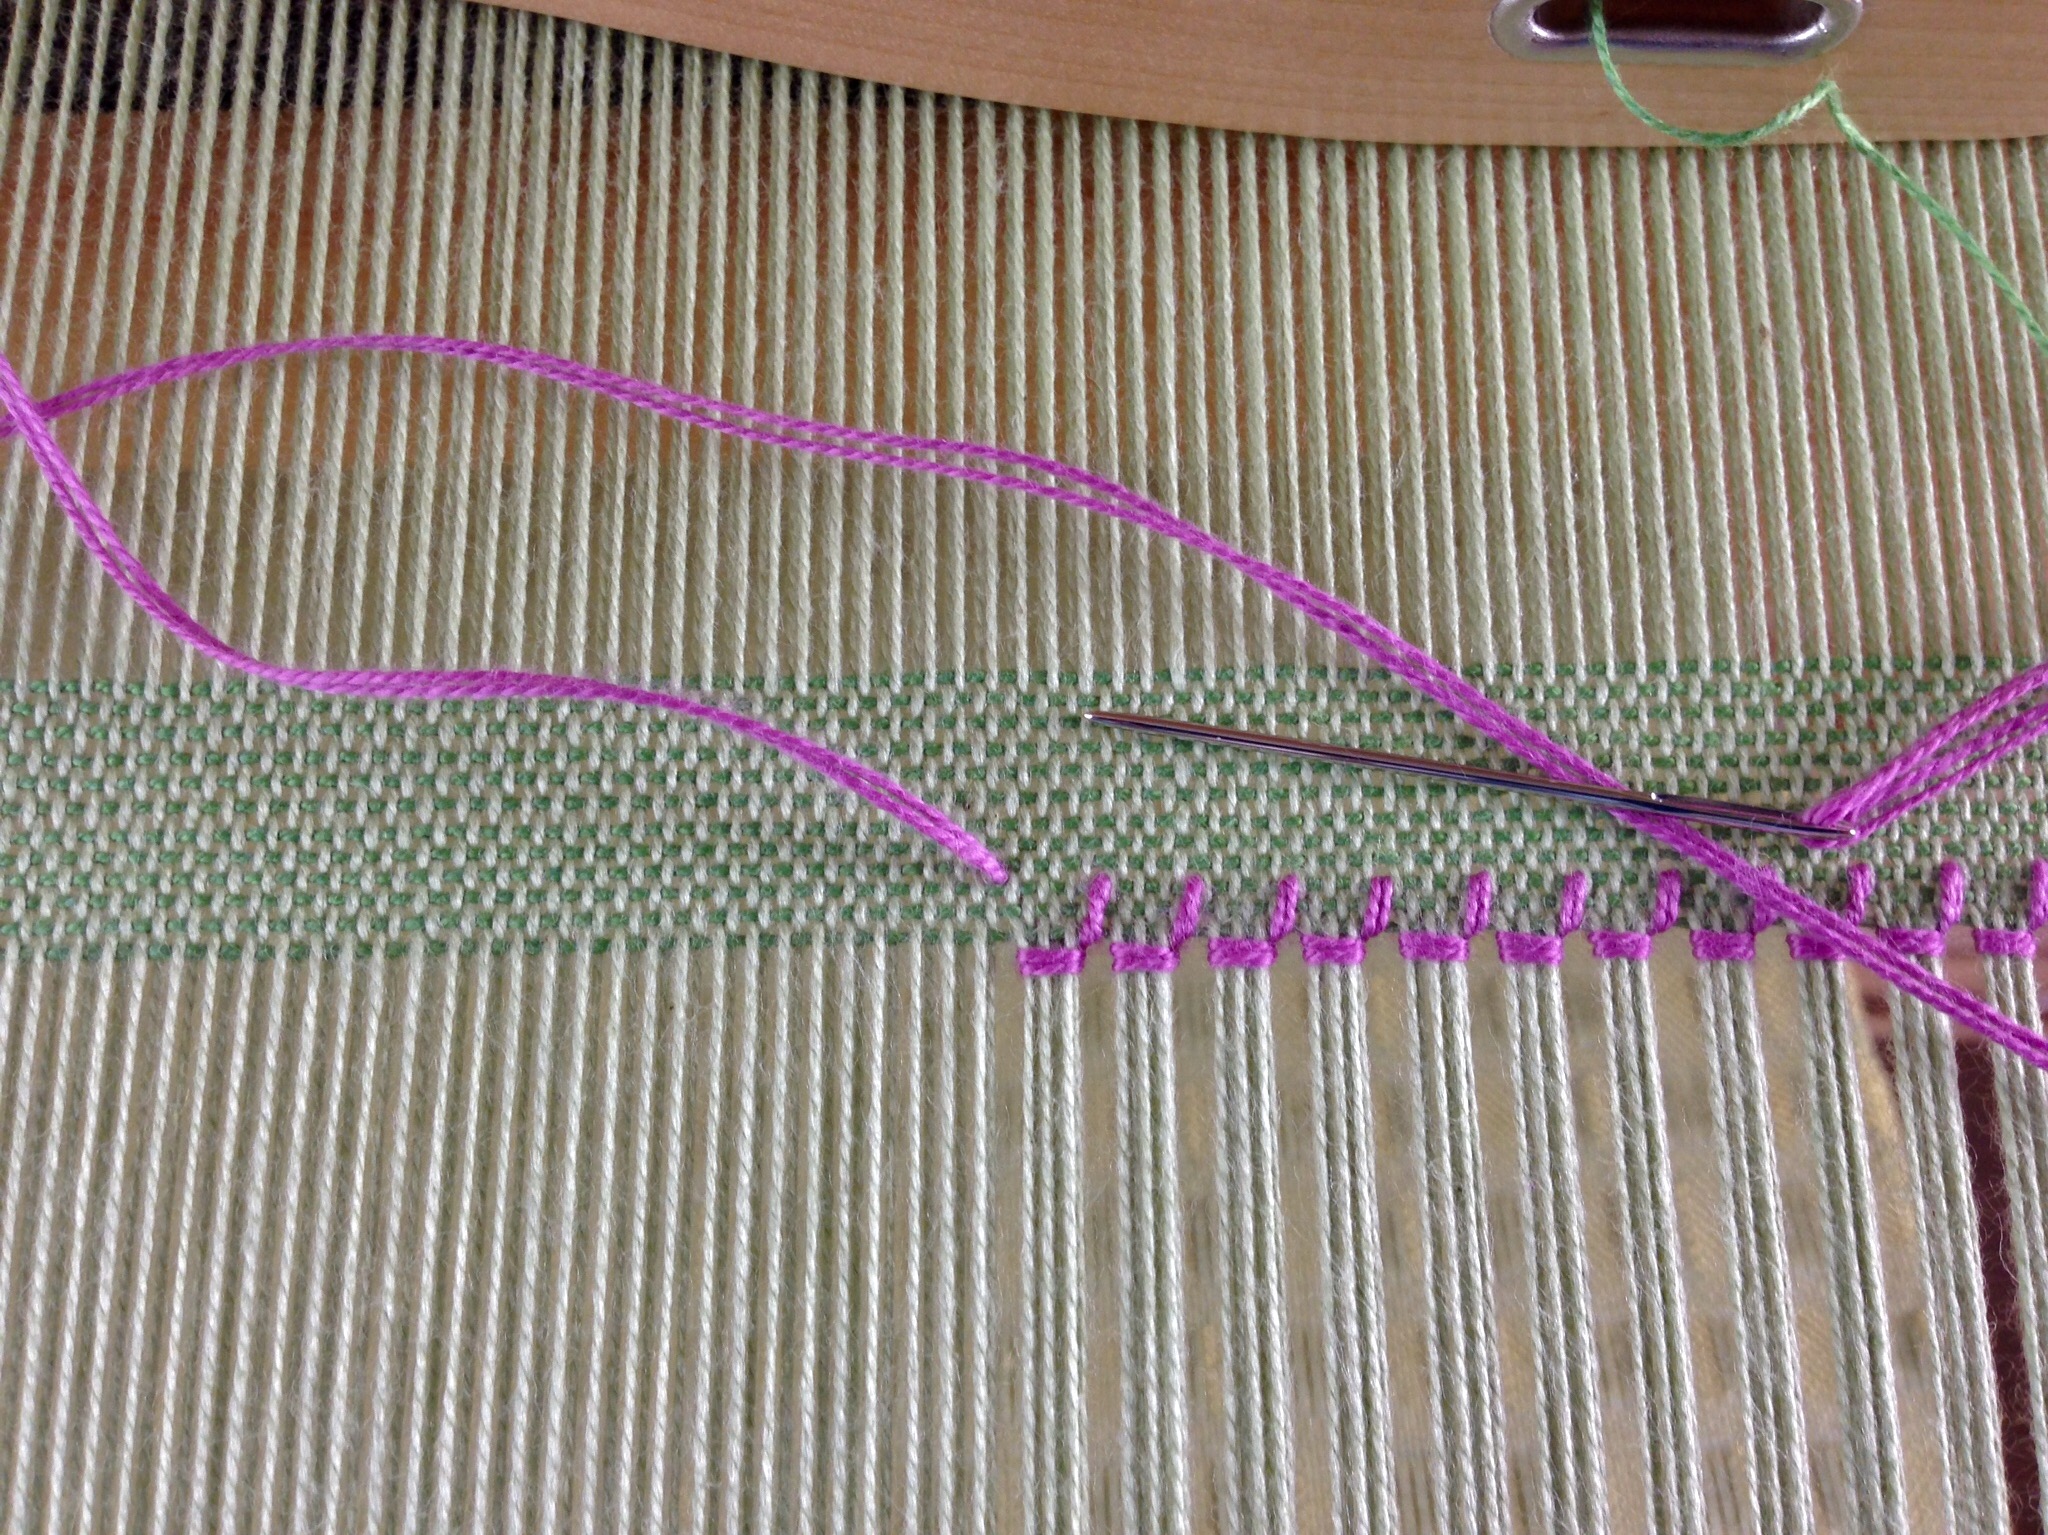
Finishing
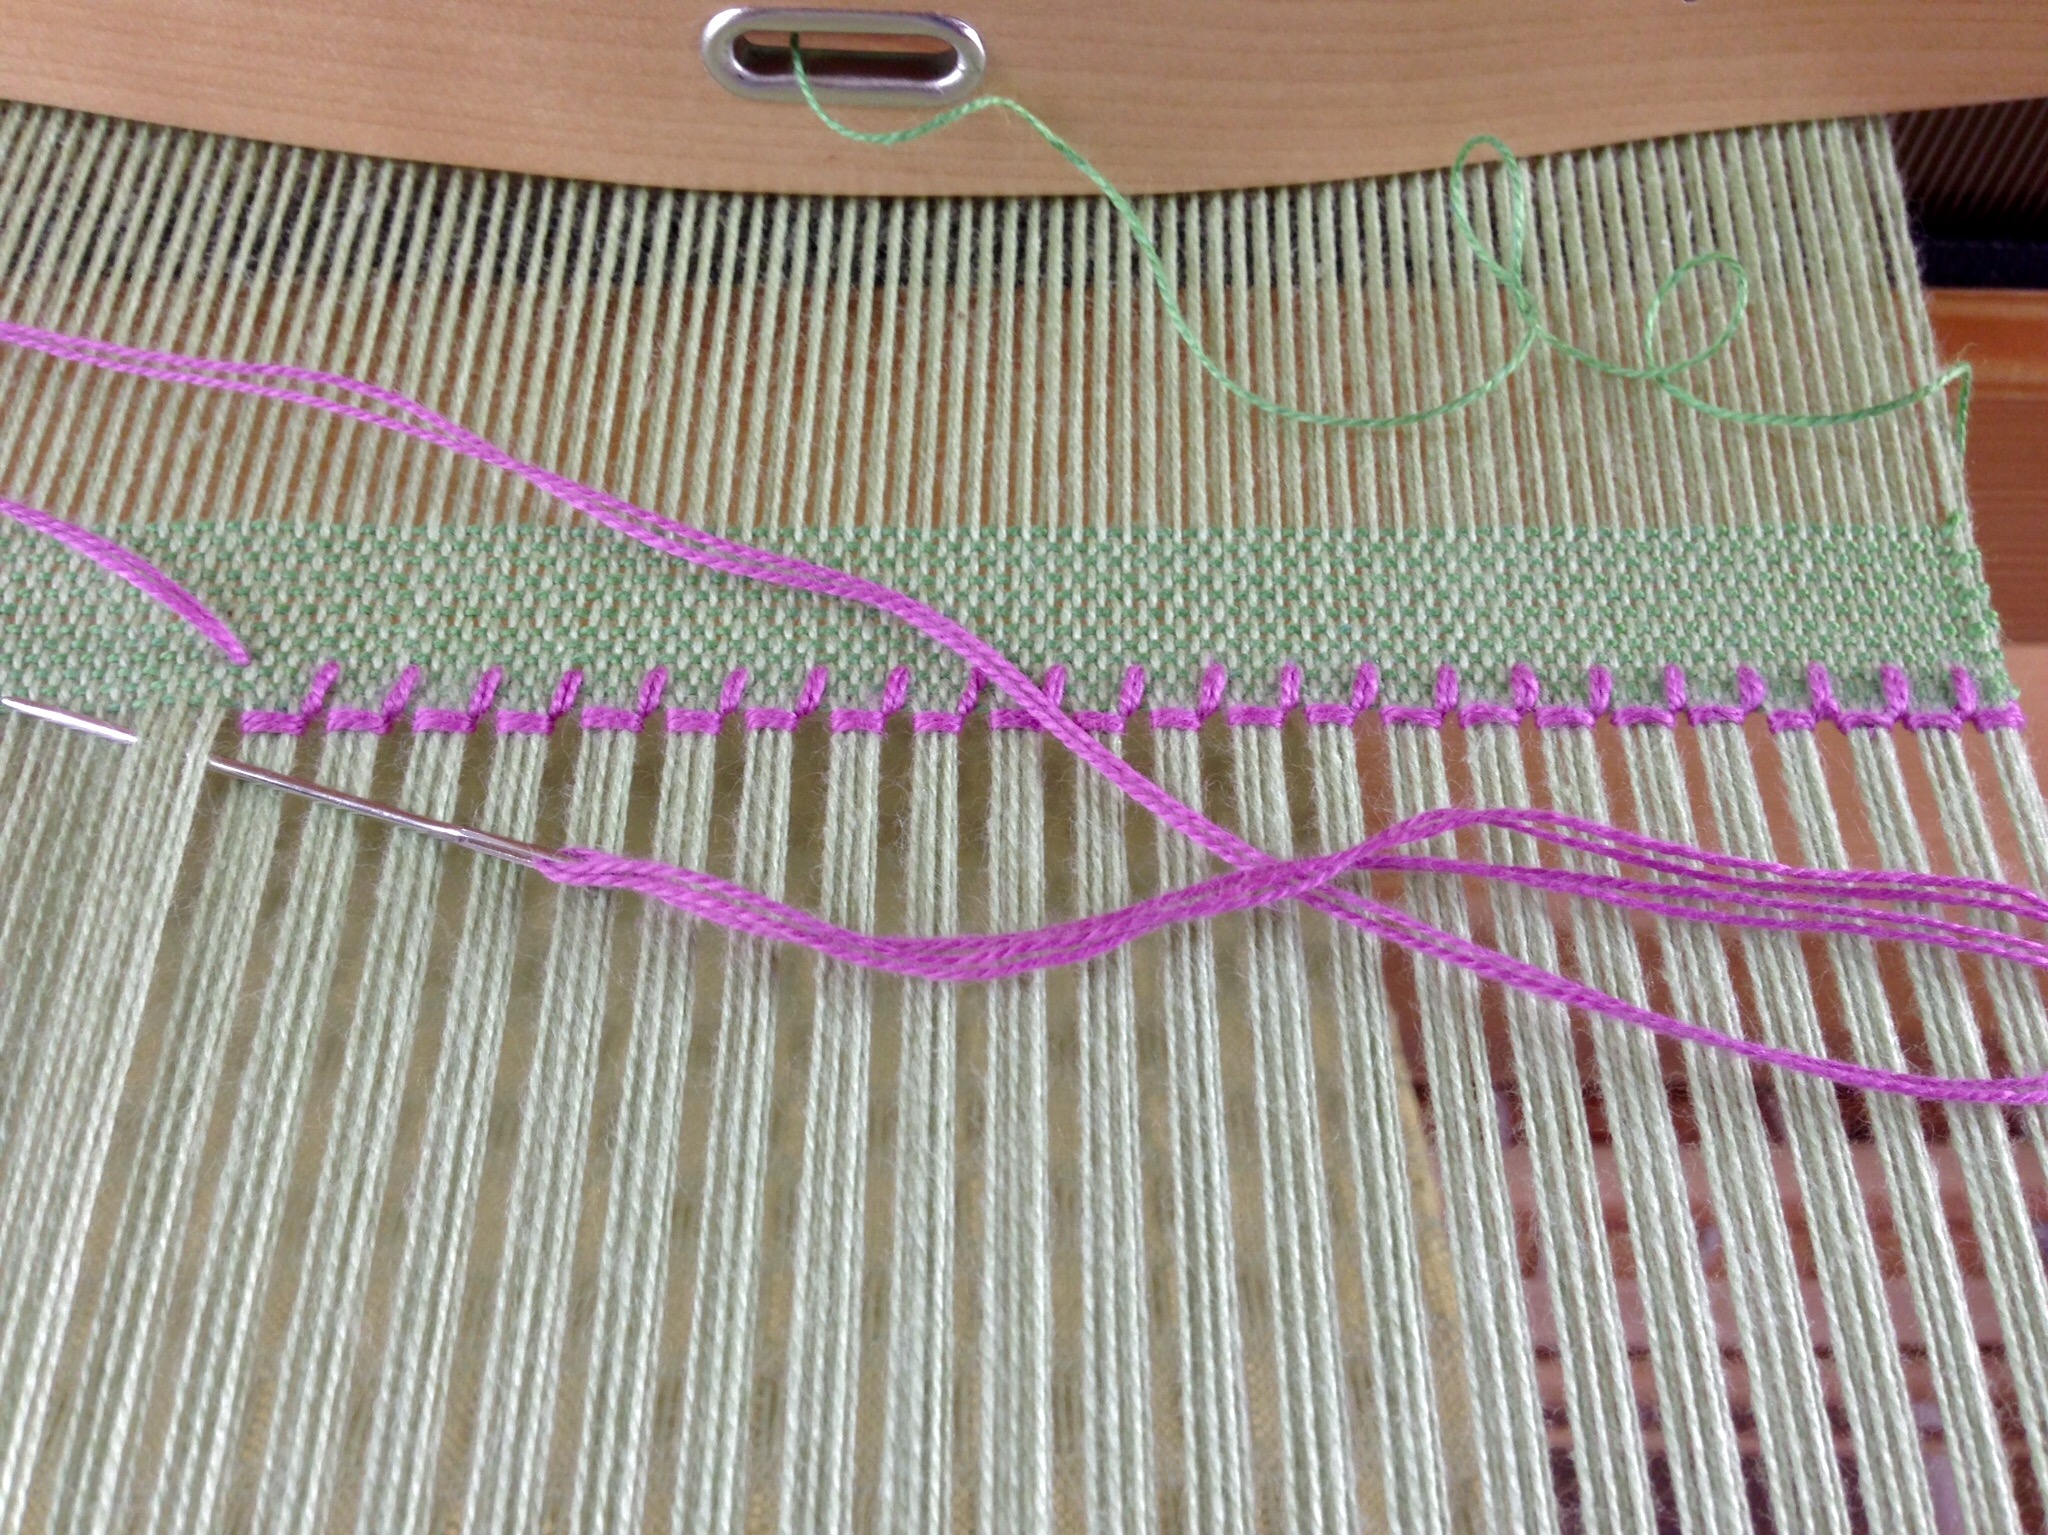
Repeat Steps 1 – 4 across the entire width.
Finish by needle weaving the stitching thread back into the selvedge for an inch/2.5 cm. Trim off the remaining stitching thread end.
Hemstitching at the end of the woven fabric:
Starting on the right-hand side, secure the end of the stitching thread as before, and follow Steps 1 – 4 for hemstitching across the width. The only difference is that the needle comes toward you under the cloth in Step 3, instead of away from you.
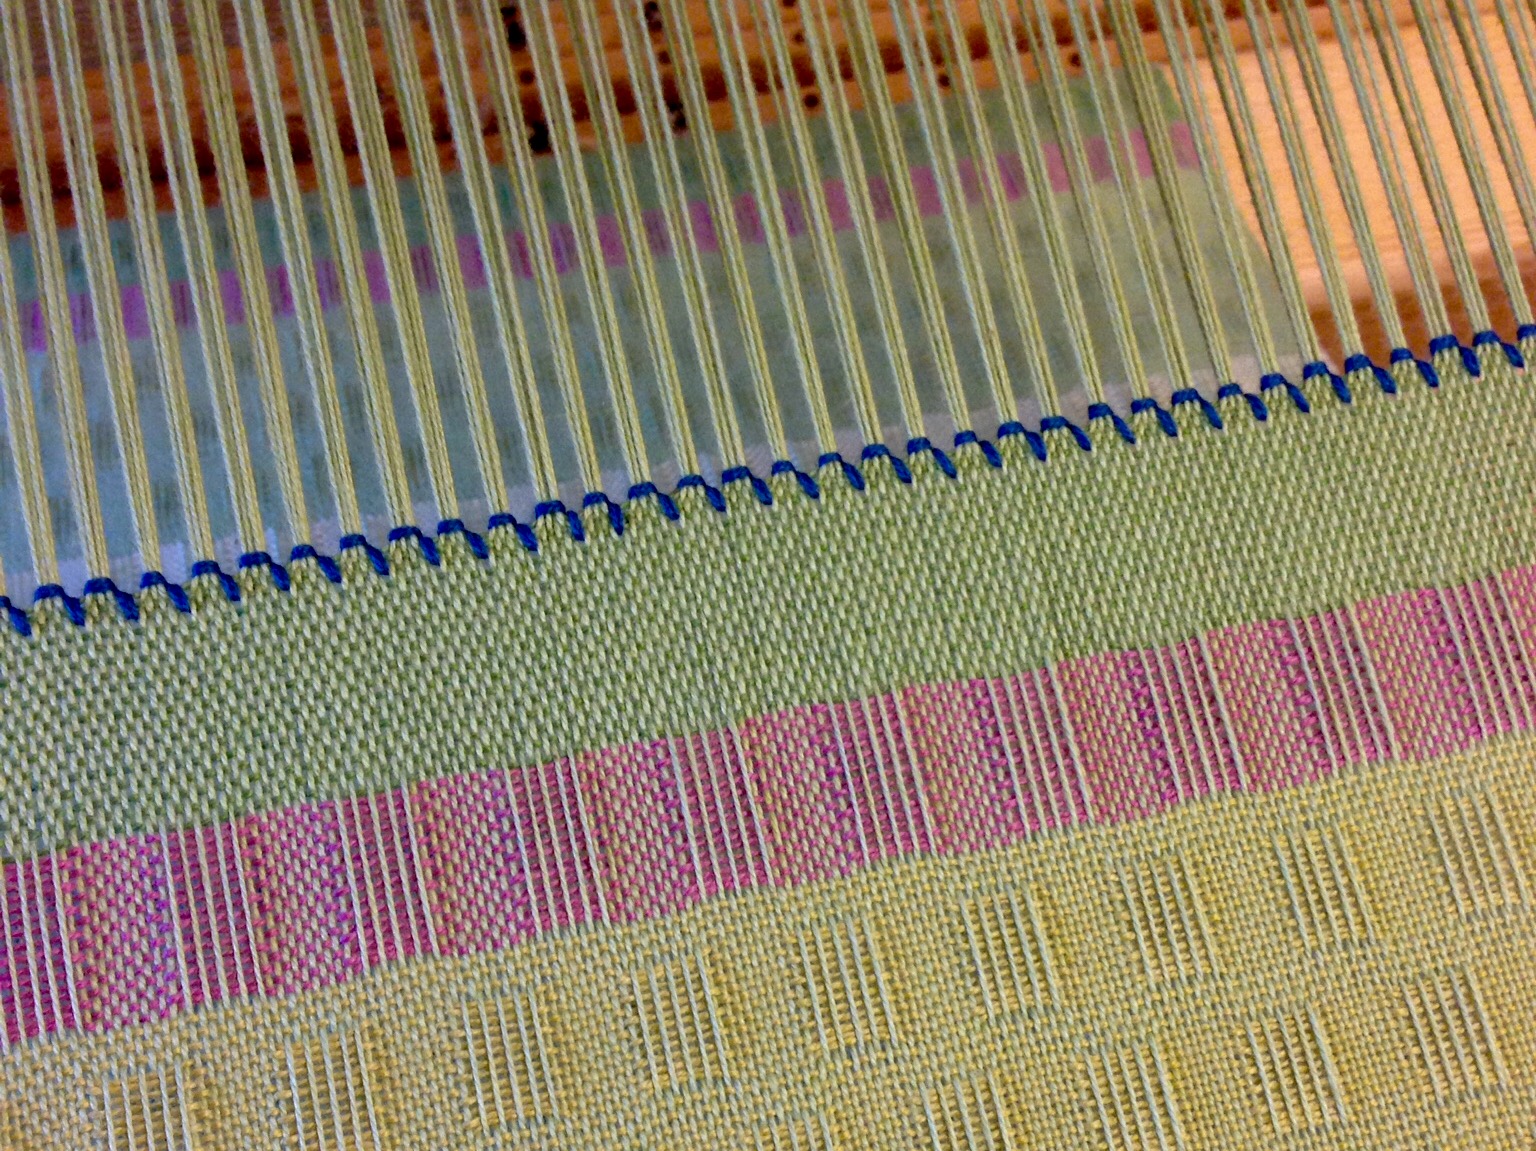
Cotton lace-weave scarf in springtime colors. Bold hemstitching at the end.
Everything that has a beginning has an end. Since the beginning of time, and through the ages, our Maker has been unfolding His mystery of life and love. There will come a day, though, when the mystery is finished. Certainly, there will be bold hemstitching at the end of the cloth as the Maker, the Grand Weaver himself, brings time as we know it to a close.
May your days begin and end with an embroidered edging of love.