Tapestry Cartoon – Zoom In

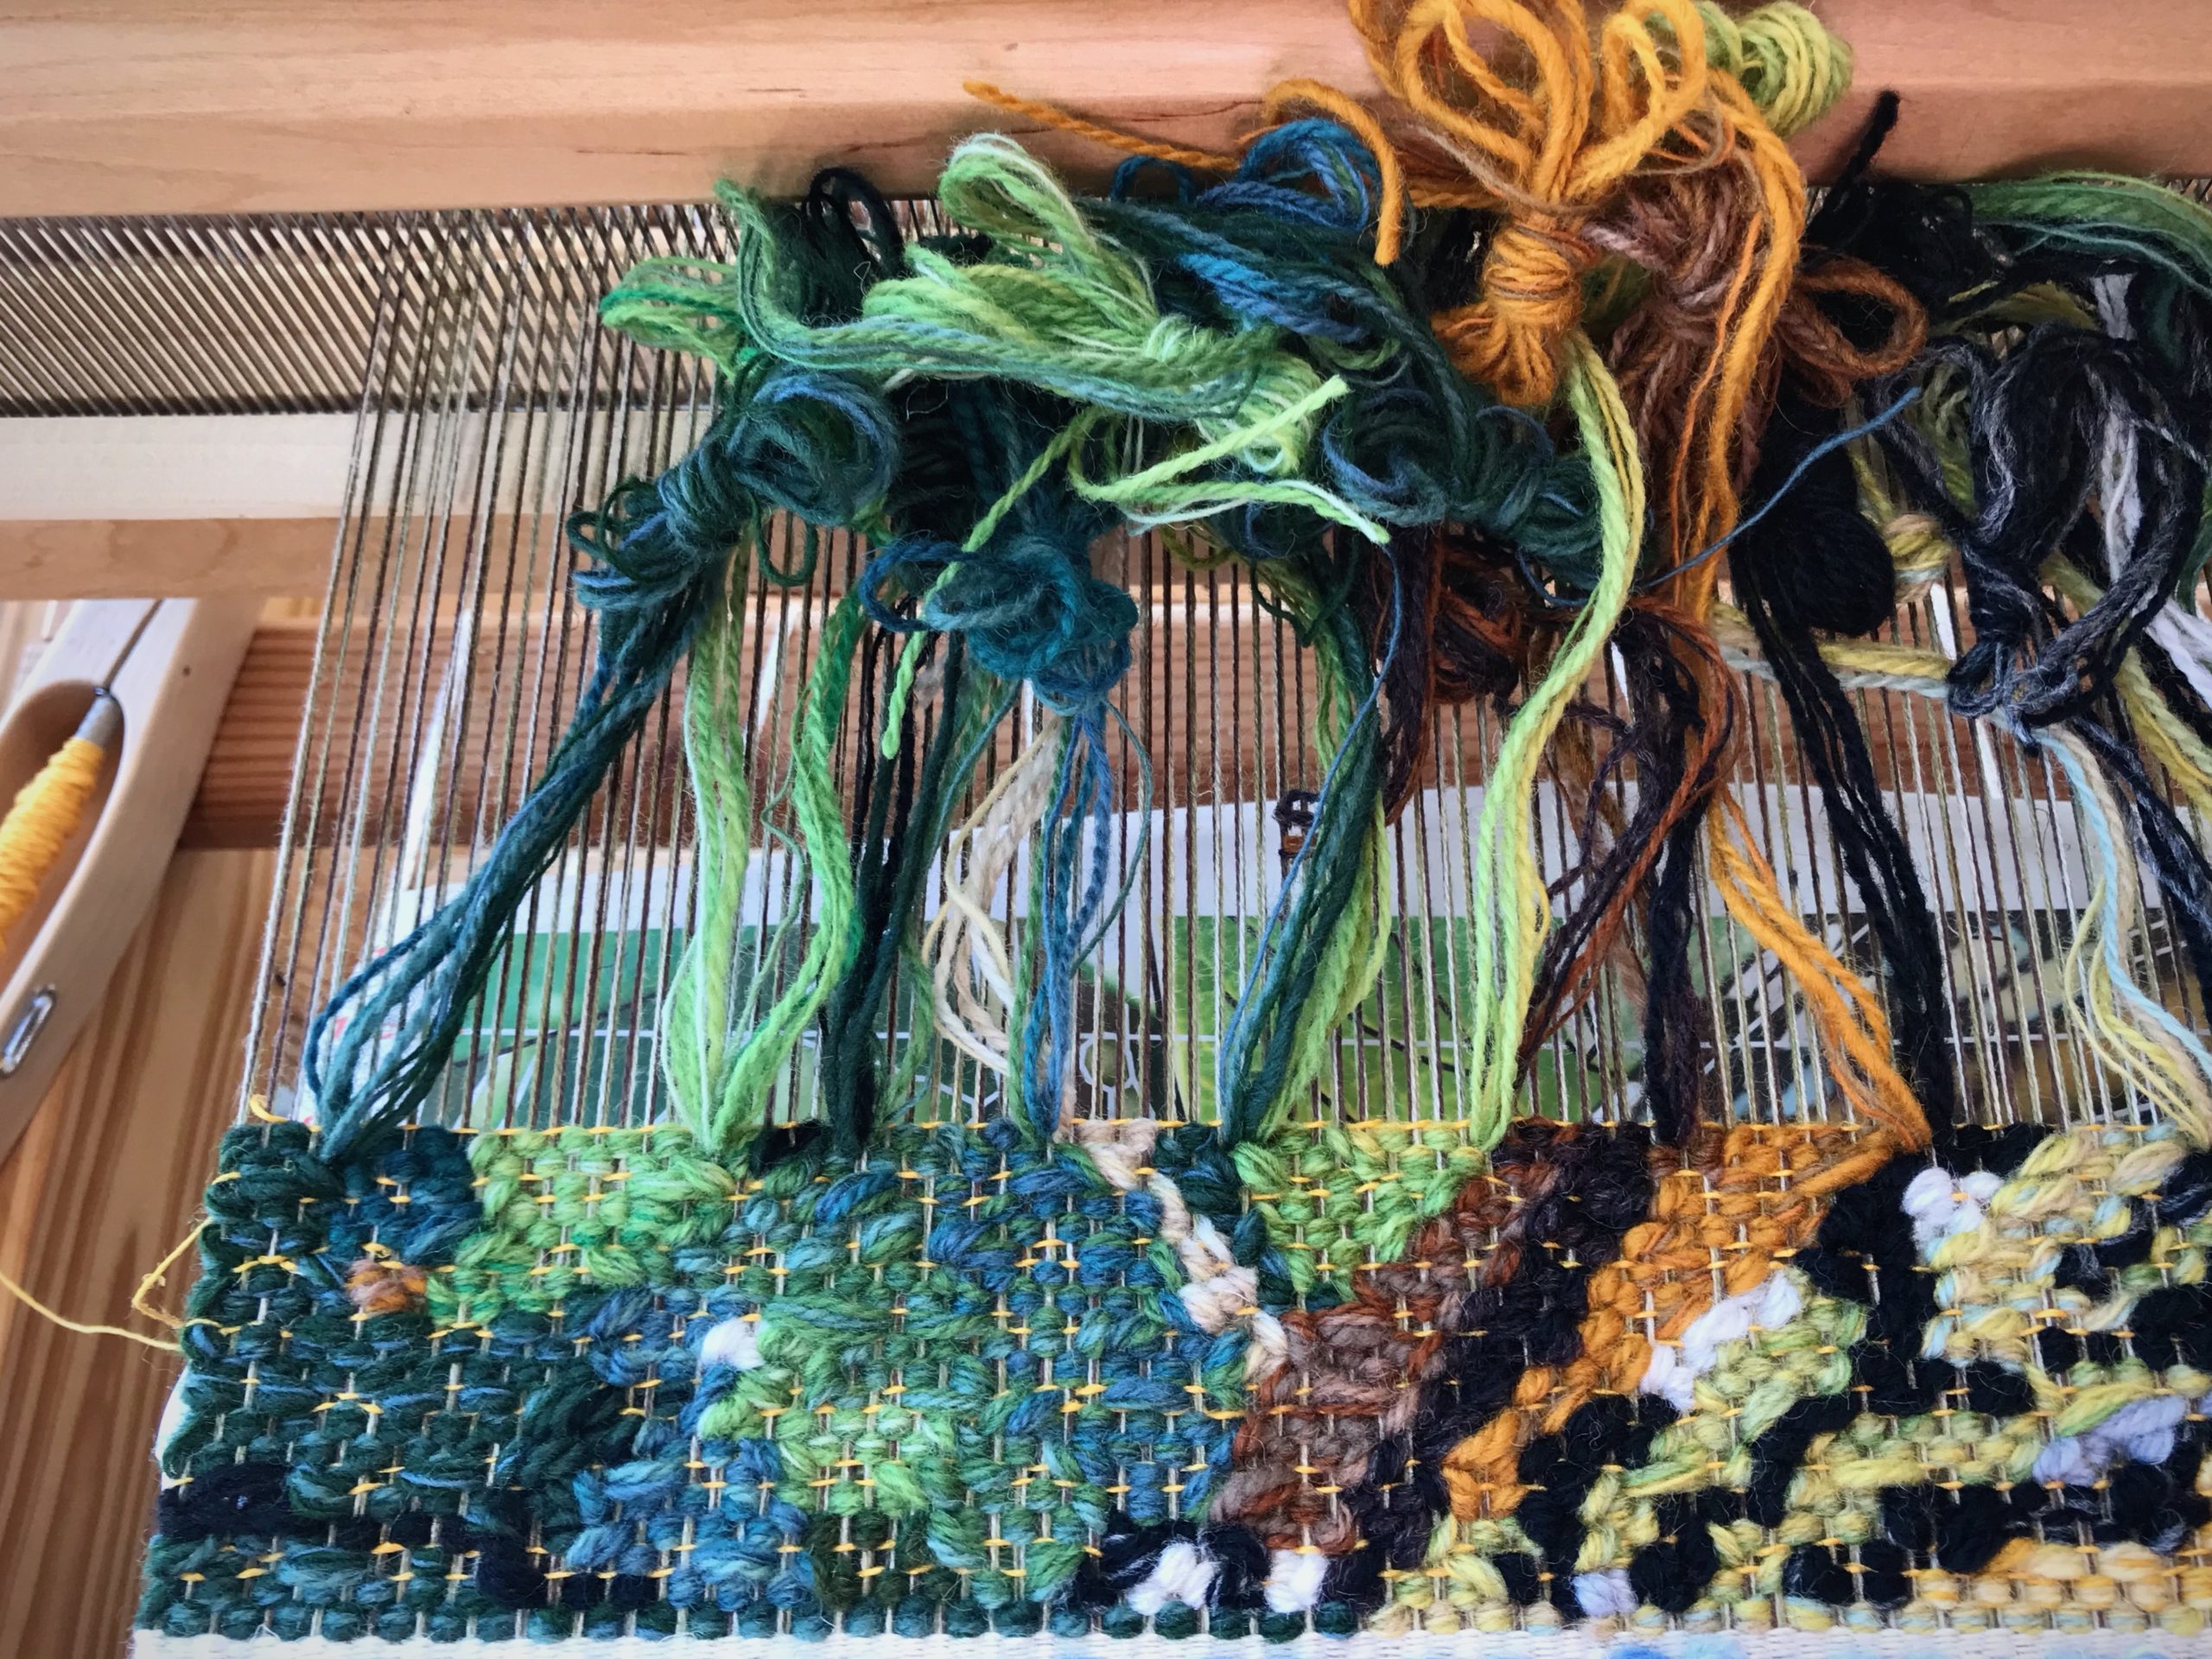
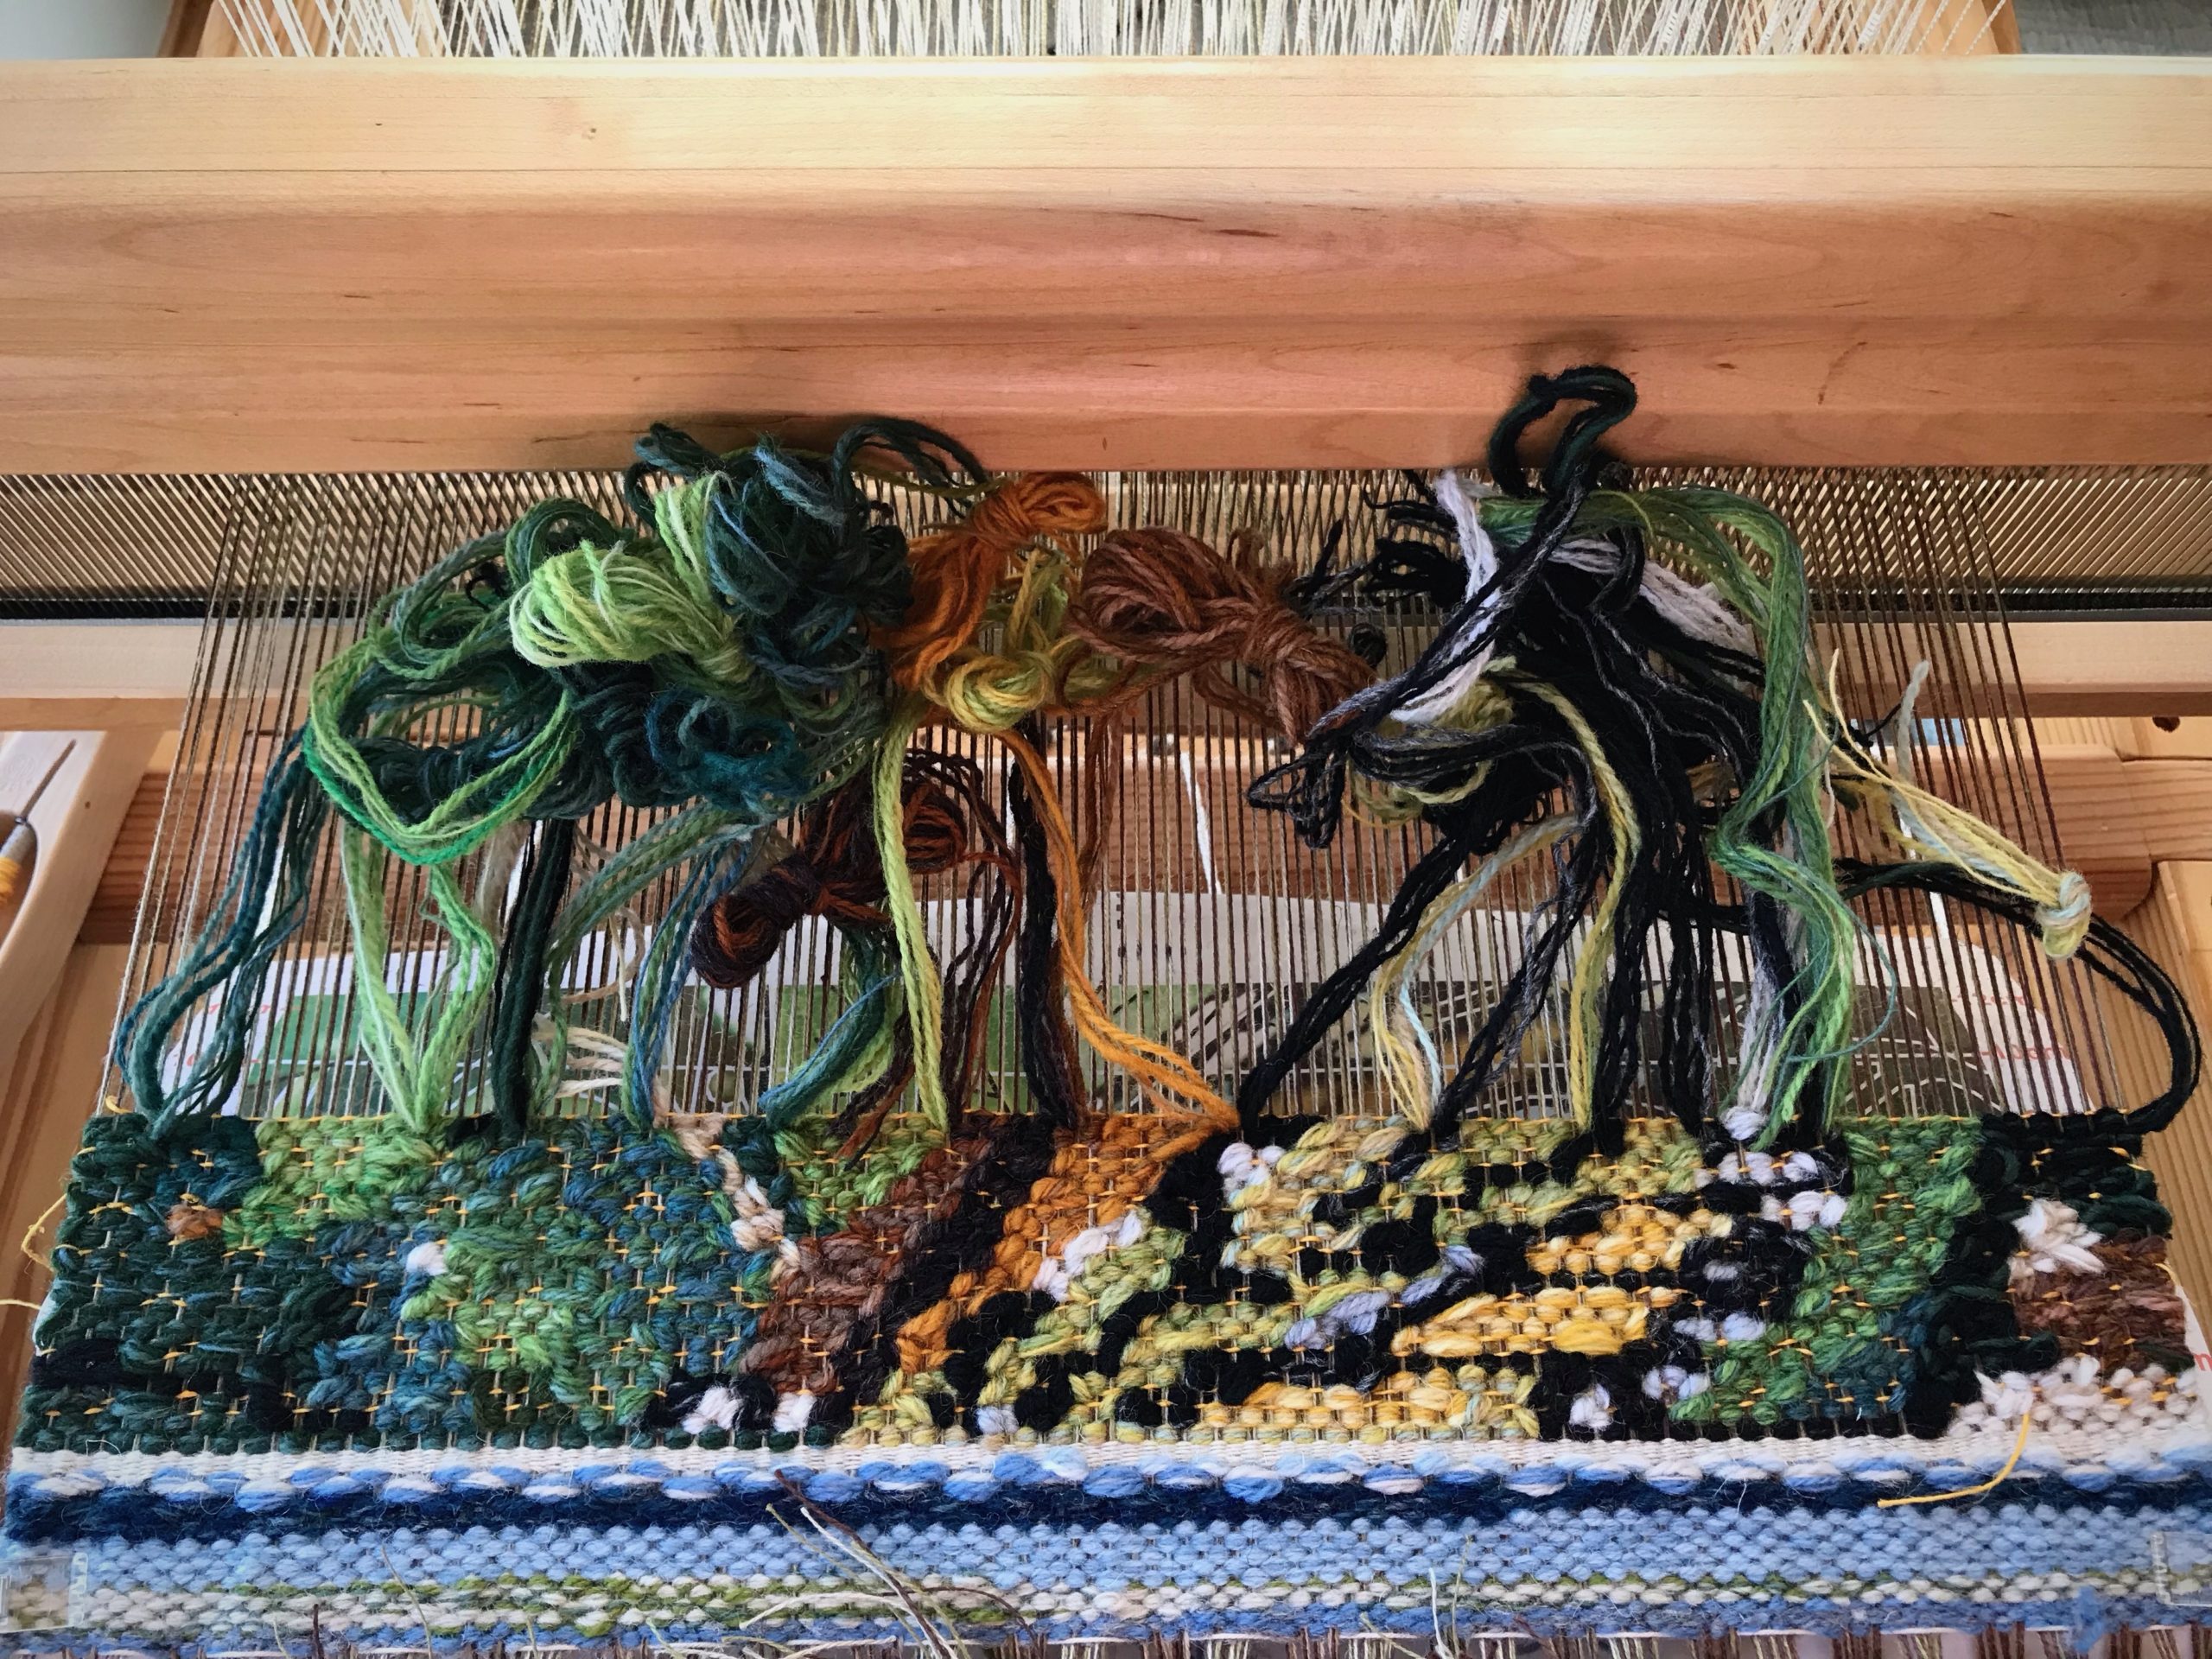
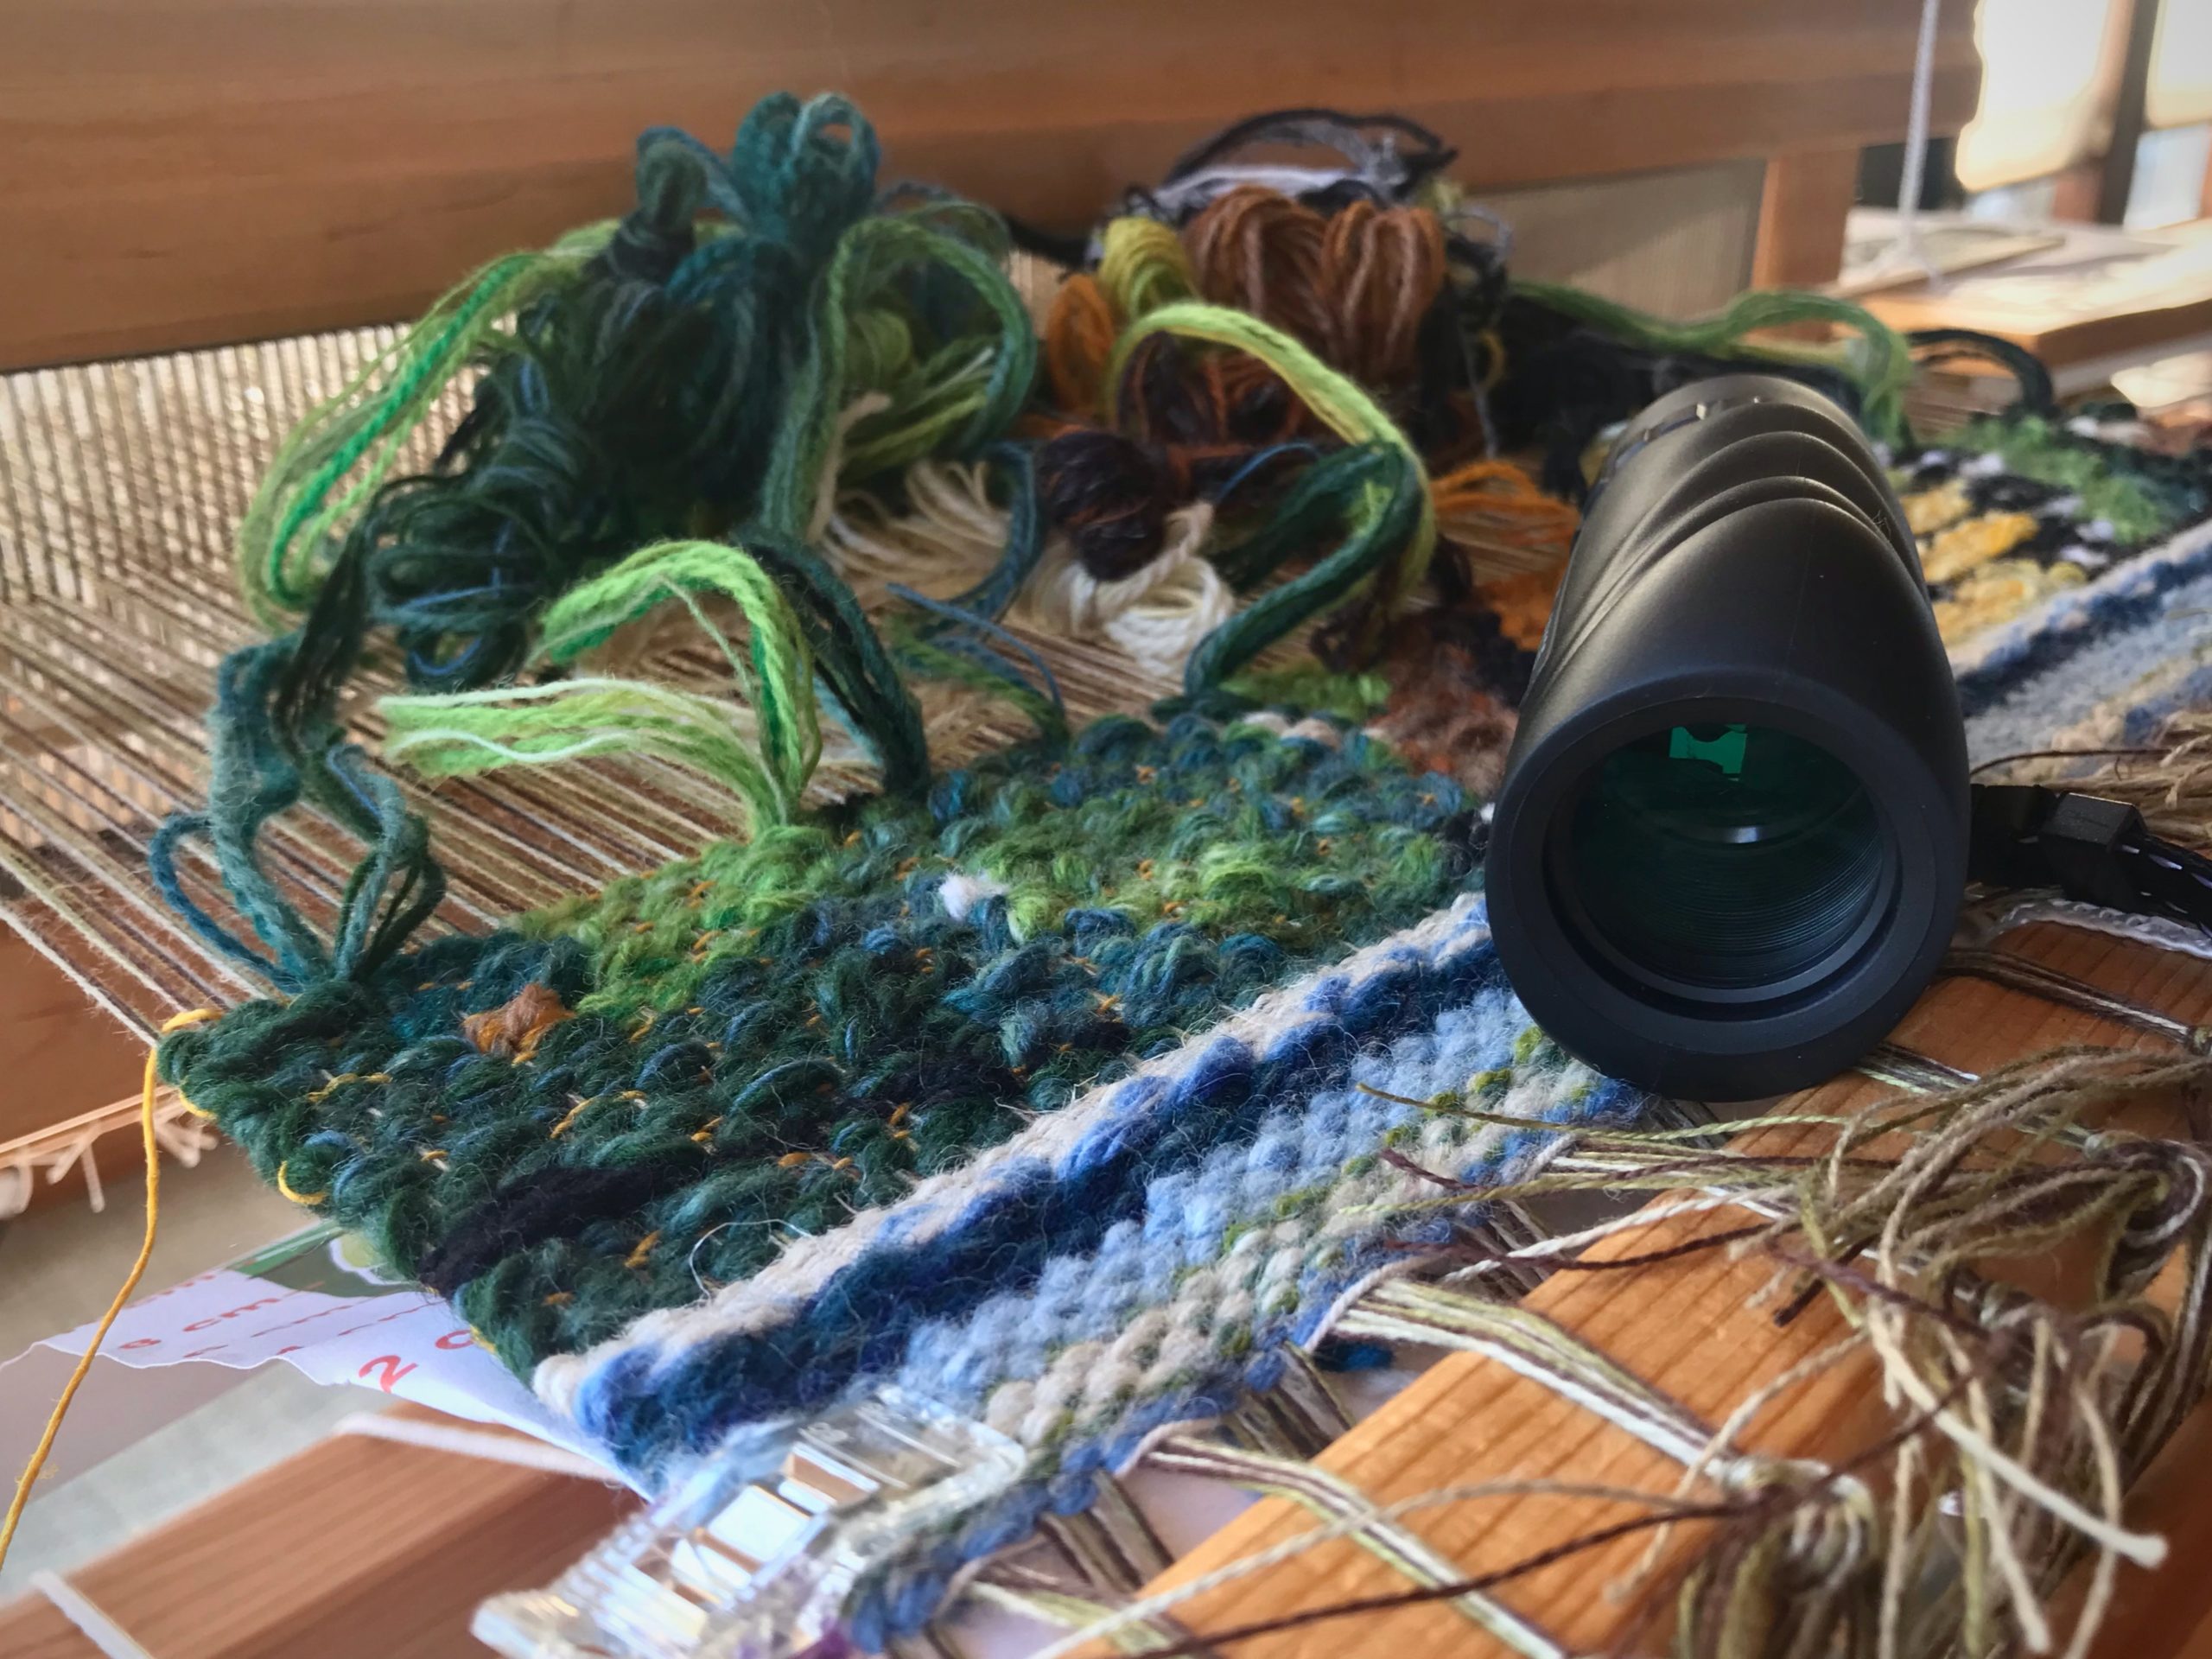
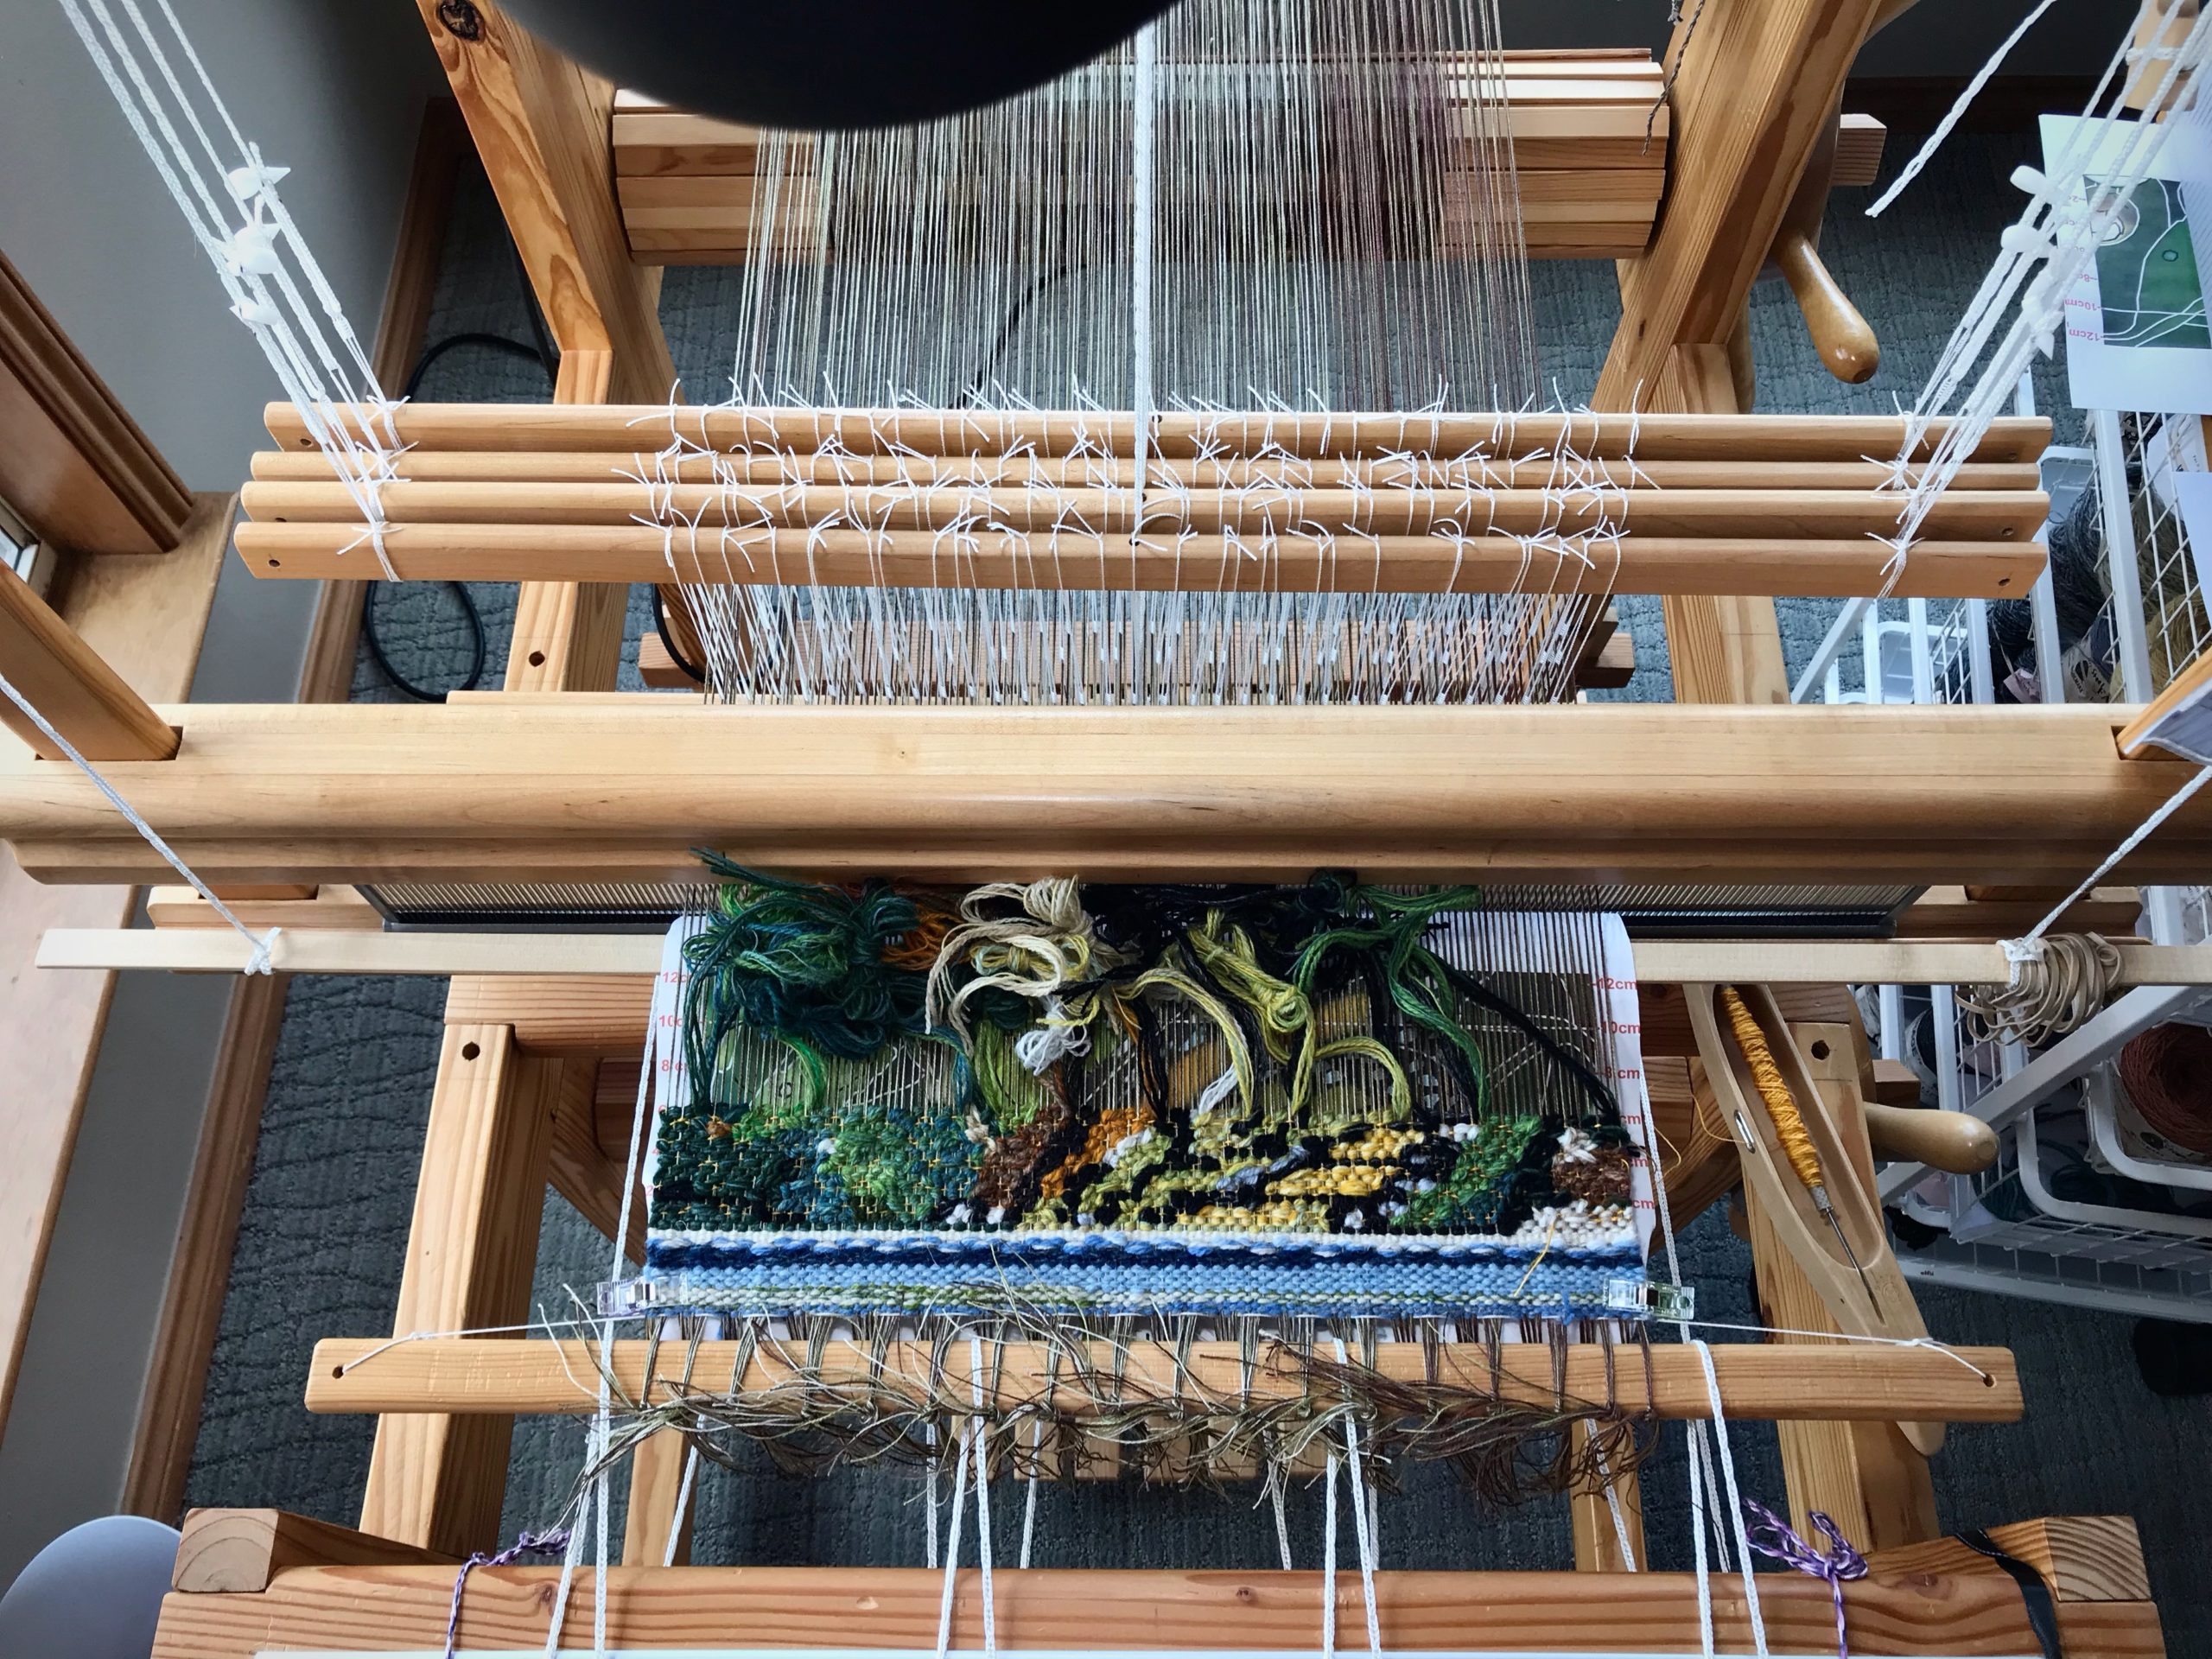
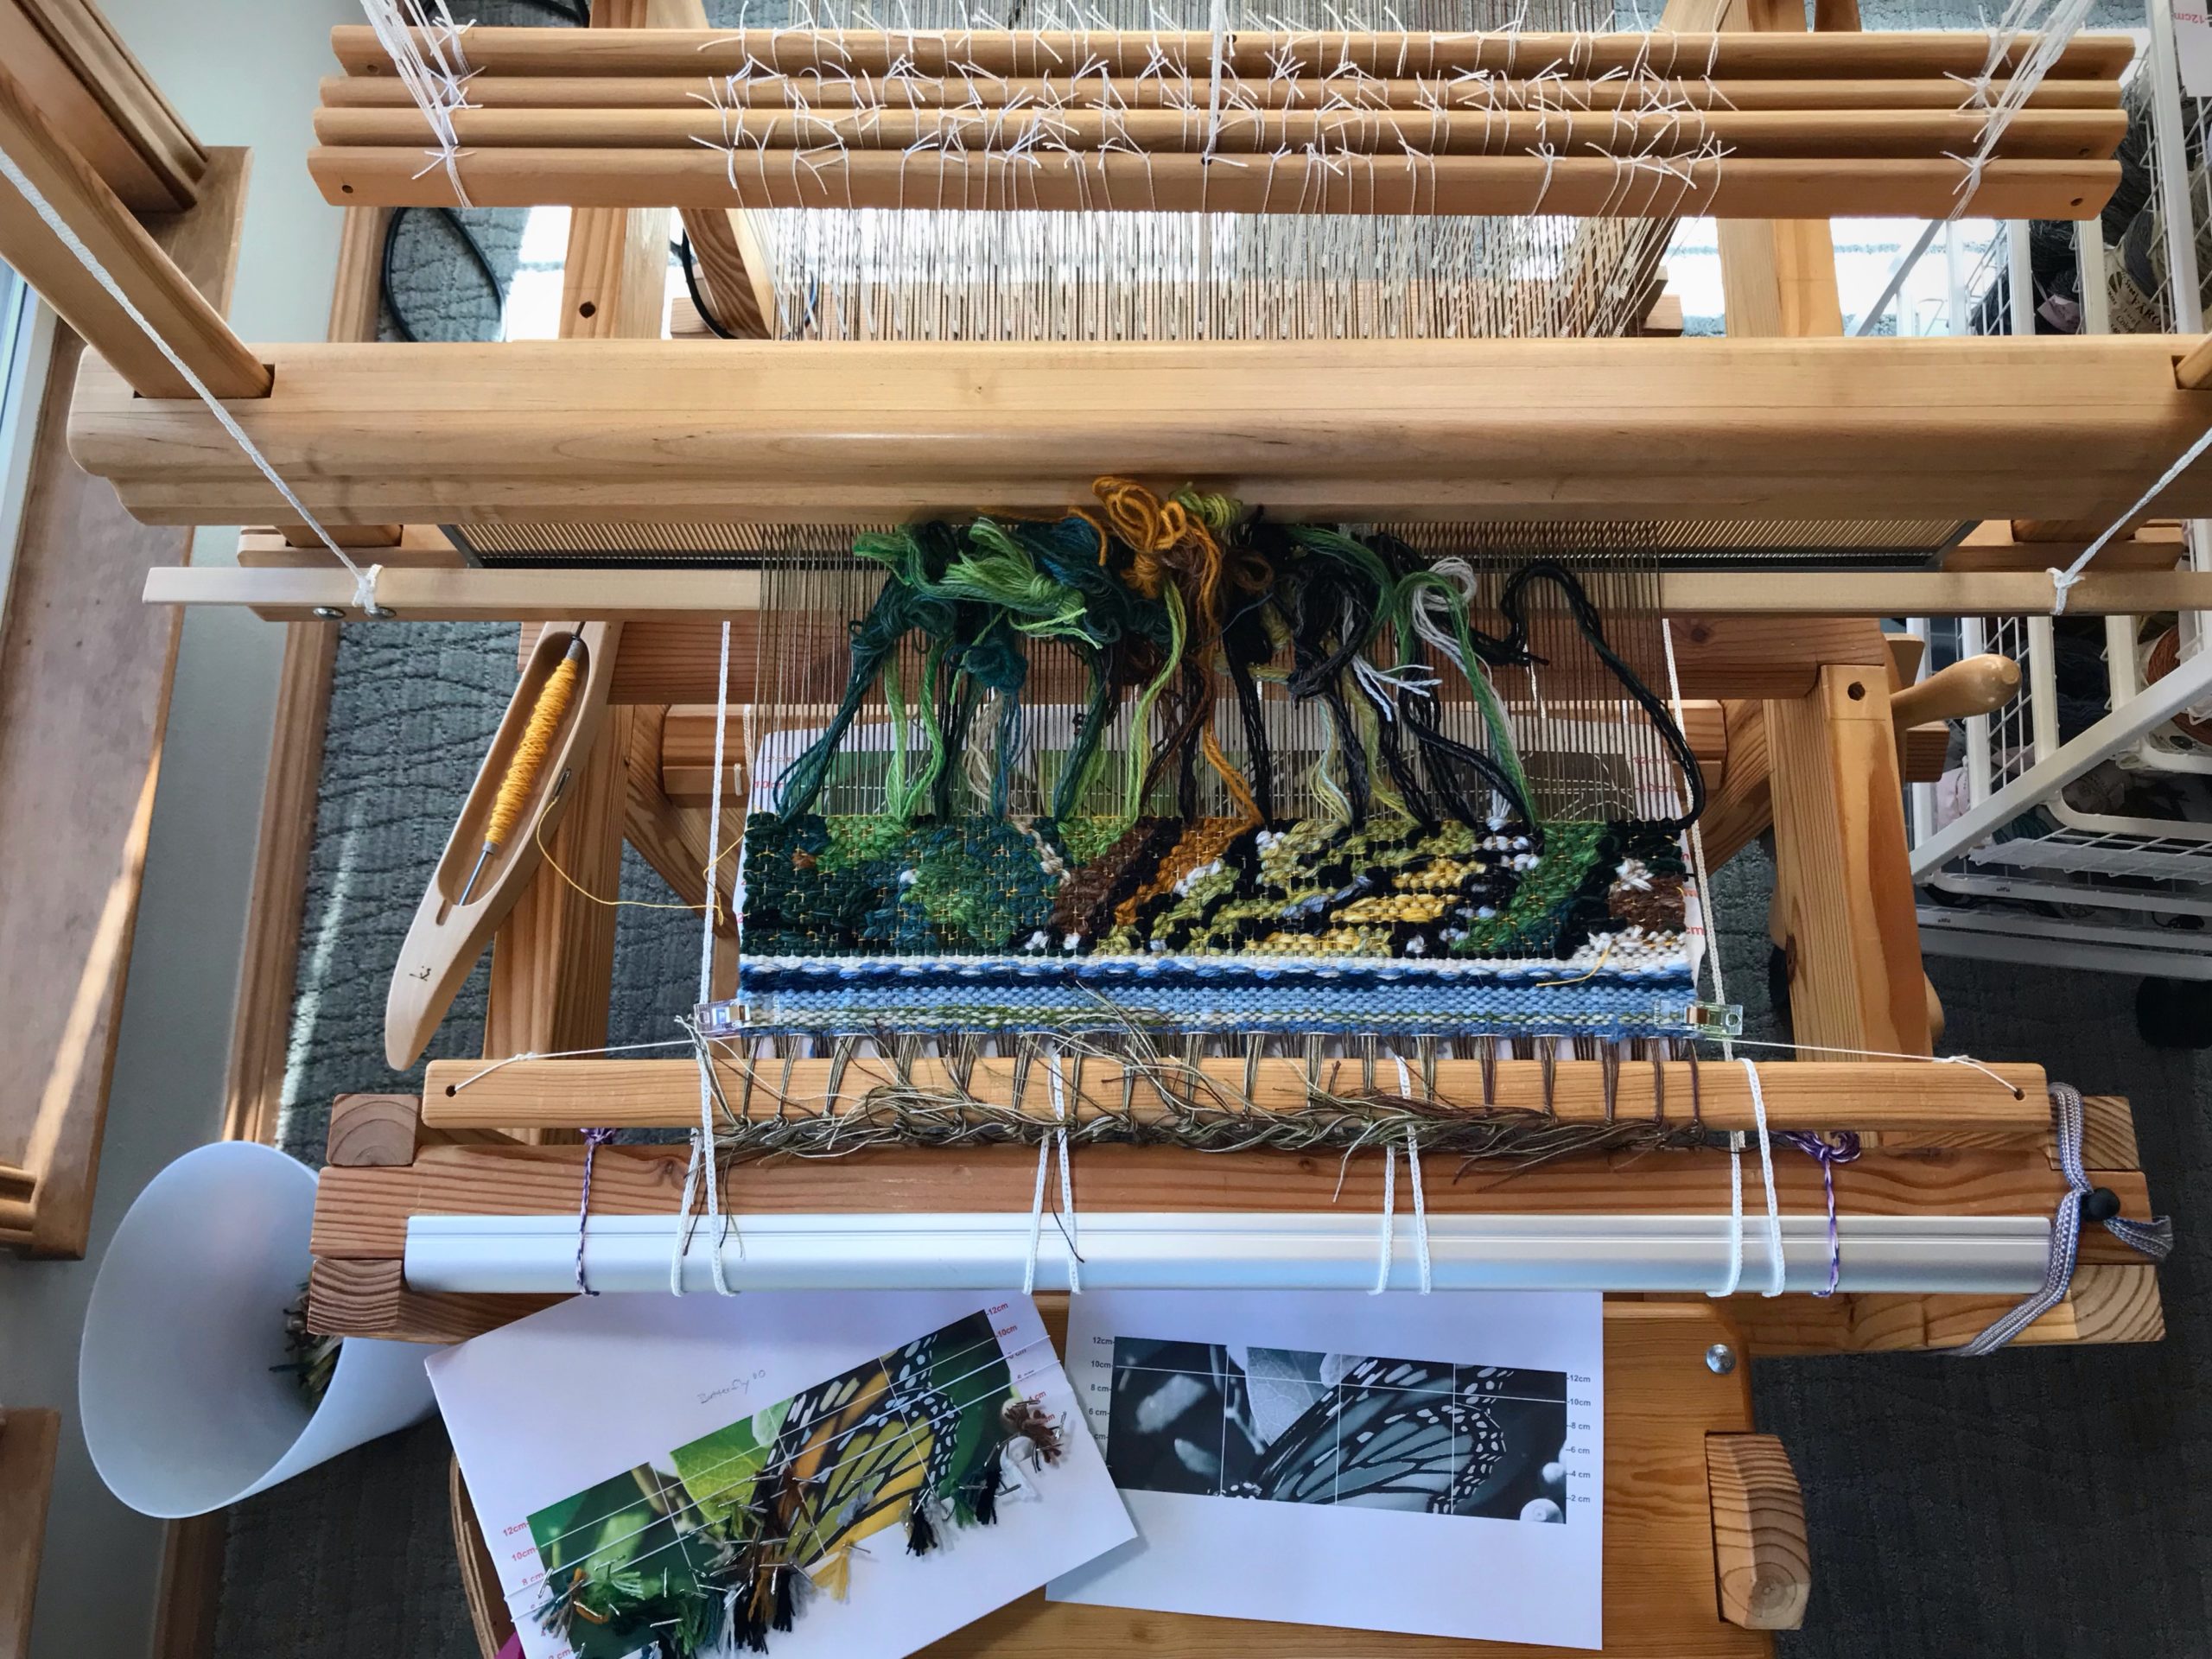
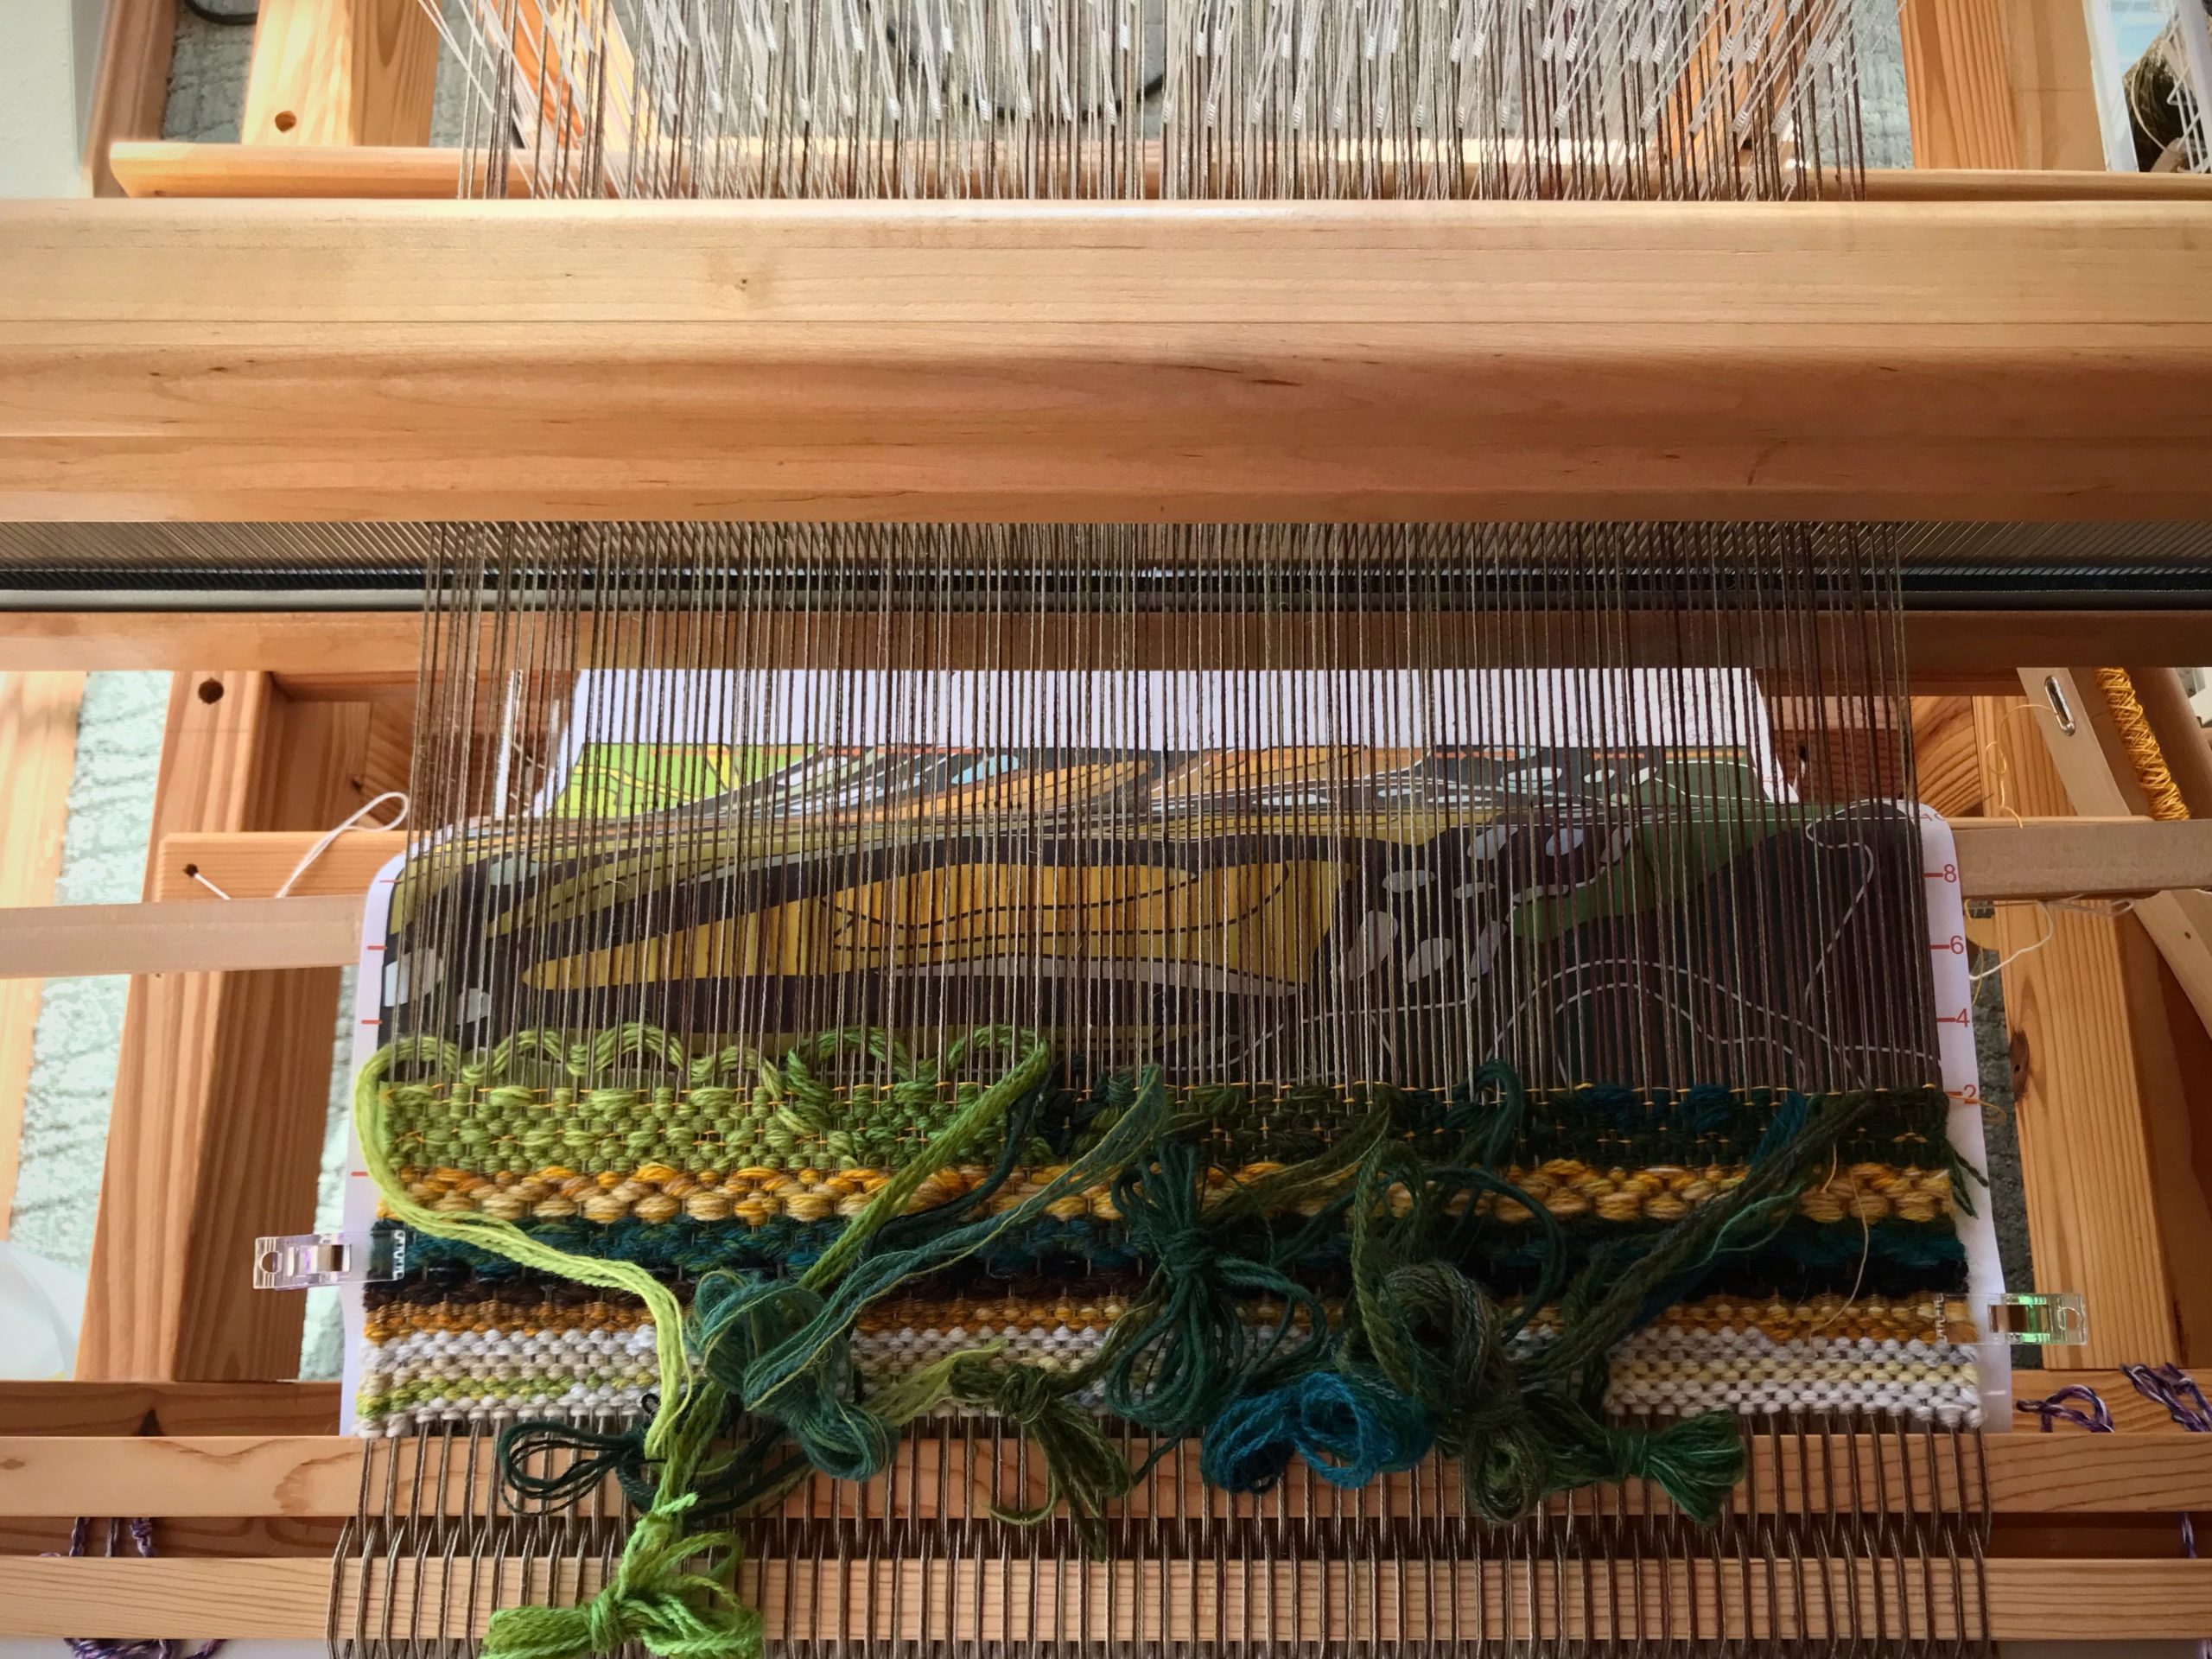
For this second butterfly sample I am zooming way in, to expose more detail of the delicate stained-glass wing. Transforming the photograph into a weaveable cartoon is a fascinating task in itself. In real life, when do we ever get this close a look at the intricacy of the fluttering wing?

Butterfly wing detail for a tapestry.
Color rows of black, green, yellow, and gold wool weft are woven in a rosepath pattern to frame the beginning of the tapestry. My “go-by” is a smaller replica of the cartoon that is under the warp.

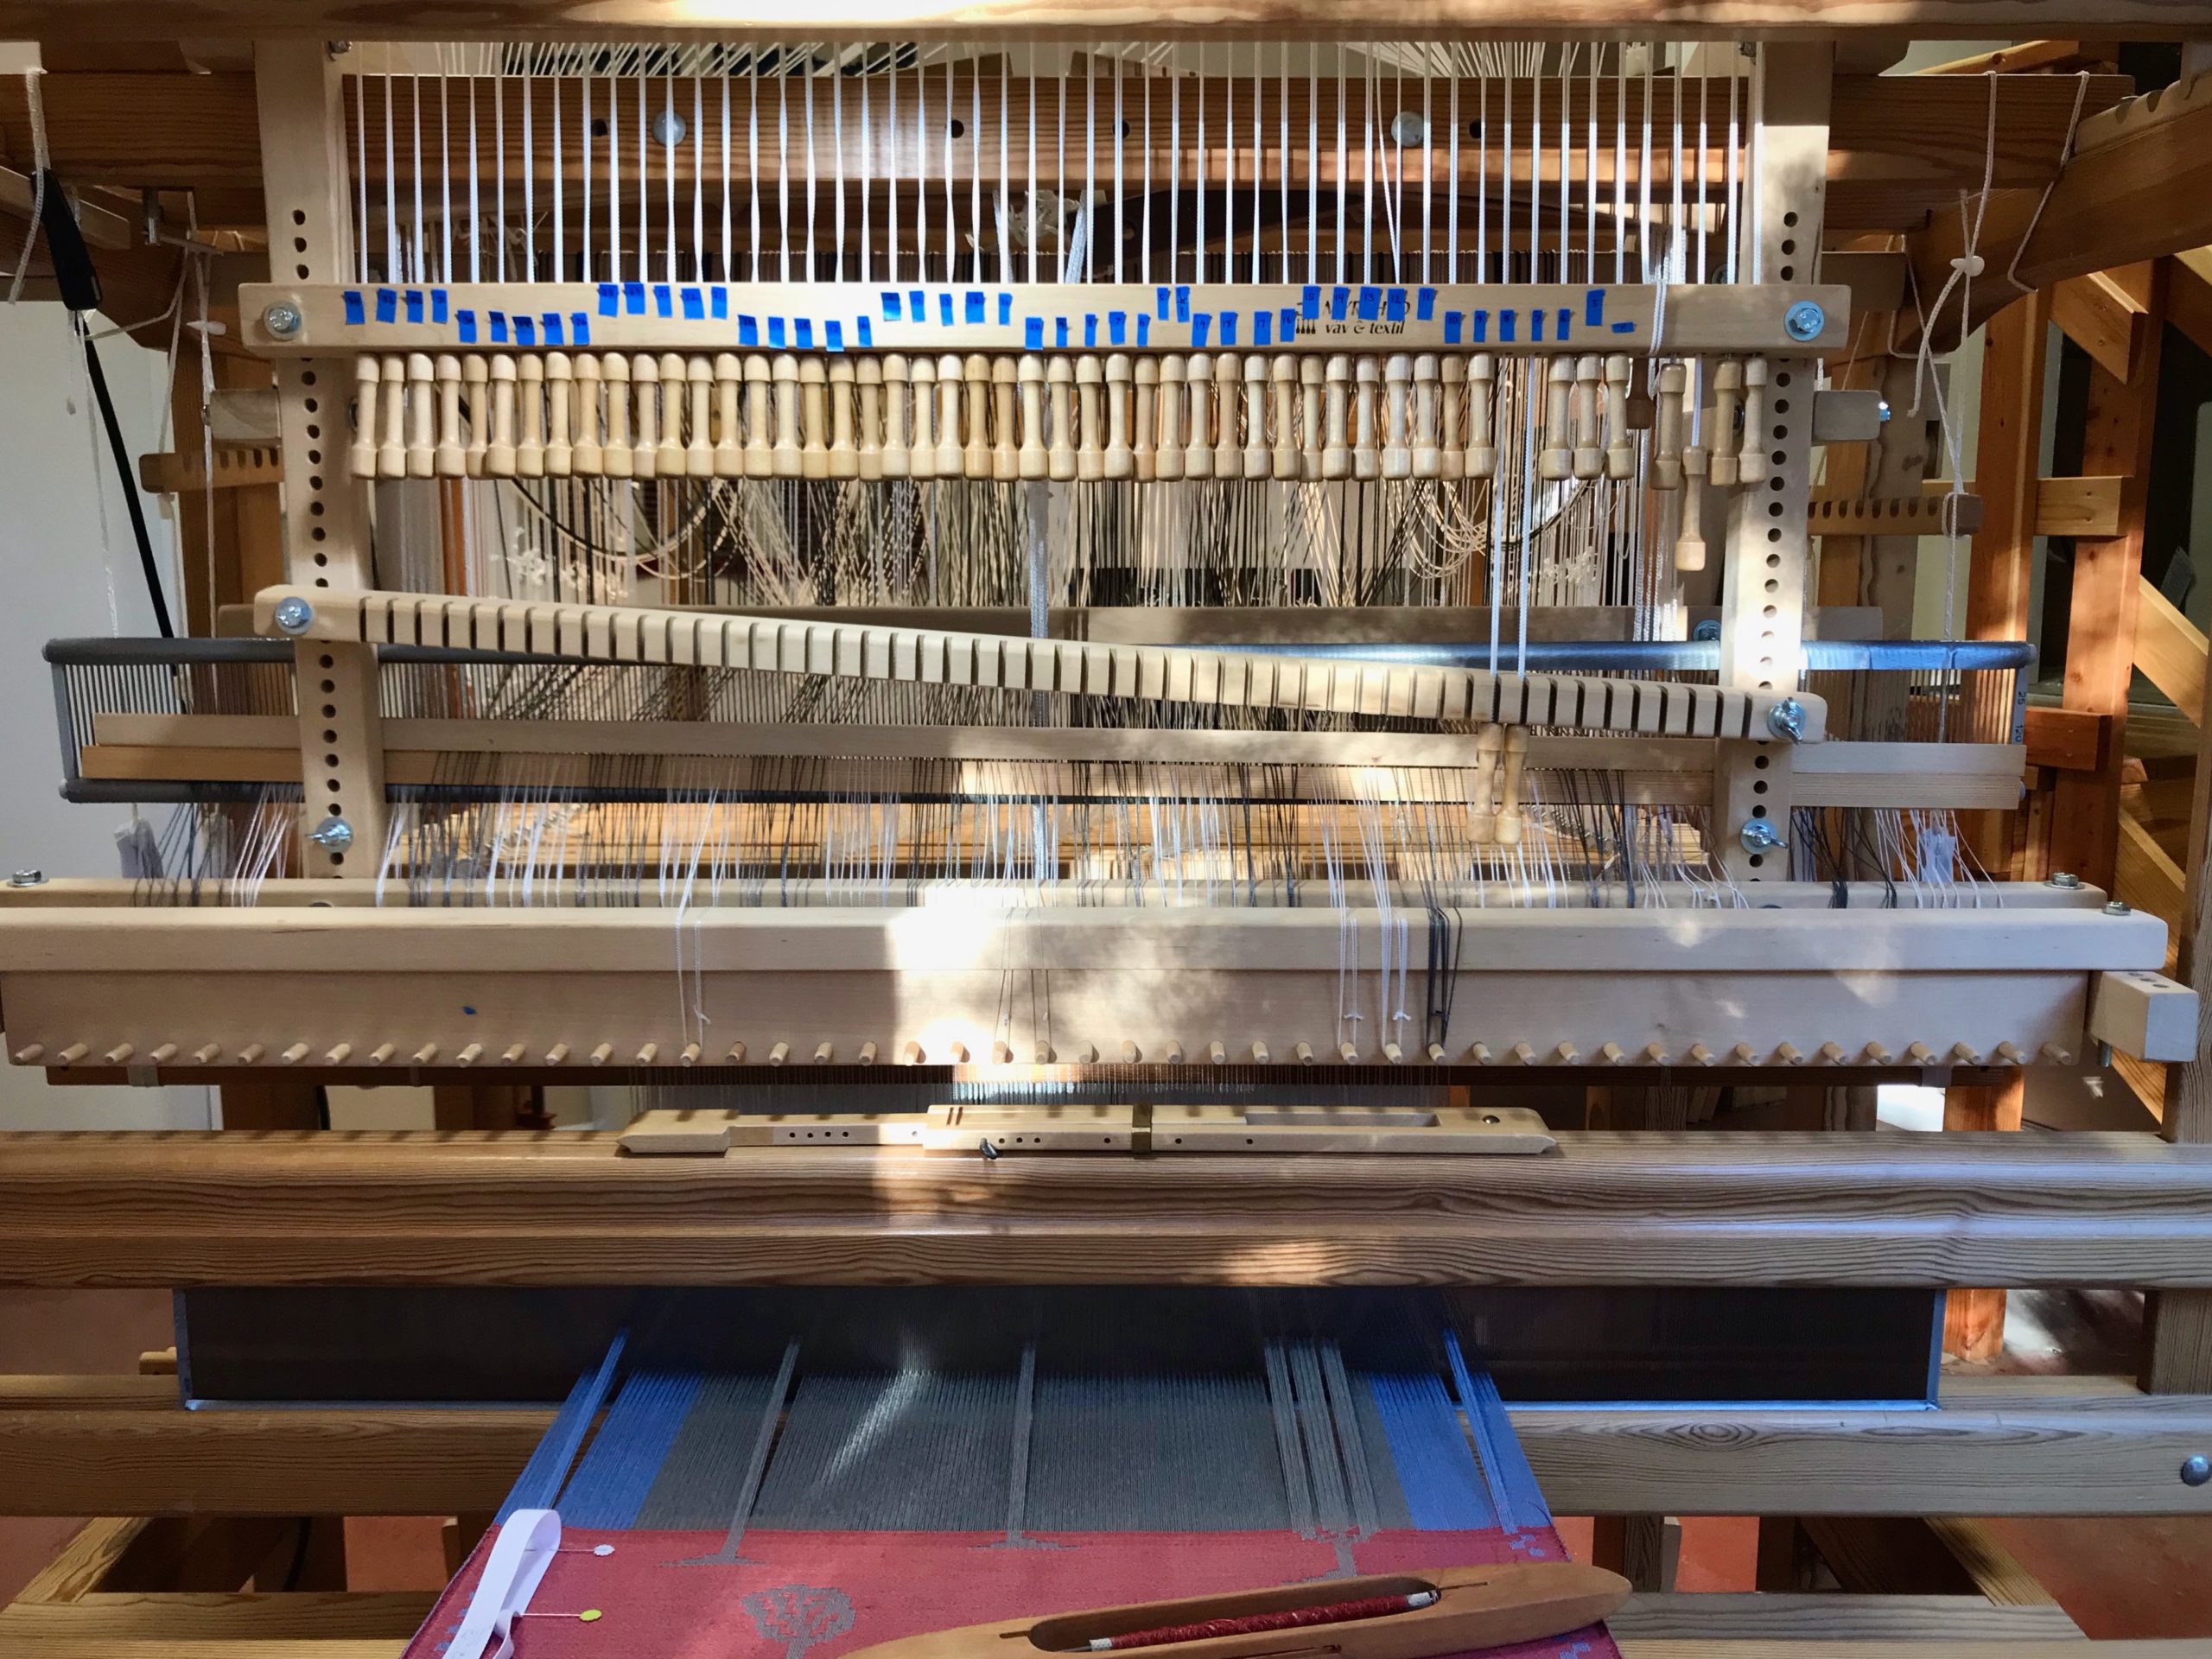
The primary reason for these butterfly samples is for me to gain a better understanding of how the details of the cartoon image relate to the sett of the warp on the loom. My goal is to thoroughly explore this style of tapestry. So, I aim to become adept in creating well-suited cartoons.

You can see the tapestry cartoon under the warp.
In progress. You can see the cartoon under the warp.

Let’s zoom in to the familiar scene of baby Jesus generations ago. The child born in a Bethlehem stable drew the attention of lowly shepherds, not impressive celebrities. Announced by angels, not by stately heralds. The detail clearly depicts something out of the ordinary: There is a kingdom that is not of this world. A King who shows up, not cloaked in royalty, but wrapped in the cloth on hand. What an intricate plan it is that a babe named Jesus would become our Savior King! And, that he transforms the image of those whose hearts invite him in.

May you examine the Christmas story in detail.

Looking forward to Christmas,
Karen

Tried and True: What a Little Piece of Tape Can Do

You never know when you’ll need a piece of blue tape. A roll of blue painter’s tape is among my essential weaving supplies. My favorite way to temporarily mark just about anything is with a piece of blue tape.

Blue Painters Tape for Temporary Markings

  1. Cut (or tear) the tape to size.
  2. Fold one edge of the tape under. This makes a little tab so that the tape is easy to remove or reposition.
  3. Use a fine point Sharpie to write on the tape.
Weaver's uses for blue painter's tape.
Tape prepared for pointing.

Three Examples

  • Keep your place. Draw an arrow on a small piece of blue tape. Use the arrow on the tape to follow along the threading or treadling draft. This eliminates confusion, especially after a pause.
Blue tape uses in the weaving studio.
Rosepath treadling for 4-shaft tapestry. Since there are plain weave picks between each rosepath row, I need something to remind me where I left off.

  • Measure the space. Draw a straight line on small pieces of tape. Measure the warp width on a tapestry frame or rigid heddle loom. Use the lines on the tape to mark where the first and last warp ends should lie on the loom. This eliminates guessing when warping the loom.
Uses for blue tape in my weaving studio.
Tapestry frame is ready for a new warp. After measuring for weaving width, and counting dents, I mark the dents with tape. No more guessing if I’m “almost there” when putting on the warp.
Blue tape to mark the rigid heddle. And other uses for blue tape.
By clearly marking the first and last slots/holes I can verify that my calculations are correct before I start warping the rigid heddle loom. This is helpful for direct warping and for indirect warping methods.

  • Number with Grace. Write out a series of numbers on a long piece of tape, leaving space between the numbers. Cut the numbers apart. Use the numbers to label pattern shaft draw handles on the drawloom. Place the numbers directly above the draw handles, arranged in groups of five for easy visual recognition. Use a separate series of numbers for border pattern shafts, if applicable. This temporary numbering system gives the advantage of being able to customize the numbering for each drawloom draft.
This is how I number my drawloom handles. Blue tape!
Using the Myrehed Combination Drawloom, I configure the numbers for the pattern shaft draw handles to coordinate with the single unit draw cords, which are grouped by tens. This makes my working chart that uses single units and pattern shafts much less complicated. For this reason, it doesn’t make sense to give my draw handles “permanent” numbers.

Have you found ways to use blue painter’s tape in your weaving studio? Share in the comments!

May your life leave marks that are more than temporary.

Have fun,
Karen

Tapestry that Tries to Copy

The jumble of yarn looks like a random play of colors. But if you look a little closer, and push the yarn butterflies out of the way, you can tell that the color choices are deliberate. You see only a hint of the image, though, until you look through the back end of the monocular, or step up on the step stool to have a look from up above the weaving. That’s when you get an overview of what’s on the loom.

New tapestry project.
Yarn butterflies each have a mix of wool, mostly 6/2 Tuna and 6/1 Fårö yarn.
Weaving a new tapestry on the floor loom.
The mix of colors in each yarn butterfly is a deliberate selection for the specific hues, values, and intensities I want to portray.
Tapestry of a butterfly wing.
View from my seat on the loom bench.

This warp is a study project. I want to test some tapestry techniques to help me develop my style. I made the cartoon by cropping and enlarging a photograph I took years ago. The butterfly had just emerged from its chrysalis! The subject for my study: the butterfly’s intricate wing.

Tapestry on the floor loom, and how to view it.
Peering through the *wrong* end of the monocular gives me a distant view of the tapestry in progress.
Get a view from higher up to get a better perspective on life.
I stand on a stepstool near the loom to get an even broader view of the tapestry from a distance. This perspective shows me how effective my yarn selections are (or are not) for the image I want to create.
Intricate butterfly wing - subject for tapestry study.
Cartoon in a reduced size helps me see the color distinctions. Photo in black and white helps me see value contrasts.

Who designed the butterfly wing? A stained-glass artist may conceive it. A tapestry weaver may copy it. A silk dyer may imagine it. But only our Creator could bring it to life. God makes himself known. Push the obstacles out of the way. Look for design. Gain a higher perspective. With each woven row, the image becomes more and more clear. When the butterfly wing begins to flutter you know you are witnessing something from the mind of God.

May you see what is hidden.

Happy weaving,
Karen

Process Review: Rosepath and Butterflies

I allowed the remaining warp to sit on the loom for a little while after cutting off the Eye of the Beholder tapestry. It crossed my mind to be completely done with it. Go ahead, discard the bit of warp that is left, I told myself. But this is linen. I have a hard time discarding linen.

New tapestry, just cut off the loom.
Cutting off Eye of the Beholder tapestry.

The warp on the loom is threaded in rosepath, with a coarse sett of 3 ends per centimeter (7.5 ends per inch). The potential weaving length is no more than 20-30 centimeters. Then, the “what if” happens. What if…I use leftover butterflies from the tapestry as weft for a short rosepath design? One thing leads to another. Now, I have a new favorite purse. The tapestry memories live on!

Linen warp and wool weft in rosepath.
Stick shuttle works to carry various lengths of wool butterflies across the linen warp.
Tapestry butterflies put to use.
Tapestry butterflies are put to use. (Butterflies accumulate with every tapestry.)
Rosepath garden.
Butterflies in the rosepath garden.
Rosepath with leftover tapestry wool butterflies.
Cutting off beautiful linen and wool rosepath!
Cutting off.
Finishing the ends.
Finishing the ends.
Rosepath and Butterflies Purse.
Handwoven purse, with lining and pocket.
Inside of purse is lined, with a pocket added, of course.
Handwoven strap made from 12/6 cotton rug warp.
Strap is 4.5cm wide and was woven with 12/6 cotton rug warp on the Glimåkra 2-treadle band loom. I sewed the strap to the bag, keeping the warp edging of the rosepath fabric visible, with the braids at the ends as embellishments.
Rosepath and Butterflies Purse. Handwoven.

May you know when to ask, “What if?”

Be blessed,
Karen

Process Review: Eye of the Beholder Tapestry and Video

I started planning this tapestry portrait of my mother one year ago. As I was concluding her portrait on my loom, it became evident that her real-life tapestry was also coming to a conclusion. I arrived at Mom’s bedside with the portrait in hand, warp ends dangling. Her smile in that cherished moment is one I will never forget. In the days that followed, she quietly slept. I silently braided the warp-end edging, trimmed the tails on the back, stabilized the tapestry through the lining, and stitched the lining in place. I carefully secured the last stitch. In the wee hours of the next morning, while she was asleep, the Lord Jesus called my mother home. Tapestry complete. Beautiful.

Weaving a pictorial tapestry. Making butterflies.
Making butterflies gets messy. Balls of yarn are everywhere as I combine strands of wool to get just the right blends of color. And then I rubber band every label back on its yarn, and every ball of yarn goes back in its proper bin.
Tapestry portrait. Eye of the Beholder.
I was overjoyed when I was able to see her eyes in the tapestry.

Eye of the Beholder is about my mother who taught me to appreciate beauty. This is a portrait of a woman with an eye for beauty, with beauty in her eyes.

I humbly share my process of weaving Eye of the Beholder in this video:

May you seek beauty that never ends.

Her daughter,
Karen