How Soft Is Your Pillow?

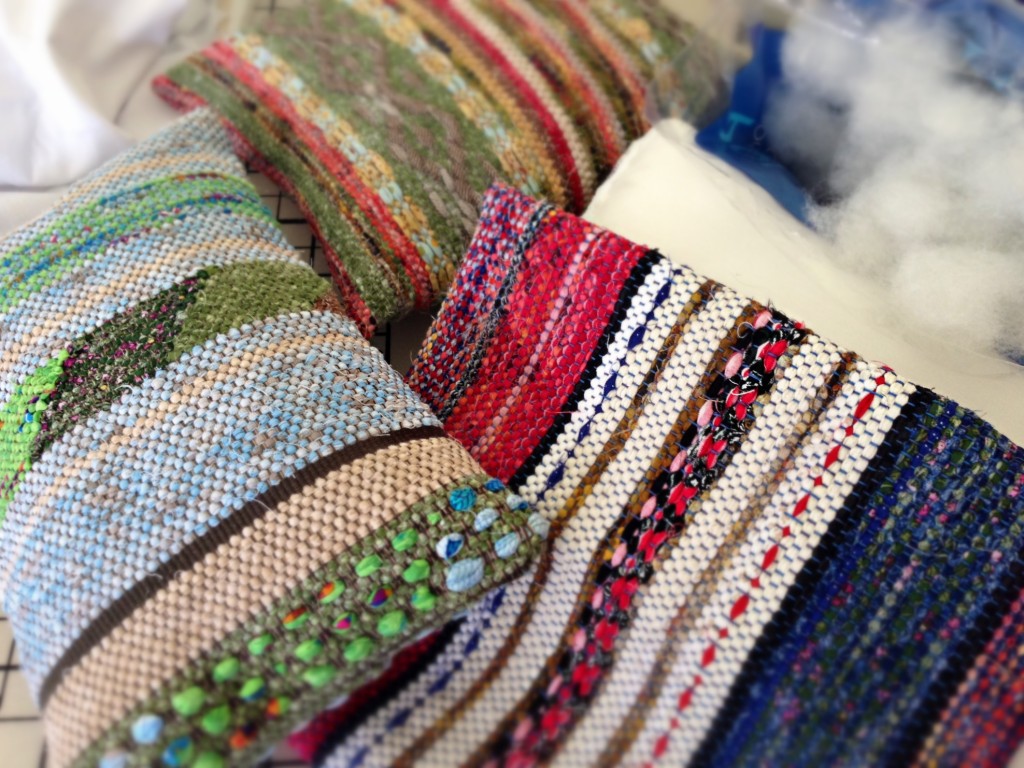
I have three short sample pieces from rug warps, where I had experimented with colors and design. I am making these samples useful by turning them into pillow covers. To complete them, I made pillow inserts to fit inside.

Rag rug cushion covers, with pillow inserts made to fit inside. Karen Isenhower
Rag rug pillow covers, with pillow inserts made to fit inside.

To get the most loft out of the polyester fiberfill, I run my fingers through clumps of it, pulling and easing it apart. I stuff these airy clouds into the pillow insert forms that I have sewn and then serge the edge of the insert closed. The durable and hearty rag rug pillow covers are pretty, but they are flimsy and floppy until the cloud-soft pillow forms are placed inside.

Like the pillow covers, your strongest asset is invisible. When we adorn our inner person with gentleness and a quiet spirit it brings clarity and courage to our outward demeanor. You would not fill the pillow cover with rocks, would you? Having cloud-soft humility instead of hard-headed stubbornness enables us to face any difficulty without becoming fearful or resentful. The beauty of your unique design is put in its best light by the loft of the pillow inside.

May you respond to difficulty with a gentle and quiet spirit.

(These three pillows are the newest additions to the Warped for Good Etsy Shop!)

Quietly,
Karen

Get Back to Your Sweet Spot

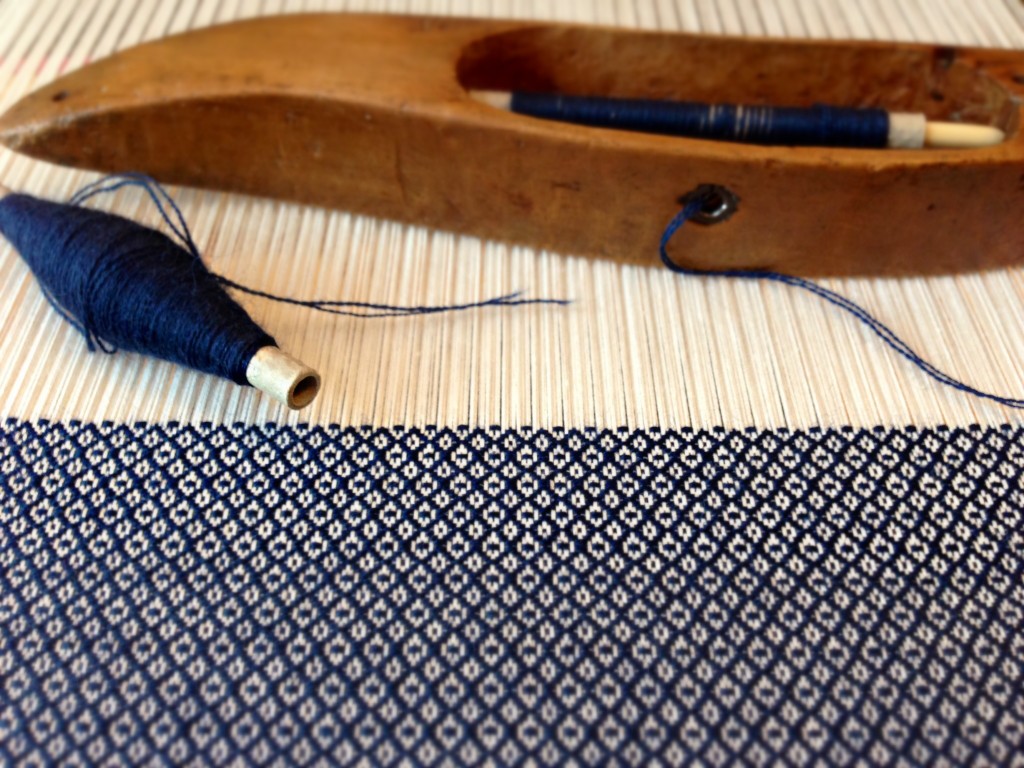
My feet follow an eight-step sequence on four treadles for this rosepath pattern. Even one step out of sequence makes a glaring error. I start out conscious of the order, repeating the numbers aloud while moving my feet. 3-2-1-4-1-2-3-4. After a while, my feet find a motor memory and I don’t need to concentrate as much. Now I’m in my sweet spot, throwing the shuttle back and forth, making cloth. (This flat cloth will be the back of a cushion with THIS rya weaving on the front.) I would like my attitudes to stay in their sweet spot, too.

Doubled Mora wool in antique Swedish shuttle, weaving rosepath
If I always stop at the same spot in the eight-step sequence, when I do need to stop, I am much less likely to get confused about where I left off. I like to have a filled quill ready so I can keep moving, even when I need to replace an empty quill.

There are normal interruptions in weaving, like stopping to replace the quill in the shuttle. Most of my treadling errors happen after those interruptions. With my attitudes, the disruption that knocks me out of my sweet spot is an encounter with someone who is disagreeable, rude, or unkind.

When we give a blessing, though, even to the undeserving, we come out ahead. If I show empathy, kindness, and humility to someone who does not show it in return, I end up with the blessing. If I return evil for evil or insult for insult, however, I throw that blessing away and my misstep makes a glaring error in my own fabric. Giving a blessing is the best way to get back to that sweet spot.

May you be ready for your next blessing.

As Always,
Karen

Weft in the Background

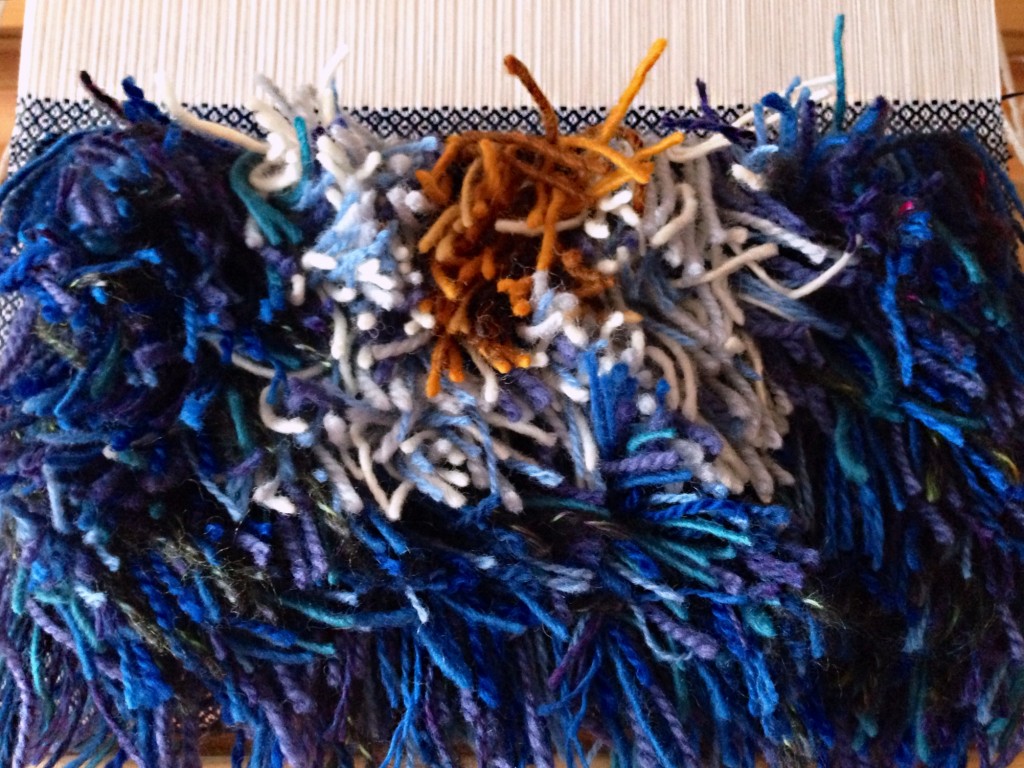
With nine shades of blue, four shades of gold, and mixed strands of white / grey / lavender, in various weights of wool, the rya is a tactile and visual delight. There is a lovely surprise under the shaggy rya tendrils that you will not see unless you spread the strands apart and peer down to the cloth. The wool background weft forms a delicate repeating pattern underneath. And that hidden ground weft is the very thing that secures every tedious row of hand-tied rya knots. Like the background weft, when we choose to build others up, we weave a lasting foundation into our relationships.

47 rya knots across each row, forming a shaggy pillow top. Karen Isenhower
Shaggy pillow top. Each row of rya knots is made by slipping individual strands of wool yarn around pairs of warp threads, snugging them into secure knots. There are 47 rya knots across each row.

Sure, more knowledge and experience improves my skills. Skills that I can show off. Knowledge without love is a danger zone, though, that leads to arrogance. I can puff up myself through knowledge, or I can build up others through love. Wouldn’t we rather be the background weft that allows the rya to stand out? Our knowledge, with love as the operating system, has the capability of building up others. What love builds, lasts.

 (More thoughts about rya knots, and love as an operating system HERE.) 

May you find your place in the background.

Truly yours,
Karen

The Secret to Making Lattice Fringe

First, a short tutorial for tying perfect lattice fringe, and then some thoughts about keeping our eyes open to reality. I decided to tie three rows of knots with this fringe for a pretty lattice effect, knowing the results are worth the time it takes.

How to Tie Lattice Fringe – Step-by-Step Tutorial

Supplies:

  • 7/8″ (2 cm) blue rigid foam insulation (mine is Dow Styrofoam Residential Sheathing Insulation, found at The Home Depot or Lowes), cut to 32 x 36″ (81 x 91 cm) (This great idea came from Thrums, one of my favorite weaving blogs.)
  • 16 straight pins
  • 7/8″ (2 cm) warping slat (or template of desired width)

1. The first row of overhand knots has been tied. (More detail HERE.) Lay the fabric over the foam board, with the fringe laying toward you at the front of the board.
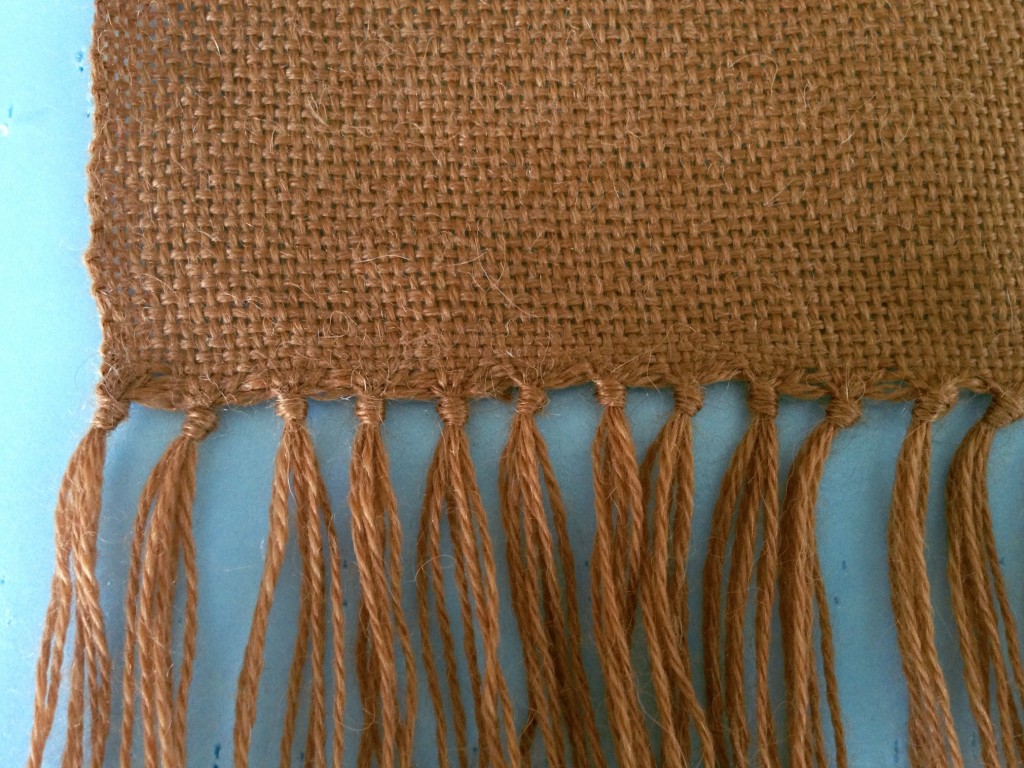
How to add lattice fringe to a row of knotted fringe. Step-by-step tutorial with pics.


2. Place a straight pin through the top thread of each of several knots in a row, into the foam board under the fabric.
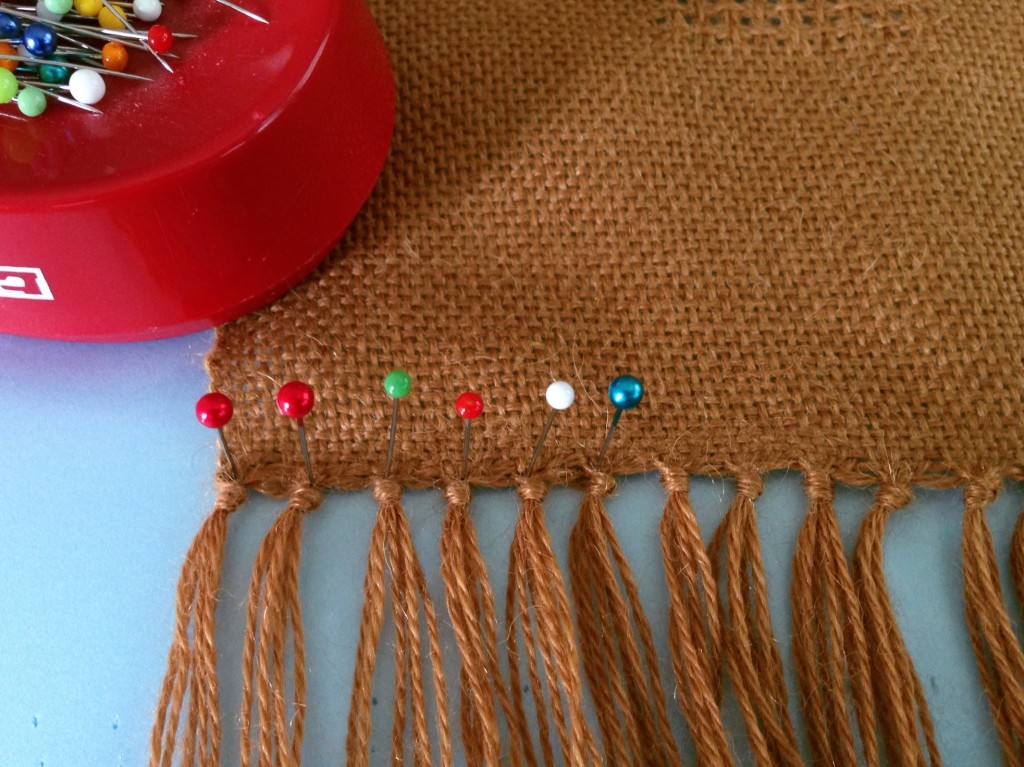
Lattice Fringe Tutorial. Step-by-step, with pics.


3. Use warping slat (or other template) as as spacing guide for the second row of knots. Lay warping slat flat, and place it flush against the row of pins. Using the width of the warping slat as a spacer, place a pin in the second row just below the slat, at the point where the knot will be formed.
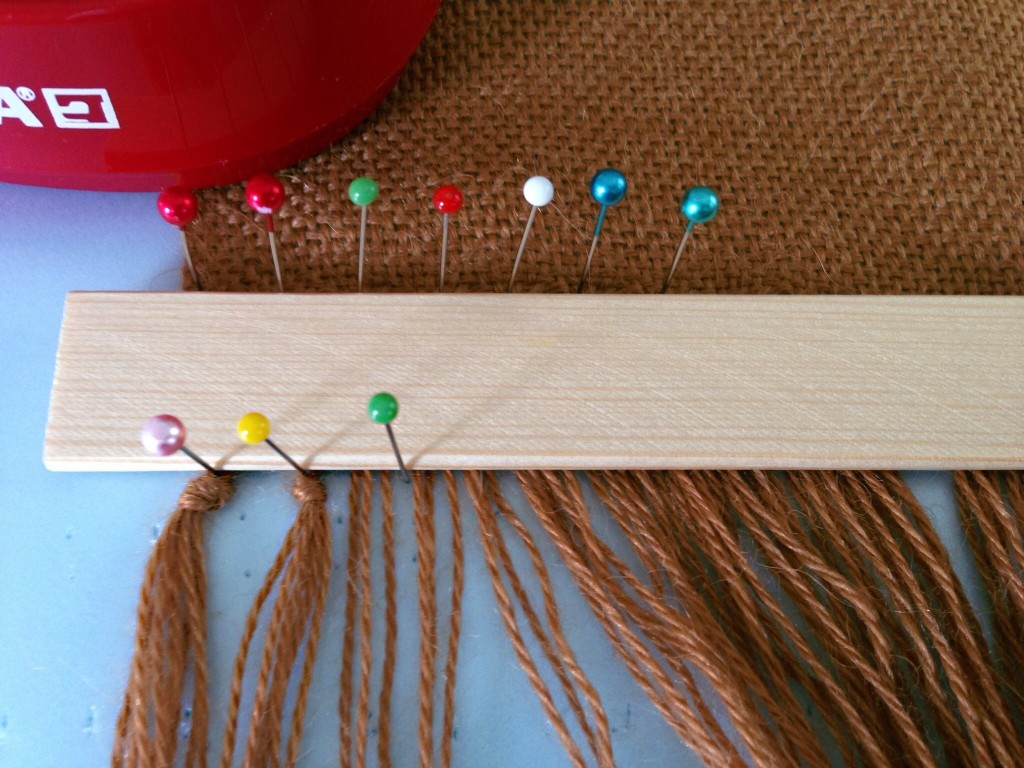
Lattice Fringe Tutorial. Step-by-step with pics.


4. Remove warping slat. Loosely tie an overhand knot below the just-placed pin in the second row, leaving the center of the knot wide open.
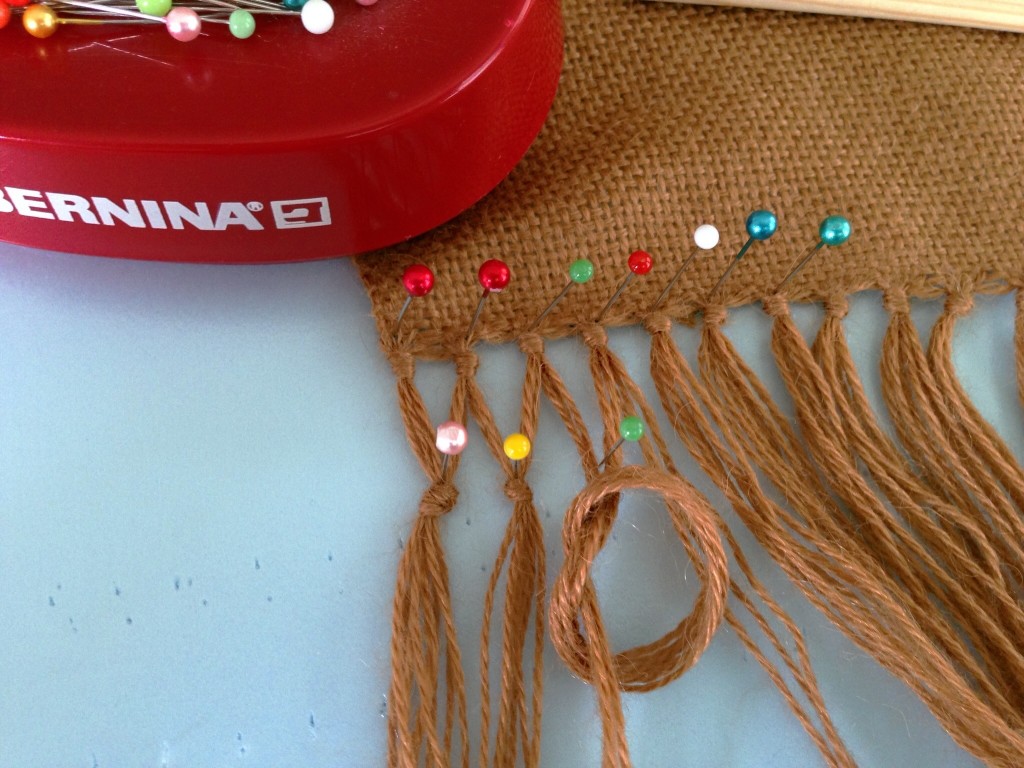
Overhand knot in lattice fringe tutorial. Step-by-step with pics.


5. Insert another pin through the center of the knot just a fraction below the point of the first pin.
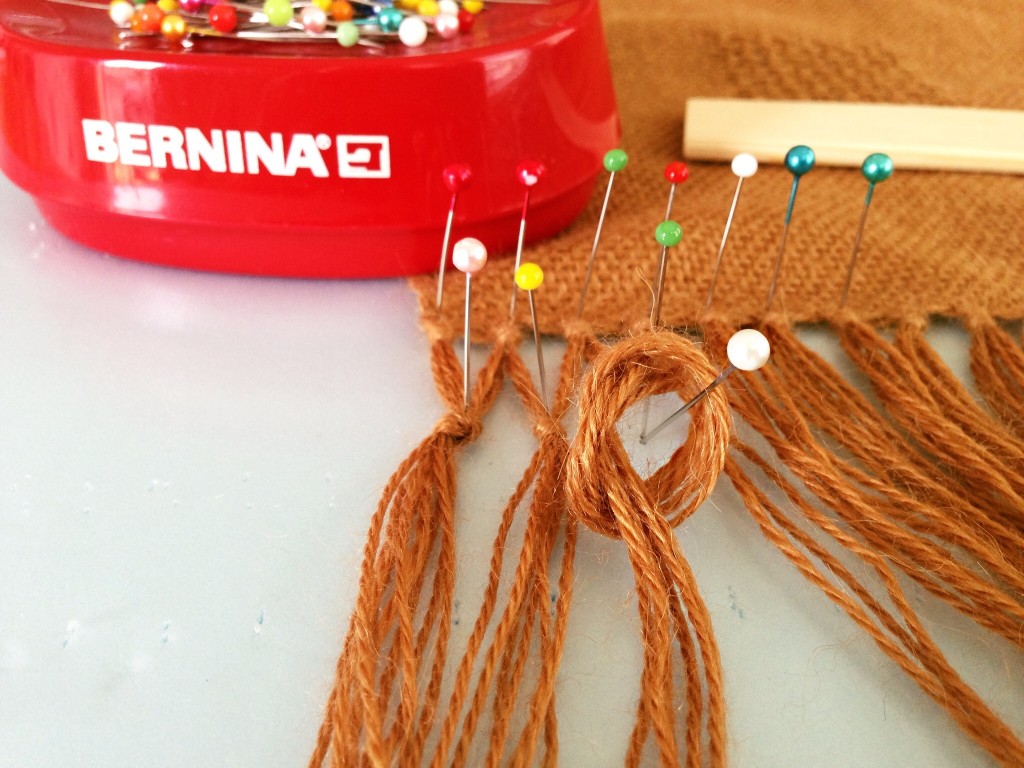
Making Lattice Fringe. Step-by-step tutorial with pics.


6. Slowly pull the knot to cinch it up to the point of the second pin.
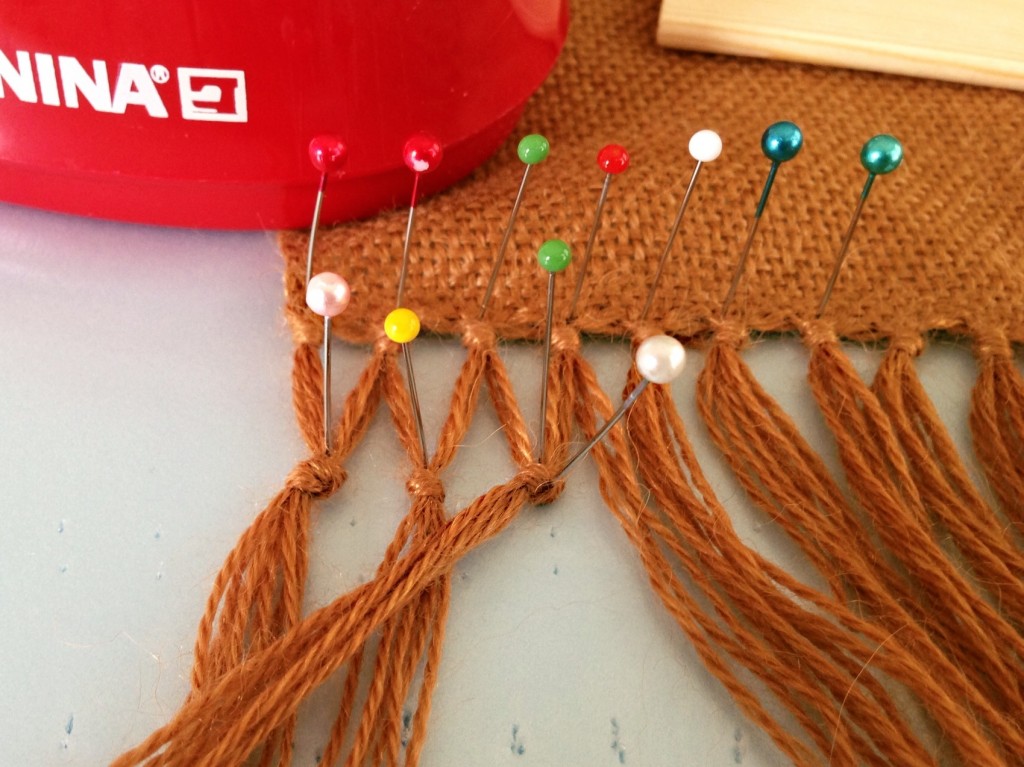
Cinching the knot for lattice fringe. Tutorial with pics.


7. Holding the knot firmly between the fingers of one hand, with your other hand gently tug each strand of the knot to its full length.
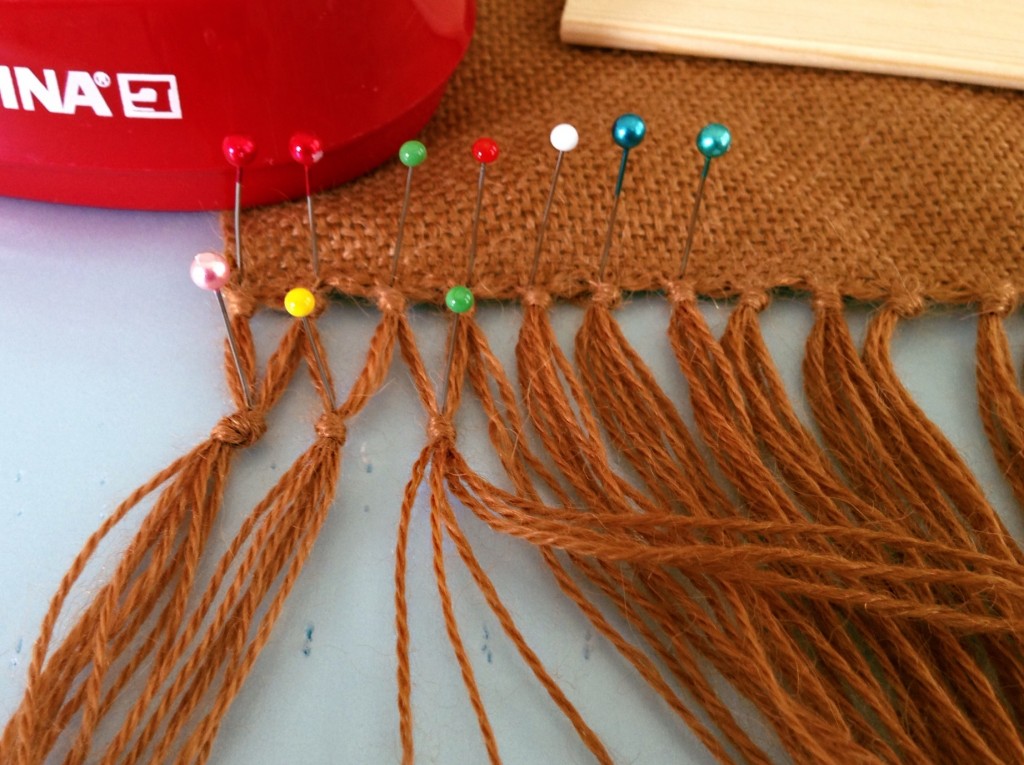
Making lattice fringe - tutorial with pics.


8. Continue tying knots across the entire row.
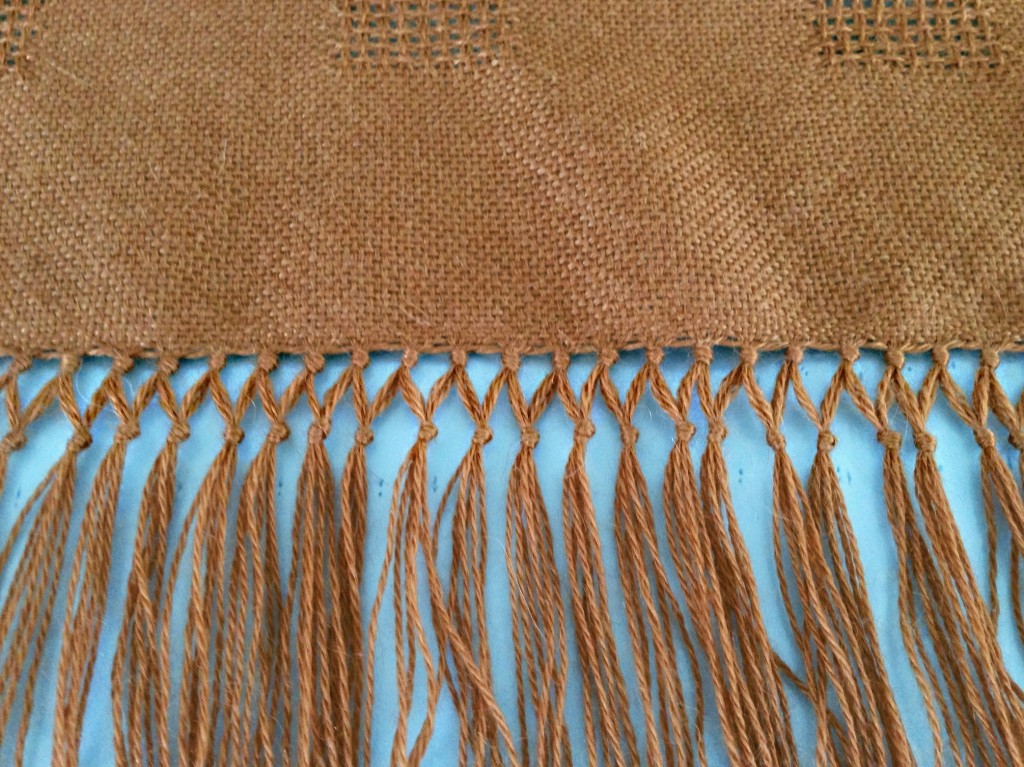
First row of lattice fringe. Tutorial step-by-step with pics.


9. Repeat the process to add another row of knots.
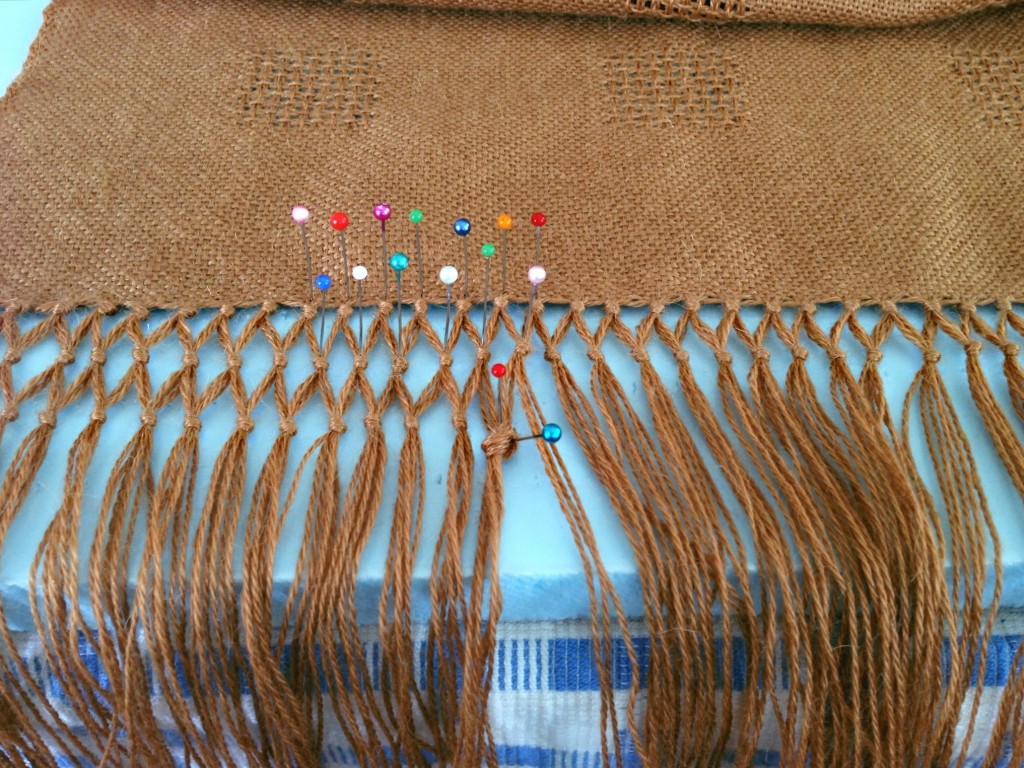
Tutorial for Making Lattice Fringe. Step-by-step with pics.


My confidence in my ability to tie these knots can drift into careless thinking. Maybe I’m good enough at this that I can leave out some steps. Do I really need that guide stick for spacing the rows? I think I can eyeball it. Pulling each strand to close the knot takes too much time. Why don’t I just skip that part? And soon, I am blind to the haphazard results I am creating. Pride is like that. In relationships and in life circumstances, though, the consequences are more severe than in fringe-tying.

Pride keeps me from seeing my own vulnerabilities. Pride puts me in harm’s way because it blinds me to the reality of my own shortcomings, and makes me think I’m above it all. I want to keep my eyes open to my need to learn and grow. Who wants to drift into haphazard results in life? Not I. Not you, either?

May you never be blind to the things that matter.

Feeling vulnerable,
Karen
Now for Some Sparkle

You were created to live an exceptional life! Since there is only one you, this is your chance to shine.

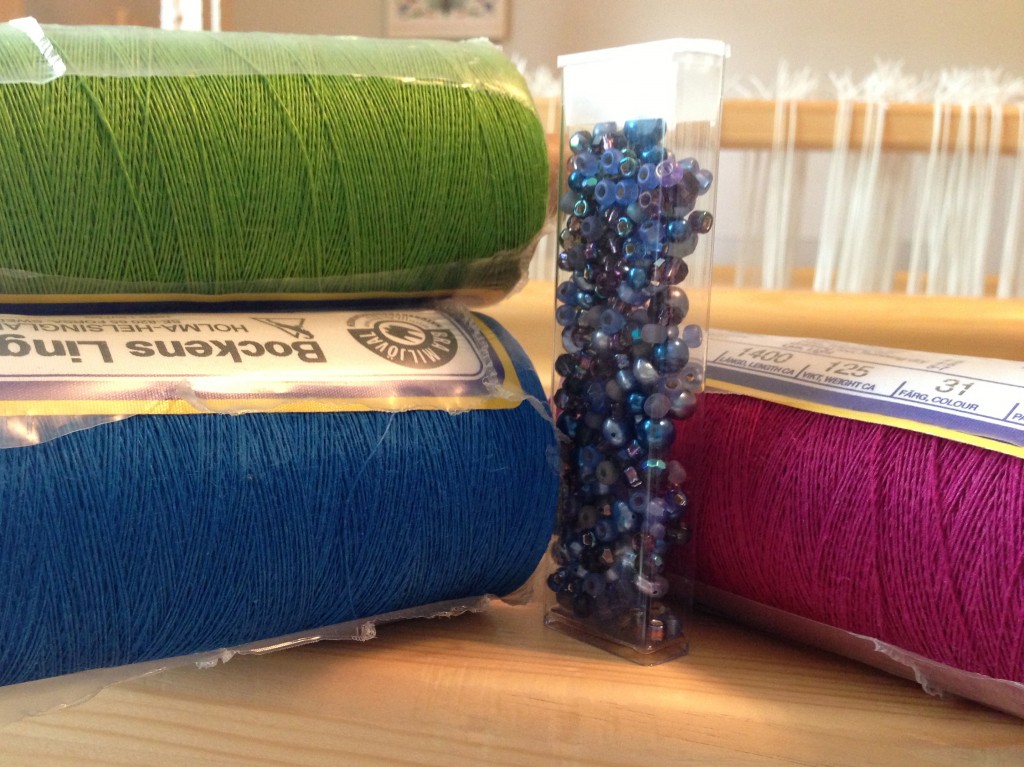
Single-ply linen warp and weft, with glass beads to add to the weft.
16/1 linen in saturated colors. The blue is for the warp, and the green and magenta are for the weft. Glass beads will be woven in with the weft. (At least, that’s the plan.)

These qualities are the glass beads that make your life sparkle:

  • Humility
  • Gentleness
  • Patience
  • Unselfish Love

And if woven into the cloth, instead of just loosely attached here and there, these light-reflecting beads will endure the test of time. Such sparkles, uncommon for many, will set you apart as one created for exceptional living.

May your sparkles increase and delight the ones you love.

For good,
Karen