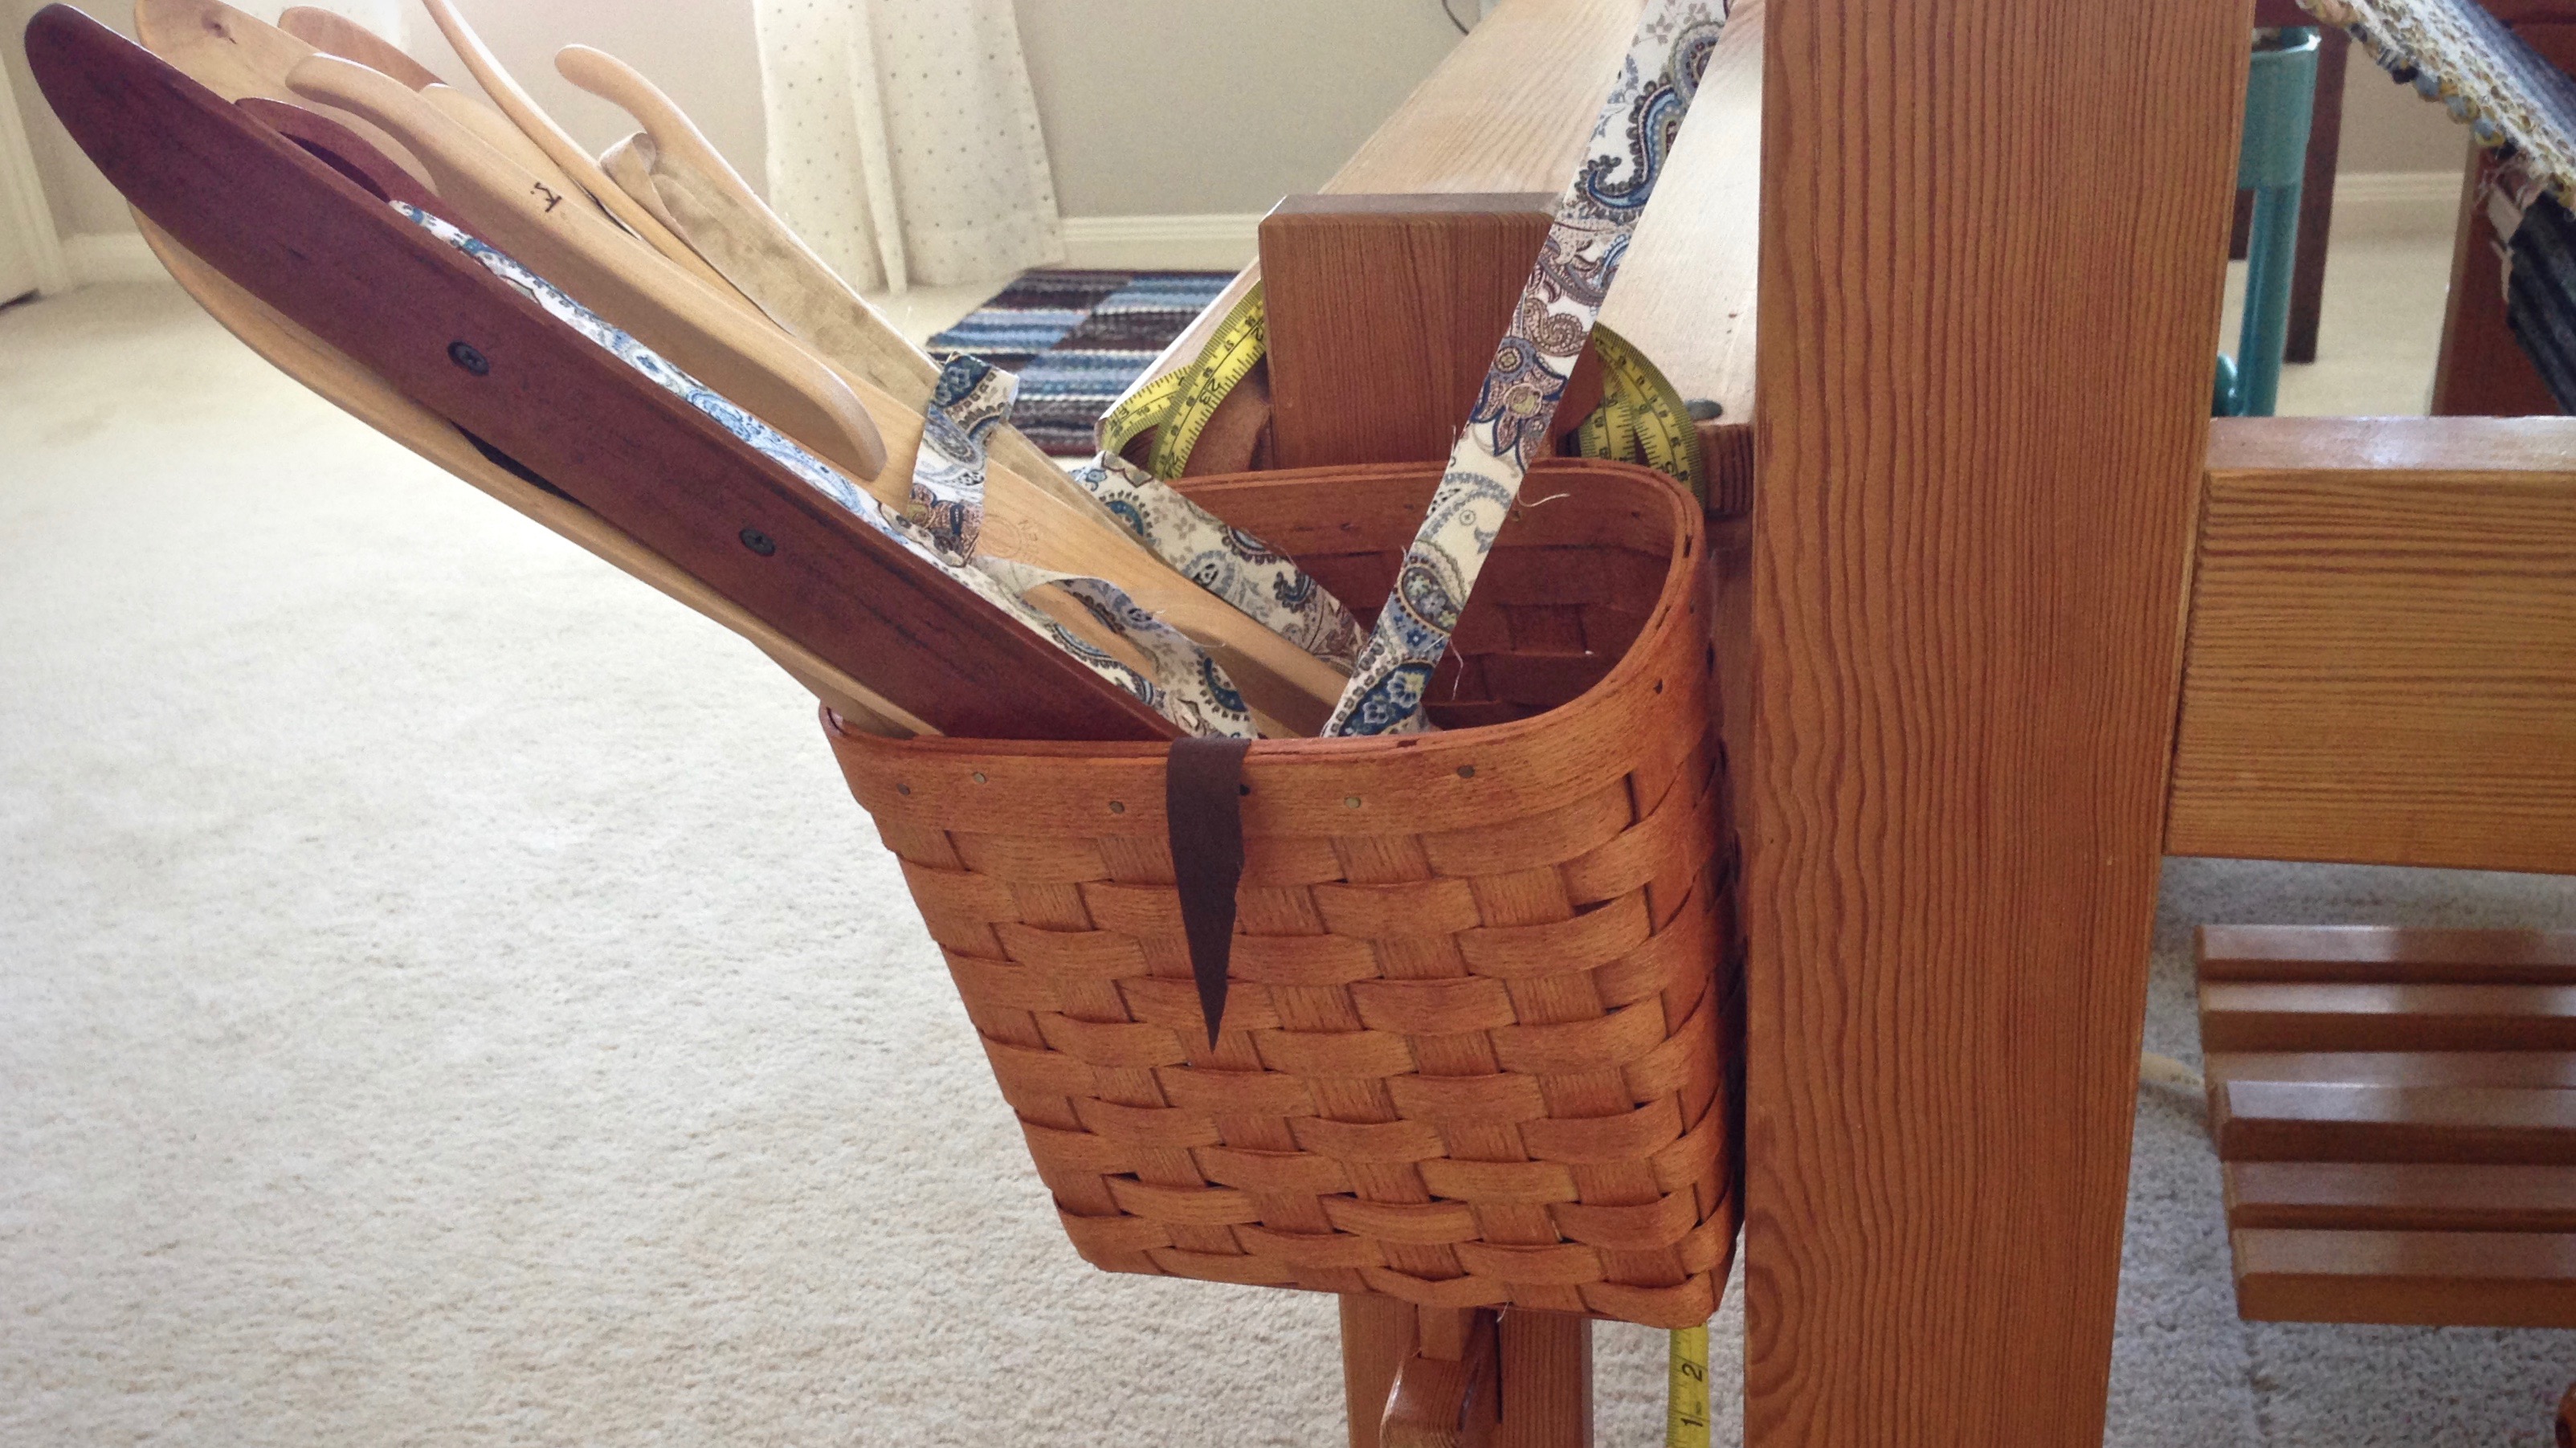
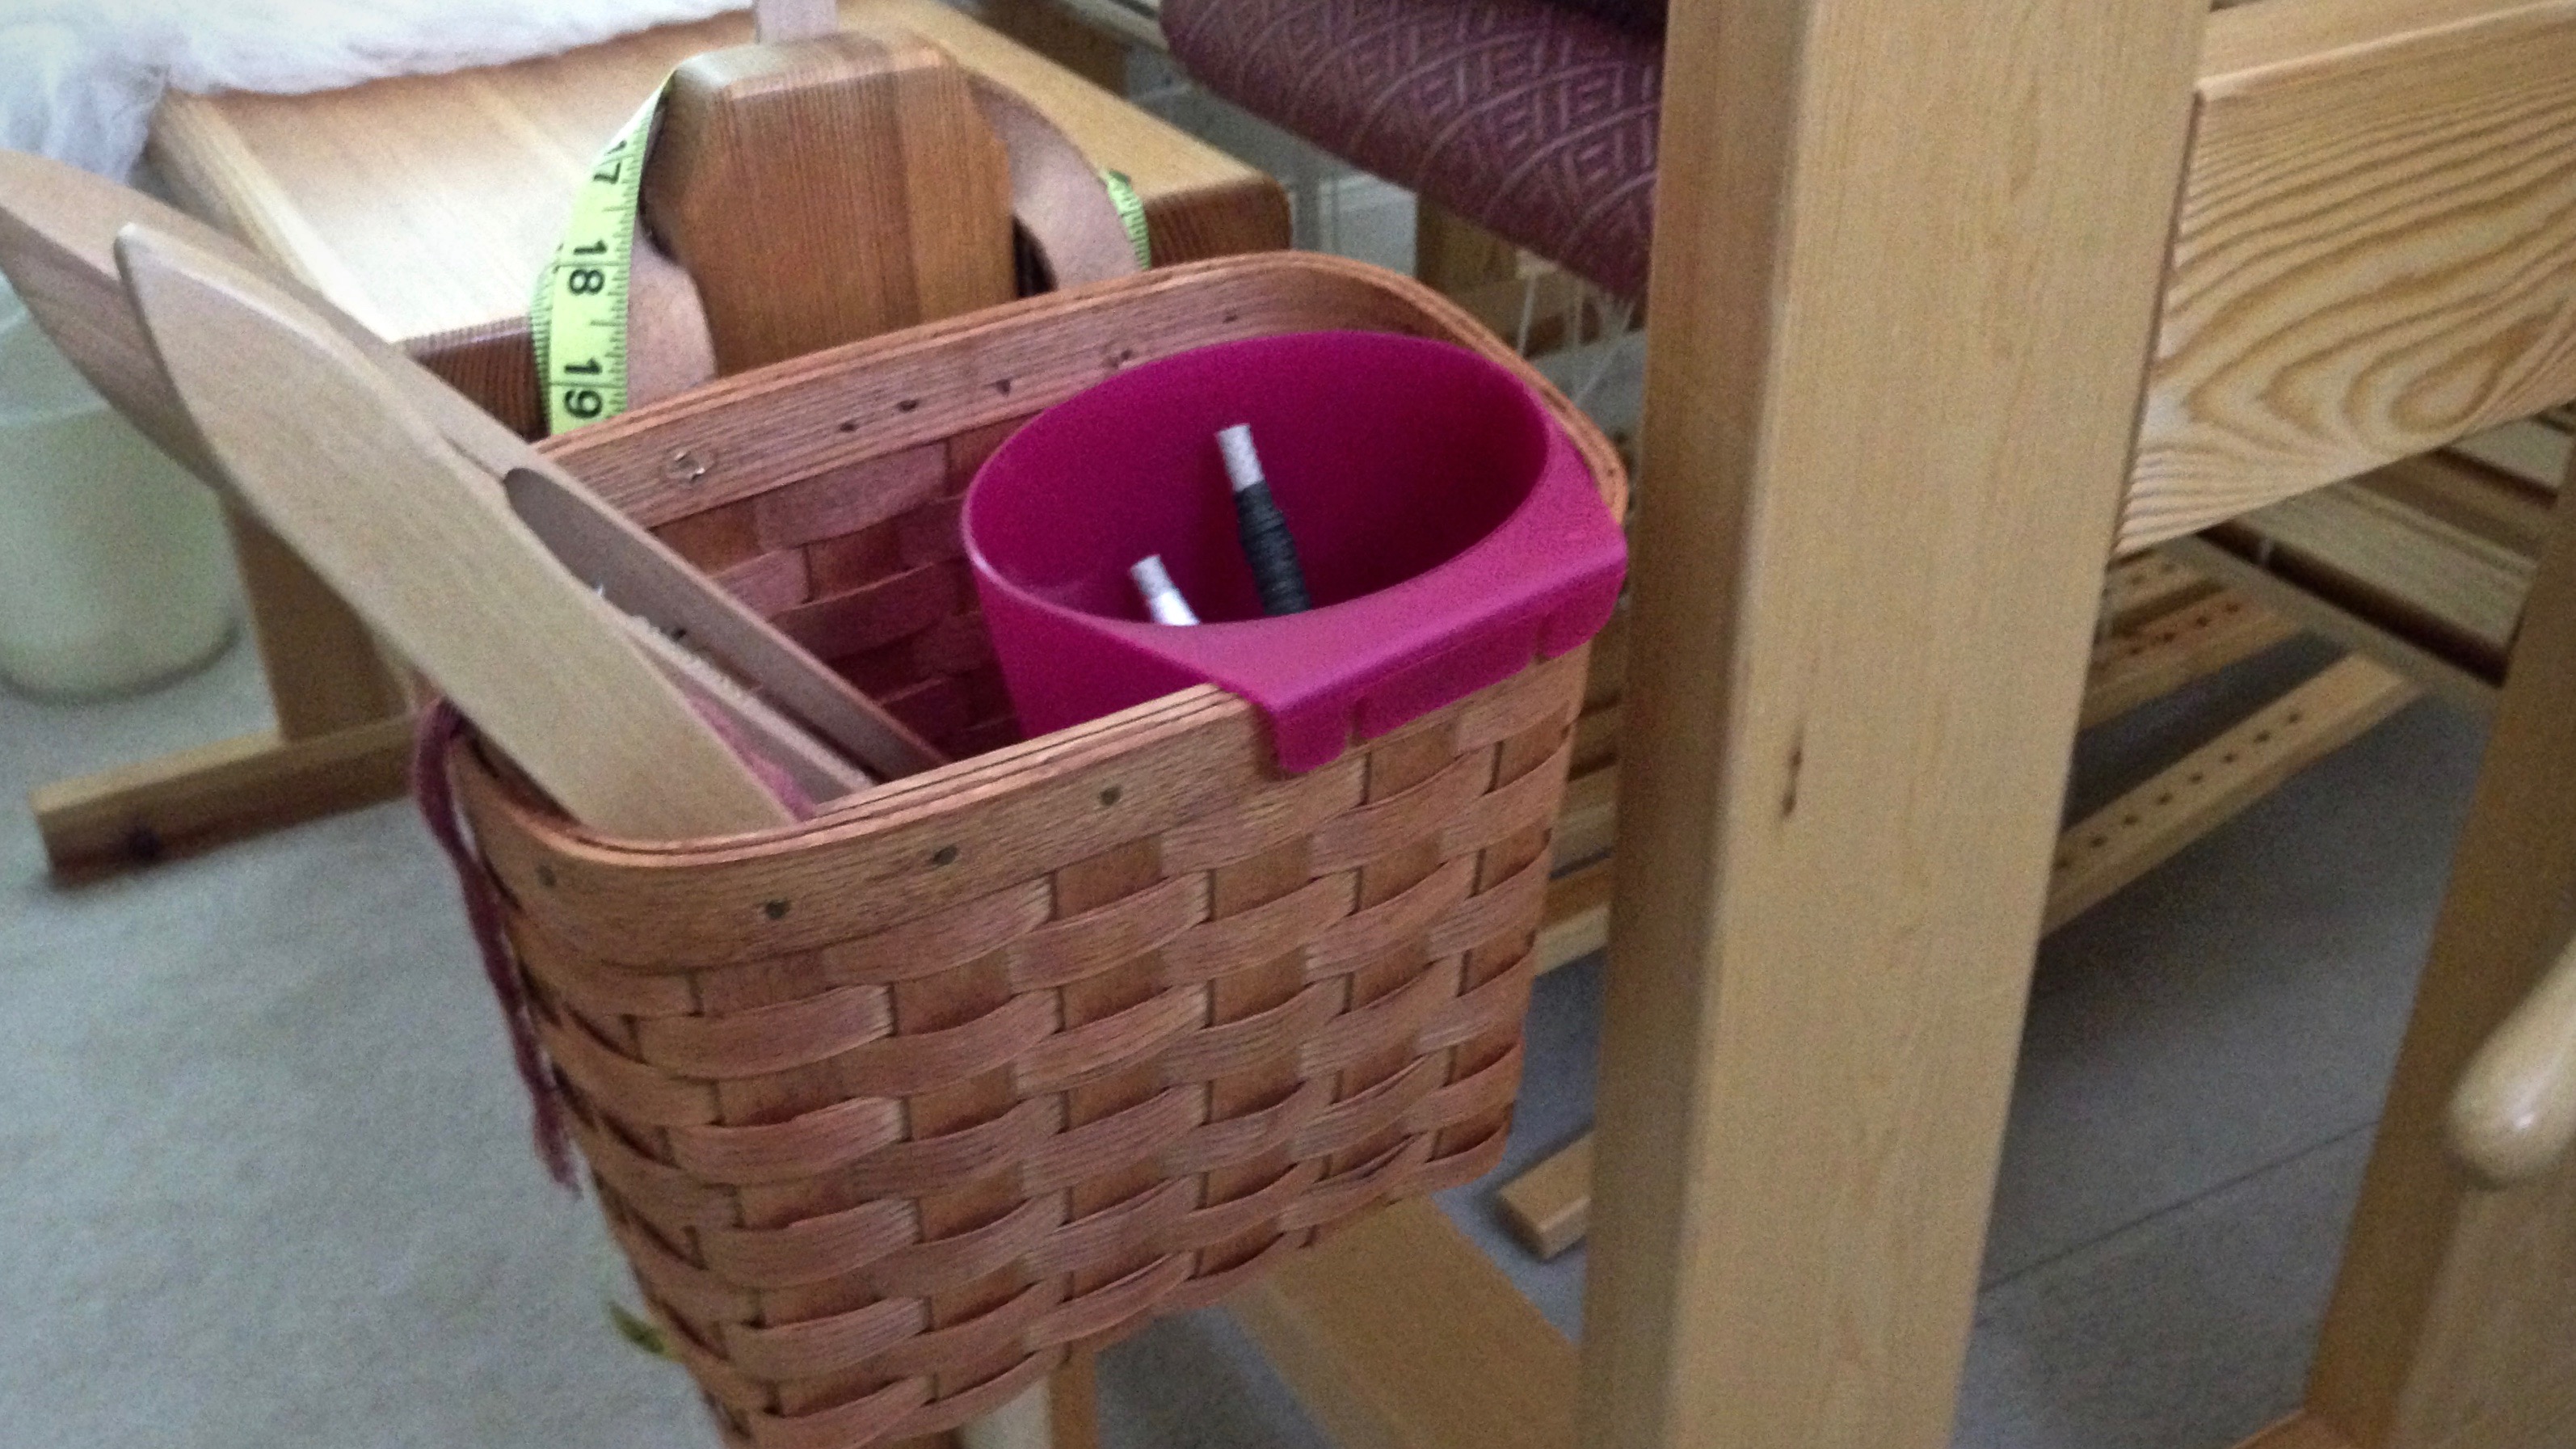
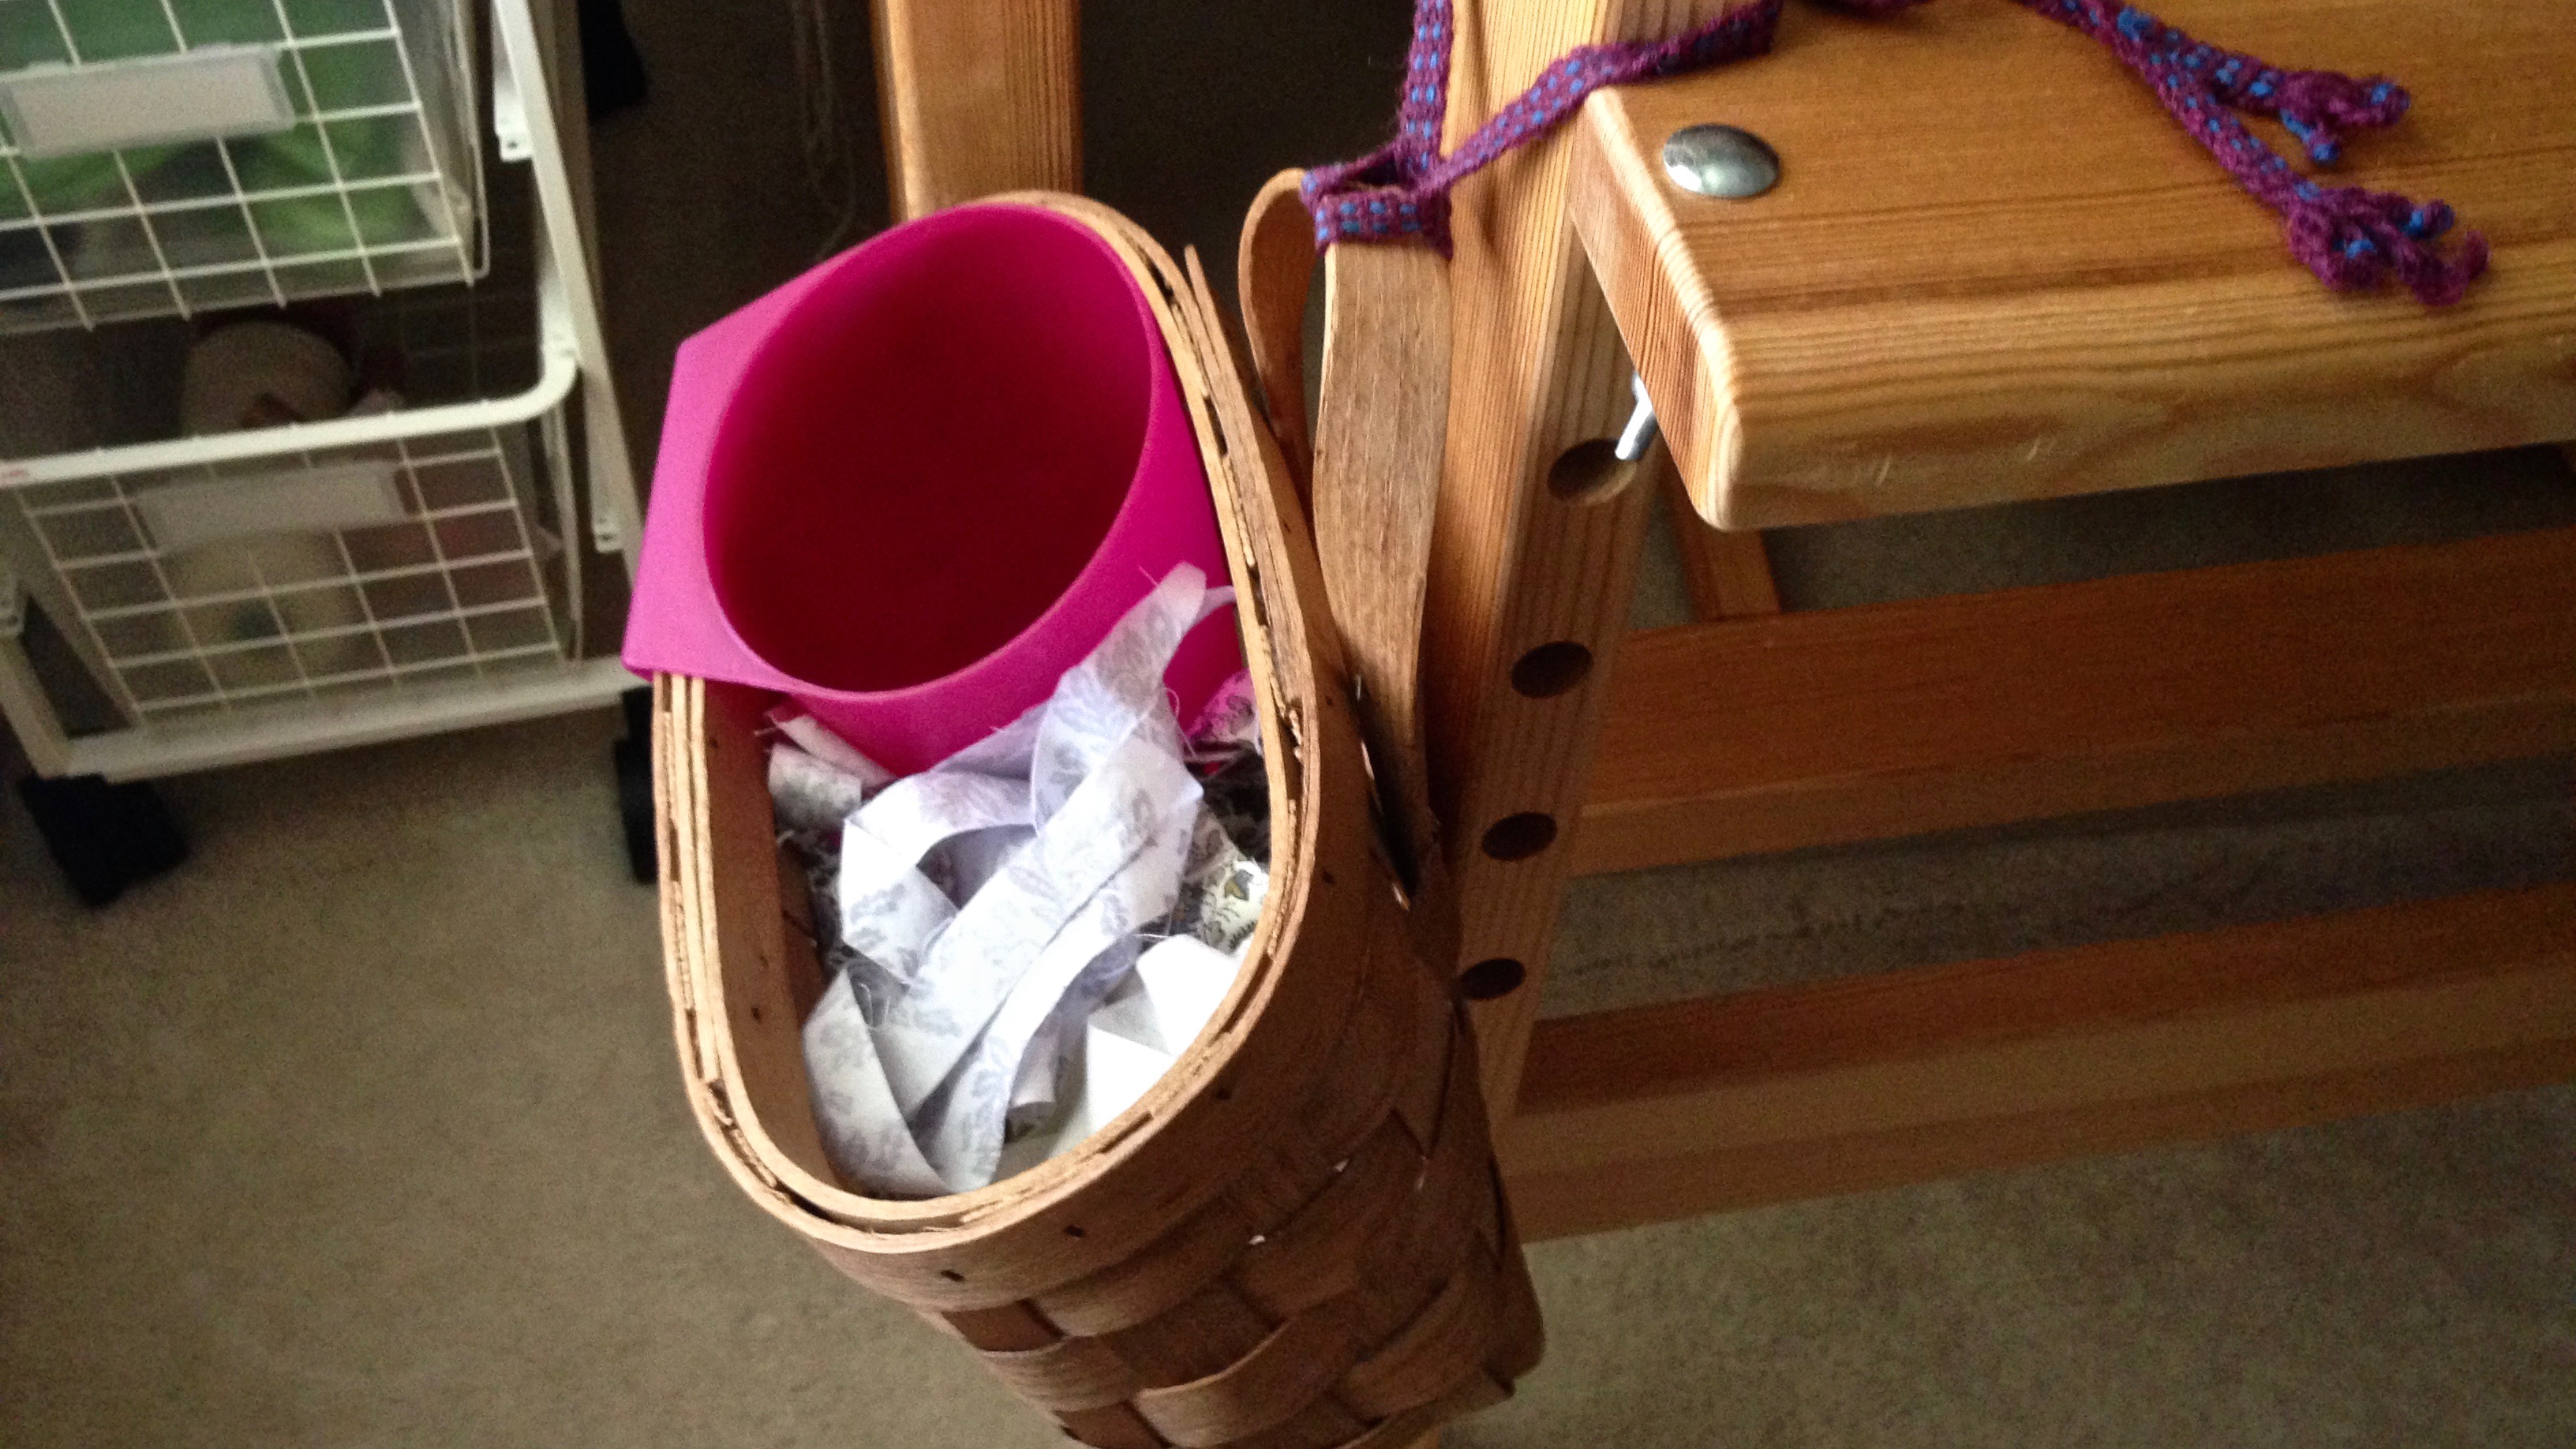
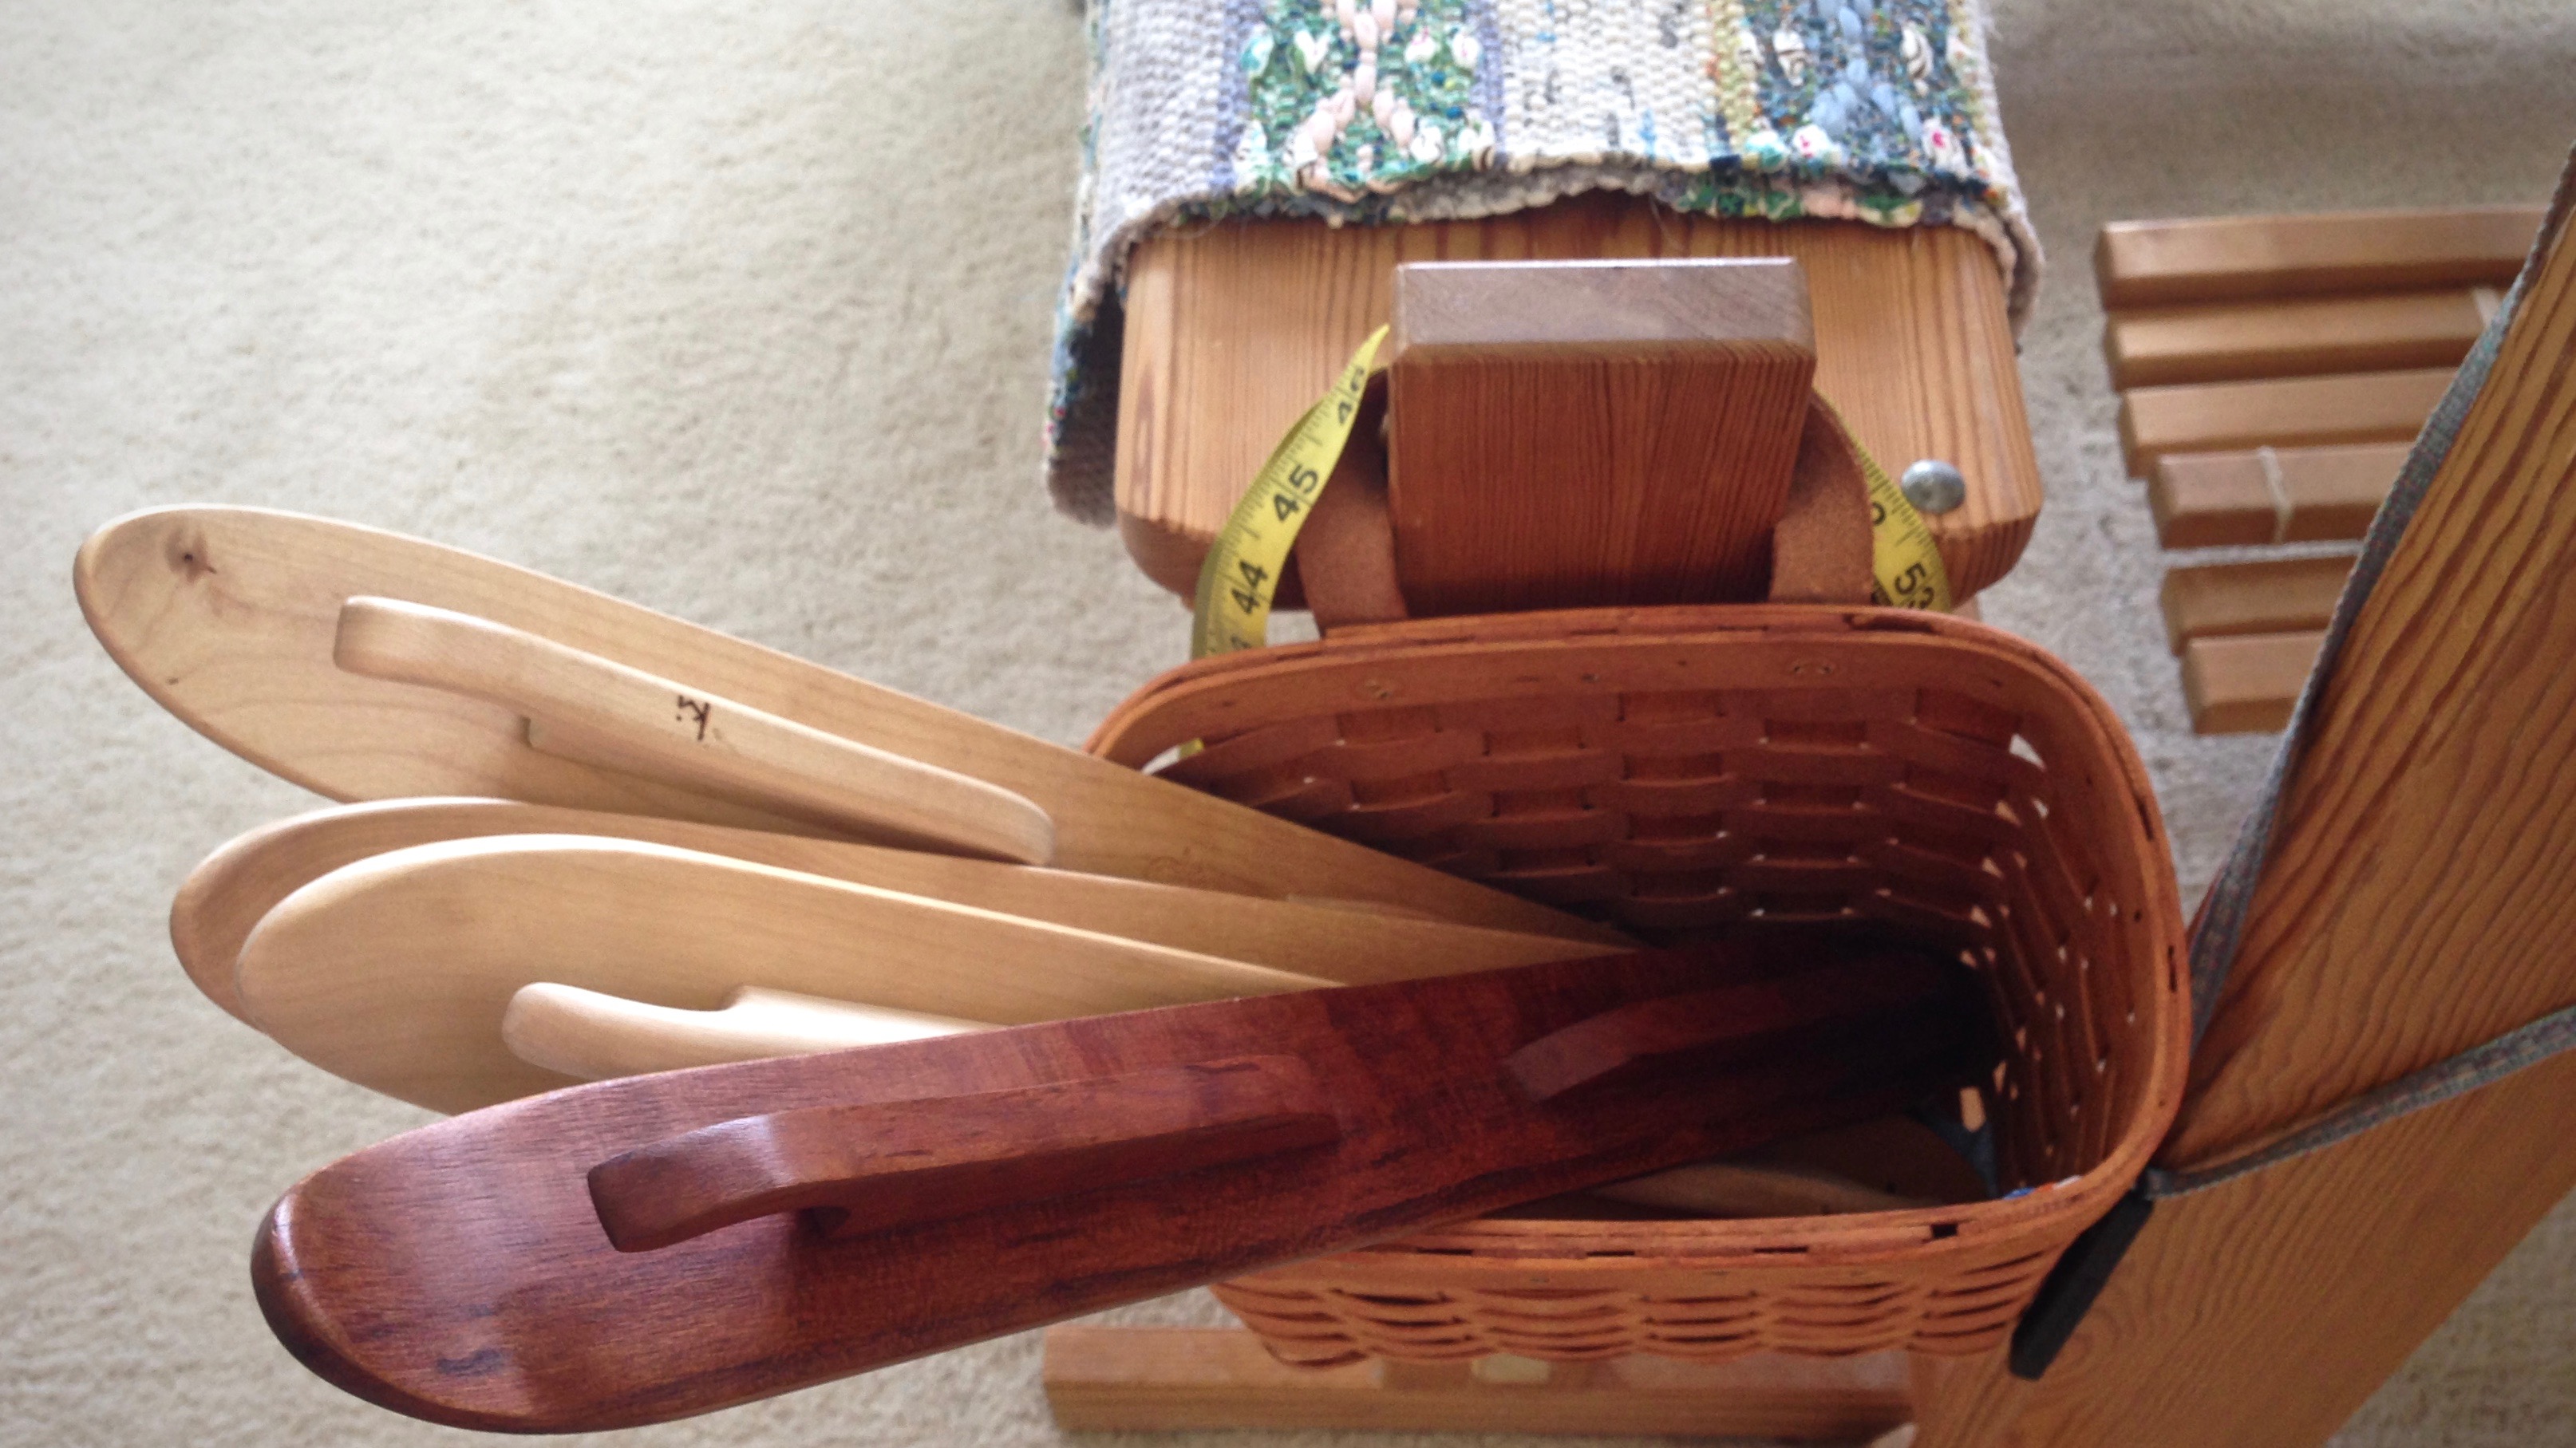
Some accessories are so useful they simply become an extension of the loom. That’s how my loom bench baskets are for me. I automatically place an emptied shuttle there without a second thought. It’s where extra shuttles go that are waiting their turn, or extra quills that have been wound, or a few fabric strips that are set aside for one section. For anything I need to drop or pick up–the baskets are always there.
Deep basket on the bench at the baby loom (Glimakra Ideal) easily holds my ski shuttles for this rosepath rag rug.Leather strap on the basket slips over the end post of my loom bench, right by the always-handy measuring tape.Basket made for this purpose, from Vavstuga.Basket at the big loom (Glimakra Standard) holds a small hanging cup I found at Ikea that is useful for holding small things, like filled and emptied quills.Old basket I’ve had for years is put to use on the other side of the big loom bench. I tied it on with a wool inkleband I wove many years ago.
Rag rugs are not finished when you cut them from the loom. In fact, they can fall apart if you are not careful. A rag rug is not secure until warpends are tied into knots. You need to leave space on the warp between rag rugs to make room for the eventual knots.
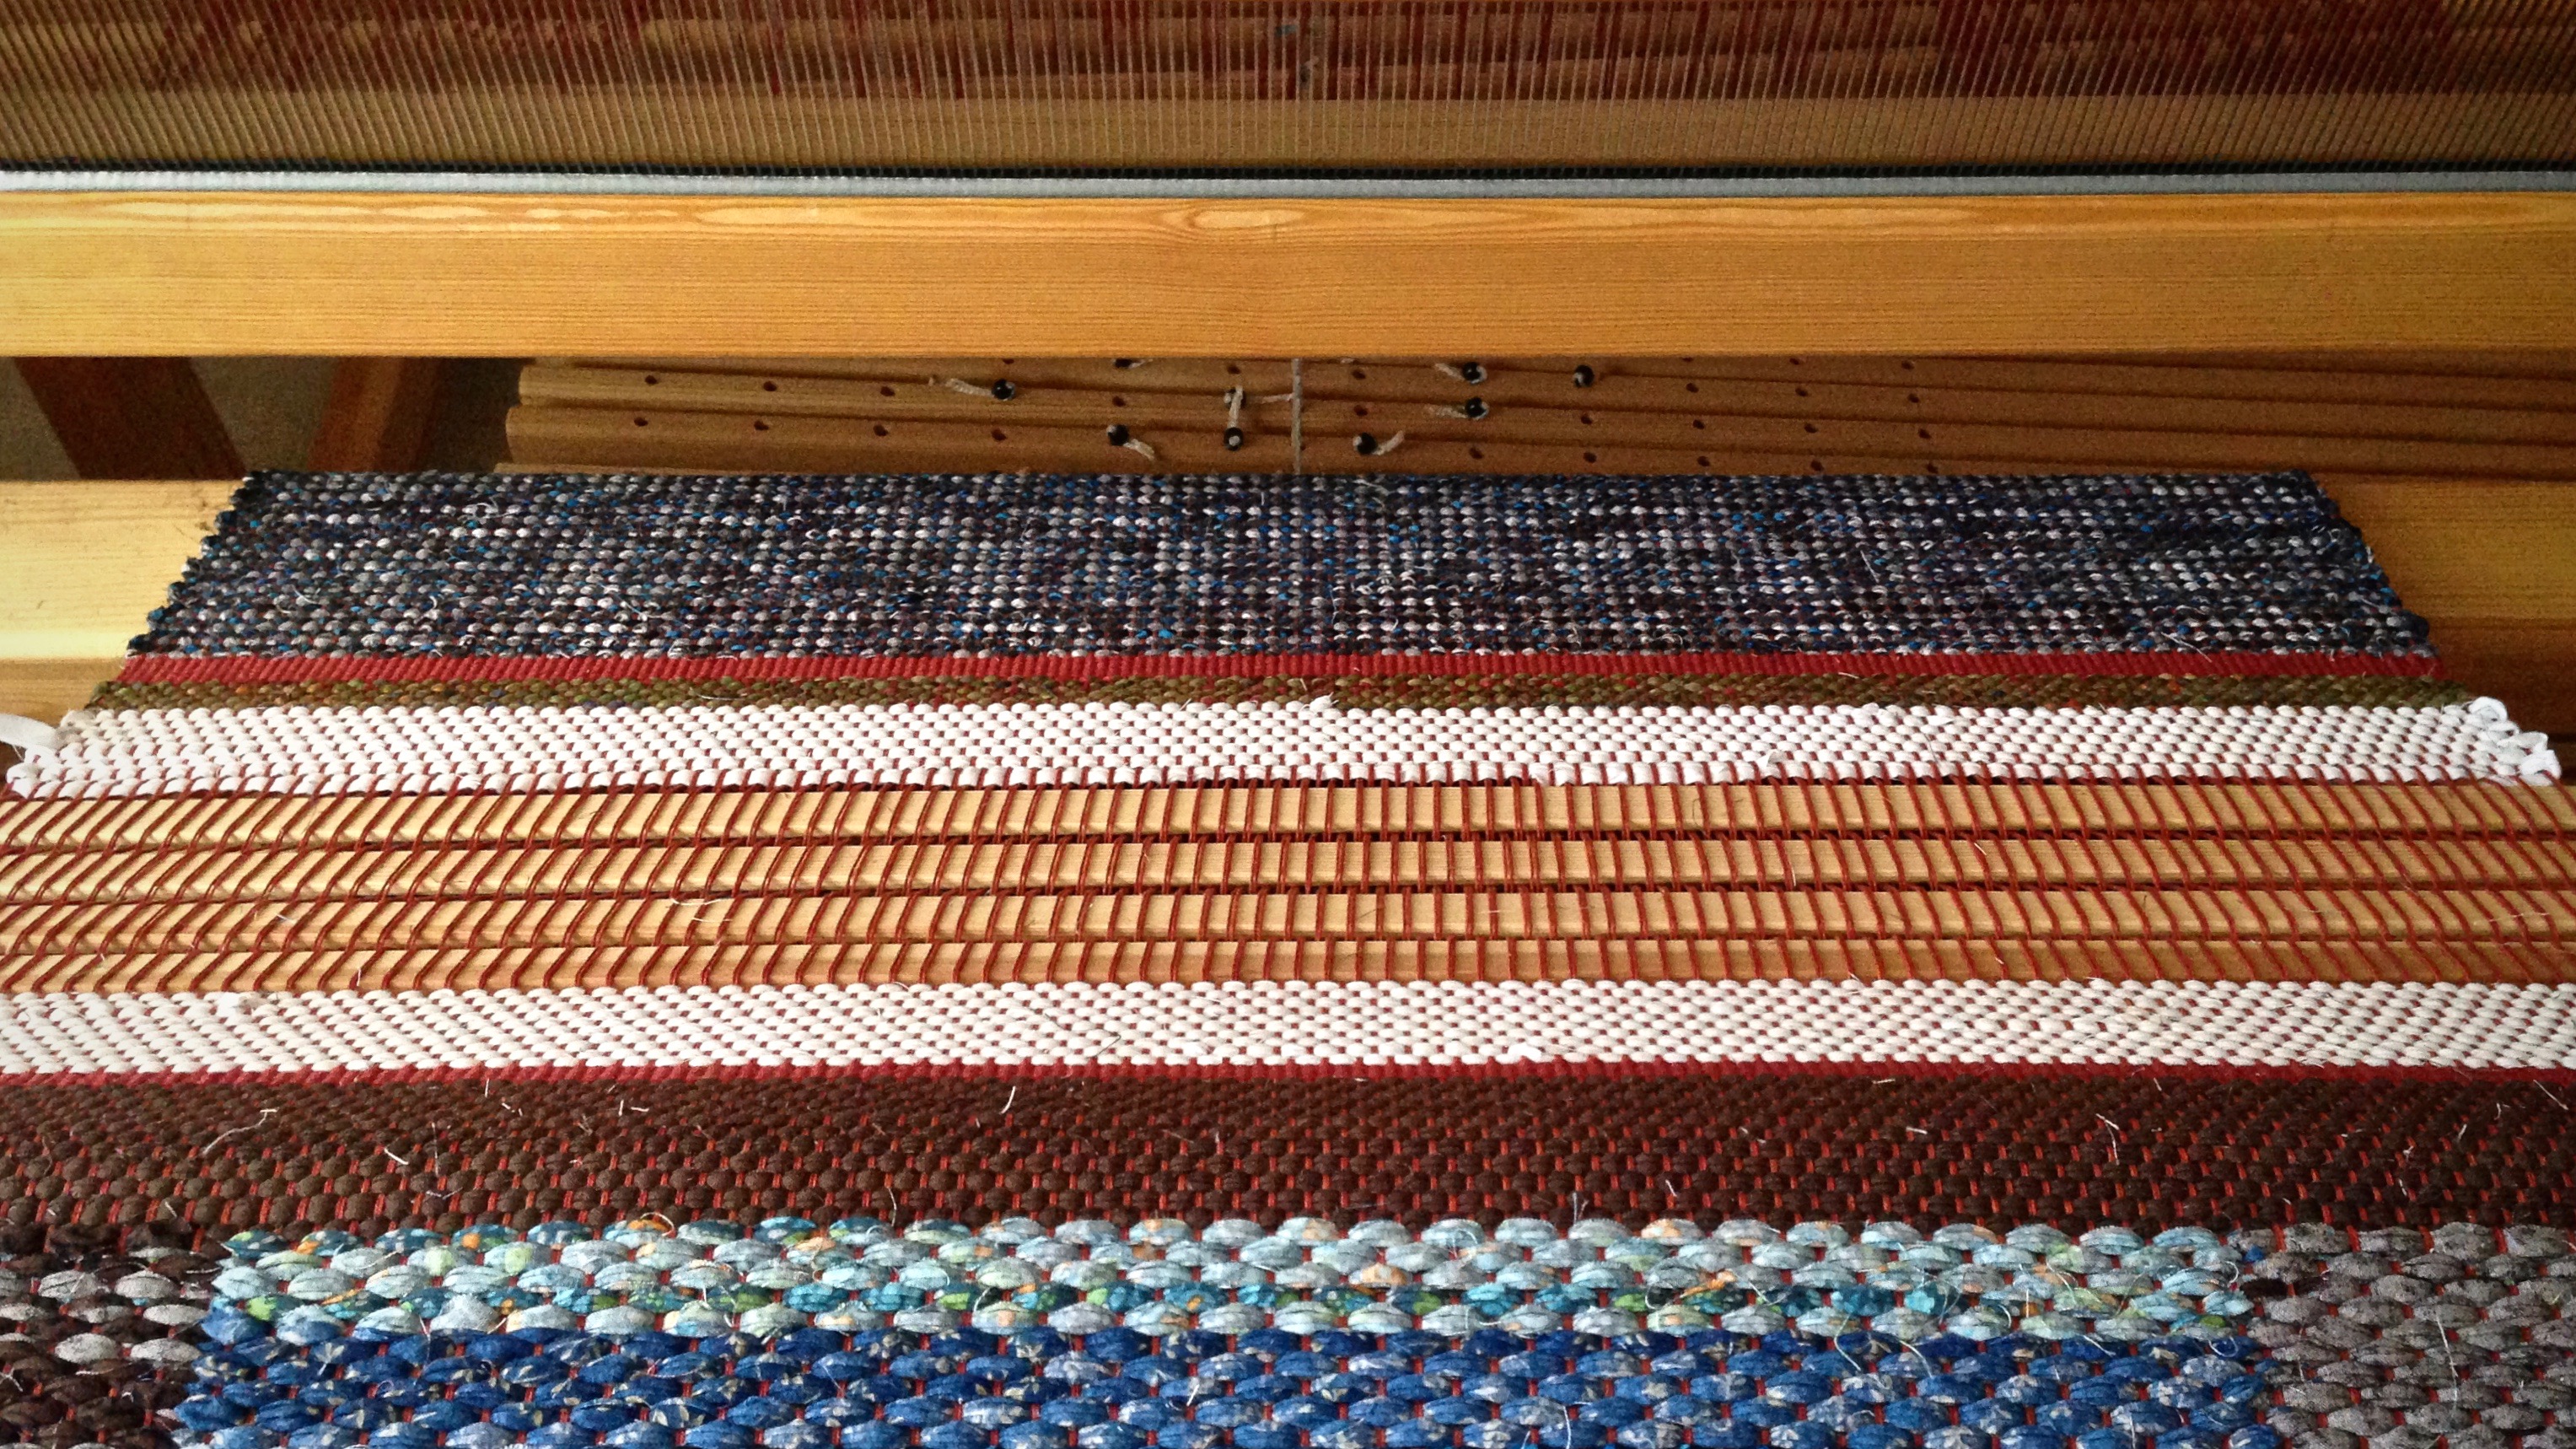
One way to leave space on the warp is by using warping slats as spacers. Simply weave about two inches of scrap header after the end of a rug. Then, insert warping slats in alternating plain weavesheds. And then, weave another scrap header. Now, you’re ready to start the next rug.
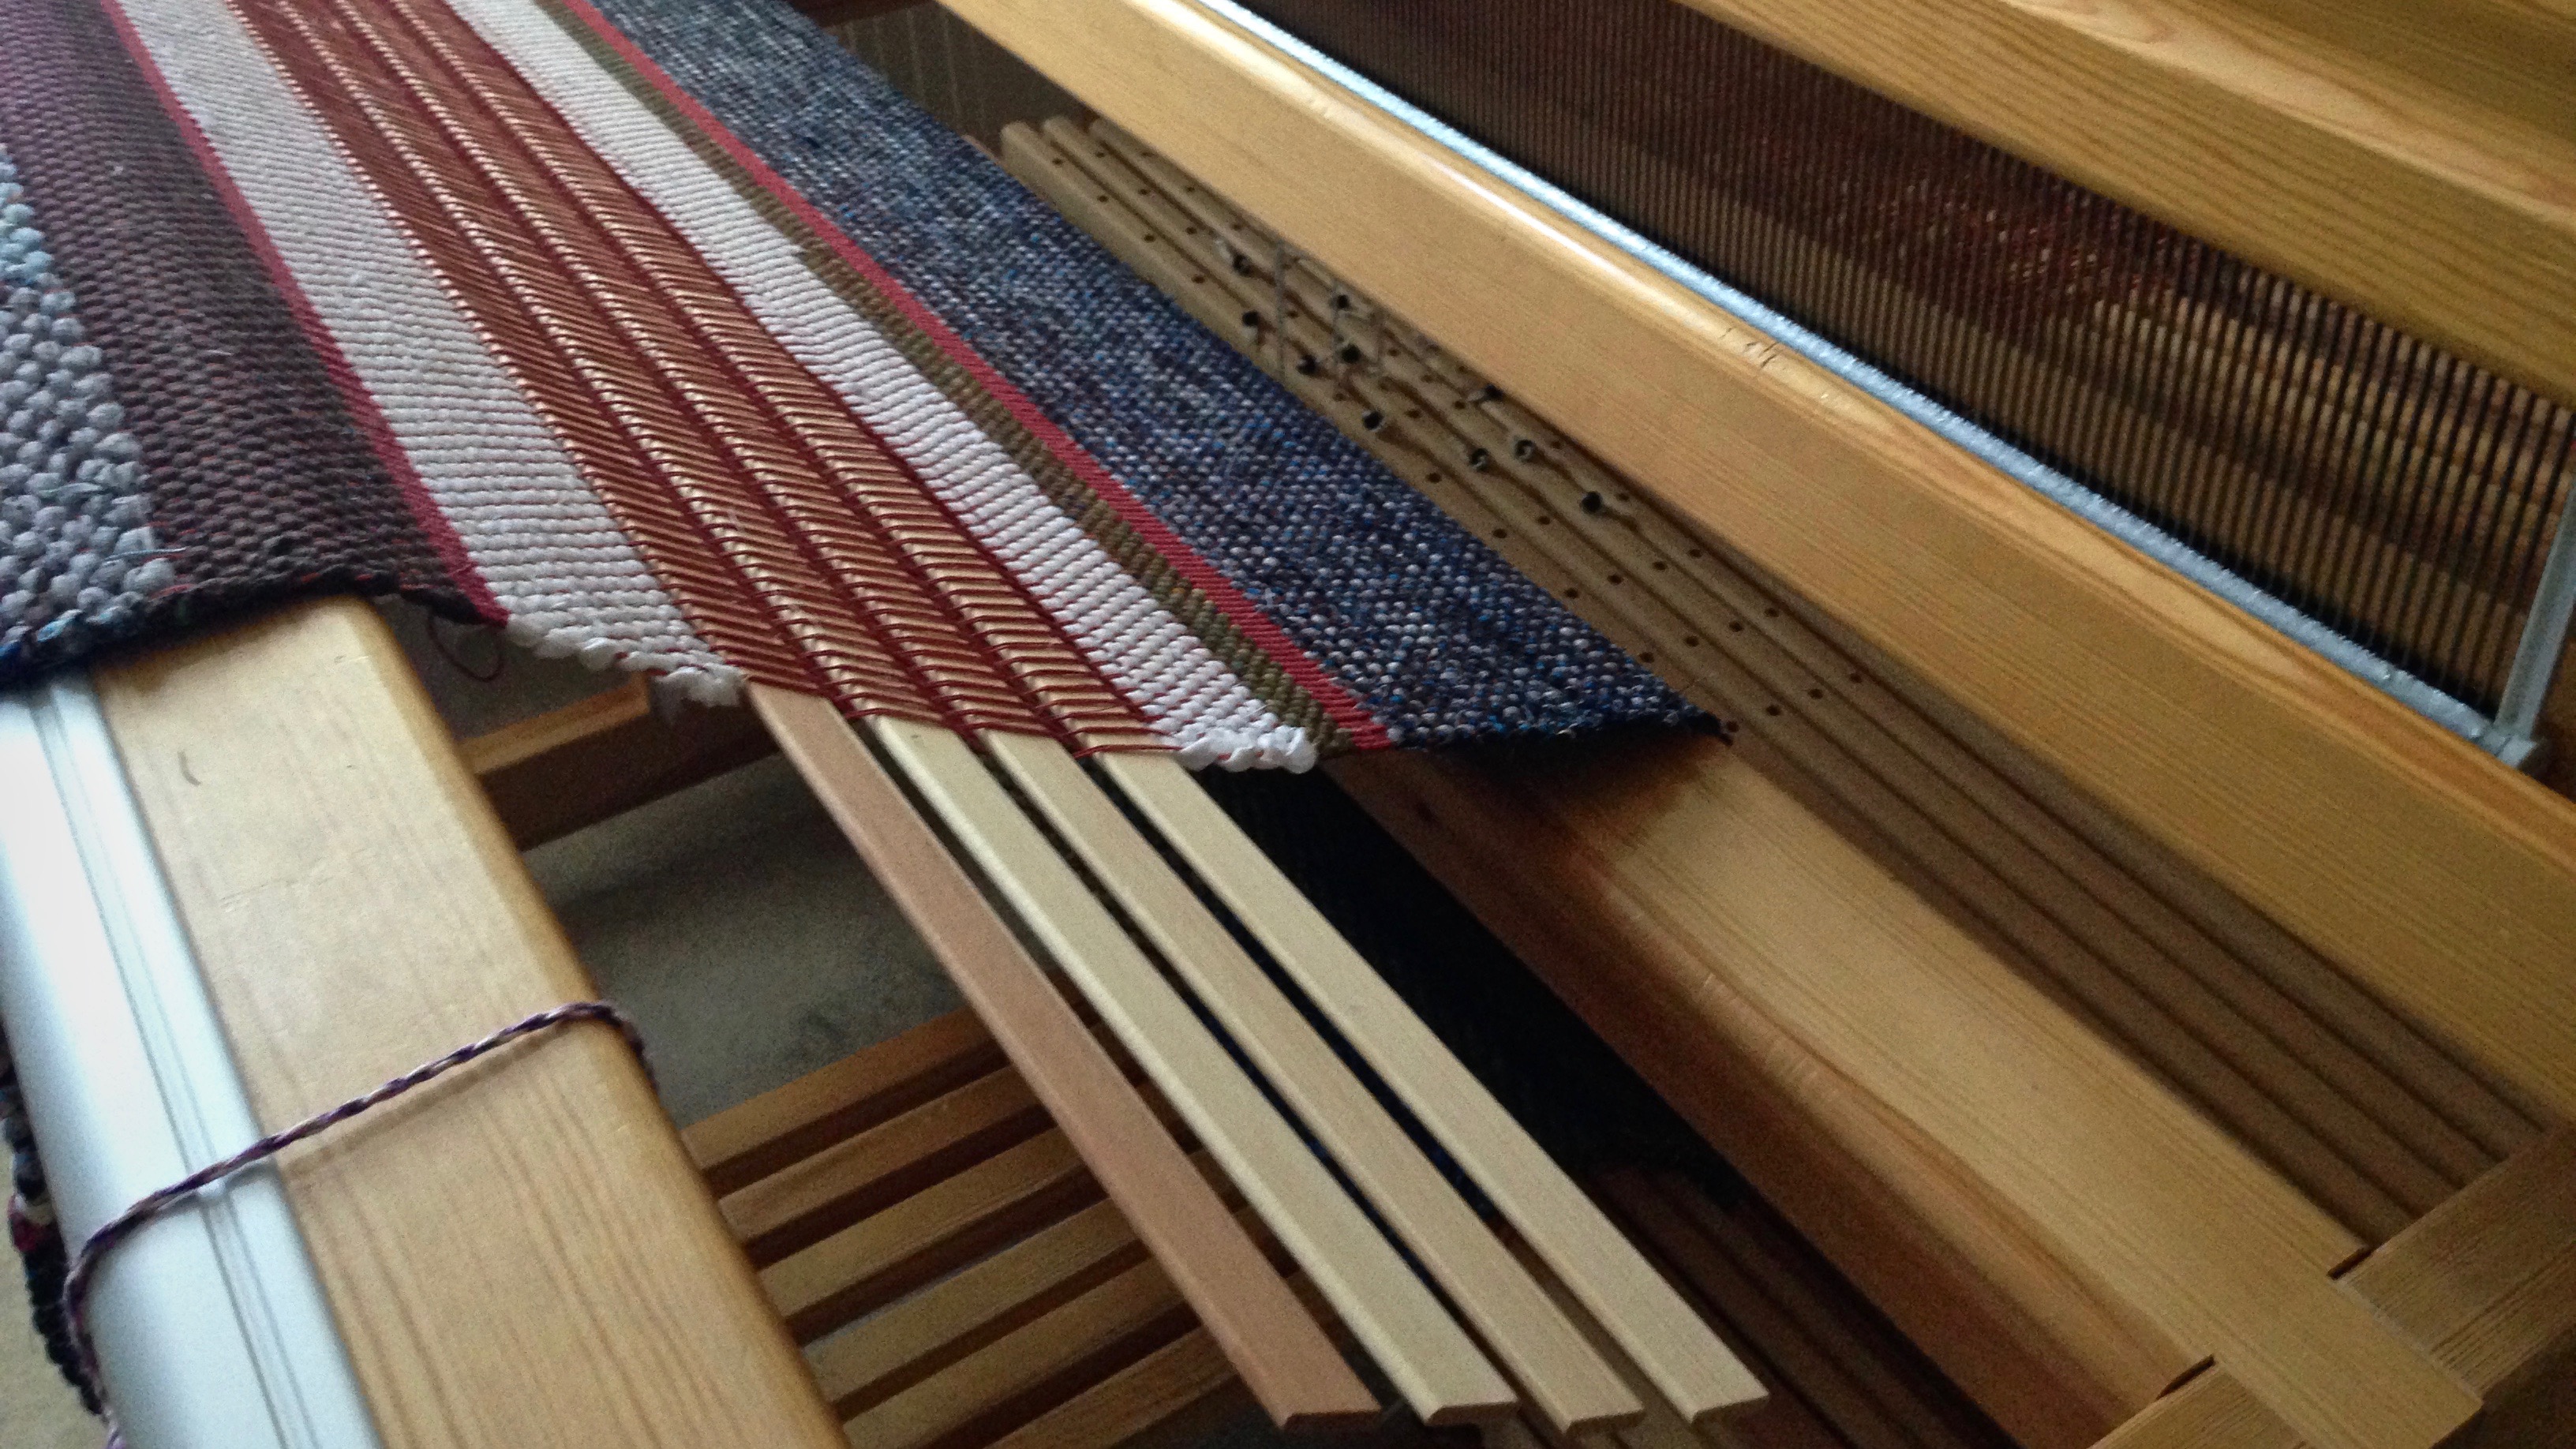
Weaving is finished. It is time to cut these rugs from the loom. Four warping slats are seen between two rag rugs as the rugs are being pulled off the loom.
I leave about eight inches (20 cm) of warp between rugs. This gives me enough length for tying the needed square knots. If you are leaving fringe, add enough to include the desired fringe length. When you insert the warping slats, keep them centered so that they can go around the breast beam and cloth beam without catching on the sides of the loom.
Full-width warping slats are placed carefully so that they do not extend beyond the weaving width on the right or on the left. This view is looking down on the end of the breast beam.
It is easy to separate the rugs after they are off the loom. Cut between slats using a rotary cutter, with a cutting mat underneath.
Double binding rag rugs are ready to be removed from the loom. The two rugs will be cut apart by slicing the warp between the middle two warping slats.
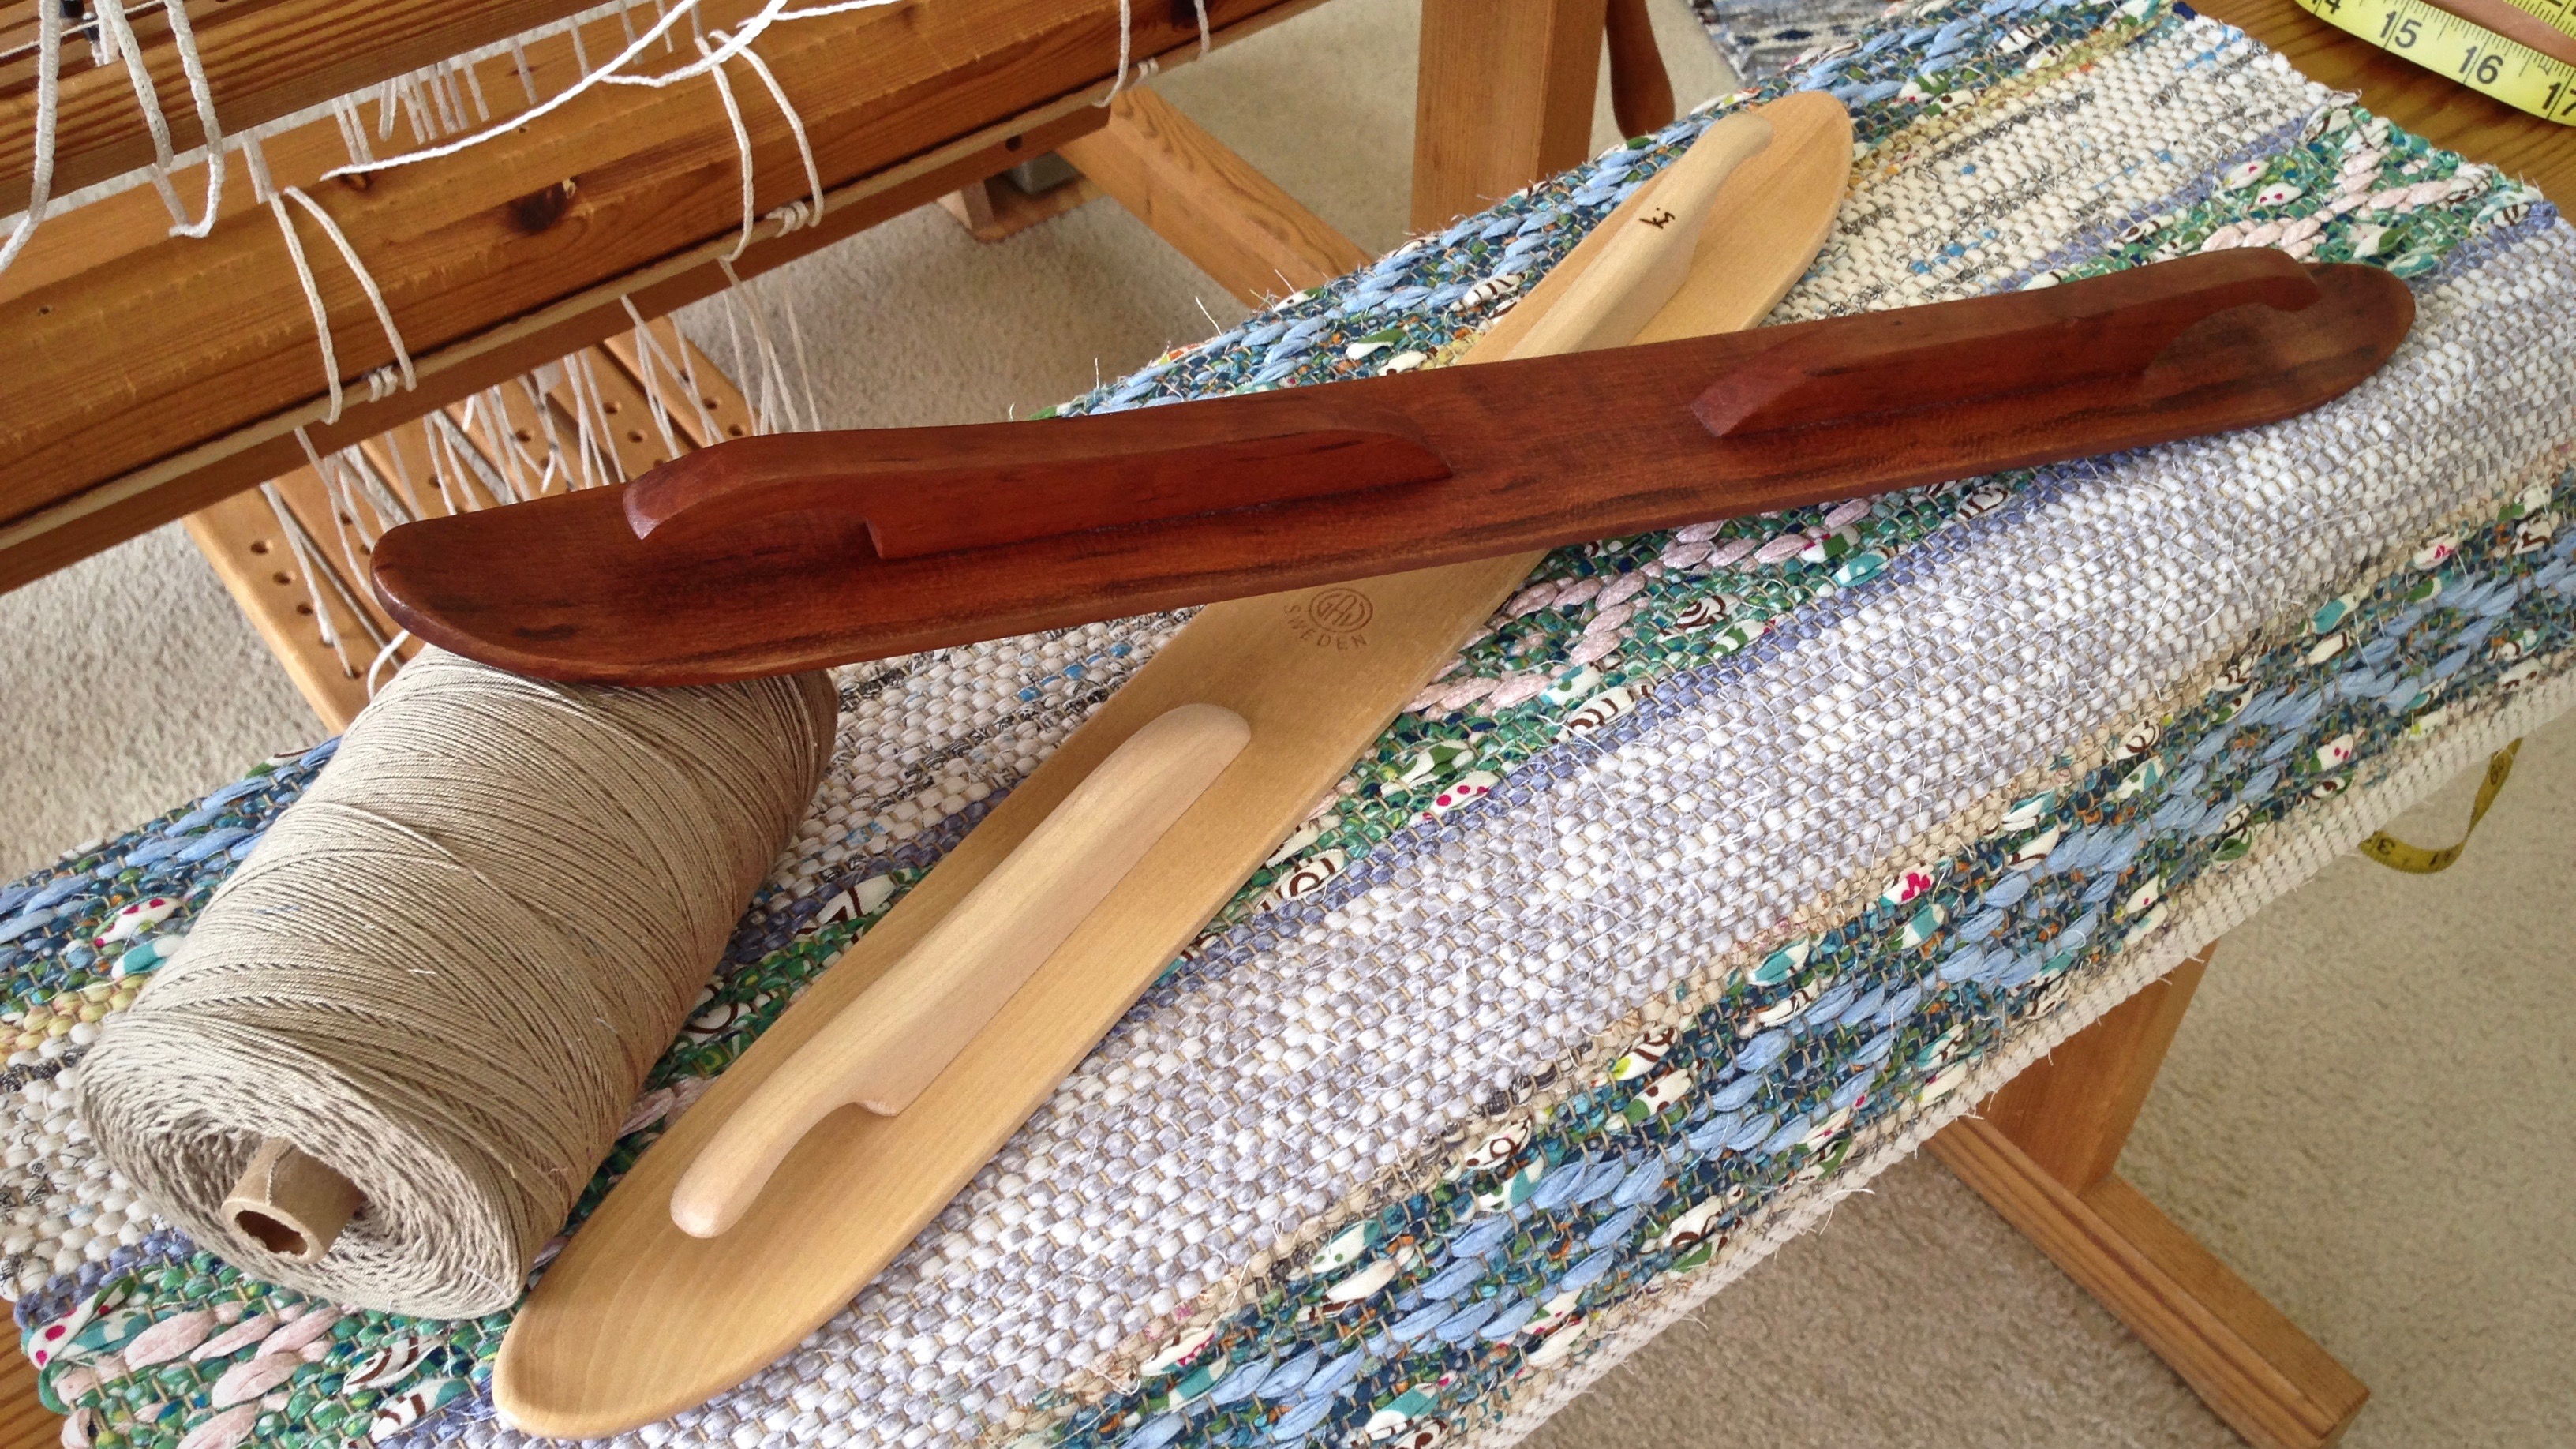
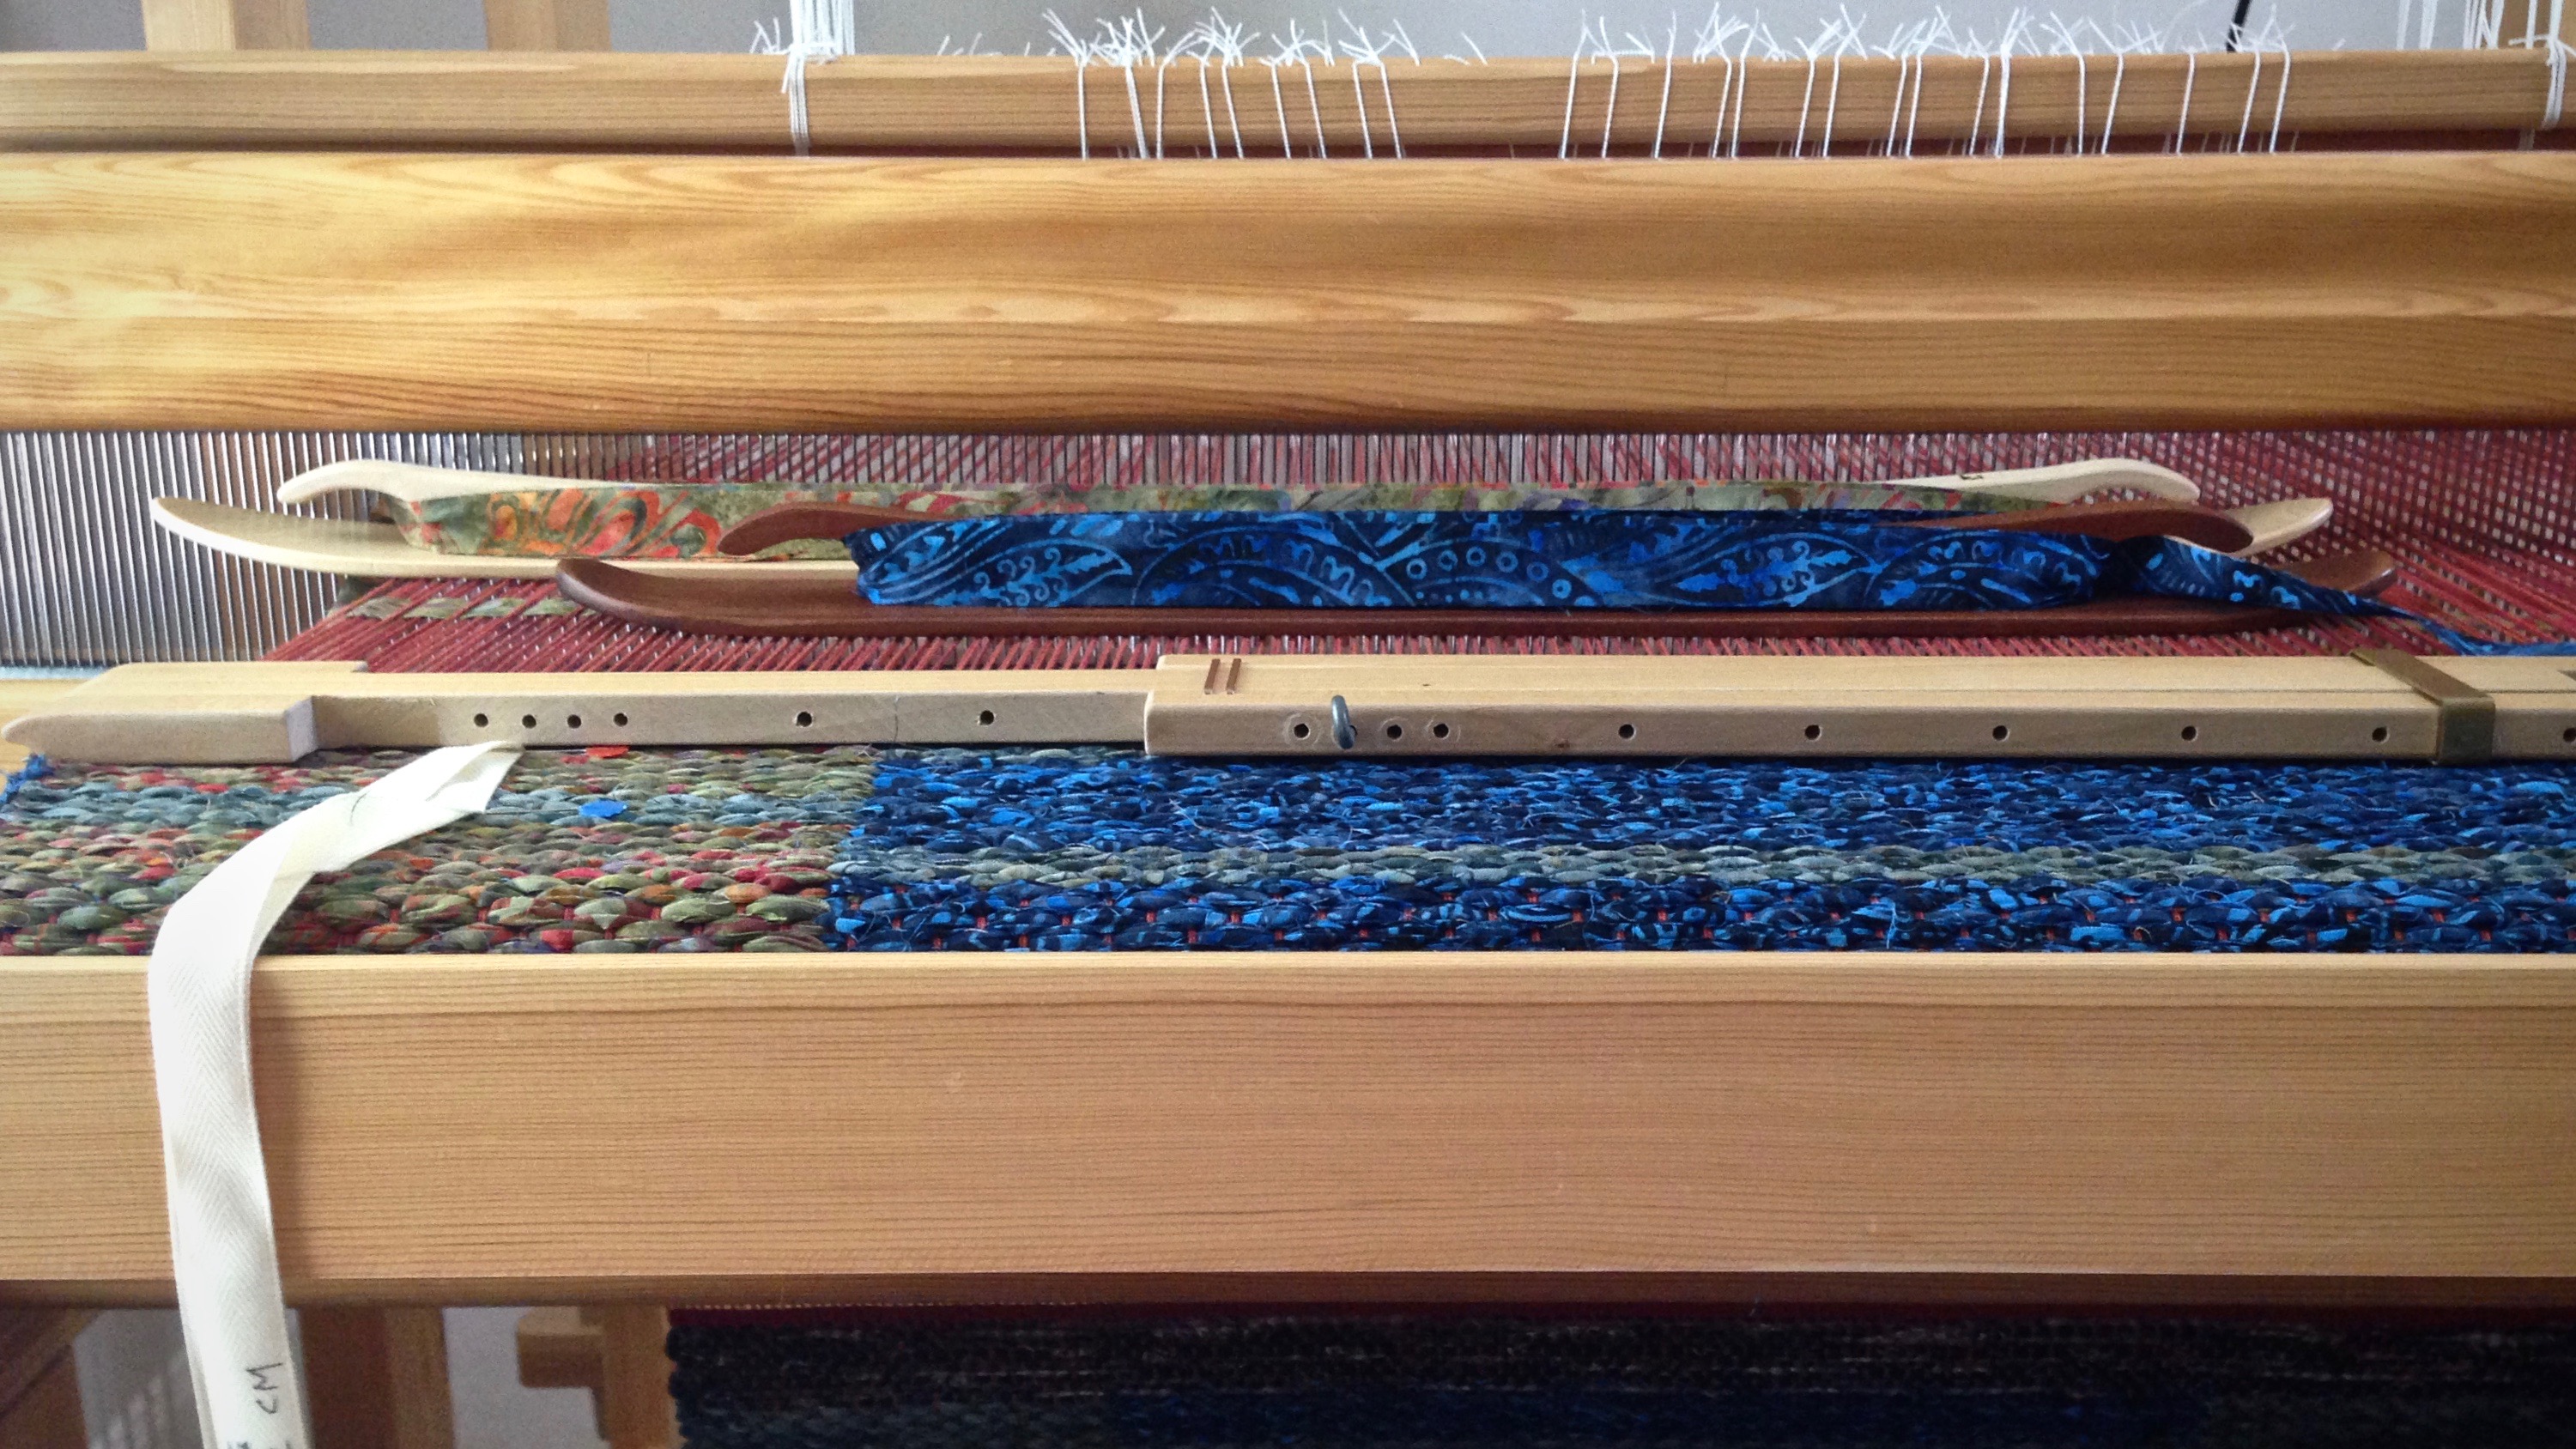
Patterned rag rugs always use at least two shuttles. I often have four or five filled ski shuttles at the loom. A low profile ski shuttle is an excellent choice for weaving patterned rag rugs. Why?
It fits pleasantly in the hand.
It holds a large amount of fabric weft without being bulky.
The low profile fits easily through the narrower shed of a tight warp that is common for rug weaving. (Beware of ski shuttles that are taller, and may not fit as easily through a tight shed.)
It is slender enough to send it out of the shed to go over or under outer warp ends, when needed.
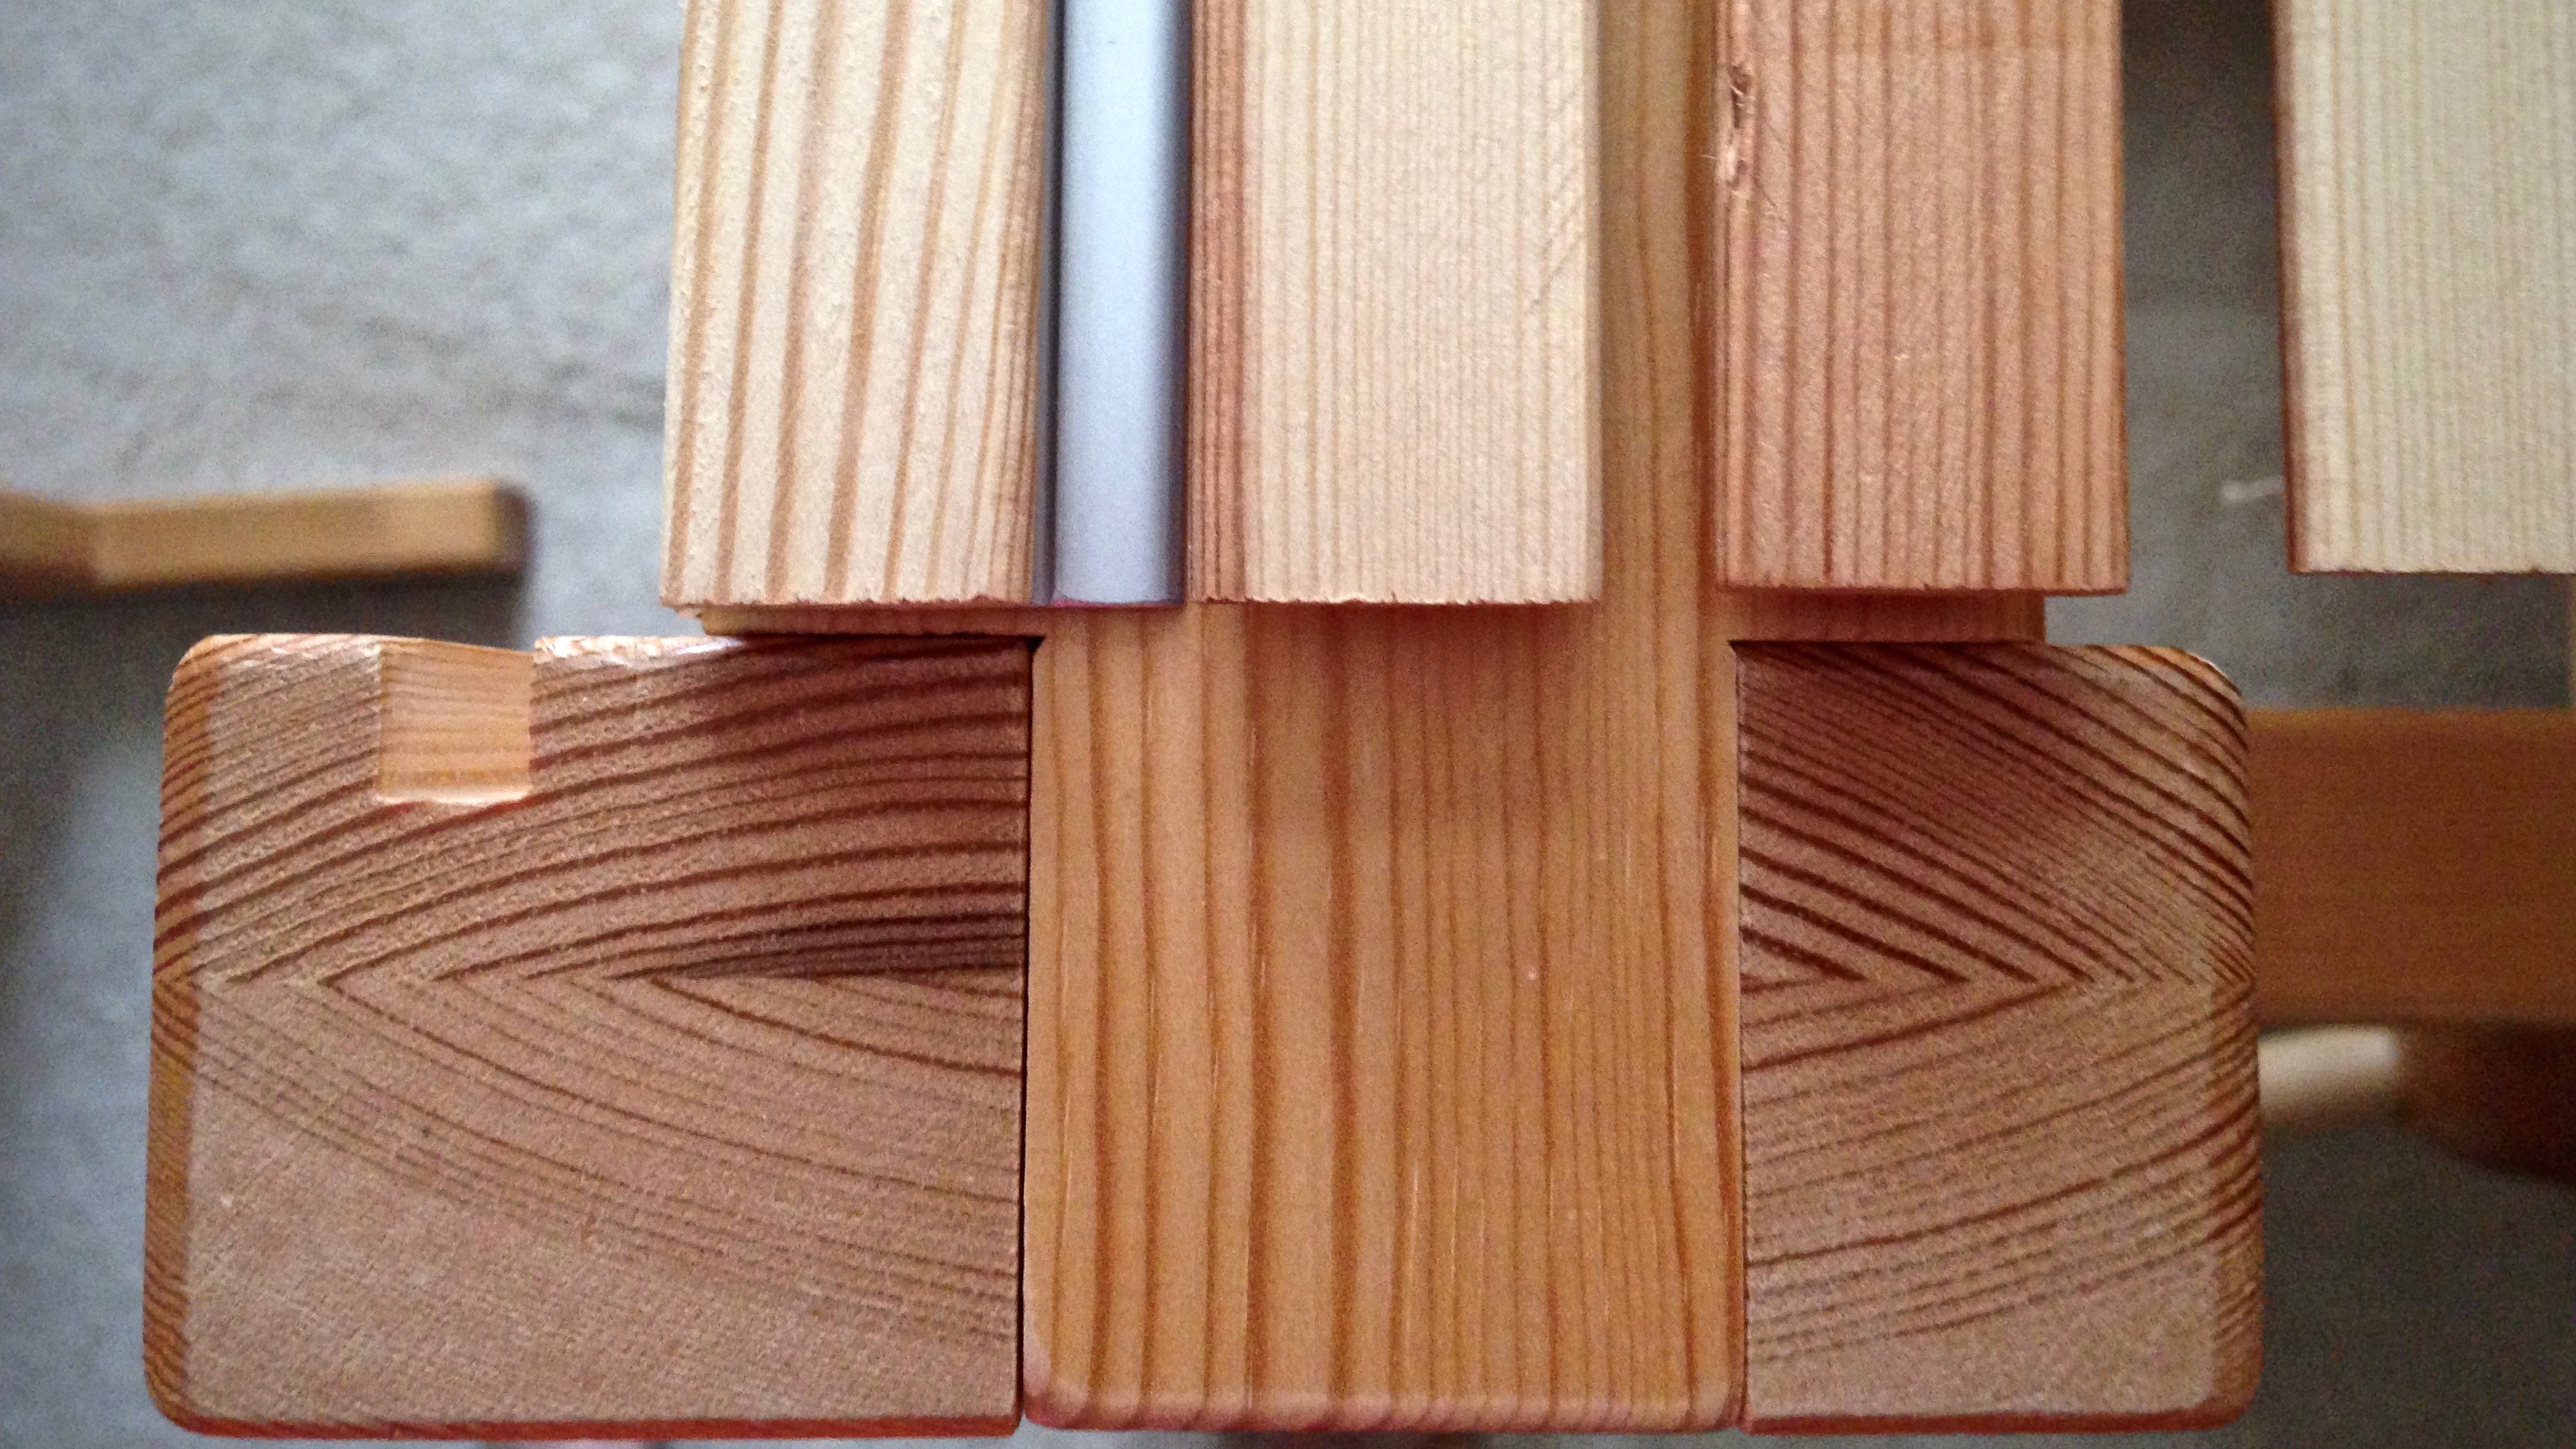
Weaving width determines which ski shuttle length to use. The shorter shuttle works with any weaving width. The longer shuttle works only for wider weaving widths (30″ or more) and for spaces with plenty of clearance at the sides of the loom. The low profile of the shuttles is seen in relation to the height of the reed in the beater.
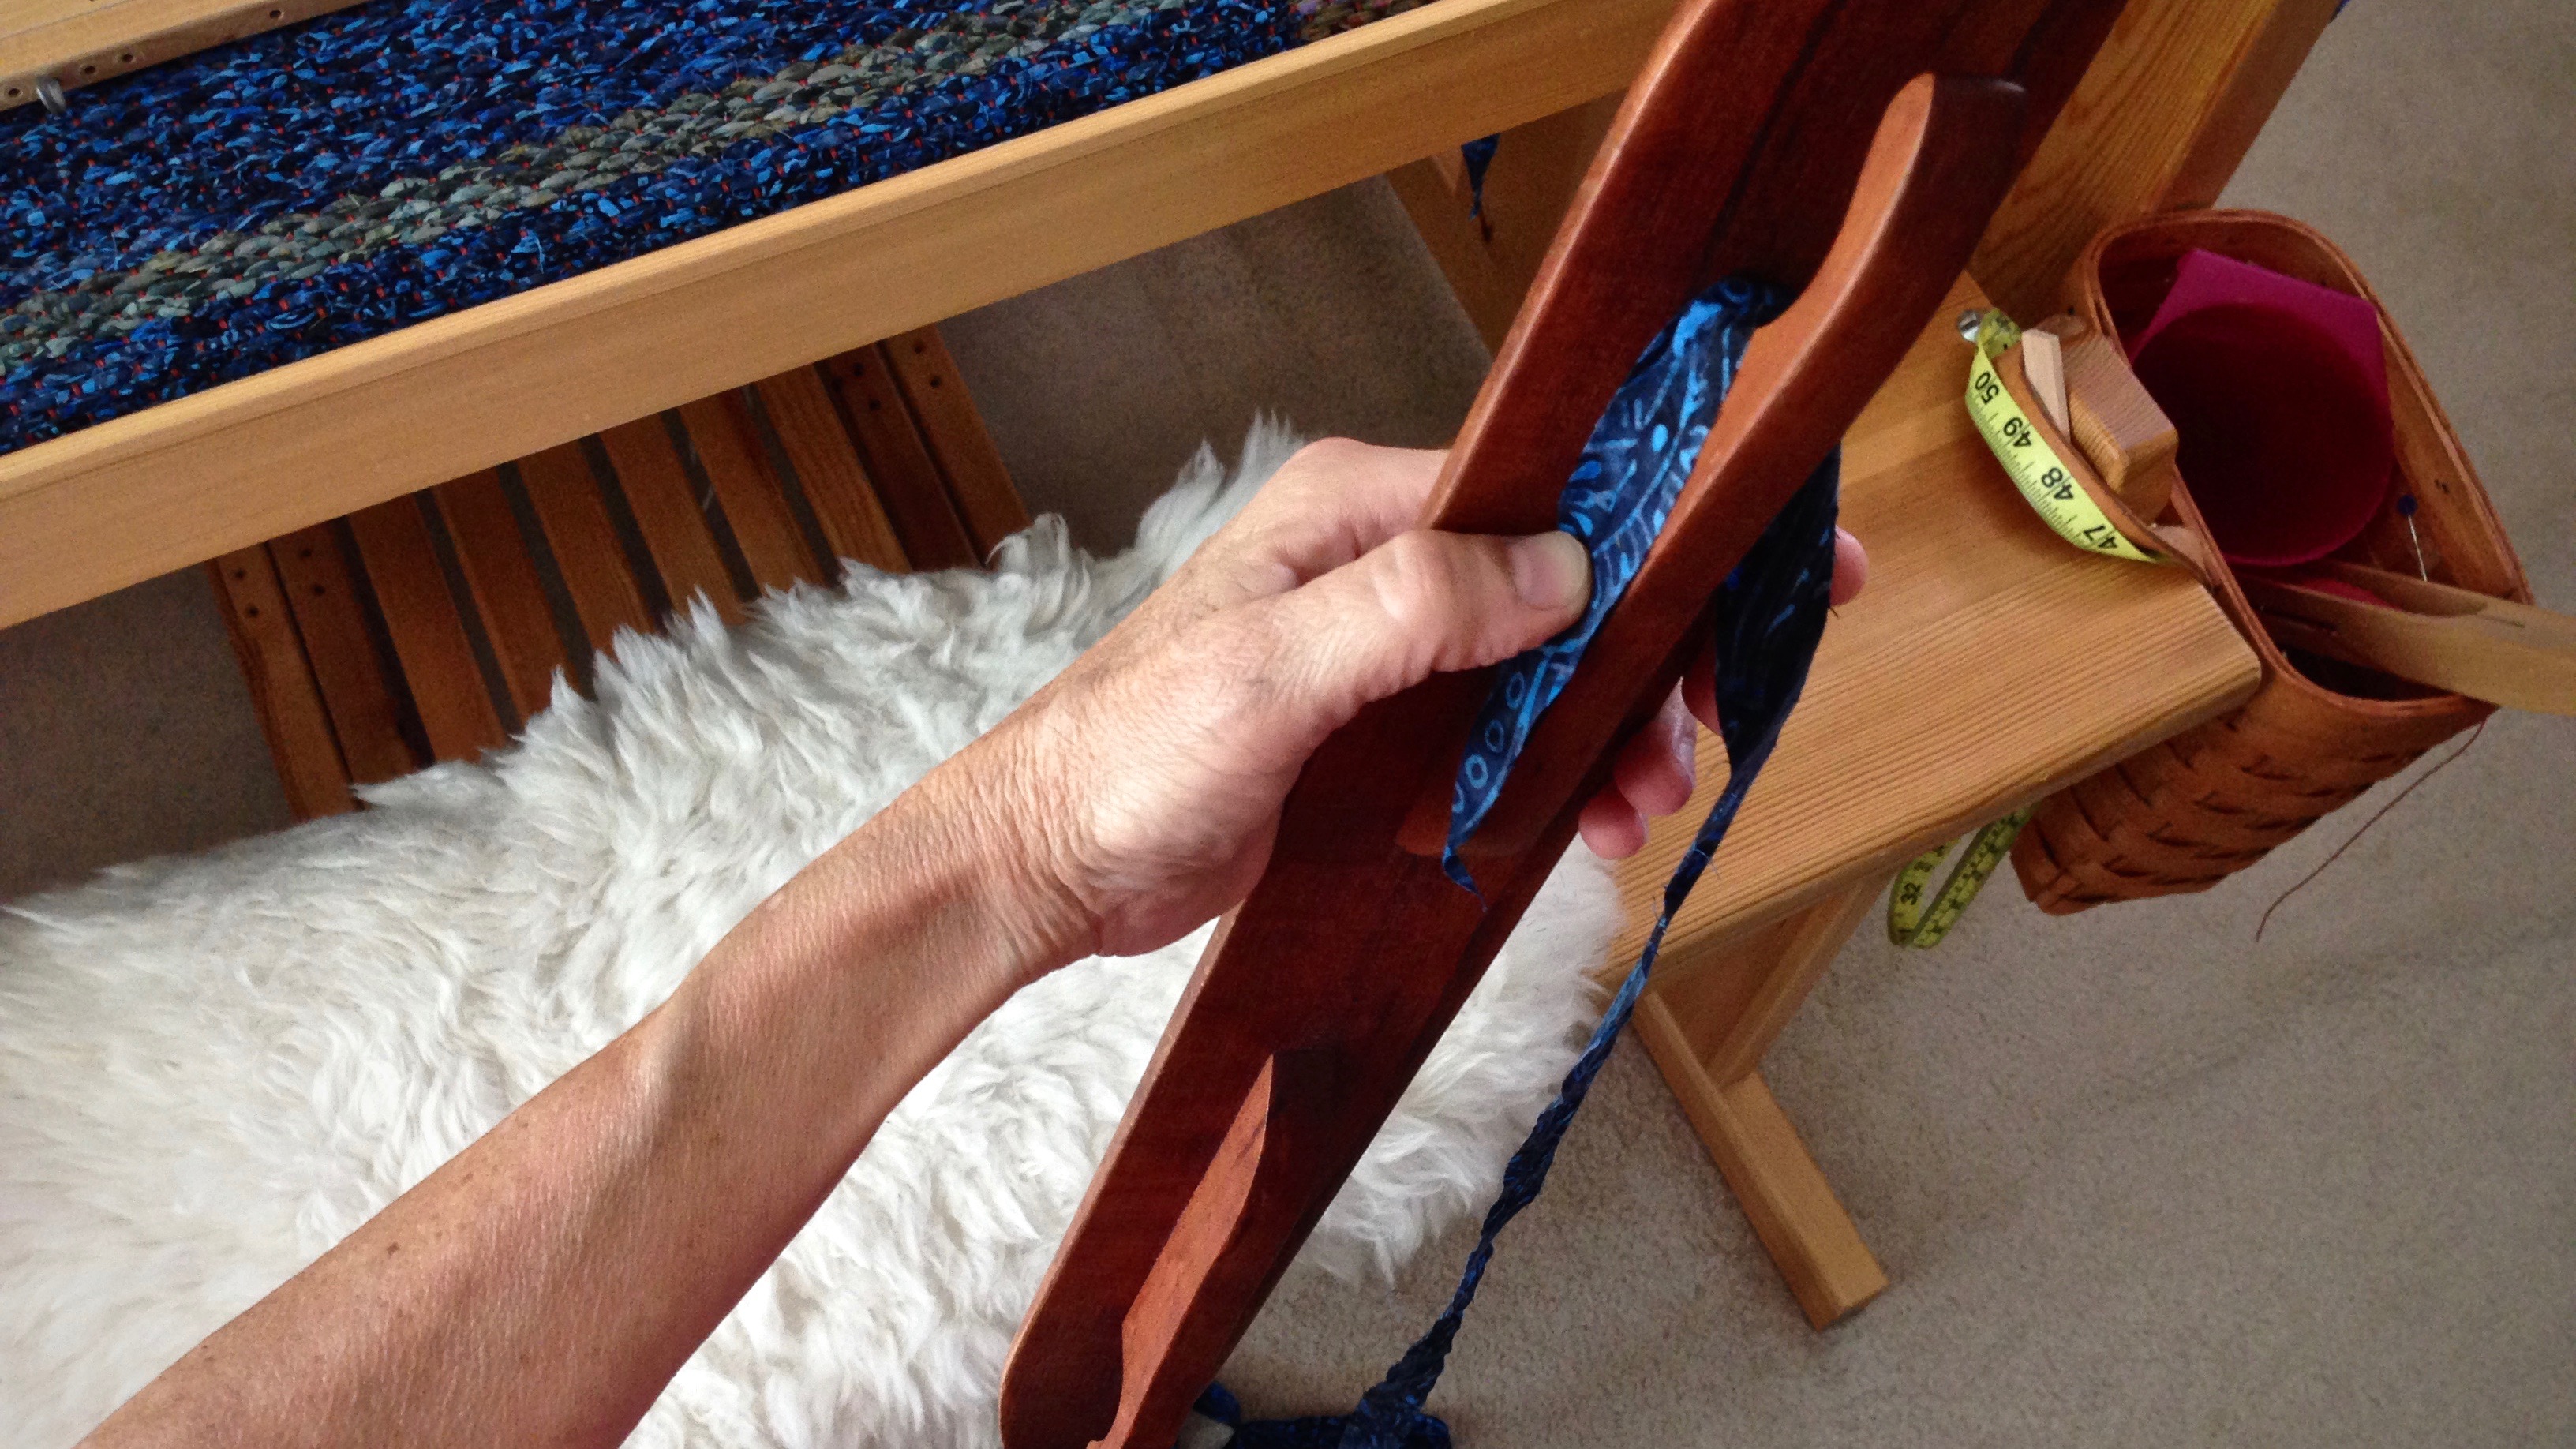
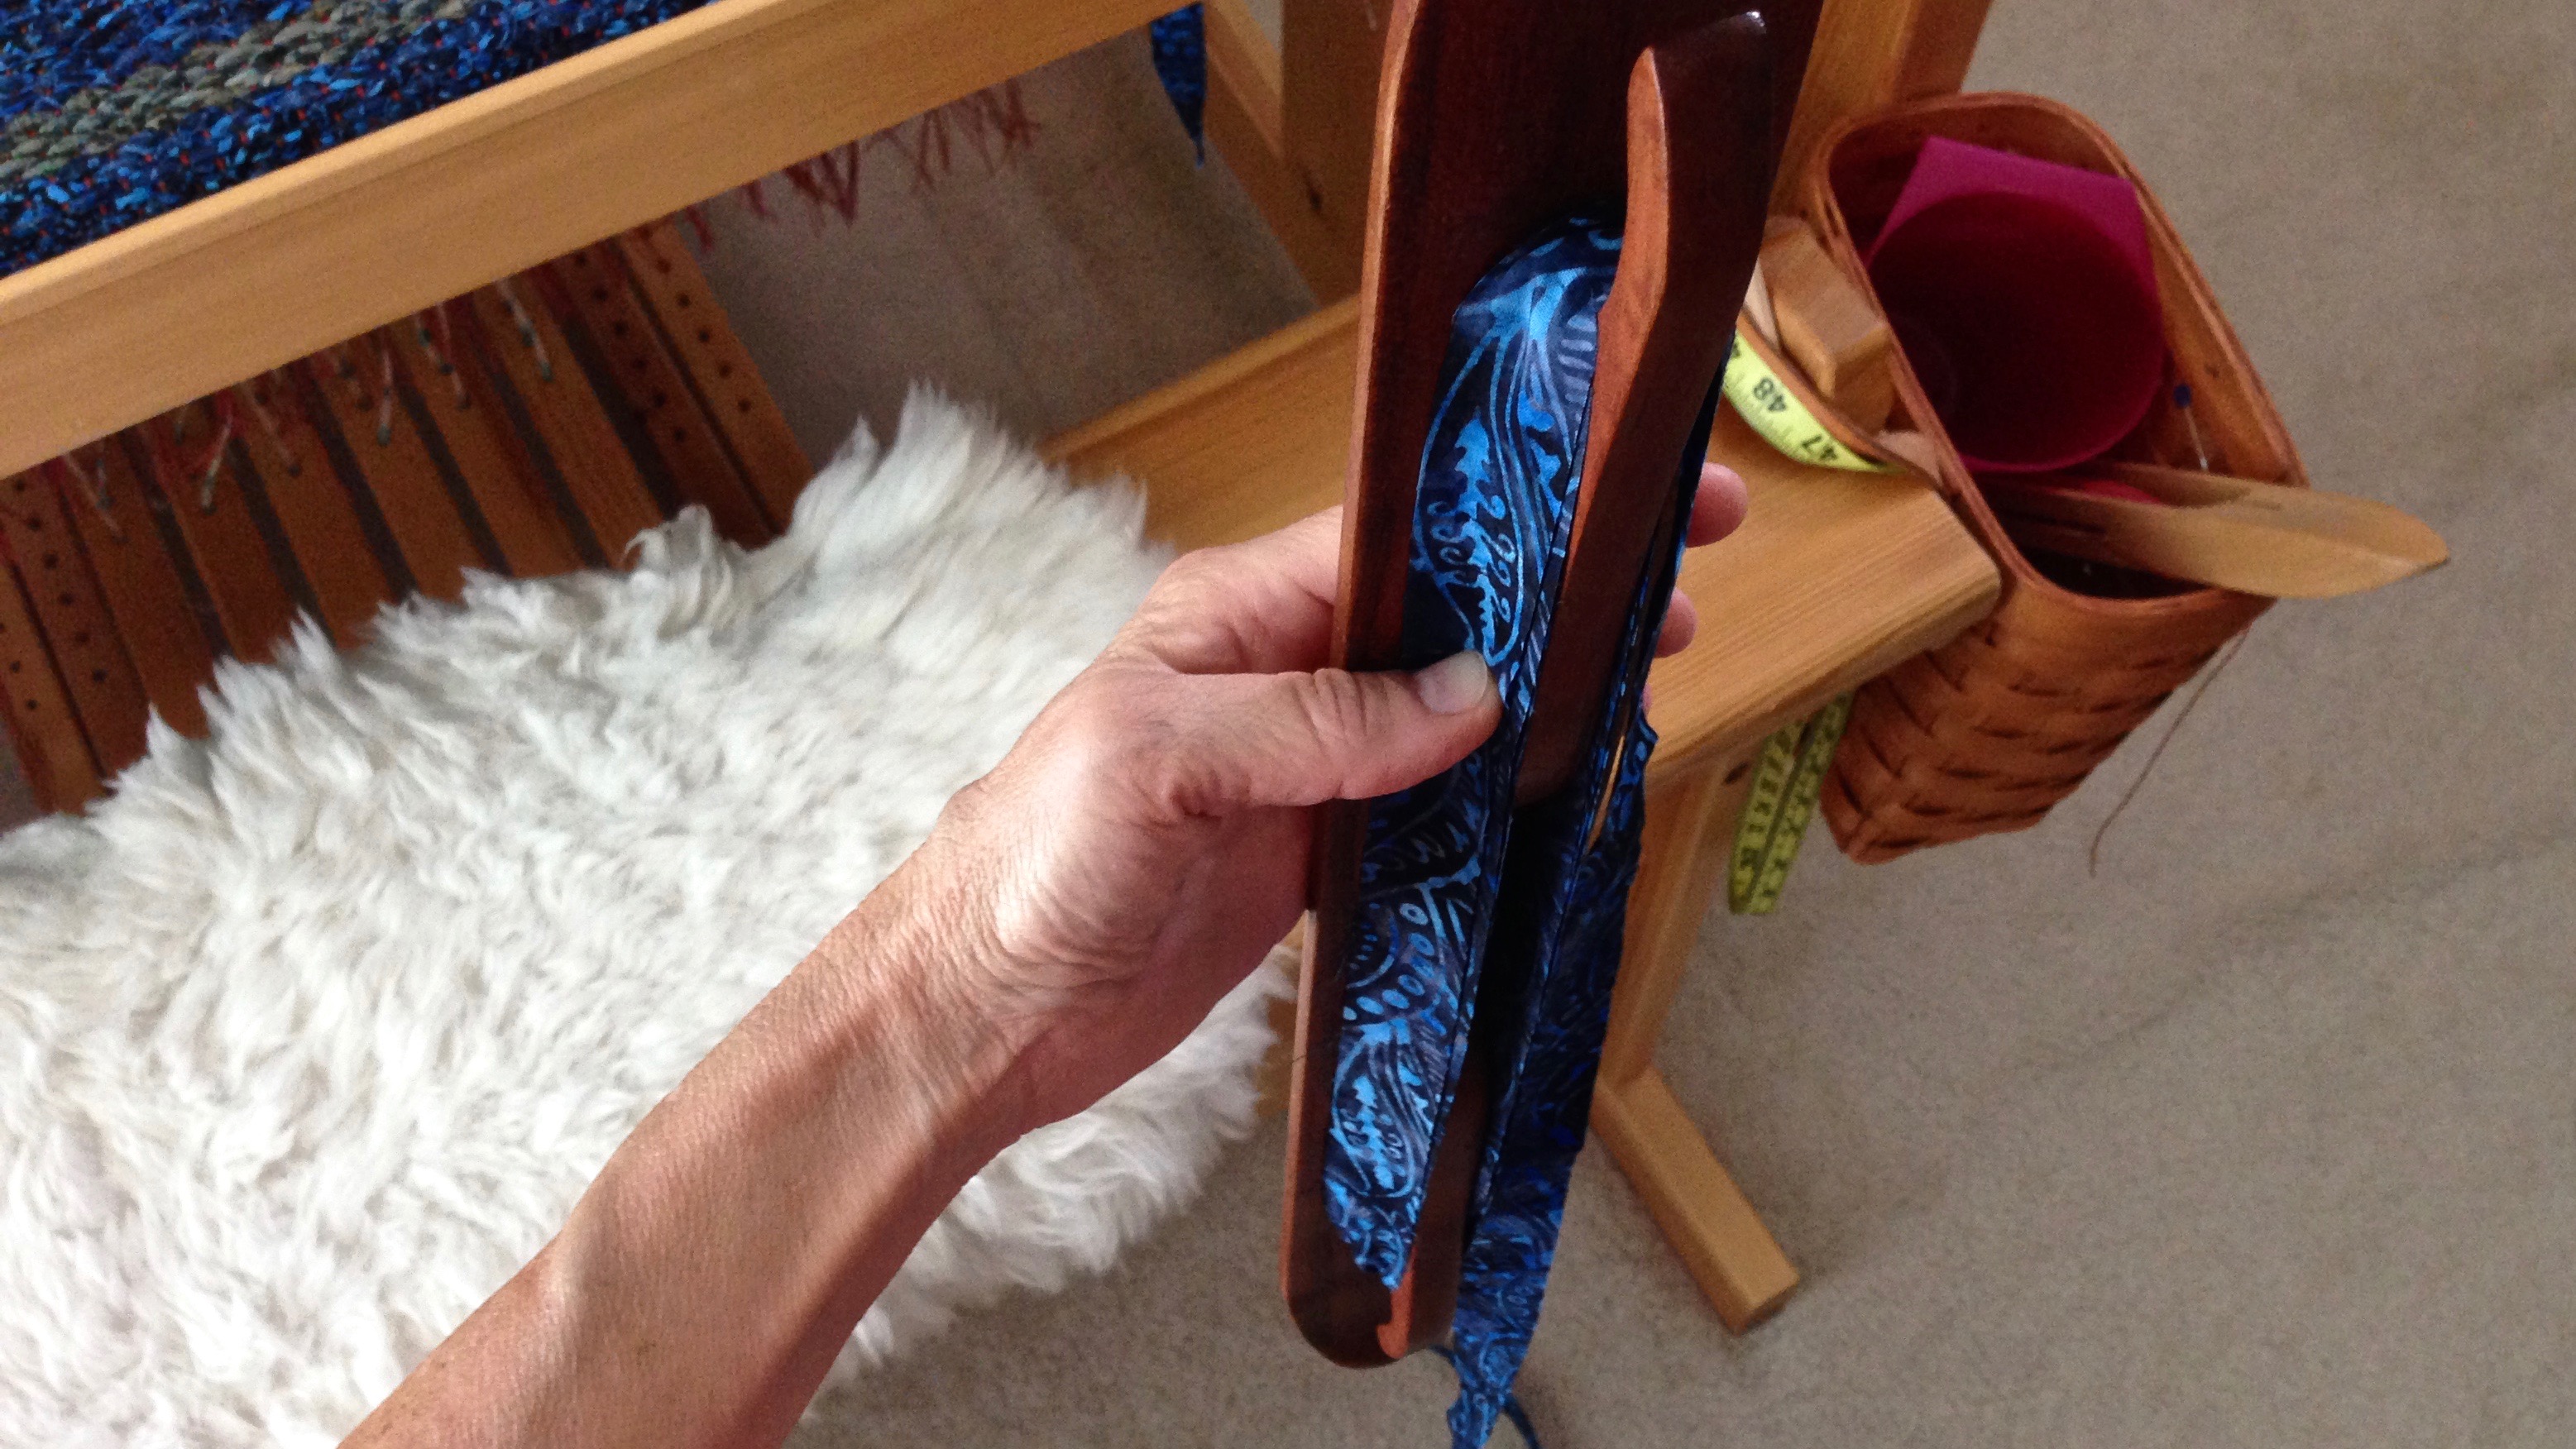
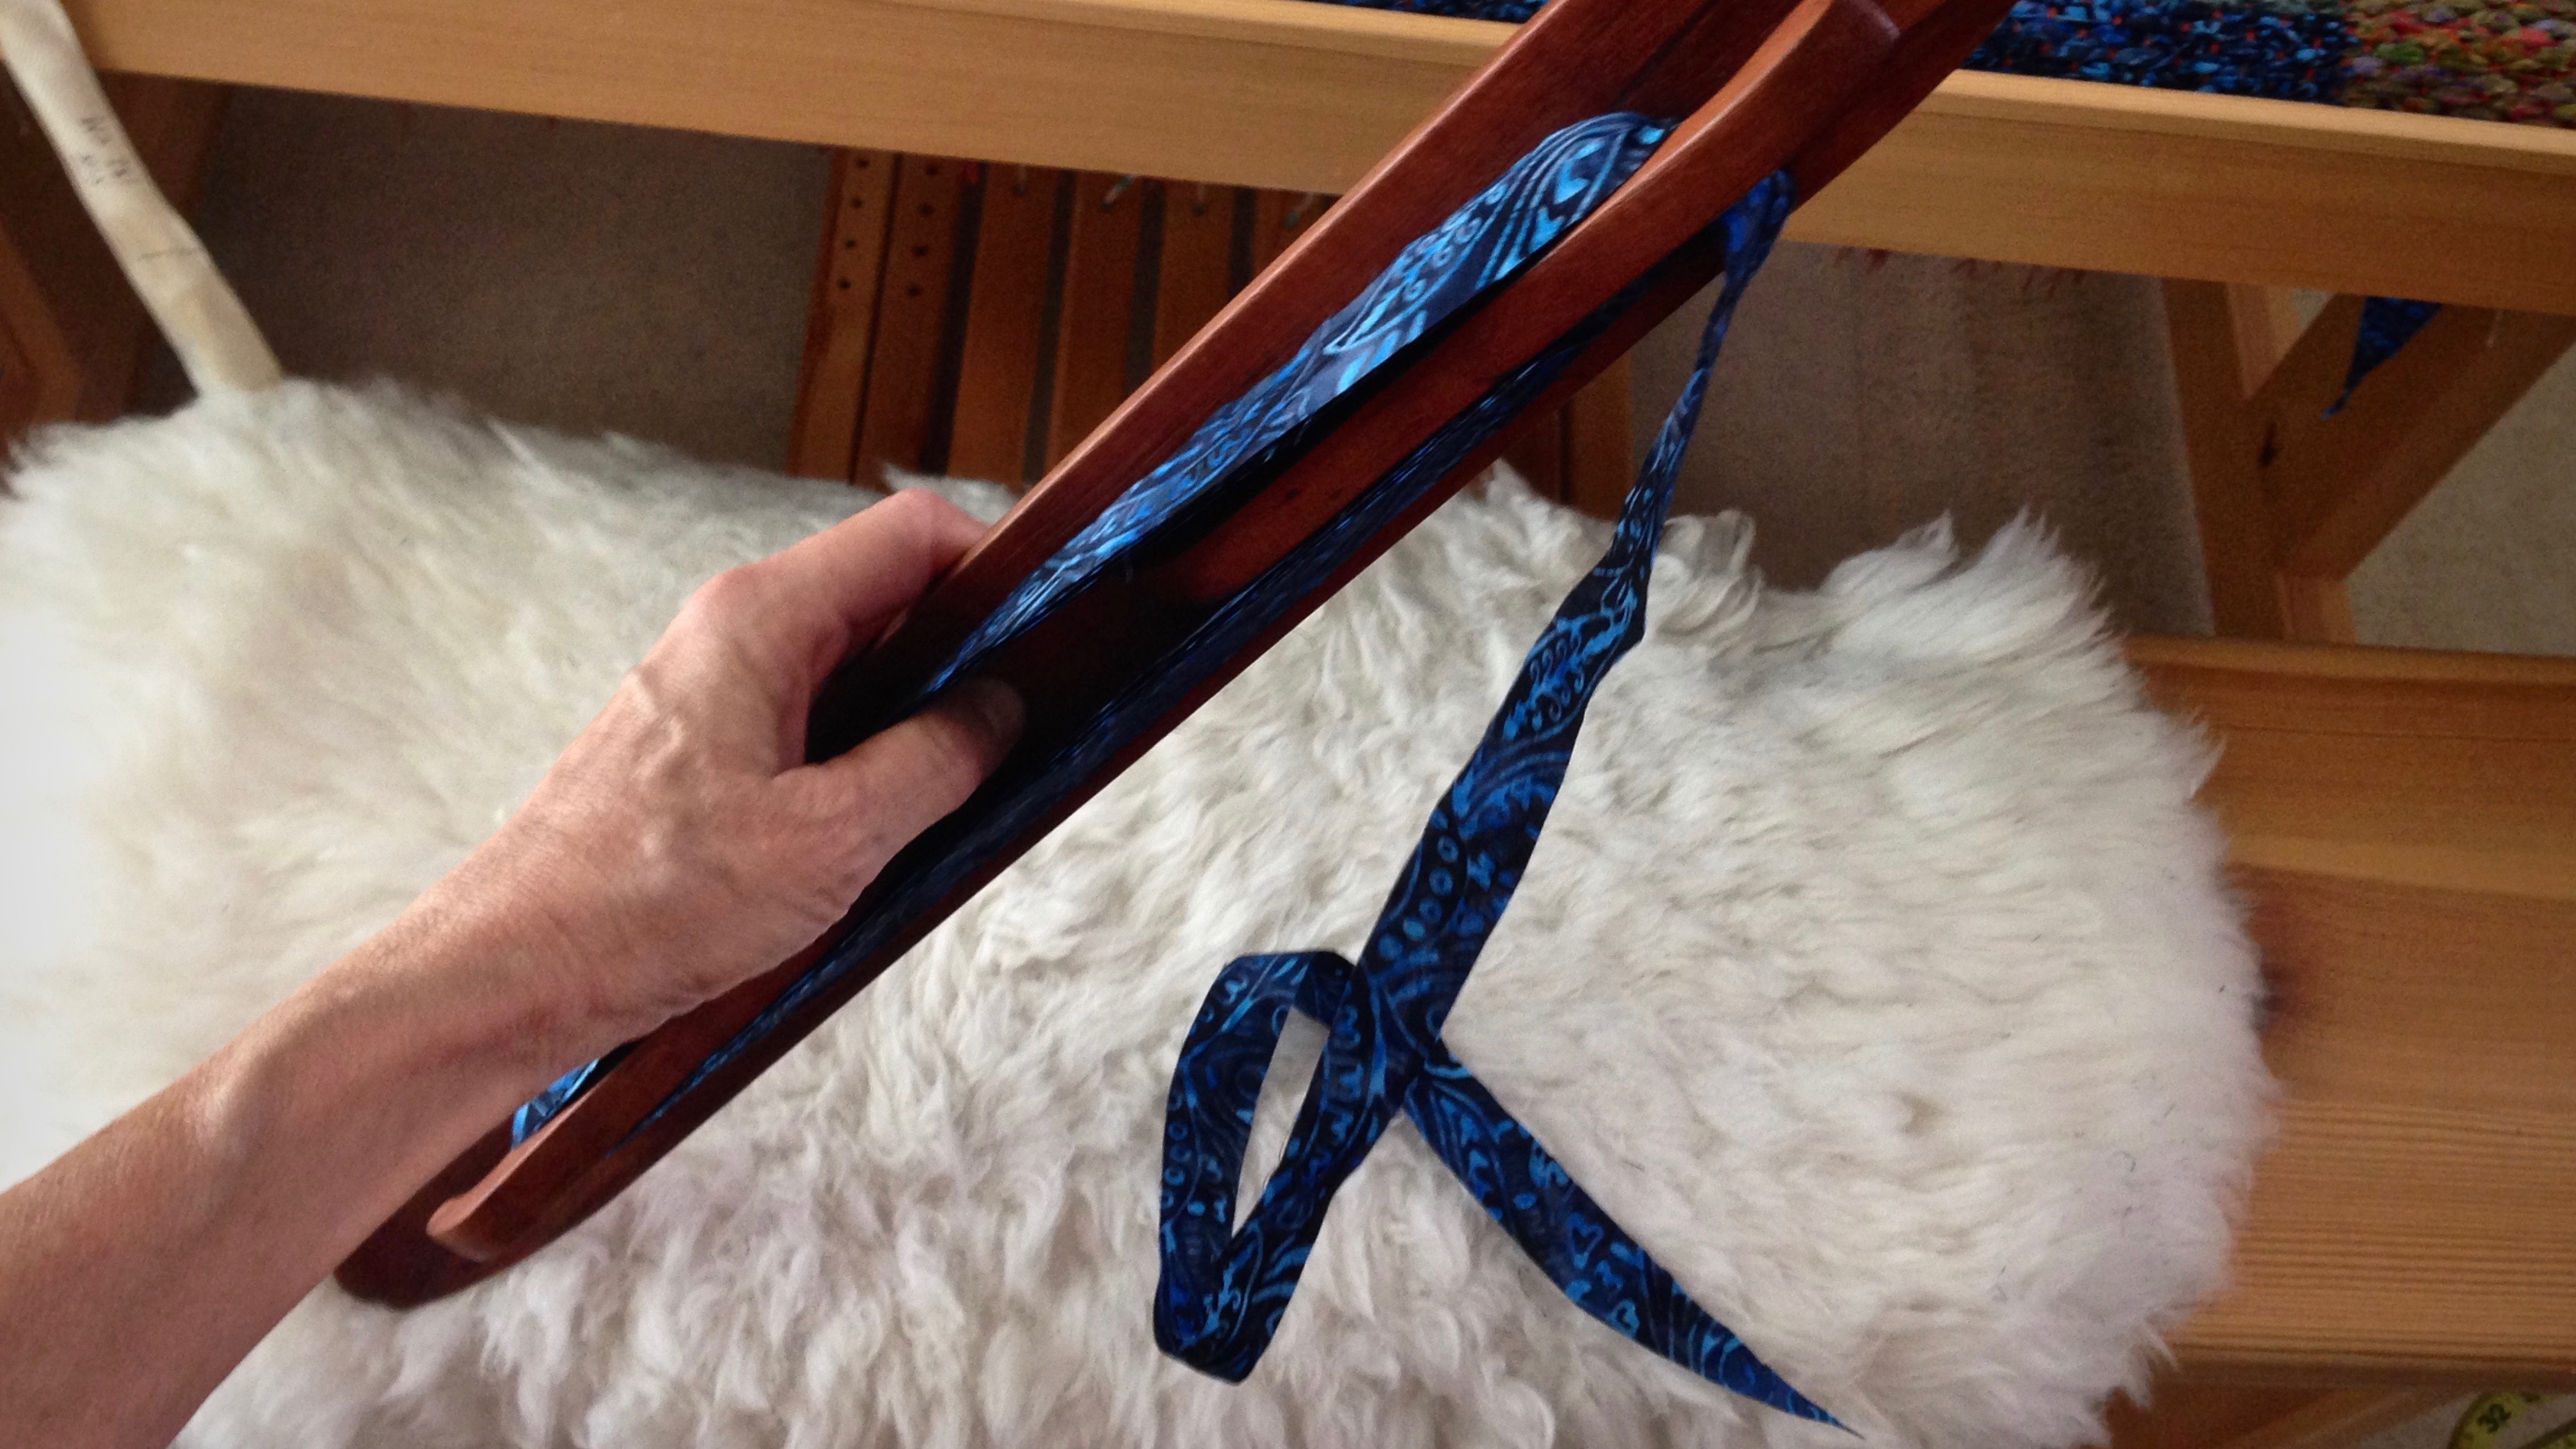
How to Wind a Ski Shuttle
1 — Hold ski shuttle vertically. Start with one tapered end of the fabric strip coming across the top of the ski shuttle. Hold the tapered end with your thumb while you start winding the fabric strip onto the shuttle with your other hand.
2 — Continue wrapping the fabric strip around the length of the shuttle, straightening the fabric as you go.
3 — Finish winding when you have a tail of fabric remaining.
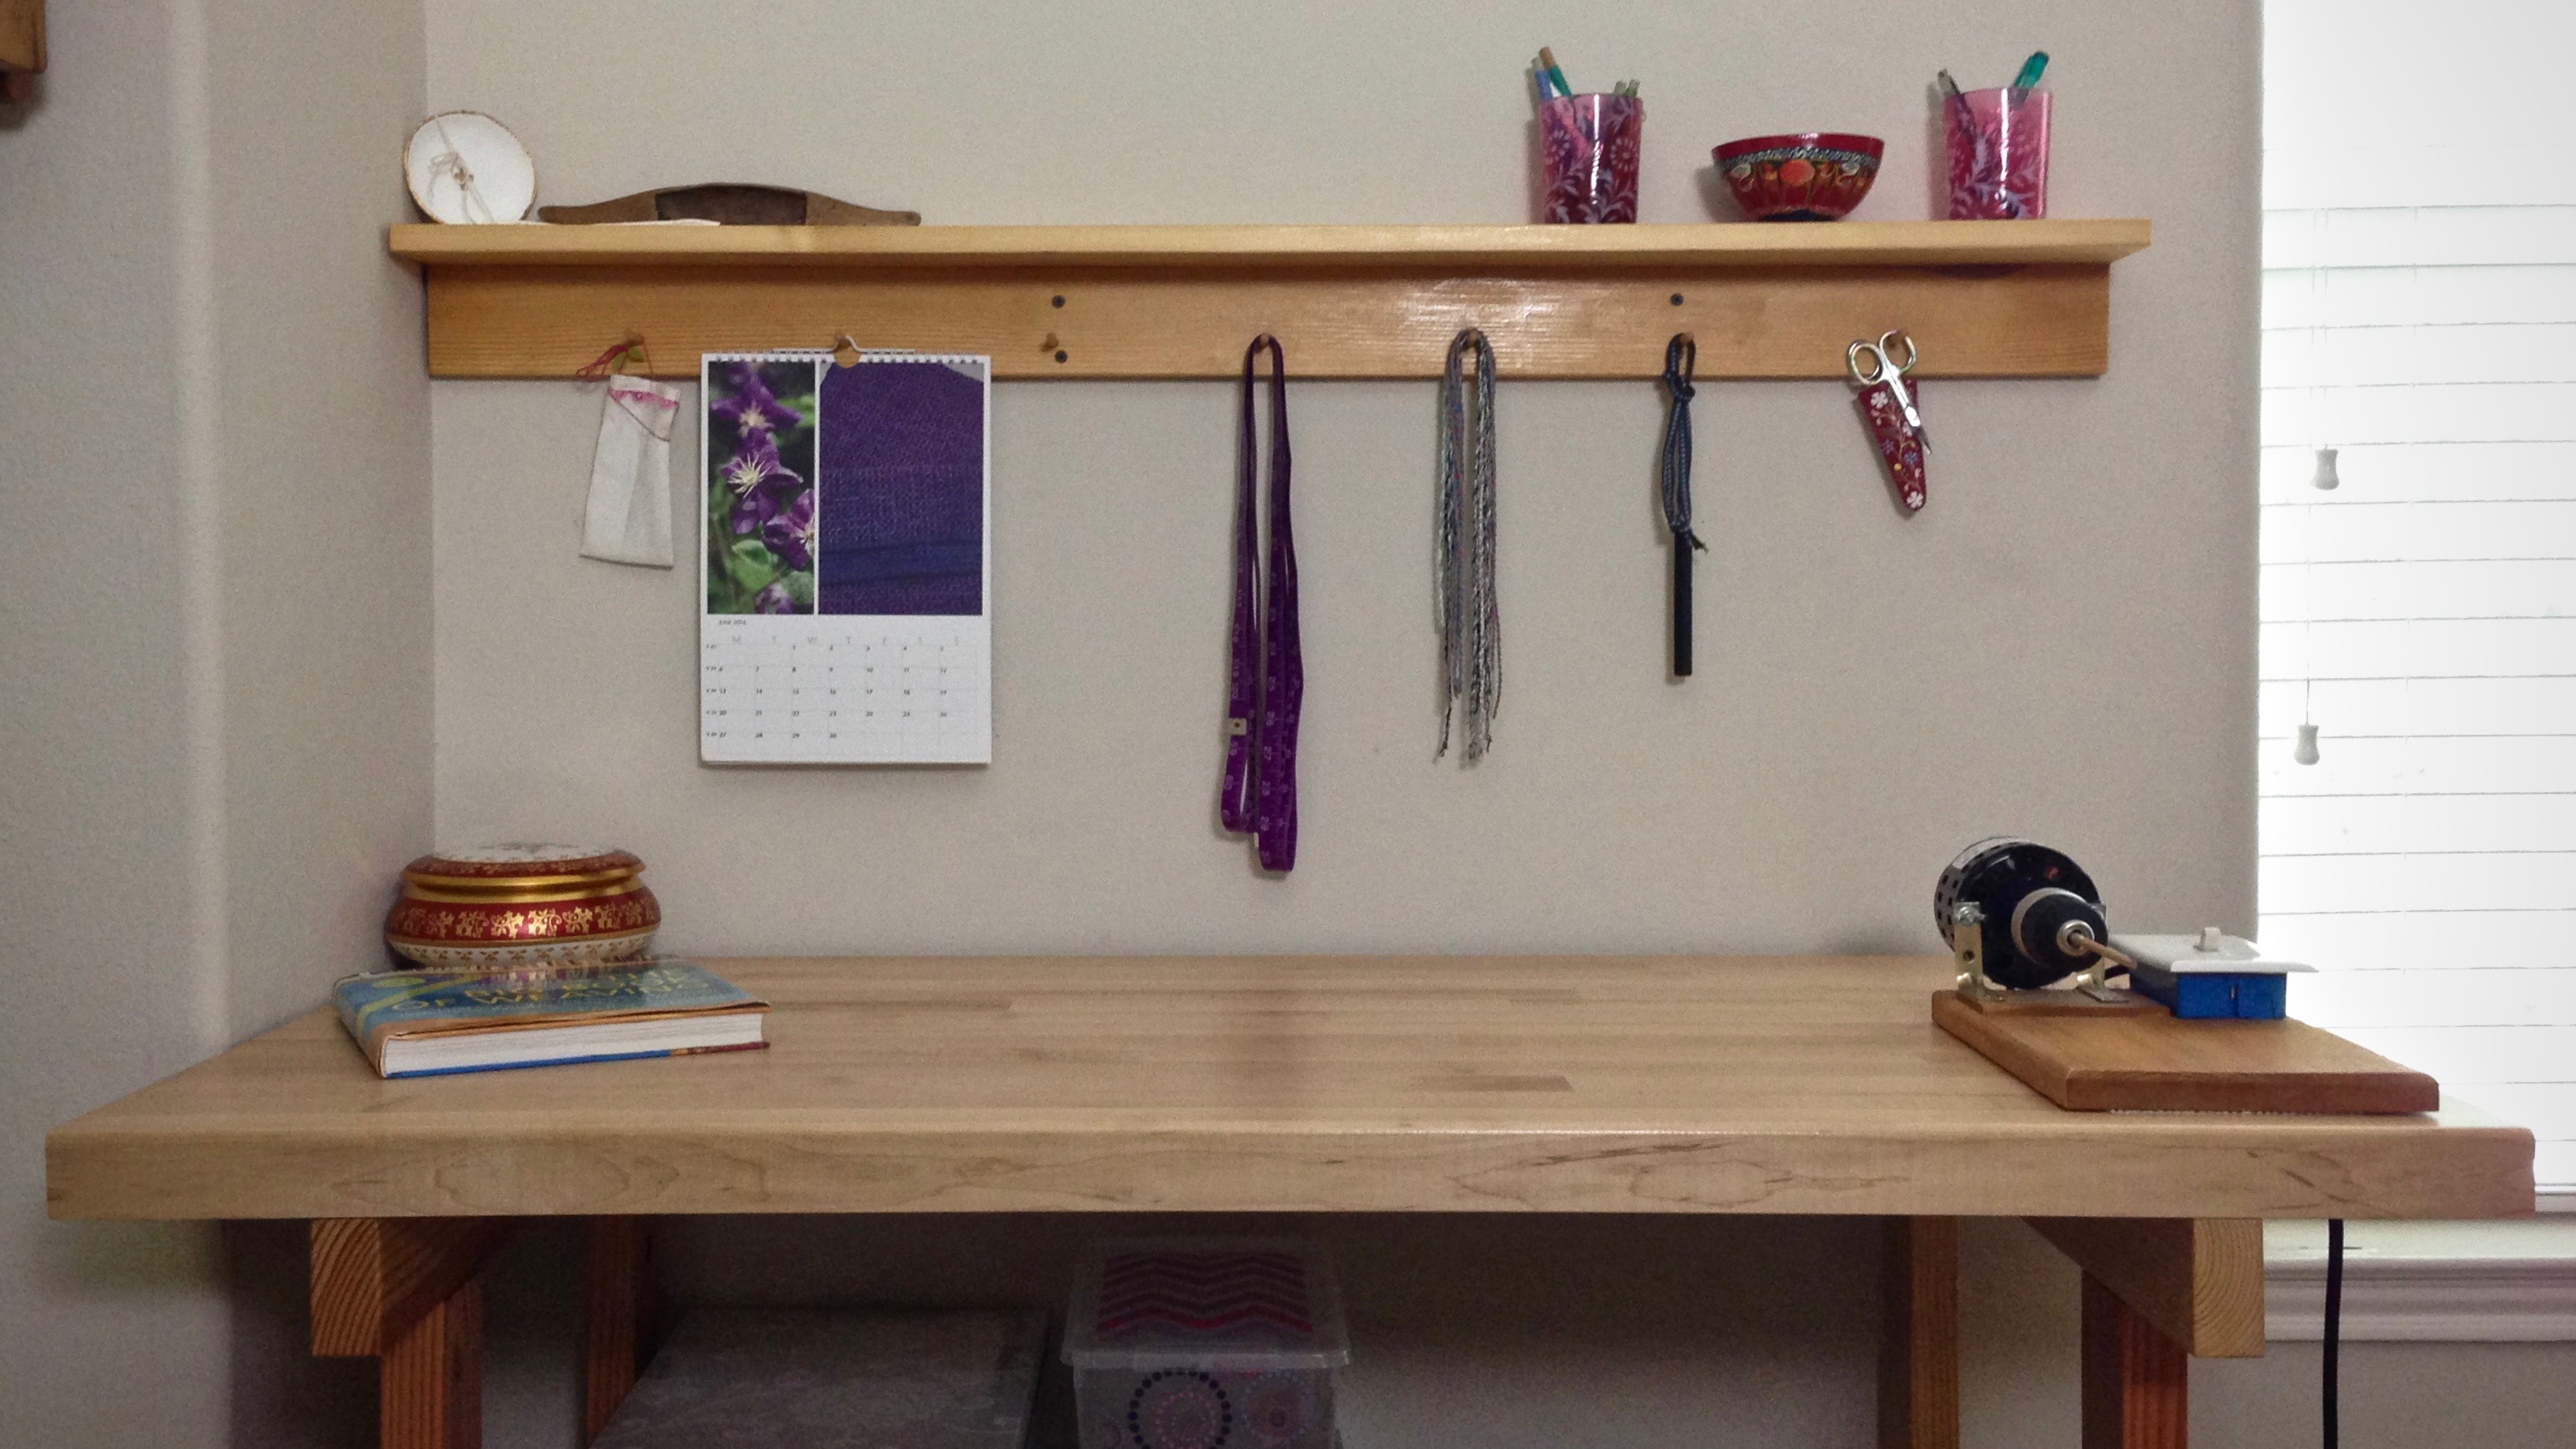
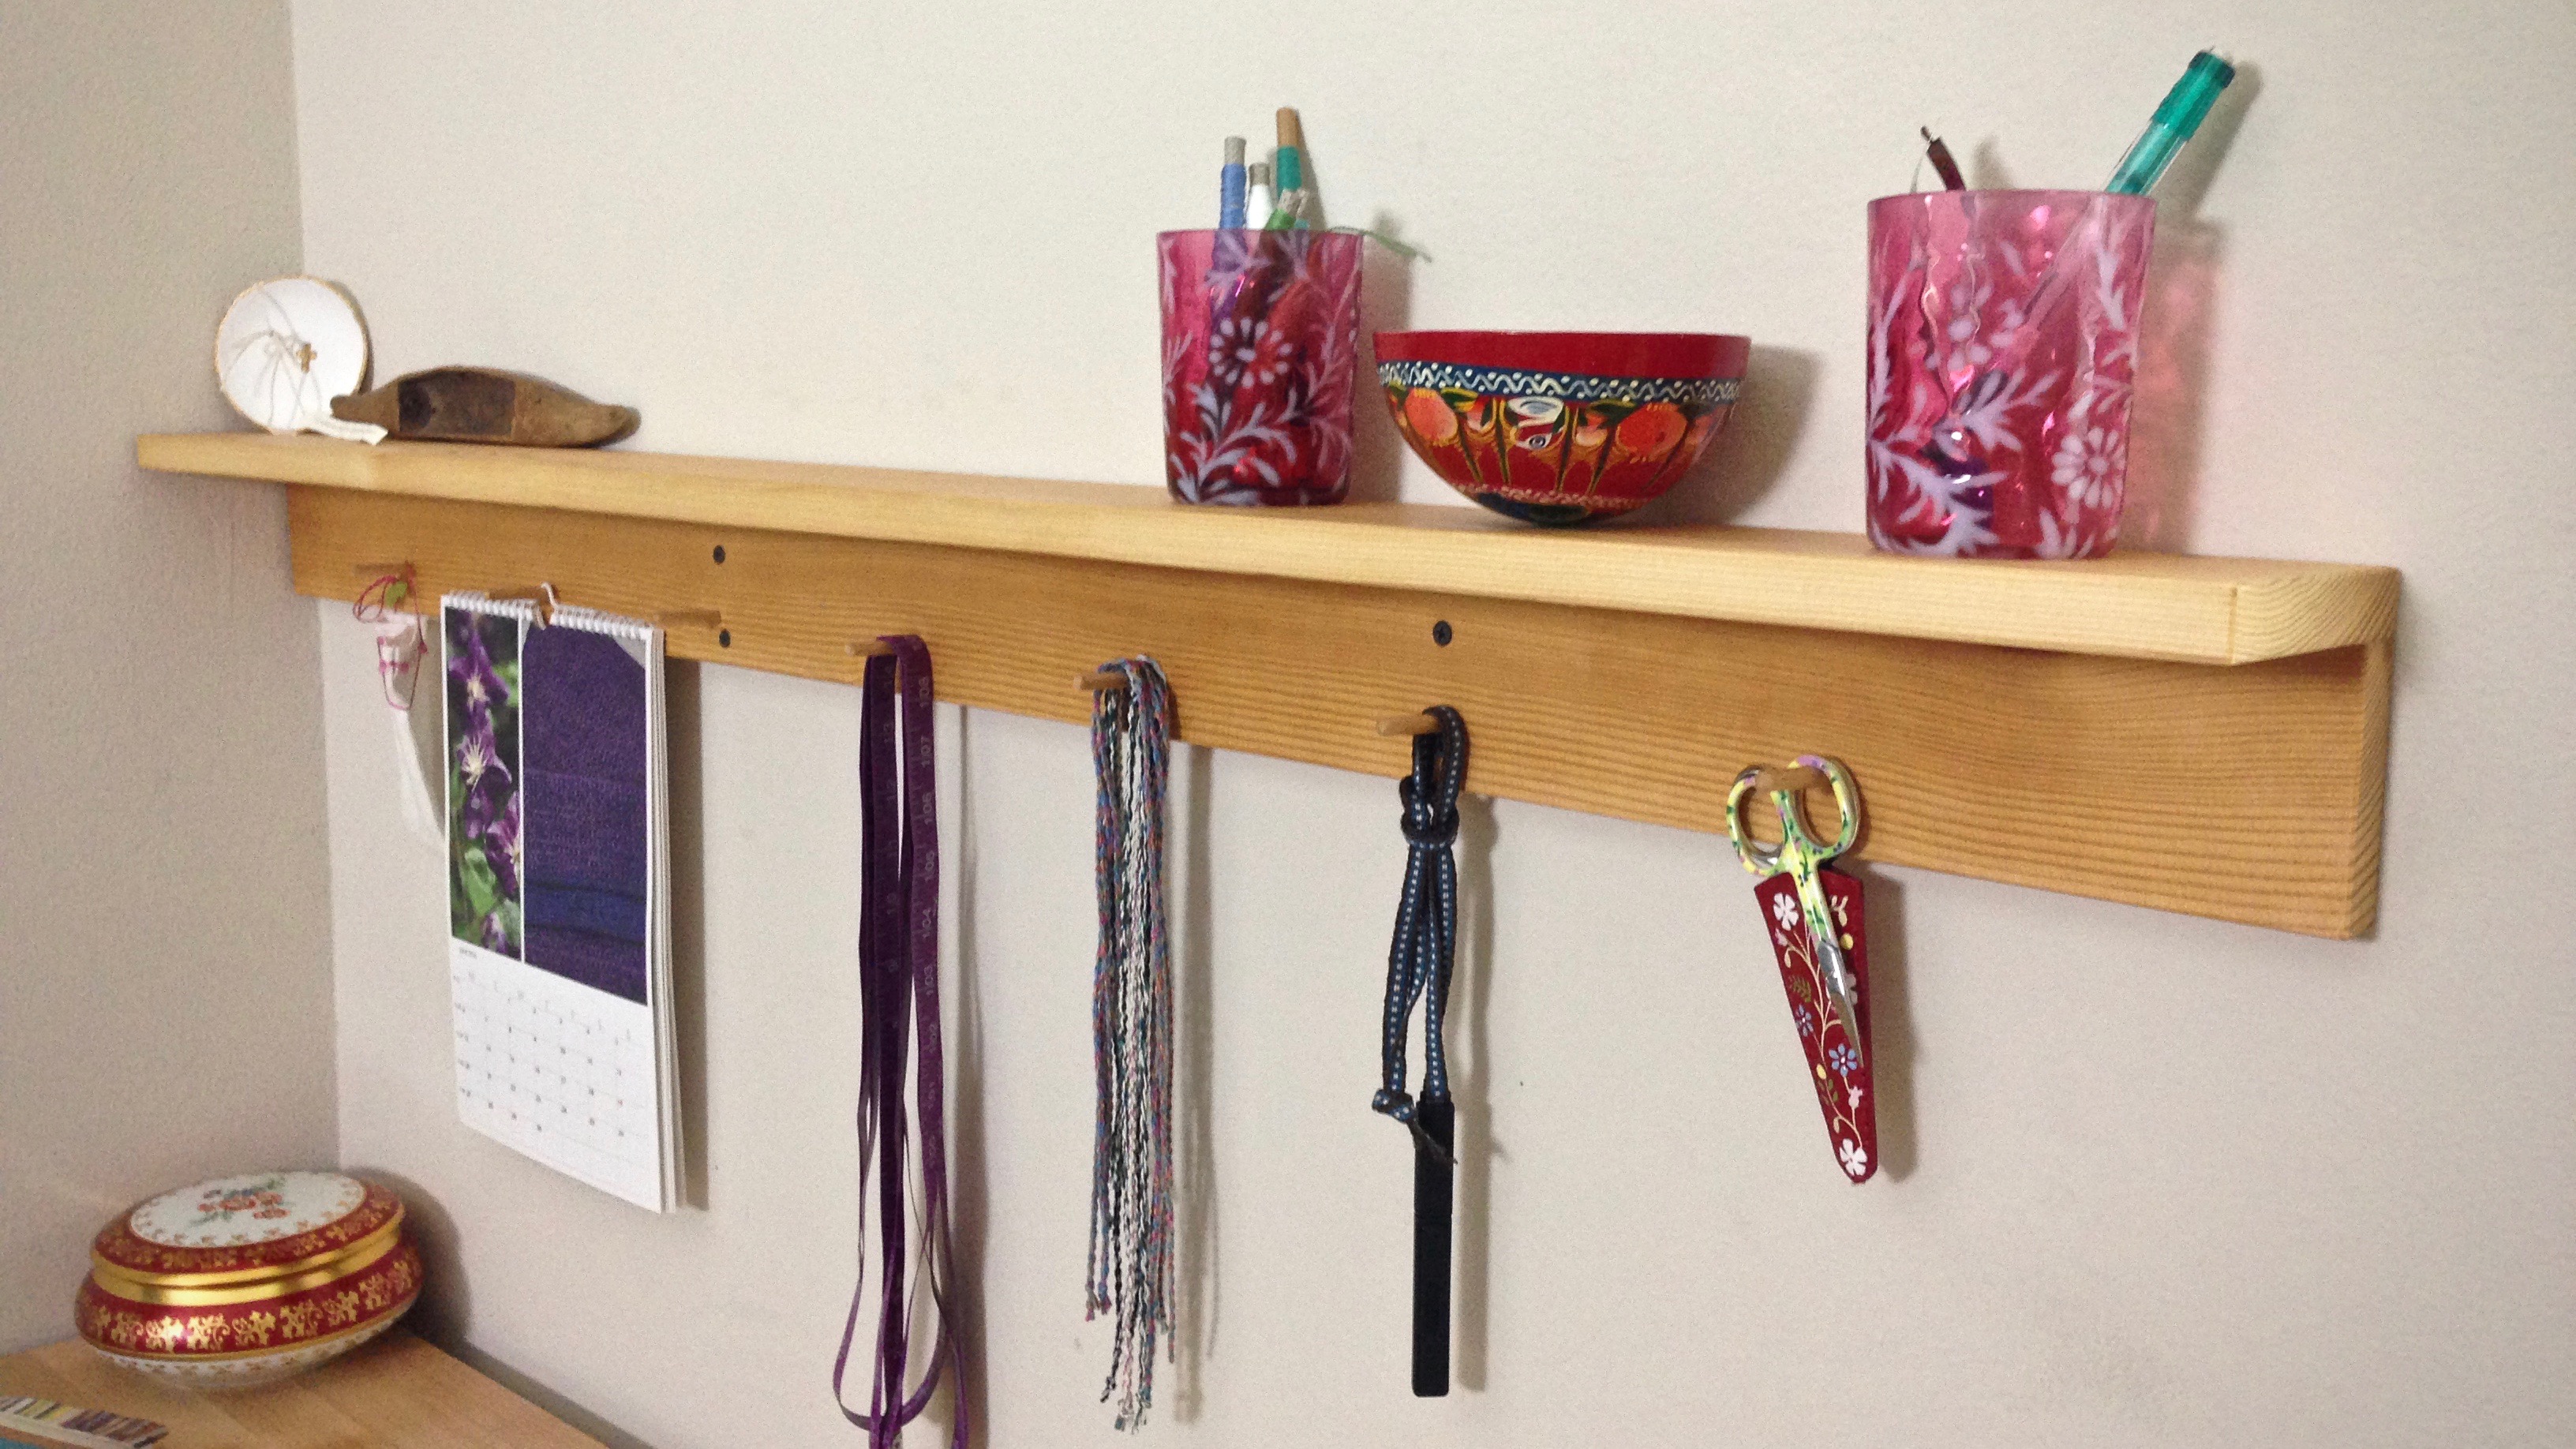
It’s not easy to keep a table top cleared off. Little things accumulate that intrude on the work space. The wonderful maple work table Steve made for my weaving room a couple years ago provides a needed surface for multiple uses. I do my project planning here; and I weigh out my yarns here; and I wind quills here. It’s time to create a space for the little things, to get them off the table. Steve to the rescue! He built a narrow shelf to go on the wall behind the work table. Pencils, snips, pins and needles, quills with a little bit of thread, and the like. Pegs below the shelf give me a convenient place to hang a few essentials–small scissors, Gingher thread clippers on a cord, a few choke ties, tape measure, and my Väv Calendar.
Hand-crafted maple shelf compliments the maple work table below. Frequently used items are within arm’s reach.Re-purposed vessels make colorful holders for small items.
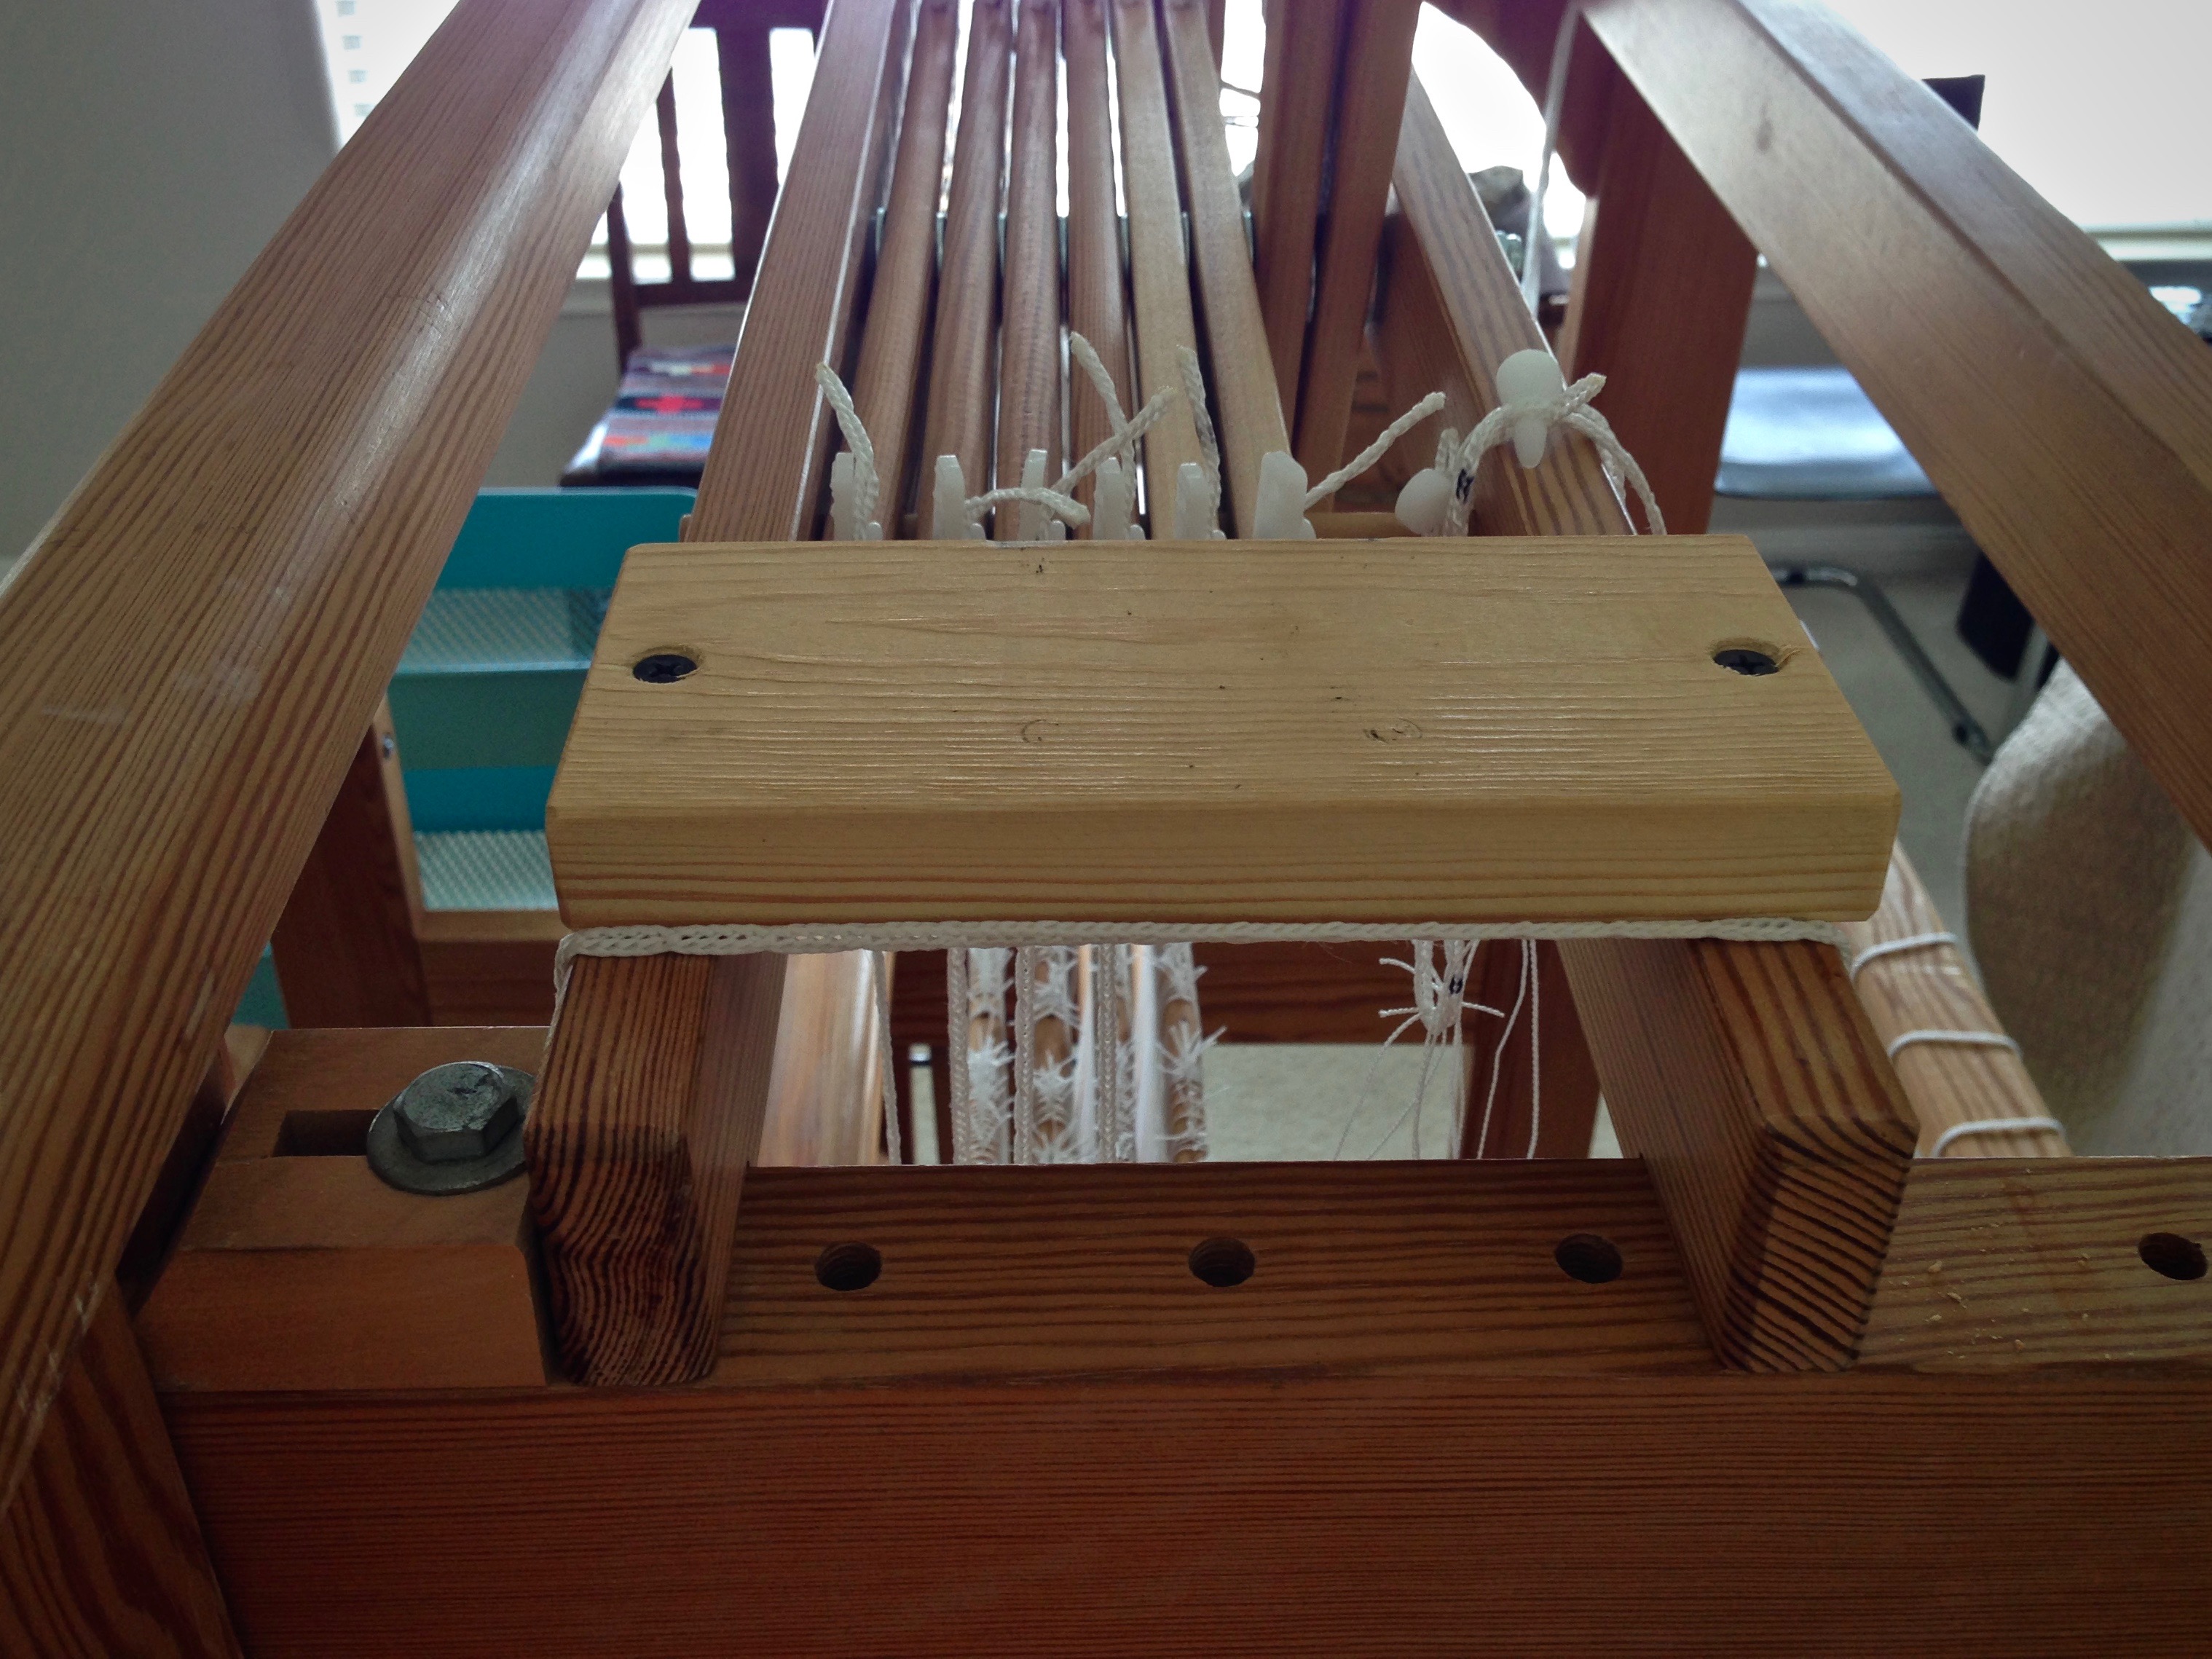
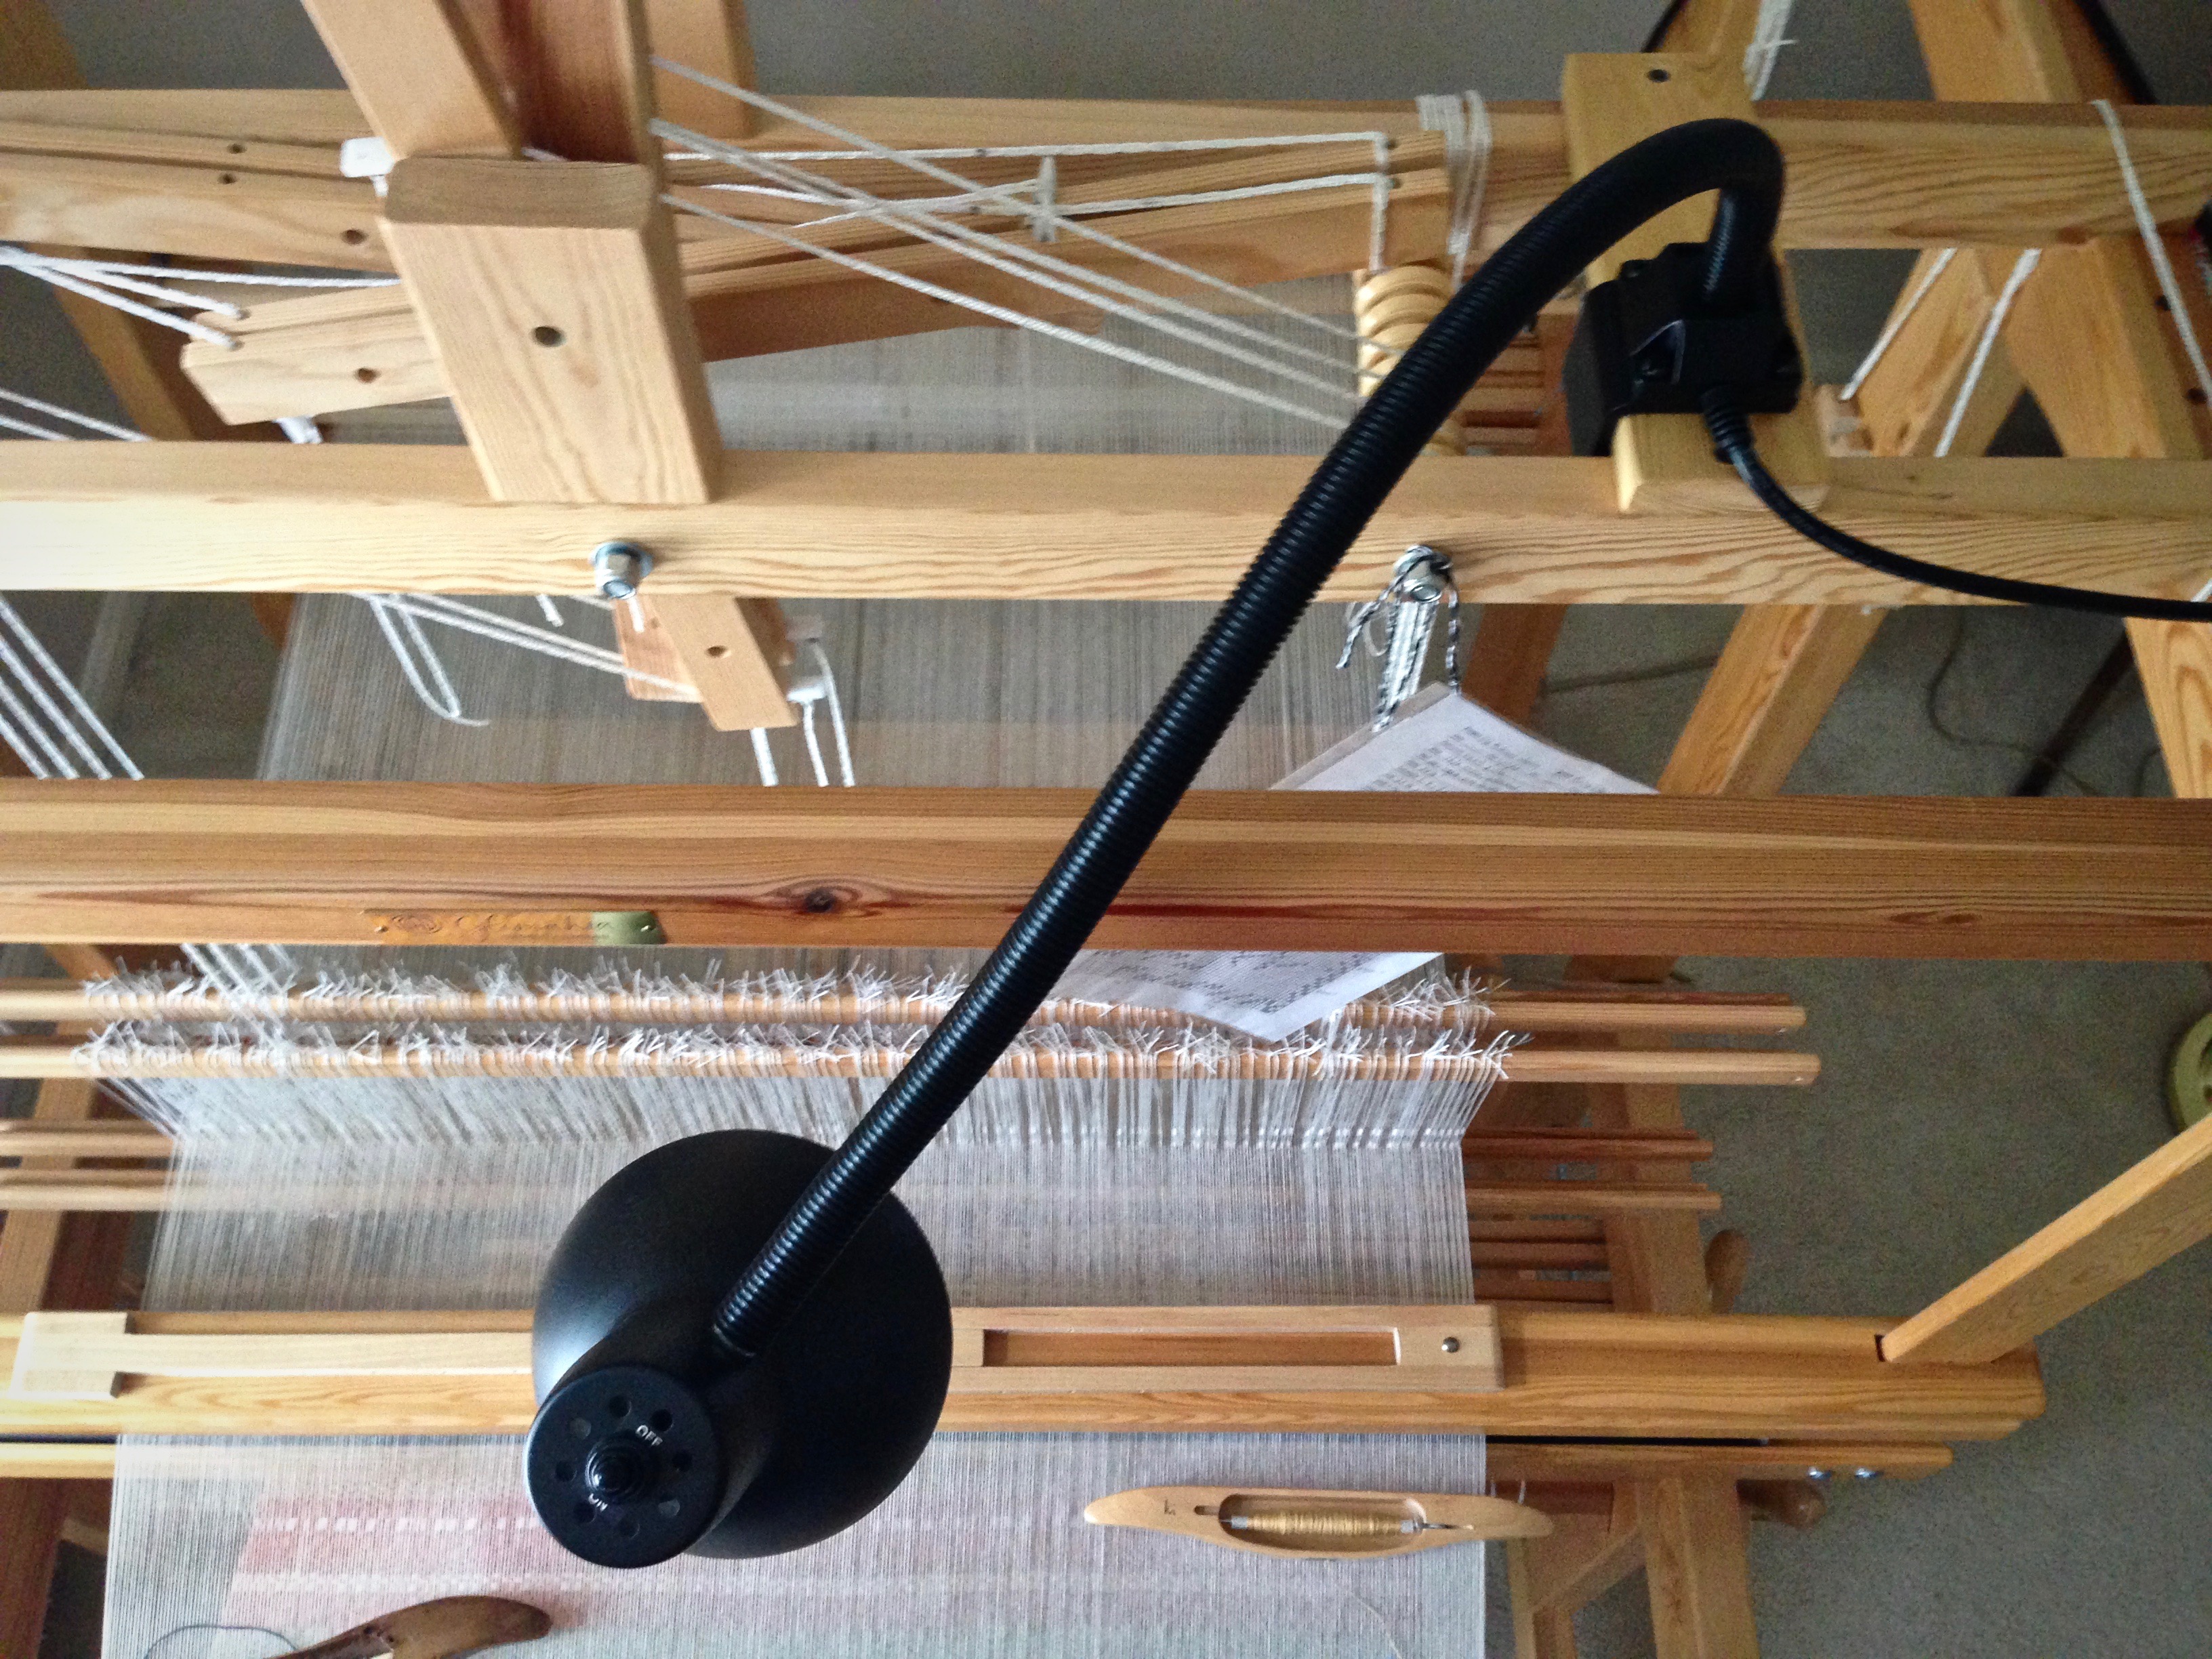
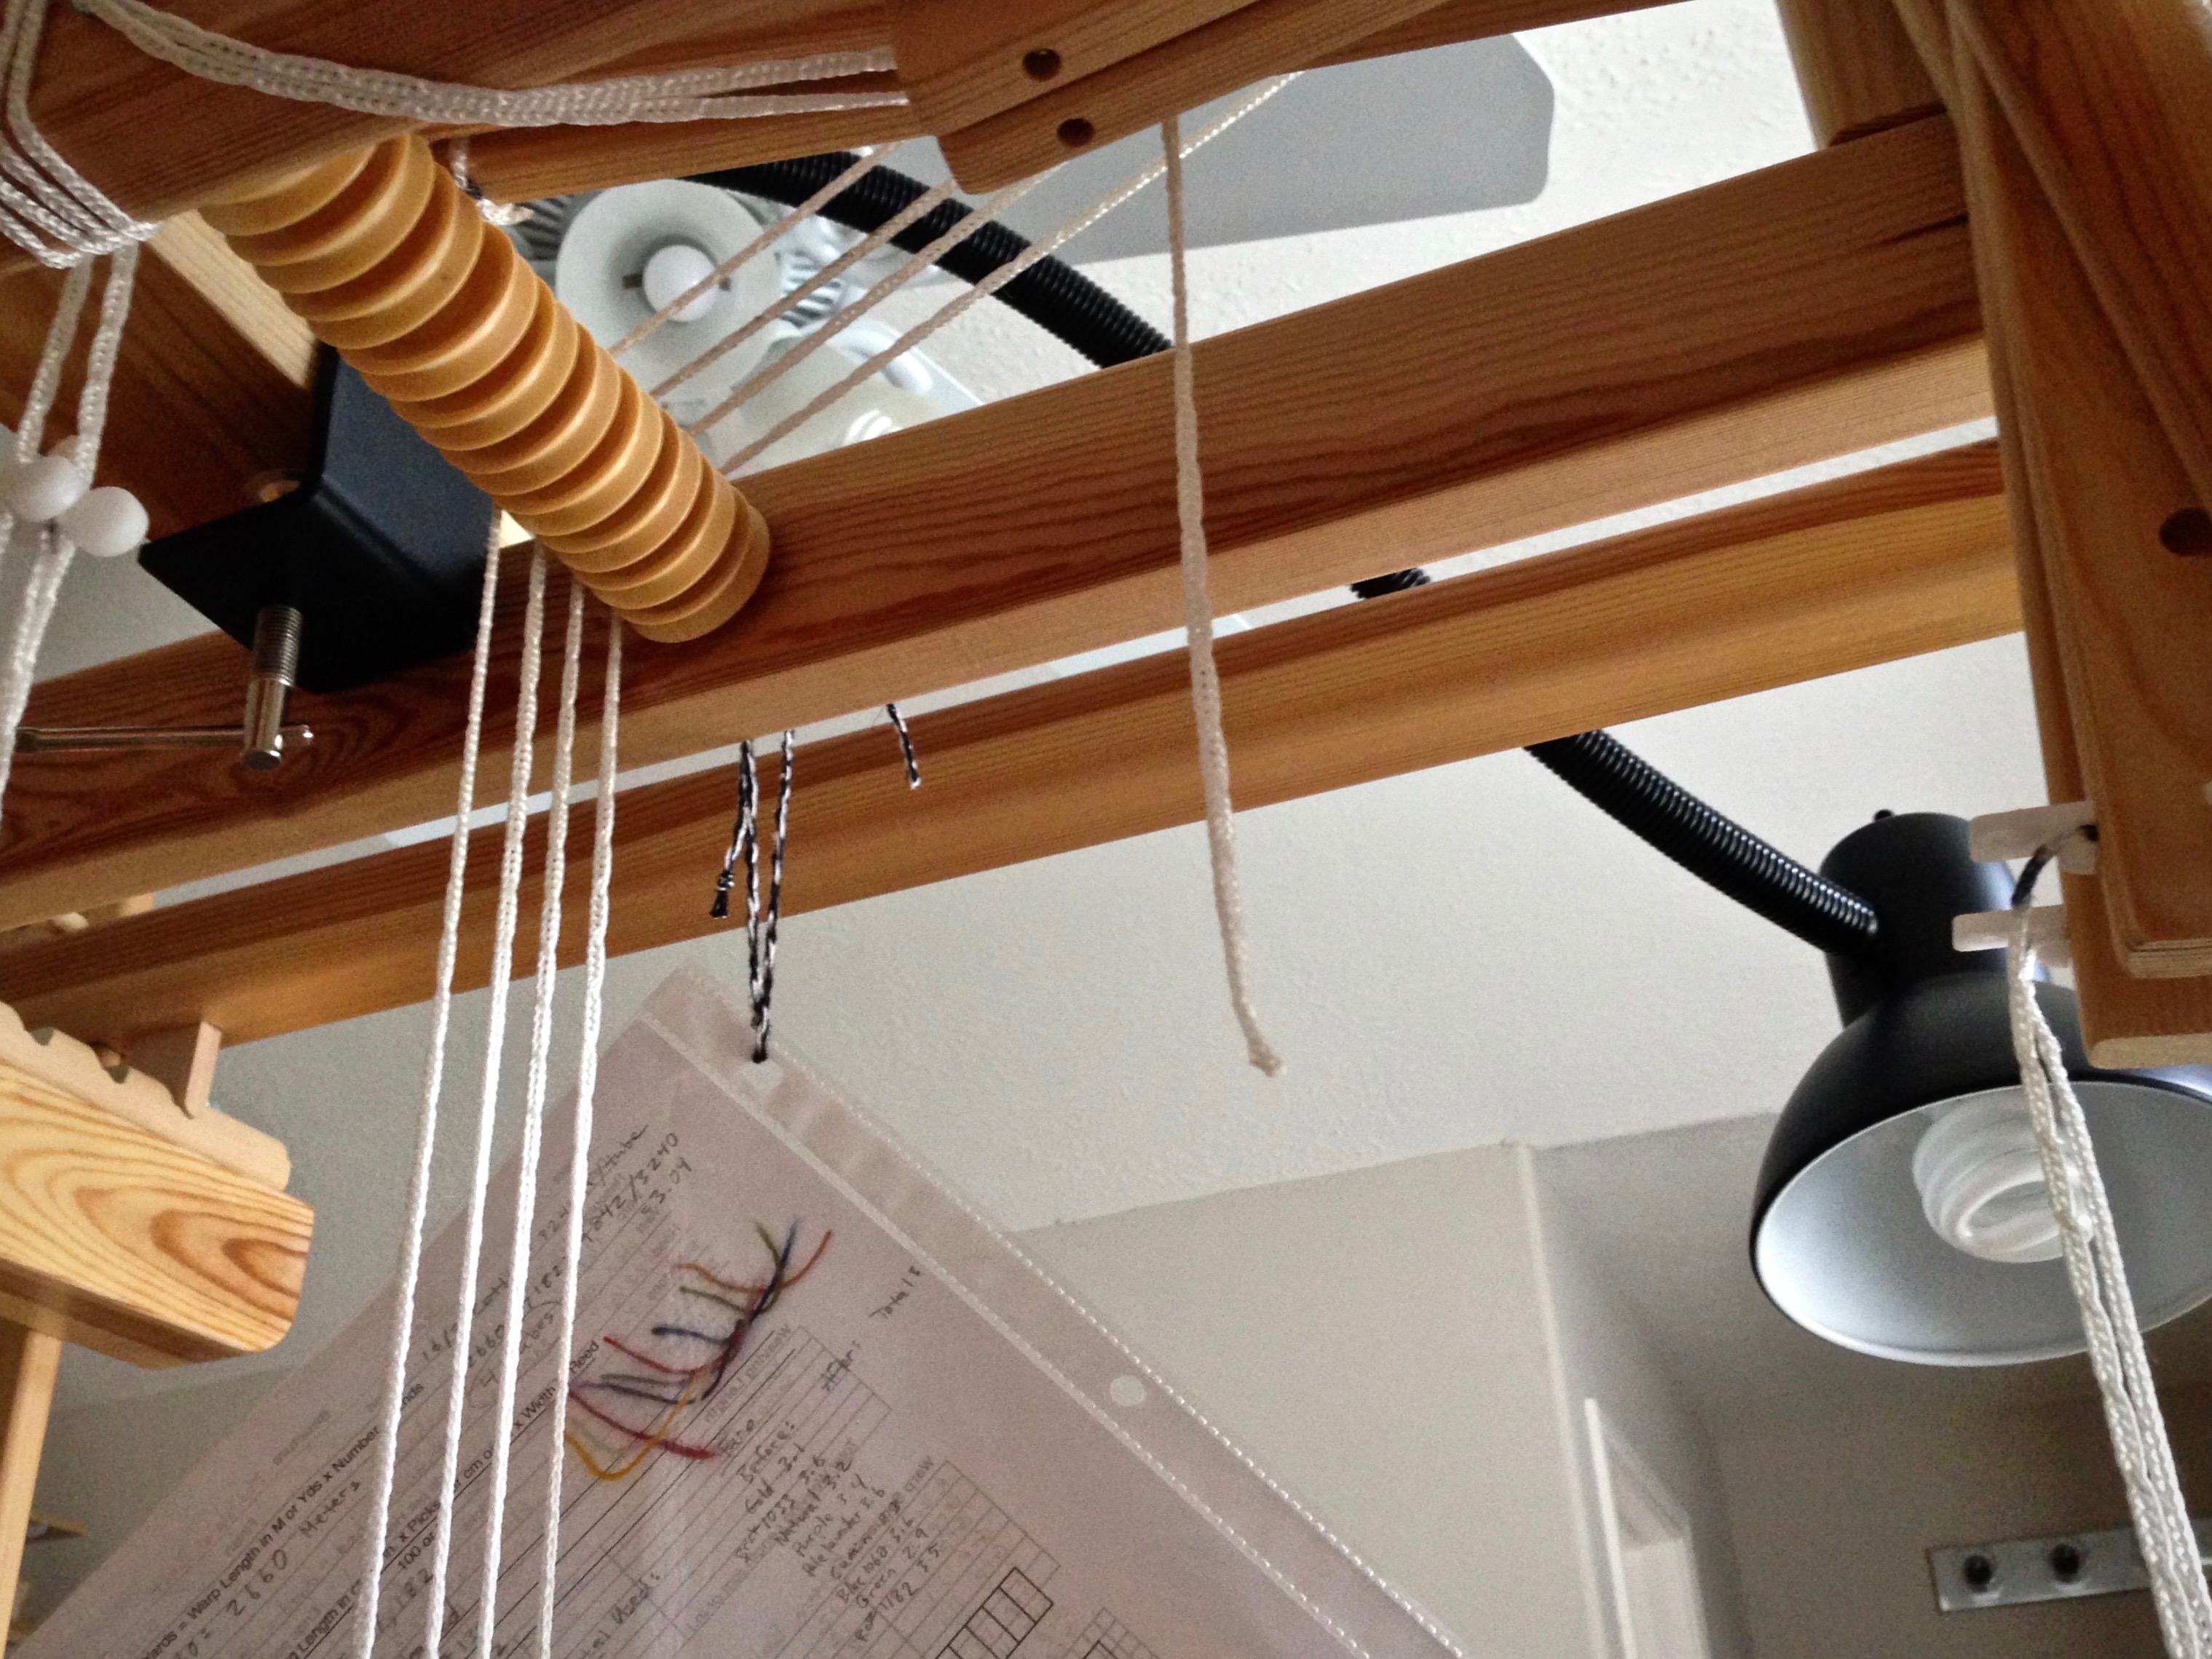
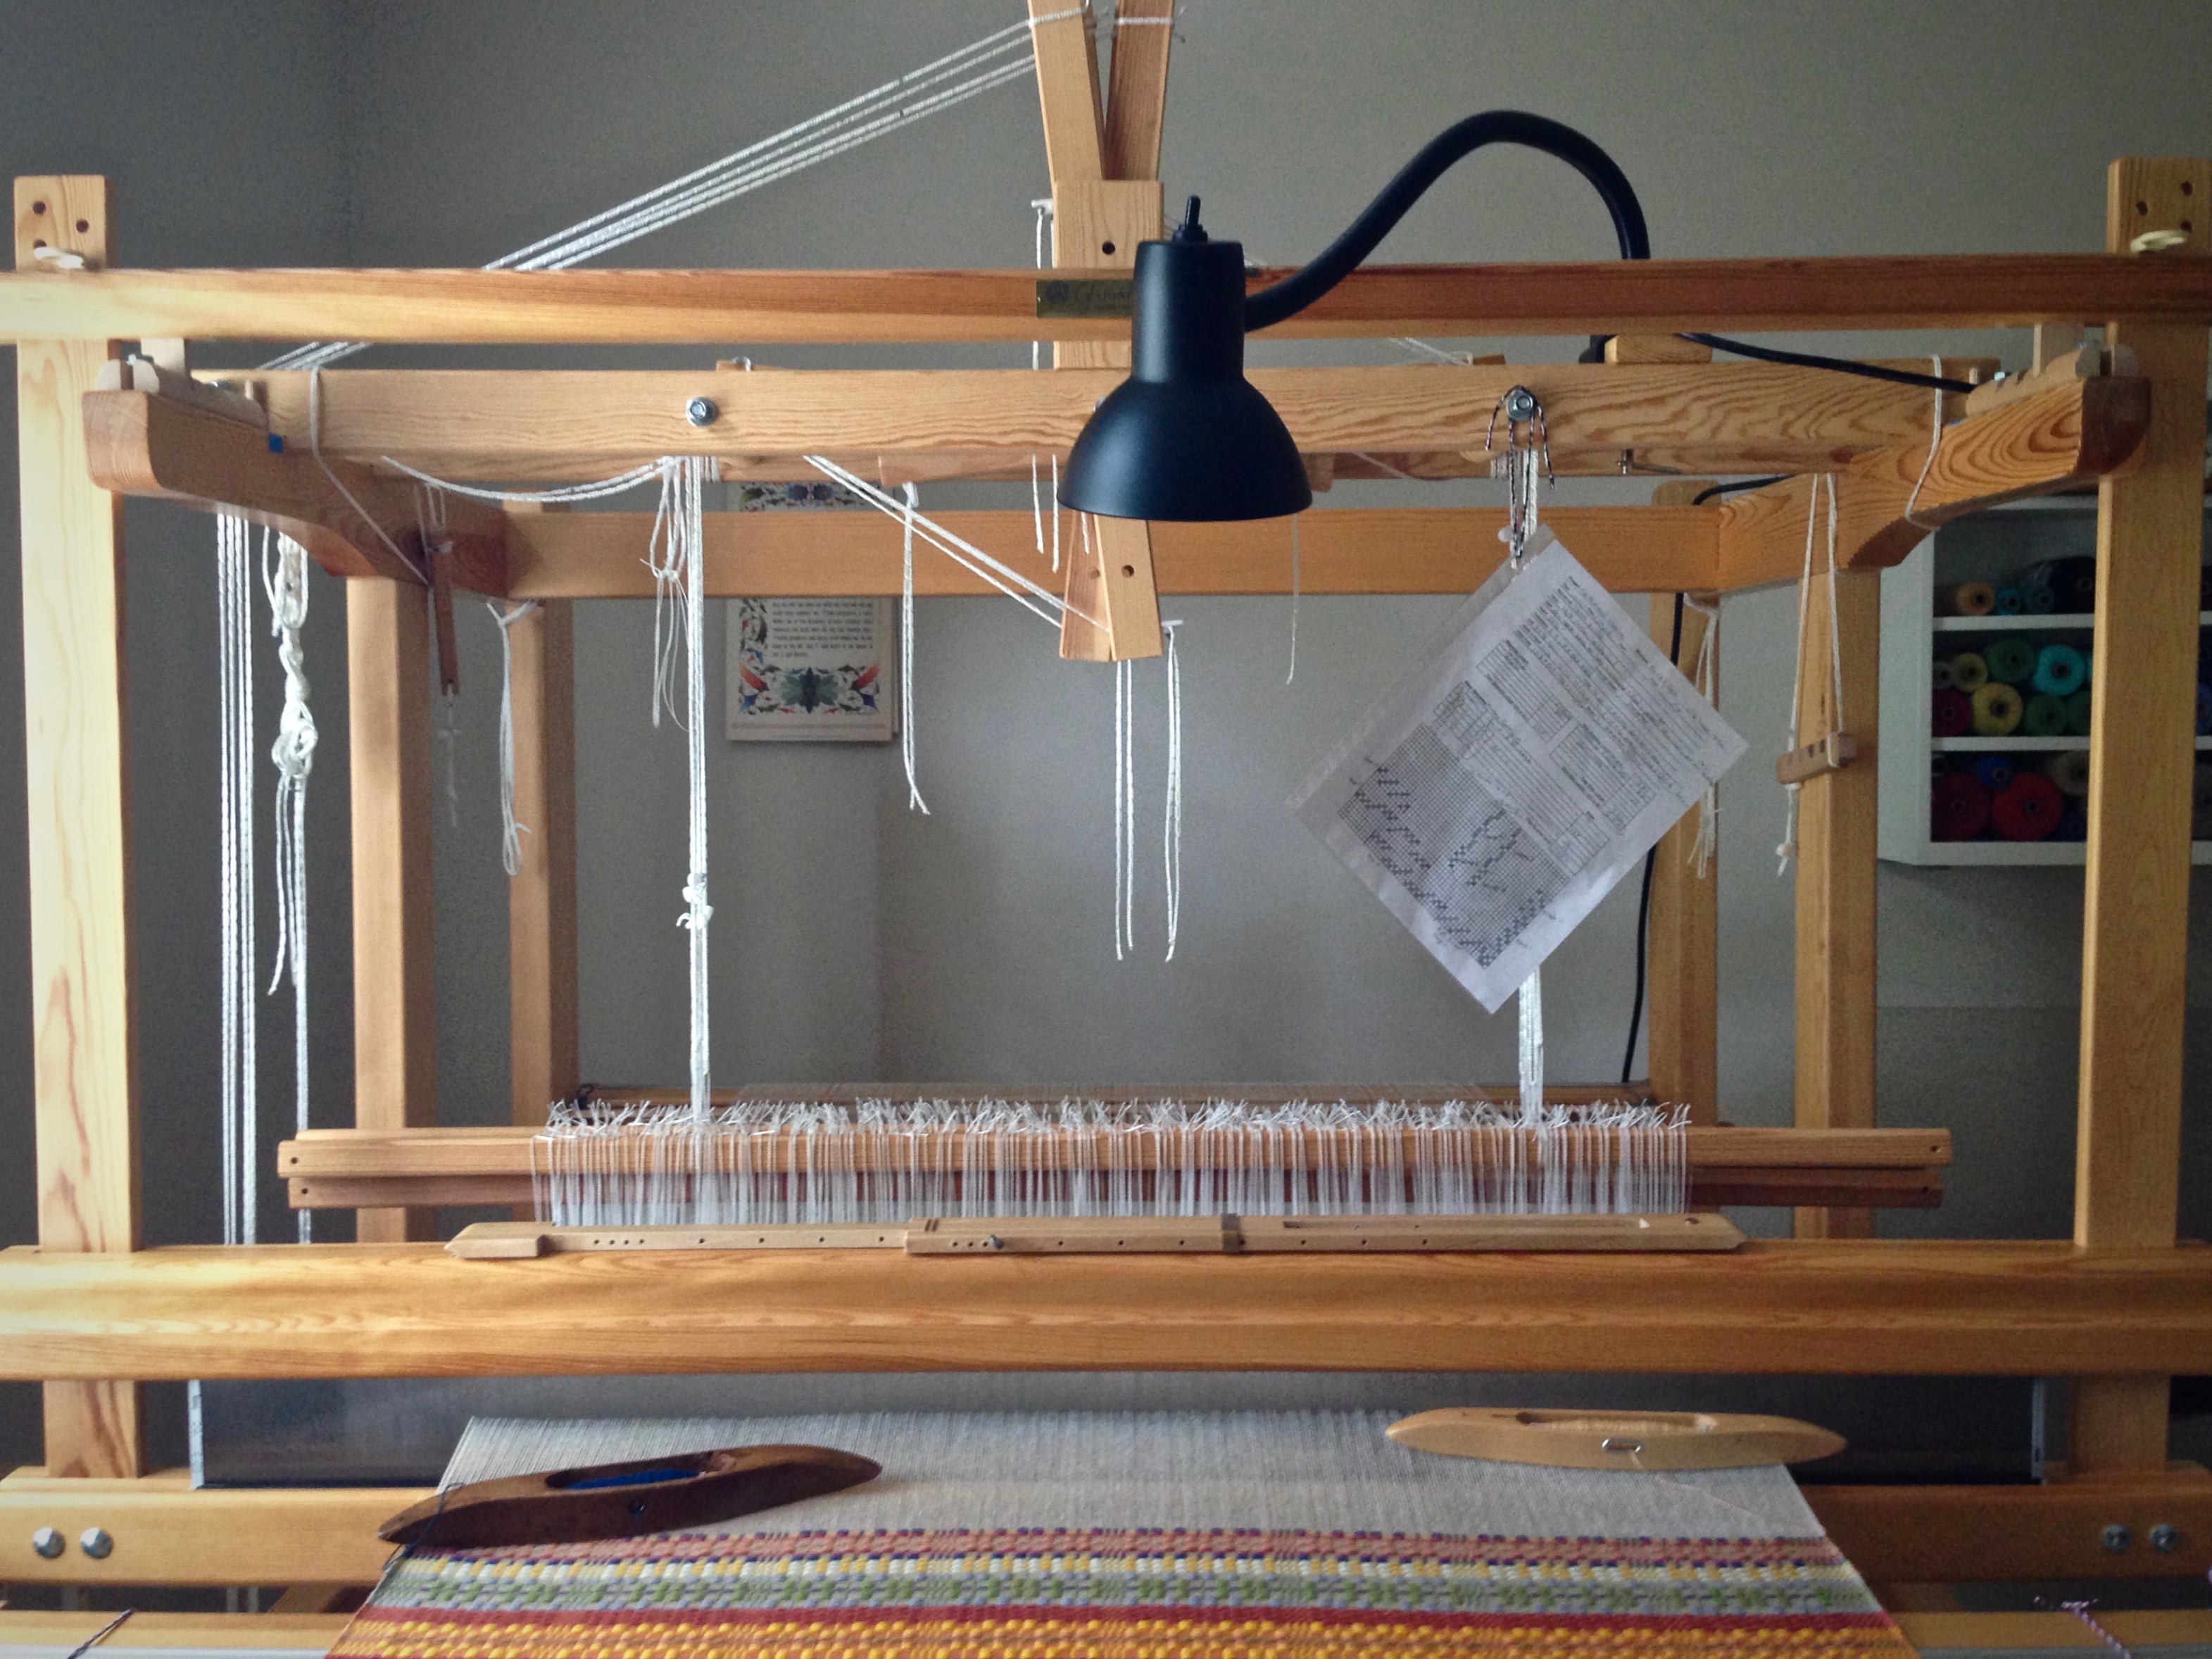
Let there be light! I now have exceptional lighting at my weaving looms. Steve installed a snake arm lamp on both of my Glimåkra looms. This wonderful illumination gives me greatly improved visibility, especially when working with fine threads. These lamps meet my lighting needs much better than the floor lamps I had been using. Good riddance, floor lamps!
Wood block, sized to fit on loom (mine is installed on the countermarch frame; 8 1/2″ x 2 3/4″ x 3/4″ for the Glimåkra Standard 8-shaft loom; 6 1/2″ x 2 3/4″ x 3/4″ for the Glimåkra Ideal 6-shaft loom)
Electric drill and pilot bit
2 drywall screws
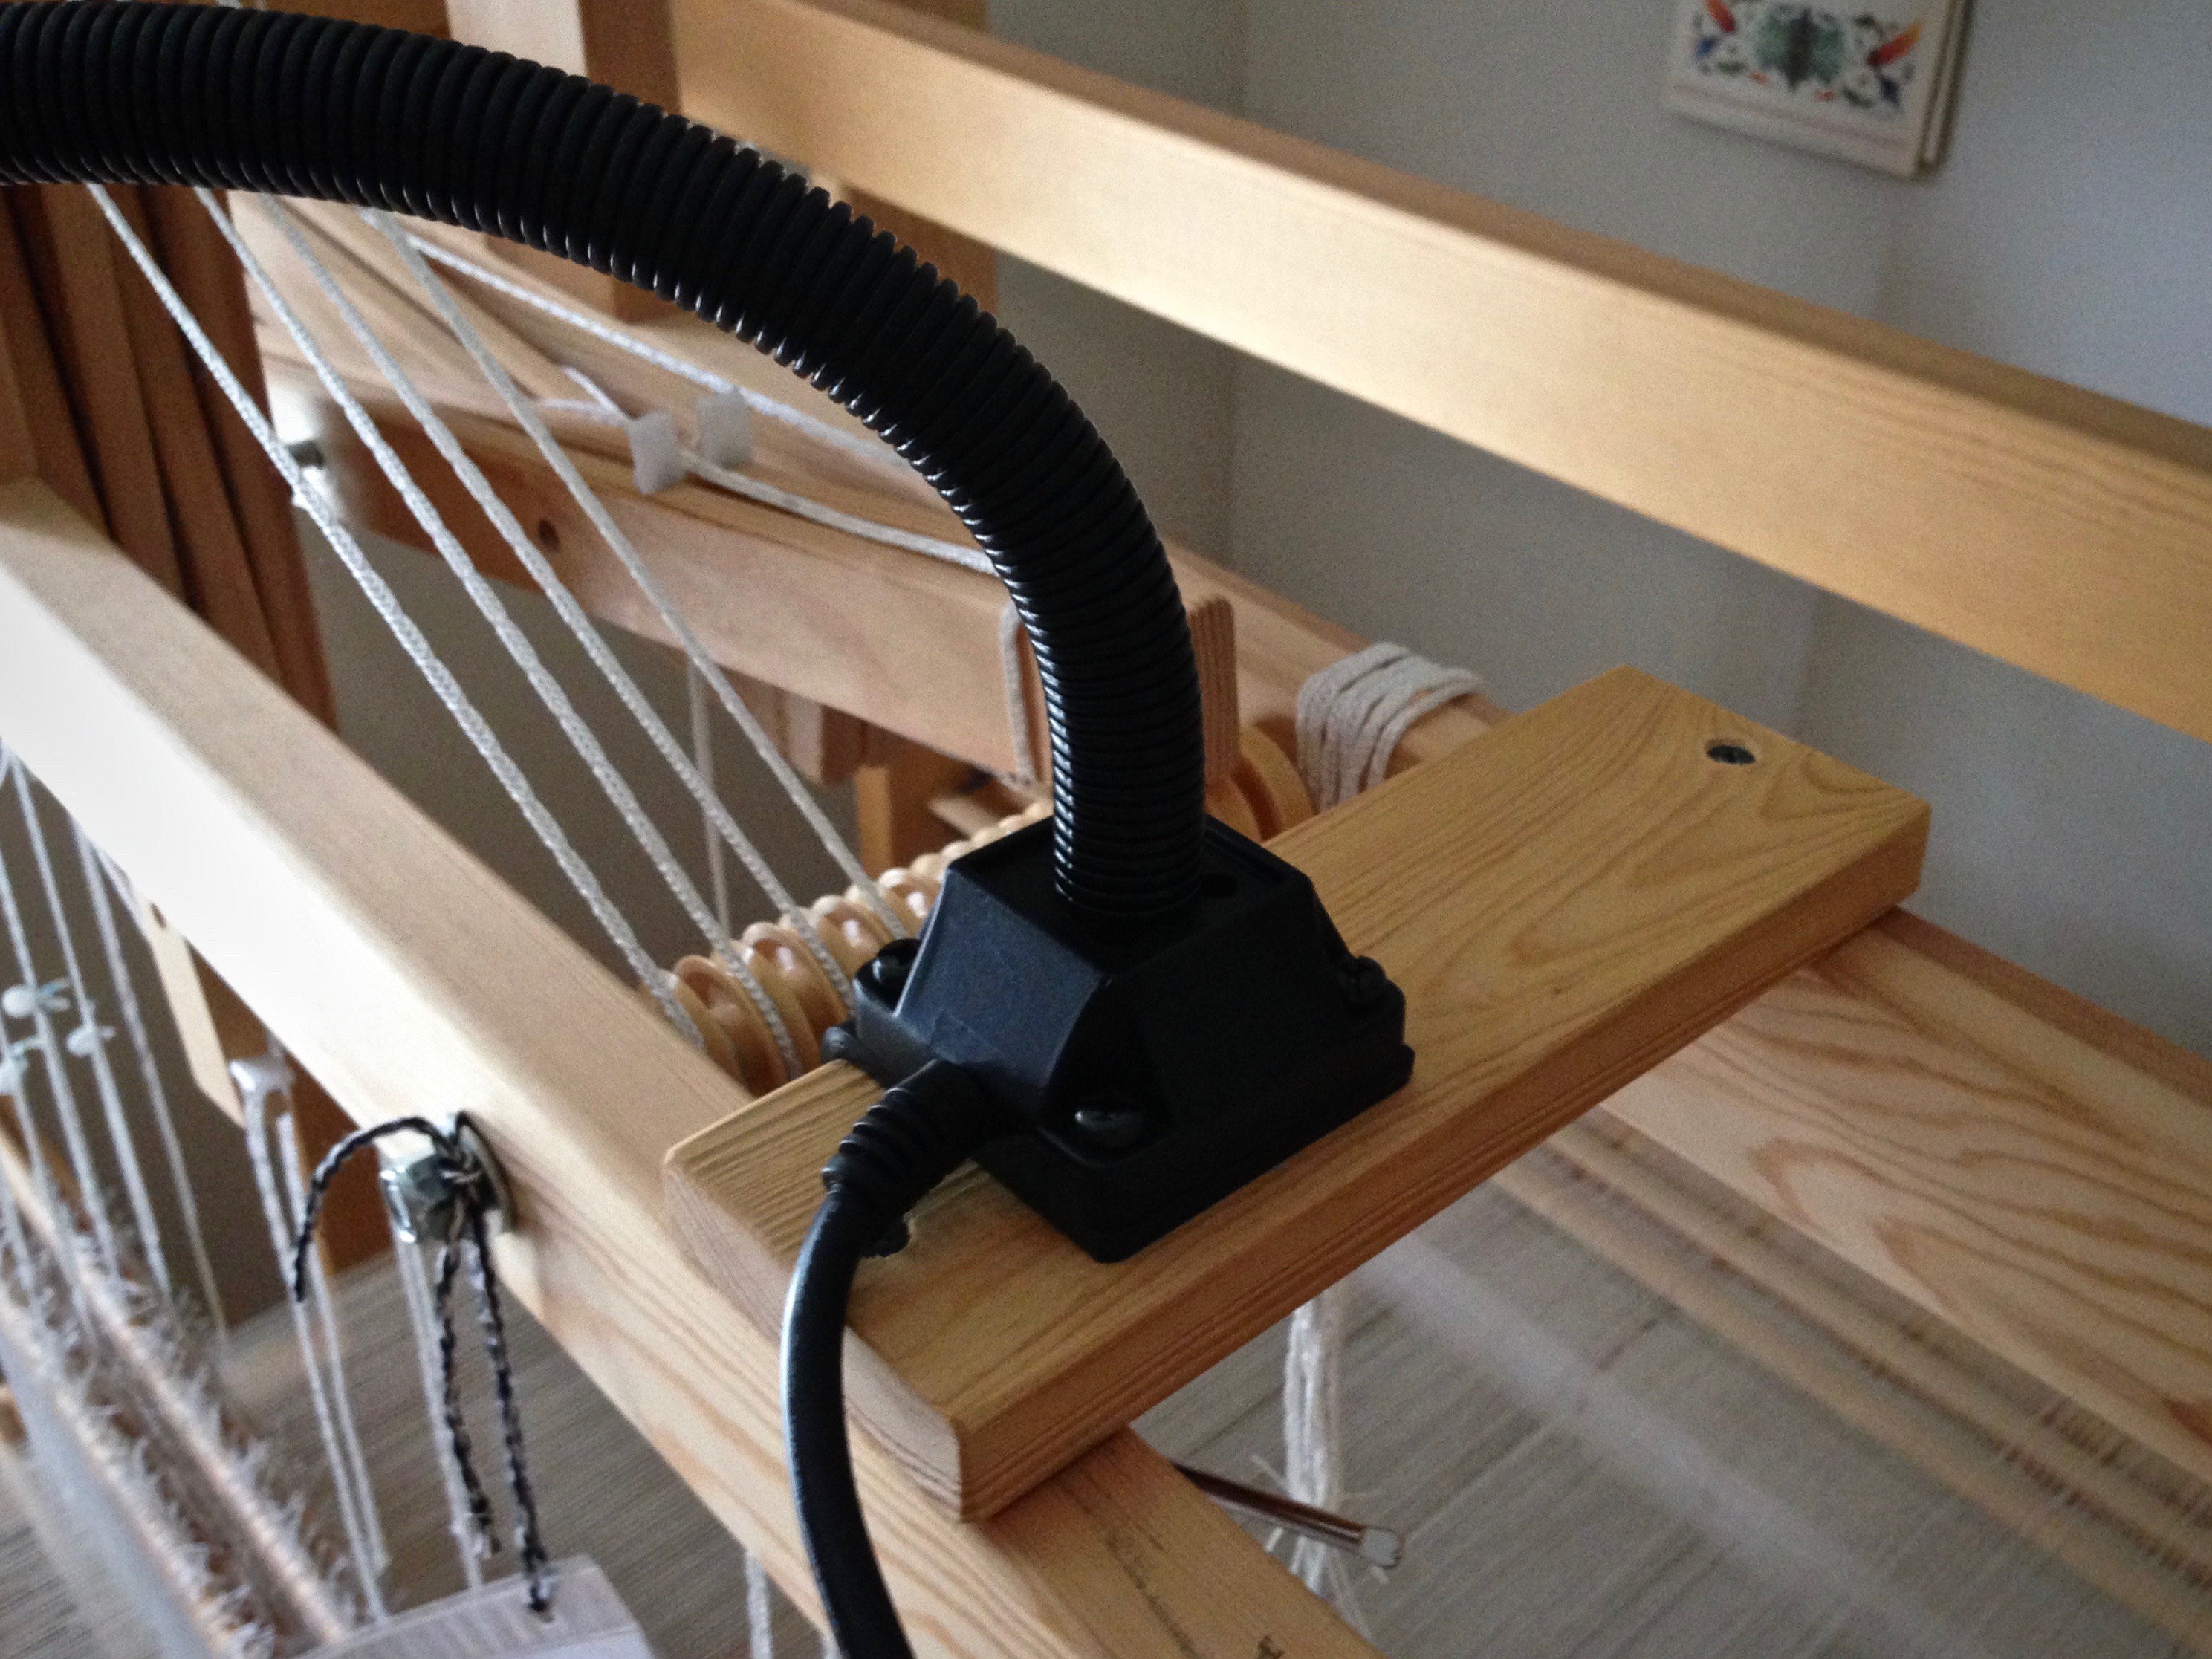
Short three-prong extension cord
Steps
Prepare wood block by drilling screw holes (screw threads slip through the holes without biting)
Position prepared wood block on loom, mark loom for screw placement
Drill pilot holes
Screw wood block in place
Block of wood is screwed into place on the Glimåkra Ideal loom countermarch frame for mounting the loom lamp.
Position lamp and clamp into place
Lamp is positioned on the mounting that is attached to the Glimåkra Standard countermarch frame.Snake arm gives flexibility for directing the light onto the weaving surface, or over the area of work; e.g., threading, sleying the reed, etc.Lamp is clamped onto the mounting. Project notes hang for easy referral while weaving. The back of the sheet shows yarn snippets used in the project.
Plug lamp cord into extension cord; plug extension cord into outlet
Simple on/off switch controls the lamp. Monksbeltpicks are easier to count with the new loom light turned on.
Illuminate!
Lamp cord runs along the frame of the loom and down to the floor, where an extension cord continues to a wall outlet.