Quiet Friday: Custom Lining for a Handwoven Bag

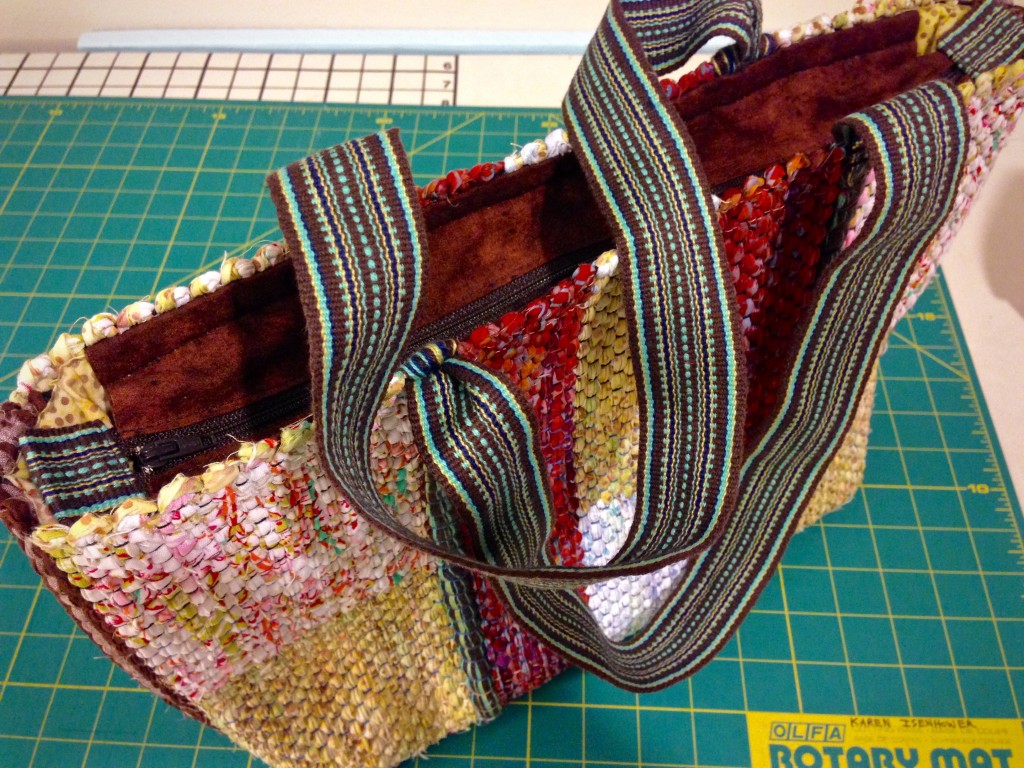
Every good bag deserves a good lining, with pockets inside and a zipper on top. This handwoven rag rug bag is no exception. The lining fabric is some of the same fabric that is woven in the bag. The polka dot pocket fabric is a cheery piece from a visit to The Philippines. The completed zippered tote is a perfect fit for my small tapestry frame, and goes with me when I travel. Quiet Friday: Weave a Bag with Handles shows how I made the bag.

How to add zippered lining to a bag.

How to Add a Custom Zippered Lining to a Bag

Tools

  • Sewing machine
  • Zipper foot
  • Walking foot (recommended, but not required)
  • Steam iron
  • Straight pins
  • Tool for pushing out corners
  • Needle and sewing thread
  • Disappearing ink fabric marker
  • Fabric scissors

Supplies

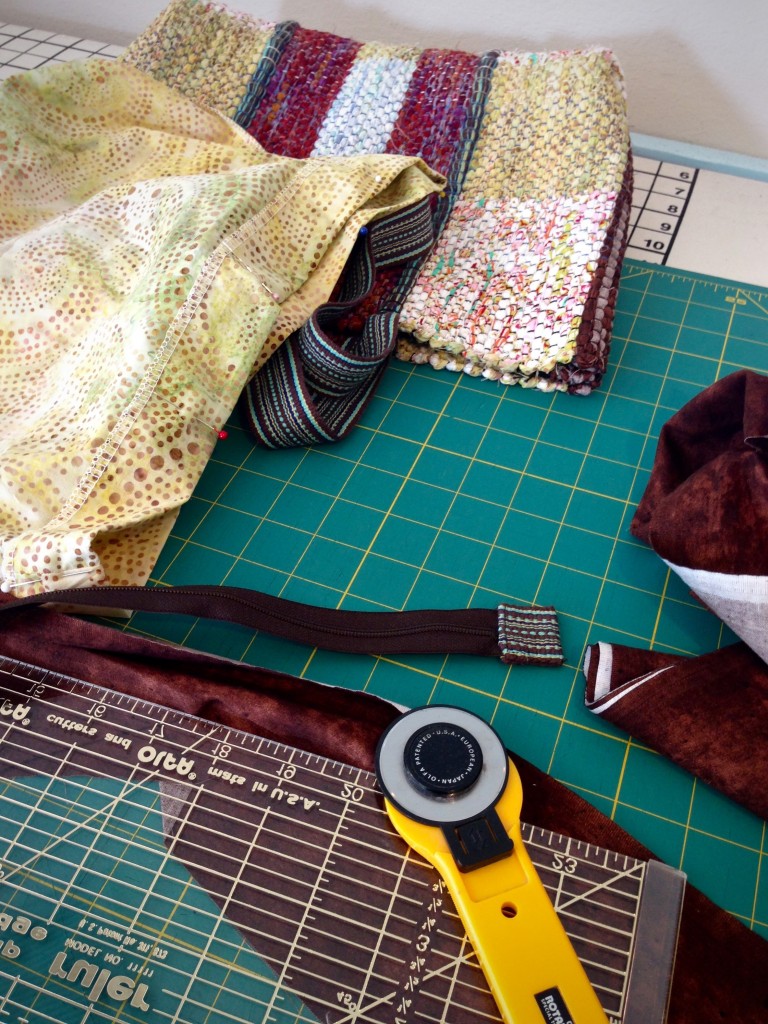
  • Fabric for lining. Lay bag on top of folded lining fabric, with bottom of bag aligned with the fold of the lining fabric. Cut the folded fabric a generous 1 1/2″ wider and 1 1/2″ taller than the bag.
  • Fabric for pocket. Mark two pieces of fabric (or use a folded piece of fabric) the desired pocket size. Add 1/4″ seam allowance. Cut along the marked lines. Stitch, right sides together, leaving an opening for turning. Turn right side out, pushing out corners. Press. Topstitch all four sides.
  • Fabric for zipper insert pieces. Cut two pieces of fabric 4 1/2″ wide by the length of the zipper plus 1″.
  • Tabs for ends of zipper tape. Cut from handwoven band or piece of fabric with sides folded under.
  • Zipper. Regular, non-separating zipper, as long as, or longer than, bag opening

Steps

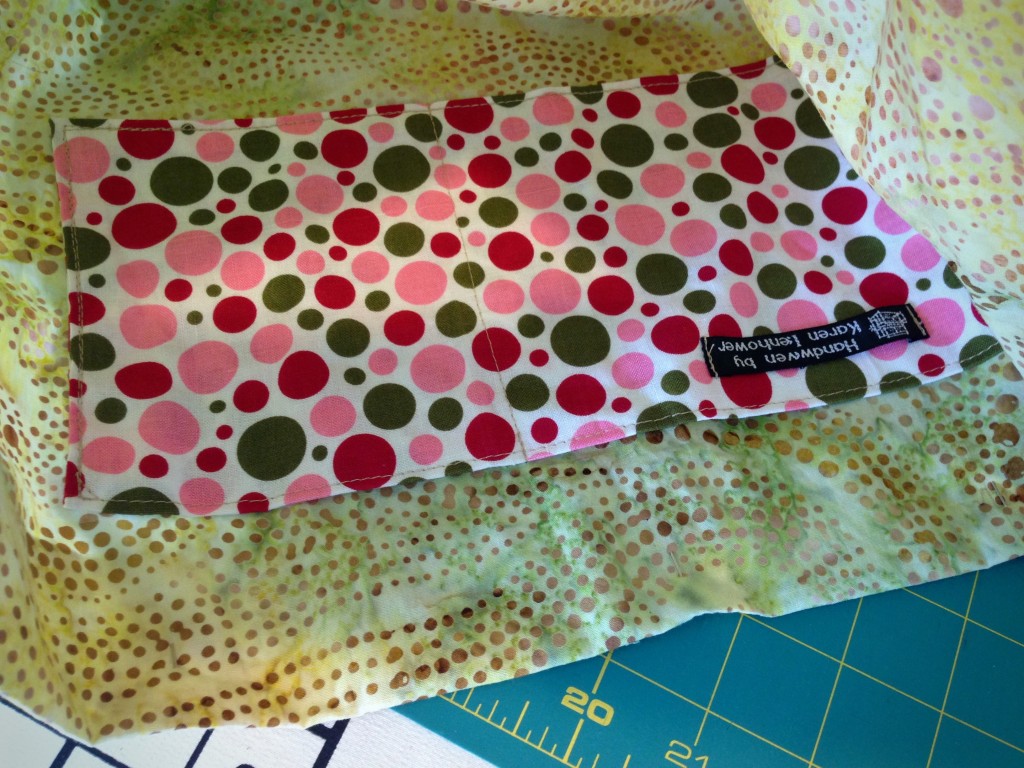
  1. Sew bottom three sides of pocket onto lining fabric. Stitch a dividing line on pocket.Adding pocket to lining for bag.
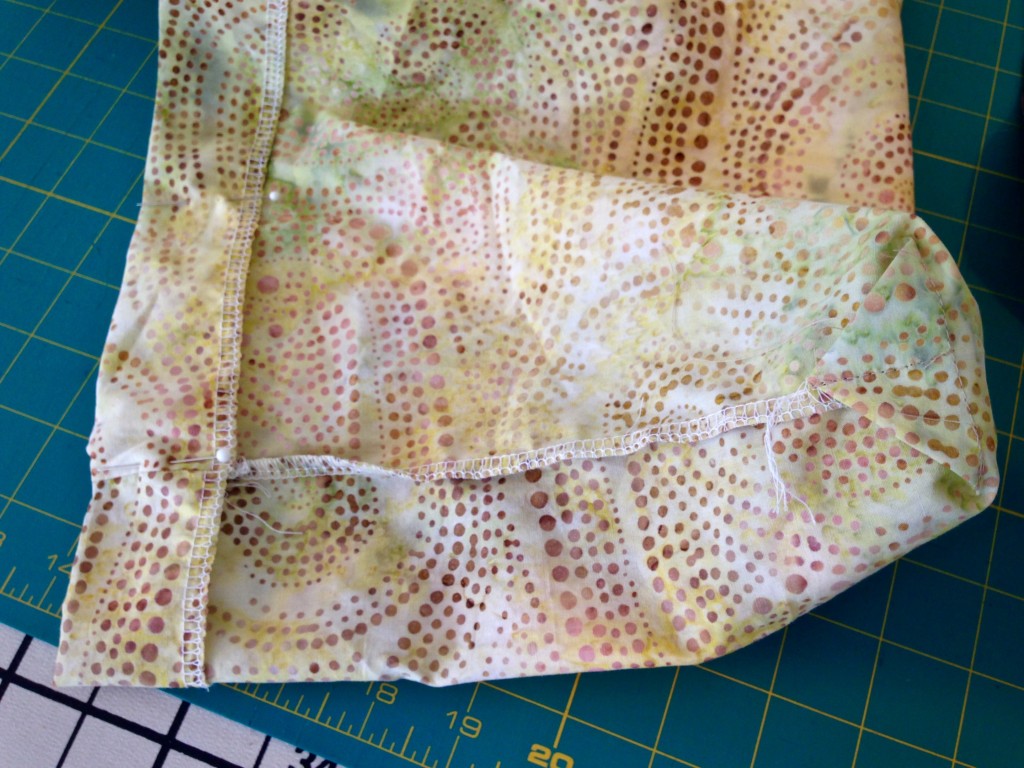
  2. Stitch sides of lining, right sides together. Fold and stitch box corners.Box corners on lining for a bag.
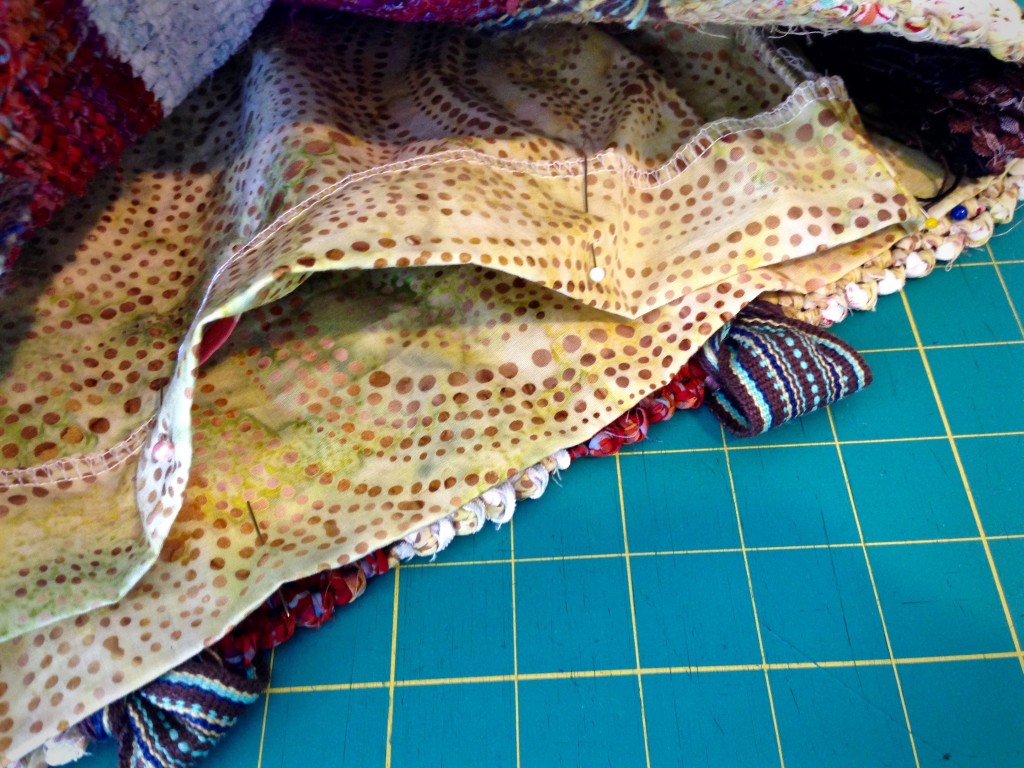
  3. With lining seated in bag, fold down top edge of lining, so that folded edge fits just inside top edge of bag. Pin folded edge of lining and remove from bag. Set aside. Fitting lining for a handwoven bag.
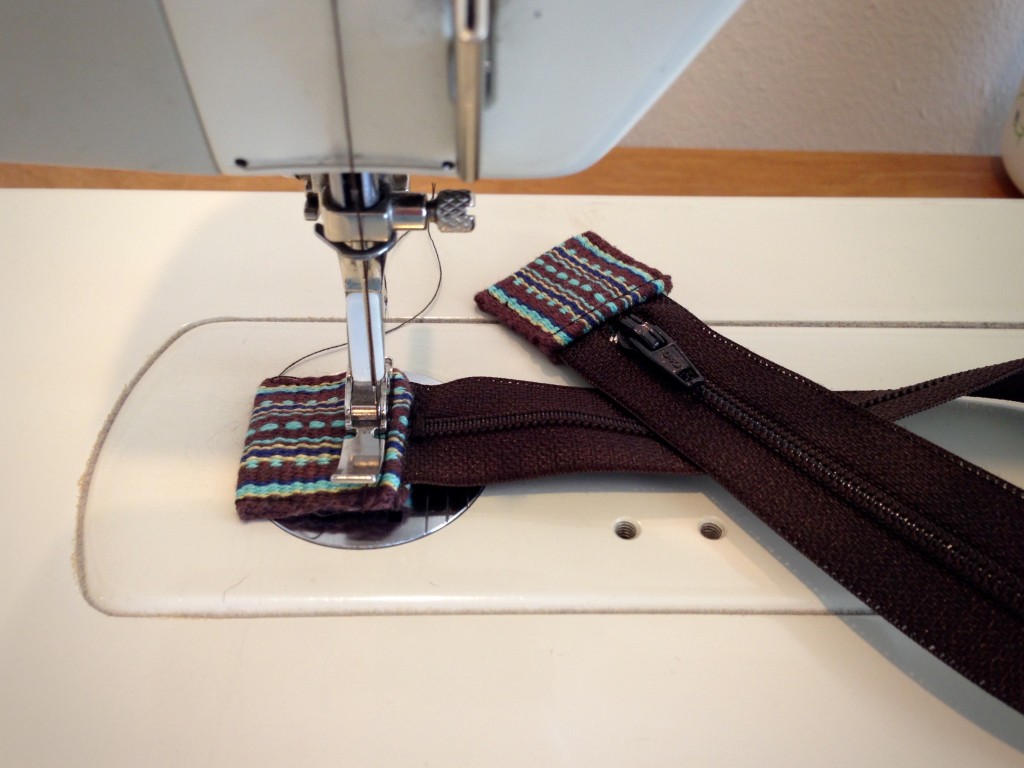
  4. Bar tack top ends of zipper tape together. Bar tack over end of desired zipper length. Cut off excess. Cut a tab from a woven band, or from fabric with sides folded in, to fold over each end of zipper tape. Use zipper foot to stitch tabs over zipper tape ends. Preparing zipper to add to bag.
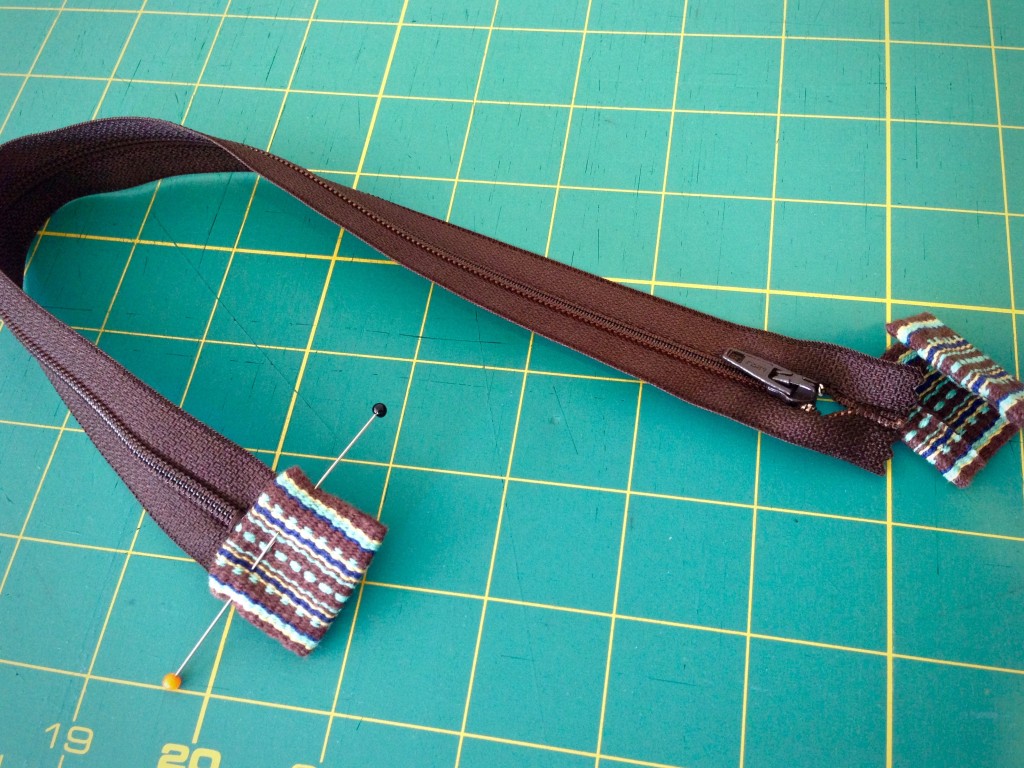
    Handwoven tabs for ends of zipper tape.
  5. For zipper insert, cut two pieces of complementary fabric 4 1/2″ wide by the length of the zipper, plus 1″. Making zipper insert for top of bag. Tutorial with pics.
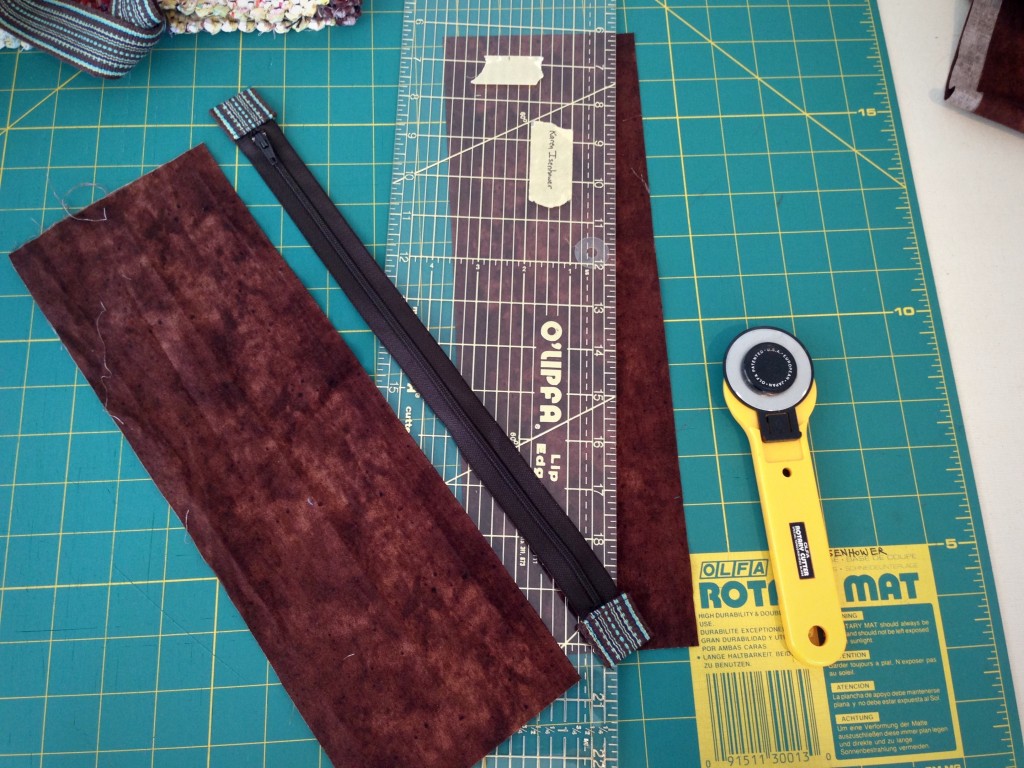
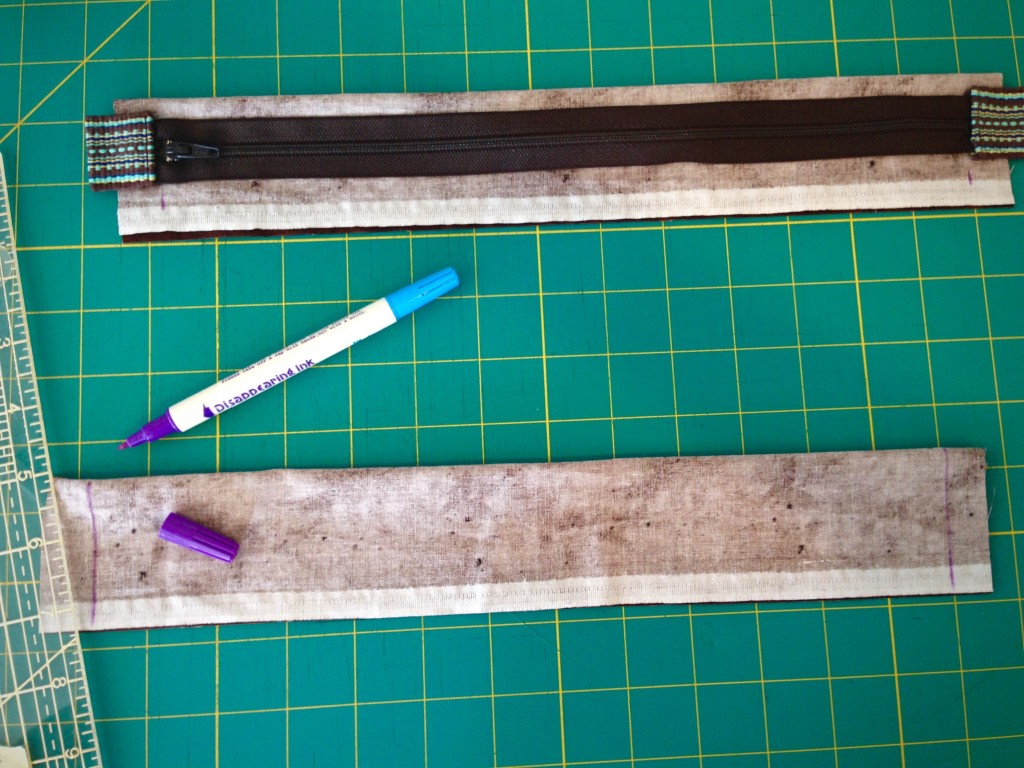
  6. Fold each zipper insert piece lengthwise in half, right sides together. Draw stitching line that matches length of zipper. Zipper insert for top of bag. Tutorial.
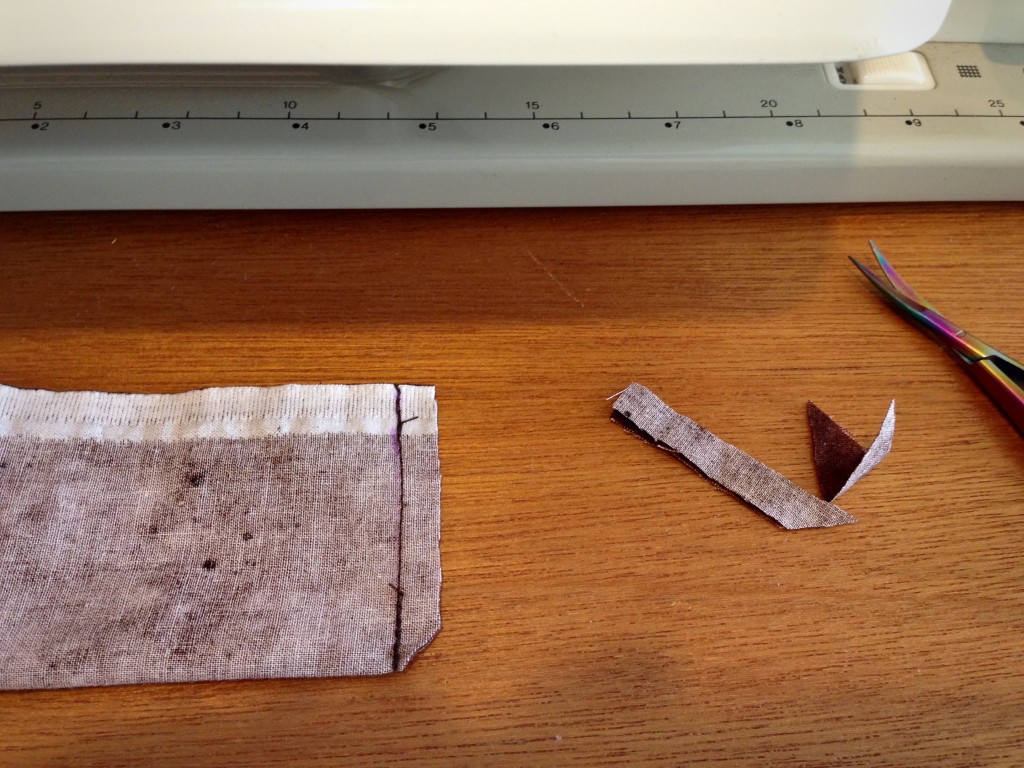
  7. Stitch both short ends of zipper insert pieces. Clip corners and trim seams. Making zipper insert for top of bag.
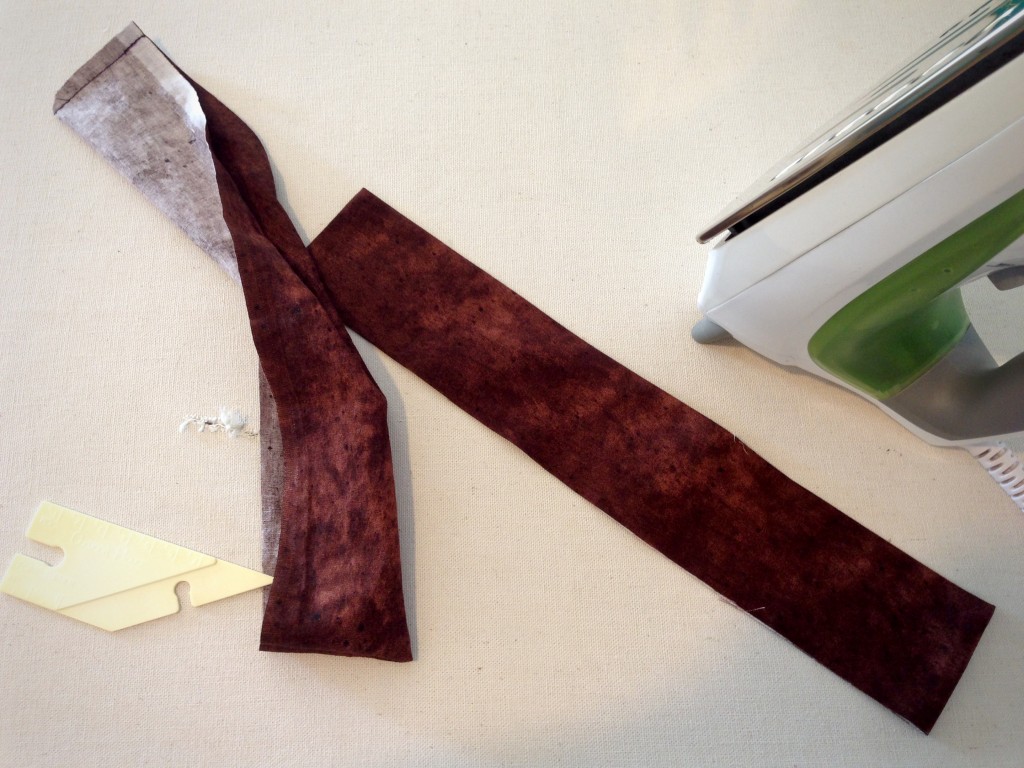
  8. Turn zipper insert pieces right side out. Push corners out. Press. Making zipper insert for top of bag.
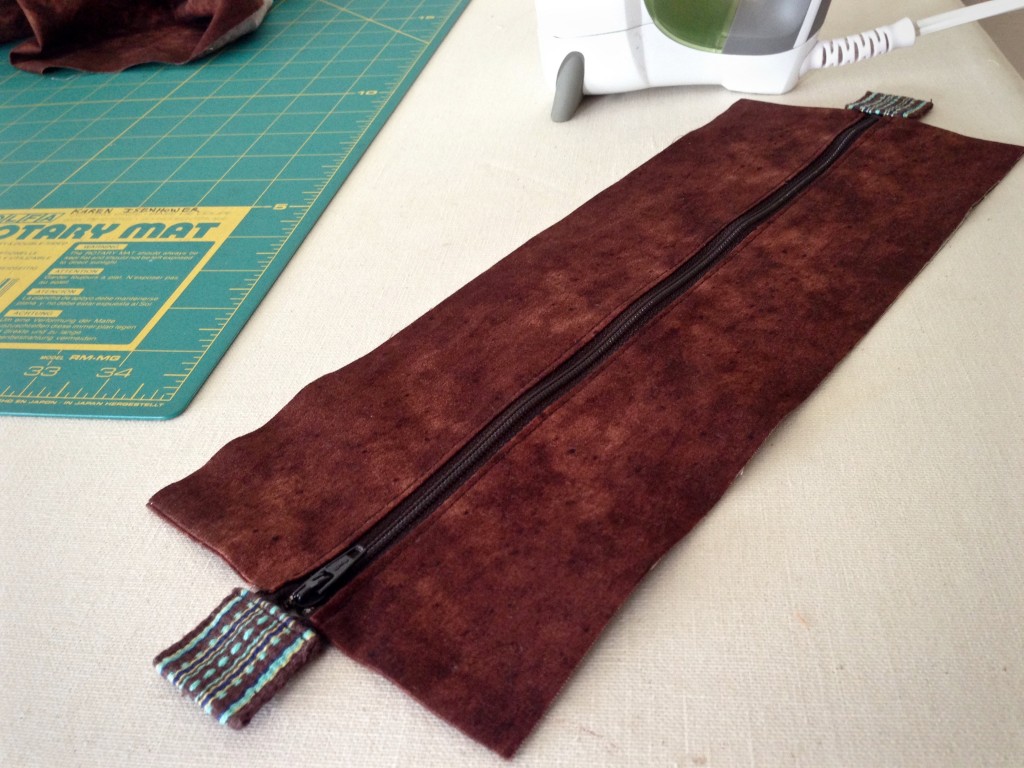
  9. Pin folded edge of zipper insert fabric to right side of zipper tape, centered lengthwise, 1/8″ away from zipper teeth. Open zipper partway. With zipper foot, starting at top end of zipper, topstitch close to folded edge. After stitching a third of the way, with needle down, close zipper, and then continue topstitching to bottom of zipper. Repeat for other side of zipper insert. Press. Making zippered lining for handwoven bag. Tutorial.
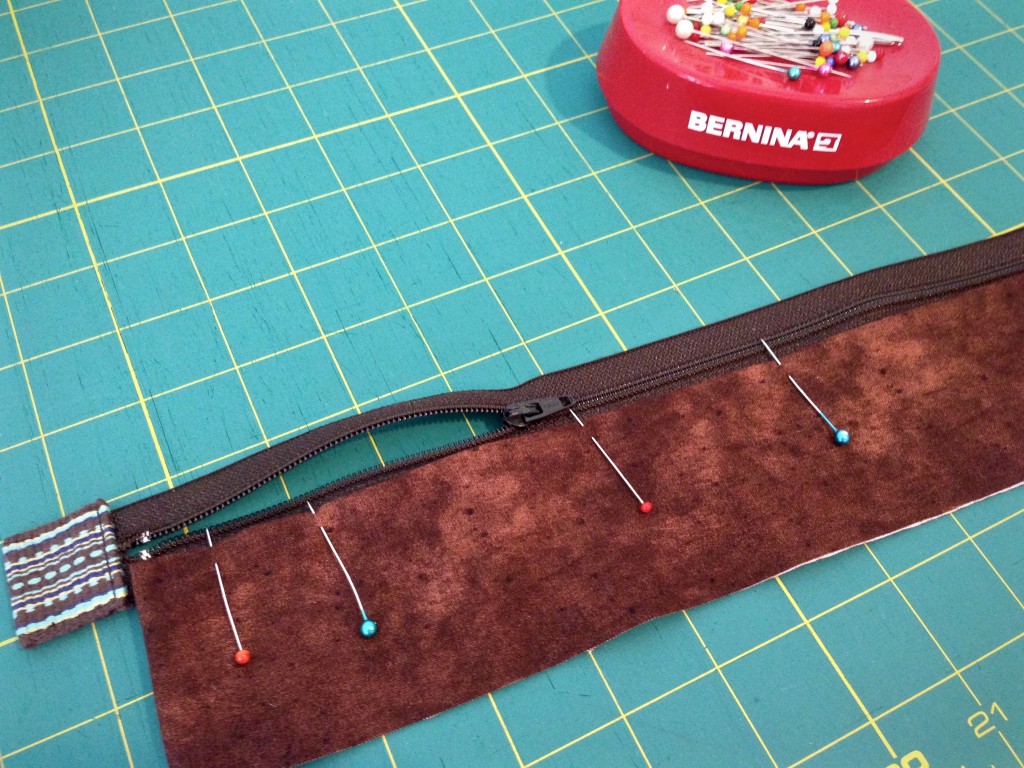
    Adding zippered top to handwoven bag.
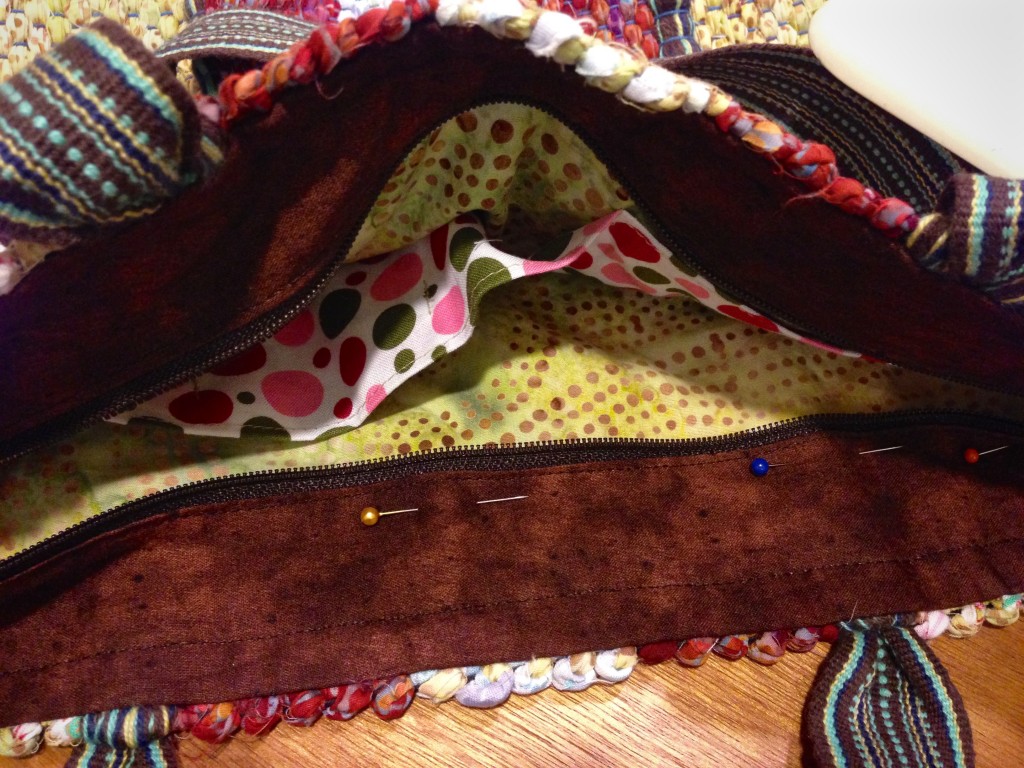
  10. With zipper opened, and zipper tab down (picture shows zipper tab up, after having pinned both sides), center and pin one side of zipper insert under one side of folded top edge of lining, so that lining overlaps insert 1/2″. Repeat with other side of zipper insert and lining. Making zippered lining for handwoven bag. How to pics.
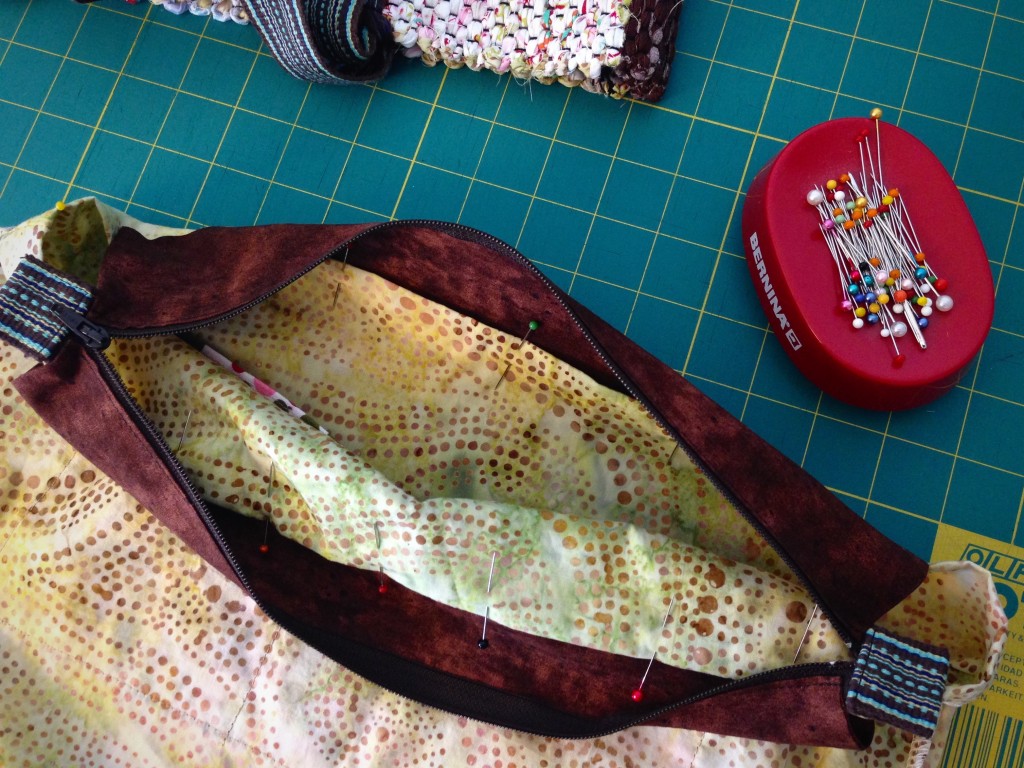
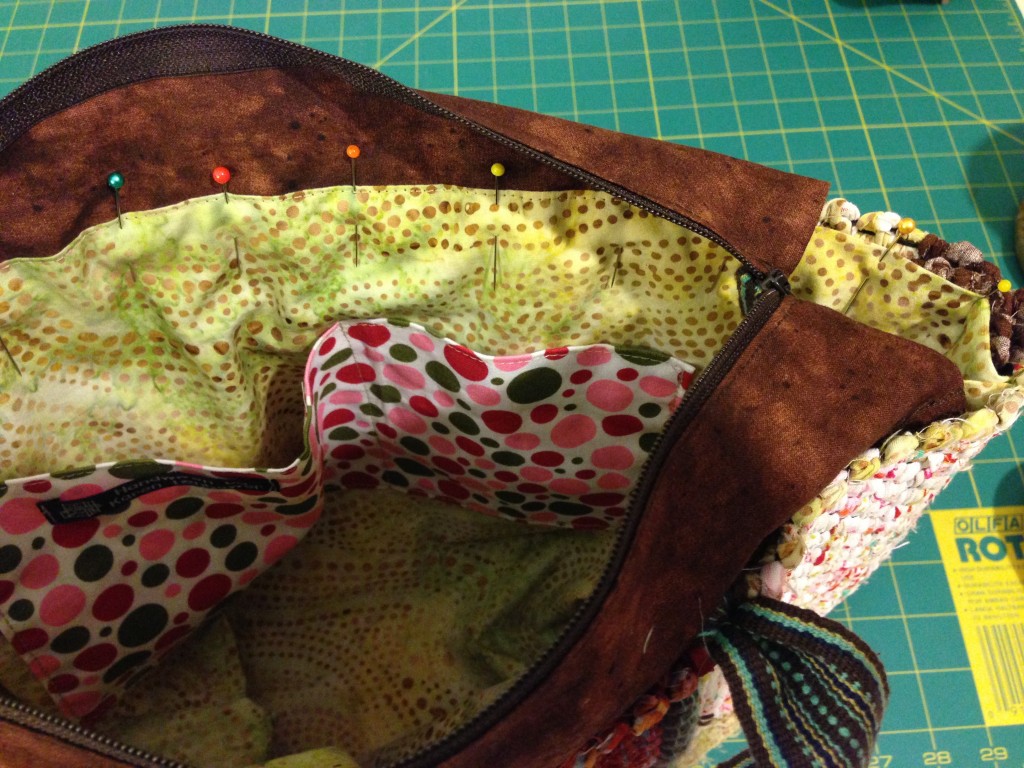
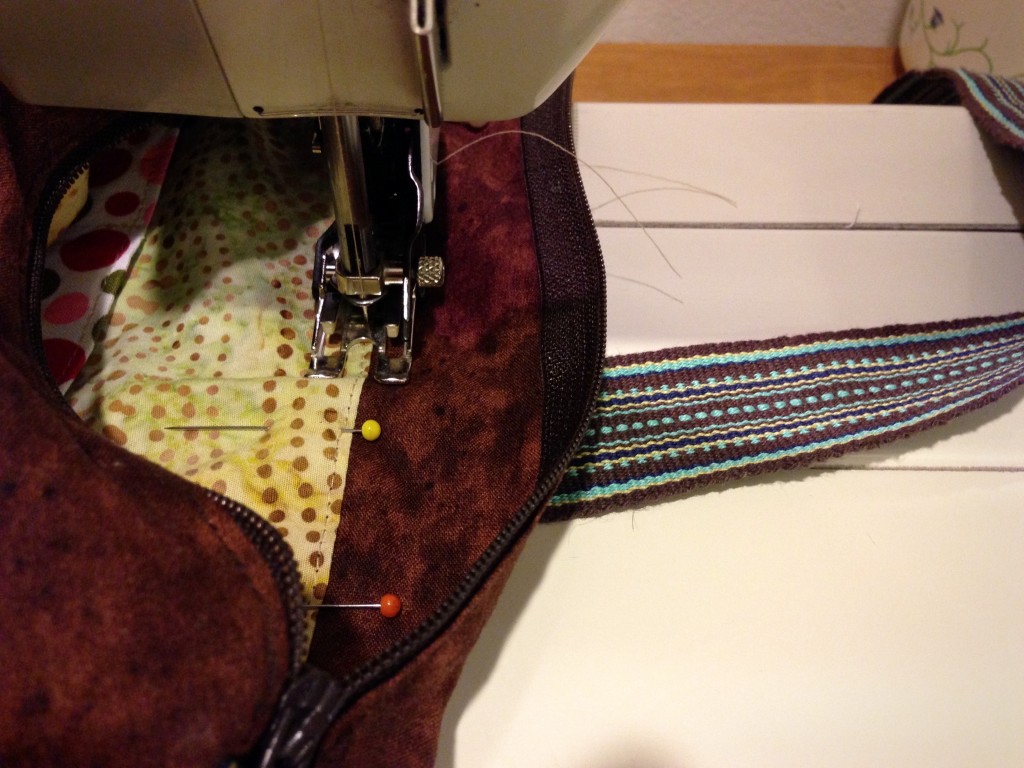
  11. Insert lining into bag, matching side seams and mid points on bag and lining, with top folded edge of lining 1/4″ below top edge of bag. (Edge of zipper insert is sandwiched between lining fold and bag.) Make sure bag handles are up and out of the way of stitching. From inside of bag, use walking foot to stitch 1/8″ from lining fold, all the way around top of lining, keeping zipper insert up and out of the way of stitching. (Walking foot helps ensure even feed of fabric layers.) Adding zippered lining to handwoven bag. Instructions.
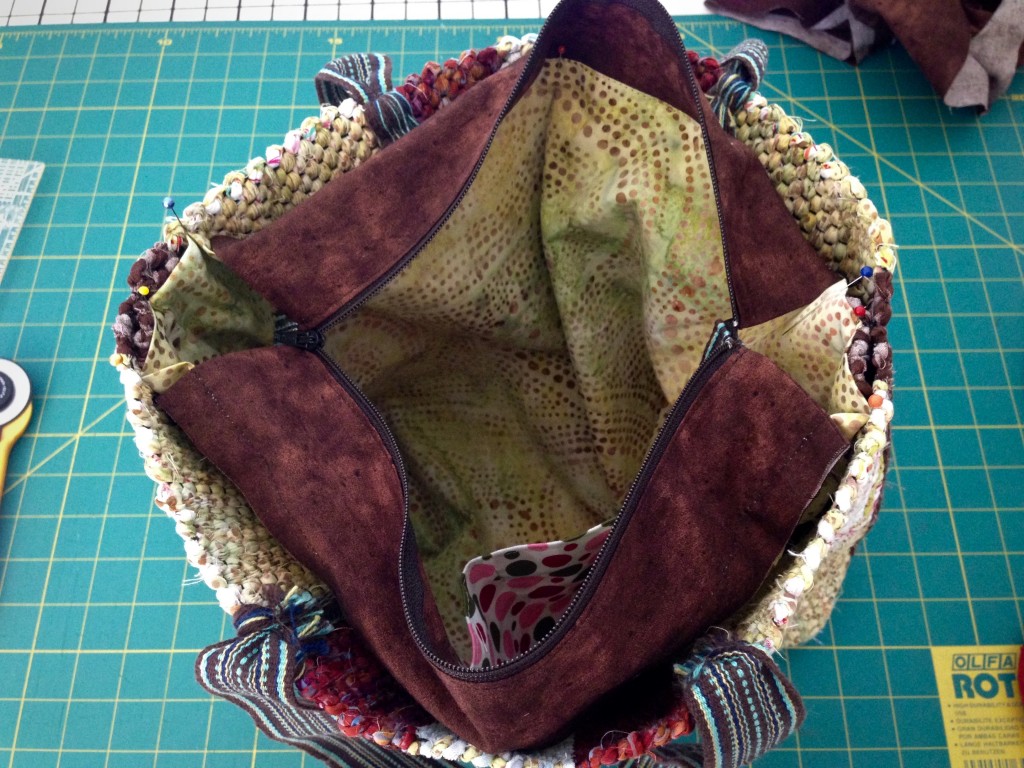
    Pinning lining into handmade bag. Instructions.
    Sewing lining into Handmade bag. How to.
  12. Fold zipper inserts down into bag. Press. Stitch across zipper inserts 1/2″ below top of lining on inside of bag. Press again.Last step of tutorial for inserting lining in bag.

Give your new bag a special purpose.

Handwoven bag with custom lining. Karen Isenhower

May your lining on the inside be as attractive as your handbag on the outside.

Happy Creating,
Karen

Tools Day: Tapestry Frame on Display

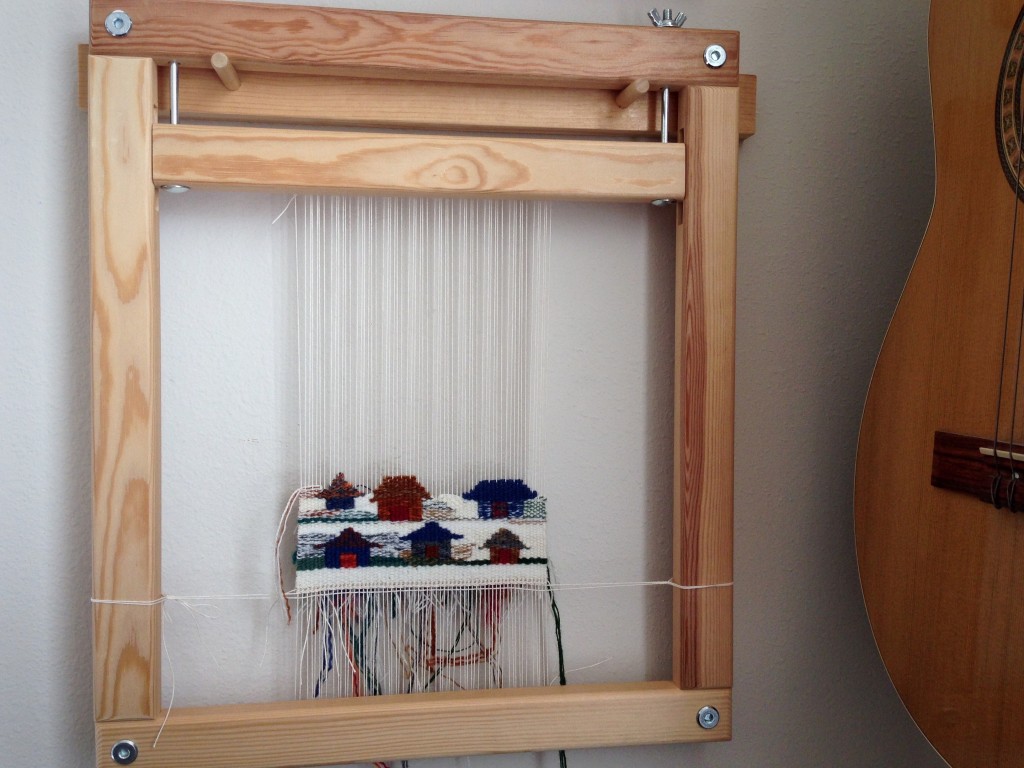
There is nothing that hinders cello practice more than a good old cello case. Out of sight; out of mind. Many years ago I discovered that if my cello sits out in the open on a cello stand in the corner of the room, I am much more likely to practice. The same is true of weaving on my tapestry frame. By hanging the tapestry frame in a corner of our living room, I have a continual reminder to weave. And we get to enjoy a living piece of artwork in the room–artwork that grows a little each day.

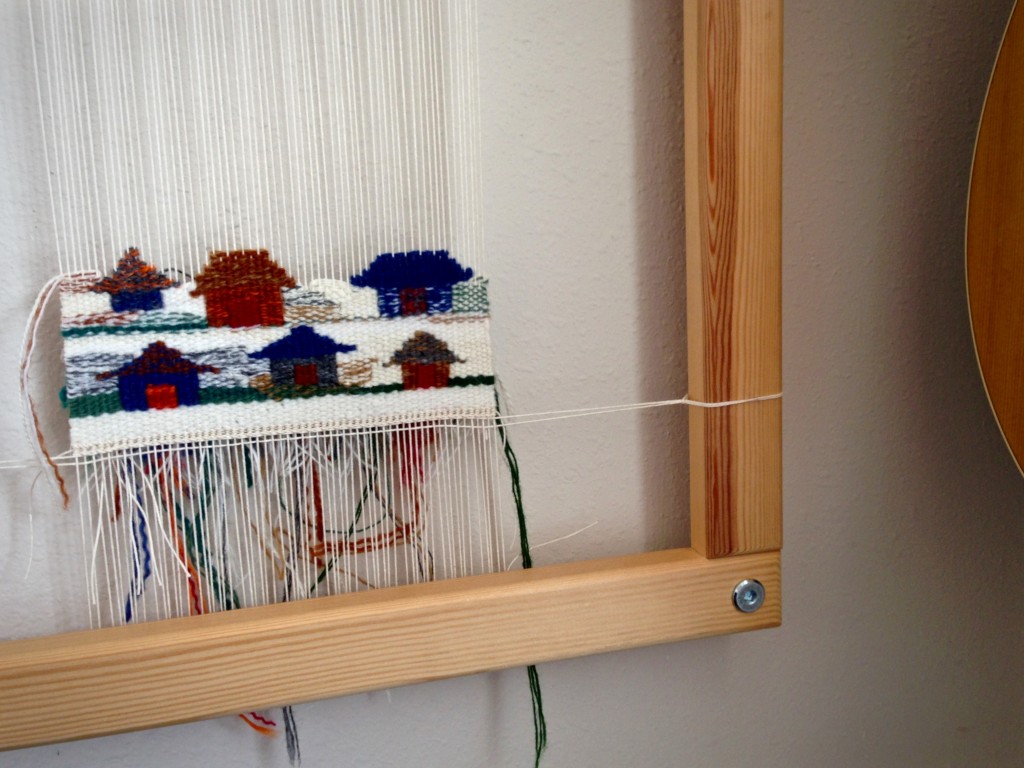
Tapestry diary of little houses.

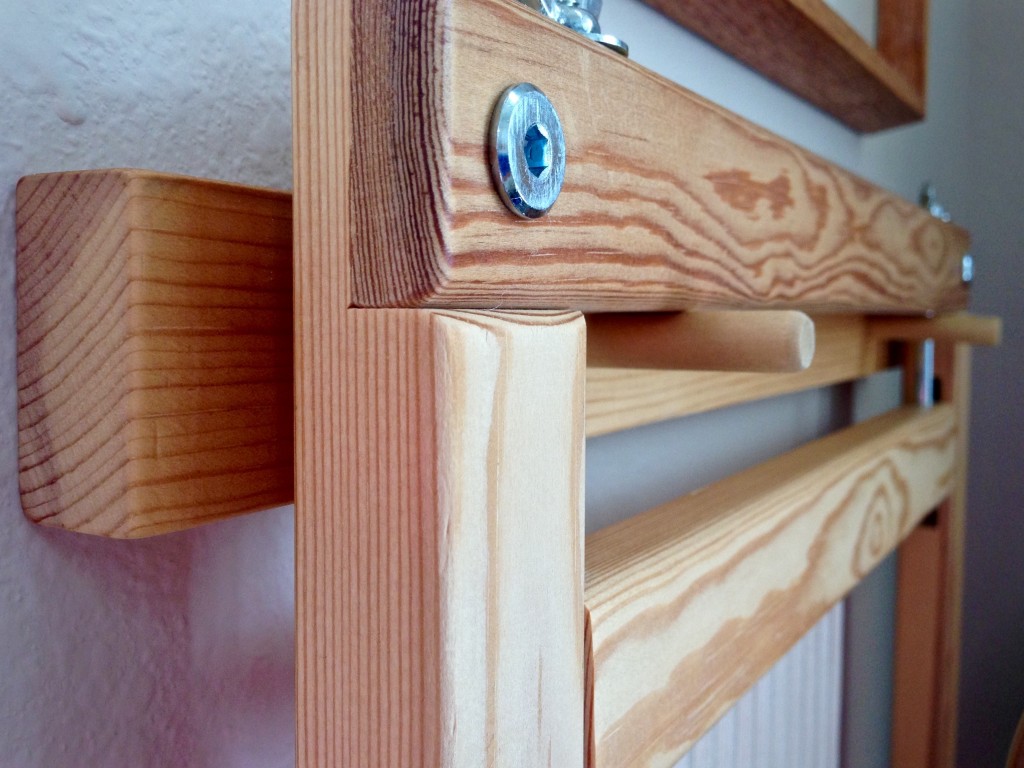
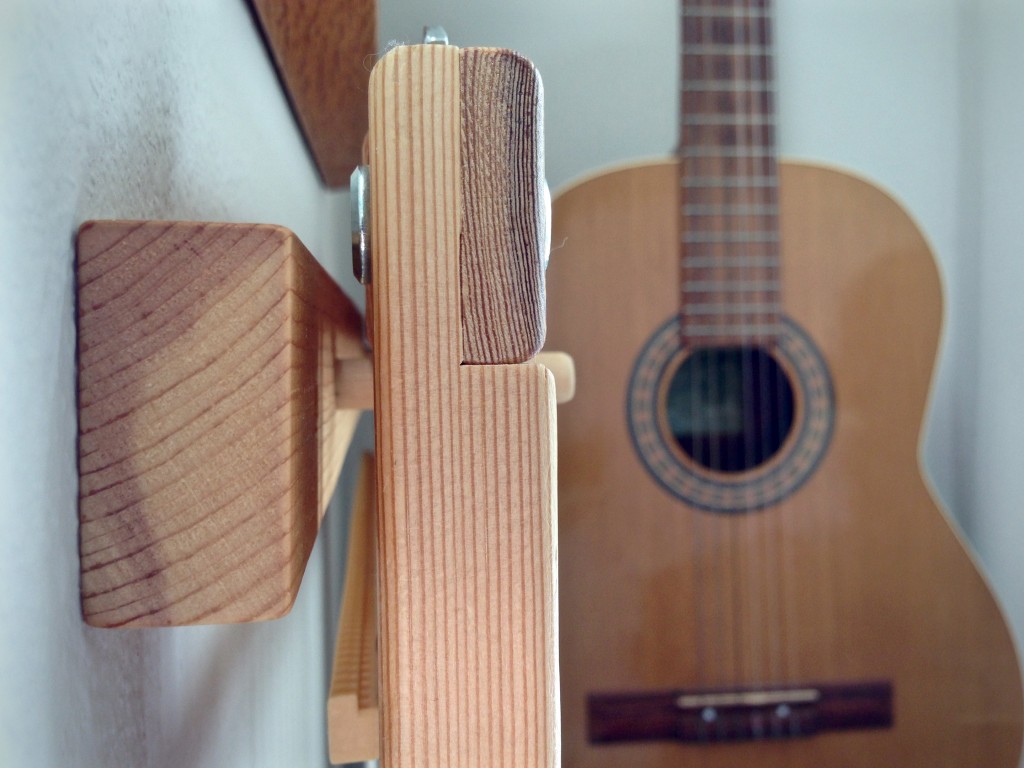
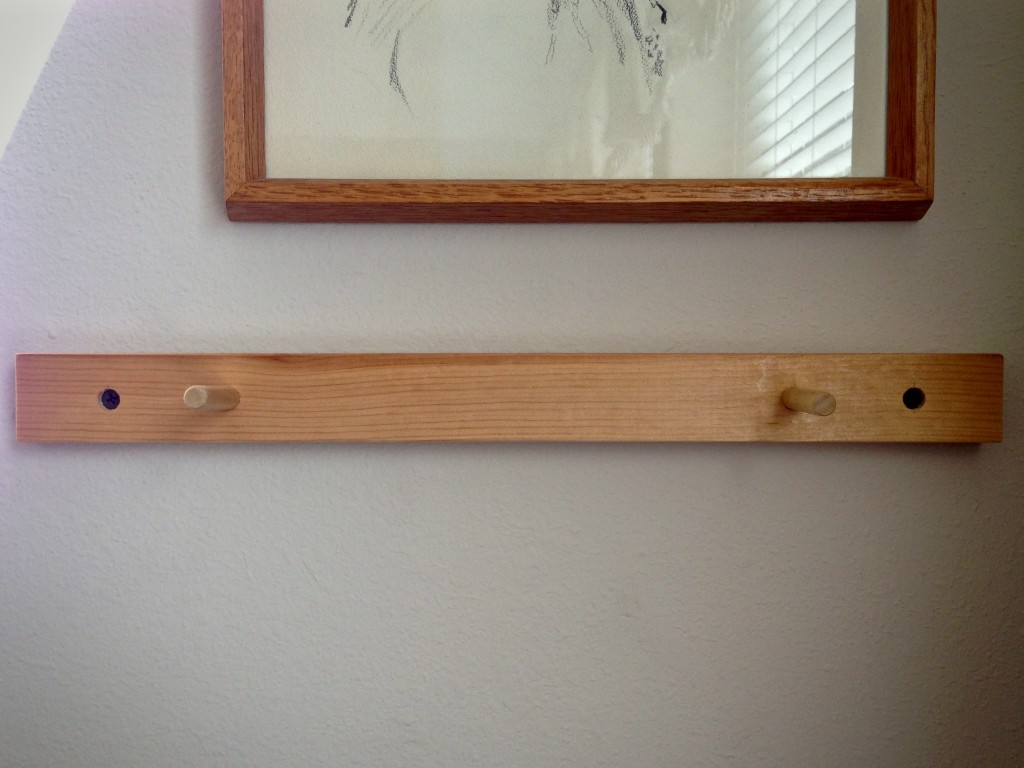
Steve made this simple holder for my tapestry frame. The 3/4″ x 1 1/2″ (2 cm x 4 cm) pine has two dowels, and is fastened to the wall with countersunk screws. The holder practically disappears behind the tapestry that it puts on display.

Pine holder for small Freja tapestry frame.
Pine board has two dowels on which to set the tapestry frame.
Tapestry frame holder.
Accessibility is the secret to daily tapestry practice. To prevent the tapestry frame from being accidentally knocked off its holder, it is placed in a corner of the room that is not in a walkway.
Super simple tapestry frame holder.
Tapestry frame holder is attached to the wall with two countersunk screws.
Small tapestry diary of little houses.
Tapestry diary for July is a village of little houses.

May you have reminders to practice your art.

In progress,
Karen

Tools Day: Color Wrapping

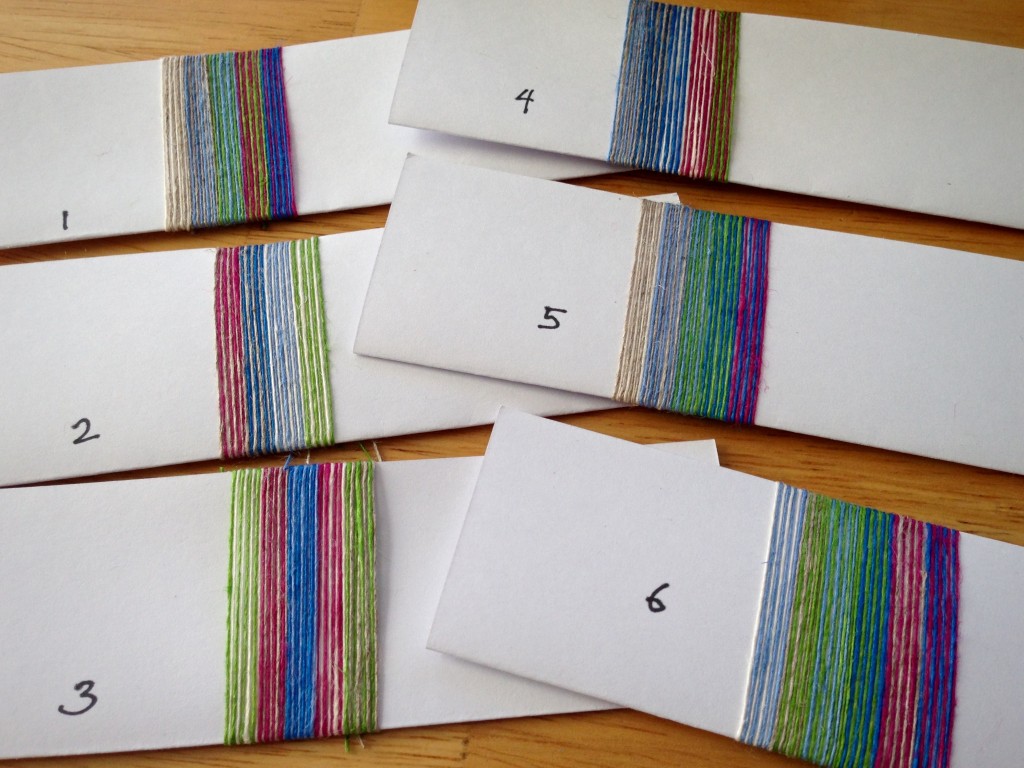
Linen singles line up for a new warp to make lace weave scarves. I have only one tube of each color. This makes an interesting challenge, since I wind warps with two threads together. Adding to the challenge, I am requiring myself to use all six colors. How will the colors behave with each other? What order should I put them in? Color wrapping is a fun way to find answers.

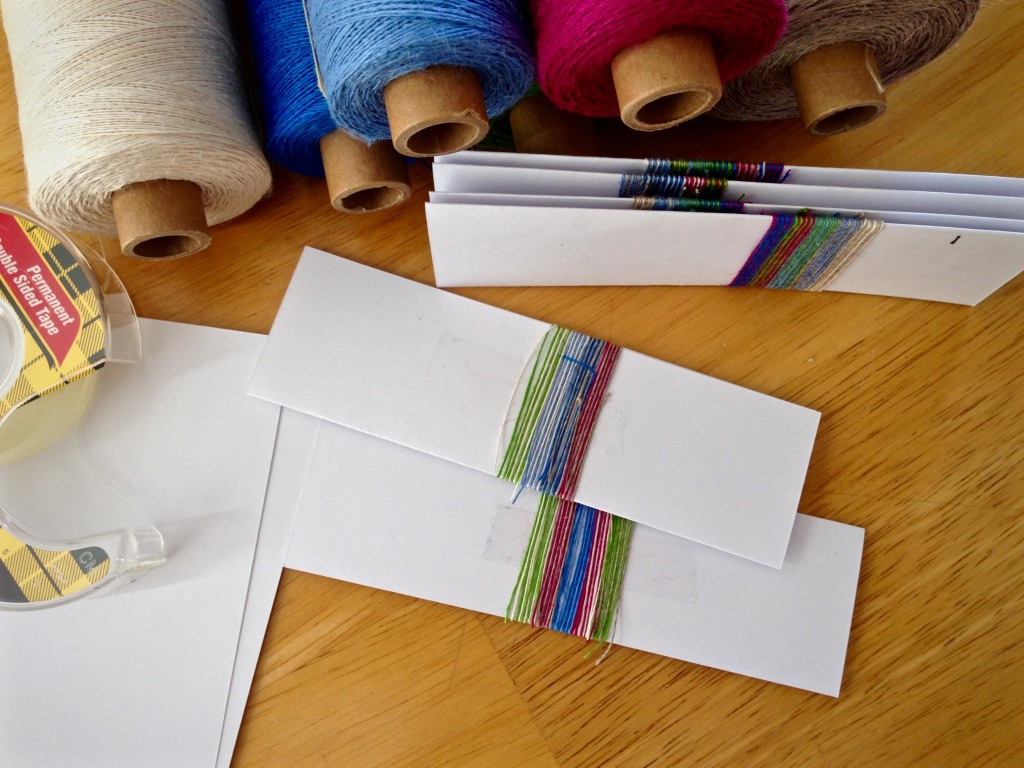
Making color-wrapped cards for planning linen warp.
Playing and planning with color by wrapping threads on index cards.

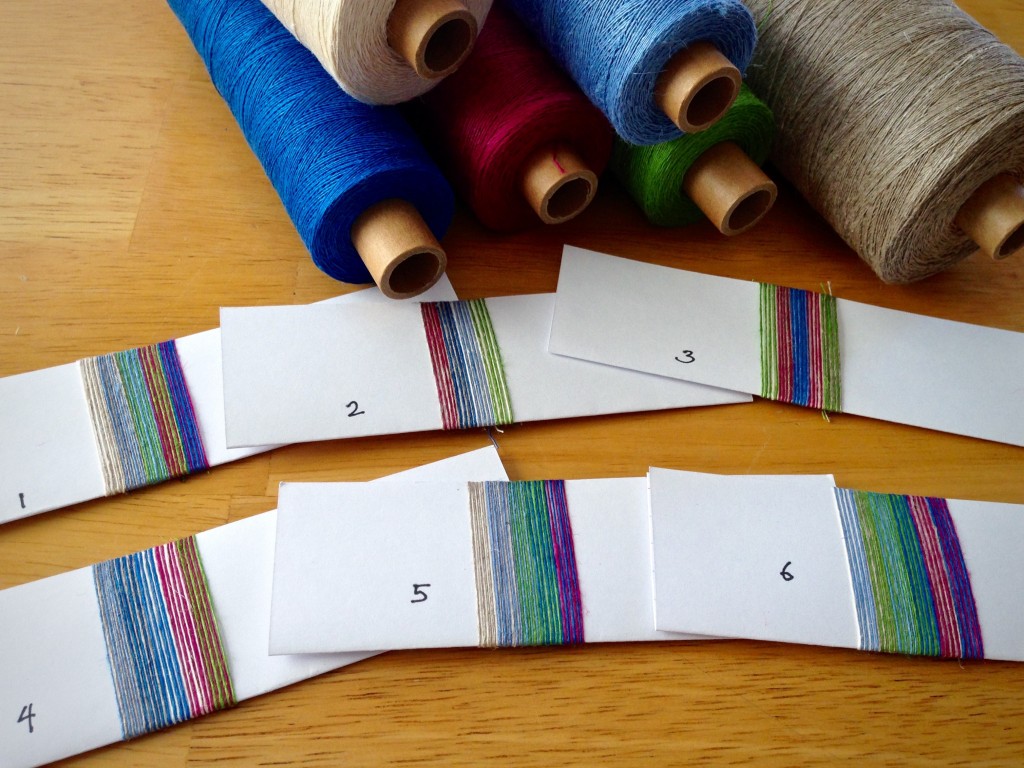
First I will select one color-wrapped card as “winner.” And then, I will decide whether to repeat the narrow stripes on that card across the warp, or spread the chosen stripe sequence over the width of the warp by expanding each of the narrow two-color stripes.

Color wrapping with linen to plan warp.
Cards wrapped with 16/1 line linen to view warp possibilities.
Color wrapping to plan linen warp.
Each narrow stripe is two colors paired together. (Click on photo to enlarge.)
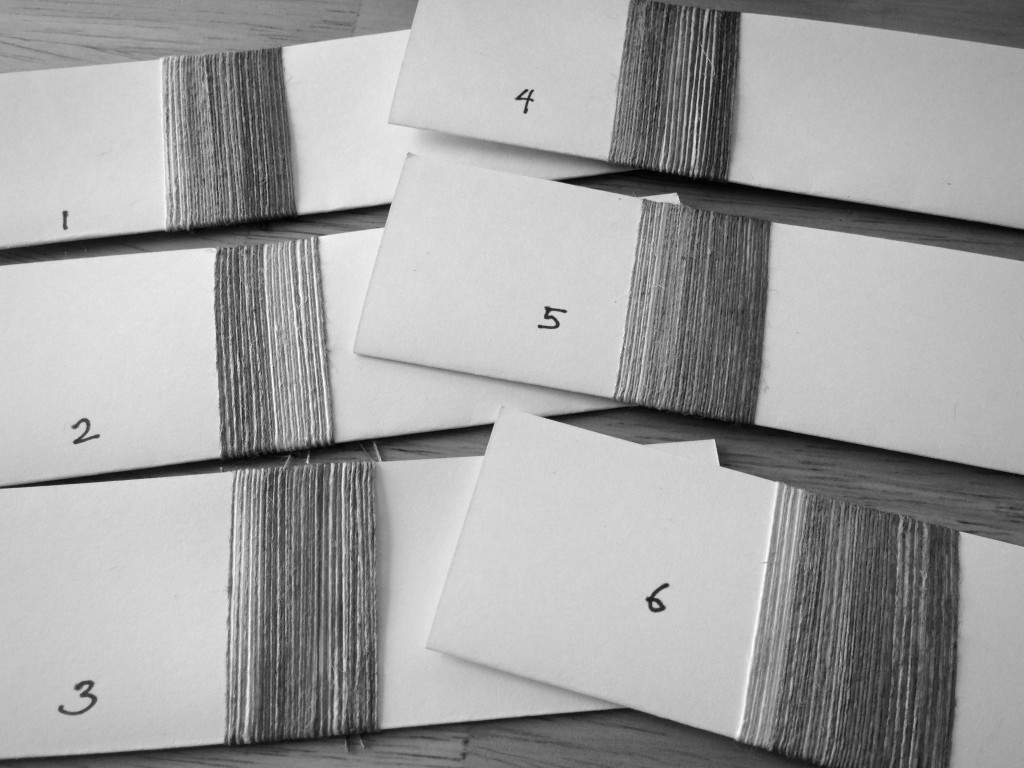
Color wrapping shown in black and white to see balance.
Black and white gives a view that shows the balance of dark and light.

Color wrapping supplies:
Index card, folded in half lengthwise
Double-stick tape

  • Place a length of double-stick tape on one side of the folded index card.
  • Starting on the back of the card (the side with tape), stick the end of a thread (or two threads, as in these examples) to the tape.
  • Wrap the threads around the card, aligning the threads right next to each other, sticking the thread to the tape on the back each time around.
  • Experiment with different arrangements of colors, and vary the width of stripes as desired.

Which of the six color wrapping examples would you choose for an eye-catching lace weave scarf? And would you repeat the sequence across the width of the warp, or would you spread the sequence out over the width of the warp? Share your thoughts and ideas in the comments.

May you discover more options than you know what to do with.

Happy Coloring,
Karen

Tools Day: Just Me Bell

My weaving studio is usually a place of solitude where I can slip into deep concentration. I am counting warp ends; or I am paying close attention to synchronizing shuttle, treadles, and beater for greater efficiency and speed; or I am doing calculations to plan my next project. Or I am examining the cloth on the loom with a magnifying glass, counting picks per inch; or I am trying to wind a quill with just enough, but not too much, yarn. Without realizing it, I get absorbed in my thinking.

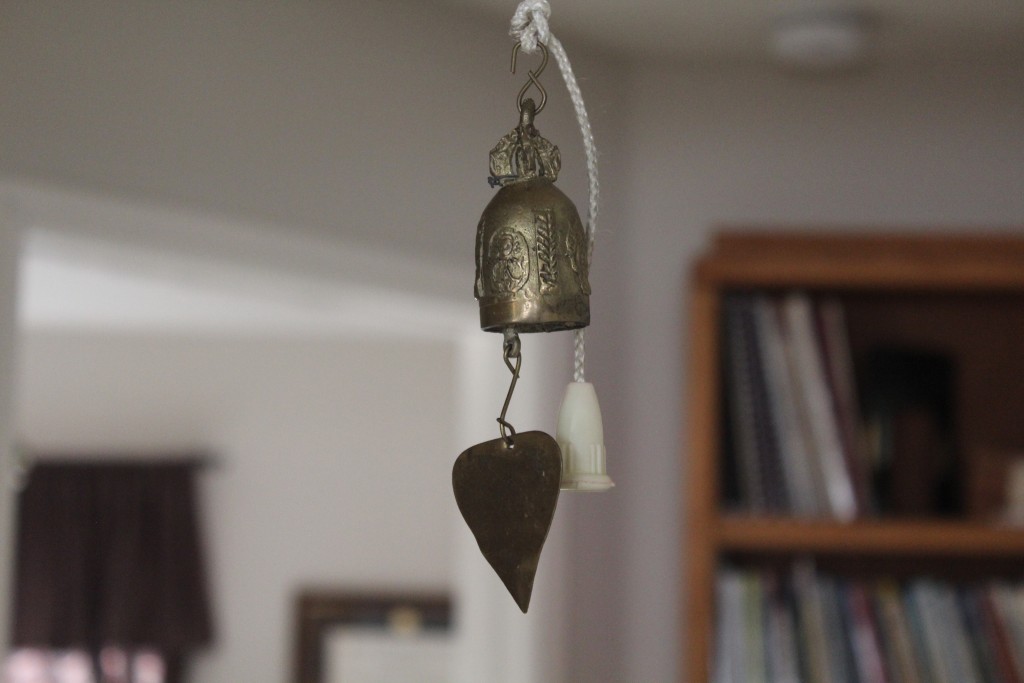
Bell for breaking silence before entering studio of concentrating artist.
Old little brass bell hangs in the hallway on the way to the weaving studio.

When I am in this state of being immersed in weaving, I am easily startled by any innocent interruption. My husband has solved the problem of seeing me jump and hearing me gasp when he walks into my concentration bubble. He has hung a little brass bell a few steps outside the doorway to my weaving room. “Ring-a-ling-a-ling…,” the bell quietly announces, “It’s just me…” Now, with fewer incidents jolting me from solitude, I may live longer, as well.

May you welcome those who come near.

Come on in,
Karen

Tools Day: Sley the Reed

I am dressing the big loom with linen. This flaxen thread brings a worthwhile challenge I find hard to resist. Beaming the warp was slow and deliberate. It pays to be attentive to everything at this stage. Threading for this dice weave could not be simpler; it was finished before I knew it. Now, it is time to sley the reed.

Tools:

  • Reed     I am using a 12-dent reed for this project.
  • Texsolv cord for hanging the reed in front of the shafts
  • Tape measure     I remove the metal ends.
  • Reed hook     Mine is from Vävstuga.
  • Bench, set at comfortable height for threading and sleying     With my Glimåkra Standard, I get to put the bench “in” the loom. It’s like going into my own little playhouse.
  • Good lighting     I use a small Ott Lite Task Lamp when natural light in the room is dim.
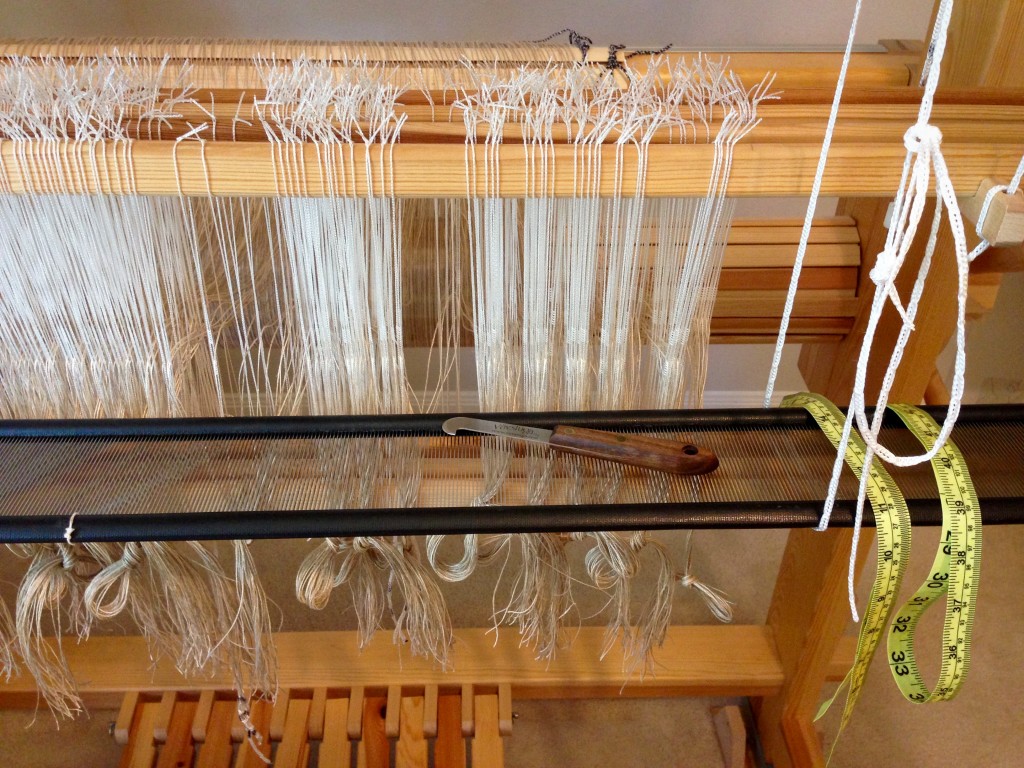
Everything is ready for sleying the reed.
Reed is positioned right in front of the threaded heddles. Shafts and reed hang at optimum height for visibility and ease of hand mobility.
Sleying the reed.
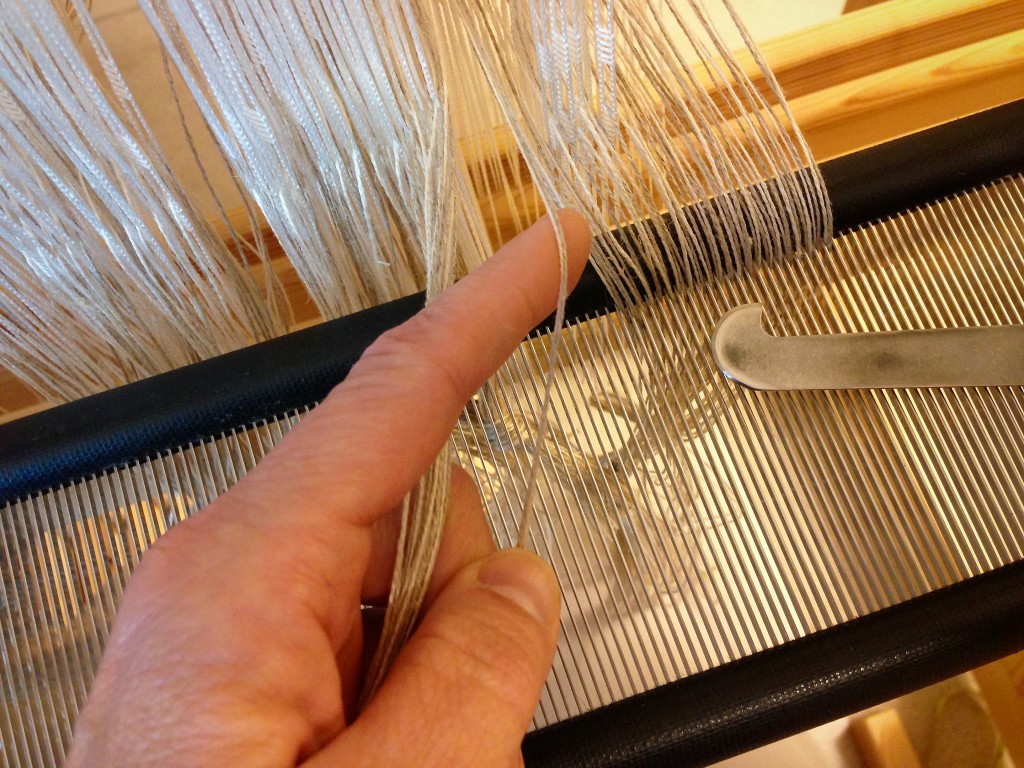
Left hand index finger separates the end(s) to be sleyed.
Sleying the reed.
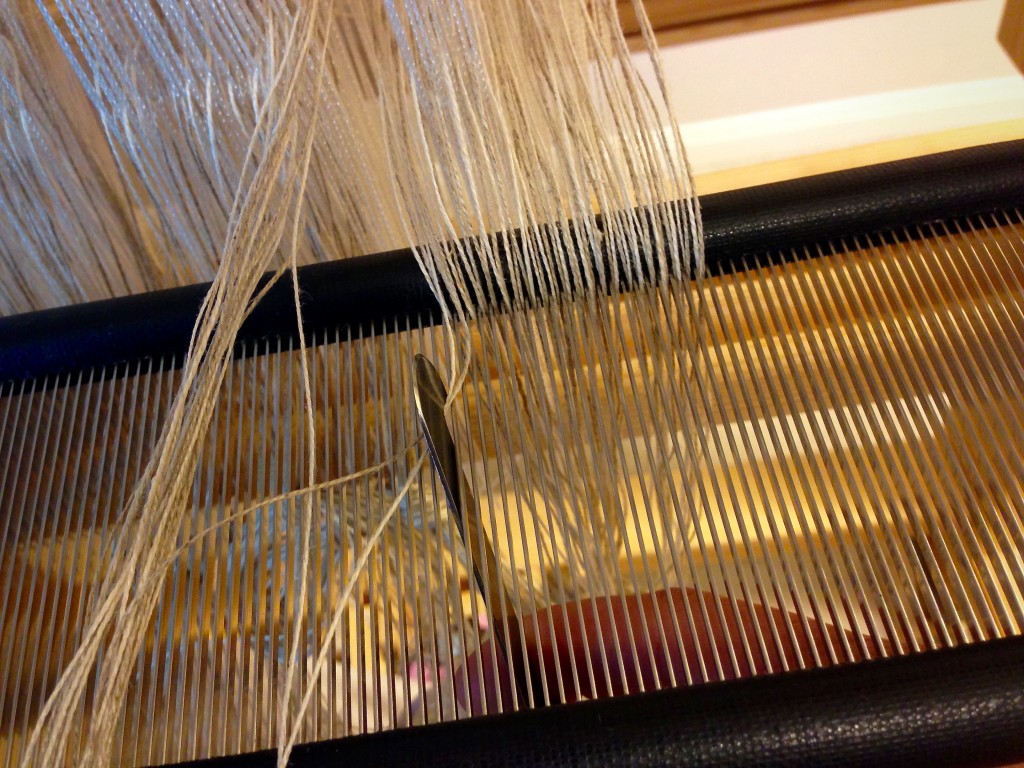
And the right hand holds the reed hook under the reed to pull the end(s) through the dent. (These two pictures show why a third hand would be nice. Normally, I sley the reed with two hands, so a third hand would be useful for taking a picture.)
  1. Form two loops of Texsolv cord that hang down from the top of the loom, one on the right and one on the left, to hold the reed for sleying.     My Texsolv loops hang from the countermarch frame.
  2. Adjust the length of the Texsolv loops so that the reed will fall just below the eyes of the heddles.
  3. Rest the reed horizontally in the Texsolv holders.
  4. Use the tape measure to find the center of the reed.     I mark the center of my reeds permanently by tying a small piece of 12/6 cotton seine twine at the center.
  5. Find your weaving width measurement on the tape measure. Fold that measurement in half and place the folded tape measure at the center point on the reed, to the right, to find the starting dent for sleying the reed. Place one end of the tape measure in that starting-point dent to keep your place.     Some people use the reed hook as a place holder, but when I pick up the reed hook to sley the first dent, I invariably loose my place.
  6. Pull ends through the reed with the reed hook, referring to your draft for the correct number of ends per dent, starting at the dent on the right hand side that has the place holder in it. Good lighting helps to prevent errors.     This is especially true with finer dents and darker threads.
  7. After sleying each group of warp ends, visually examine the sleyed dents to look for missed dents or extra ends in dents.
  8. Tie the sleyed group of ends into a slip knot.
  9. Finish sleying all the ends; and smile, knowing you are a step closer to weaving fabric.

May all your looms be dressed.

Happy Dressing,
Karen