A rosepath rag rug puts beauty under our toes. Strange? Yes, strangely wonderful. Let’s fill our homes with handmade goodies. Let’s make smiles happen in every corner. Let’s be different and make a difference. Live with beauty underfoot.
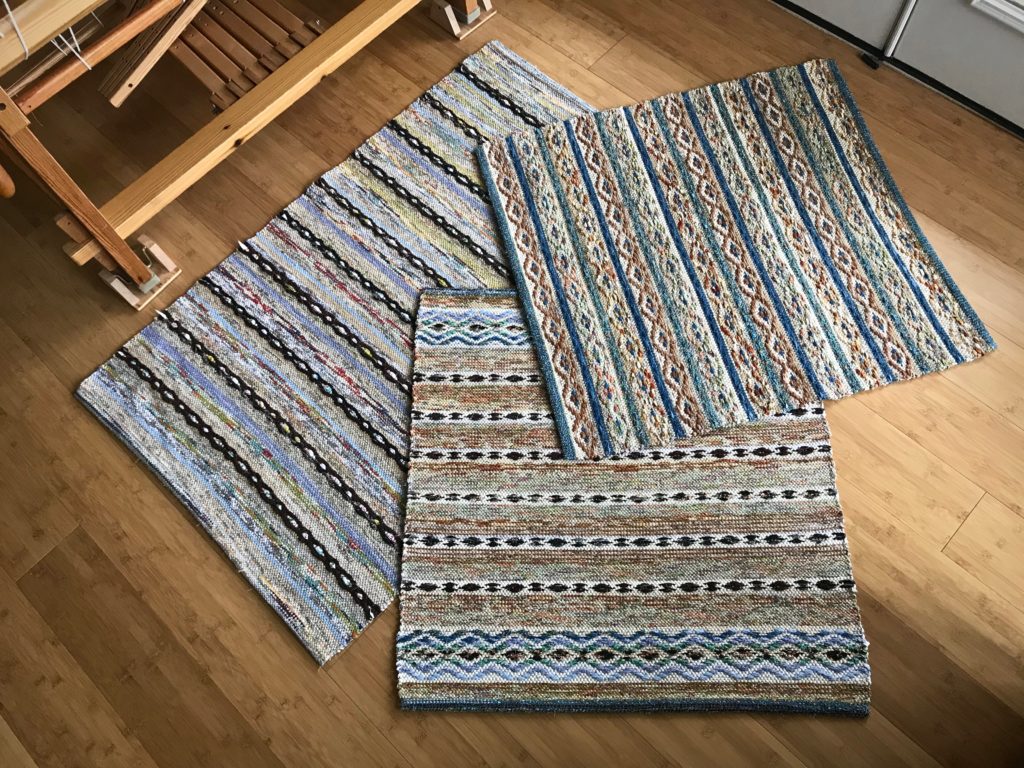
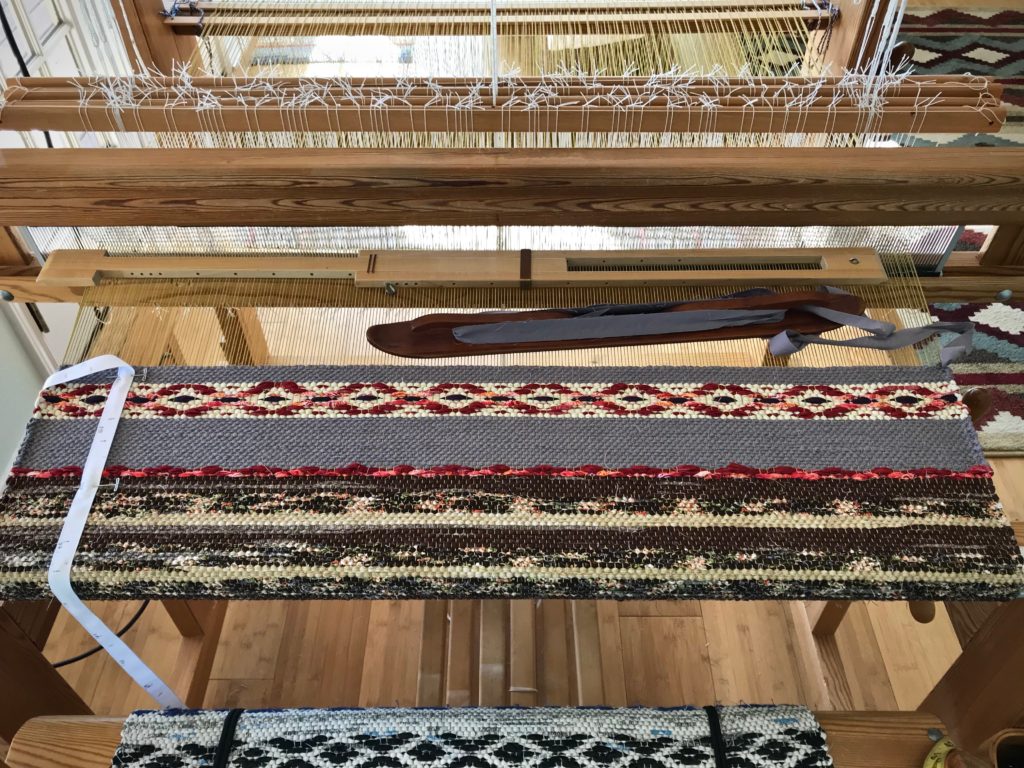
Three of these rugs have already gone to their new homes. (See Tied Up in Knots.) The remaining three rugs bring outdoor garden beauty indoors.
From bottom to top: Planting Seeds, Prayer Garden, Mystery Garden.
Come with me now to review the process of making these six rosepath rag rugs.
As Shelter in Place becomes a necessity for many, consider these words of encouragement from the book of Psalms: For He [the Lord] will conceal me in His shelter in the day of adversity. Psalm 27:5a
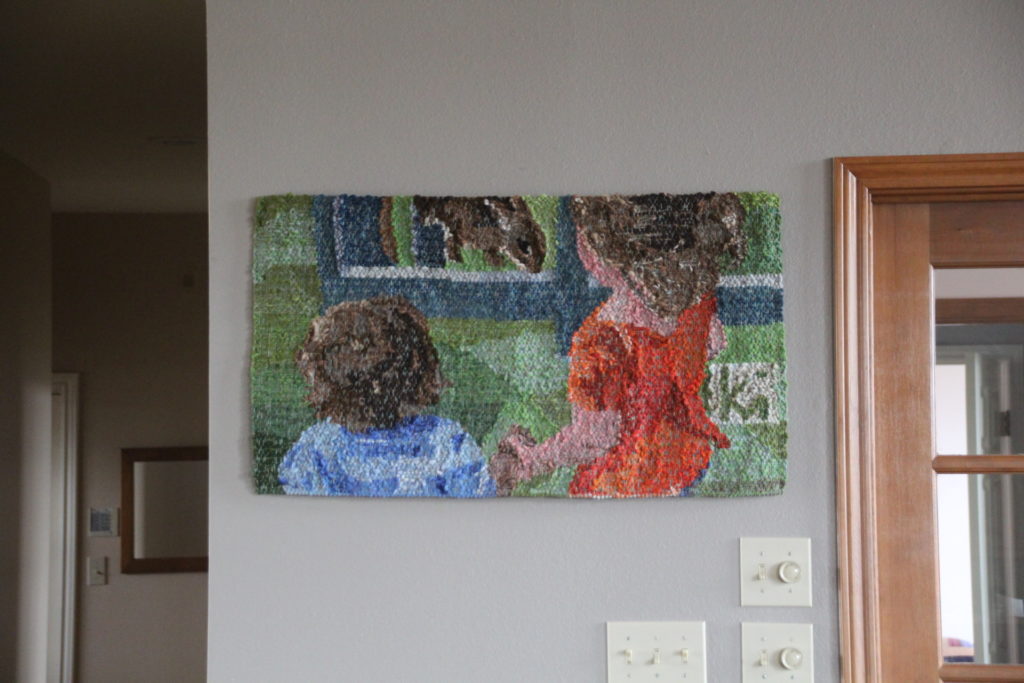
Drum roll please… And now, I present to you: Siblings
The Siblingstapestry is a woven expression of personal meaning. The tapestry tells a story of a singular incident, almost hidden in the excitement of the occasion. Lucia grasps Ari’s wrist as they approach Sugar Pie, the bunny. In that moment I see something worth keeping—precious sibling love.
Please enjoy this short video of the process of weaving and finishing the Siblings tapestry.
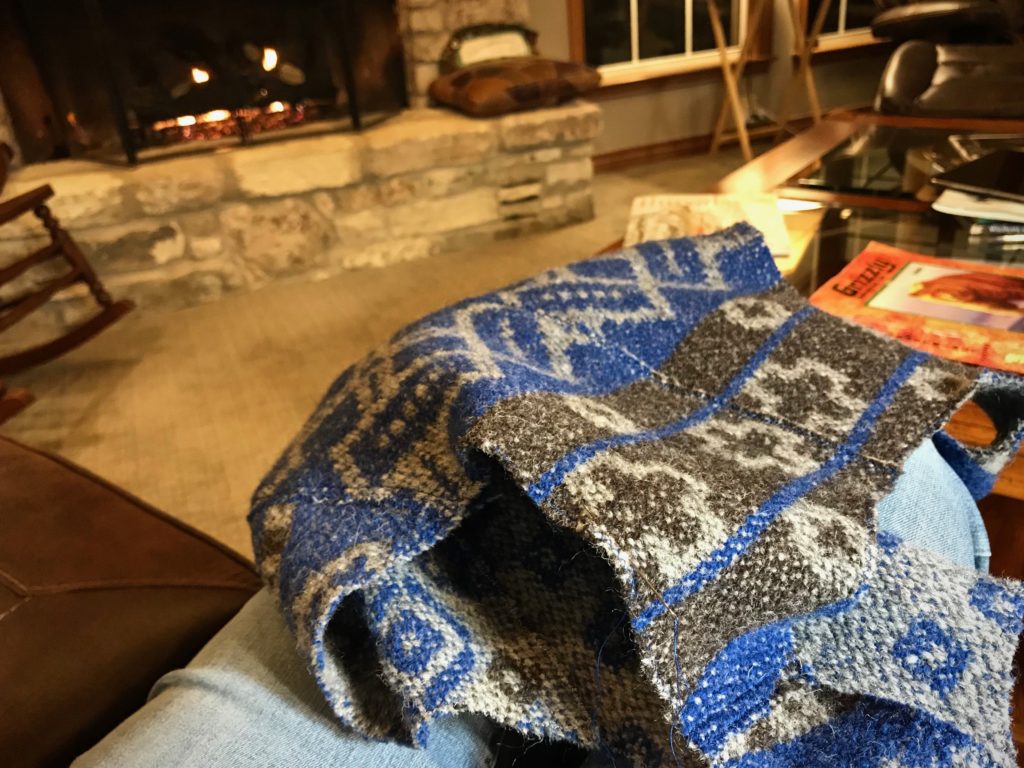
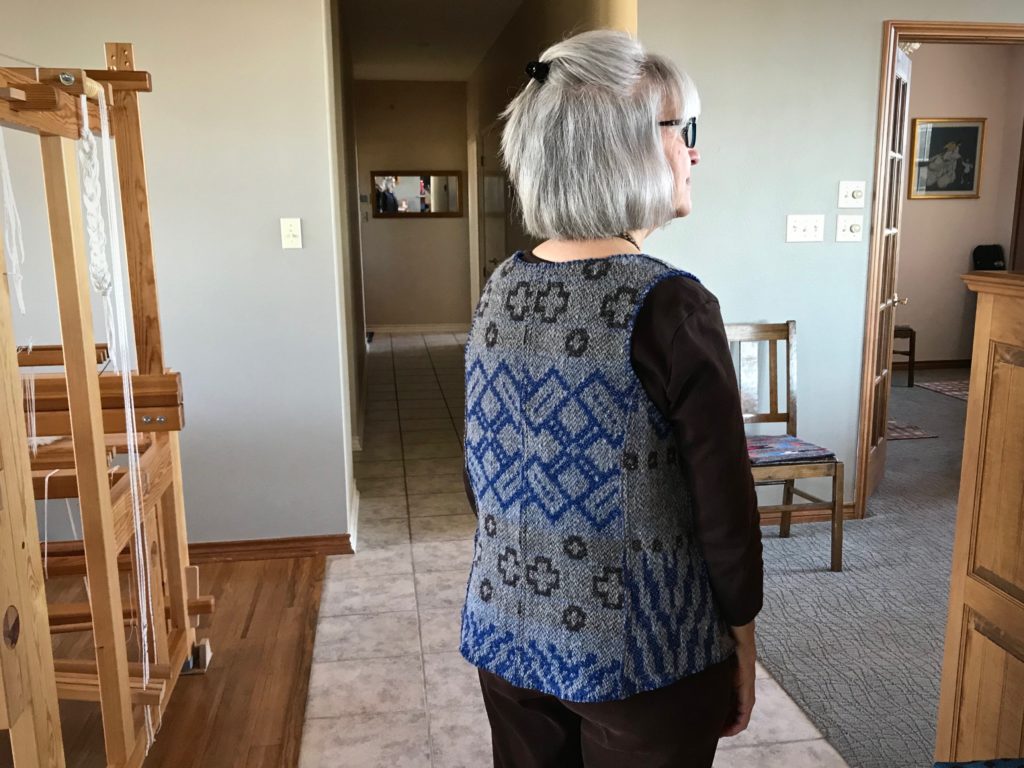
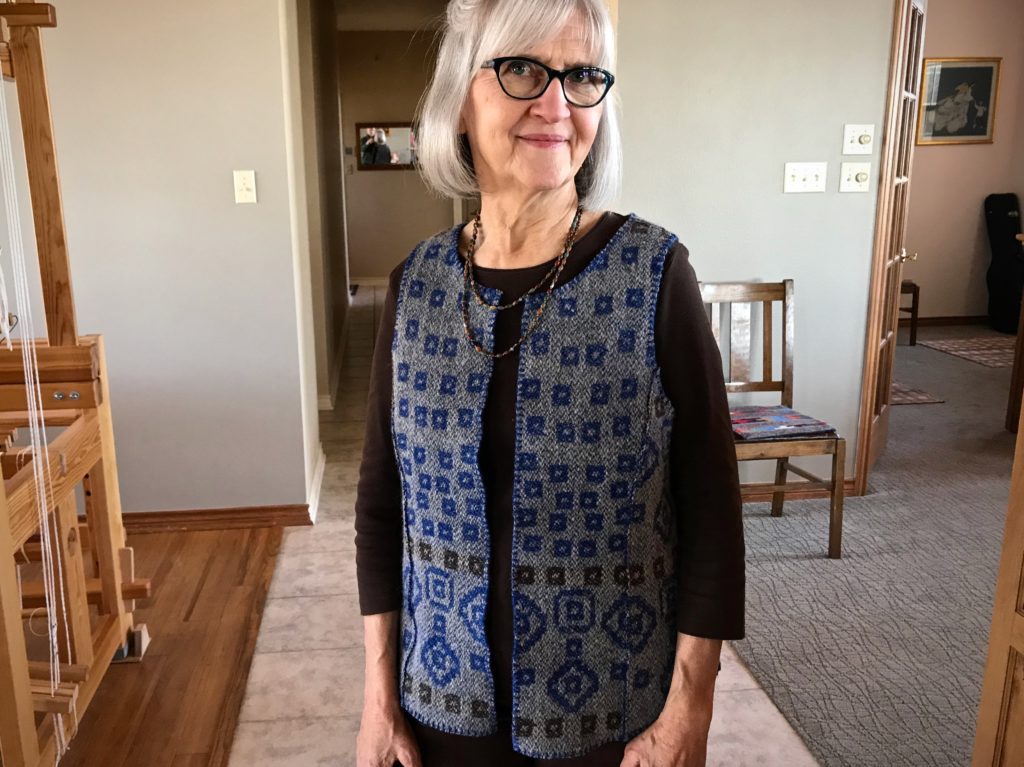
I warped the drawloom with gray 6/2 Tuna wool several months ago with the goal to make fabric for a reversible vest. The beautiful drawloom fabric turned into dreamy garment-worthy fabric after washing! (See Process Review: Drawloom Jewels)
And then I hit two huge hurdles.
Hurdle 1. Fit.
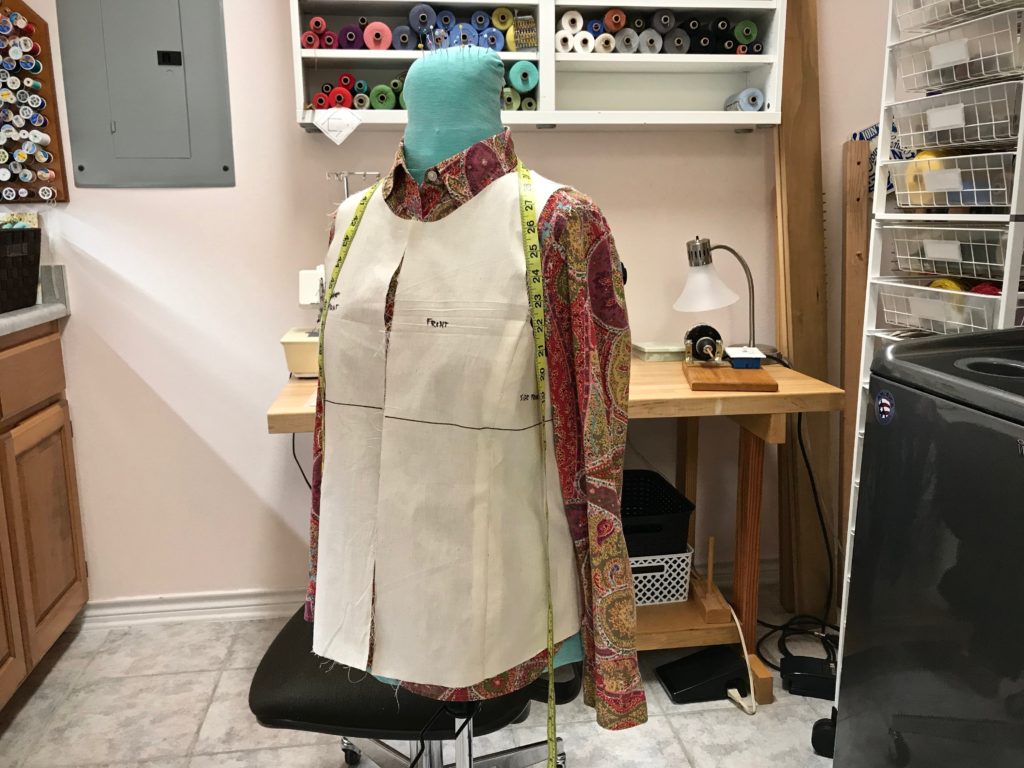
In order to cut into handwoven drawloom fabric, I need assurance that the end result will fit me. My sewing assistant helped me refine a commercial pattern.
Meet my sewing assistant, Miss Fit.
After umpteen muslins and two or three mock-ups, I finally got the fit I was after. Confidence to cut!
Hurdle 2. Garment Construction Uncertainties.
Do some detail studies, my dear friend Elisabeth said to me. Her advice got me over the insecurity hurdle. A detail study is making a small sample to test a hypothesis or answer a question. I made a list of everything I wanted to know about constructing a vest from this type of handwoven wool fabric. And then, using some of the extra fabric from the sampling at the beginning of the warp, I did a detail study for each point on the list. Twelve detail studies in all.
(If you are interested in seeing my complete list of 12 detail studies for this project, click HERE to send me an email and ask for my “Detail studies”.)
Here are a few examples of my findings:
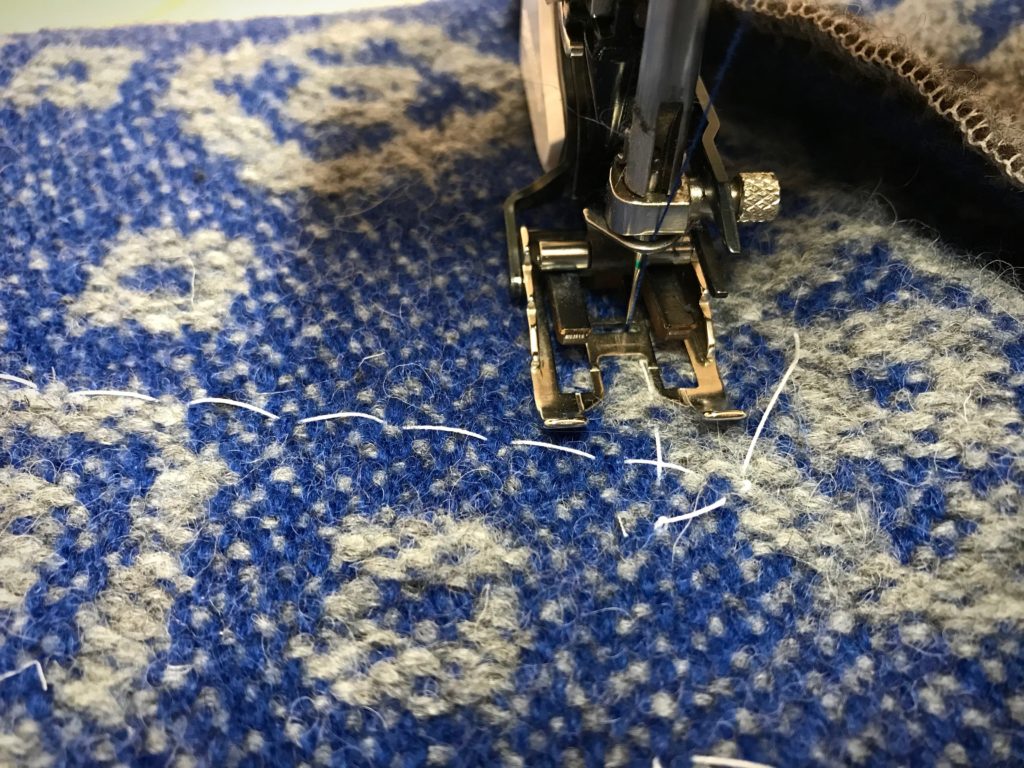
Zigzag before or after cutting? // Zigzag before cutting, stitch width 3, stitch length 2 1/2
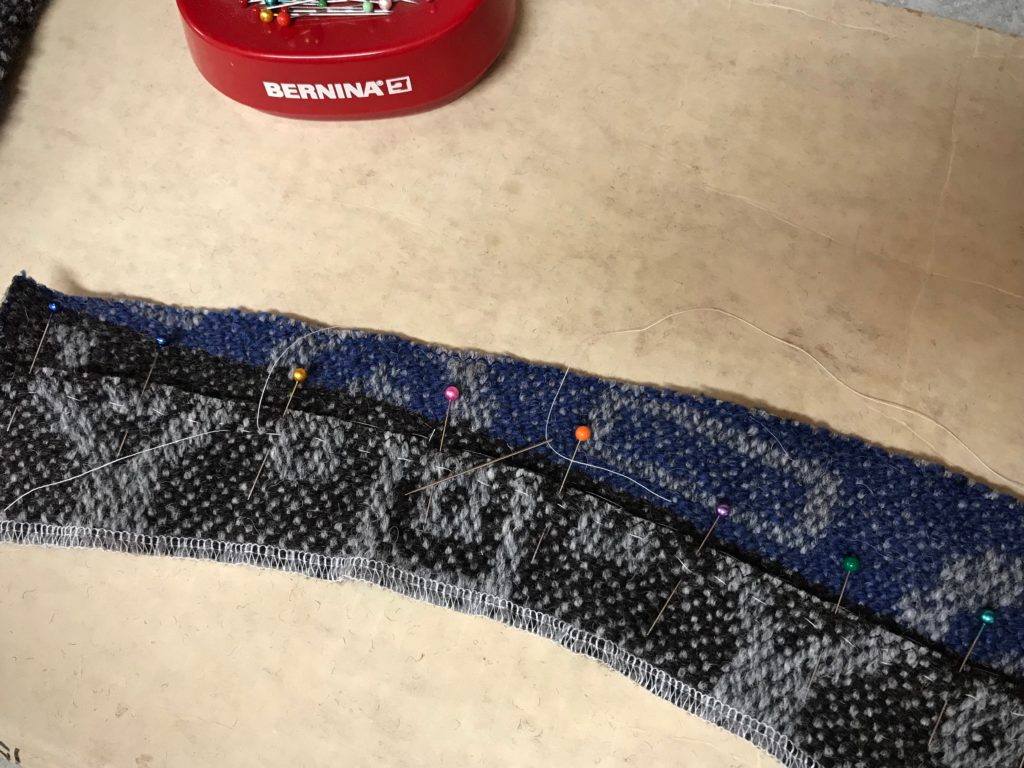
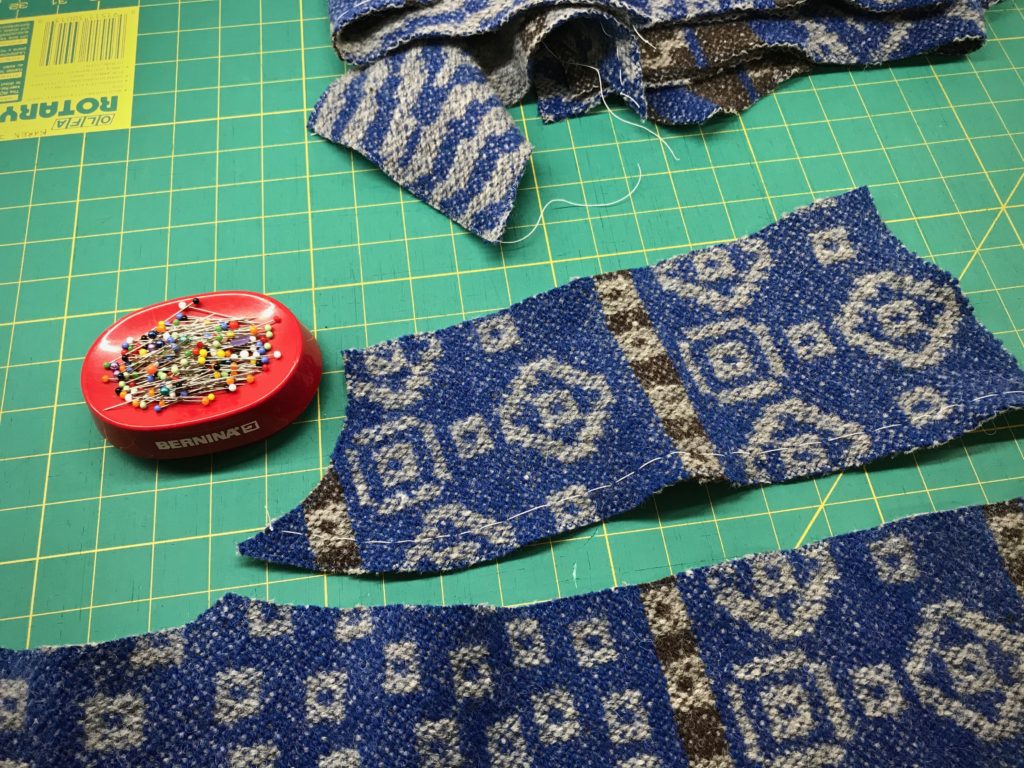
Lapped seams? 3/8”, 1/2”, 5/8”? // Yes, lapped seams, overlap 1/2”, stitch basted line to guide placement
Neck and armhole curves – staystitch with hand running stitches or machine stitching? 1 row or 2? // Hand running stitches, 2 rows
Detail study testing lapped seams.
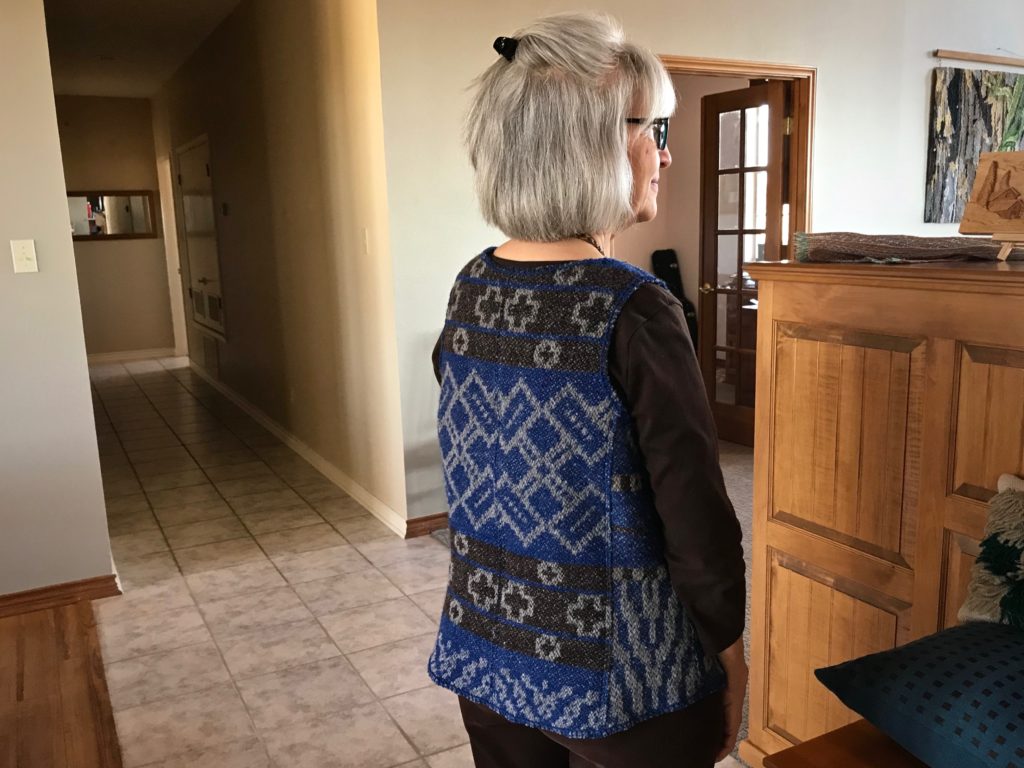
From the results of the detail studies I was able to compile a step-by-step garment construction plan. Confidence to sew!
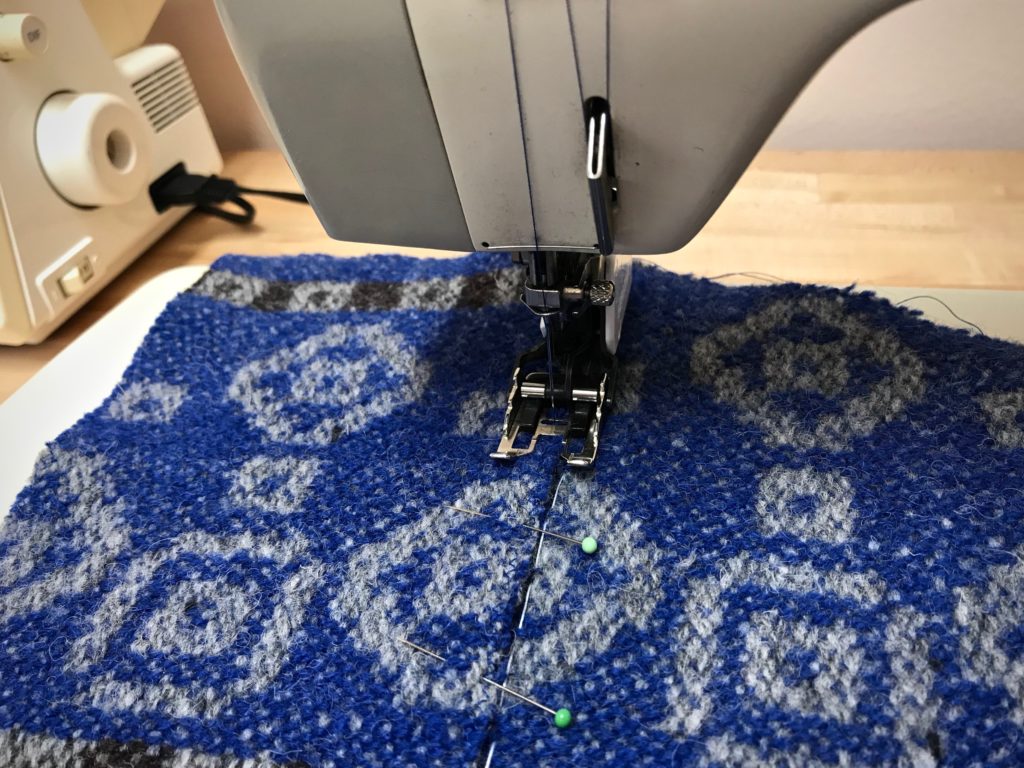
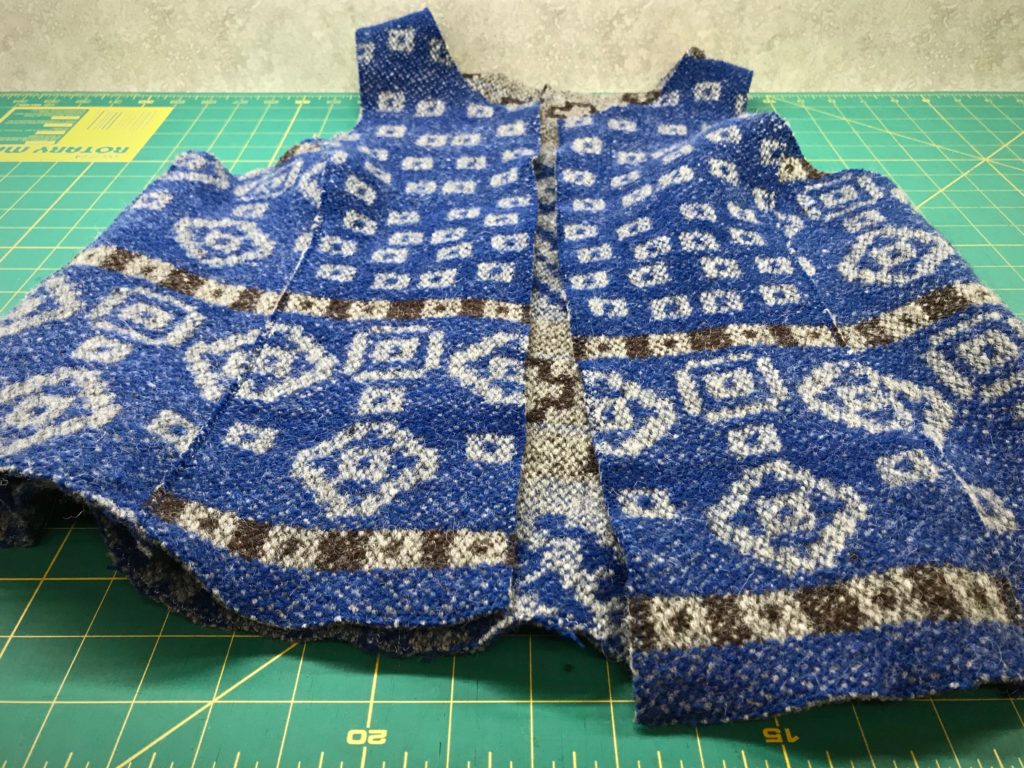
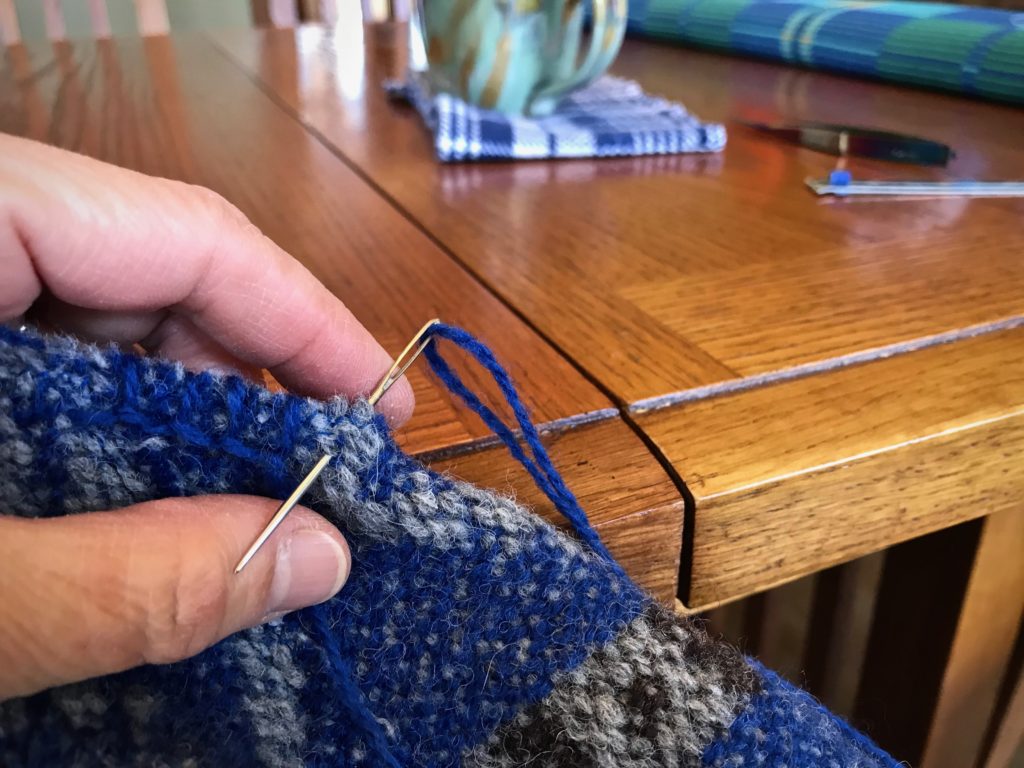
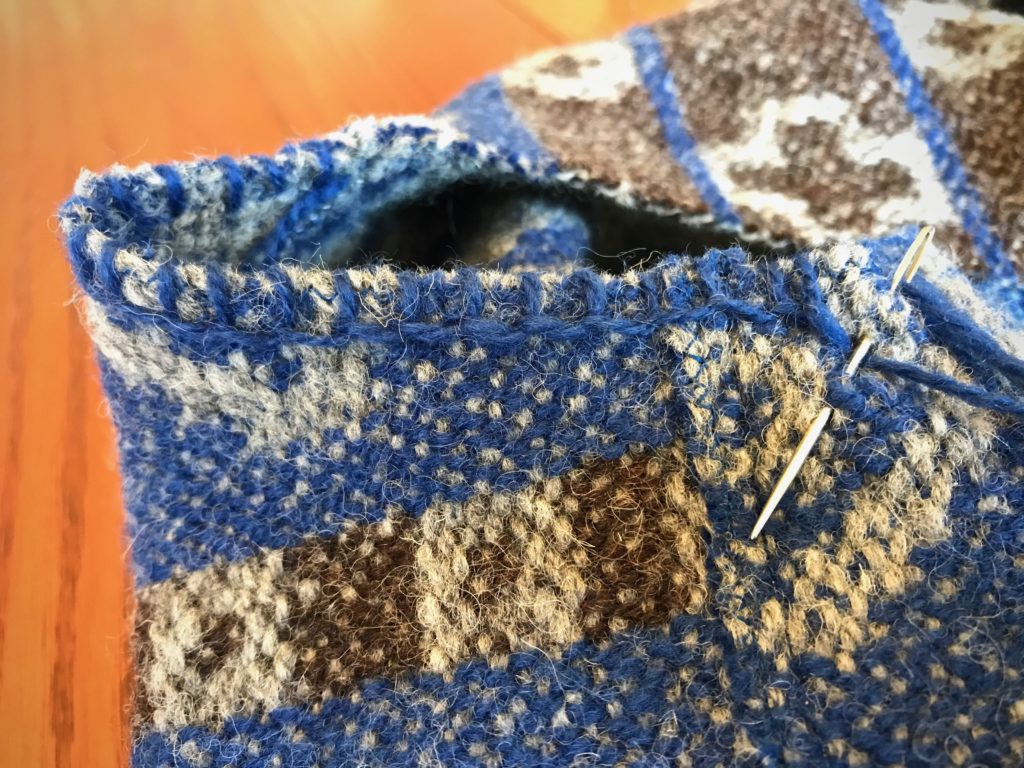
Follow my process pictures of the garment construction to see the results:
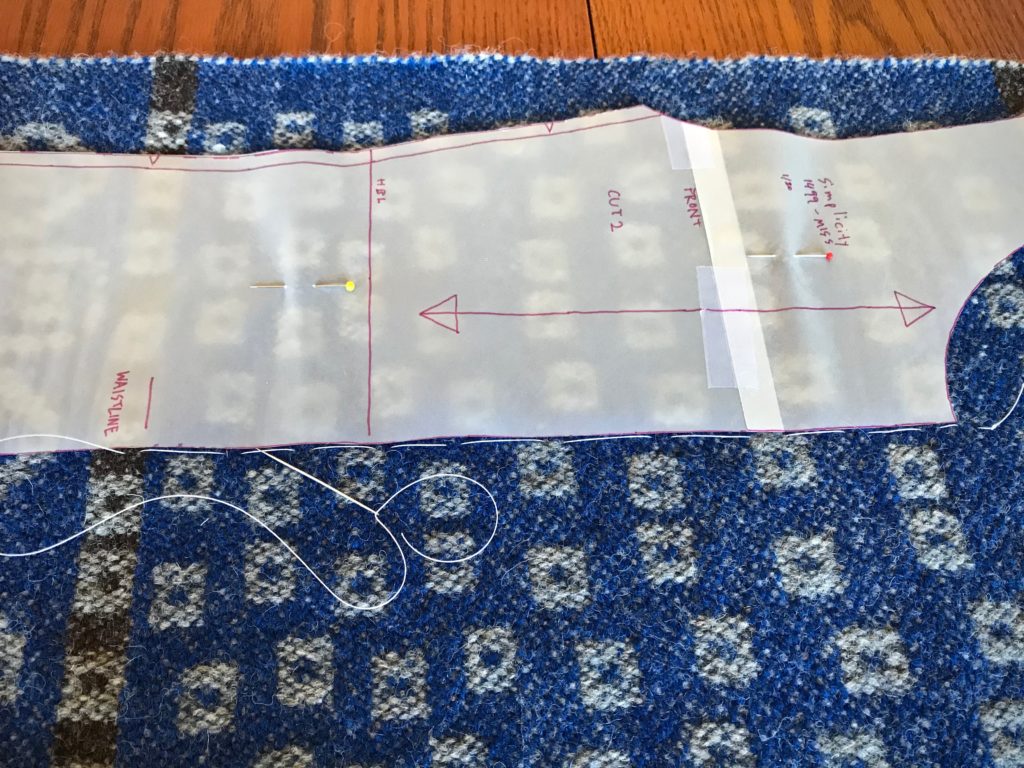
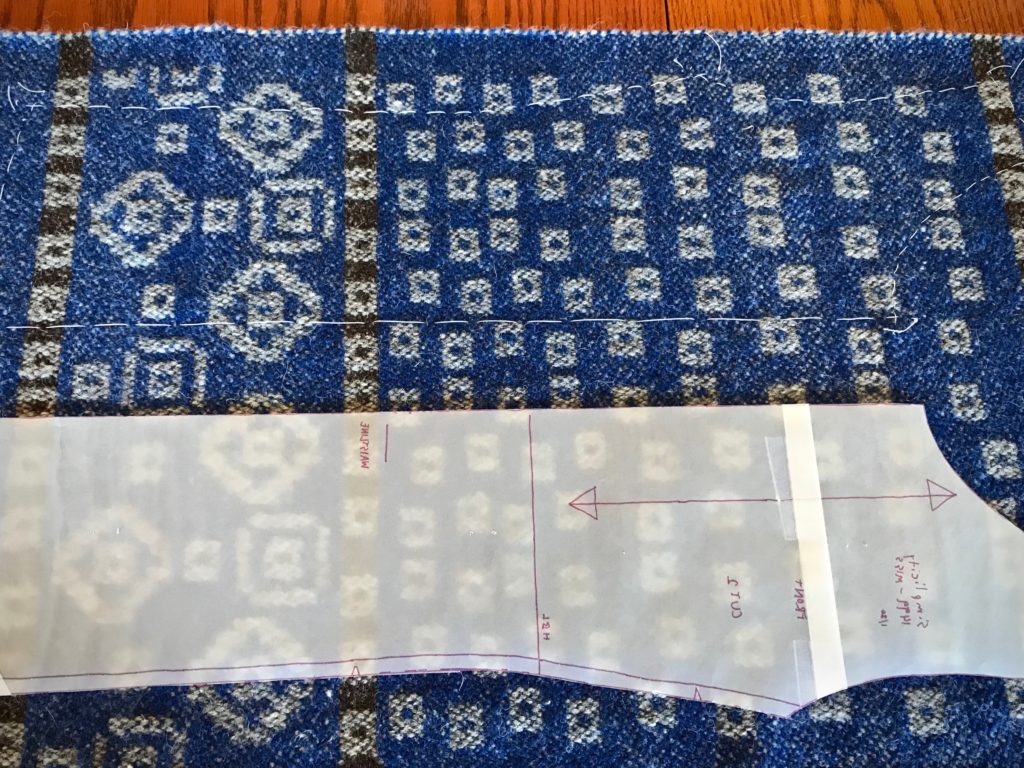
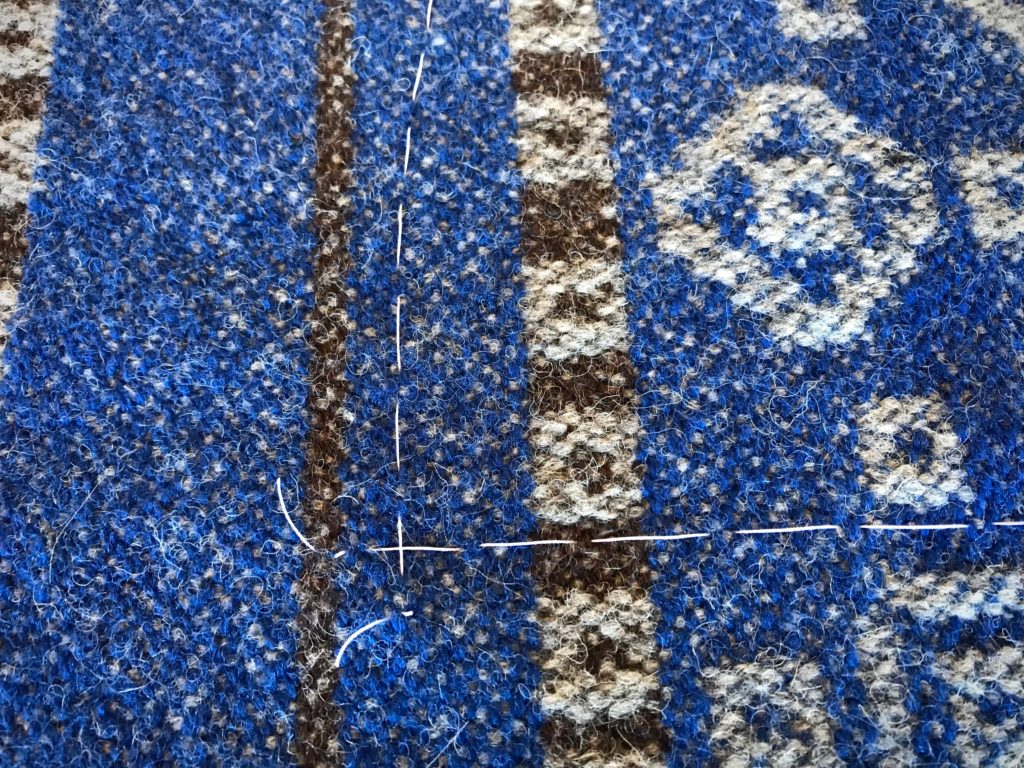
Cutting lines marked with basting stitches.Tracing paper is used for the pattern, which allows me to clearly see the placement of the pattern on the fabric.Making an X with the basting thread at the corners. This helps clarify exactly where to stitch and cut. (One of Elisabeth’s helpful tips.)Buttonhole twist thread is used for the basted lines. It makes an easy guide for the sewing machine needle to follow. The zigzag stitches are just inside the line.Basting stitch on the front side piece is a guide for positioning the lapped seam.Ready for hand work.Two rows of running stitches around the armholes and neck opening.Blanket stitch is used to embellish and strengthen the armholes, neck, front edges, and lower edge of the vest.Reverse side.
Wind very narrow fabric strips on quills and put them in a boat shuttle. It’s efficient. It’s faster to wind a quill than to load fabric on a ski shuttle. Plus, I like the advantage of sending a boat shuttle across rather than a ski shuttle. This rag rug on the drawloom has fabric strips that are only one centimeter (~3/8”) wide, instead of the usual two-centimeter-wide (~3/4”) strips for an ordinary rag rug. Grab your boat shuttle and pay attention to a few simple tips. Your very narrow fabric strips will be woven up in no time.
Tips for Using a Boat Shuttle to Weave Very Narrow Fabric Strips
Use fabric that has minimal fraying at the edges. Trim off any long threads. Loose dangling threads that are long enough to wind themselves on the quill will make you wish you had used a ski shuttle.
Wind the fabric with the right side down. Then, when the quill unrolls, the right side will be facing up.
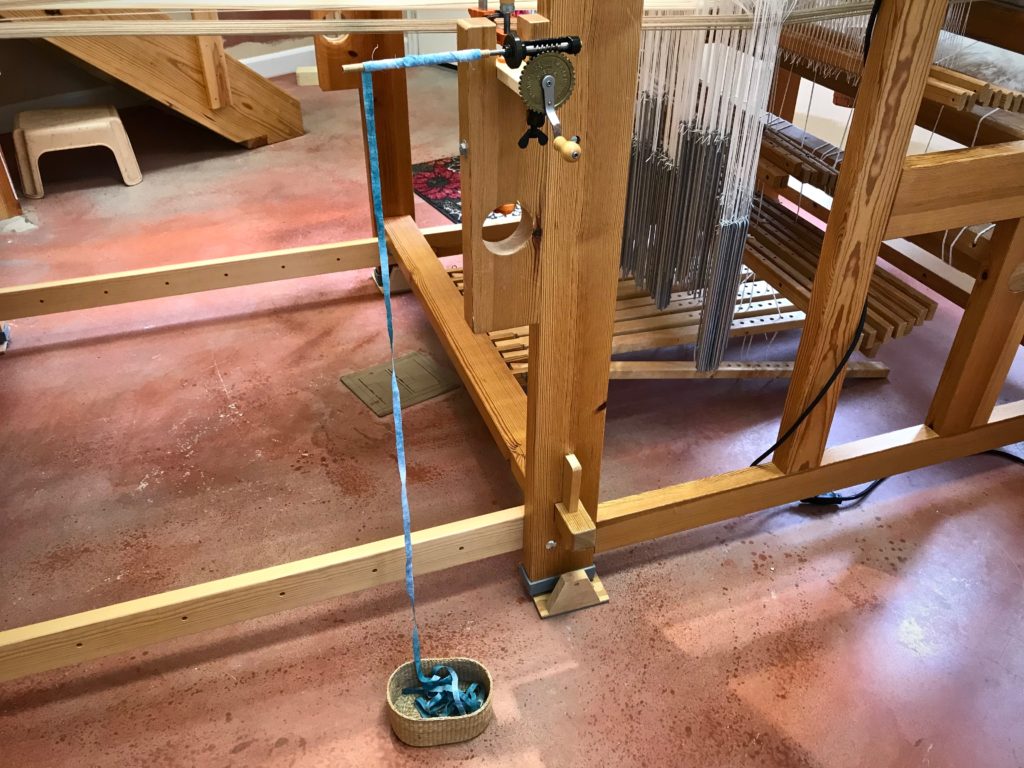
Swedish bobbin winder is clamped to the side of the loom. A five-yard fabric strip is wound onto a quill. The right side of the fabric is against the quill.
Handle the wound quill as little as possible to prevent fraying the fabric edges. Simply wrap the tail end of the fabric strip around the filled quill. Do not wrap the end into a slip knot around the quill because the fabric will fray as you release the knot.
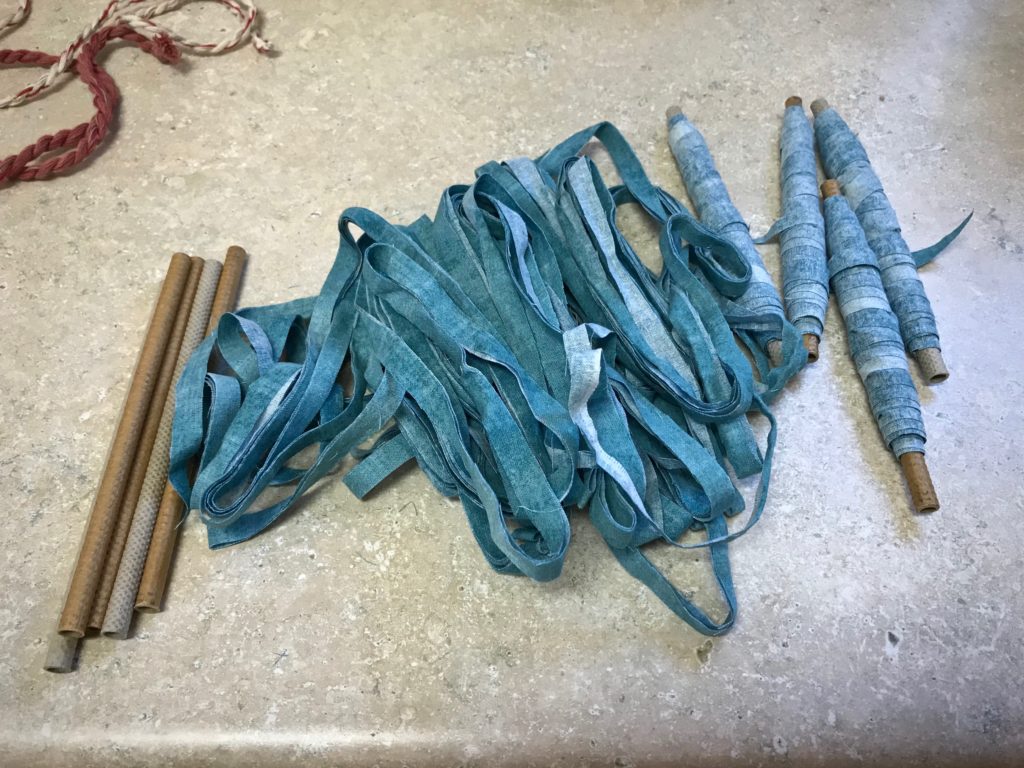
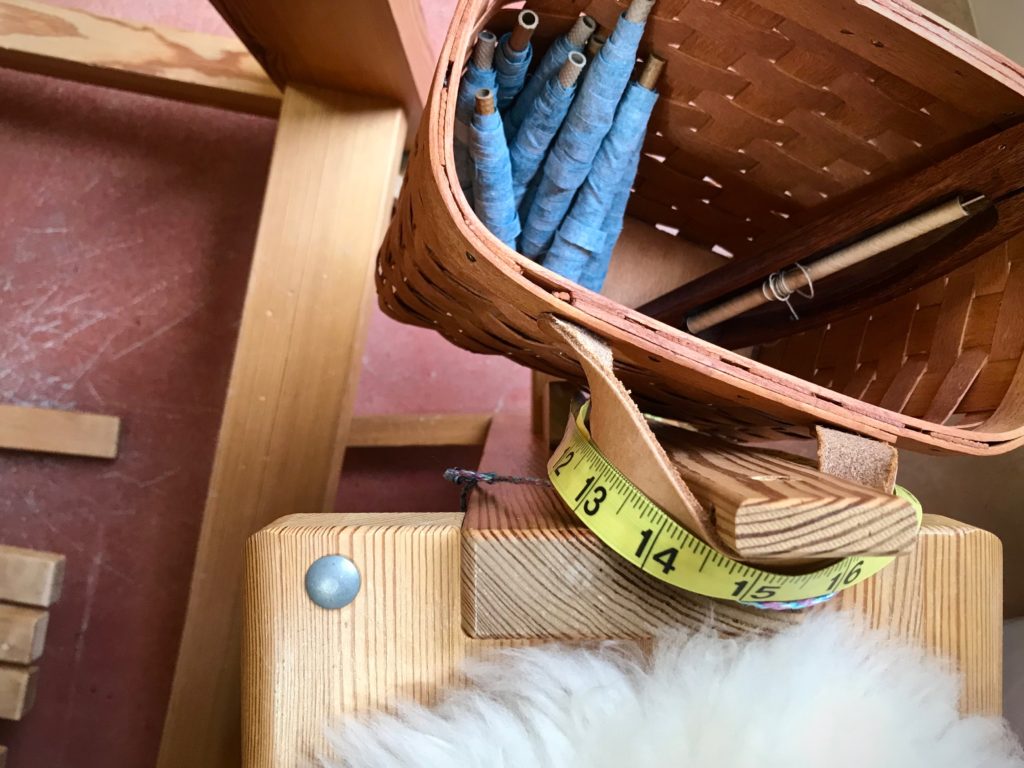
One long fabric strip per quill. Fabric is cut 1 cm (3/8″) wide.One fabric-filled quill covers a little more than one unit of weaving (4 picks). I keep a dozen filled quills in the basket on my loom bench so I can keep weaving as long as possible.
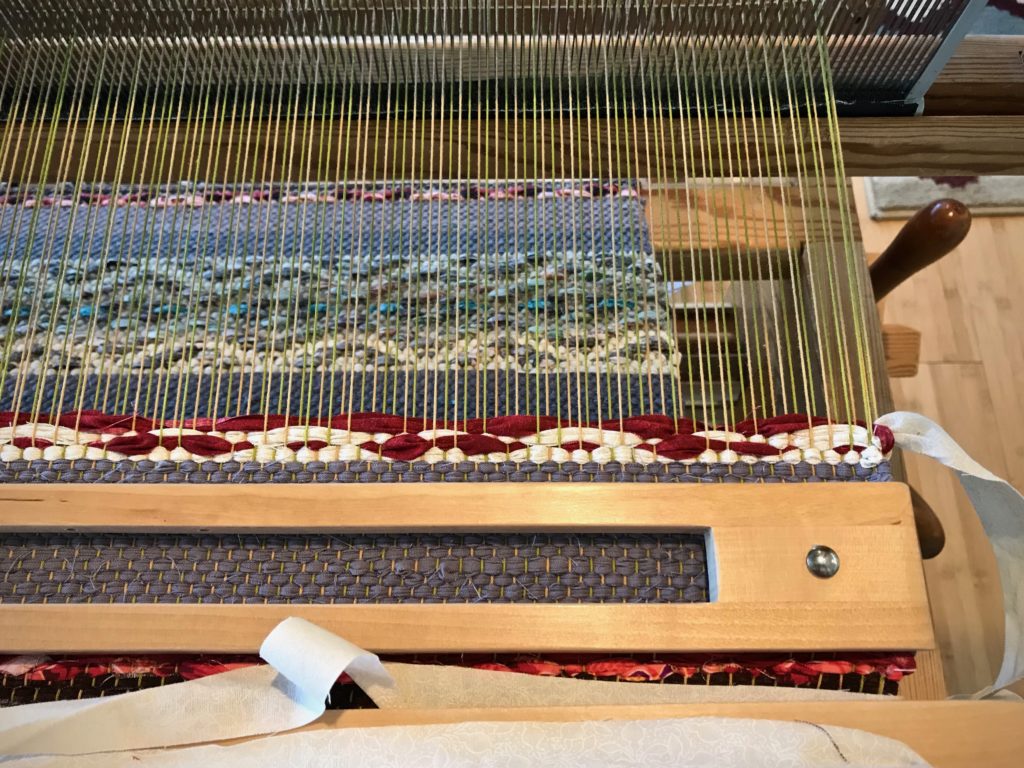
Unwind enough weft for the pickbefore you throw the shuttle. Pull the weft out straight from the quill. When a quill unwinds in the shed, the weft comes off at an angle. And as such, if there are any loose threads at the edges of the fabric strips, the threads will wind themselves on the quill and bind it up. And you will wish you had used a ski shuttle.
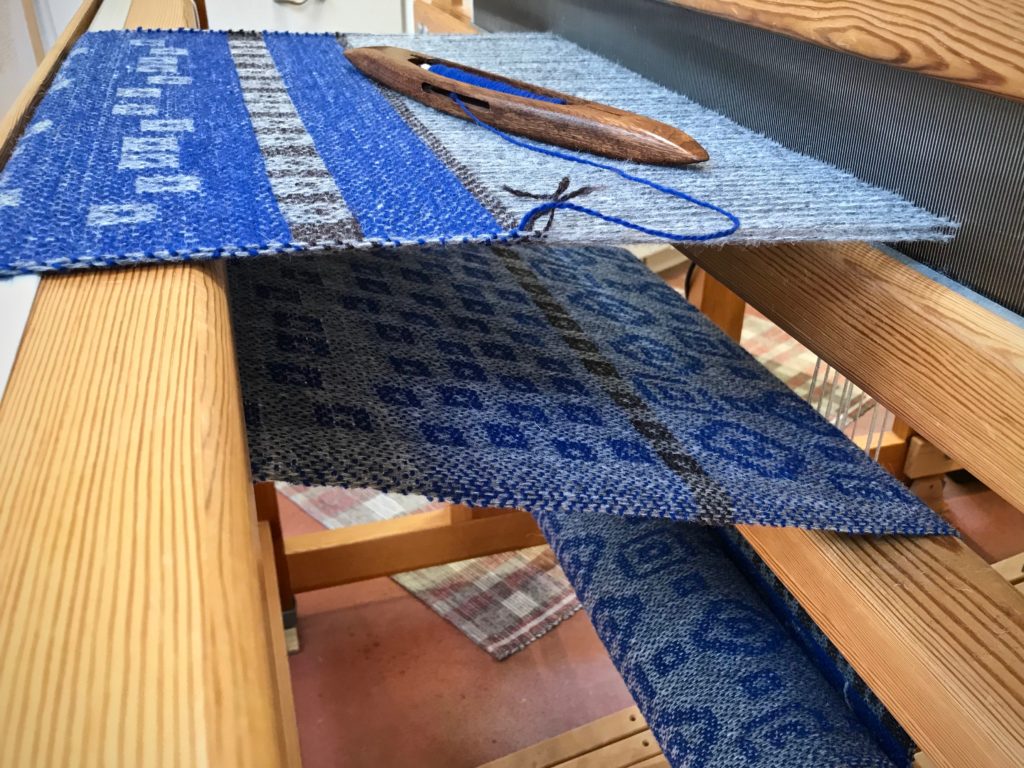
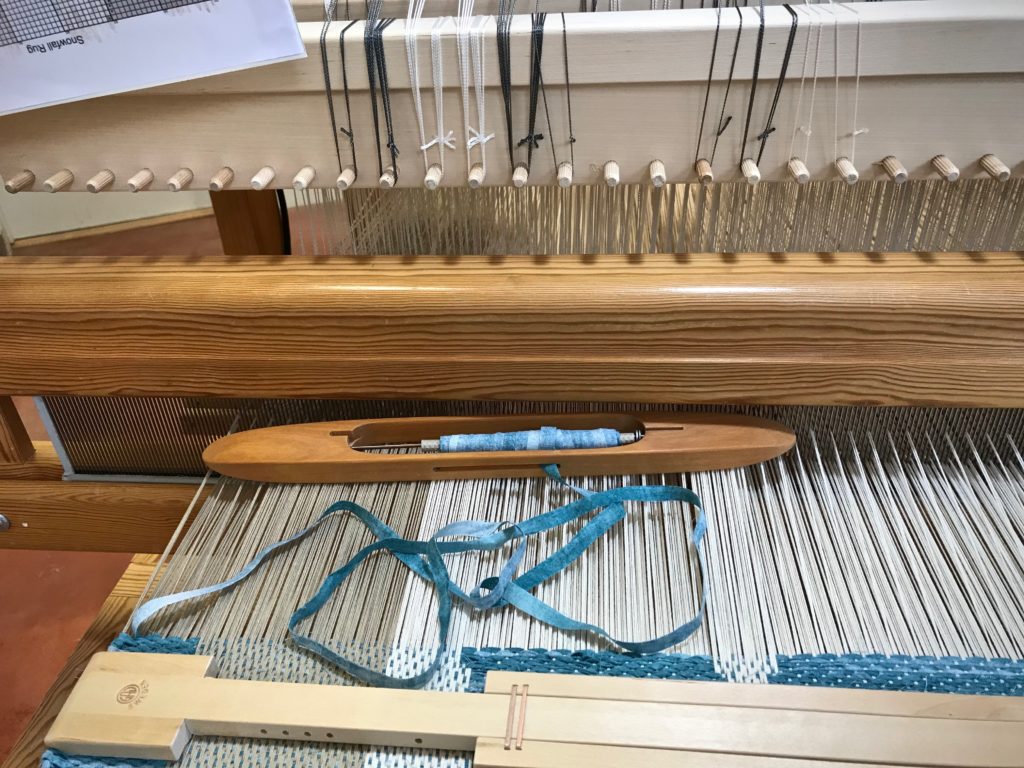
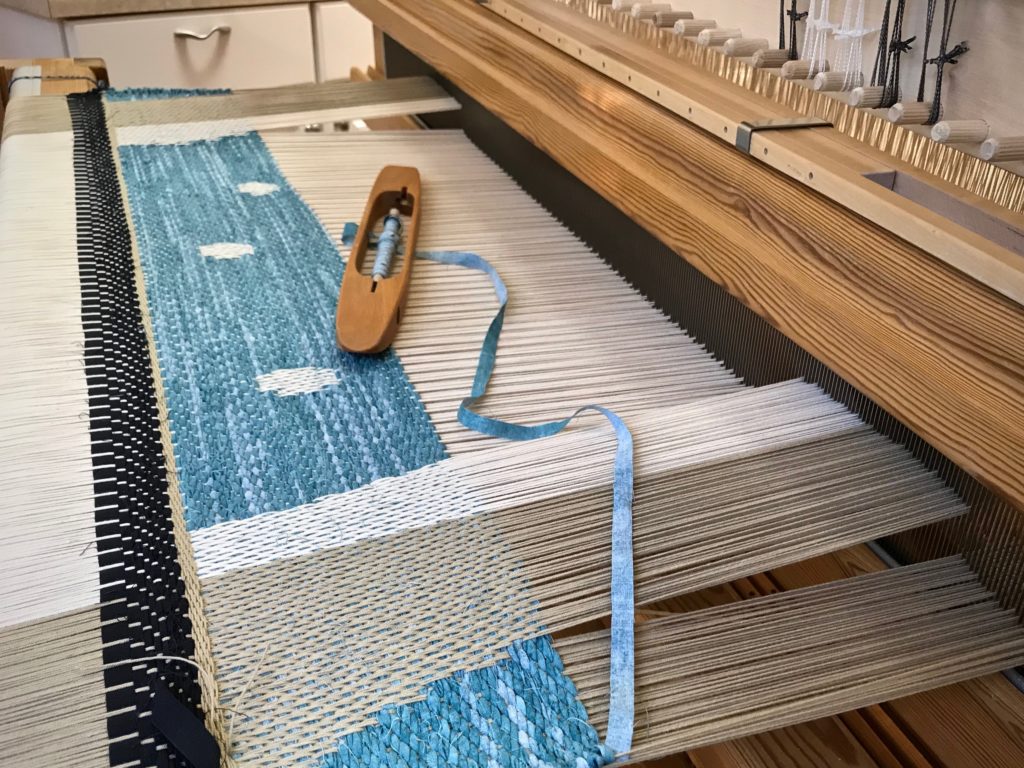
Folke Samuelson Damask Shuttle has a low profile, well-suited for the smaller sheds of the drawloom. Fabric is unrolled from the shuttle prior to the next pick.Drawloom rag rug is well underway. Single unit drawcords are pulled and held in place on the pegs above the beater. Design is Trasmatta Snöfall (Snowfall Rag Rug) by Kerstin Åsling-Sundberg, from Damast, edited by Lillemor Johansson.
What do you do with weft tails on a rag rug? Normally, you wrap the weft tail around the outer warpend and tuck it back into the shed. But what about color changes? If you have several color changes in a row, you can end up with extra bulk on one selvedge or another from those tucked-in tails.
3 Ways to Outsmart Rag Rug Weft Tails
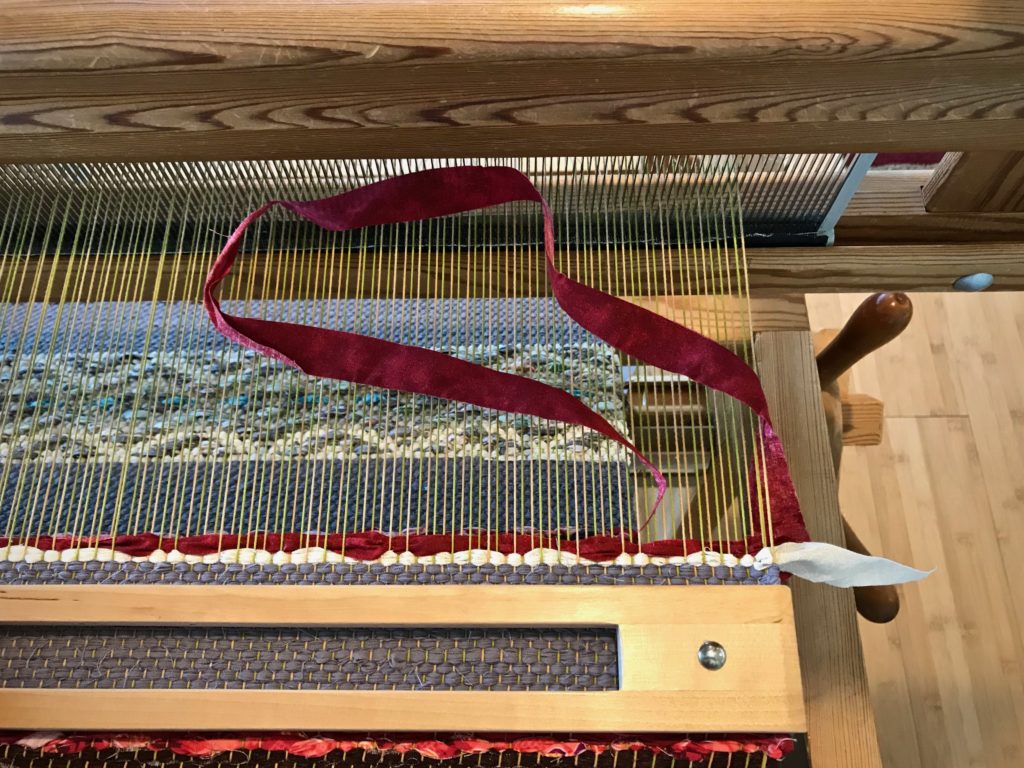
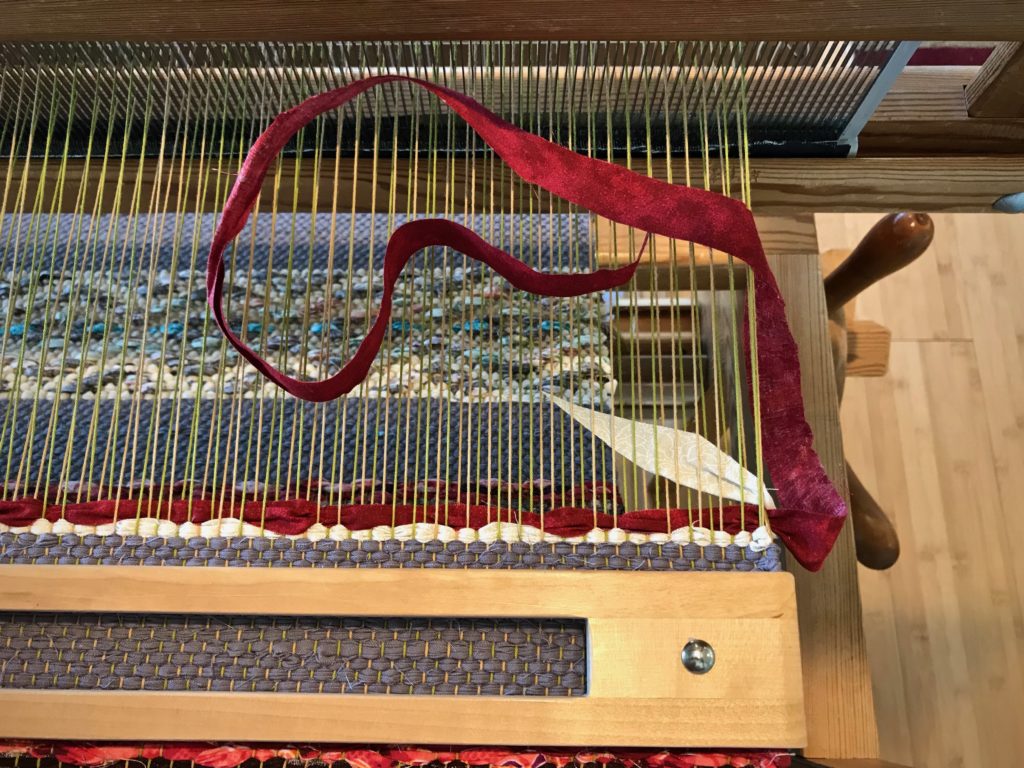
TWO PICKS For a two-pick stripe, leave a tail of several inches on the first pick. For the second pick, lay the weft tail from the first pick in the shed. Lay in the second pick, and cut the fabric strip to overlap the weft tail in the shed. This eliminates any extra bulk at the selvedges. (All tails are cut at a steep angle.)
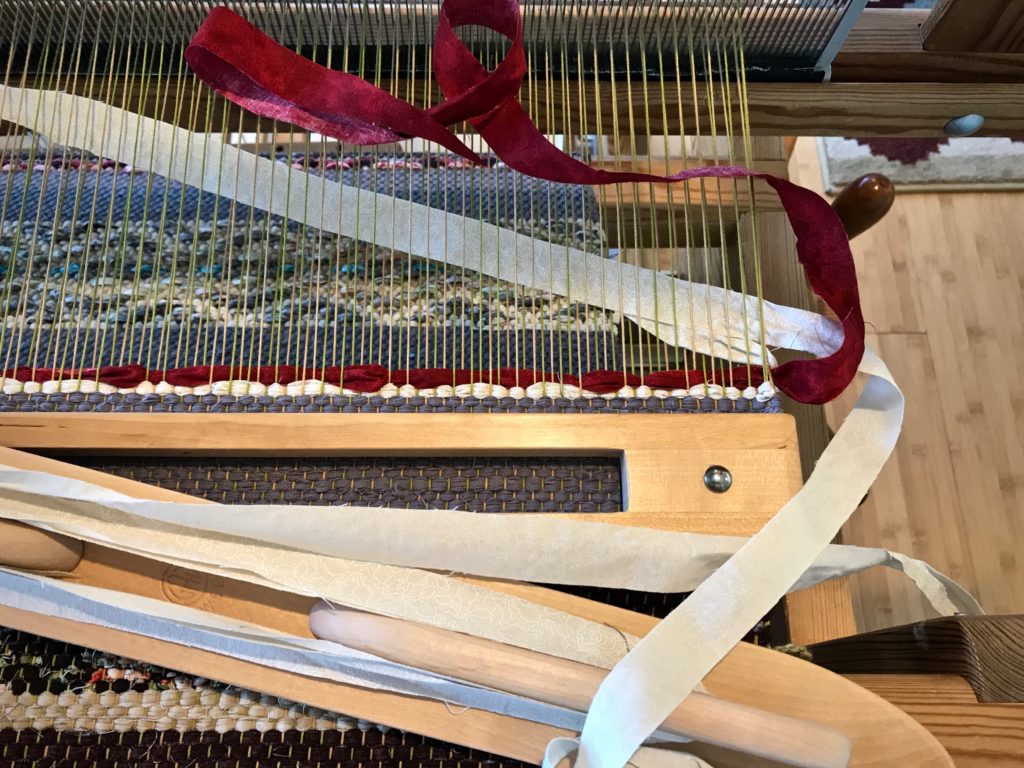
CARRY IT When feasible, carry the weft up the side. If a weft is out of play for only one or two rows, do not cut it. When another weft enters the shed, make sure it encircles the idle weft.
DISTRIBUTE Whenever possible, avoid tucking in weft tails two picks in a row. Wait, and tuck in the tail on a subsequent pick.
HERE IS AN EXAMPLE:
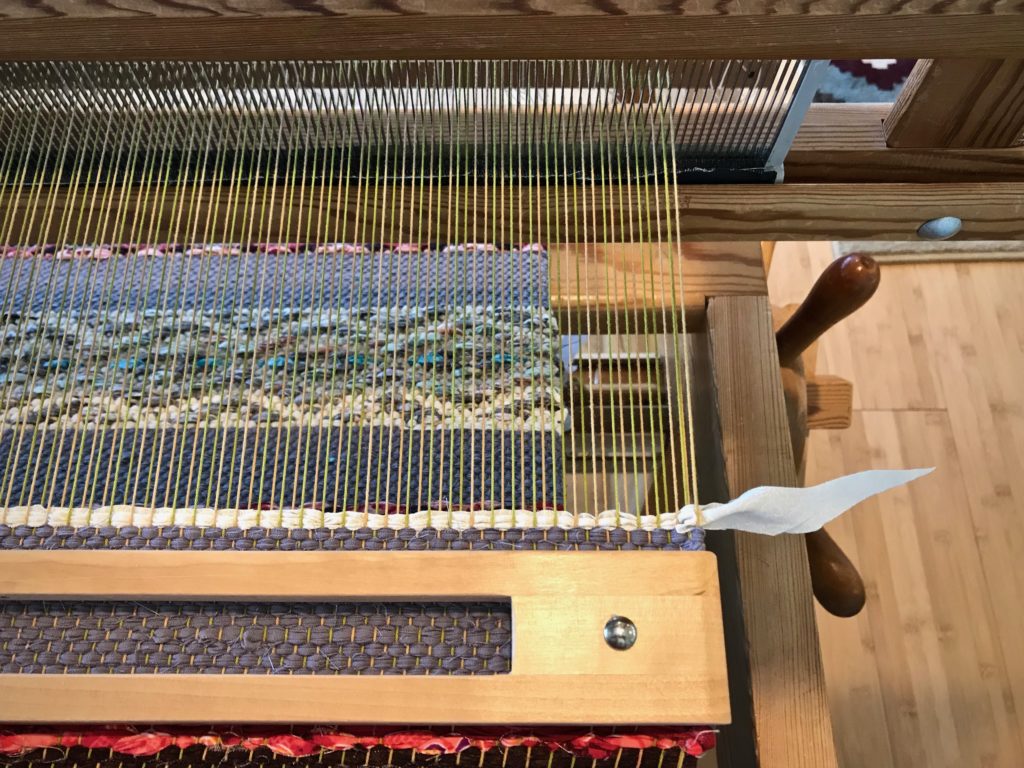
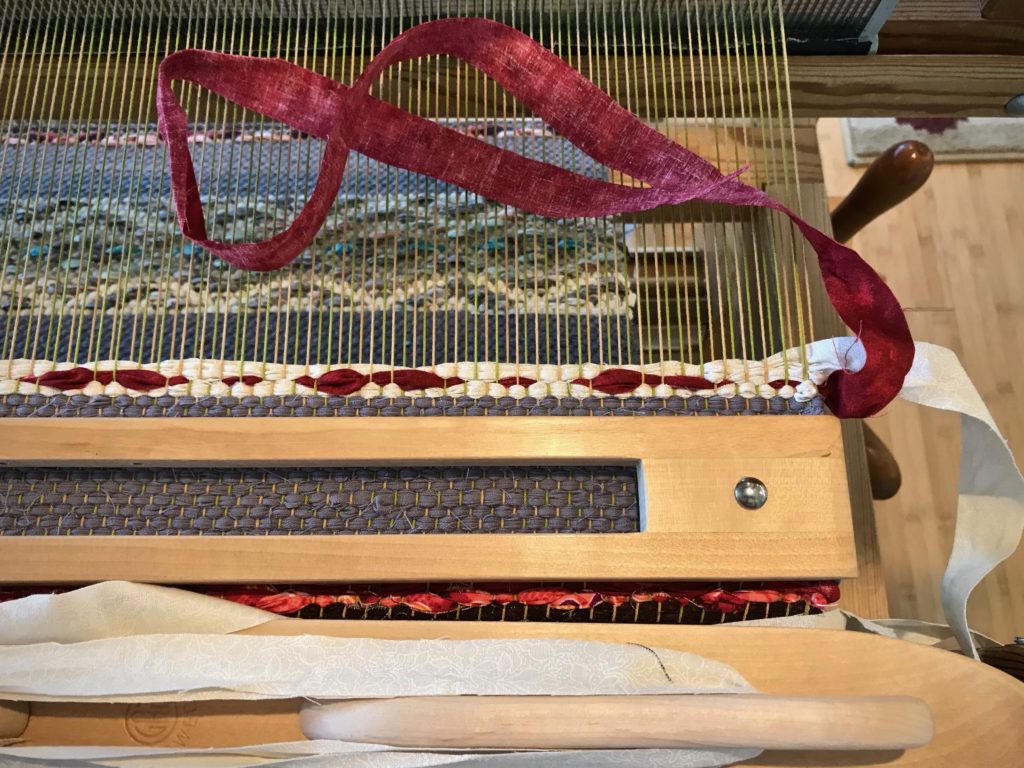
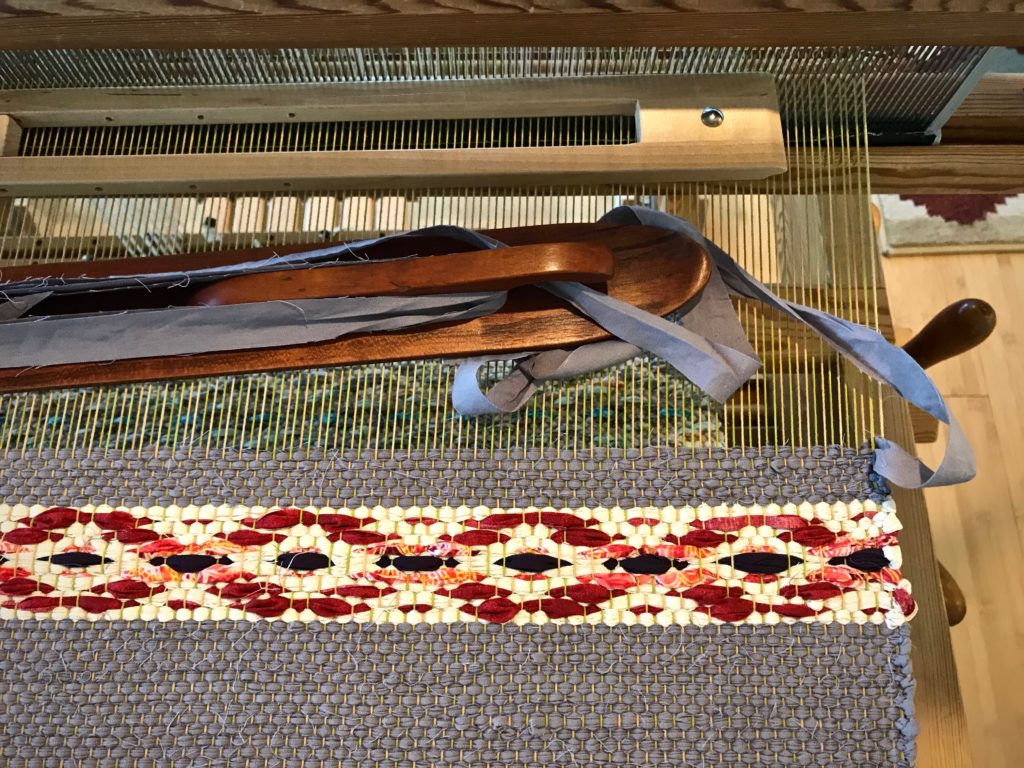
Gray weft ends with weft tail tucked in. White tabby weft tail is not tucked in.Rosepath pattern weft for a two-pick stripe. Loooooong weft tail.Tabby weft goes around the rosepath pattern weft, and is tucked in the shed.Tabby weft comes through the shed and lays over the tucked-in tail.Tabby weft is beaten in.Pattern weft is laid in the shed, with tails overlapping near the center of the warp.Tabby weft is beaten in, and weft tail is tucked in. In the middle of the rosepath medallion the orange print weft is carried up the side until it is used again. For the gray strip that follows the last white tabby pick, the weft tail is tucked in on the second gray pick.Rosepath medallion with several color changes.
One more thing. Cut the weft tail extra long if you are tucking it in a row with weft floats, as in rosepath (Like the center pick in this medallion). This helps keep that weft tail from popping out of place. You don’t want those tails to start waving at you.