I am not fiddling with the weft fabric strips. Instead of making the right side of the fabric always show on top, I am letting the fabric strips fall as they may. The resulting variance in the weft gives the rug a vintage-like appearance. Also, I am using print fabric for some of the the light color of the double binding that purposely obscures the contrast of dark and light in some places. This is to give the rug a softer, more playful appearance.
Some of the red fabric for the rug’s hem has a wrong side that is much lighter than its right side. I am letting some of that lighter fabric show on top. Besides giving the rug a vintage-like appearance, this variance also makes the rug more reversible. The front and back side of the rug will be similar to each other, instead of one dark side and one light side.Glimåkra Ideal, with the beginning of a burst-of-color short rug to be used as a bath mat.
Home is where we make our true expression. The textiles from our hands speak without saying a word.
I have good reasons for cutting off this first double-binding rag rug before proceeding with the rest of the warp. This pause and reset ensures happy weaving to the end. Cutting off gives me a fresh start for the next rug.
Reasons for cutting off rag rug before end of warp
Uneven warp tension. I can improve the warp by tying back on.
Large rag rag. I can get a tighter warp tension by removing the rug’s bulk from the cloth beam.
New design. It helps me to see the completed rug before starting the next one, since this is a brand-new design.
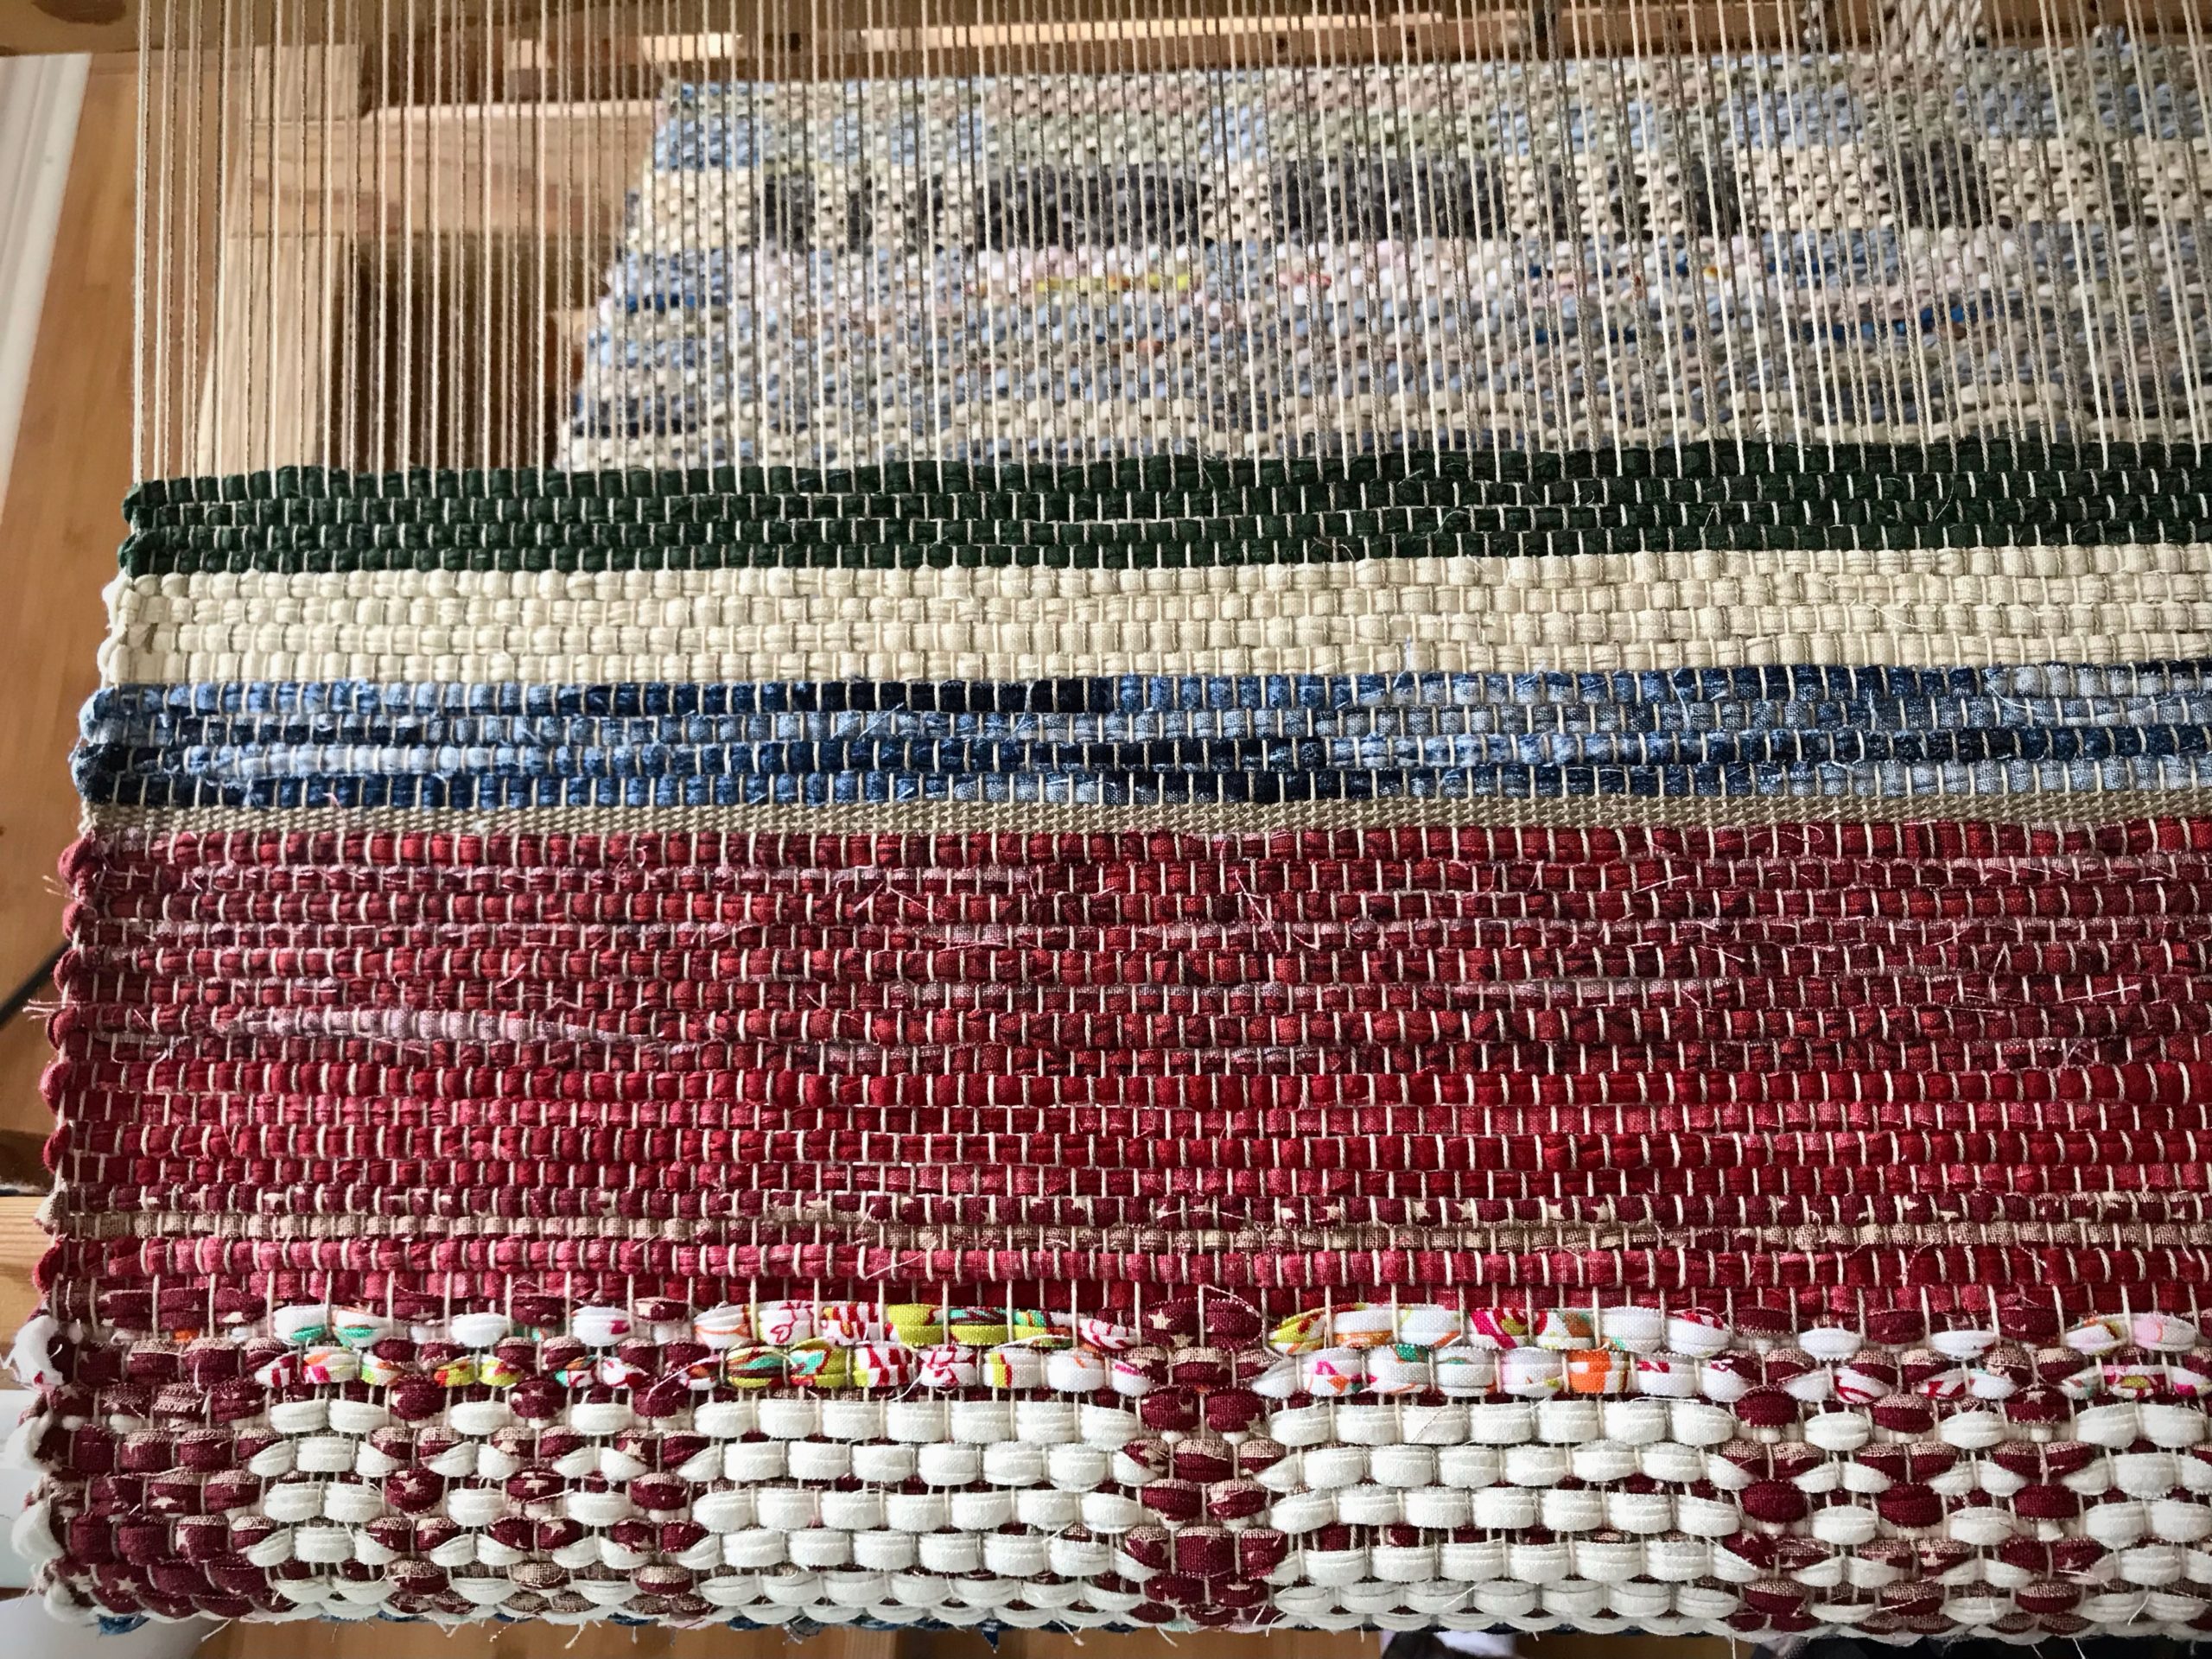
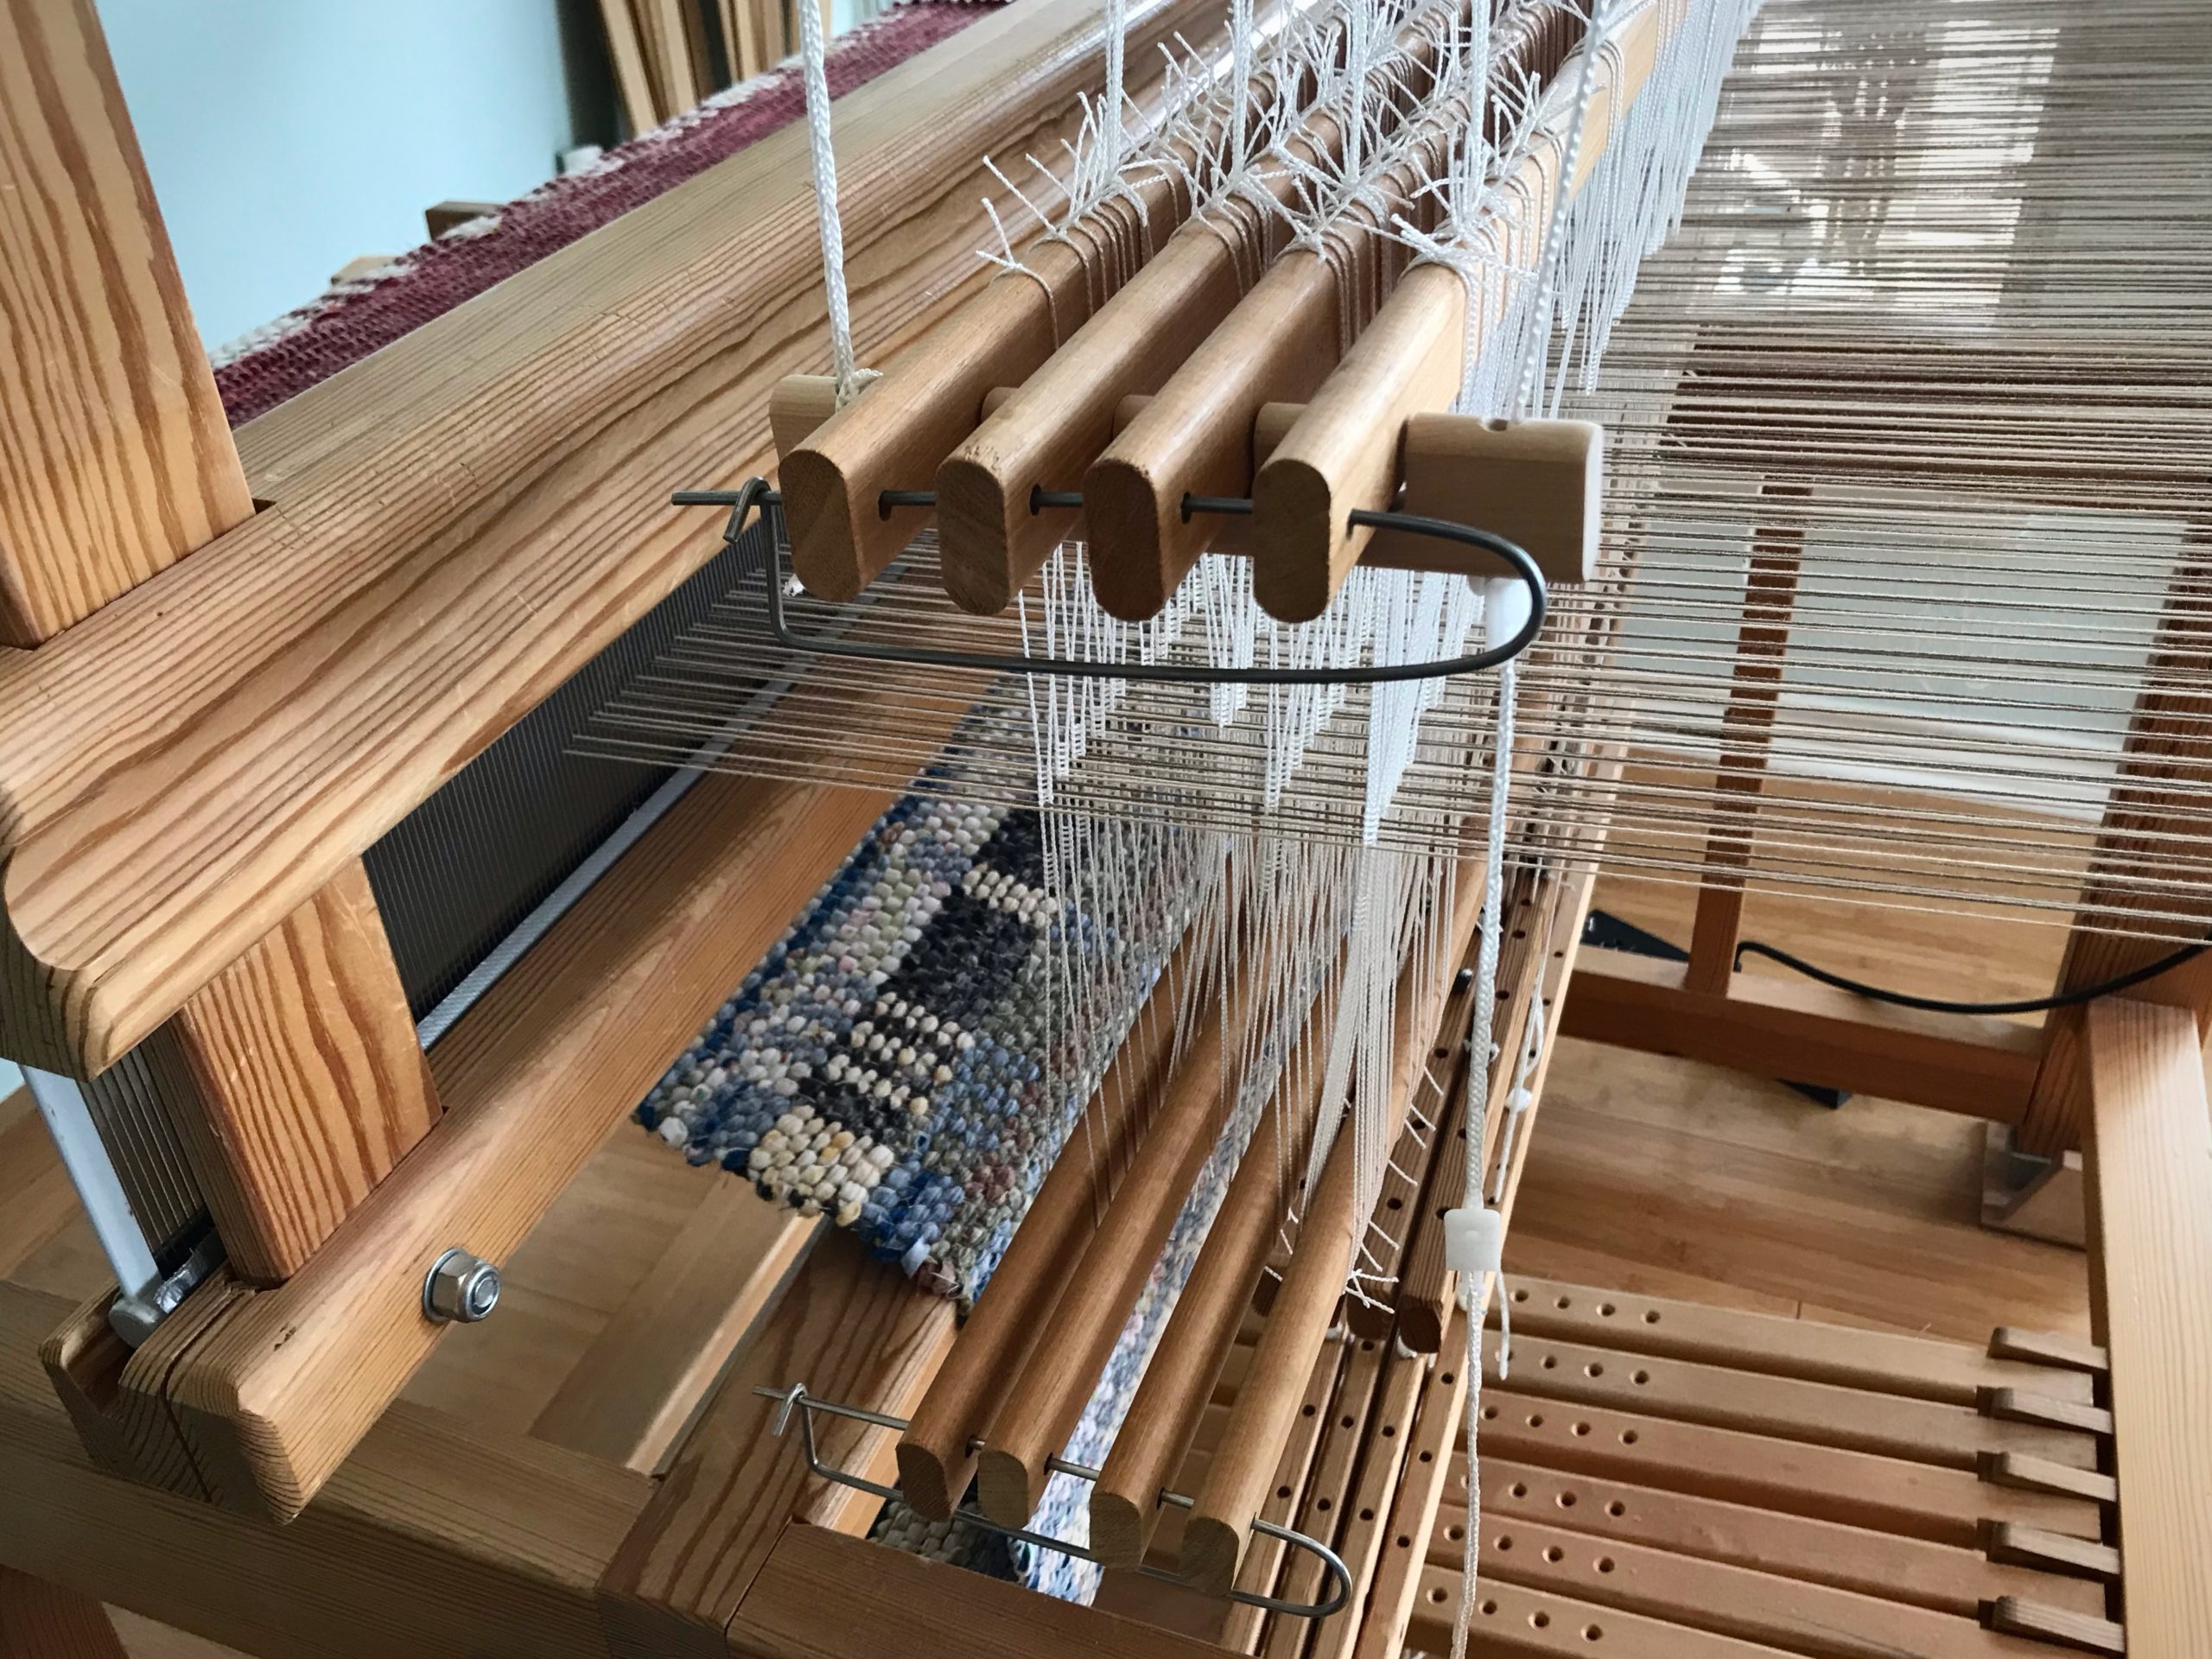
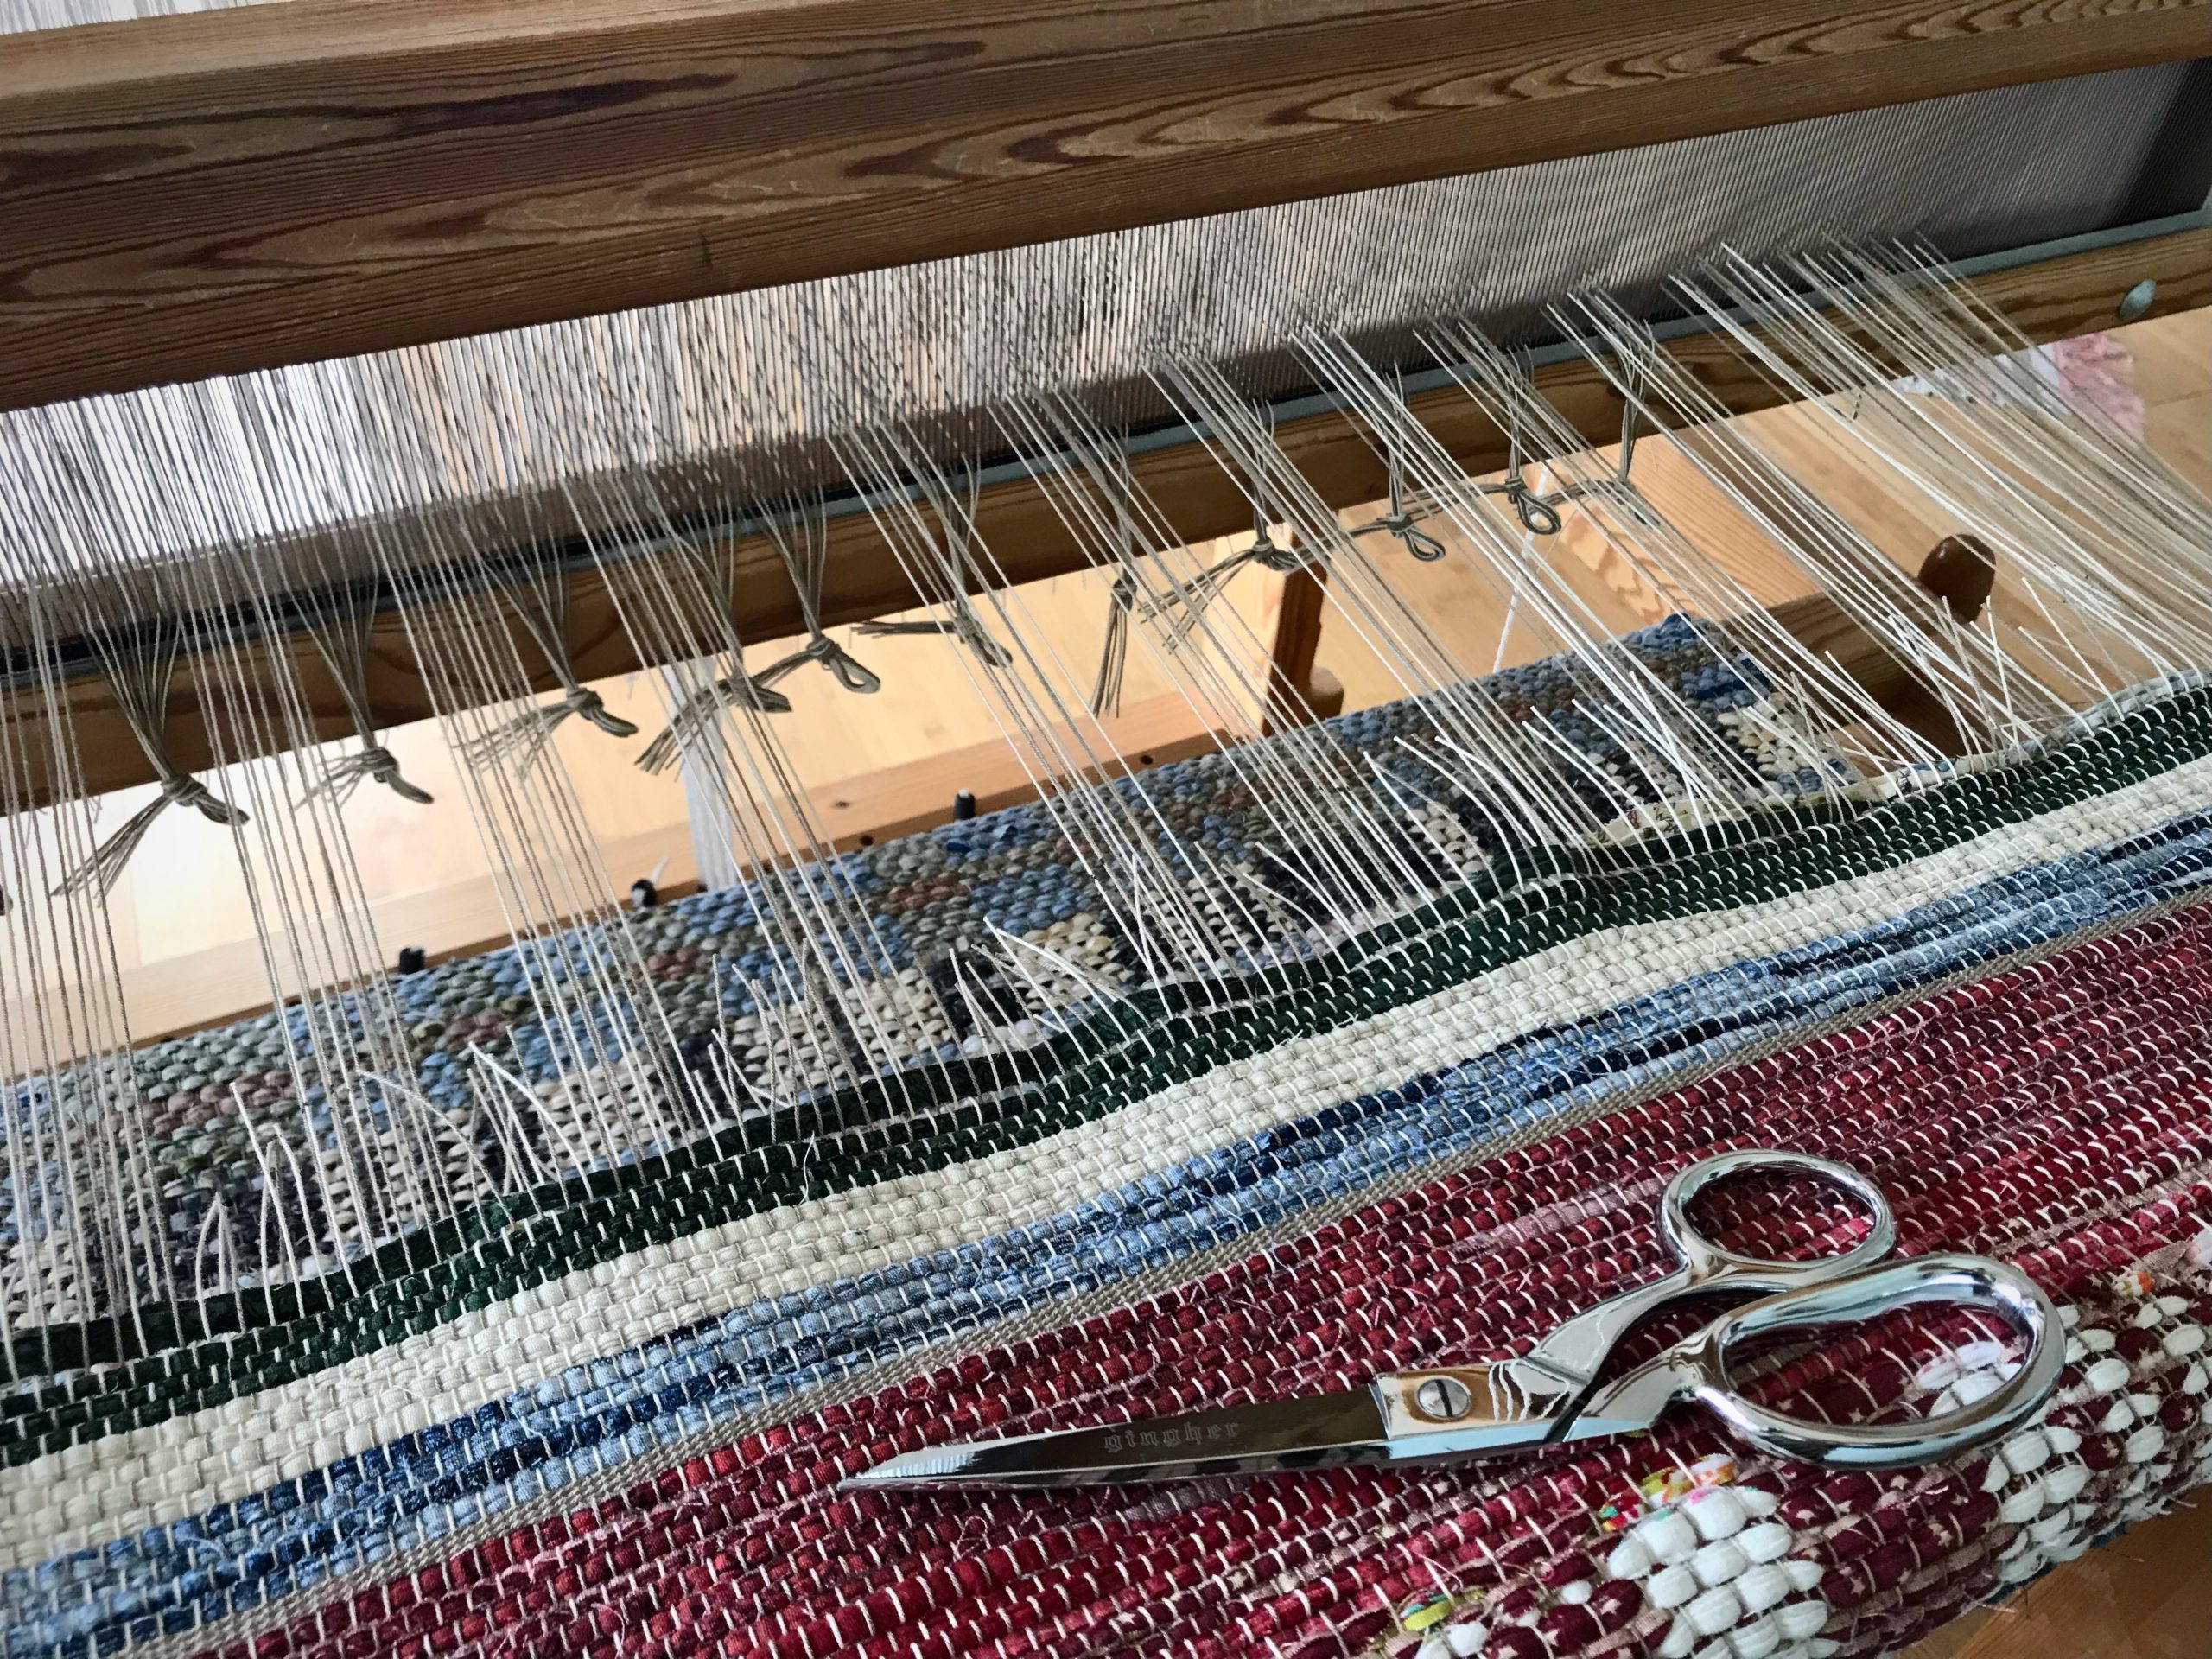
Rug comes to an end with a red border/hem. A warp-thread header follows, and then a few rows of scrap header to help secure the weft until finishing knots are tied.
Steps for cutting off rag rug before end of warp (countermarch loom)
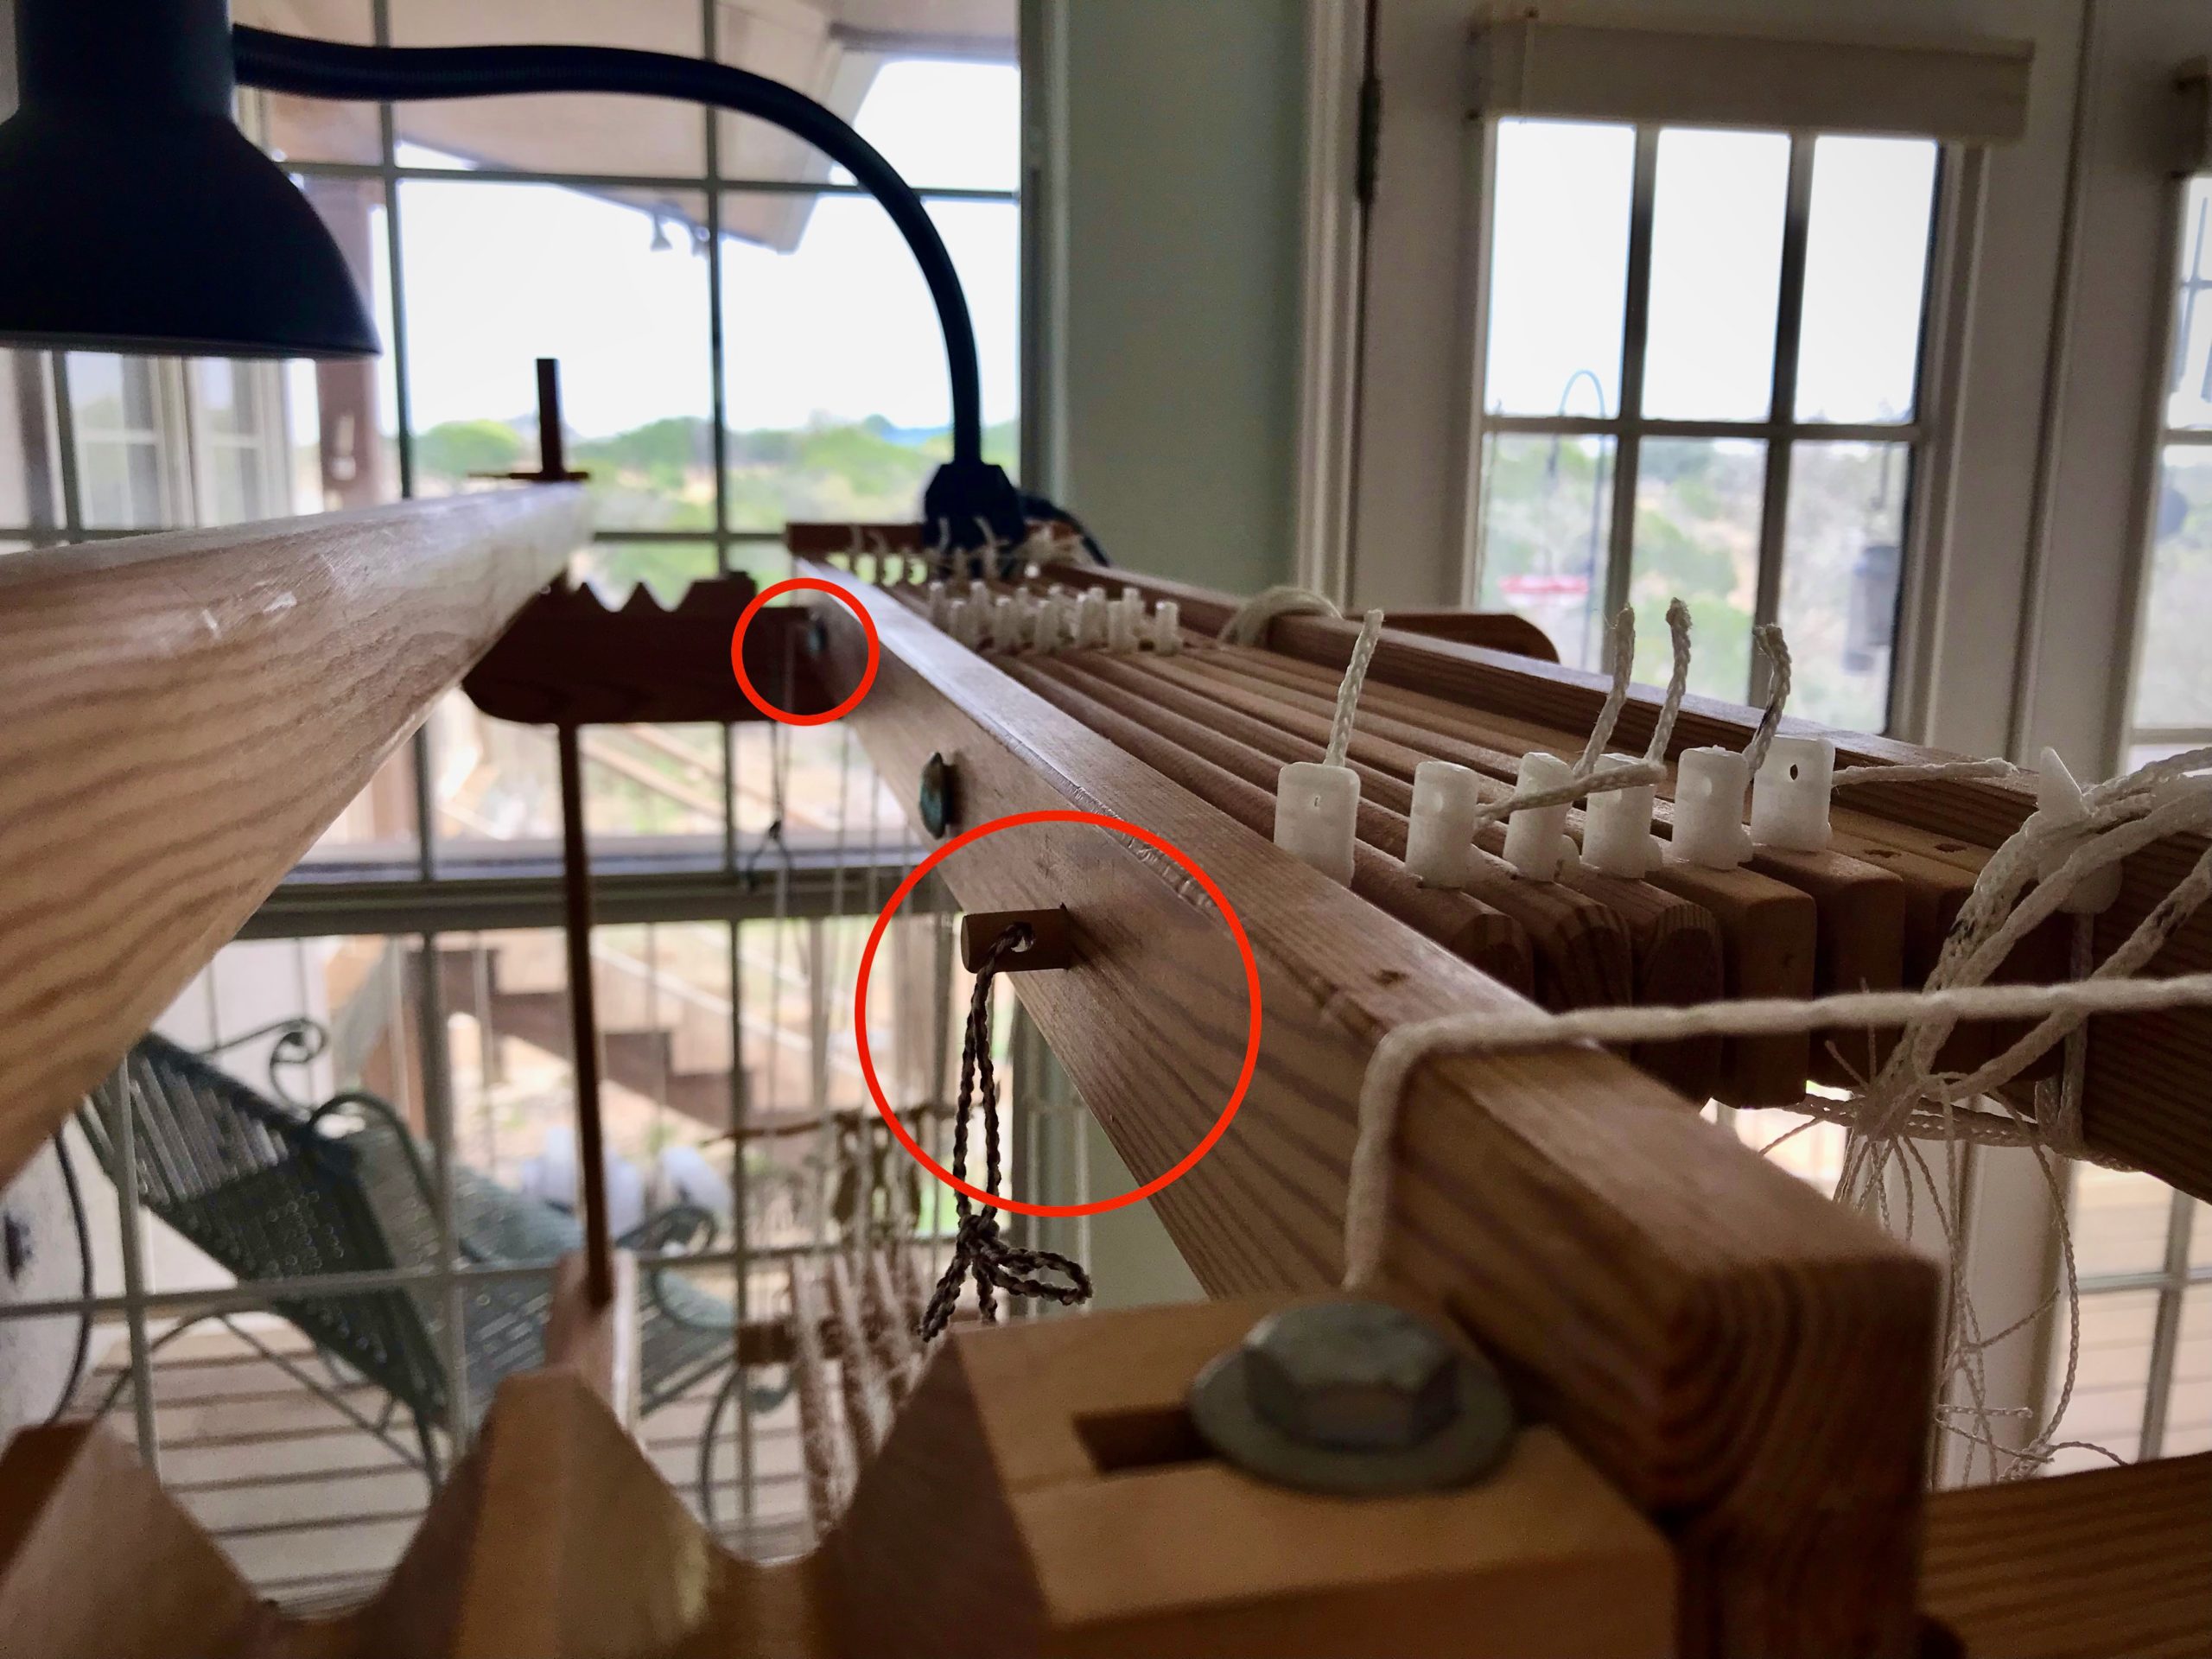
Tension on the warp is released at the back ratchet and front ratchet.
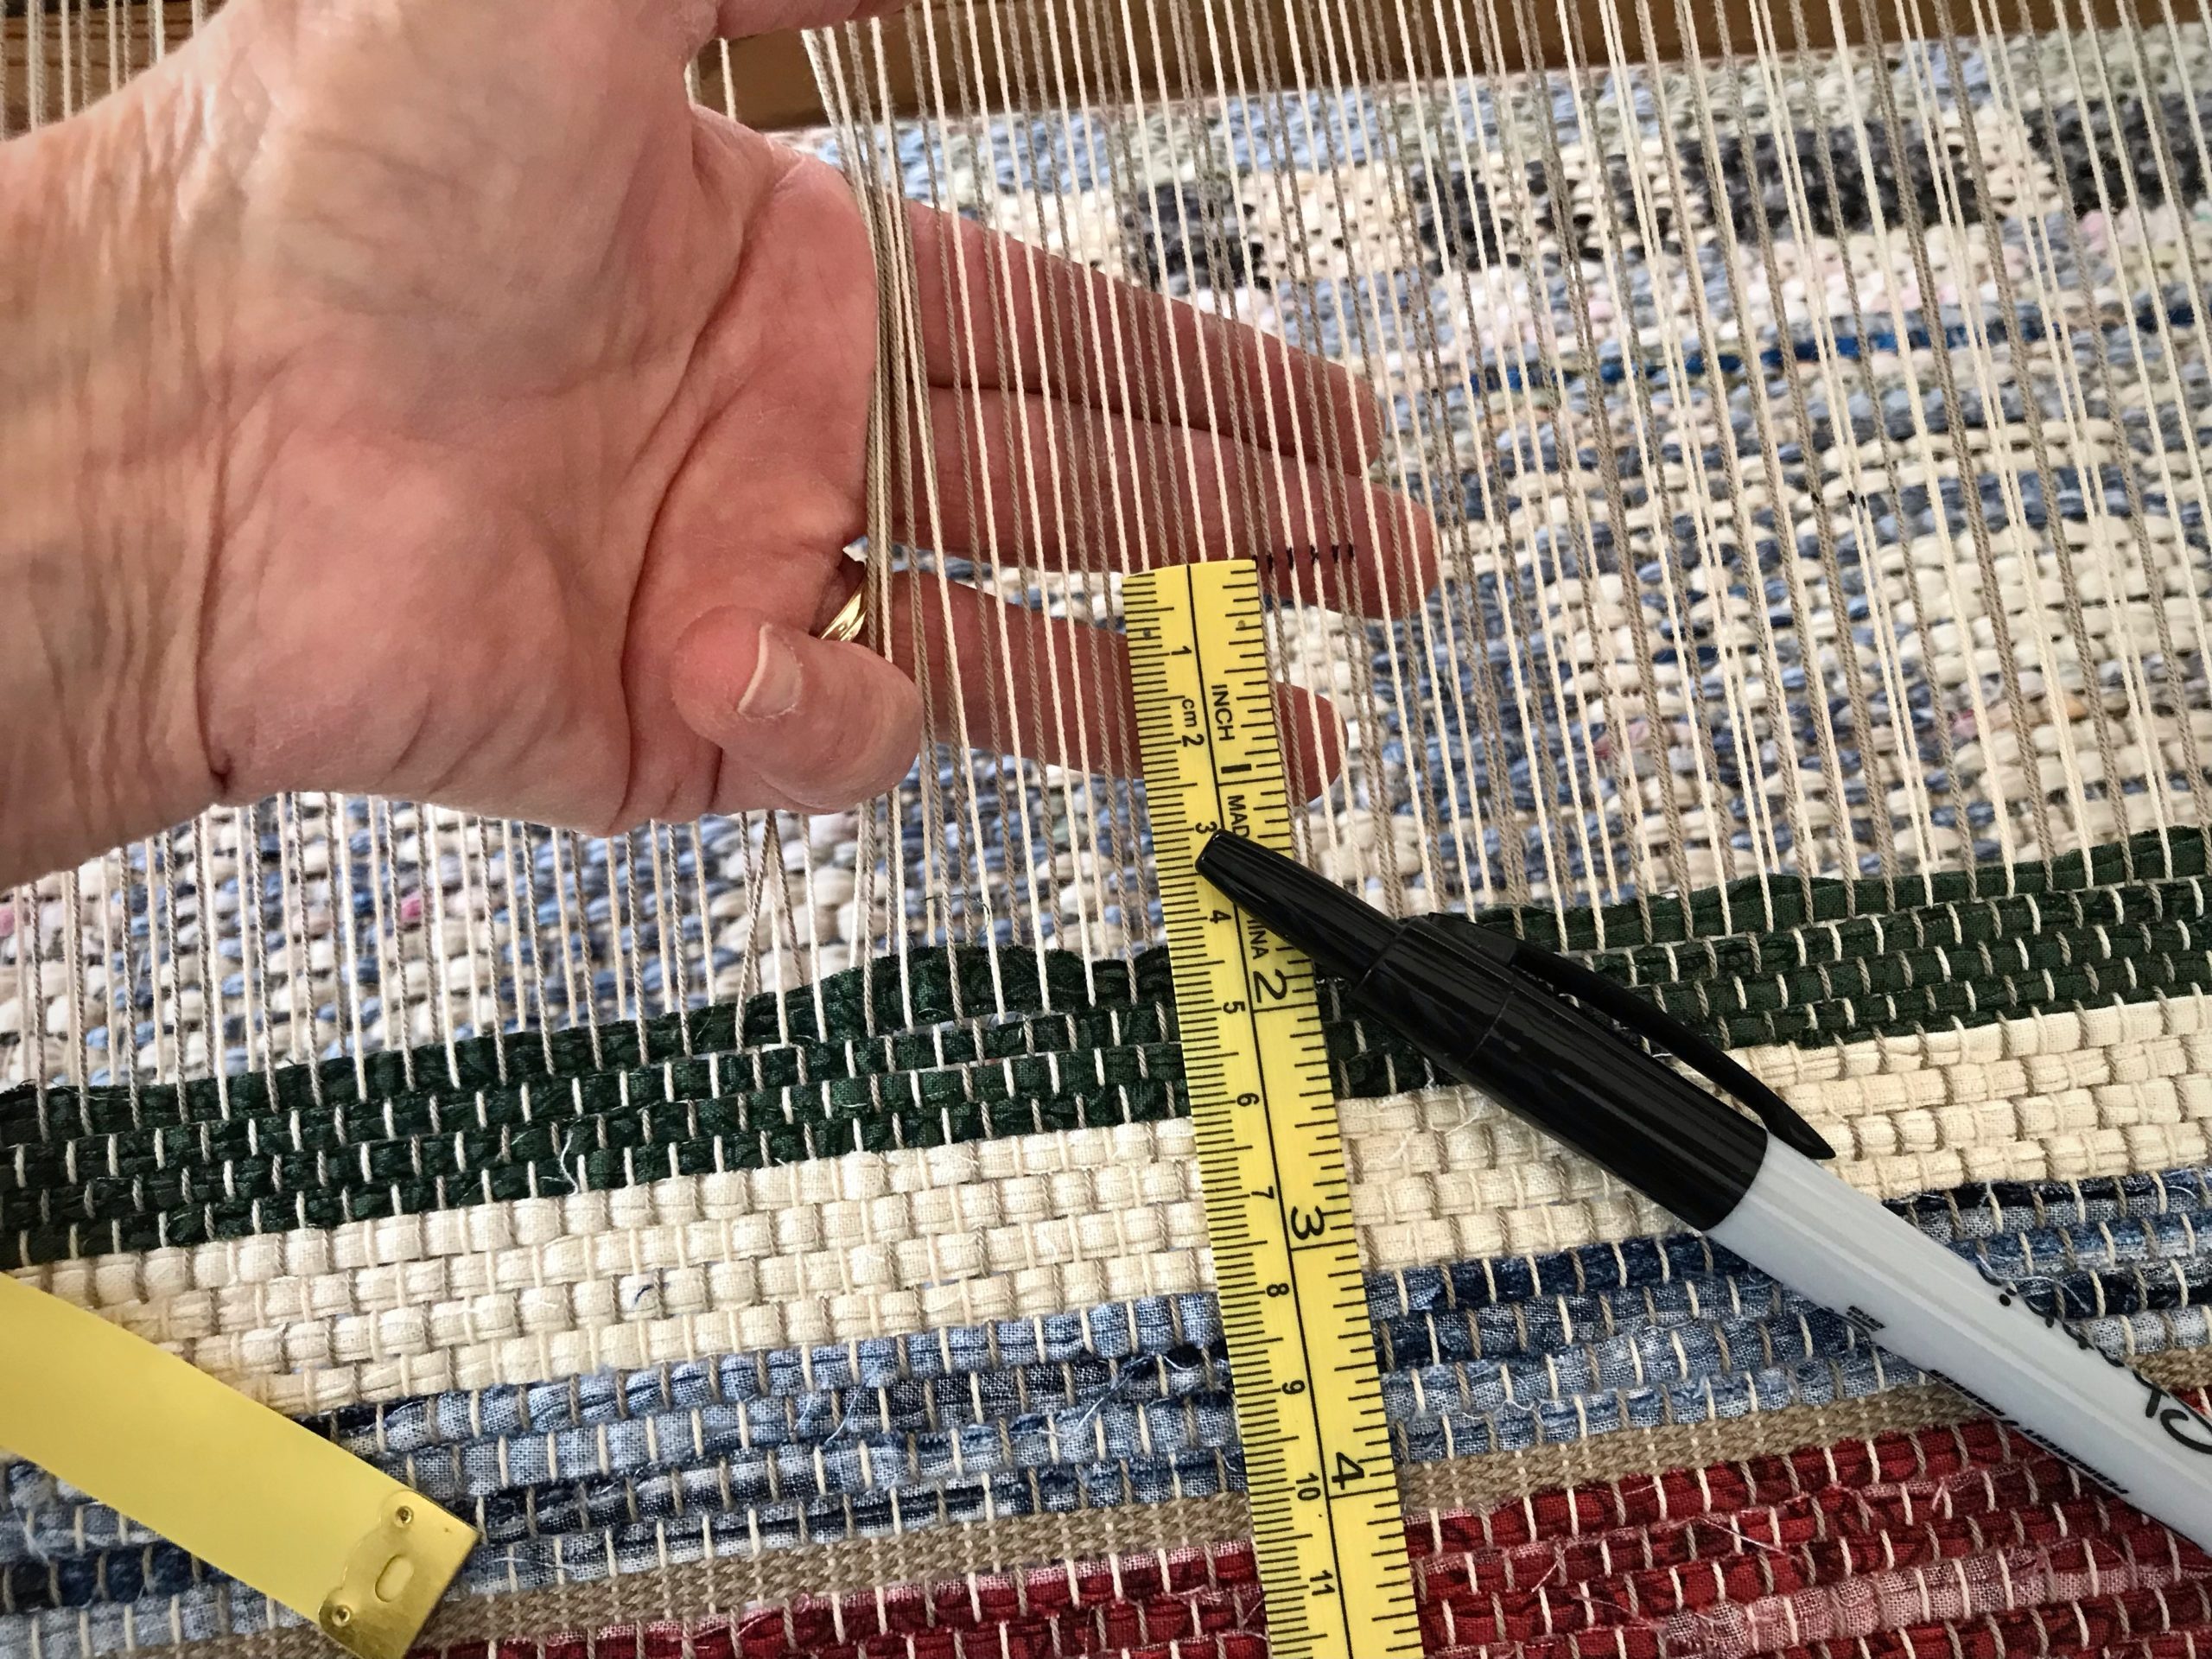
Mark a cutting line across the warp with a black marker. Allow at least 10 centimeters (4 inches) beyond the rug’s warp-thread header for tying knots later that will secure the weft.
Mark a cutting line across the warp. Leave enough warp at the end of the rug to tie overhand knots to secure the weft.
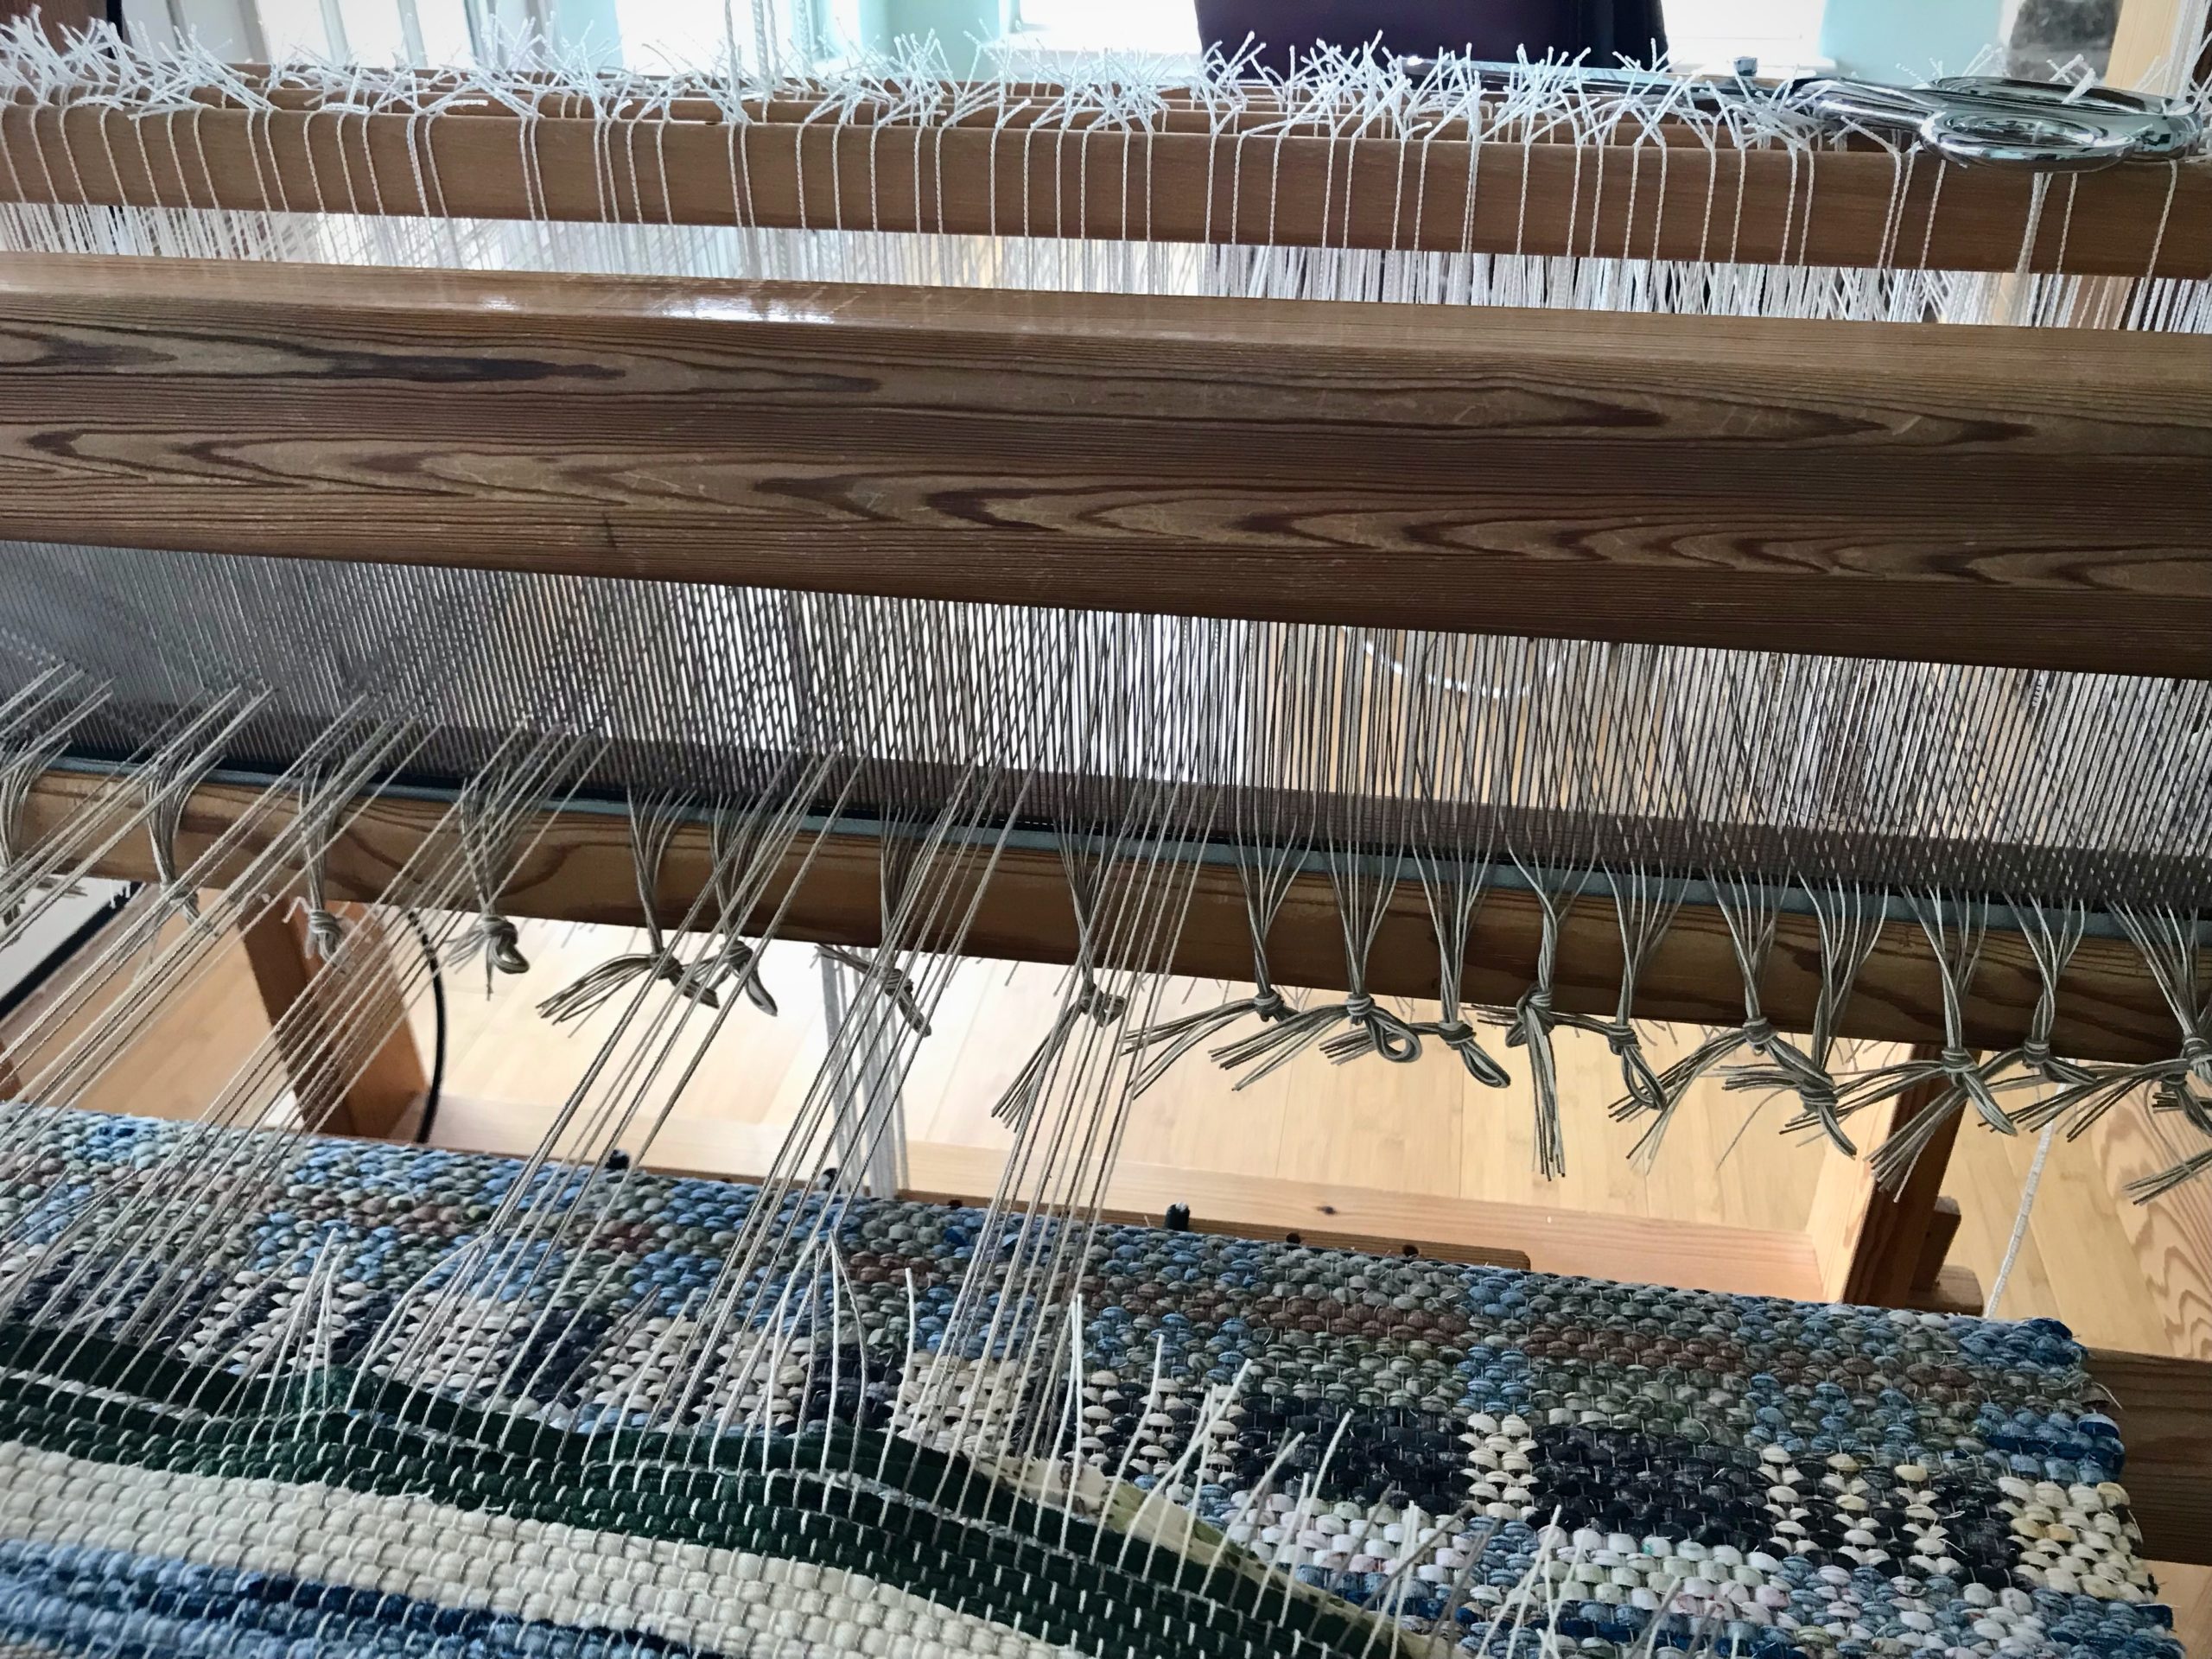
With tying back on in mind, cut one group of ends and skip the next group of ends. Continue across the warp, alternating cut and uncut groups of ends. Tie groups of cut ends in slipknots as you go.
By spacing out the cut ends, the weight of the rug is evenly distributed. There is less pulling and distortion while cutting off. At the same time I am preparing groups of ends for tying back on.
Make a second pass, cutting the remaining groups of ends, and tying them in slipknots.
Continue cutting off groups of ends.
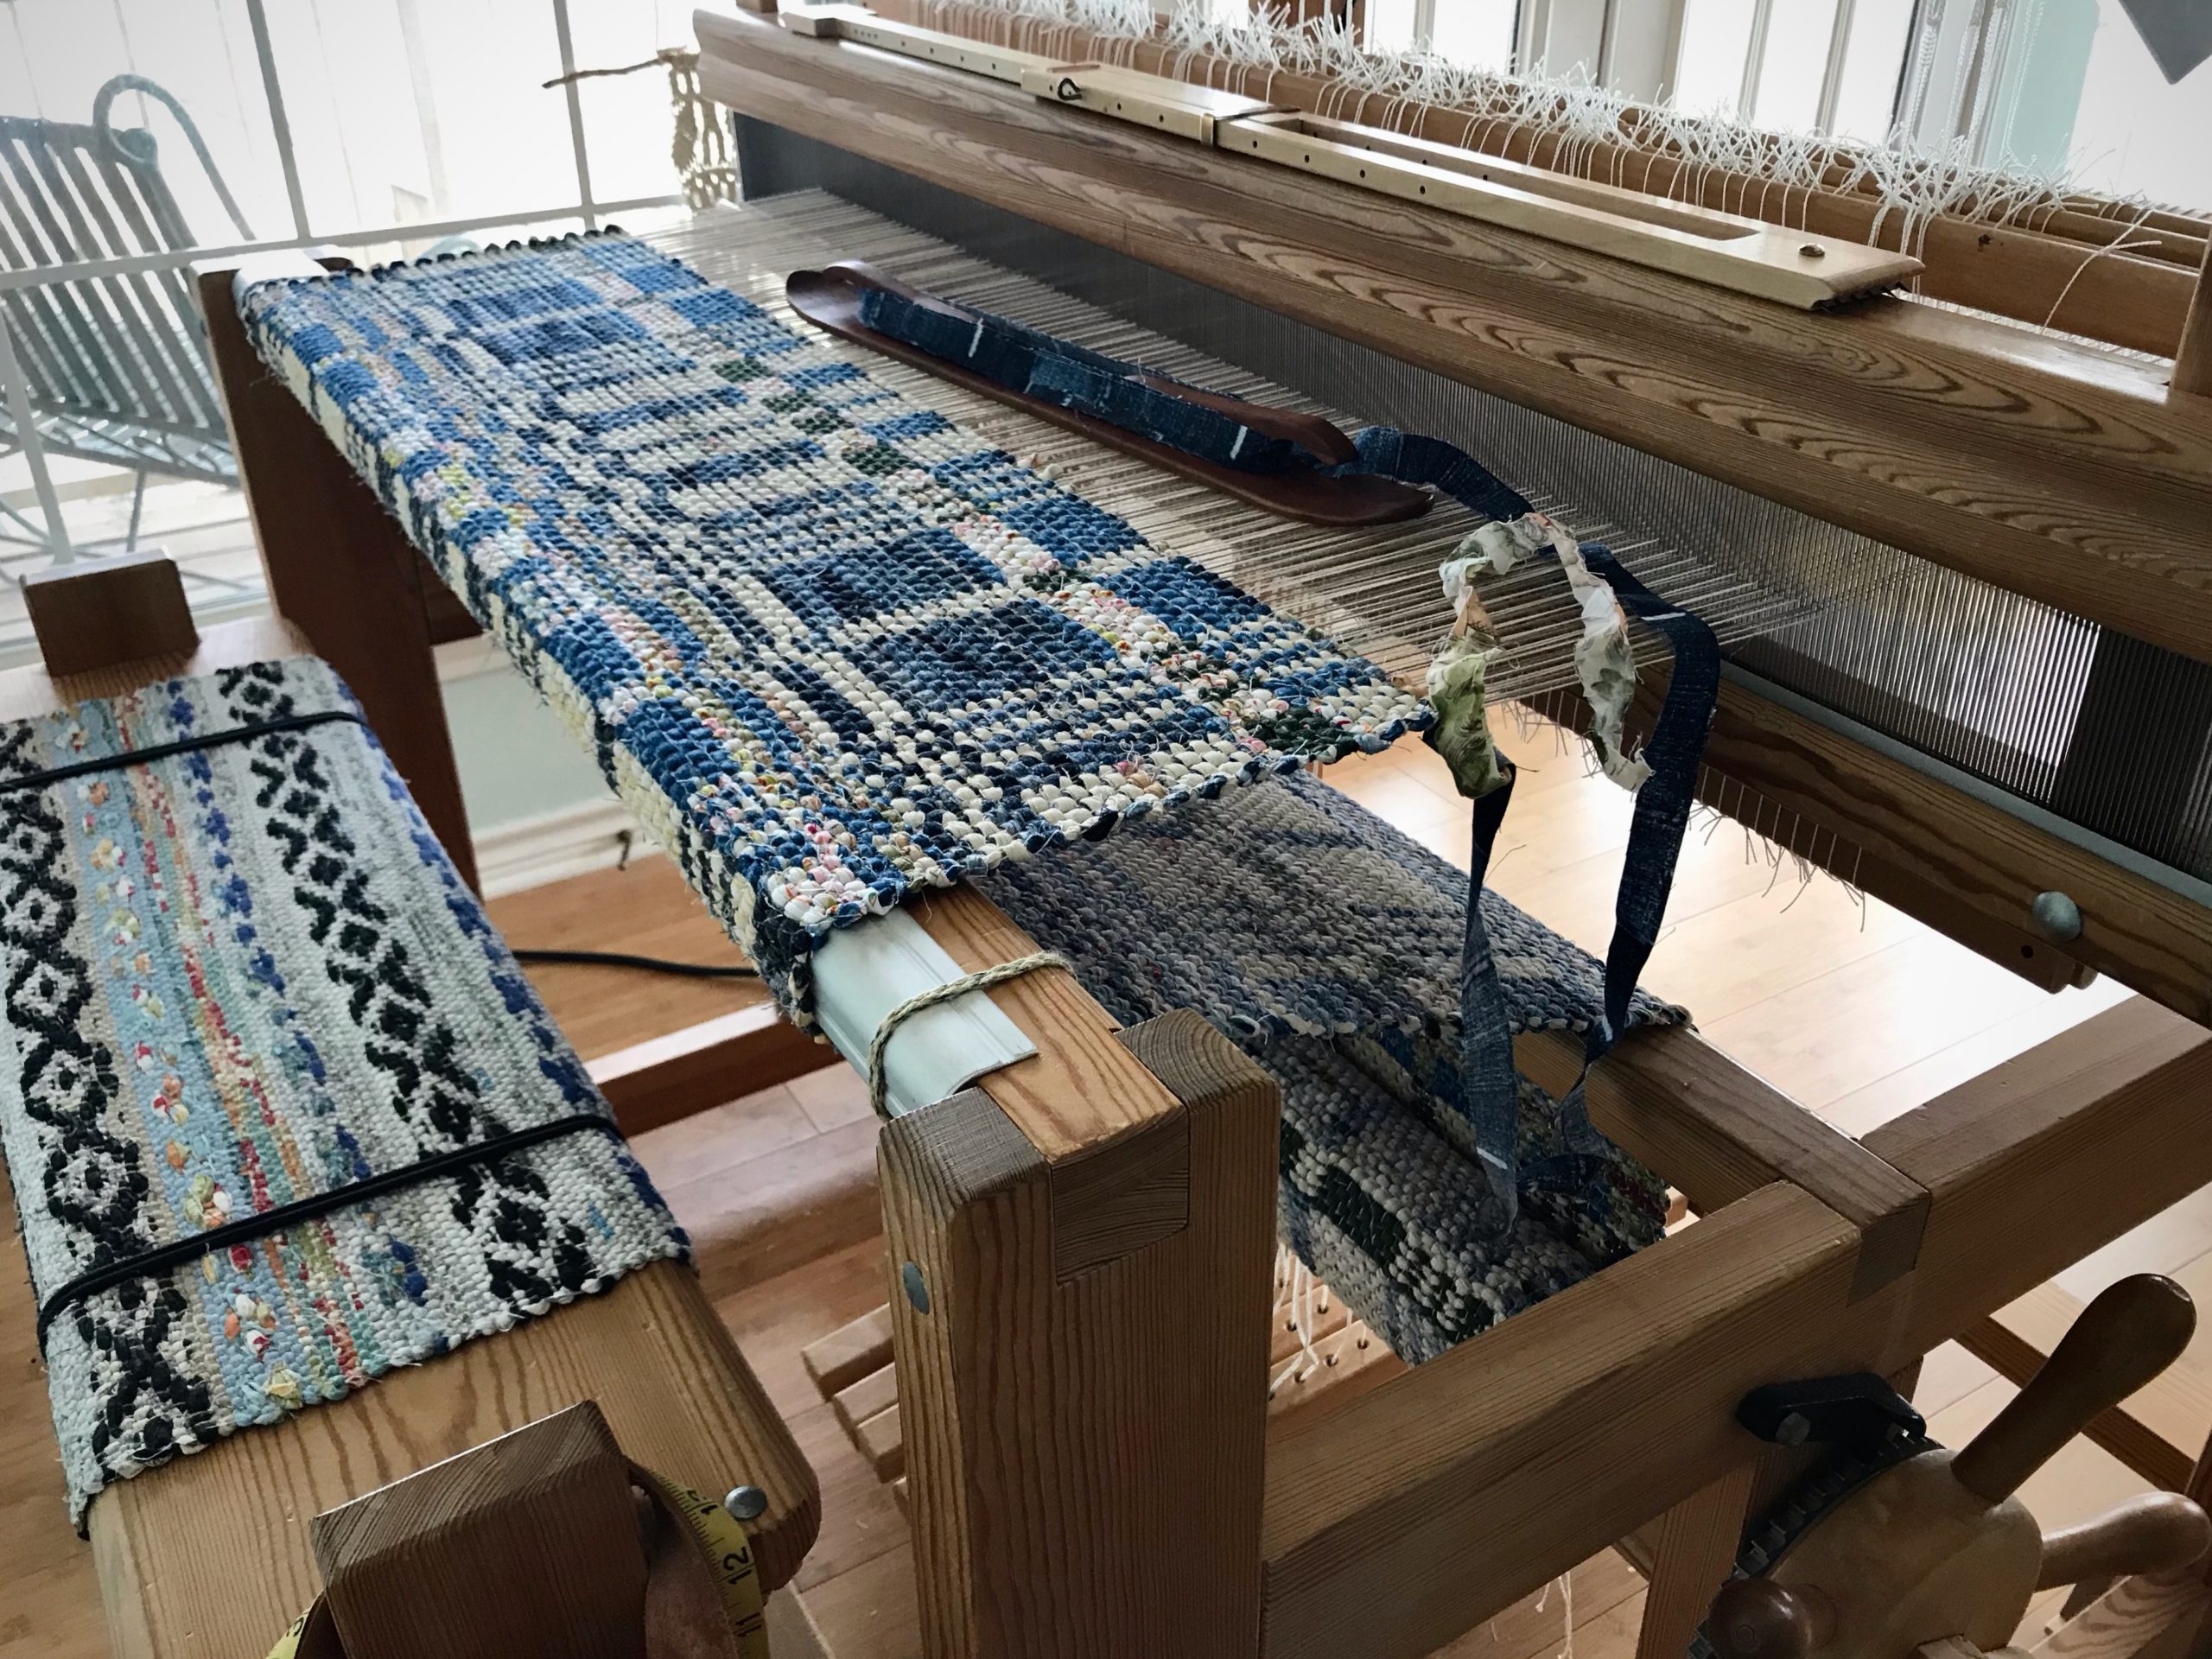
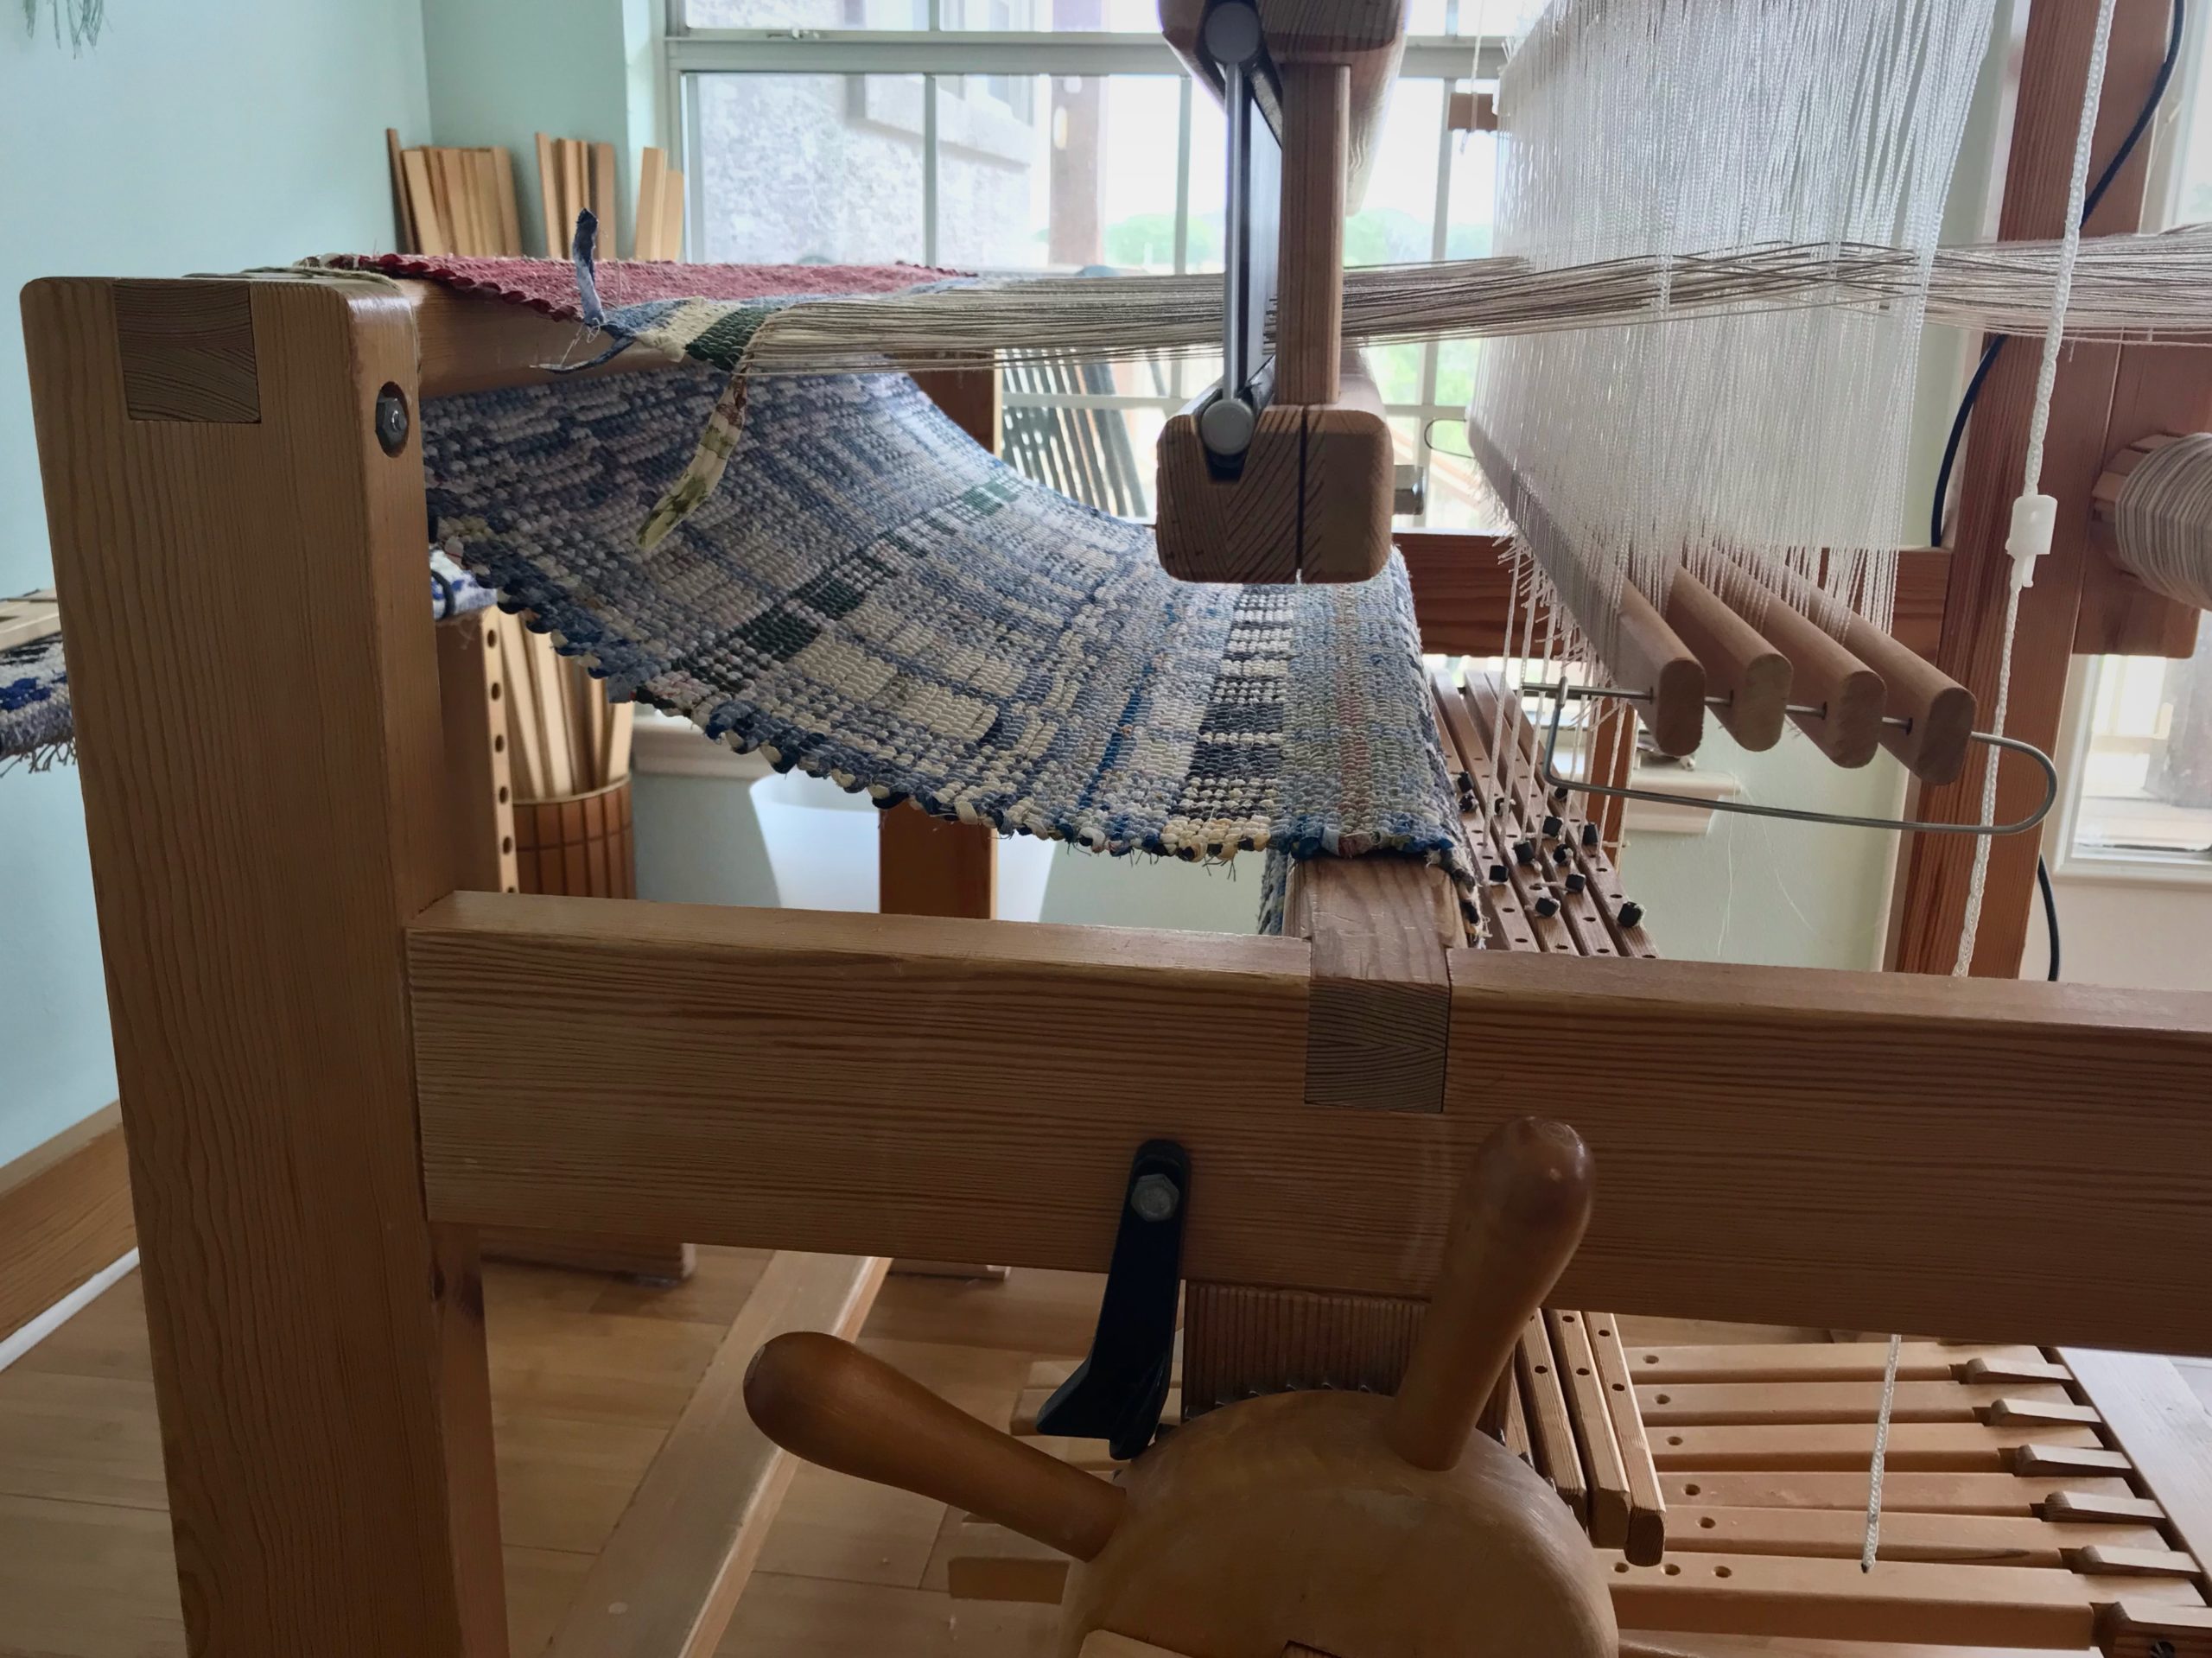
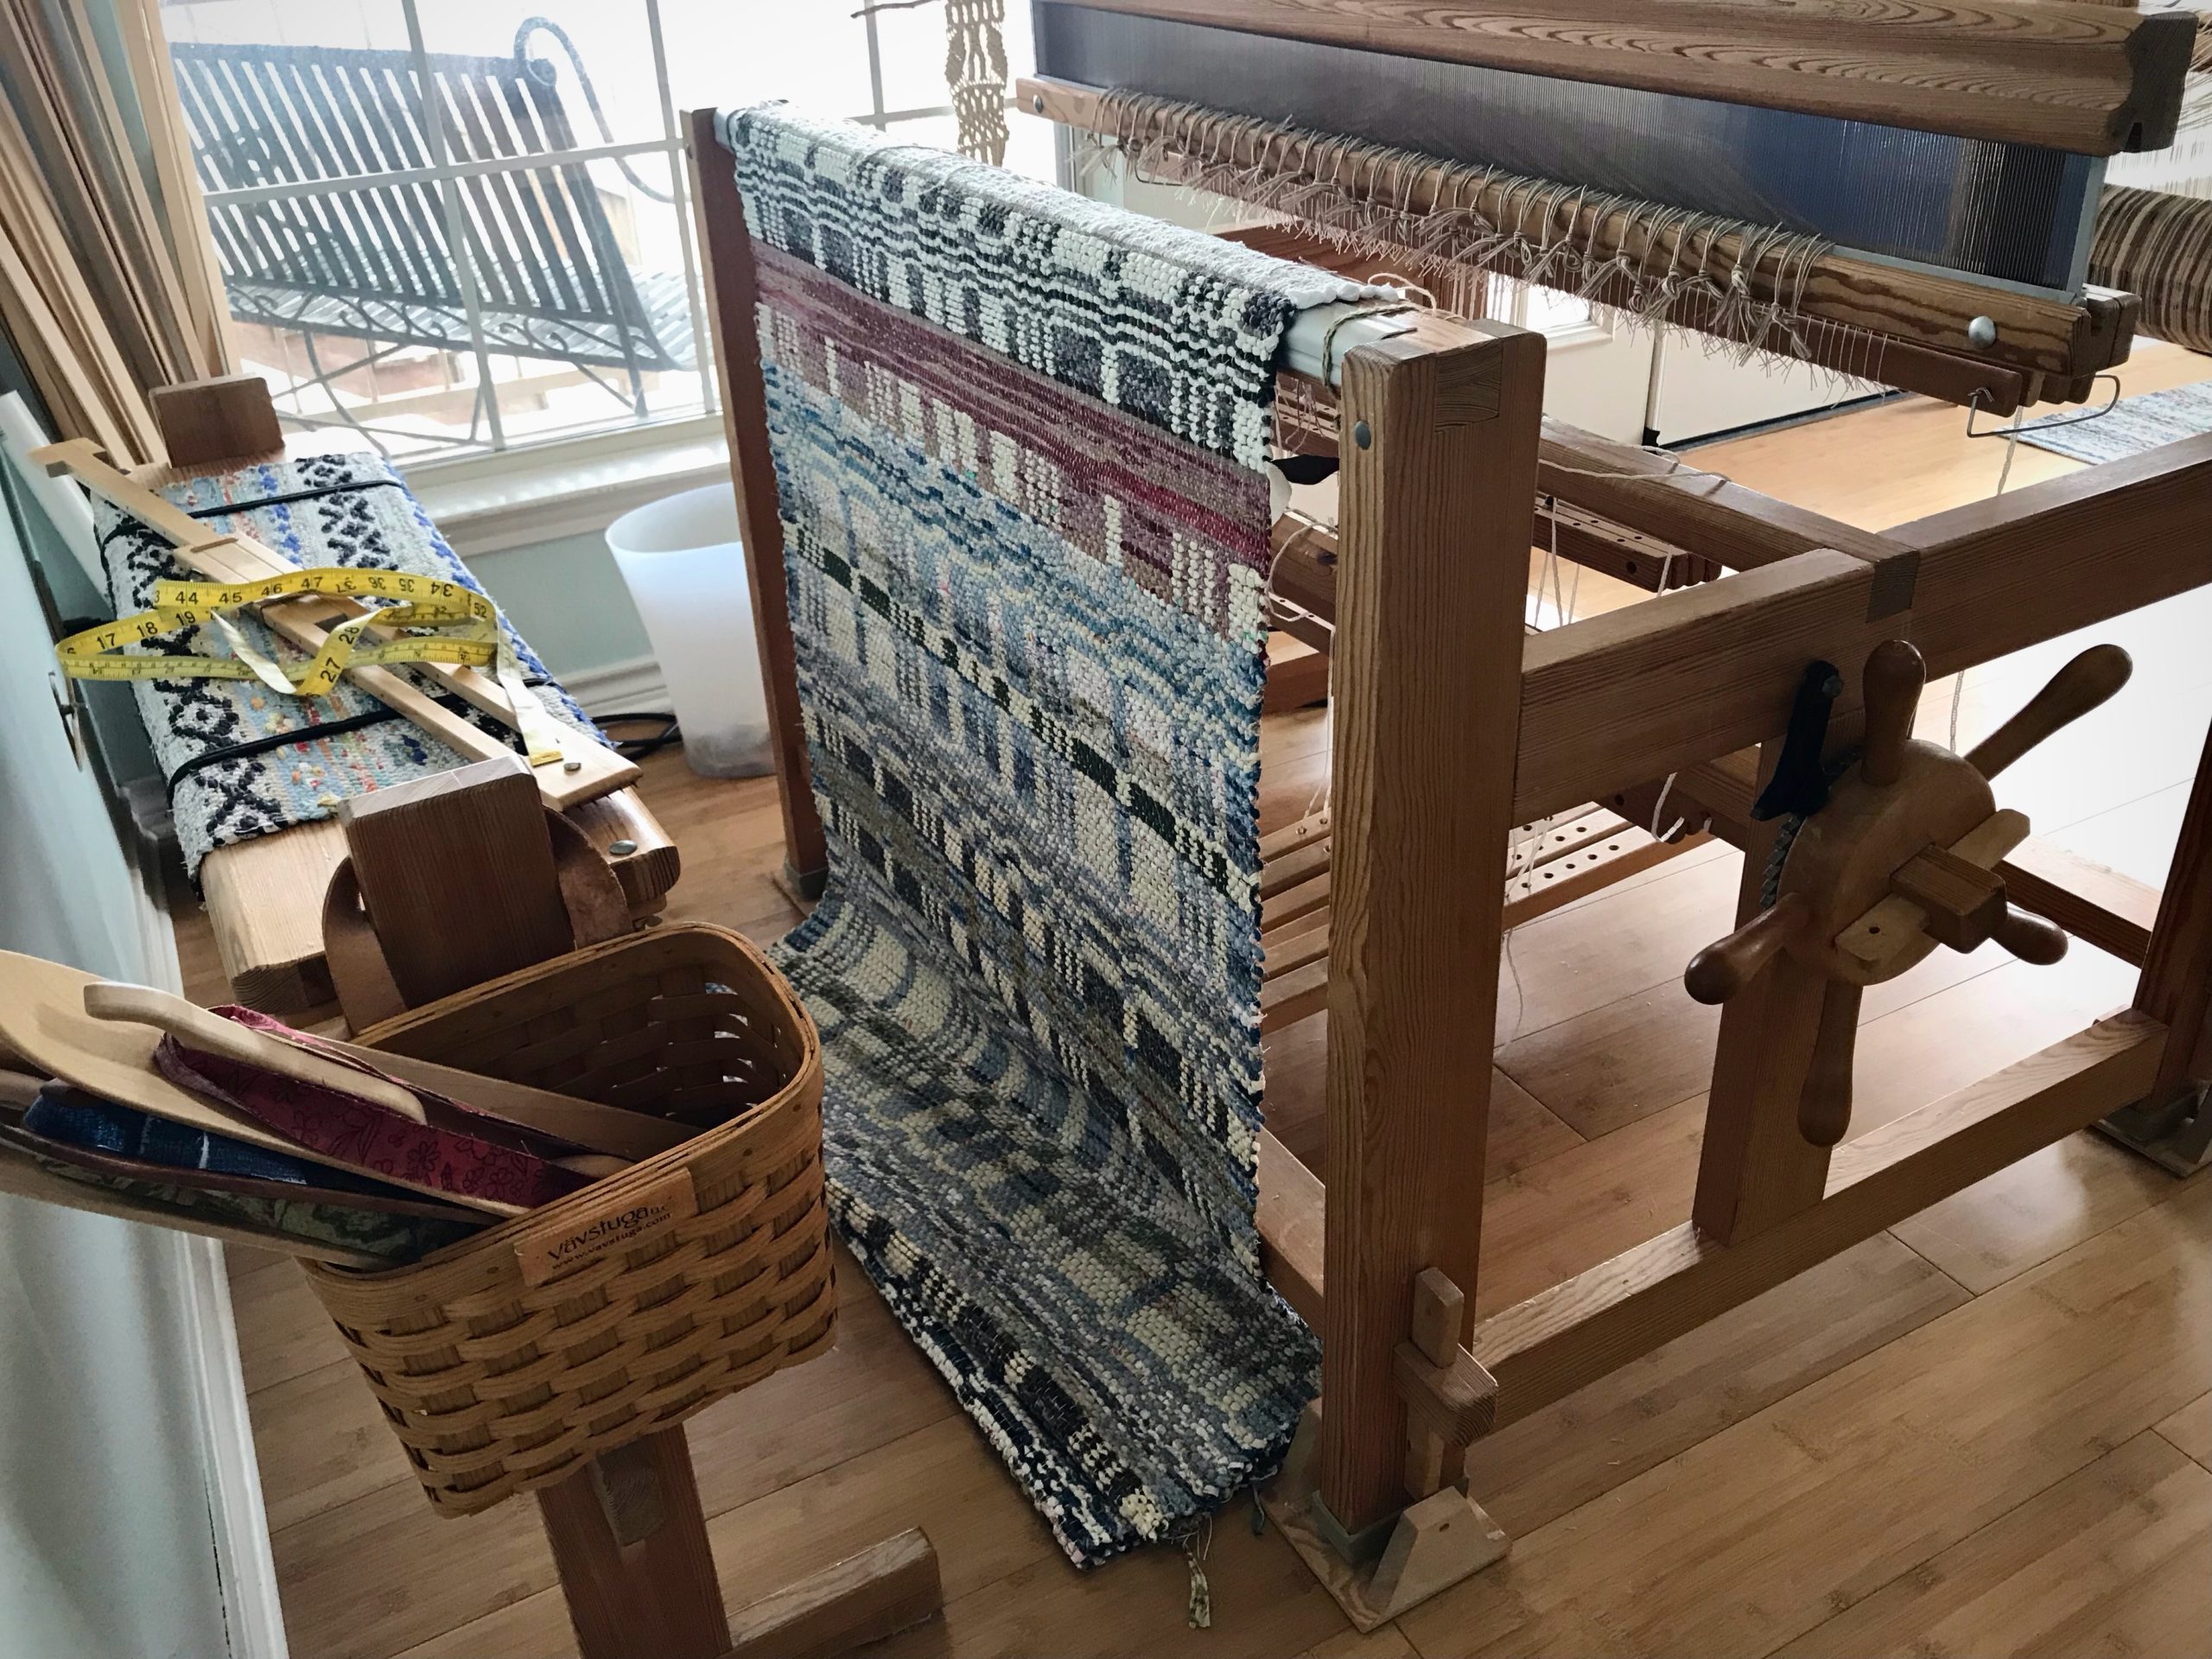
Unroll the rug from the cloth beam. Take a photograph.
First look at the back of the rug.
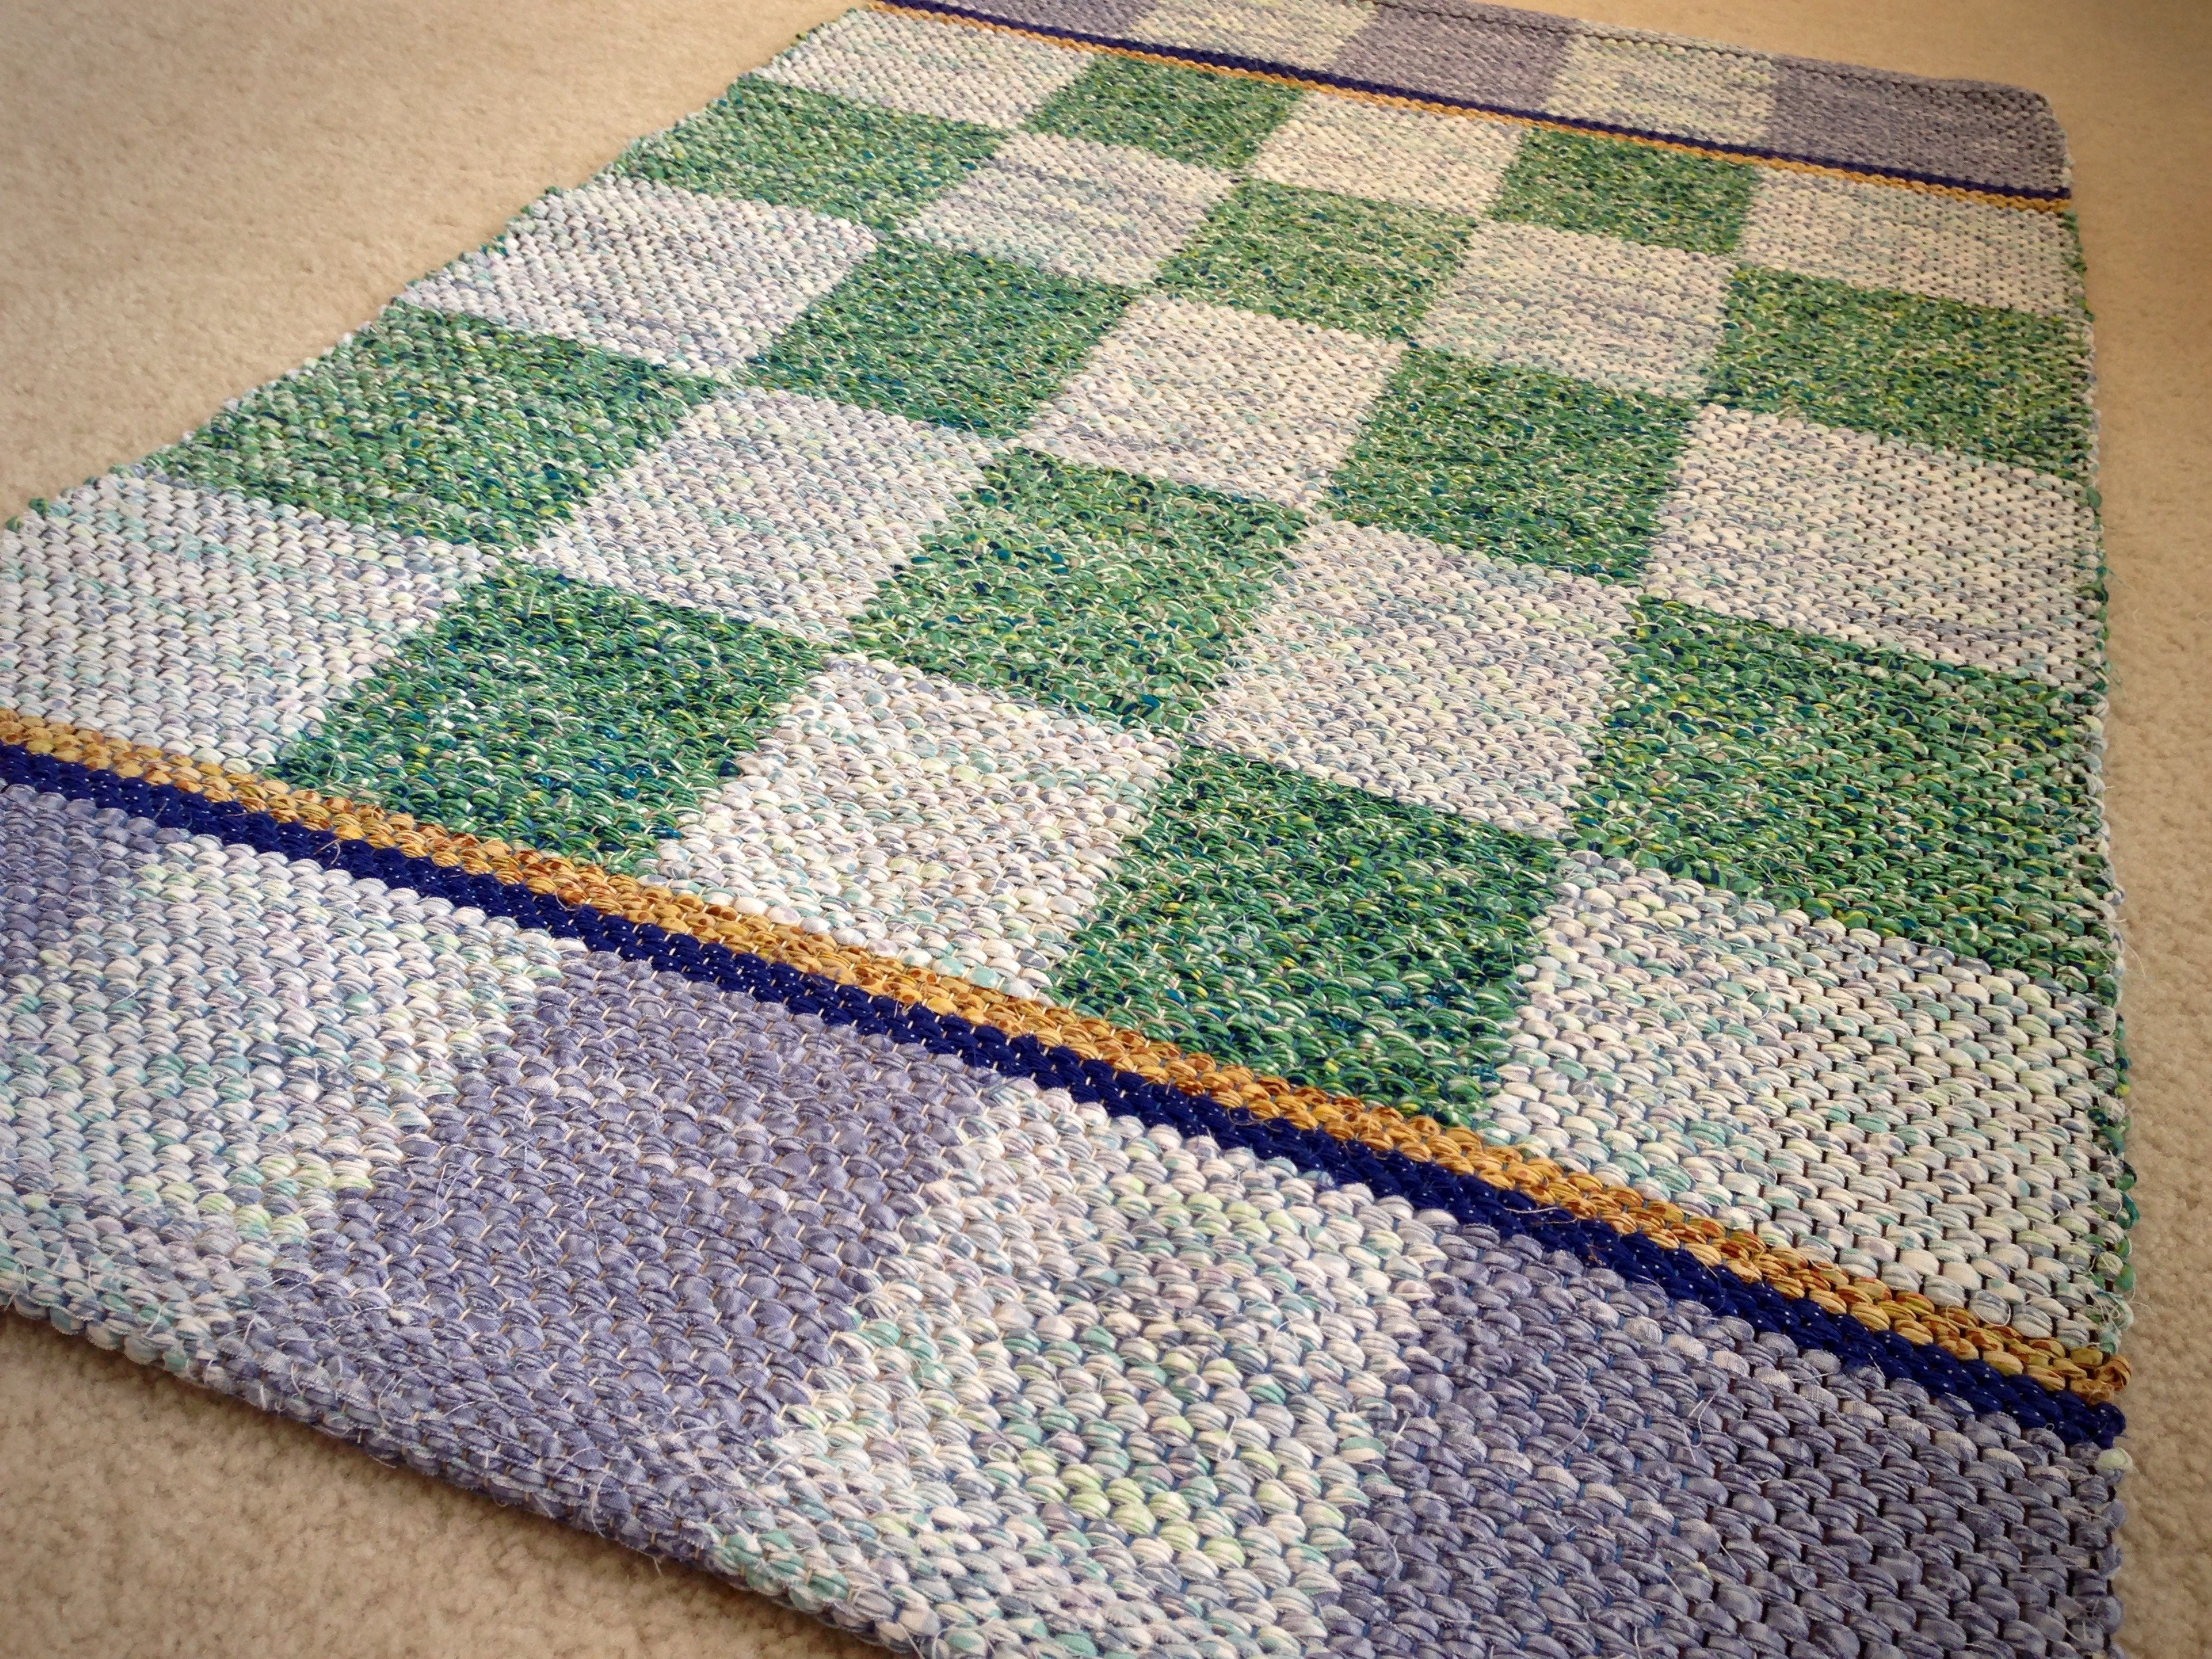
Lay the rug out on the floor. Ooh and aah.
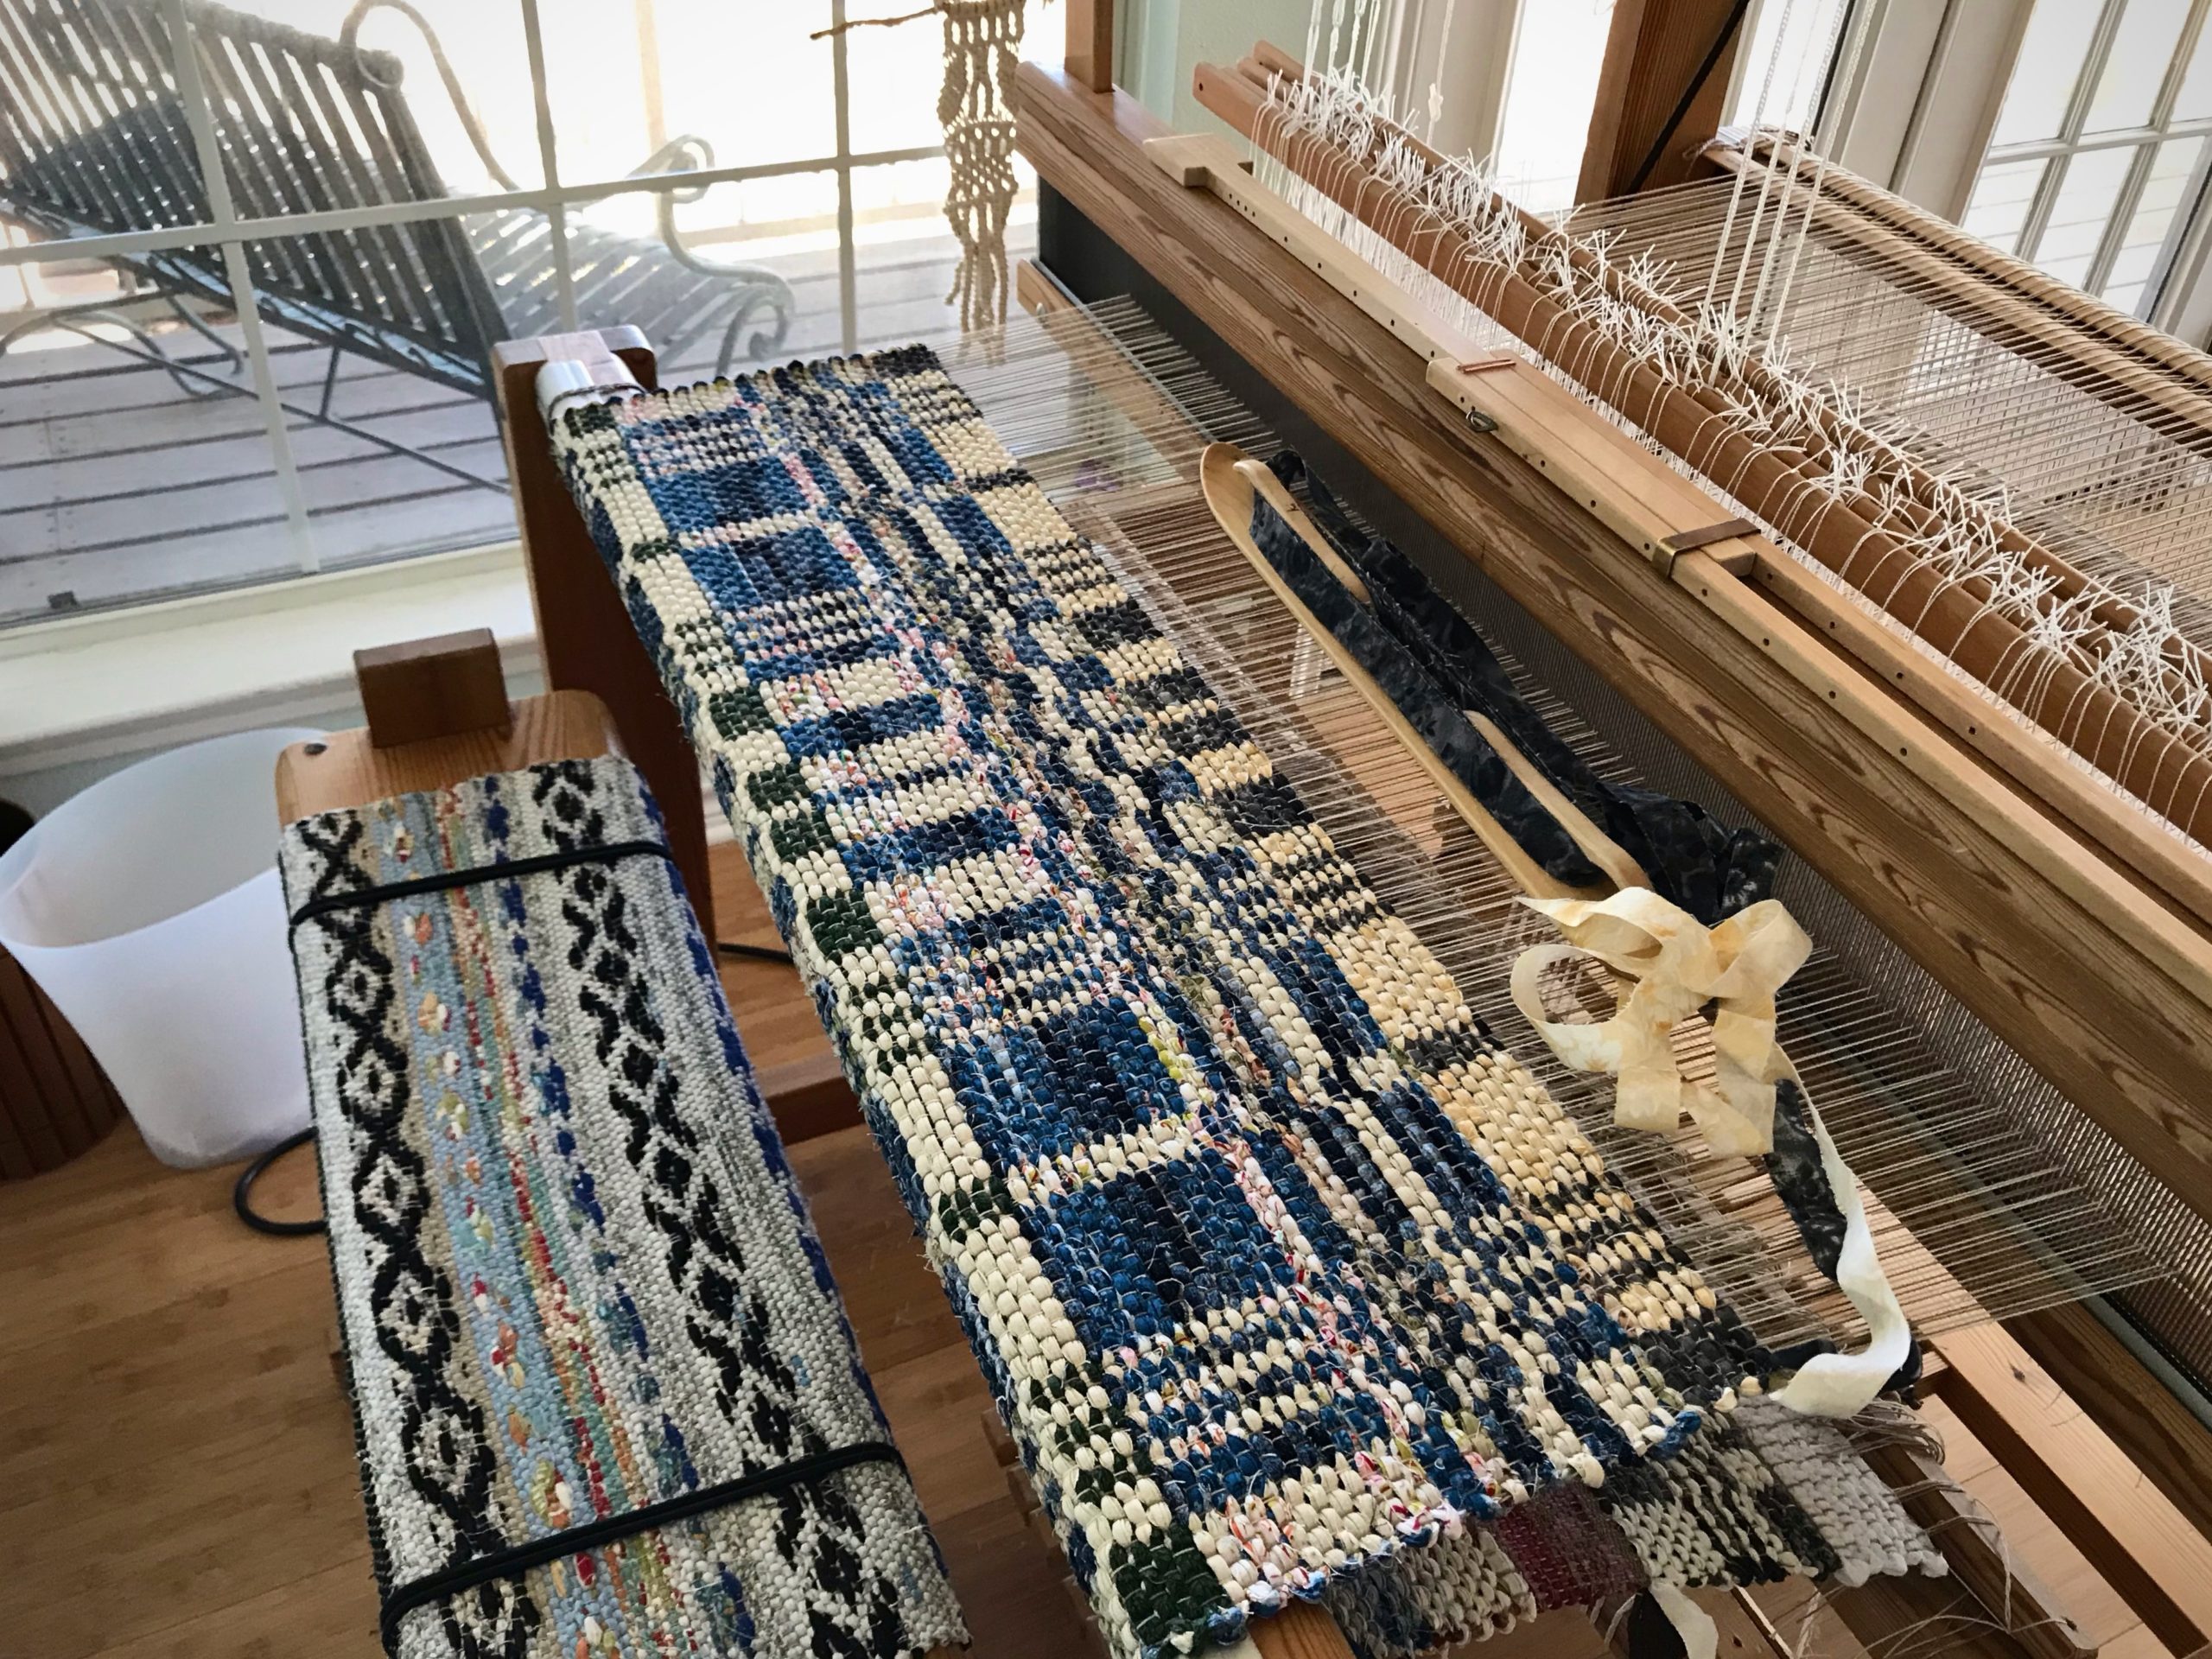
Double-binding rag rug, ready for finishing and hemming! I let the rug rest on the floor for a couple days to let the warp and weft relax. Next step is to tie ends into overhand knots.
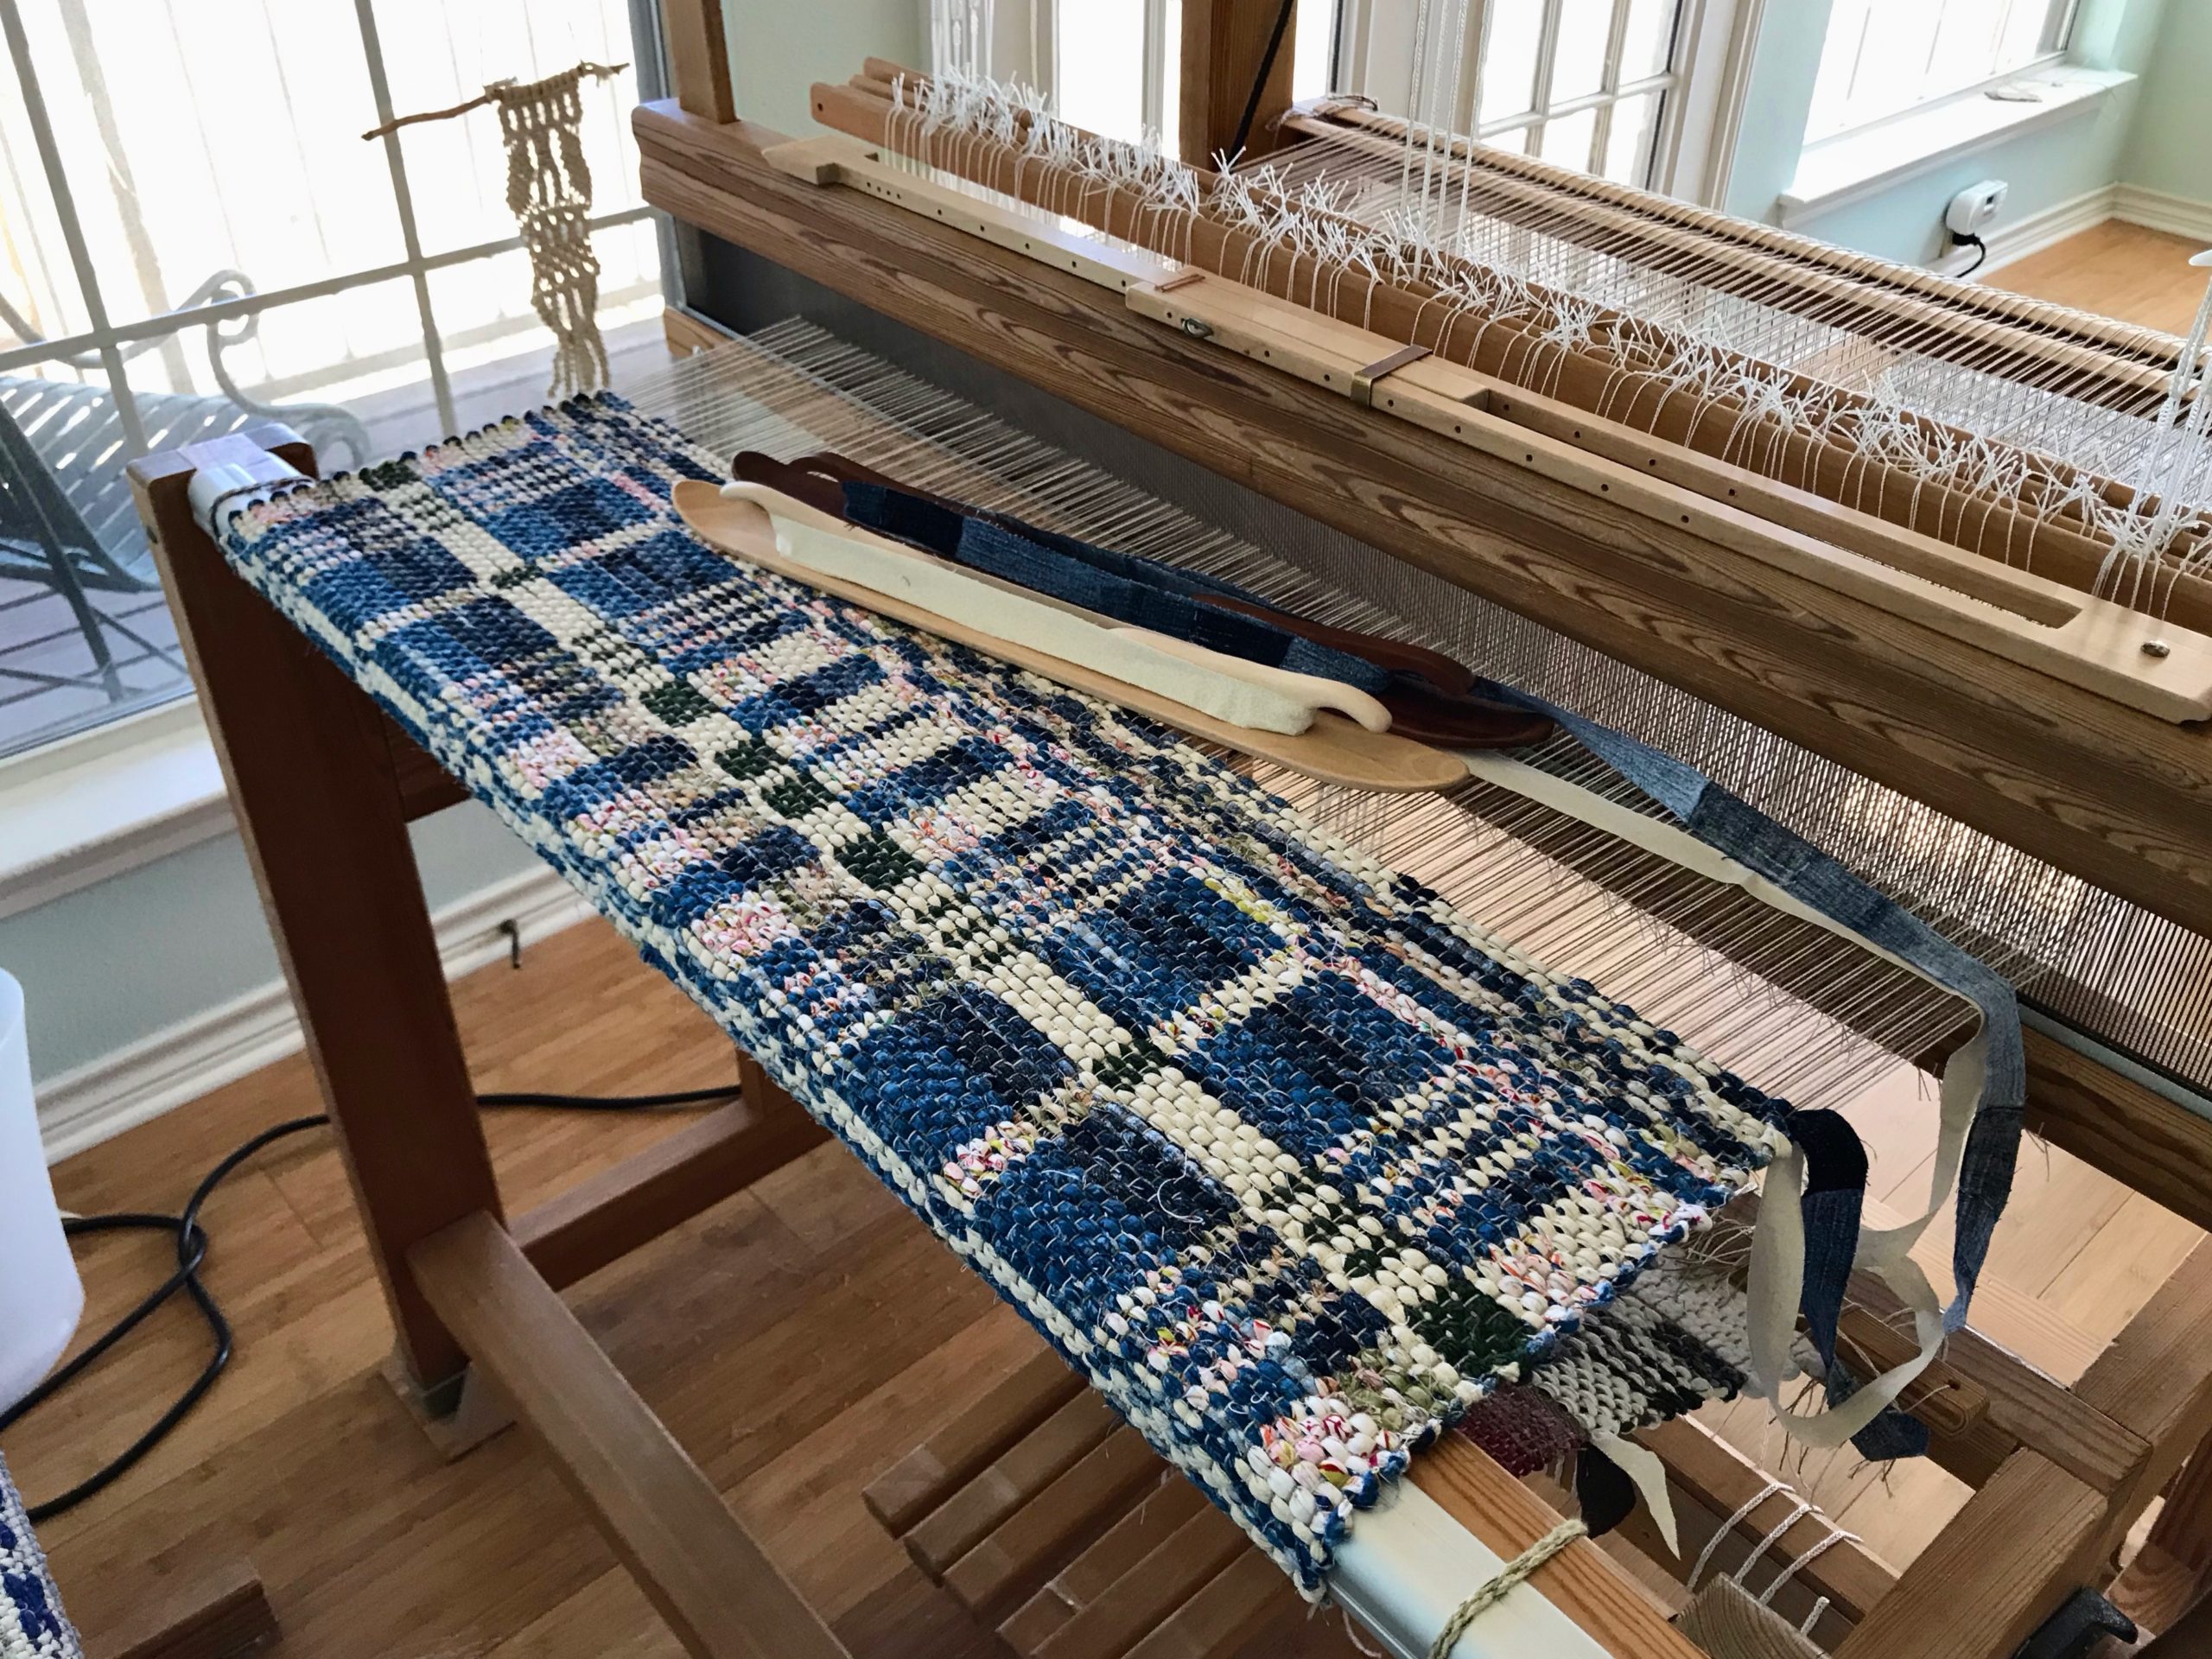
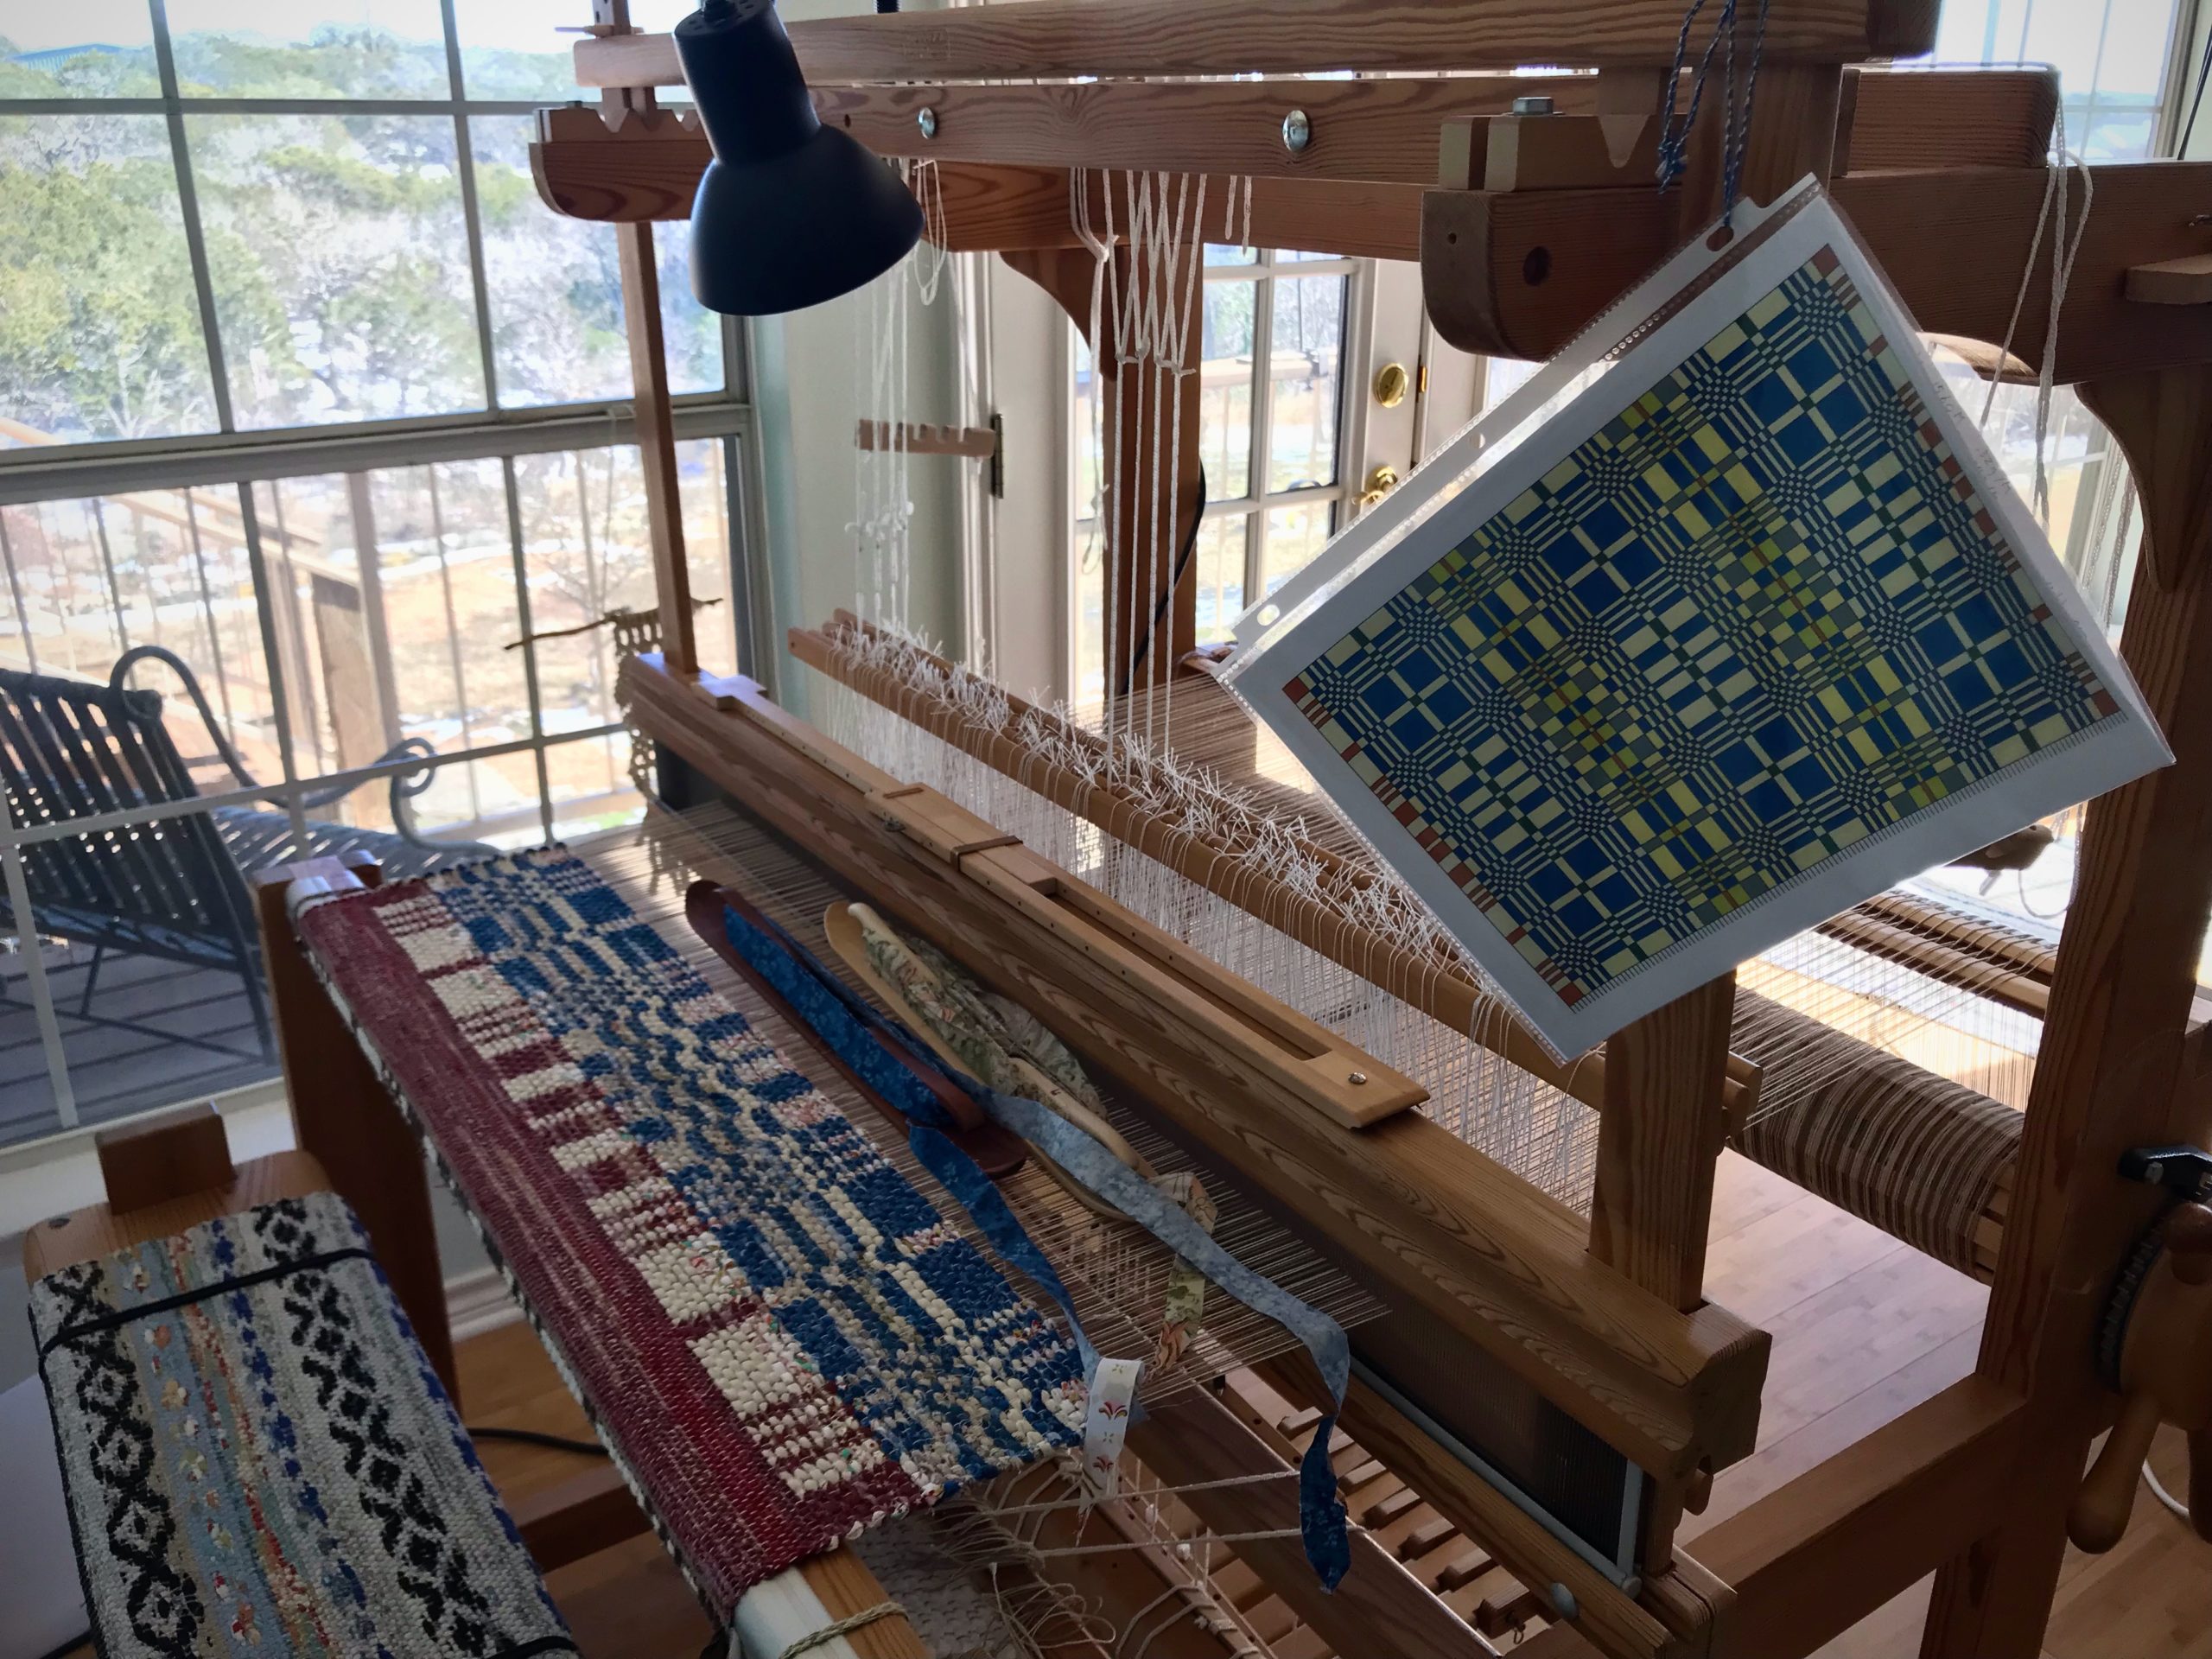
This rag rug could be a coverlet if woven in different materials. The distinctive block design from a Landes Block Drawdowns collection gives me an exciting approach for weaving a double-binding rag rug.
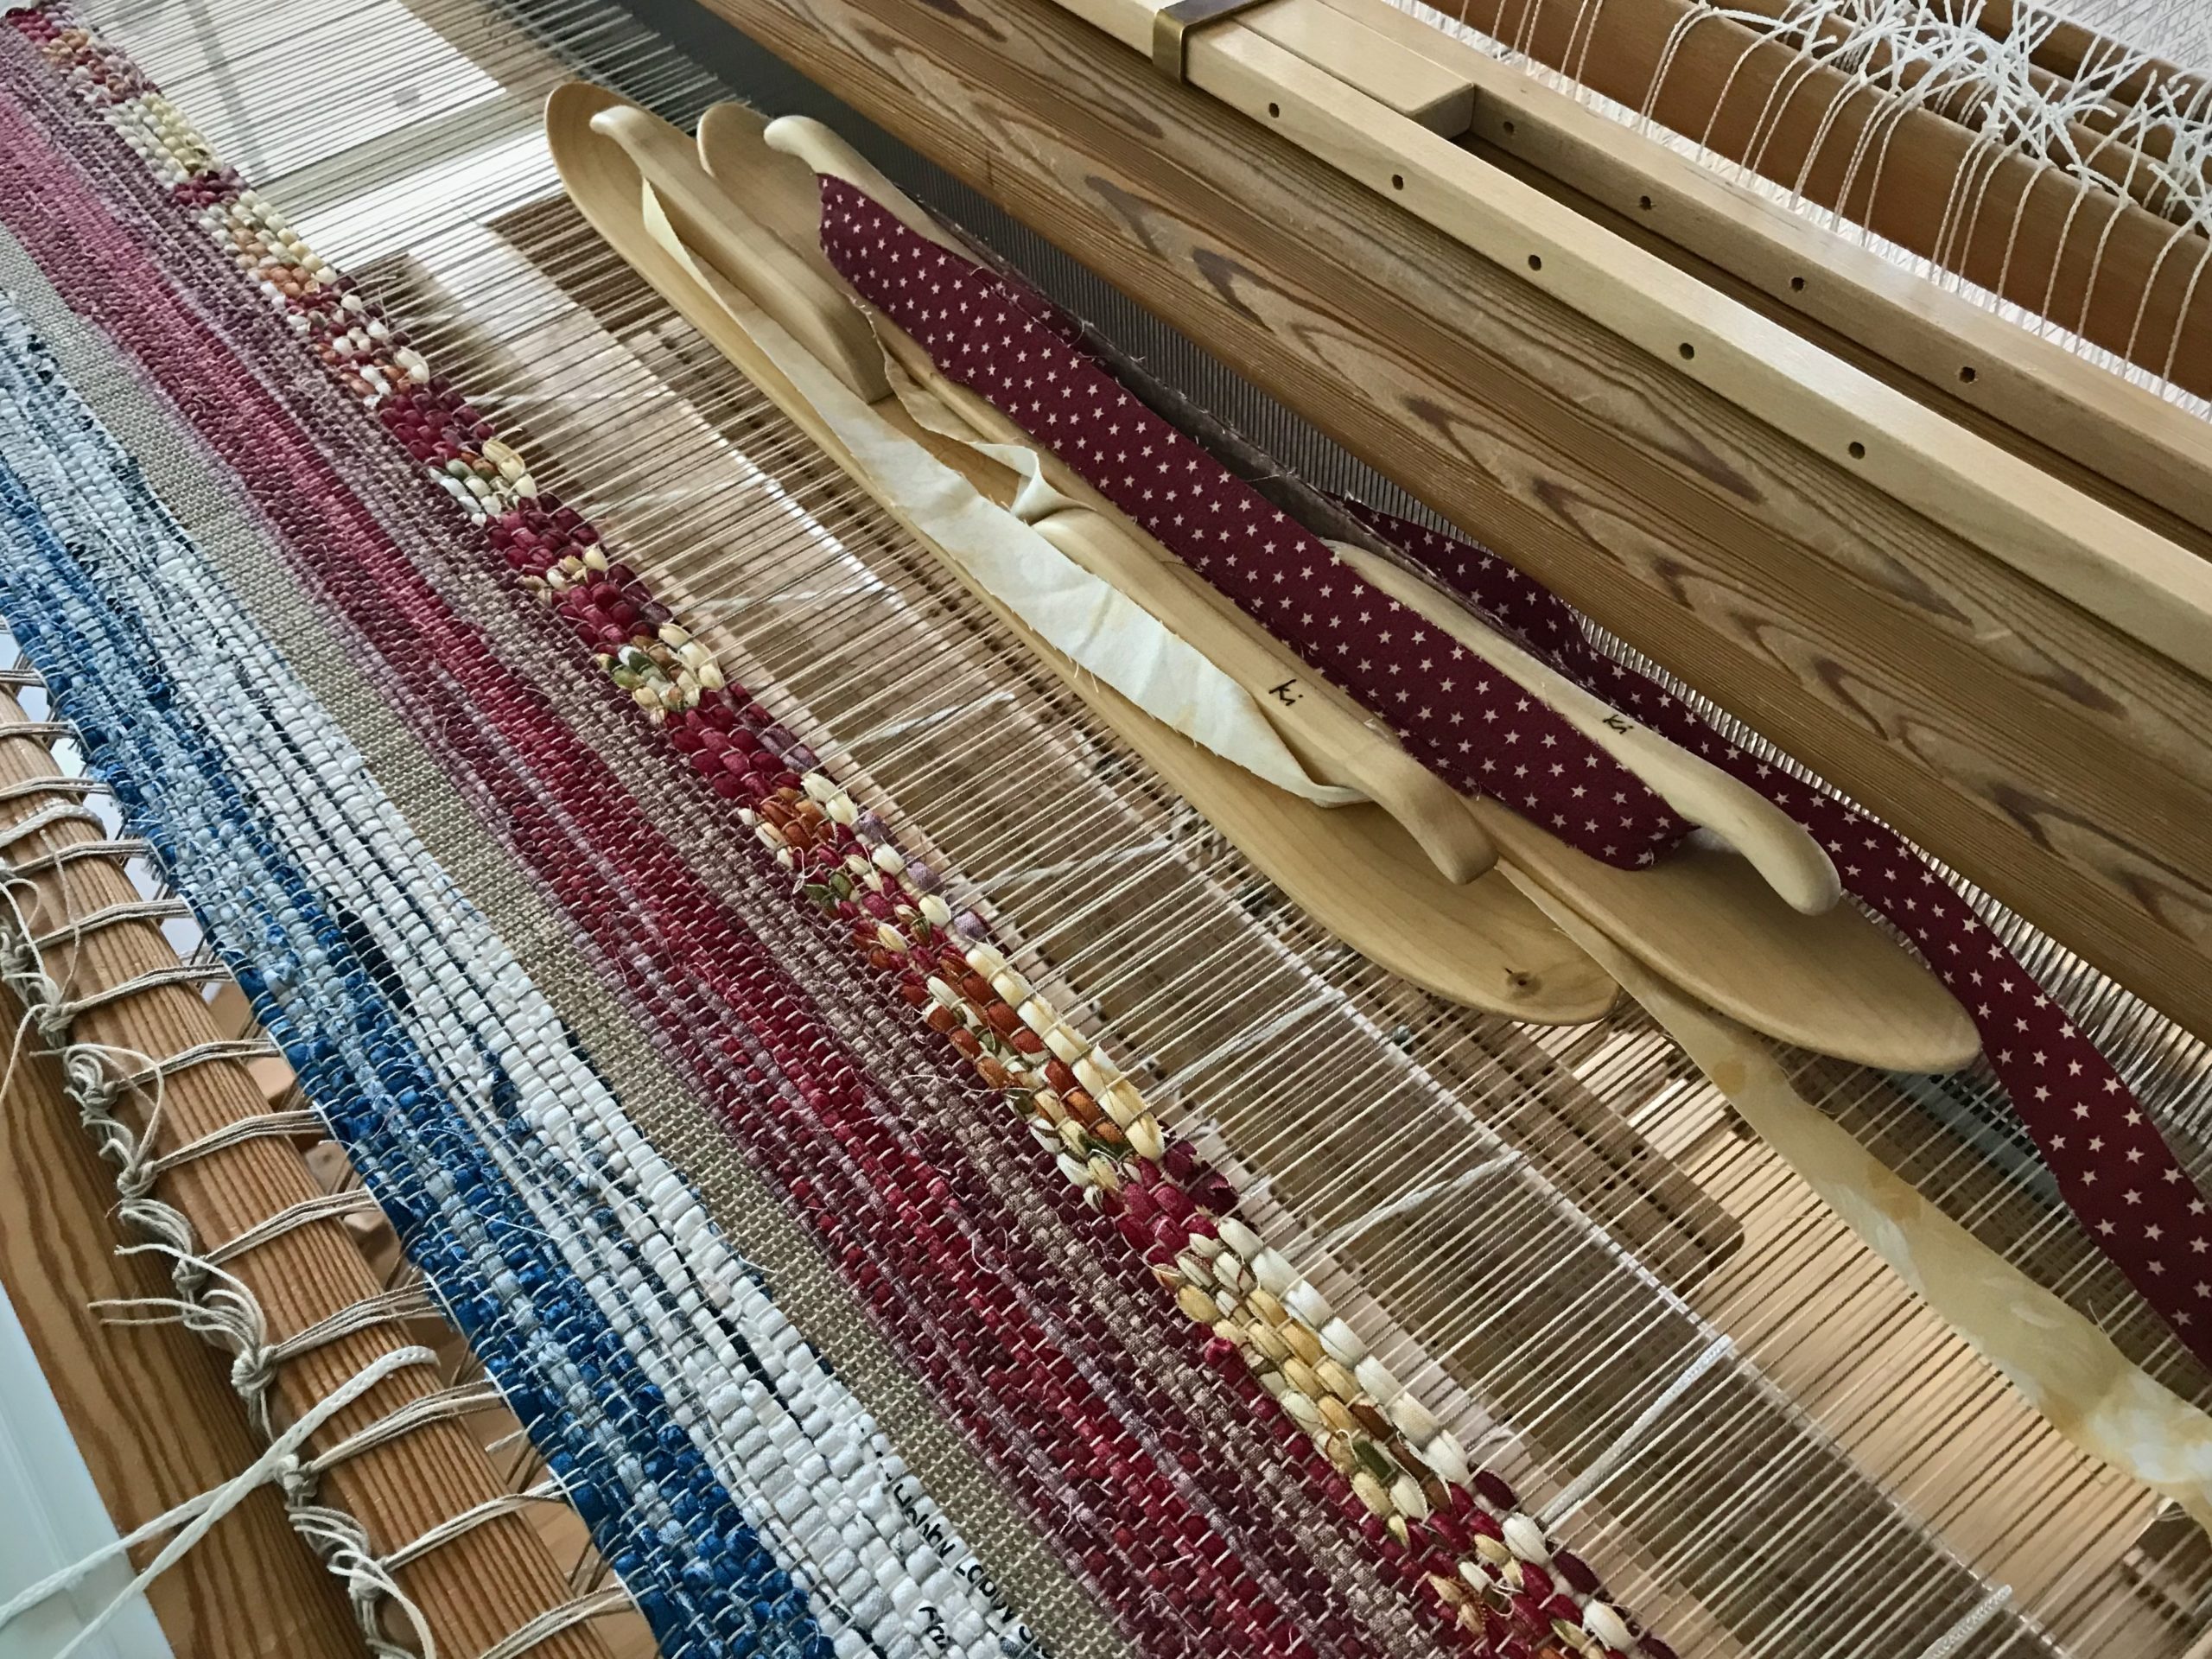
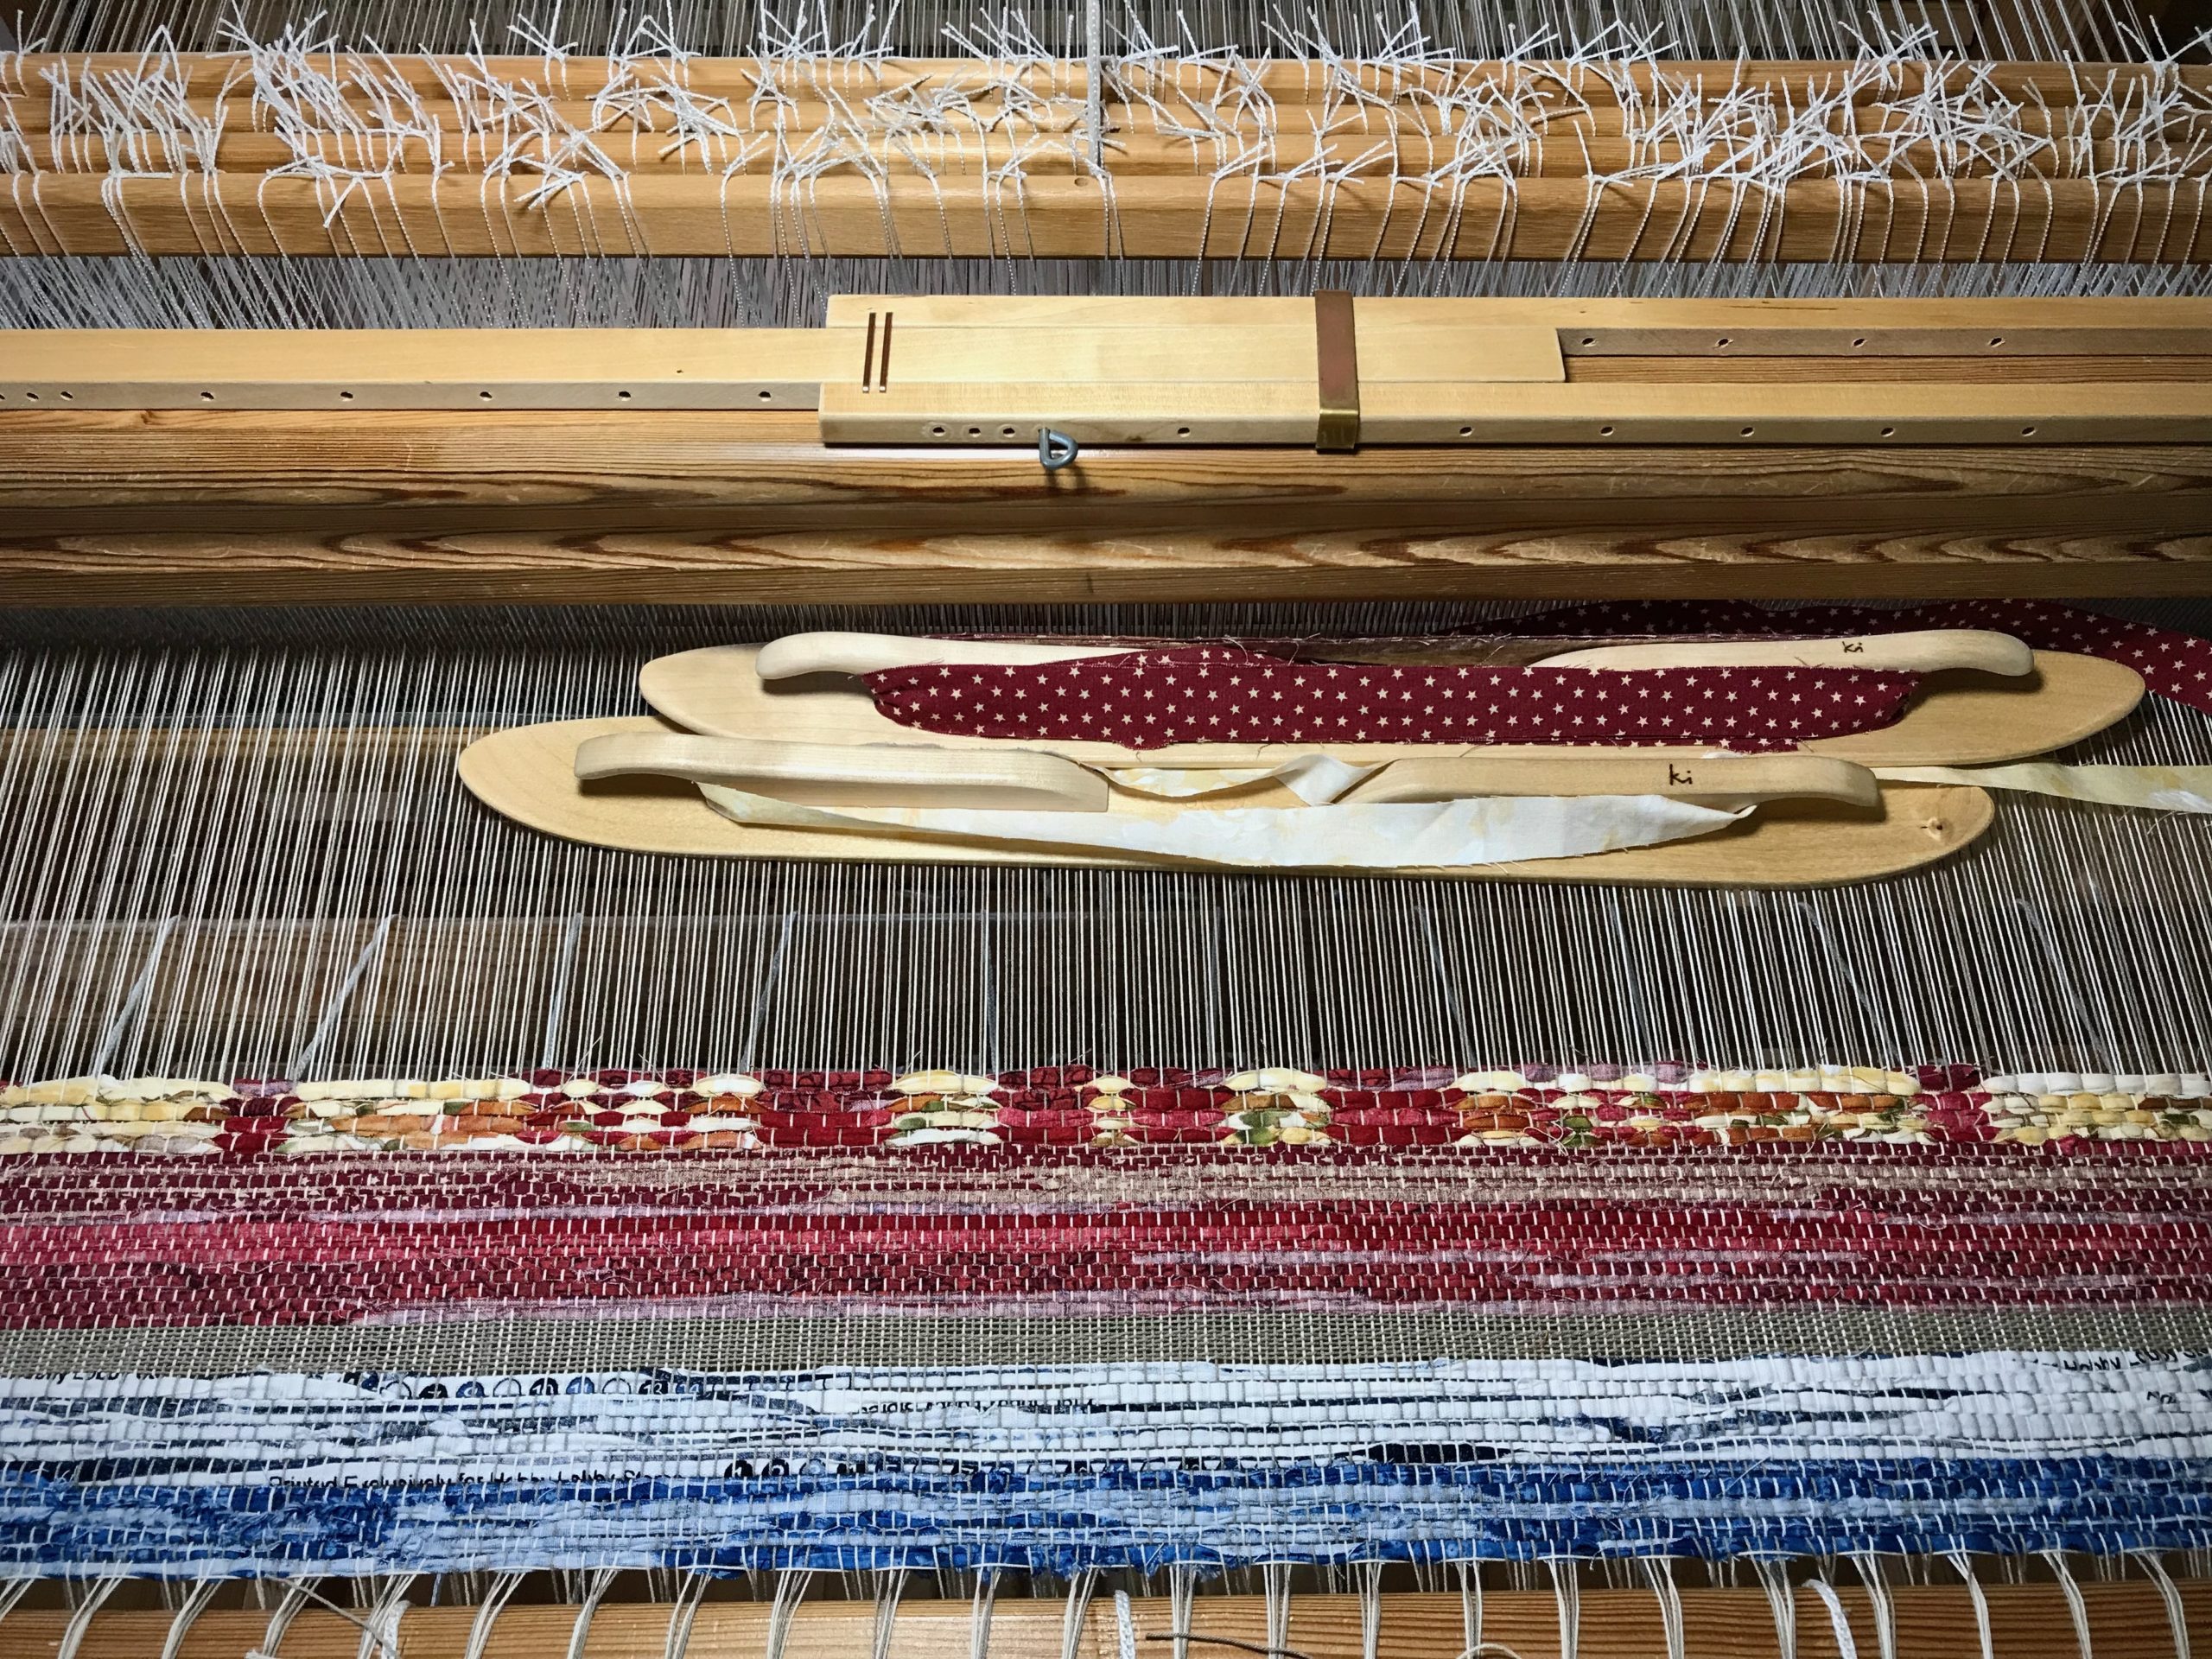
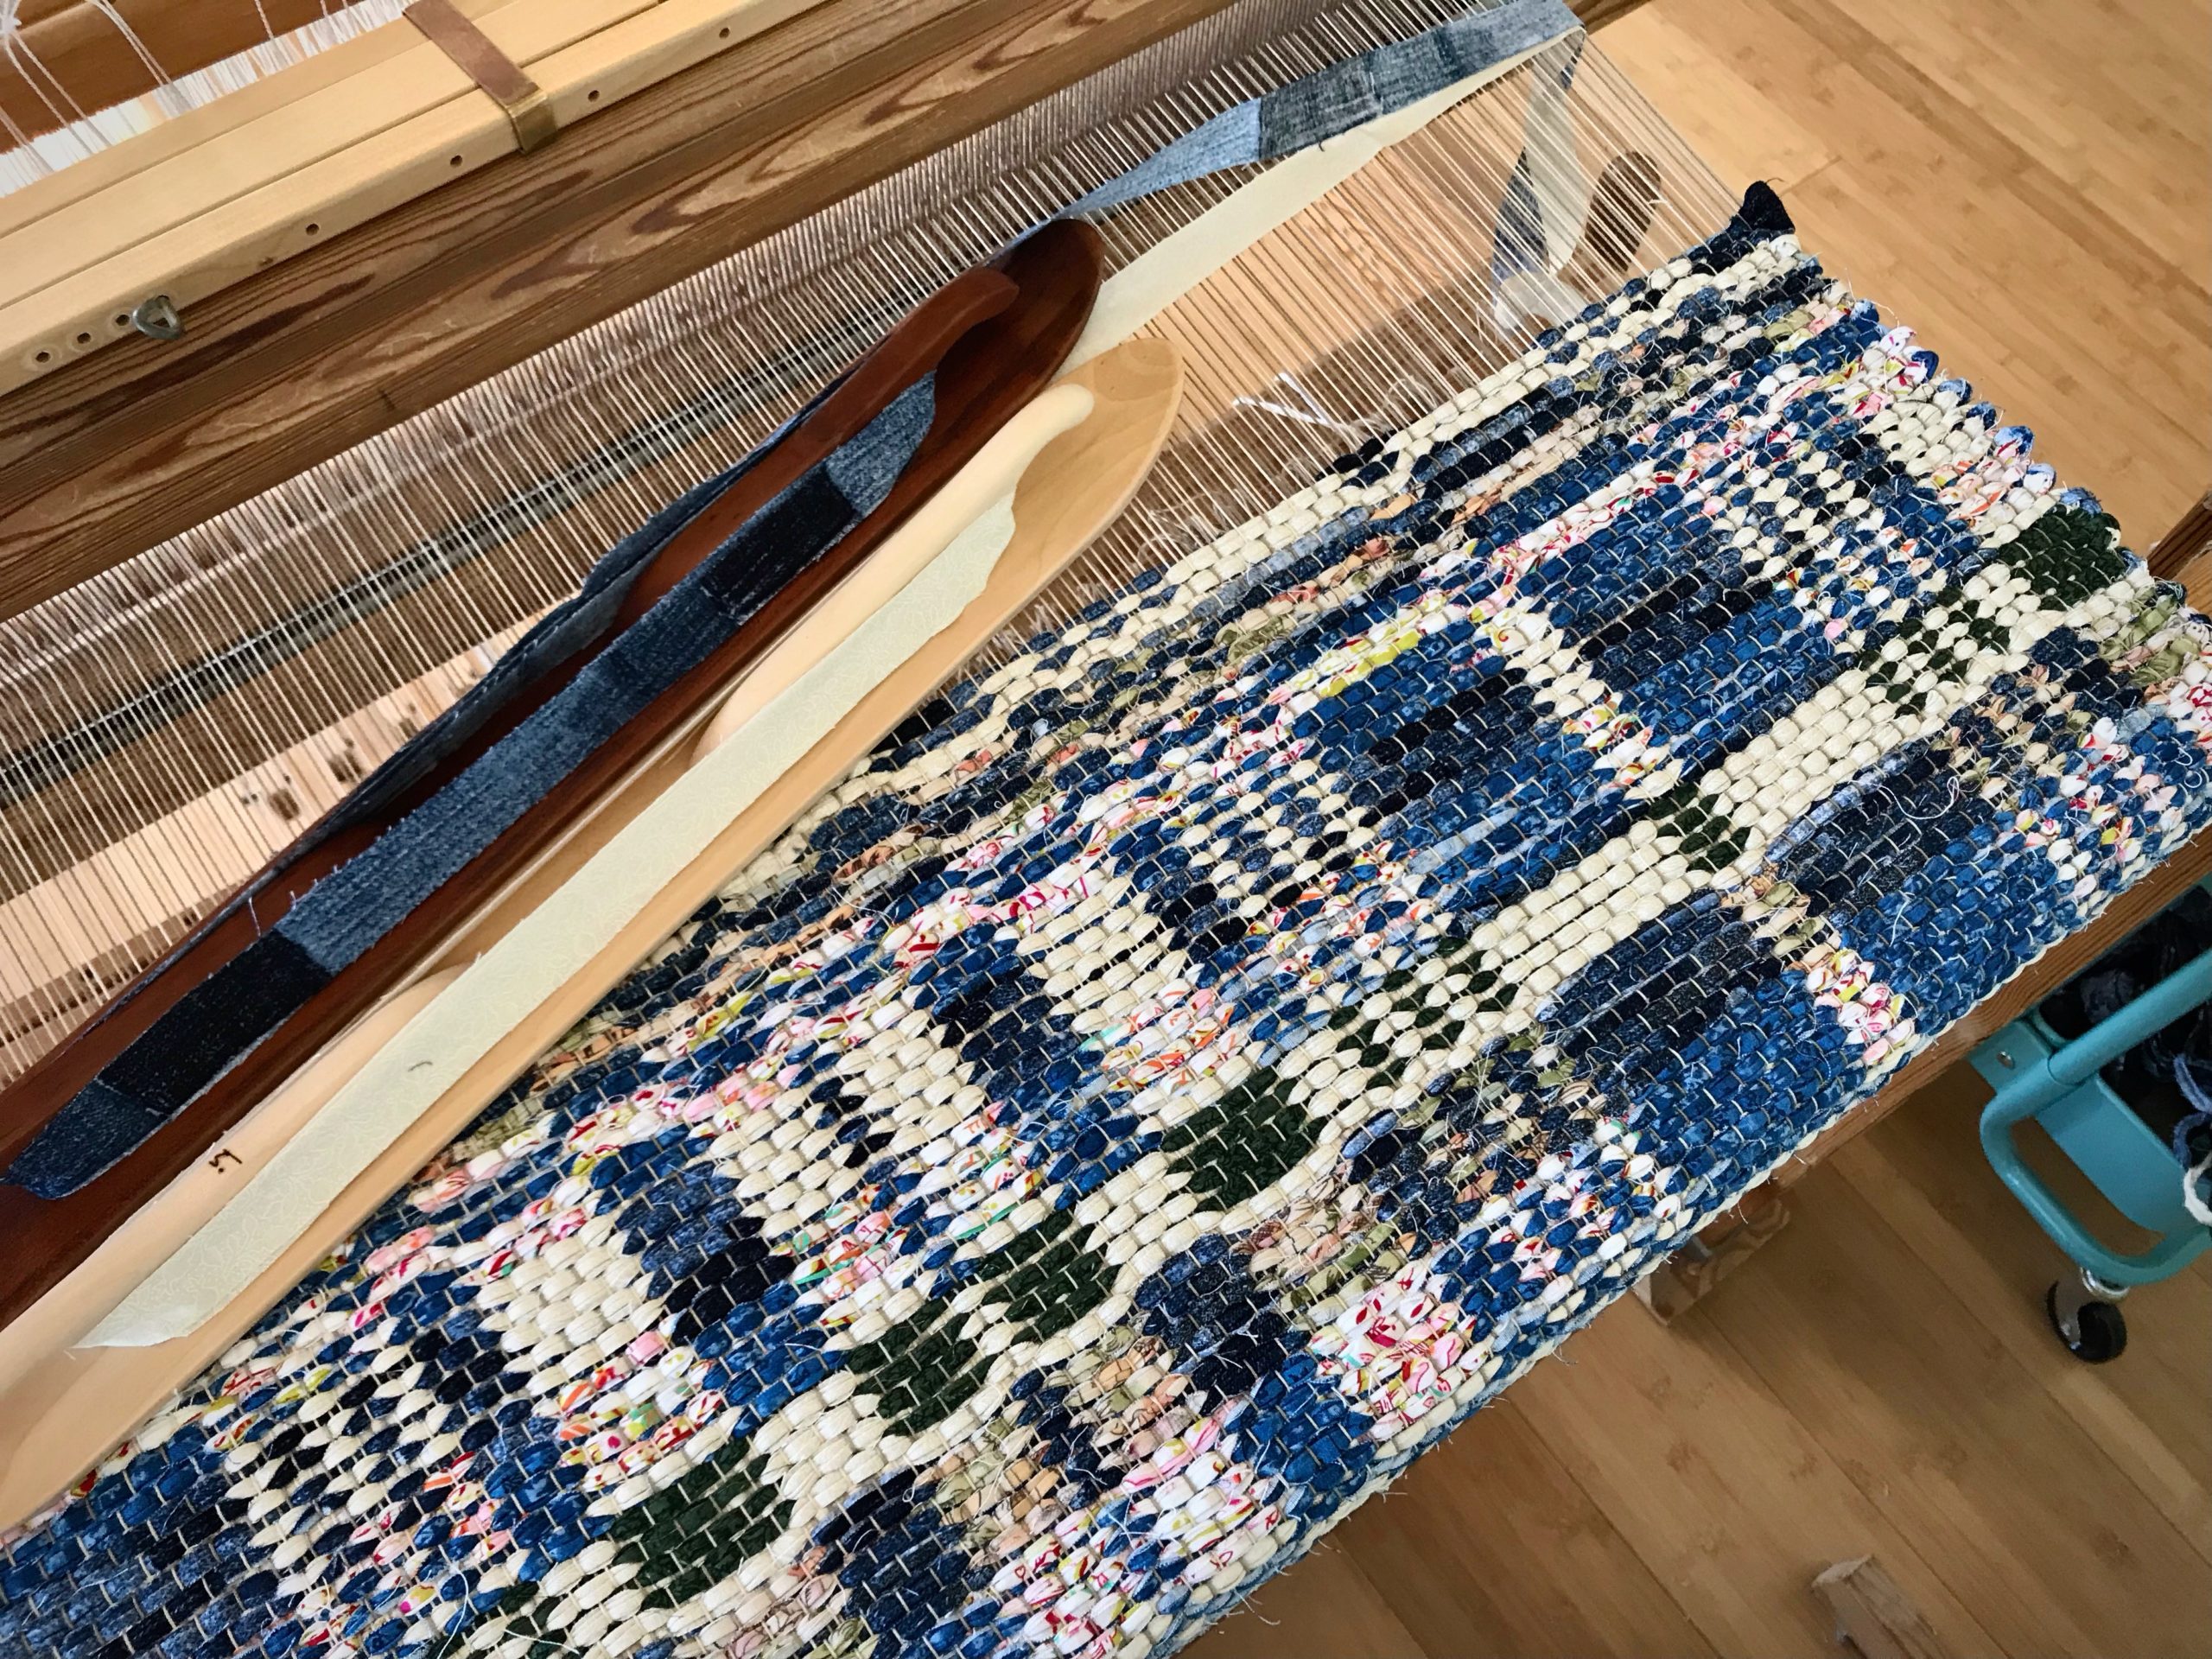
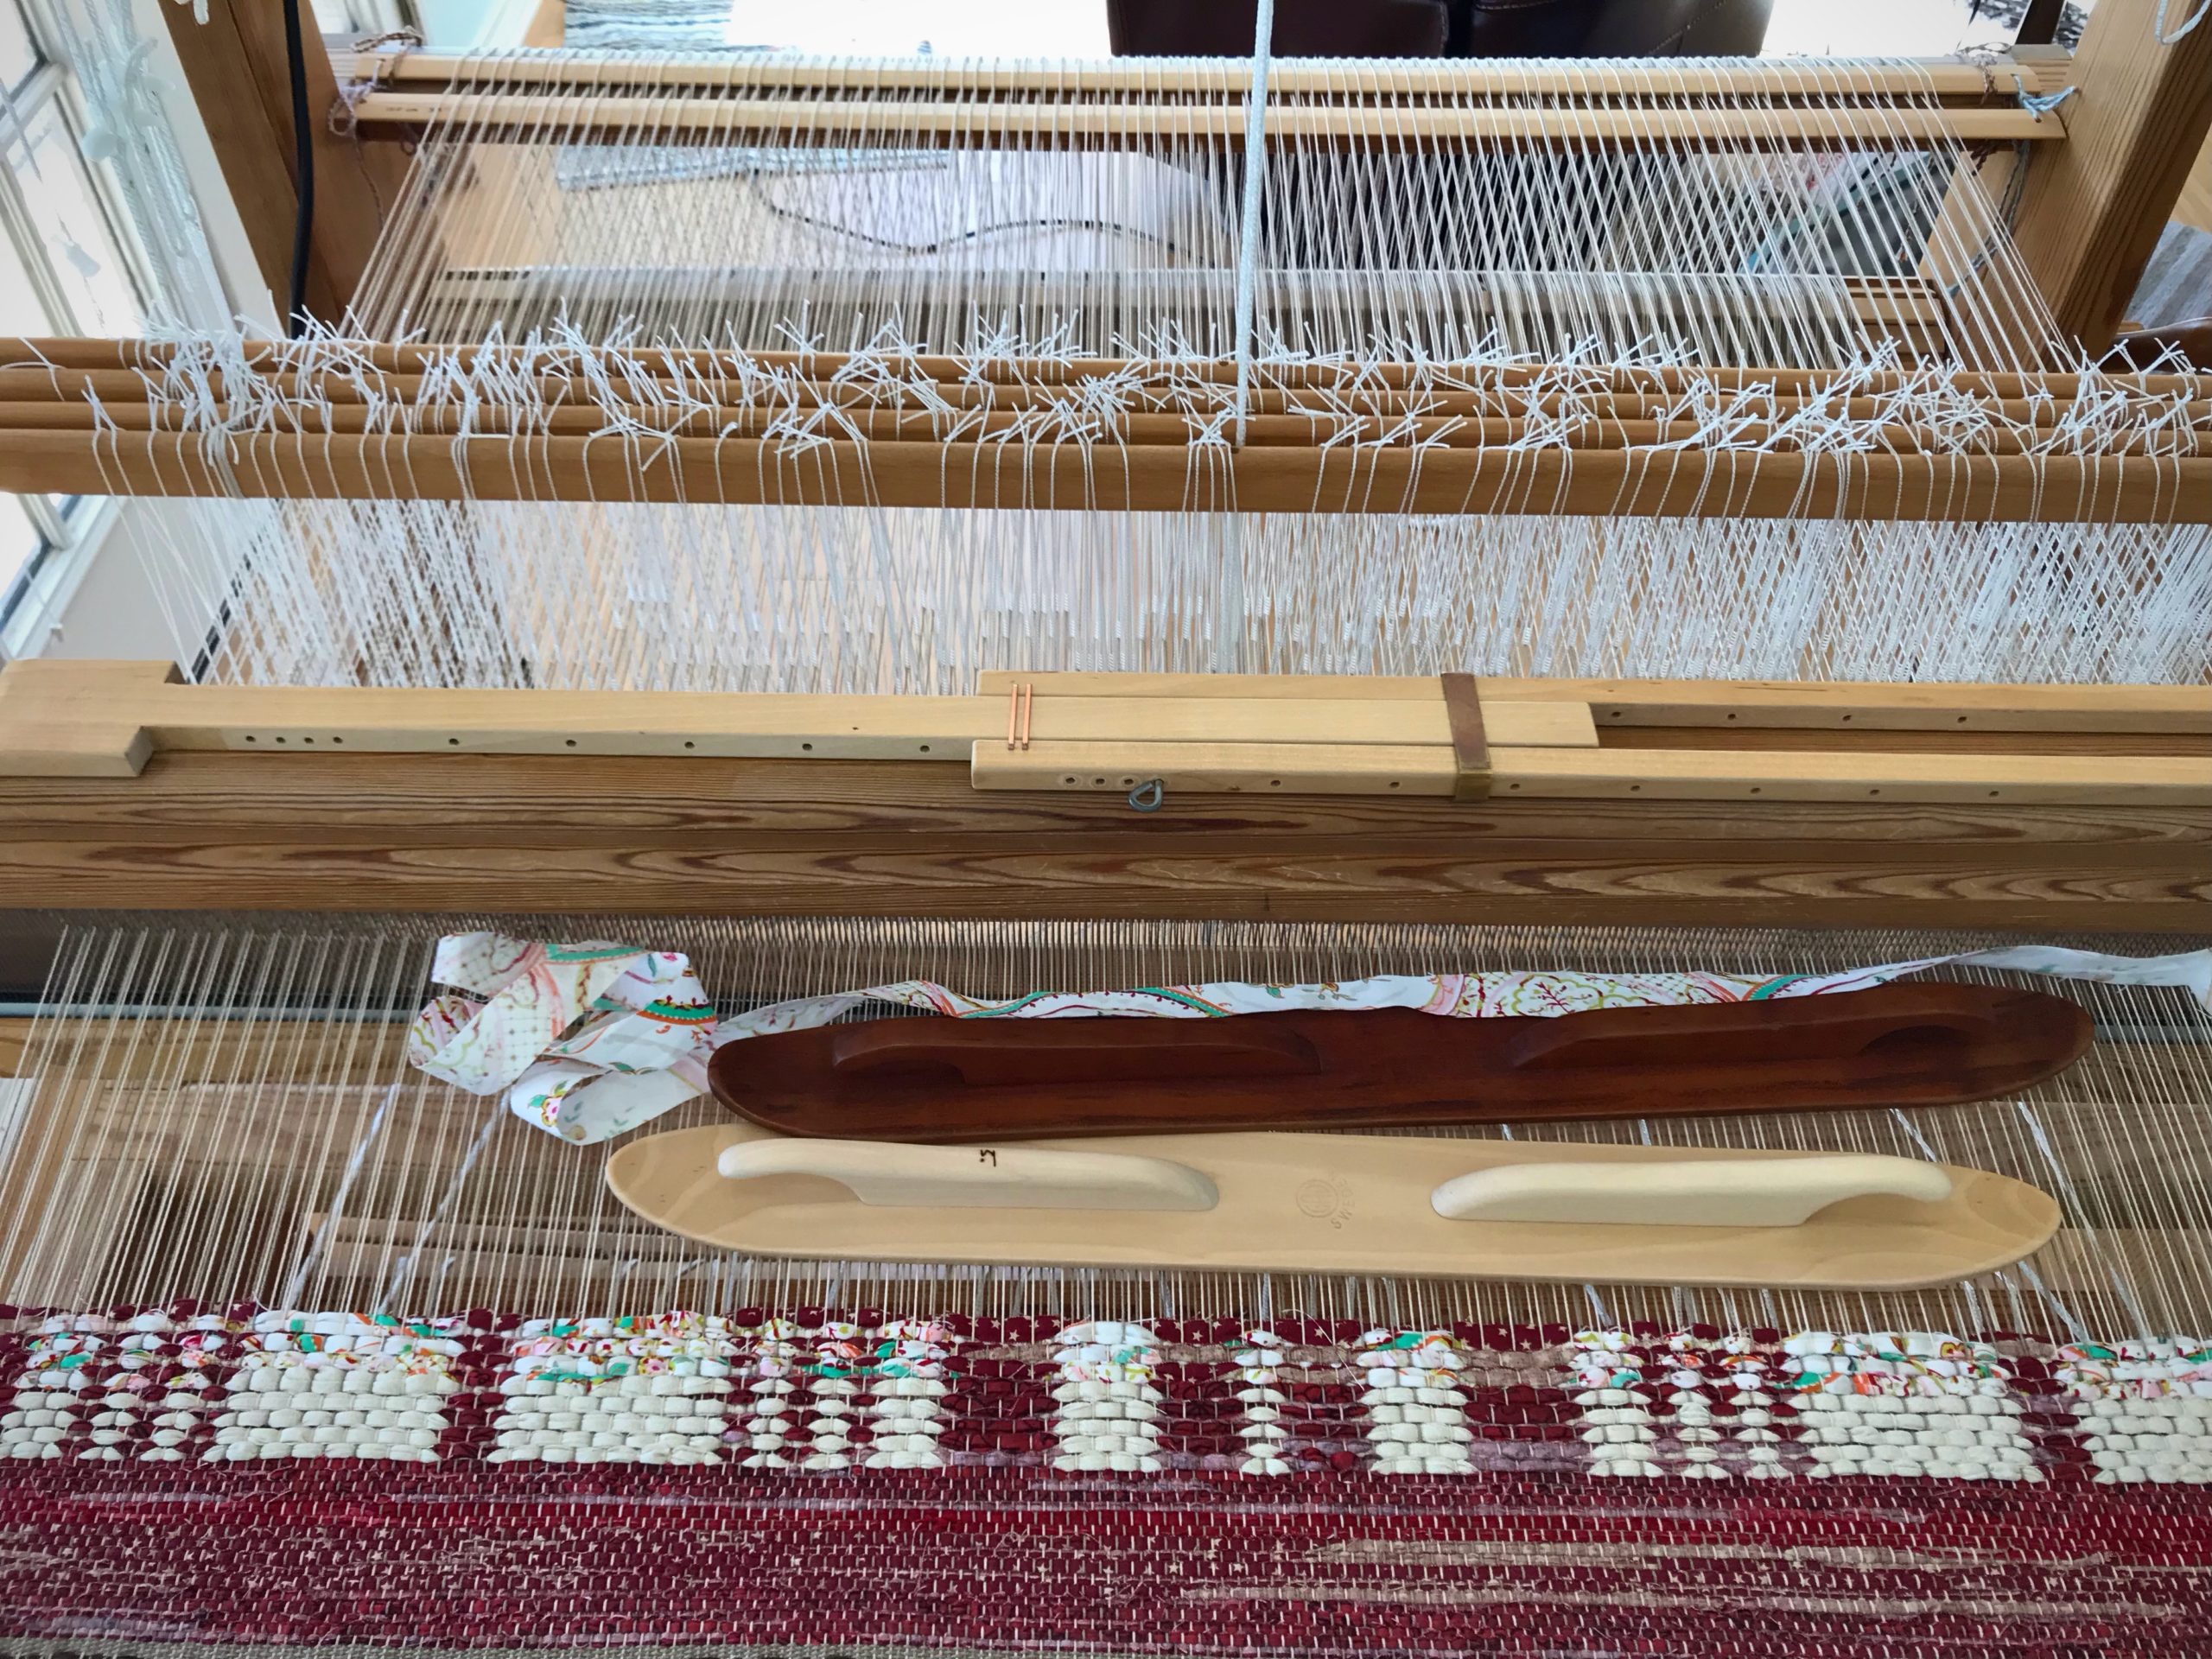
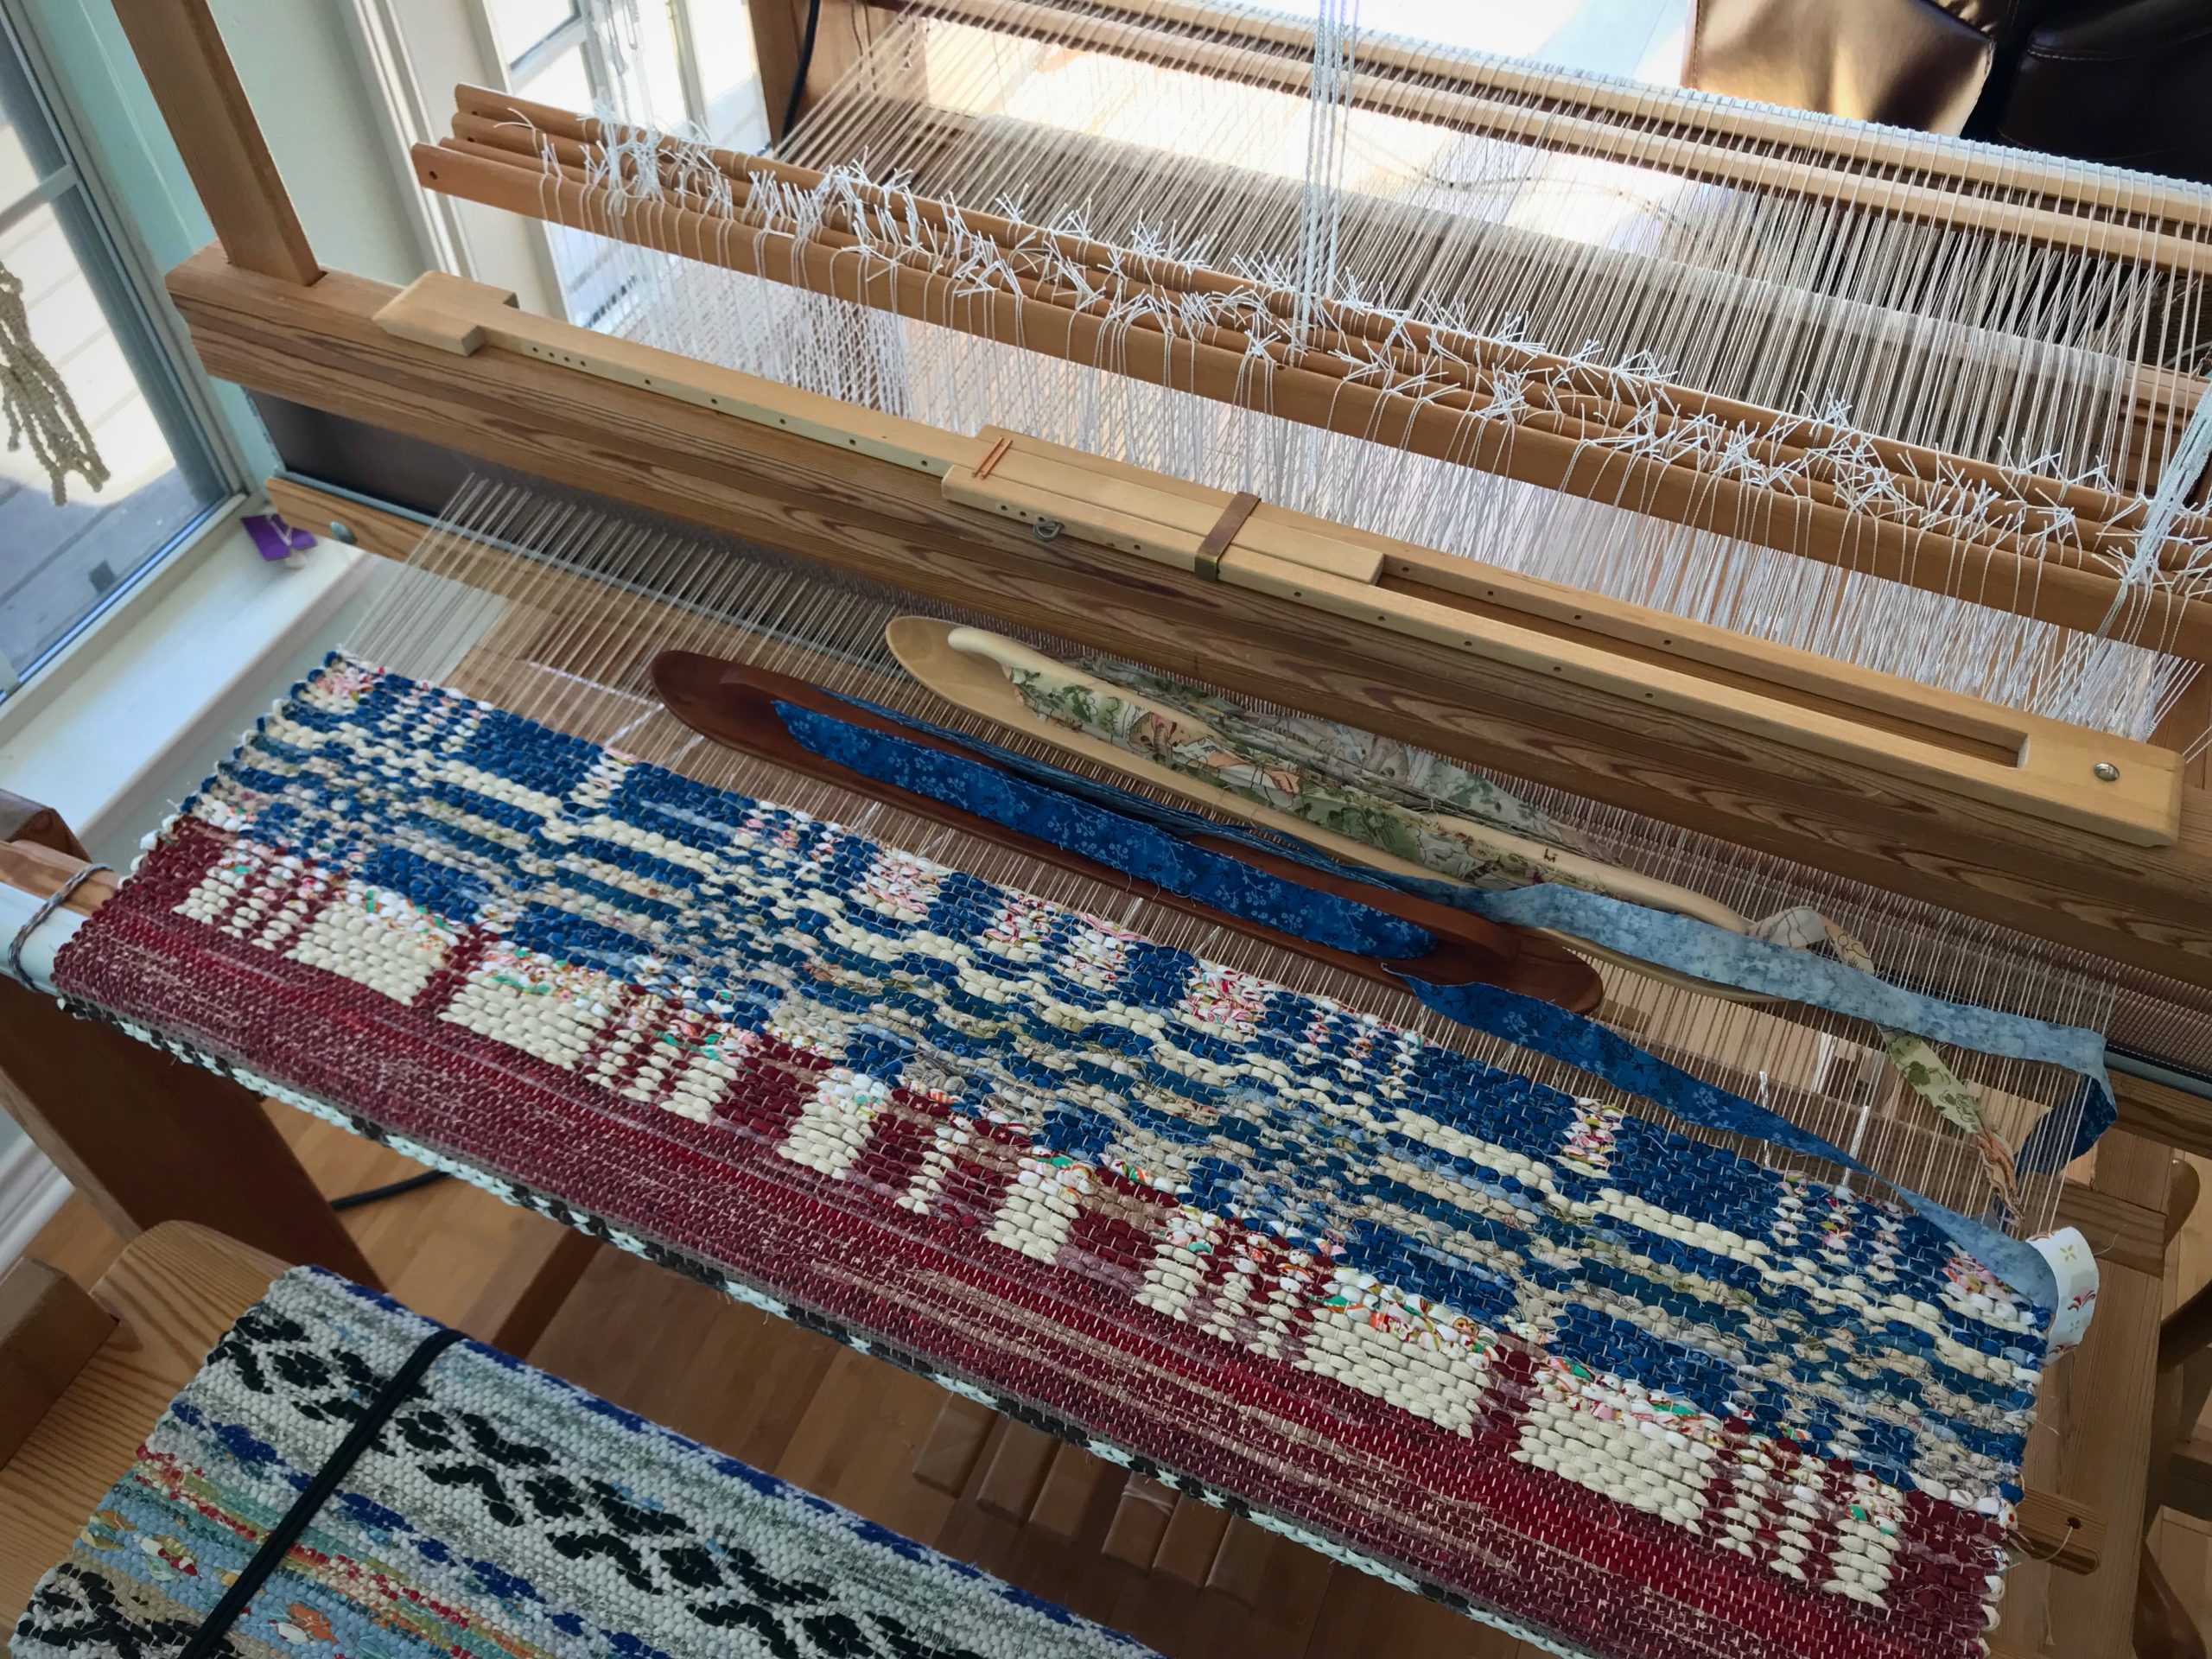
Coverlet Rag Rug on the Glimåkra Ideal loom. Cotton fabric strips are sorted in the Ikea cart by the loom.Double Binding uses two shuttles. The two wefts exchange places on the face and back of the cloth.
Double binding is a double-layer fabric in a simple two-block structure. In each block, one of two wefts appears on the face, and the other appears on the back. I switch weft blocks by reversing the order of the two wefts. It’s that simple. For example, one pick of dark weft is followed by a pick of light weft. This sequence is repeated for a few rows. To change to the next block, with the opposite arrangement of dark and light, start with one pick of light weft and follow that with a pick of dark weft, repeating for the remainder of that block.
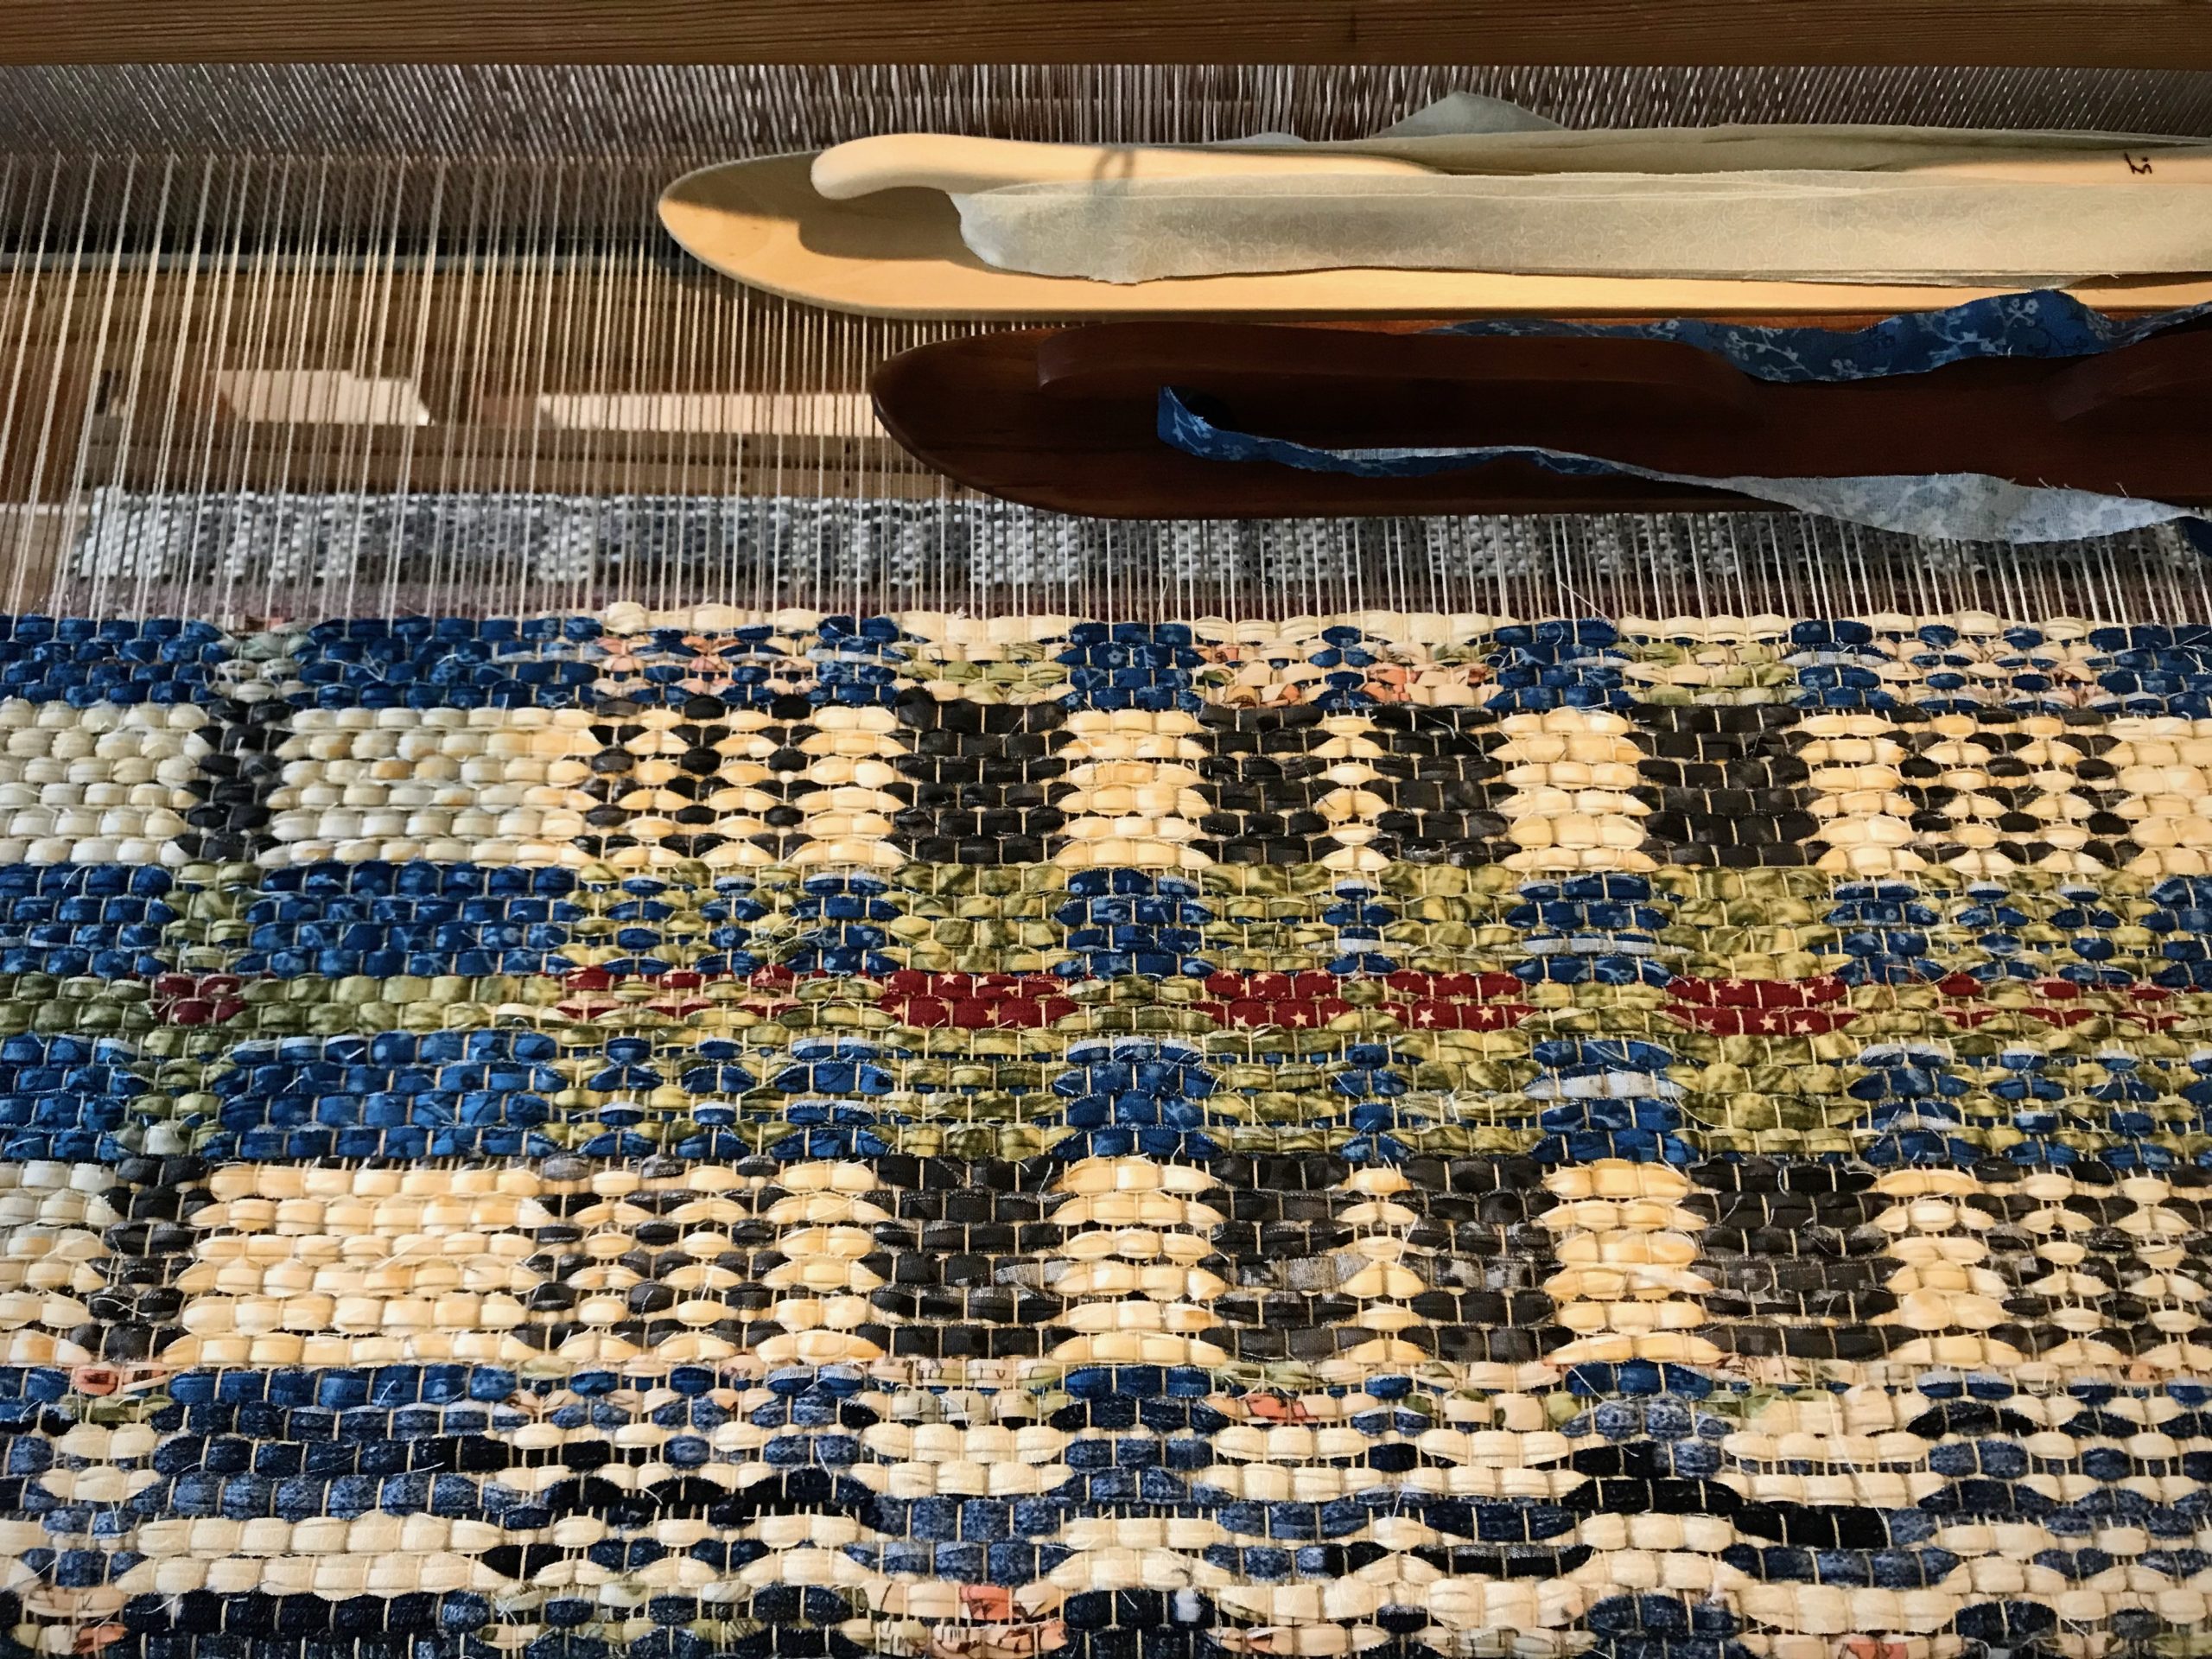
Temple, removed and placed on the beater for pictures, is a necessary tool for weaving rag rugs.Variation in the light wefts and in the dark wefts adds interest.Changing blocks and changing colors.View from further away shows more of the coverlet design. Only when cut from the loom will we see the whole thing!
A small change repositions everything. Simply reversing the weft order puts a different face on the cloth. What direction am I taking my life? Reverse course to make way for a new life pattern. When we are left alone in the dark, God comes and offers a better way. Give up my way, reverse course, and go his way. Everything changes in such an encounter. Darkness to light.
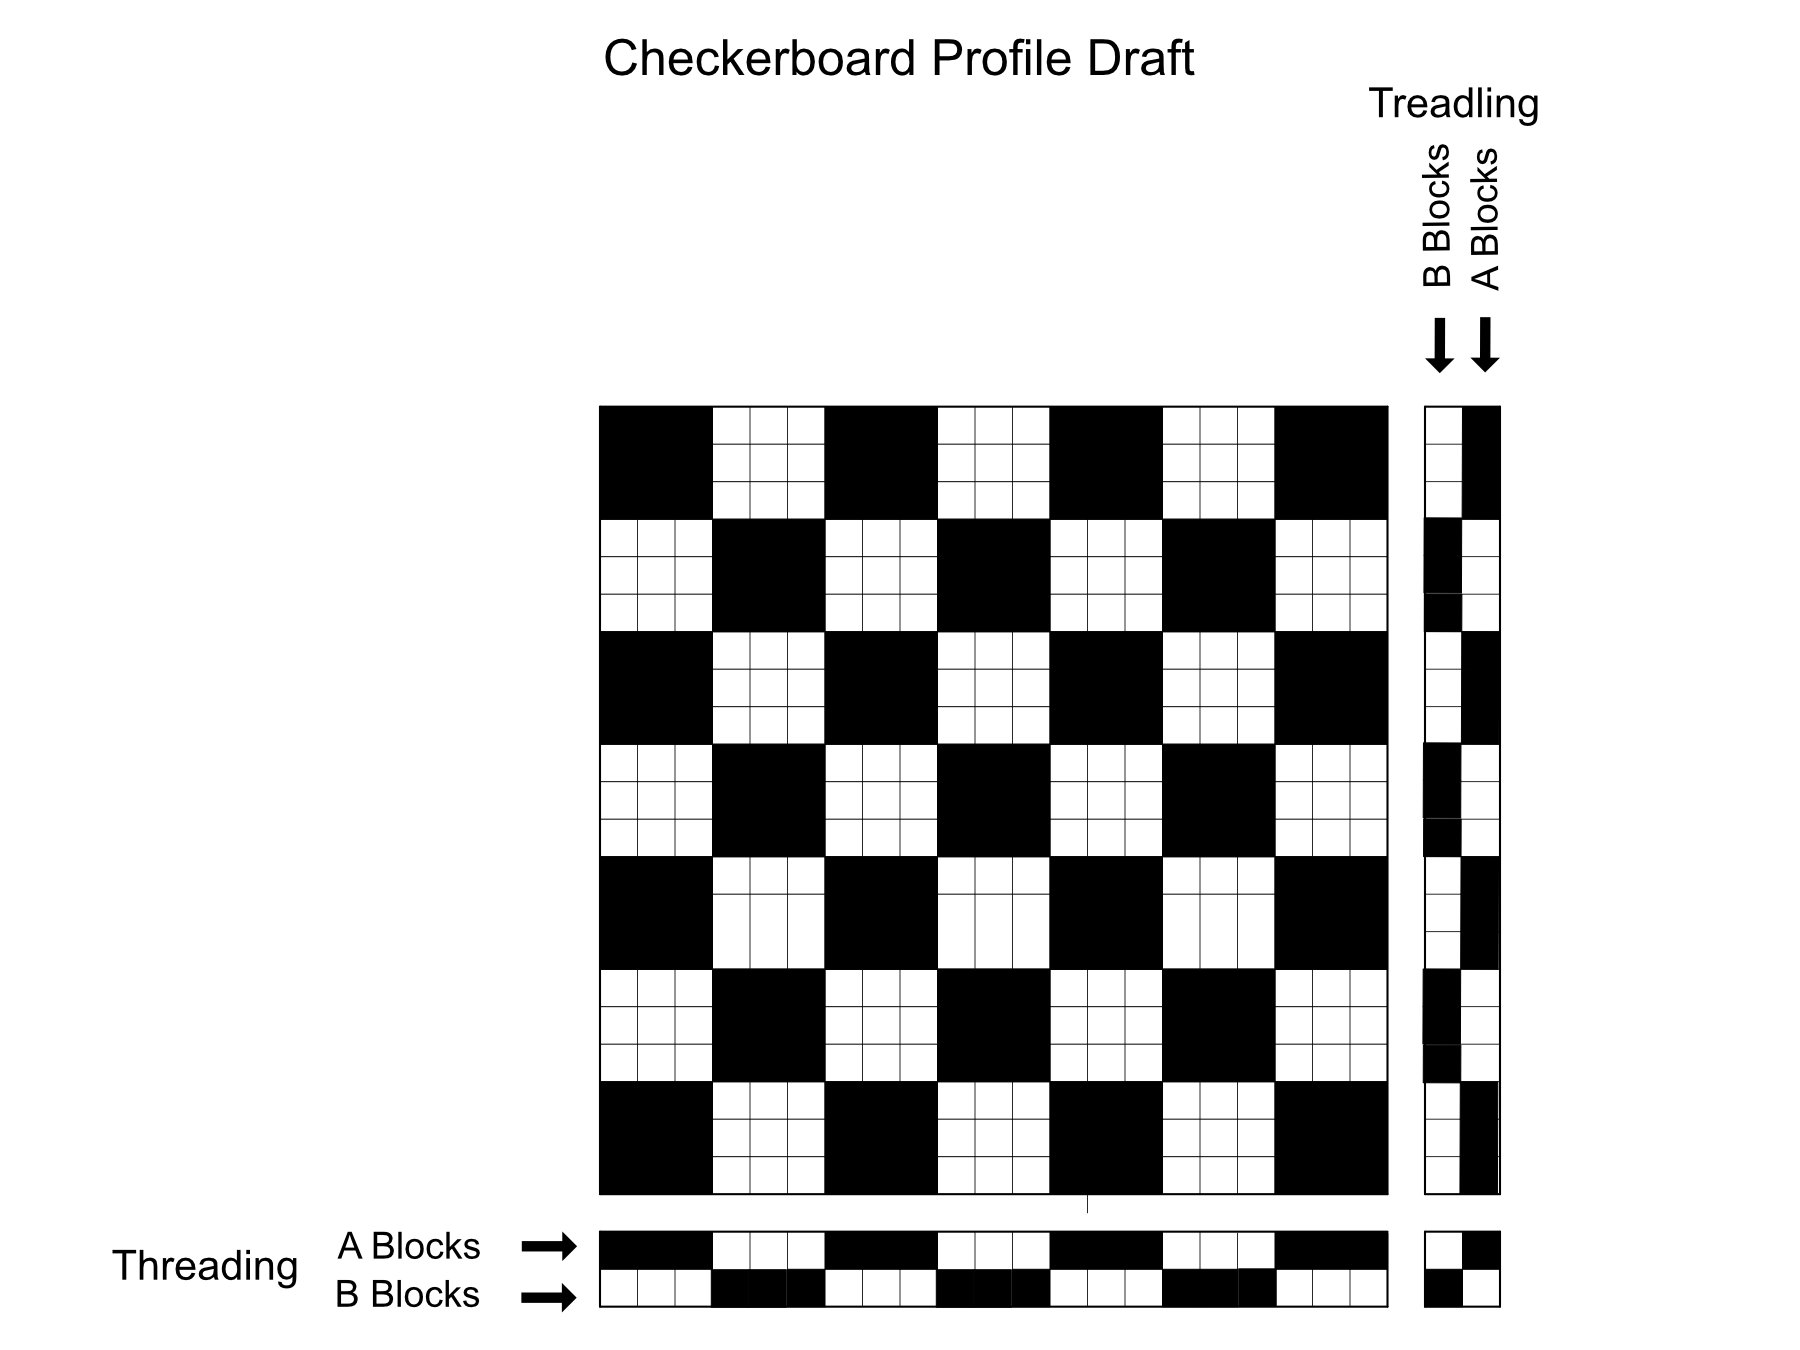
I am happy to say that with only four shafts we have exactly what we need for a checkerboard rag rug. Thank you to Megan for asking about it. ”I am searching for a 4-shaft draft for a checkboard pattern. I am limited to only 4 shafts.” Double binding opens up a world of opportunity!
Let’s talk about blocks. A block is a specific sequence of warp ends or weftpicks. Double binding on four shafts has two blocks for the warp and two blocks for the weft.
→ Use graph paper to plan the configuration of your blocks.
For the threading blocks, use two rows of squares. One row is for Block A and one row is for Block B. Each square on the paper represents one threading unit. You can make a checkerboard pattern by uniformly alternating the A blocks and B blocks. Or, you can make a wildly different geometric pattern by varying the size of alternating blocks. Your two-row graph becomes a profile draft to use as your threading key.
For the weft blocks, use the same arrangement of blocks as for the threading, and turn them vertically for the treadlingdraft. Or, use your creativity to make a unique configuration of weft blocks. The sky is the limit!
Three possible block configurations for the threading. The bottom example is a part of the sequence for the rug currently on my loom.Weaving with two ski shuttles. Glimåkra Ideal. 4 shafts, 6 treadles.Printout shows me where the blocks change in the weft.
Check out these resources for more double-binding rag rug ideas: Alla Tiders Trasmattor, by Monica Hallén and Ann-Kristin Hallgren; Så Fint med Trasmattor, by Monica Hallén and Ann-Kristin Hallgren; Älskade Trasmattor att väva som för, by Monica Hallén and Ann-Kristin Hallgren; Swedish Rag Rugs 35 New Designs, by VävMagasinet; Happy Weaving, from VävMagasinet.
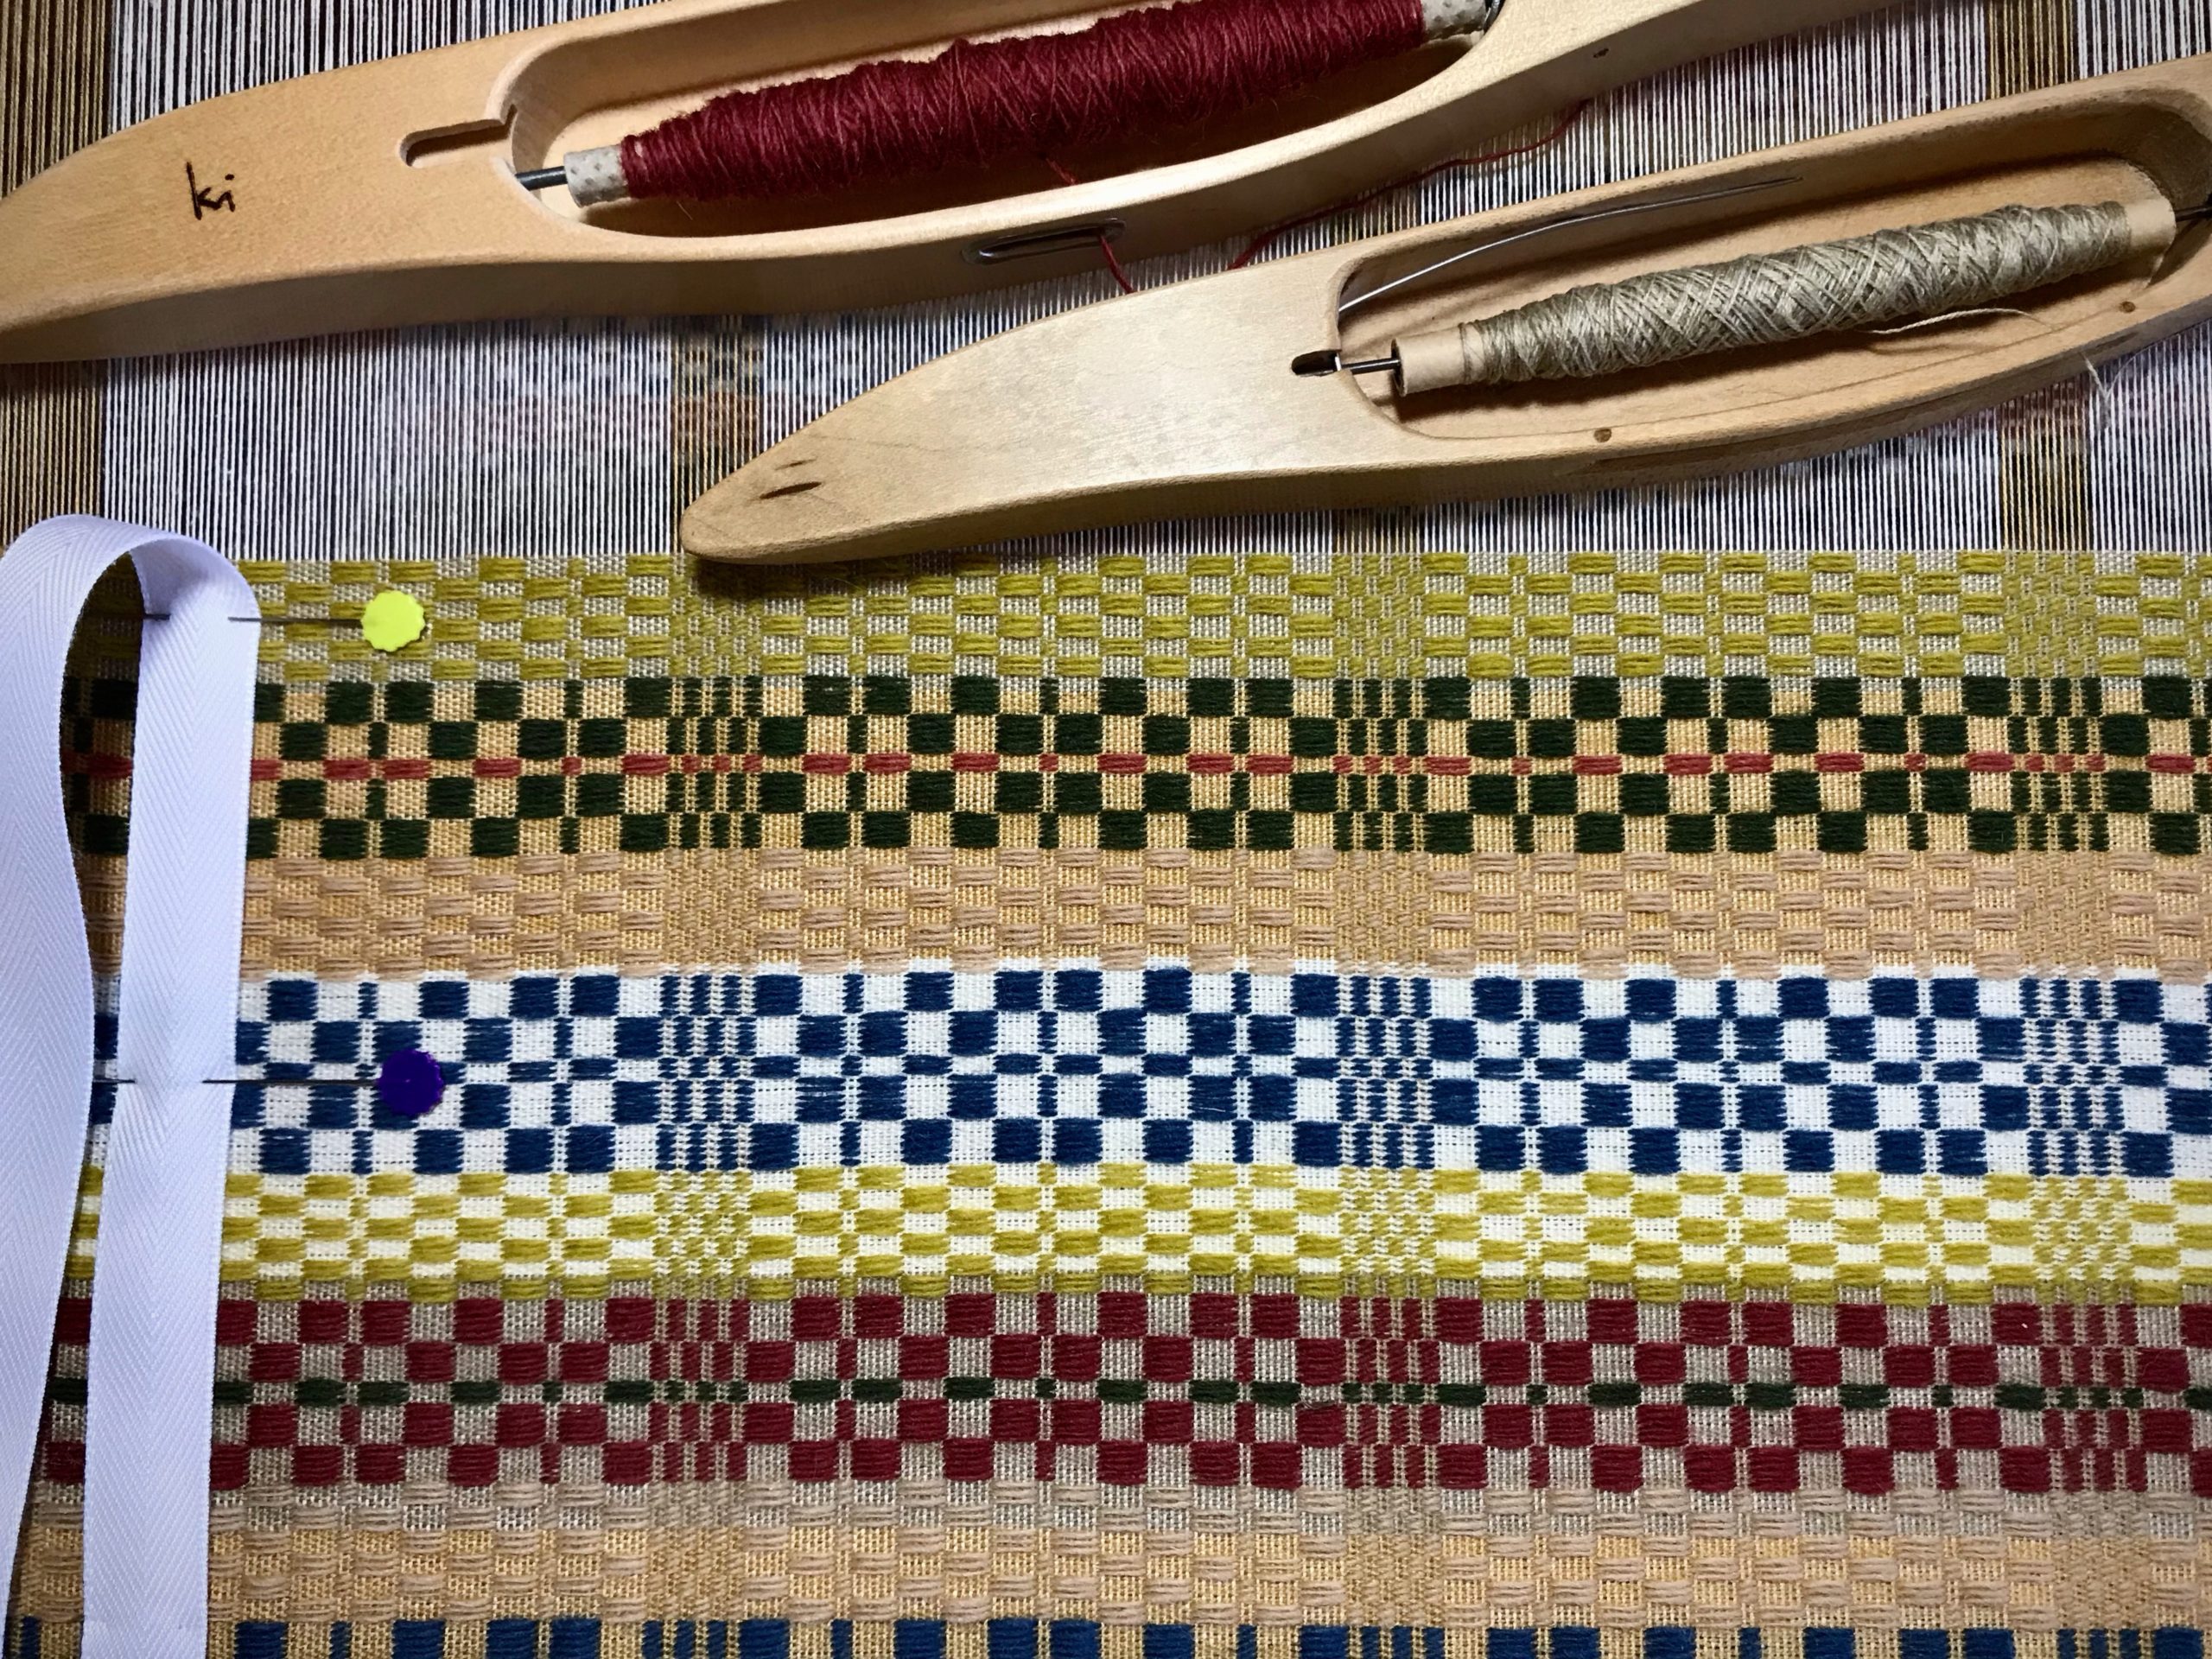
You can measure what you are weaving. A set of towels will all be the same length. A table runner will fit the table as planned. A rug will be the right size for the designated floor space. All it takes is a dependable way to measure. (Thanks to Elisabeth S. for writing me, “I’d love to have a better way to measure my work as I’m weaving it.”)
Measurement Tape (accompanying video below)
Supplies:
Calculator
Project notes
5/8” polyester twill tape
Fine point indelible marker
Tape measure
2 flat-head straight pins
Make Calculations
Determine the finished length.
Consider the Golden Ratio, 1:6.
Consider where the finished textile will be placed.
Estimate take-up and shrinkage.
Include these measurements in your project notes.
Prepare a Measurement Tape
Draw the beginning line about 2 cm from the end of the tape. If there is a hem, draw a second line to mark the hem’s length.
Write the item description on the tape.
Write ” ___ (finished length) + ___ (take-up and shrinkage) = ___ (total length)” on the tape.
Measure the total length from the first line (or from the hem) on the tape. Draw a line at the end (add hem, if needed).
Cut the tape about 2 cm after the ending line.
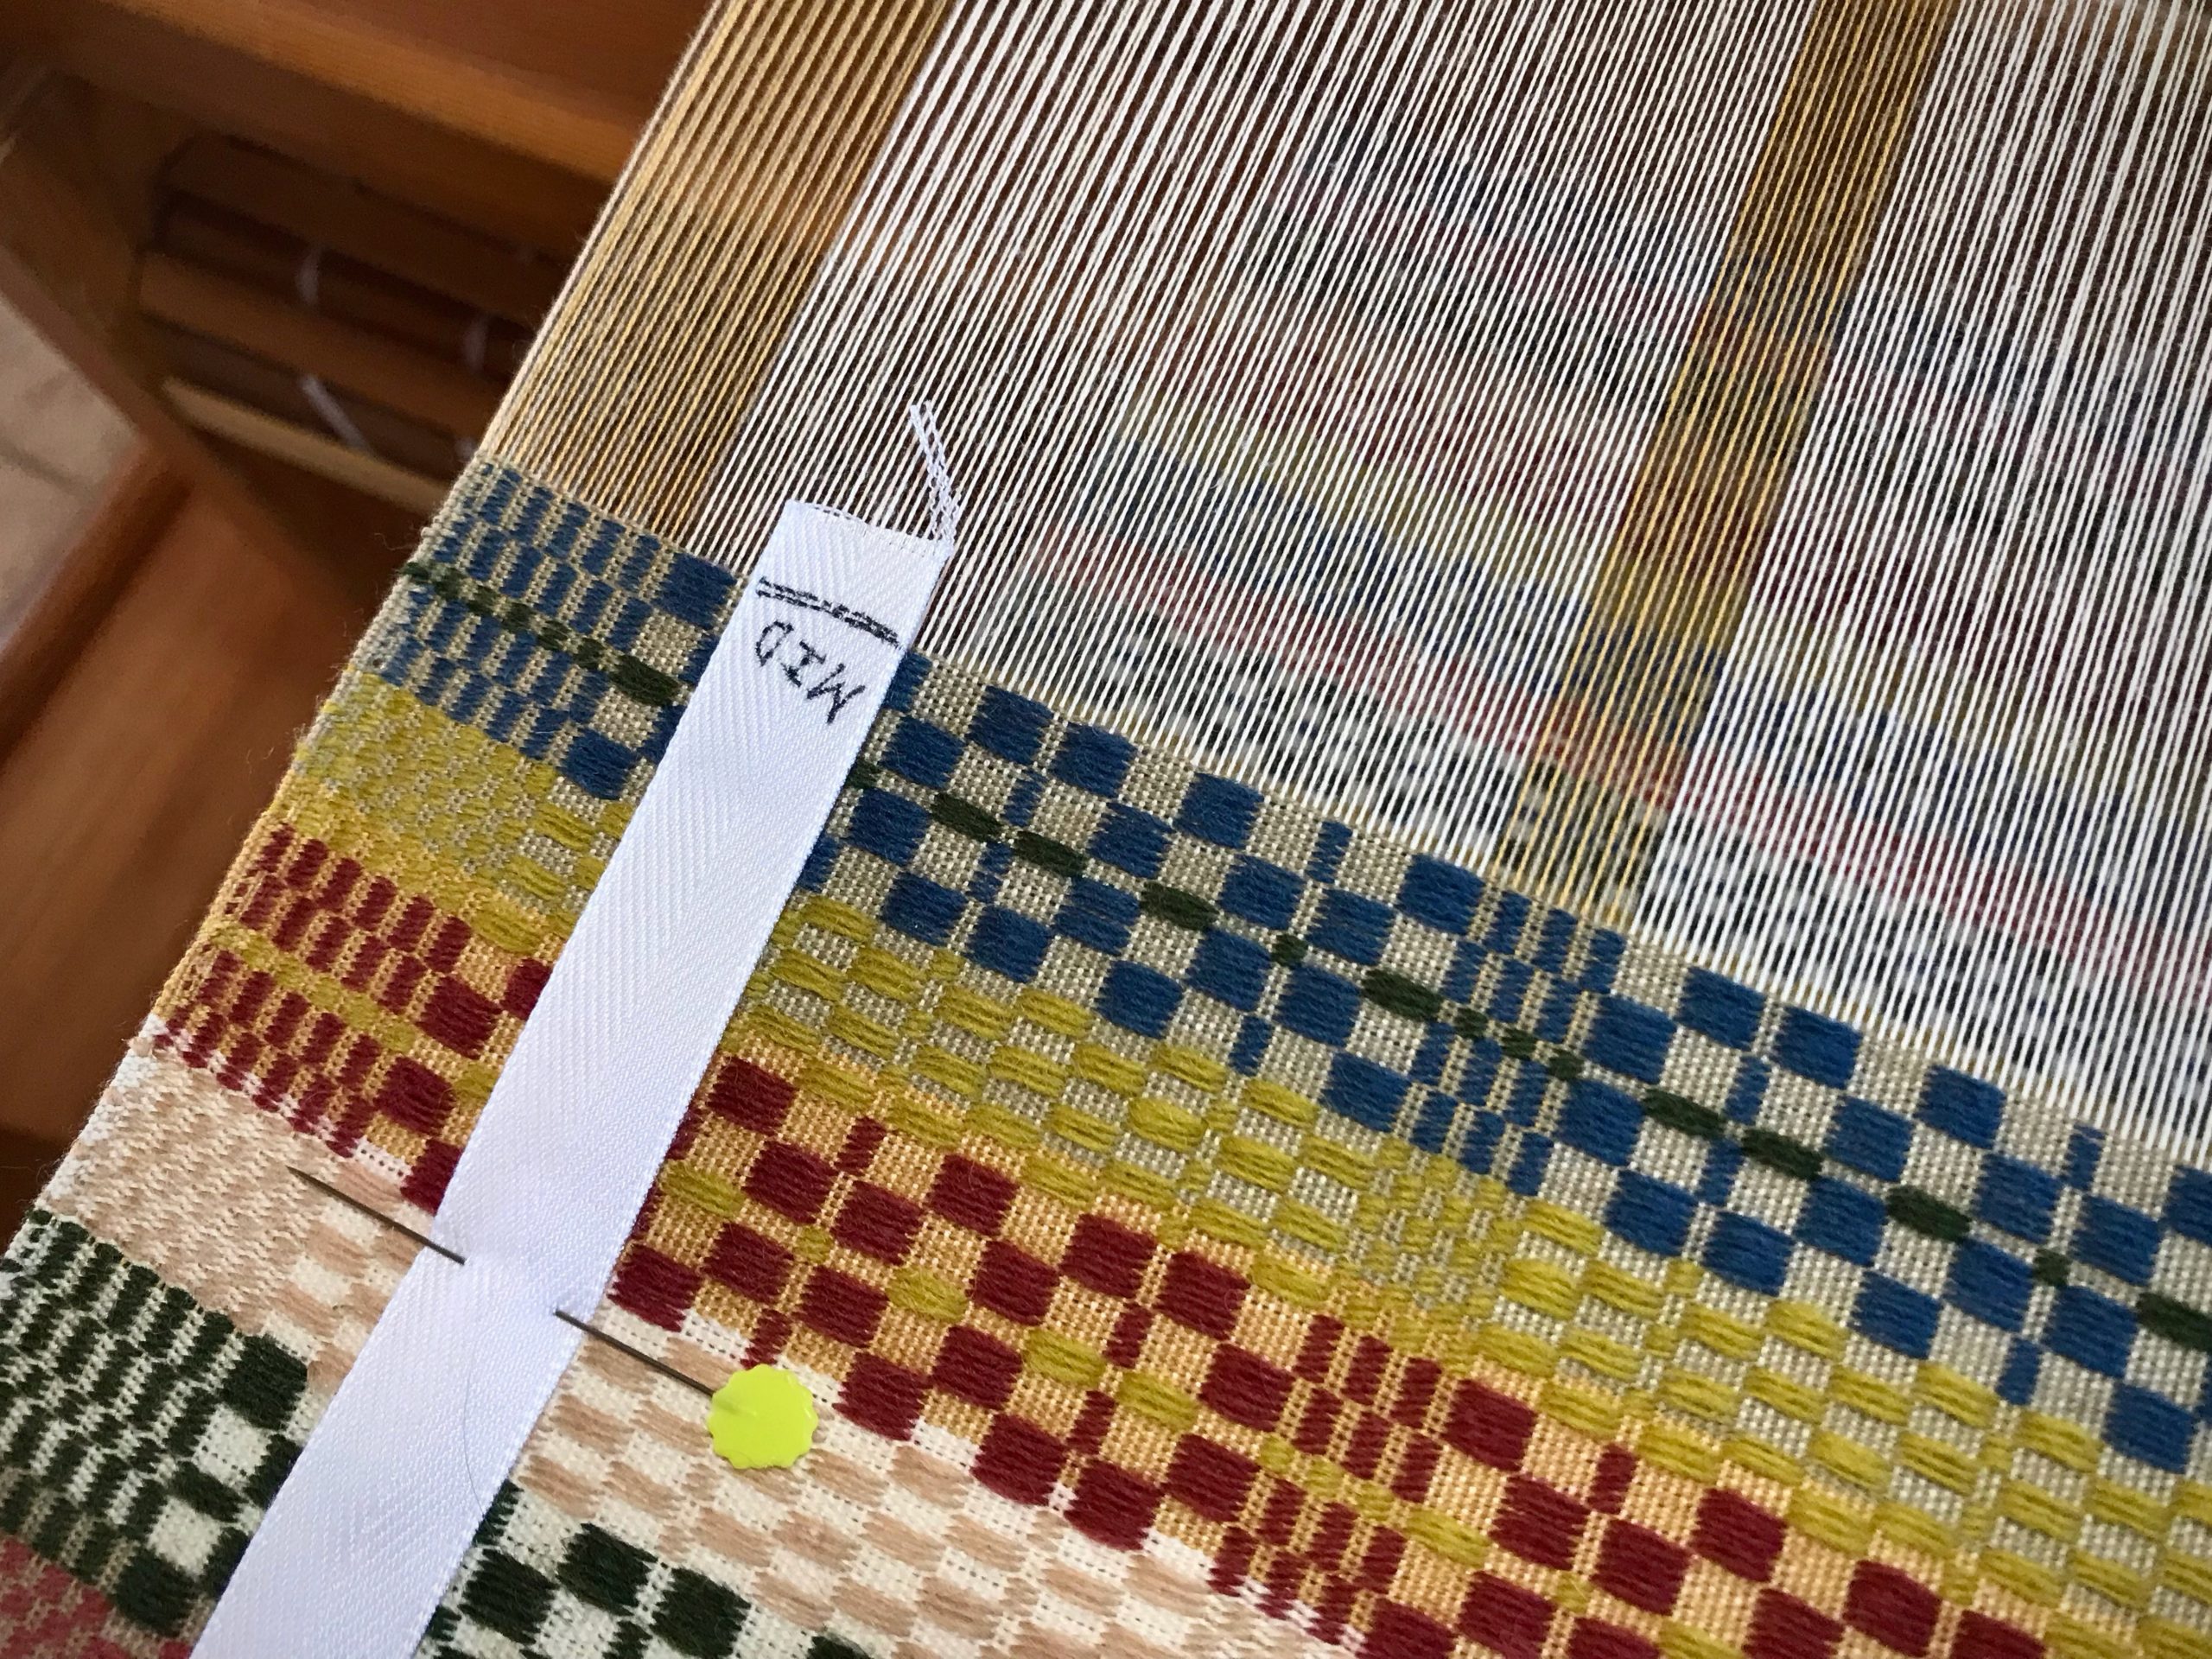
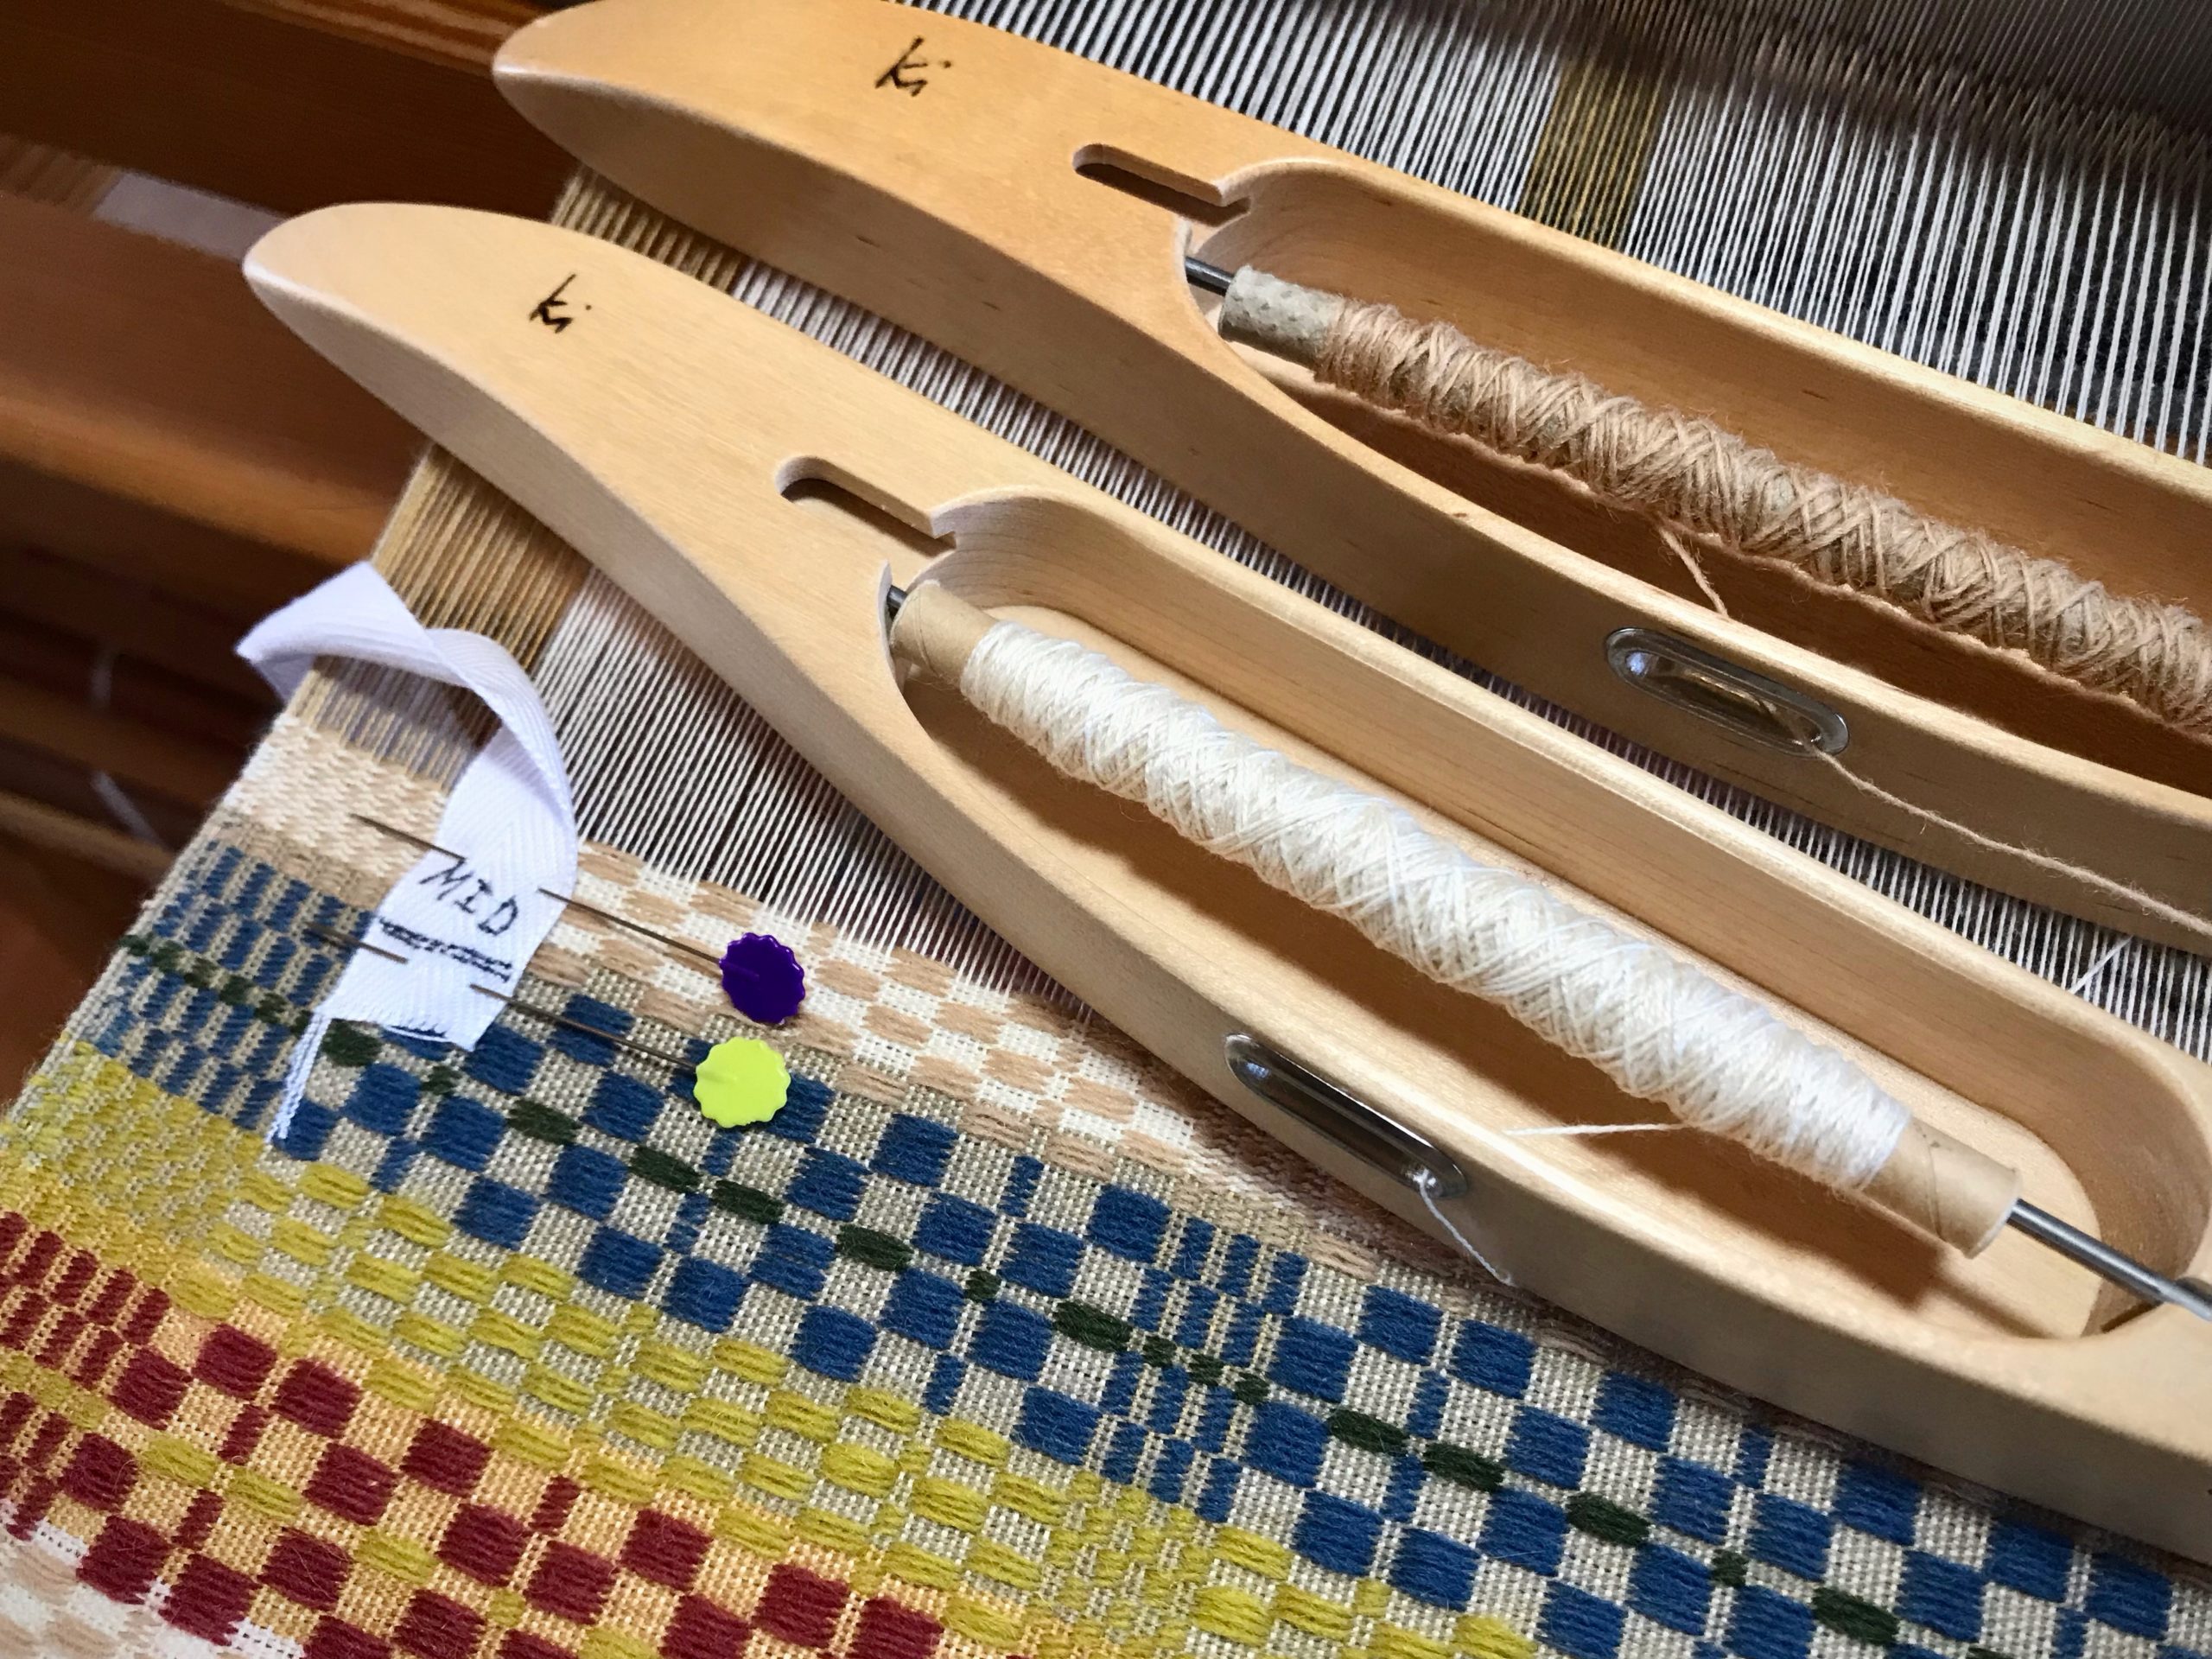
Find the middle of the tape. Draw a line and write “MID”.
Place the first line of the measurement tape directly over the beginning picks of the woven article.
Prepare a Half Measurement Tape
Do the same as for a full-length measurement tape, except divide the total length measurement in half. Draw a line on the tape at the halfway point. Write “MID” before the line.
Cut the tape about 2 cm after the MID line.
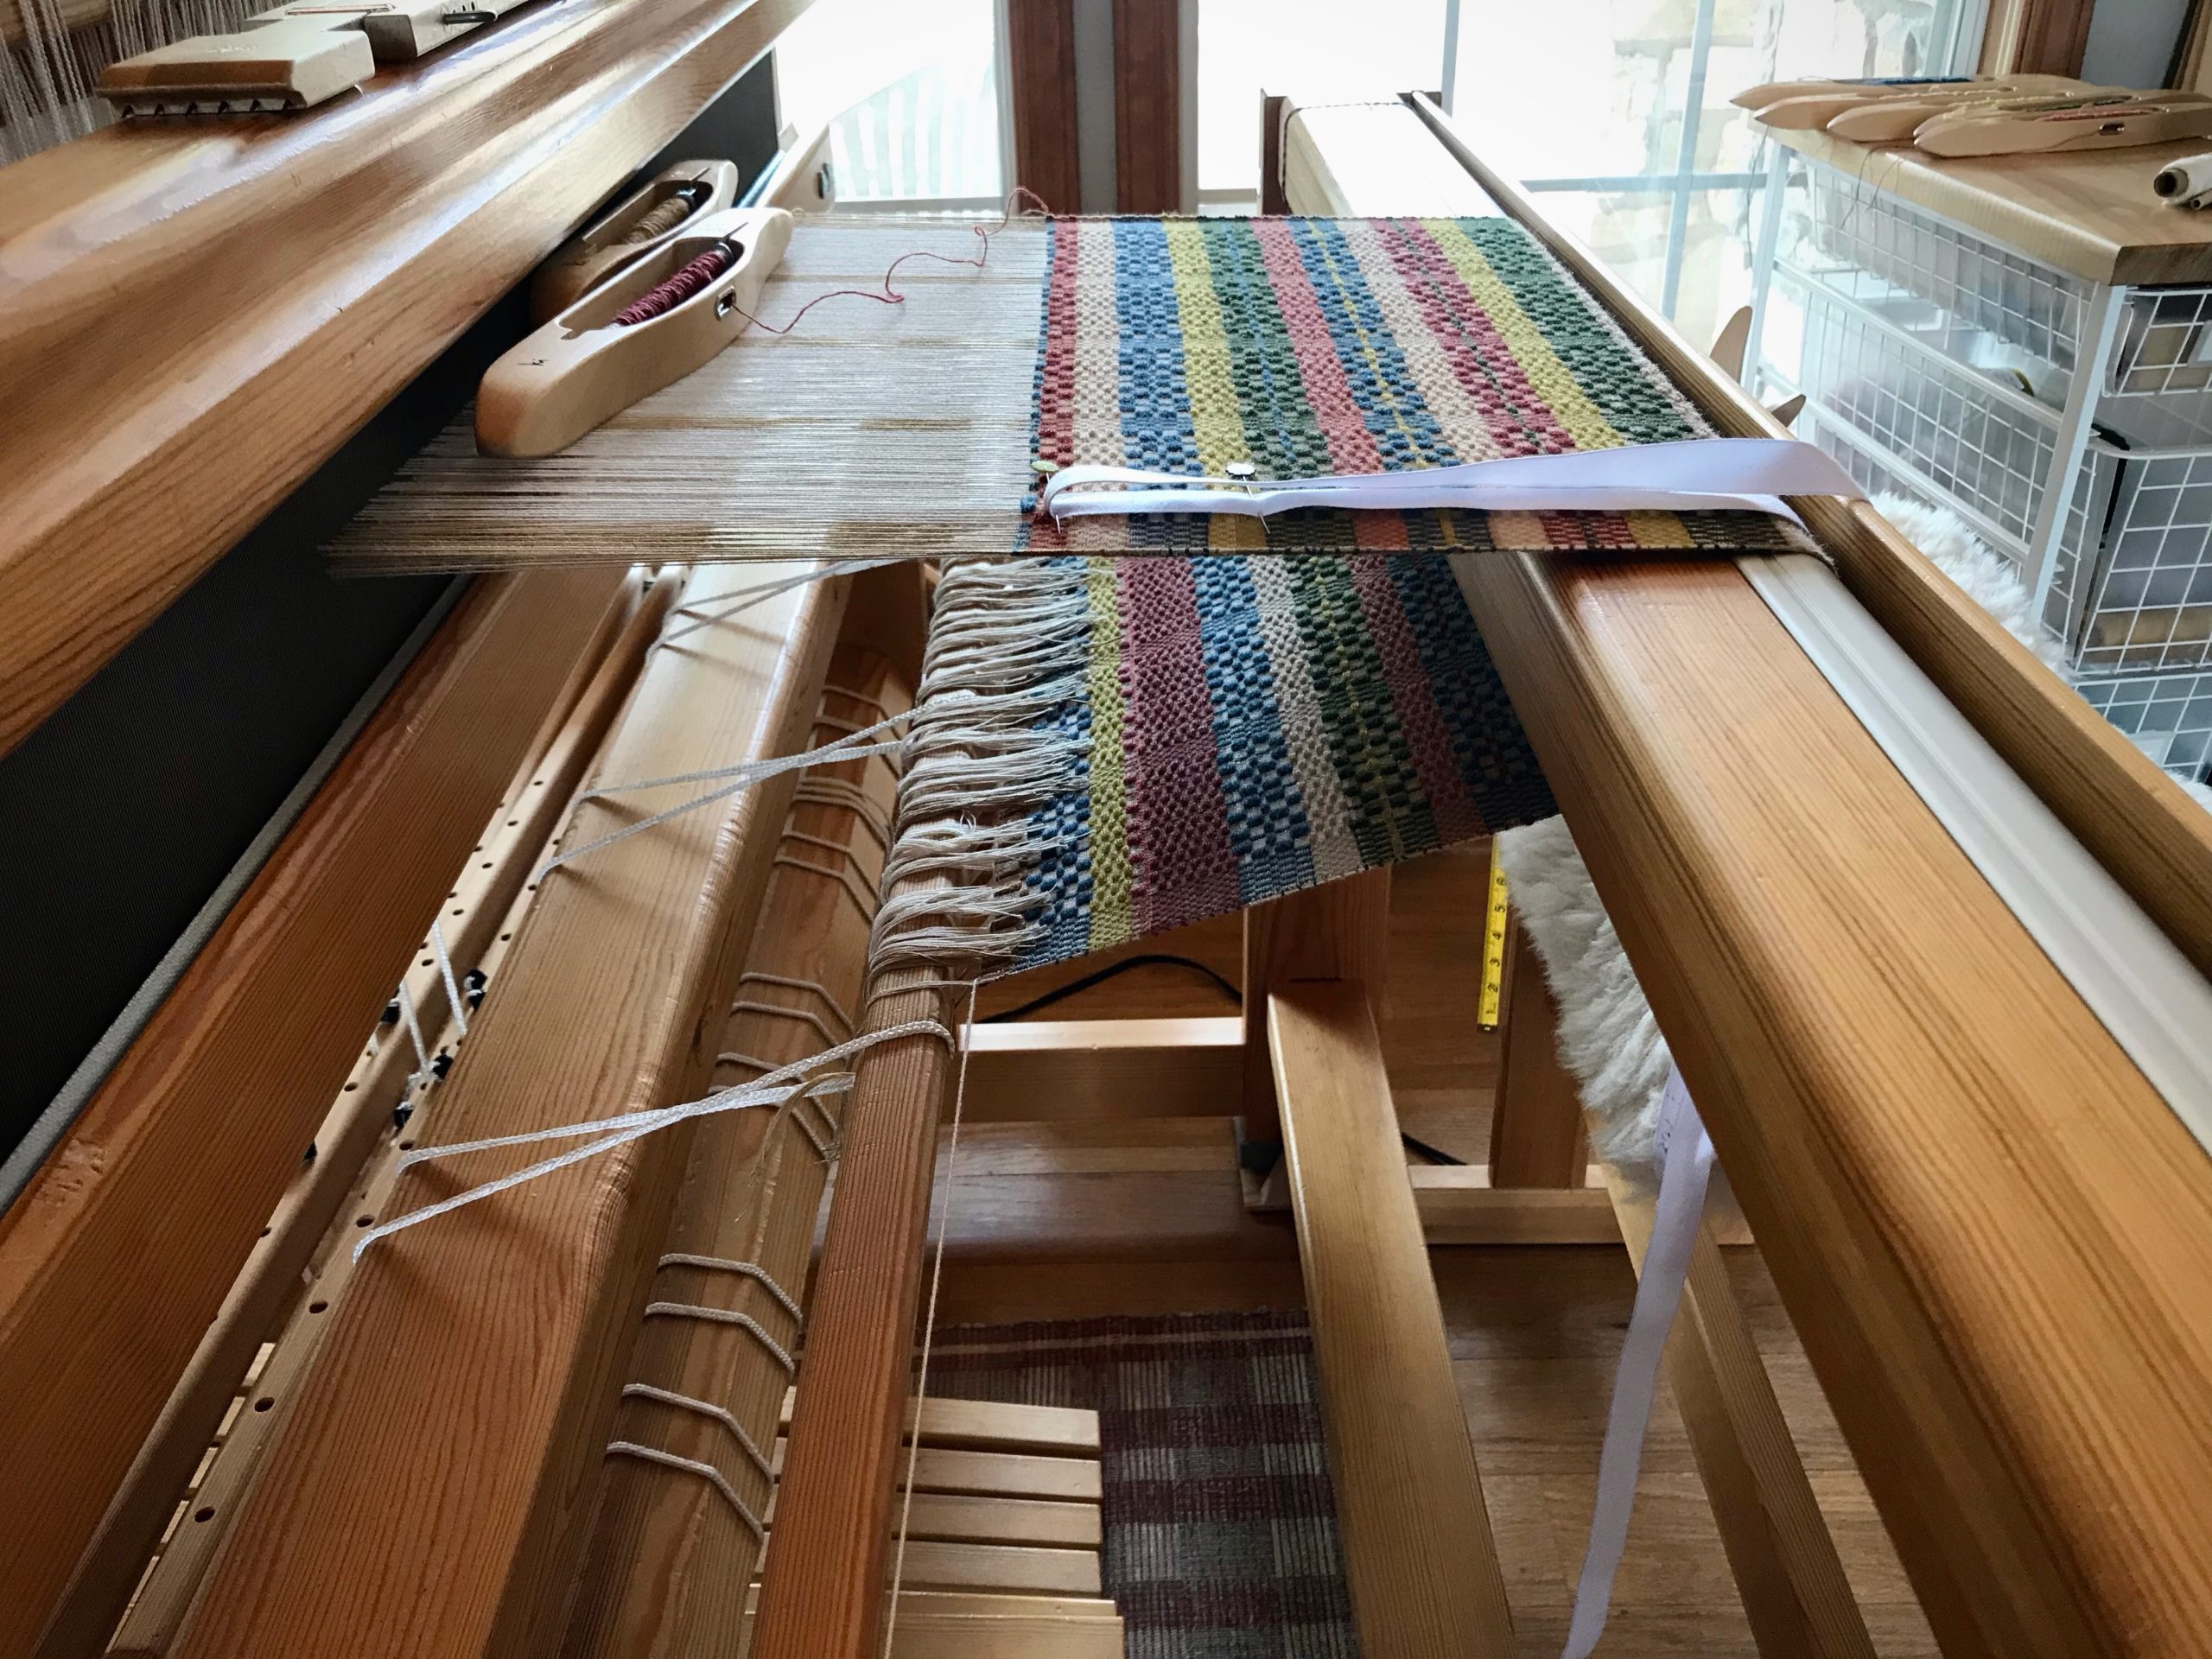
Weave and Measure (Always with the warp under tension)
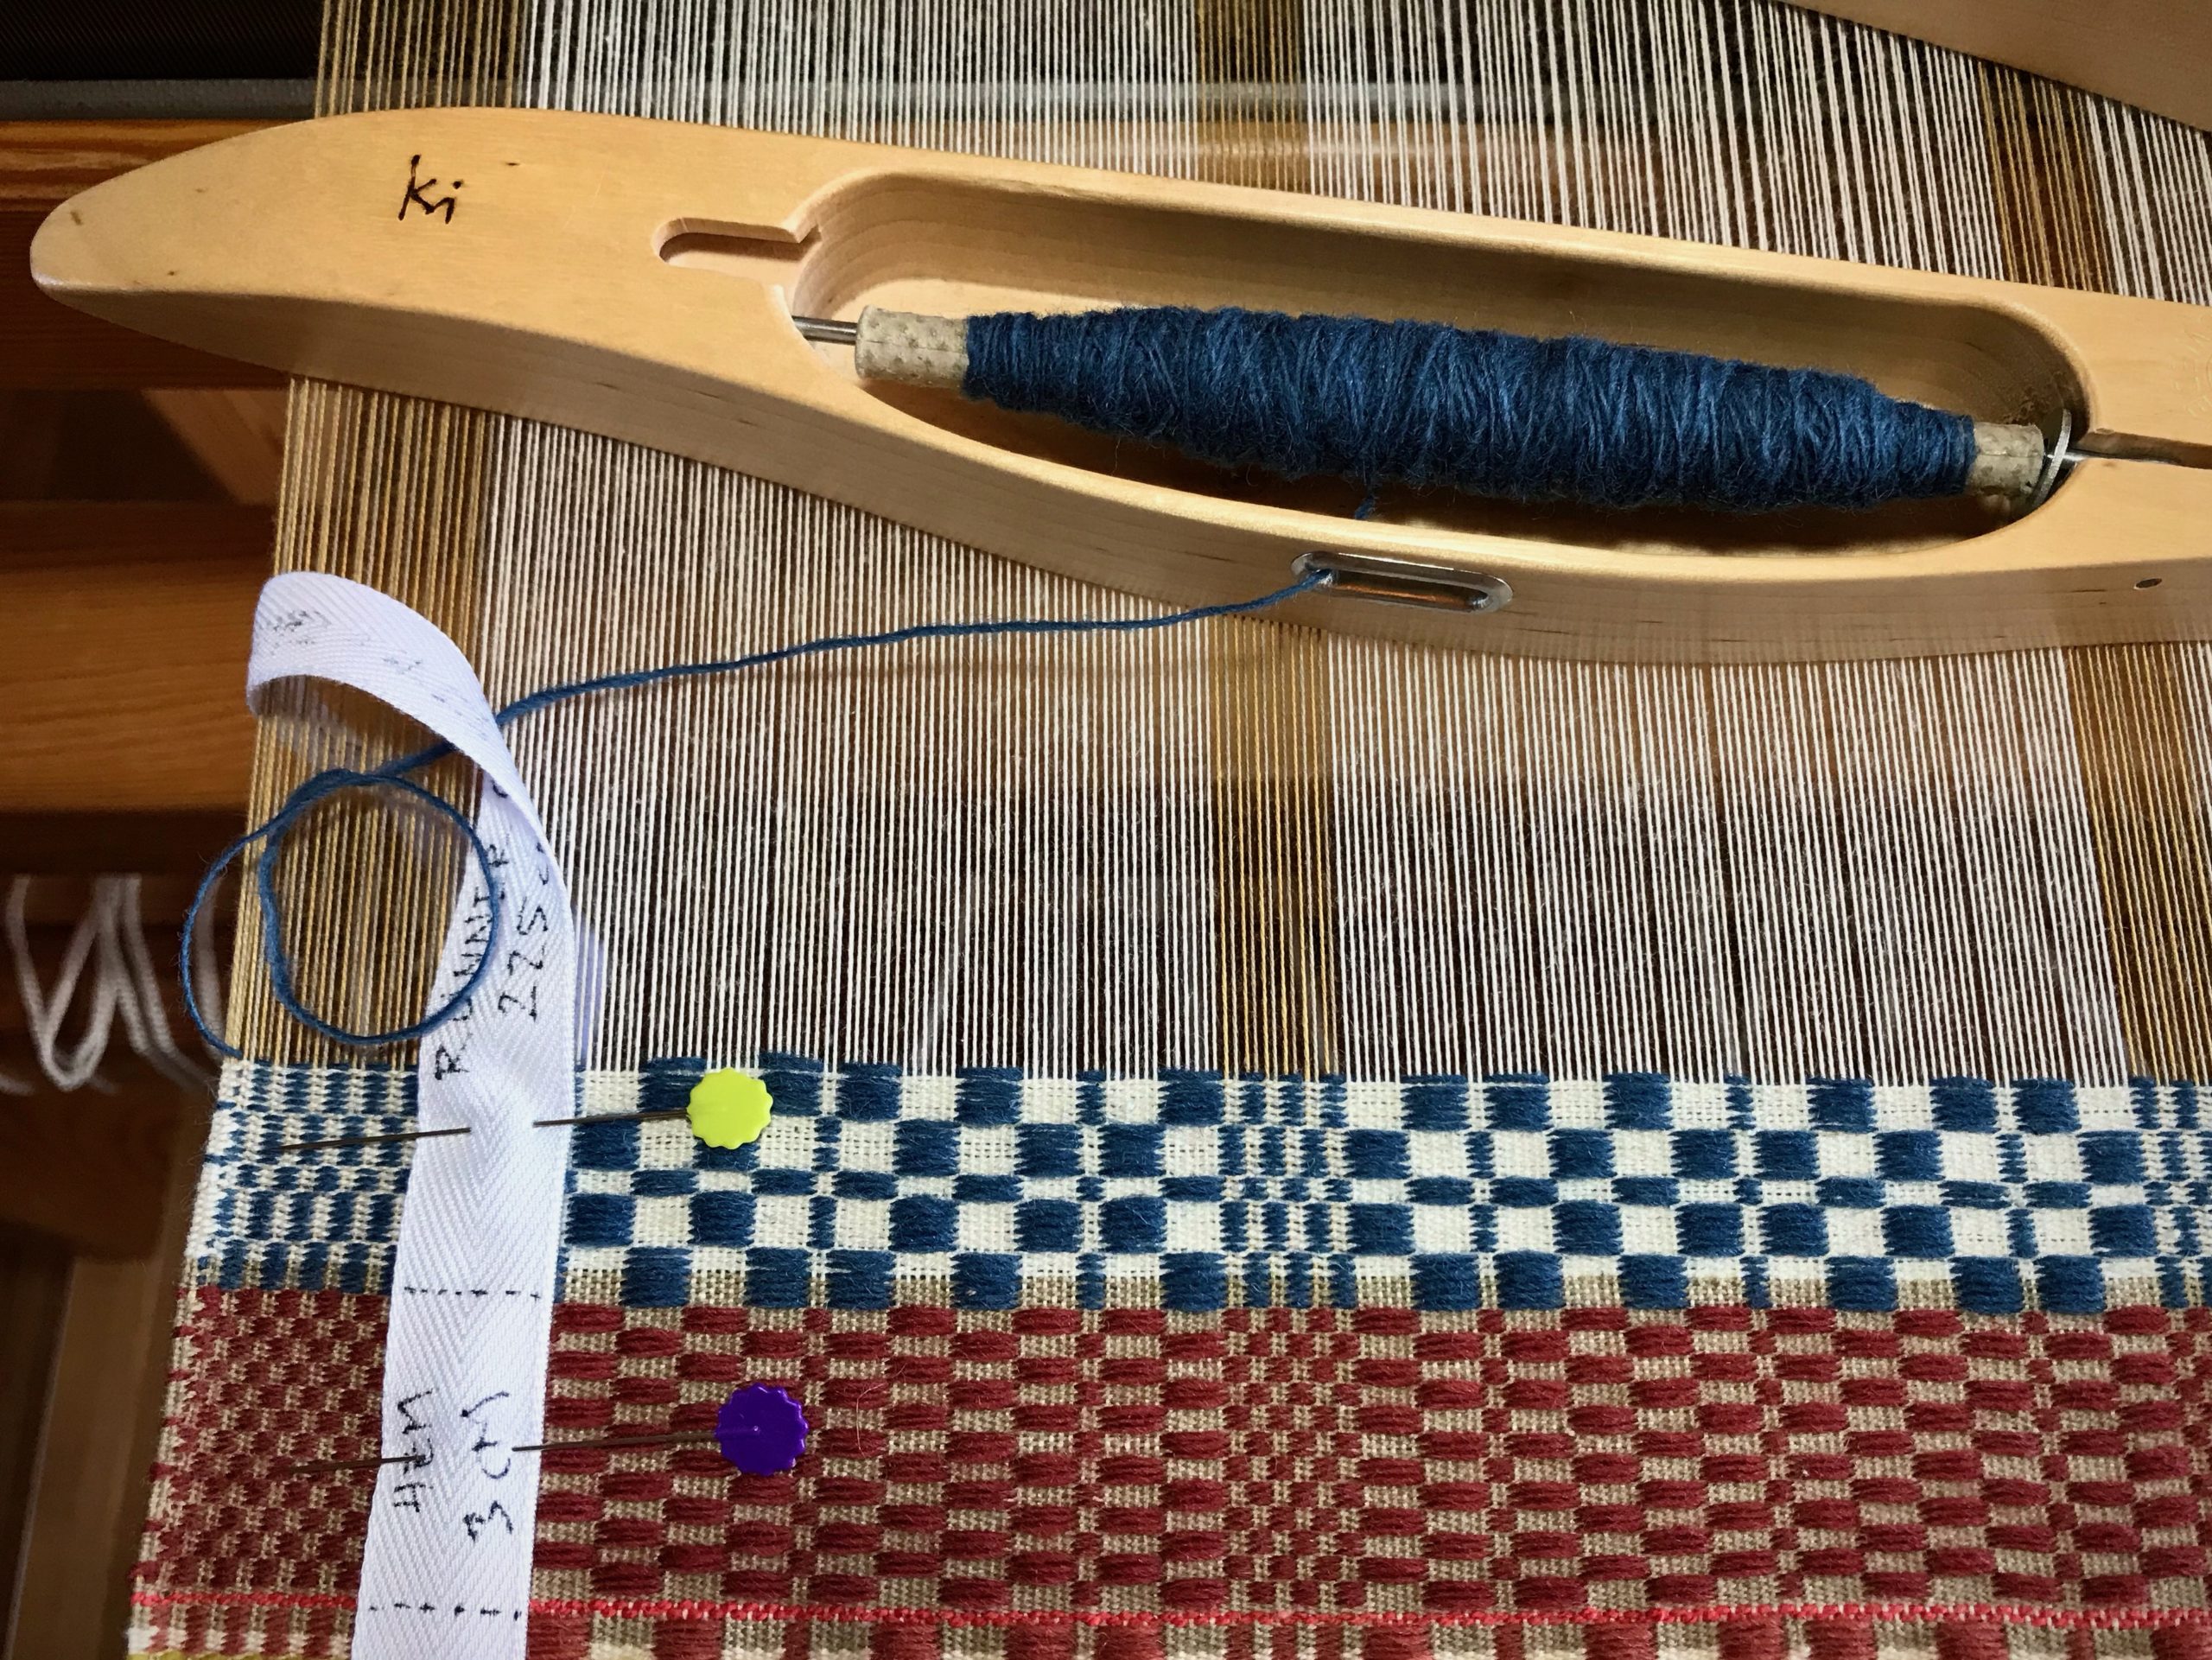
Use two straight pins to pin the measurement tape to the weaving near one selvedge. Place the beginning line of the tape directly over the beginning of the woven article.
As weaving progresses, remove the pin closest to the breast beam. Leapfrog over the remaining pin. Reinsert the removed pin through the tape near the fell line.
Move one pin at a time. I usually move the pin right before I advance the warp.
If using a half measurement tape, weave past the MID line. Mark the spot with a pin. Remove the measurement tape. Turn the tape and pin into place to weave the second half.
When you reach the MID line on a half measurement tape, keep the measurement tape in place until you have woven a few more centimeters.Place one pin through the cloth, pointing to the MID line. Then, it’s safe to remove the measurement tape and turn it around. Go your merry way, weaving the second half of the Monksbelt runner, or whatever you have on your loom.
Here’s a demonstration of making and using a measurement tape: