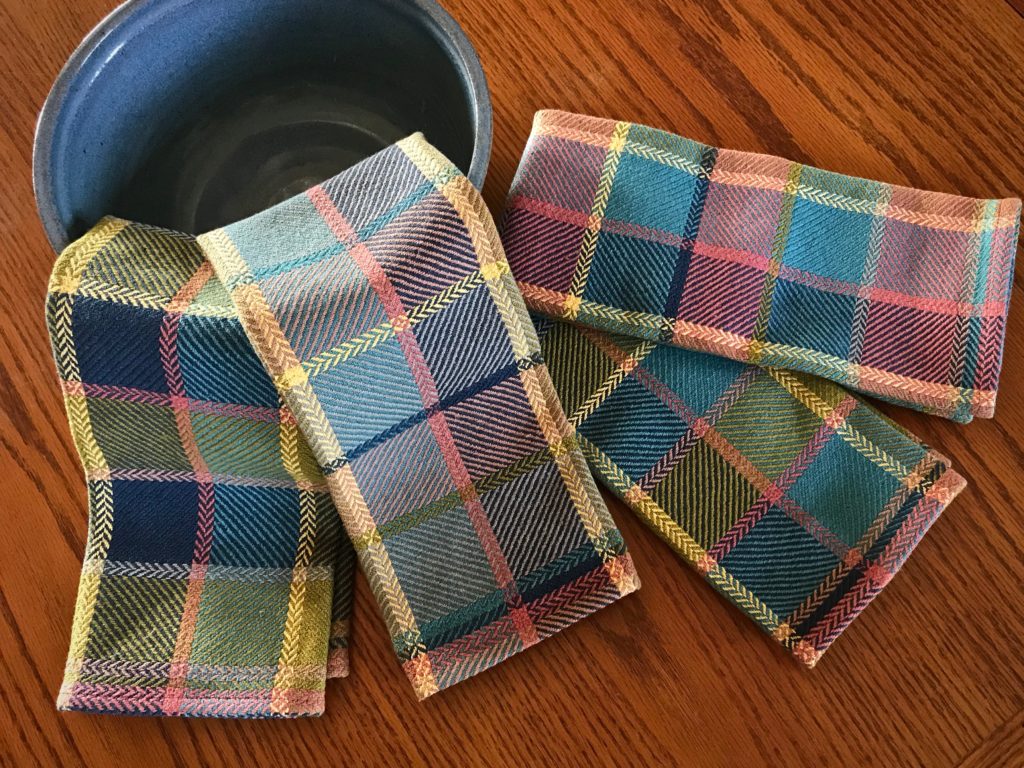
These towels make me think of my father. He was a brilliant architect. As an architect’s daughter, I learned to appreciate the interaction of structure, design, and color. This fabric has it all! These towels are also an expression of joy, a prominent aspect of my dad’s personality. If you could create a tangible article of jubilation, this would be it.
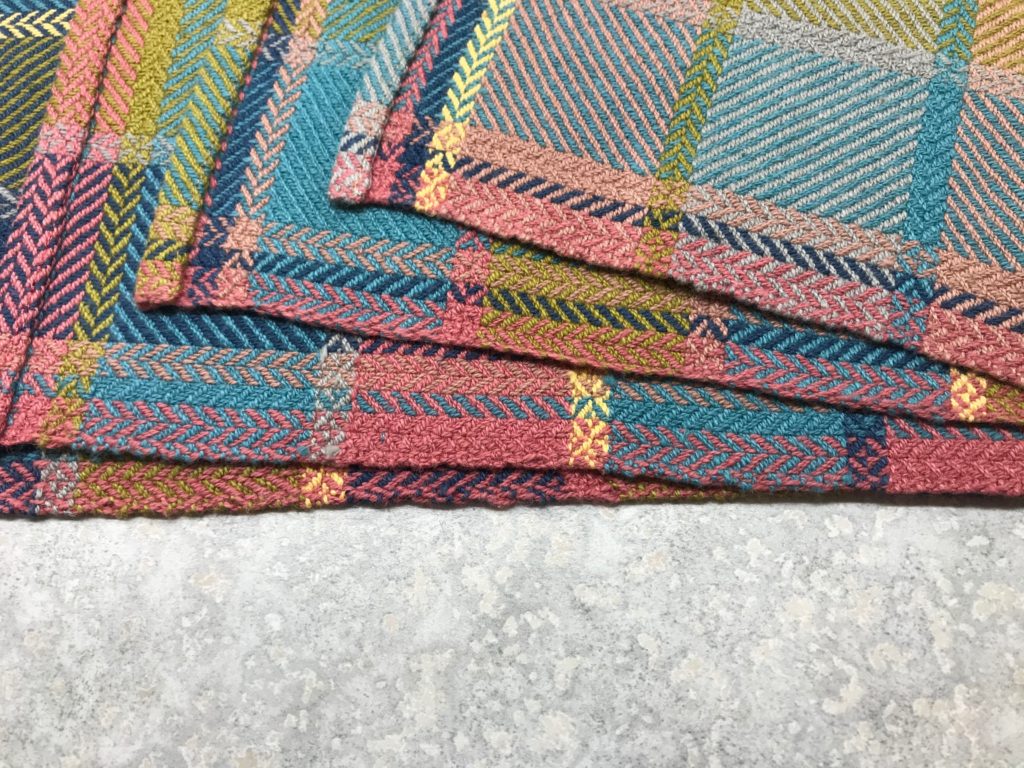
Broken and reverse twill structure. Using all the same colors, each towel has a different sequence of weft color order.
After weaving three towels, I eliminated the floating selvedges. Which one of the four towels do you think was woven without floating selvedges? Leave your answer in the comments. (1 – 4, with the towel on top as #1.)
Three of the four towels were woven with floating selvedges.
Here’s a short slideshow video that shows the process from start to finish:
Jubilation bath towels are up next on the Glimåkra Standard!
May your jubilation rub off on your family and friends.
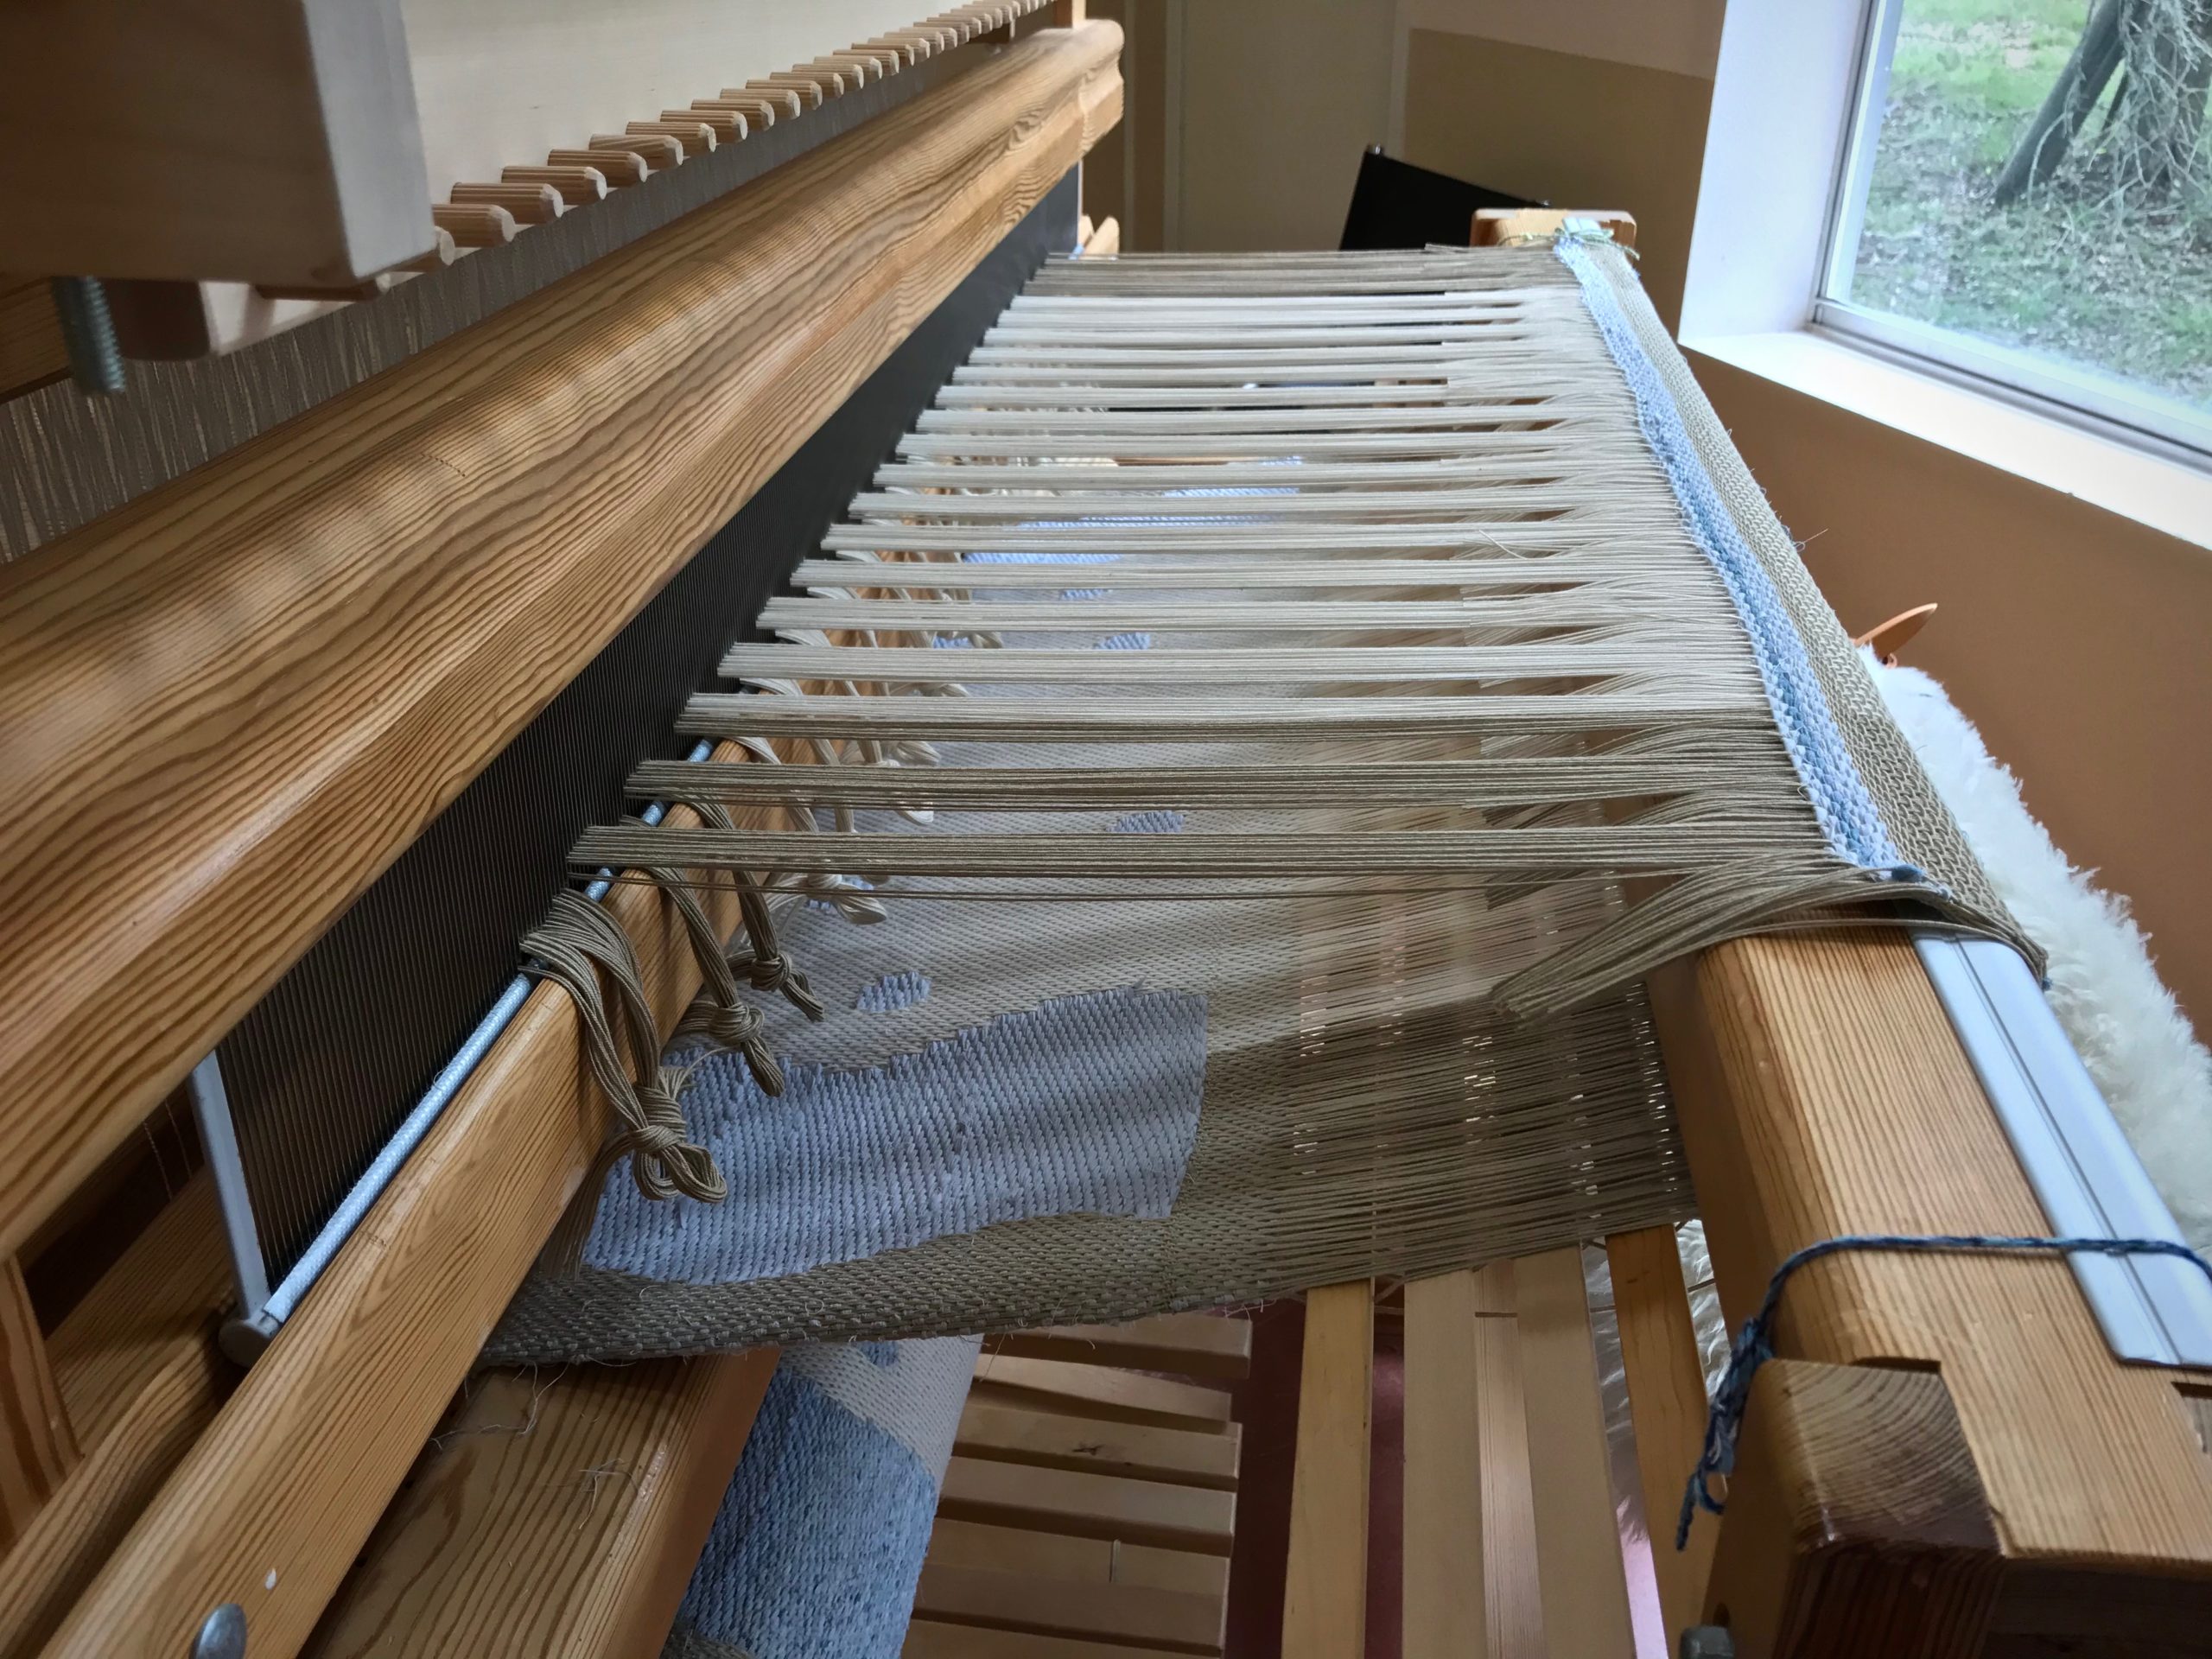
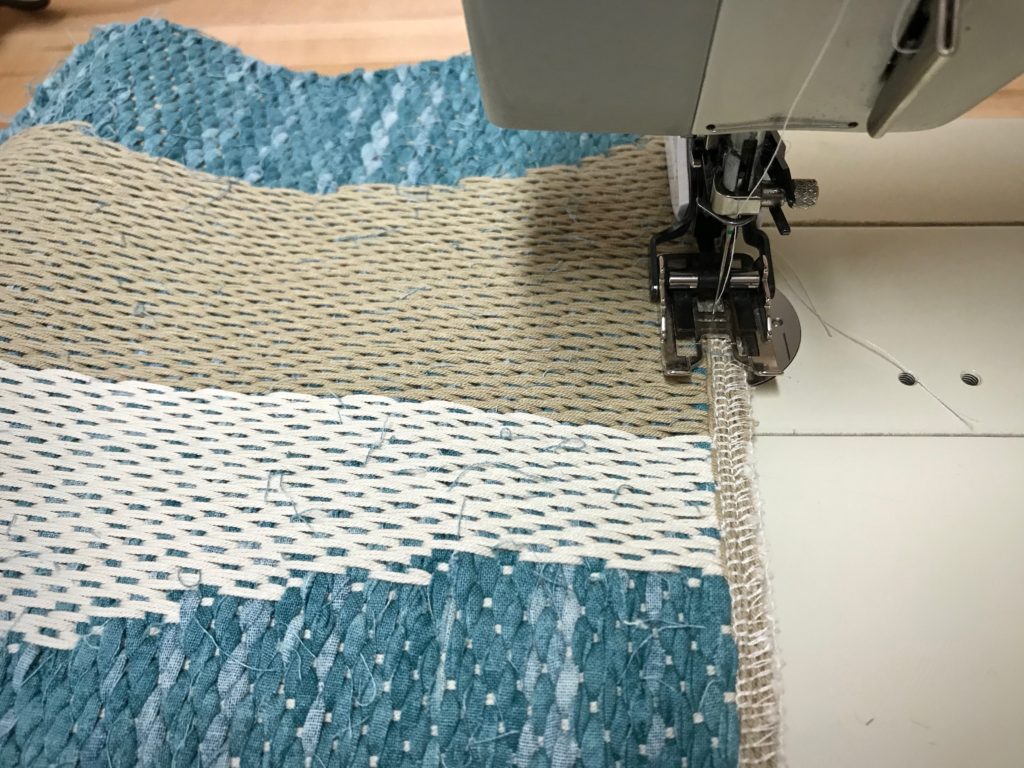
I have woven umpteen rag rugs. But never one like this! Eight-shaft satin on the single-unit drawloom brings its own challenges, from managing draw cords to getting a decent shed. Add rag weaving to the mix and we have a whole new experience!
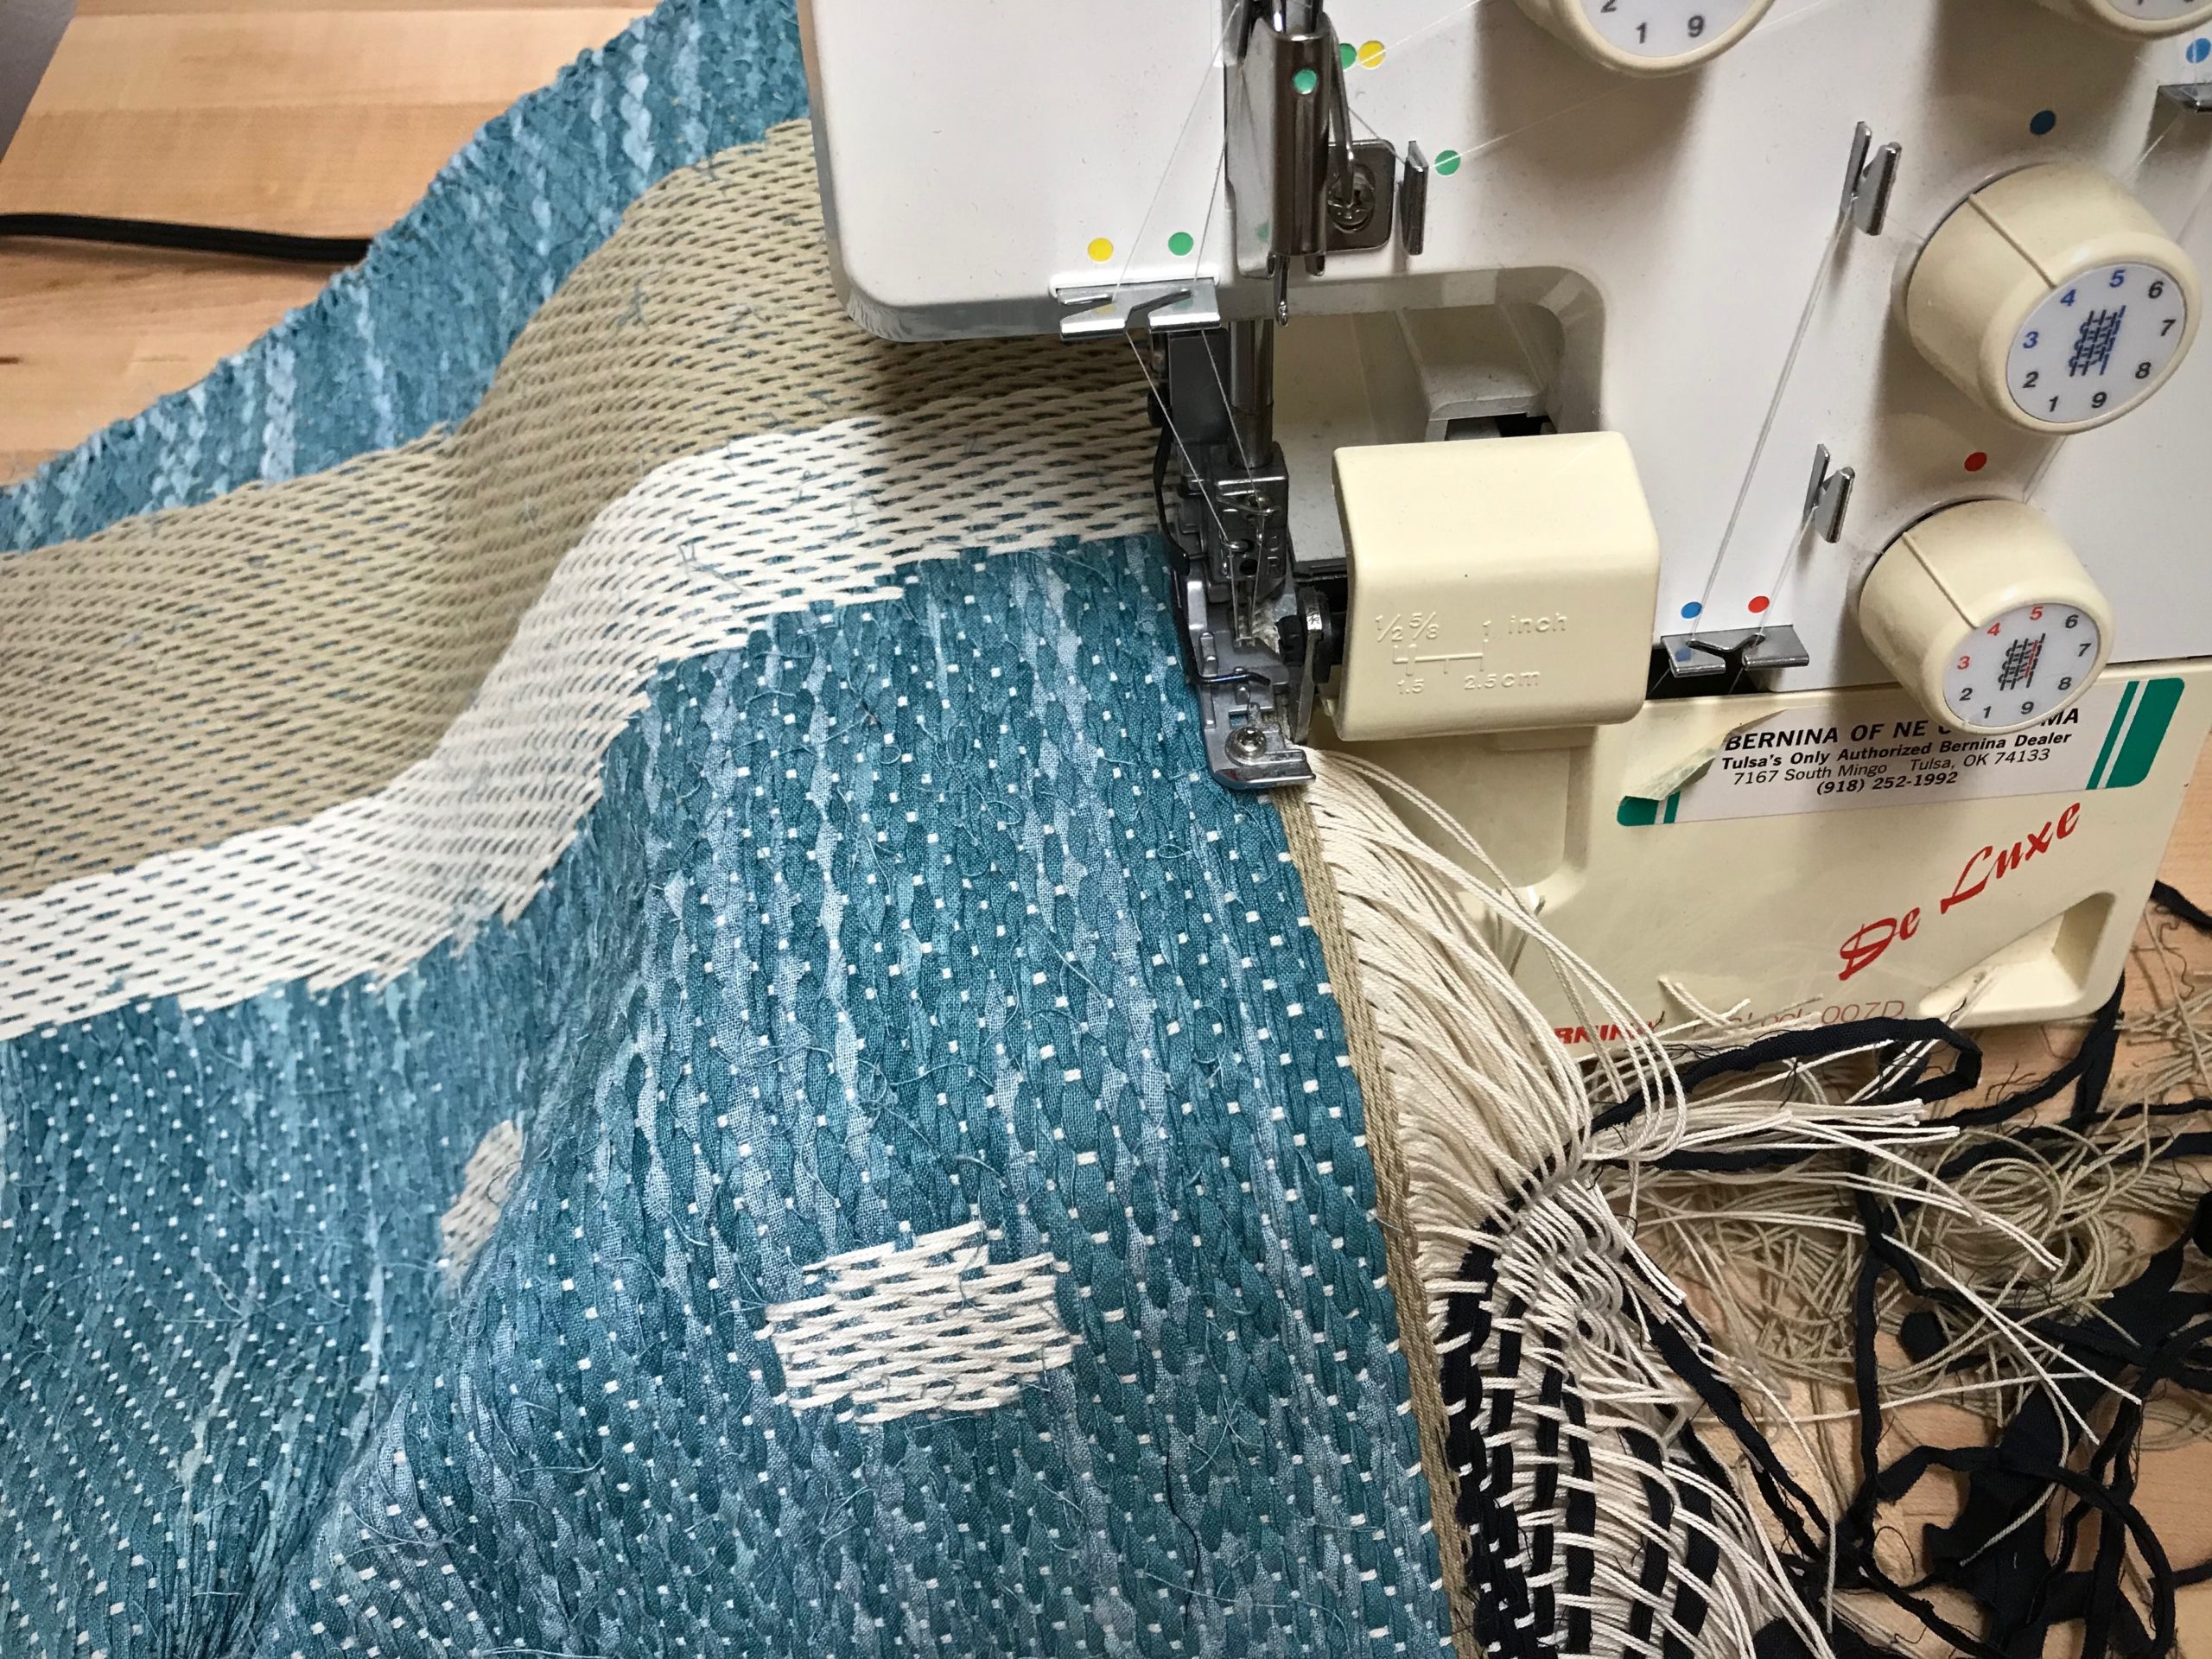
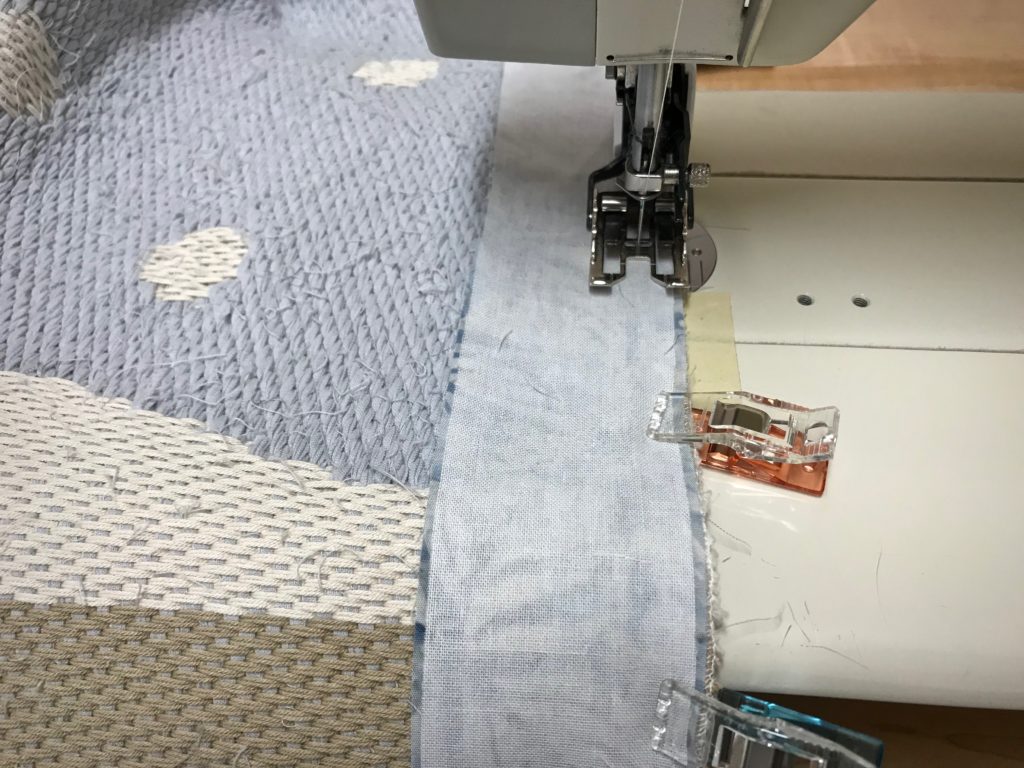
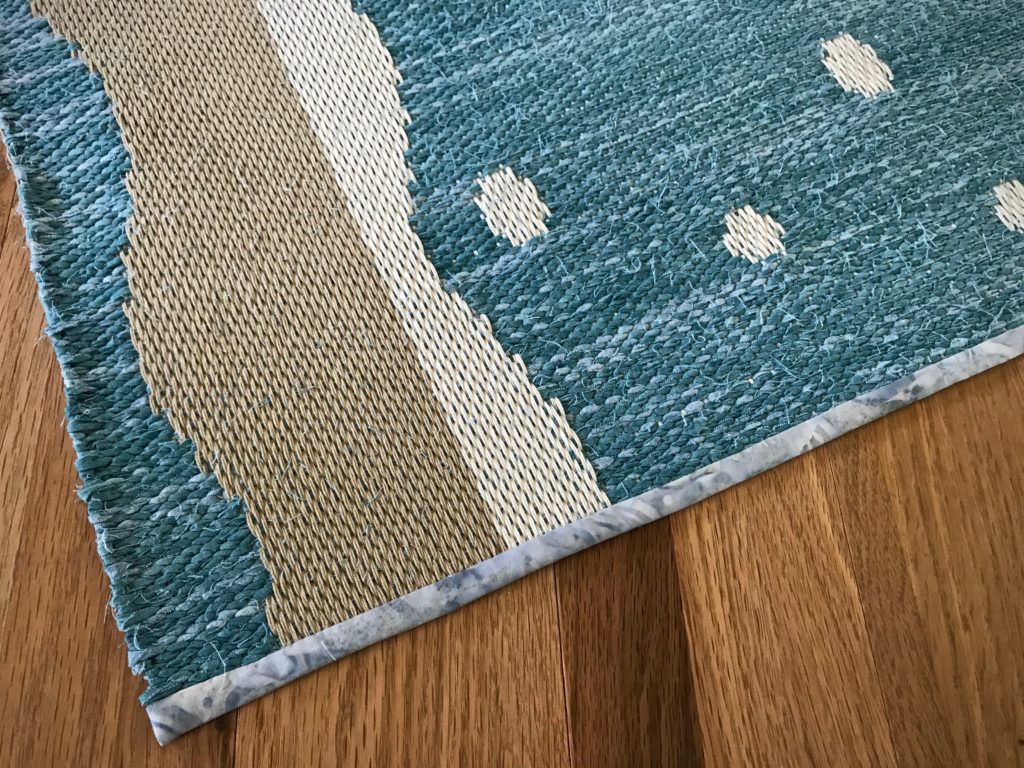
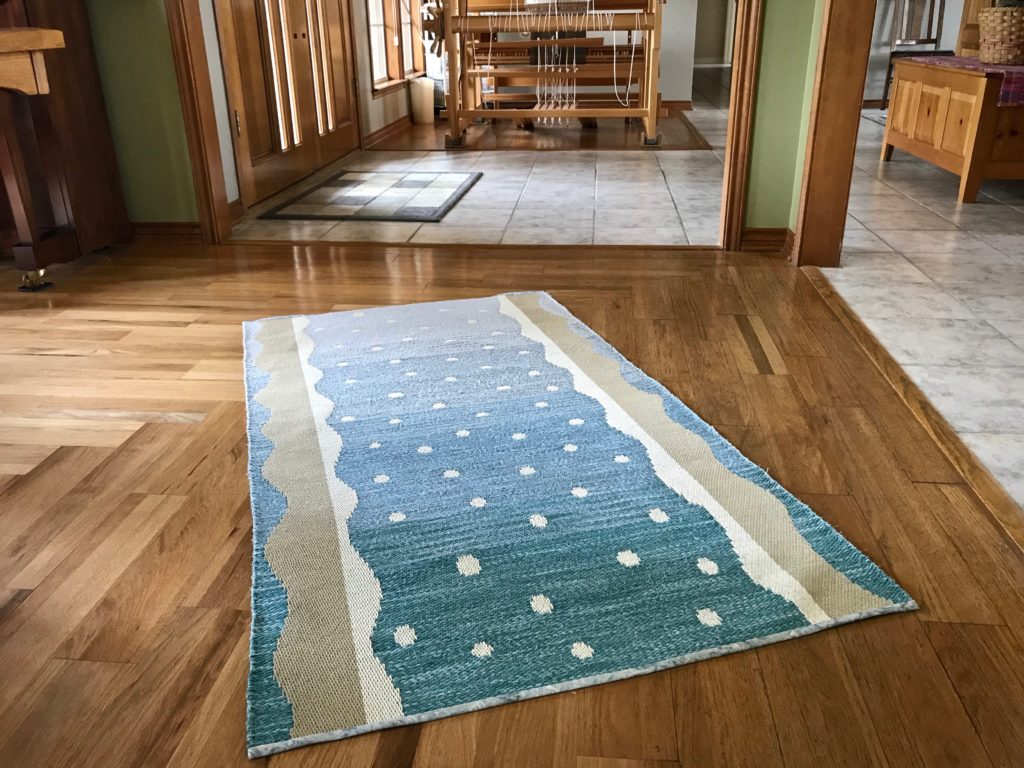
Finishing has its own set of new challenges. My go-to method of tying knots to secure warpends is unwieldy in this instance because the threads are extremely dense. By quietly doing some detail studies on a sample, I find a way to finish this unusual rug: Secure the ends with the serger. Then, sew two rows of straight stitches on the sewing machine for added security. Sew a narrow bound hem using some of the fabric that was used as weft in the rug. Steam press to finish.
Serger cuts off the ends as it overlocks the edge. I pull out the scrap header little by little just ahead of the serger needles and blade.Two rows of straight stitching.Lightweight woven fusible interfacing backs the fabric used for the narrow bound hem.My Grandma’s thimble helps me hand stitch the back side of the bound hems.Finished and pressed.Dream come true!
Stony Creek Rag Rug
(Design by Kerstin Åsling-Sundberg)
I have another rag rug to weave on this warp. It will still be a challenge. With what I’ve learned, though, I’m anticipating a satisfying weaving and finishing experience.
We know what to do in normal circumstances. It’s in unusual times that we fall into dismay. Private time with Jesus turns confidential fears to confident faith. He treats our challenges like personal detail studies, showing us the way forward. His grace enables us to conquer the next challenge with confident faith.
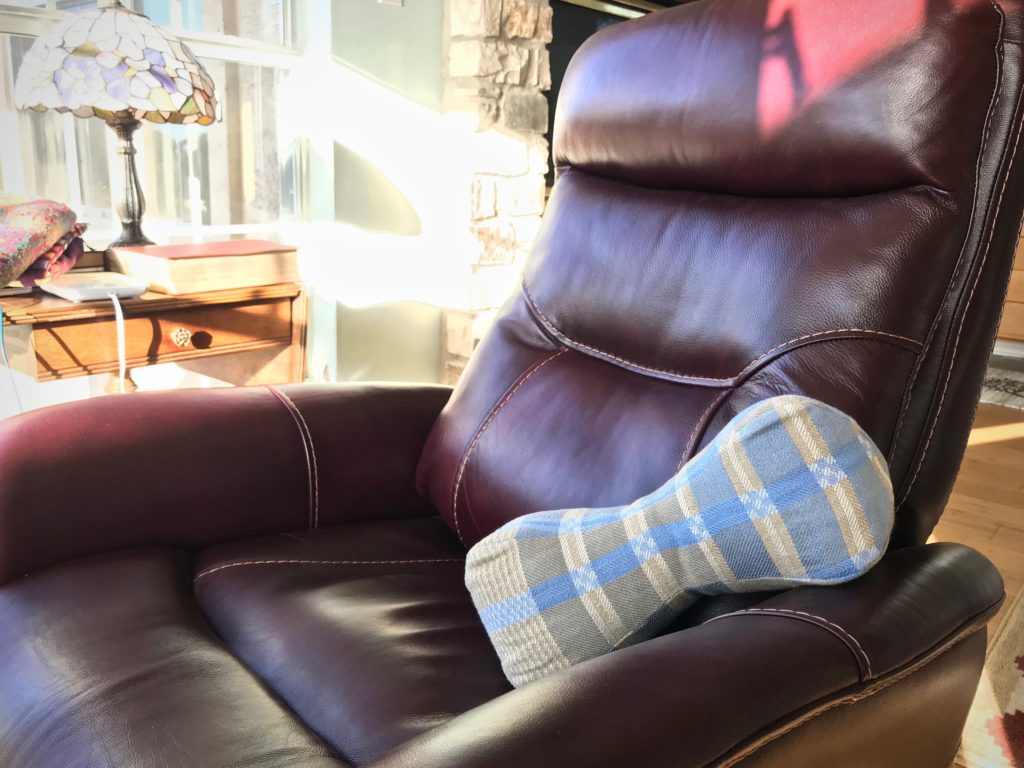
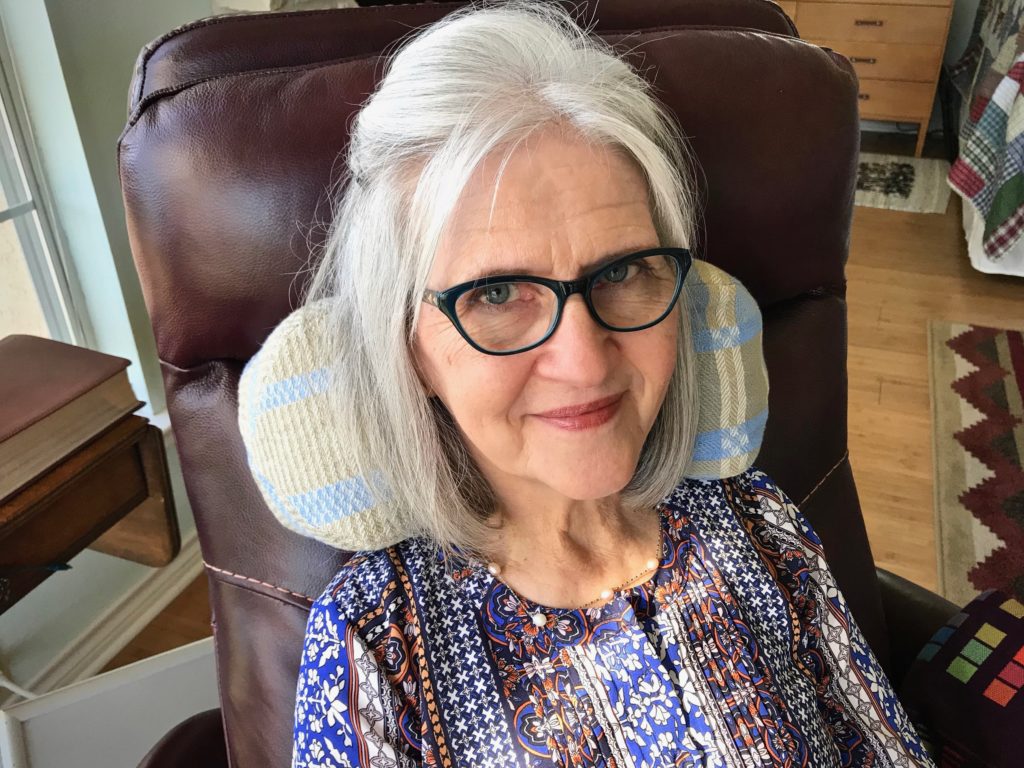
My grandma made a pattern on brown paper for a neck pillow. I suppose she found the pattern in a magazine or newspaper decades ago. I am using my copy of her pattern to make my own neck pillow. Maybe someday my pillow will be as worn and wobbly as Grandma’s well-loved neck pillow that I remember.
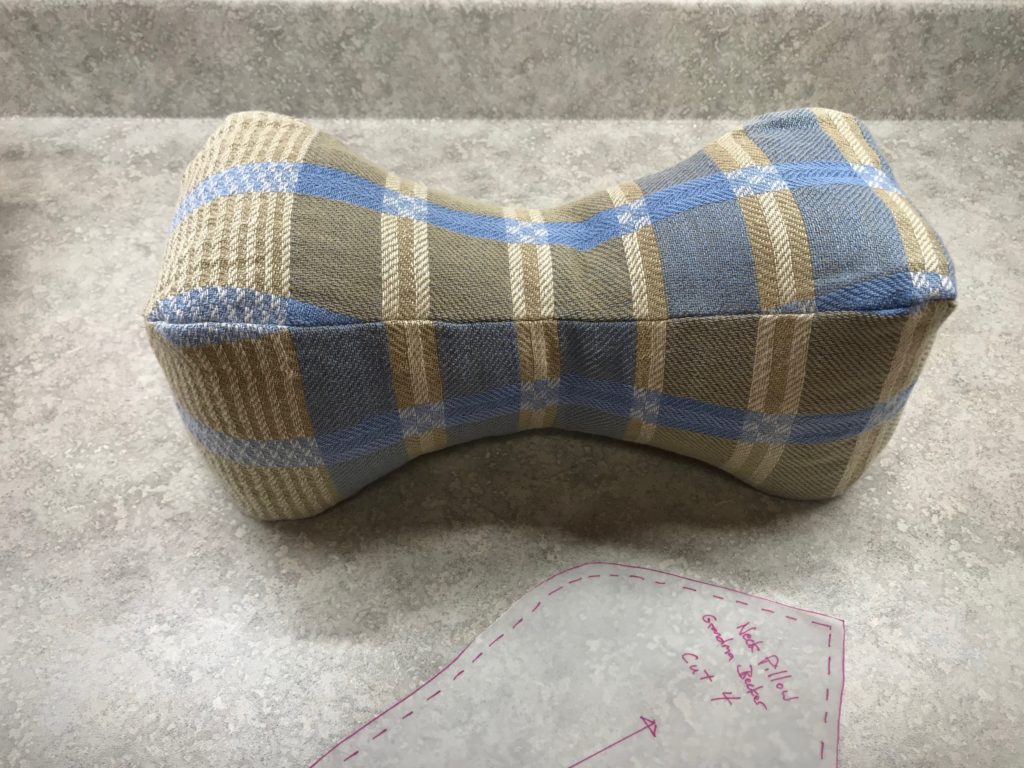
My version of Grandma’s neck pillow.
Looking through my pile of handwoven scraps I find the piece of fabric that had been hanging as a Roman shade on the back door of our previous home. This two-block twill in cotton and linen was my first 8-shaft project on my floor loom. Good memories! The fabric, softened and slightly faded through daily use, is perfect for the comfy neck pillow I’m imagining. (Unlike Grandma’s pillow, I’m making this one with a removable cover so it can be easily laundered.)
Roman shade from my first 8-shaft weaving project. I wove the linen draw cord on my two-treadleband loom.
Instructions for Constructing a Handwoven Neck Pillow
Supplies:
Cotton muslin, pre-washed
Handwoven fabric, pre-washed
Cluster Fluff, or other cluster fill or polyester fiberfill
7” invisible zipper
Sewing machine
Invisible zipper foot
Sewing thread
Hand-sewing needle
Iron
Sleeve board for pressing, optional
Steps:
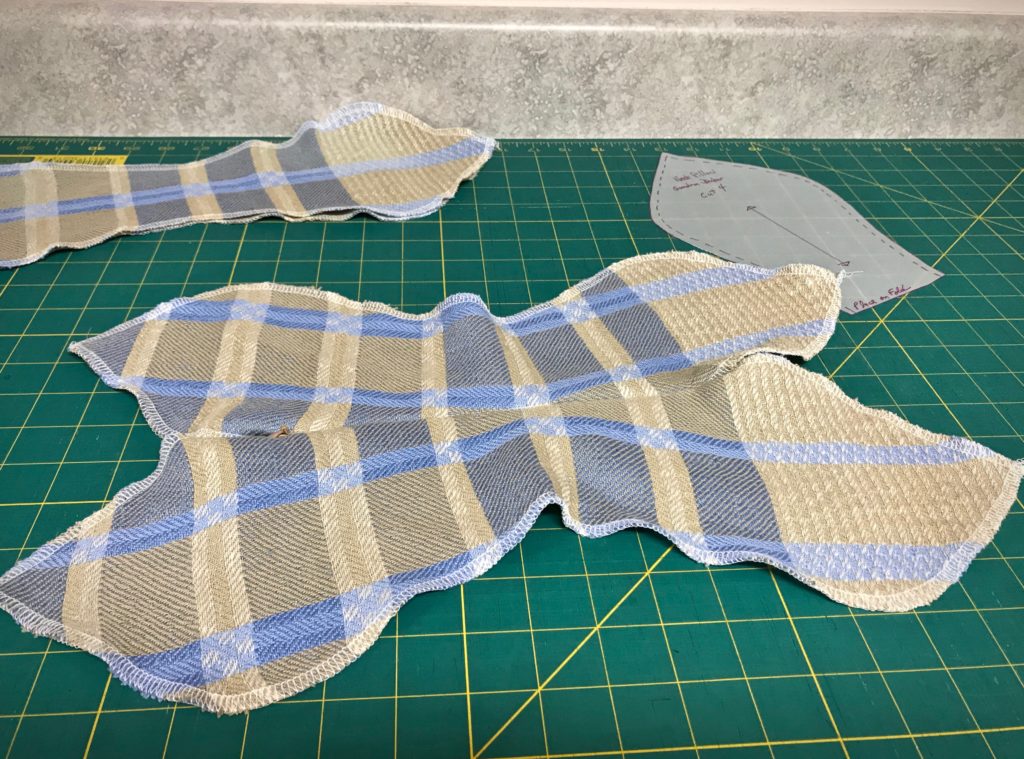
Cut four pillow pattern pieces from the muslin.
Sew two of the muslin pieces together, right sides together. Press seams open.
Sew the other two muslin pieces together, right sides together. Press seams open.
Sew the two parts together, right sides together, leaving a 4-inch opening for turning and stuffing. Press seams open using a sleeve board.
Turn the pillow right side out.
Stuff with Cluster Fluff, starting at the furthest end from the opening. Fill to desired fullness.
Hand stitch the opening closed.
Cut four pillow pattern pieces from the handwoven fabric.
Serge or zigzag the fabric edges. Press flat.
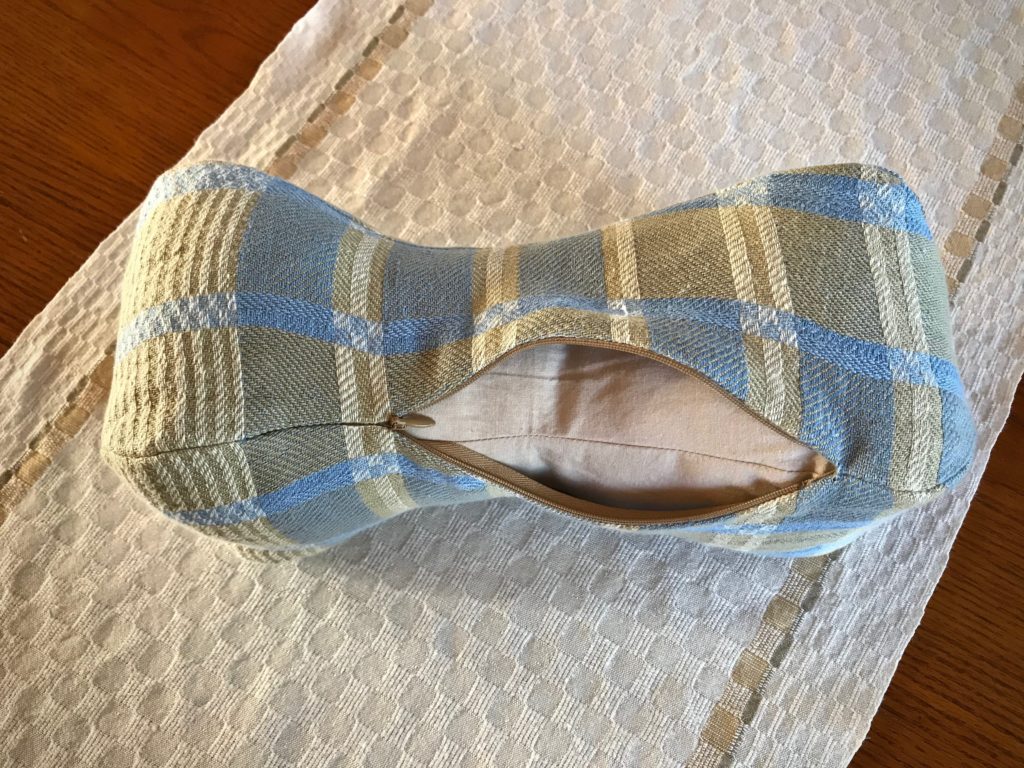
Insert invisible zipper between two of the pieces.
Invisible zipper is sewn into place between two of the panels.
Complete the seams at both ends of the zipper. Press seams open.
Sew the two other pieces together, right sides together. Press seams open.
Open zipper, and sew the two parts together, right sides together. Press seams open using a sleeve board.
Turn the pillow case right side out.
Push the muslin pillow into the pillow case. Close the zipper.
Inner pillow and outer cover are made from the same pattern to make it a snug fit.Fabric is 16/2 cotton warp and 16/1 linen weft.
Take a nap in your favorite chair with the pillow behind your neck.
If you would like a pdf copy of my grandma’s neck pillow pattern, please click HERE to send me an email request. I will be happy to send the pattern to you.
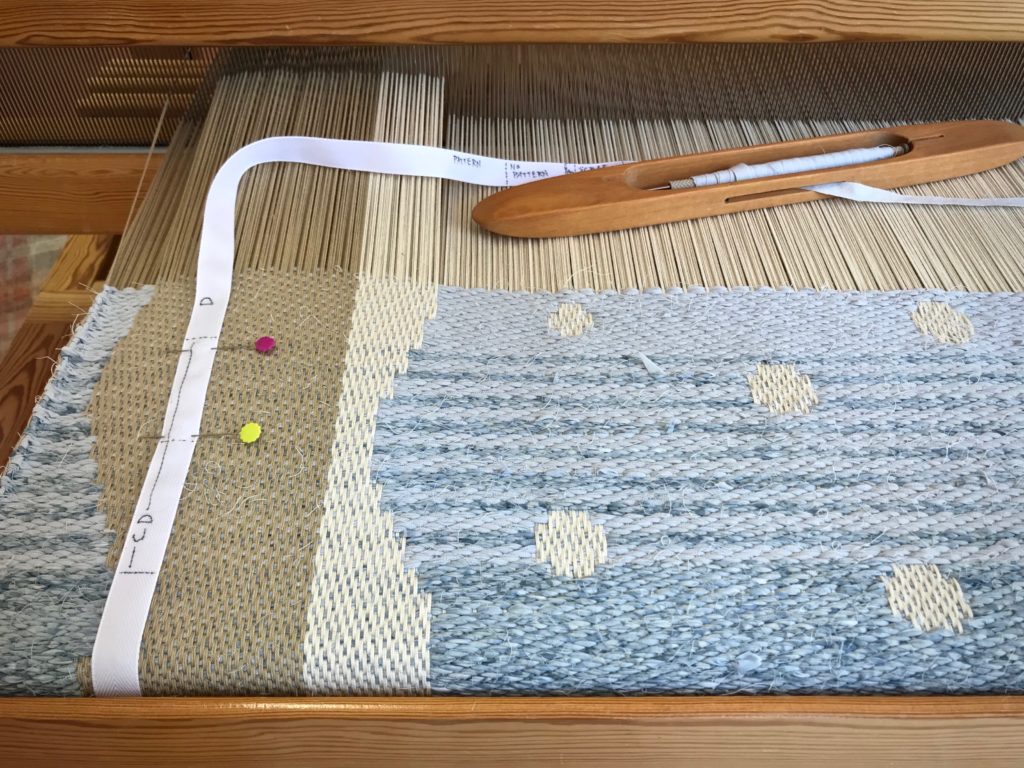
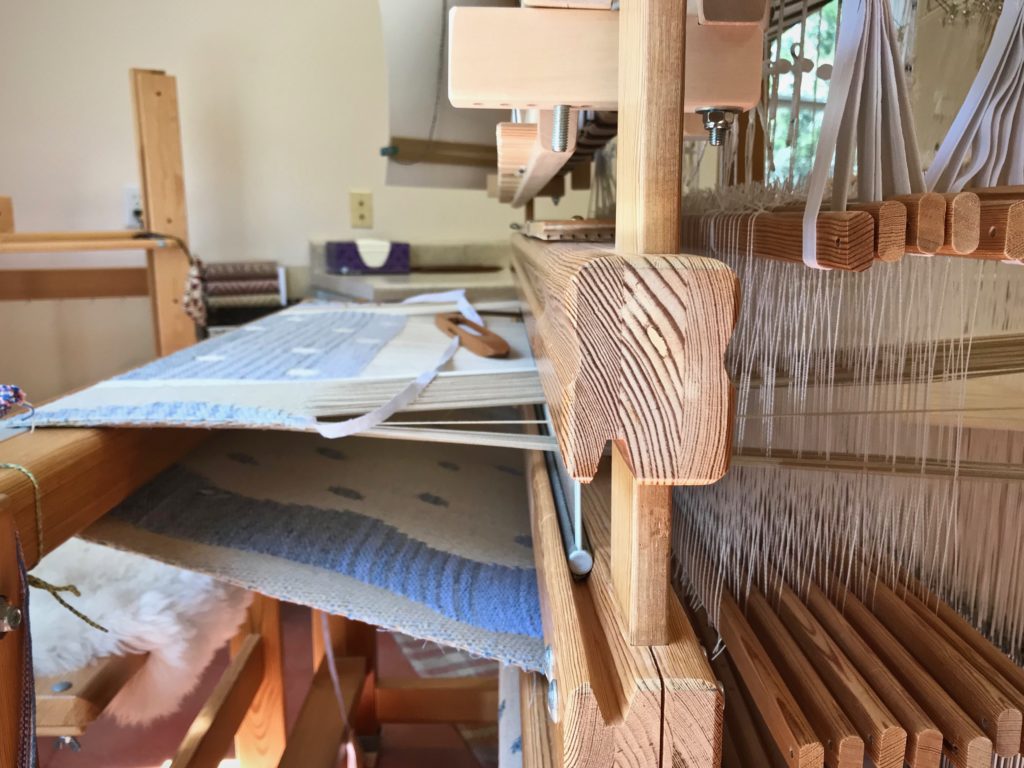
This is a huge project. Four shades of blue from dark to light span the nearly one-and-a-half-meter-long rug. I have reached the final color-transition section. I am eagerly awaiting the day this rug will be rolled out!
Transitioning from one color to the next.
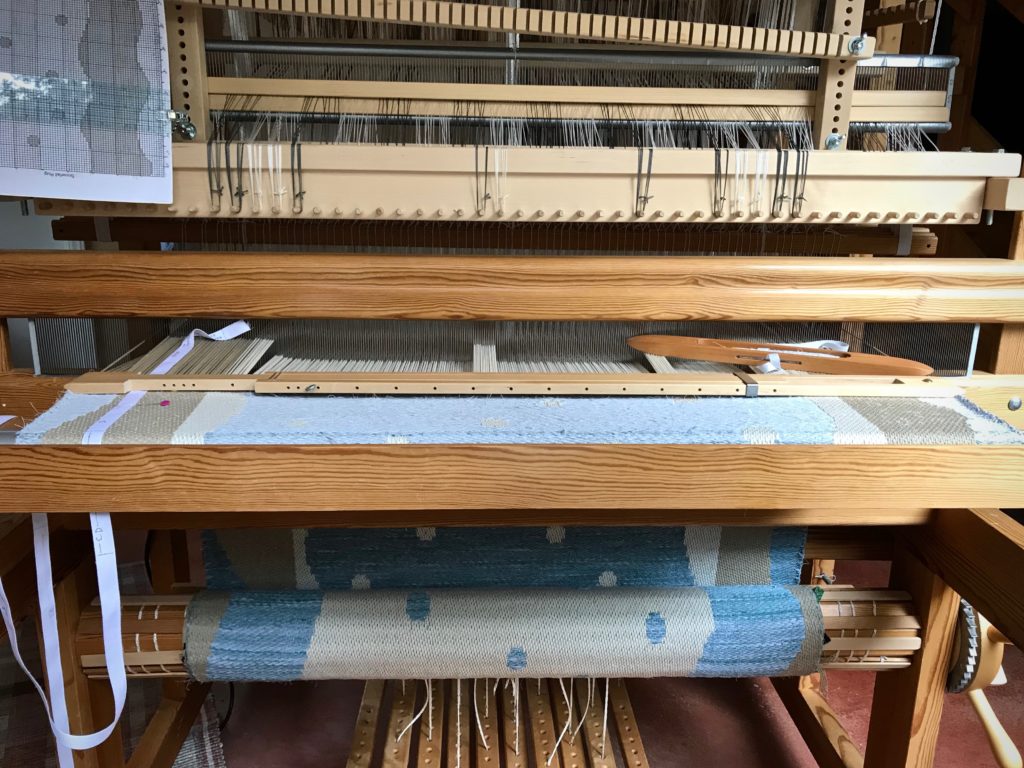
My measuring ribbon shows me where to make the color changes. I alternate two weft colors (C and D) through the transition area to blend the hues. All the while, I stop after every half-unit of four picks to manage the draw cords. A graphed chart tells me exactly which of the 164 draw cords to pull or release. In this way the graphic designs are woven into the rug, row by row. I weave in quiet, allowing me to put full attention on each move.
View of the underside of the rug as it goes from the breast beam to the knee beam.Draw cords are arranged by tens, alternating black cords and white cords. I pull the cords as they correspond to the prepared chart hanging at the left side of the loom.
We need hope in these unsettling times. Jesus invites us to admit our fears and failures, and put our trust in him, and follow him. And this is the message Jesus gives his followers: I am always with you. The Lord gives strength and courage. As our Grand Weaver, he has his full attention on us. So be strong and take courage.