I always put on more warp than I need for a project. That end of the warp is where I play, experiment, and try out crazy ideas, not to mention try to use up the thread from as many quills as possible. Or, for rag rugs, I try to use up as much of the weft fabric strips as I can. I have containers for those odd pieces (remnants). That is where I look when I want to make something.
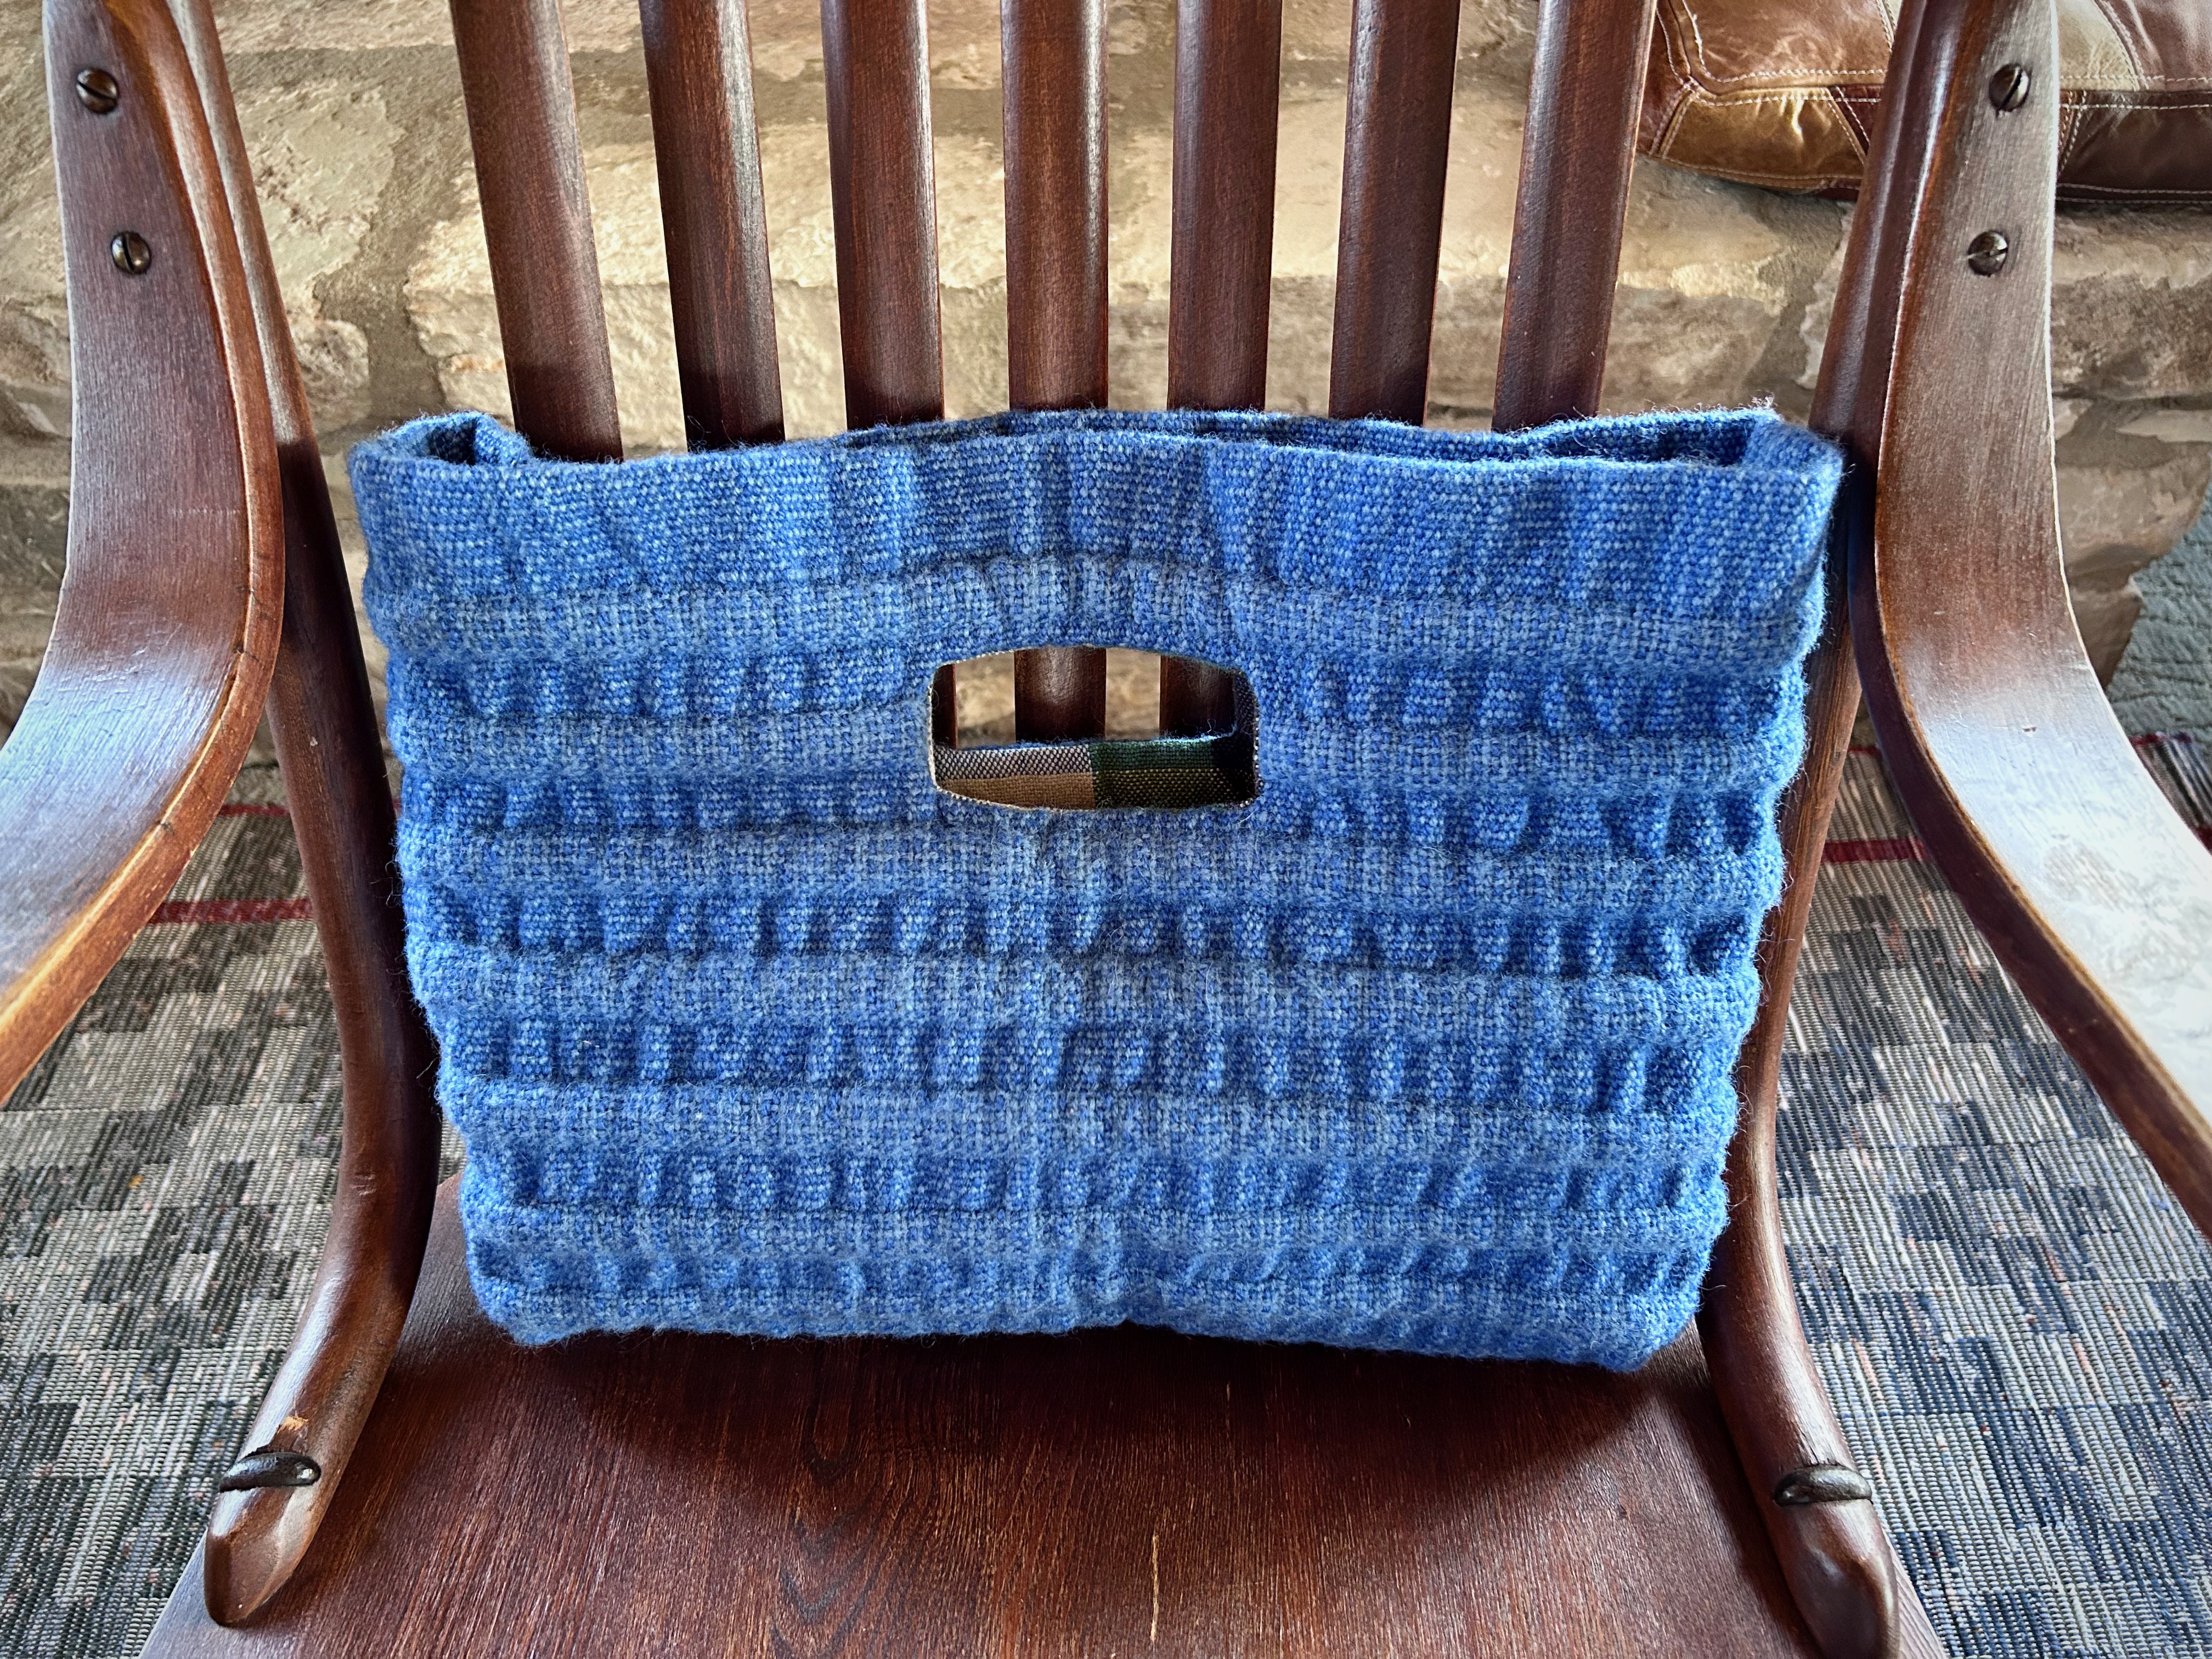
Rag rug “scrap” became a seat cushion last year for me to use in the car.Two cut-to-fit kneeling pads go in the cushion cover. I added handwoven bands for ties. The ties don’t stay tied, and they aren’t really needed. I let them hang as if they are chunky fringe.
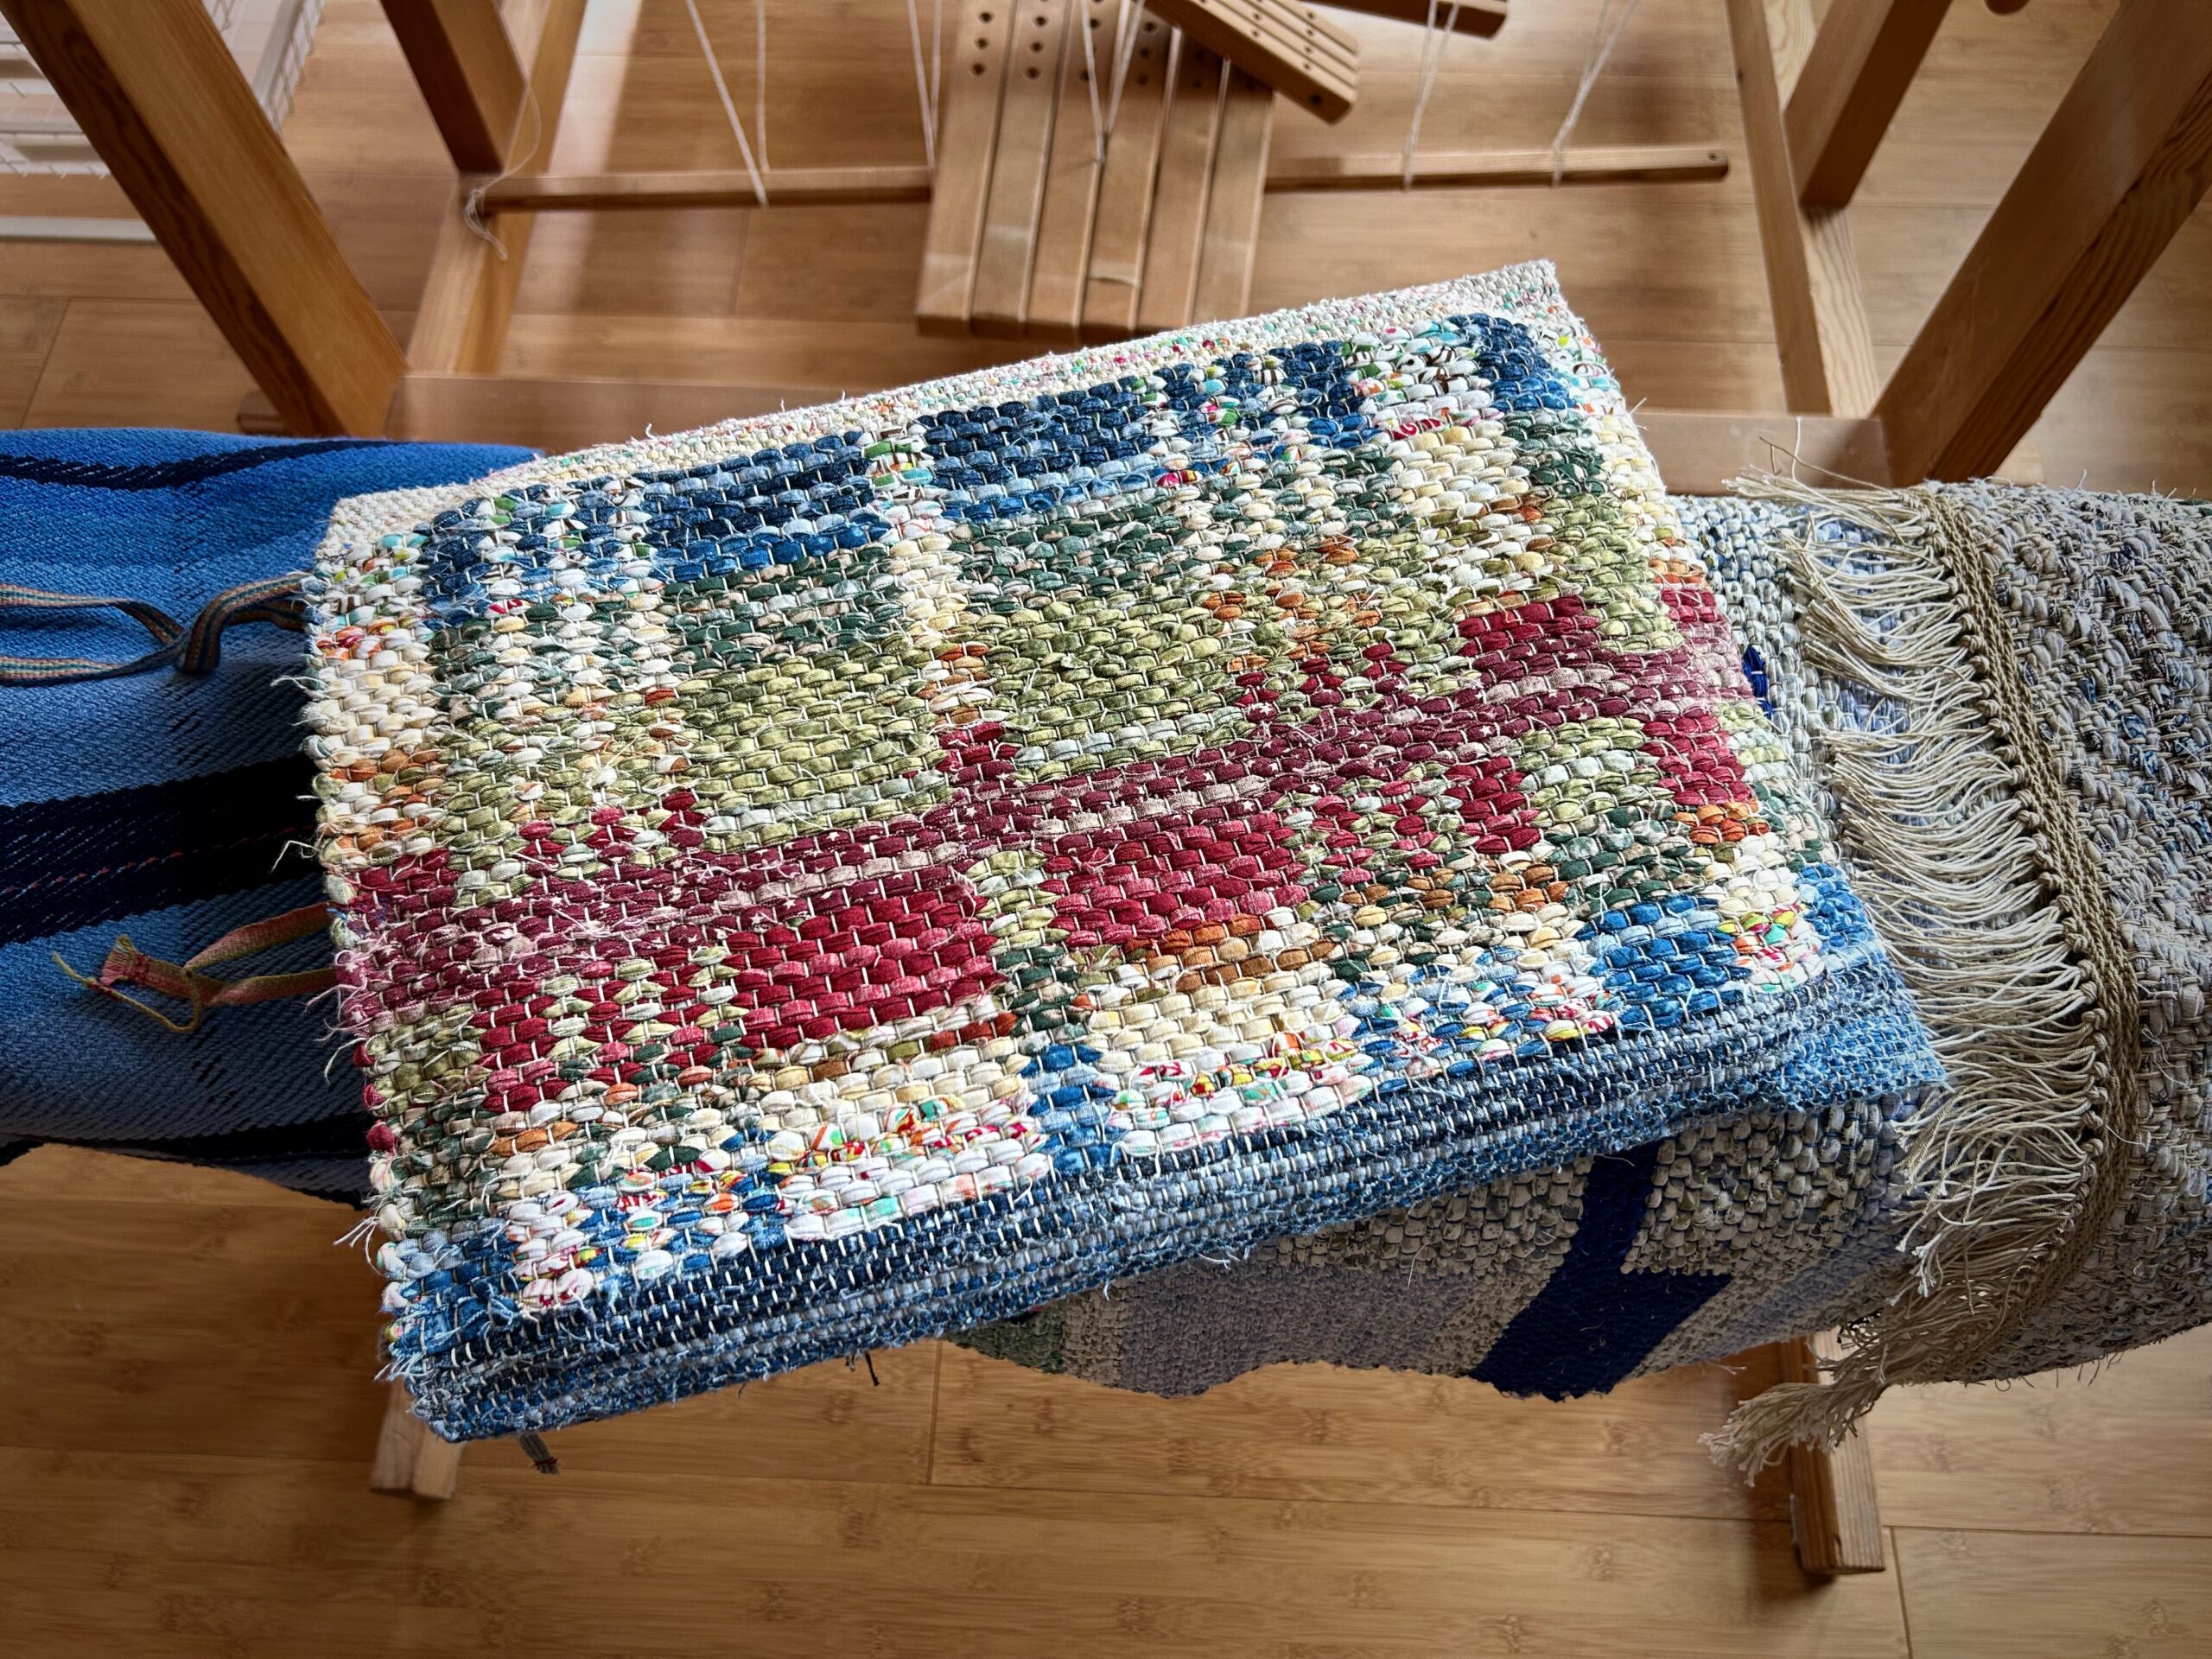
The seat cushion I made for myself last year works great. Now I want to make a seat cushion for me to use in the other car. Time to get out that container of “scraps.”
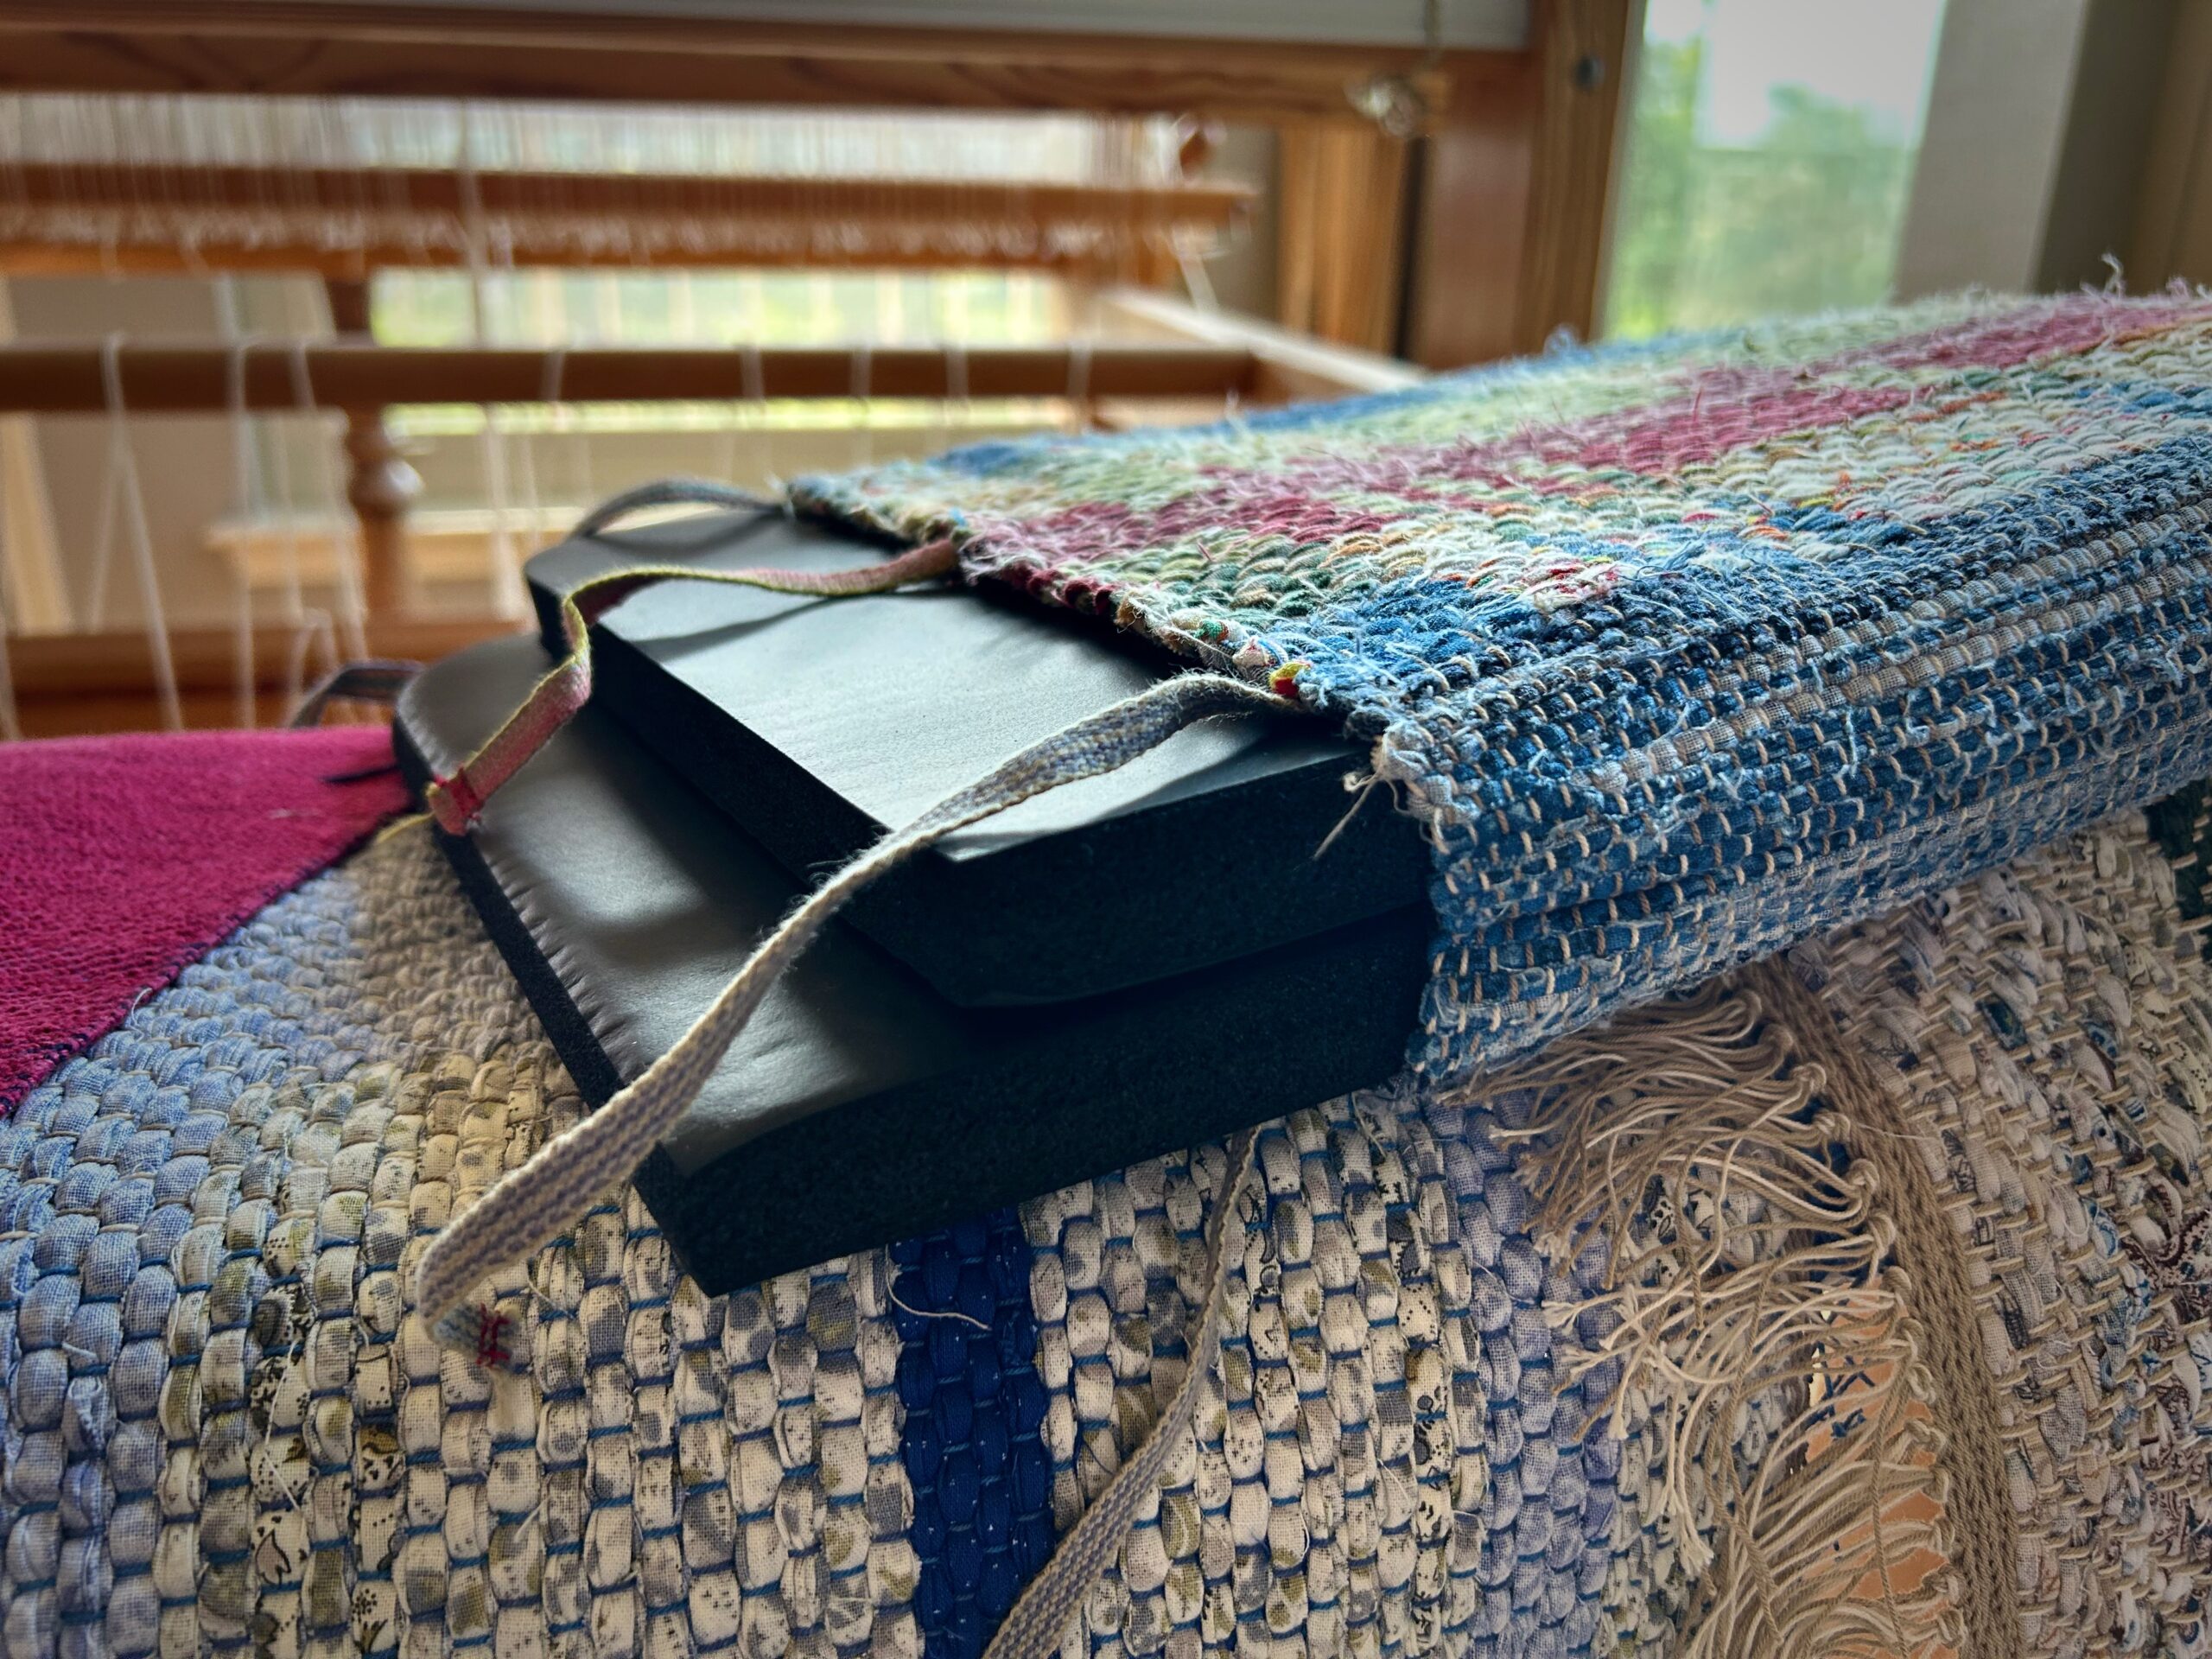
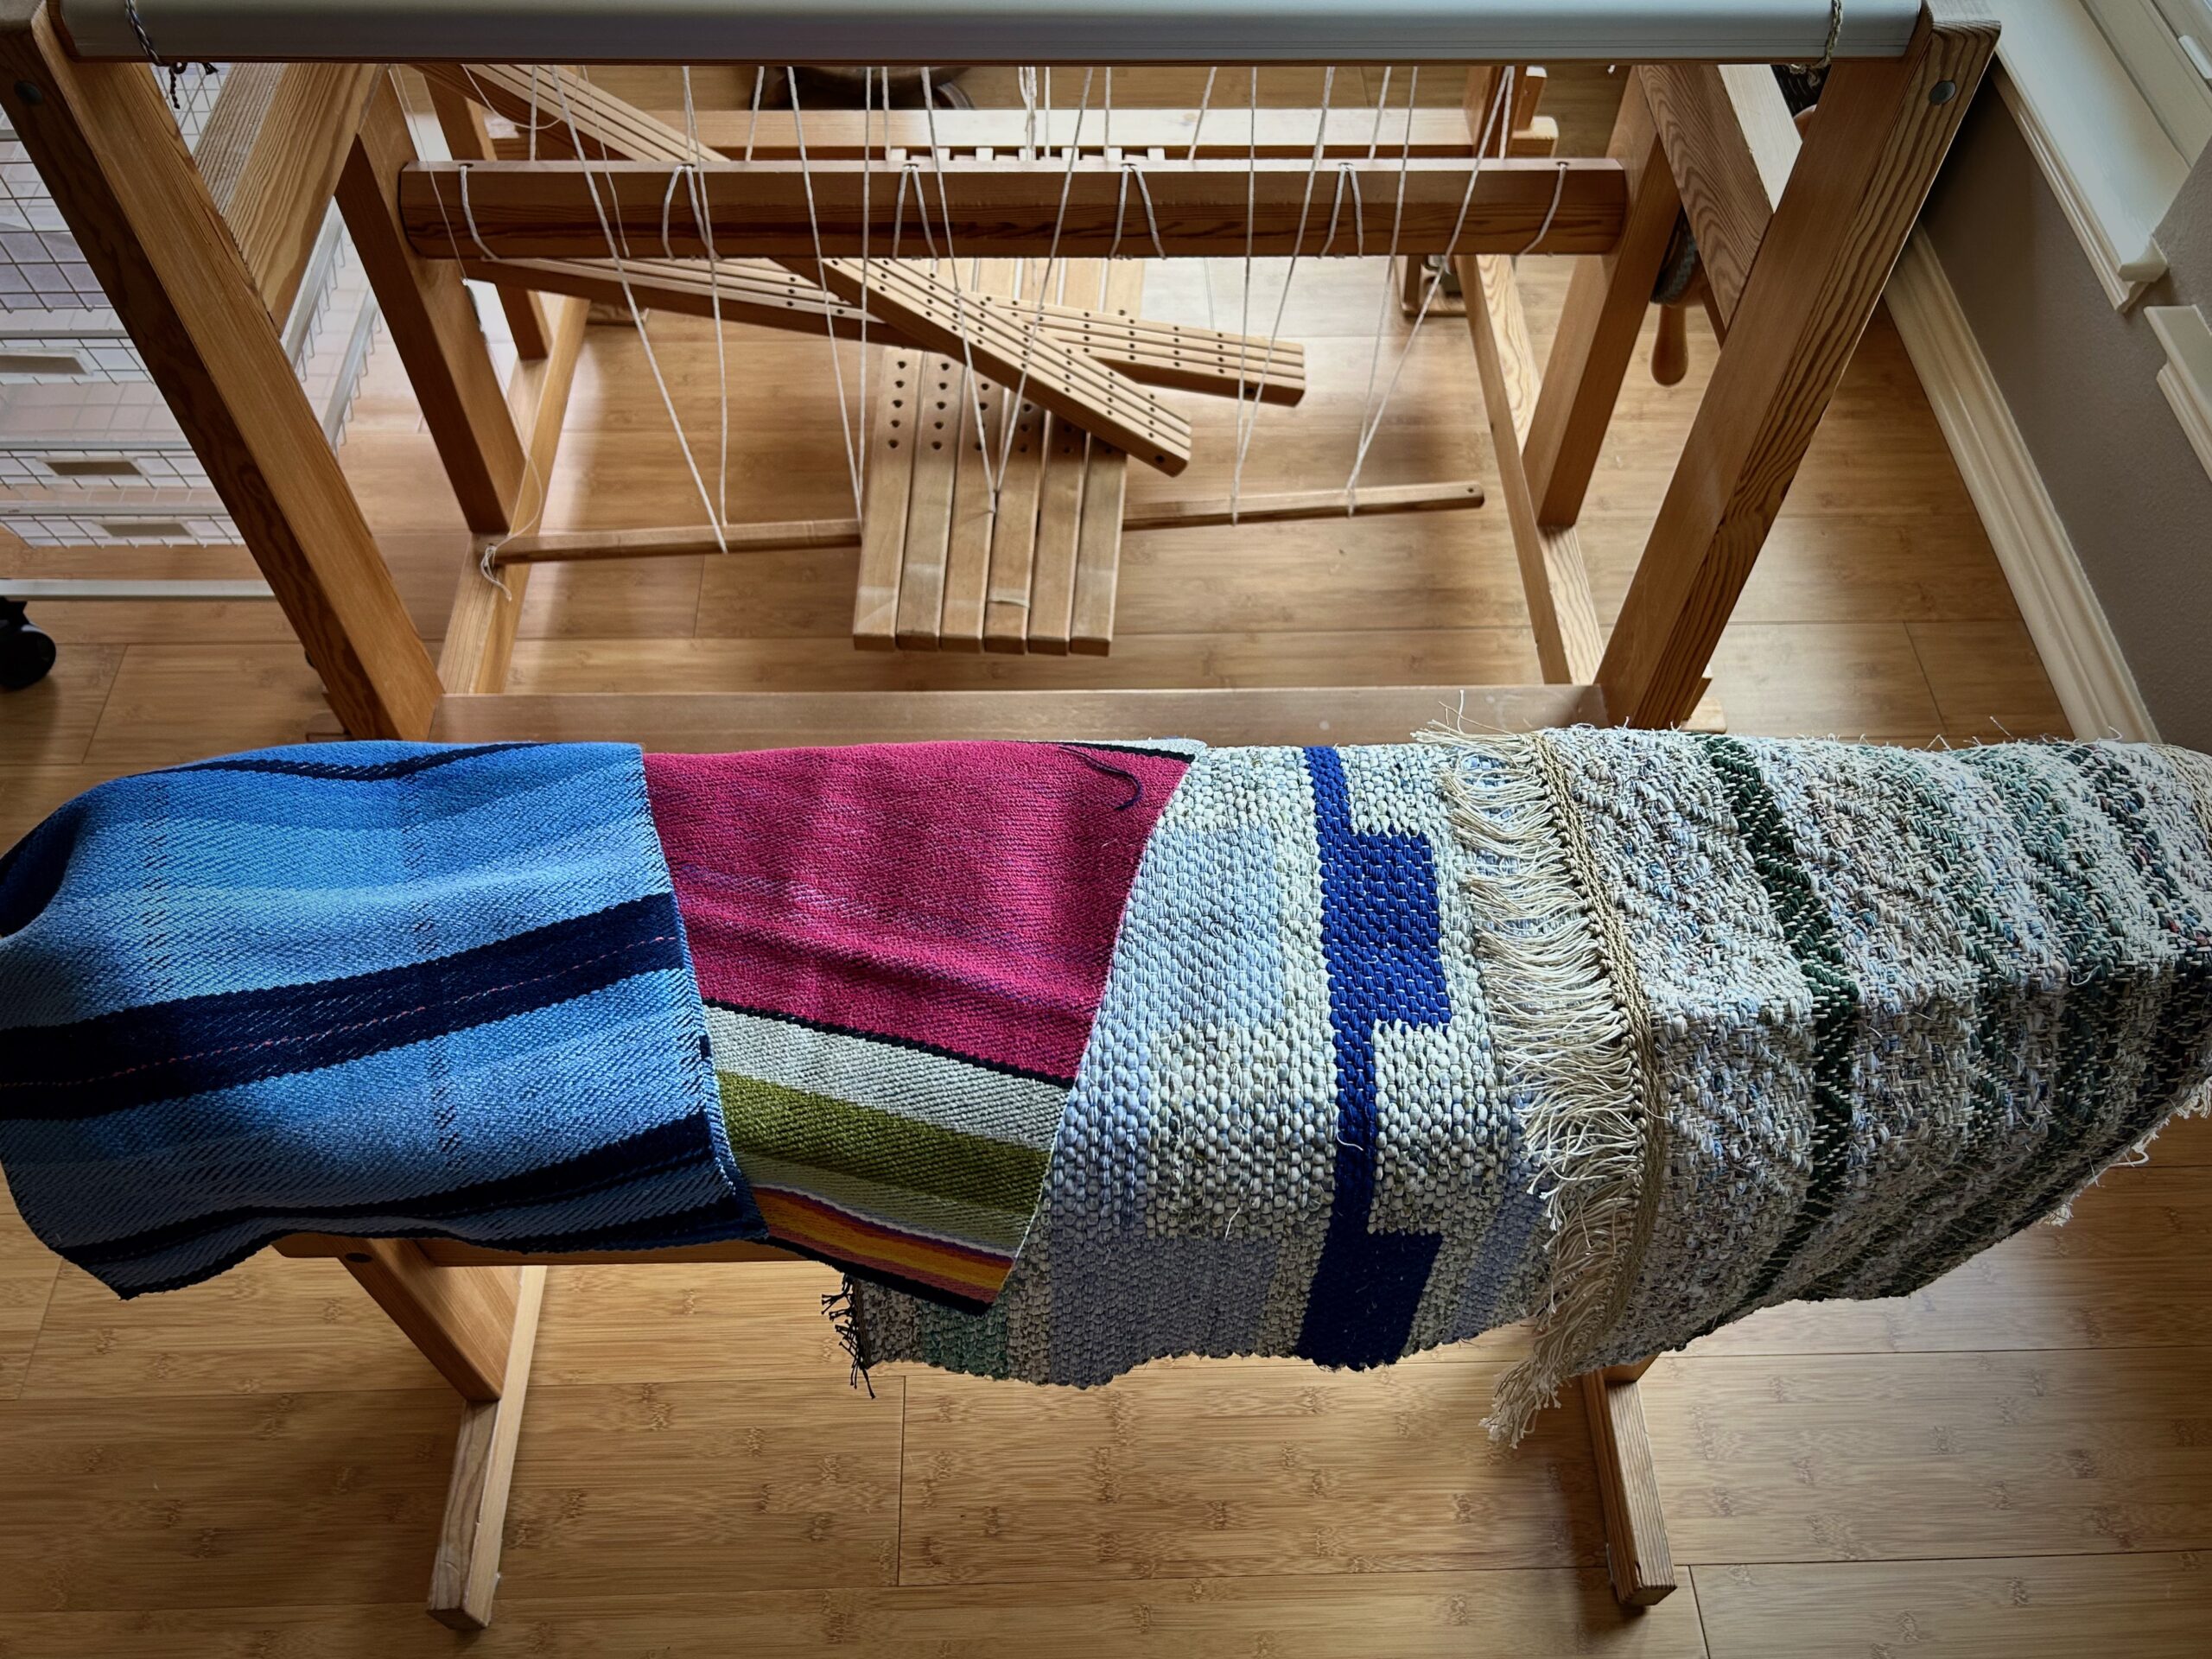
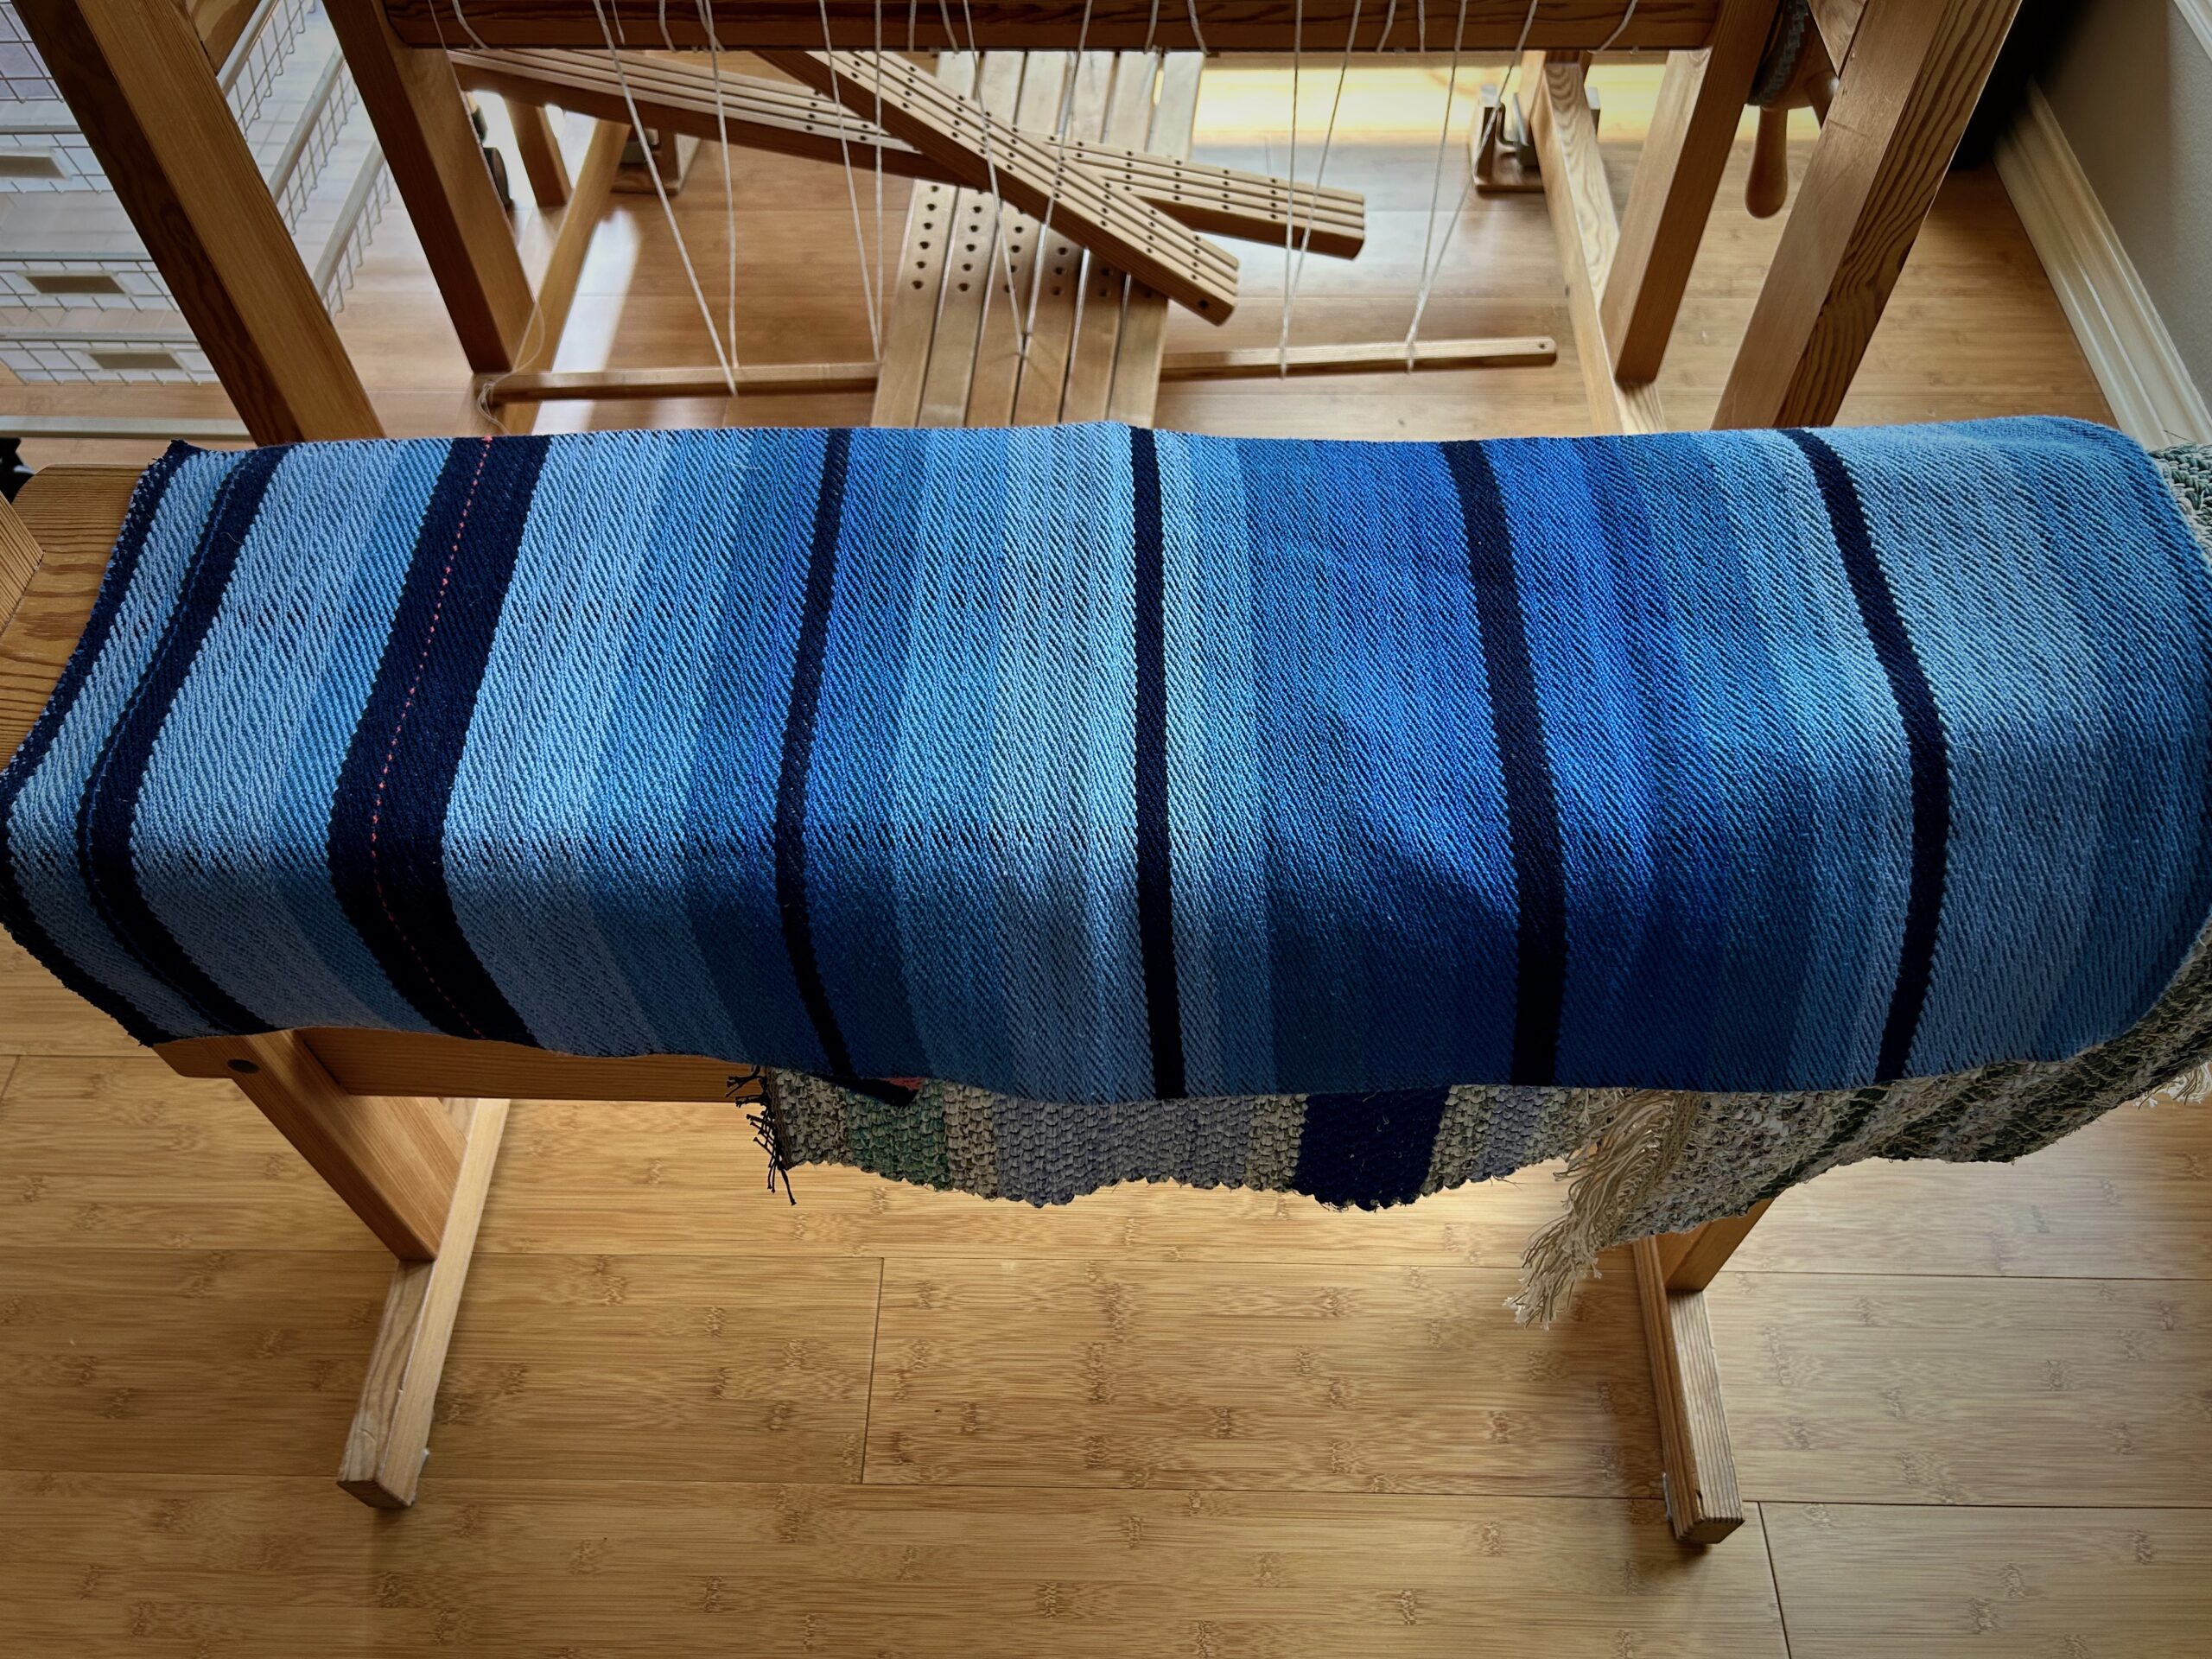
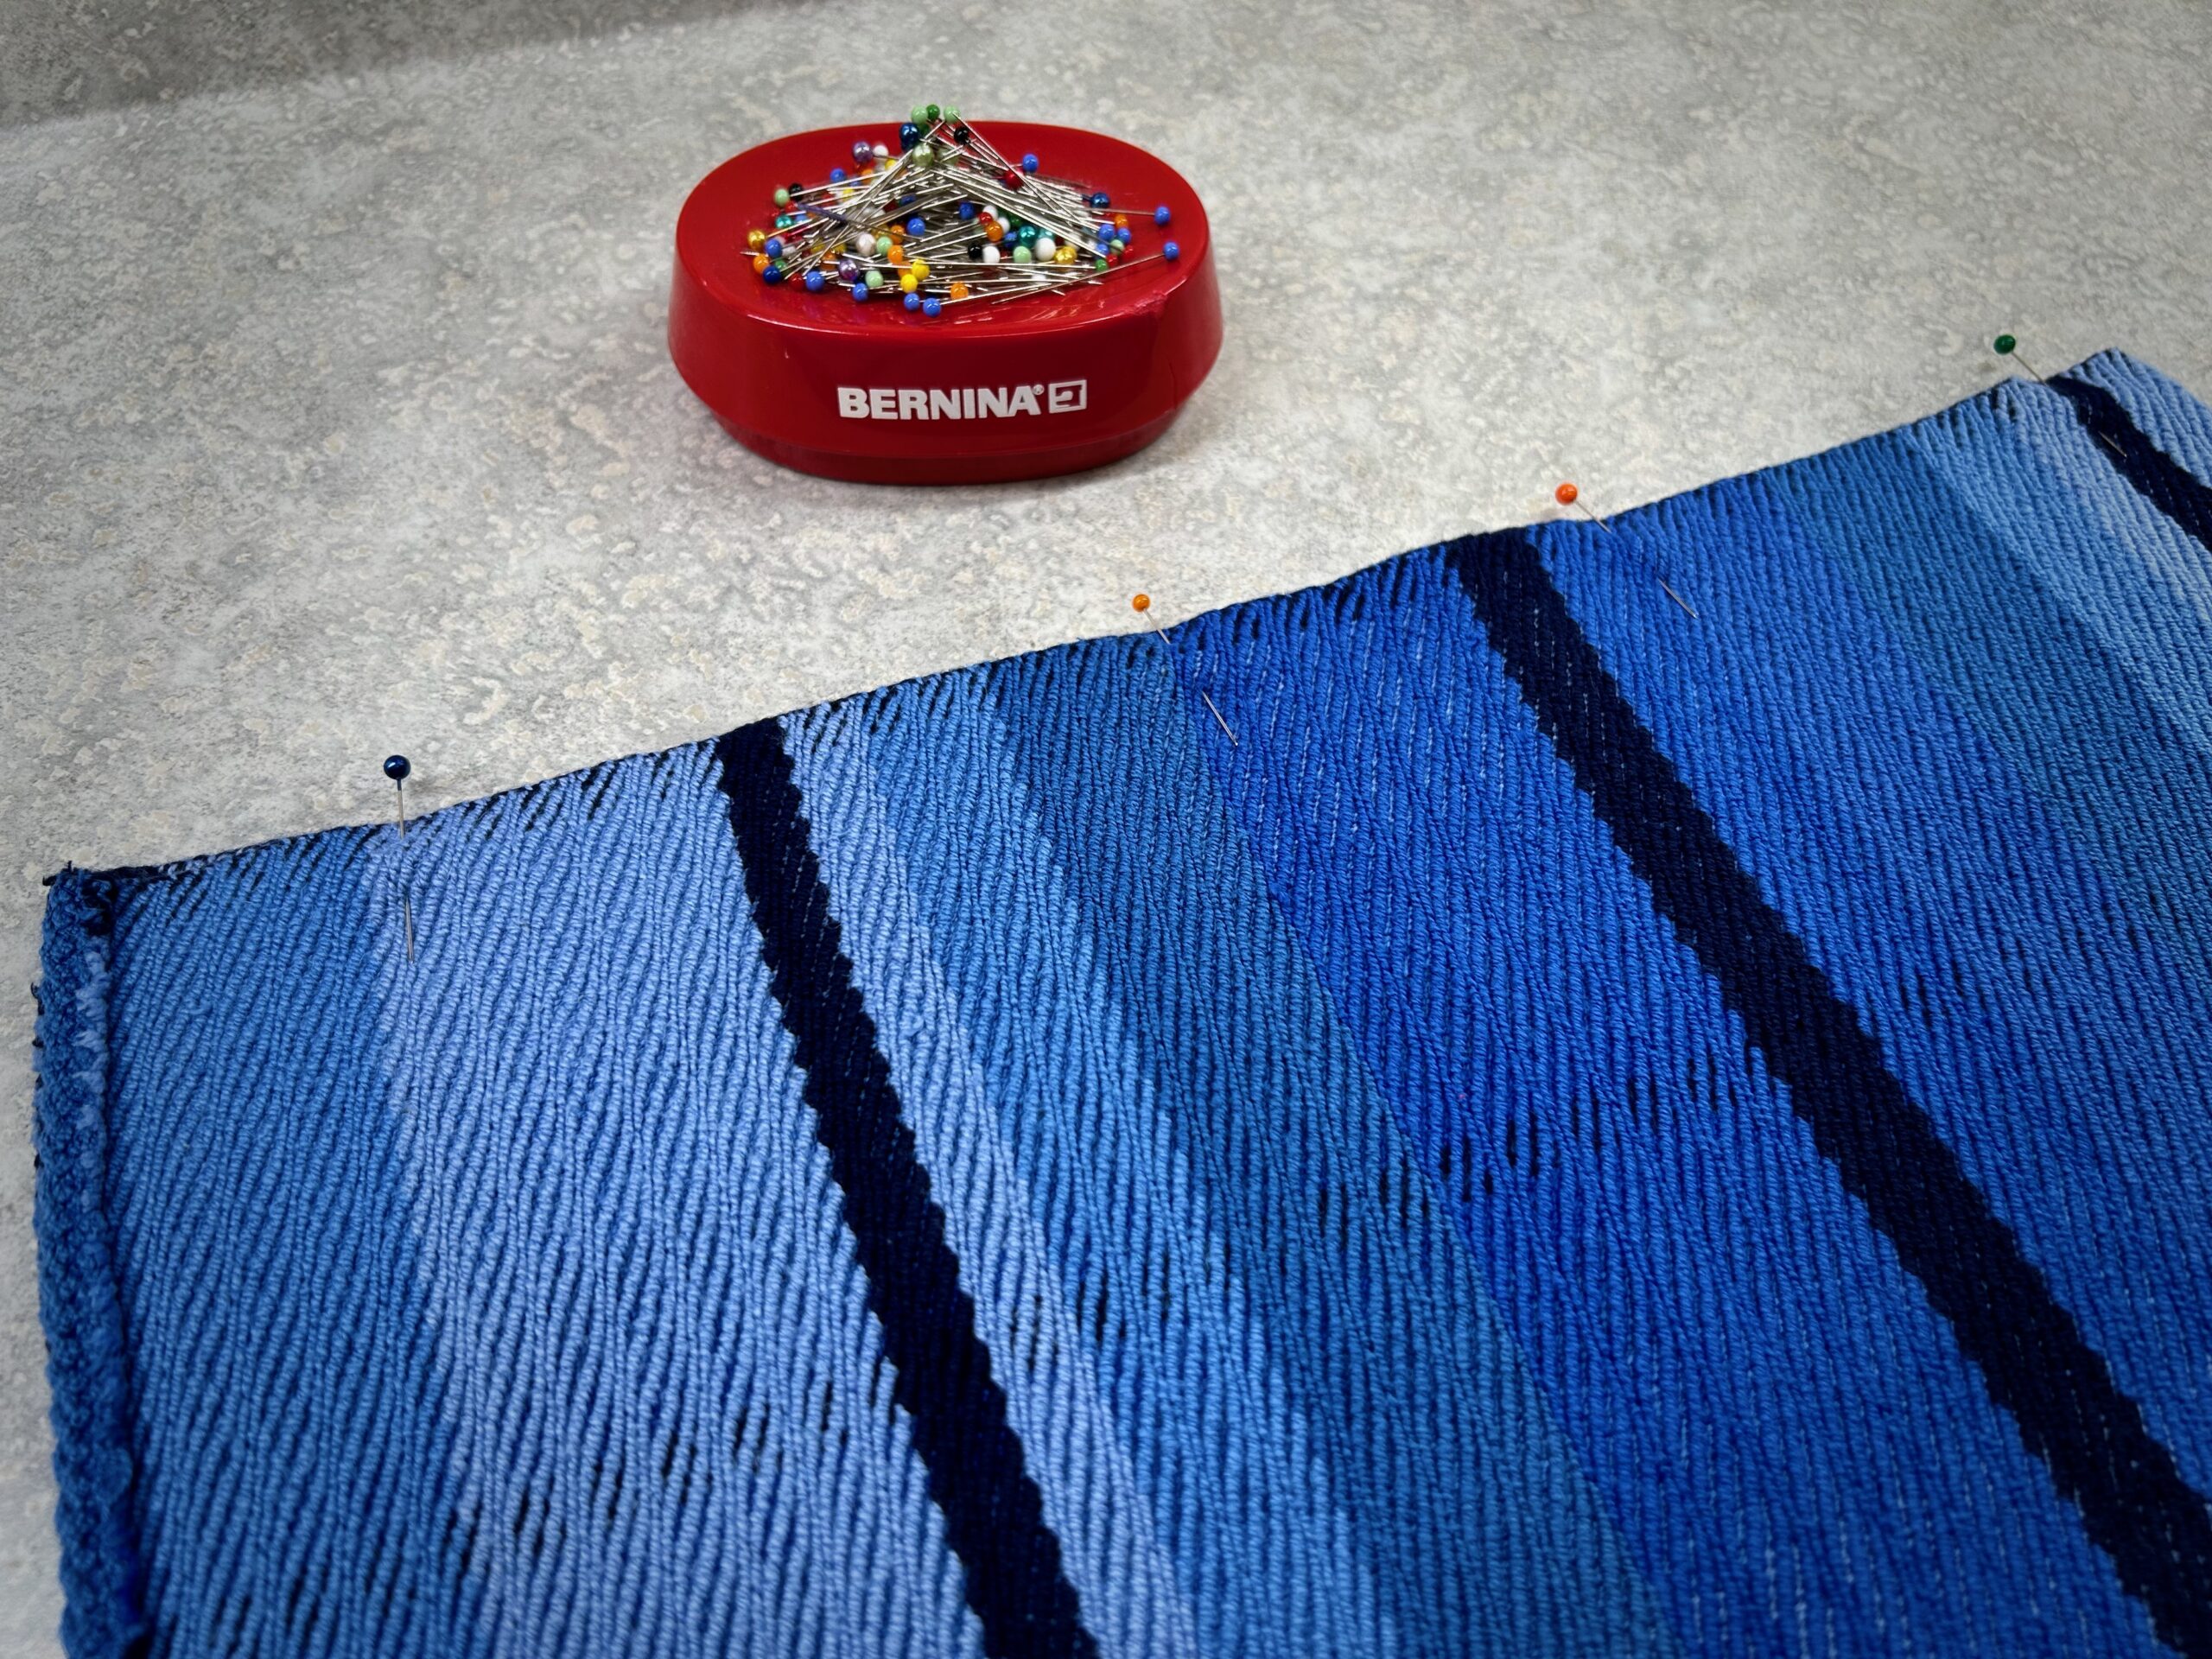
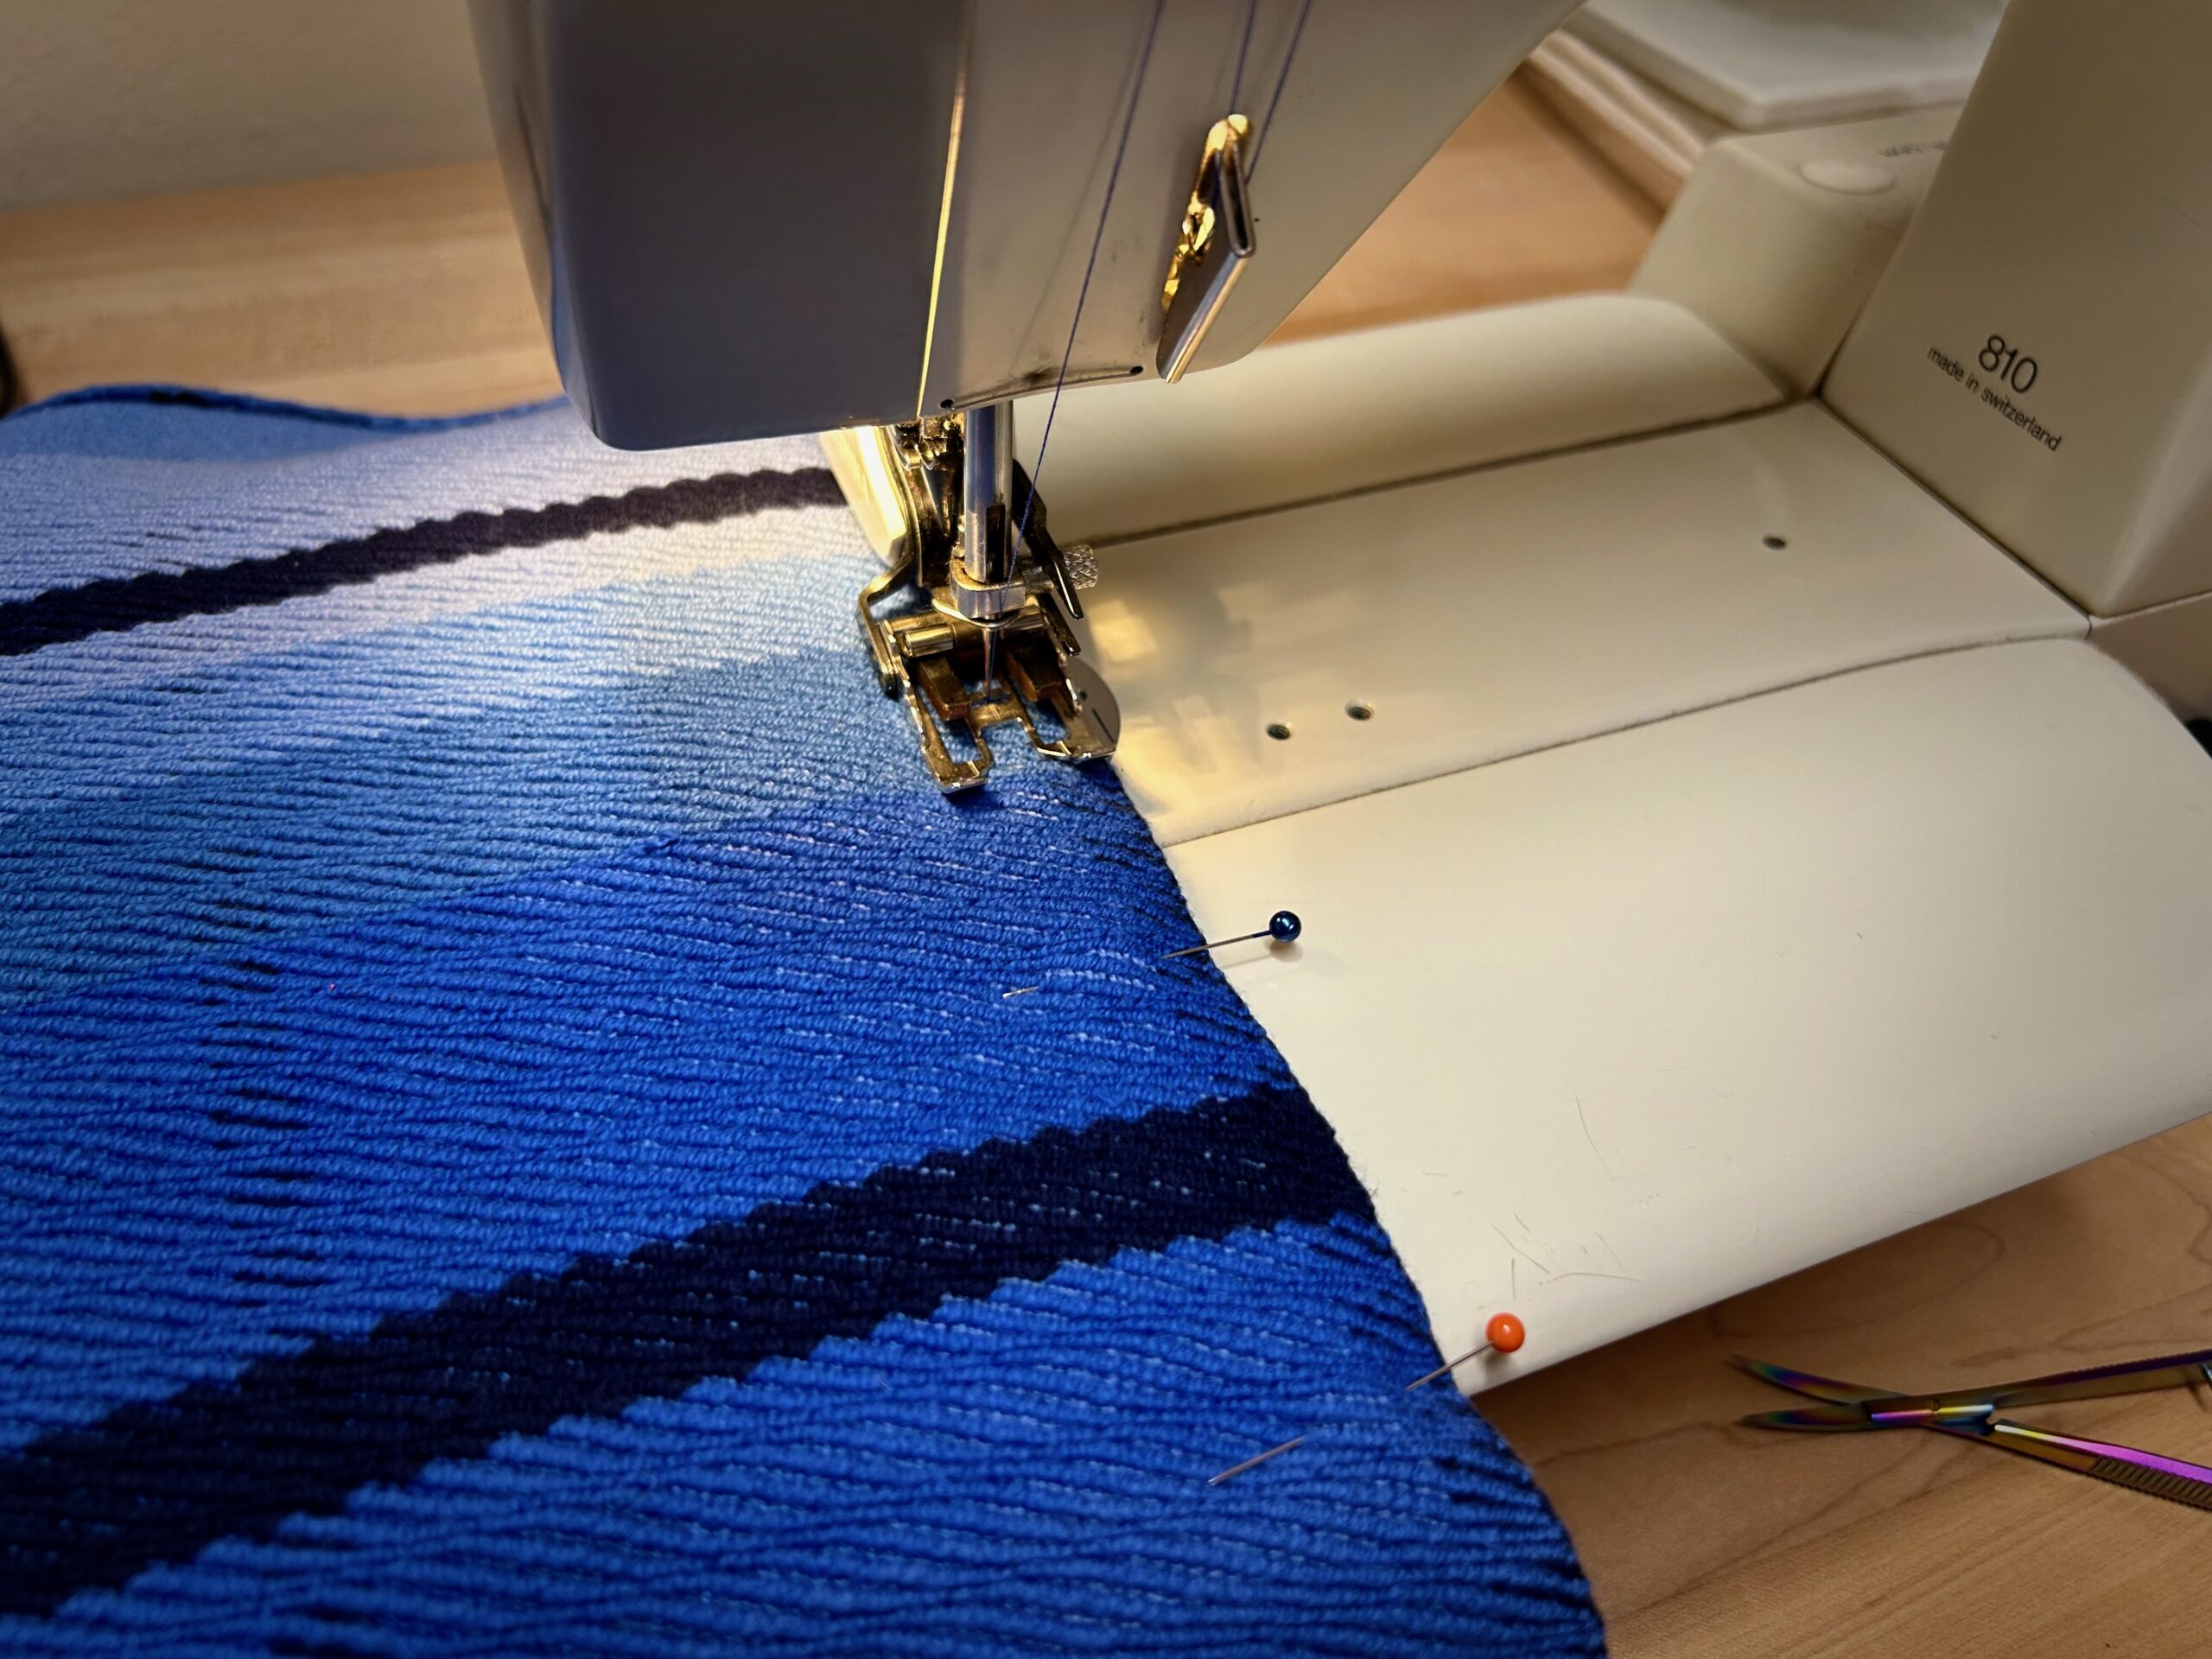
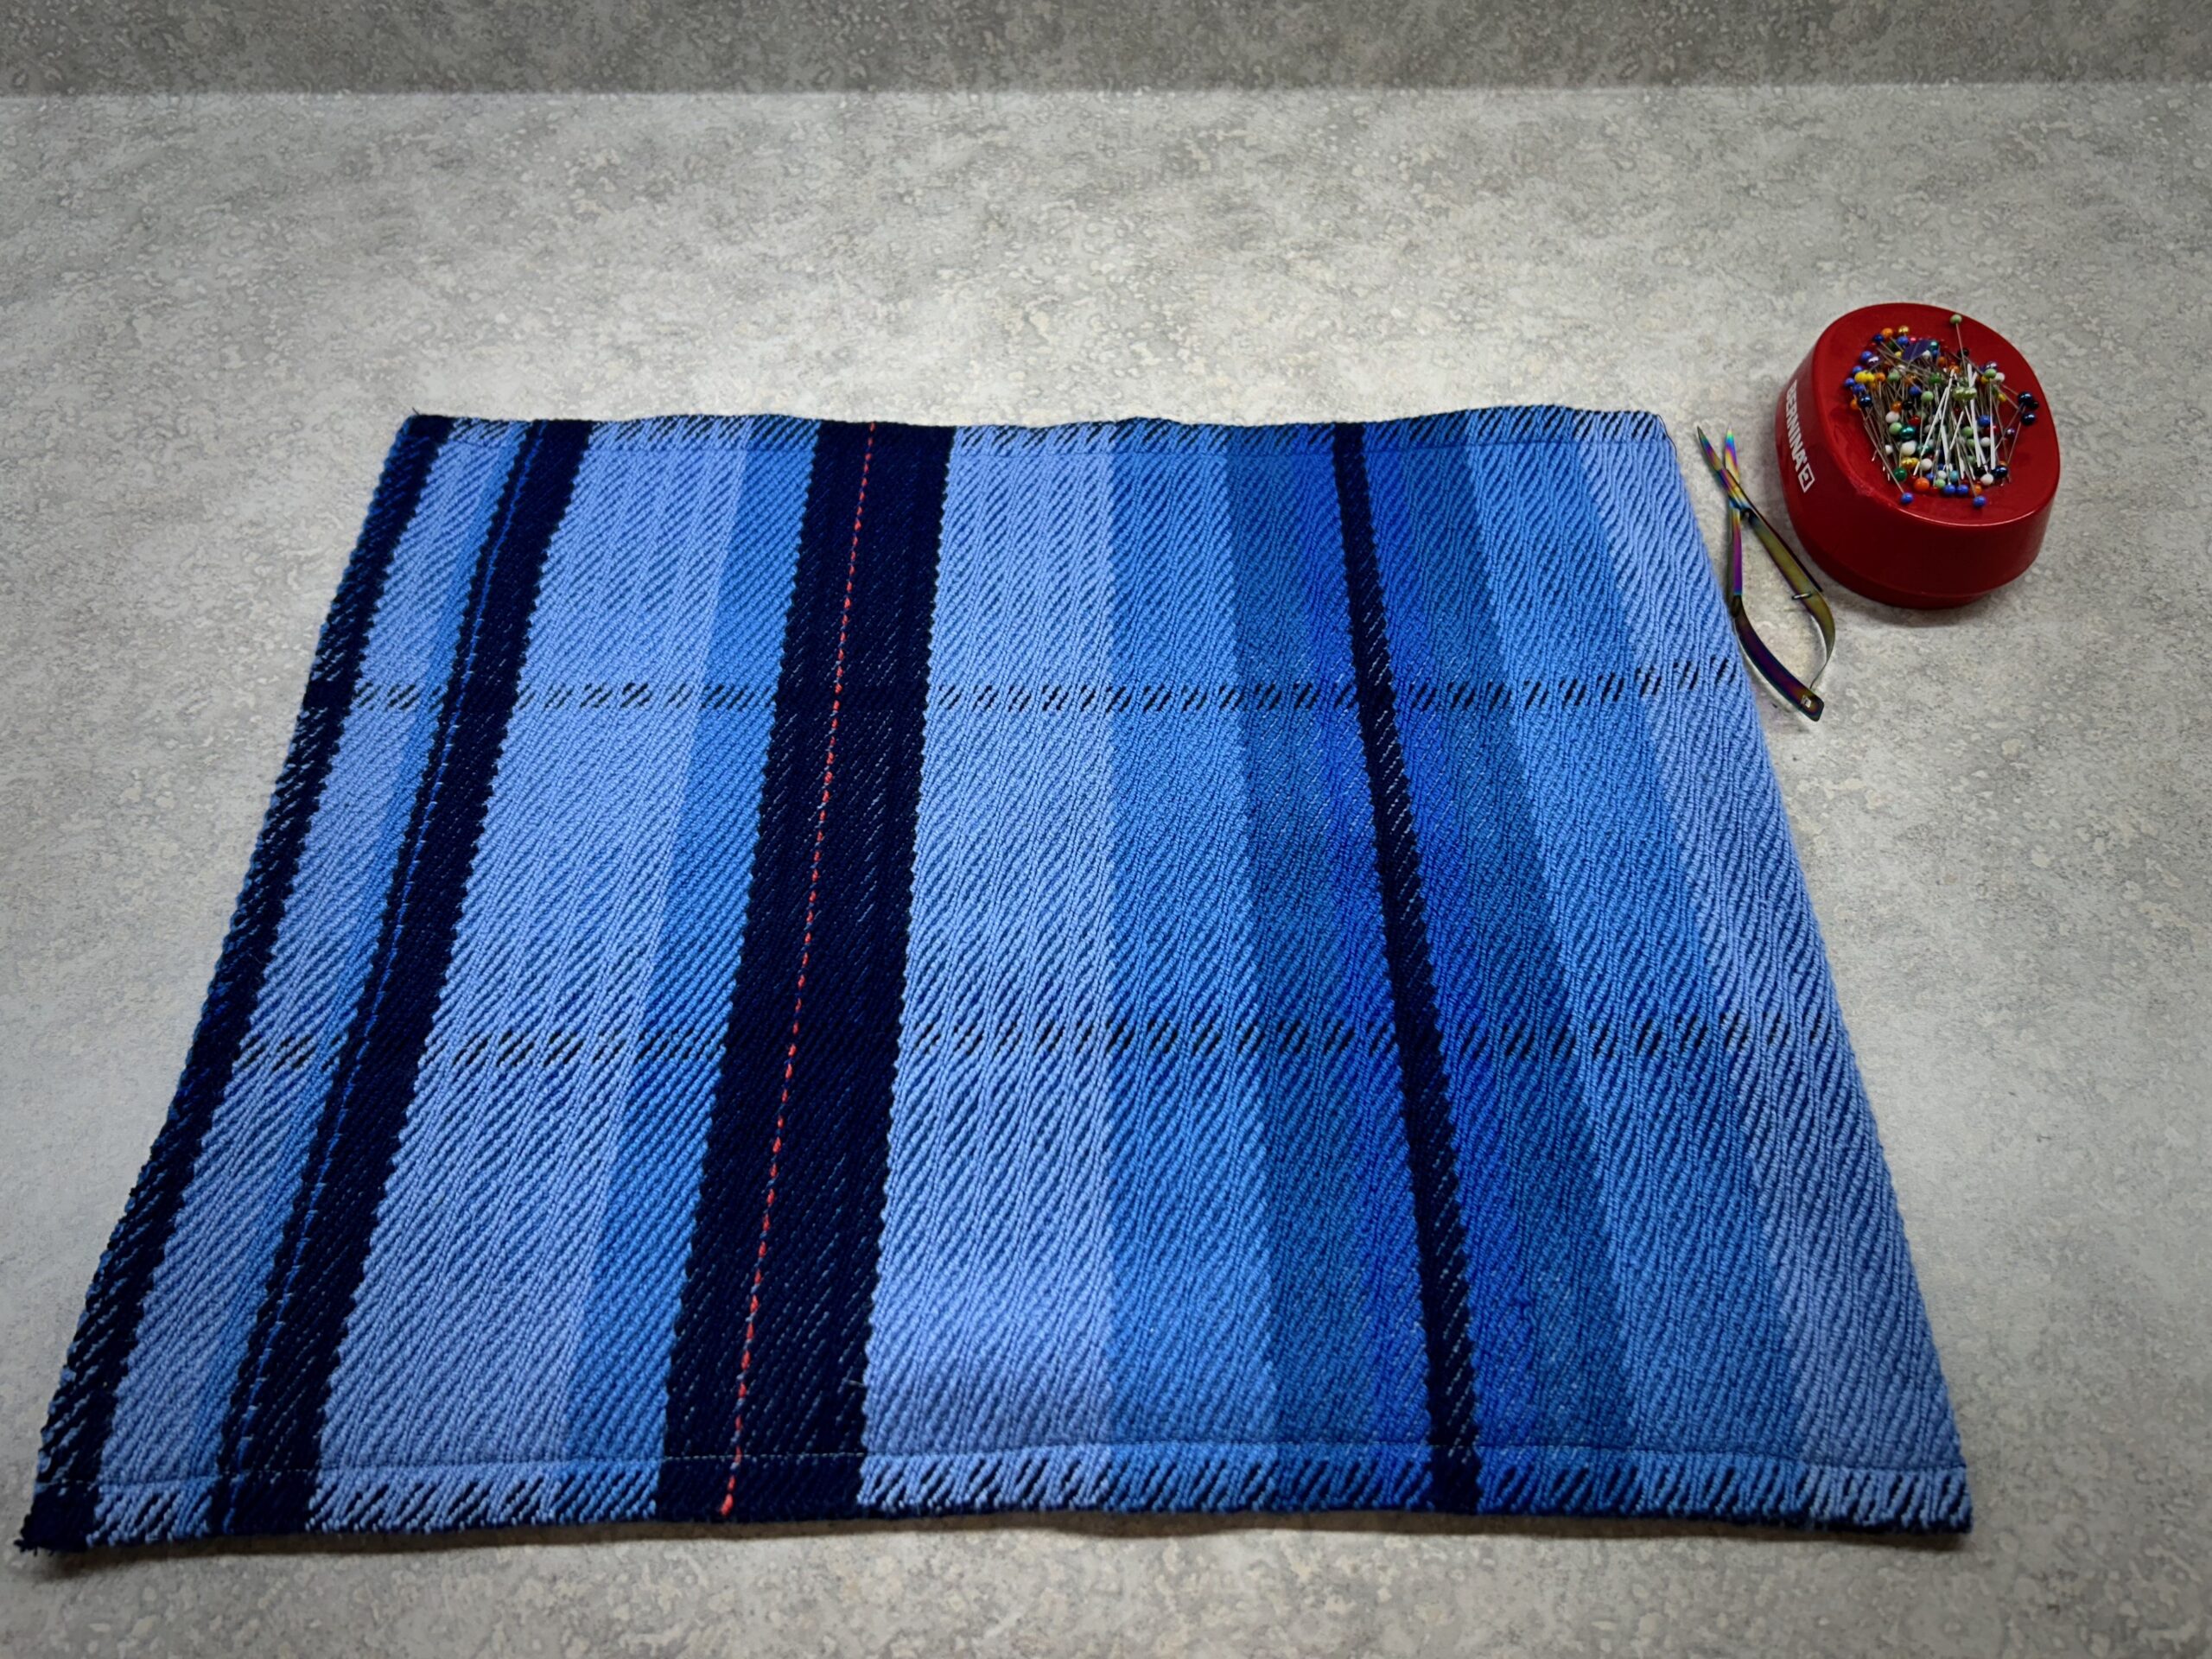
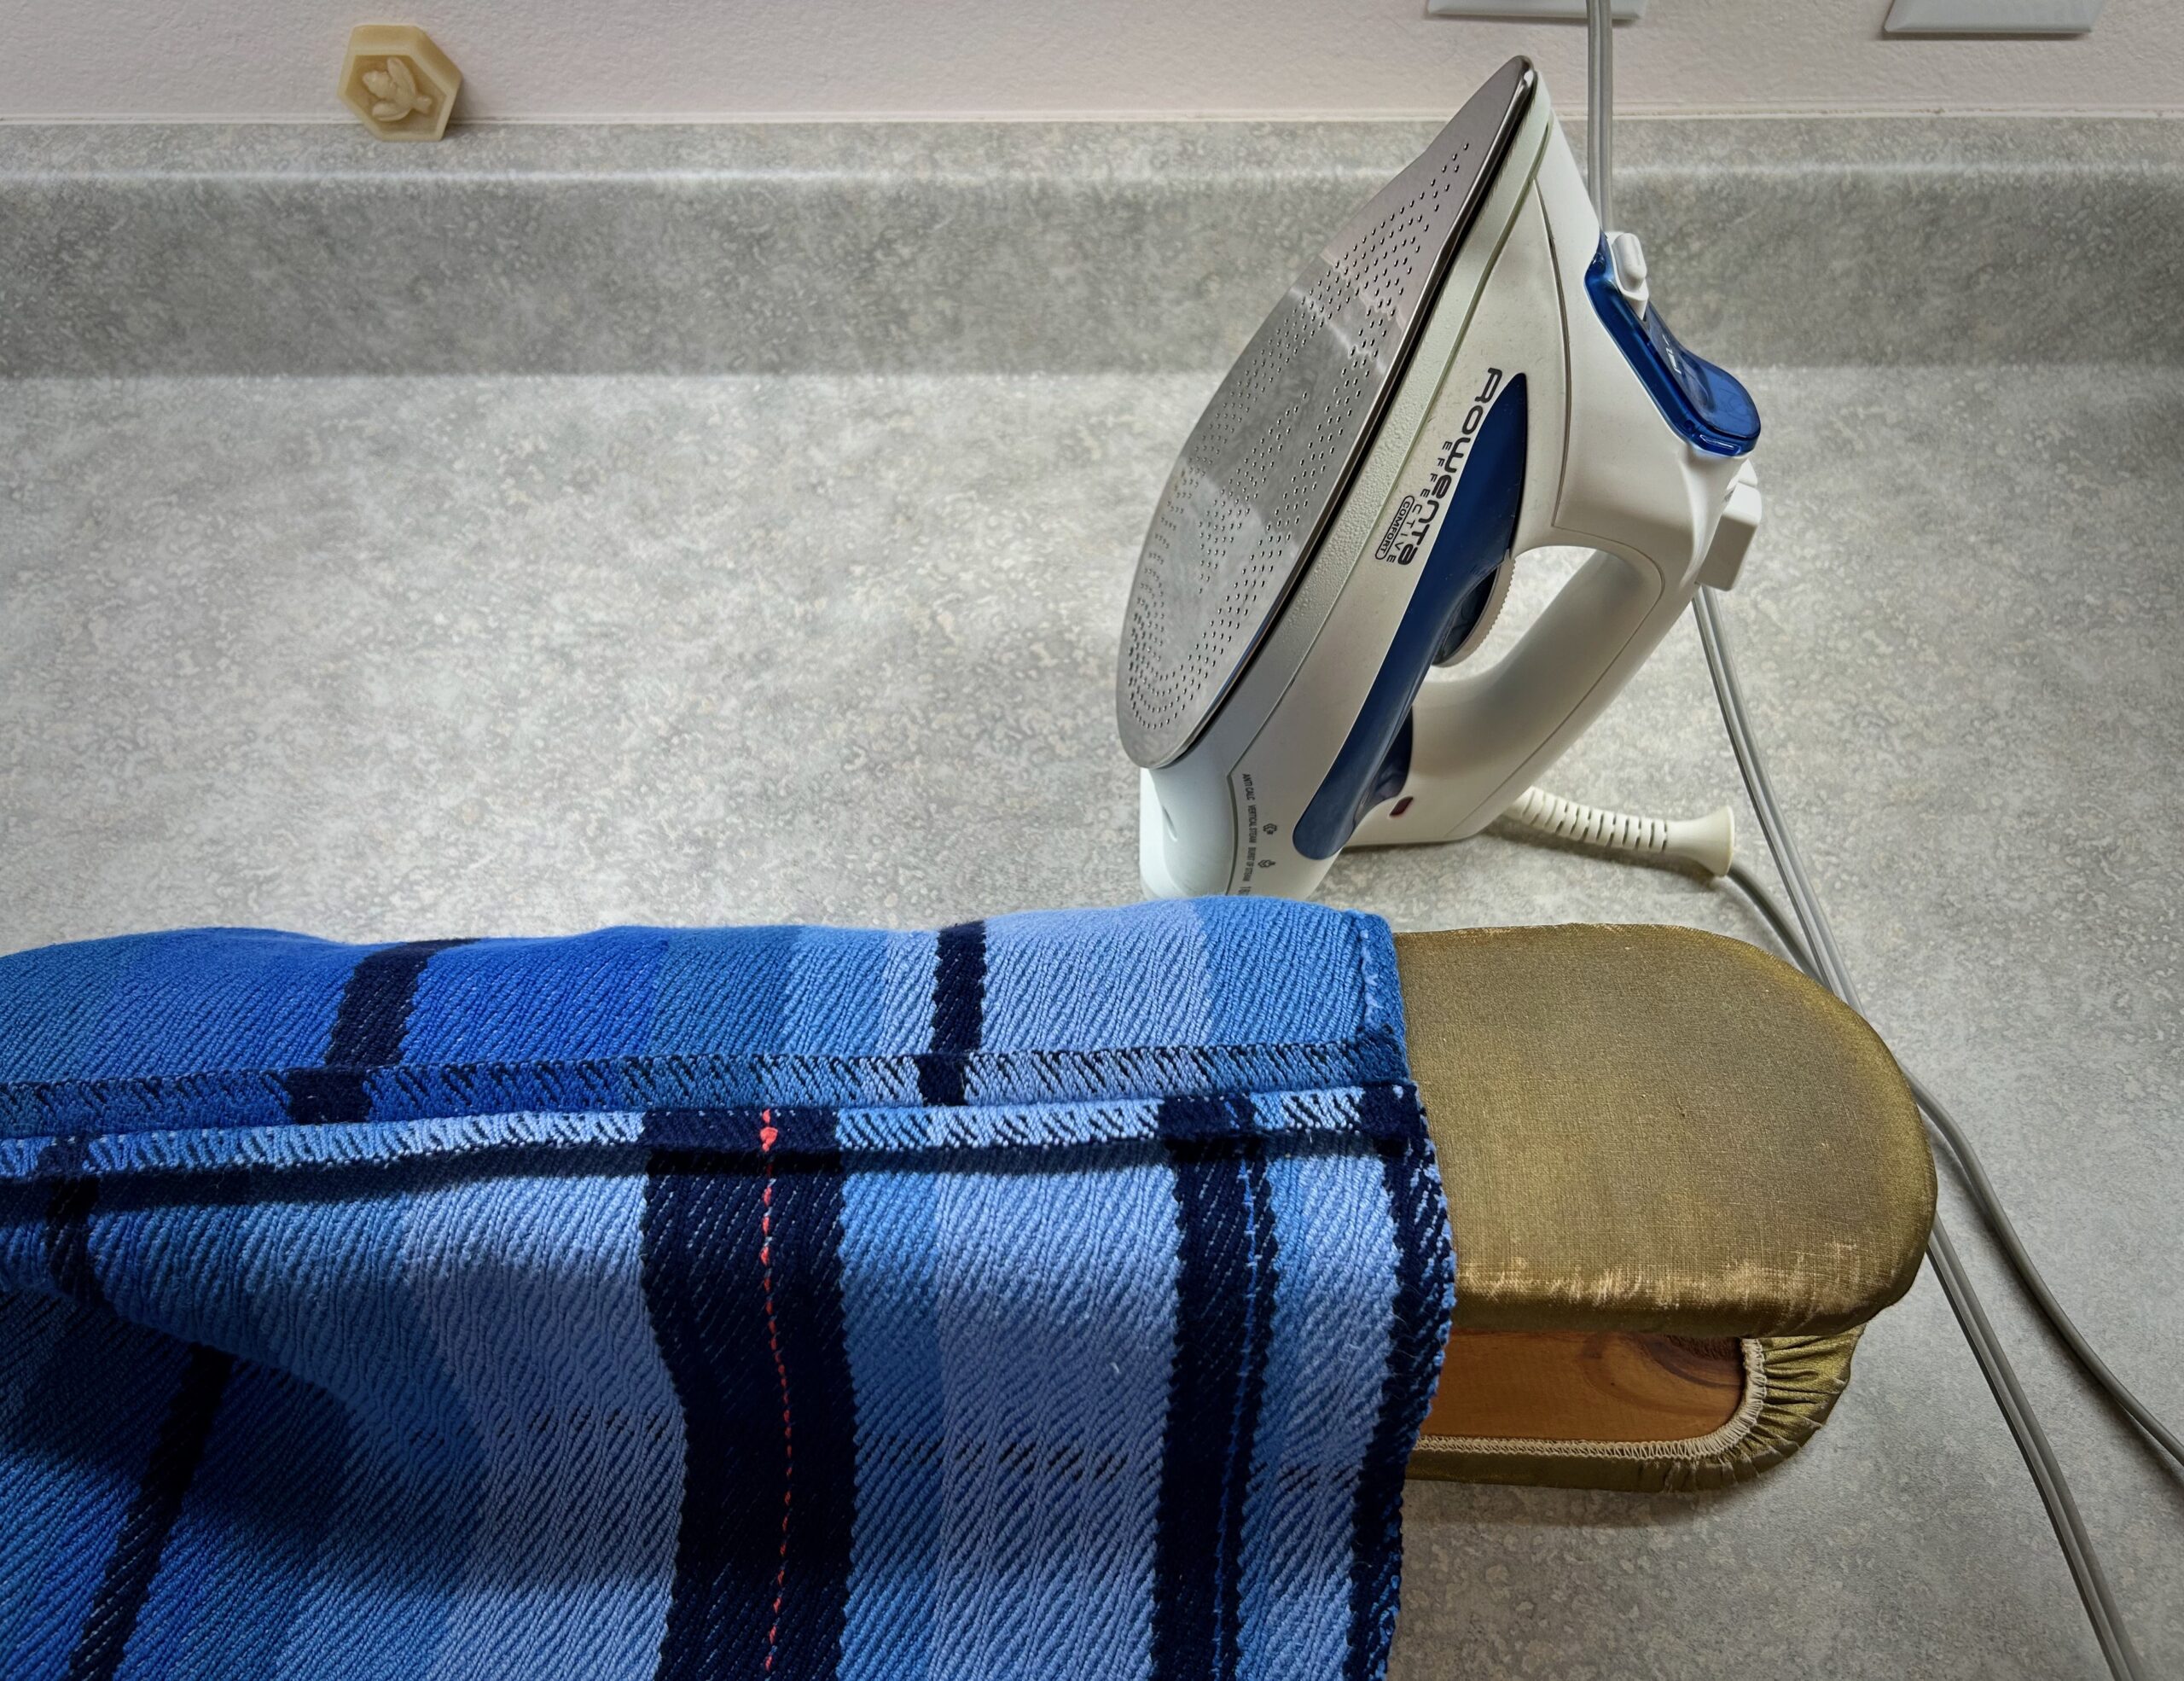
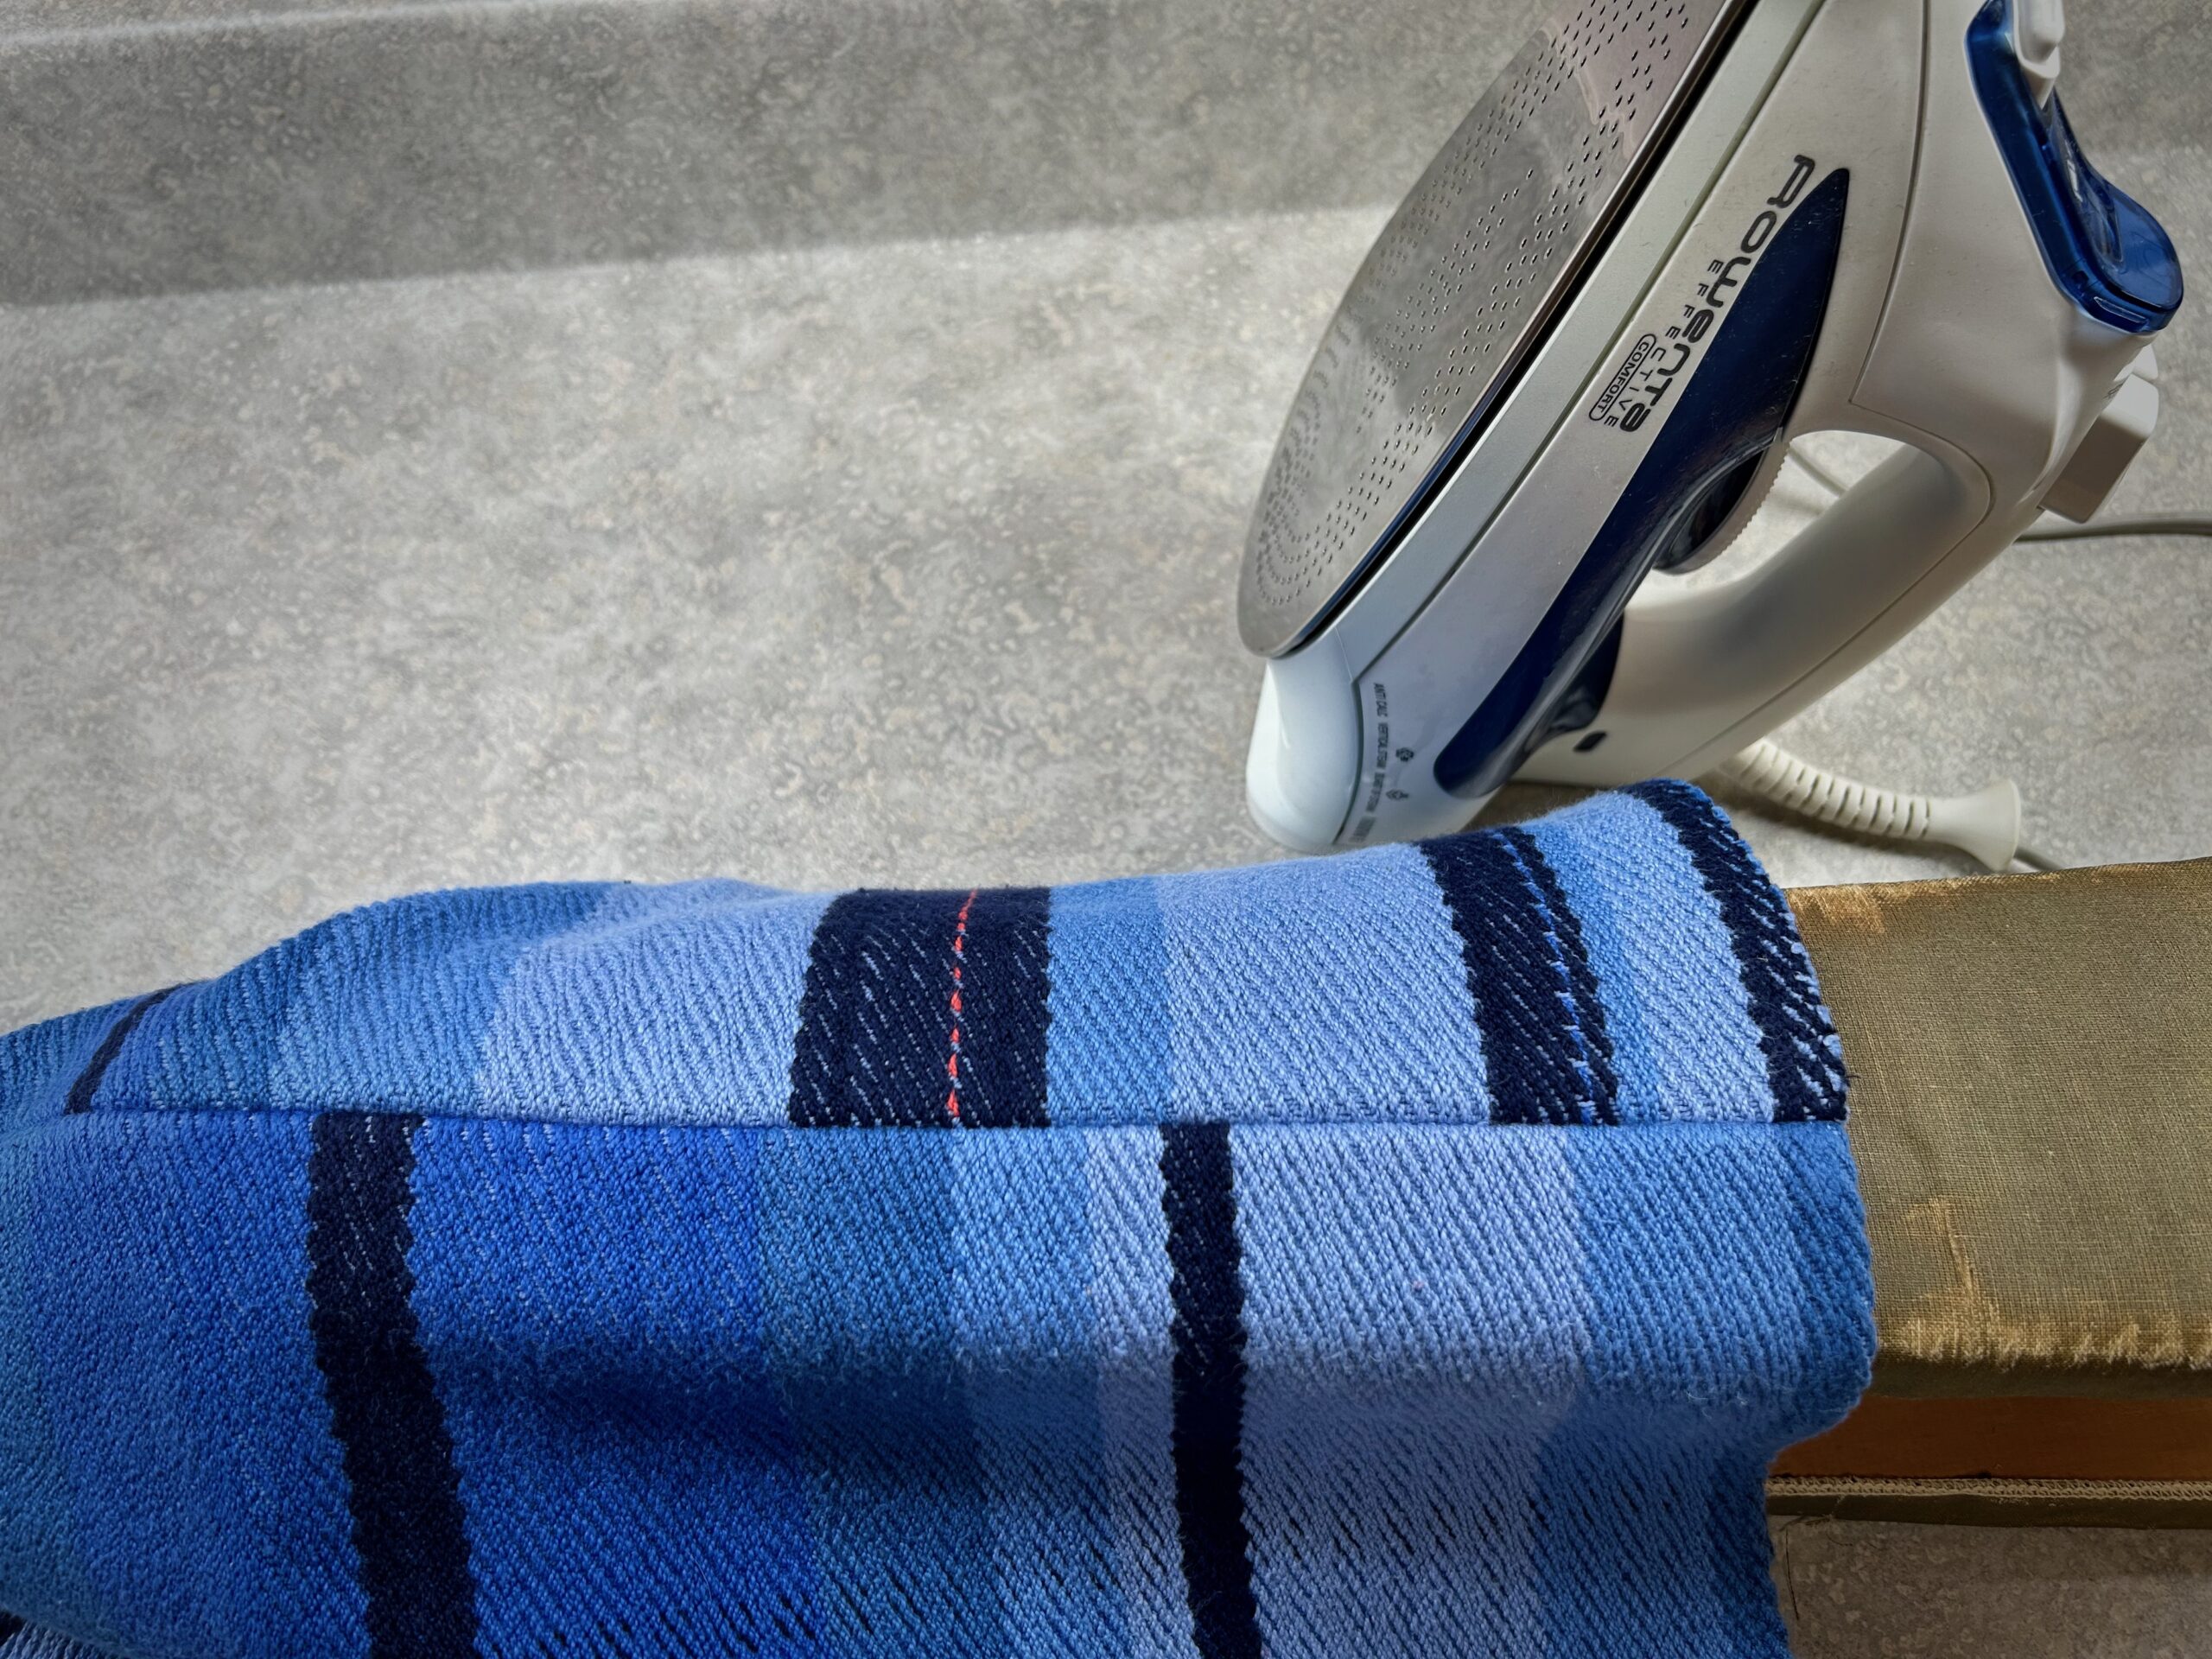
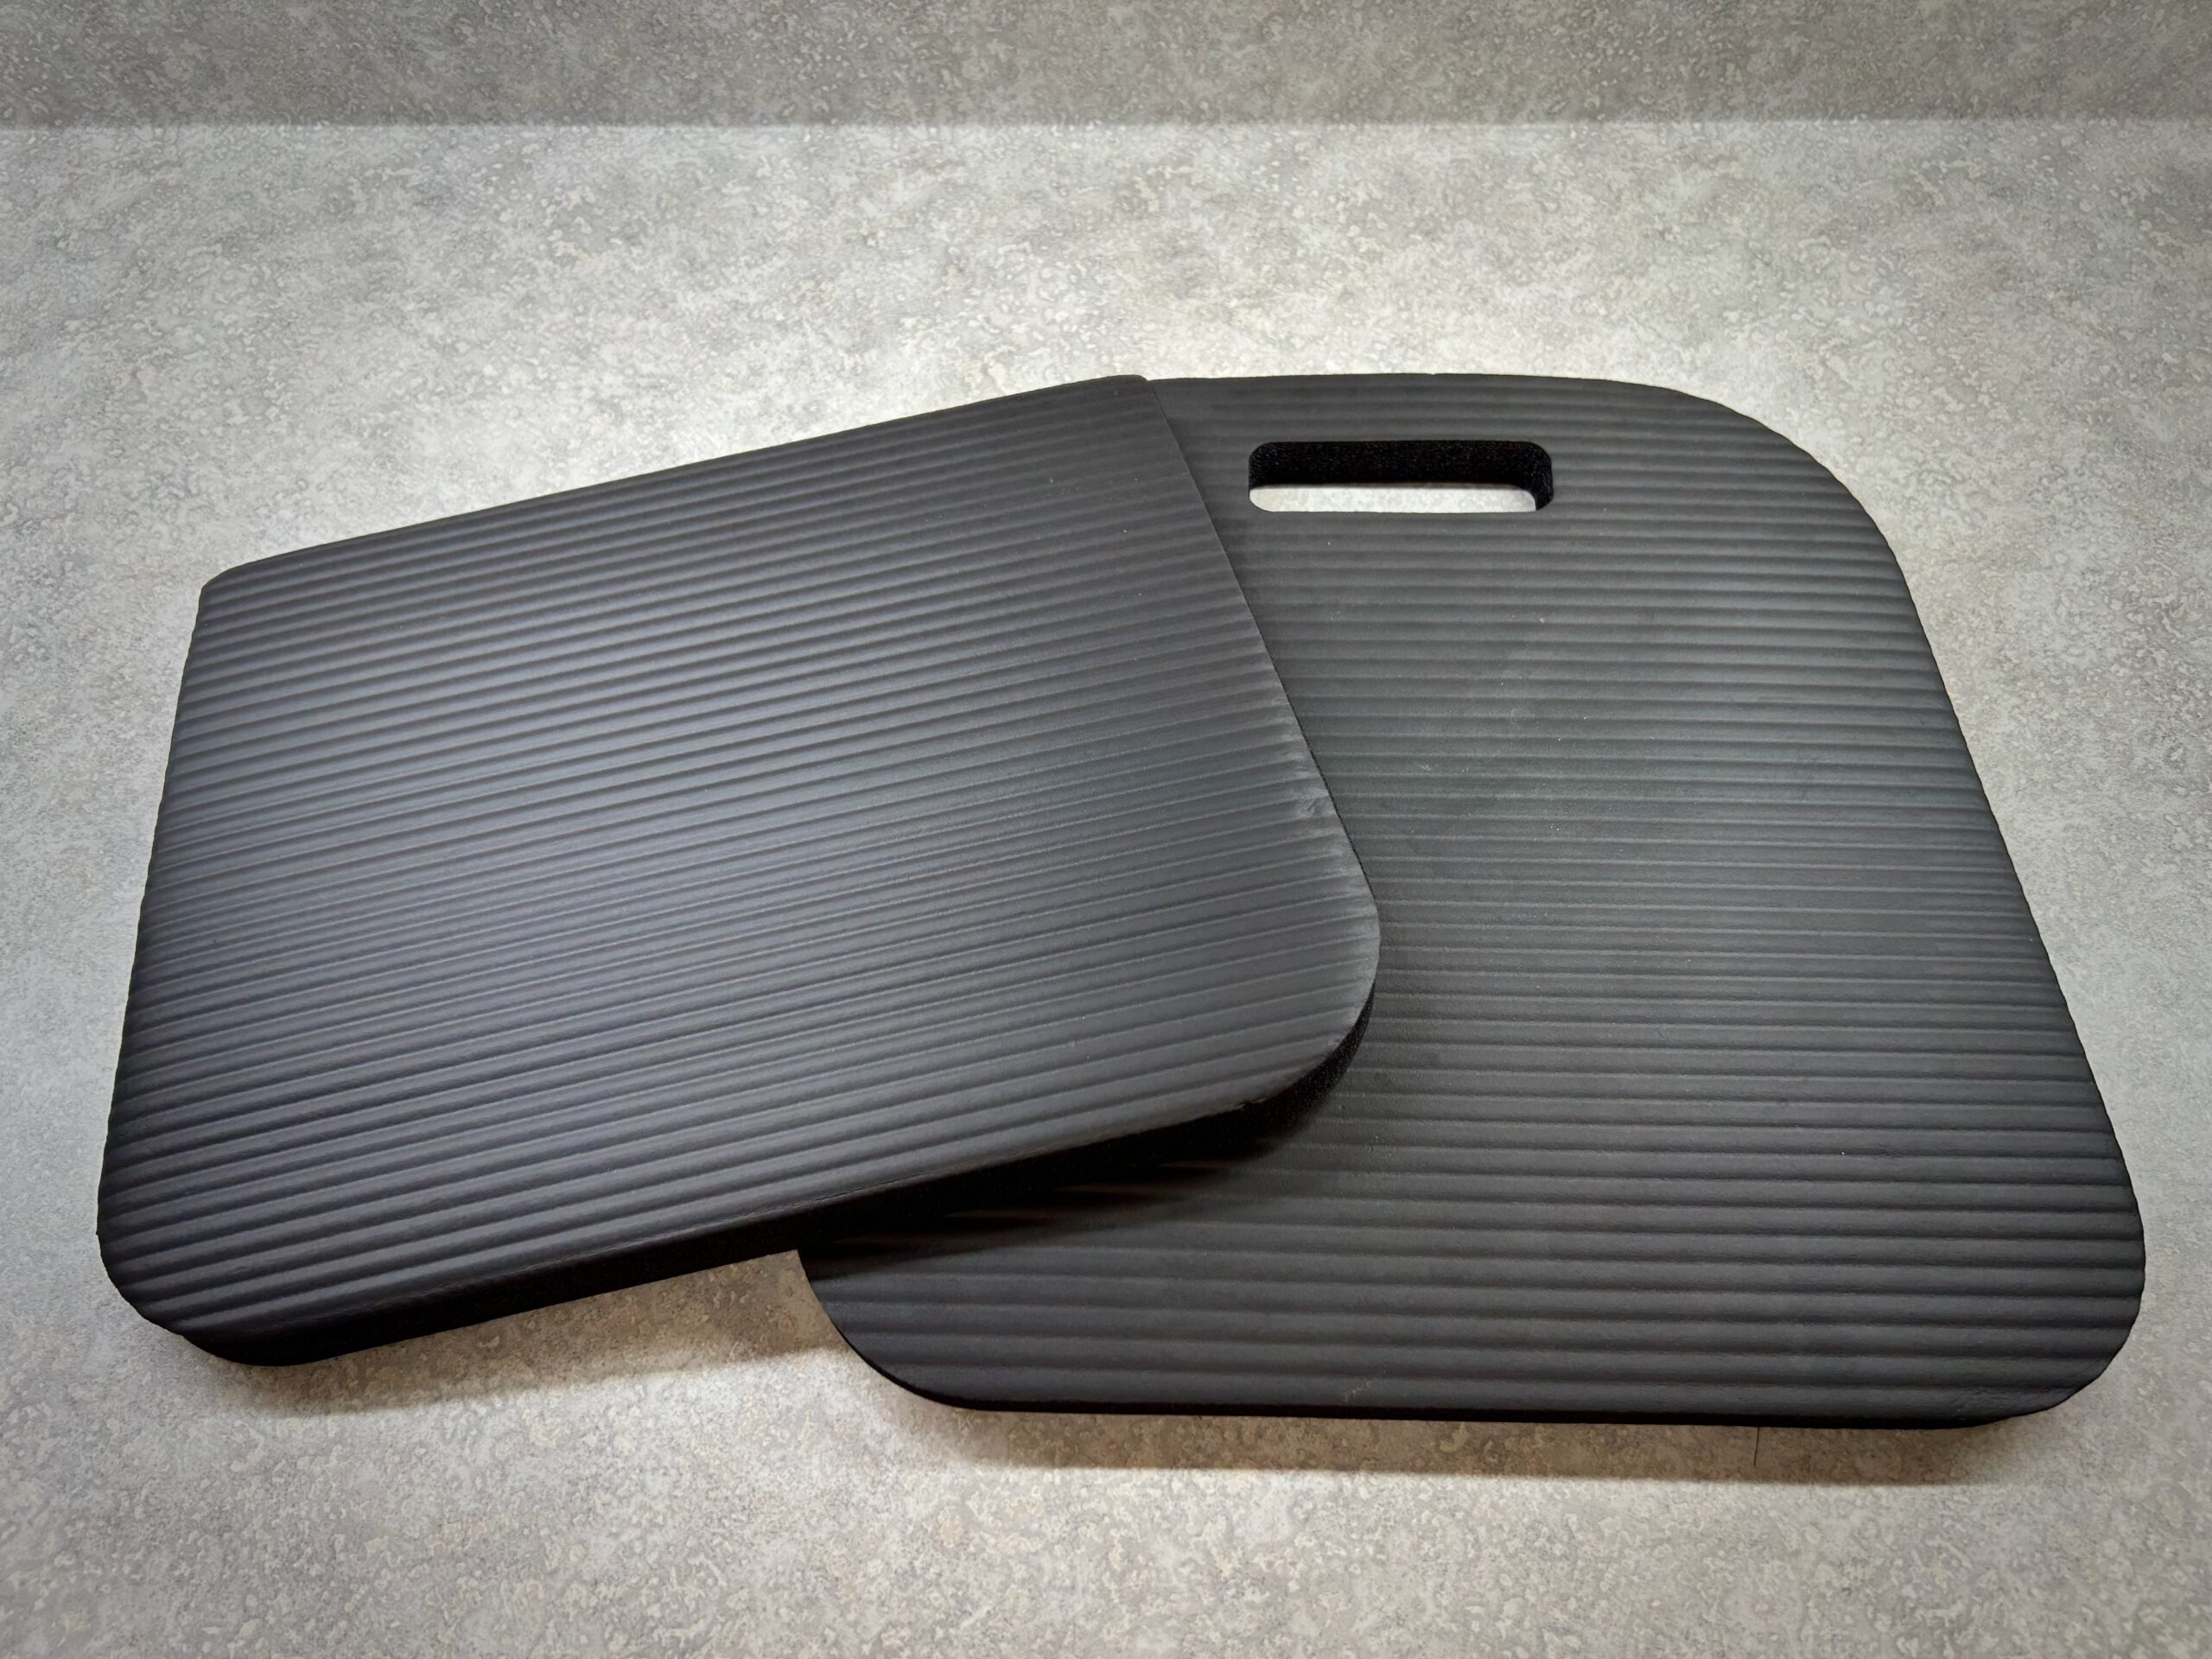
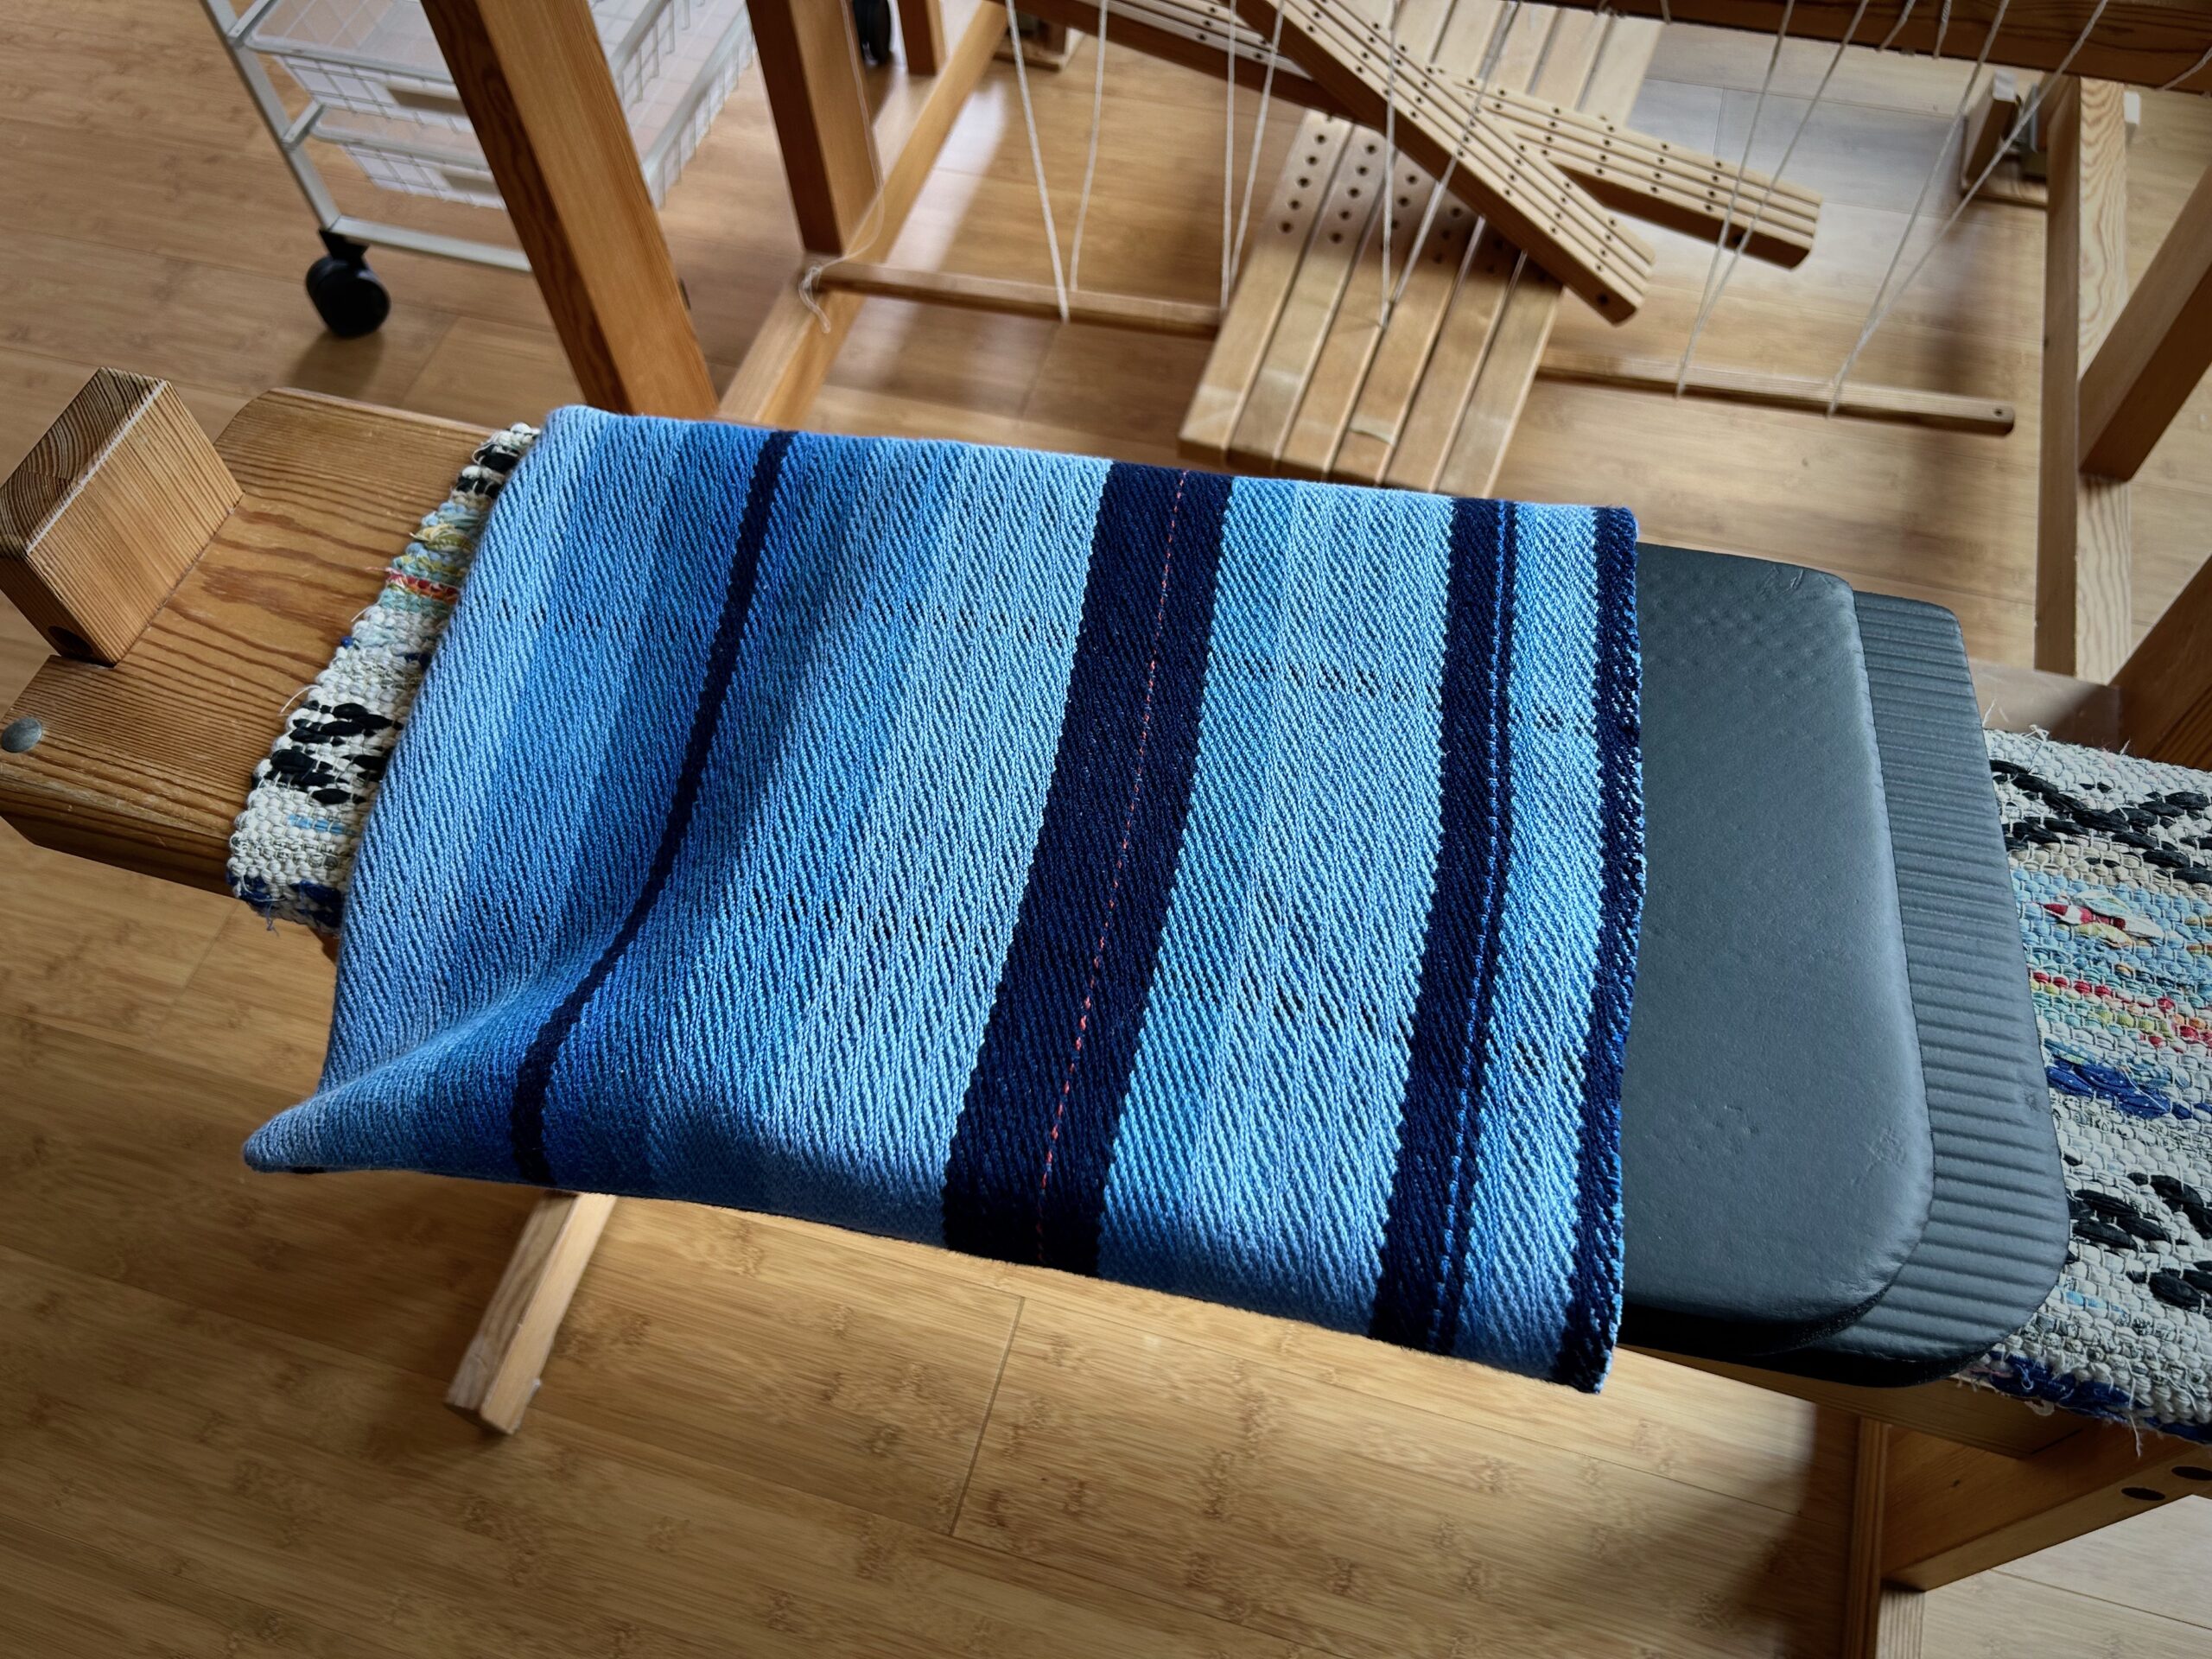
I find four potential “scraps” to use for another cushion cover. The rag rug pieces aren’t quite big enough, but would work if I added some fabric to them. The colorful magenta and stripes piece would work as a top, with some other fabric for the bottom.Blue striped eight-shafttwill in 8/2 cotton is just right! This is fabric I wove a few years ago for chair covers for my mother-in-law. It has a good weight to it, with quite a bit of give. And the blues are very pretty!I am folding the piece in half lengthwise. This fabric has a pretty strong bias pull, so it makes sense to pin the seam before sewing.Walking foot on my sewing machine makes all the difference, especially with this bias-strong fabric. The walking foot helps keep the two layers of fabric together, instead of the top layer stretching ahead of the bottom layer.Two simple seams, and I’m finished with sewing! I am leaving the end open so it is super easy to add or subtract the fillers for the cushion. No ties this time.Press the seams open.Press the seams from the right side. Nothing matches at the seams because this long piece was made with intentionally irregular stripes.Two kneeling pads are cut to fit. They will go inside the cushion cover. This gives me a good firm cushion to elevate my sitting position in the car. There is enough room in the cusion cover that I can add a little more height, or I can remove one of the kneeling pads for a lower sitting position.Two kneeling pads go in.Ready to Go!
Less than thirty minutes for this project, from selecting the fabric to inserting the pads. That’s exactly why I always put on extra warp! You never know when you will need an odd piece of handwoven something…
Handwoven remnants (aka scraps) do not get thrown away. Every scrap is good for something. Some scraps are so unusual it takes an extra dose of creativity to find a use for them.
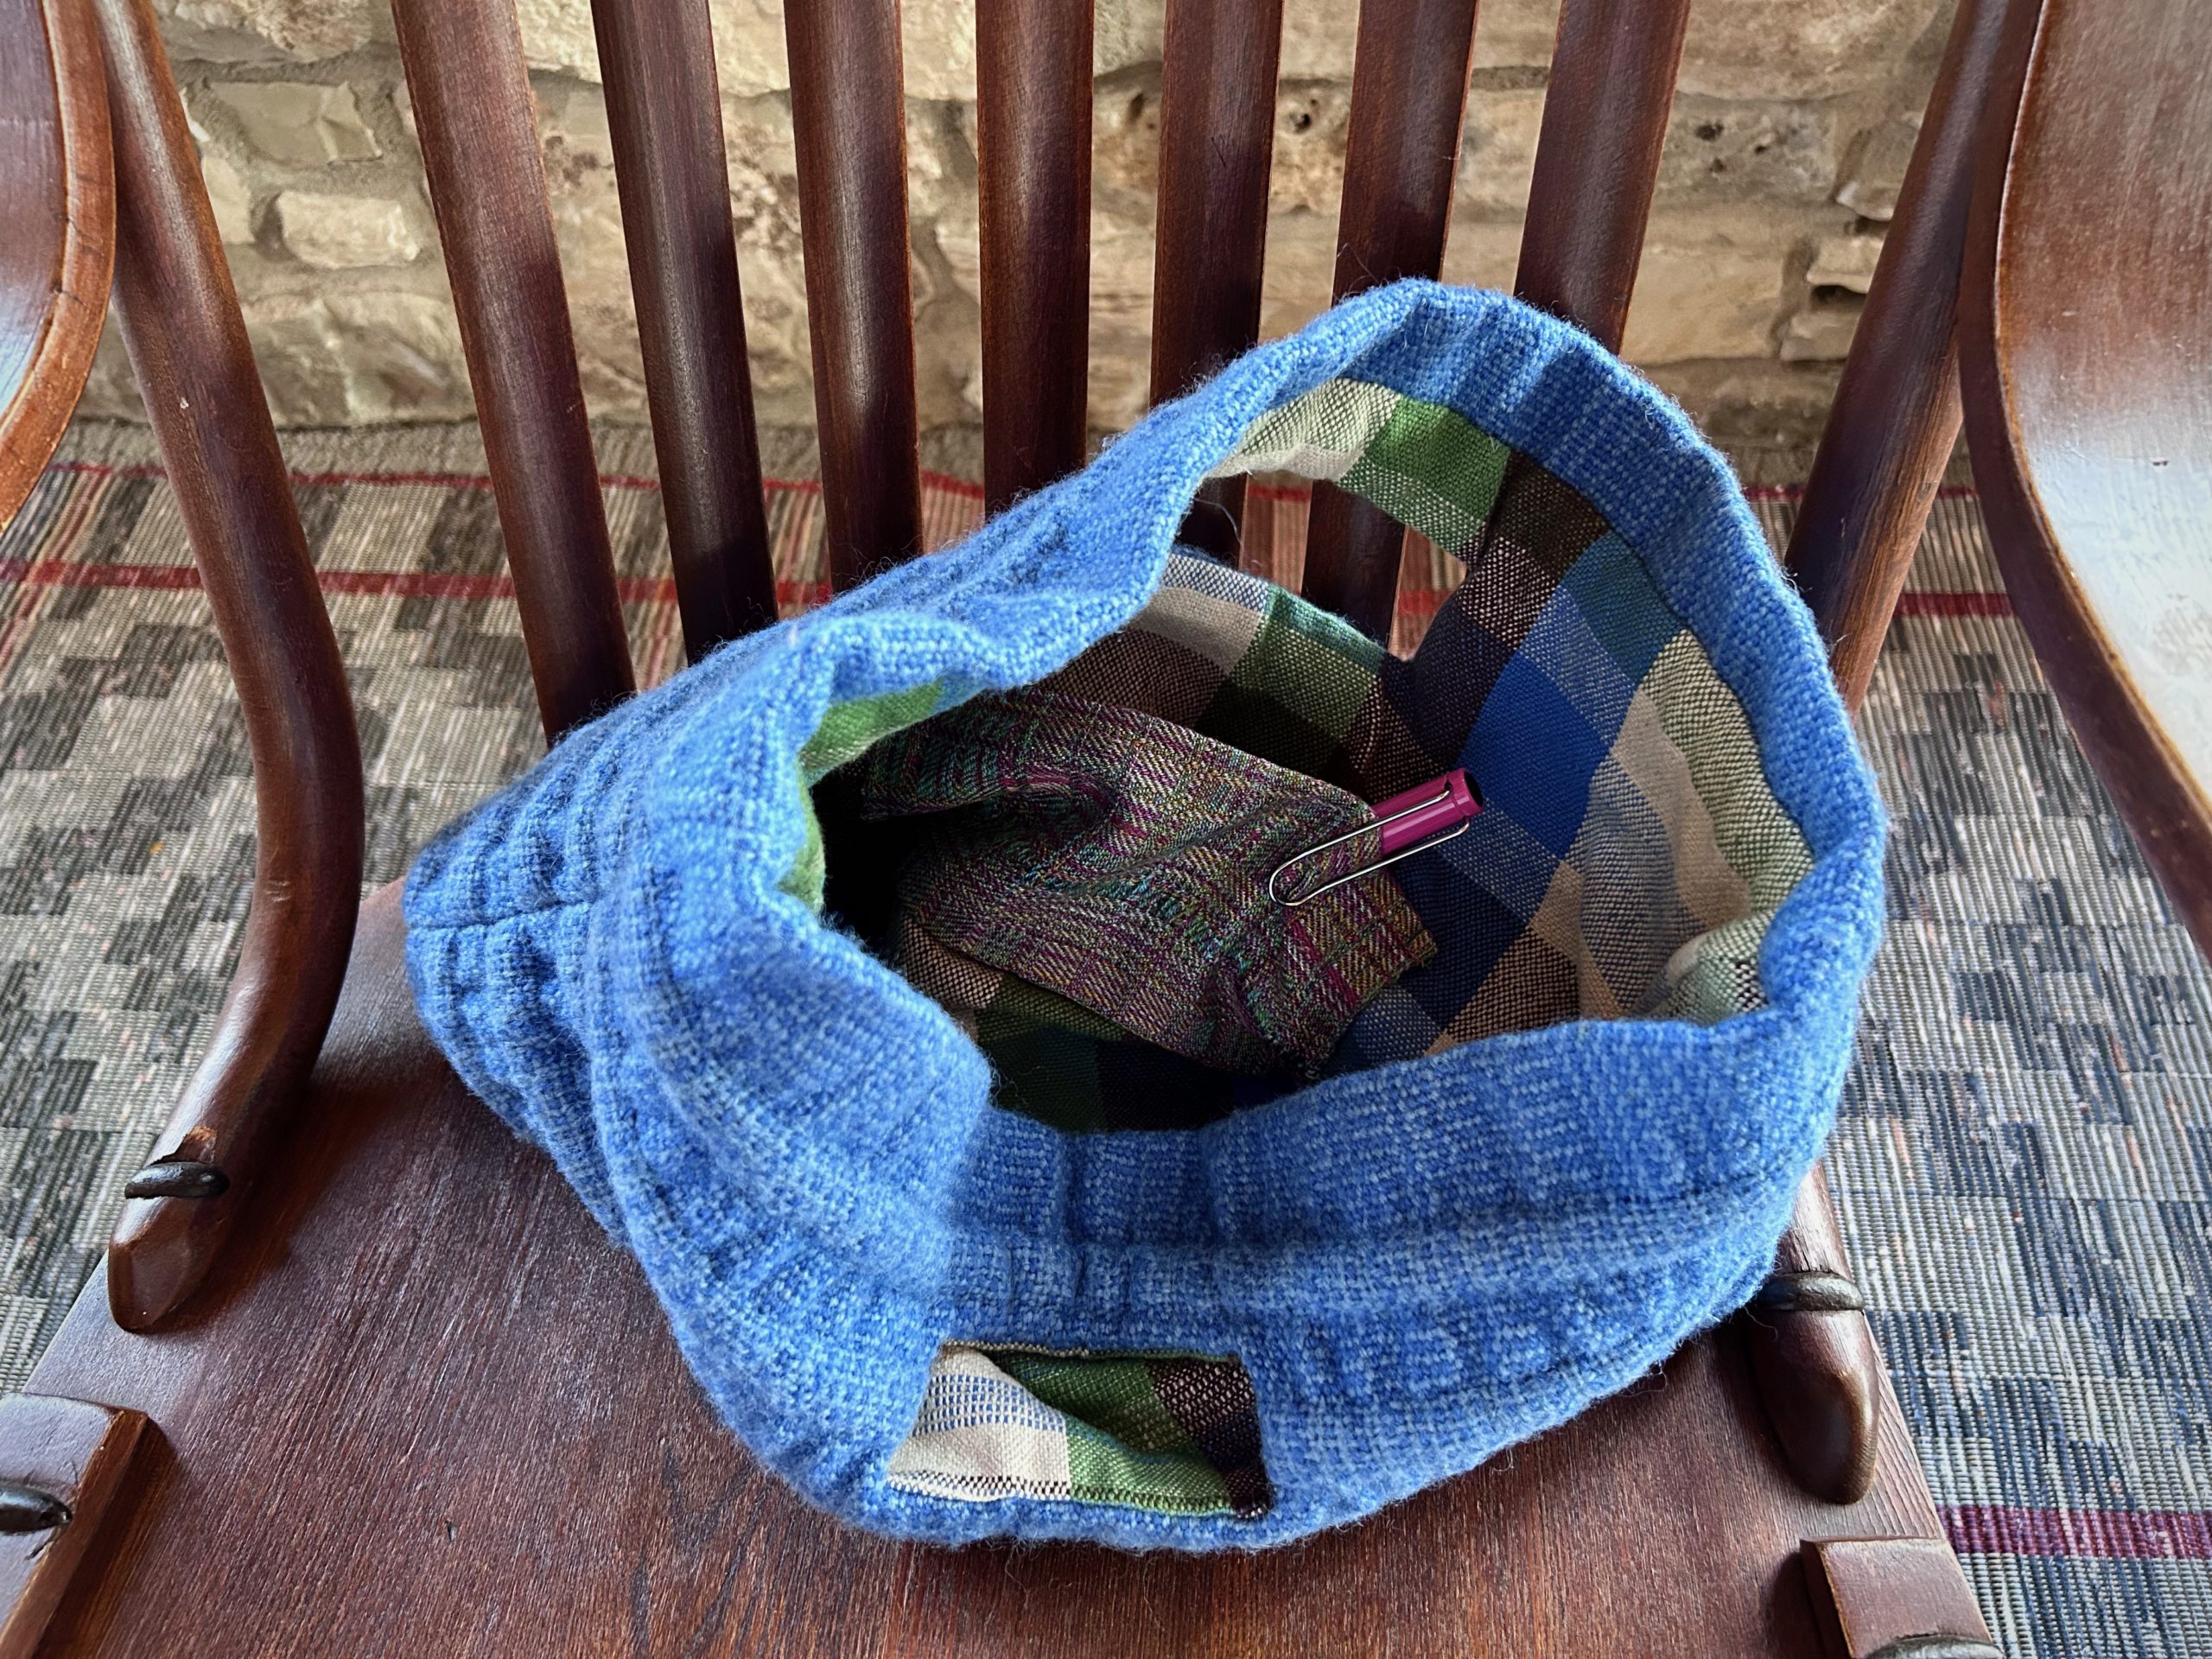
Simple rectangular handbag made from weft-cord handwoven fabric. The cording produces ridges. Ruffled gathers form in between the rows of ridges. 6/2 Tuna wool for warp and plain weave weft. I used a bulky single-ply wool for the cording.
This remnant of blue wool fabric is something I wove a few years ago during my Big Book of Weaving adventure. This structure uses a weft-cord technique, which creates interesting ridges in the fabric. The original project is a simple handbag. The remaining fabric has been buried in a box of remnants. Until now.
Handwoven remnants from previous projects are used for the lining and pocket in the handbag.
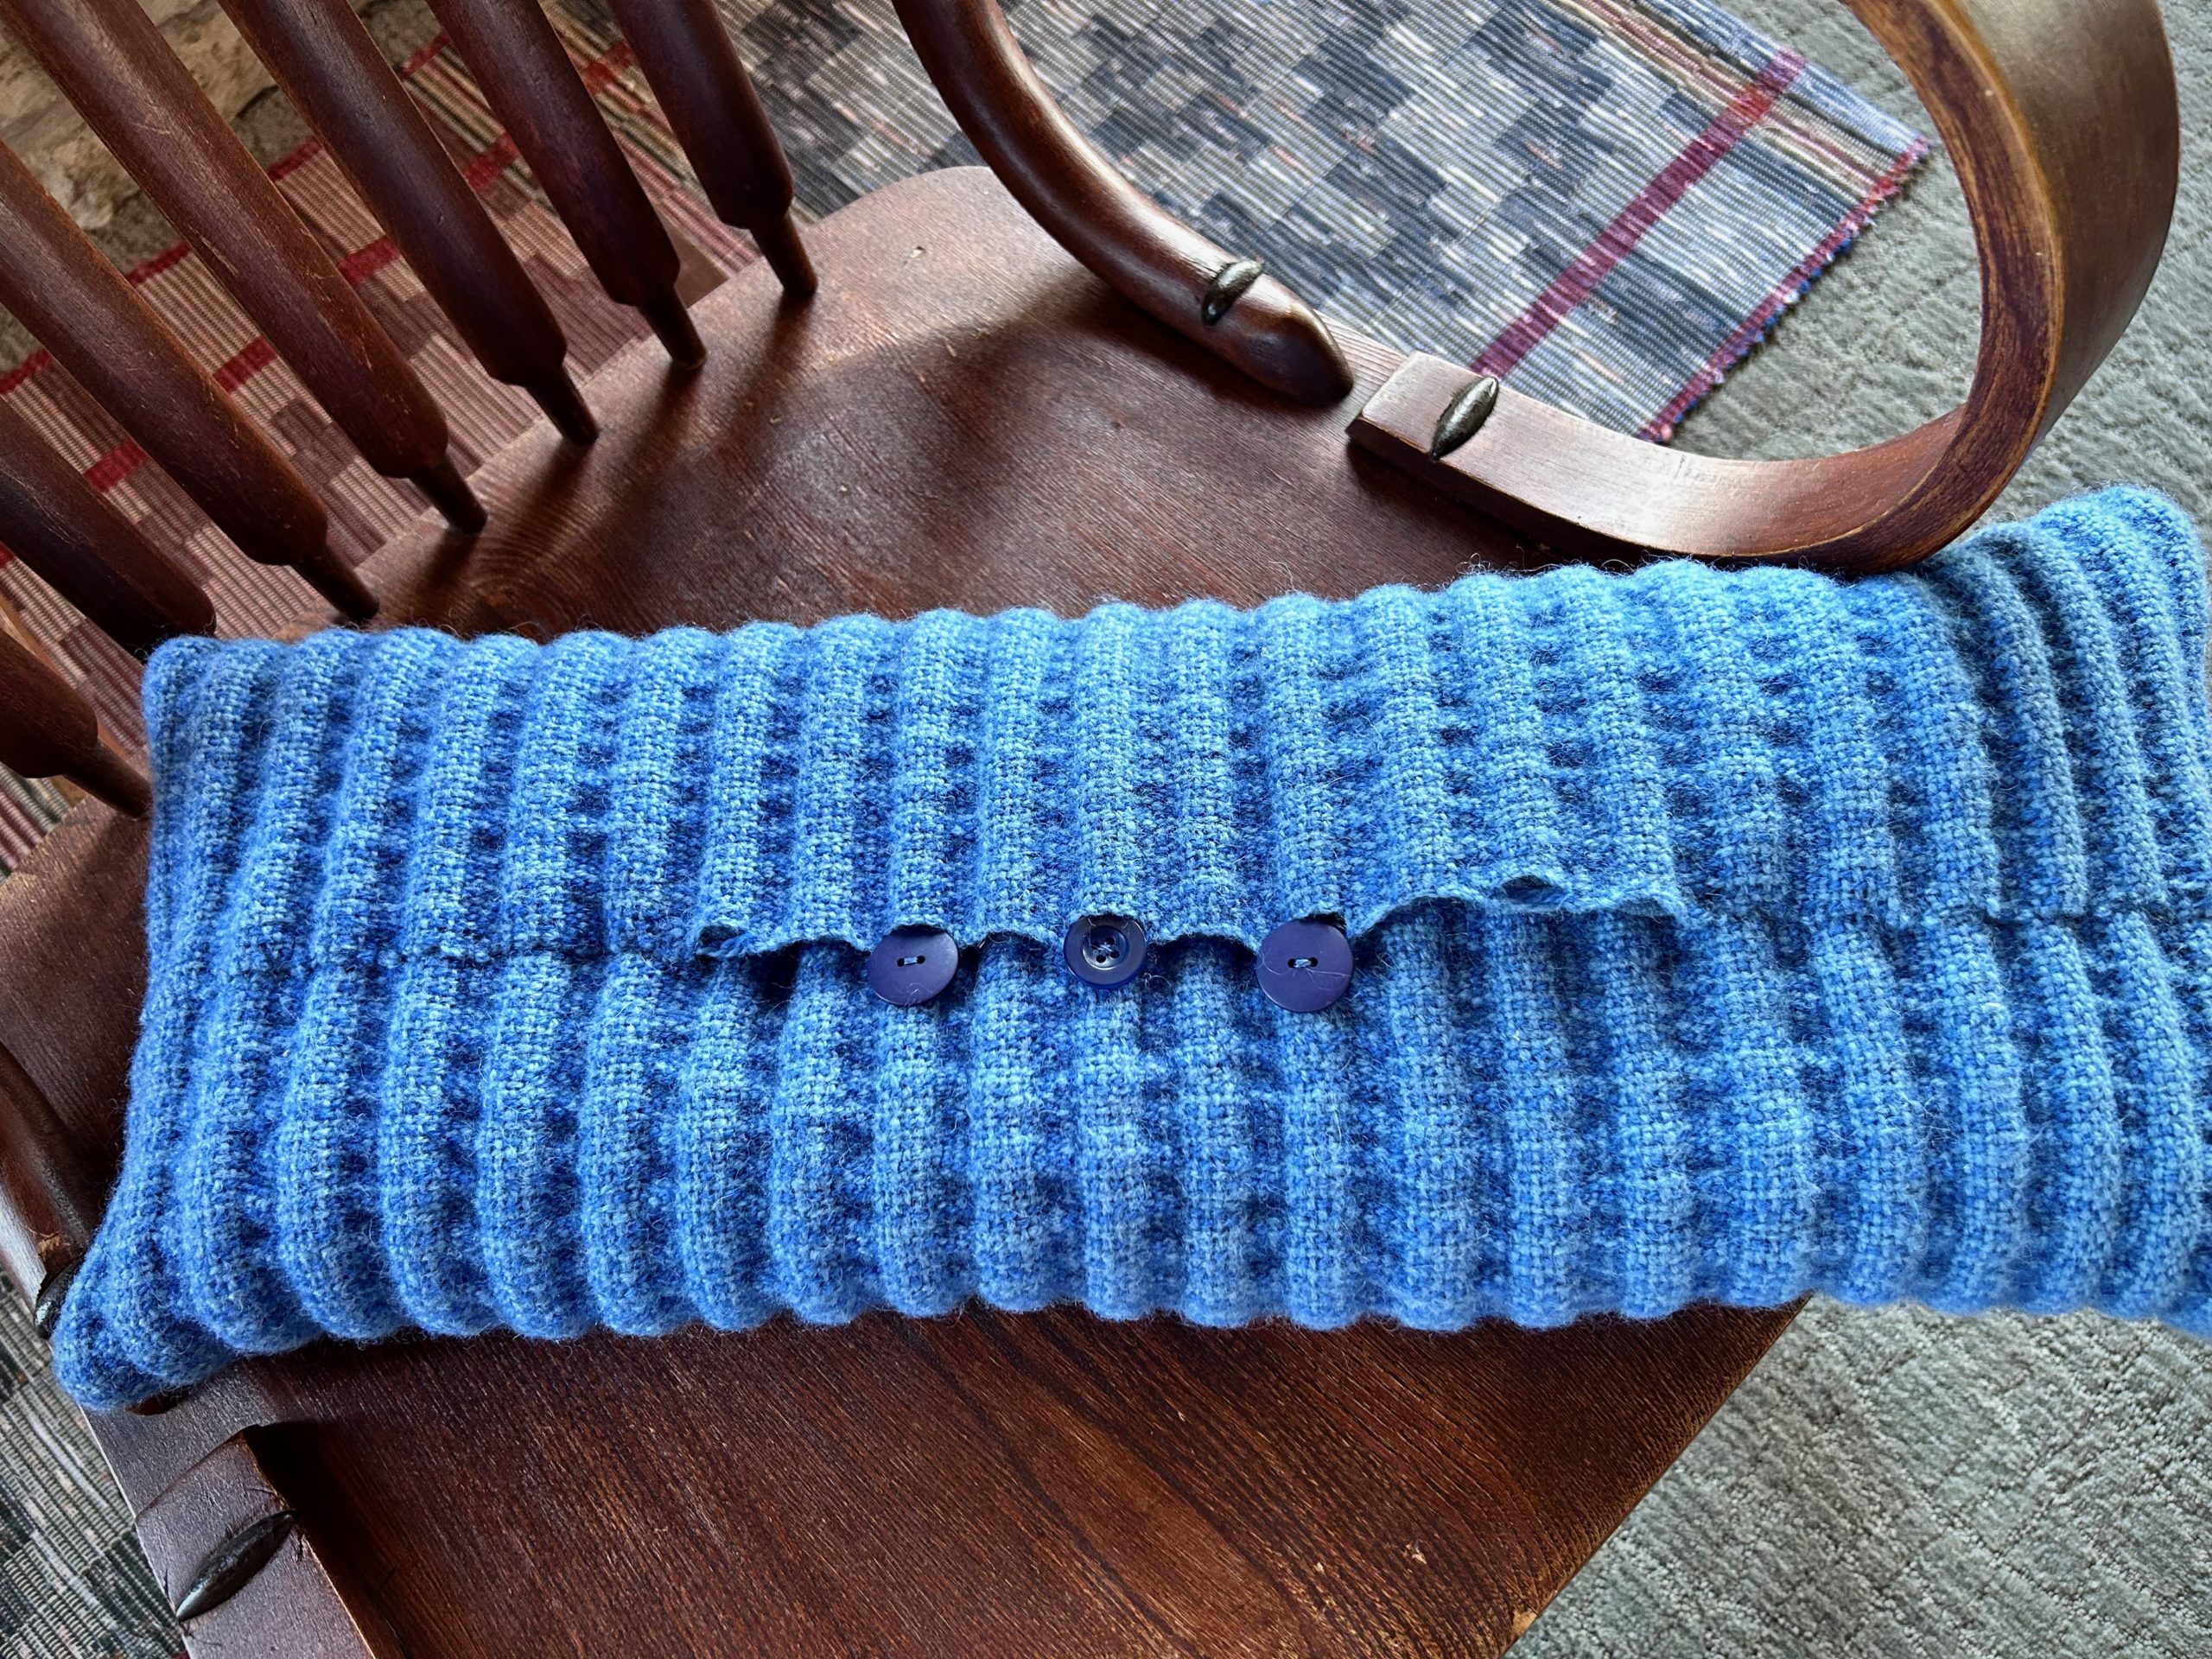
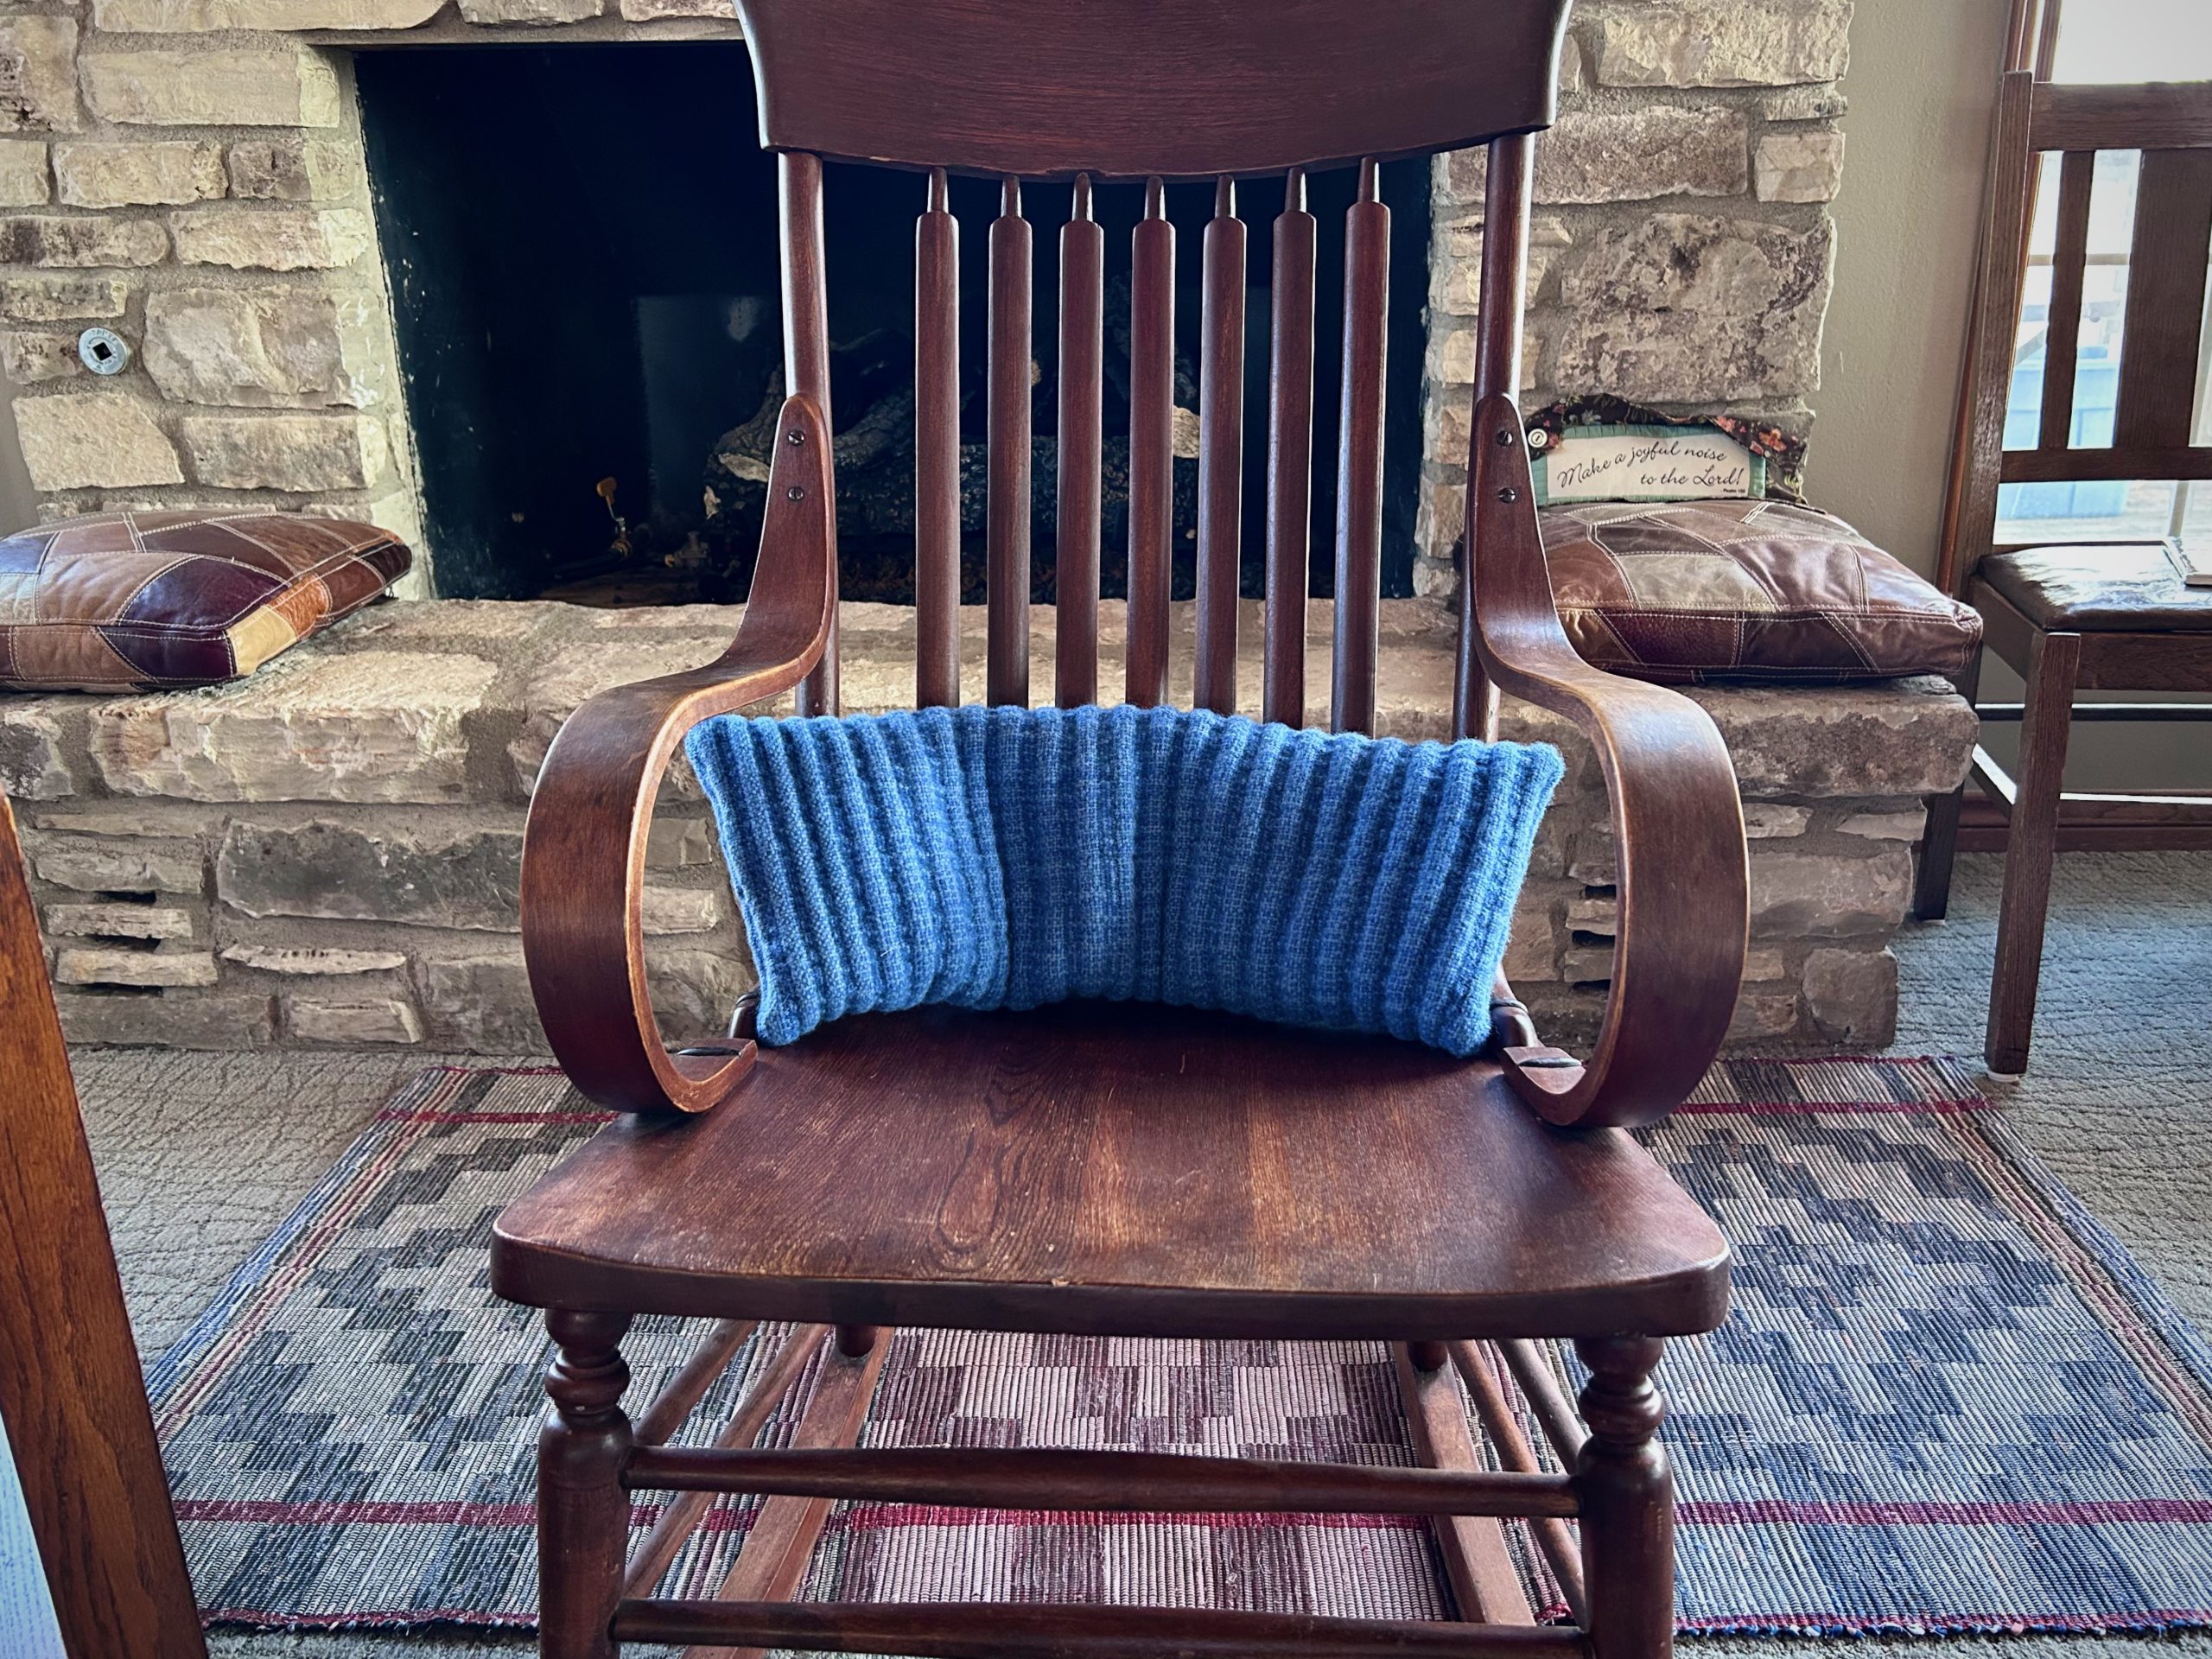
I had a great idea to make a bench cushion for my Julia loom from this unusual remnant. Guess what? All those ridges are not so comfortable to sit on (fortunately, I tested it first). My next idea, though, is a success! The blue bumpy scrap makes a nice lumbar pillow, adding special comfort to the rocking chair that belonged to my great grandmother.
Remnant is folded over and hand-stitched, leaving an opening in the center for a muslin pillow insert that I made to fit. The weft-cord weaving produces natural loops at the selvedges, which I am using to my advantage here. Three buttons from my button box are used for closure in conjunction with the selvedge loops.Buttons to the back, the wide and narrow pillow works beautifully for lumbar support in my great grandmother’s rocking chair.
Take a short stroll through our home and you will see and touch linen in all its superb versatility. Linen warp and weft speaks of elegance. Yet, this natural fiber is right at home with ordinary daily living. Linen, oh, how it sings!
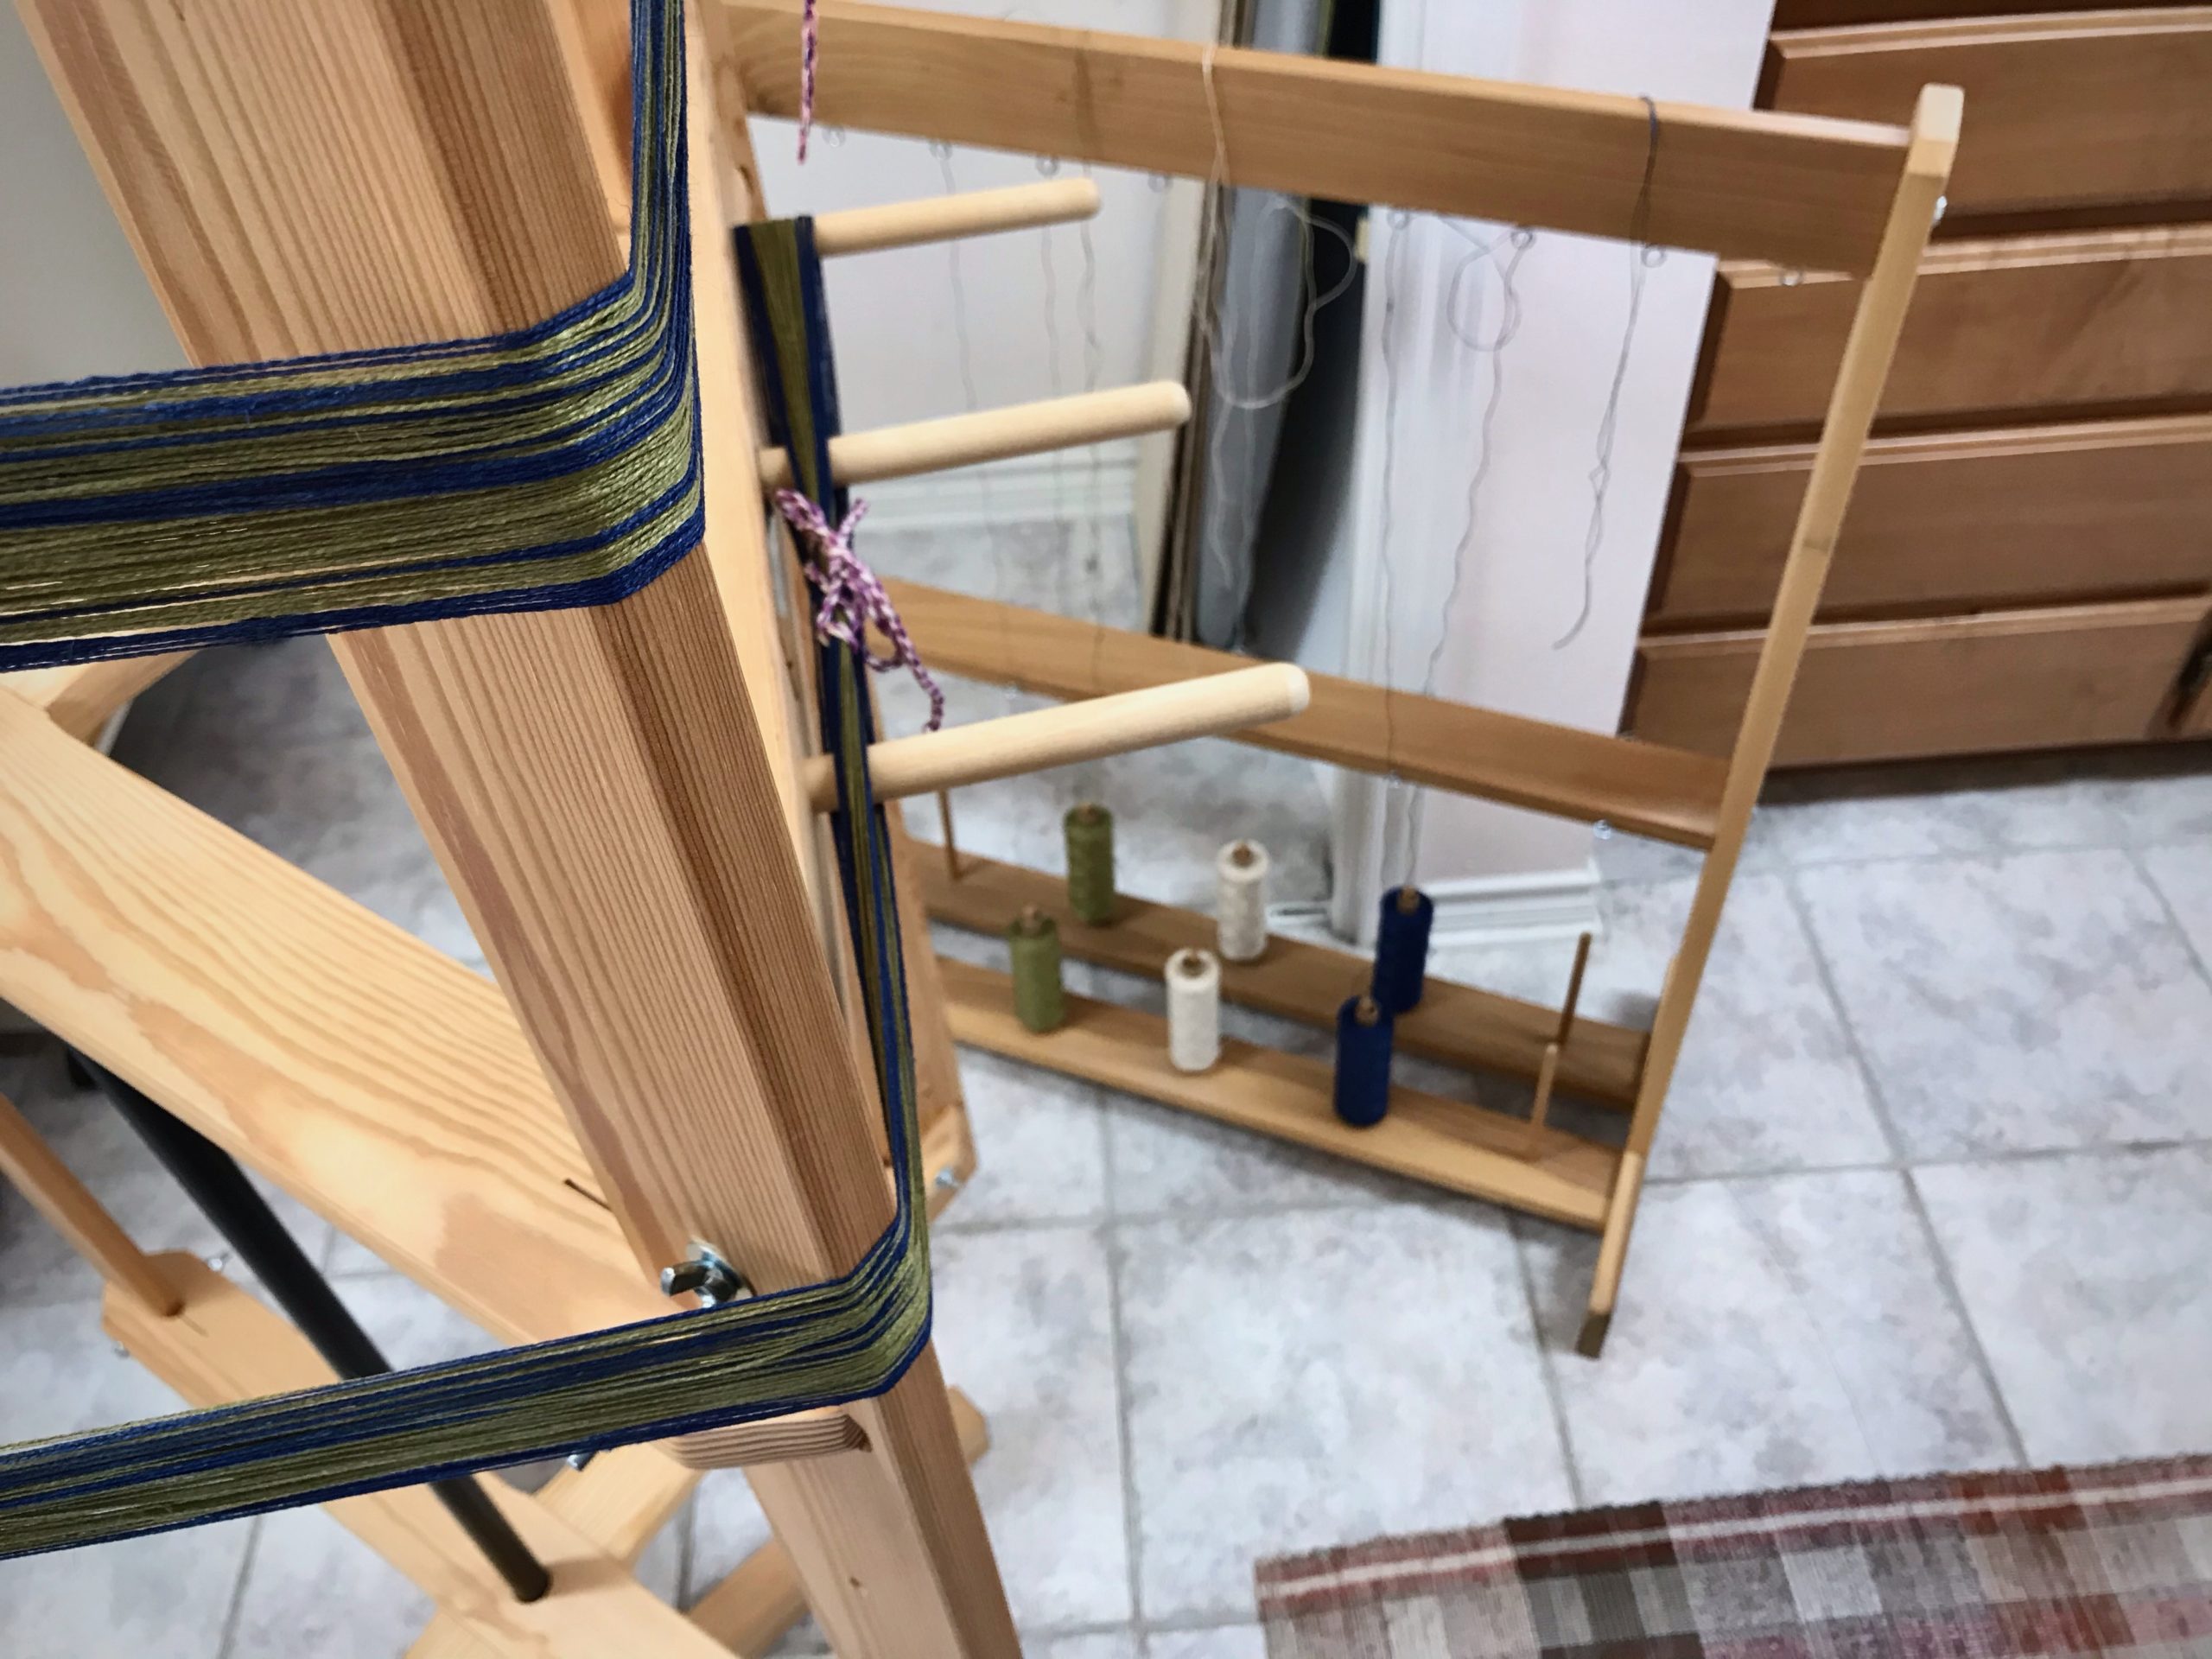
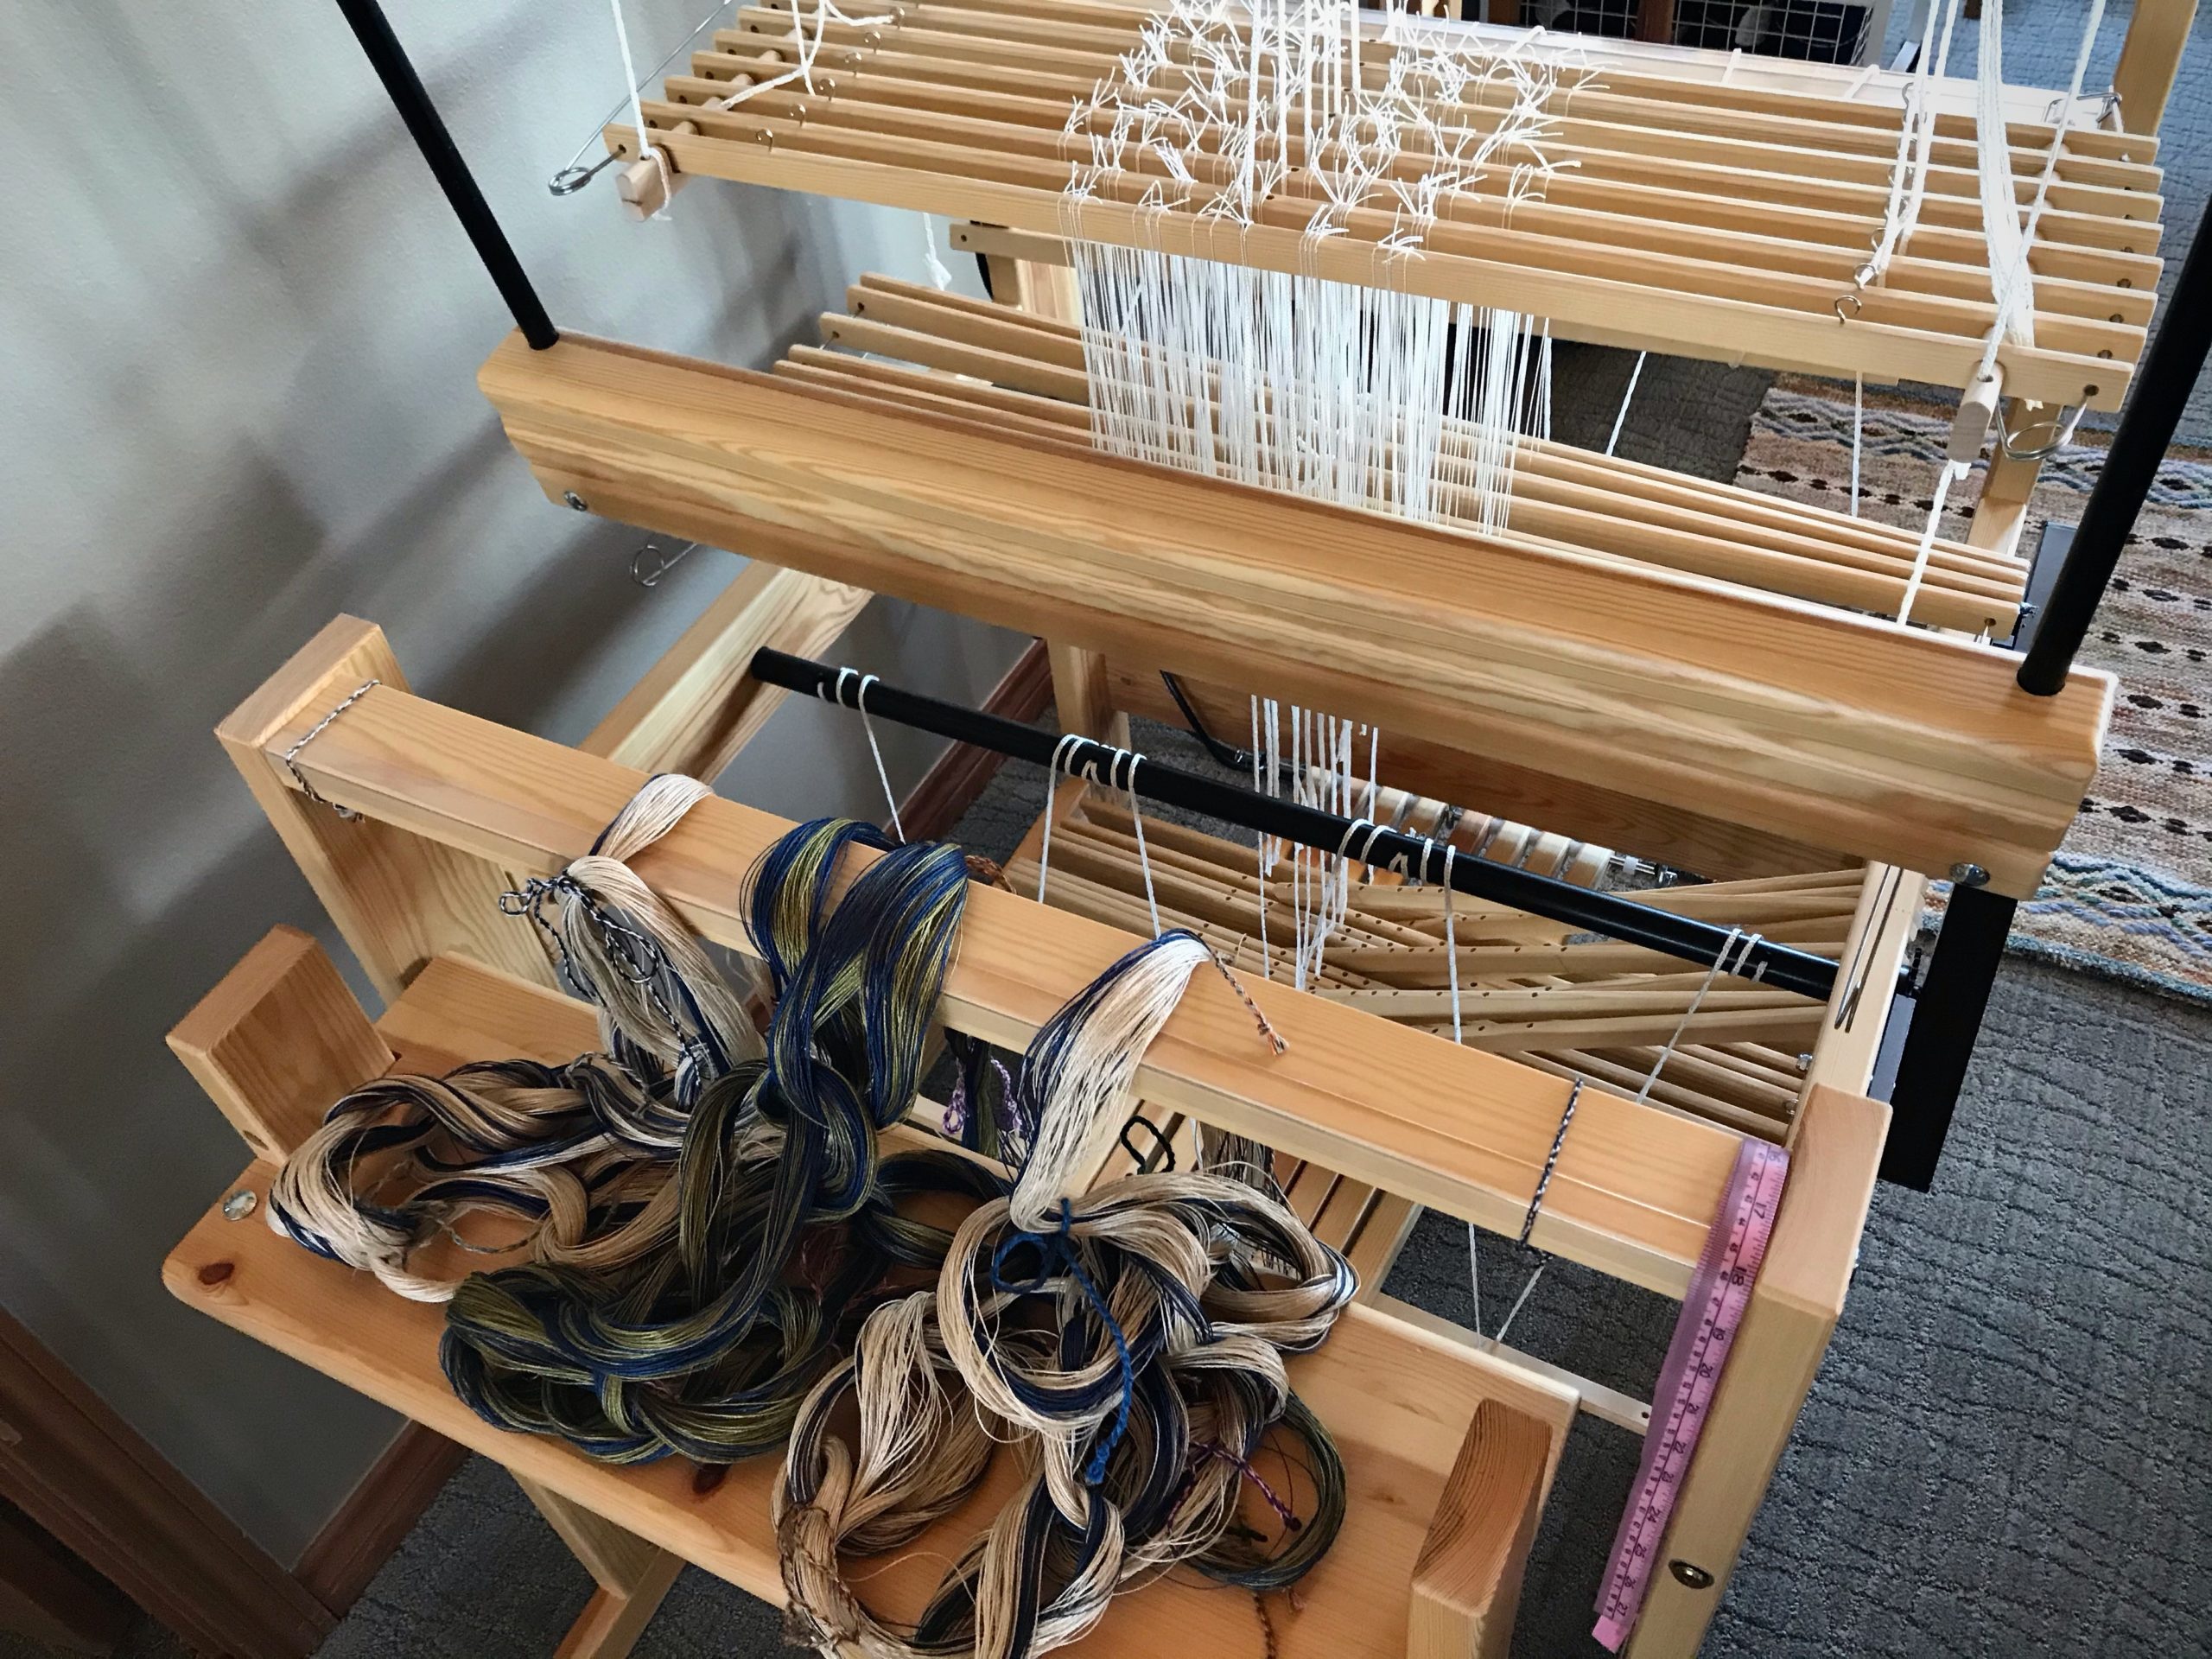
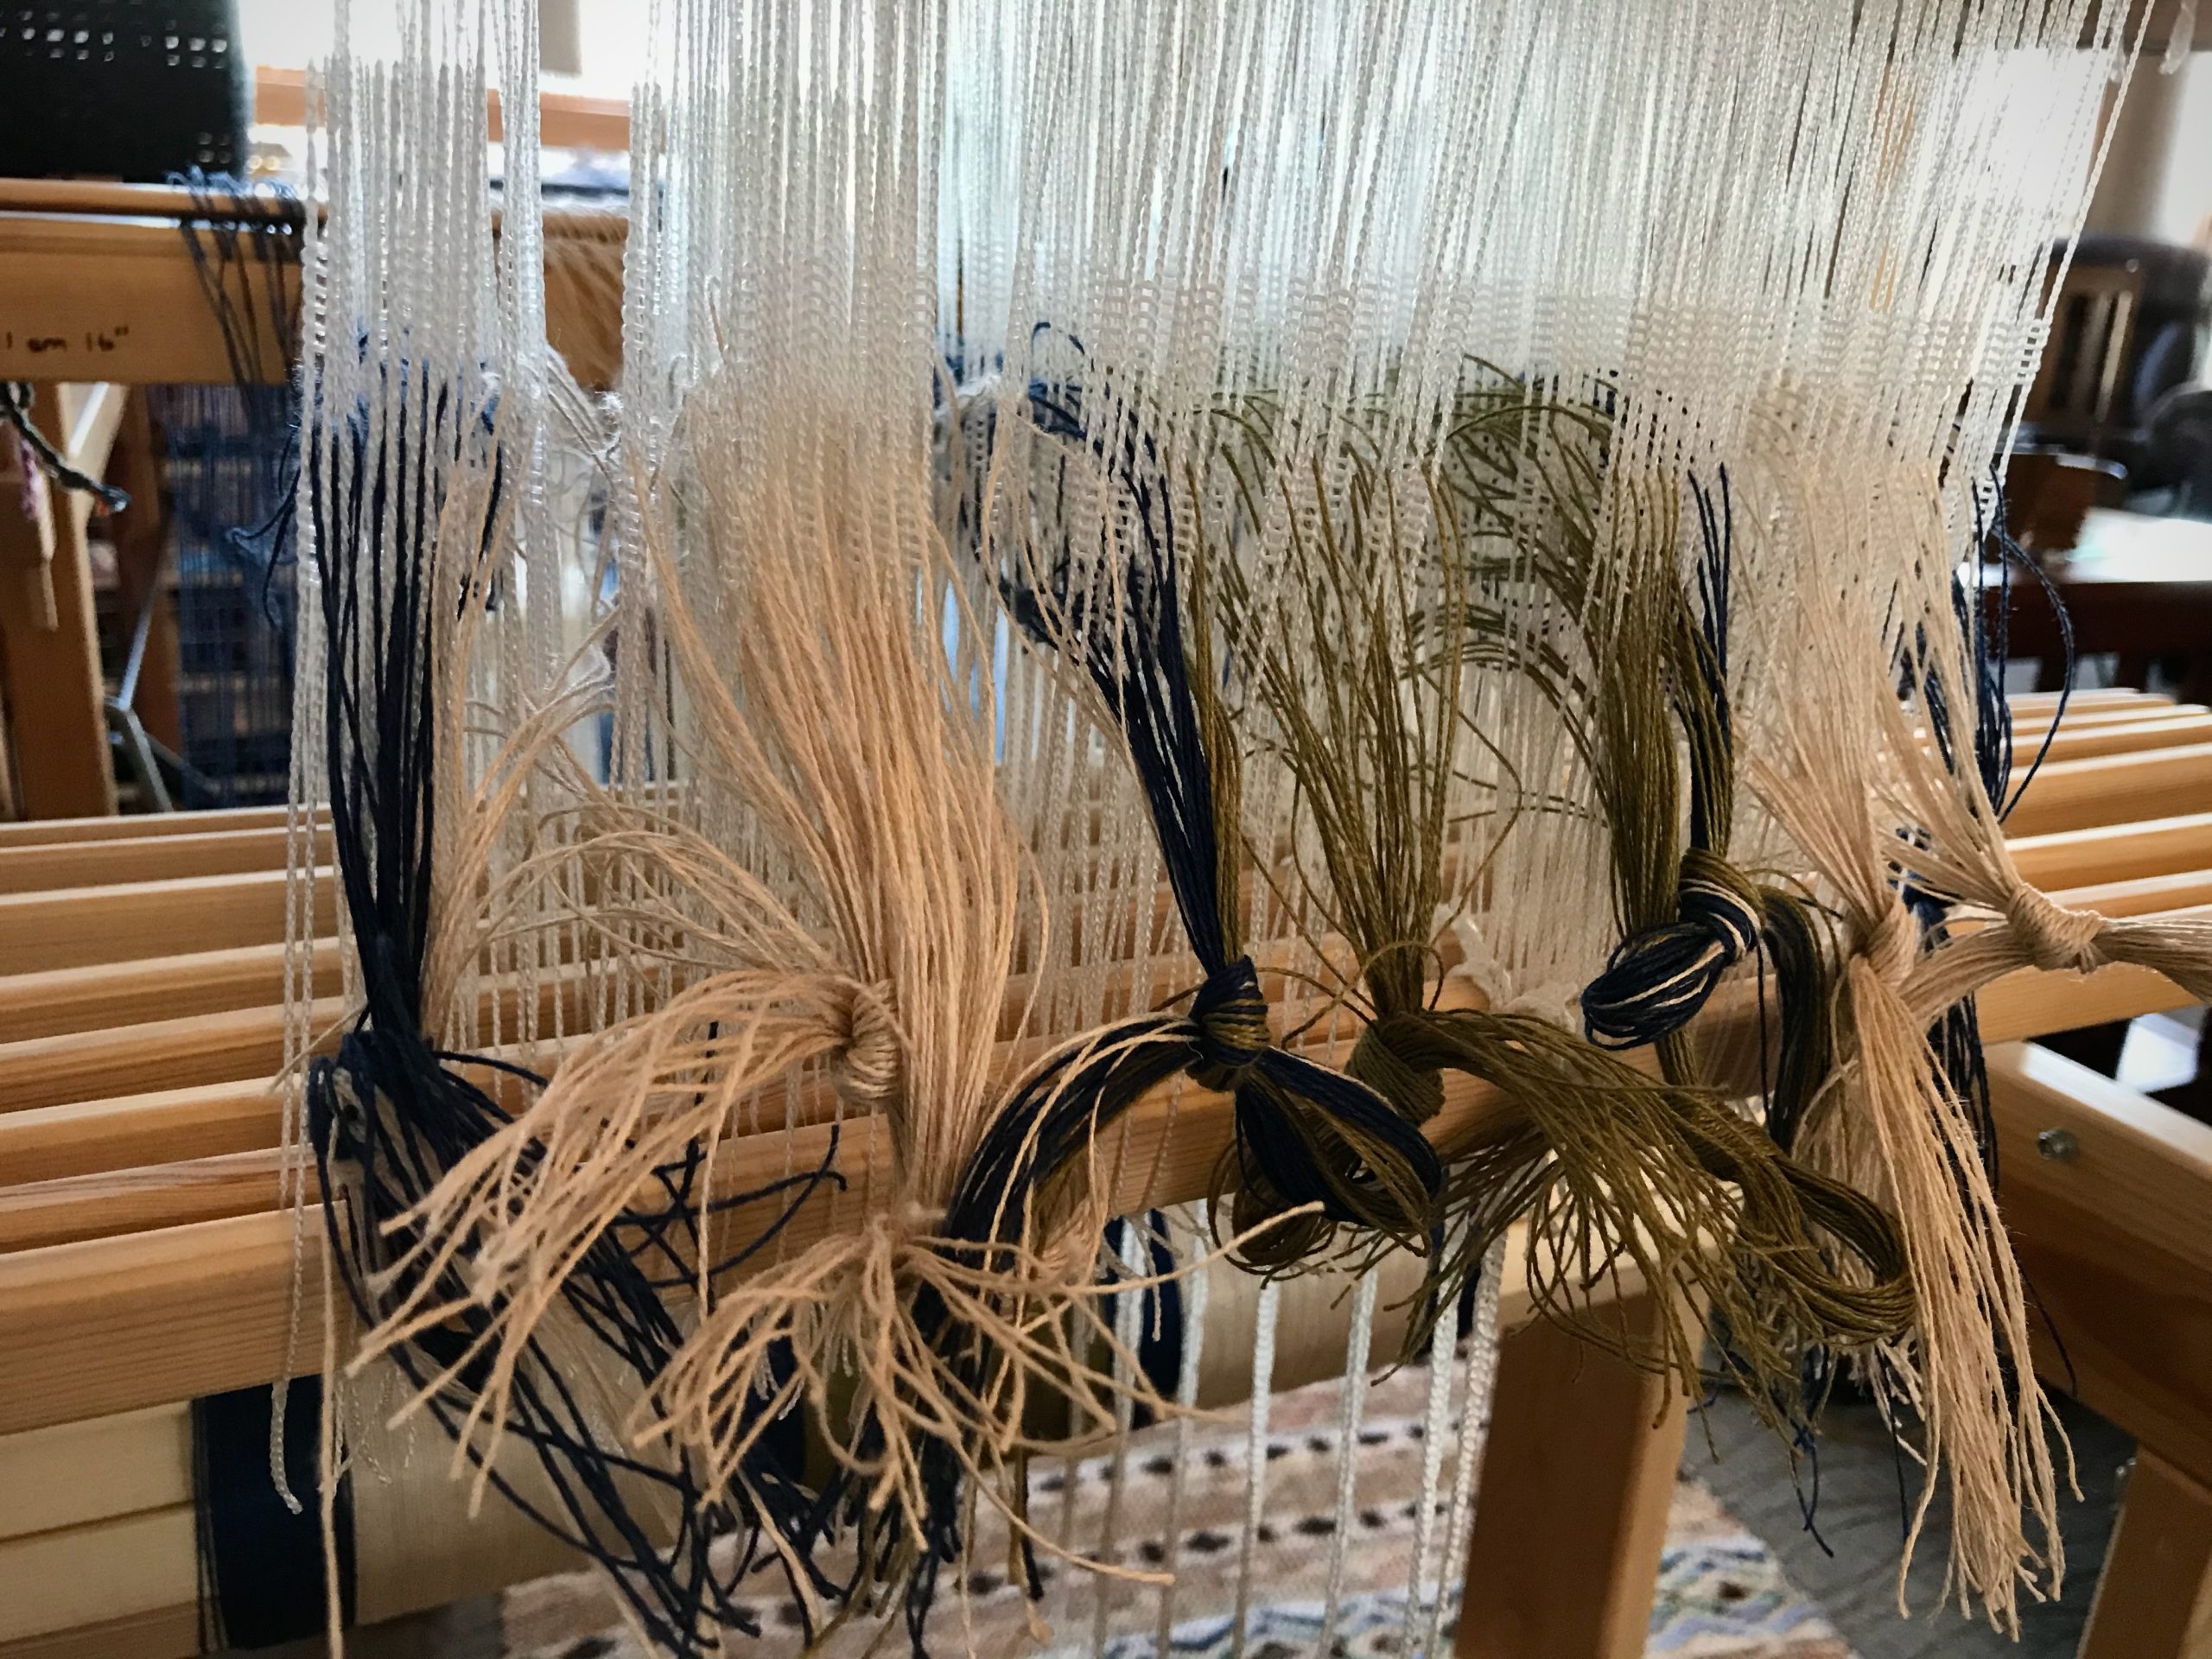
I am thrilled to be dressing the Julia now with 16/2 linen on eight shafts. We will have another linen highlight to grace our home—a table runner for our dining room table.
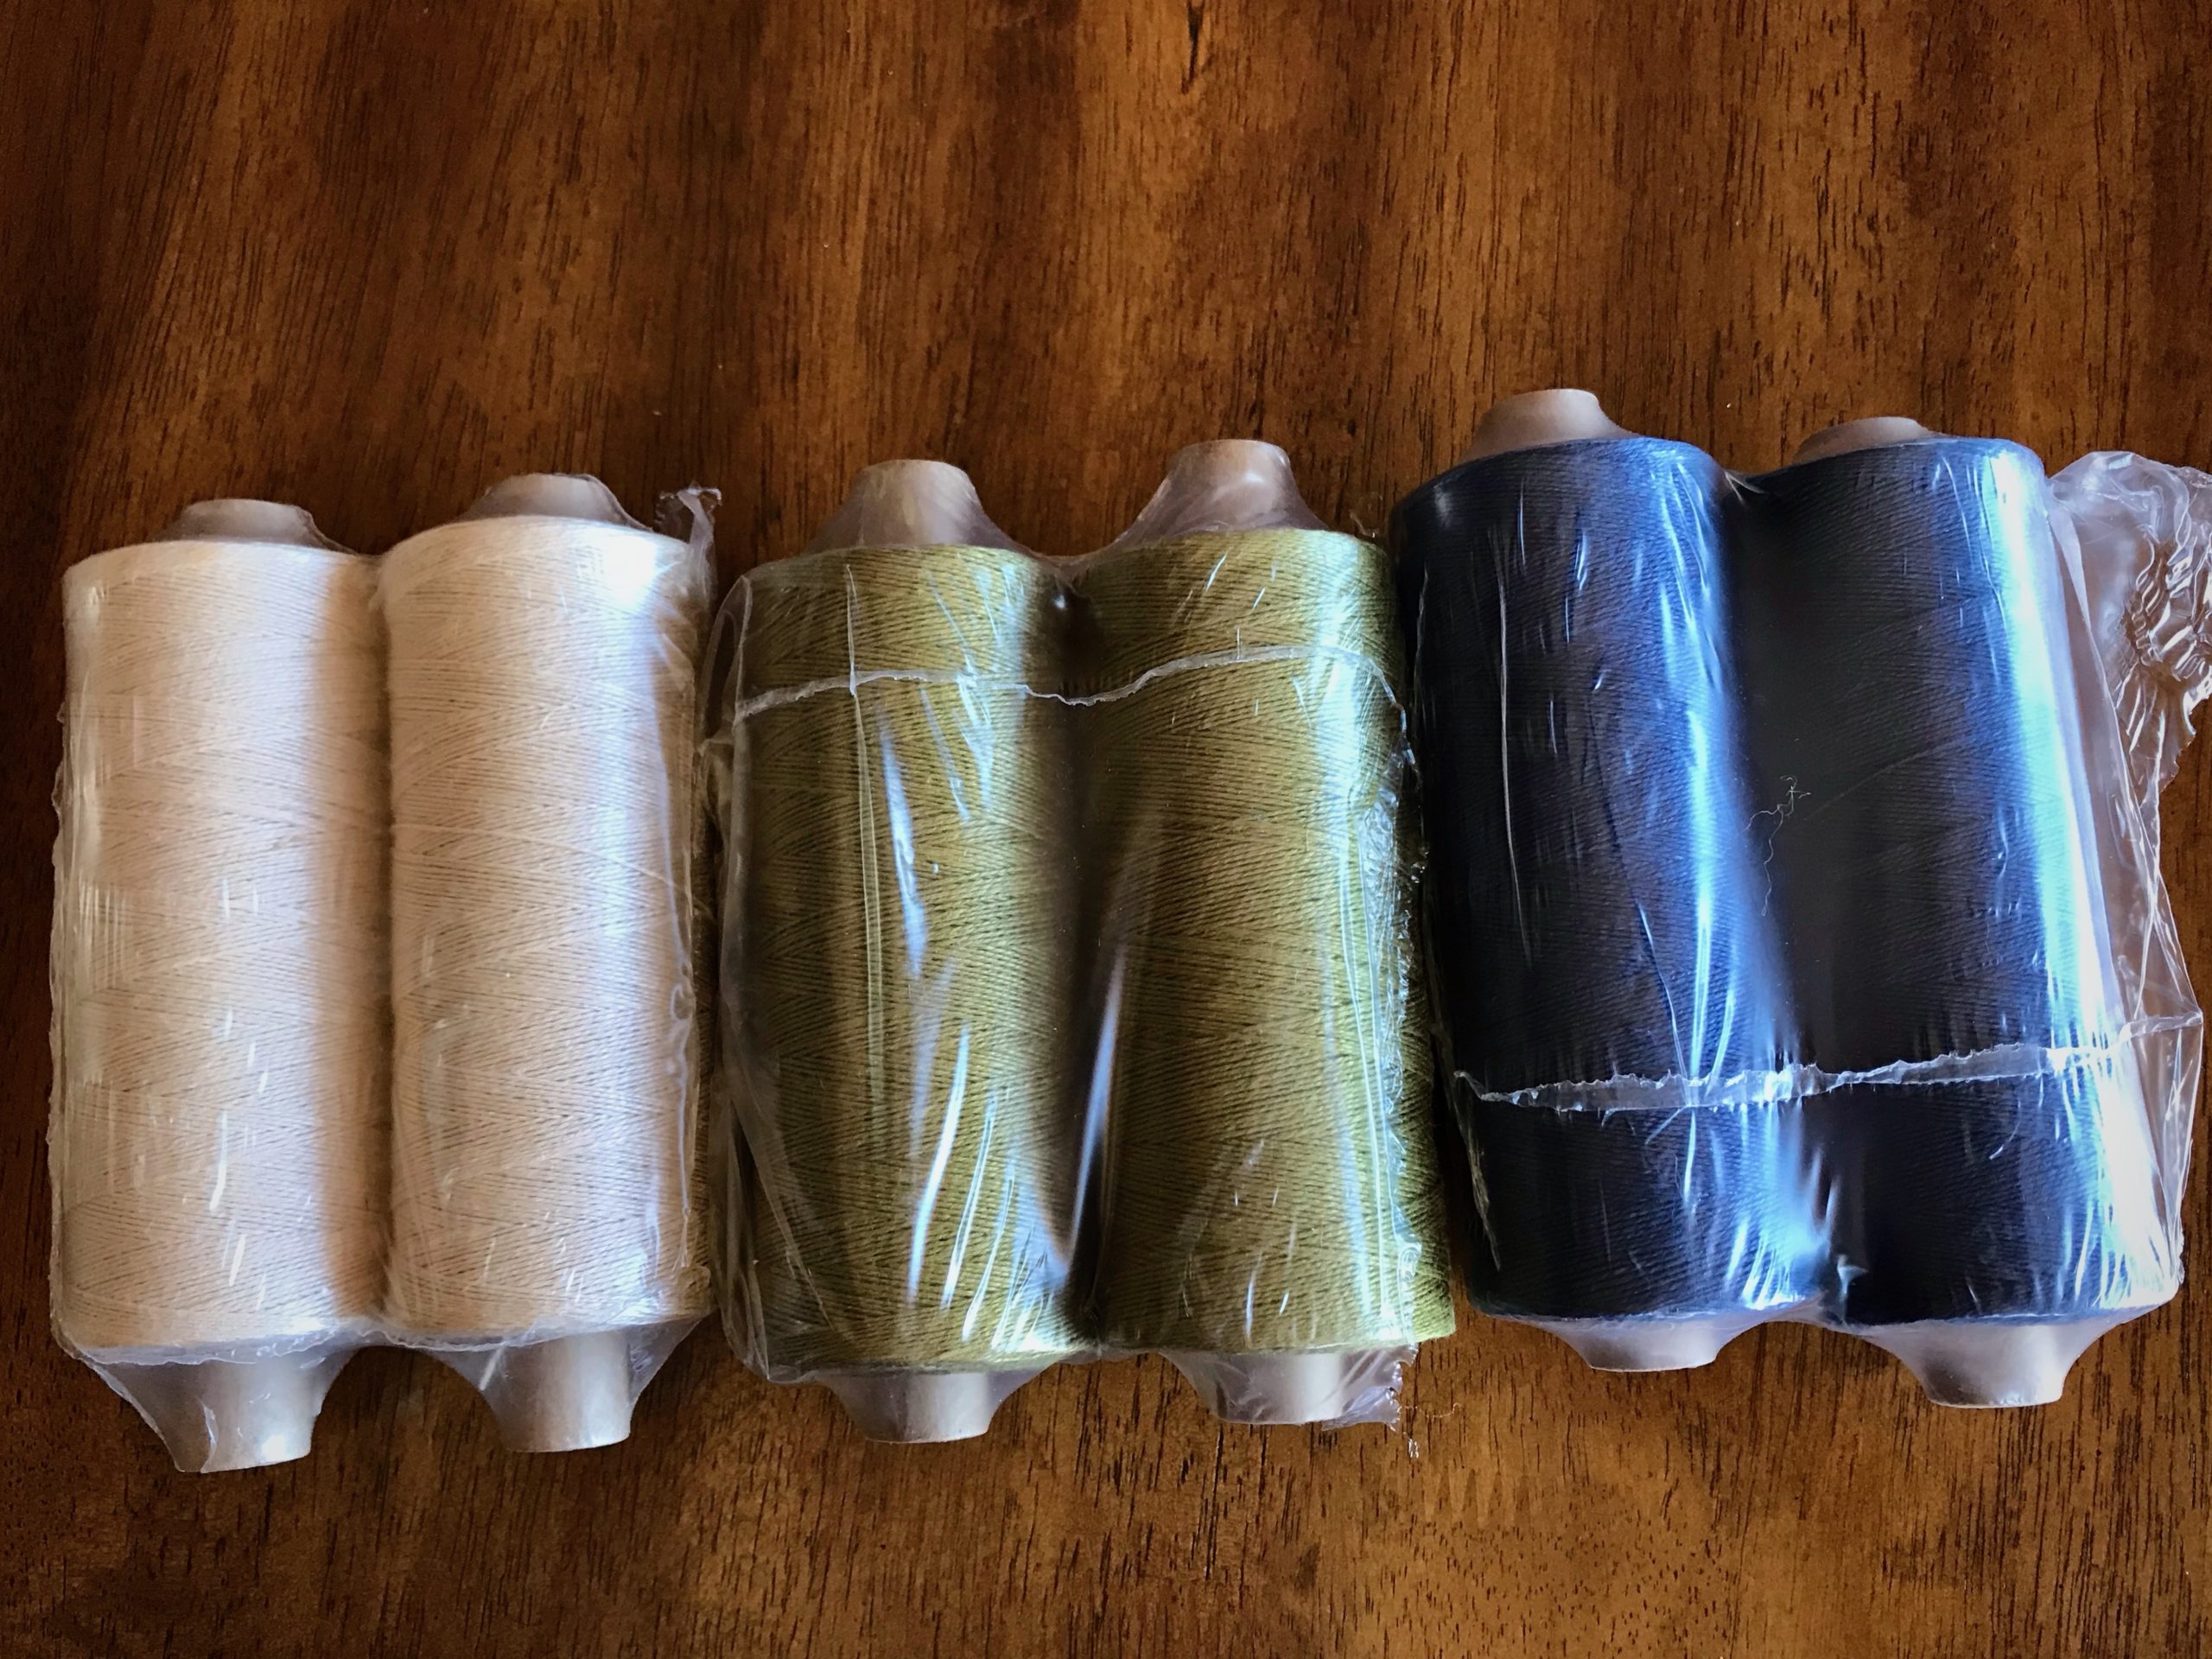
It is a happy day when new tubes of Bockens 16/2 line linen arrive at the door.Winding two threads together at a time on the warping reel.Dividing the warp into three bouts makes it easier to spread and beam the warp with even tension across the warp.Golden bleached linen is a gorgeous backdrop for the olive center section and contrasting midnight blue borders.
Is there anything more vibrant than the sheen of linen saturated with color? And, have you noticed that plain unbleached linen is anything but plain? Linen fills both ends of the spectrum—glowing exuberant color and natural wrinkled humility. Linen, oh, how it sings! There’s always room for more music in the home.
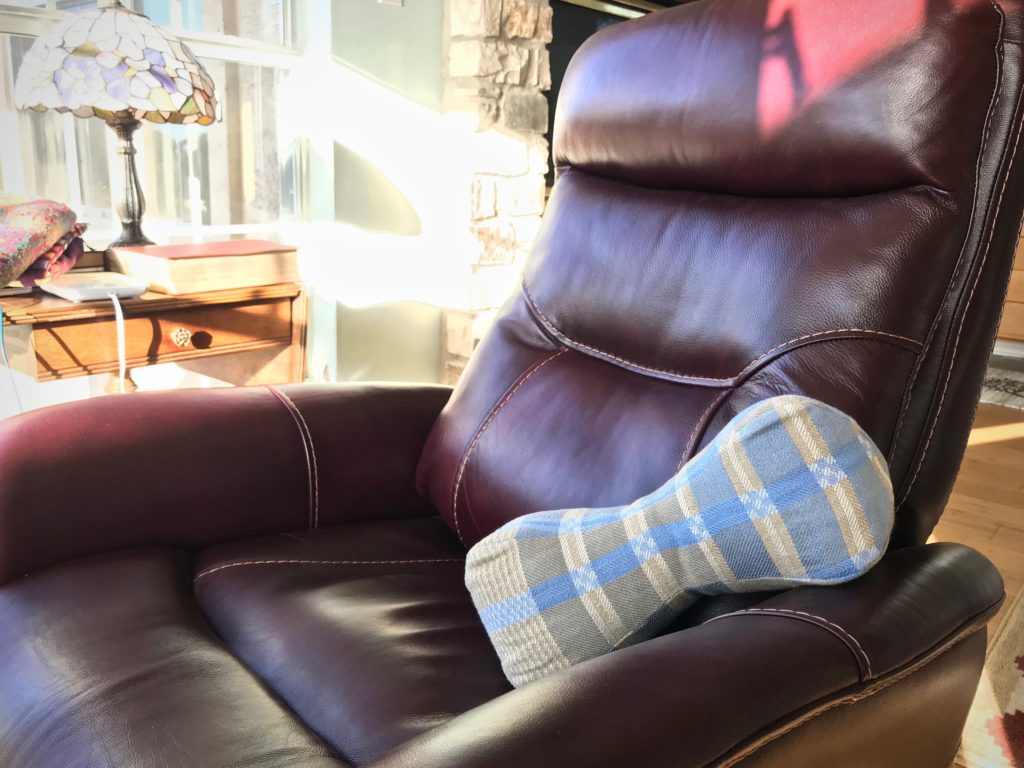
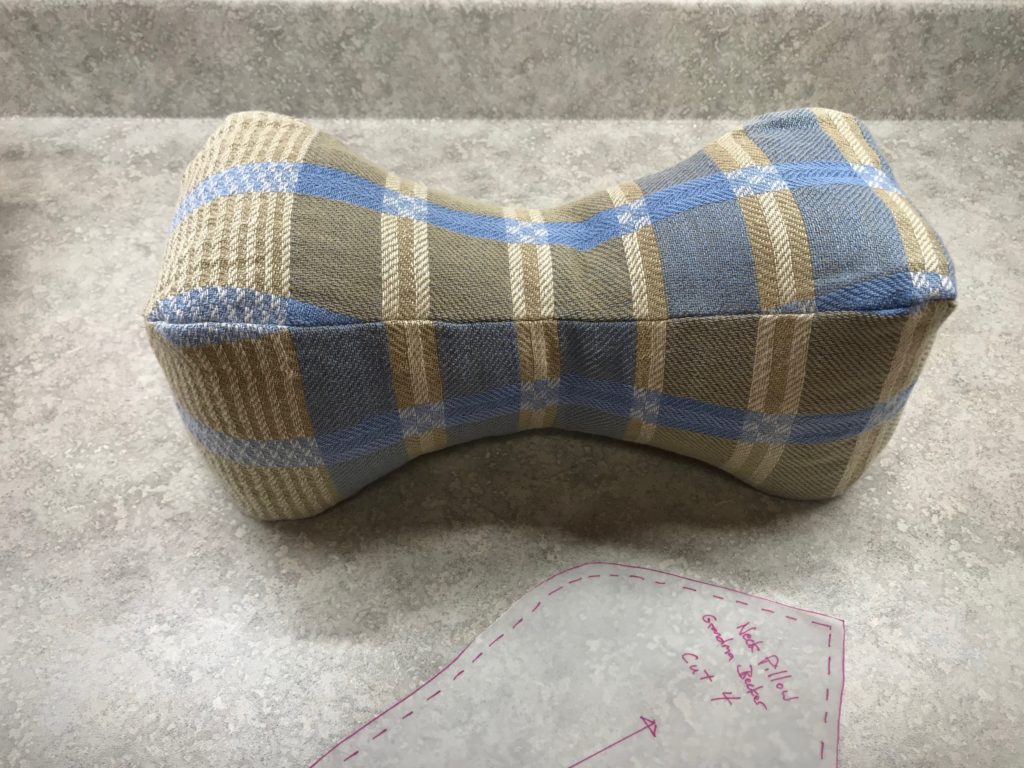
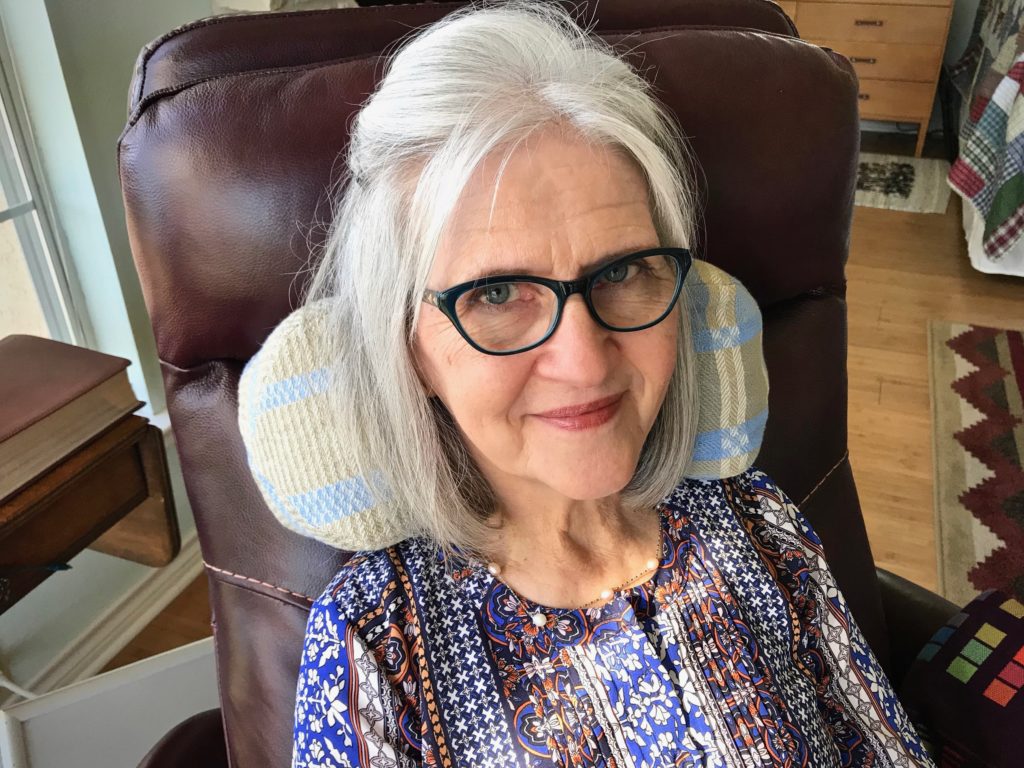
My grandma made a pattern on brown paper for a neck pillow. I suppose she found the pattern in a magazine or newspaper decades ago. I am using my copy of her pattern to make my own neck pillow. Maybe someday my pillow will be as worn and wobbly as Grandma’s well-loved neck pillow that I remember.
My version of Grandma’s neck pillow.
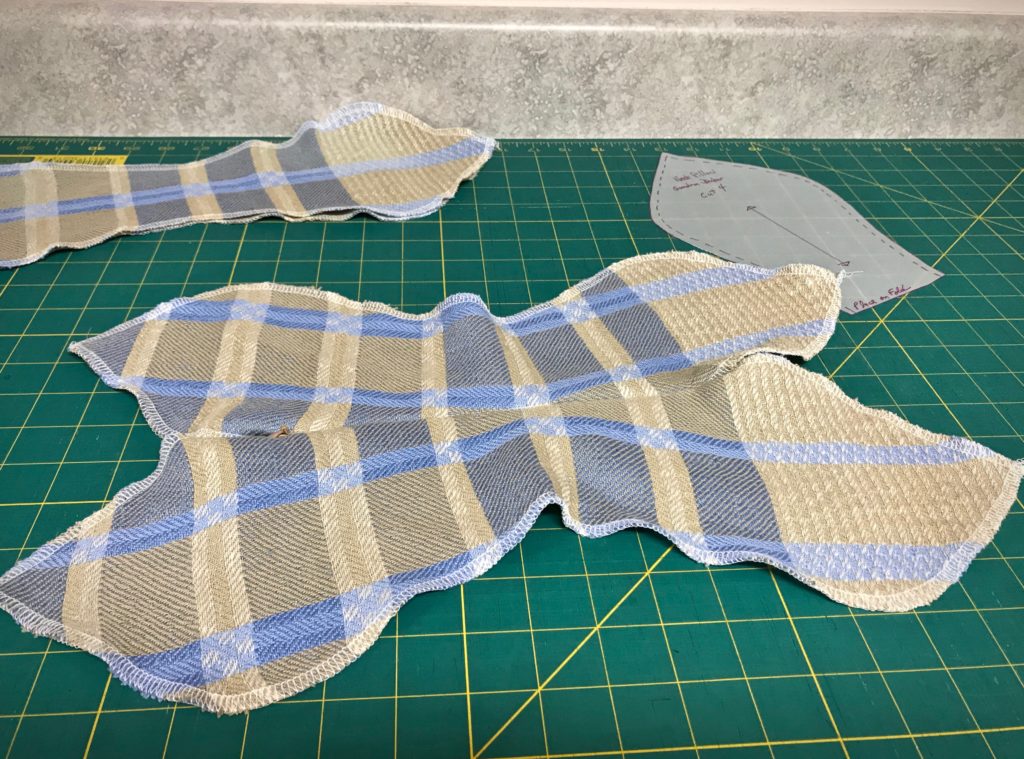
Looking through my pile of handwoven scraps I find the piece of fabric that had been hanging as a Roman shade on the back door of our previous home. This two-block twill in cotton and linen was my first 8-shaft project on my floor loom. Good memories! The fabric, softened and slightly faded through daily use, is perfect for the comfy neck pillow I’m imagining. (Unlike Grandma’s pillow, I’m making this one with a removable cover so it can be easily laundered.)
Roman shade from my first 8-shaft weaving project. I wove the linen draw cord on my two-treadleband loom.
Instructions for Constructing a Handwoven Neck Pillow
Supplies:
Cotton muslin, pre-washed
Handwoven fabric, pre-washed
Cluster Fluff, or other cluster fill or polyester fiberfill
7” invisible zipper
Sewing machine
Invisible zipper foot
Sewing thread
Hand-sewing needle
Iron
Sleeve board for pressing, optional
Steps:
Cut four pillow pattern pieces from the muslin.
Sew two of the muslin pieces together, right sides together. Press seams open.
Sew the other two muslin pieces together, right sides together. Press seams open.
Sew the two parts together, right sides together, leaving a 4-inch opening for turning and stuffing. Press seams open using a sleeve board.
Turn the pillow right side out.
Stuff with Cluster Fluff, starting at the furthest end from the opening. Fill to desired fullness.
Hand stitch the opening closed.
Cut four pillow pattern pieces from the handwoven fabric.
Serge or zigzag the fabric edges. Press flat.
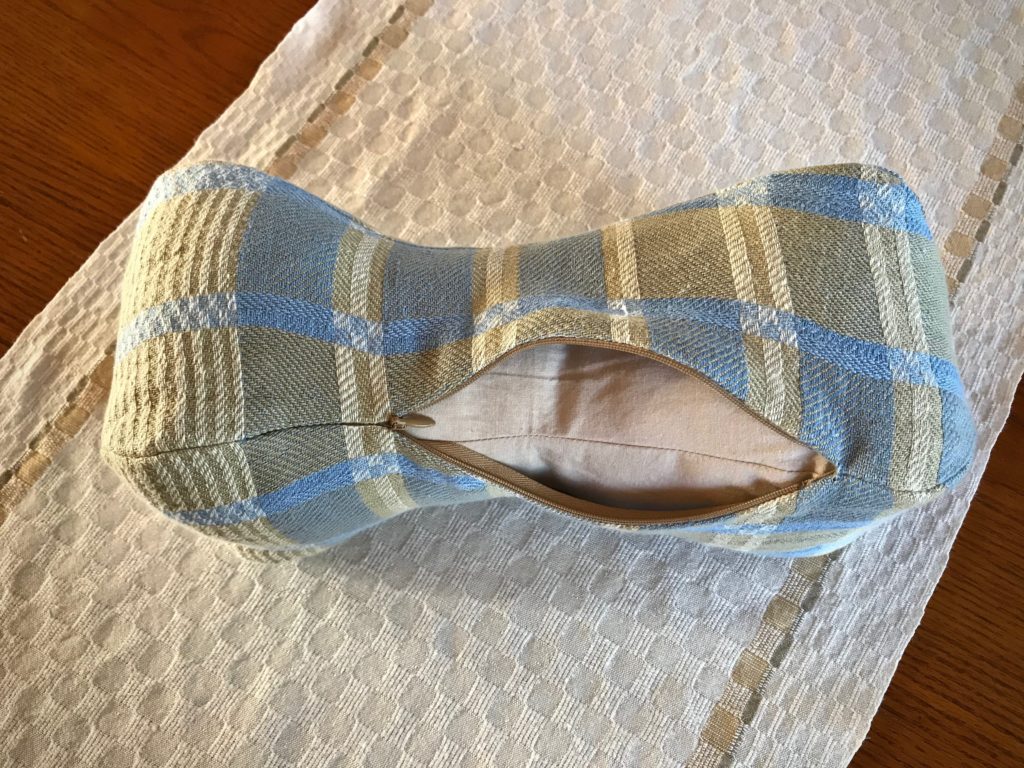
Insert invisible zipper between two of the pieces.
Invisible zipper is sewn into place between two of the panels.
Complete the seams at both ends of the zipper. Press seams open.
Sew the two other pieces together, right sides together. Press seams open.
Open zipper, and sew the two parts together, right sides together. Press seams open using a sleeve board.
Turn the pillow case right side out.
Push the muslin pillow into the pillow case. Close the zipper.
Inner pillow and outer cover are made from the same pattern to make it a snug fit.Fabric is 16/2 cotton warp and 16/1 linen weft.
Take a nap in your favorite chair with the pillow behind your neck.
If you would like a pdf copy of my grandma’s neck pillow pattern, please click HERE to send me an email request. I will be happy to send the pattern to you.
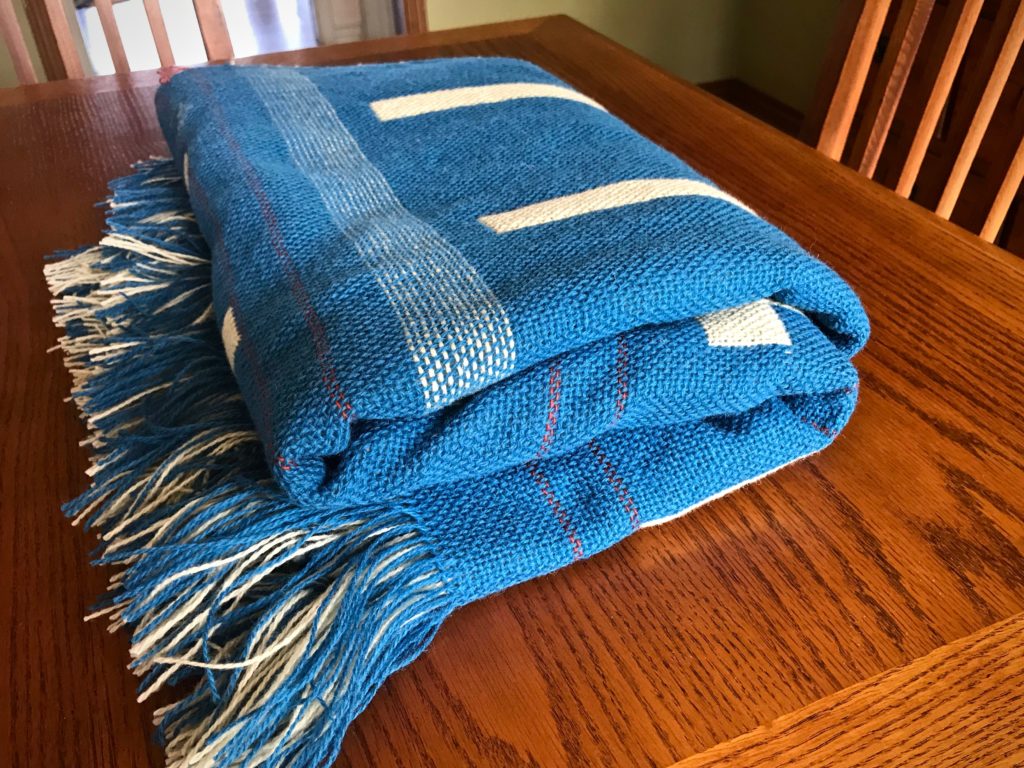
It took me seven years of study, practice, and mistakes to complete this rigorous Swedish weaving curriculum! You have been with me through much of it right here. I’m talking about The Big Book of Weaving, by Laila Lundell. I made it through the book, sequentially, page by page, warp by warp. 43 warps in all! Remember the blue 12-shaftdouble-weave blanket I had on the loom in June? That is the final project in the book.
Double-weave wool fabric is ready for wet finishing, where it will be transformed into a soft, cozy blanket.
In the short video below, each completed project is presented in order in our Texas hill country home. Watch to the end to see the blue blanket in all its finished glory.
For nitty-gritty details, check out The Big Book of Weaving tab at the top of the page.
Getting lost and absorbed in the whole process of weaving.
V. Favorite project: Old-Fashioned Weaving / Monksbelt (at 4:46 in the video)
Are we determined students of heavenly things? Oh, to know God’s will! Study what’s written, don’t lose heart, eyes on the prize, no option besides completion through Jesus Christ. One life dedicated to know him. Day by day, warp by warp, the Grand Weaver teaches us. We can know God’s will.