Quiet Friday: Finally Finished

Finish the finishing, please. I always have a pile of handwovens that need finishing. Don’t you? The finishing smorgasbord includes repairing skipped threads (unintentional floats), securing ends, fringe treatments, hemming, wet finishing, pressing, adding hanging tabs, embellishments, and more. You know you are finally finished when your handiwork is being used and enjoyed.

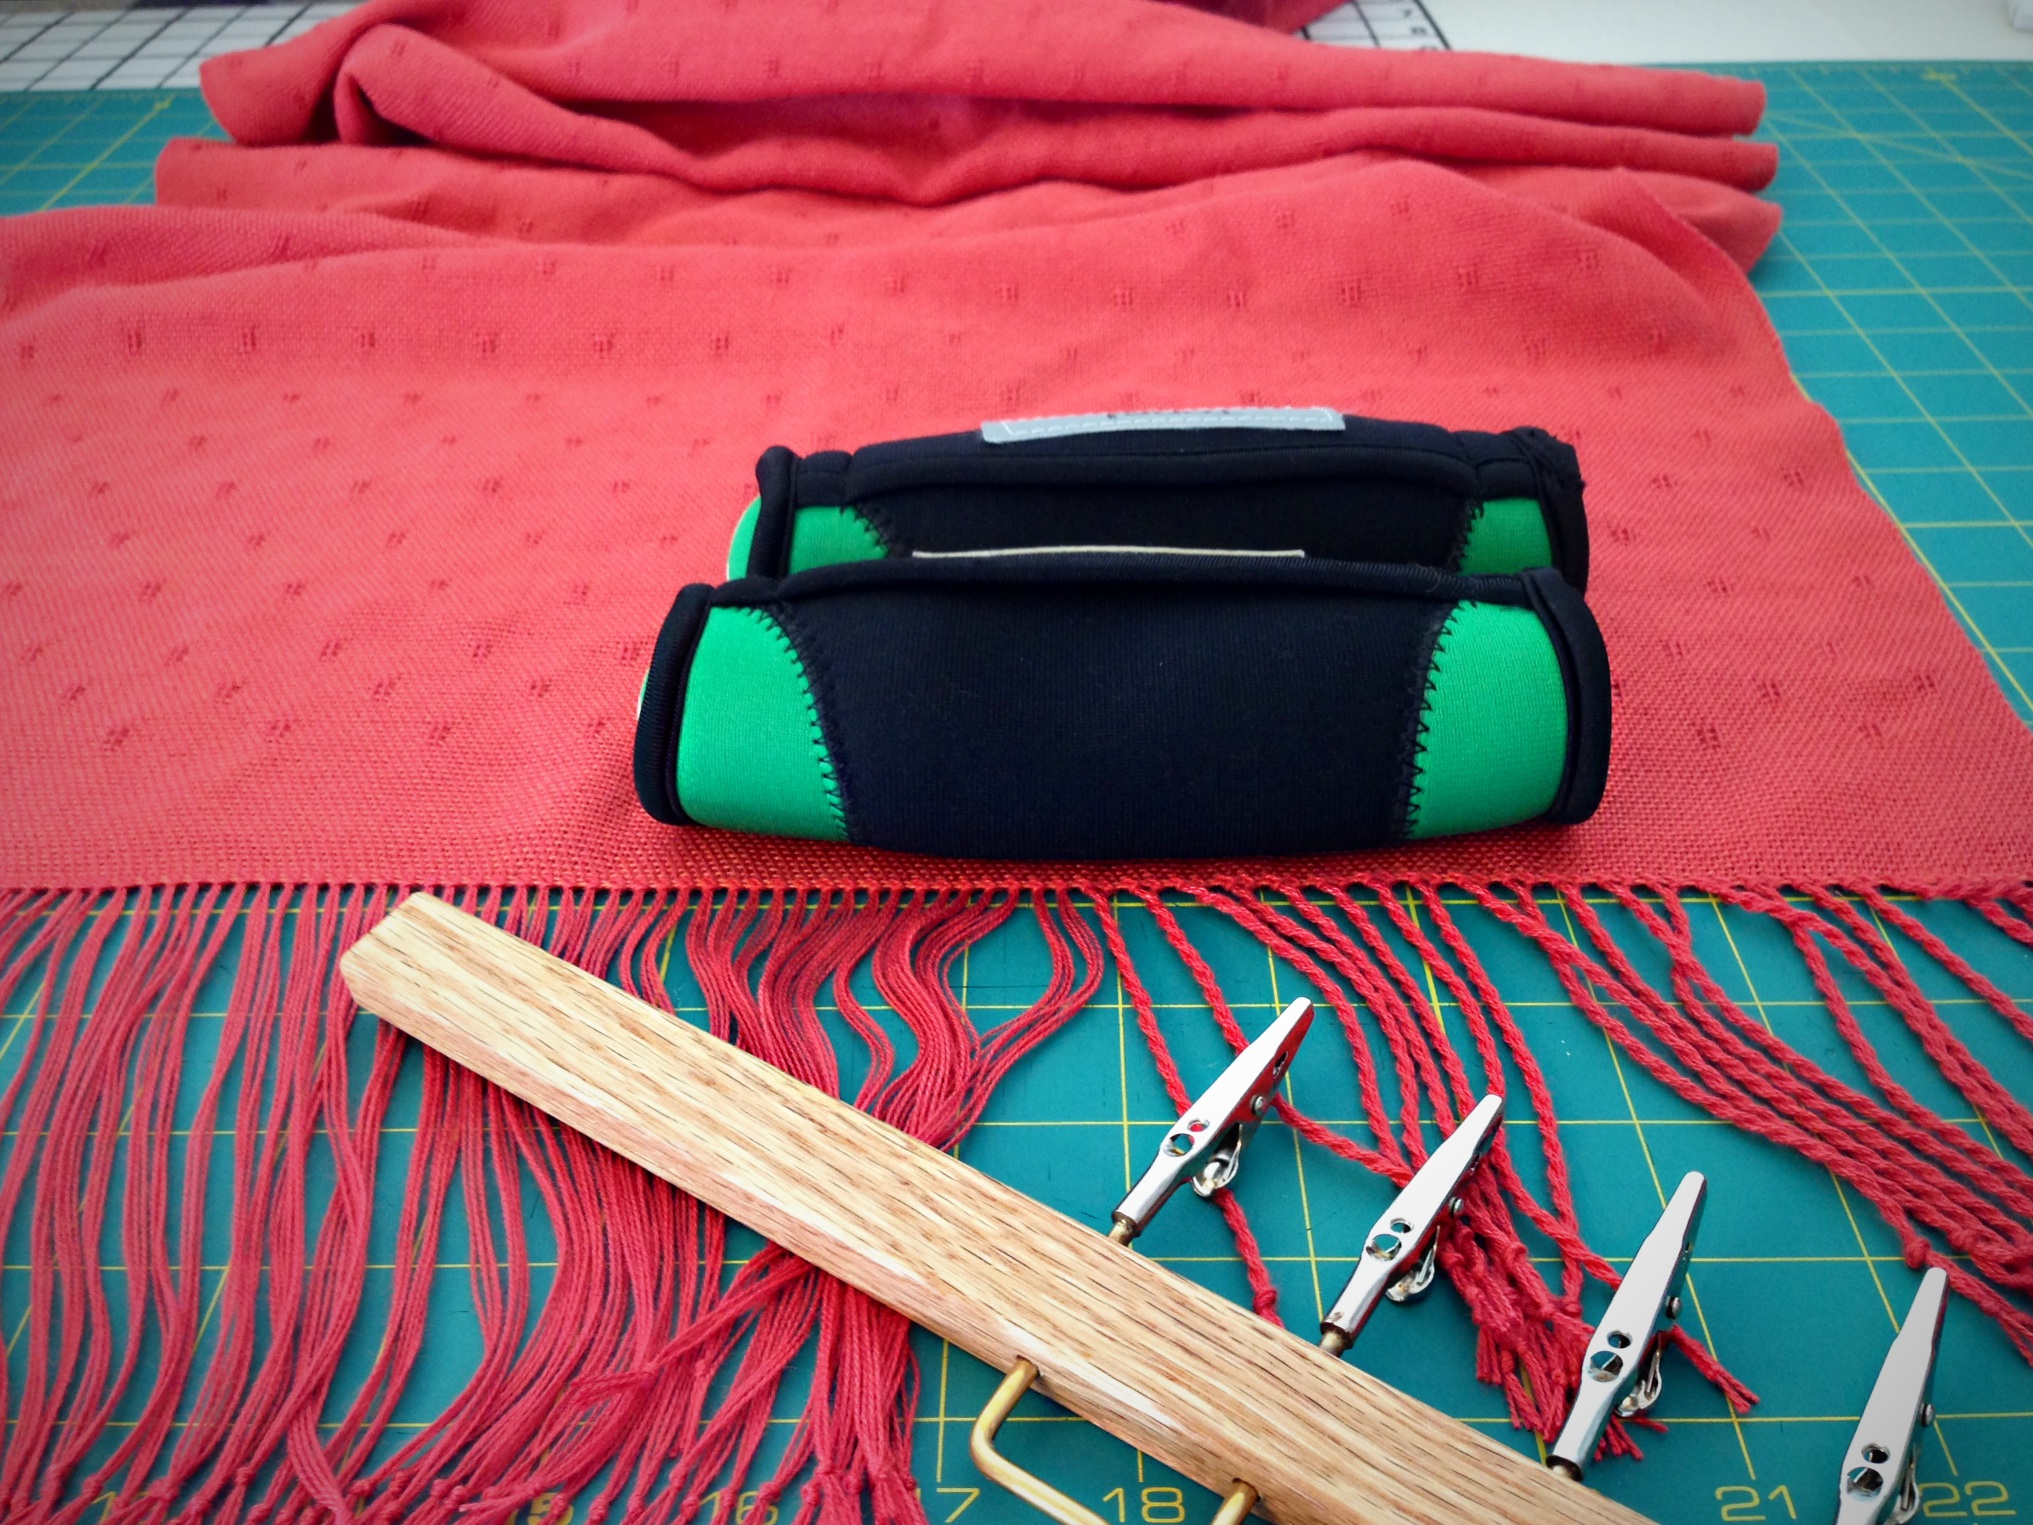
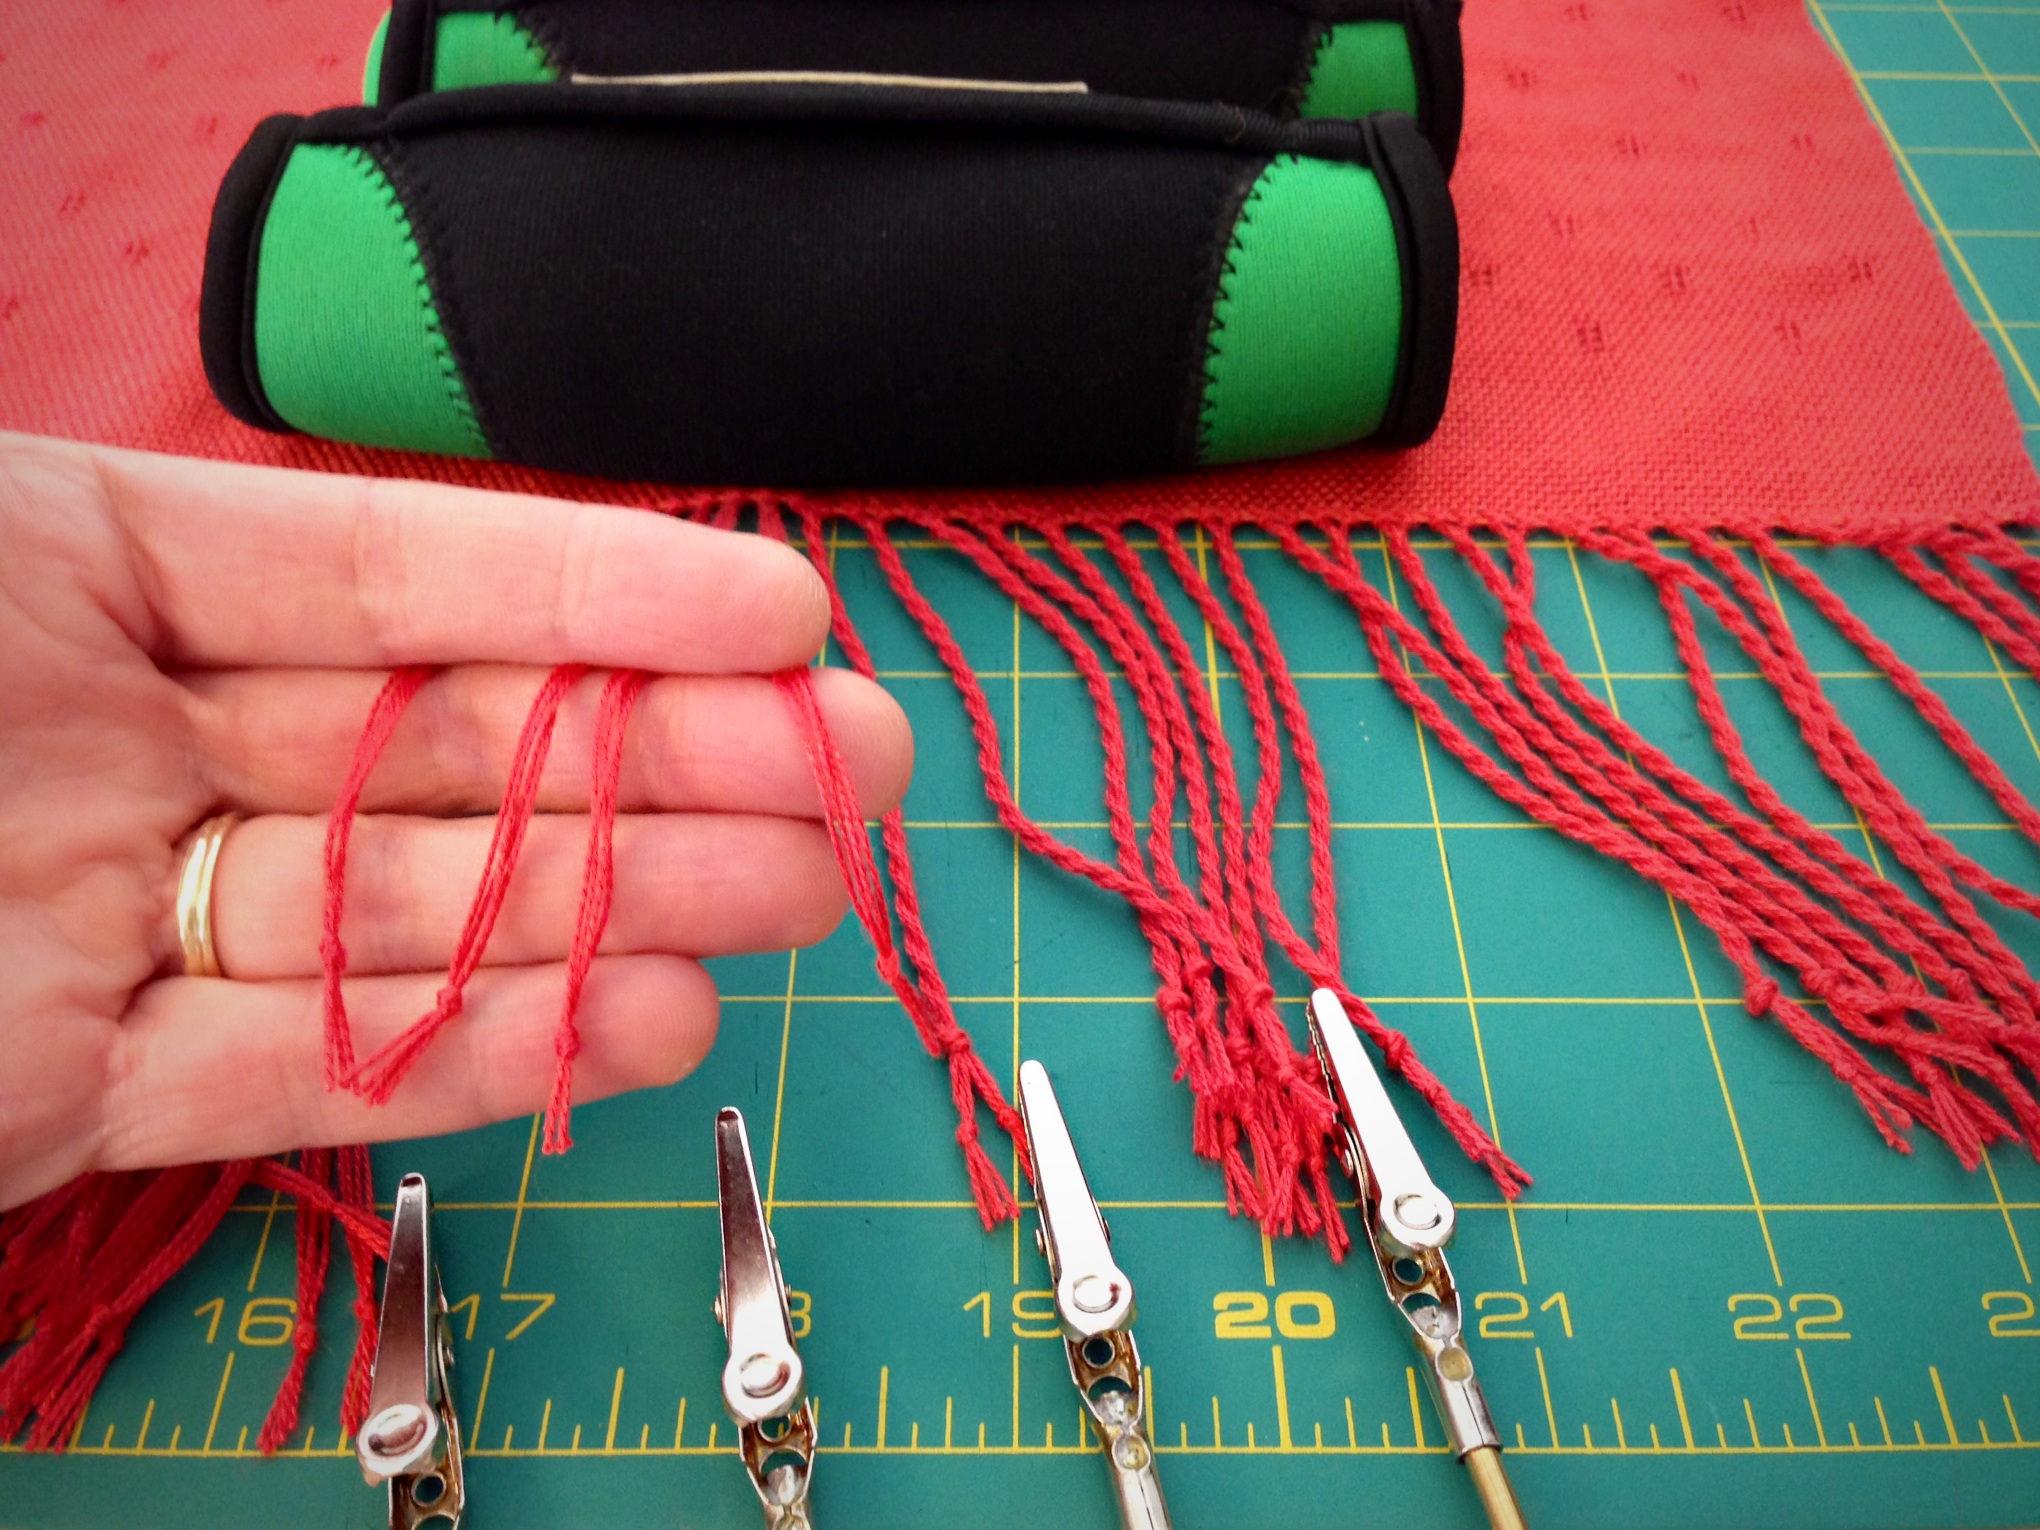
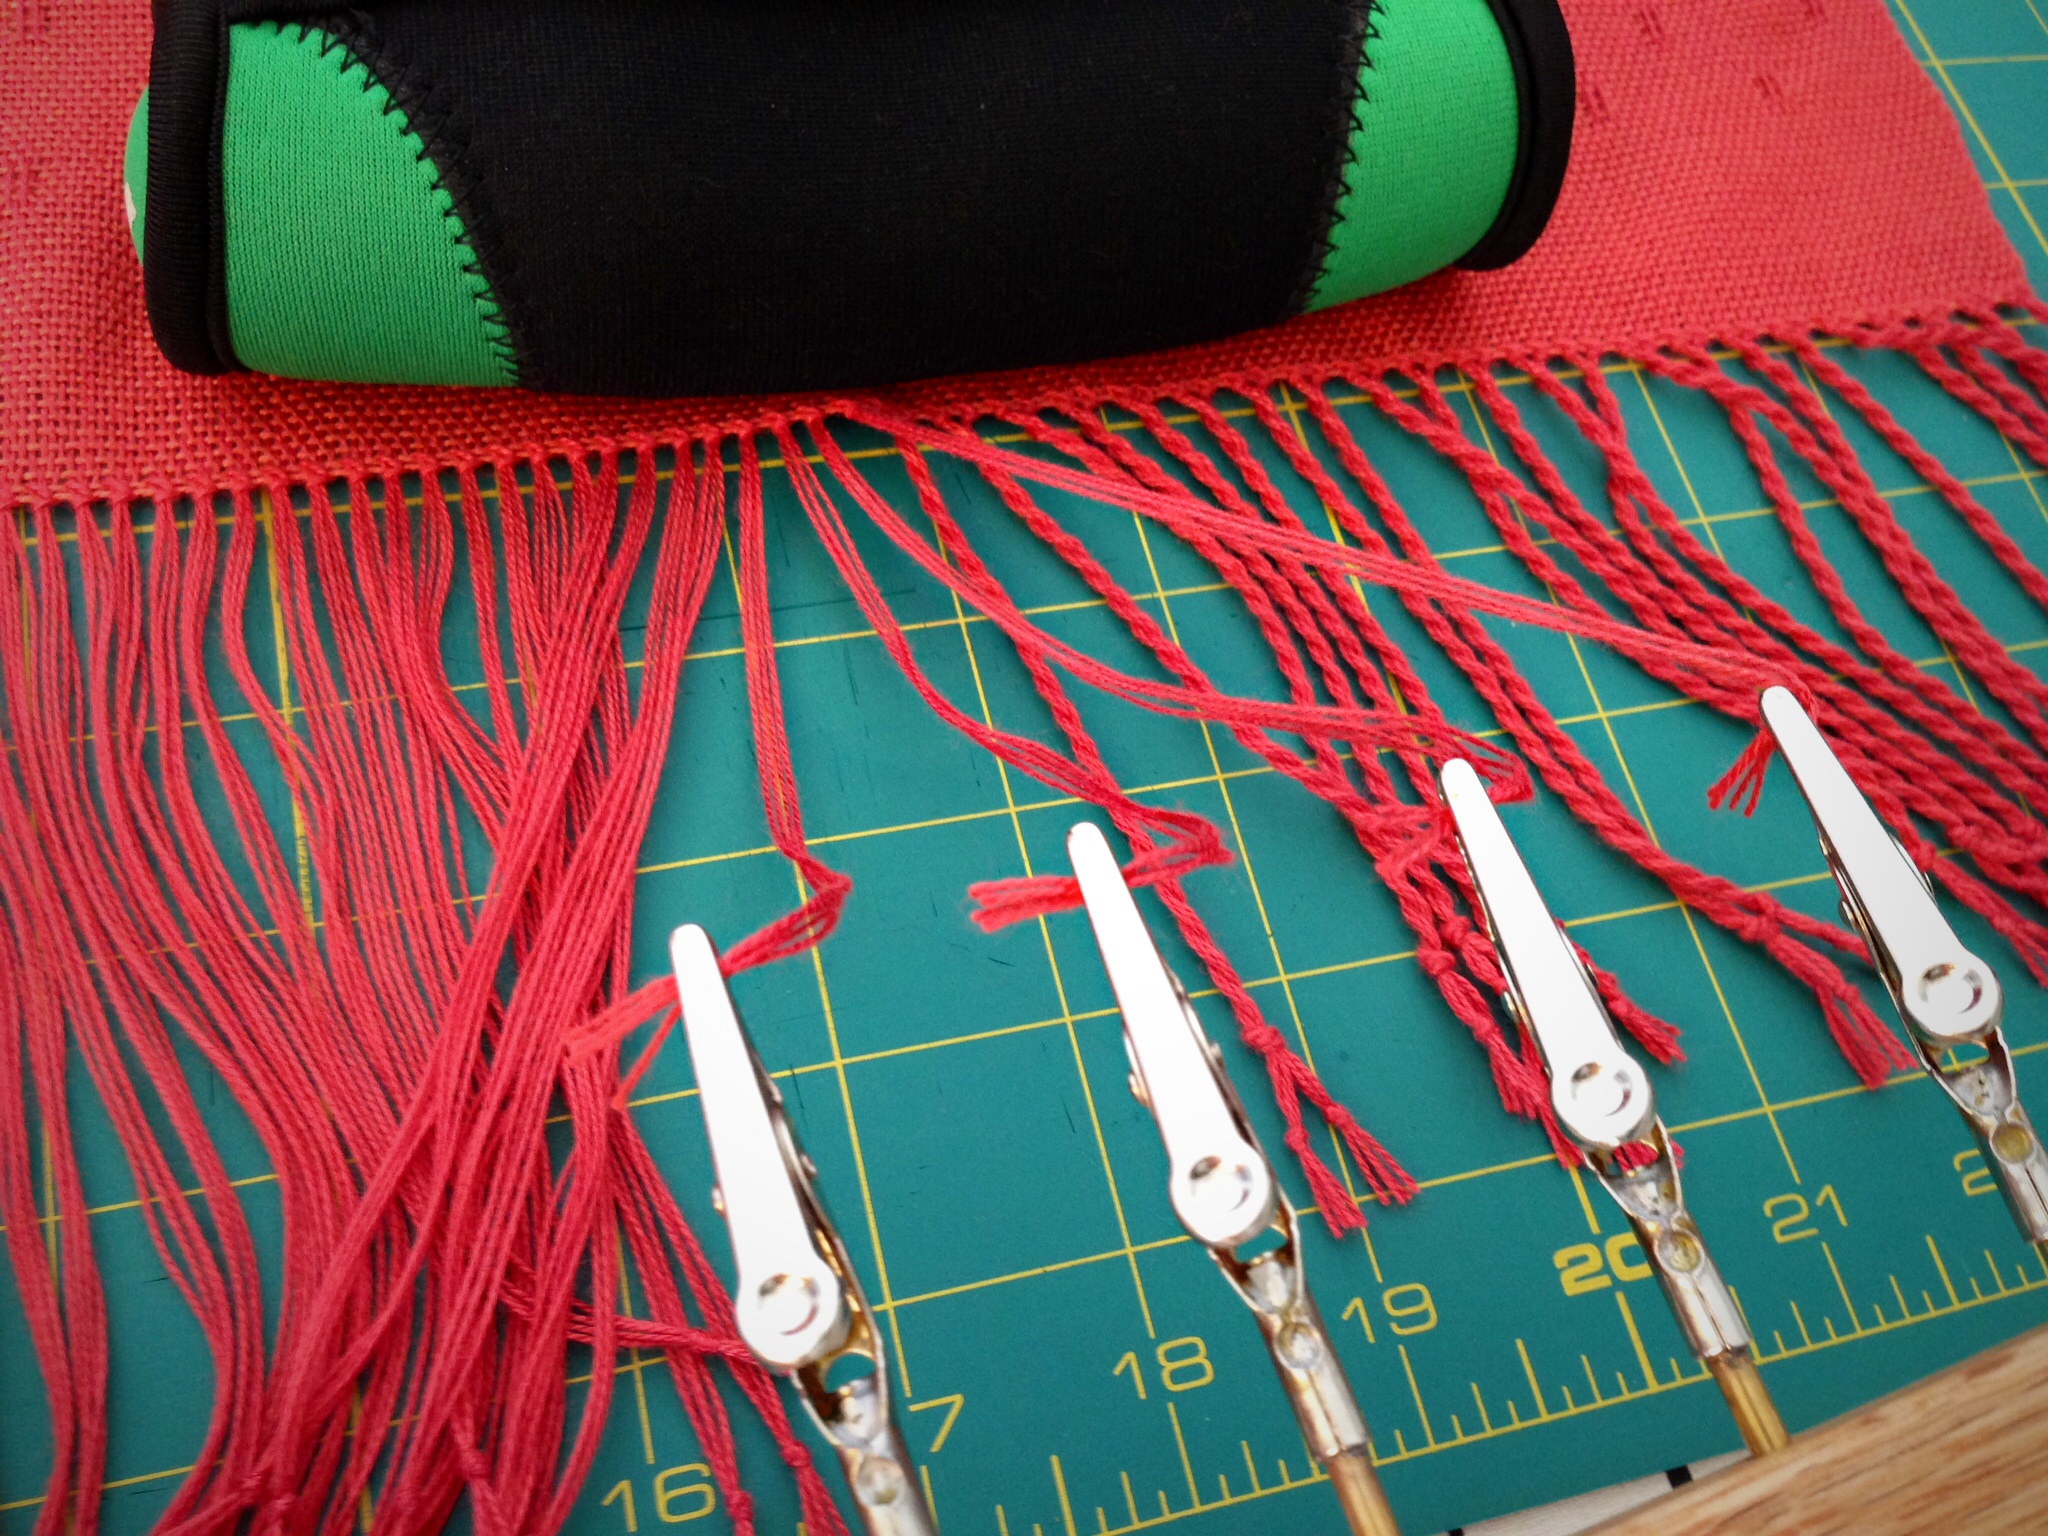
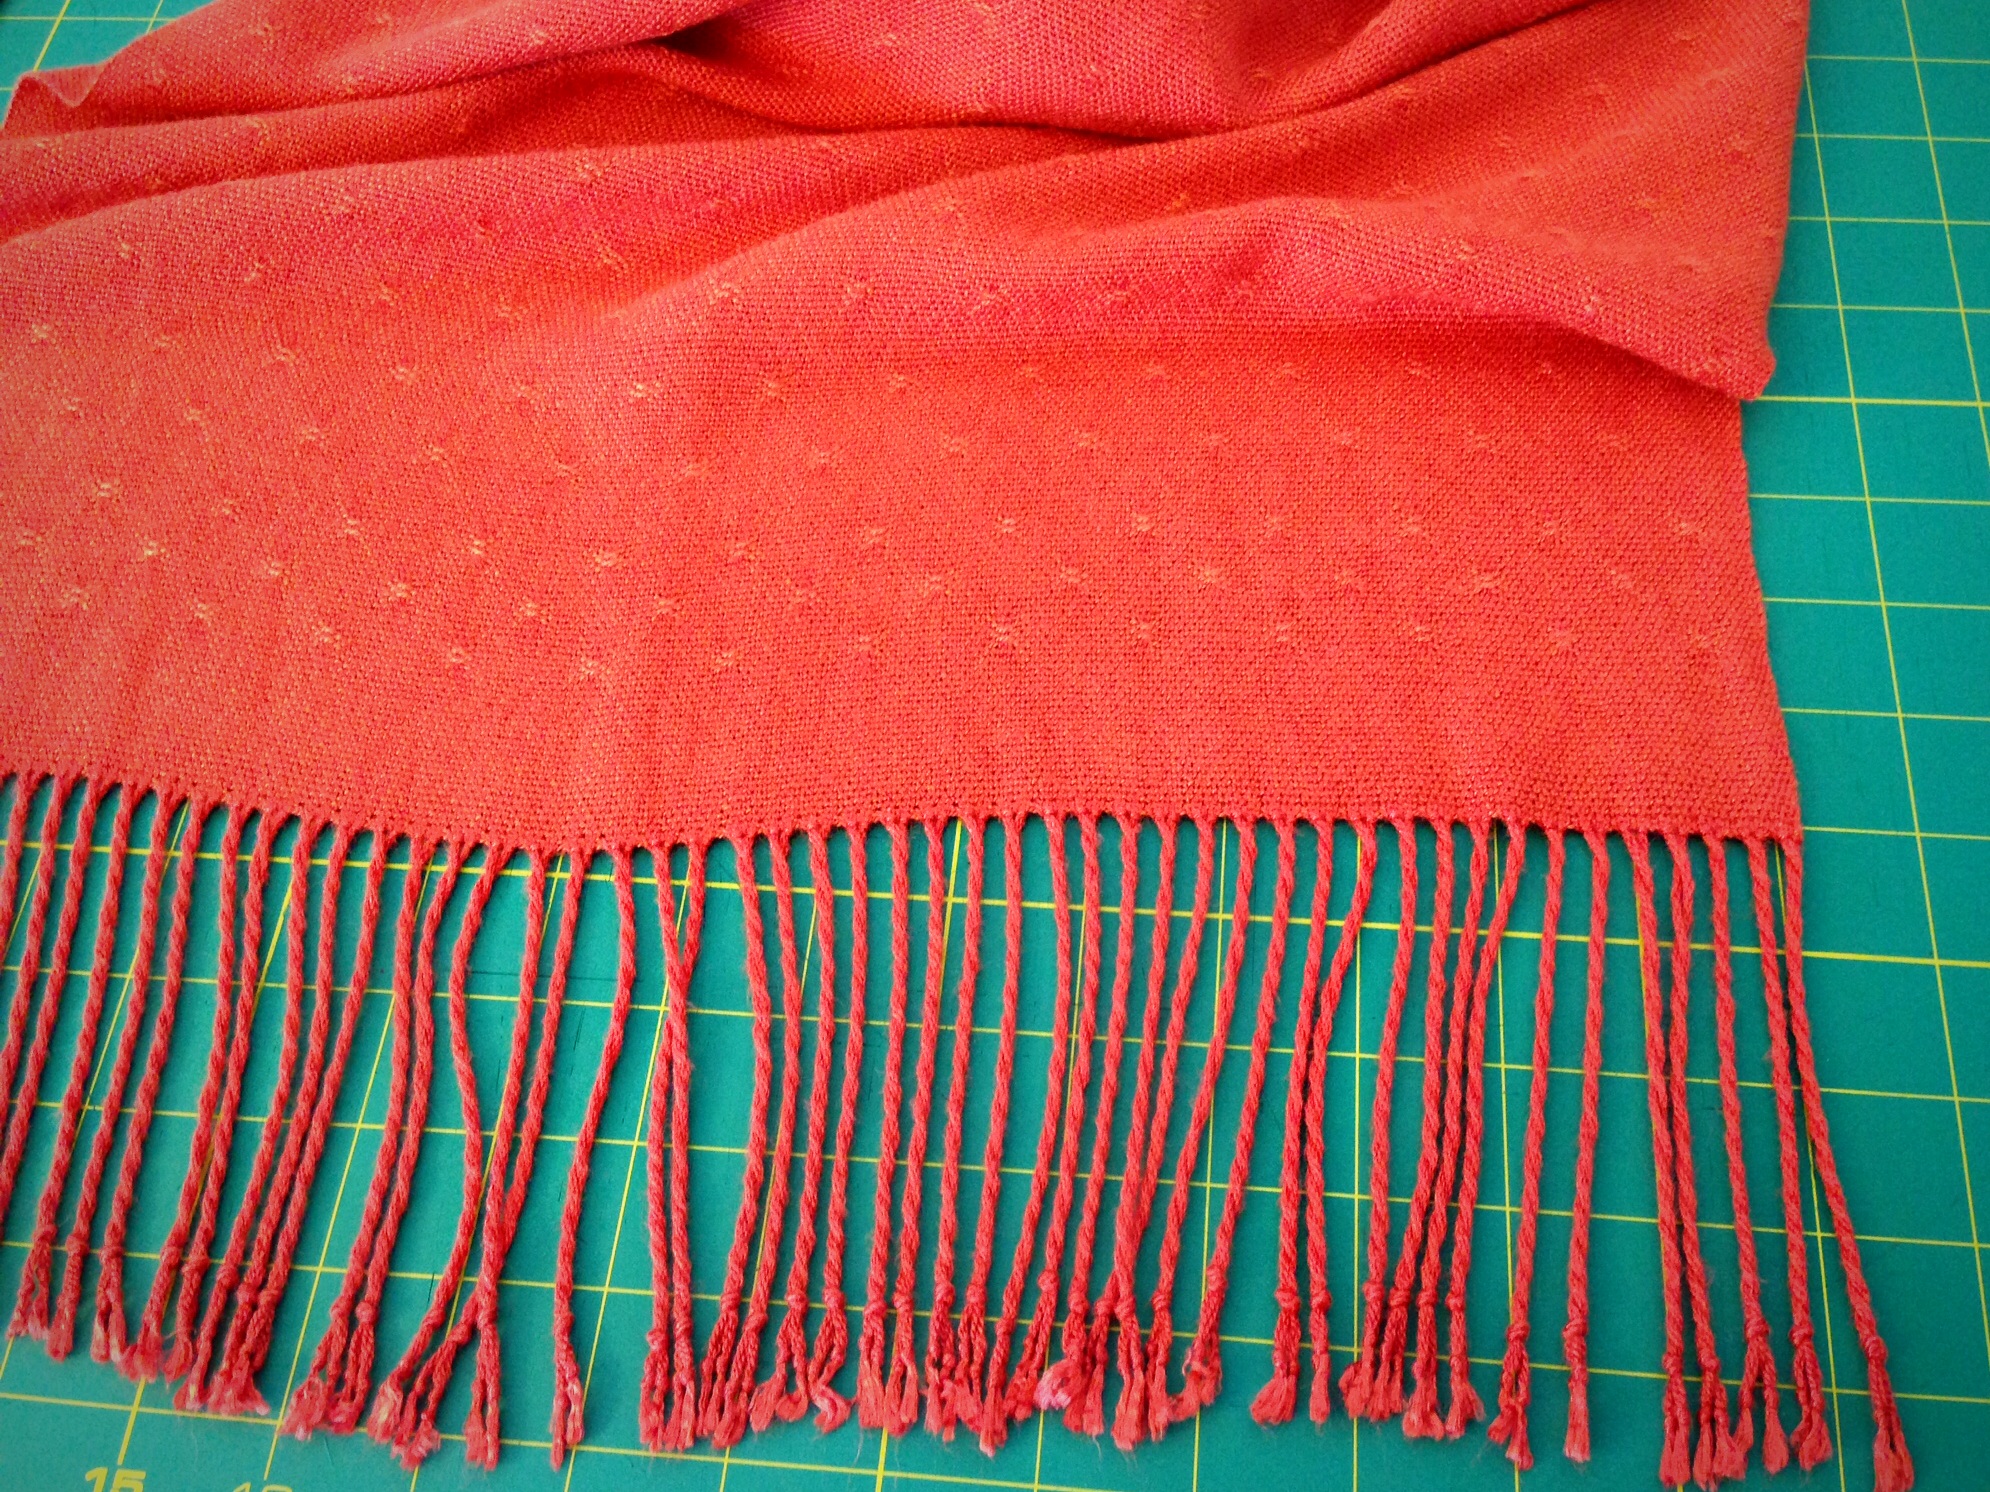
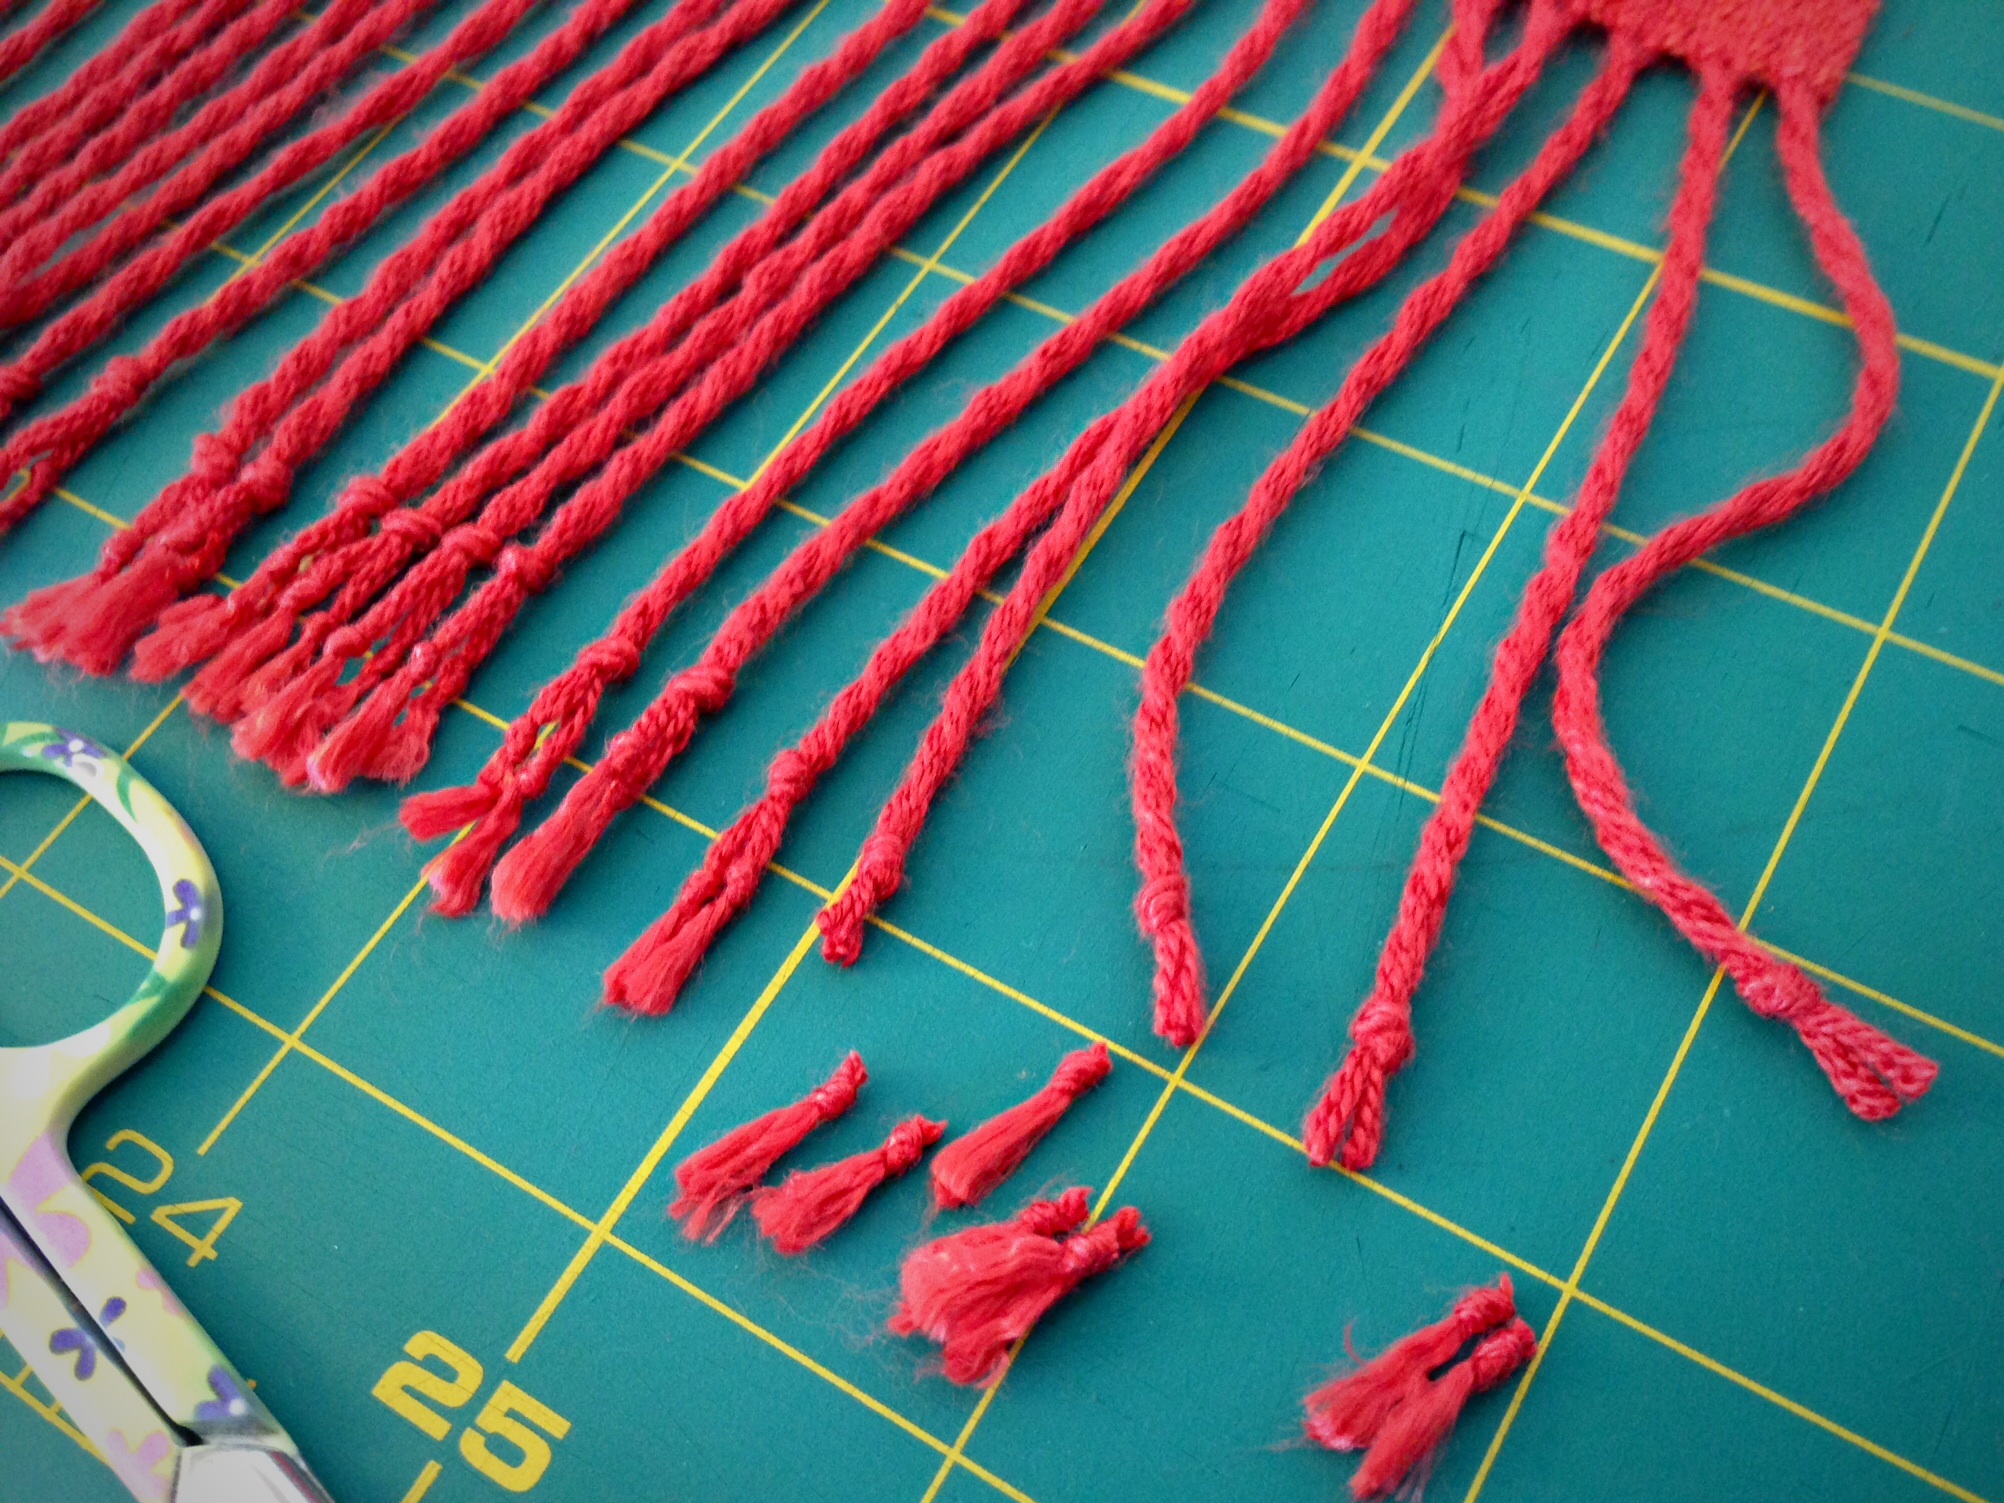
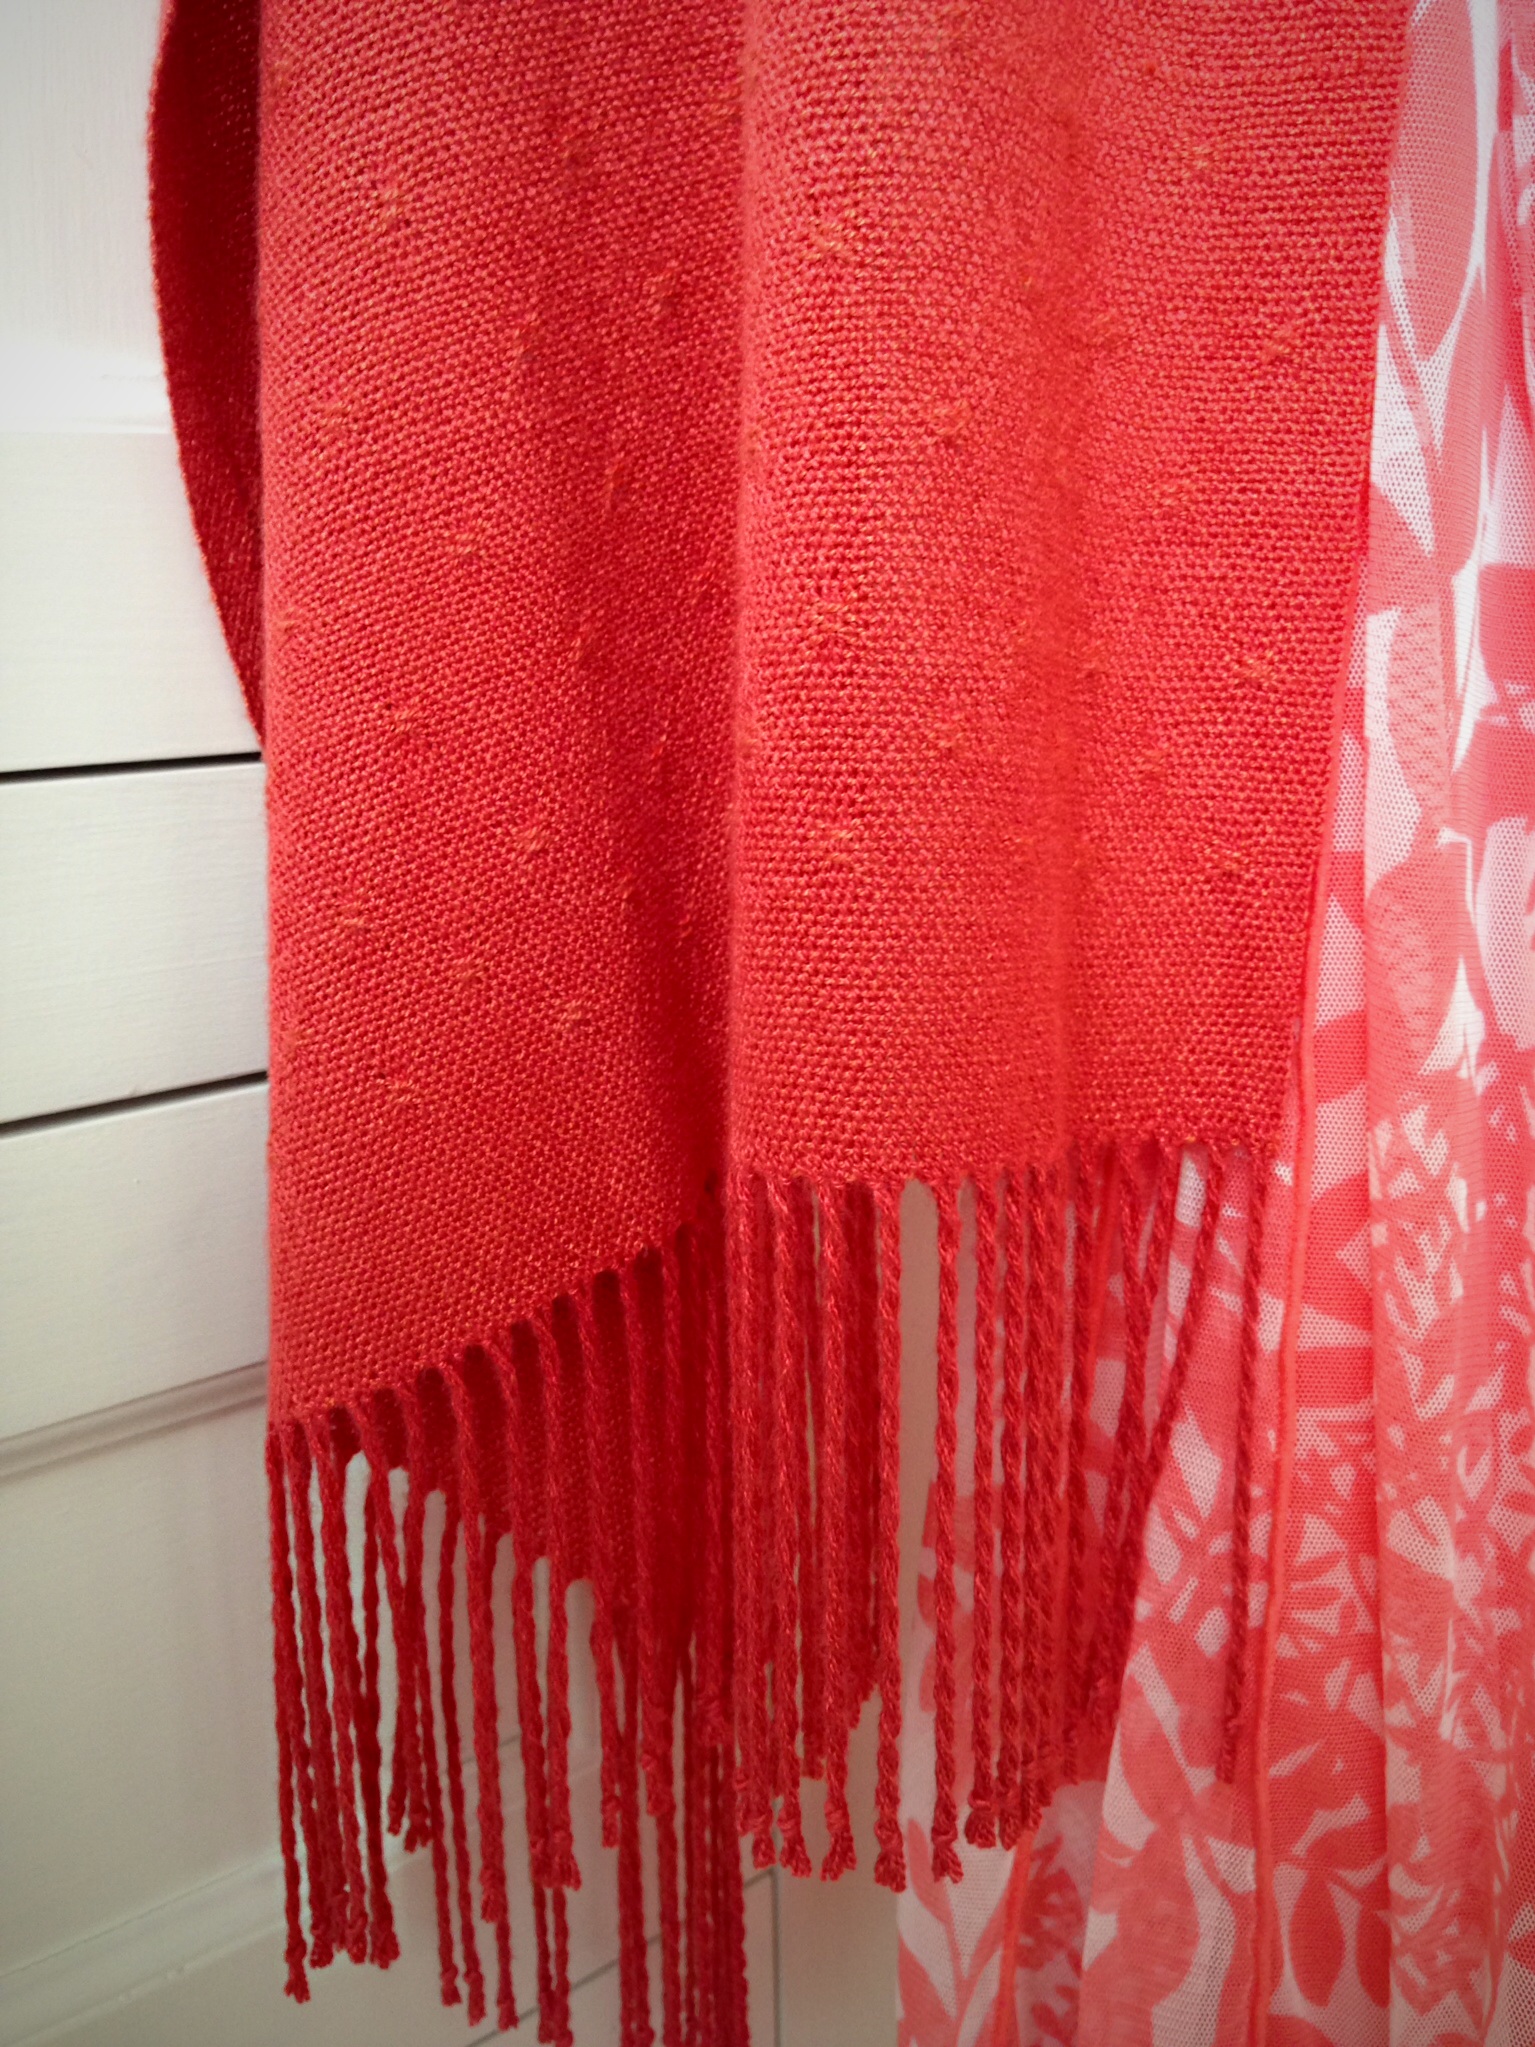
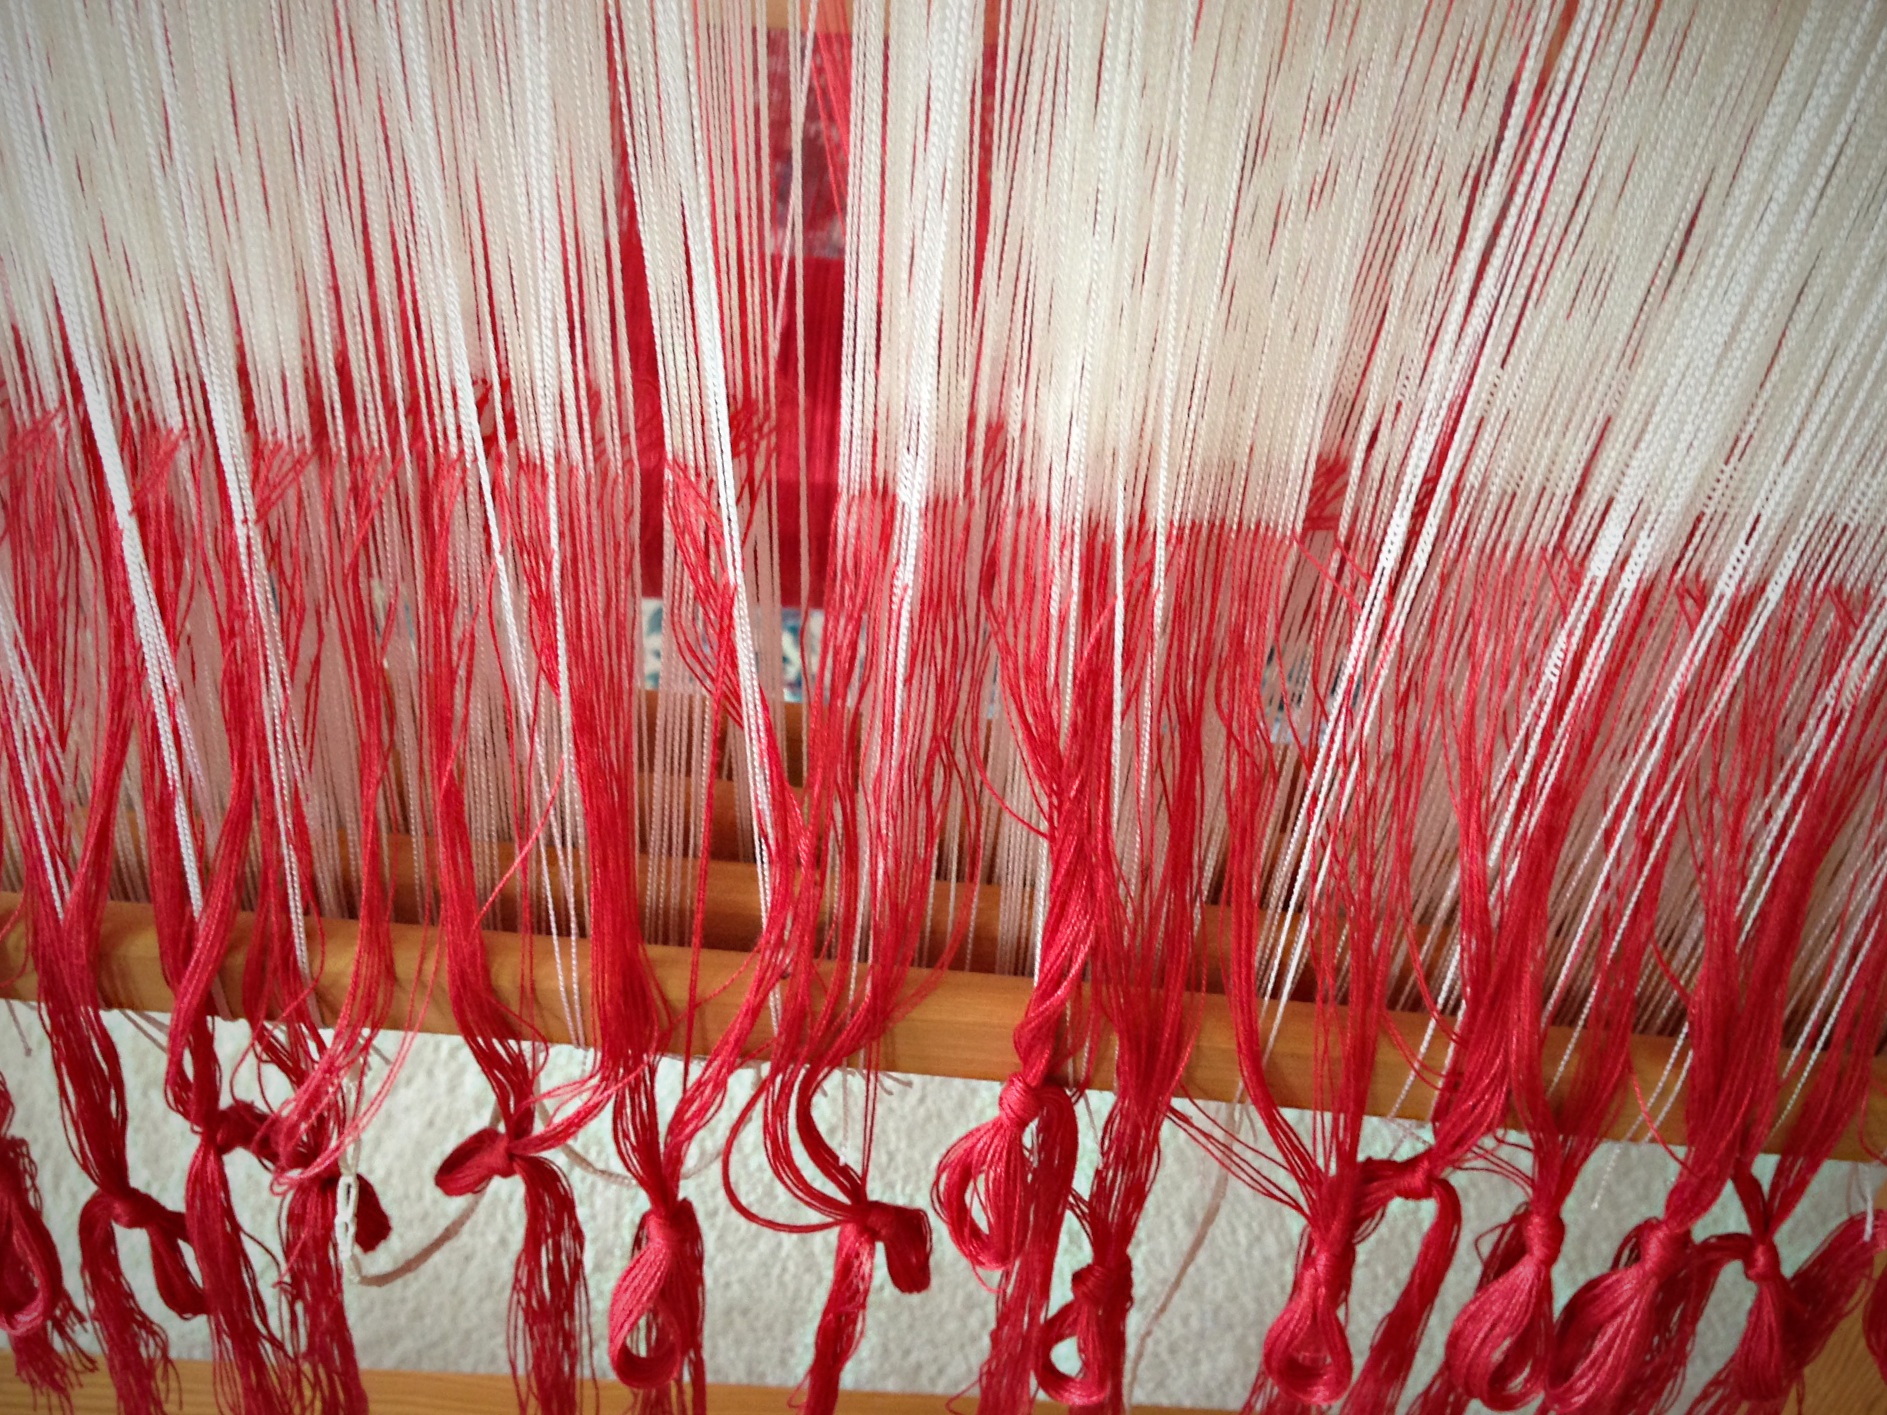
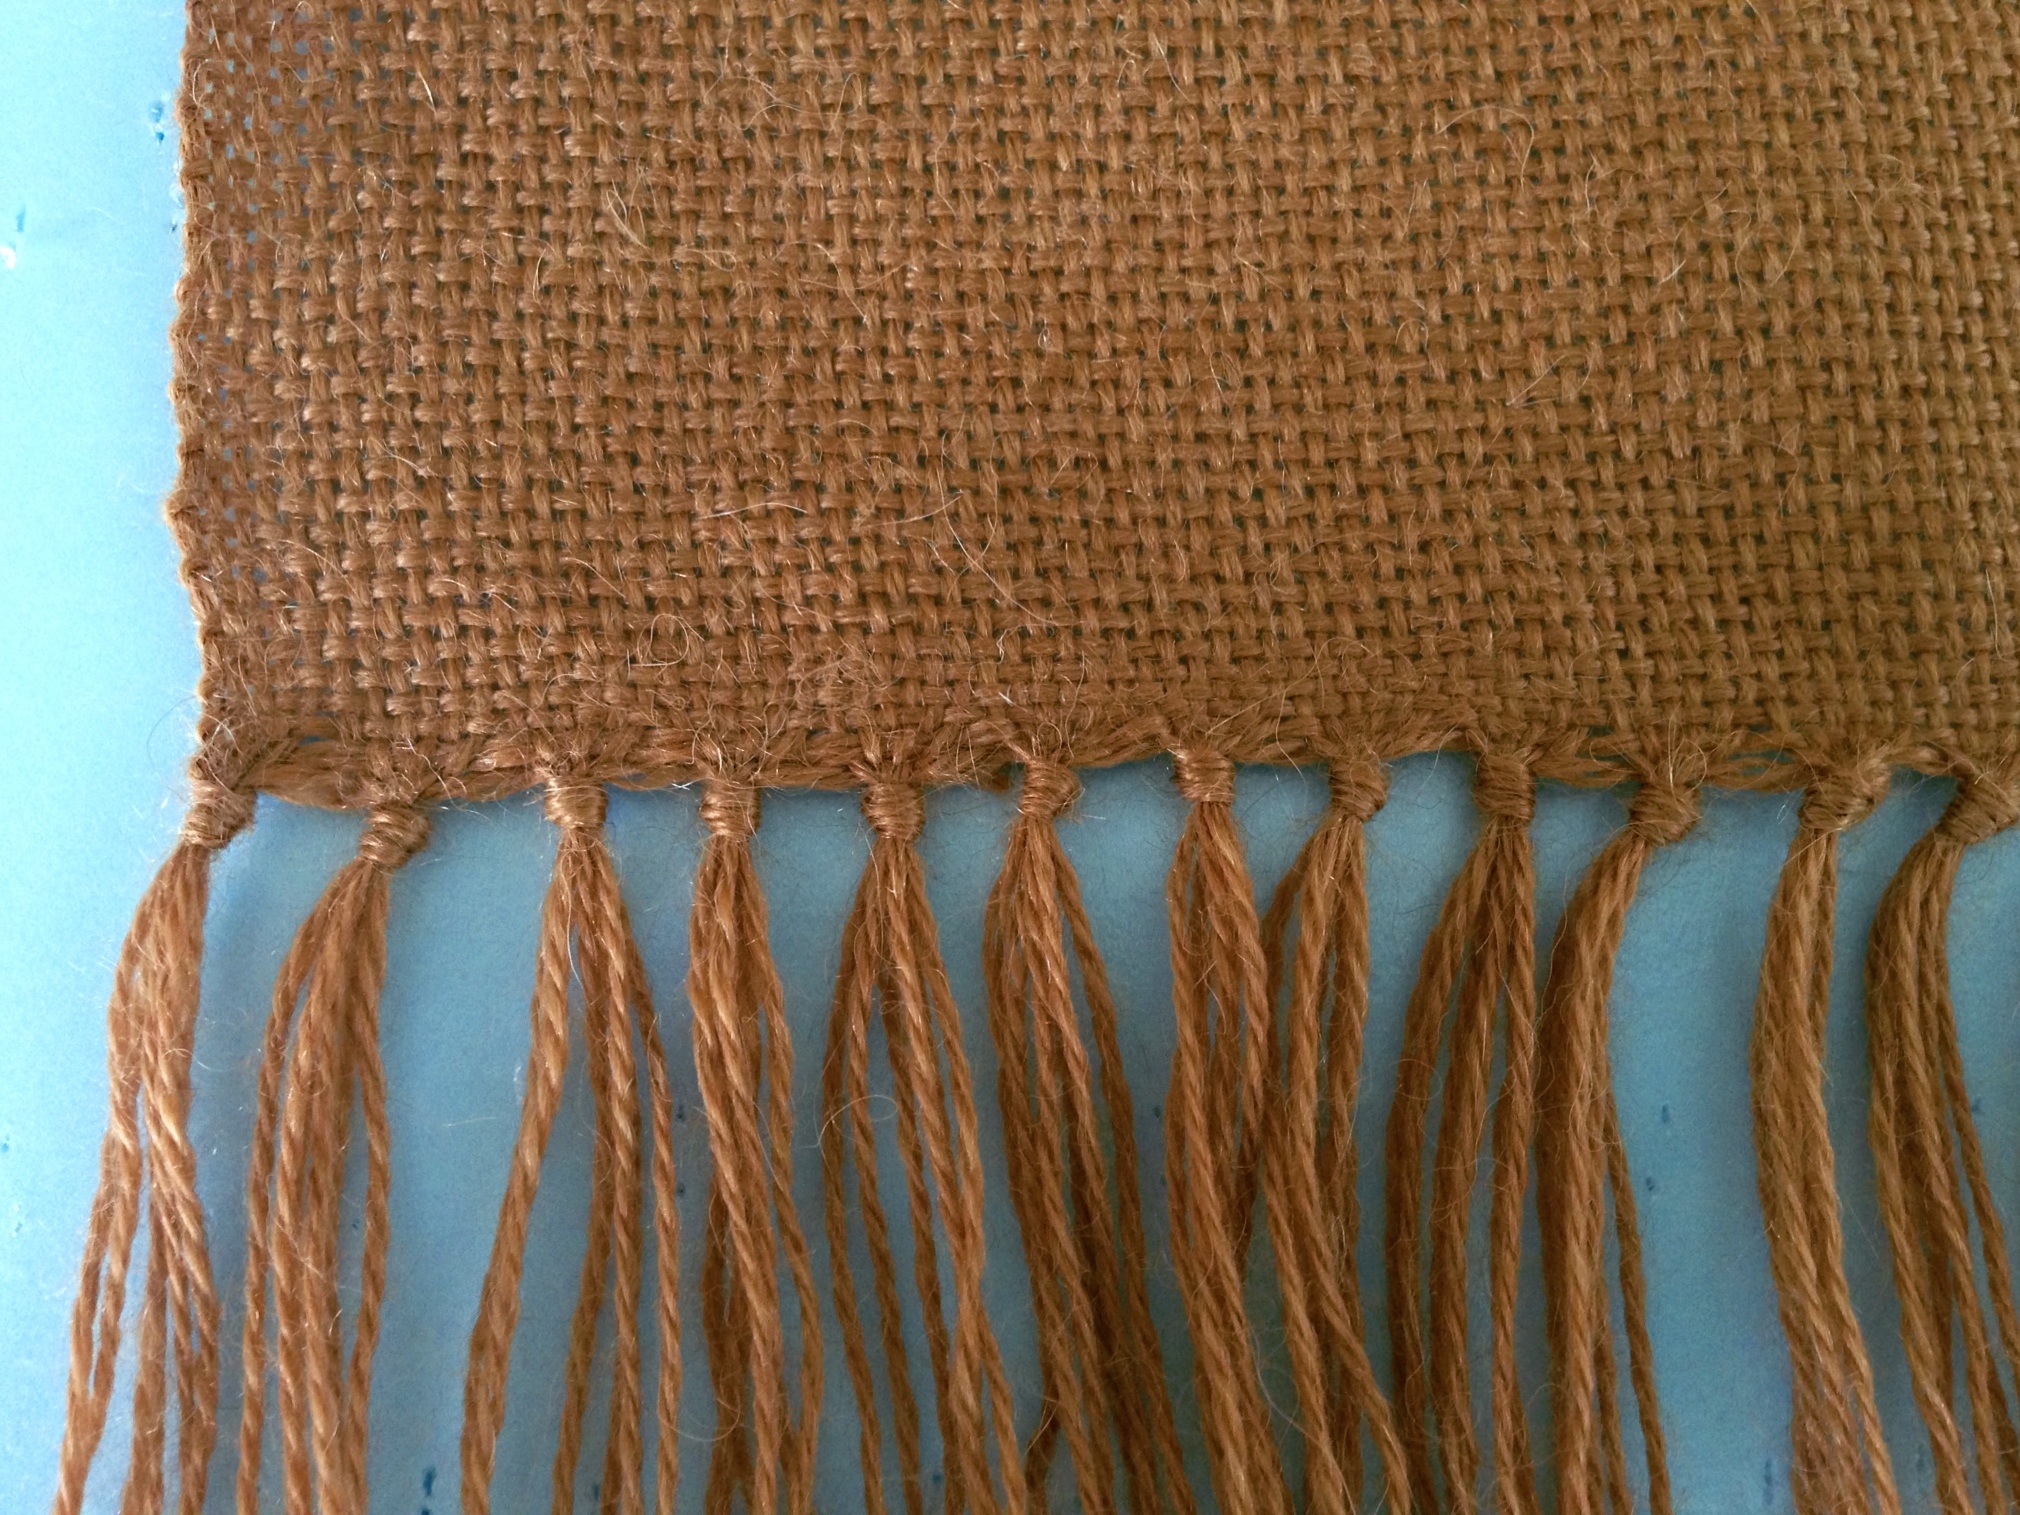
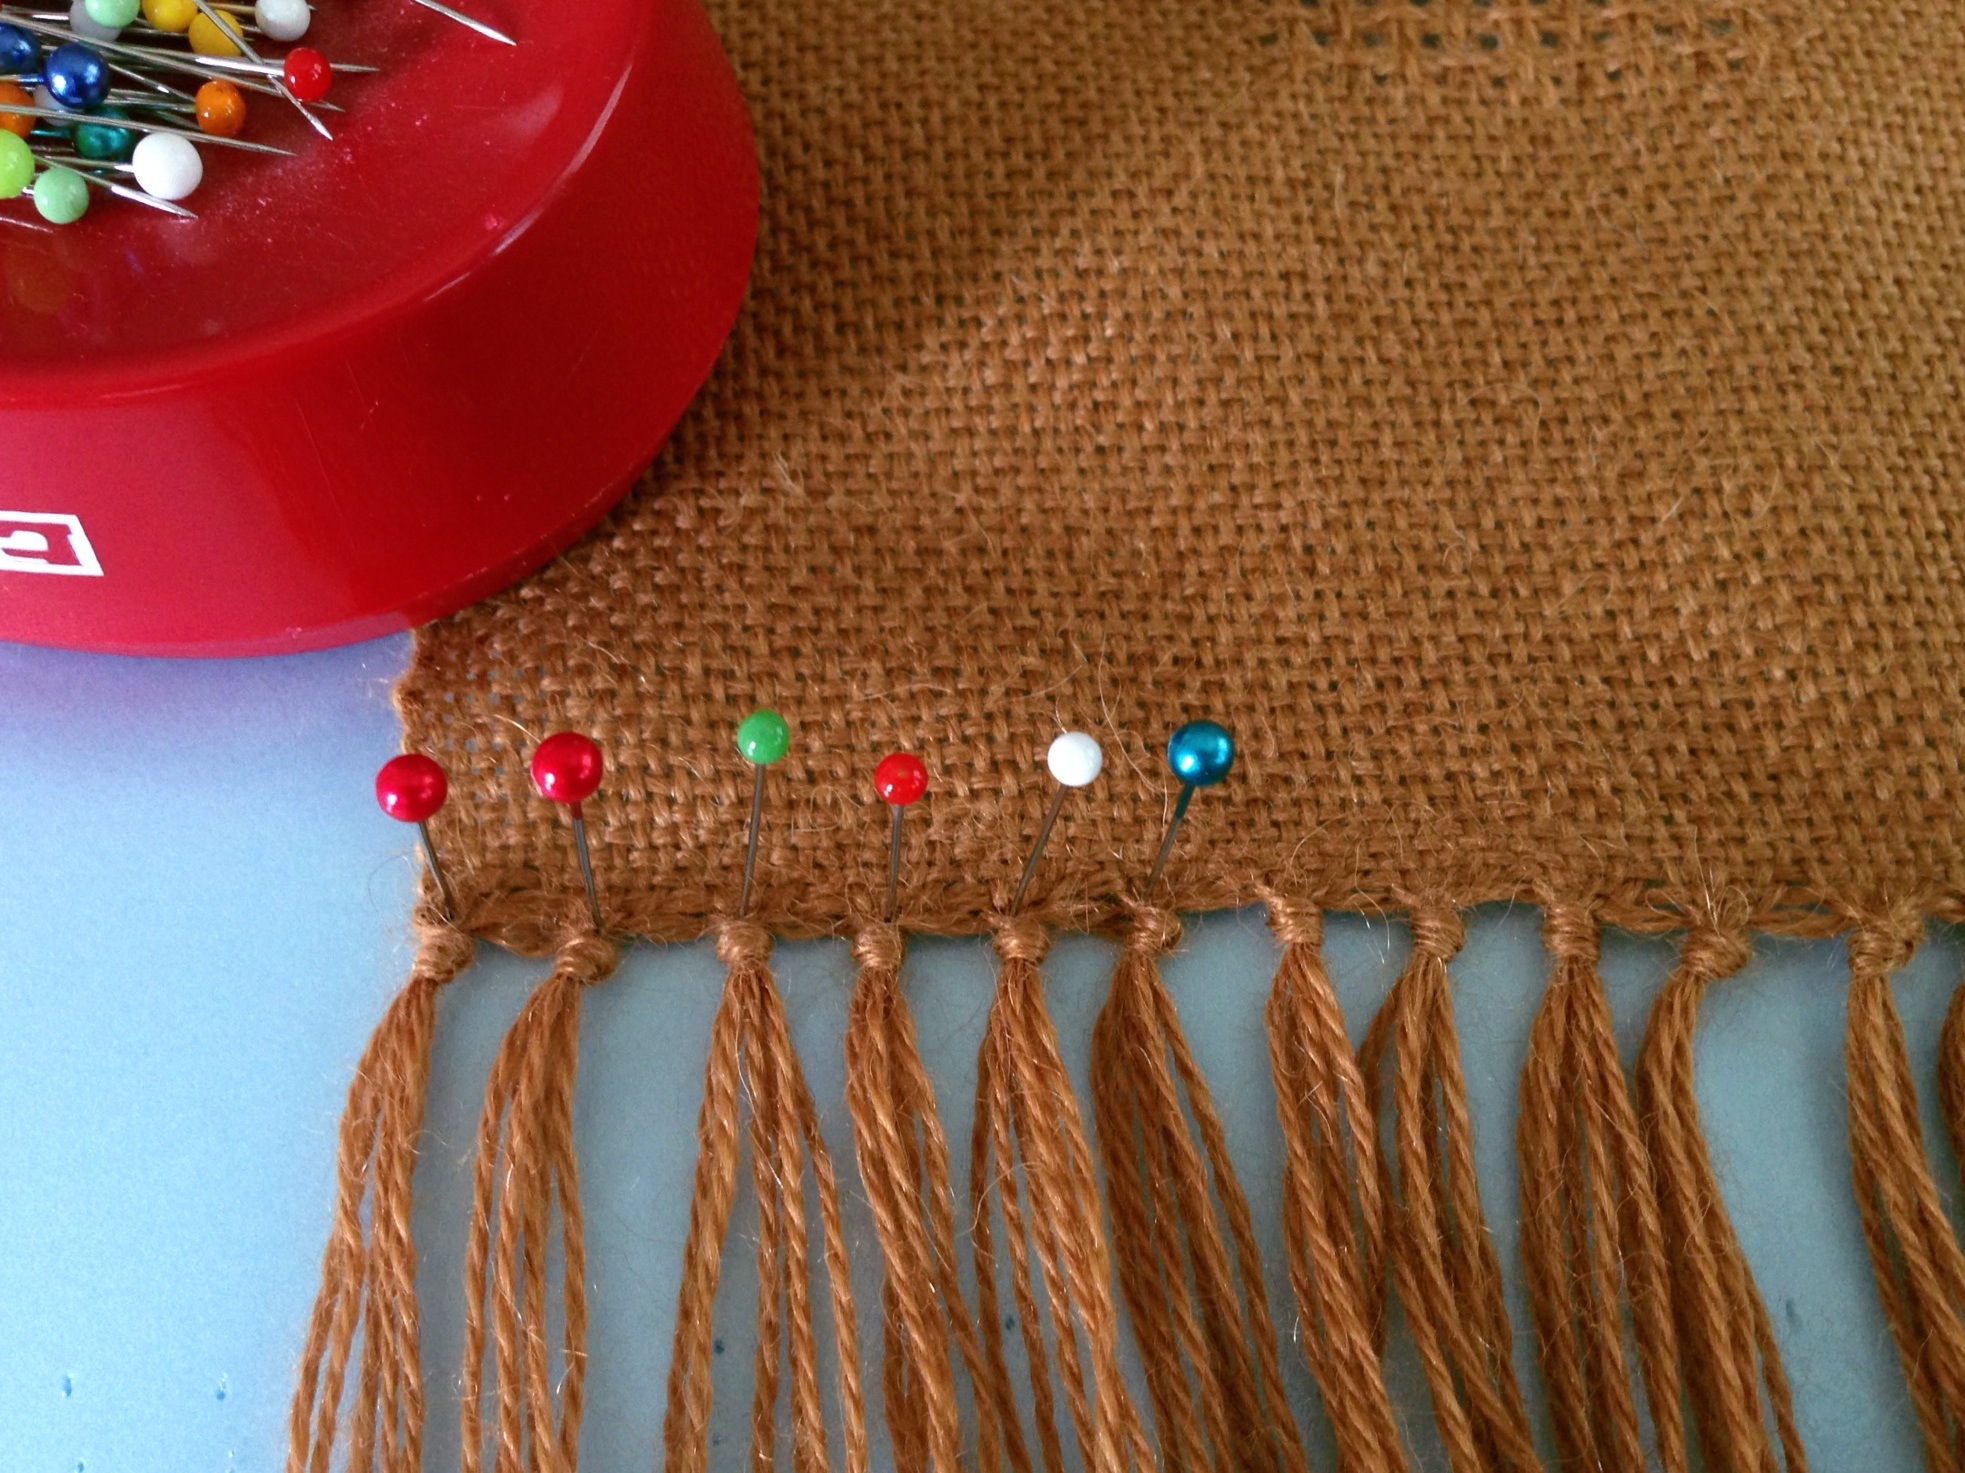
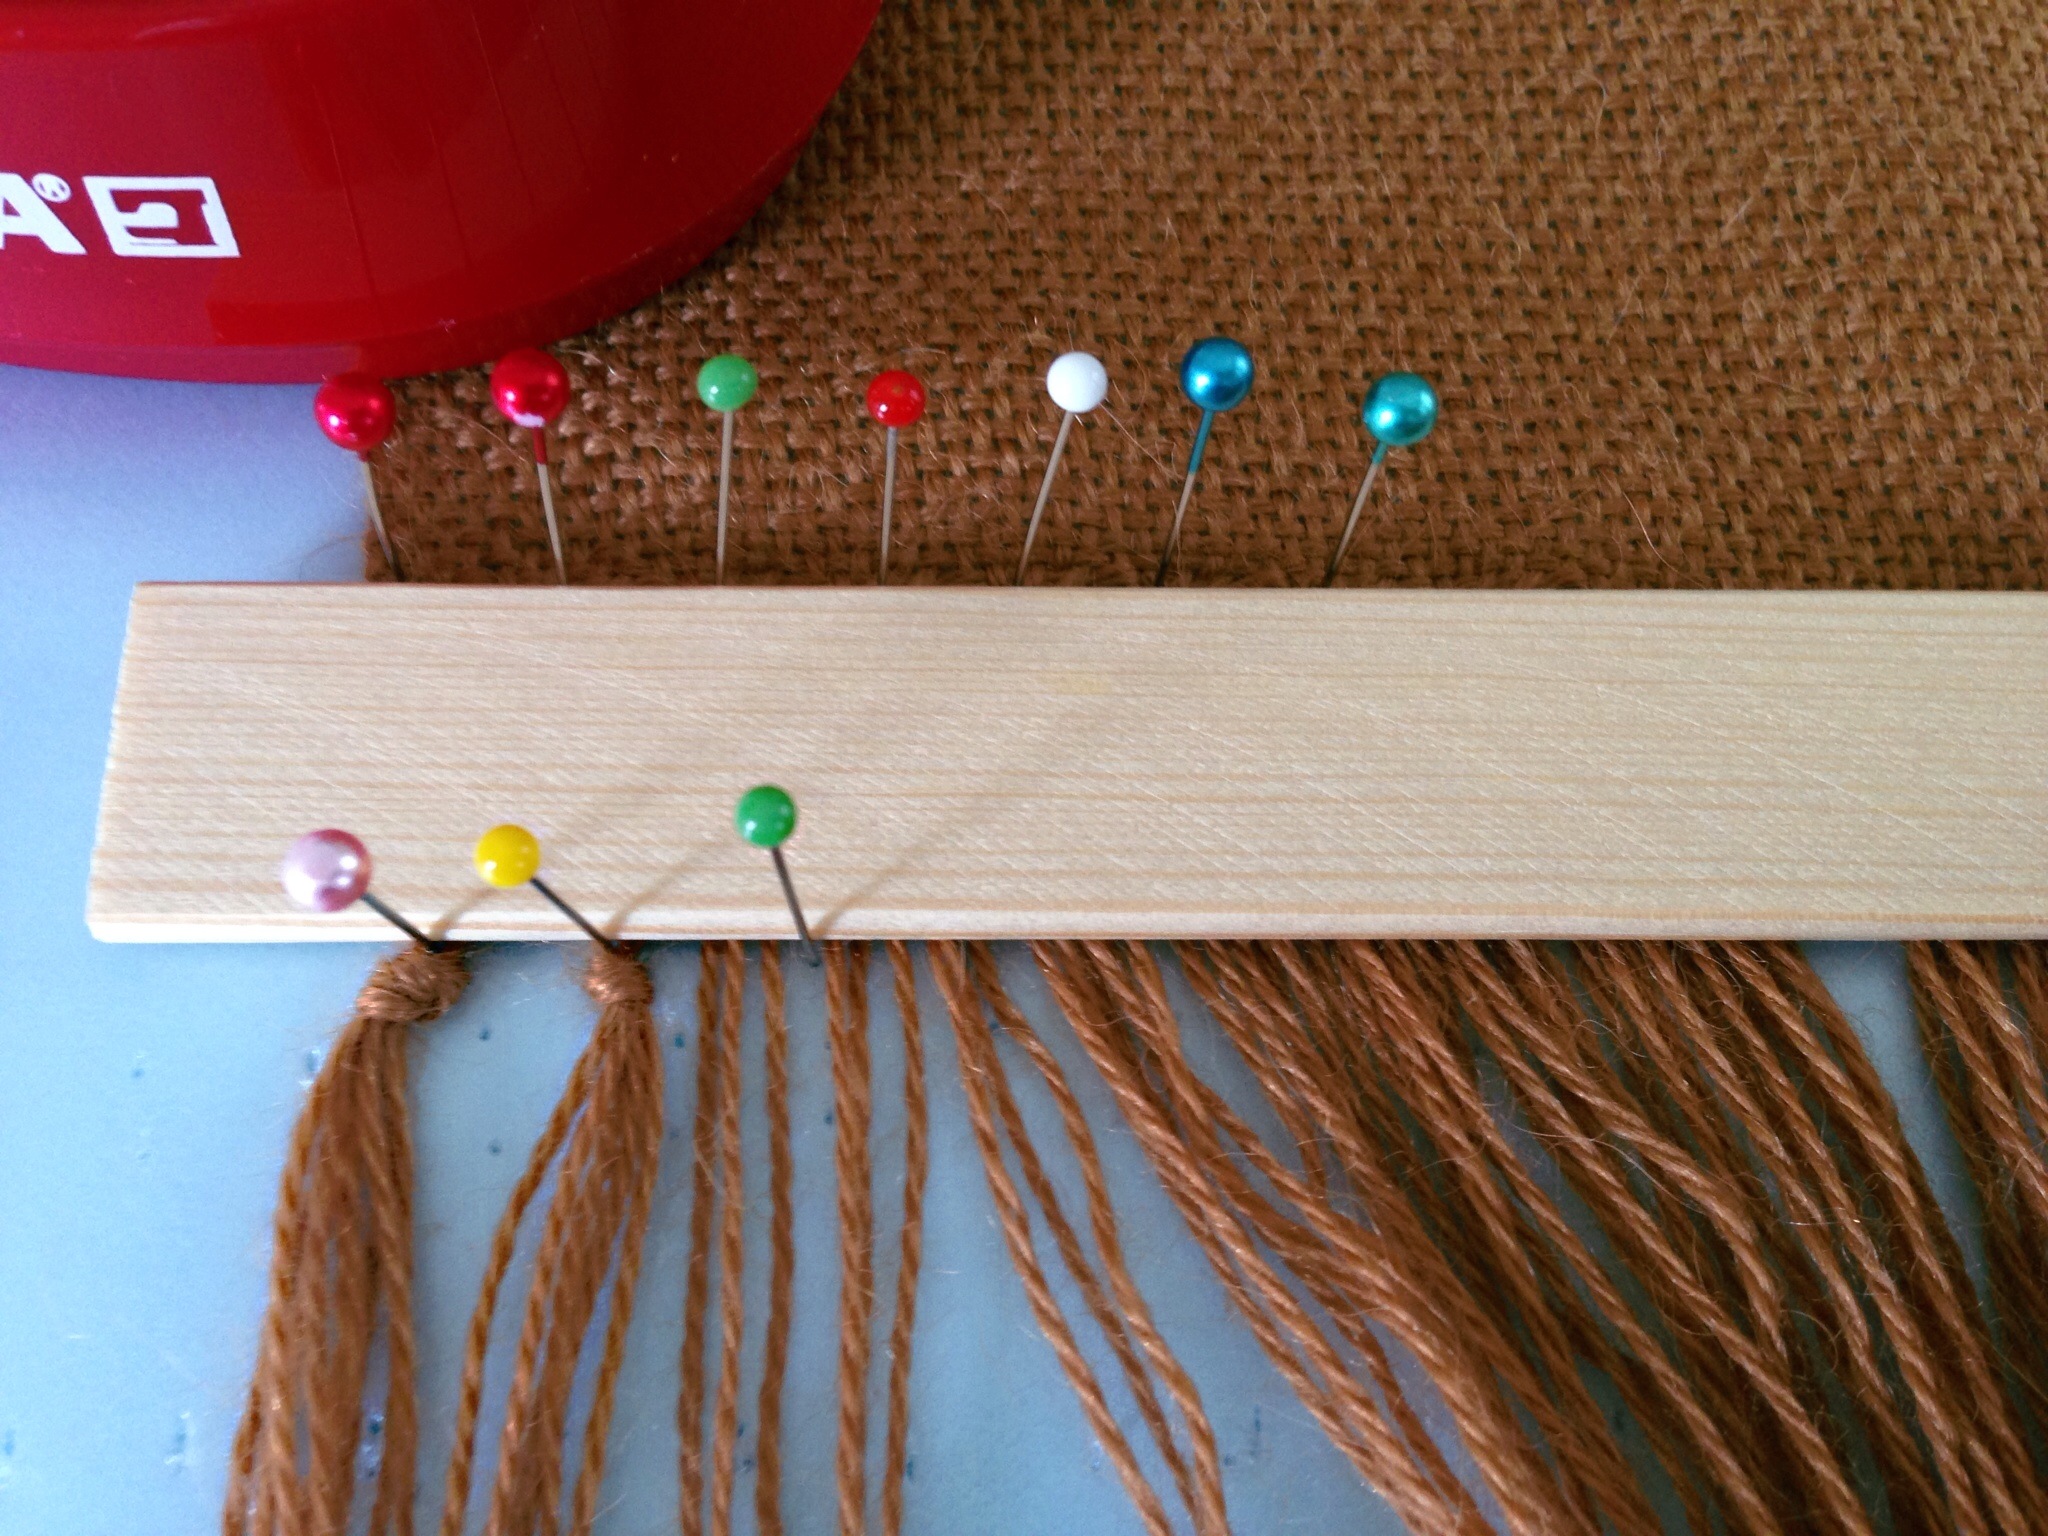
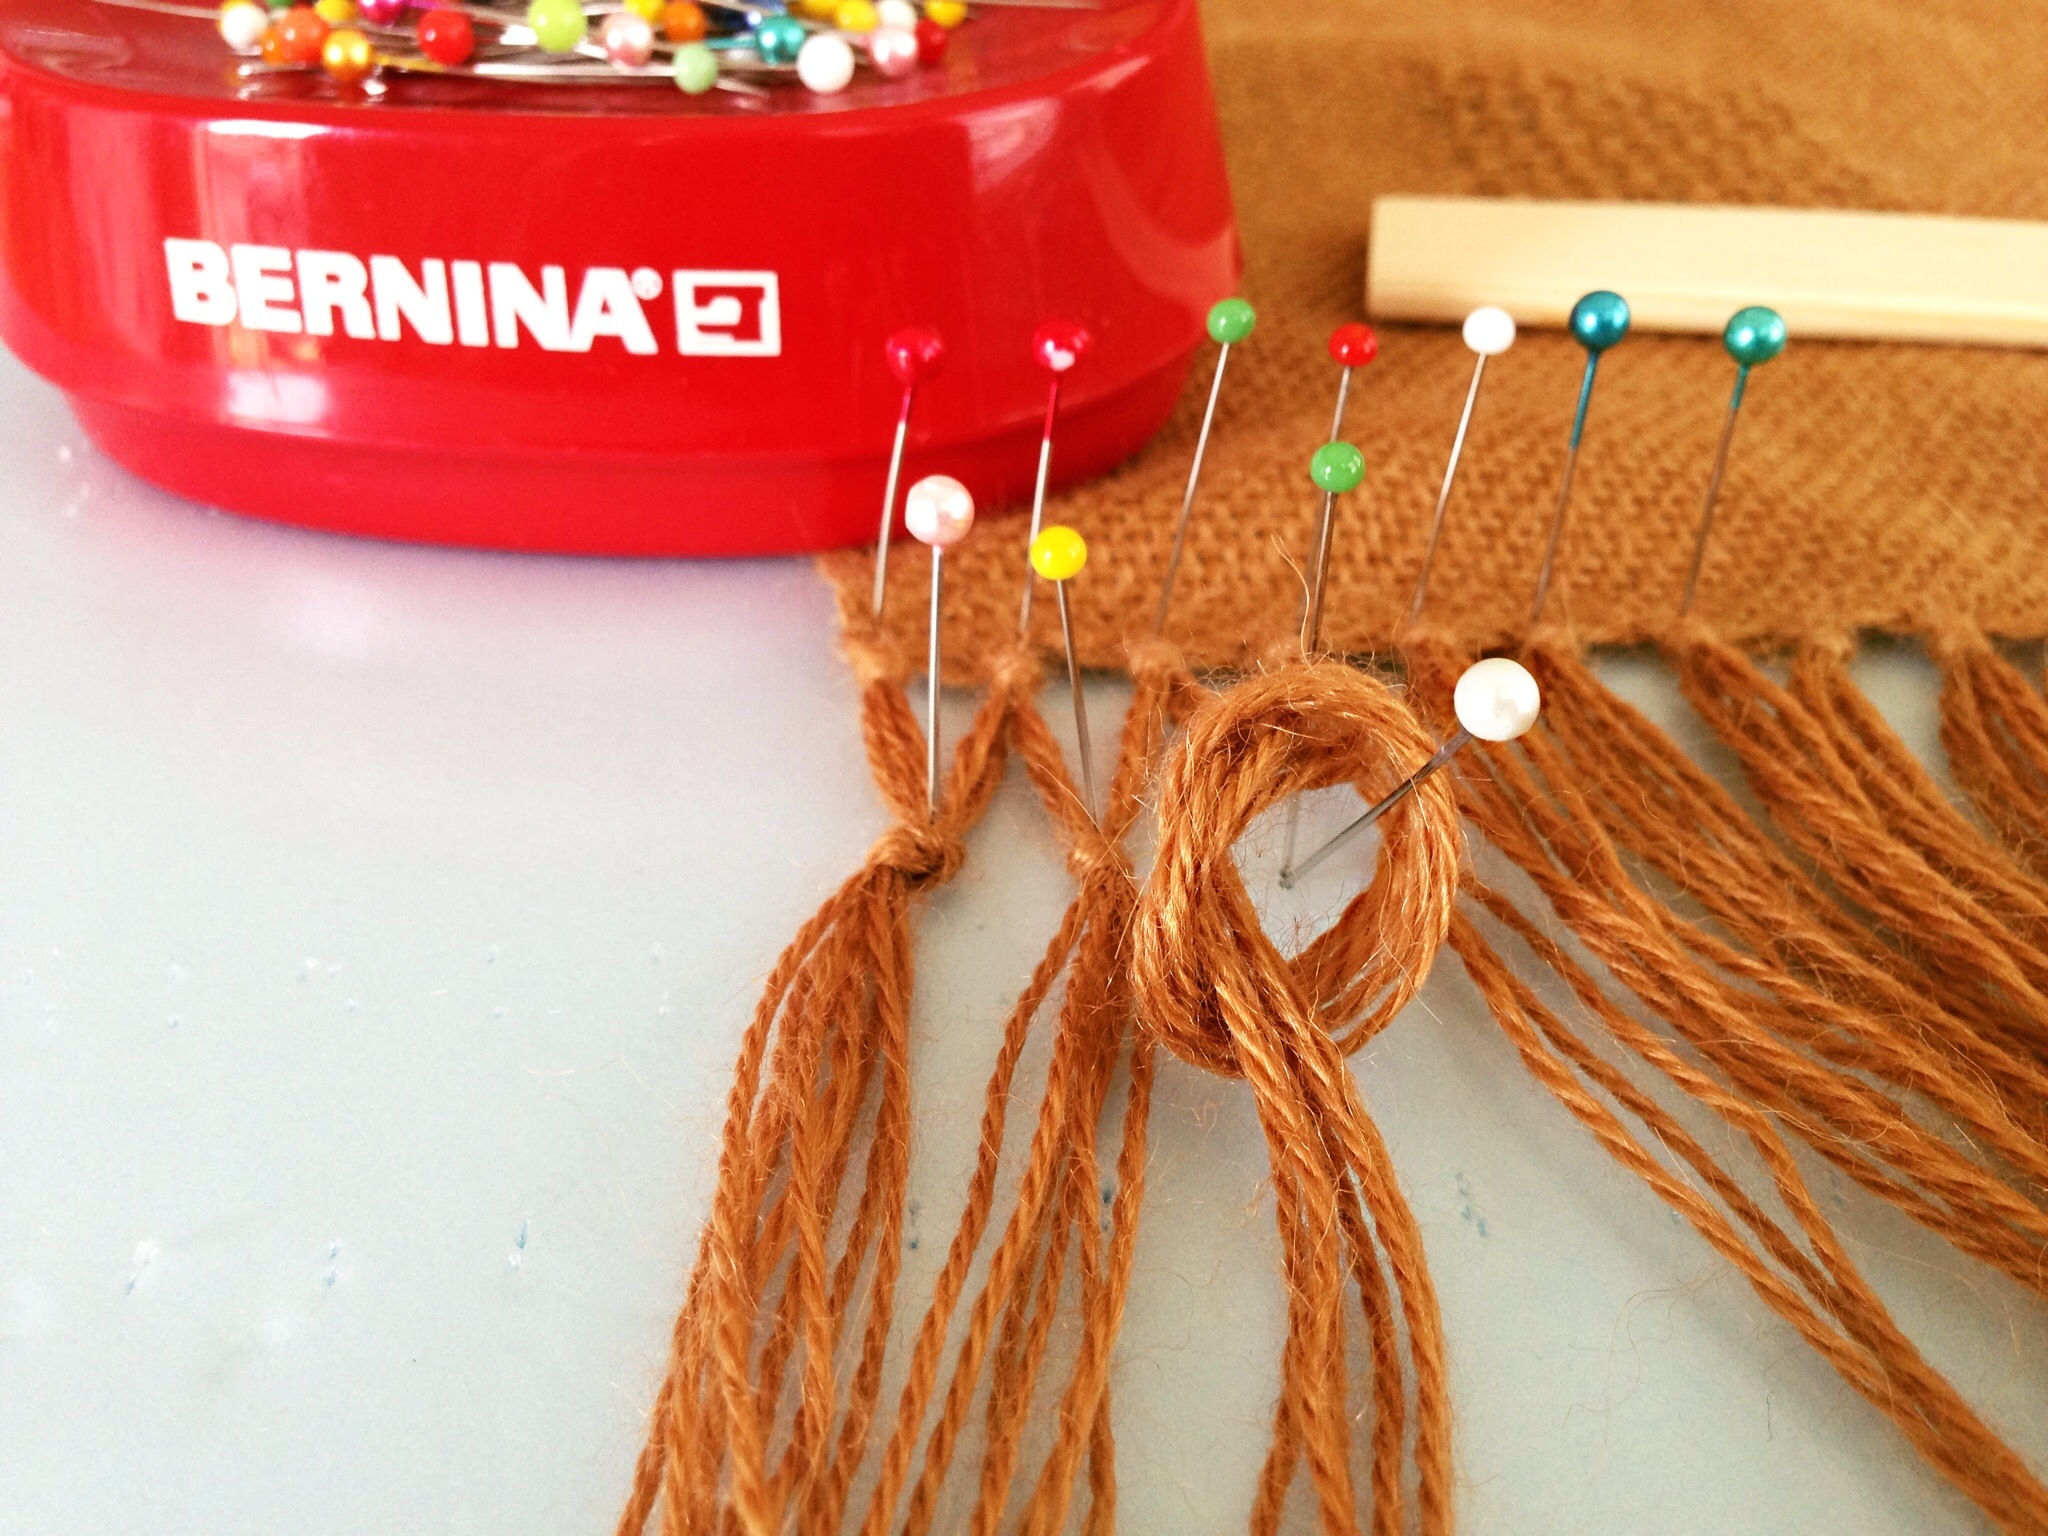
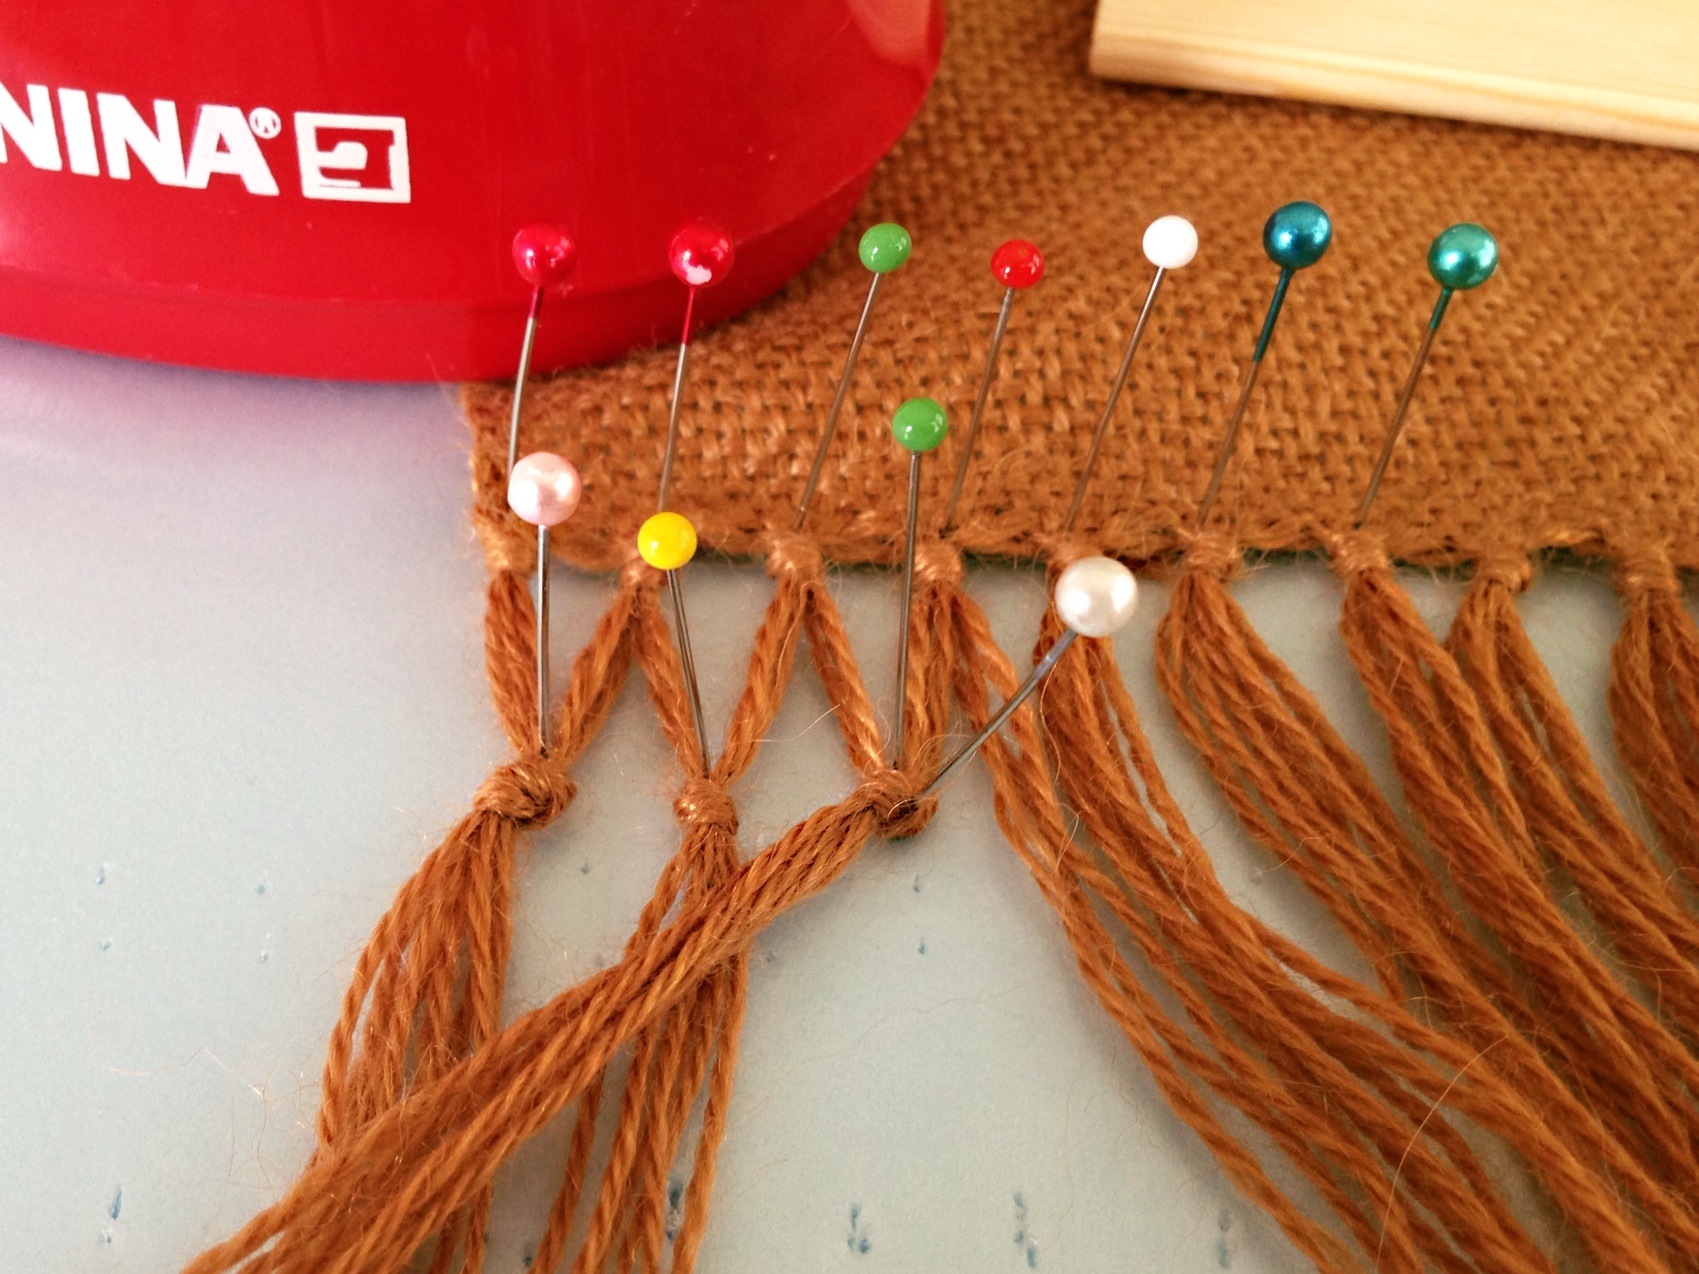
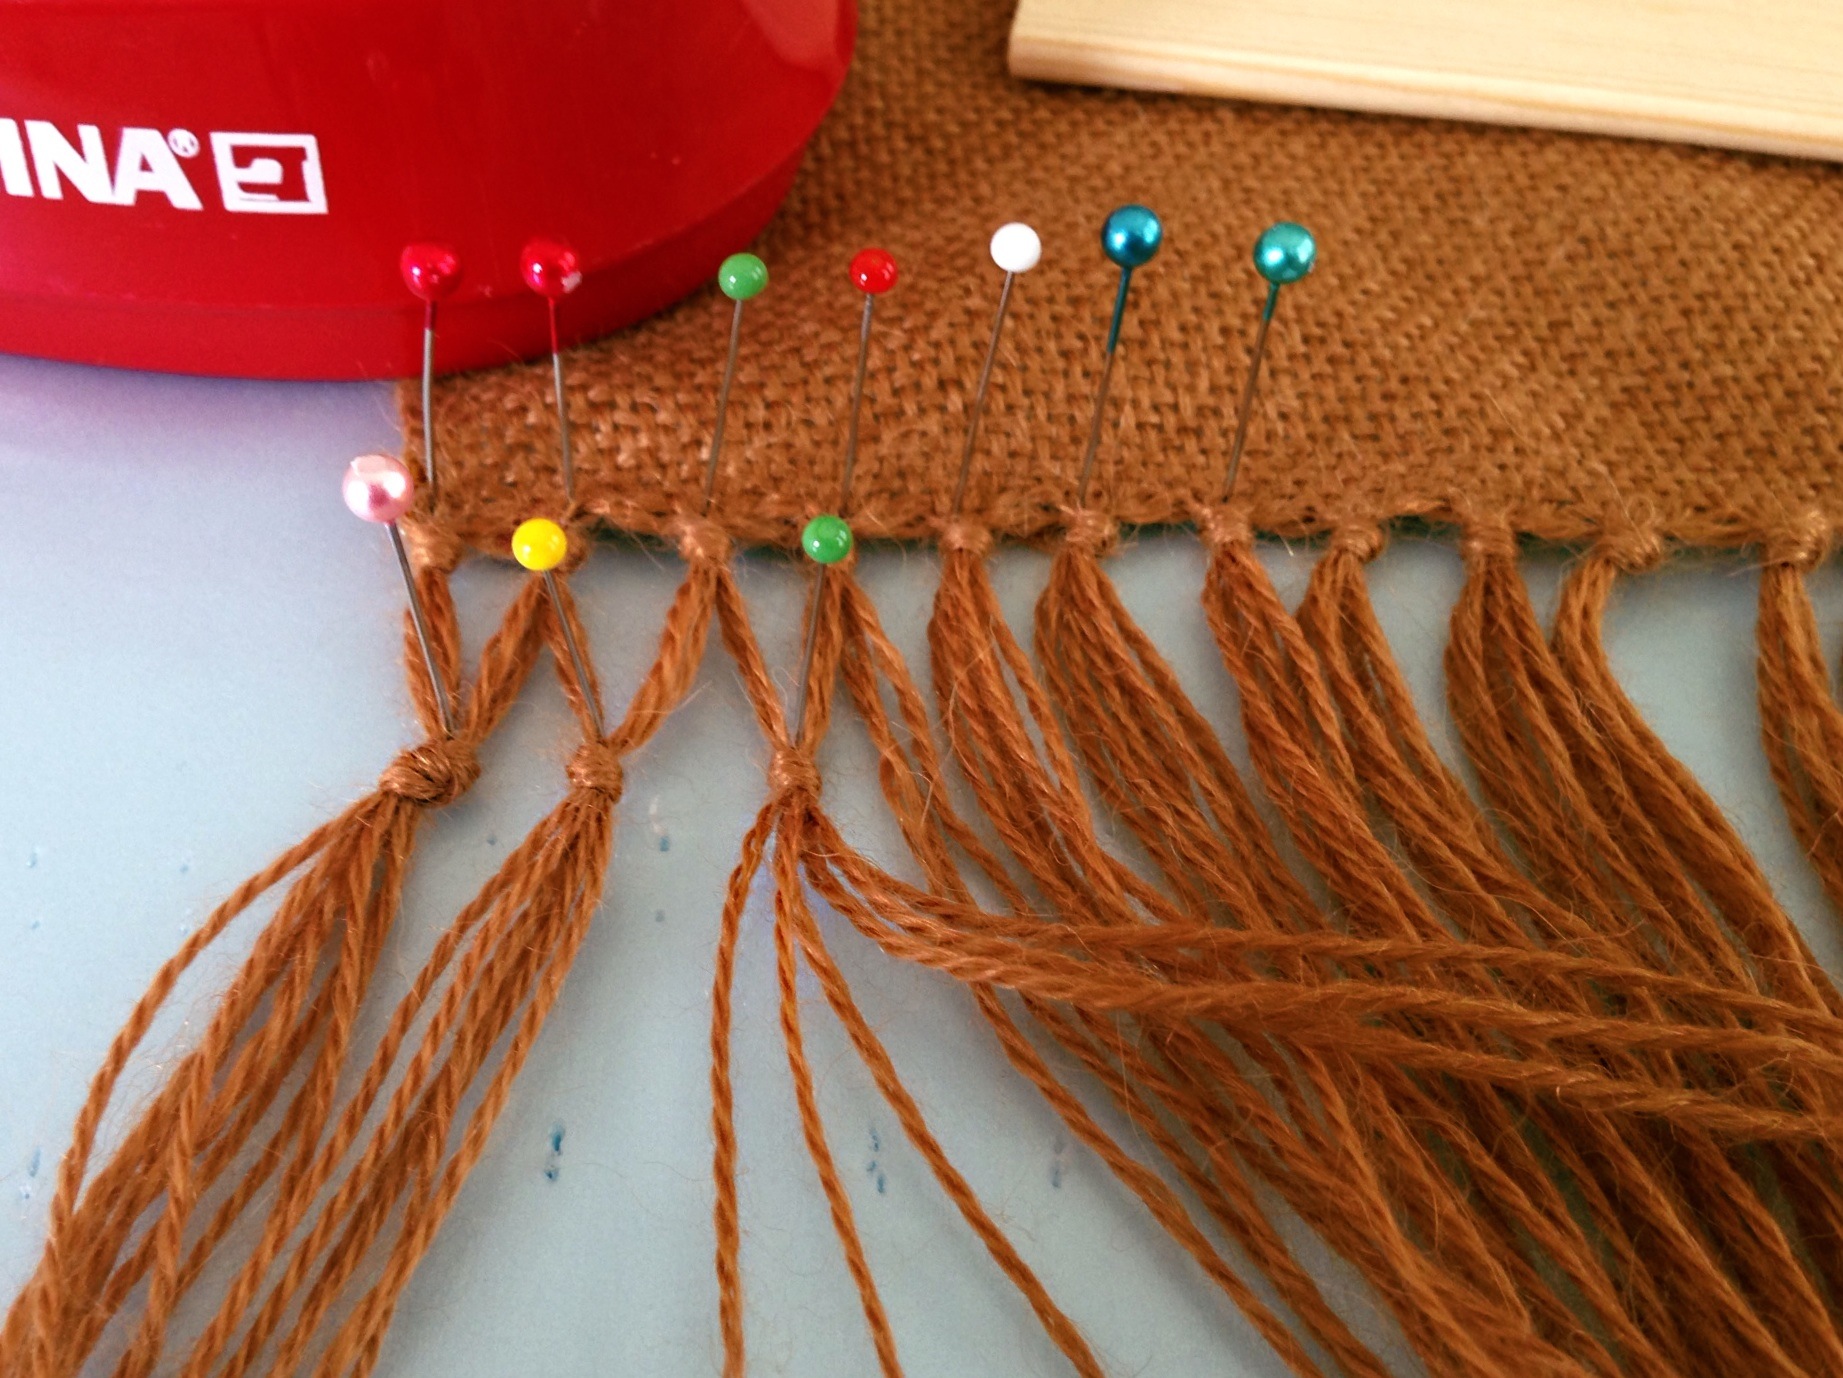
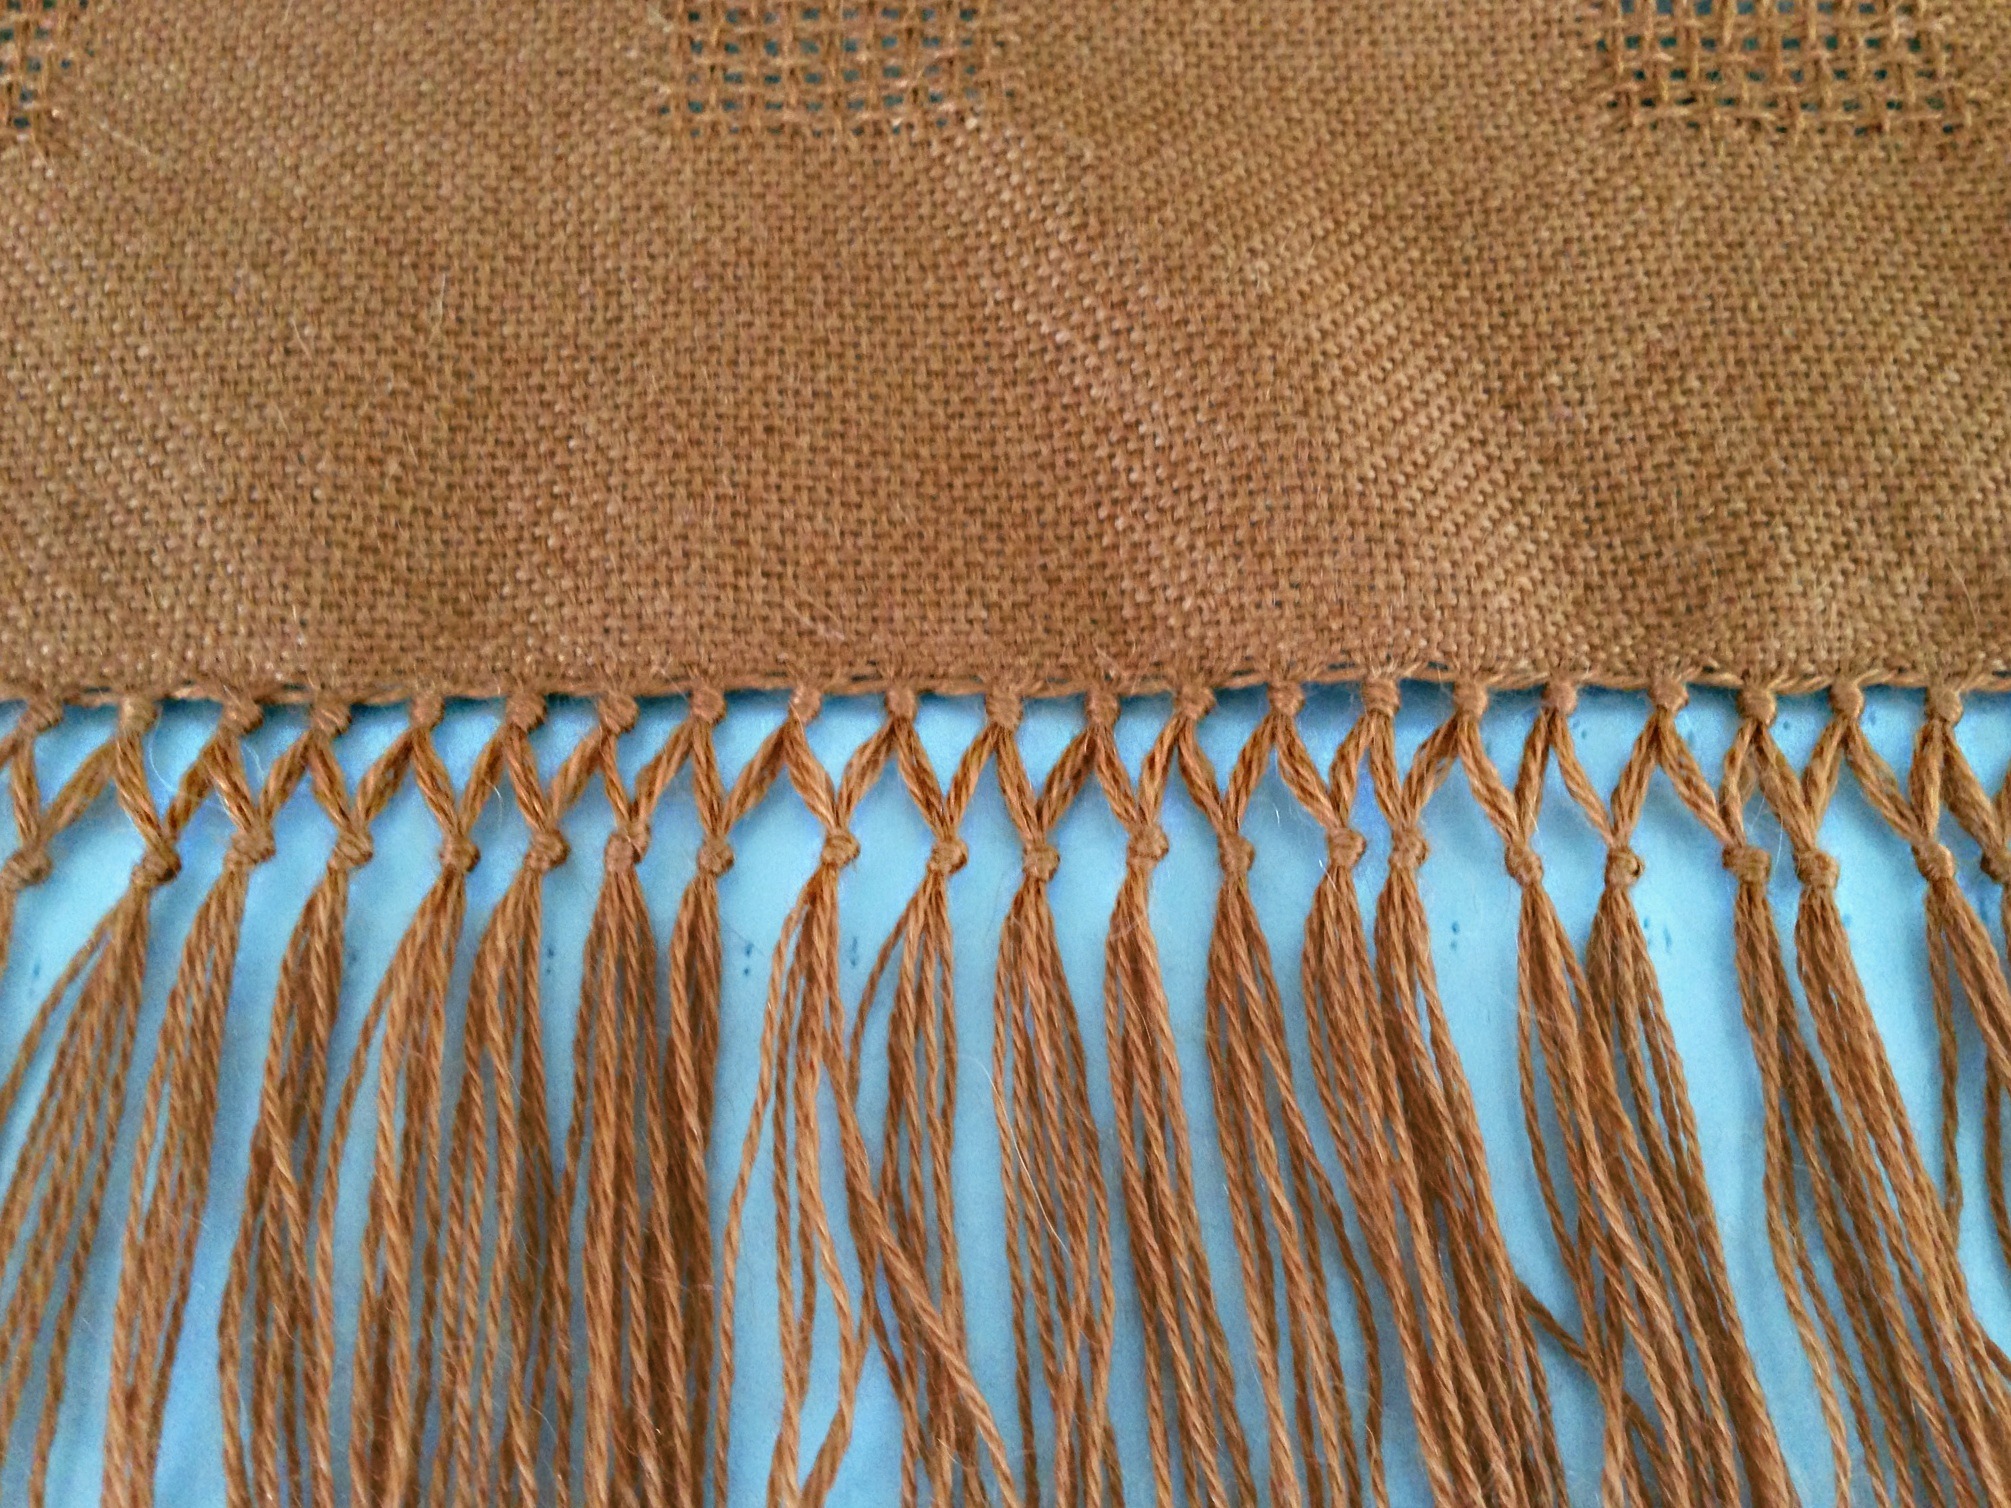
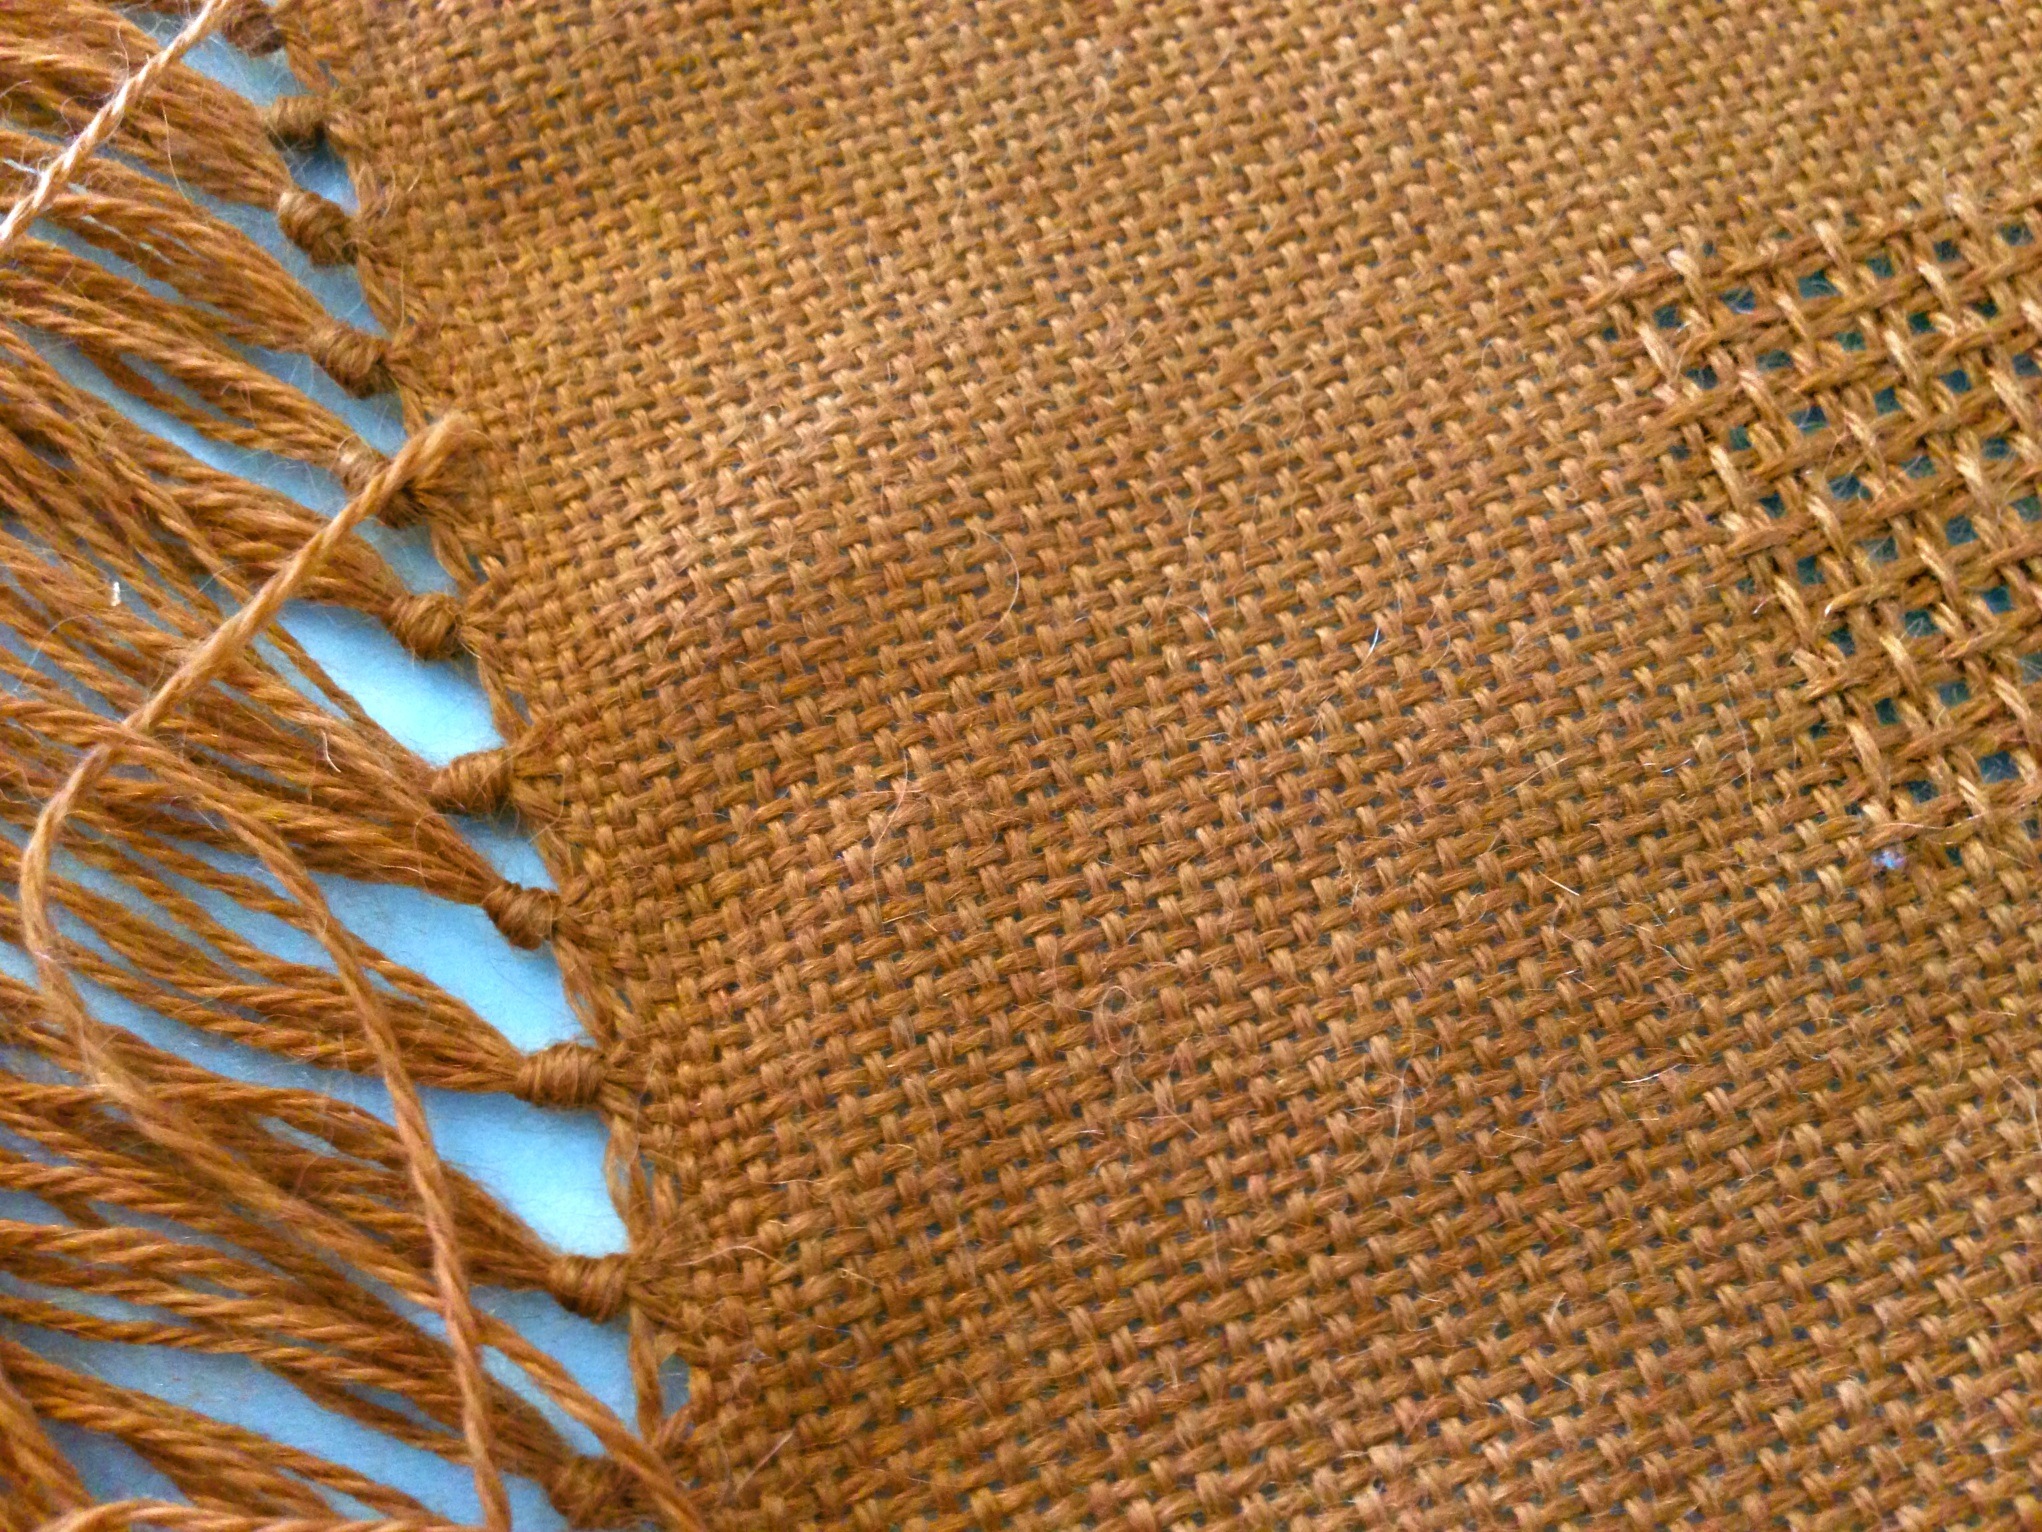
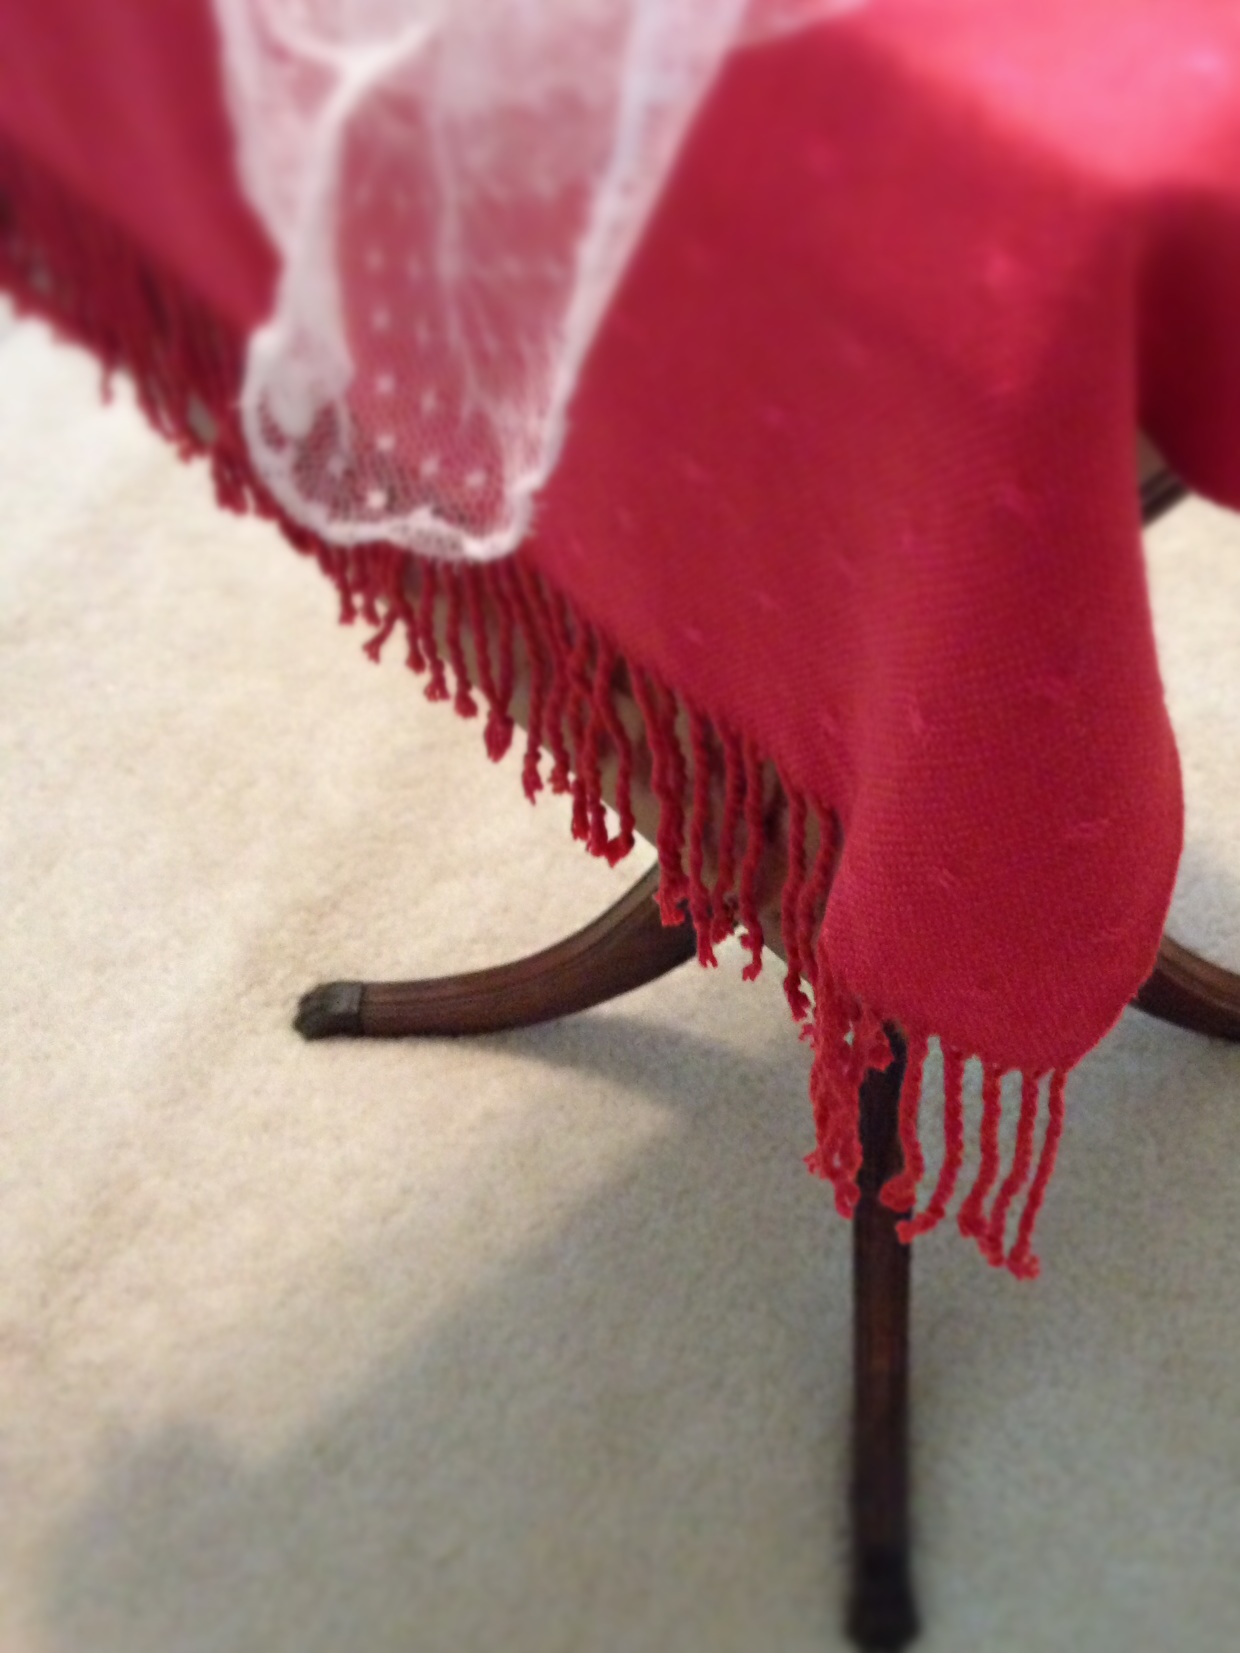
1. Twisted fringe on bamboo huck lace small tablecloth. This cloth covered an heirloom table, becoming the altar, at Melody’s wedding. (This short piece was at the end of the warp after weaving two shawls.) You can see the shawls HERE, and twisting the fringe HERE.

Bamboo huck lace small tablecloth.
Twisted fringe gives an elegant finishing touch to this small huck lace table covering.

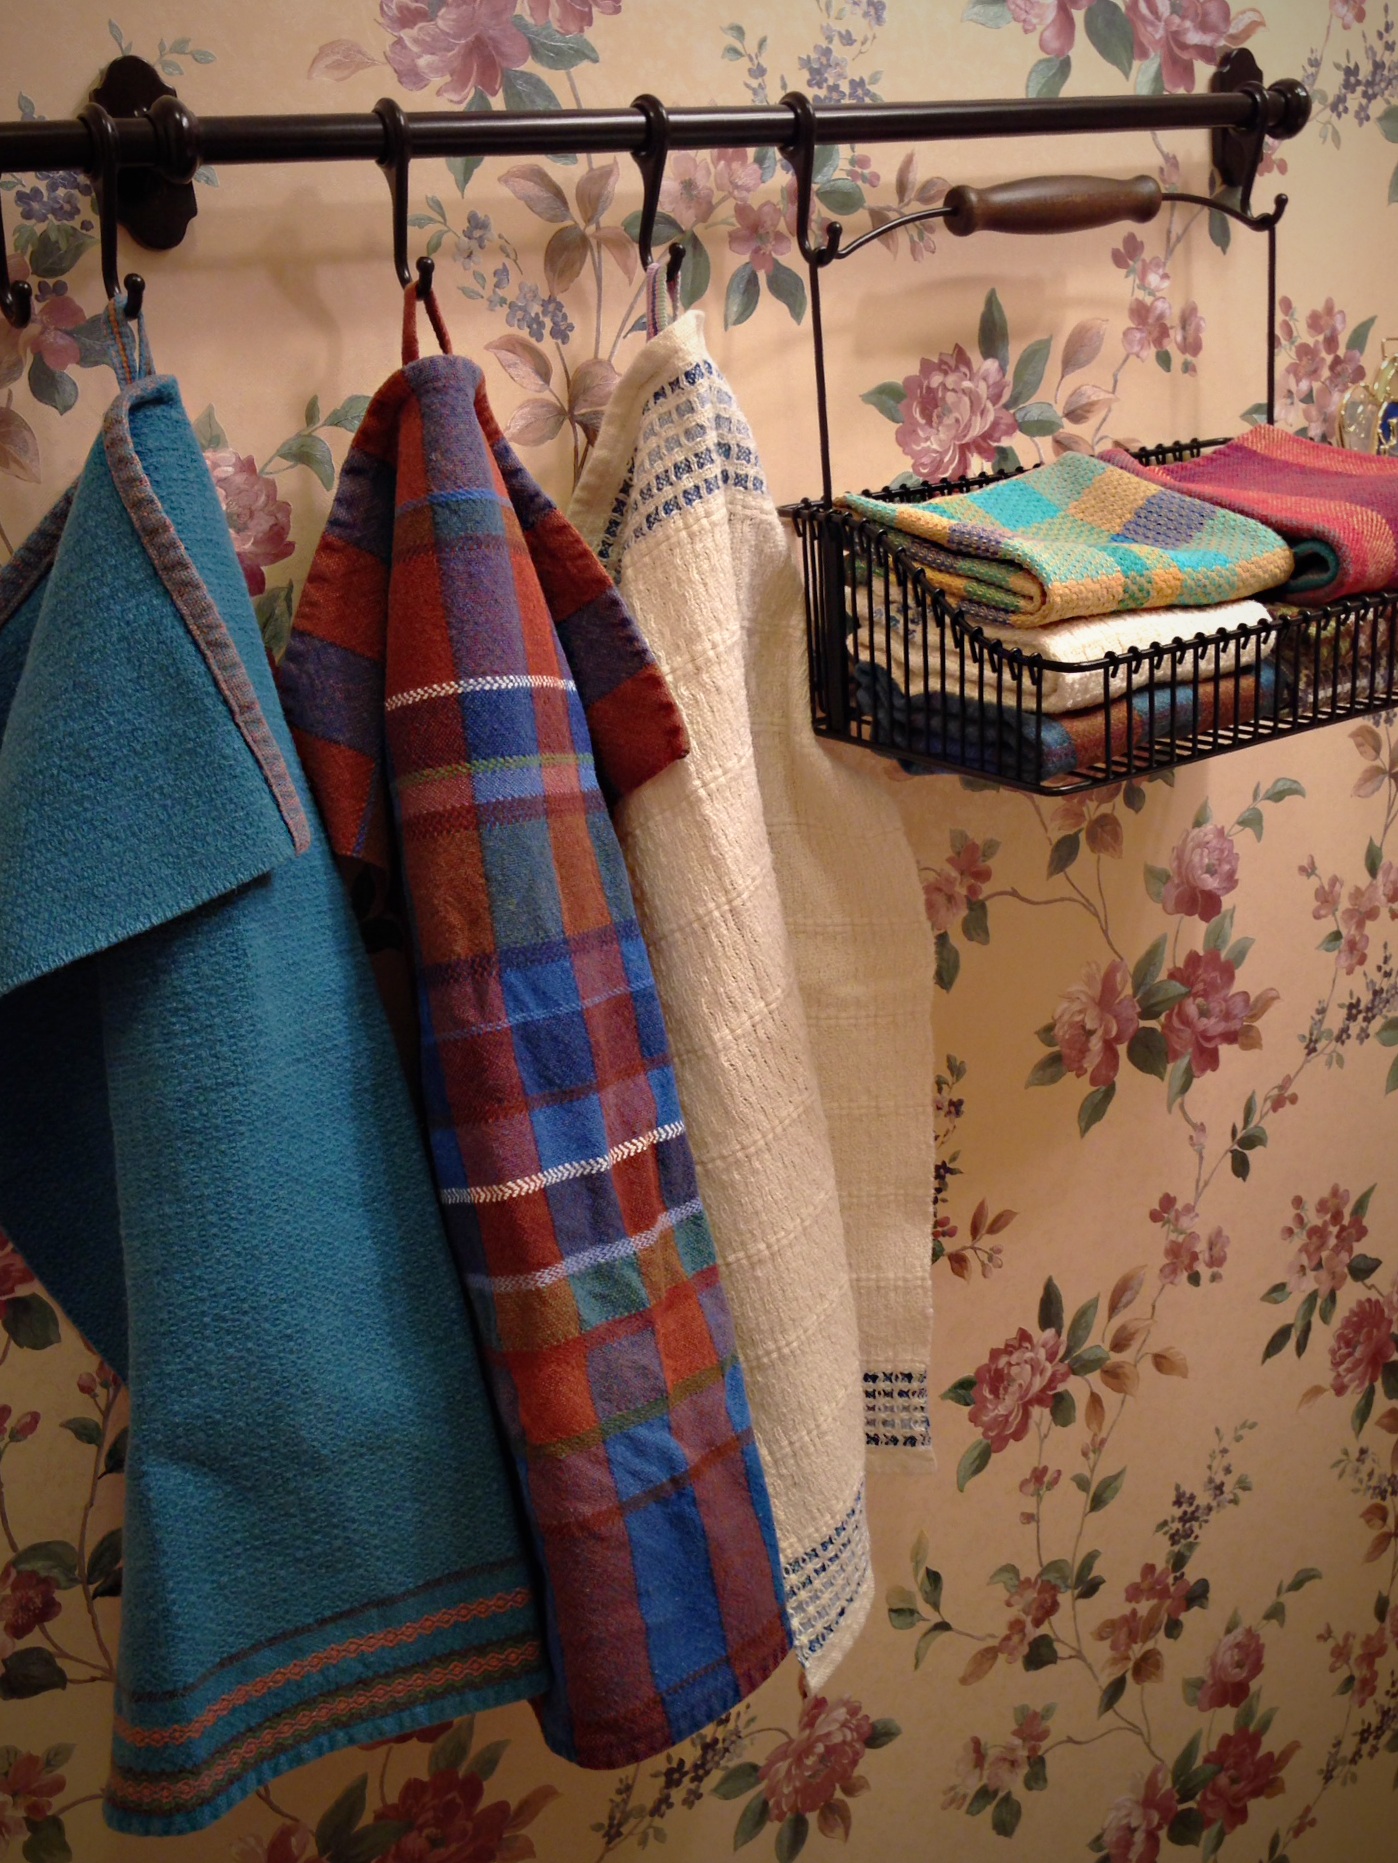
2. Added hanging tabs to handtowels. Installed Ikea rod with basket and hooks to hang handwoven handtowels in the powder room. (When you need tabs for towels, it helps to have a collection of inkle and band loom bands.) You can see the most recent towels HERE – I kept one of the eight for myself; the rest became gifts.

Ikea basket and hooks hold handwoven towels for guests.
Ikea basket and hooks hold assortment of handwoven towels for guests to use in the powder room.

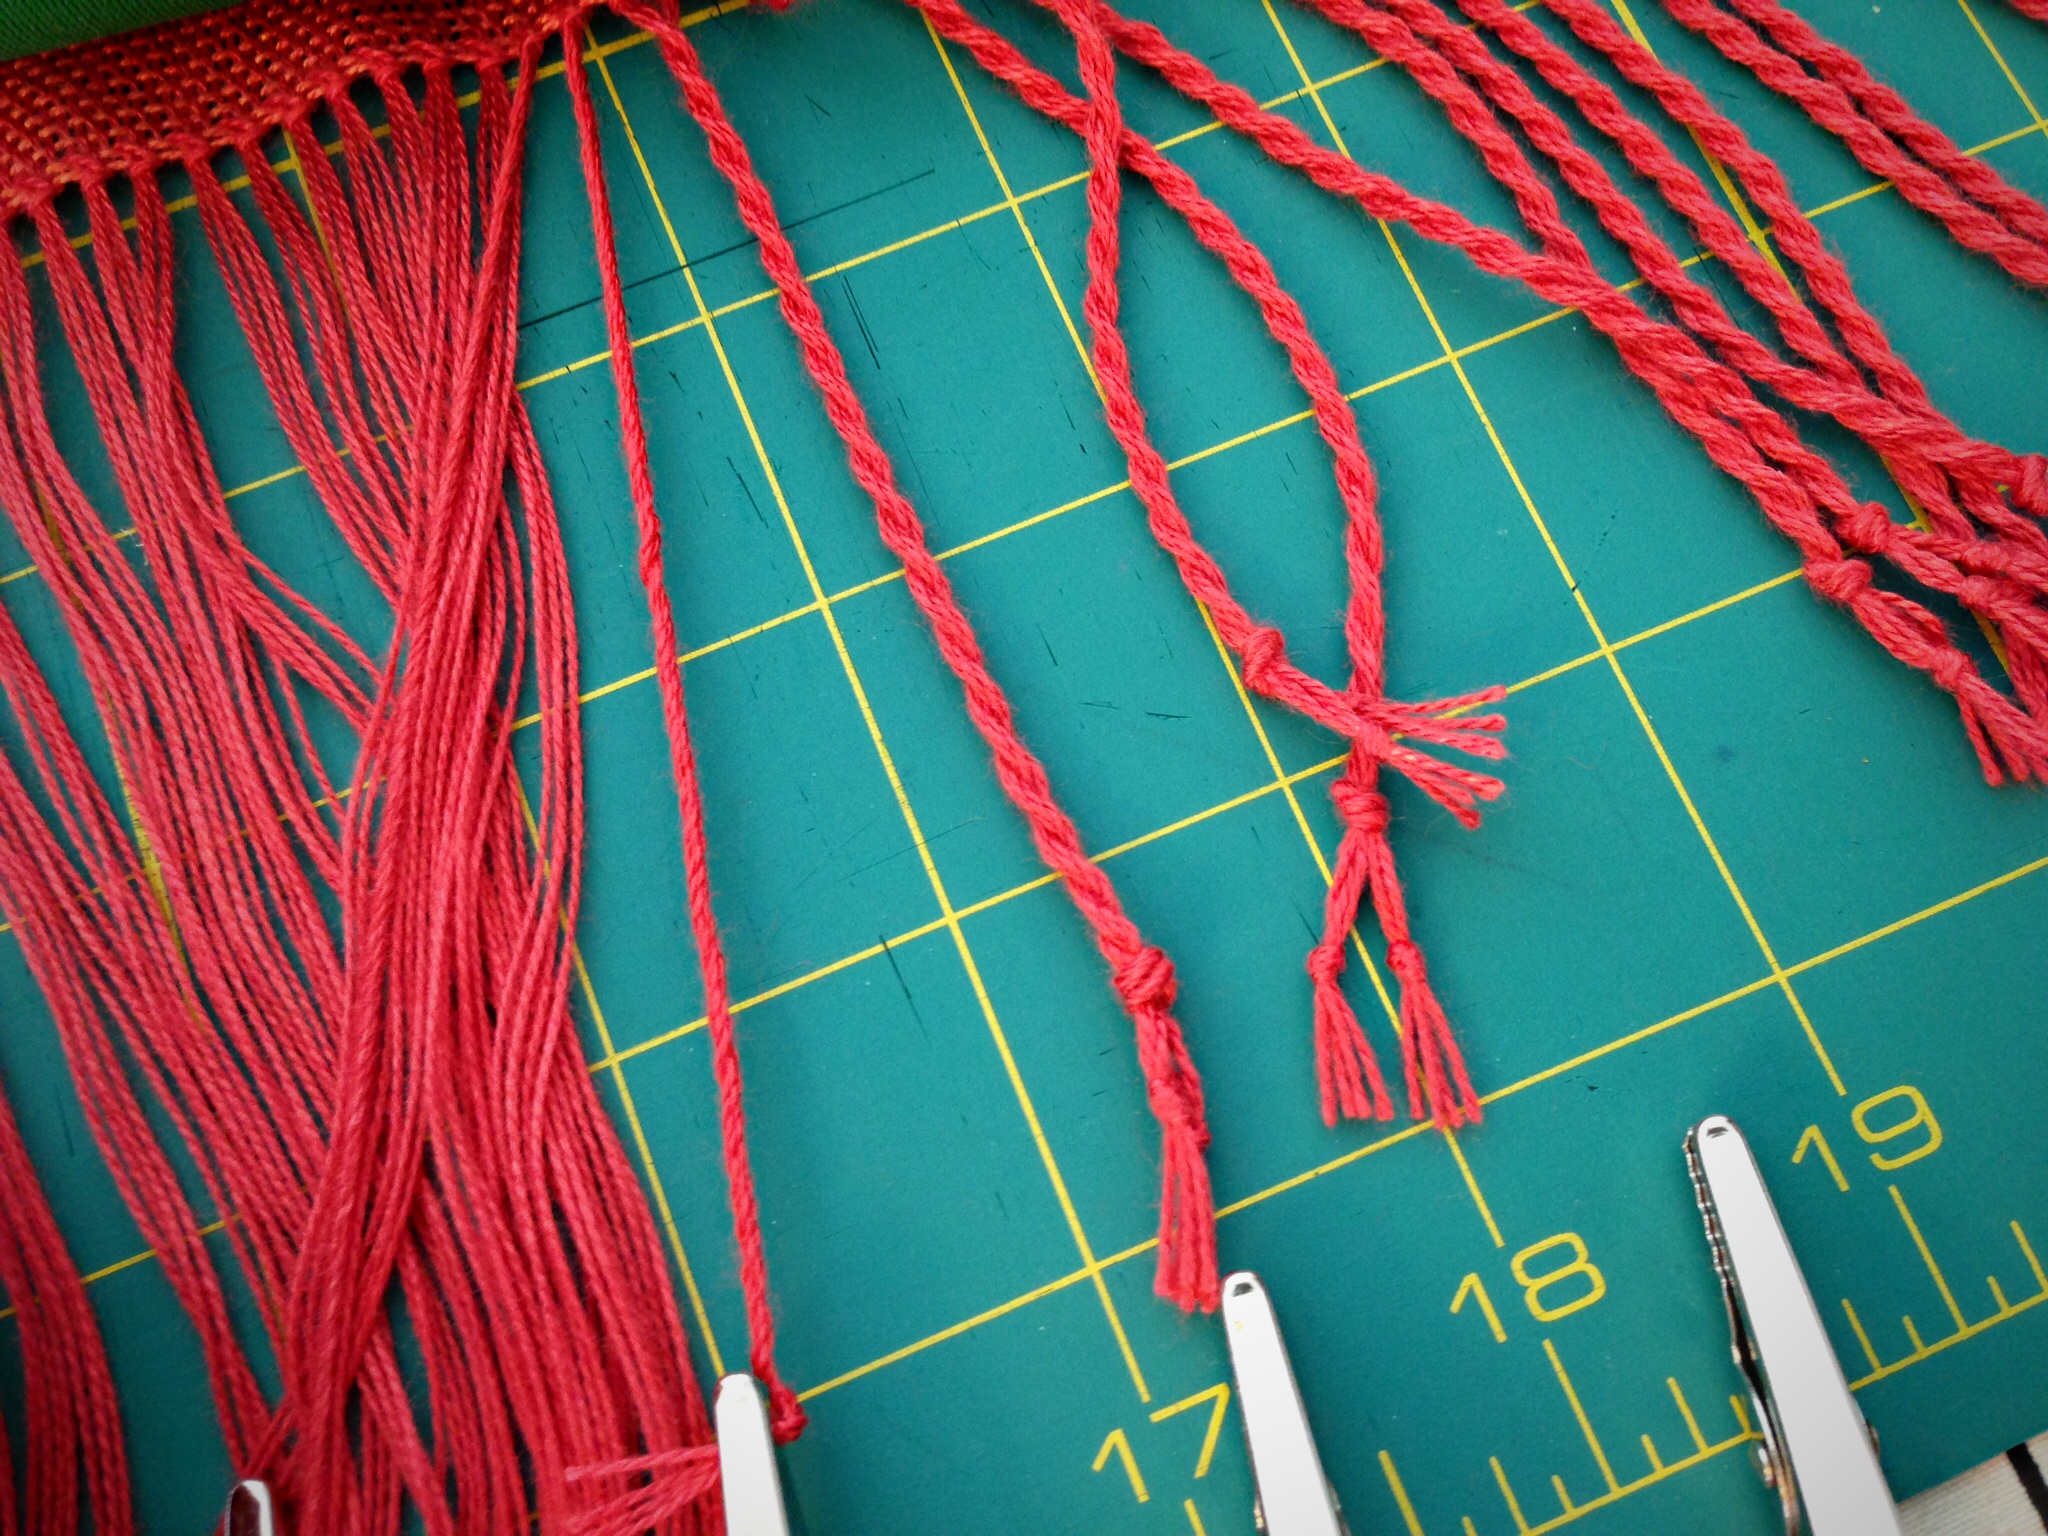
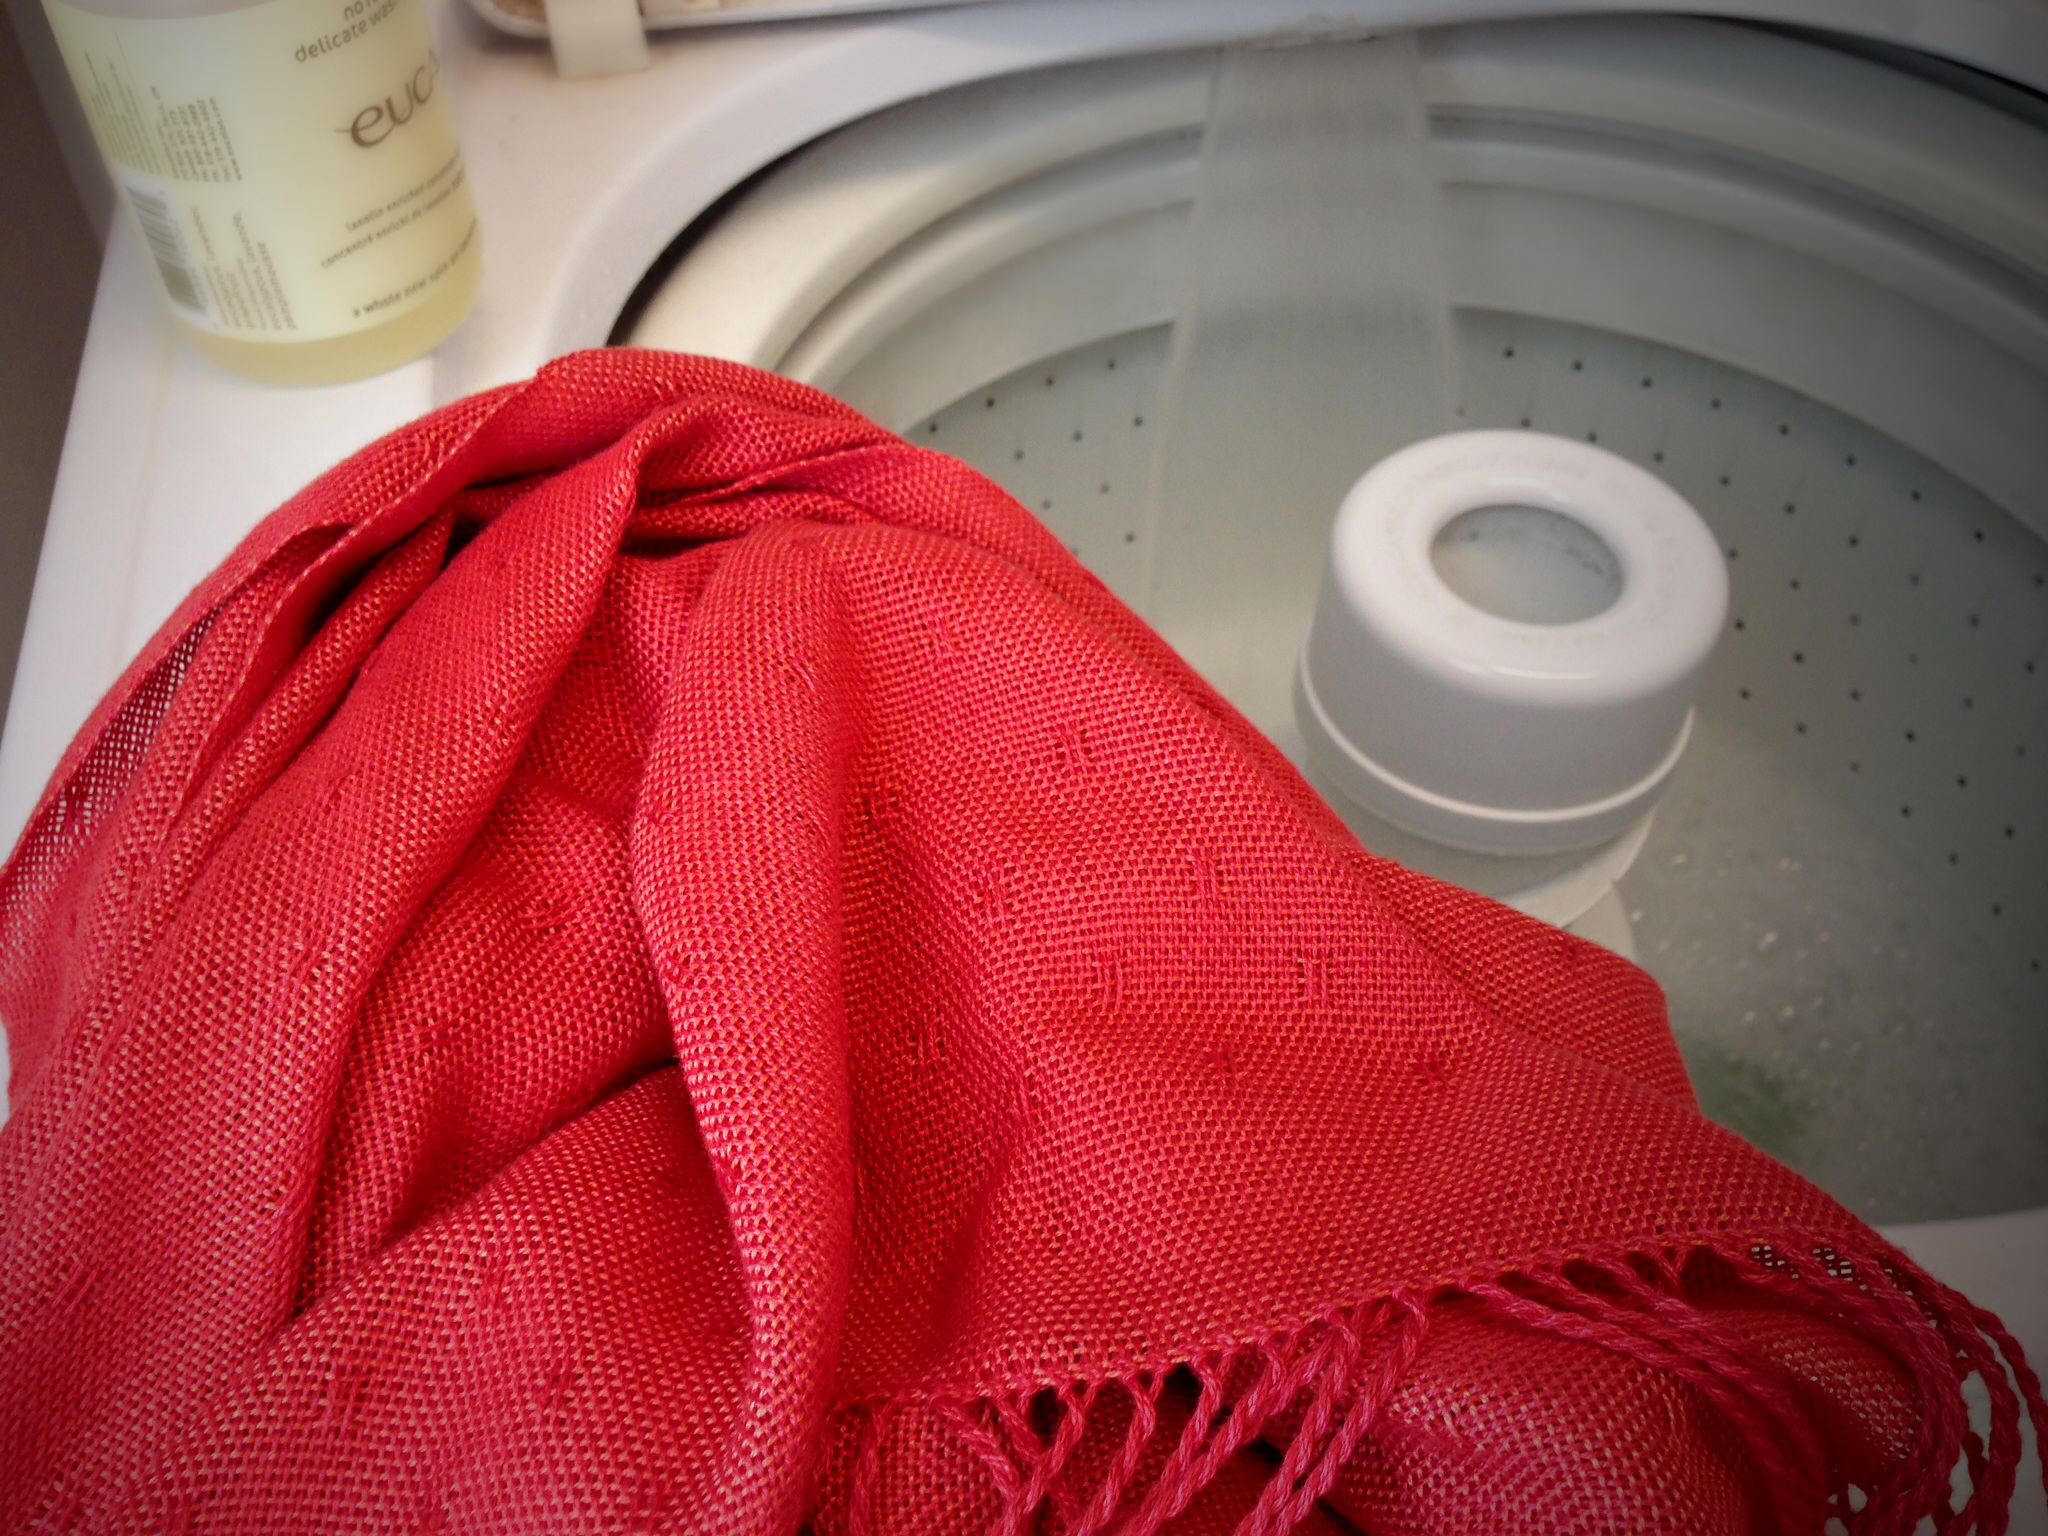
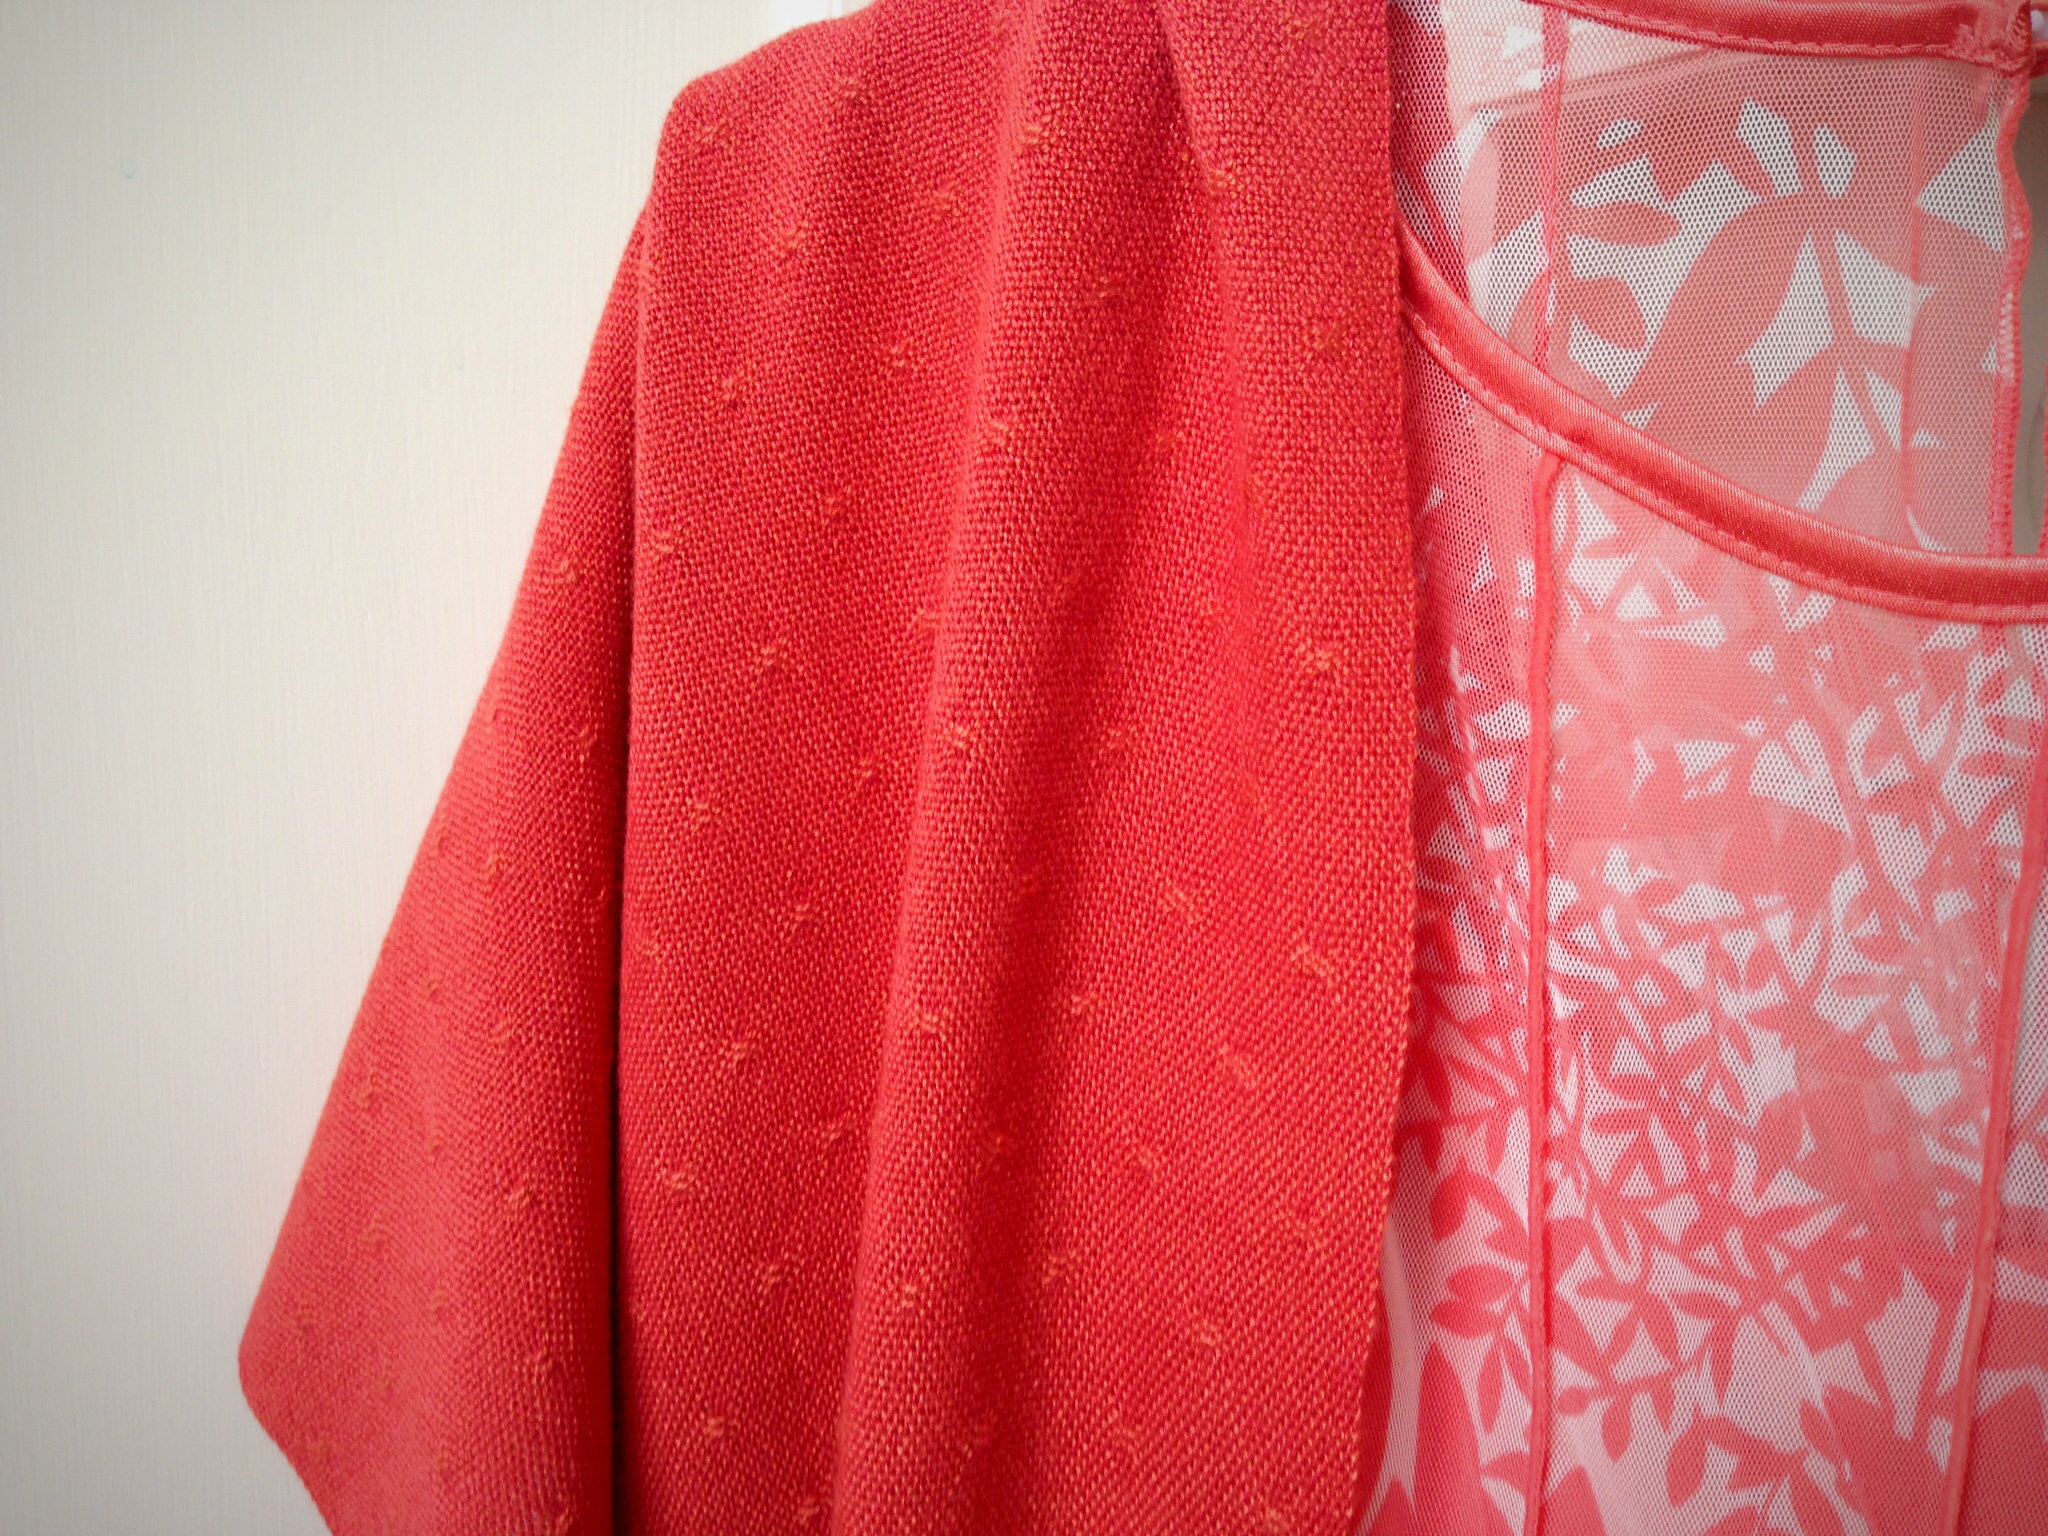
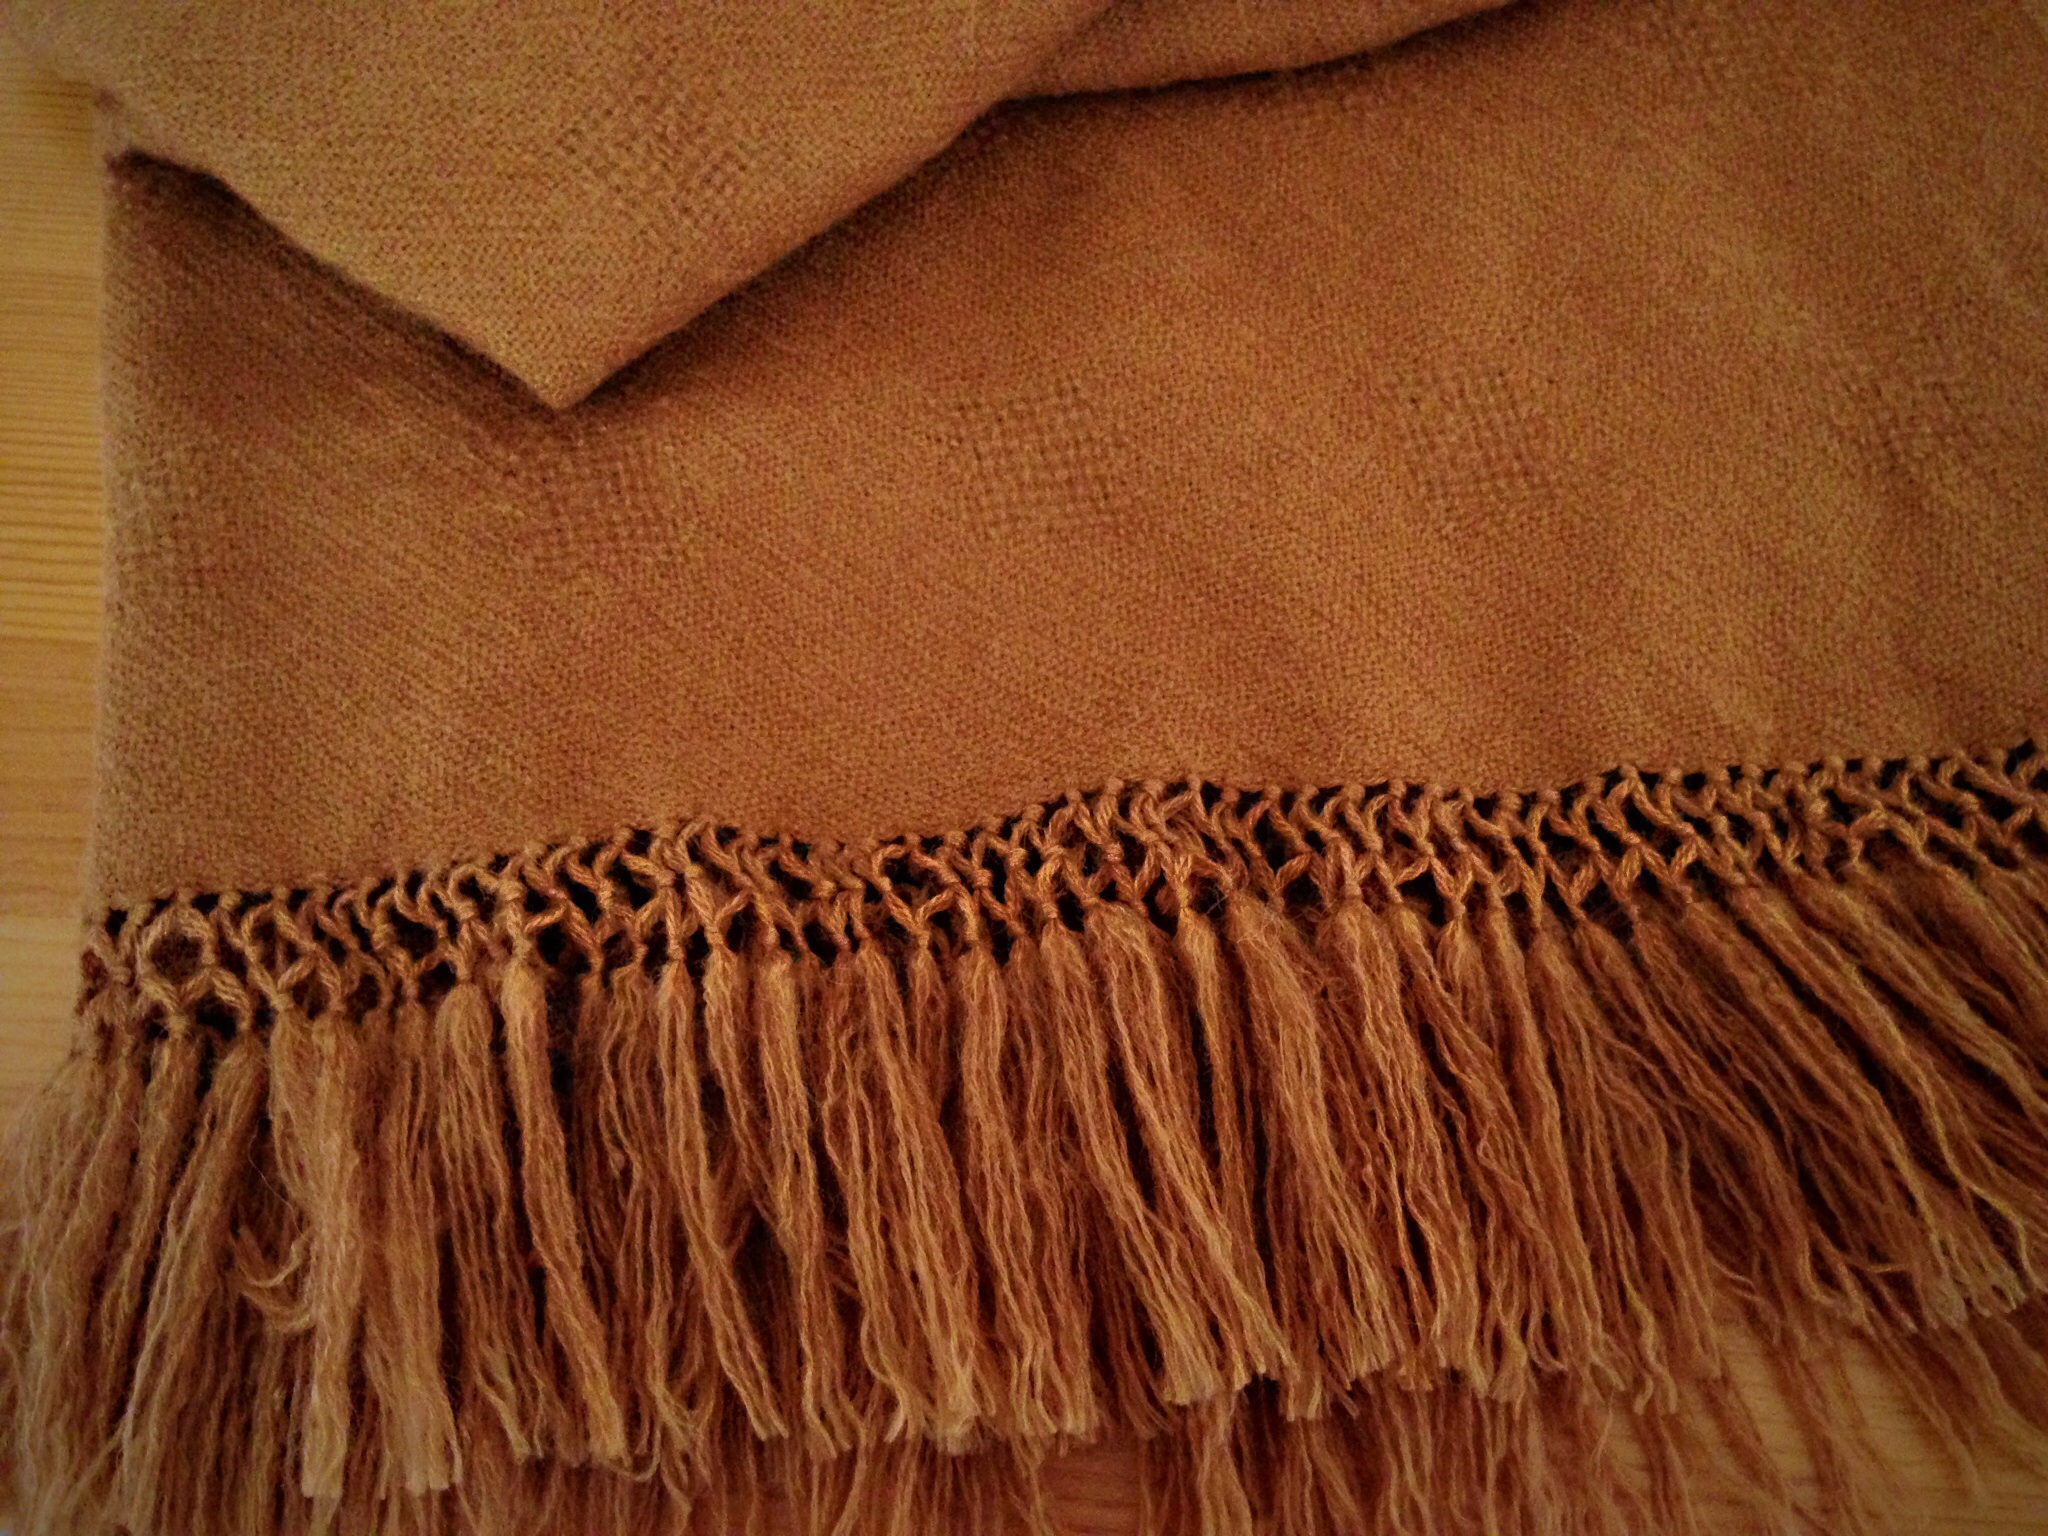
3. Untangled the fringe of alpaca/tencel throw. (A wet finishing nightmare I don’t care to repeat.) You can see what it looked like before washing HERE.

Alpaca Tencel handwoven throw with lattice fringe
Each strand of fringe was carefully separated one-by-one after leaving the alpaca/tencel throw in the washing machine a few minutes too long. Untangling took longer than tying the lattice fringe. Hours and hours.

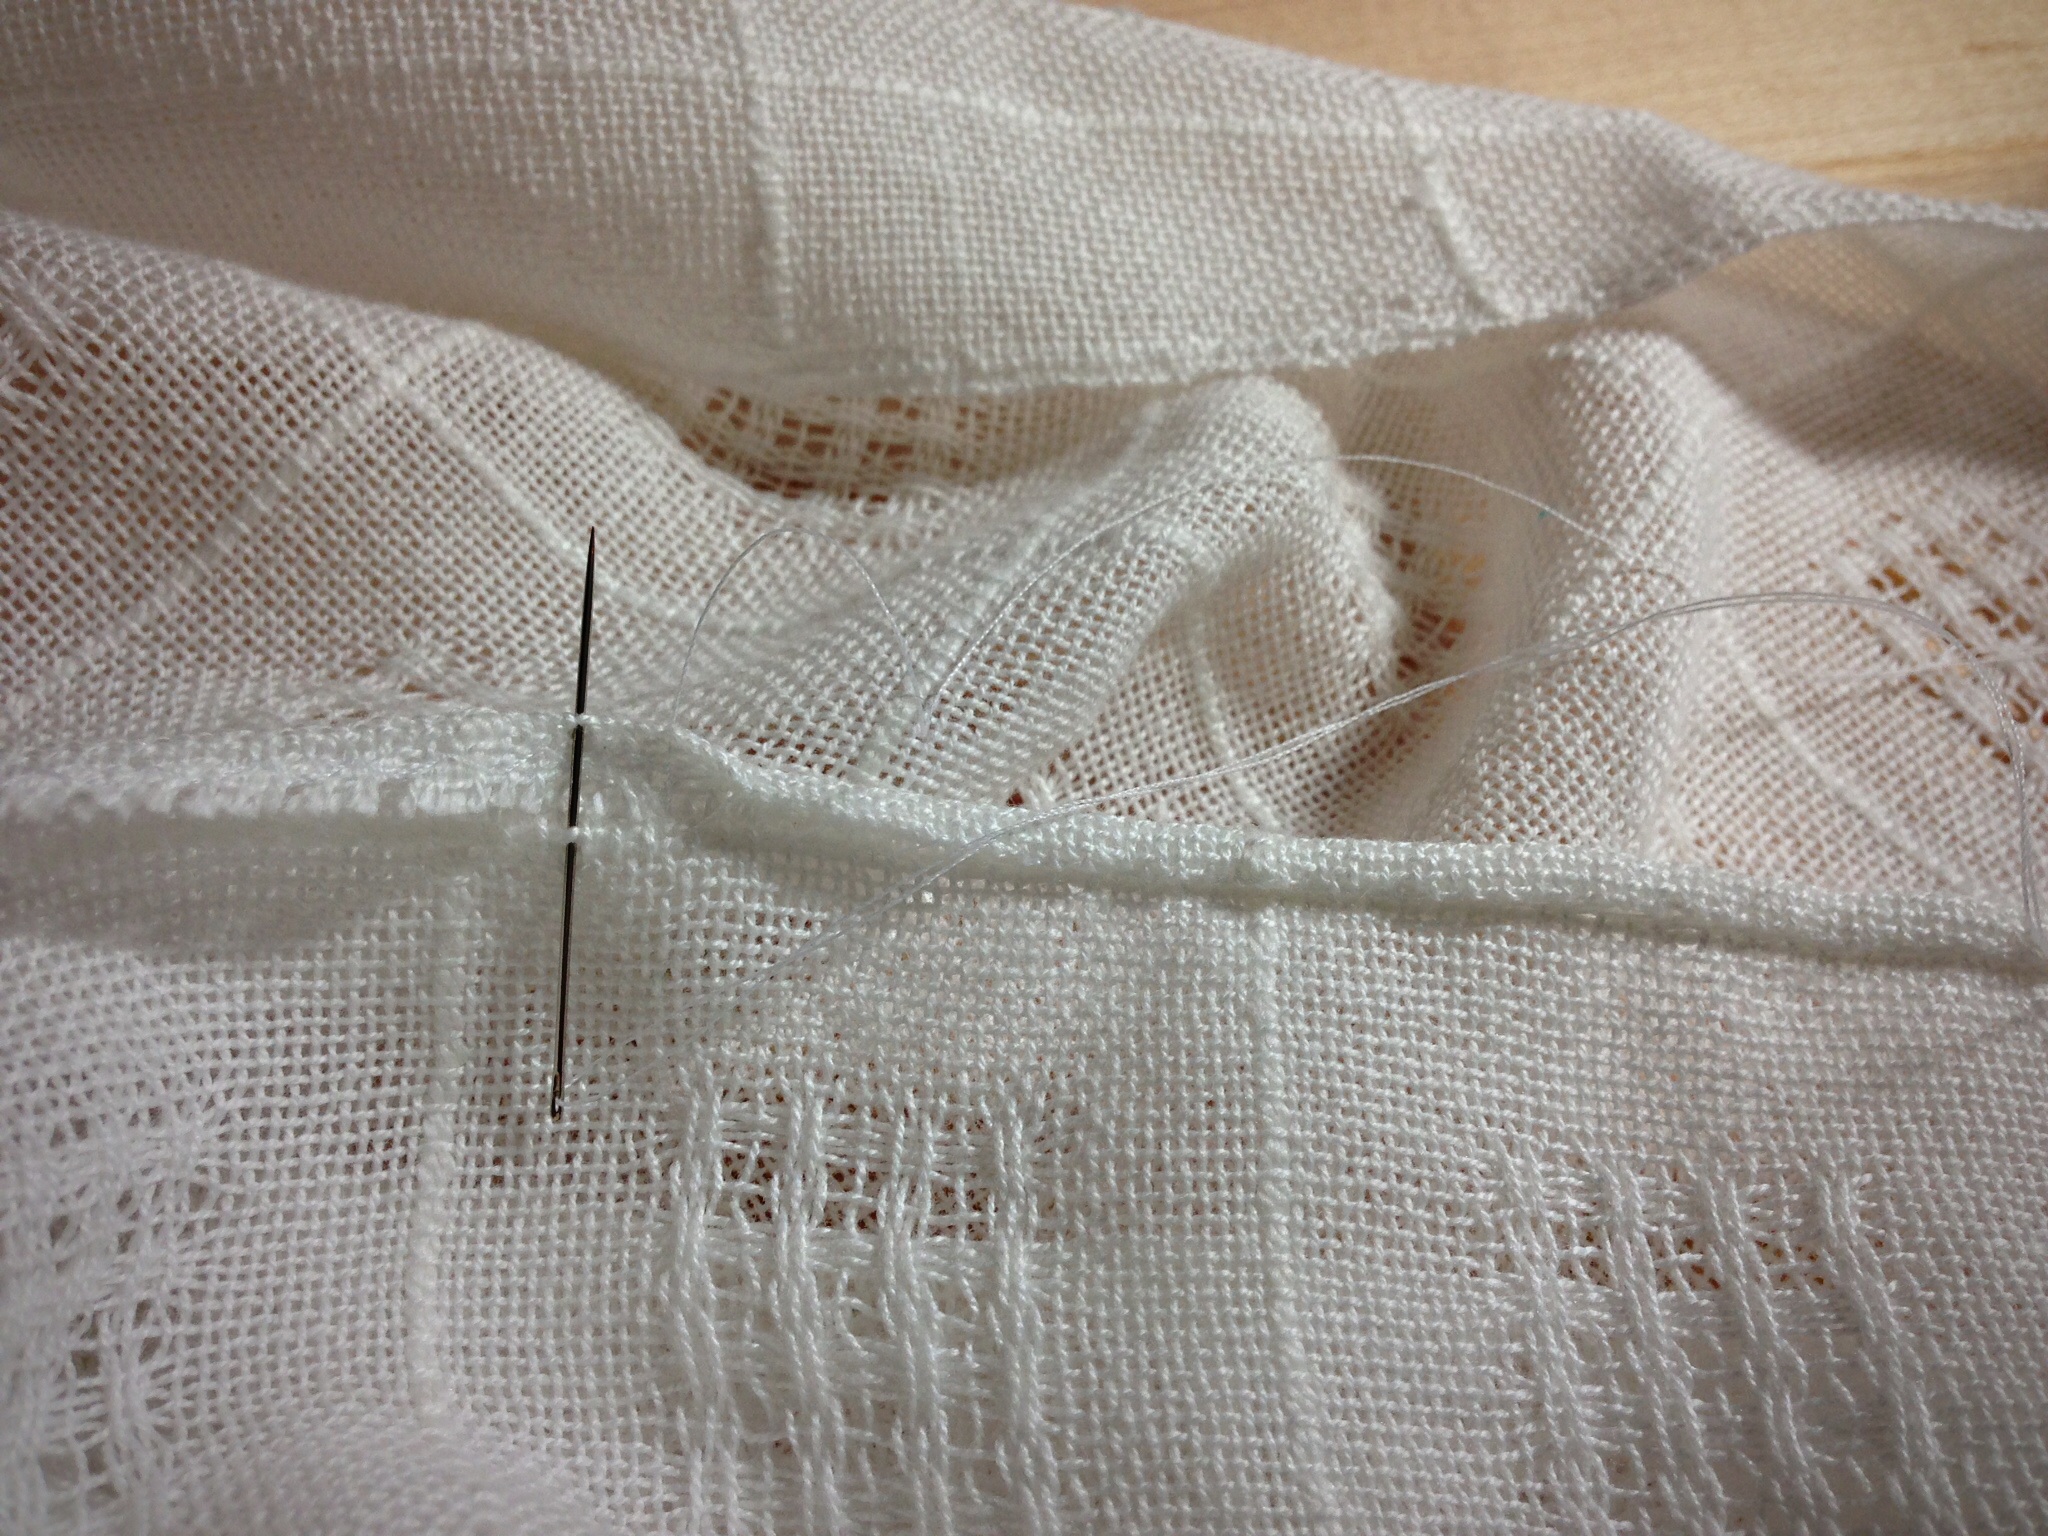
4. Hand-stitched rolled hem on Swedish lace tablecloth. (I may use this as a curtain for my weaving studio window, hung on rings with clips, on a rod.) HERE are the long curtain panels that hang on windows in my home.

Hand-stitched rolled hem on handwoven Swedish lace cloth.
Swedish lace panel can be used as a tablecloth, or a curtain, or even a light, summery shawl. The hand-stitched rolled hem gives a delicate touch to this elegant piece.
Swedish lace, handwoven cloth. Karen Isenhower
Swedish lace is shown to its best advantage when light is allowed to shine through the cloth. The pressed rolled hem adds a classy touch.

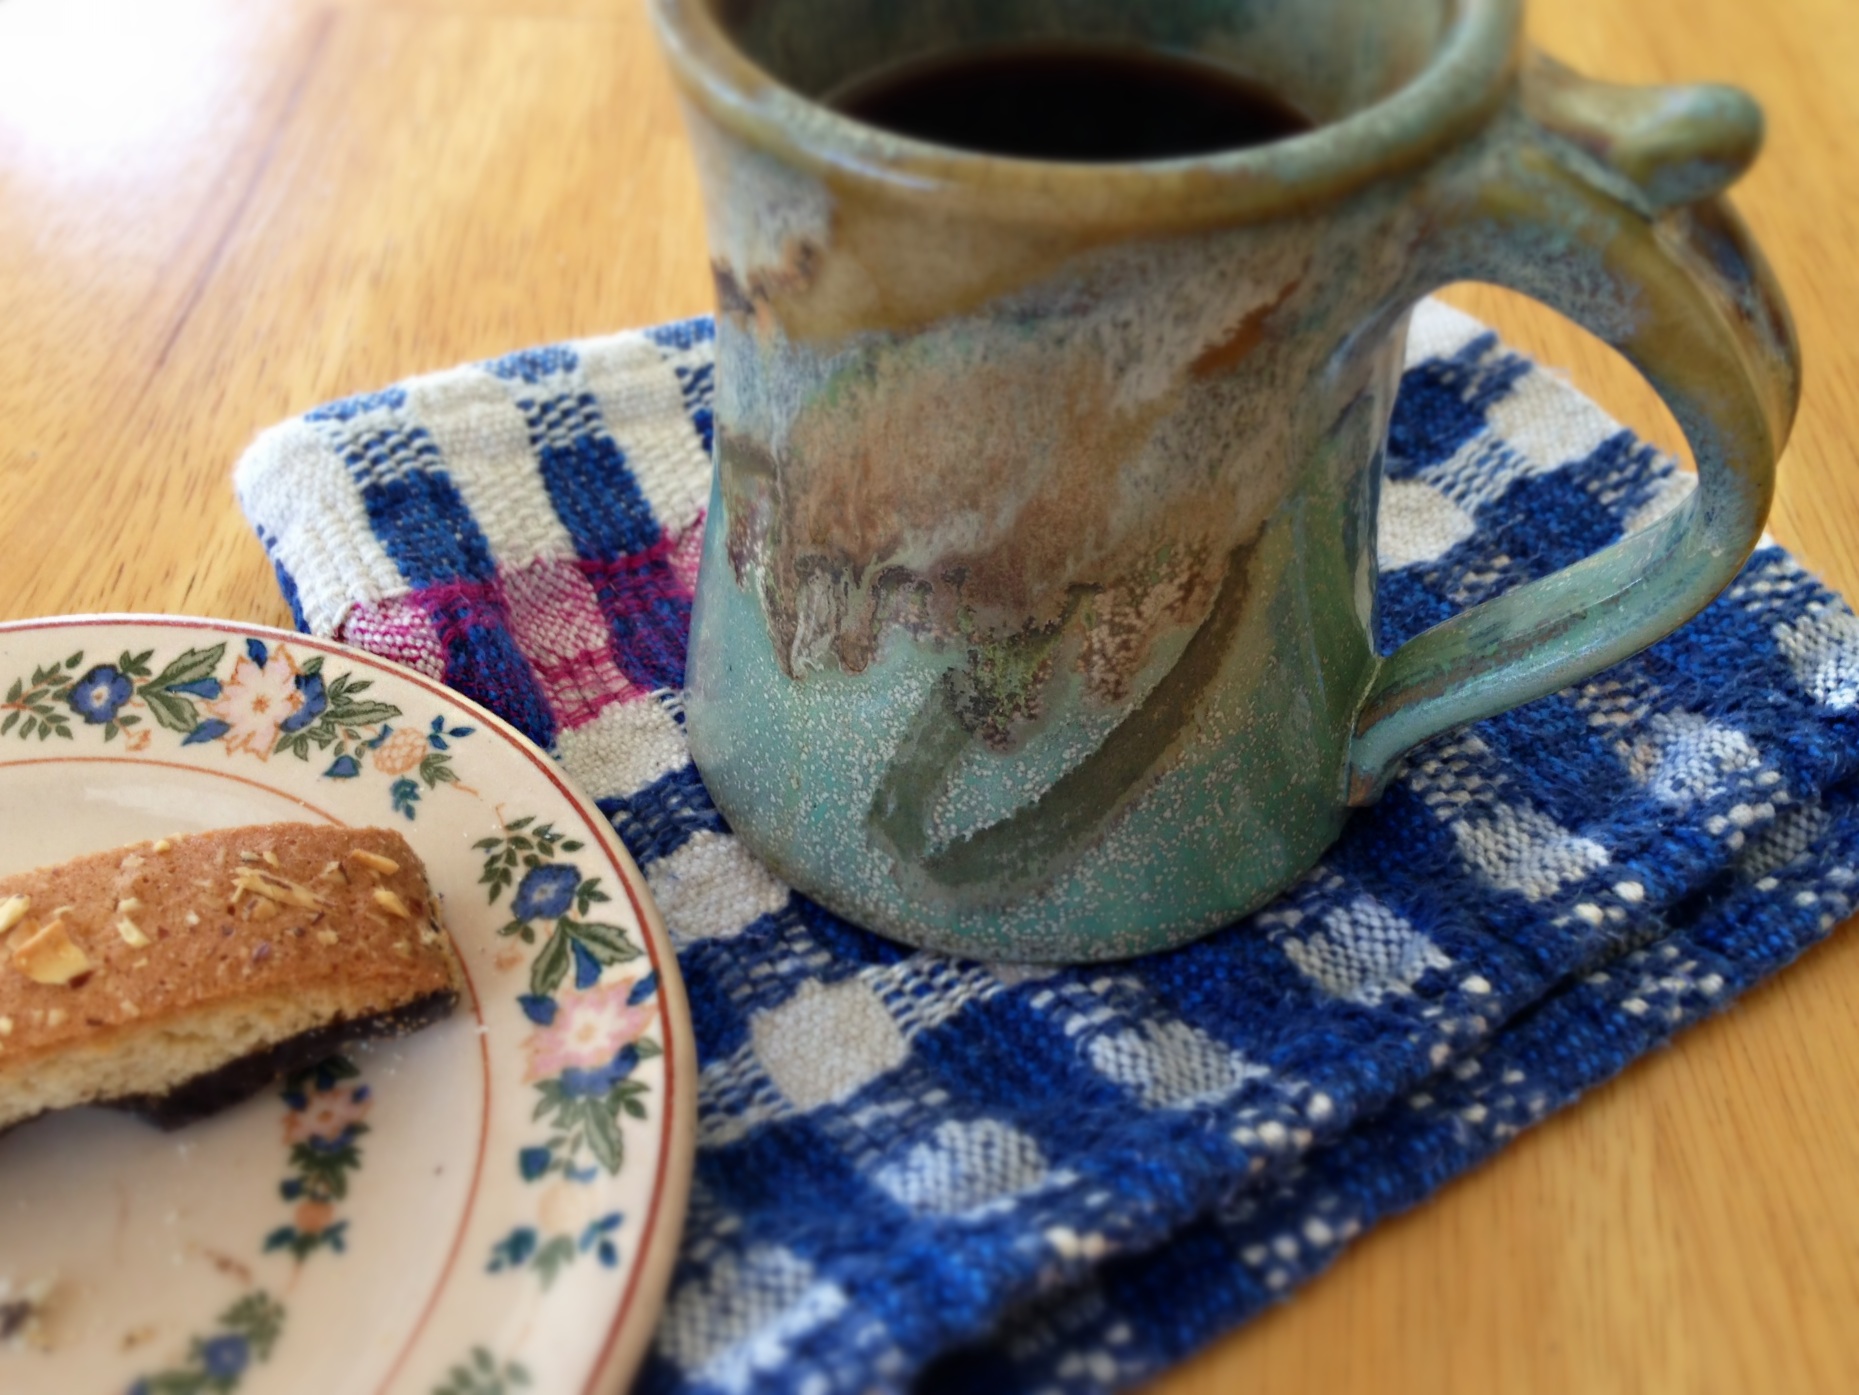
5. Hemmed small sample piece to carry around with me when I have a cup of coffee. (I grab this re-usable “scrap” instead of a paper napkin or paper towel. It also doubles as a coaster wherever I happen to sit down.) The original M’s and O’s towels are HERE; and HERE you can see what I mean about carrying my coffee cup around with me.

Handwoven scrap is used as a napkin/coaster for cup of coffee.
Scrap of handwoven fabric, from a cottolin warp of handtowels, follows my favorite coffee cup around.

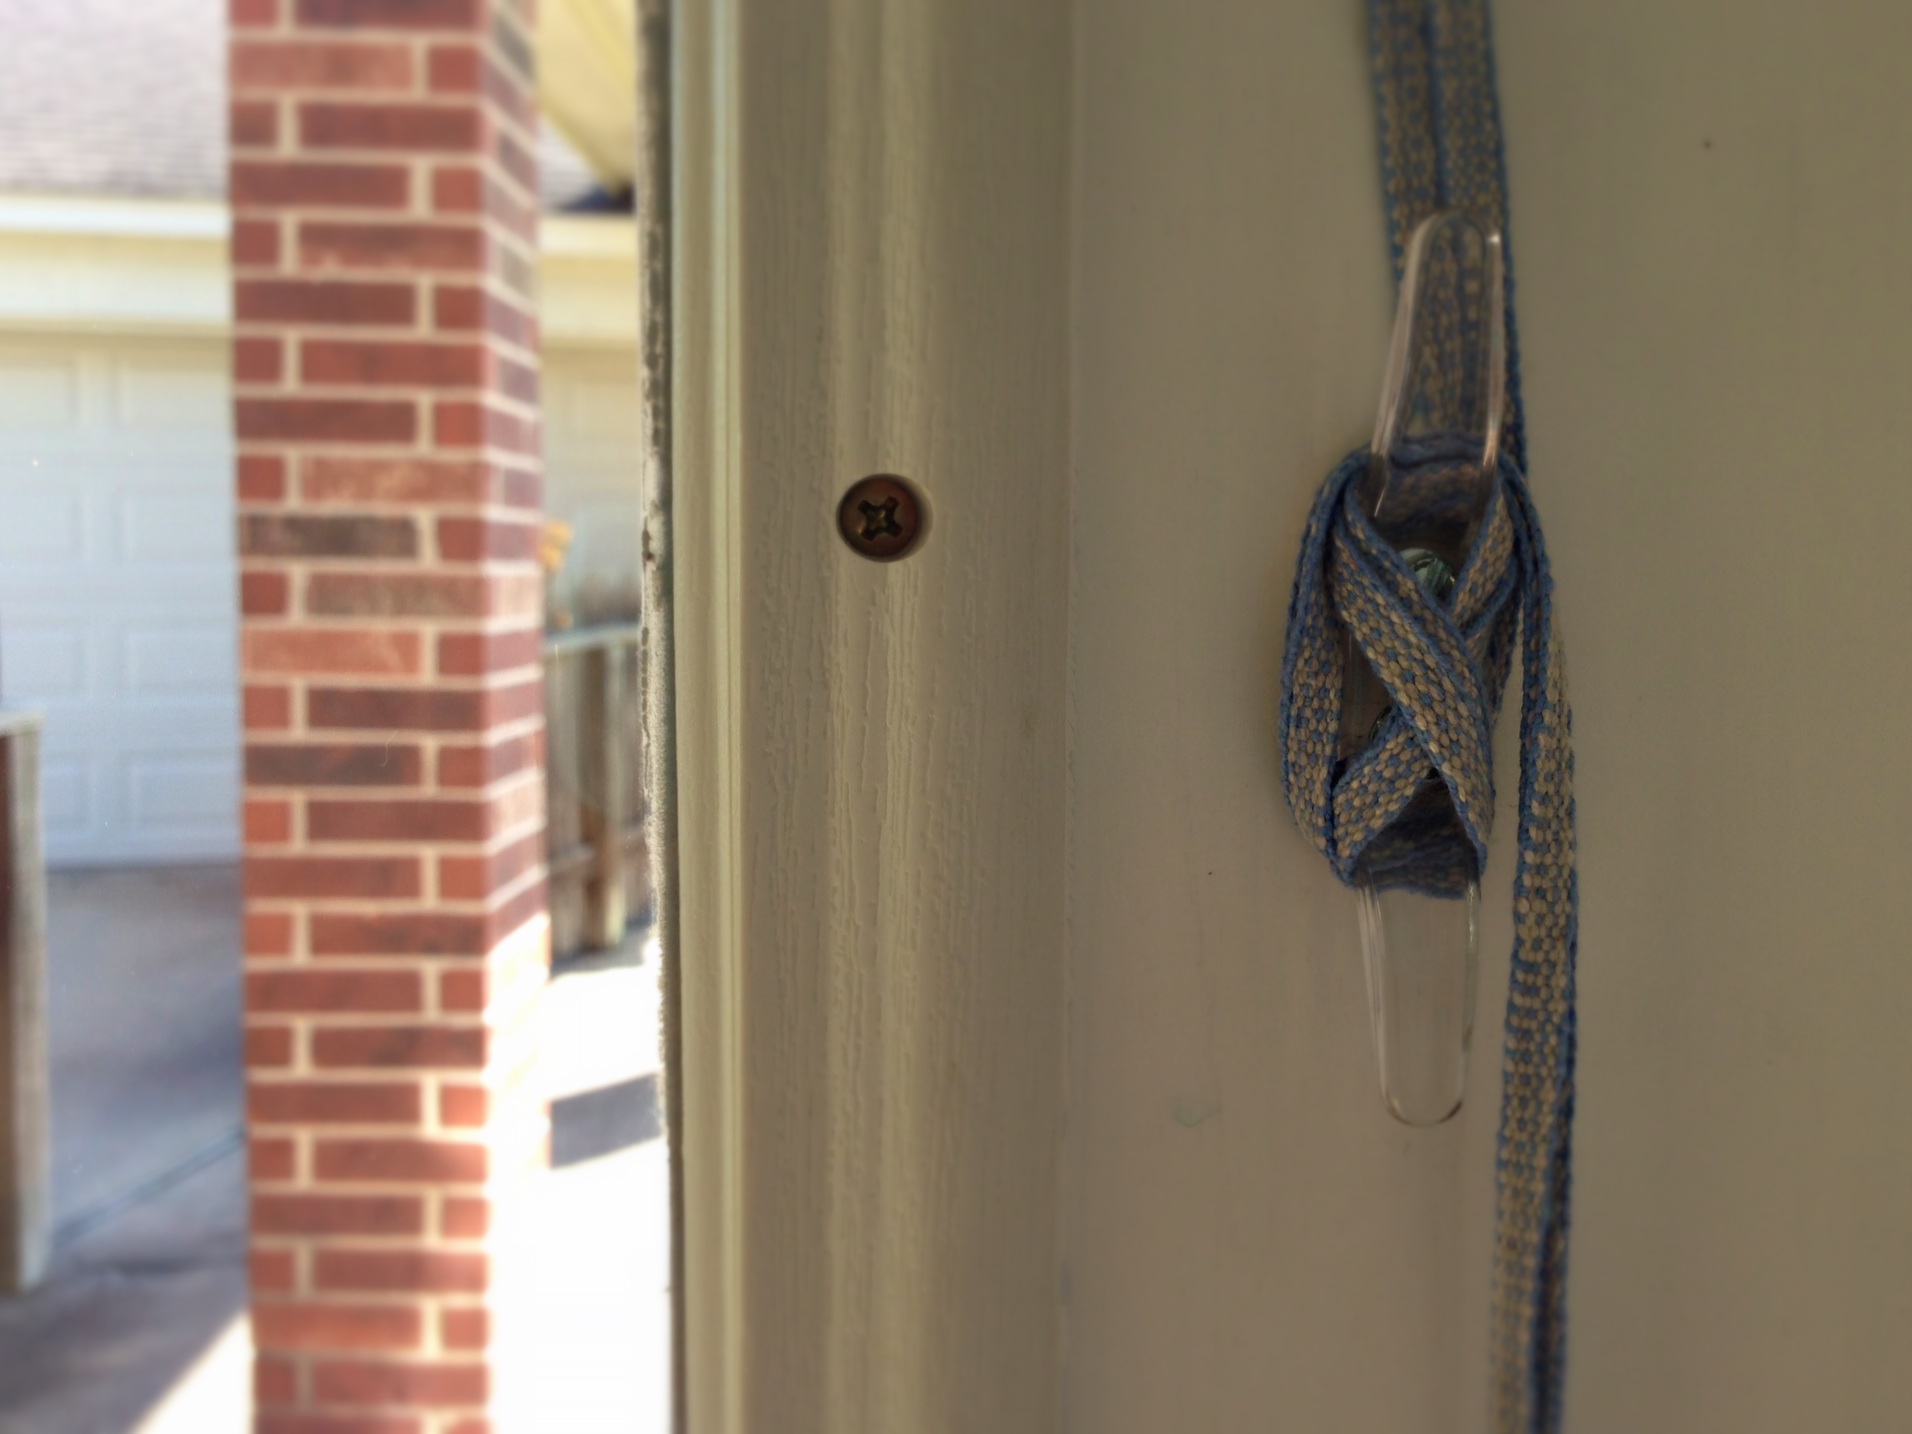
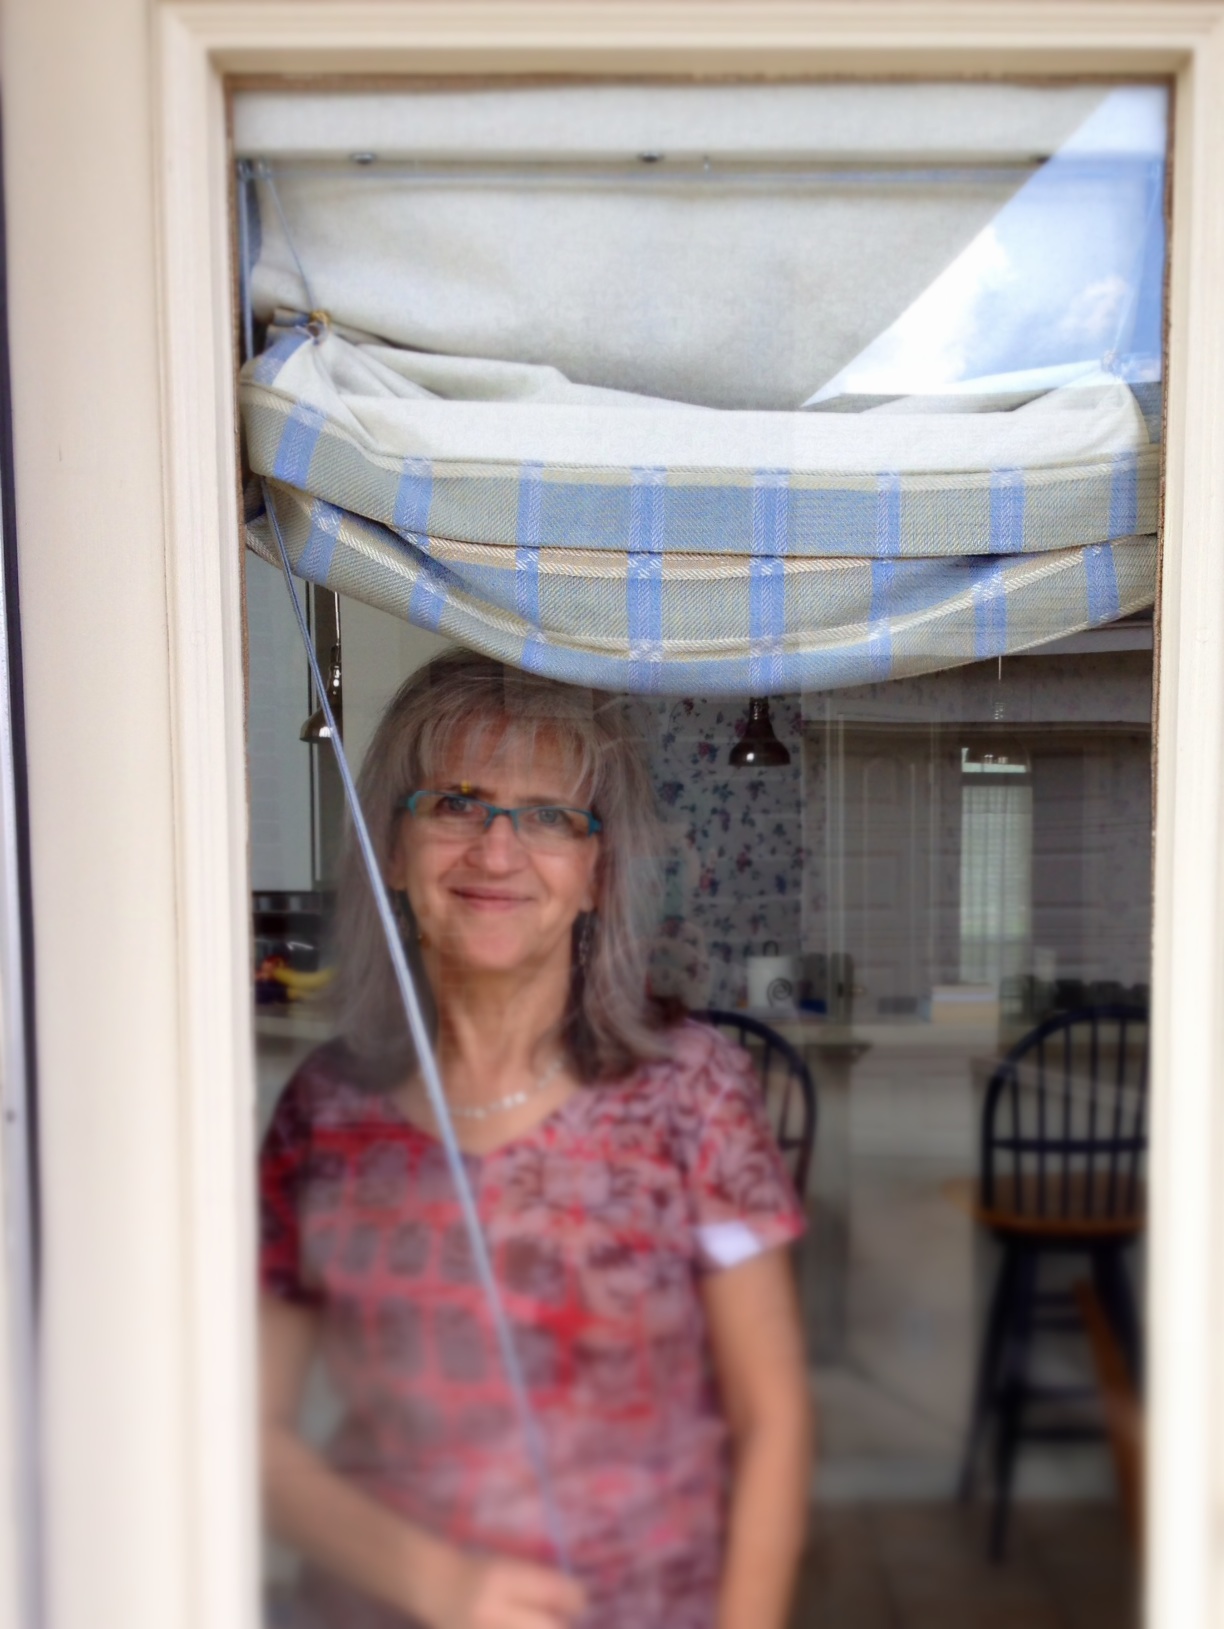
6. Replaced nylon cord on handwoven Roman shades with a cord I wove on my band loom. (The “temporary” nylon cord stayed more than a year. We now enjoy seeing this on our kitchen door every day, finally fully finished.) The only place I have a picture of the original nylon cord, and of the fabric on the loom for the Roman shades is in my Projects on Weavolution HERE. (I’m not sure if you can see it without logging in to the site.)

Handwoven on Glimakra band loom - pull cord for Roman shades.
Linen and cotton threads that match the handwoven Roman shades were used to weave the pull cord. Cord woven on Glimakra two-treadle band loom.
Handwoven Roman shades in two-block twill. Karen Isenhower
Handwoven Roman shades finally have a matching pull cord. When the shades are lowered at night, the two-block twill structure is seen covering the whole kitchen door window. Woven on 8-shaft Glimakra Standard loom.
Opening the handwoven Roman shades. Please come on in!
Opening the shades to start the day and welcome you. Please come in!

May you reduce your finishing pile (I know you have one).

Forever finishing,
Karen

Tools Day: Fringe Twister

A hemstitched edge deserves twisted fringe. You have to overlook the amount of time it takes to put this finishing touch on your handwoven articles (often as much, or more, time than it took to weave the cloth in the first place). You do it because you care about the end result. The hemstitching and fringe are the mat and frame for your work of art. Begin well and finish well.

Tools for twisting fringe.
Step 1: (First, with fabric not yet washed and dried, cut all fringe strands on both ends of article to an equal and even length.) A pair of two-pound walking weights holds the fabric in place for tying knots. This fringe twister tool has a long handle and four little alligator clips.
Steps for making twisted fringe.
Step 2: Tie an overhand knot a fingertip-length away from the end, securing four ends together. (Other projects may have more than four ends grouped together.) This extra step holds the secret to clean cut fringe ends (see step 7).
Fringe twister at work.
Step 3: Let each little alligator grab a knot in it’s teeth, four in a row. Crank the handle around until the twisted threads begin to kink back on themselves. Count the number of turns of the handle and repeat that same number of turns for each grouping.
Making twisted fringe. Step-by-step.
Step 4: Grab the strands from the first two alligators’ mouths, being careful not to let the strands unwind. Combine the two thread groups and tie an overhand knot a fingertip-width away from the first knots.
Making twisted fringe. Step-by-step pics.
Step 5: After the knot is tied, let the strands unwind in your hand, keeping them from tangling with neighboring threads. Snug the knot by holding the knot and pulling on the two smaller knots, one at a time.
Bamboo Shawl, ready to trim edges of fringe. Explanation about twisting fringe.
Step 6: Wet finish the fabric by a method suitable for the type of thread or yarn being used. Air dry completely, or other suitable method for drying. While still damp, separate and straighten each twisted fringe.
Secret for clean cut fringe ends.
Step 7: First set of knots are cut off, removing the frayed ends, and leaving clean cut ends.
Finished Bamboo Huck Lace Shawl. Karen Isenhower
Step 8: Wear your lovingly handmade creation to a very special occasion, such as to your daughter’s wedding.

This is a lesson for raising children and letting them go, too. You weave for years, give time-consuming attention to the finishing touches while they are in your hands, and then you let them go. Wedding in four days!

May you take the time to finish well.

Love,
Karen

Quiet Friday: Coral Shawl for a Memorable Occasion

Have you ever experienced a chain of events, where the dominos start falling, and you just try to keep up? That is the story of this shawl. My daughter got engaged, so I bought a dress to wear at her wedding. The dress is sleeveless, so I wanted a shawl to wear over my shoulders. Not knowing where to find a matching shawl, I decided to weave one. To weave a shawl, I had to finish weaving these towels that were on the loom, plan the draft for a shawl, and order thread.

Thread and yarn record notebook.
New 10/2 bamboo thread samples added to my thread/yarn record book.

The excitement of dressing the loom, trying out weft color options, weaving the delicate huck lace pattern, twisting fringe, wet finishing the cloth, and waiting for the wet cloth to dry, is all intensified because of the meaning of the event where I will wear the shawl. The shawl, itself, is a minor player that will serve best if it is not even noticed. The attention will be on Melody and Eddie as they pledge their love and faithfulness to each other, embracing companionship for a lifetime. Three weeks to go!

Threading heddles with coral bamboo thread for huck lace.
Threading heddles for huck lace.
Sleying the reed on Glimakra Ideal.
Reed is sleyed with two ends per dent in a 12 dent reed, which means the sett is 24 ends per inch.
Every thread is ready. Let the weaving begin!
Every thread stands at attention, each in their proper place. Let the weaving begin!
Weft color auditions on coral bamboo warp. Karen Isenhower
Trying out the weft colors in the late afternoon on the dark coral warp. First, coral weft; and then, hot pink weft.
Coral pink bamboo shawl in huck lace.
Pink coral shawl was woven first. The hot pink huck lace weft floats are on the back side of the cloth, visible as the cloth angles toward the knee beam.
Hemstitching on the loom. Huck lace bamboo shawl.
Hemstitching at the beginning of the coral shawl. Notice the subtle border treatment that starts with plain weave and three closer rows of huck lace before the body of the shawl.
Twisting fringe.
Twisting groups of warp ends together to create twisted fringe that embellishes the ends of the shawl.
Wet finishing begins for coral huck lace shawl.
There is nothing that makes me more nervous than wet finishing. A mistake at this point can ruin the handwoven masterpiece. For this reason, I first wet finished the sample piece, and then the pink coral shawl. Now, I am confident about throwing the coral shawl into the washing machine with a half-capful of no rinse delicate wash concentrate.
Bamboo shawl, laying flat to dry.
After gently rolling the wet cloth in towels to remove excess water, I lay it out smoothly on my longest countertop, and leave it to dry overnight.
Trimming the fringe after washing. Frayed ends removed.
After the cloth is fully dry, knots at the ends of the twisted fringe are trimmed off, removing frayed ends and leaving clean-cut ends.
Finished handwoven coral bamboo huck lace shawl. Karen Isenhower
Ready for a special occasion!

May those you love know how much you love them.

With Anticipation,
Karen

The Secret to Making Lattice Fringe

First, a short tutorial for tying perfect lattice fringe, and then some thoughts about keeping our eyes open to reality. I decided to tie three rows of knots with this fringe for a pretty lattice effect, knowing the results are worth the time it takes.

How to Tie Lattice Fringe – Step-by-Step Tutorial

Supplies:

  • 7/8″ (2 cm) blue rigid foam insulation (mine is Dow Styrofoam Residential Sheathing Insulation, found at The Home Depot or Lowes), cut to 32 x 36″ (81 x 91 cm) (This great idea came from Thrums, one of my favorite weaving blogs.)
  • 16 straight pins
  • 7/8″ (2 cm) warping slat (or template of desired width)

1. The first row of overhand knots has been tied. (More detail HERE.) Lay the fabric over the foam board, with the fringe laying toward you at the front of the board.

How to add lattice fringe to a row of knotted fringe. Step-by-step tutorial with pics.


2. Place a straight pin through the top thread of each of several knots in a row, into the foam board under the fabric.

Lattice Fringe Tutorial. Step-by-step, with pics.


3. Use warping slat (or other template) as as spacing guide for the second row of knots. Lay warping slat flat, and place it flush against the row of pins. Using the width of the warping slat as a spacer, place a pin in the second row just below the slat, at the point where the knot will be formed.

Lattice Fringe Tutorial. Step-by-step with pics.


4. Remove warping slat. Loosely tie an overhand knot below the just-placed pin in the second row, leaving the center of the knot wide open.

Overhand knot in lattice fringe tutorial. Step-by-step with pics.


5. Insert another pin through the center of the knot just a fraction below the point of the first pin.

Making Lattice Fringe. Step-by-step tutorial with pics.


6. Slowly pull the knot to cinch it up to the point of the second pin.

Cinching the knot for lattice fringe. Tutorial with pics.


7. Holding the knot firmly between the fingers of one hand, with your other hand gently tug each strand of the knot to its full length.

Making lattice fringe - tutorial with pics.


8. Continue tying knots across the entire row.

First row of lattice fringe. Tutorial step-by-step with pics.


9. Repeat the process to add another row of knots.

Tutorial for Making Lattice Fringe. Step-by-step with pics.


My confidence in my ability to tie these knots can drift into careless thinking. Maybe I’m good enough at this that I can leave out some steps. Do I really need that guide stick for spacing the rows? I think I can eyeball it. Pulling each strand to close the knot takes too much time. Why don’t I just skip that part? And soon, I am blind to the haphazard results I am creating. Pride is like that. In relationships and in life circumstances, though, the consequences are more severe than in fringe-tying.

Pride keeps me from seeing my own vulnerabilities. Pride puts me in harm’s way because it blinds me to the reality of my own shortcomings, and makes me think I’m above it all. I want to keep my eyes open to my need to learn and grow. Who wants to drift into haphazard results in life? Not I. Not you, either?

May you never be blind to the things that matter.

Feeling vulnerable,
Karen

You Thought You Were Finished?

Tying the fringe into careful overhand knots is taking longer than the time it took to weave the three-yard-plus length of fabric. I would rather just do the weaving part. But without clearly defining the edges of the woven cloth by securing the ends, the whole fabric is at risk of unravelling. (To view this alpaca/Tencel throw on the loom, click HERE and HERE.)  We form distinct edges on our life’s fabric through the interactions we have with people around us.

Tying fringe on handwoven lace weave alpaca shawl.
Each knot of six warp ends were carefully tied around a straight pin, snuggling the knot right up to the edge of the fabric. As the knot is tied, I gentle pull each strand individually, which secures the knot and gives an even finish.

With relationships, it is tempting to take the easy way out. Quicker, painless, and less stressful. But it is the challenges from other people that help define who we are. Without the clarity of knowing what we stand for, we are at risk of falling for anything. Don’t avoid the often tedious work of making sure all your ends are secure.

Our challenges to each other sharpen us, finishing us for a greater purpose. Like iron sharpening iron, it is the abrasion that sharpens us, defines our edges, and brings the point of our lives into focus. All those loose ends tied into knots–ahh, the process is worth it.

May your finishing edges be as beautiful as you are.

With a few more loose ends,
Karen