My mother taught me to notice and enjoy beauty. I think that is why I find so much enjoyment at the weaving loom. The interplay of colors and materials never ceases to amaze me. I am often delighted as I see the woven material forming under my shuttle, feeling more like an observer than a performer. So, it was with great pleasure that I got to show my mom my weaving looms when she came to Texas for Melody’s wedding. I put this rug warp on the loom with that special visit in mind. Thanks for everything, Mom!
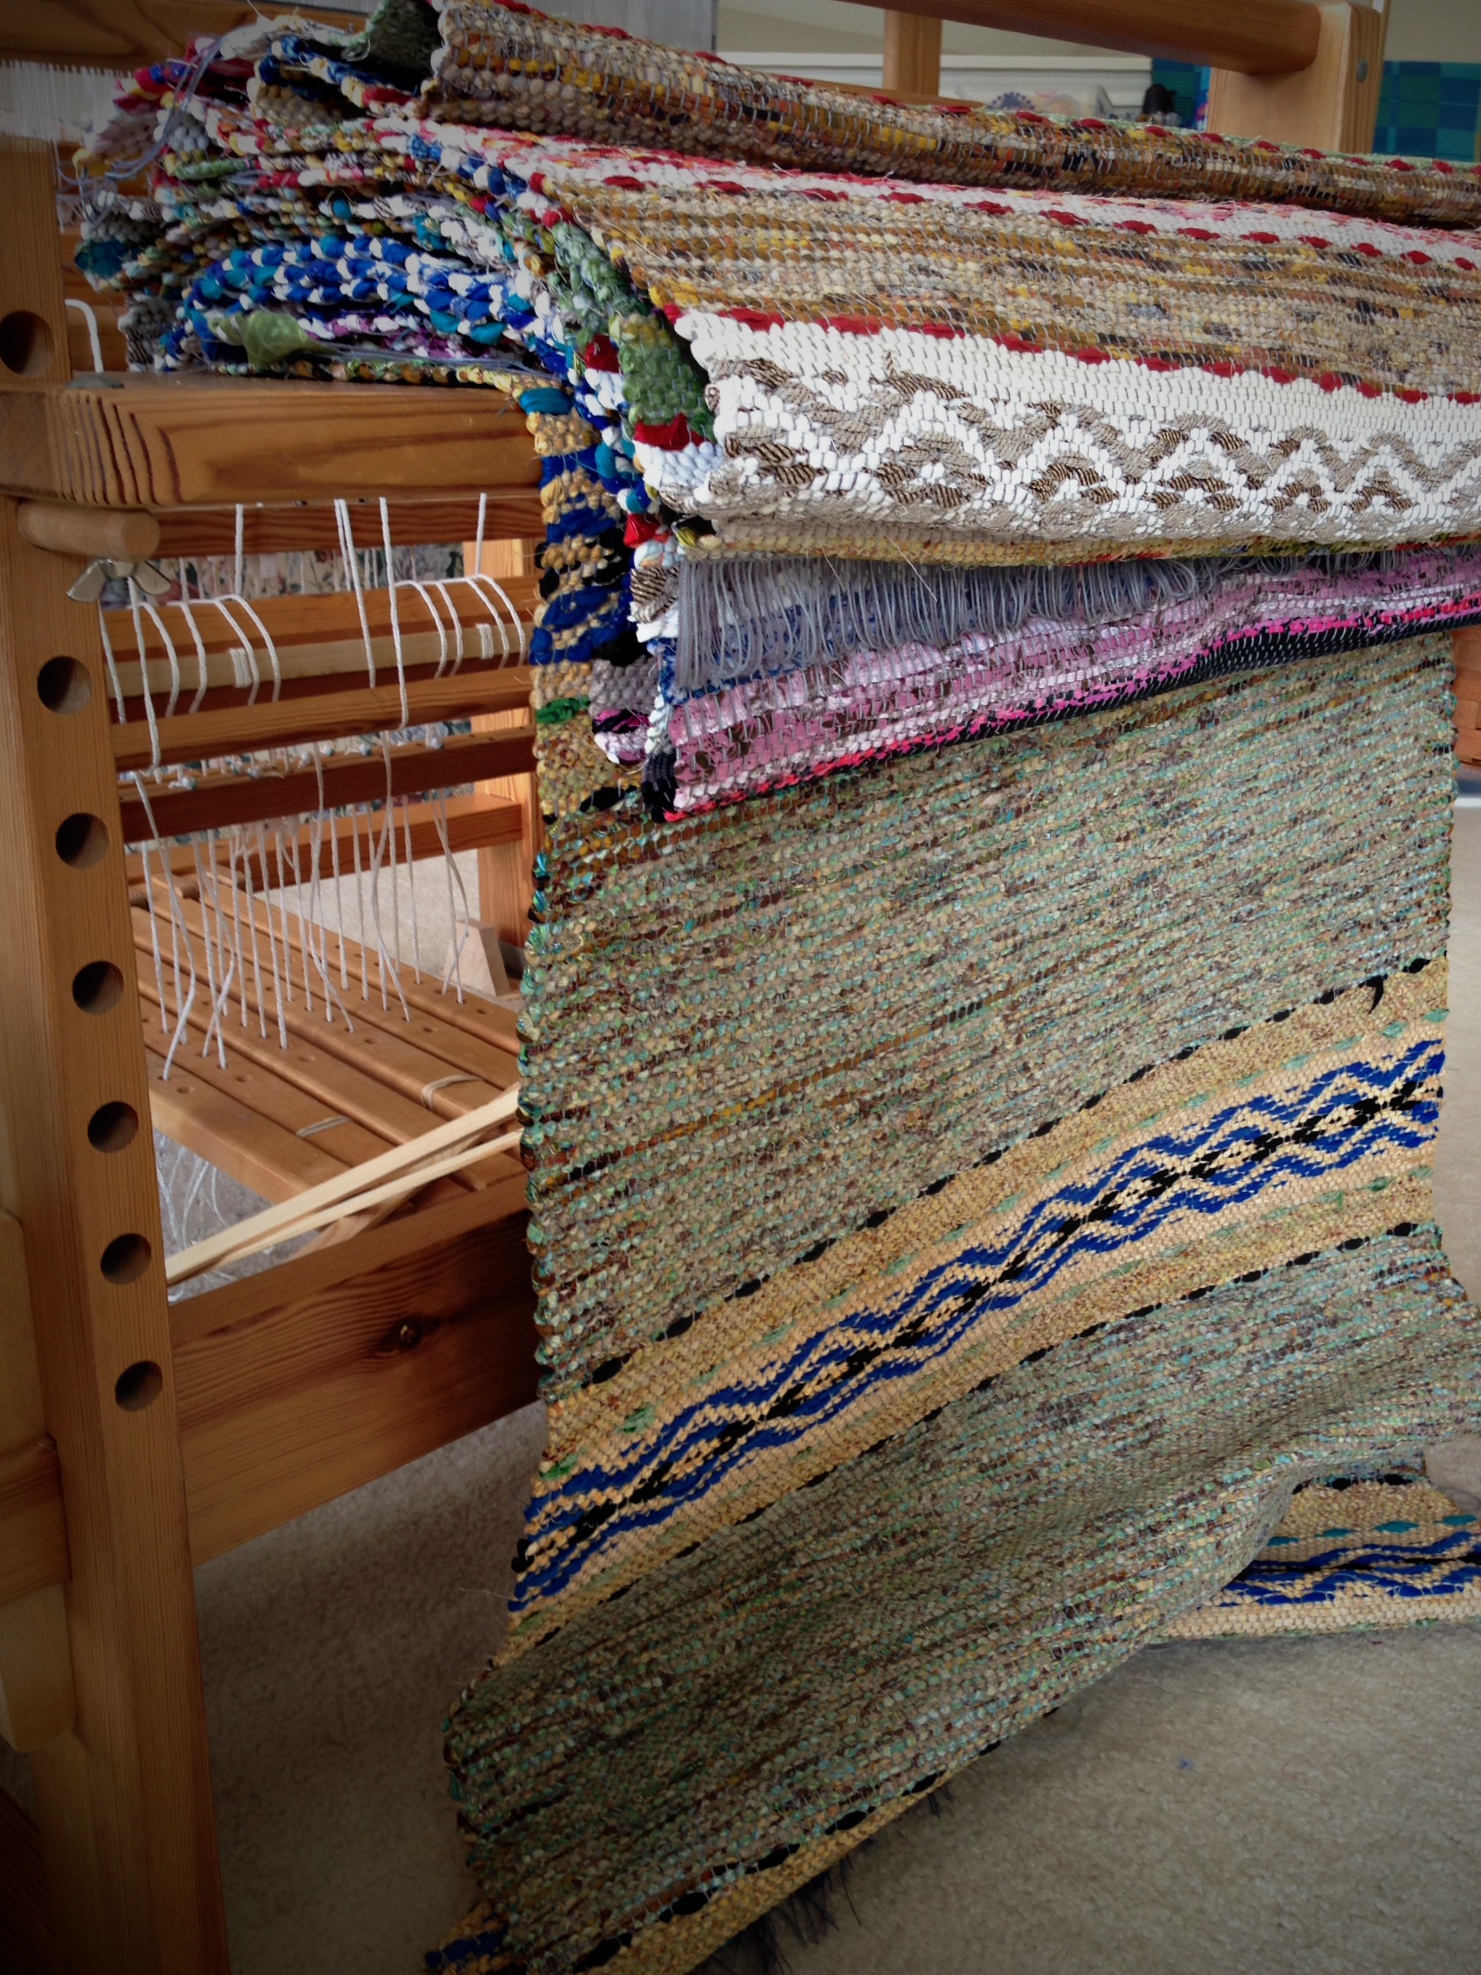
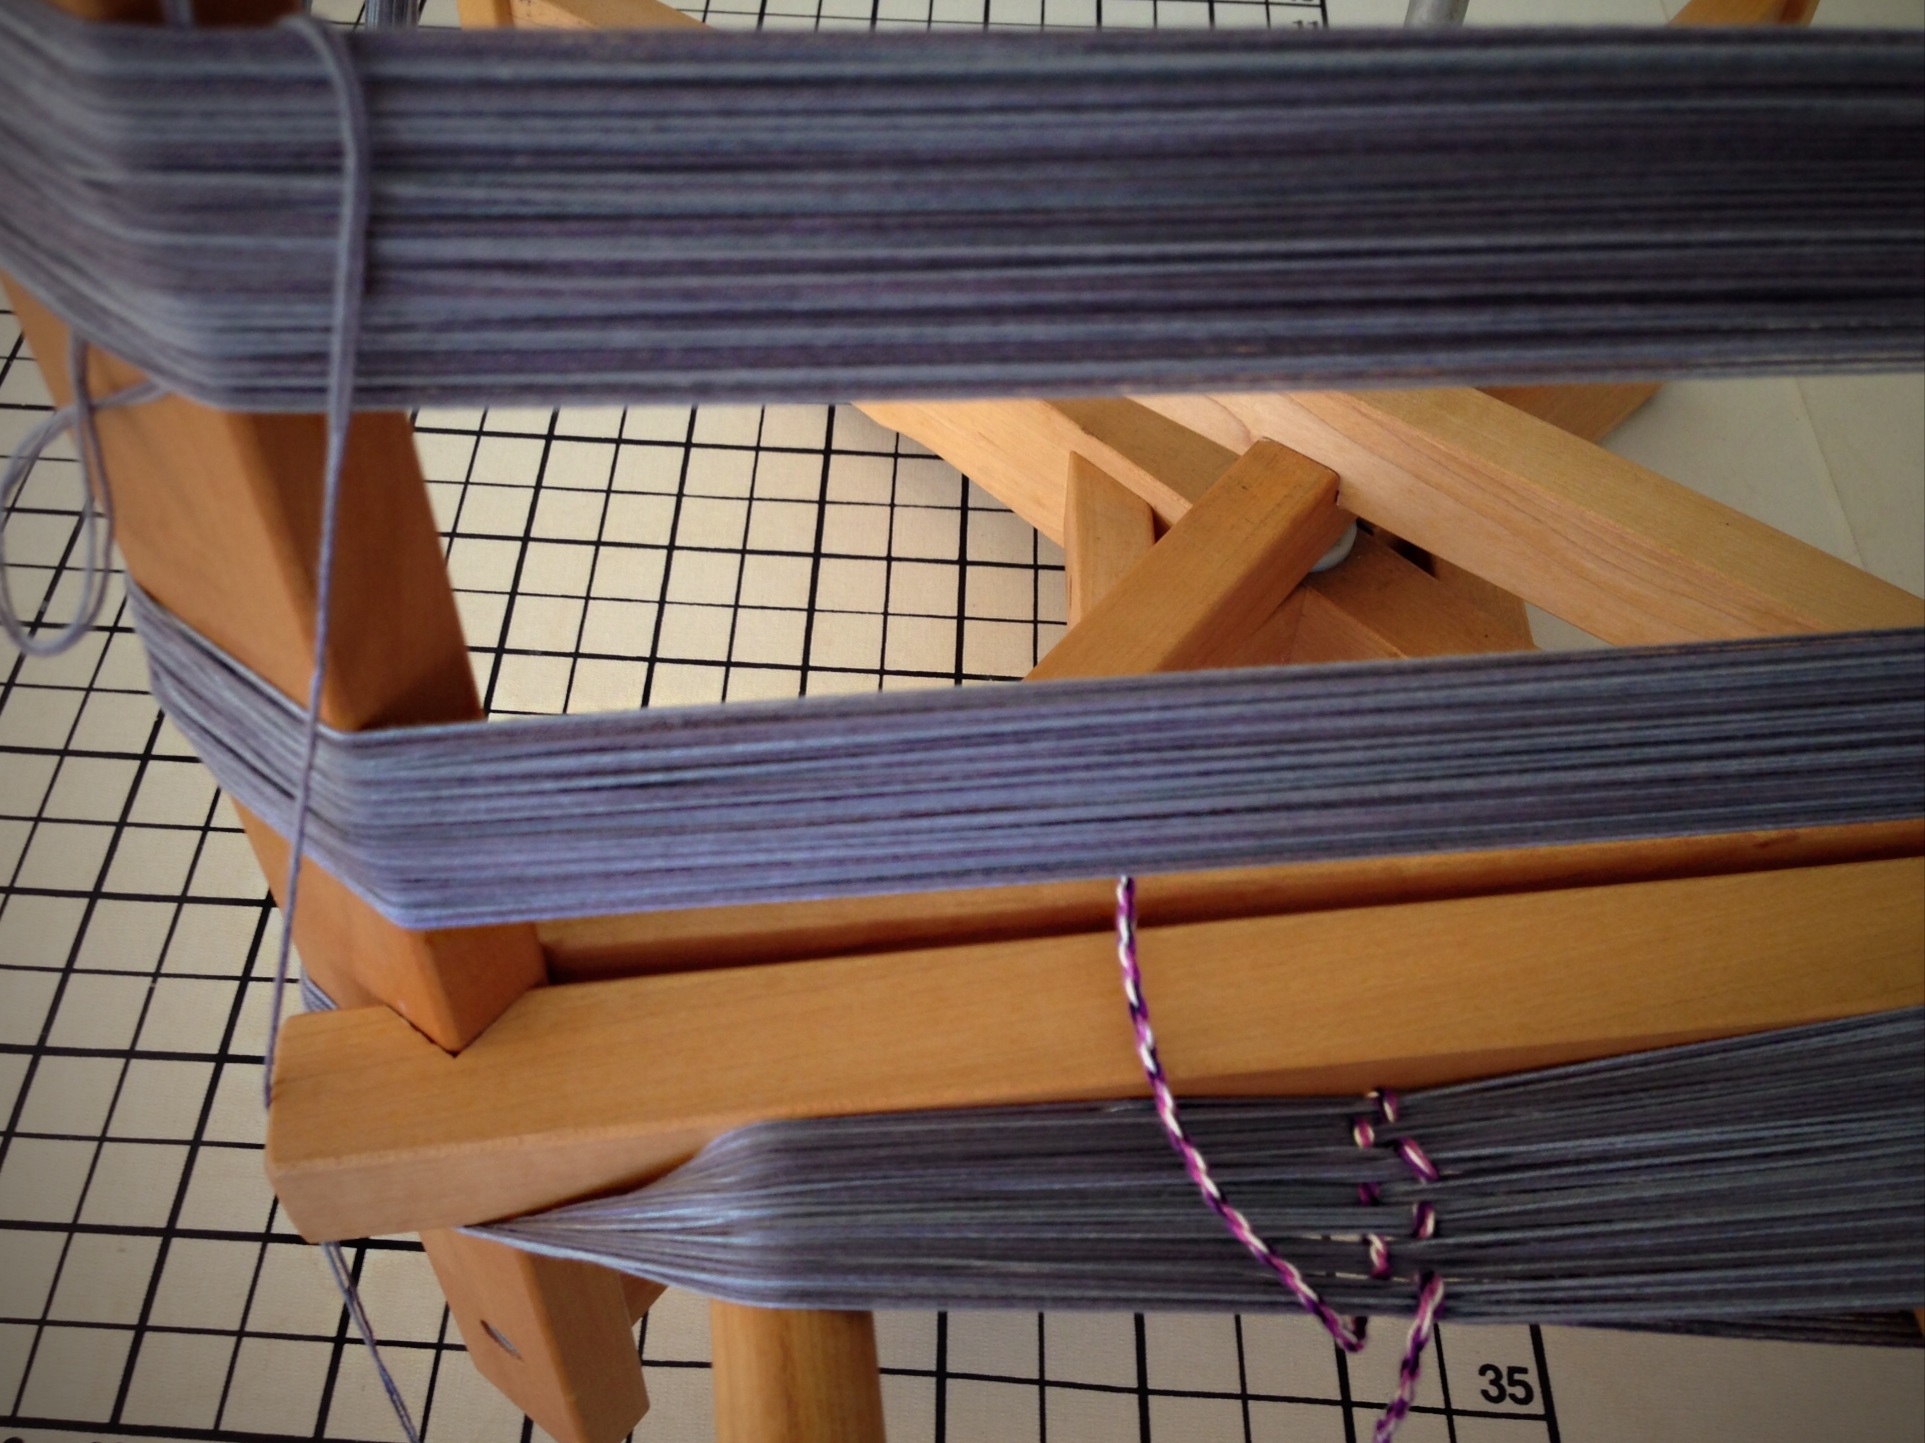
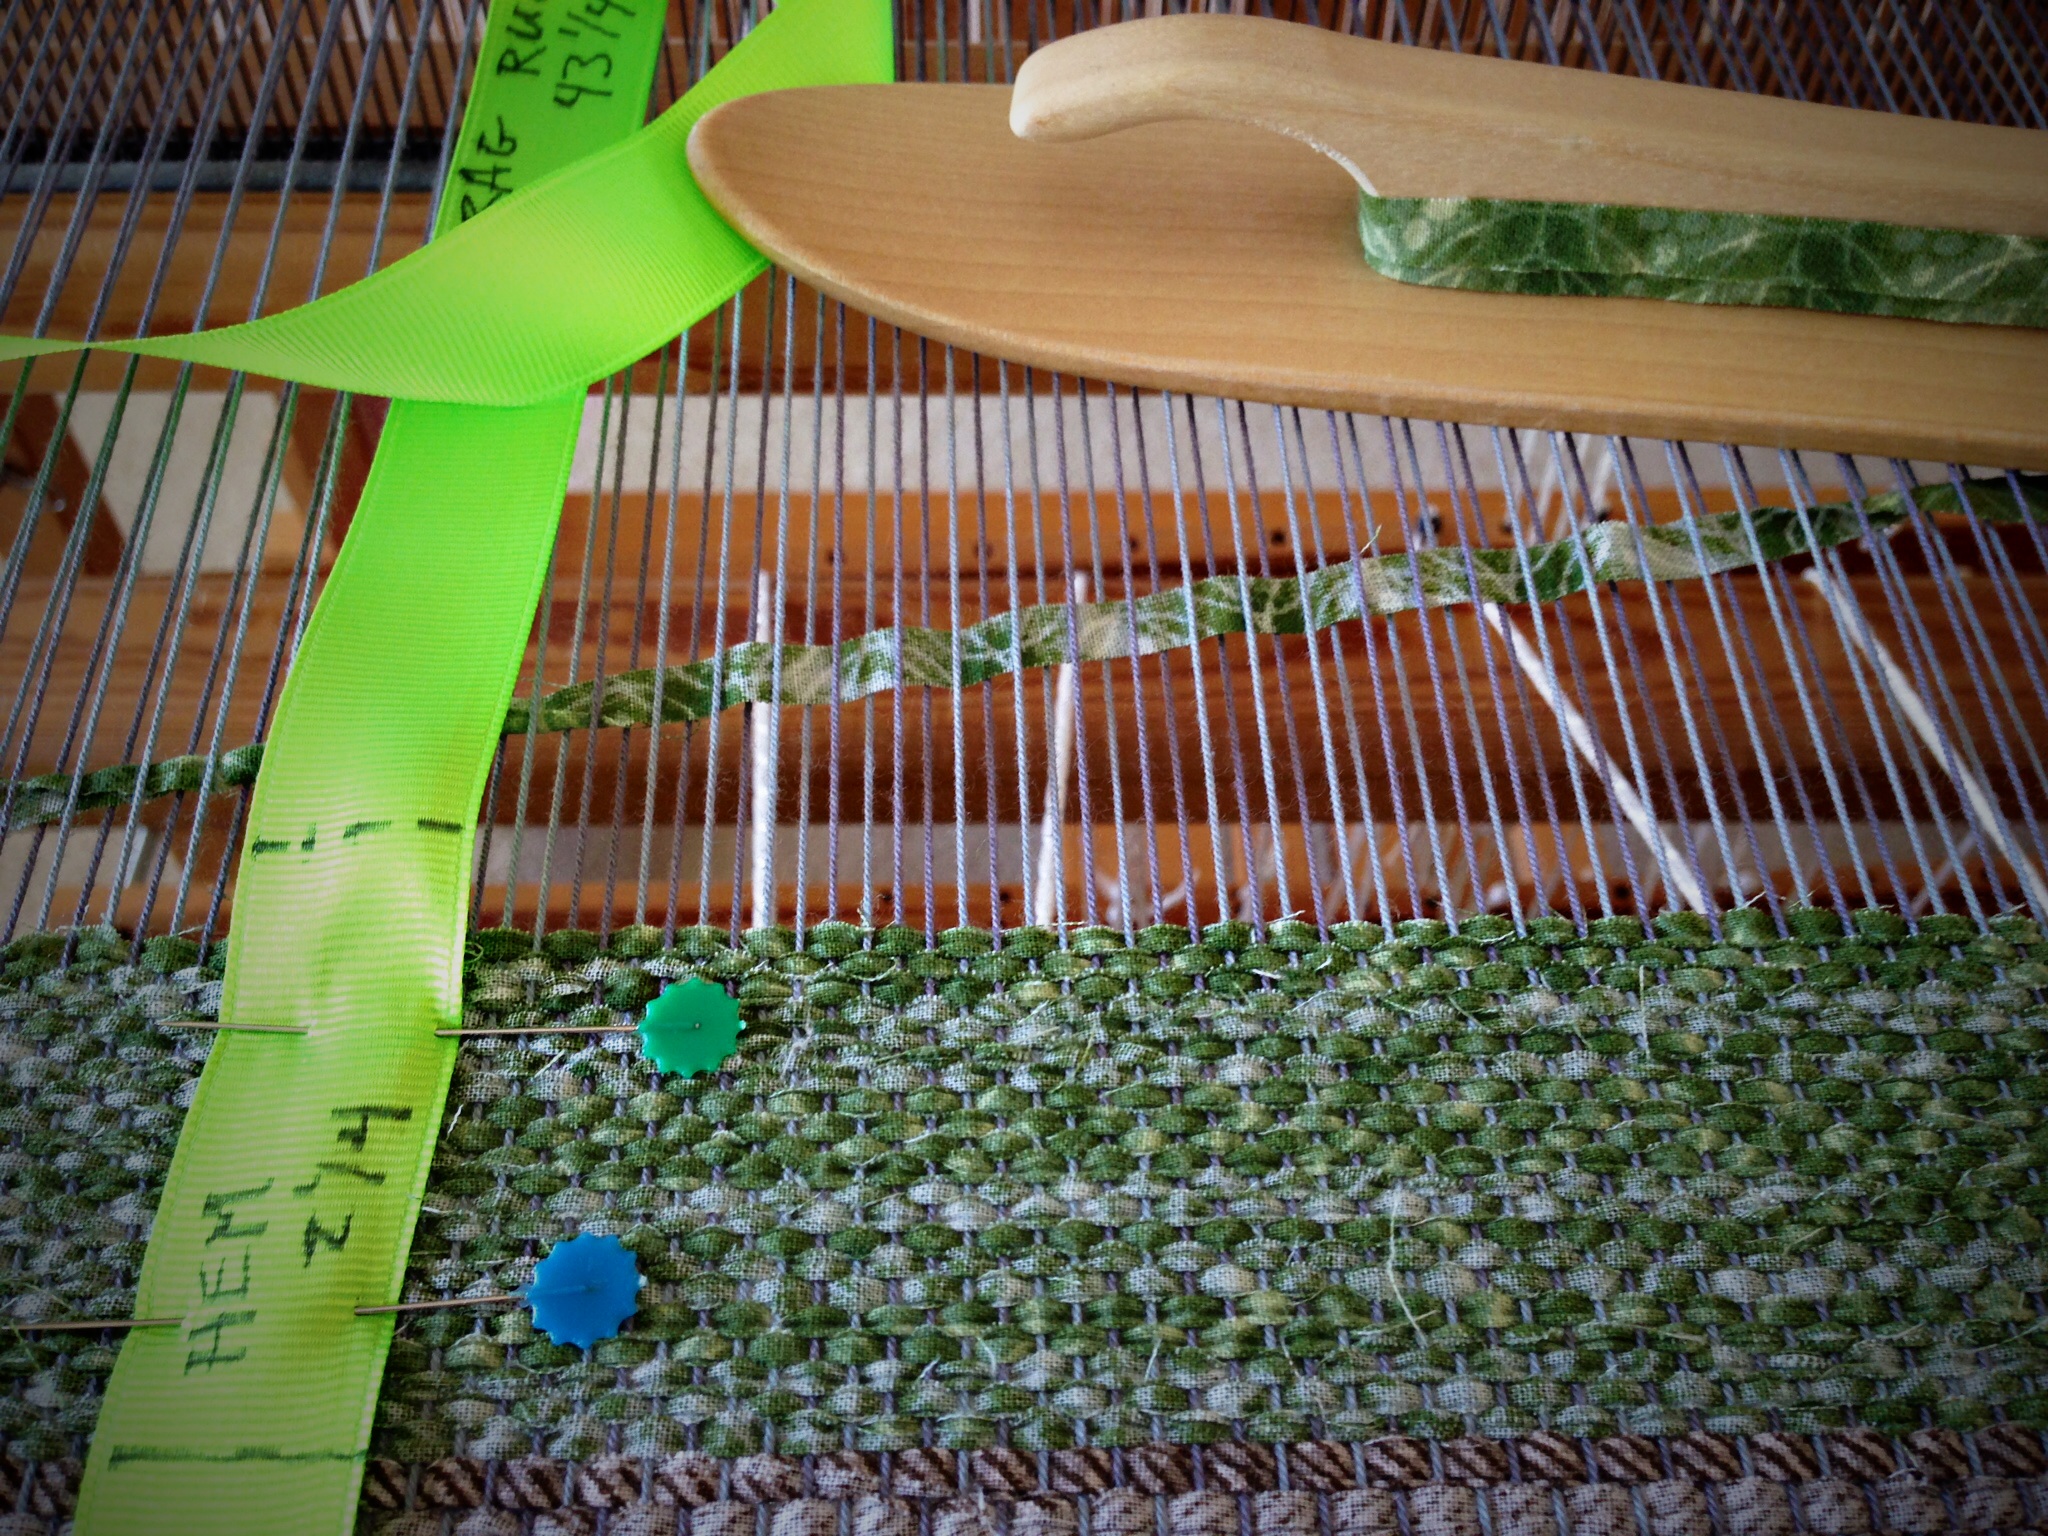
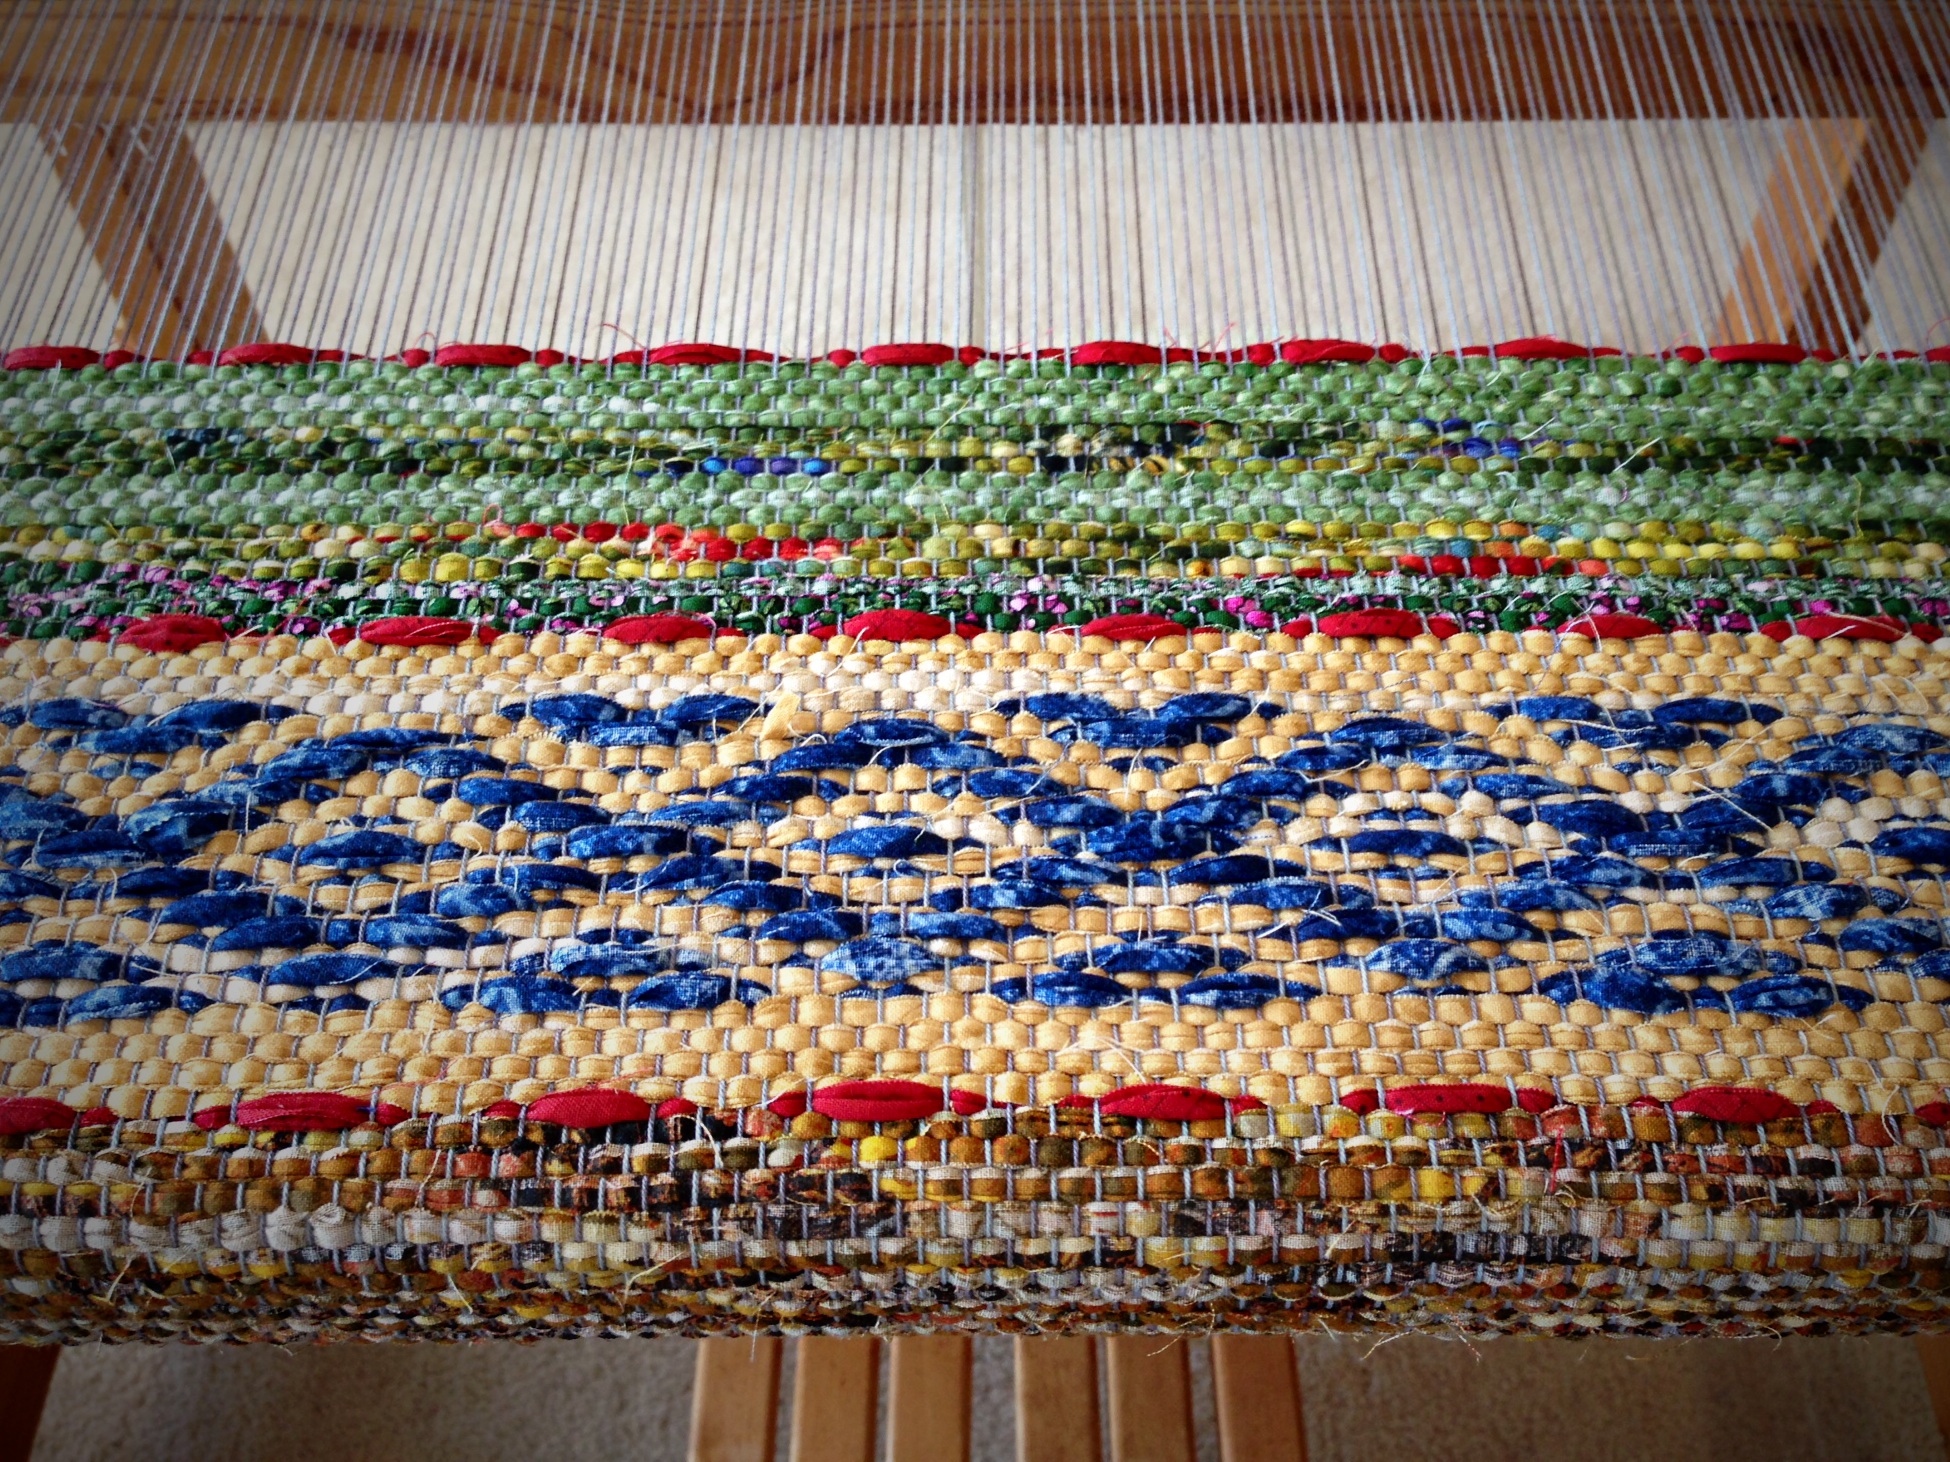
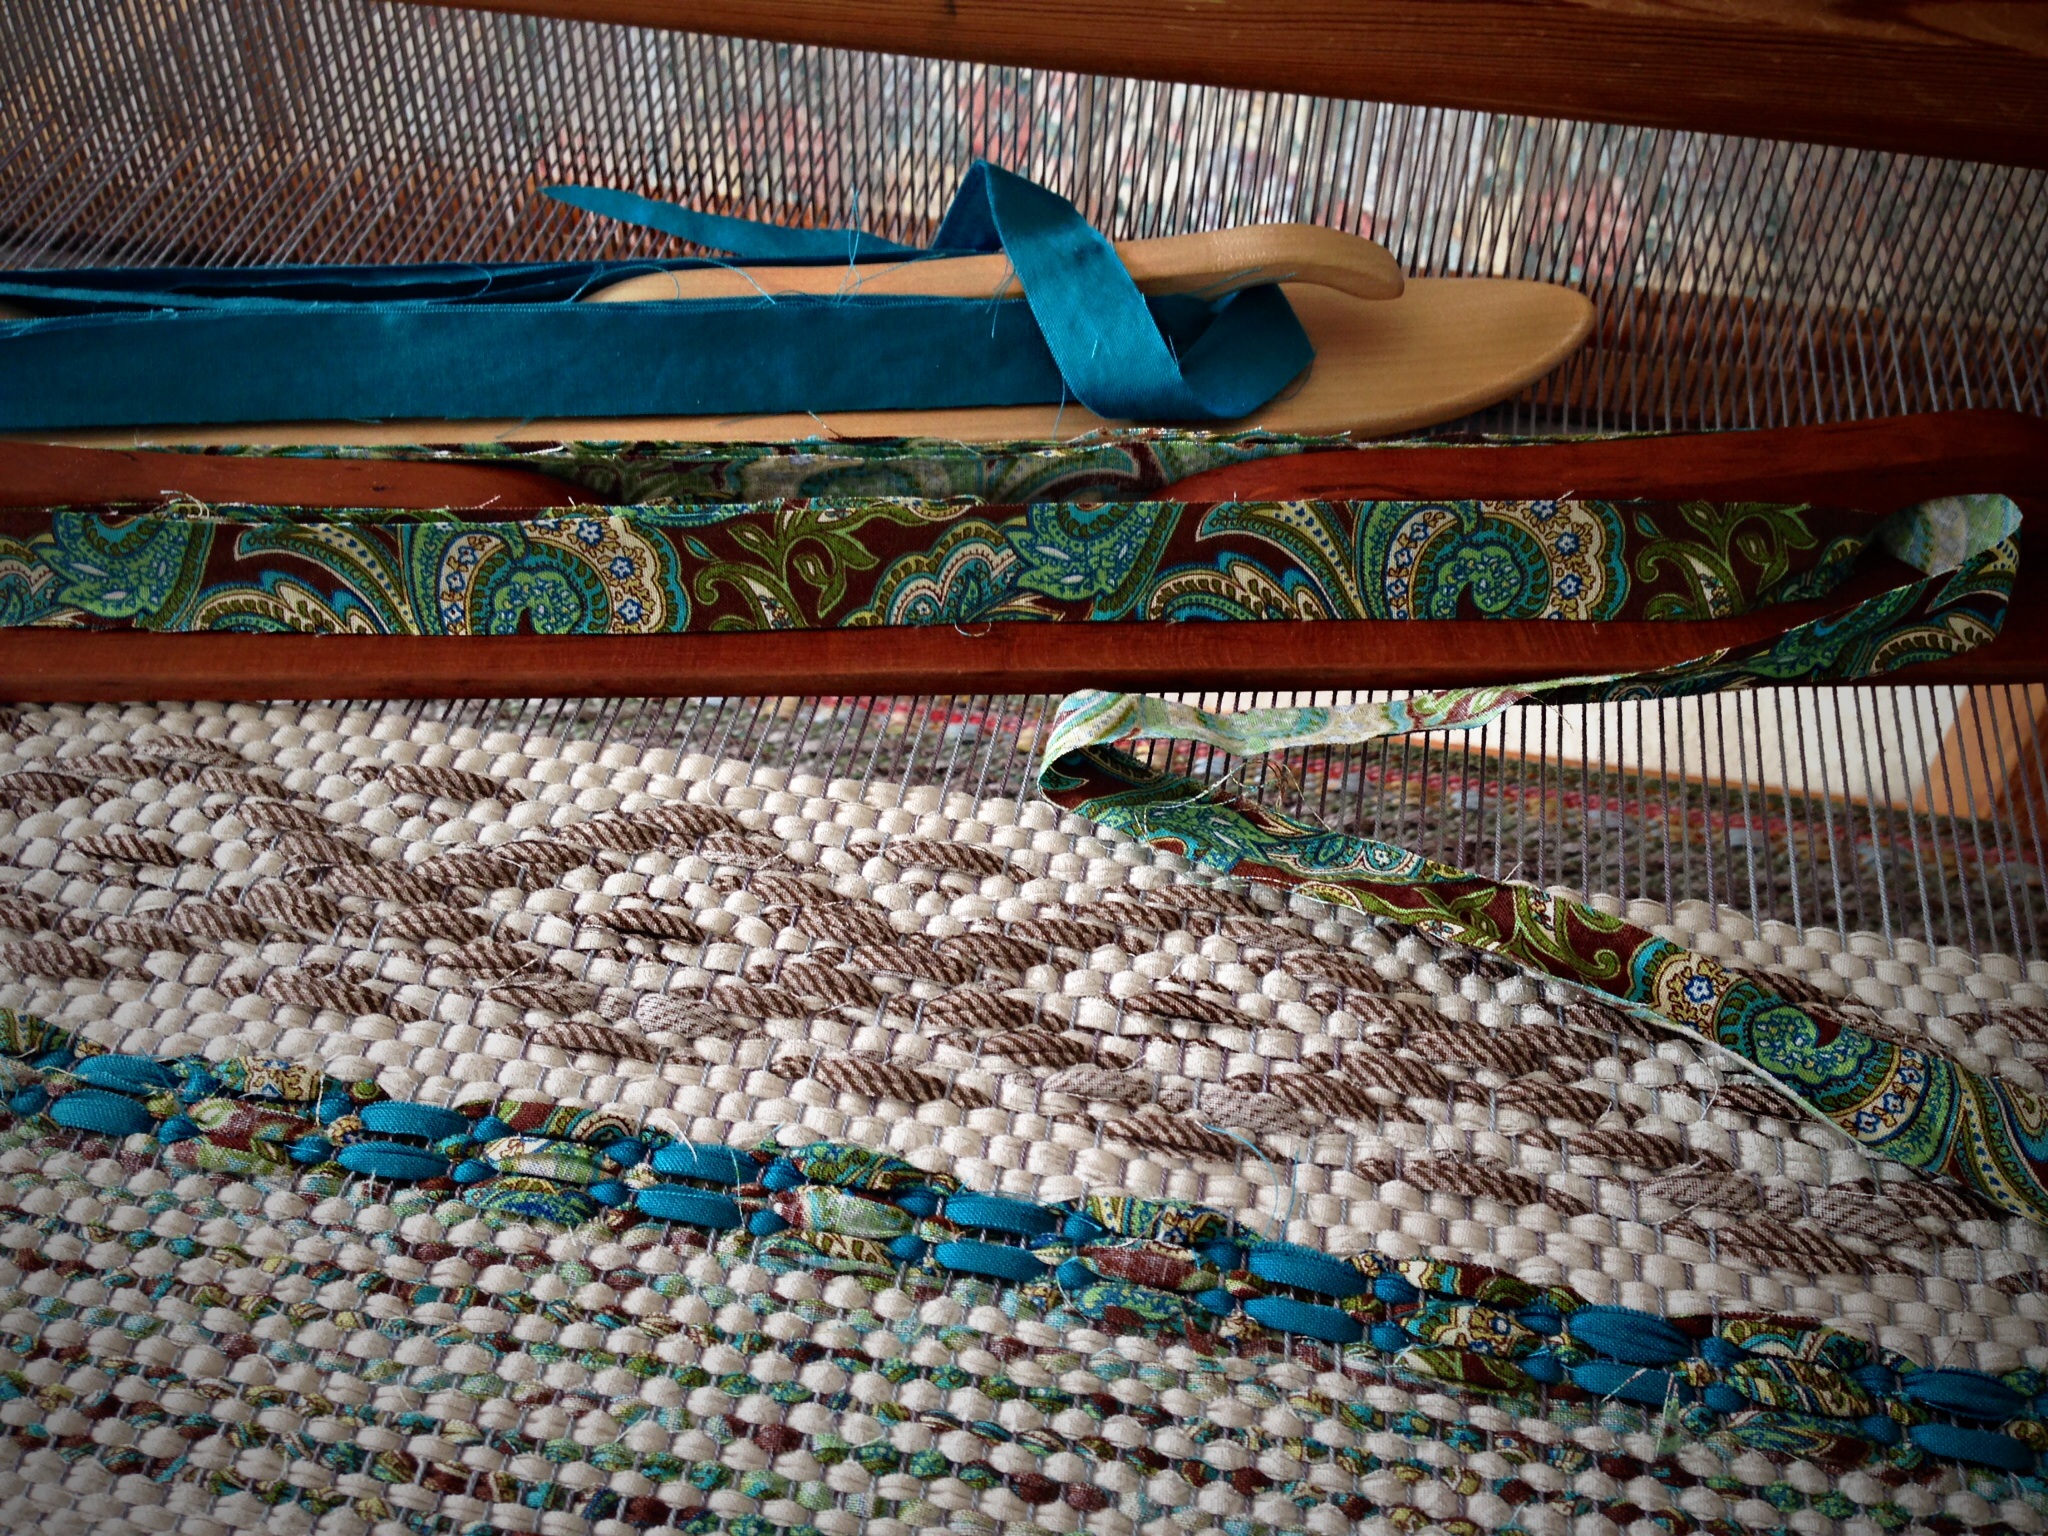
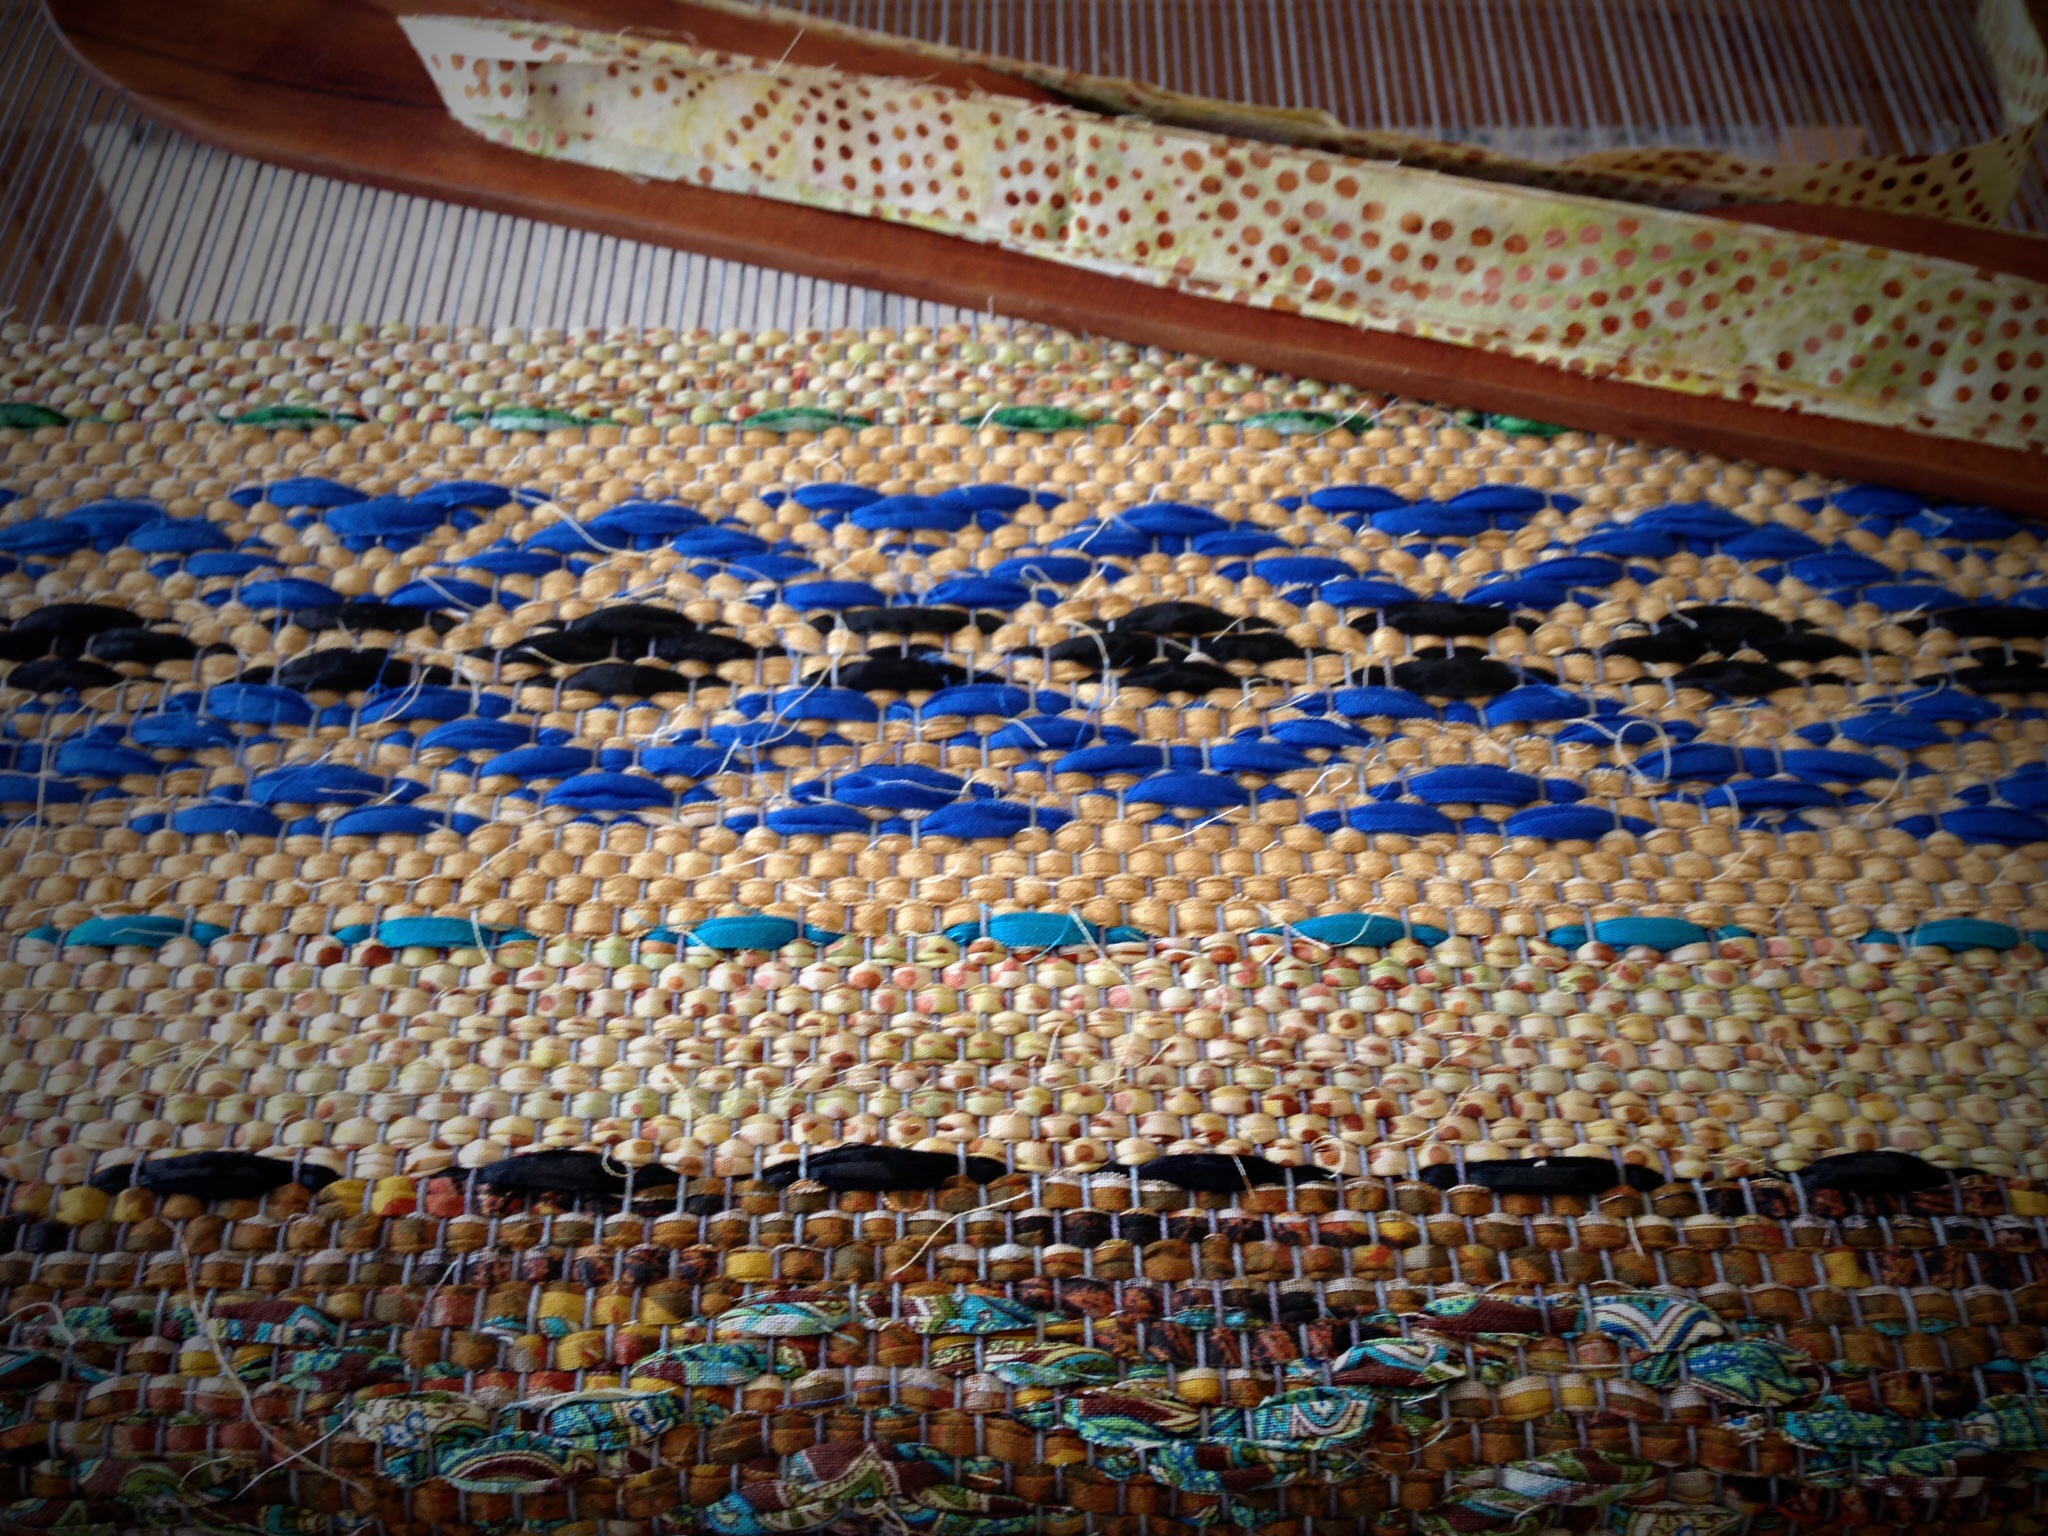
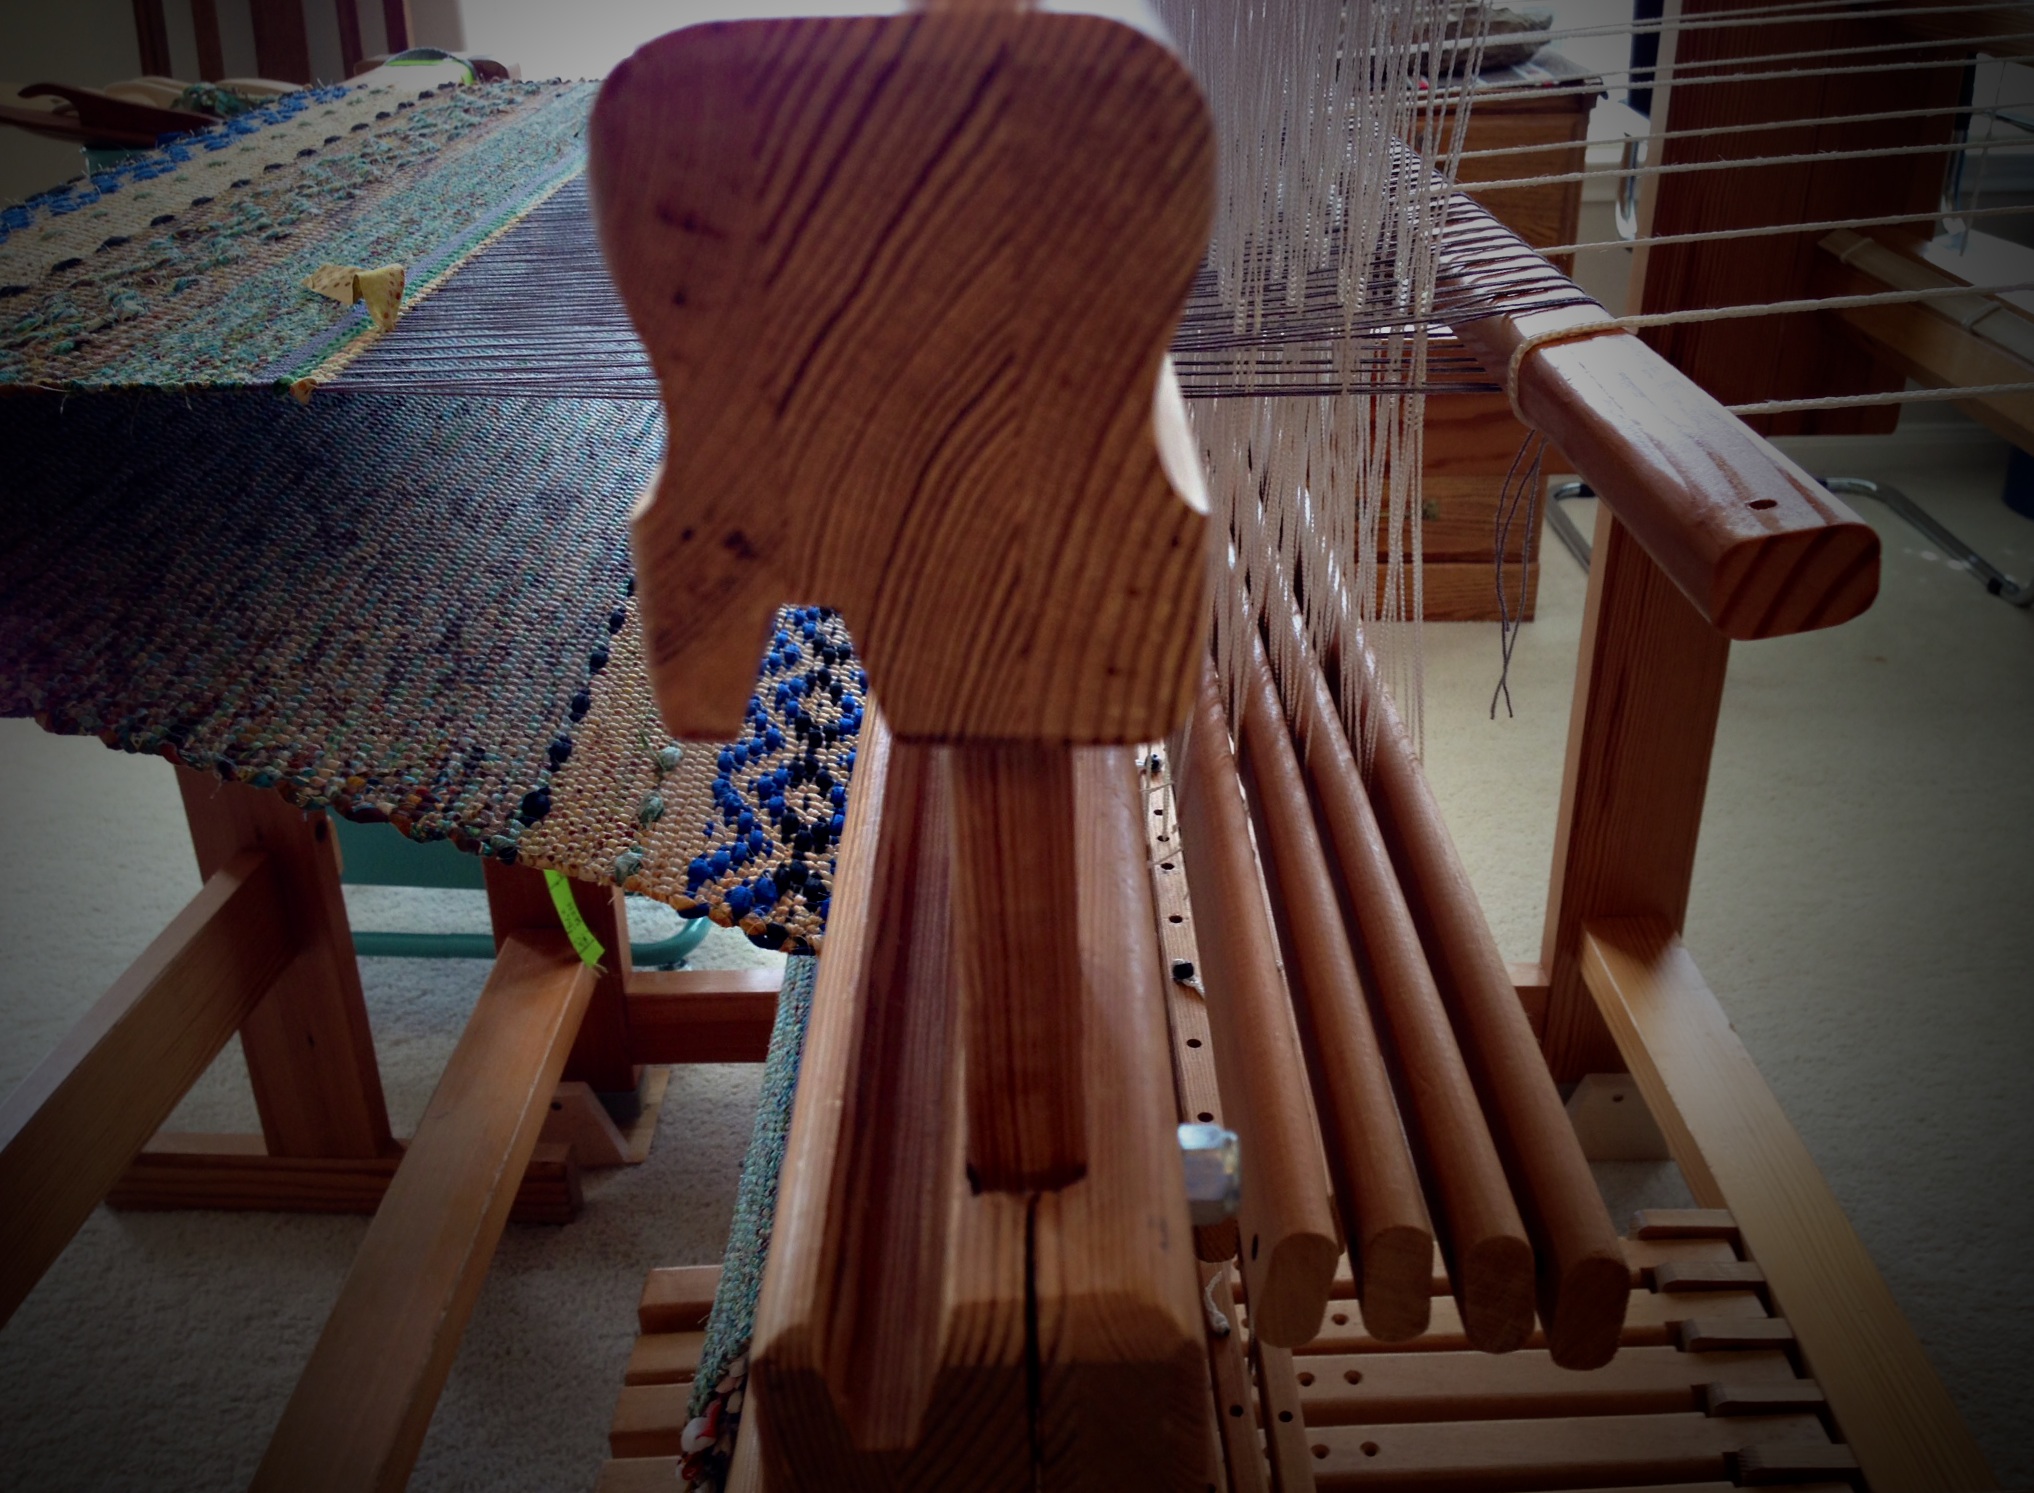
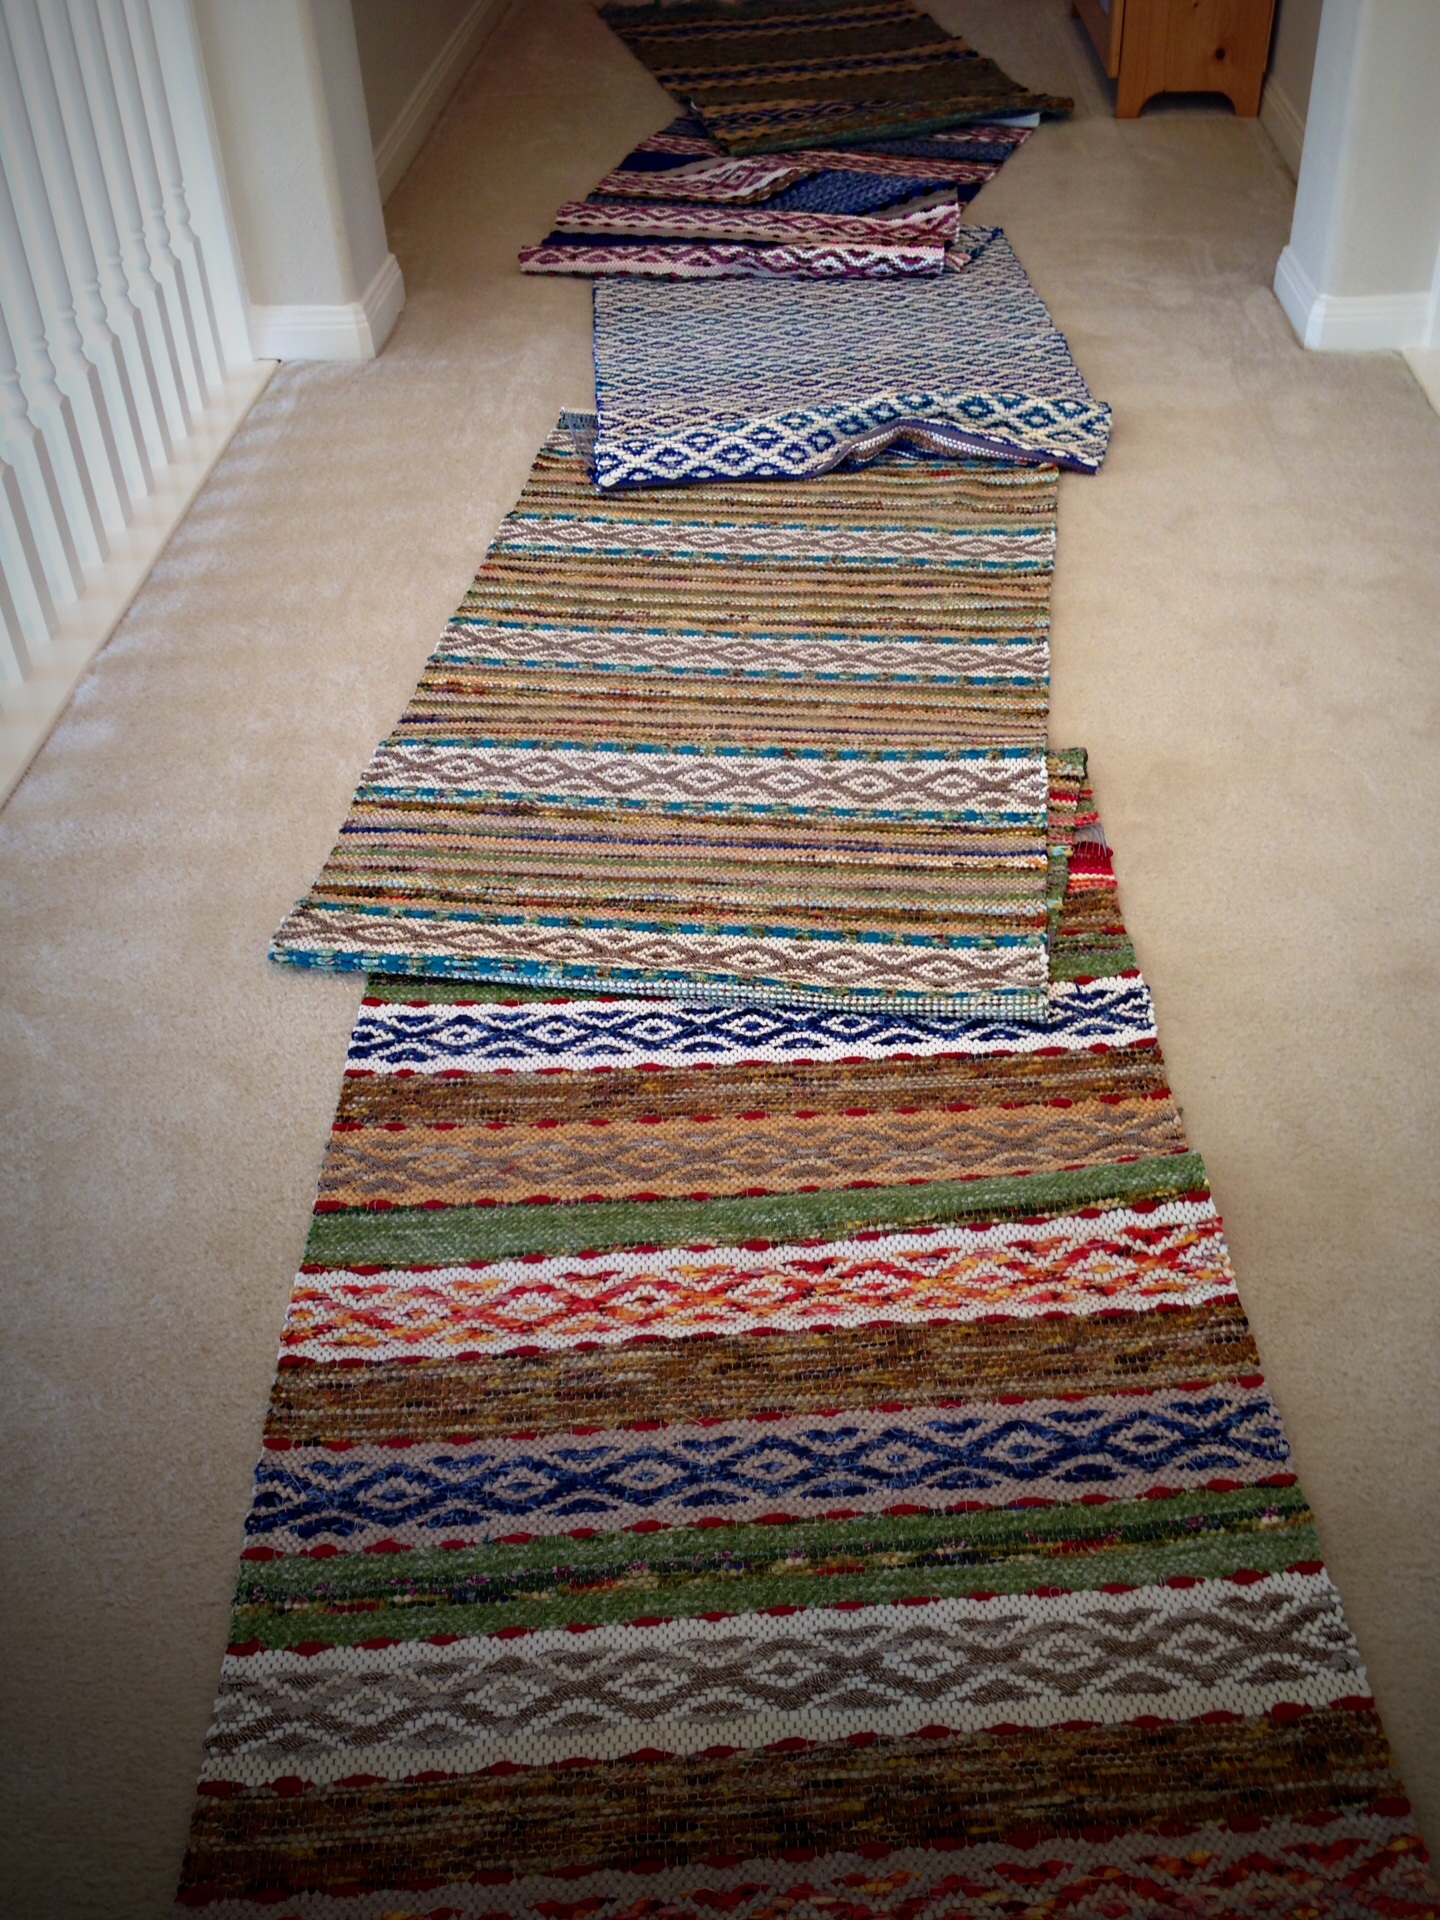
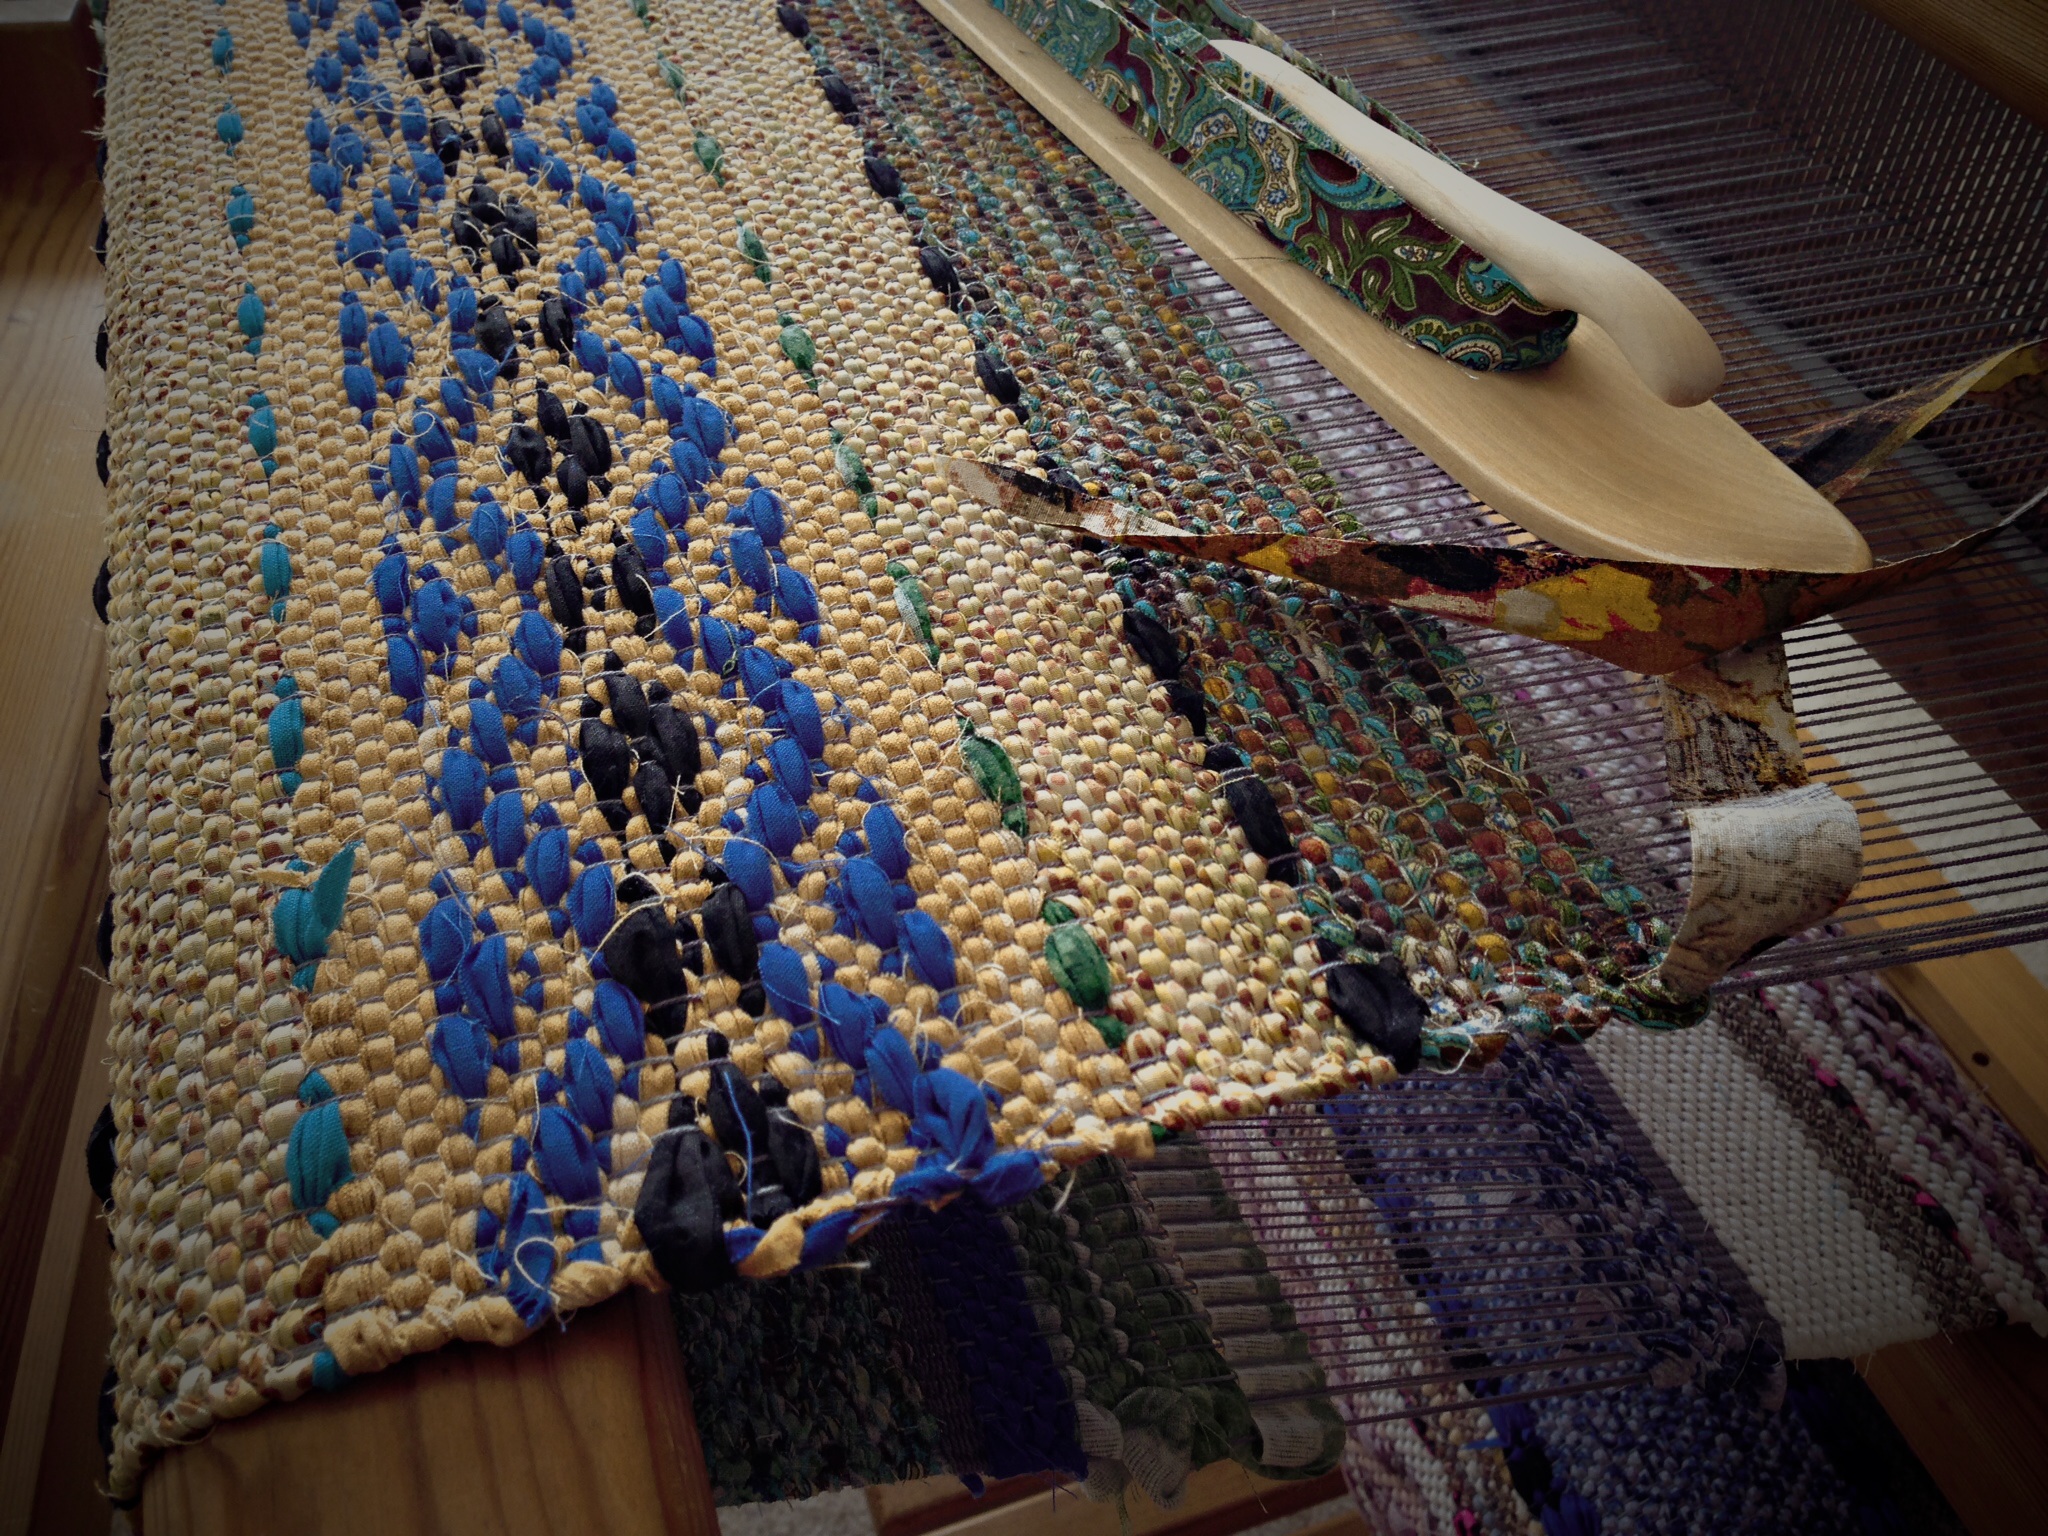
Seeing the underneath side of the rugs first, just after the rugs are cut from the loom.First step is winding the warp on the warping reel. 219 warpends in two similar shades of grey, 8.5 yards / 7.75 meters long.After weaving some waste fabric strips, I weave the hem, using 1/4 inch- / 1/2 cm- wide strips. I mark the green ribbon to show the weaving length of the hem, and the overall length of the rug. I also mark the midway point on the ribbon.This is the rug my mother got to see on the loom. She liked it!Turquoise paisley fabric pairs with a solid blue to outline the brown rosepath design.Three ski shuttles create gradient color changes in the blue and teal (out of view) background, while maintaining the white rosepath pattern. It was a little insane to manage three ski shuttles! But I have to admit I enjoyed it.This is my version of Radiant Orchid, the Pantone Color of the Year 2014.Two-toned rosepath, with dotted outlines. Subtle turquoise waves almost hide in the dark earth tones at each end of the rug.This is not how to plan a rug. The end of the warp is right behind the shafts. Or, maybe this shows how well I planned the warp, right down to the very last inch…Not yet cut apart, ready for finishing the ends and hemming.
May you make fond memories with those you love.
(While I’m busy hemming these rugs, please visit my Etsy Shop to see more rosepath rag rugs.)
The goal is to weave a firm selvedge on a rag rug. This is especially challenging when the weave changes, like it does with this rug. Plain weave in a single color, a lone weft in a contrasting color, rosepath with tabby in between, and plain weave with alternating colors. It helps to have a few guiding principles.
A few guidelines for weaving firm rag rug selvedges:
1. Make sure the weft going into the shed catches the outermost warpend. If needed, manipulate the outermost warp end up or down to make this happen.
2. When using two shuttles, start the second shuttle going in the same direction as the first shuttle.
3. When using two shuttles, be sure to catch the “idle” weft at the selvedge by crossing over or under it with the “working” weft.
4. Turn the fabric strip under twice at the selvedge.
5. Pull the weft snug at the selvedge. (A tight warp tension helps with this.)
Coming to the end of the last rag rug on this warp. Weaving plain weave with two alternating wefts gives the tidiest selvedge because of the way the wefts interlock as they cross at the edge.
I can handle any rag rug selvedge if I pay attention to these guidelines. Similarly, are there guiding principles that help us maneuver the daily challenges of life?
Following God’s ways gives needed structure to our days on this earth. His faithful guidance is that of a loving father. By practicing his principles we can be mentally prepared for action, emotionally stable, and spiritually focused. And we find we are well able to handle all of life’s twists and turns.
At the risk of telling you something you already know, I am going to show two ways I use rubber bands in my weaving studio. Yes, rubber bands. Simple, to the point of being simplistic. But I sheepishly admit, I didn’t know to do these things until I saw someone else do them; and then I expanded (pun intended) their practices to suit the way I like to work.
1. While it is common to put a rubber band on one treadle to act as a marker for your feet, I find it helpful to put rubber bands on two treadles for even greater efficiency. I put one rubber band on the first pattern treadle, and a second rubber band on the third pattern treadle. My feet never have to guess where to step. (With the rosepathtie-up for the rag rugs on the Glimakra Ideal loom, there are two plain weave treadles on the right, and then four pattern treadles. The rya weaving on the Glimakra Standard loom has one treadle on the right that lifts the warpends for the rya knots, and four pattern treadles.)
Plain weave, like the solid blue section, and the band of brown, uses the two treadles on the right on this Glimakra Ideal loom. The rosepath pattern, in orchid, and the dots and dashes, in dark pink and blue/black, uses the remaining four treadles.Five treadles are used for this rya weaving on the Glimakra Standard loom. The treadle on the right lifts the warpends on the second shaft, onto which the rya strands are tied. The remaining four treadles are used to weave a rosepath pattern in the cloth.
2. Rubber band the thread label around the tube of thread. This is the simplest way to keep track of fiber information–fiber content, weight, color number, brand. I also cut a short length of the thread and stick it to the sticky side of the label. This helps me get the labels back on the correct tubes, especially when using several threads of different colors.
With similar colors, like these two tubes of 12/6 cotton rug warp, it helps to keep an identifying strand attached to the label. I always try to put the label back on its tube as soon as possible to prevent mix-ups.
May you find simple solutions to do what you do better.
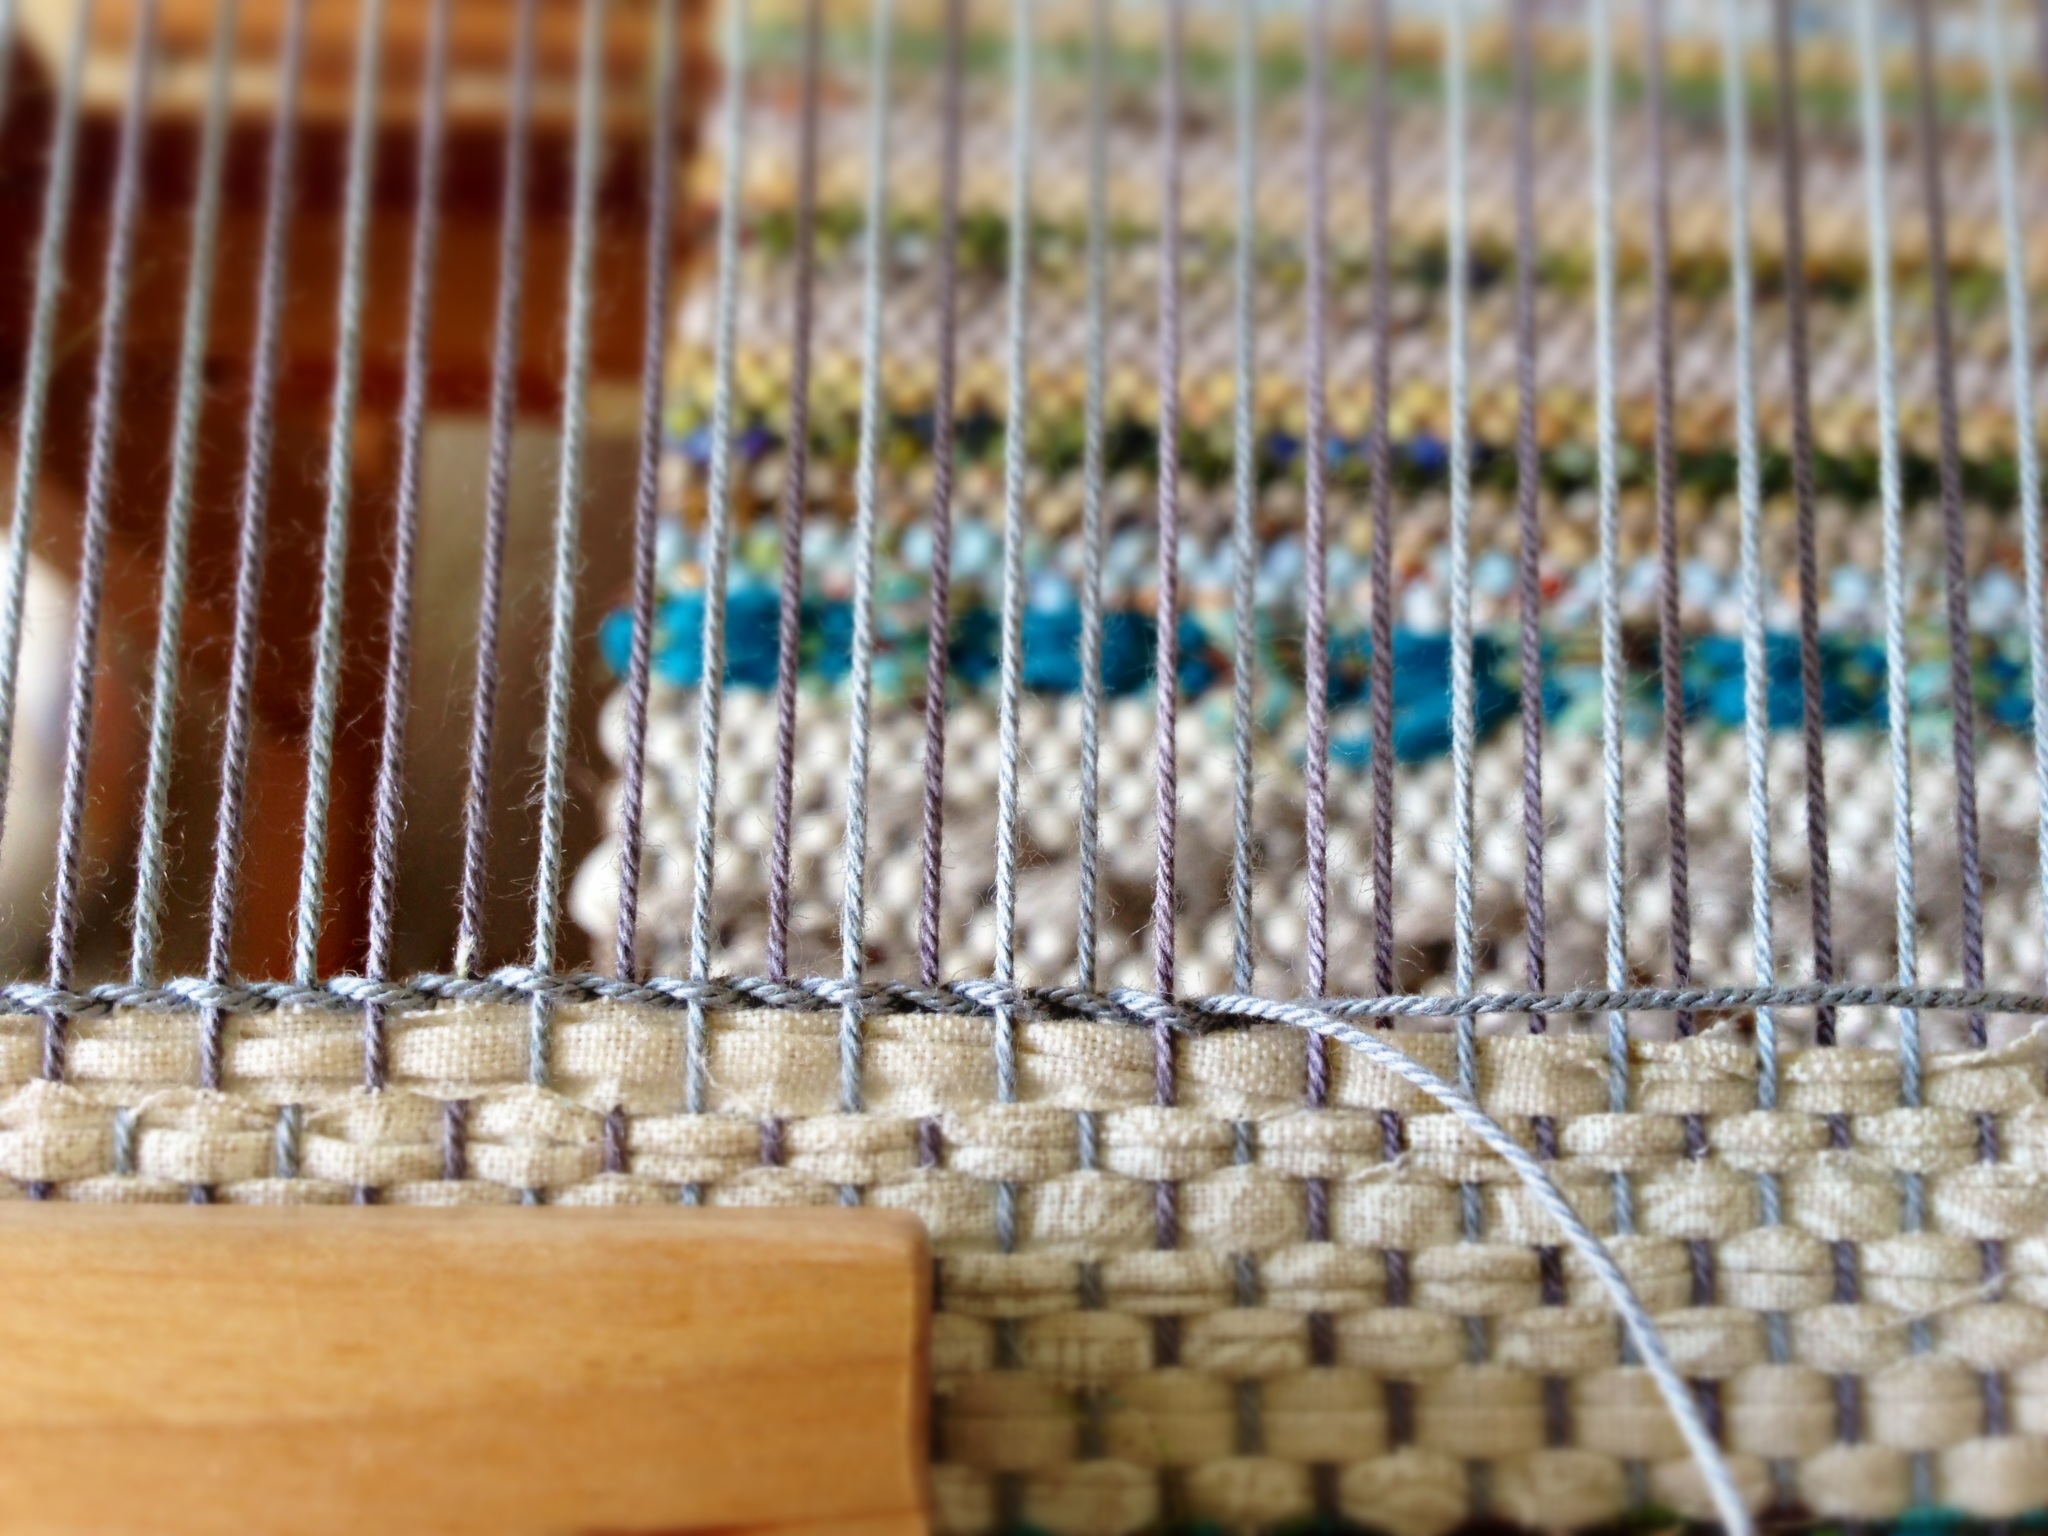
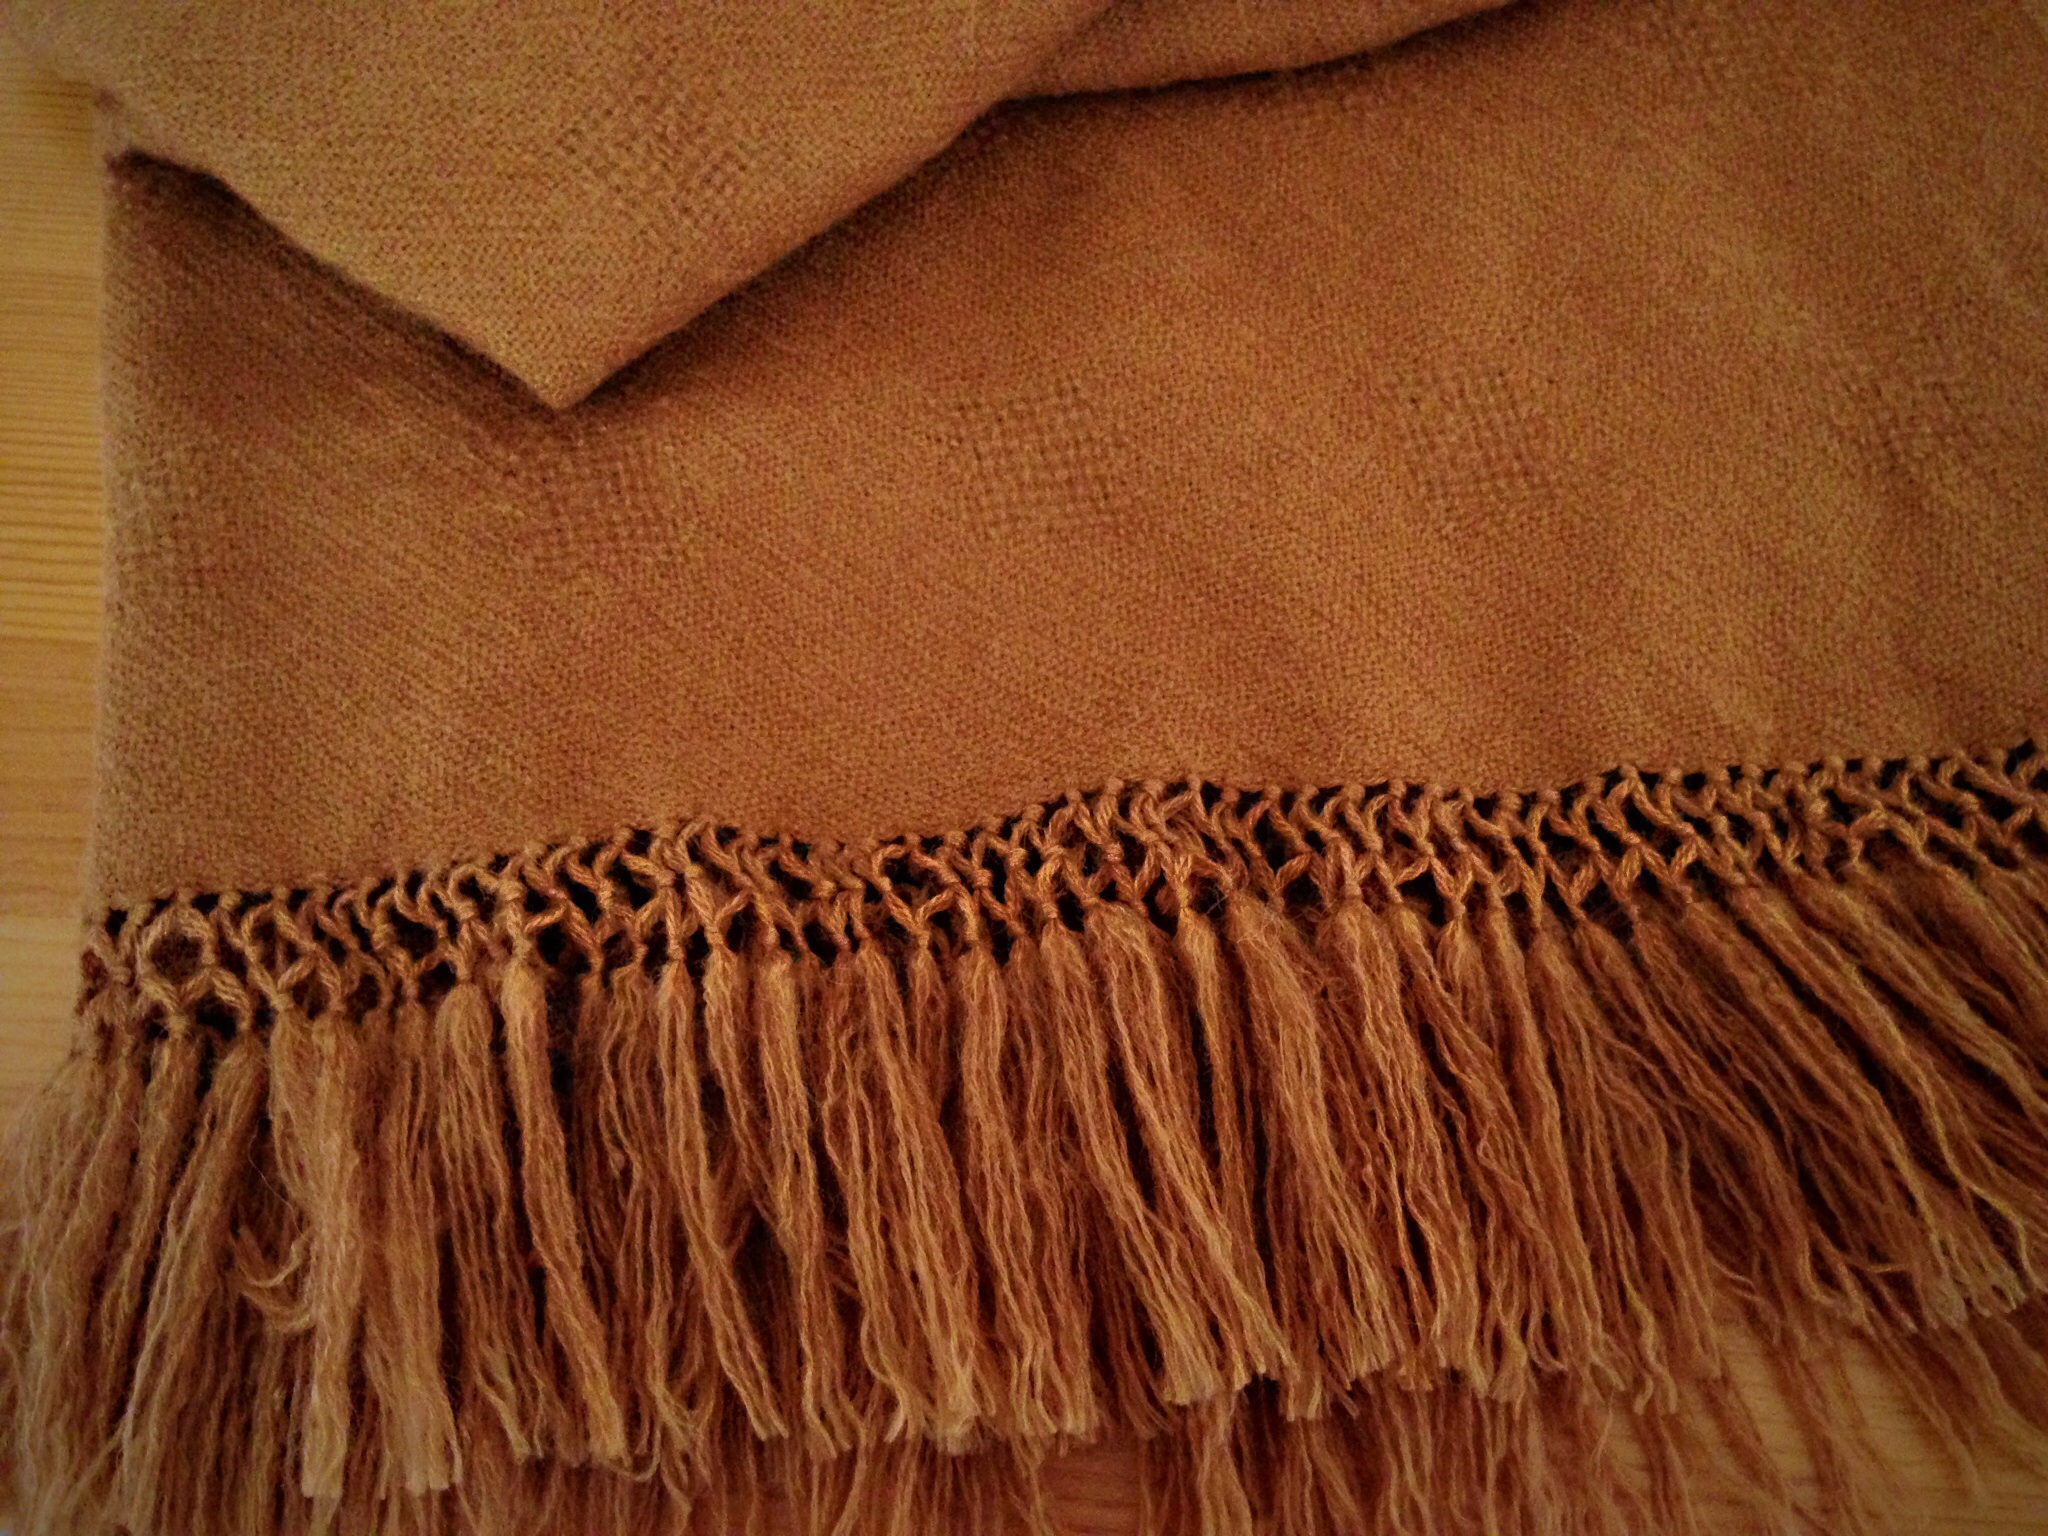
The outside rows of a rag rug are vulnerable. Twining secures the weft, making it a good way to begin and end a rag rug. I cut a length of rug warp thread two and a half times the width of the rug. Starting on the left side, with the length of thread folded in half, the top half goes under, and the lower half goes over each successive warp end.
Twining separates the warpends evenly and secures the weft. At the end of the row I weave in the ends, and then, beat twice with the beater to push the row of twining firmly into place.
Is it really necessary to secure the weft? When the rug is under tension on the loom it seems like everything is holding together just fine. It is tightly woven, with the weft firmly packed in. Yes. It is necessary. The rug will start falling apart the minute it is cut from the loom. Twining keeps the most vulnerable place of the weaving intact.
Faith is the vulnerable spot where you allow yourself to be loved by God. Wrapped in his mercy and his grace, our weakest point is no longer our entry into failure, but where we are kept in his security. Your faith is the point of access, the opening, for your maker to show his strength to make you complete.
May you rest secure.
Etsy Announcement!
My new Etsy WarpedforGood Shop is open! I would love for you to come and browse. As my tried and true blog friends, your feedback means a lot to me. Please let me know what you think!
You may remember seeing the progress on some of the items in the shop, like the Warp Rep Rug, the Rosepath Rugs, and the Cutest Little Loom Rugs. The rugs you see on the loom now will be posted in my Etsy shop when they are finished!
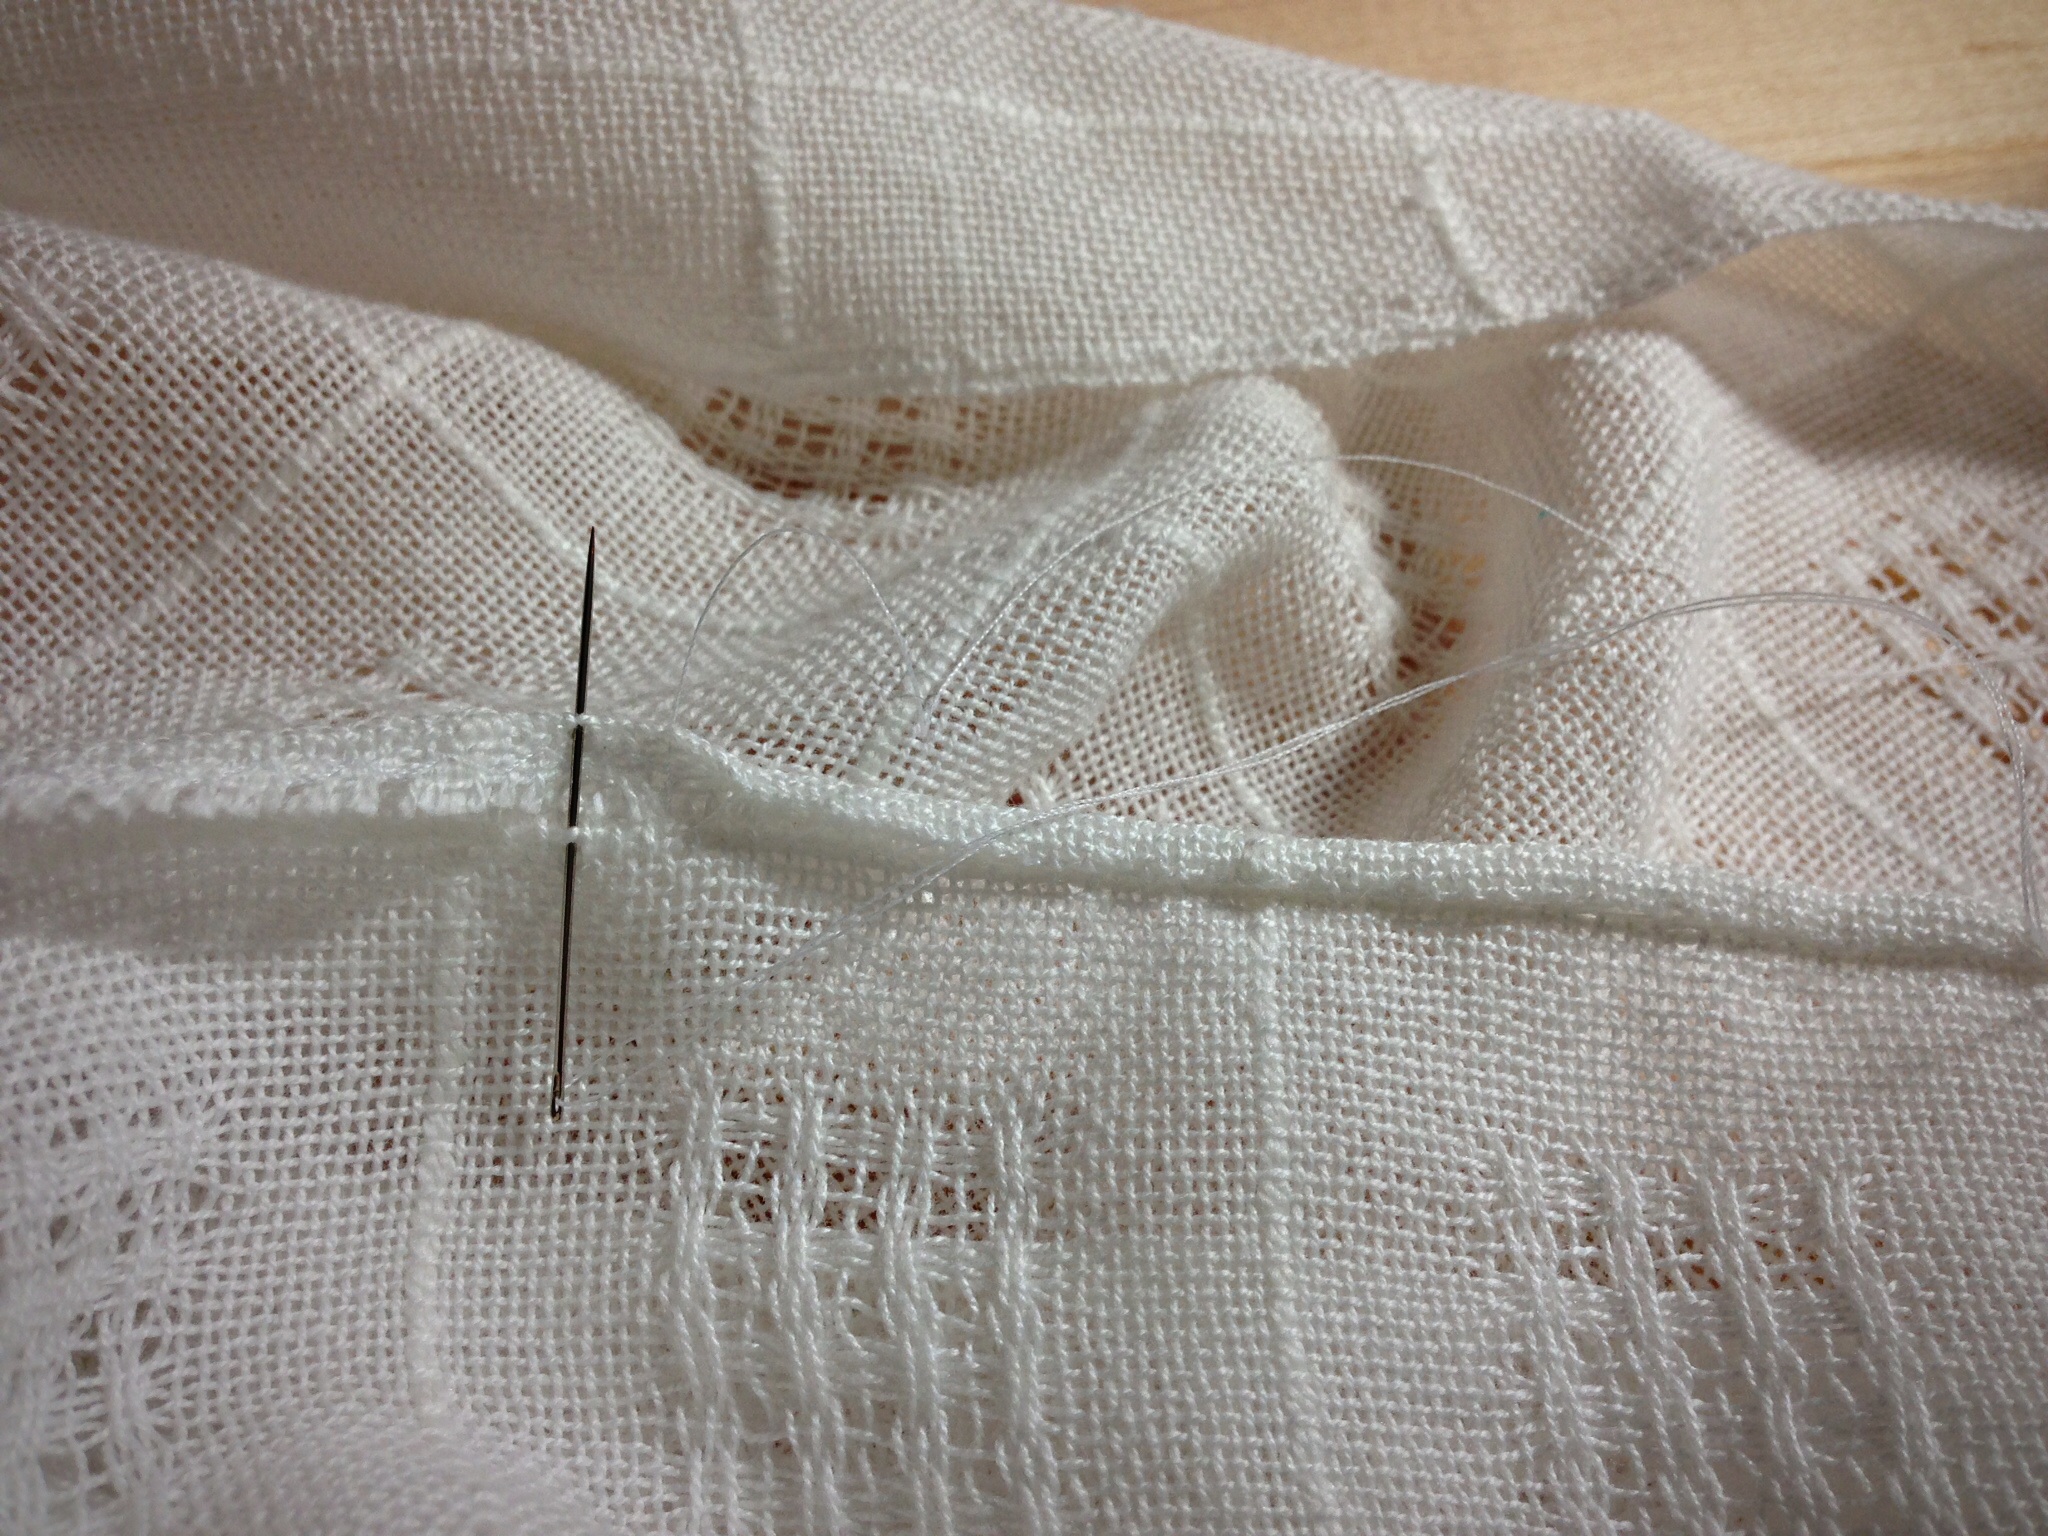
Finish the finishing, please. I always have a pile of handwovens that need finishing. Don’t you? The finishing smorgasbord includes repairing skipped threads (unintentional floats), securing ends, fringe treatments, hemming, wet finishing, pressing, adding hanging tabs, embellishments, and more. You know you are finally finished when your handiwork is being used and enjoyed.
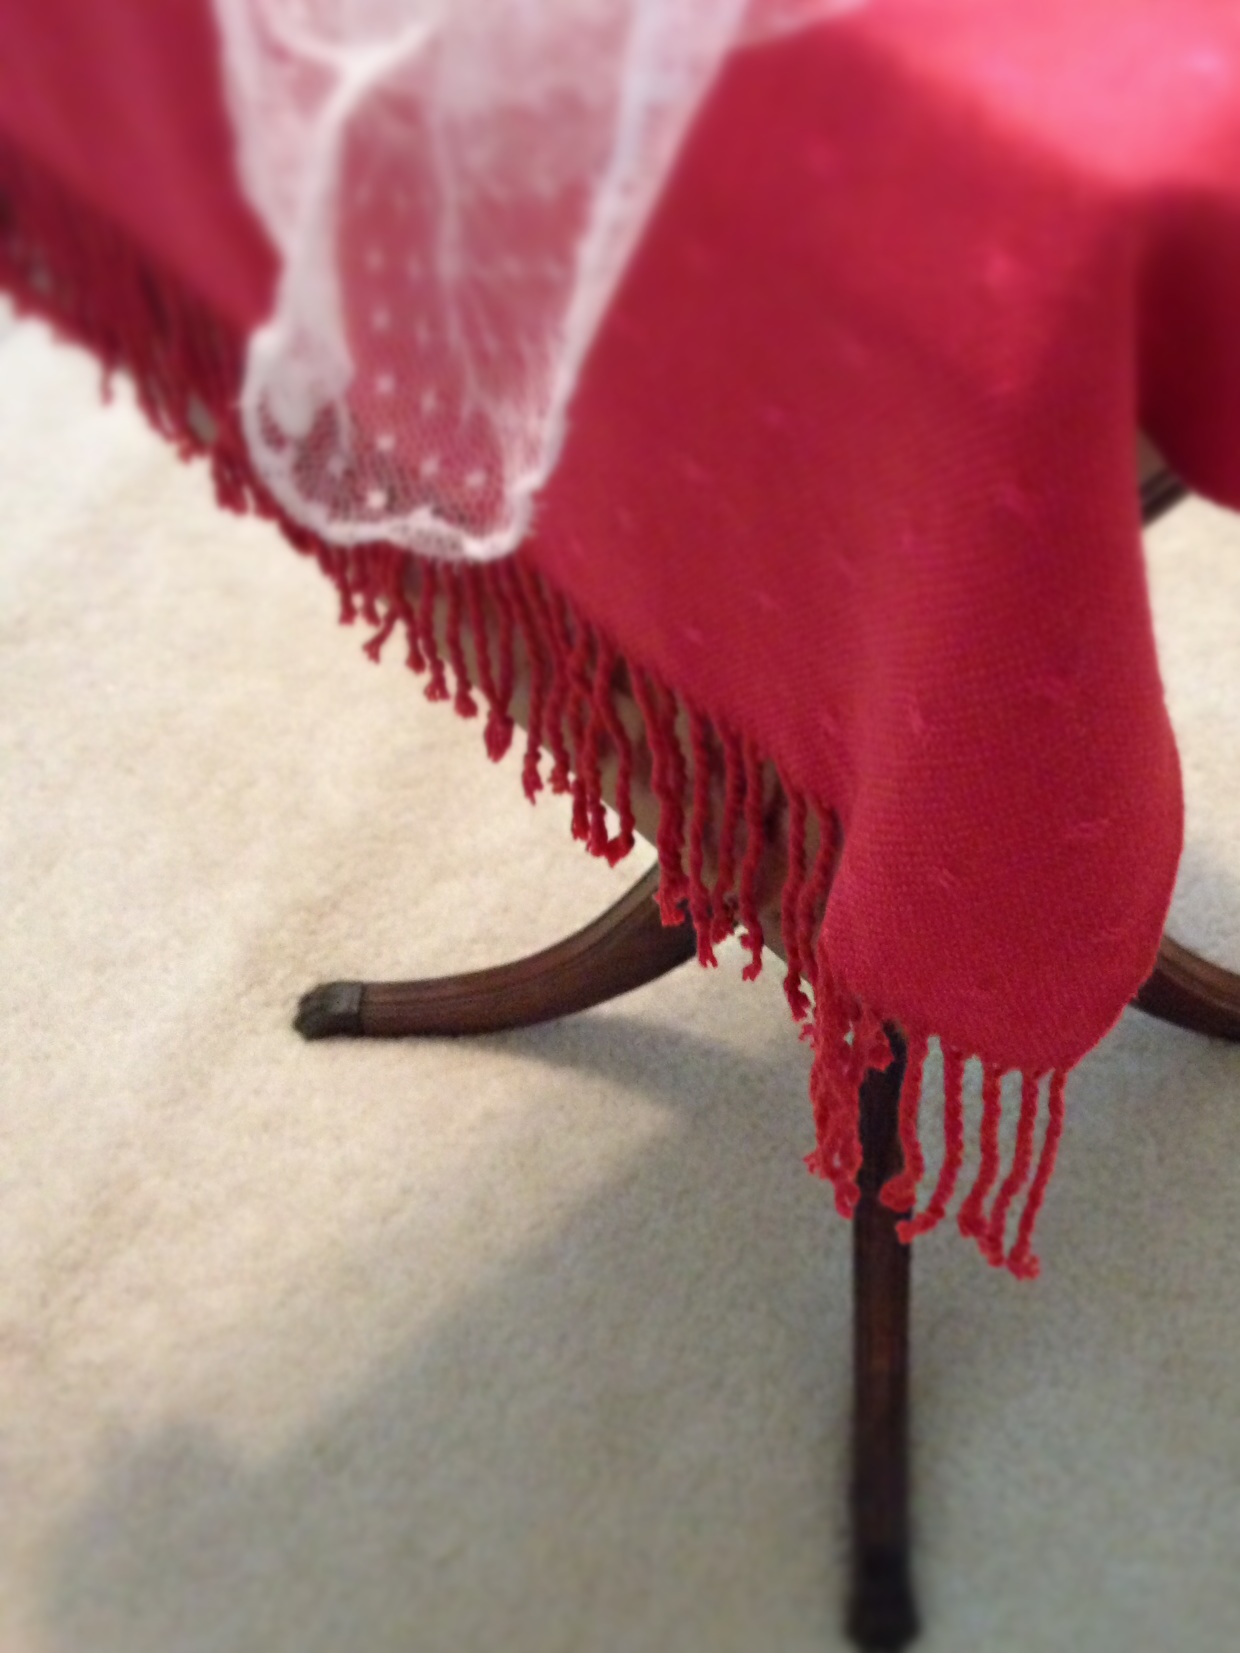
1. Twisted fringe on bamboo huck lace small tablecloth. This cloth covered an heirloom table, becoming the altar, at Melody’s wedding. (This short piece was at the end of the warp after weaving two shawls.) You can see the shawls HERE, and twisting the fringe HERE.
Twisted fringe gives an elegant finishing touch to this small huck lace table covering.
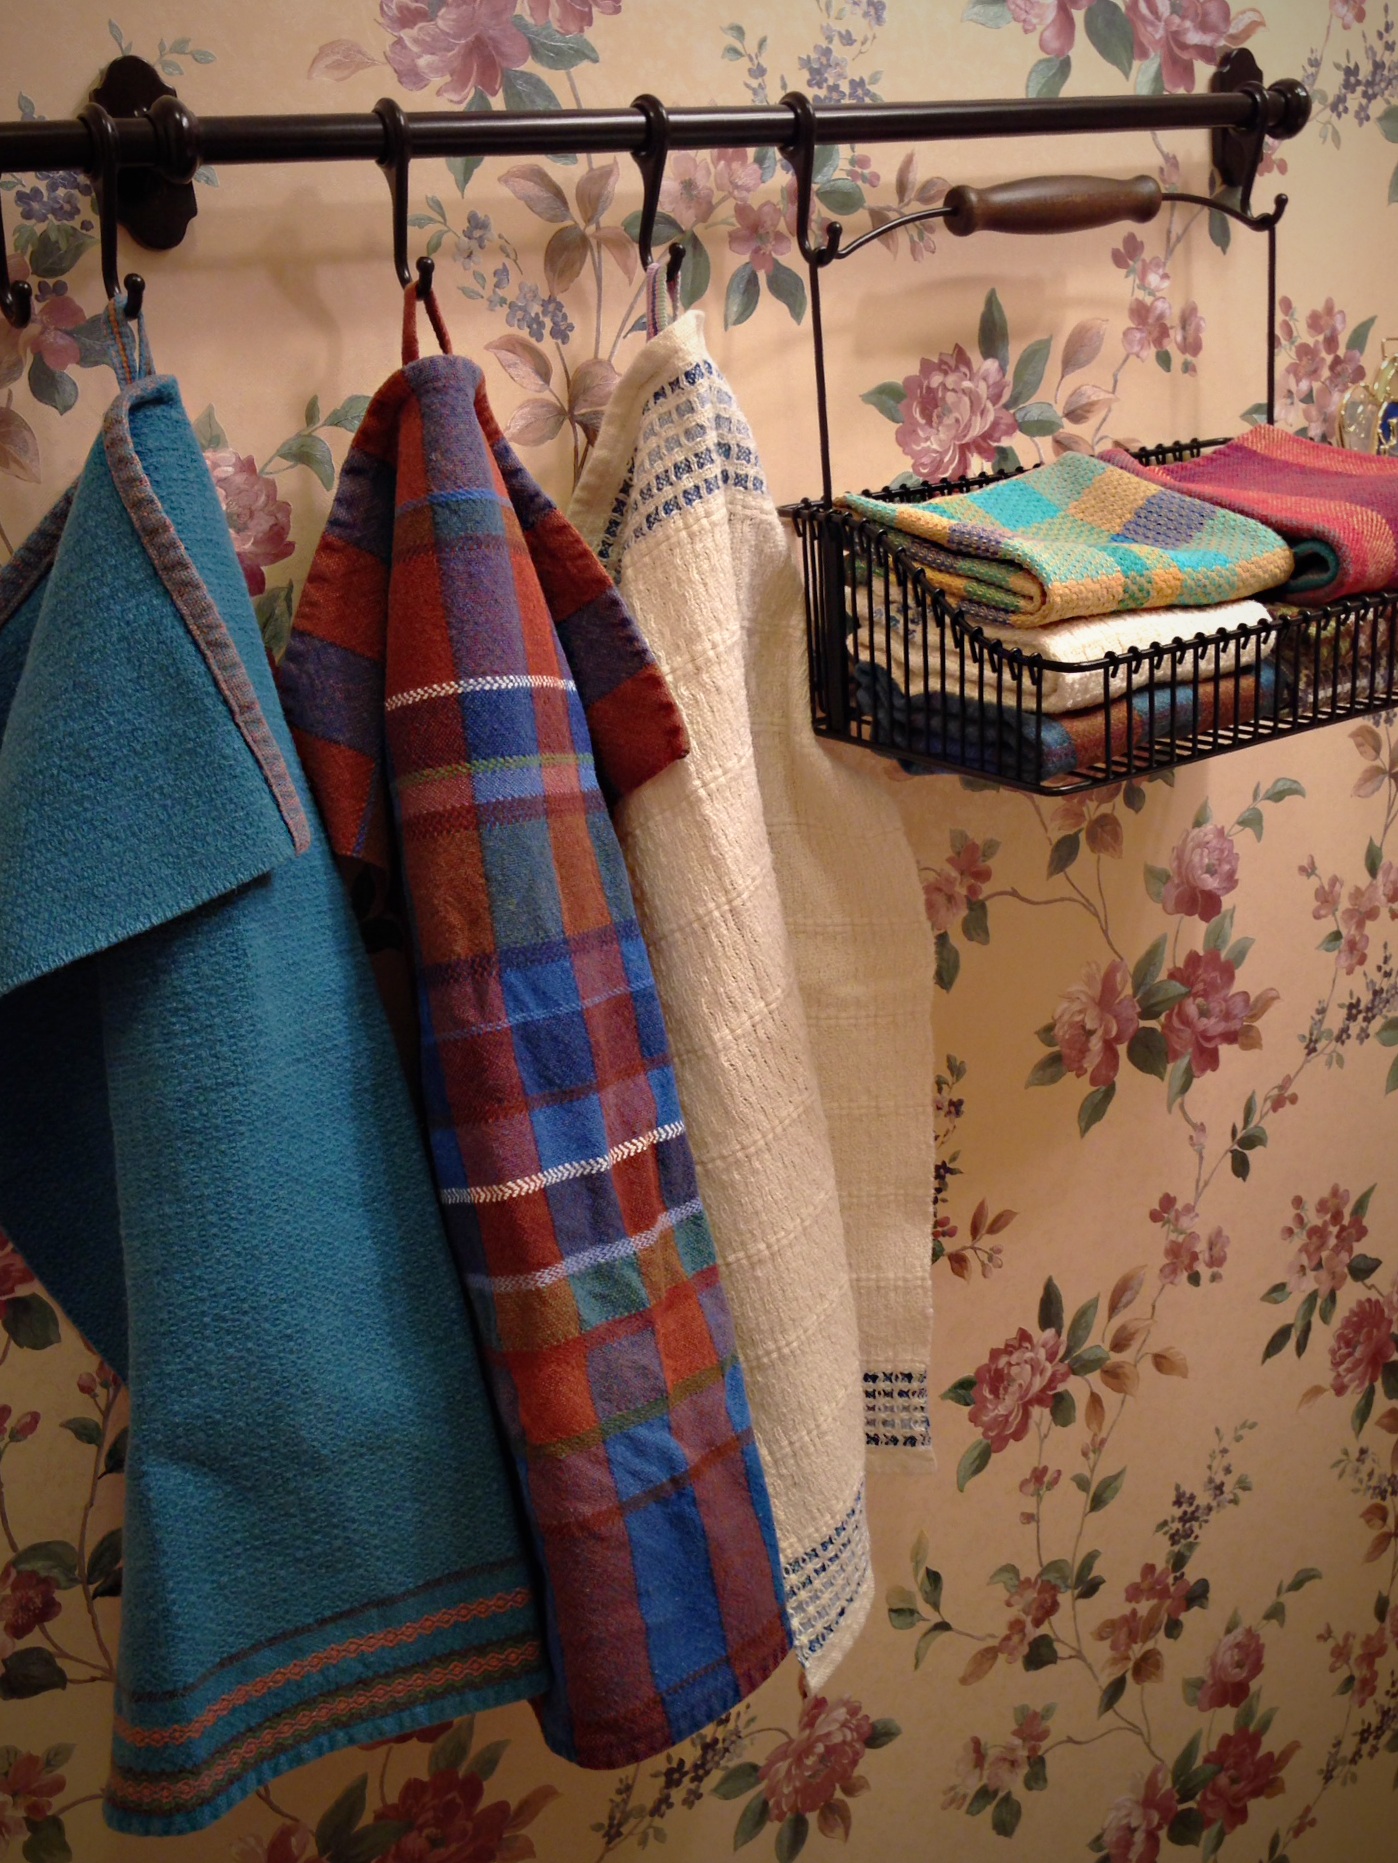
2. Added hanging tabs to handtowels. Installed Ikea rod with basket and hooks to hang handwoven handtowels in the powder room. (When you need tabs for towels, it helps to have a collection of inkle and band loombands.) You can see the most recent towels HERE – I kept one of the eight for myself; the rest became gifts.
Ikea basket and hooks hold assortment of handwoven towels for guests to use in the powder room.
3. Untangled the fringe of alpaca/tencel throw. (A wet finishing nightmare I don’t care to repeat.) You can see what it looked like before washing HERE.
Each strand of fringe was carefully separated one-by-one after leaving the alpaca/tencel throw in the washing machine a few minutes too long. Untangling took longer than tying the lattice fringe. Hours and hours.
4. Hand-stitched rolled hem on Swedish lace tablecloth. (I may use this as a curtain for my weaving studio window, hung on rings with clips, on a rod.) HERE are the long curtain panels that hang on windows in my home.
Swedish lace panel can be used as a tablecloth, or a curtain, or even a light, summery shawl. The hand-stitched rolled hem gives a delicate touch to this elegant piece.Swedish lace is shown to its best advantage when light is allowed to shine through the cloth. The pressed rolled hem adds a classy touch.
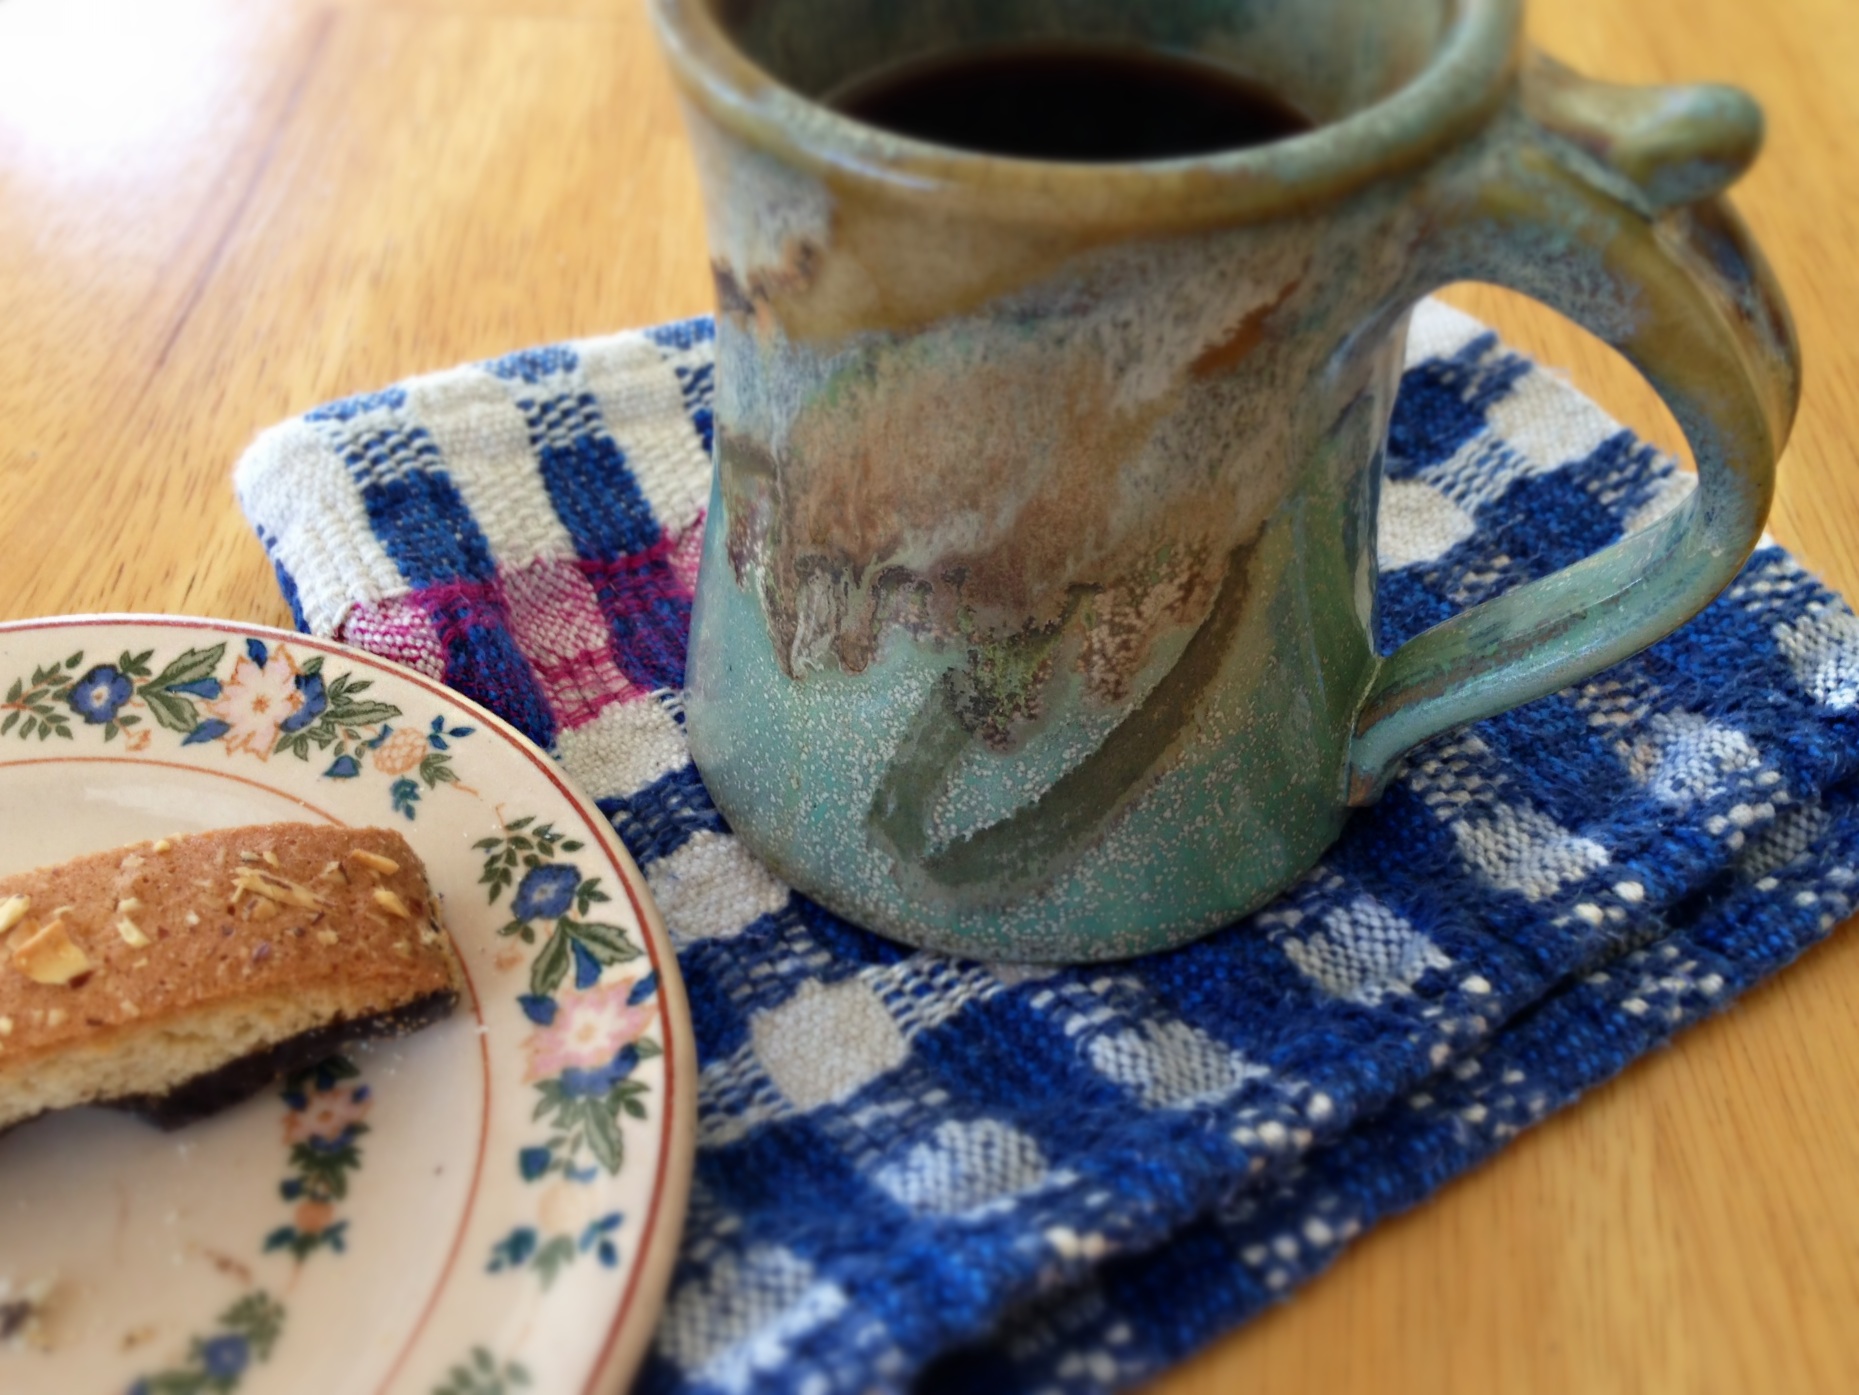
5. Hemmed small sample piece to carry around with me when I have a cup of coffee. (I grab this re-usable “scrap” instead of a paper napkin or paper towel. It also doubles as a coaster wherever I happen to sit down.) The original M’s and O’s towels are HERE; and HERE you can see what I mean about carrying my coffee cup around with me.
Scrap of handwoven fabric, from a cottolin warp of handtowels, follows my favorite coffee cup around.
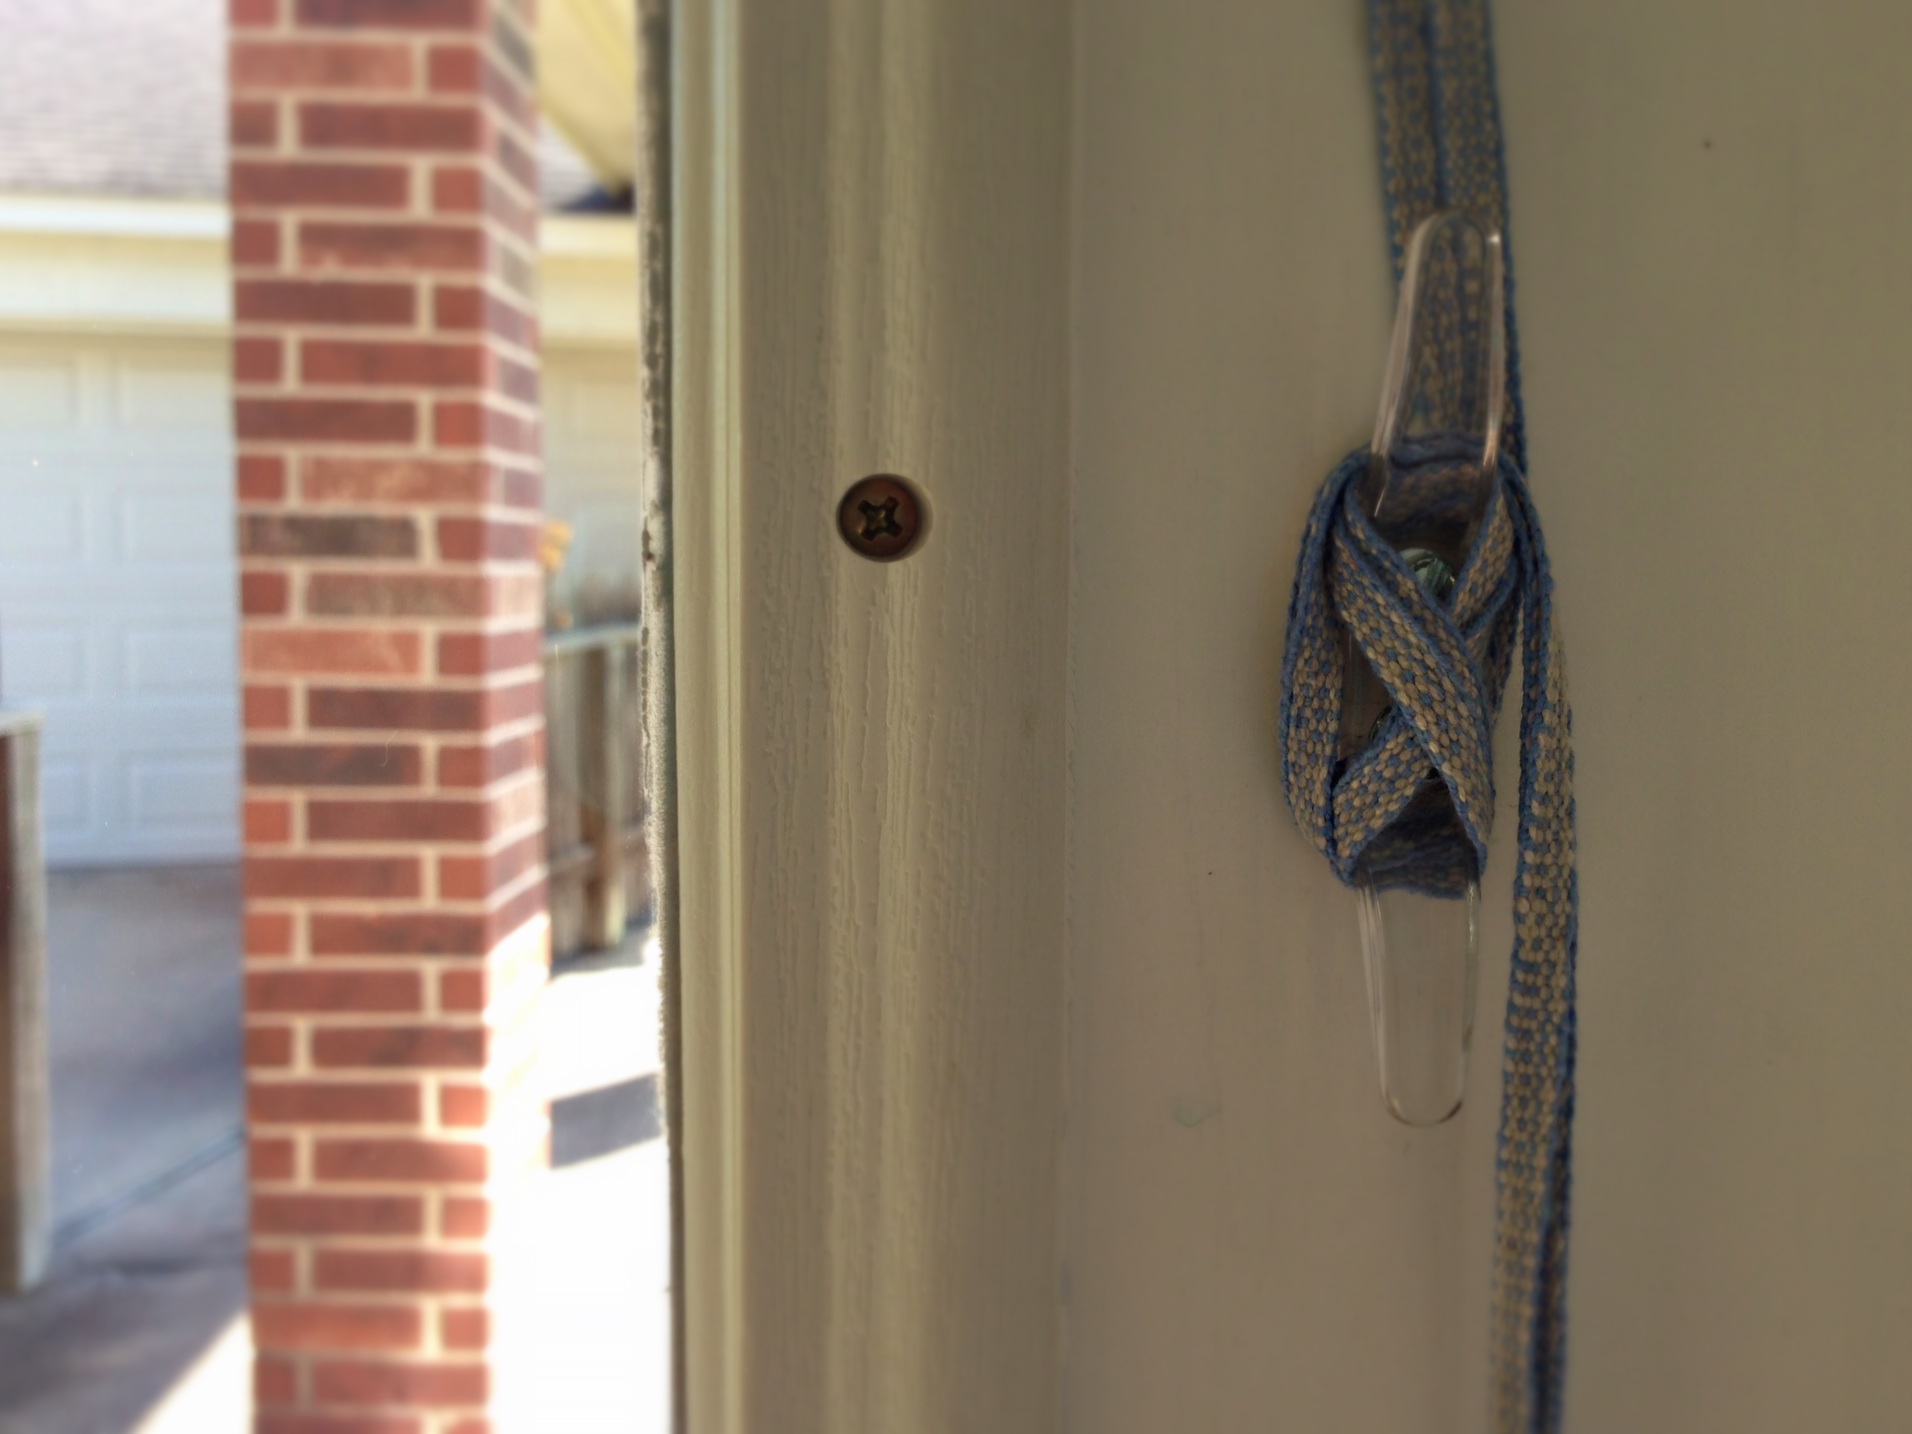
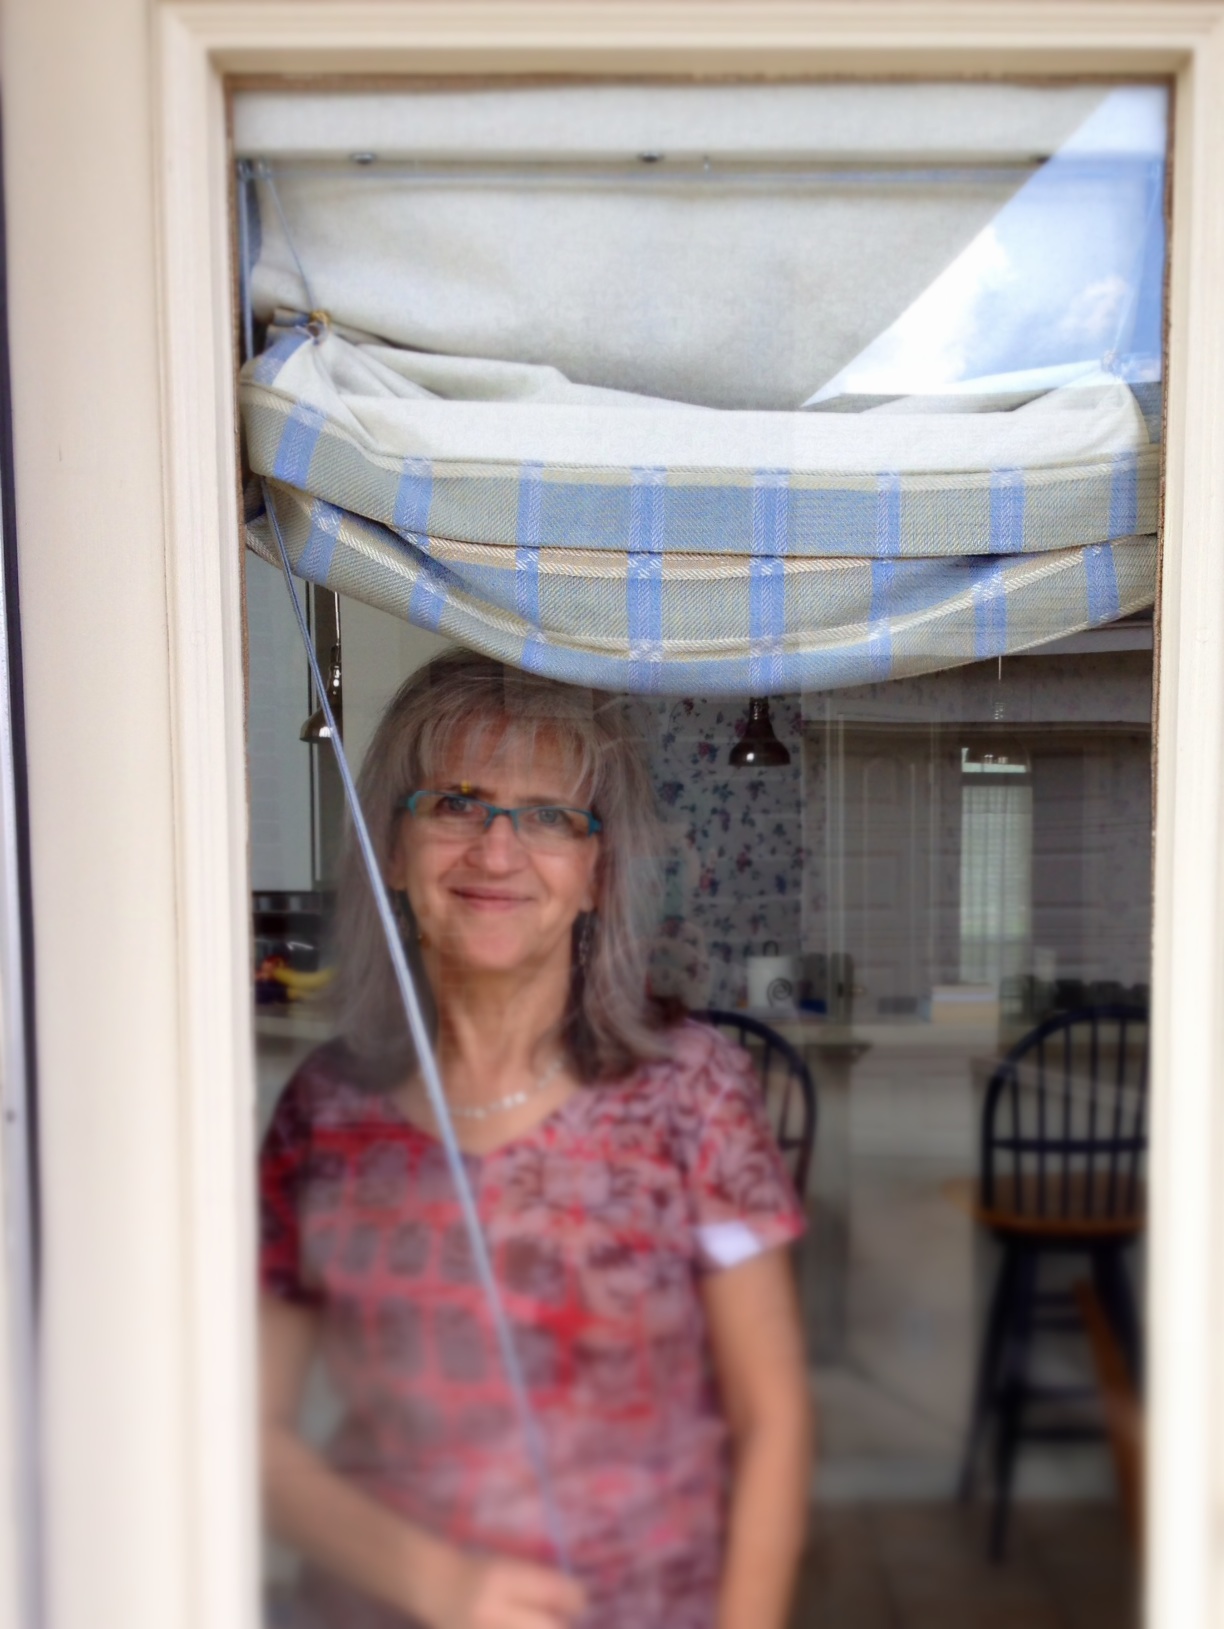
6. Replaced nylon cord on handwoven Roman shades with a cord I wove on my band loom. (The “temporary” nylon cord stayed more than a year. We now enjoy seeing this on our kitchen door every day, finally fully finished.) The only place I have a picture of the original nylon cord, and of the fabric on the loom for the Roman shades is in my Projects on Weavolution HERE. (I’m not sure if you can see it without logging in to the site.)
Linen and cotton threads that match the handwoven Roman shades were used to weave the pull cord. Cord woven on Glimakra two-treadle band loom.Handwoven Roman shades finally have a matching pull cord. When the shades are lowered at night, the two-block twill structure is seen covering the whole kitchen door window. Woven on 8-shaft Glimakra Standard loom.Opening the shades to start the day and welcome you. Please come in!
May you reduce your finishing pile (I know you have one).