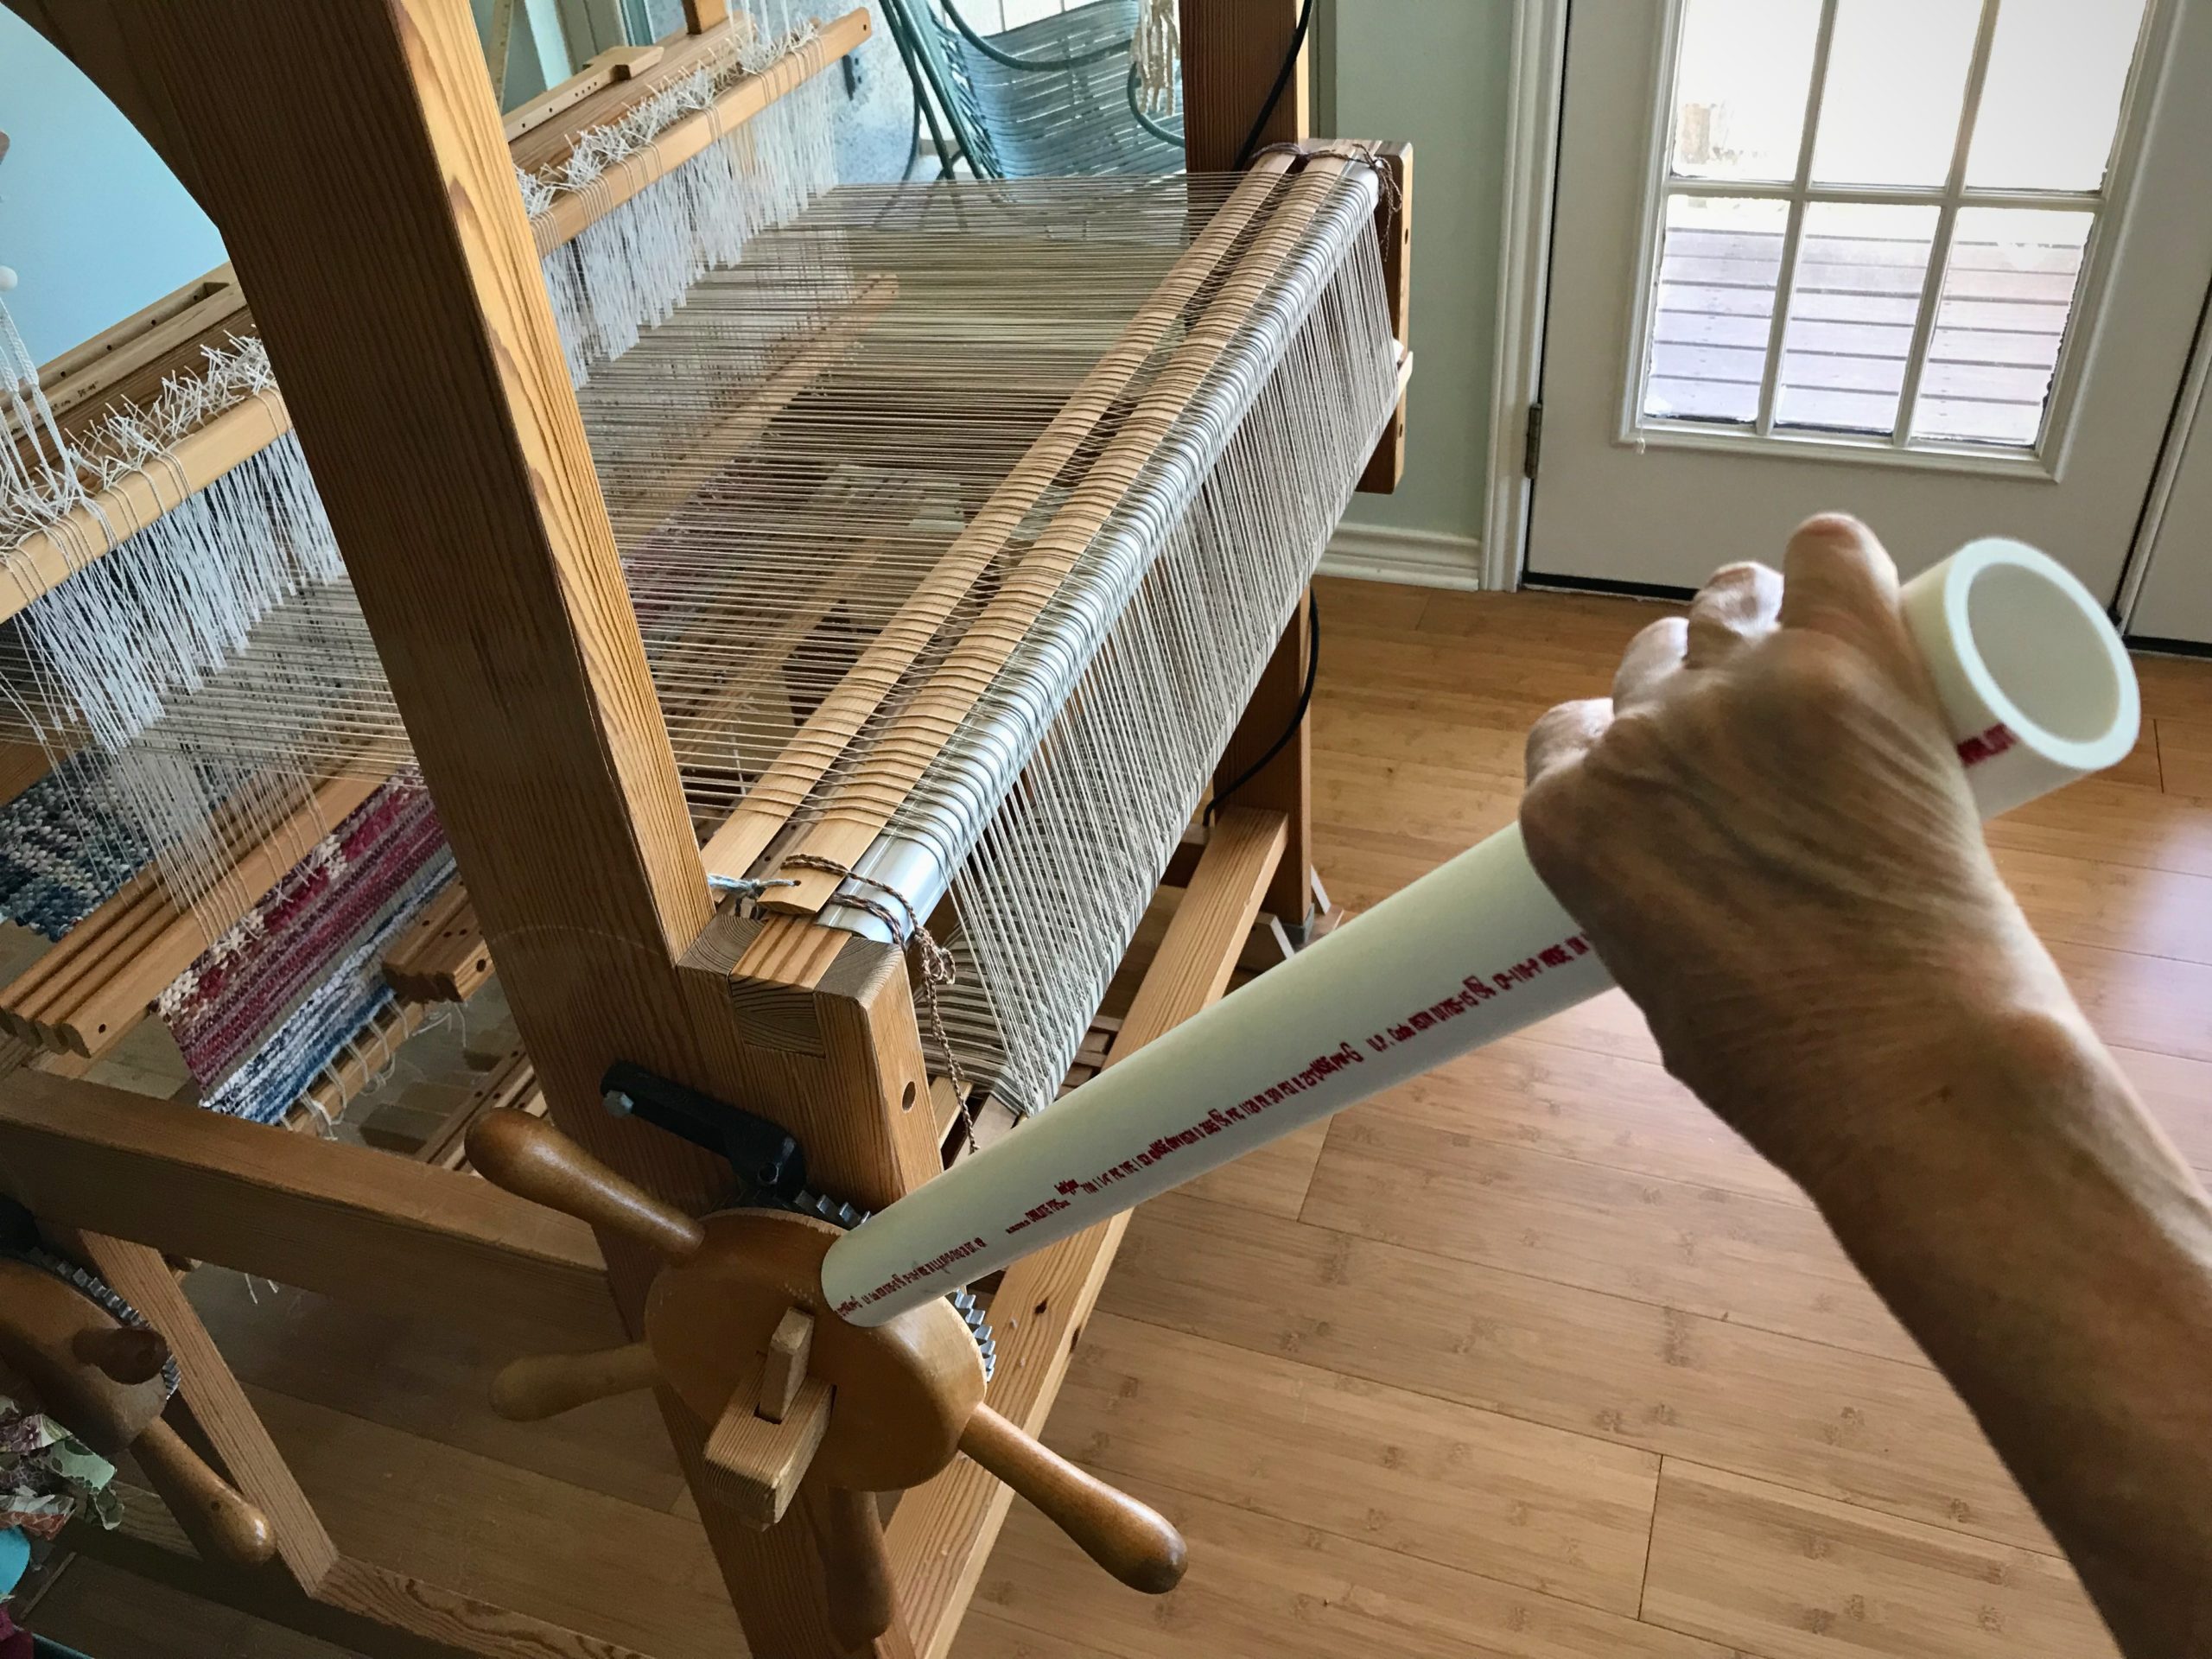
UPDATE: I no longer use the cheater bar, as it could put too much force on the loom parts. Instead, I loosen the front ratchet first, and then I am able to loosen the back ratchet.
I have a tool that makes me stronger than I naturally am. Warp tension is extremely tight on my loom when I am weaving rugs. After advancing the warp, and locking the pawl on the cloth beam, I tighten the ratchet on the warp beam as much as I can. Then, I put all my weight into tightening the cloth beam. And then, with a bit of oomph, I lean into the handles on that cloth beam wheel to turn it one more notch on the ratchet. I pat myself on the back for exhibiting such strength. But wait, I have just created a problem. The next time I need to advance the warp, I’m not nearly strong enough to release those front and back pawls.
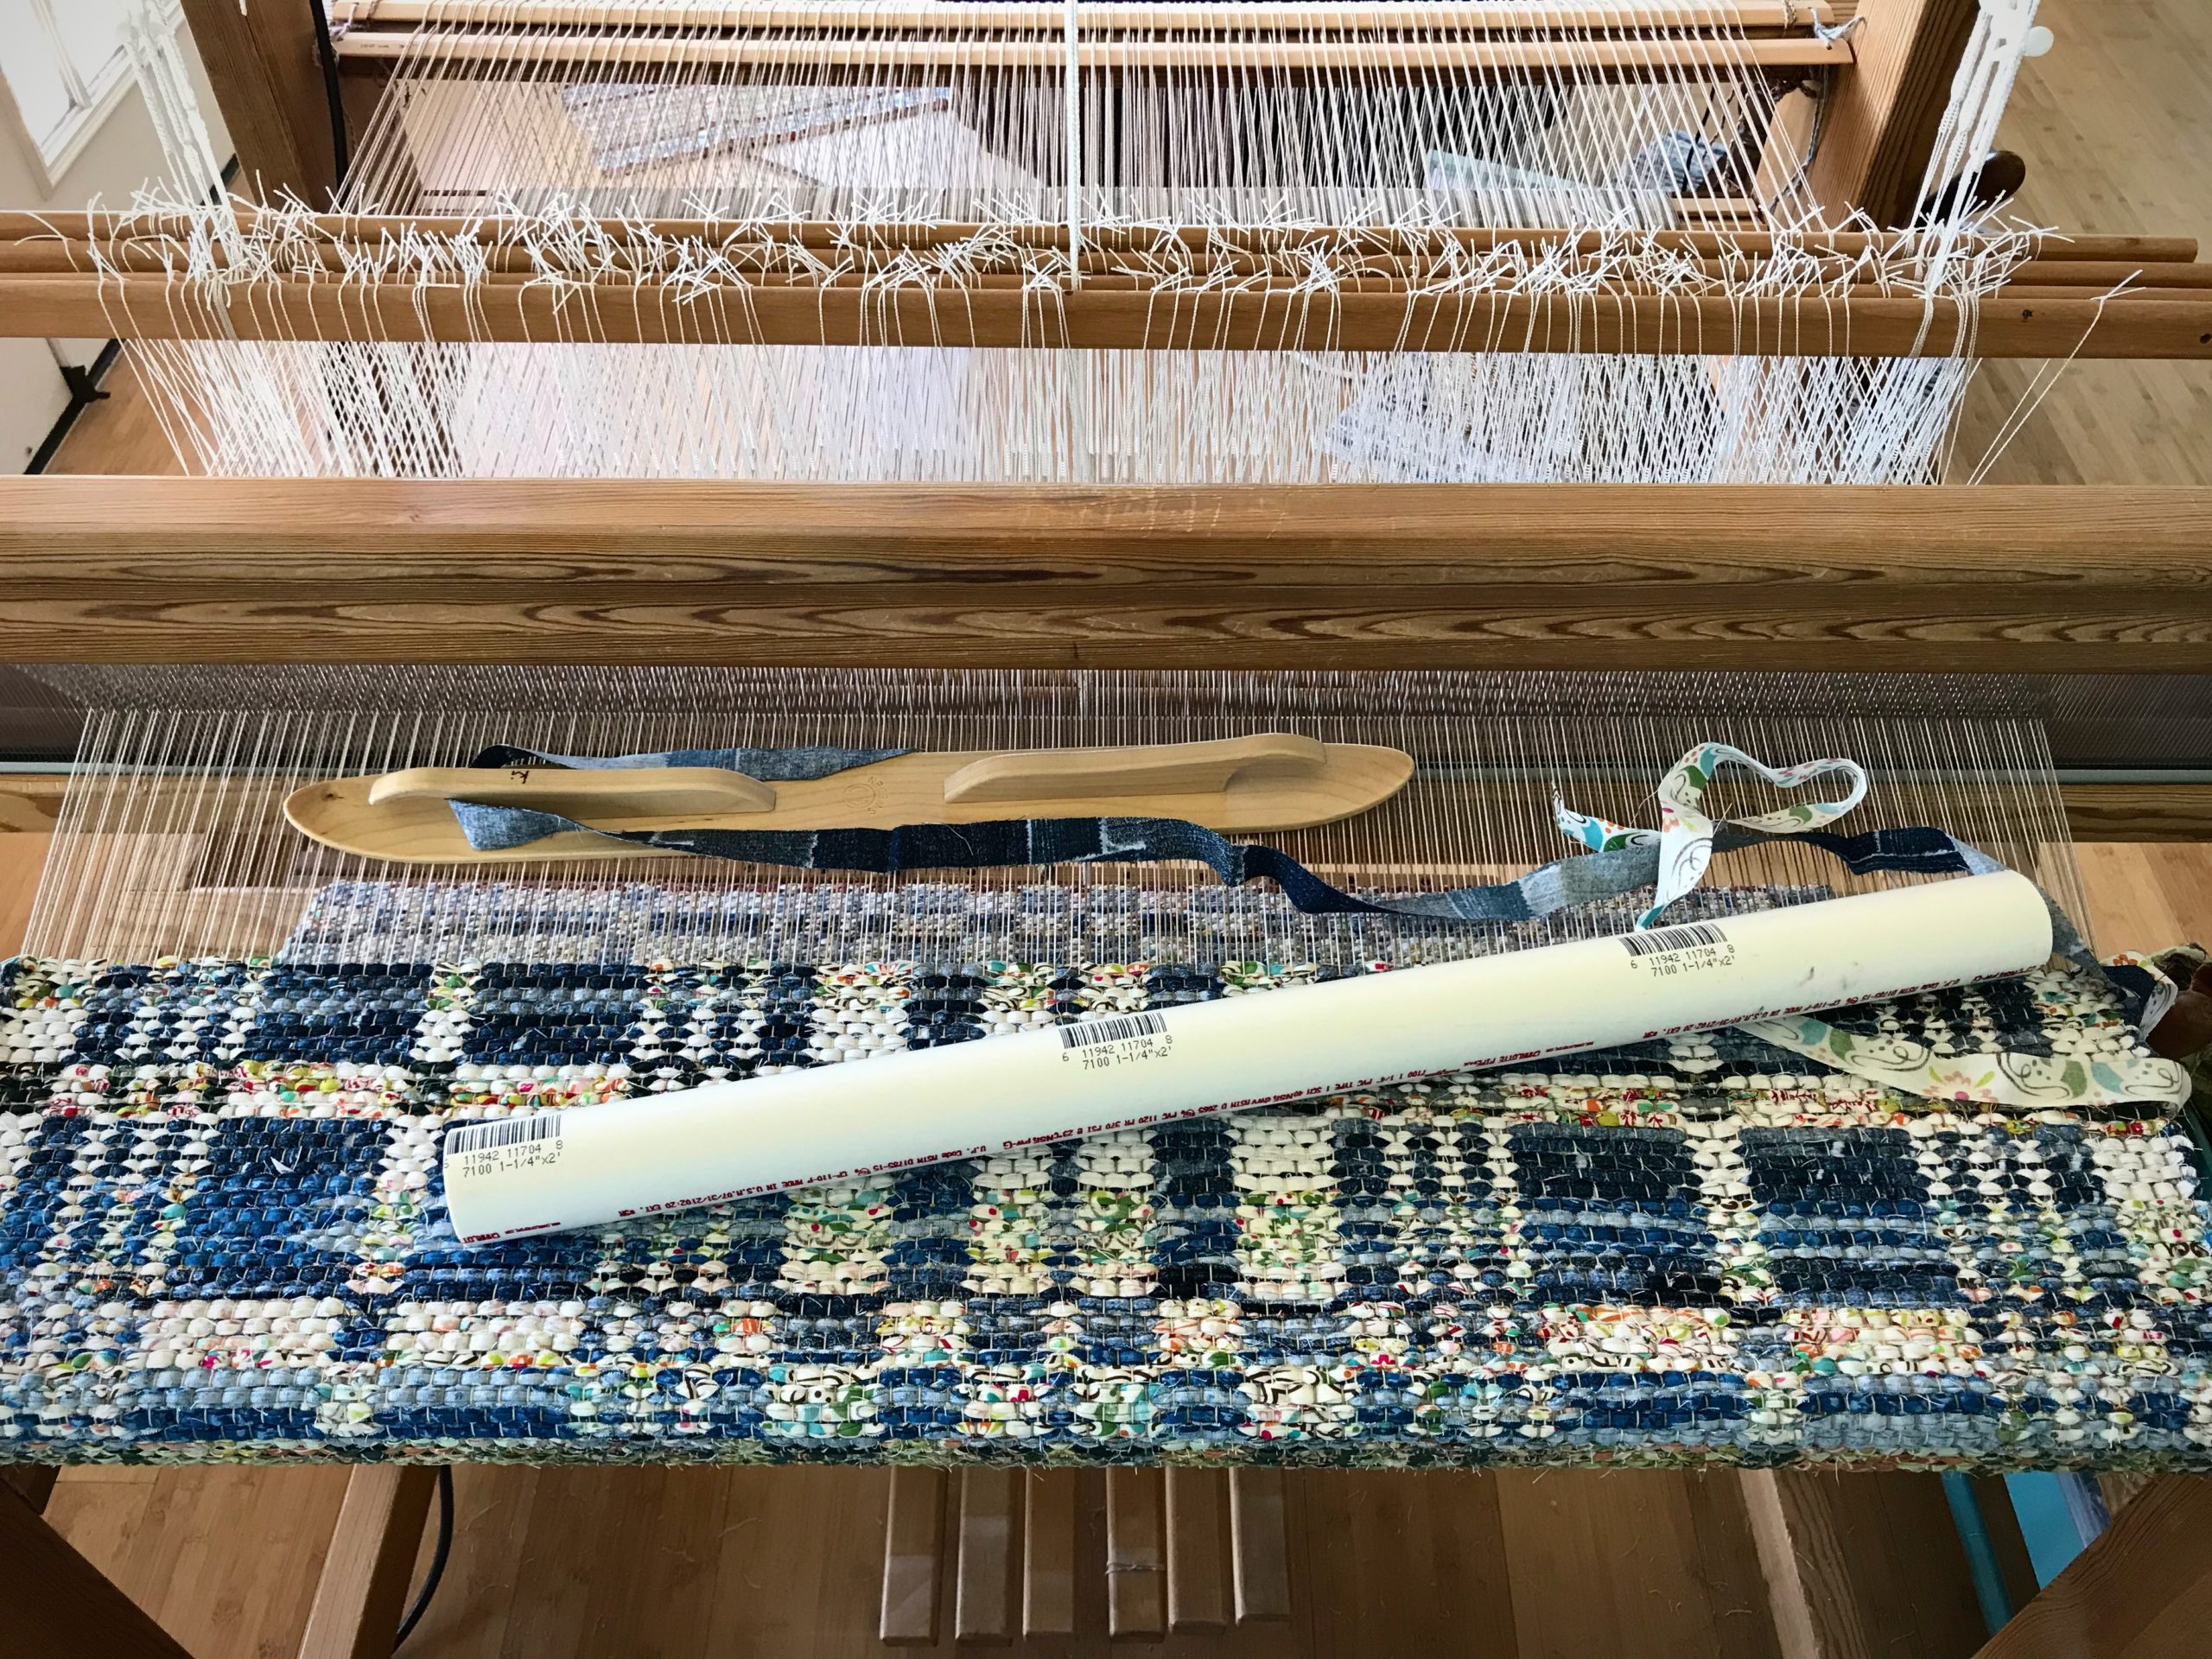
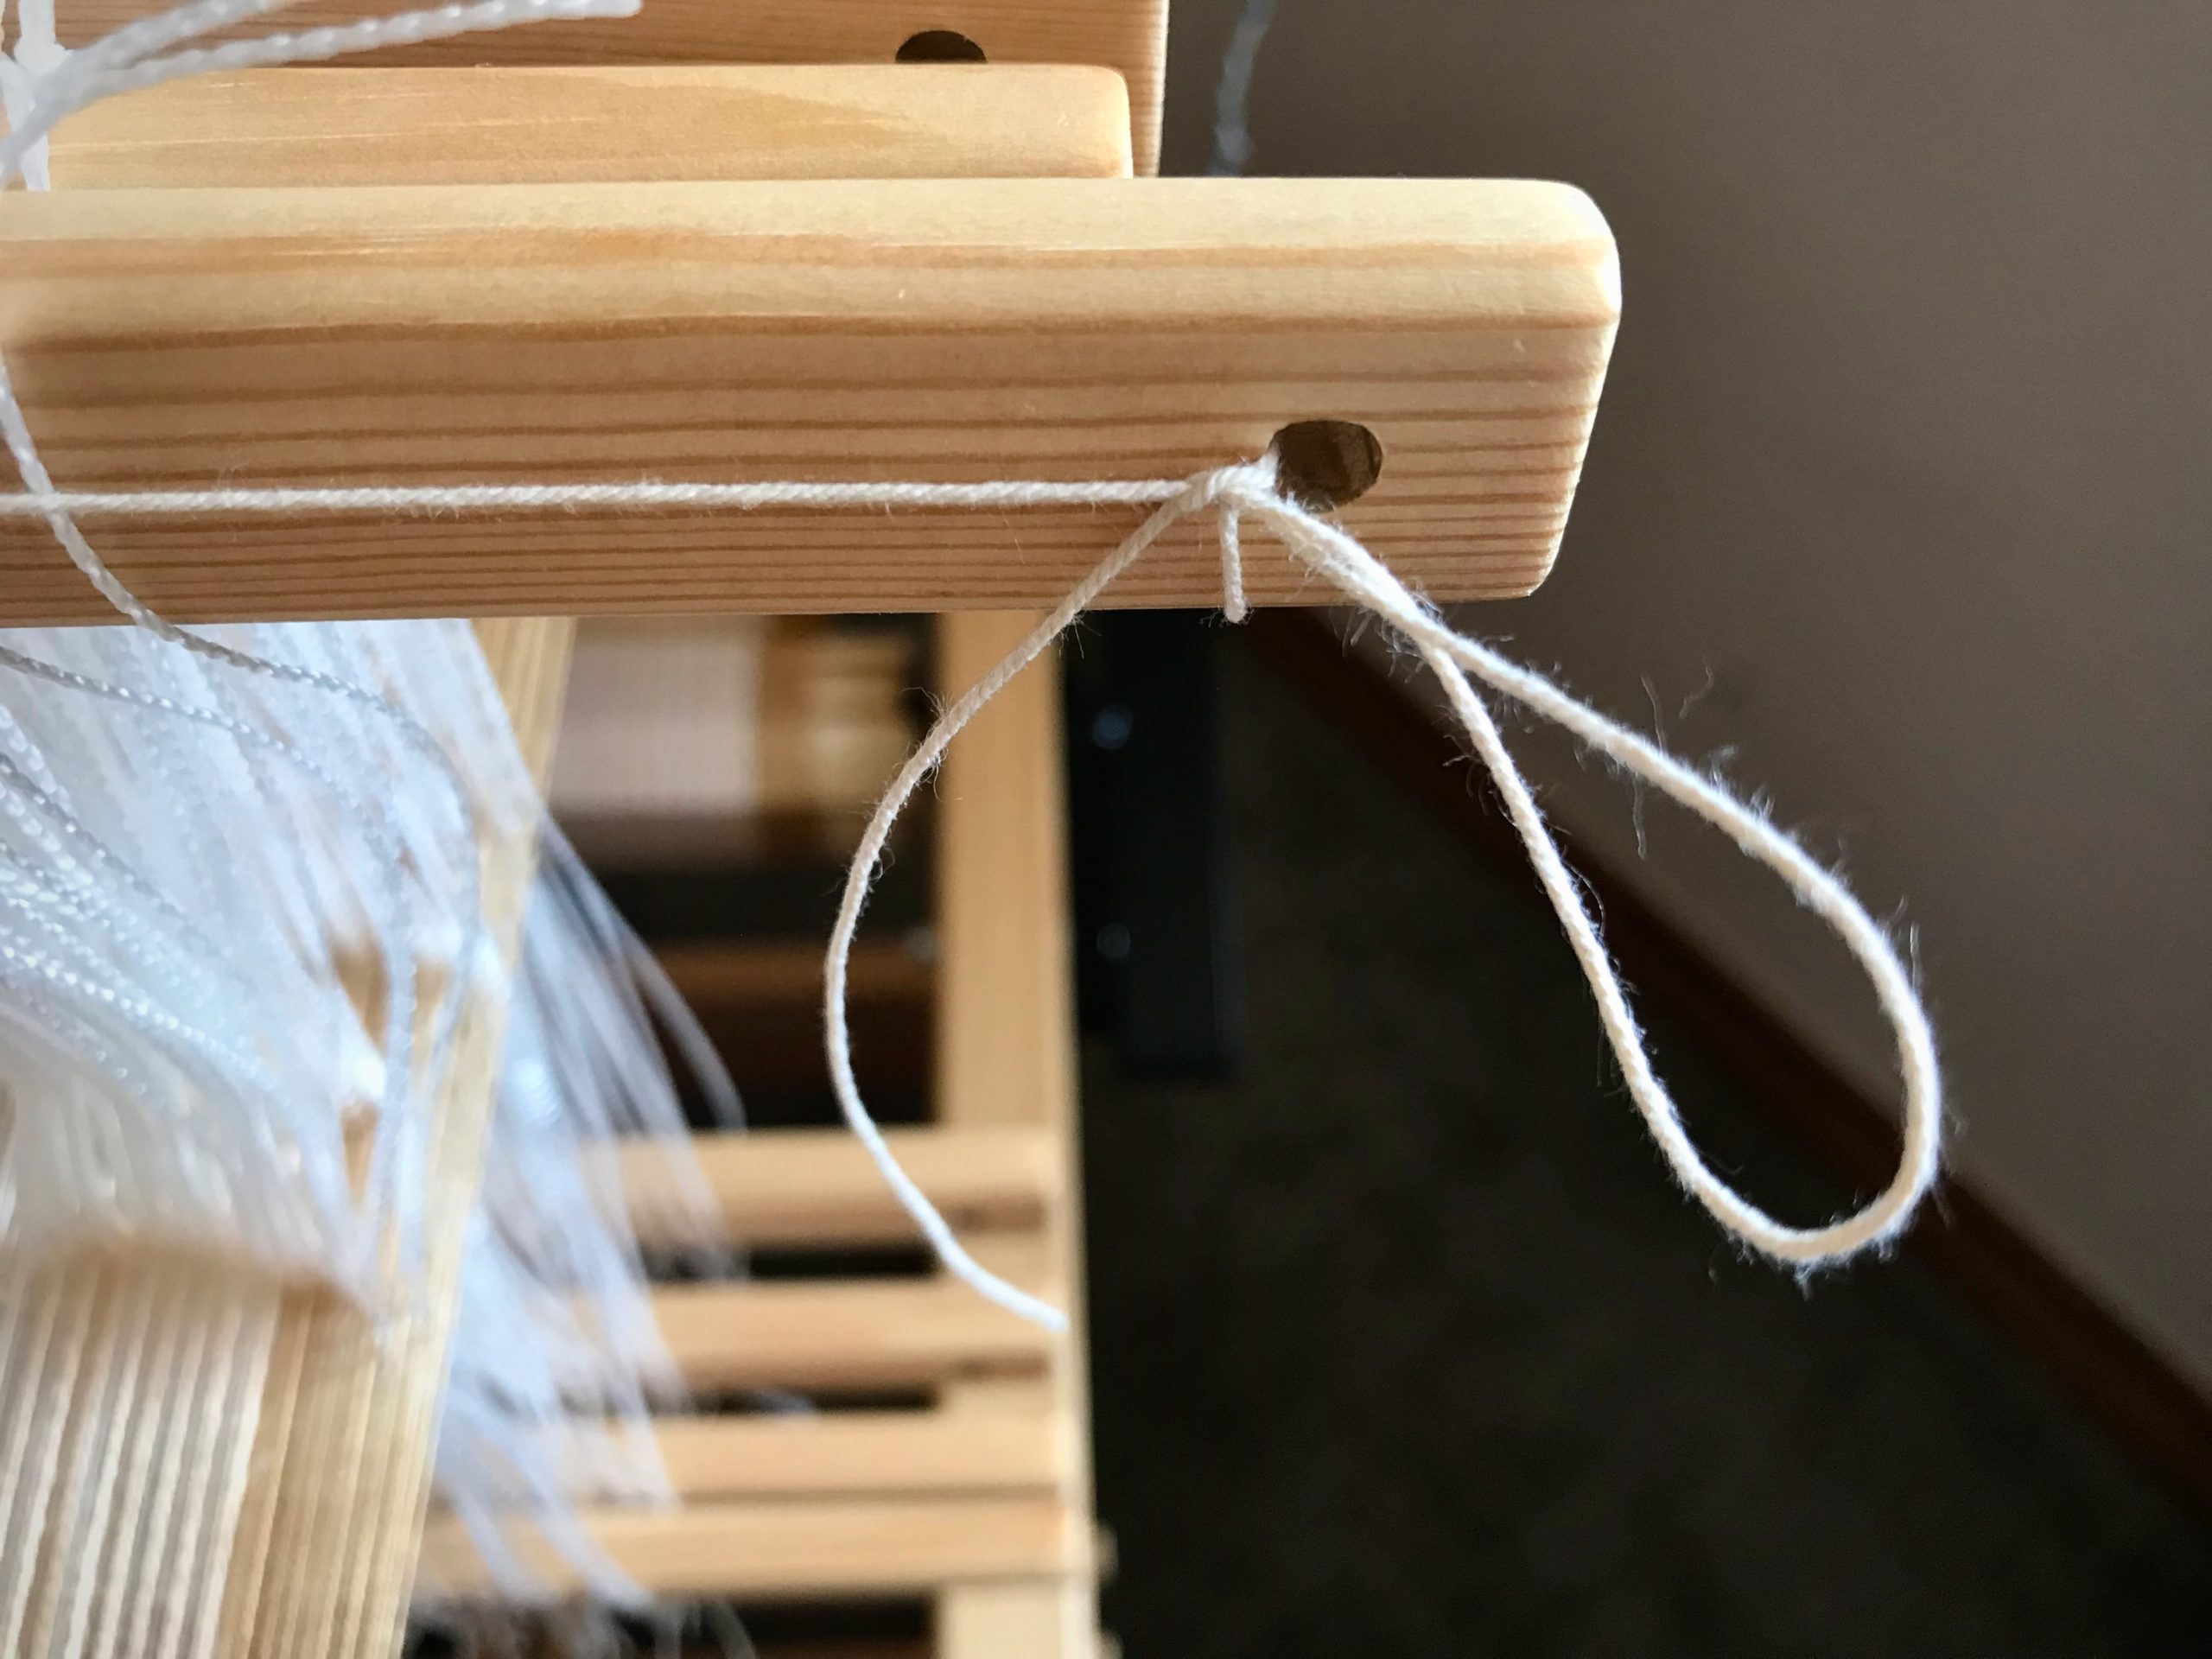
Meet my simplest tool: The Cheater Bar.
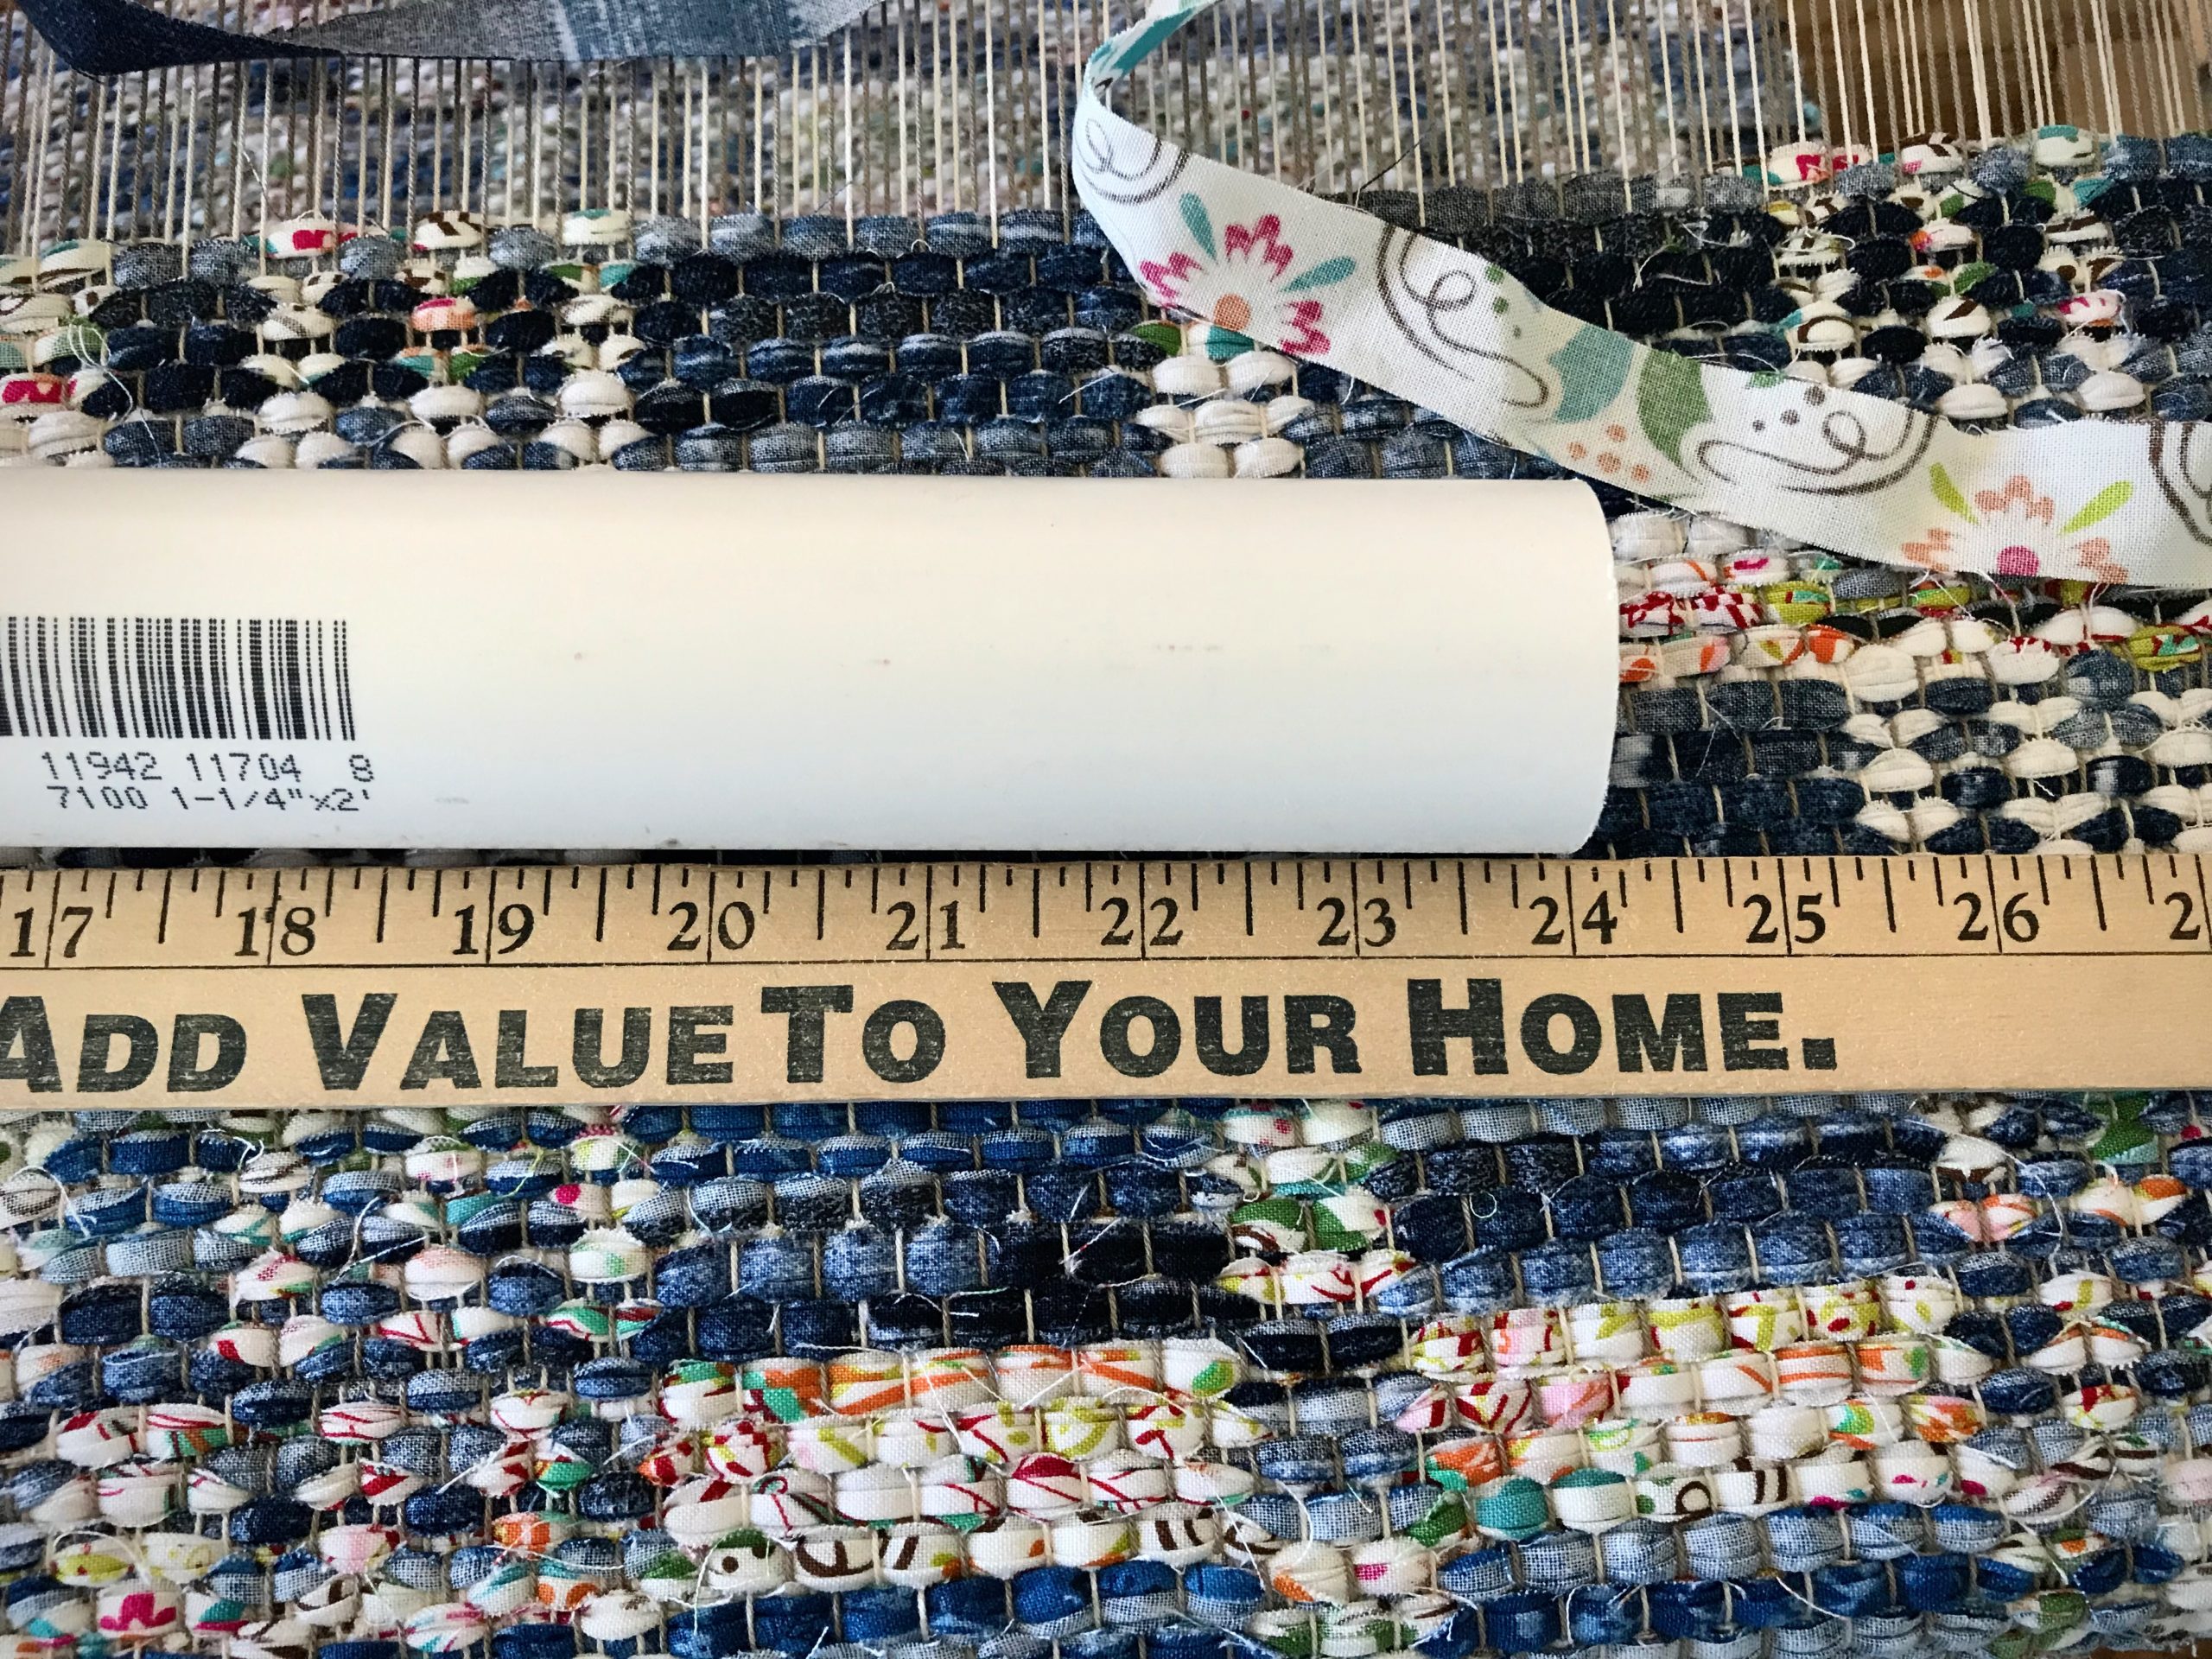
Cheater Bar is PVC pipe to use as a lever.PVC pipe, 1 1/4″ x 24″
With this amazing helper, I can safely release even the most extremely tight warp tension. (But NEVER use the Cheater Bar to tighten the warp.)
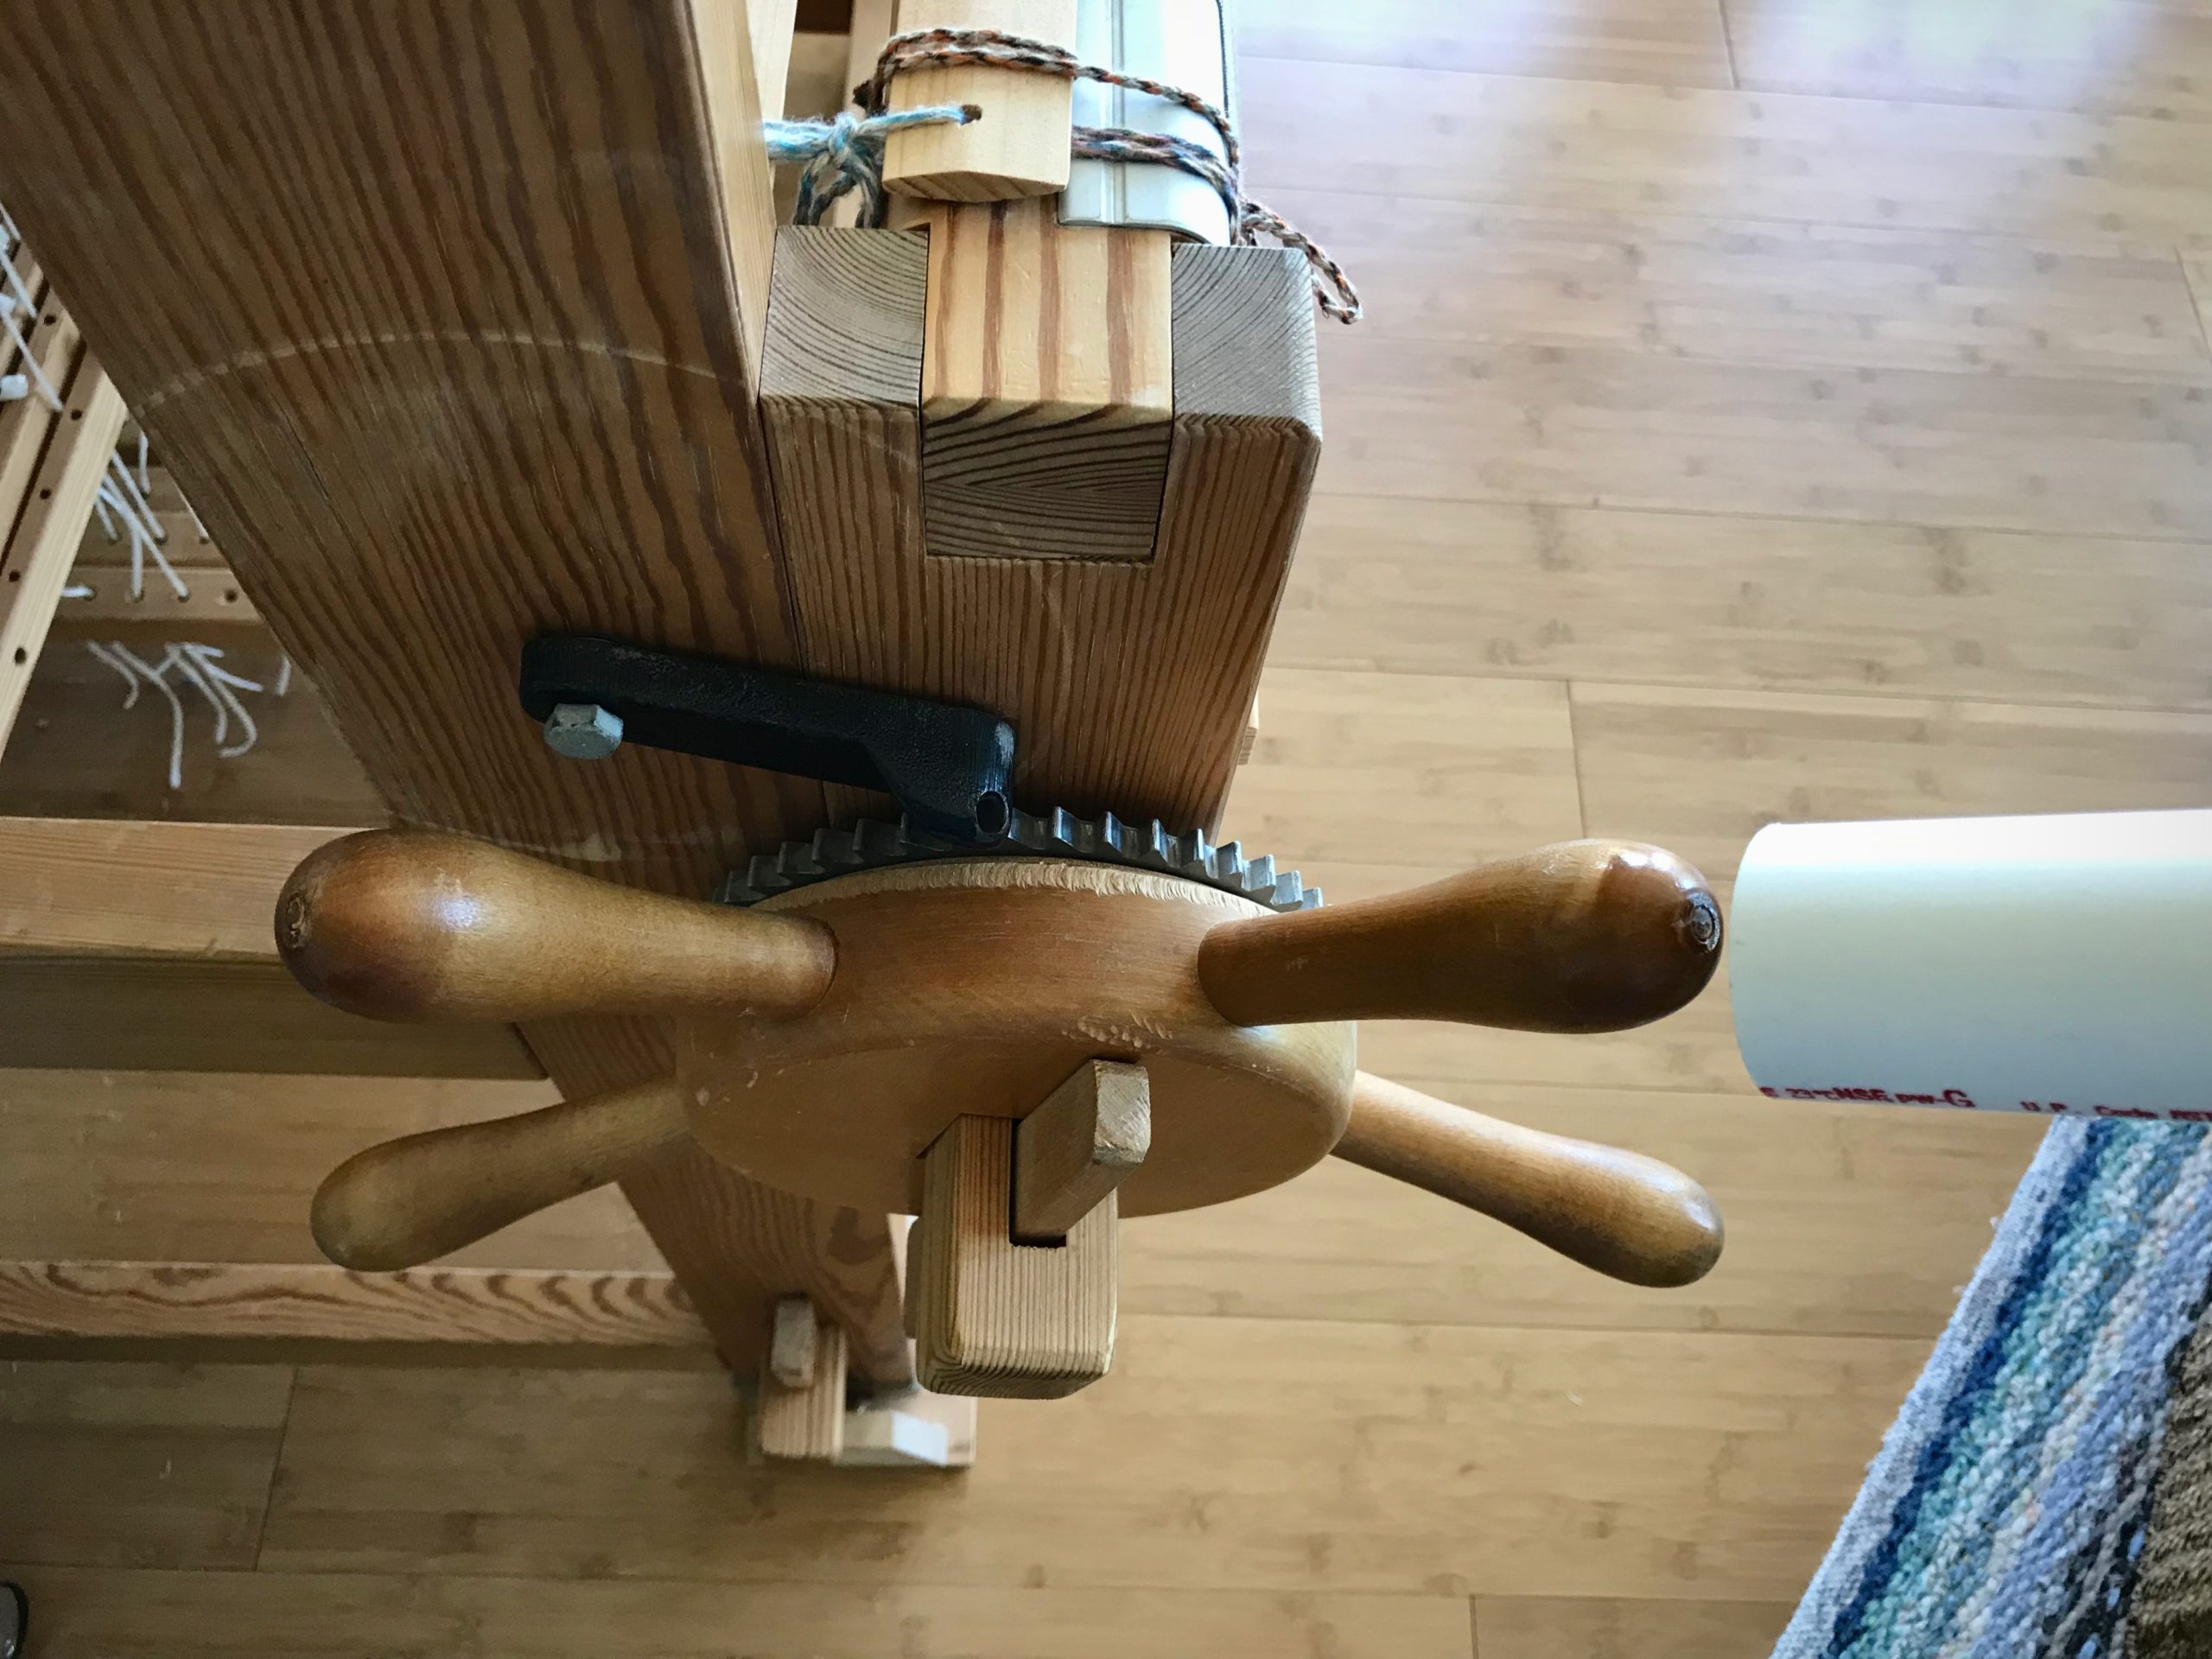
Slip the end of the pipe over a handle on the ratchet wheel.Force of the lever makes it easy to release the ratchet. CAUTION! Do not use the lever to tighten the warp beam or cloth beam. You could easily tighten it more than the loom is made to handle.
I never knew I could be this strong. Celebrate the moment! (A play on words. Steve tells me “moment” is a physics term that has to do with a force’s tendency to cause something to rotate about a specific point or axis.)
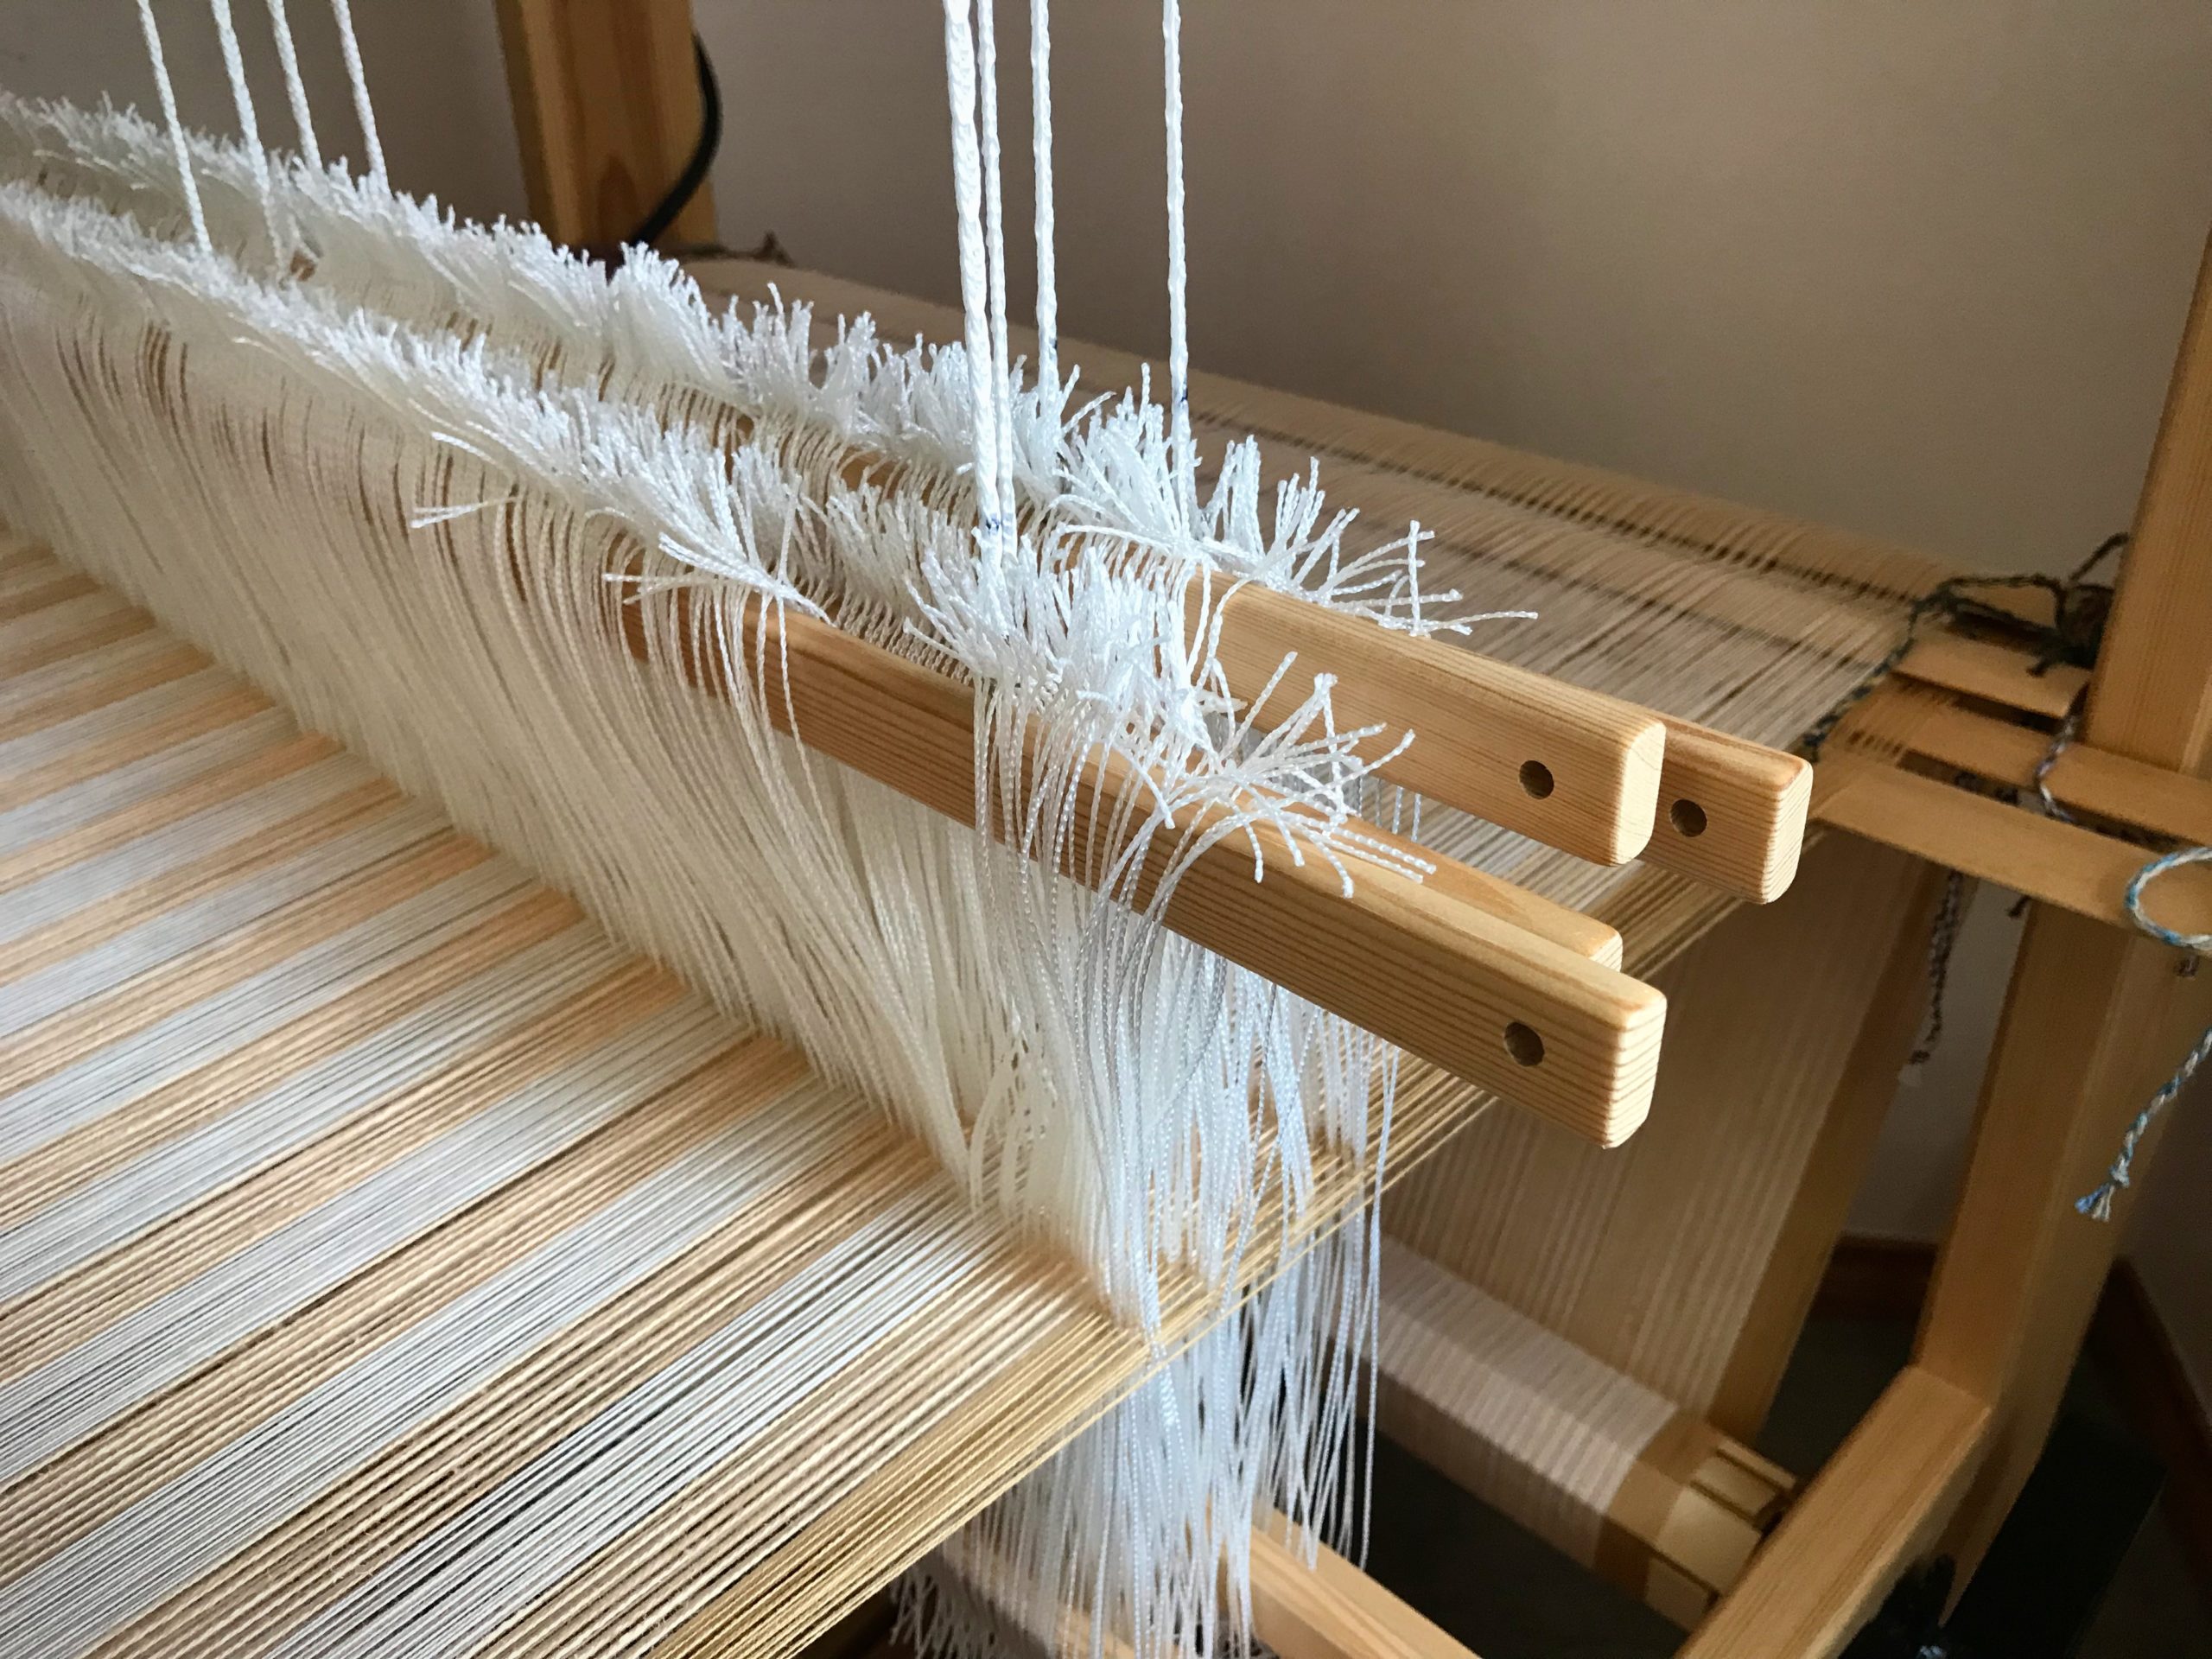
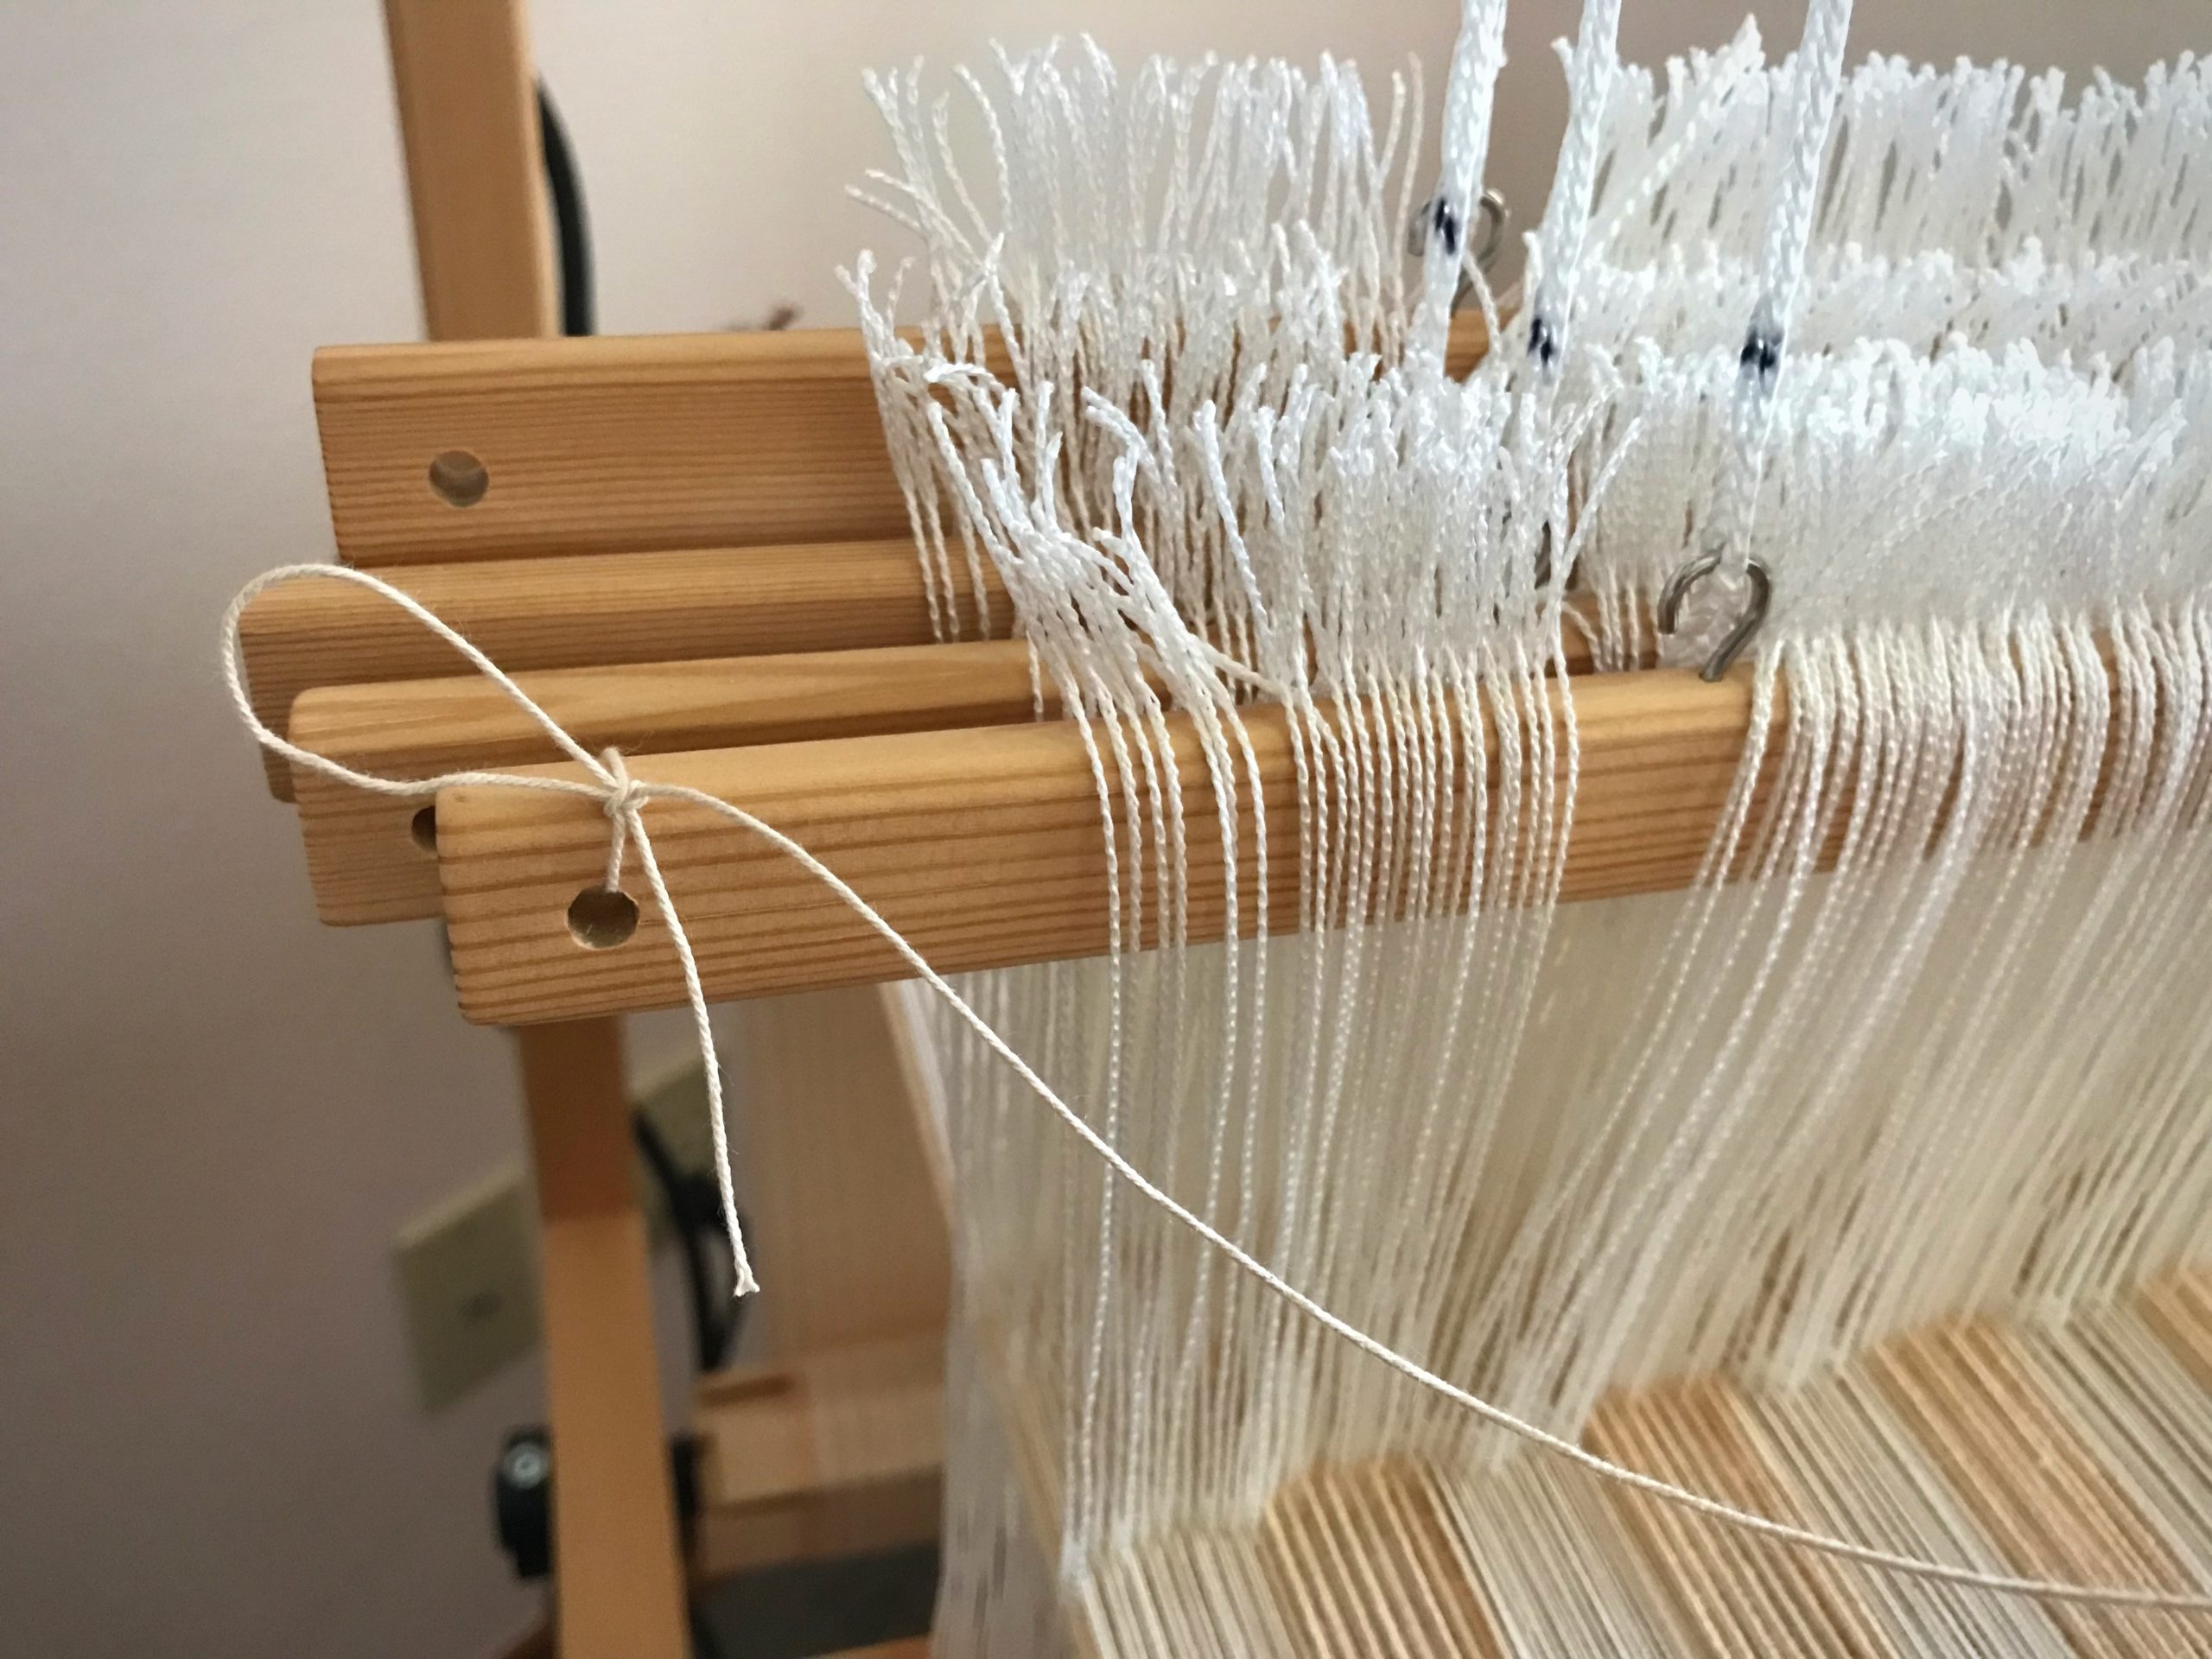
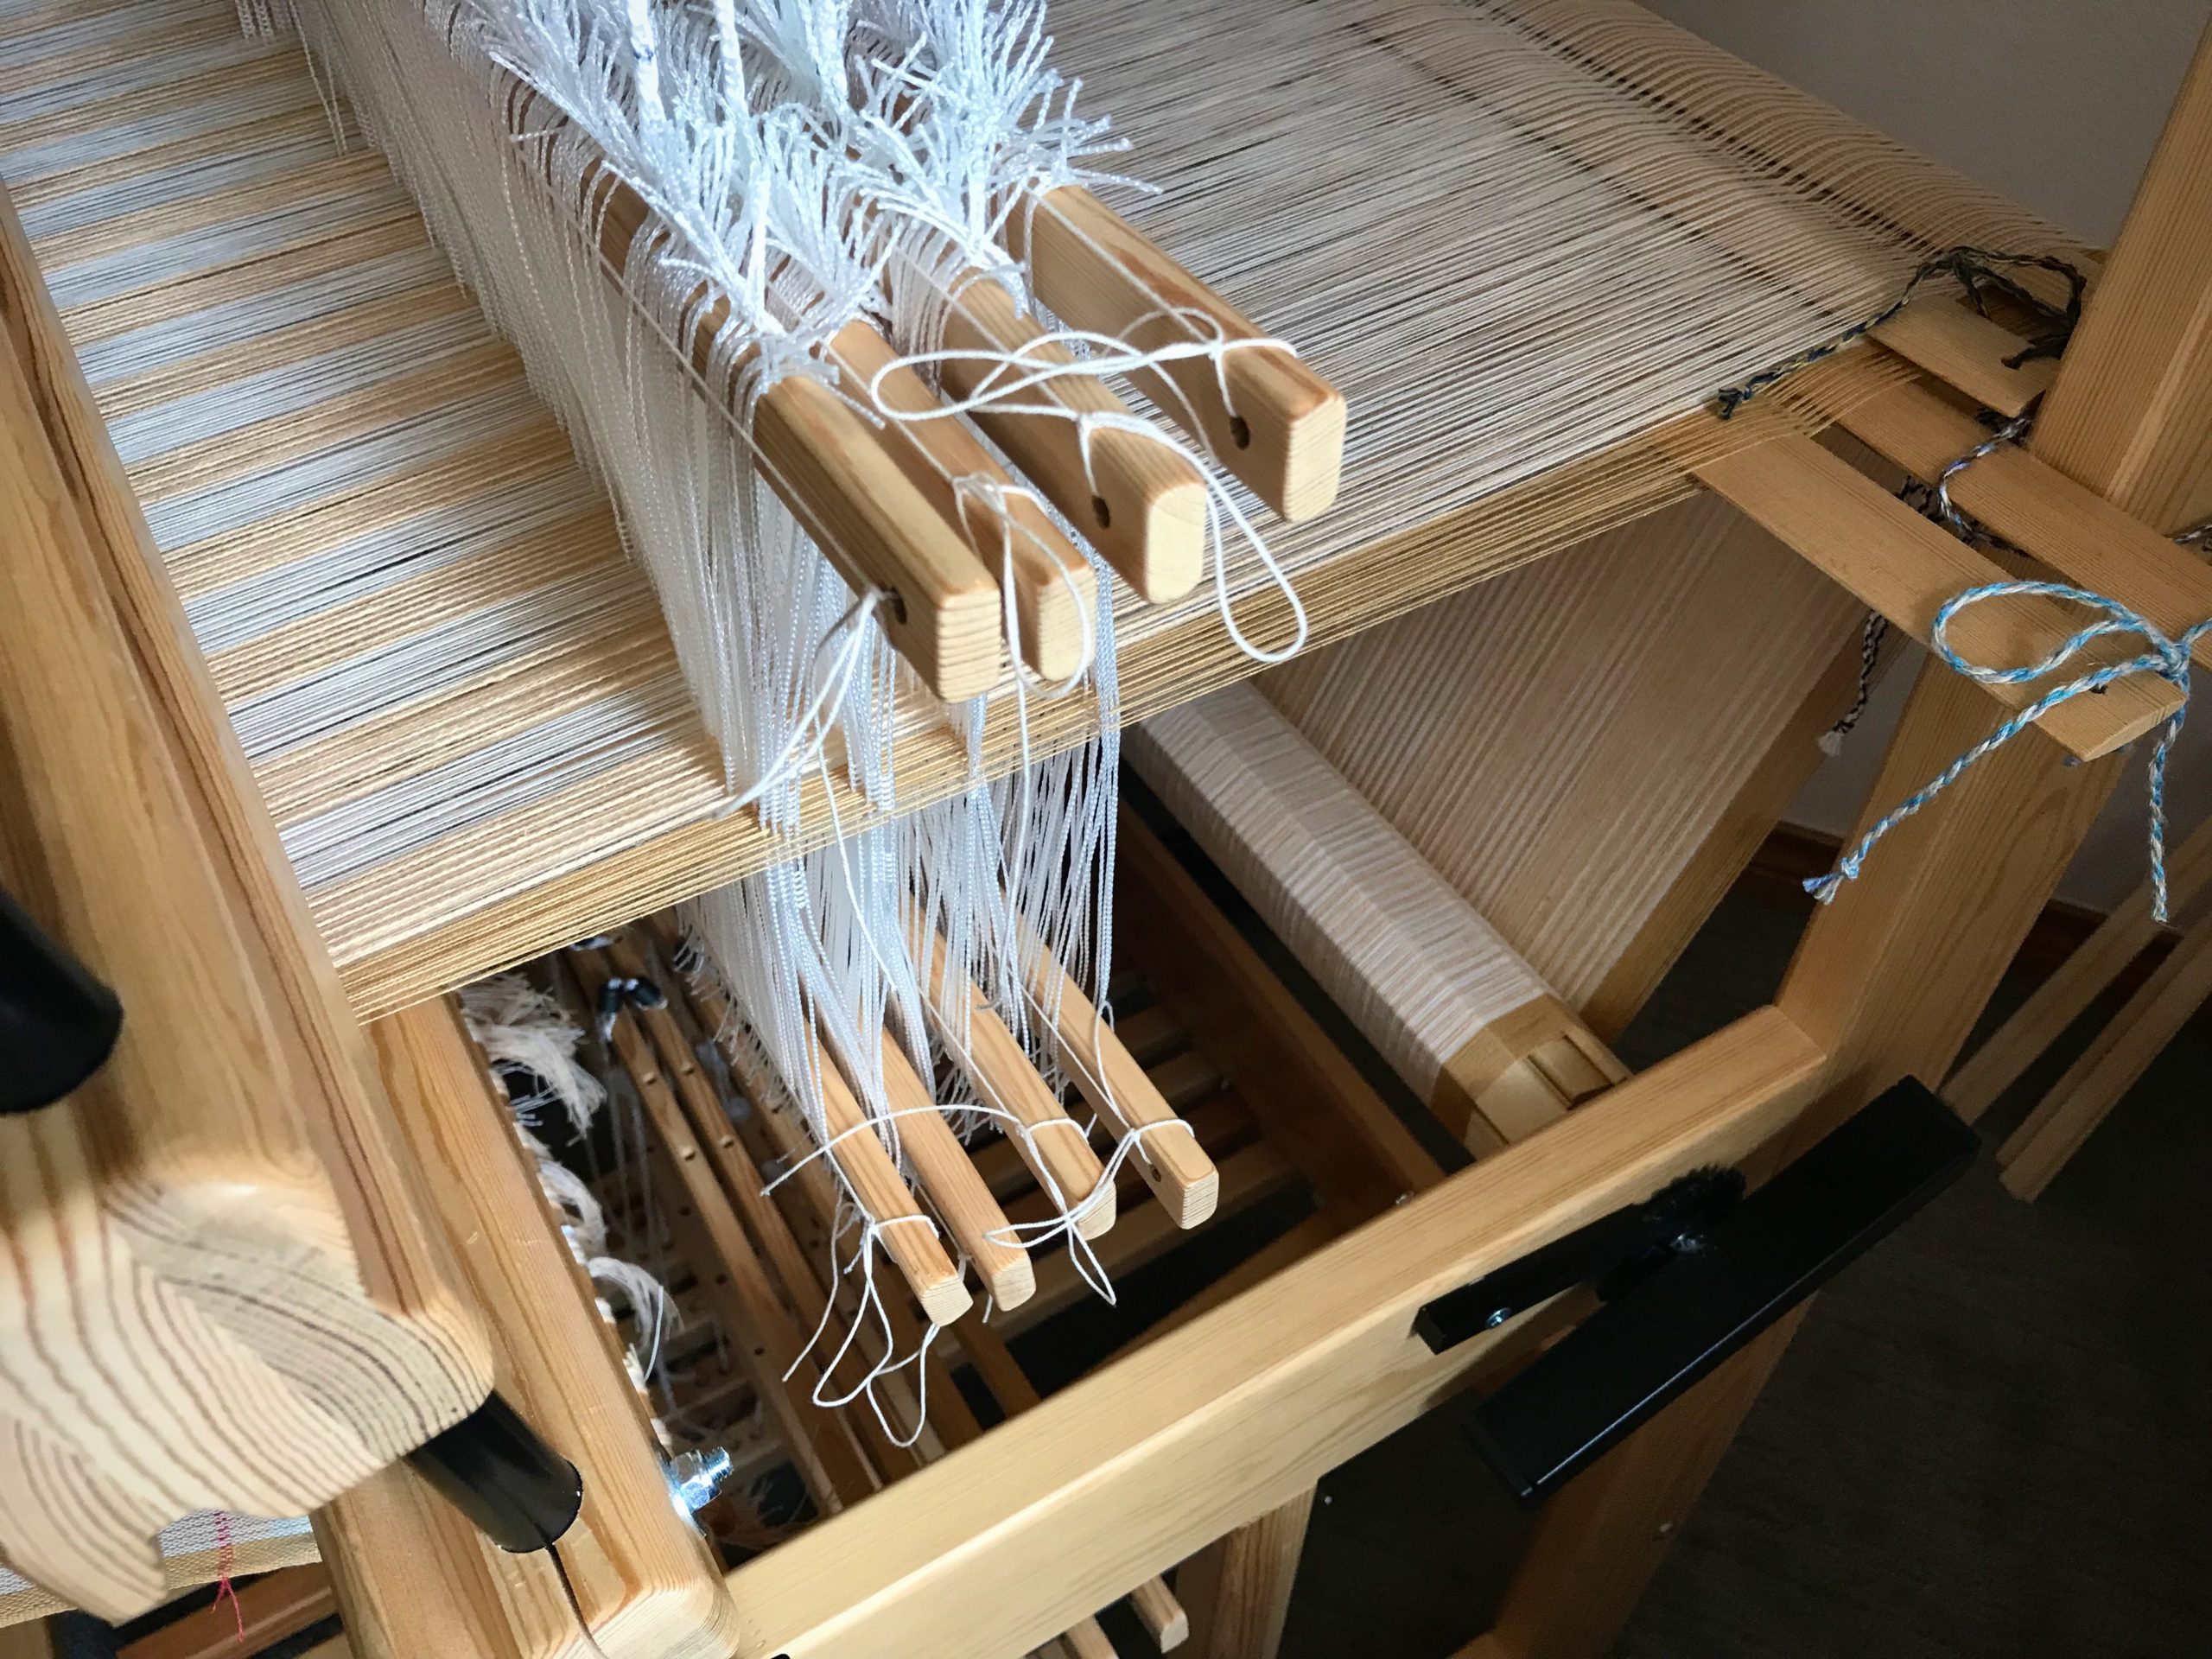
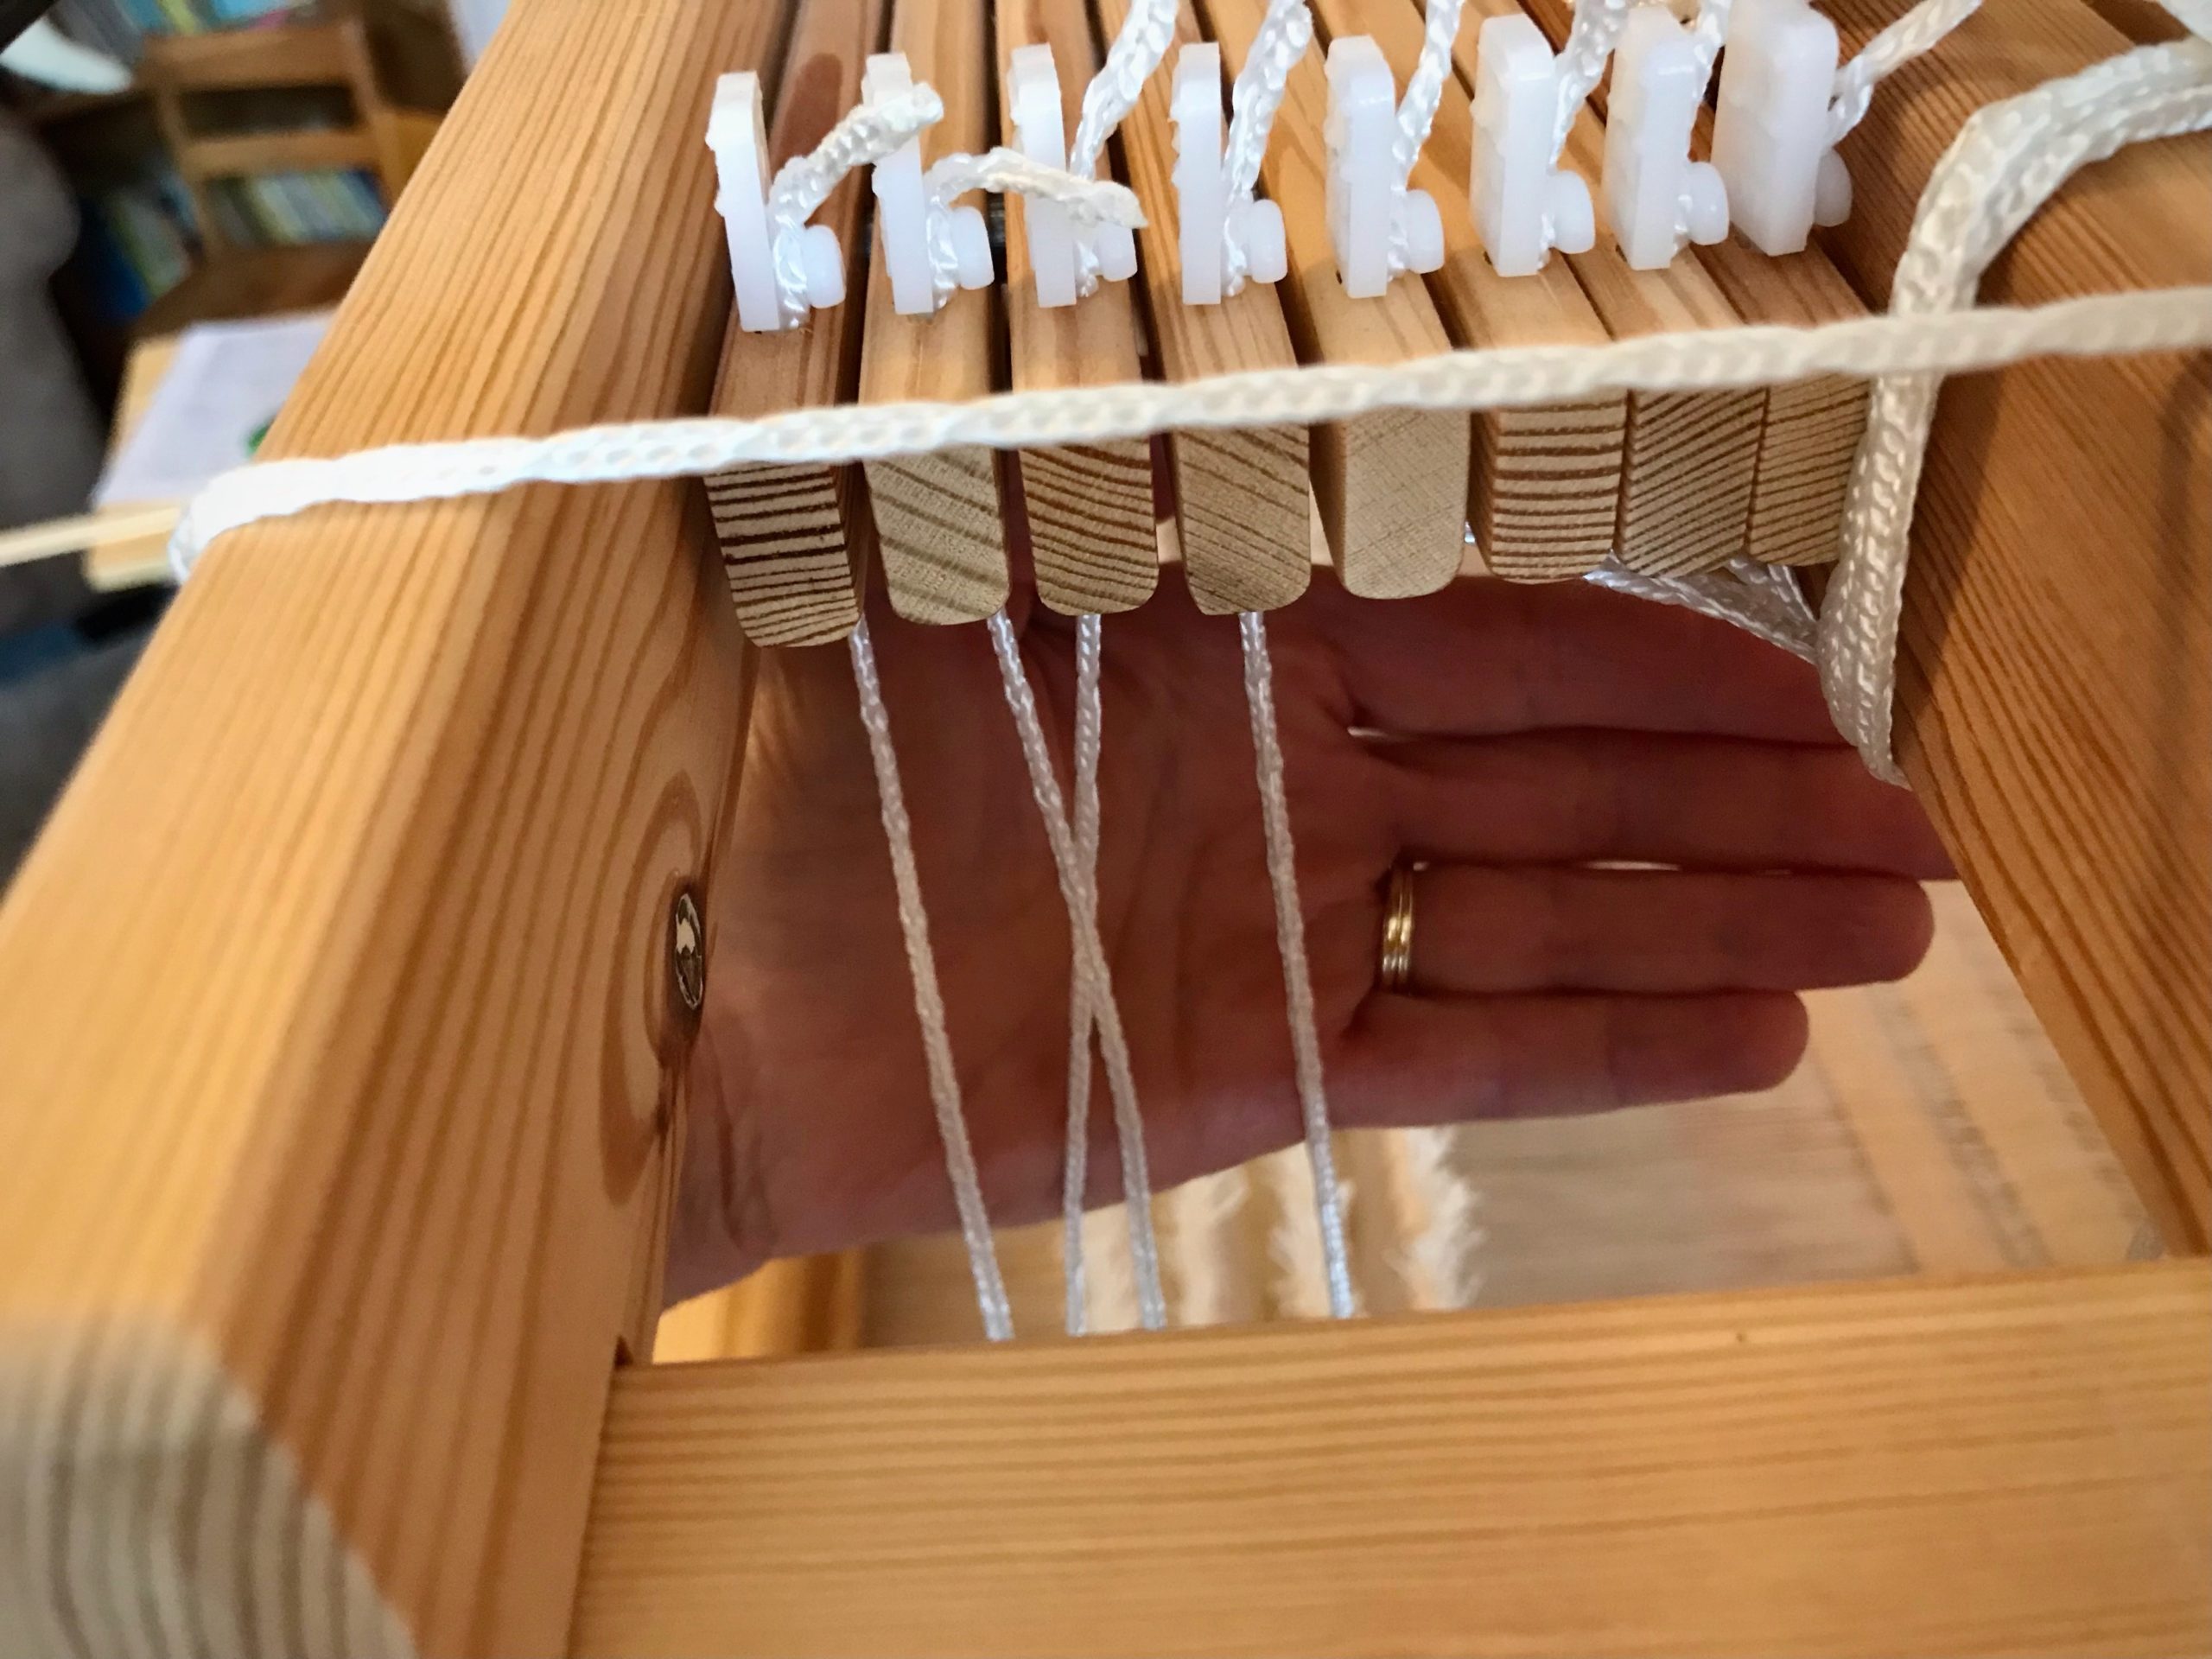
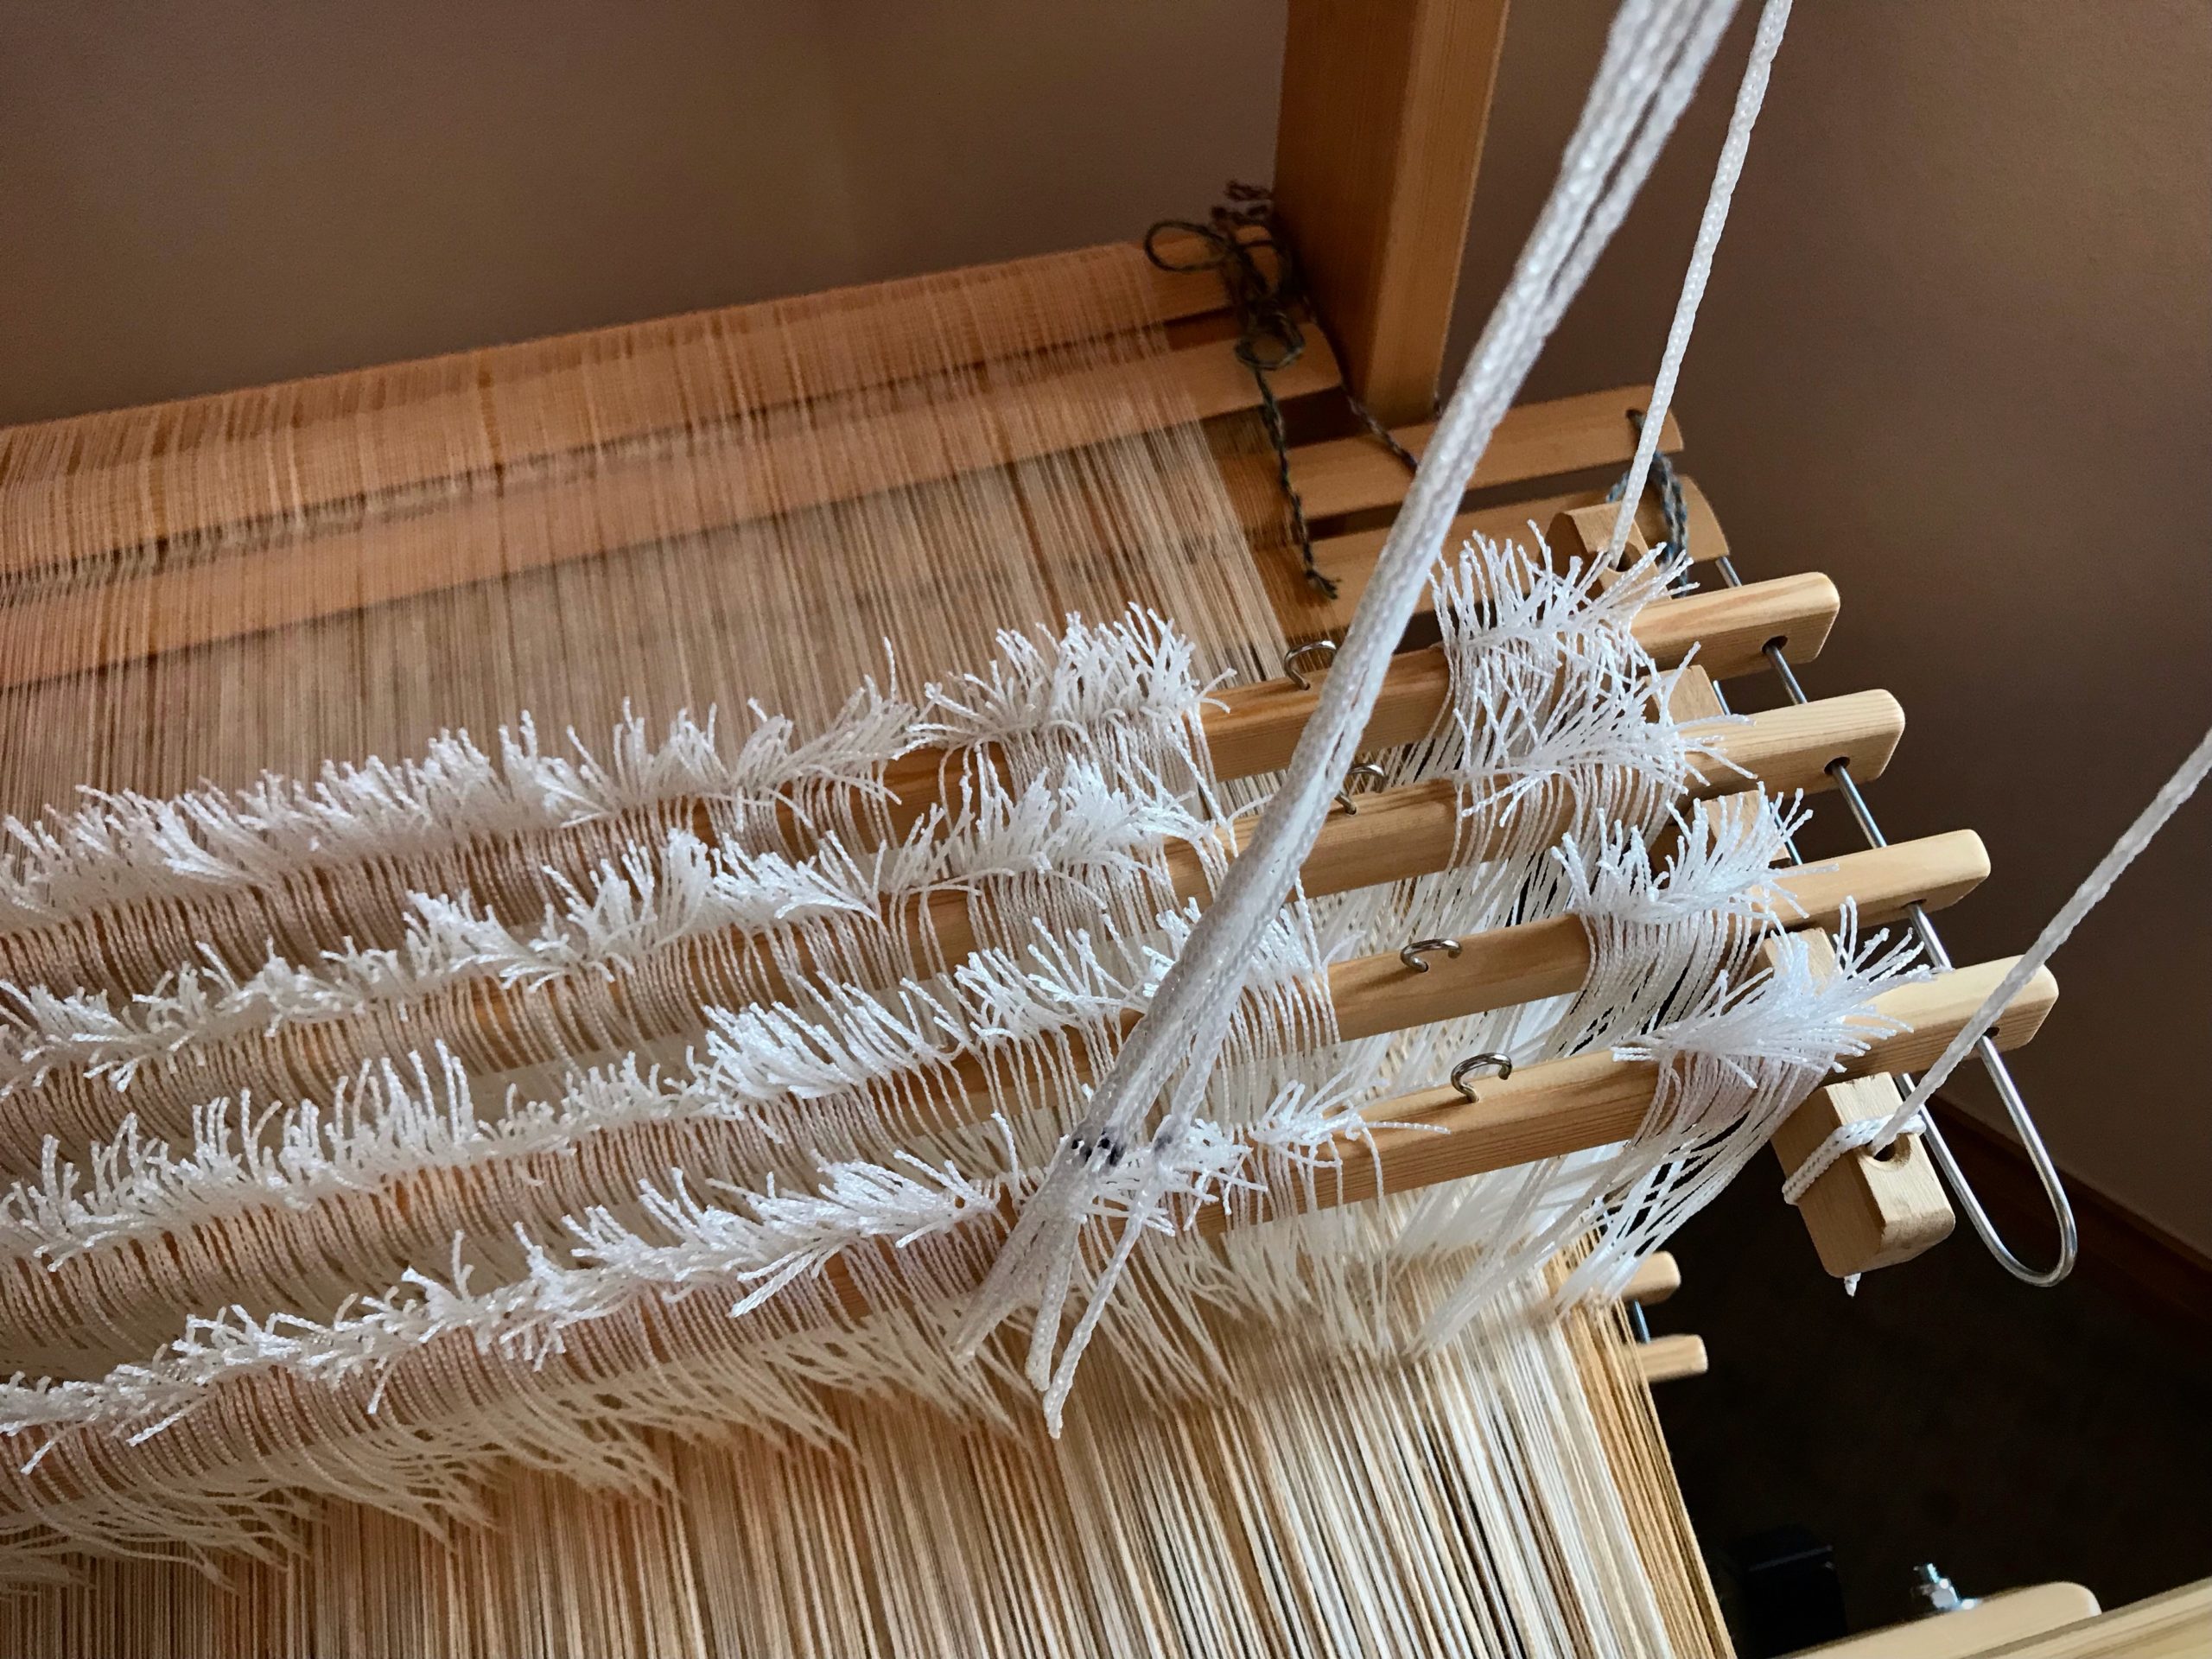
Some things are easier done than said. I said to myself that it’s too much trouble to tie retaining cords on the shafts. I am weaving almost full width on the Glimåkra Julia. I know that heddlescan slip off the ends of shafts. Still, I tell myself I can keep an eye on it. It won’t be a problem, right? Wrong.
Juila’s wide warp. So far, so good. I’ll pay attention and everything will be just fine. Famous last words.Oops. I took this picture after I had fixed most of the mess created by dangling heddles. When heddles slip off shafts they must be put back on thread by thread to maintain correct warp order. These were tangled enough that it took me a few tries to get it right.
Tie Retaining Cords on Shafts
Purpose: Keep Texsolv heddles secure on their shaft bars, especially when weaving a wide warp.
Supplies
Tape measure
12/6 cotton seine twine
Scissors
12/6 cotton seine twine (rug warp) to the rescue!
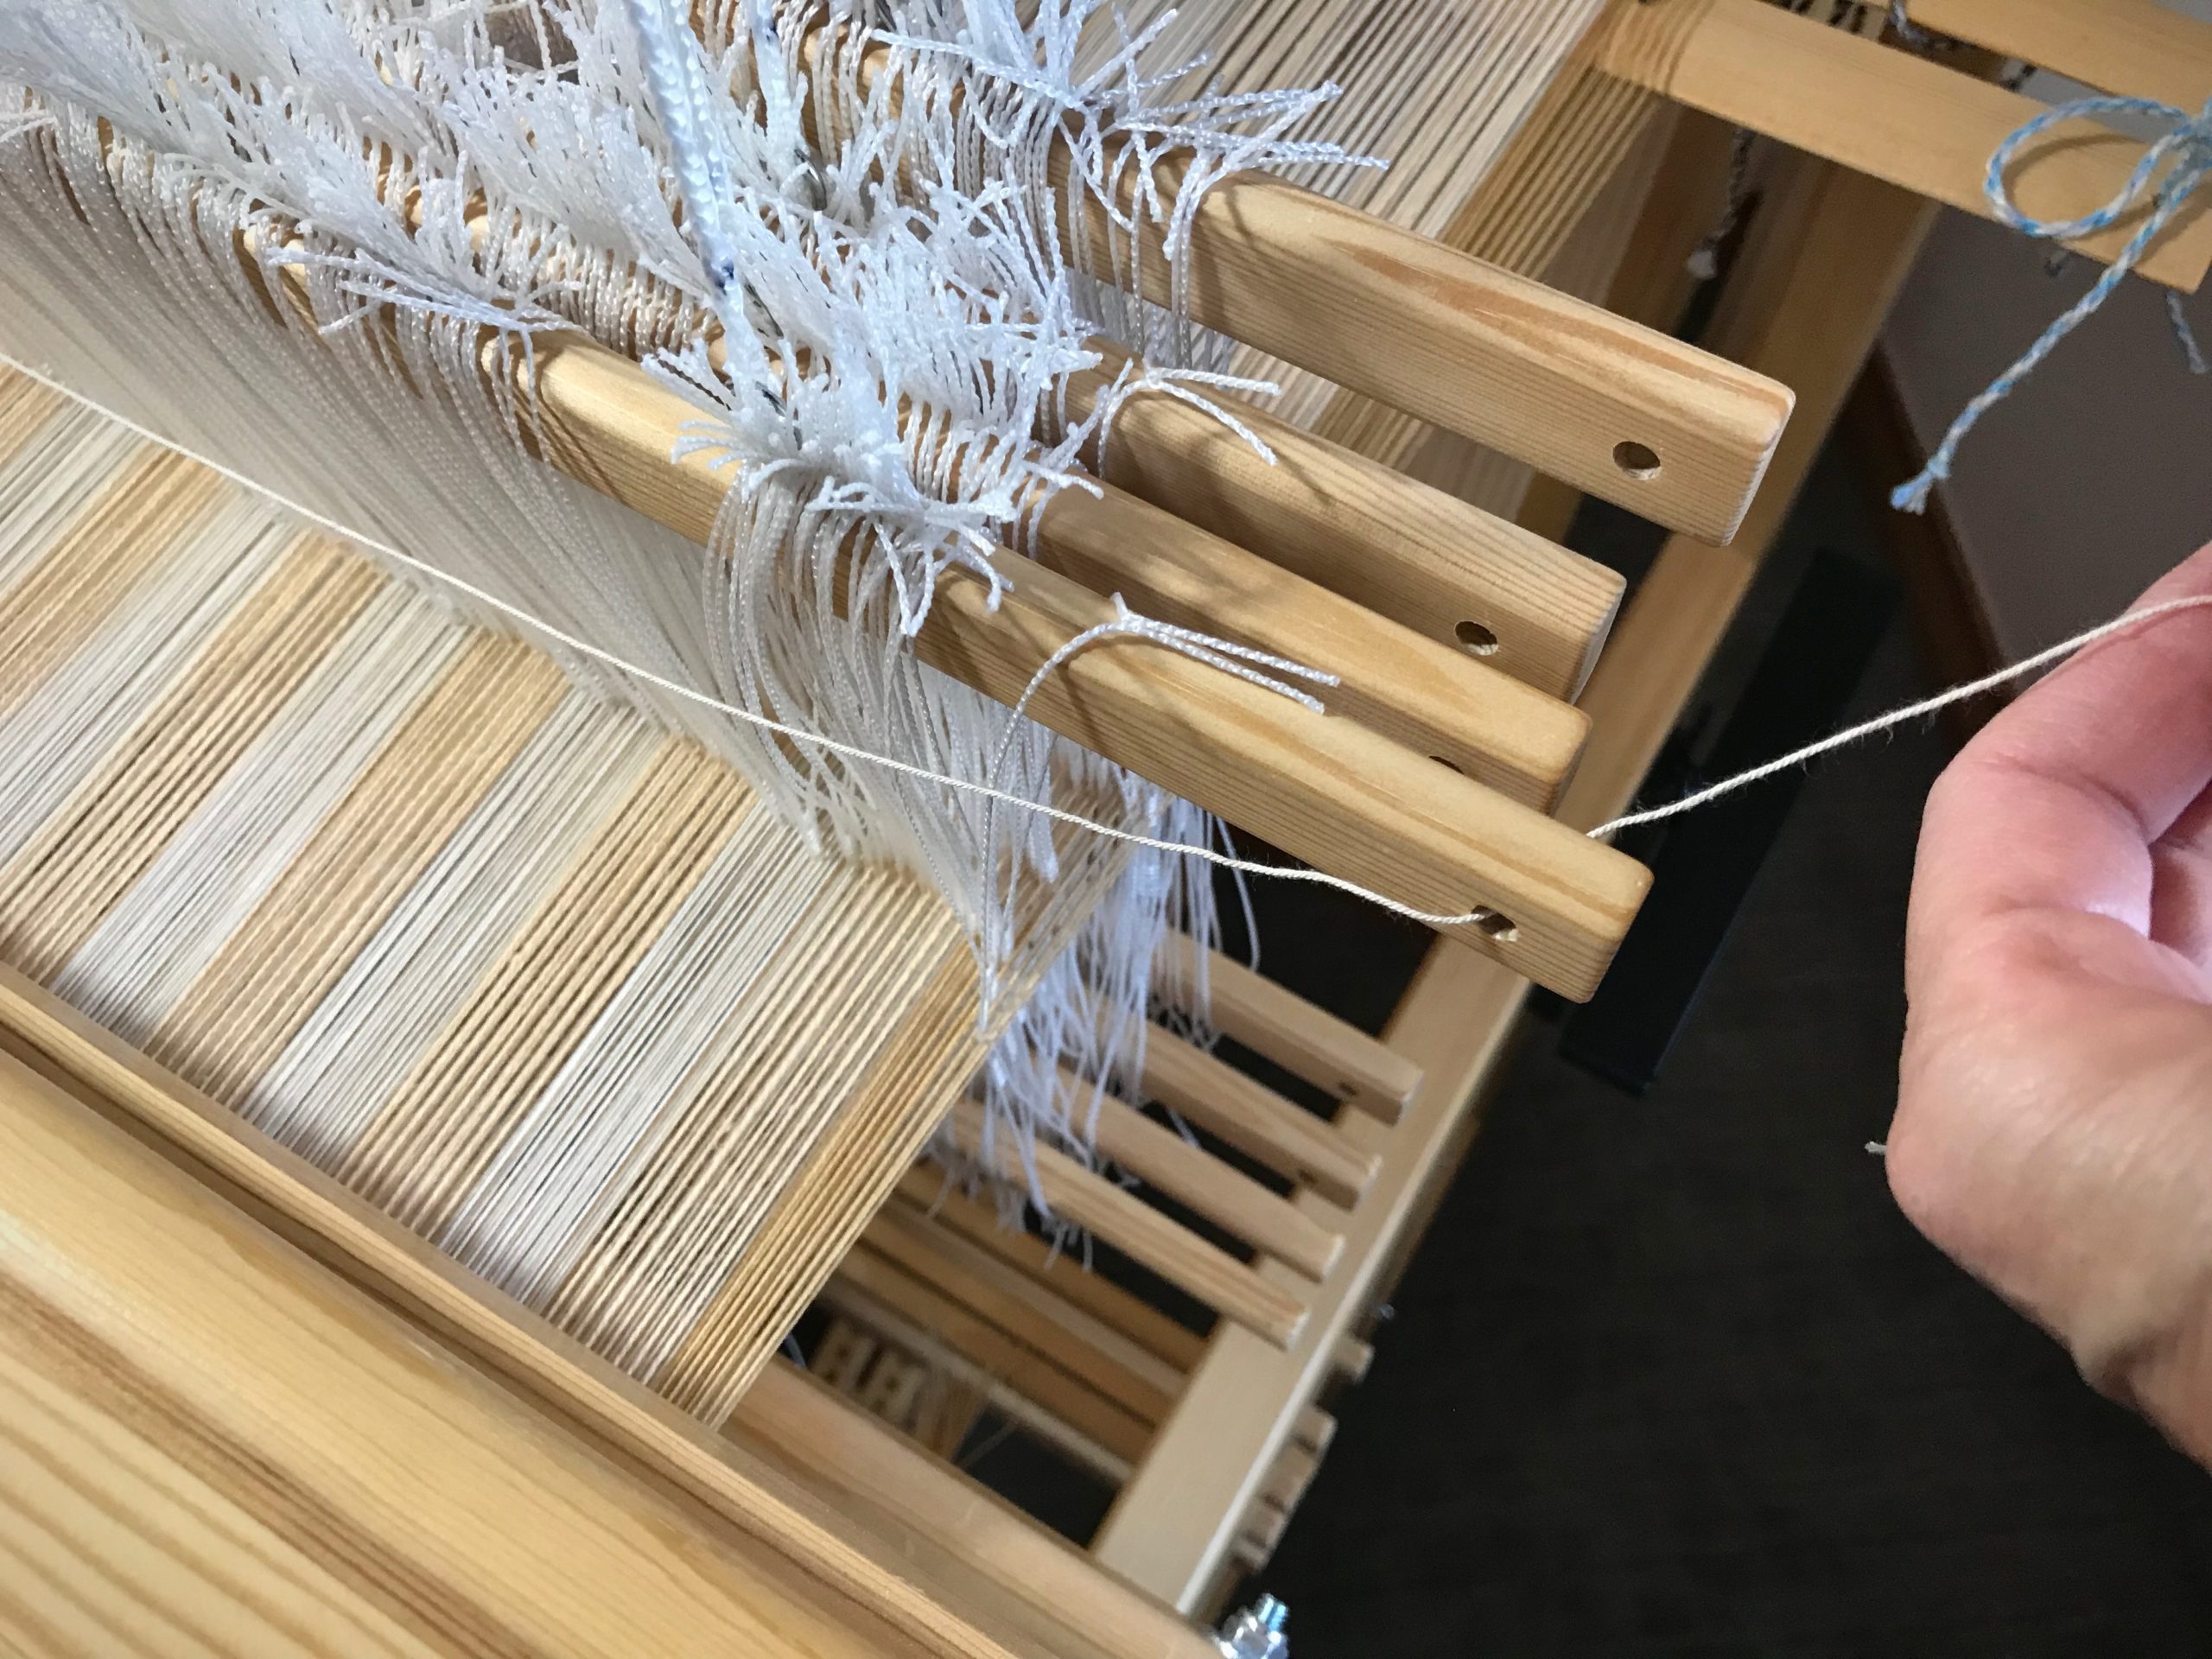
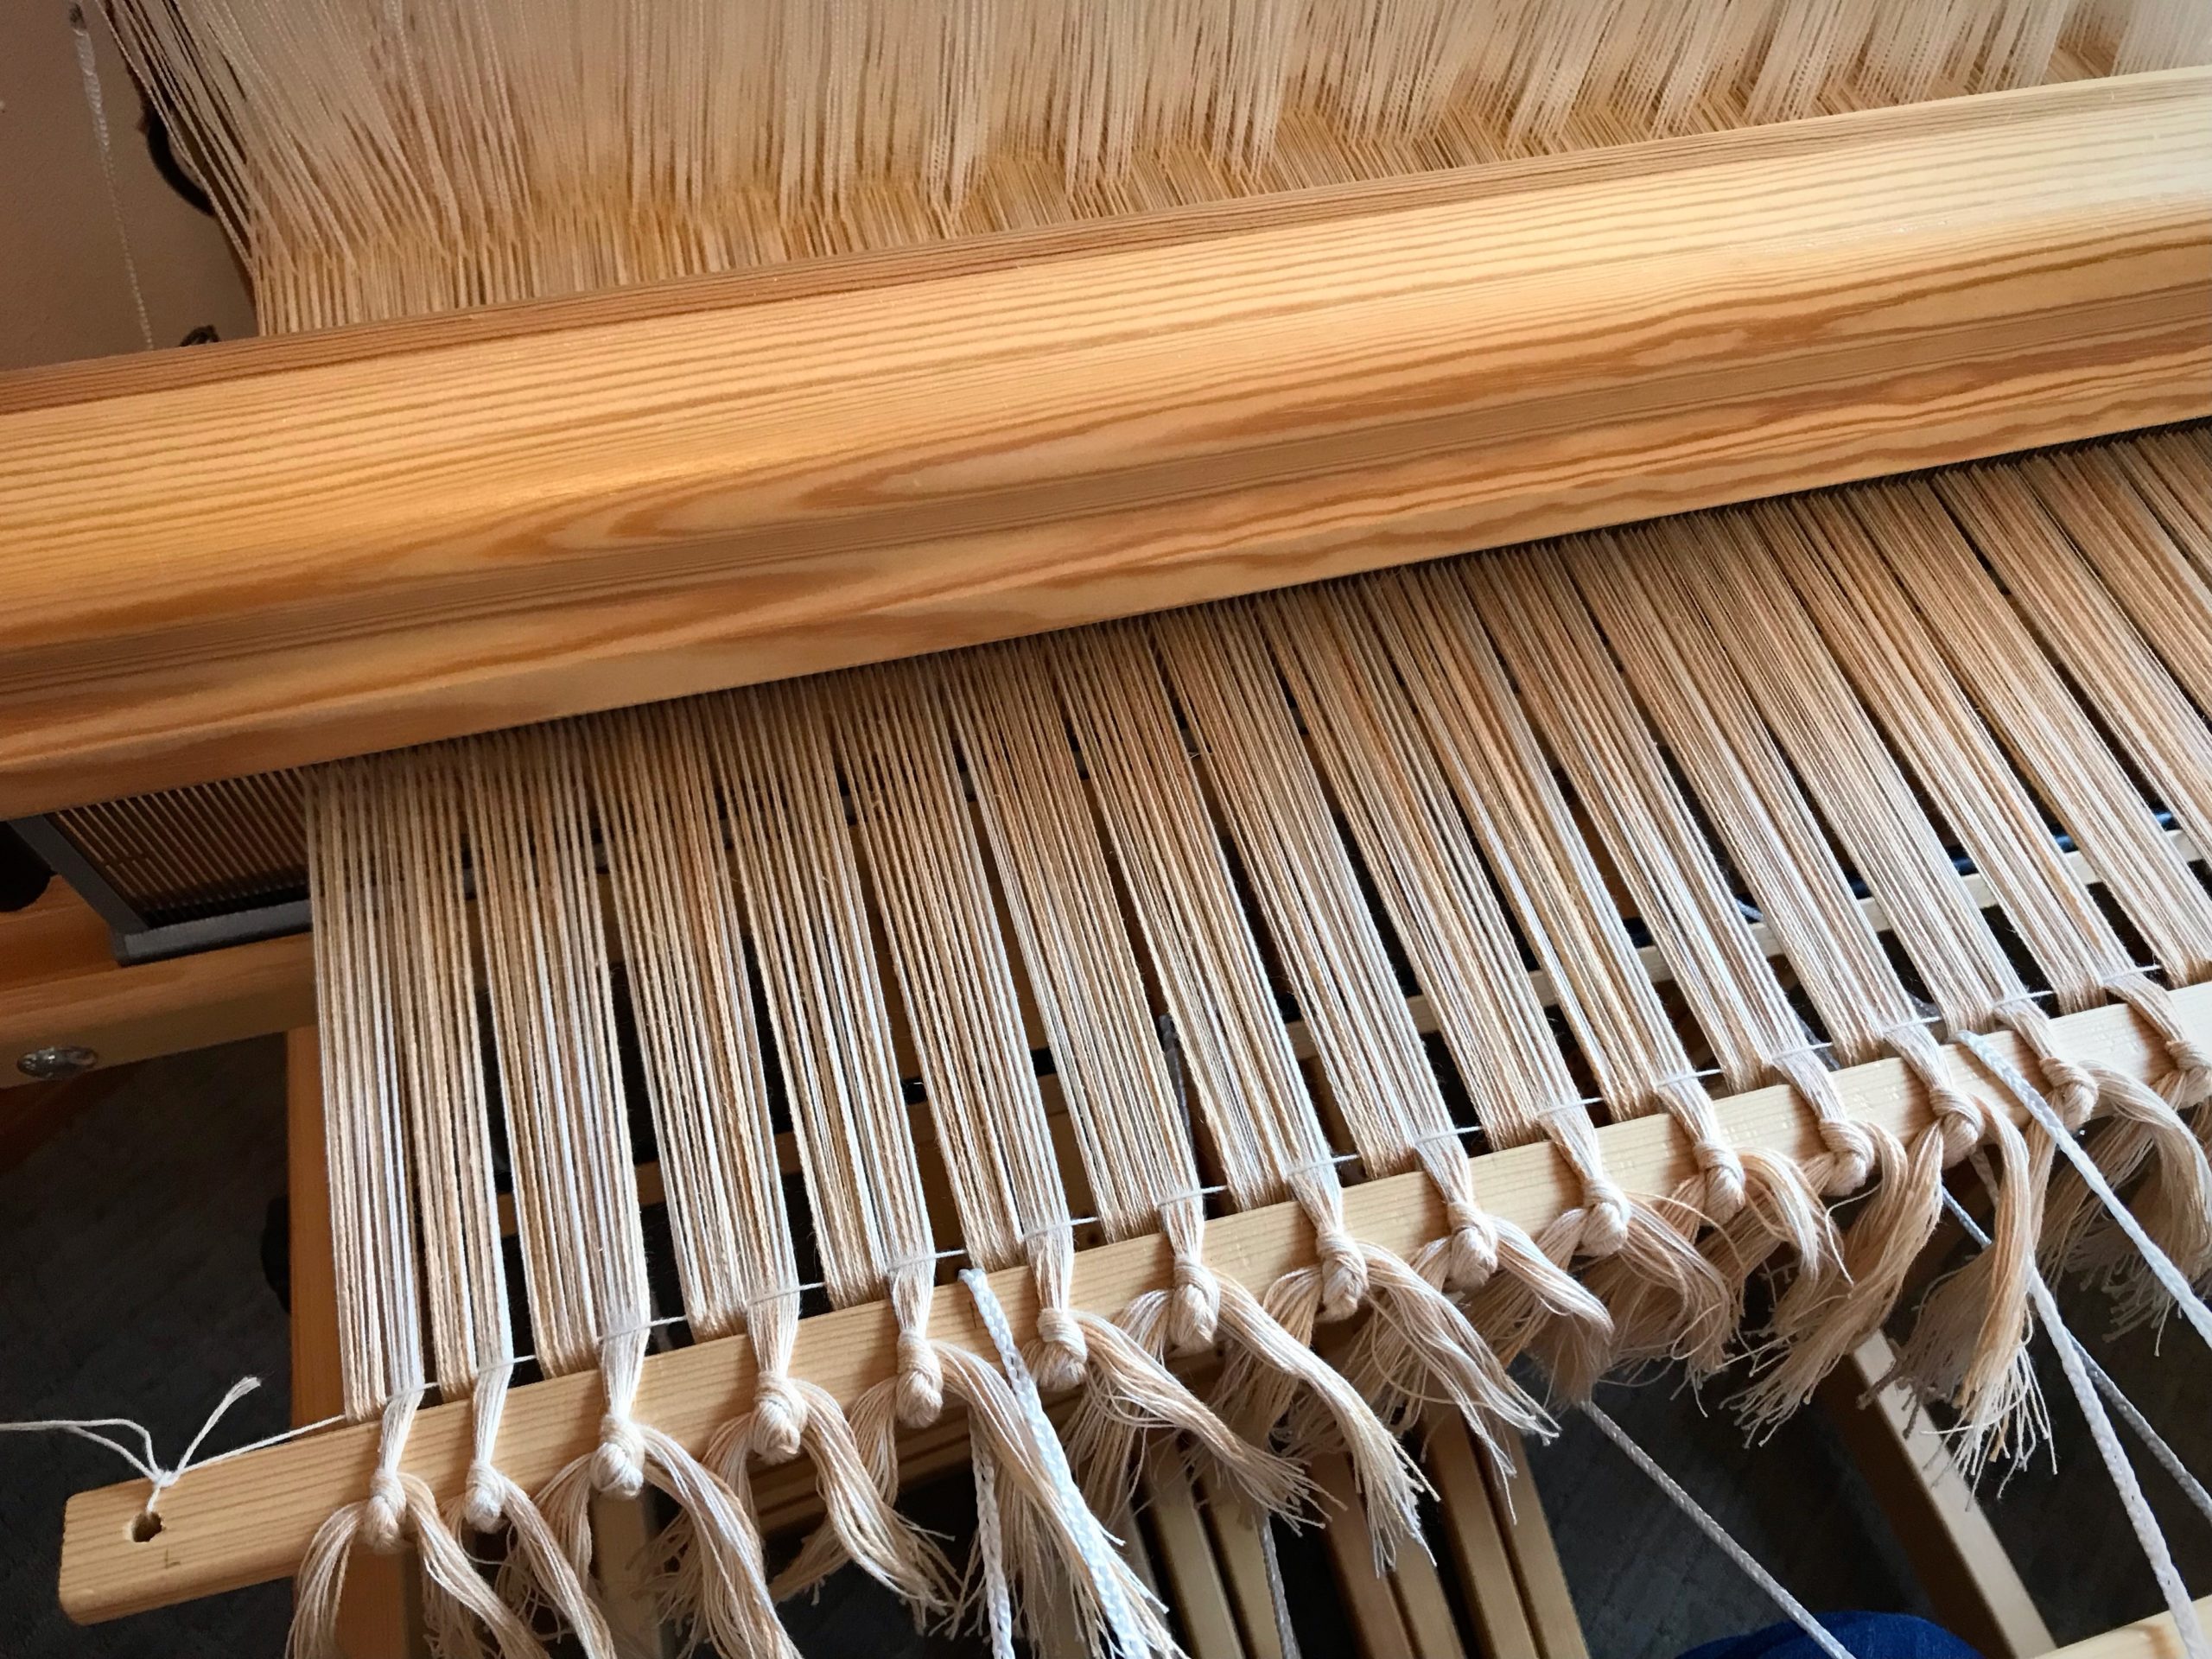
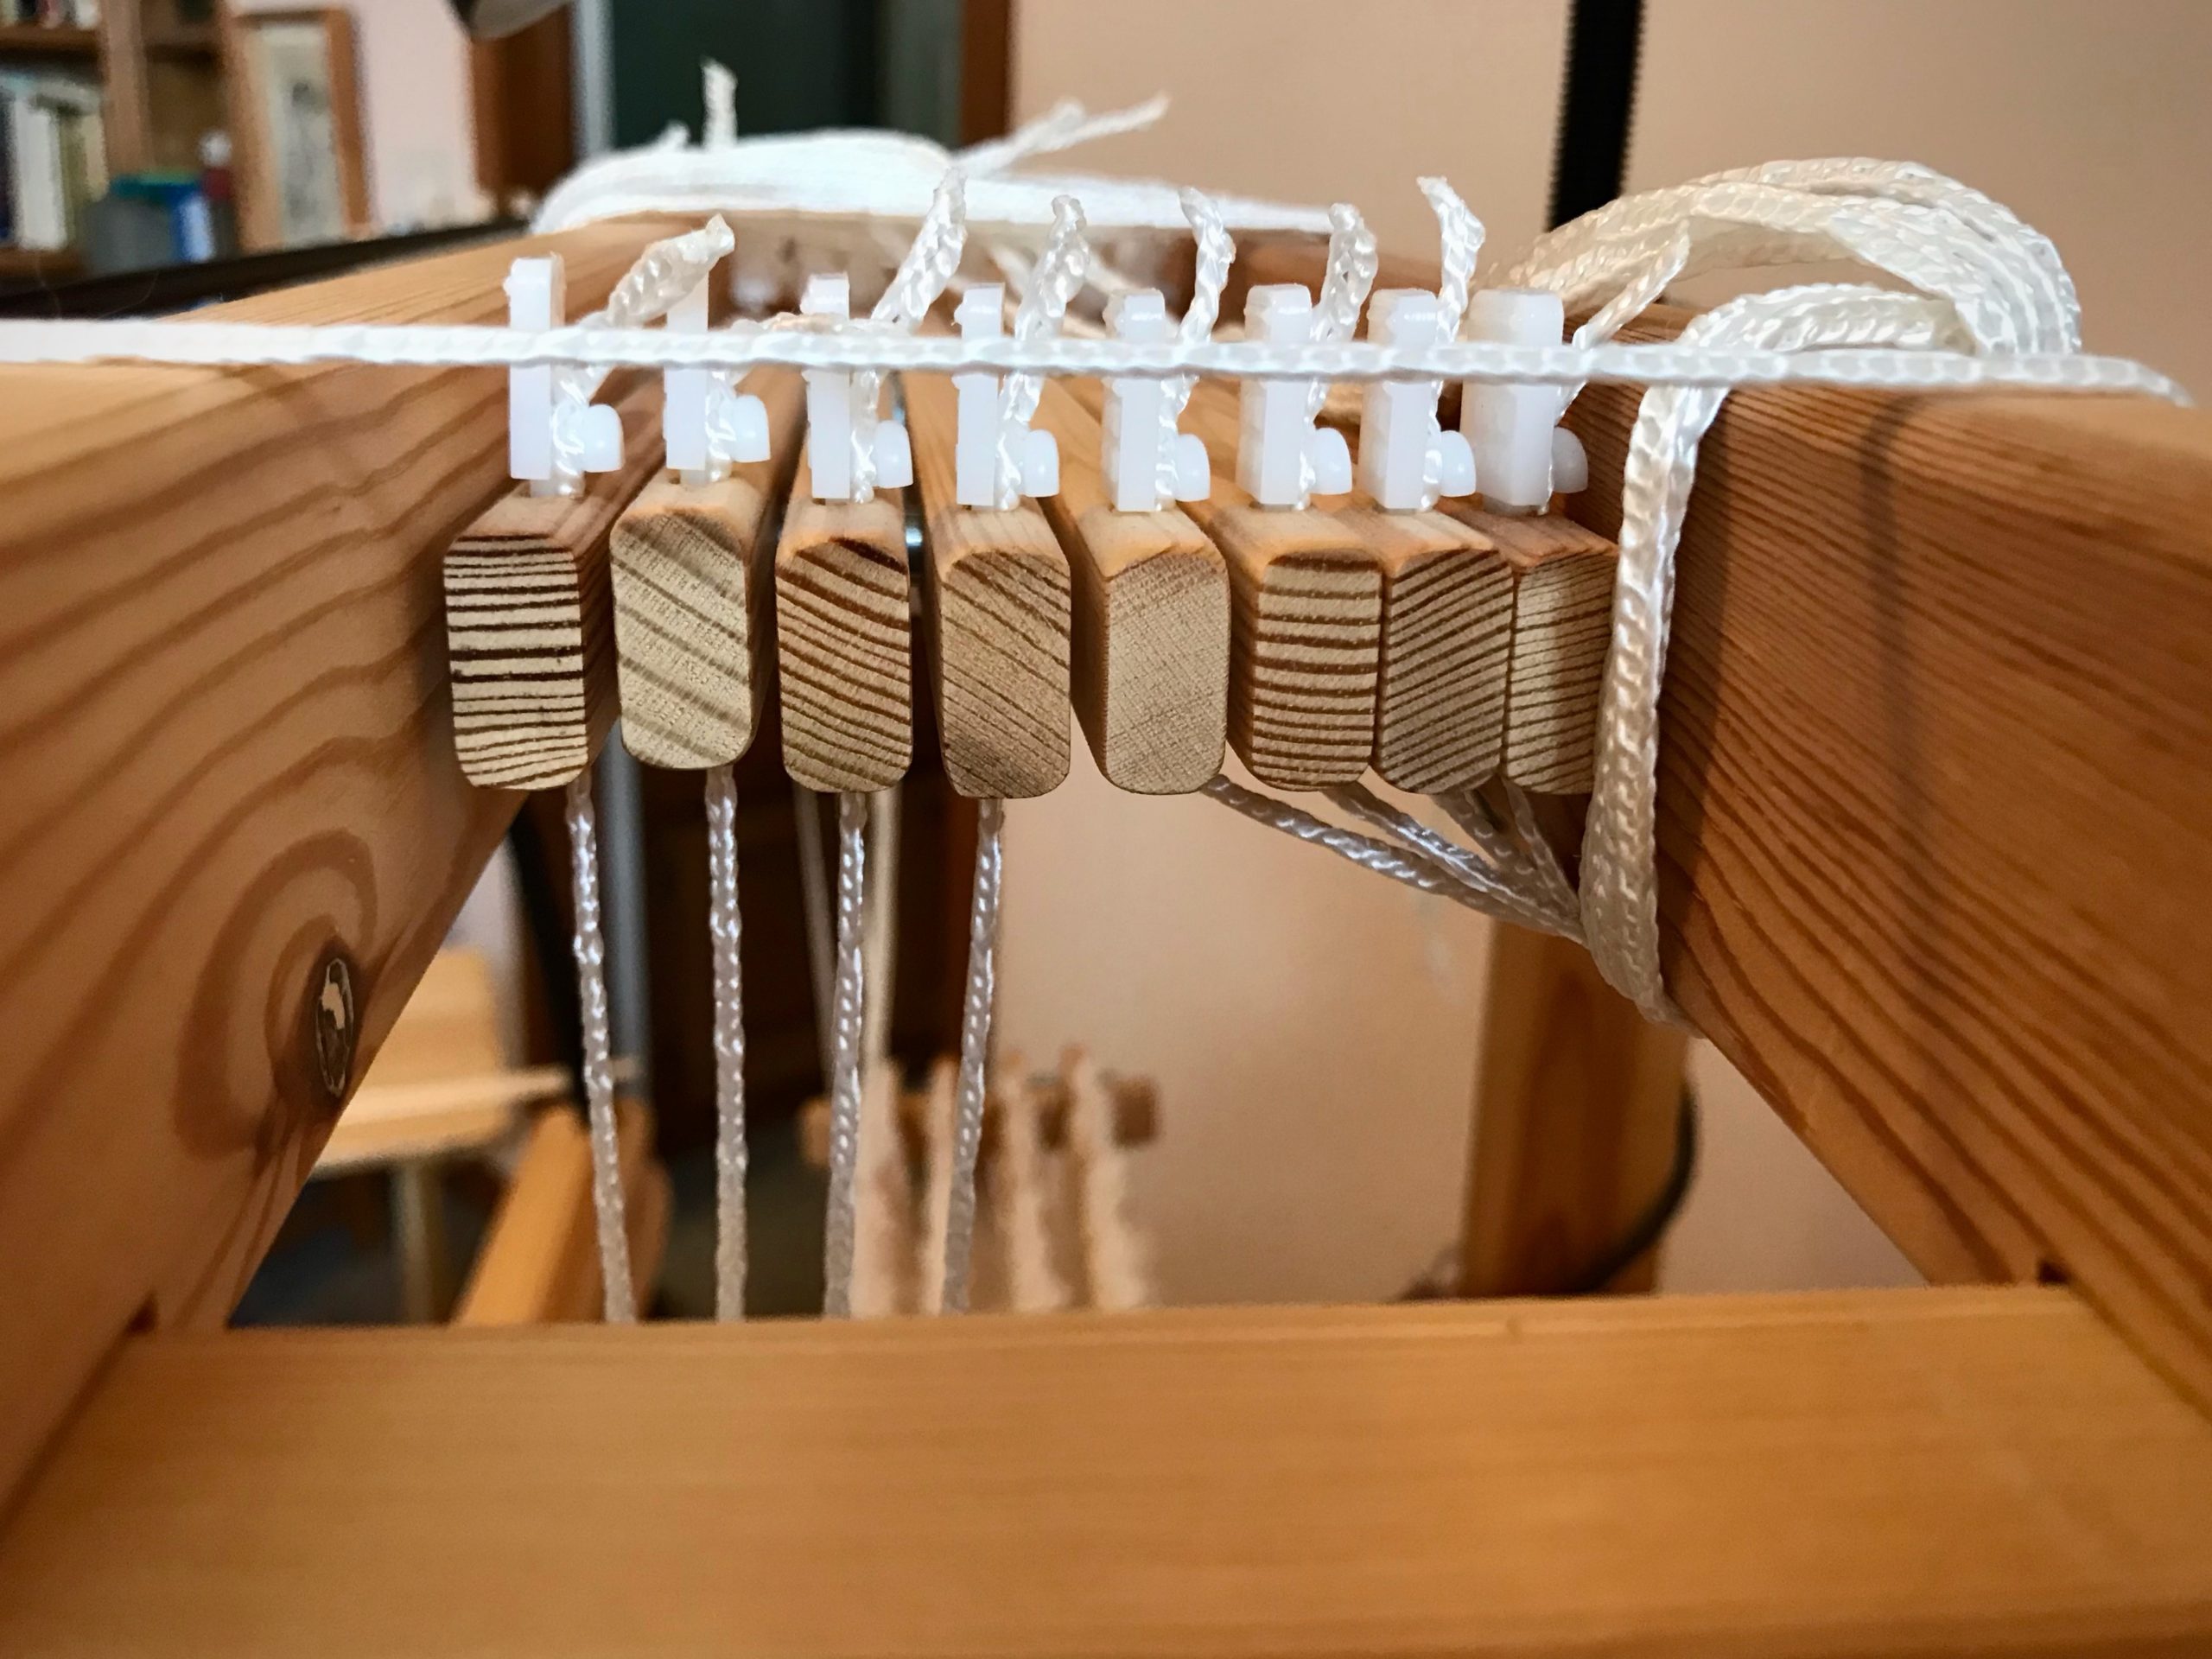
1 Measure shaft bar from hole to hole. (Julia shaft bar is 70 cm) 2 Figure additional length (about 40 cm) for tying two knots. (70 + 40 = 110 cm) 3 Cut seine twine to measured length for each upper and lower shaft bar. (Heddles can slip off lower shaft bars, too.)
4 Insert one of the seine twine cords through the hole on one end of a shaft bar. Tie. (I use the half-bow slip knot as described in Learning to Warp Your Loom, by Joanne Hall, p.38.)
Tie retaining cord to one end of the shaft bar. Any knot will do, but I like this half-bow slip knot because I can untie it simply by pulling the end of the cord.
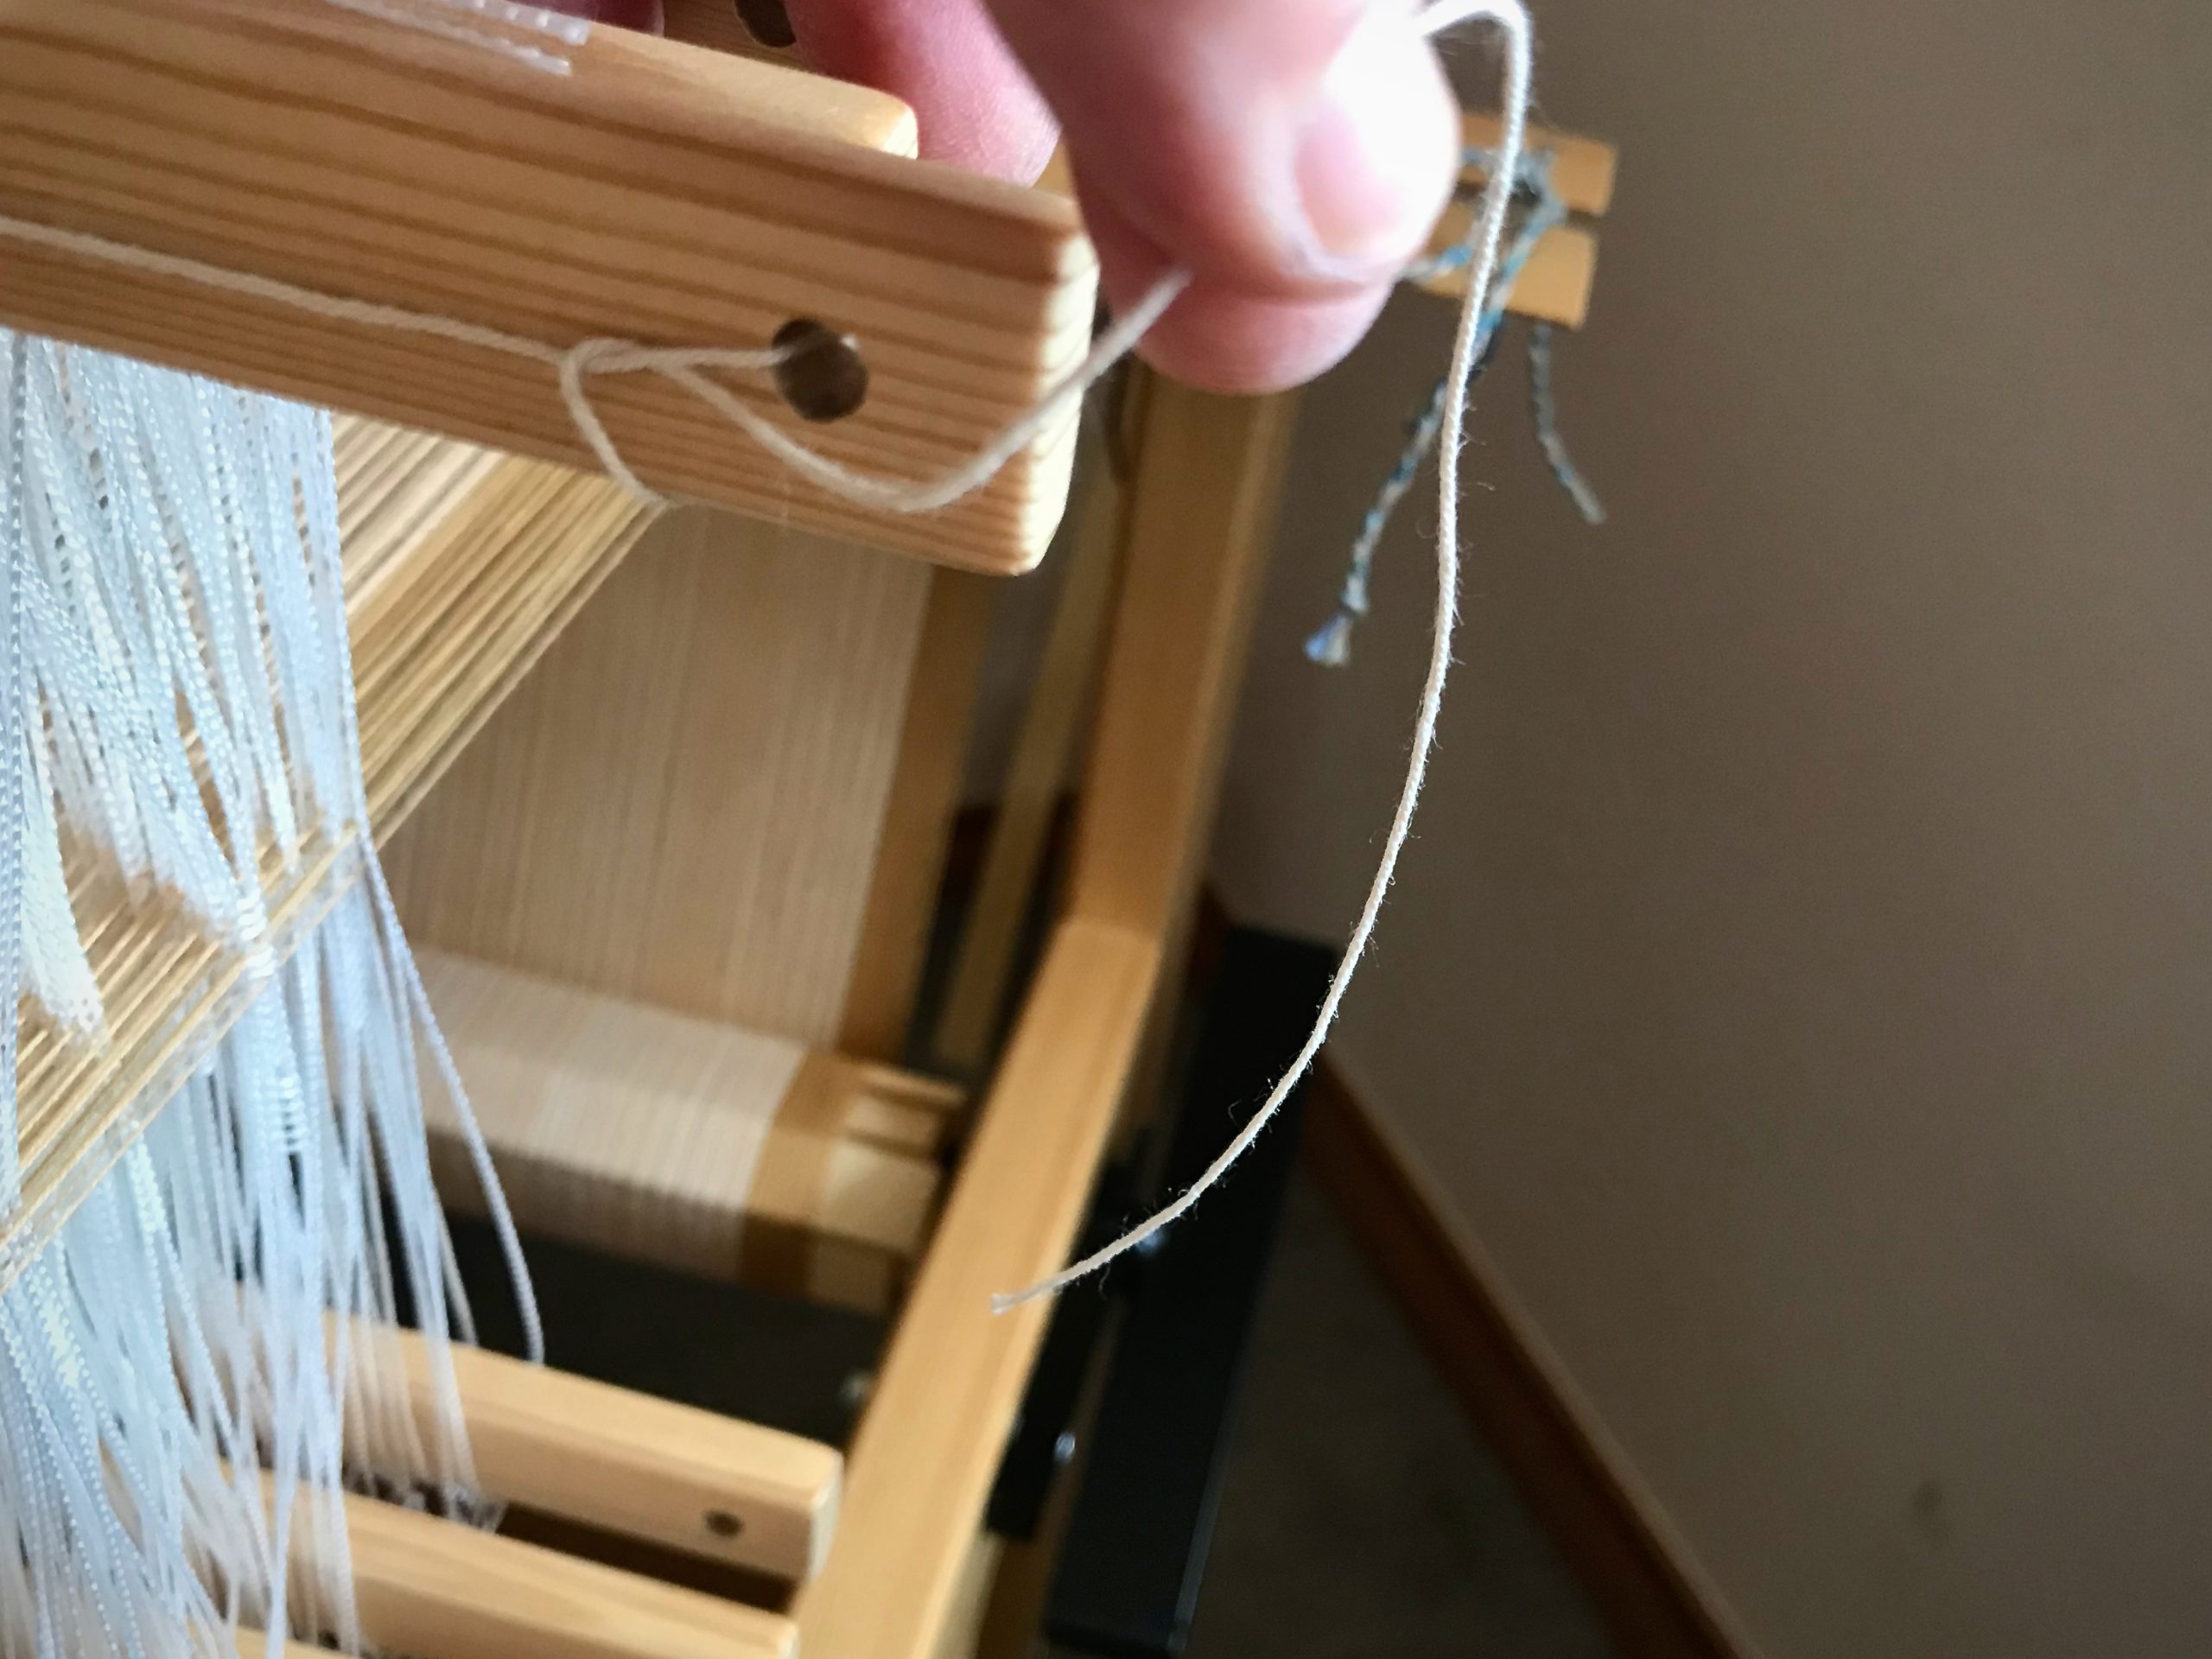
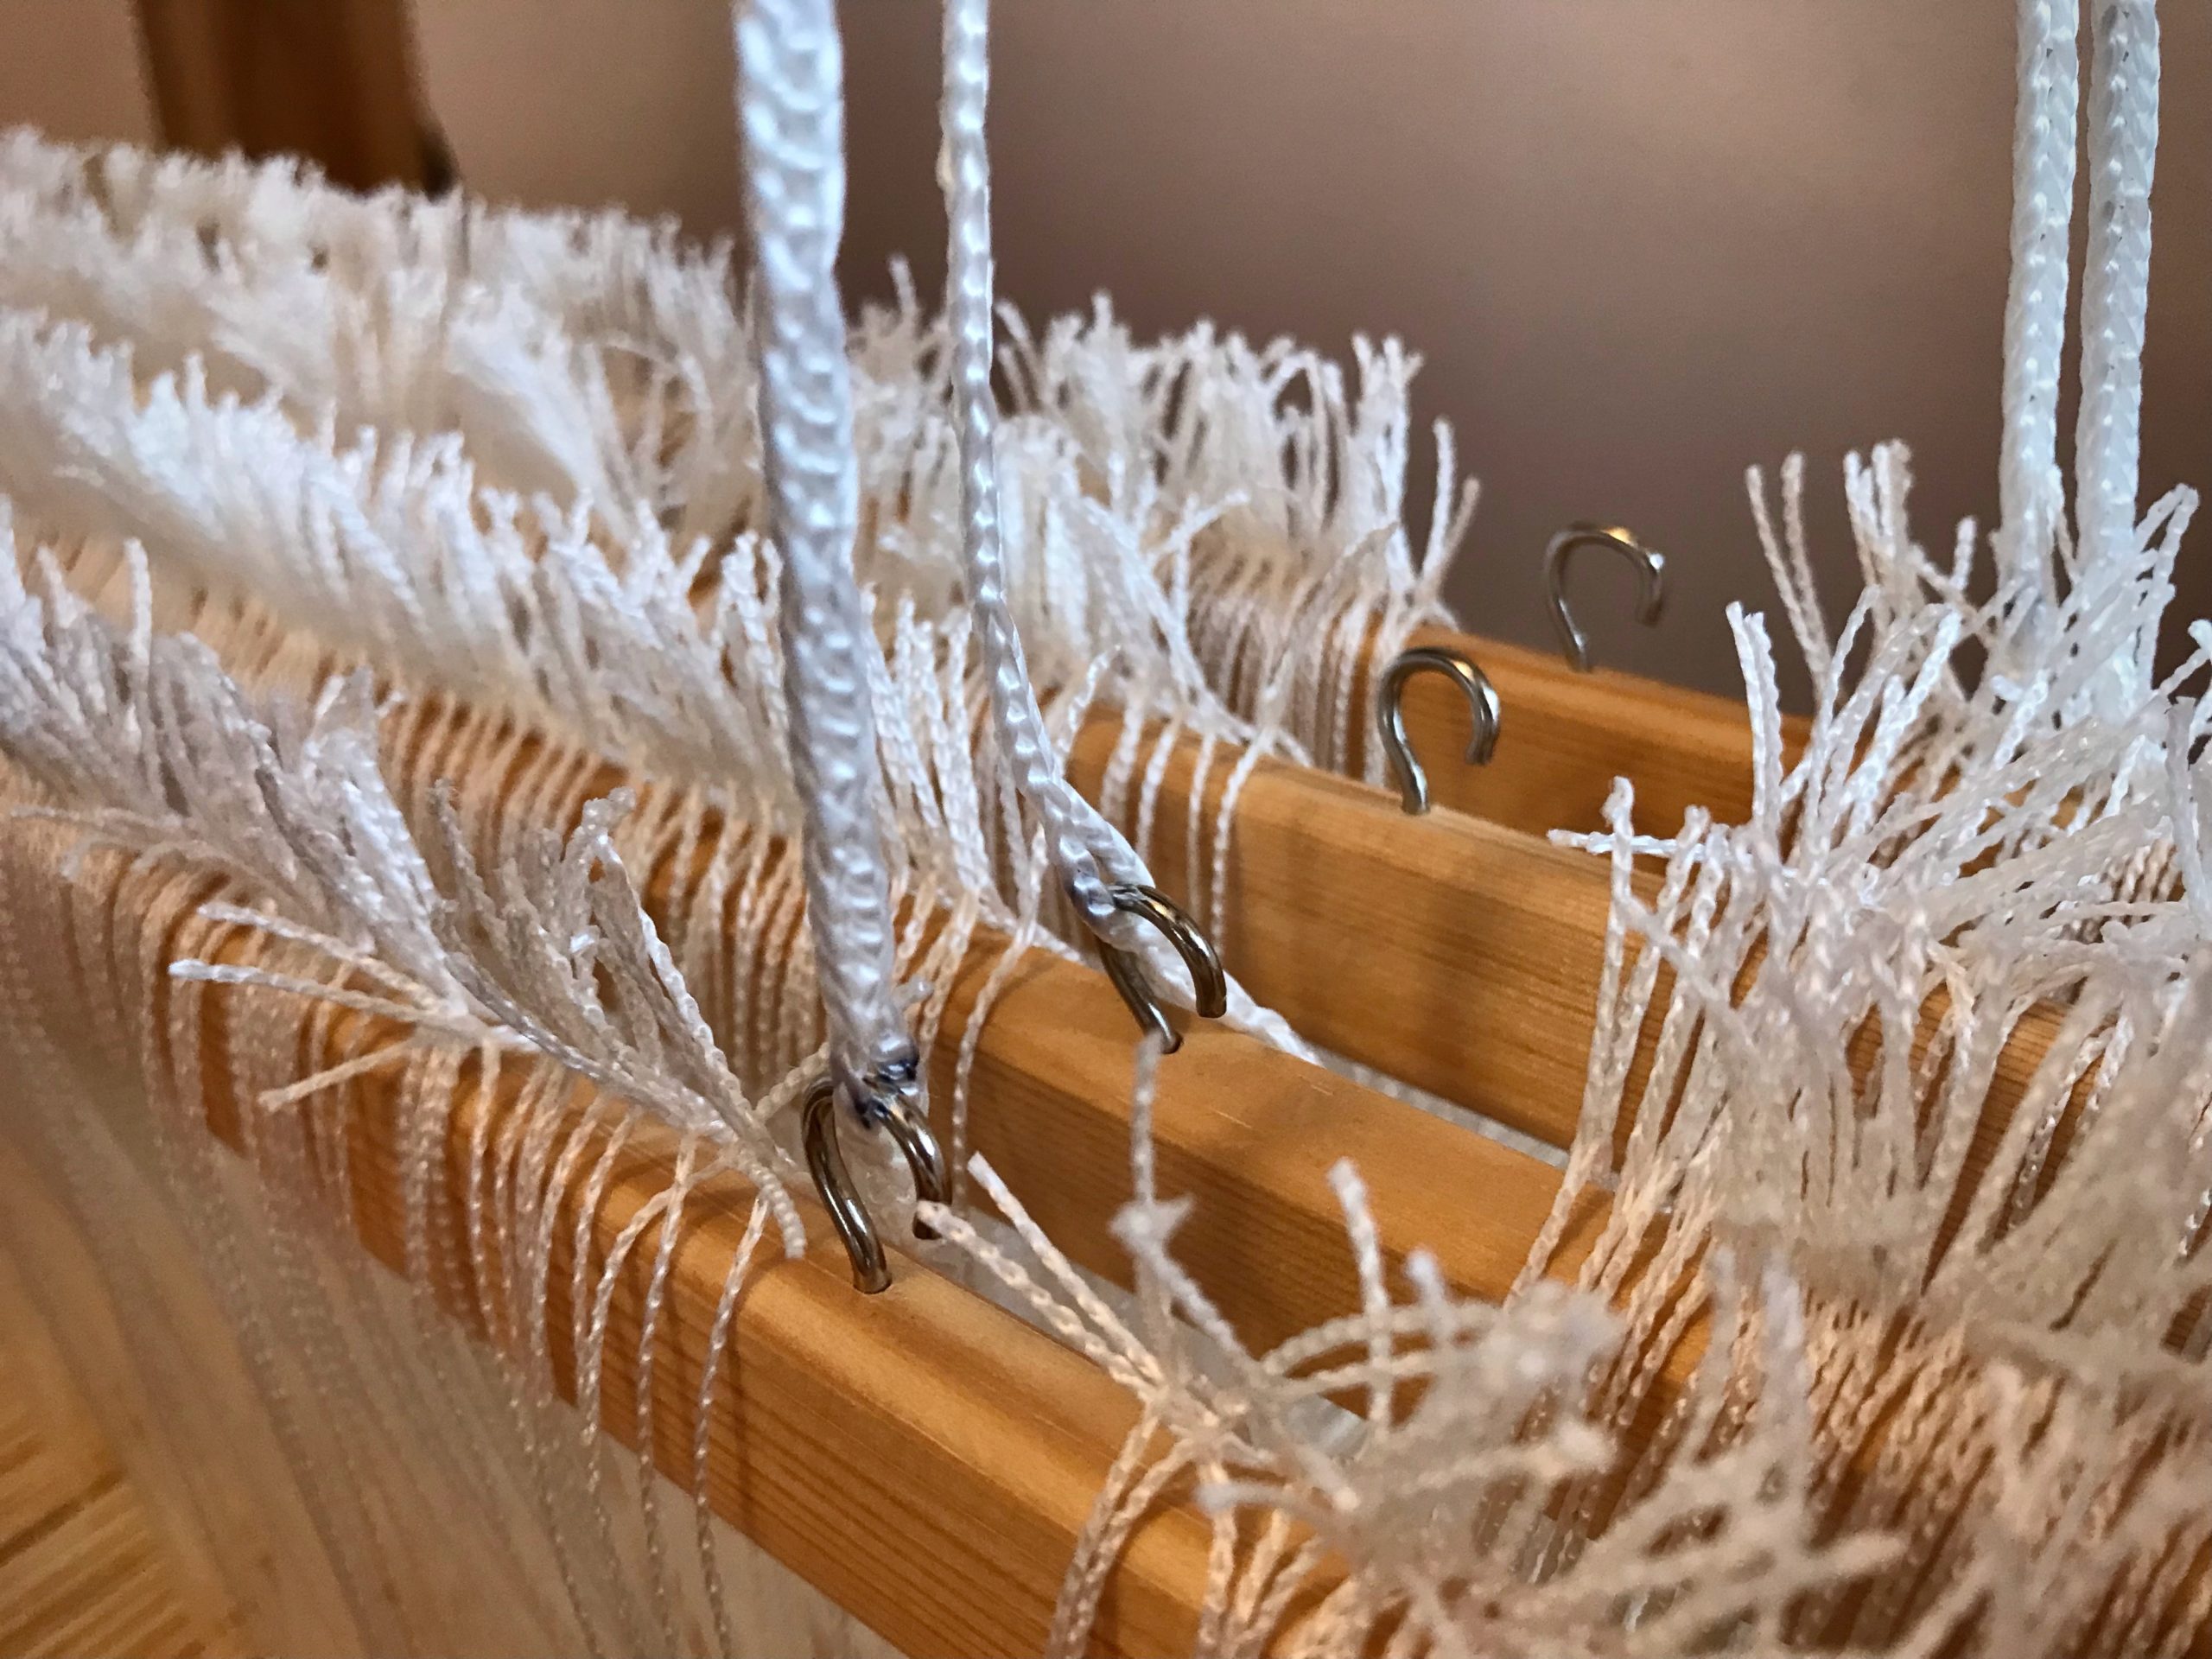
5 Insert the other end of the cord through the hole at other end of the shaft bar. Tie.
Thread the cord through the hole at the end of the bar.Tie a simple knot and tighten it.Tie another simple knot, leaving a fold in the end of the cord.Pull the loop to tighten the knot.
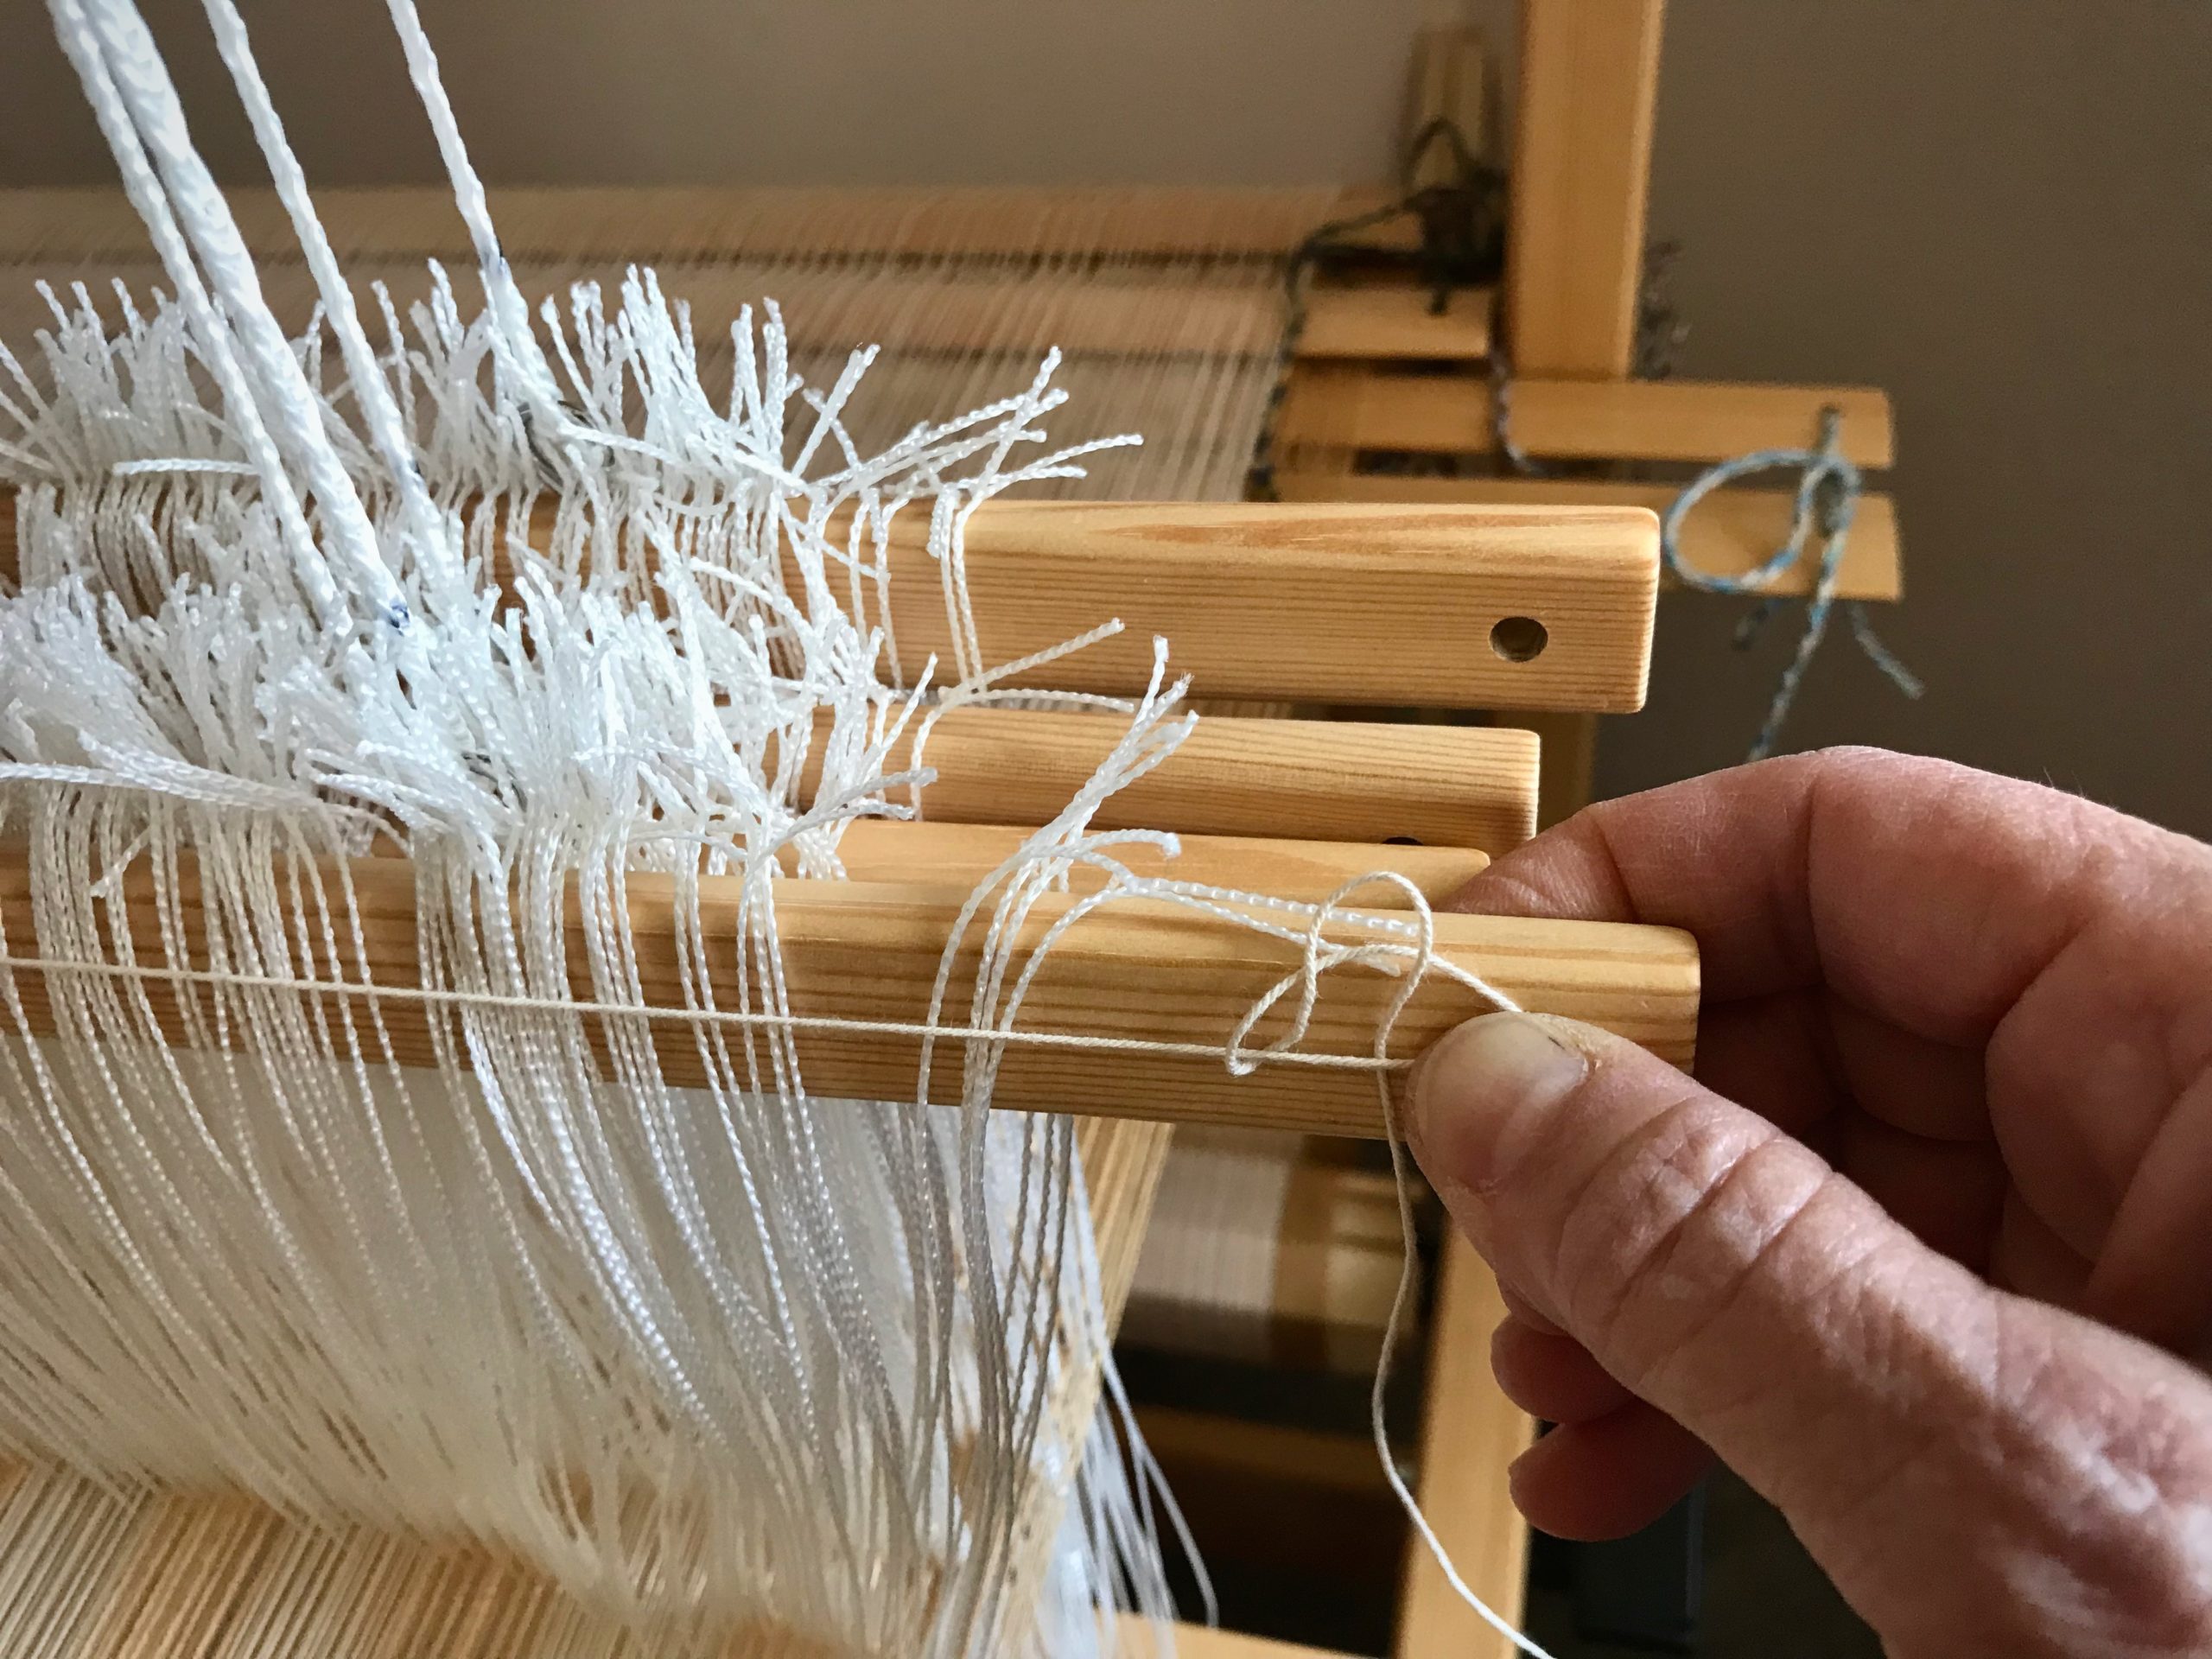
6 Repeat steps 4 and 5 for each remaining upper and lower shaft bar.
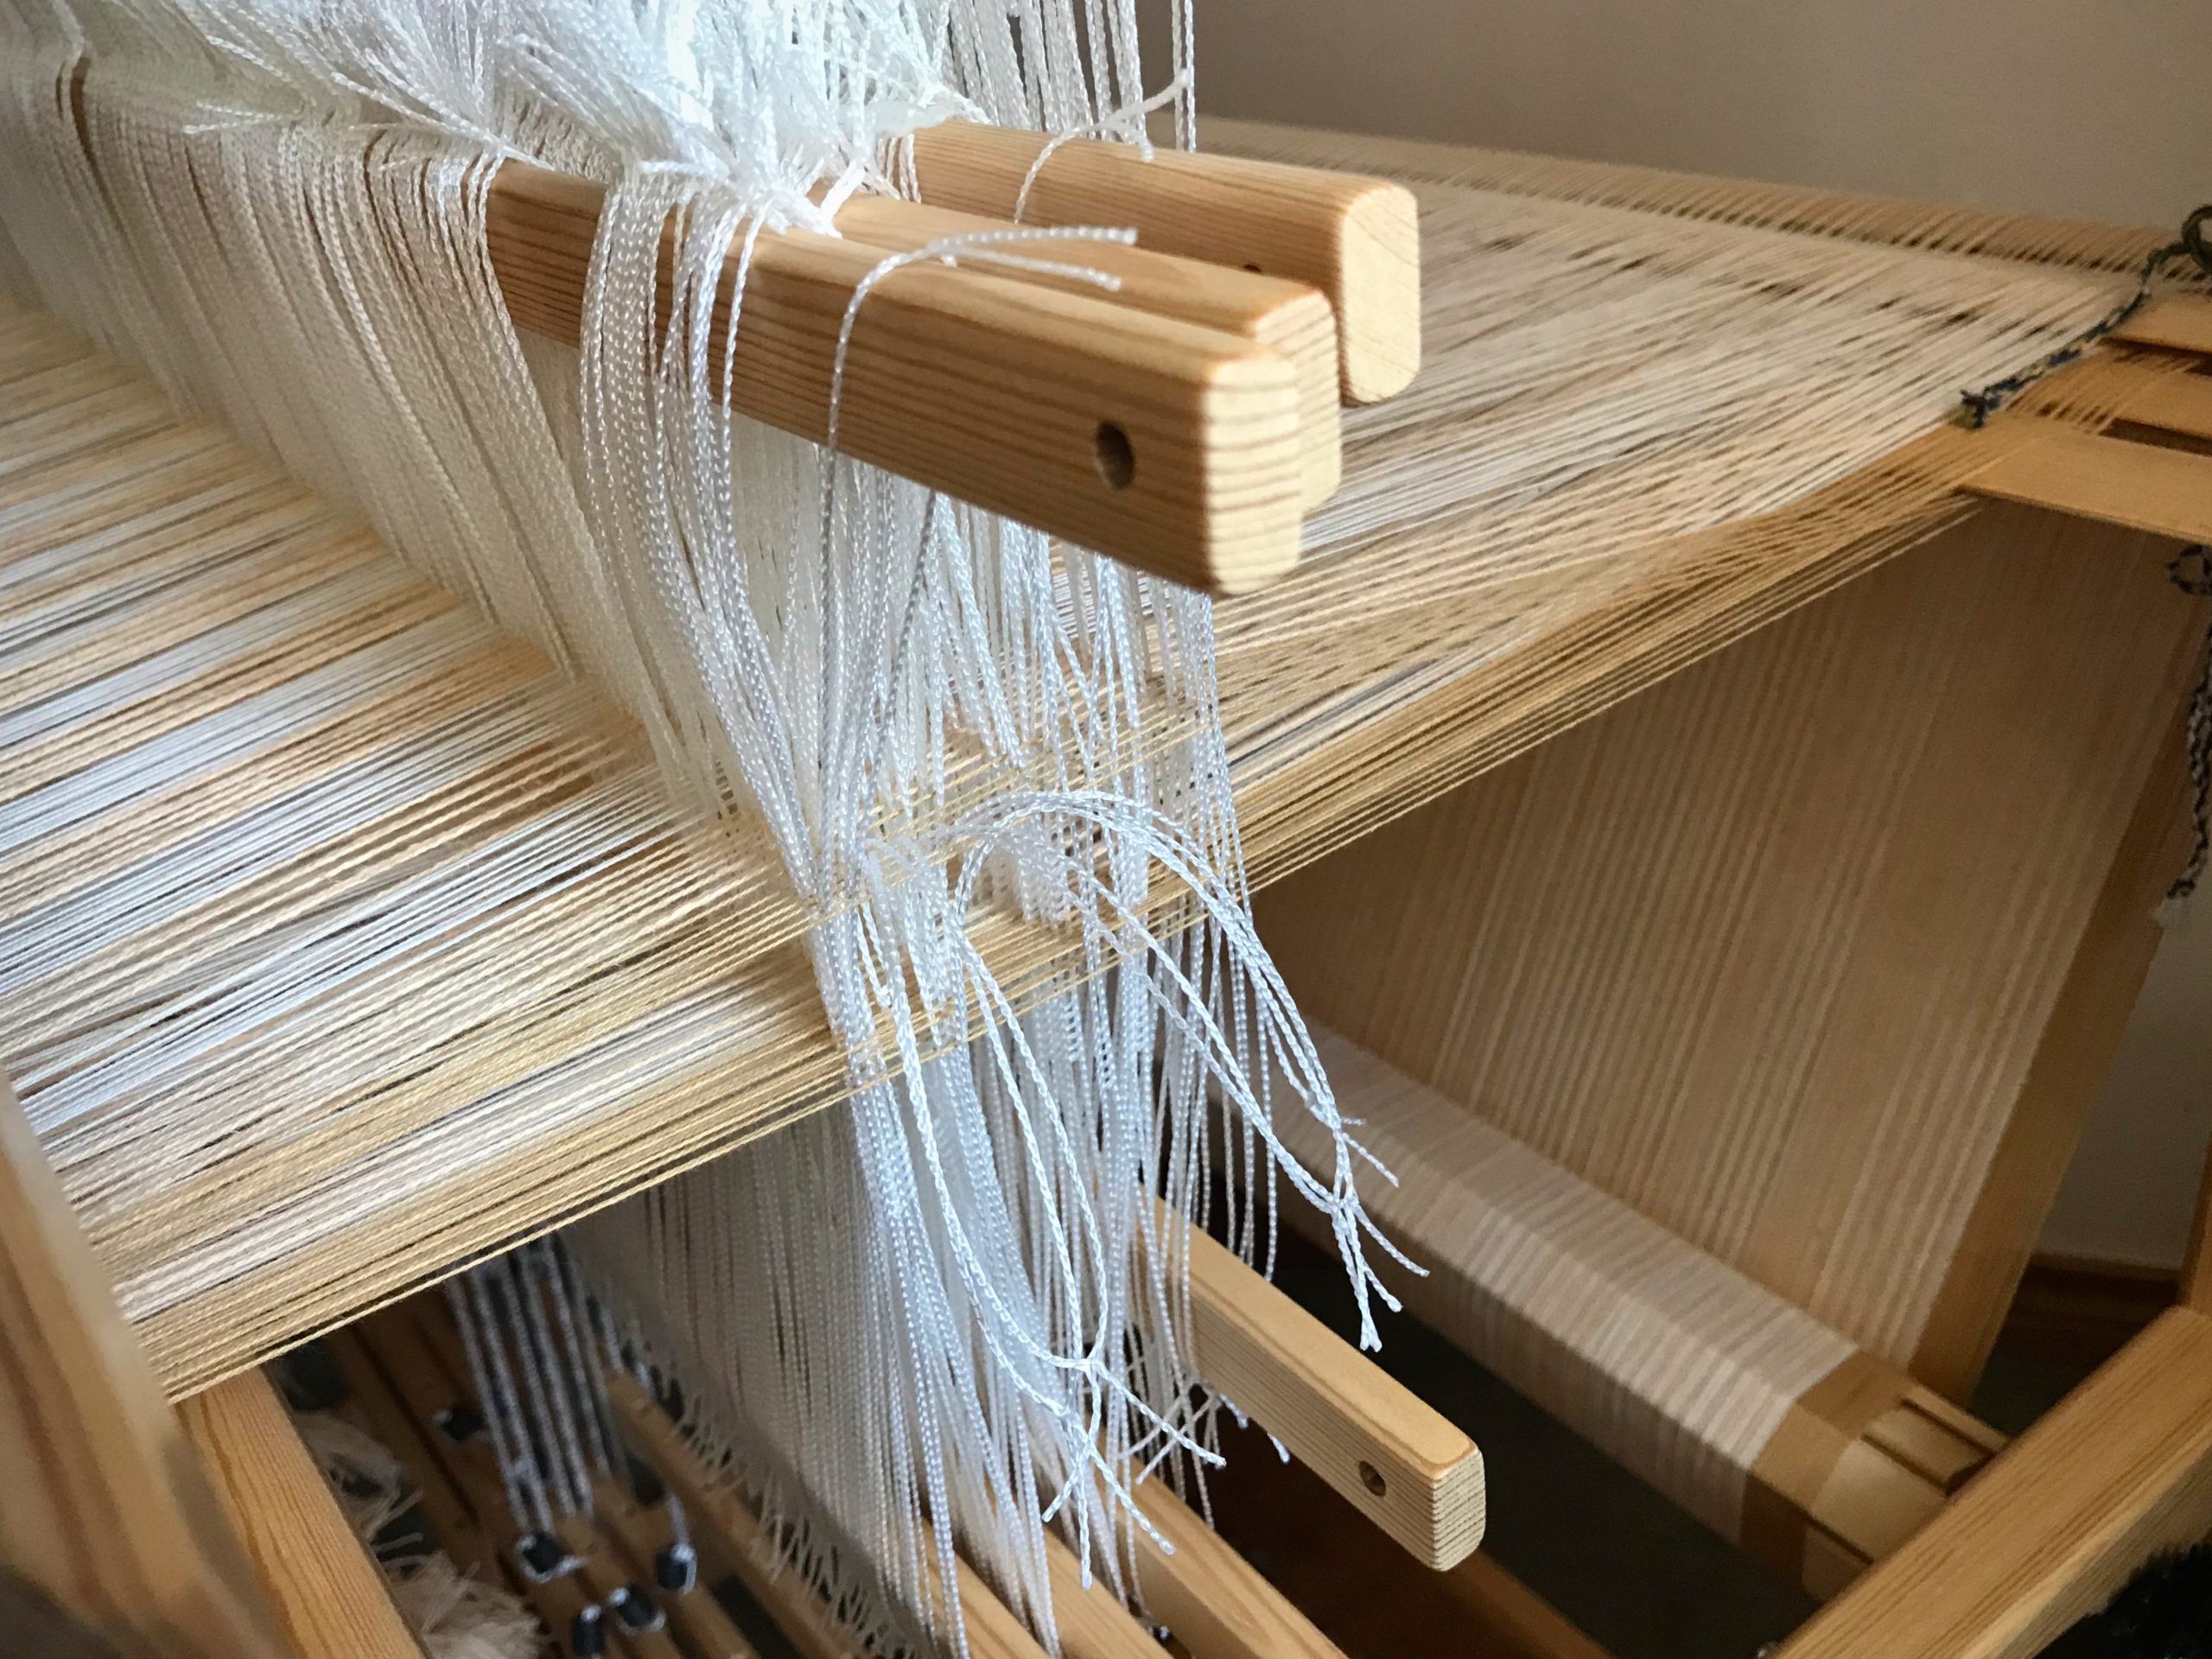
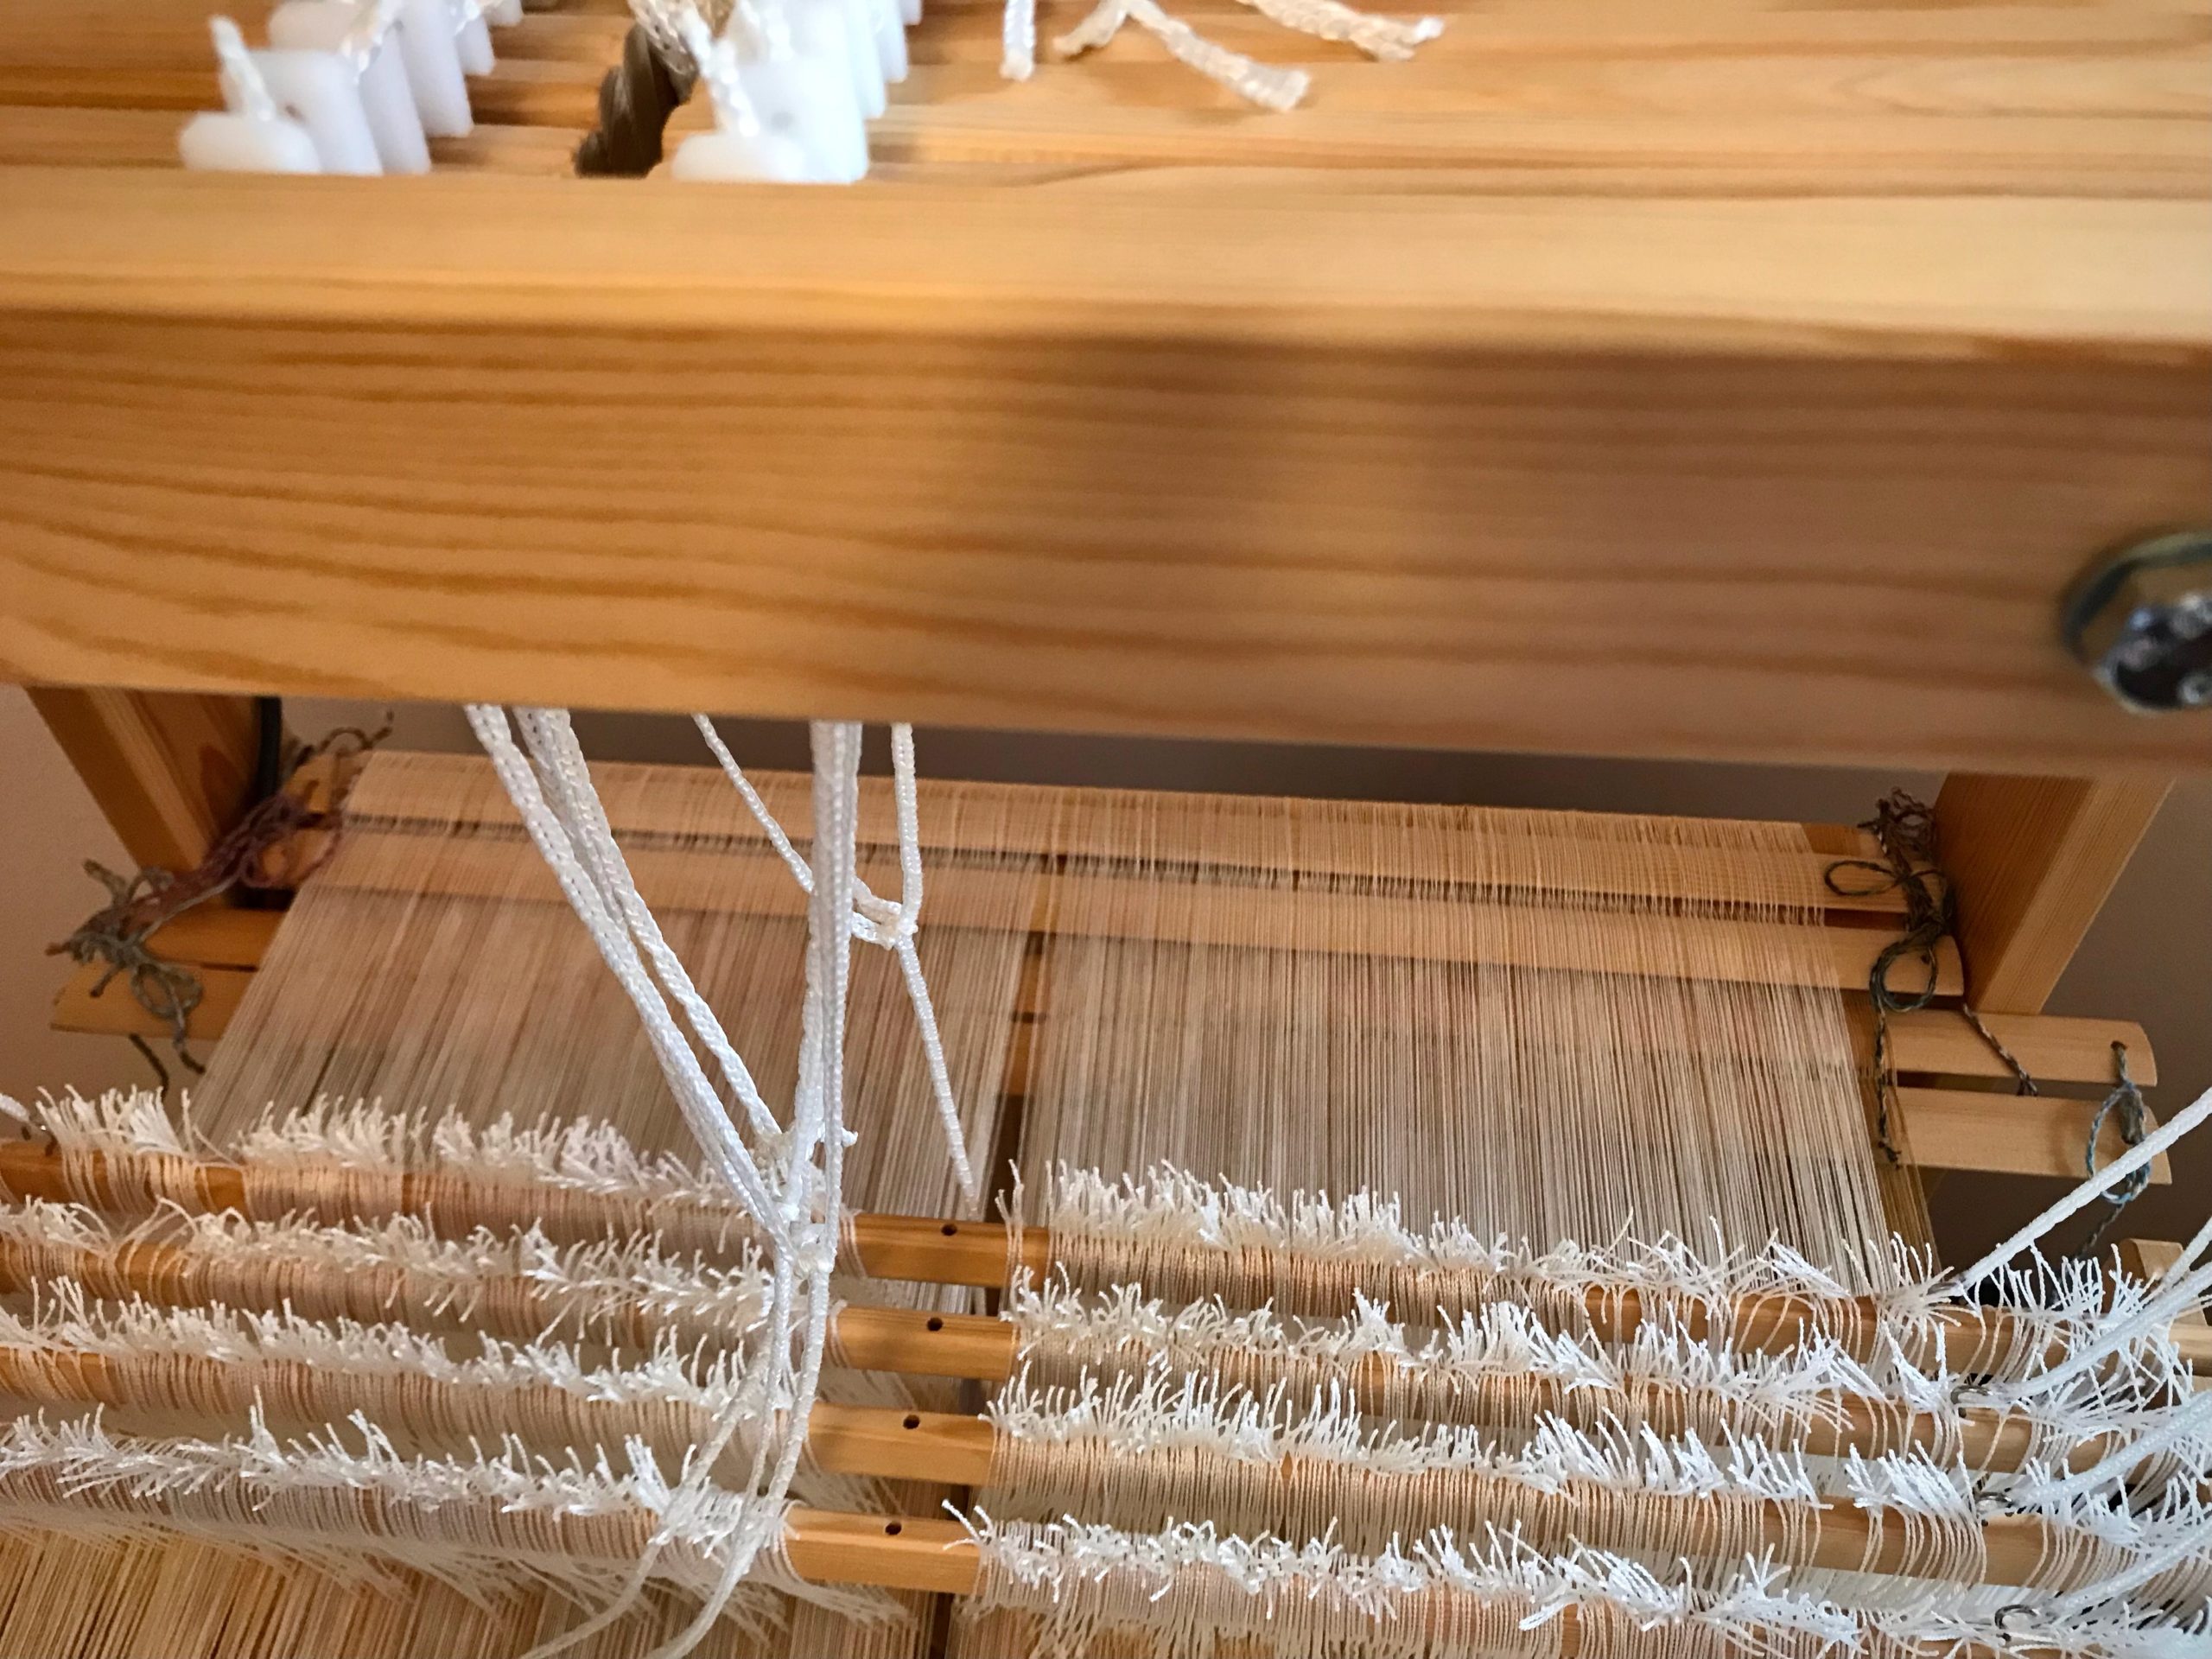
All tied up and ready to go! When this project is finished I will wind up these retaining cords on an empty tube and re-use them for the next wide warp on the Julia.
Continue weaving with one less thing to think about.
45 minutes: Time it took to reposition heddles that had slipped off a few shafts and were in a mess because I didn’t notice it immediately. Less than 10 minutes:Time it took to cut string and tie retaining cords on 4 upper shaft bars and 4 lower shaft bars.
‘Nuff said.
May you take the time to do what needs to be done.
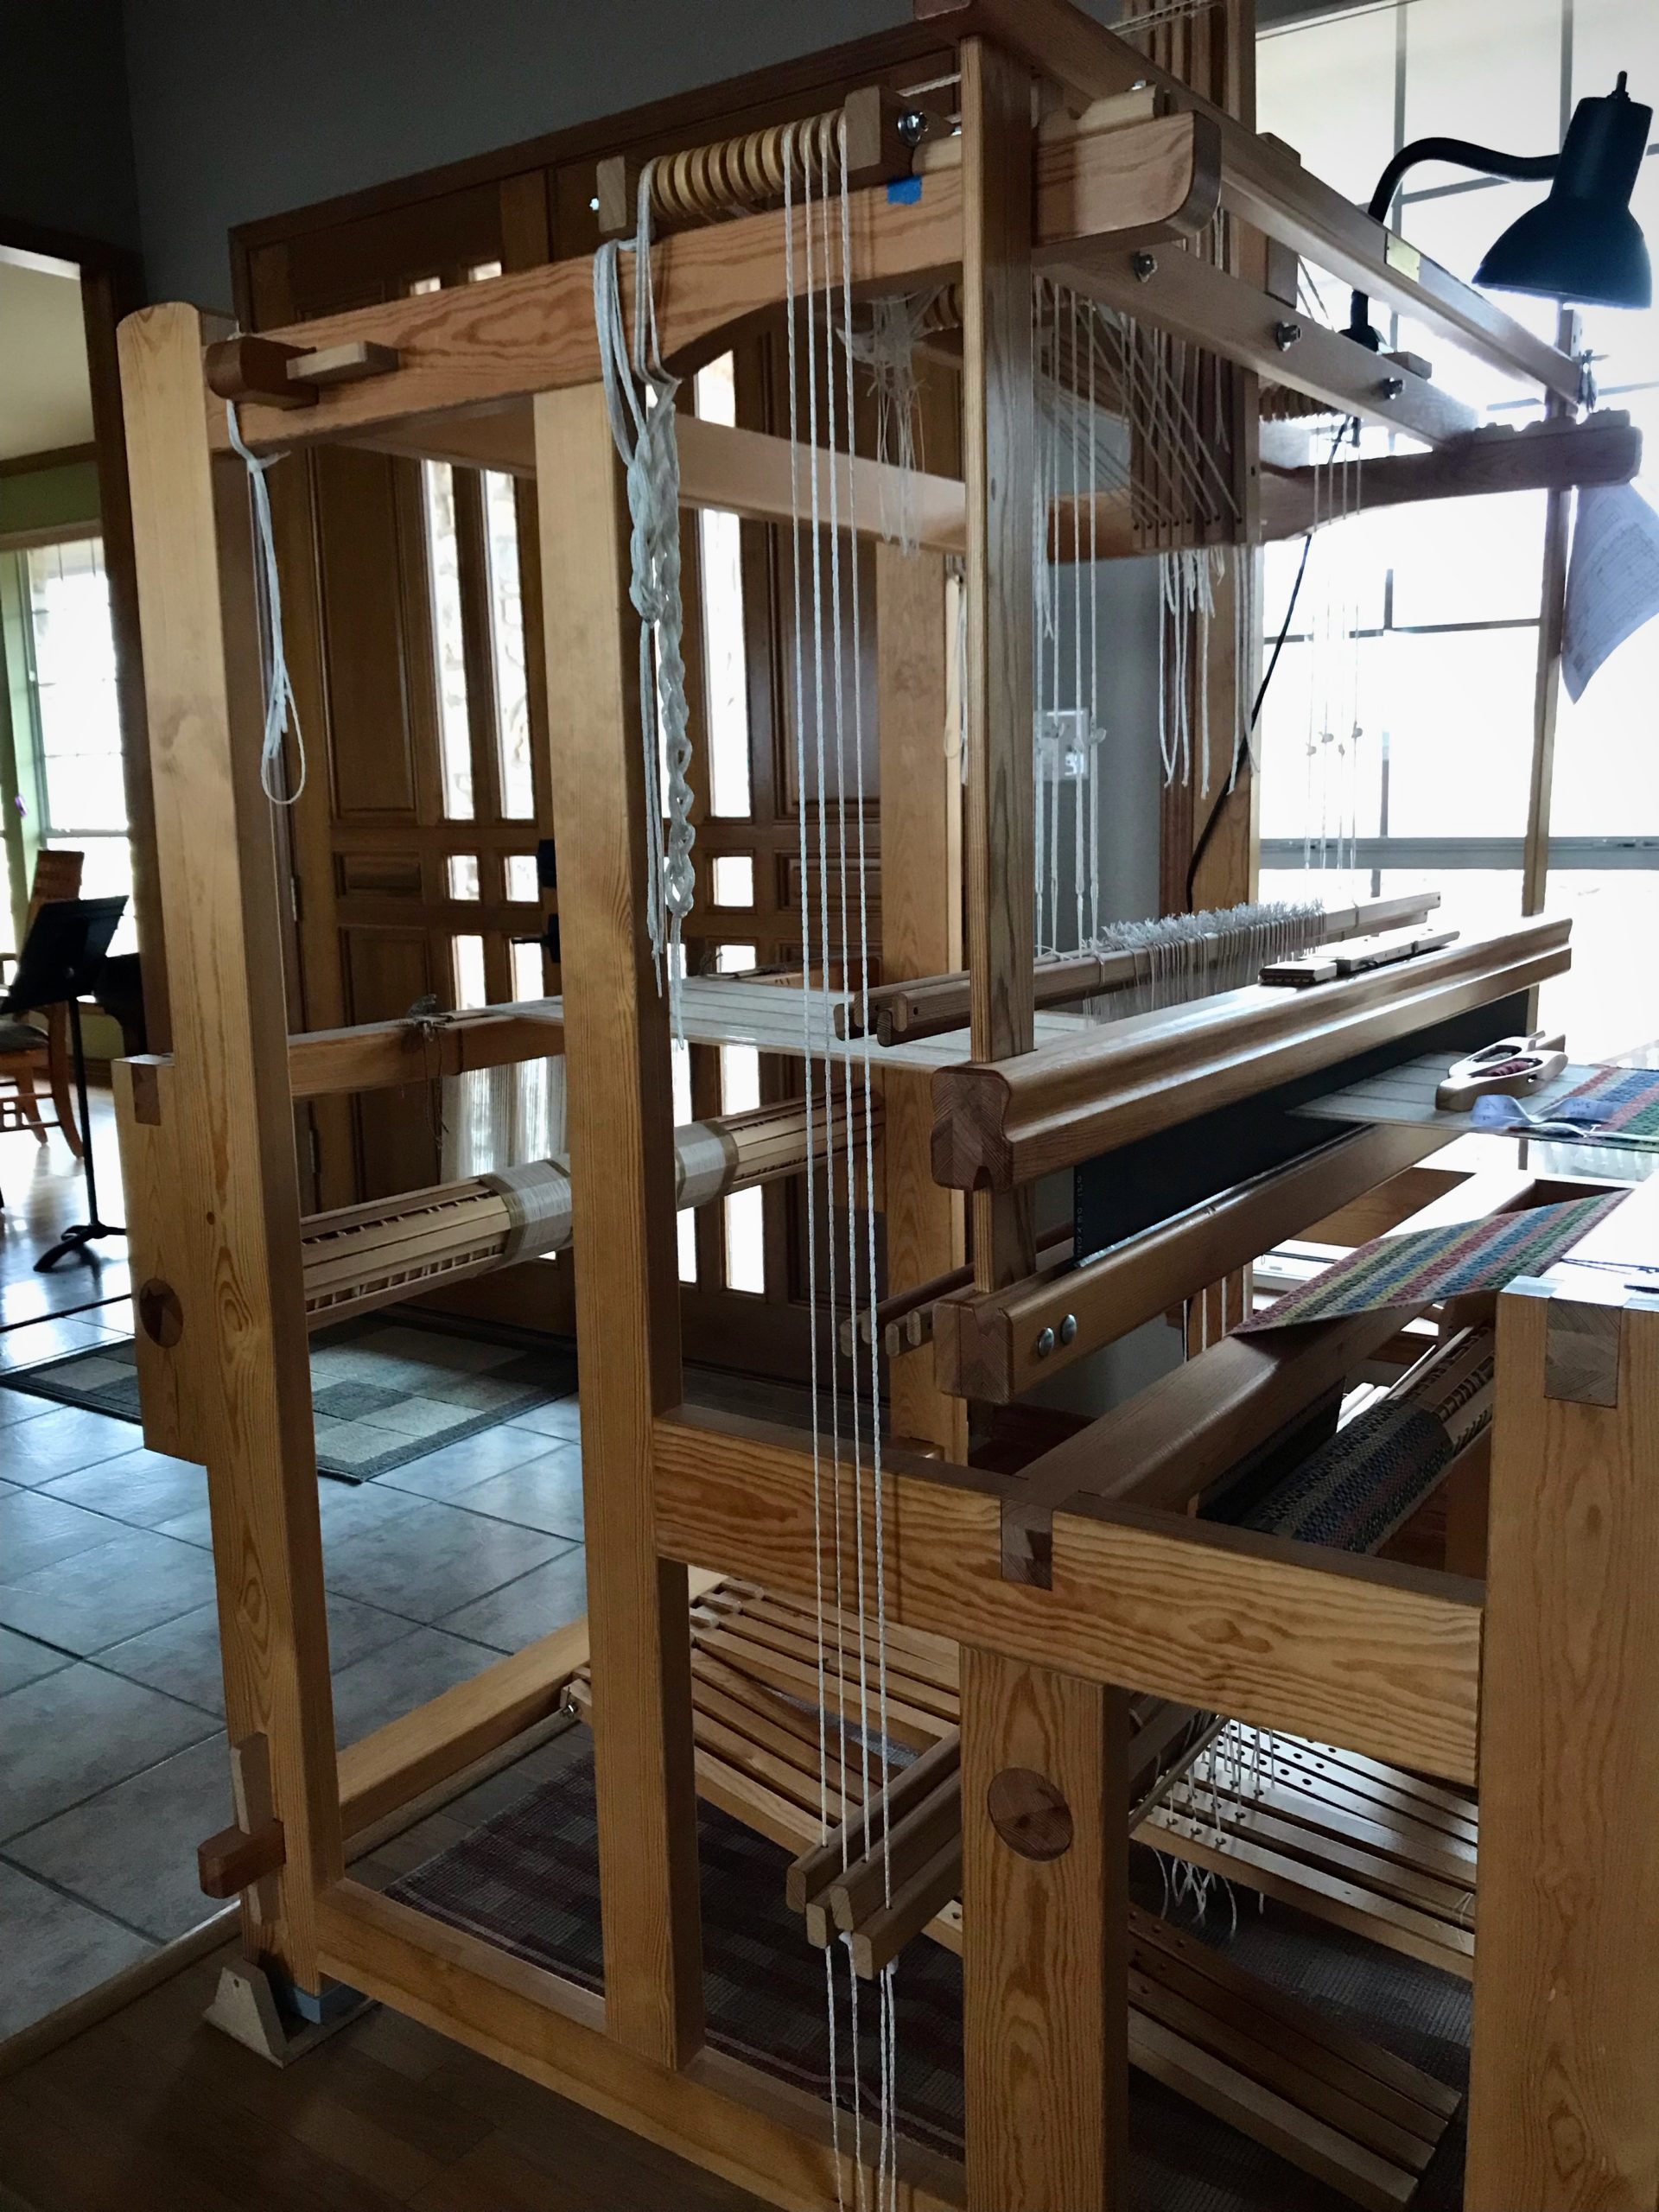
You followed all the instructions for dressing the loom, and have finished the countermarchtie-up. Now, at the moment of triumph you step on the treadles, one by one. Alas! Some or all of the treadles give you nothing you can call a shed. Now what? Maybe you relate to Laura who wrote me recently, “I can’t seem to get the treadles to make a shed.”
The solution is simple. Follow the advice in this sentence on page 37 of Learning to Warp your Loom, by Joanne Hall, “If your sheds are not good, check your loom tie-up from the top down.”
If sheds are missing, there is a good chance you have a crossed cord.
1 Follow each Texsolv cord, starting from the countermarch at top of the loom.
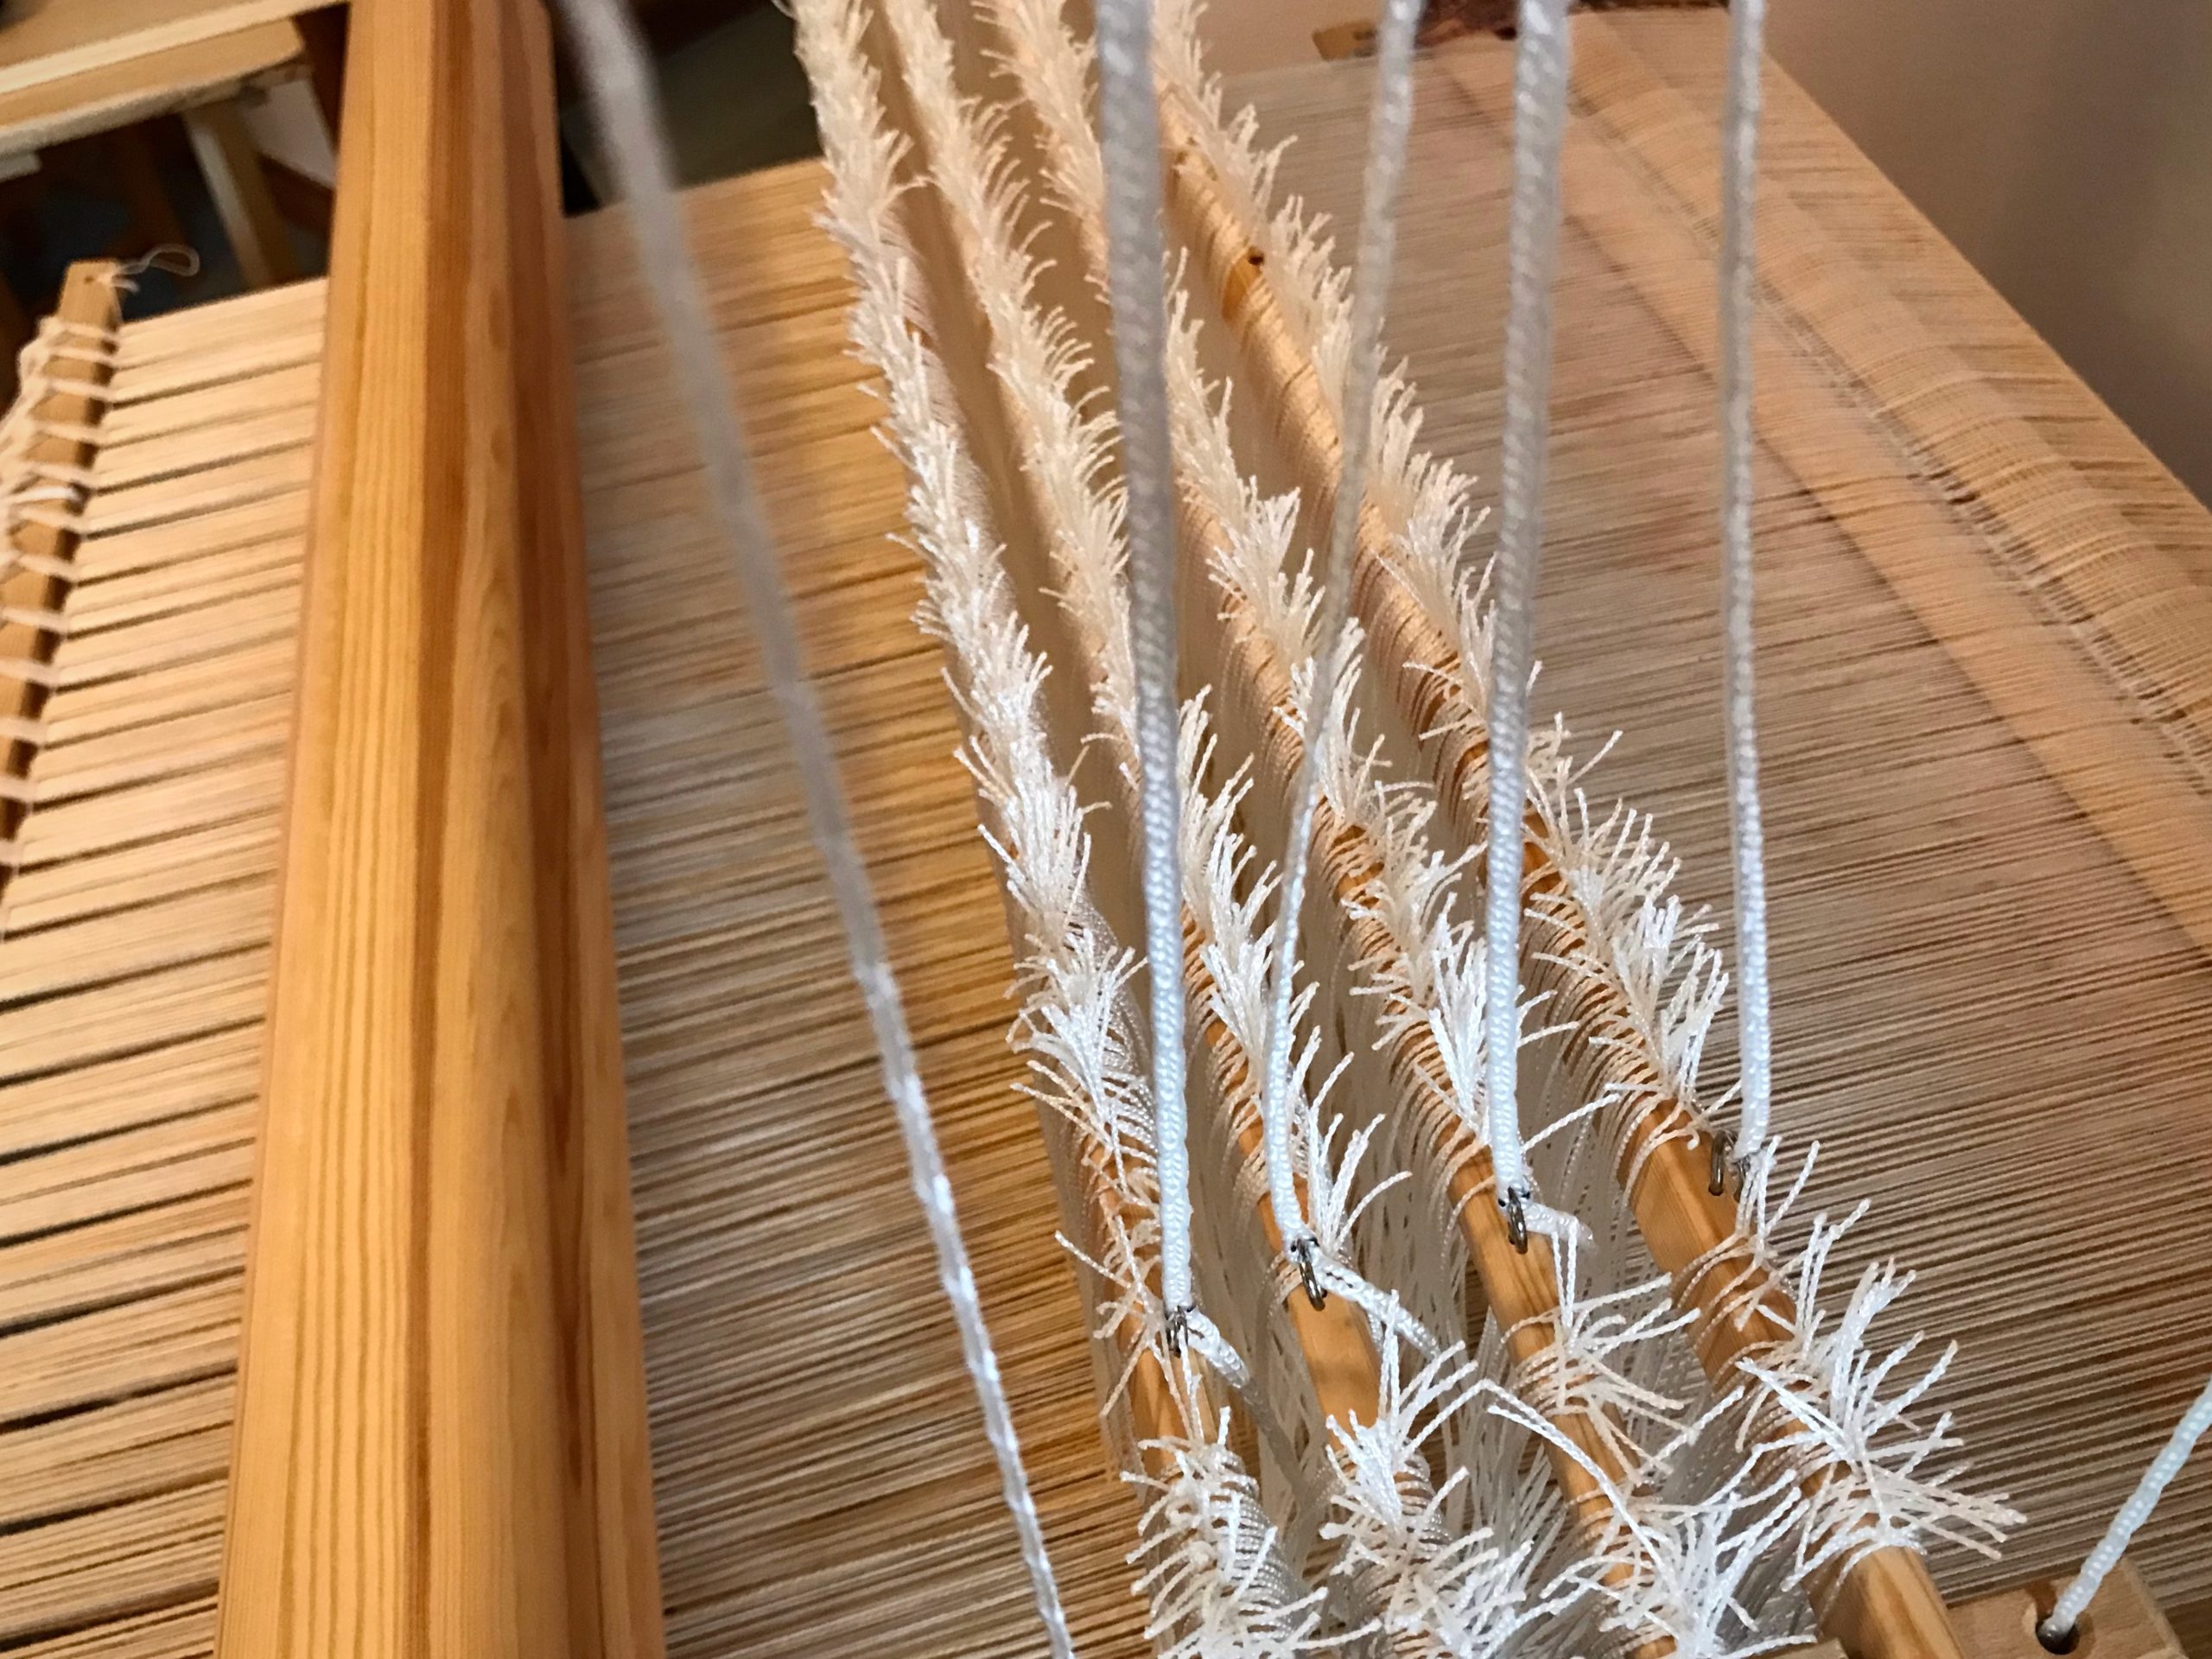
All the shafts are good to go, right? Not quite. Better see what’s happening at the top of those Texsolv cords.
2 Make sure that each cord is connected in the right order at the right place.
Is the first countermarch jack connected to the first shaft, the second jack to the second shaft, and so on?
Misaligned cords as seen from the top of the loom.
Are the cords that go to the lower lamms strictly in order?
– With horizontal countermarch, does each cord fall behind the shafts in order?
Cords from the horizontal countermarch go through the center of the warp, to be attached to lower lamms below.Make sure each cord goes behind its corresponding shaft bars to the lamms below. When attaching the cords to the lamms, make sure the cords are attached in the correct order. If loom is already tied up, follow each cord to check that it is attached to its corresponding lamm.
– With vertical countermarch, is each cord on its pulley, and connected to lamms in the right order?
Vertical countermarch has cords that go over pulleys on the side down to the lower lamms. I have to be extra careful to keep from attaching a cord to the wrong lamm.
3 Correct any misaligned cord.
Now, step on each treadle, one by one. Decent sheds that just need a little refining? Triumph!
Helpful Habit
When attaching a cord while dressing the loom, start your hand at the top of the cord and slide it down to the point of connection. This helps you take hold of the correct cord.
Ready to connect the shaft cords on the Glimåkra Julia, made easy by the small hooks on the shaft bars. Instead of expecting the cords to hang straight down in order, I reach my hand up to the top of the cord.Touching where the cord meets the wood, I know I have the correct cord for the shaft closest to the front of the loom. I do the same for the next cord.My hand slides down the cord and I connect the cord to the correct shaft. Now, all that’s left is tying up the treadles. Then, we weave!
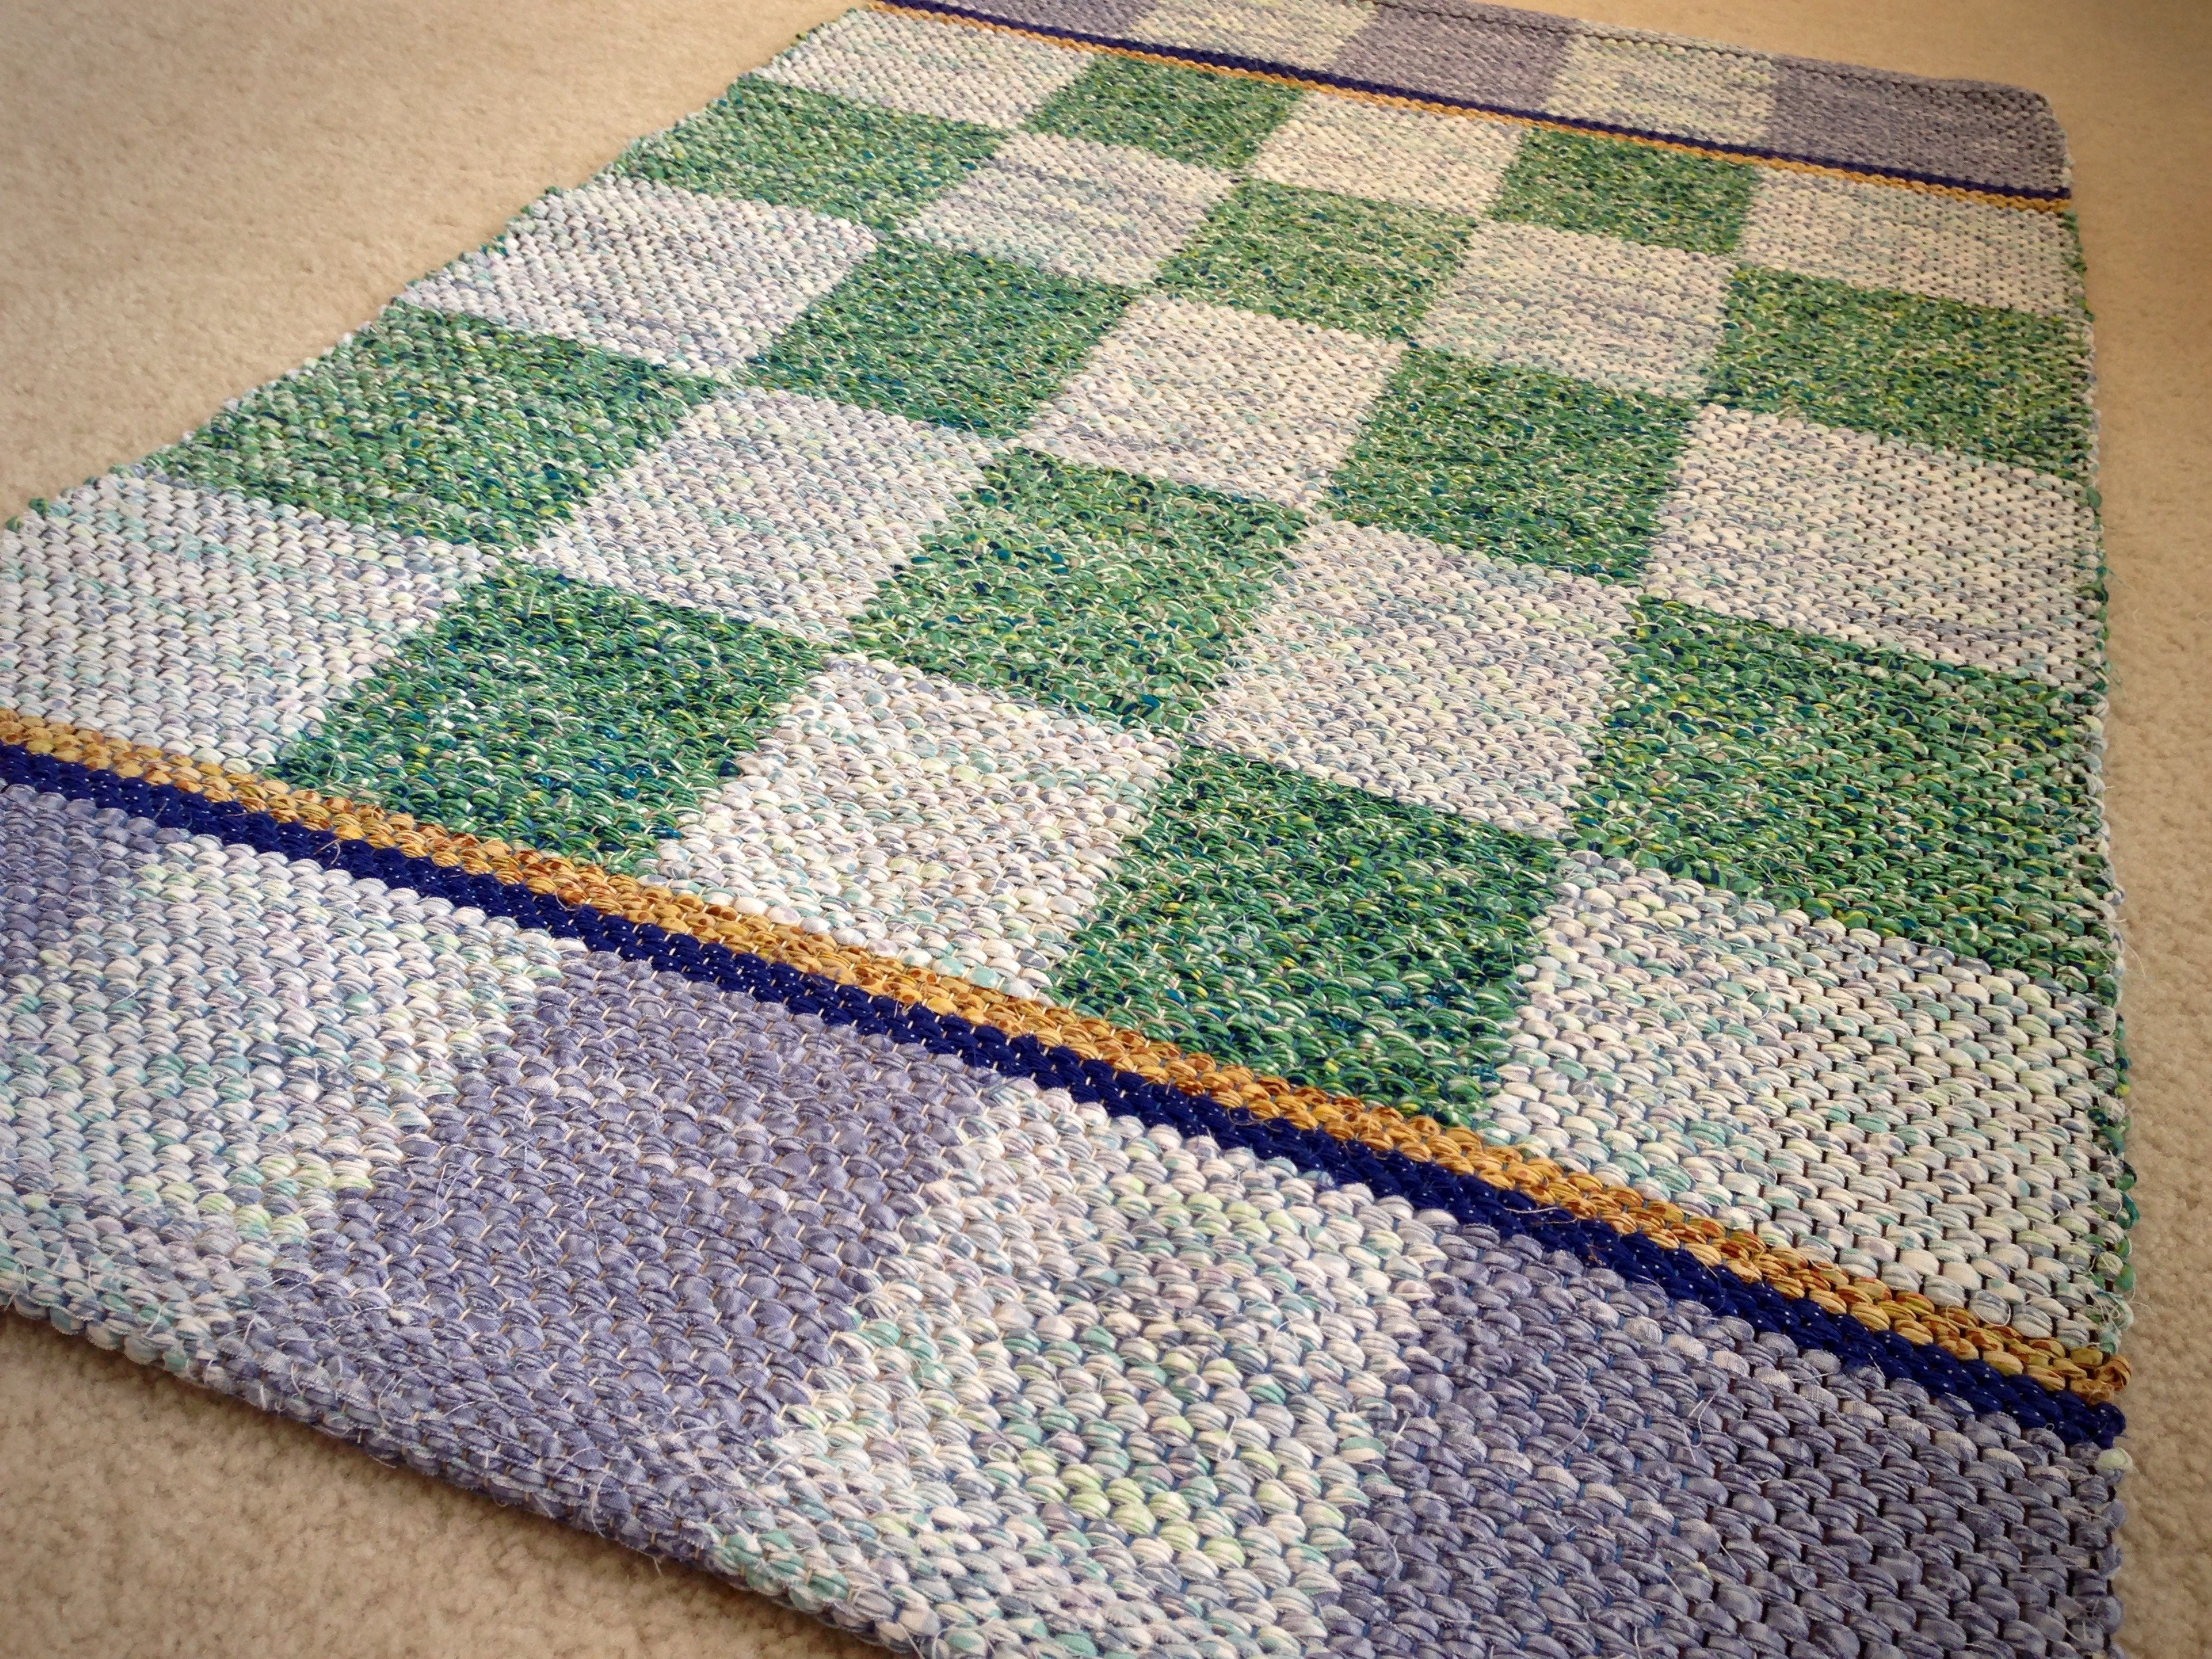
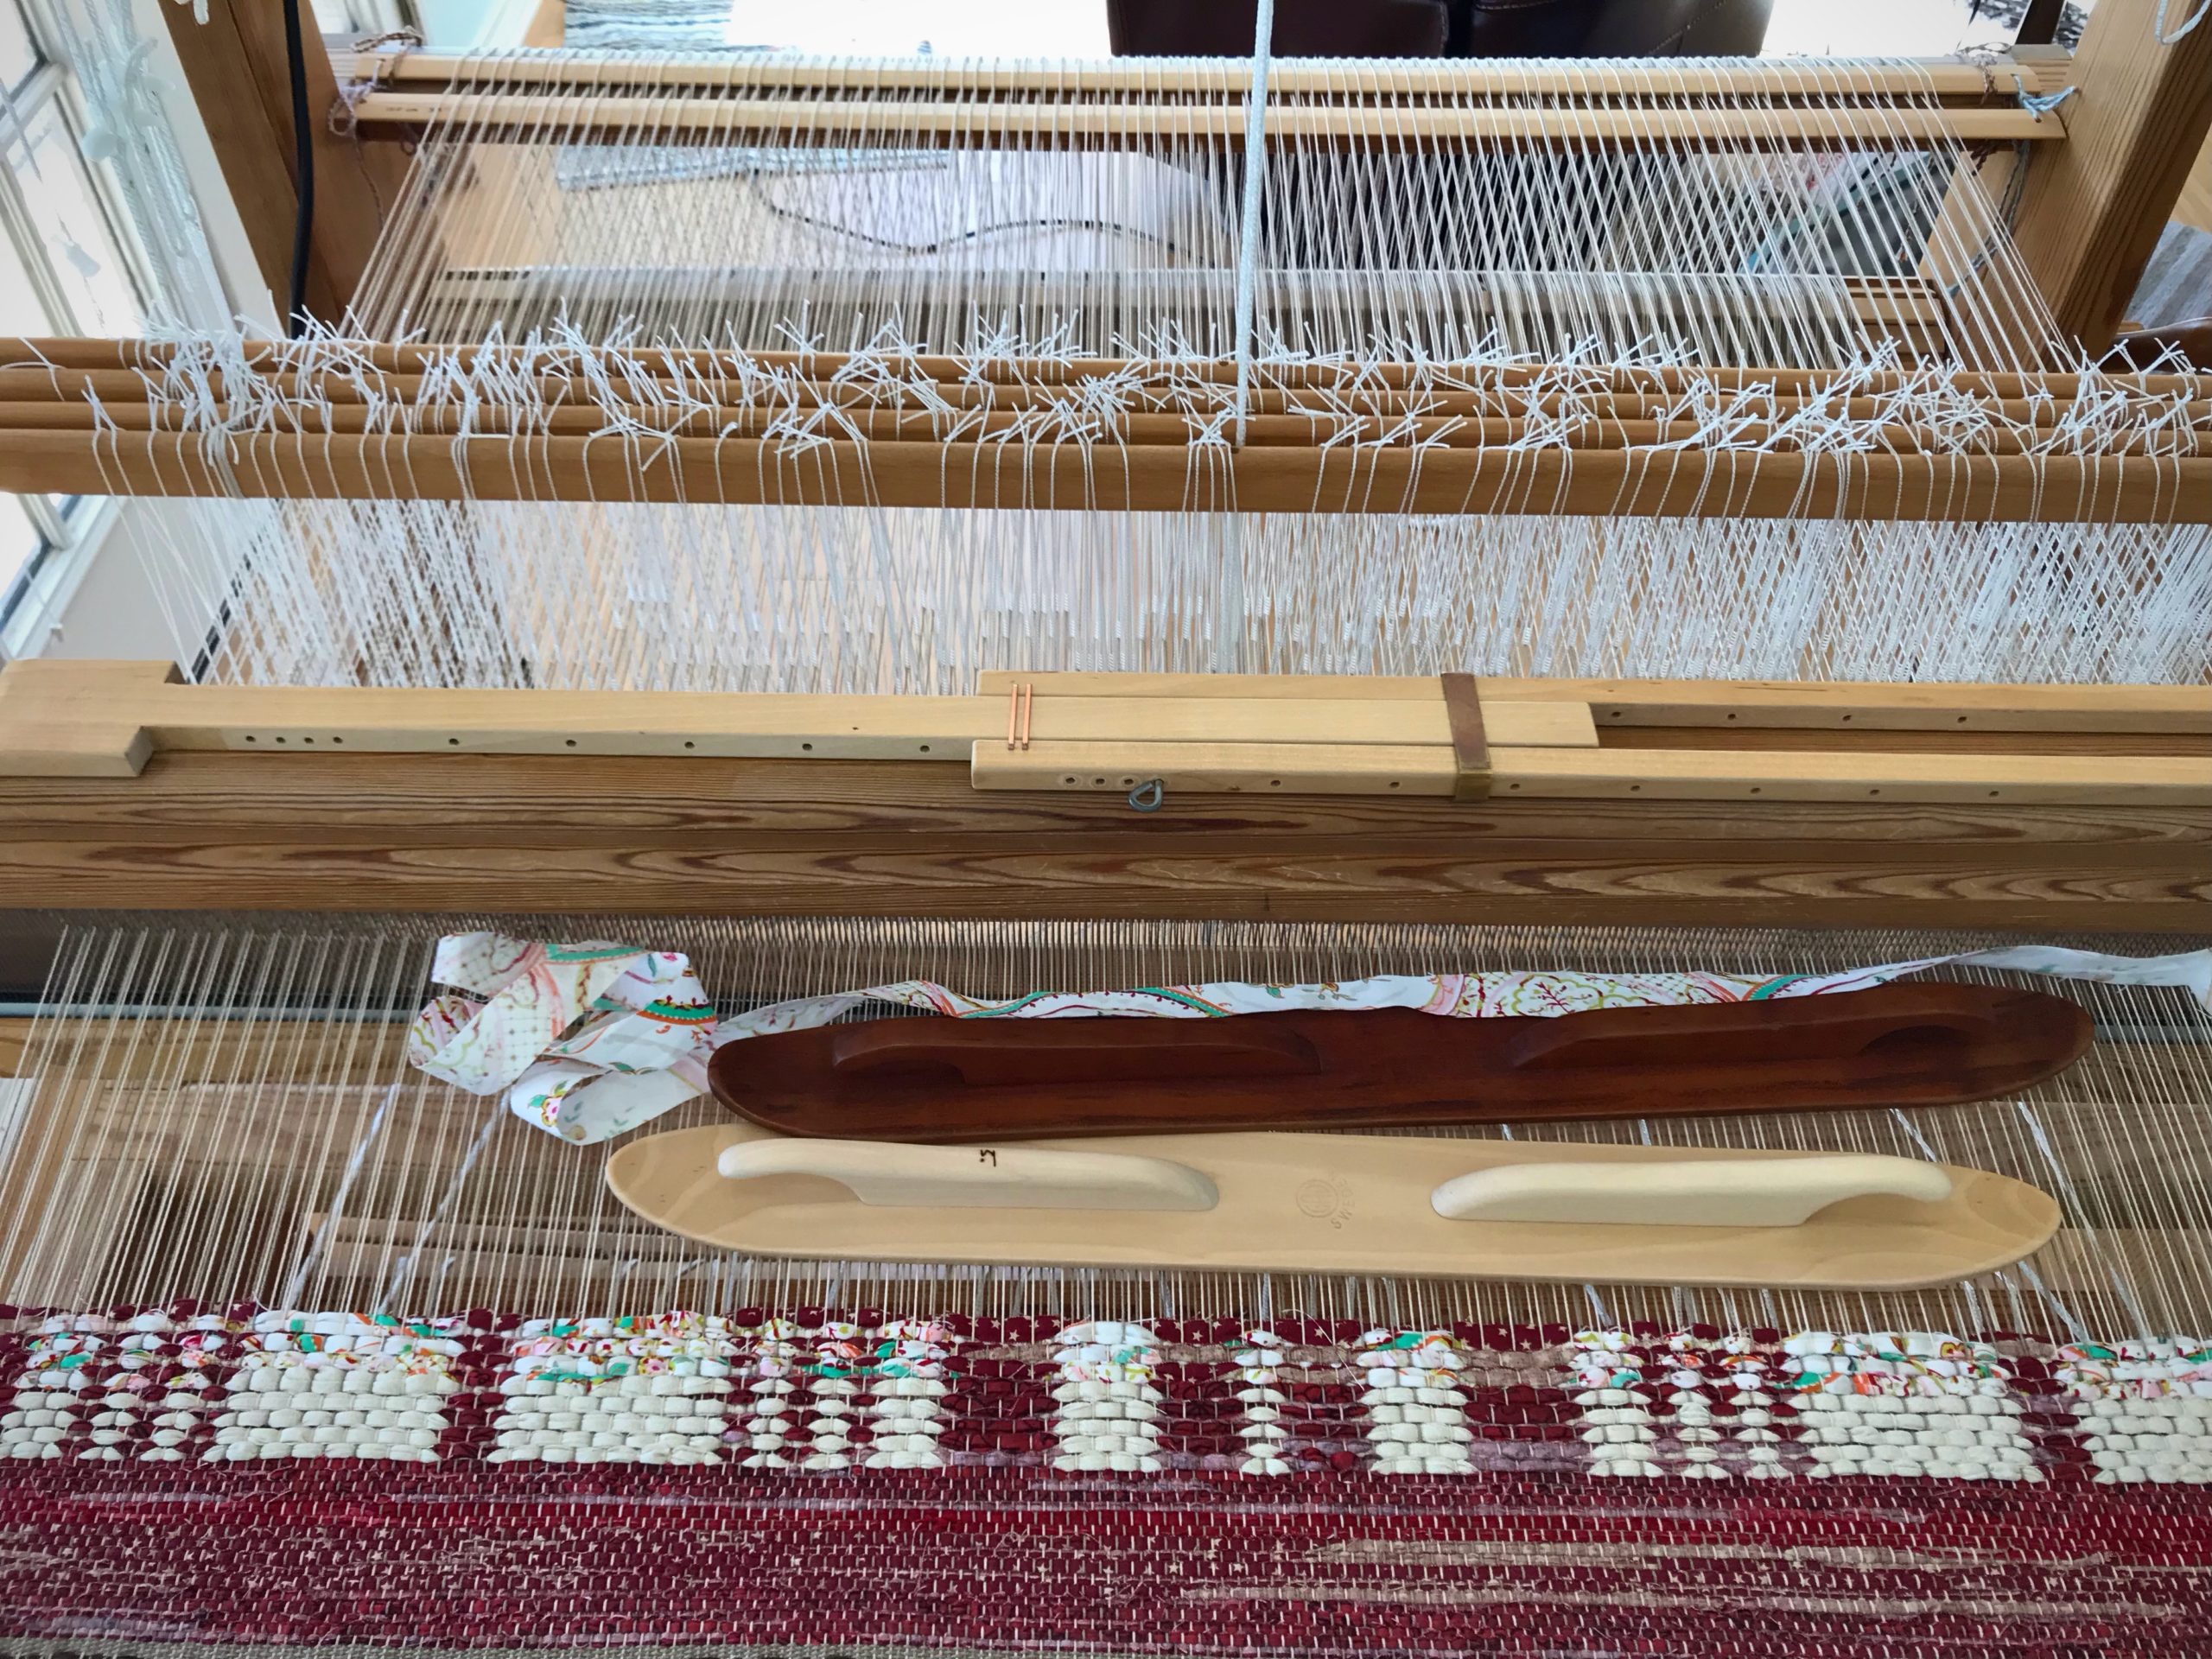
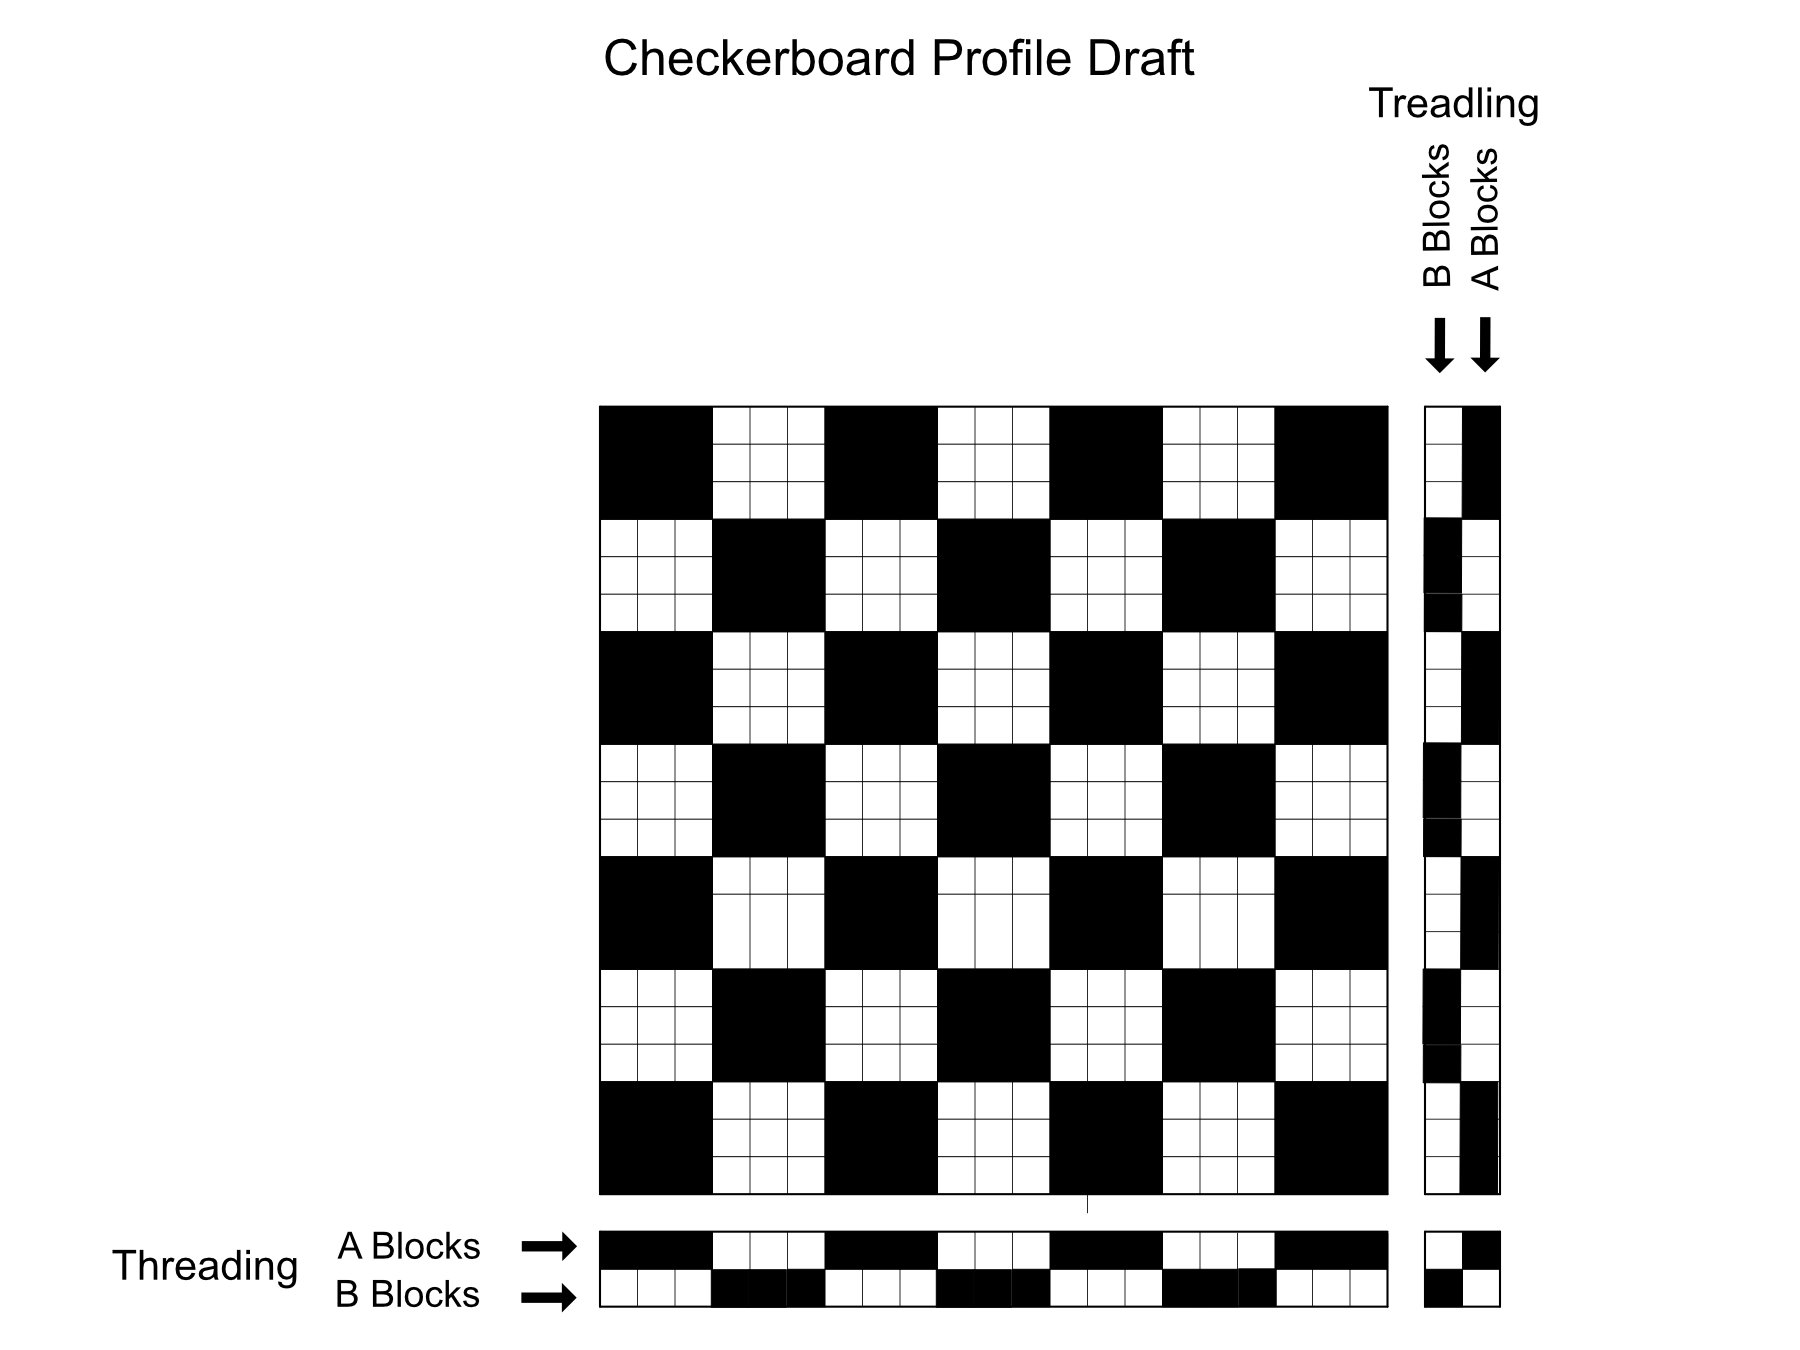
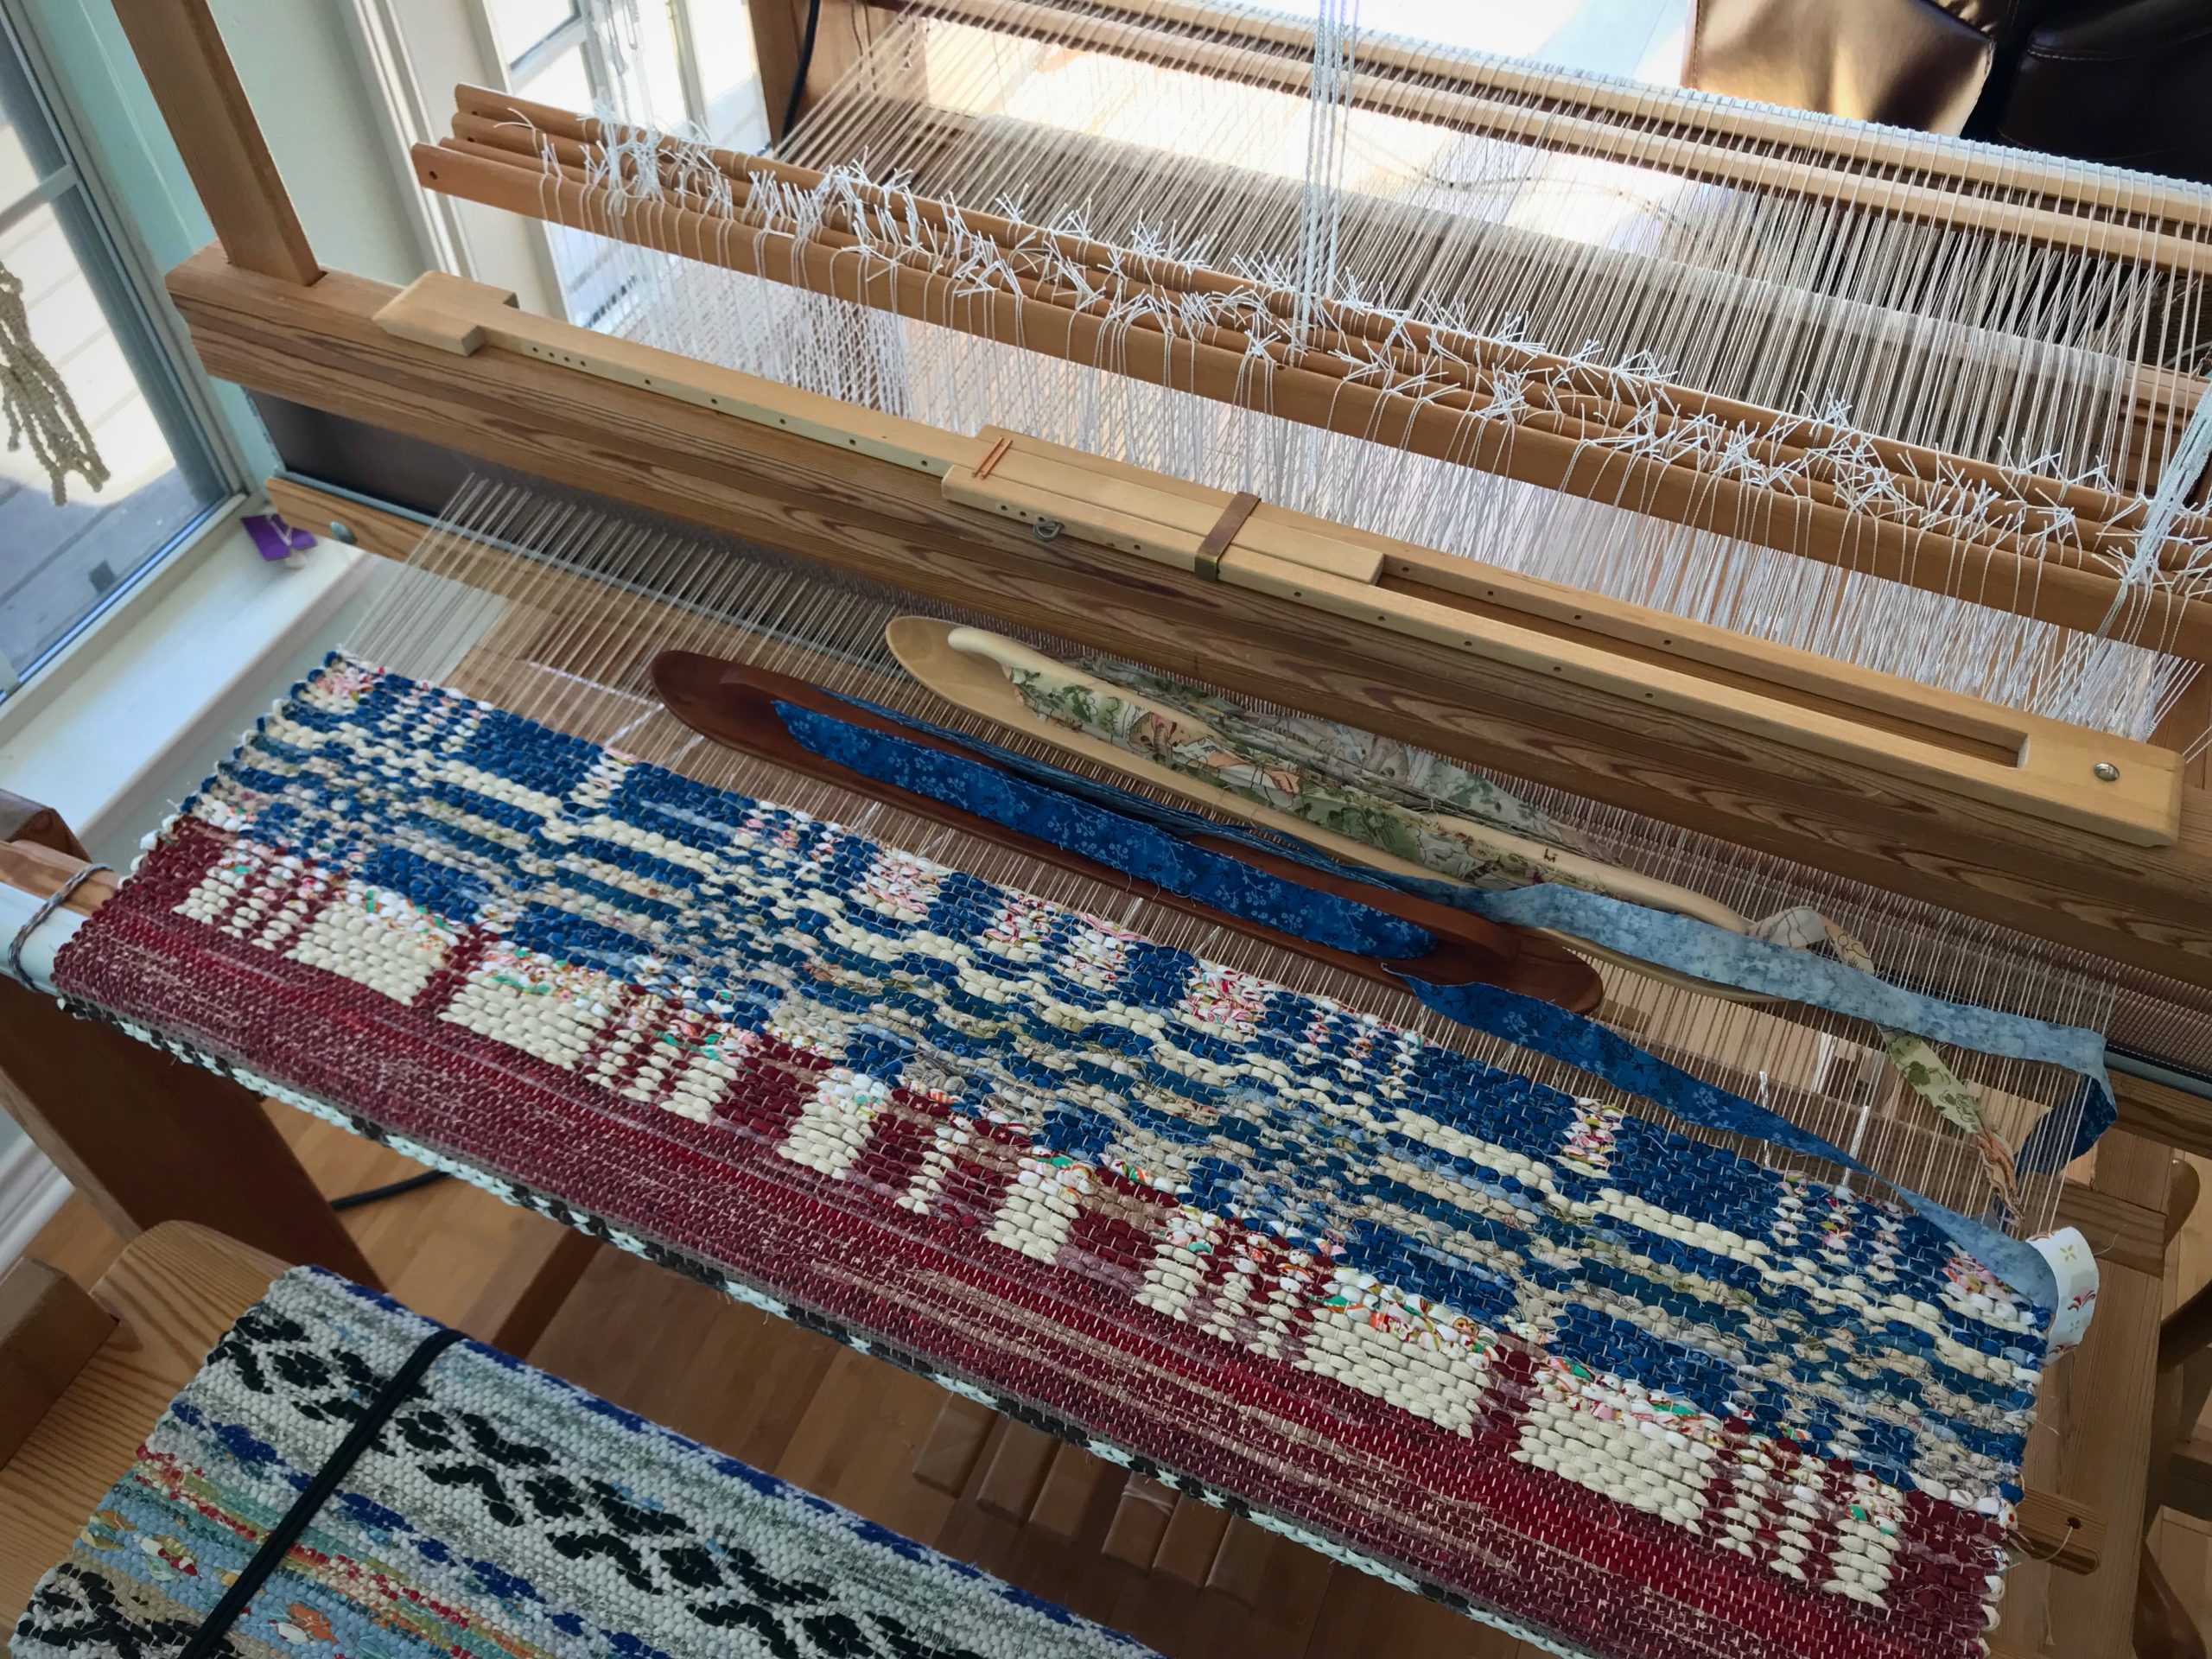
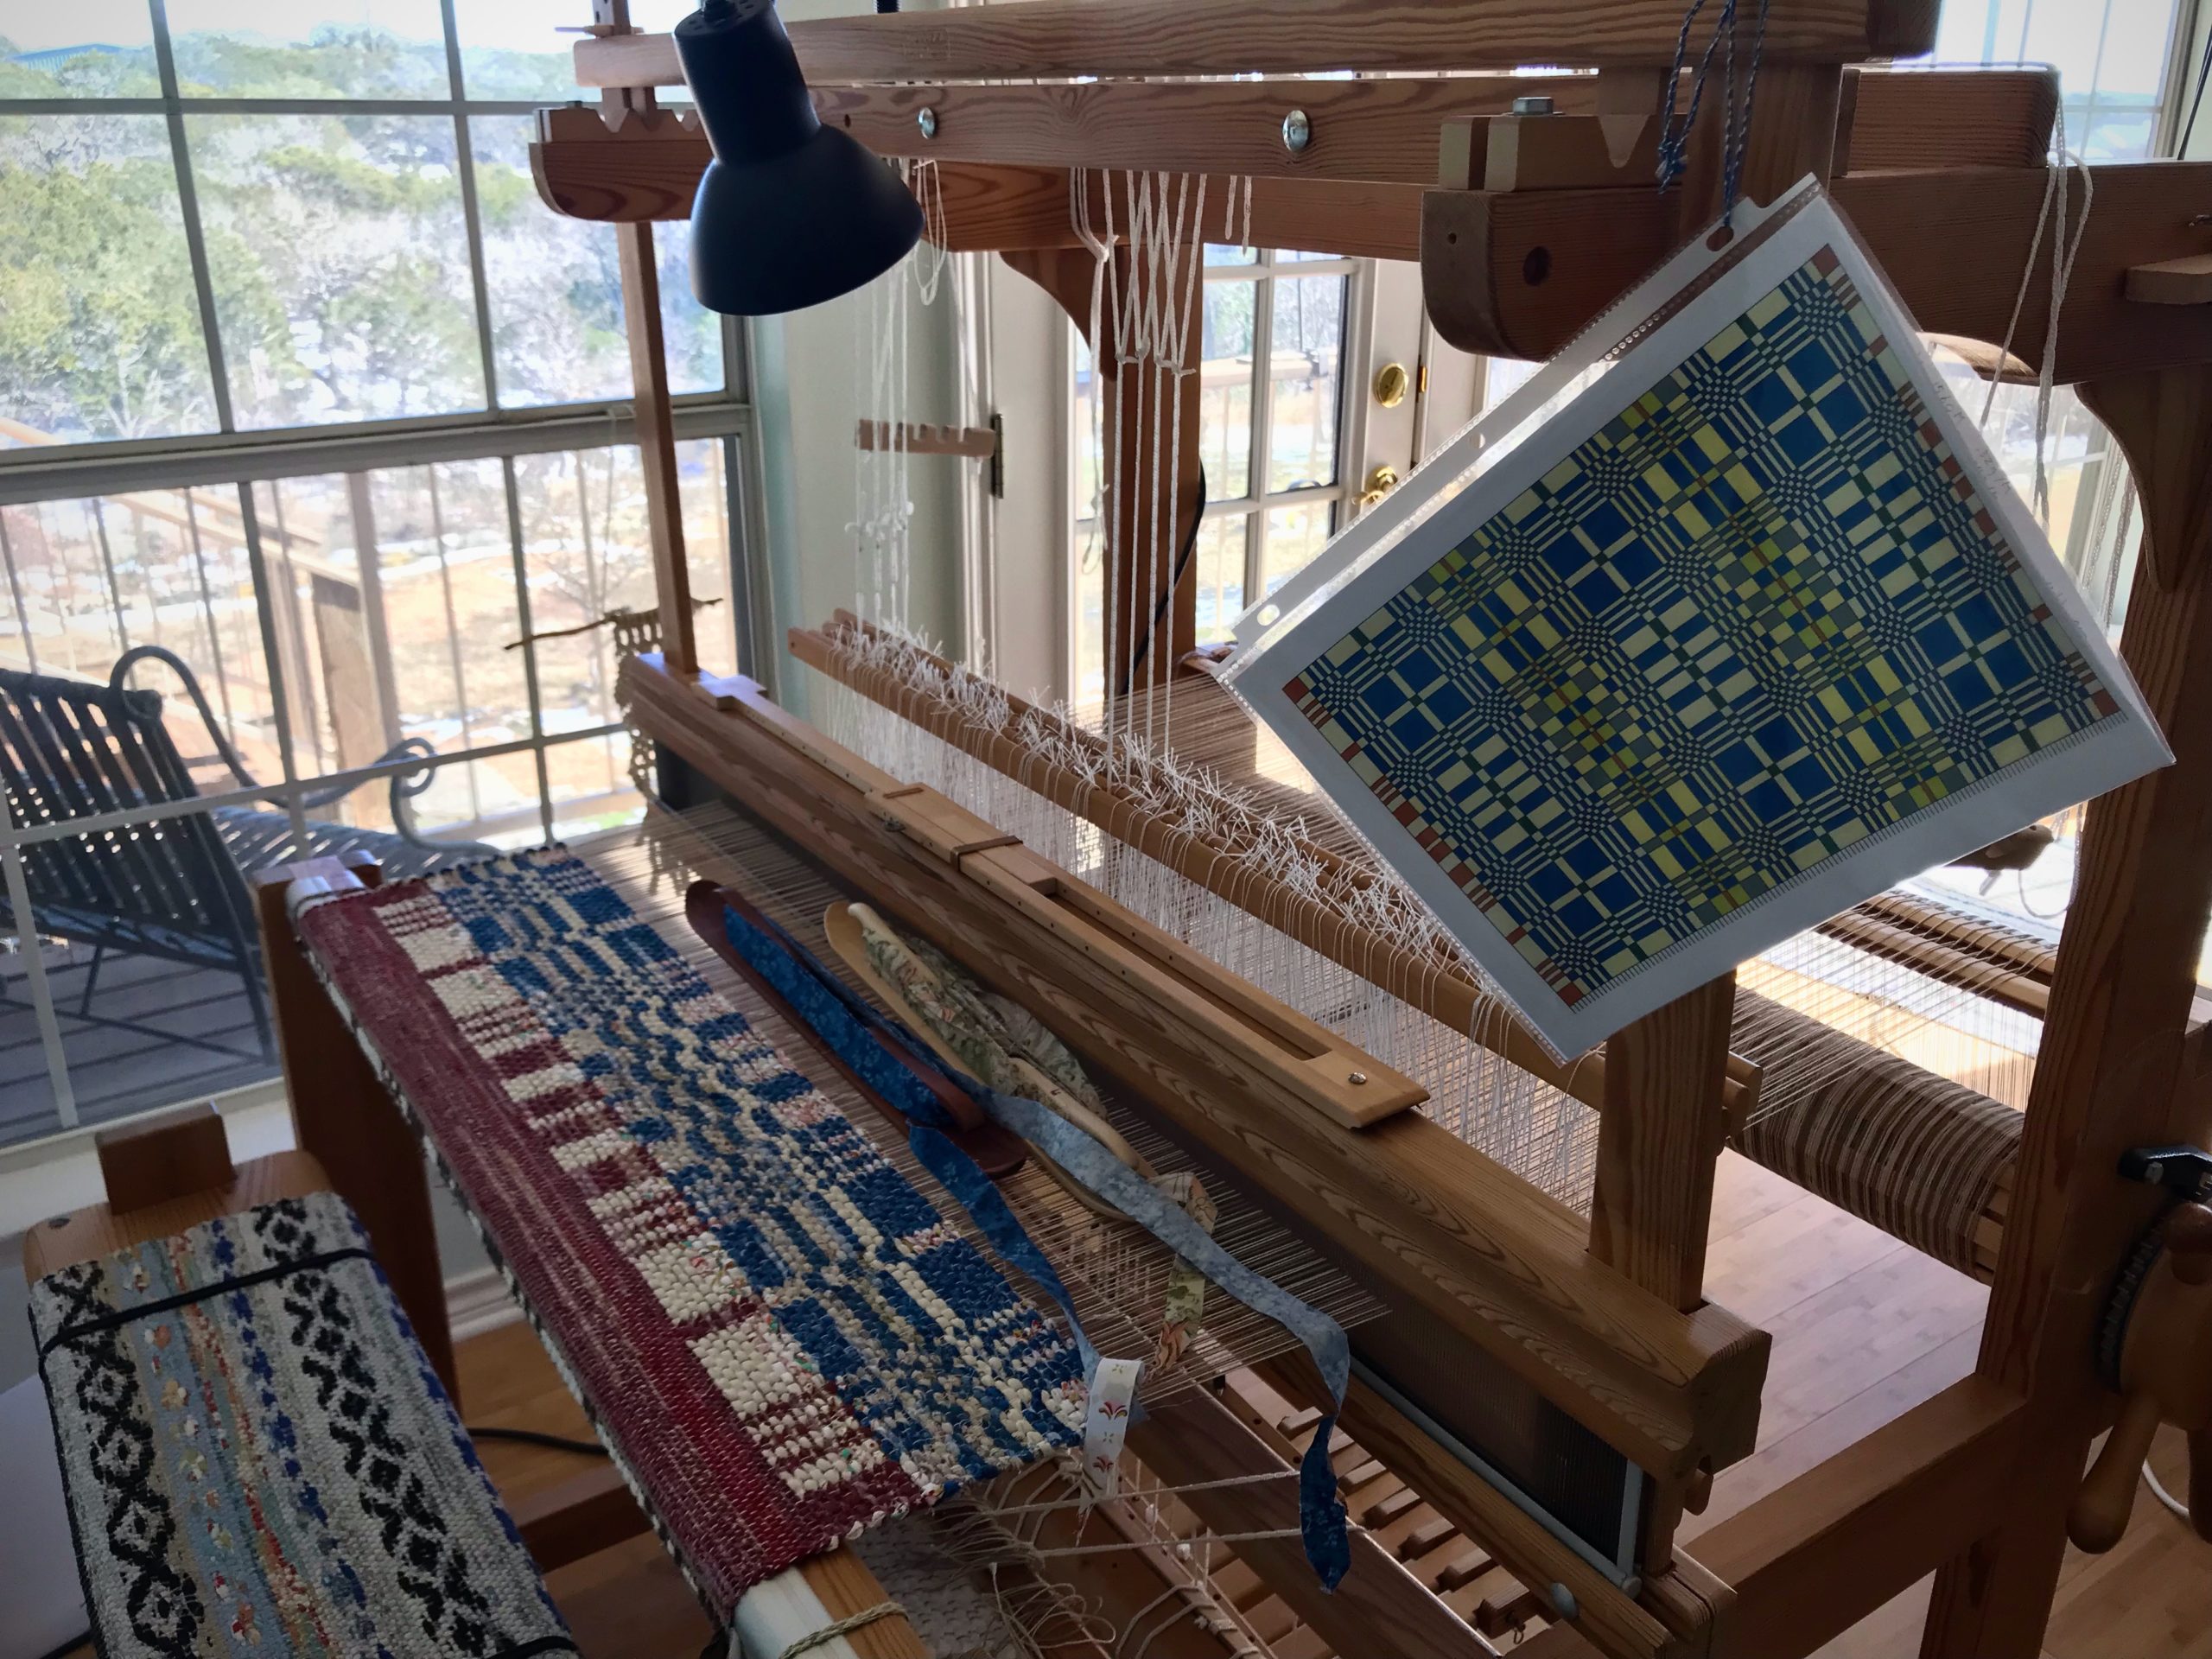
I am happy to say that with only four shafts we have exactly what we need for a checkerboard rag rug. Thank you to Megan for asking about it. ”I am searching for a 4-shaft draft for a checkboard pattern. I am limited to only 4 shafts.” Double binding opens up a world of opportunity!
Let’s talk about blocks. A block is a specific sequence of warp ends or weftpicks. Double binding on four shafts has two blocks for the warp and two blocks for the weft.
→ Use graph paper to plan the configuration of your blocks.
For the threading blocks, use two rows of squares. One row is for Block A and one row is for Block B. Each square on the paper represents one threading unit. You can make a checkerboard pattern by uniformly alternating the A blocks and B blocks. Or, you can make a wildly different geometric pattern by varying the size of alternating blocks. Your two-row graph becomes a profile draft to use as your threading key.
For the weft blocks, use the same arrangement of blocks as for the threading, and turn them vertically for the treadlingdraft. Or, use your creativity to make a unique configuration of weft blocks. The sky is the limit!
Three possible block configurations for the threading. The bottom example is a part of the sequence for the rug currently on my loom.Weaving with two ski shuttles. Glimåkra Ideal. 4 shafts, 6 treadles.Printout shows me where the blocks change in the weft.
Check out these resources for more double-binding rag rug ideas: Alla Tiders Trasmattor, by Monica Hallén and Ann-Kristin Hallgren; Så Fint med Trasmattor, by Monica Hallén and Ann-Kristin Hallgren; Älskade Trasmattor att väva som för, by Monica Hallén and Ann-Kristin Hallgren; Swedish Rag Rugs 35 New Designs, by VävMagasinet; Happy Weaving, from VävMagasinet.
You can measure what you are weaving. A set of towels will all be the same length. A table runner will fit the table as planned. A rug will be the right size for the designated floor space. All it takes is a dependable way to measure. (Thanks to Elisabeth S. for writing me, “I’d love to have a better way to measure my work as I’m weaving it.”)
Measurement Tape (accompanying video below)
Supplies:
Calculator
Project notes
5/8” polyester twill tape
Fine point indelible marker
Tape measure
2 flat-head straight pins
Make Calculations
Determine the finished length.
Consider the Golden Ratio, 1:6.
Consider where the finished textile will be placed.
Estimate take-up and shrinkage.
Include these measurements in your project notes.
Prepare a Measurement Tape
Draw the beginning line about 2 cm from the end of the tape. If there is a hem, draw a second line to mark the hem’s length.
Write the item description on the tape.
Write ” ___ (finished length) + ___ (take-up and shrinkage) = ___ (total length)” on the tape.
Measure the total length from the first line (or from the hem) on the tape. Draw a line at the end (add hem, if needed).
Cut the tape about 2 cm after the ending line.
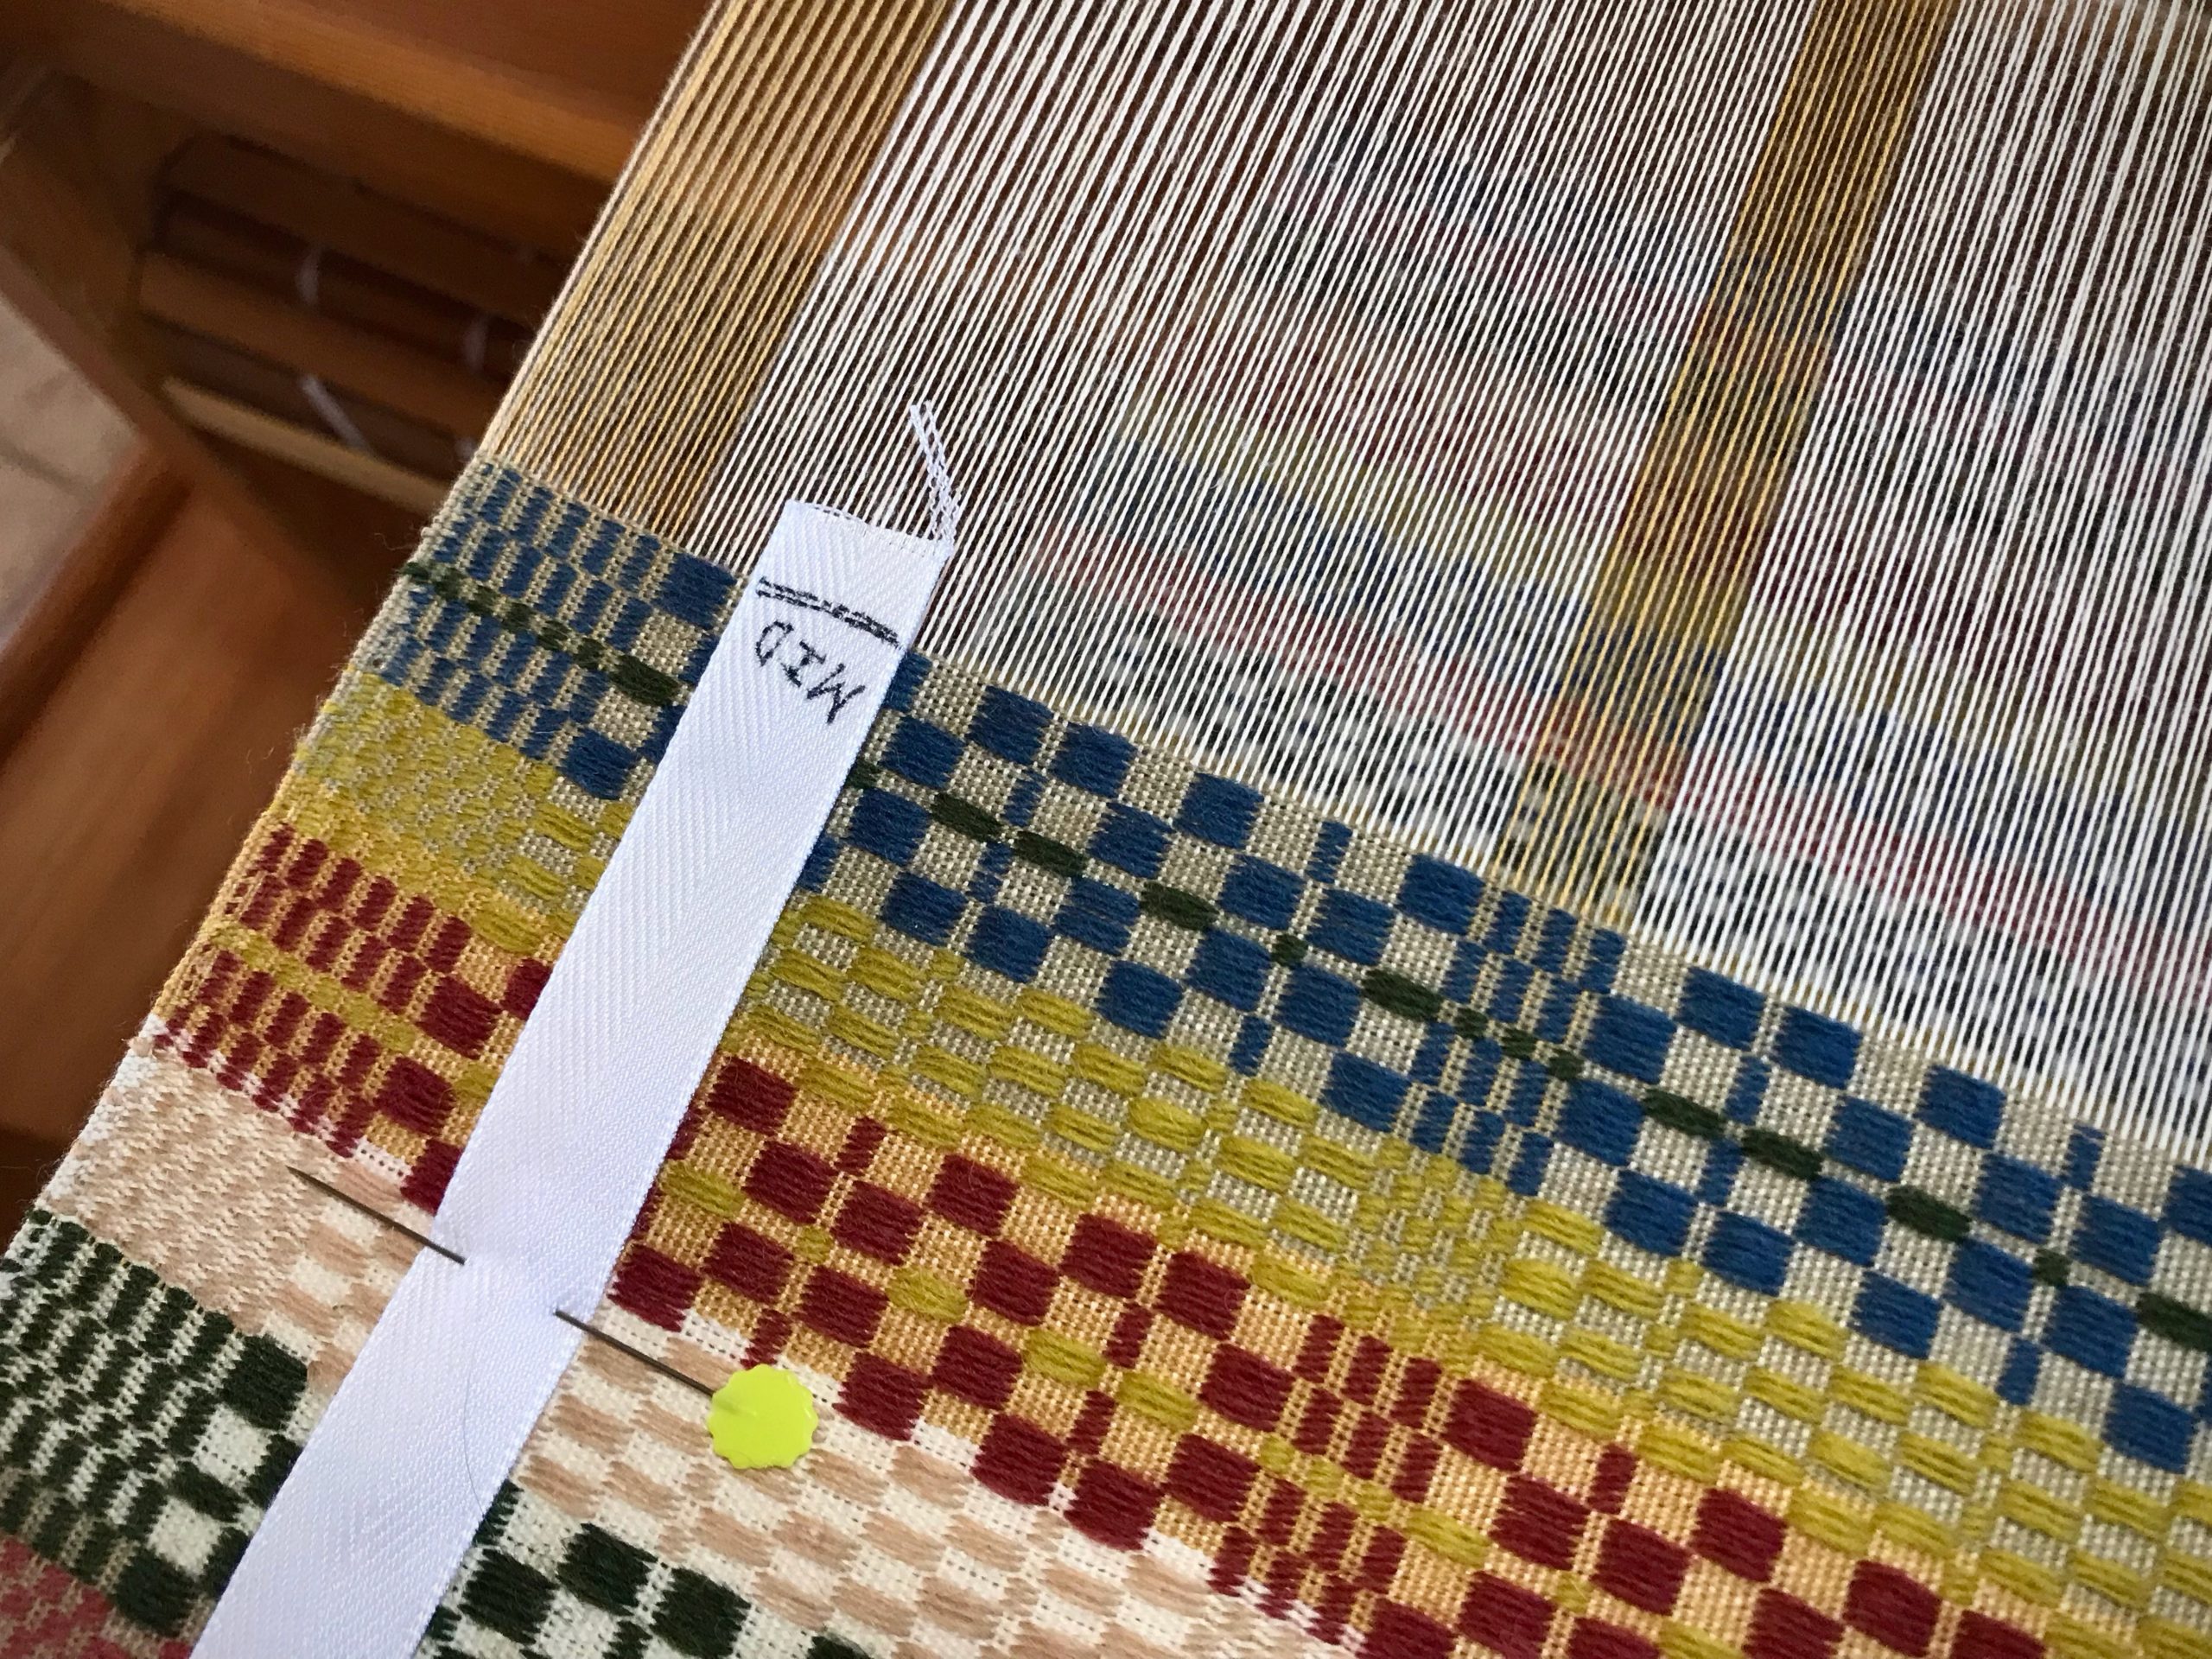
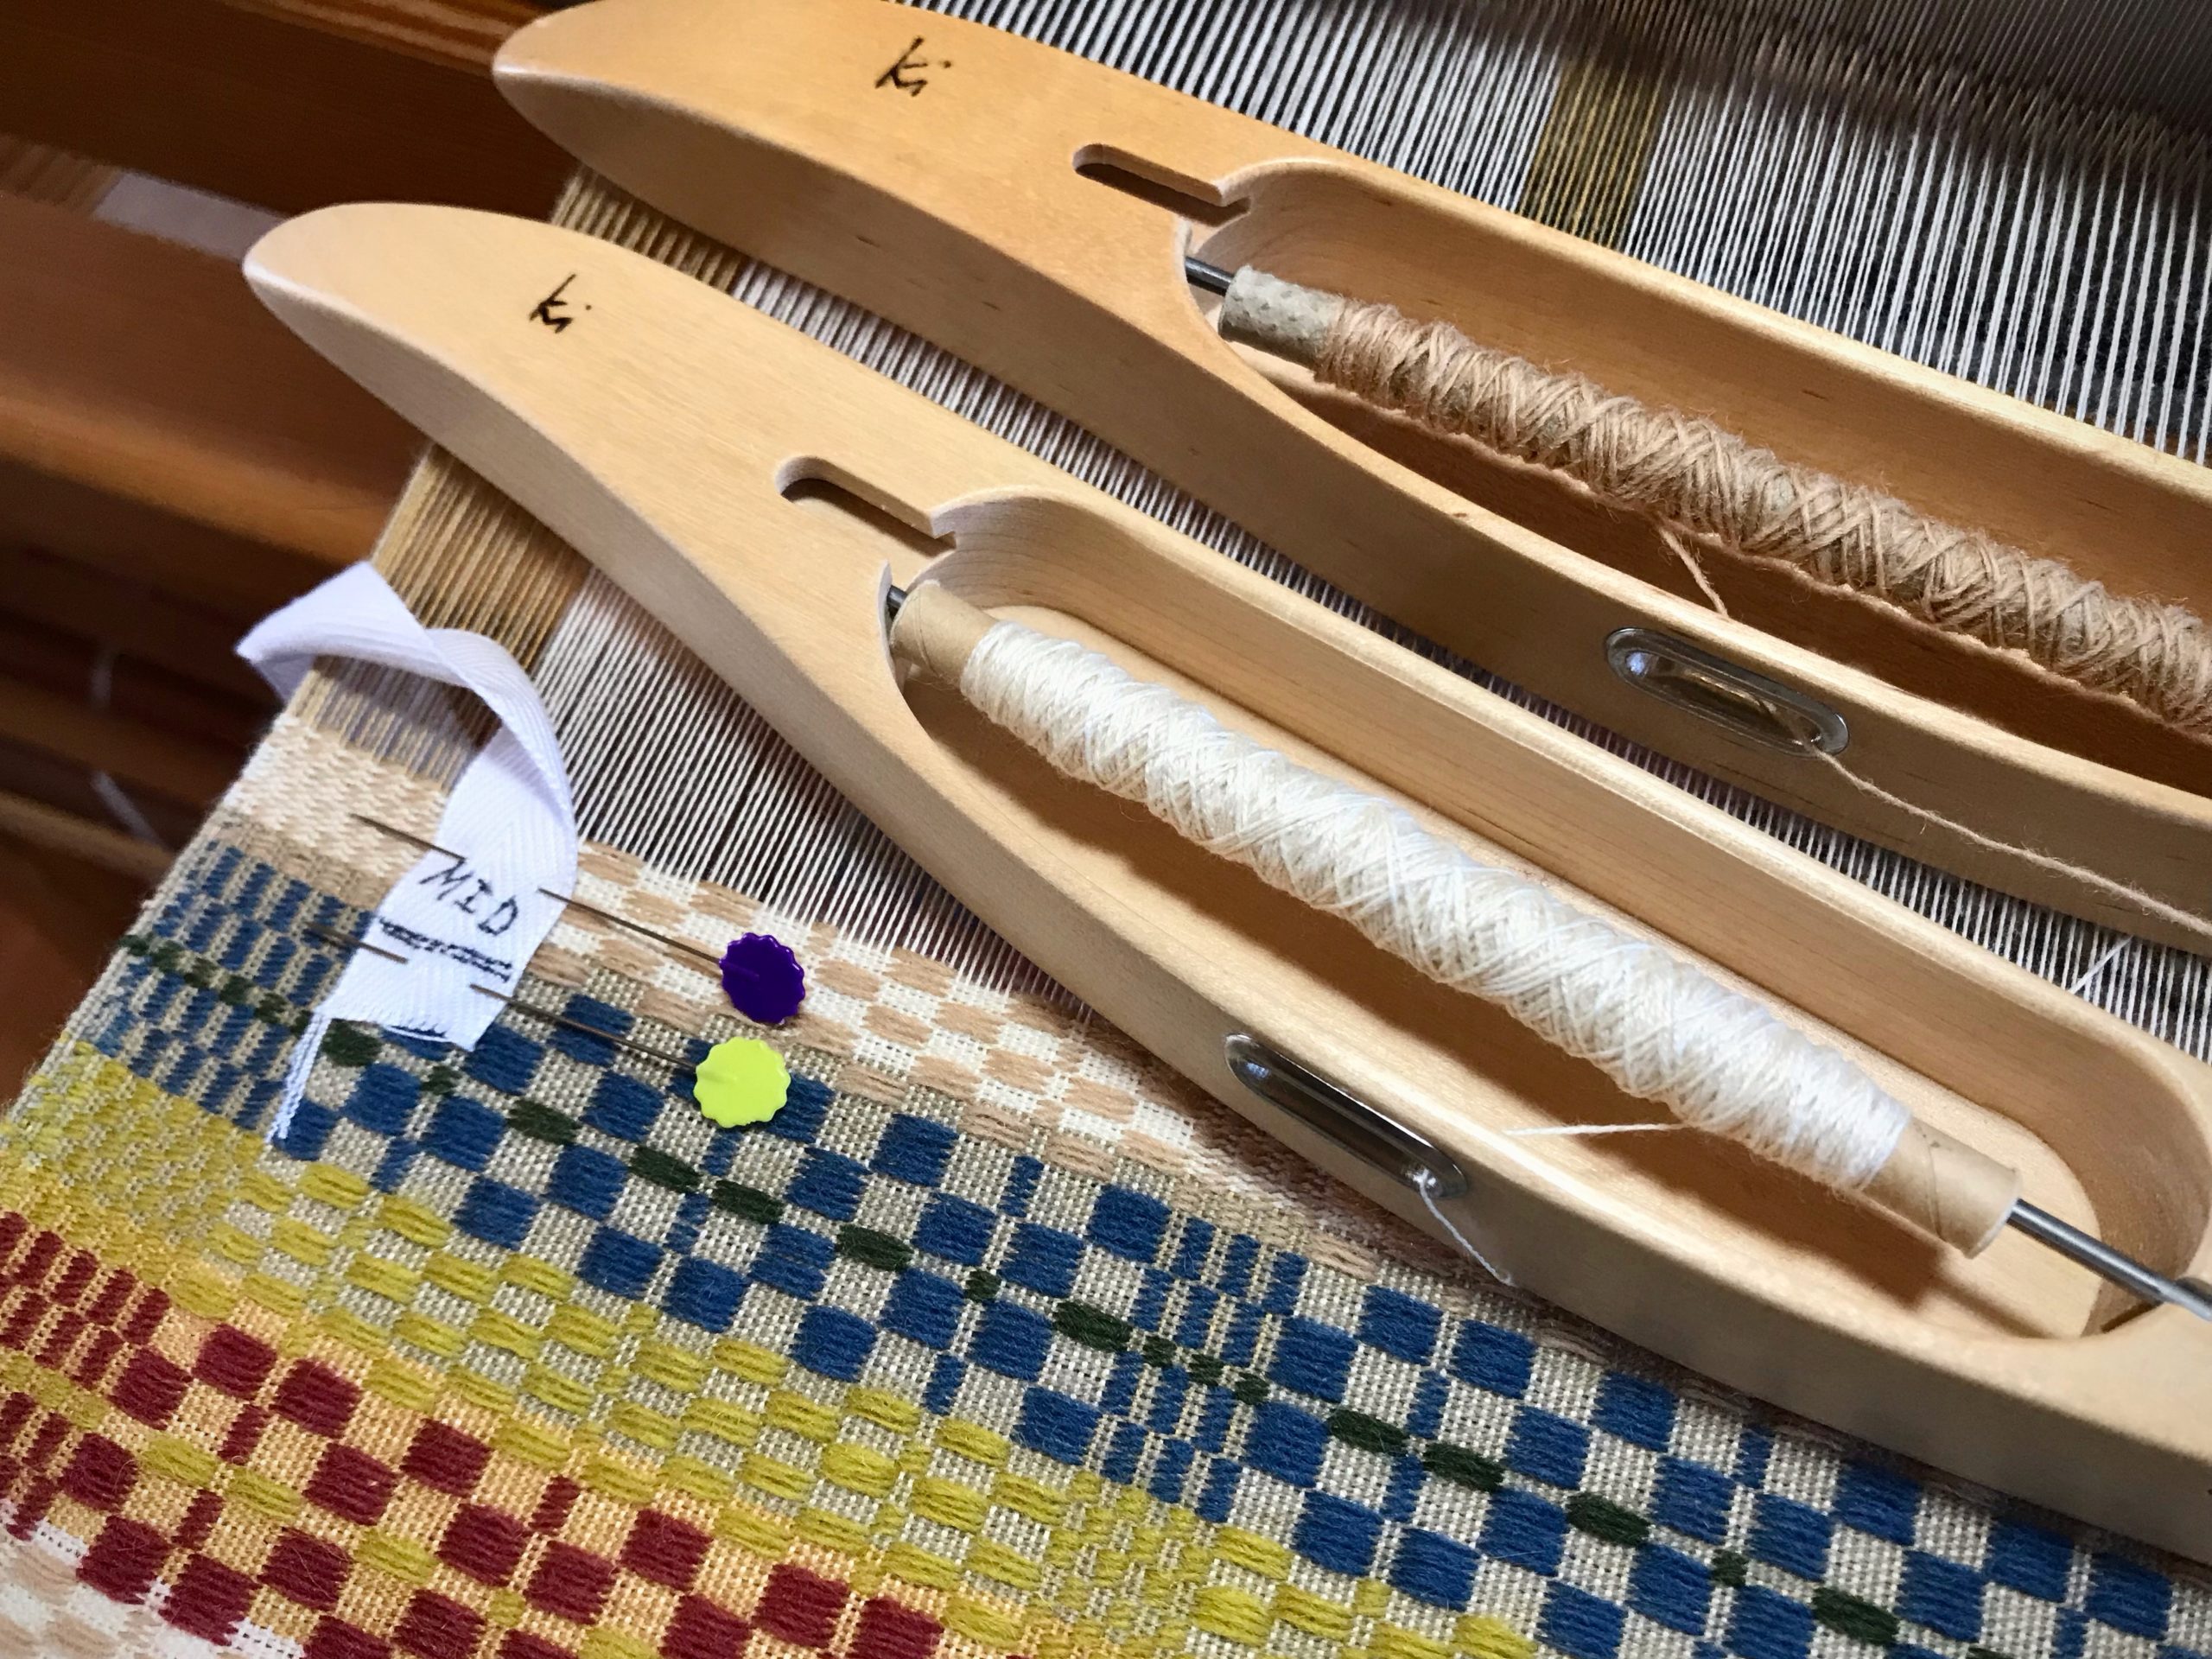
Find the middle of the tape. Draw a line and write “MID”.
Place the first line of the measurement tape directly over the beginning picks of the woven article.
Prepare a Half Measurement Tape
Do the same as for a full-length measurement tape, except divide the total length measurement in half. Draw a line on the tape at the halfway point. Write “MID” before the line.
Cut the tape about 2 cm after the MID line.
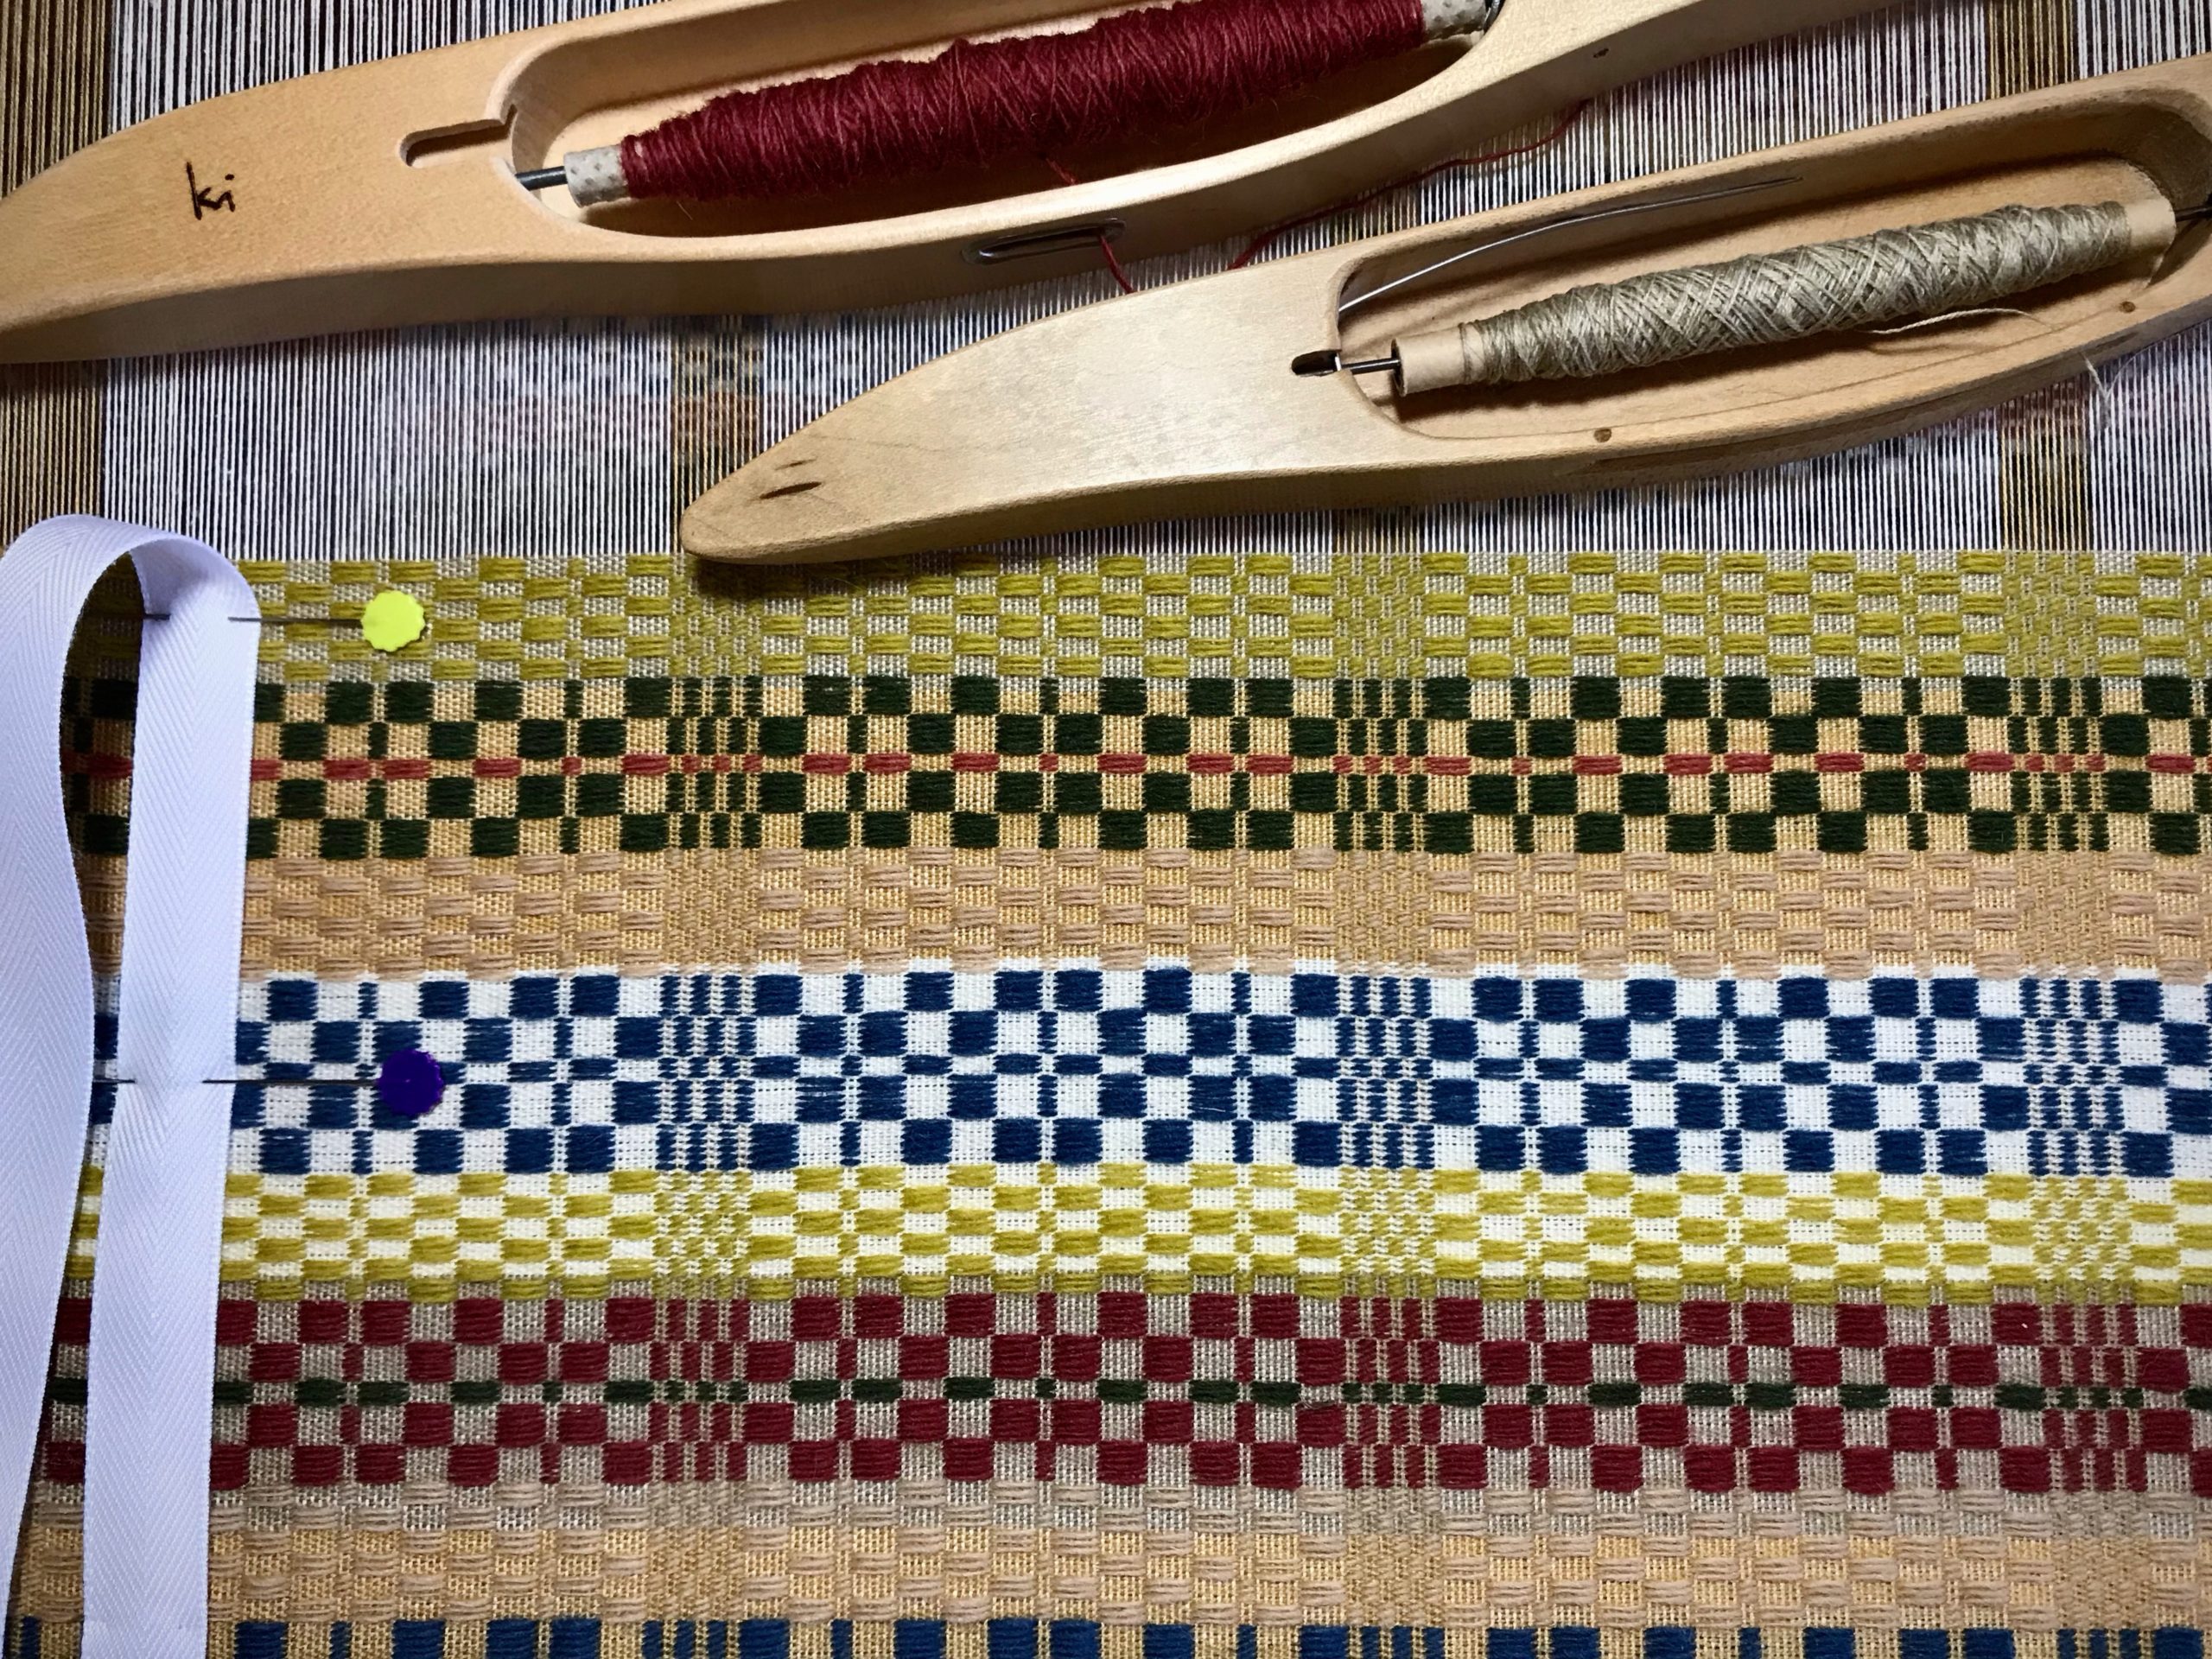
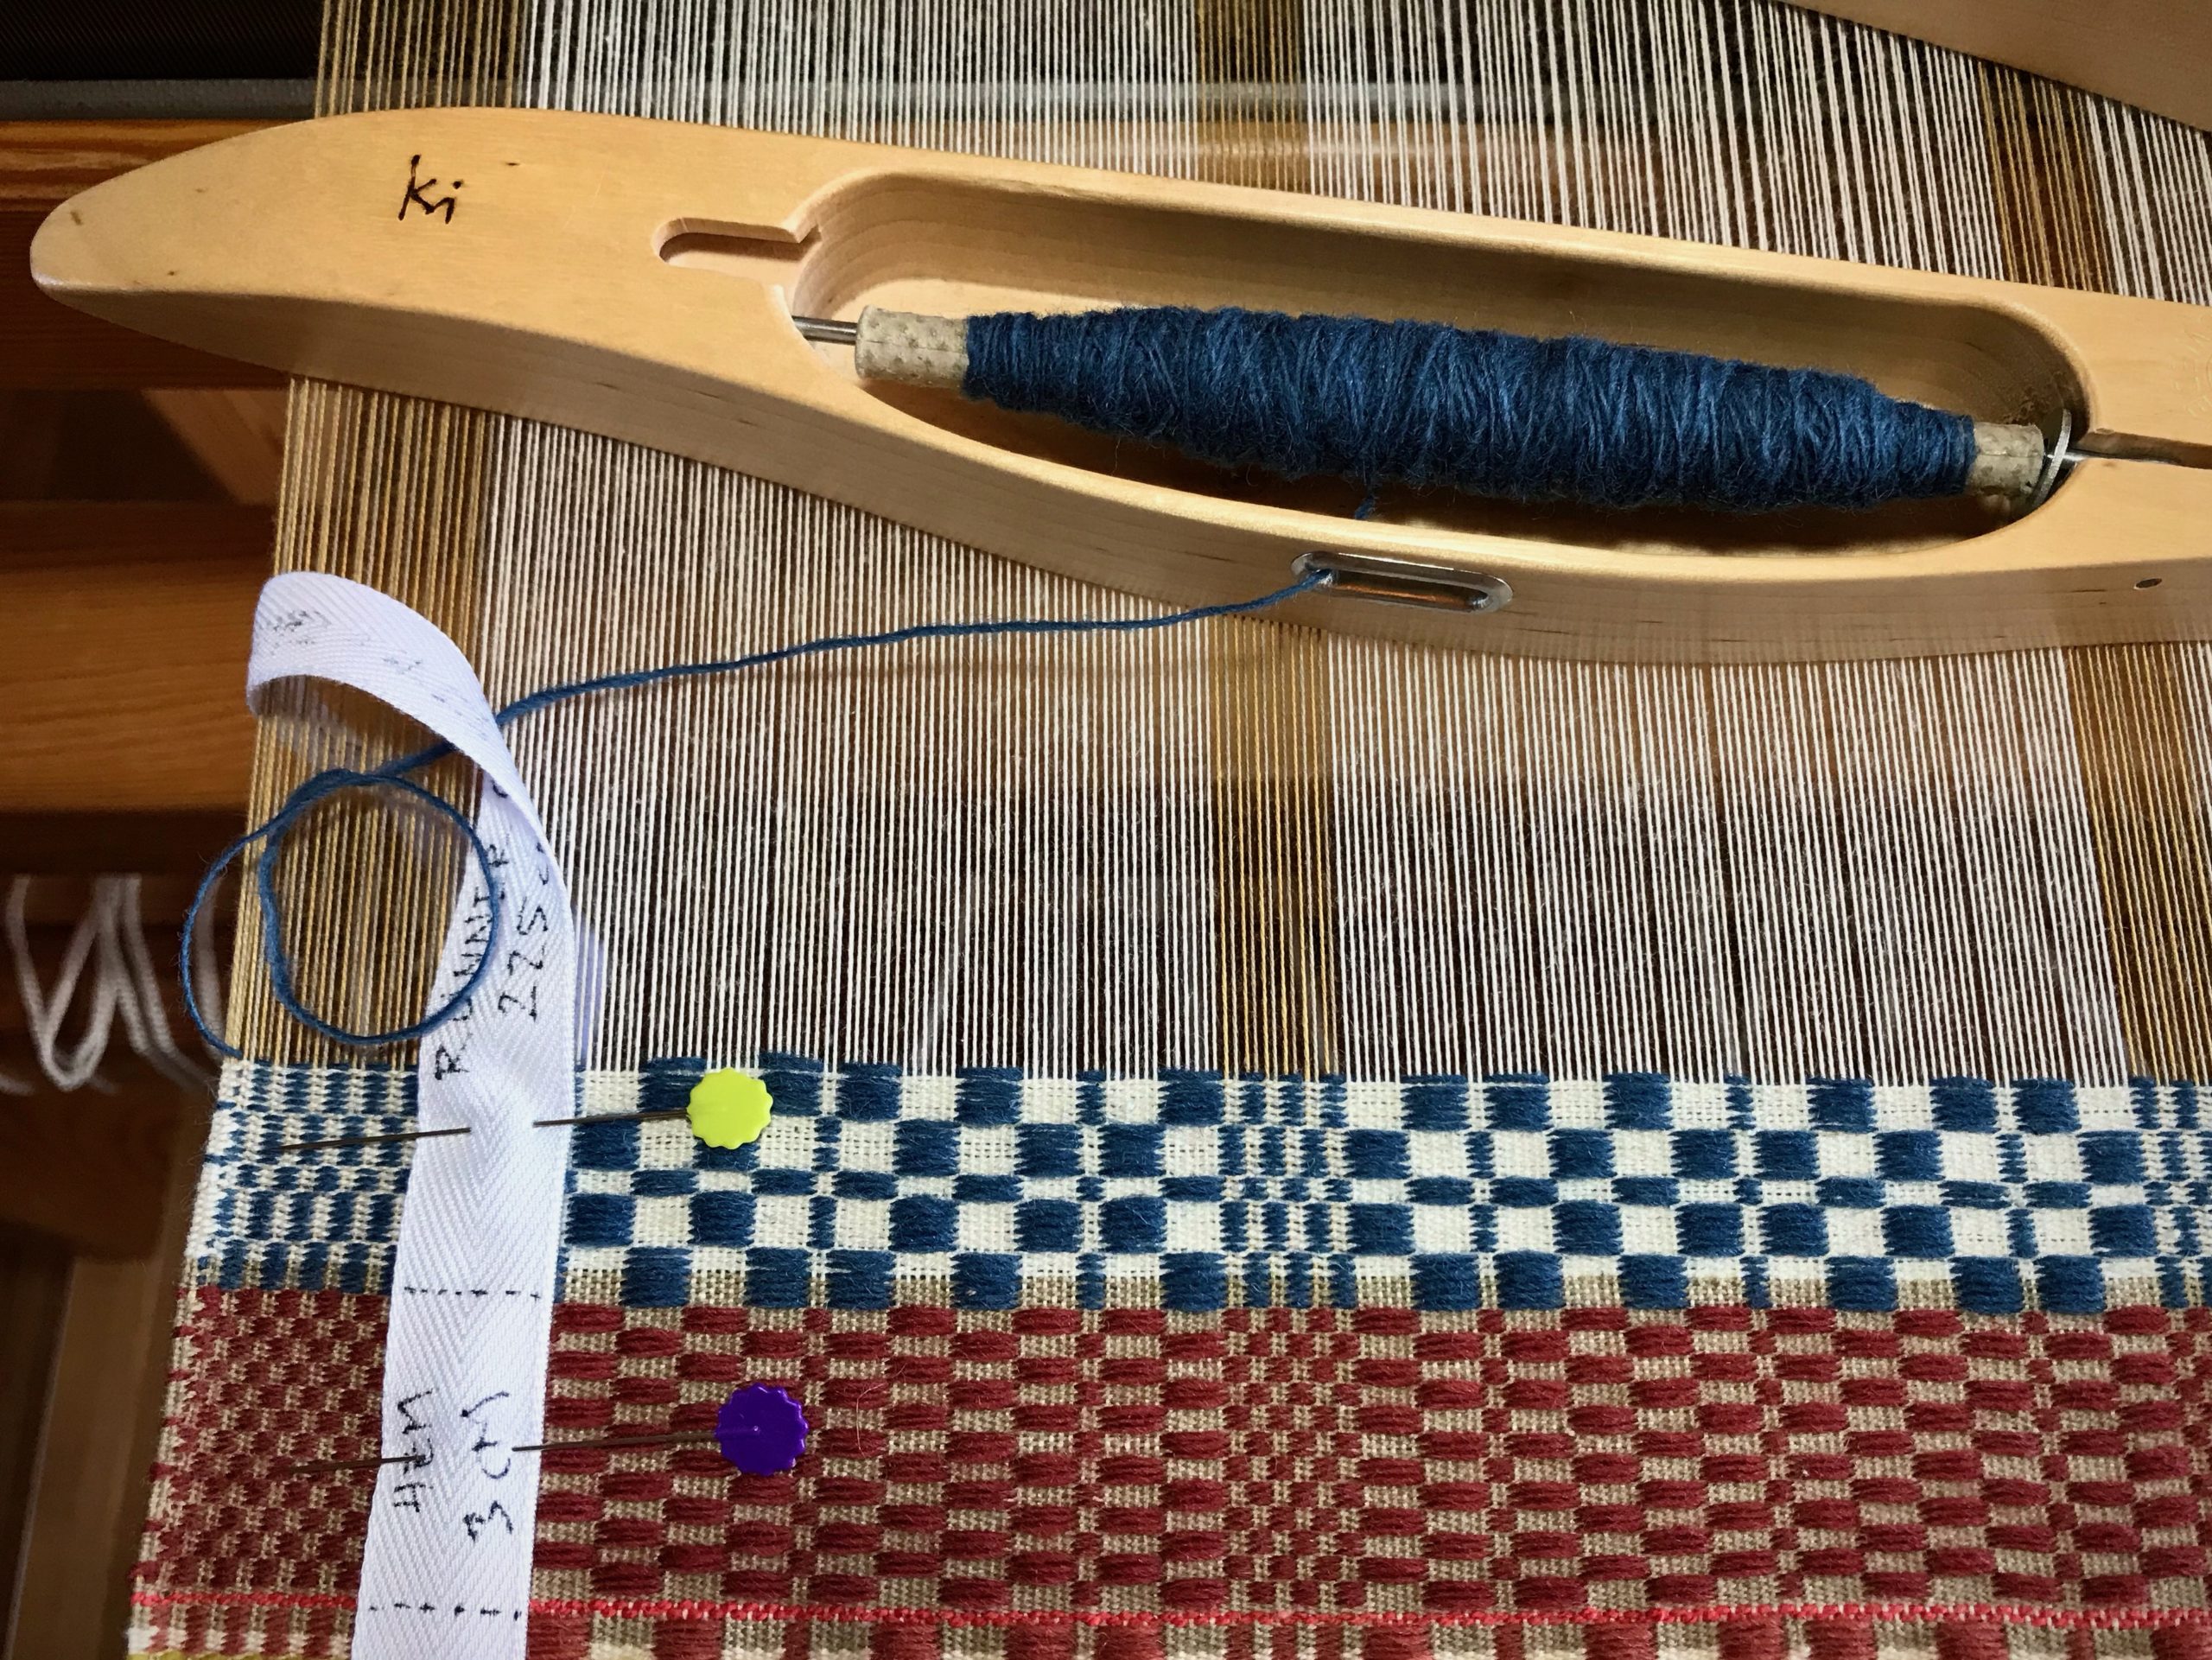
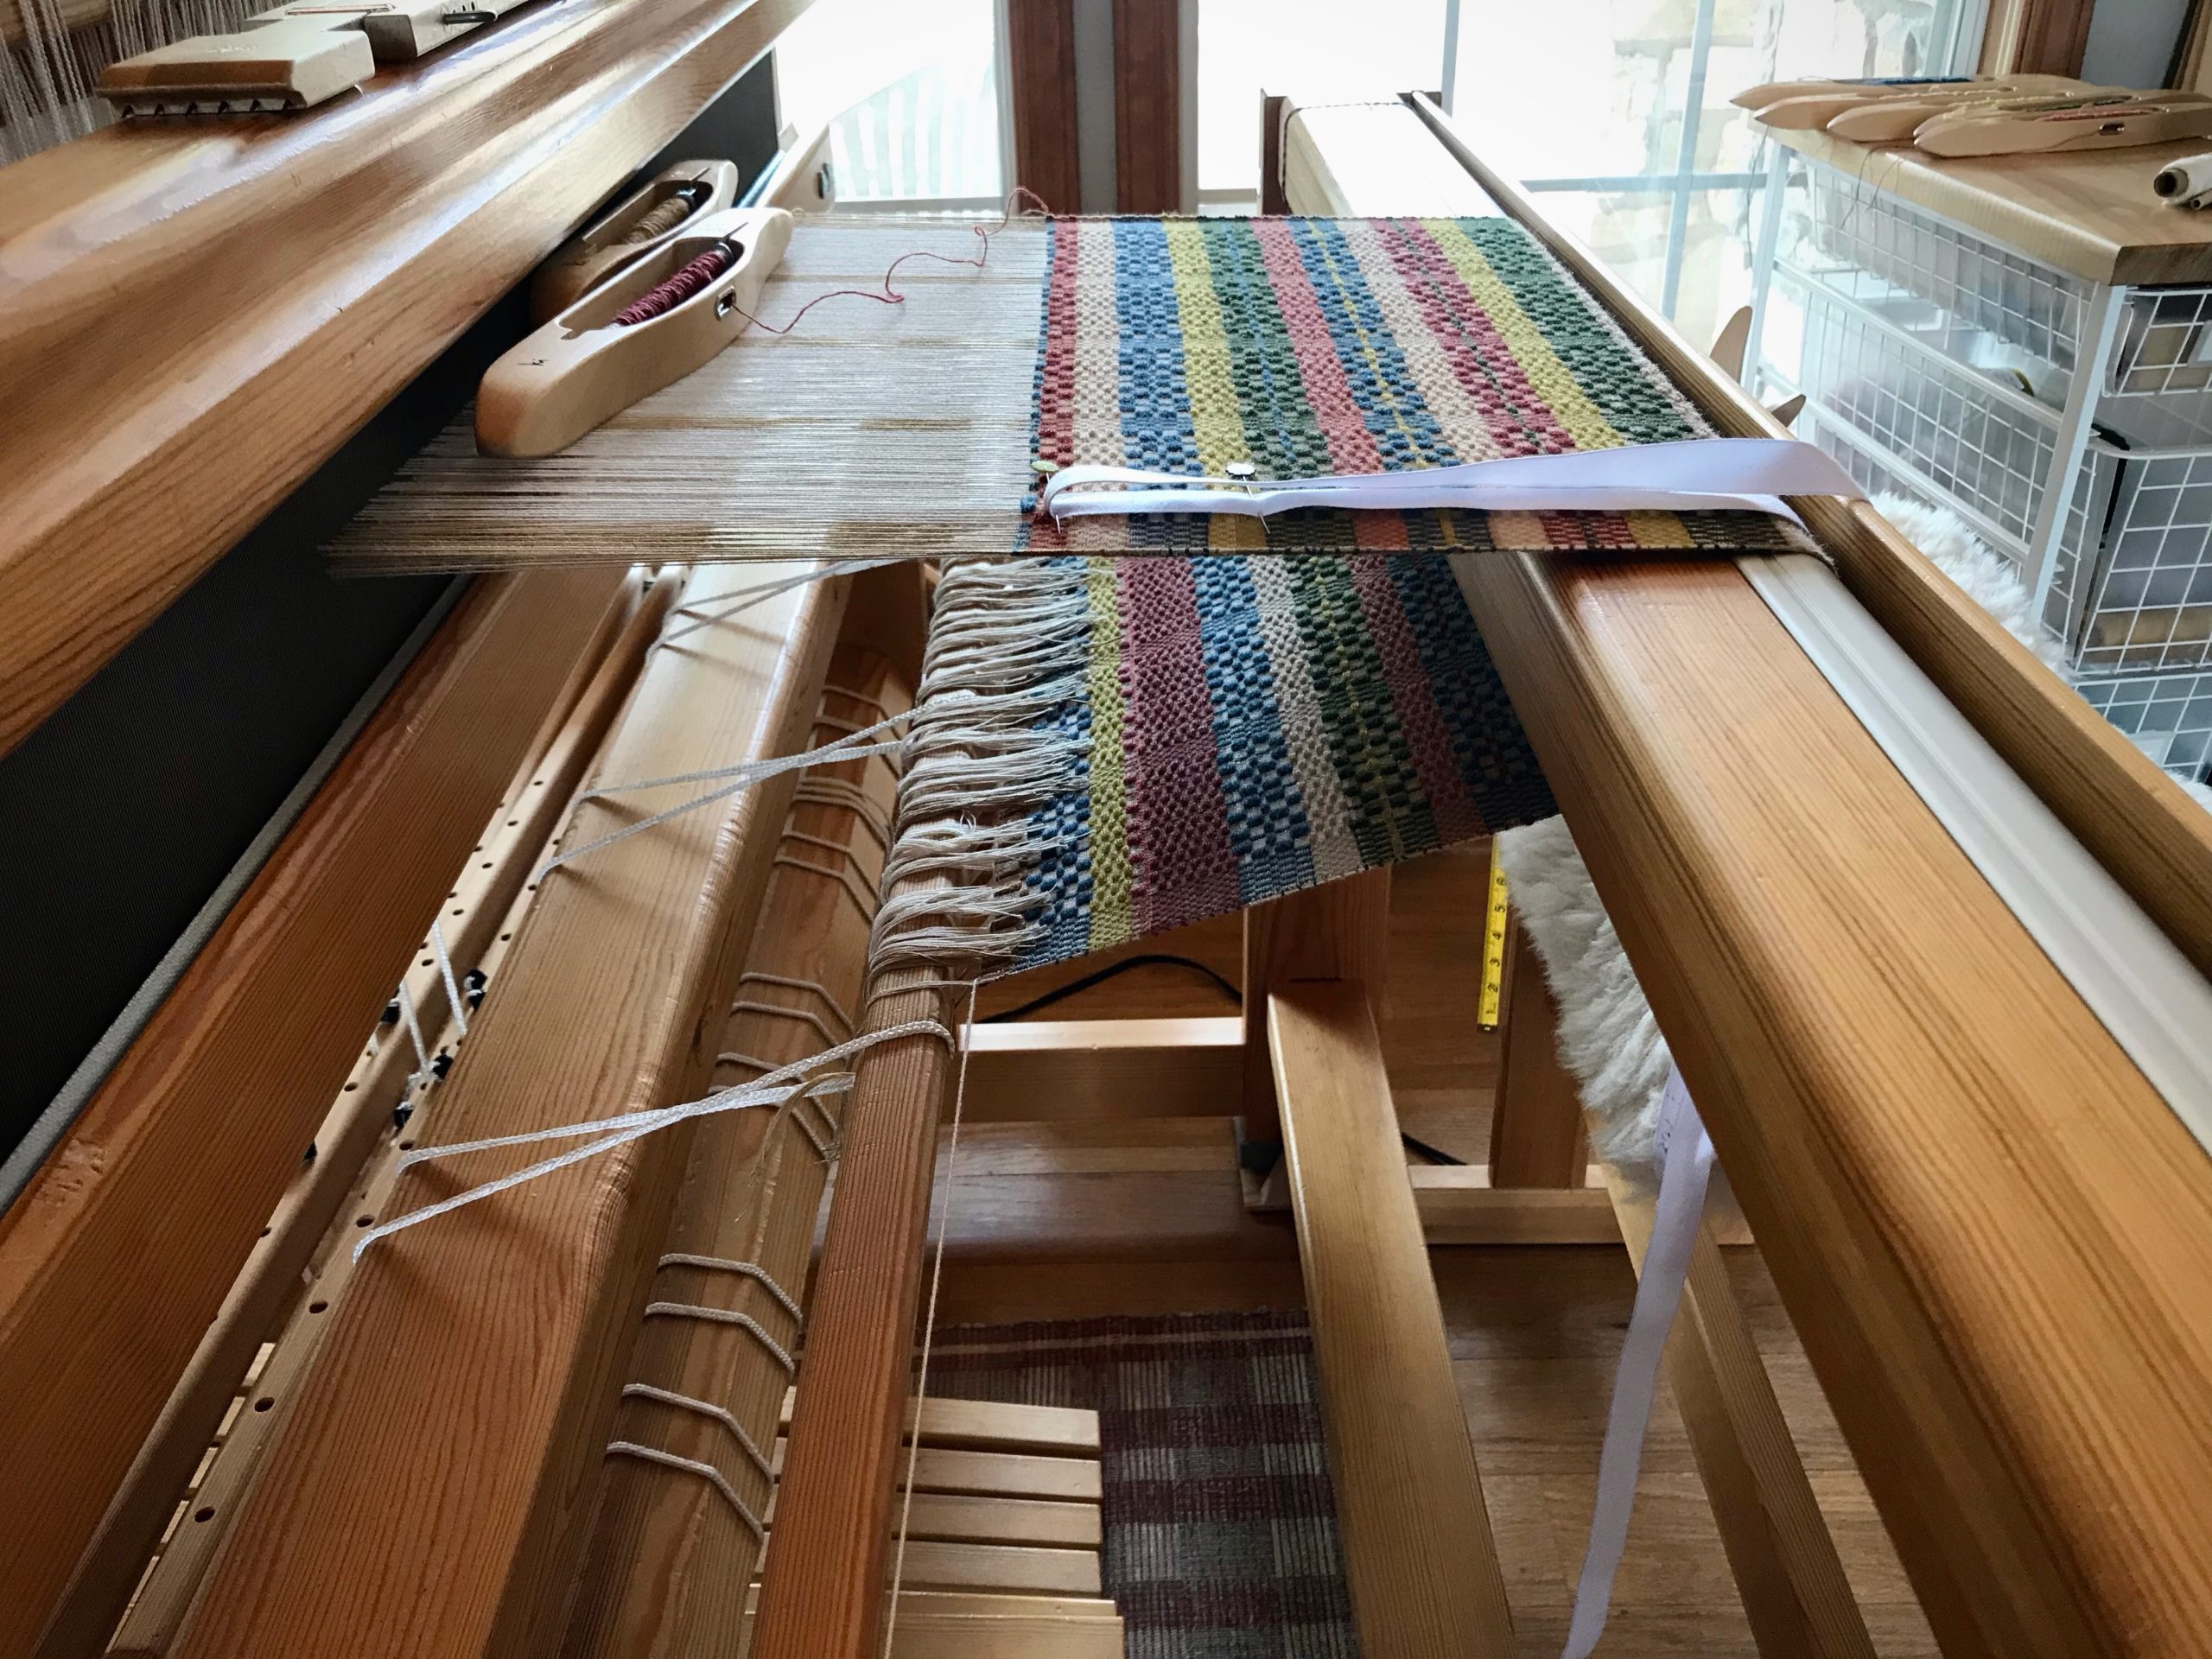
Weave and Measure (Always with the warp under tension)
Use two straight pins to pin the measurement tape to the weaving near one selvedge. Place the beginning line of the tape directly over the beginning of the woven article.
As weaving progresses, remove the pin closest to the breast beam. Leapfrog over the remaining pin. Reinsert the removed pin through the tape near the fell line.
Move one pin at a time. I usually move the pin right before I advance the warp.
If using a half measurement tape, weave past the MID line. Mark the spot with a pin. Remove the measurement tape. Turn the tape and pin into place to weave the second half.
When you reach the MID line on a half measurement tape, keep the measurement tape in place until you have woven a few more centimeters.Place one pin through the cloth, pointing to the MID line. Then, it’s safe to remove the measurement tape and turn it around. Go your merry way, weaving the second half of the Monksbelt runner, or whatever you have on your loom.
Here’s a demonstration of making and using a measurement tape: