Slay the dragon. Ride the sleigh. Sley the reed. To succeed in these challenges, you must be prepared, pay attention, and make sure you’re on the right track. Here, I’m going to focus on sleying the reed with success. (For dragon slaying and sleigh riding challenges, I won’t be of much help.) Don’t miss the new video below with tips for sleying the reed.
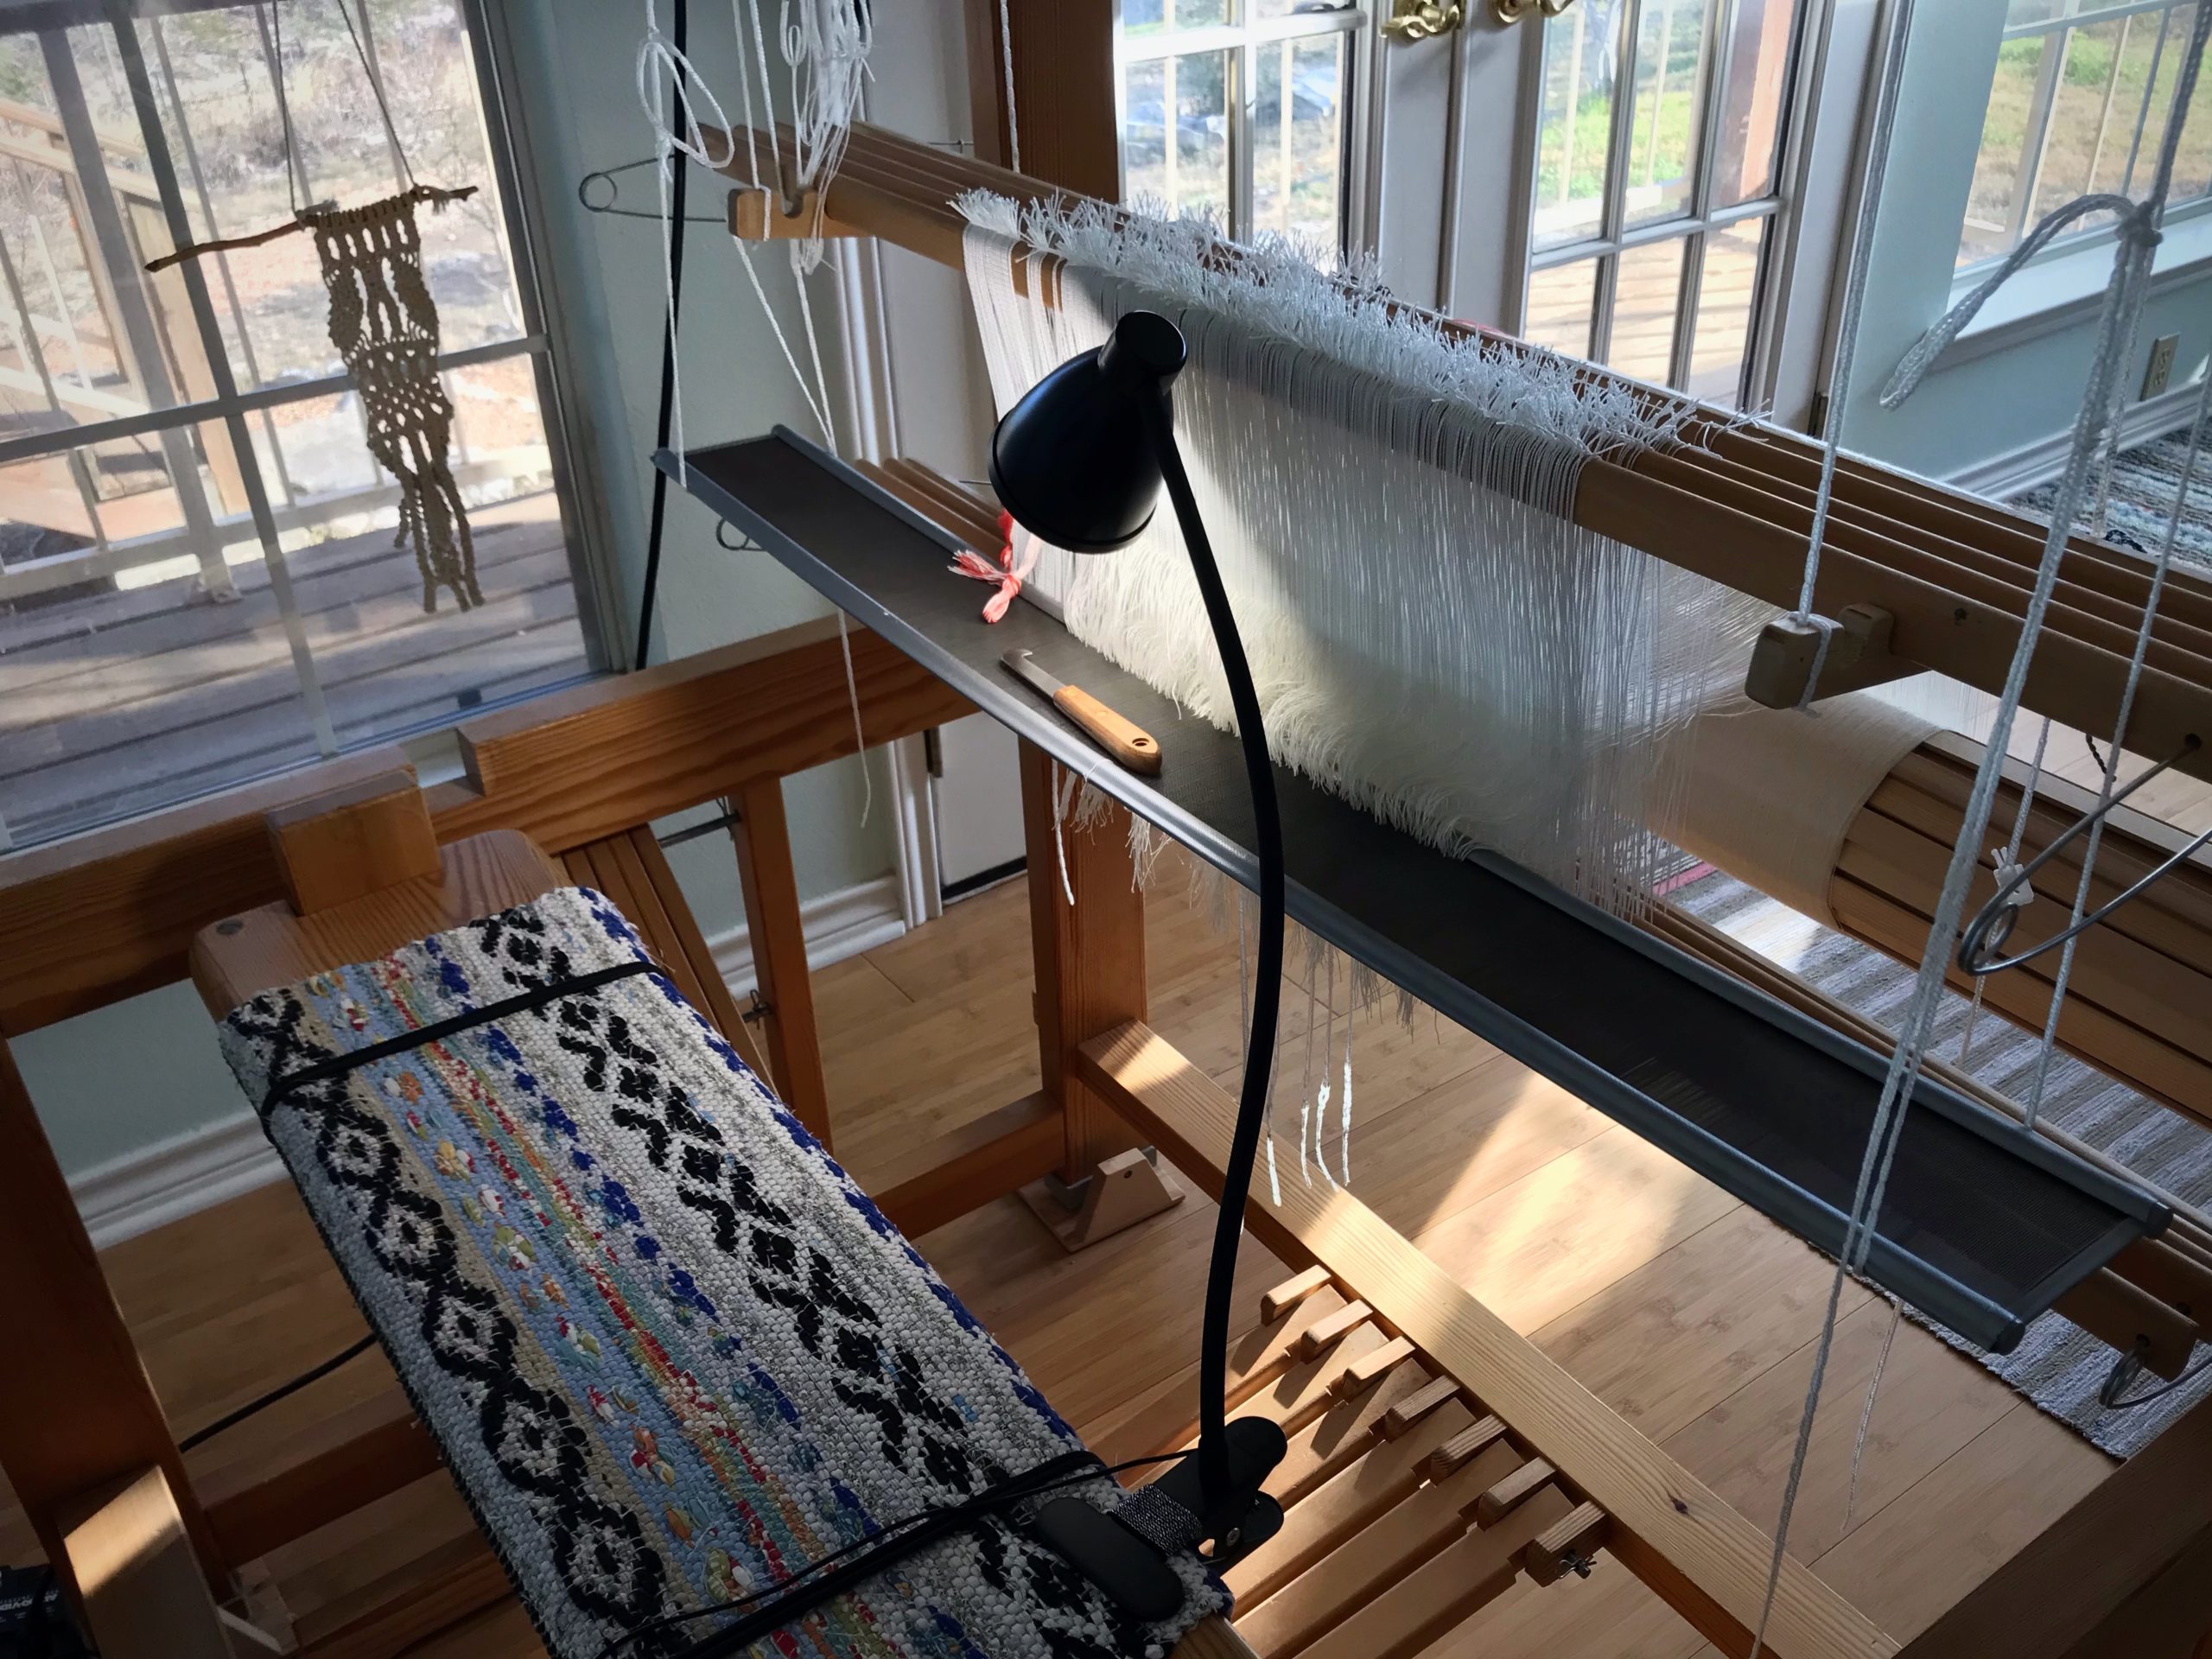
Shop light attached to top of loom provides good general lighting to all working areas of the loom. Smaller clip-on lamp provides directed light for detail work, like sleying a dense reed.Even in a room filled with natural light, a focused bright light on the work area relieves eye strain and reduces errors.
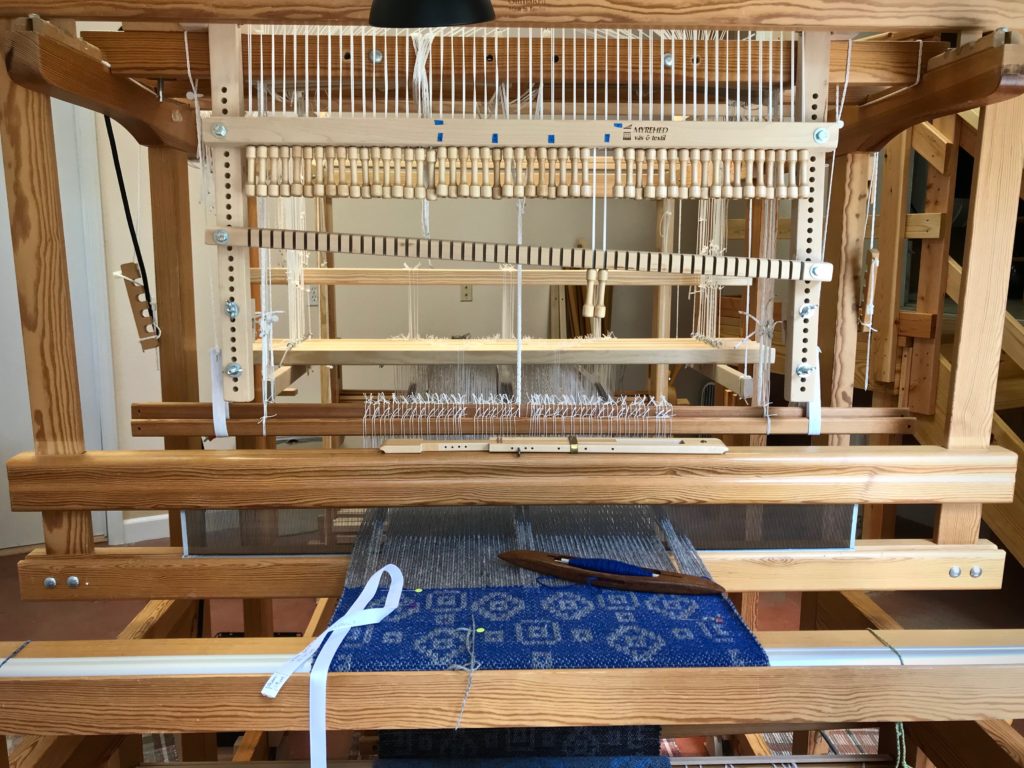
First, make sure you have good lighting. I have a snake arm shop light attached to the top of my loom. (See Tools Day: Loom Lighting for more about loom lighting.) I also have a smaller clip-on gooseneck LED lamp, clipped onto my loom bench, that illuminates my specific working area. With a fine-dent reed, like this metric 100/10- (~ imperial 25-) dent reed, focused lighting makes a difference. It means seeing the dents instead of guessing.
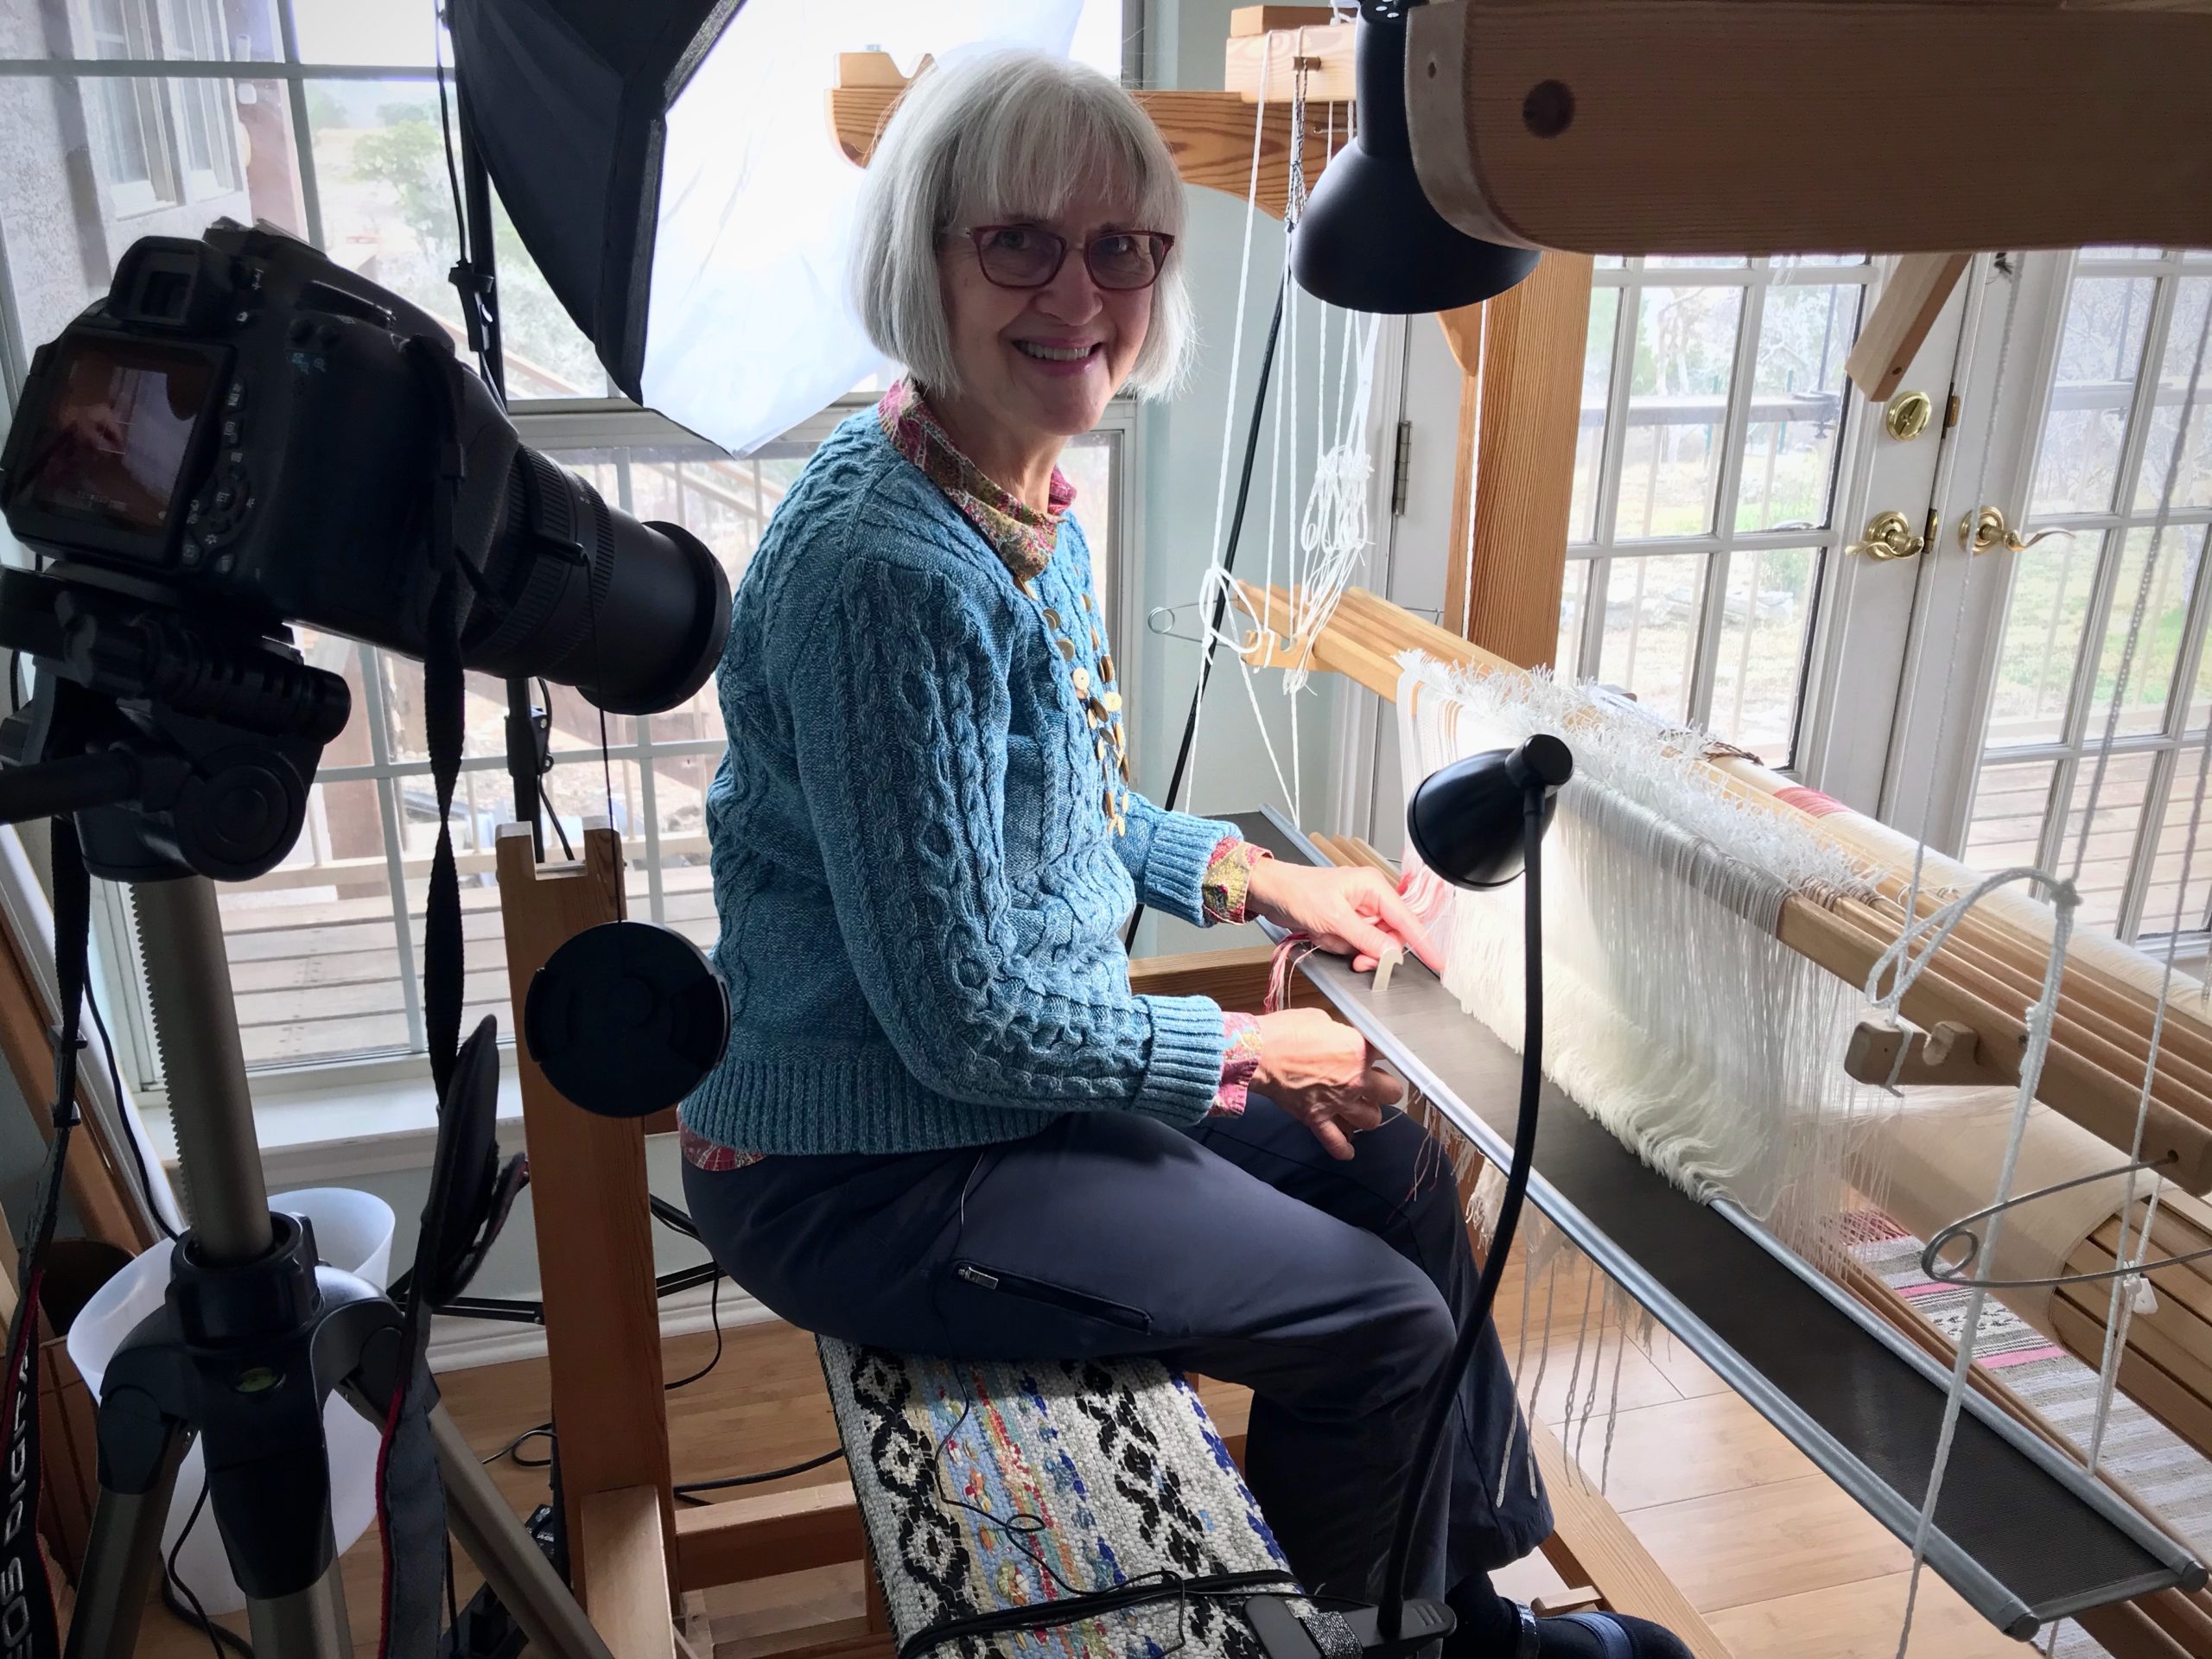
Making a new video. Steve does the filming and I do the editing.
In this video, I share some tips for sleying the reed, with checkpoints to ensure success. (See Tools Day: Click Test for more about the “click test” mentioned in the video.)
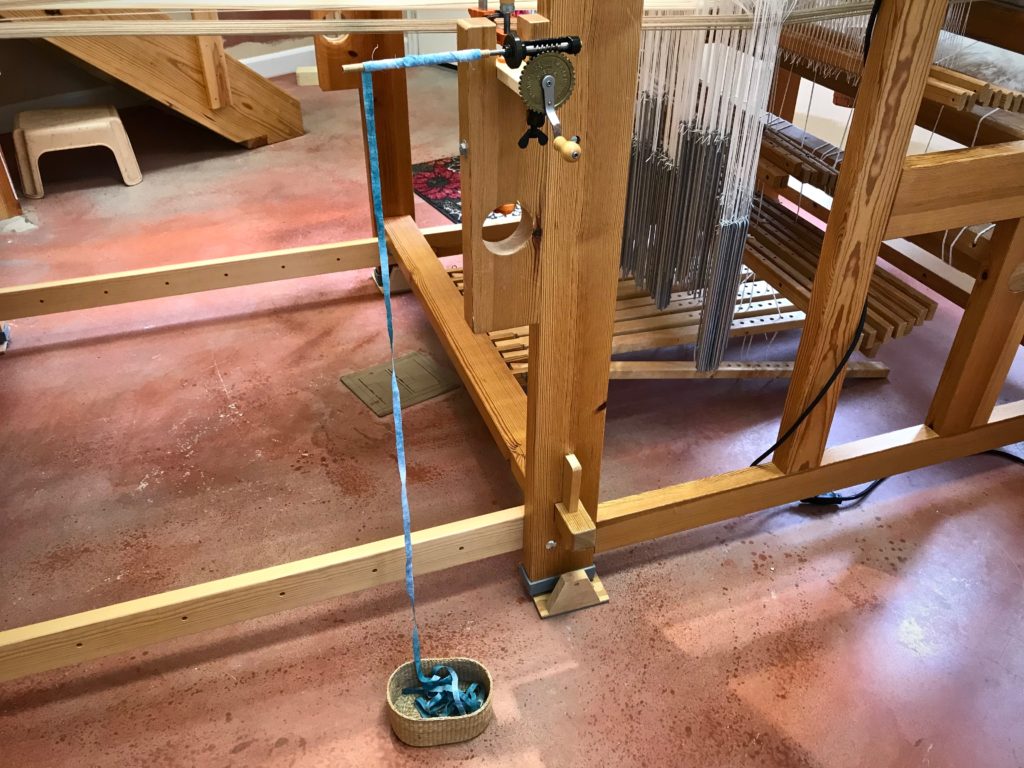
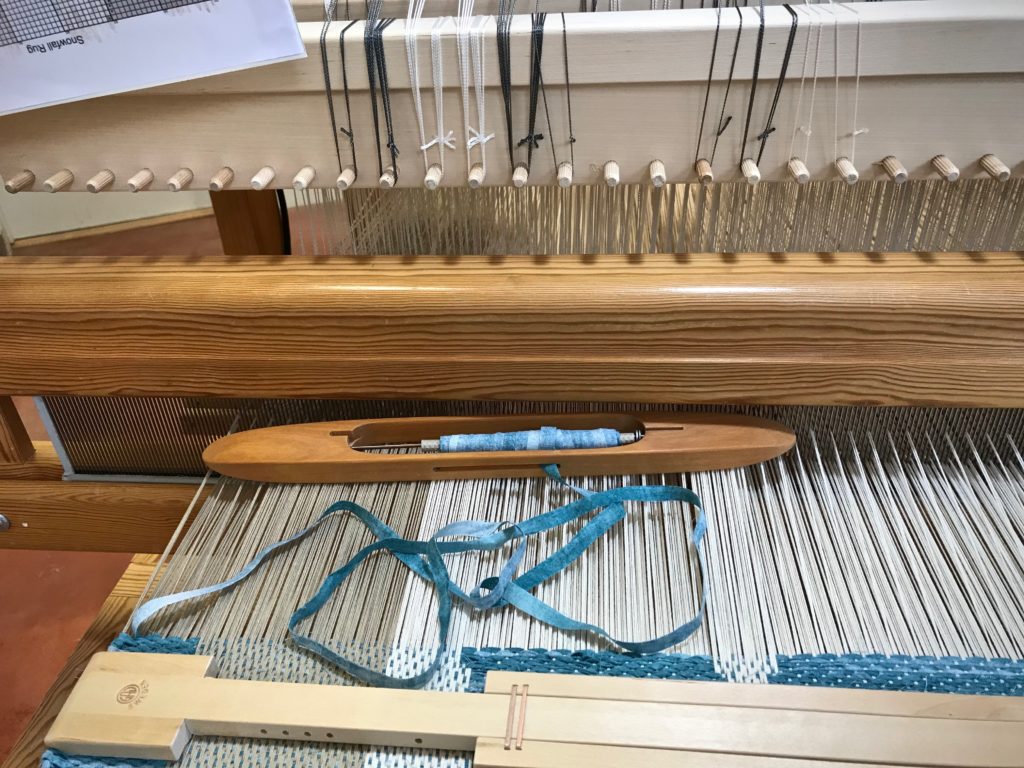
Wind very narrow fabric strips on quills and put them in a boat shuttle. It’s efficient. It’s faster to wind a quill than to load fabric on a ski shuttle. Plus, I like the advantage of sending a boat shuttle across rather than a ski shuttle. This rag rug on the drawloom has fabric strips that are only one centimeter (~3/8”) wide, instead of the usual two-centimeter-wide (~3/4”) strips for an ordinary rag rug. Grab your boat shuttle and pay attention to a few simple tips. Your very narrow fabric strips will be woven up in no time.
Tips for Using a Boat Shuttle to Weave Very Narrow Fabric Strips
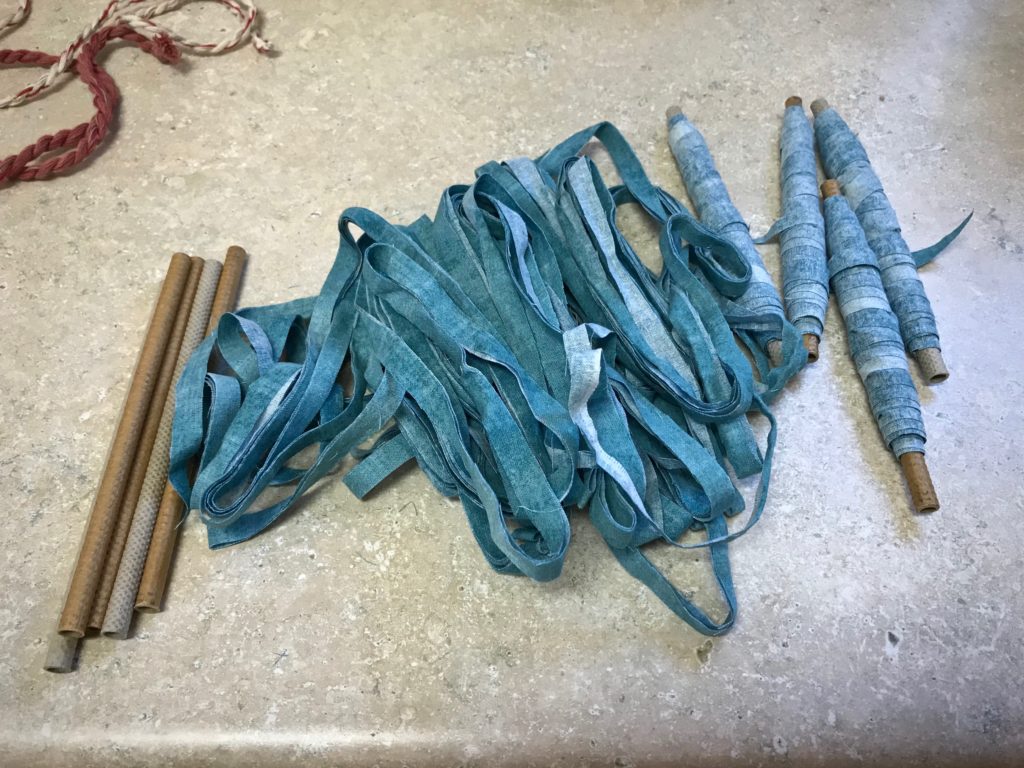
Use fabric that has minimal fraying at the edges. Trim off any long threads. Loose dangling threads that are long enough to wind themselves on the quill will make you wish you had used a ski shuttle.
Wind the fabric with the right side down. Then, when the quill unrolls, the right side will be facing up.
Swedish bobbin winder is clamped to the side of the loom. A five-yard fabric strip is wound onto a quill. The right side of the fabric is against the quill.
Handle the wound quill as little as possible to prevent fraying the fabric edges. Simply wrap the tail end of the fabric strip around the filled quill. Do not wrap the end into a slip knot around the quill because the fabric will fray as you release the knot.
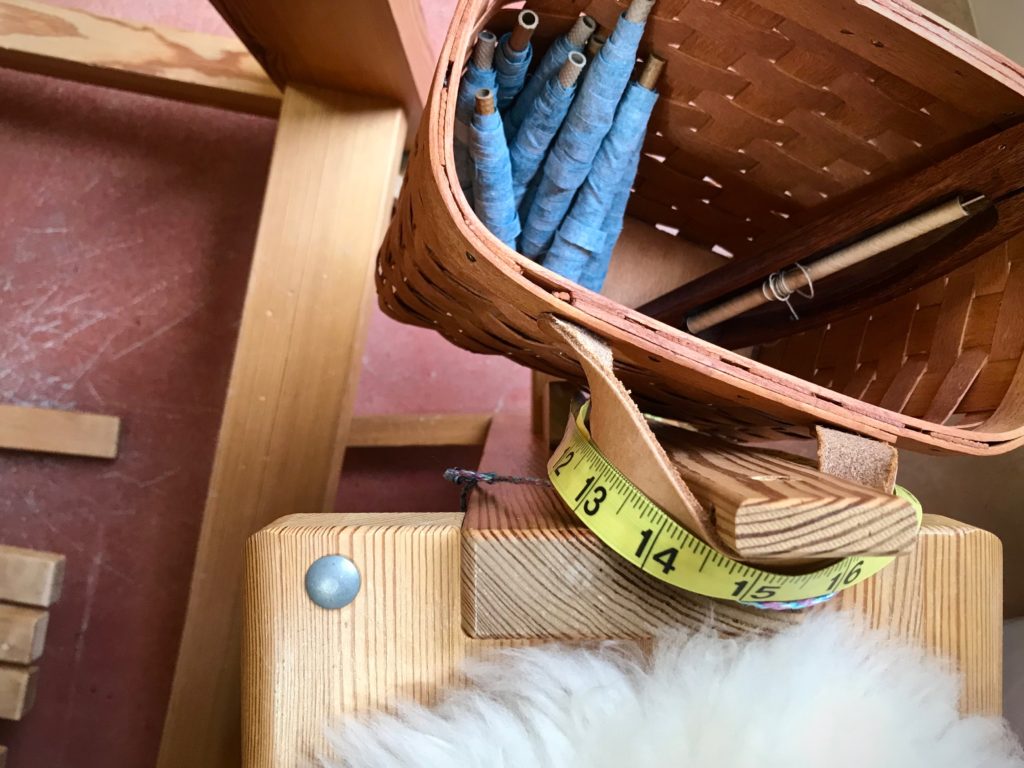
One long fabric strip per quill. Fabric is cut 1 cm (3/8″) wide.One fabric-filled quill covers a little more than one unit of weaving (4 picks). I keep a dozen filled quills in the basket on my loom bench so I can keep weaving as long as possible.
Unwind enough weft for the pickbefore you throw the shuttle. Pull the weft out straight from the quill. When a quill unwinds in the shed, the weft comes off at an angle. And as such, if there are any loose threads at the edges of the fabric strips, the threads will wind themselves on the quill and bind it up. And you will wish you had used a ski shuttle.
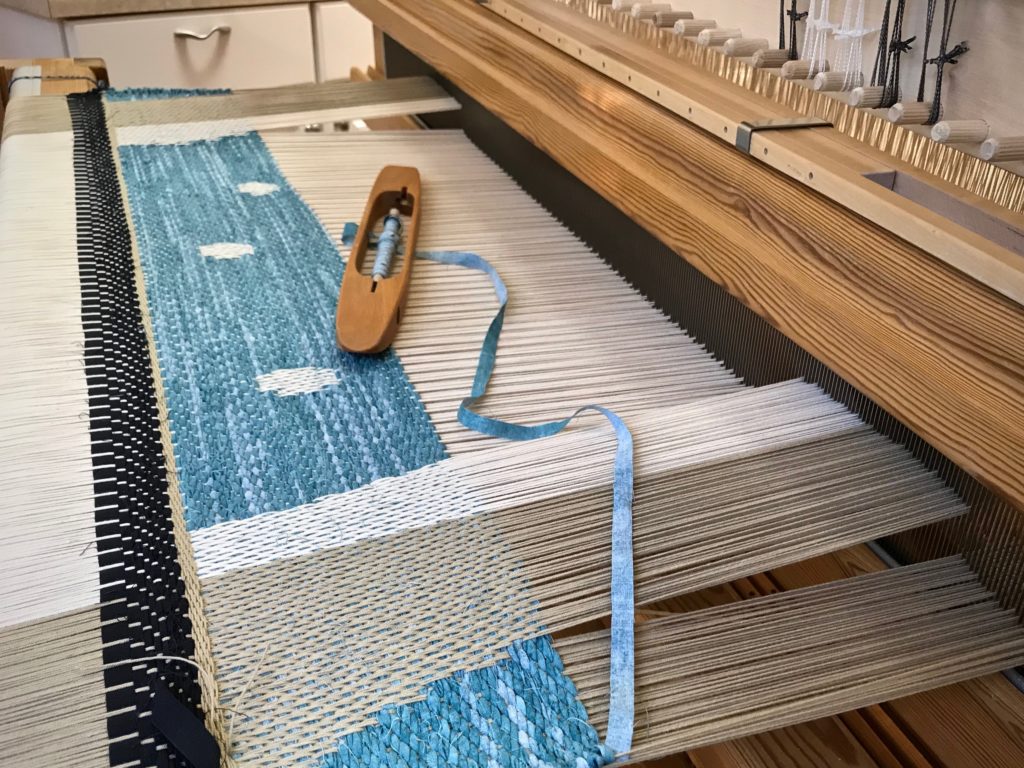
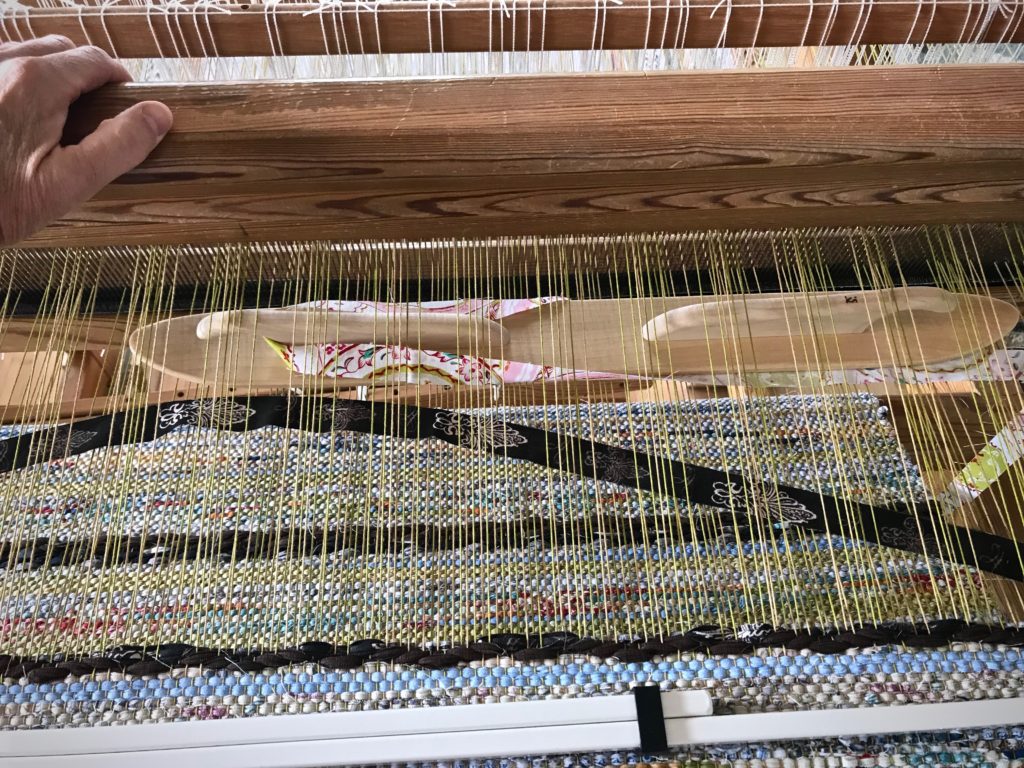
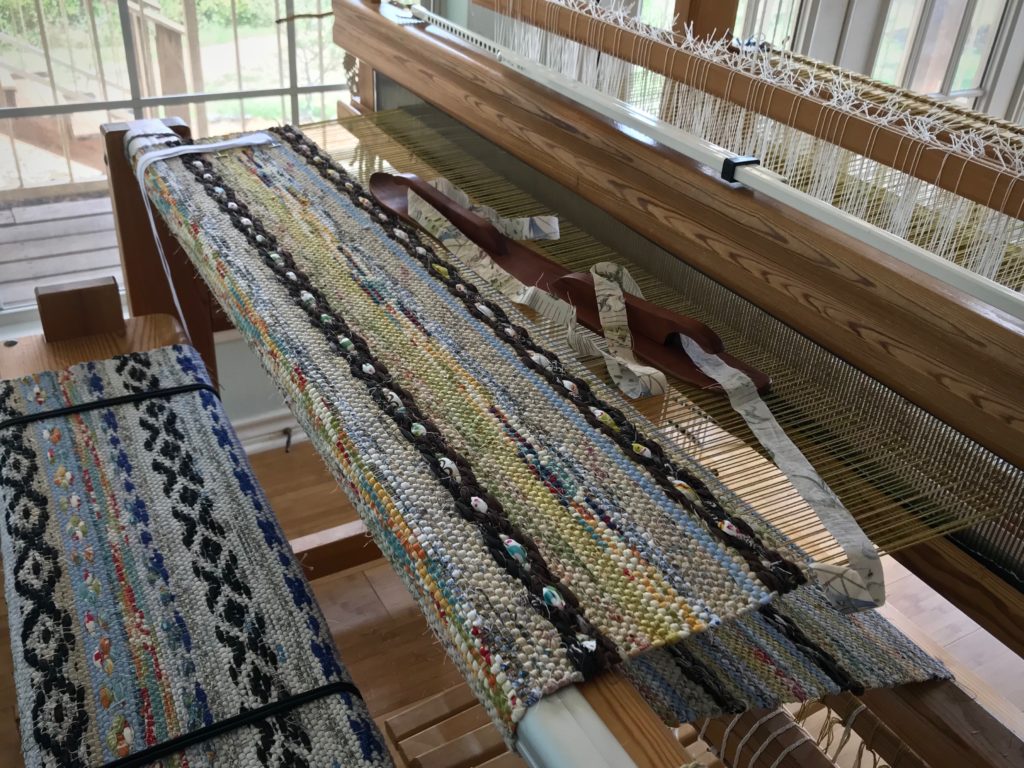
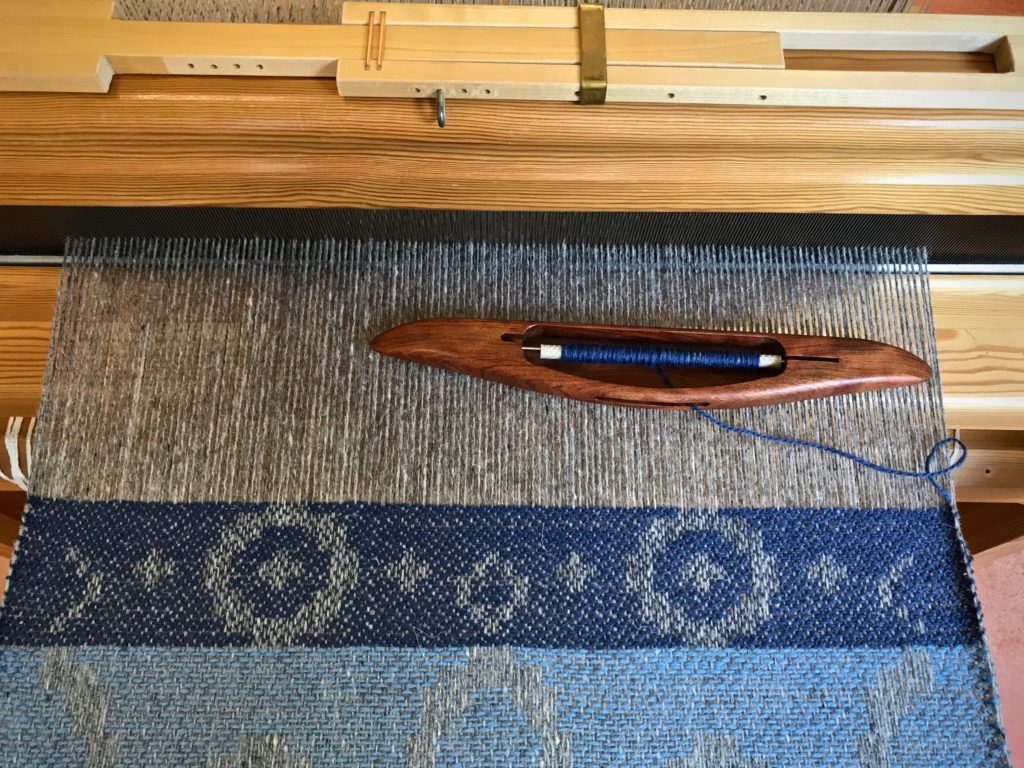
Folke Samuelson Damask Shuttle has a low profile, well-suited for the smaller sheds of the drawloom. Fabric is unrolled from the shuttle prior to the next pick.Drawloom rag rug is well underway. Single unit drawcords are pulled and held in place on the pegs above the beater. Design is Trasmatta Snöfall (Snowfall Rag Rug) by Kerstin Åsling-Sundberg, from Damast, edited by Lillemor Johansson.
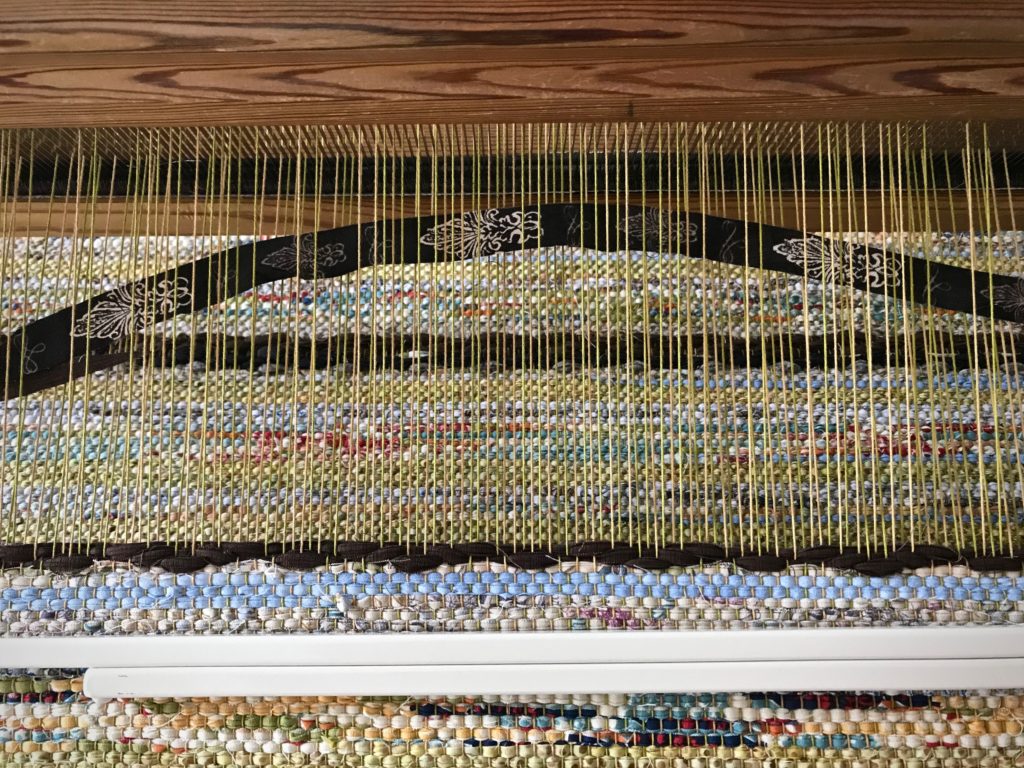
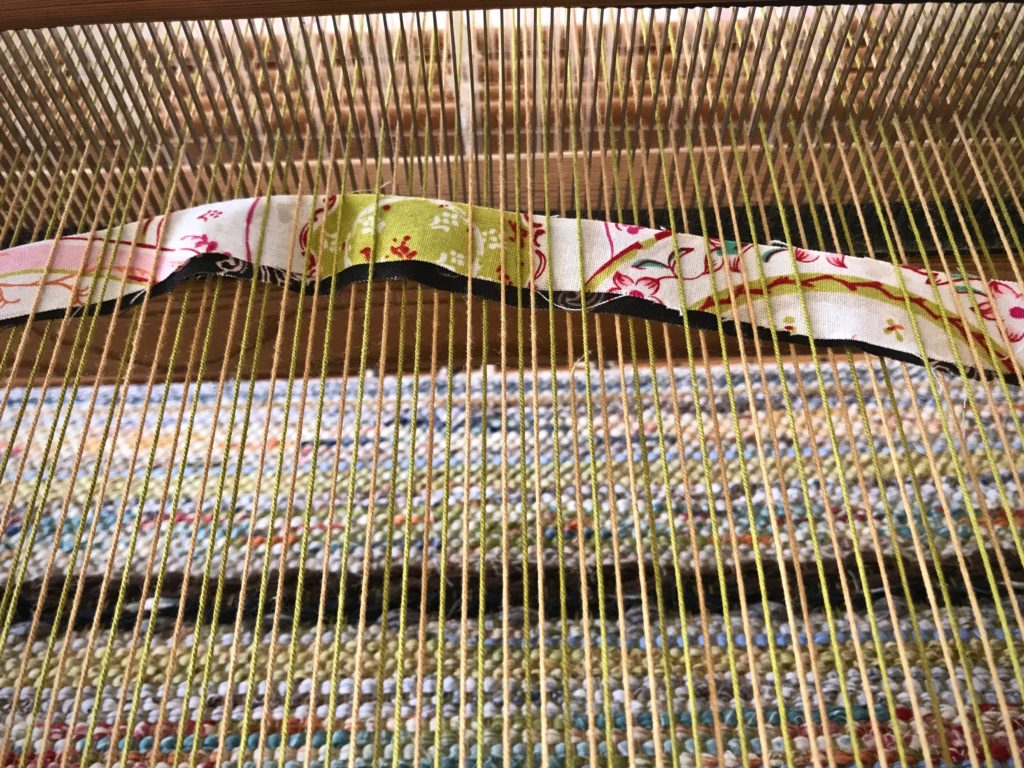
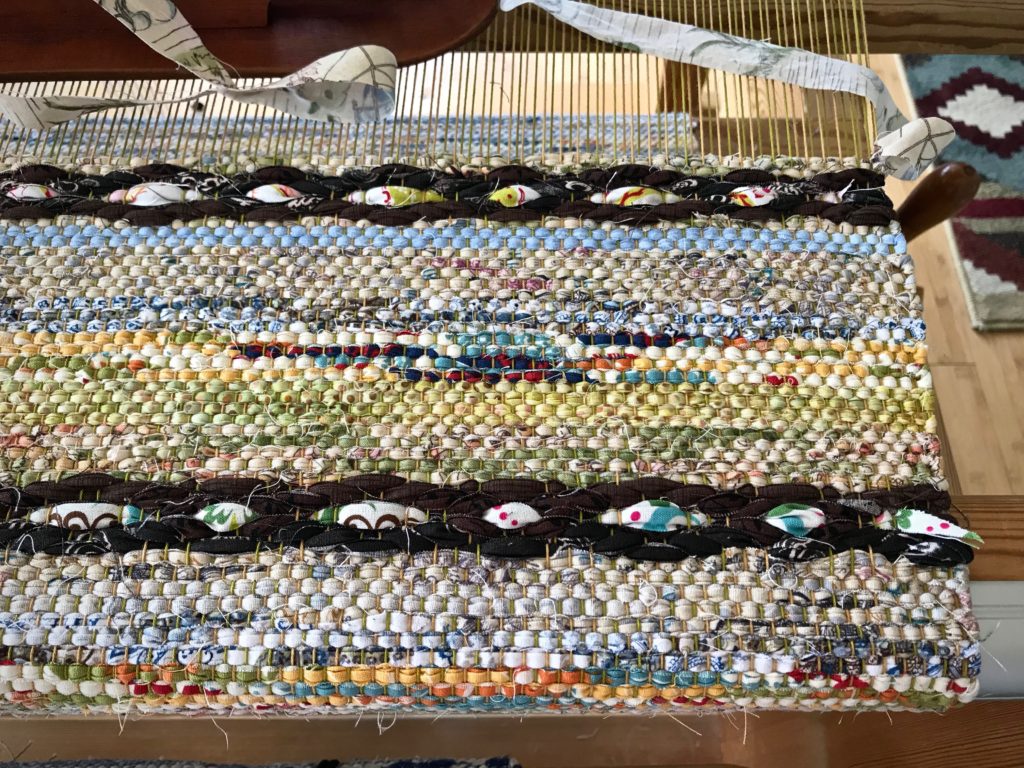
The first rag rug on this 12/6 cotton warp is well underway. This rug is mostly plain weave, with one simple rosepath repeat every ten centimeters. I am weaving the rosepath motif withouttabby between pattern picks. The treadling is 1, 2, 3, 4, 1, 4, 3, 2, 1. The dark brown motif contrasts with the surrounding light-colored plain weave. It almost looks as if a thick chain has been laid across the rug. I transform the otherwise dark rosepath “chains” with a simple bright inlay strip.
Weave the first four picks of the rosepath pattern, treadling 1, 2, 3, 4 (or, if using a different treadling sequence, weave up to the center pick).
Lay in the center pick (treadle 1, in this example). Wait to beat it in.
Center pick of the rosepath motif is arched in the shed.
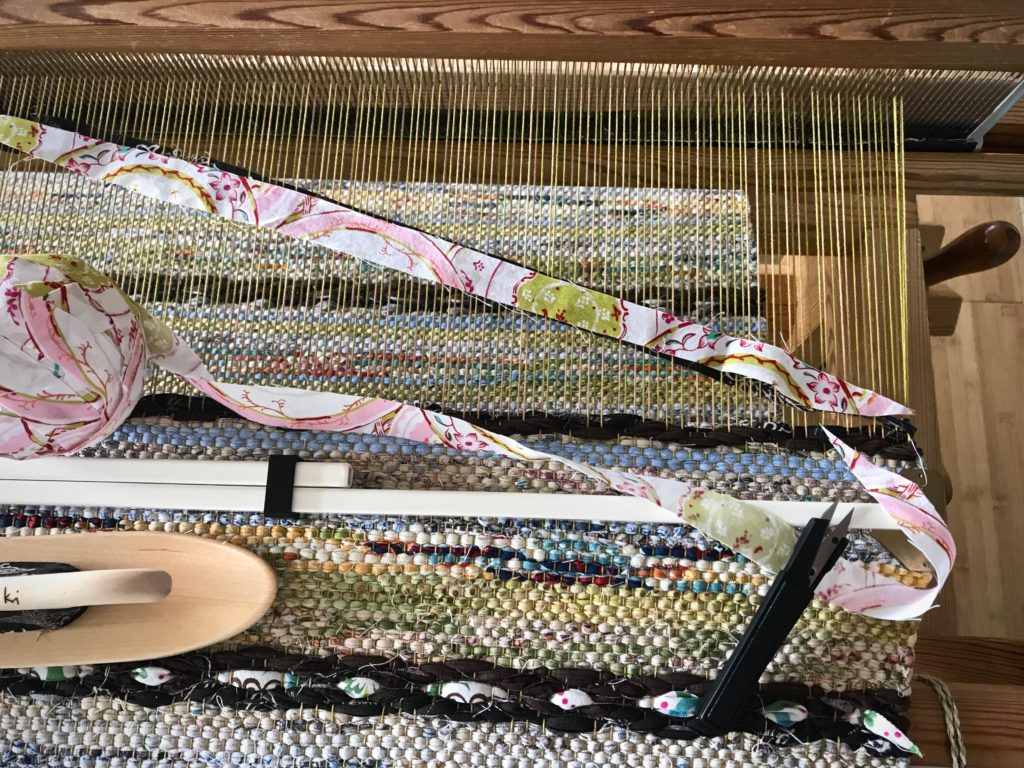
Measure and cut the inlay strip to size, tapering the ends.
Inlay fabric strip is measured against the weft in the shed and cut to size.
Put the inlay strip in the shed, laying it directly on top of the fabric strip already there.
By pushing the beater back I can send the inlay fabric strip through the shed with a ski shuttle.Place the inlay fabric strip directly over the fabric strip of the center pick in the motif.
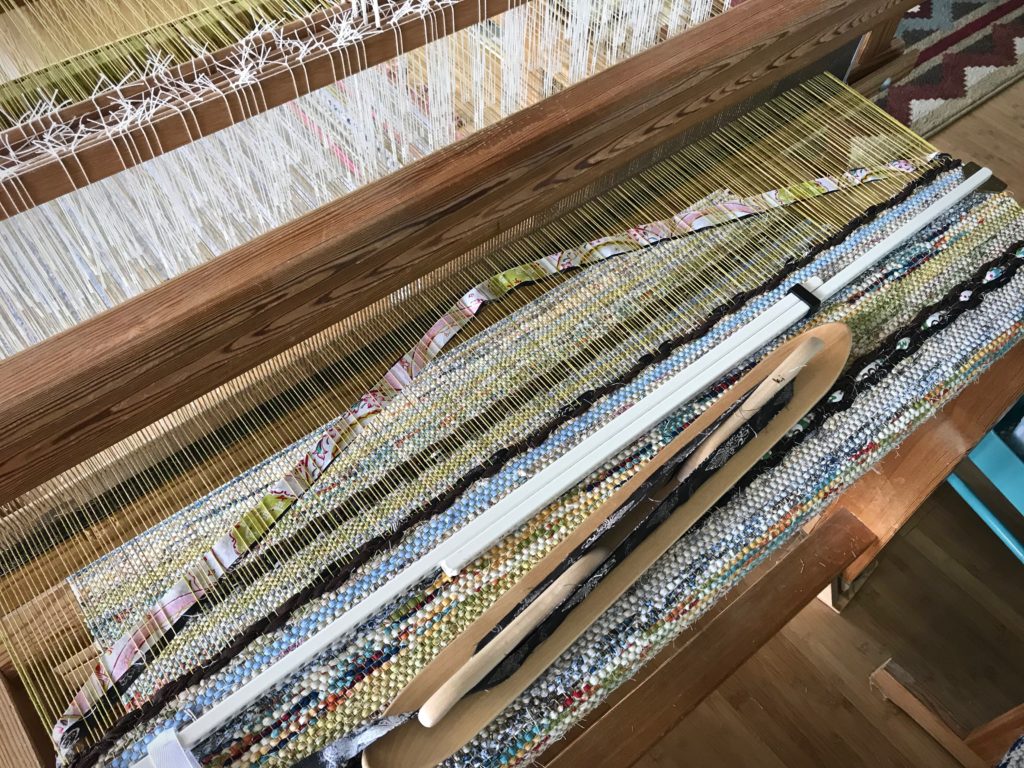
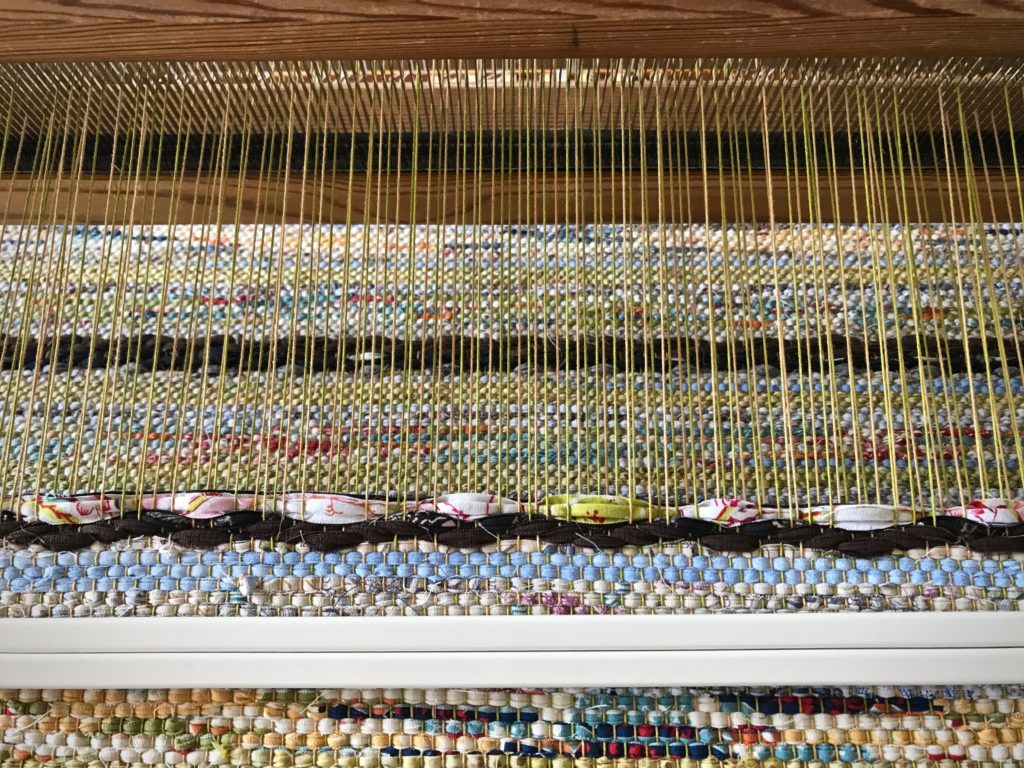
Both weft layers are beaten in together. The inlay strip stays visible on top.
Continue weaving to complete the rosepath pattern, treadling 4, 3, 2, 1 (or, as needed, for a different sequence).
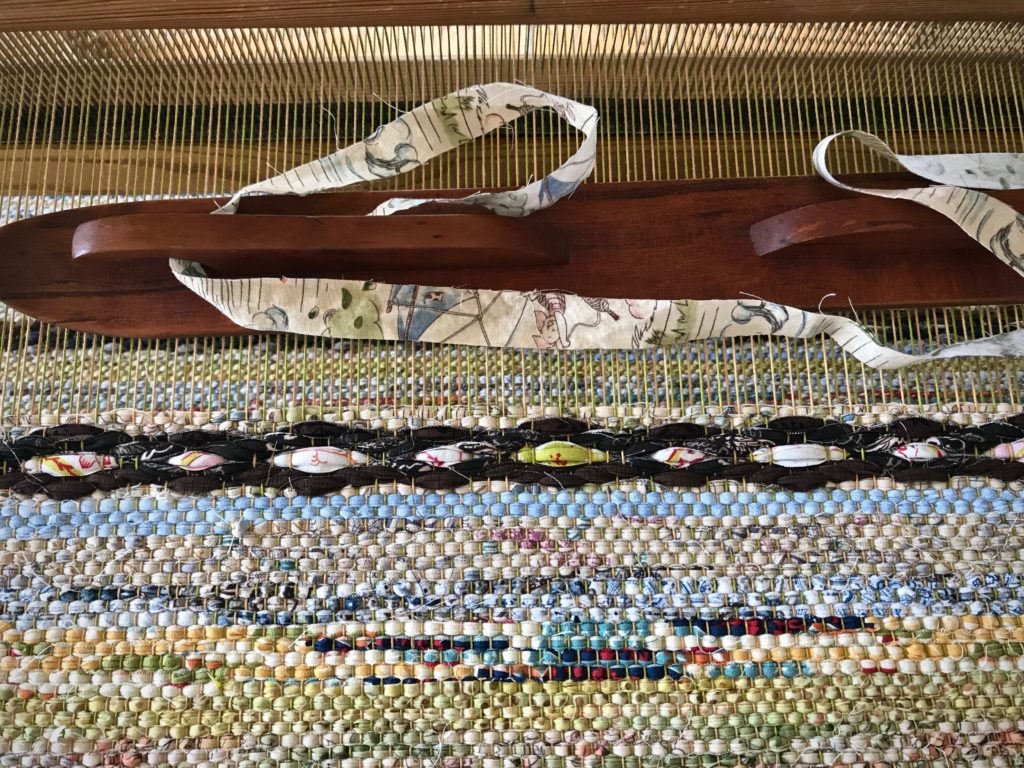
Finished rosepath motif.
You can accomplish a similar effect by weaving in a separate fabric strip for the center pick. In that case, cut tapered ends that are long enough to twist and tuck back into the shed. And carry the weft strip from the previous pick up the side.
The inlay method eliminates the extra bulk at the selvedges, and adds a slight thickness to the center pick, helping to give it a raised look. I am leaving the inlay weft tails loose, but you could cut them a little longer and tuck the ends in, if you prefer.
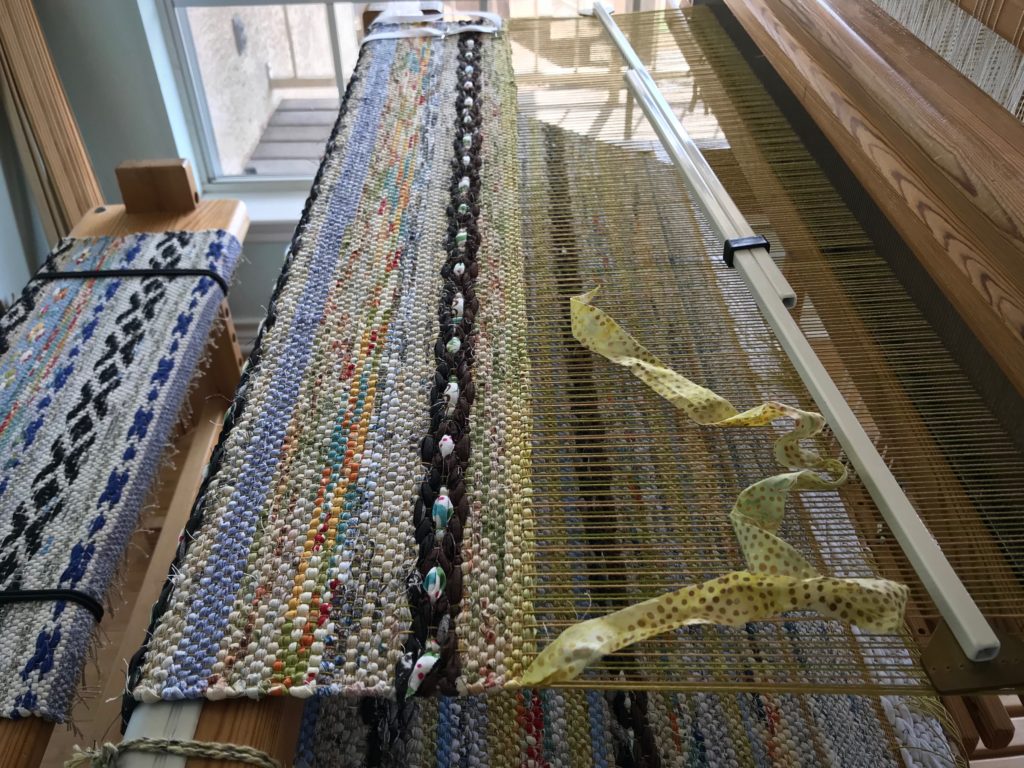
Weft tails are free at the sides, like little flags at the ends of the rosepath rows.Glimåkra Ideal loom–great tool for dreaming up rag rugs!
May you experience the simple pleasure of doing something unexpected.
Why sample? It means using morewarp and weft. And it means waiting longer to start to the “real” project. What do I gain from it, anyway? Is it a waste of resources and time?
I can’t imagine putting on a warp that didn’t have room up front for sampling. There’s more than one reason to put on sufficient warp to weave a sample. It makes perfect sense, especially if there is anything new or unfamiliar about your planned project.
Five Reasons to Add Extra Warp for Sampling
Sampling to test patterns, weft colors, and beat consistency, before starting on fabric for a garment.
1 Space to play. I want plenty of room to play, and to practice techniques that are new to me. 2 Room to try out designs. By weaving a portion of my designs, I am able to determine what works, and what adjustments need to be made. 3 Warp for testing weft colors. Only when woven can I see the full effect of each potential weft color. 4 Time to gain a consistent beat. When I start the main project, I want to have woven enough to be able to “feel” how firmly or softly I need to move the beater. 5 The best reason of all! It’s always good to have enough warp on the loom that you can invite friends and family to enjoy some weaving time. …Before your main project is in progress.
My weaving friend Betsy came over to see what it is like to weave on a drawloom. My daughter Melody came for a visit and wanted to see what it was like to weave on a drawloom. Garment fabric. This is to be used for two side panels of a vest I plan to make for myself.This is to be the back panel of the vest.This is the beginning of the front panels for the vest.
Drive up to this storybook cottage, and you can tell there is something special about it. It’s the home of Ed and Joanne Hall. When I arrive, Joanne greets me and takes me down the hand-crafted pine stairs to her delightful weaving studio dotted with floor looms.
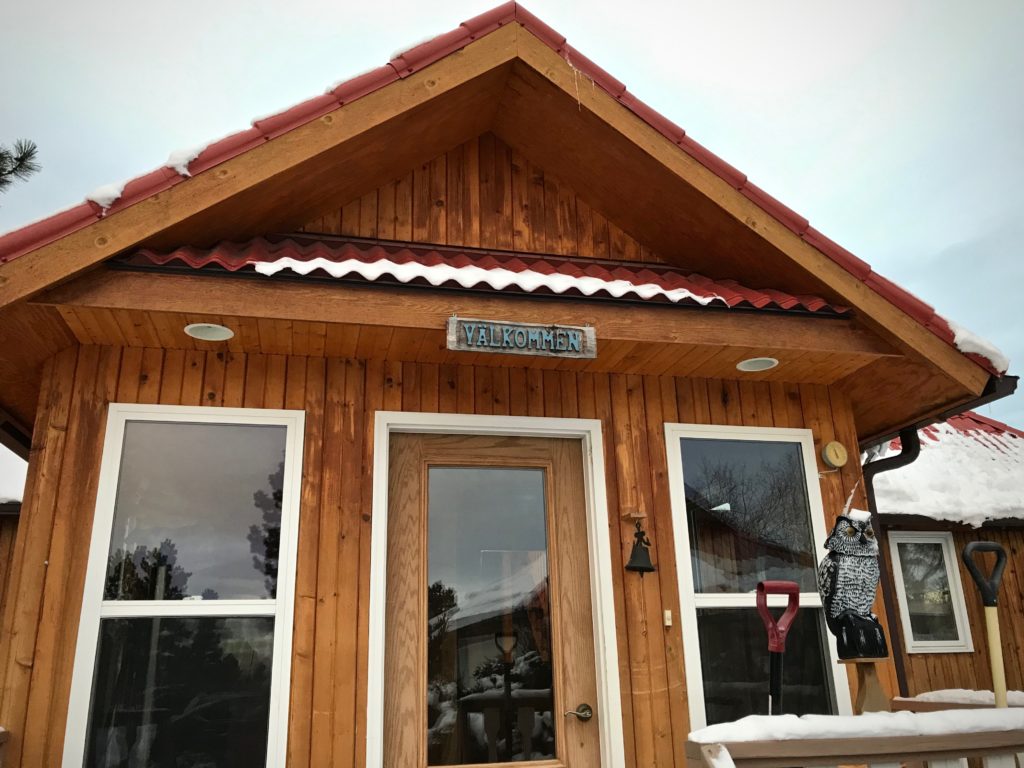
Driving up to the Hall’s home and Joanne’s weaving studio in Montana.Välkommen = Welcome
I recently had the joy of learning the ins and outs of drawloom weaving in this storybook studio in Montana. After the class ended, Joanne and I sat at her kitchen table to share some thoughts about weaving.
Joanne Hall Photo credit: Ed Hall
Come join us, and sit in on our conversation…
If you could keep only one loom, what would it be?
The 59” Glimåkra Standard. That would be my loom, with a drawloom. A big loom is easier to set up, easier to warp because I can step inside it, and easier to weave on than a little loom. As you get older you need every advantage you can get.
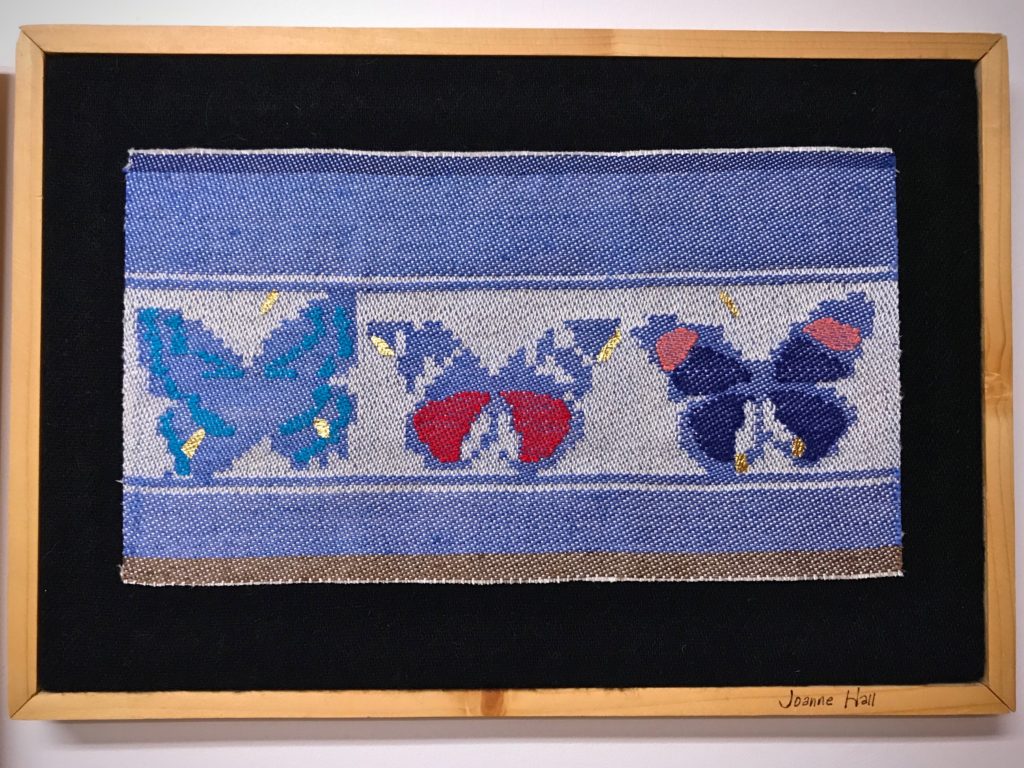
Butterfly piece was woven on the very first warp Joanne put on her drawloom. The warp is 20/2 cotton, unbleached; and the weft is 16/1 linen. Being a tapestry weaver, I had to add more colors, so I laid in some colors and then I put a little gold leaf here and there. I did not want to add anything that looked like embroidery. I wanted my new work on the drawloom to have all the elements woven in. – Joanne Hall
What would you weave on that loom?
I would mostly make narrow warps. I could weave some blankets or larger things, as well, because it’s easy on that loom. It is easy to beat and so easy to treadle. I could also weave tapestry on it.
Describe the drawloom you would use.
With the Myrehed combination, I would have both the shaft drawloom and the single unit drawloom. I do like images, like tapestry weaving, so I would enjoy weaving with the single unit drawloom.
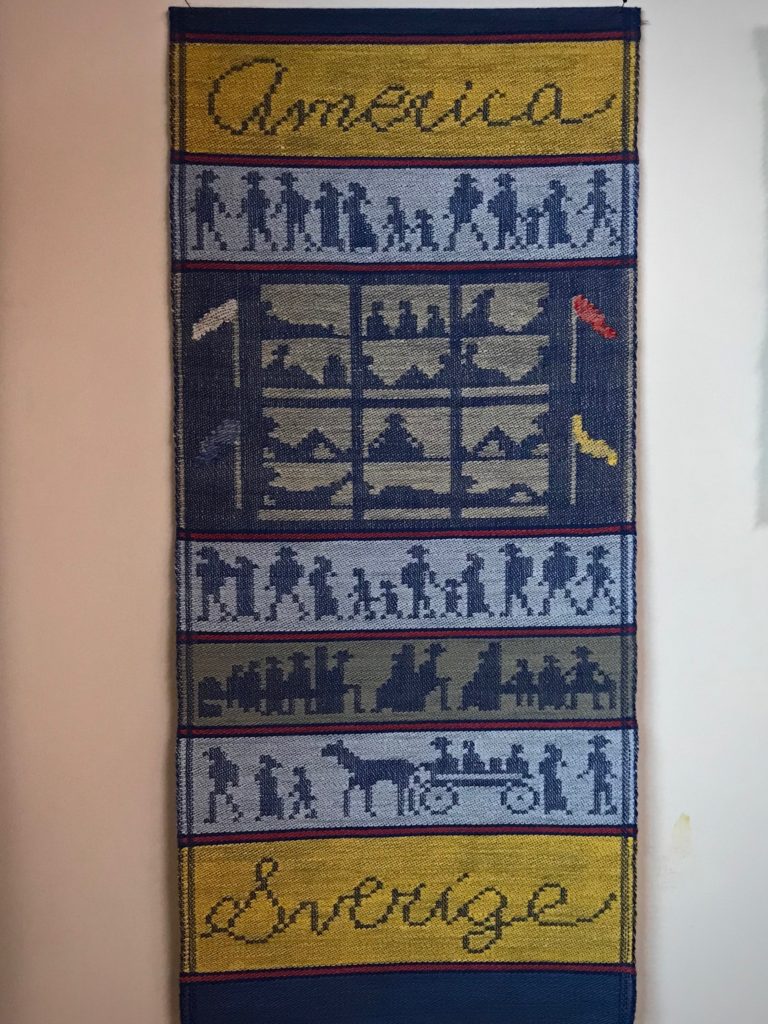
Story of the immigrants. Three of my grandparents immigrated from Sweden to America. This tells the story of their journey–walking, riding, then endless days on the boat, then walking again, all the way to Minnesota. – Joanne Hall
Are there any weaving secrets you’d like to share?
One important thing to know is to wind a warp with more than one thread, especially a long warp. It is easier to beam and you will prevent problems when you wind with two or more threads. And doing so may also have a positive effect on weaving that warp.
Another thing to consider is that once you start weaving, plan to invest in good equipment. Some weavers start out buying the smallest, least expensive equipment. That’s okay for getting started, but don’t spend too much time with inferior equipment. Once you start warping looms, get a big vertical warping reel that is more than two yards around. You can wind a warp in half an hour, an hour at the most. And the warp will be more even and accurate than one wound on smaller equipment.
If someone wants to learn more about weaving, what is a good way to start?
Go someplace where you can take a class weaving on floor looms, even if you have never woven before. Keep in mind that researching online can be more confusing than helpful. In a class you will learn much faster and you will probably get better information.
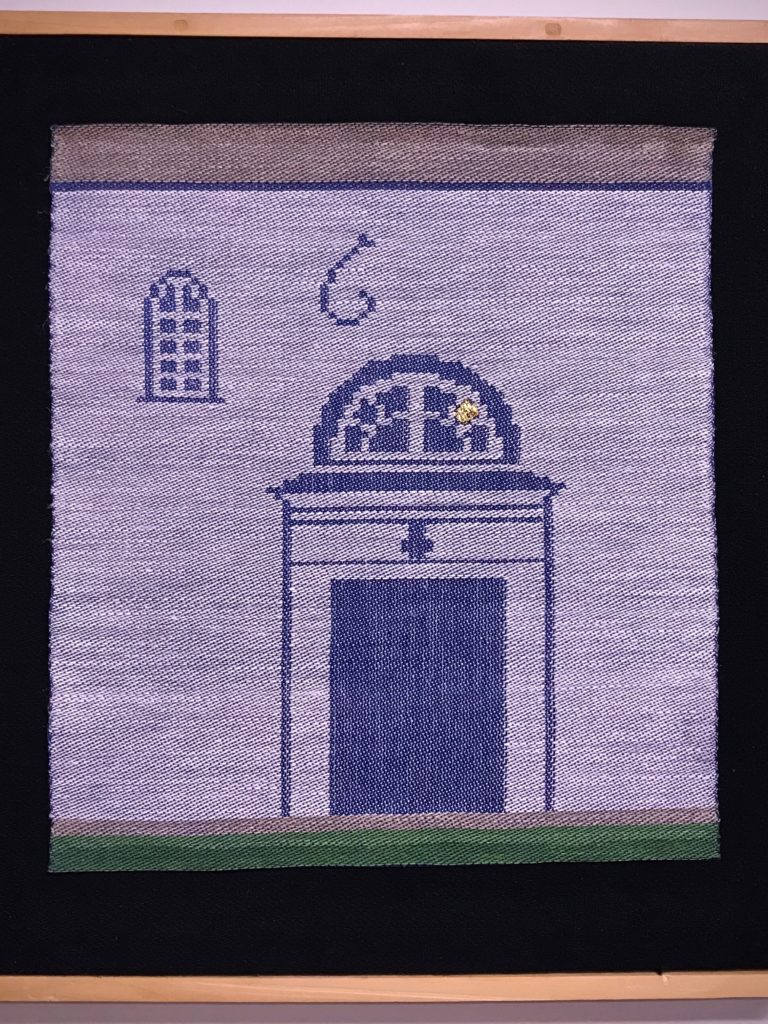
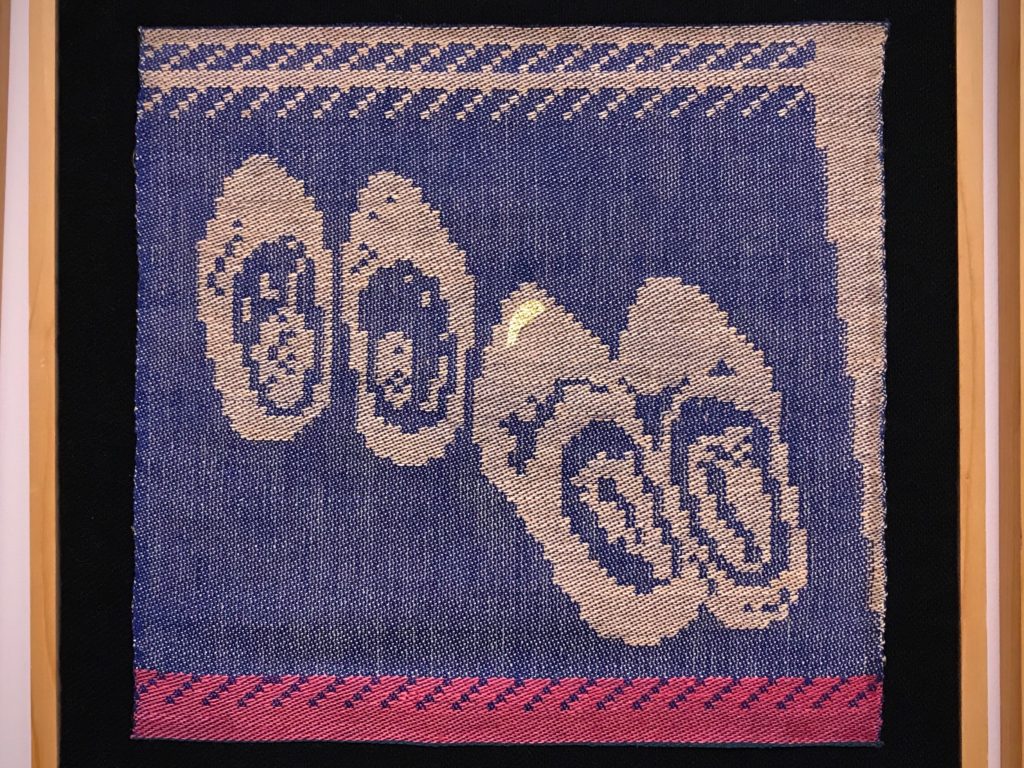
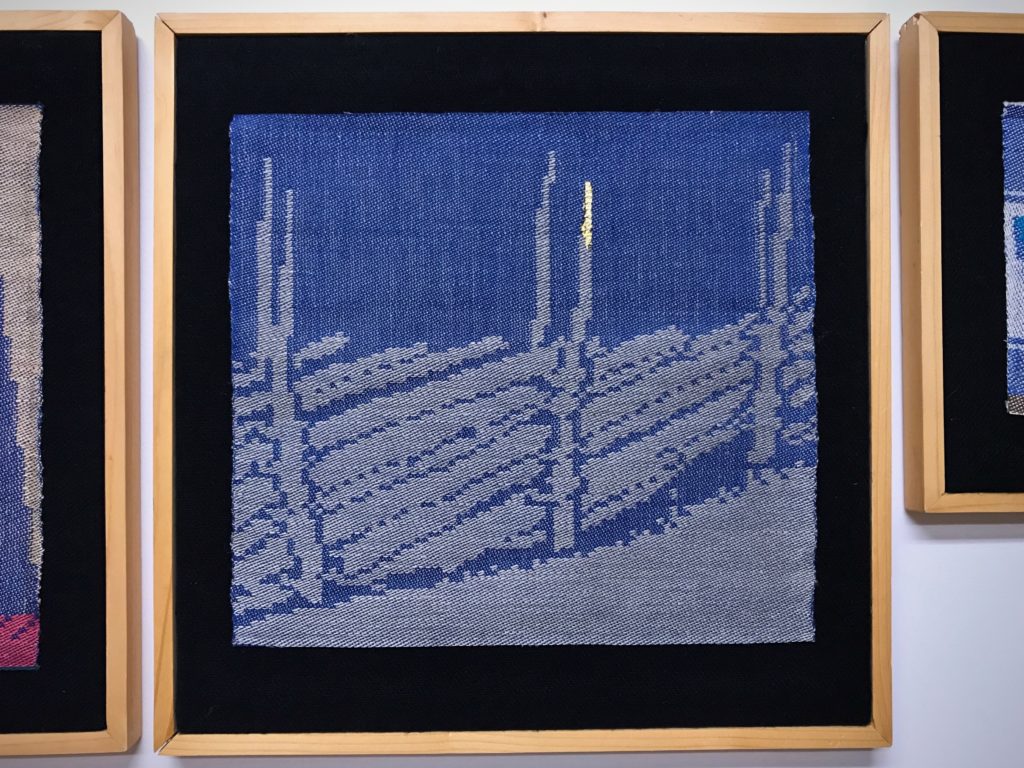
Front door of Joanne’s father’s father’s (grandfather’s) church in the small town of Ör, in Dalsland, Sweden. The “6” near the door was part of the date on the church, 1661. Woven on single unit drawloom by Joanne Hall.From a photo Joanne took in a small red house in an outdoor museum in the place where her mother’s family lived. These wooden shoes were on a rag rug in front of the fireplace. Woven on single unit drawloom by Joanne Hall.Fence that is typical of fences all over Sweden. This came from a photo of the fence around an outdoor museum in Falköping Sweden, Joanne’s mother’s grandparent’s home. Single unit drawloom, woven by Joanne Hall.
Any final thoughts?
In Sweden, weavers guilds are different than they are here in the US. Most everyone in Sweden can join a guild, called a vävstuga, which in Sweden is a place with looms—floor looms, big floor looms. You meet there as often as you want, and you can weave on floor looms in the company of other weavers, who are very helpful. If we had that, it would be wonderful.
That would be wonderful, indeed! I think I got a little taste of that, right here in your Montana studio. Thank you!