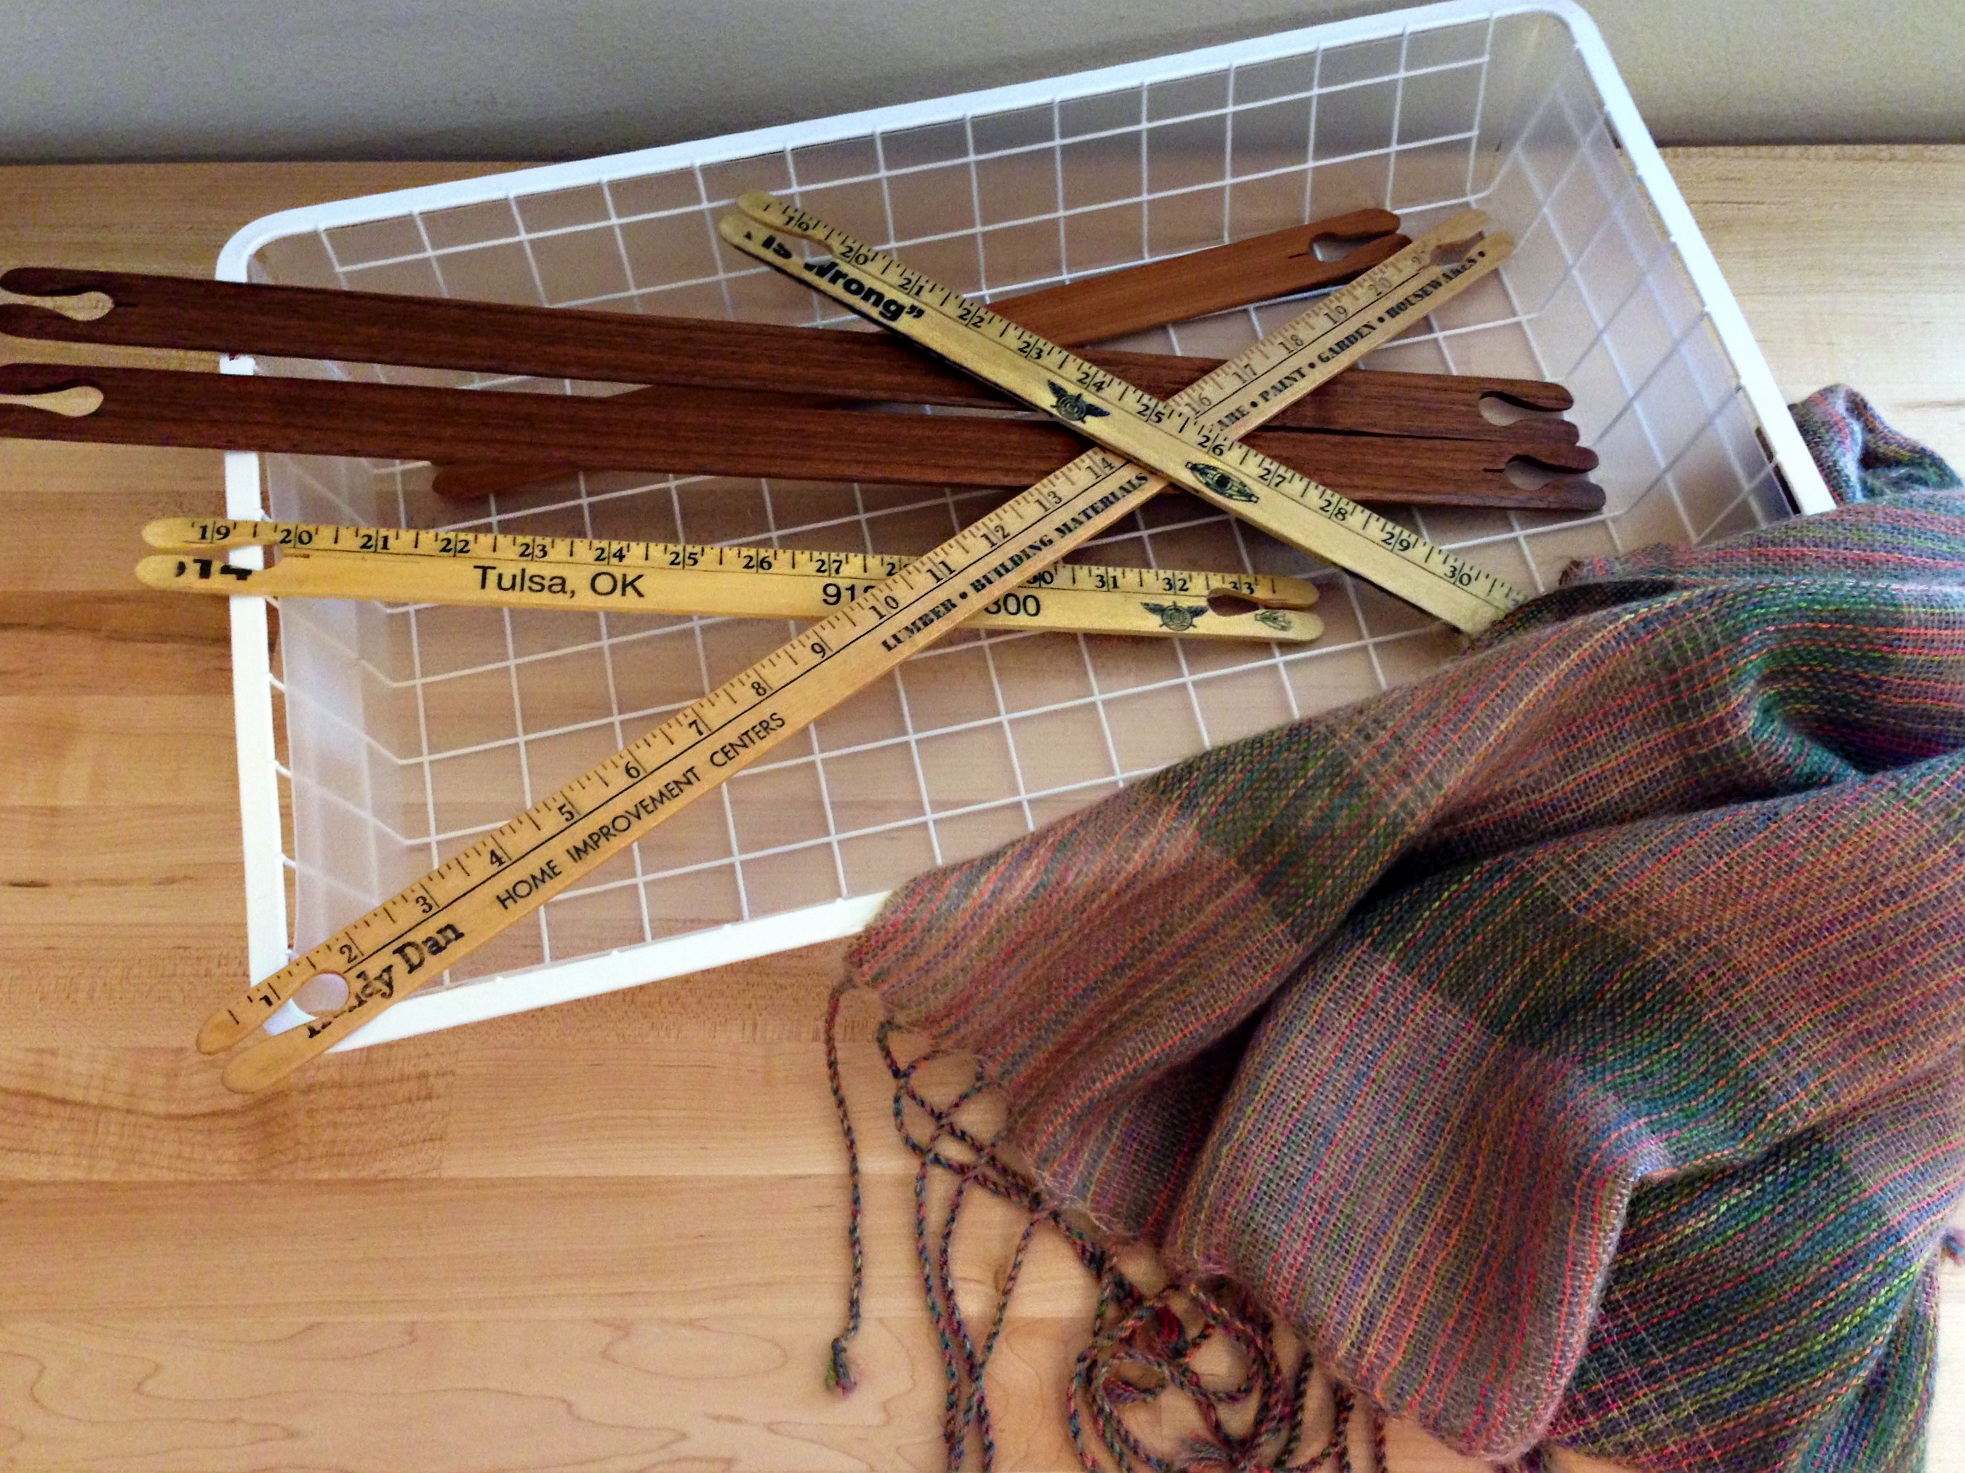
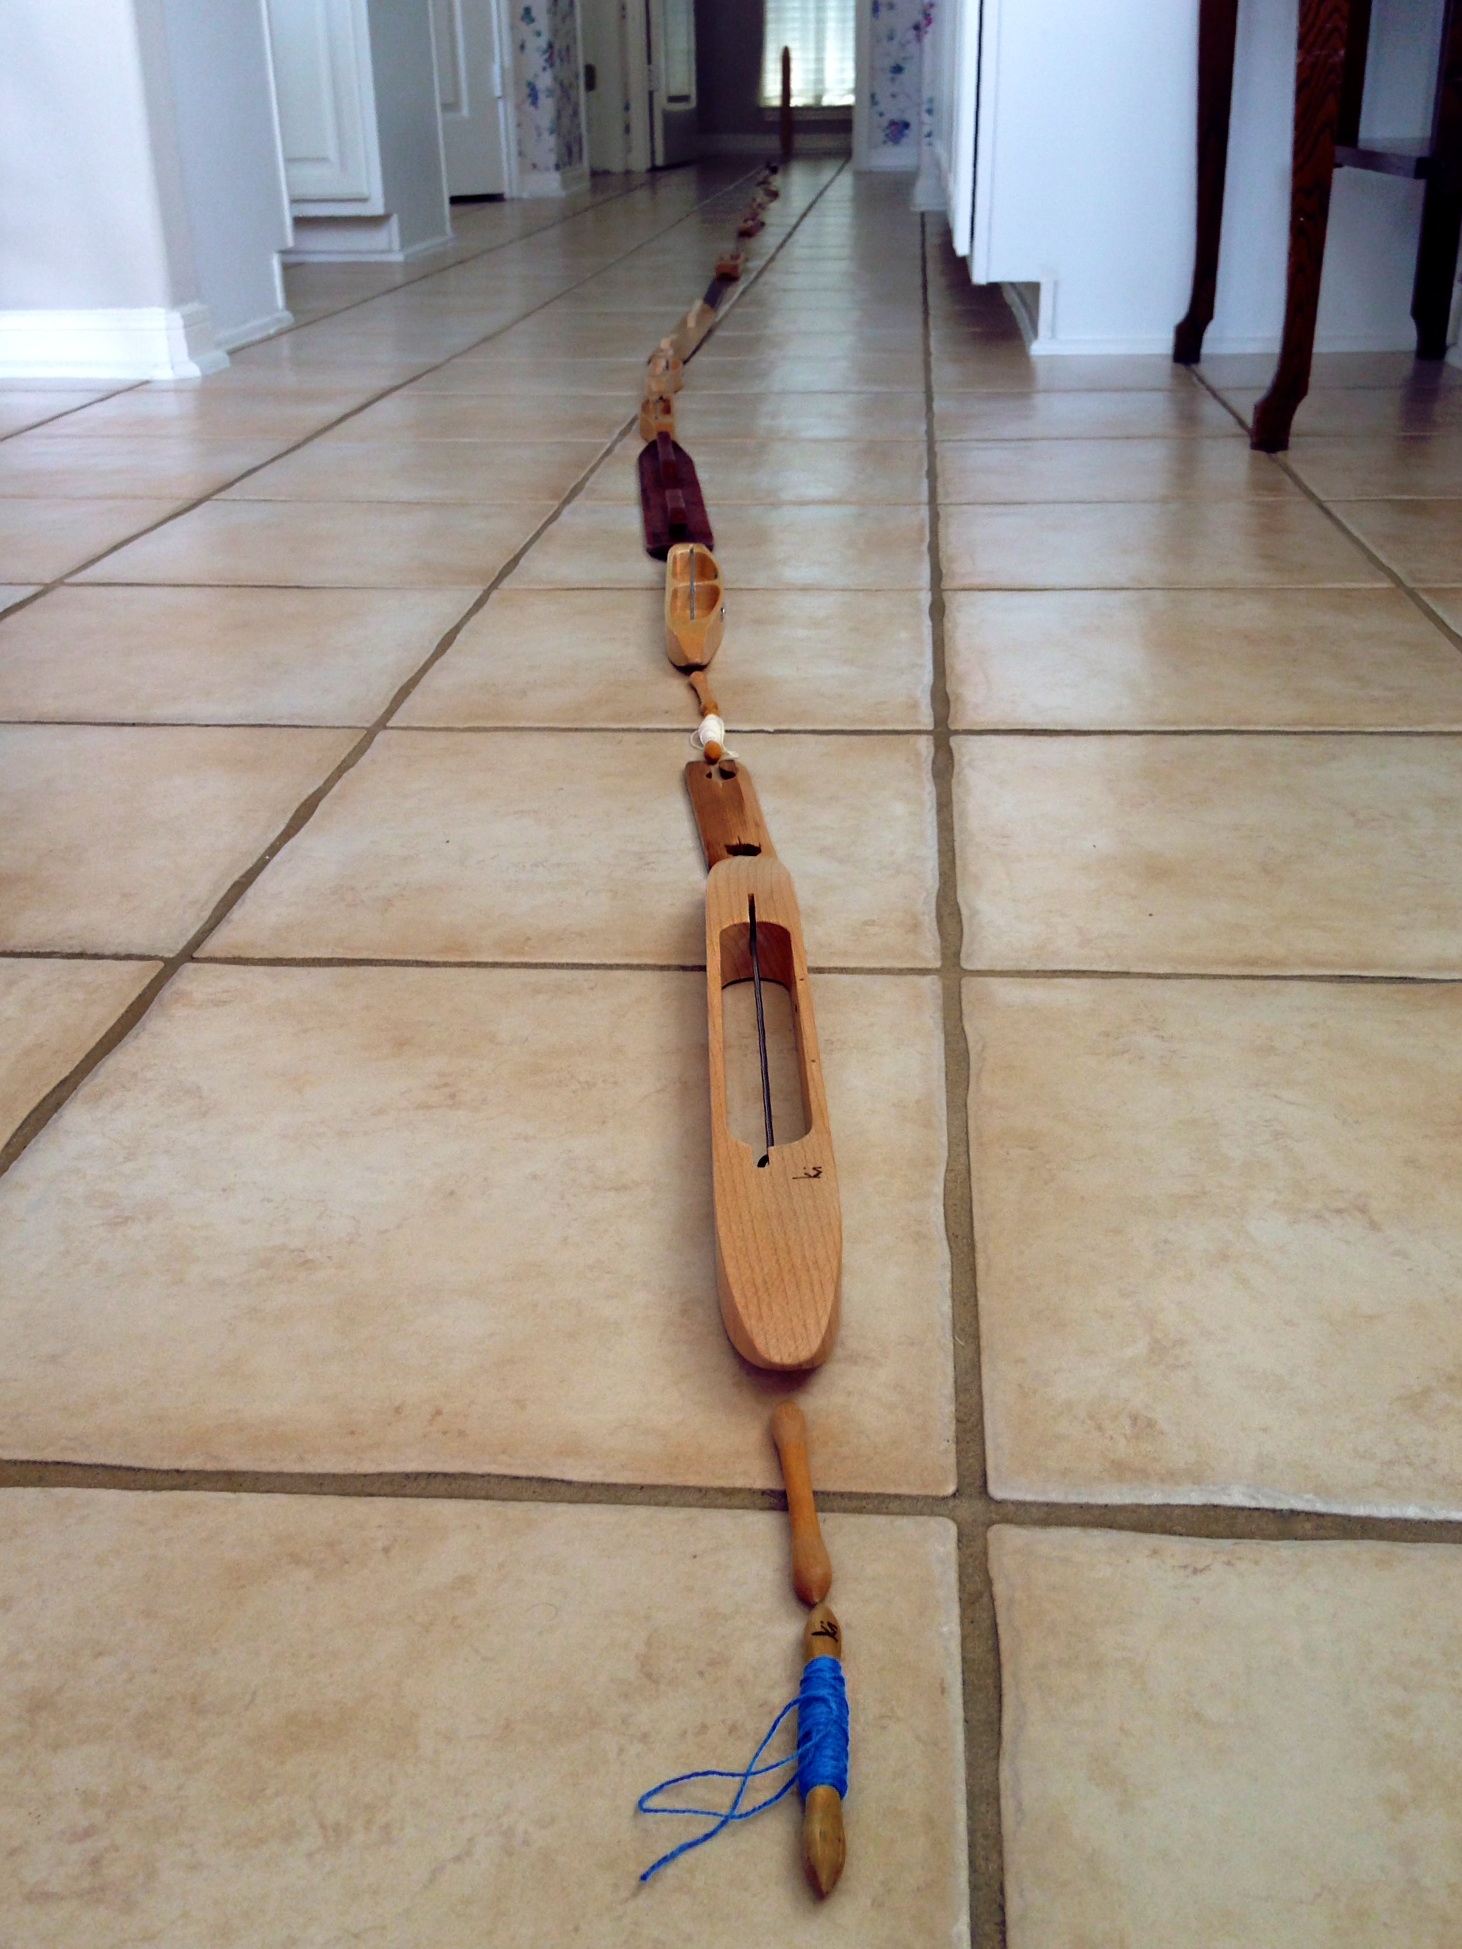
If I line up all my weaving shuttles, end to end, how far do you think they will reach? The accumulation started slowly, adding a shuttle here and there, as needed. My husband contributed to my collection by handcrafting some of the shuttles for me. “I could use a stick shuttle in such-and-such a size.”“Okay, dear,” he would say, before going out to the garage to whip up yet another yardstick shuttle for my rigid heddle loom.
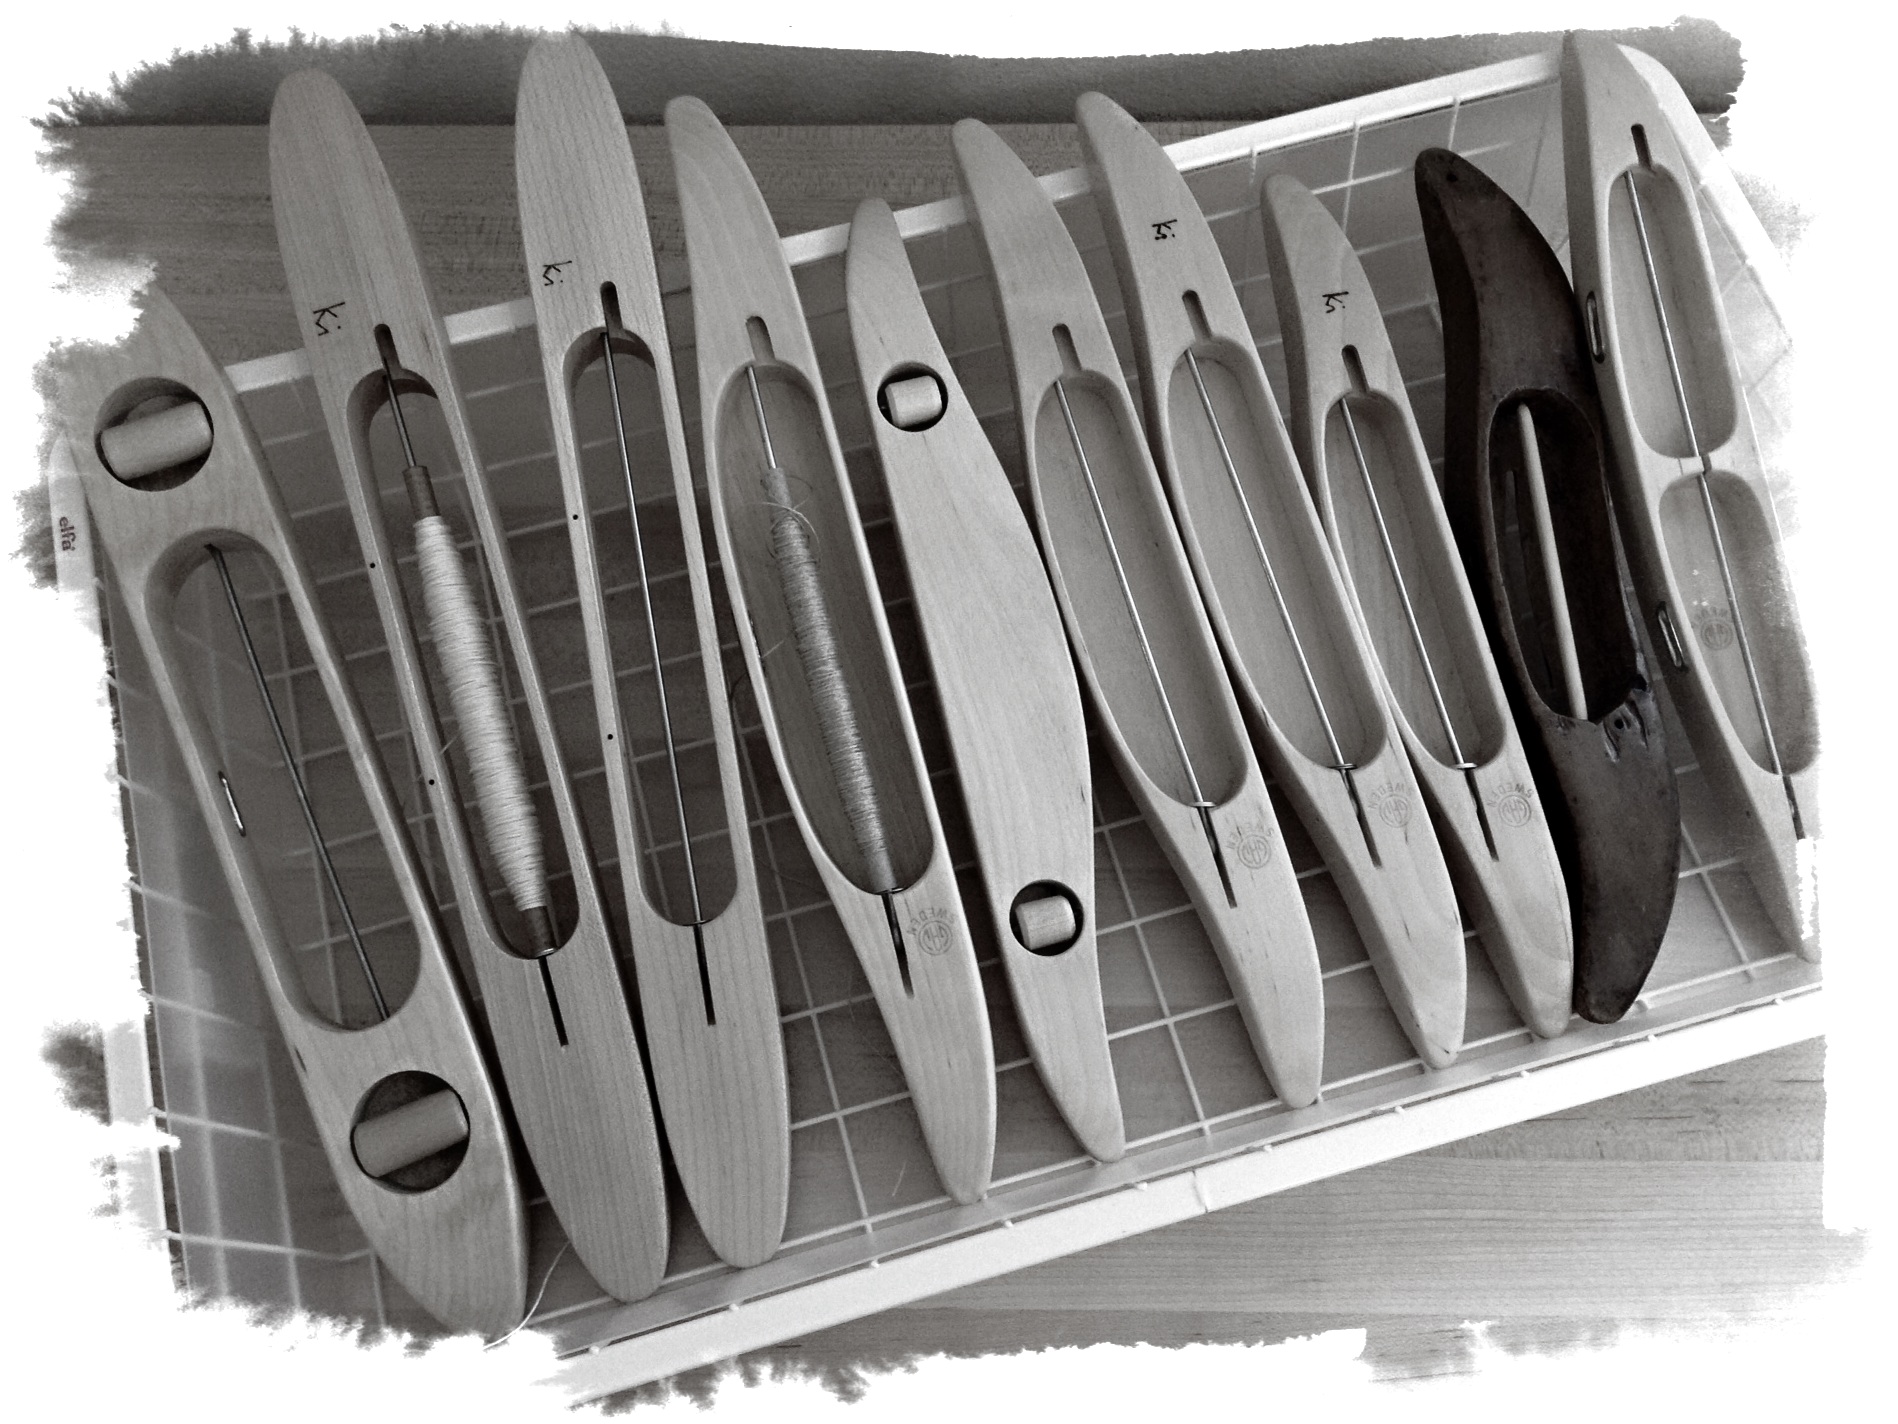
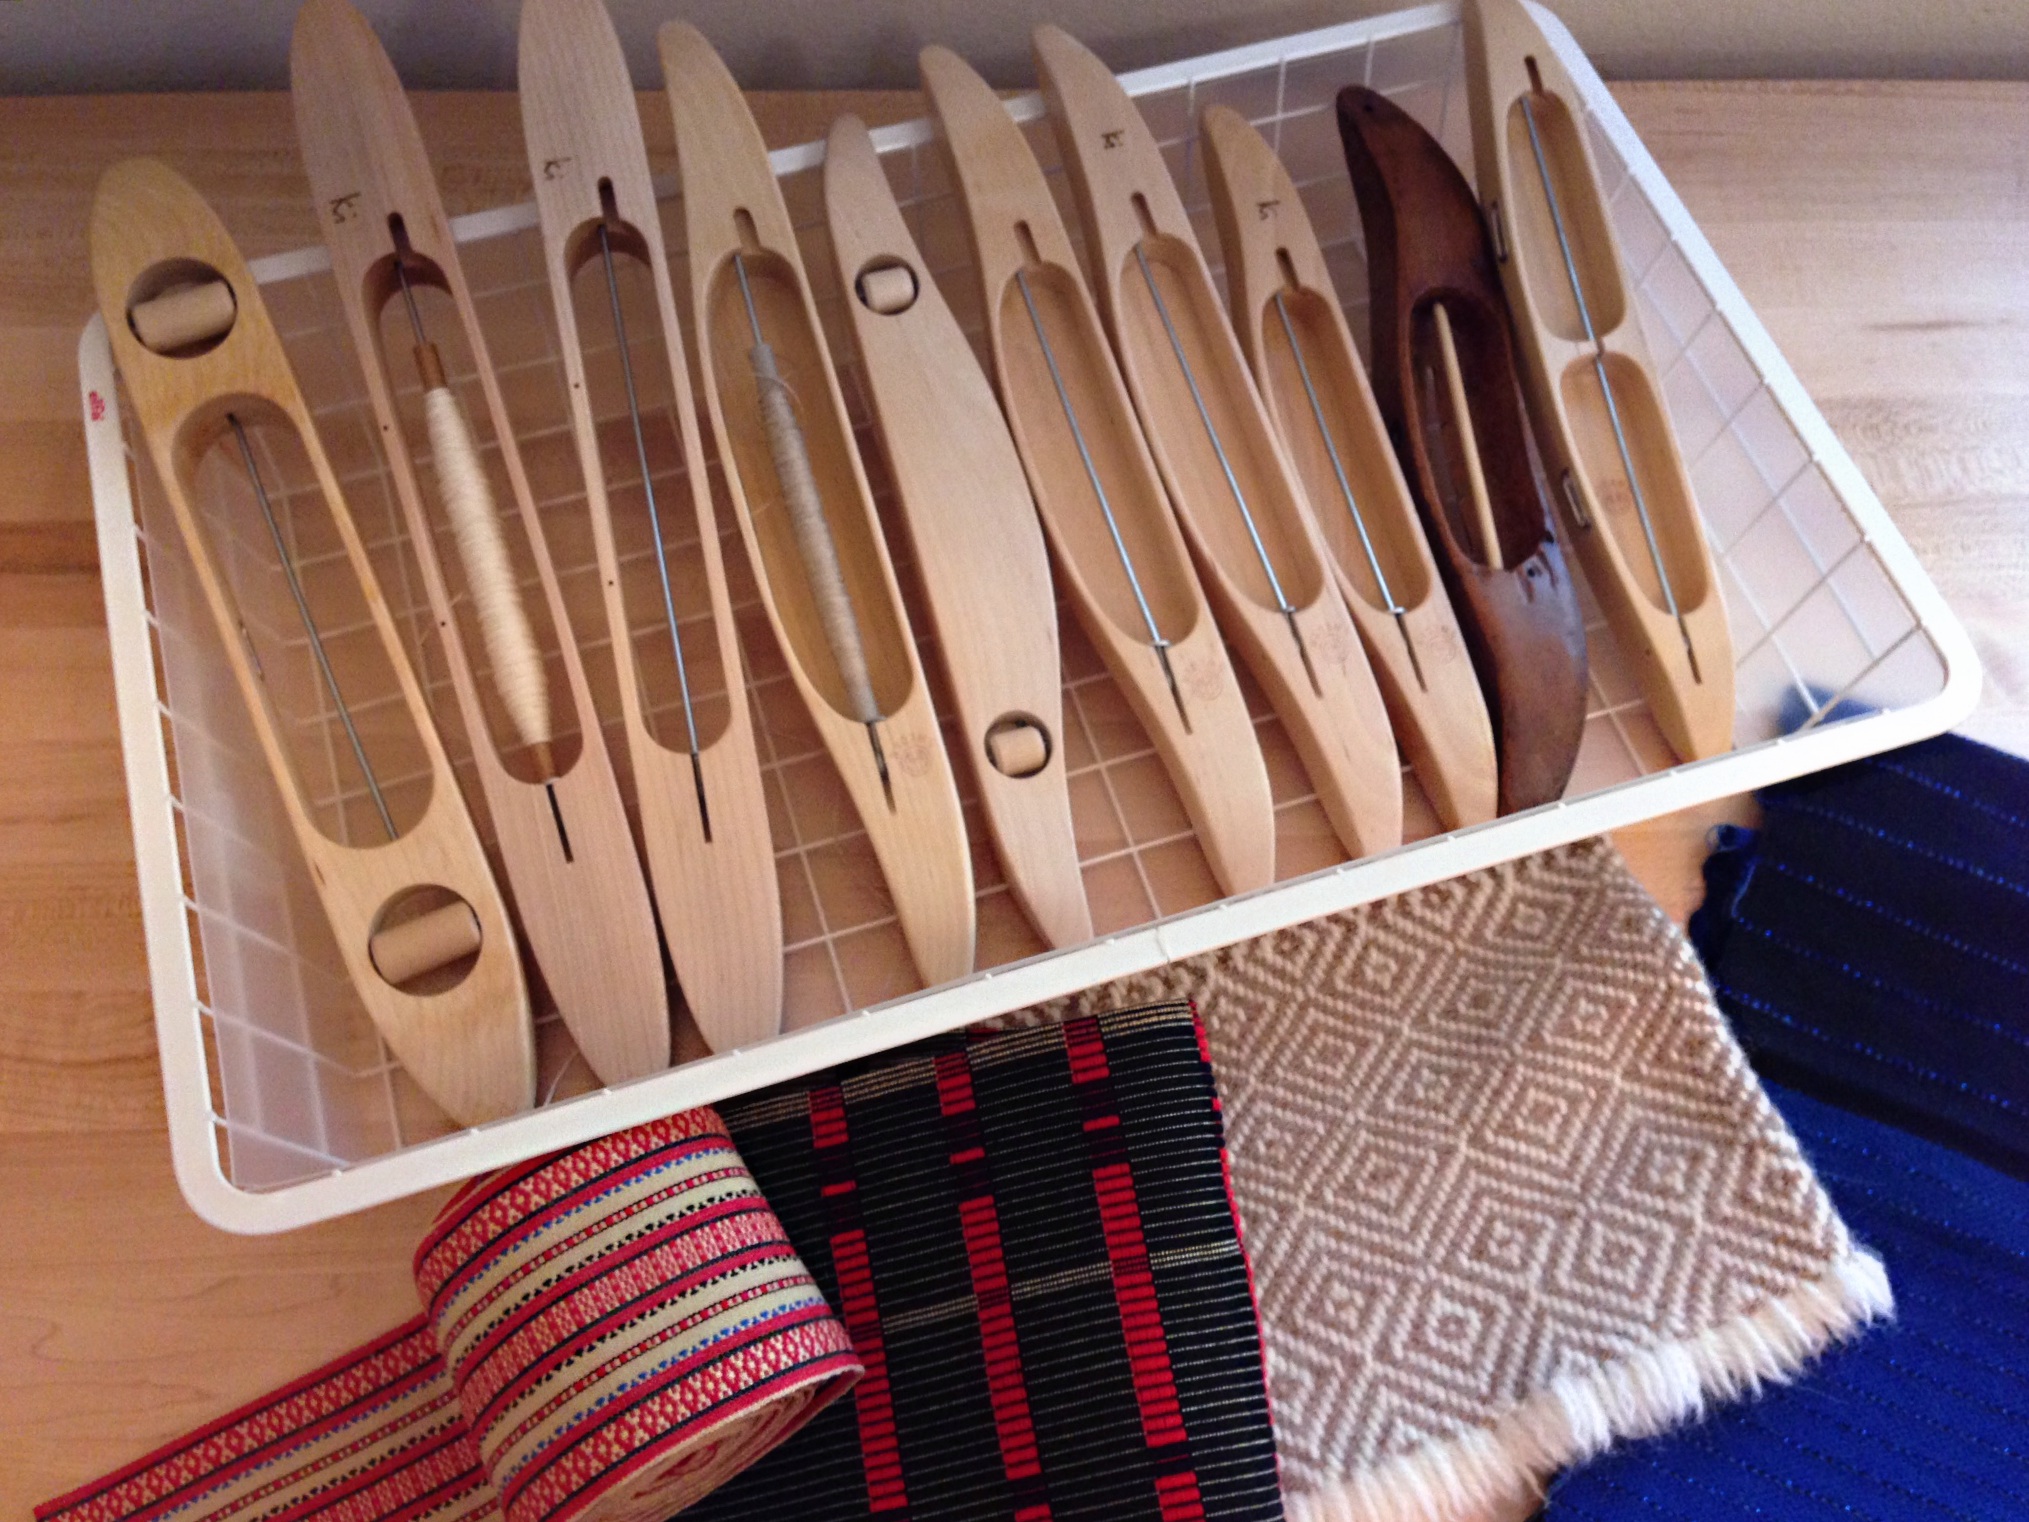
Ski shuttles are for rag weaving. Boat shuttles are for almost everything else. Most of my boat shuttles are traditional Swedish shuttles. All these fascinating shuttles, such simple tools, work the wonder of weaving.
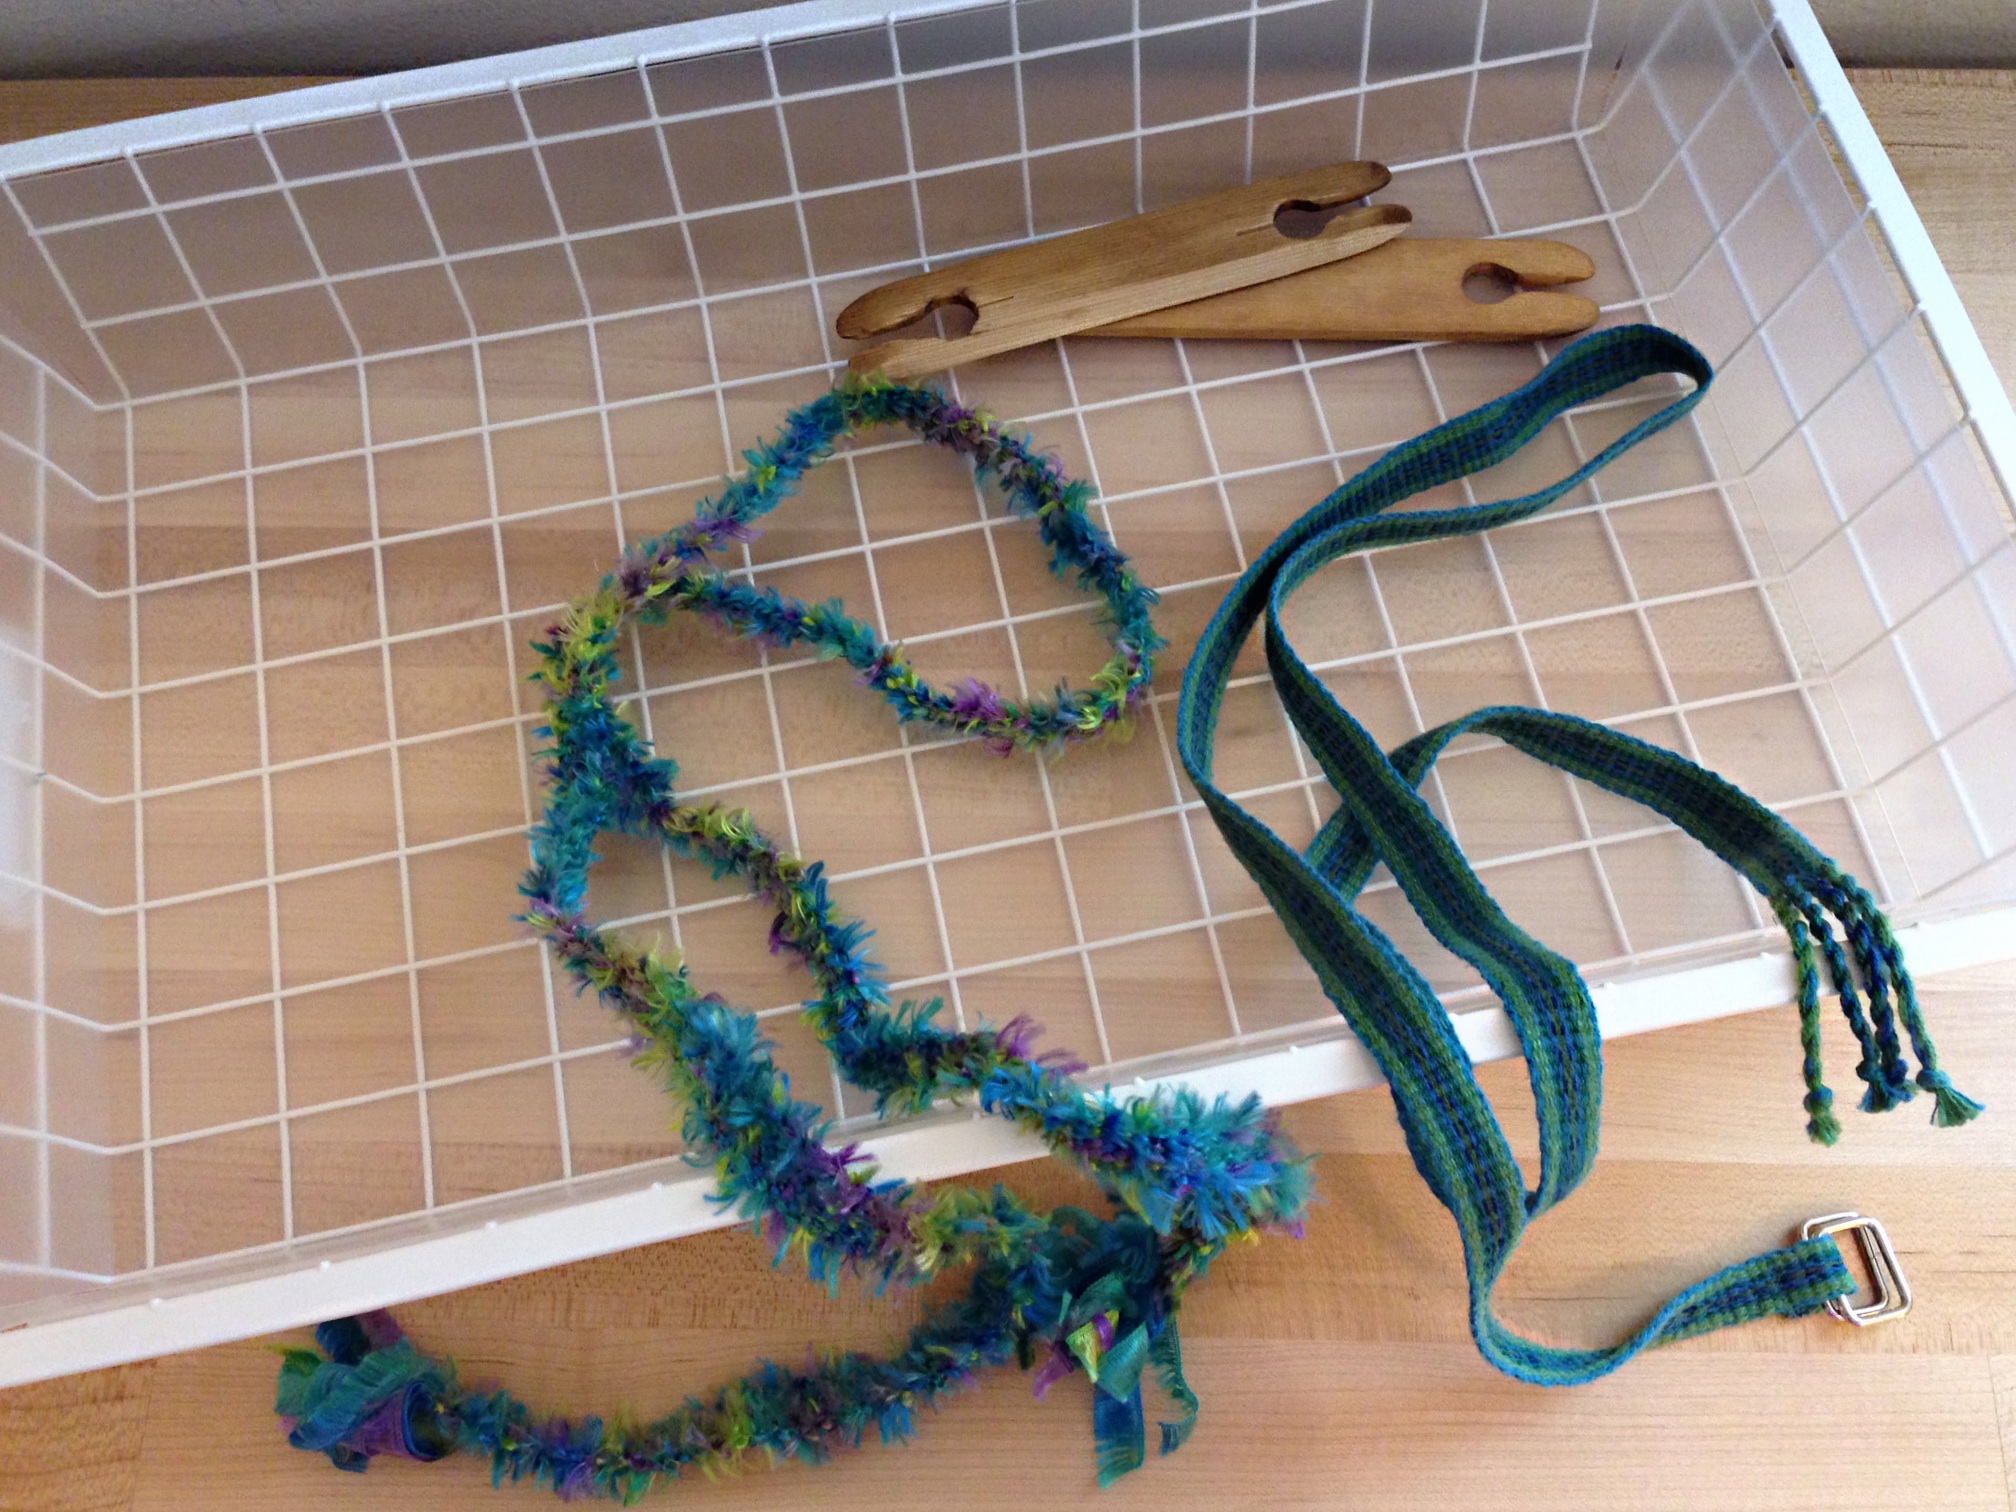
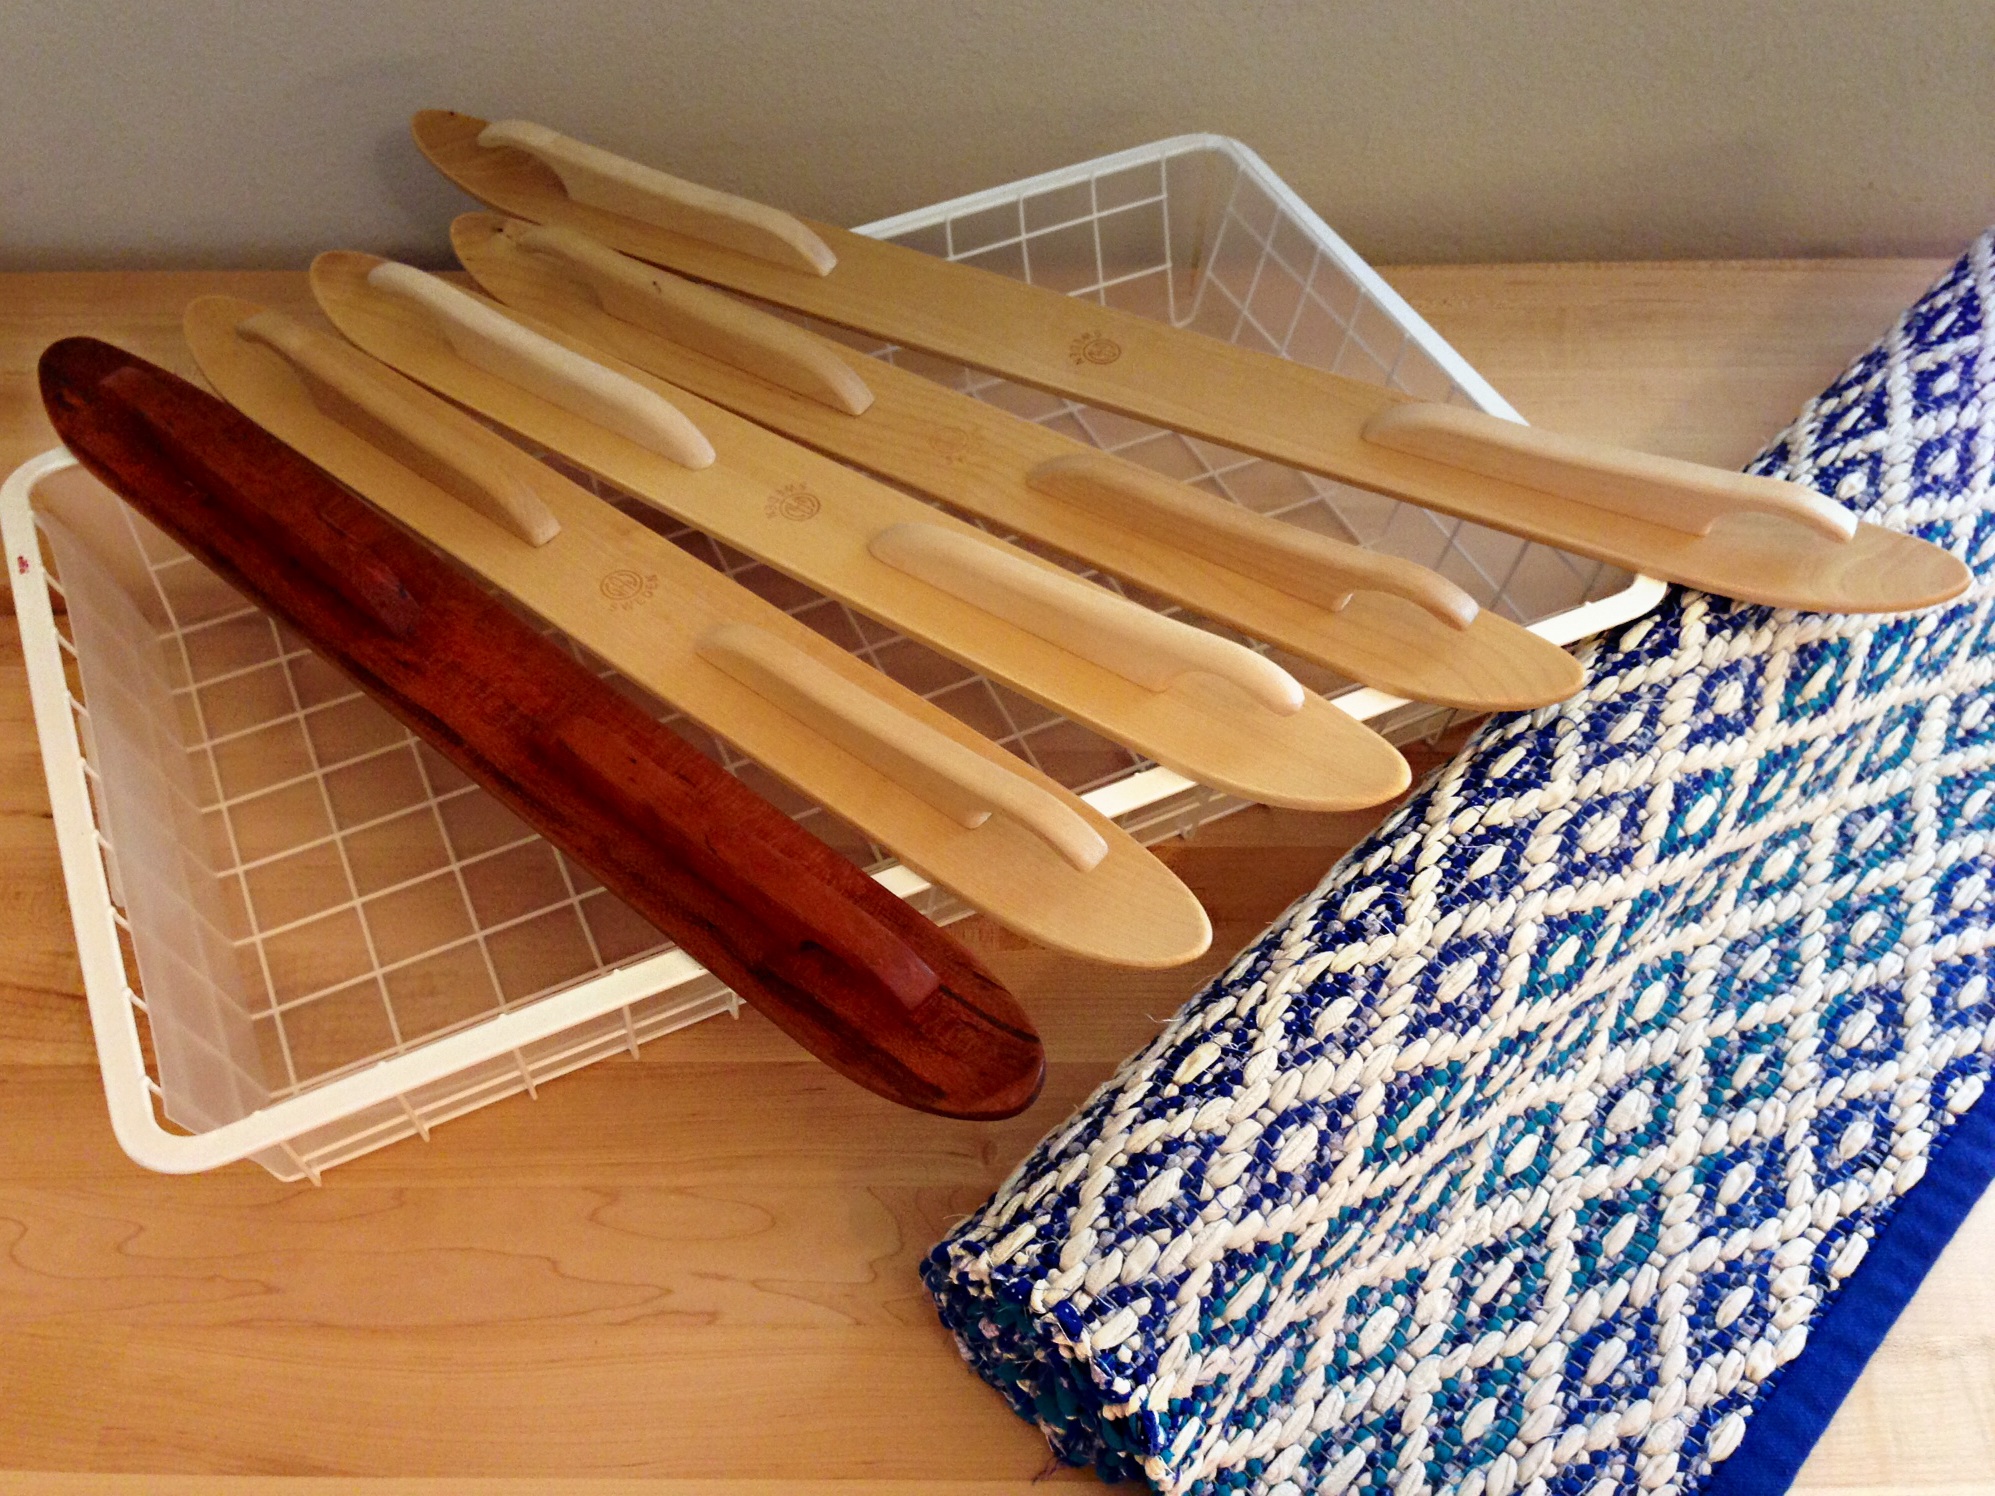
Shawl woven on 32-inch rigid heddle loom, with super kid mohair/silk and baby alpaca. Smooth, handcrafted walnut stick shuttles were used for this project.Tapered edge on pine inkle loom shuttle helps for beating in the weft. I have been known to weave with crazy novelty yarns on my inkle loom.Maple band loom shuttles, hand-carved by my husband, *live* in a small handmade bag that hangs on the back corner of the band loom. This shaped shuttle is perfect for the tricky one-handed manipulation that is needed. If they are too smooth and polished, however, they slip right out of my hand.My favorite ski shuttle is the beautiful cherry wood shuttle made by my husband, Steve. It helps to have several ski shuttles. The “Creative Expression” Rosepath Rag Rug used three shuttles at a time to get the gradient color effect.Boat shuttles eager to weave. Do you hear them? … “Pick me”…”No, pick ME!”These are a few of my favorite things. Swedish woven goods made on a Swedish loom with Swedish boat shuttles. (I’m the only thing not Swedish here.)How far will my shuttles reach? 34 1/2 feet (that’s 11 1/2 yards, or 10 1/2 meters long). I ran out of room, so the last one is standing on end.
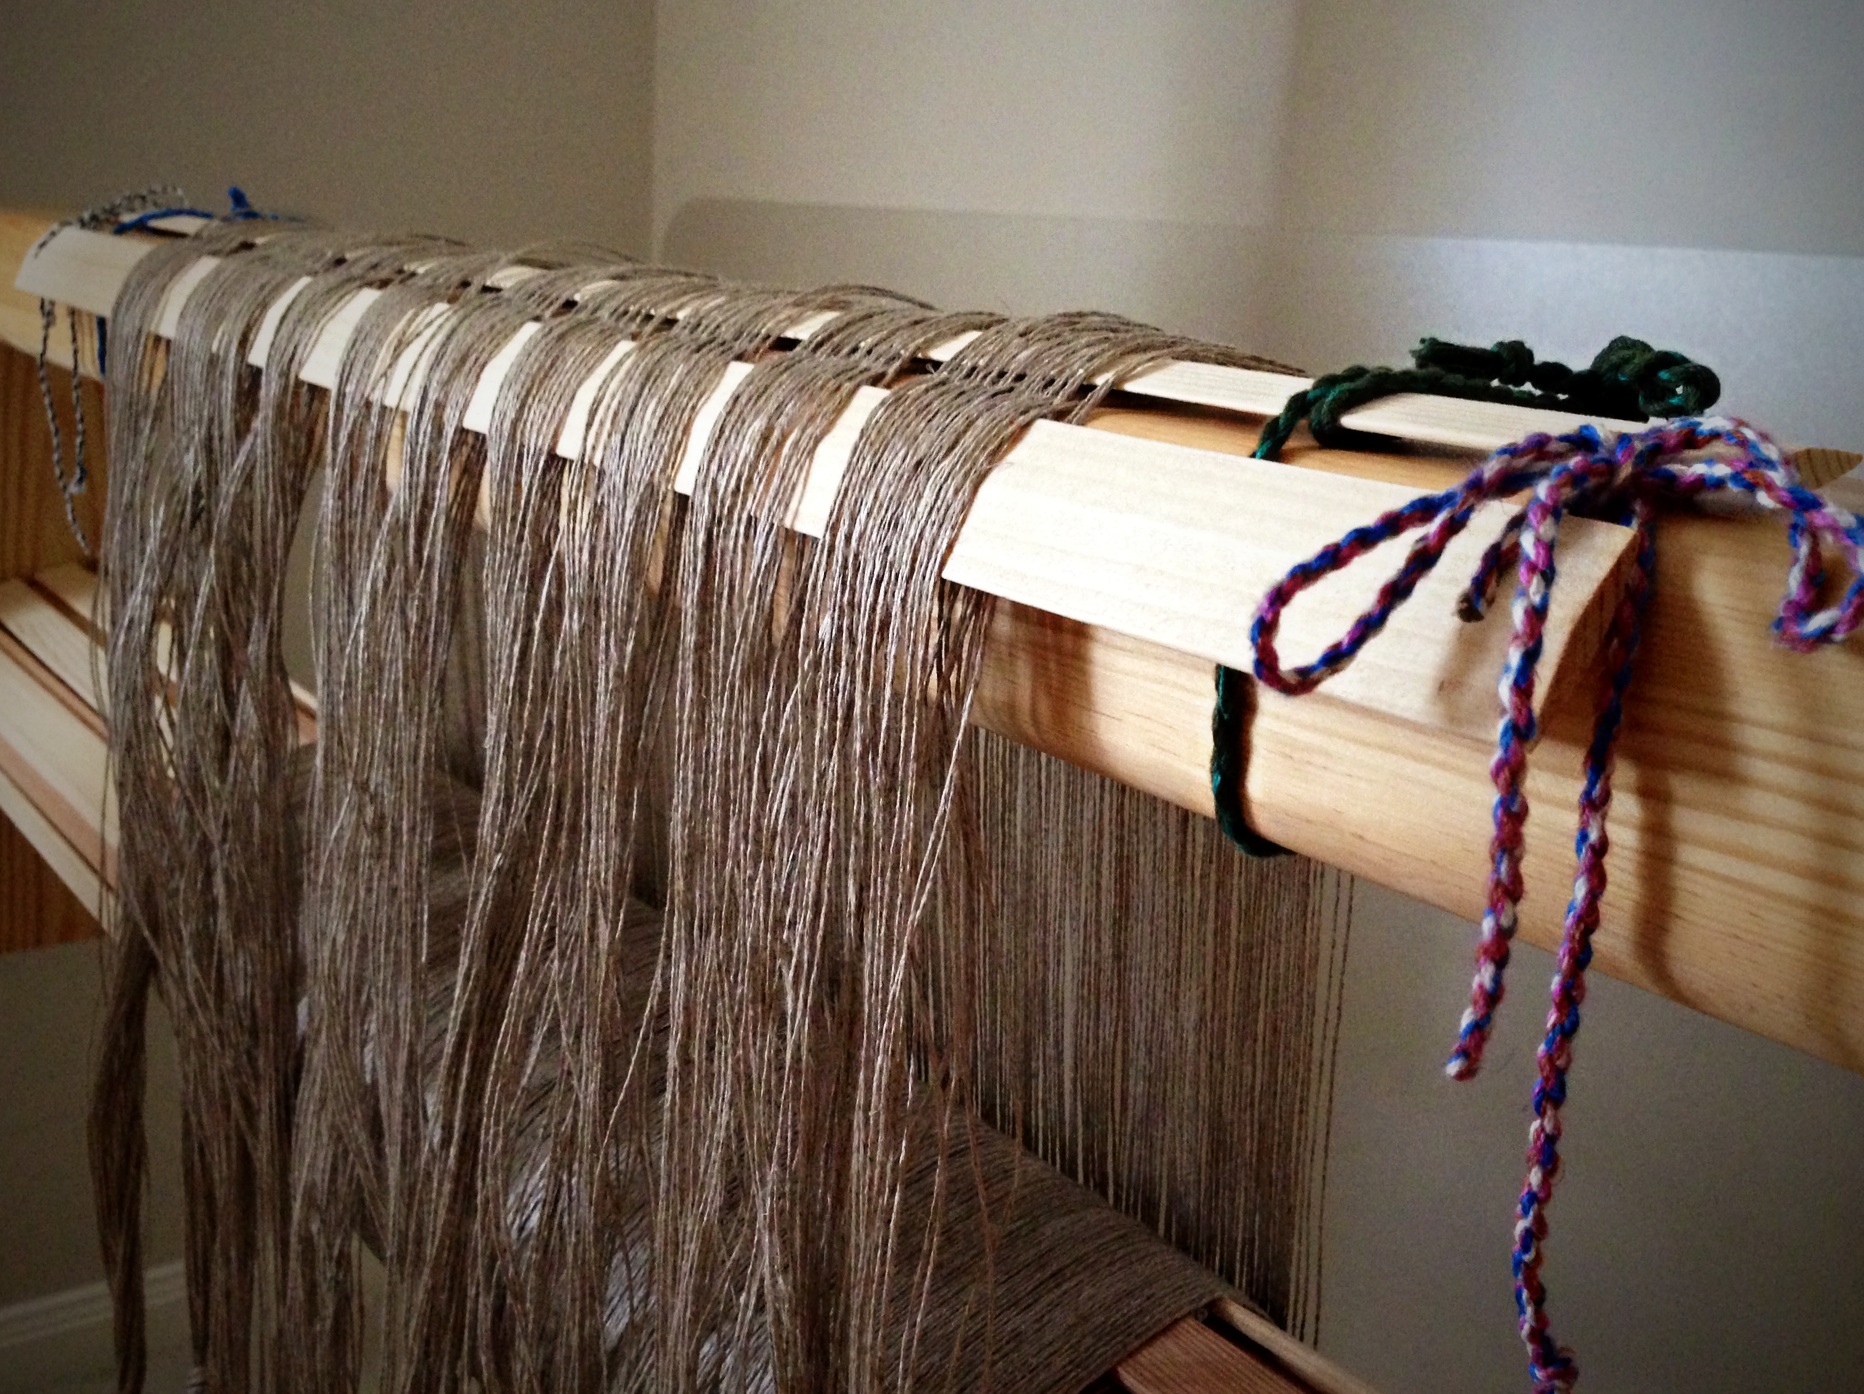
Resourcefulness, make-do ability, outside-the-box thinking, solution-minded questions, and a little stubbornness. These are some of the best things to keep in the weaver’s toolbox. Jury rigging is an old nautical term having to do with sailors improvising the replacement of a damaged mast and sails, using only tools and materials that happen to be on hand. You could call it makeshift repairs or temporary contrivances. That describes what I did this week as I came near the end of the linen warp. And, like a sailor, I was working with wood, strings, and cloth.
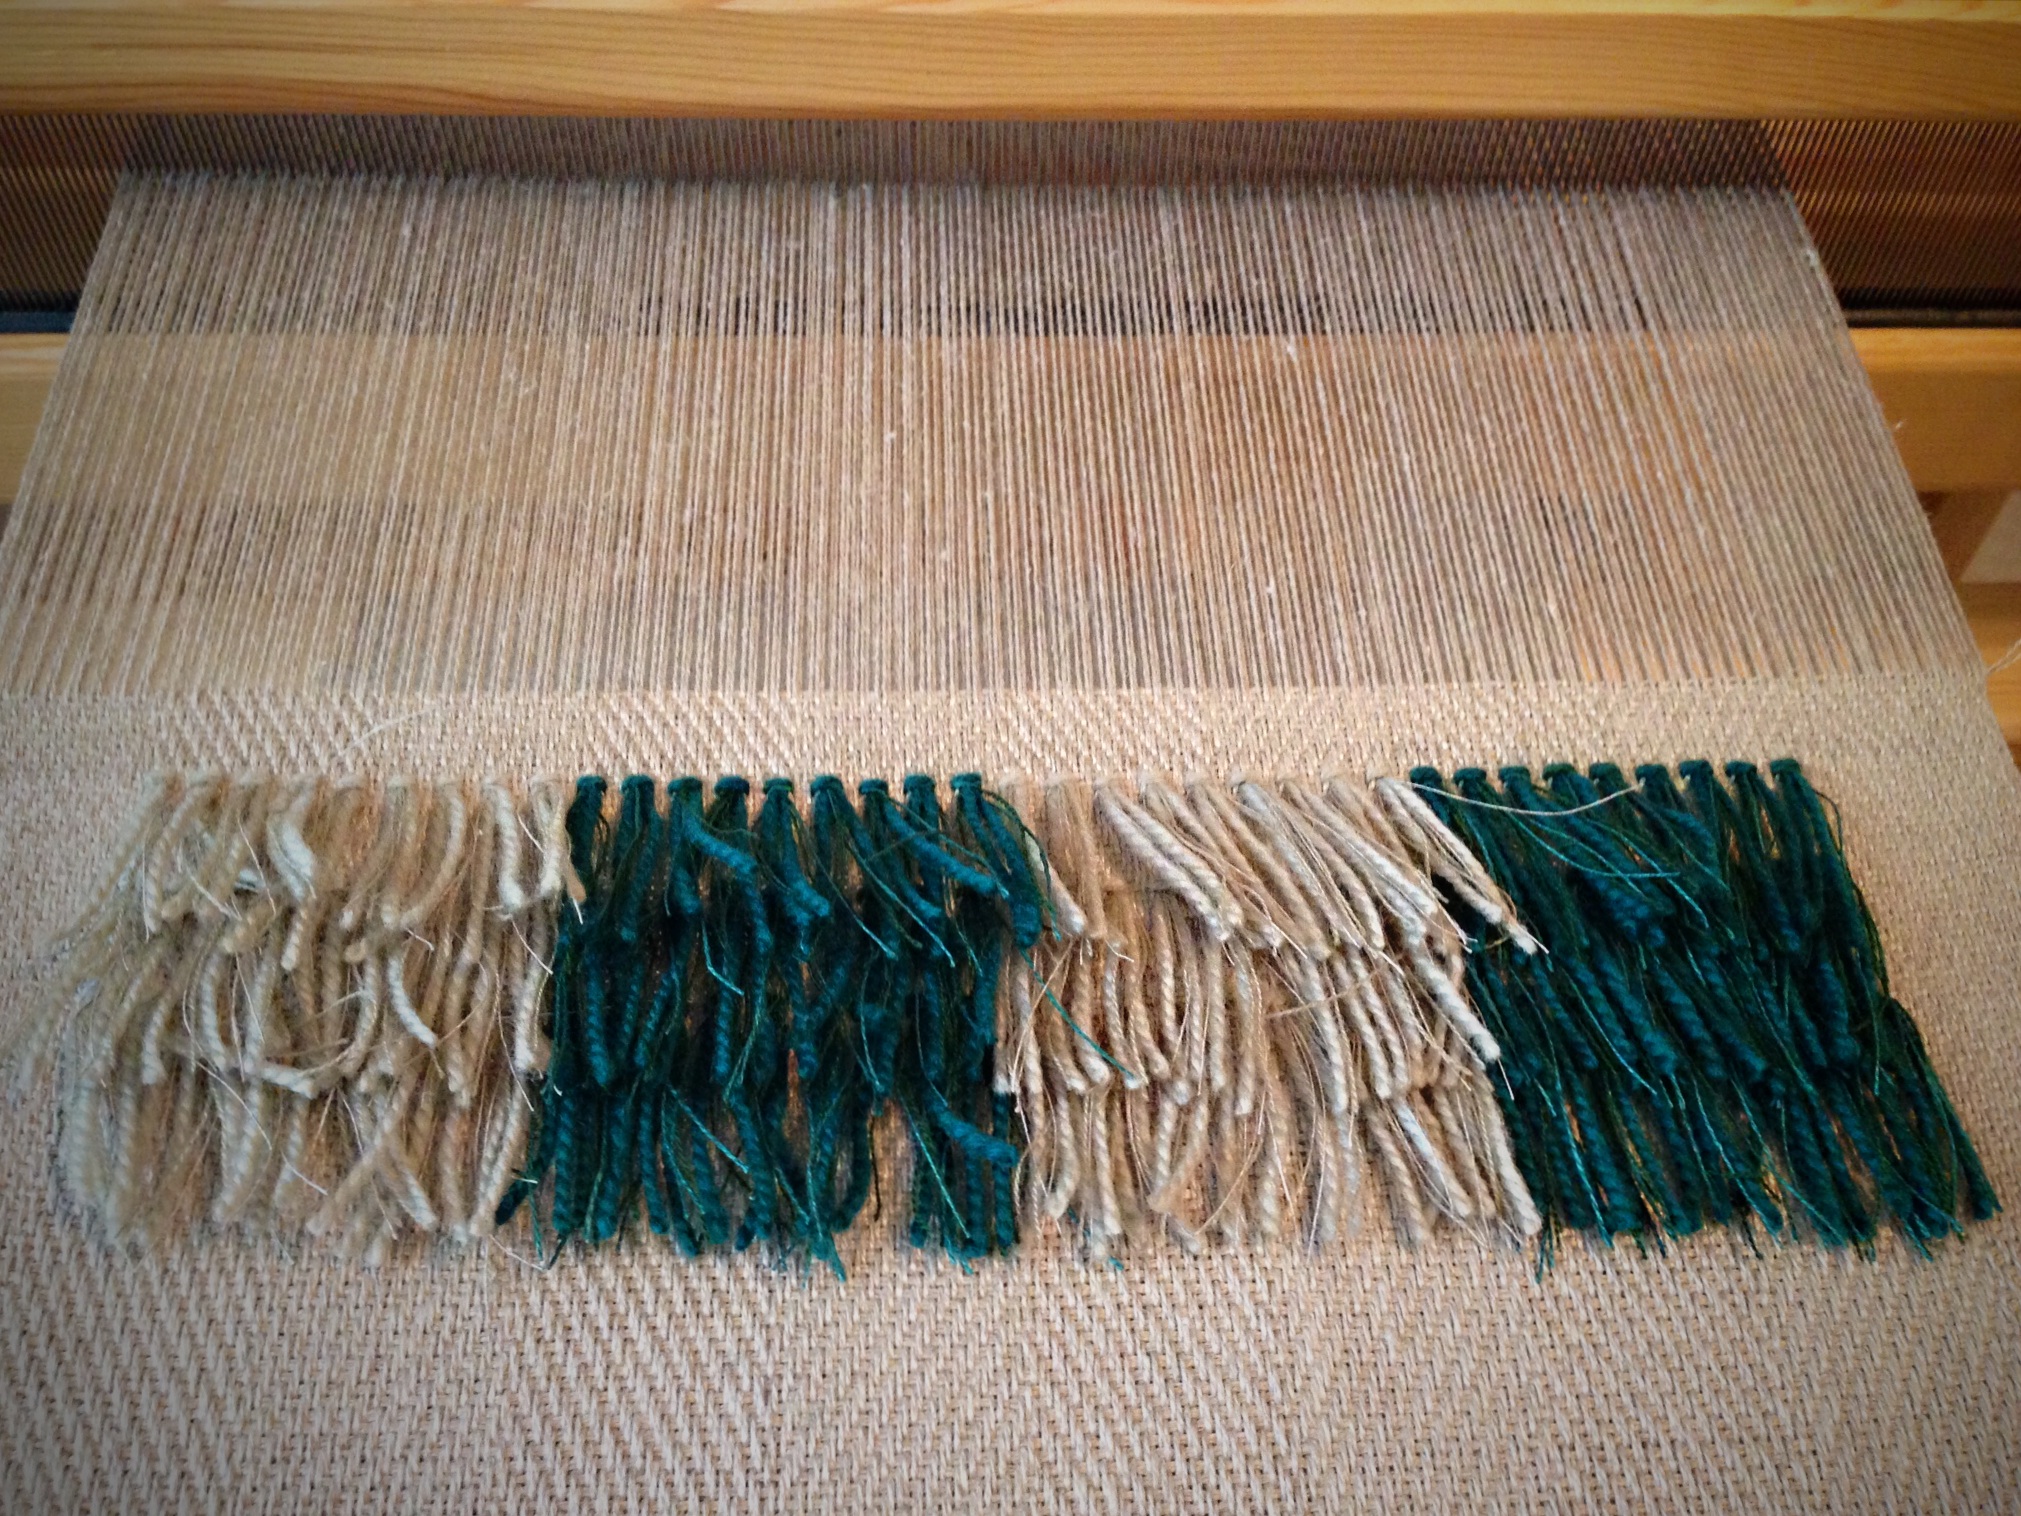
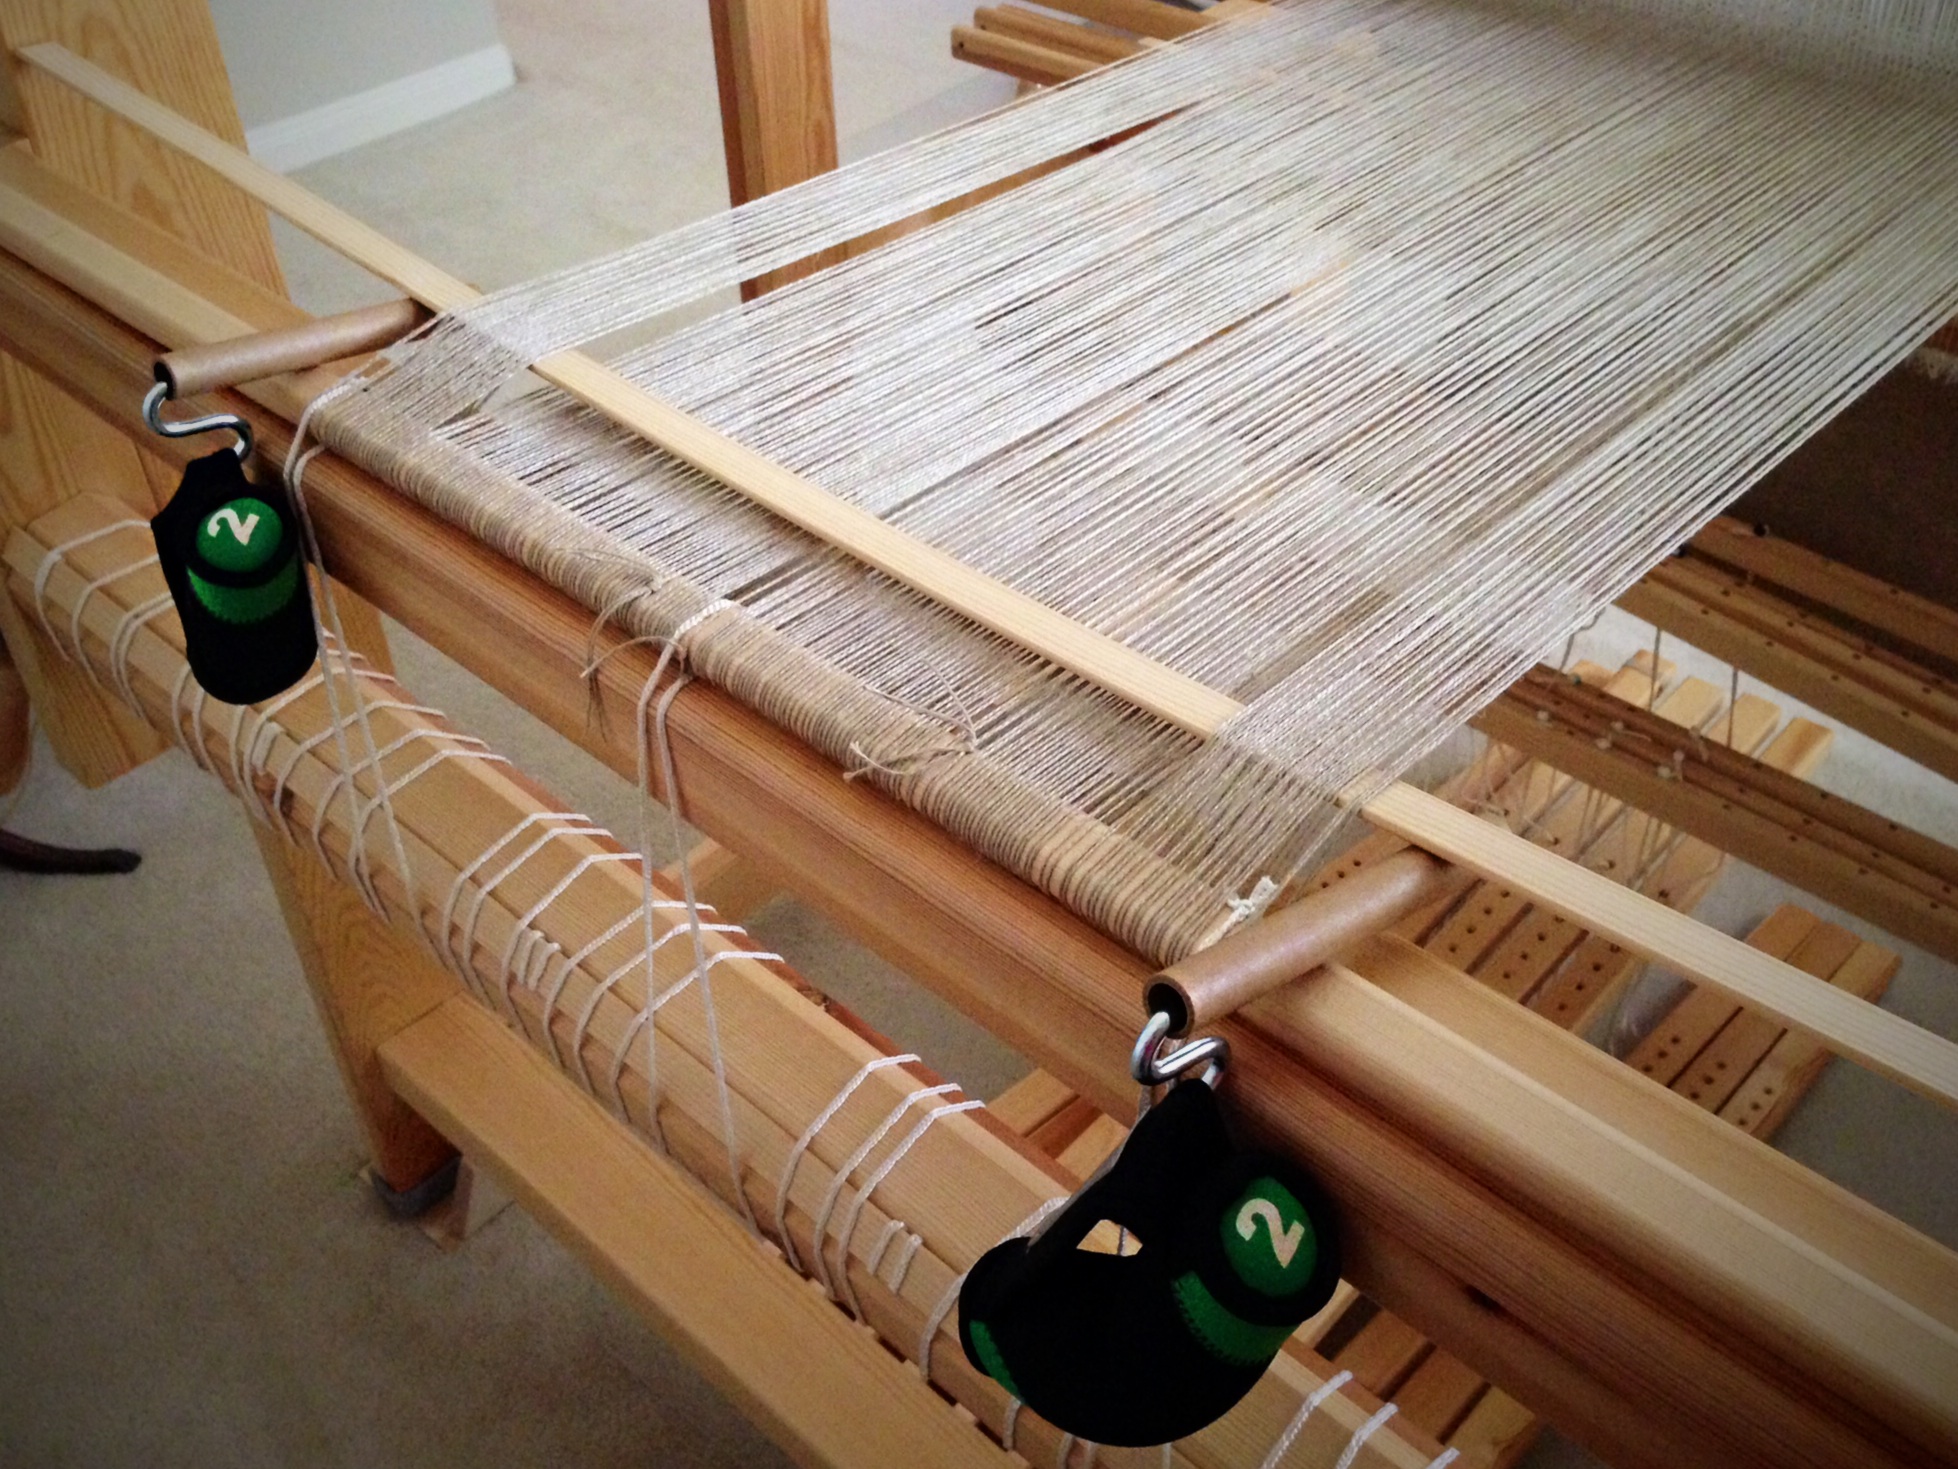
Warpends on the sides have become looser than the warp that has the rya knots in it. That’s not good. Tension needs to be even across the warp.
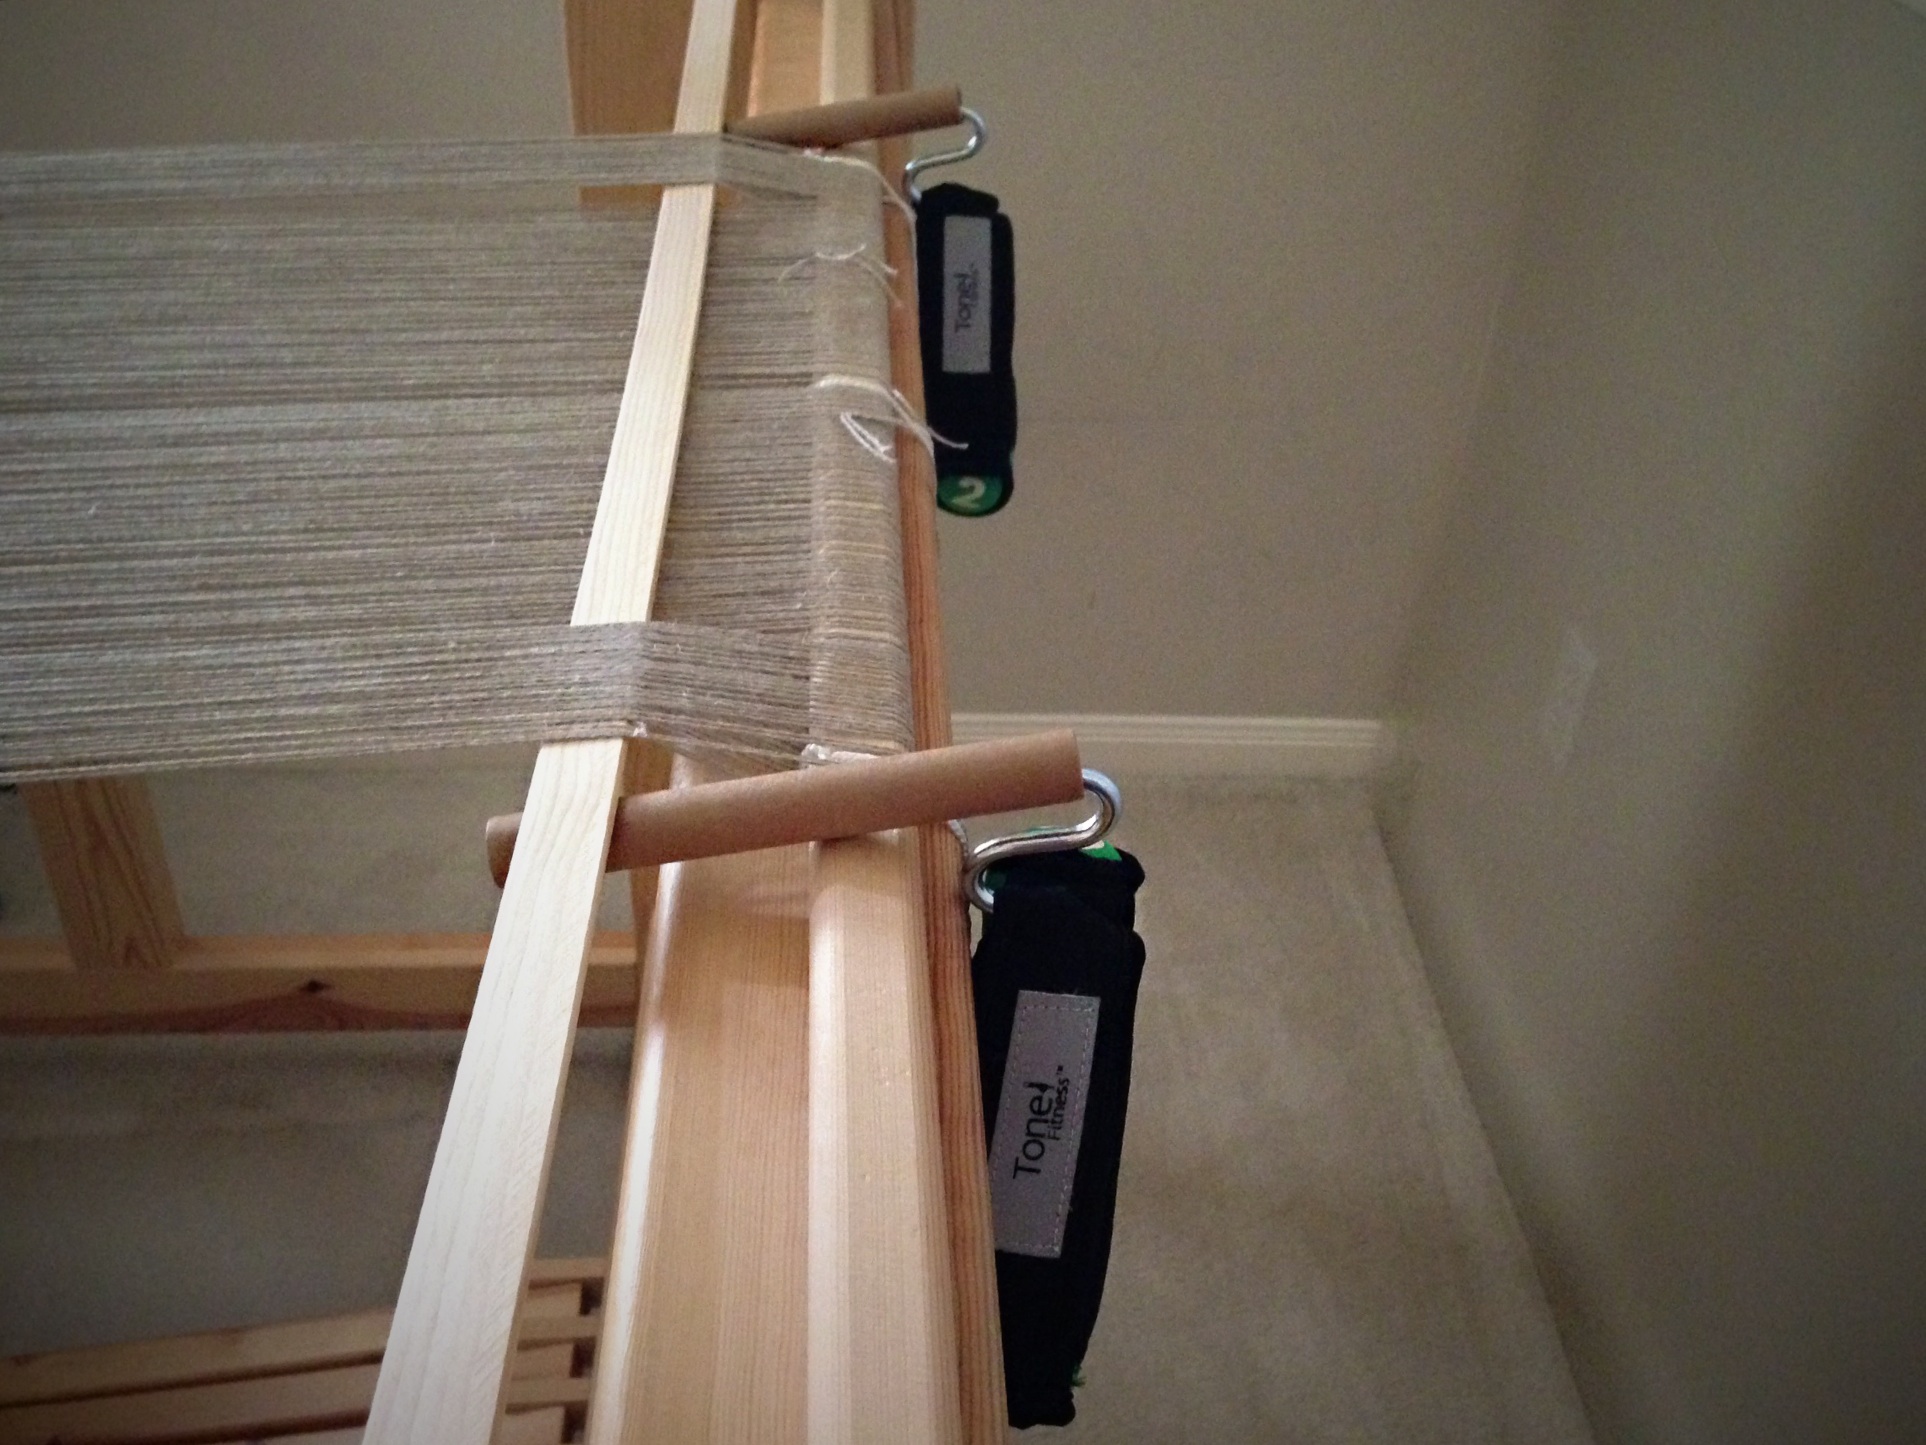
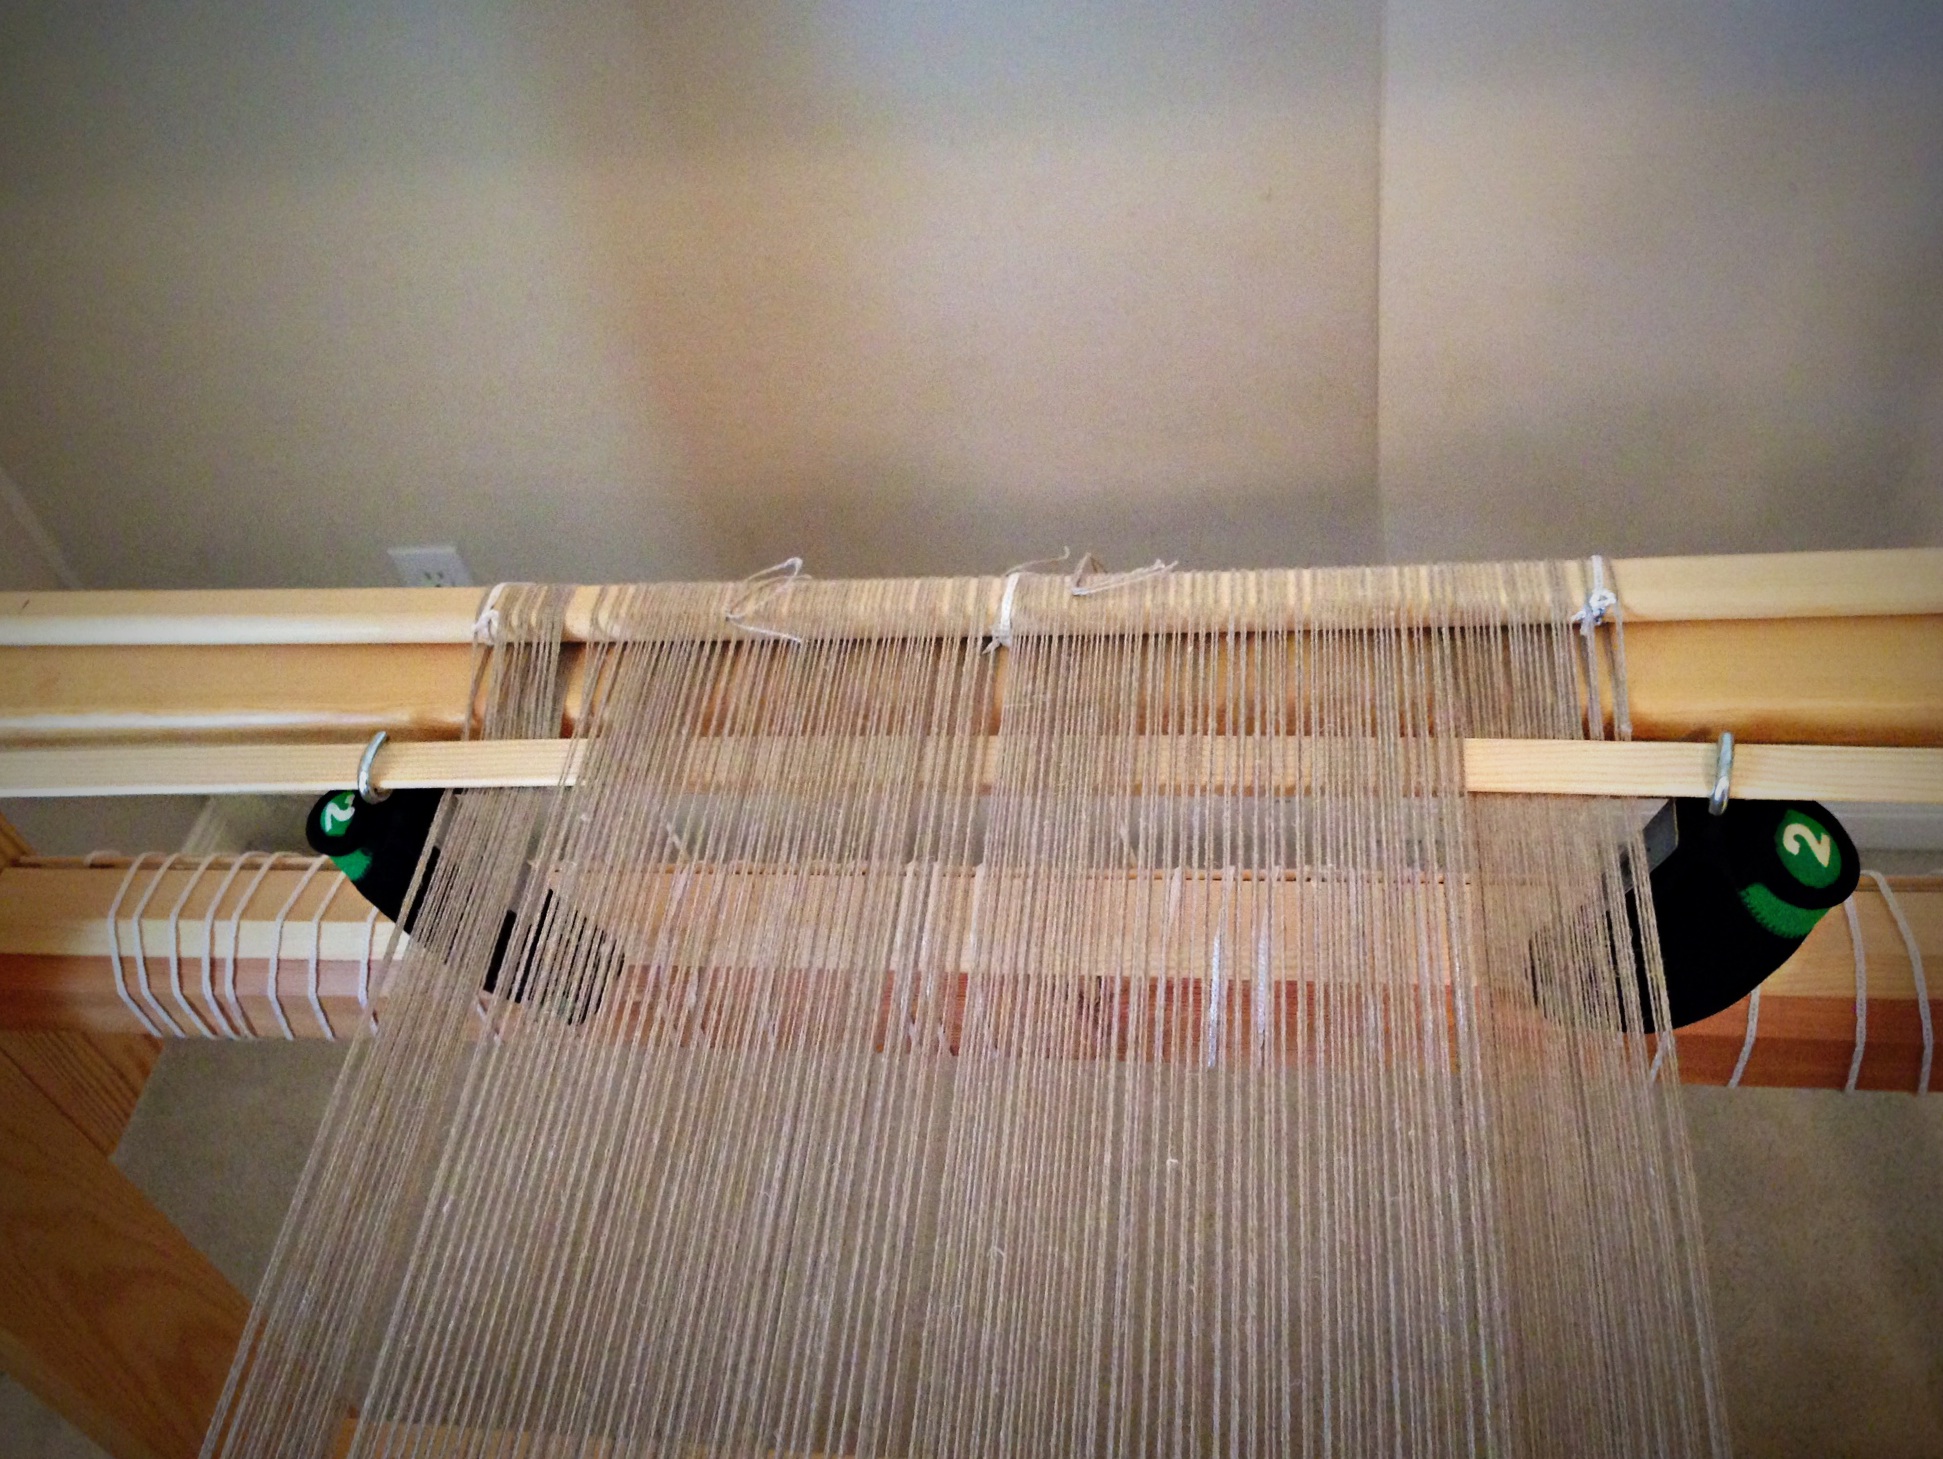
I needed to even out the tension across the warp ends, because the outer edges were not taking up at the same rate as the warp in the center, because of the rya knots. The pictures show how I jury rigged a warping slat, empty thread tubes, S-hooks, and 2-pound walking weights to adjust the tension so I could continue weaving.
Adding weight to the loose sections of the warp.Two-pound walking weights are easy to hang from S-hooks. Using empty thread spools was a short-lived solution. That had to change when I advanced the warp.Changing the slat so it is over the loose warp ends enables me to hang the weights directly on the slat with S-hooks.View from underneath, walking weights hang from warping slat to increase tension on the loose warp ends.
May you know when to make a temporary, but useful, contraption.
All the best, Karen
(~My thank-you to you, my reader friends–a discount coupon good during August 2014 toward anything in my Etsy Shop. Find the coupon code on my About Page.~)
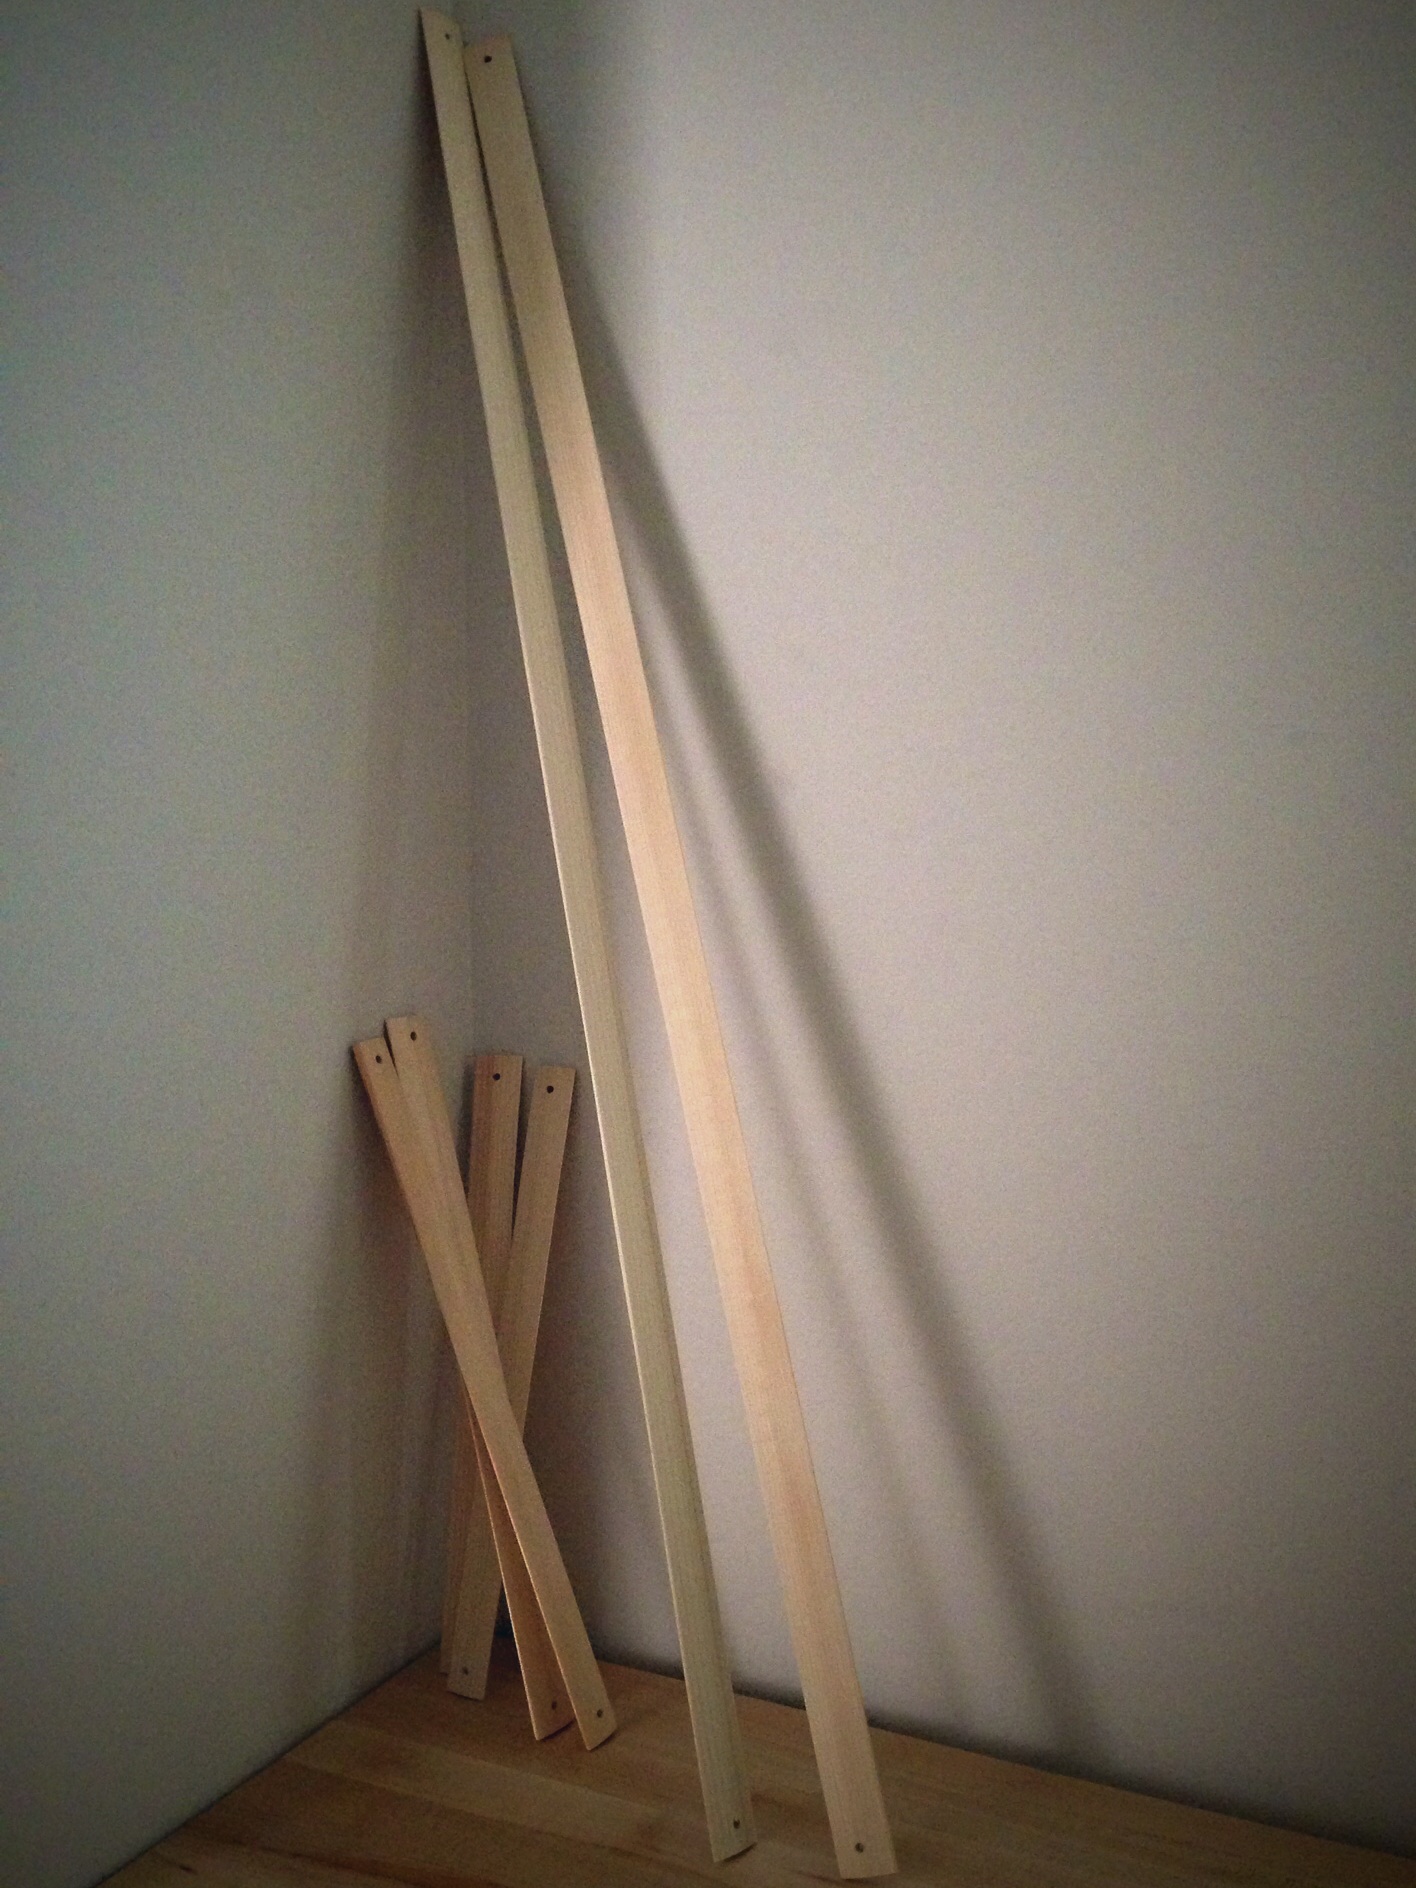
What can you do with a pair of flat beveled wood sticks, with a hole at each end? Use them for lease sticks, of course! This is an example of efficient simplicity. By slipping these two sticks through the opening of the lease cross made while winding a warp, and tying the ends of the sticks together, all the warpends stay perfectly in order throughout the process of dressing the loom. After beaming the warp, with the warp still under tension, I tie the back lease stick to the back beam. Then, when threading the heddles, I simply take each thread in order by going to the cross in between the two lease sticks and picking up the next thread. I always weave with the lease sticks in. I don’t remove them until the end of the warp comes over the back beam.
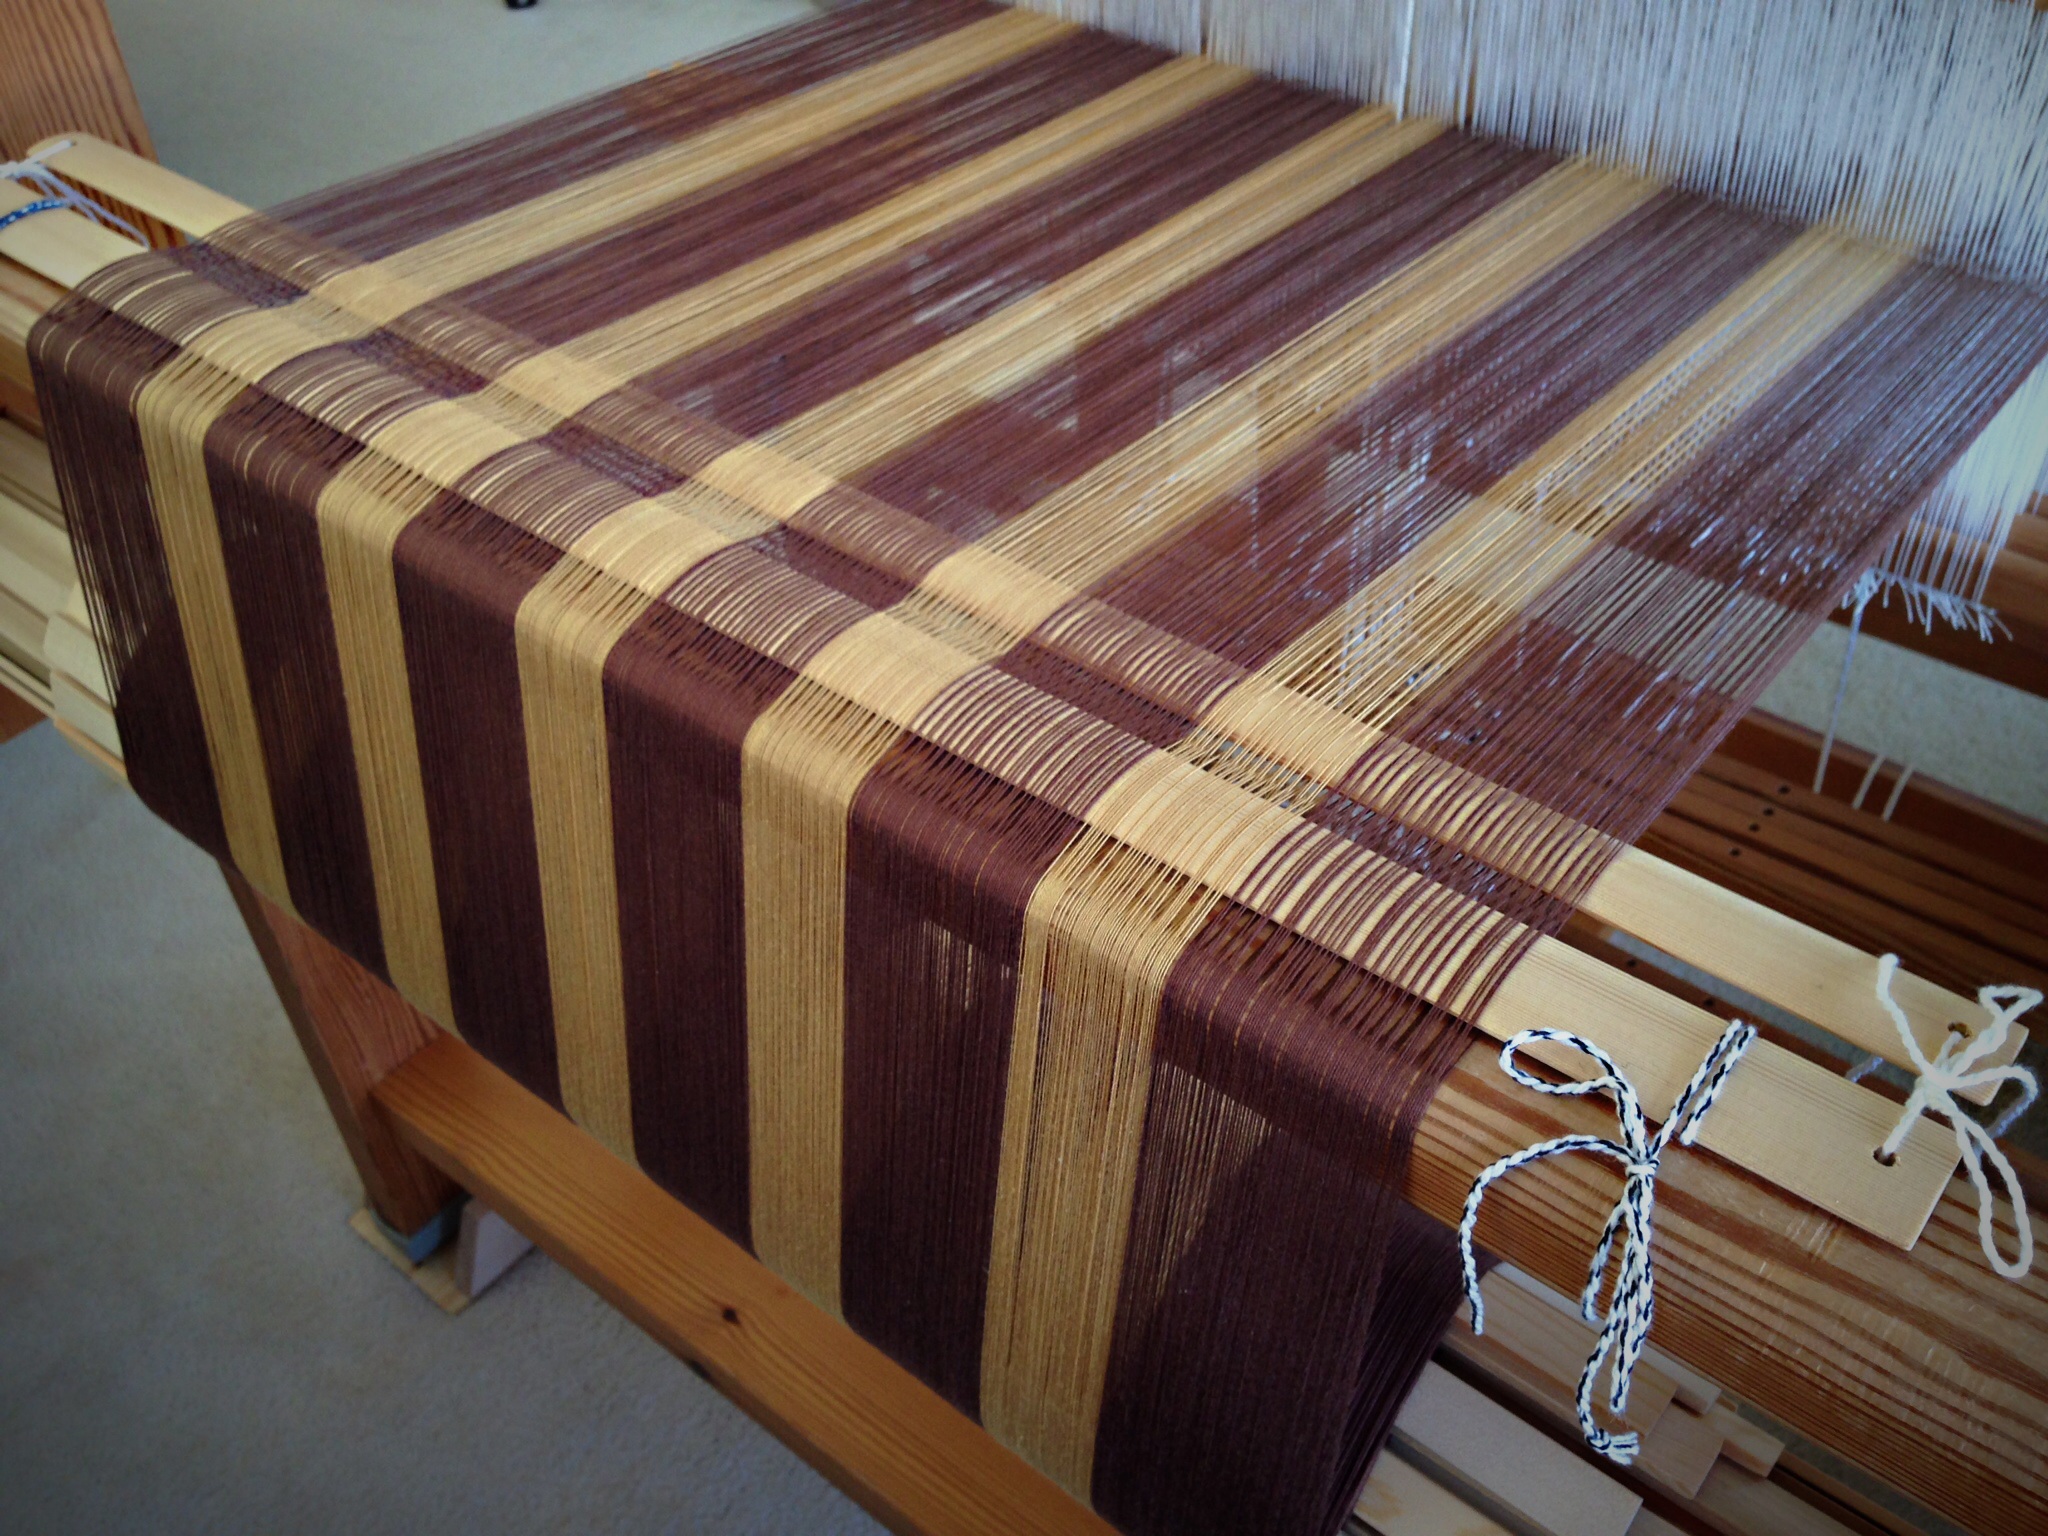
I keep several lengths of lease sticks on hand. Some were purchased from Glimakra, and some were fashioned by my skilled hubby.Striped warpthreaded and ready to weave cotton tea towels. Pair of lease sticks are tied together at the ends with choke ties, and back lease stick is tied to back beam.Linen warp is ready for threading. Lease sticks are tied together at the ends, and secured to the back beam. This warp is for another rya project.Threading the last grouping of threads in this 8/2 linen warp. The lease sticks separate the threads in a way that clearly shows which thread is next.
May you encounter simplicity in your creative process.
At the risk of telling you something you already know, I am going to show two ways I use rubber bands in my weaving studio. Yes, rubber bands. Simple, to the point of being simplistic. But I sheepishly admit, I didn’t know to do these things until I saw someone else do them; and then I expanded (pun intended) their practices to suit the way I like to work.
1. While it is common to put a rubber band on one treadle to act as a marker for your feet, I find it helpful to put rubber bands on two treadles for even greater efficiency. I put one rubber band on the first pattern treadle, and a second rubber band on the third pattern treadle. My feet never have to guess where to step. (With the rosepathtie-up for the rag rugs on the Glimakra Ideal loom, there are two plain weave treadles on the right, and then four pattern treadles. The rya weaving on the Glimakra Standard loom has one treadle on the right that lifts the warpends for the rya knots, and four pattern treadles.)
Plain weave, like the solid blue section, and the band of brown, uses the two treadles on the right on this Glimakra Ideal loom. The rosepath pattern, in orchid, and the dots and dashes, in dark pink and blue/black, uses the remaining four treadles.Five treadles are used for this rya weaving on the Glimakra Standard loom. The treadle on the right lifts the warpends on the second shaft, onto which the rya strands are tied. The remaining four treadles are used to weave a rosepath pattern in the cloth.
2. Rubber band the thread label around the tube of thread. This is the simplest way to keep track of fiber information–fiber content, weight, color number, brand. I also cut a short length of the thread and stick it to the sticky side of the label. This helps me get the labels back on the correct tubes, especially when using several threads of different colors.
With similar colors, like these two tubes of 12/6 cotton rug warp, it helps to keep an identifying strand attached to the label. I always try to put the label back on its tube as soon as possible to prevent mix-ups.
May you find simple solutions to do what you do better.
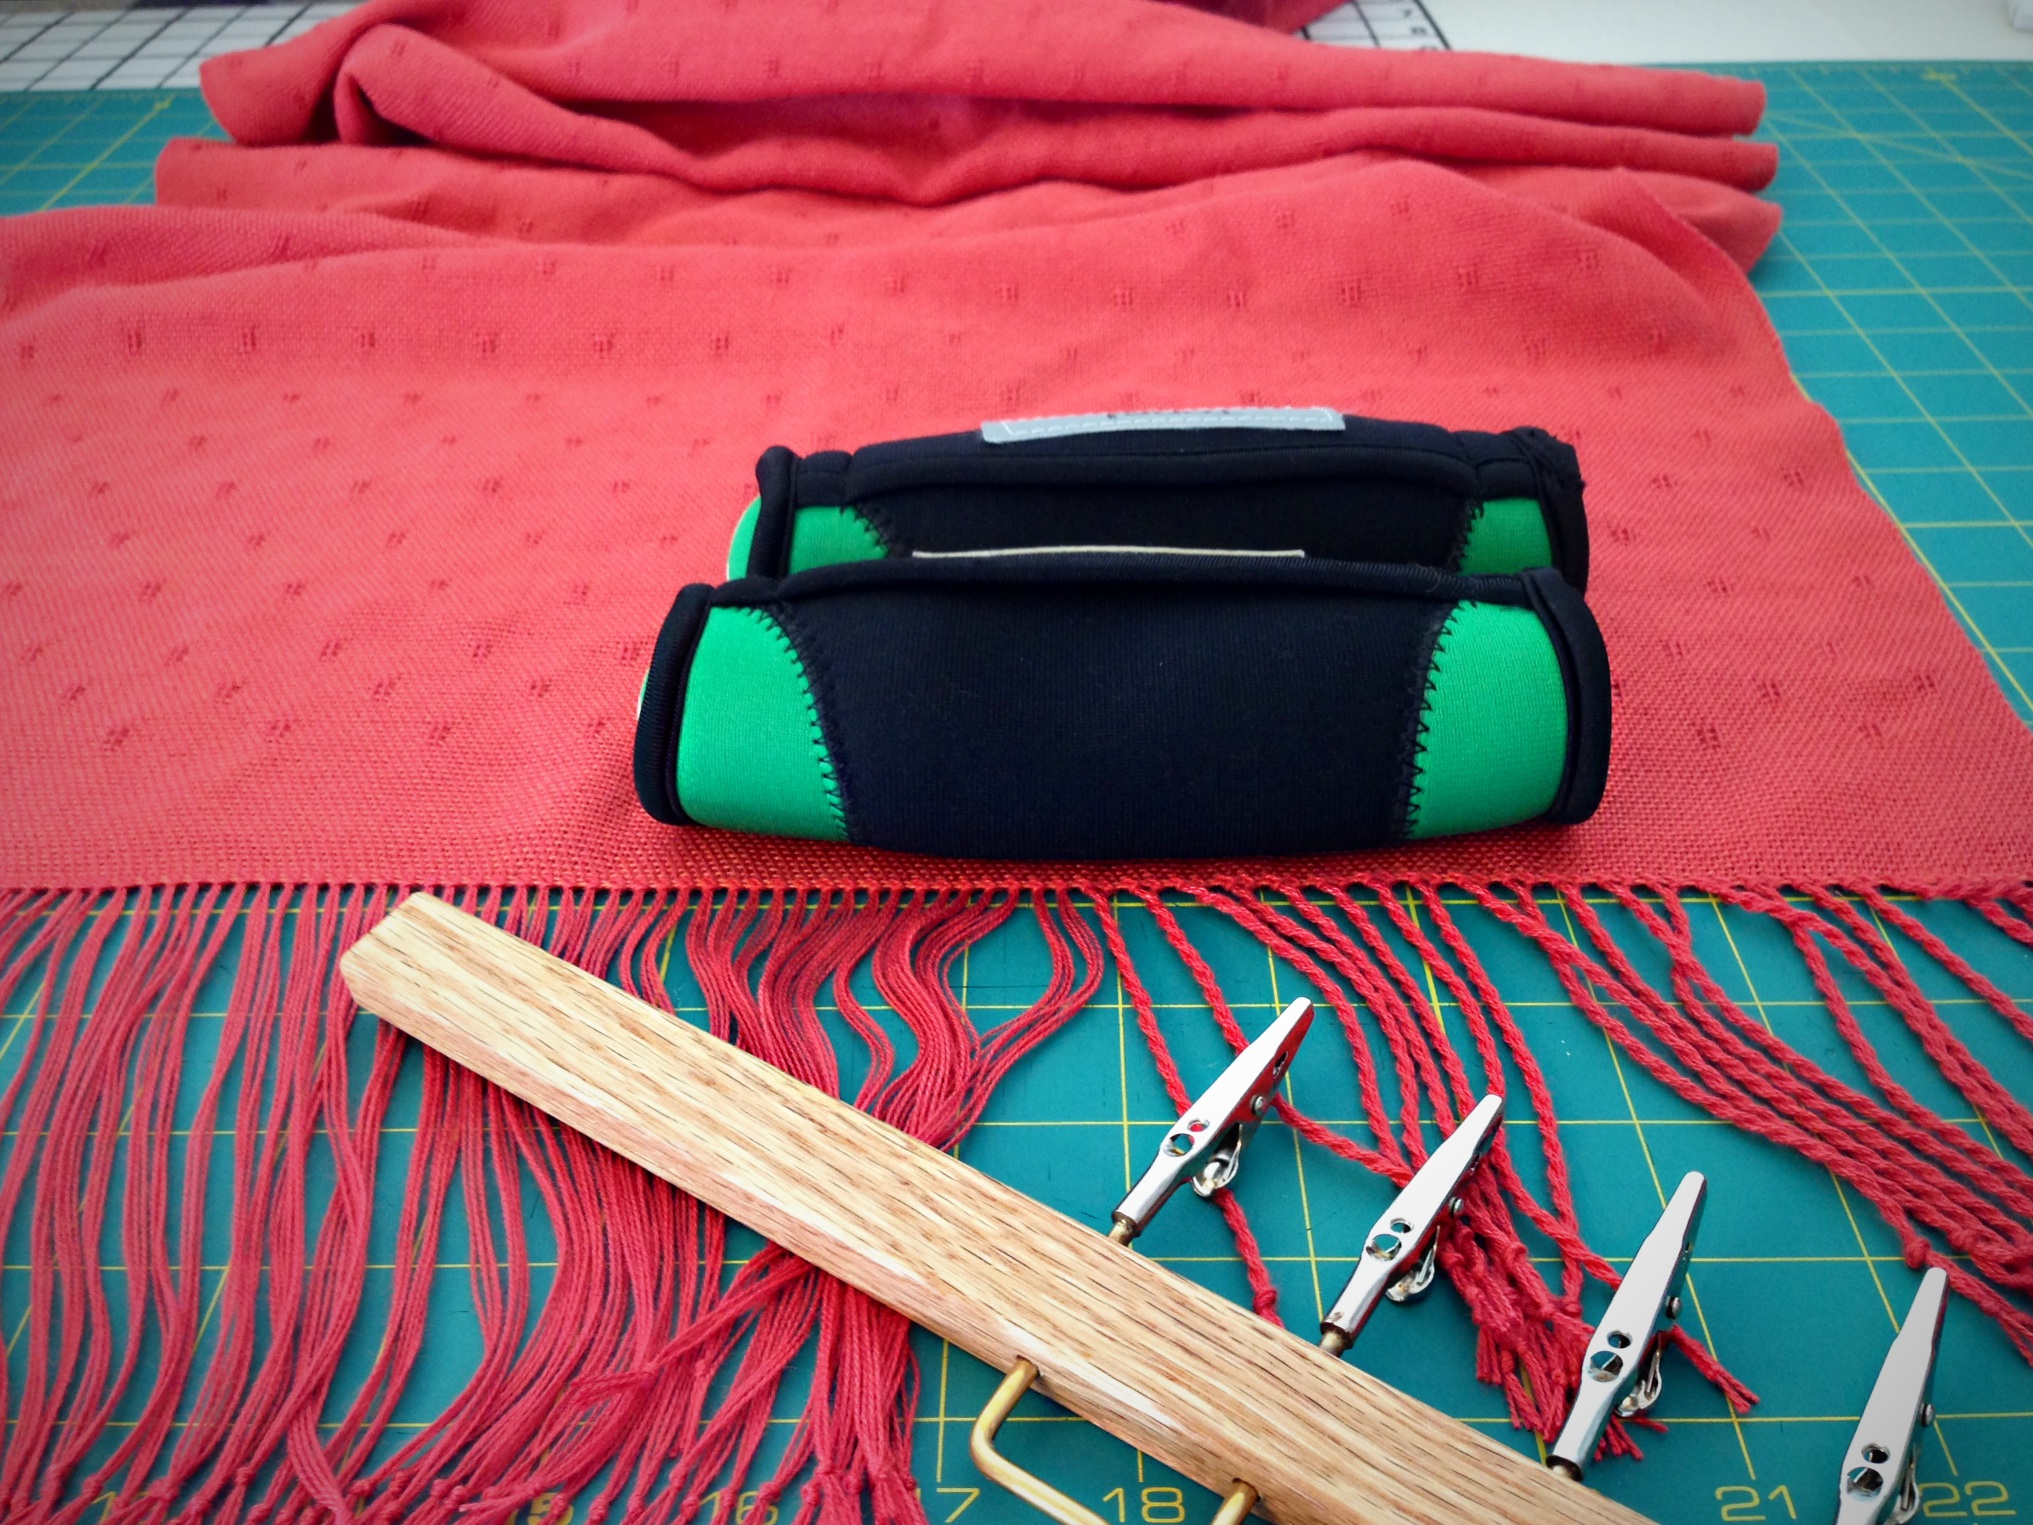
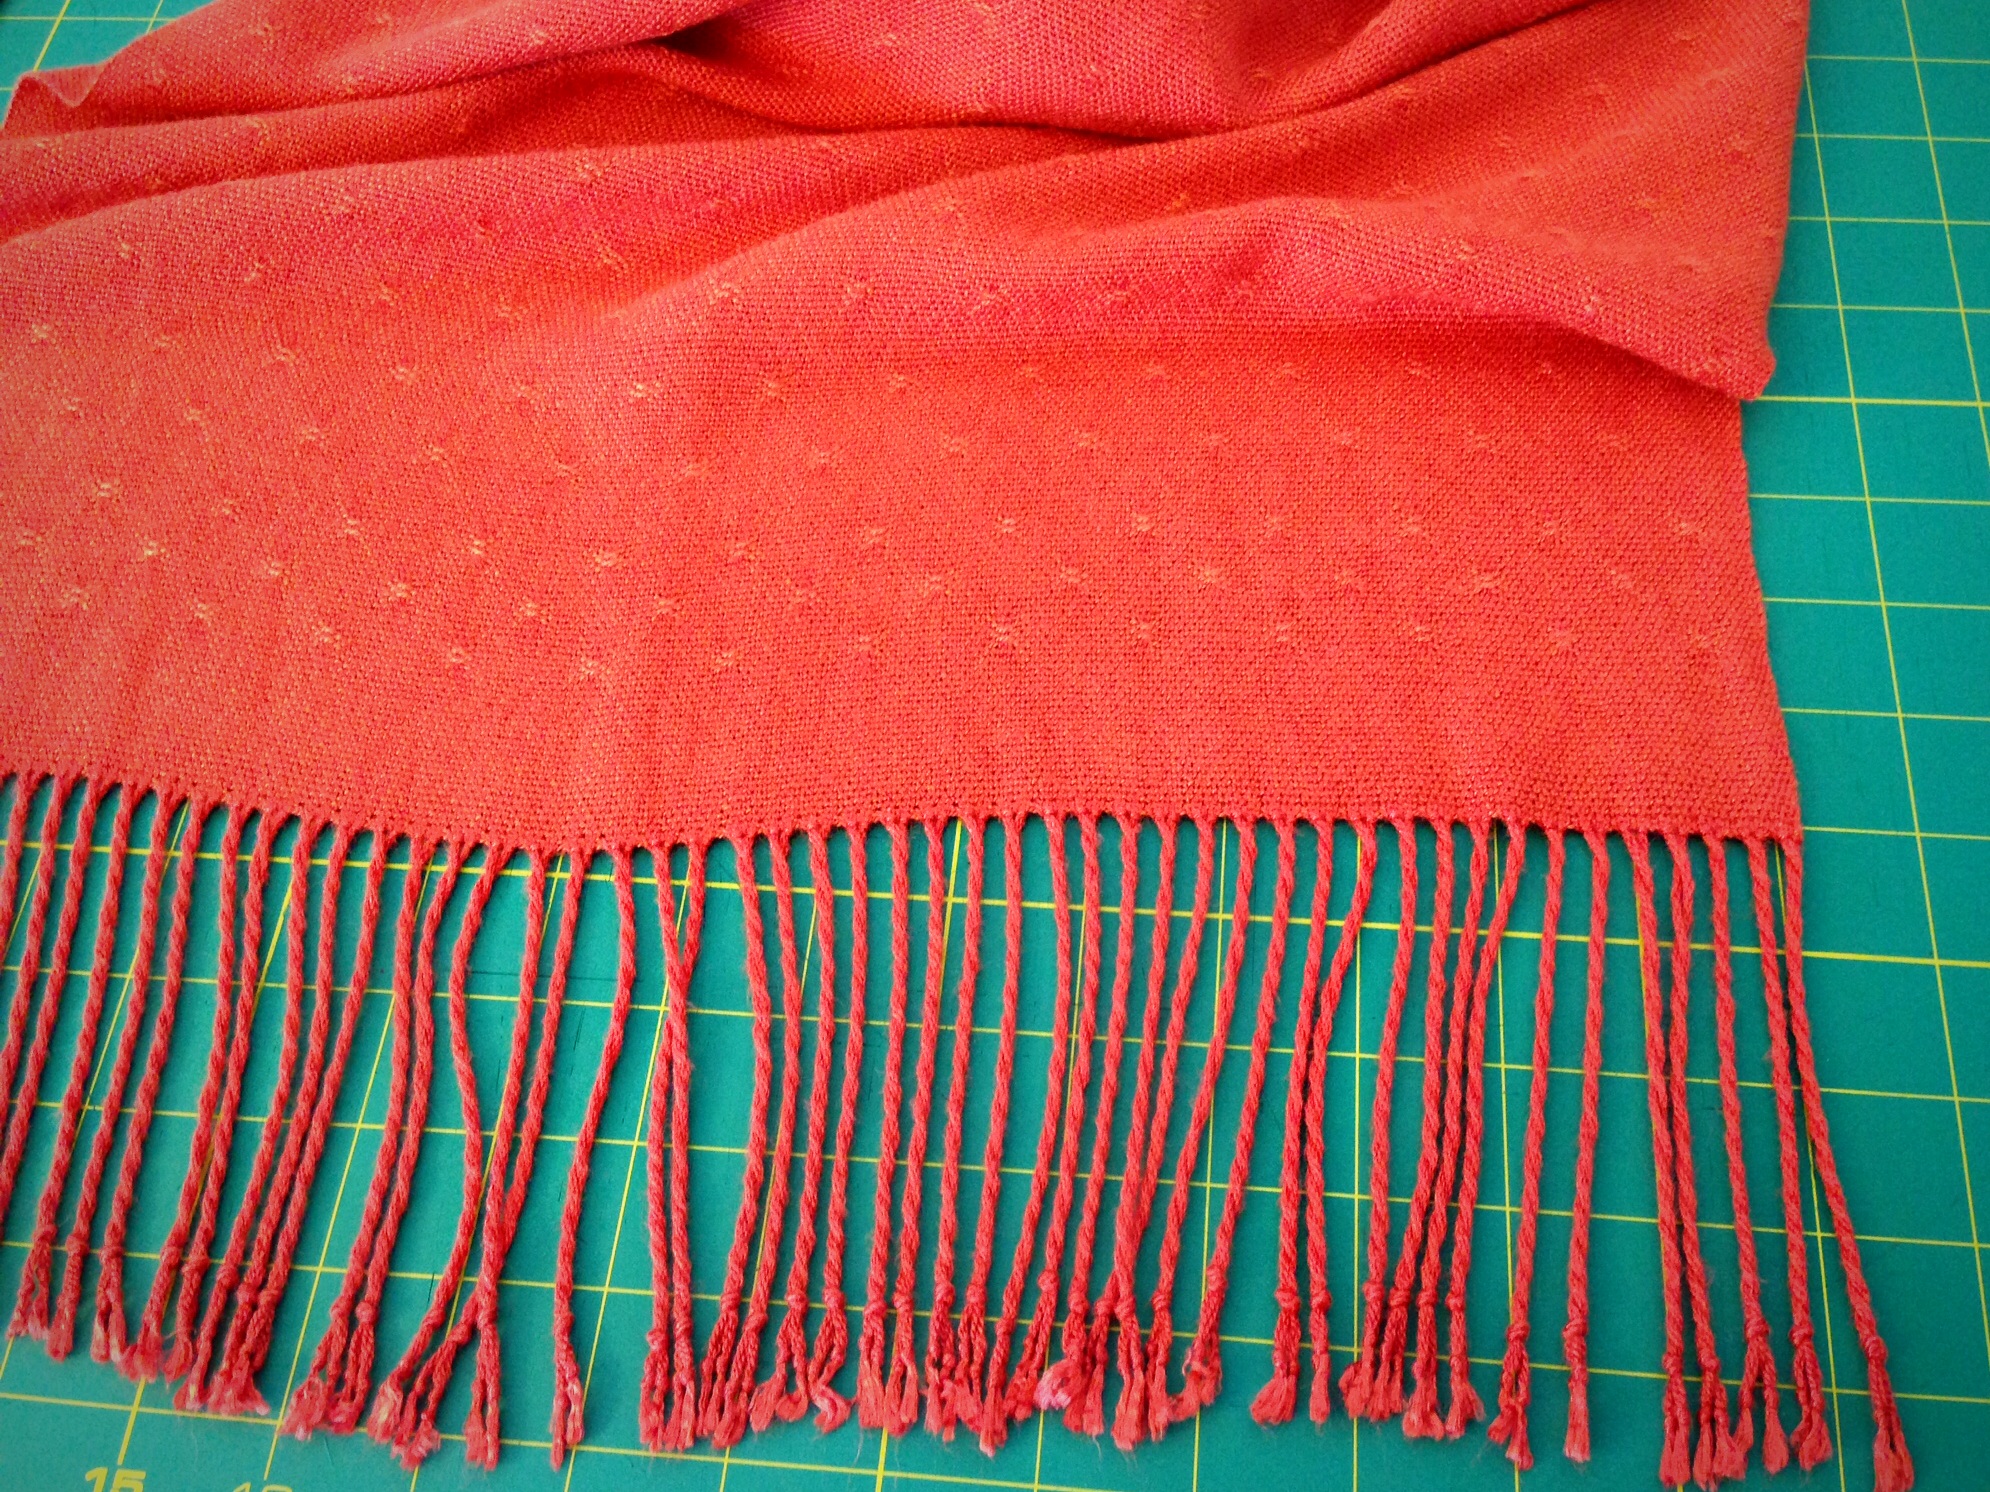
A hemstitched edge deserves twisted fringe. You have to overlook the amount of time it takes to put this finishing touch on your handwoven articles (often as much, or more, time than it took to weave the cloth in the first place). You do it because you care about the end result. The hemstitching and fringe are the mat and frame for your work of art. Begin well and finish well.
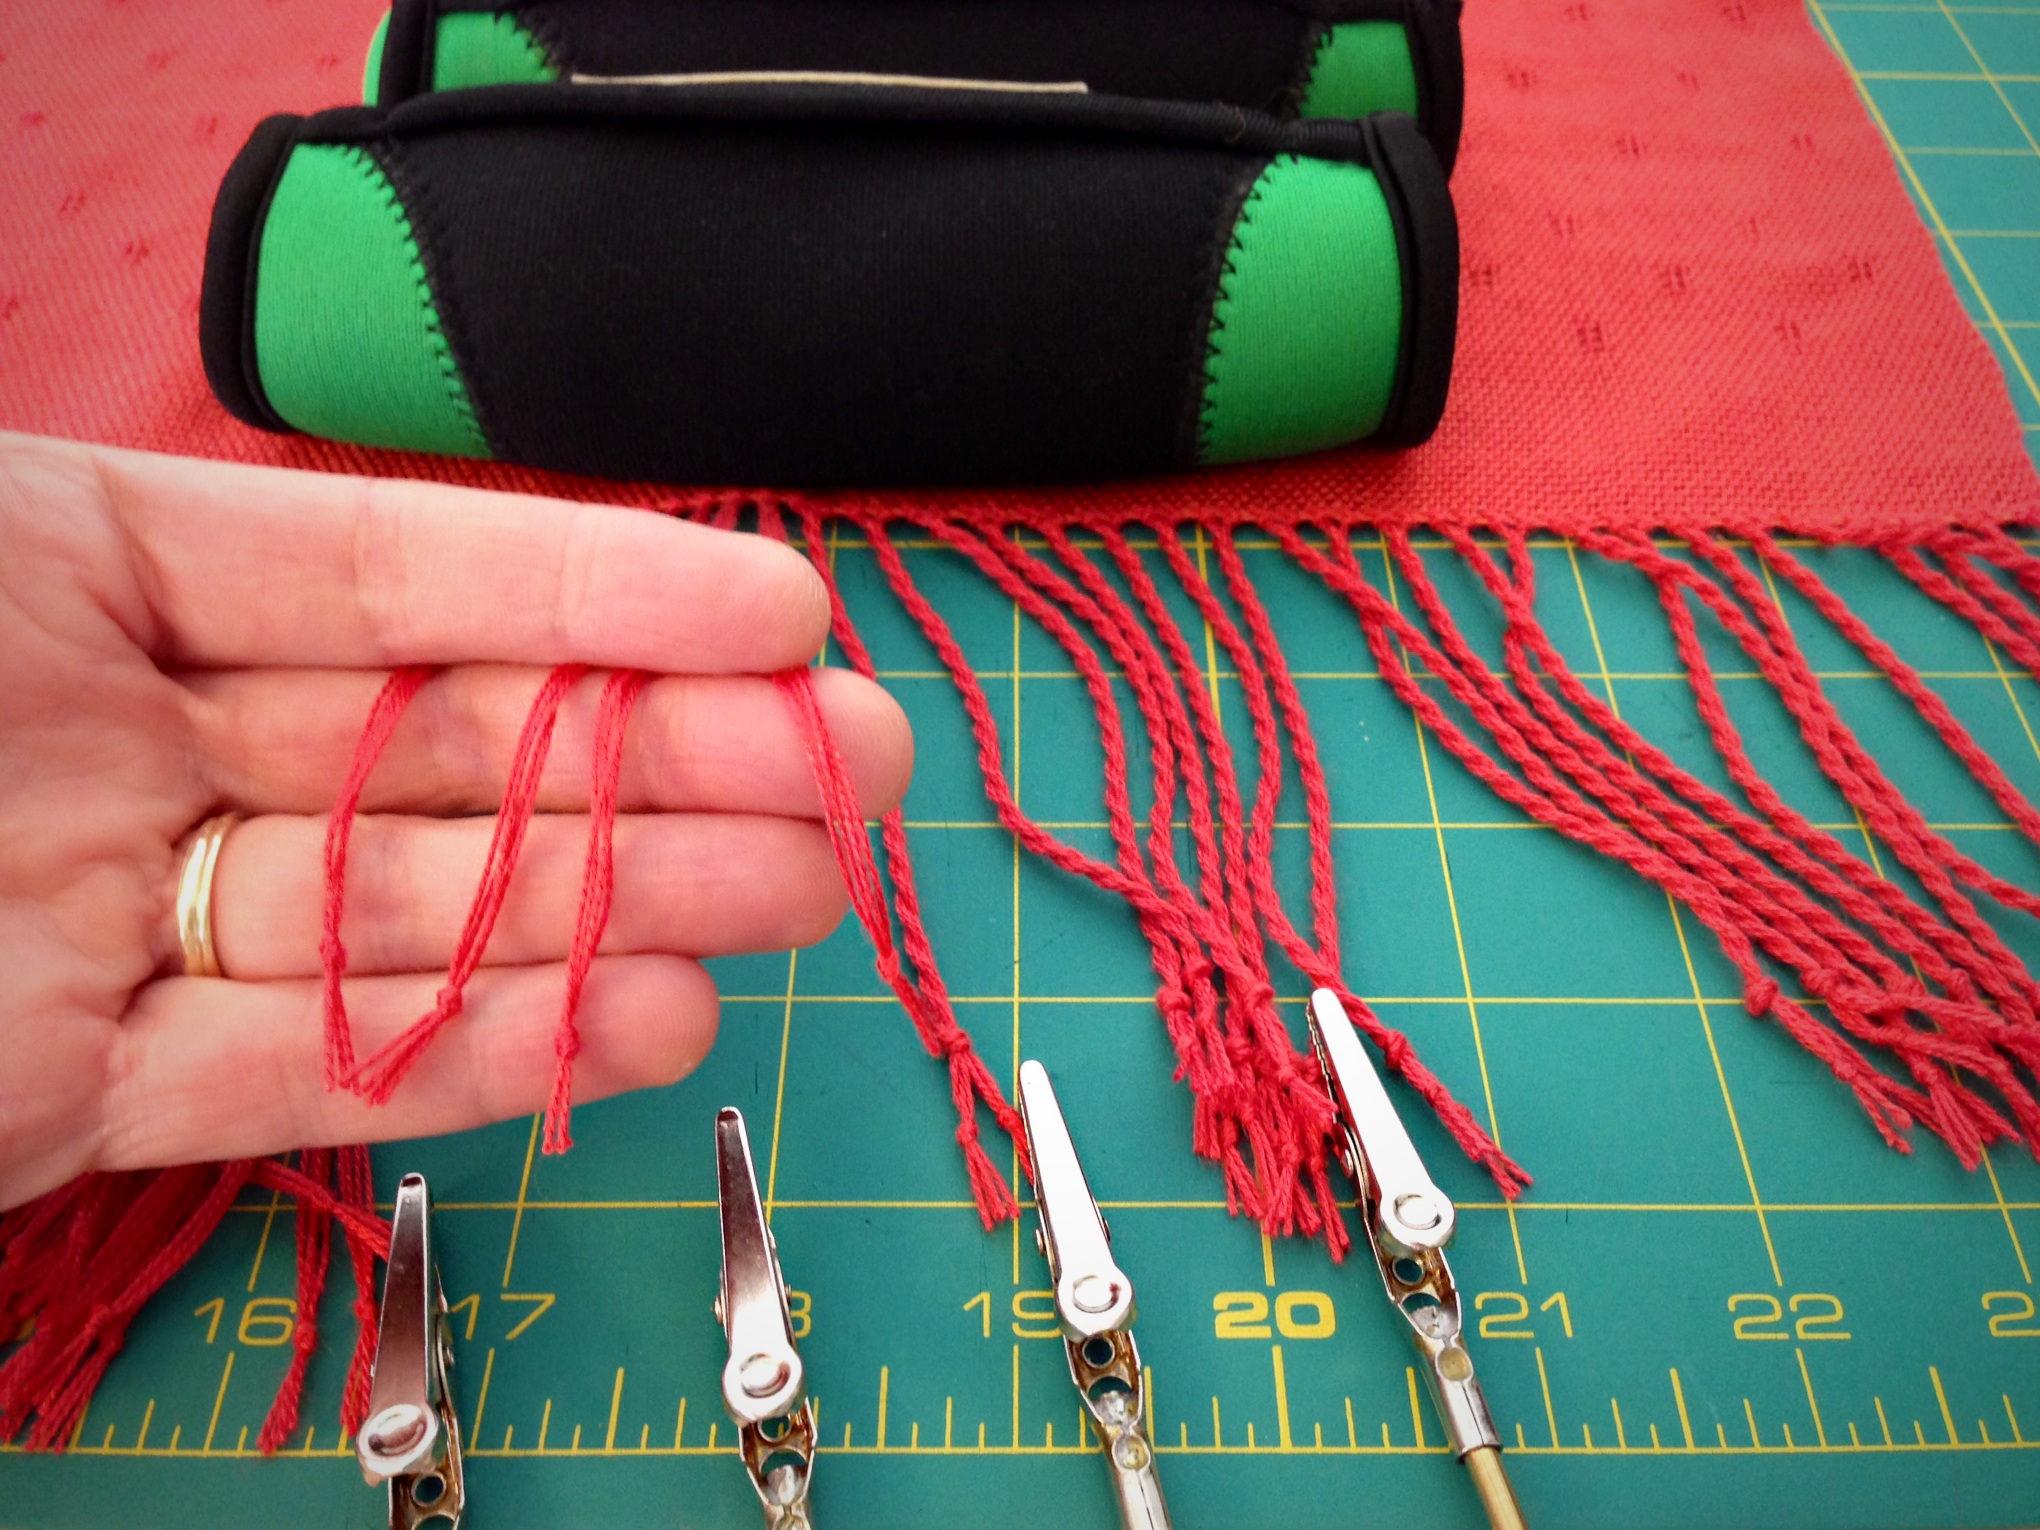
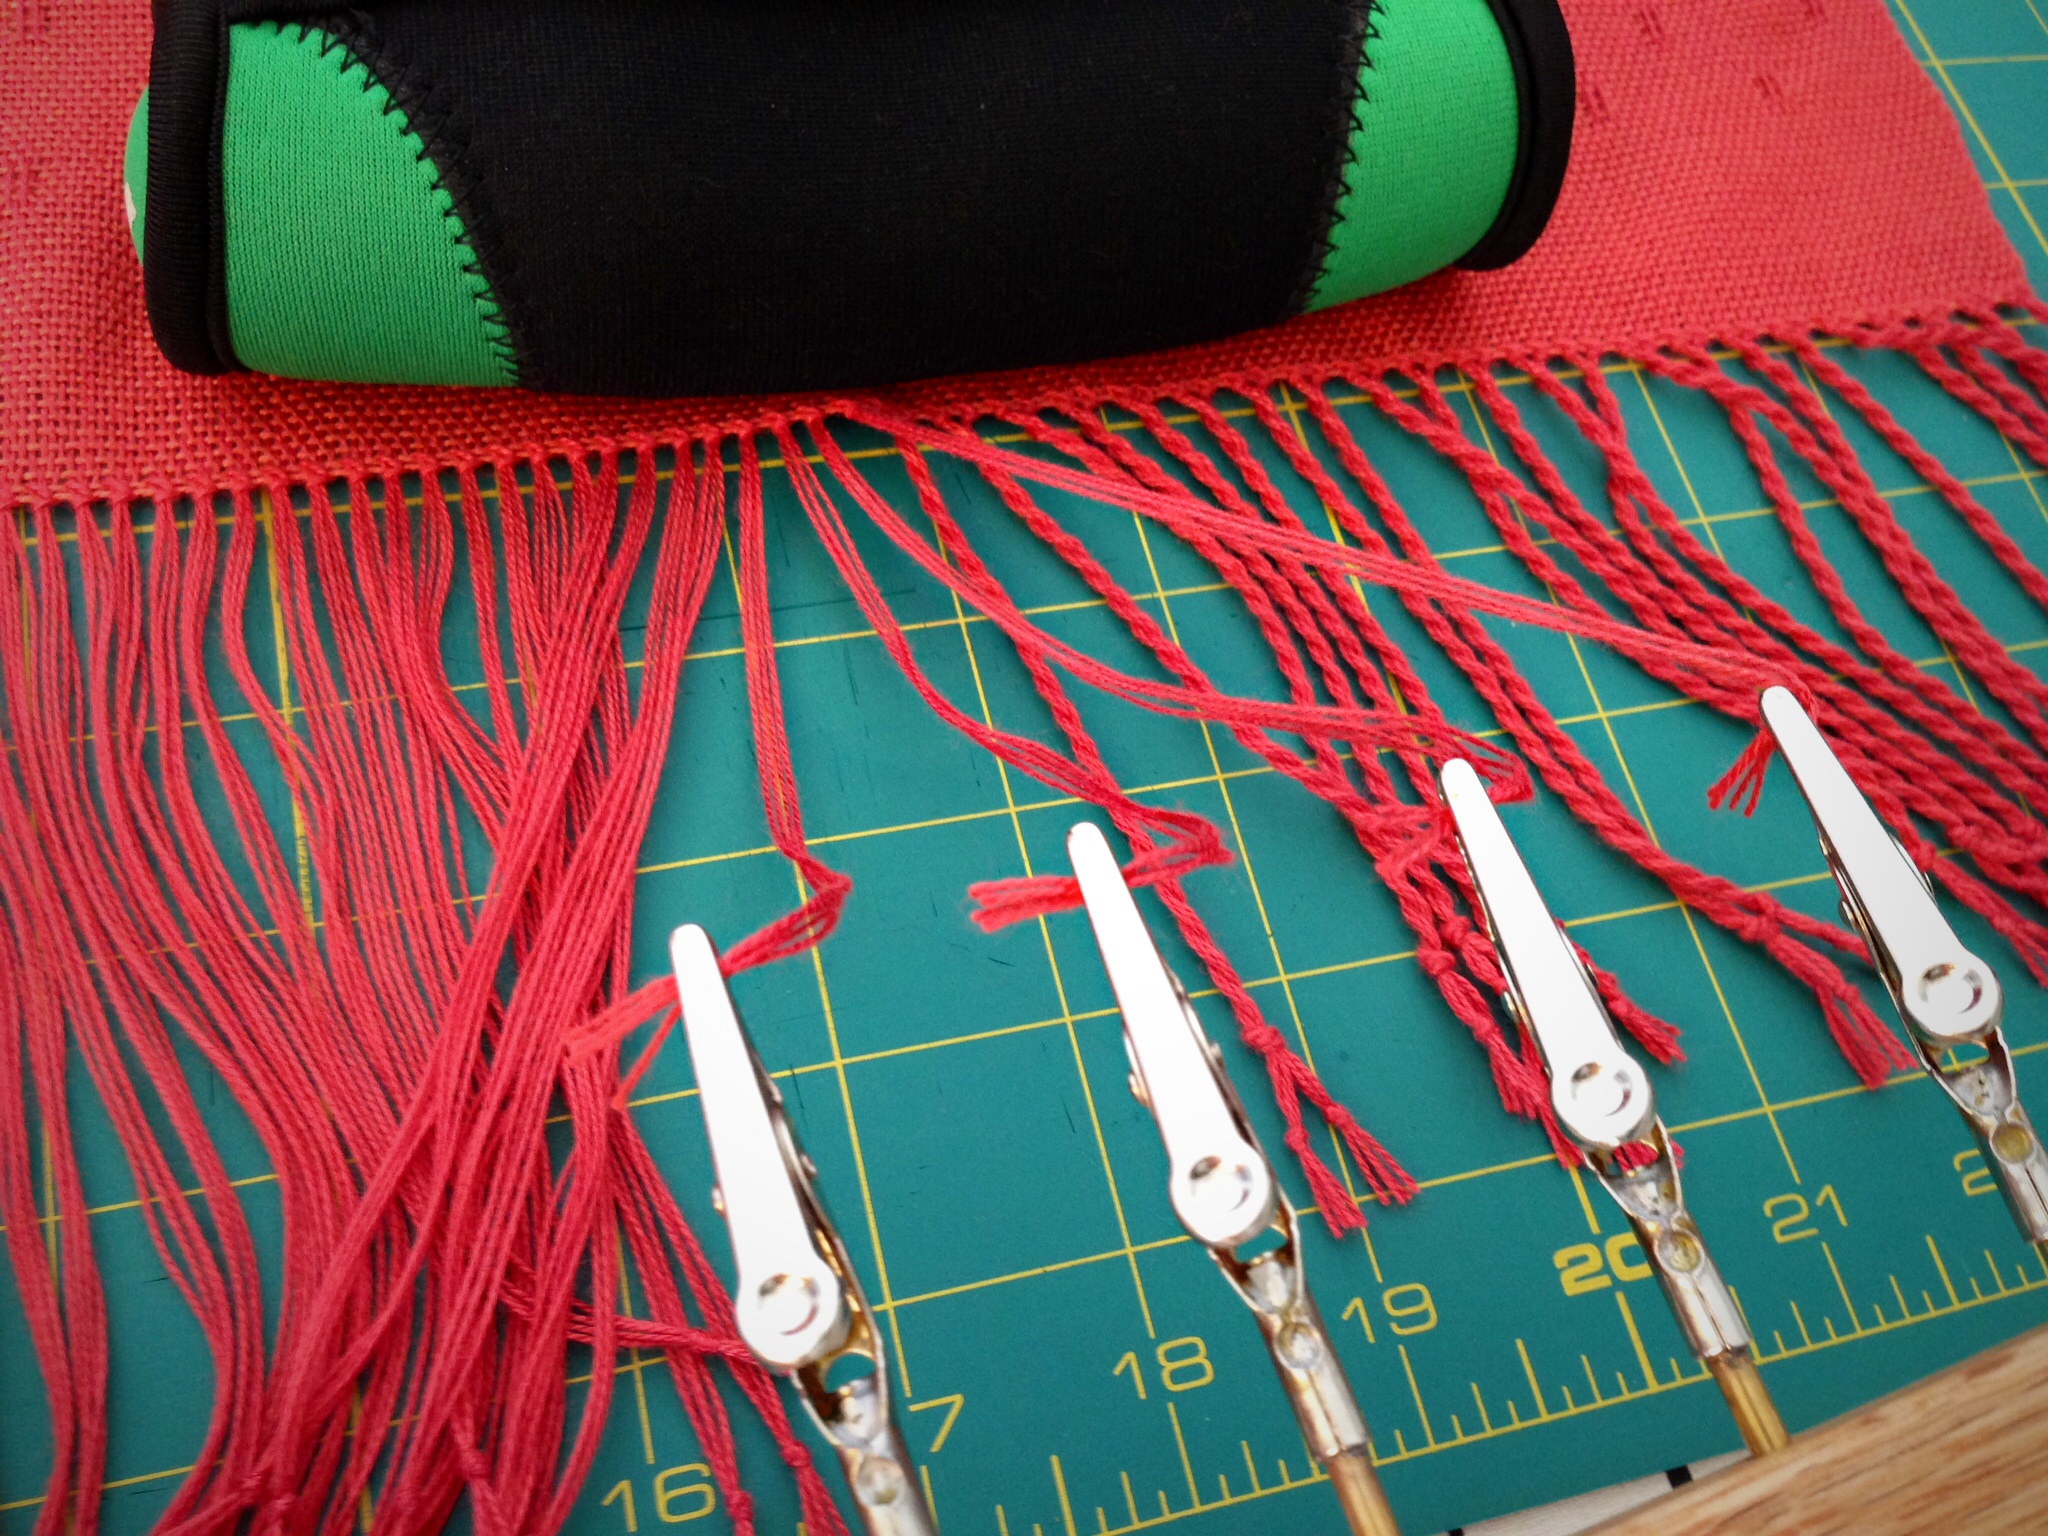
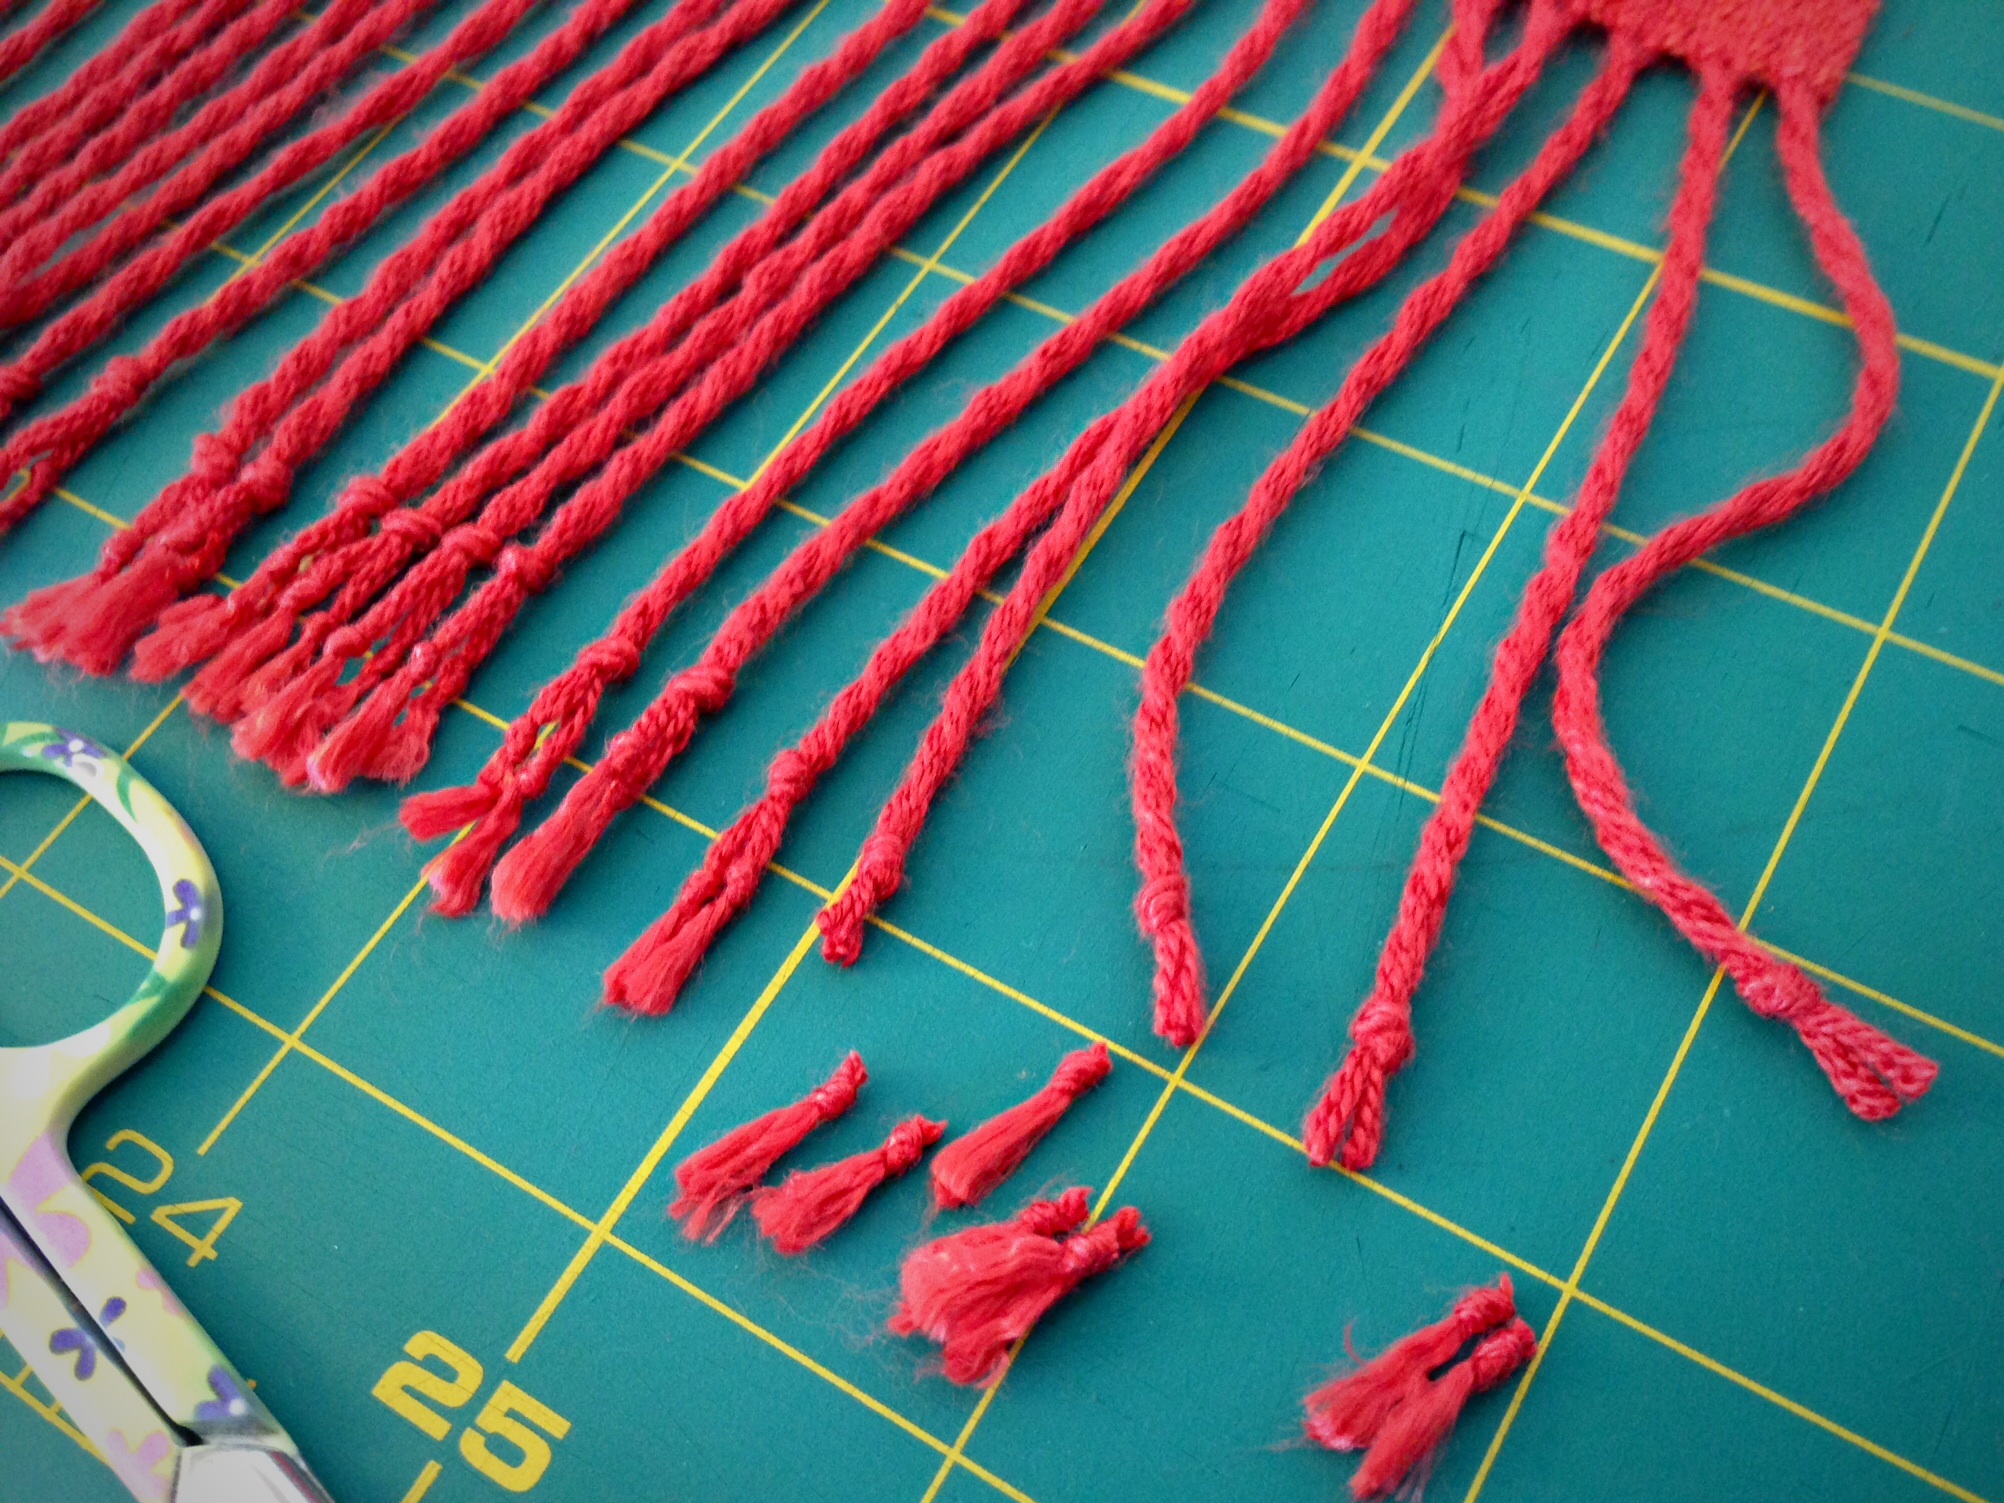
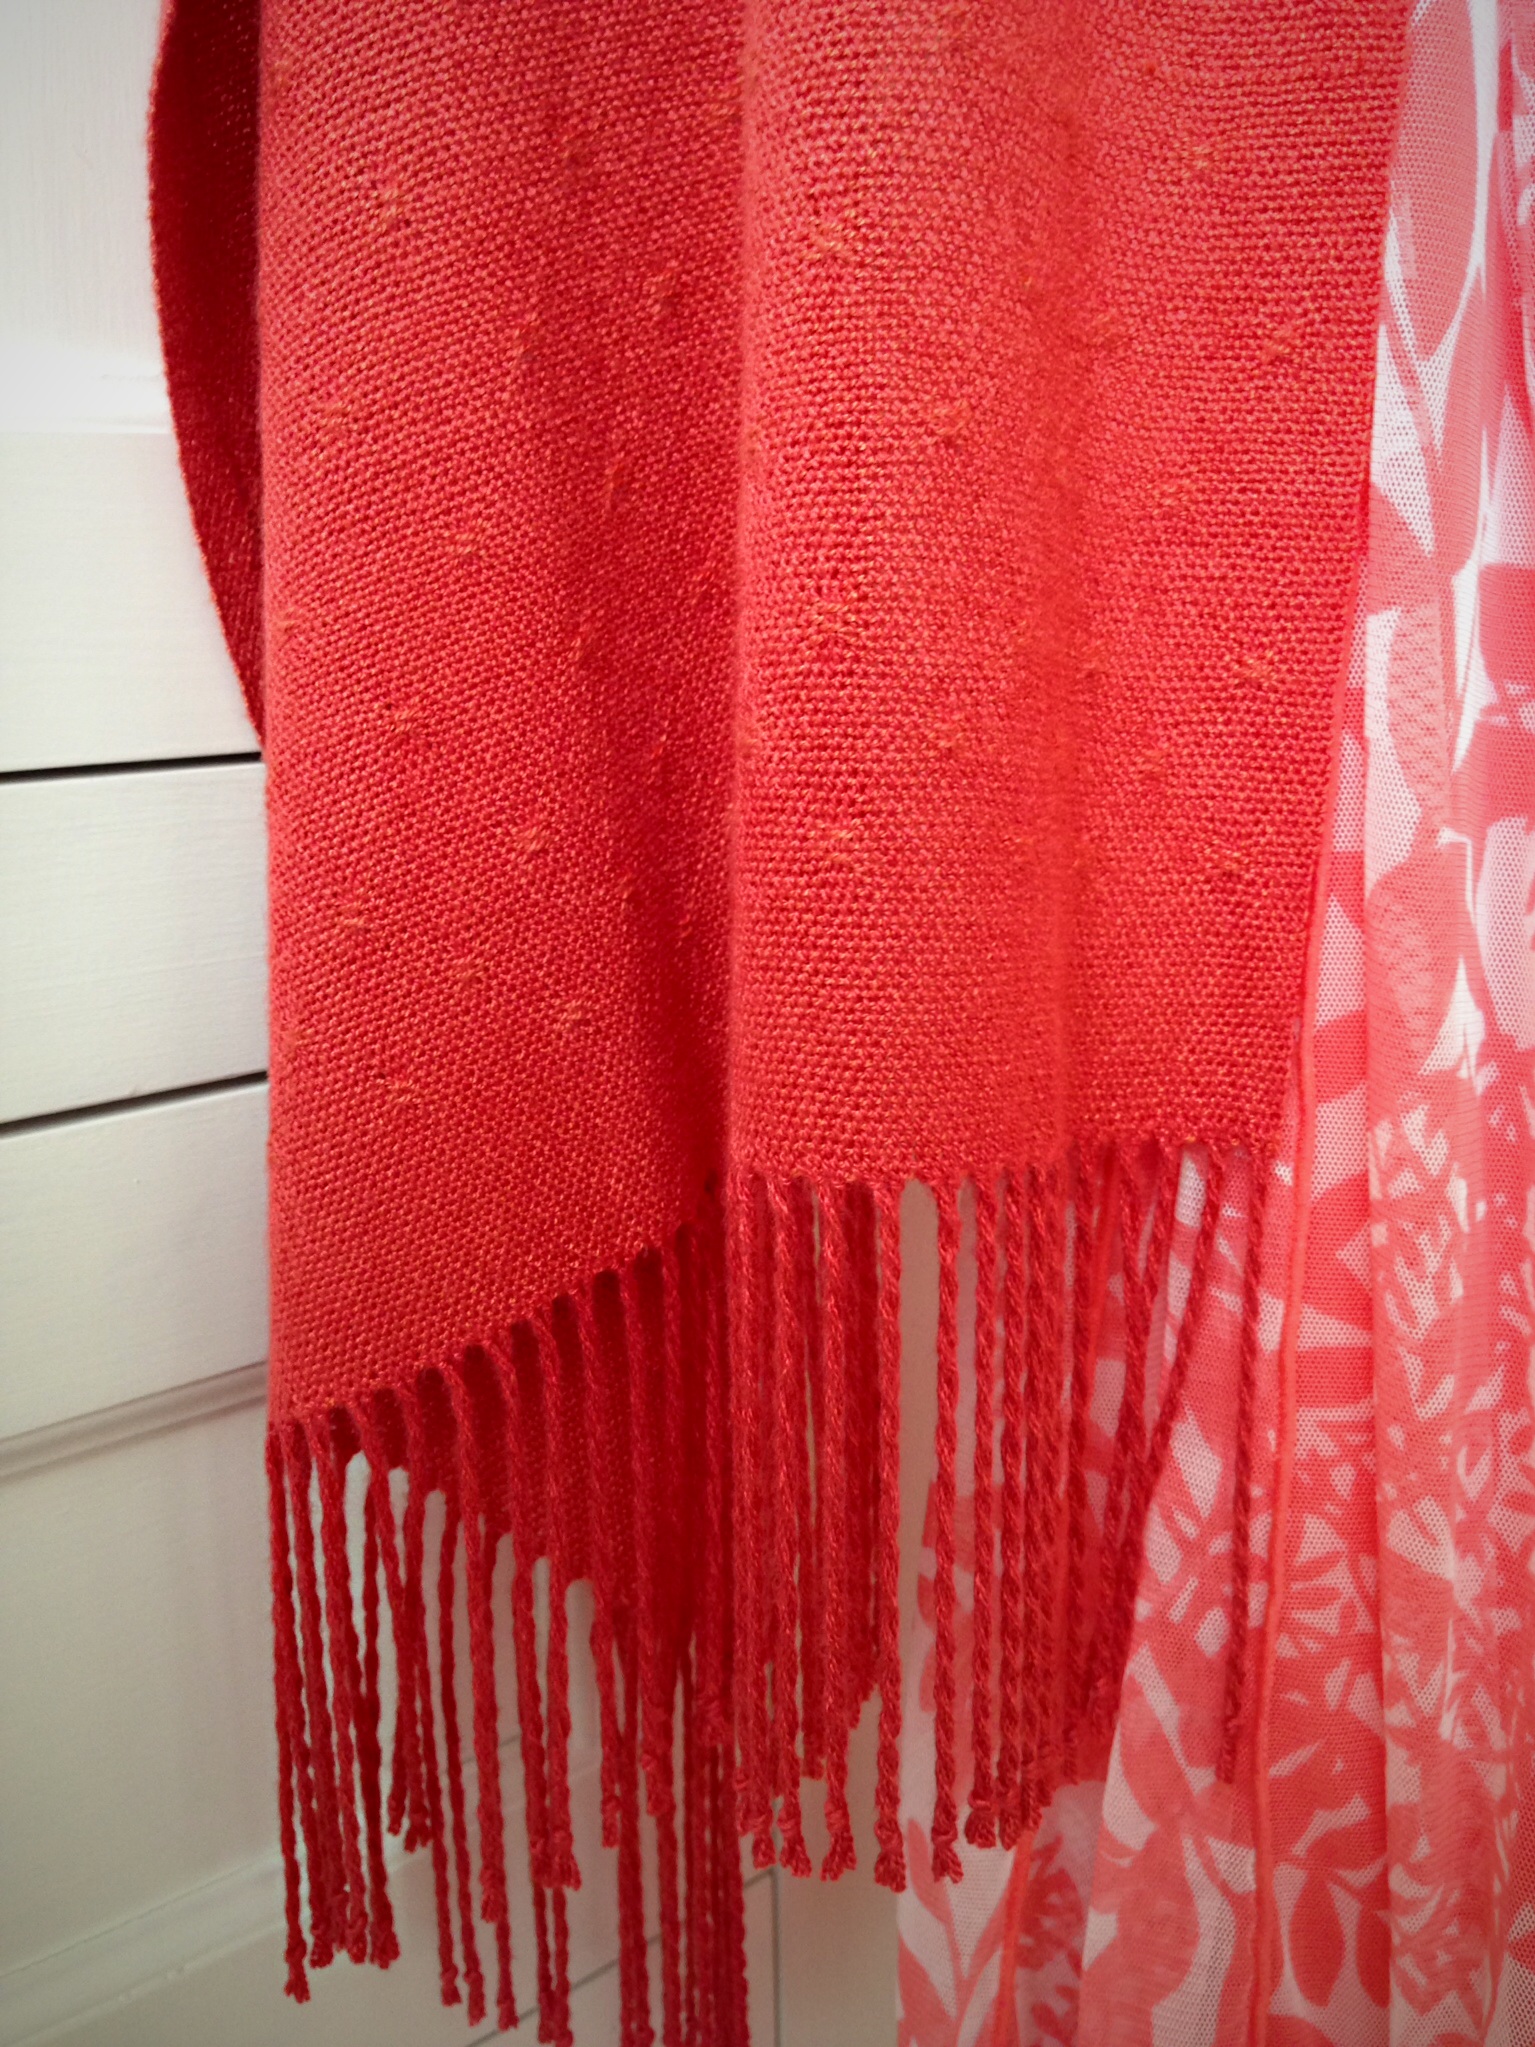
Step 1: (First, with fabric not yet washed and dried, cut all fringe strands on both ends of article to an equal and even length.) A pair of two-pound walking weights holds the fabric in place for tying knots. This fringe twister tool has a long handle and four little alligator clips.Step 2: Tie an overhand knot a fingertip-length away from the end, securing four ends together. (Other projects may have more than four ends grouped together.) This extra step holds the secret to clean cut fringe ends (see step 7).Step 3: Let each little alligator grab a knot in it’s teeth, four in a row. Crank the handle around until the twisted threads begin to kink back on themselves. Count the number of turns of the handle and repeat that same number of turns for each grouping.Step 4: Grab the strands from the first two alligators’ mouths, being careful not to let the strands unwind. Combine the two thread groups and tie an overhand knot a fingertip-width away from the first knots.Step 5: After the knot is tied, let the strands unwind in your hand, keeping them from tangling with neighboring threads. Snug the knot by holding the knot and pulling on the two smaller knots, one at a time.Step 6: Wet finish the fabric by a method suitable for the type of thread or yarn being used. Air dry completely, or other suitable method for drying. While still damp, separate and straighten each twisted fringe.Step 7: First set of knots are cut off, removing the frayed ends, and leaving clean cut ends.Step 8: Wear your lovingly handmade creation to a very special occasion, such as to your daughter’s wedding.
This is a lesson for raising children and letting them go, too. You weave for years, give time-consuming attention to the finishing touches while they are in your hands, and then you let them go. Wedding in four days!