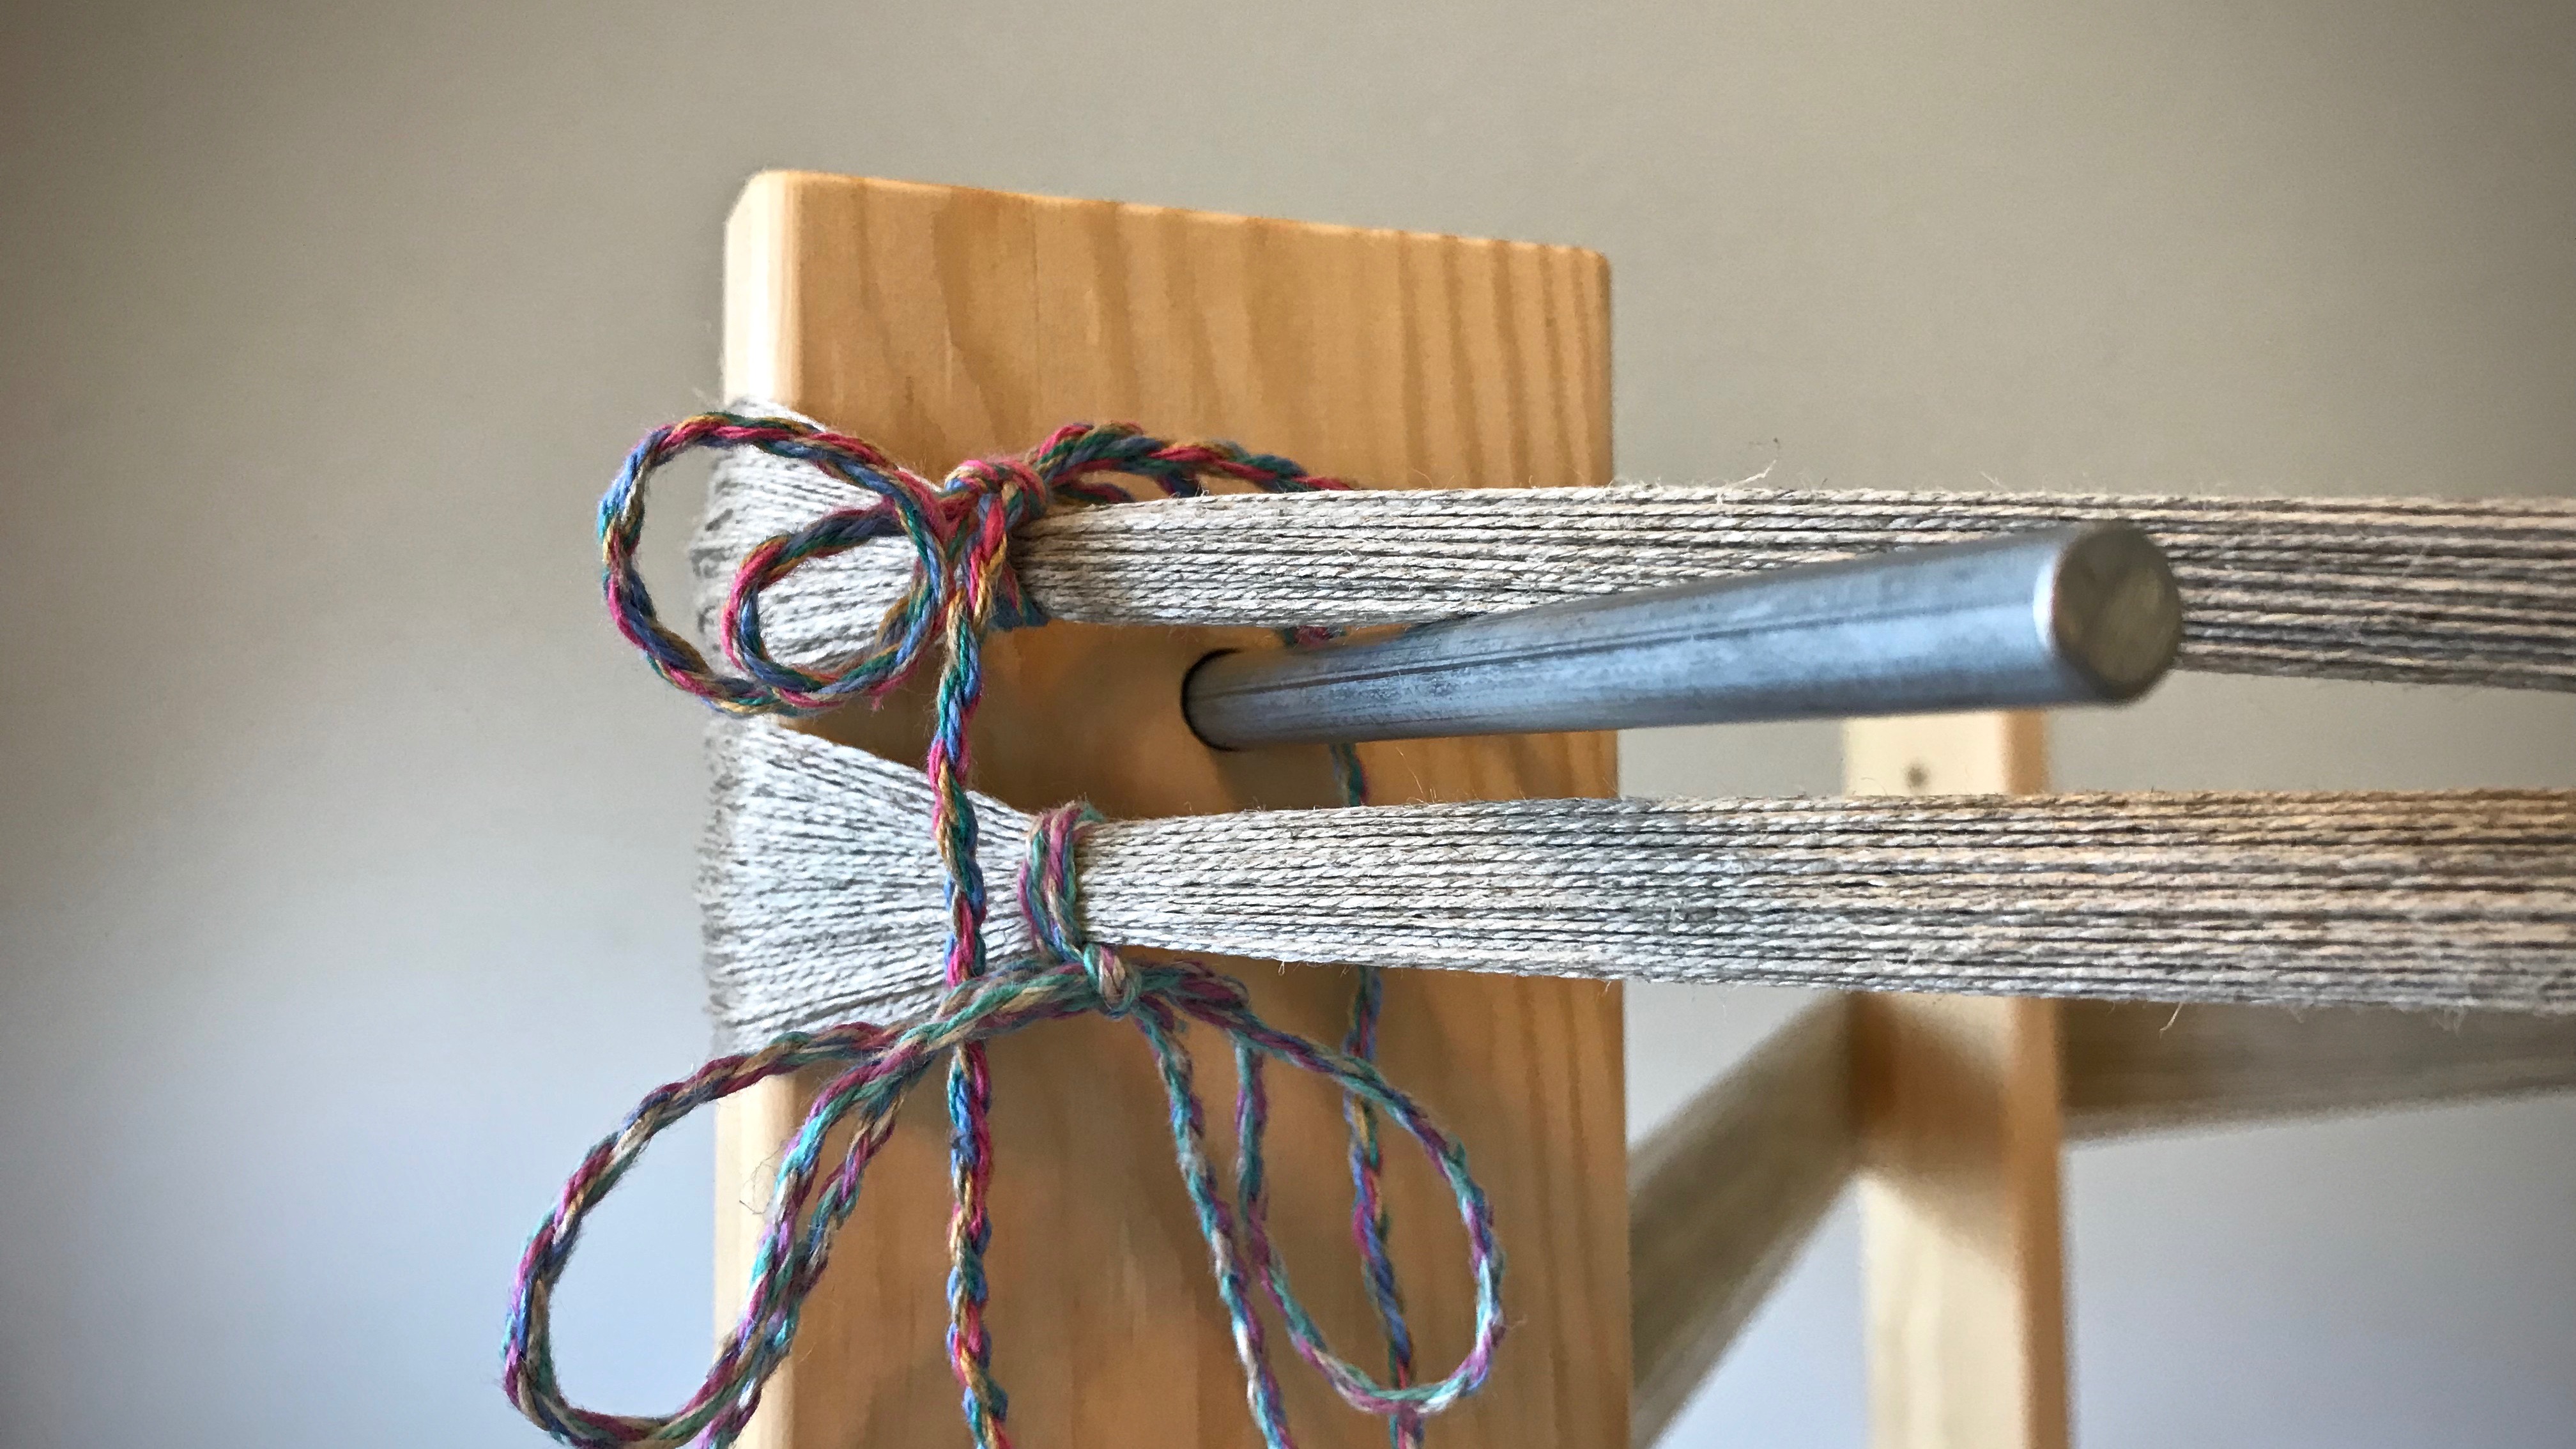
Here’s a secret: Two threads are better than one. To measure a warp, I always, without exception, wind the warp with two or more threads together. A warp that is wound with a single thread is prone to tangle as threads twist around each other. A warp wound with pairs of threads won’t do that.
Choke ties secure the warp bout around the starting pin on the warping reel.I hold two threads in my right hand, with my little finger separating them, to wind the warp. My left hand turns the warping reel. I purchase enough thread to be able to wind with two tubes at a time. Any thread that remains unused goes toward another project.
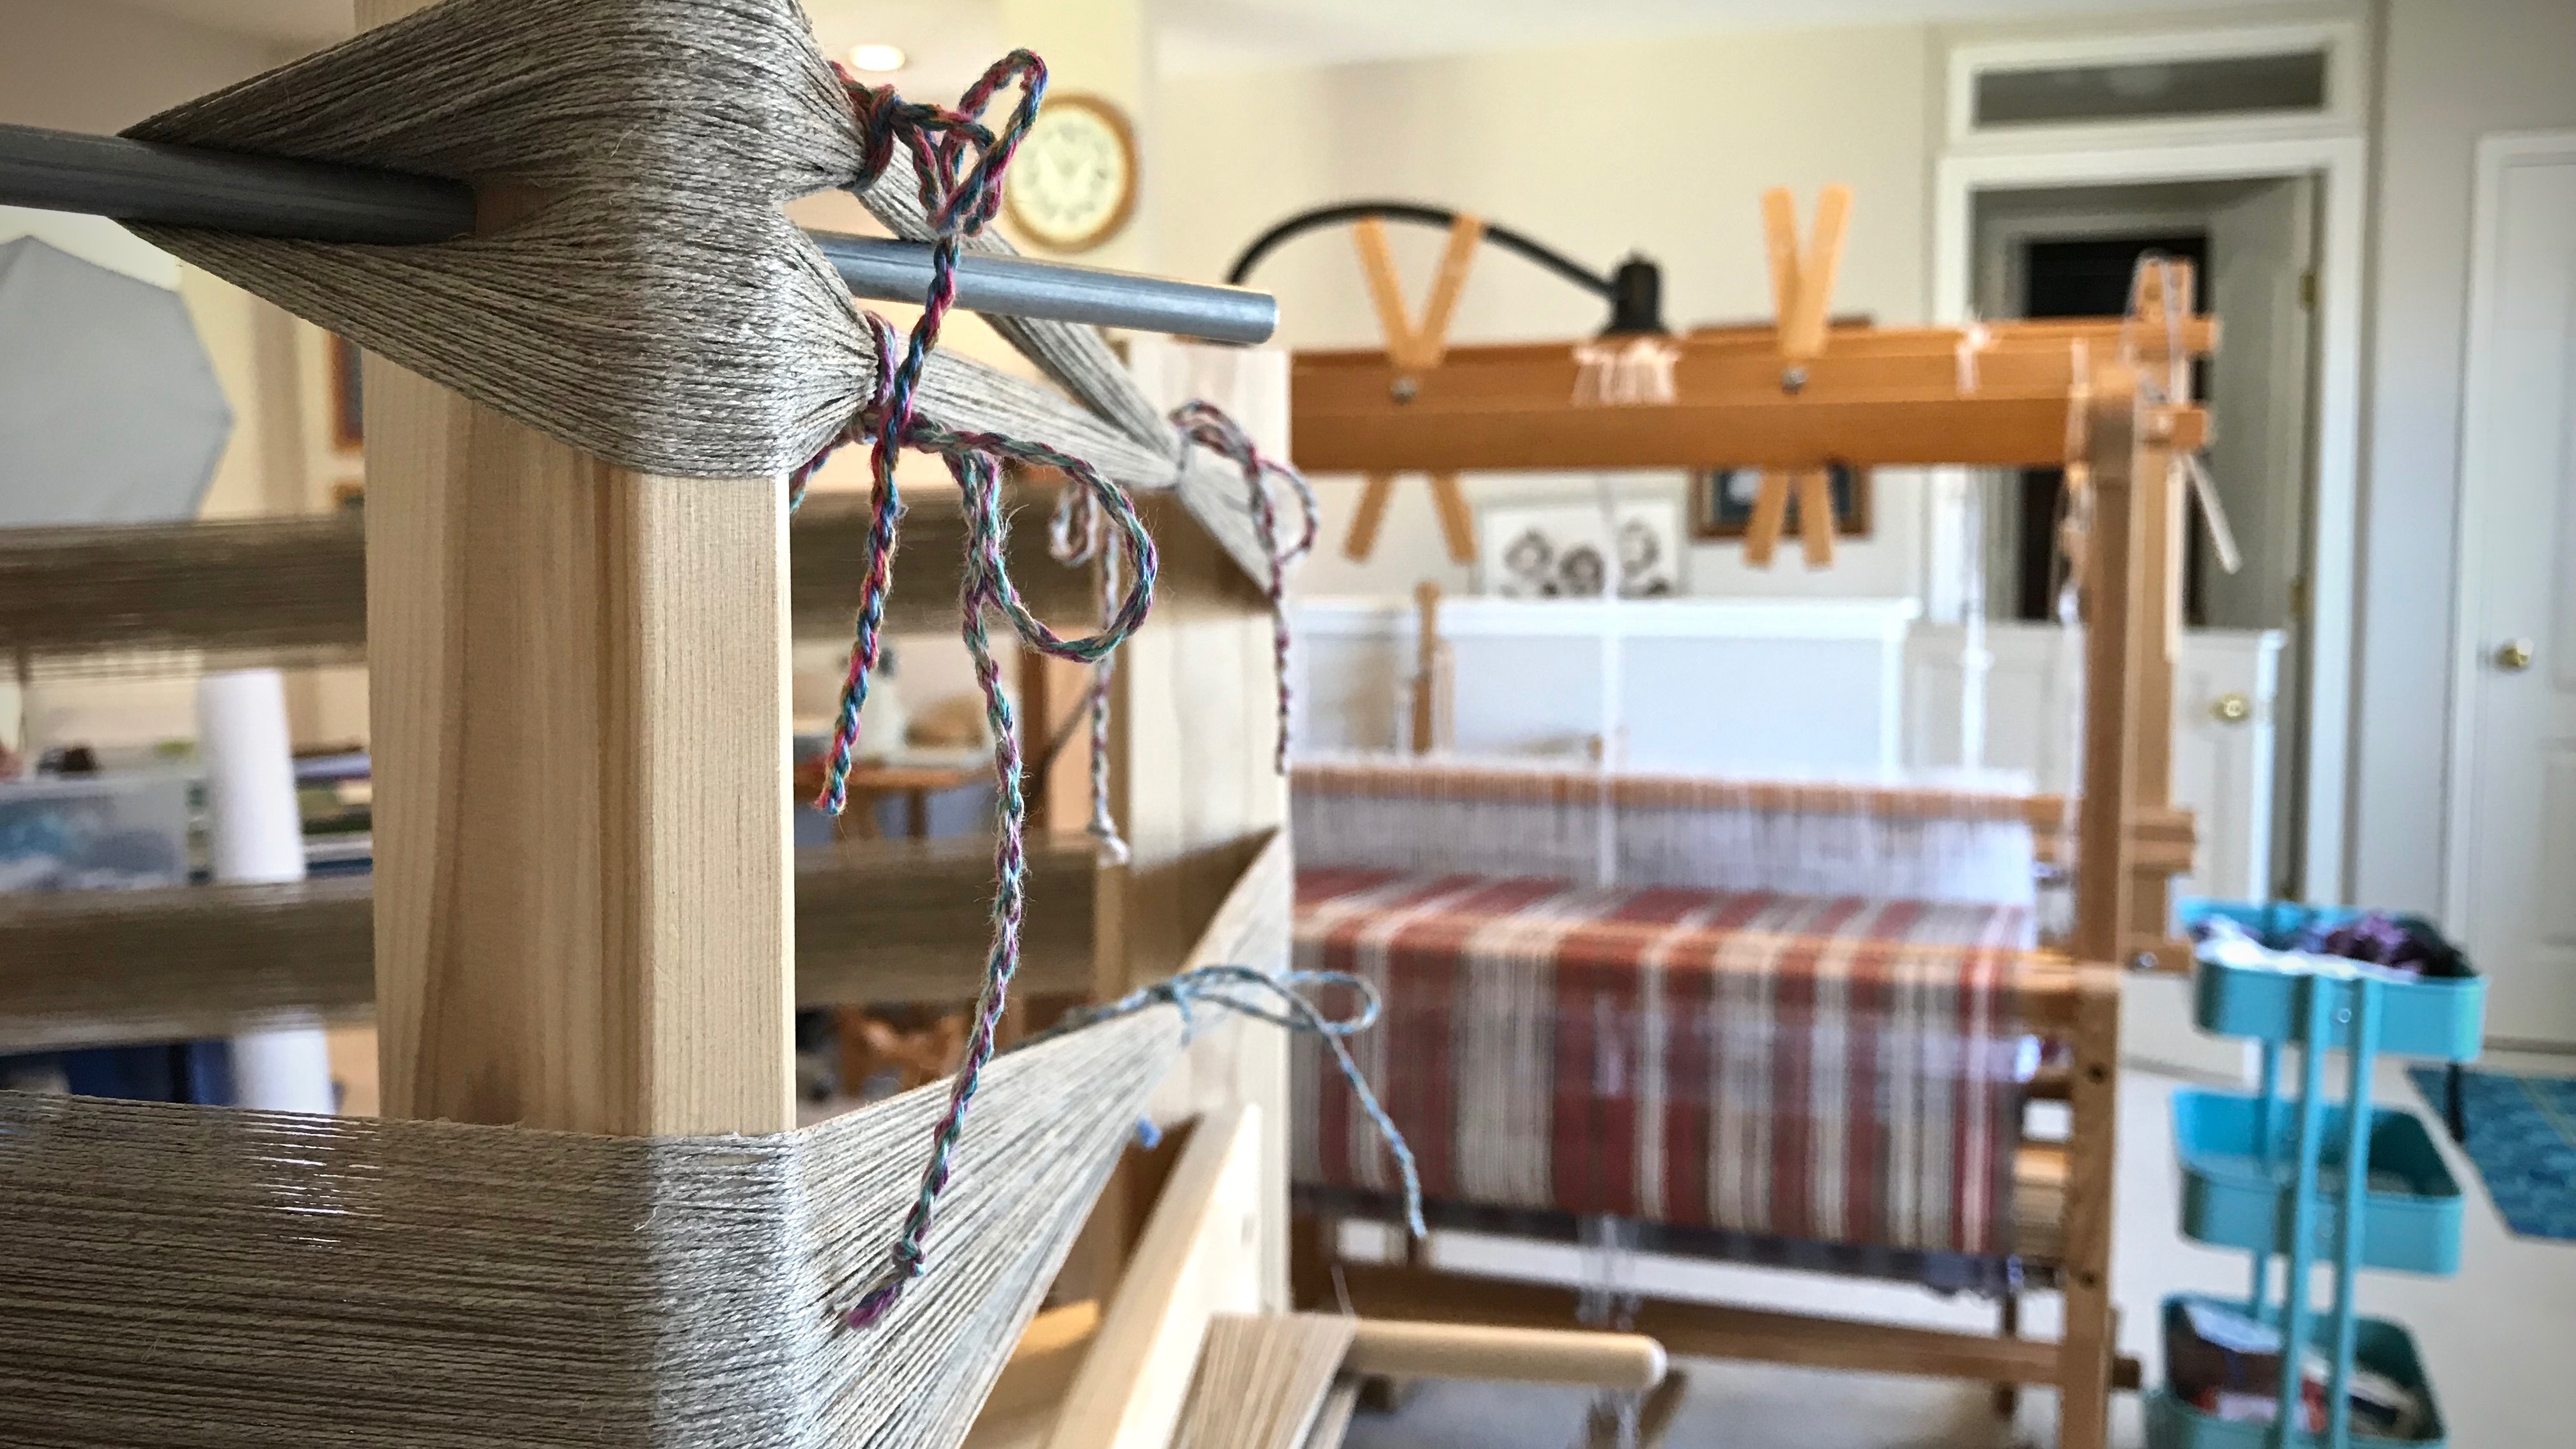
I am particular about this warp. It’s linen, so consistency matters. Tangles would disrupt the even tension the linen needs. I have dräll in five-shaftsatin in mind as I take each careful step to dress the loom. I expanded the loom to ten shafts to be able to weave this! Expect happy weaving, to be sure, but imagine how pleasant it will be to hold this dreamed-of cloth in my hand. That future cloth gives meaning to my present efforts at the loom.
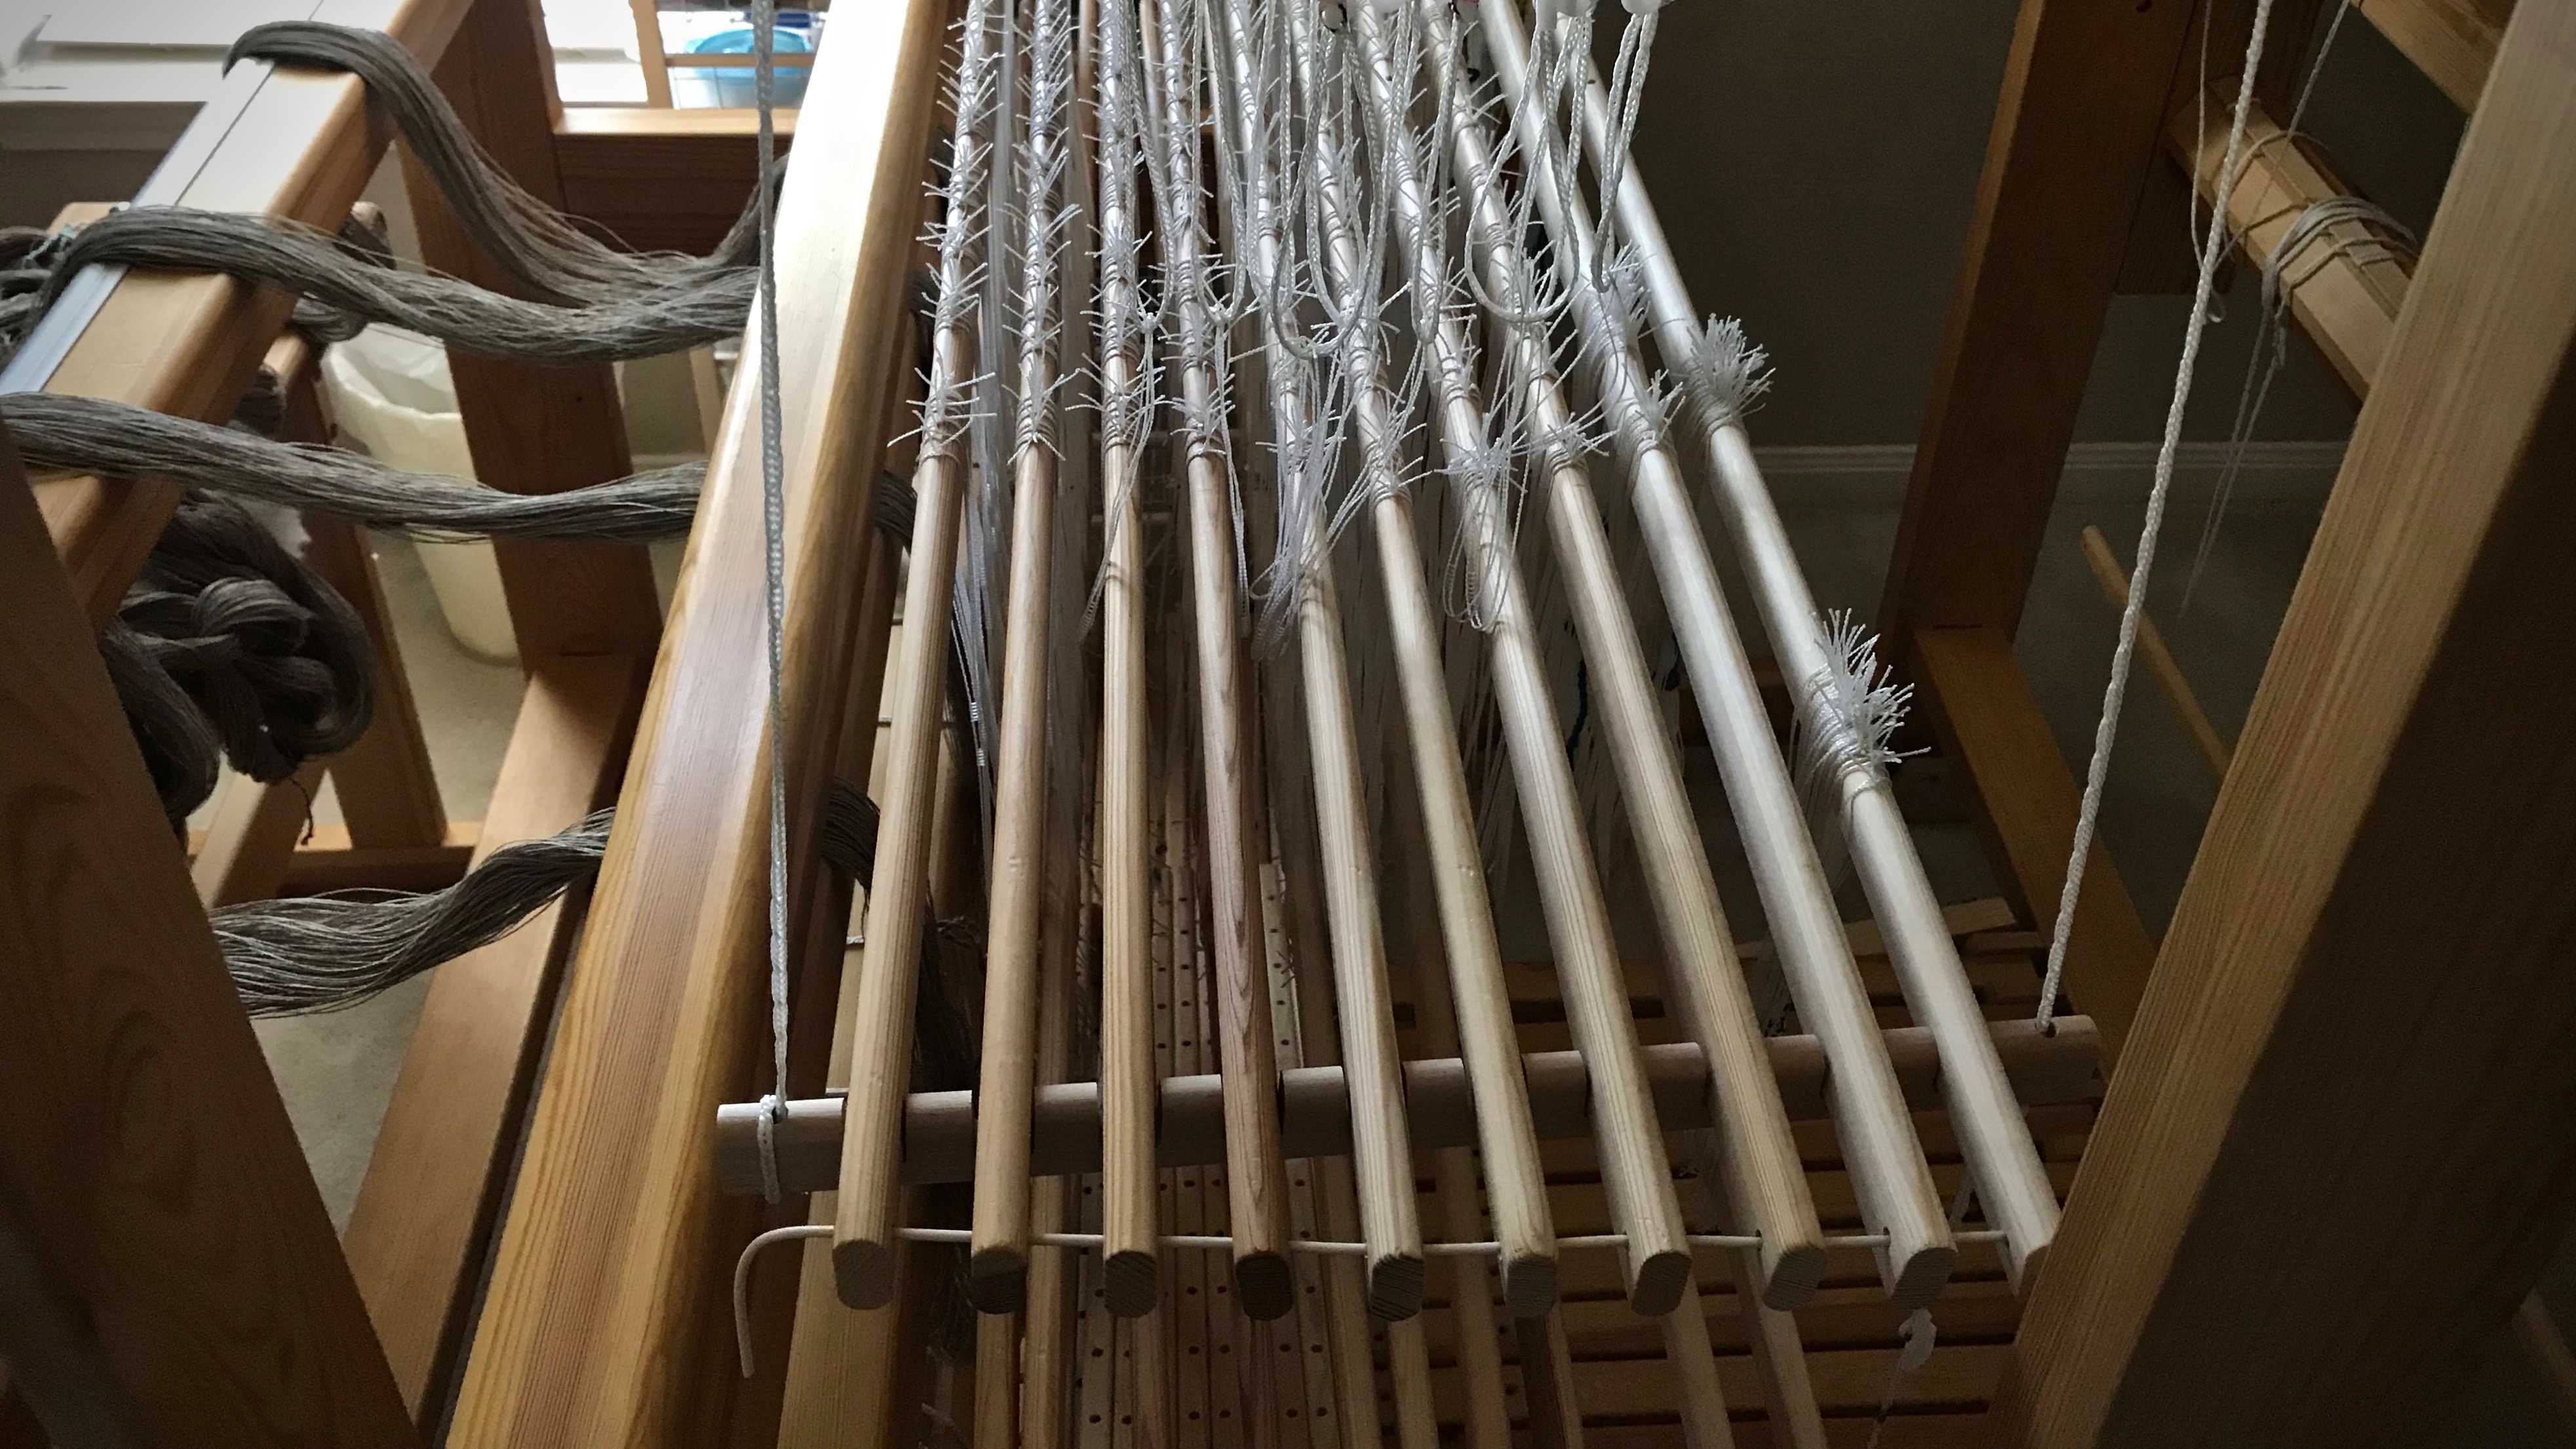
Various stages of weaving. Winding 16/2 unbleached line linen to warp the Standard loom. The Baby Loom (Glimåkra Ideal) in the background is in the middle of rag-rug weaving.Ten shafts in place on the Big Loom (Glimåkra Standard) to prepare the loom for weaving dräll in five-shaft satin.
There must be meaning beyond this life for us to find meaning in this life. The end of the weaving is the beginning of the life of the cloth. There is purposeful preparation by the Grand Weaver, with a precisely measured warp. The back-and-forth shuttle is like the ticking of a clock, or the passing of years. The end is the beginning. Can you imagine the splendid setting the Grand Weaver has in mind for his hand-woven cloth?
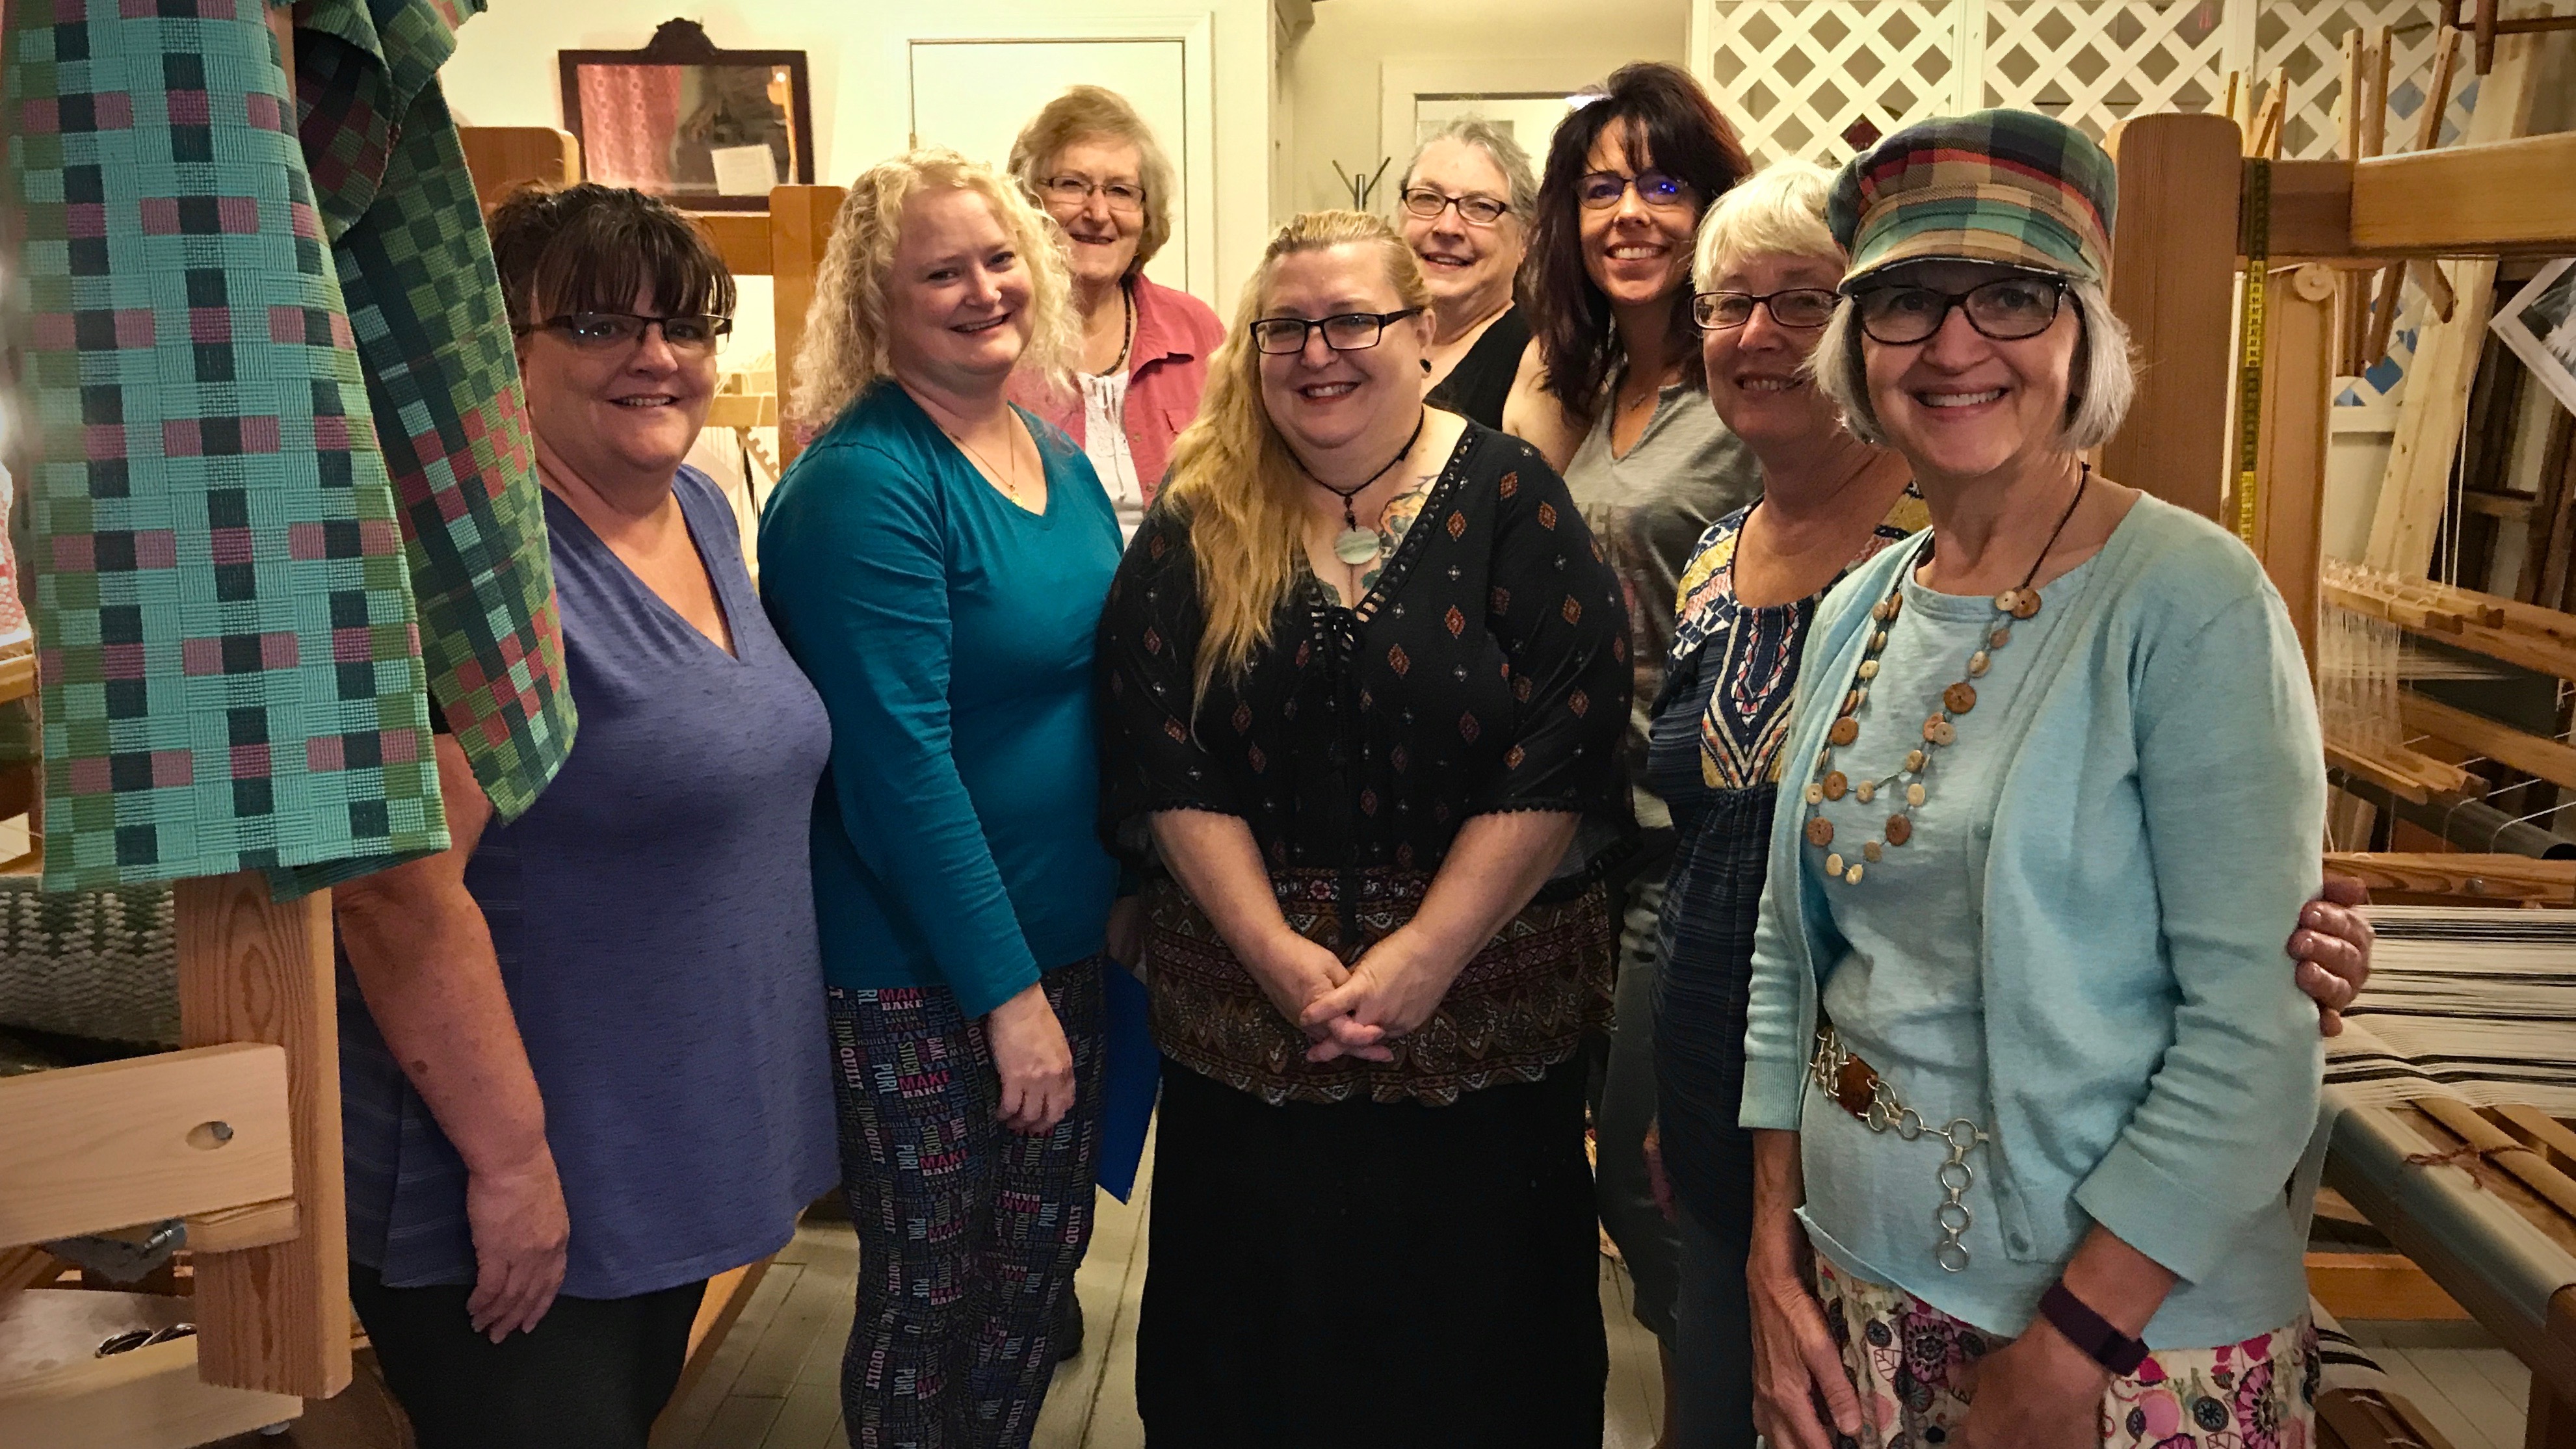
Seven enthusiastic weavers came to the Discovery Towels Workshop I presented a few days ago. We had three wonderful days together. Thick and thin threads can do spectacular things when you combine them in the warp and weft. And Eureka Springs, Arkansas is the ideal setting for such a weaving adventure! This is a unique, quaint little town like none other. The Victorian-style homes, and the twisting, winding roads that follow the hillside contours make you feel like you are in a storybook village. We happened to be there at the same time as the annual Volkswagen Festival and Parade, which defies description. You just have to experience it for yourself.
Eureka Springs, Arkansas
Debbie Davis of Red Scottie Fibers, our gracious and knowledgeable host, provided the perfect setting in The Shoppes at Fleece ‘N Flax. Her classroom space is full of Glimåkra countermarch and counterbalance looms. What could be better?!
Discovery weavers!
You will be amazed when you see the beautiful towels that these seasoned and not-yet seasoned weavers produced! It was a joy to have some time with these enthusiastic discoverers.
May you enjoy the thrill of discovery.
~~On a personal note, regarding hurricane Harvey, Steve and I tried to drive home to Houston on Sunday, after our stay in Arkansas. We were unable to return all the way home because of flooded roads and highways, so we diverted our route to drive out to our place in Texas hill country. So far, our Houston home has not flooded, but our loved city is suffering greatly. Please keep these brave people, including many of our dear friends, in your prayers.~~
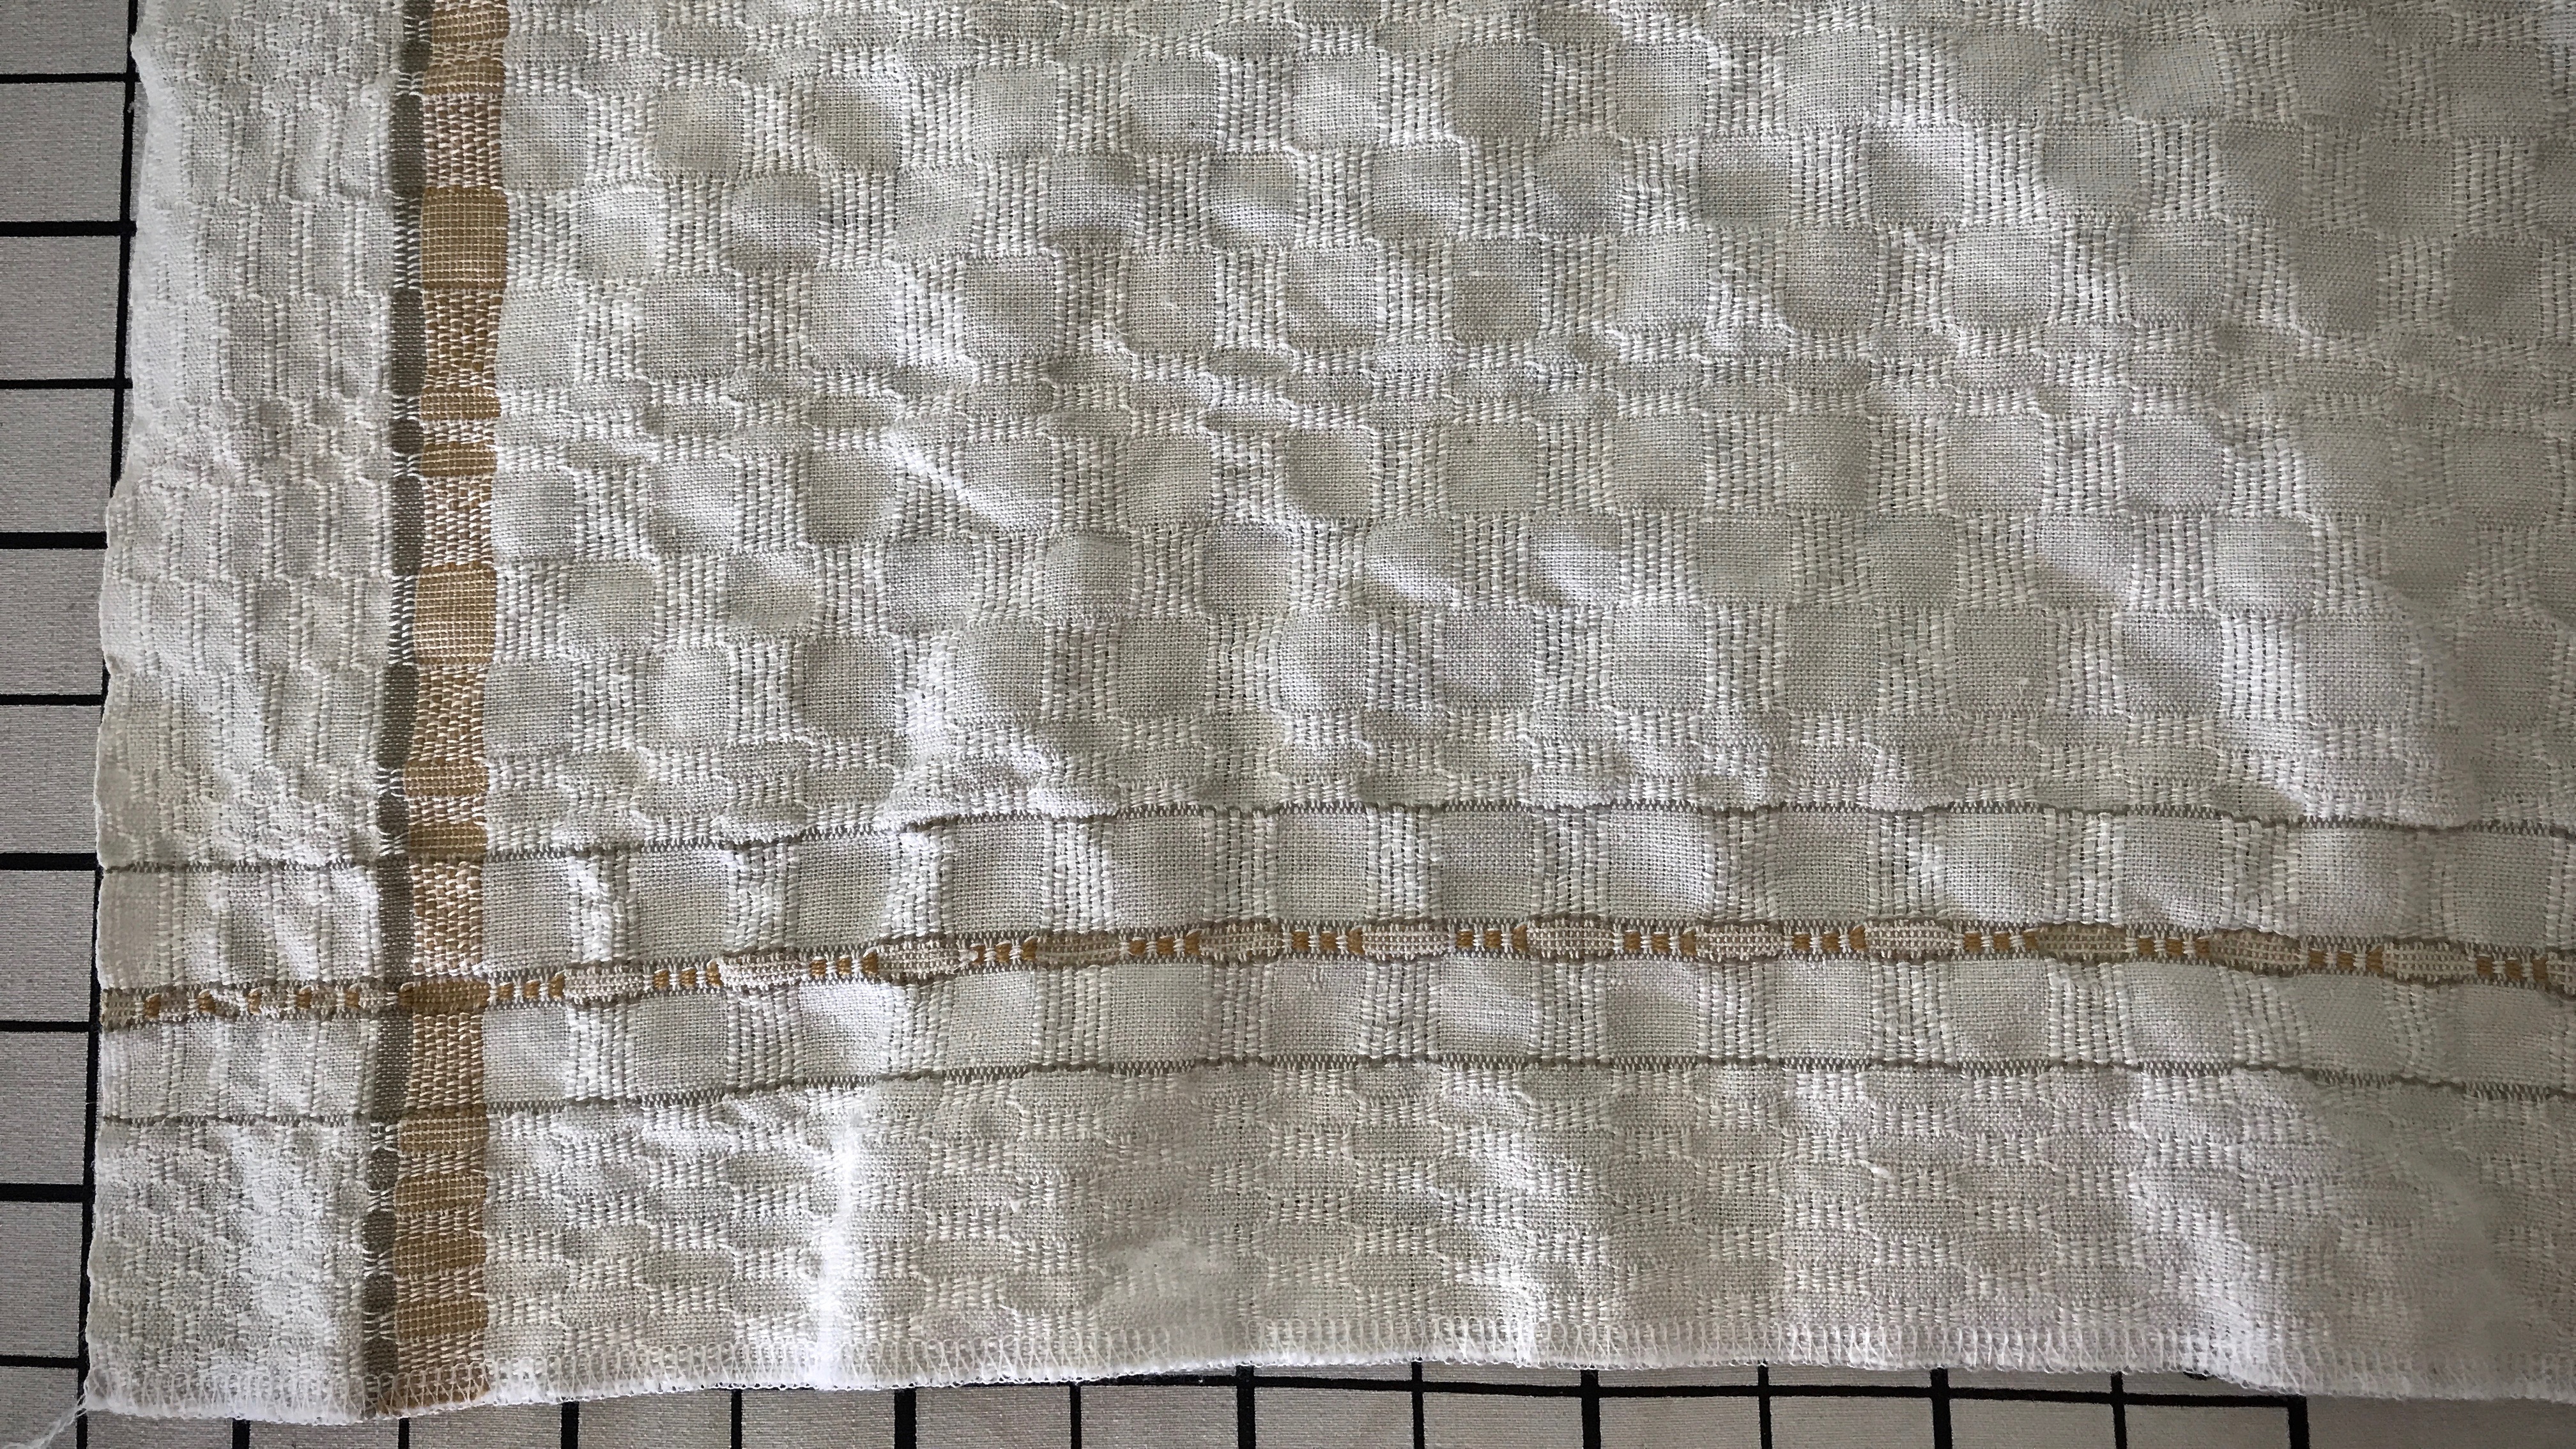
The neutral colors and the quiet elegance of these towels say “serenity.” What a pleasure to weave M’s and O’s. This was mostly single-shuttle weaving! Uncomplicated, luxurious, and serene. Five towels, plus one very long table runner that I made specifically for our dining room table. The fine 20/1 line linen weft increases the visual and tactile elegance for me.
I’m still amazed when I see the results that come from threads and a weaving loom. And thrilled that I get to be a part of that experience. Enjoy this short slide-show video of the process.
Hems shouldn’t be noticed. At least, not at first glance. I don’t want the stitching of the hem to detract from the overall handwoven quality. Decorative items, like this table runner, deserve a hand-stitched hem. But for functional pieces, like these tea towels, I stitch the hems on my trusty old Bernina sewing machine. This ensures the durability I want for something that will be thrown in the washer and dryer again and again.
Long M’s and O’s table runner is hemmed by hand using an invisible hem stitch.
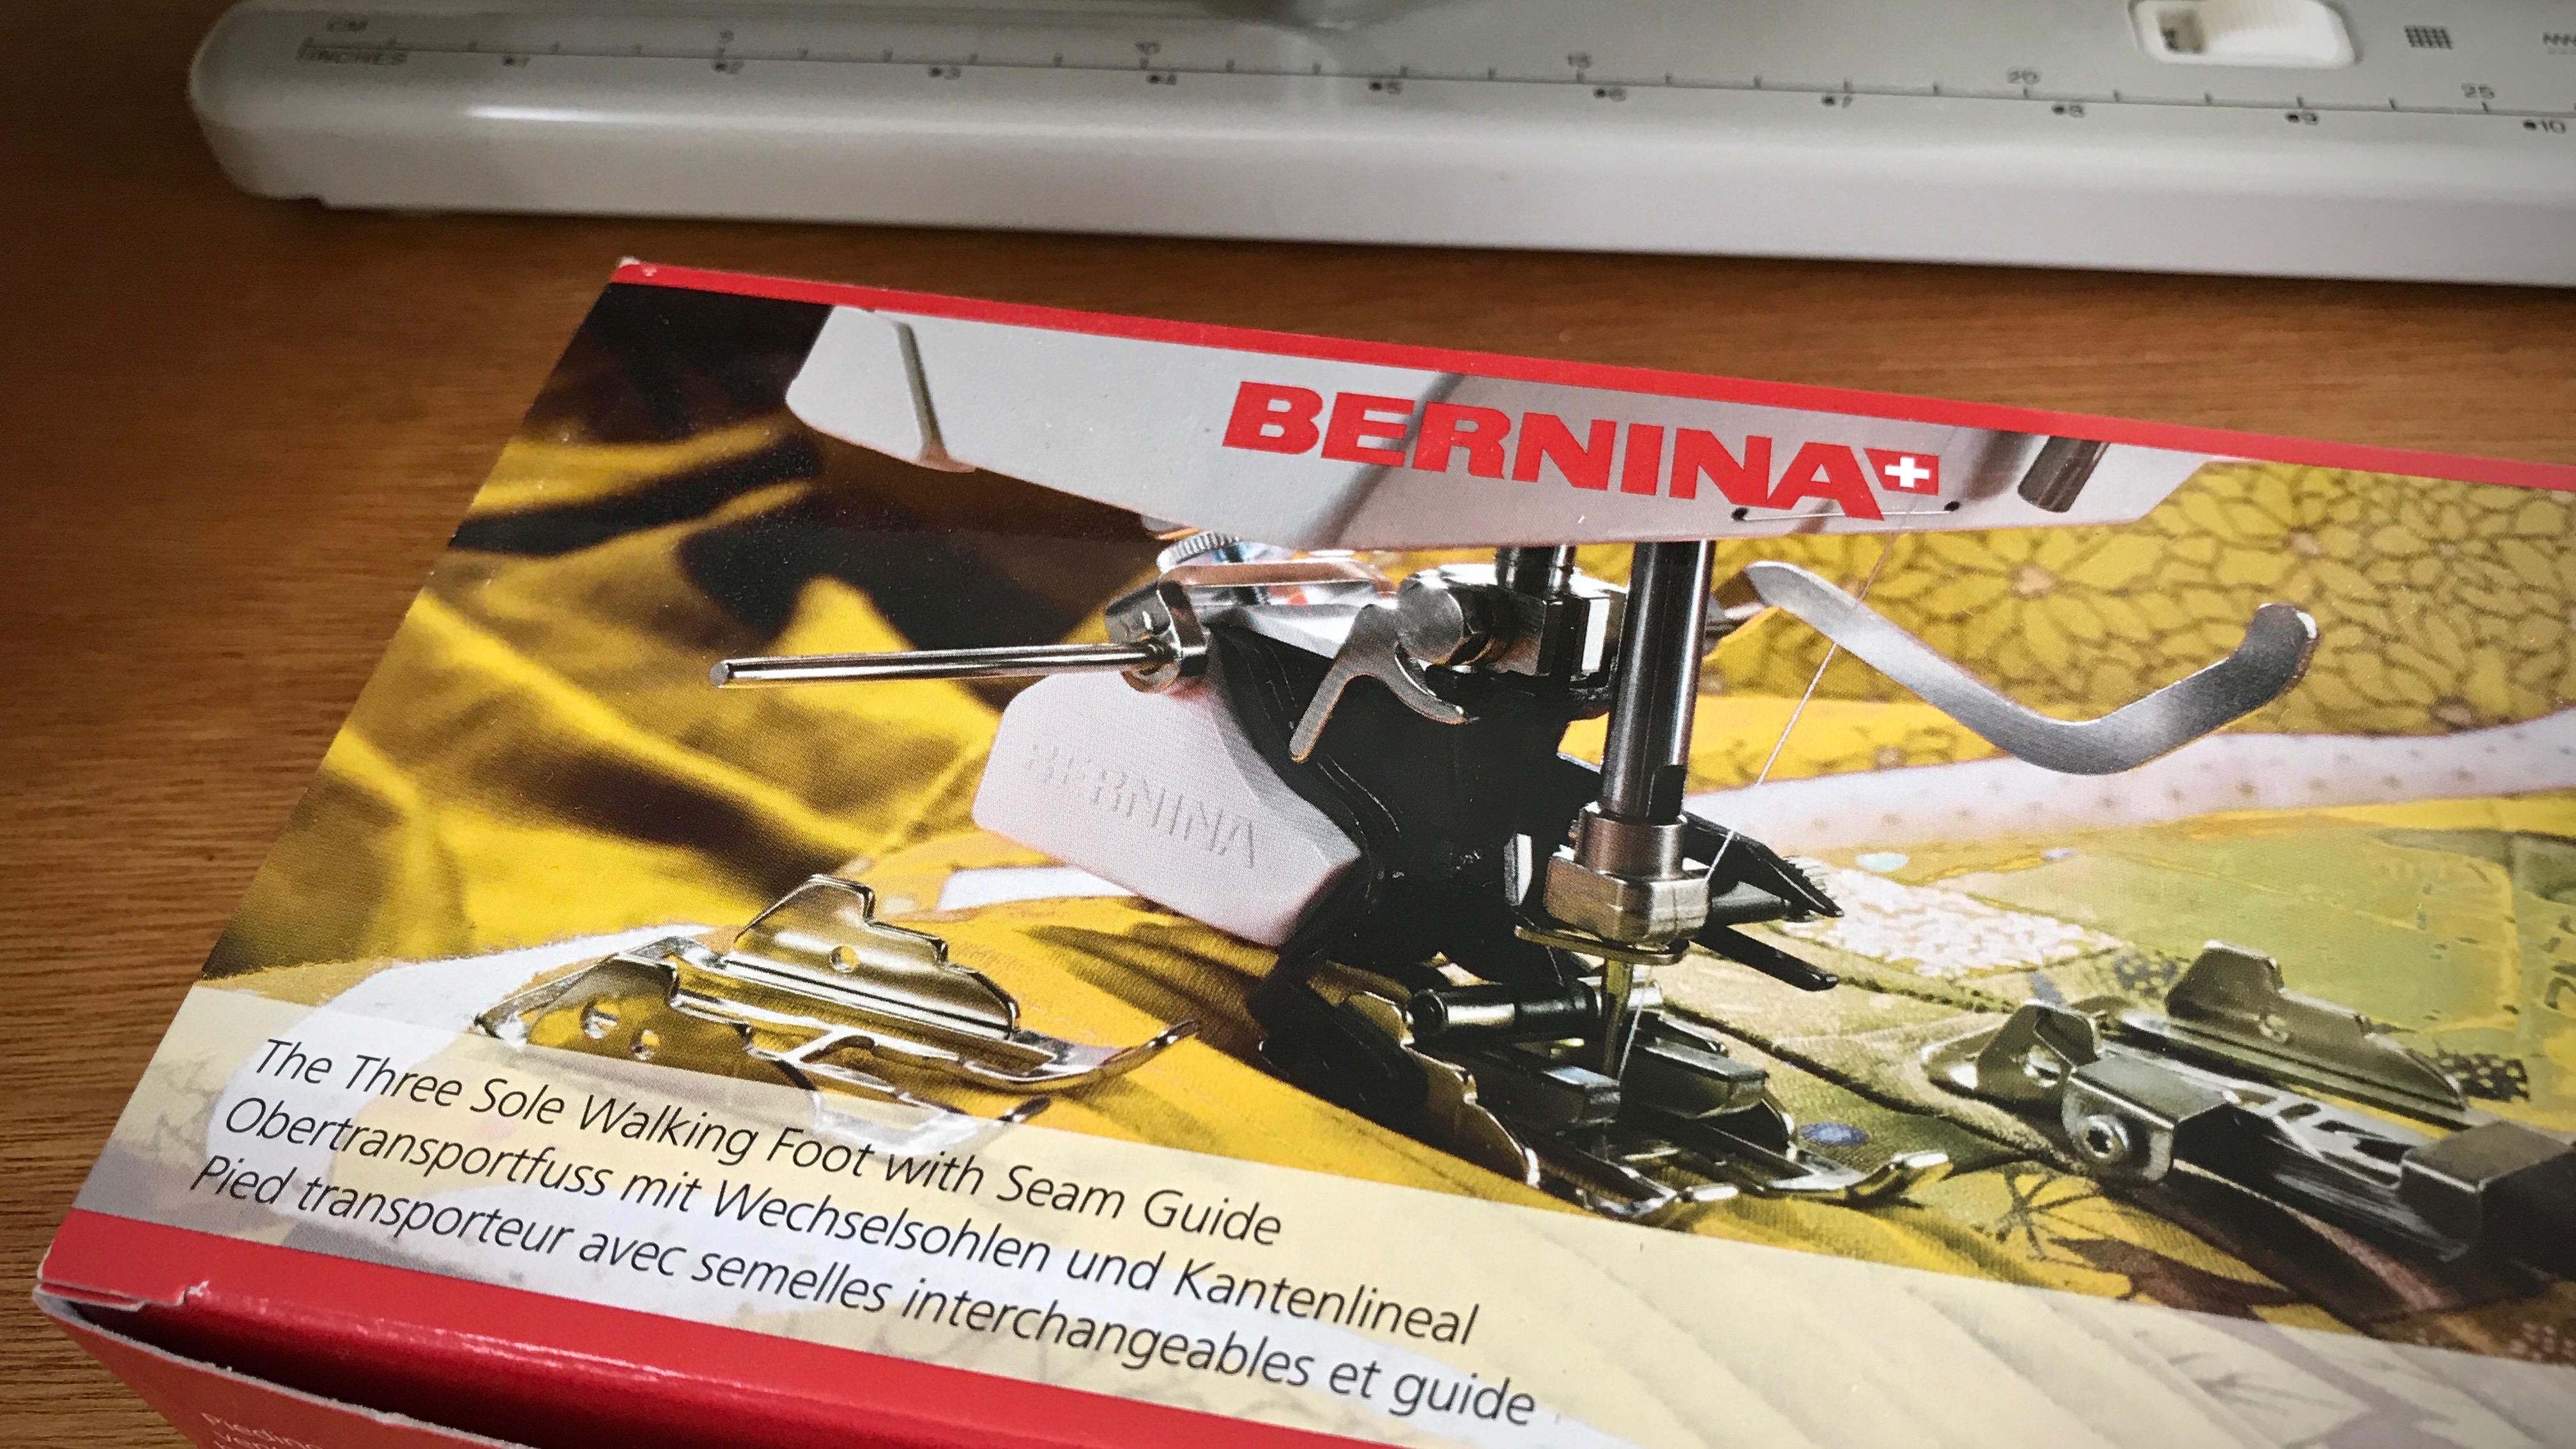
Last year I purchased a Bernina walking foot through my local Bernina repairman. It was one of the best sewing investments I have made. (Don’t be fooled by off-brand “Bernina compatible” products.) The advantage of a walking foot is that it evenly feeds layers of fabric, which is especially useful for sewing handwoven fabric. And for the towel hem, it means the top of the hem won’t become skewed and slanted as you sew, like it might with a regular sewing machine foot.
Bernina Three Sole Walking Foot with Seam Guide. The walking foot stays on my Bernina sewing machine almost all the time.
One of the three sole plates that comes with the Bernina walking foot is a sole for edge stitching. This works beautifully for stitching a narrow hem on lighter-weight fabric, like these airy cotton and linen towels.
My process for a machine-stitched narrow hem
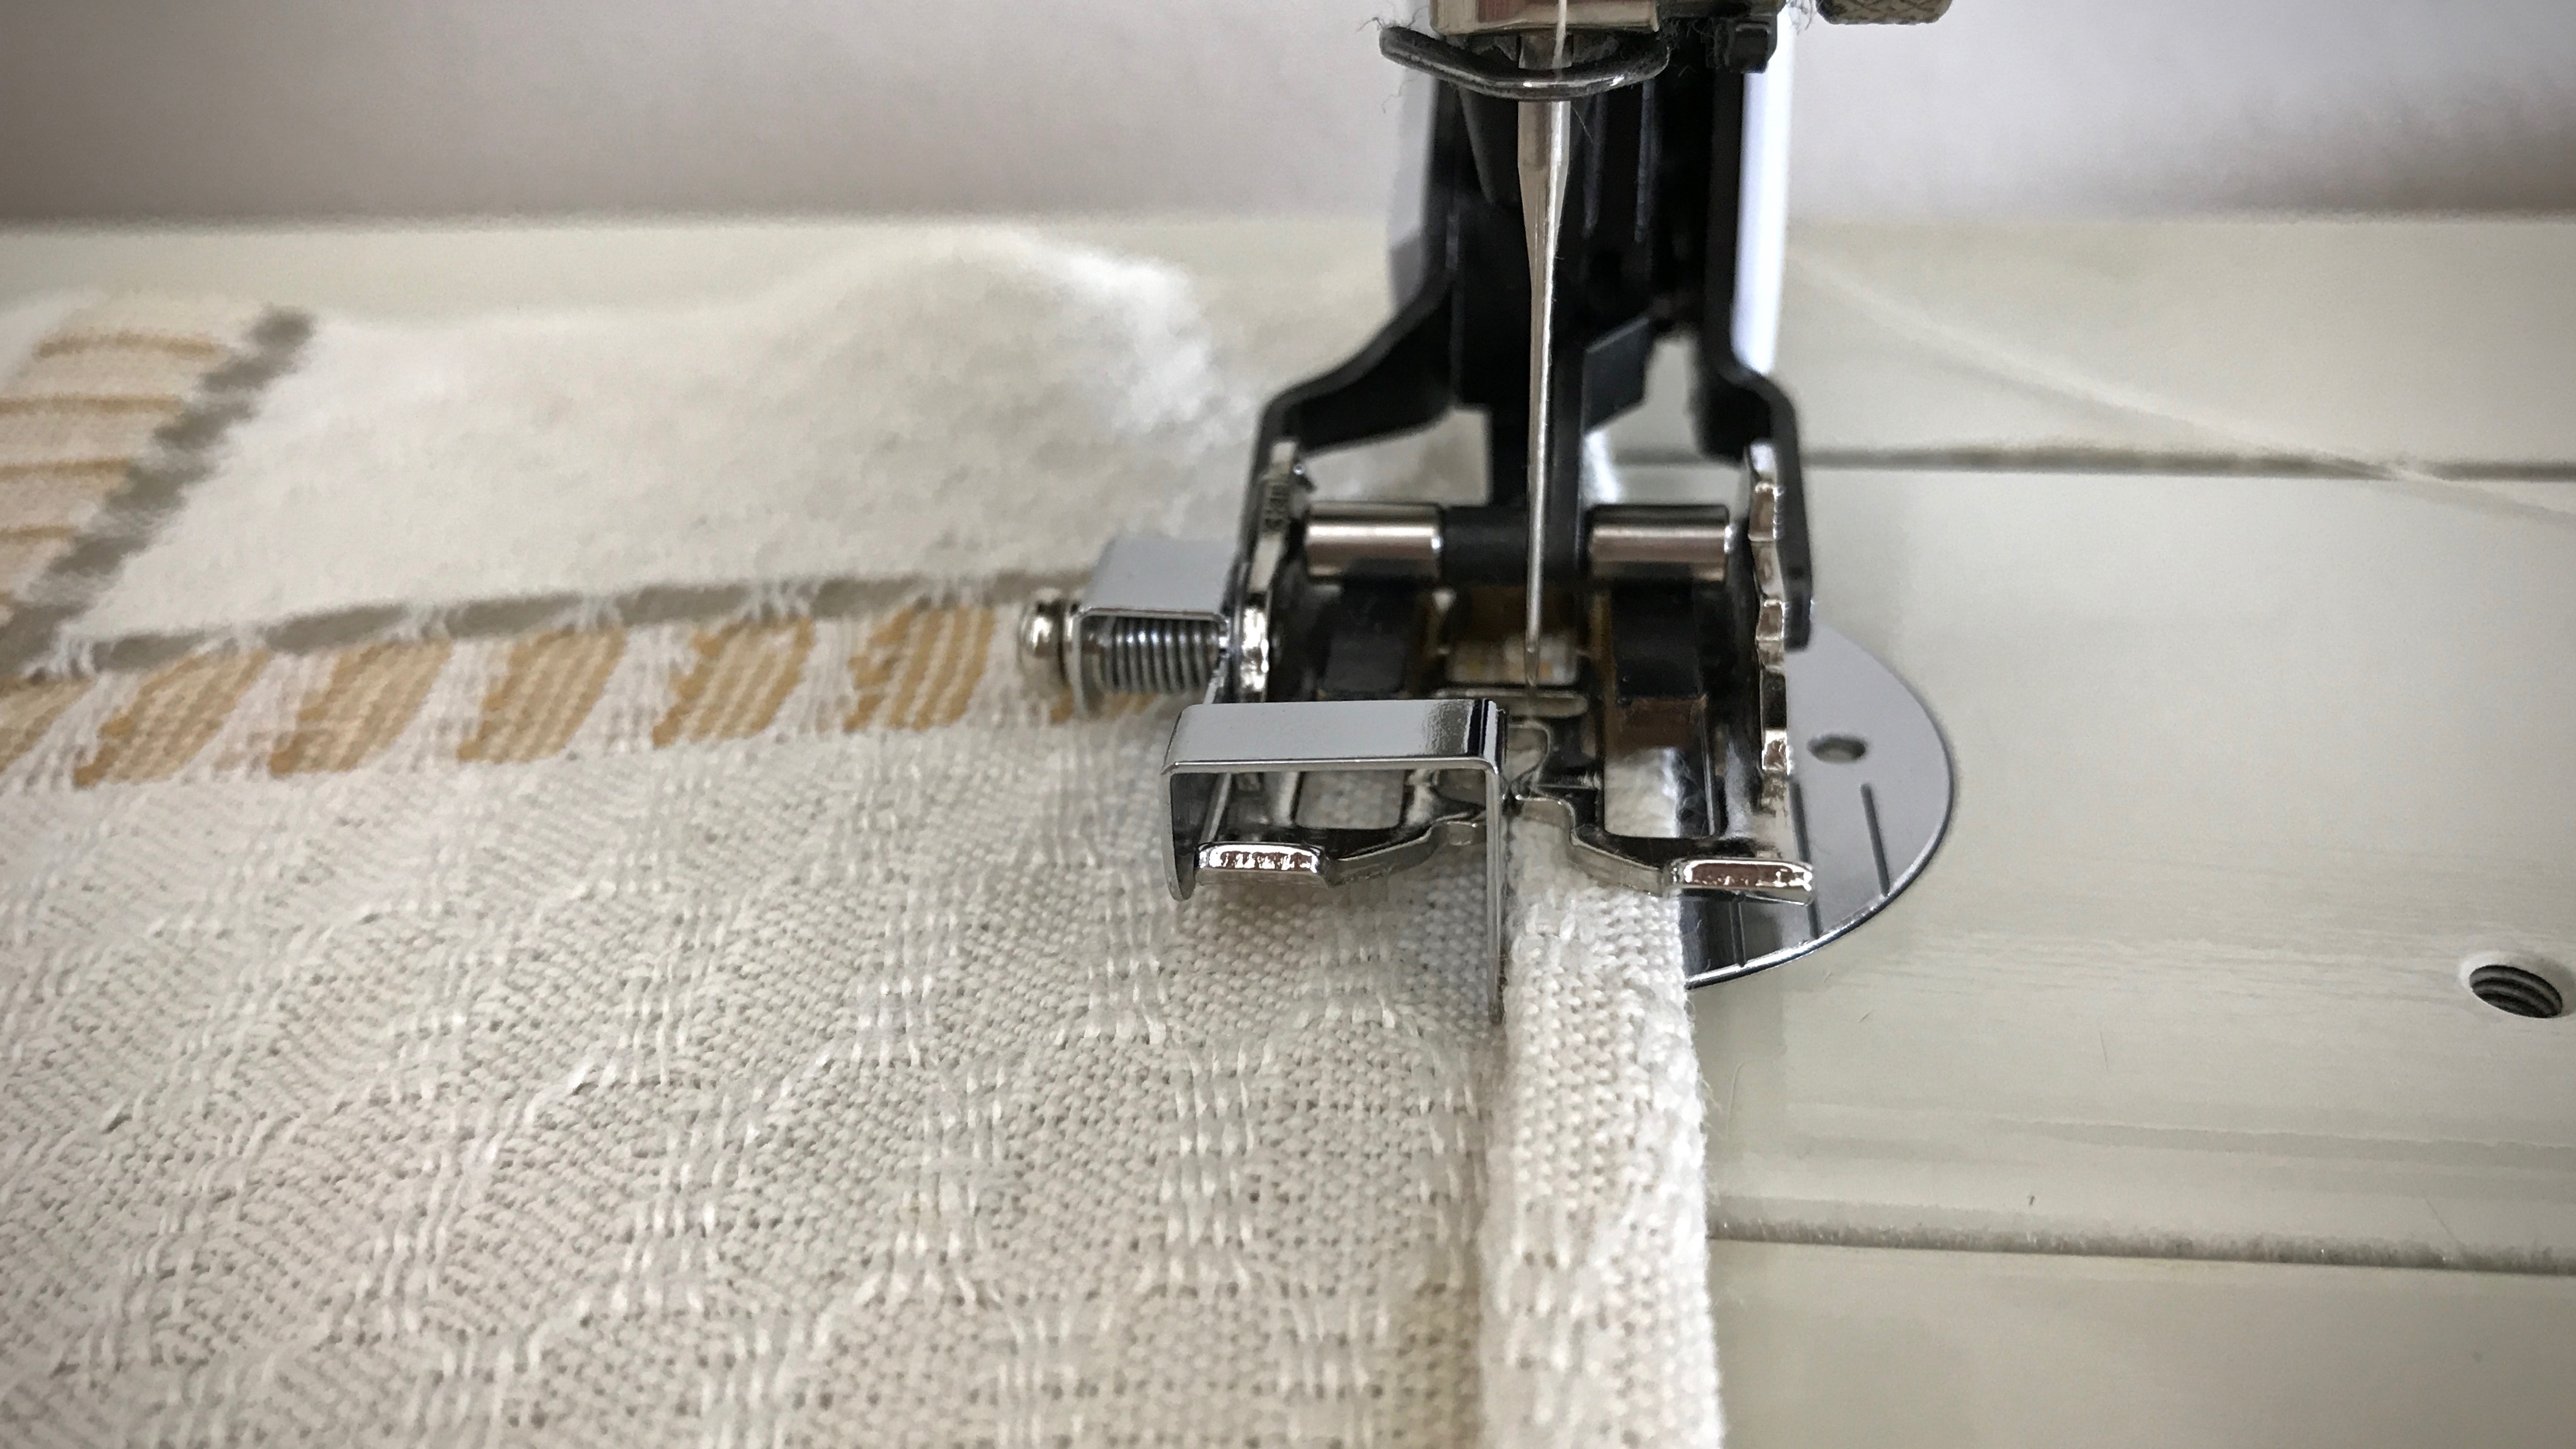
Turn and press the 1/4″ hem twice. Hold the folded edge in place with small fabric clips.
Small fabric clips hold the folded and pressed towel hem in place, in preparation for stitching the hem.
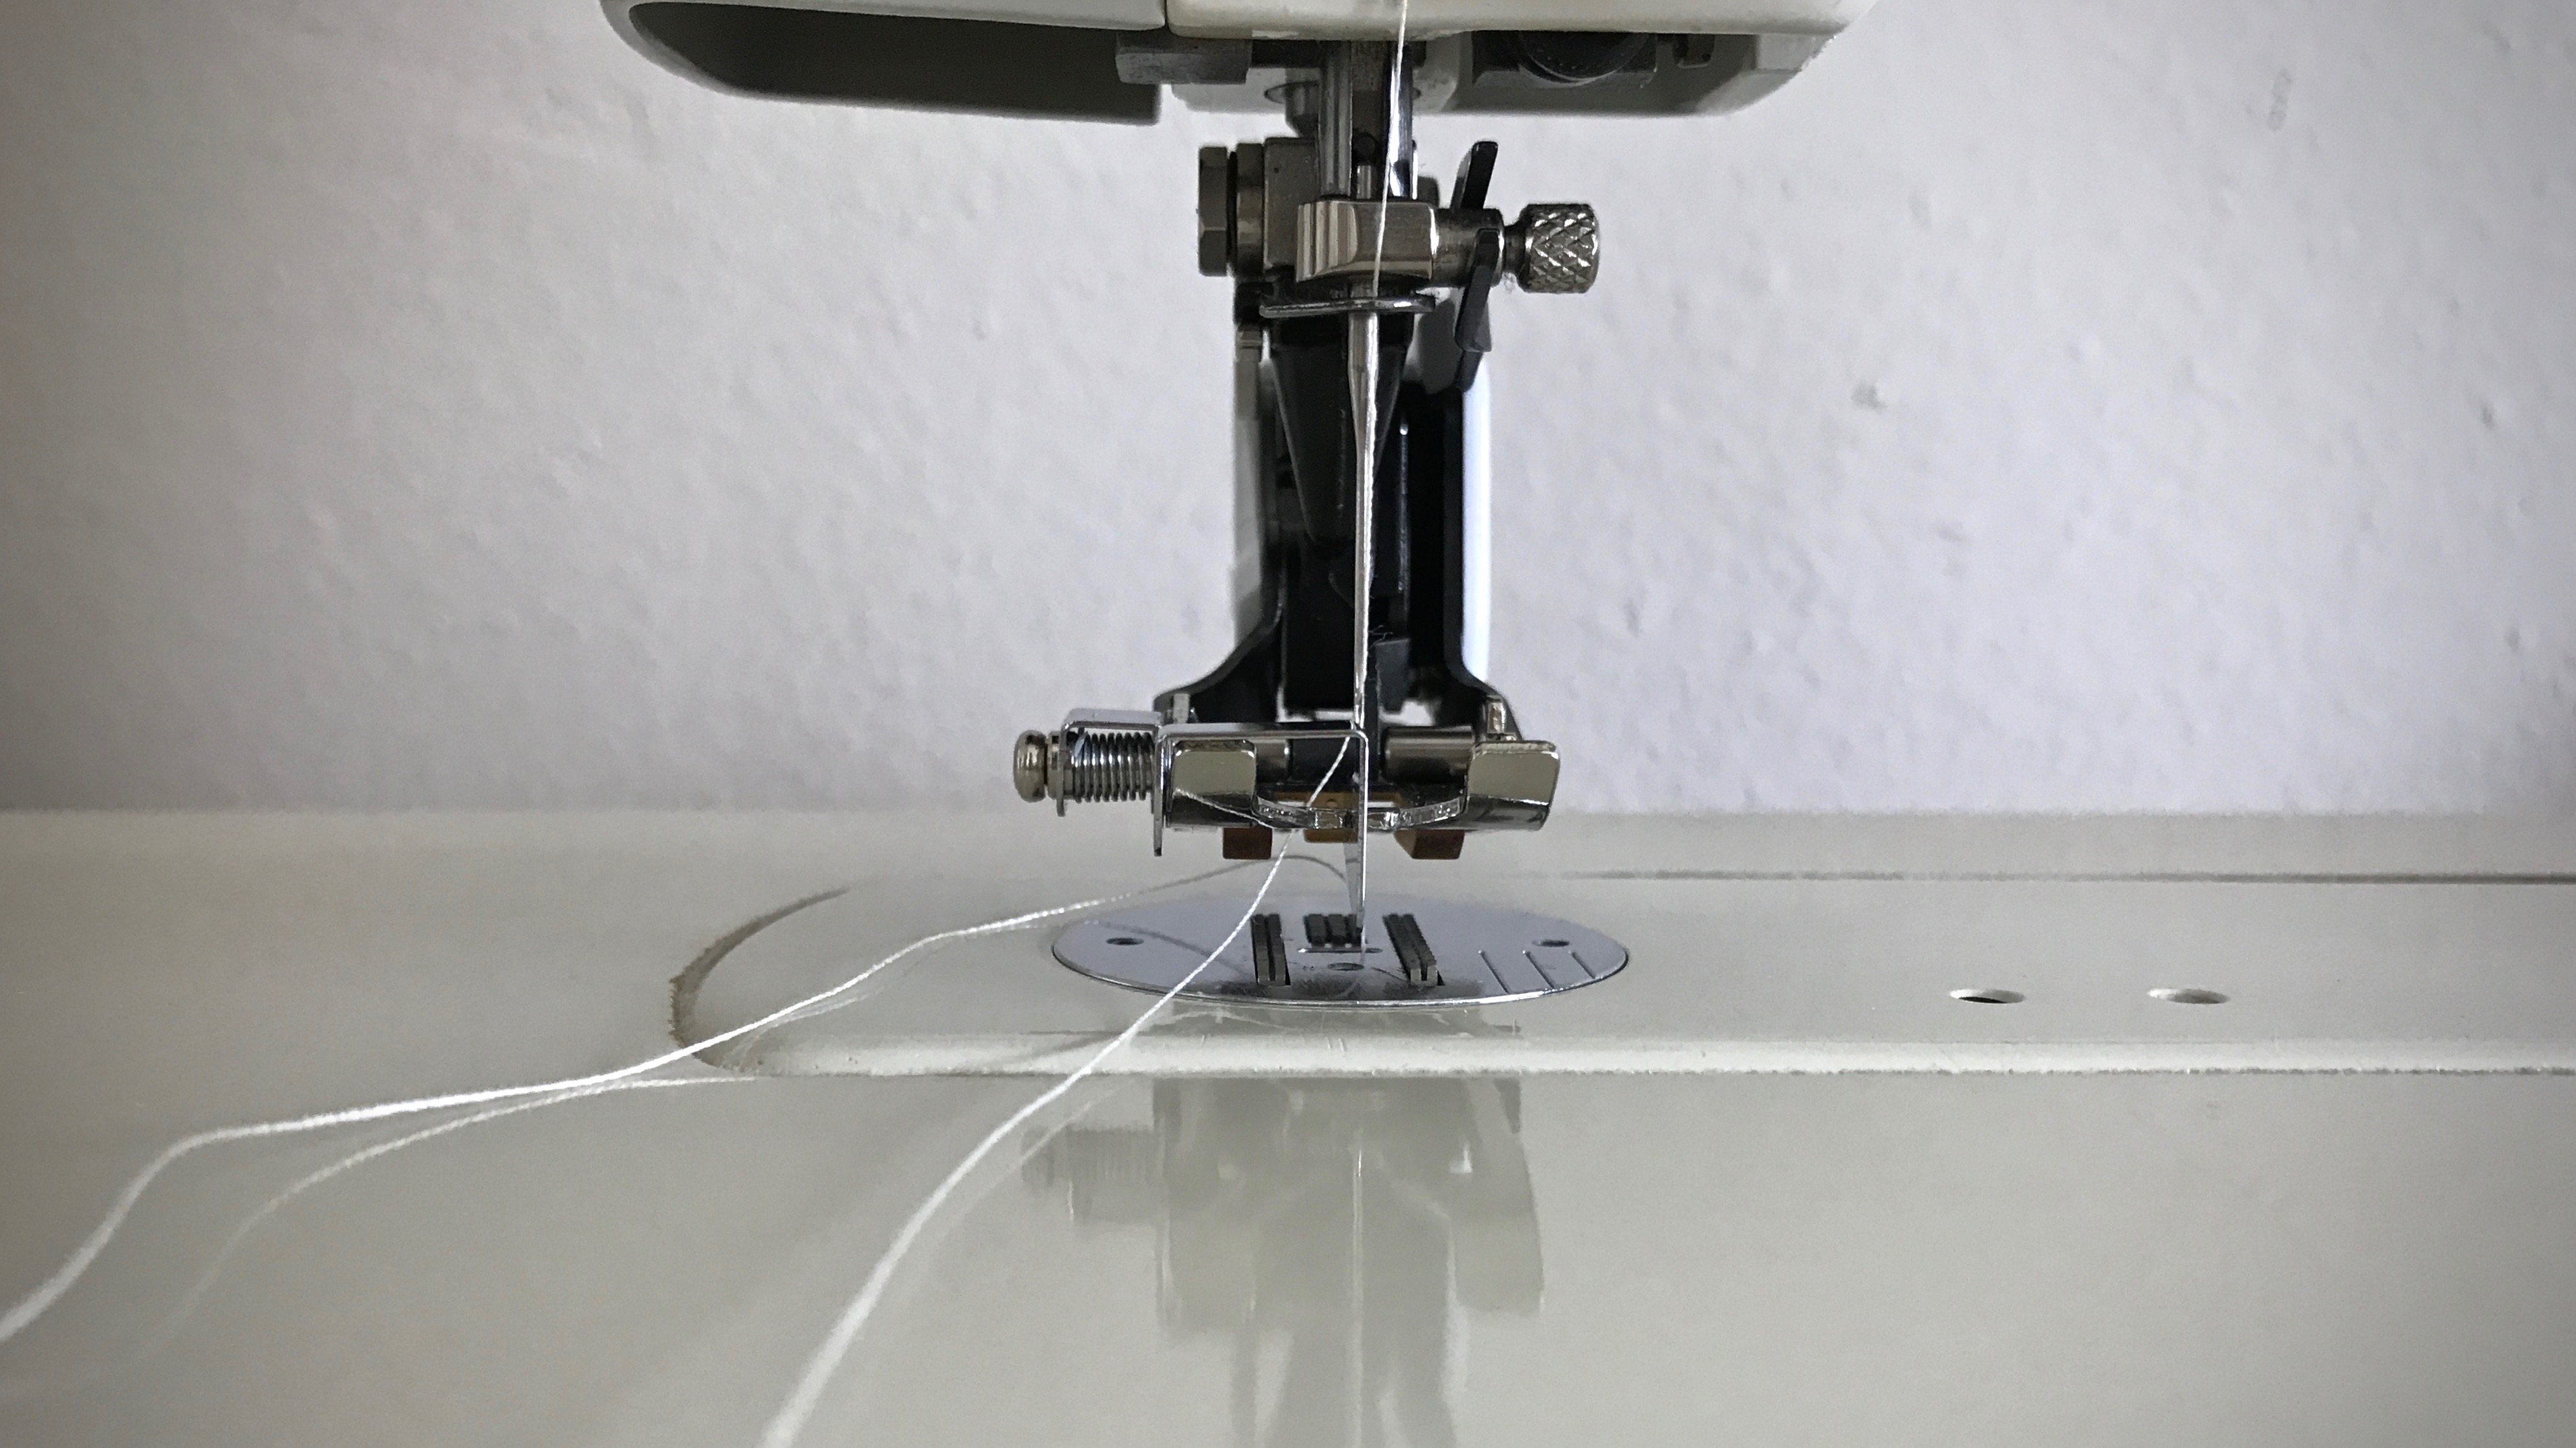
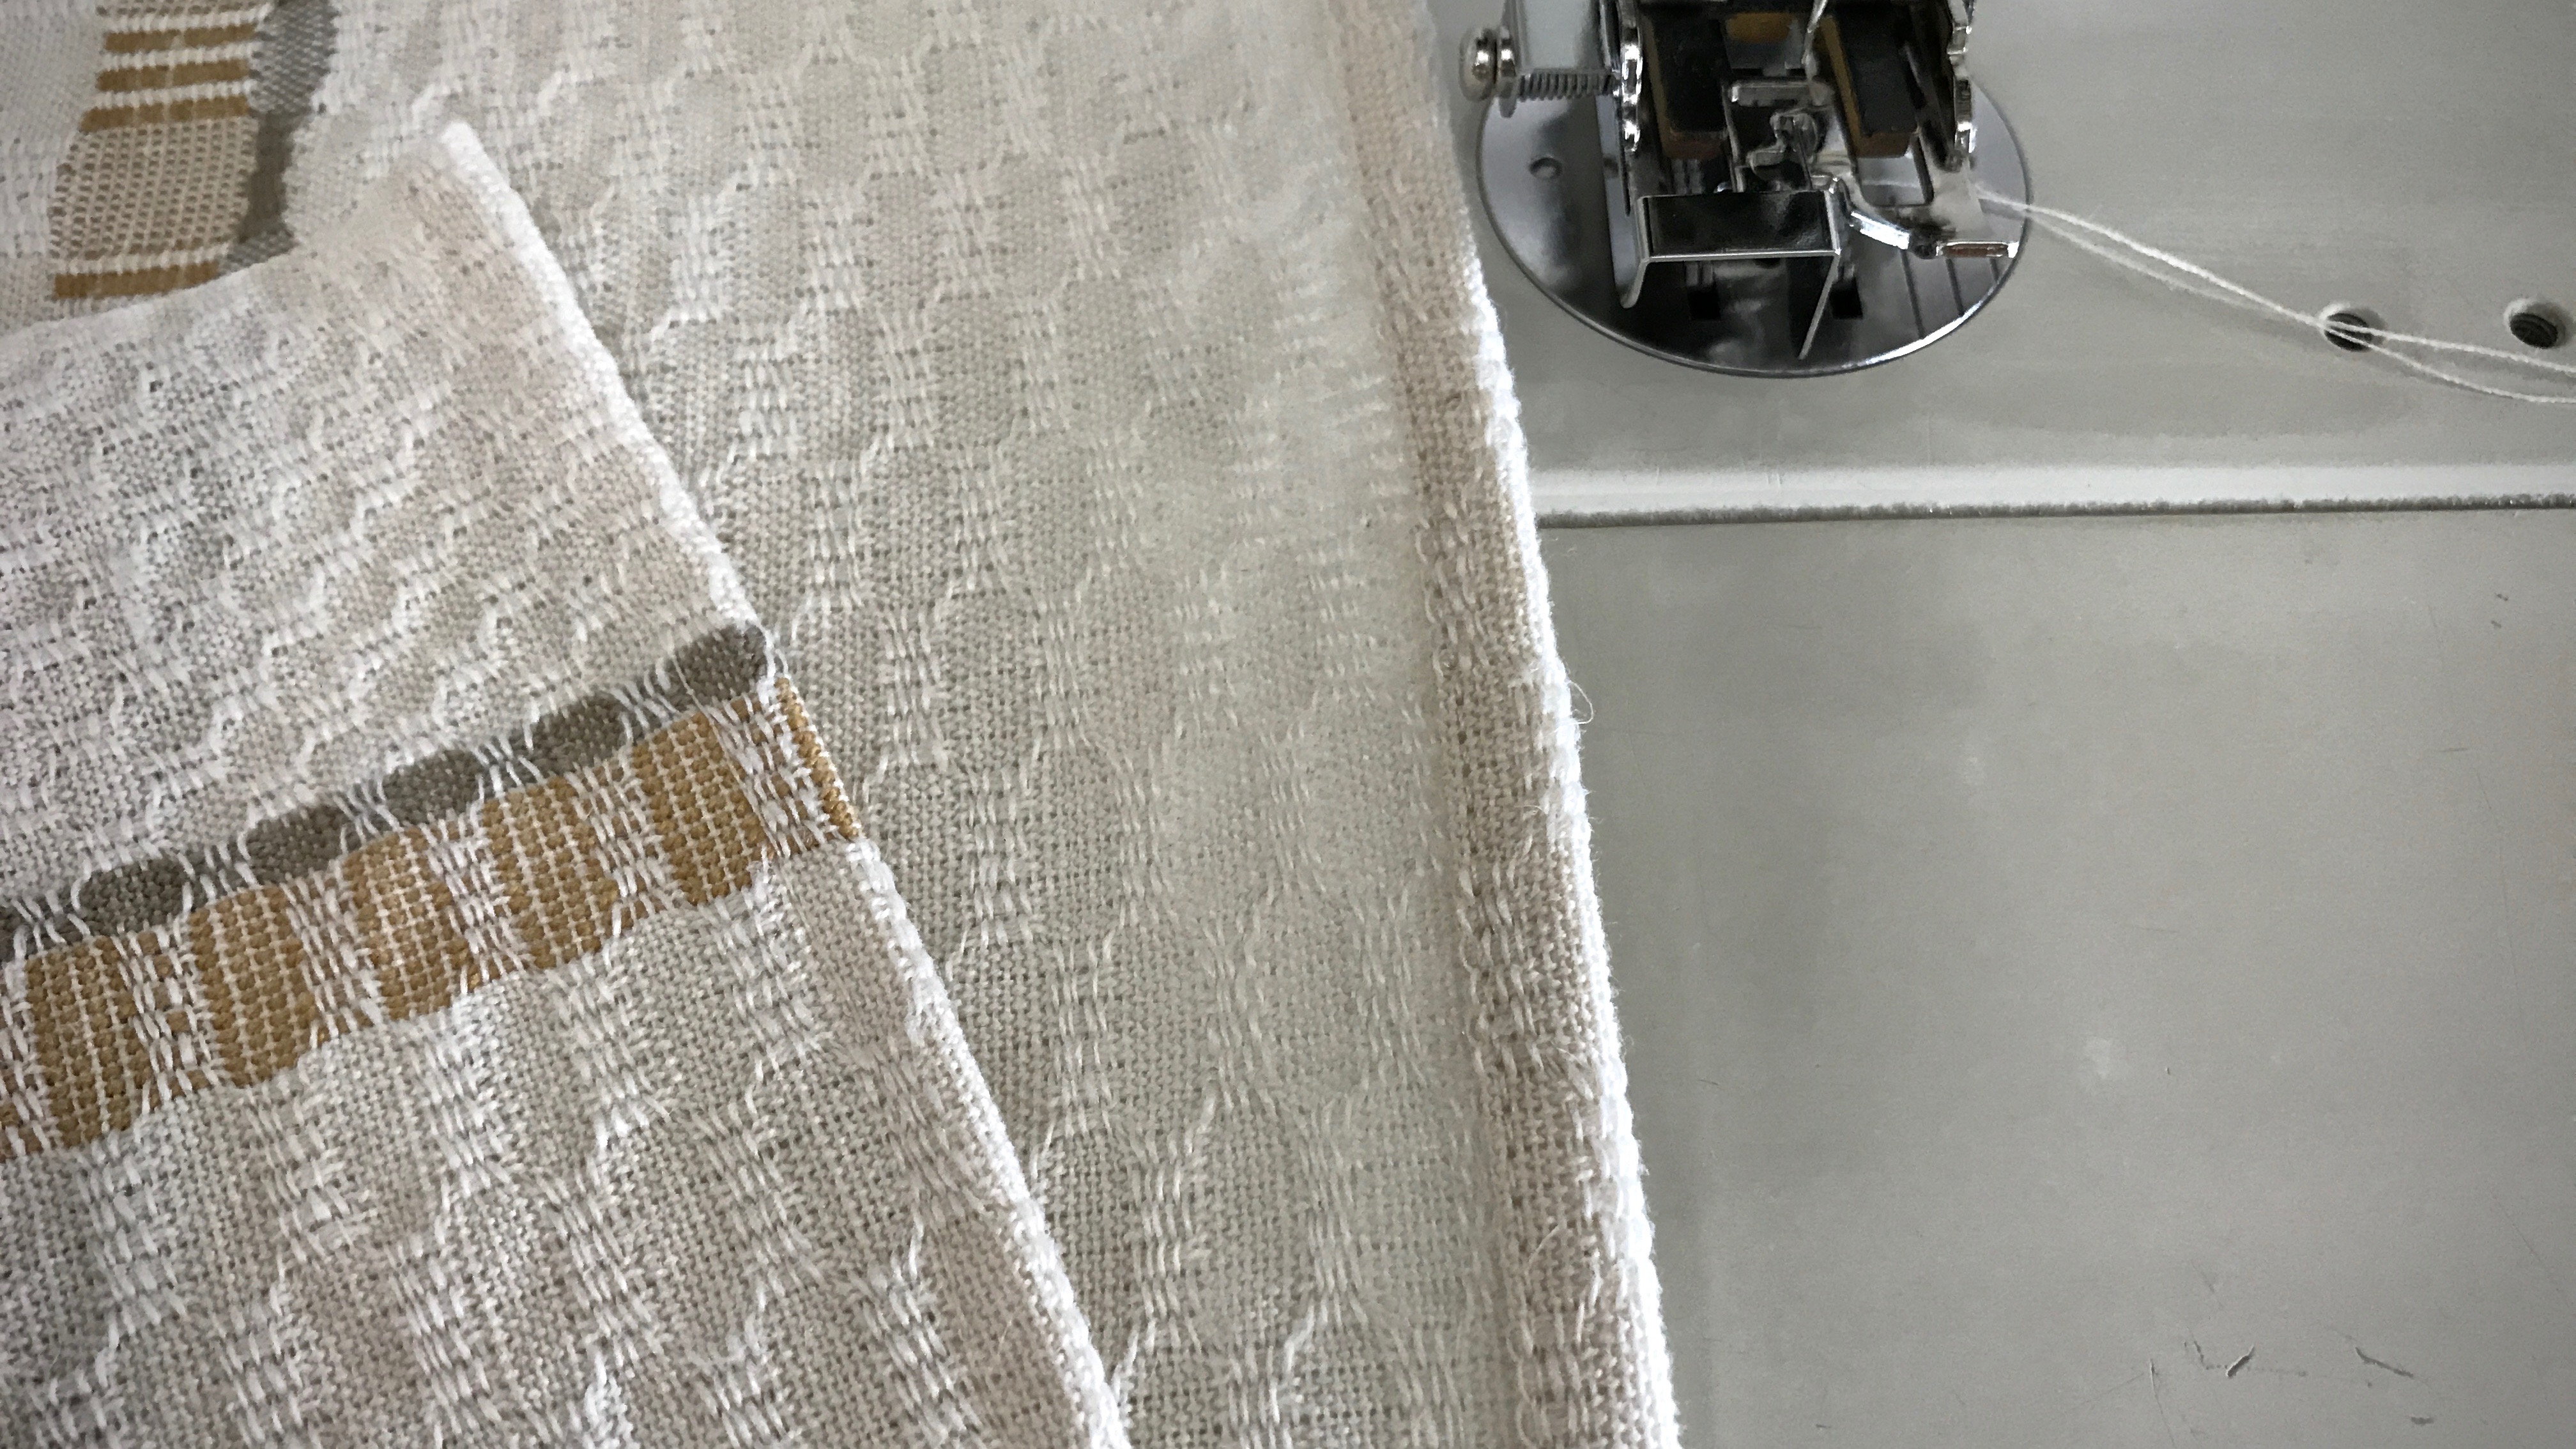
At the sewing machine, attach the edge-stitching sole plate to the walking foot. Align the fold of the hem with the edge-stitching guide.
Sole with stitch guide. The metal plate that extends below the foot is a steady guide that works for sewing a narrow hem, as well as for top-stitching, or “stitch-in-the-ditch” techniques.
Adjust the sewing machine needle to the right, so that it catches the fabric just inside the edge of the fold.
Sewing the narrow hem. Needle is positioned so that it is to the right of the hem fold.
Slowly sew a narrow hem, keeping the folded edge next to the walking foot’s edge-stitching guide. Remove fabric clips before they come to the needle.
Front and back of the hem have consistent, straight stitching. The narrow hem (not yet pressed) will be barely visible.
May your hems be a suitable frame for your handiwork.
Is there anything as exciting as cutting off? Oh sure, there will be some errors to mend. And only wet finishing will reveal the true nature of the cloth. But after investing hours and hours at the loom, cutting the fabric off is a celebration. This is the moment when the work of this weaver’s hands is finally revealed!
While admiring and examining the fabric as it comes off the loom, I am already moving onto the next step–finishing. Here are a few of my regular practices.
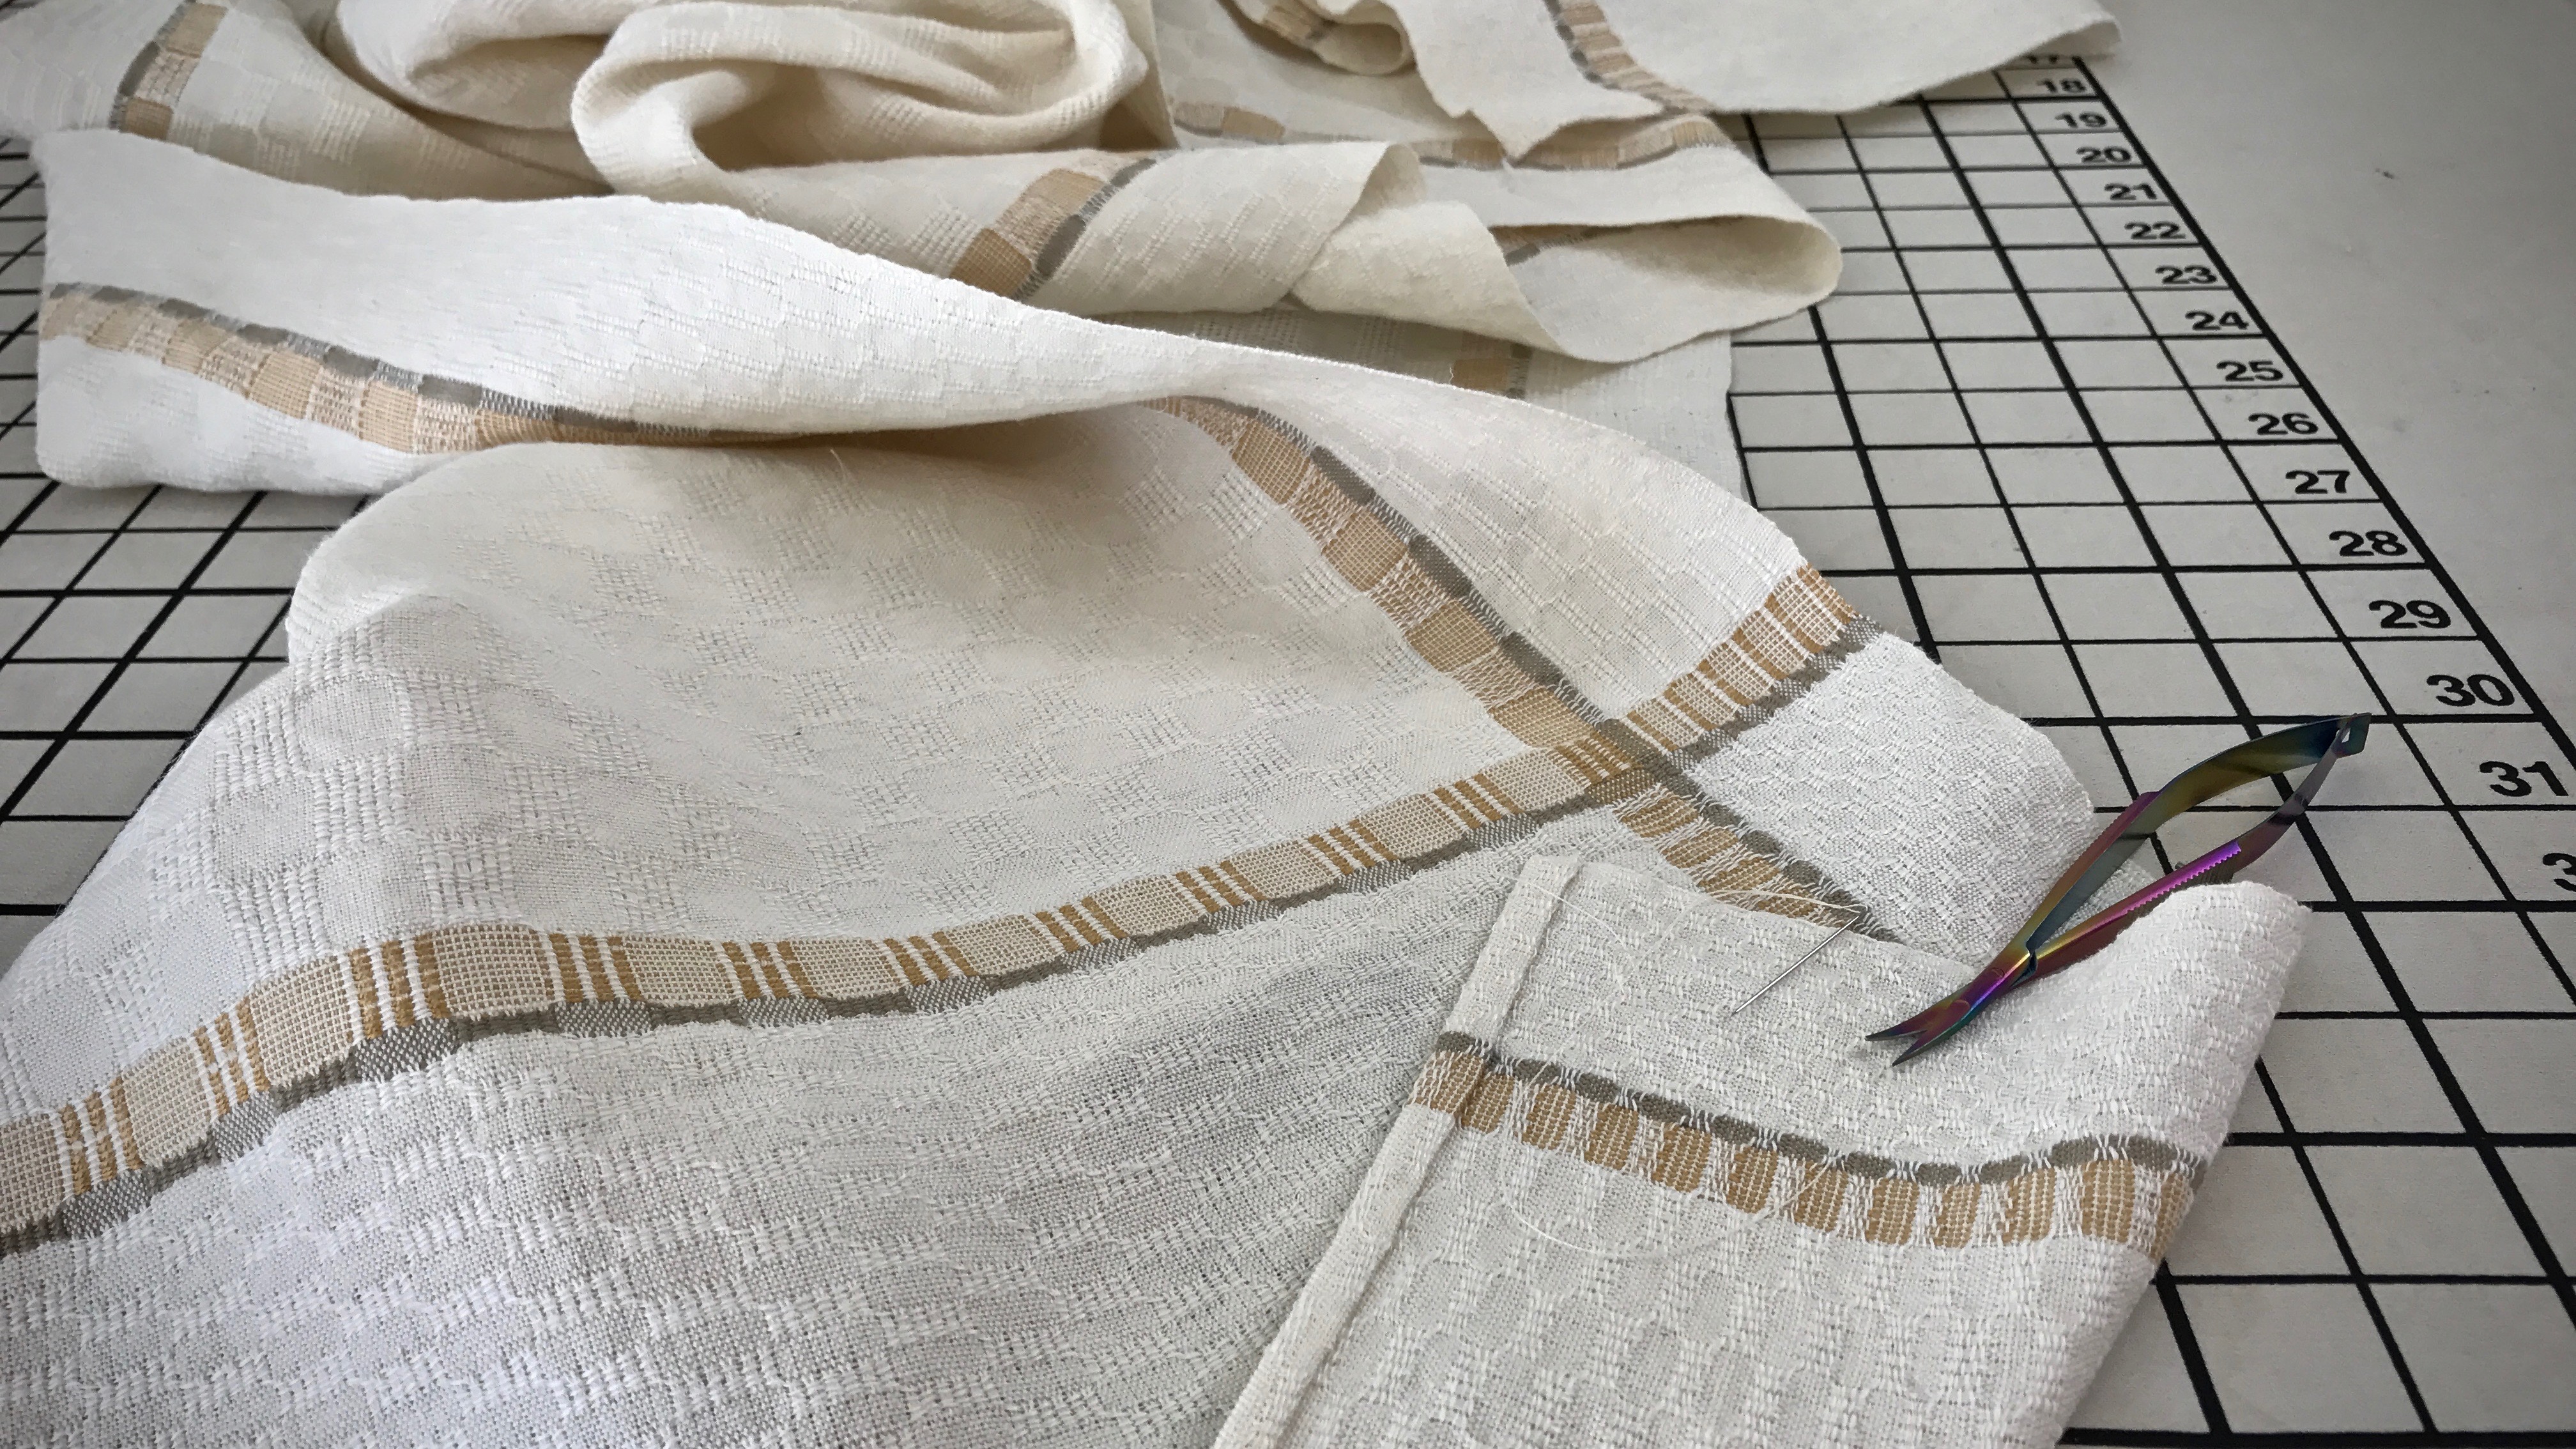
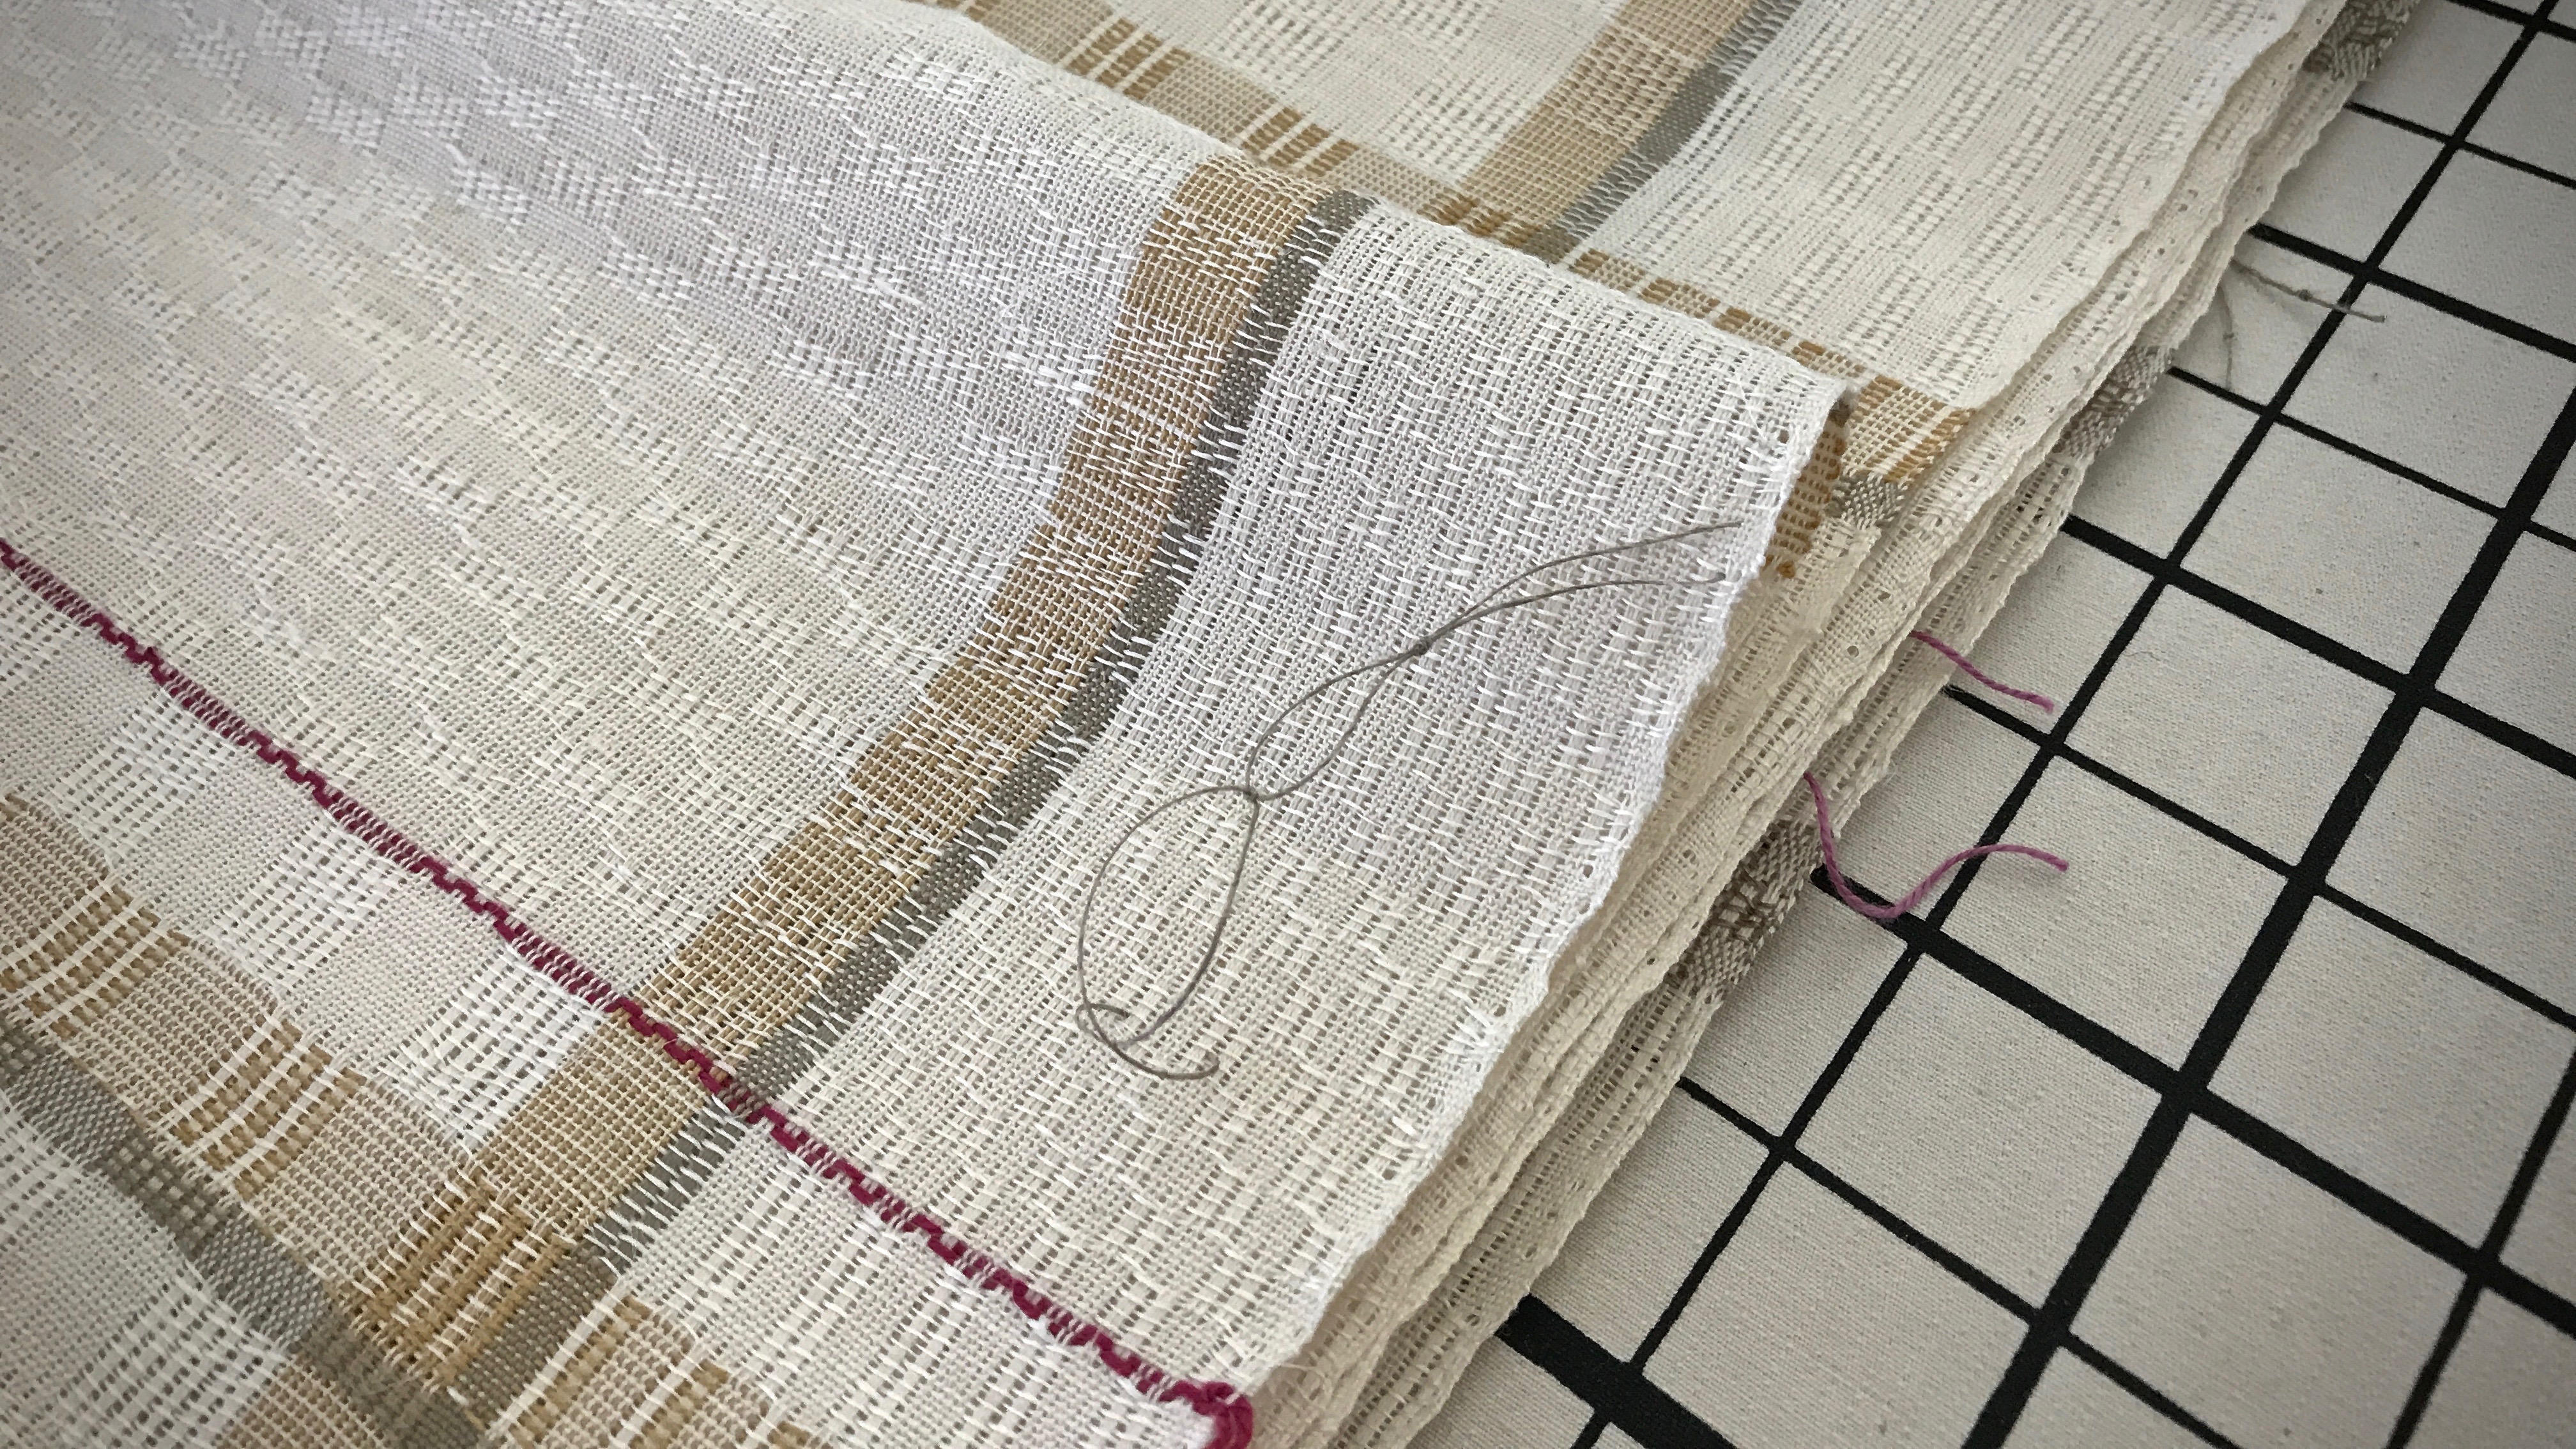
Thread-mark the right side of the fabric on each sample and individual piece before completely removing the fabric from the loom. This removes guesswork later. Thread a blunt-tip needle with 6 – 8″ of warp or weft thread, and make a 1/2″ stitch through the fabric. Leaving a loose loop, tie the ends of the thread together in a square knot on the right side of the fabric.
Knot in the thread tells me that this is the right side of the fabric. Thread marks are sewn onto each piece before removing the fabric from the loom if the difference between the right and wrong side of the fabric is less than obvious. Thread marks remain until hems are turned under.
Tie sequential knots in the thread marks. e.g., First towel has one knot, second towel has 2 knots, etc. This enables accurate record-keeping measurements before and after wet finishing for individual items.
After washing, I count the number of knots in the thread to know which towel is which. Before and after measurements enable me to calculate the amount of shrinkage that occurs, which helps for planning future projects.
Cut pieces apart before washing.
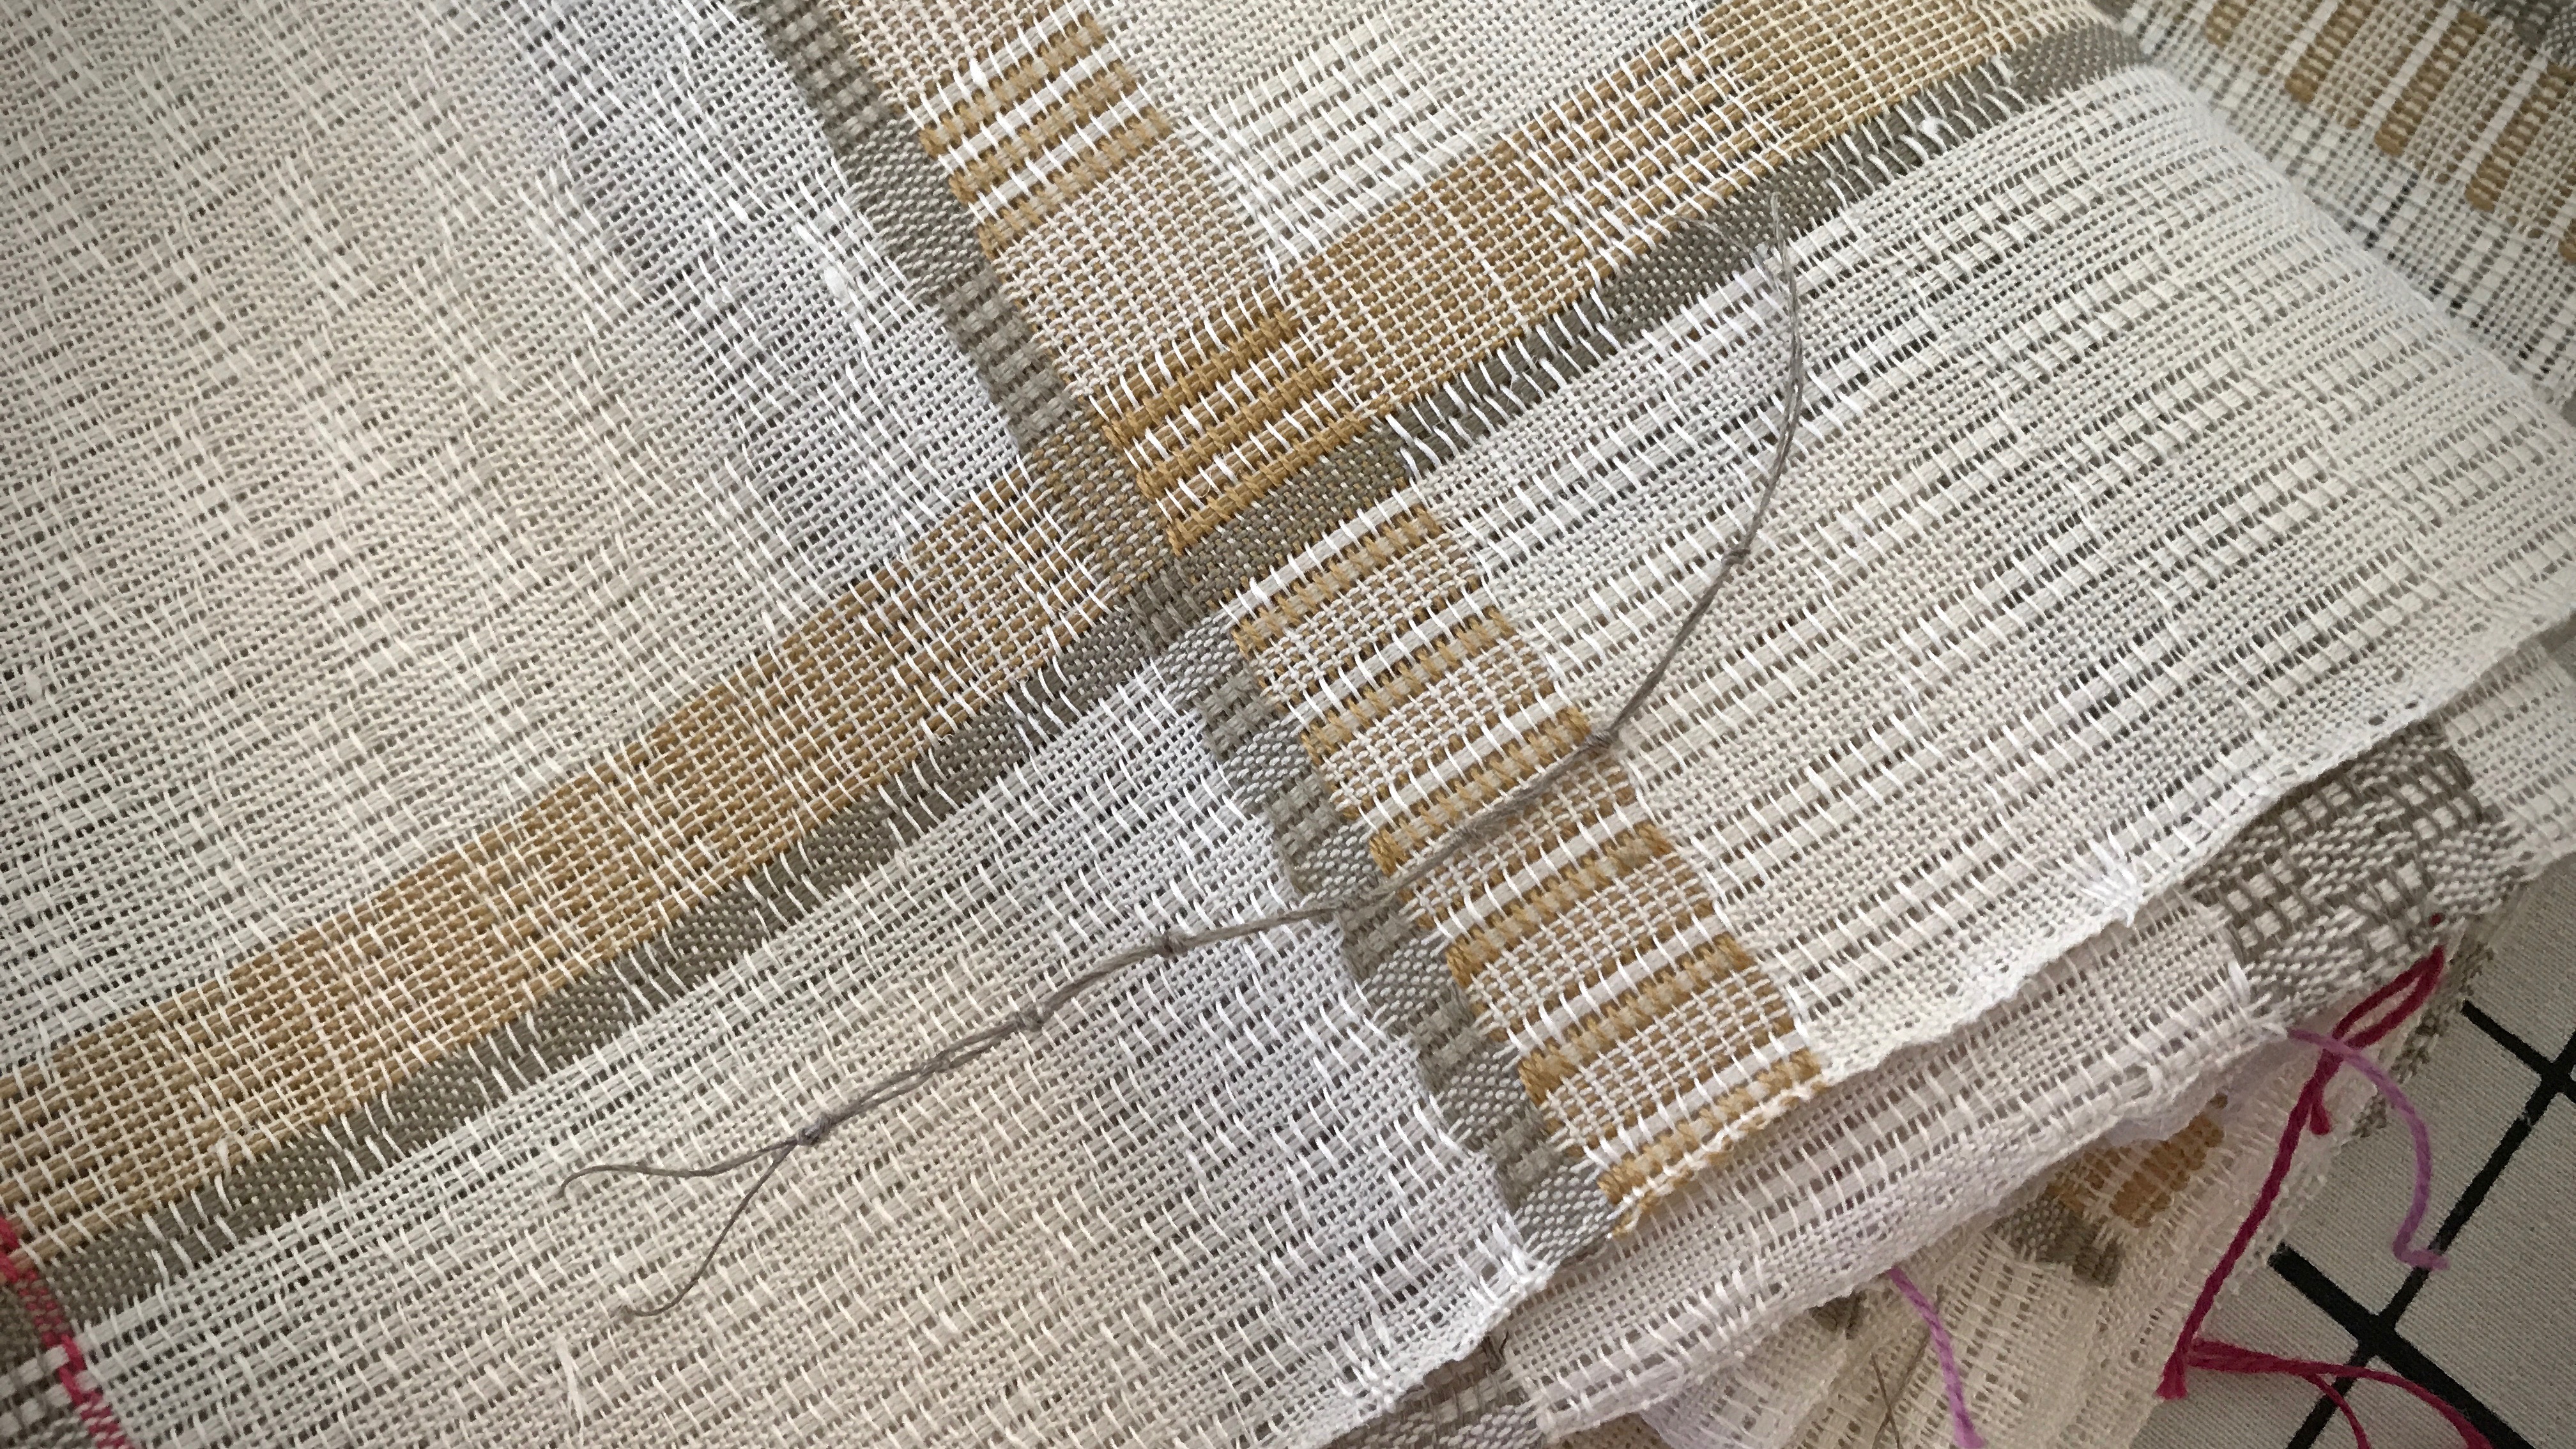
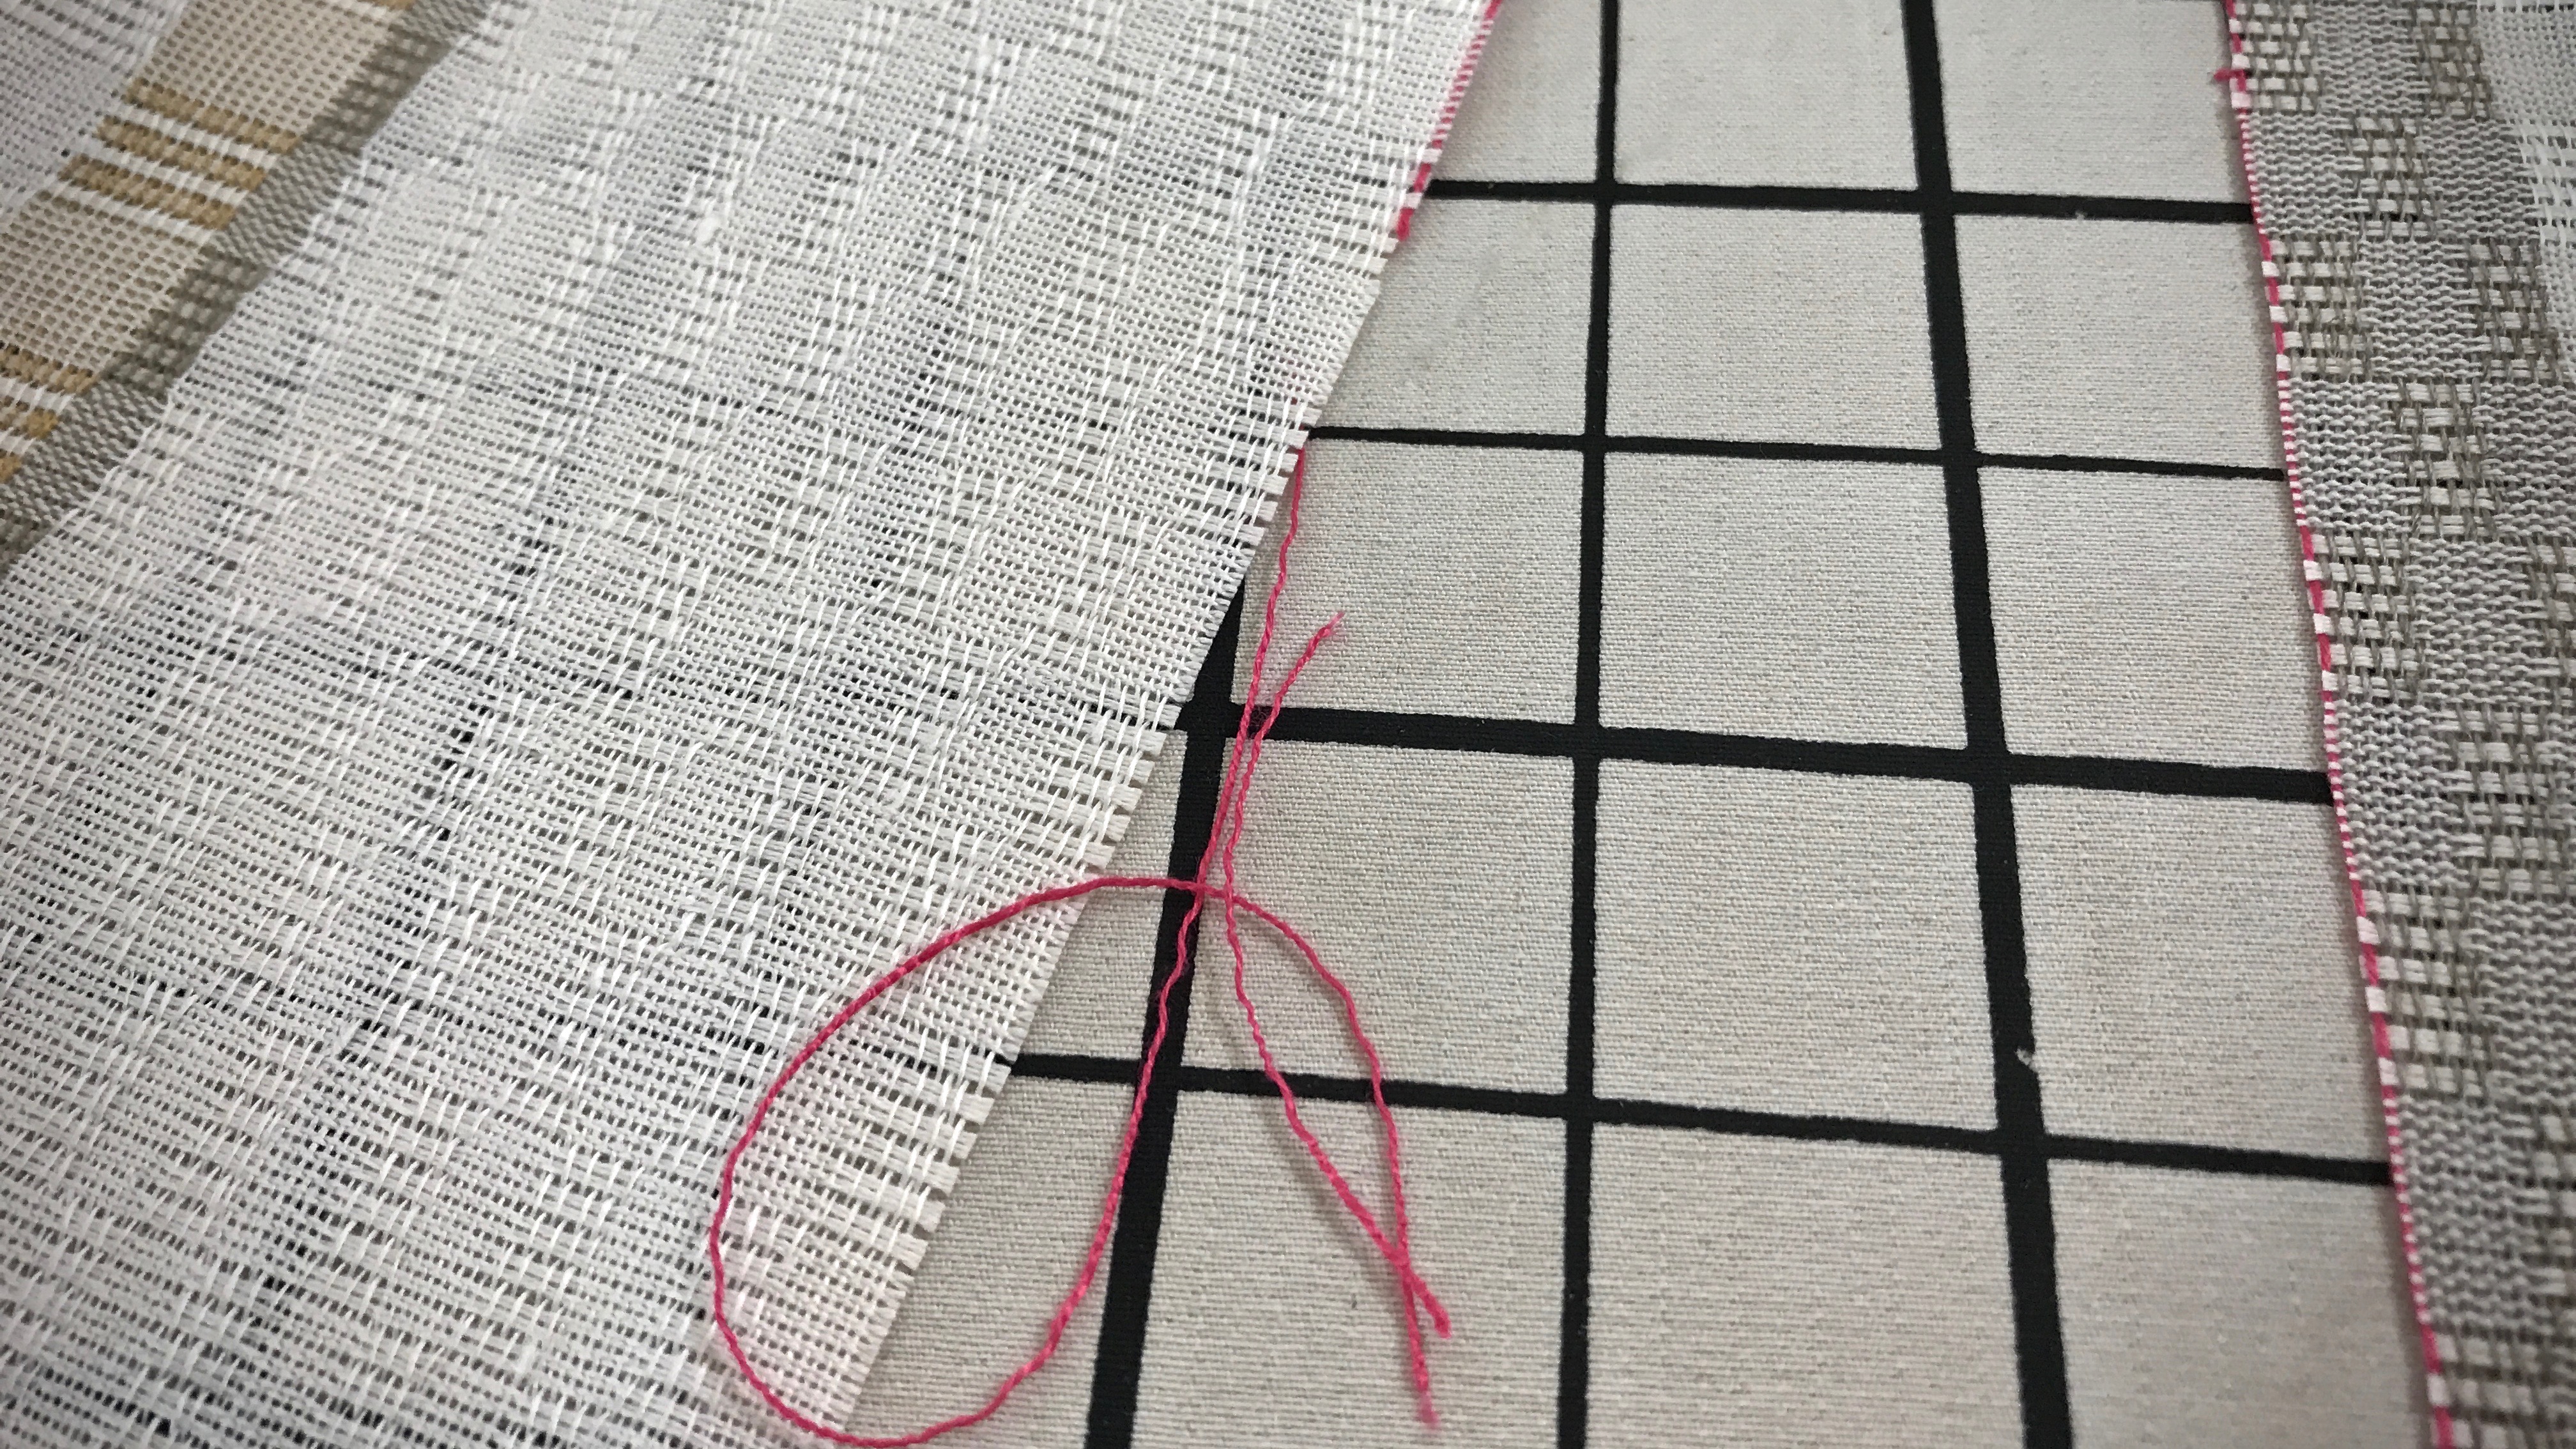
1. Two weft picks have been woven for each cutting line. The two threads make an easy guide path for the scissors.
Cutting line for separating the woven pieces. Cut between the two red weft threads.
2. Use the same cutting-line color for every project (I use red, unless red is one of the weft colors in the project). This helps prevent accidental cutting at weft design stripes in the piece (which I did once –Oops!– before establishing this rule).
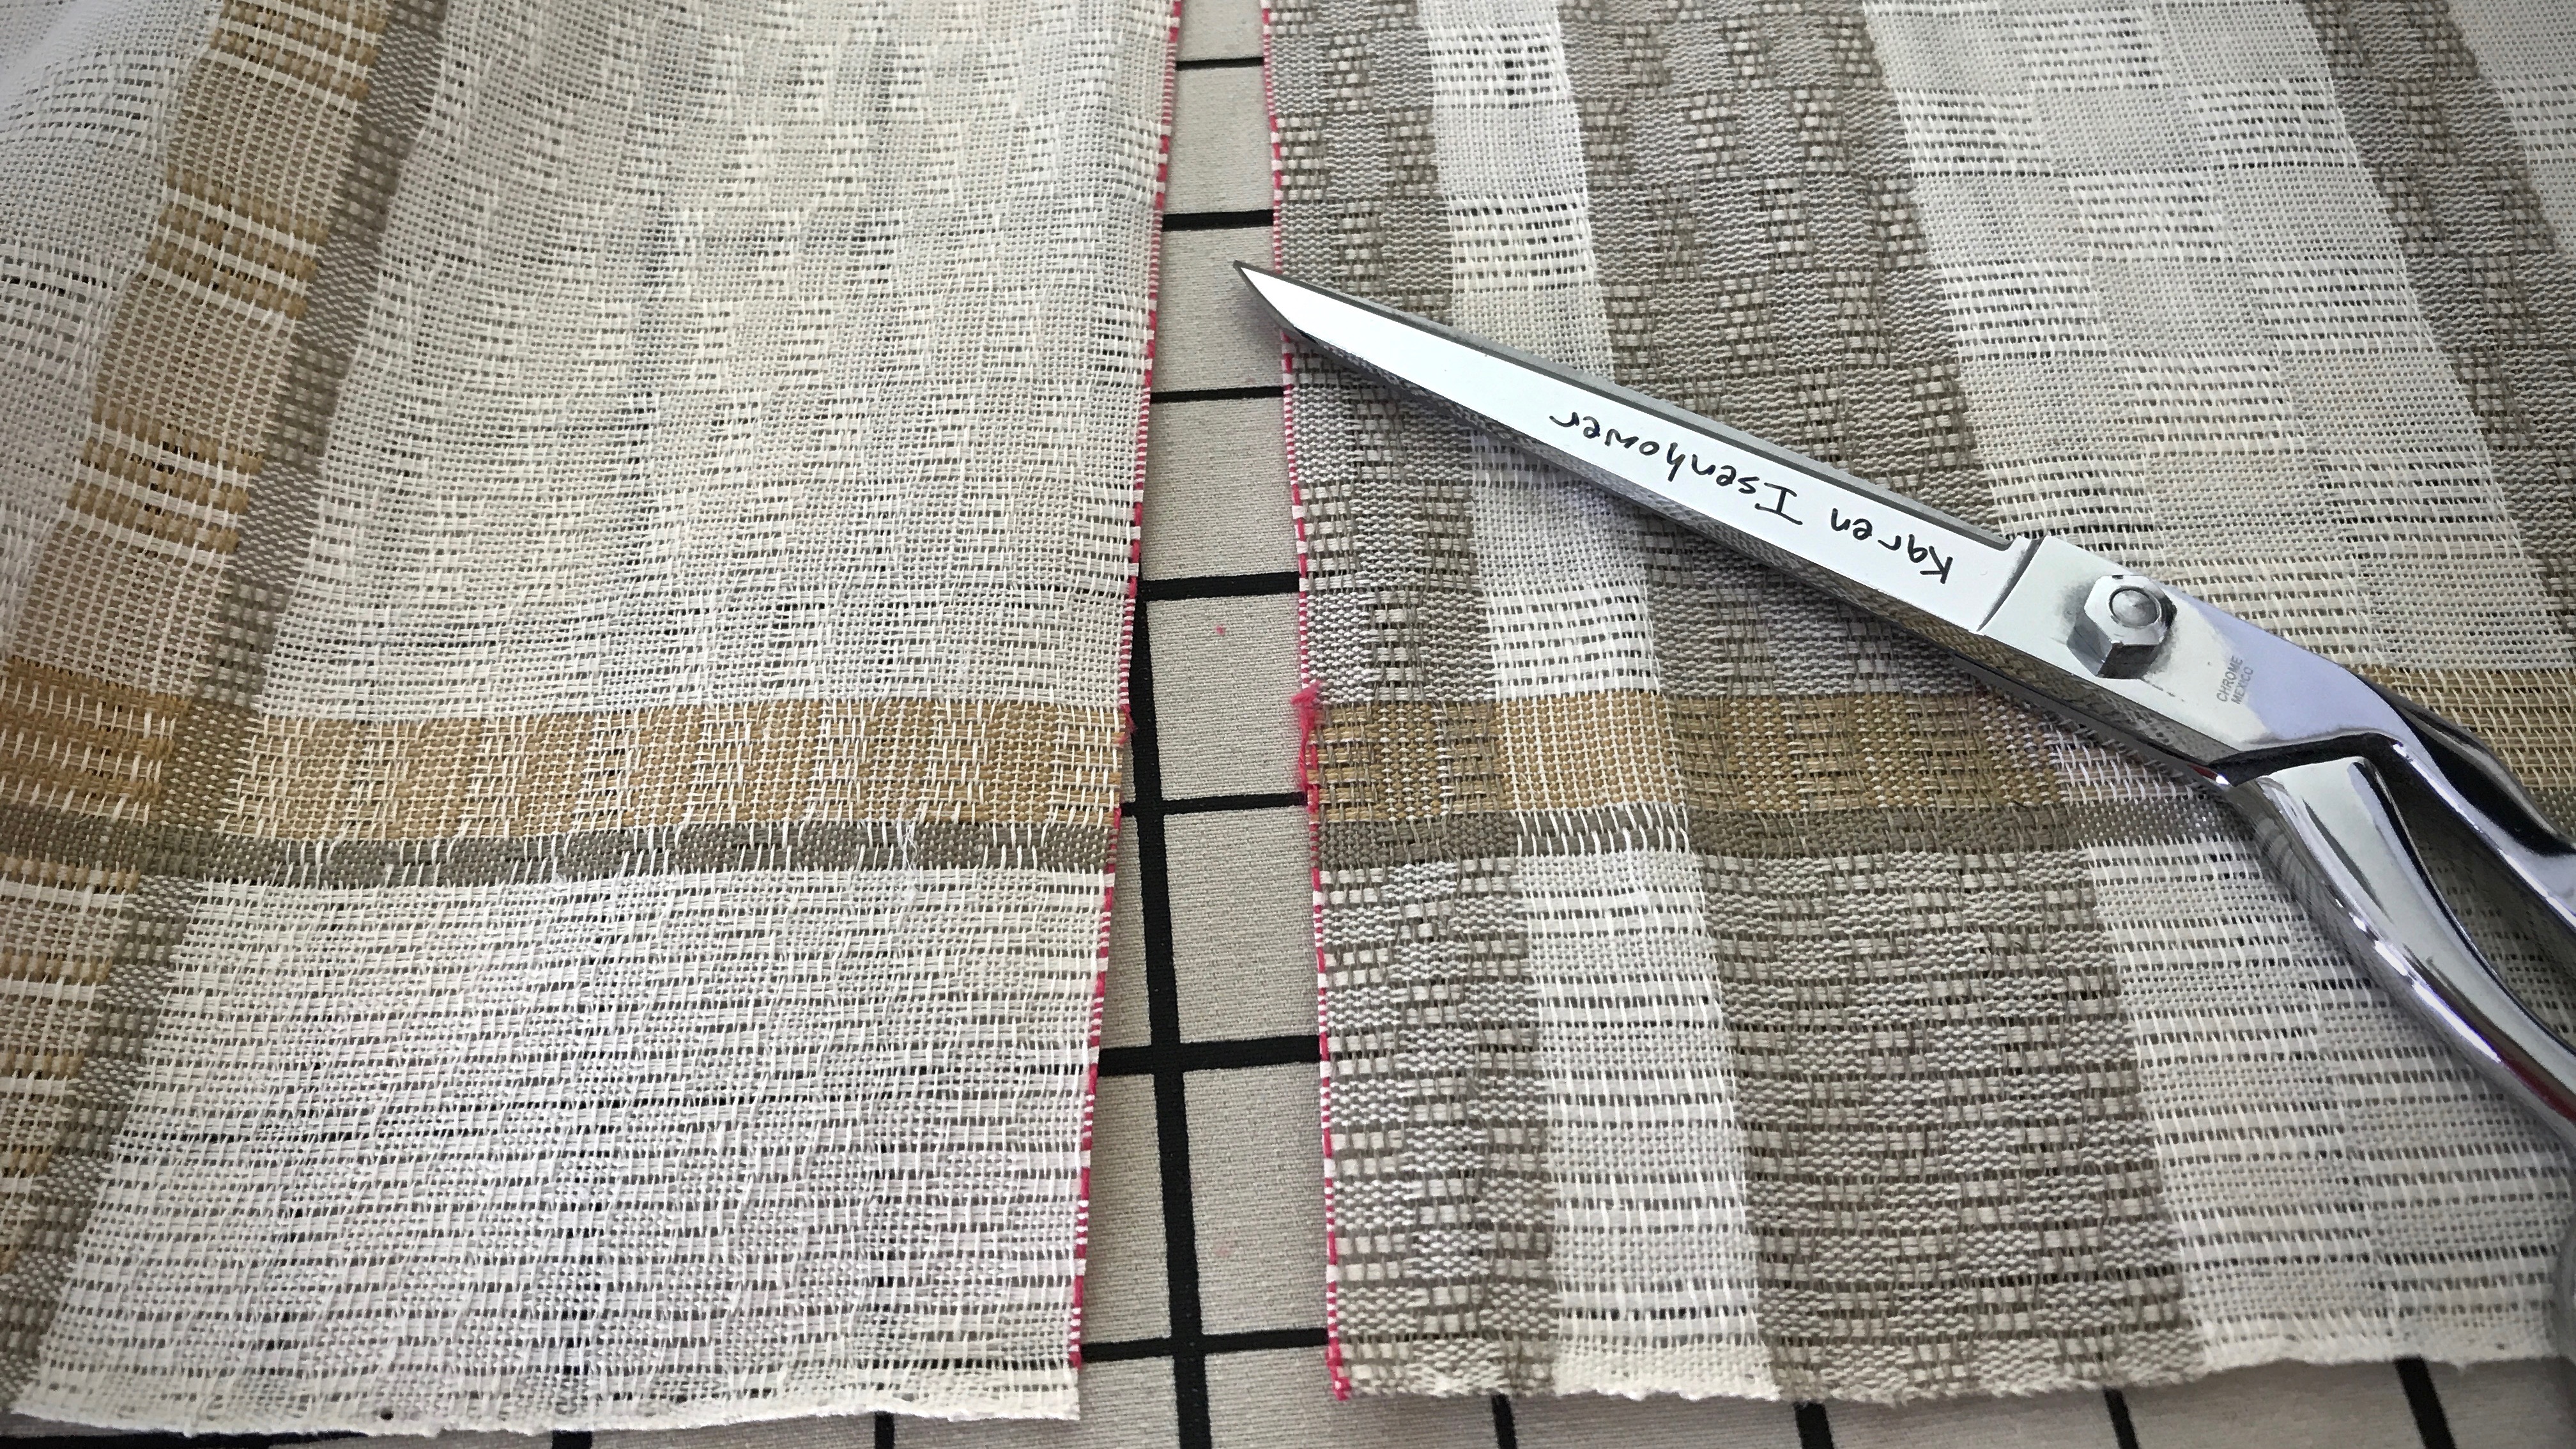
3. Pull out the cutting-line threads. Any remaining thread residue is easily removed with a lint roller.
Red cutting line thread pulls off, leaving a straight woven edge for finishing.
Finish the cut edges with an overlock stitch on a serger or with a zigzag stitch (preferably a three-stitch zigzag, according to my friend, Elisabeth) on a sewing machine.
All items are prepared for washing. Errors have been mended, and cut edges have been finished with the serger.Lovely texture of the M’s and O’s (Sålldräll) structure is revealed after washing. A few more finishing steps remain: pressing, adding handwoven hanging tabs, and hemming.
Humans are not finished until they are loved. Love is patience and kindness at the core. We want to be on the receiving end of that, don’t we? We all need someone to love us–to carry our burdens, to believe us, to hope the best for us, to endure with us. It’s in the finishing that we discover the value, the corrections needed, and the beauty that has been woven in. This is the love of God to us. This is the finishing work of Jesus Christ, and his love in us.
May you have many cutting-off celebrations.
With love, Karen
PS It’s good to be back with you! I hope you had a pleasant and weaving-full July.