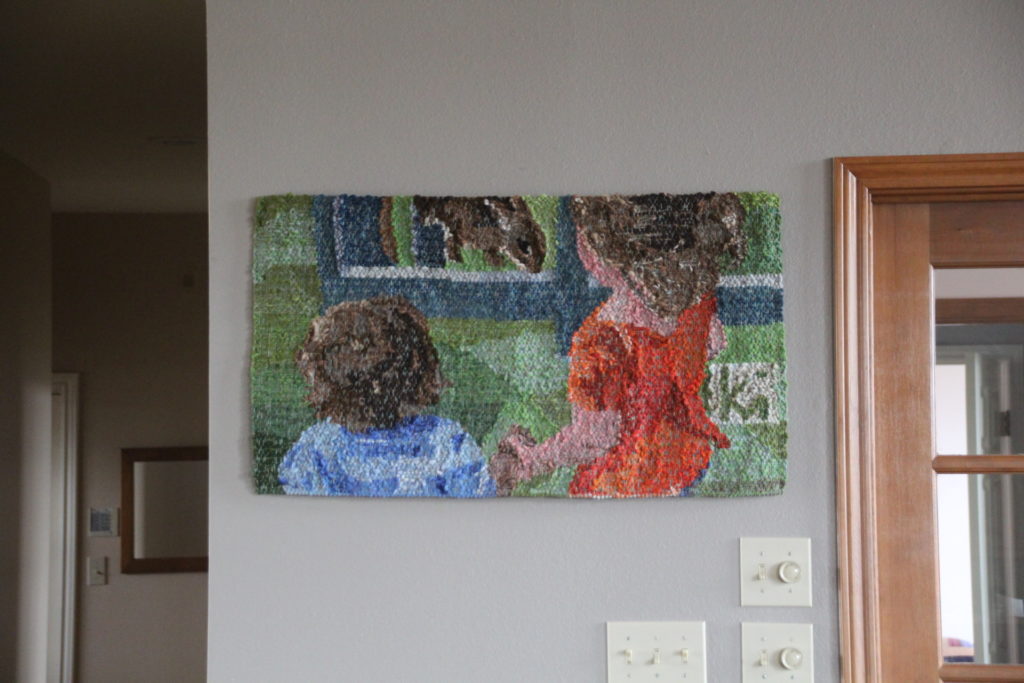
Drum roll please… And now, I present to you: Siblings
The Siblingstapestry is a woven expression of personal meaning. The tapestry tells a story of a singular incident, almost hidden in the excitement of the occasion. Lucia grasps Ari’s wrist as they approach Sugar Pie, the bunny. In that moment I see something worth keeping—precious sibling love.
Please enjoy this short video of the process of weaving and finishing the Siblings tapestry.
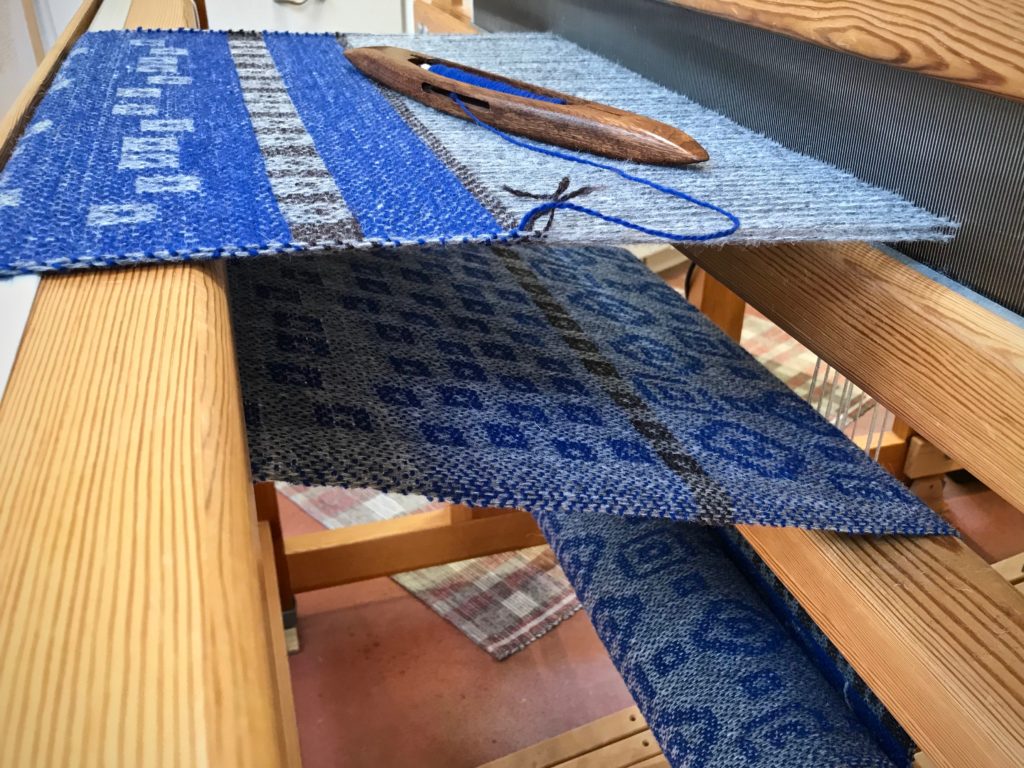
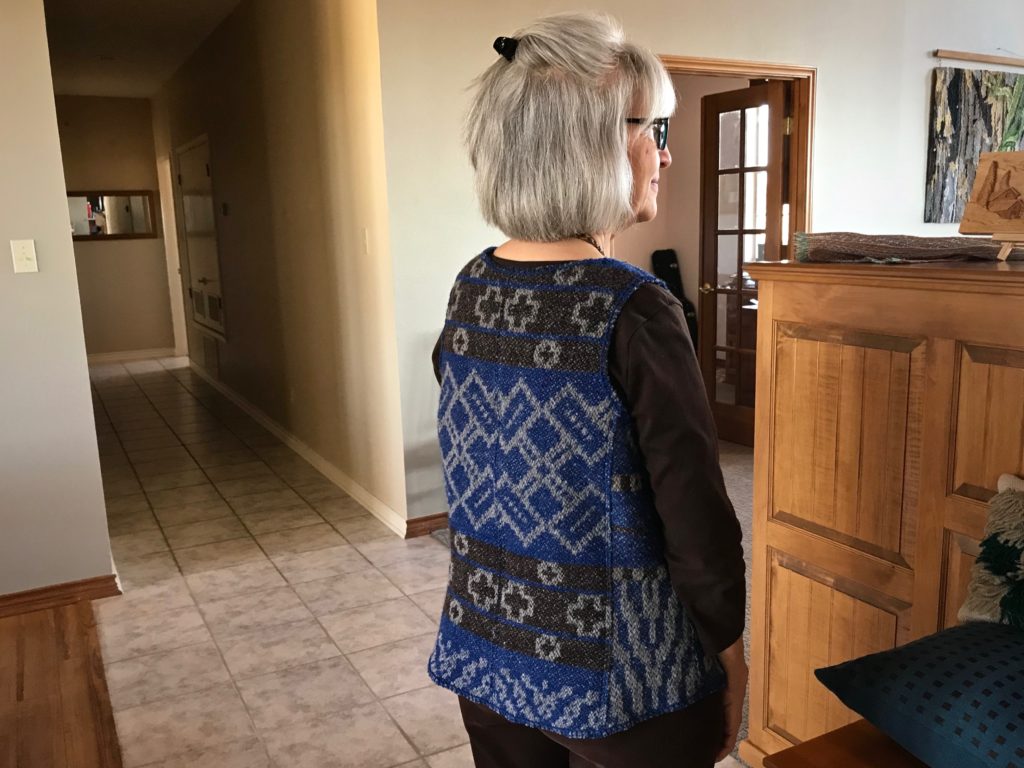
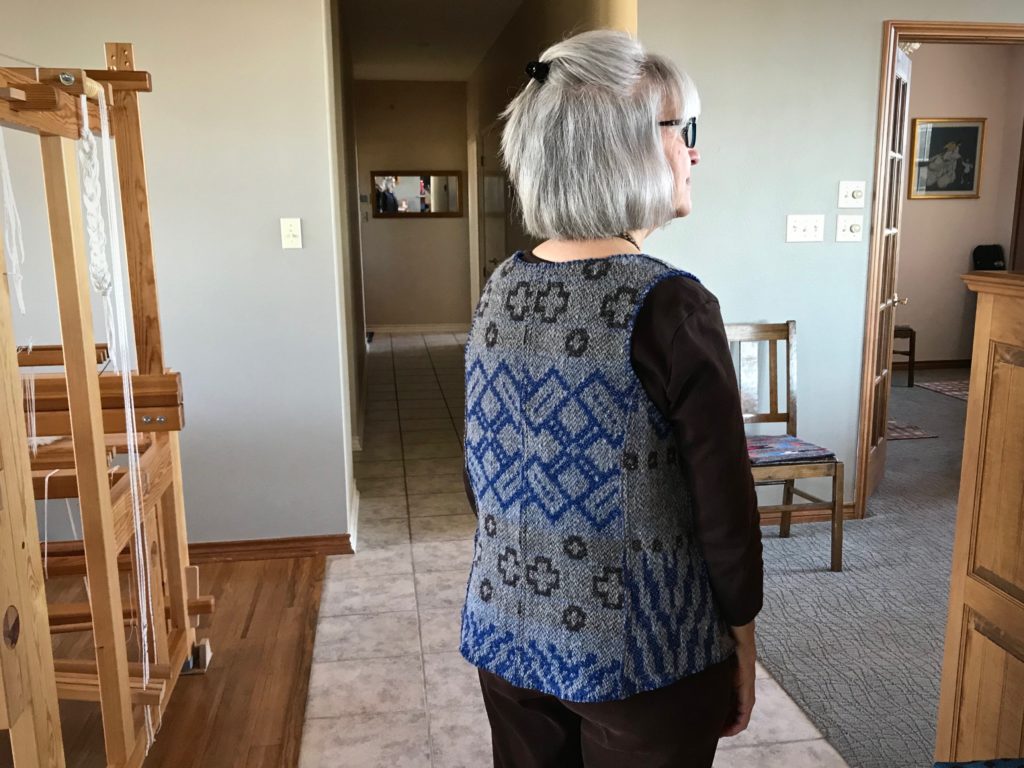
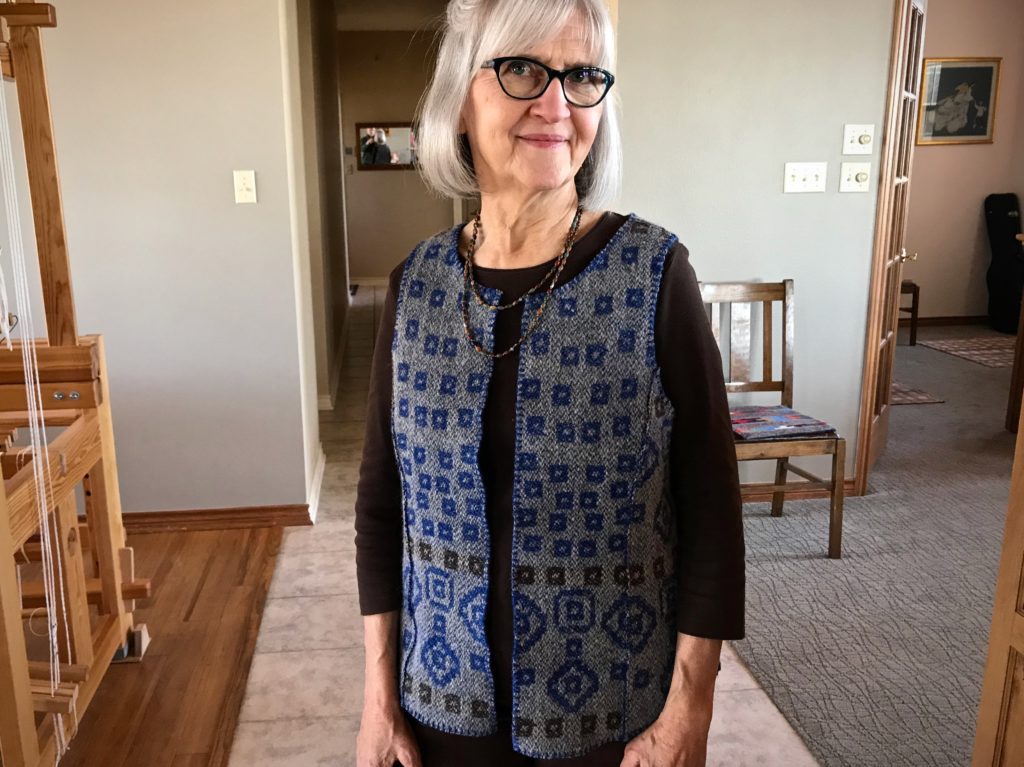
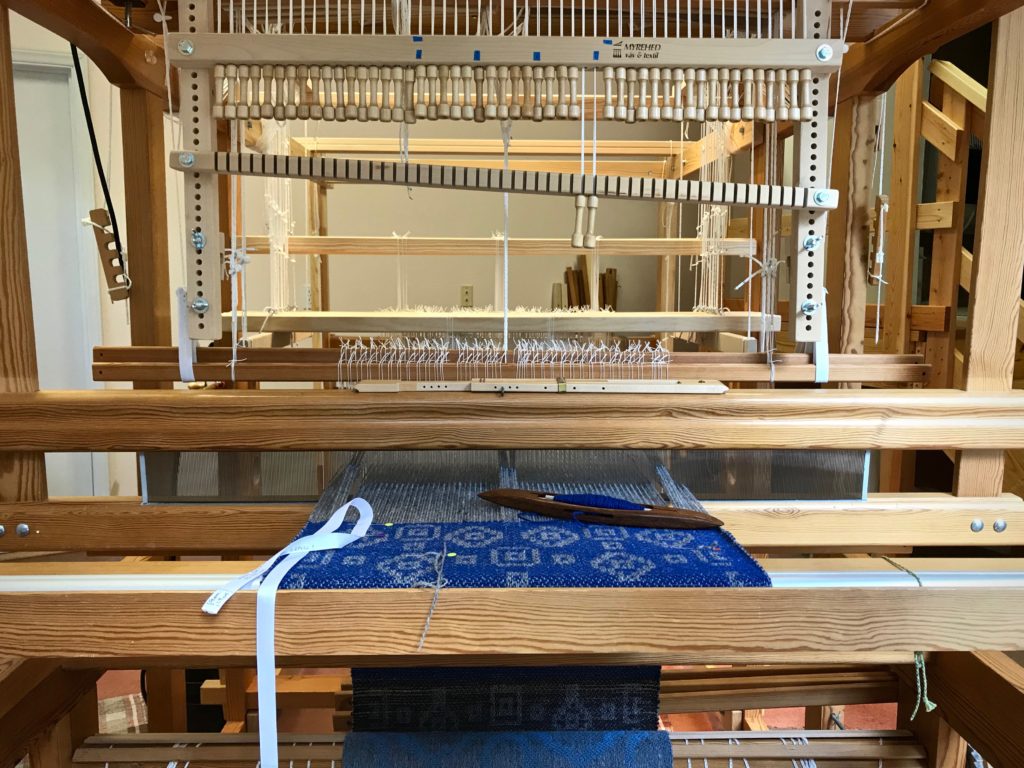
I warped the drawloom with gray 6/2 Tuna wool several months ago with the goal to make fabric for a reversible vest. The beautiful drawloom fabric turned into dreamy garment-worthy fabric after washing! (See Process Review: Drawloom Jewels)
And then I hit two huge hurdles.
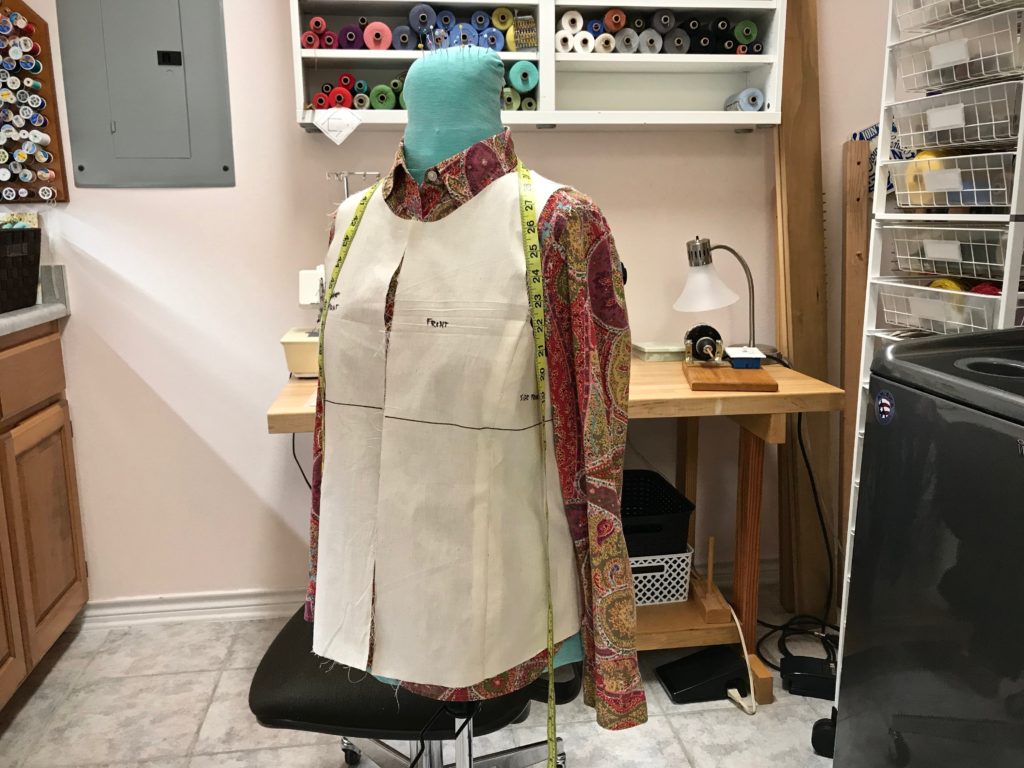
Hurdle 1. Fit.
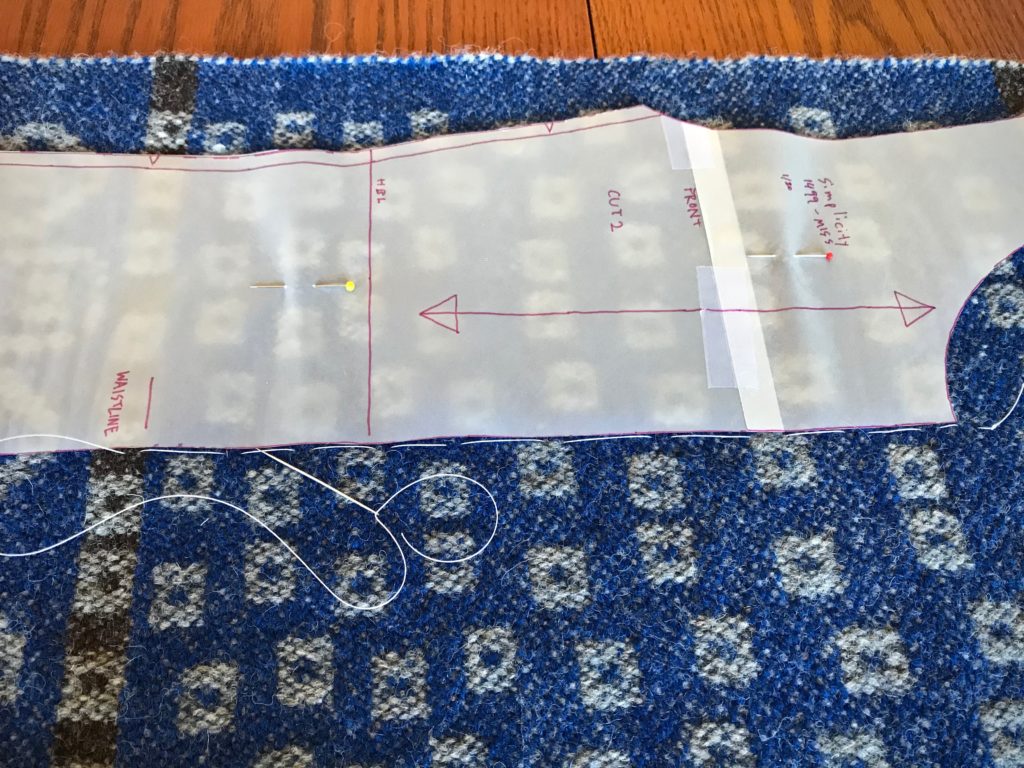
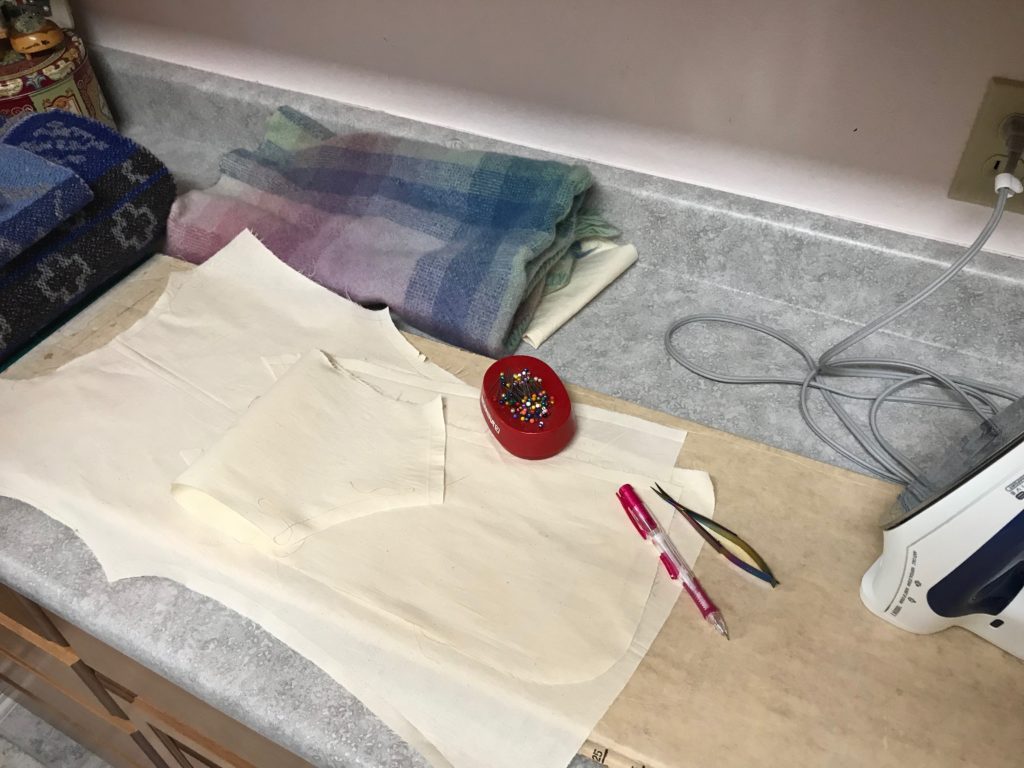
In order to cut into handwoven drawloom fabric, I need assurance that the end result will fit me. My sewing assistant helped me refine a commercial pattern.
Meet my sewing assistant, Miss Fit.
After umpteen muslins and two or three mock-ups, I finally got the fit I was after. Confidence to cut!
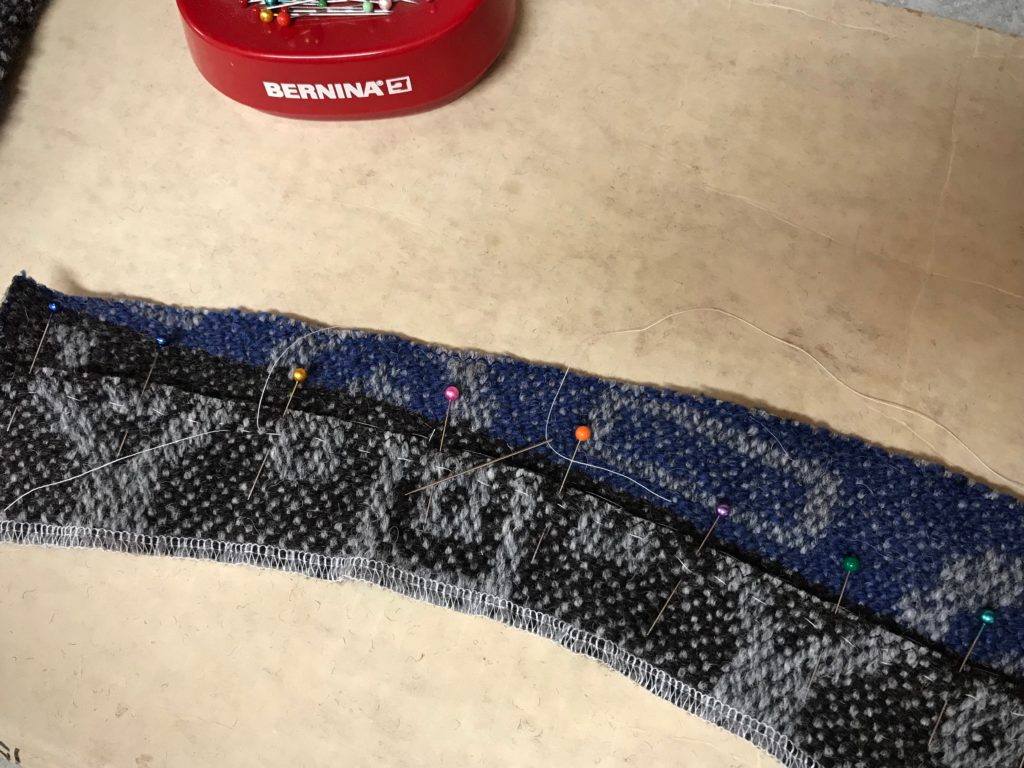
Hurdle 2. Garment Construction Uncertainties.
Do some detail studies, my dear friend Elisabeth said to me. Her advice got me over the insecurity hurdle. A detail study is making a small sample to test a hypothesis or answer a question. I made a list of everything I wanted to know about constructing a vest from this type of handwoven wool fabric. And then, using some of the extra fabric from the sampling at the beginning of the warp, I did a detail study for each point on the list. Twelve detail studies in all.
(If you are interested in seeing my complete list of 12 detail studies for this project, click HERE to send me an email and ask for my “Detail studies”.)
Here are a few examples of my findings:
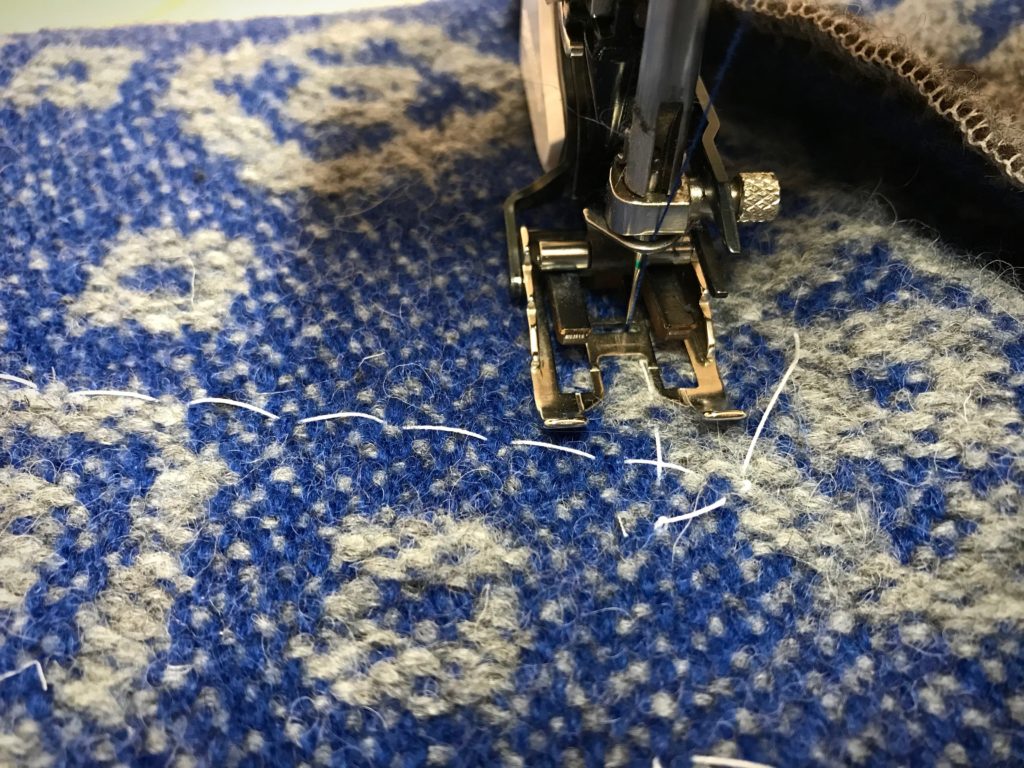
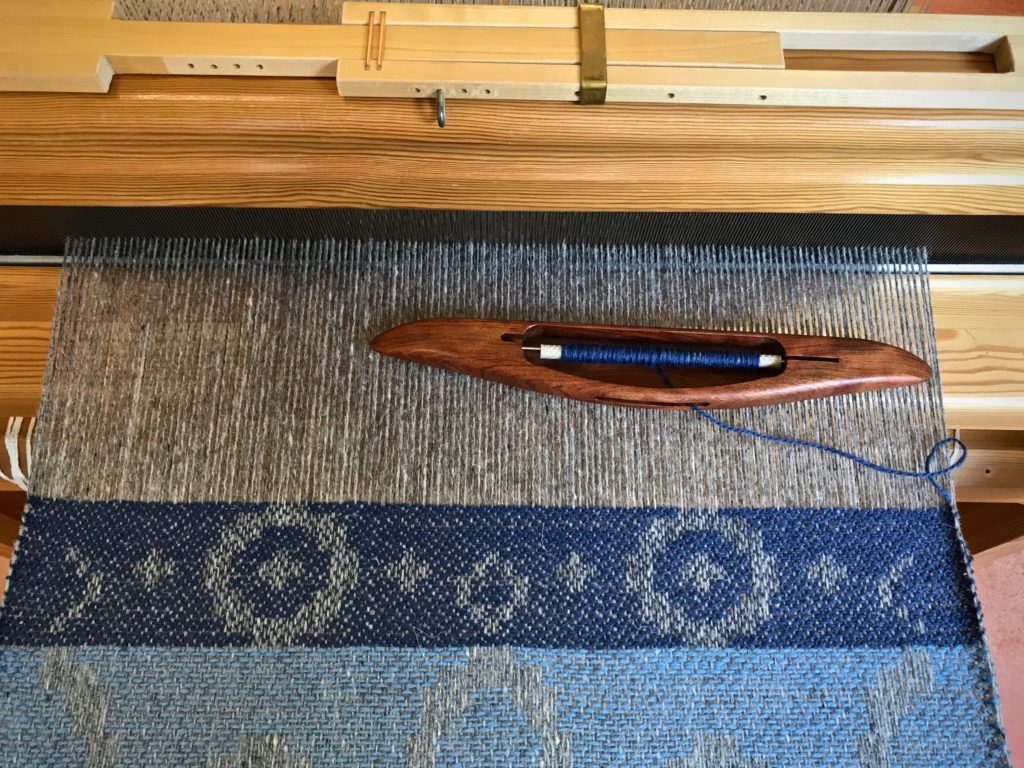
Zigzag before or after cutting? // Zigzag before cutting, stitch width 3, stitch length 2 1/2
Lapped seams? 3/8”, 1/2”, 5/8”? // Yes, lapped seams, overlap 1/2”, stitch basted line to guide placement
Neck and armhole curves – staystitch with hand running stitches or machine stitching? 1 row or 2? // Hand running stitches, 2 rows
Detail study testing lapped seams.
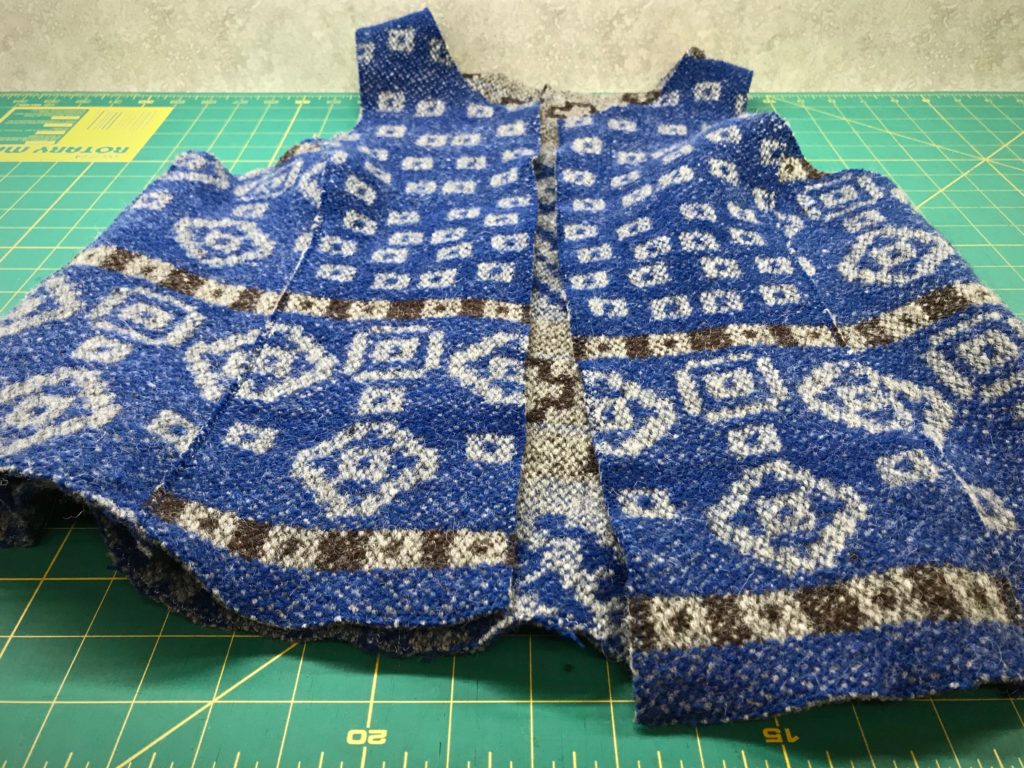
From the results of the detail studies I was able to compile a step-by-step garment construction plan. Confidence to sew!
Follow my process pictures of the garment construction to see the results:
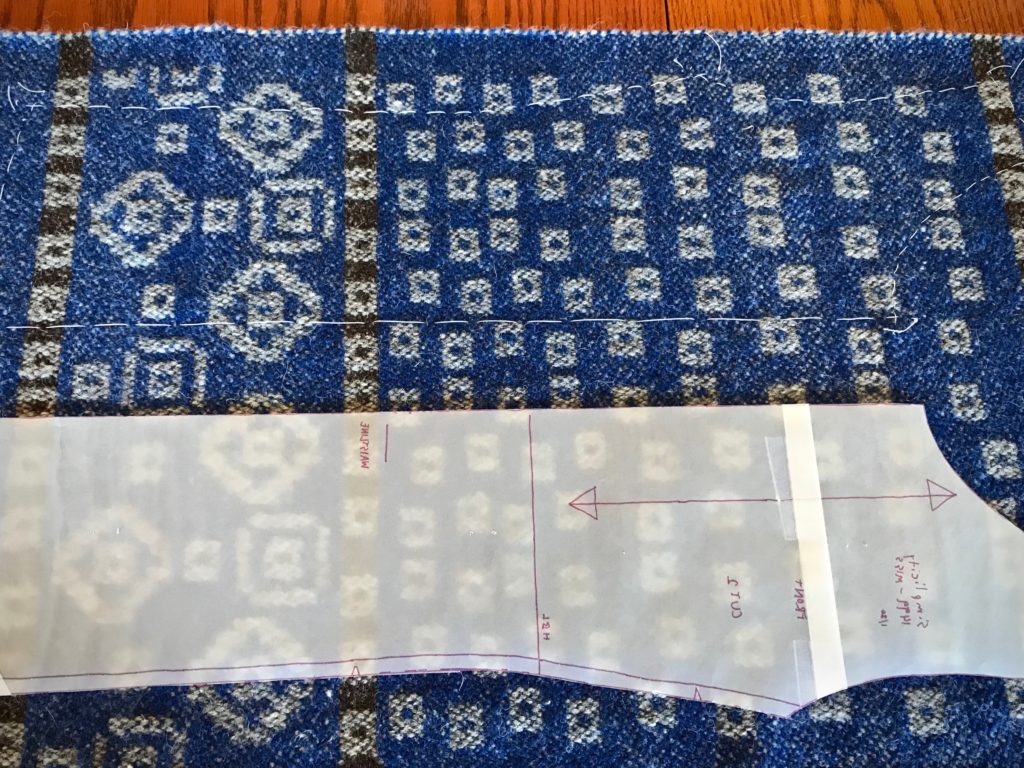
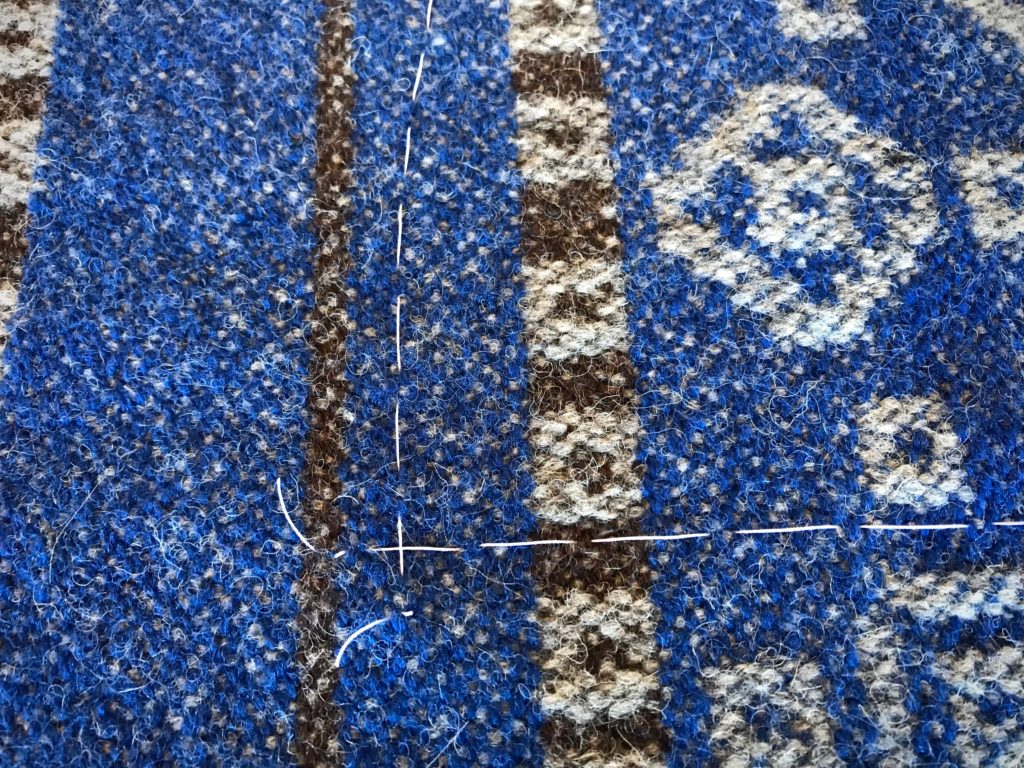
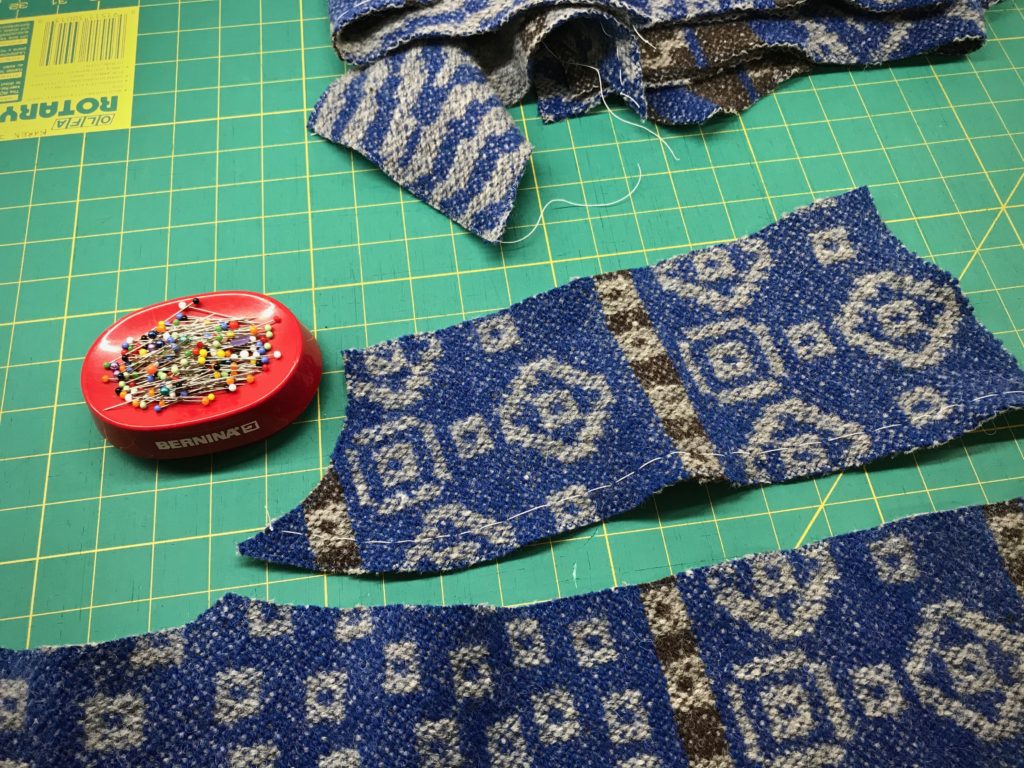
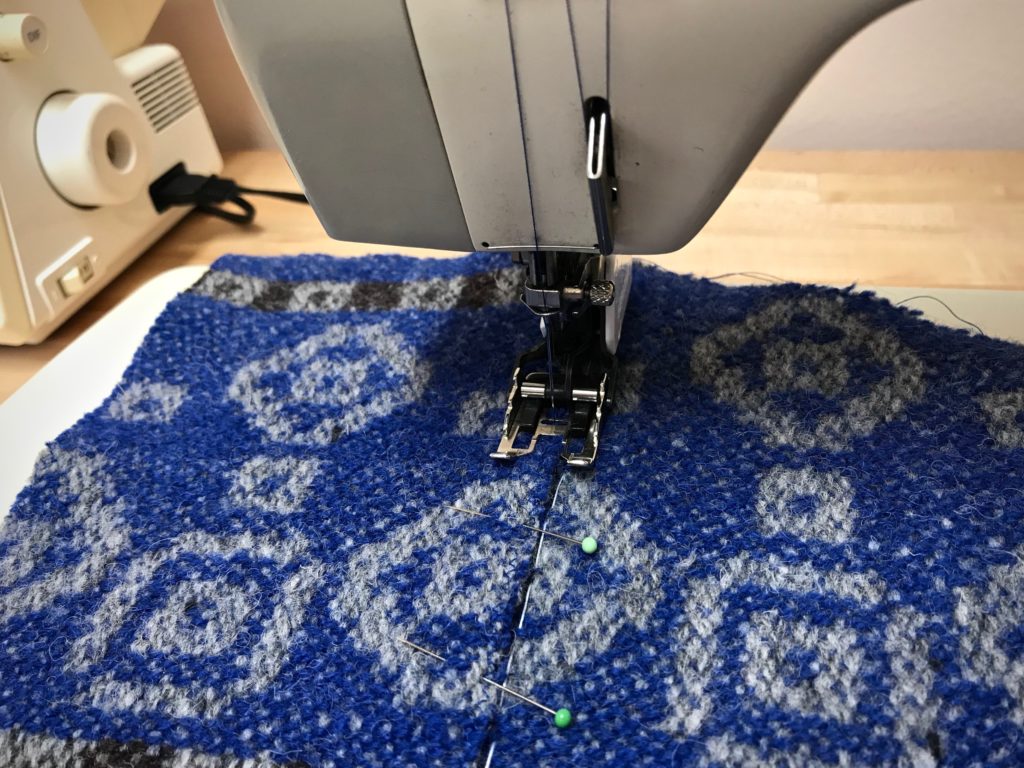
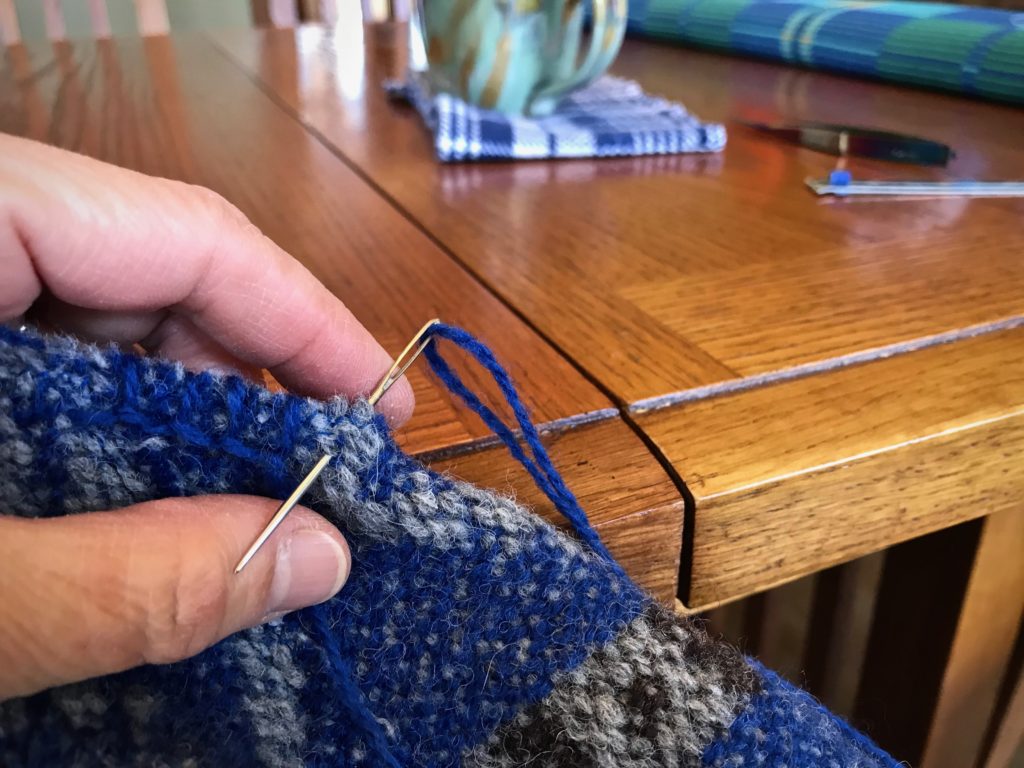
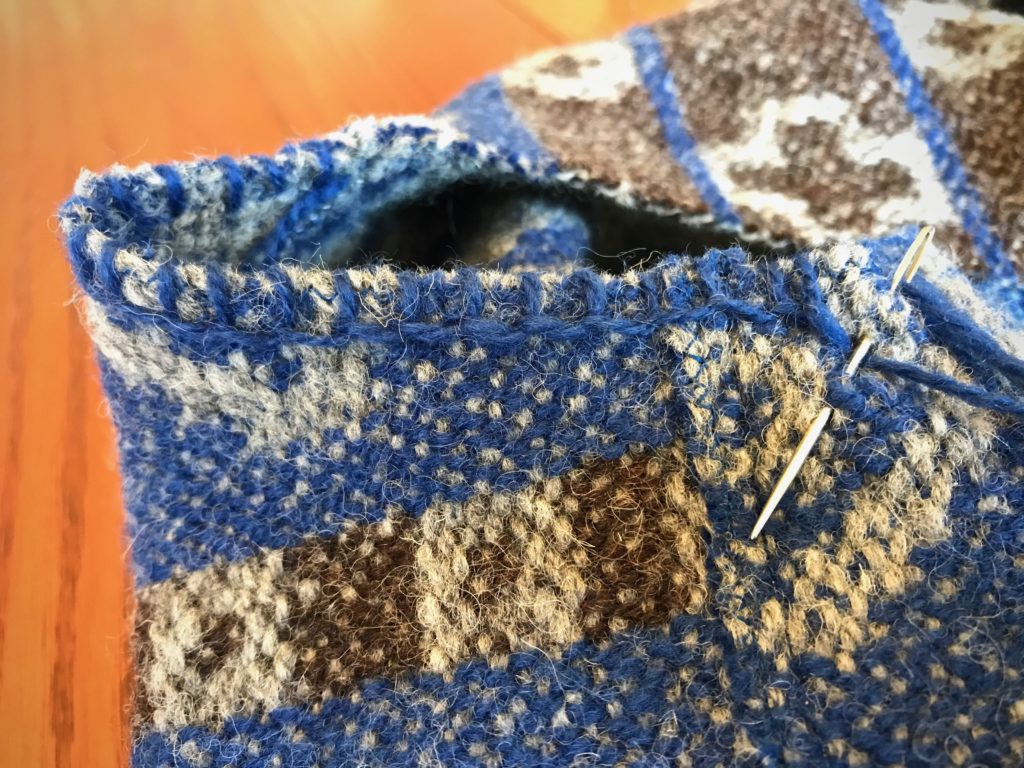
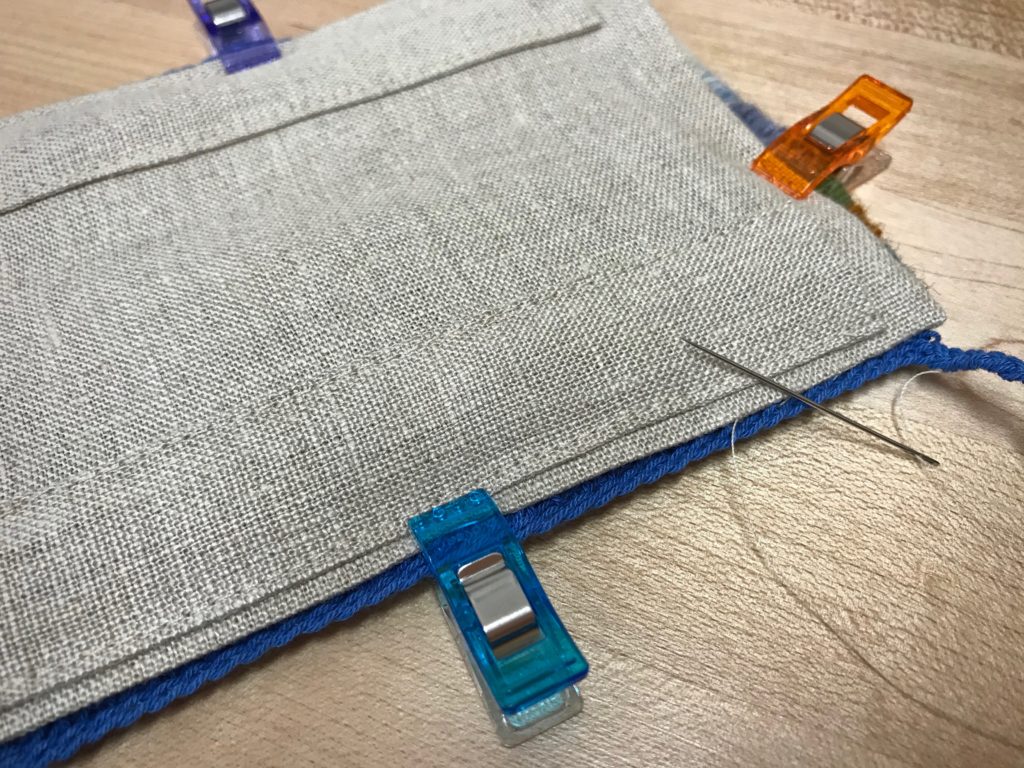
Cutting lines marked with basting stitches.Tracing paper is used for the pattern, which allows me to clearly see the placement of the pattern on the fabric.Making an X with the basting thread at the corners. This helps clarify exactly where to stitch and cut. (One of Elisabeth’s helpful tips.)Buttonhole twist thread is used for the basted lines. It makes an easy guide for the sewing machine needle to follow. The zigzag stitches are just inside the line.Basting stitch on the front side piece is a guide for positioning the lapped seam.Ready for hand work.Two rows of running stitches around the armholes and neck opening.Blanket stitch is used to embellish and strengthen the armholes, neck, front edges, and lower edge of the vest.Reverse side.
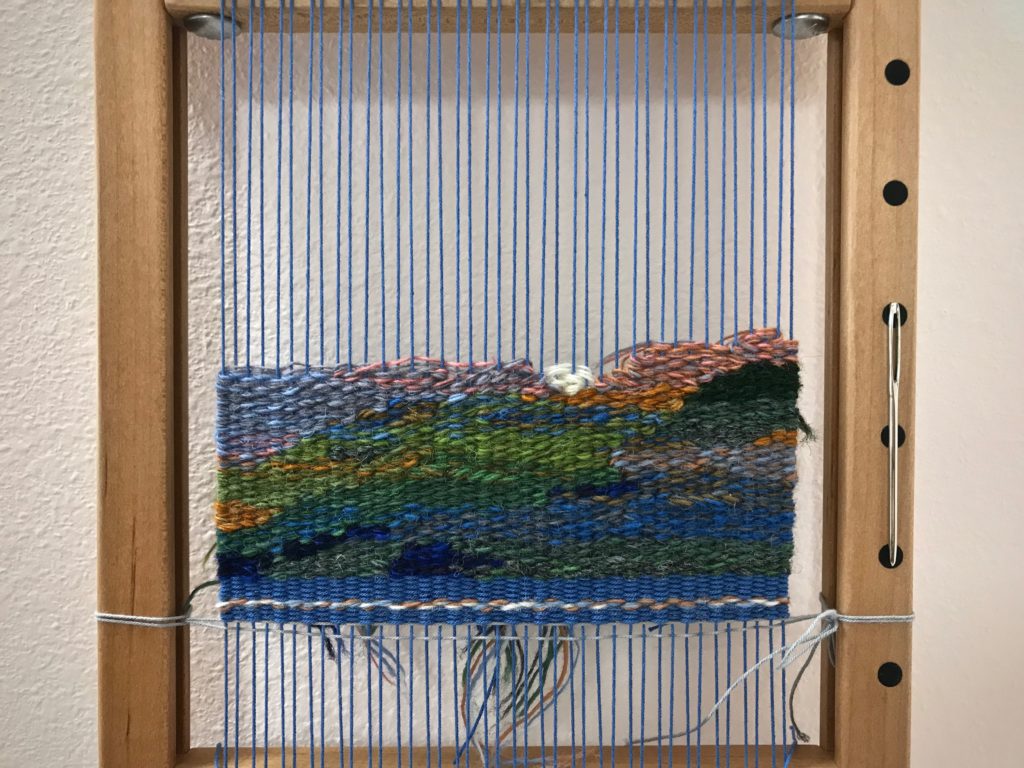
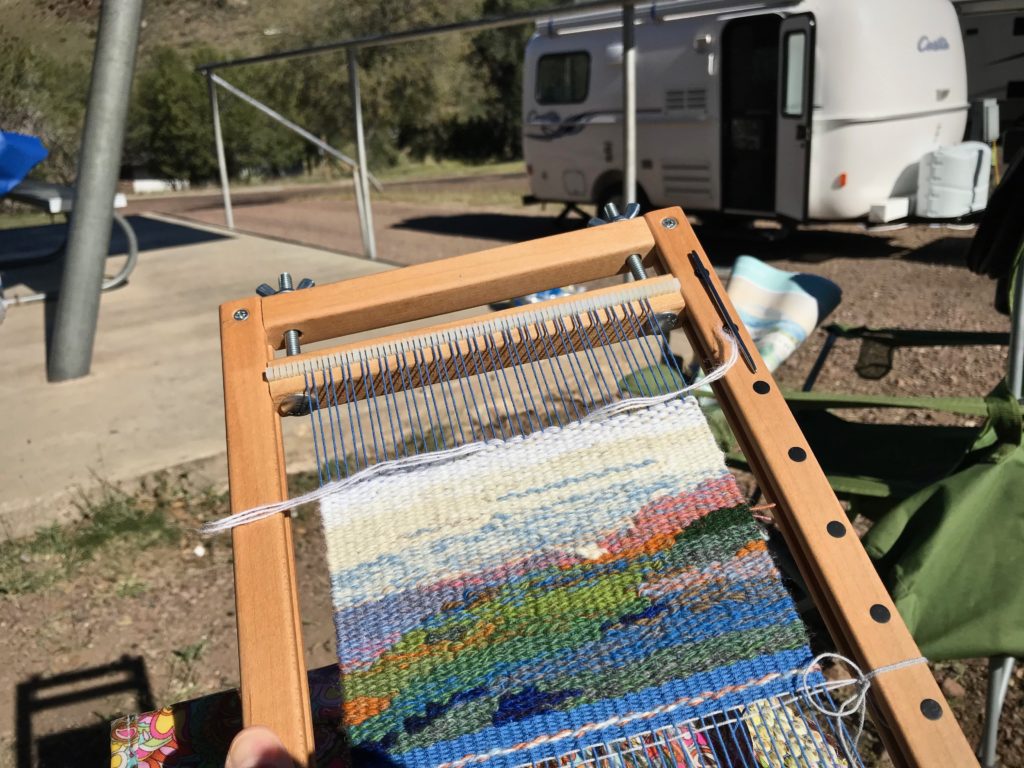
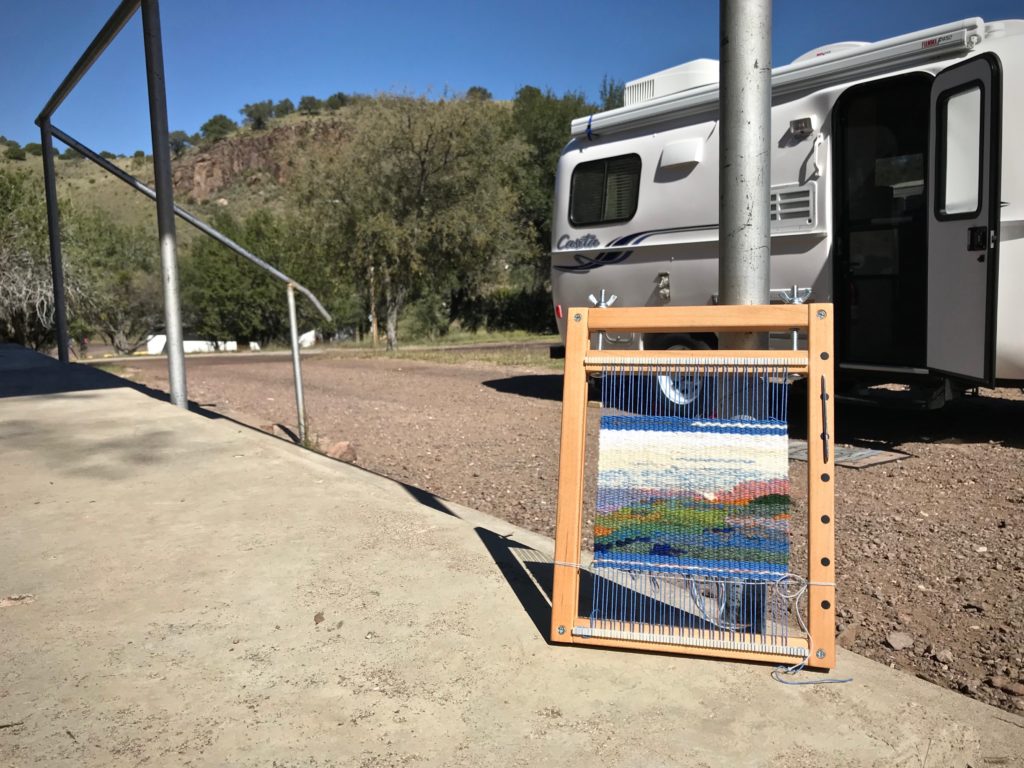
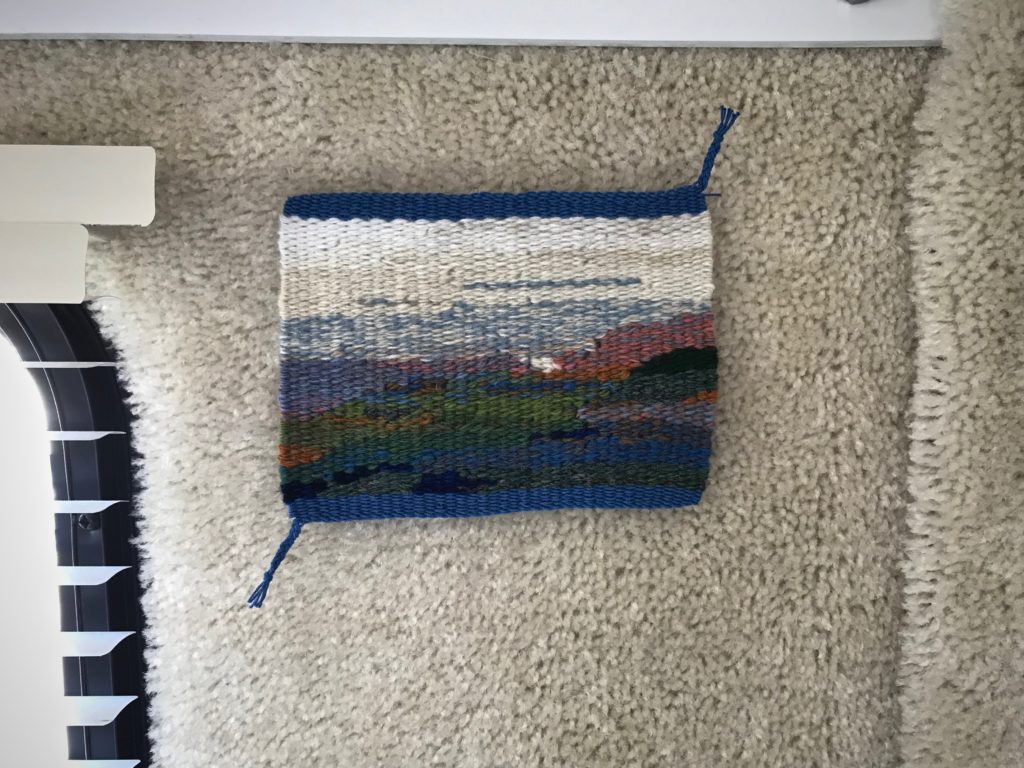
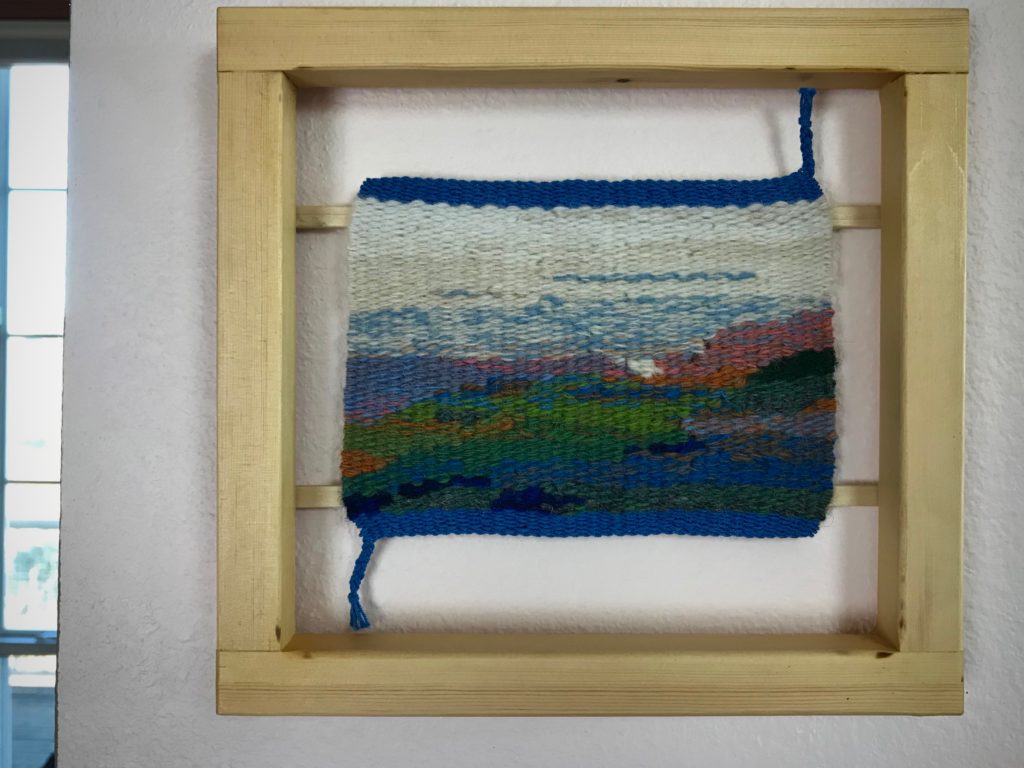
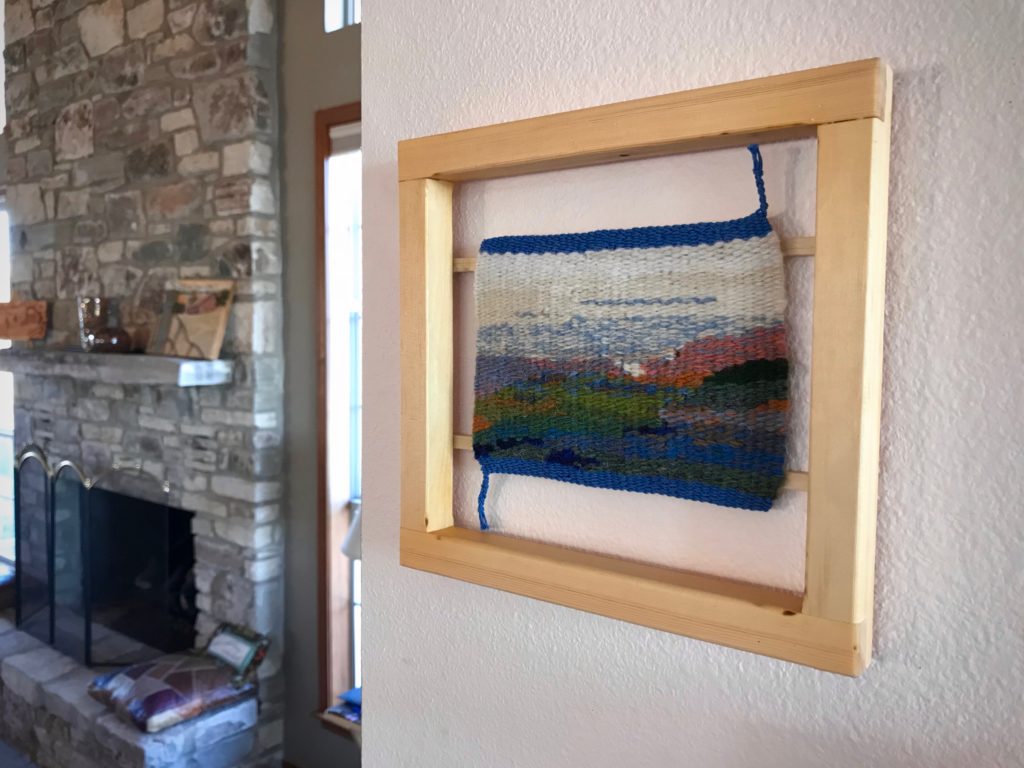
The Park ranger had told Steve and me that if we were willing to drive six more rugged miles we would witness a spectacular overview of the Fresno Canyon that few people get to see. This is an opportunity we wouldn’t dare miss. And the park ranger was right. Oh, what a view! From this high point above the valley the view is phenomenal! I welled up with emotion as I looked over the glorious beauty of God’s creation.
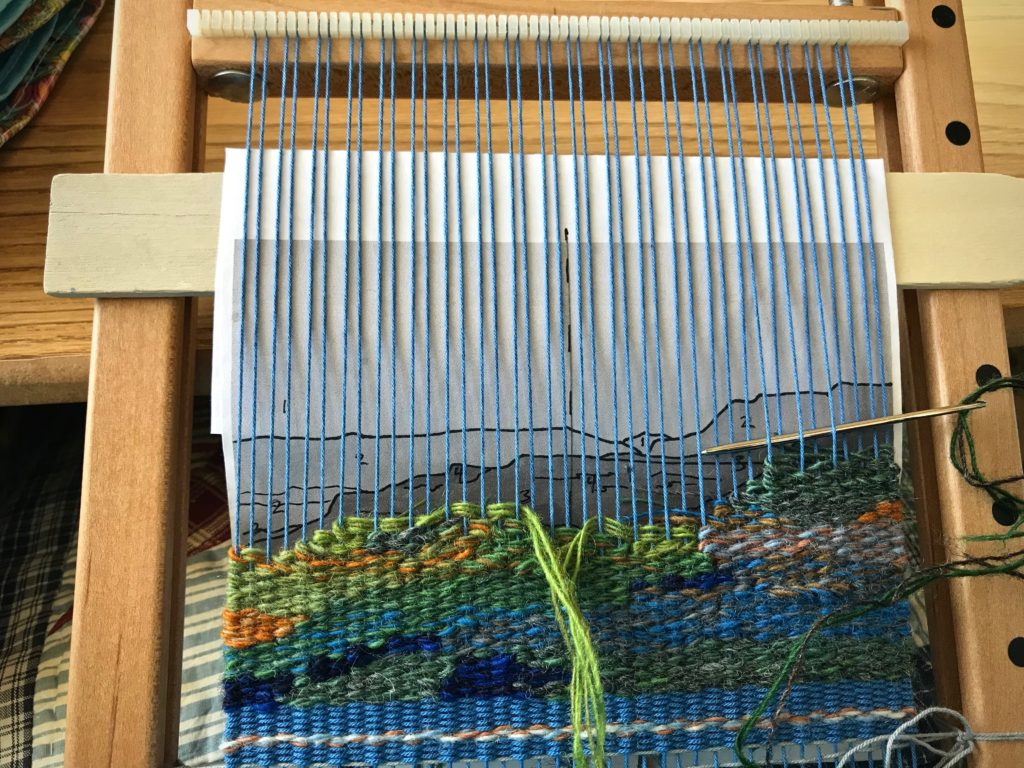
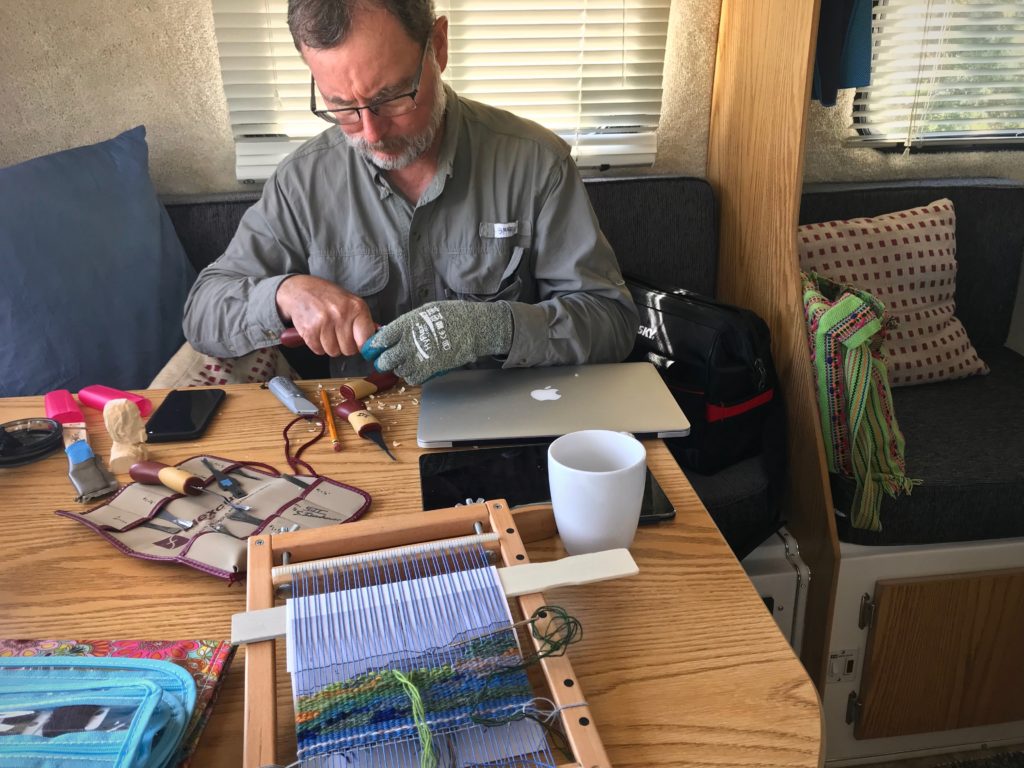
The memory of that scene is in this small tapestry. Most of my small-tapestry weaving happens when we travel, where we make even more memories, which I store up in my heart. I pull from these stored treasures to weave tapestries that reawaken the fond memories.
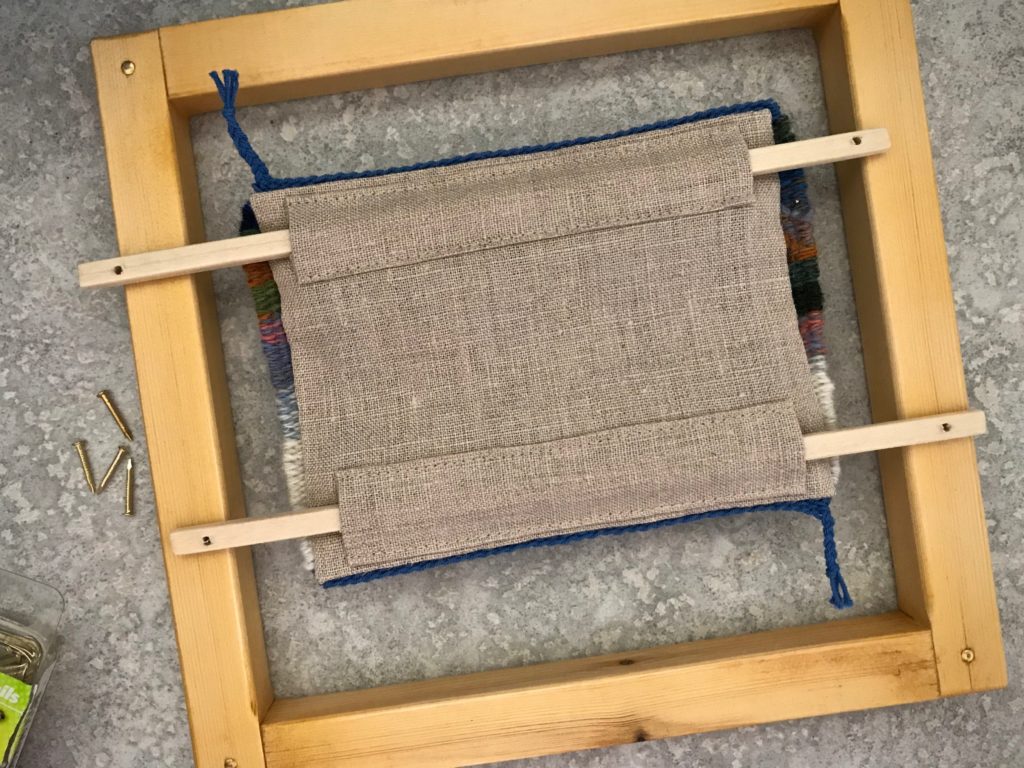
Fresno Canyon photo printed in black and white is used for the cartoon. Instead of an exact picture of the image, I aim for a representation of the memory, expressed with color.During a brief rainstorm while at Caprock Canyons State Park, Steve and I relax in the Casita with our handcrafts. Wood carving and tapestry weaving.Warp is blue 12/6 cotton. Weft is triple strands of 6/1 Fårö wool. I use the tapestry needle to weave.Weaving in the sunshine at Davis Mountains State Park after returning from a hike.Finished weaving one Texas landscape while enjoying another.Warp ends are woven and braided.Linen is cut to size and pressed. Narrow rod sleeves are sewn into place.Linen backing is hand-stitched to the back of the small tapestry.Steve designed a simple frame for the small tapestry.Finished Fresno Canyon tapestry. A treasured memory kept and framed.
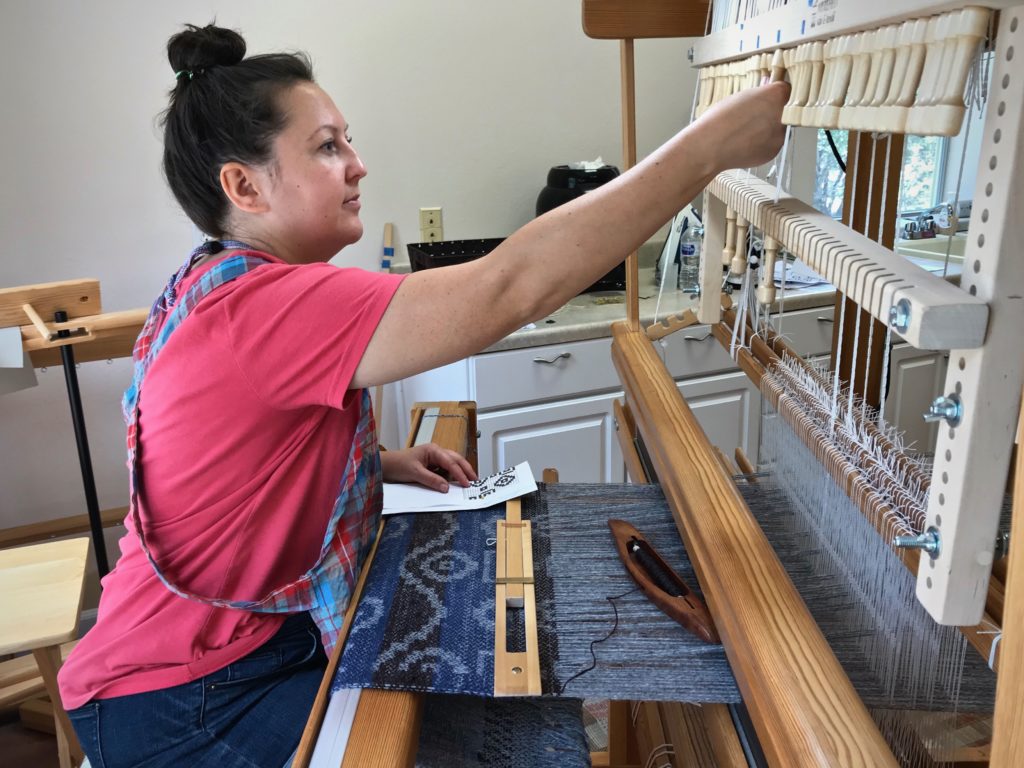
It is exciting when Maverick walks by. Although he never comes in my drawloom studio, he does stop for a moment to look my way. You’ll see him in the slideshow video below. But what happens inside the studio is even more exciting, especially when it’s time for cutting off!
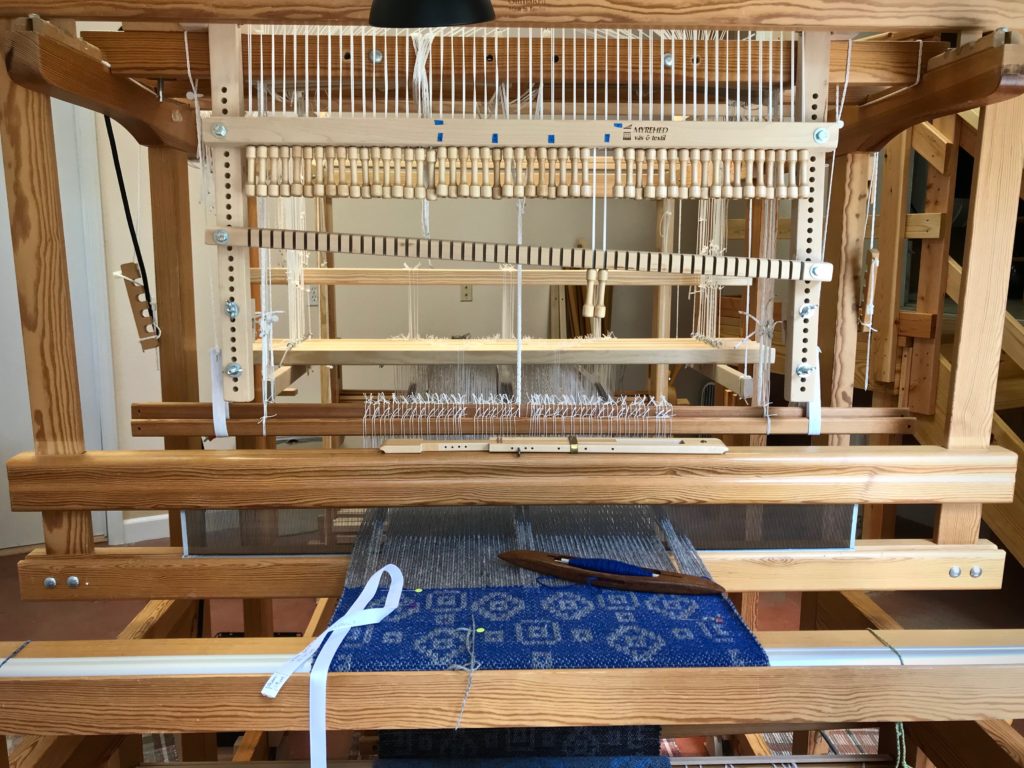
Drawloom, set up with sixteen pattern shafts. I graph out the designs in Excel on my computer. Then, I print out the gridded pattern to use at the loom. I keep my place in the pattern with a magnet and magnet board made for cross-stitch embroidery.
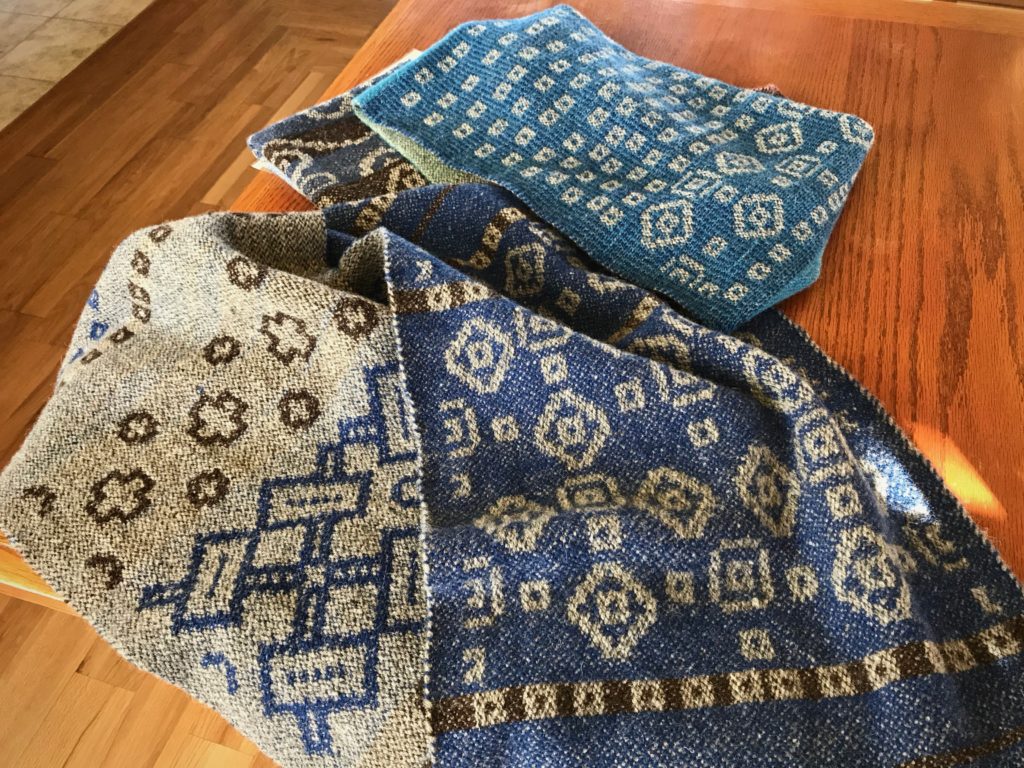
This is Tuna wool, so I expect some shrinkage, but how much? I take careful measurements before and after wet finishing. Besides the main piece of fabric that I’m using for a garment, I have two sample pieces. I can experiment with the samples before wet finishing my garment fabric.
Here are my findings: Sample 1. Hand wash and air dry.
10% shrinkage in width; 13% shrinkage in length.
Sample 2. Machine wash (3 minutes agitation on a gentle cycle, with a short spin) and machine dry (low setting) till damp, finish with air drying.
13% shrinkage in width; 14% shrinkage in length.
~How to do the shrinkage calculations~ First measurement (on the loom) minus the second measurement (after washing and drying) equals the difference. The difference divided by the first measurement equals the percentage difference. For example, 50 cm – 43.5 cm = 6.5; 6.5 / 50 = 0.13; 13% shrinkage.
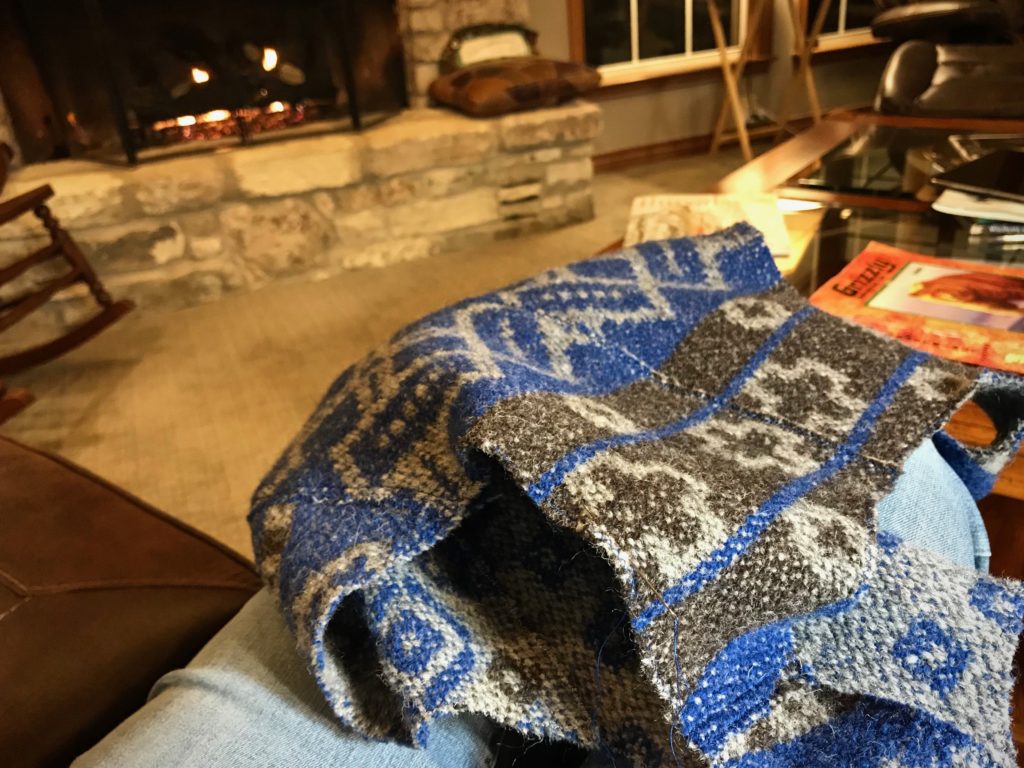
The first sample fabric is softer than the unwashed fabric, but not as soft as I’d like. The second sample fabric is beautifully soft, like a nice warm sweater. So, with confidence, I wet finish the garment fabric—with great results. It’s perfect for the fall/winter vest that I’ll soon be wearing, made from this fabric!
Like a sweater, this soft fabric will be comfortable to wear.Muslin pattern for a simple vest. First, I’ll make a vest out of a wool throw, woven on my rigid heddle loom ages ago. Then, I will cut into the new drawloom fabric, with confidence about the fit.
Why sample? It means using morewarp and weft. And it means waiting longer to start to the “real” project. What do I gain from it, anyway? Is it a waste of resources and time?
I can’t imagine putting on a warp that didn’t have room up front for sampling. There’s more than one reason to put on sufficient warp to weave a sample. It makes perfect sense, especially if there is anything new or unfamiliar about your planned project.
Five Reasons to Add Extra Warp for Sampling
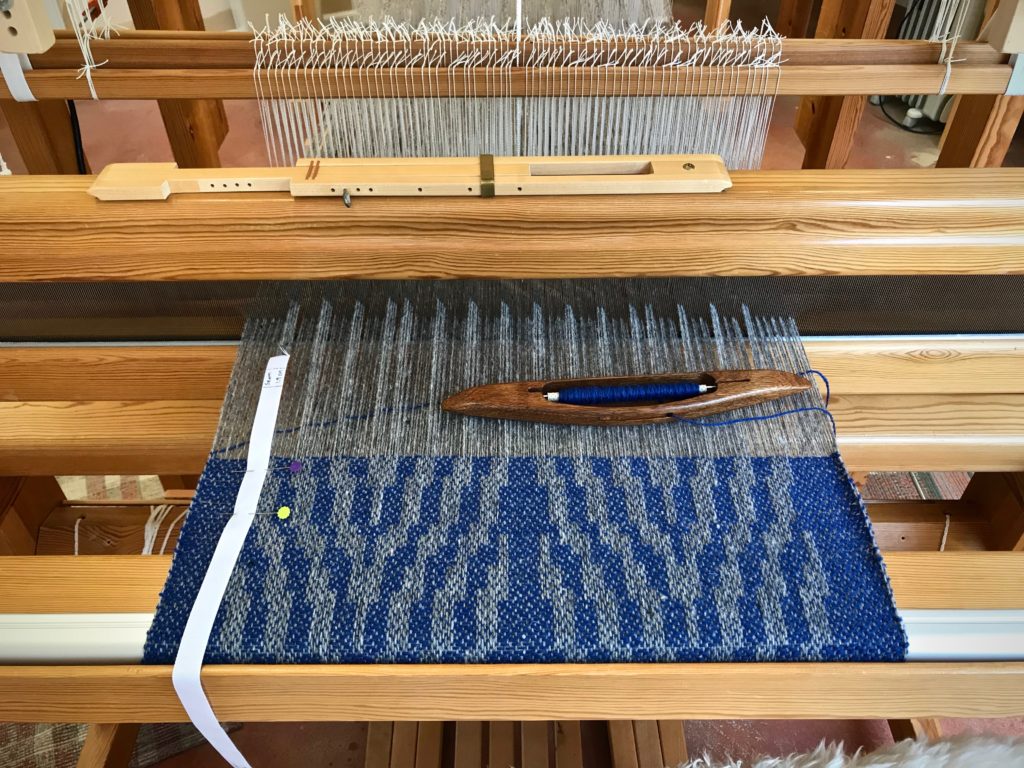
Sampling to test patterns, weft colors, and beat consistency, before starting on fabric for a garment.
1 Space to play. I want plenty of room to play, and to practice techniques that are new to me. 2 Room to try out designs. By weaving a portion of my designs, I am able to determine what works, and what adjustments need to be made. 3 Warp for testing weft colors. Only when woven can I see the full effect of each potential weft color. 4 Time to gain a consistent beat. When I start the main project, I want to have woven enough to be able to “feel” how firmly or softly I need to move the beater. 5 The best reason of all! It’s always good to have enough warp on the loom that you can invite friends and family to enjoy some weaving time. …Before your main project is in progress.
My weaving friend Betsy came over to see what it is like to weave on a drawloom. My daughter Melody came for a visit and wanted to see what it was like to weave on a drawloom. Garment fabric. This is to be used for two side panels of a vest I plan to make for myself.This is to be the back panel of the vest.This is the beginning of the front panels for the vest.