Quiet Friday: Custom Lining for a Handwoven Bag

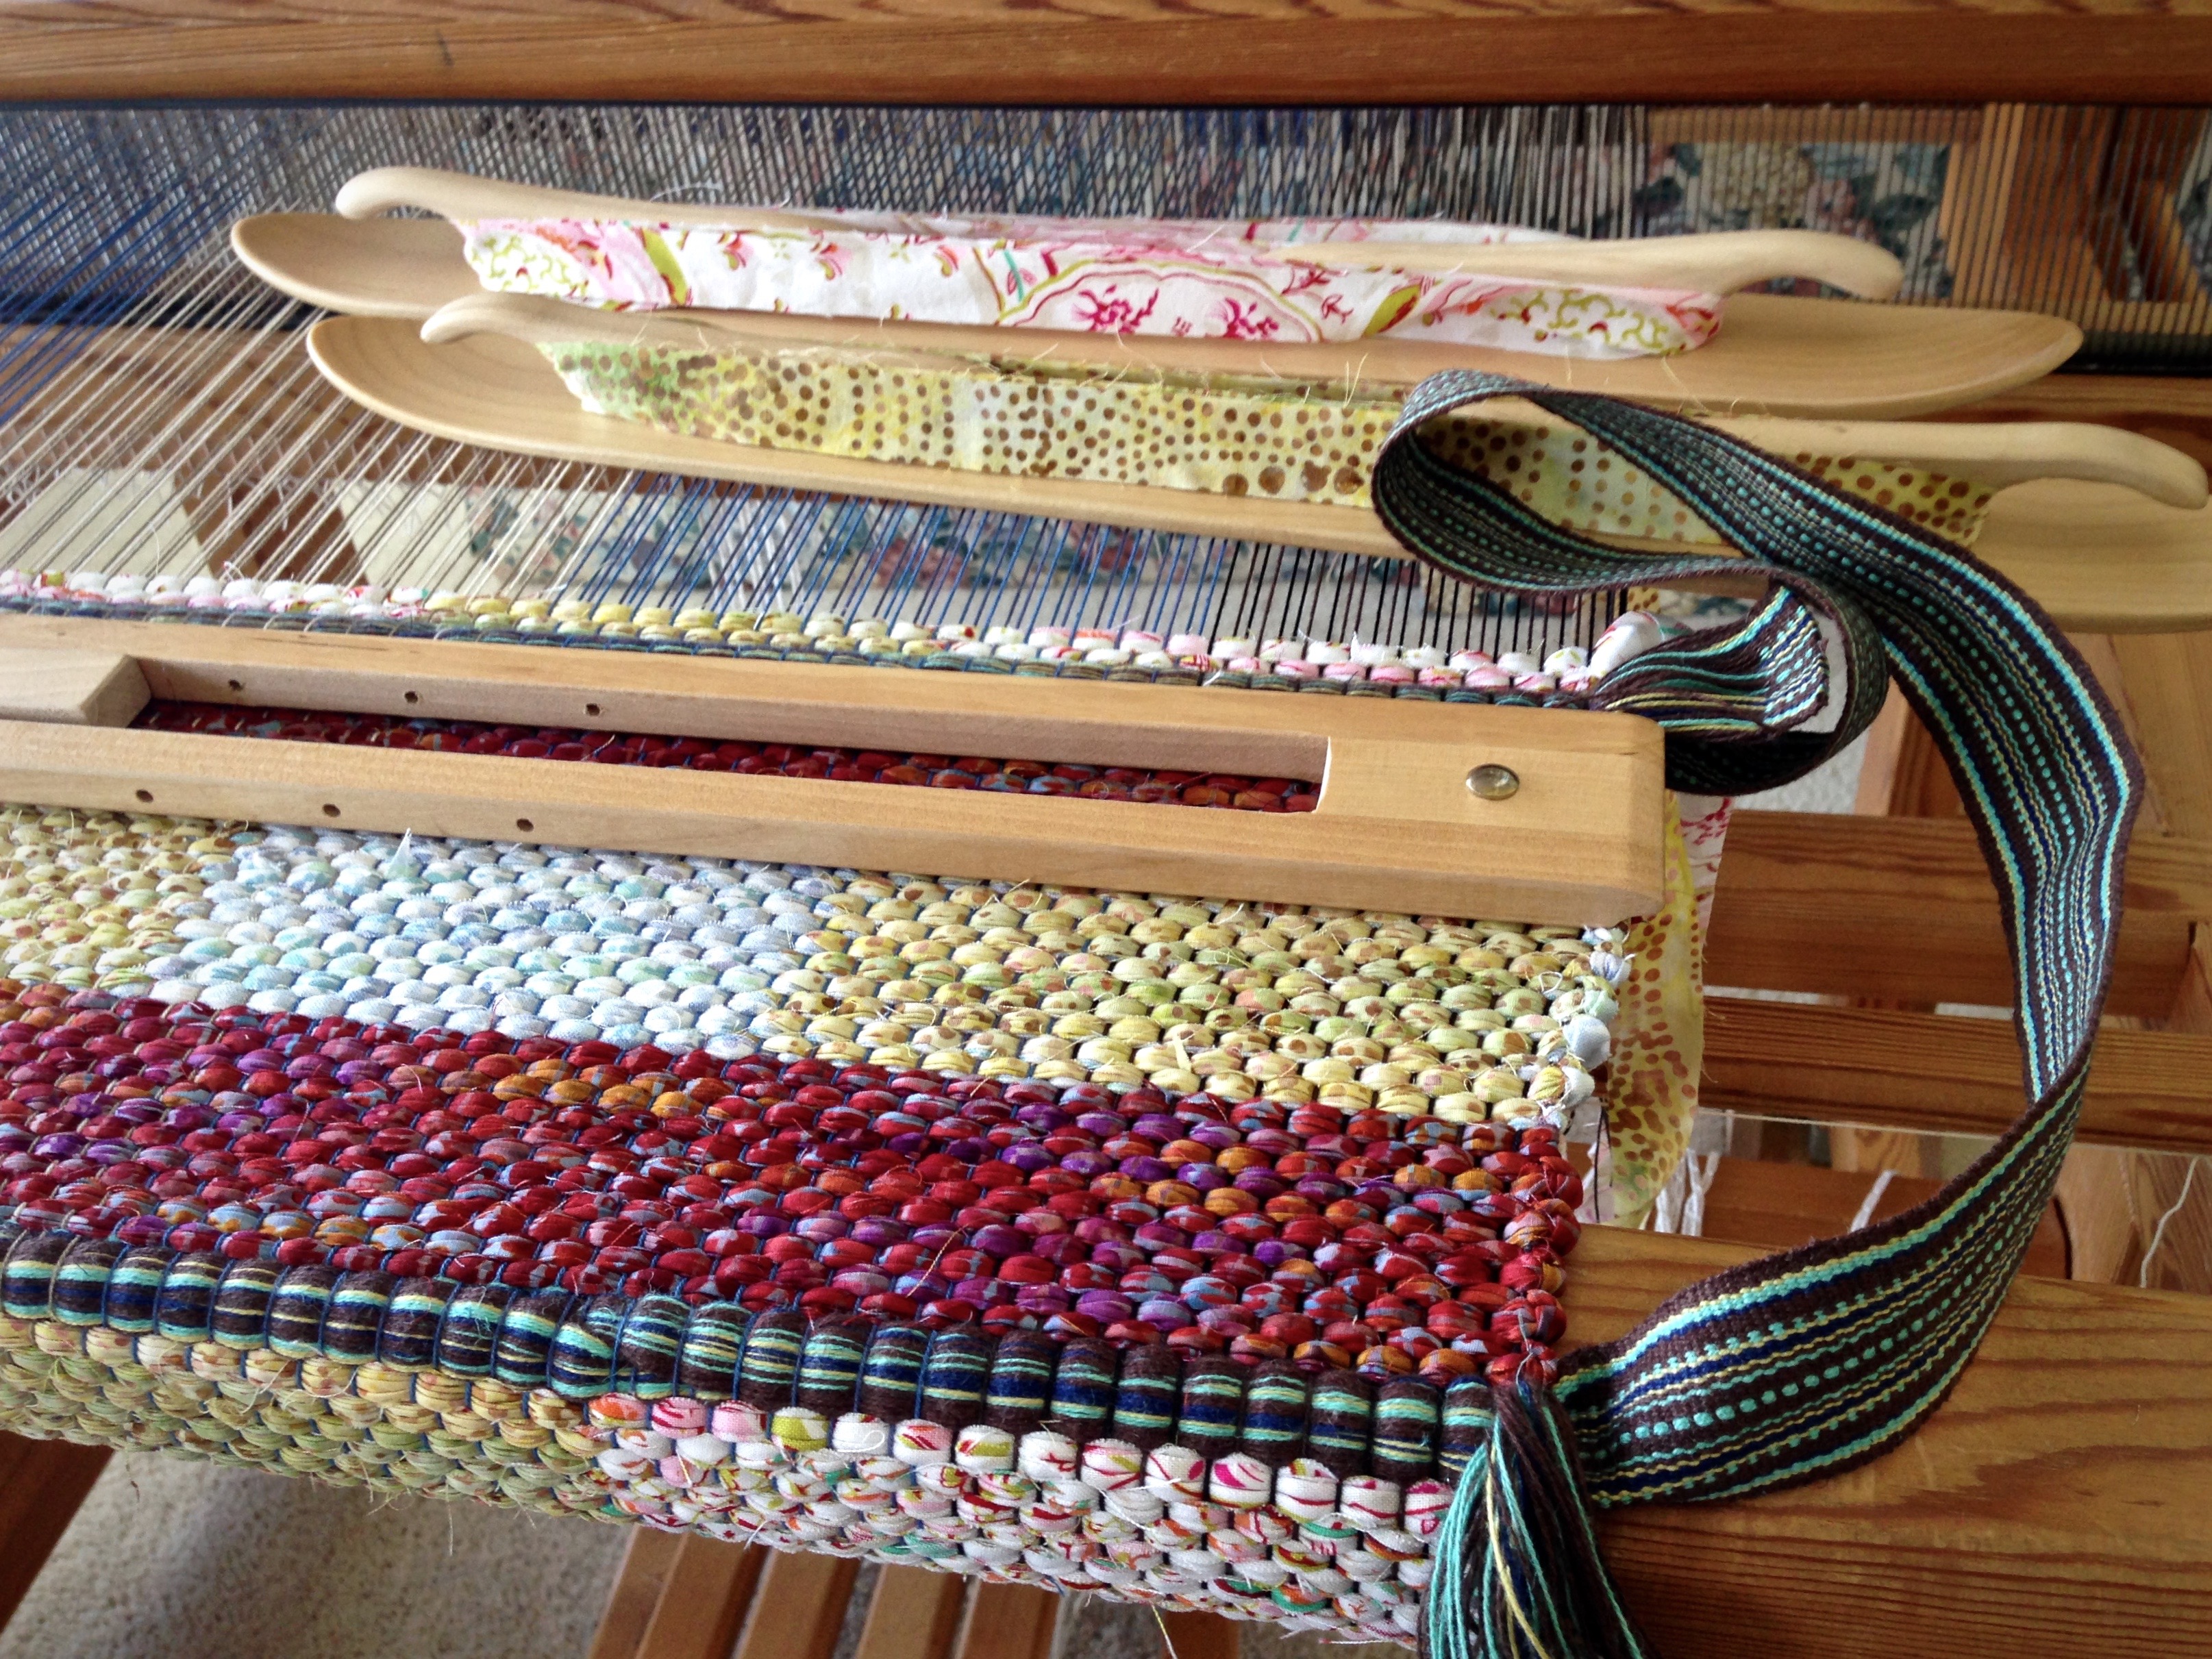
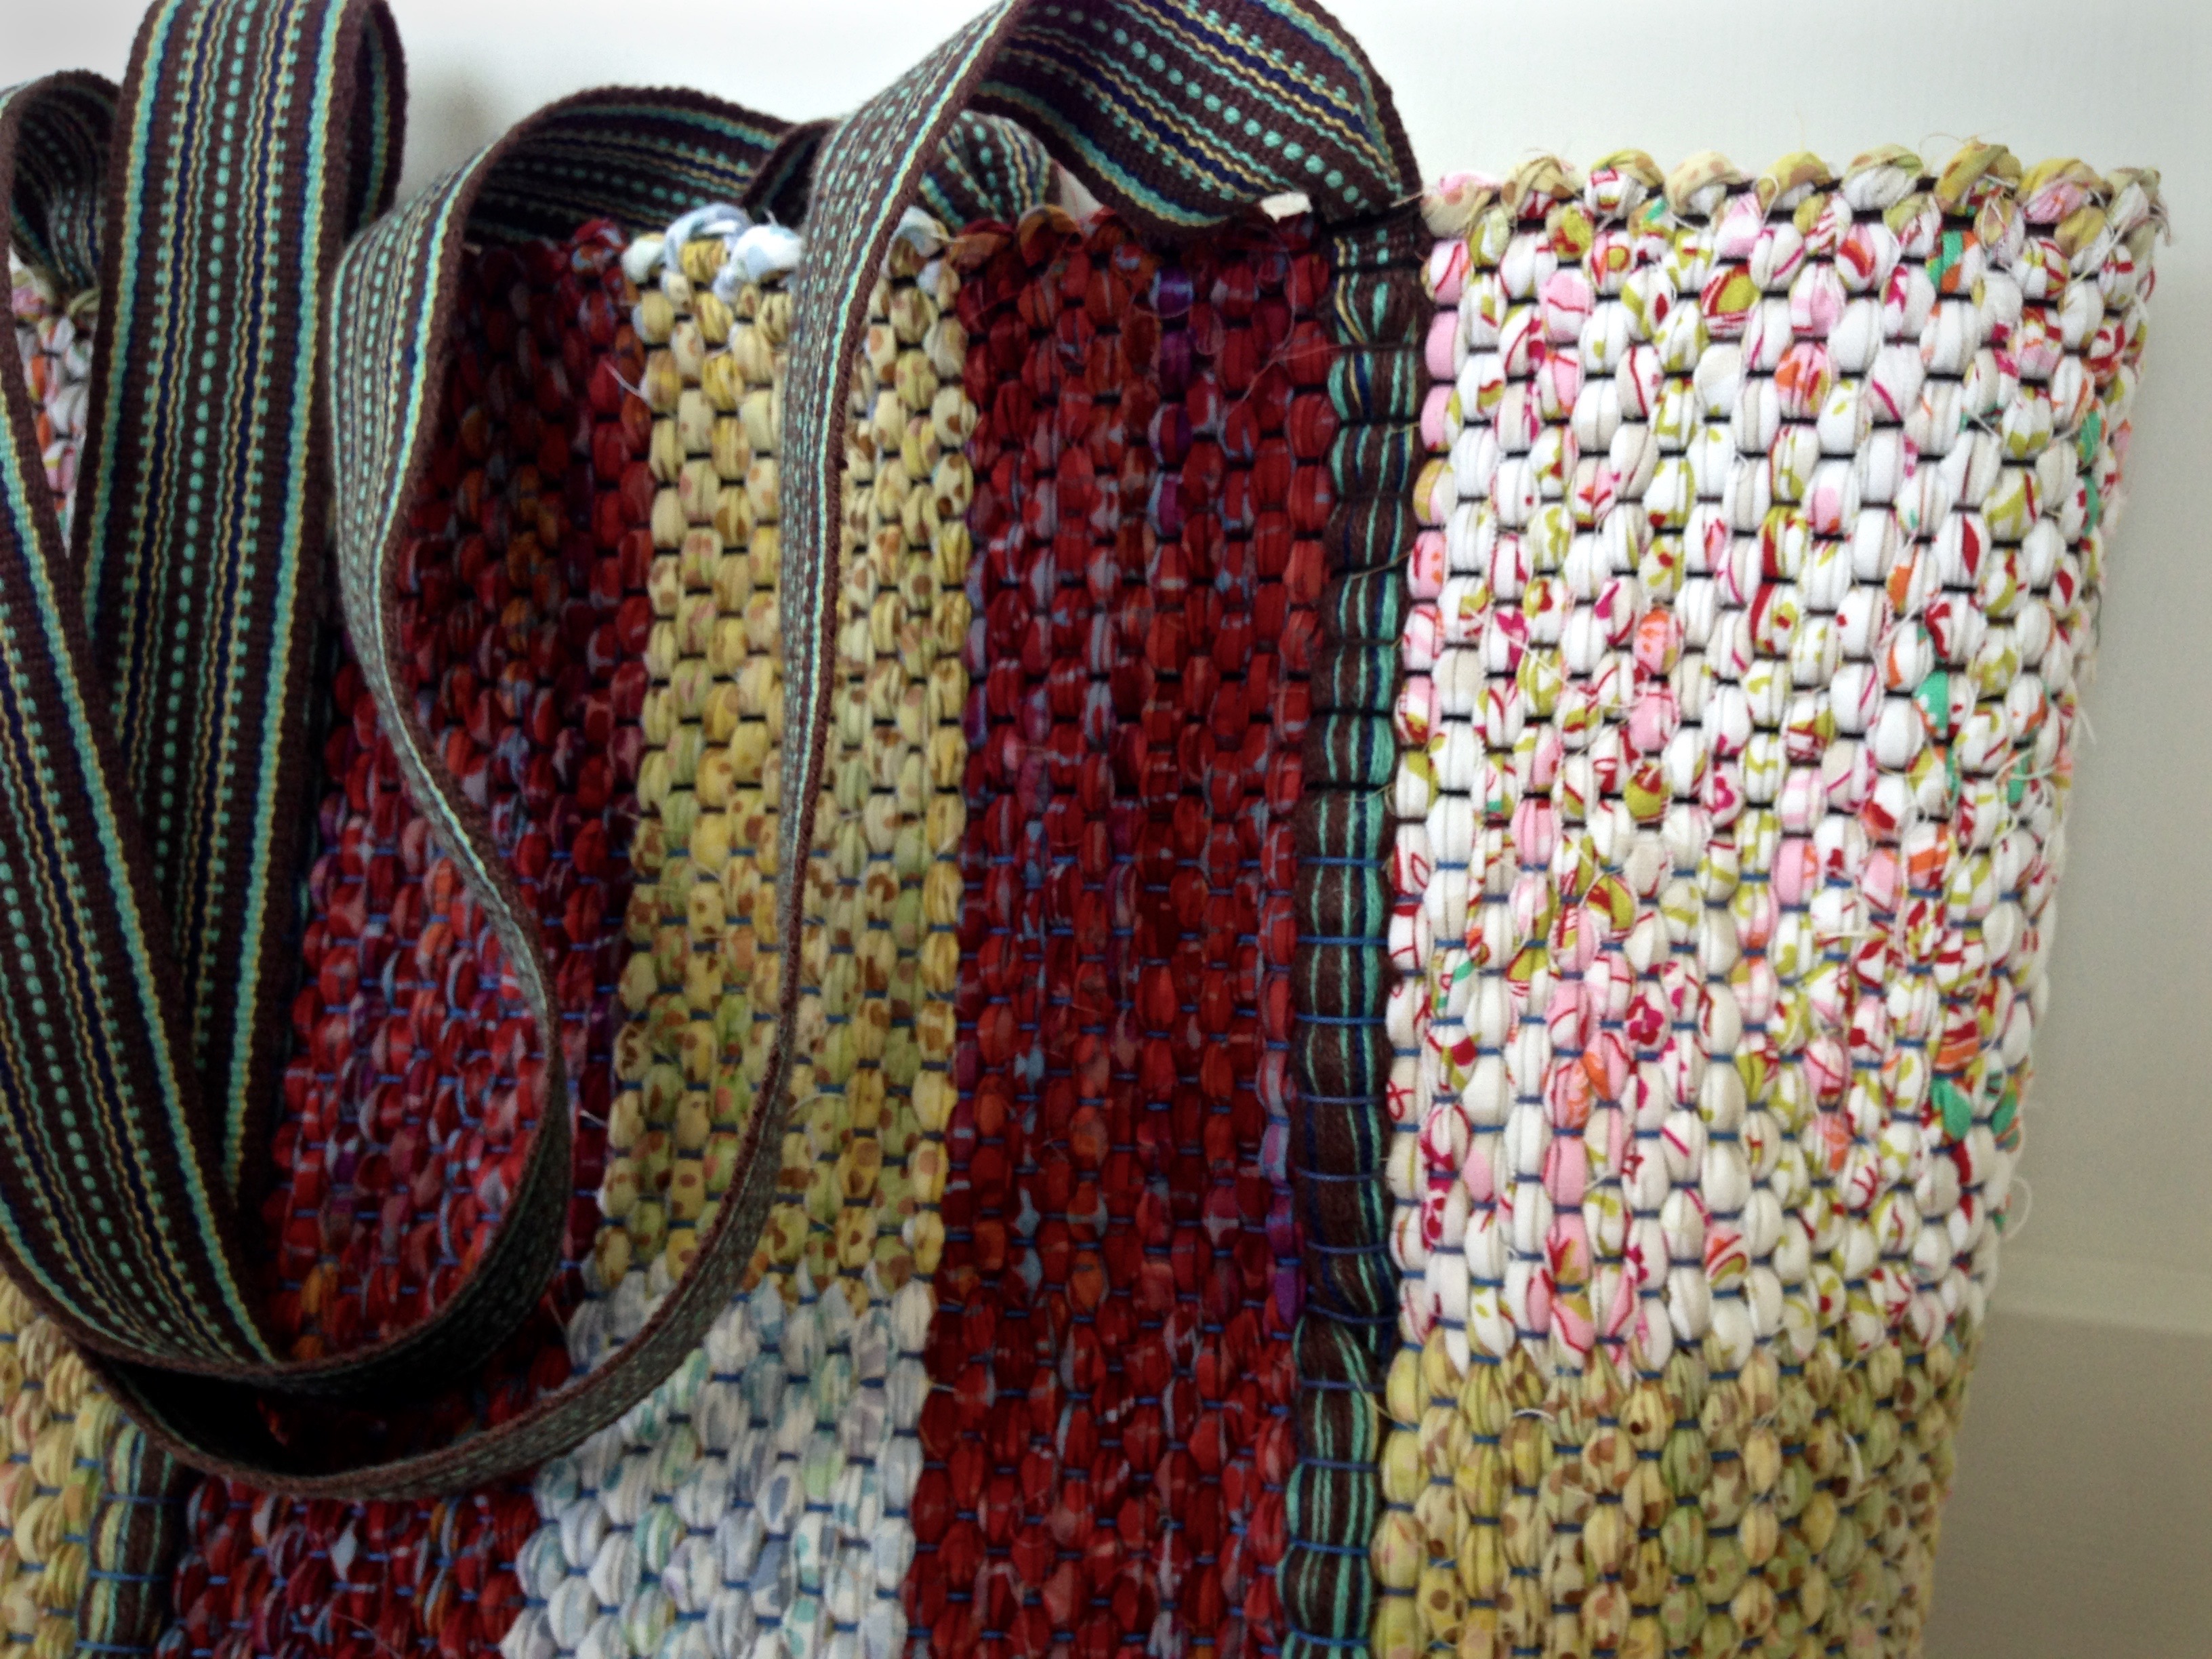
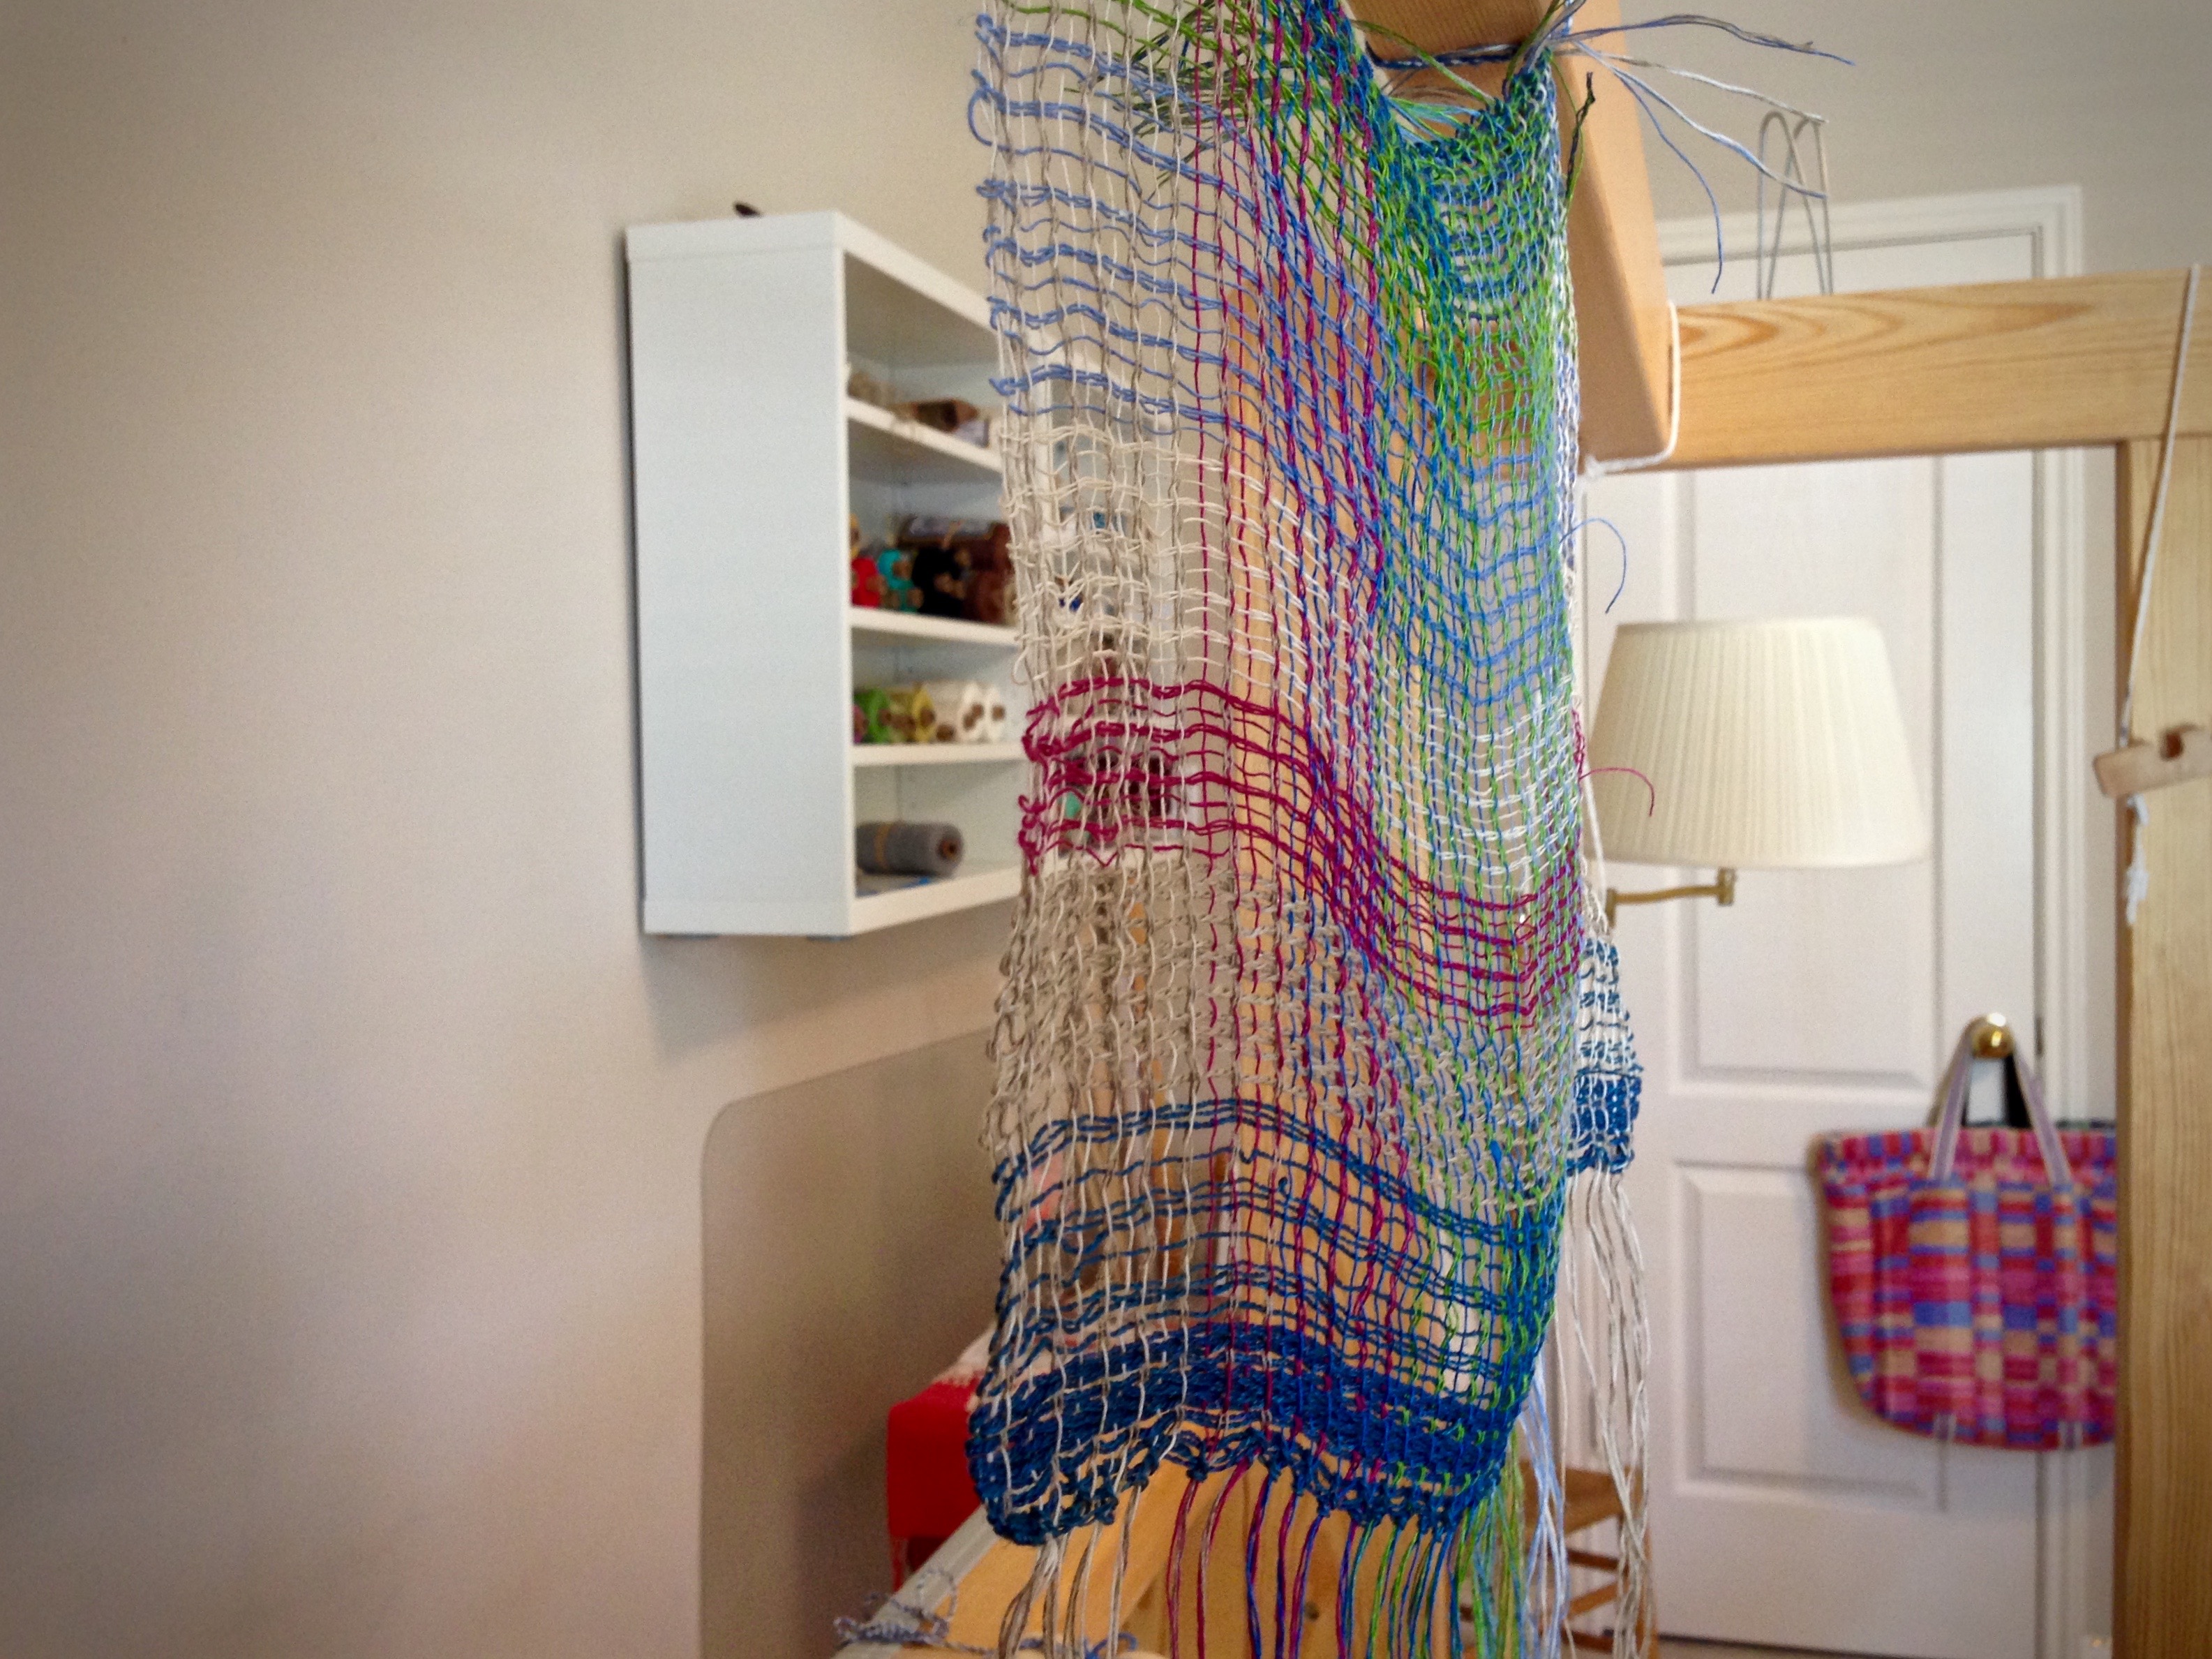
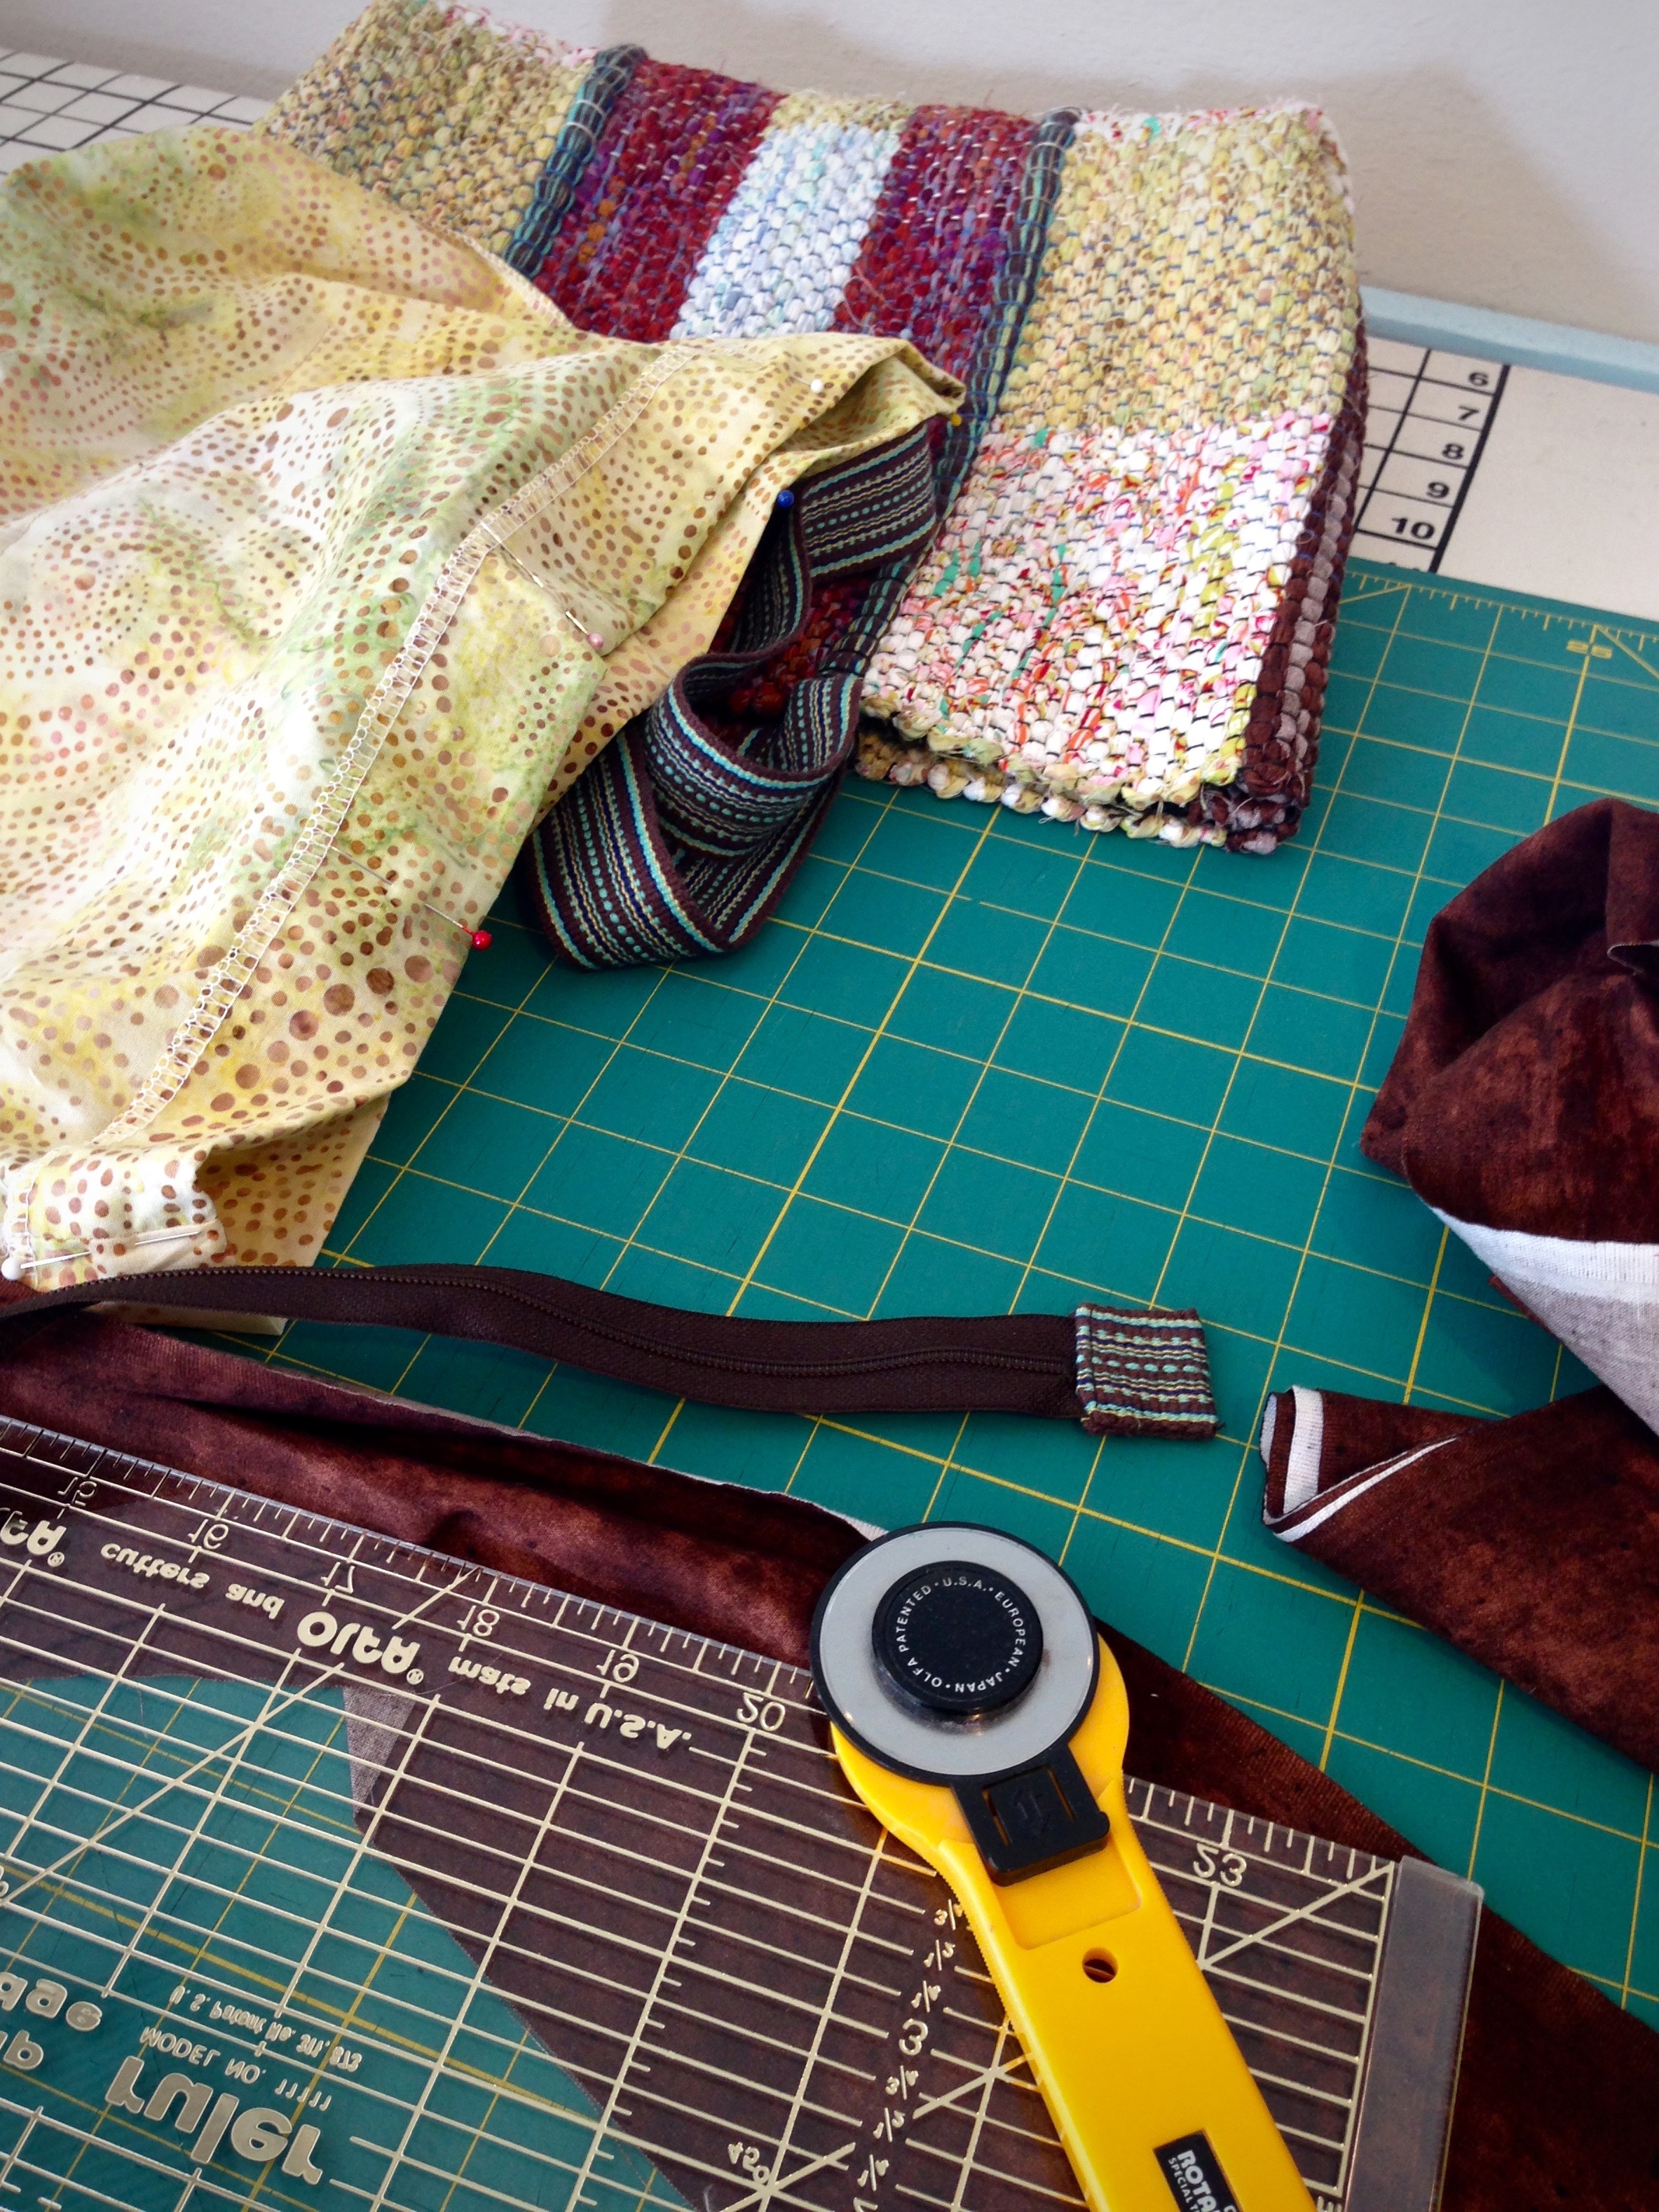
Every good bag deserves a good lining, with pockets inside and a zipper on top. This handwoven rag rug bag is no exception. The lining fabric is some of the same fabric that is woven in the bag. The polka dot pocket fabric is a cheery piece from a visit to The Philippines. The completed zippered tote is a perfect fit for my small tapestry frame, and goes with me when I travel. Quiet Friday: Weave a Bag with Handles shows how I made the bag.

How to add zippered lining to a bag.

How to Add a Custom Zippered Lining to a Bag

Tools

  • Sewing machine
  • Zipper foot
  • Walking foot (recommended, but not required)
  • Steam iron
  • Straight pins
  • Tool for pushing out corners
  • Needle and sewing thread
  • Disappearing ink fabric marker
  • Fabric scissors

Supplies

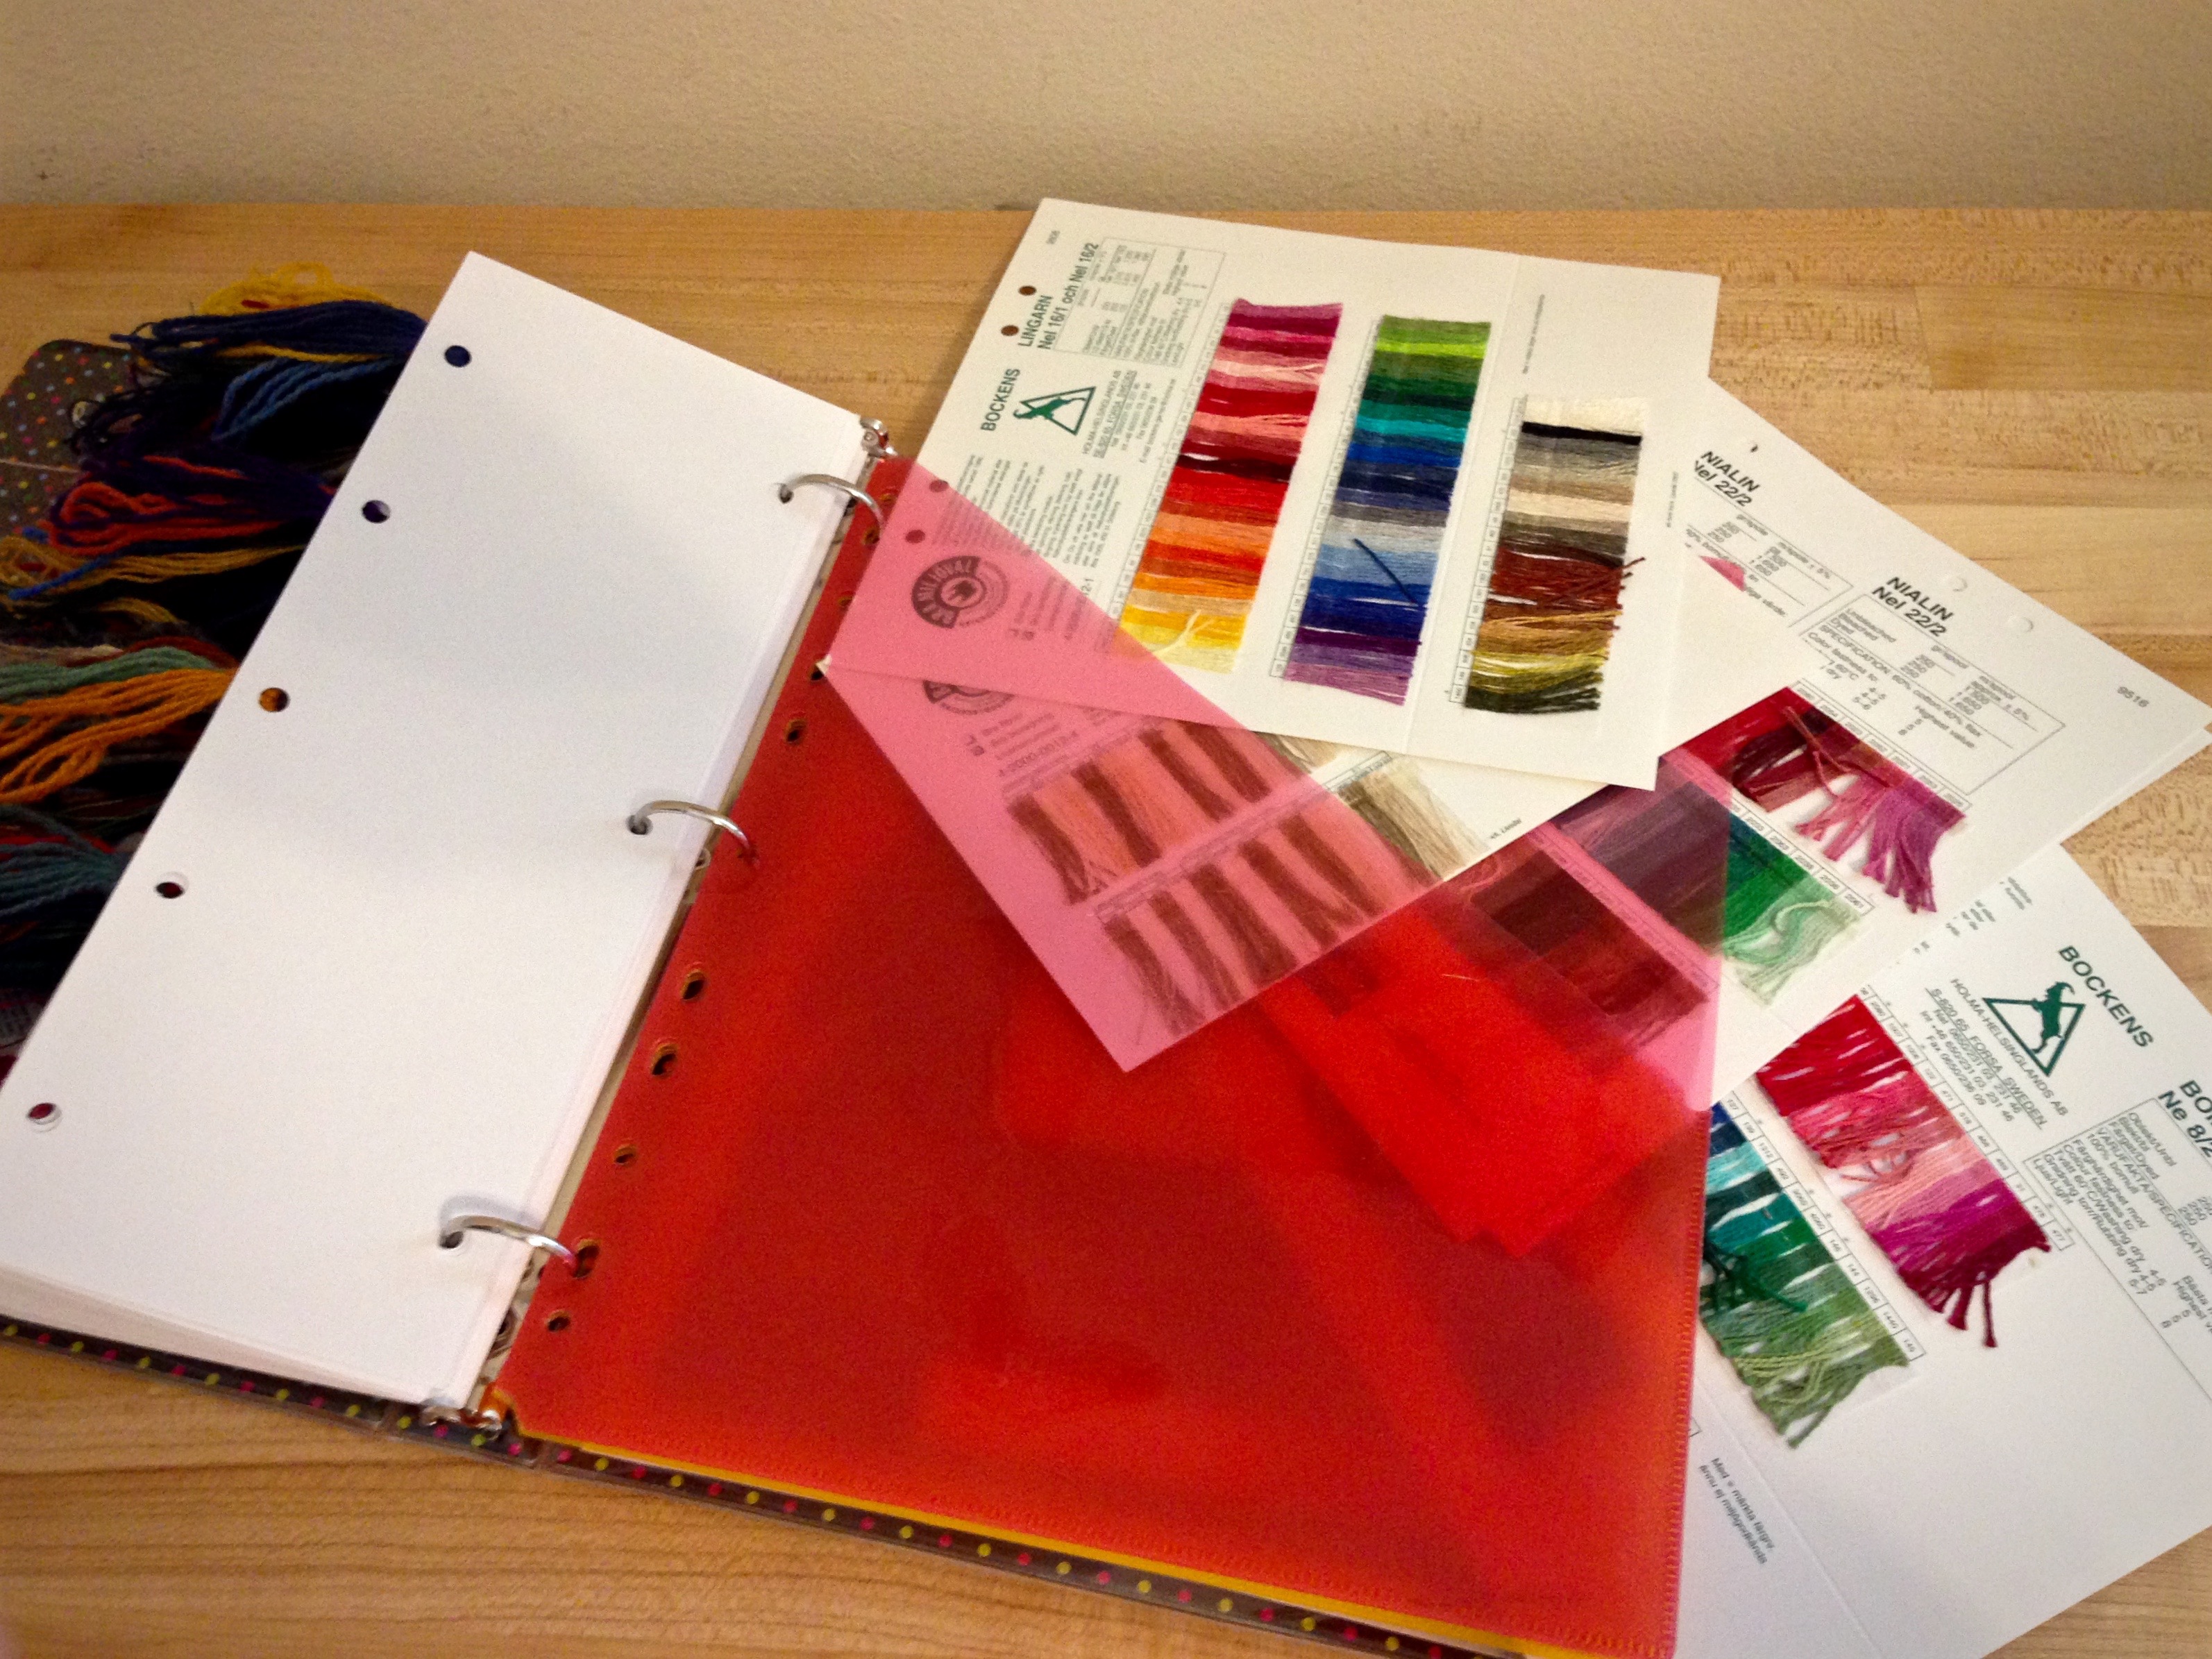
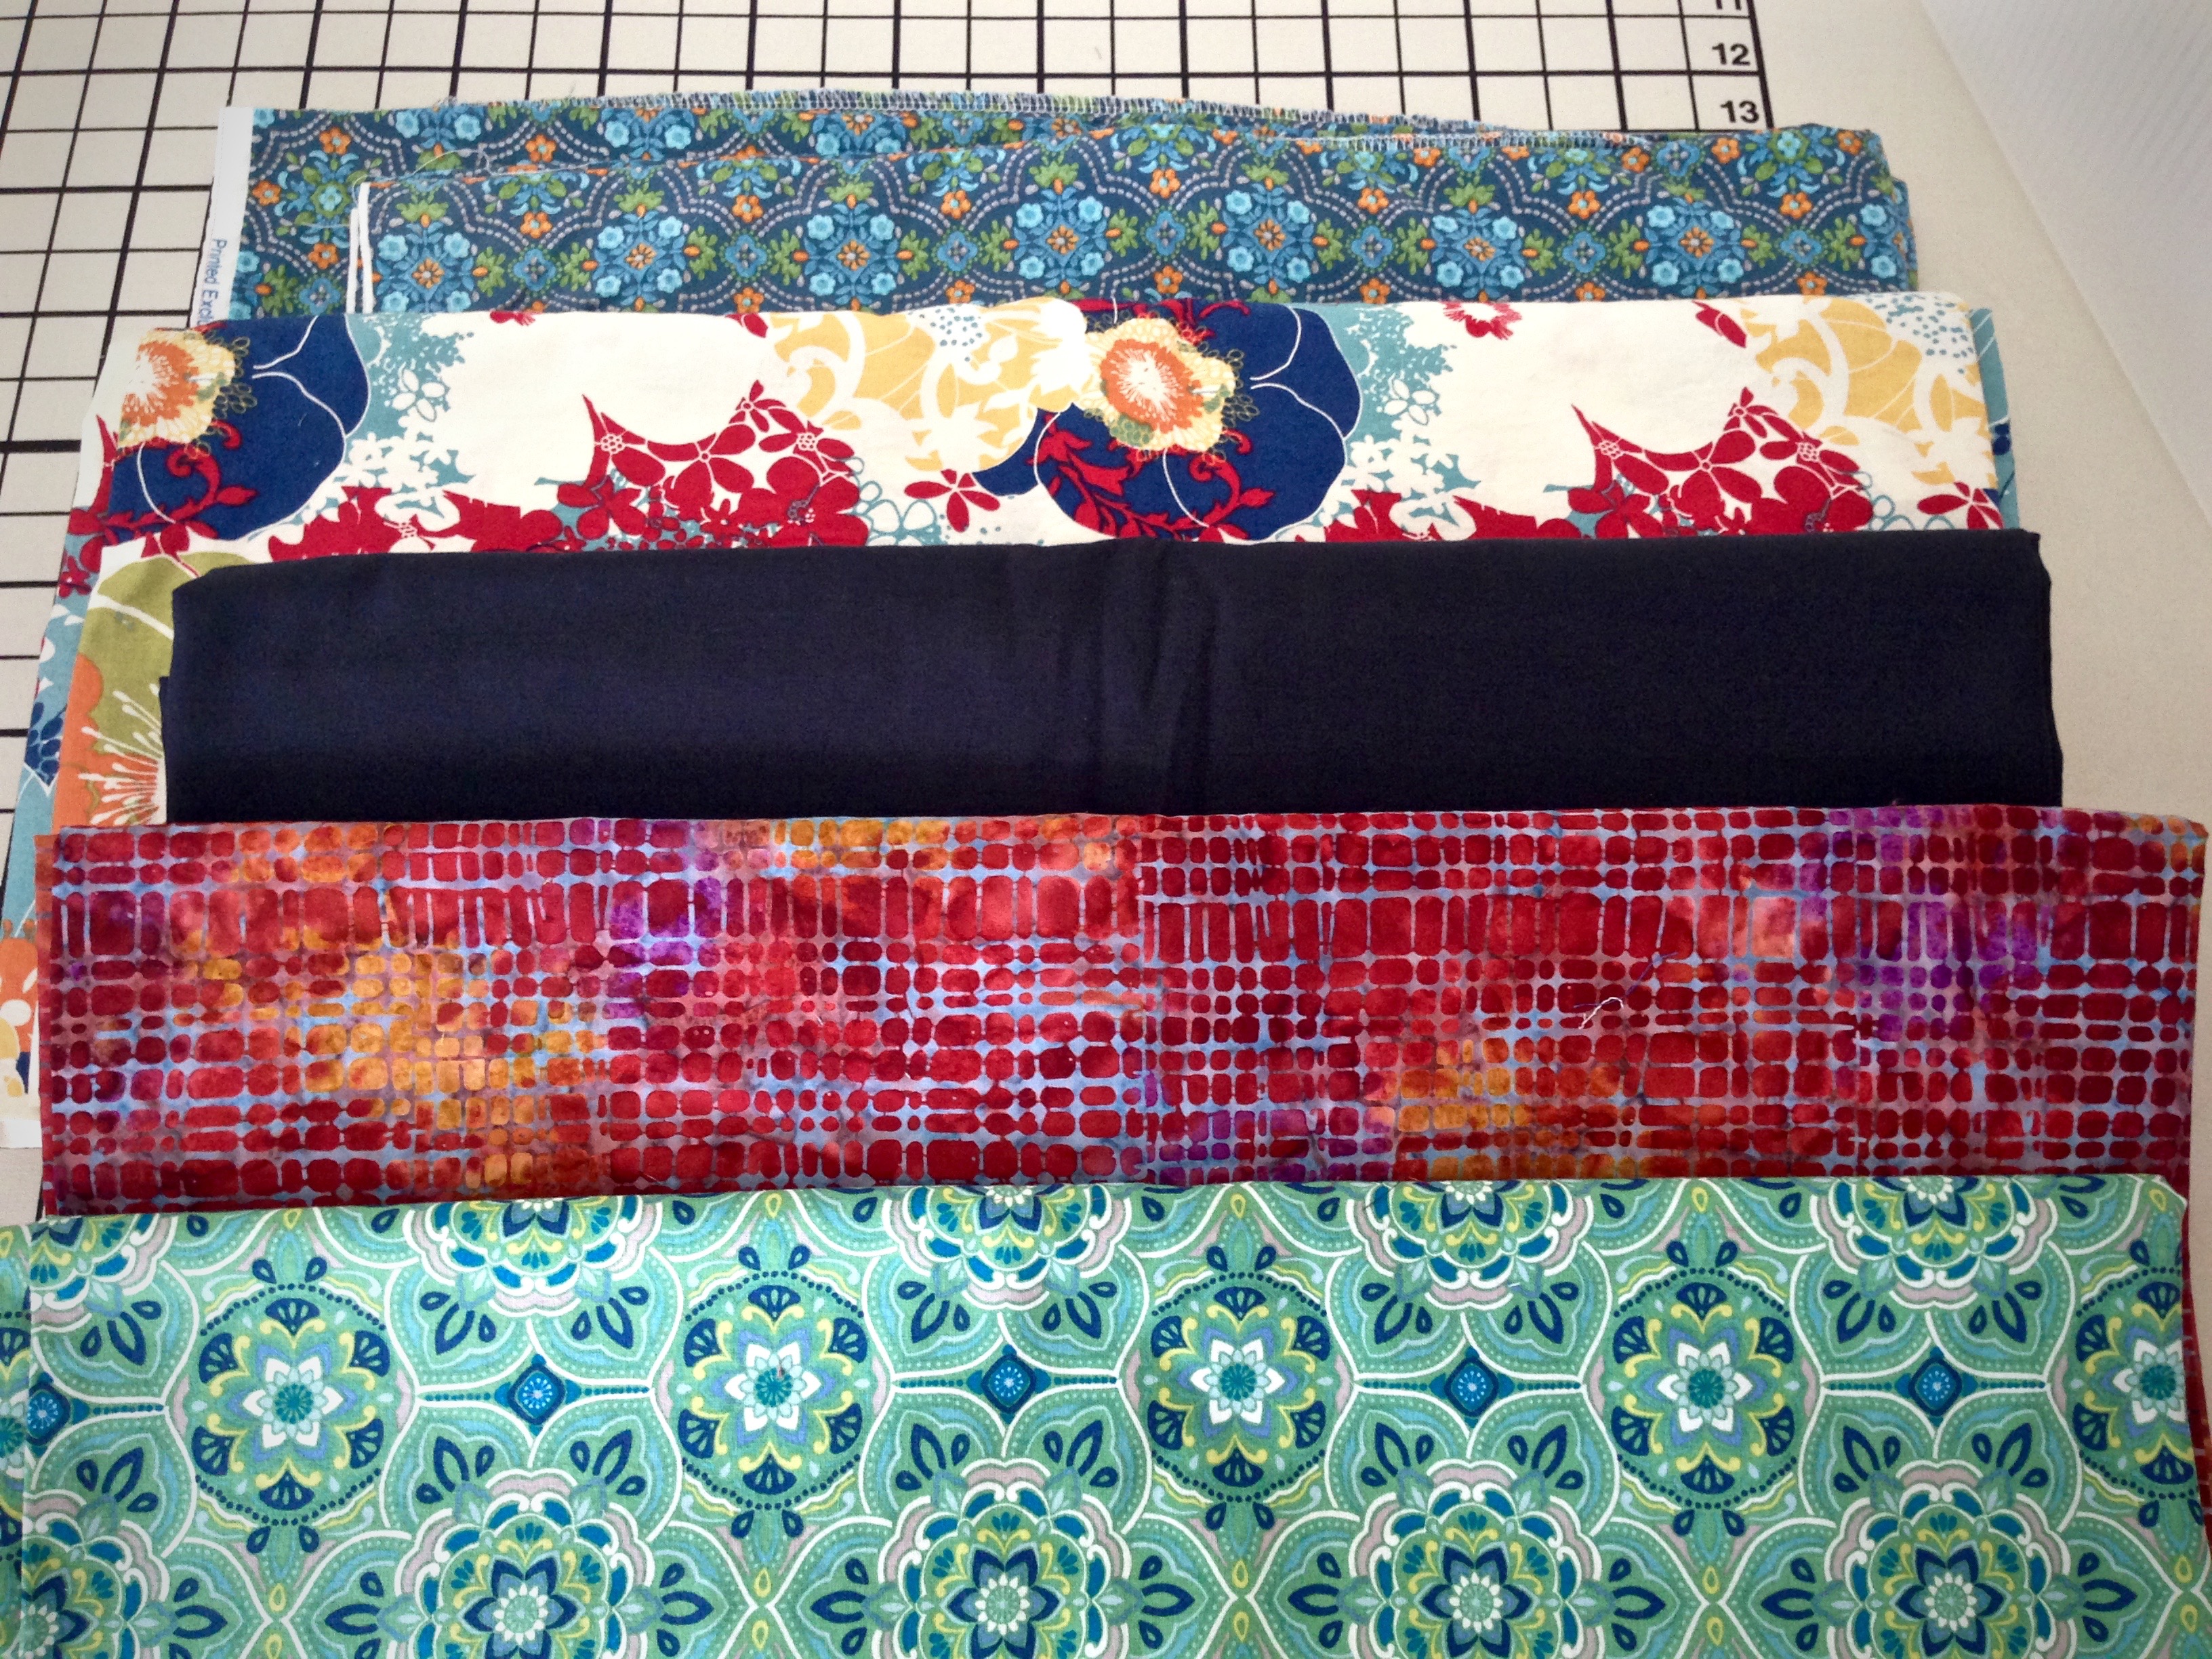
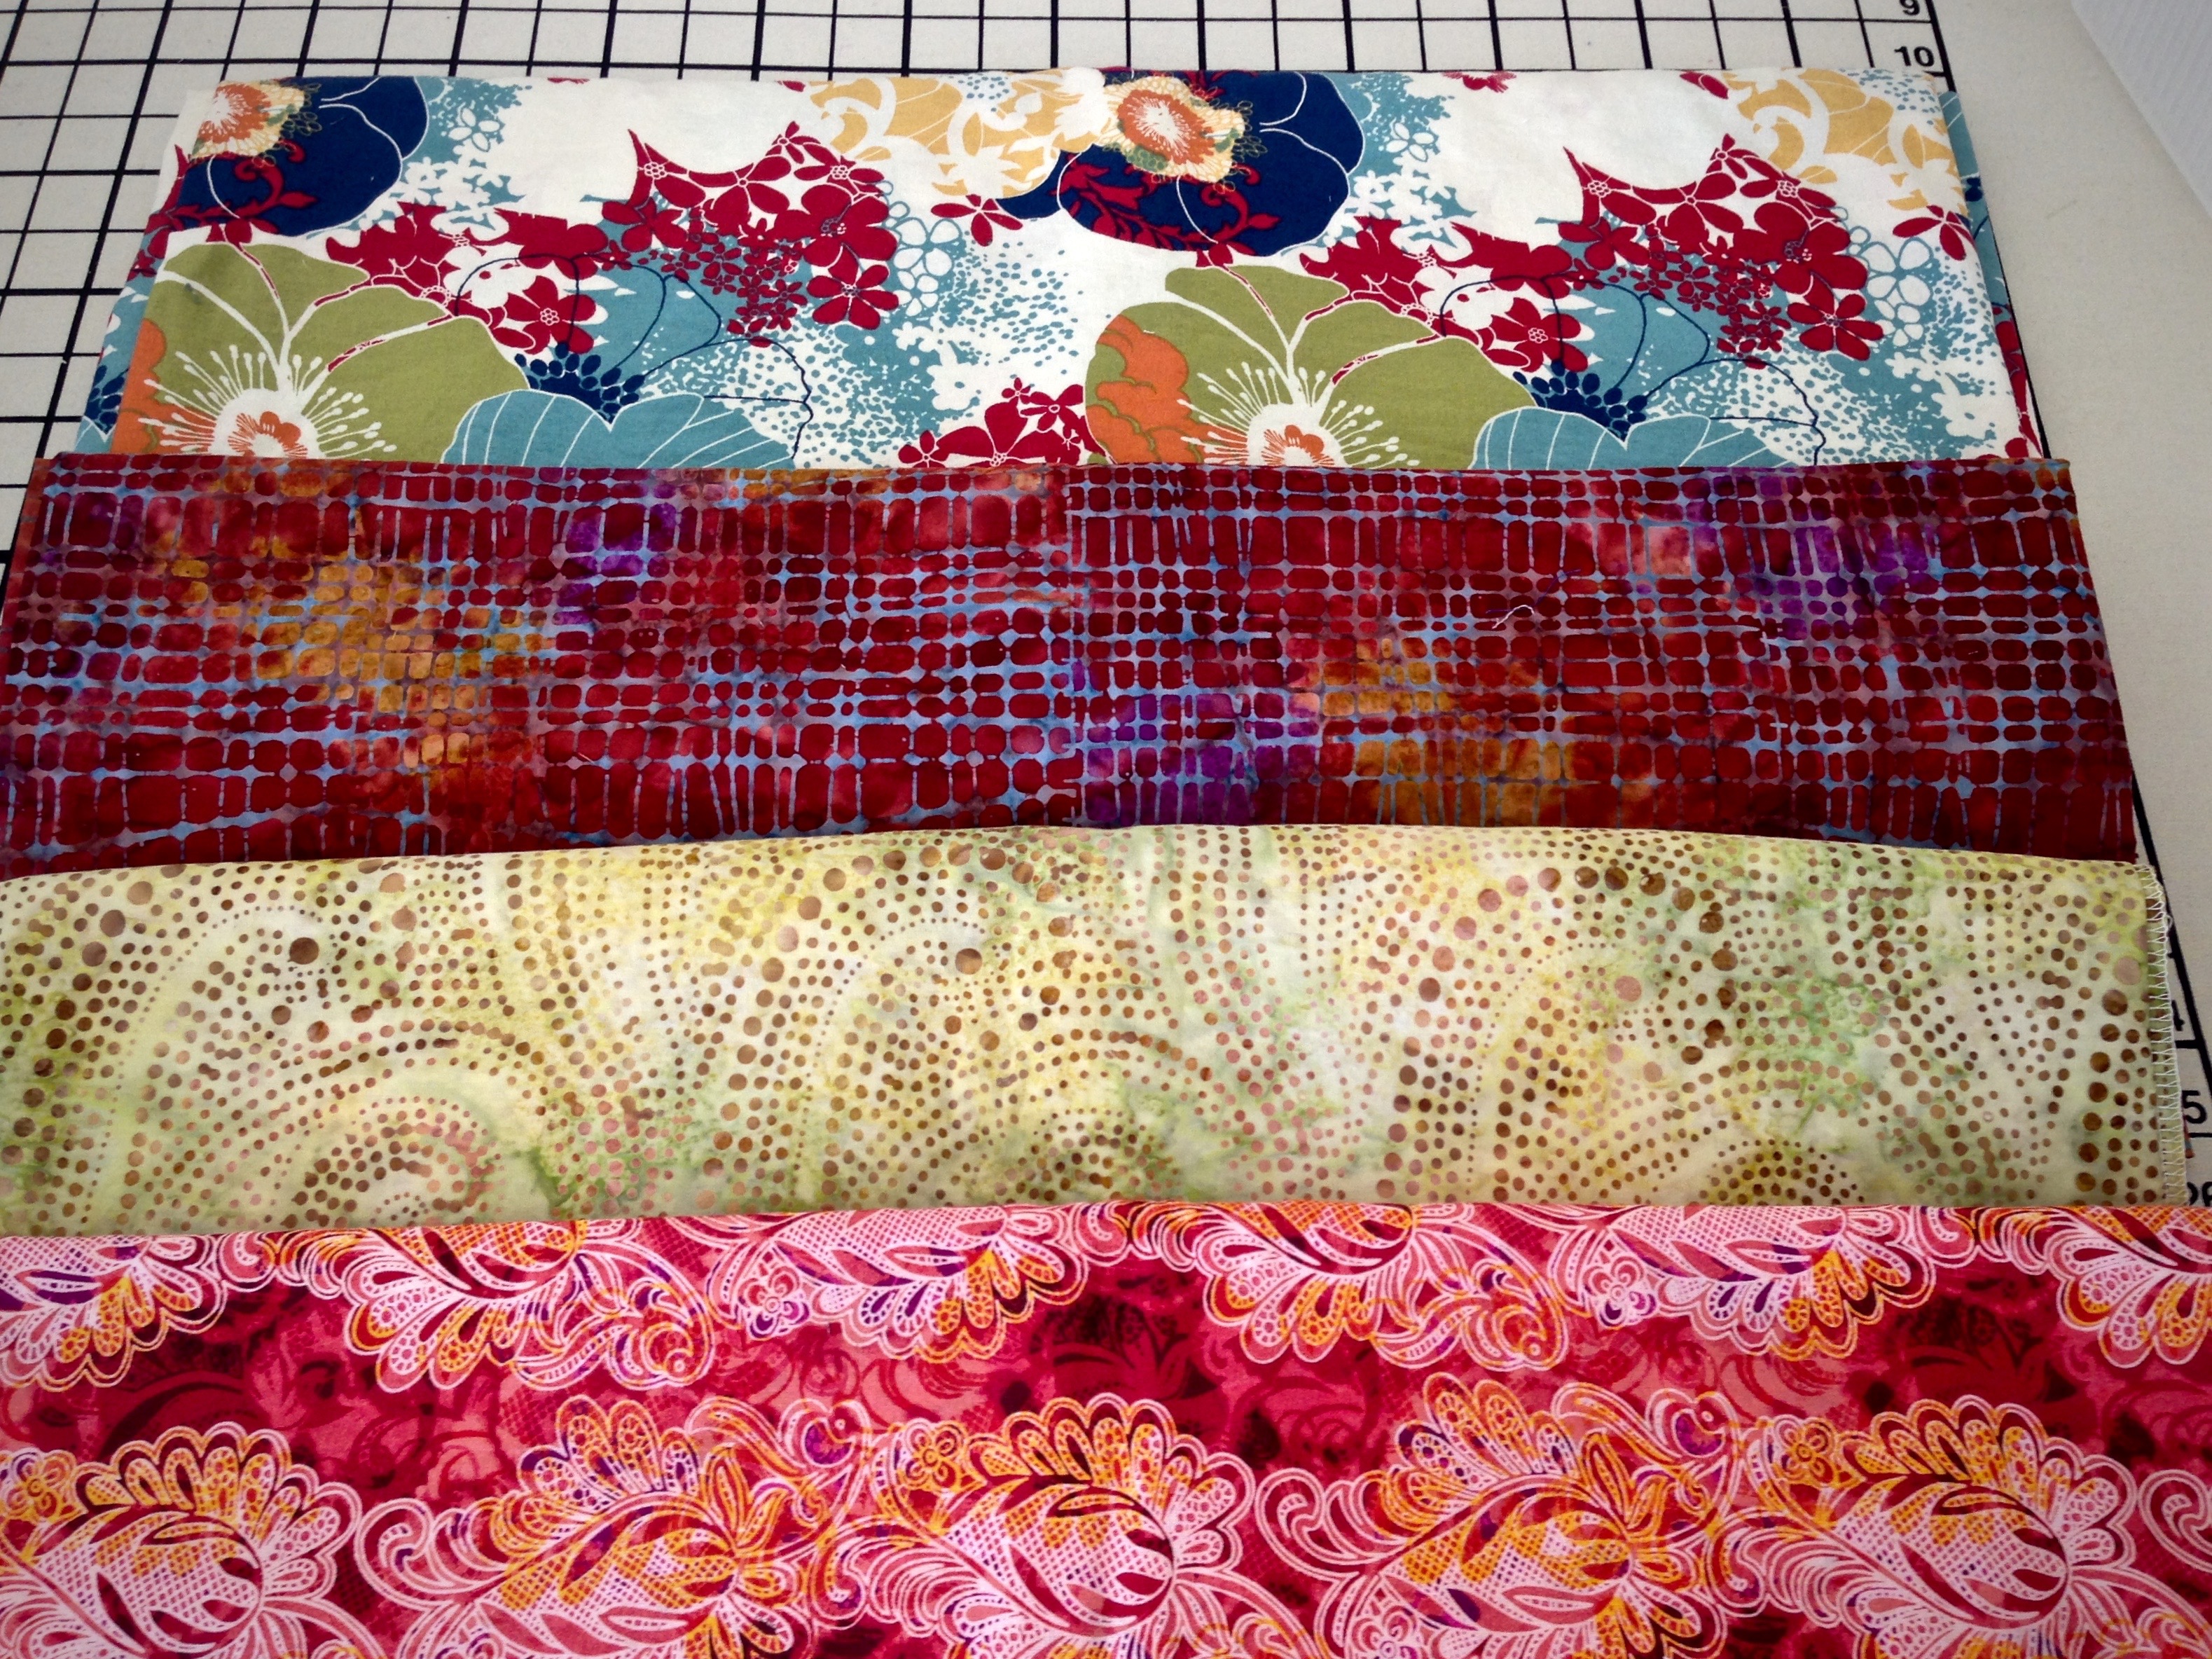
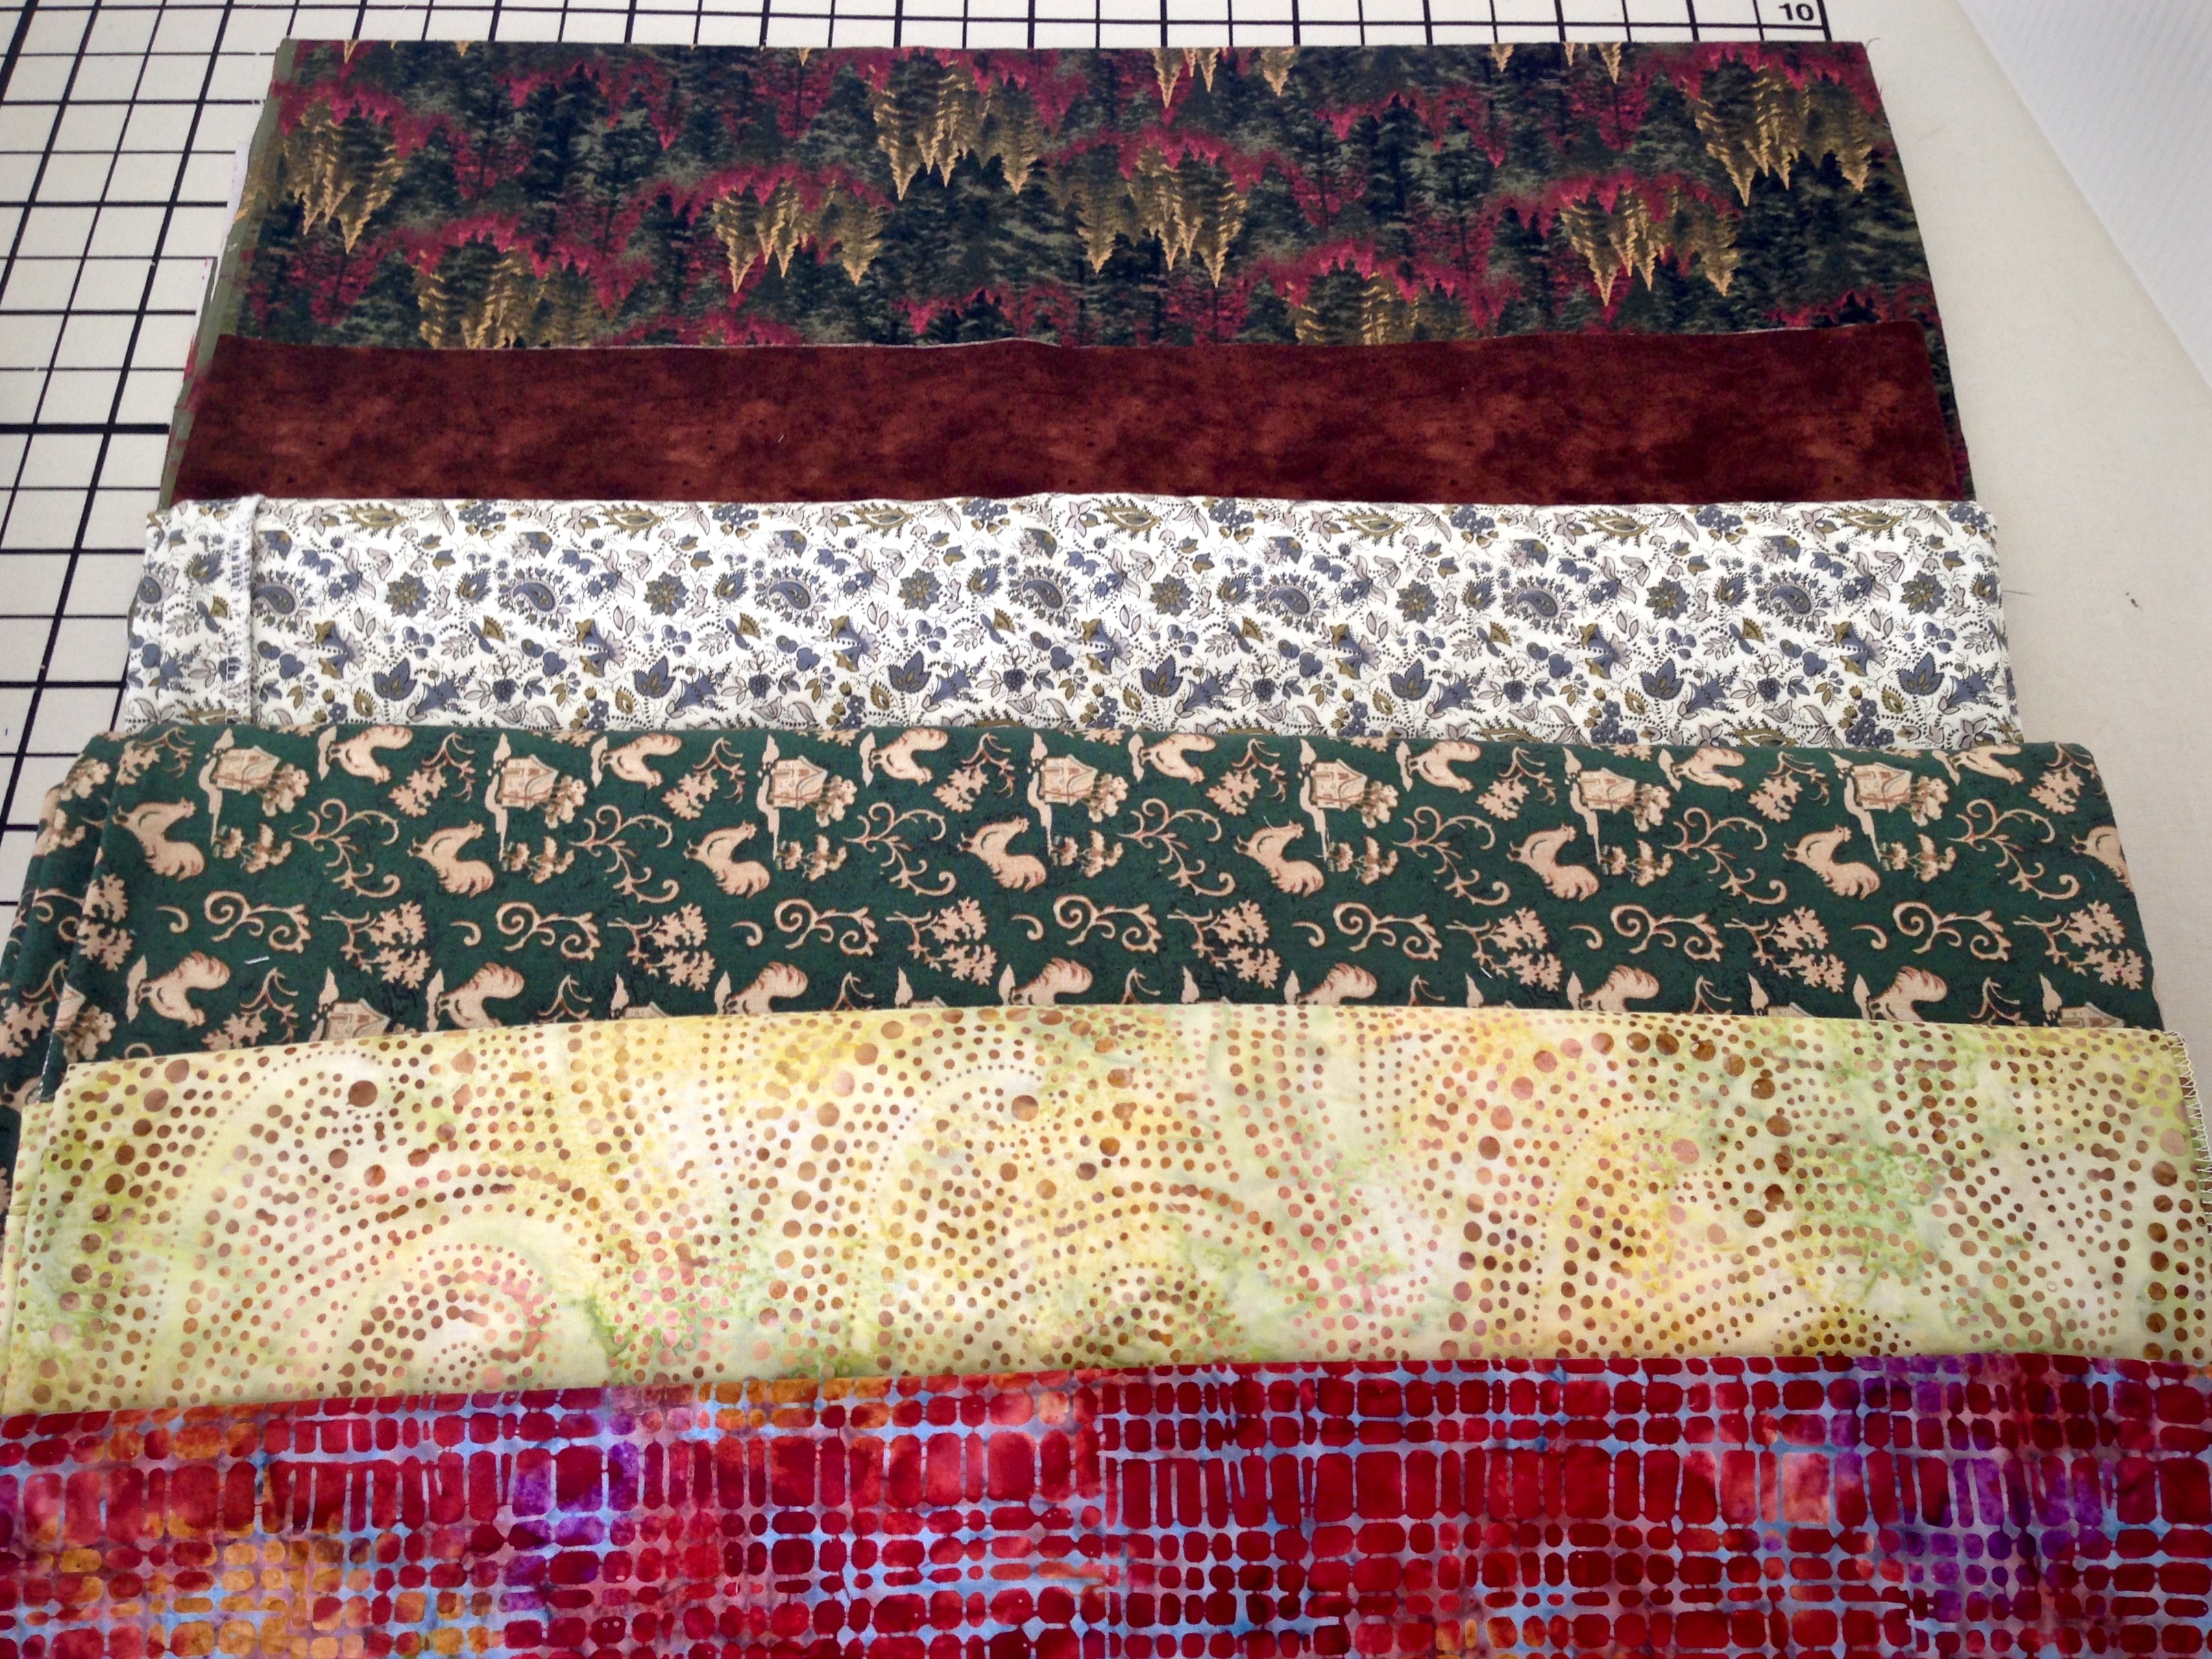
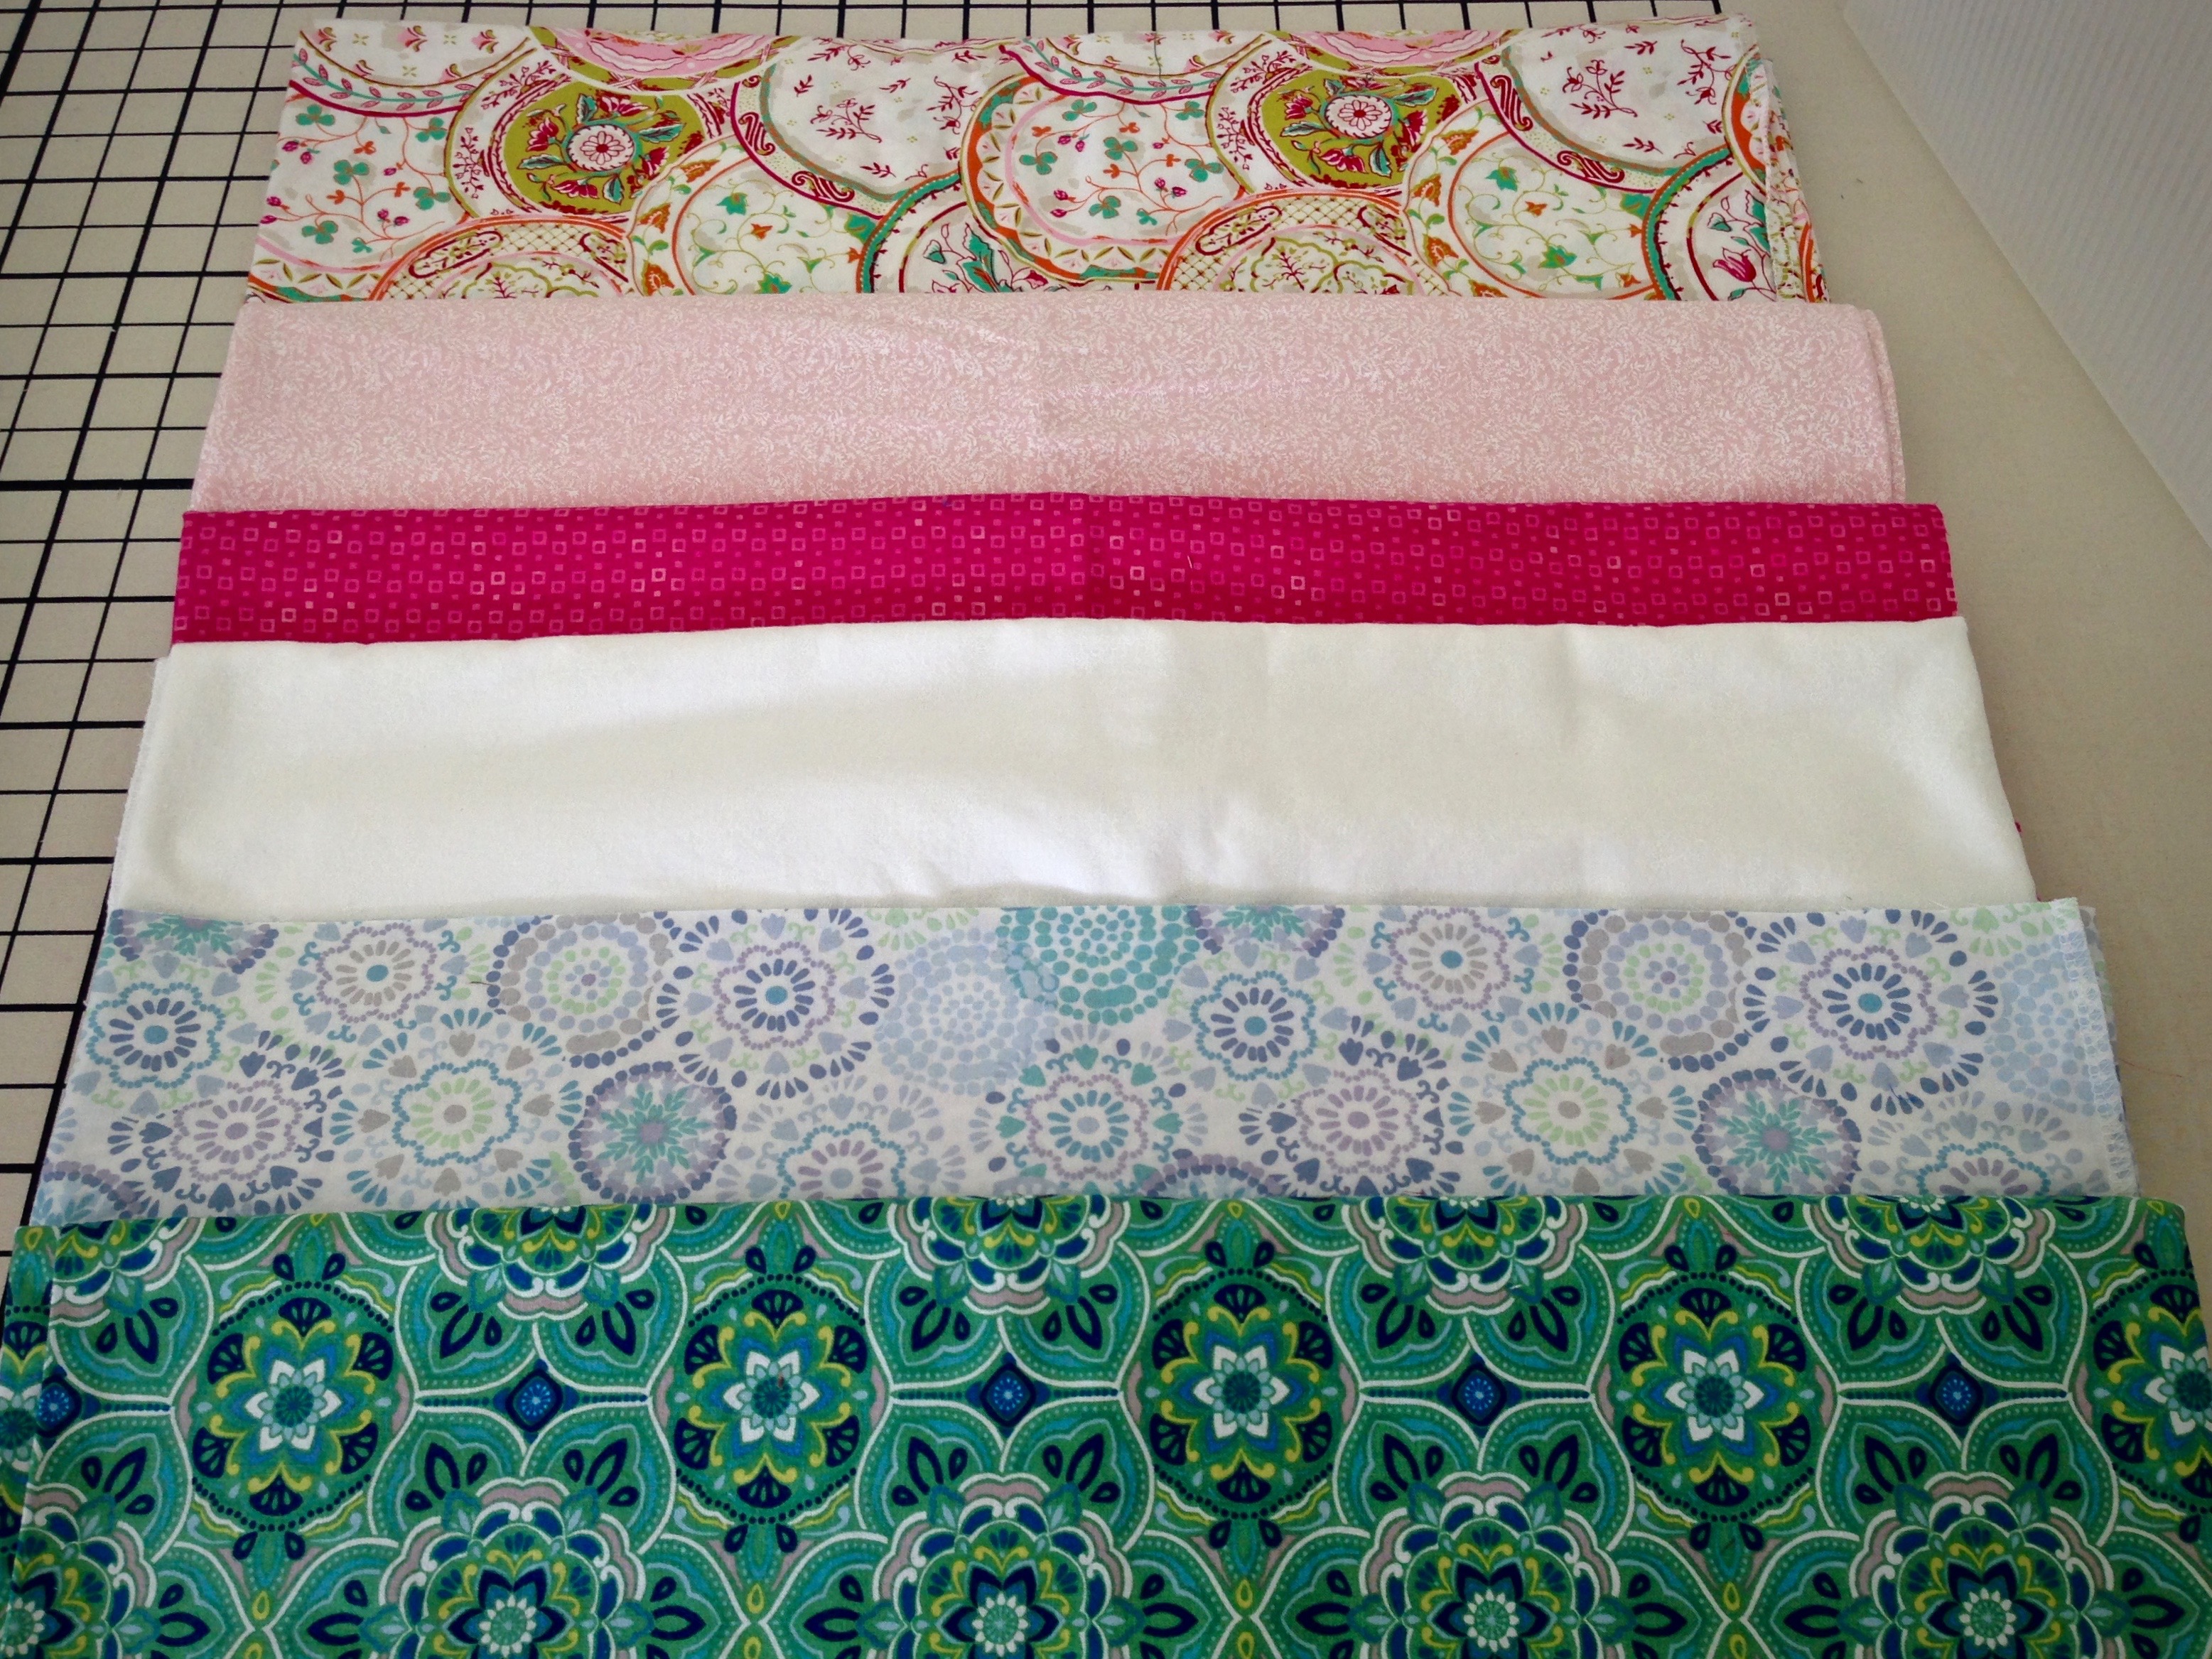
  • Fabric for lining. Lay bag on top of folded lining fabric, with bottom of bag aligned with the fold of the lining fabric. Cut the folded fabric a generous 1 1/2″ wider and 1 1/2″ taller than the bag.
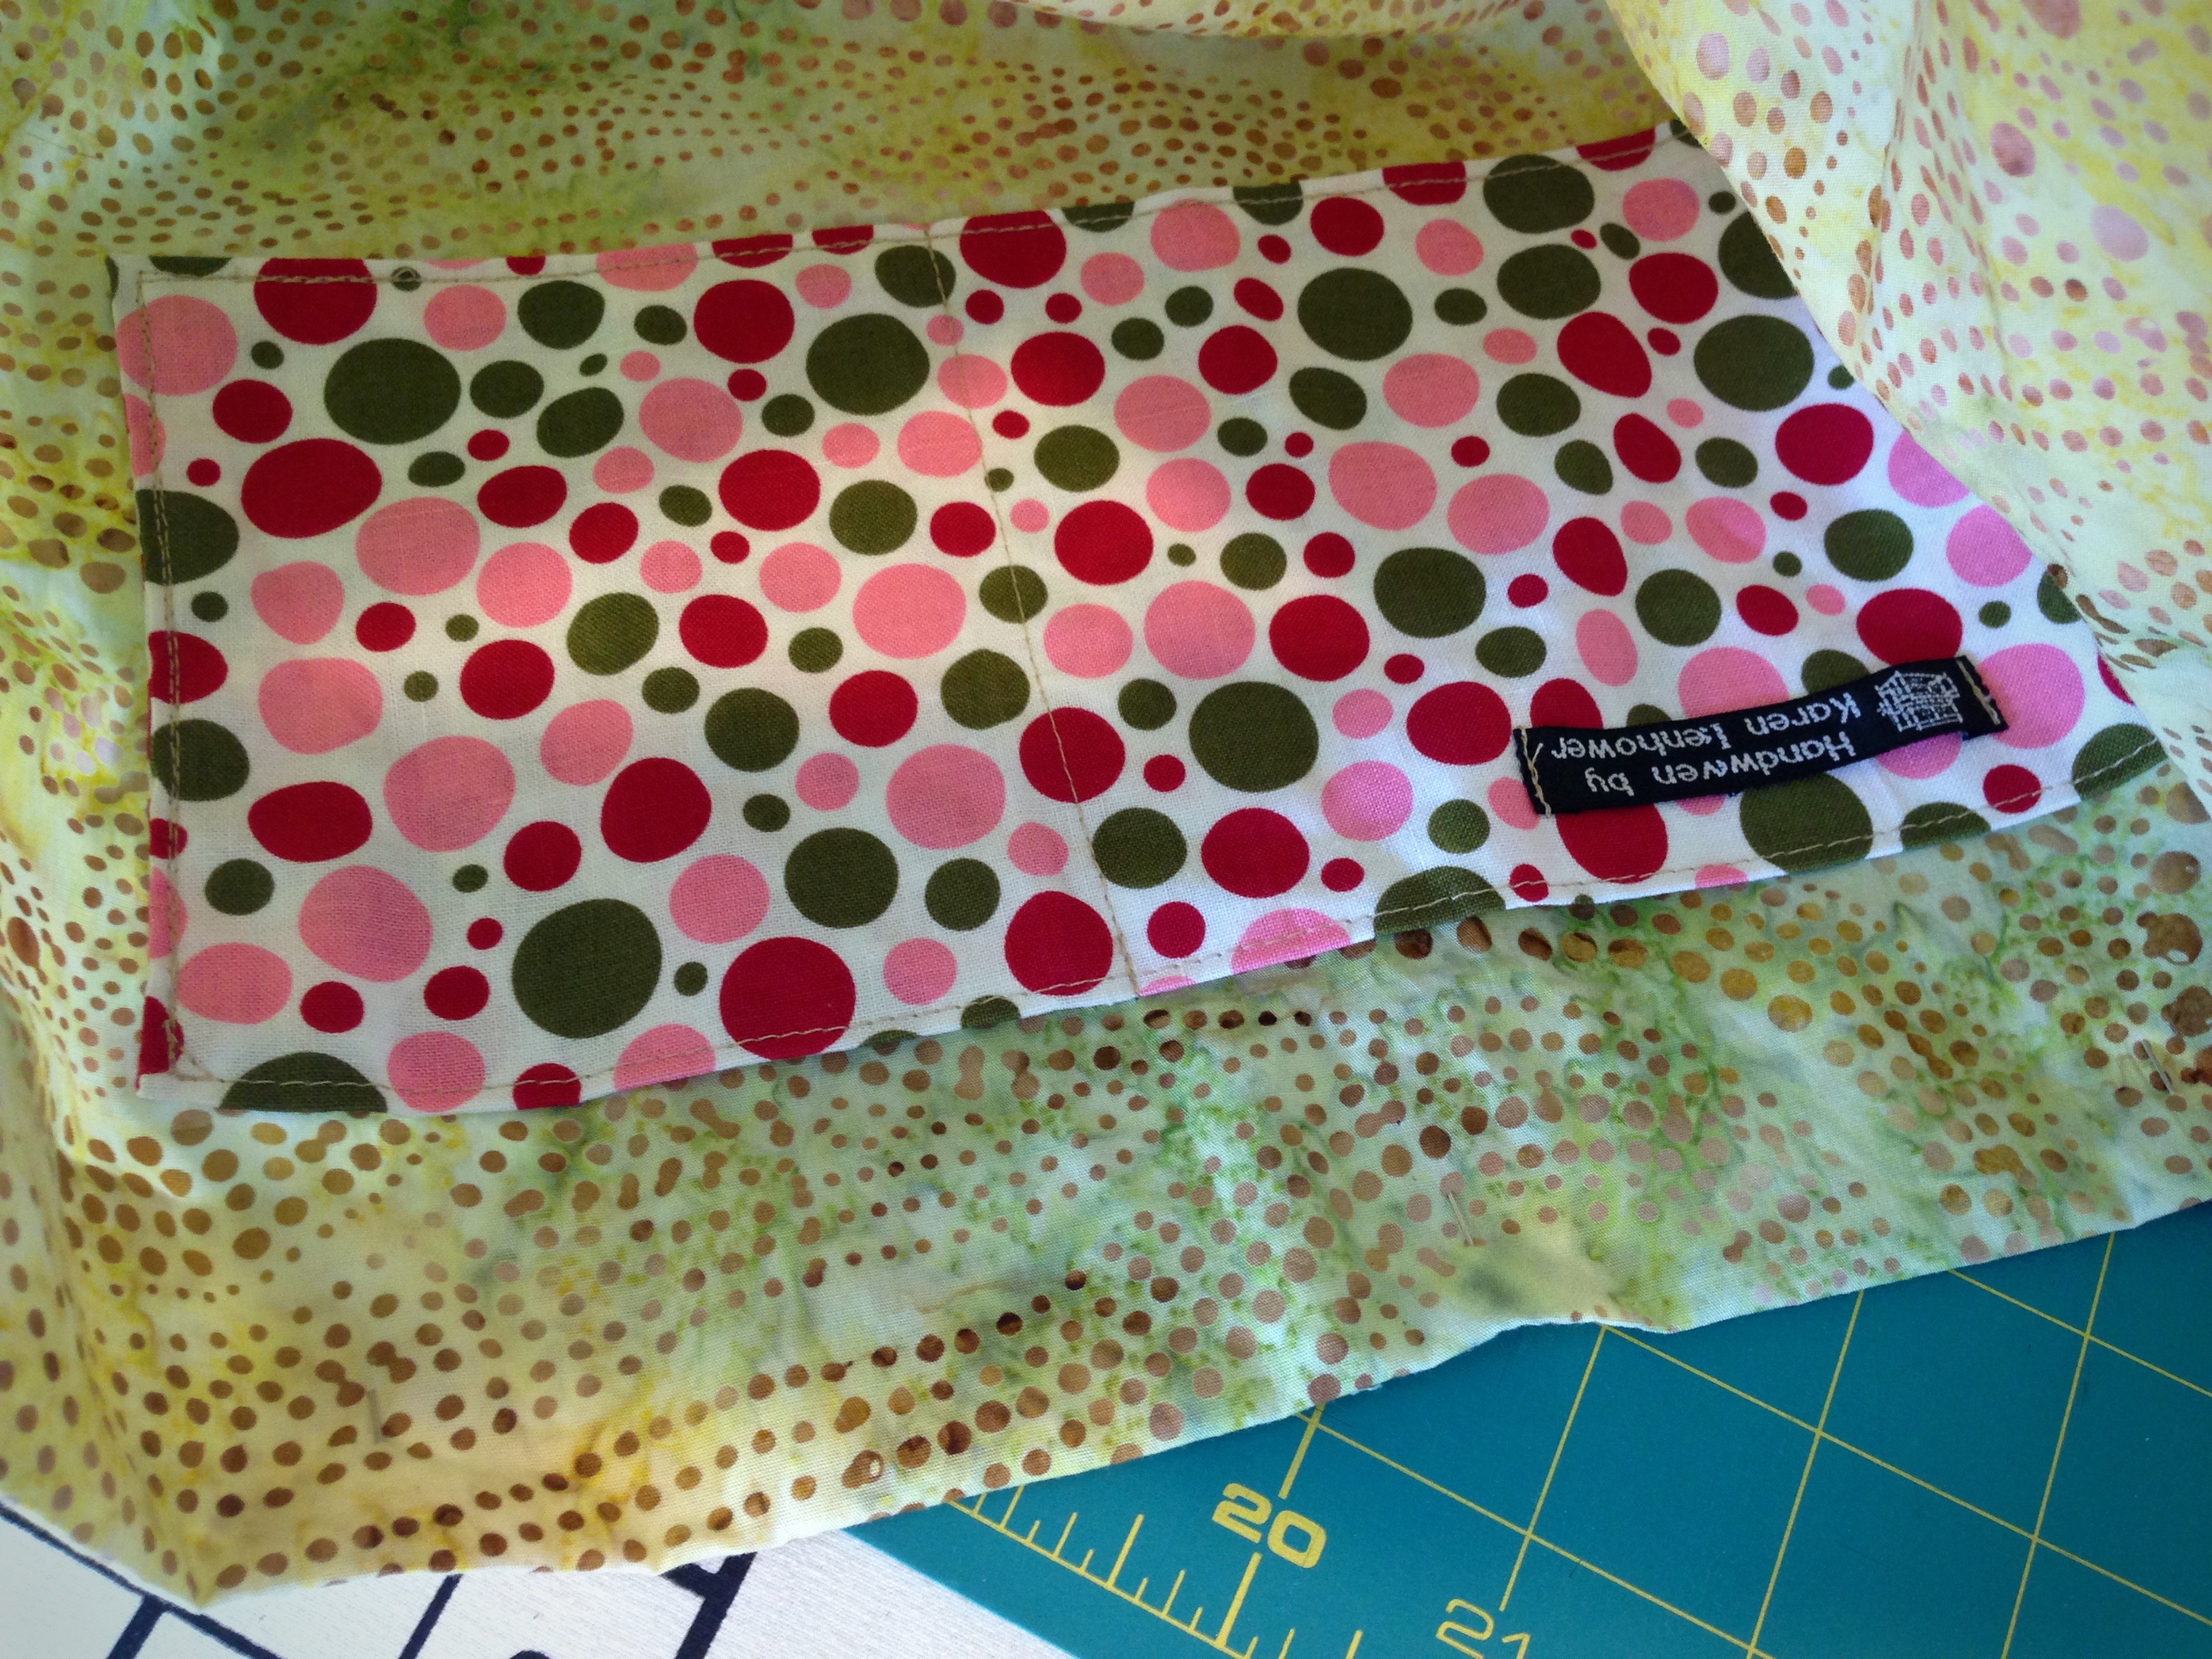
  • Fabric for pocket. Mark two pieces of fabric (or use a folded piece of fabric) the desired pocket size. Add 1/4″ seam allowance. Cut along the marked lines. Stitch, right sides together, leaving an opening for turning. Turn right side out, pushing out corners. Press. Topstitch all four sides.
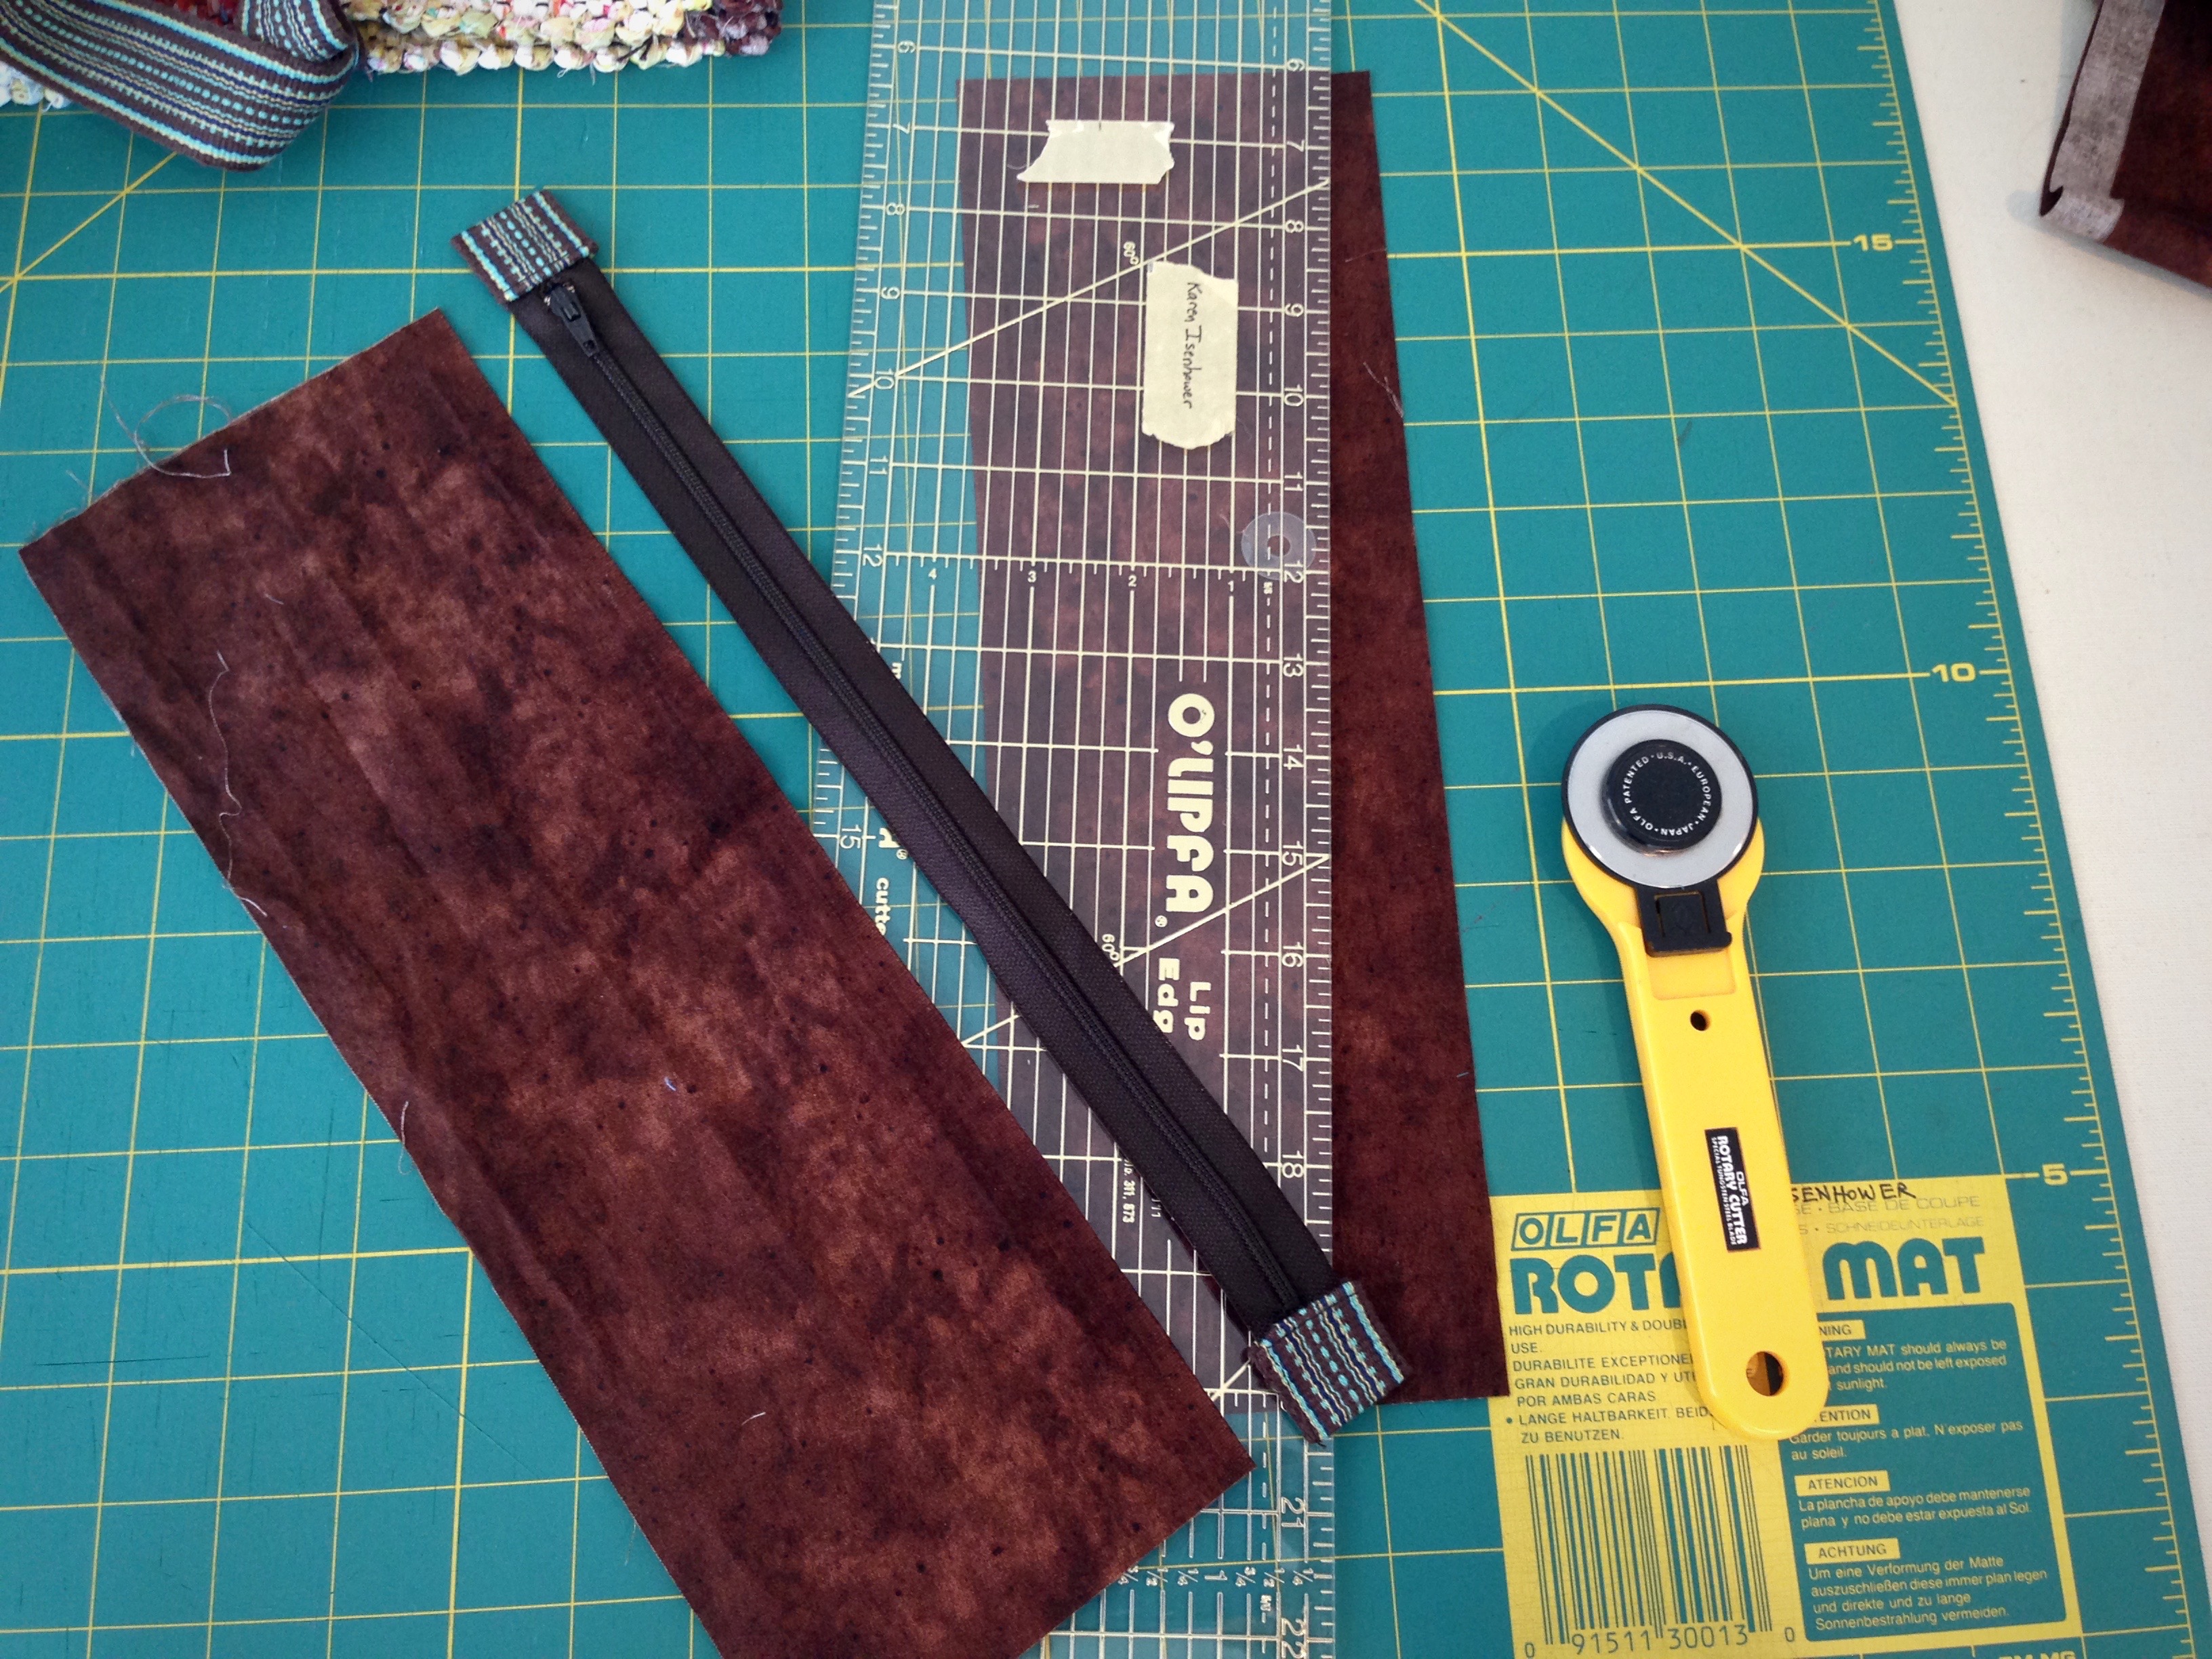
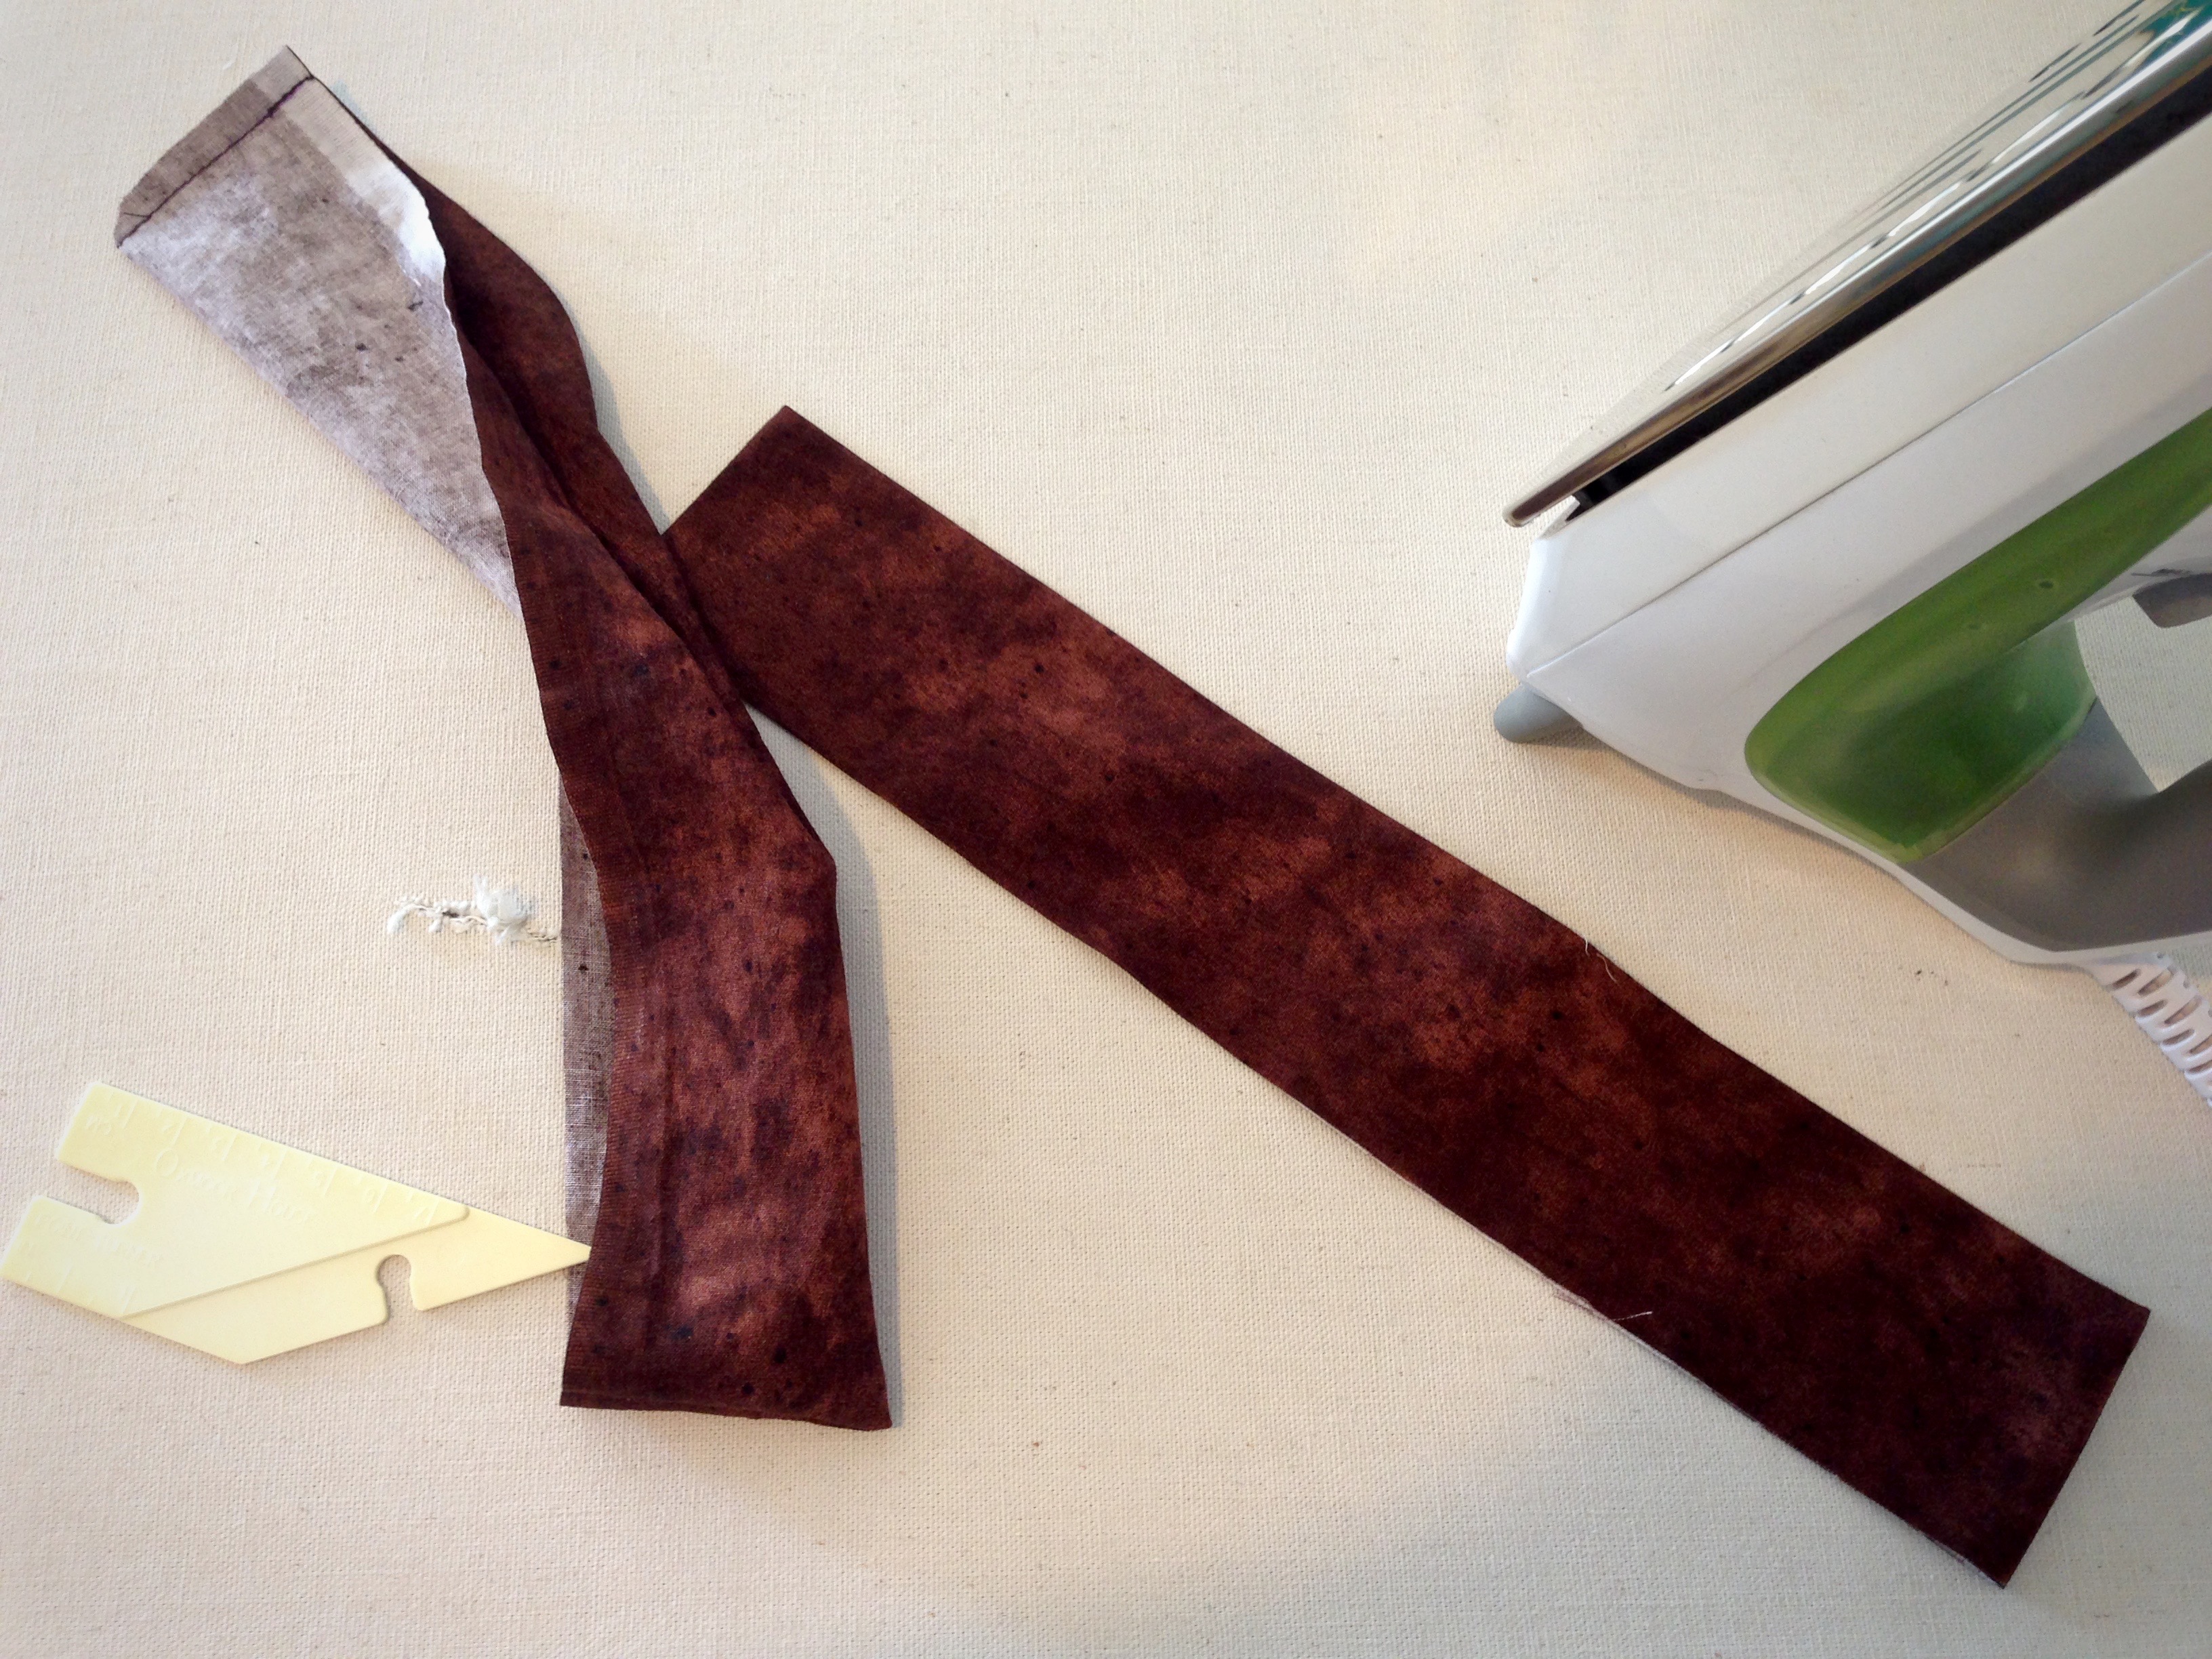
  • Fabric for zipper insert pieces. Cut two pieces of fabric 4 1/2″ wide by the length of the zipper plus 1″.
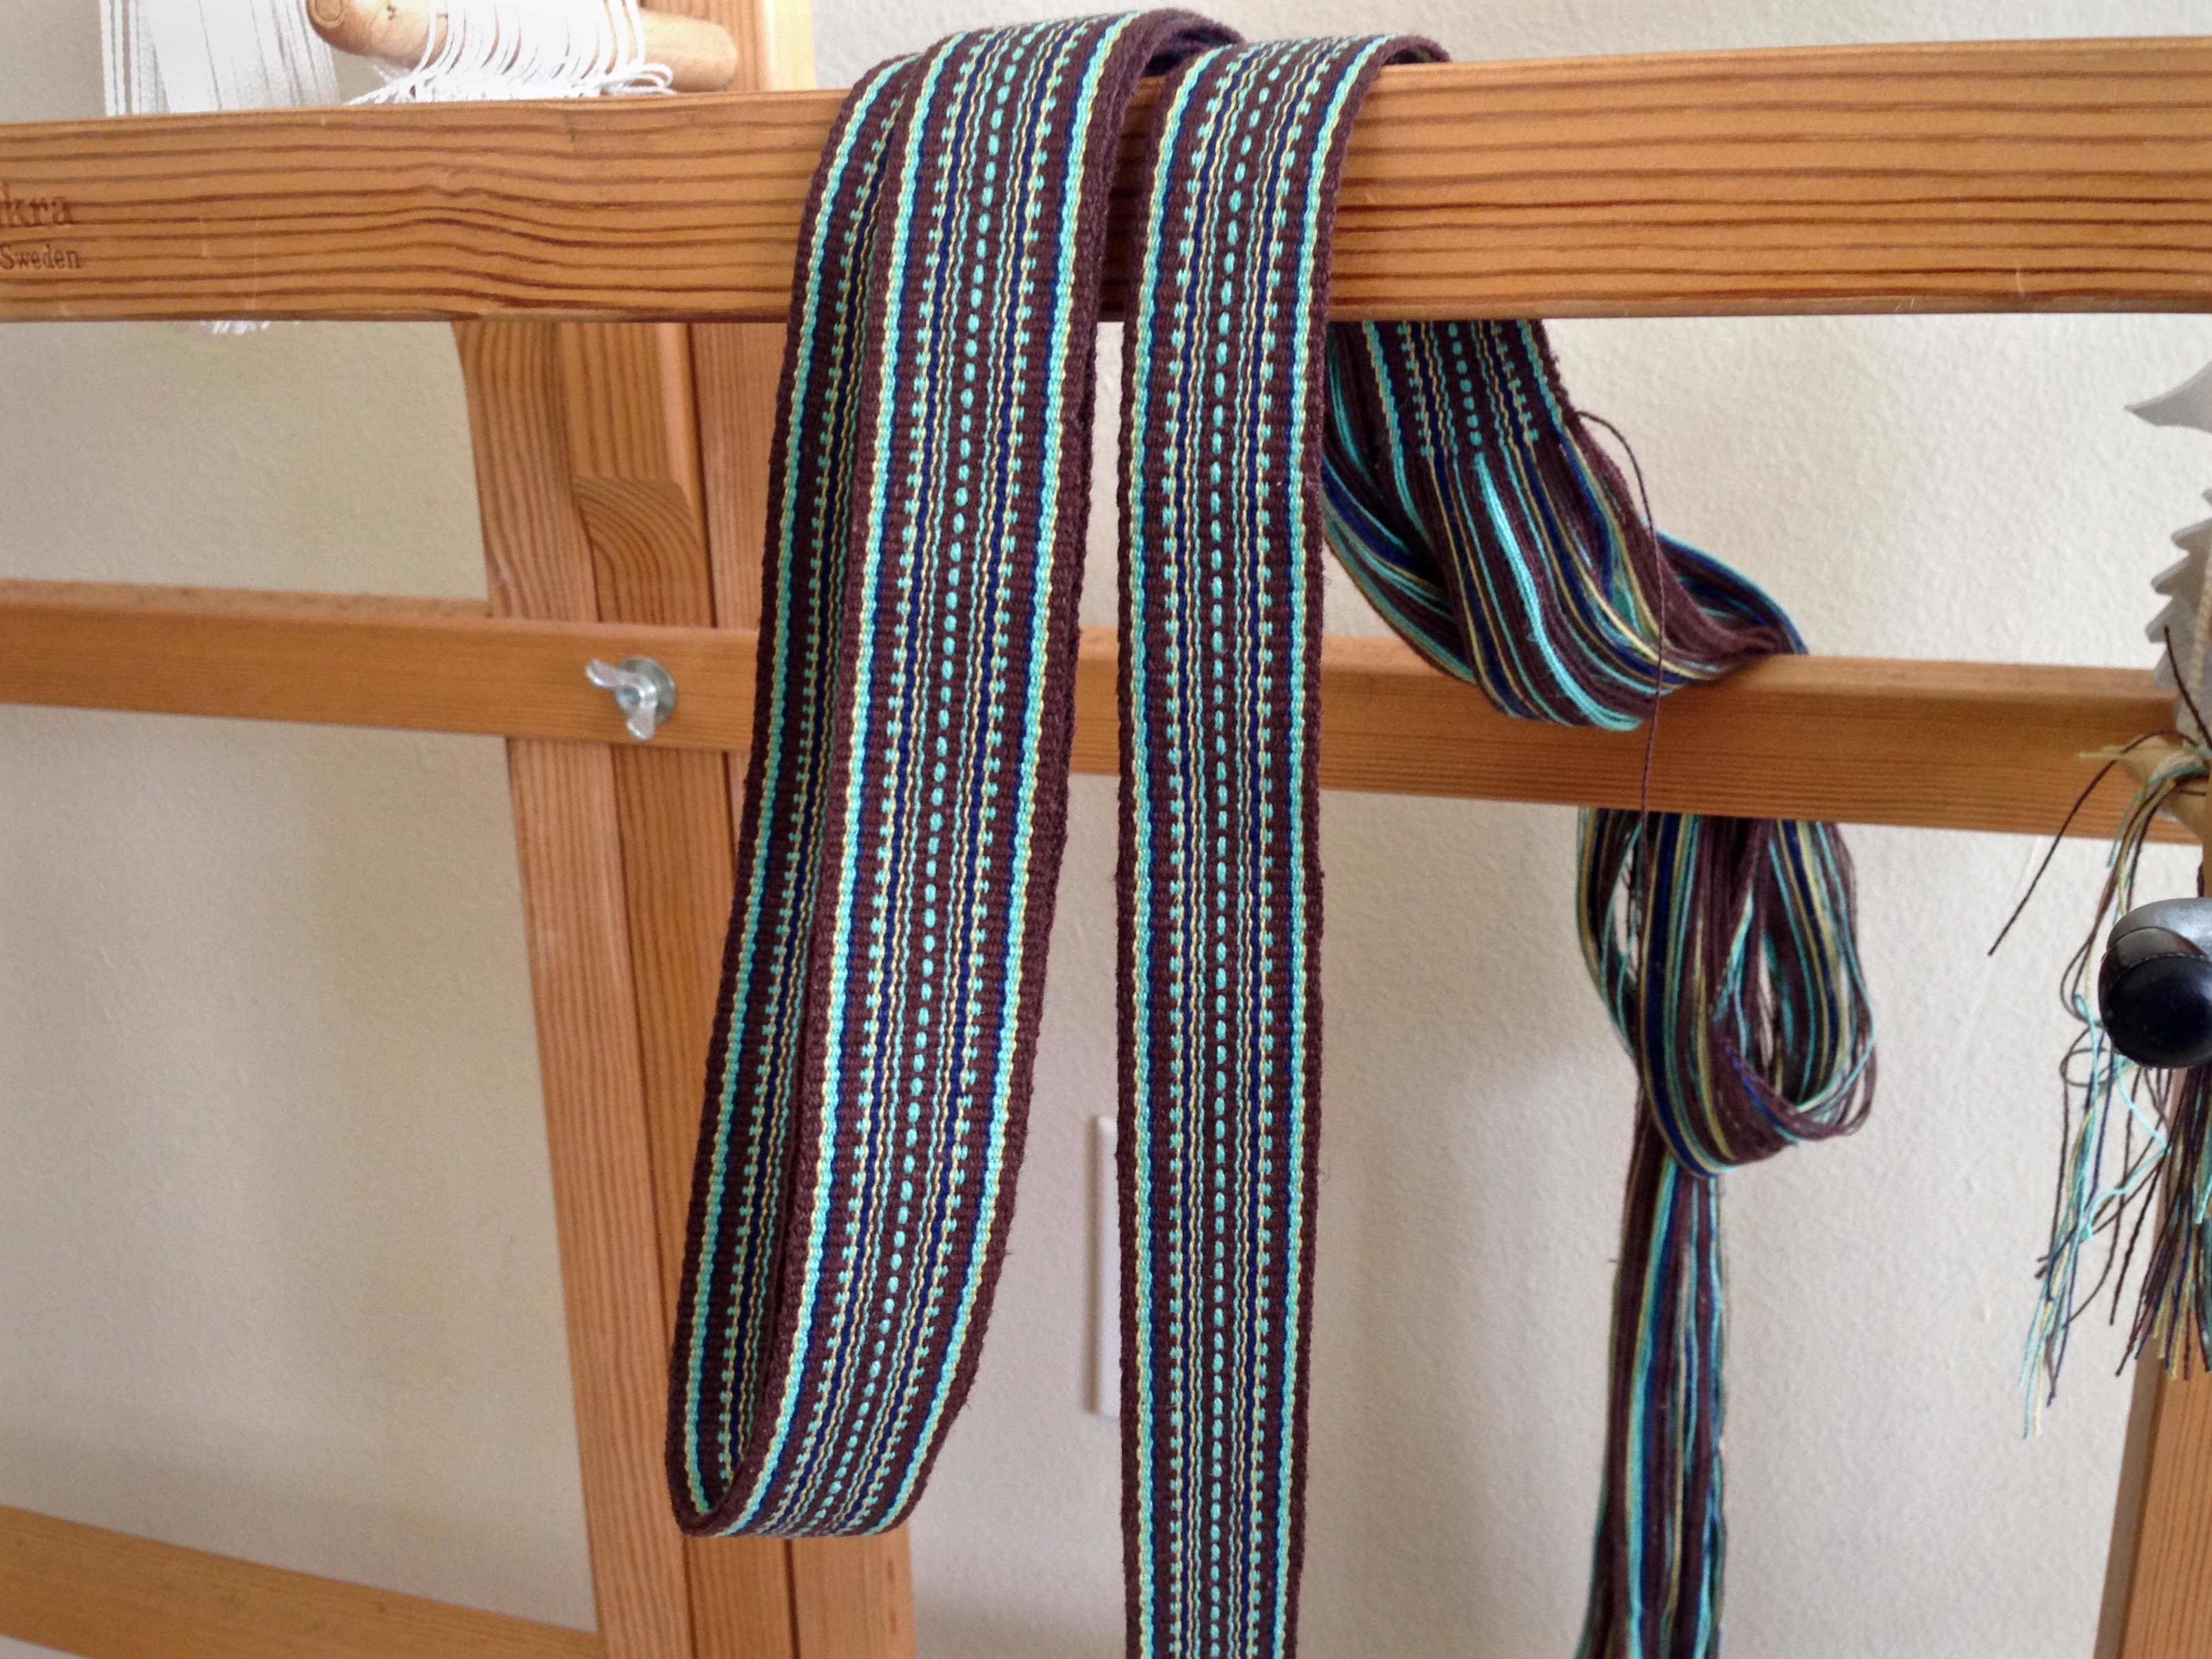
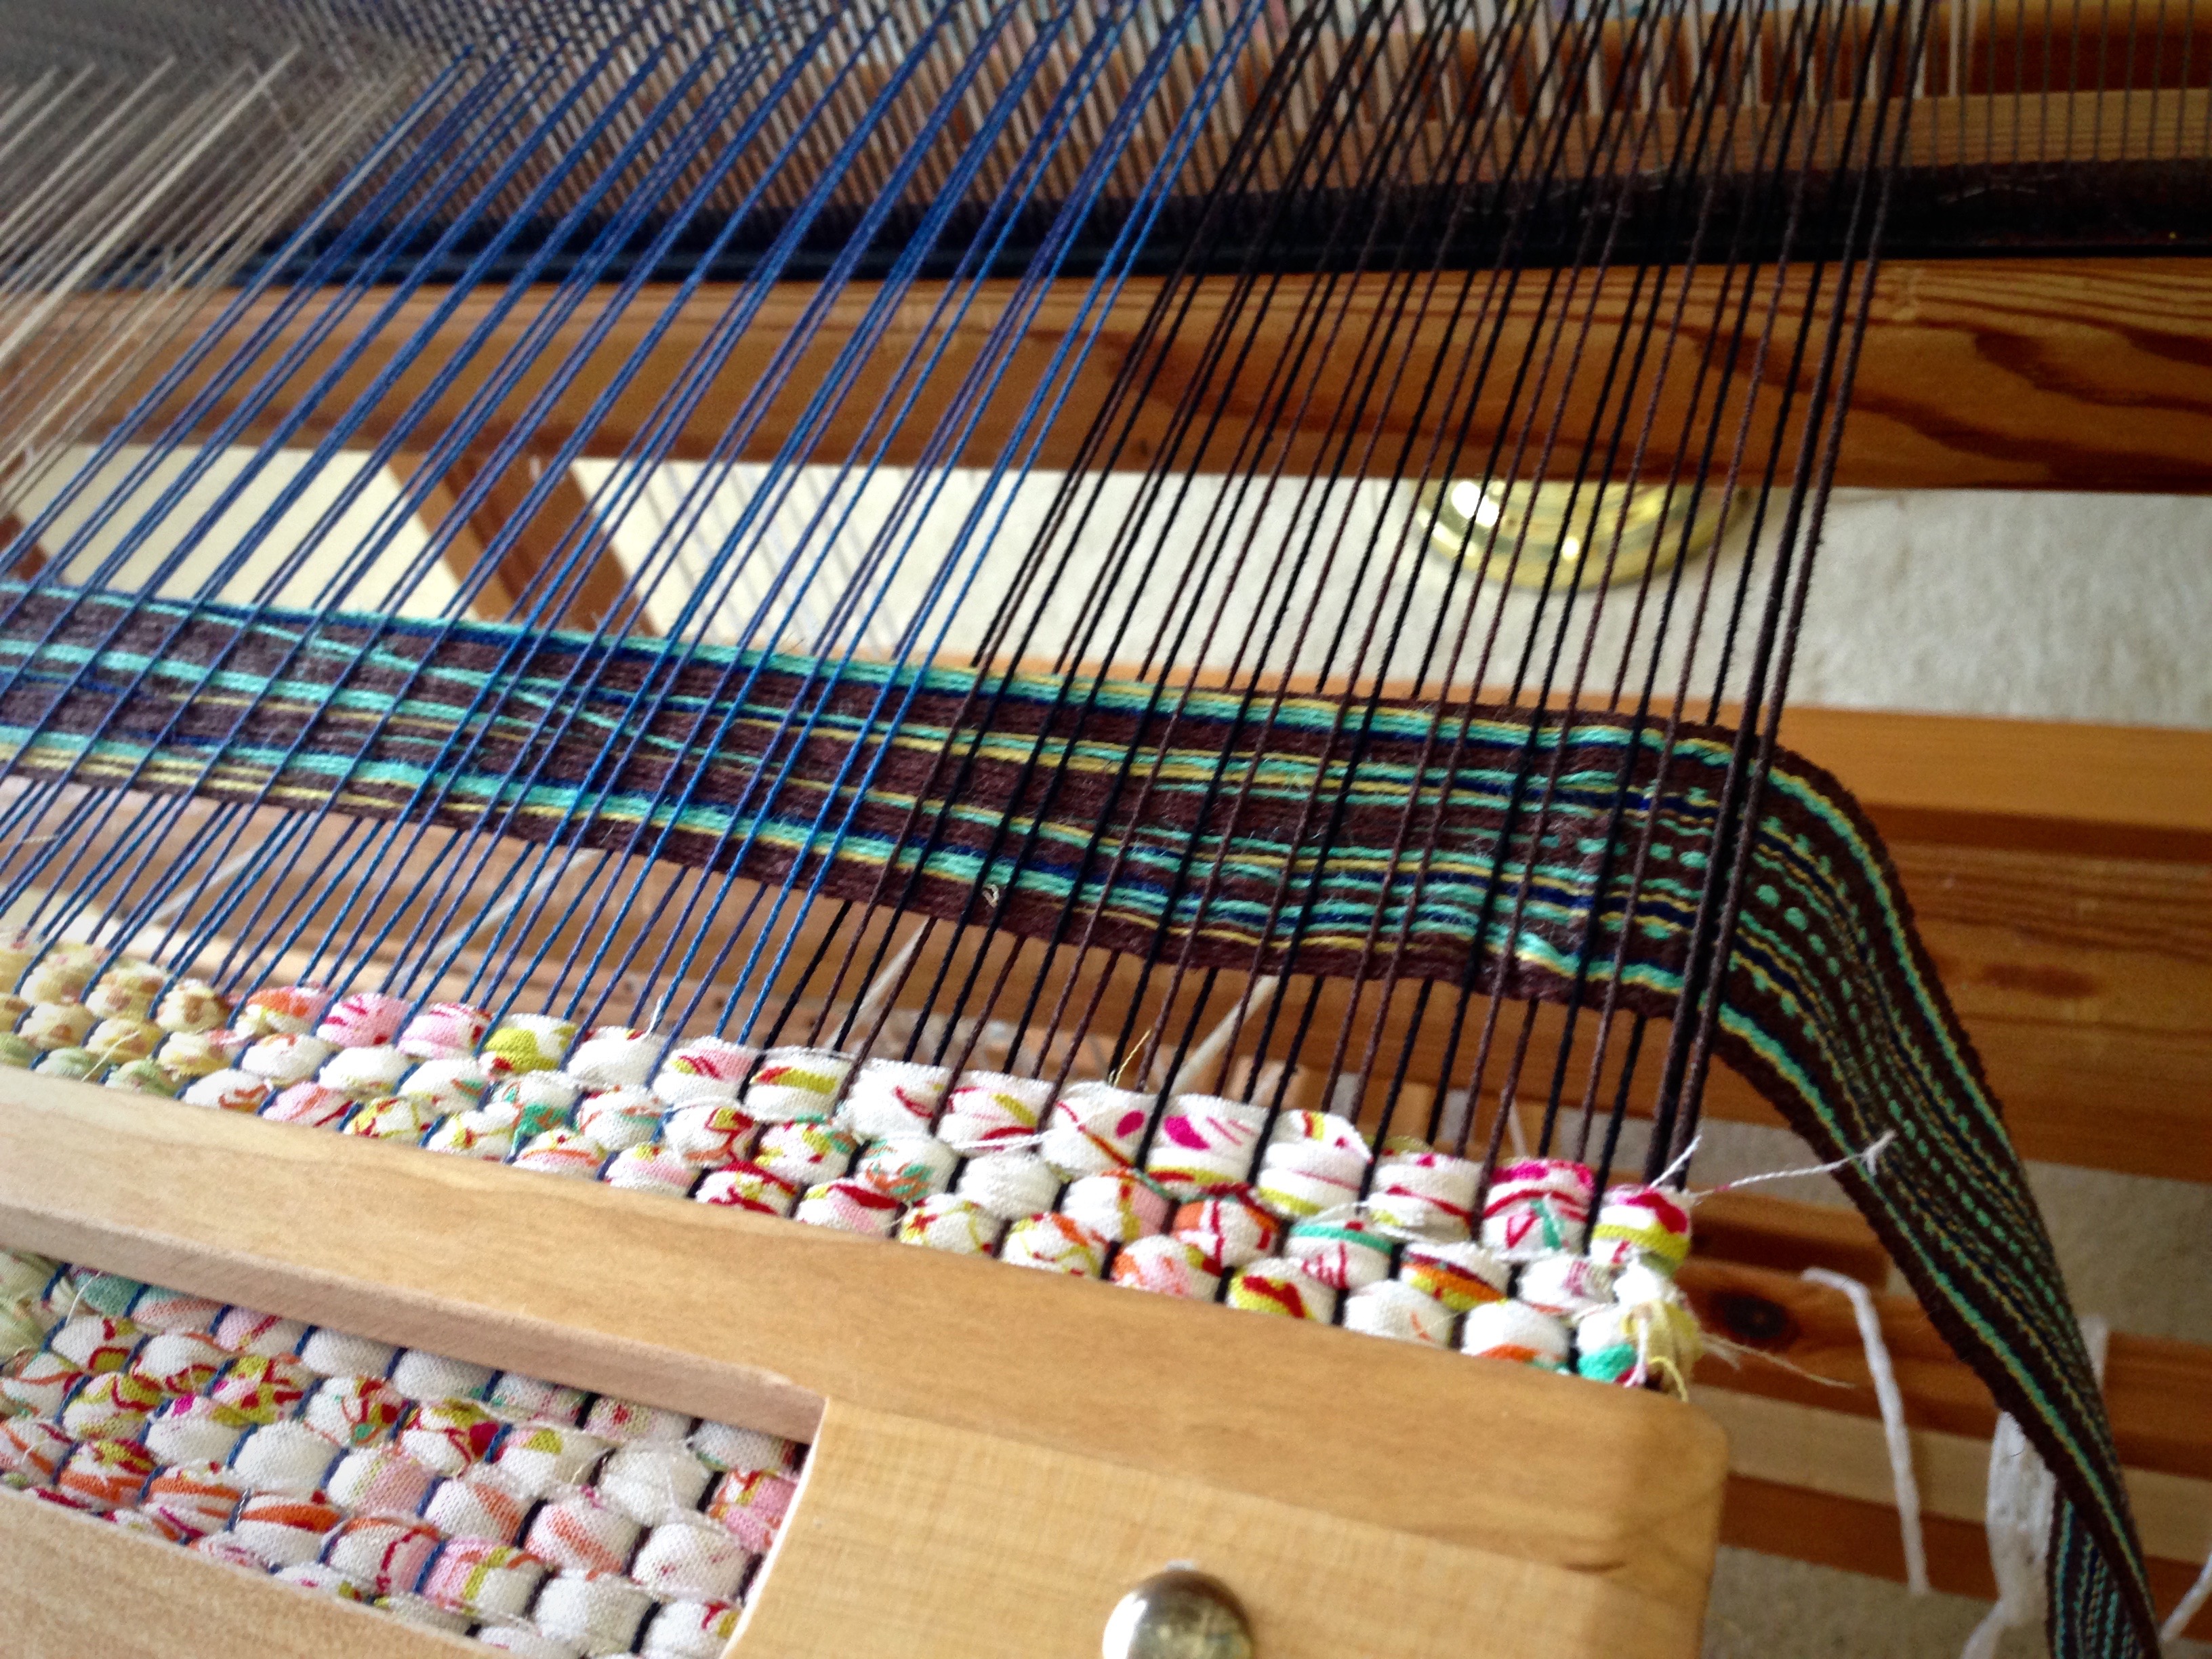
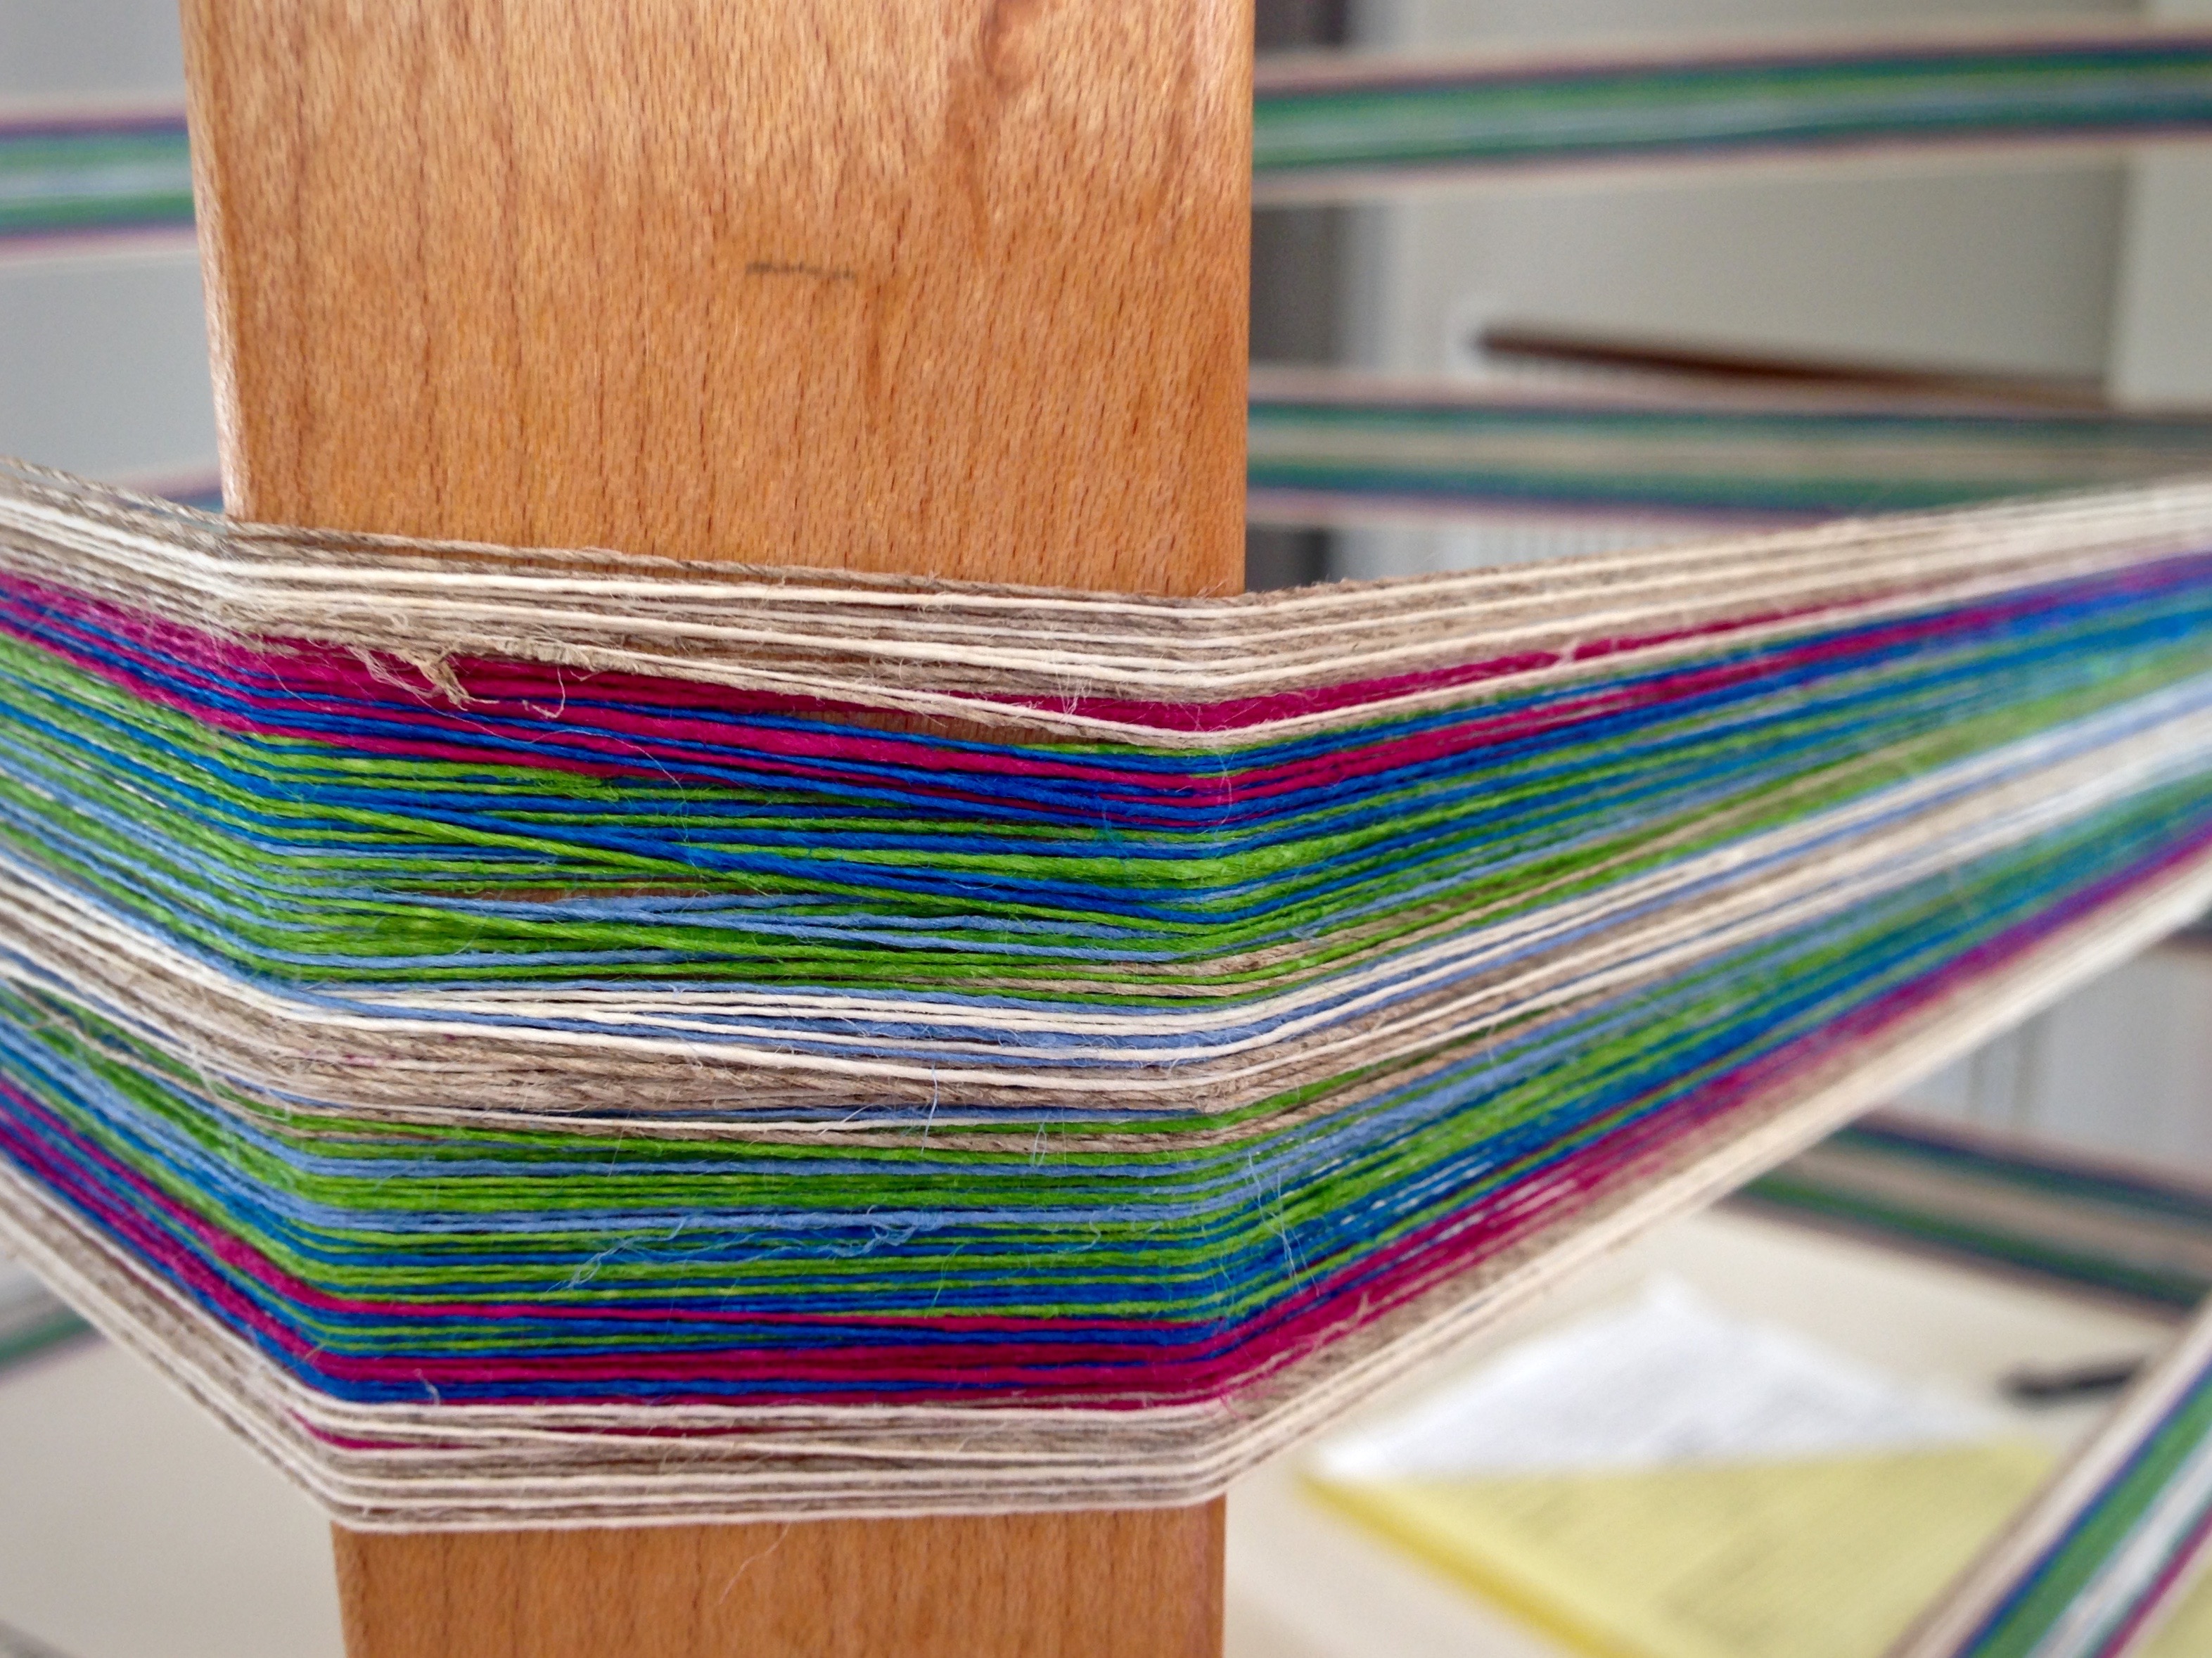
  • Tabs for ends of zipper tape. Cut from handwoven band or piece of fabric with sides folded under.
  • Zipper. Regular, non-separating zipper, as long as, or longer than, bag opening

Steps

  1. Sew bottom three sides of pocket onto lining fabric. Stitch a dividing line on pocket.Adding pocket to lining for bag.
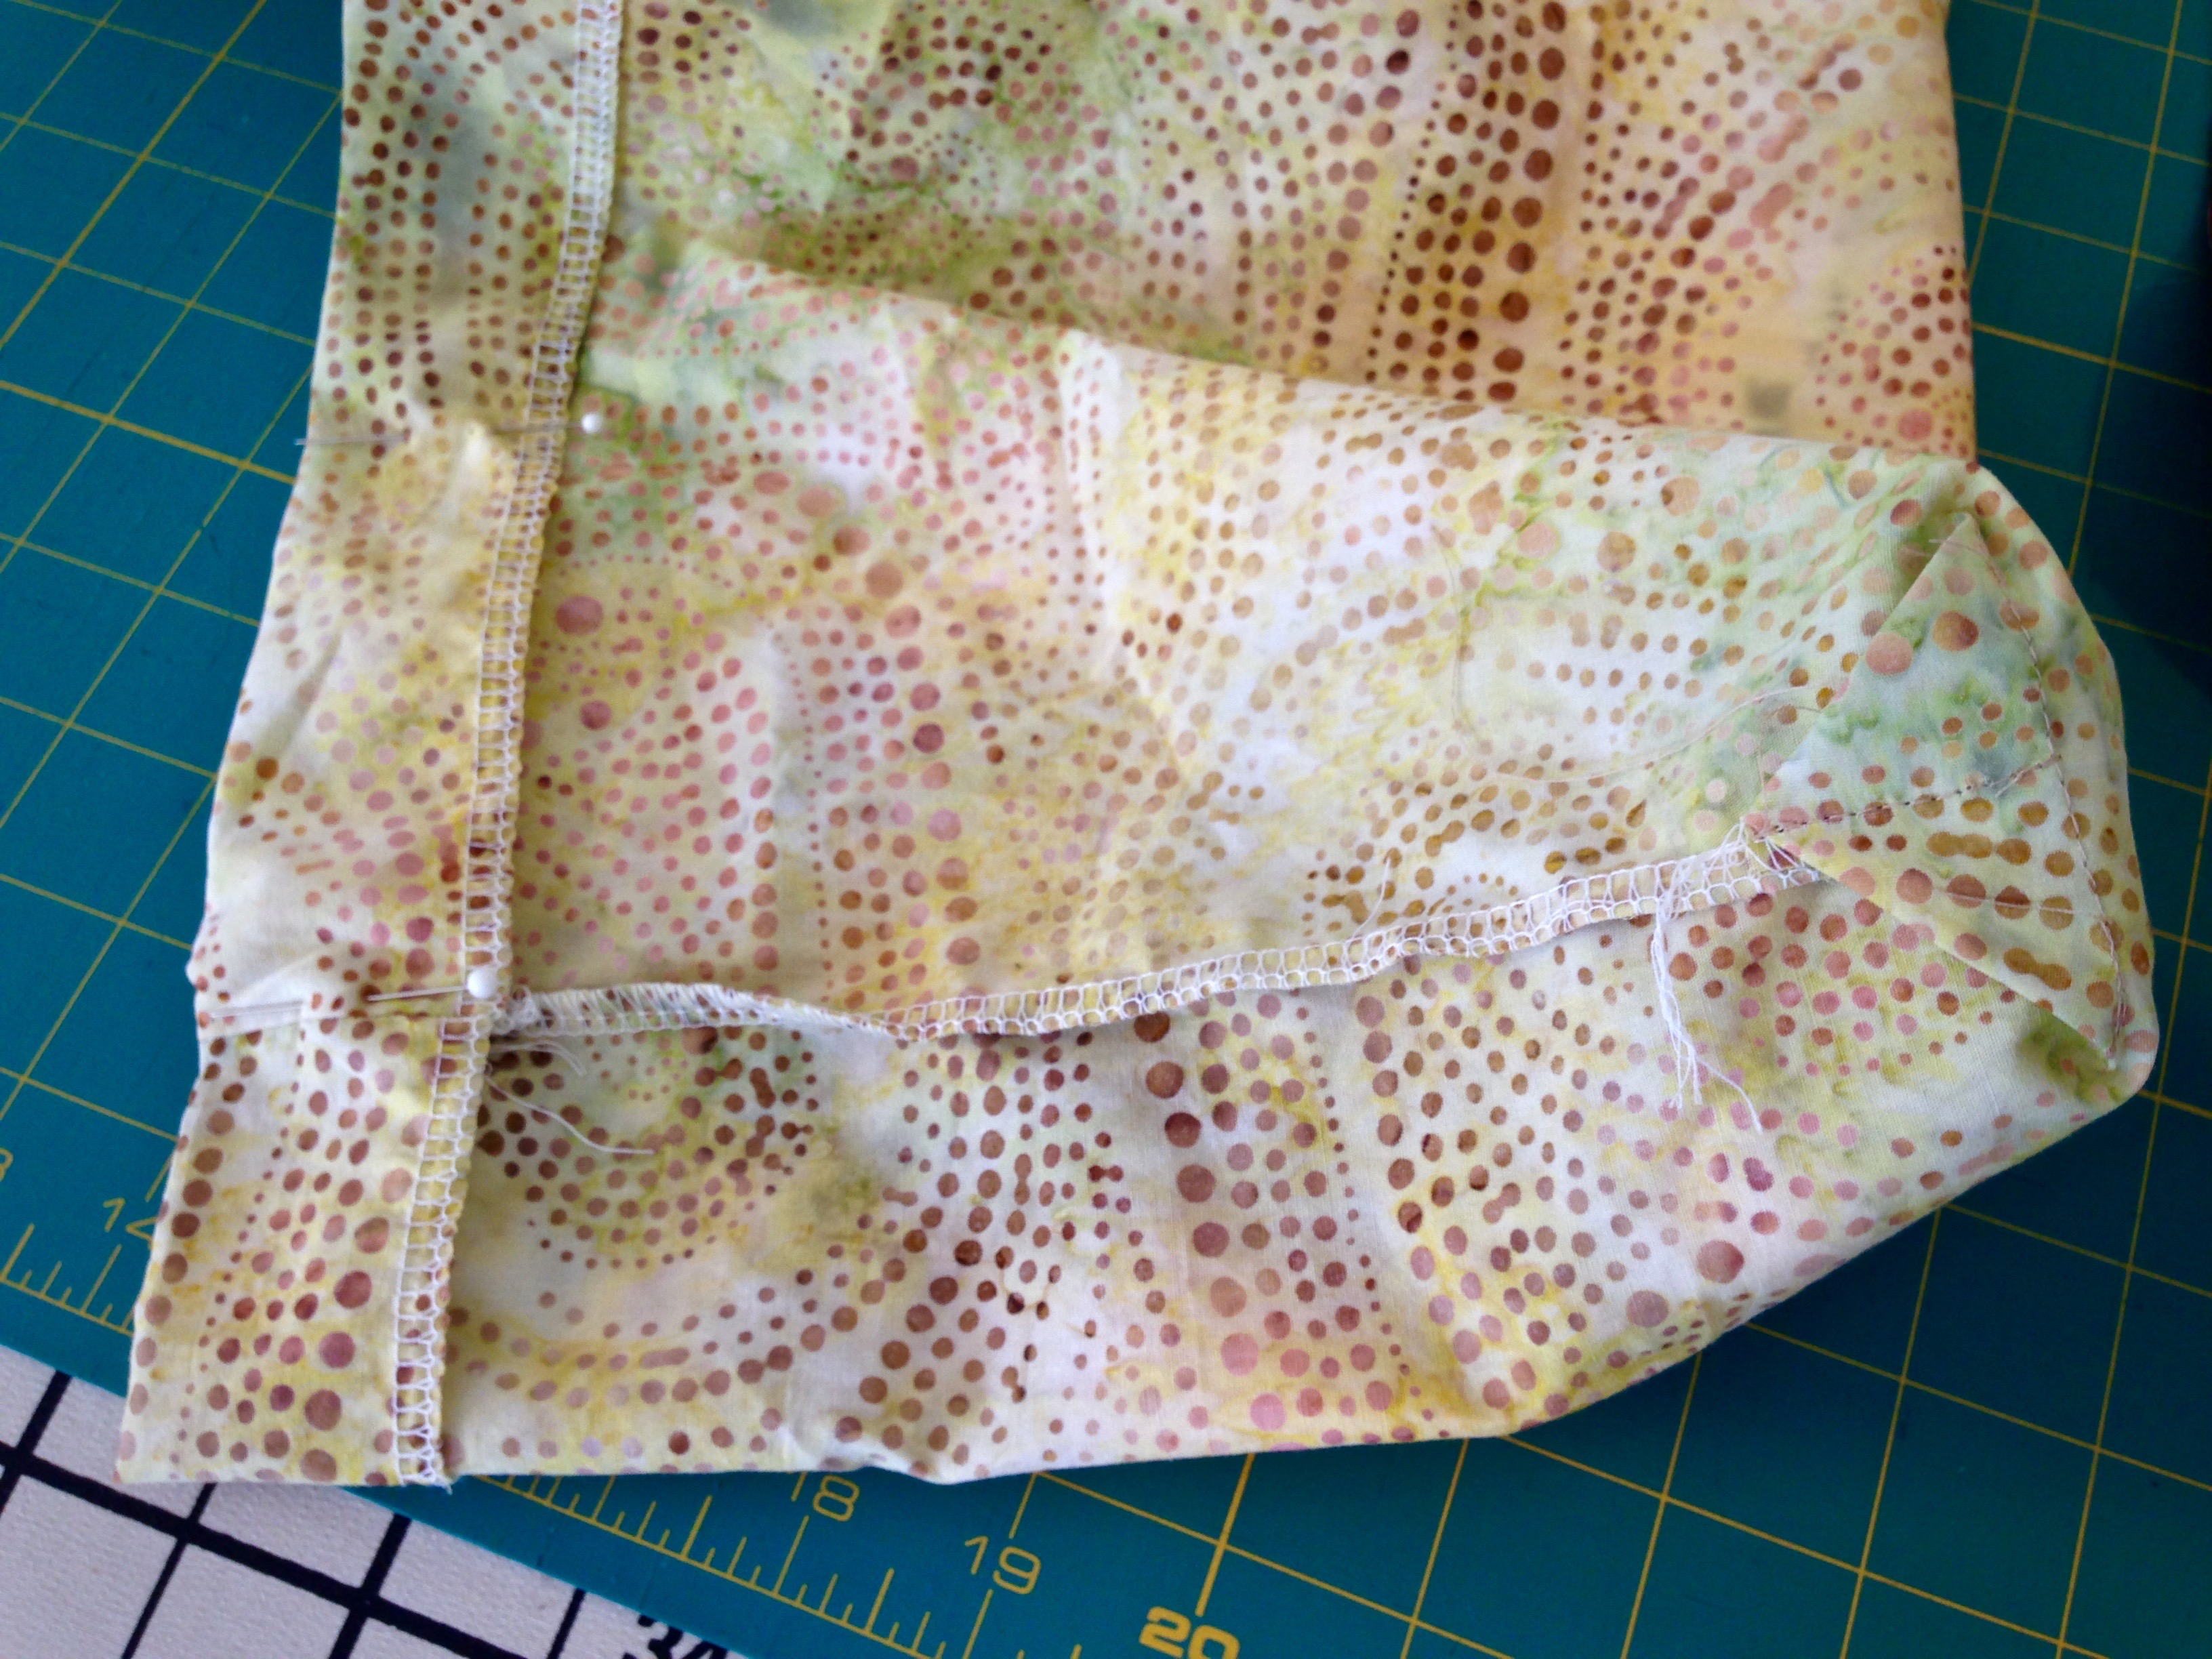
  2. Stitch sides of lining, right sides together. Fold and stitch box corners.Box corners on lining for a bag.
  3. With lining seated in bag, fold down top edge of lining, so that folded edge fits just inside top edge of bag. Pin folded edge of lining and remove from bag. Set aside. Fitting lining for a handwoven bag.
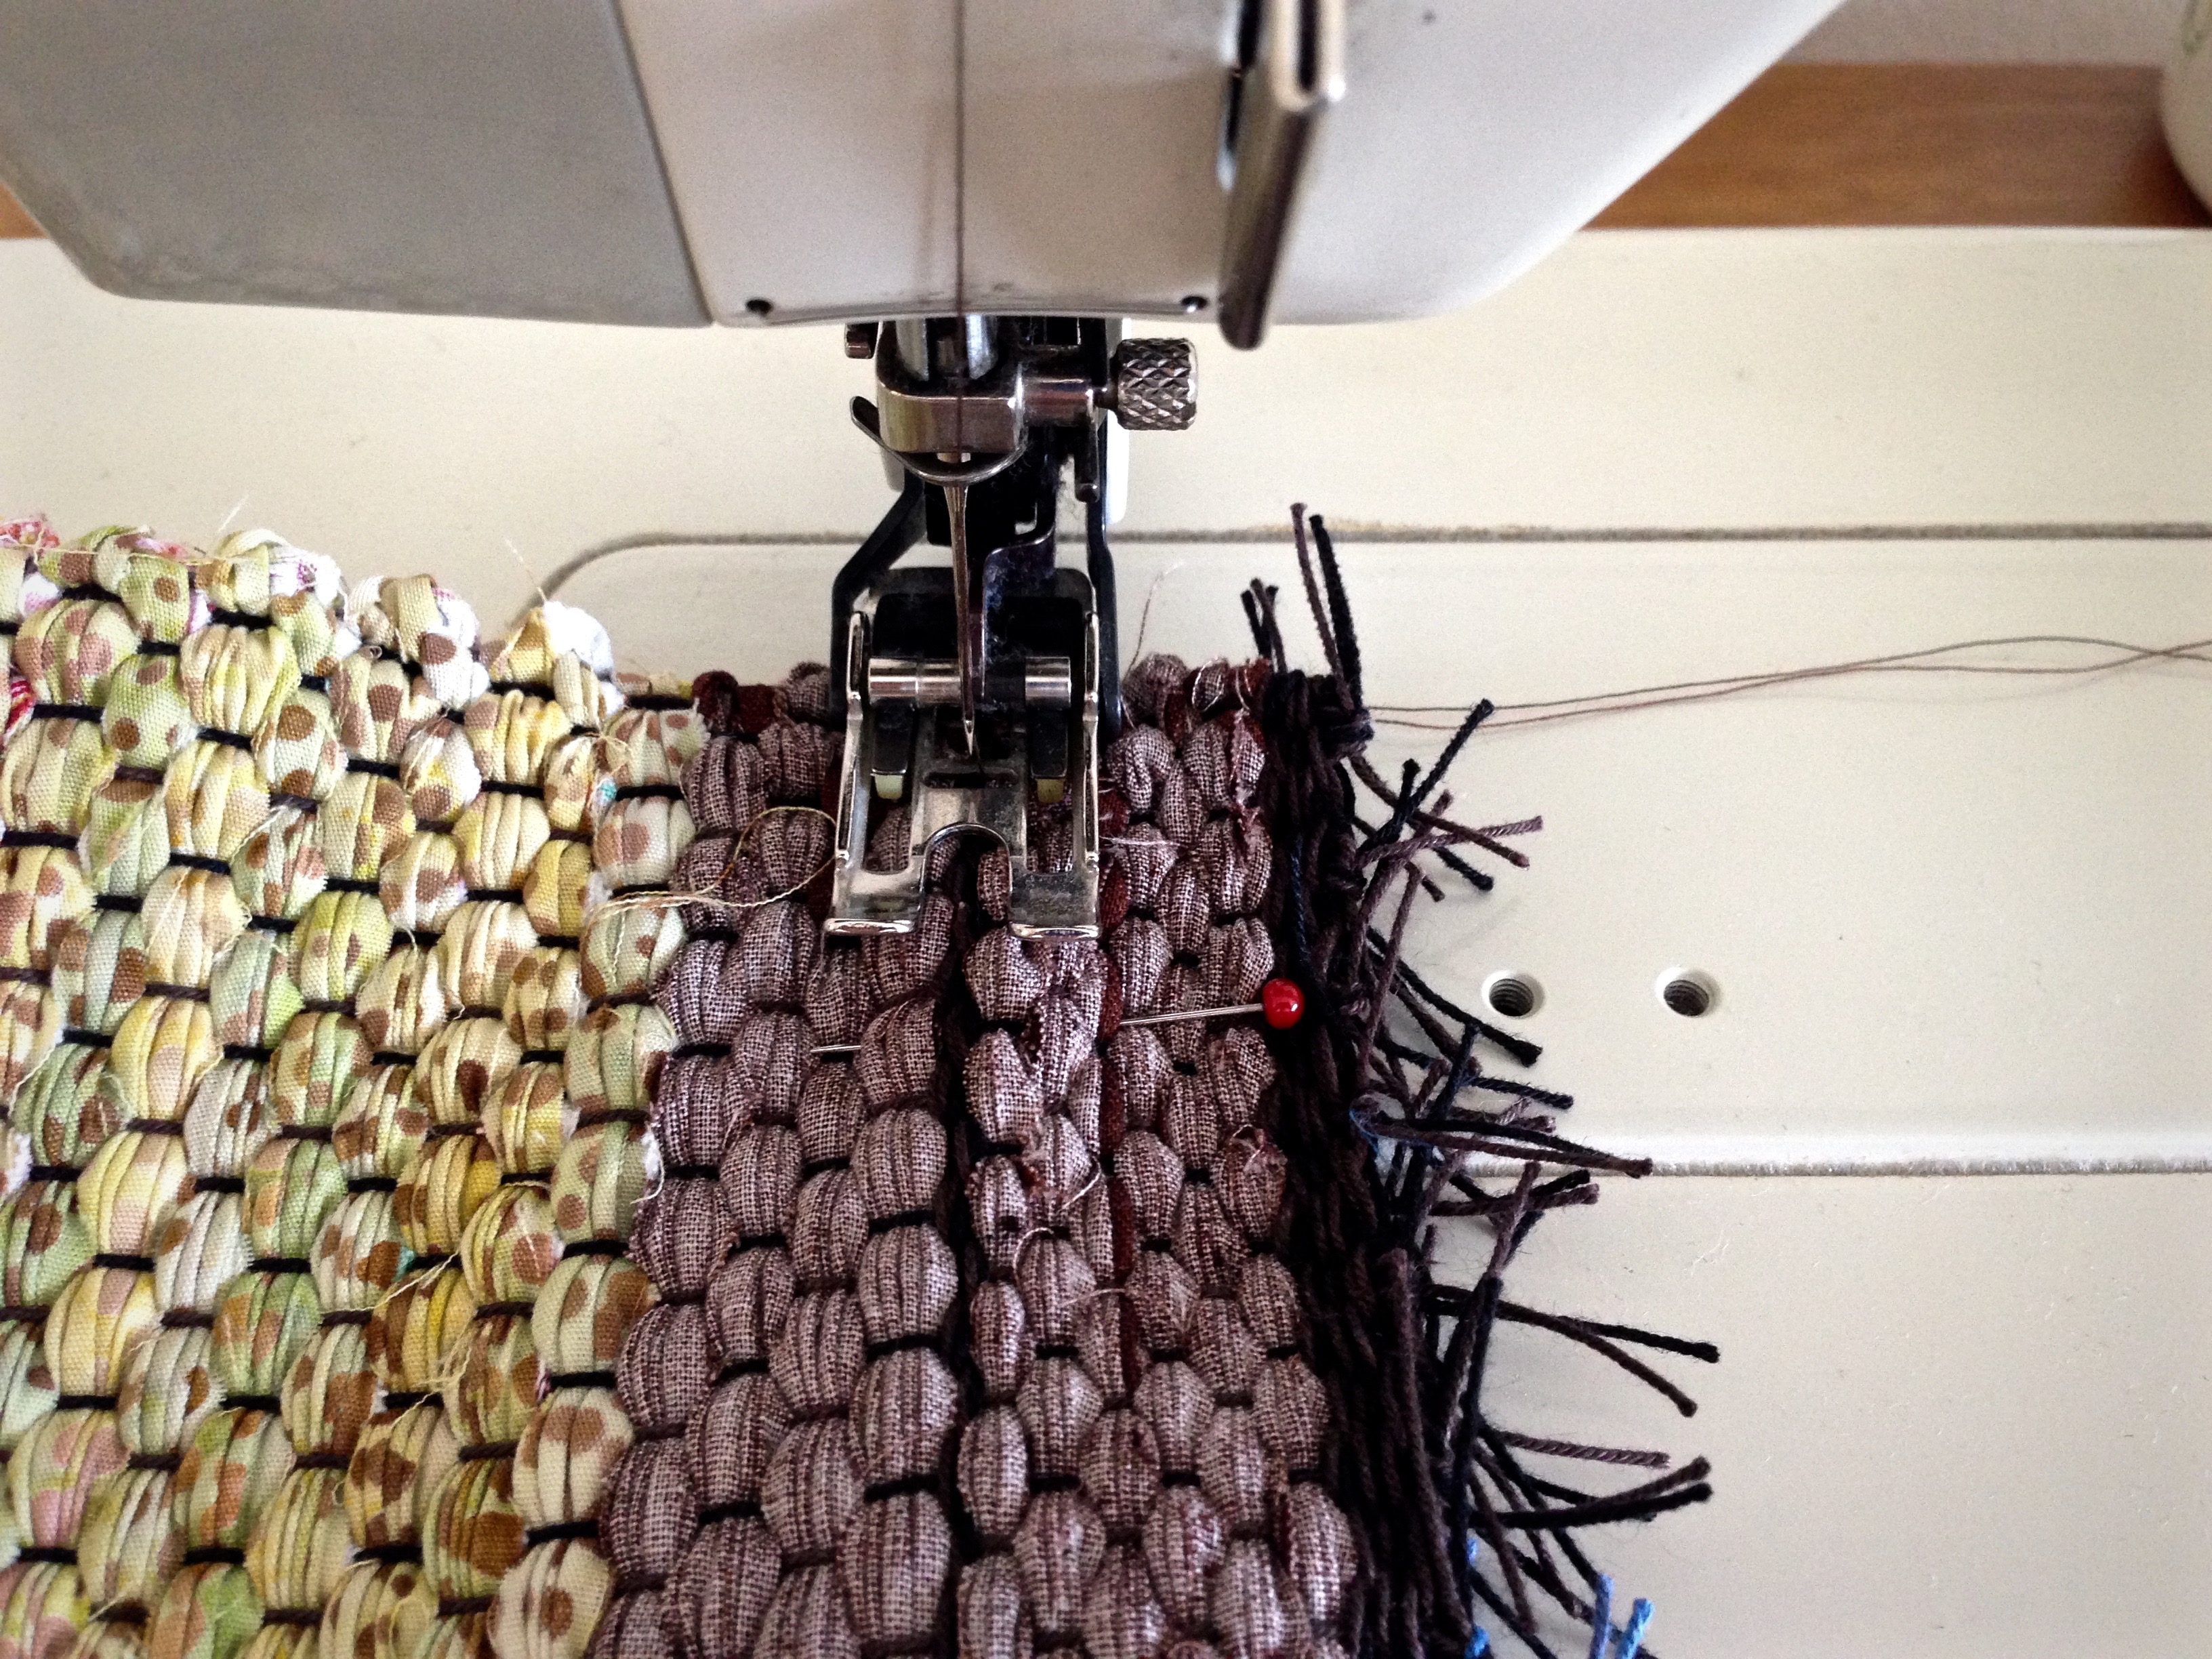
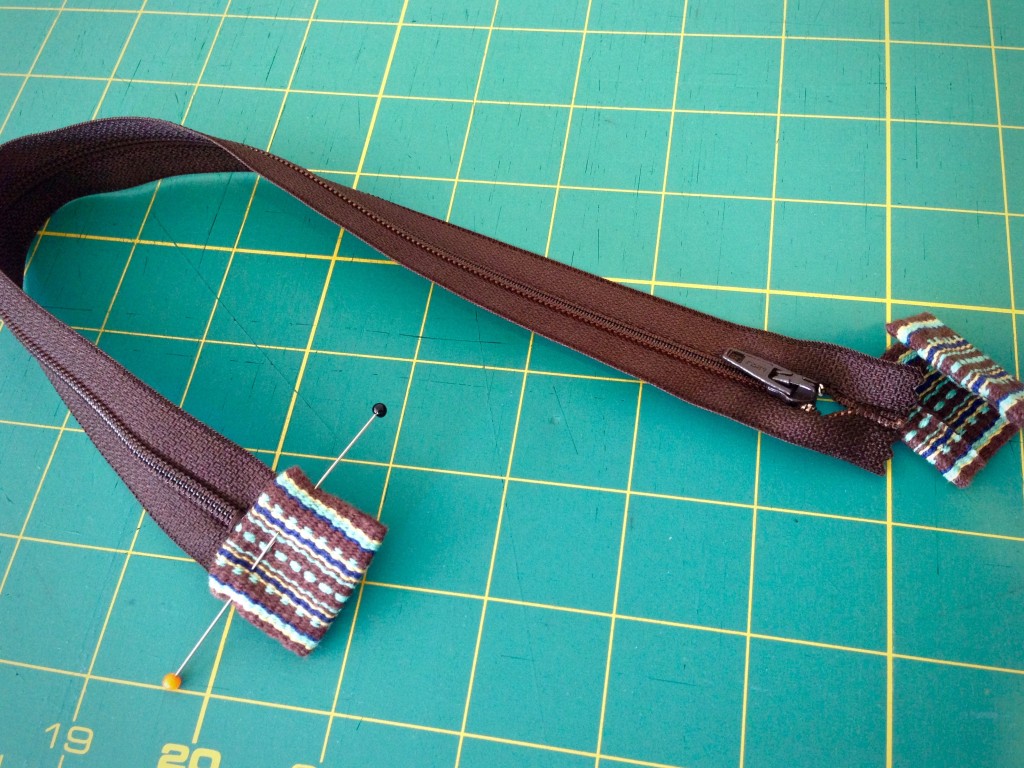
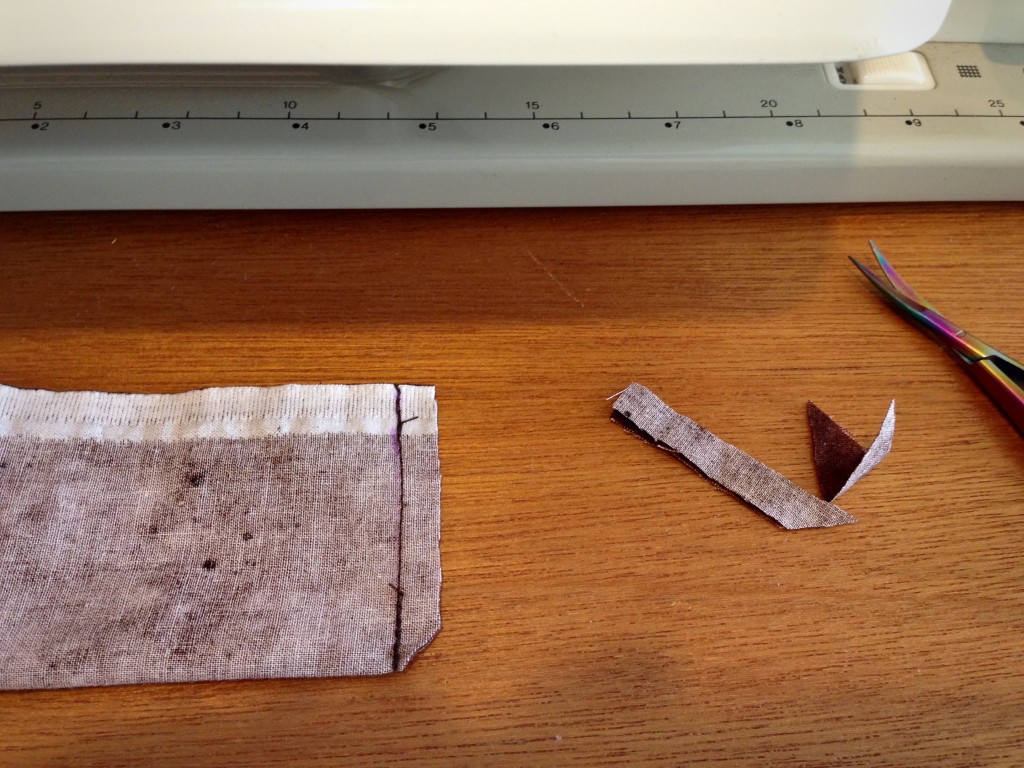
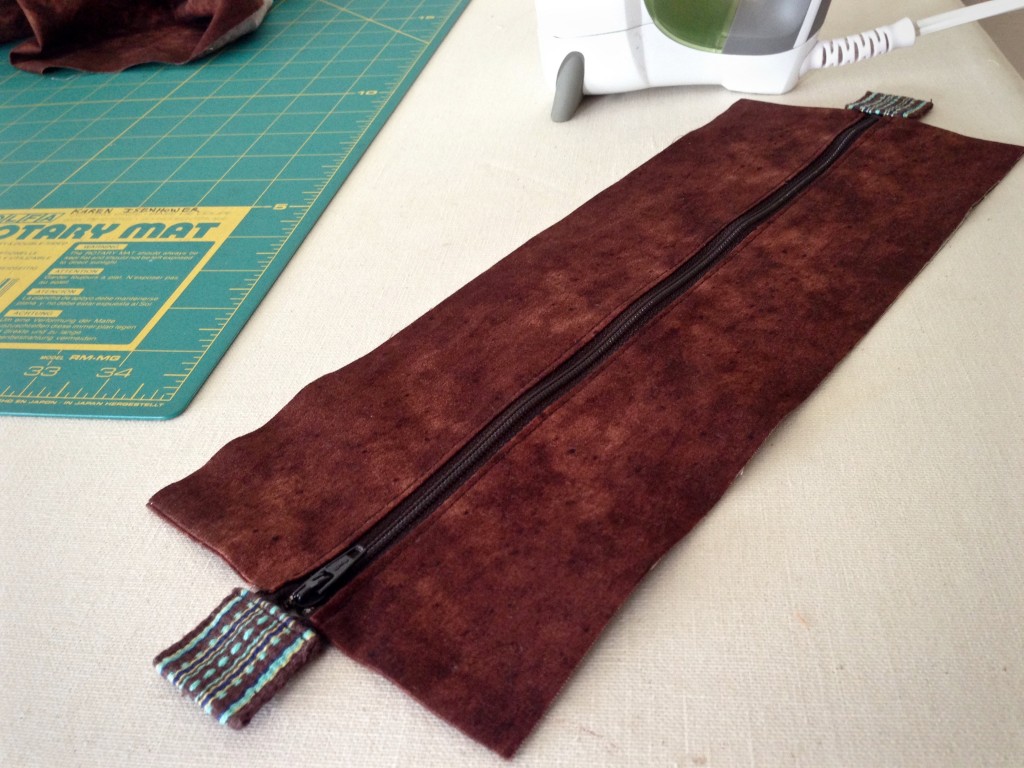
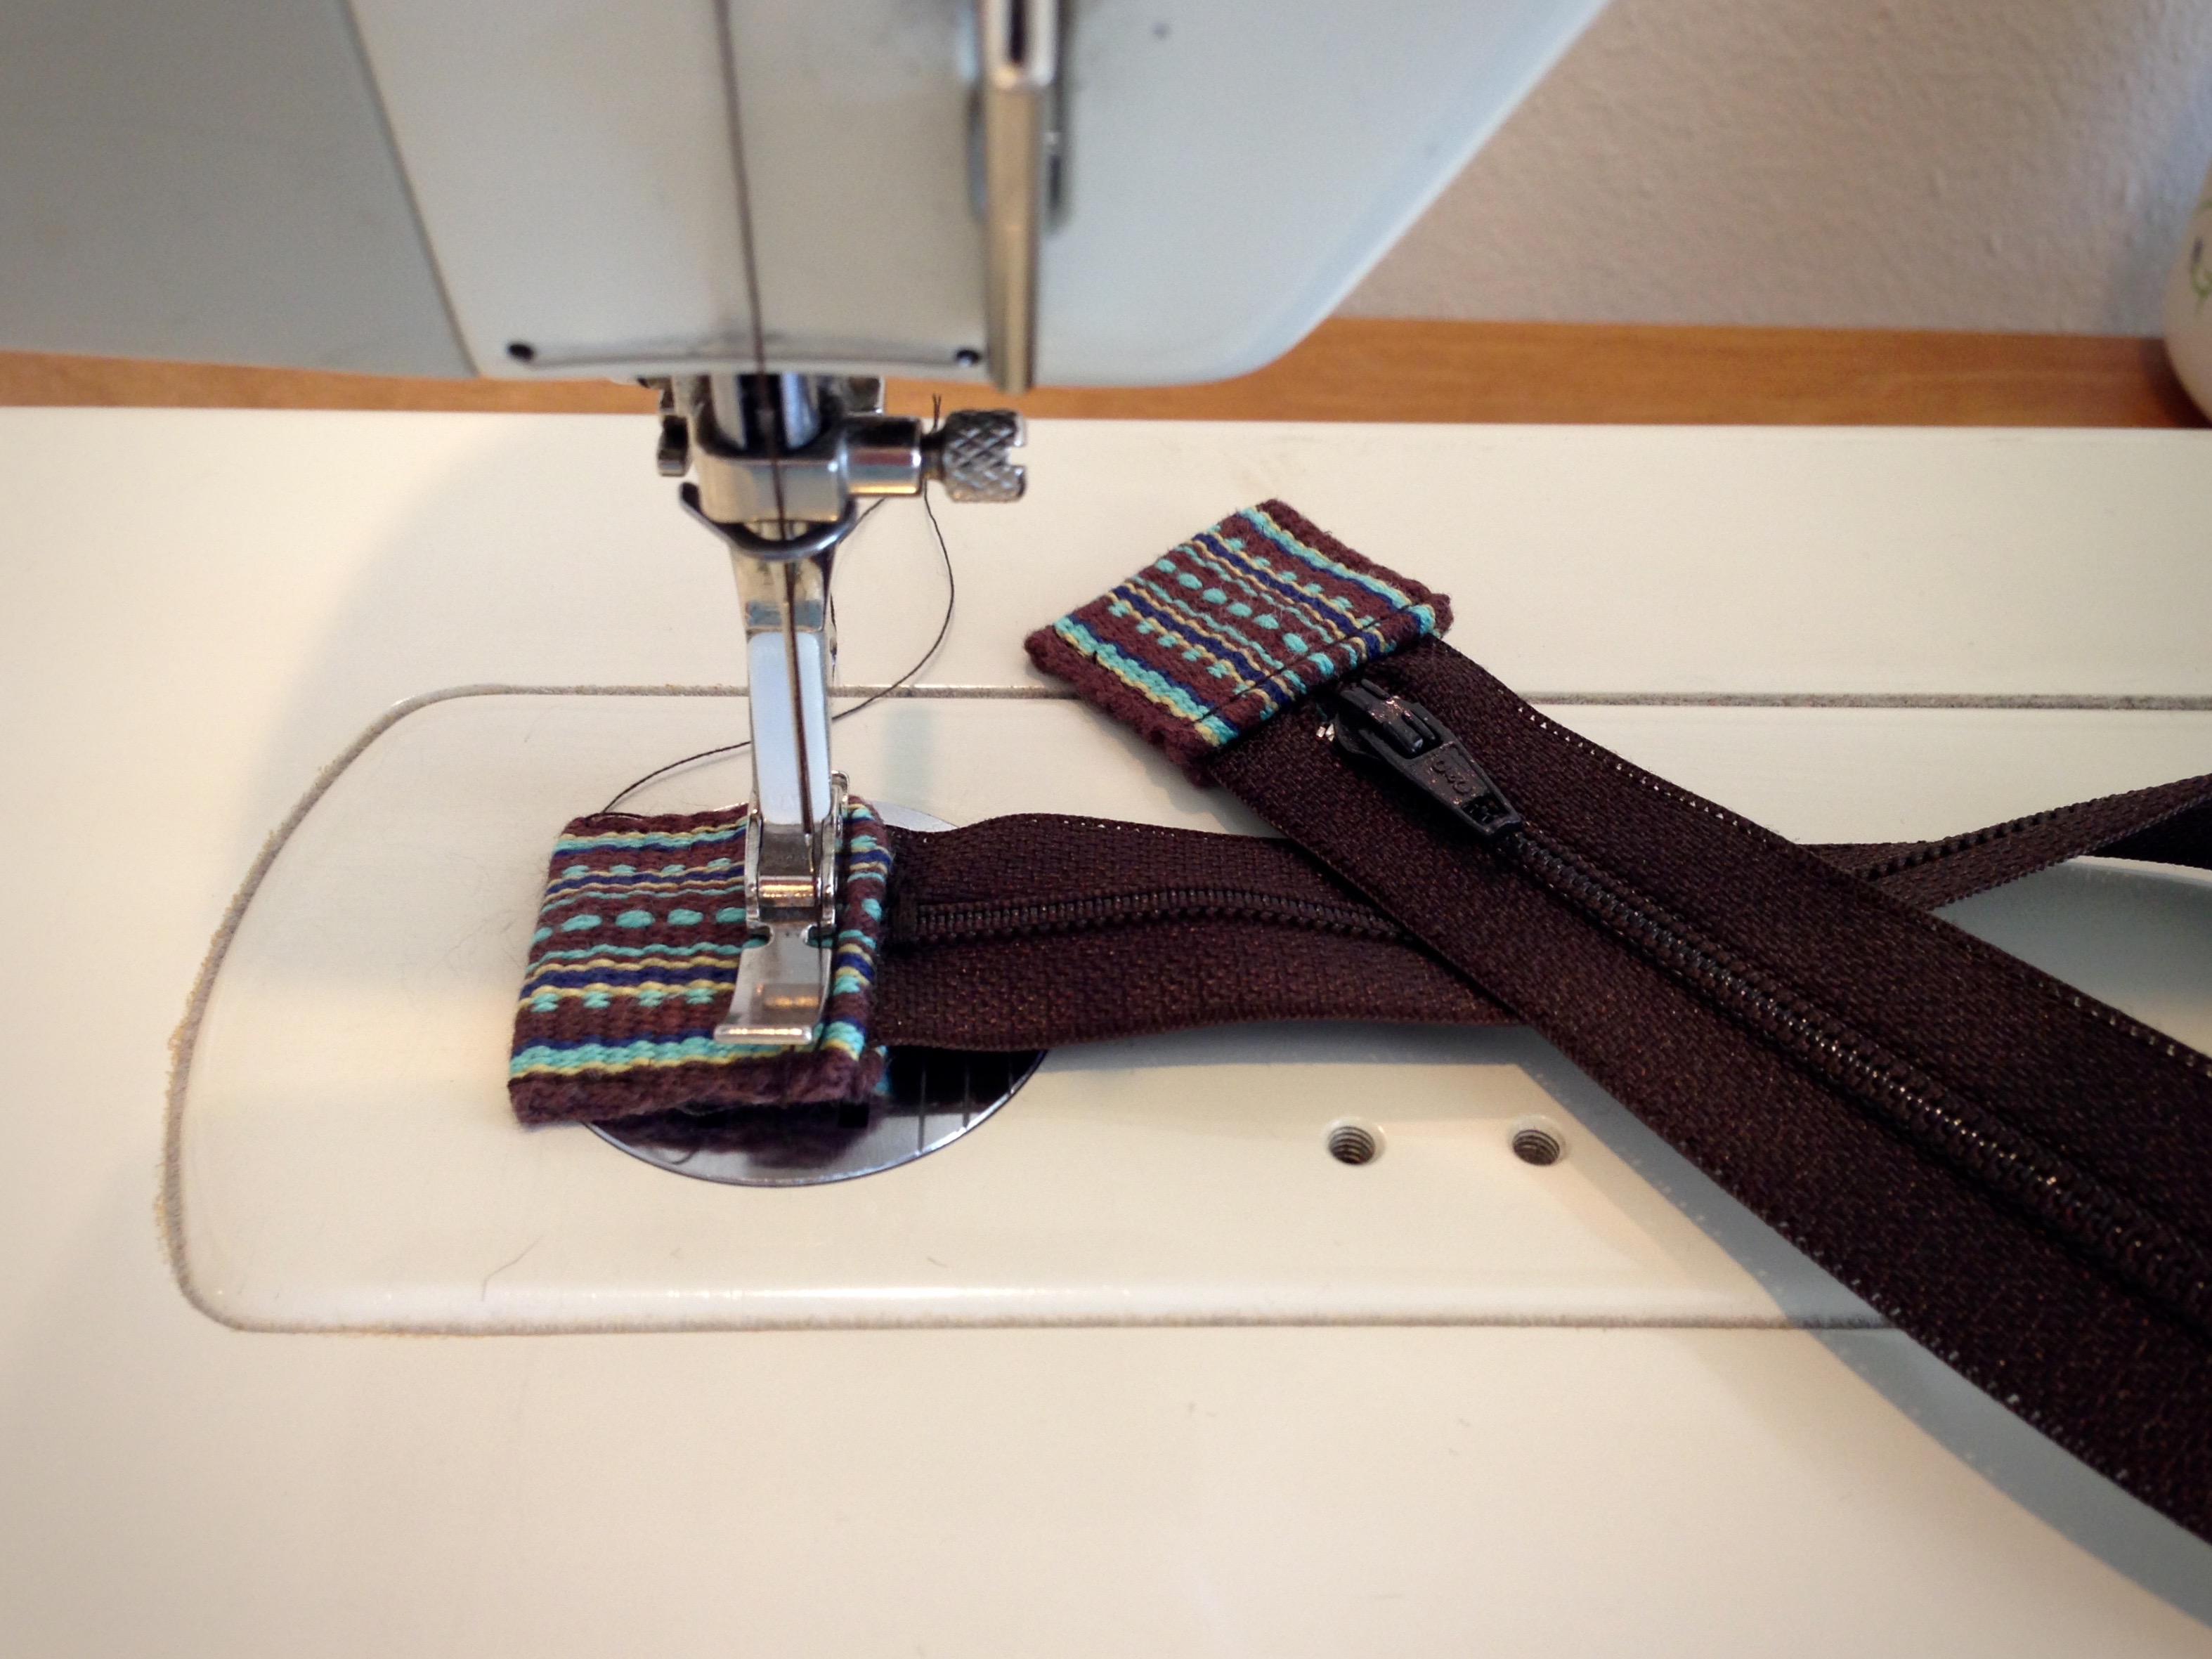
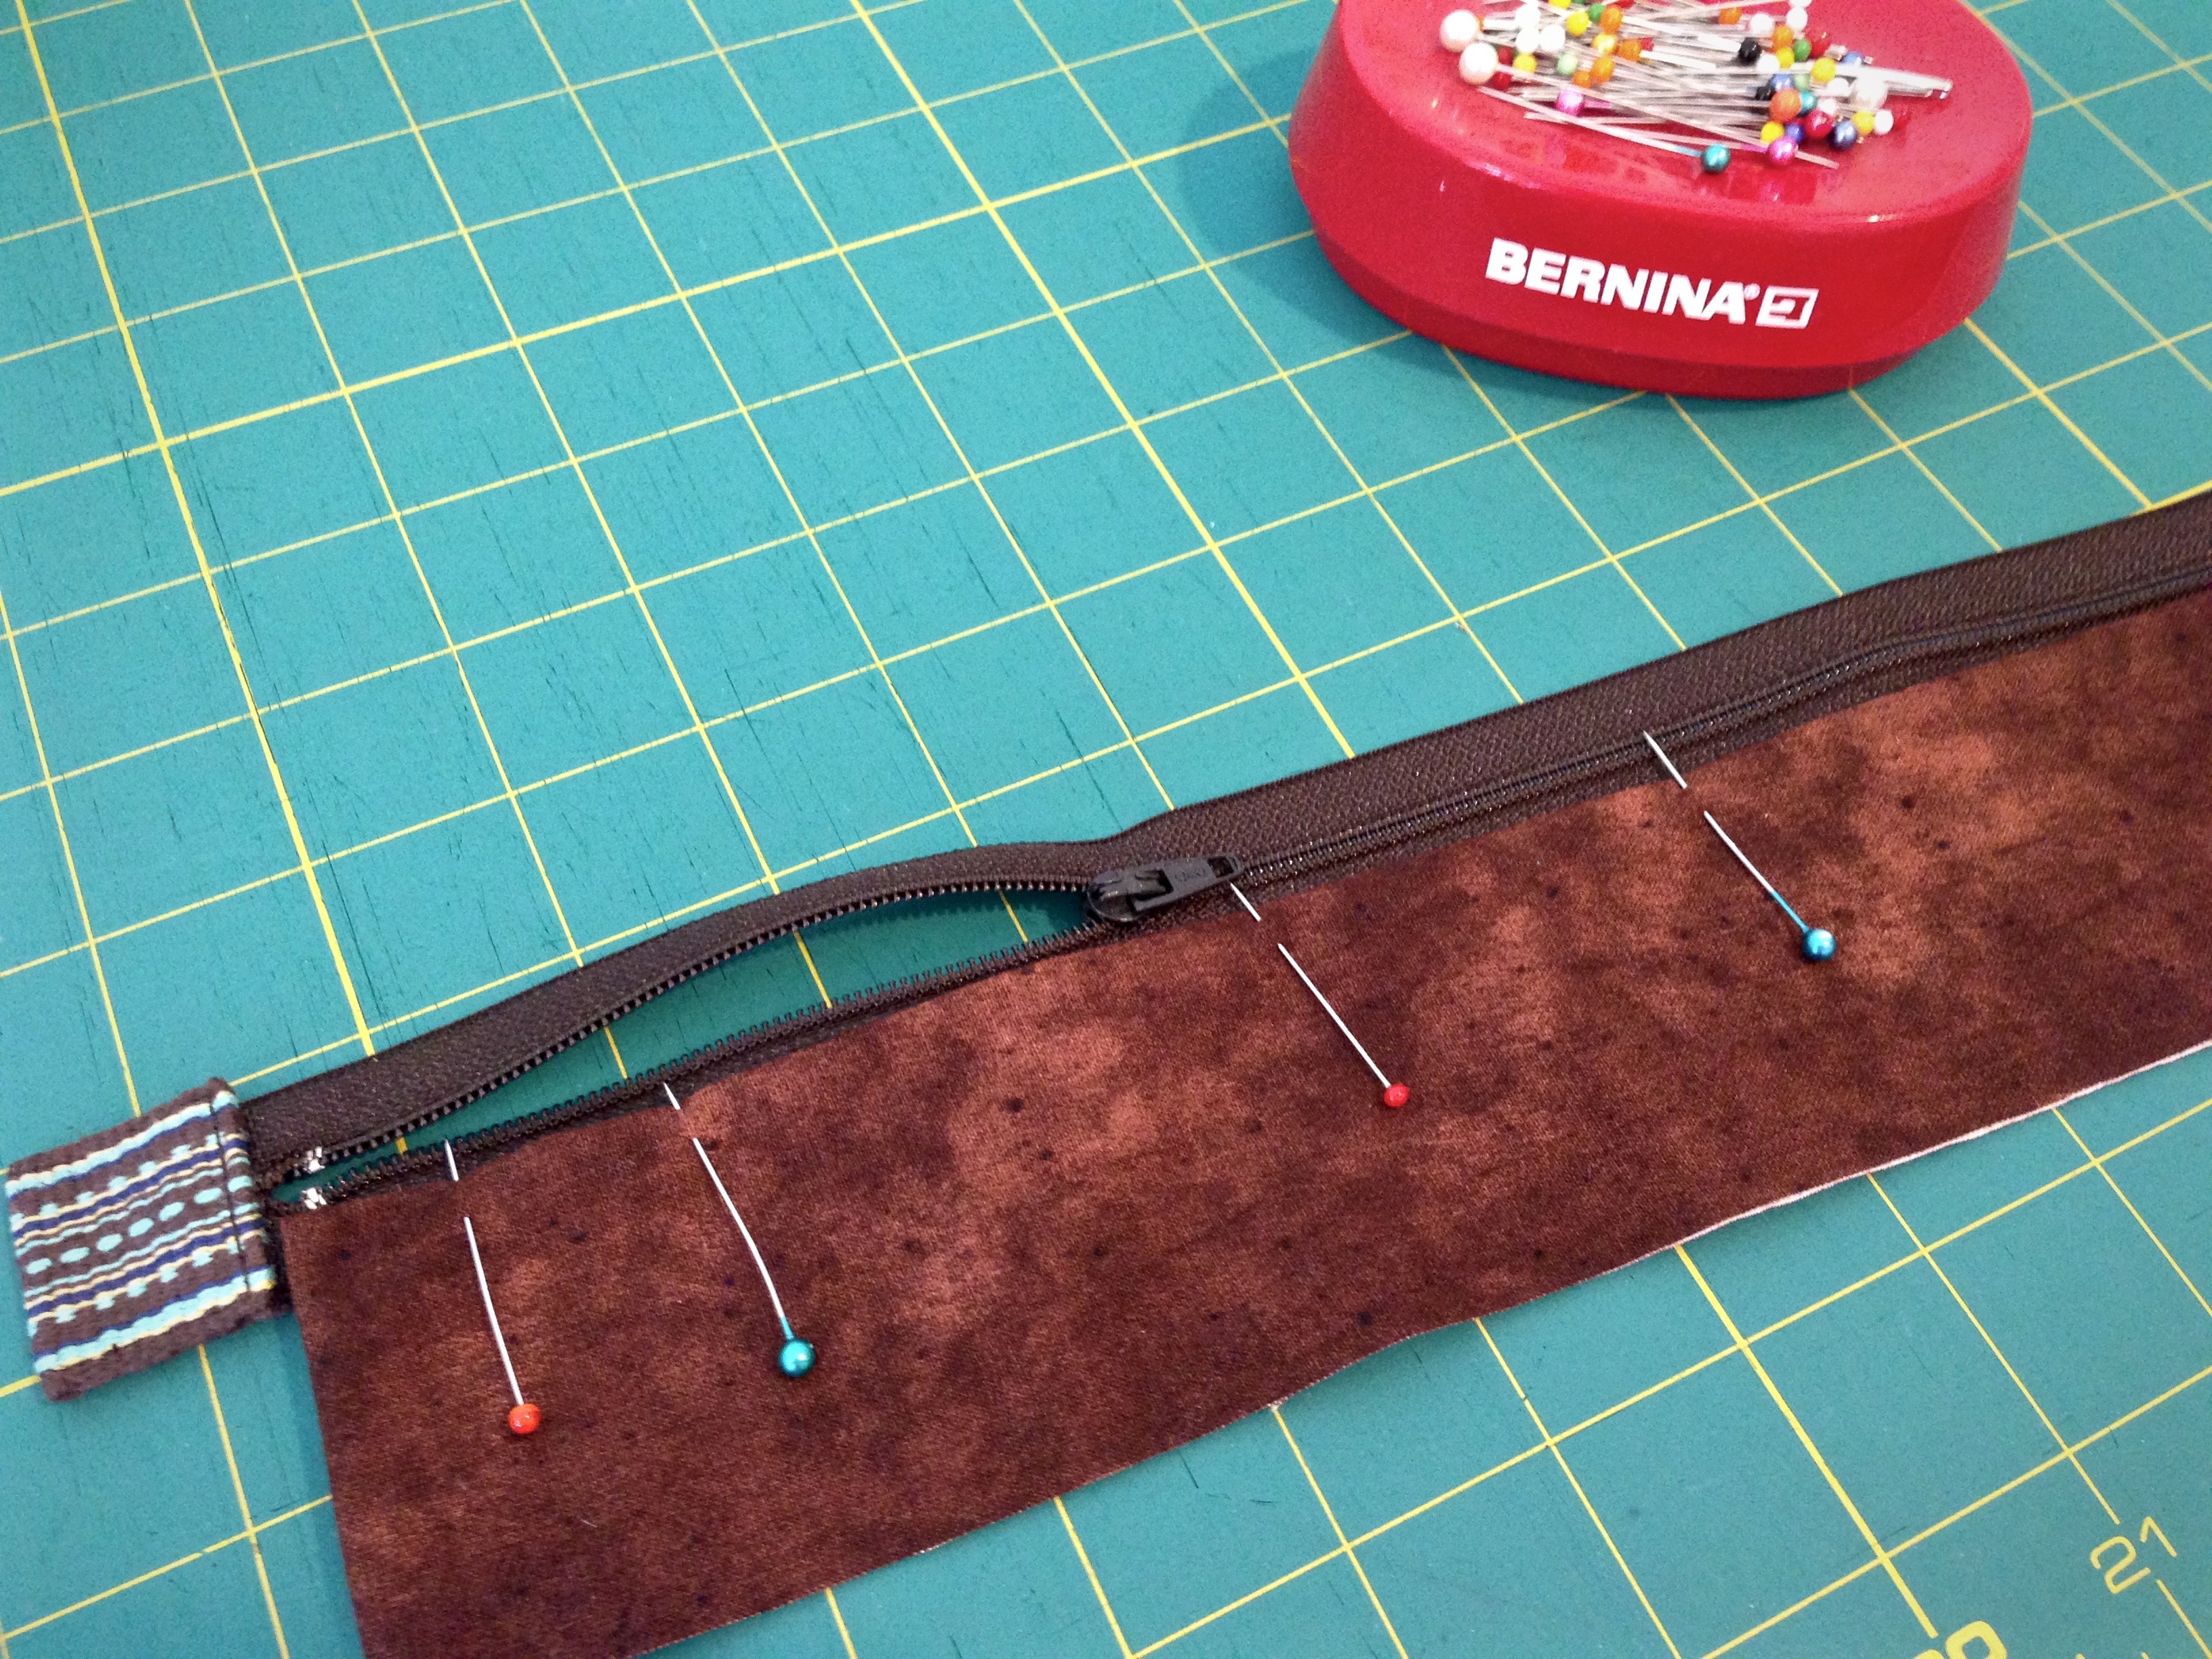
  4. Bar tack top ends of zipper tape together. Bar tack over end of desired zipper length. Cut off excess. Cut a tab from a woven band, or from fabric with sides folded in, to fold over each end of zipper tape. Use zipper foot to stitch tabs over zipper tape ends. Preparing zipper to add to bag.
    Handwoven tabs for ends of zipper tape.
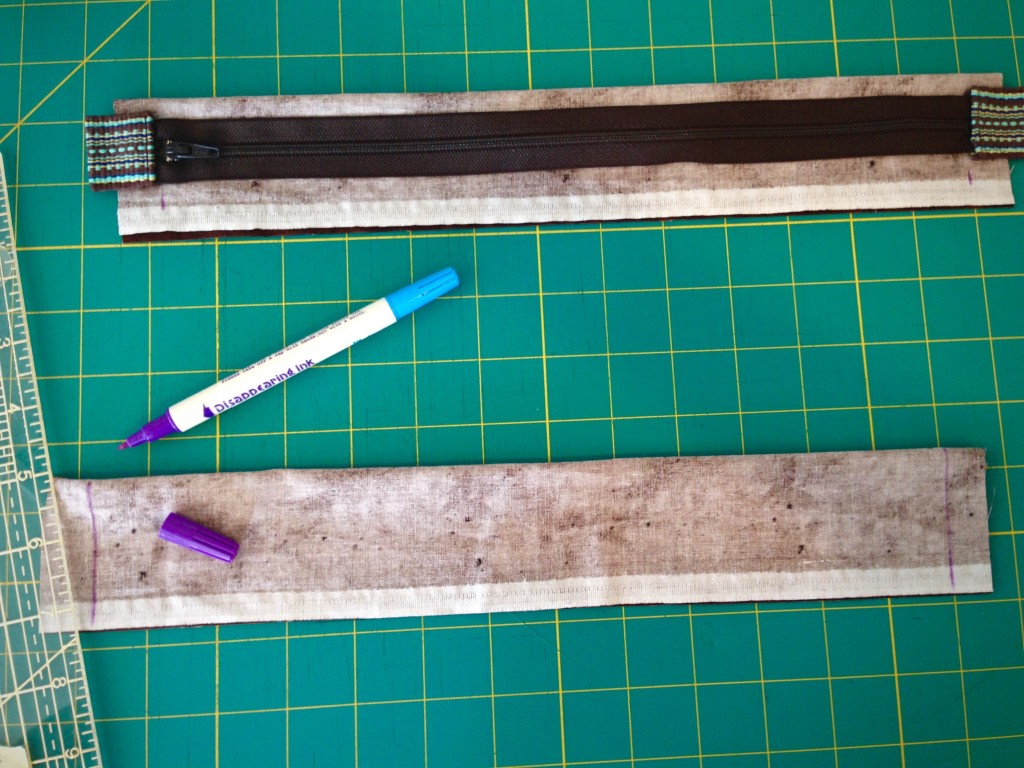
  5. For zipper insert, cut two pieces of complementary fabric 4 1/2″ wide by the length of the zipper, plus 1″. Making zipper insert for top of bag. Tutorial with pics.
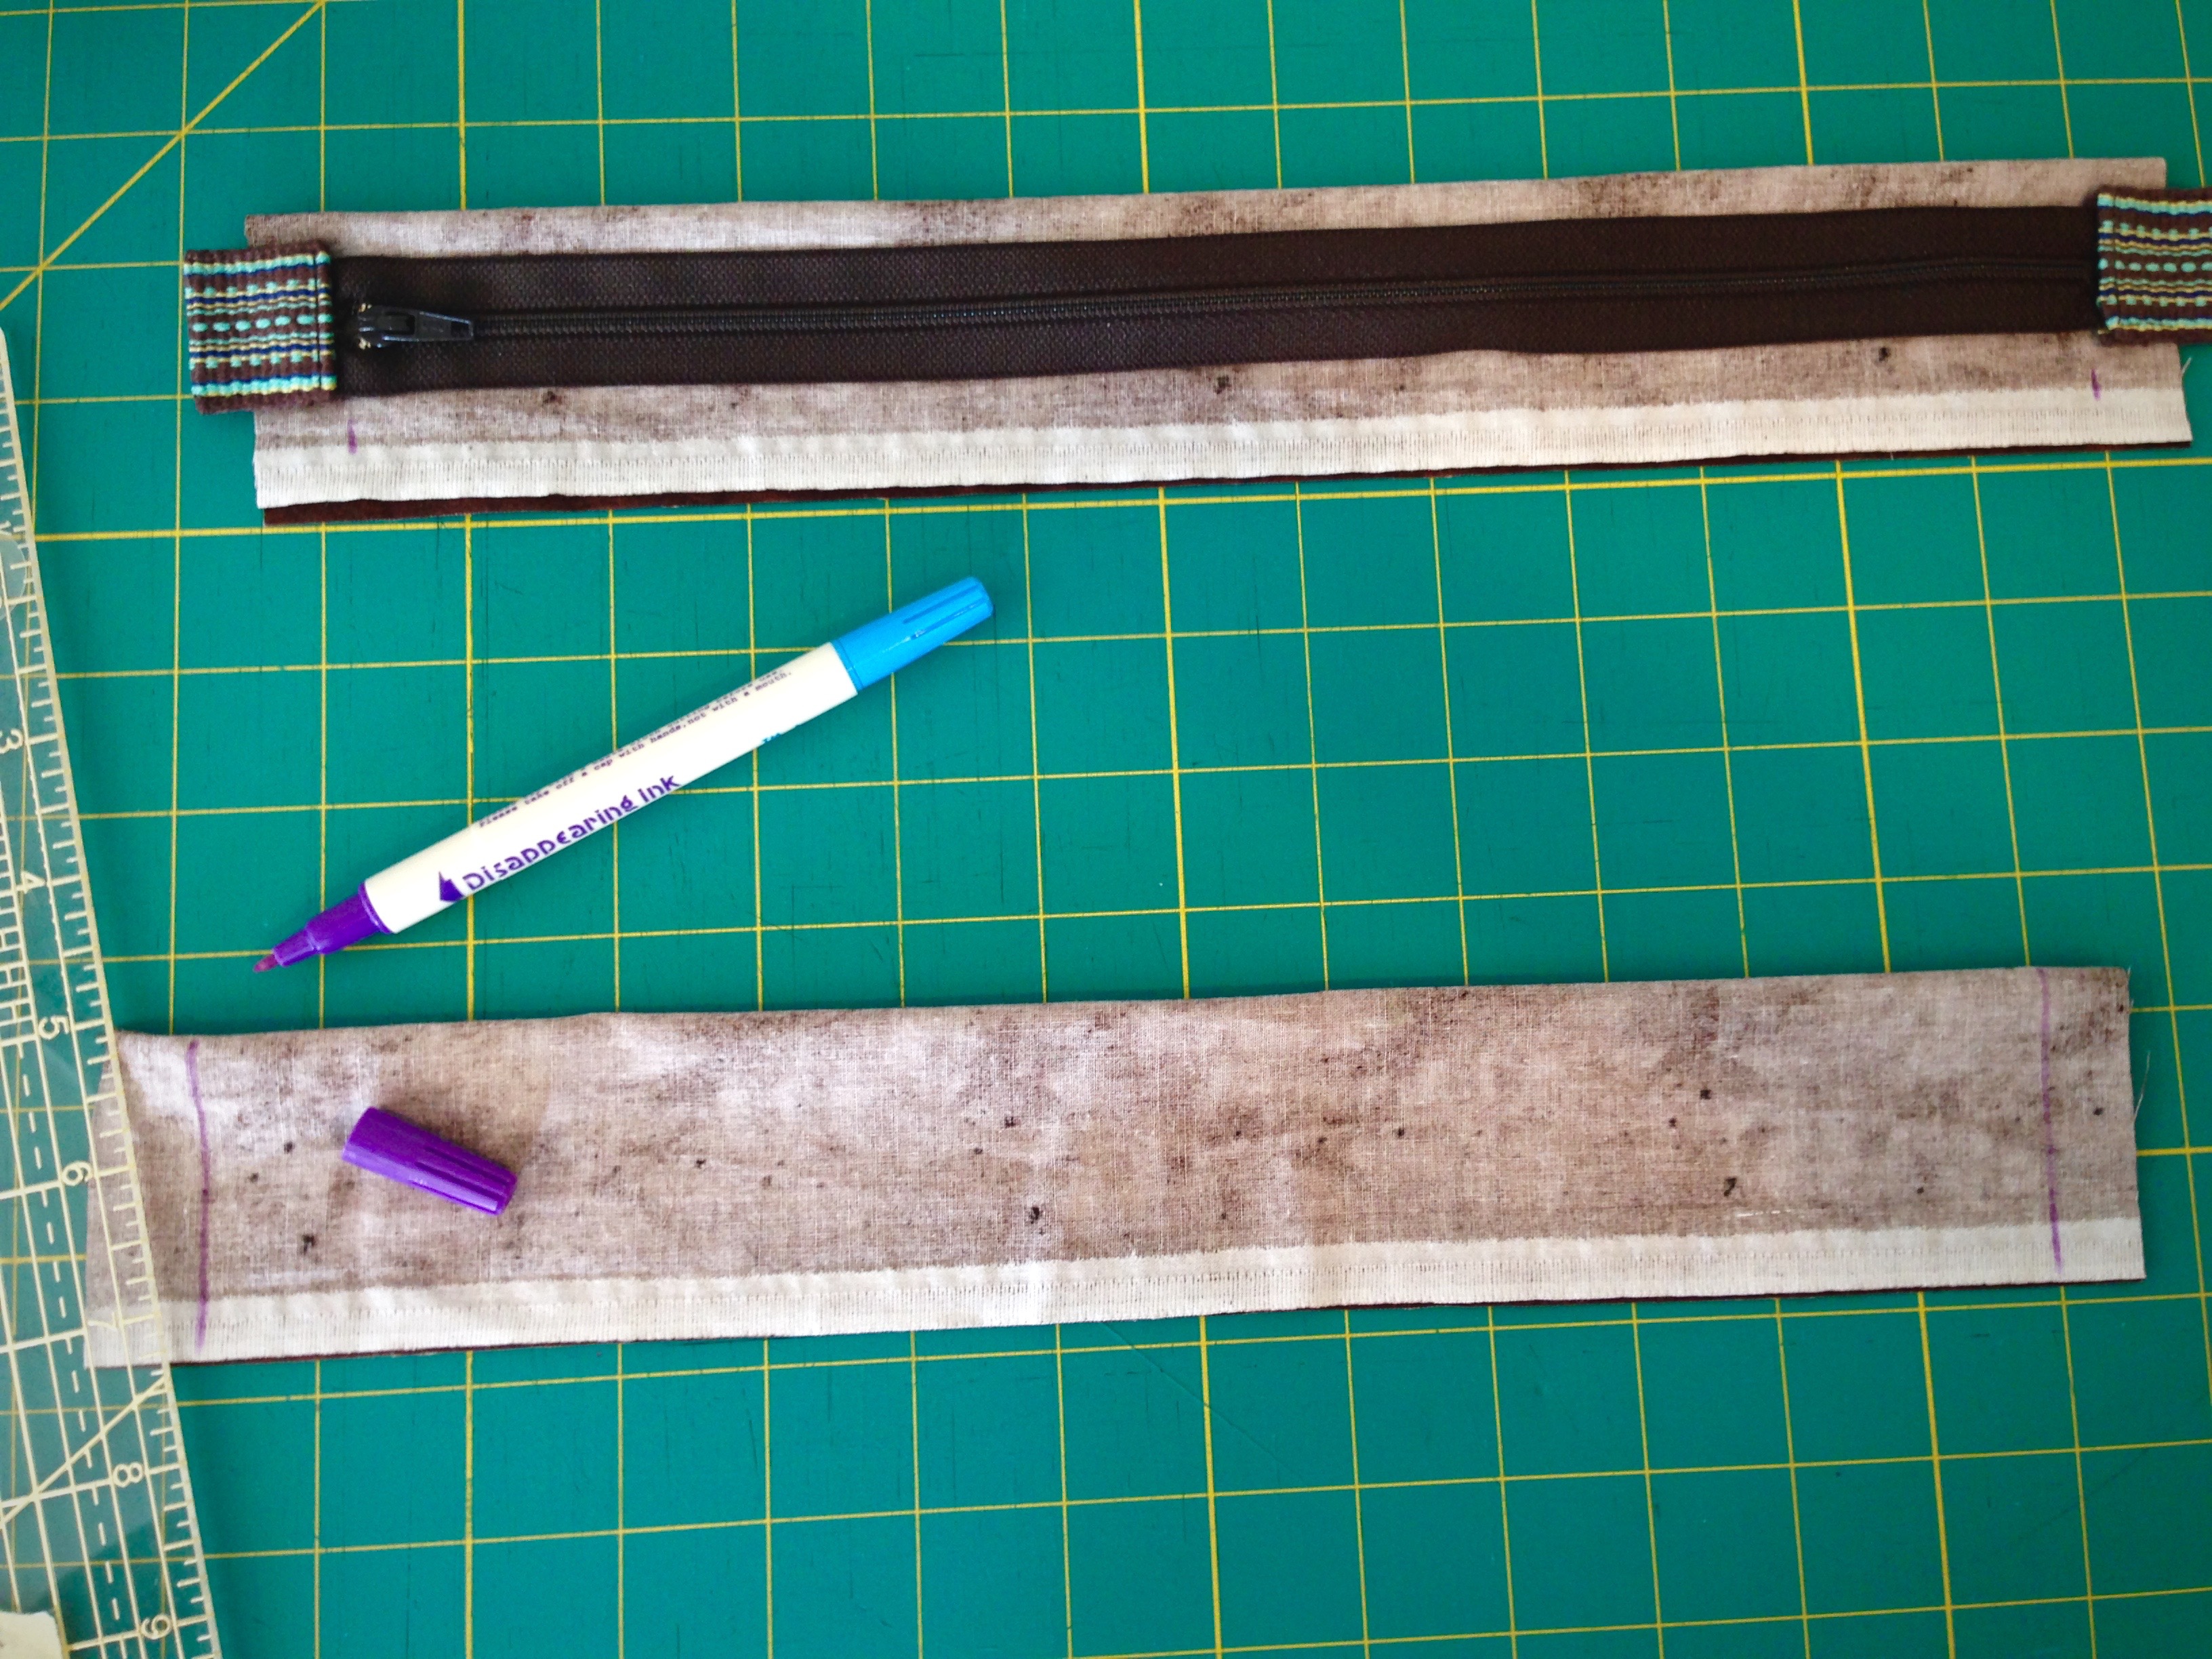
  6. Fold each zipper insert piece lengthwise in half, right sides together. Draw stitching line that matches length of zipper. Zipper insert for top of bag. Tutorial.
  7. Stitch both short ends of zipper insert pieces. Clip corners and trim seams. Making zipper insert for top of bag.
  8. Turn zipper insert pieces right side out. Push corners out. Press. Making zipper insert for top of bag.
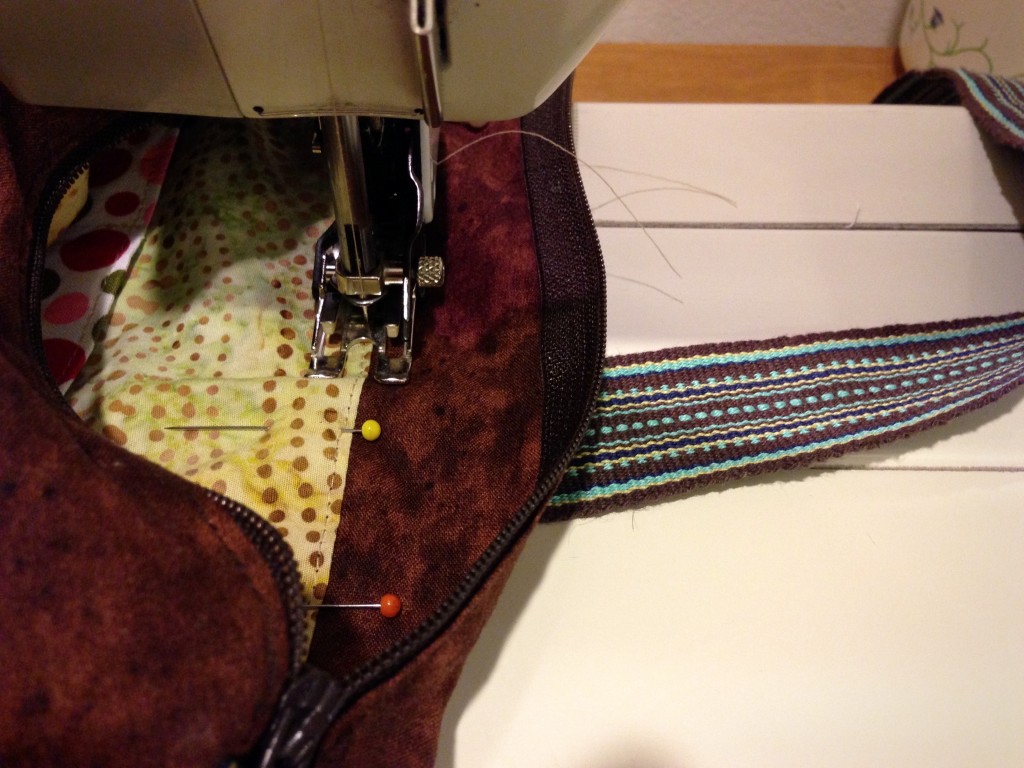
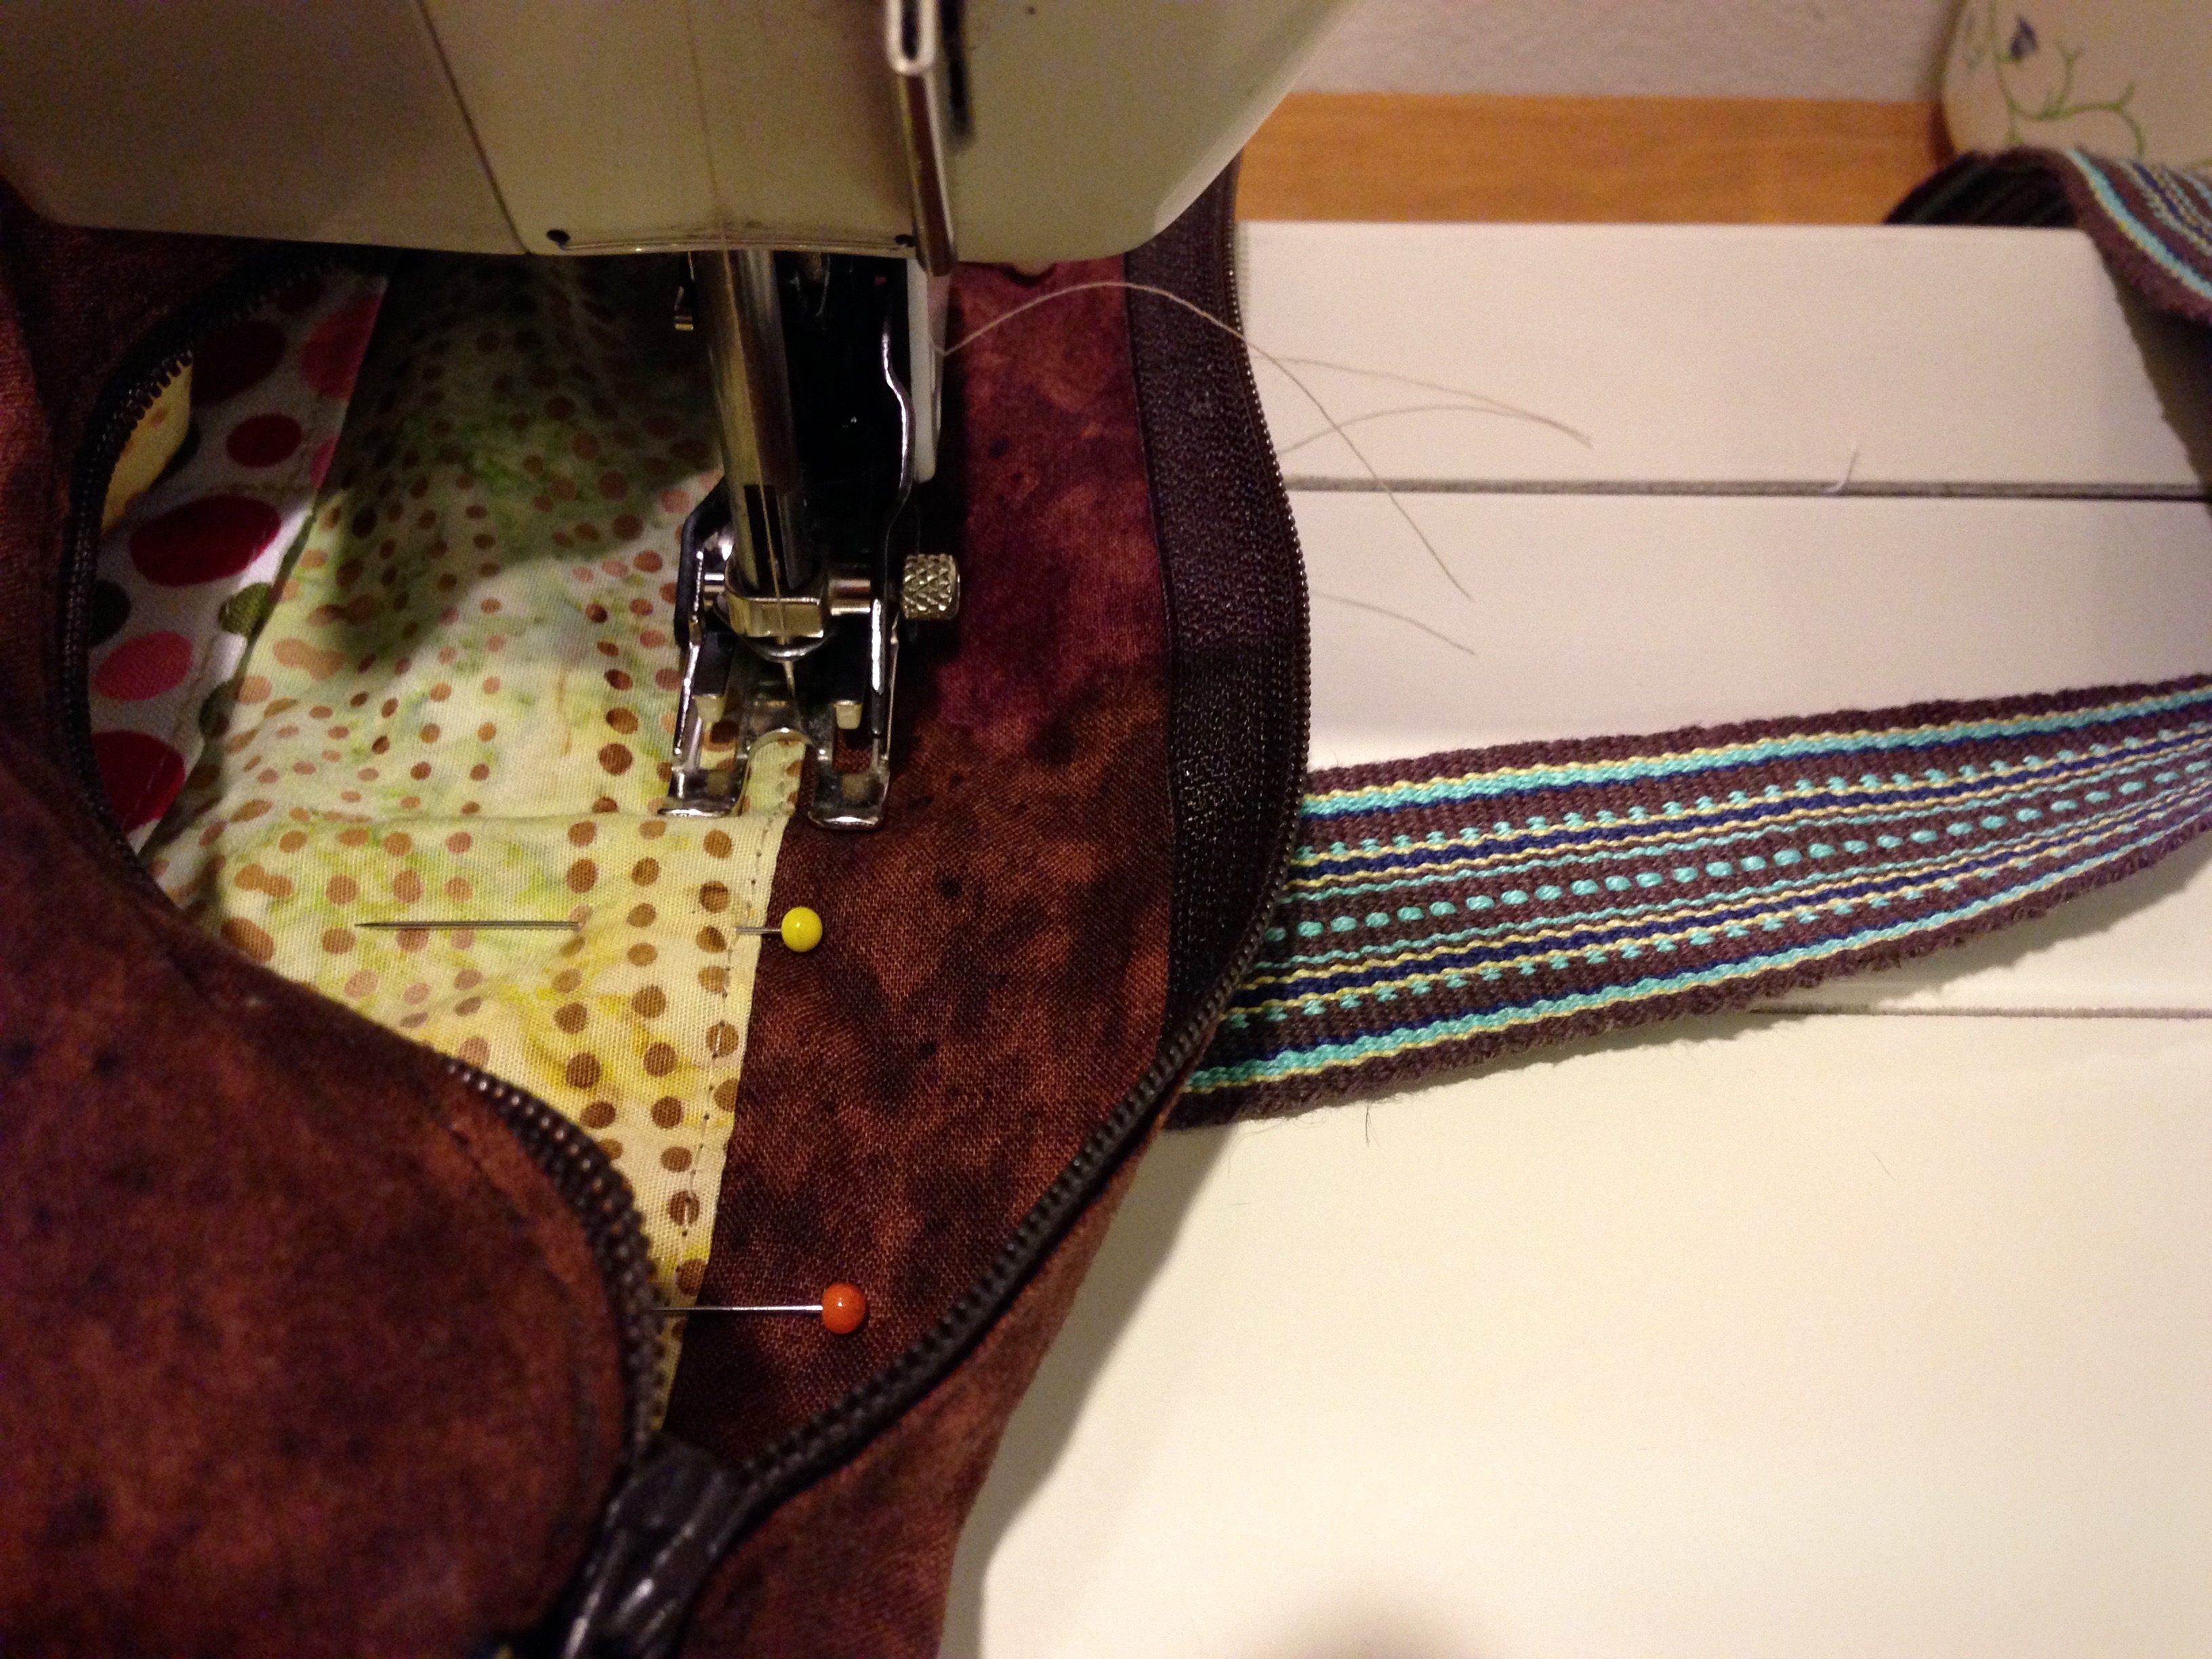
  9. Pin folded edge of zipper insert fabric to right side of zipper tape, centered lengthwise, 1/8″ away from zipper teeth. Open zipper partway. With zipper foot, starting at top end of zipper, topstitch close to folded edge. After stitching a third of the way, with needle down, close zipper, and then continue topstitching to bottom of zipper. Repeat for other side of zipper insert. Press. Making zippered lining for handwoven bag. Tutorial.
    Adding zippered top to handwoven bag.
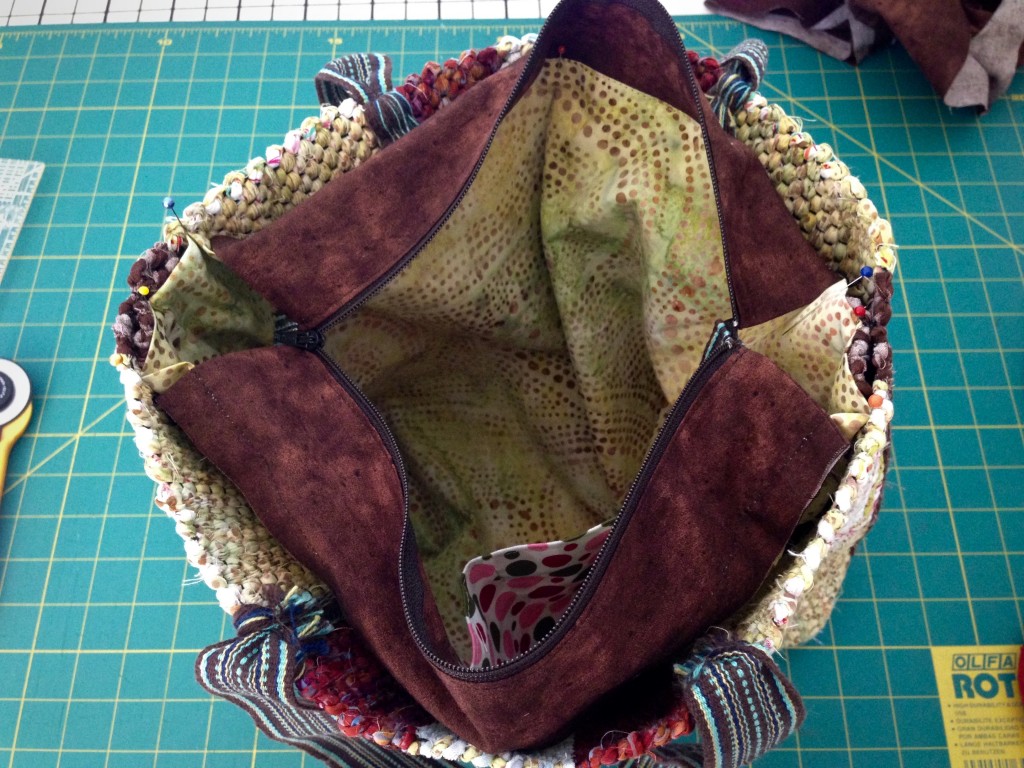
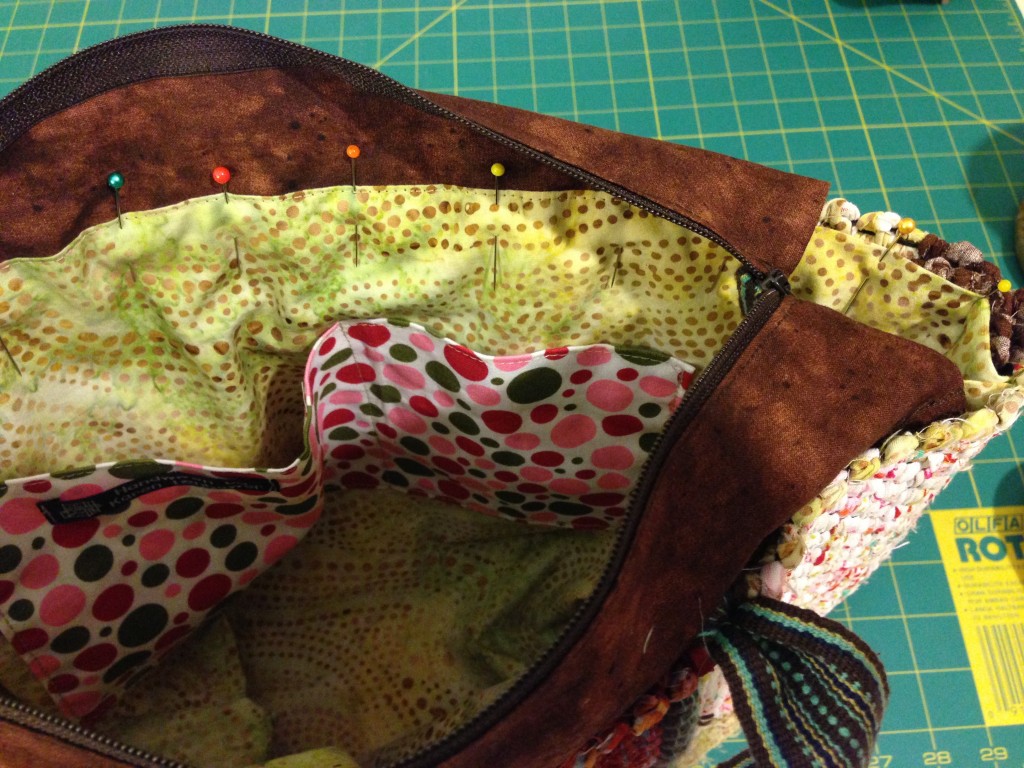
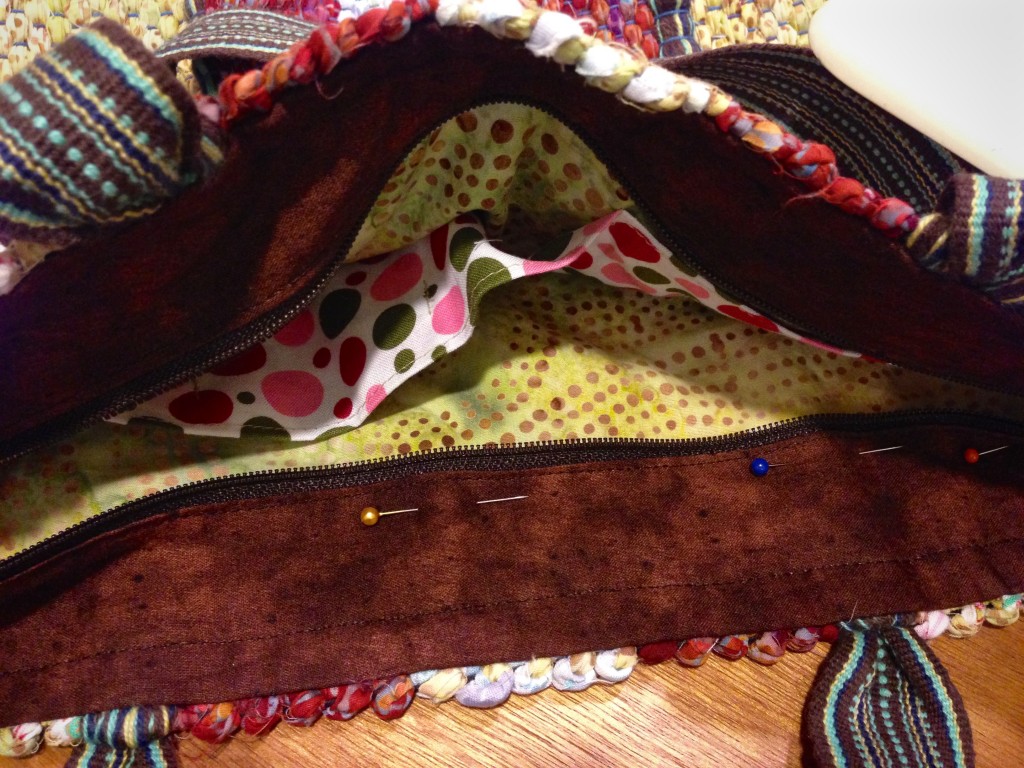
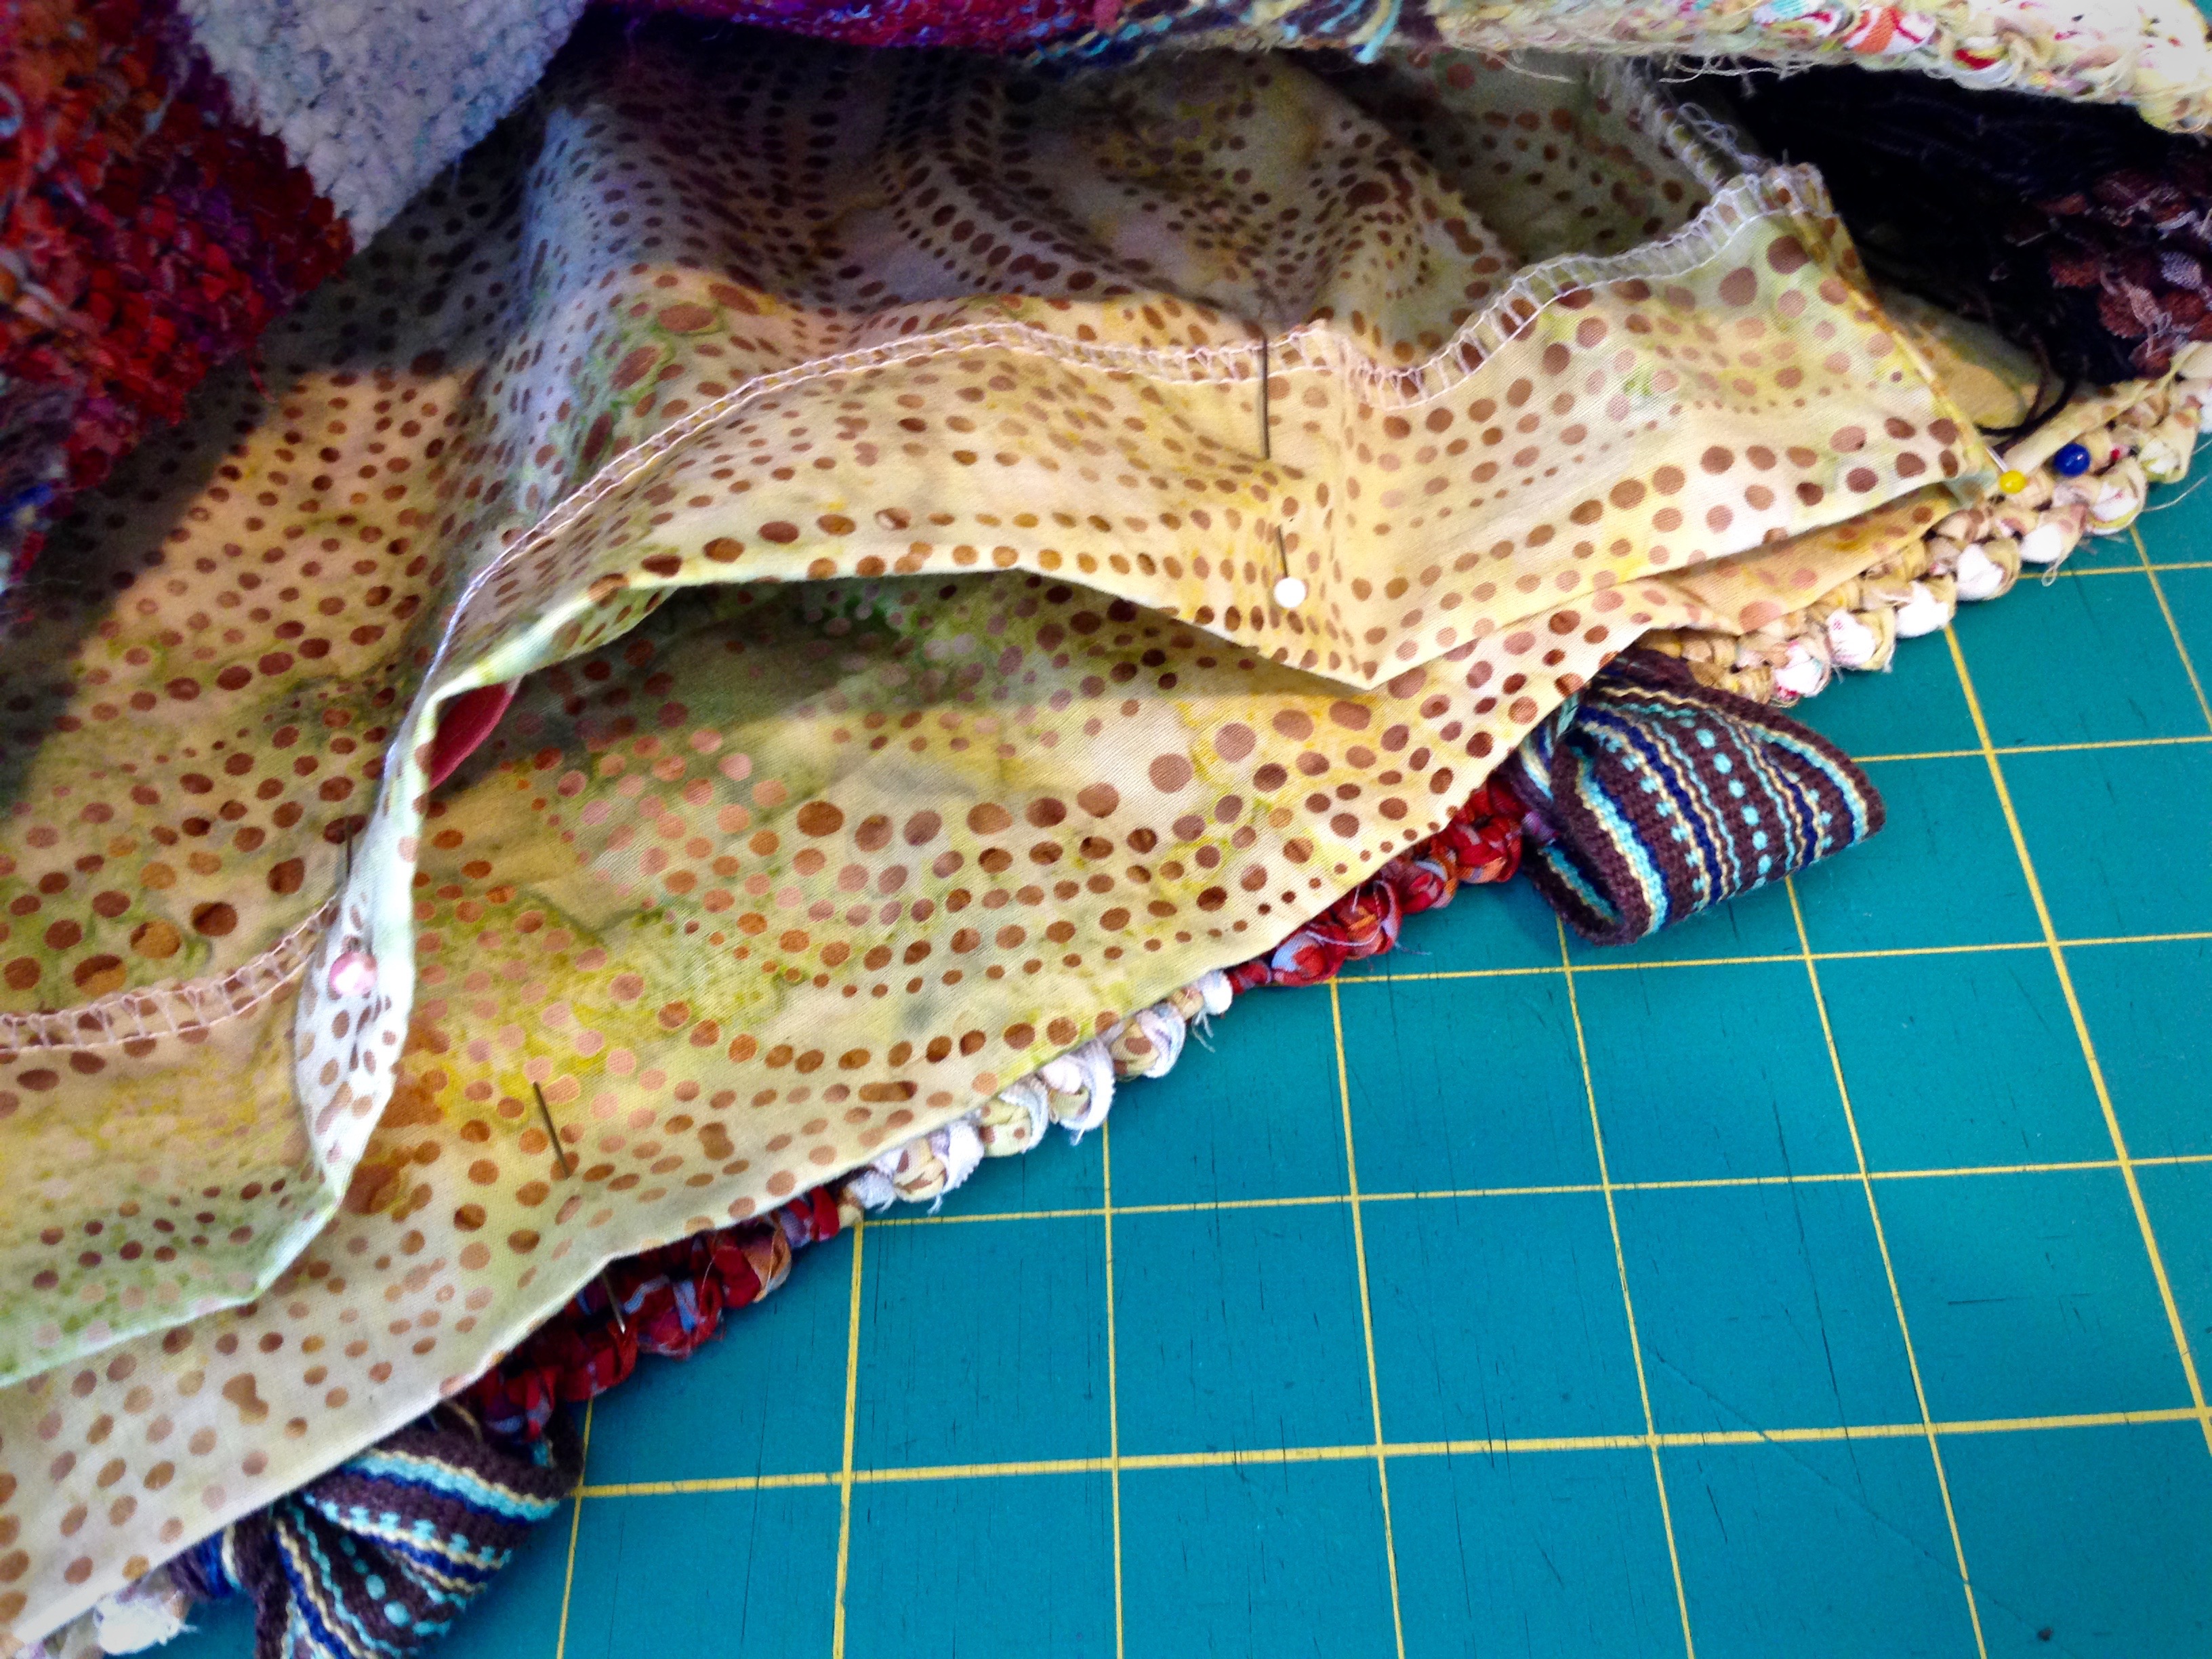
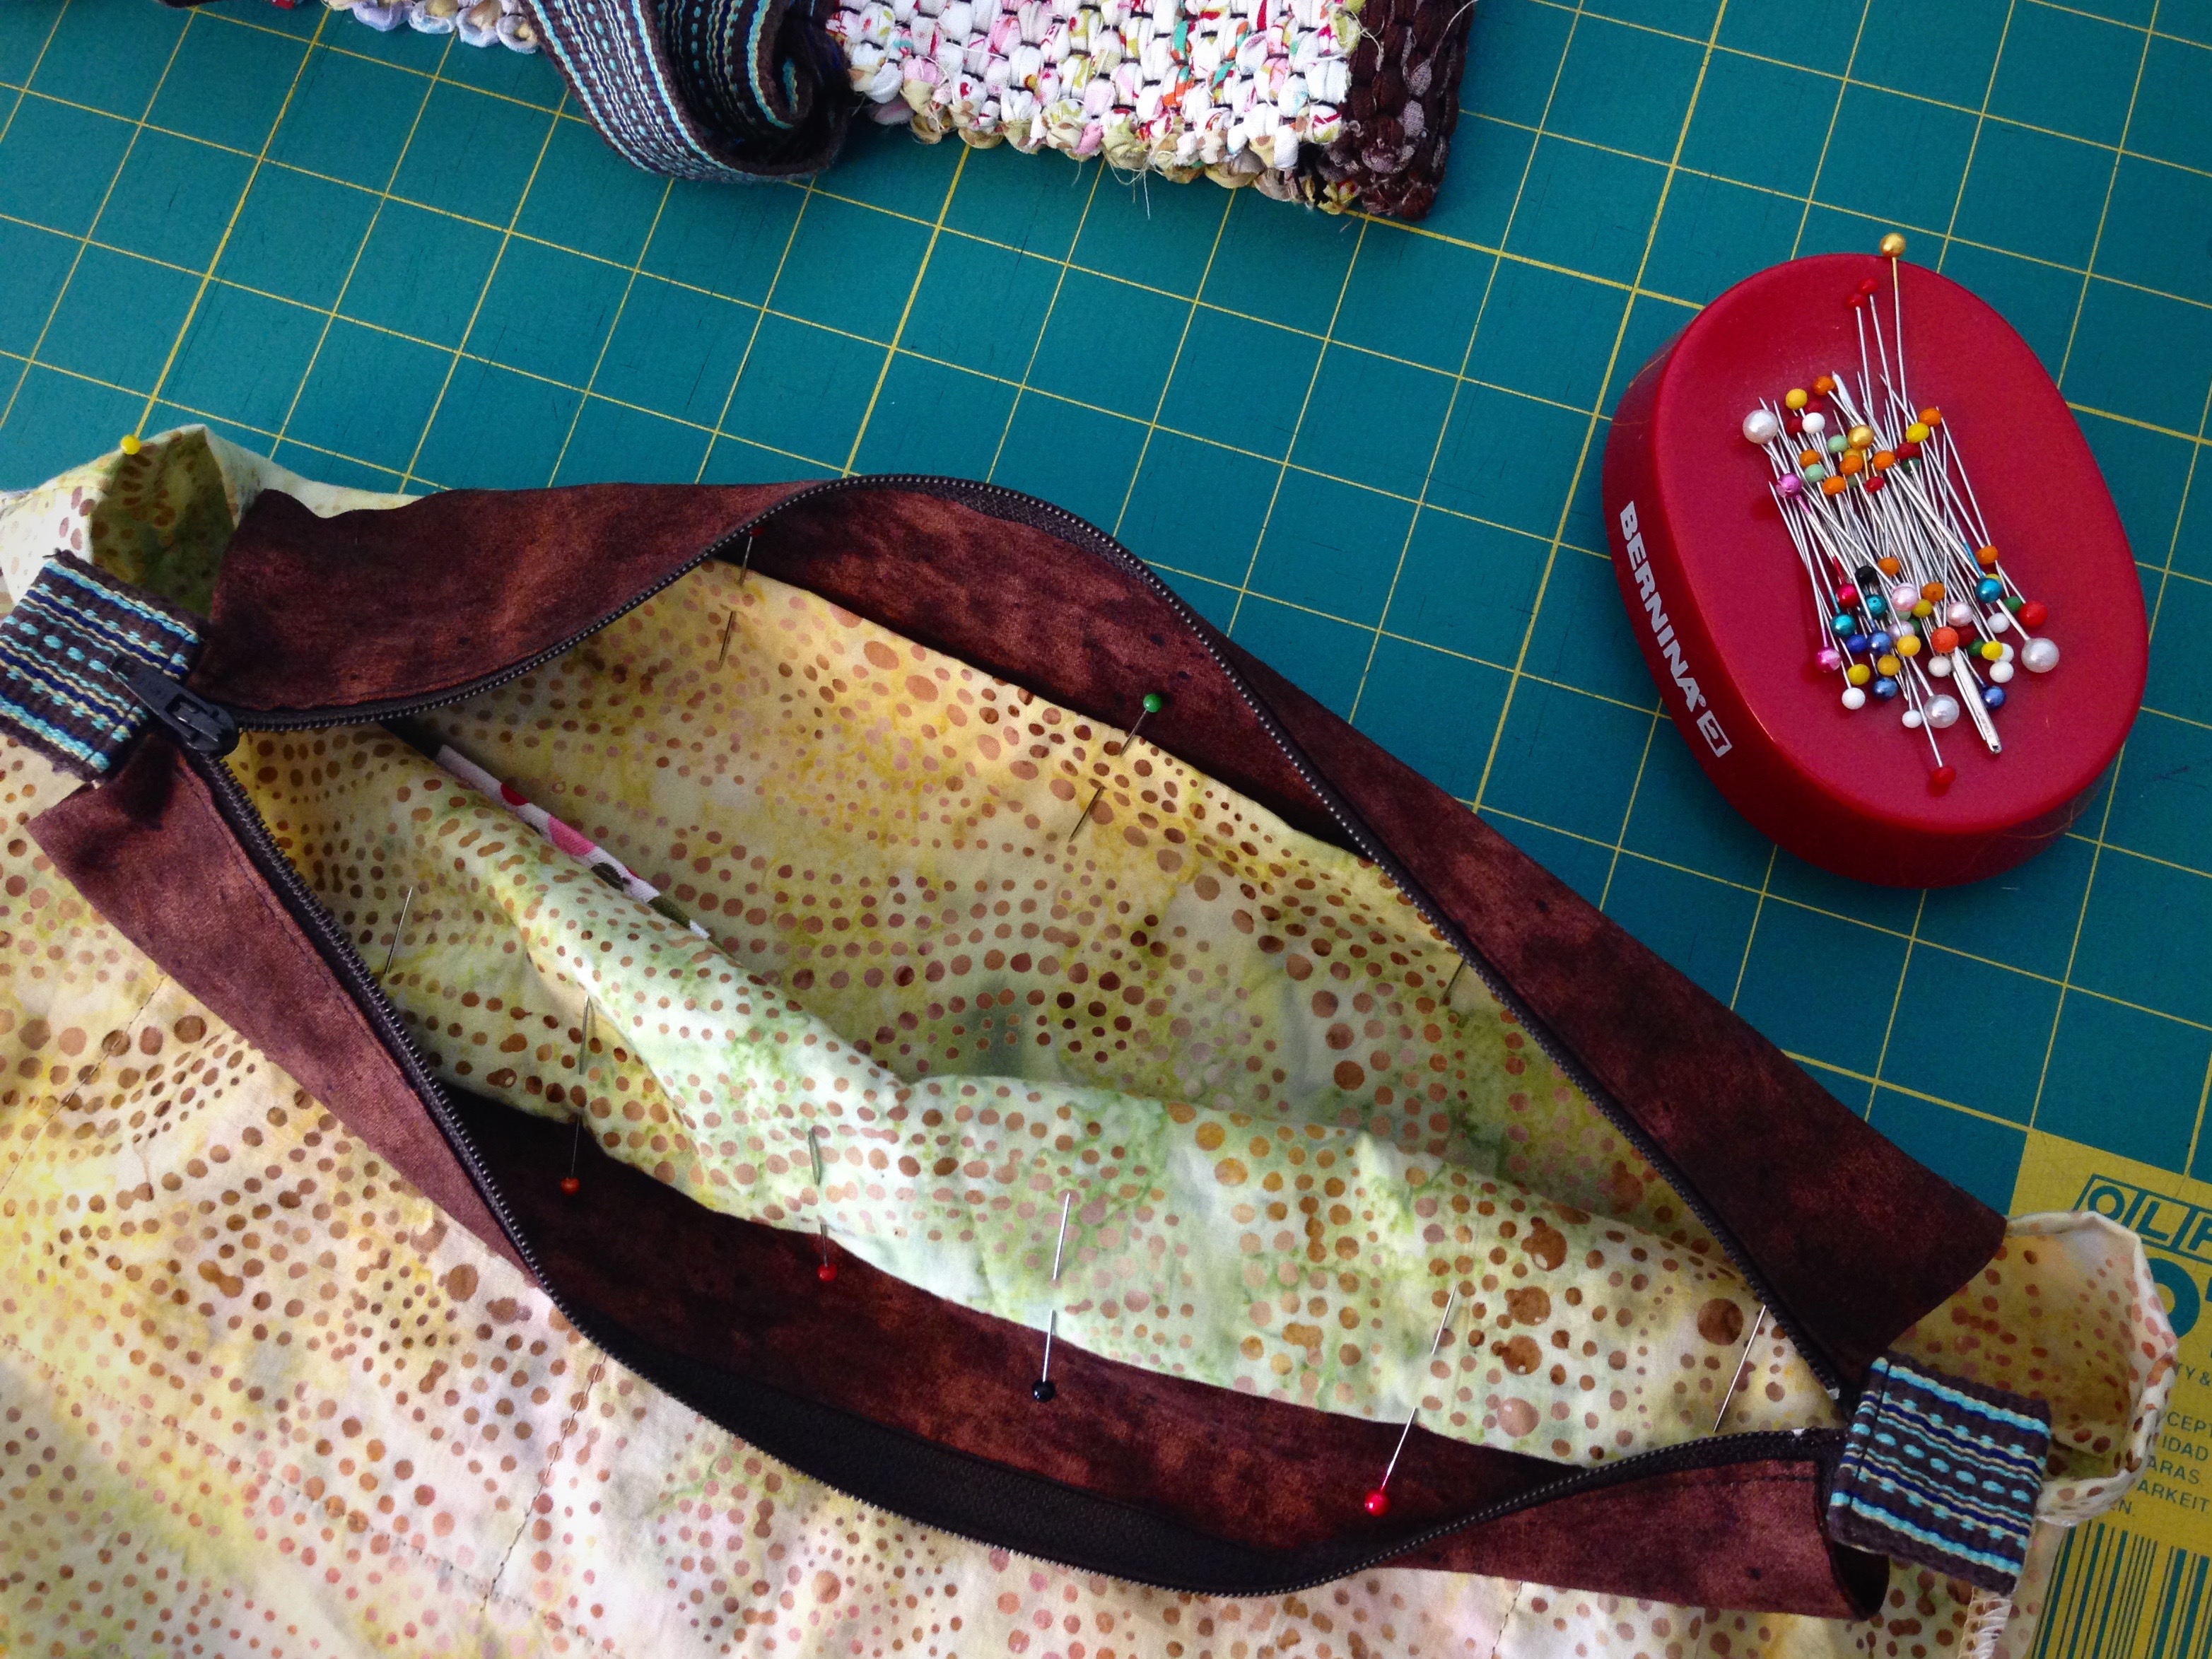
  10. With zipper opened, and zipper tab down (picture shows zipper tab up, after having pinned both sides), center and pin one side of zipper insert under one side of folded top edge of lining, so that lining overlaps insert 1/2″. Repeat with other side of zipper insert and lining. Making zippered lining for handwoven bag. How to pics.
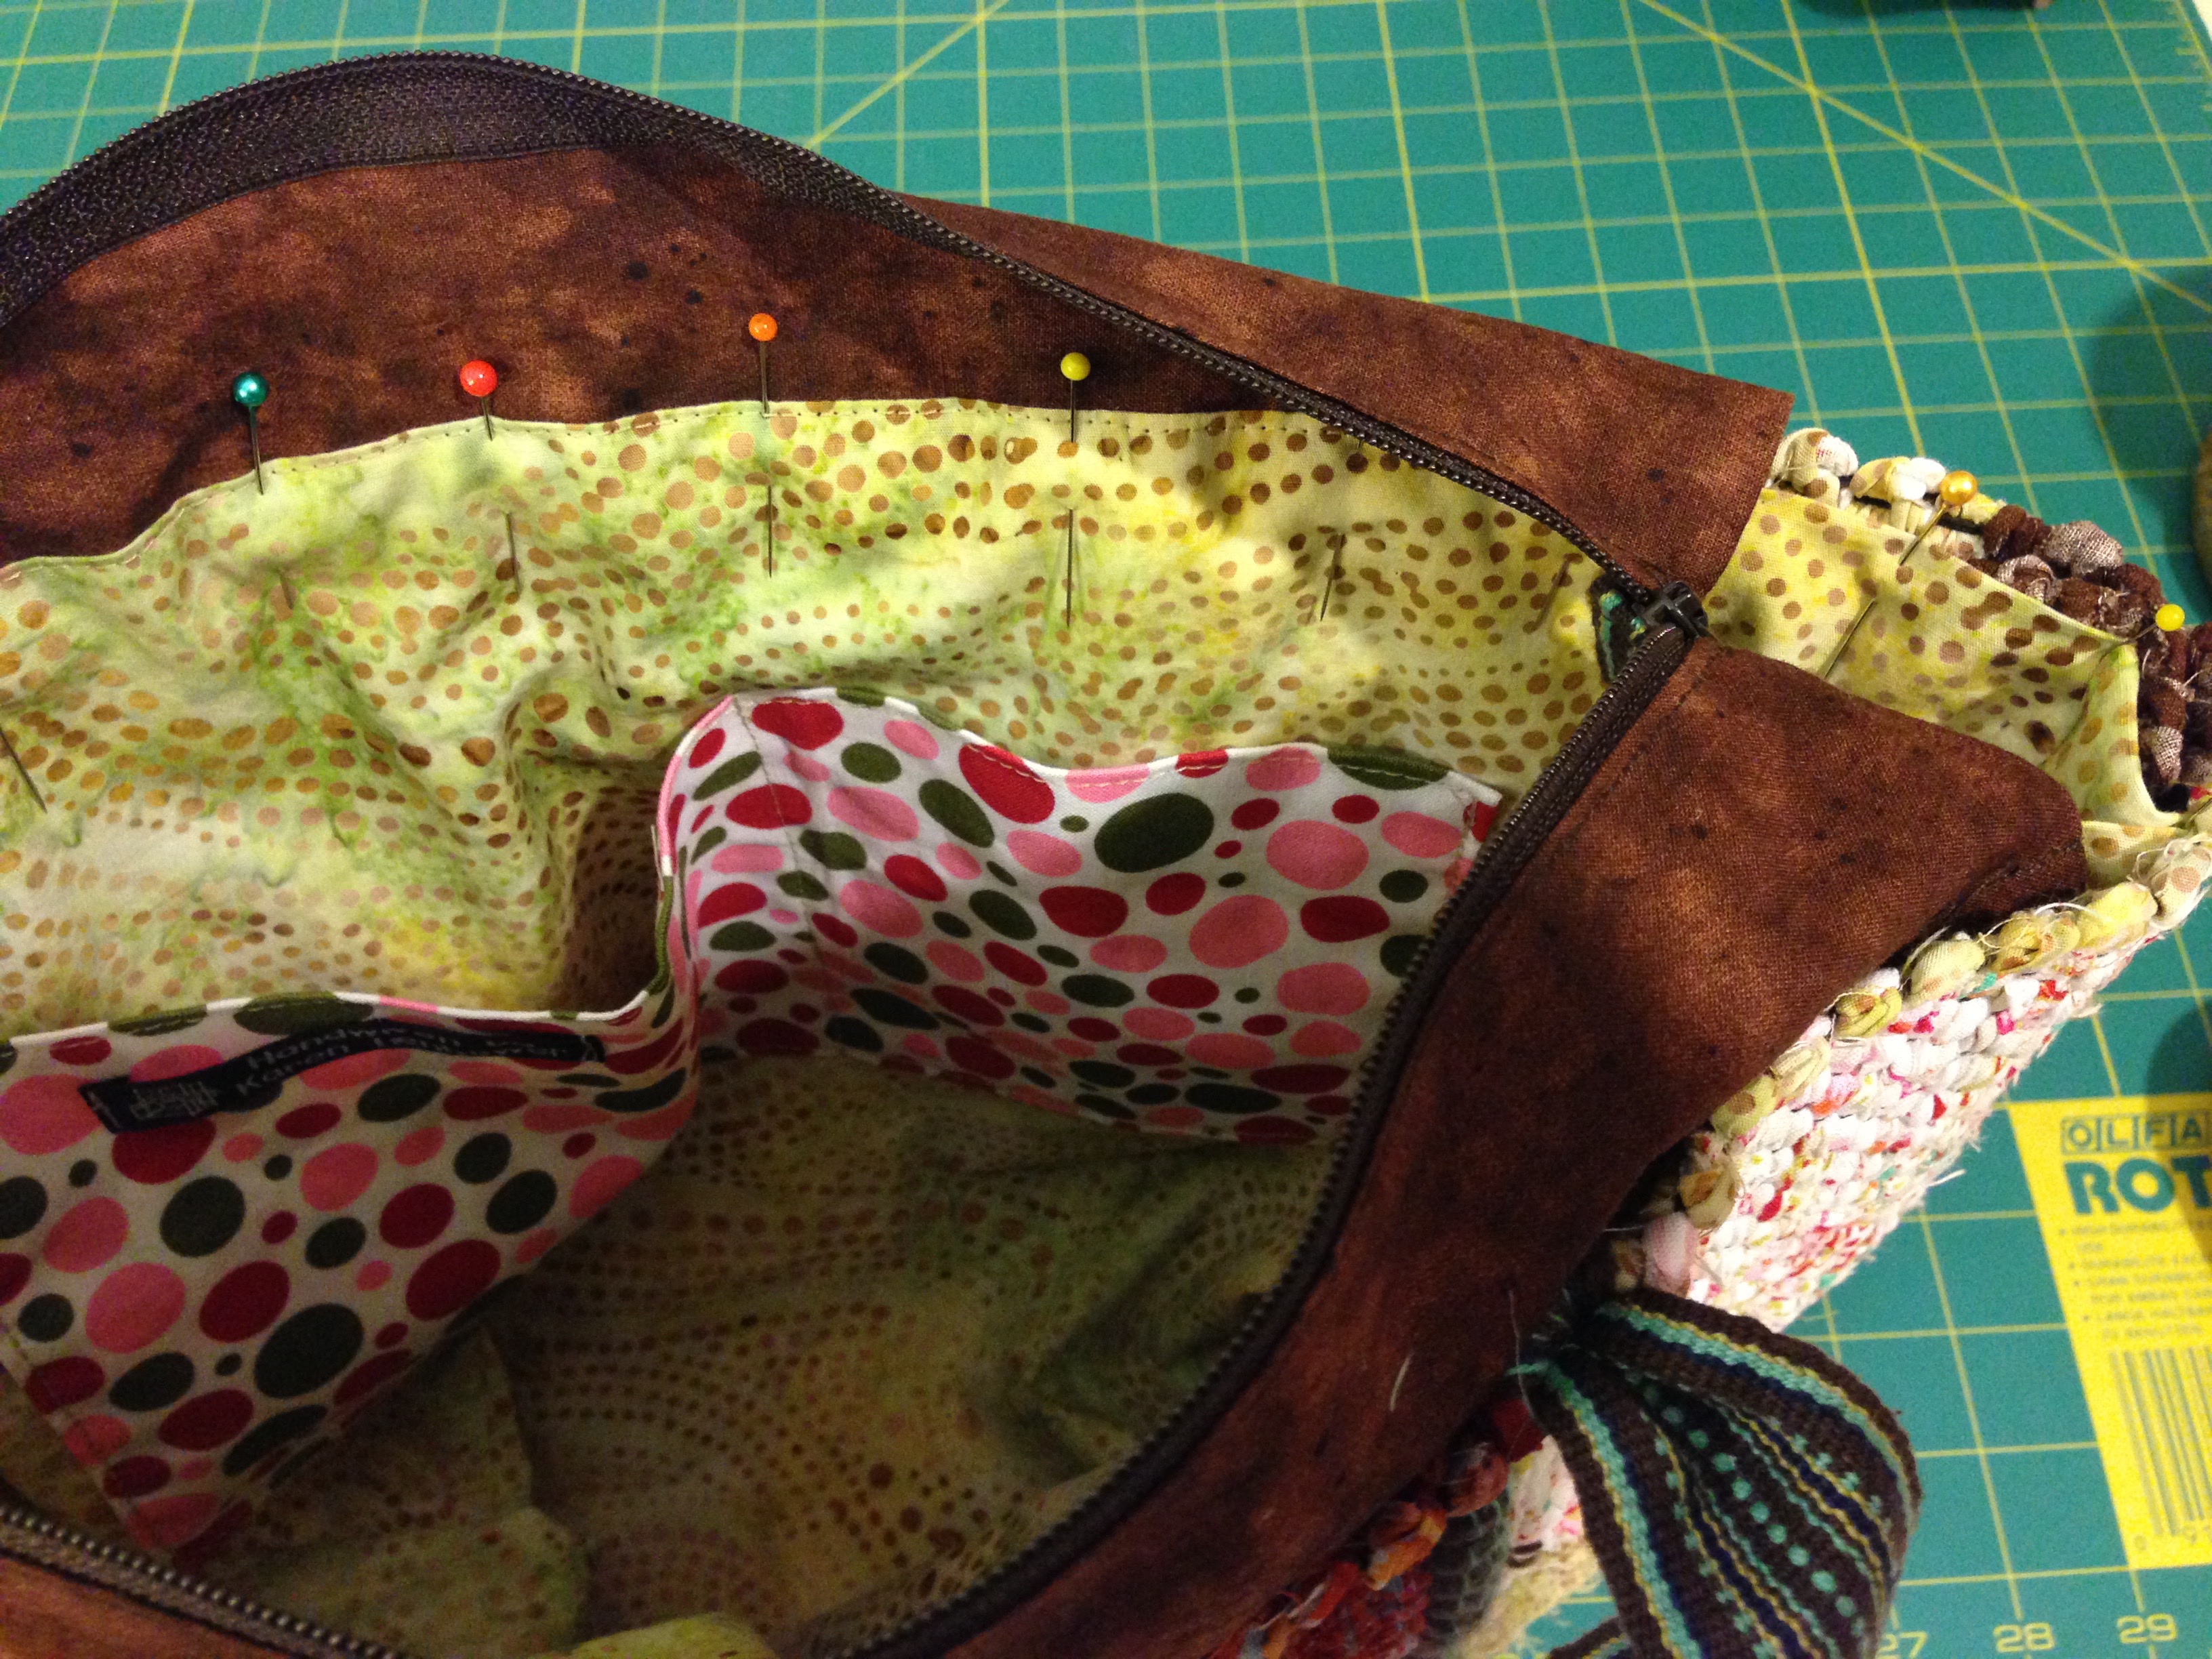
  11. Insert lining into bag, matching side seams and mid points on bag and lining, with top folded edge of lining 1/4″ below top edge of bag. (Edge of zipper insert is sandwiched between lining fold and bag.) Make sure bag handles are up and out of the way of stitching. From inside of bag, use walking foot to stitch 1/8″ from lining fold, all the way around top of lining, keeping zipper insert up and out of the way of stitching. (Walking foot helps ensure even feed of fabric layers.) Adding zippered lining to handwoven bag. Instructions.
    Pinning lining into handmade bag. Instructions.
    Sewing lining into Handmade bag. How to.
  12. Fold zipper inserts down into bag. Press. Stitch across zipper inserts 1/2″ below top of lining on inside of bag. Press again.Last step of tutorial for inserting lining in bag.

Give your new bag a special purpose.

Handwoven bag with custom lining. Karen Isenhower

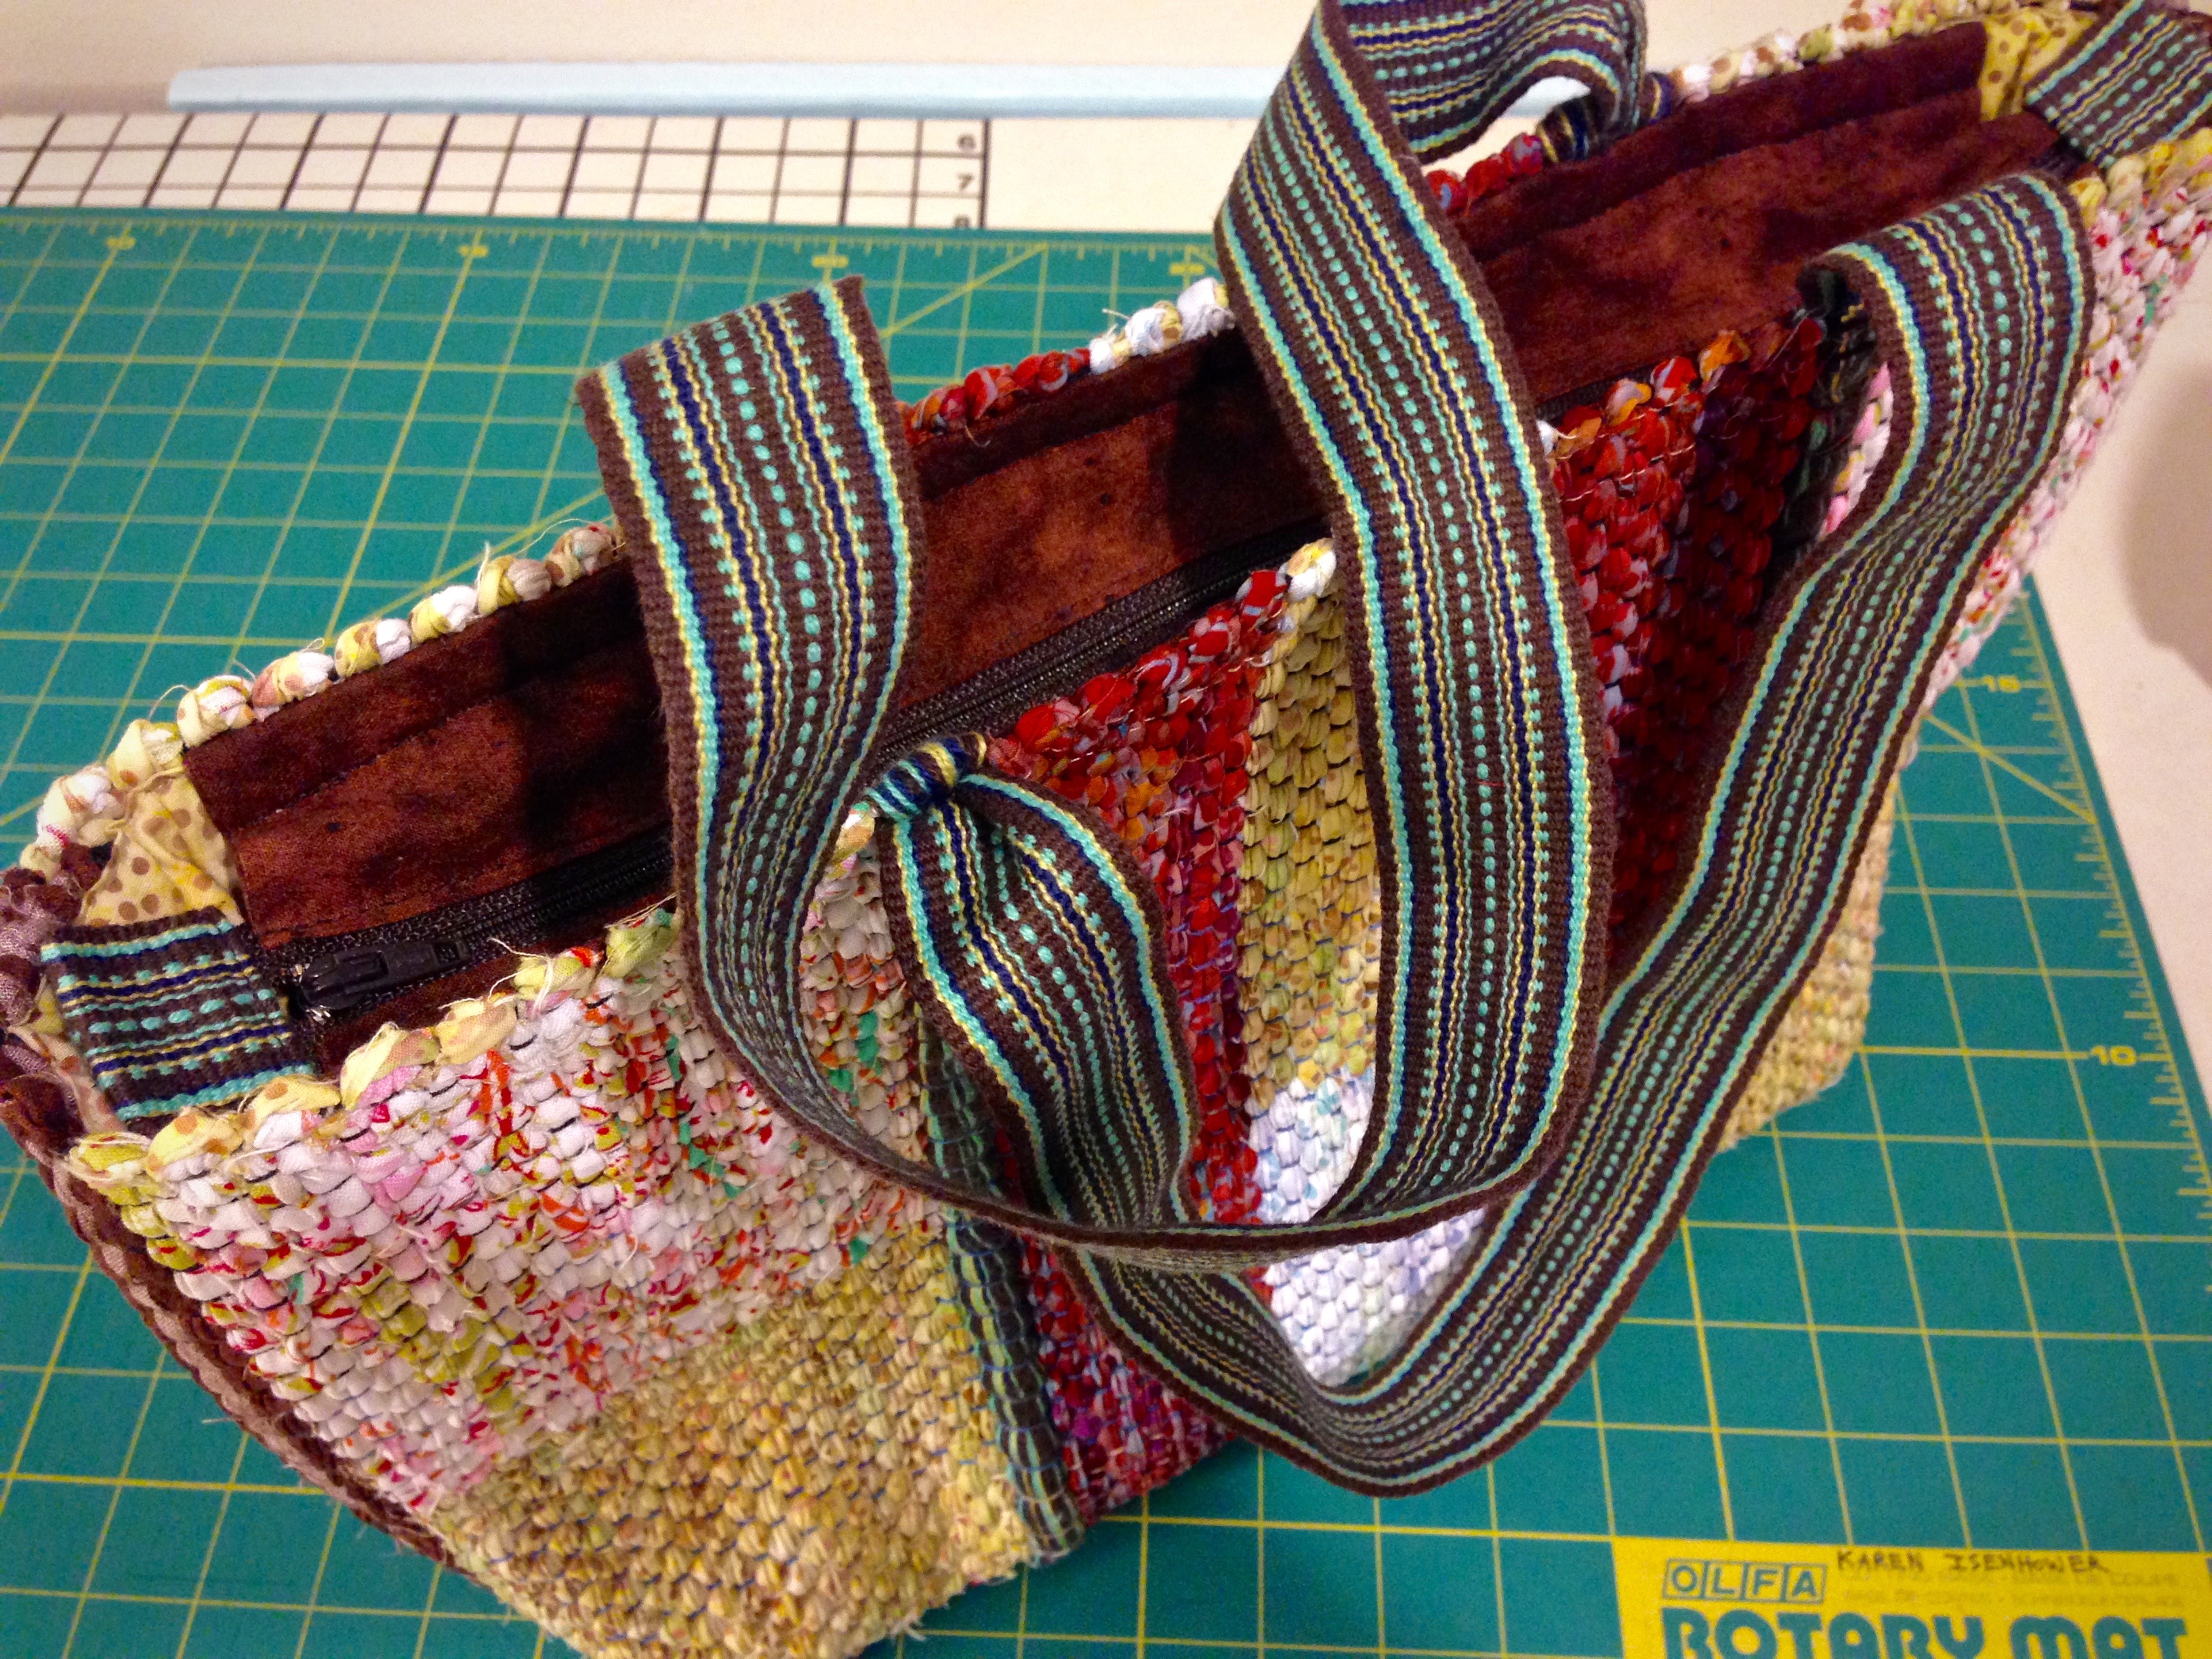
May your lining on the inside be as attractive as your handbag on the outside.

Happy Creating,
Karen

Tools Day: Yarn Record Book

Would you like to keep track of every type of thread and yarn you use? You need something you can refer back to for fiber content, color numbers, sett information, and where you purchased the yarn. I have a simple yarn record system that accomplishes that. Because it is easy to do, I update the records every time I start a new tube of thread or skein of yarn that is not already represented. I call it my Yarn Record Book.

How to Create a Yarn Record Book

1. Gather supplies:

  • Three-ring binder
  • 8 1/2 x 11″ white cardstock
  • Paper cutter or scissors
  • Three-ring hole punch or single-hole punch
  • Small color wheel and other color tools
  • Black fine point Sharpee
  • Pocket pages
  • New spectacular yarn and thread in colors and sizes you have never tried before!

Make a Yarn Record Book Tutorial

2. Cut cardstock. Cut a sheet of white cardstock lengthwise in half.

Making pages for yarn record book.

3. Punch holes. Punch three holes on one long side of the cut cardstock to coincide with three-ring binder, and punch five holes on the opposite side.

Preparing pages for yarn record book. Tutorial.

4. Insert color tools. Place color wheel and other color tools in front inside pocket.

Yarn Record Book Tutorial

Color tools in yarn record book.

5. Add yarn label information. Write information on front of prepared card:

  • Fiber type and size/plies; e.g., Cotton 8/2
  • Brand name
  • Fiber content
  • Where purchased
  • Length and weight

Making Yarn Record Book. How to.

6. Add yarn sample. Cut one meter of the new thread or yarn. (My loom bench, conveniently a meter in width, is my quick measuring guide.) Fold the length in half, in half again, and in half one more time. Push the loop at the fold of the yarn through a hole on the five-hole side of the card and pull the other end of the yarn through. Write the color number above the hole.

Adding yarn to yarn record book.

7. Insert yarn card into notebook. On the back of the card write the date the yarn is added. Include information about how the yarn is to be used, and the intended sett. (Later, if your plans change, or you determine the sett needs adjusting, come back and make notes here to reflect that.) Insert the card in the Yarn Record Book. I arrange fibers in alphabetical order, e.g., alpaca, cotton, linen, wool; and, within each fiber, by size of yarn from finest to coarsest.

Adding project info to yarn record book.

8. Add color cards. Put purchased yarn sample color cards in pocket pages at the end of the notebook.

Yarn samples in yarn record book.

9. Expand. When you accumulate so many types and colors of threads and yarns that your notebook is overflowing, get a bigger notebook!

Yarn Record Book. Karen Isenhower

May you make progress in putting things in order.

Happy Organizing,
Karen

Quiet Friday: Weave a Bag with Handles

Voila! A rag-weave bag with the handles woven in. First, the handle straps were woven on my band loom. And then, I wove the straps into the rag-weave bag on my floor loom. Lastly, I cut the weaving from the loom and sewed the bag together. This is a warp for double binding rag rugs. I take advantage of this double cloth structure to make handles that are extremely secure. The pictures show how it all comes together. (Quiet Friday: Rag Rug Bag shows my first attempt at this feat. Be sure to read the comments. My amazing readers helped me develop the idea for this workable solution.)

As a bonus, at the end of this post you will see a new video that demonstrates my method of cutting fabric strips for weaving rag rugs.

1. Weave bag handles. (First seen on Is My Weft Showing?)

Unwoven warp (length equal to the rag rug warp width on the loom, plus 2″/5cm) comes before and after each of two bag handles, which are woven to desired length. Unwoven warp is held together at the beginning, and in between the two handles, and at the end, with 1″/2.5cm of woven band.

Bag handle woven on band loom. Karen Isenhower

2. Insert unwoven band warp for one handle.

Weave approximately 1/3 of the bag.

Cut the two handle straps apart in the middle of the 1″/2.5cm woven section that separates the two lengths of unwoven band warp. Entering from the right-hand side, insert one unwoven band warp, used here as weft, into the first shed of the double binding weave, with 1/2″/1cm of the band-woven handle strap reaching into the shed. Tap the weft in with the beater, but do not beat it in firmly, yet.

Steps for weaving handle into rag weave bag.

Weave handle into rag weave bag. How to.

3. Insert unwoven band warp for the second handle.

Entering from the left-hand side, insert the unwoven band warp, used as weft, from the second handle strap into the second shed of the double binding weave, with 1/2″/1cm of the band-woven handle strap reaching into the shed. Beat firmly, packing in both layers of weft together.

Weave handle into rag weave bag on the loom.

4. Weave the center 1/3 of the bag.

Step-by-step weaving handle into bag.

5. Insert remaining unwoven warp of first handle.

Repeat Step 2 with the unwoven band warp attached to the handle on the right-hand side. Make sure the handle strap is not twisted.

Inserting bag handles during weaving. Tutorial.

6. Insert remaining unwoven warp of second handle.

Repeat Step 3 with the unwoven band warp attached to the handle on the left-hand side. Make sure the handle strap is not twisted.

How to insert bag handles into the weaving.

7. Weave the final 1/3 of the bag.

Double binding rag rug bag.

8. Finishing work.

Cut rag-weave bag from the loom. Remove header and knot the ends. Press. (For more about finishing the ends, see Quiet Friday: Rag Rug Finishing and Wear and Tear Rag Rugs)

Finishing ends to make bag.

9. Stitch the bag.

Fold the bag, right sides together. Stitch side seams. Turn right side out. For whimsical detail, form box corners on the outside, and stitch in place by hand with warp thread. (You could form box corners on the inside just as well, stitching flattened corners by machine or by hand.)

Creating a rag rug bag.

10. Take your bag with you wherever you go.

Rag rug bag with woven handles. Karen Isenhower

Rag rug bag detail. Karen Isenhower

May your ideas turn into fruitful efforts.

Happy weaving,
Karen

Choosing Rag Rug Fabric is Like Song Writing

Choosing fabric for a rag rug reminds me of song writing. I like to start with a pretty melody. Add some harmony. Write a good accompaniment to finish the song. Be sure to include a good balance of harmony and dissonance to make the music exciting. That’s a good description of my thought process for selecting fabric for a rag rug design.

  1. Start with a melody–a fabric in the color(s) that you want to use in your design.
  2. Add harmony–one other fabric that compliments the first one.
  3. Write the accompaniment–with the chosen pair of fabrics on the table (or in the shopping cart at the fabric store), lay other fabrics beside them, one at a time. Select compatible colors that enhance the “melody” and “harmony.” Eliminate fabrics that “sing a different tune;” but don’t be afraid of unusual combinations. Some dissonance can work in your favor to add interest and excitement to the mix.

Here are a few examples of fabric combinations I am playing around with as I plan my next double binding rag rug design.

Fabric combinations for rag rug planning. Simple tutorial.
Starting with the blue fabric at the top, I added the bold multi-color print as harmony. The black acts as contrast. The two remaining pieces could be used as accents.
Choosing fabric for double binding rag rug.
Bold multicolor print takes the melody line, and the red batik adds harmony. Two more selections bring out the yellow-green and the reds and oranges in the melody piece.
How to select fabrics for weaving rag rugs.
Dark print with green as the base color is complemented with the reddish brown. Other fabrics are included to add contrast and interest.
Process for choosing rag rug fabrics. Short tutorial.
Summer print is enhanced with the harmonizing light pink. Dark pink in small portions makes a good contrast. White serves as a unifying backdrop. Two more prints, used sparingly, could be added for interest.

You can view my double binding rag rugs on Etsy to examine some of the fabric choices I have made for previous rugs.

Classic Check; Autumn Clouds; Improvisation; Woodland Walk; Black and Red SquaresForest at Dawn; Opportunity in Disguise; Painting Sunsets.

May you find a good balance of harmony and dissonance.

With a song in my heart,
Karen

Quiet Friday: Weaving Linen Air

Linen lace weaving. It’s like weaving air. 16/1 linen warp and weft, with uneven sleying and careful weaving. Beating is not the right word this time; let’s call it “placing the weft.” Gentle, gentle, gentle, easy does it. No temple needed. Indeed, what would you hook the temple into? There is almost nothing there.

Linen on the warping reel.
Winding the 16/1 linen warp on the warping reel.
Linen warp chain, ready to dress the loom.
Wound warp is chained and placed over the breast beam and through the beater in preparation for dressing the loom.
Lease sticks with linen.
Lease sticks.
Dressing the loom with linen singles.
Ends are counted and grouped before threading.
Uneven sleying of the reed with linen singles.
Reed is sleyed unevenly, sometimes called “crammed and spaced.”

I did weave a sample, trying out different colors and sizes of weft. The weave is so airy; honestly, I was not sure if the fabric would hold its shape off the loom. To wet finish, I first soaked the sample for 20 minutes in hot water with mild soap. Then, I washed it by hand, lifting and lowering the net-like cloth repeatedly in the water. I rolled it in a towel and gently squeezed to remove moisture. Lastly, I laid it out flat to dry.

Half bow keeps linen from slipping, while allowing adjustments.
Half bow-tie makes sure the linen will not slip. Adjustments are easy, if necessary, after weaving a few inches.
Tying up treadles in the "playhouse" under the warp.
Treadle tie-up happens in the “playhouse” under the warp in the back. Sunlight through the linen reveals “invisible” hairy fibers.
Sample weaving. Linen lace.
Sample.
Linen sample, not yet wet finished.
Sample, not yet wet finished.
Linen sample in black and white.
Black and white view shows cloth structure.

Result? It came through beautifully, with the lace weave intact. Linen, there is something about you that is exquisite and delightful, yet a bit mischievous and sly. I like you.

Linen sample after wet finishing. Karen Isenhower
After wet finishing and drying, the linen sample shows a glimpse of scarves to come.
Weaving linen air. Karen Isenhower
Weaving linen air.

May all your concerns be as light as air.

Happy Linen Weaving,
Karen