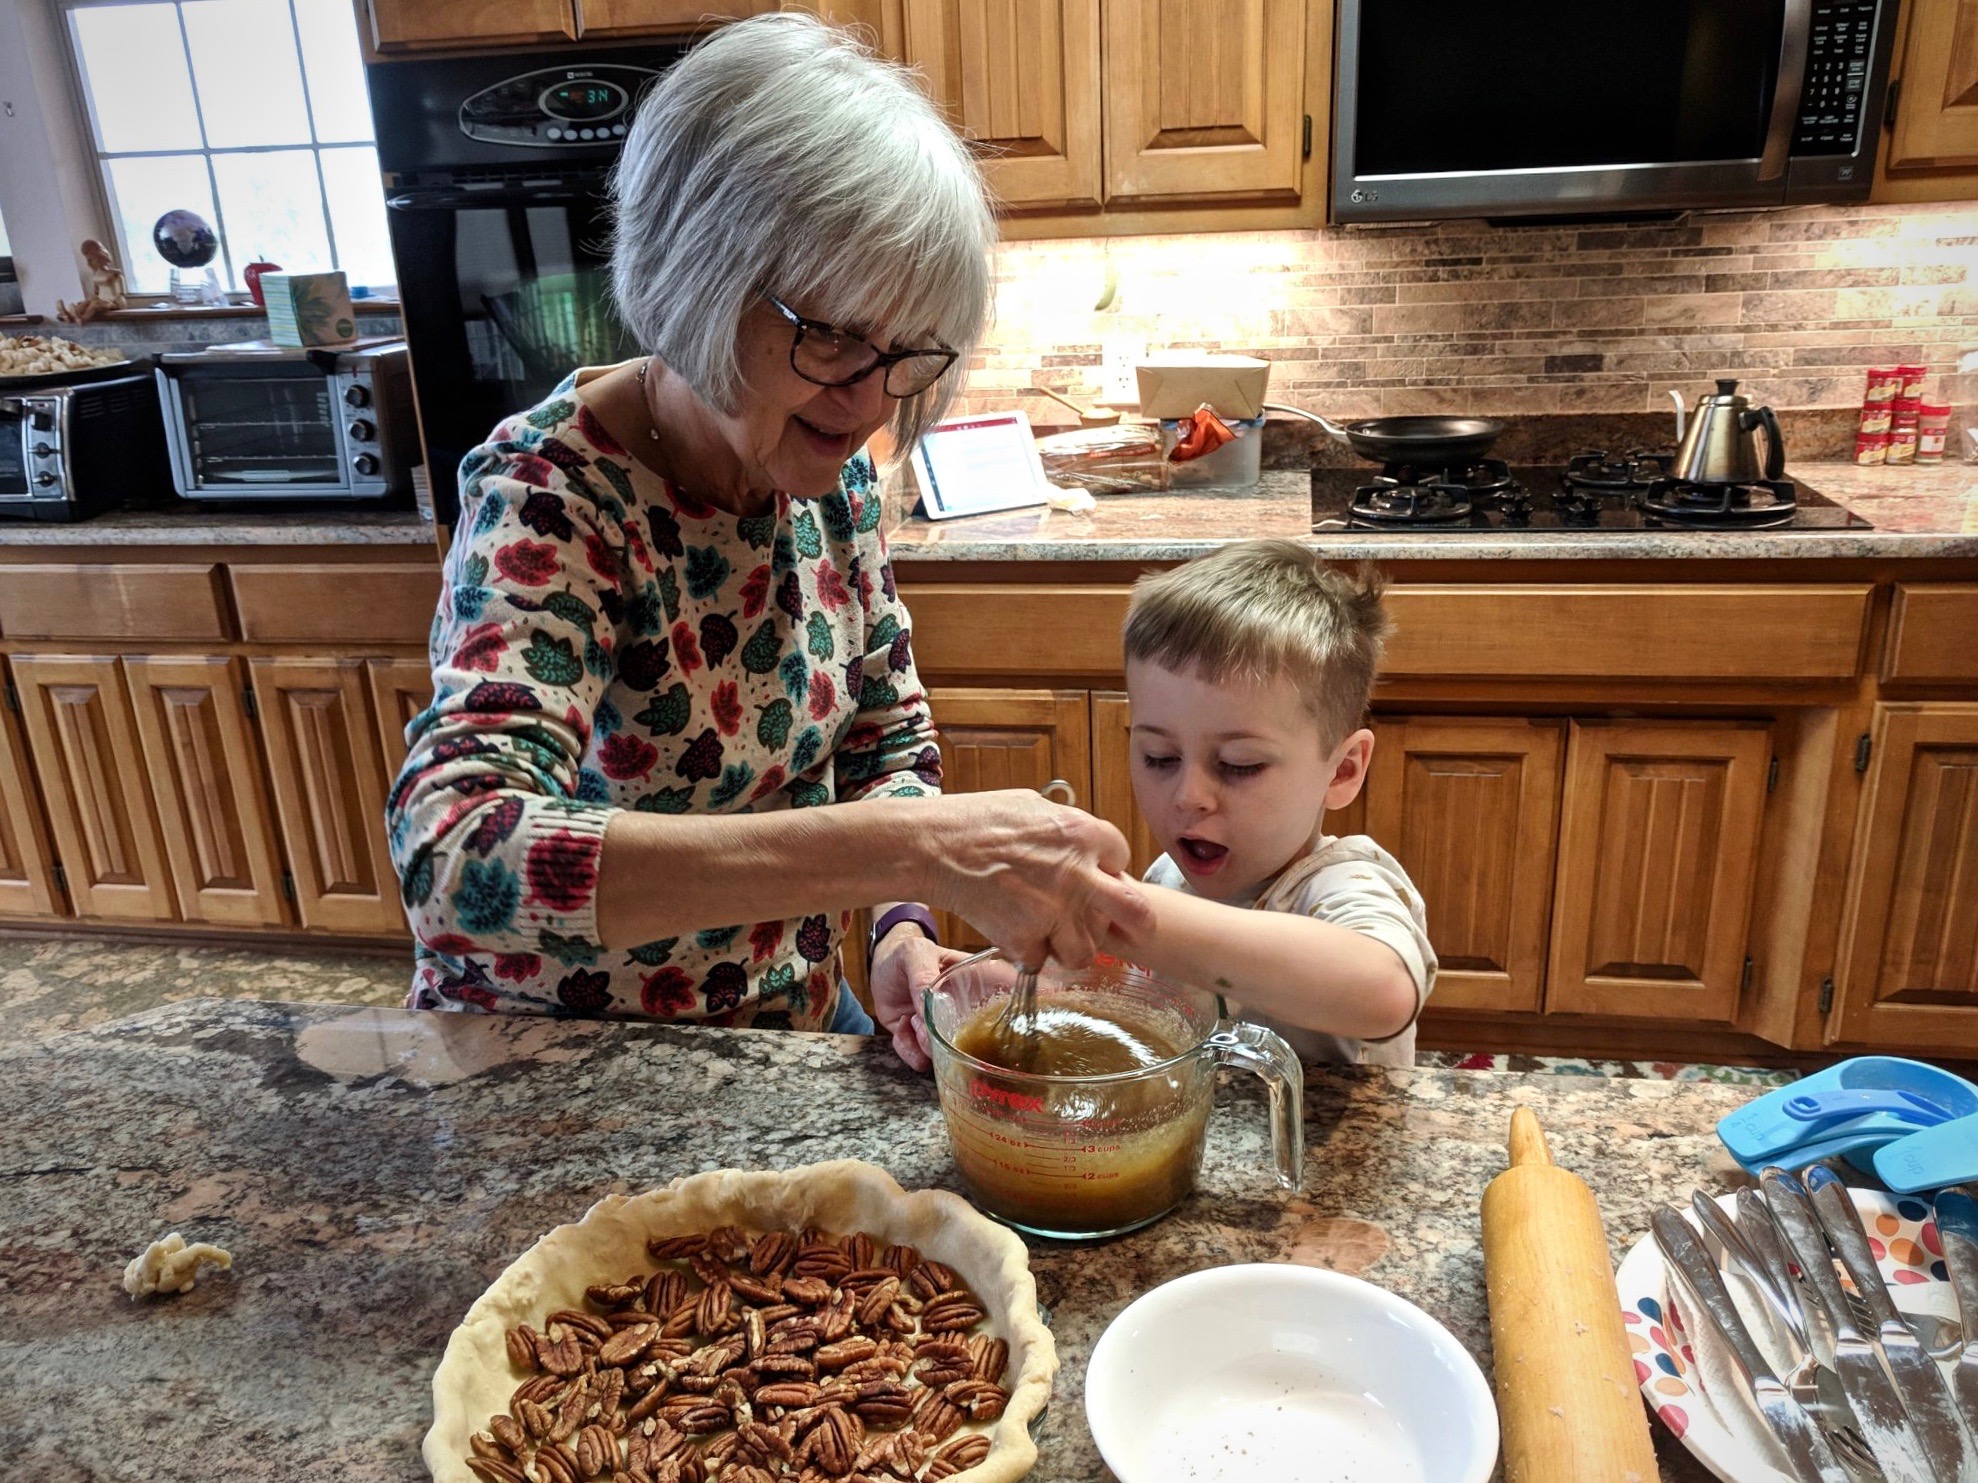
Before everyone arrives for our Thanksgiving family gathering, I am making pie crust for the pecan pie, dough for my “famous” cranberry bread, and doing the prep to make Gram’s turkey dressing. Each family is bringing their contributions to the meal (feast). Thanksgiving Day is a flurry of activity with too many cooks in the kitchen—just how we like it! And sitting at the table with the feast before us, we give thanks. Thanks to each other, and to our Creator. We are blessed!
Thanksgiving feast prep. It takes two pastry chefs to make the perfect pecan pie.
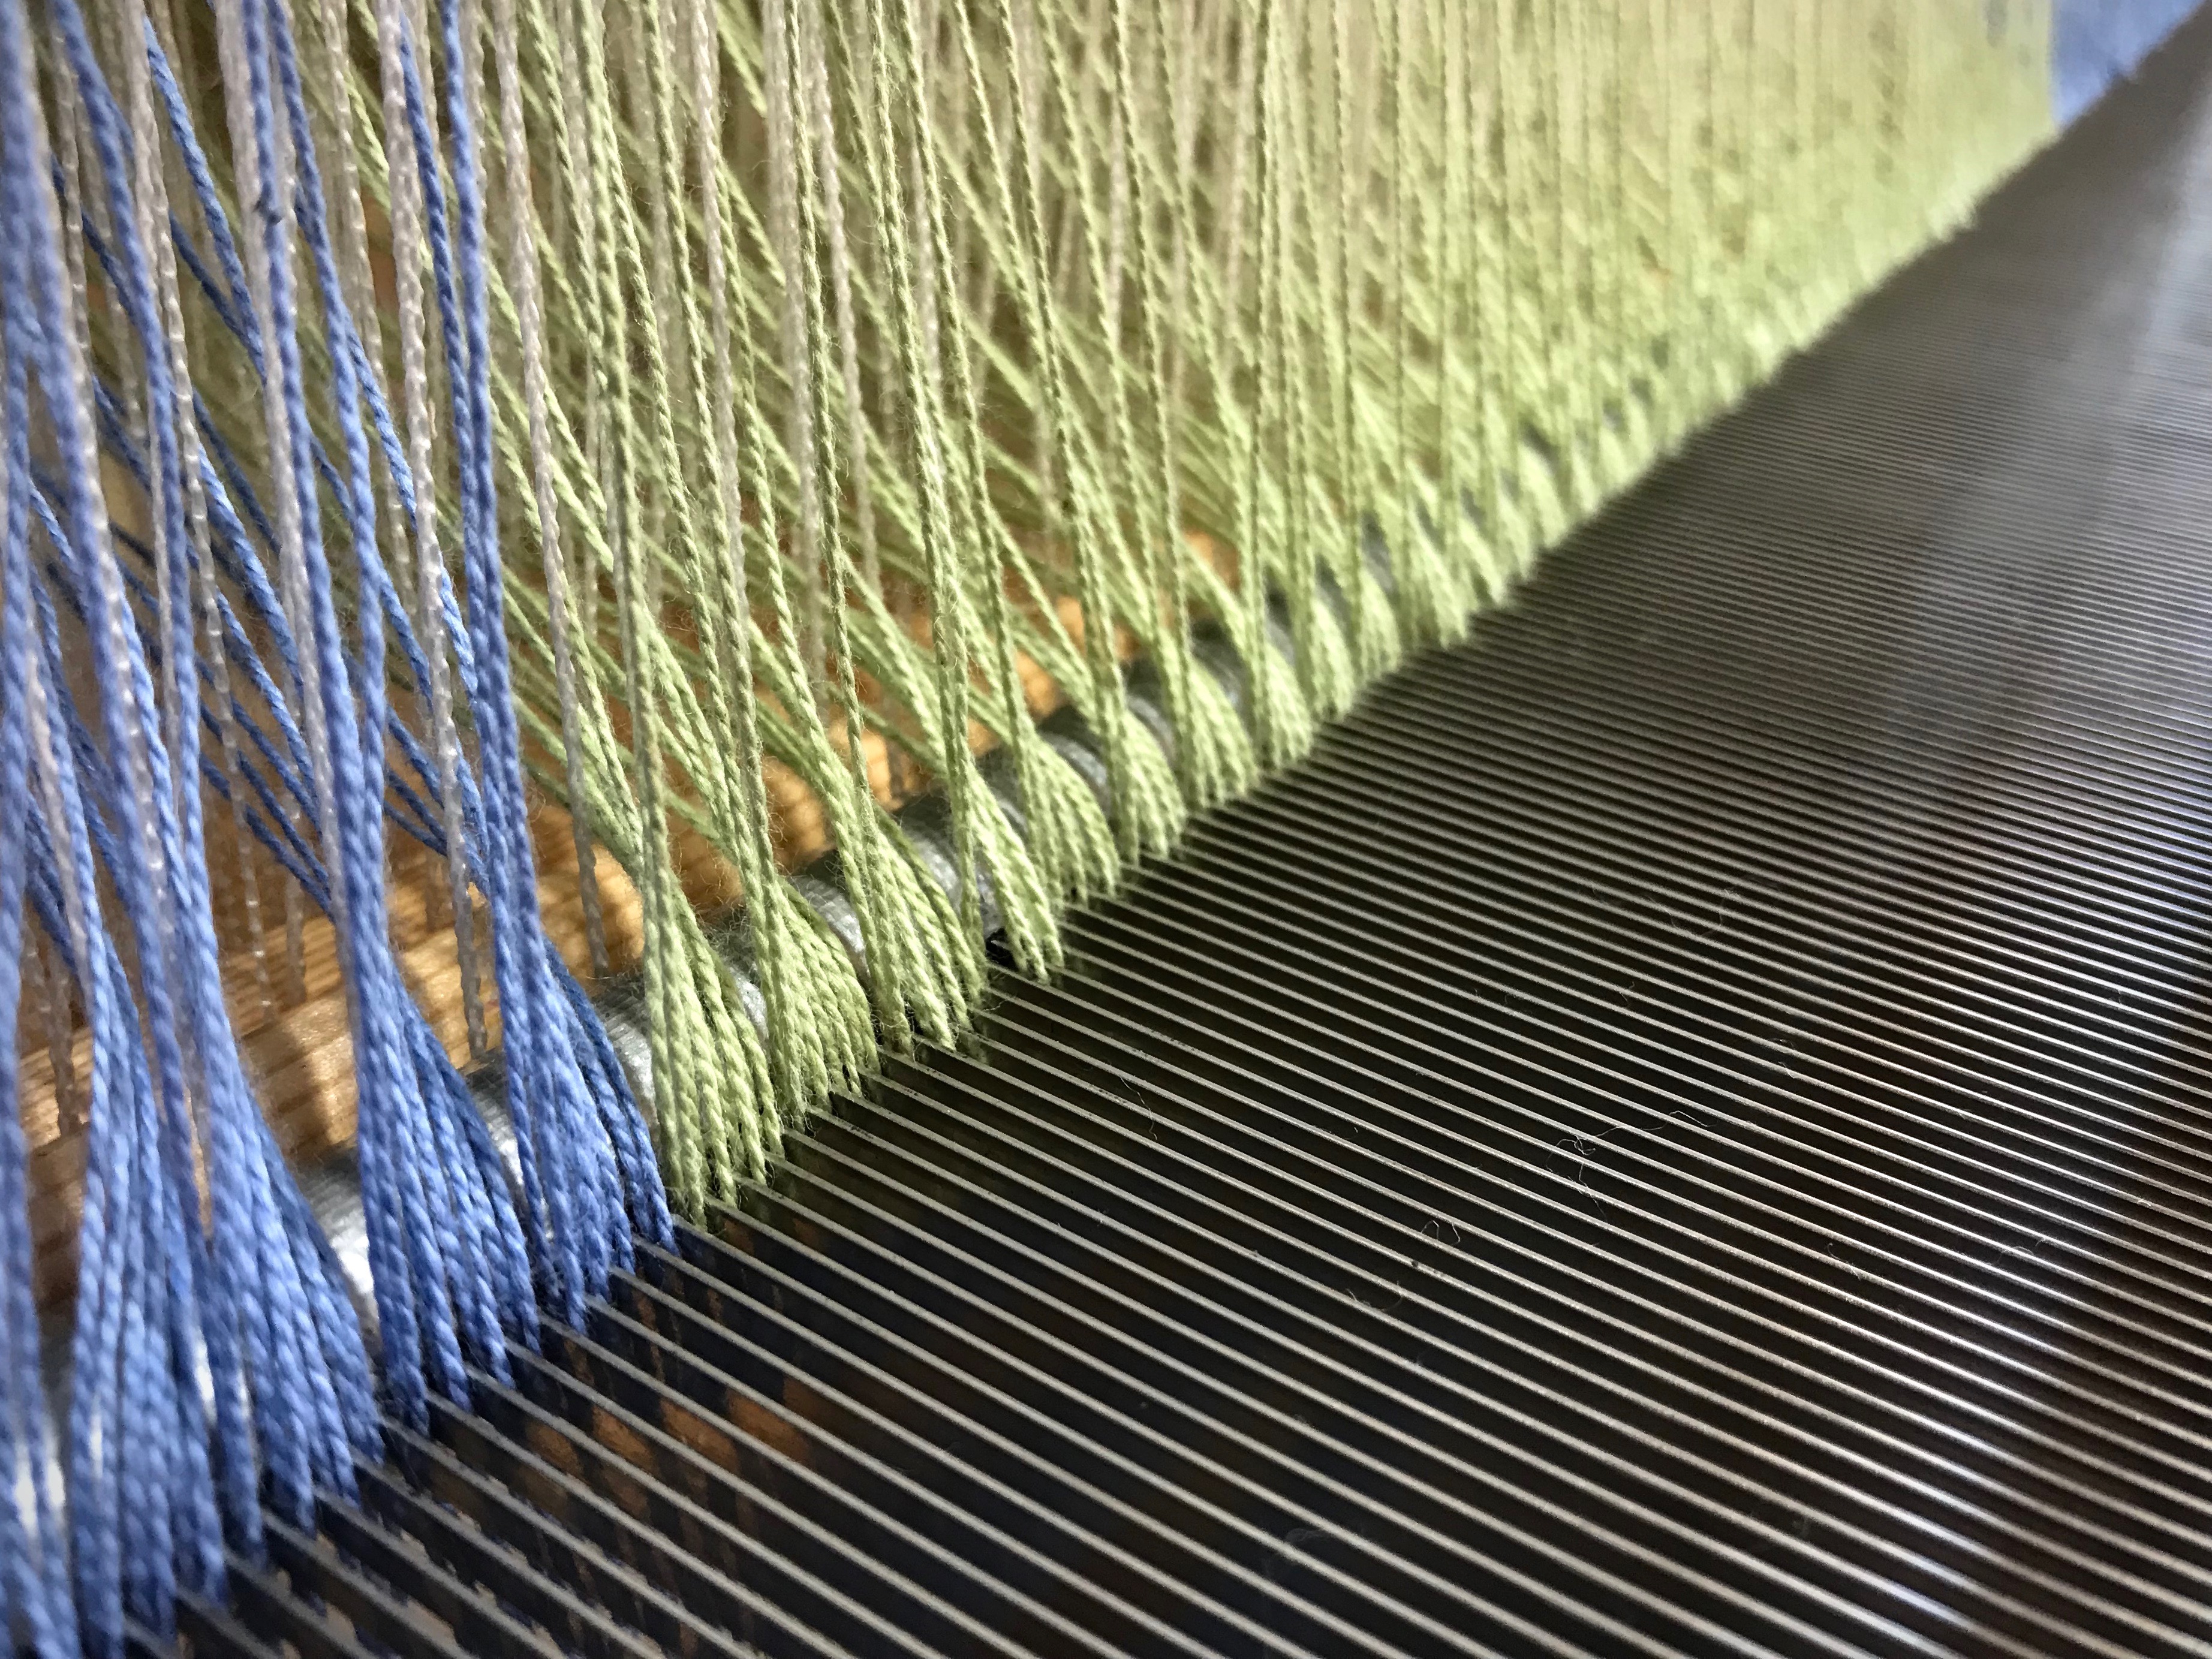
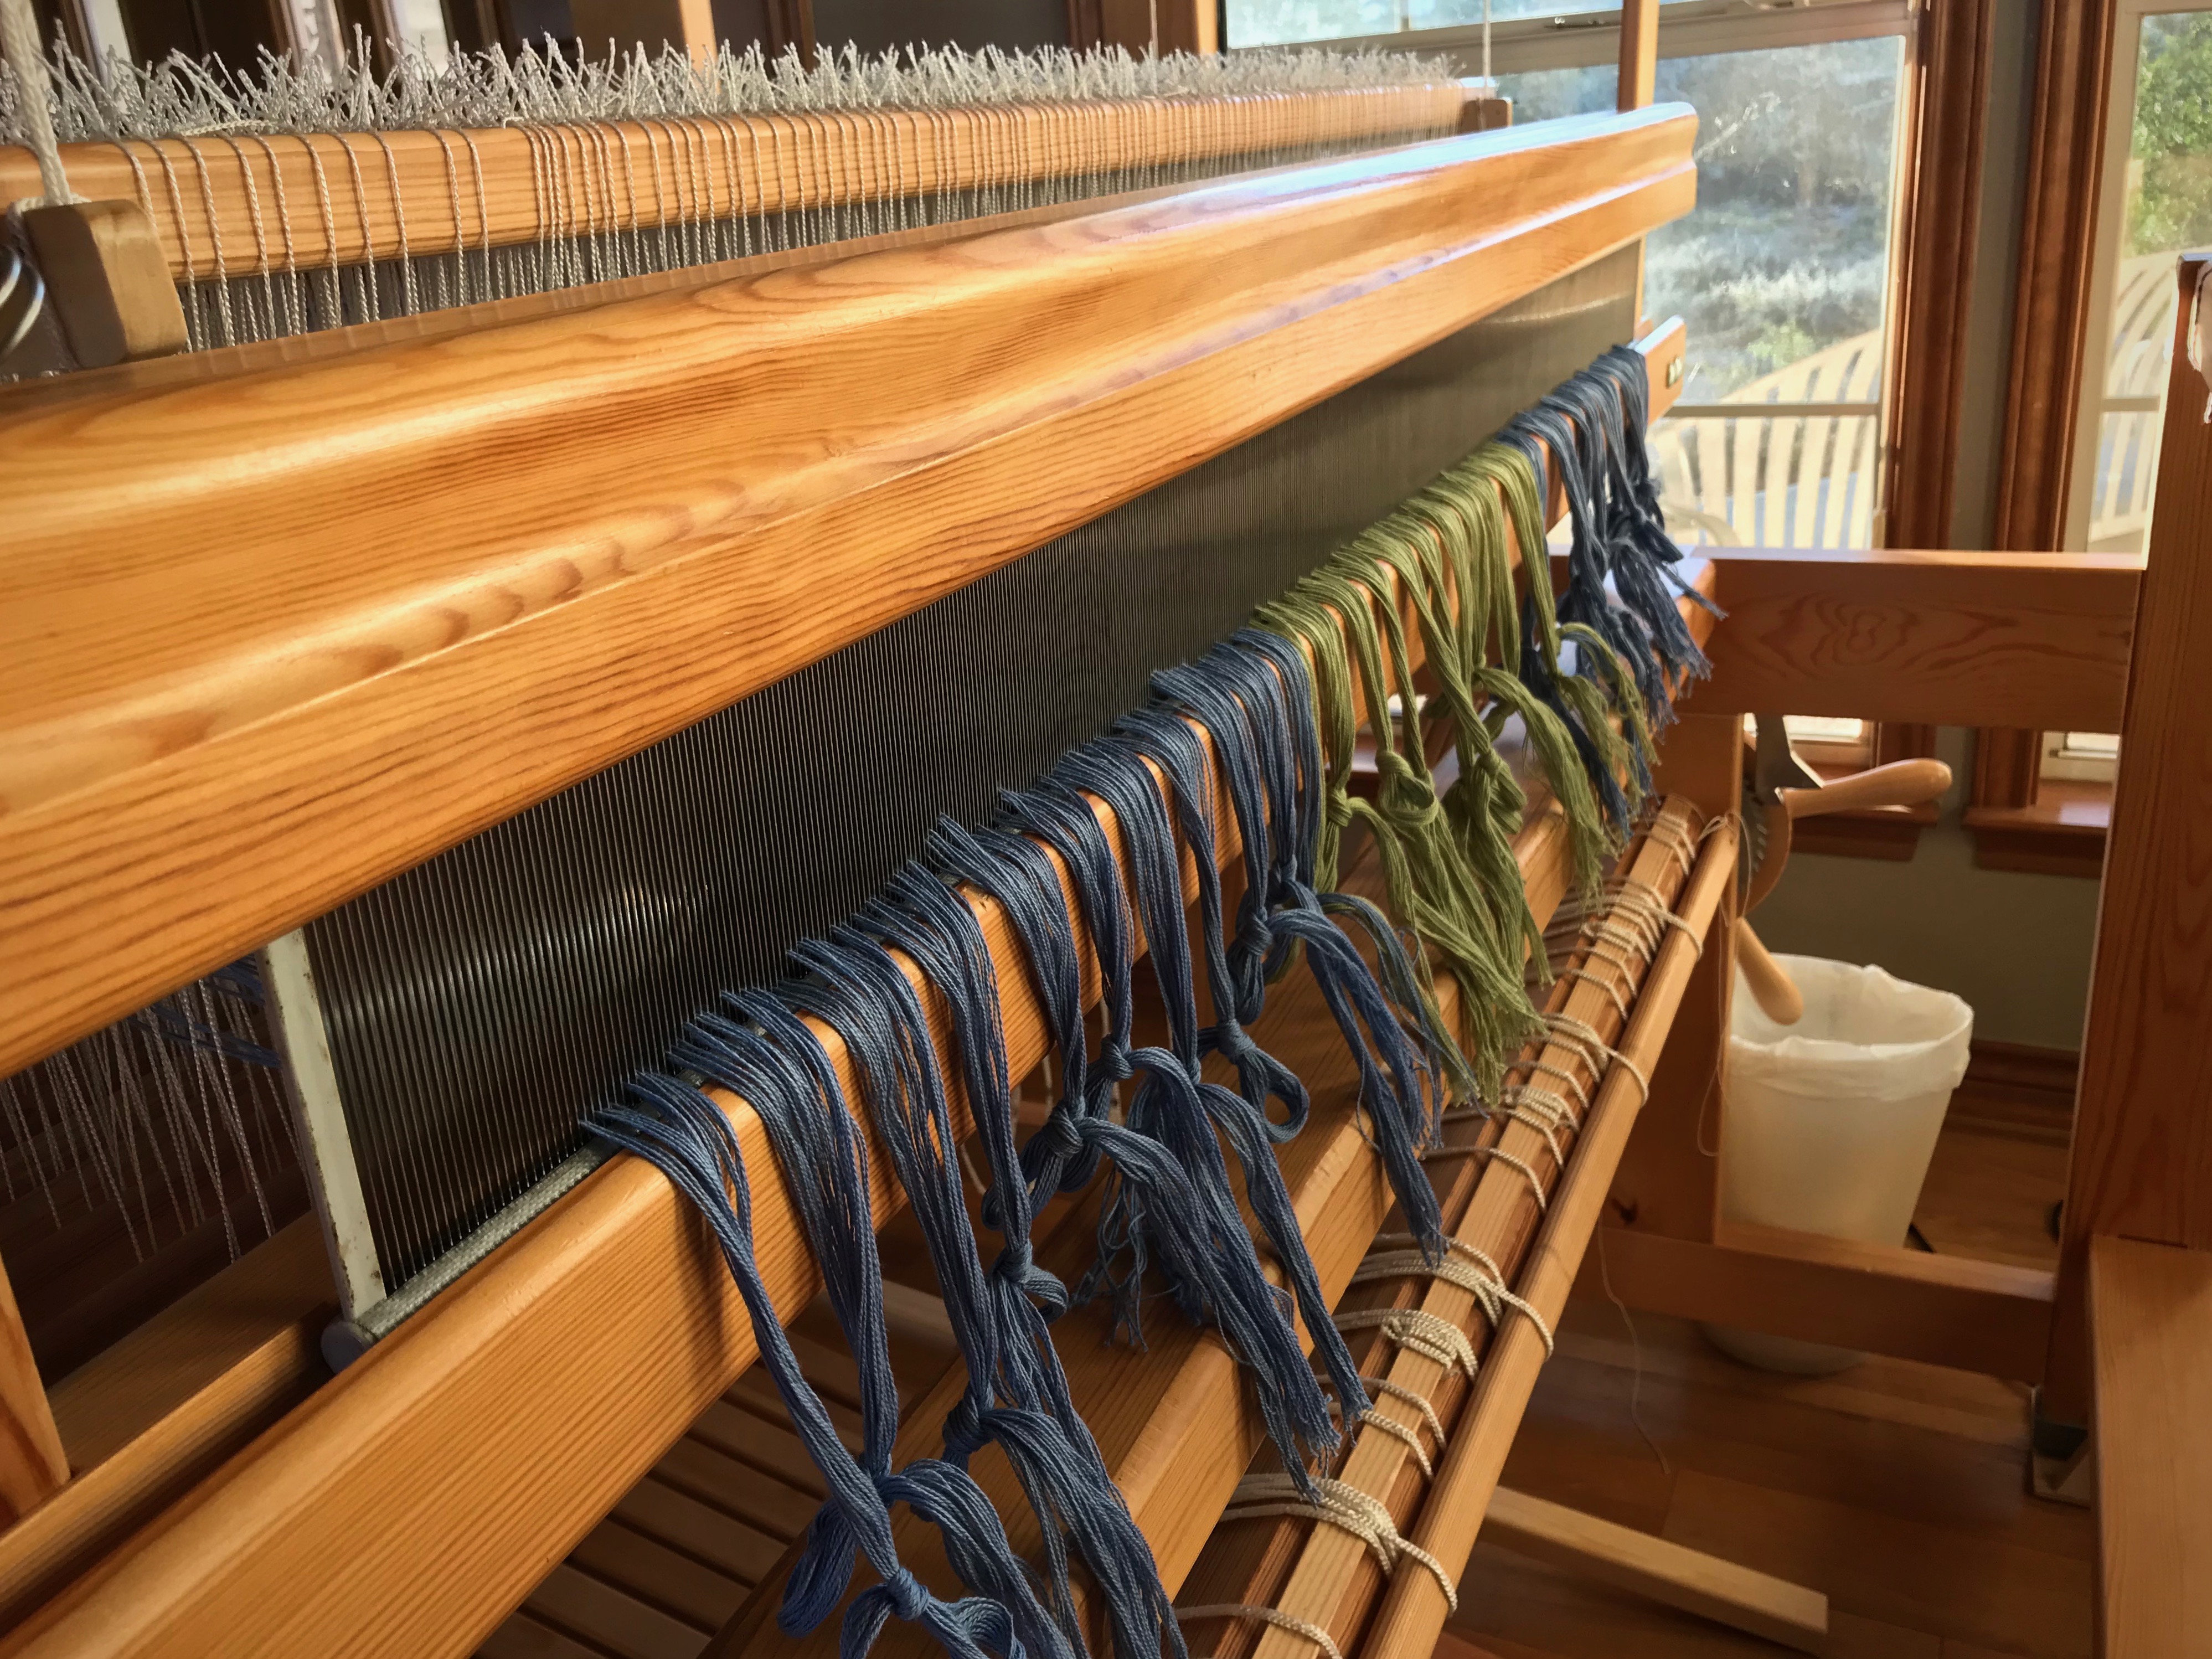
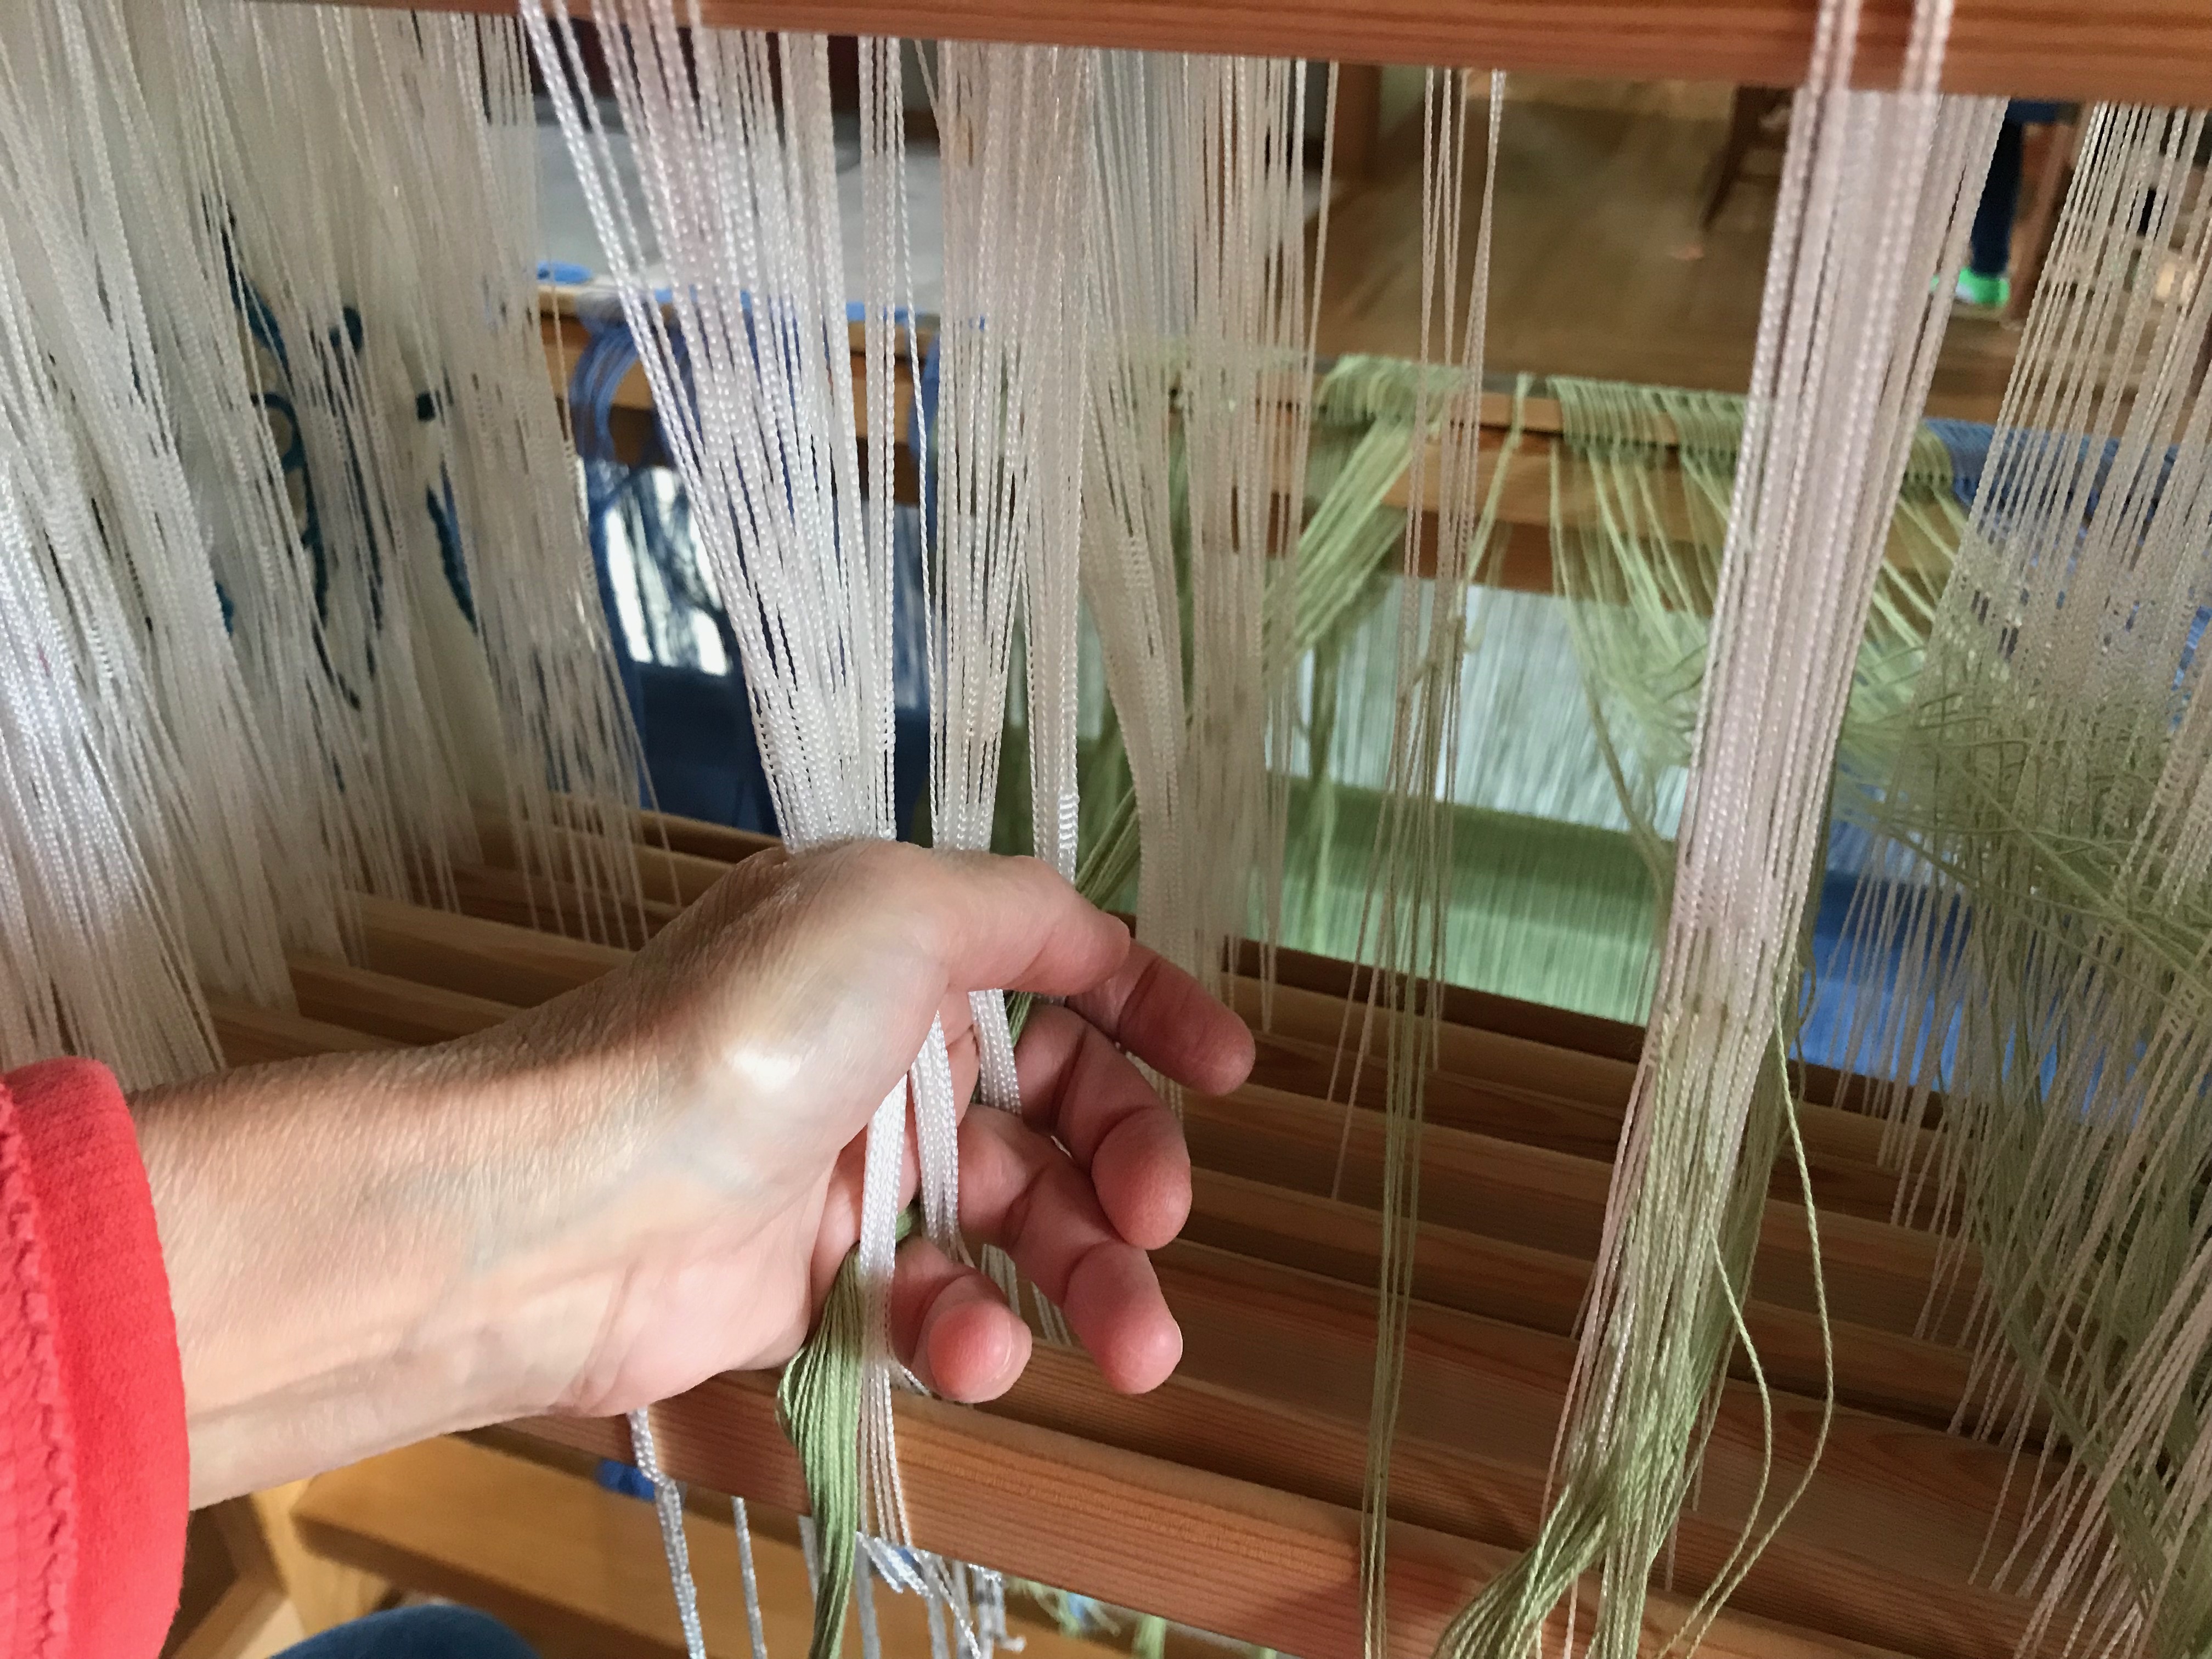
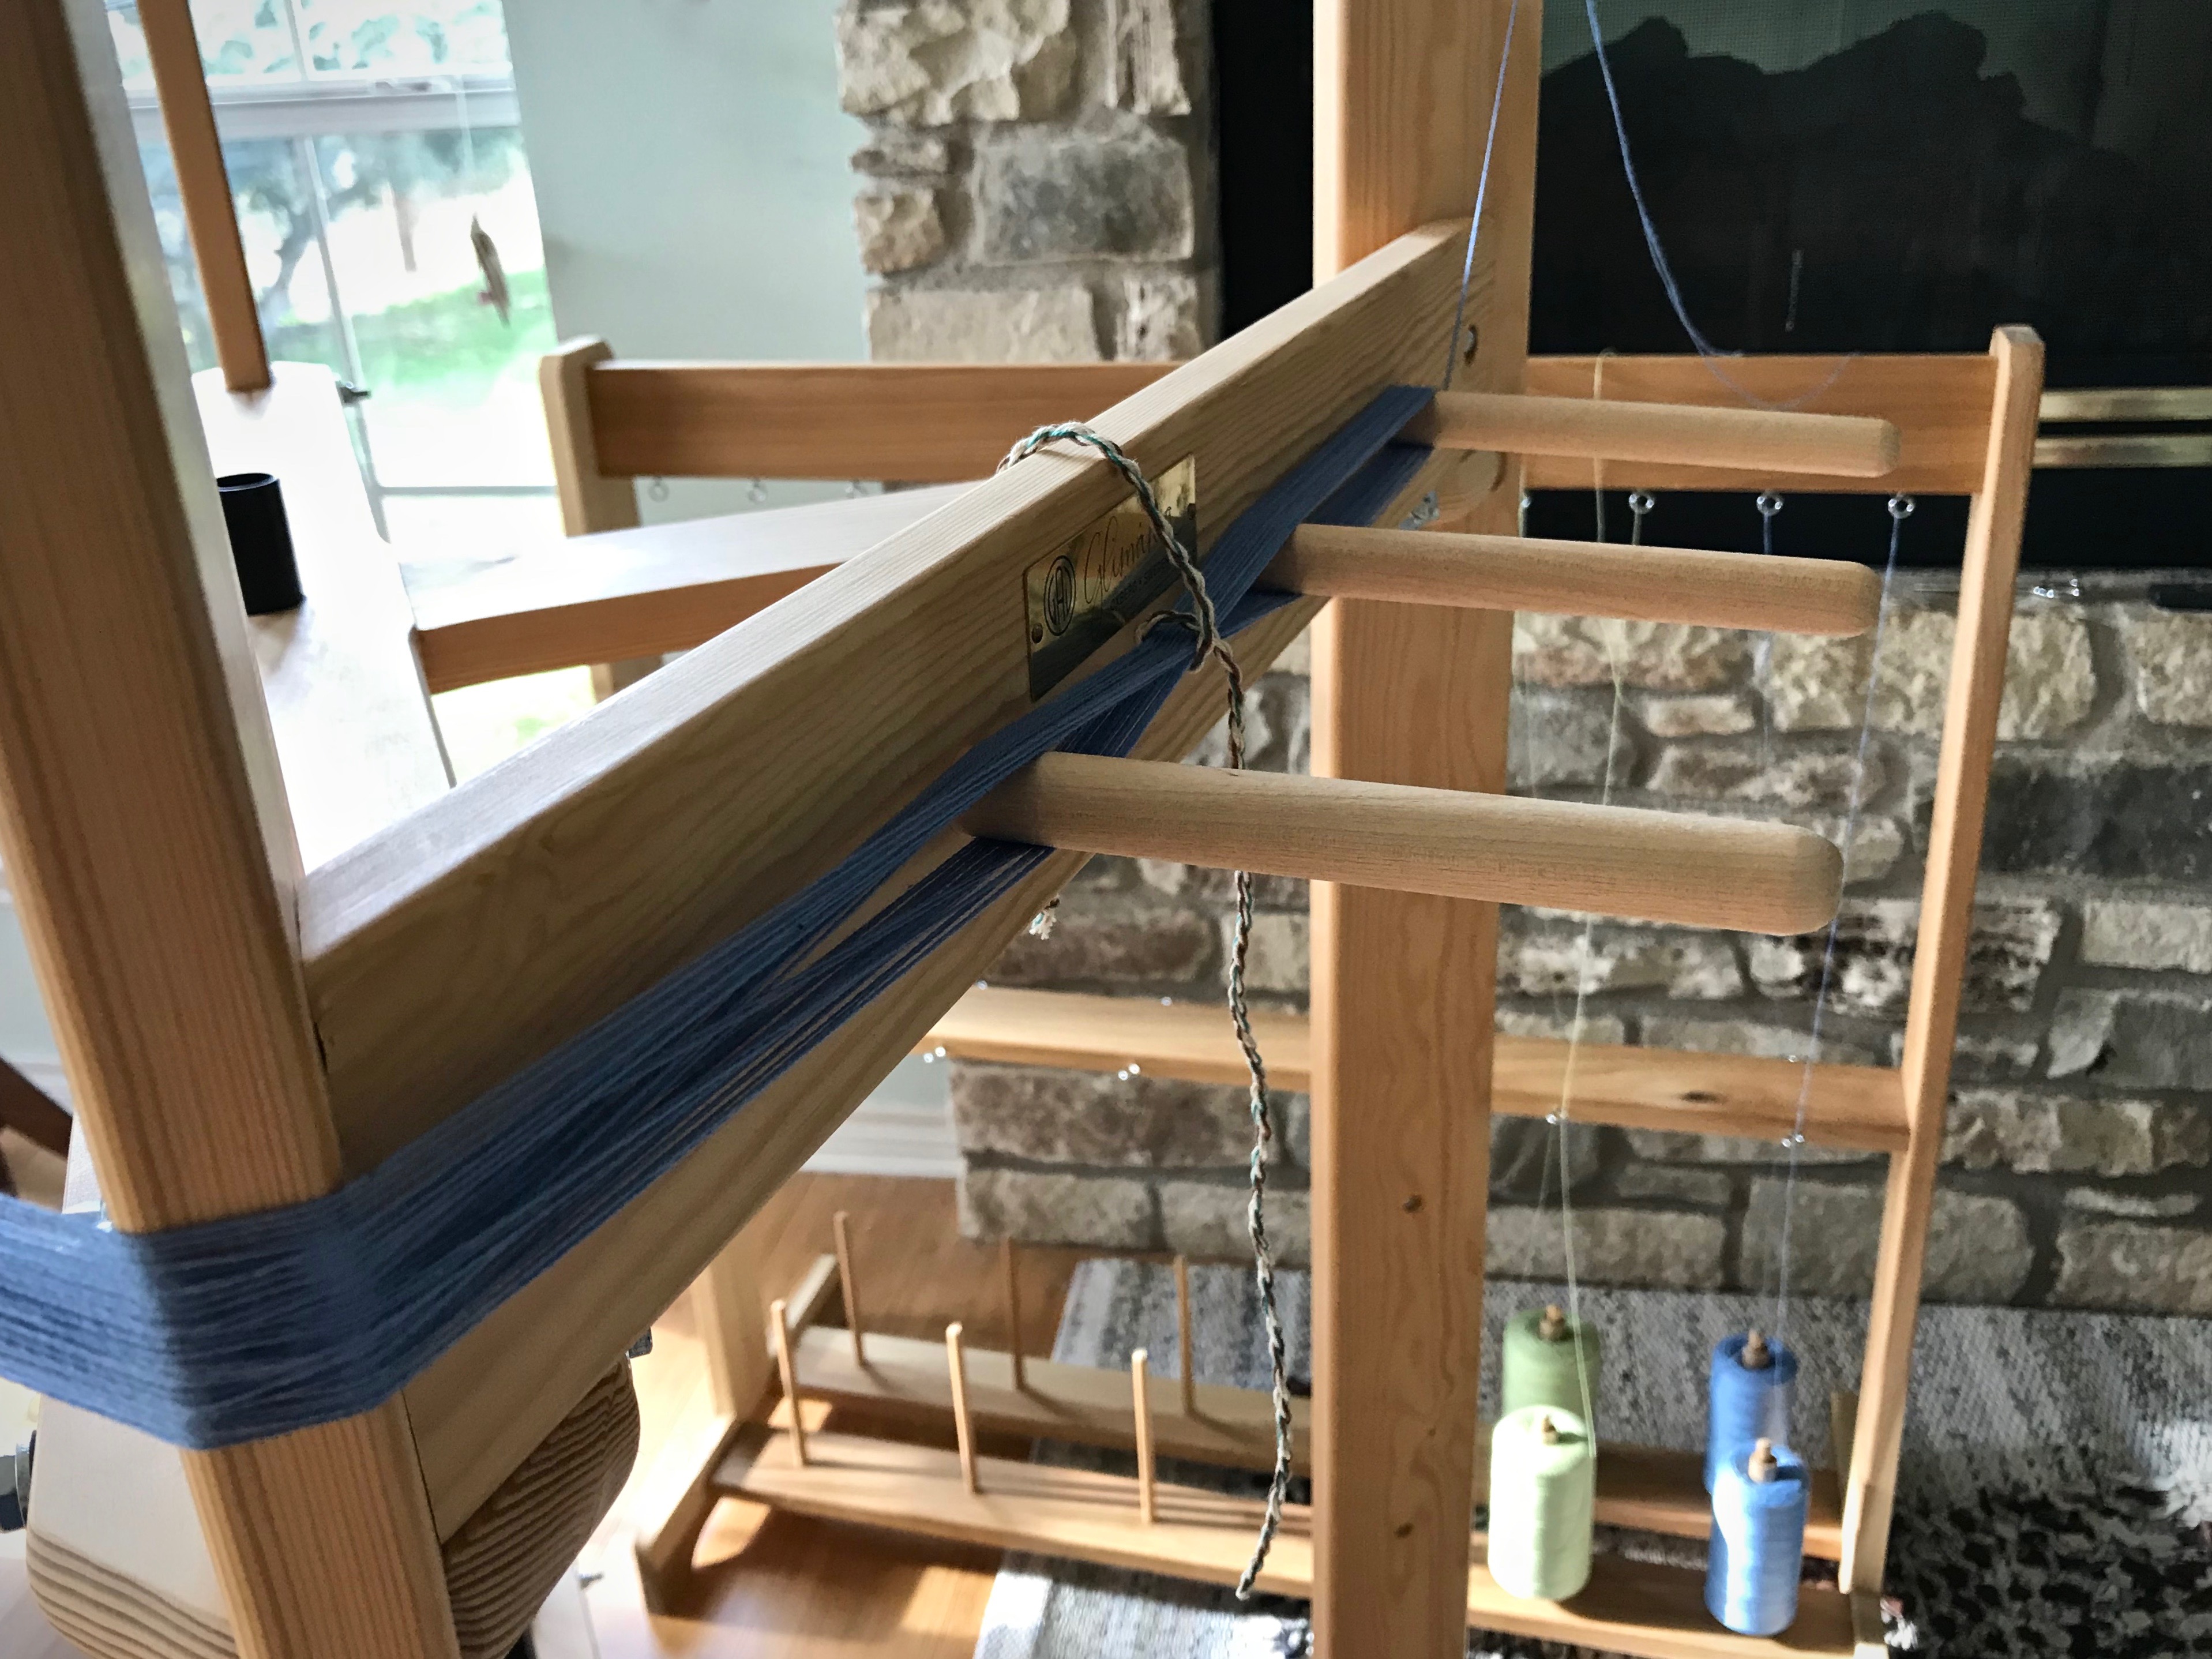
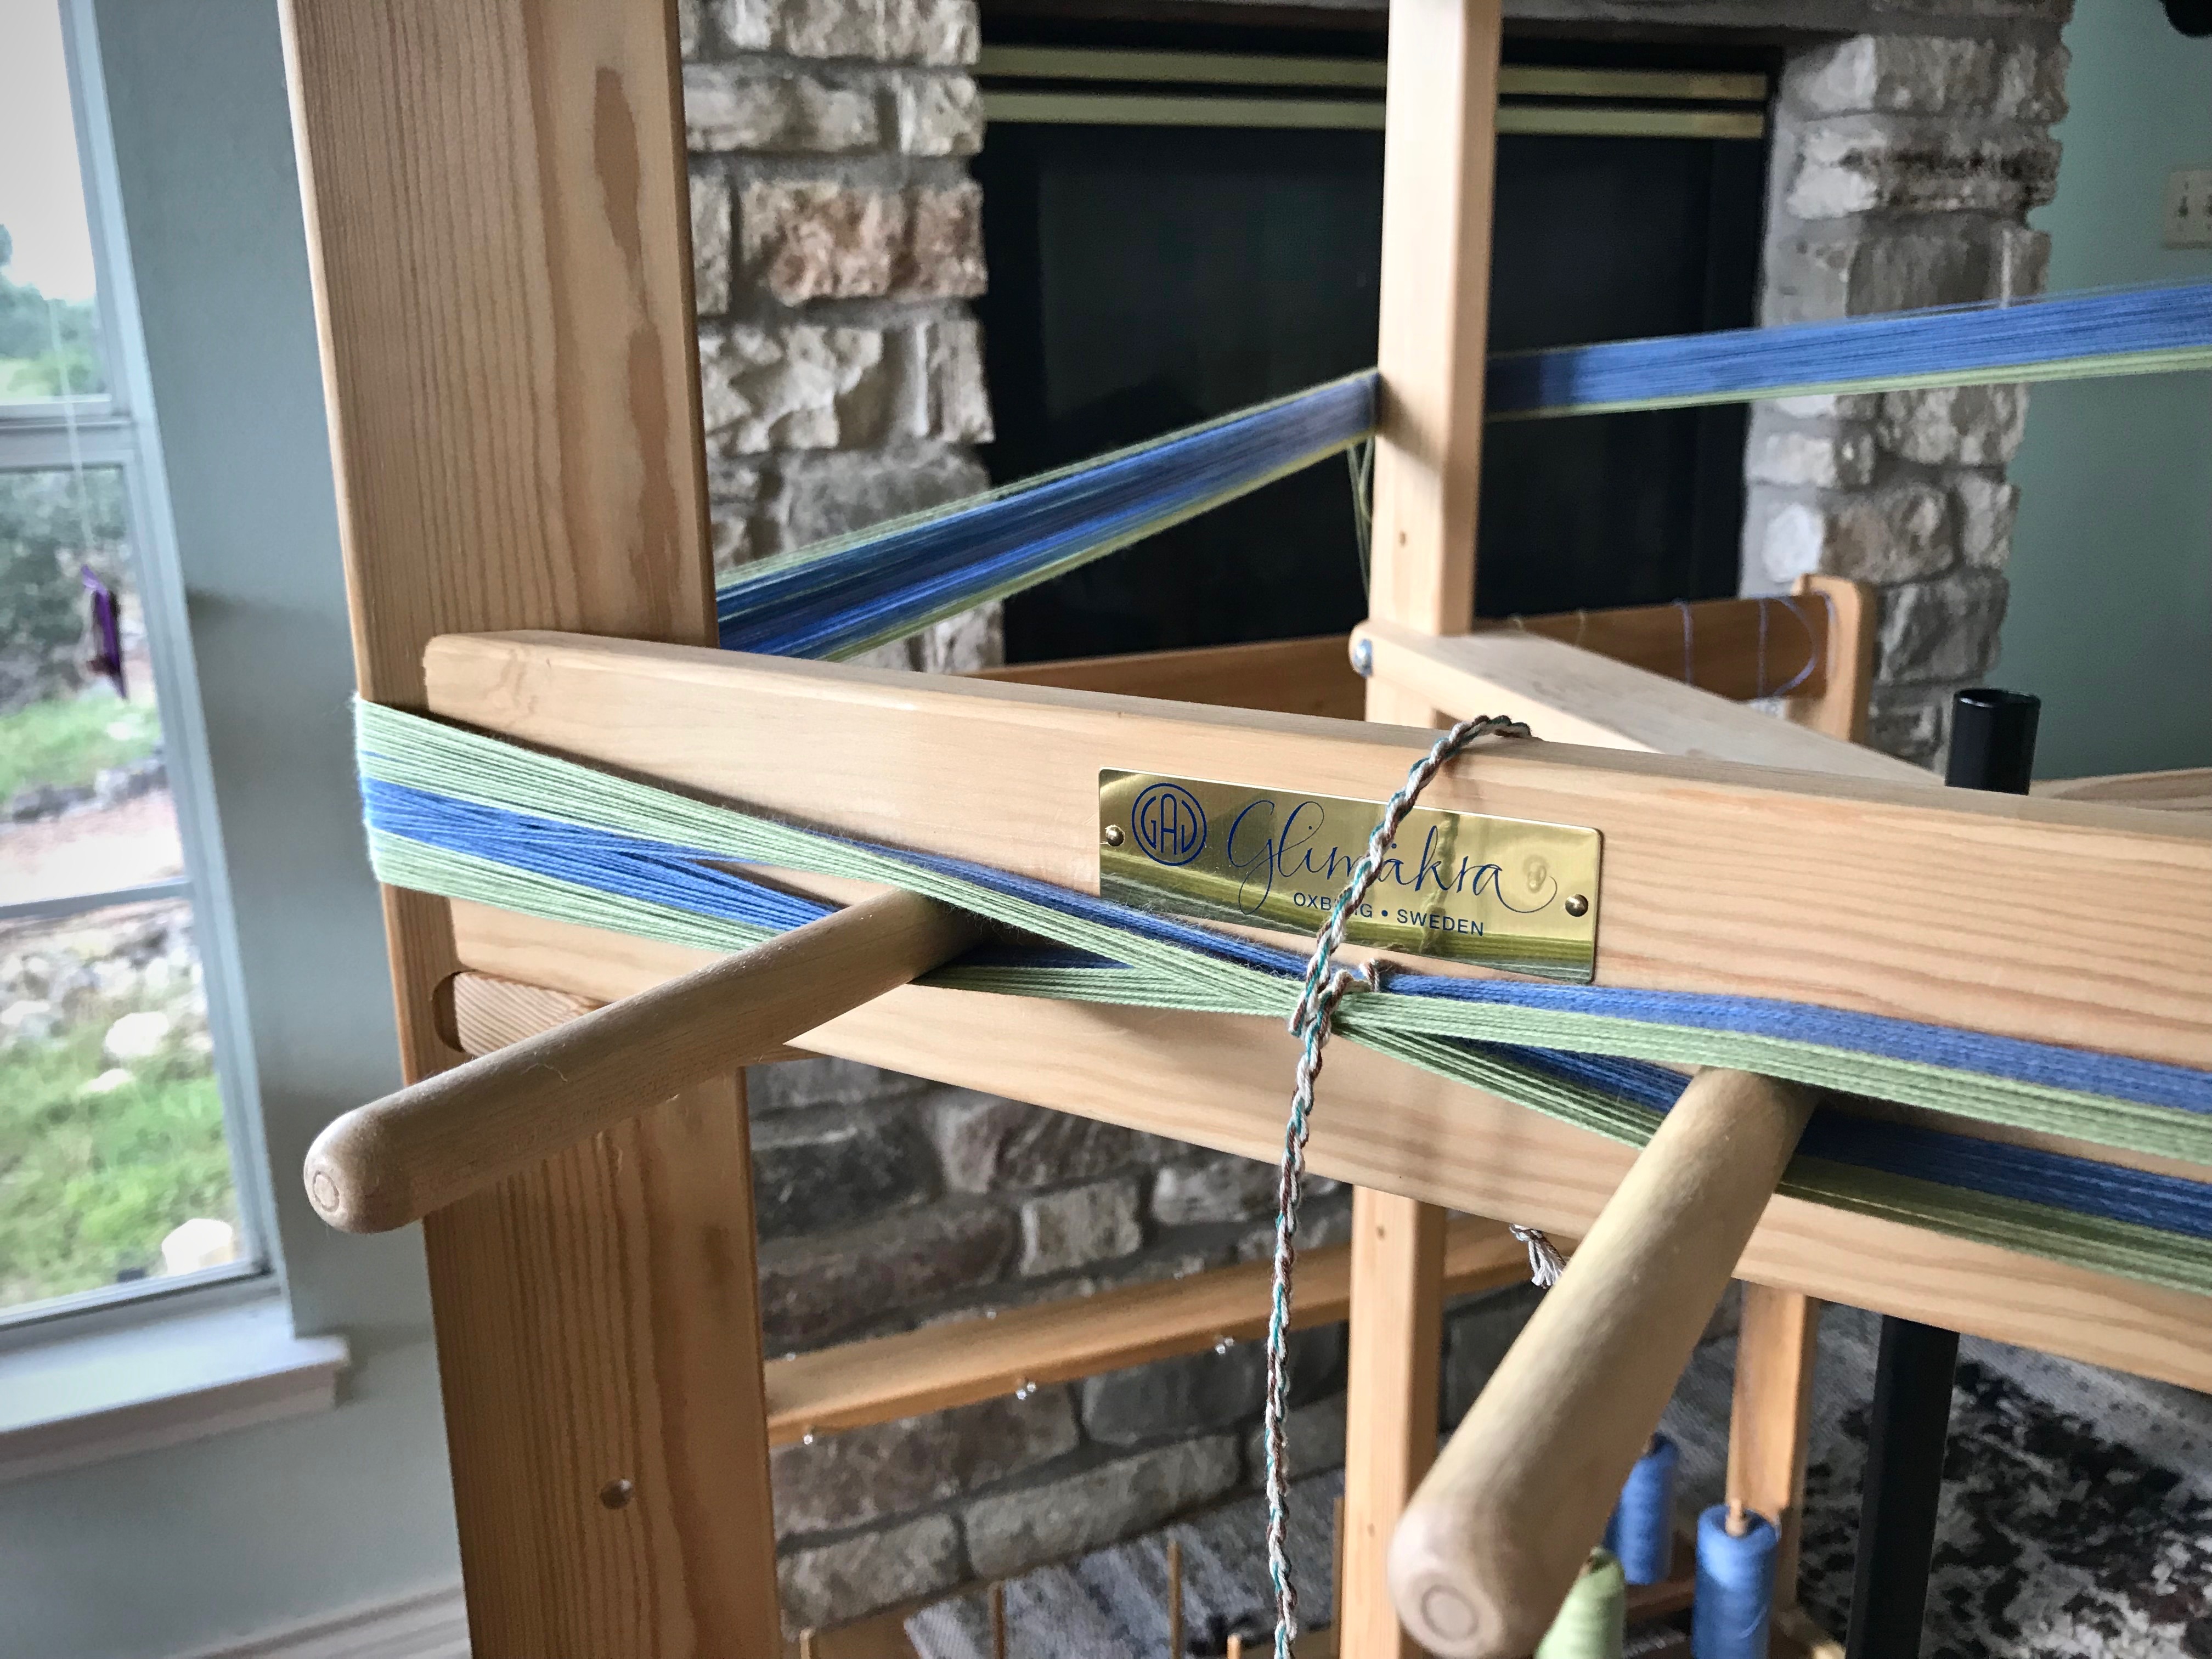
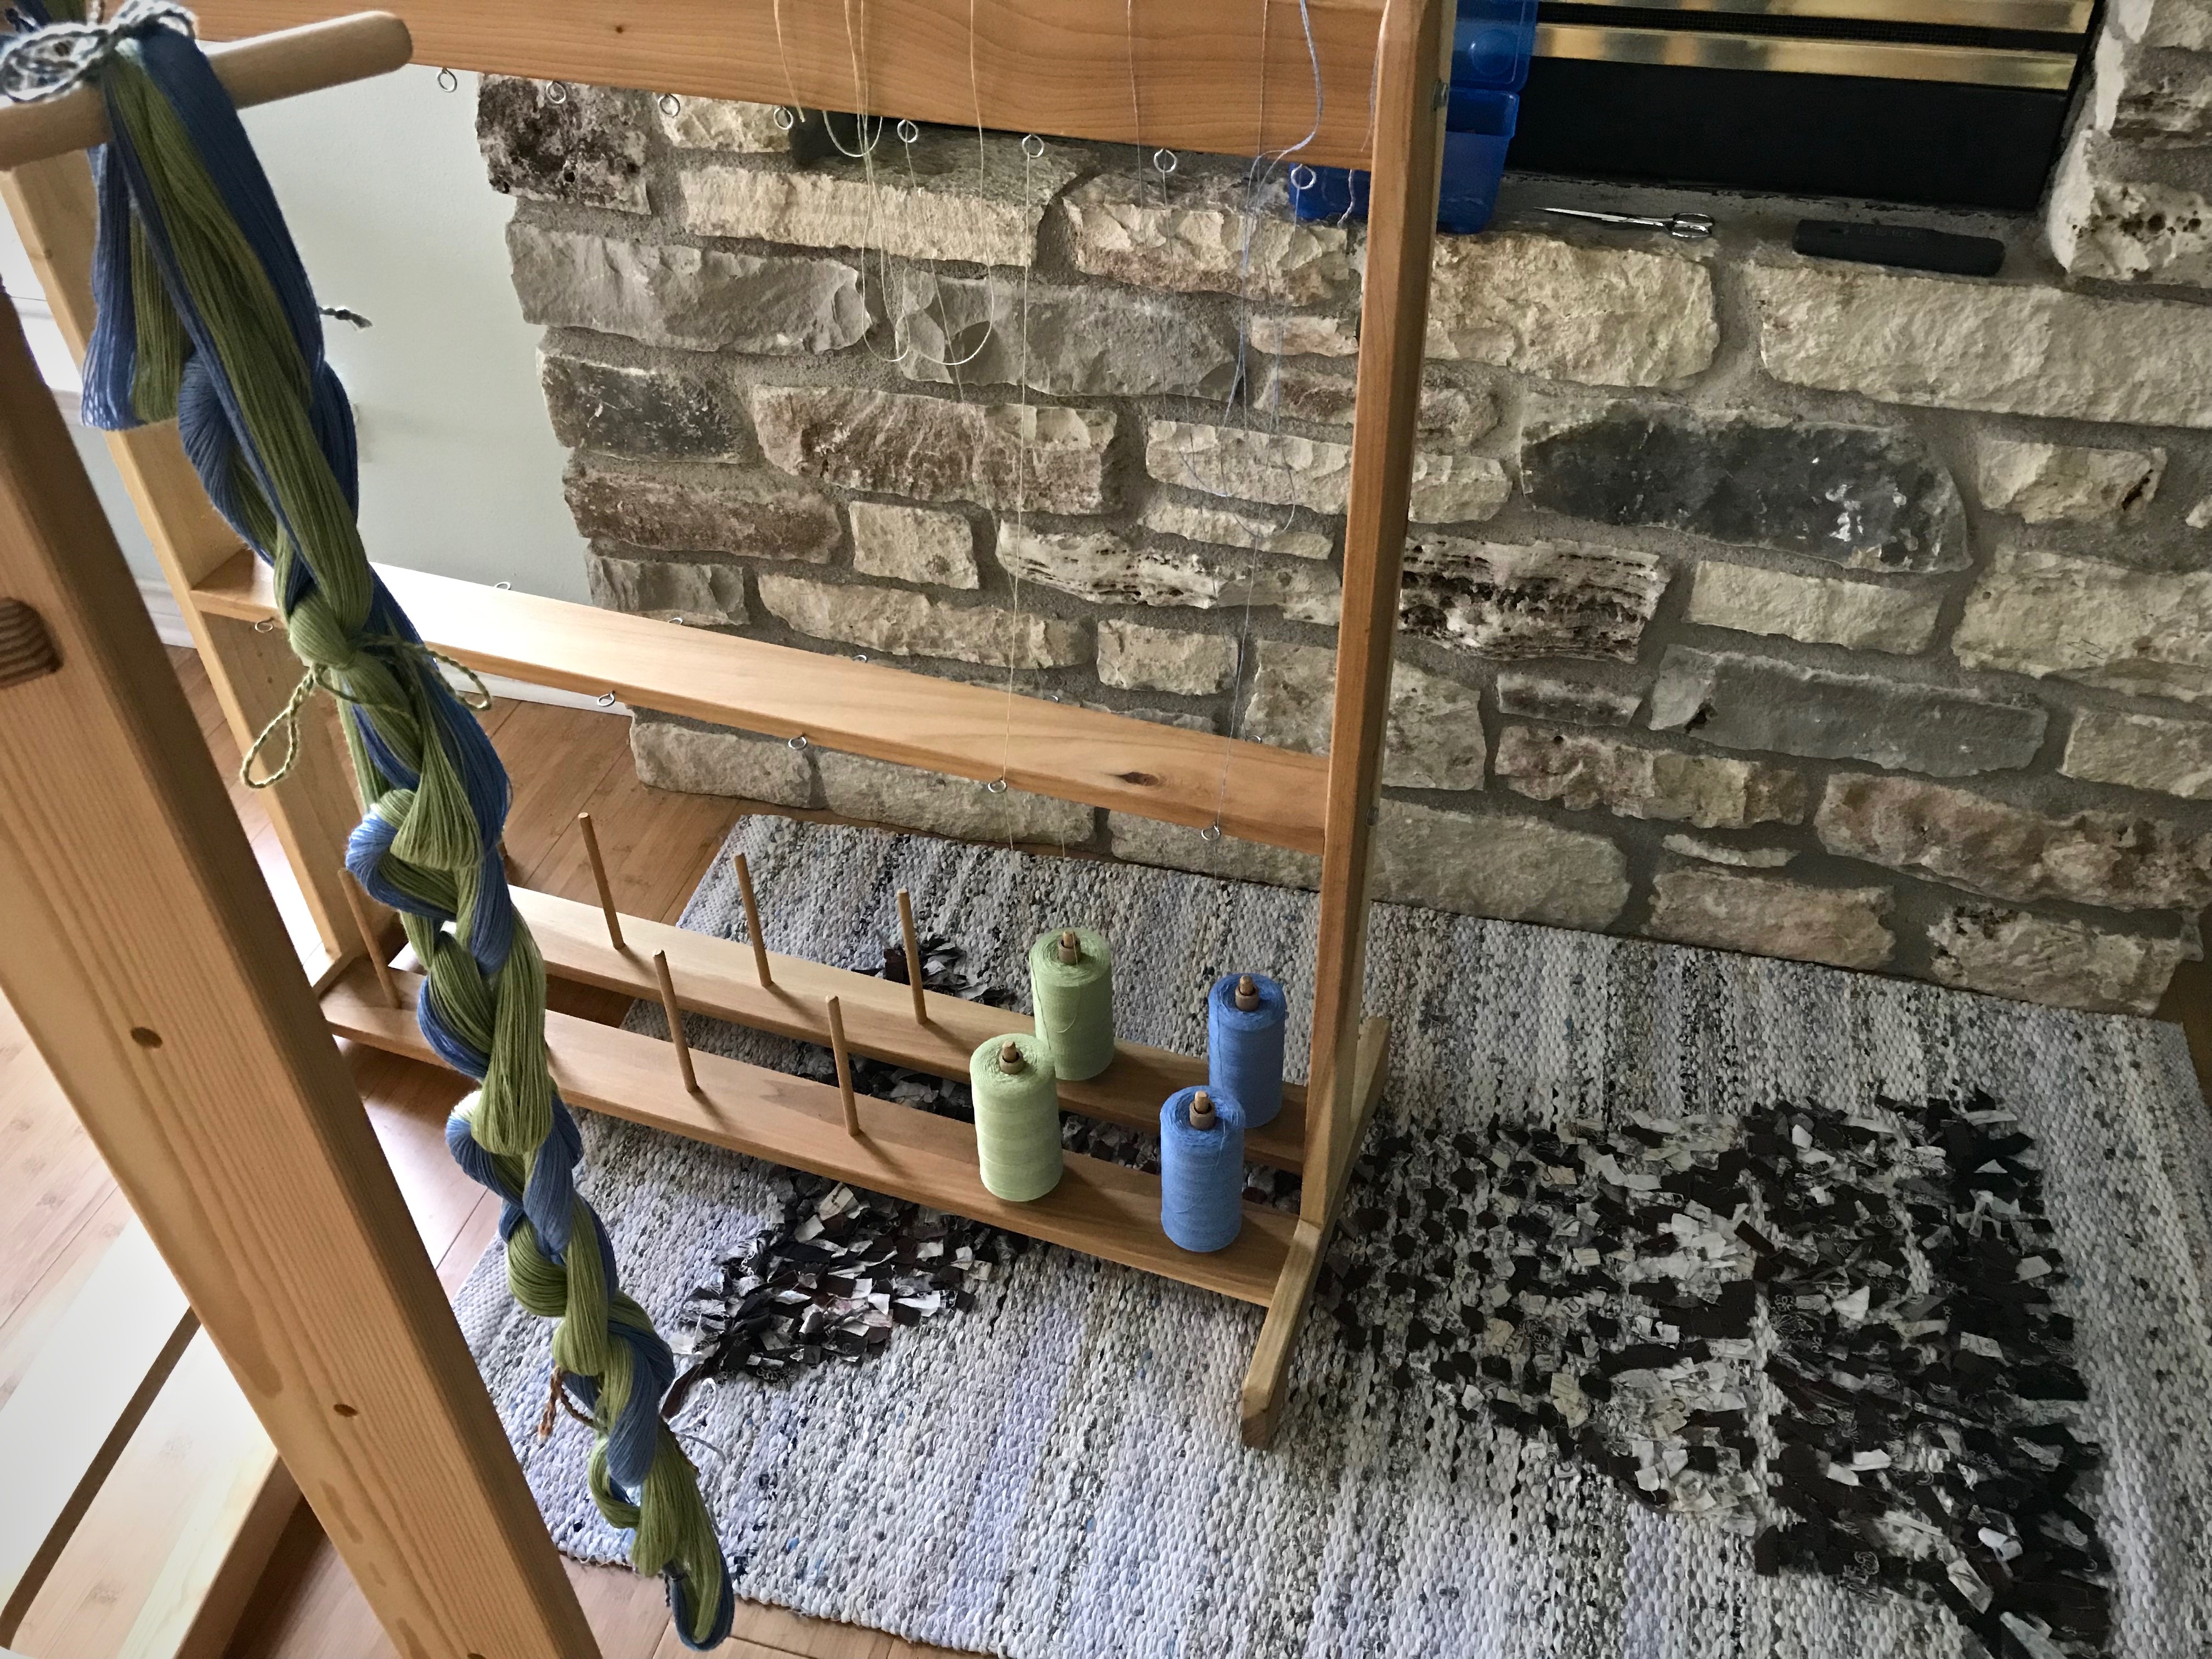
And before everyone arrives I also manage to sley the reed on the Standard. A different kind of dressing—loom dressing.
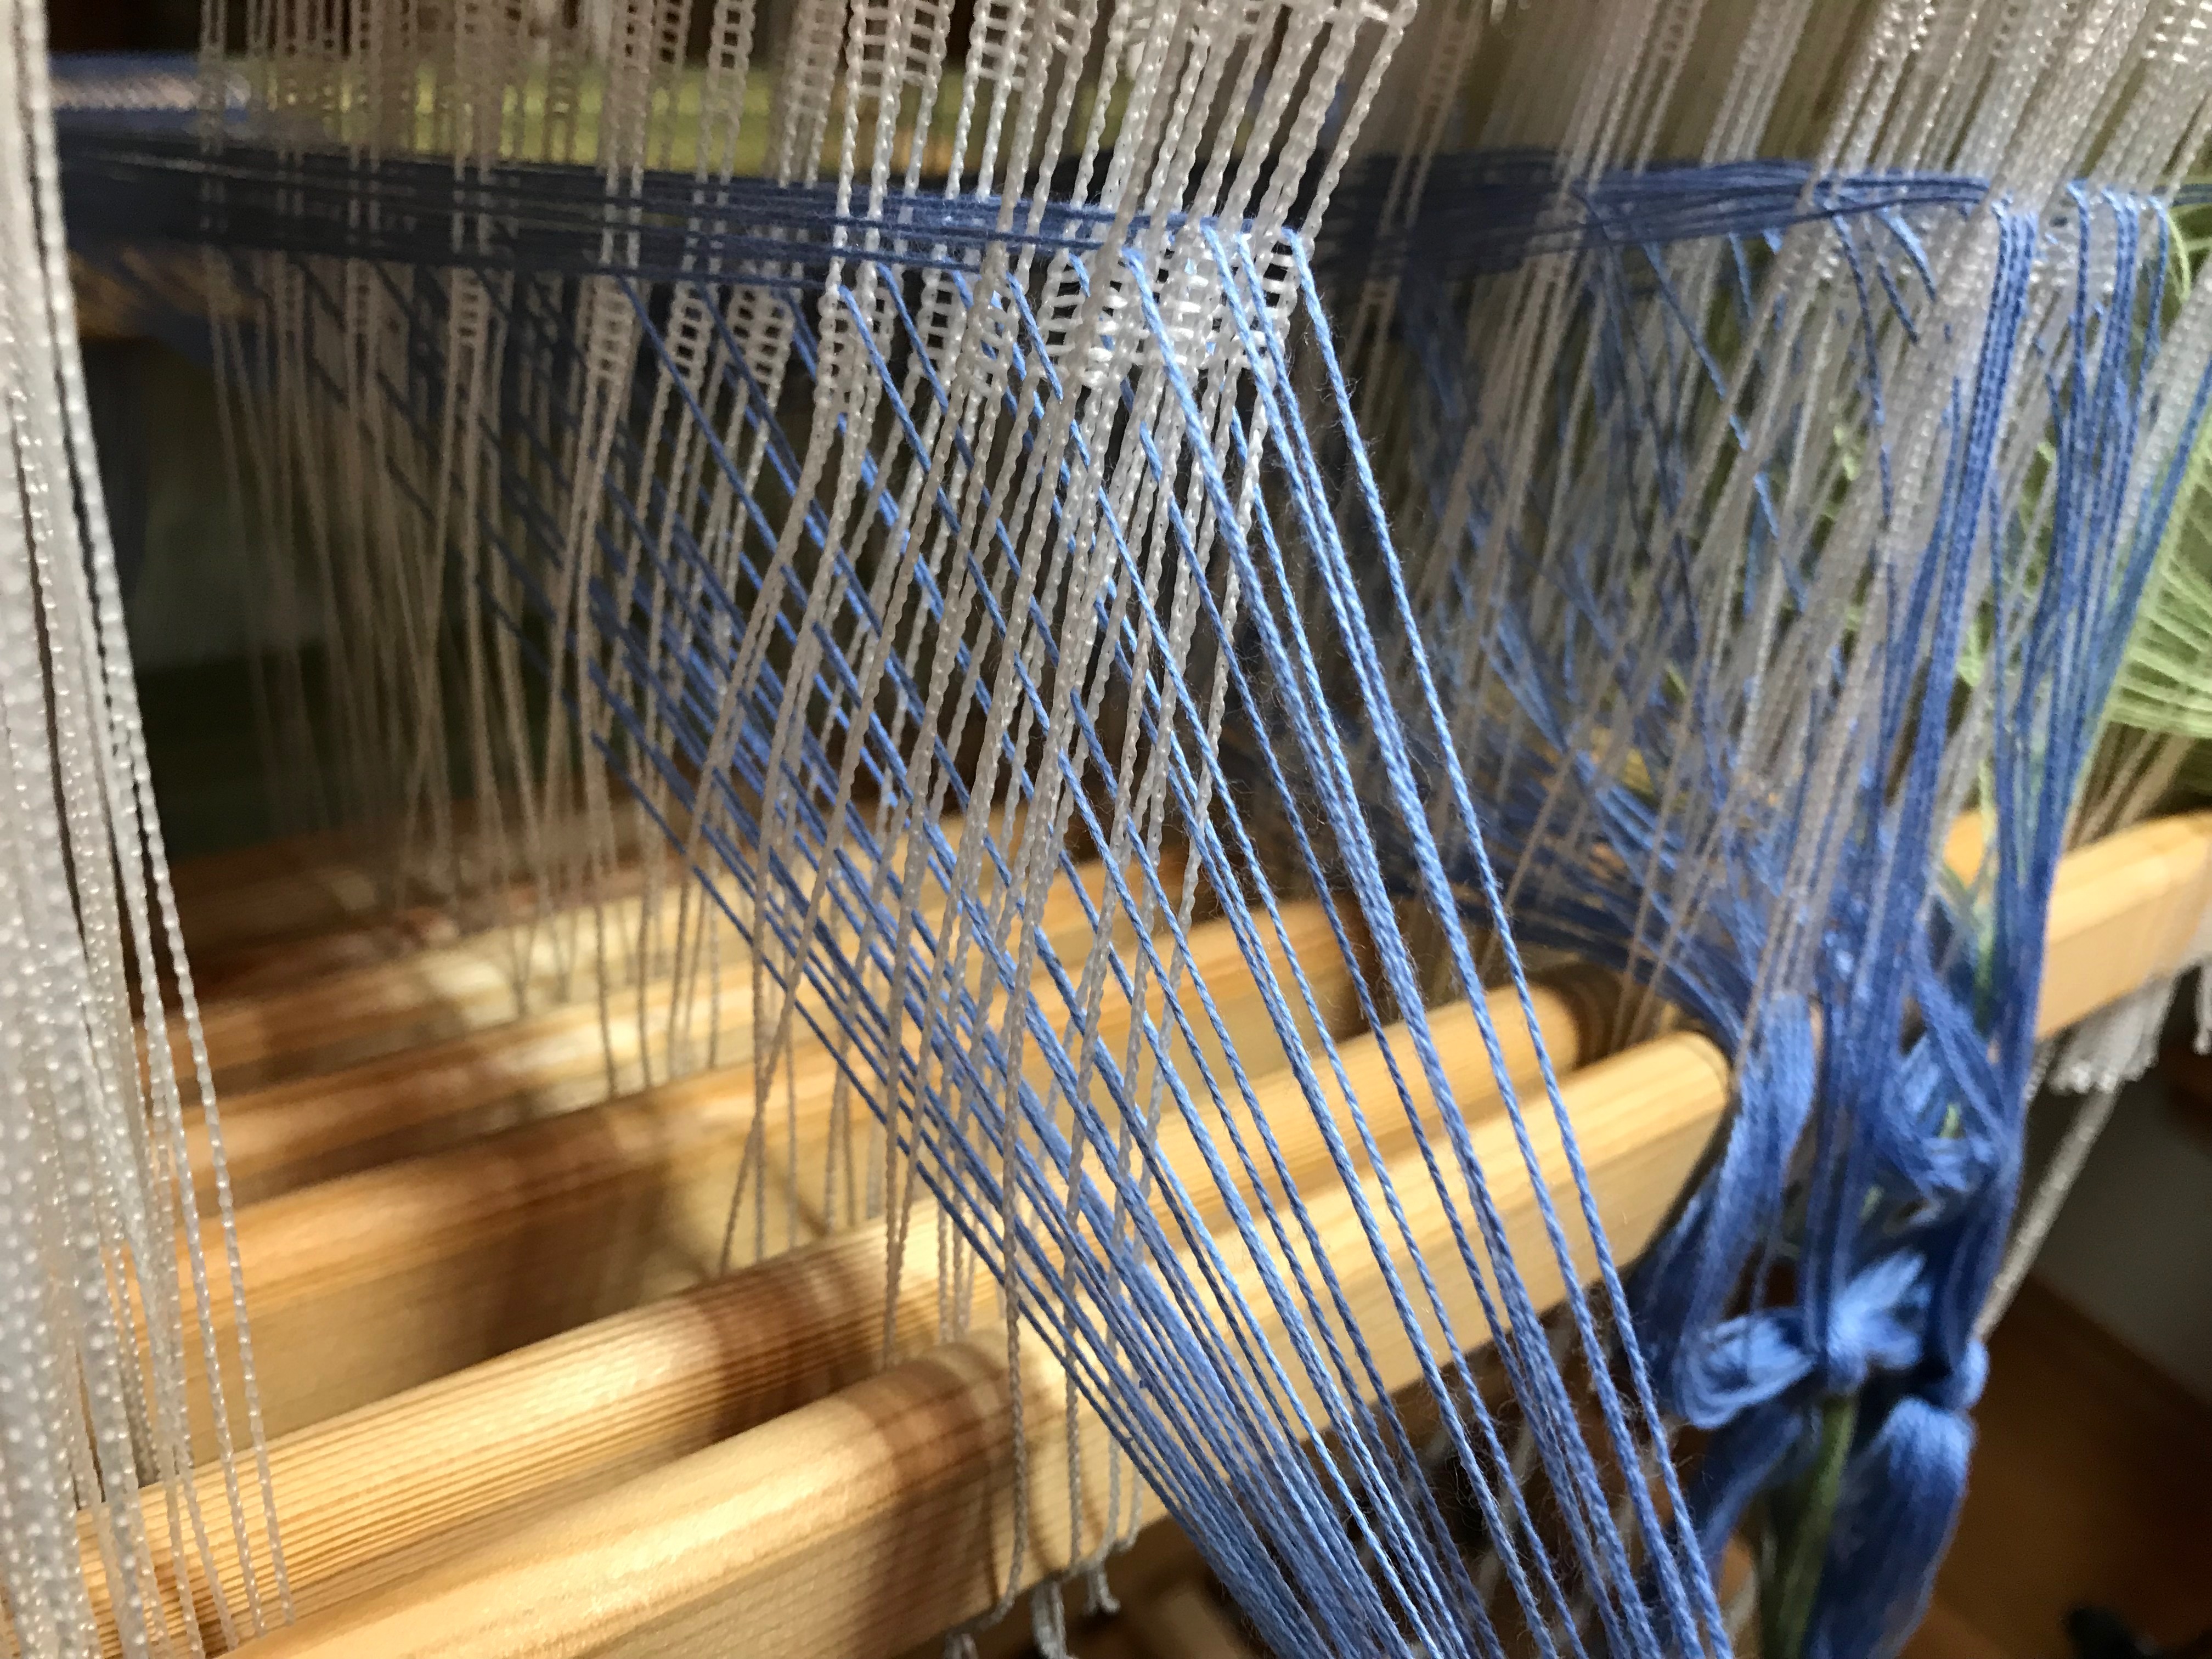
Two ends per dent in a 45/10 metric reed.I sit “inside” the loom on my loom bench to sley the reed.After the reed is sleyed, I remove the loom bench, lower the shafts, and move the countermarch to the front of the loom. Then, I place the reed in the beater and make sure it is centered. Next step–tying on!Getting dressed. Oh the beauty of a fresh warp going over the back beam! Magical.
A feast for the eyes and hands and heart. Thankful indeed!
Threadingfourshafts is straightforward because the heddles fit perfectly between four fingers and a thumb. Threading eight shafts is tricky because we don’t have that many fingers! Thankfully, threading eight shafts can be as straightforward as threading four shafts. I like to think of it as four shafts in the back, and four shafts in the front.
Set a small group of heddles apart on each shaft to prepare for threading the next group of ends.
Pick up the next threading group of ends and bring it to the front, on the left side of the separated heddles.
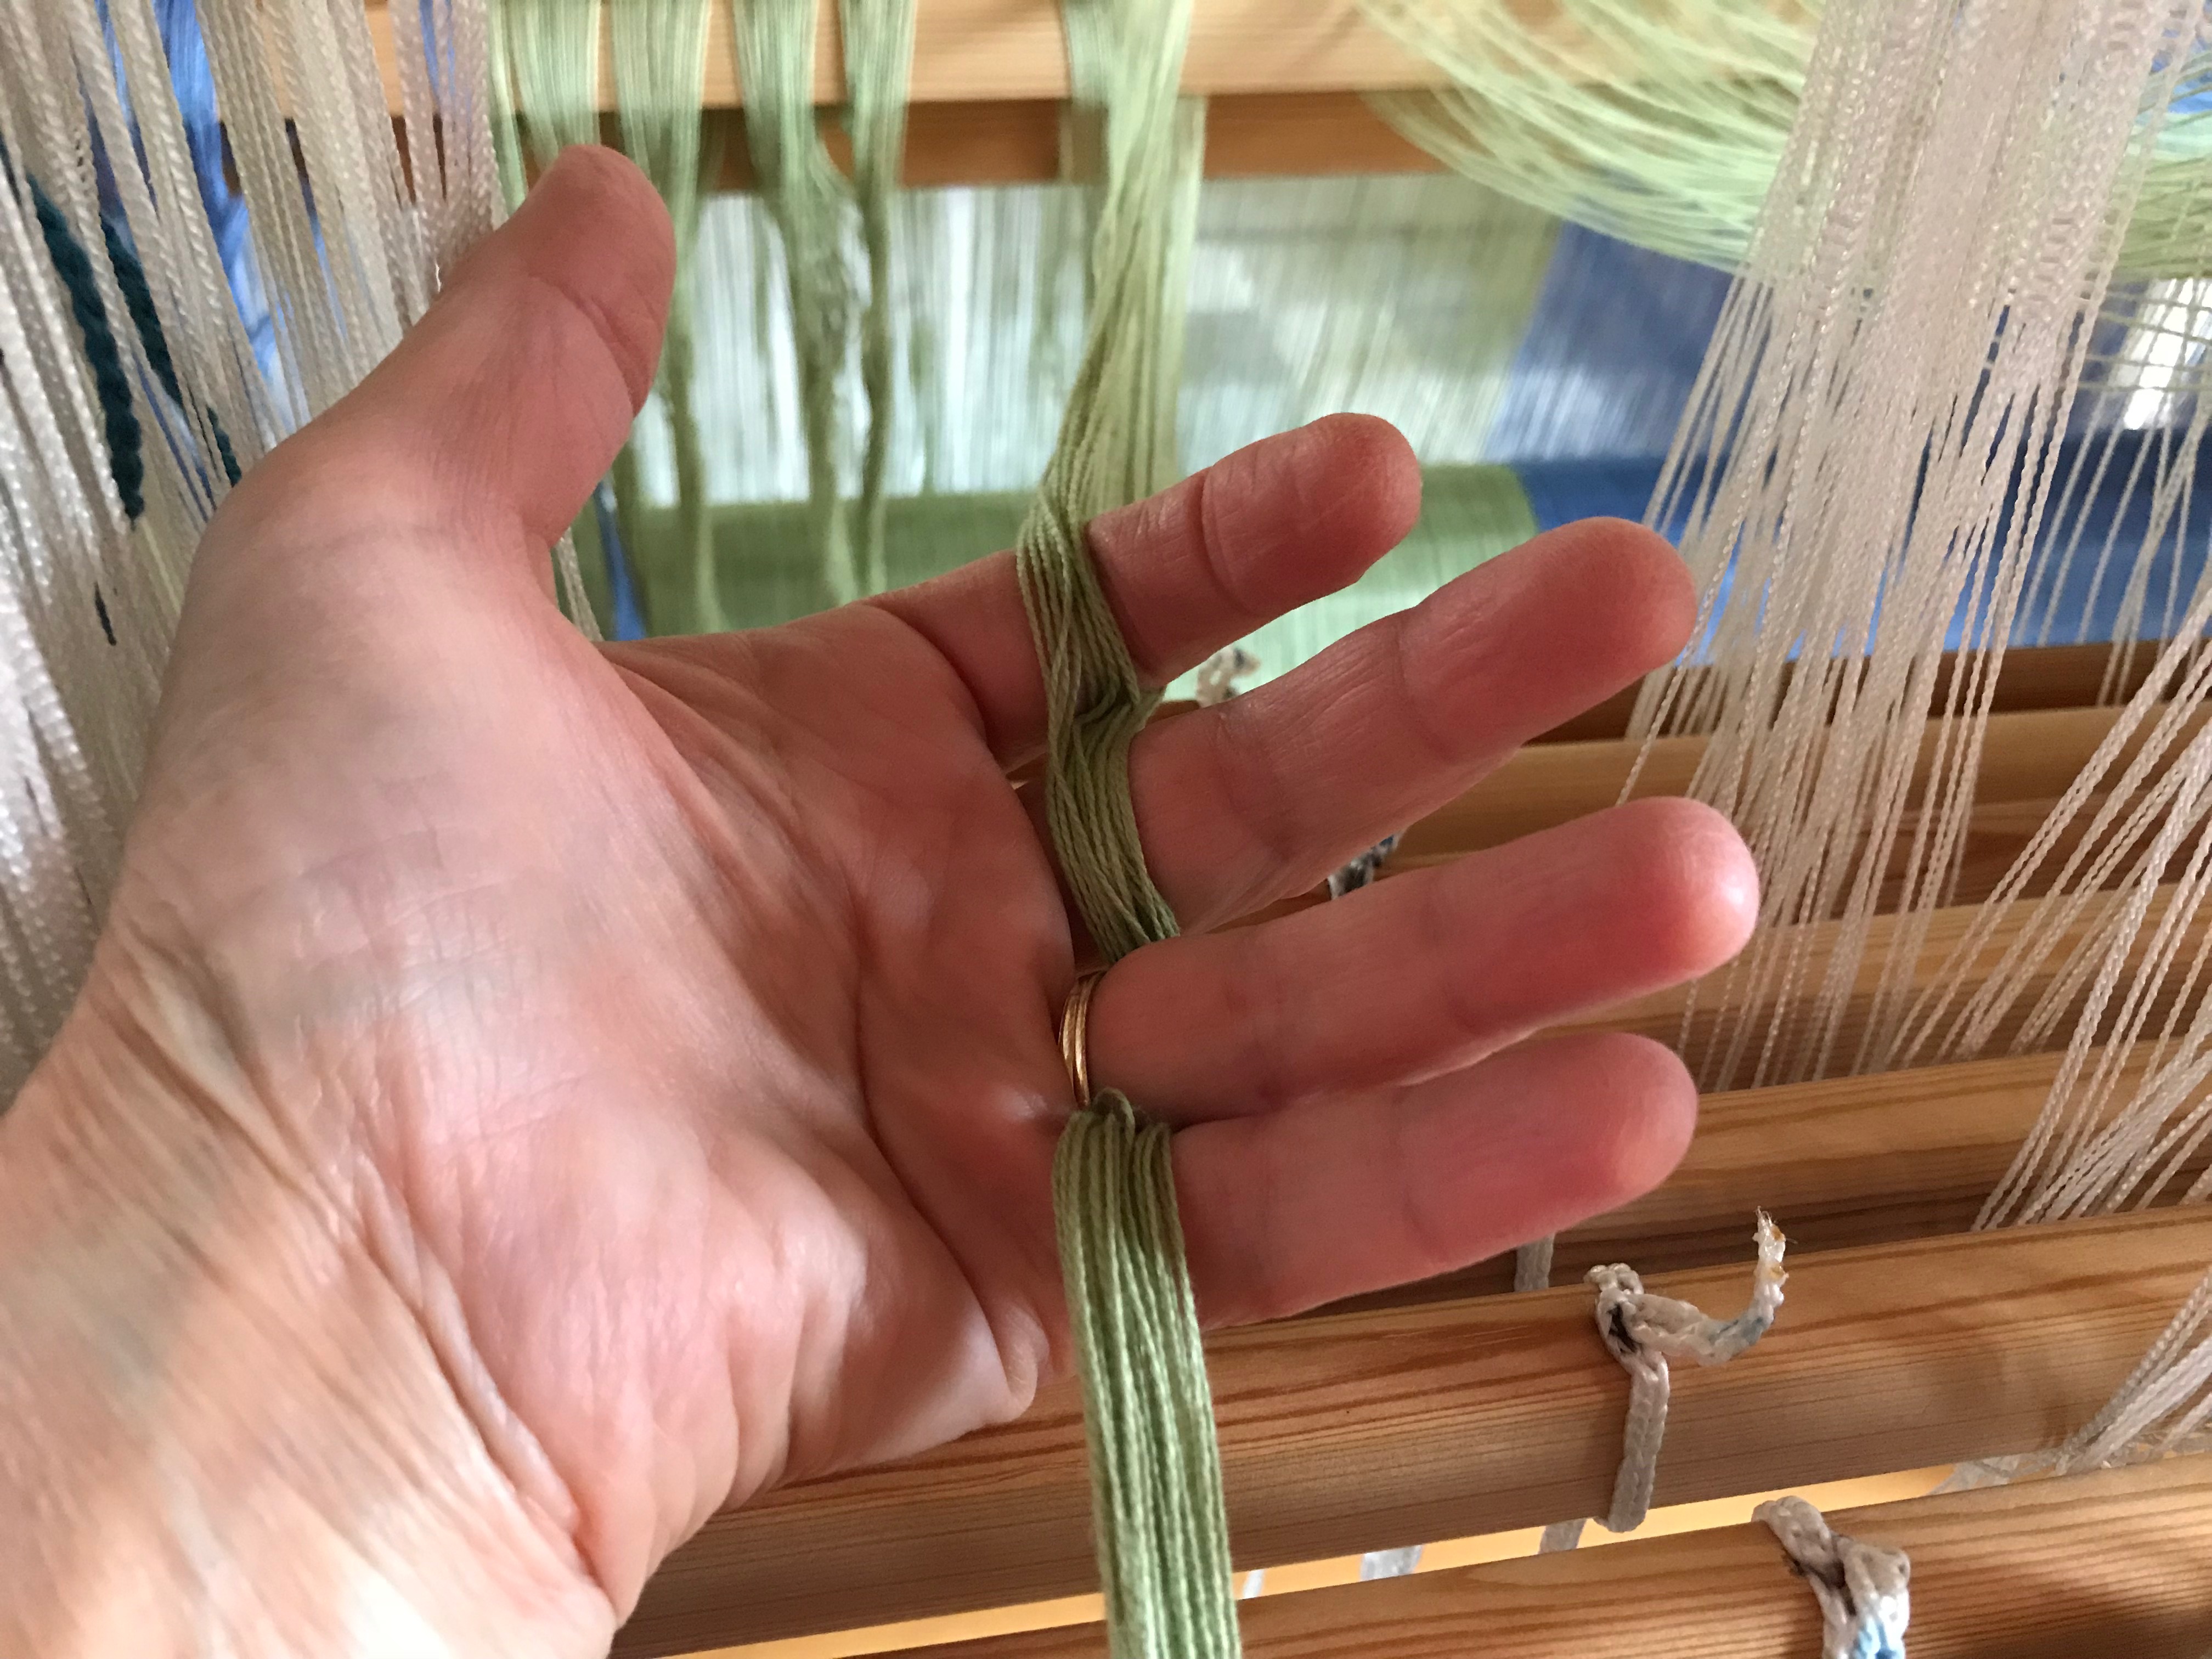
Lace the threading group of ends under, over, under, over the fingers of your left hand, palm up.
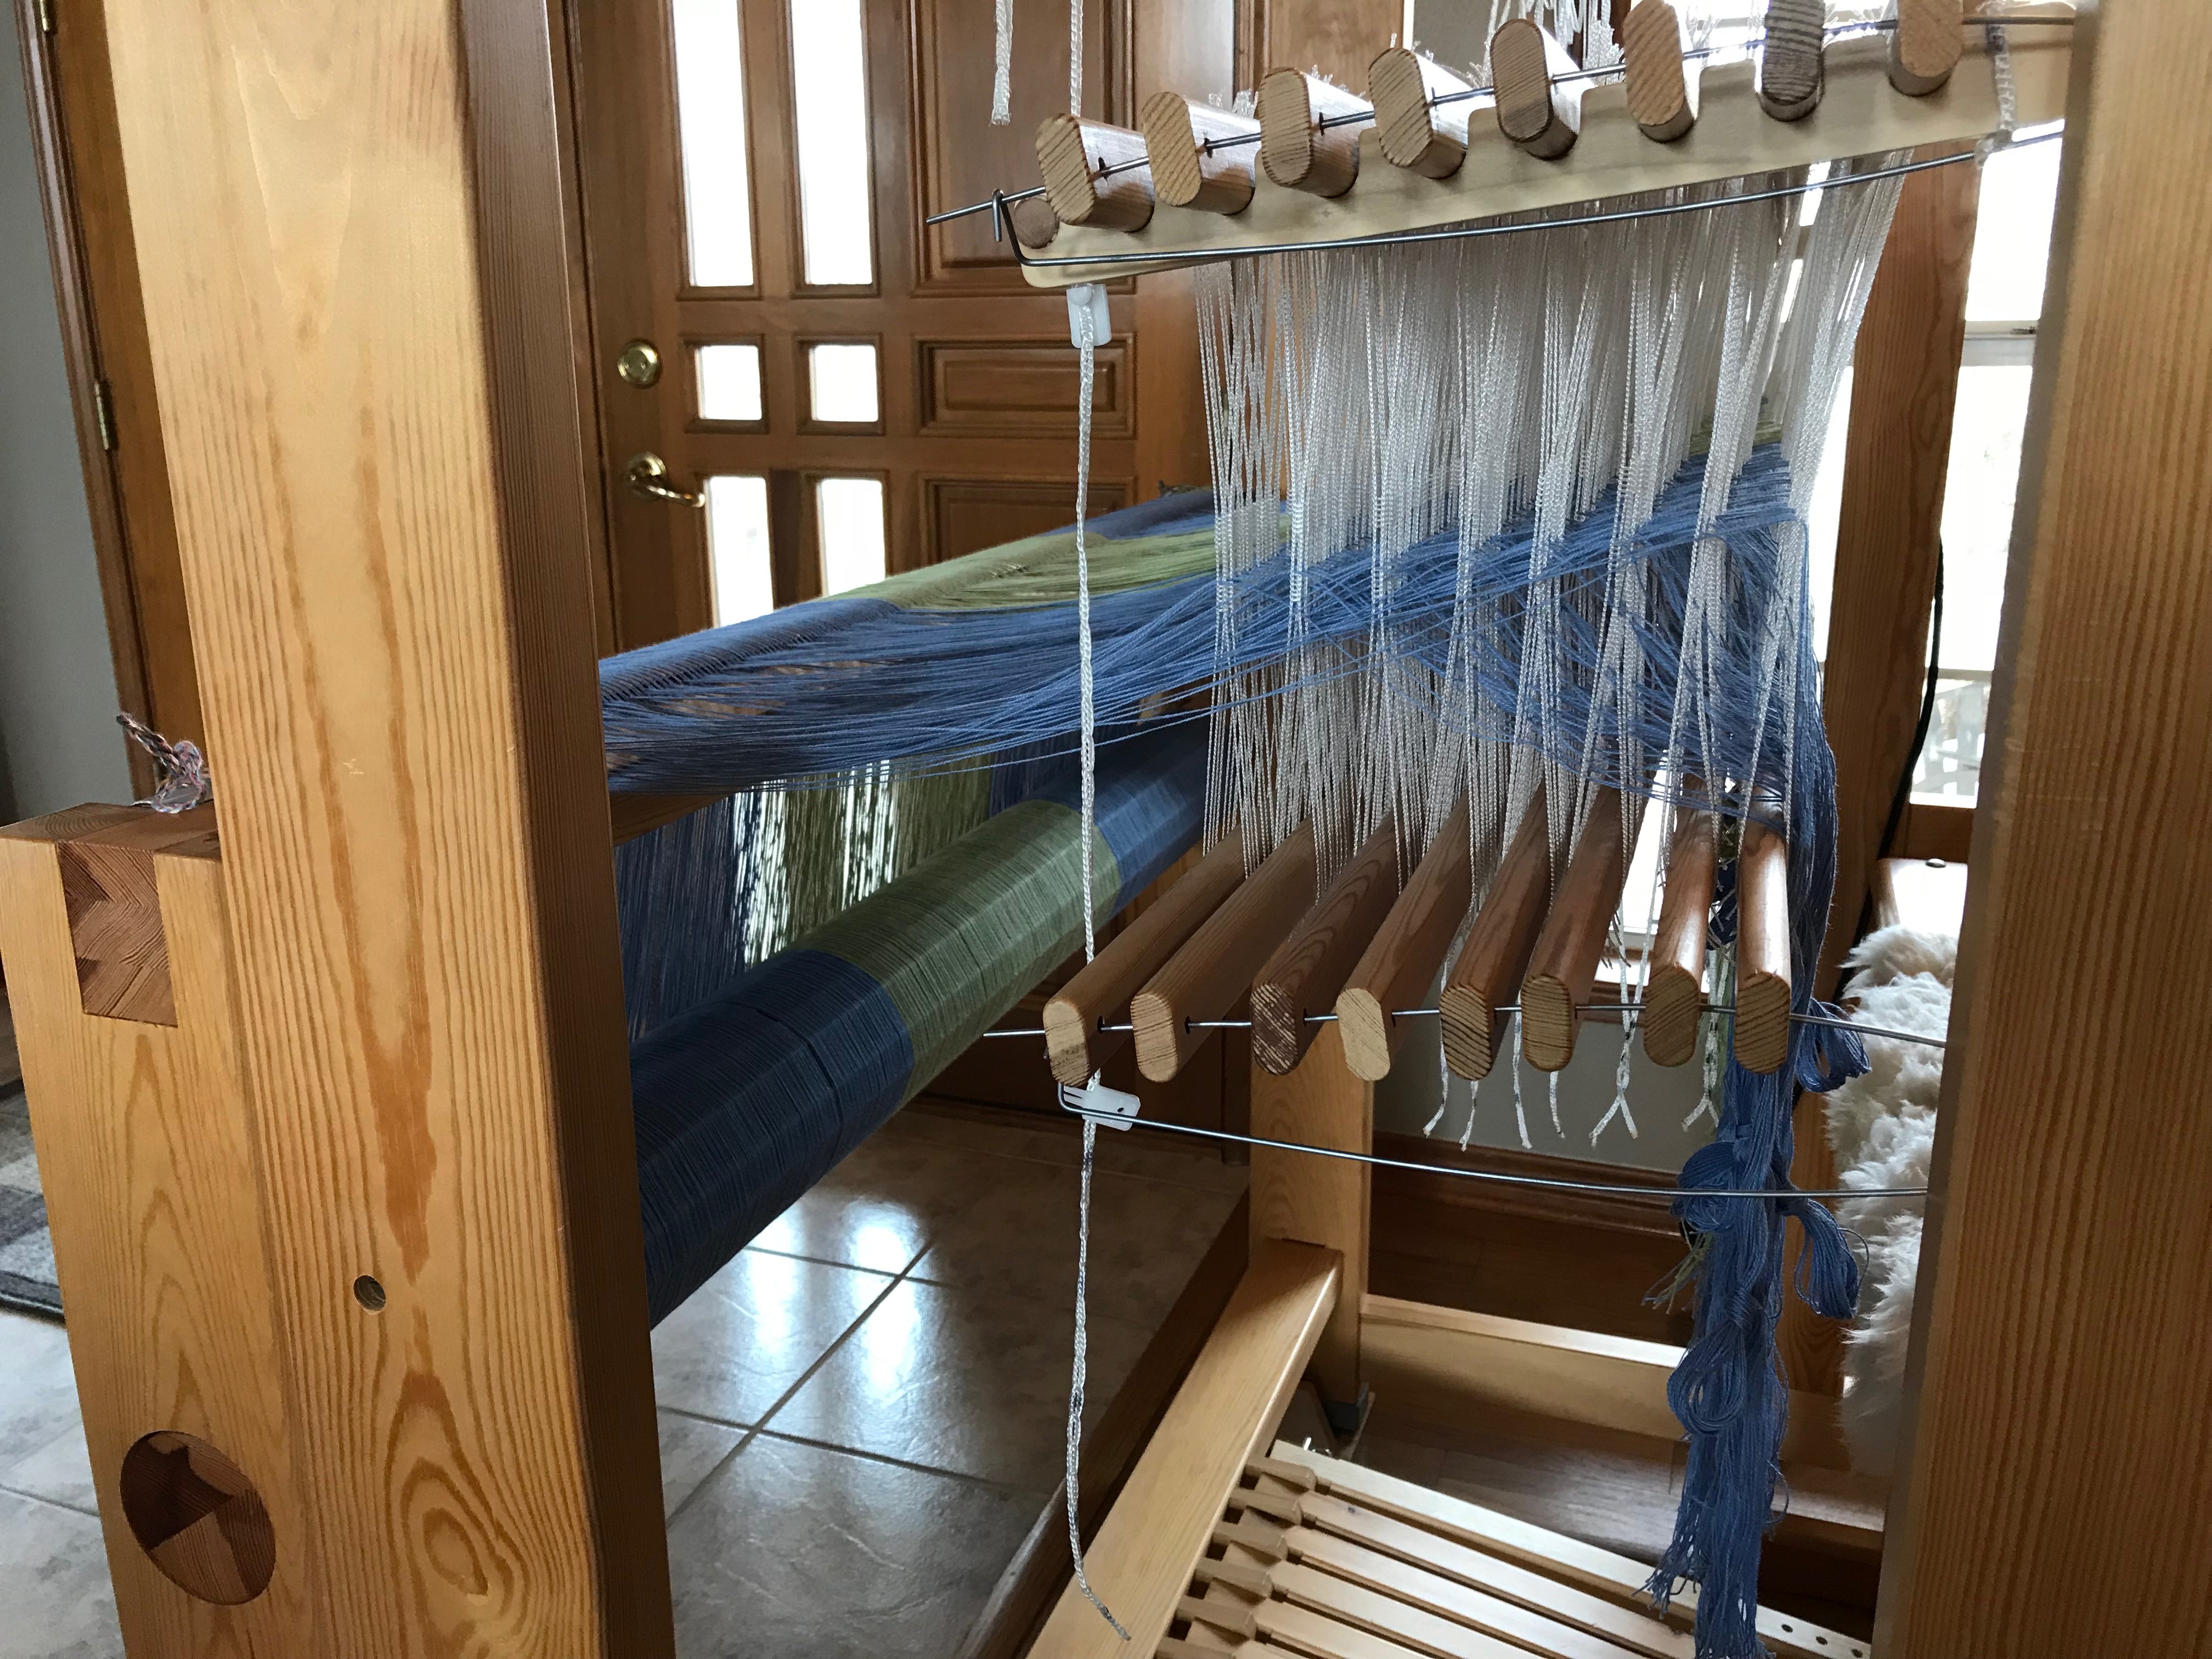
Left hand becomes tensioning device for threading the heddles. I like to put my index finger in between the two parts of the cross, as separated by the lease sticks.
Wrap left hand index finger around the group of heddles on shaft one (the shaft nearest the back of the loom), the middle finger around heddles on shaft two, the ring finger around heddles on shaft three, the pinky around heddles on shaft four, and bring the thumb around to hold it all loosely together.
Each warpend is taken in order from between the lease sticks, and then threaded through the heddles in order.
Thread the first four heddles—1, 2, 3, 4.
With the right hand, hold the group of warp ends taut, and open the fingers of the left hand to release the heddles.
Keeping the group of warp ends loosely laced around the fingers, slide the left hand toward you to thread the next four heddles—5, 6, 7, 8. Position your fingers around the heddles on each shaft, as you did for the first four shafts.
Left hand slides toward the front of the loom to thread the next four heddles. It helps to hold the warp ends taut with the right hand while the left hand is repositioned.
After threading the second set of heddles, follow the same procedure as before and slide the left hand back again to thread 1, 2, 3, 4.
Continue sliding the left hand forward and back, until the threading is completed for that group of ends.
Check the threading group for accuracy, and then tie the group of ends together in a loose slip knot.
Always check for accuracy before moving on to the next threading group.
Complete the threading across the warp. And then, step back and admire the beauty of a beamed and threaded loom.
Shafts are raised high for good access and visibility for threading, and for checking for accuracy.Threading is complete. Cotton throw. 8/2 cotton, undulating (wavy) twill on eight shafts.
May you find efficient methods for the work of your hands.
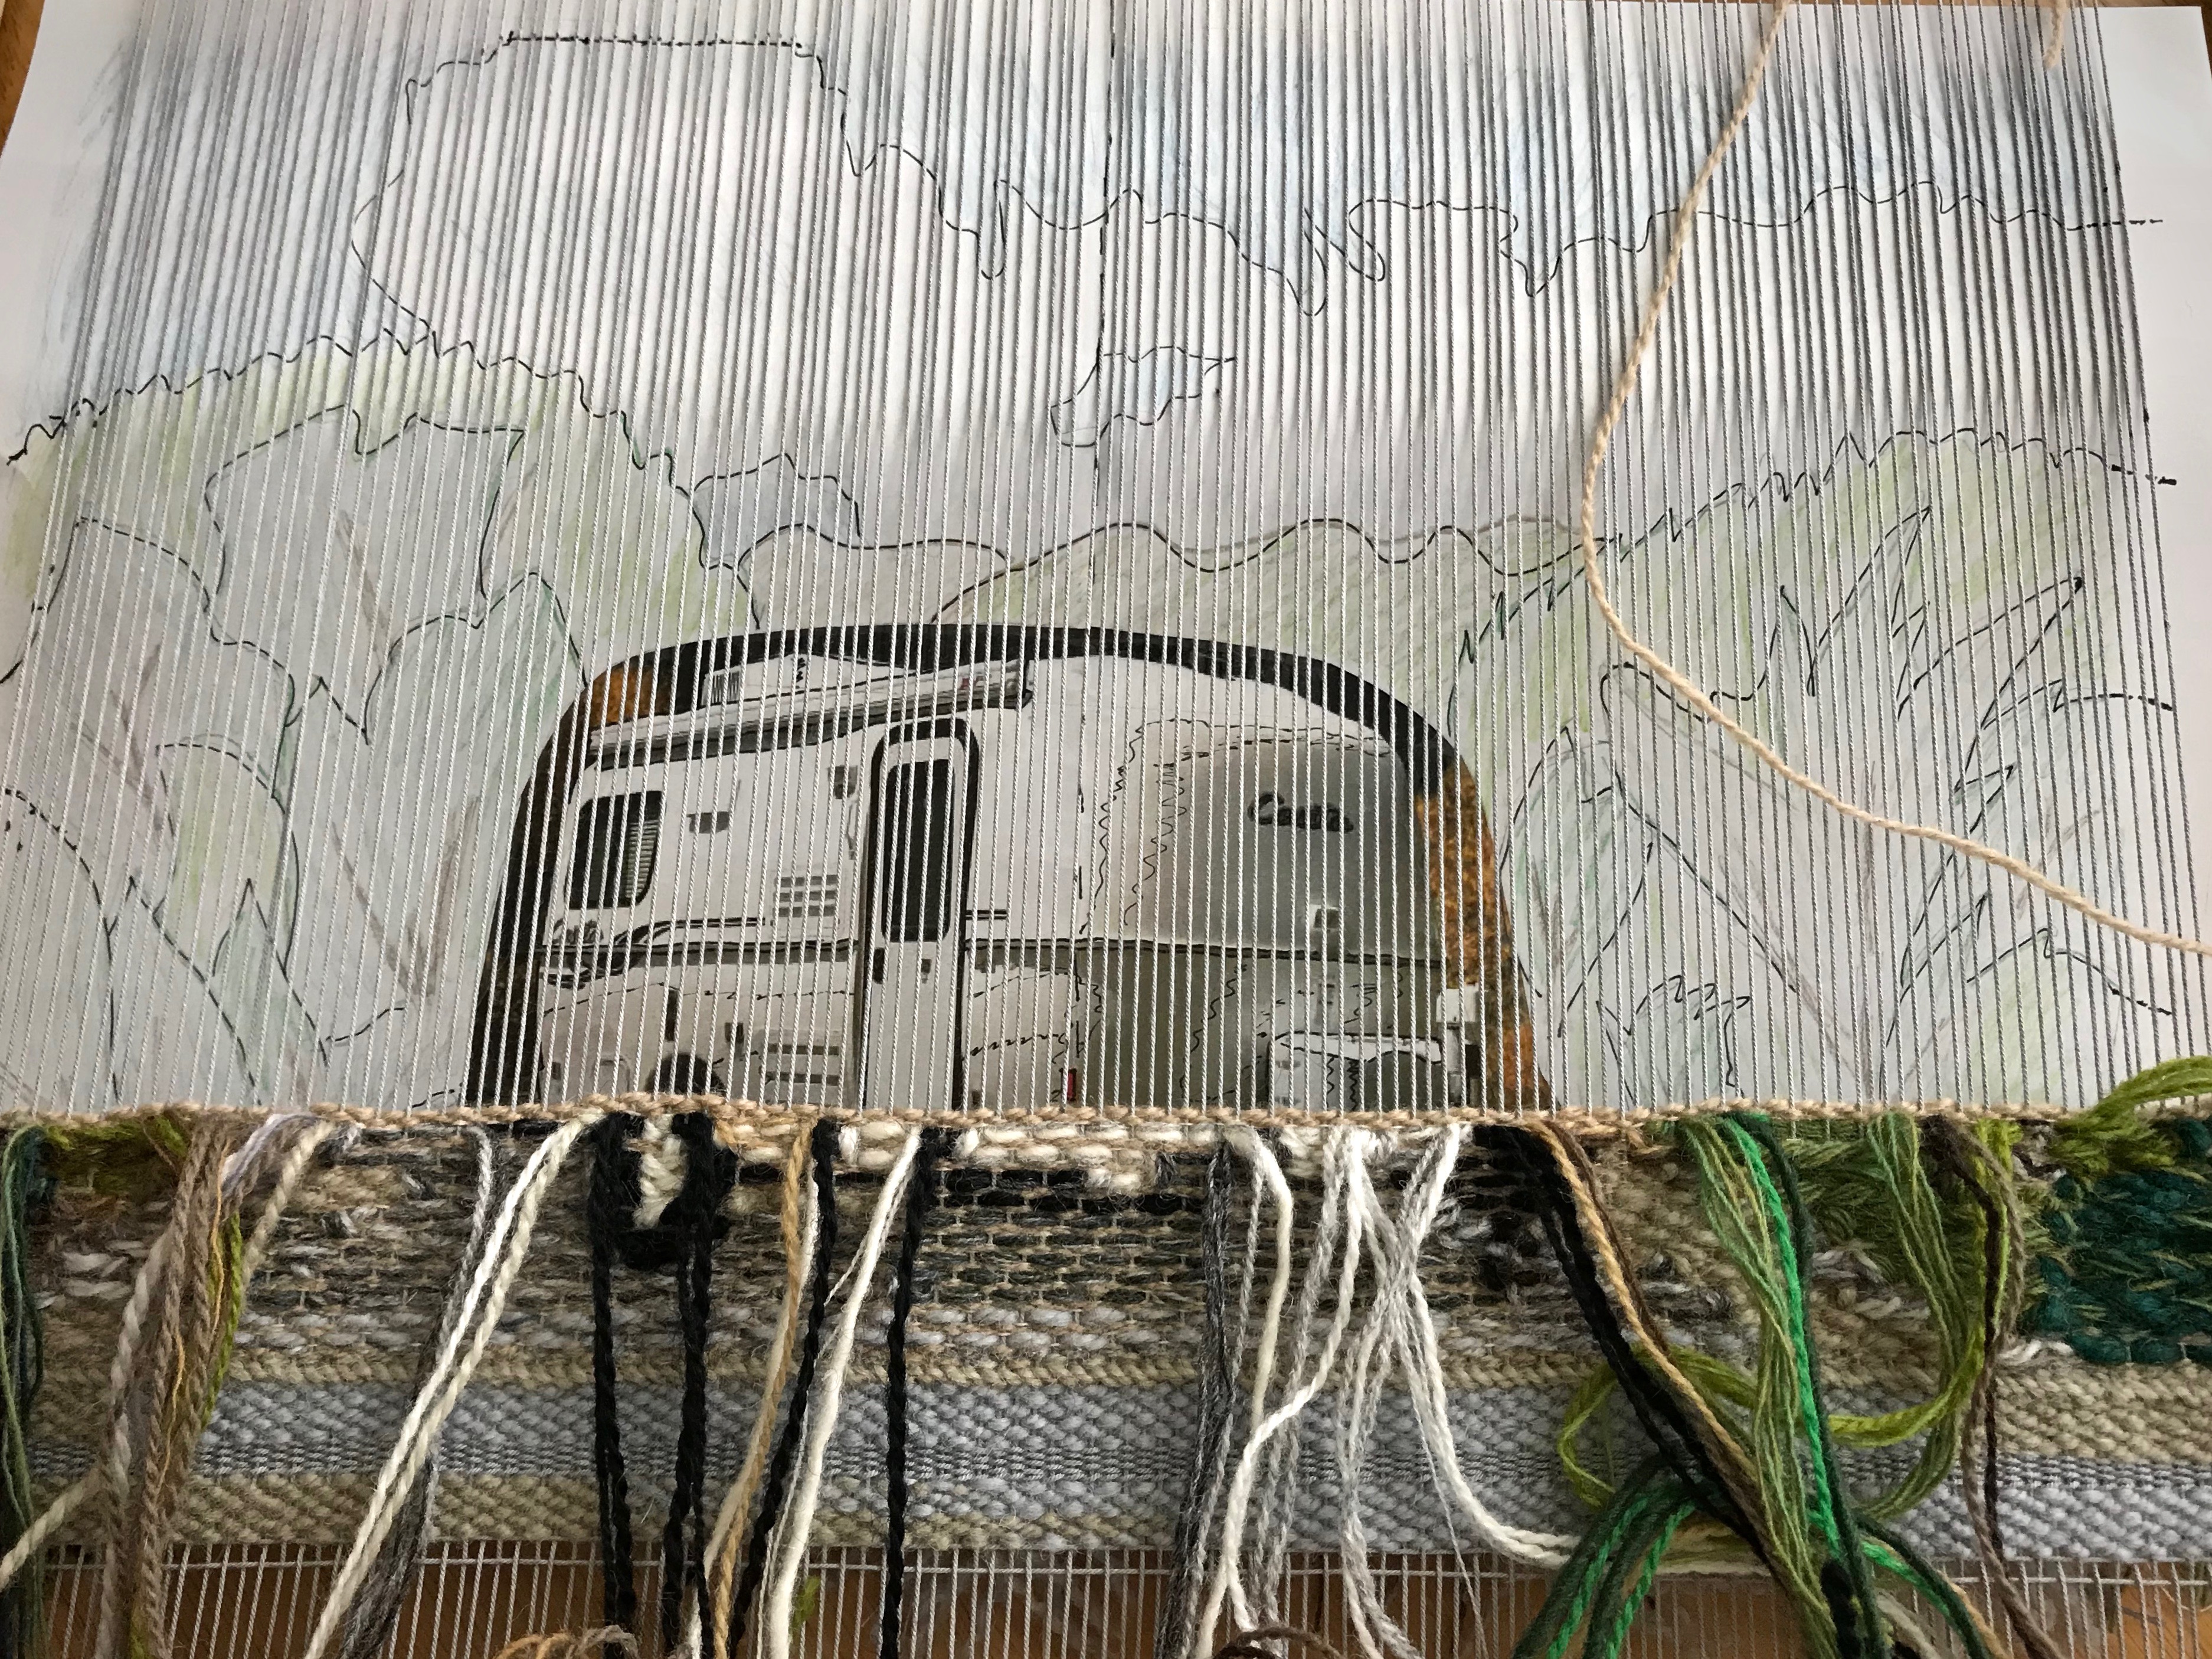
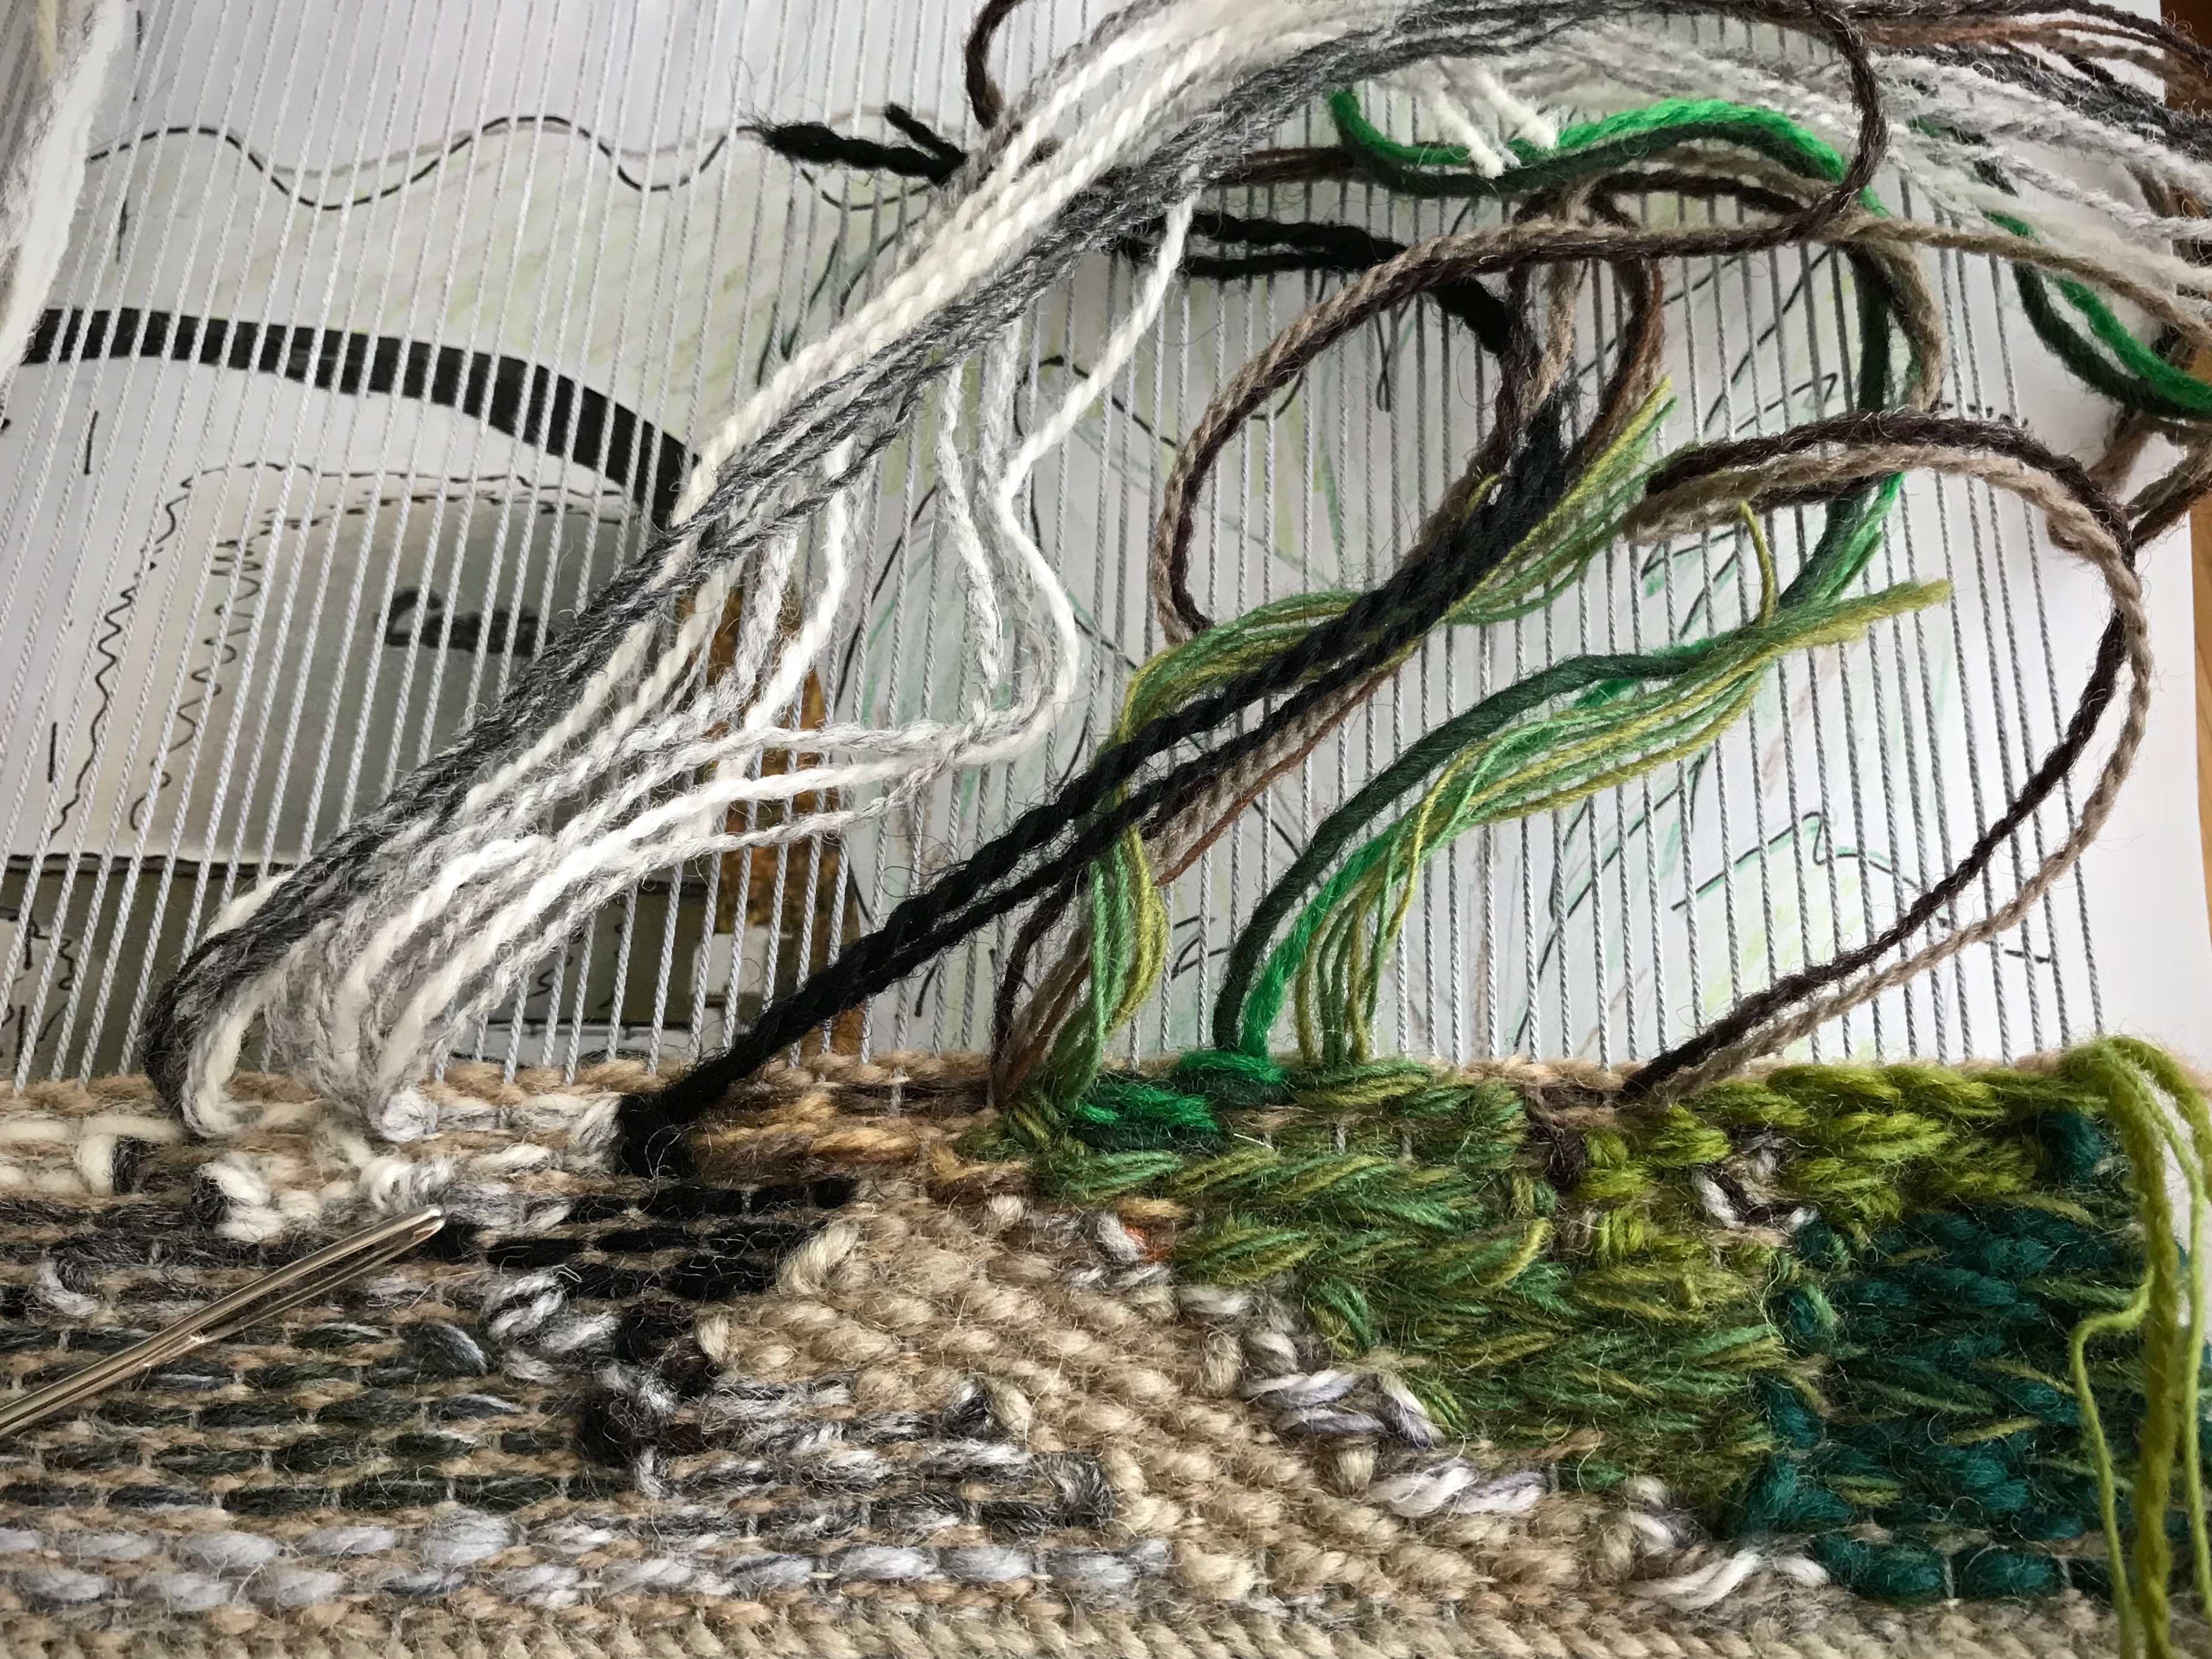
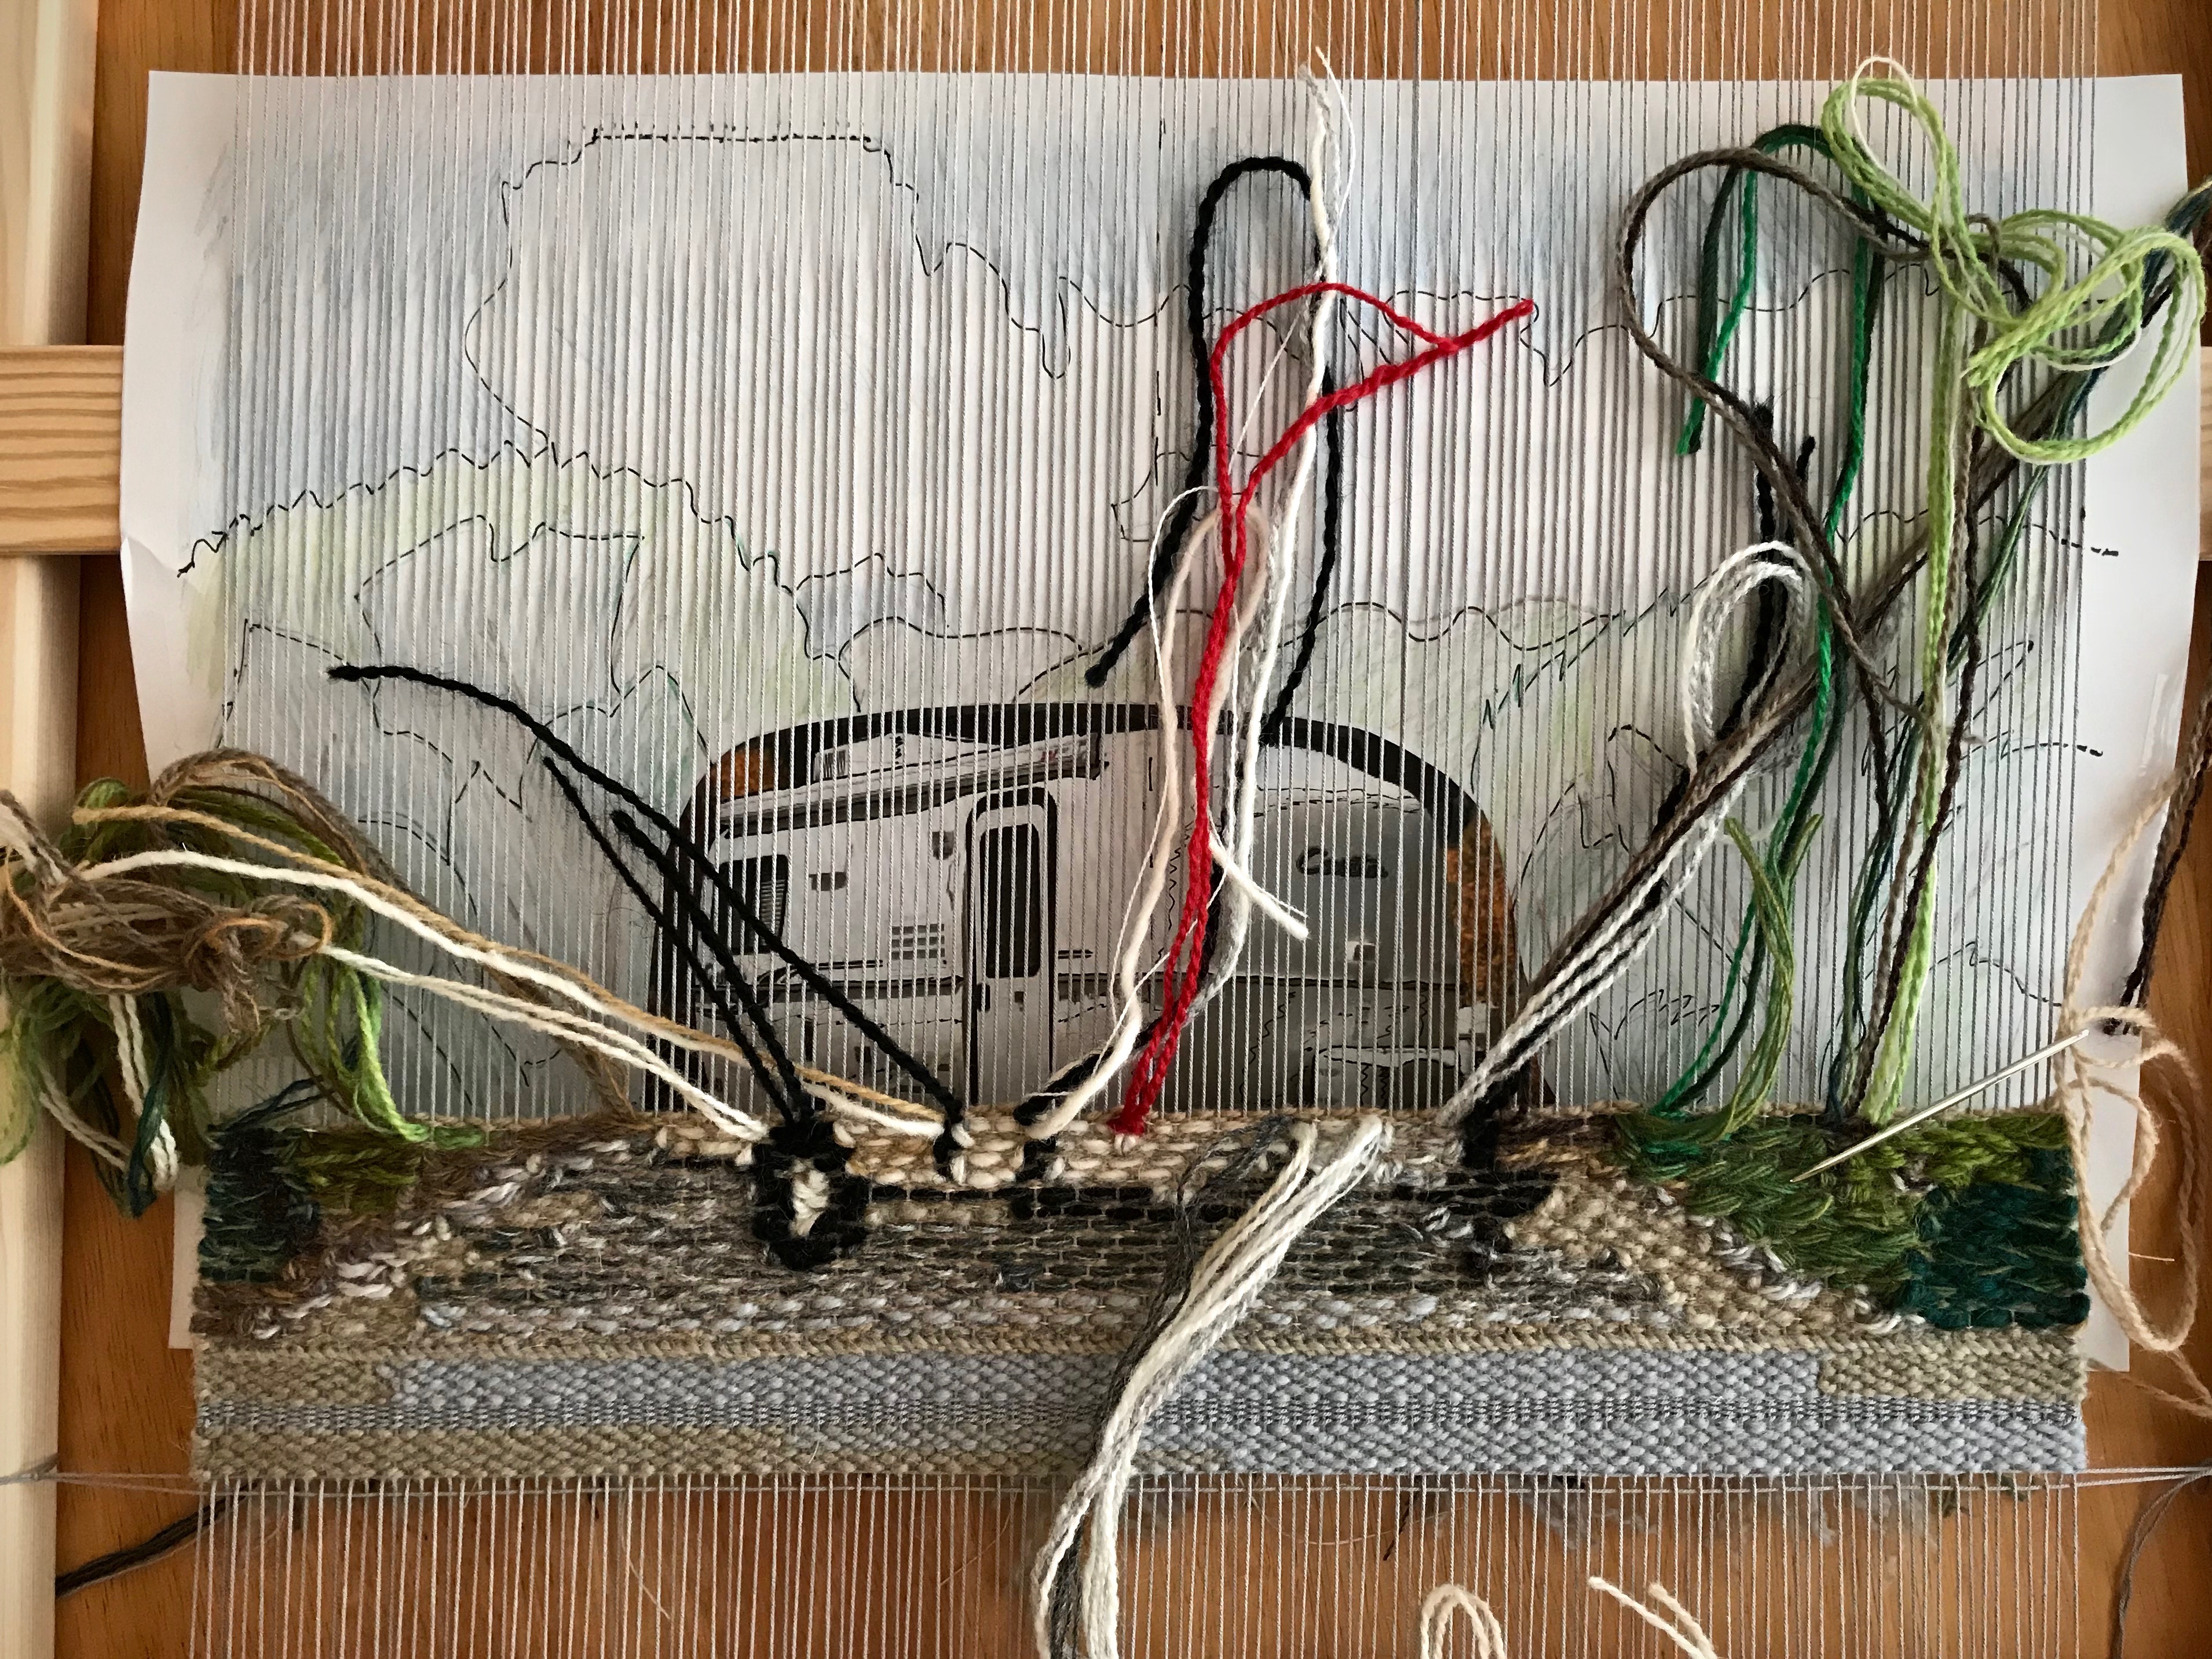
As Steve and I sign off little by little from activities and responsibilities here in Houston, the taste is bittersweet. Bitter, because moving away from time-tested friends is heart wrenching. Sweet, because an unknown exciting adventure awaits. Bitter, because unknown is uncomfortable. Sweet, because heart-connected friendships are treasures that distance can’t destroy. Bittersweet, but not bitter-ness, or sugary-sweet pretense. It’s life. Texas hill country living and Casita adventures are less than a month away! It’s all good.
We are naming our Casita travel trailer “La Perlita” – (“Little Pearl”).Large Glimåkra Freja tapestry frame and expressive tapestry weaving.Adventures are coming soon… We will pick up our new little pearl the day after Steve retires and pull it to our hill country home.
May you have friends by your side when you face bittersweet seasons.
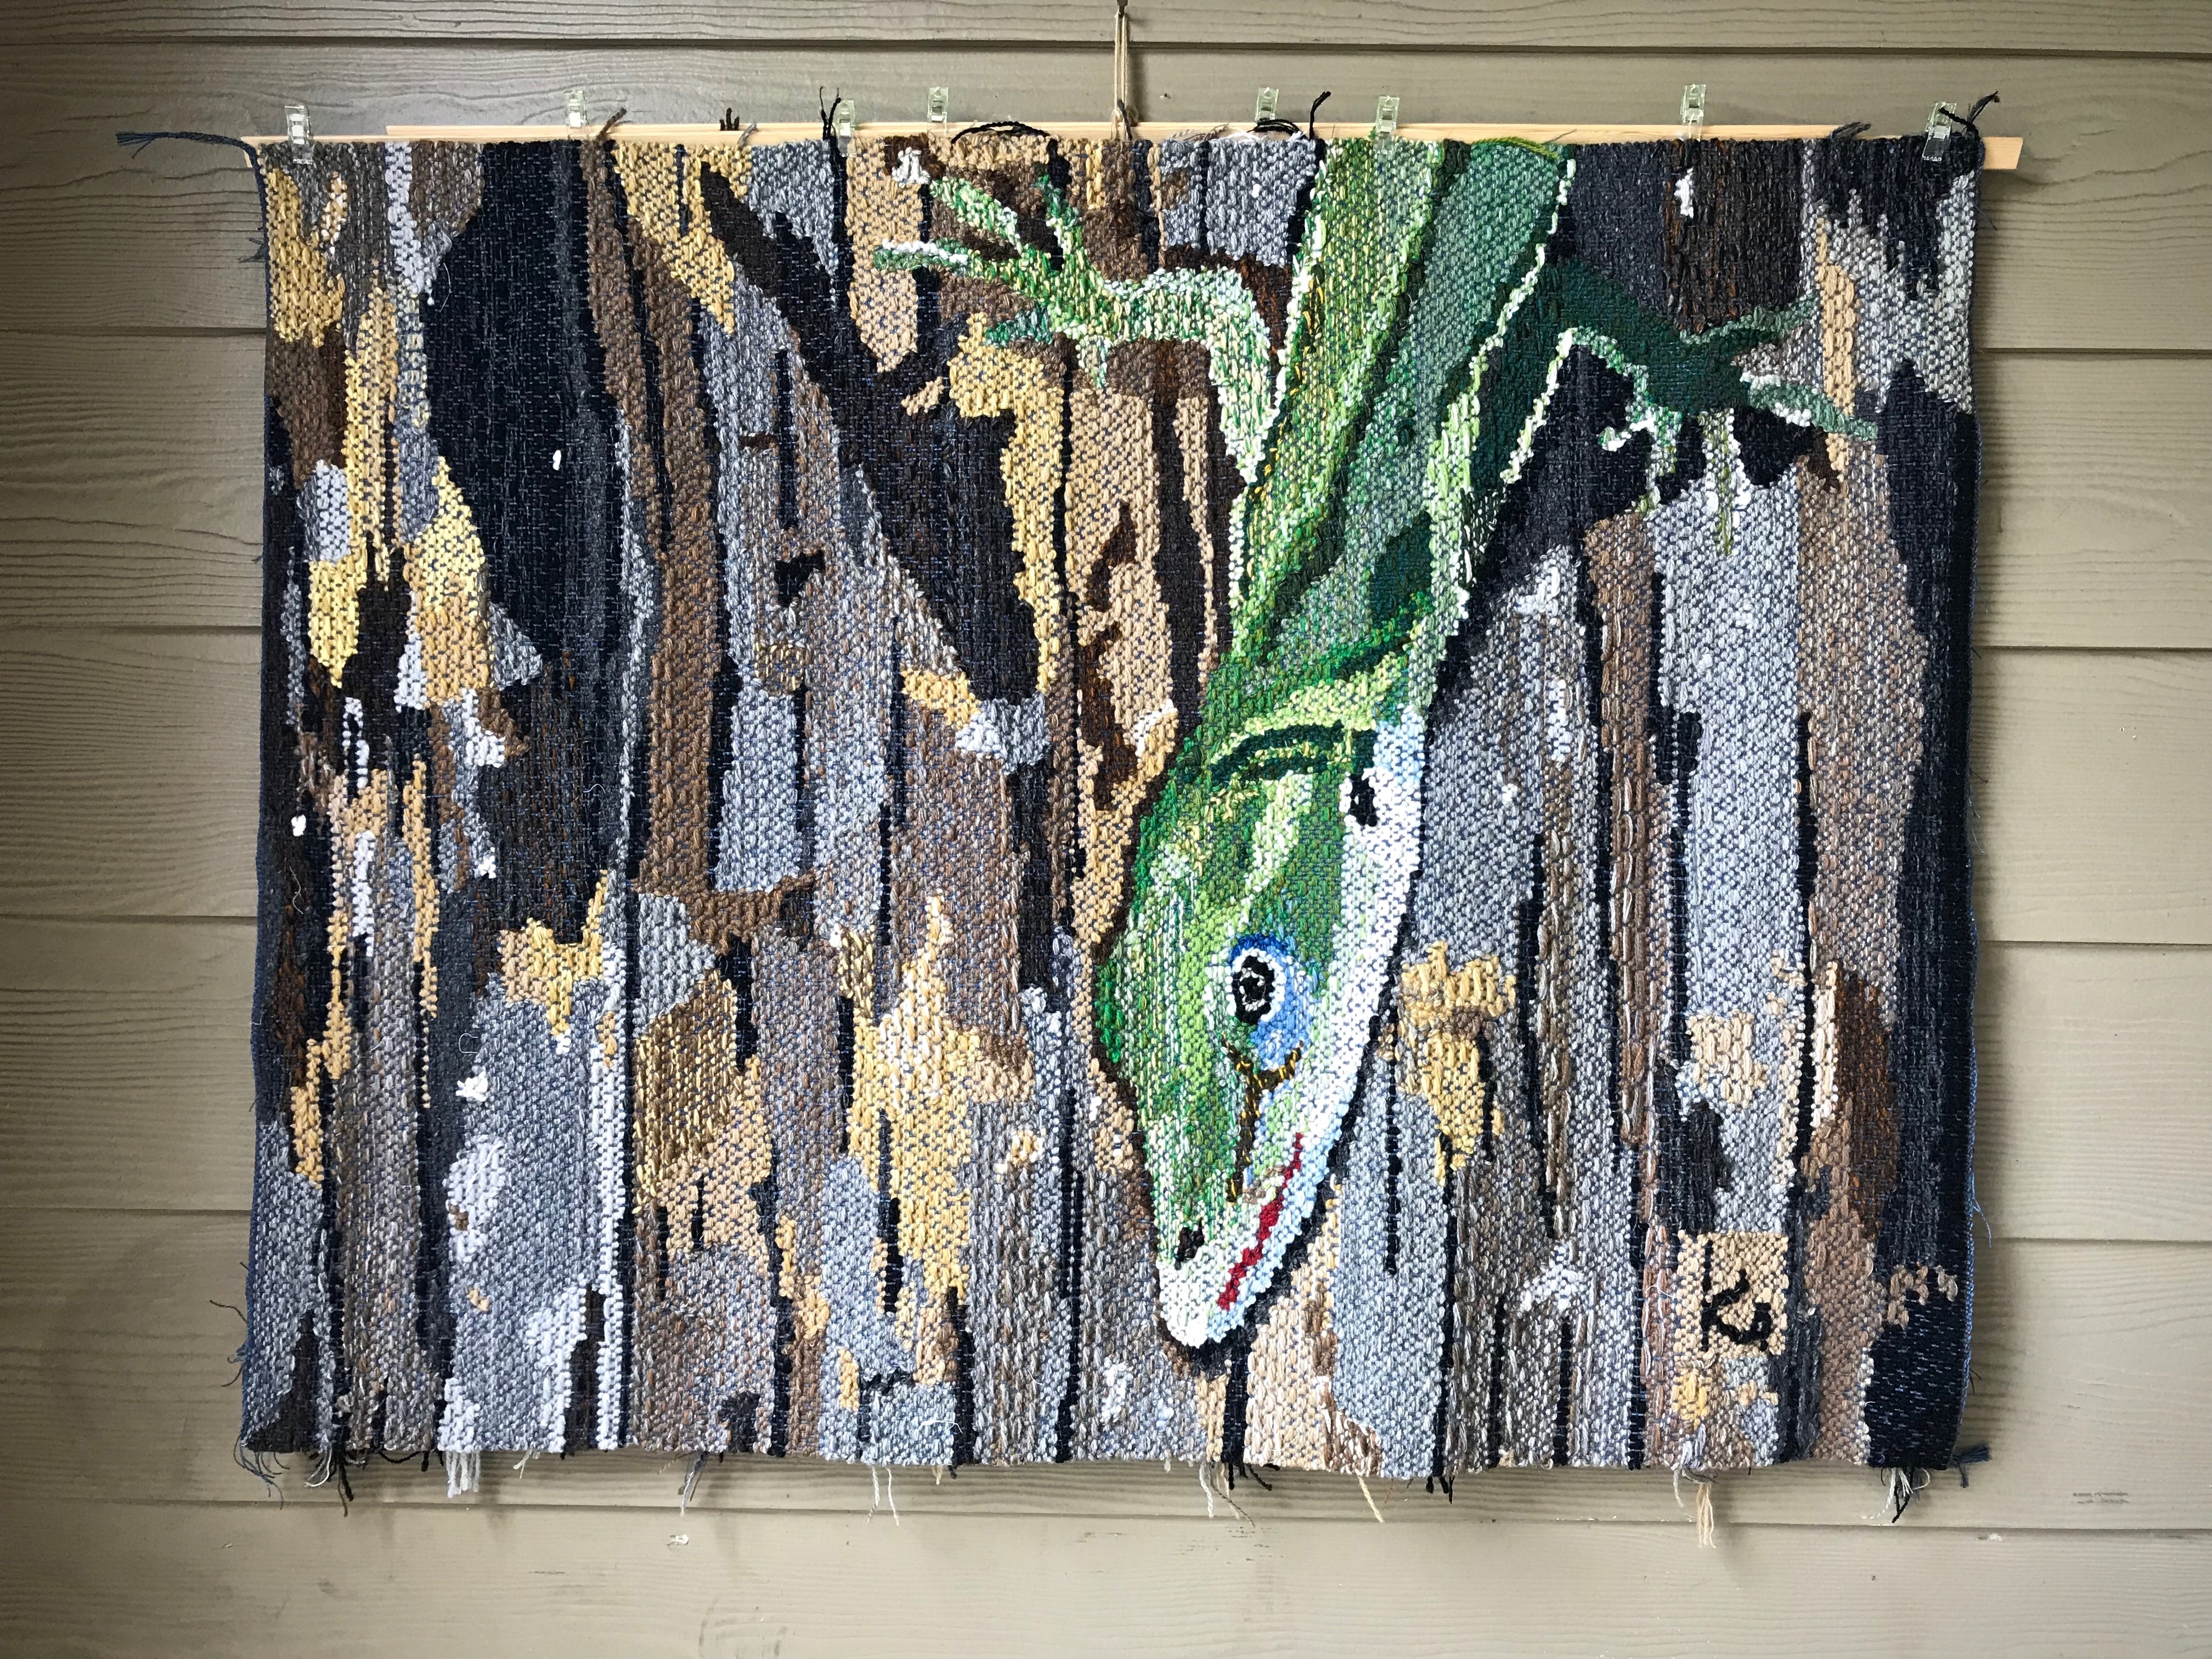
This is the moment we’ve been waiting for! We finally get to see the whole tapestry. This lizard has given me quite a ride! I have learned plenty. Things I’m happy with myself about, like drawing a cartoon from a photograph, following the cartoon details, making and keeping track of butterflies. And some things I’d like to improve, like choosing colors that give the best contrast, managing the cartoon under the tapestry, and choosing where to pick the floats. I’m eager to do four-shaft tapestry again so I can learn some more!
I wove the fringe into an edging, ending with a small braid. Next, I will tack the edging and braids to the back, clip weft tails on the back, and sew on a backing fabric. And then, I’ll find a special place to hang this Lizard tapestry in our Texas hill country home, just a half mile from the place I saw and photographed the cute little green anole in the first place.
Lizard Tapestry. Next steps are clipping weft tails on the back, adding a backing, and hanging in our Texas hill country home.
May your learning experiences take you for an exciting ride.
Happy Weaving, Karen
~Change Is Coming~
With Steve’s approaching retirement, I am implementing some adjustments for Warped for Good. Friday posts will become less frequent, and by December you will receive new posts only on Tuesdays. Today is my final Quiet Friday post, something I’ve enjoyed doing once a month for the five and-a-half years Warped for Good has been active.
I invite you to continue joining with me on this weaving journey at Warped for Good!
This is the third and final gift promise from last Christmas. A Cornflower and Willow 8/2 cotton warp will become a throw in wavy (undulating) twill for my daughter-in-law Lindsay. I am hopeful that I will be able to finish it before Christmas. As promised. (See Weaving a Gift.)