Tools Day: Cartoon Support

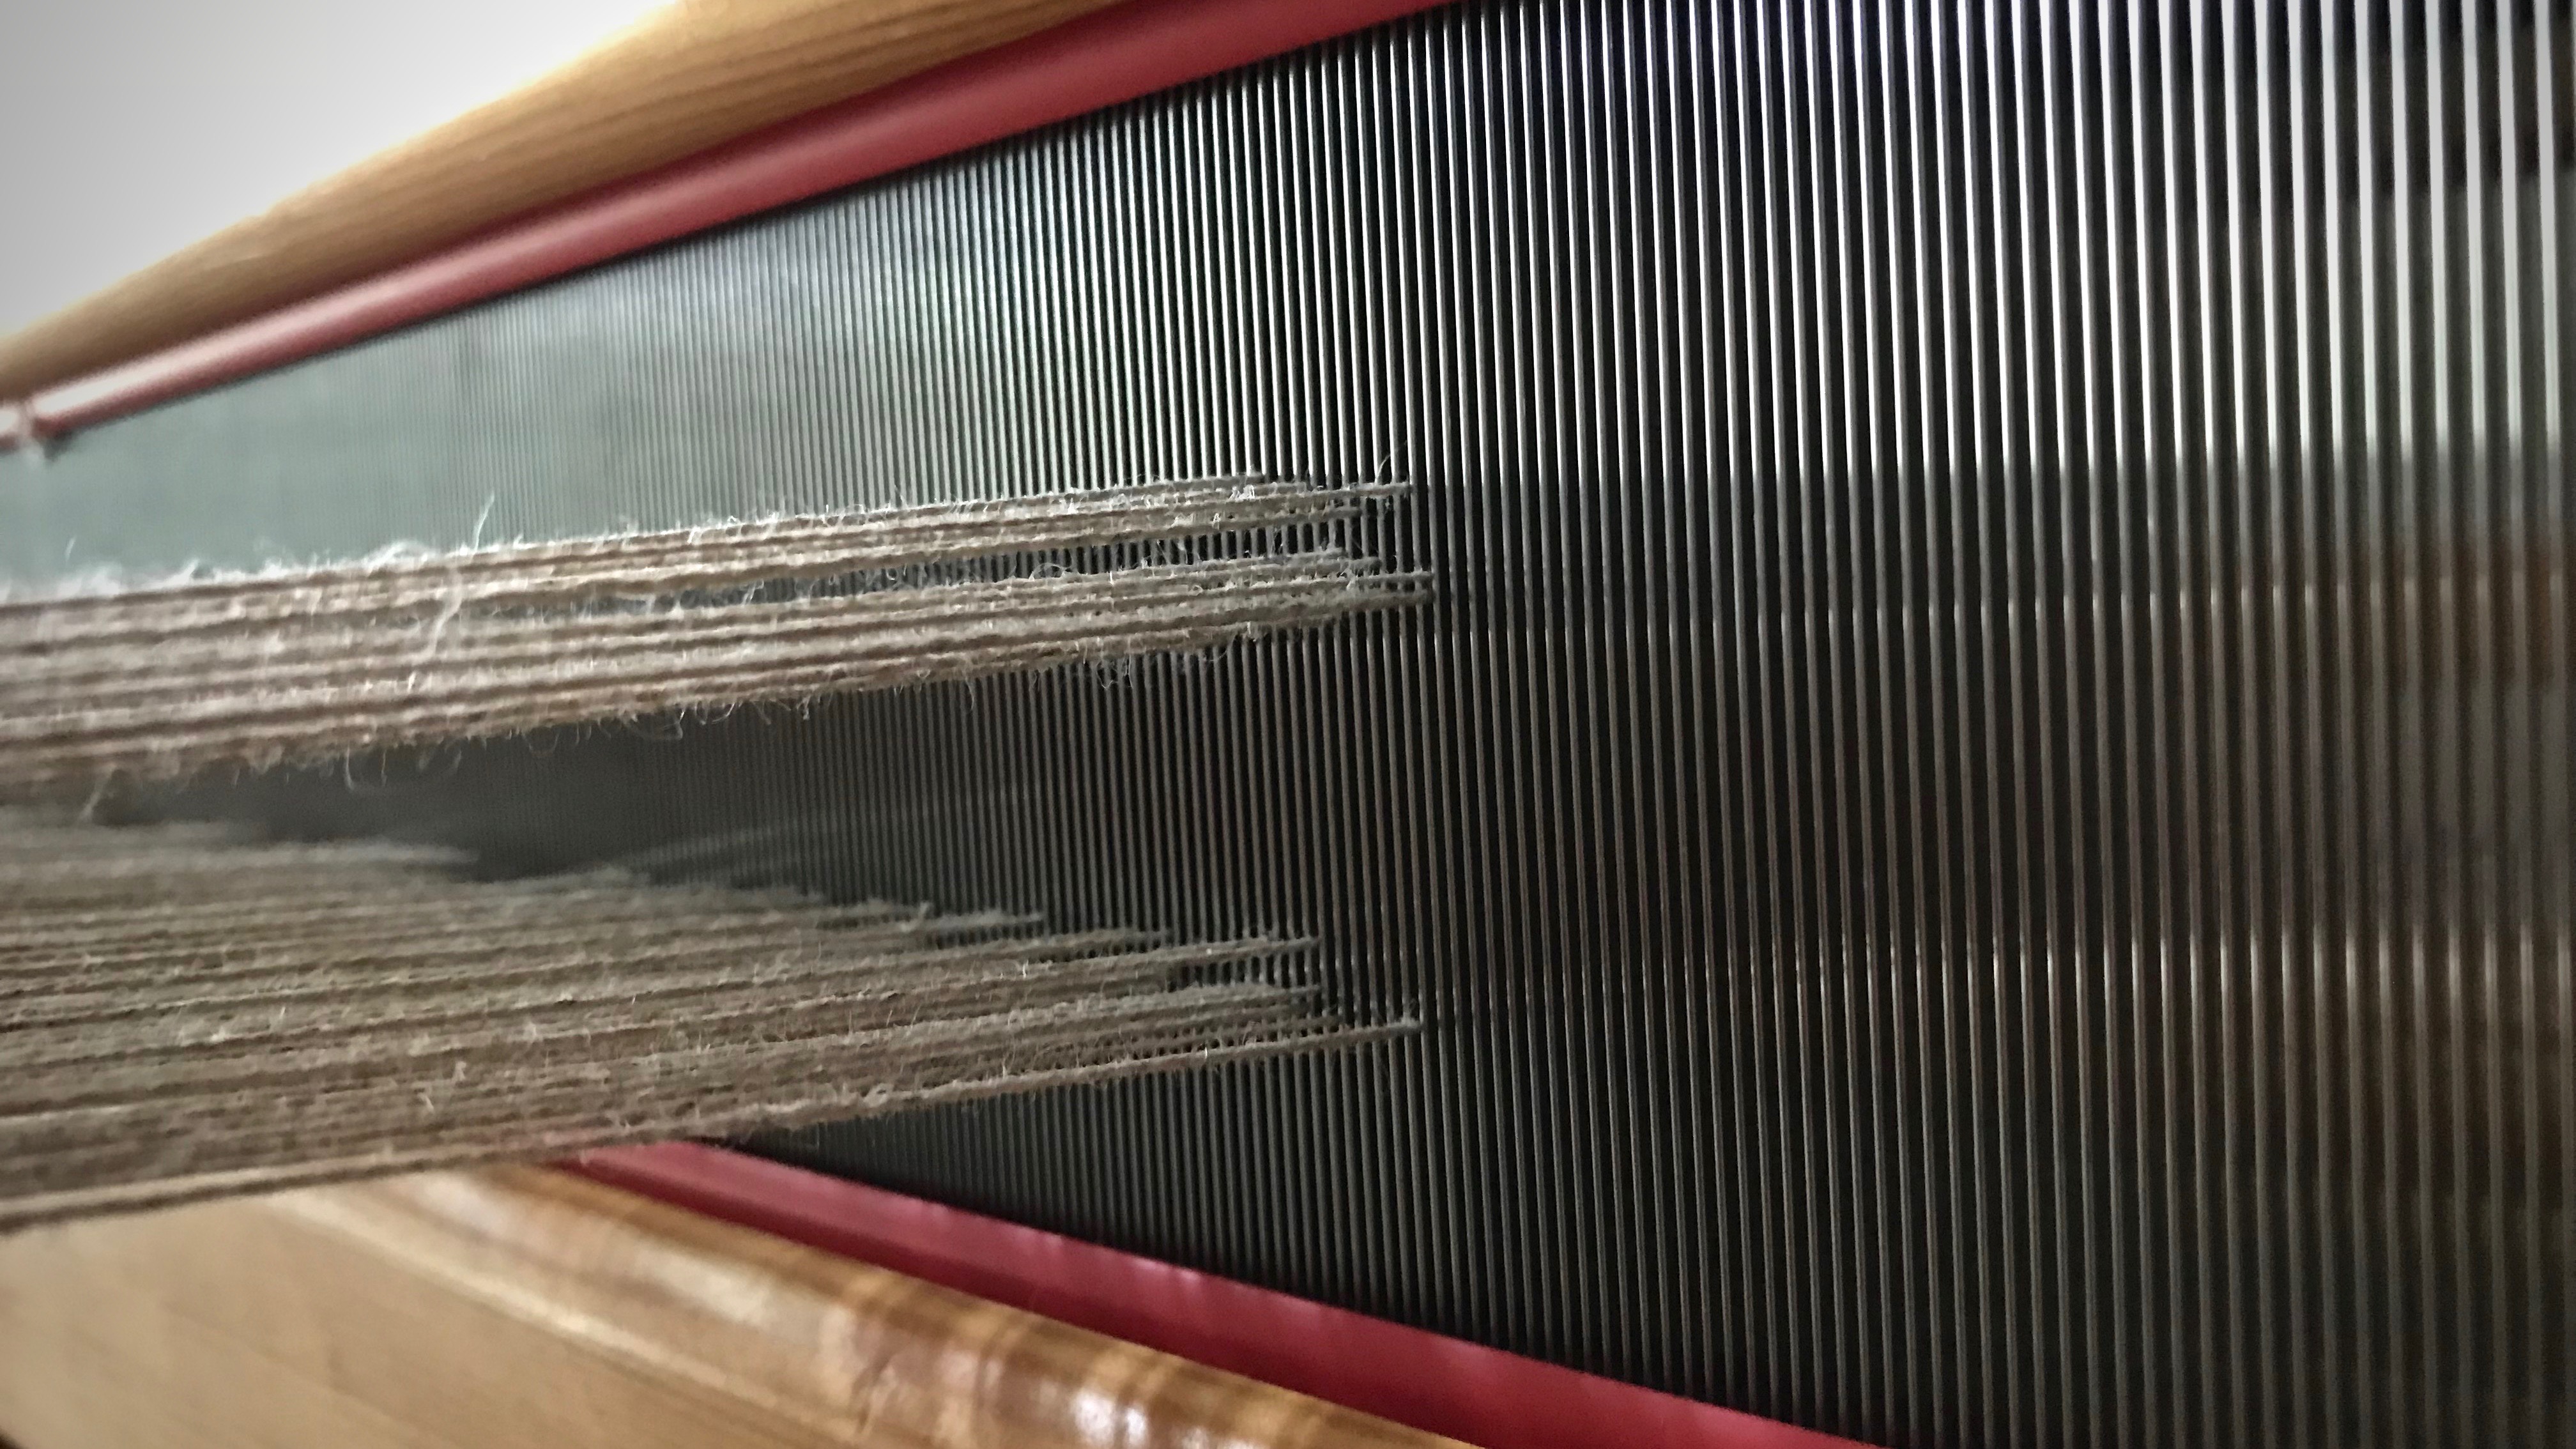
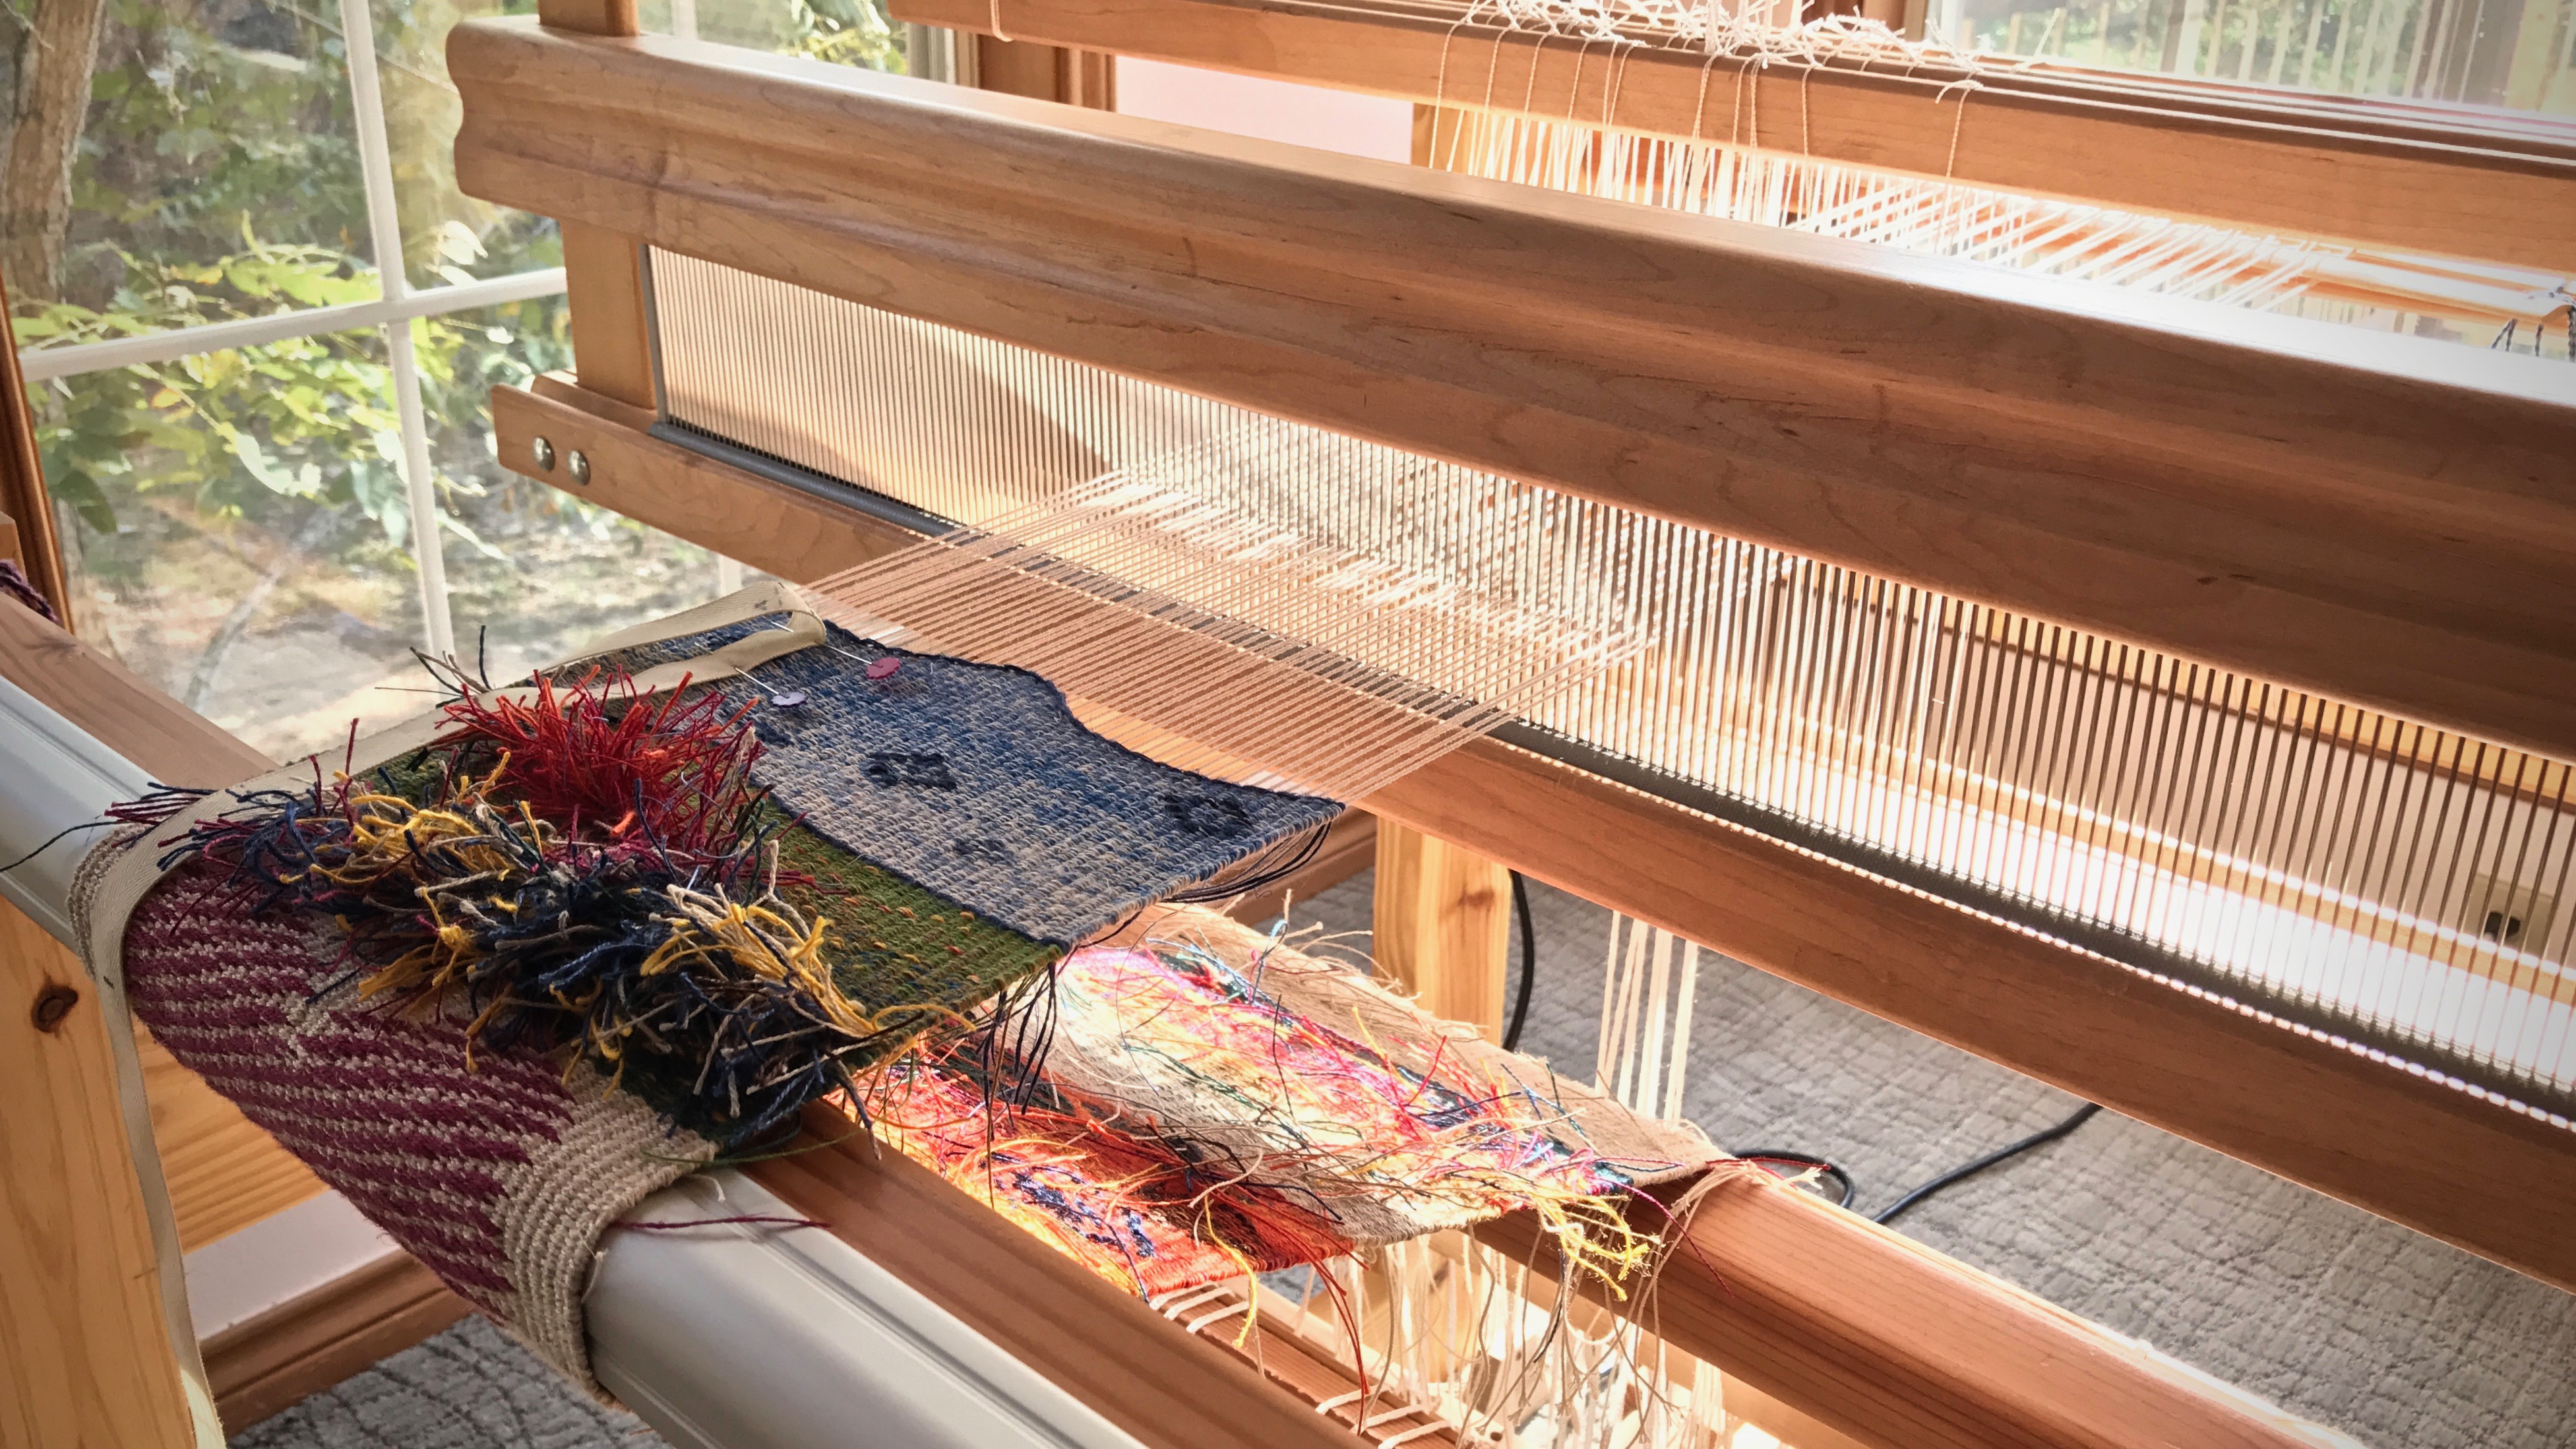
Alignment, security, and visibility are the main things I think about in regard to attaching and supporting the cartoon. In order to weave a tapestry this size, or any size for that matter, you need a good way to manage the cartoon. My cartoon is drawn onto a thin Pellon product (Pellon 830 Easy Pattern, 45″ wide) that is meant for pattern making. This material is easy to pin, doesn’t tear, and only barely wrinkles.

Alignment
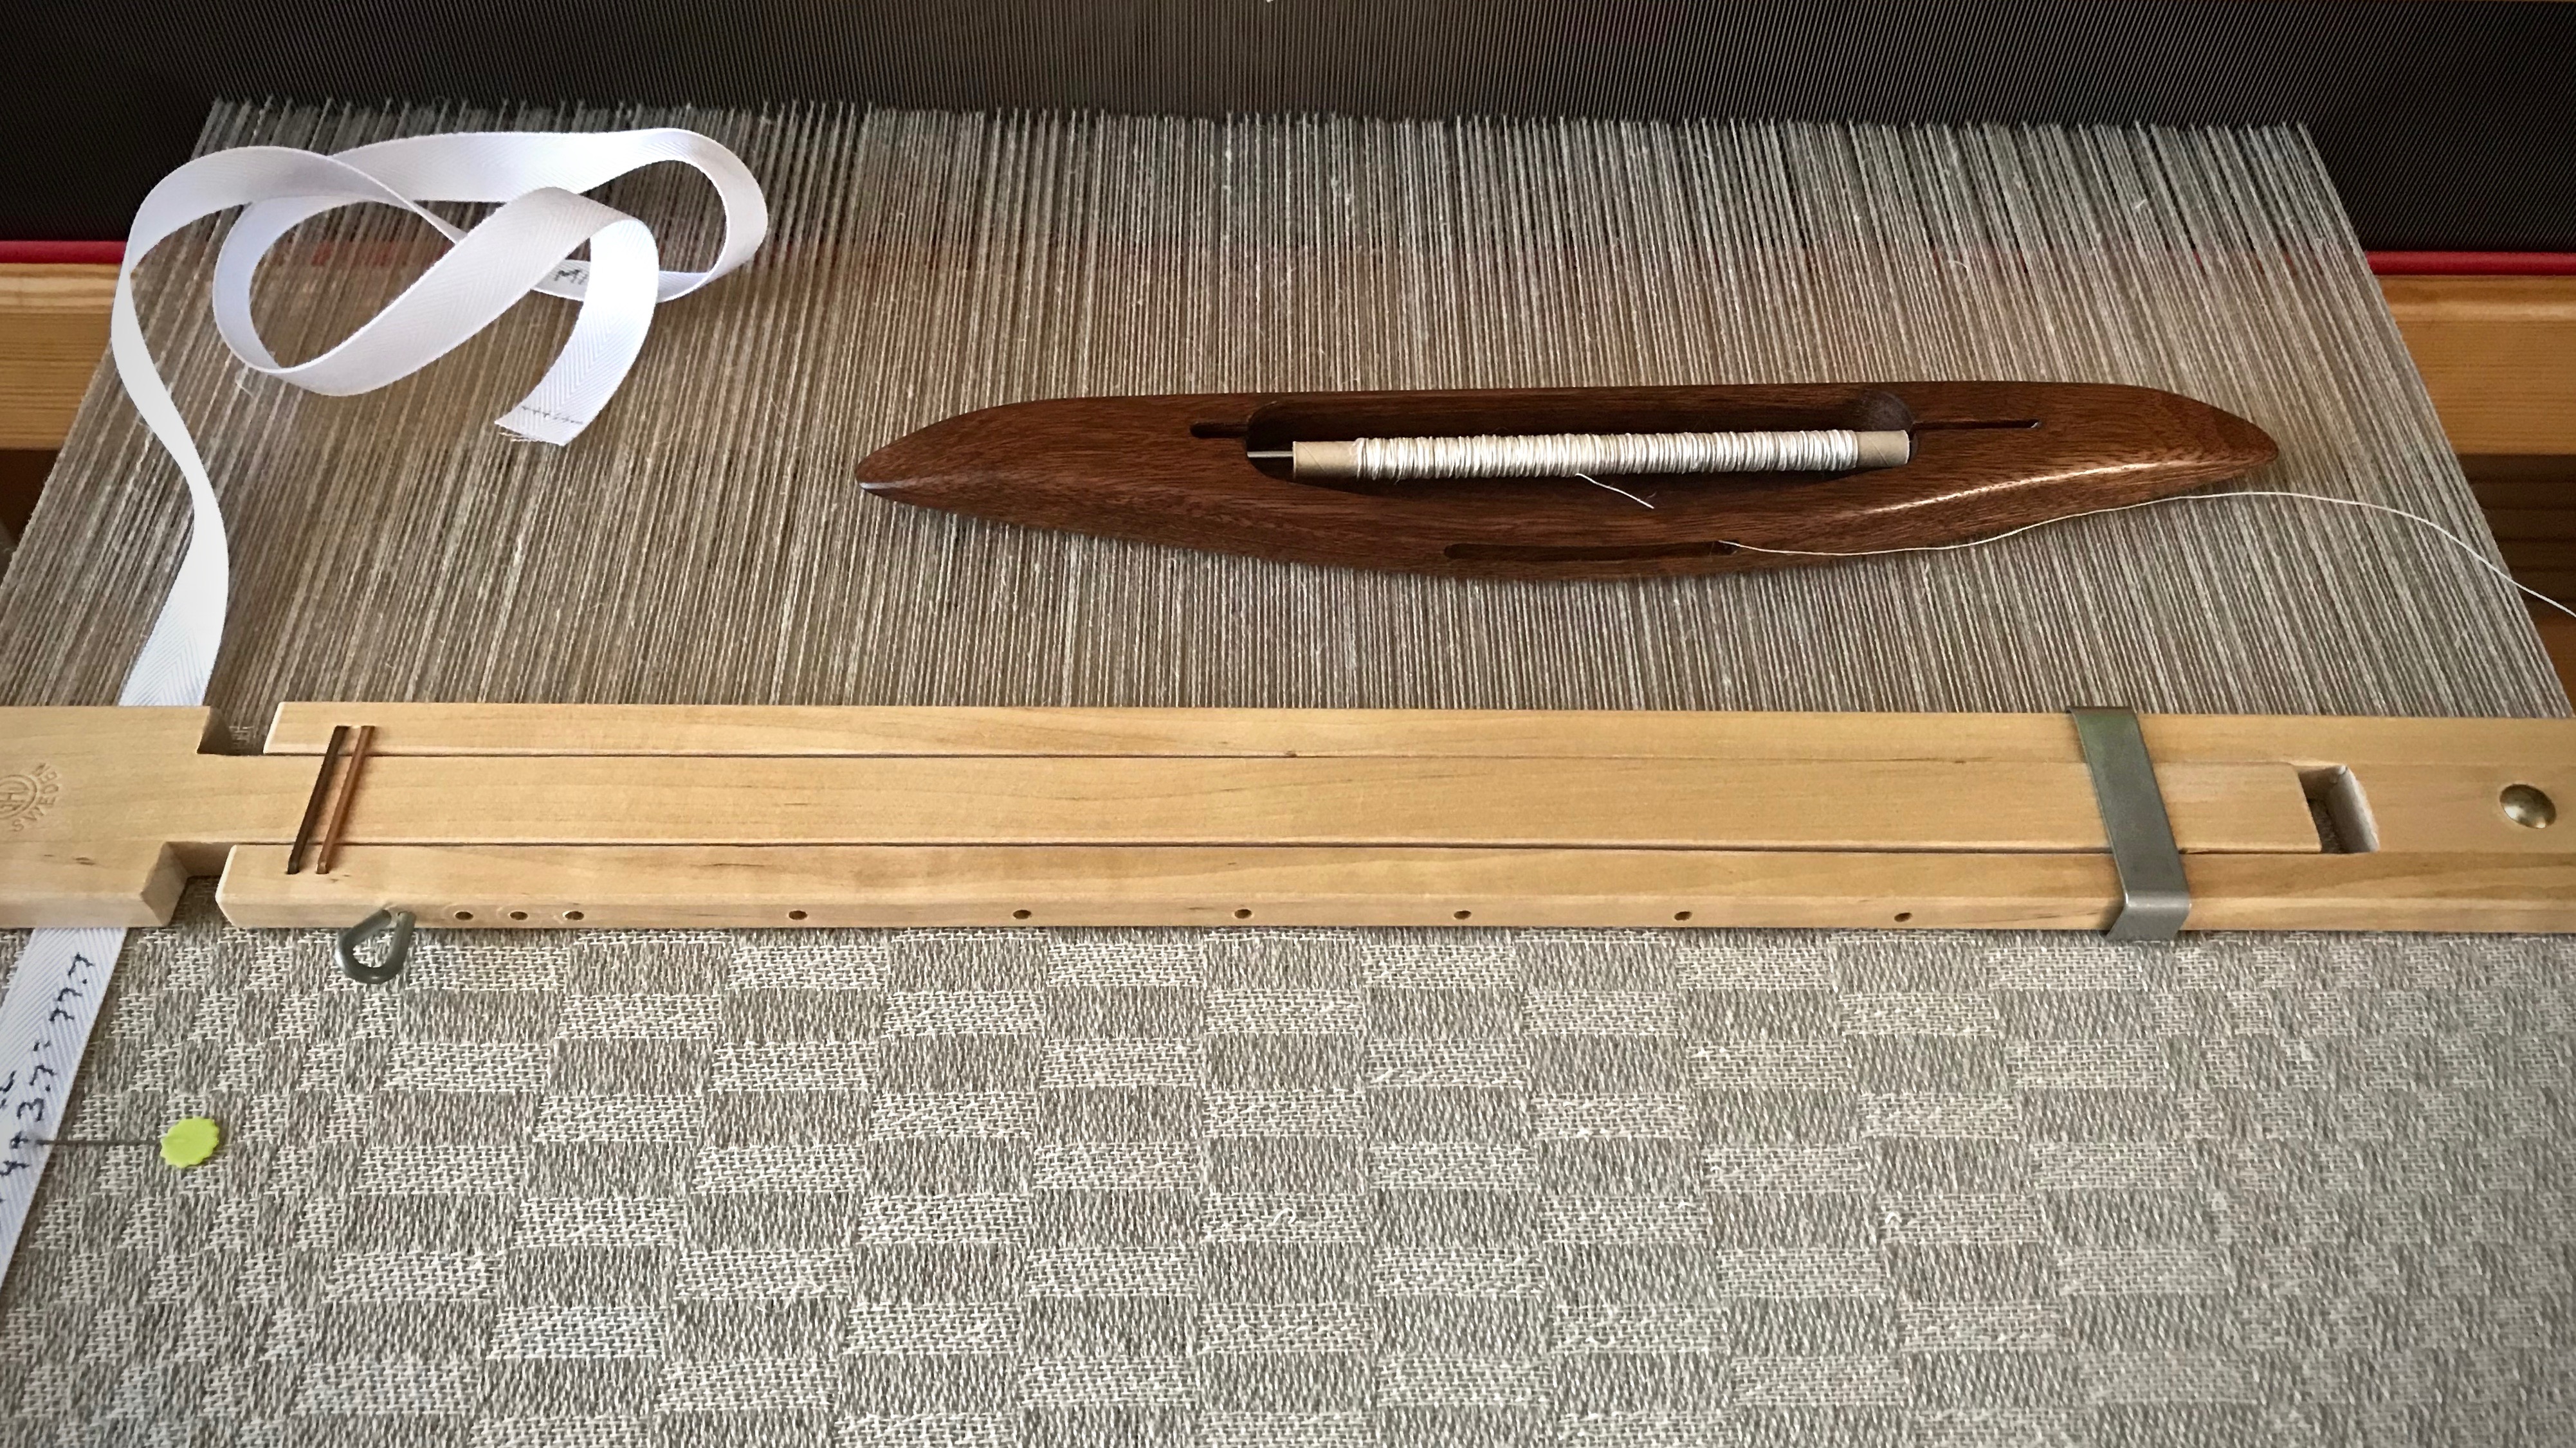
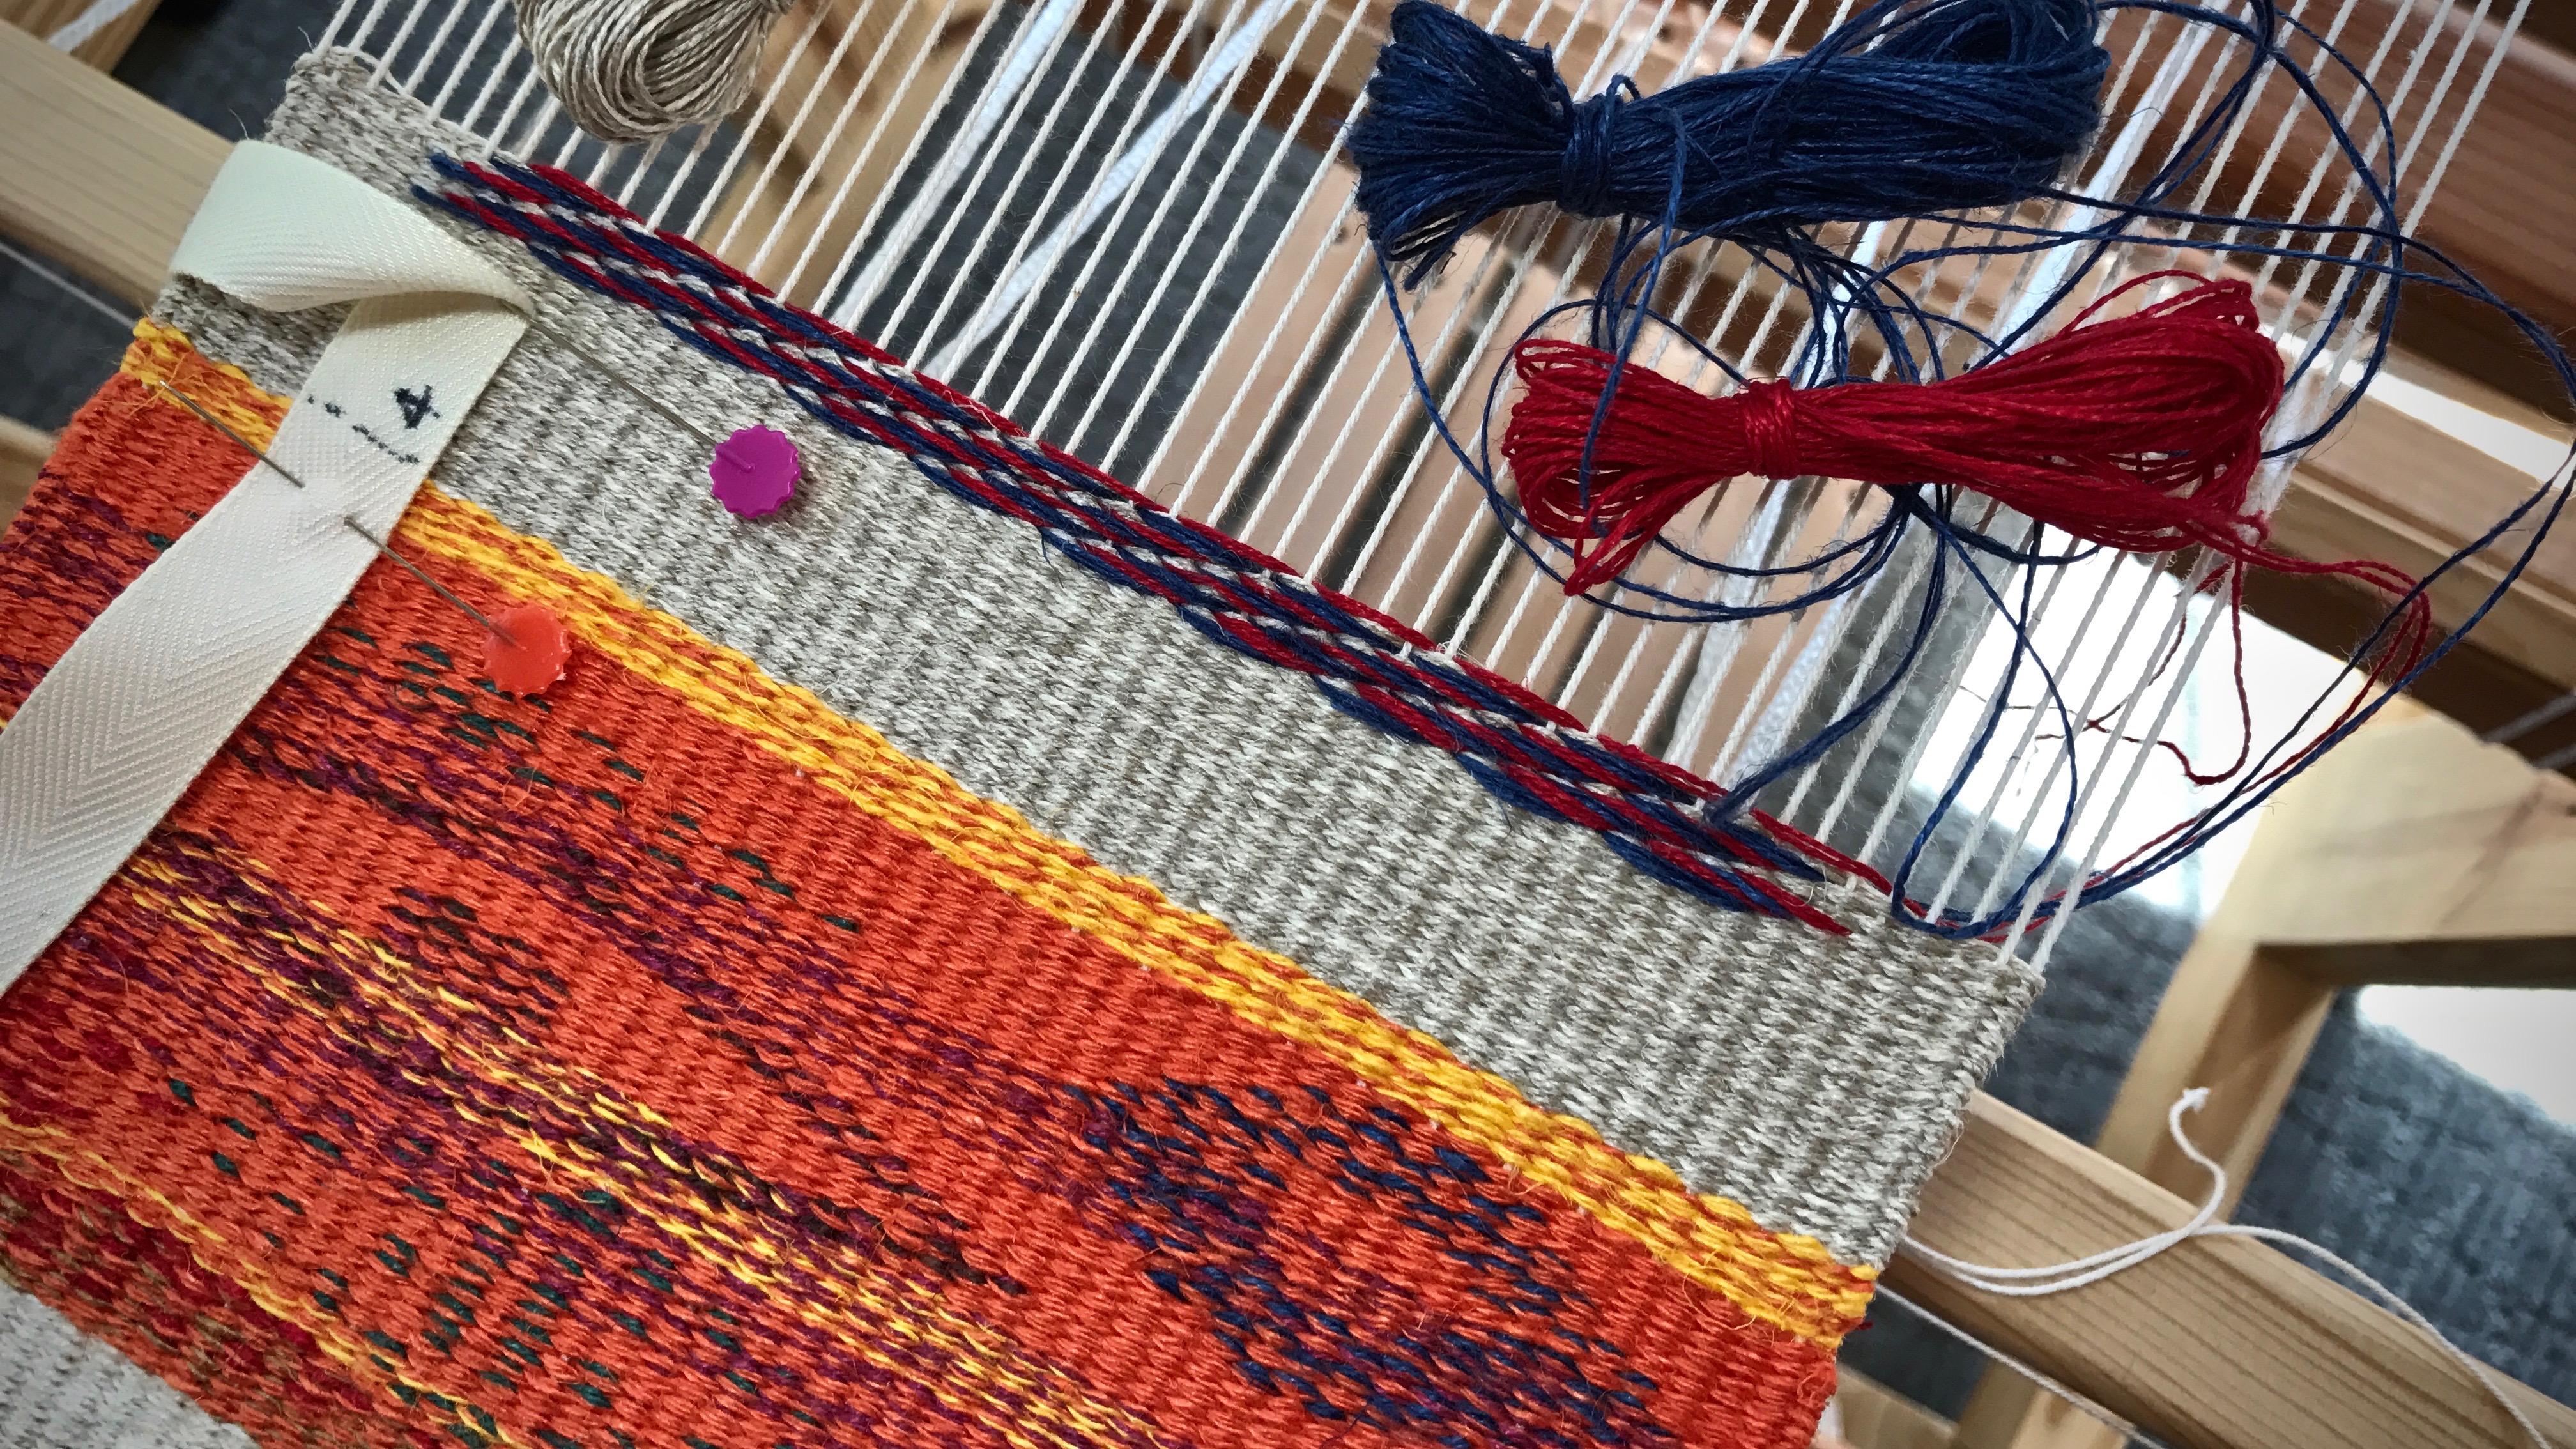
Align center of cartoon to center of warp.

A blue dashed line from top to bottom of the cartoon marks the center. I also have a pencil mark on the exact center of my beater. When the blue line on the cartoon is perfectly aligned with the center warp end, as seen from the mark on the beater, I know my cartoon is in the correct position.

Beginning a new tapestry.
Pencil mark on the beater is above the center warp end.

Security

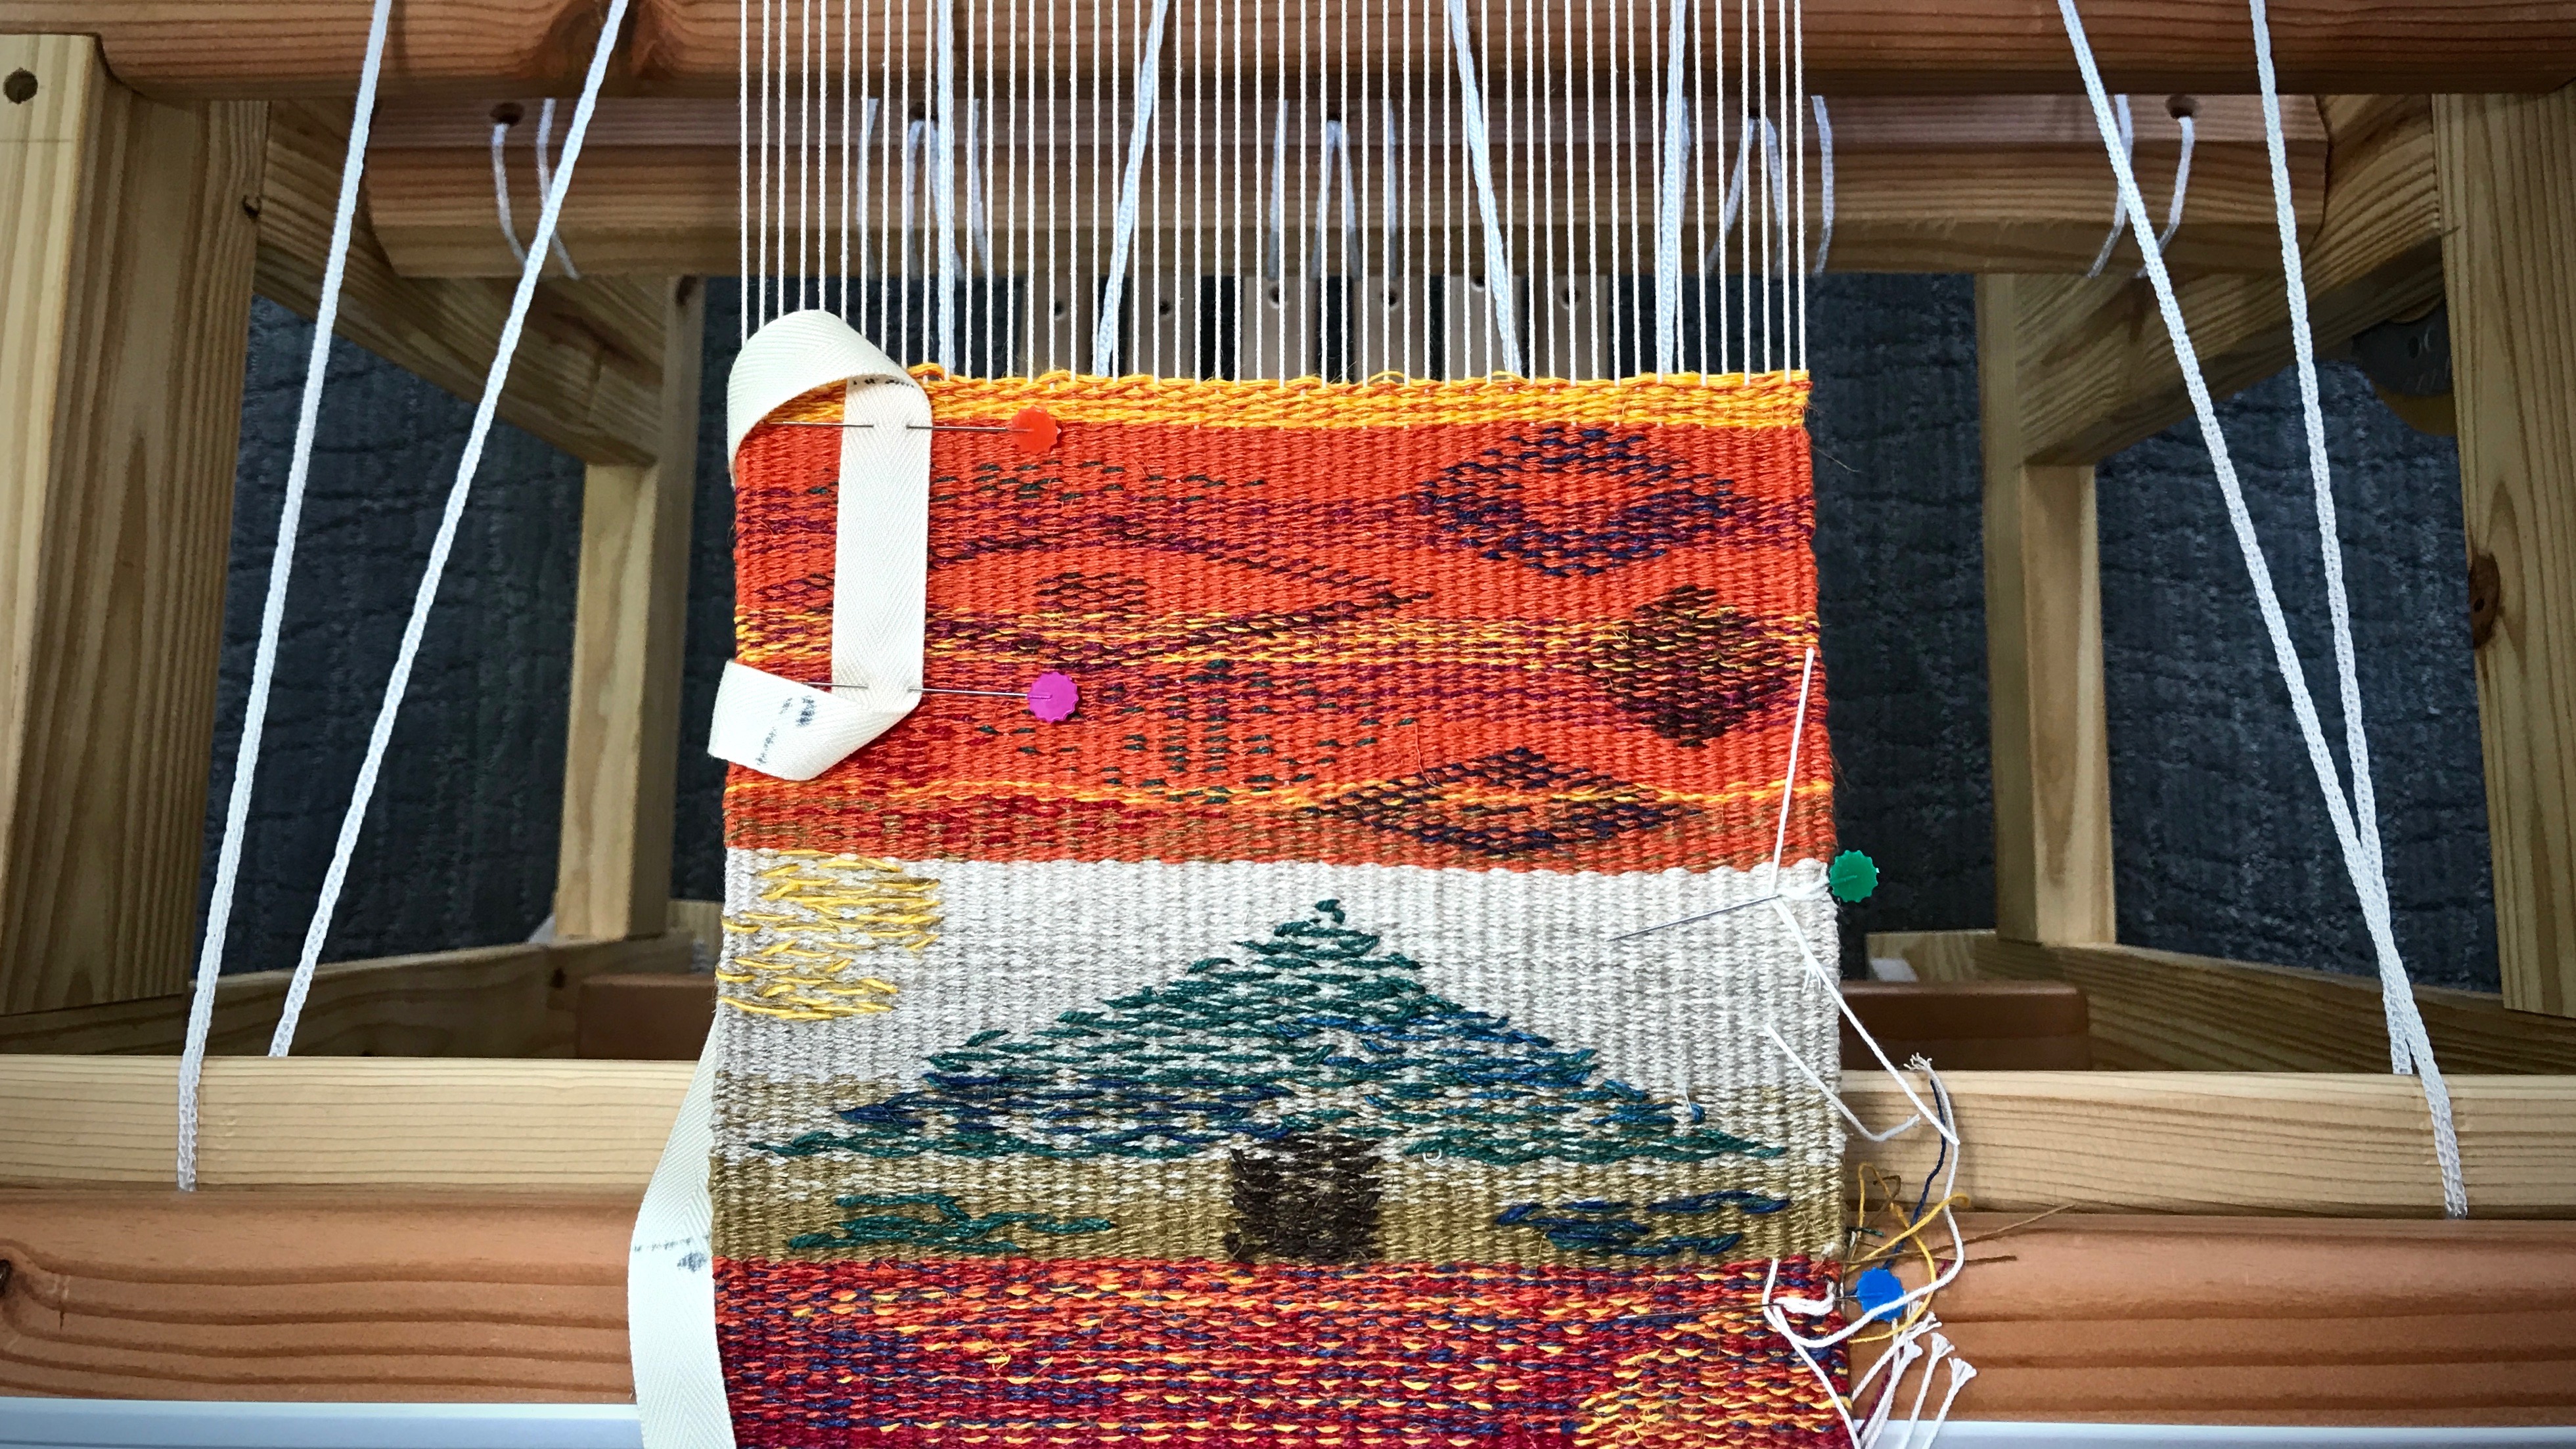
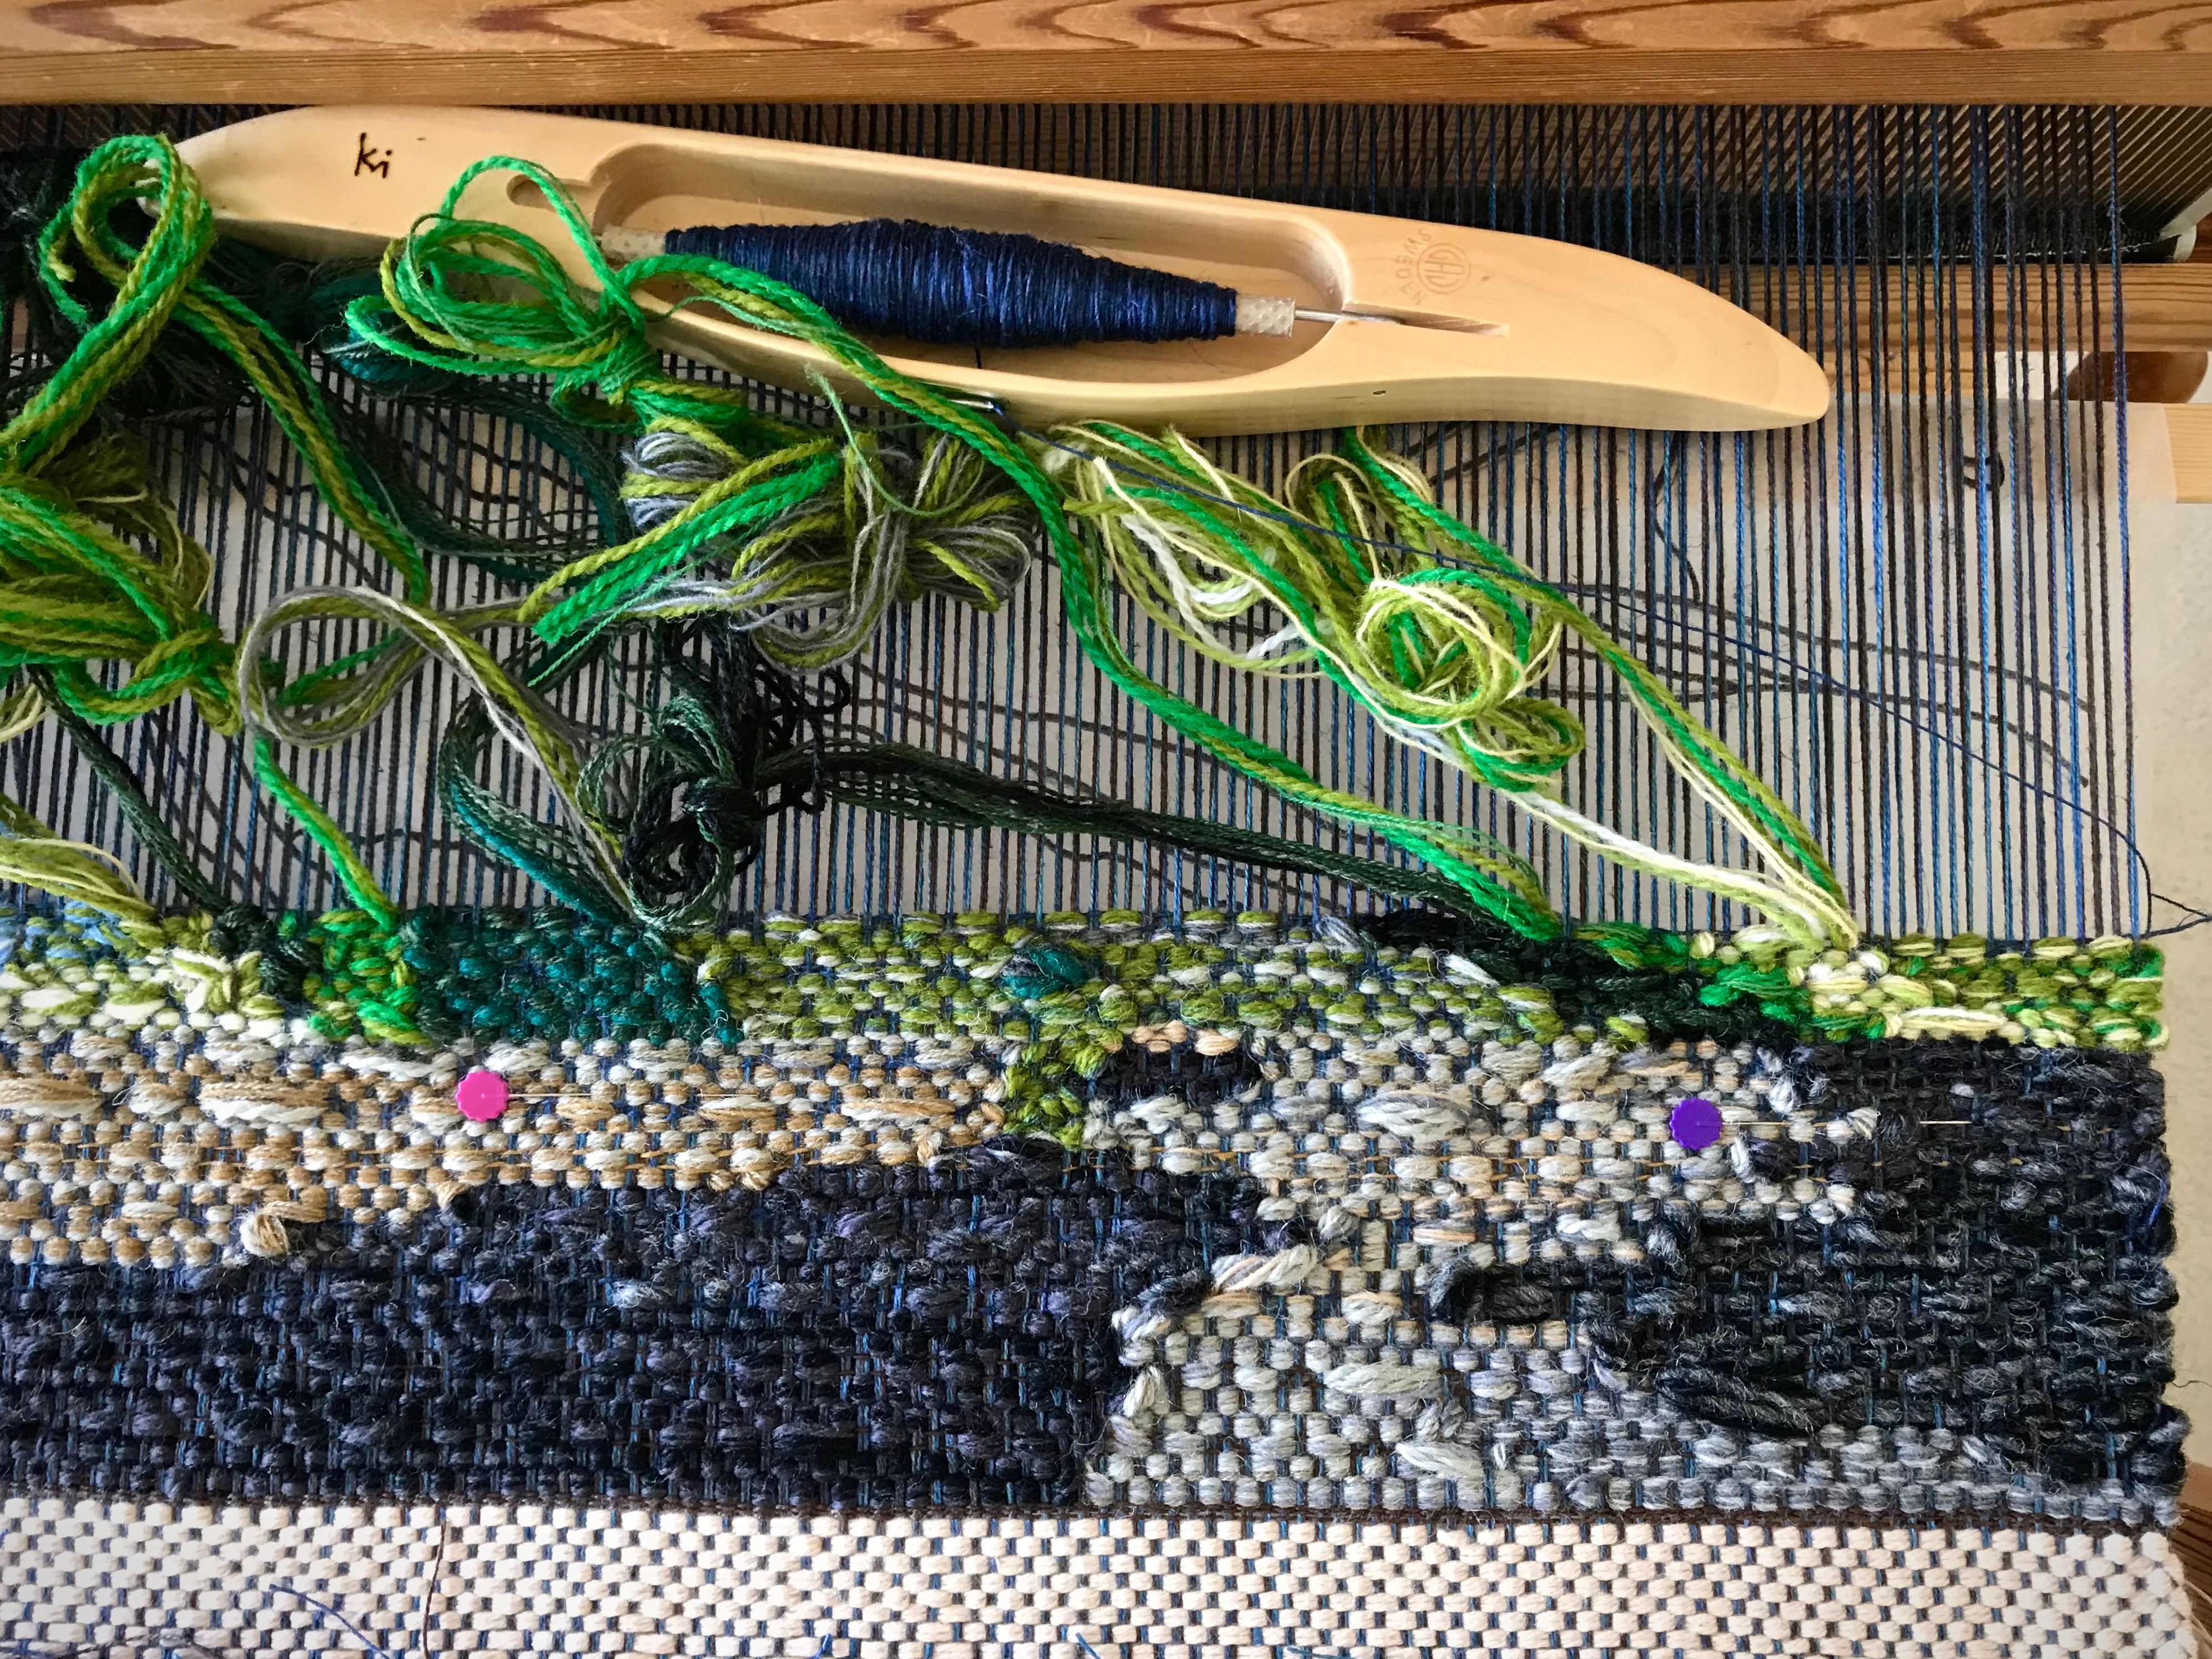
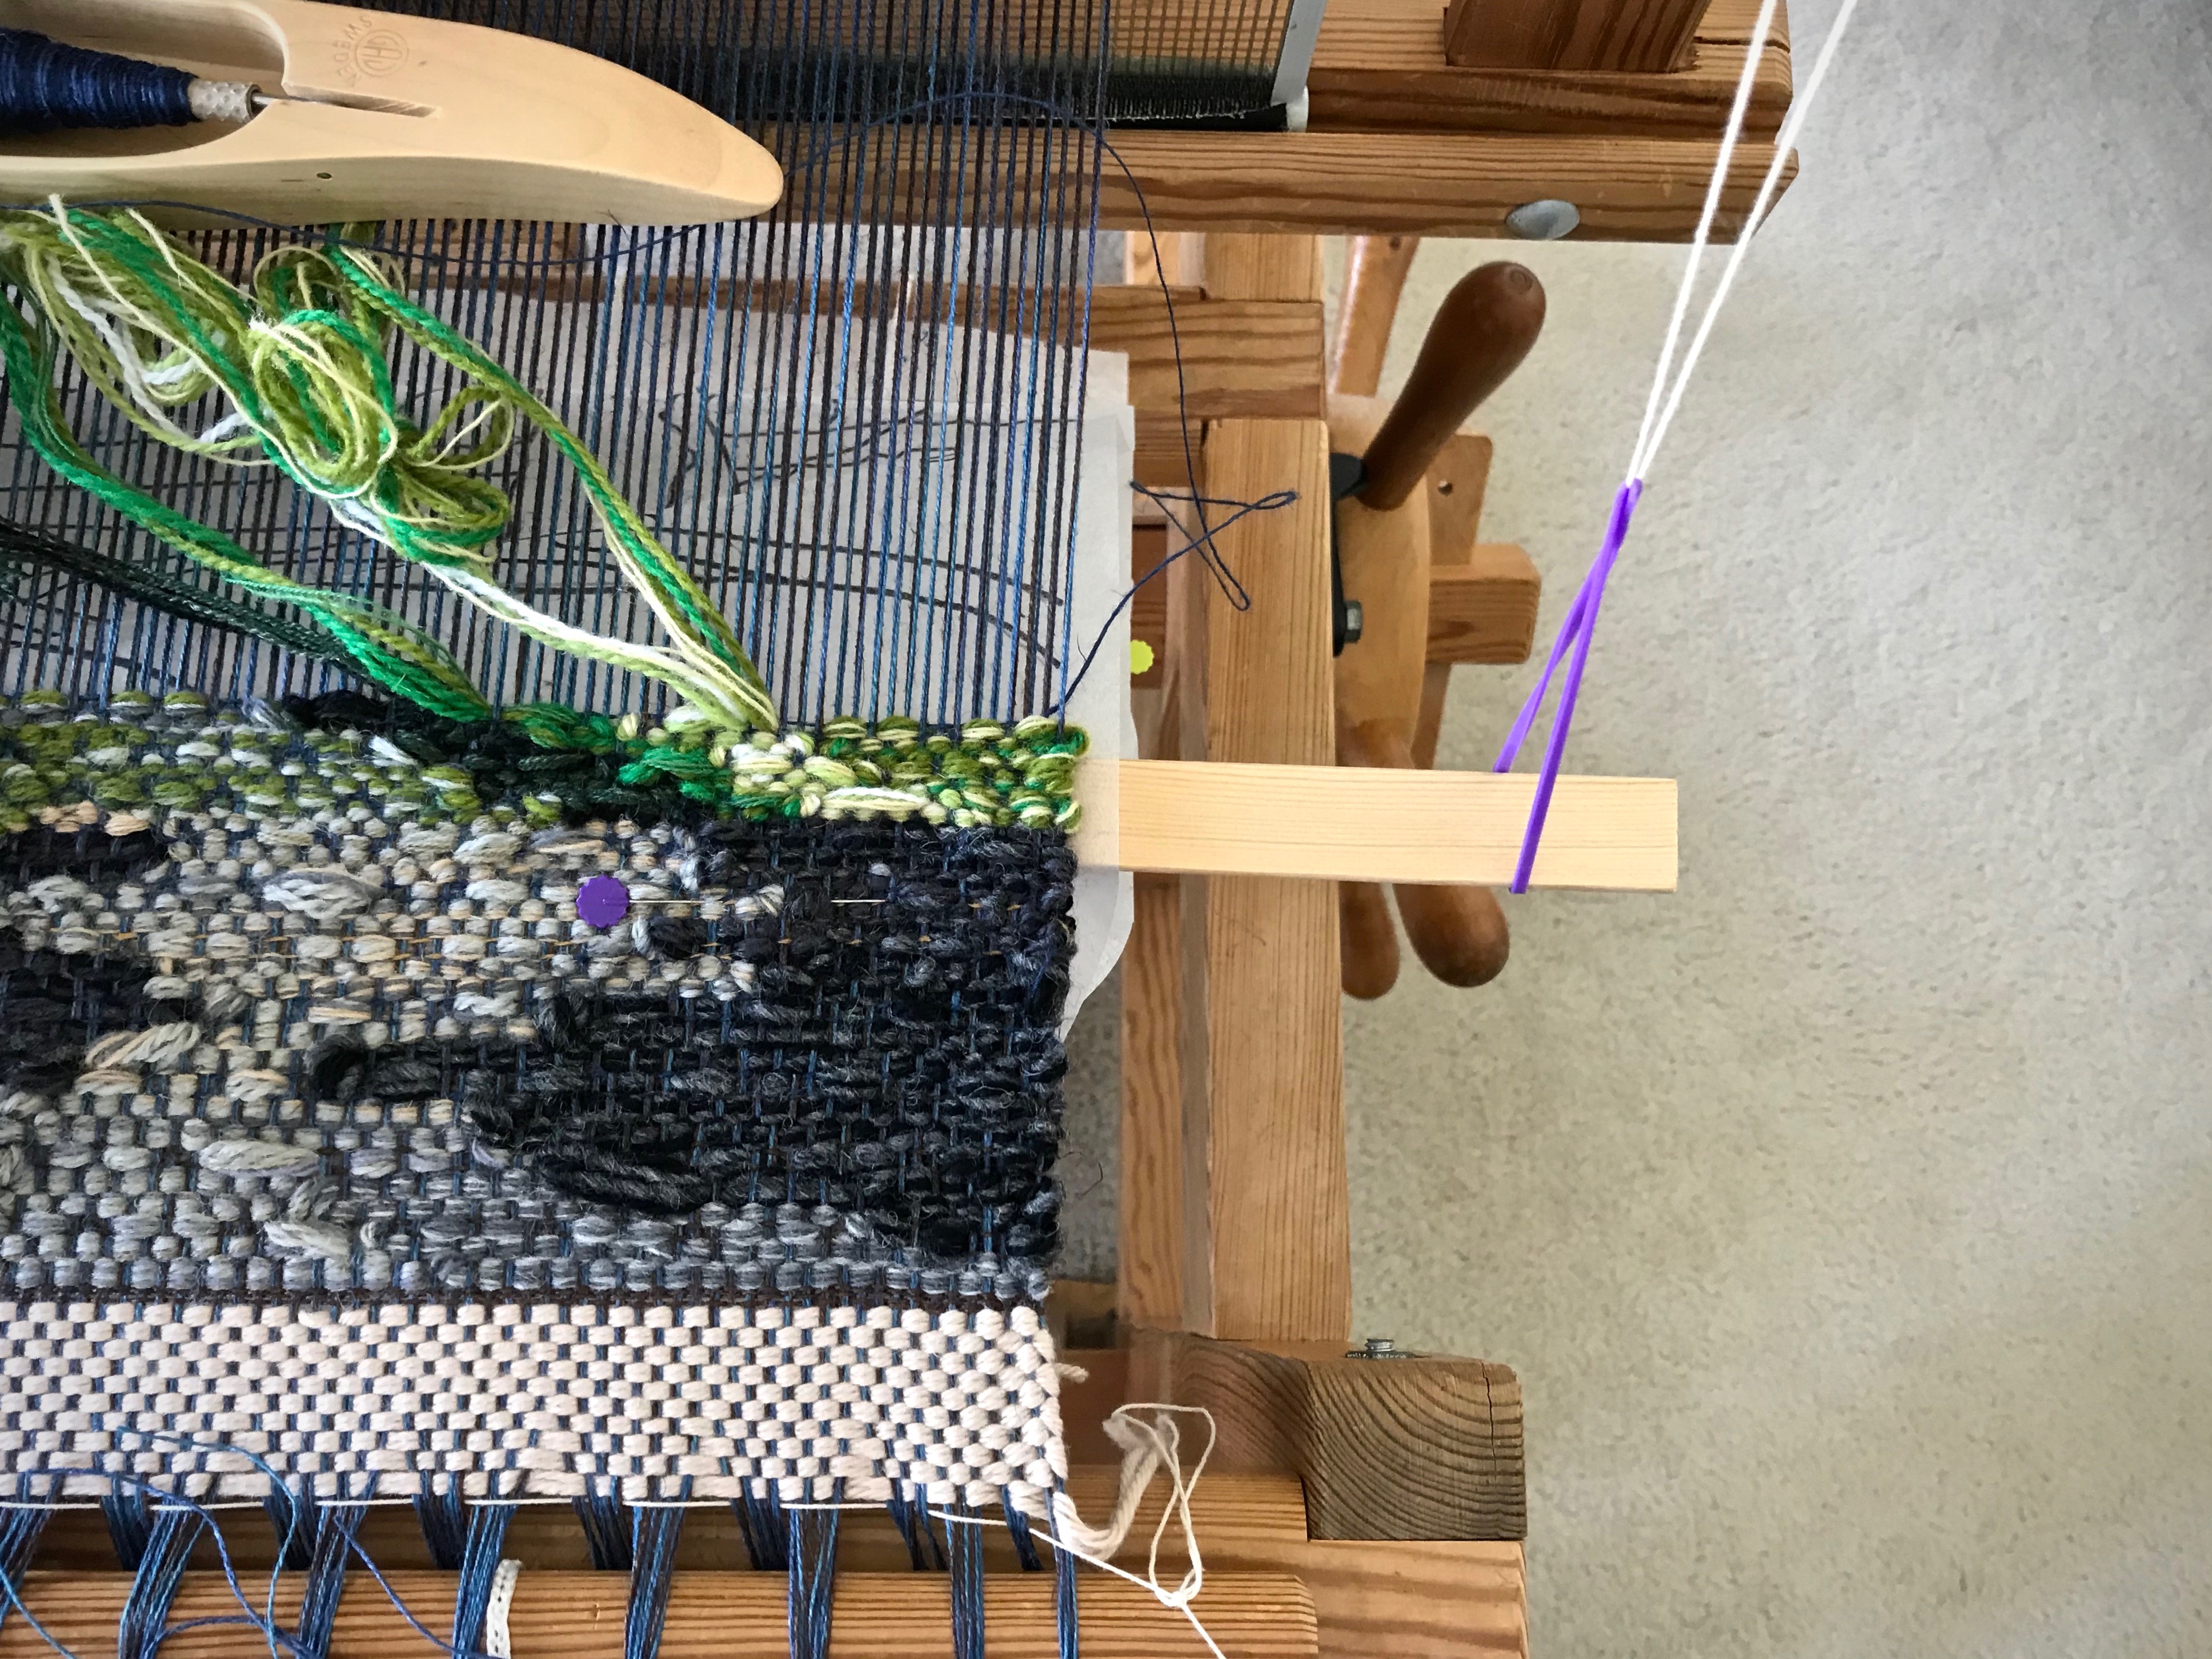
  • Pin the cartoon in two places on each side of the woven tapestry.
    This warp is too wide for me to reach all the way to pin the cartoon in the center. So, on both sides of the weaving I place one flathead pin near the selvedge, and another one as far as I can comfortably reach toward the center. I move the pins forward each time I am ready to advance the warp.
Beginning a new four-shaft tapestry.
Two flat-head pins hold the cartoon under the tapestry weaving on the right-hand side.
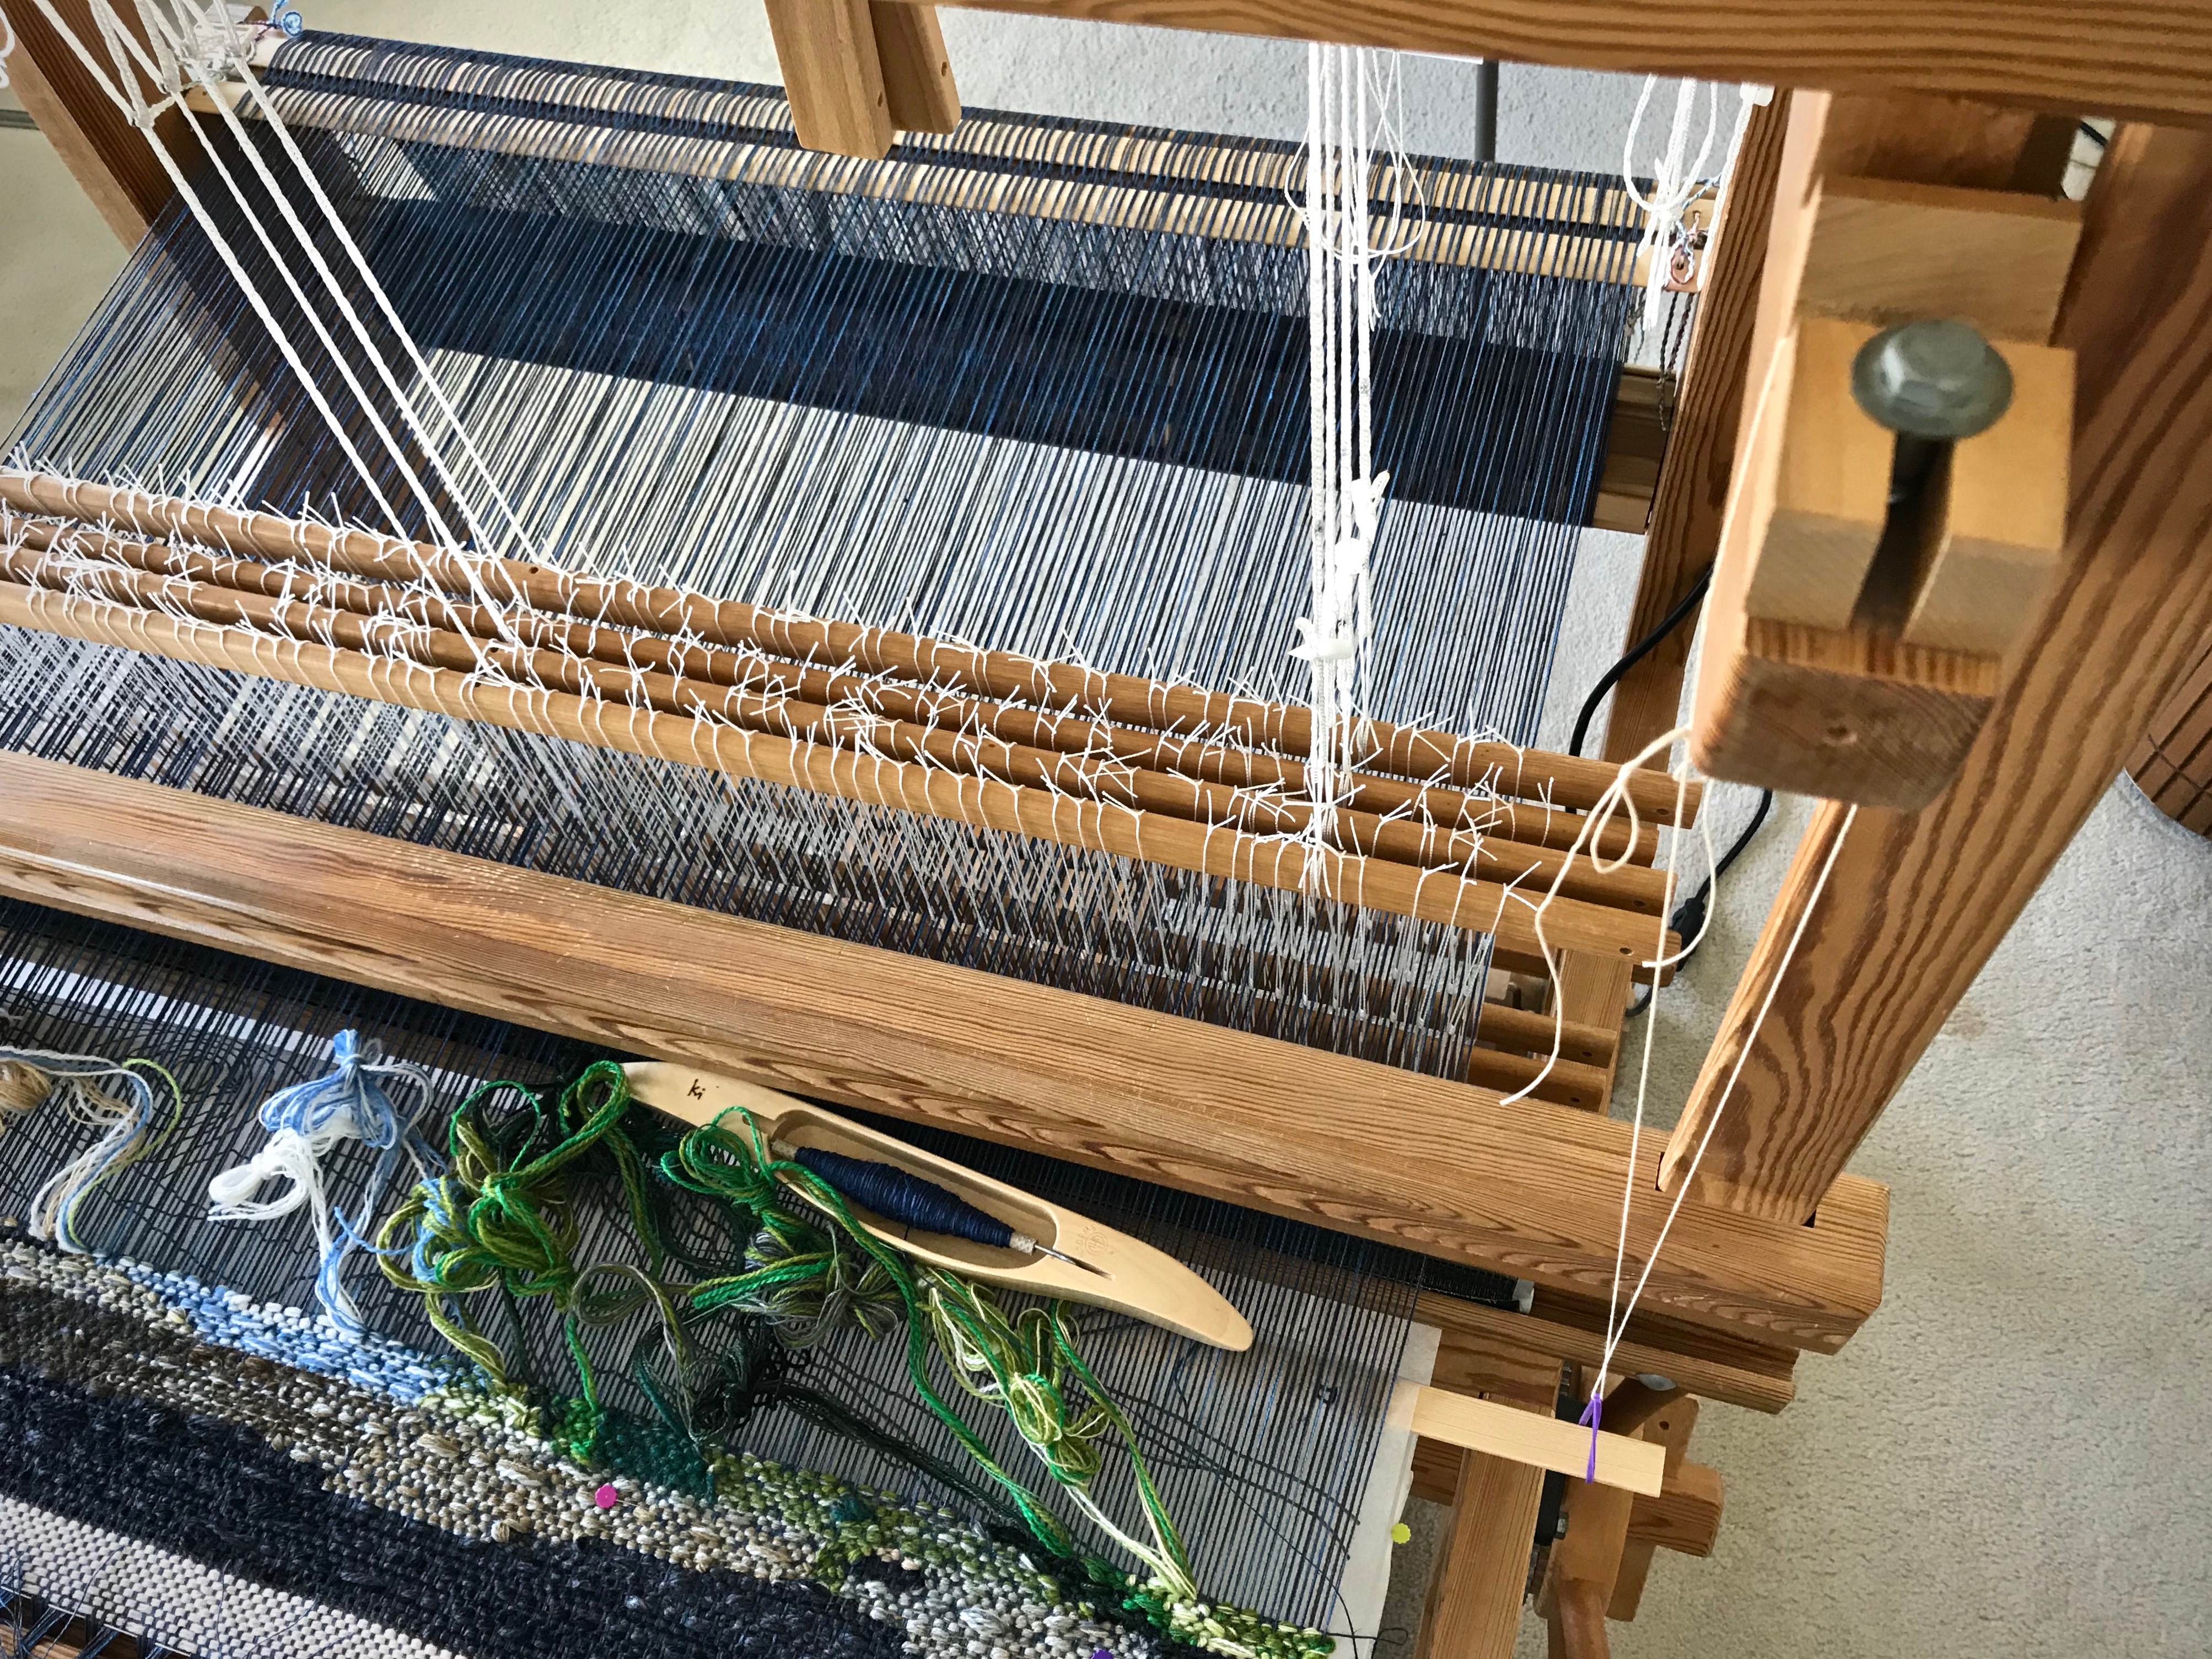
  • Hang a support slat under the cartoon.
    I learned this from The Big Book of Weaving, by Laila Lundell, p. 239, 2008 edition. I used this method previously for a rag rug that had a cartoon for a large inlay pattern. It also works well for holding the cartoon for a woven transparency.
Positioning a cartoon under the warp.
Seine twine loop with rubber band hangs from beater cradle. Slat holds cartoon up against the warp.

Supplies: 12/6 cotton seine twine, 2 rubber bands, long warping slat

1 Make a loop with the seine twine to hang from the beater cradle to just below the warp, with a rubber band on the loop.

2 Tie the ends of the loop with a bow knot or a weaver’s tie-up knot (this useful knot is described in How to Warp Your Loom, by Joanne Hall, p. 39).

Cartoon management for tapestry.
Top of loop tied in a bow knot.
Weaver's tie-up knot helps hold the tapestry cartoon.
Weaver’s tie-up knot is perfect for this application, since it is quick and easy to undo and re-tie if repositioning is needed.

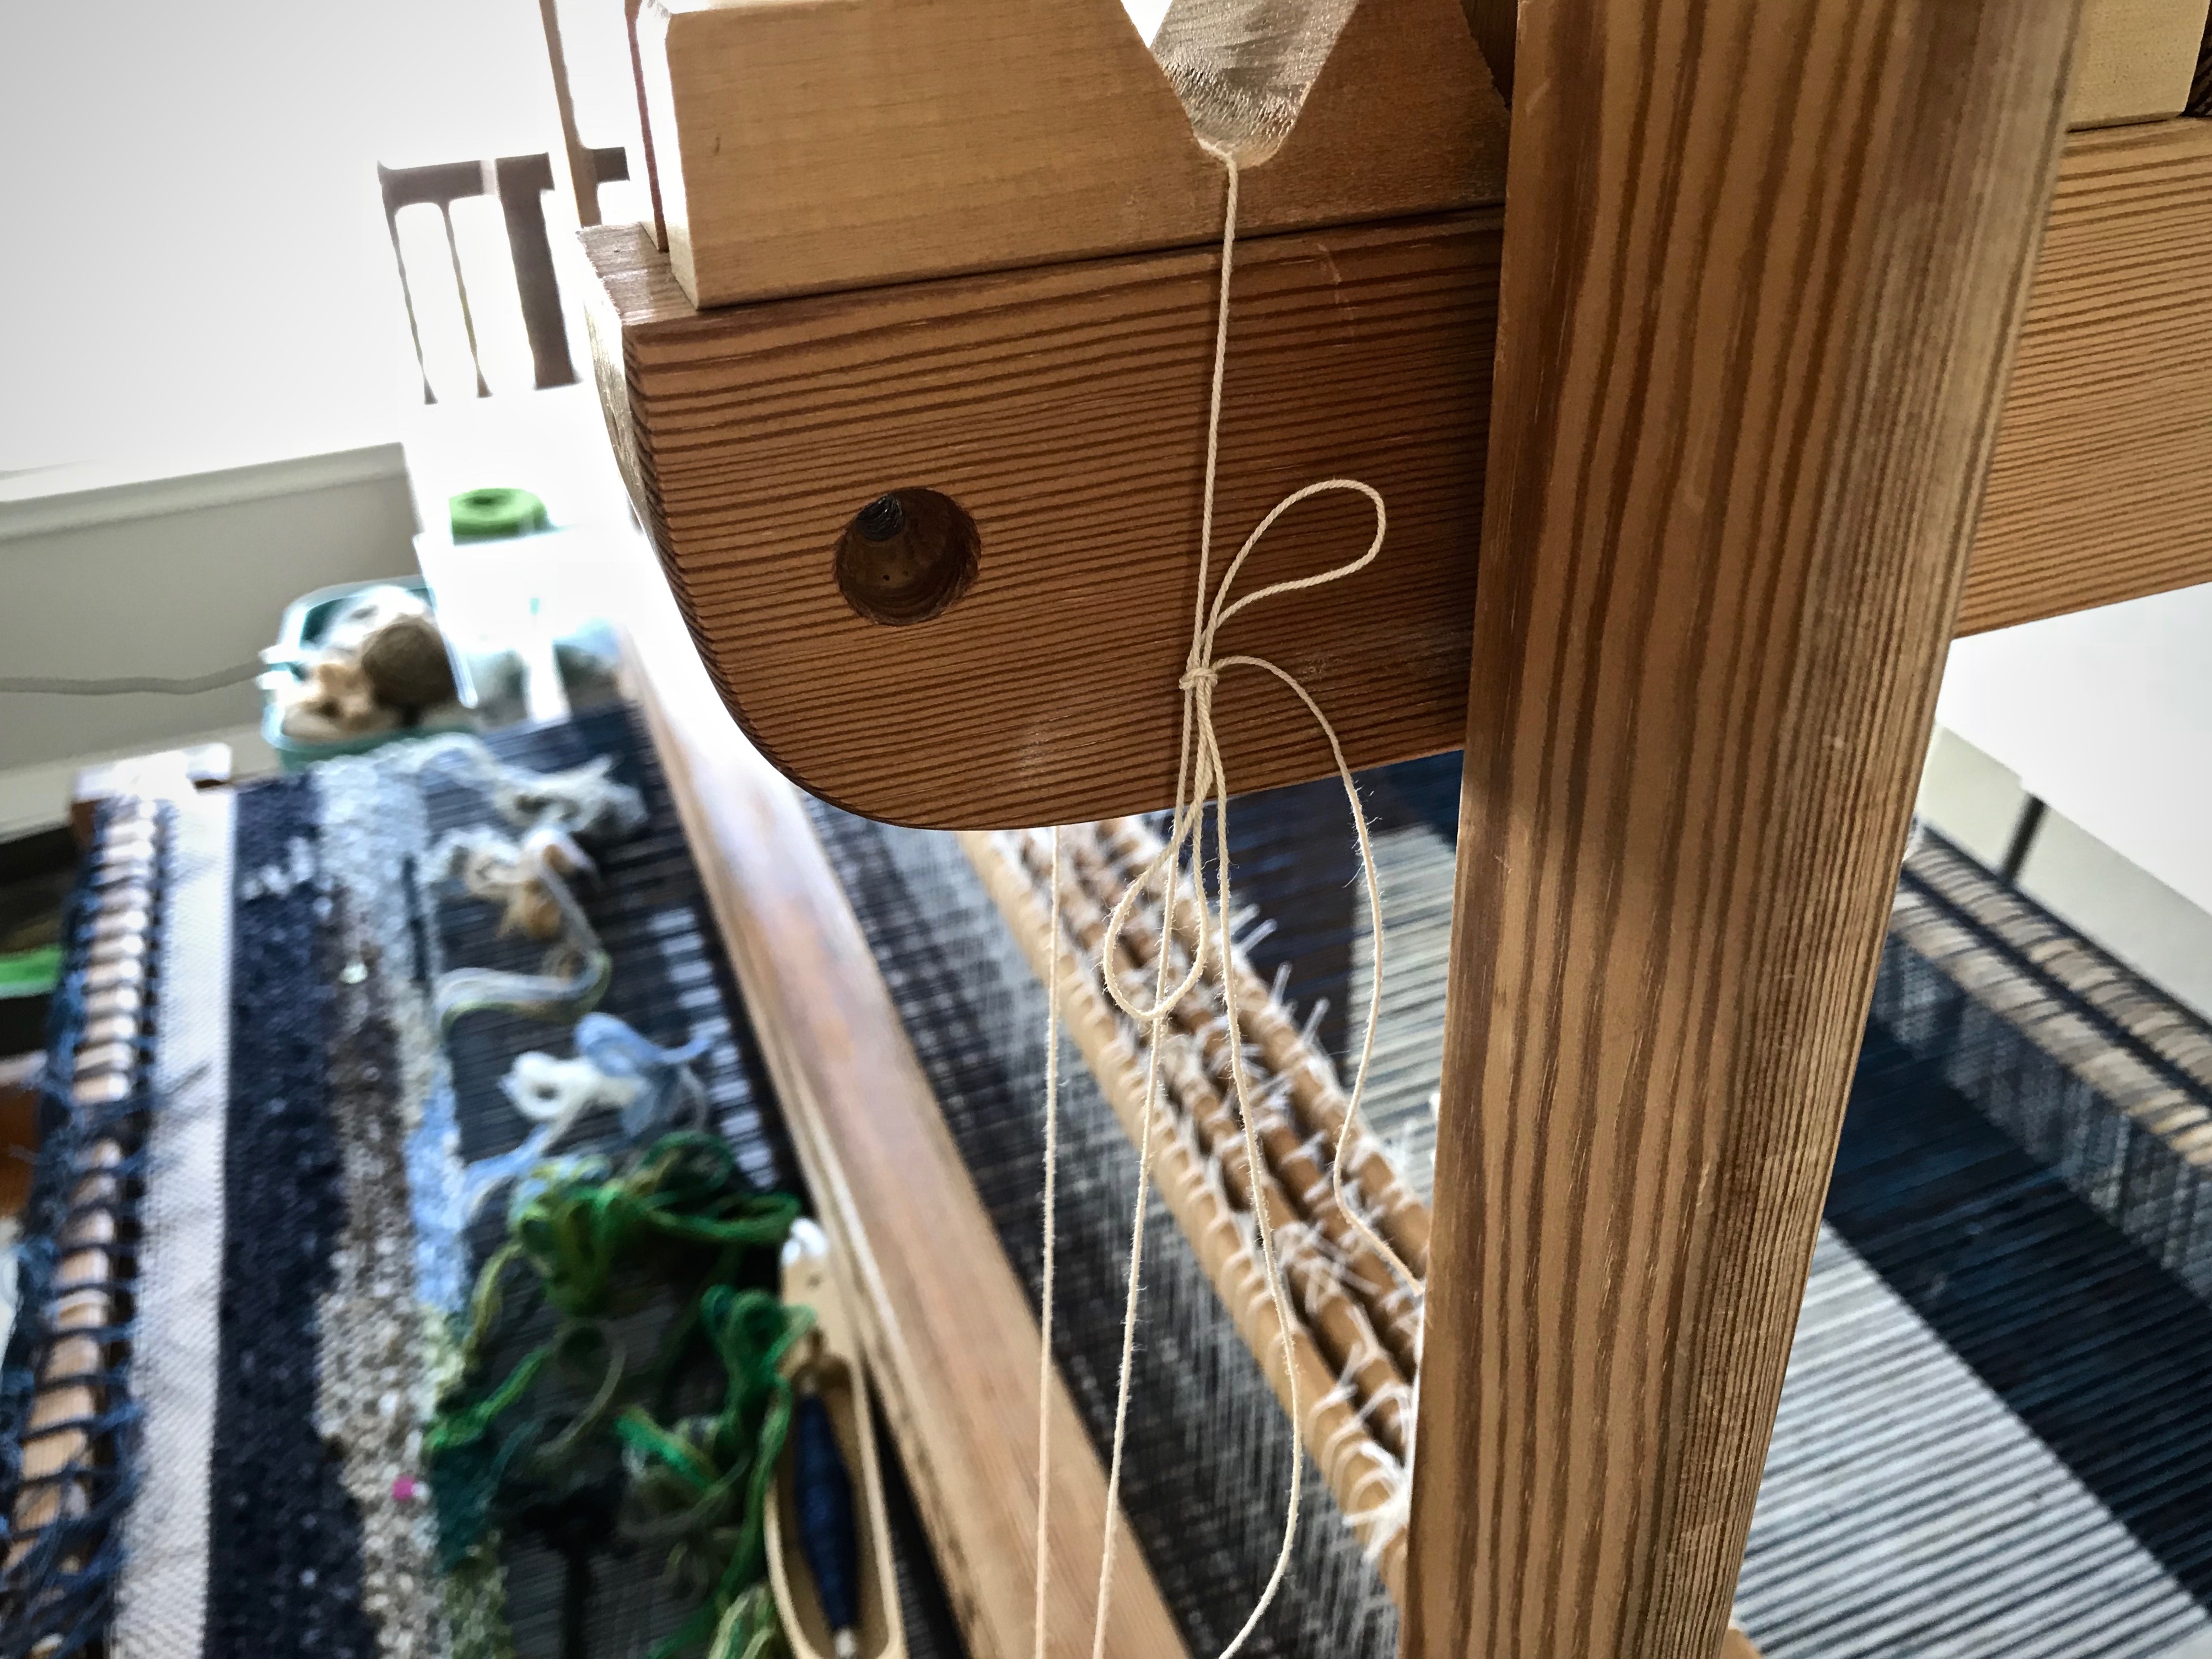
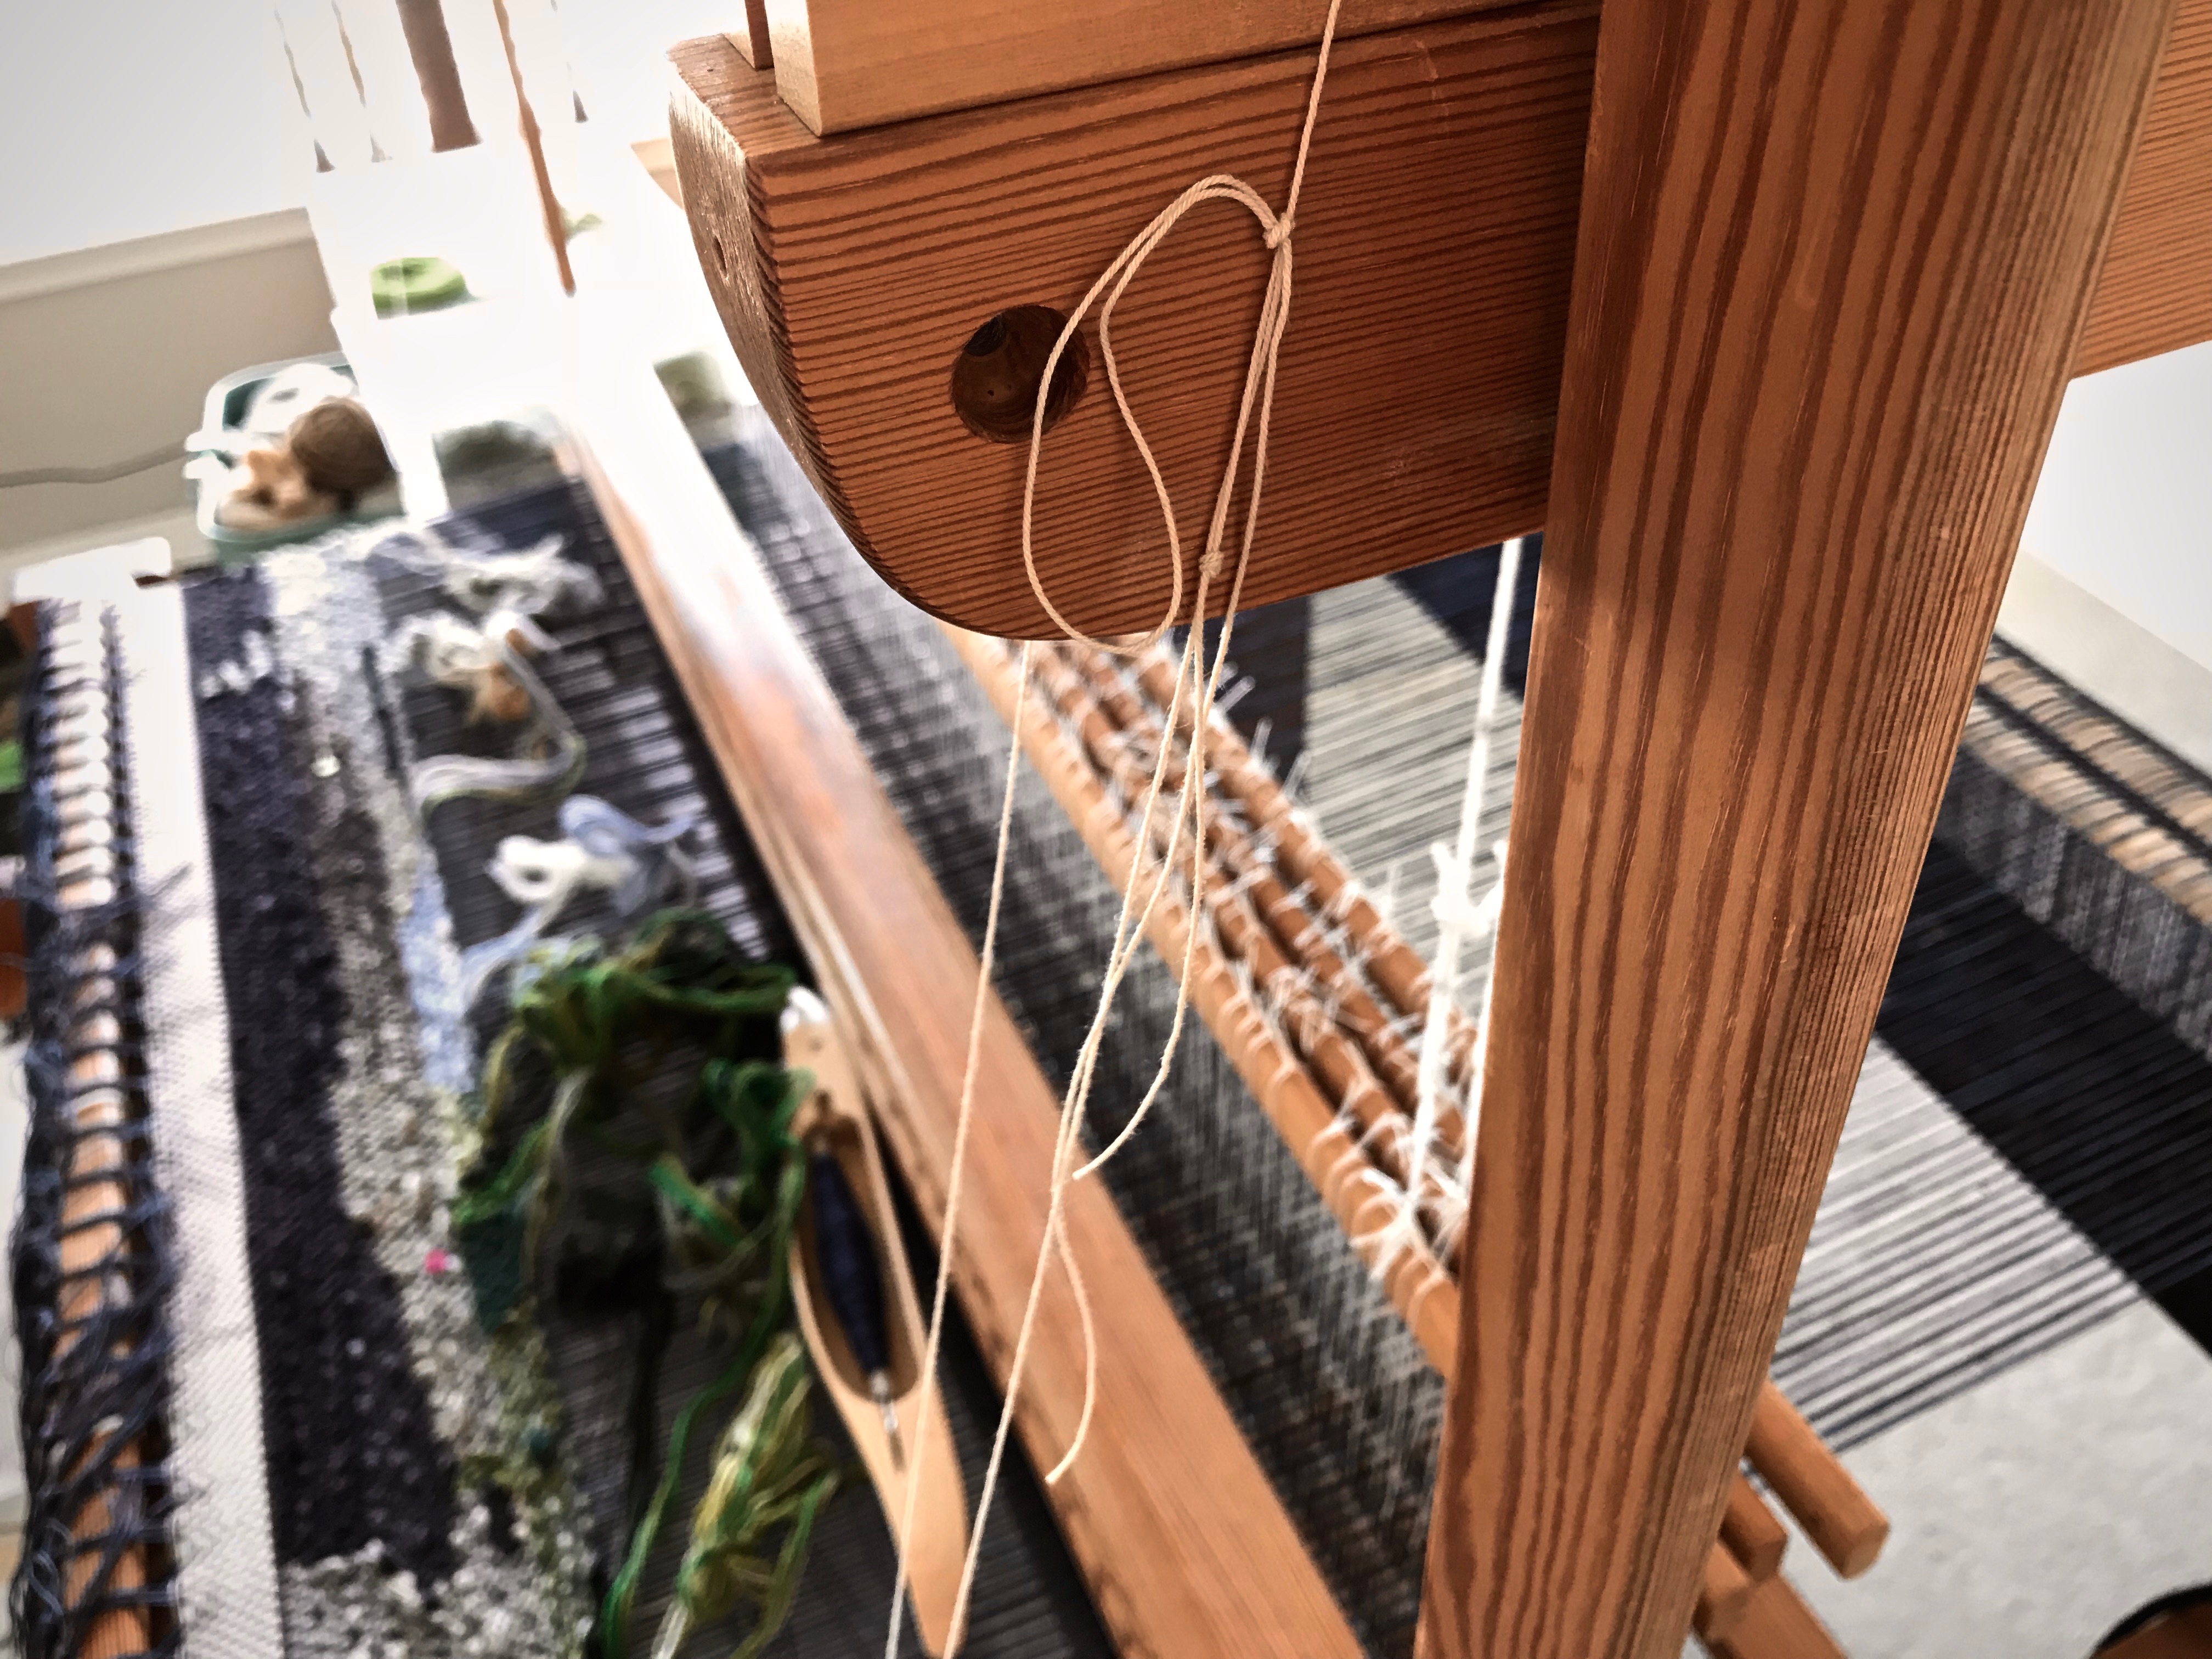
3 Make another loop the same way, with rubber band, and hang it on the other beater cradle.

4 Place the warping slat in the hanging rubber bands, underneath the cartoon.

5 Adjust the length of the loops so that the slat lightly presses up on the cartoon and the warp.

One way to manage a tapestry cartoon.
Rubber band gives flexibility to the seine twine loop that is holding up the cartoon.
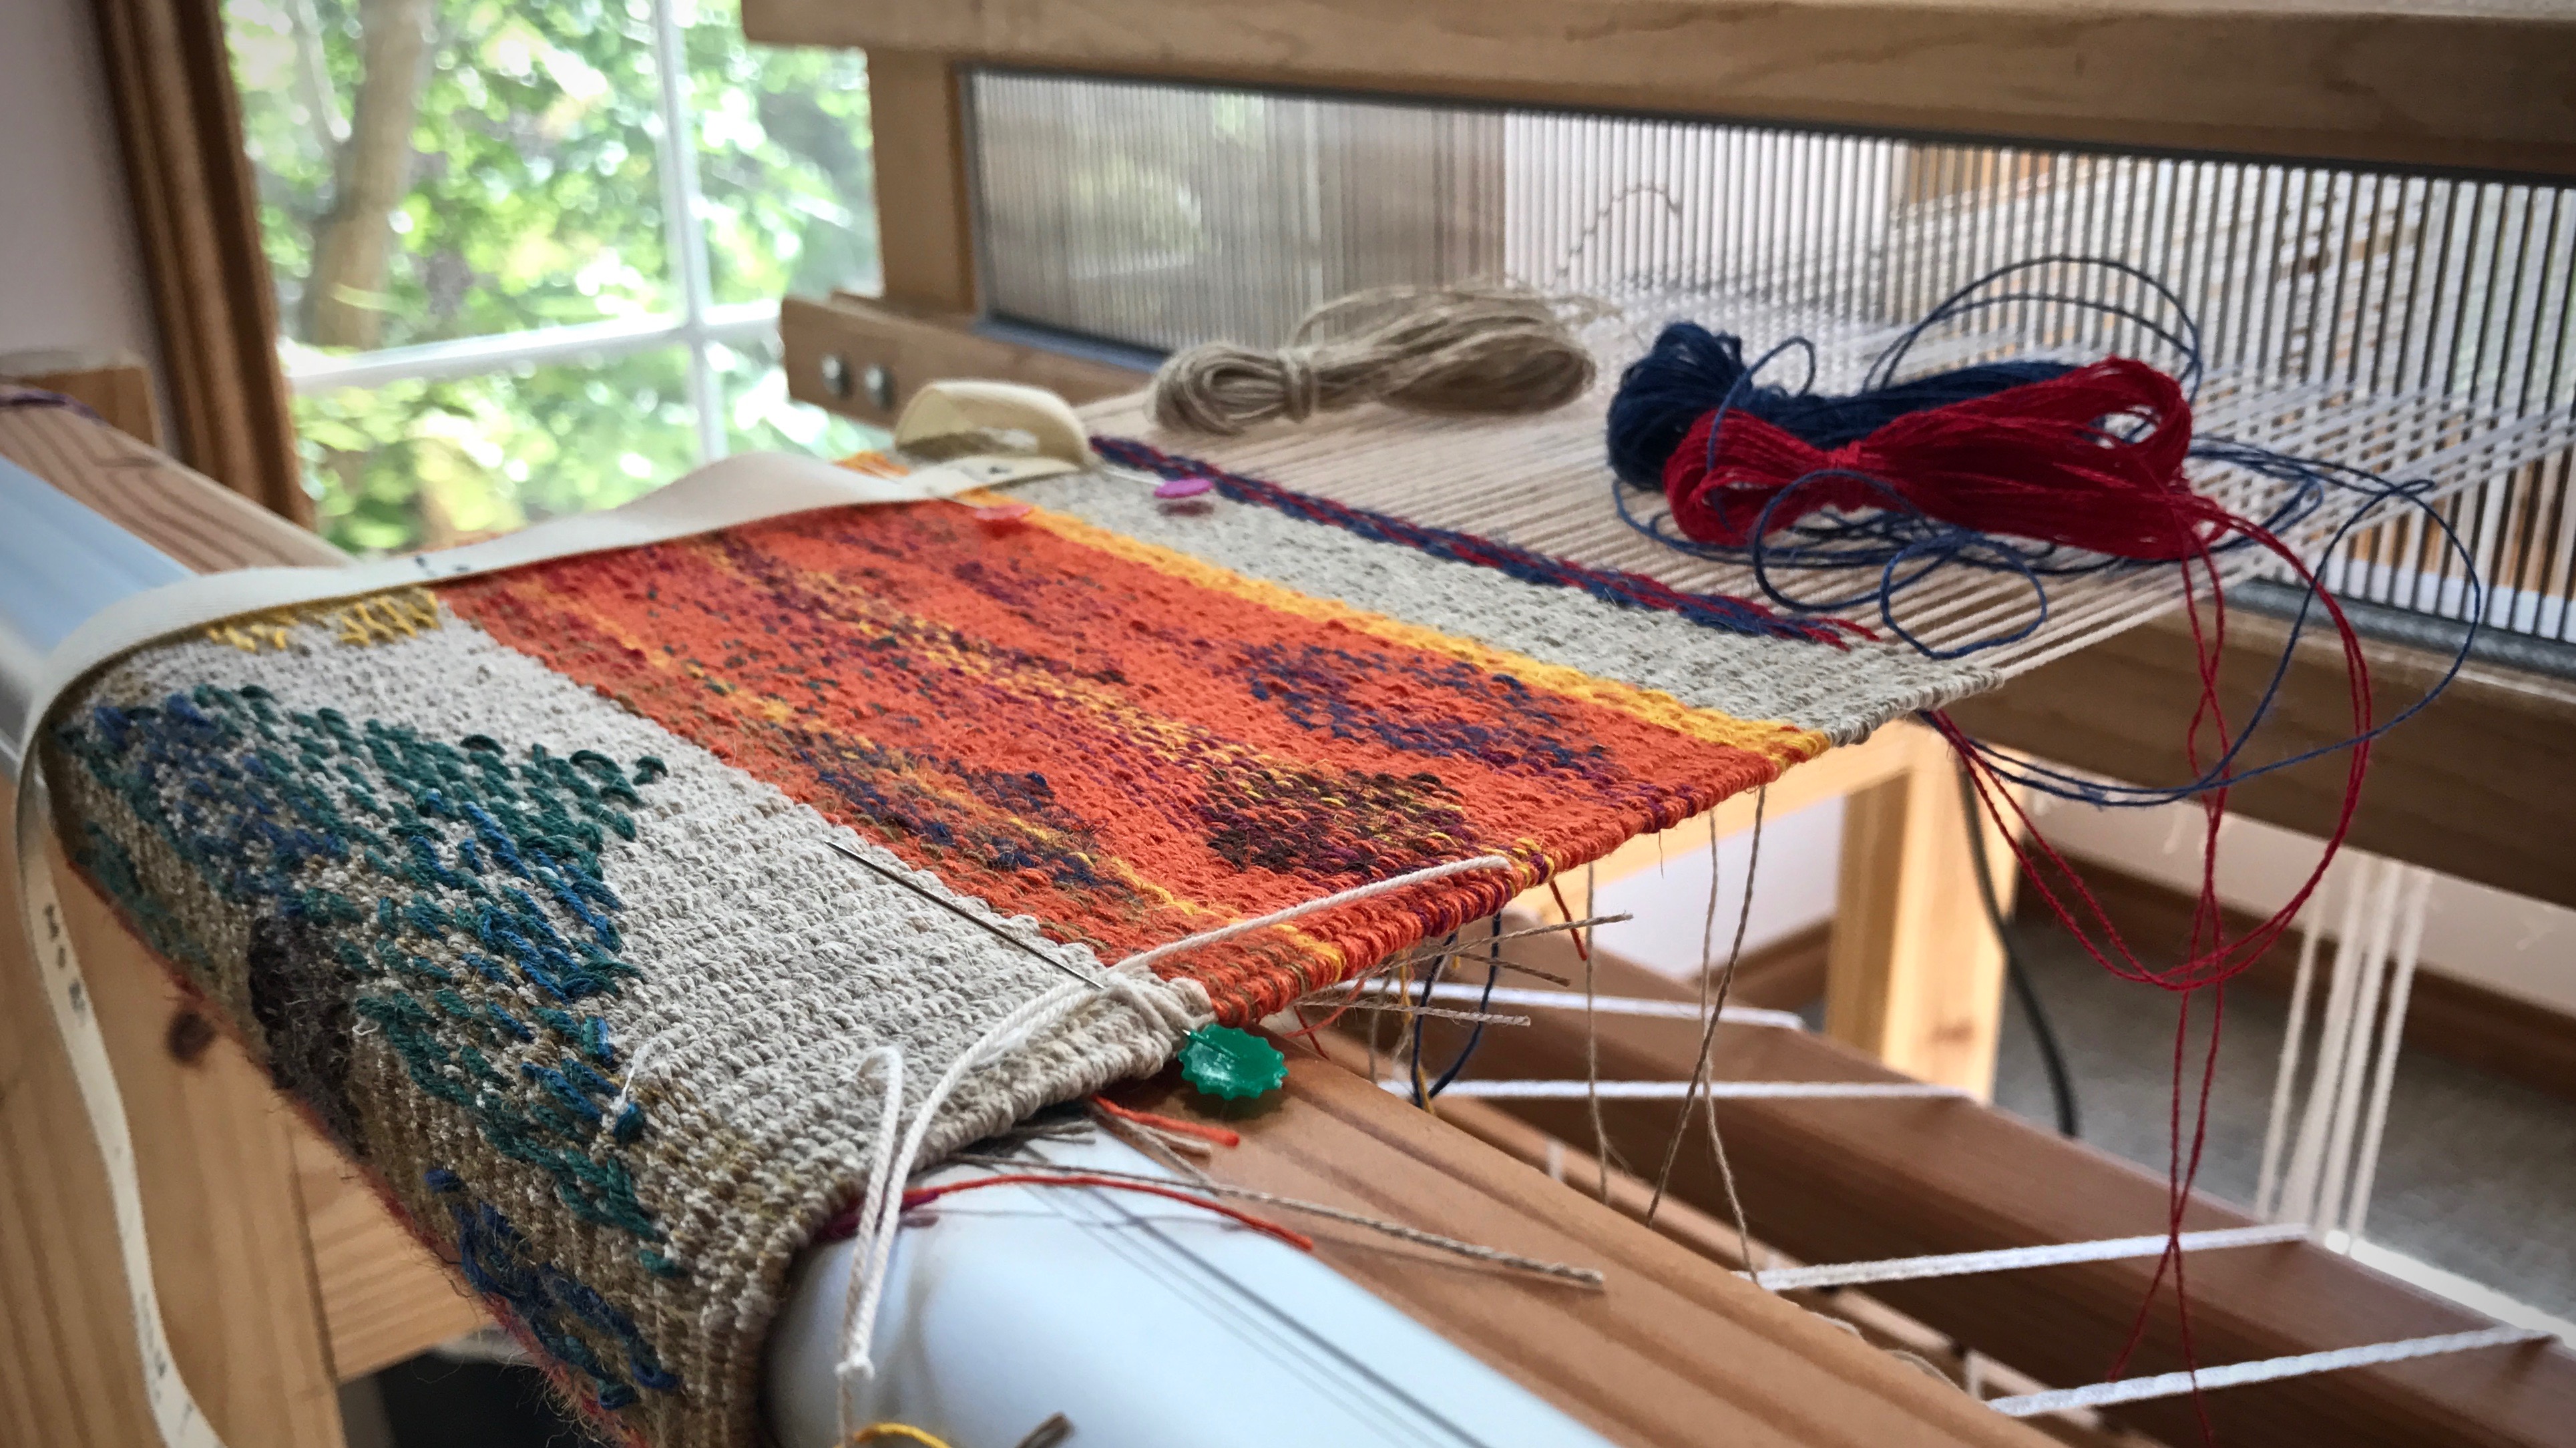
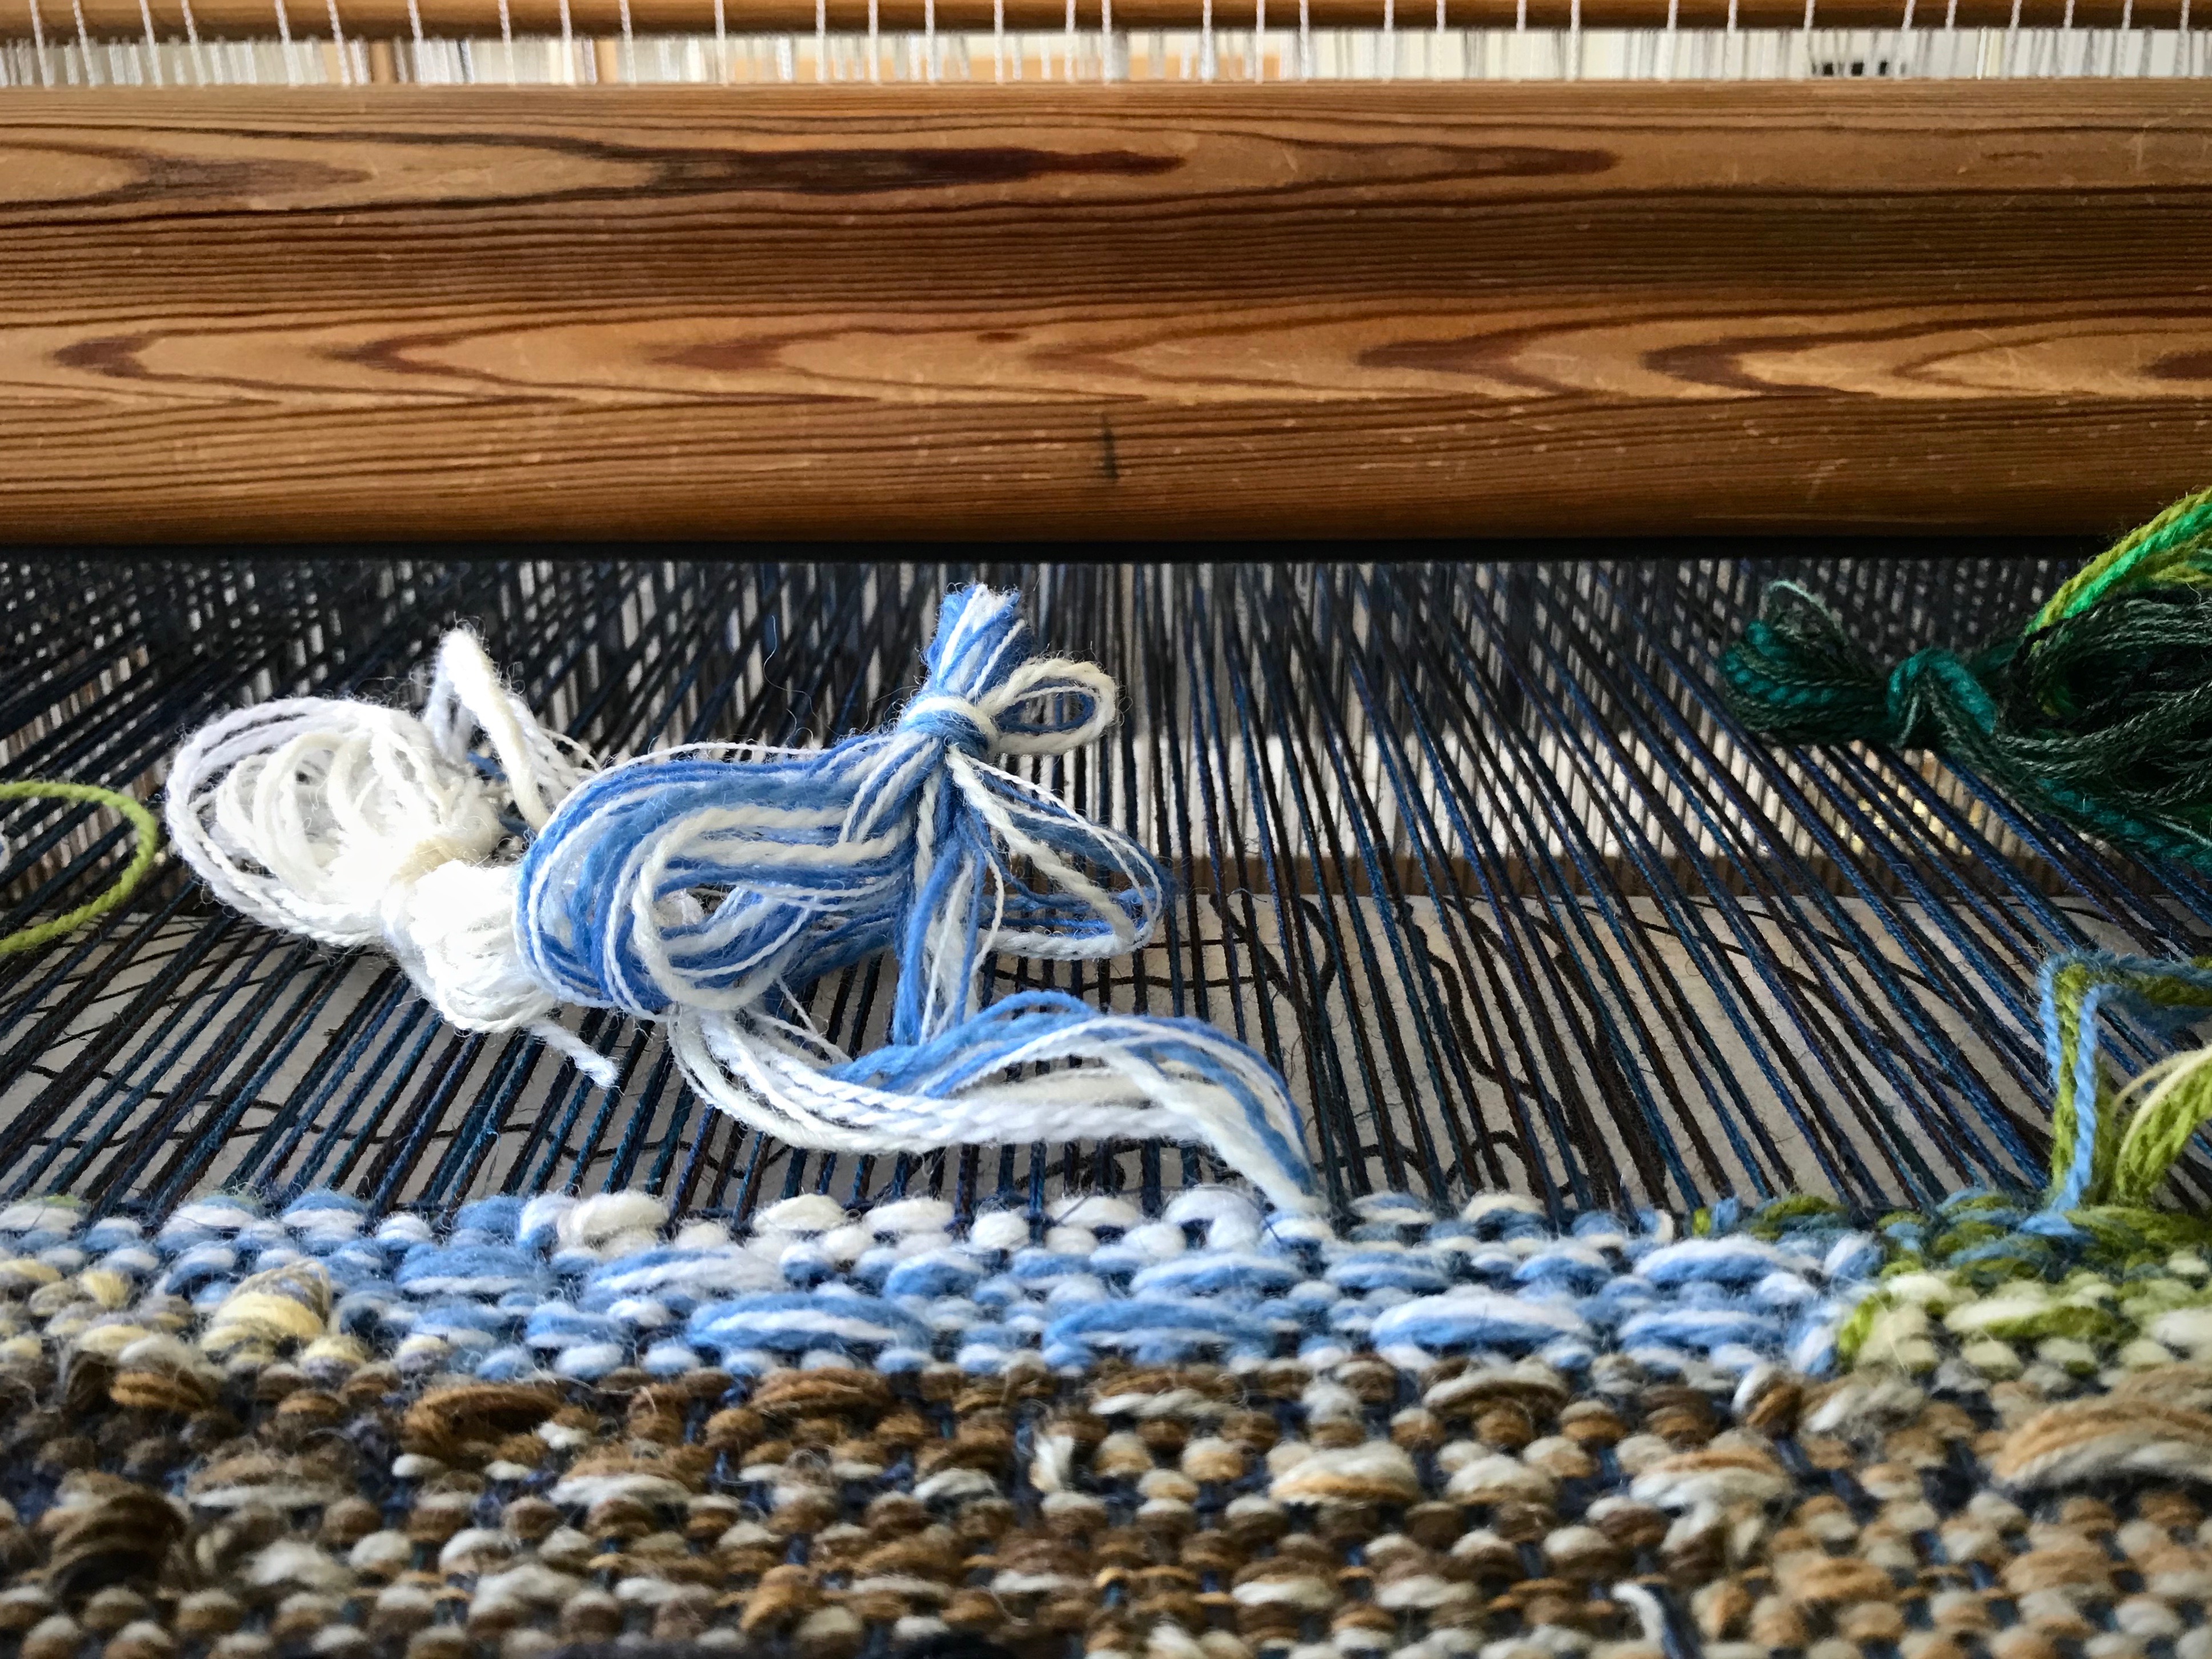
  • Pin the rolled-up cartoon underneath.
    I roll up the Pellon cartoon under the warp and pin it once on each side. As the warp and cartoon advance I can reposition the pin as needed.
Cartoon management for tapestry.
Under the warp, the cartoon is loosely rolled up and pinned.
  • Move the slat toward the breast beam, out of the way, to beat in the weft.
    Because of the rubber bands, the slat support has flexibility and does not impede the movement of the beater.

Visibility
Move the slat near to the fell line.

With the slat under or near the fell line, it presses the cartoon up to the warp. By doing this, I can easily see what comes next as the tapestry weaving develops row by row.

Managing a cartoon for tapestry weaving.
Placing the slat under the fell of the weaving raises the cartoon to visibility where it is needed most.

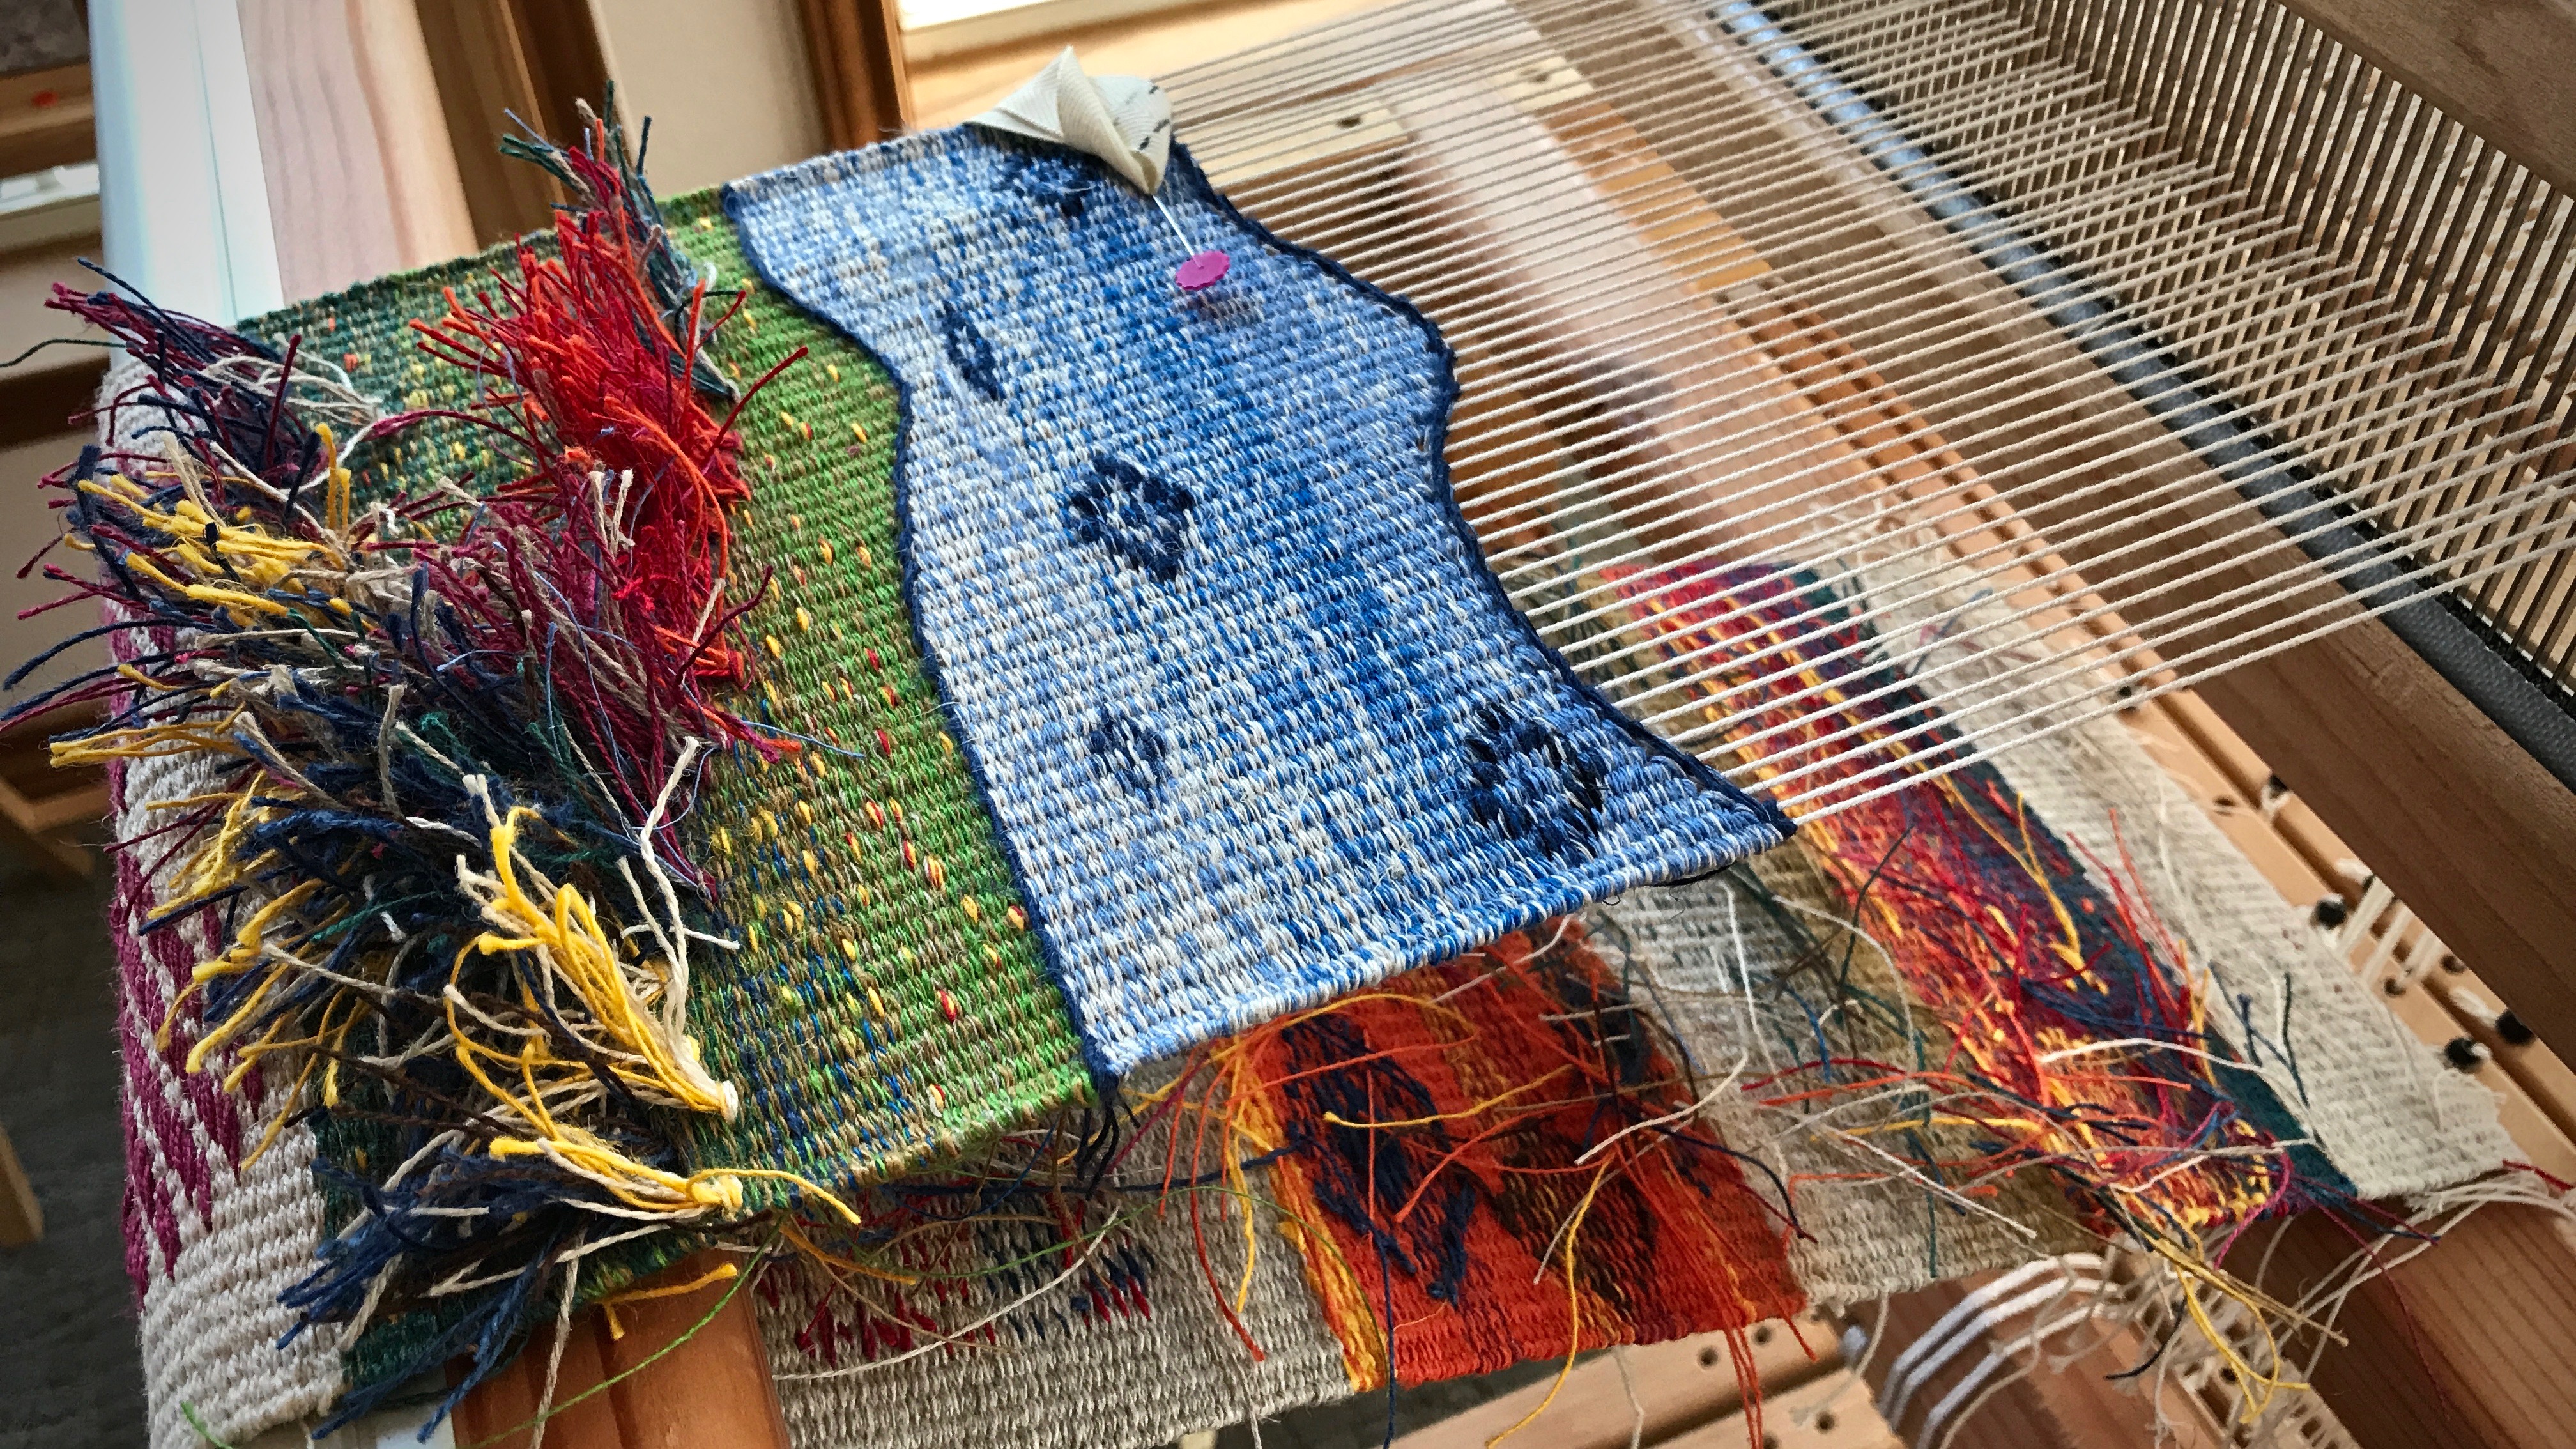
I wait for my ordered yarn to arrive. Meanwhile, I dream of this tapestry becoming a reality as cartoon meets wool.

May you have the alignment, security, and visibility you need.

All the best,
Karen

Double Weave Throw – Take Two

Nothing about the original draft is incorrect, but when I wrote it in pencil on my planning sheet, I transposed one. little. thing. The threading key. “X = plum; black square = other colors.” Exact opposite of what is written in the draft from The Big Book of Weaving, by Laila Lundell. (See When You Misread the Threading Draft, where I discover my dilemma.)

One little mistake. Big consequences.
Blind to my own mistake, even as I double check my handwritten draft.

Thanks to Fiberworks weaving software I am working out a solution. I adjusted the tie-up, so the treadle tie-ups on the first, third, fifth, and seventh shafts trade places with the tie-ups on the second, fourth, sixth, and eighth shafts. It works. And now, the one little threading error that is clearly visible seems like a breeze to correct!

Ready to weave a cotton double weave throw.
Tie-up adjustments bring the correct warp ends to the surface. Solid stripes of color are set to produce the desired design when woven.
One threading error. No big deal at this point.
One blue warp end stands out like a sore thumb. I’m glad to find this one threading error at this stage in the process.

There are times when my whole perspective needs an adjustment. It’s time for love. Love adjusts our view. At the heart level, love brings about changes in us. It re-sets our attention and motivations. Because God loved us, we can love, too. We don’t see, understand, or know everything now, which shows how incomplete we humans are. But the love that heaven knows is something we get to participate in here and now. Our cloth is far from perfected, but our love adjustments give us a glimpse of cloth from another realm.

May you make necessary adjustments.

Love,
Karen

Treadle Adjustments on a Countermarch Loom

The countermarch loom is known for having a clean shed, so that is my goal. Is that possible for ten shafts and ten treadles? The first treadle I step on reveals that treadle cord adjustments are definitely needed!

How to evaluate the shed and adjust on countermarch looms.
Before making any adjustments, a few of the sheds look impassable, like this one.

I learned the basics of making adjustments to treadle cords from Learning to Warp Your Loom, by Joanne Hall, and The Big Book of Weaving, by Laila Lundell. I also gained valuable experience from Vävstuga Basics, with Becky Ashenden.

Here’s how the process looks for me, with this ten-shaft, ten-treadle project as an example.

I keep the following note on my iPhone. It helps me remember how things work.
I fill in the blanks for each treadle, noting which shafts are too high or too low. Then, using my iPhone note for reference, I make the needed adjustments.

Note on iPhone for making countermarch treadle adjustments.

  • The first time through, I am primarily interested in the bottom of the shed. I make adjustments to clear the shed enough to be able to weave a little bit.
  • Weave an inch or two. It is surprising how the shed cleans up with a little bit of weaving.
Adjusting treadles on countermarch loom.
Bottom of the shed has threads on one or two shafts that need to be lowered. After making those adjustments, this treadle will have a clean shed for weaving.
  • After weaving that first inch or so, I go through a second, and a third time, if needed, to get a clean shed on each treadle. Adjustments for the top of the shed are only needed if there are threads that will interfere with the shuttle.
Clean shed of a countermarch loom. Tutorial.
No hindrance for the shuttle here. This is the kind of shed I hope to see on every treadle.

When I first see a messy shed, I think, “How will I ever get my shuttle through that?” But it turns out to be little adjustments here and there. It’s not too difficult if you understand the loom.

Five-shaft satin dräll in linen. How to adjust countermarch treadles.
After all treadle adjustments have been made, the shuttle glides freely through the shed. And pick by pick, linen threads become cloth.

Nothing is too difficult for the one who made heaven and earth. Our Creator knows how to help us. He hears our prayers for help, and little by little, we see what He is doing as the shed clears and the shuttle glides through, unhindered.

May little adjustments clear the way for you.

With you,
Karen

Crabba or Not

Sometimes I really don’t know what I am doing! It’s uncomfortable. I make a guess and hope for the best. I almost skipped this section of the tapestry/inlay sampler because I don’t understand the instructions for crabba in The Big Book of Weaving. I’ve heard of crabba, and have seen pictures, but I have no experience with it.

Tapestry / inlay sampler. All linen.
First two attempts at weaving the diamond-shapes of crabba. 1) Too faint. 2) Too flat.

Consequently, I am attempting to weave something that resembles the crabba motif, with  “rhomboid pattern shapes and stairstep contours.” My first little diamond all but disappeared. Pattern weft needs to be thicker. My second attempt flattened into a flying saucer. Aha! I need at least two pattern picks of each row. Finally, I wove three more diamond motifs. Crabba, or not, they are now a part of this inlay sampler.

Color gradation in linen background, with inlay in diamond shapes.
Color gradation continues in the background under the inlay diamond shapes.
Tapestry / inlay sampler. All linen. Morning light!
Visiting the loom in morning light brings a reminder that much of weaving is learning by doing. And much of life is that way, too.

We can’t know everything. But we can keep learning, even when we don’t understand the instructions. Instead of quitting, step up and make an attempt. Raise your hopes. Stir up your faith to hope for the impossible. Your brave steps today set you up for greater progress next time you face a hurdle. Place your faith in the Lord, the instruction-giver. Sometimes He lets you learn by doing.

May you hope for the best.

~~Houston update: After diverting to Texas hill country because of the Hurricane Harvey flooding last week, Steve and I finally returned home to Houston this weekend. We are very thankful to come home to a dry house, untouched by the flooding that has devastated so many in our city. Relief efforts will continue in Houston for some time. Thank you for your prayers.~~

Hopefully,
Karen

Tapestry and Inlay Sampler

It is satisfying to see this ambitious project take shape on the loom! When finished, this sampler of tapestry and inlay techniques will be a handy reference as well as a colorful hanging for the wall. It’s a much-anticipated project from The Big Book of Weaving, by Laila Lundell!

Tapestry and inlay sampler with linen weft.
Practicing parallelogram shapes.
Linen butterflies are usedf for twill inlay.
Linen butterflies are used for the twill inlay. Turns are made below the warp.

I don’t always understand the instructions, in which case I struggle, doing the best I can. But the more I progress, the more I understand. I am finding out what works. The text, Swedish translated to English, about unfamiliar techniques is helpful, but I often wish I had the author looking over my shoulder to guide me.

Loom with a view. Linen tapestry/inlay sampler.
Loom with a view. Time flies, even with slow weaving, at this Texas hill country loom.
Threads on the underside. Tapestry / inlay sampler in linen.
Weaving from the front. Weft tails are taken to the back of the weaving.

Where do we get instructions for living? We may consider entering the kingdom of God for that. But Jesus also spoke of the kingdom of God entering us. Invite the King in. That’s when His ways become our ways. Instead of struggling through instructions, we find ourselves learning His will by doing what we know to do. Life is a sampler, with occasions to learn, to struggle, and to soar. Let’s weave our living sampler in the shadow of the Grand Weaver, Himself.

May your sampler show what you’ve learned.

Happy weaving,
Karen