Tools Day: Leveling String

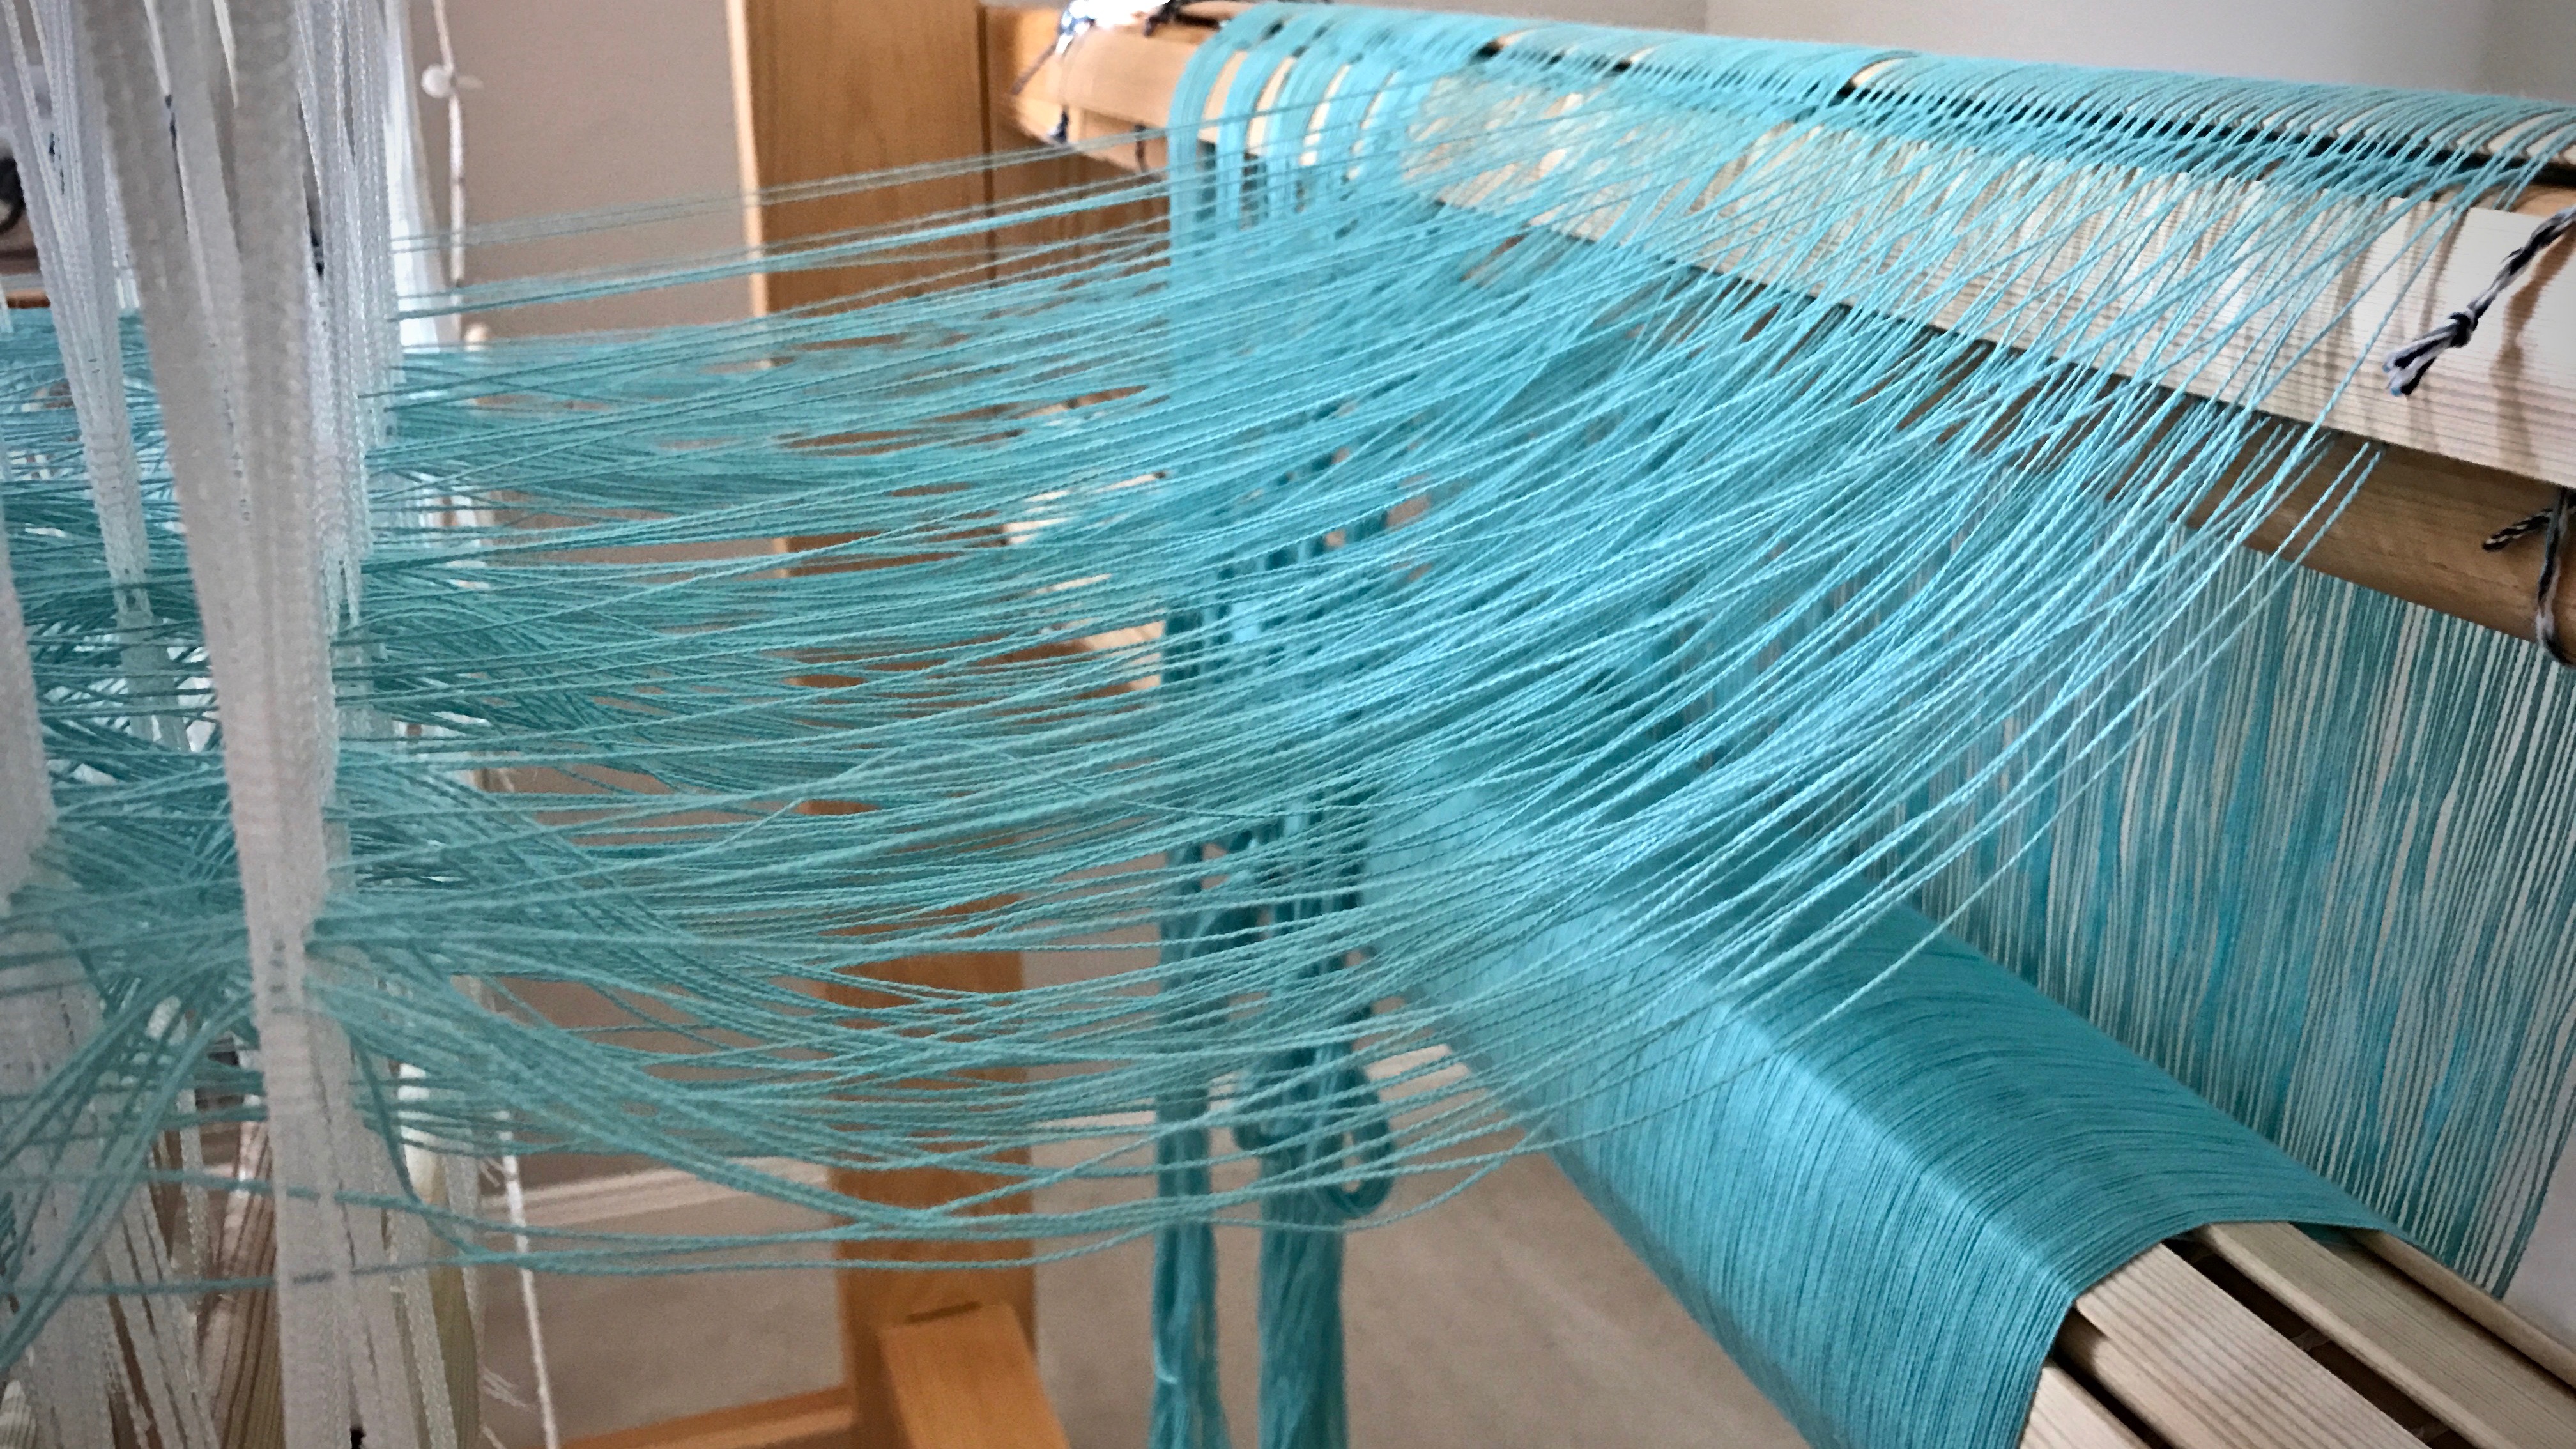
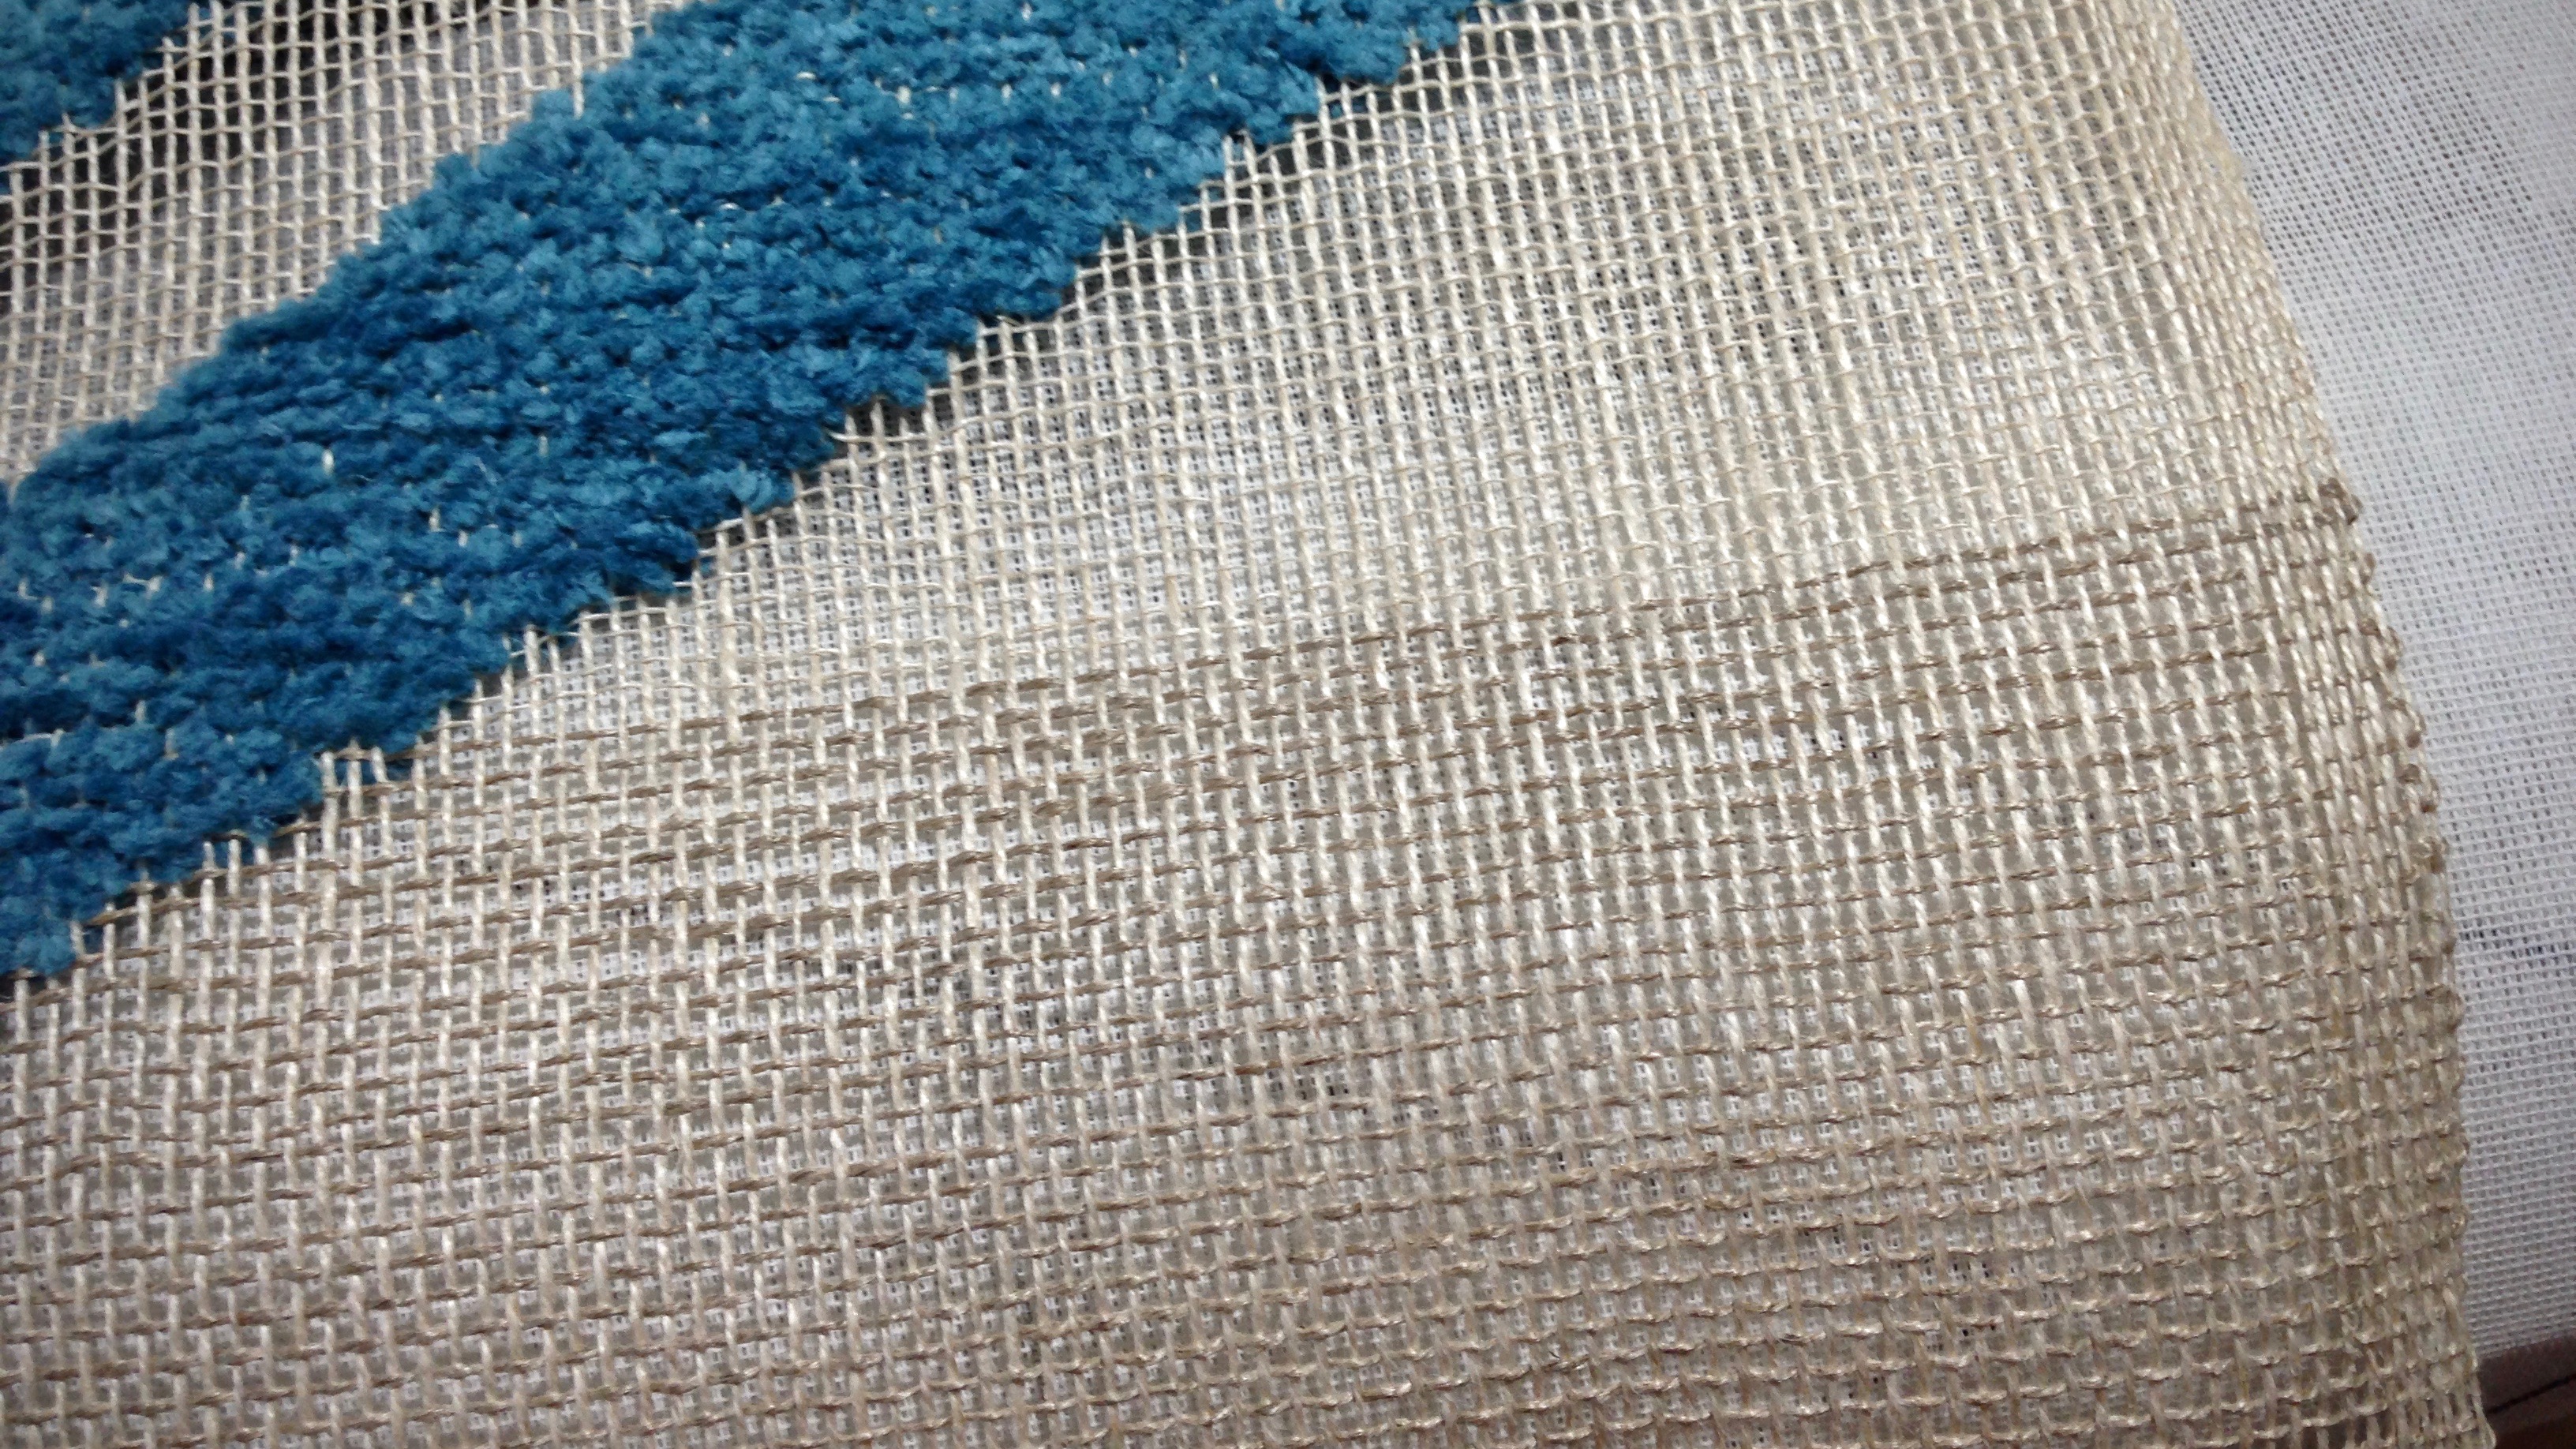
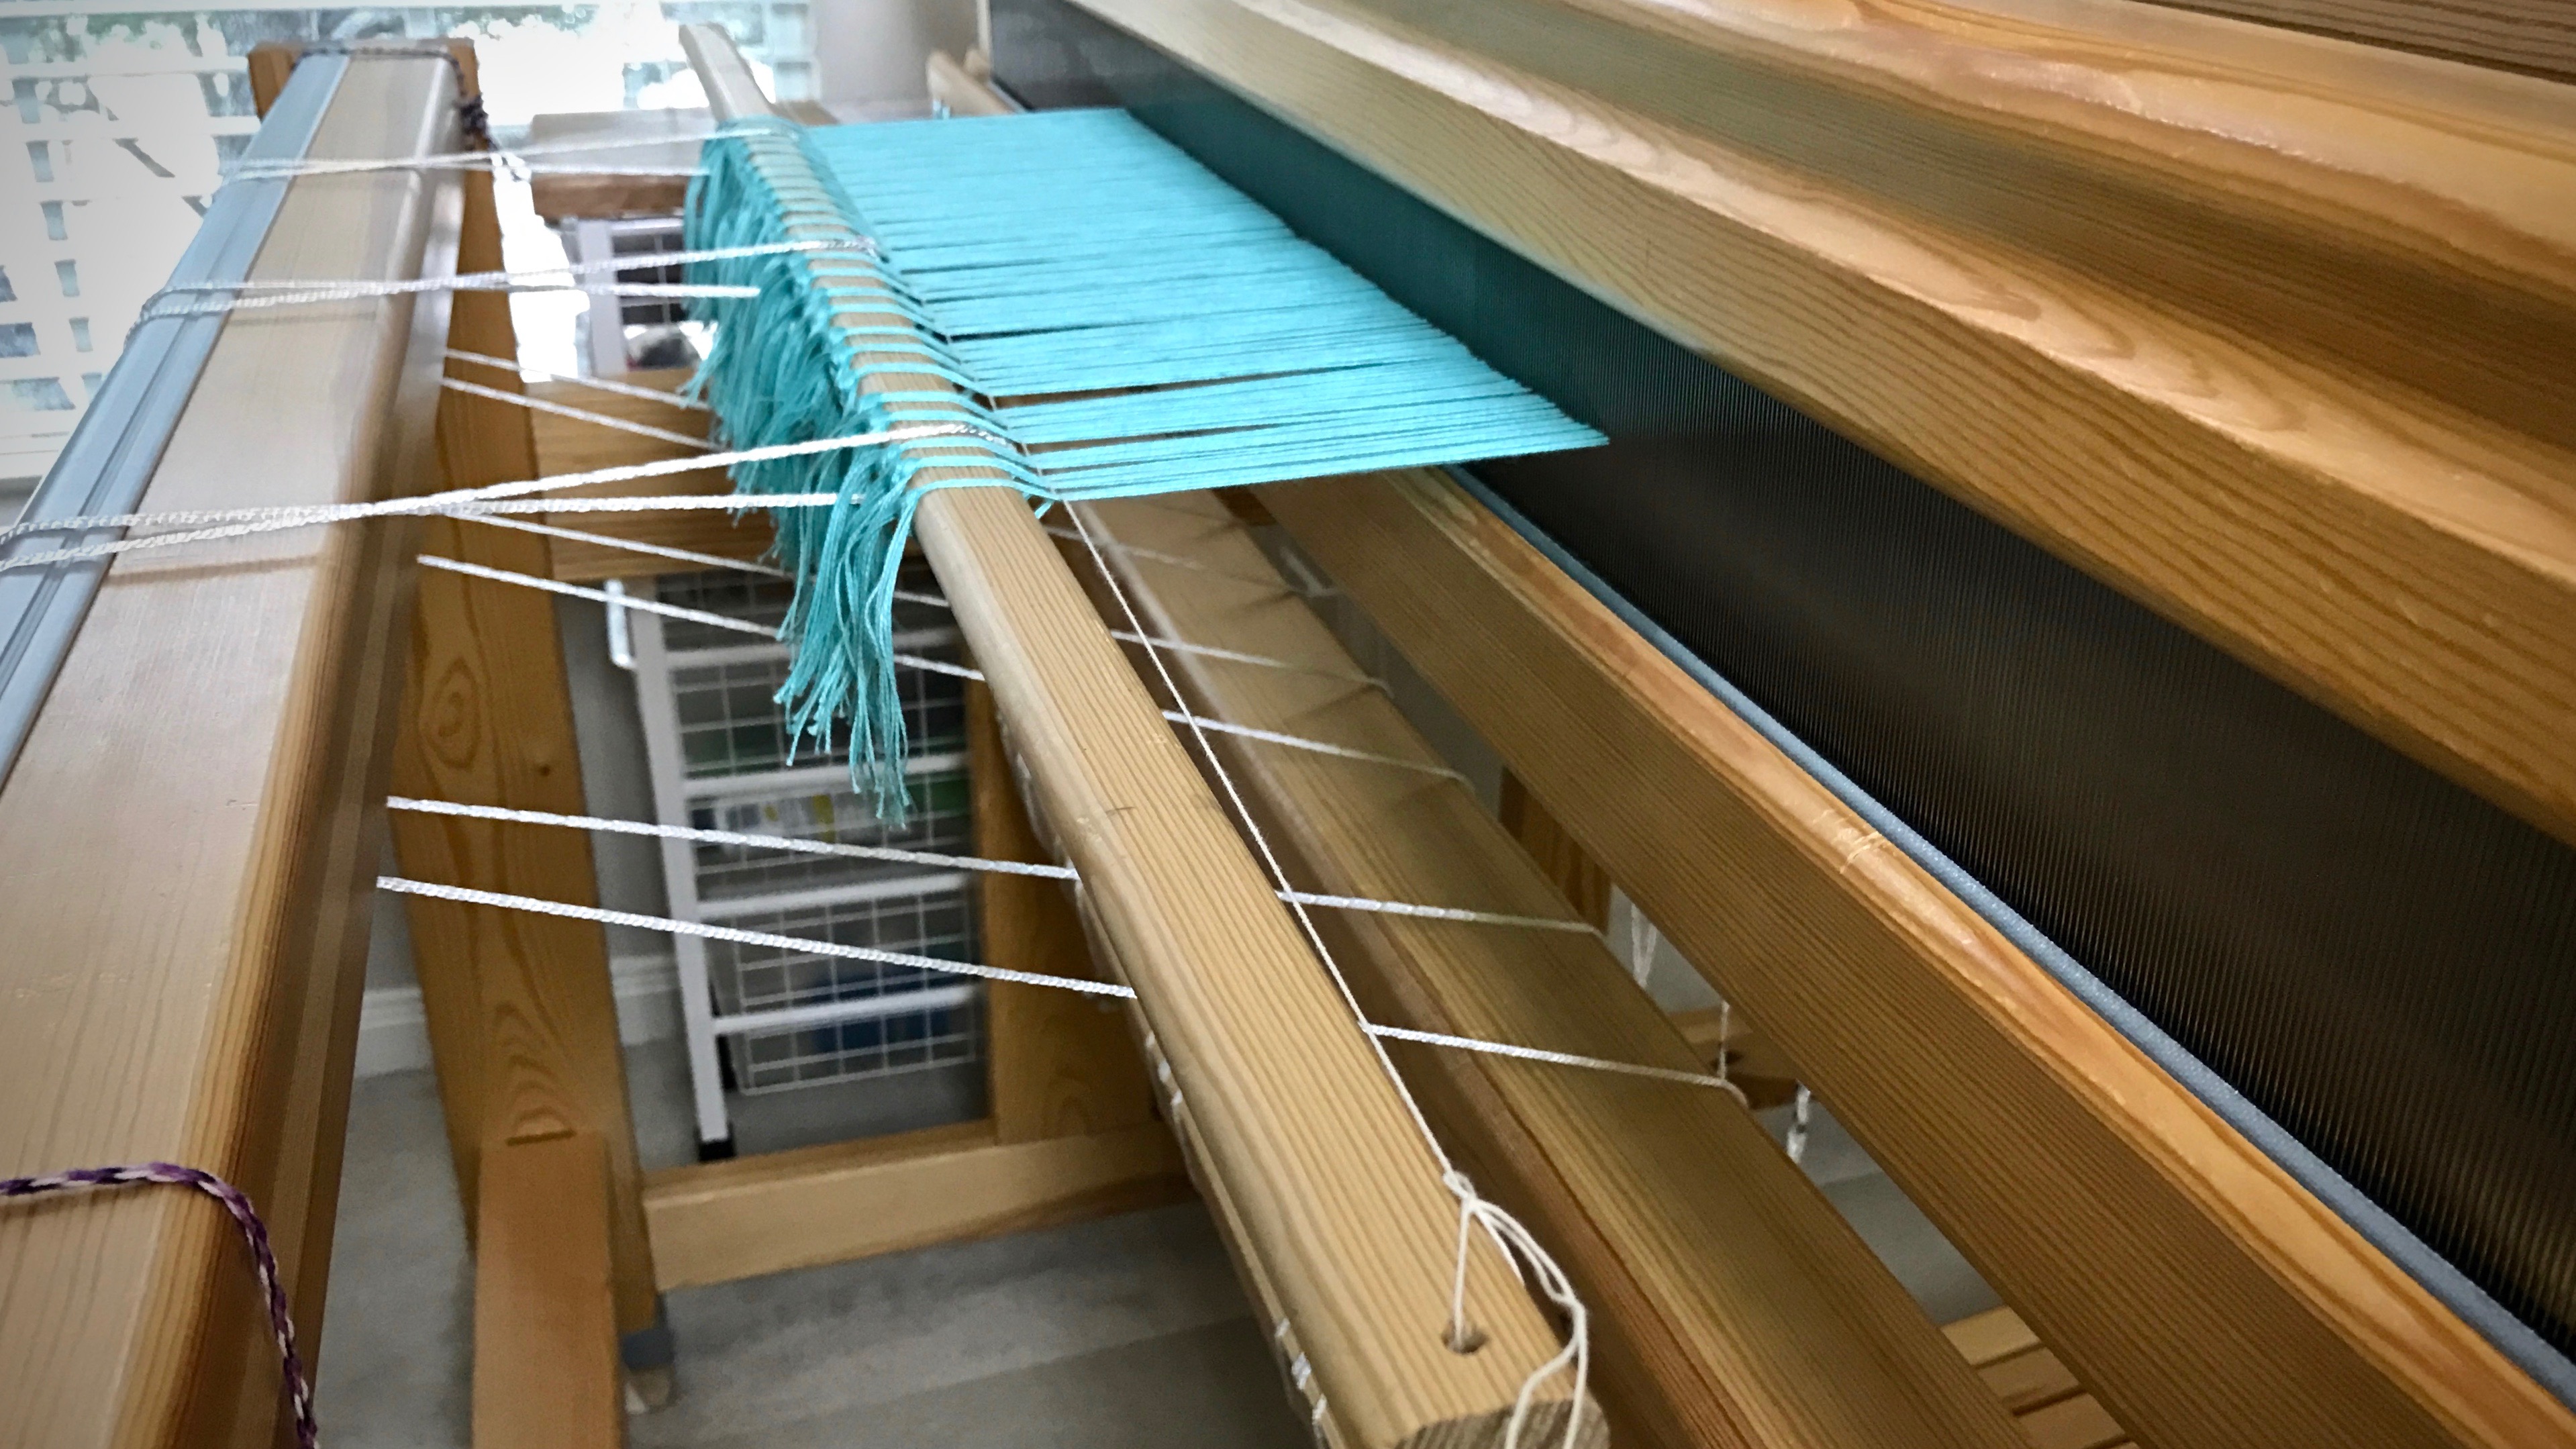
Thirty-five years ago, I took a beginner rigid heddle loom class. Our teacher taught us to use strips of toilet paper (or fat scrap yarn) as weft at the beginning of the weaving to space the warp. After several inches of weaving, the warp ends would fall into alignment. Unless fringe is planned, that beginning warp goes to waste, not to mention the unsightly aspect of the throwaway weft. Here comes the leveling string to the rescue! This piece of 12/6 cotton seine twine is just what we need to get off to a good start with every project we put on the loom. The leveling string levels out the warp ends, and delivers a nice, flat weaving surface. It is superb to be able to weave fabric right from the very beginning of the warp!

The use of a leveling string is also described in my three favorite books that detail how to warp a loom:

  • The Big Book of Weaving, by Laila Lundell
  • Learning to Warp Your Loom, by Joanne Hall
  • Dress Your Loom the Vävstuga Way: A Benchside Photo Guide, by Becky Ashenden

Tools:

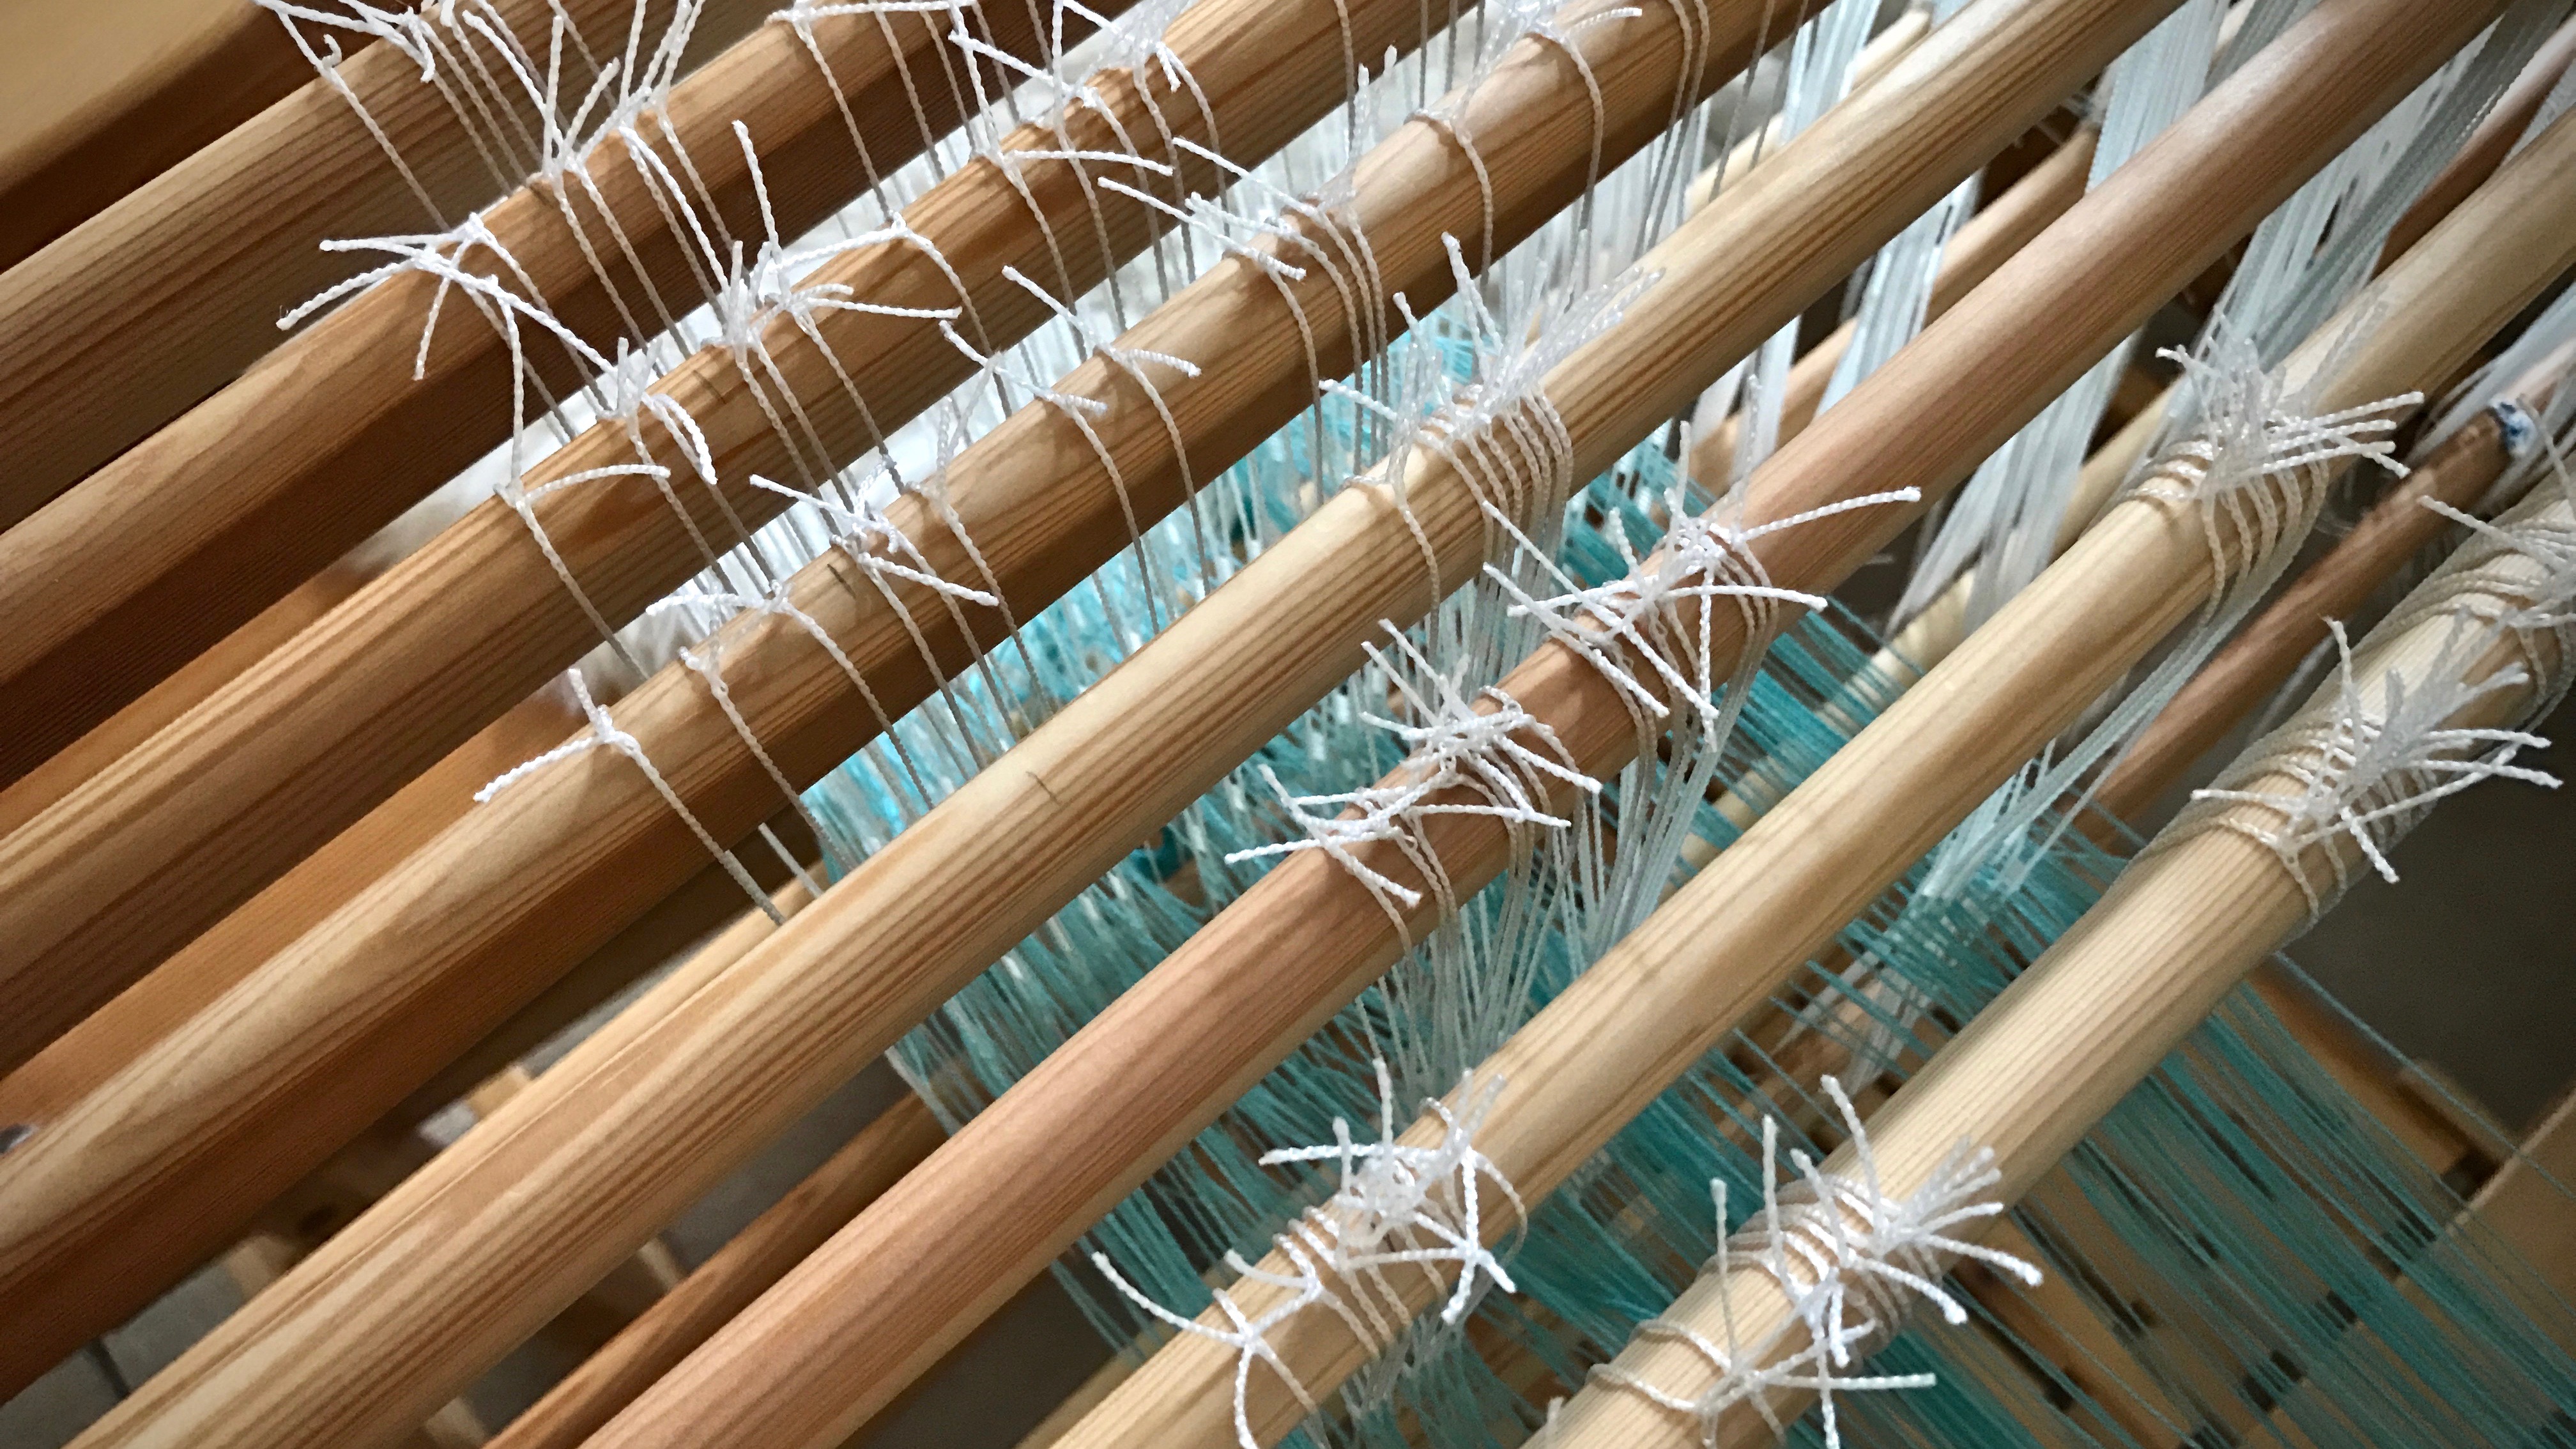
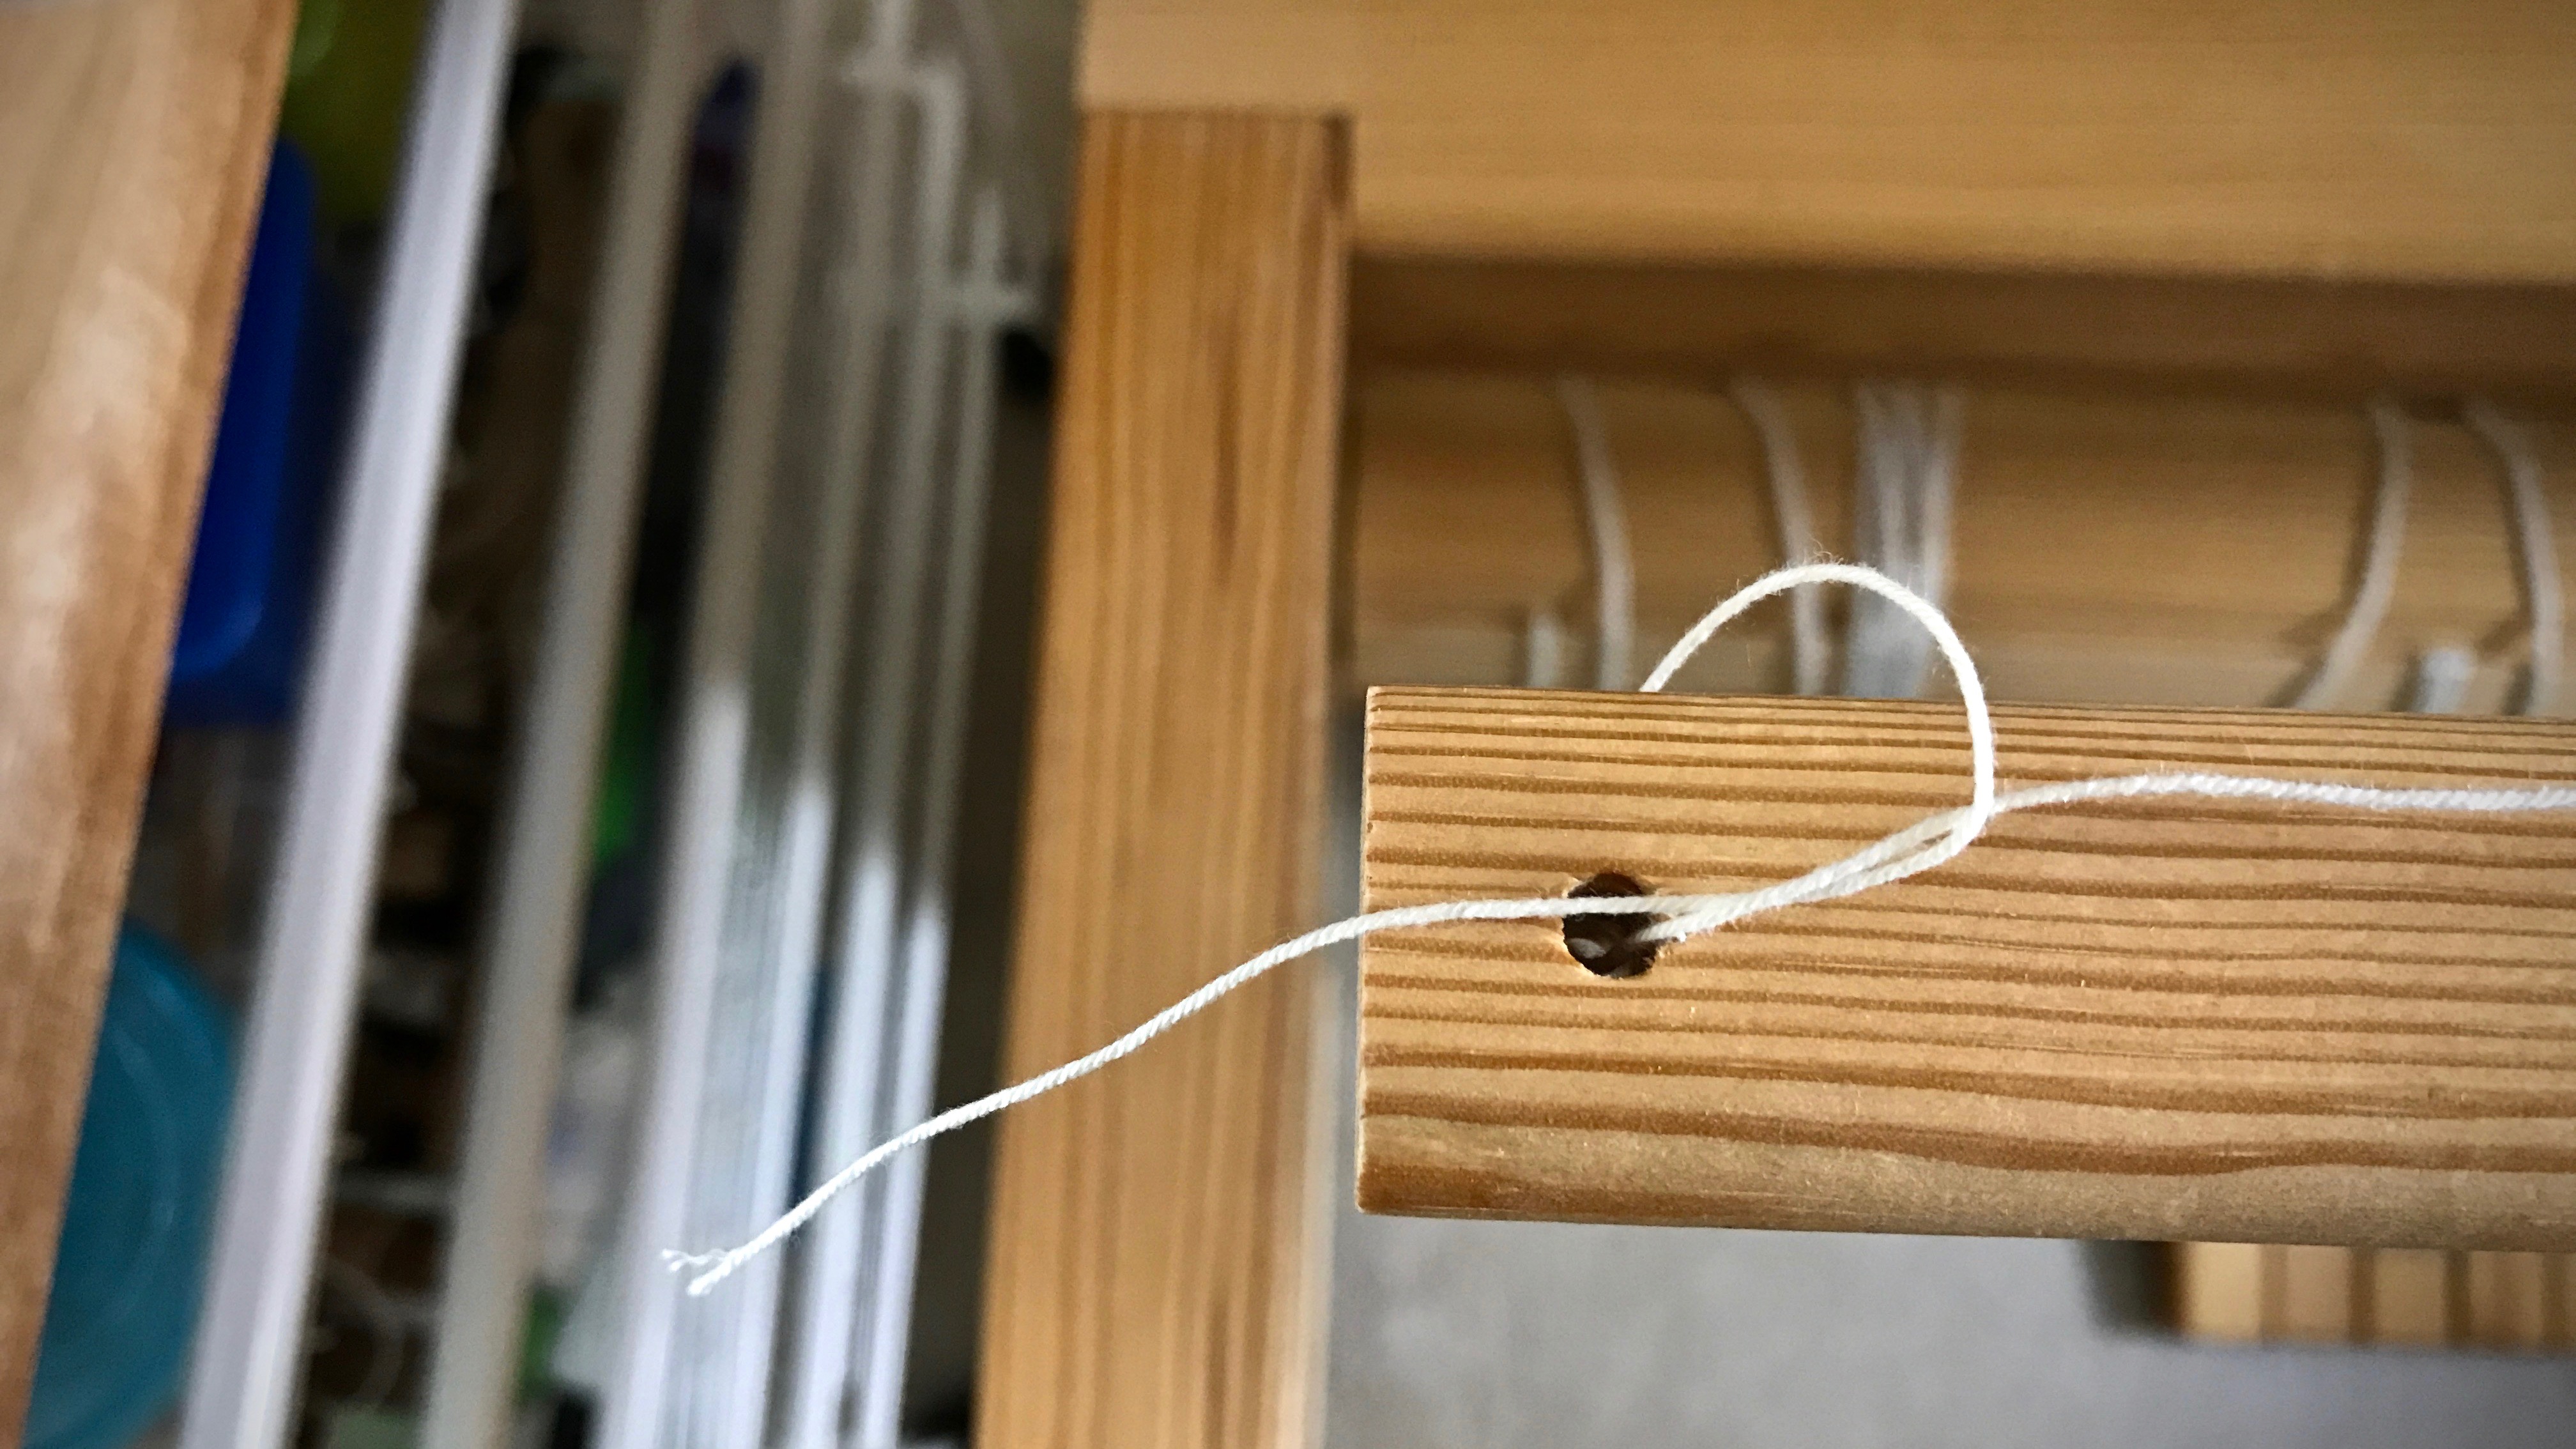
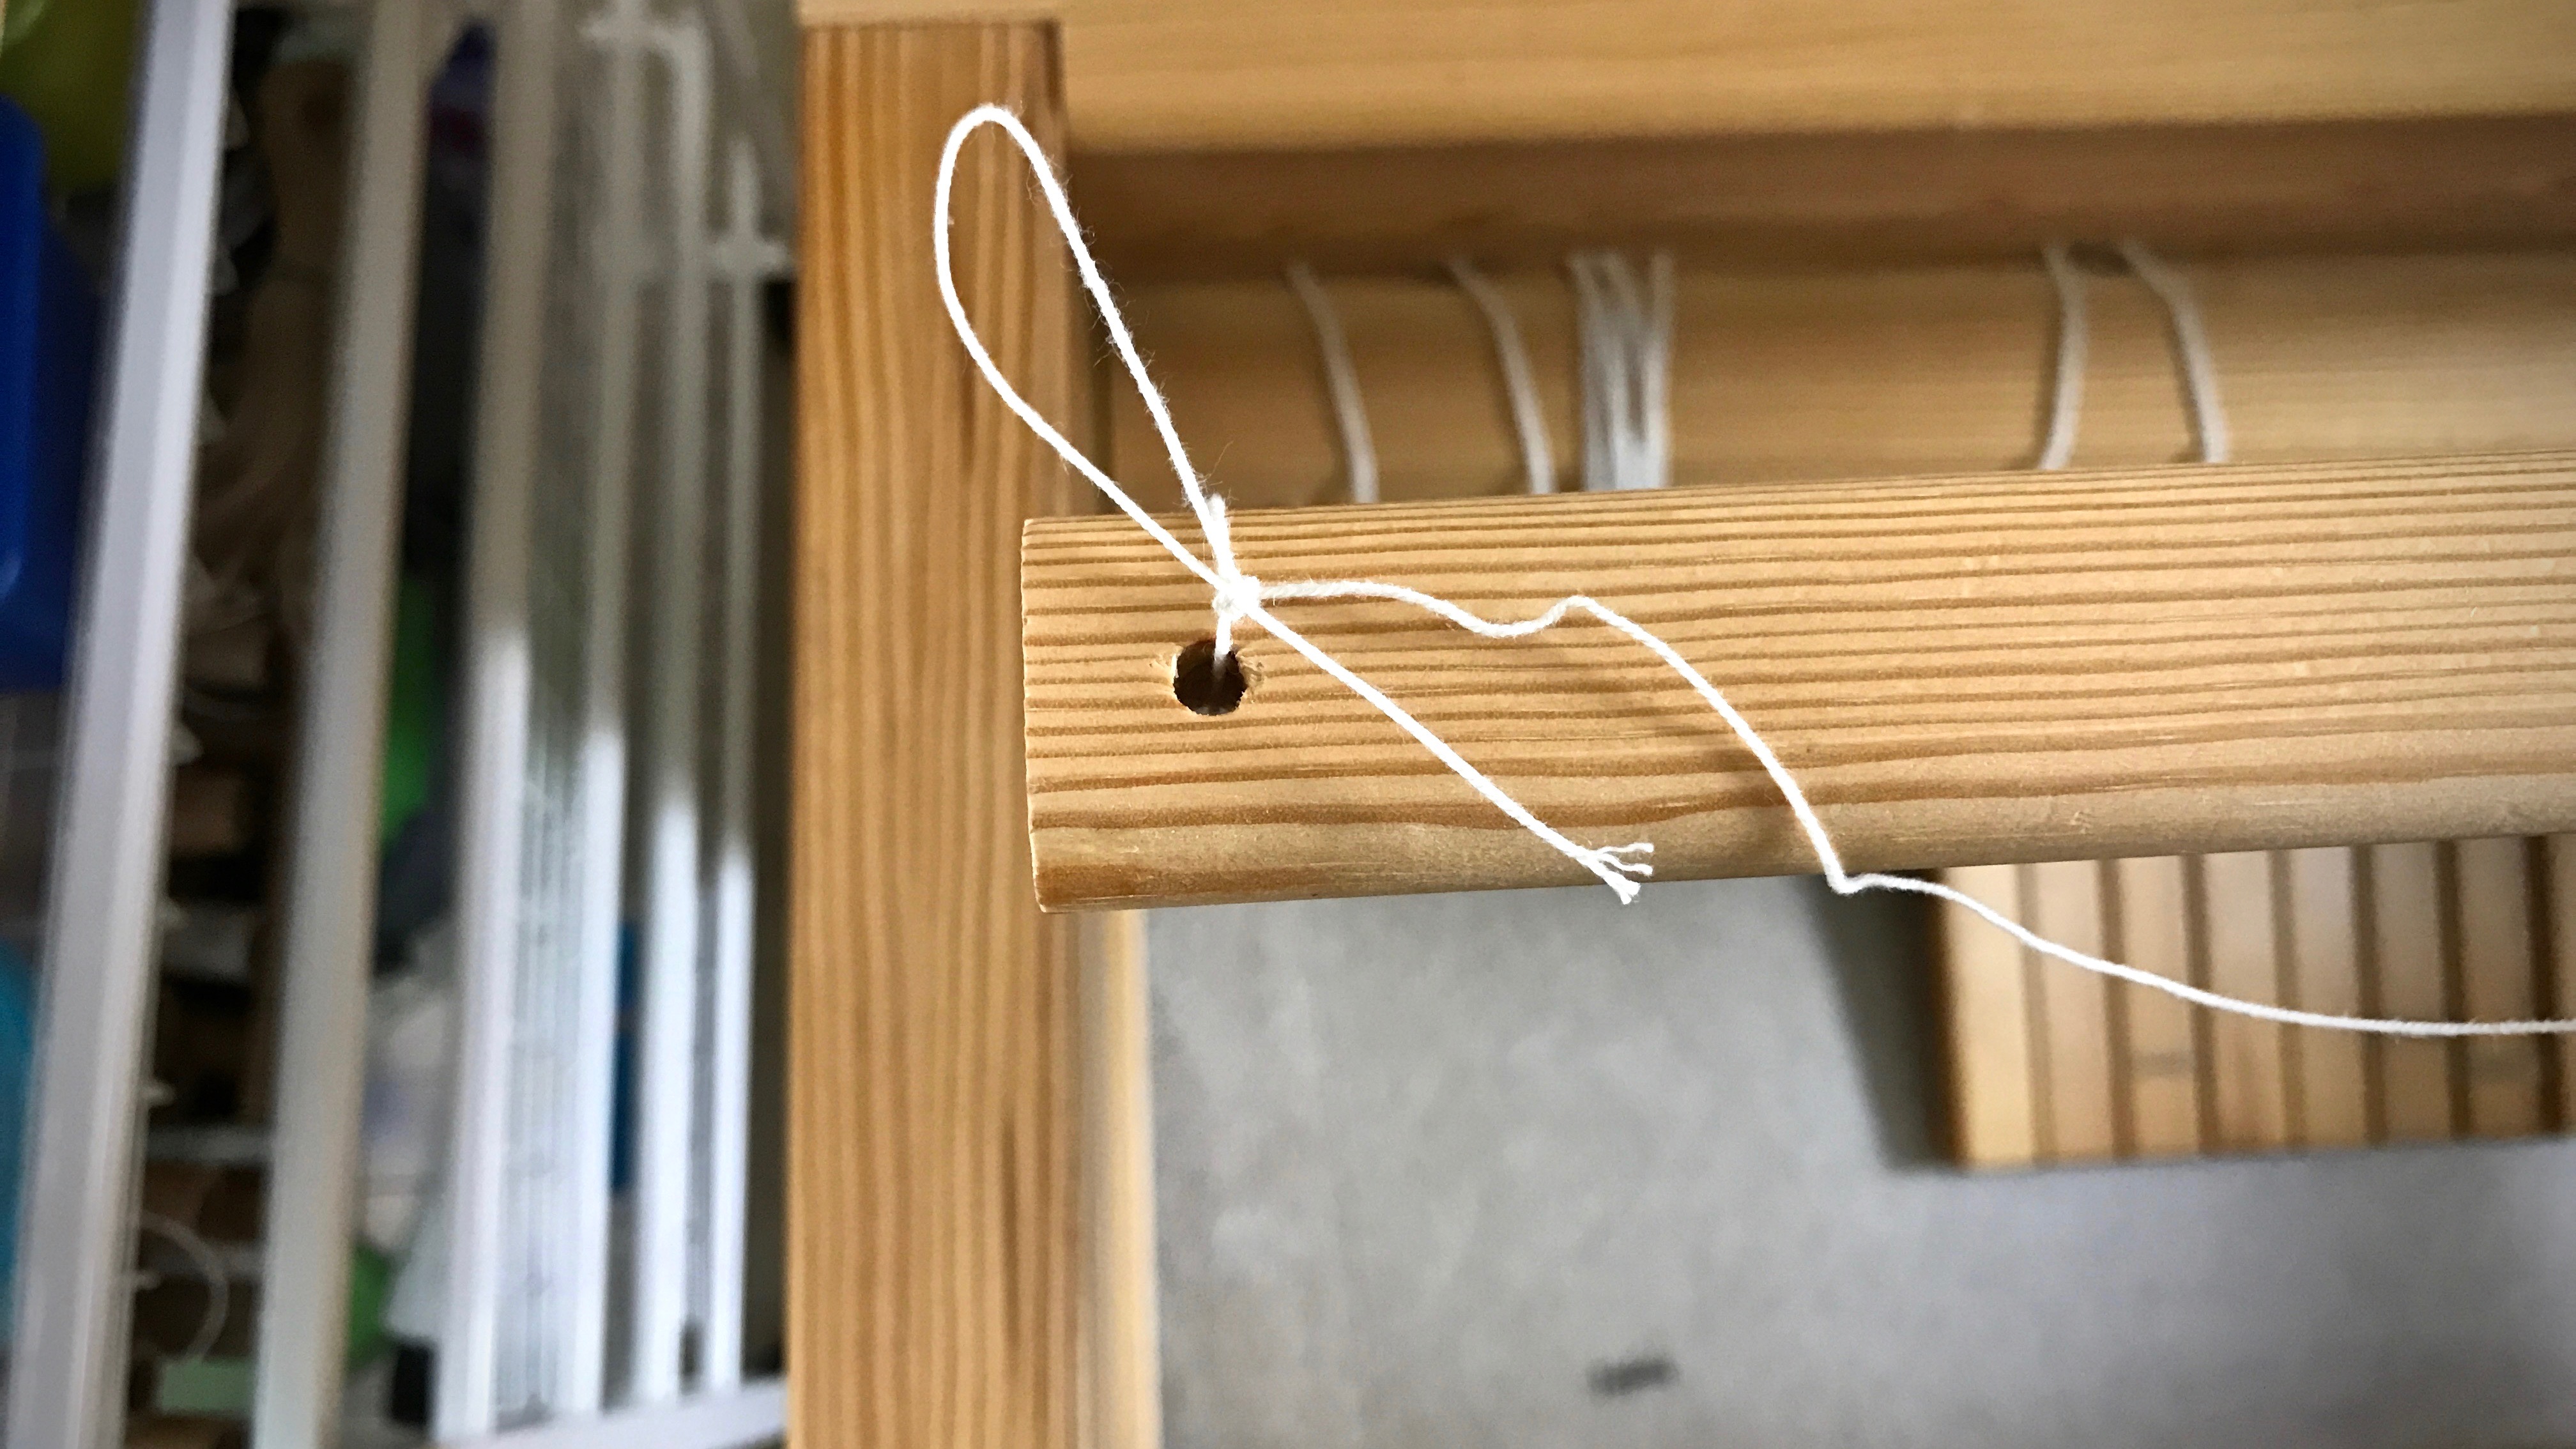
  • Front tie-on bar with a hole at each end (Joanne Hall writes, “If there are no holes in your bar, replace the cord with a thin stick.” I have not tried this, but I trust anything Joanne says!)
  • 12/6 cotton seine twine, the length of front tie-on bar, plus about 20 inches (I like to have plenty of string to tie the knots on the ends)

Steps:

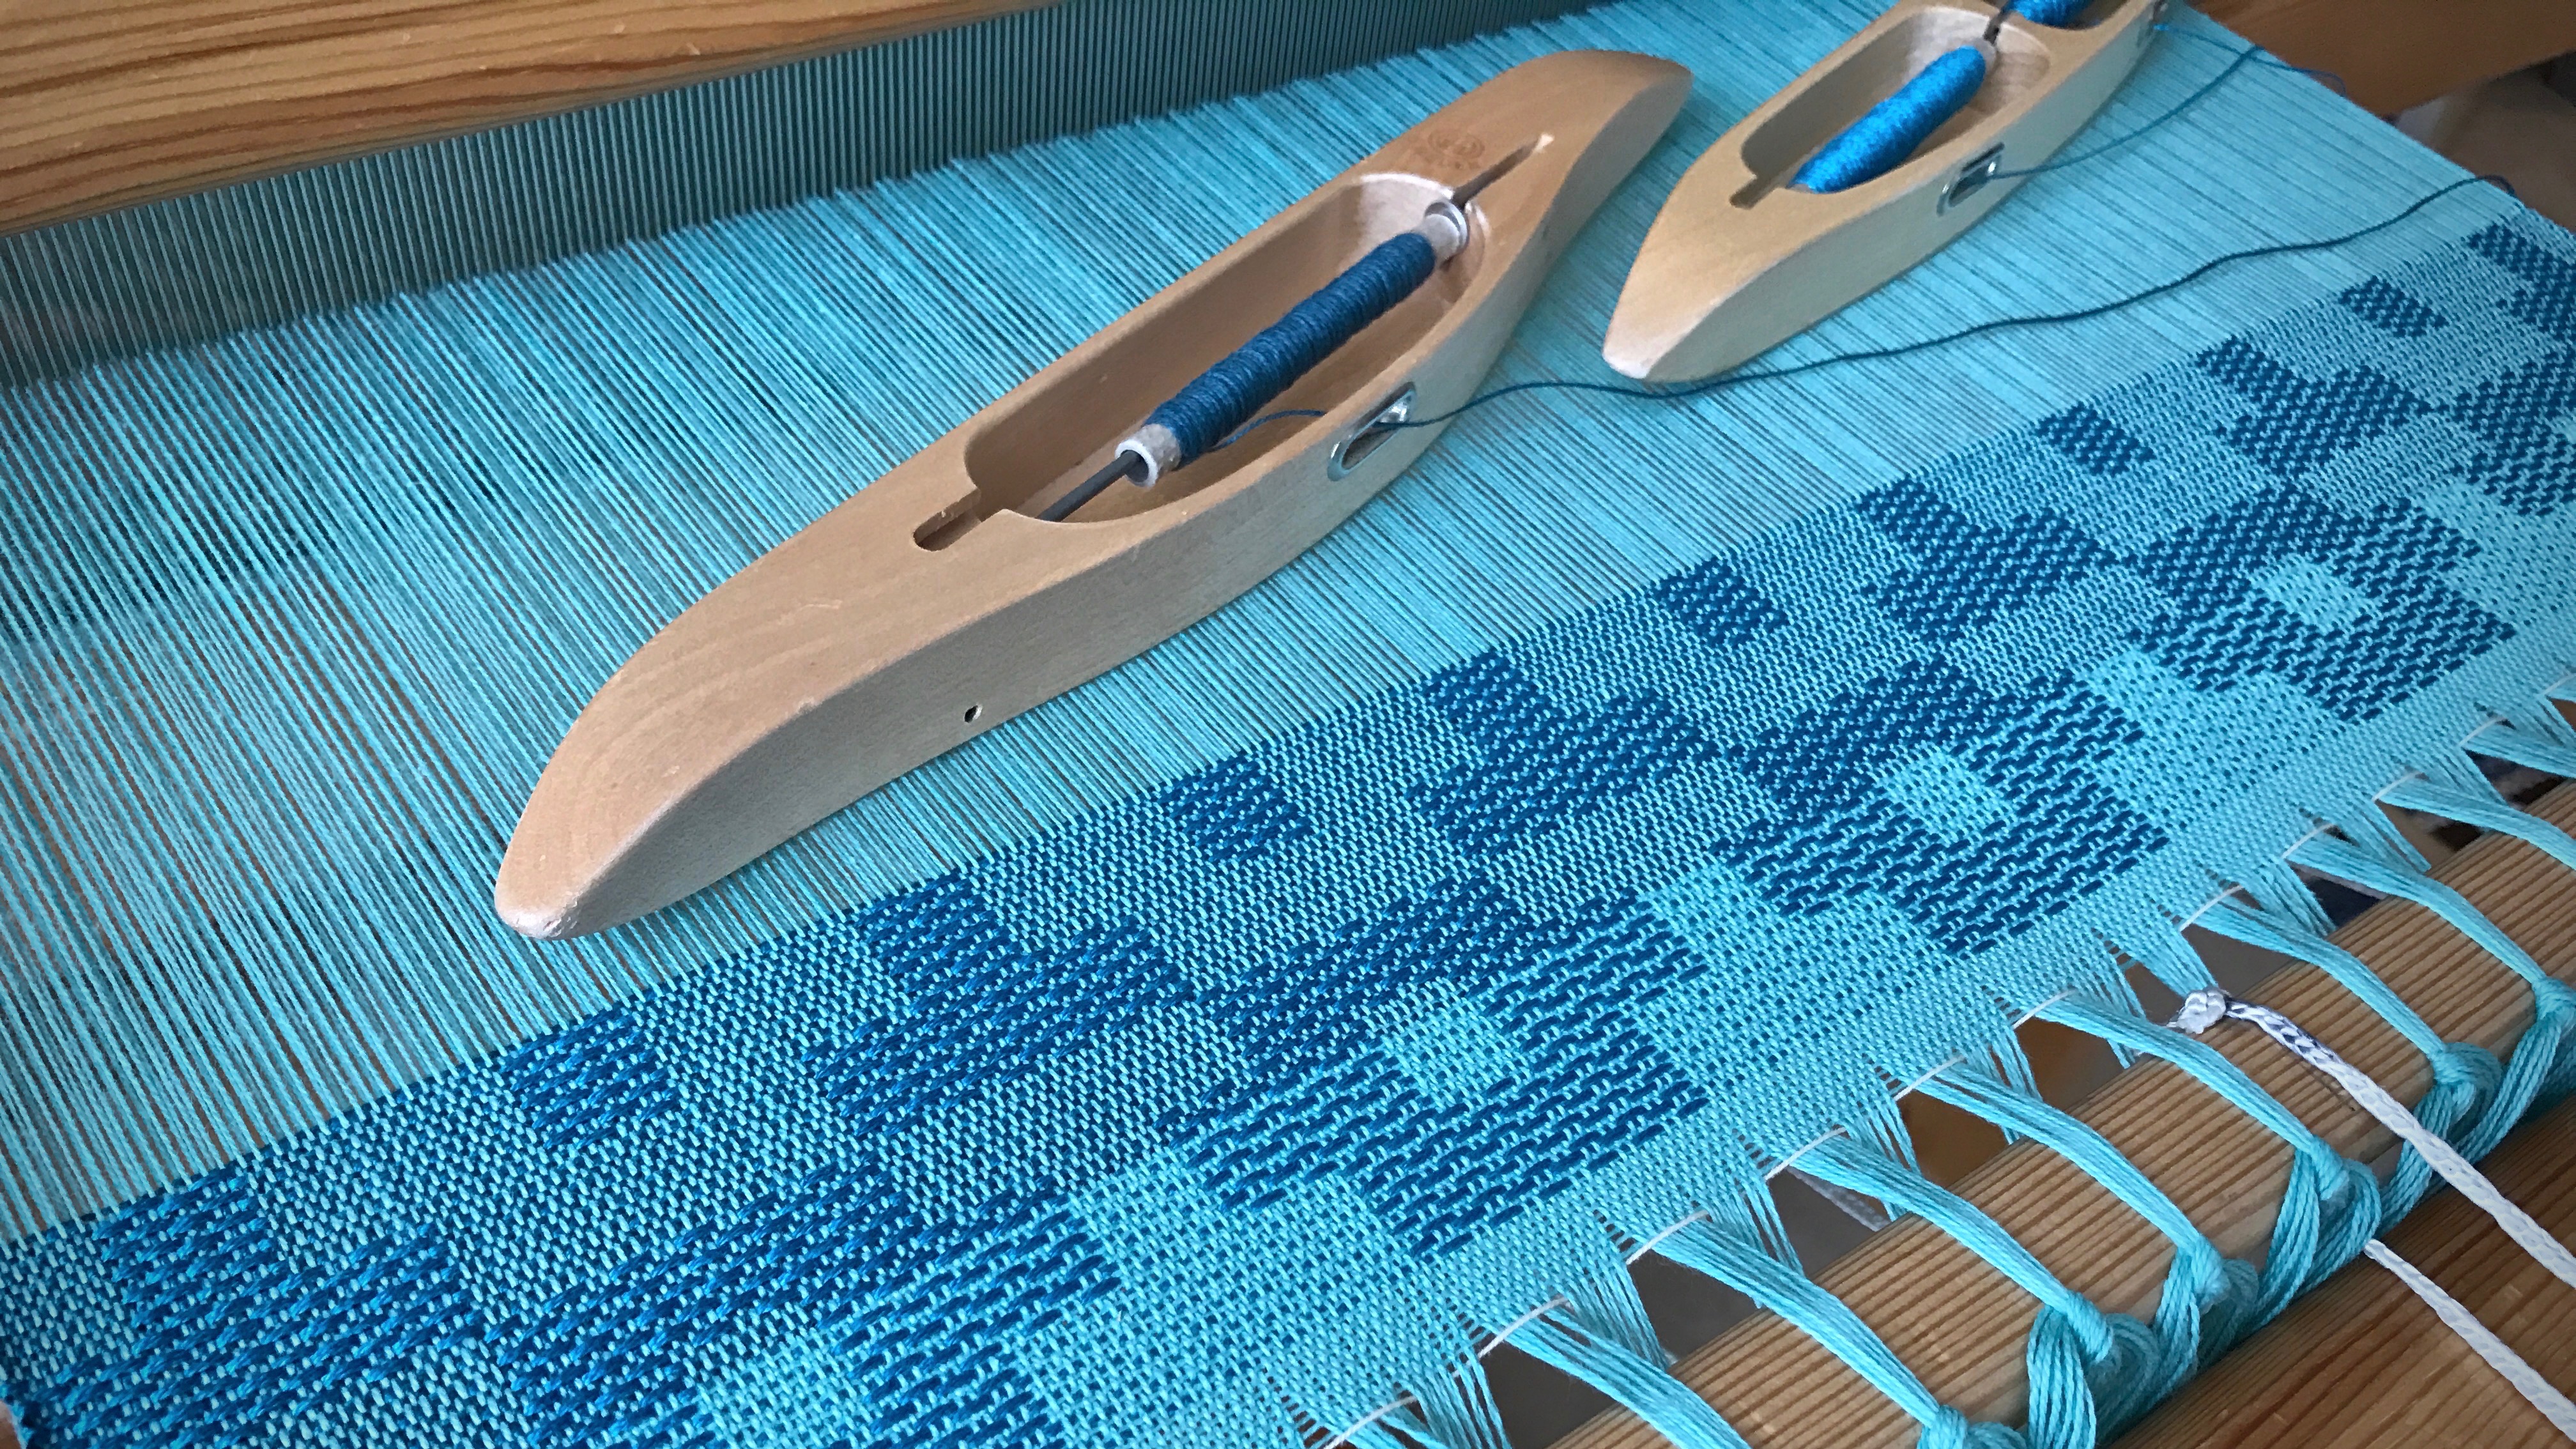
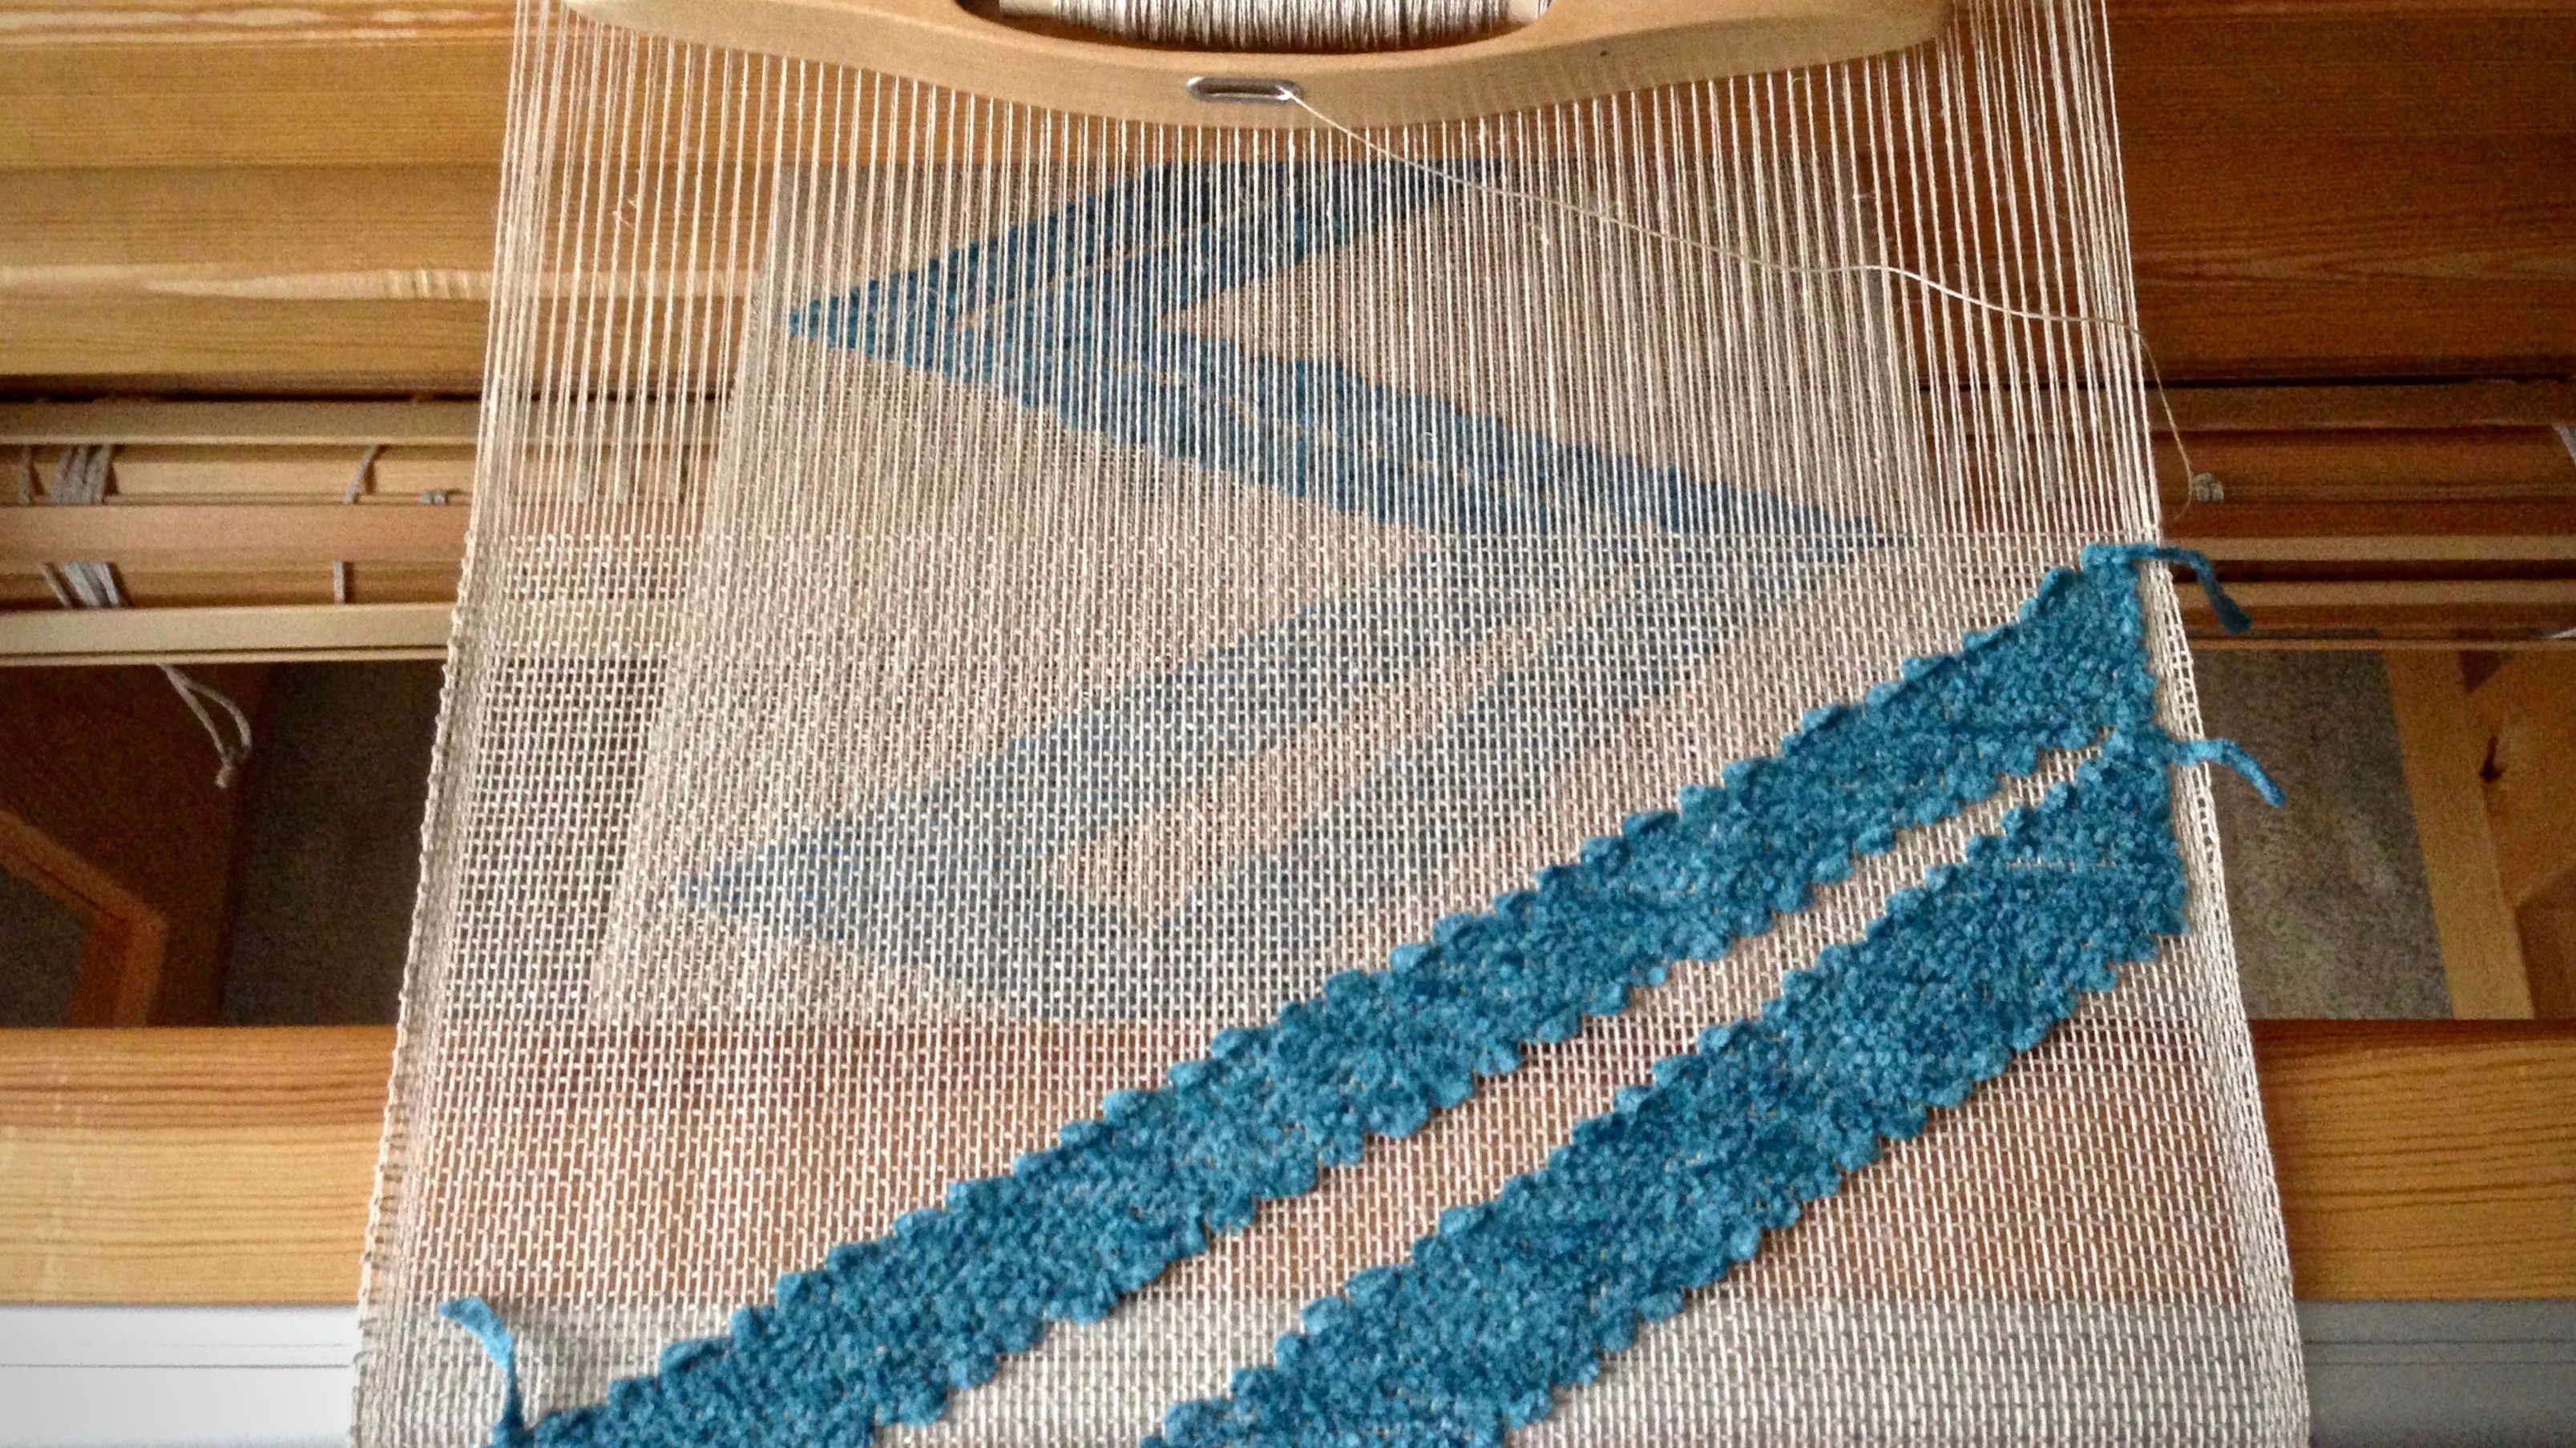
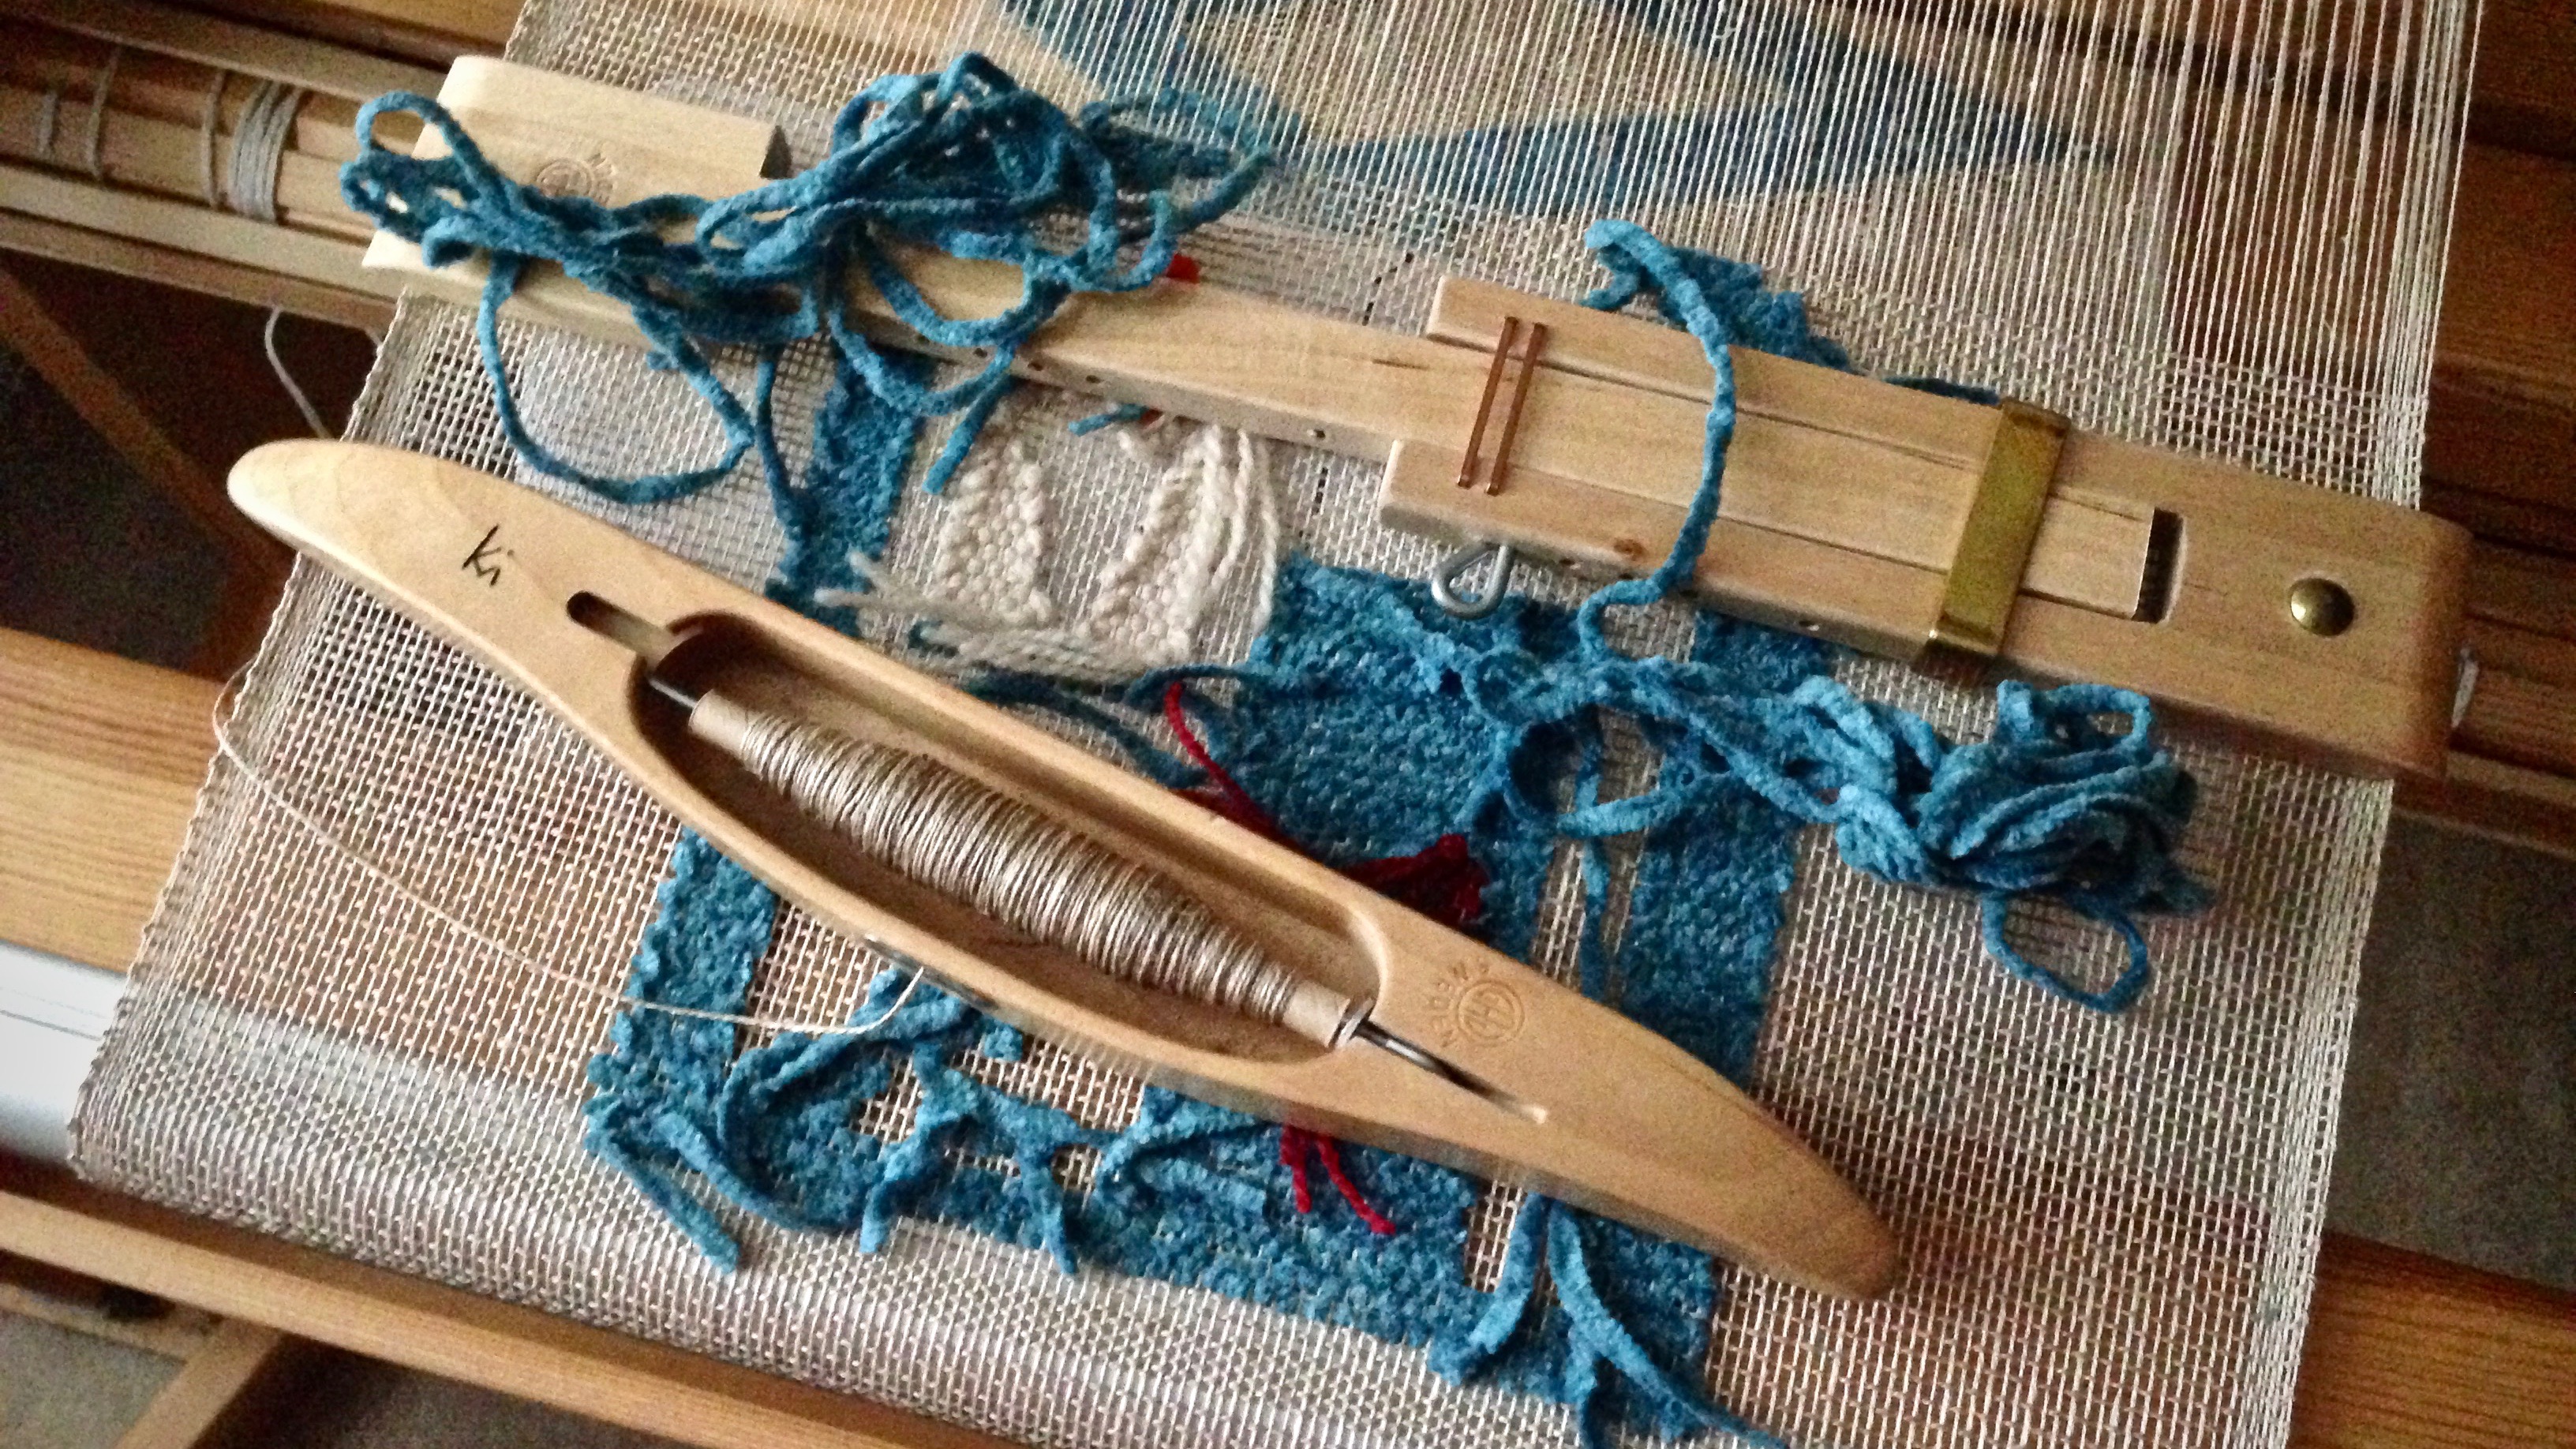
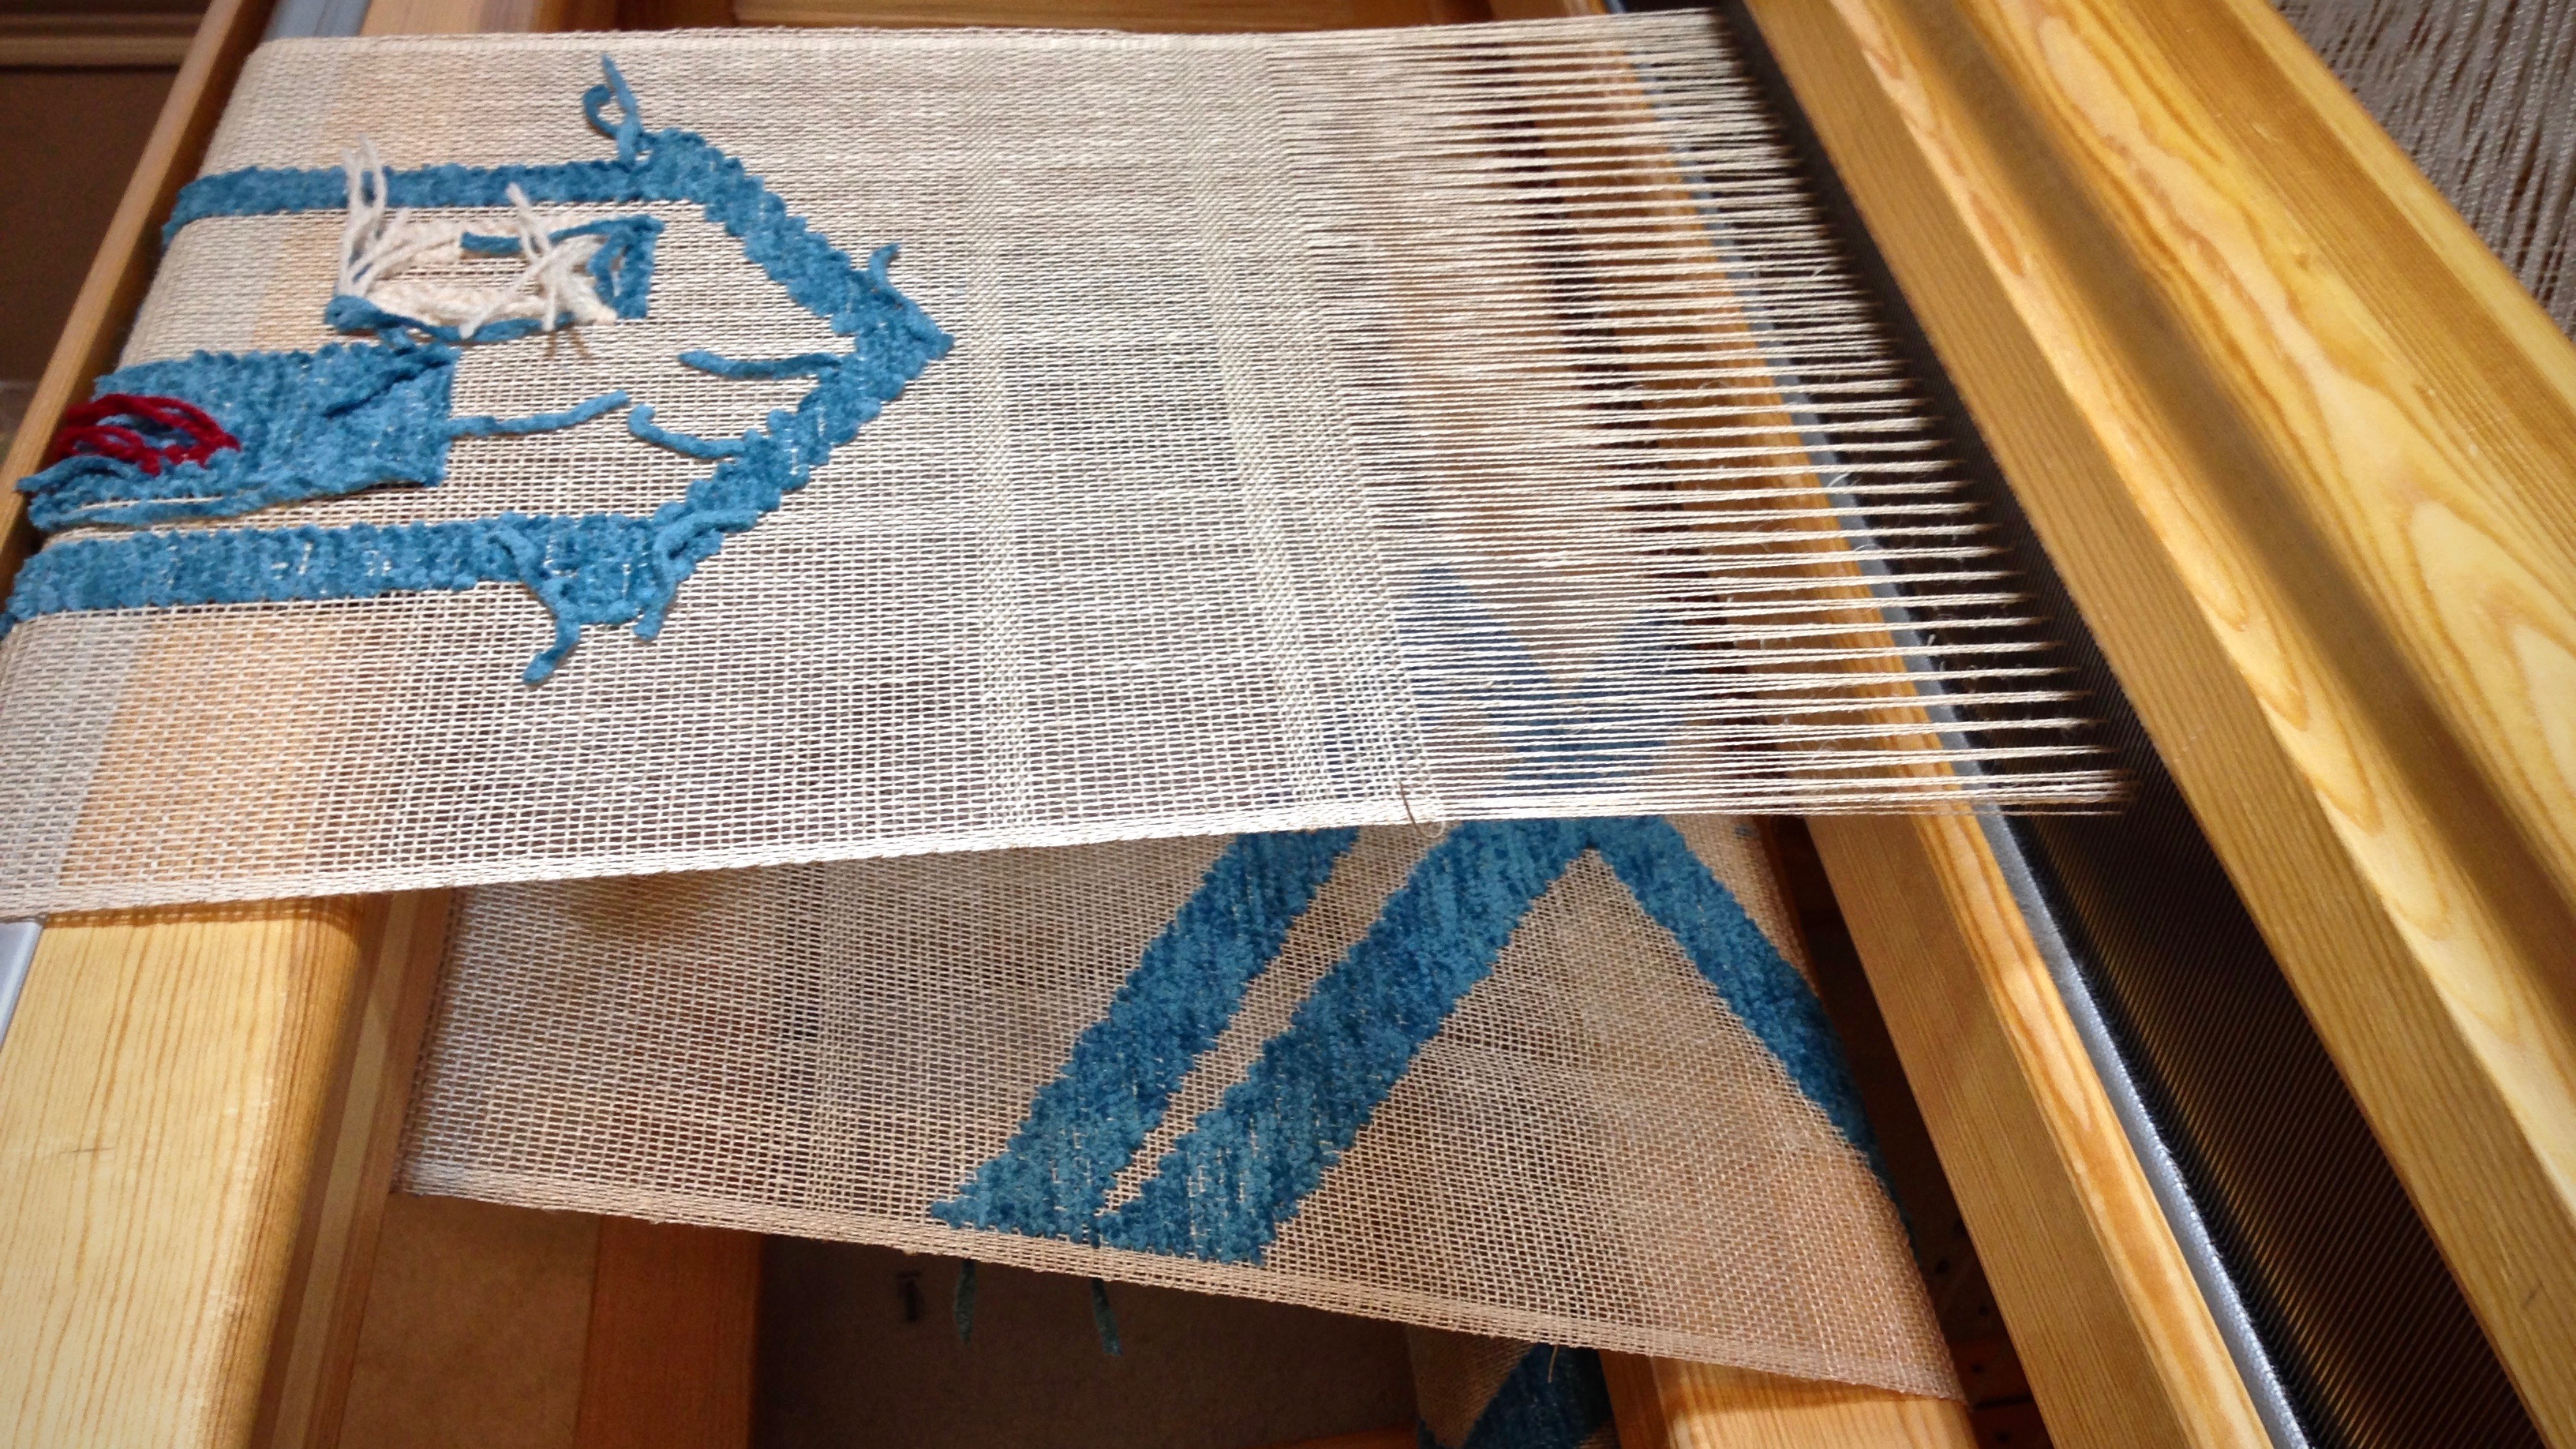
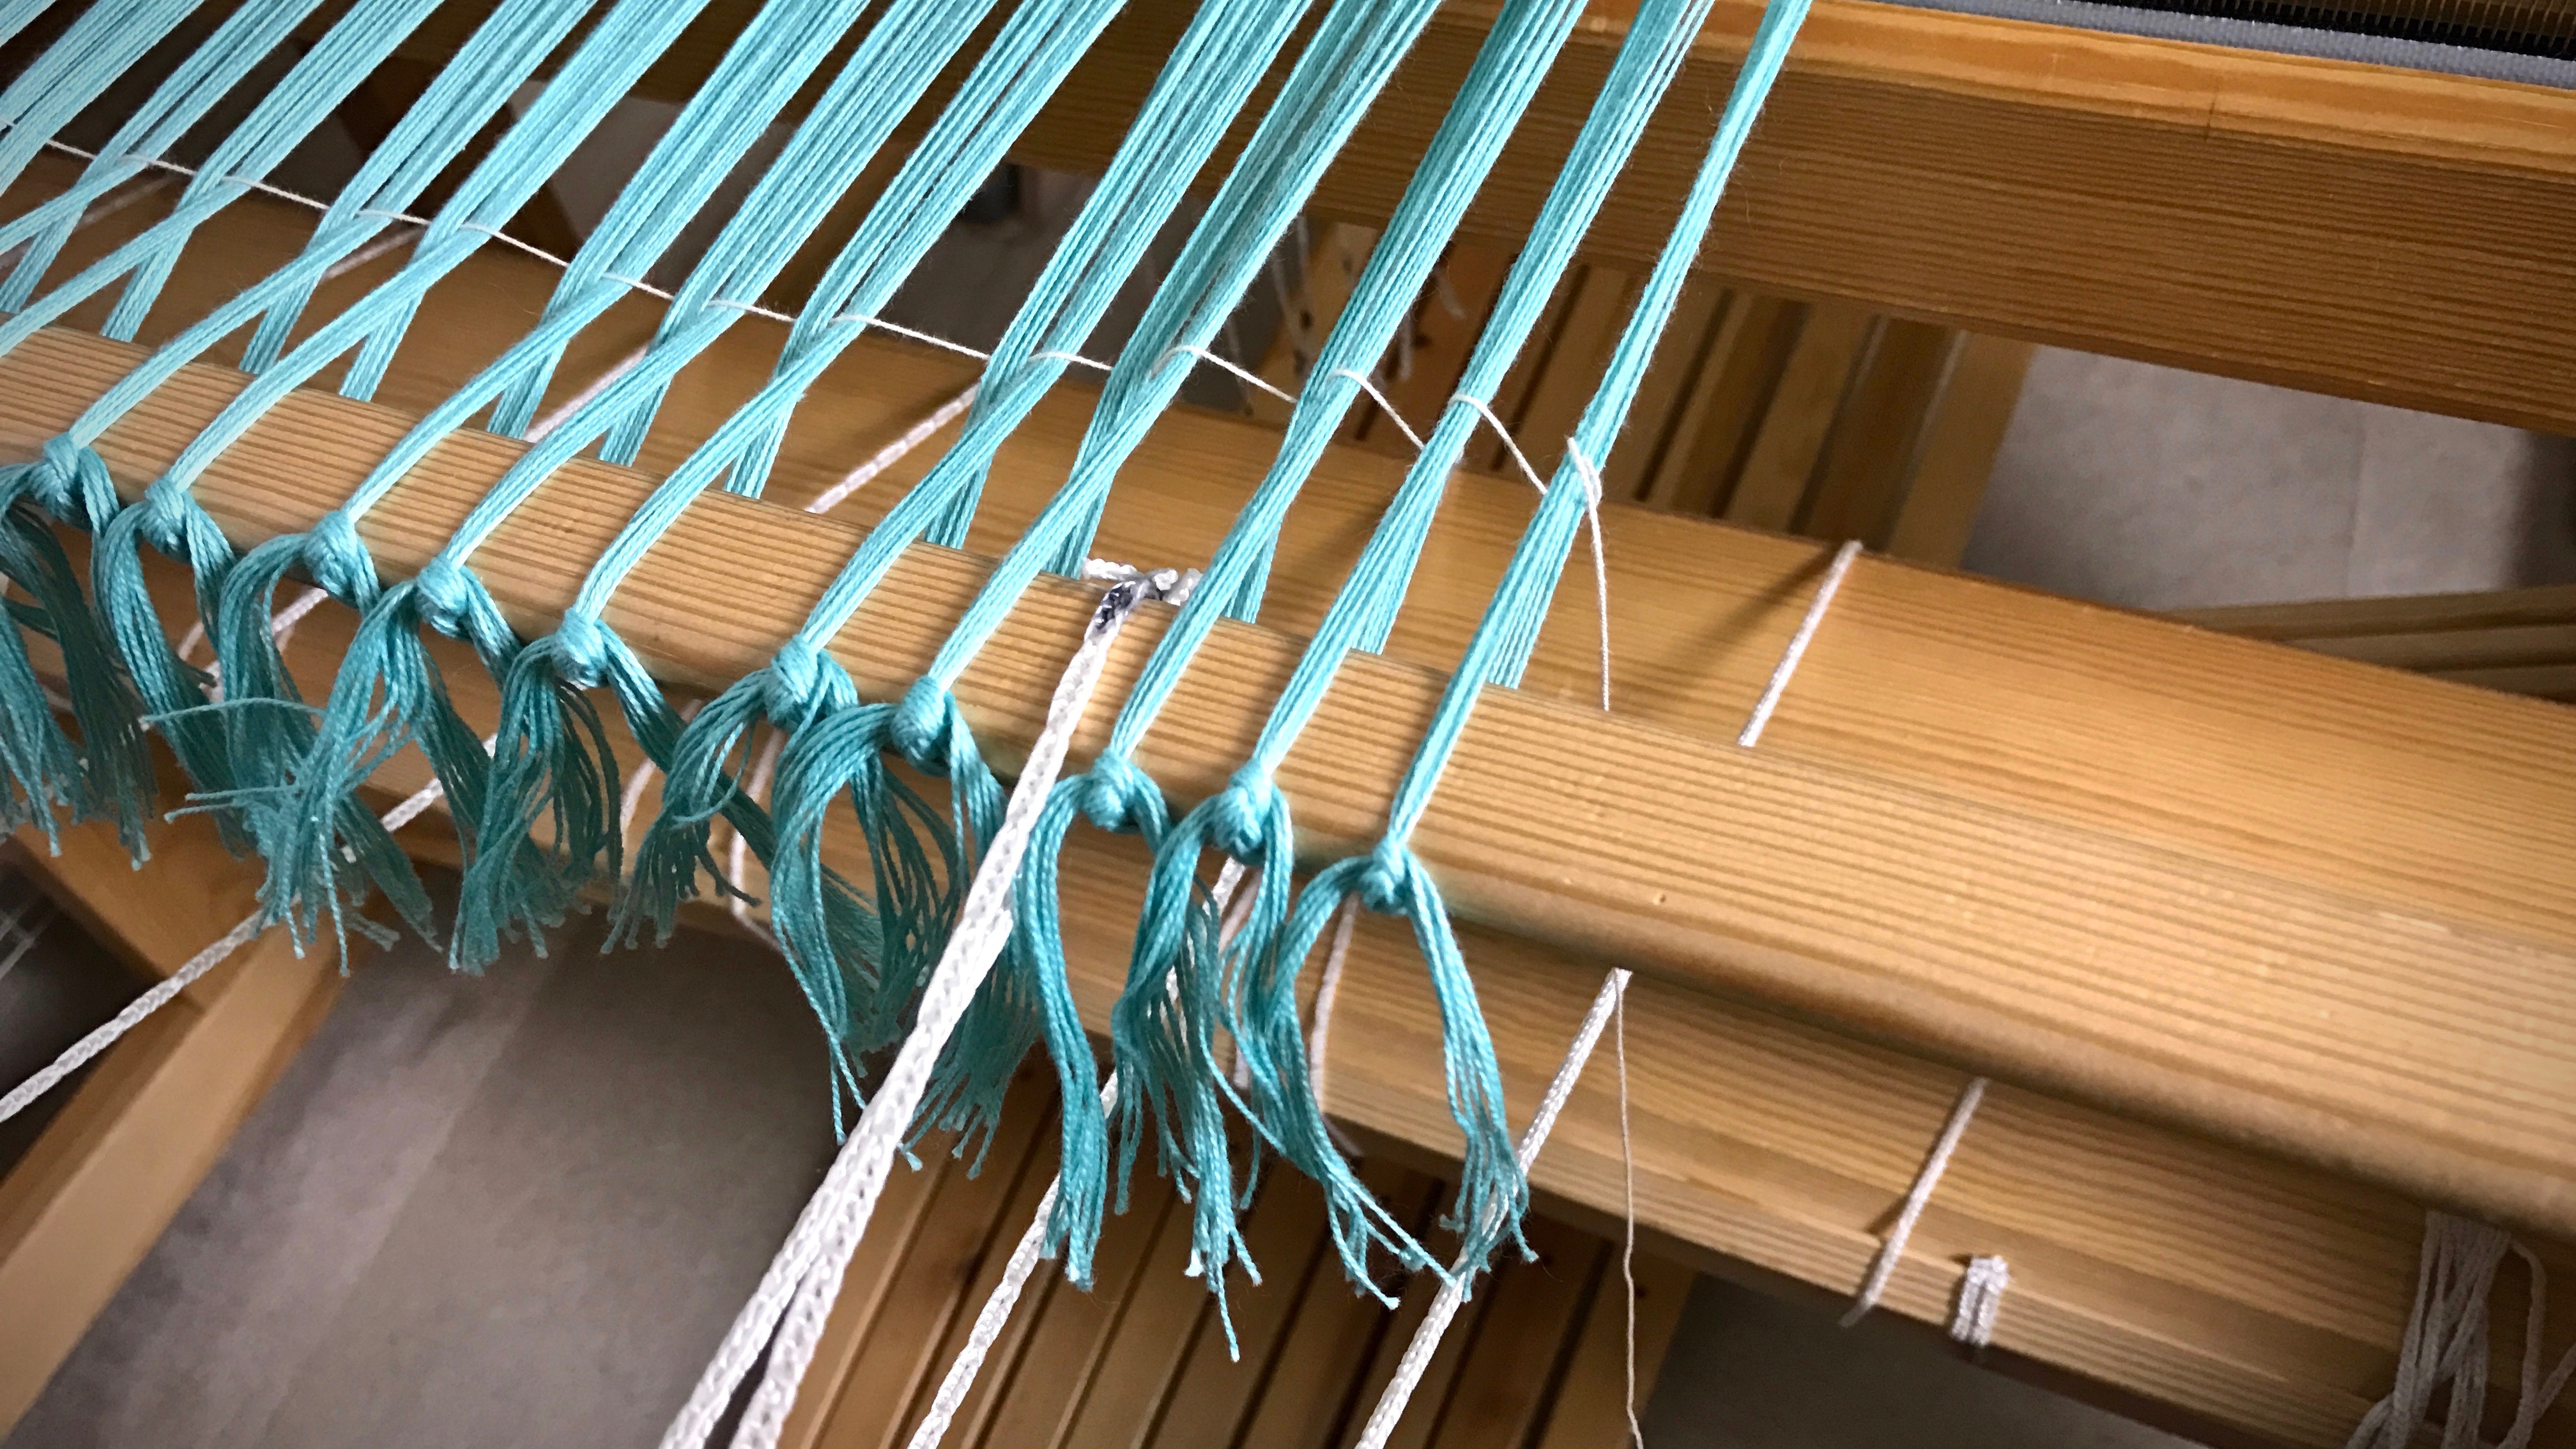
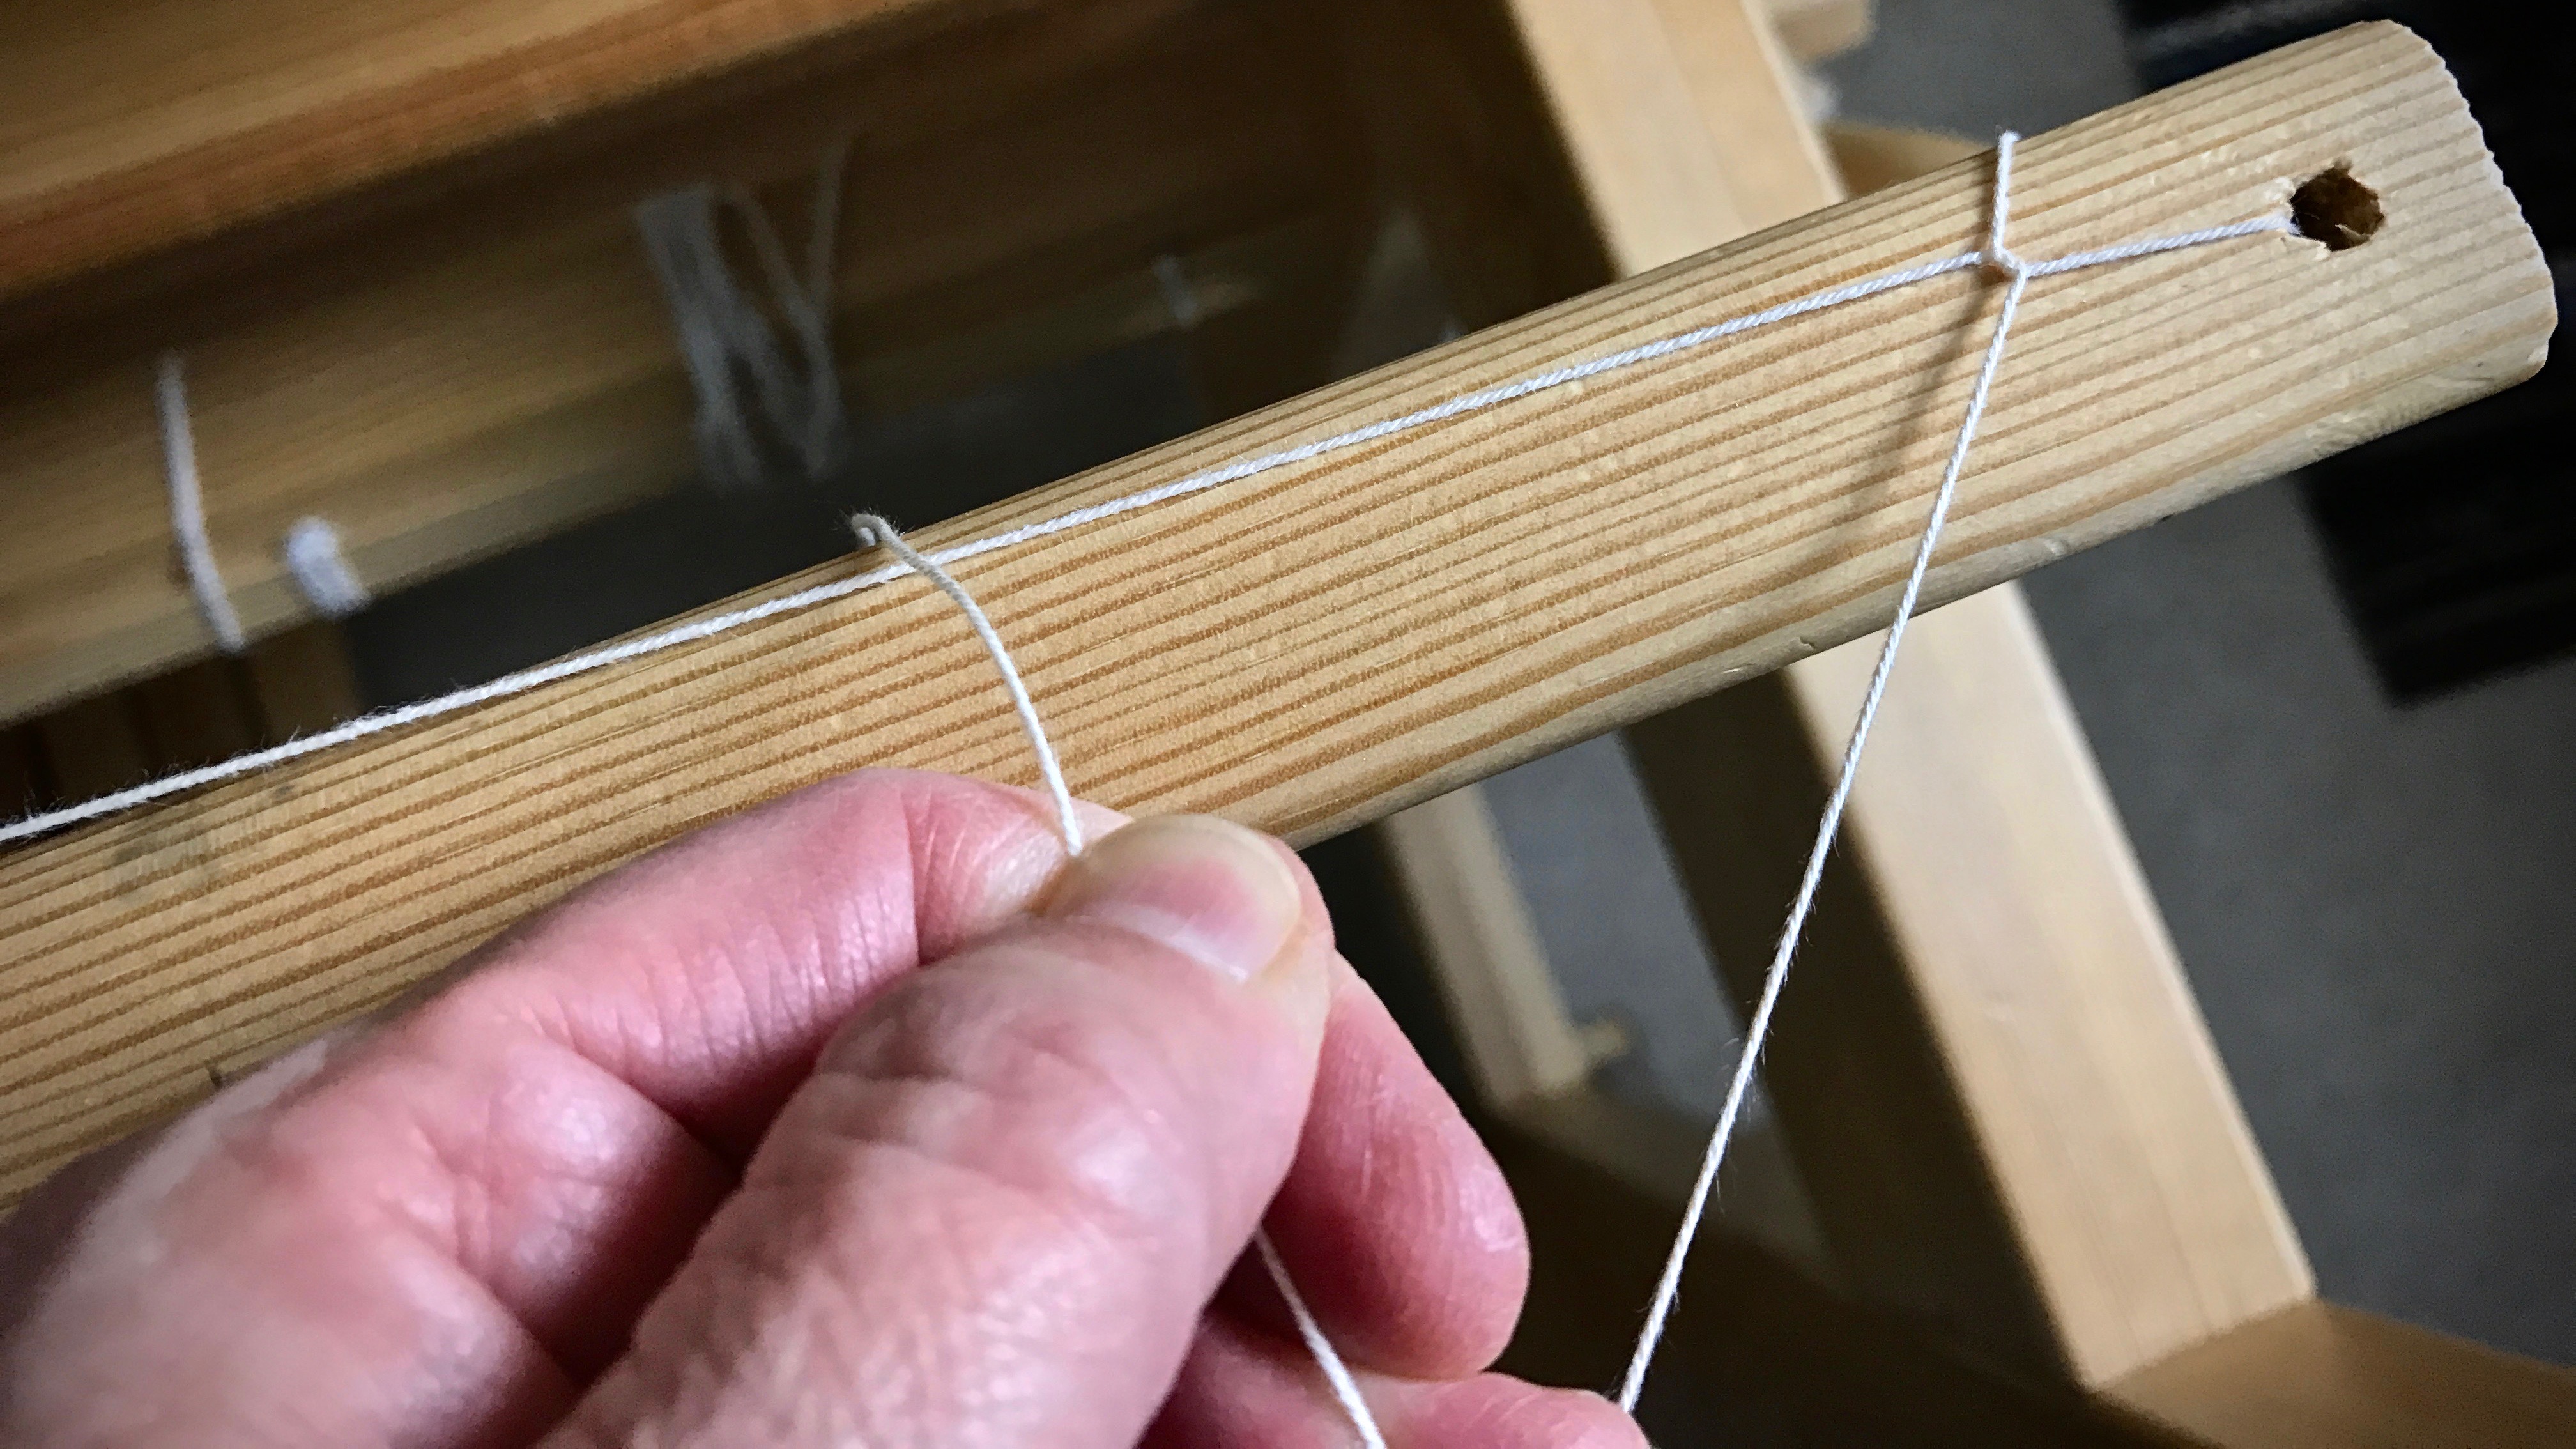
1. Tie on warp in small bundles, about 1″ each, with half of the bundle’s ends going over, and half going under, the front tie-on bar (as seen in Step 3 pictures). Tie the ends together with a bow knot or other tie-on knot. (TIP – If you do not tie the knots too tight, it is easier to get even tension across the warp, and it is easier to tighten the leveling string in Step 4.)

2. Tie one end of the leveling string to one end of the front tie-on bar, using a slip knot with half bow.

Tying the leveling string. Tutorial pics.

Tying the leveling string. Step-by-step.

Leveling string - tying it on.

Tying on the leveling string. How to.

How to tie the leveling string.

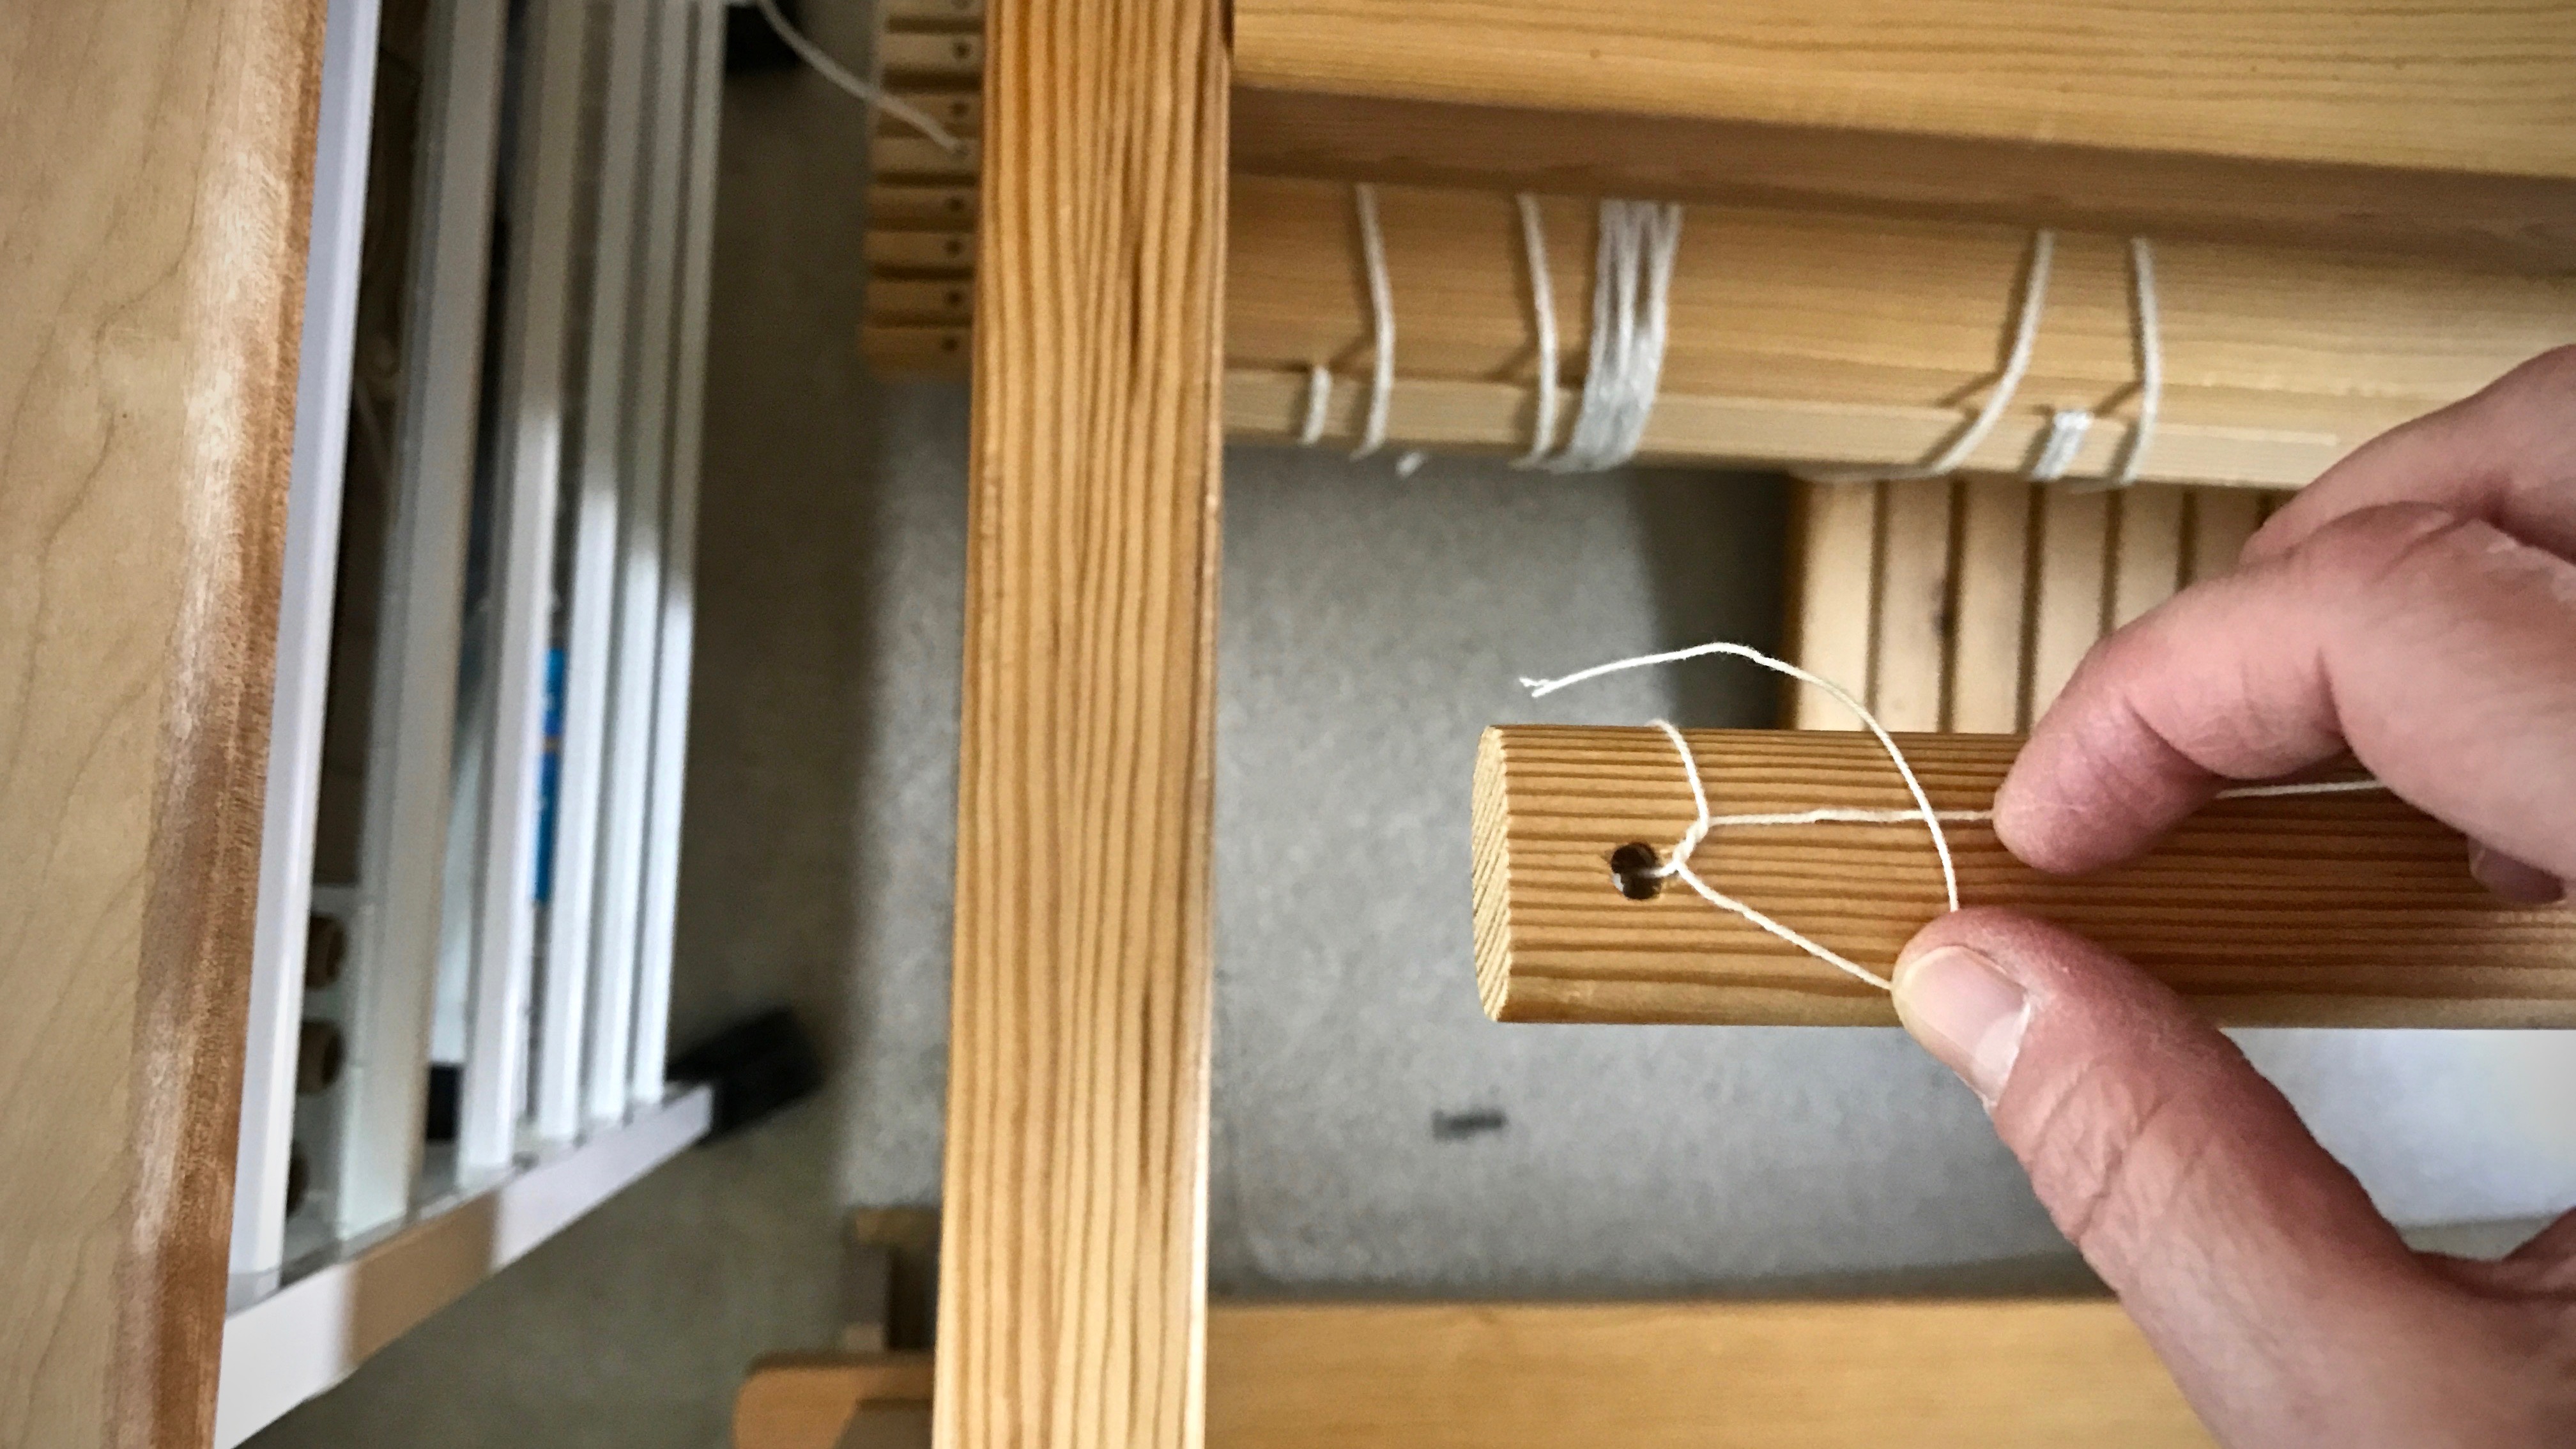
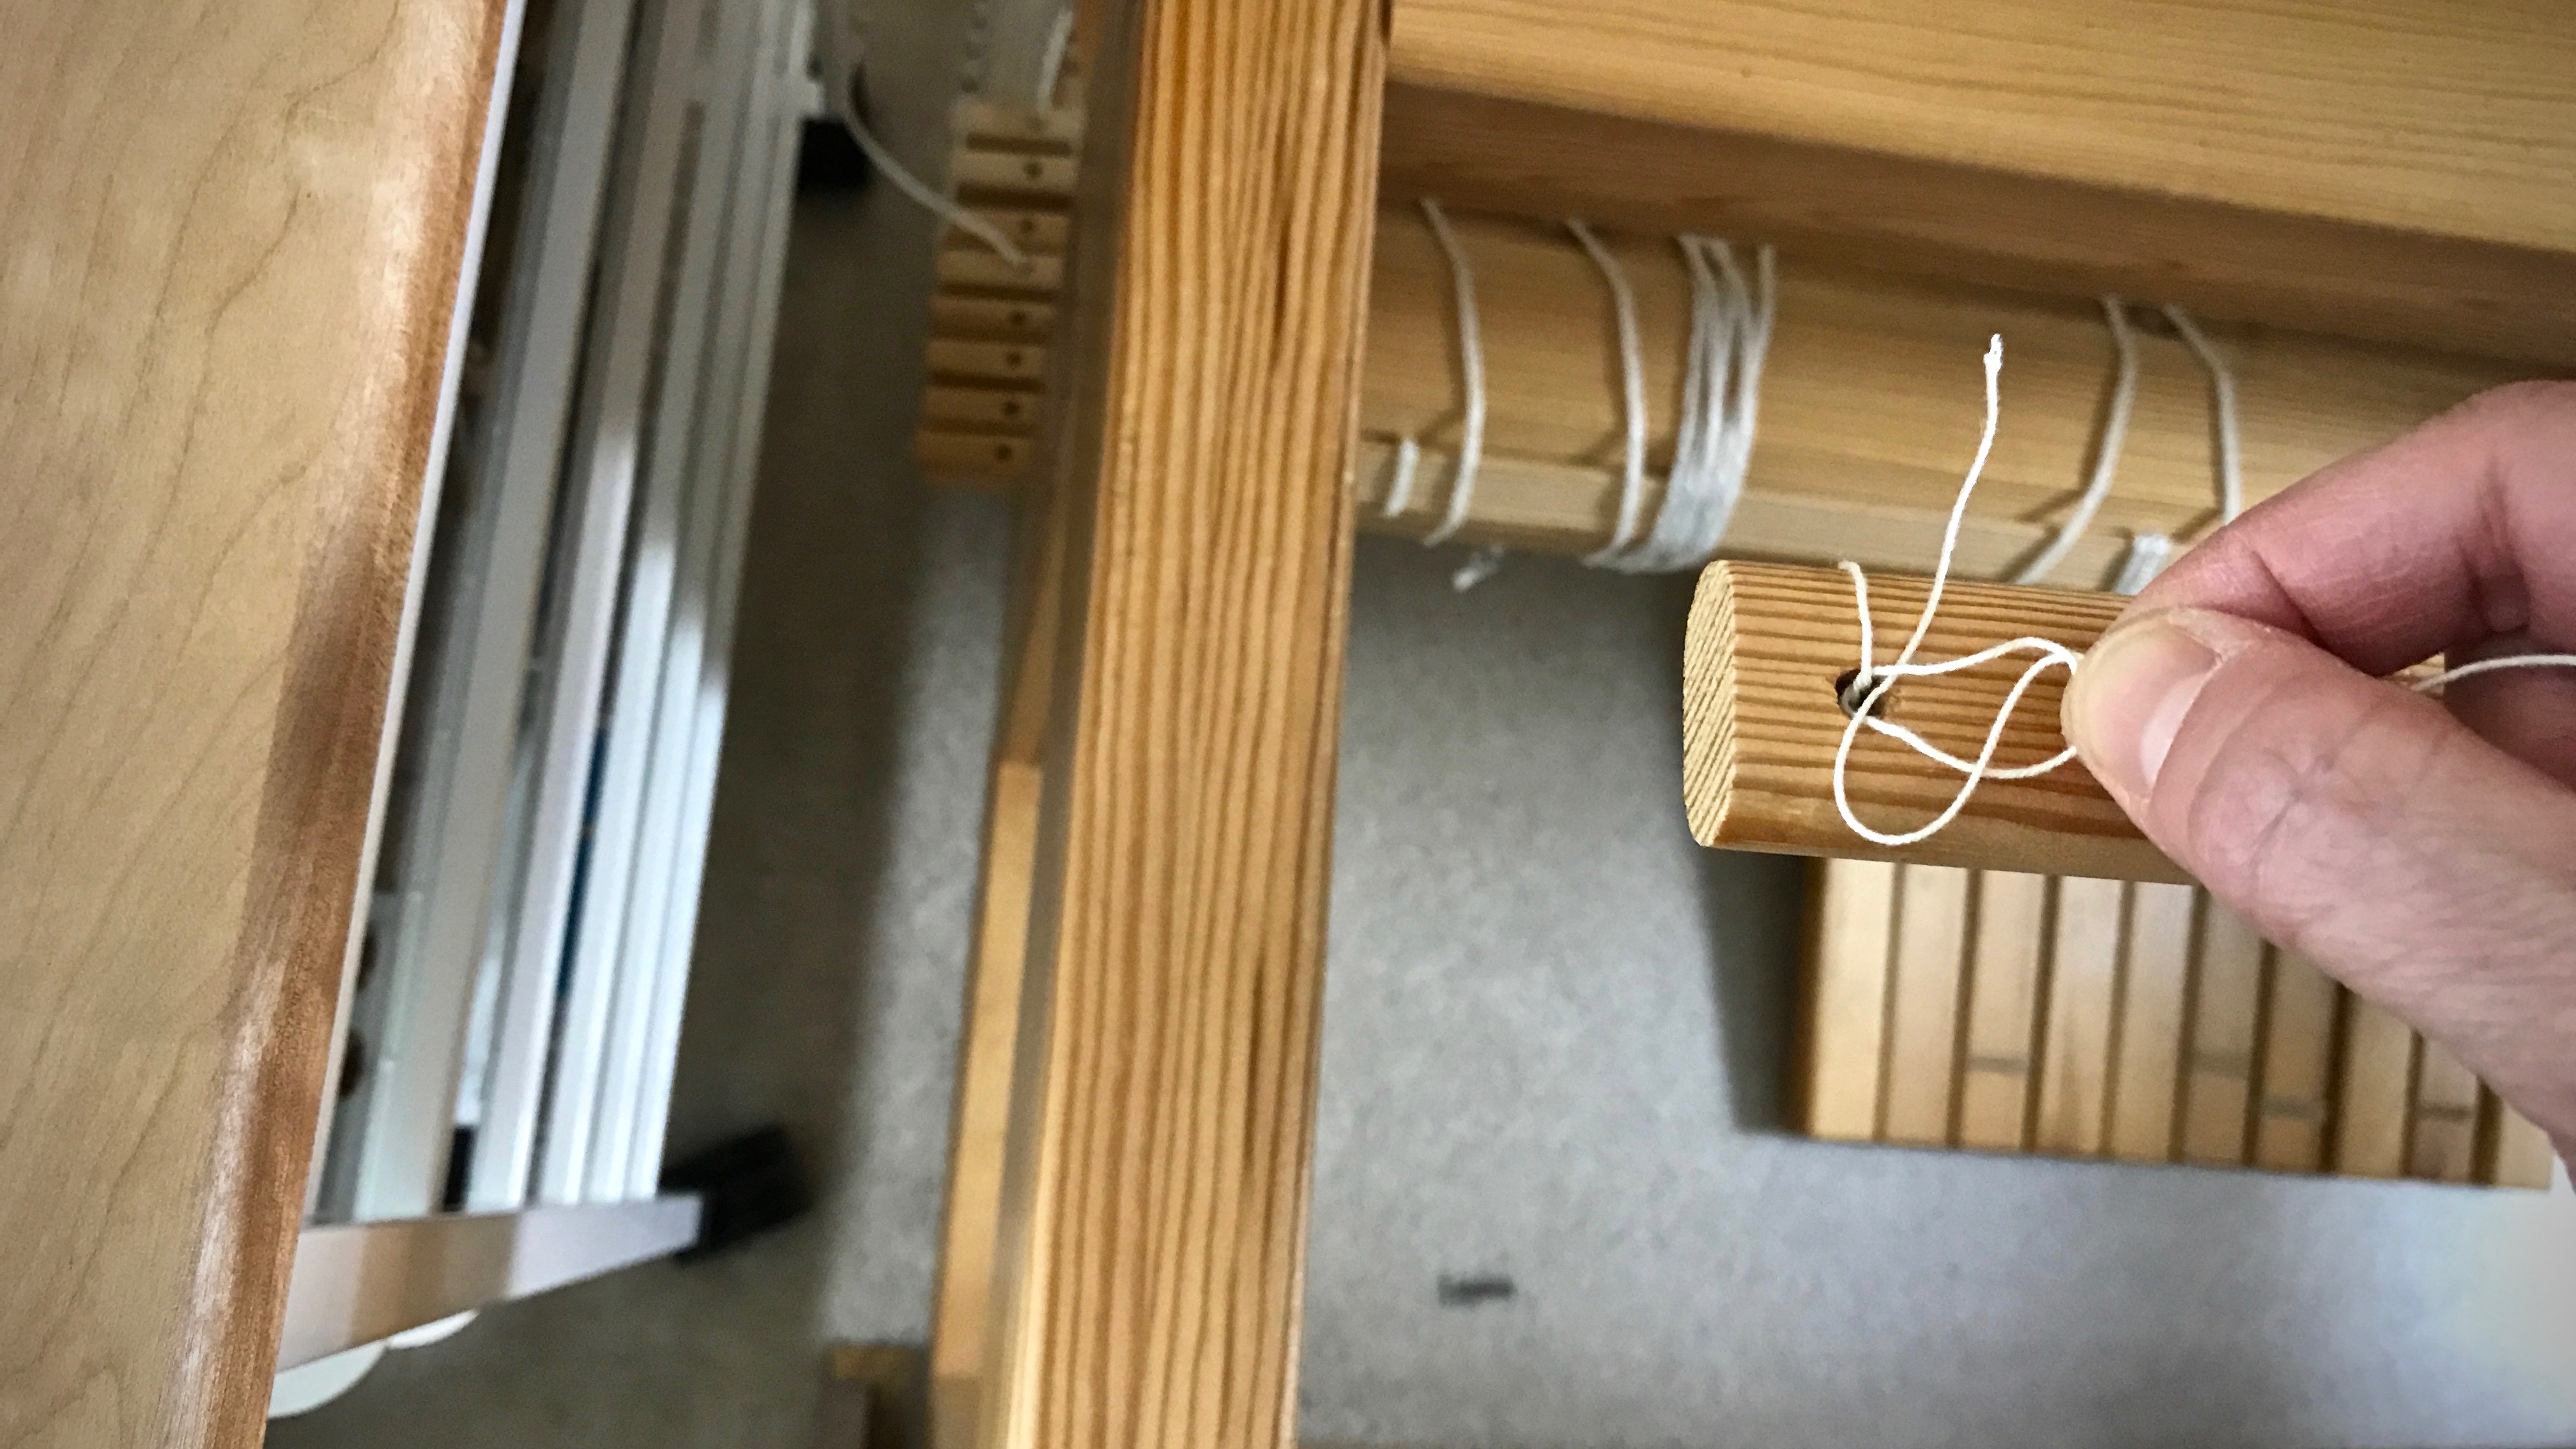
3. Thread the leveling string over and under the tie-on bundles, going over the raised ends and under the lowered ends.

Threading the leveling string through the warp. Tutorial pics.

Leveling string going through the warp.

Tying the second end of the leveling string.

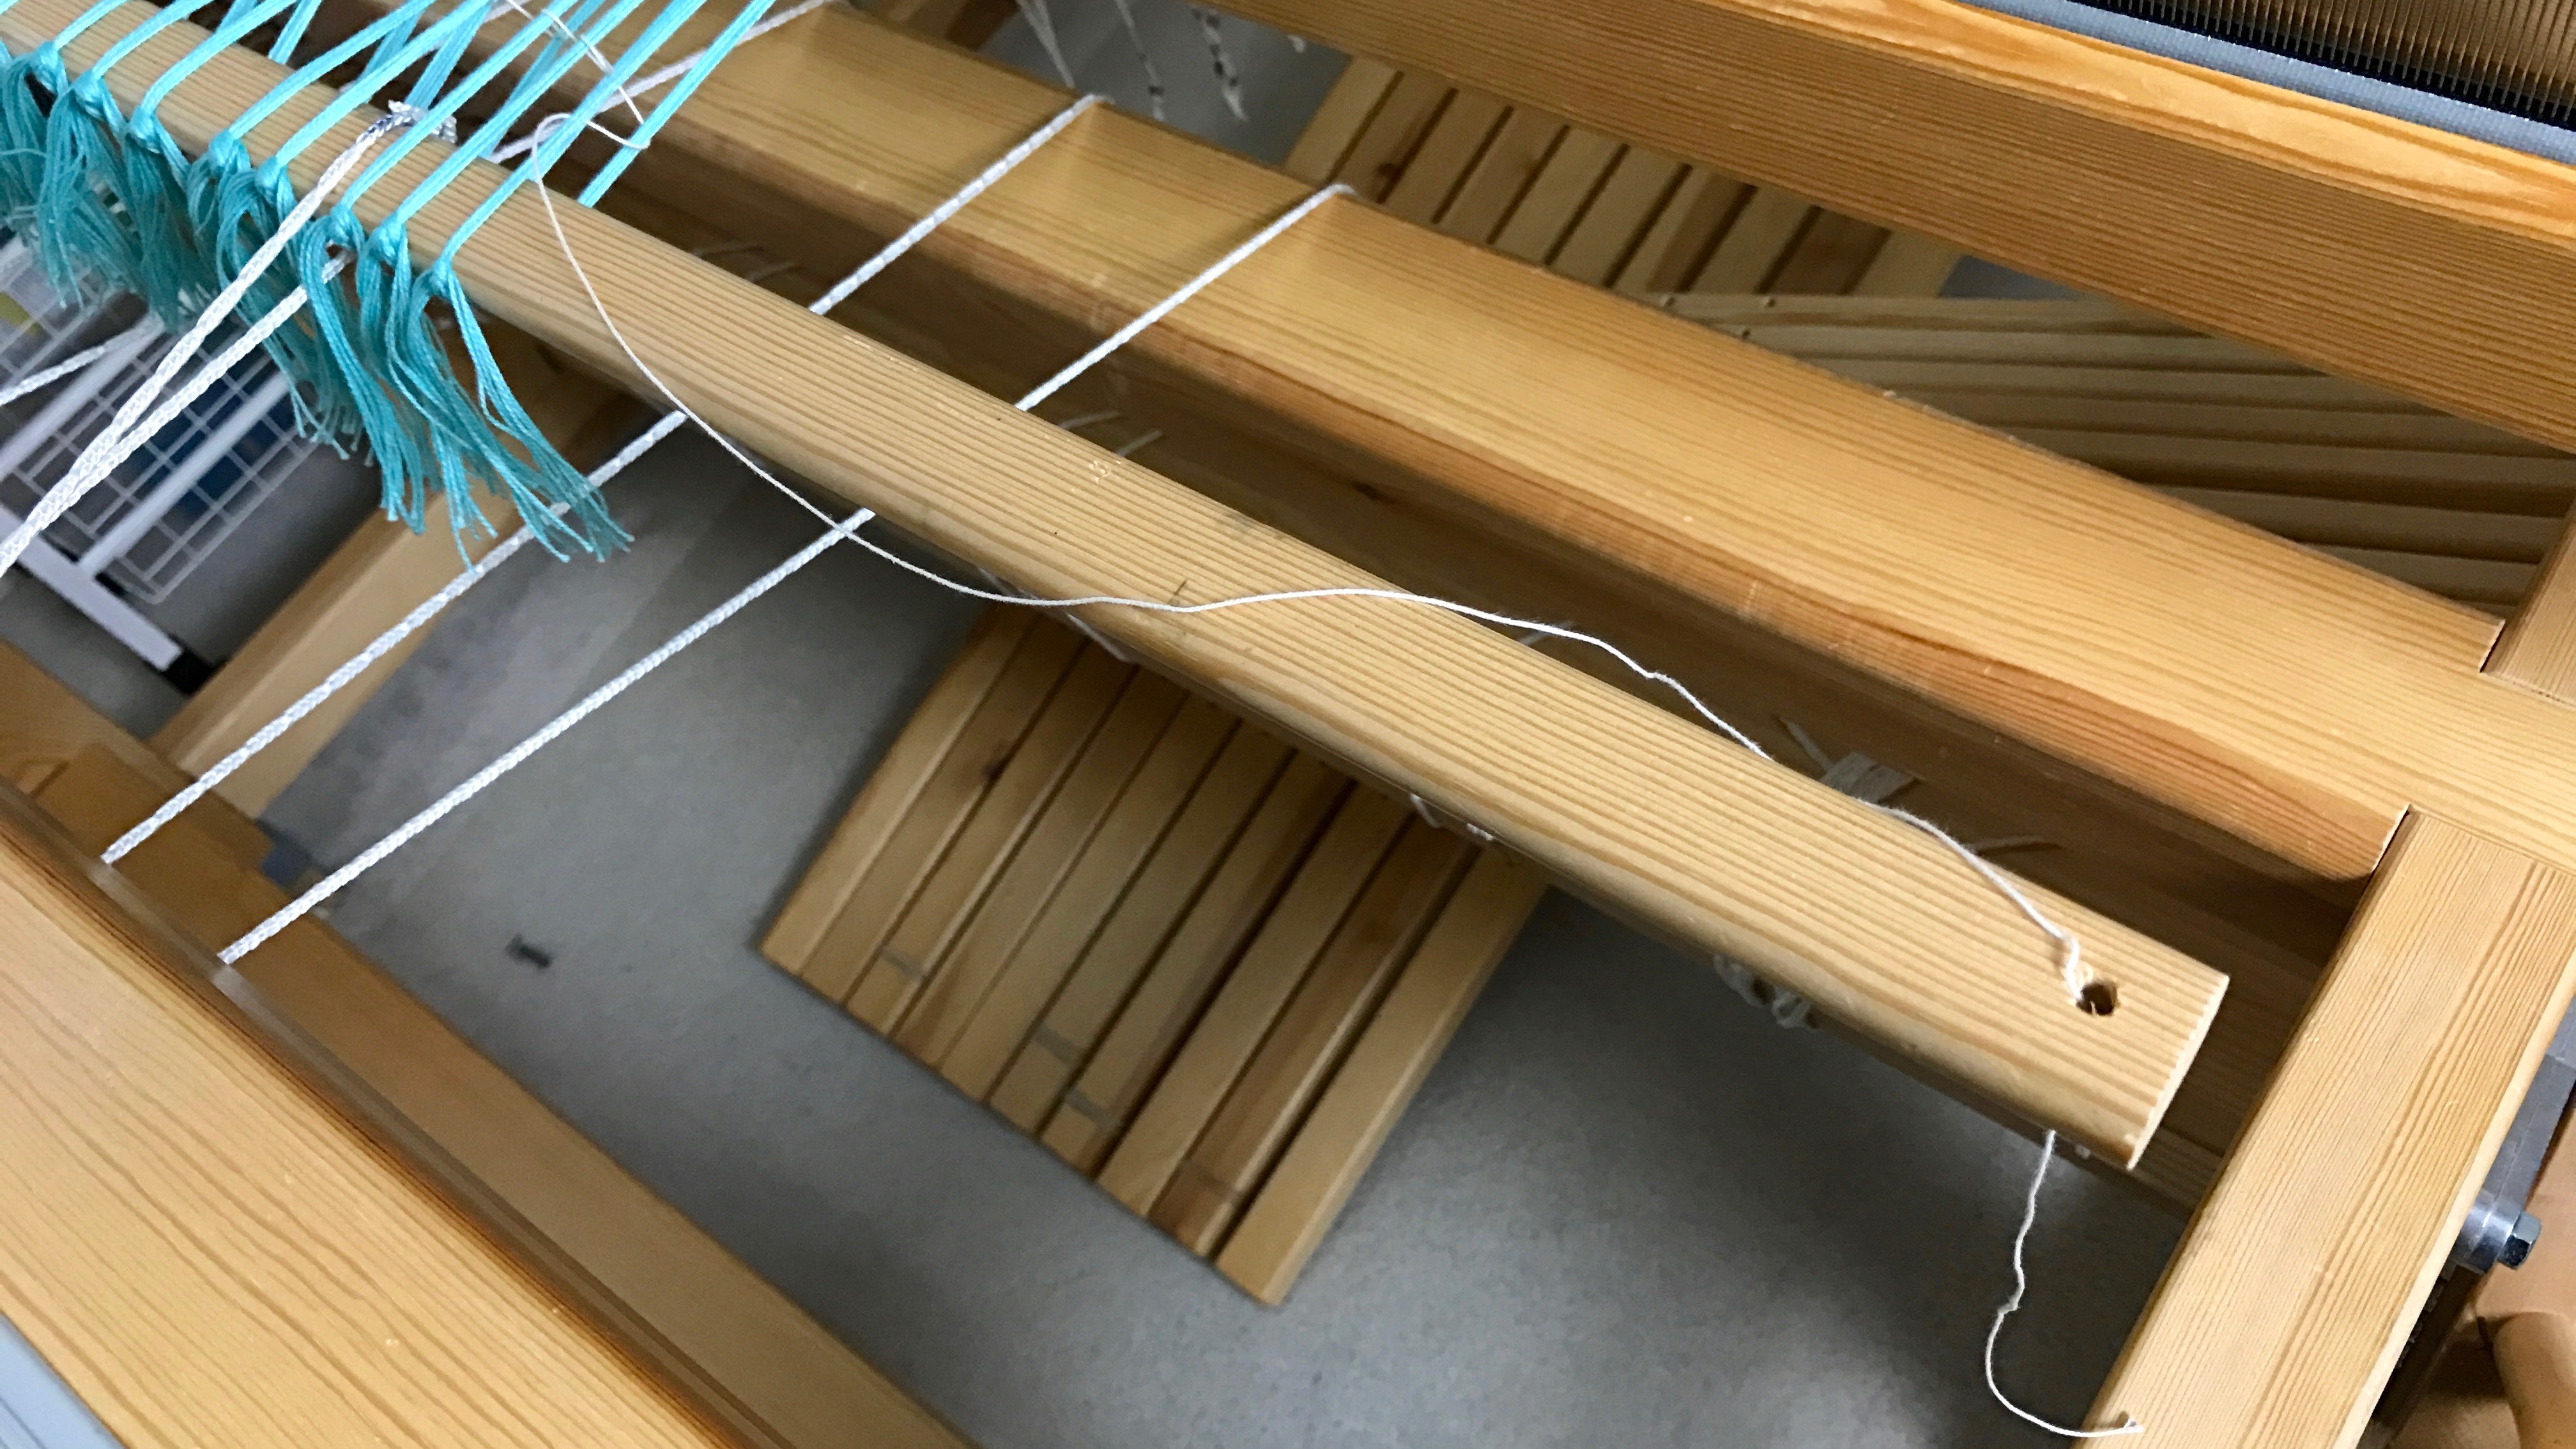
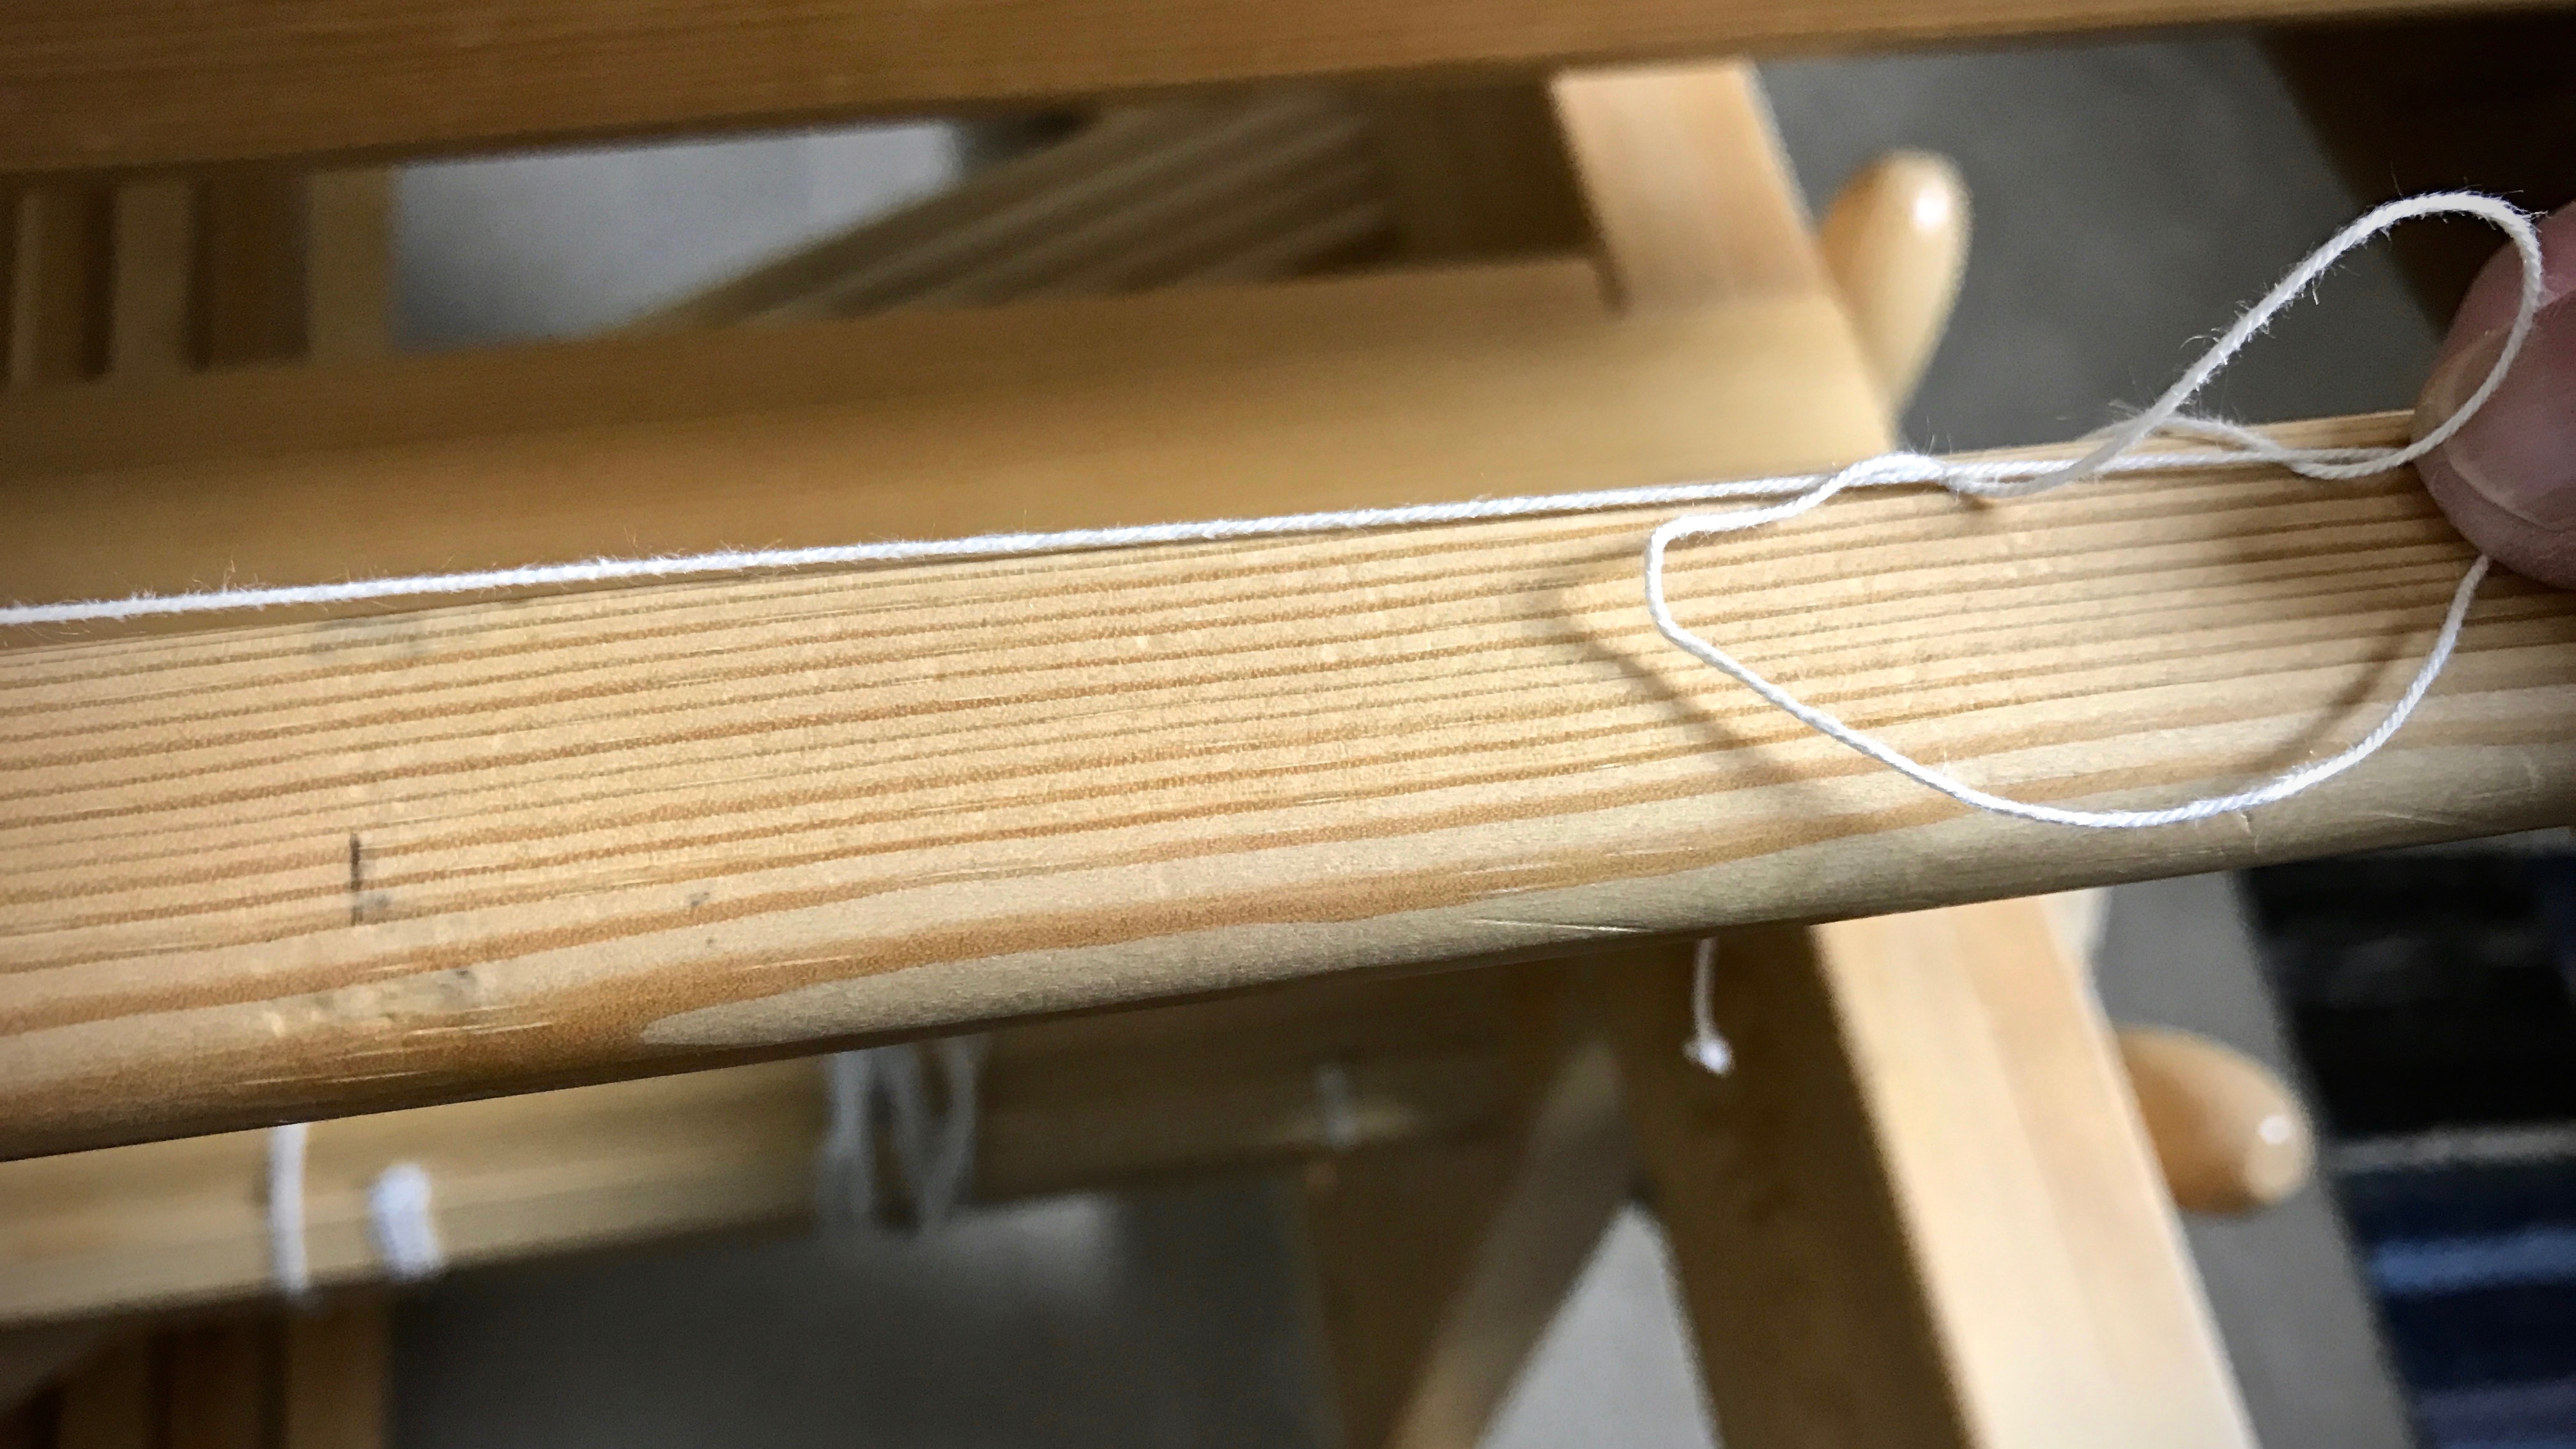
4. Tighten the leveling string while tapping it in with the beater.

Tightening the leveling string.

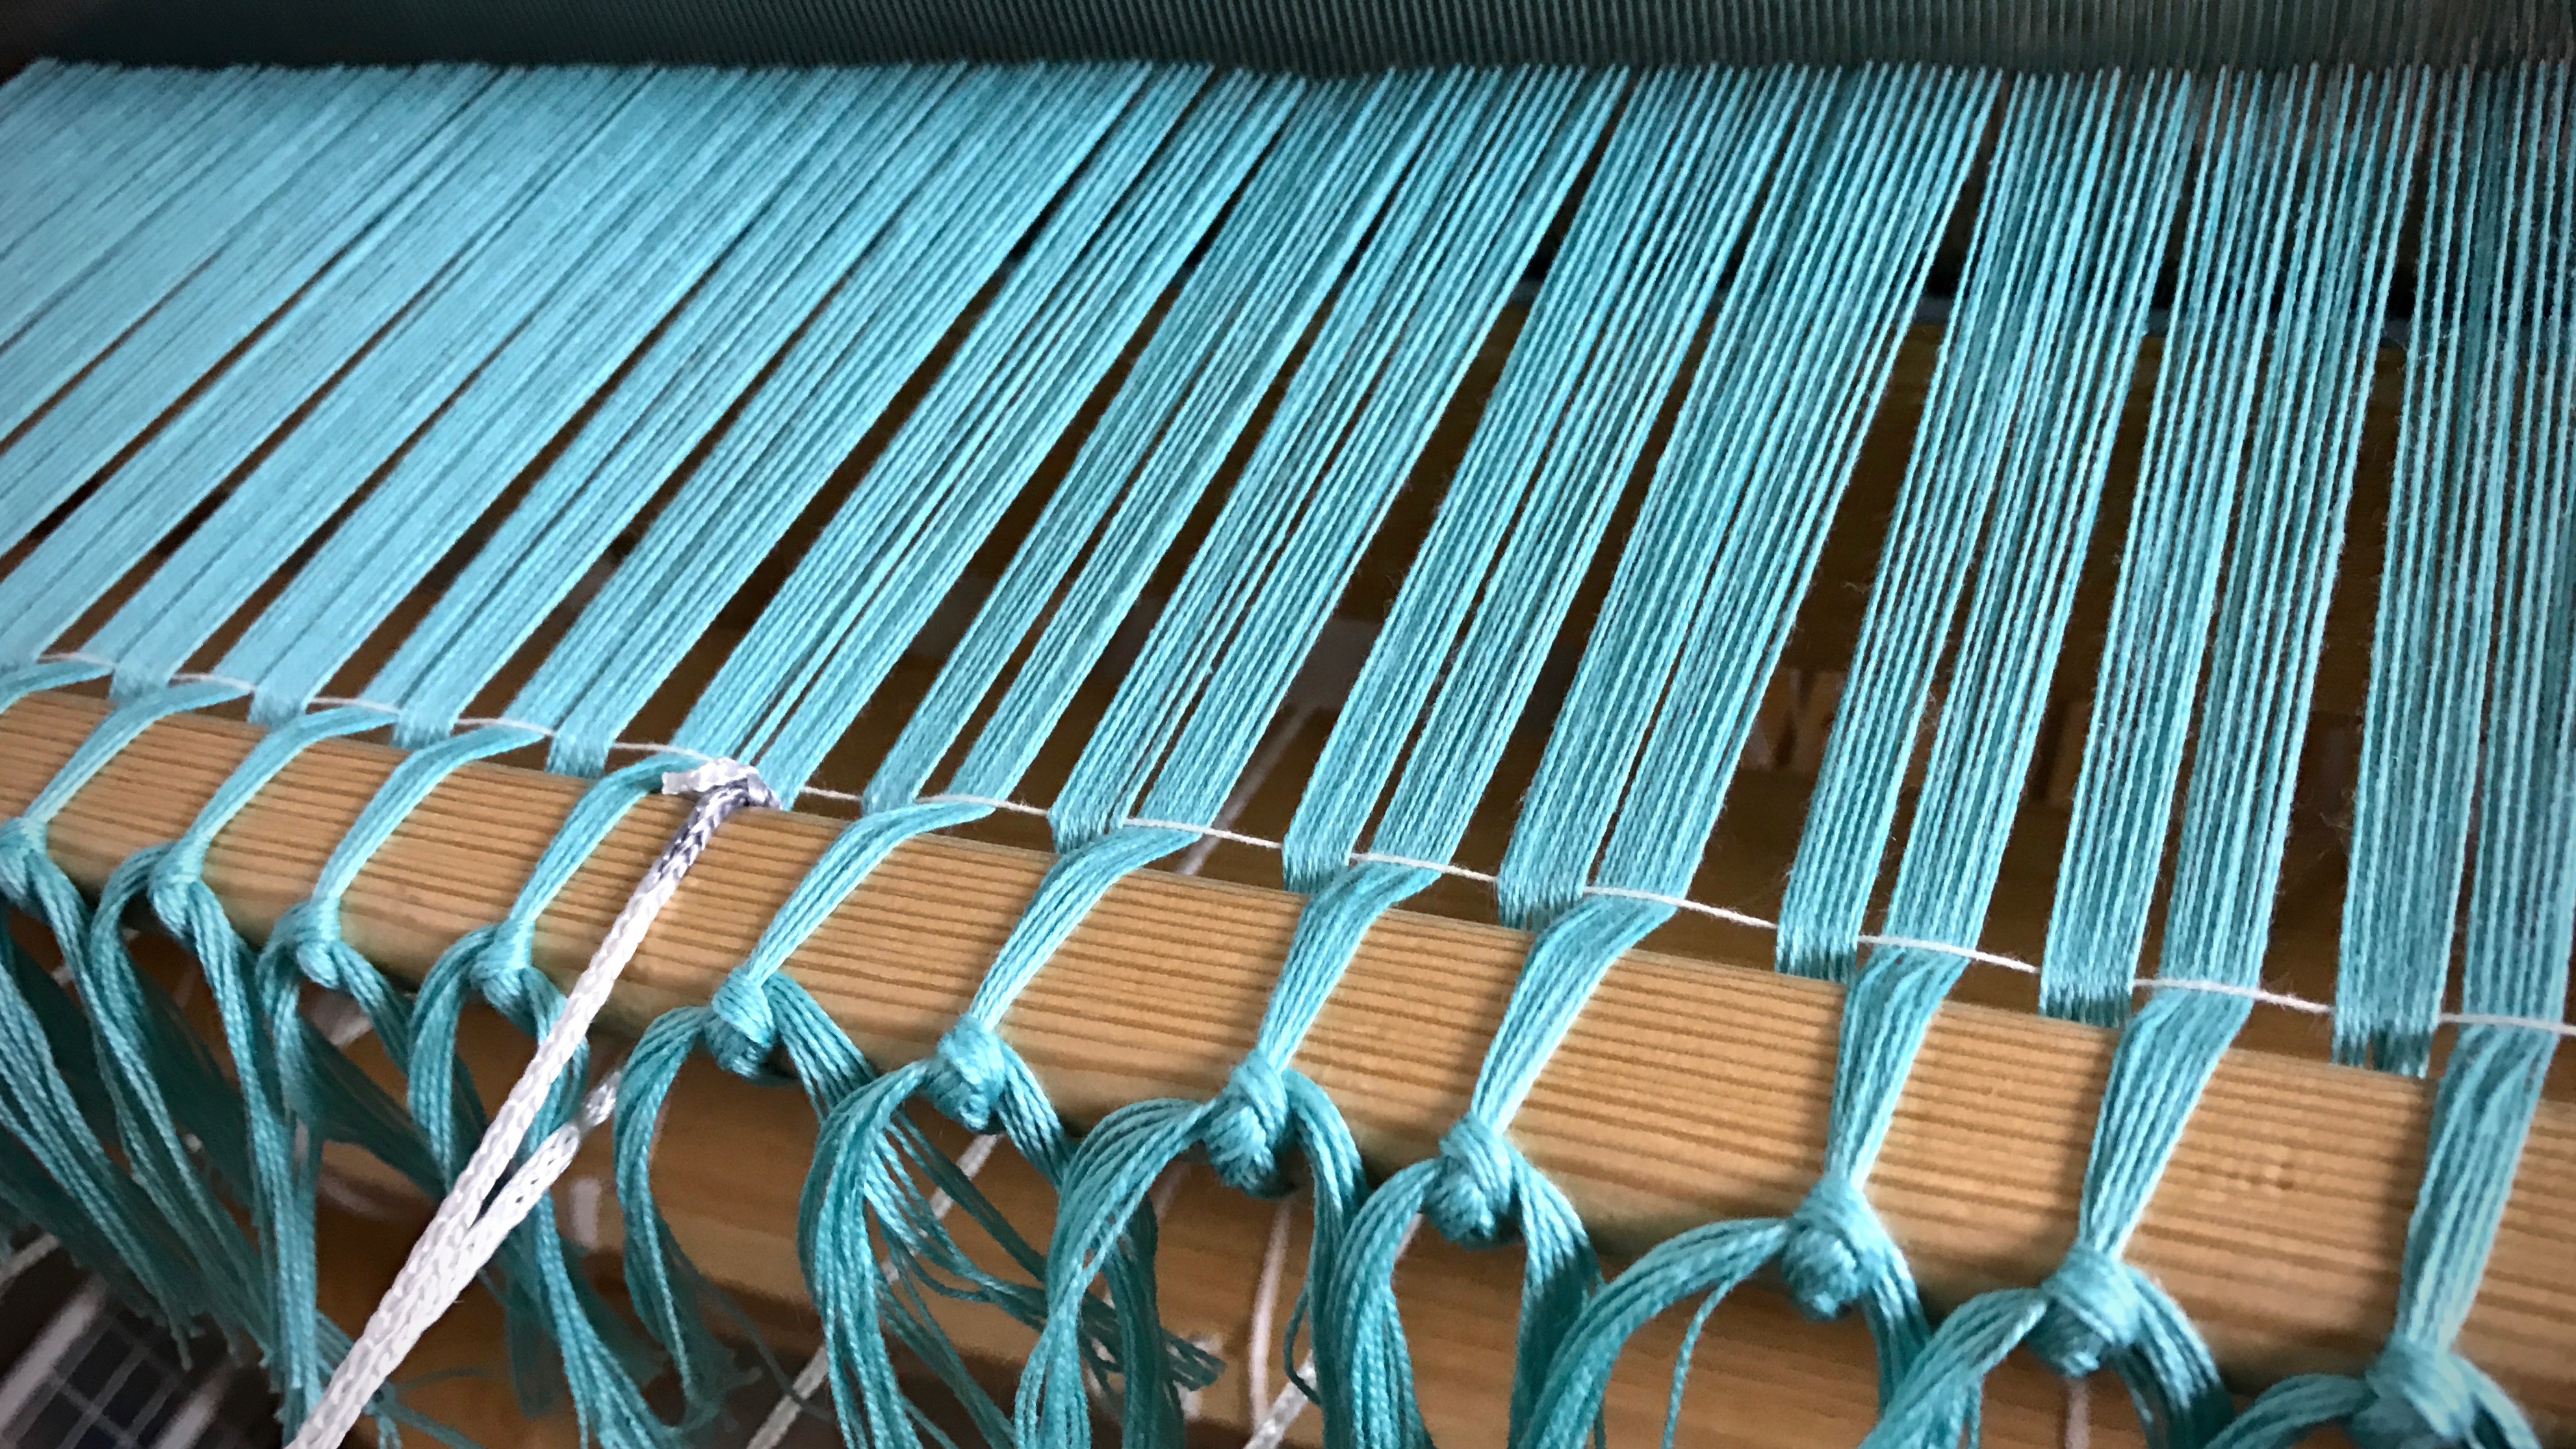
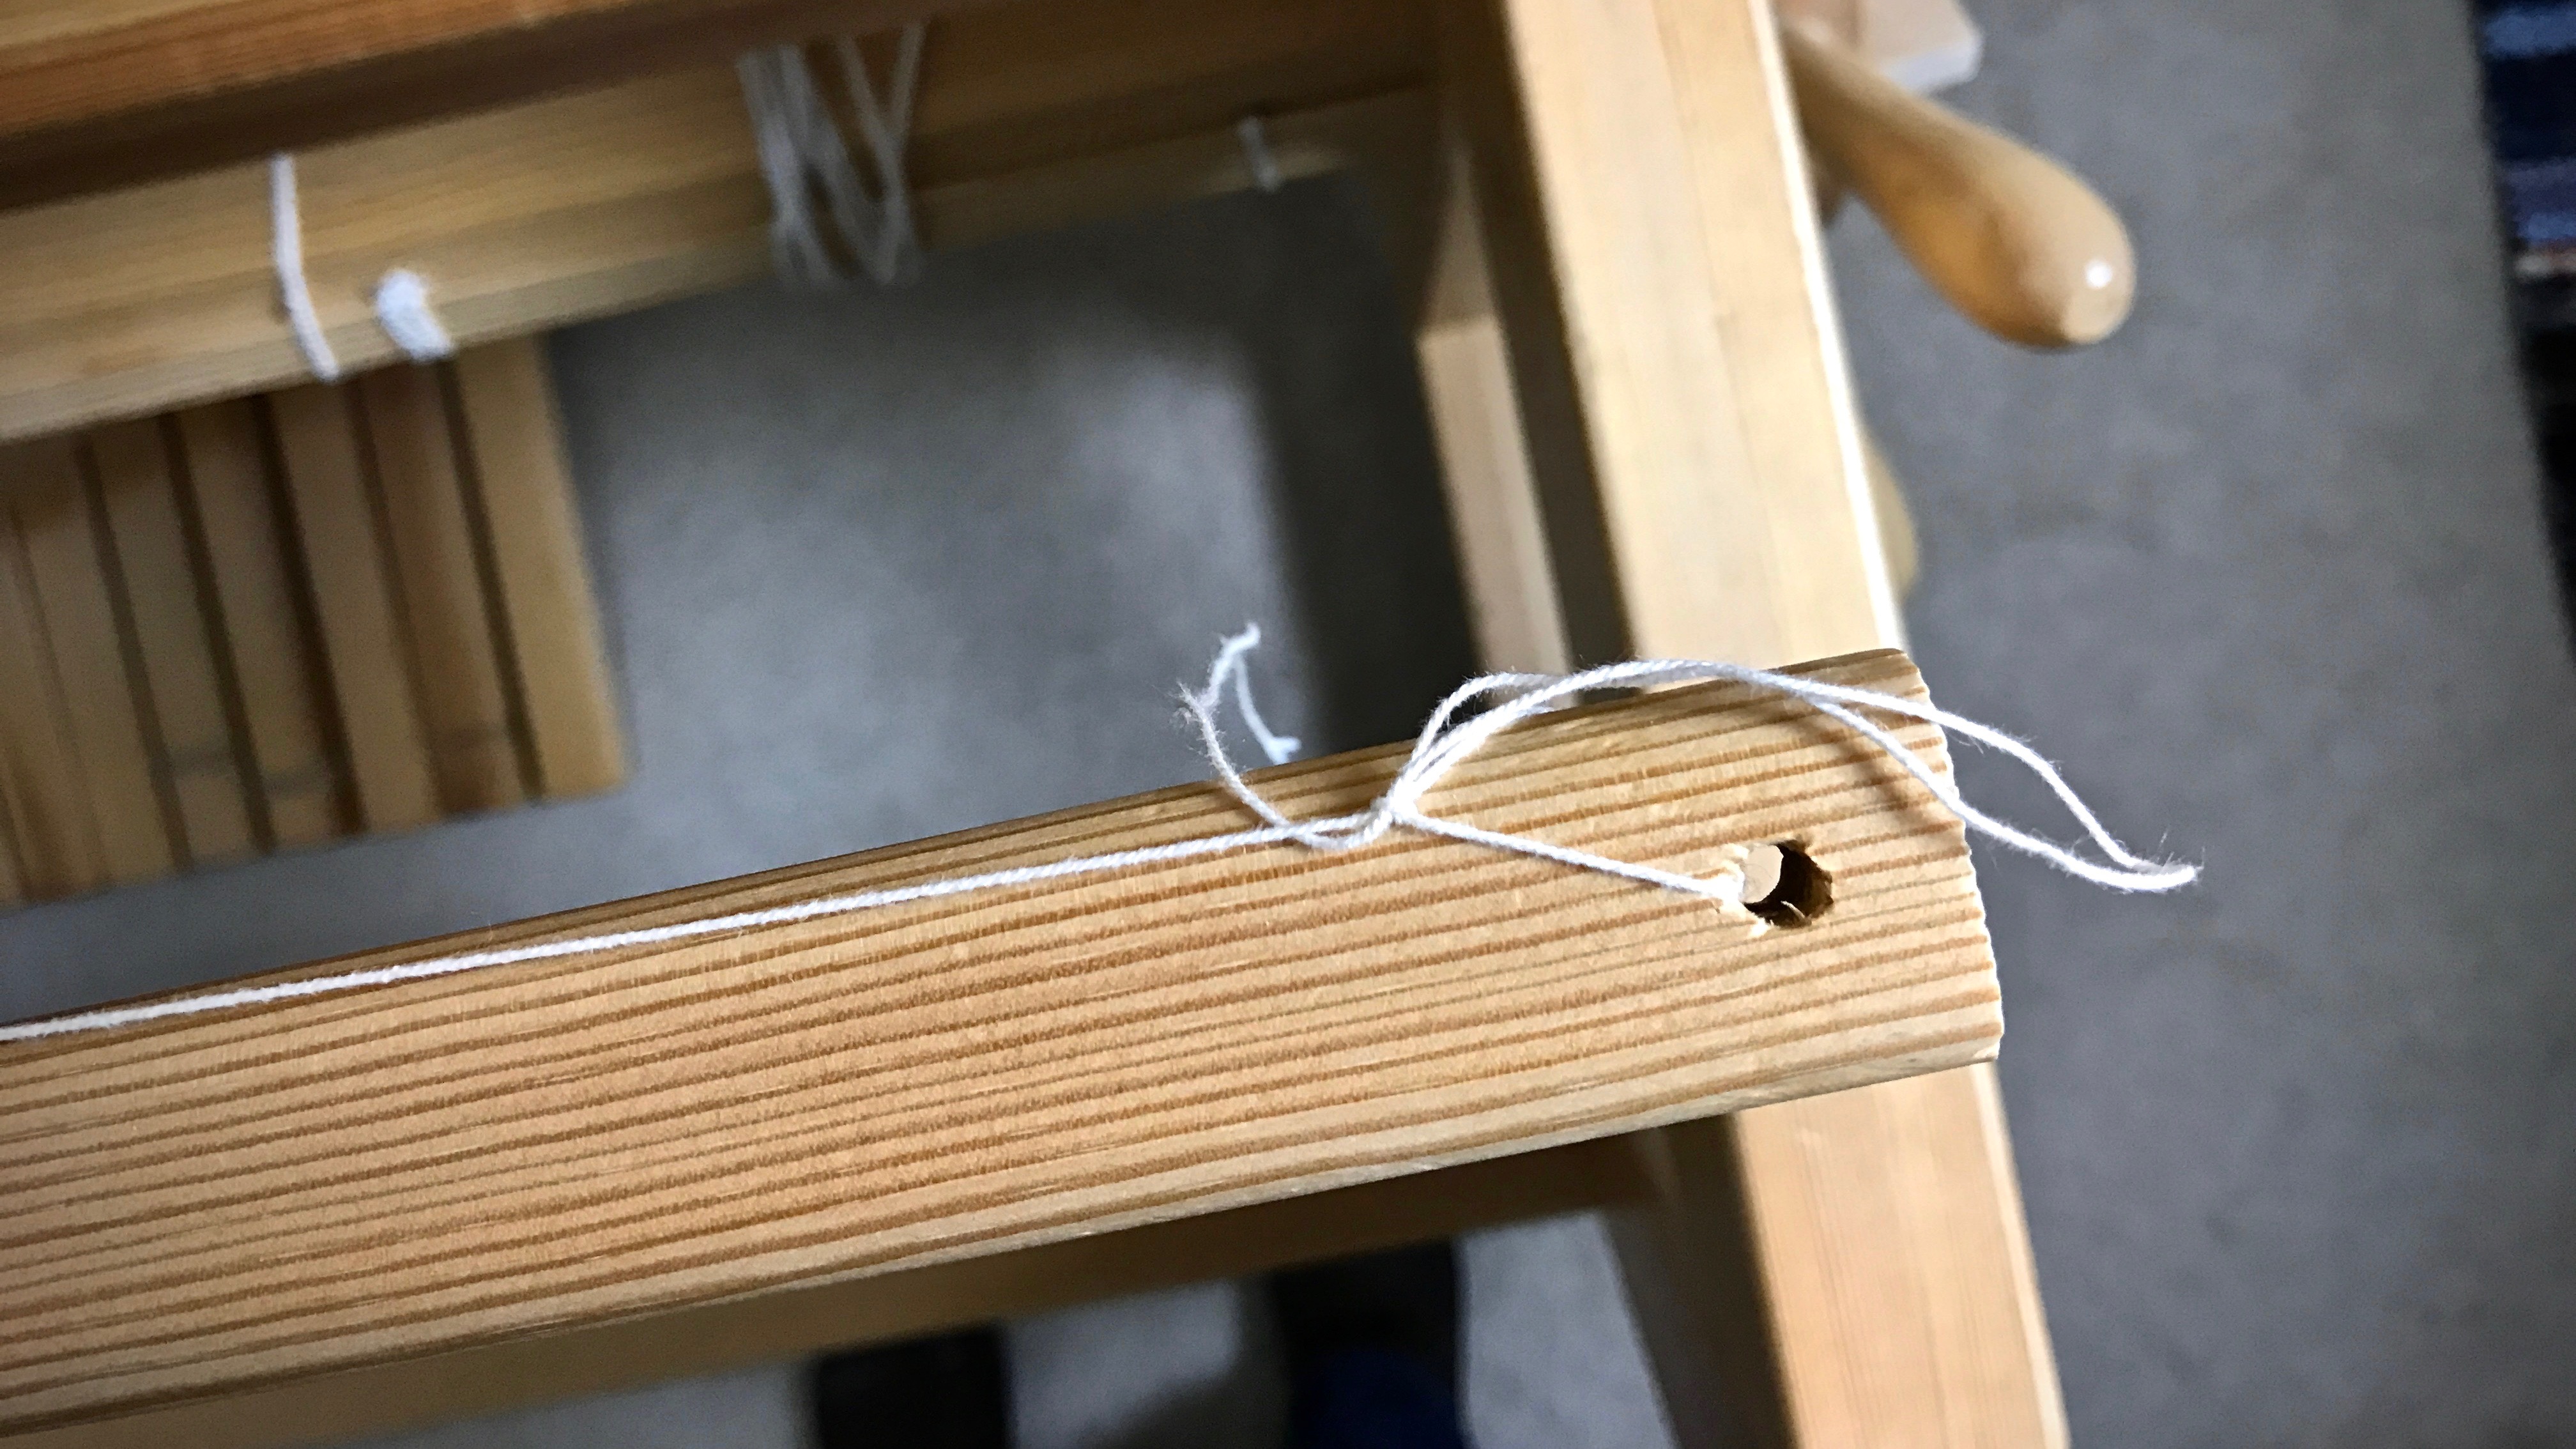
5. Tie the end of the leveling string to the end of the front tie-on bar, using a slip knot with half bow, as before.

How to tie the second end of the leveling string.

How to tie the leveling string.

Finishing the knot for the leveling string.

Why I use a leveling string.

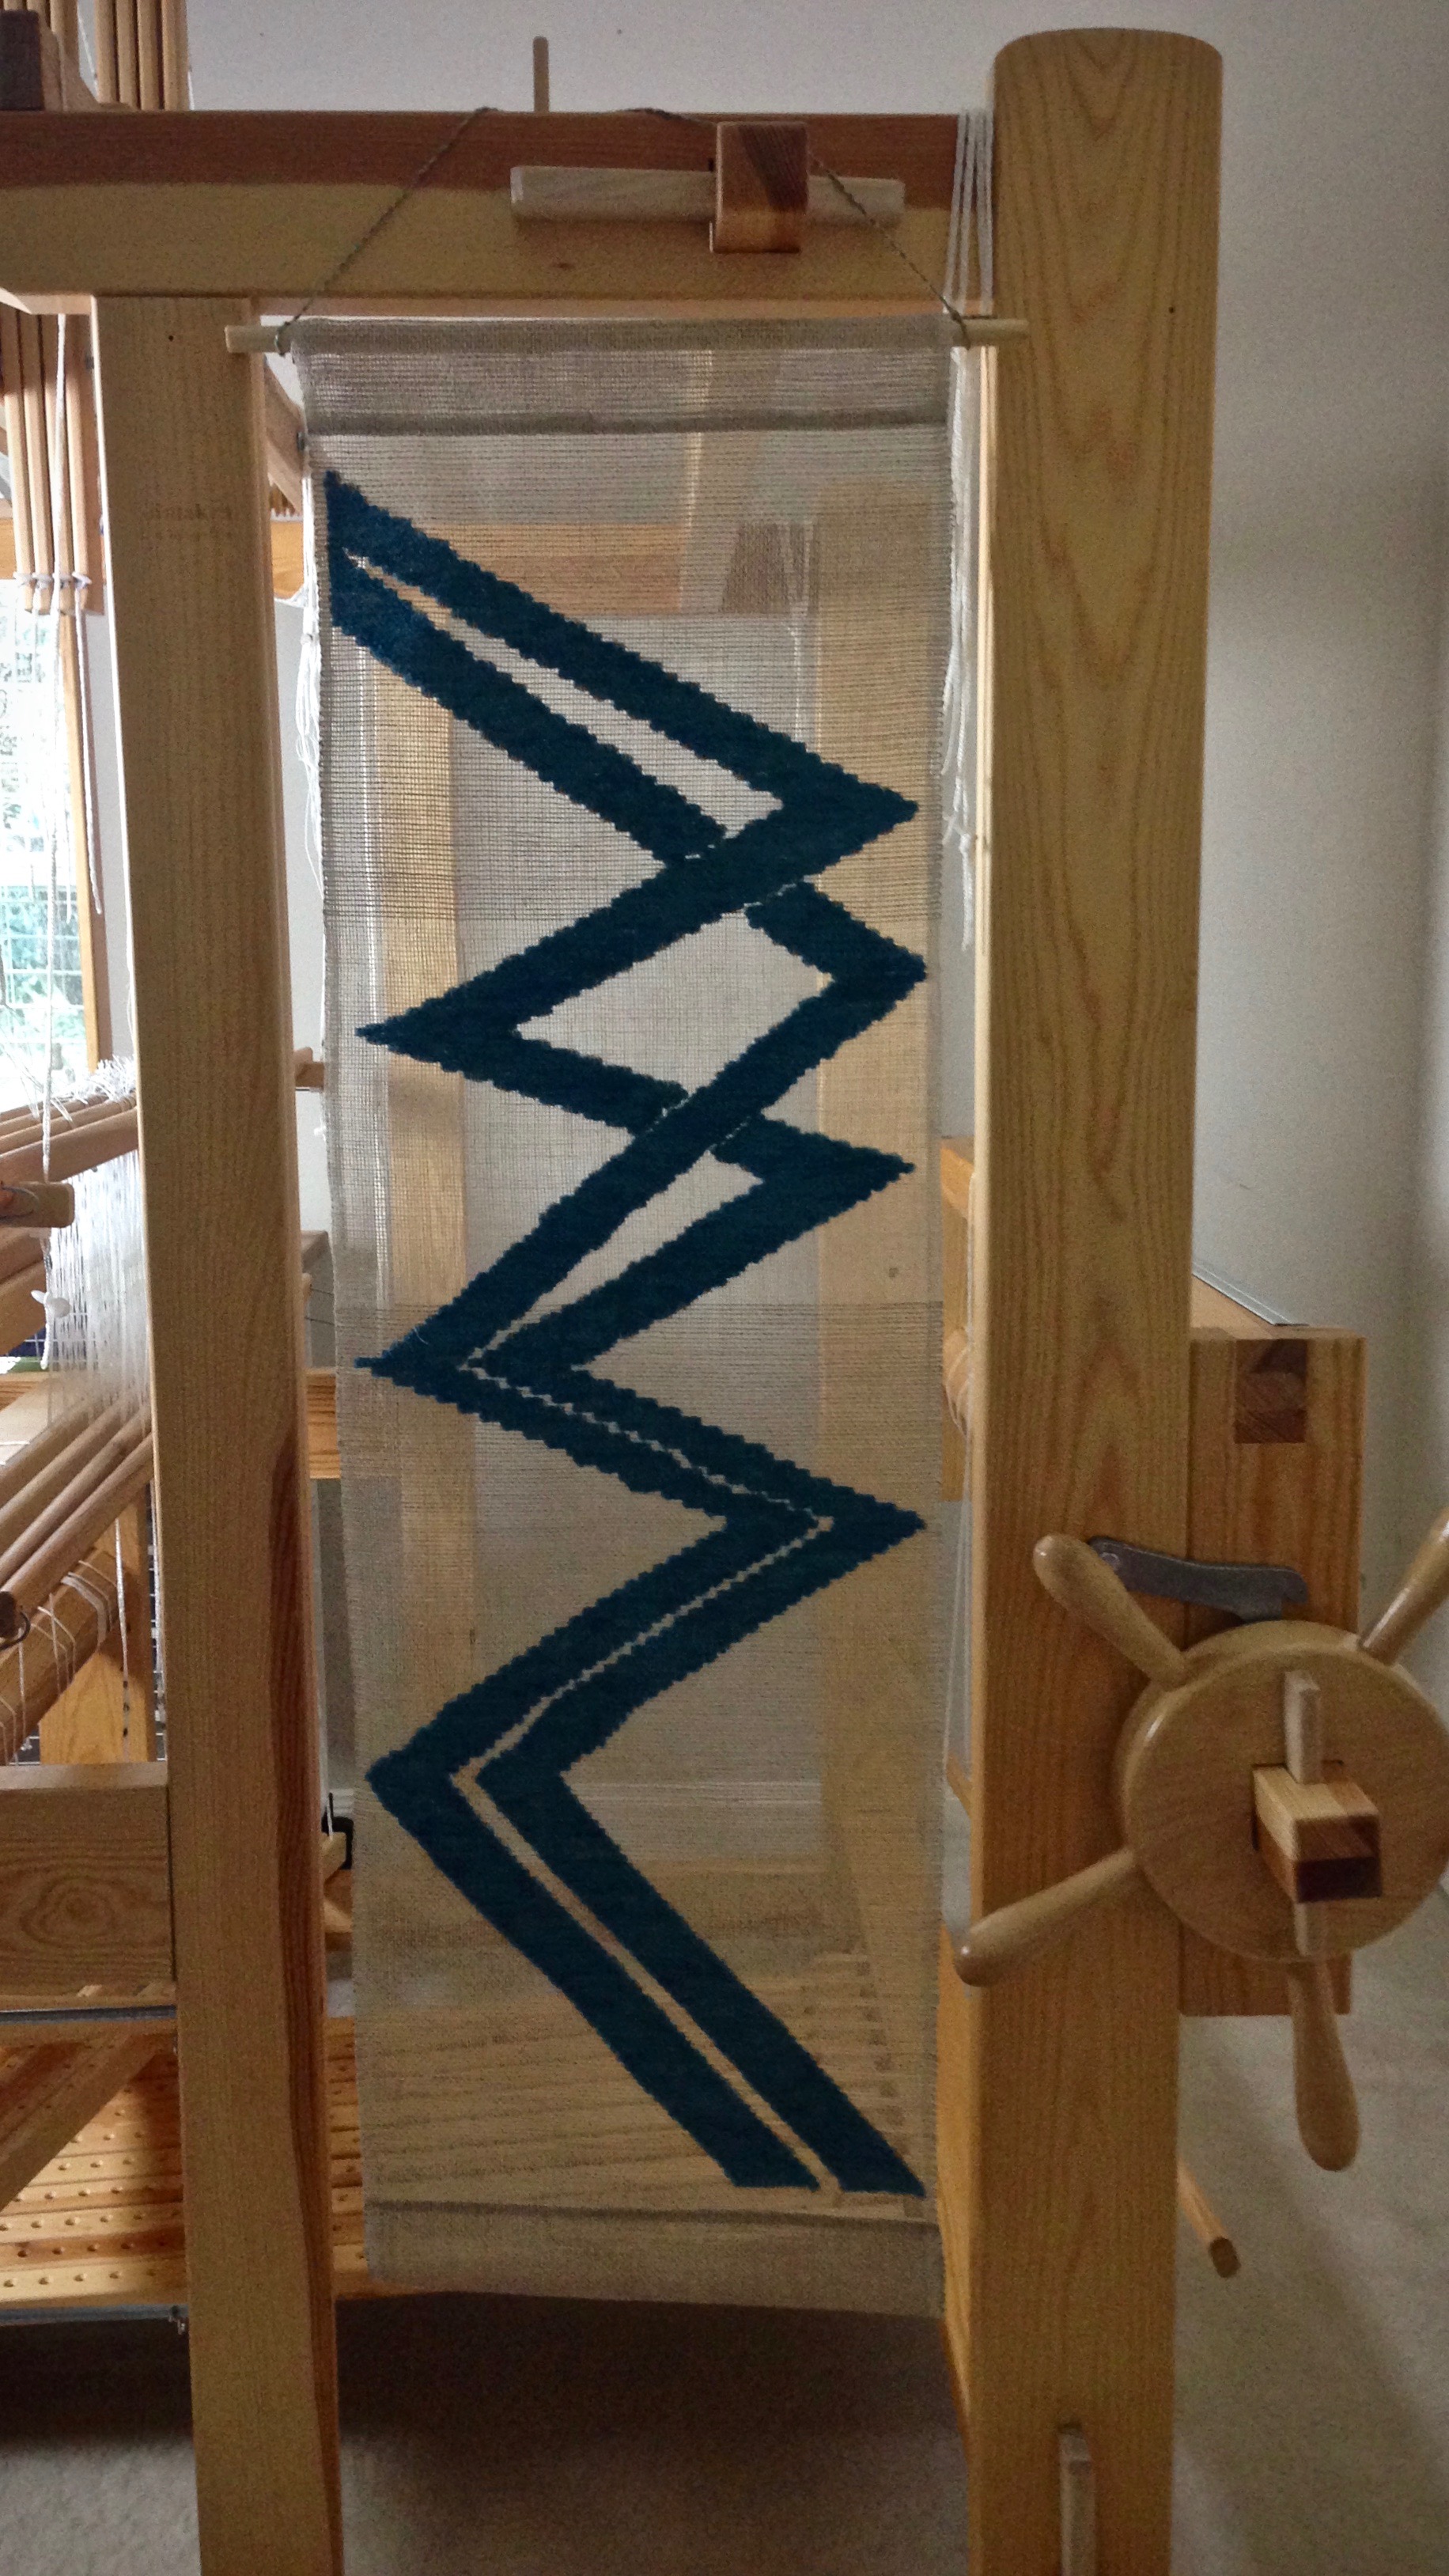
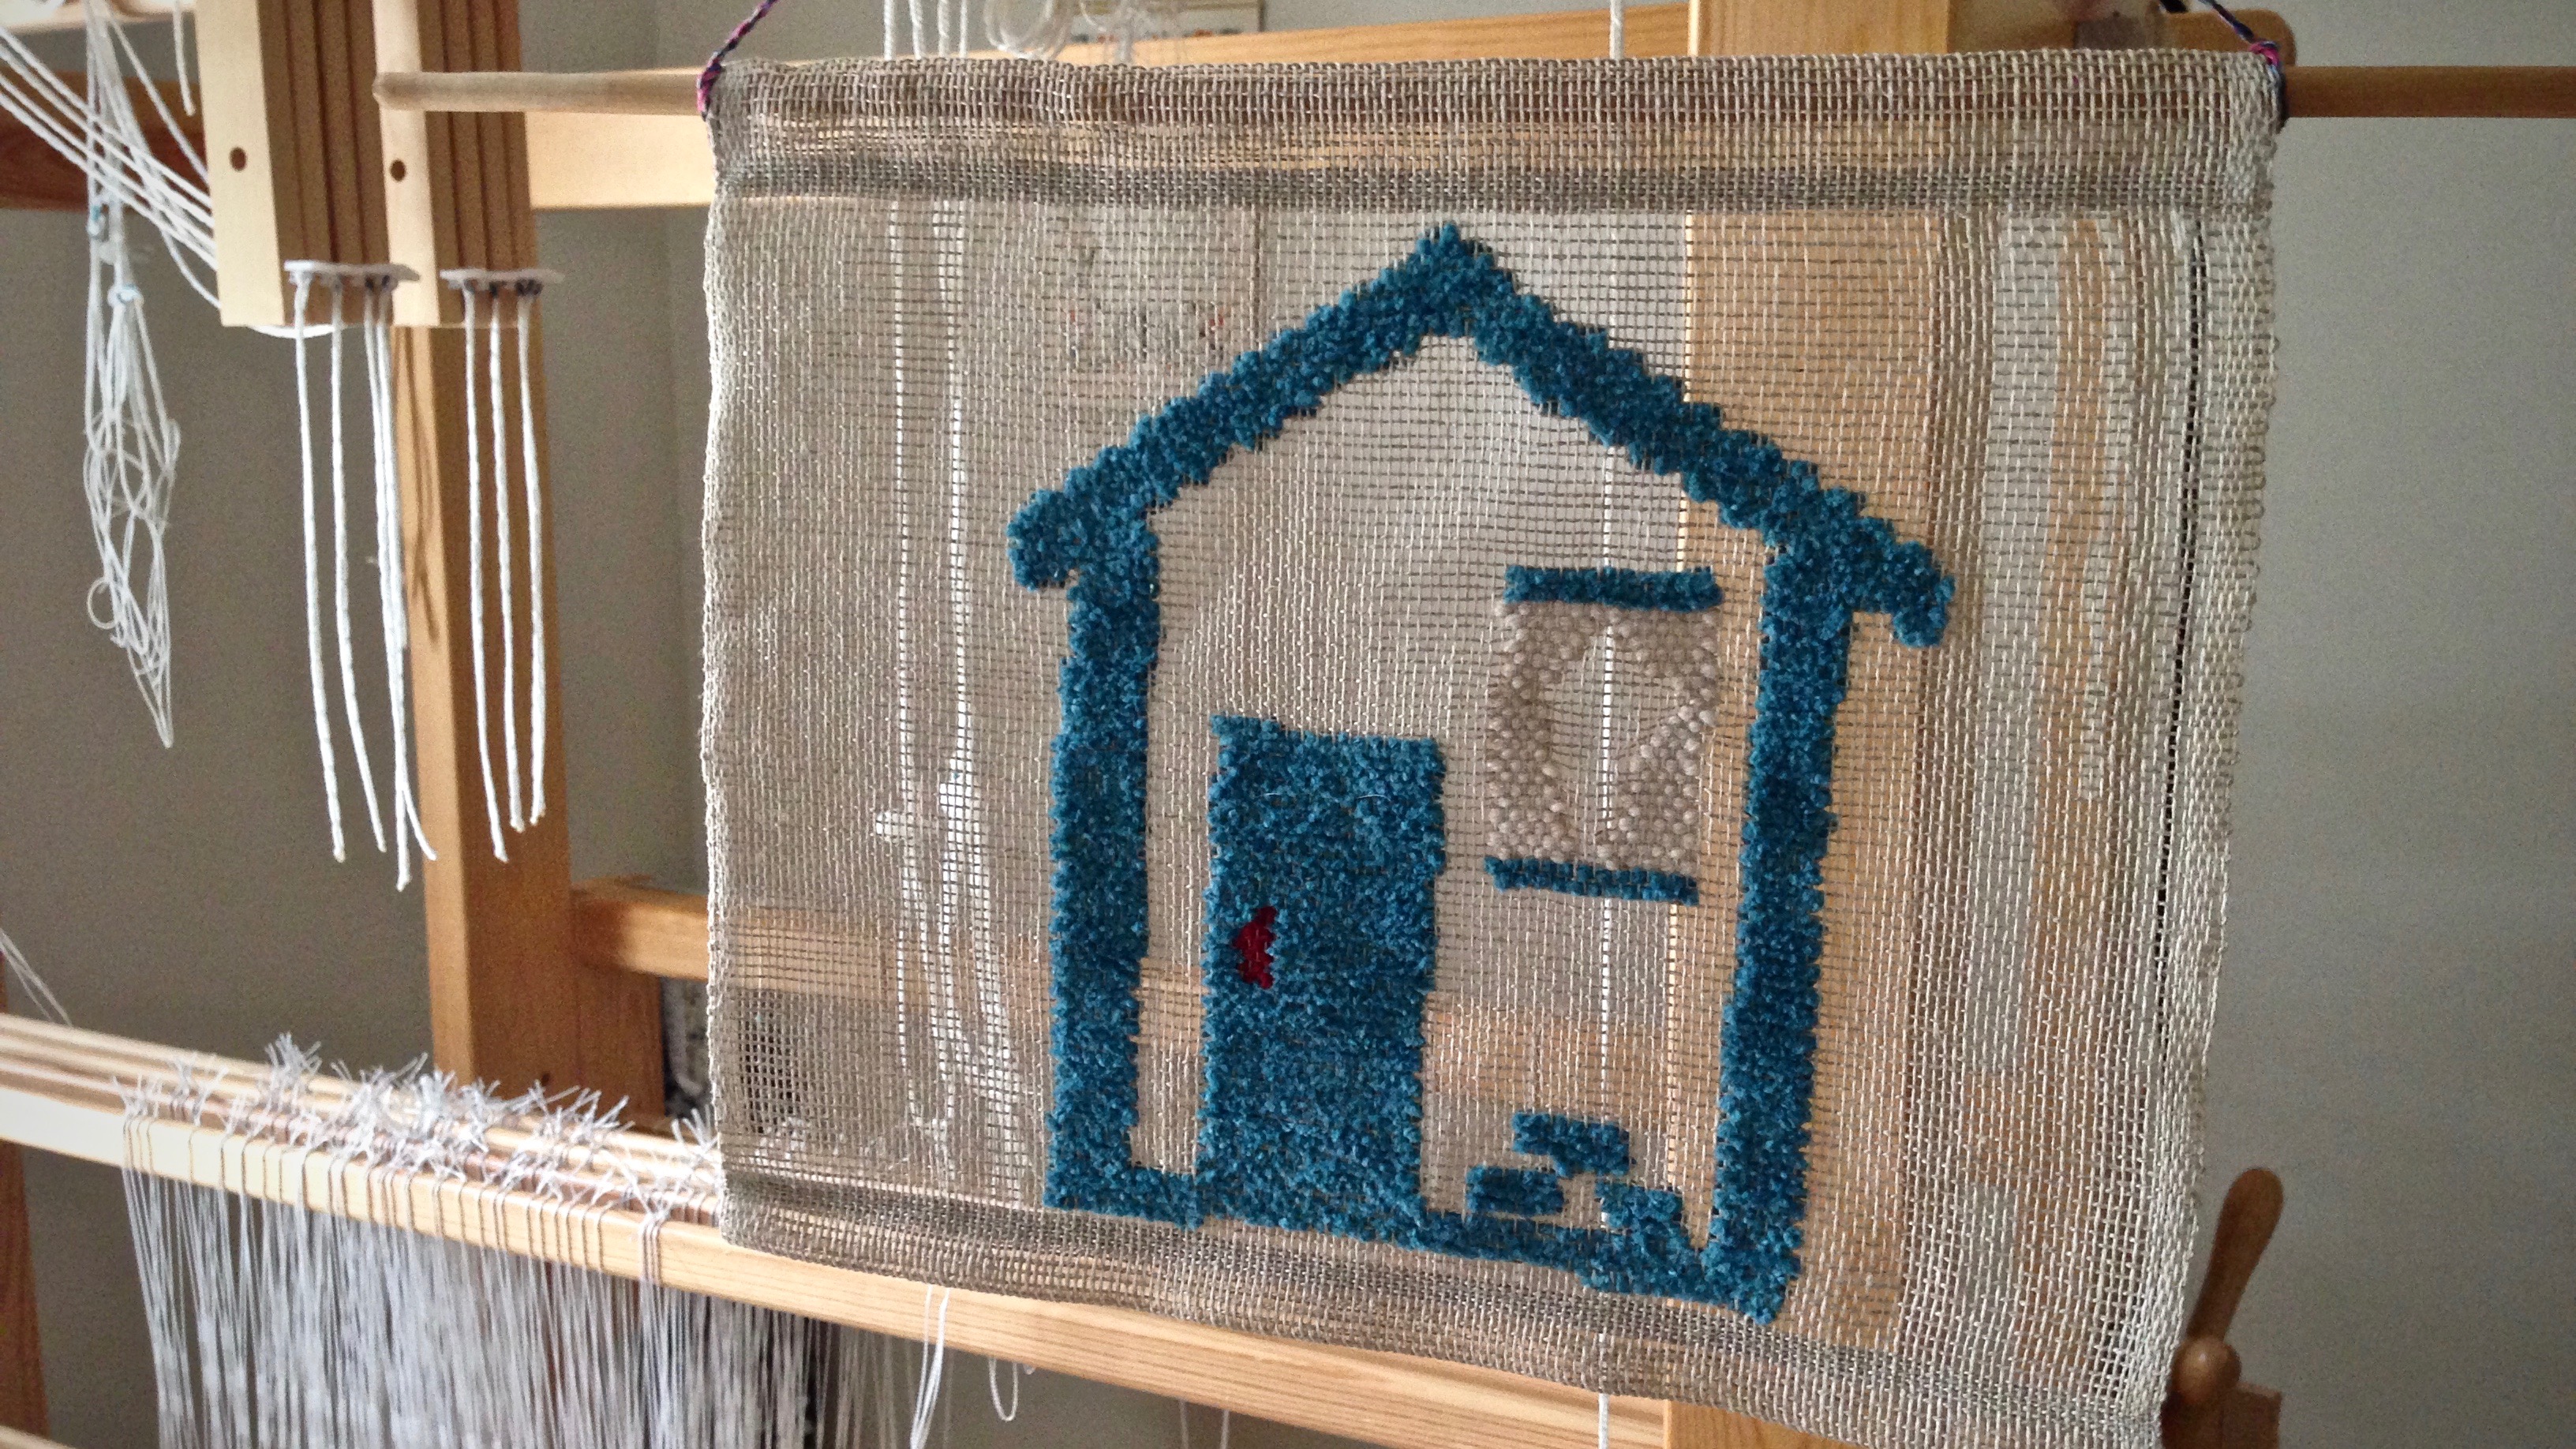
6. Weave to your heart’s content.

Why the leveling string is so helpful!

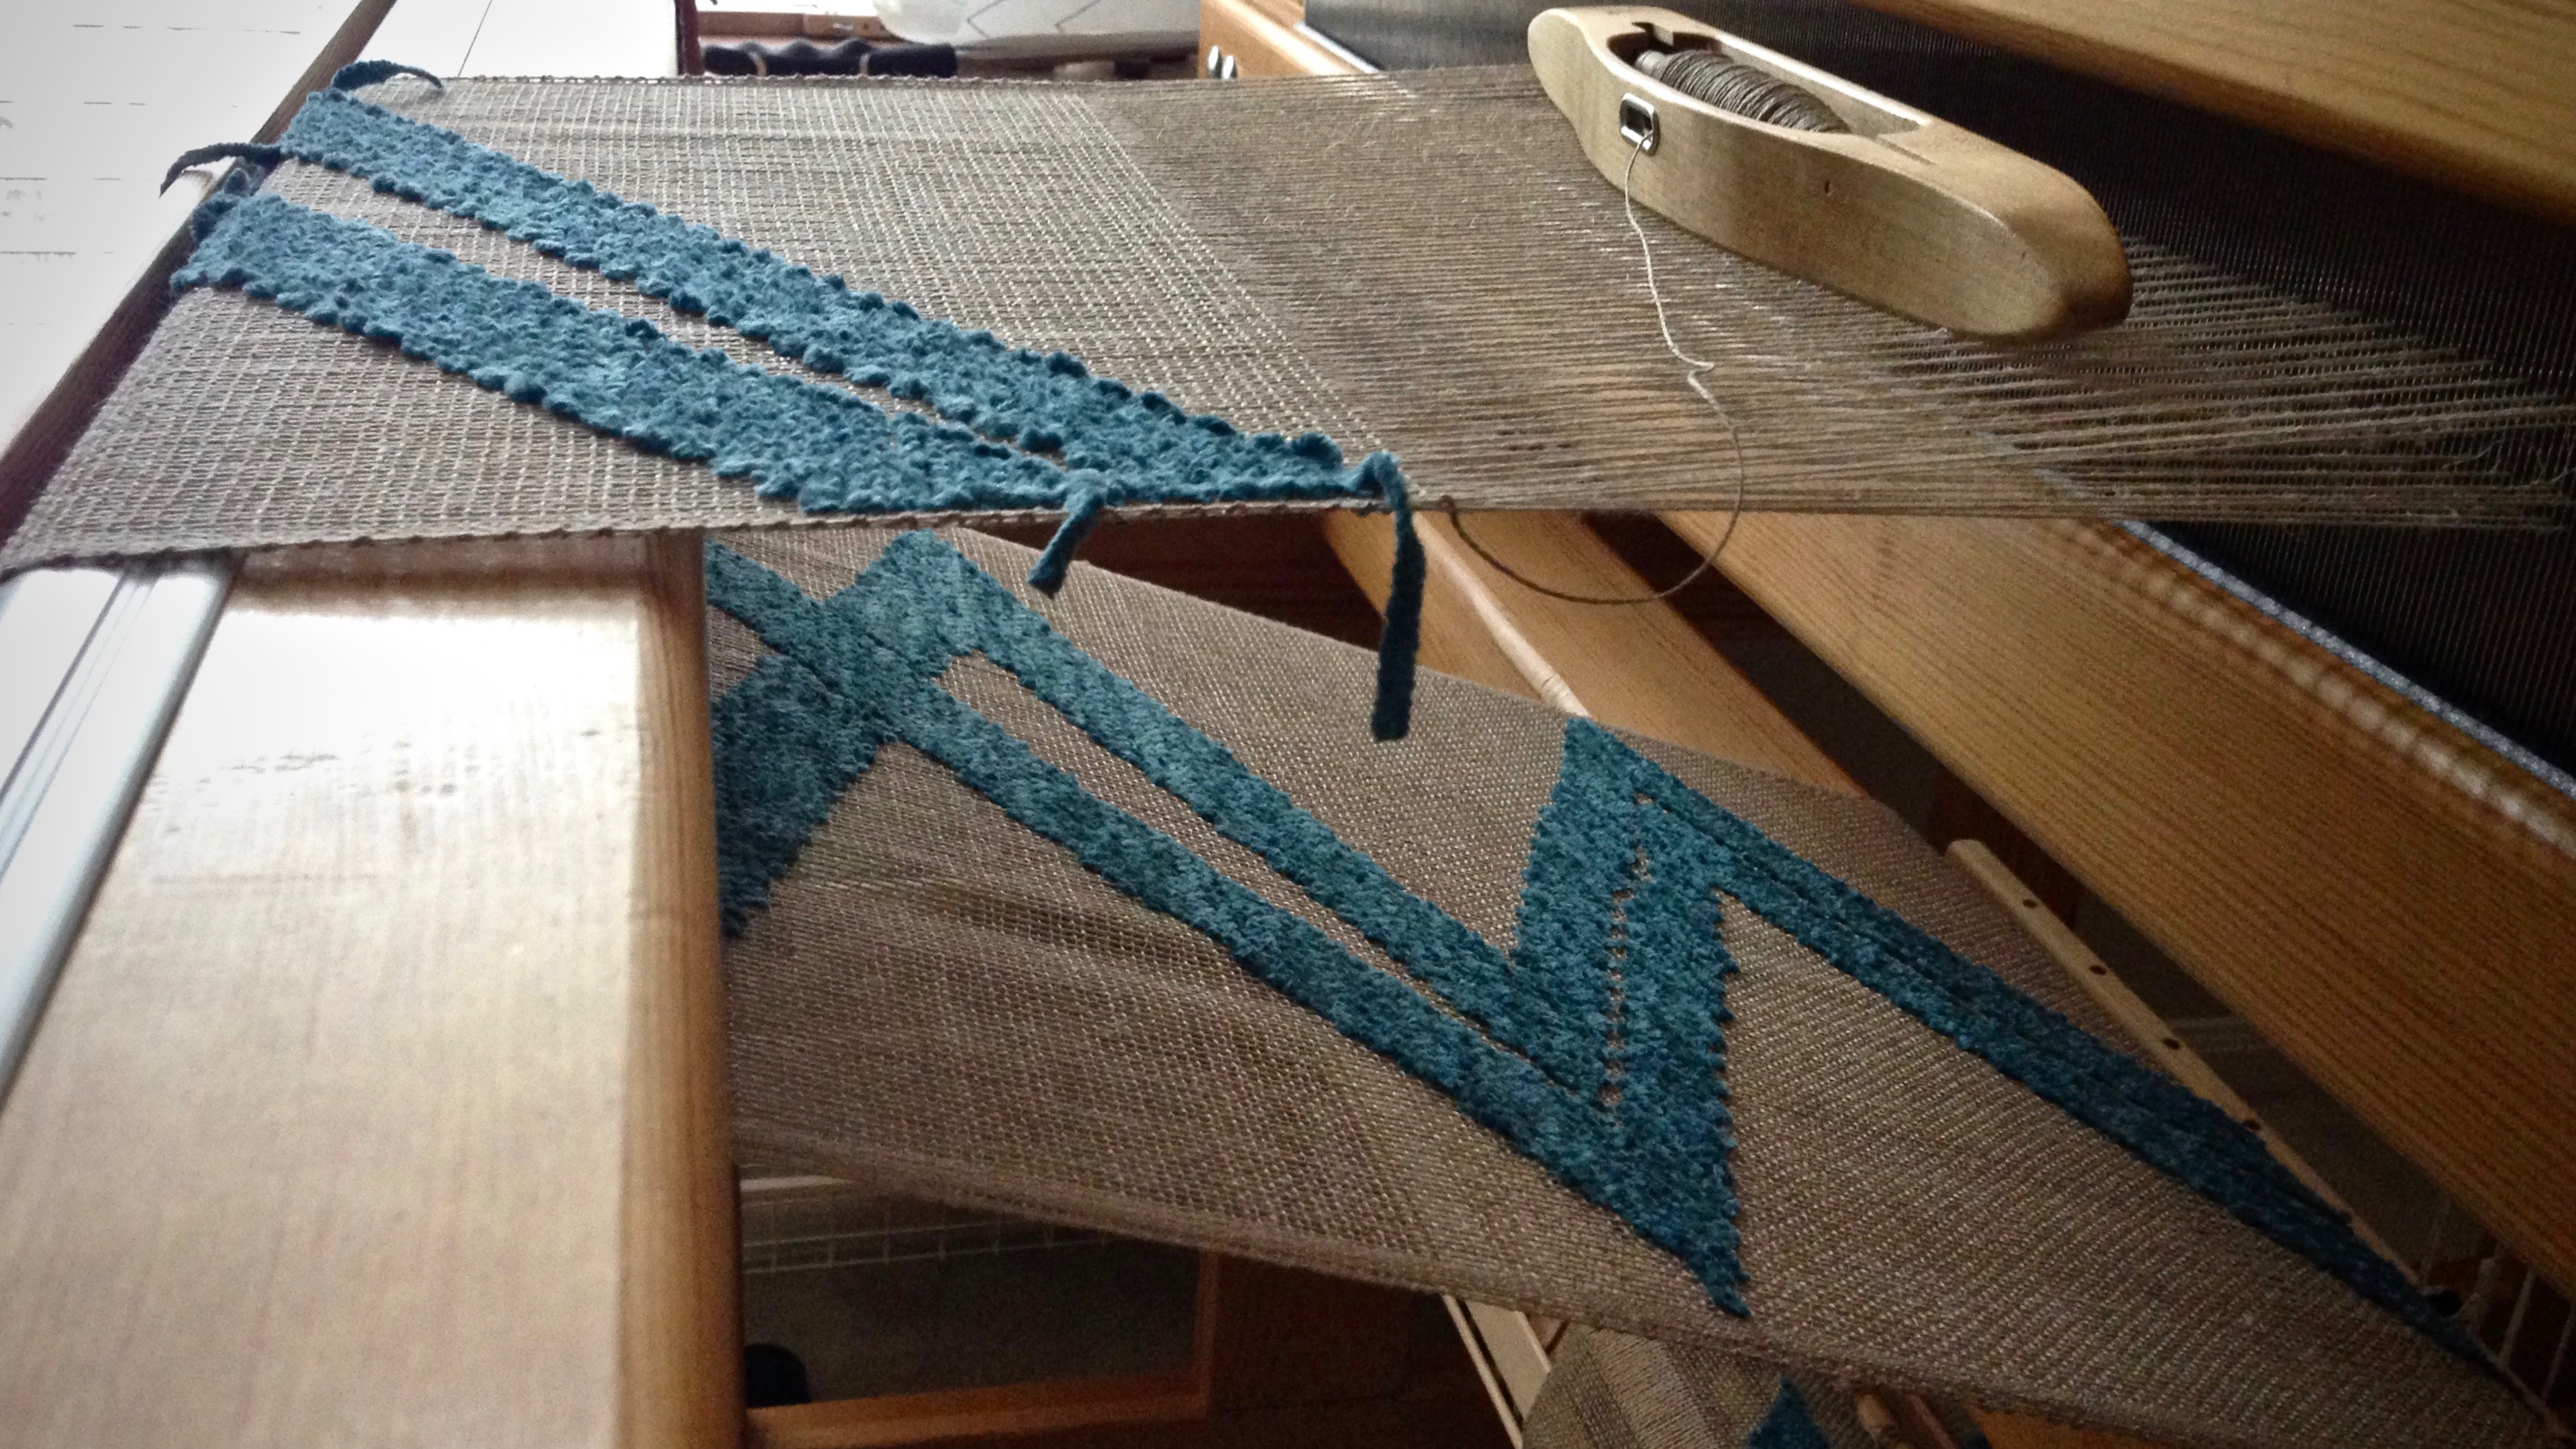
When you get to the end of the warp, and are ready for cutting off, simply tug the loose end of the string at one end of the bar to release the slip knot, and pull the leveling string out of the warp.

May you weave as soon as possible.

Happy Valentine’s Day,
Karen

My Best Weaving Stunt to Date!

Do you ever go out on a limb? I’ve been known to play it safe. But not today! My excitement for weaving this kuvikas structure was severely dampened when I saw that the pattern in the cloth was not the pattern I intended. What happened? I had switched the threading for shafts 1 and 2! Consistently, too–all the way across the warp.

Start of kuvikas (summer and winter), and discovery of threading error.
While testing weft color options, I realize that this is NOT the pattern for which I thought I had threaded. Even though this pattern does reveal an “I” for “Isenhower,” I had my heart set on a square within a square.

I could leave the threading as is. No one would know. Oh, the arguments I had with myself at this point. “Take it out, and re-thread.” “You’d be crazy to take it out and re-thread.” The crazy self won. (I did find myself asking, “What solution would Becky Ashenden, the weaving solution genius, come up with?”) Here is the stupendous thing: I was able to correct the pattern by doing shaft-bar gymnastics. And no re-threading! What?! (I documented the process and will bring it to you in my Quiet Friday post at the end of the month.)

Kuvikas (summer and winter), cotton tabby and tencel pattern weft.
The sight of these little squares within squares makes me extraordinarily happy! 8/2 cotton tabby weft. Doubled 8/2 Tencel pattern weft. Kuvikas, as this weaver intended it to be.

There are times when we are called to go out on a limb. It’s the right thing to do. But the prospect is overwhelming. We ask, “Who? Me?” And “How, Lord?” Trust the Lord, one step at a time. He will be with you. Marvelous things will happen, catching even you by surprise.

May you know when to go out on a limb.

Happy,
Karen

Kuvikas and Taqueté

Kuvikas and taqueté. There are always new things to try. I’m back to eight shafts. This Glimåkra loom is highly adaptable. It is no problem to set up the loom for a new project. You may have guessed that I like to switch it up. Four shafts or eight shafts, two treadles or ten. And, change the tie-up, too. I don’t mind. With this project, I am going to change the treadle tie-up again at the midway point, switching from kuvikas to taqueté.

Threading eight shafts on my Glimakra Standard loom.
Threading eight shafts. Four pairs of shaft bars have been added to switch from a four-shaft project to an eight-shaft project. Four additional upper lamms and lower lamms have also been added to the loom.

If you know and practice the basics, it’s not frightening to try new weave structures. Every new experience builds on what I’ve learned before. I can trust the system of weaving that I’ve been taught, and that I practice with every project. It makes sense.

Aquamarine cotton. Threading my Glimakra Standard loom.
After the warp is beamed, the warp ends are tied with an overhand knot into groups, according to the threading pattern. In this case, 48 ends are in each group. Counting the ends into groups helps eliminate, or at least reduce, threading errors.
Threading eight shafts for kuvikas and taqueté.
Complex, but not complicated. Warp ends are inserted into specific heddles to set up the loom for a particular type of cloth. Very systematic.

Don’t be afraid. The Lord not only teaches us his ways–his system, but offers us his strength while we learn. I can trust him for that. Trust replaces fear. I don’t have to find my own way, or guess. The system works. It makes sense. I learn to weave, and live, one step at a time, with freedom to enjoy the process.

May you rise above your fears.

All the best,
Karen

Quiet Friday: Cartoon House Cartoon

The fascinating thing about weaving a transparency is that it feels like color-by-number with yarn. There are similarities to tapestry weaving, for sure. But this seems ten times faster. I found it to be engaging and fun! I echo what my transparency-weaving friend says when it’s time to stop and do something else, “Just one more row…”

Linen warp chain awaits beaming.
Warp chain of 16/2 golden bleached linen, before beaming the warp.
Threading heddles in the Glimakra Standard. Coffee and notes at hand.
Threading heddles in my little playhouse, with project notes by my side, and a cup of coffee on the side cart.
Adding the leveling string to a linen warp.
Leveling string is added with extra care so that abrasion of the linen warp is kept to a minimum.
Butterflies are made from the hefty cotton chenille yarn.
Weaving a transparency. Glimakra Standard loom.
Weaving without a cartoon. I am counting warp ends to keep the pattern angle consistent.
Transparency weaving on the loom, with buckram cartoon.
Cartoon has been added. The pattern weft follows the lines drawn on the buckram cartoon, which is pinned in place.
Cartoon removed at the end of the transparency weaving.
Cartoon is removed.
Ending a woven transparency.
Now, for the end of the warp…

New transparency, ready for hanging!

After the main transparency with the zigzags, I had room to play on the remaining warp. I made another cartoon–a “cartoon” house. This gave me a chance to use a few more yarn butterflies, without it being overwhelming. Home. Sweet. Home.

Cartoon for playtime at the end of the warp. Transparency weaving.
“Cartoon” house cartoon. Ready for playtime at the end of the warp.
Weaving a small transparency. Cartoon House.
With several butterflies going at once, the transparency weaving gets even more interesting!
Transparency weaving. Linen warp and weft. Cotton chenille pattern weft.
Now, the actual end of the warp is here.
Cartoon house just off the loom!
Cartoon house just off the loom.
Welcome home! Transparency weaving. Karen Isenhower
Welcome home! Home. Sweet. Home.

May you enjoy the fascination of learning something new.

Happy Weaving,
Karen

Almost Ruined Transparency

The cotton chenille looks as if it is magically suspended in space. But it’s the linen that suspends it. 16/2 unbleached linen weft crosses 16/2 golden bleached linen warp. The two shades blend into one as they are woven for the transparency background.

Weaving a transparency. Linen warp and weft. Cotton chenille pattern weft.
Weaving a transparency from the back. The front side of the pattern can be seen after it comes around the breast beam.

Unfortunately, I had 16/1 golden bleached linen (16/1 is half as thin as 16/2) on my winding table, for the plattväv towels on the other loom. I wound a quill with the 16/1 and wove the transparency with it. It’s the wrong thread size and color. For 8 1/2 inches! Too far to undo without irreparably damaging the linen warp. This is disappointing. How did I let that happen? Take a deep breath… Move forward, and finish out the weaving with the correct 16/2 linen.

Linen weft change is a mistake. Oops!
Two densities of linen. The 16/2 unbleached linen weft adds depth to the 16/2 golden bleached warp. The 16/1 golden bleached weft gives a lighter look to the web.
Just off the loom! Handwoven transparency.
Just off the loom! First transparency attempt, and a great learning experience.

We all fall short. We do the wrong thing. That’s a weight to carry. Jesus breaks the yoke of our burden, and lifts the weight. We have been set free! When we finish the weaving, the chenille pattern will be the main attraction, not the error. By amazing grace, the error is overcome by the light shining through the transparency.

May your burdens be lifted.

With you,
Karen