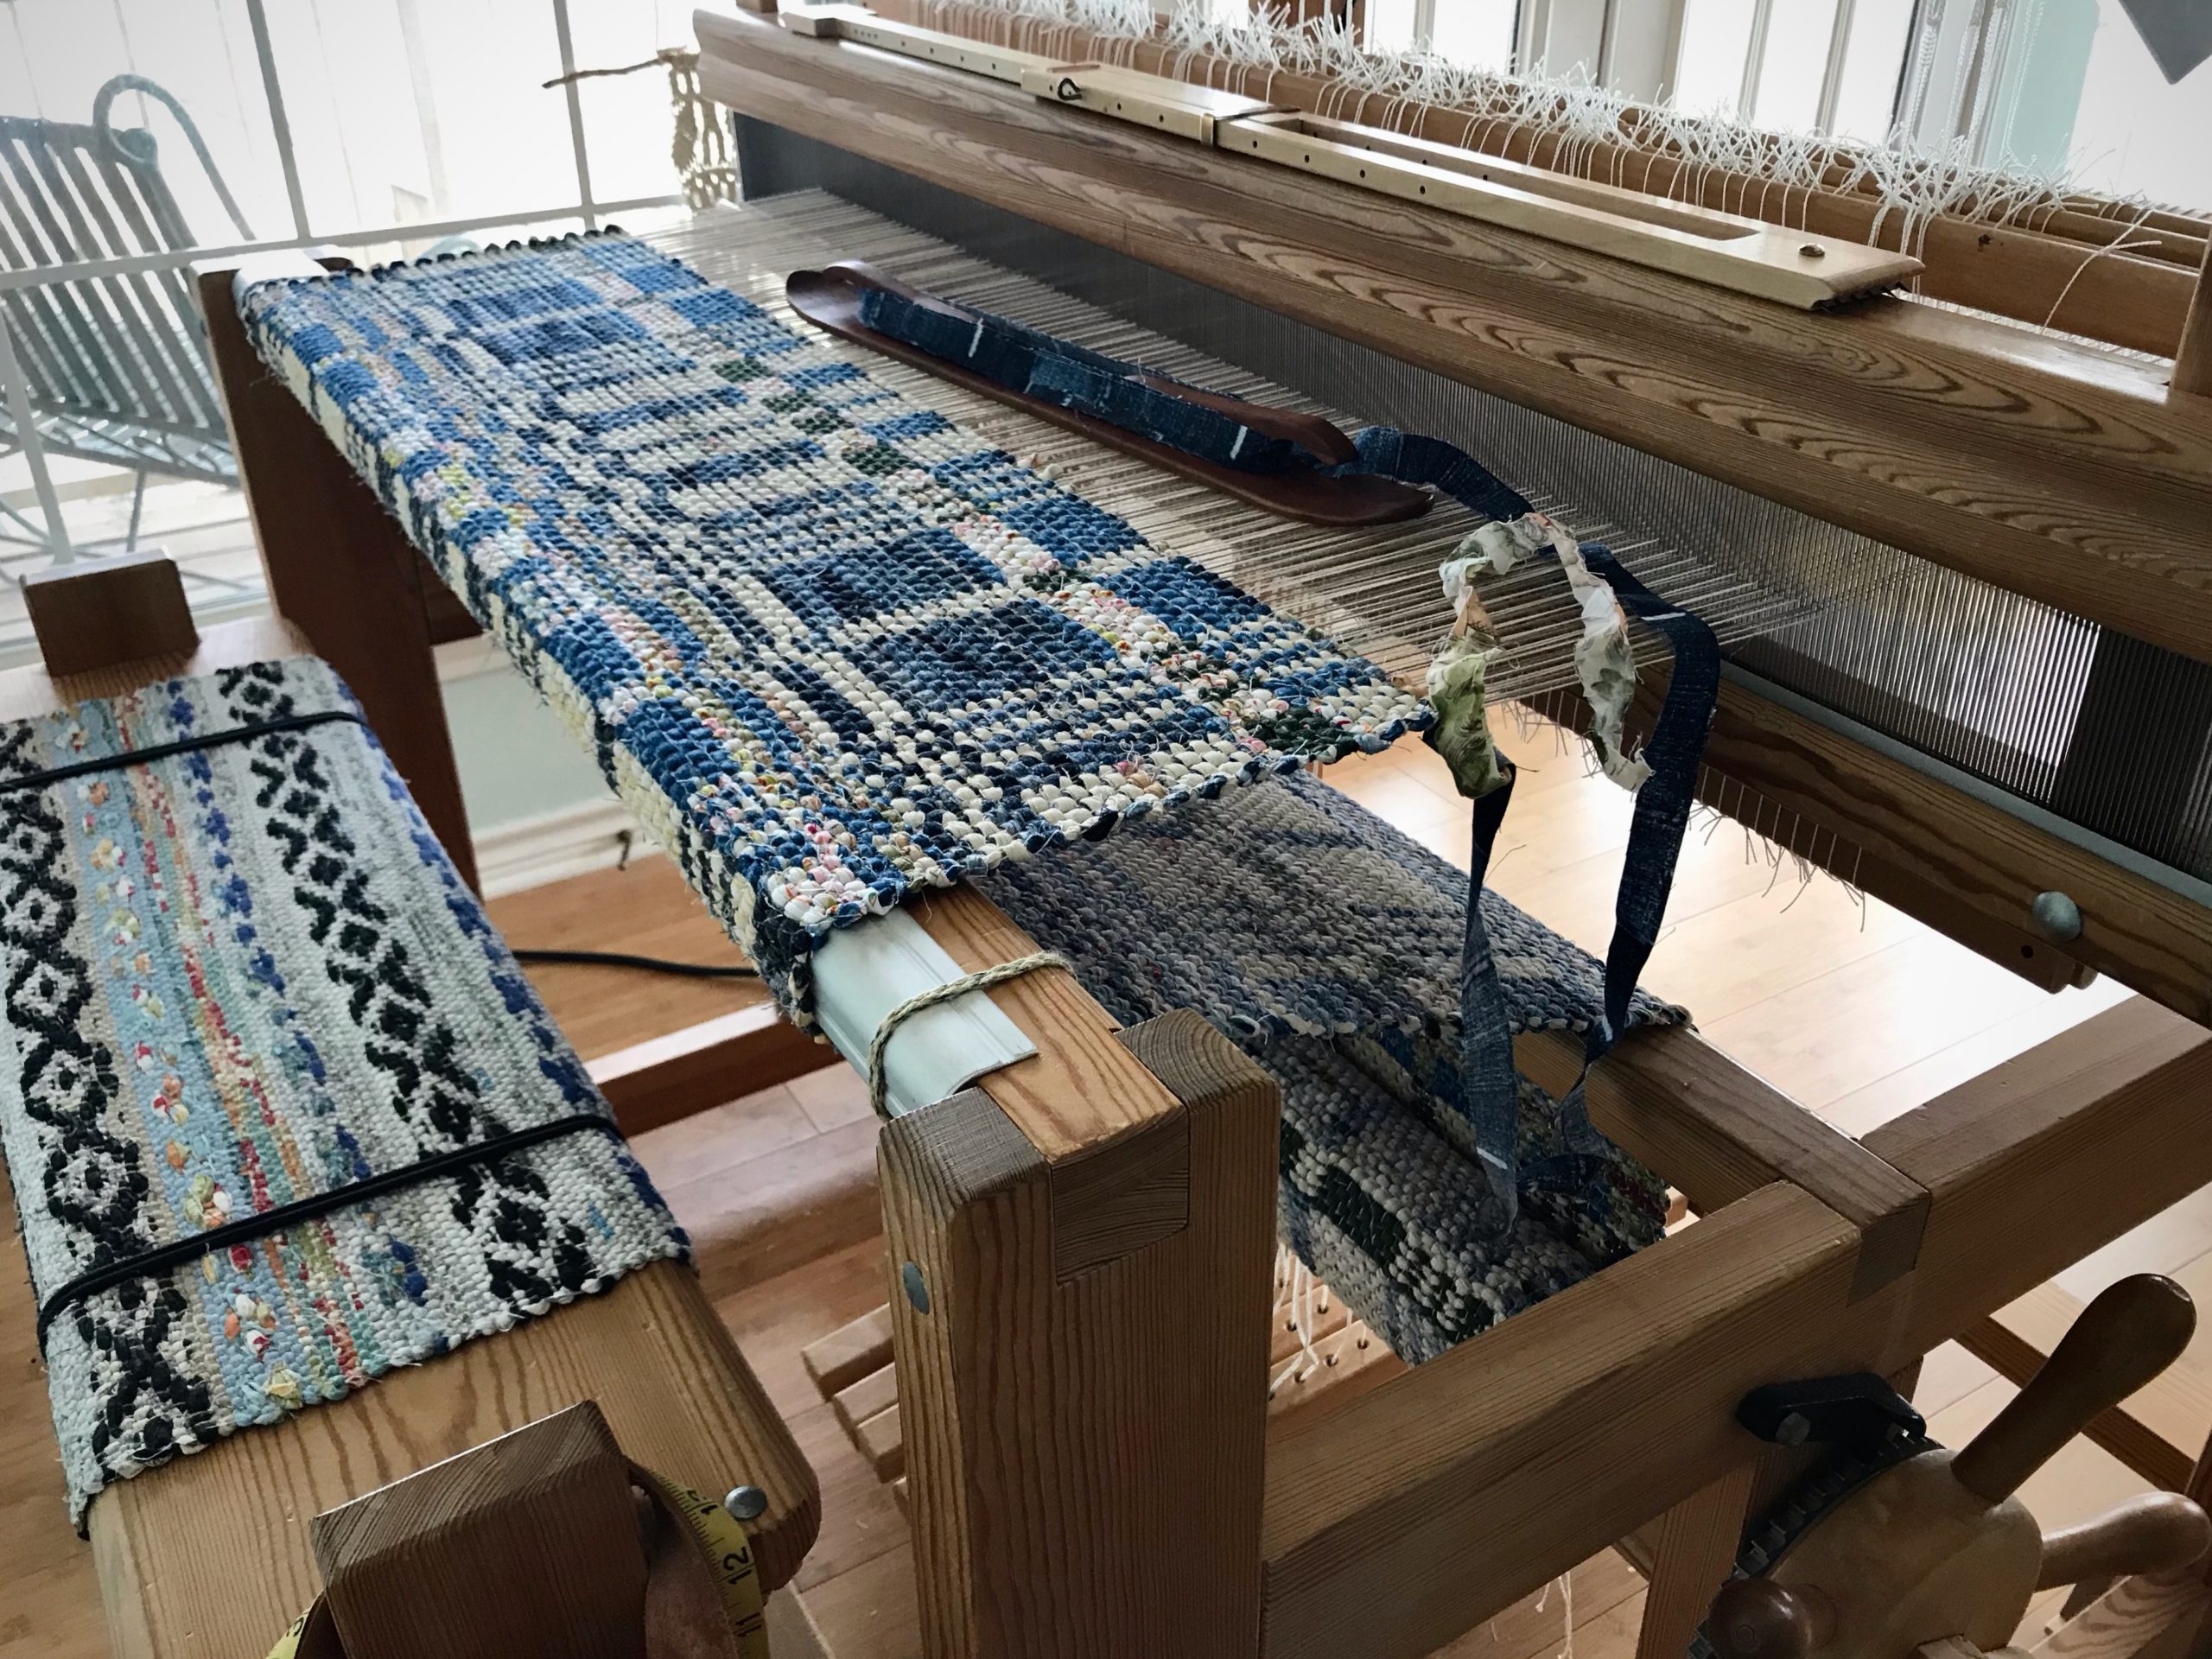
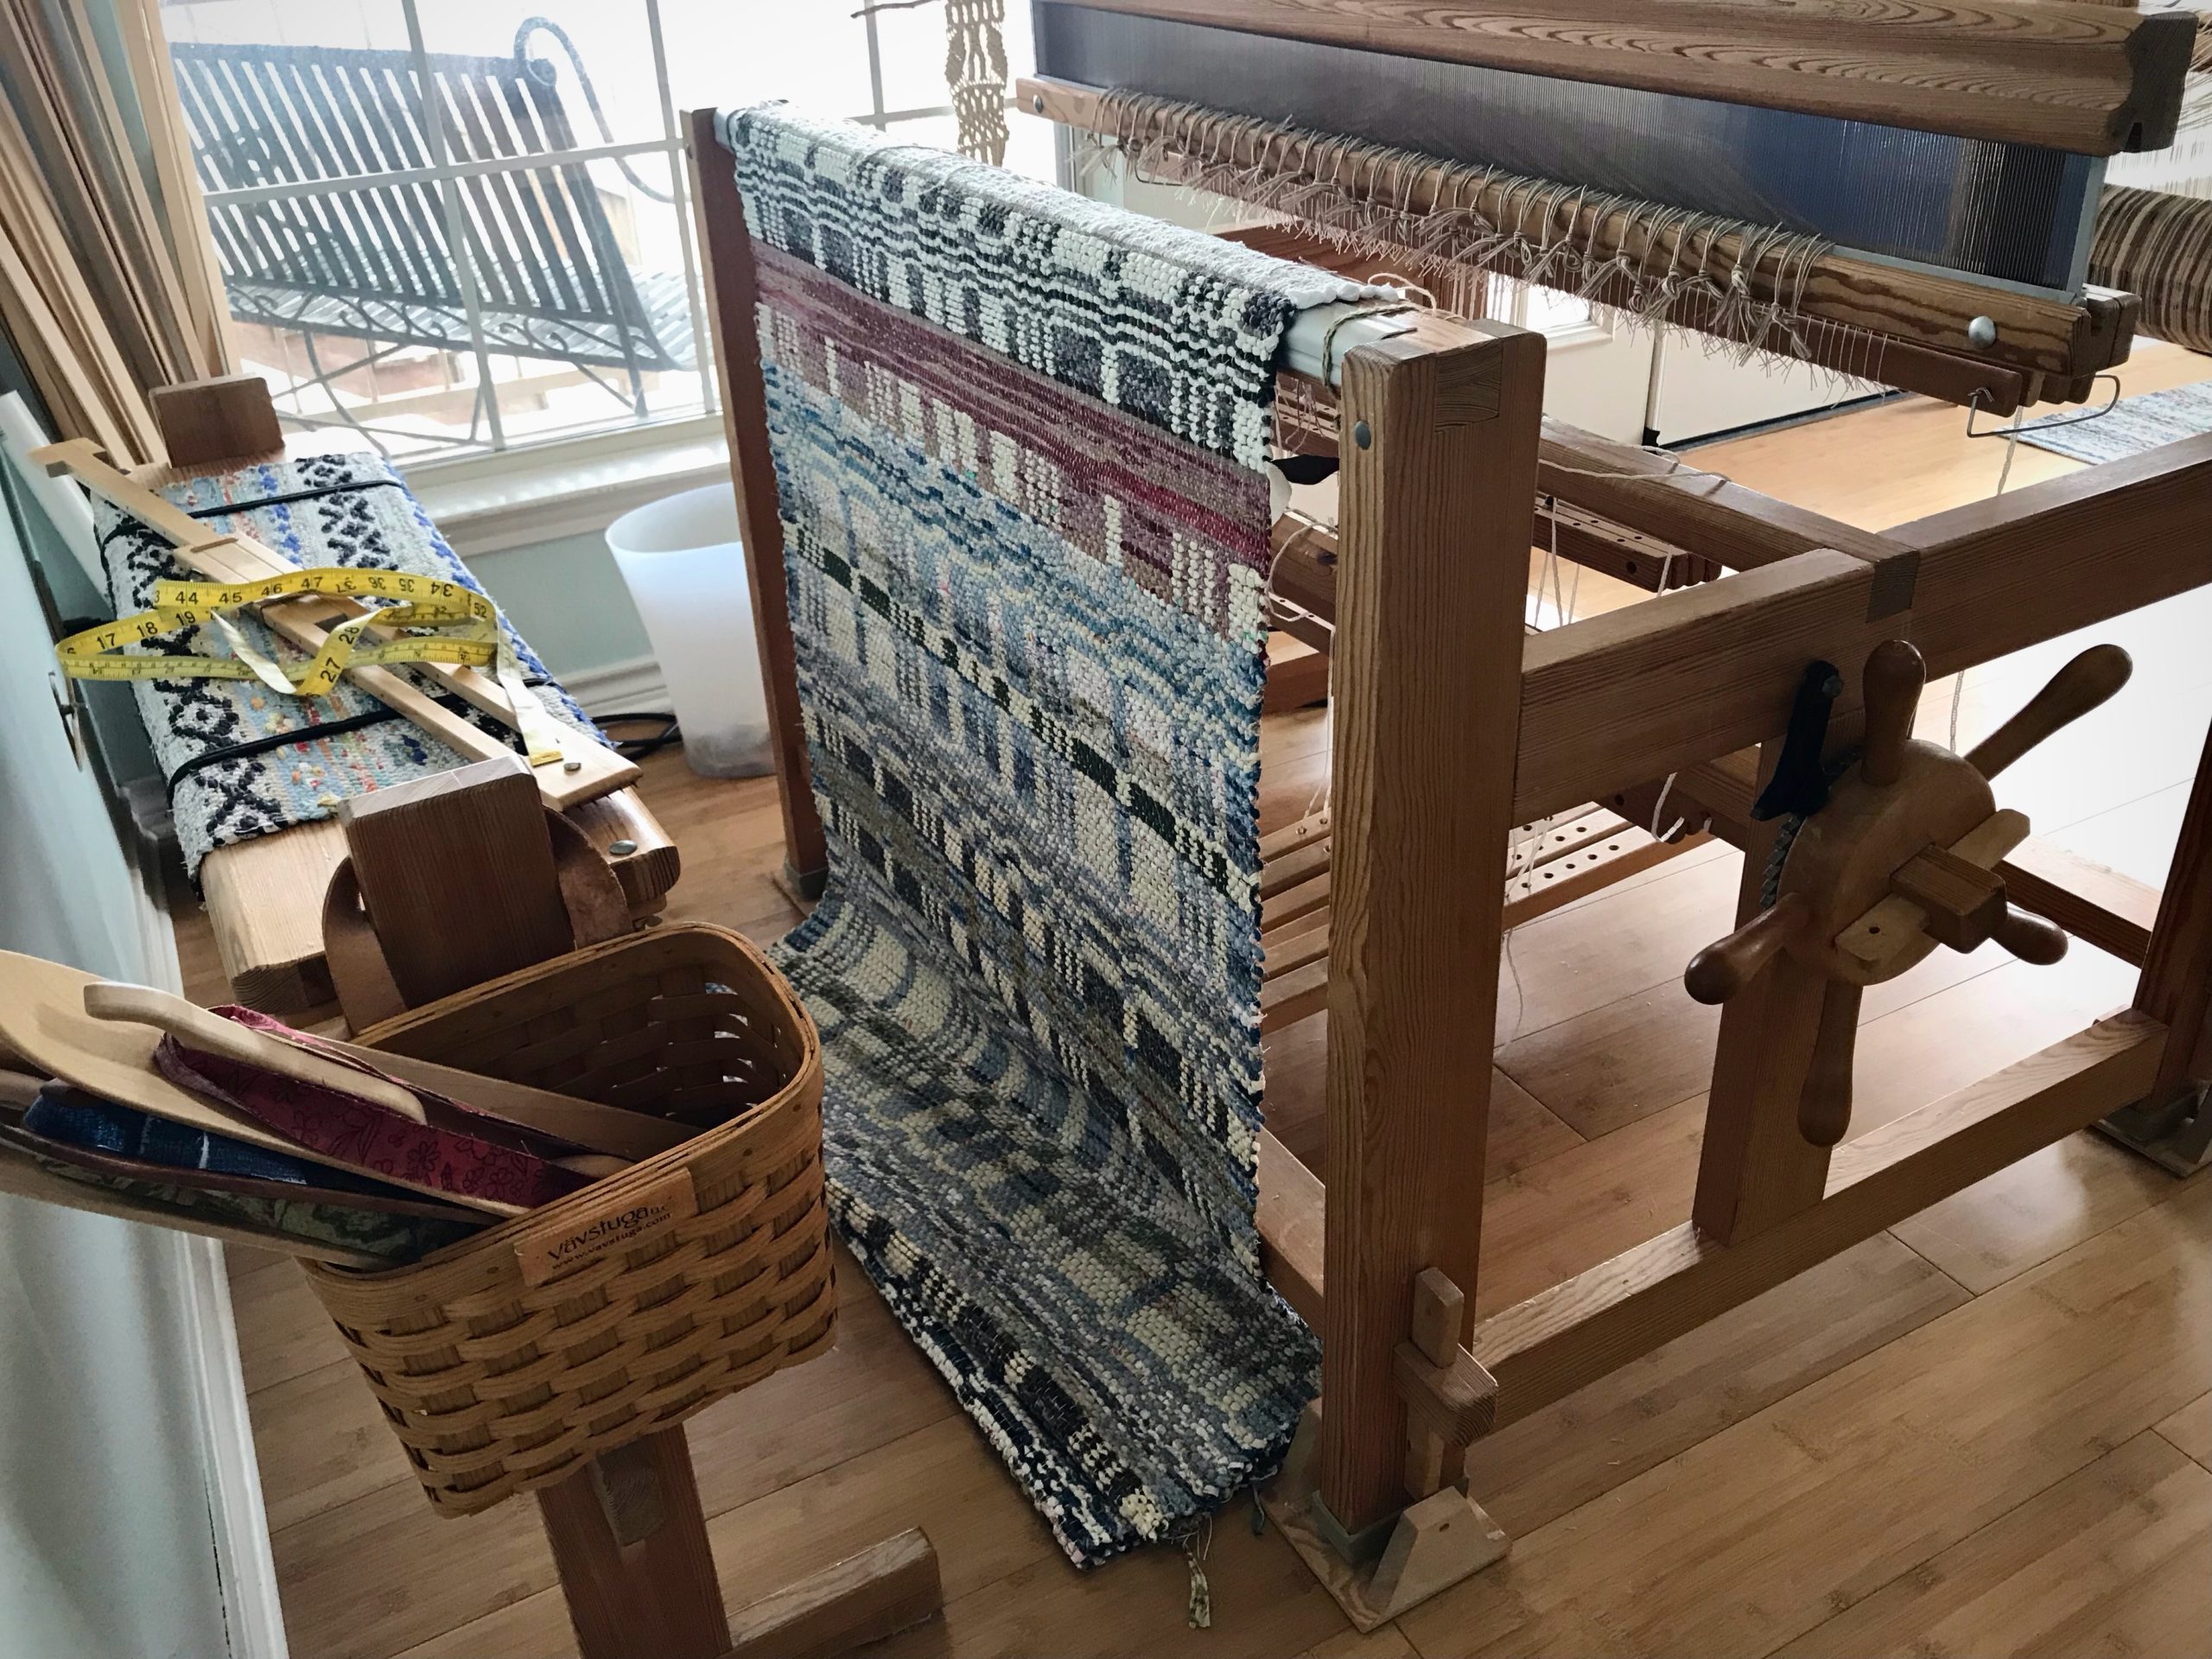
I have good reasons for cutting off this first double-binding rag rug before proceeding with the rest of the warp. This pause and reset ensures happy weaving to the end. Cutting off gives me a fresh start for the next rug.
Reasons for cutting off rag rug before end of warp
Uneven warp tension. I can improve the warp by tying back on.
Large rag rag. I can get a tighter warp tension by removing the rug’s bulk from the cloth beam.
New design. It helps me to see the completed rug before starting the next one, since this is a brand-new design.
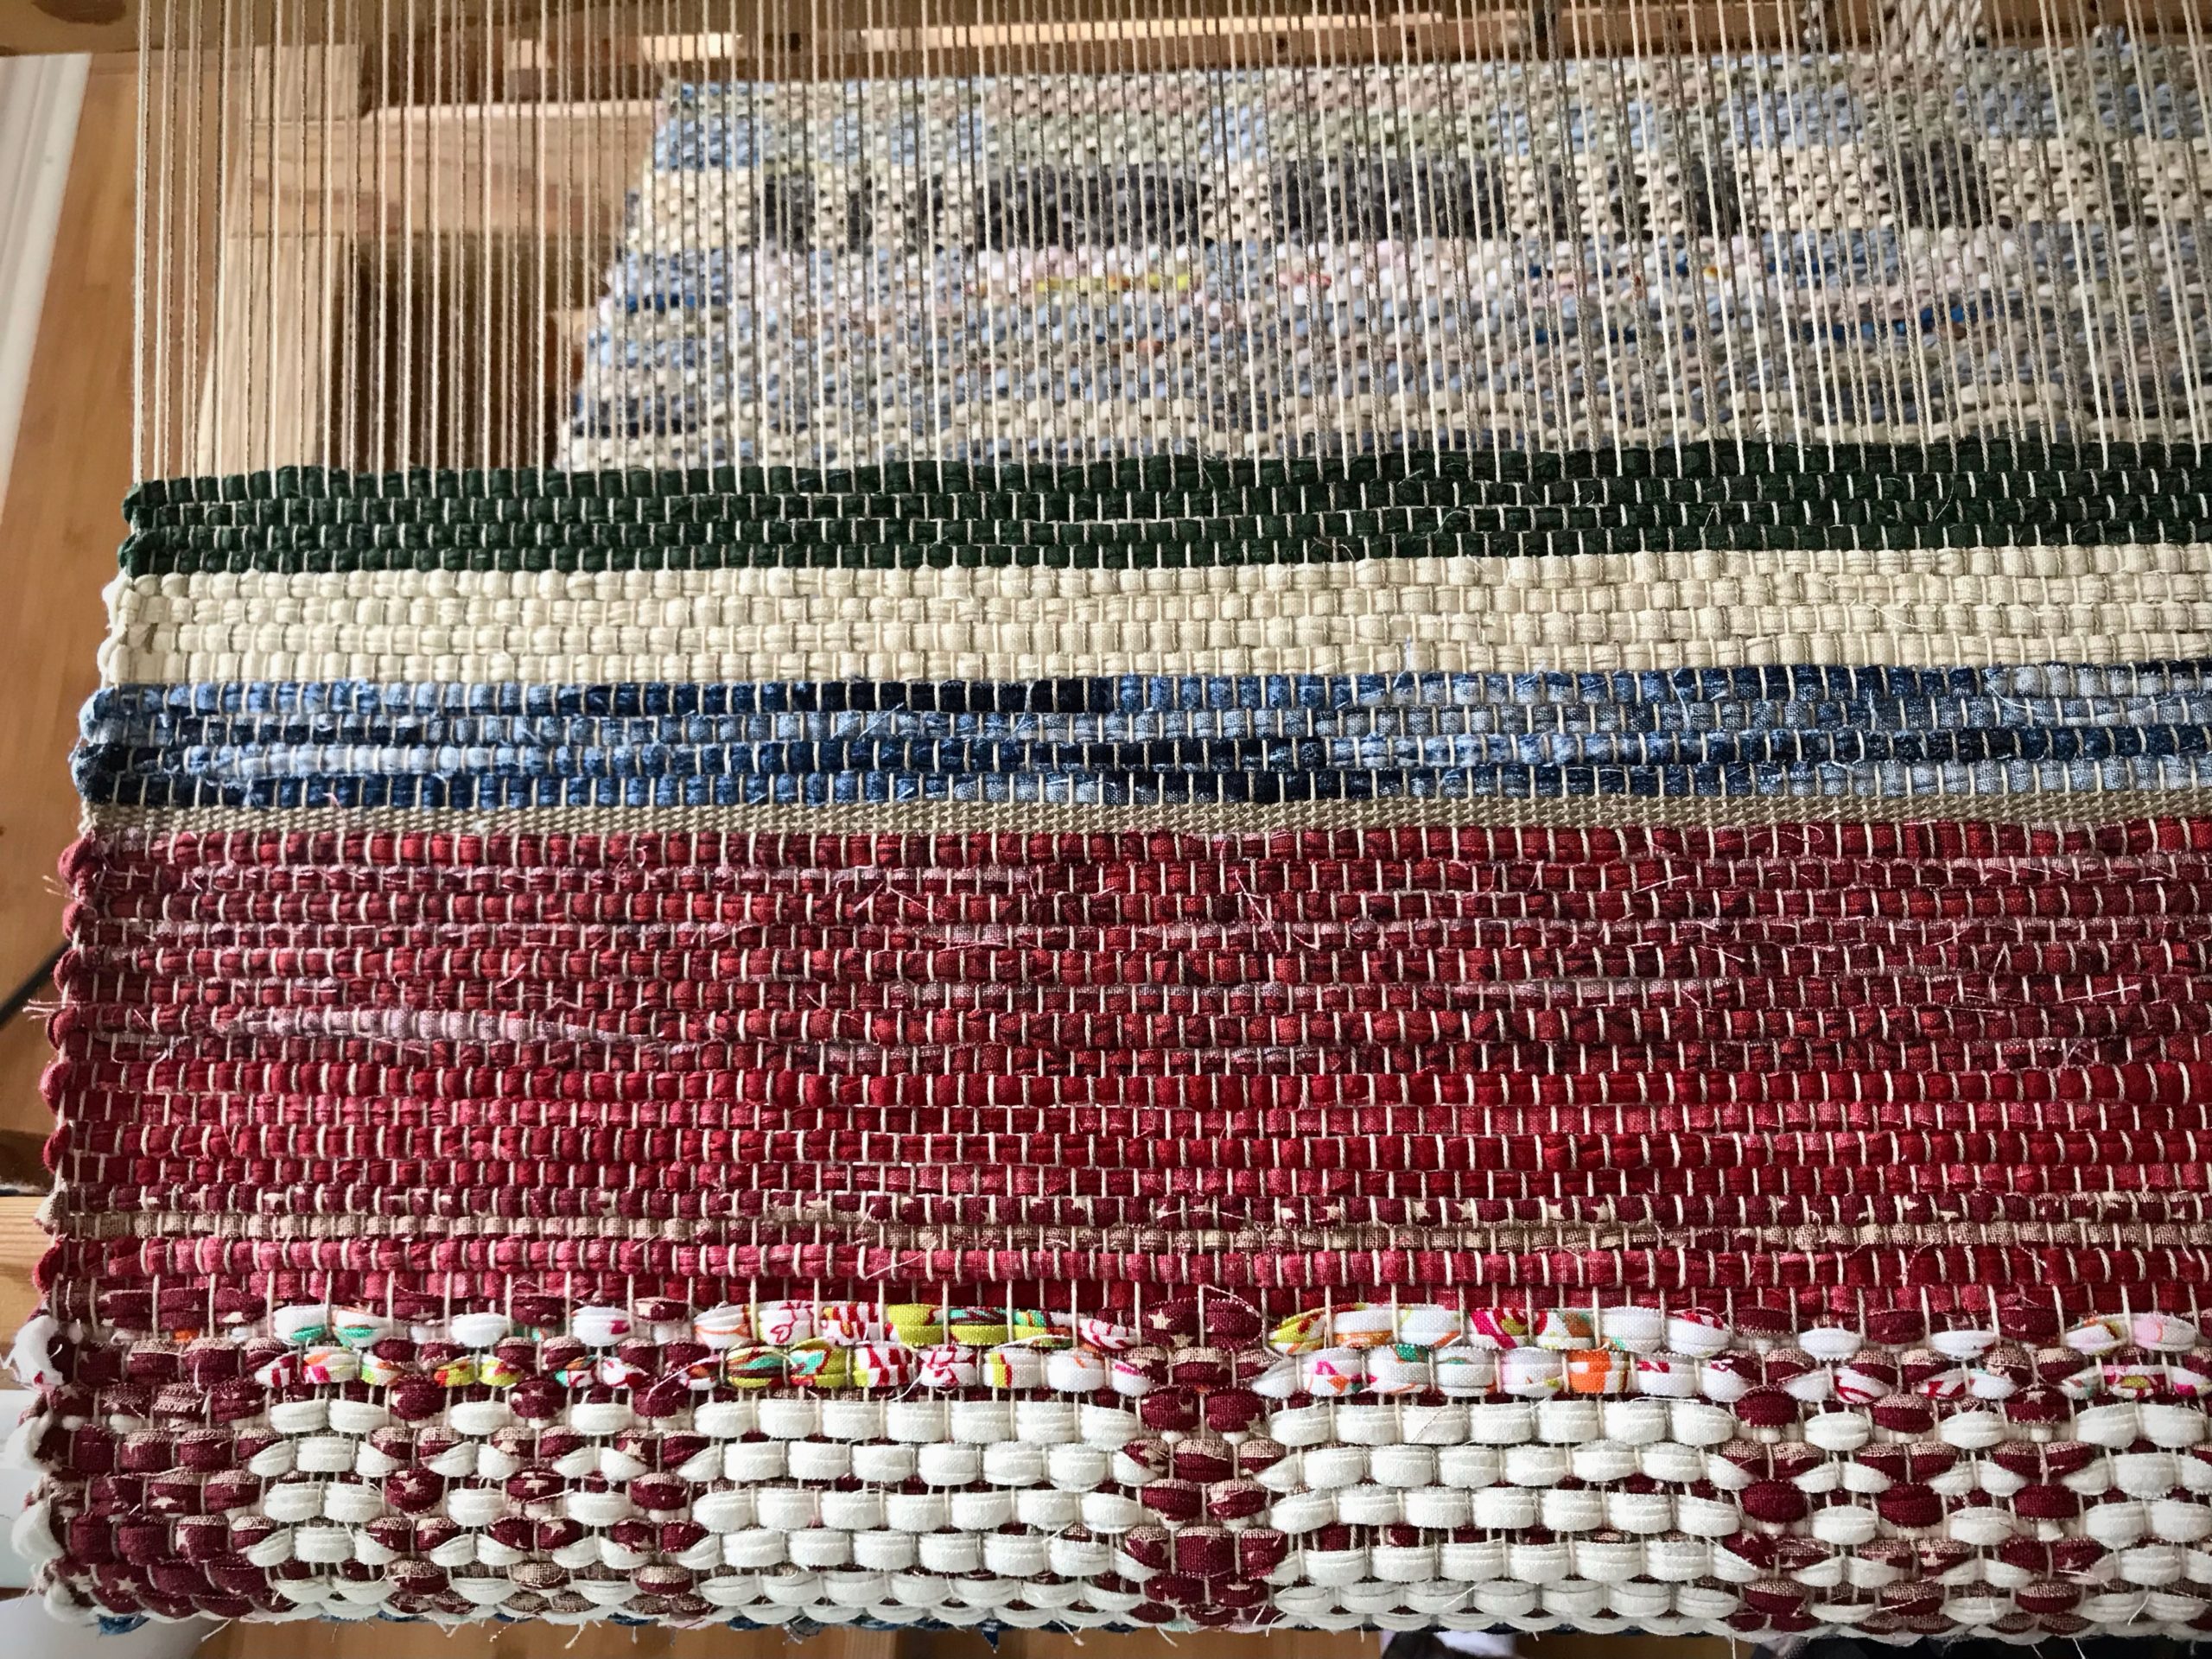
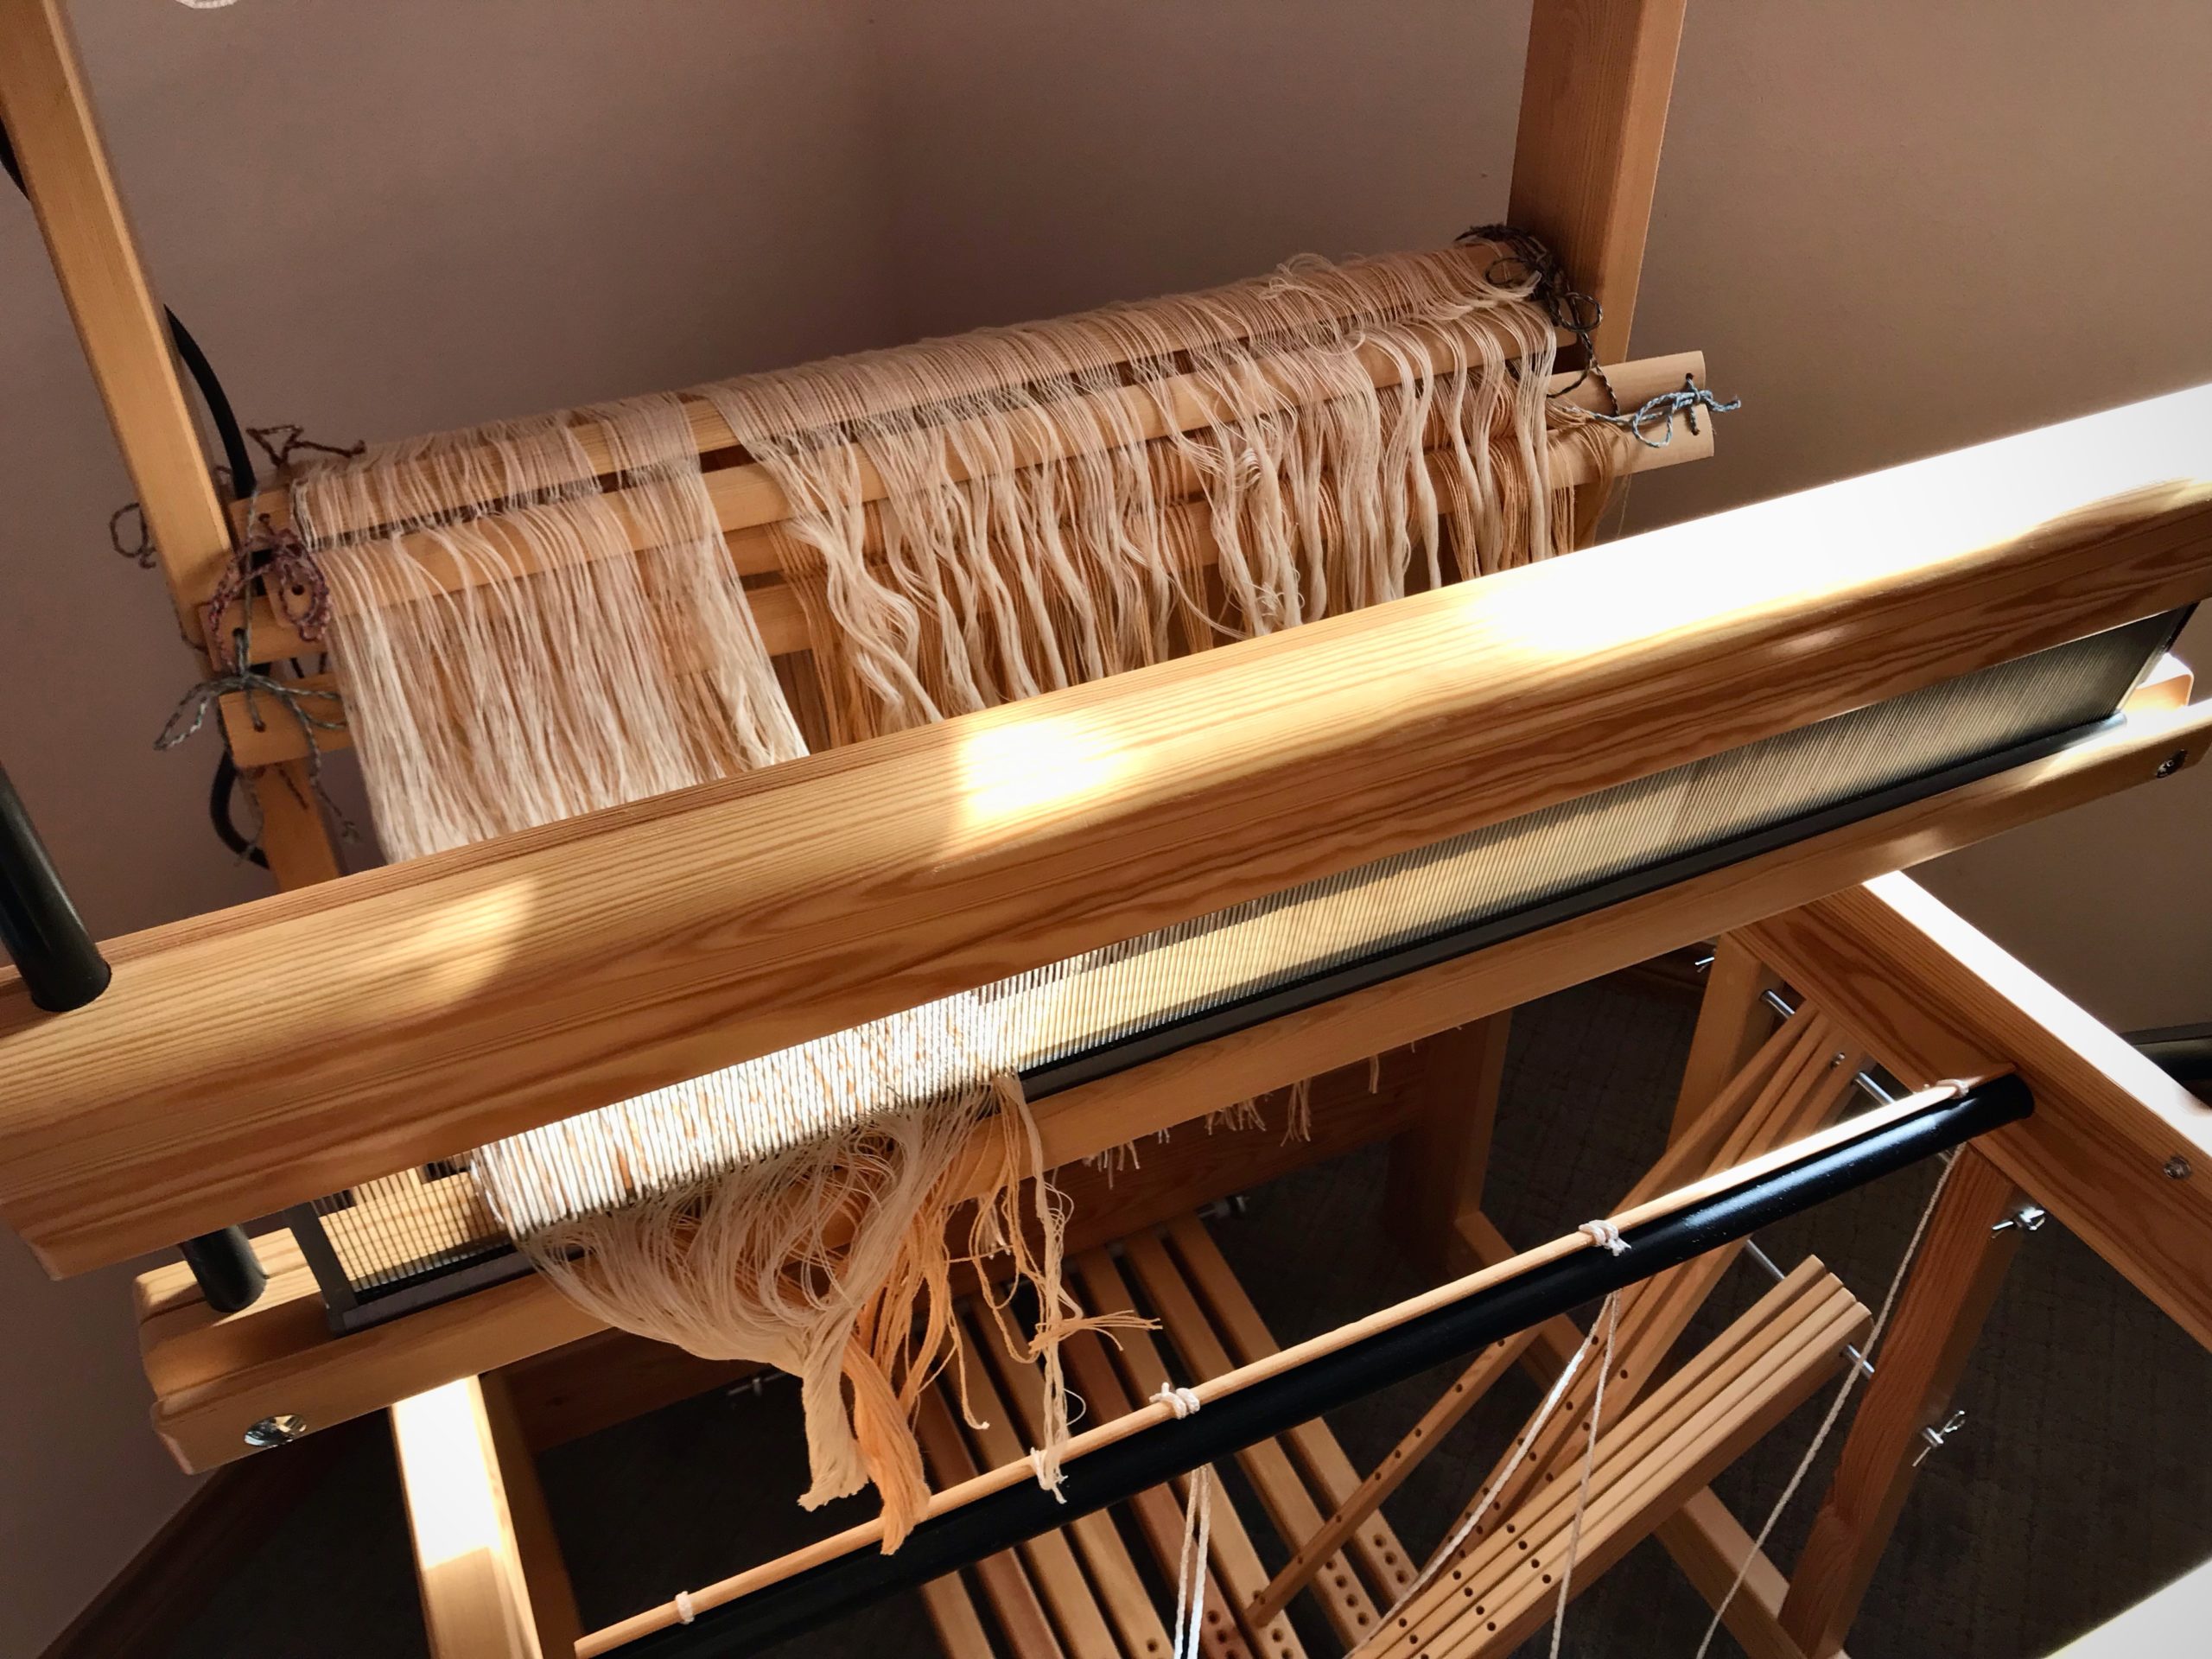
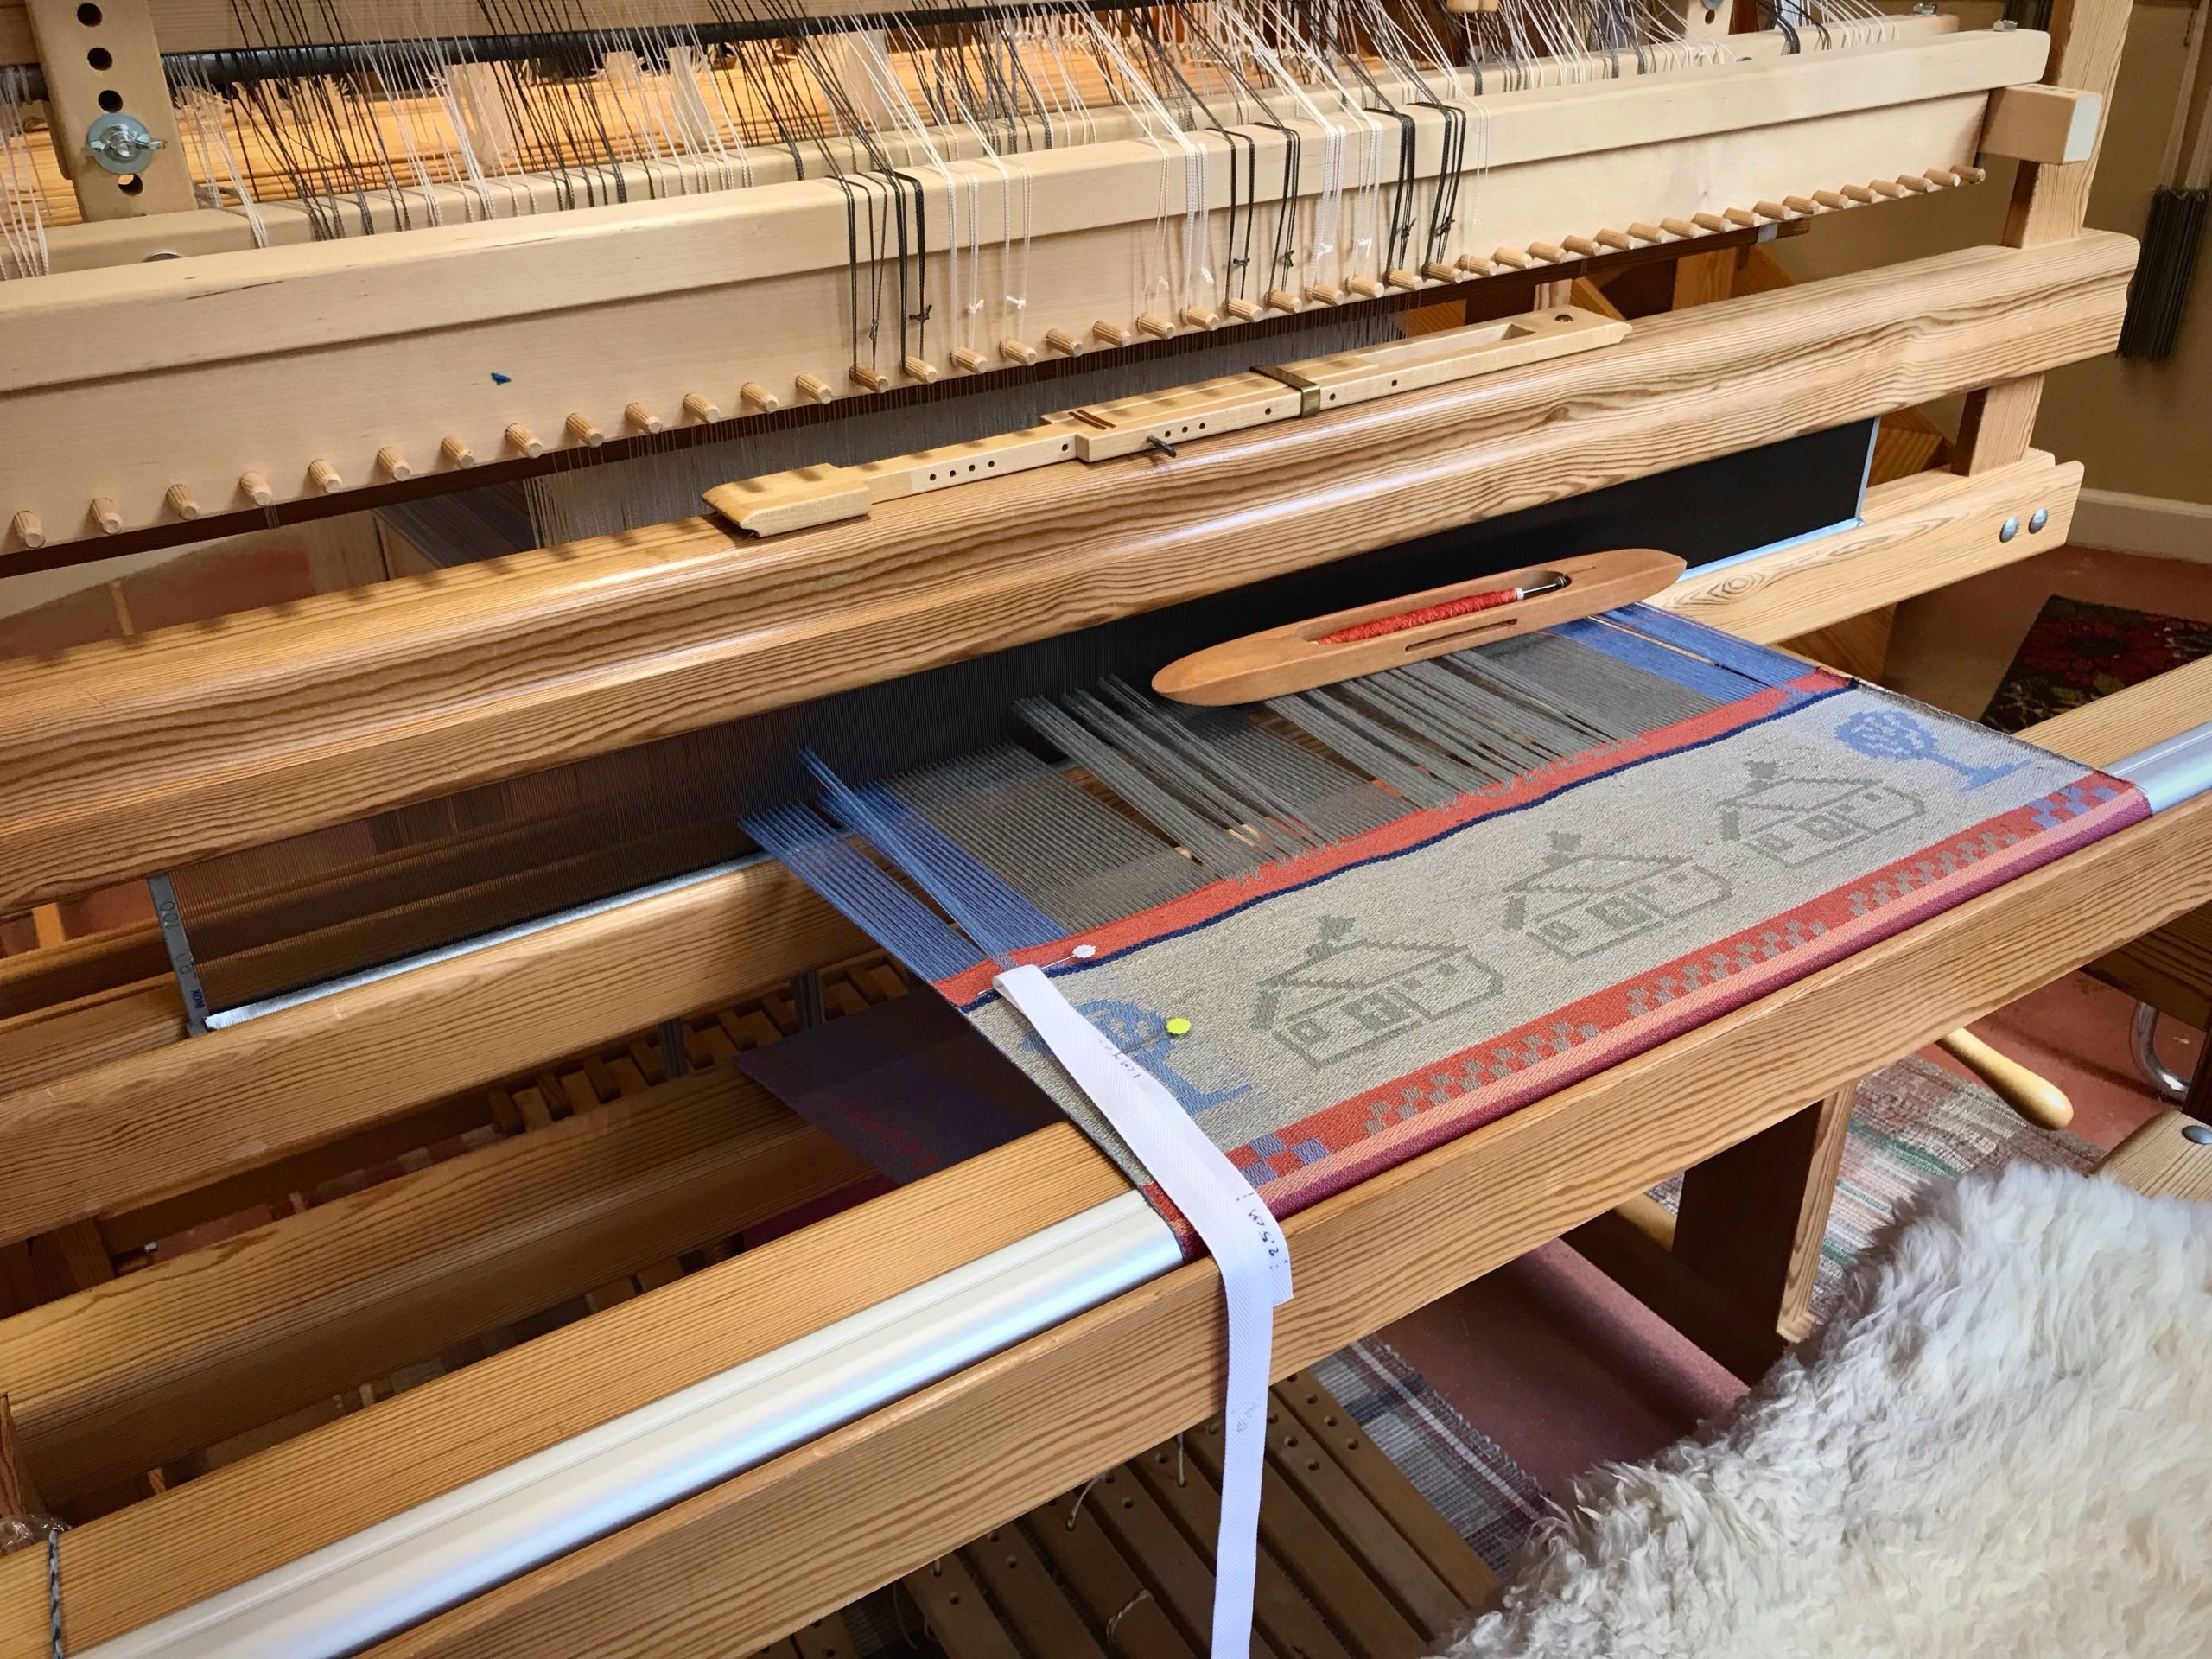
Rug comes to an end with a red border/hem. A warp-thread header follows, and then a few rows of scrap header to help secure the weft until finishing knots are tied.
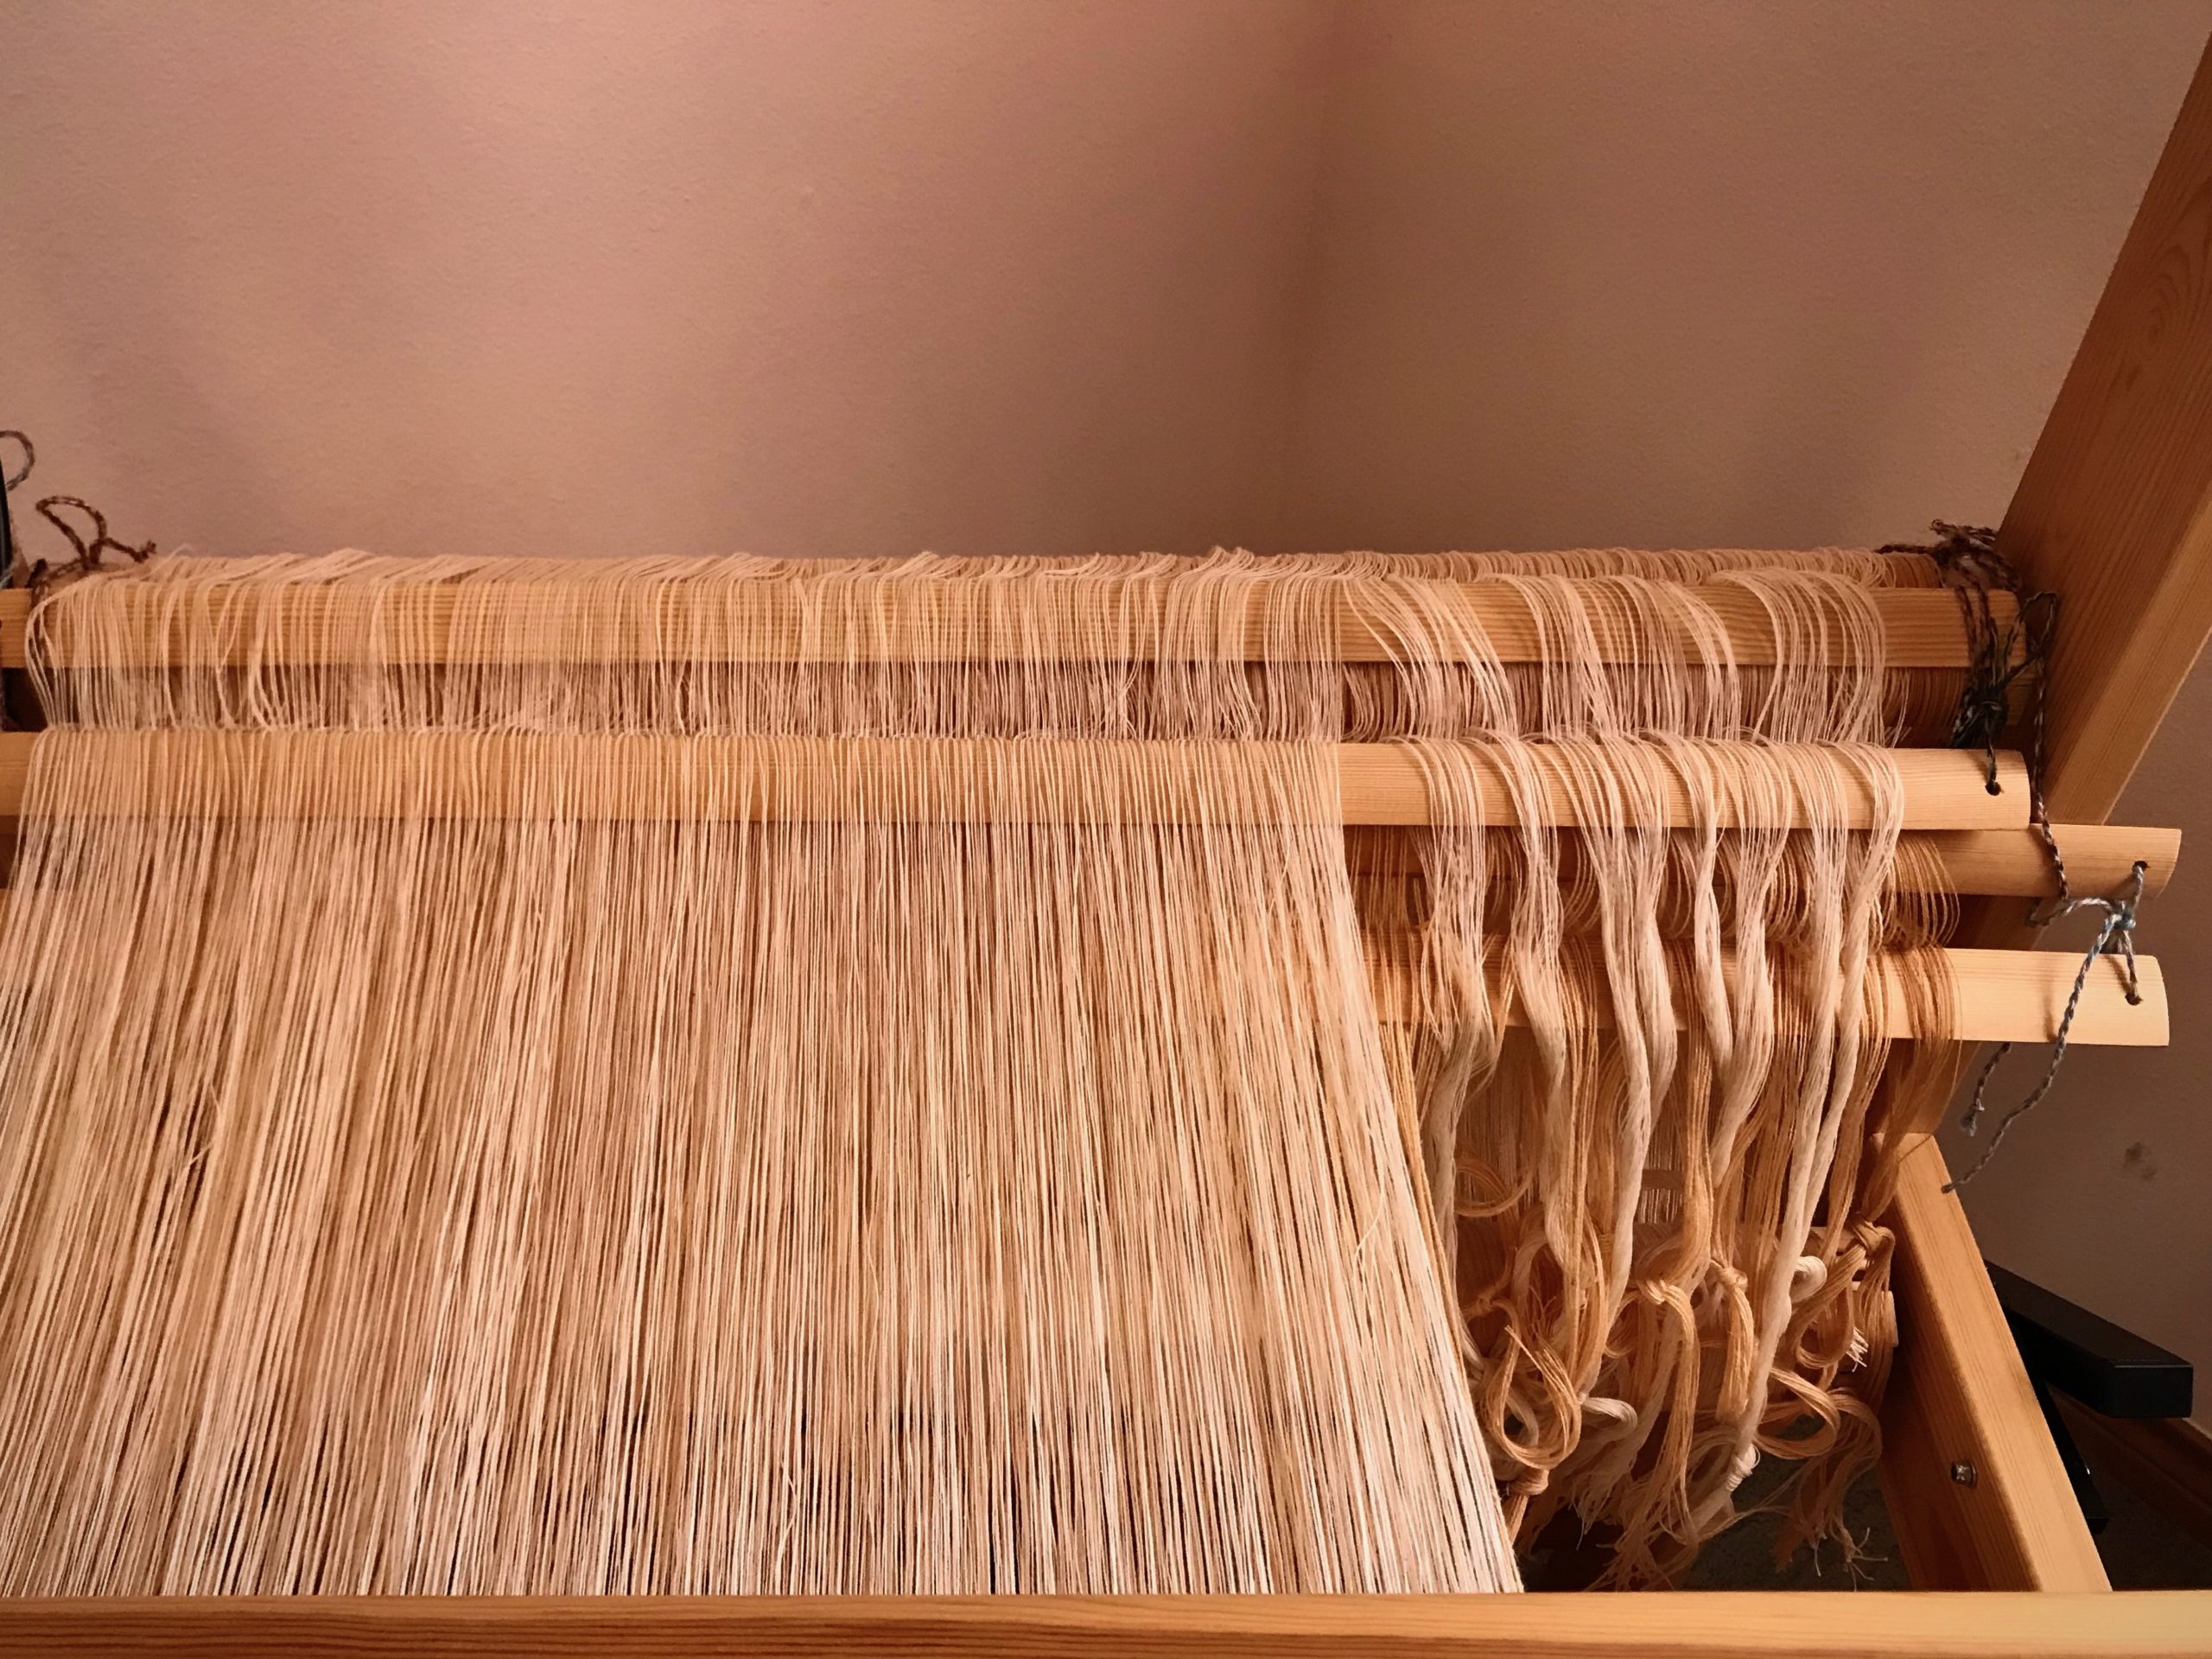
Steps for cutting off rag rug before end of warp (countermarch loom)
Tension on the warp is released at the back ratchet and front ratchet.
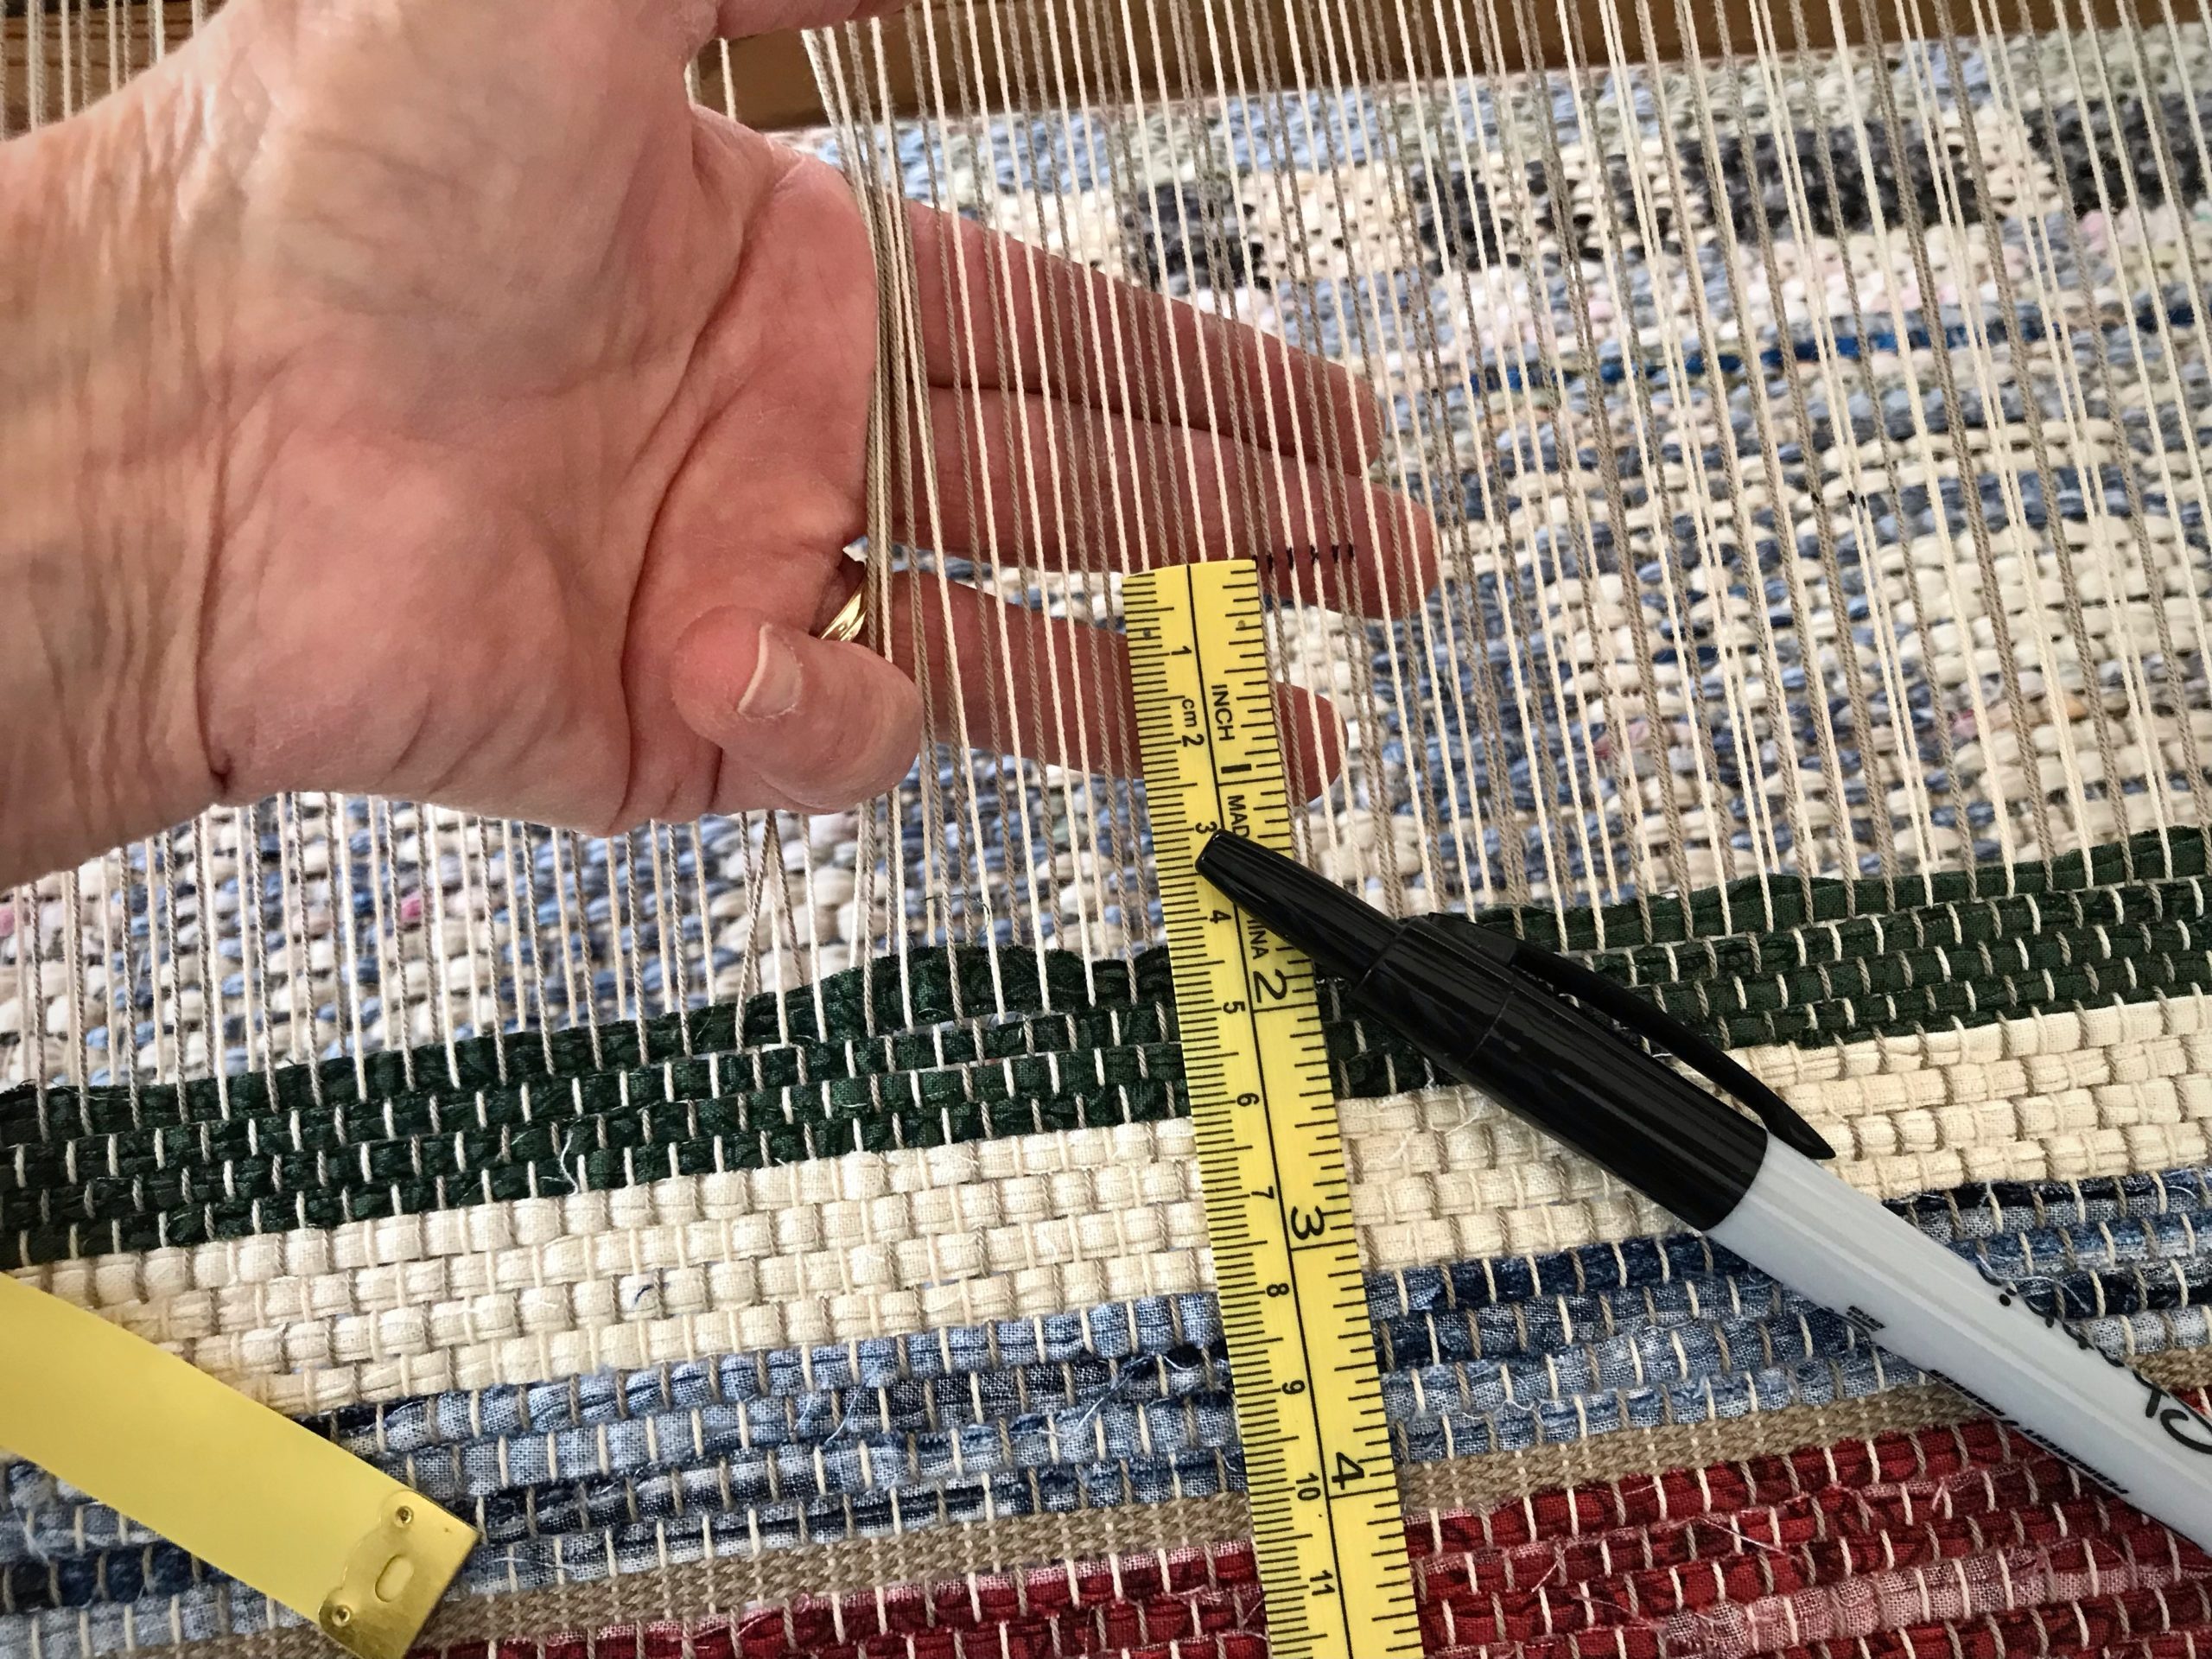
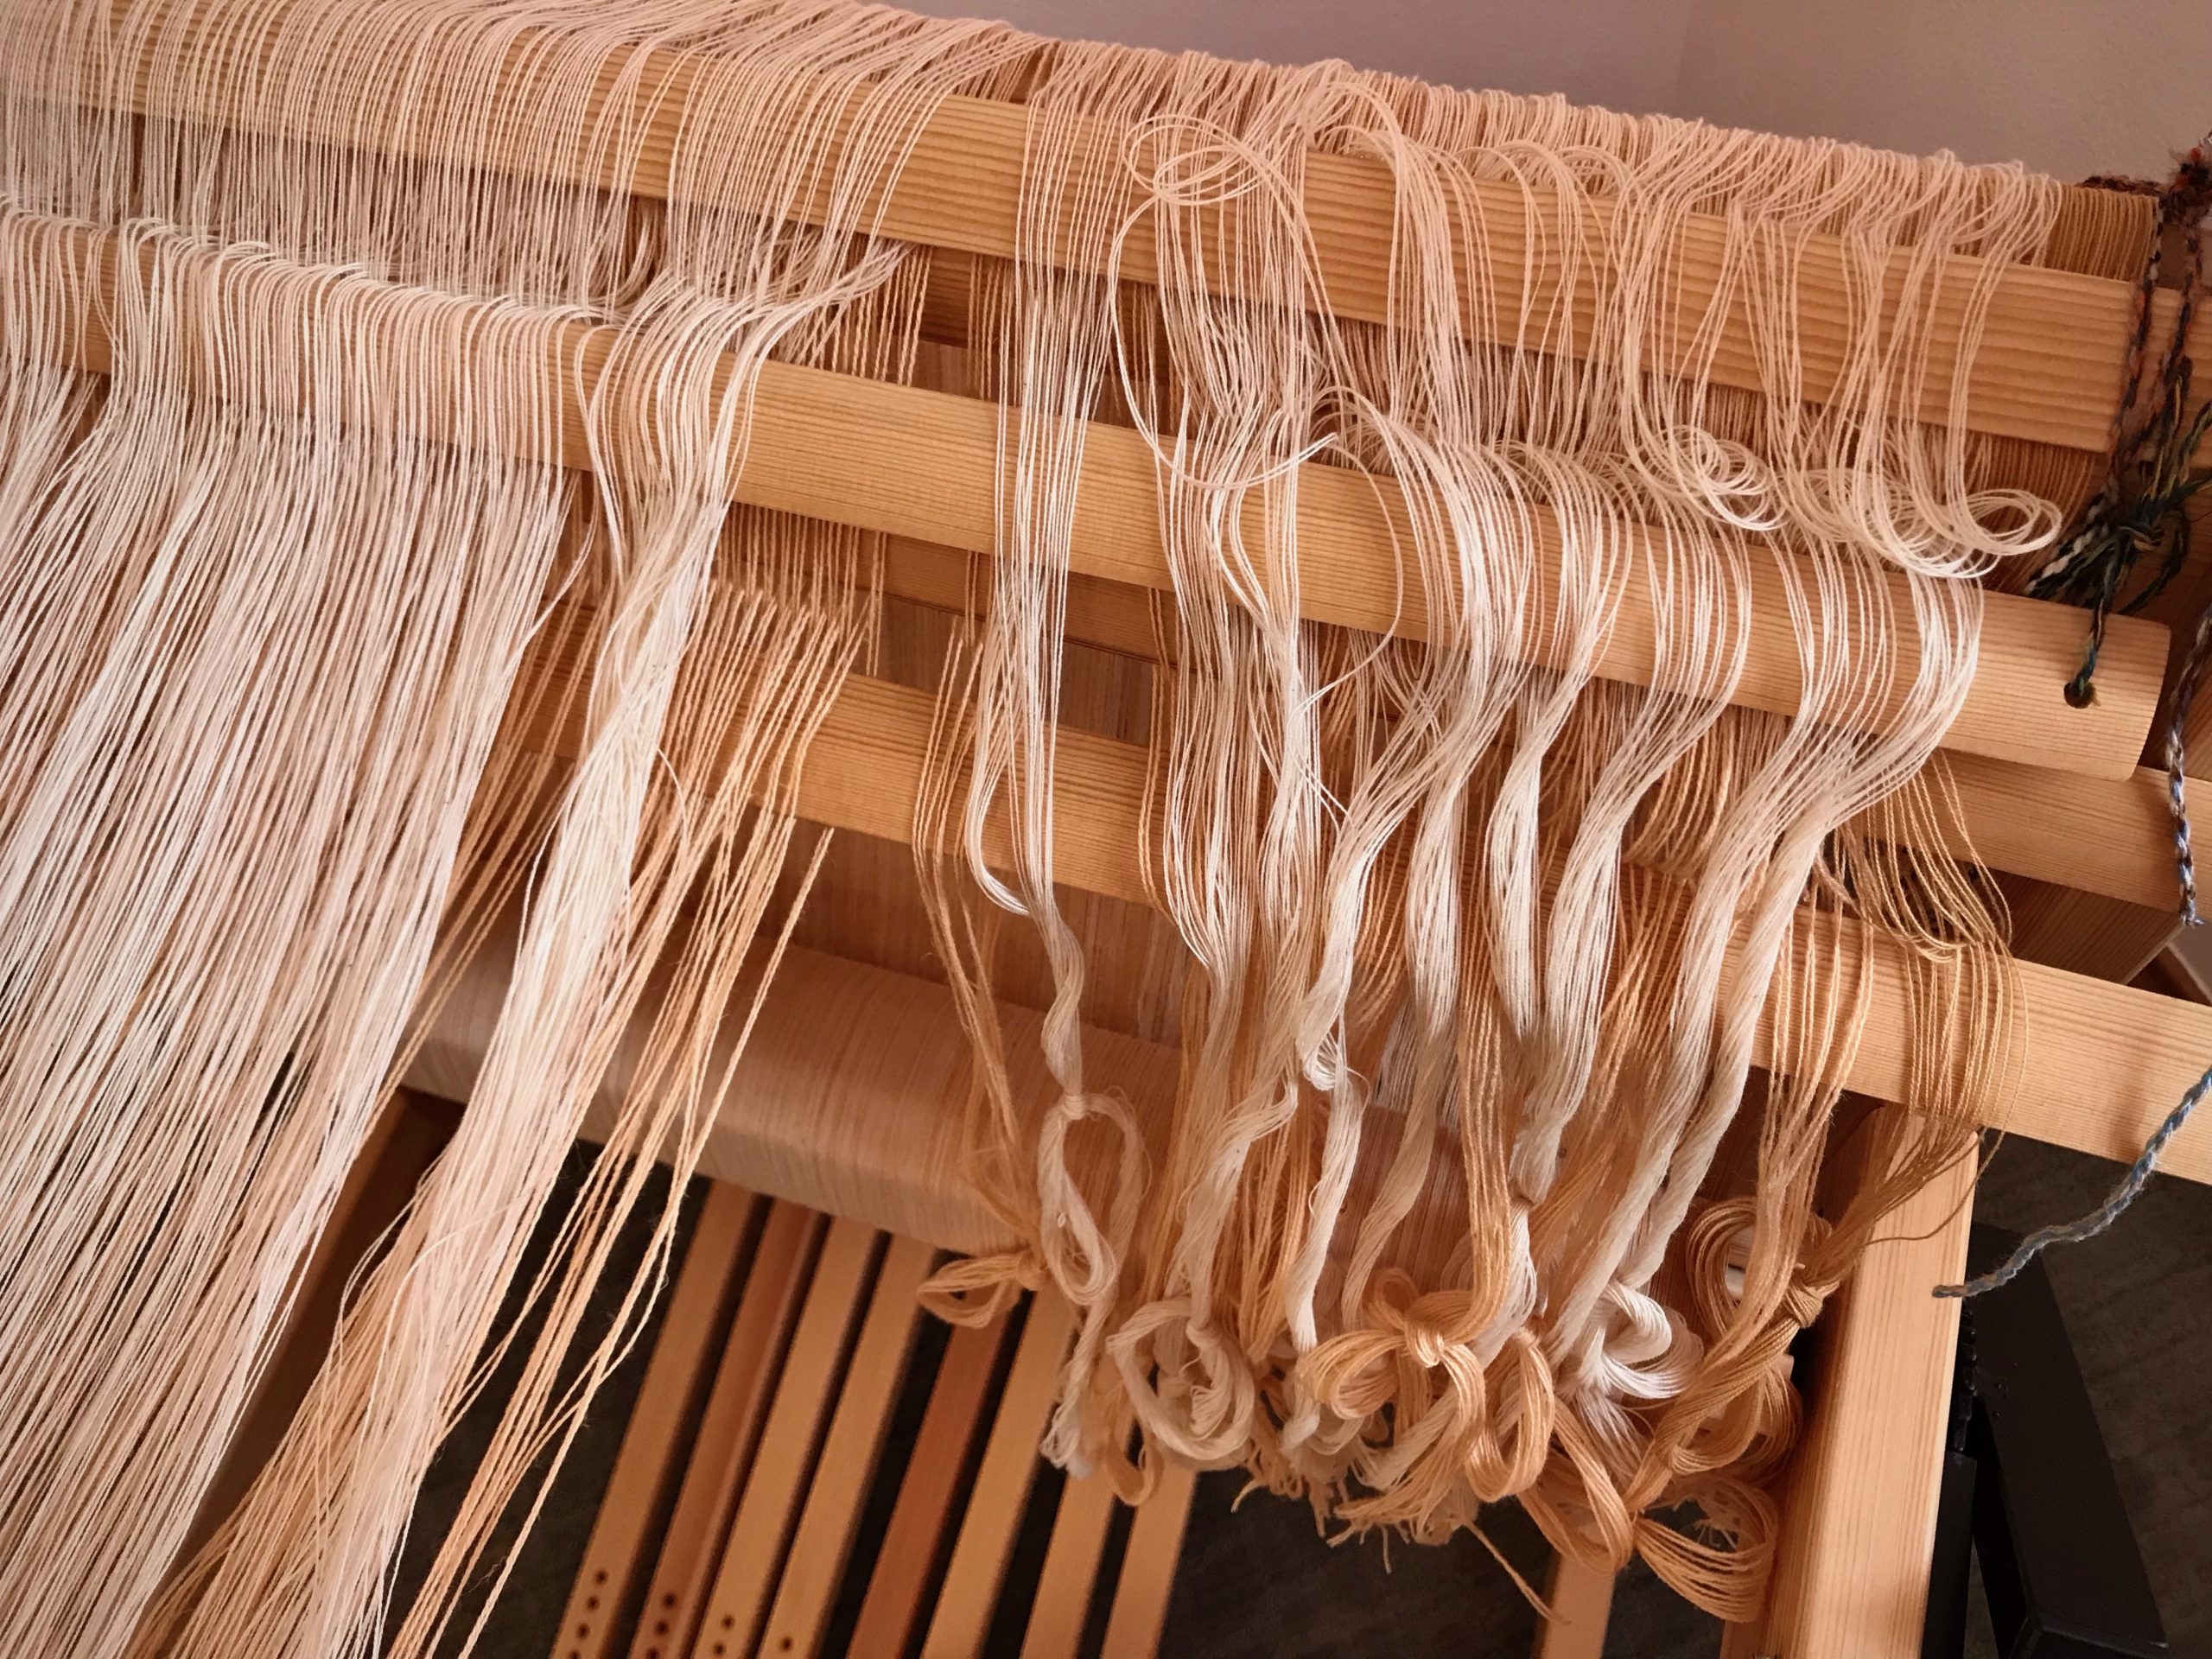
Mark a cutting line across the warp with a black marker. Allow at least 10 centimeters (4 inches) beyond the rug’s warp-thread header for tying knots later that will secure the weft.
Mark a cutting line across the warp. Leave enough warp at the end of the rug to tie overhand knots to secure the weft.
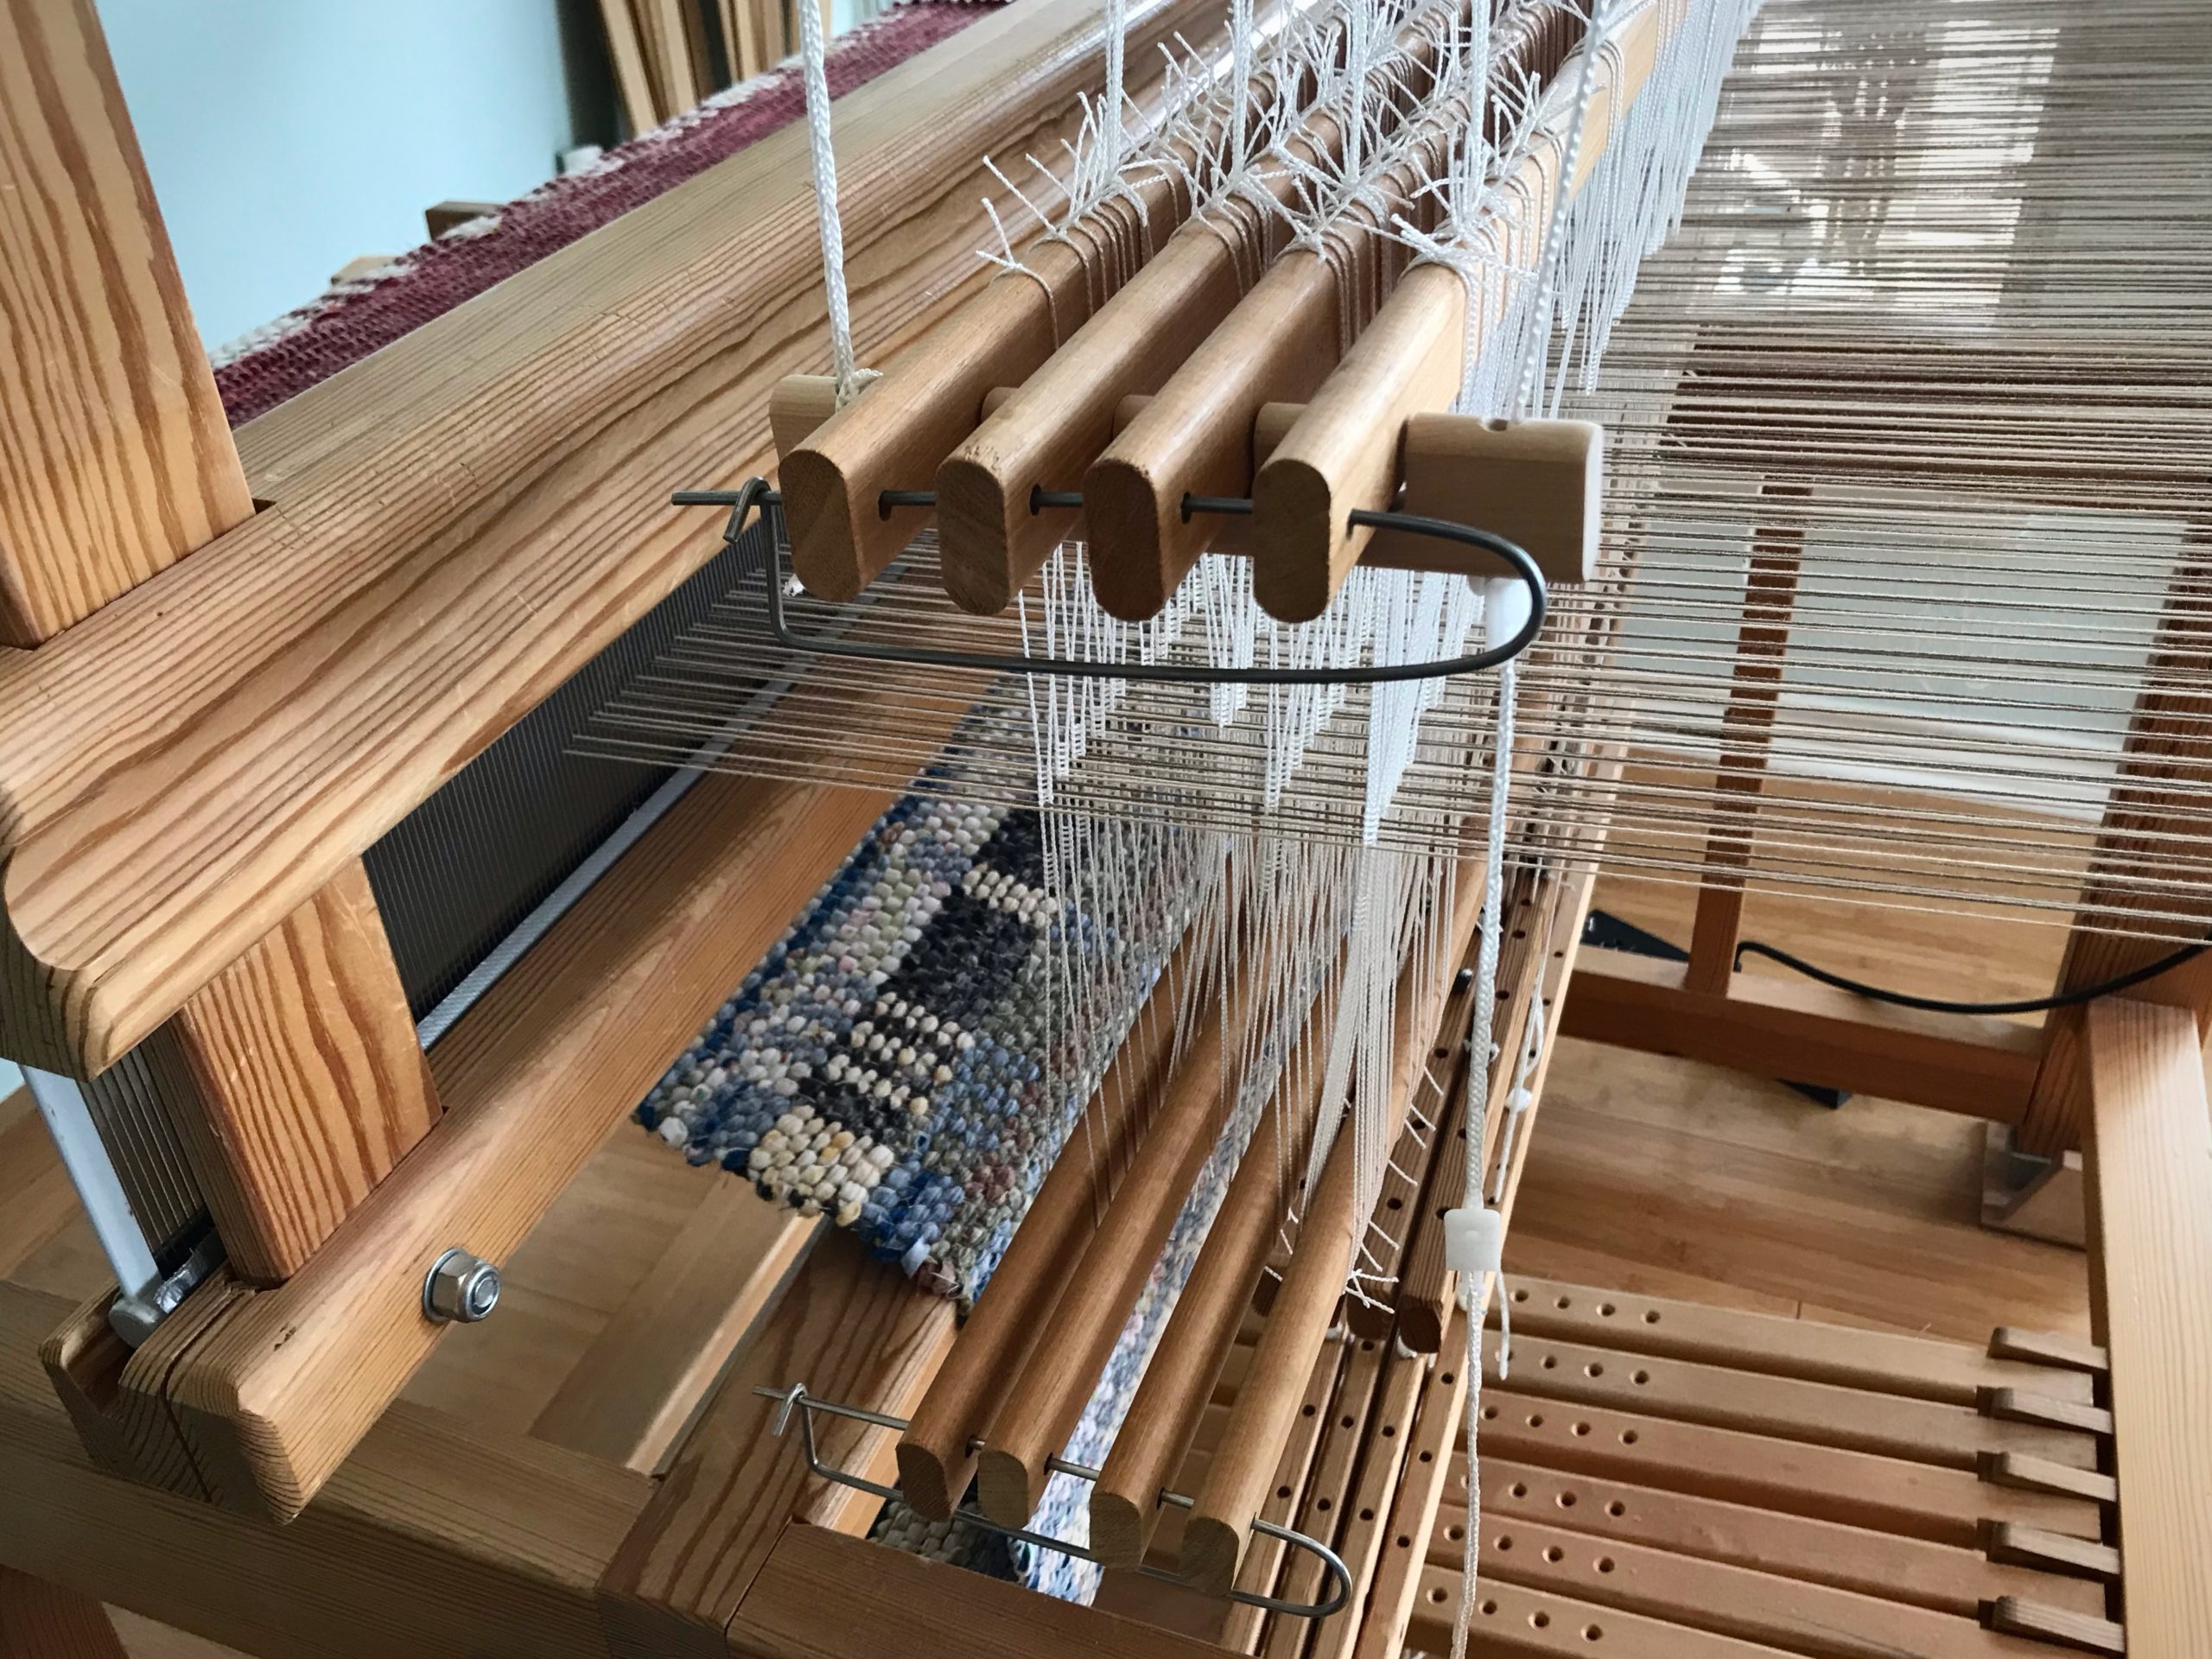
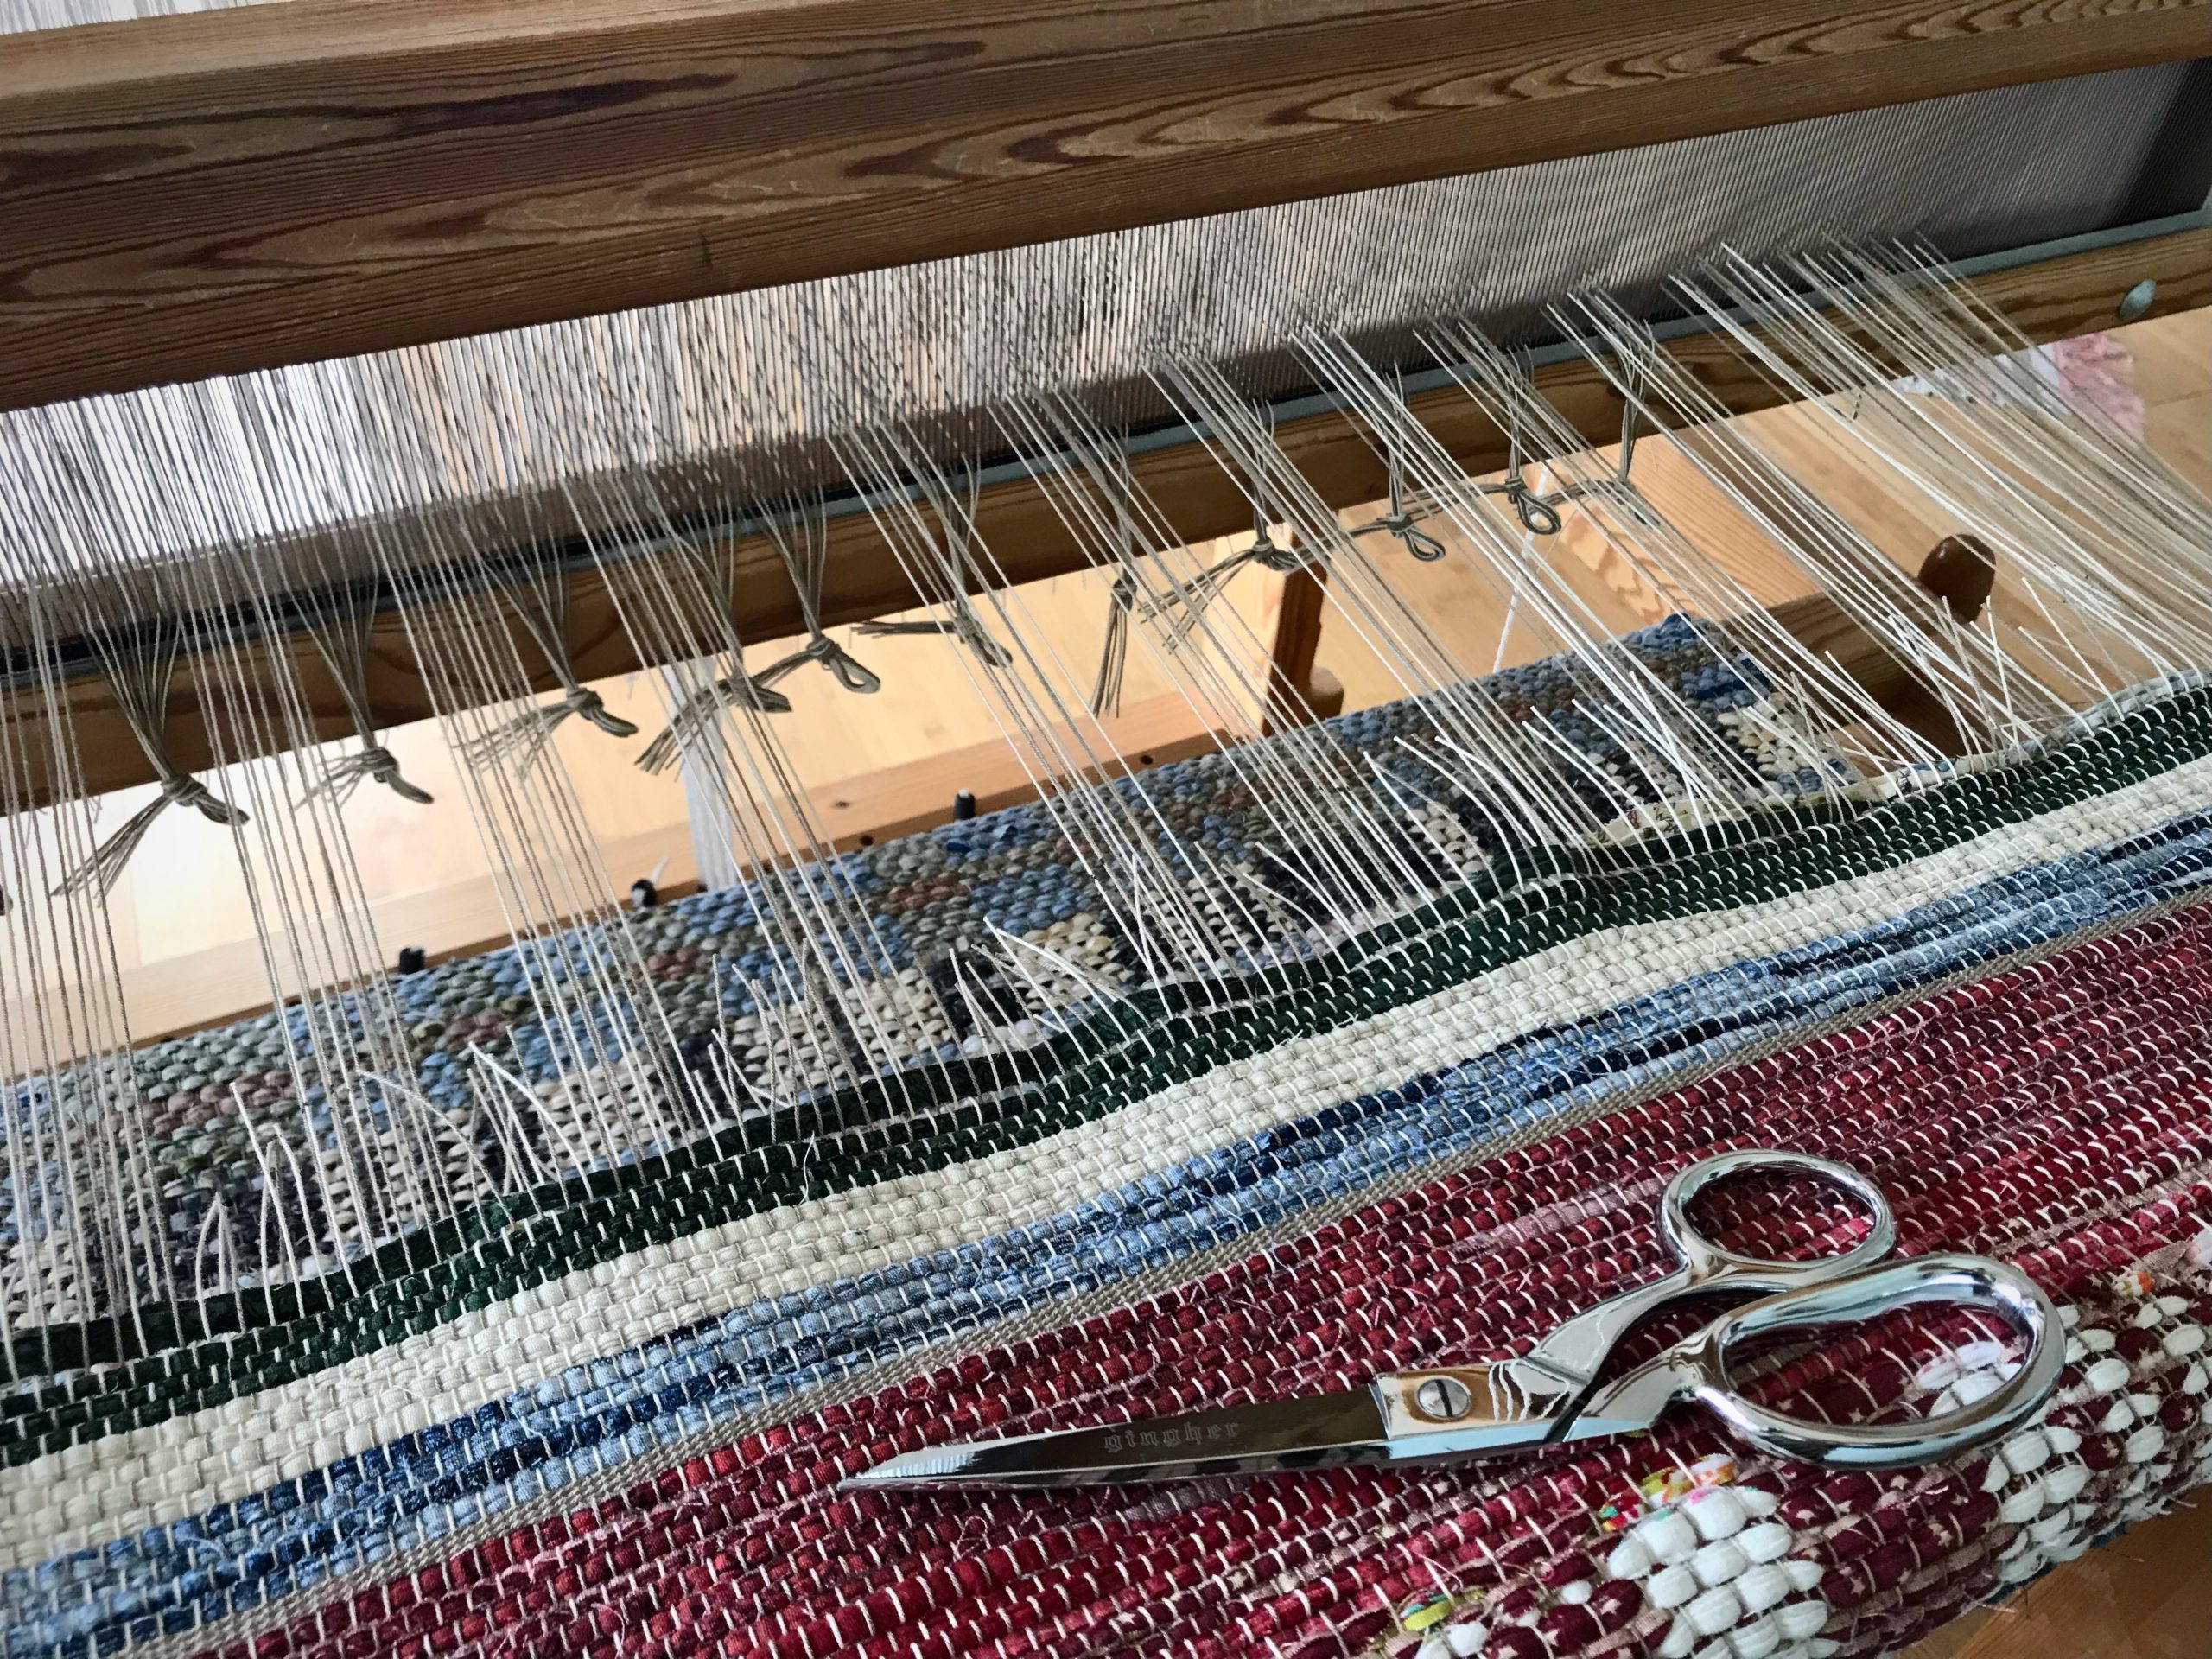
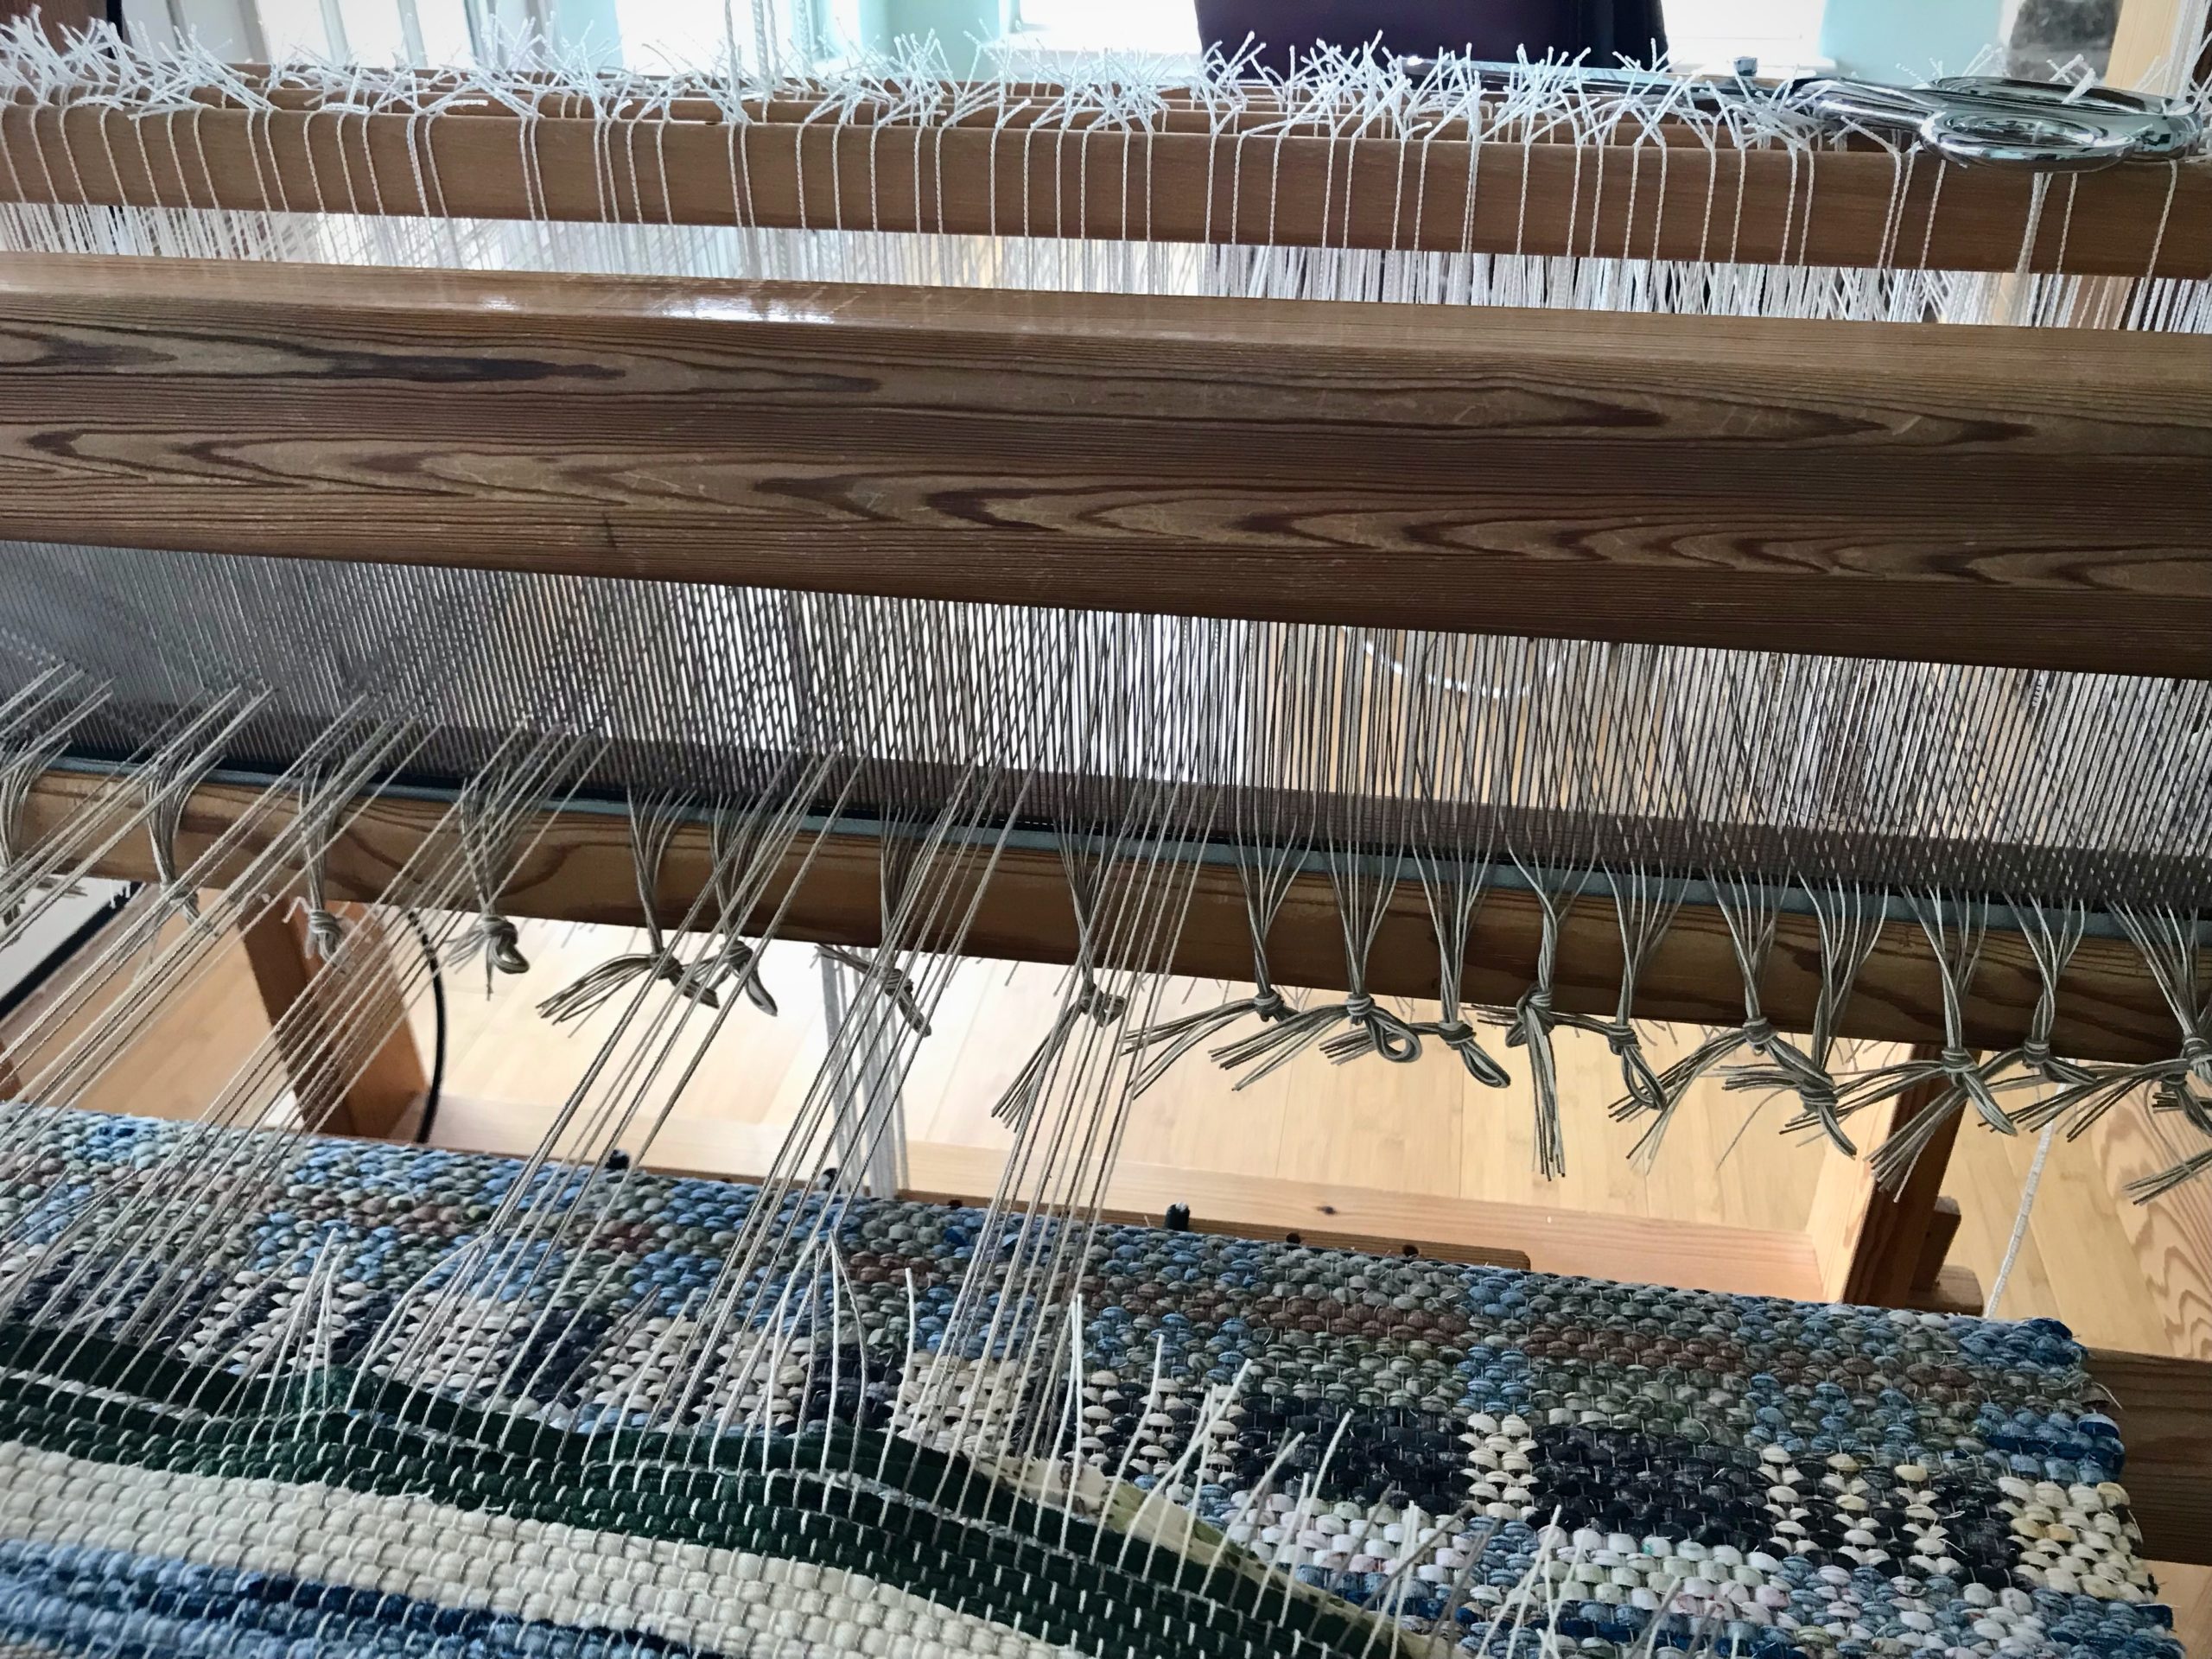
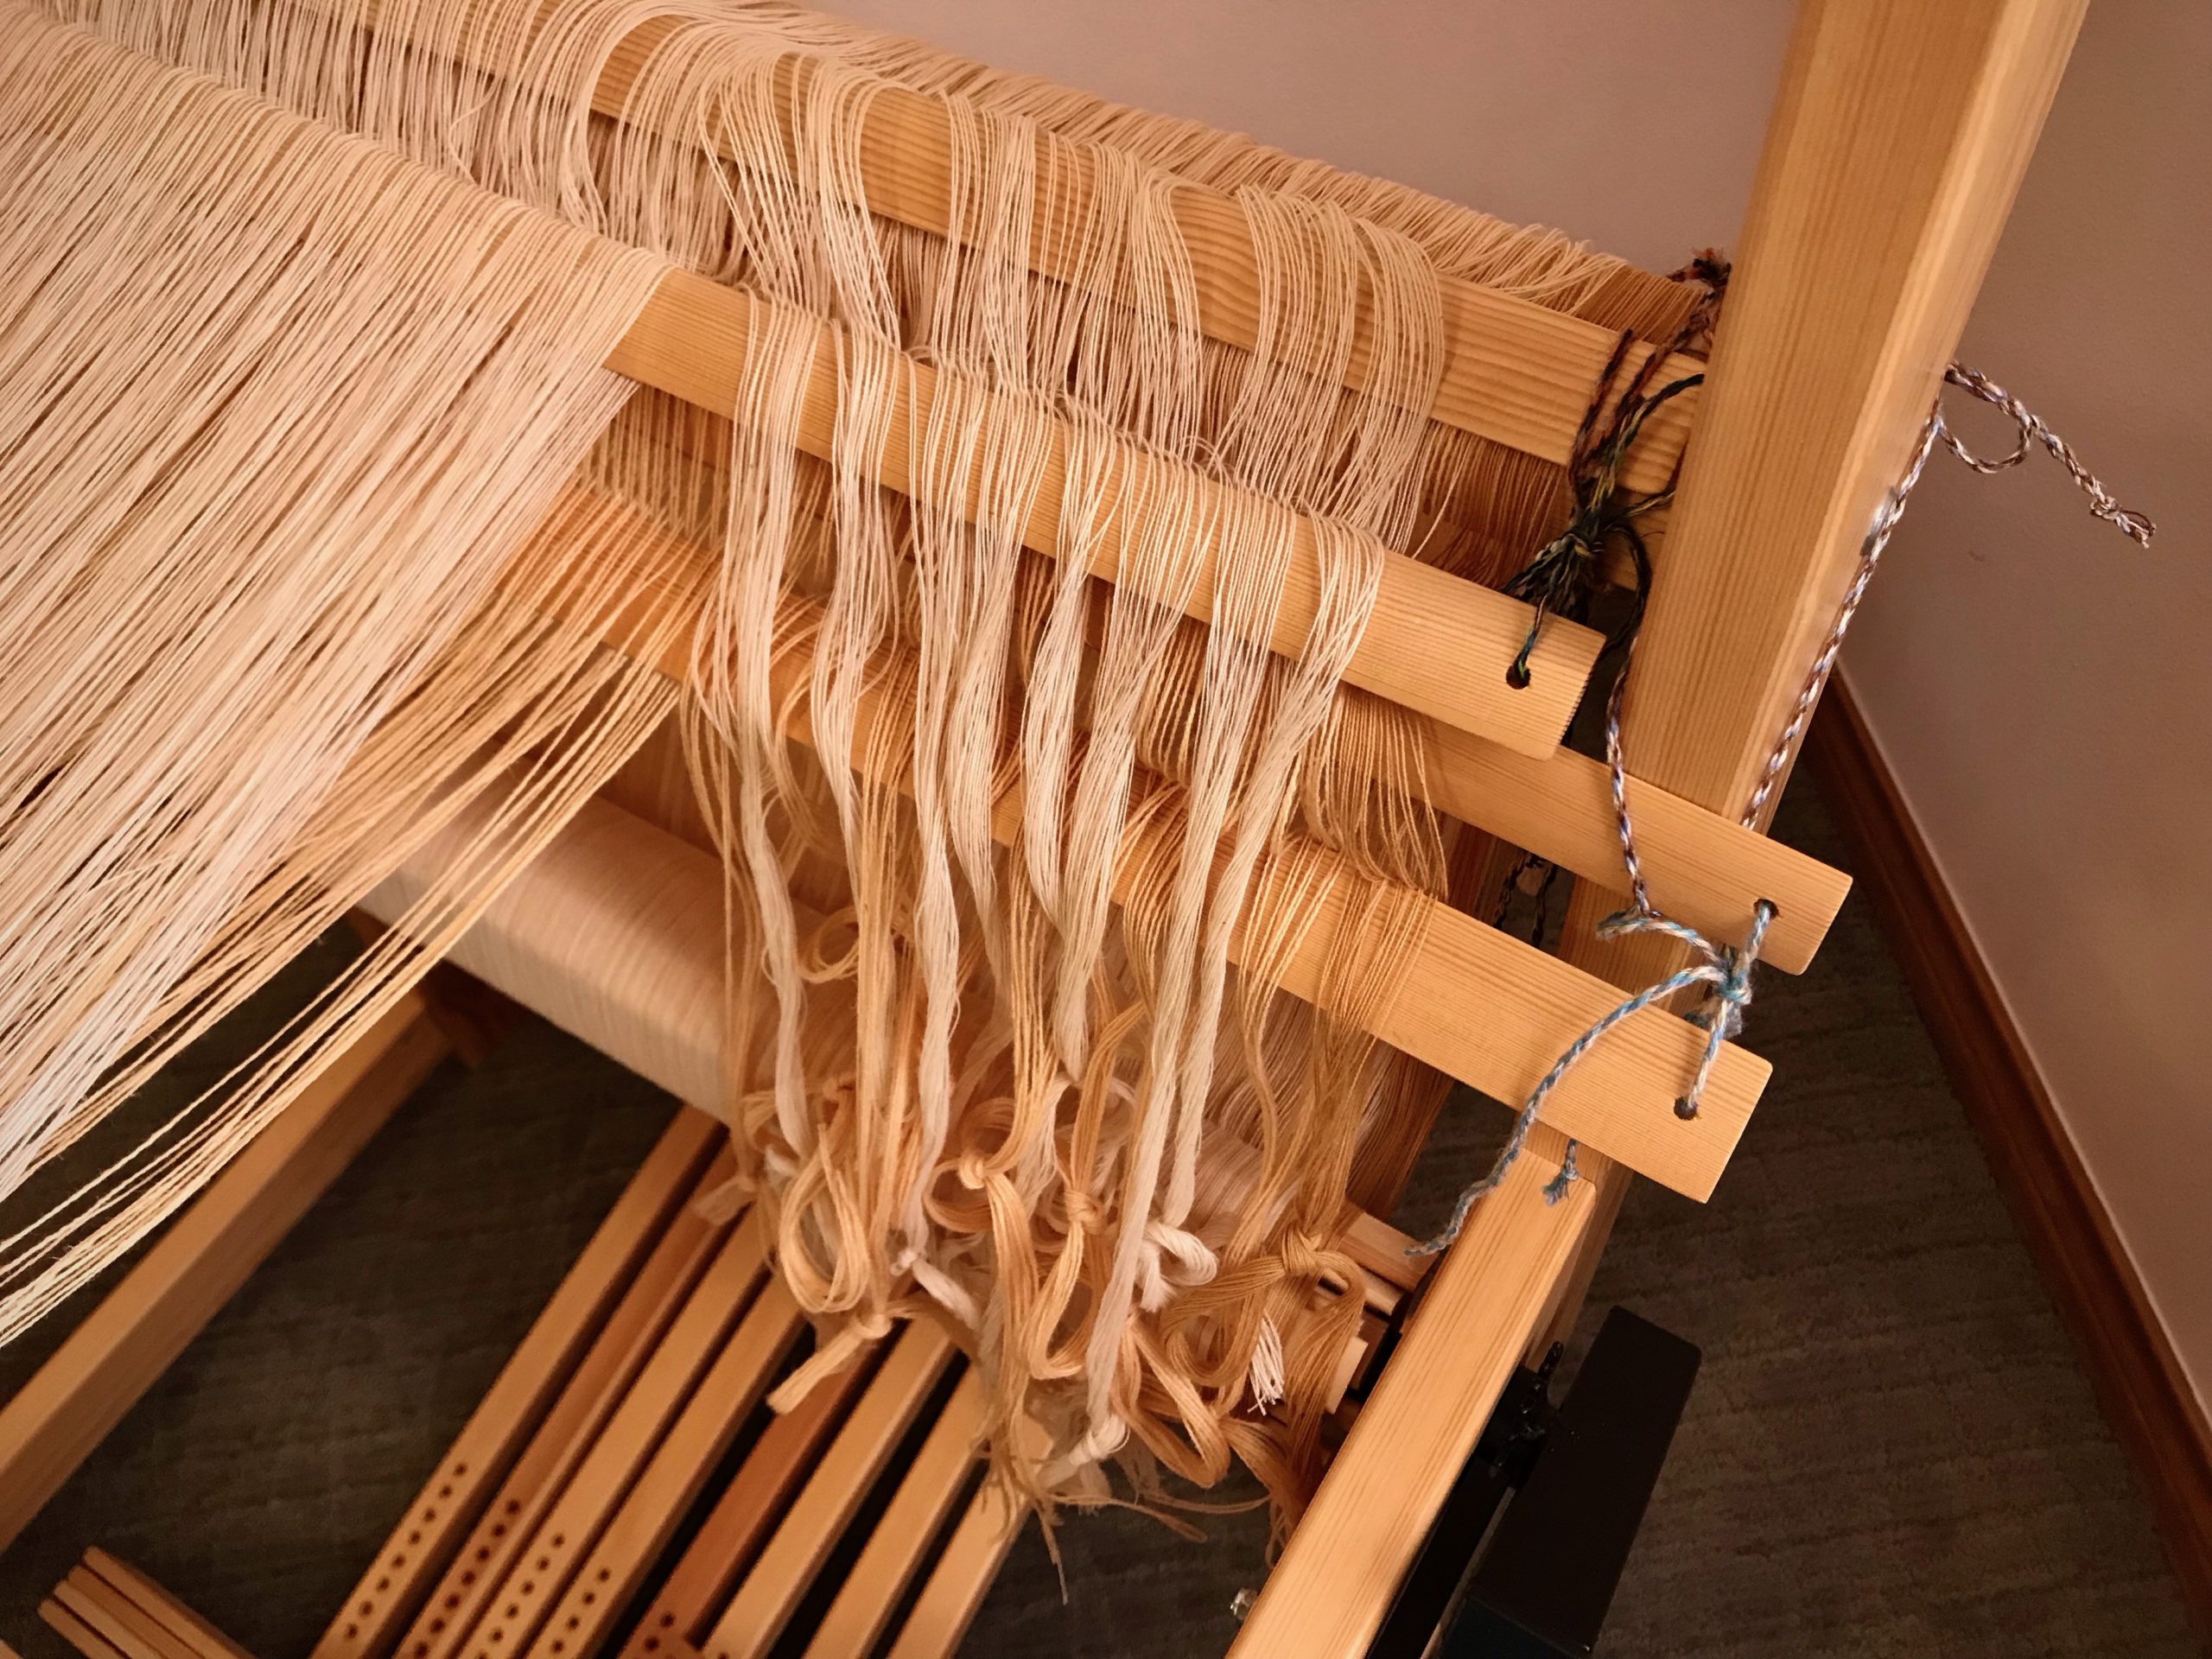
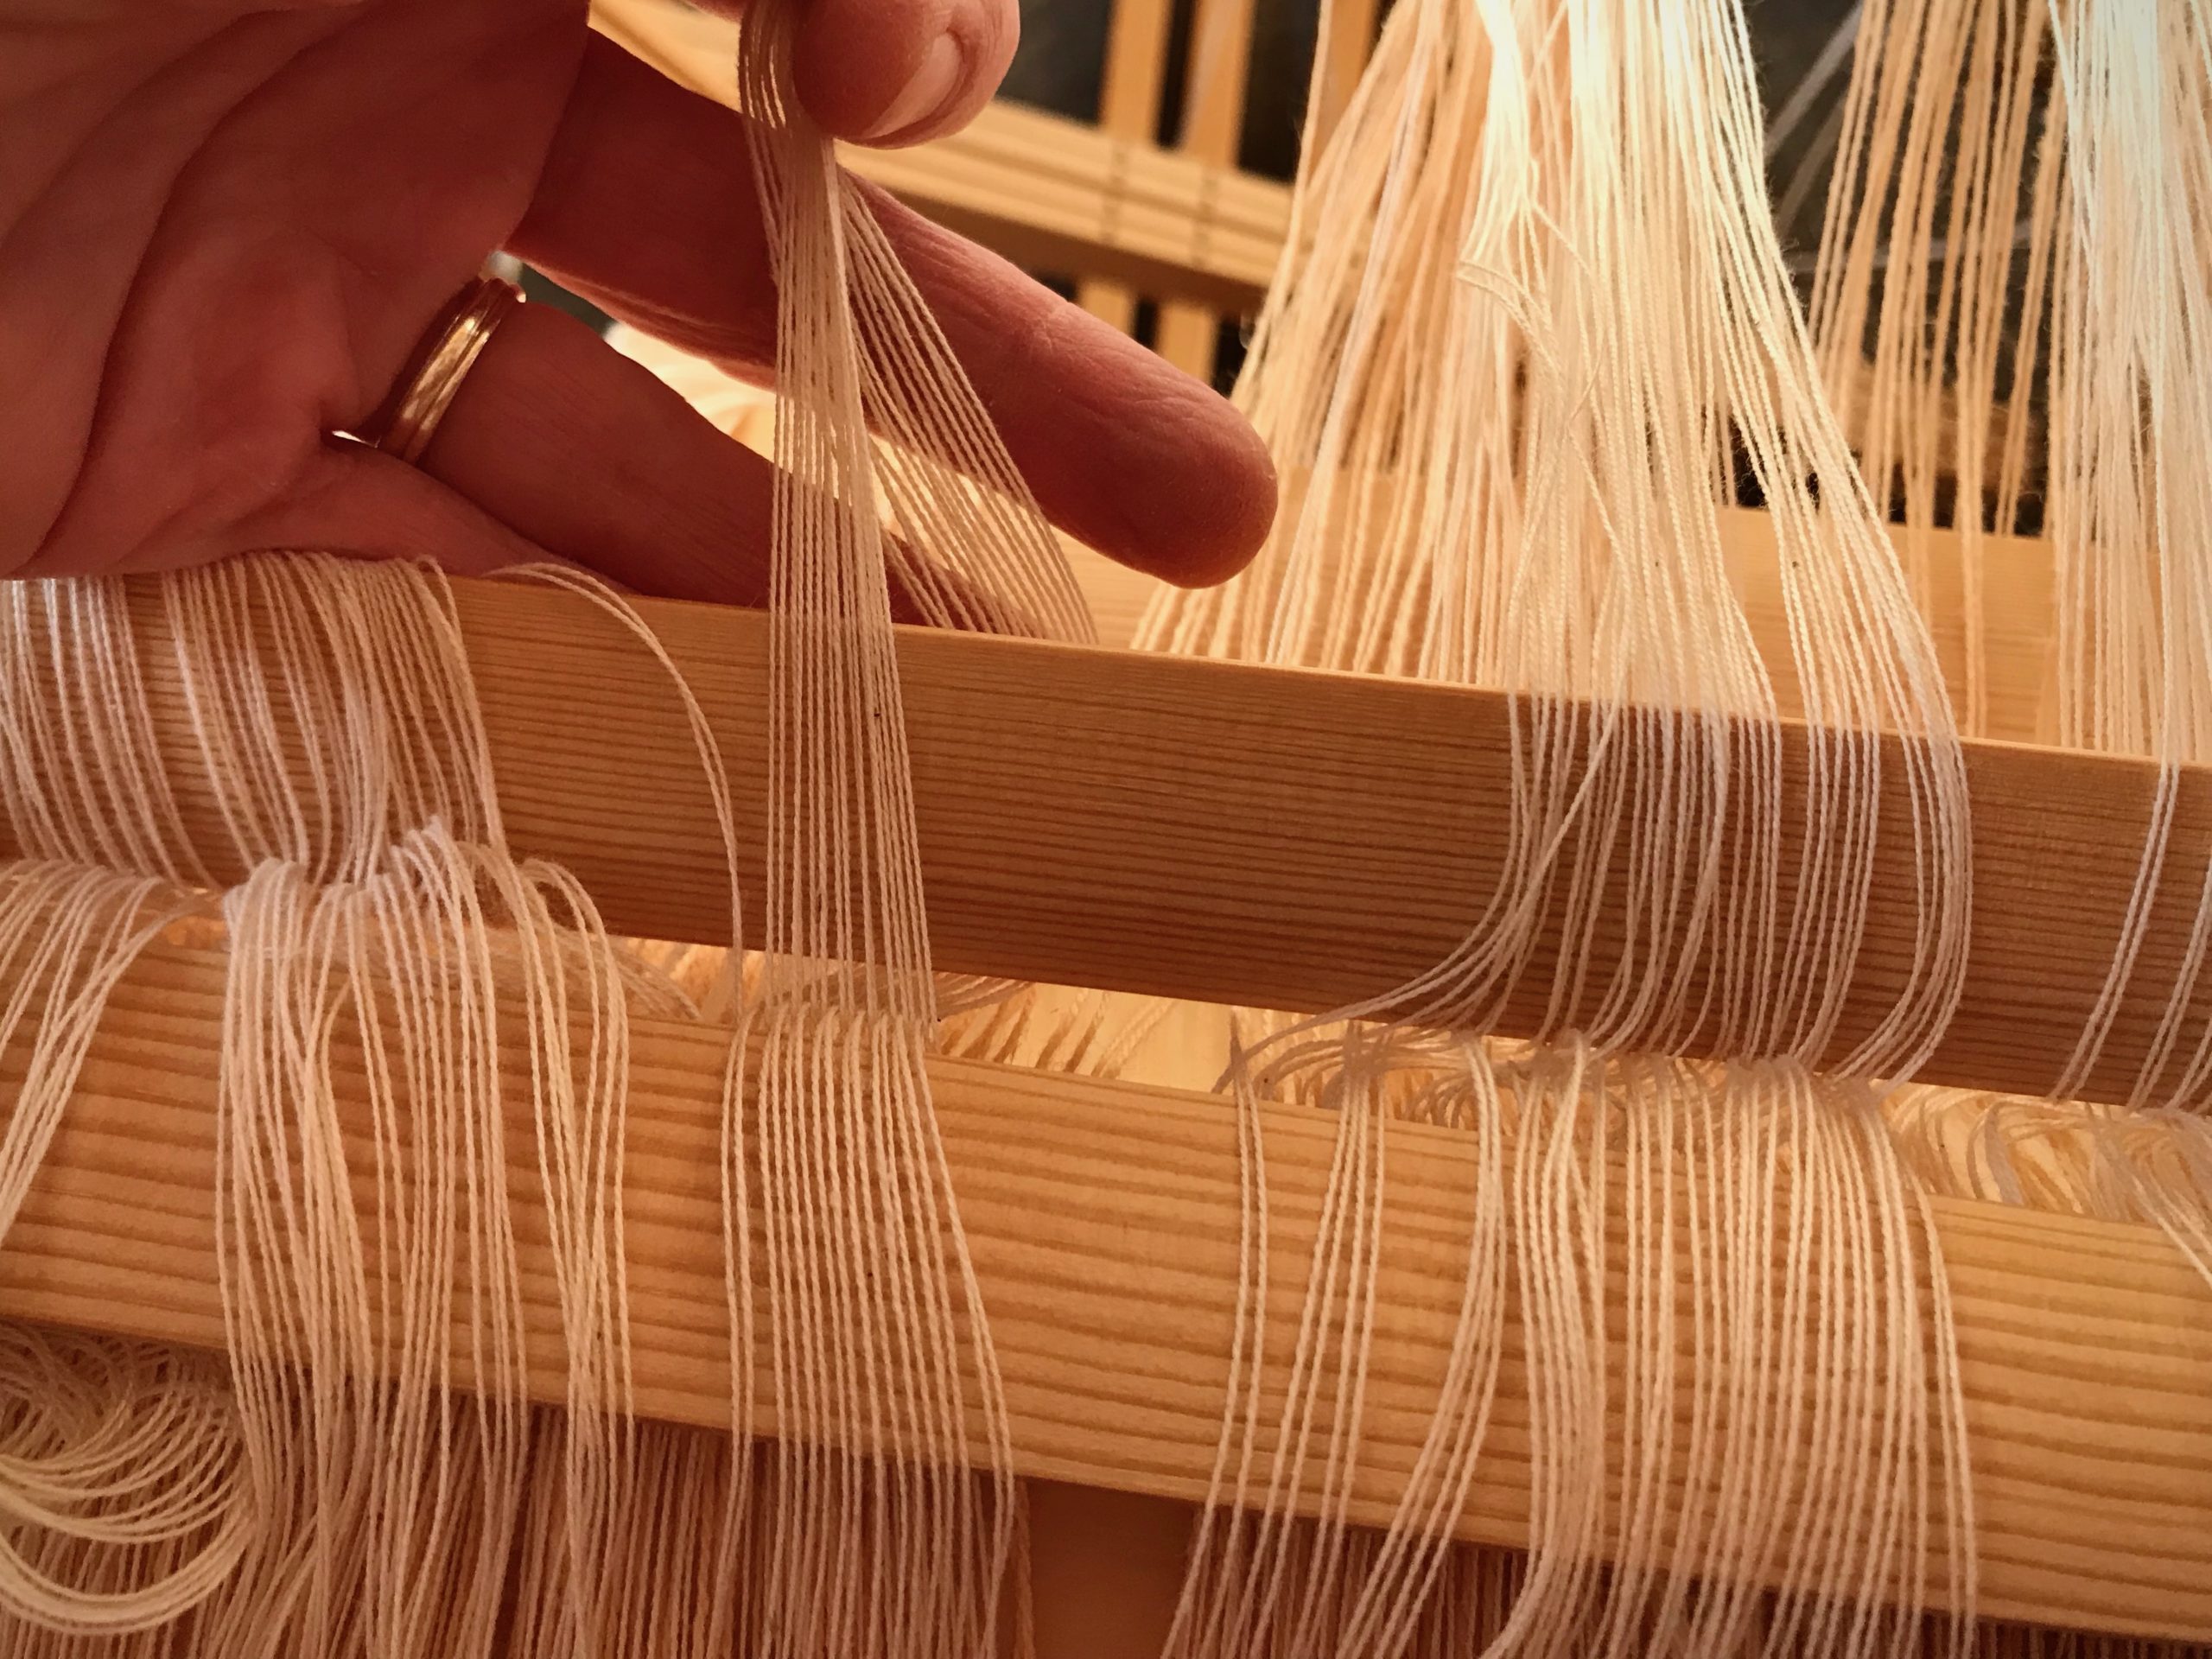
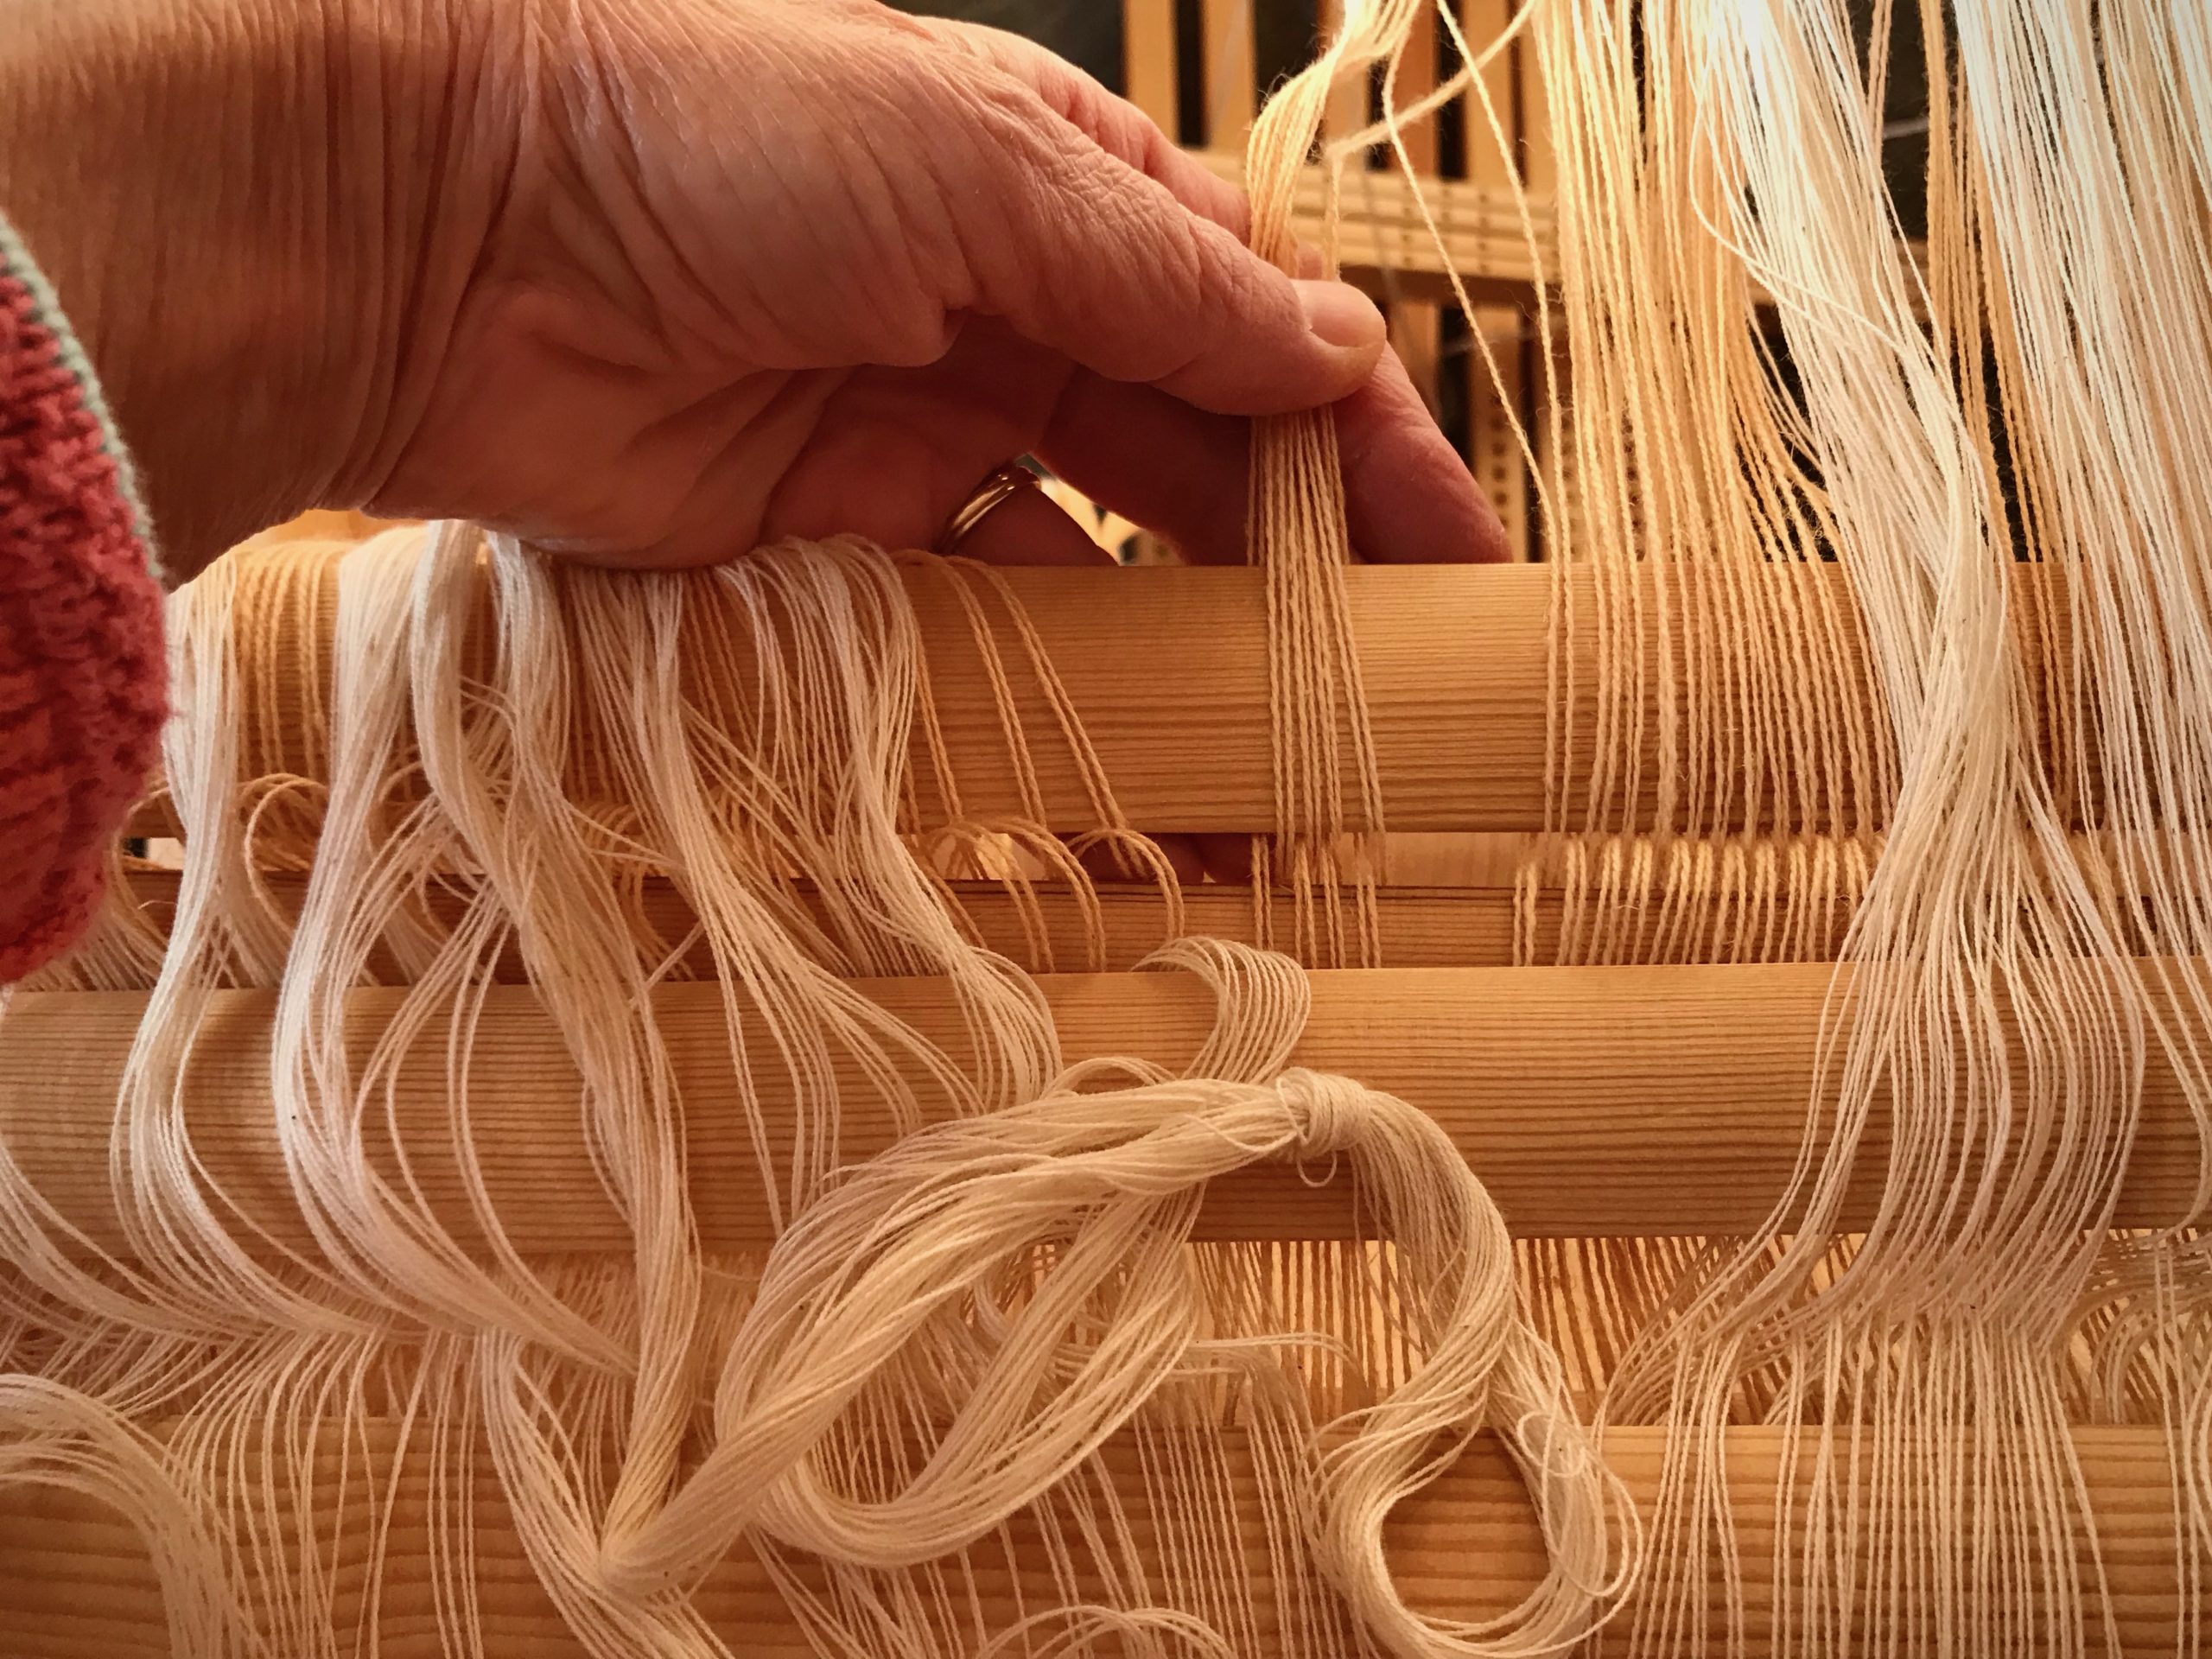
With tying back on in mind, cut one group of ends and skip the next group of ends. Continue across the warp, alternating cut and uncut groups of ends. Tie groups of cut ends in slipknots as you go.
By spacing out the cut ends, the weight of the rug is evenly distributed. There is less pulling and distortion while cutting off. At the same time I am preparing groups of ends for tying back on.
Make a second pass, cutting the remaining groups of ends, and tying them in slipknots.
Continue cutting off groups of ends.
Unroll the rug from the cloth beam. Take a photograph.
First look at the back of the rug.
Lay the rug out on the floor. Ooh and aah.
Double-binding rag rug, ready for finishing and hemming! I let the rug rest on the floor for a couple days to let the warp and weft relax. Next step is to tie ends into overhand knots.
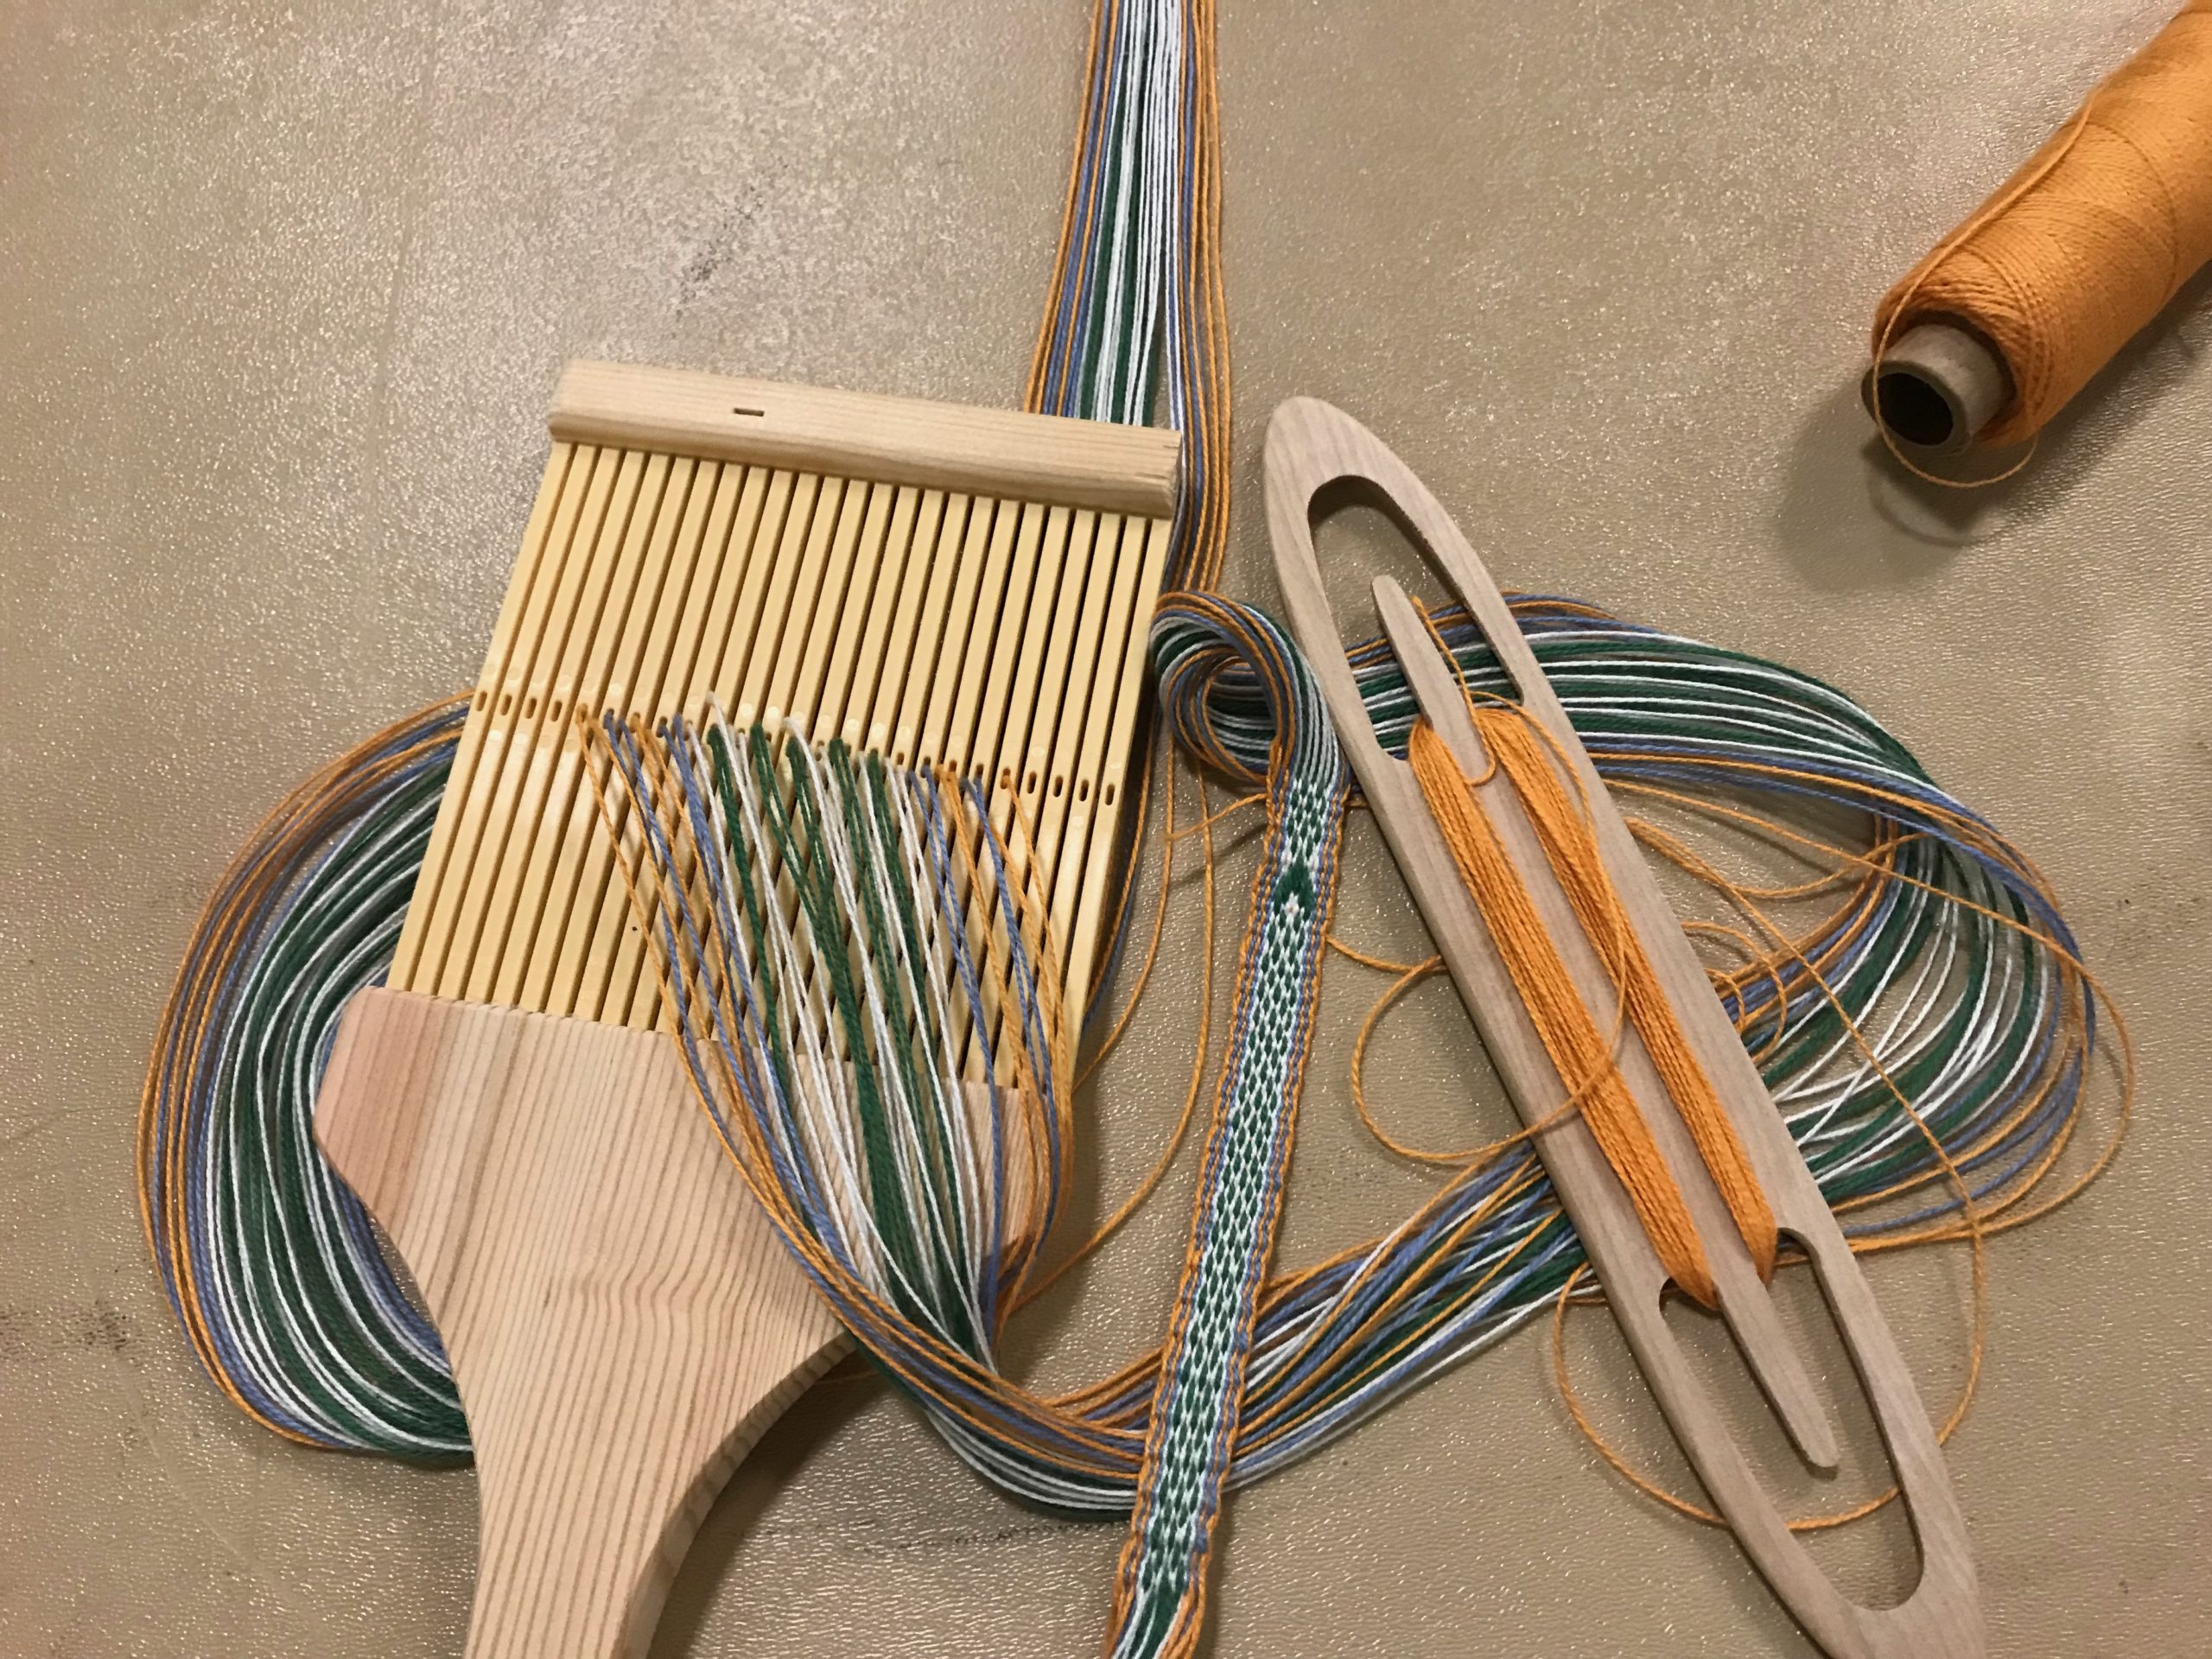
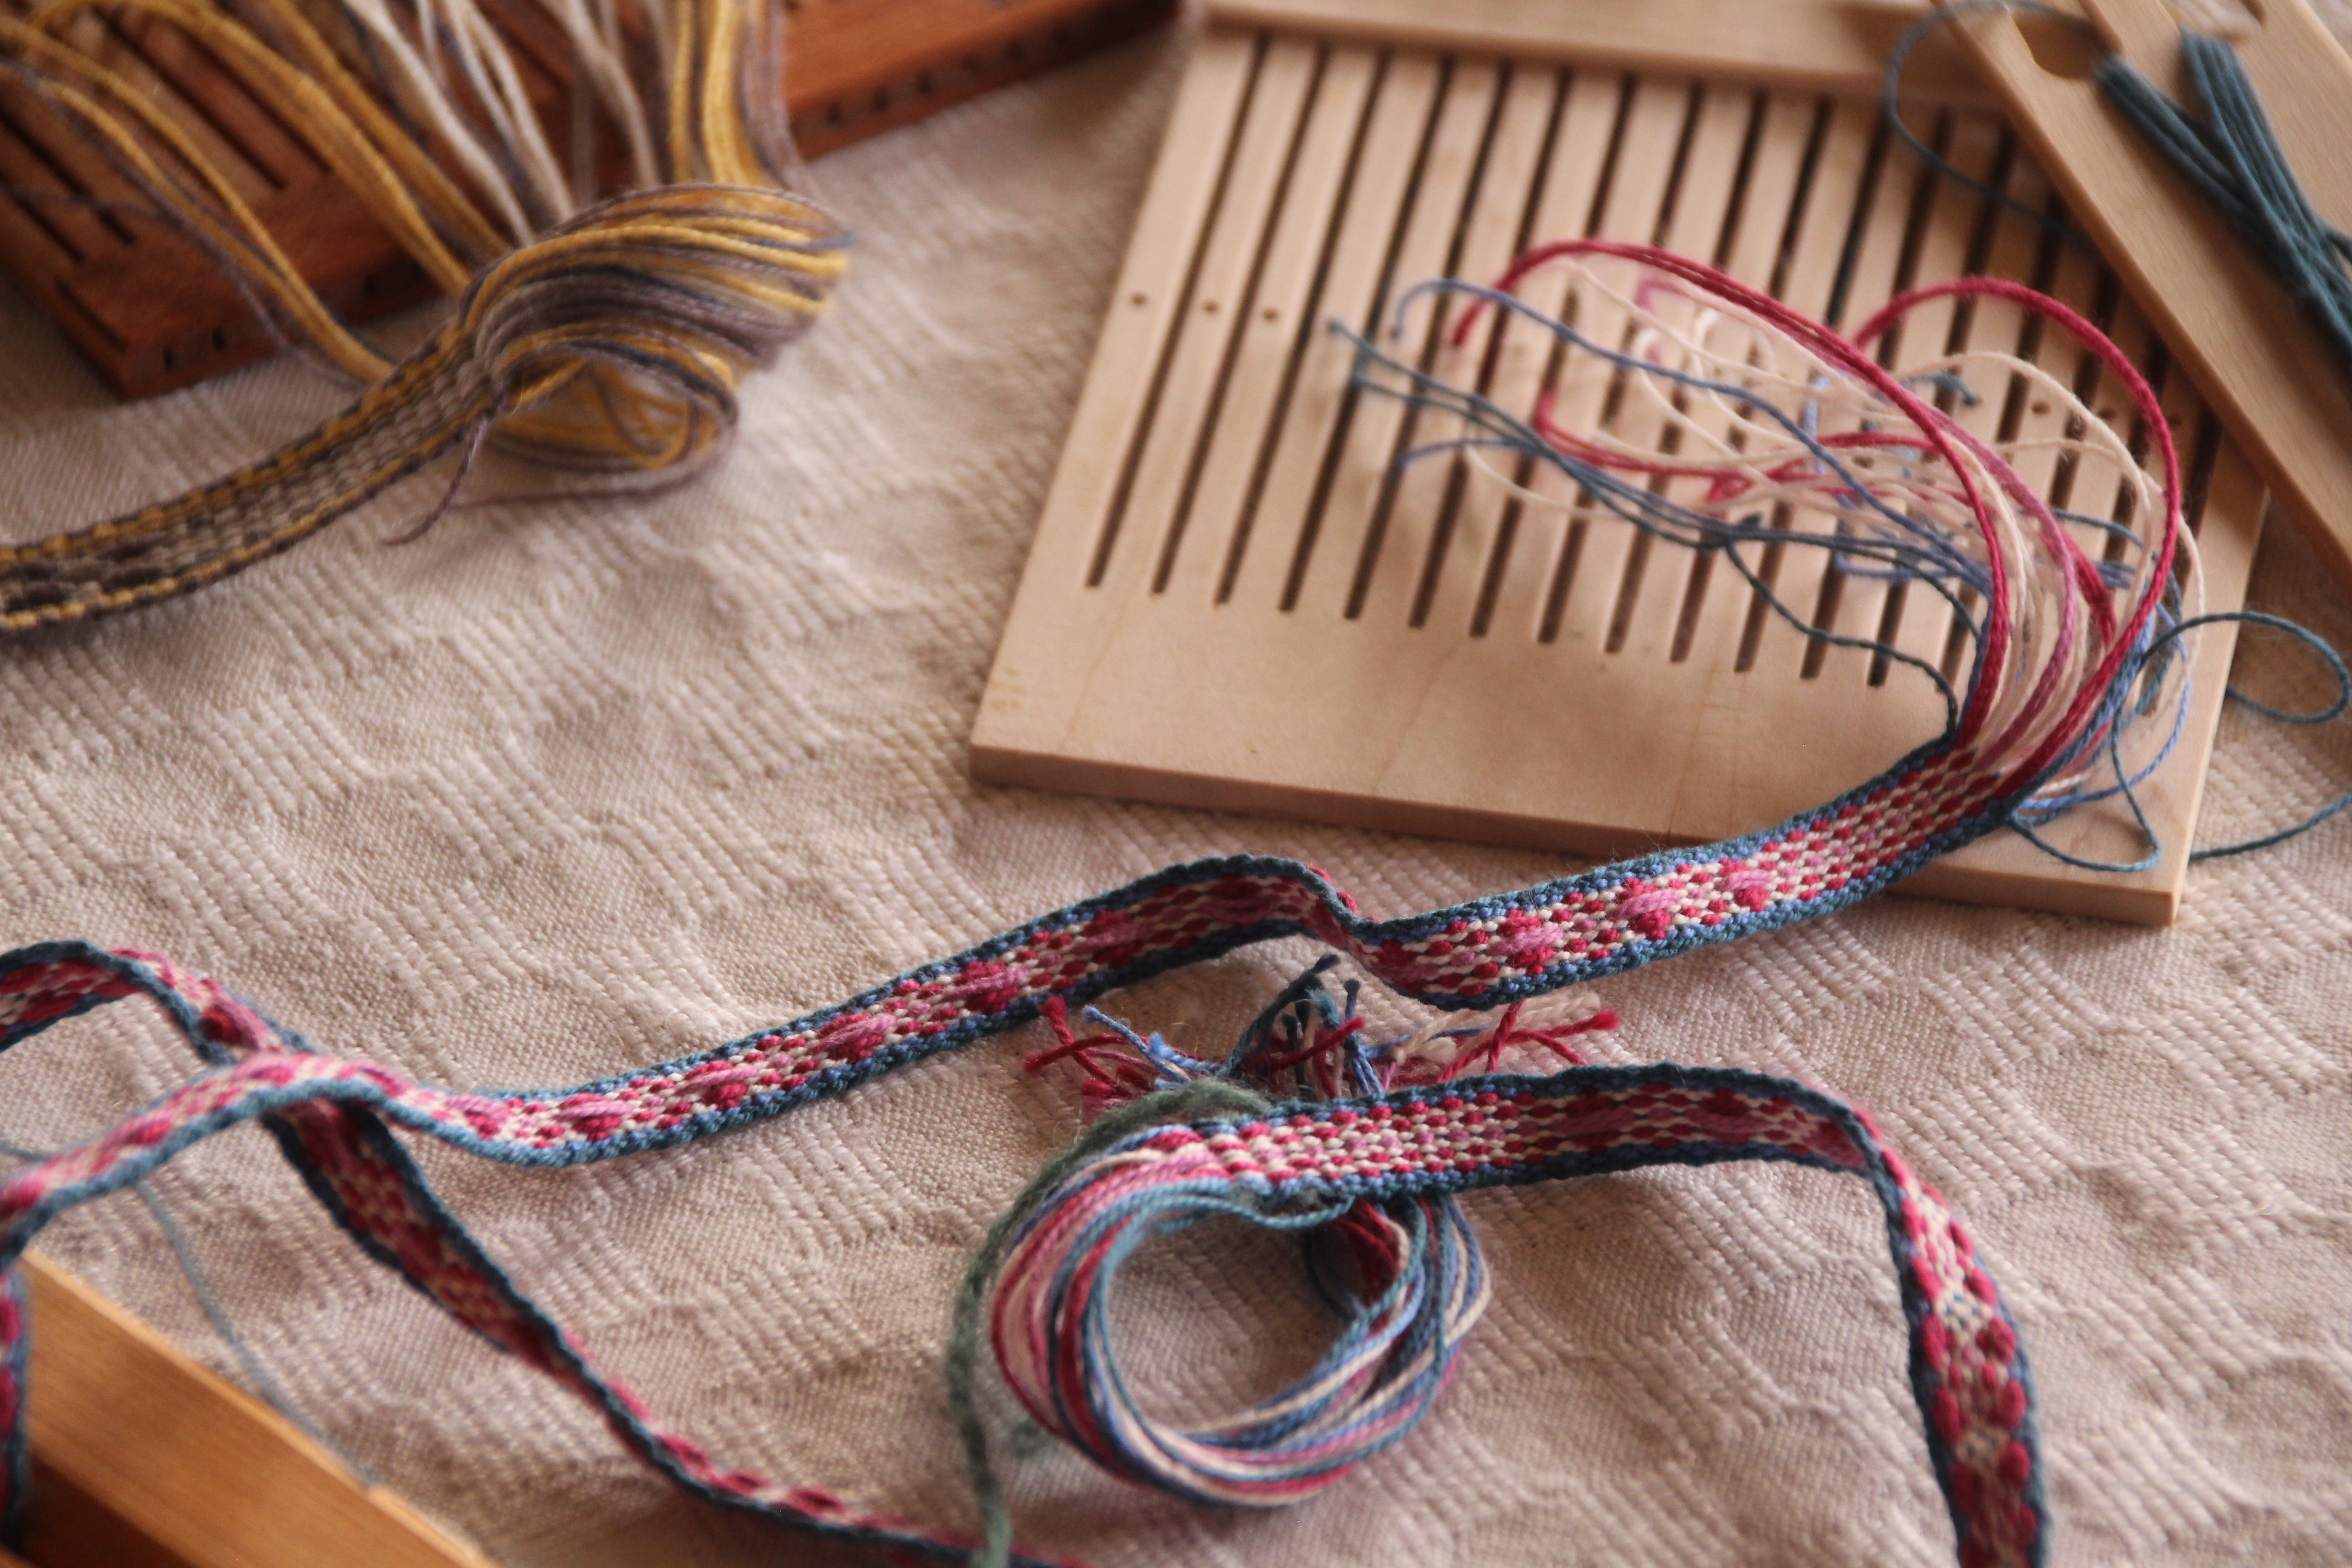
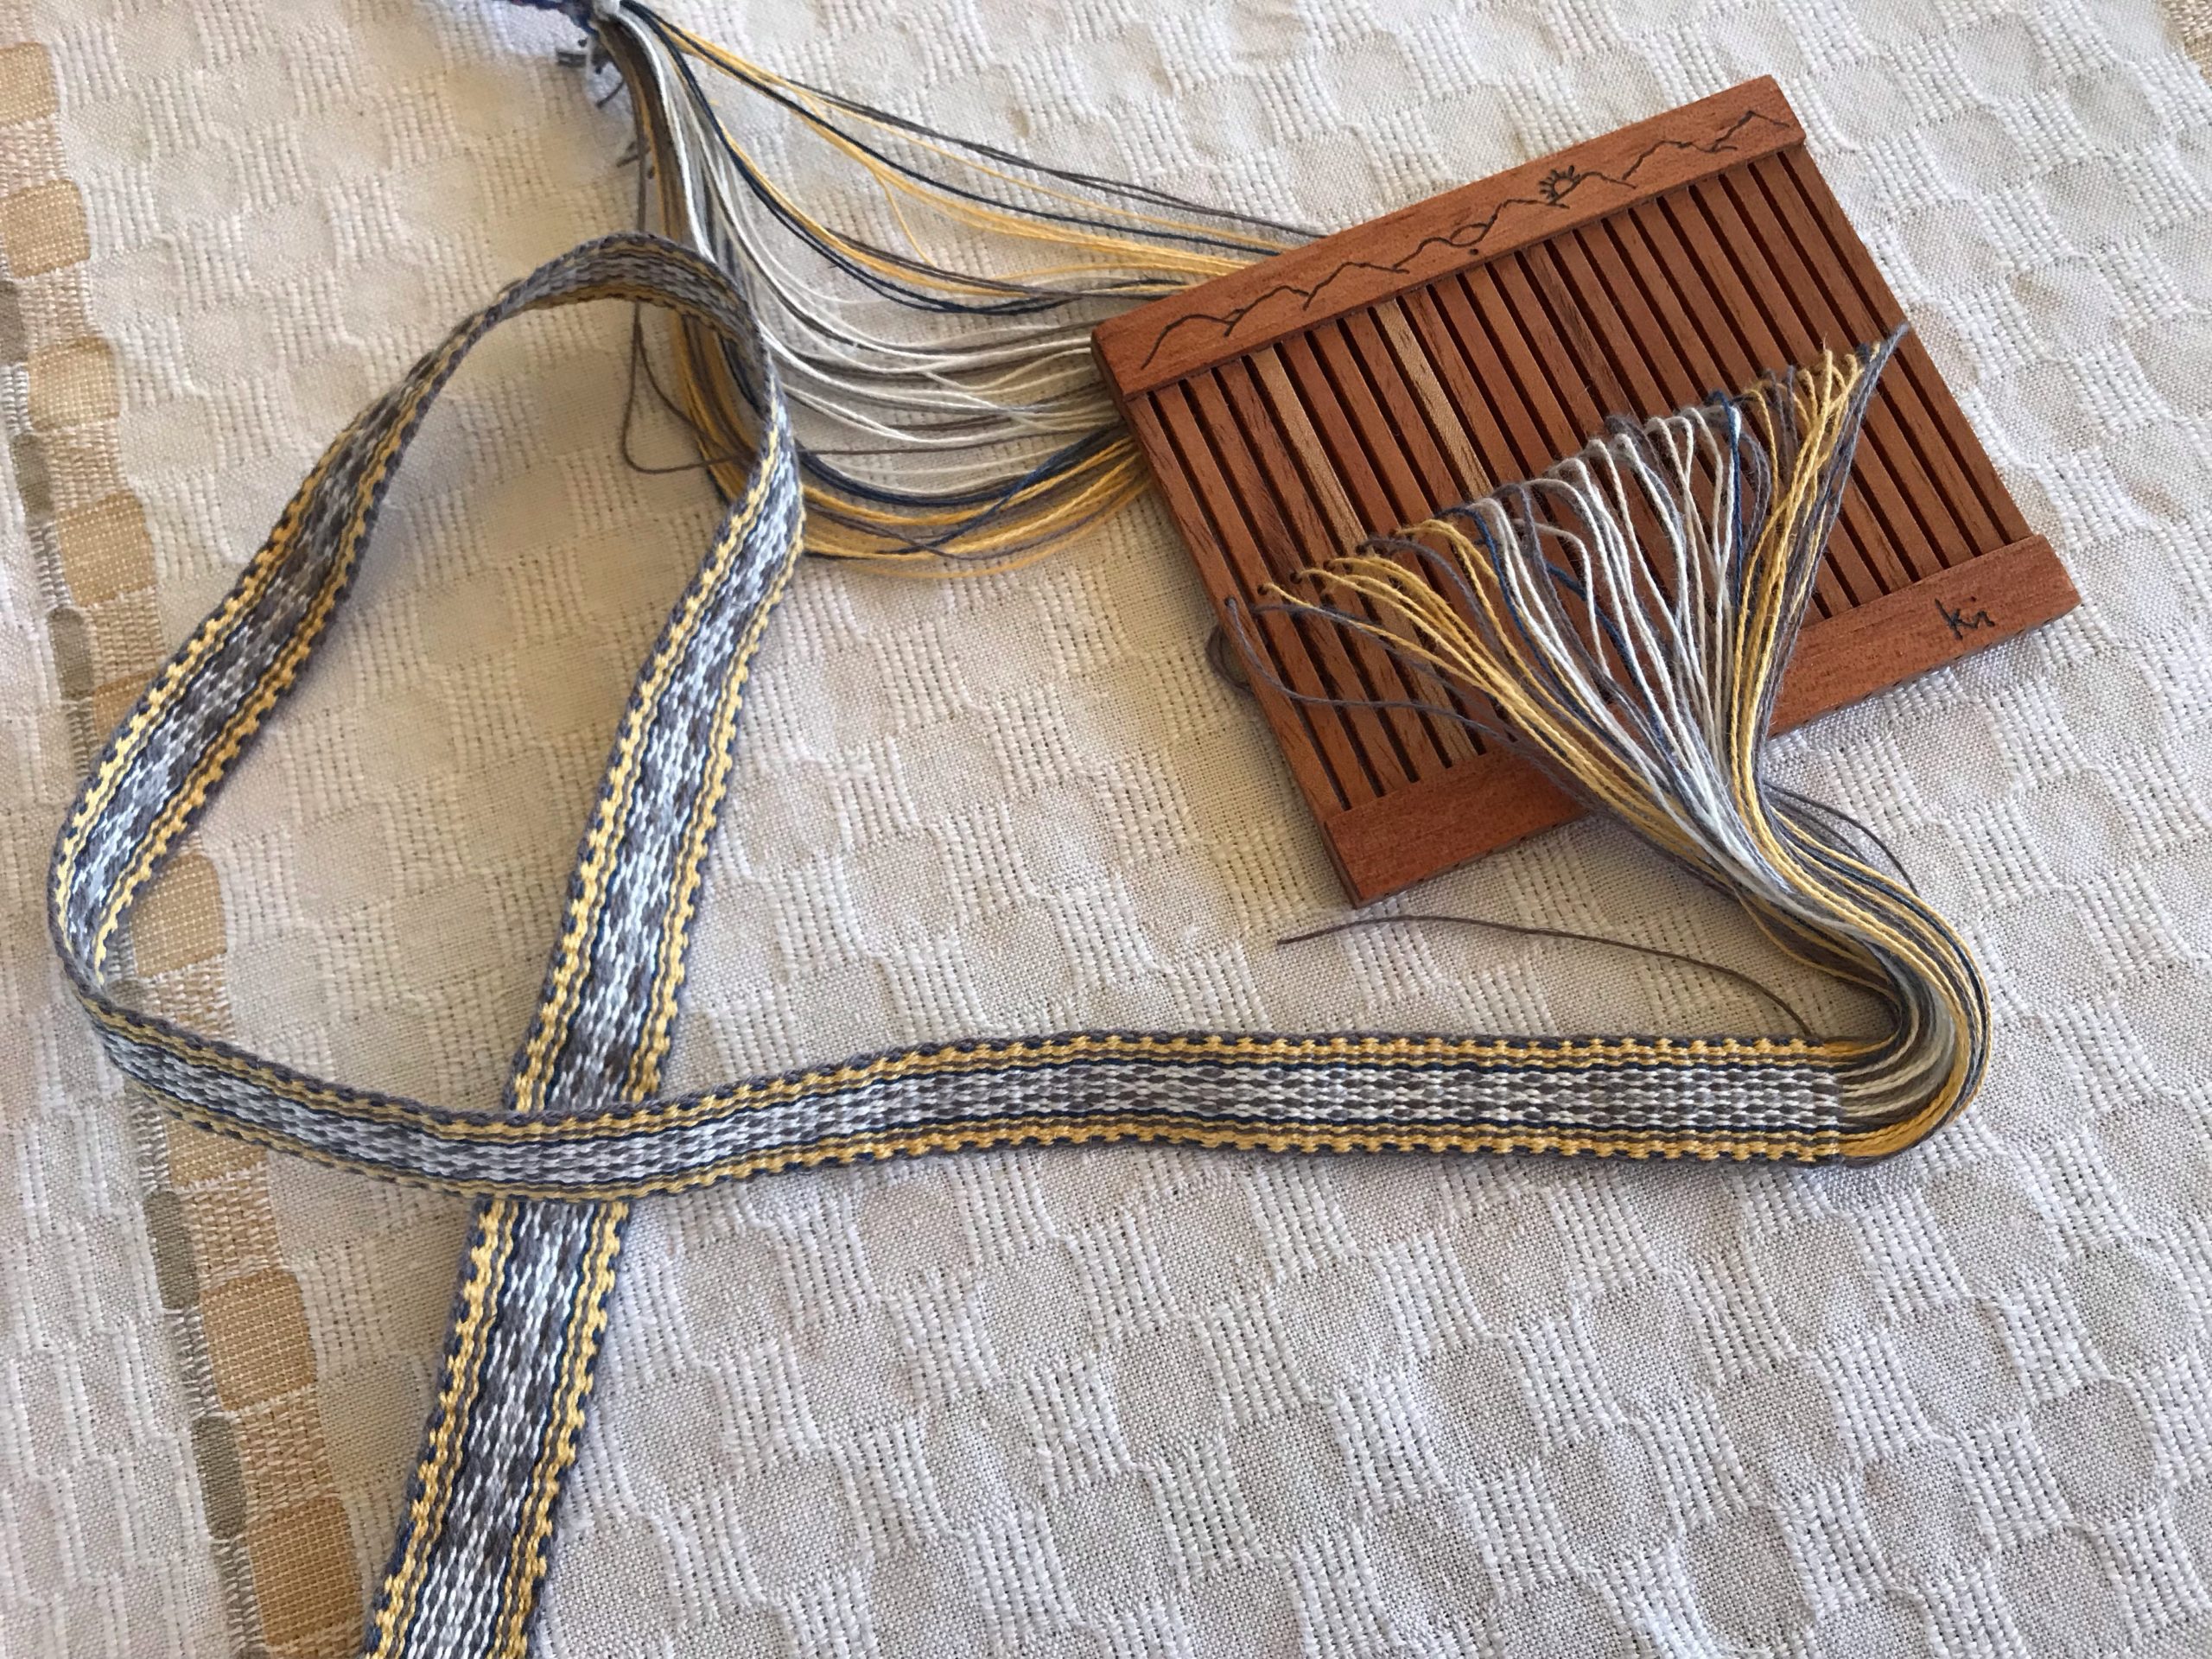
Band weaving is a simple activity that helps you notice the little things. You see how each thread falls into place. How the thread turns the selvedge corner just so. How the pattern threads stand proud in floats or hide in subtle patterns. I enjoy practicing my skills as a band weaver. And more so, now that Steve has turned his attention to making band heddles for me.
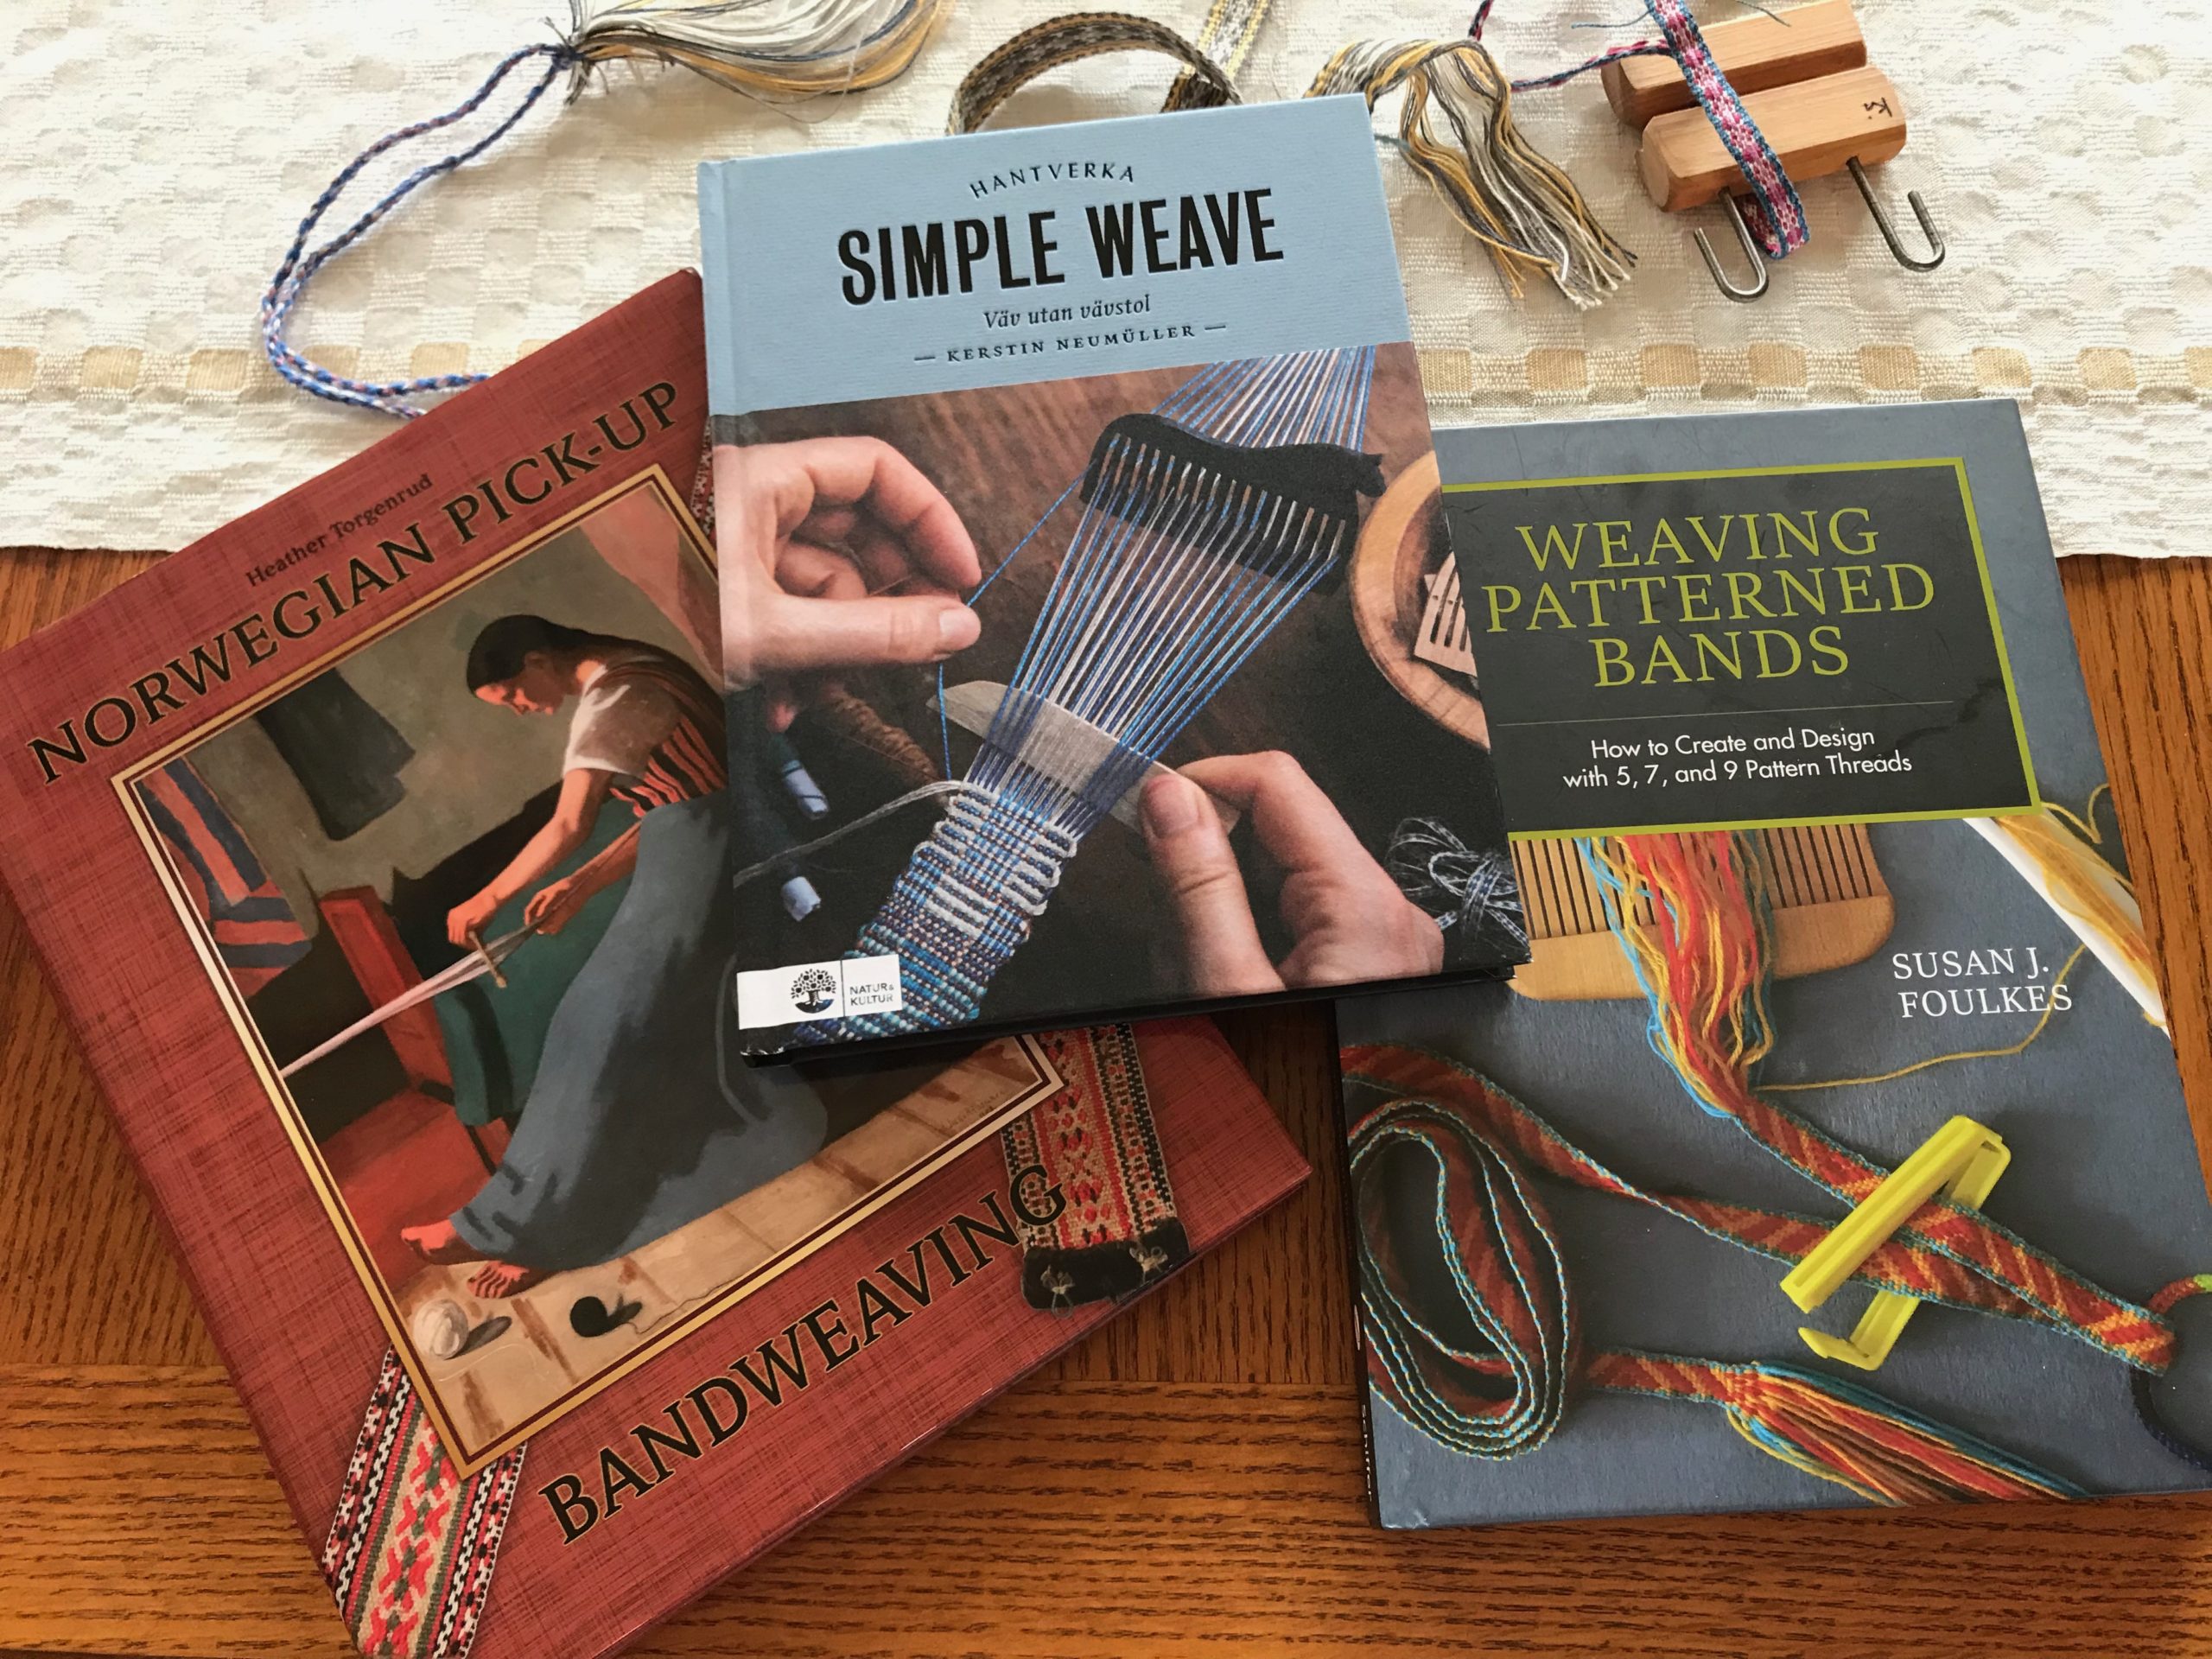
Workshop at Contemporary Handweavers of Texas Conference 2019 got me started with weaving patterned bands on a rigid heddle.First heddle by Steve is made from Soft Maple. Band has 21 ends (with 5 pattern threads, doubled). 8/2 cotton and 22/2 cottolin.Heddle made from Spanish Cedar. Wood-burned top represents the Texas Hill Country hills that we enjoy. Band has 45 ends (with 5 pattern threads, doubled), using the heddle’s full width. 8/2 cotton and 22/2 cottolin.Walnut band heddle in the making.Torgenrud, H. (2015). Norwegian pick-up bandweaving. Schiffer Publishing; Foulkes, S. (2018). Weaving Patterned Bands. How to Create and Design with 5, 7, and 9 Pattern Threads. Schiffer Publishing; Neumüller, K. (2021). Simple Weave. (Language: Swedish). Natur & Kultur, Stockholm.
Pictures in the following slideshow video tell more of the story.
Edited: Steve has compiled photo documentation of how he made my Spanish Cedar and Walnut heddles. Click HERE to send me an email requesting a PDF copy of Making a Band Heddle.
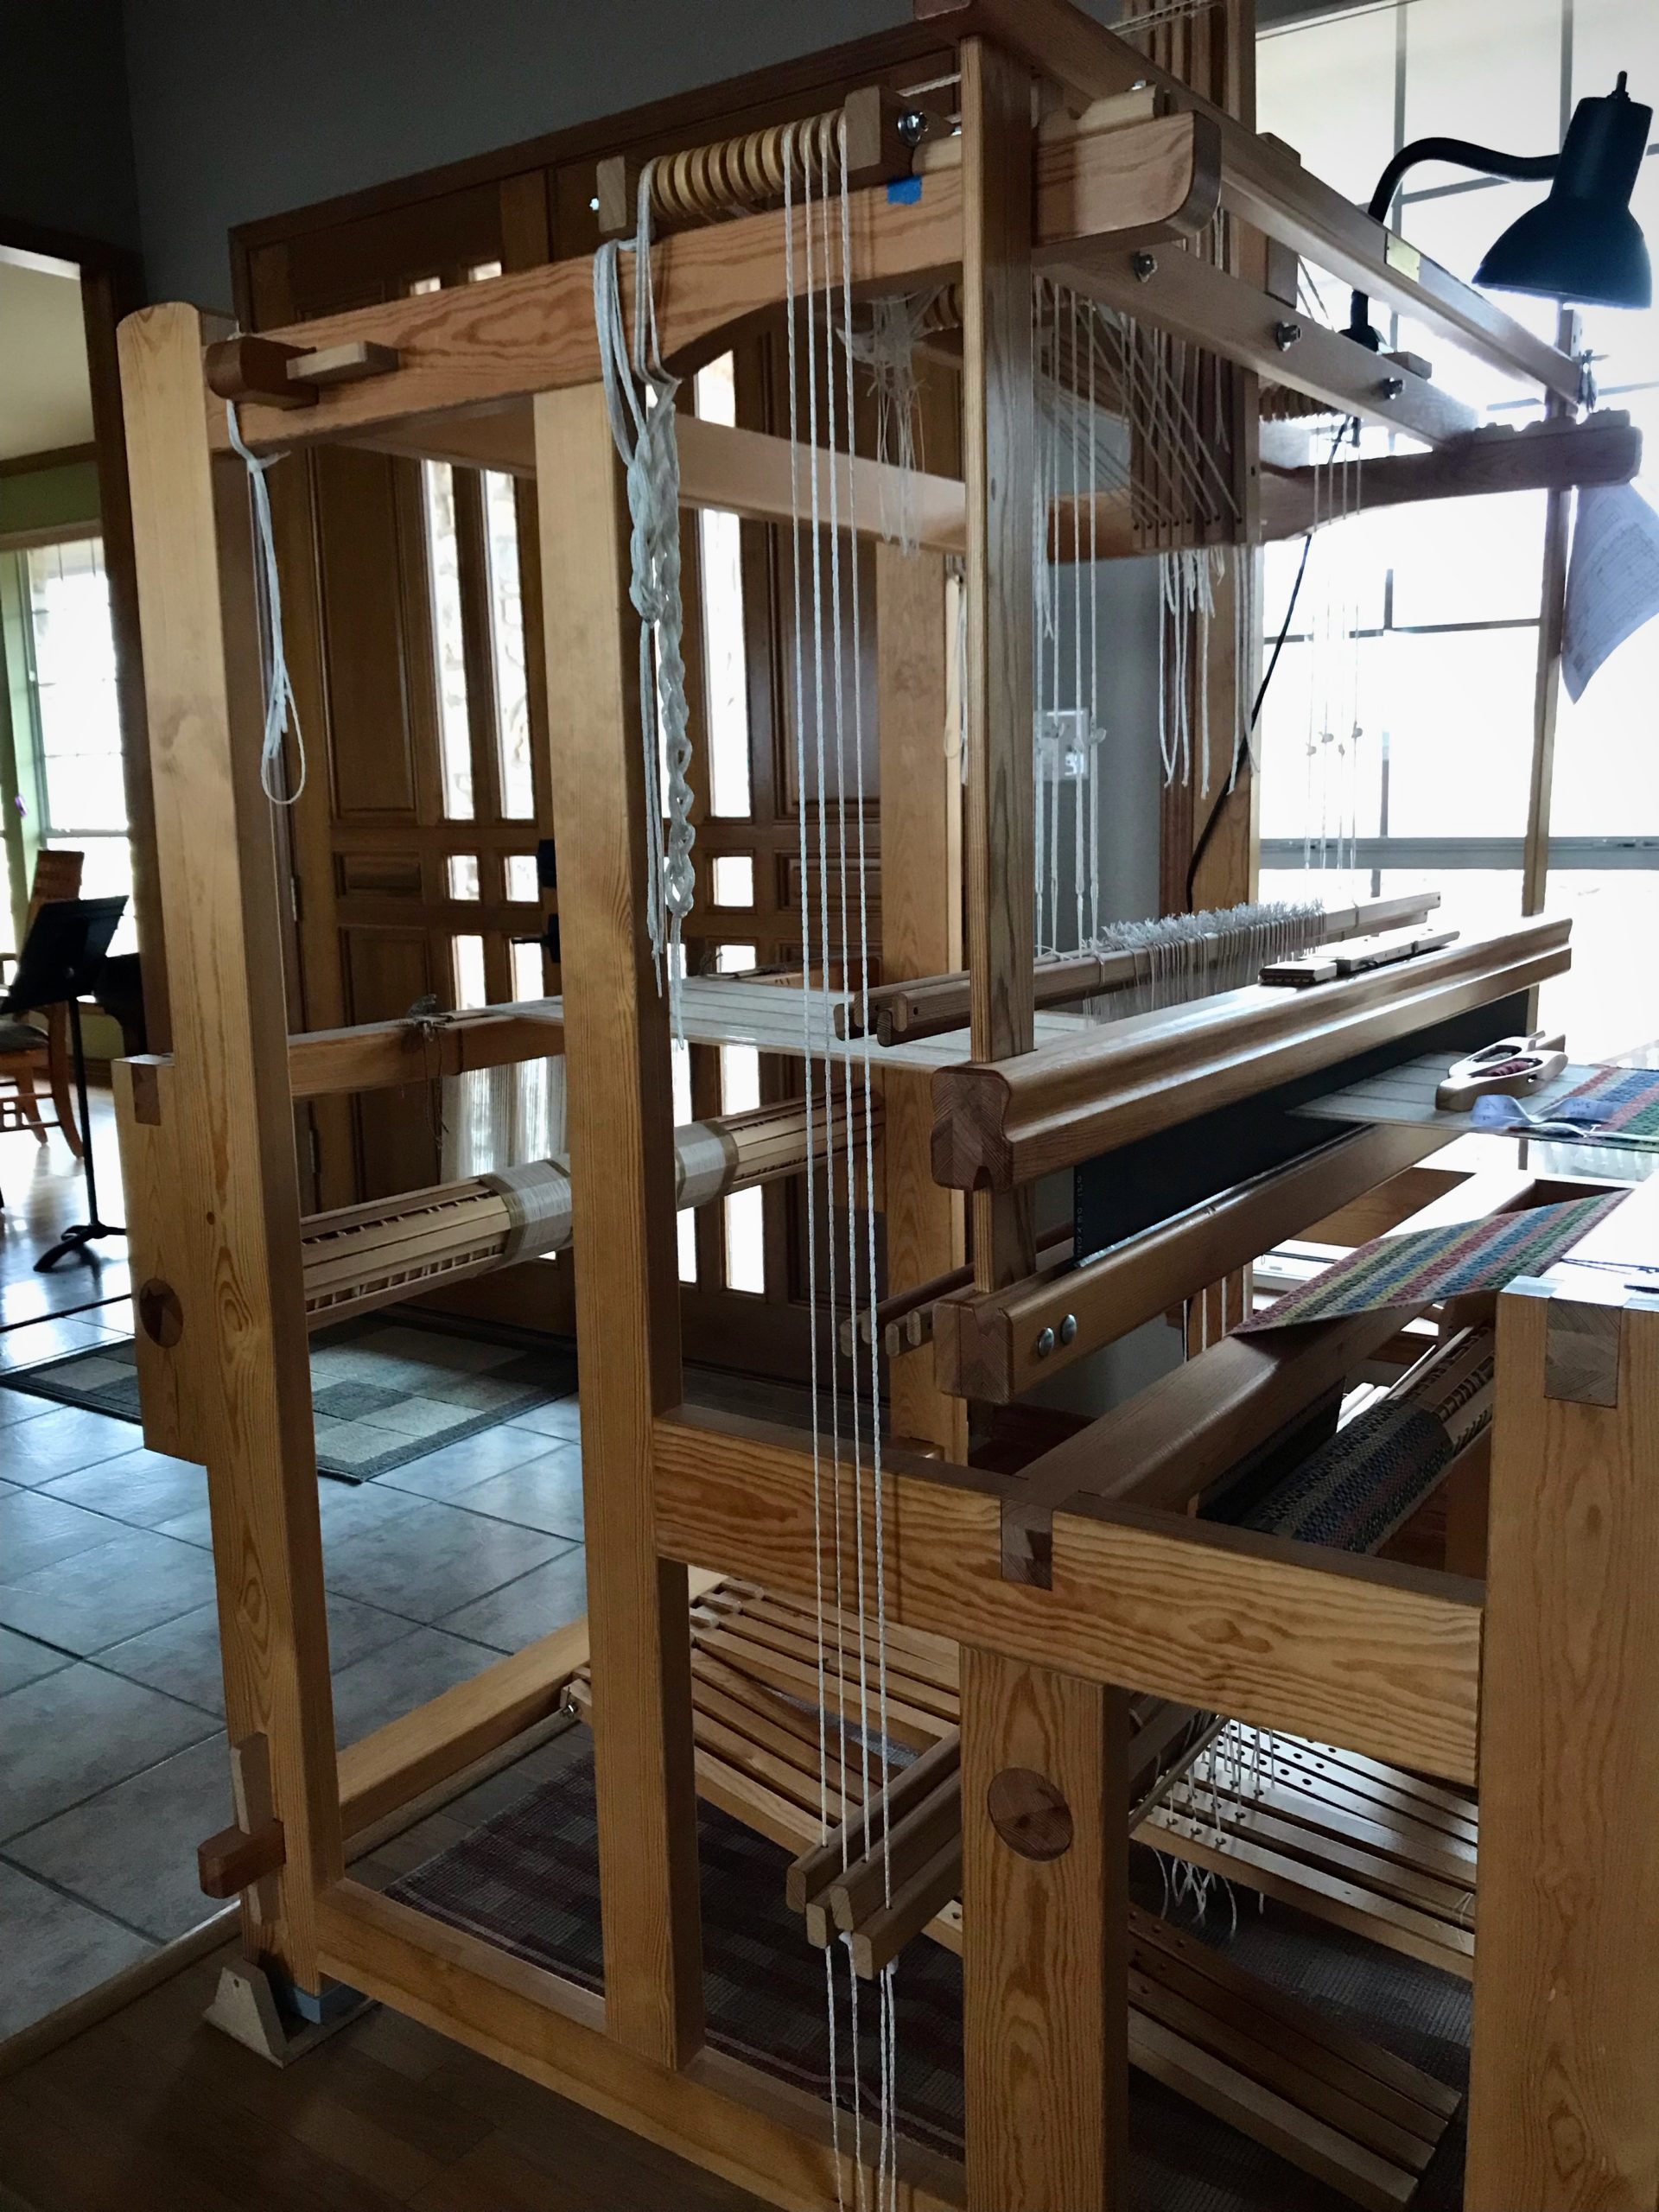
You followed all the instructions for dressing the loom, and have finished the countermarchtie-up. Now, at the moment of triumph you step on the treadles, one by one. Alas! Some or all of the treadles give you nothing you can call a shed. Now what? Maybe you relate to Laura who wrote me recently, “I can’t seem to get the treadles to make a shed.”
The solution is simple. Follow the advice in this sentence on page 37 of Learning to Warp your Loom, by Joanne Hall, “If your sheds are not good, check your loom tie-up from the top down.”
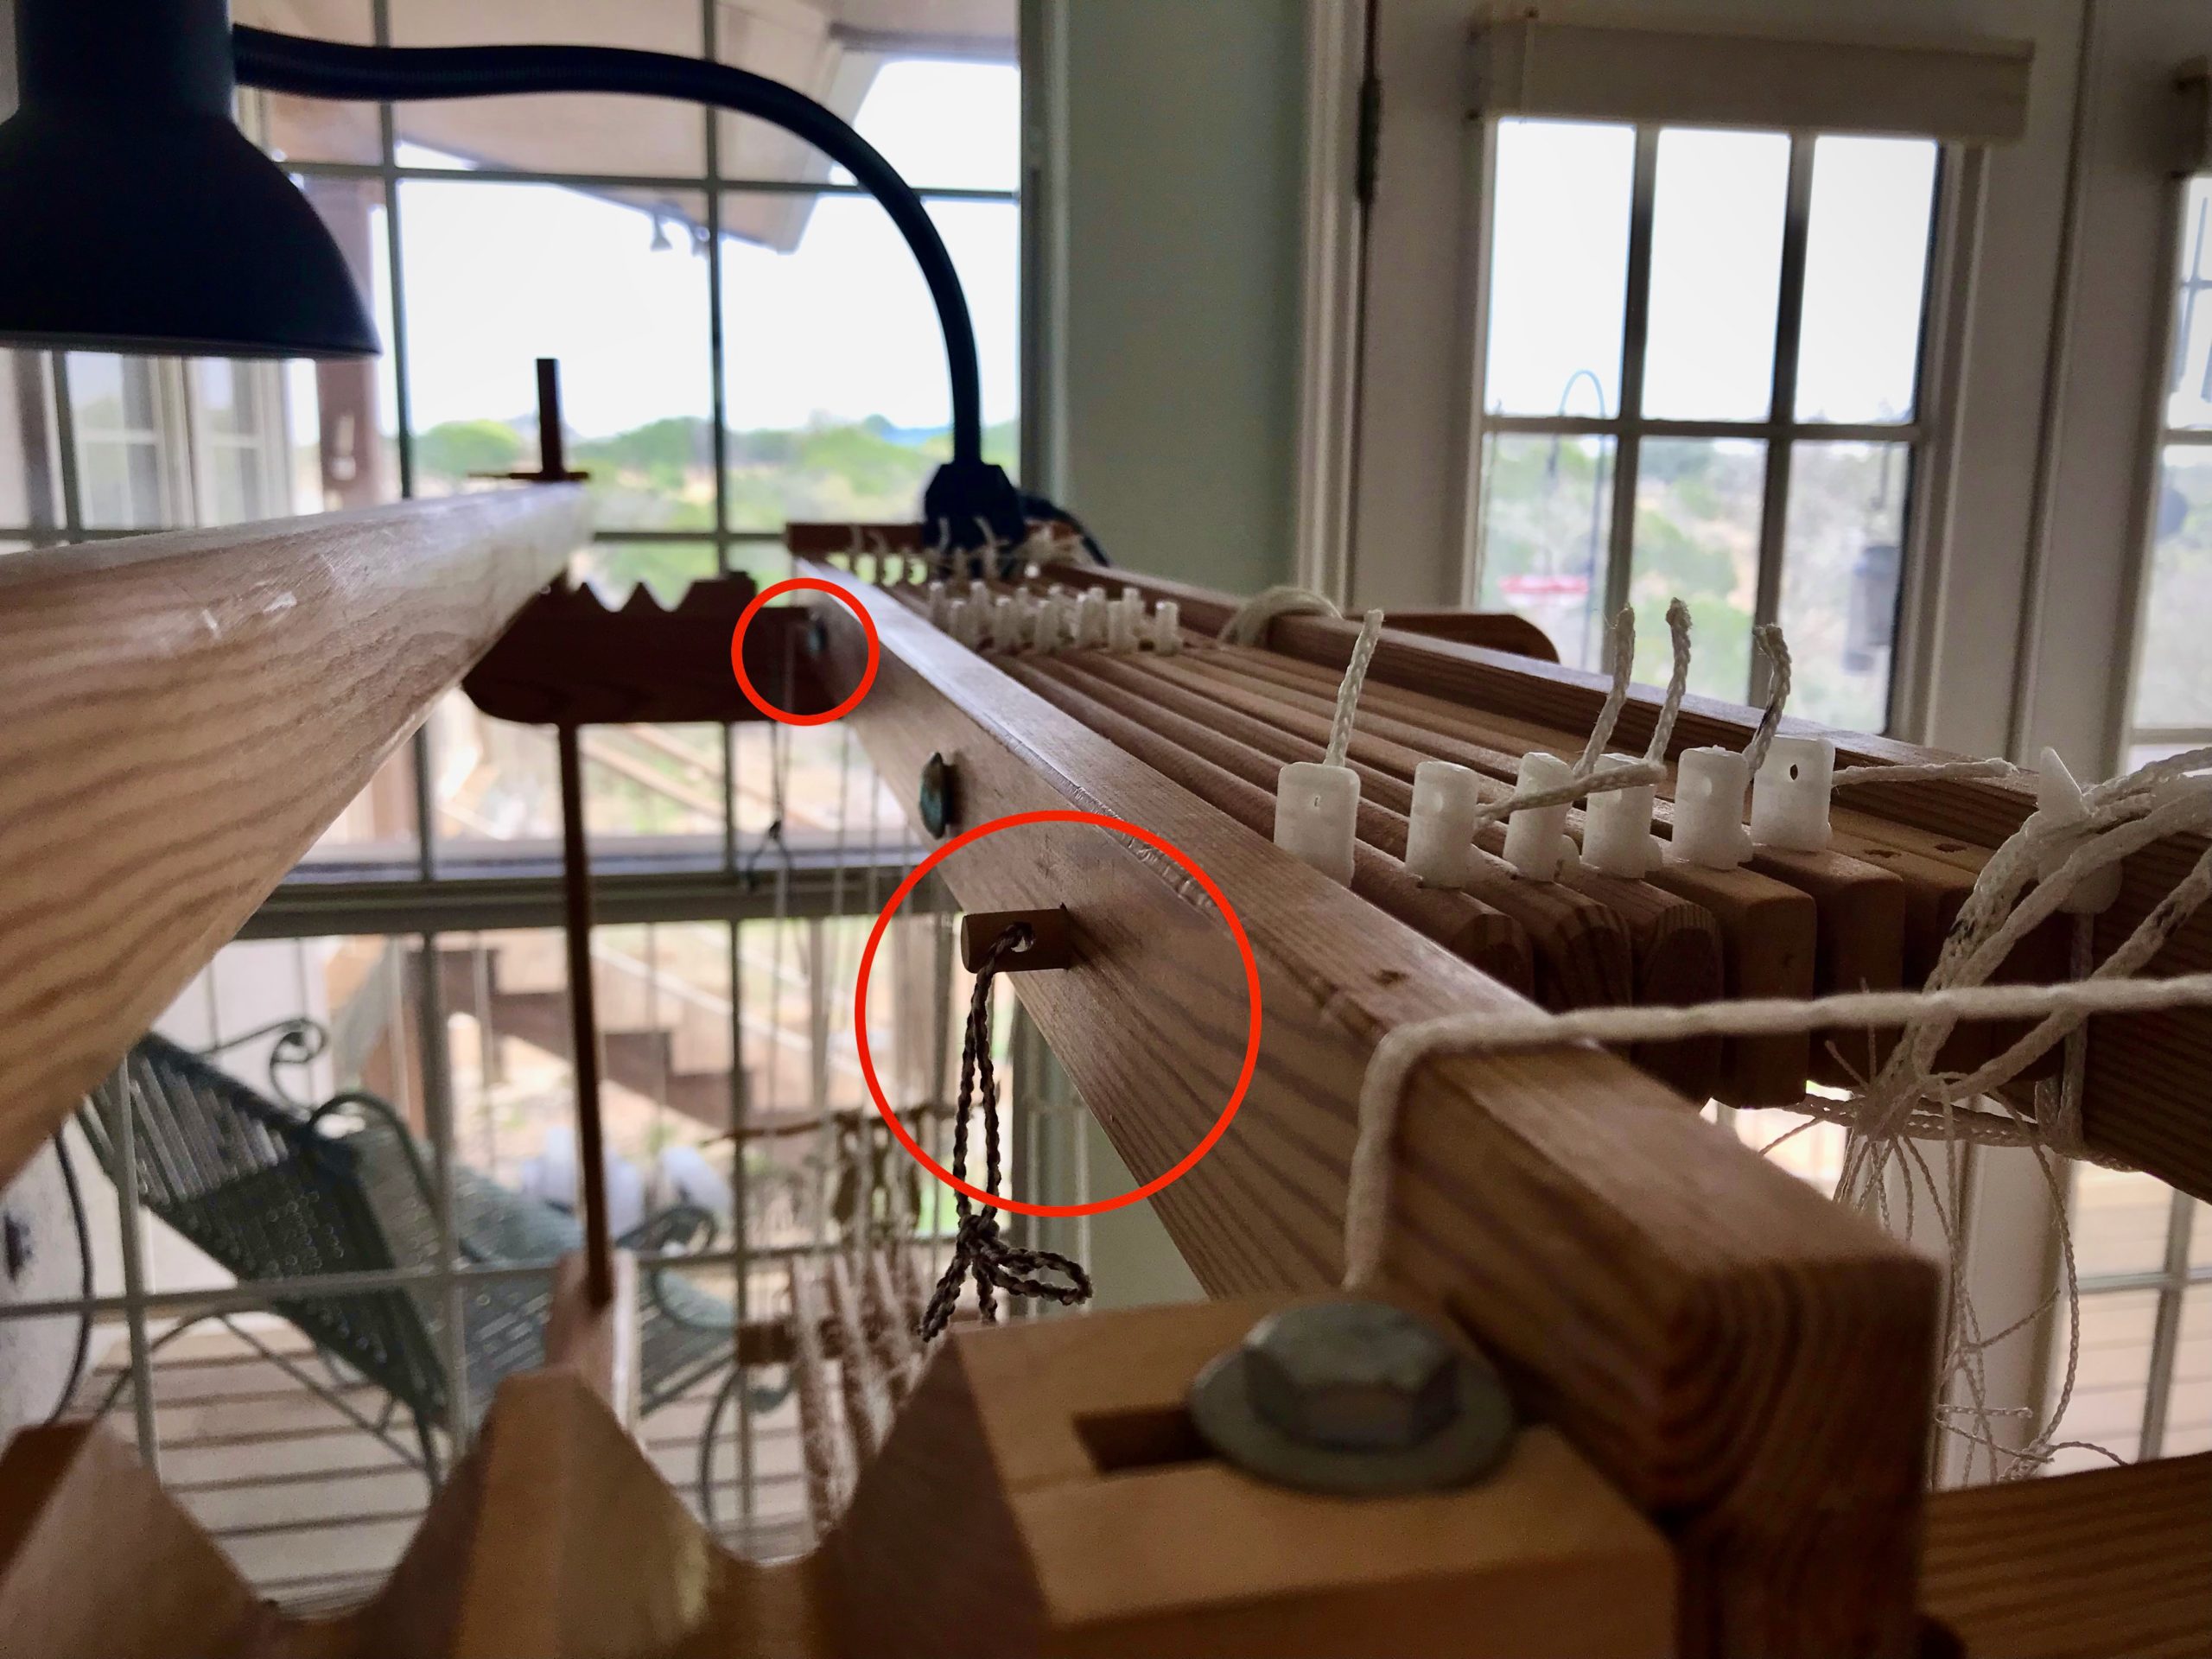
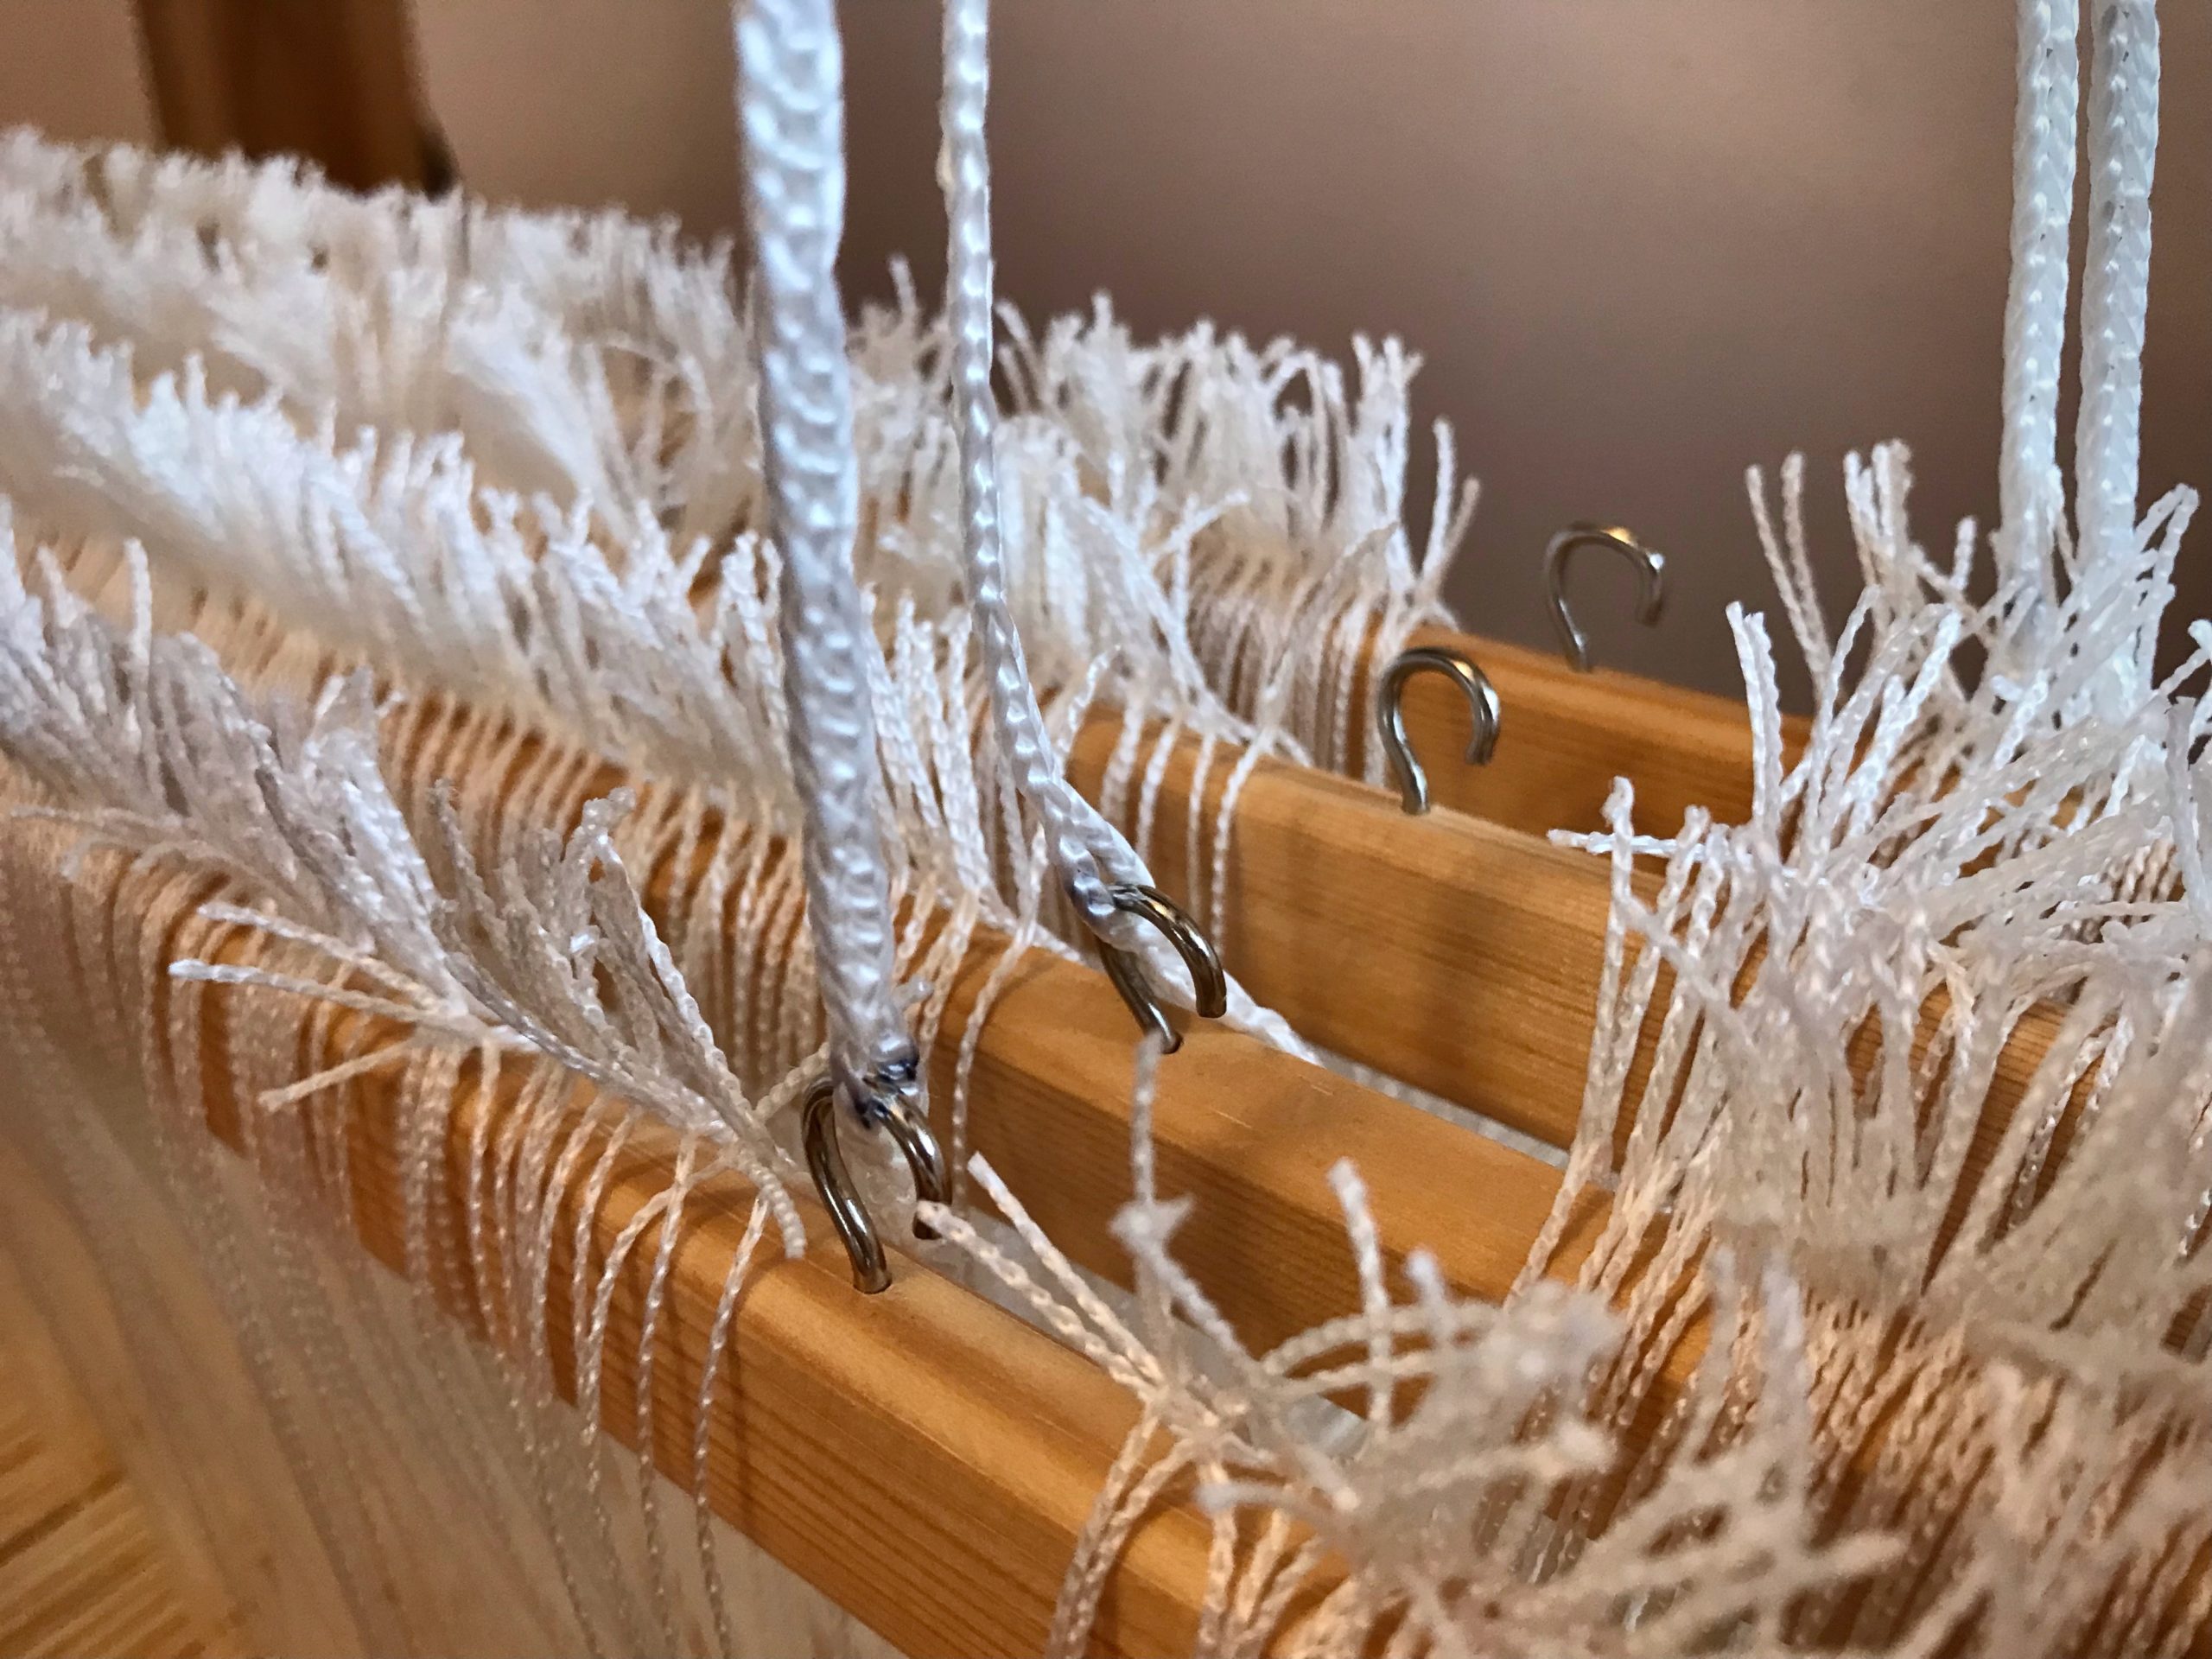
If sheds are missing, there is a good chance you have a crossed cord.
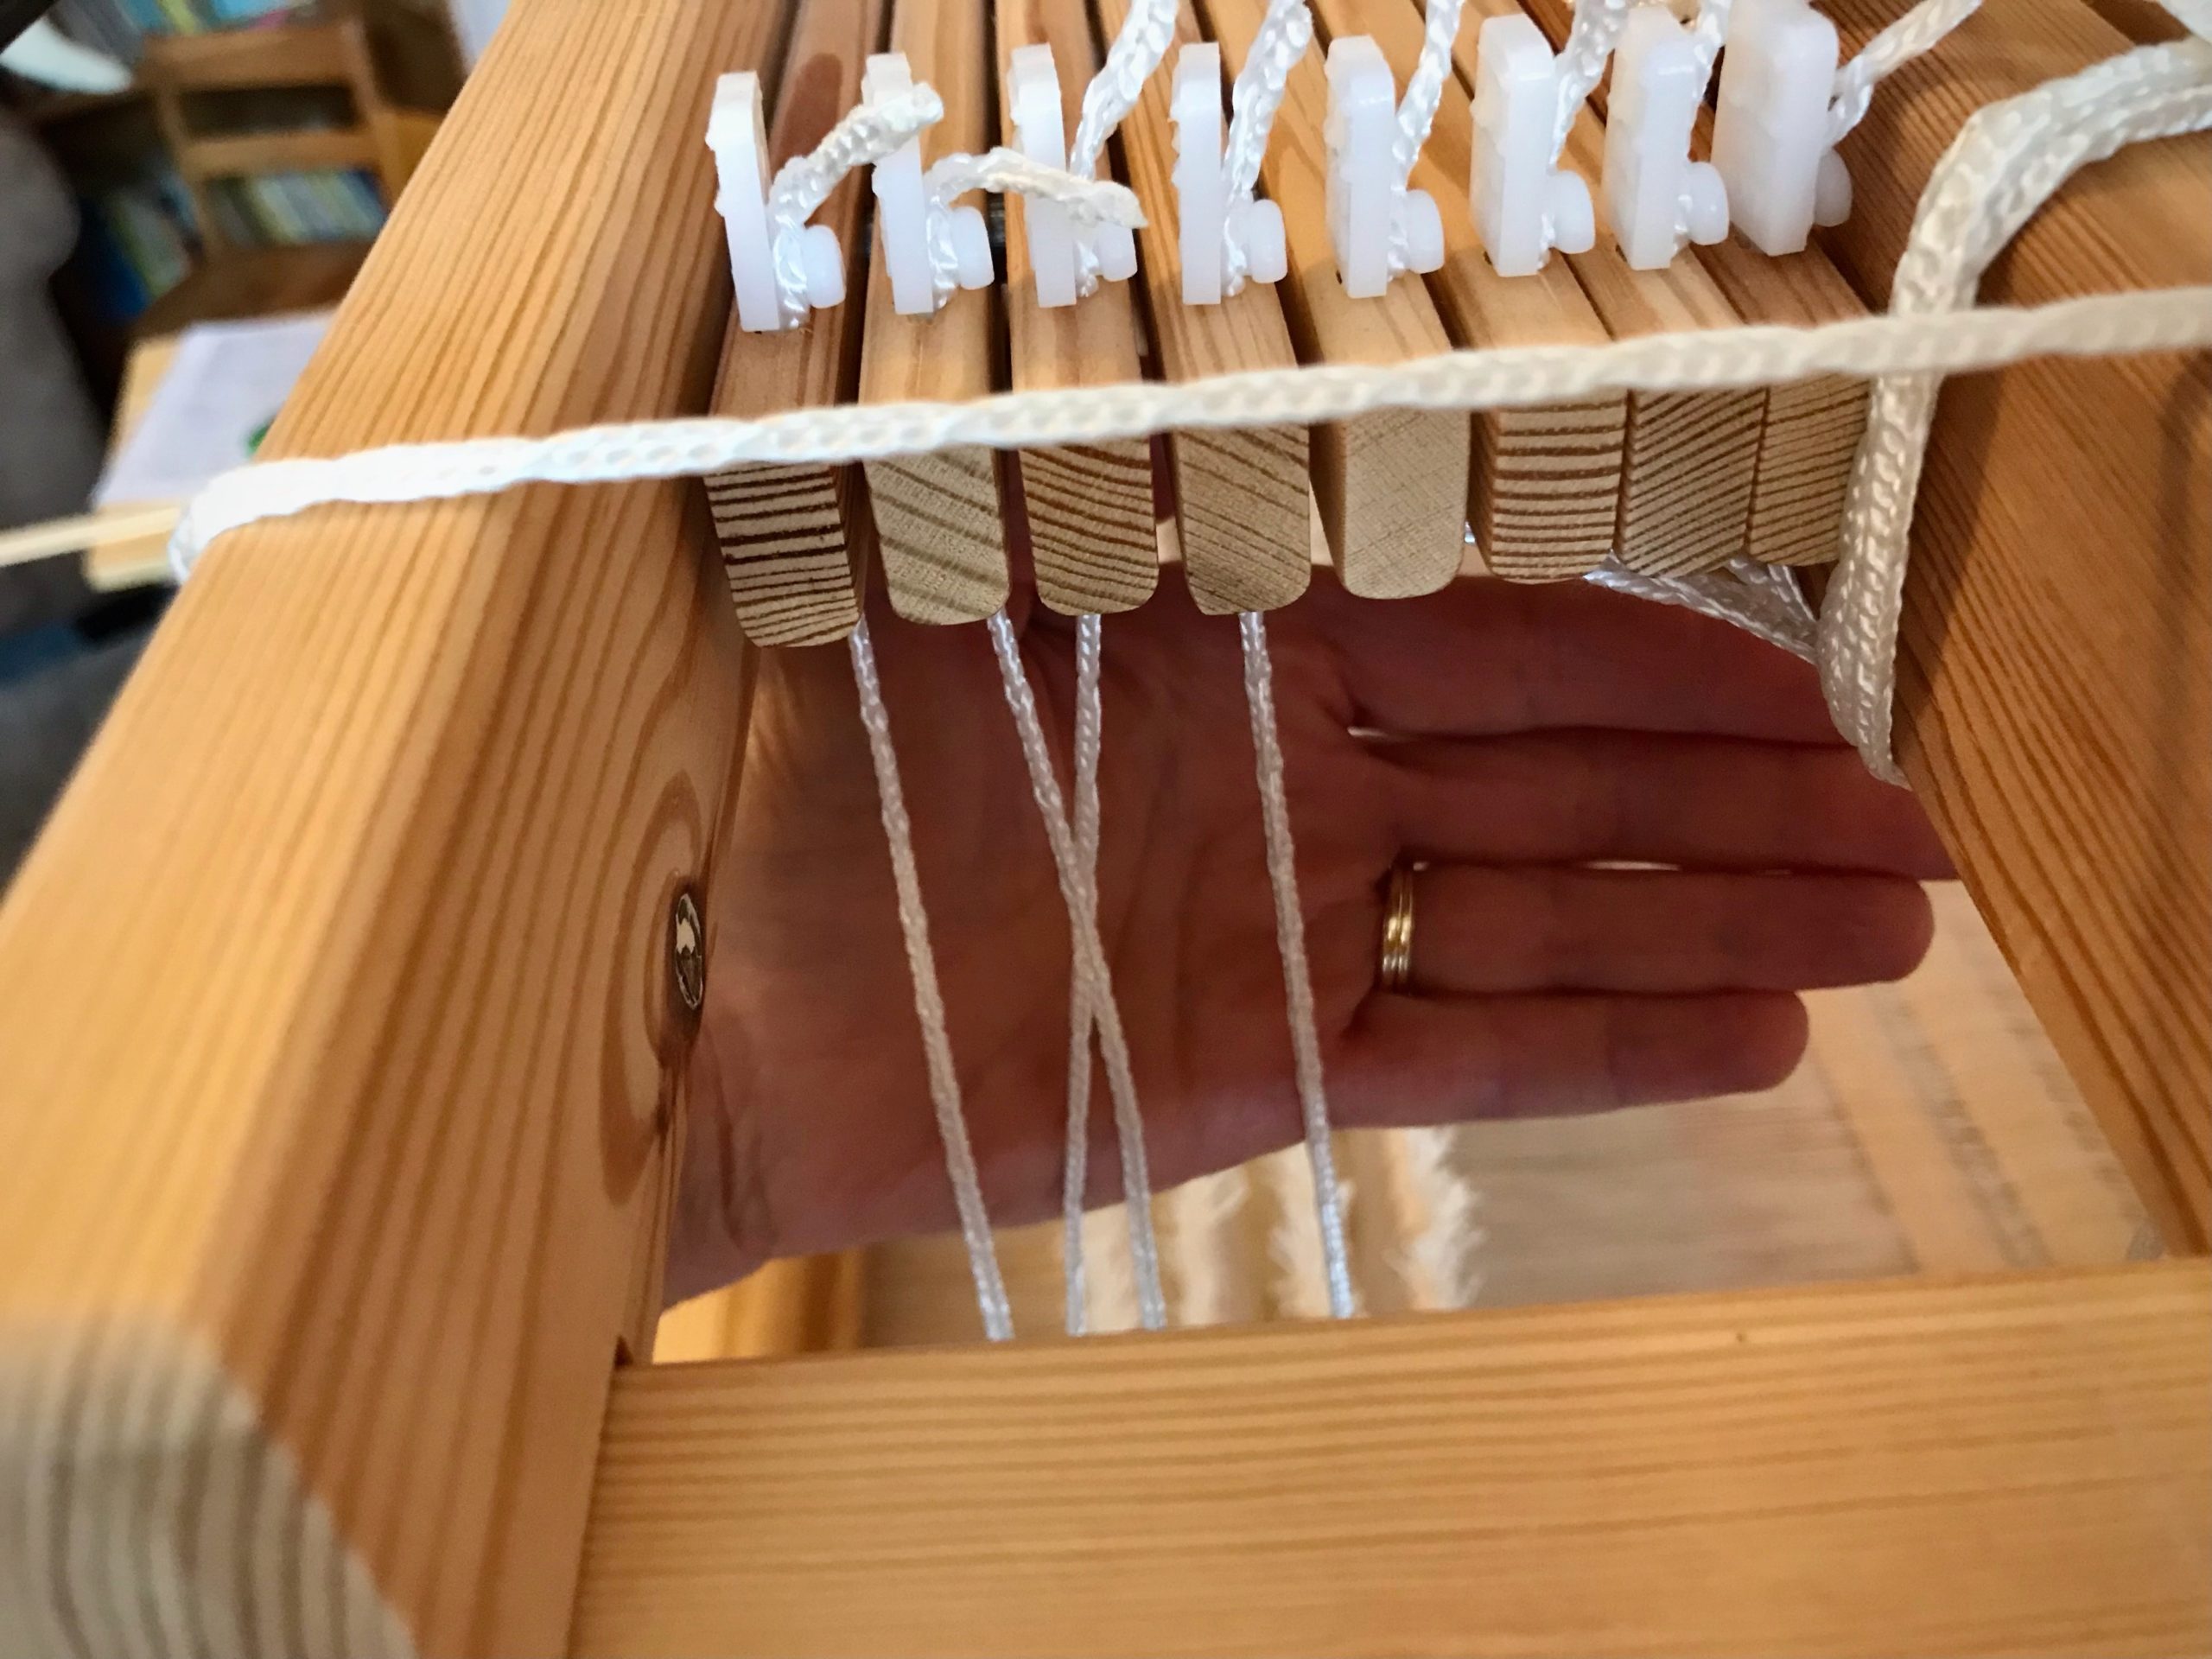
1 Follow each Texsolv cord, starting from the countermarch at top of the loom.
All the shafts are good to go, right? Not quite. Better see what’s happening at the top of those Texsolv cords.
2 Make sure that each cord is connected in the right order at the right place.
Is the first countermarch jack connected to the first shaft, the second jack to the second shaft, and so on?
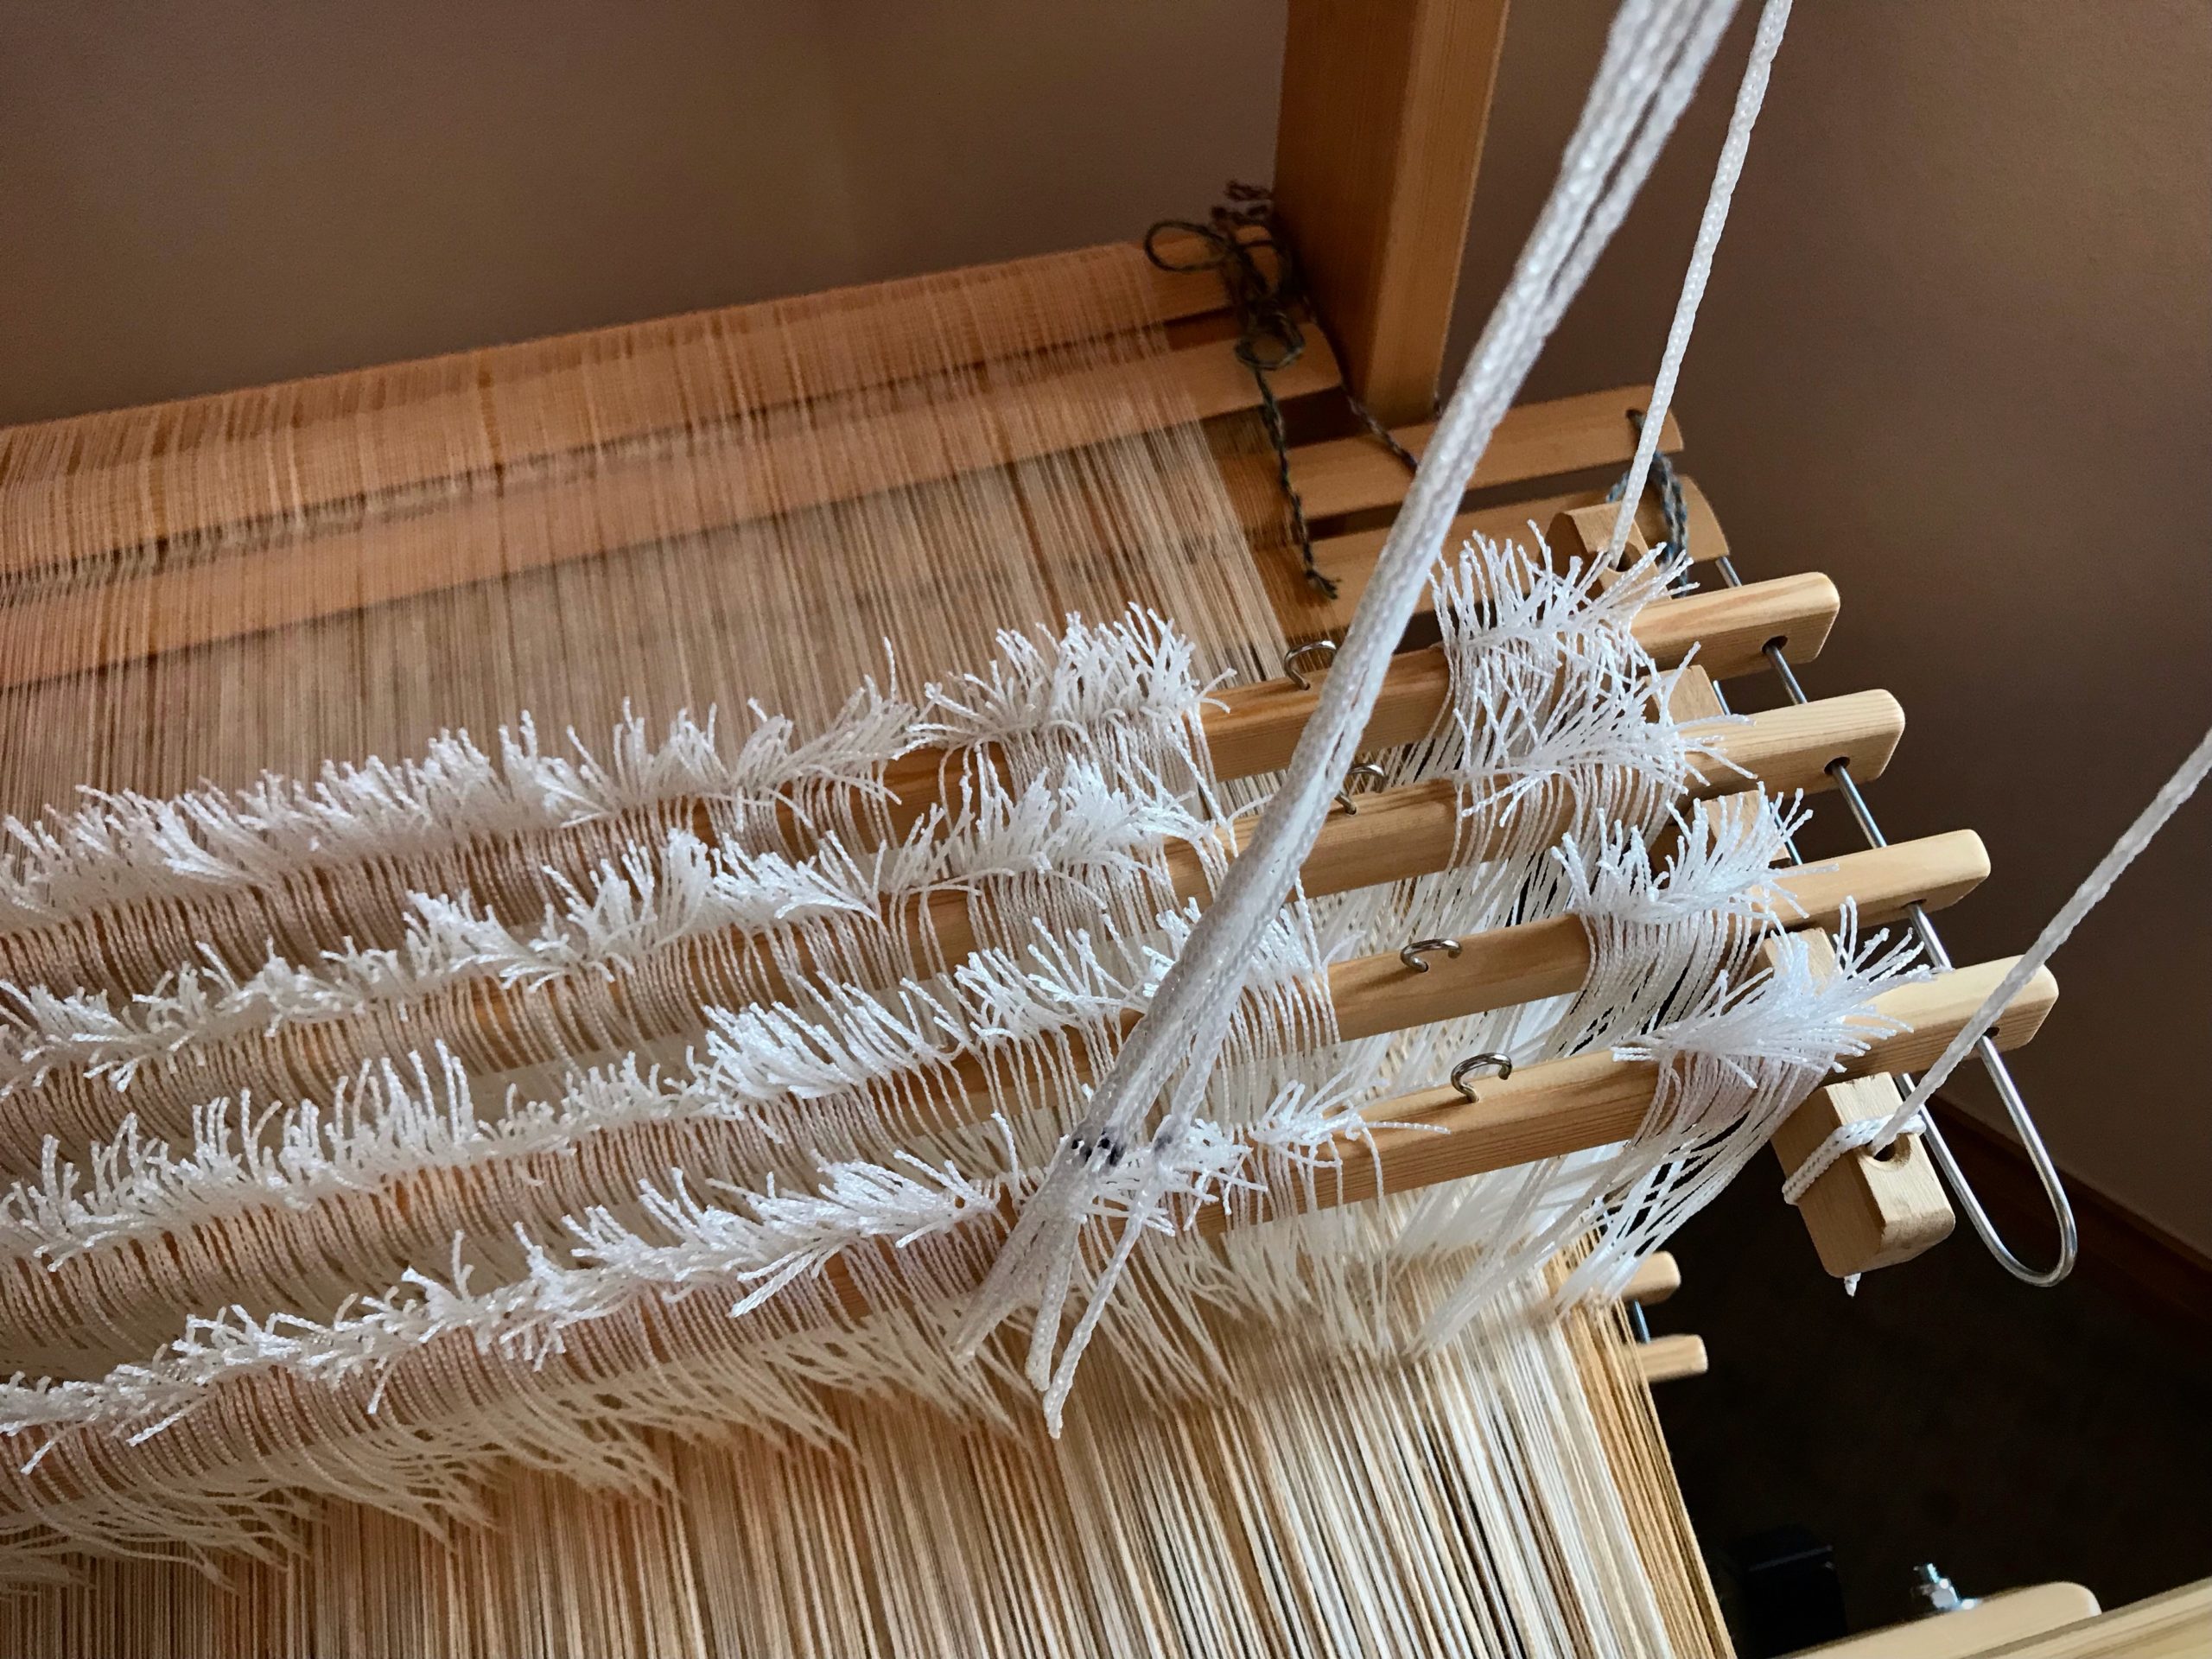
Misaligned cords as seen from the top of the loom.
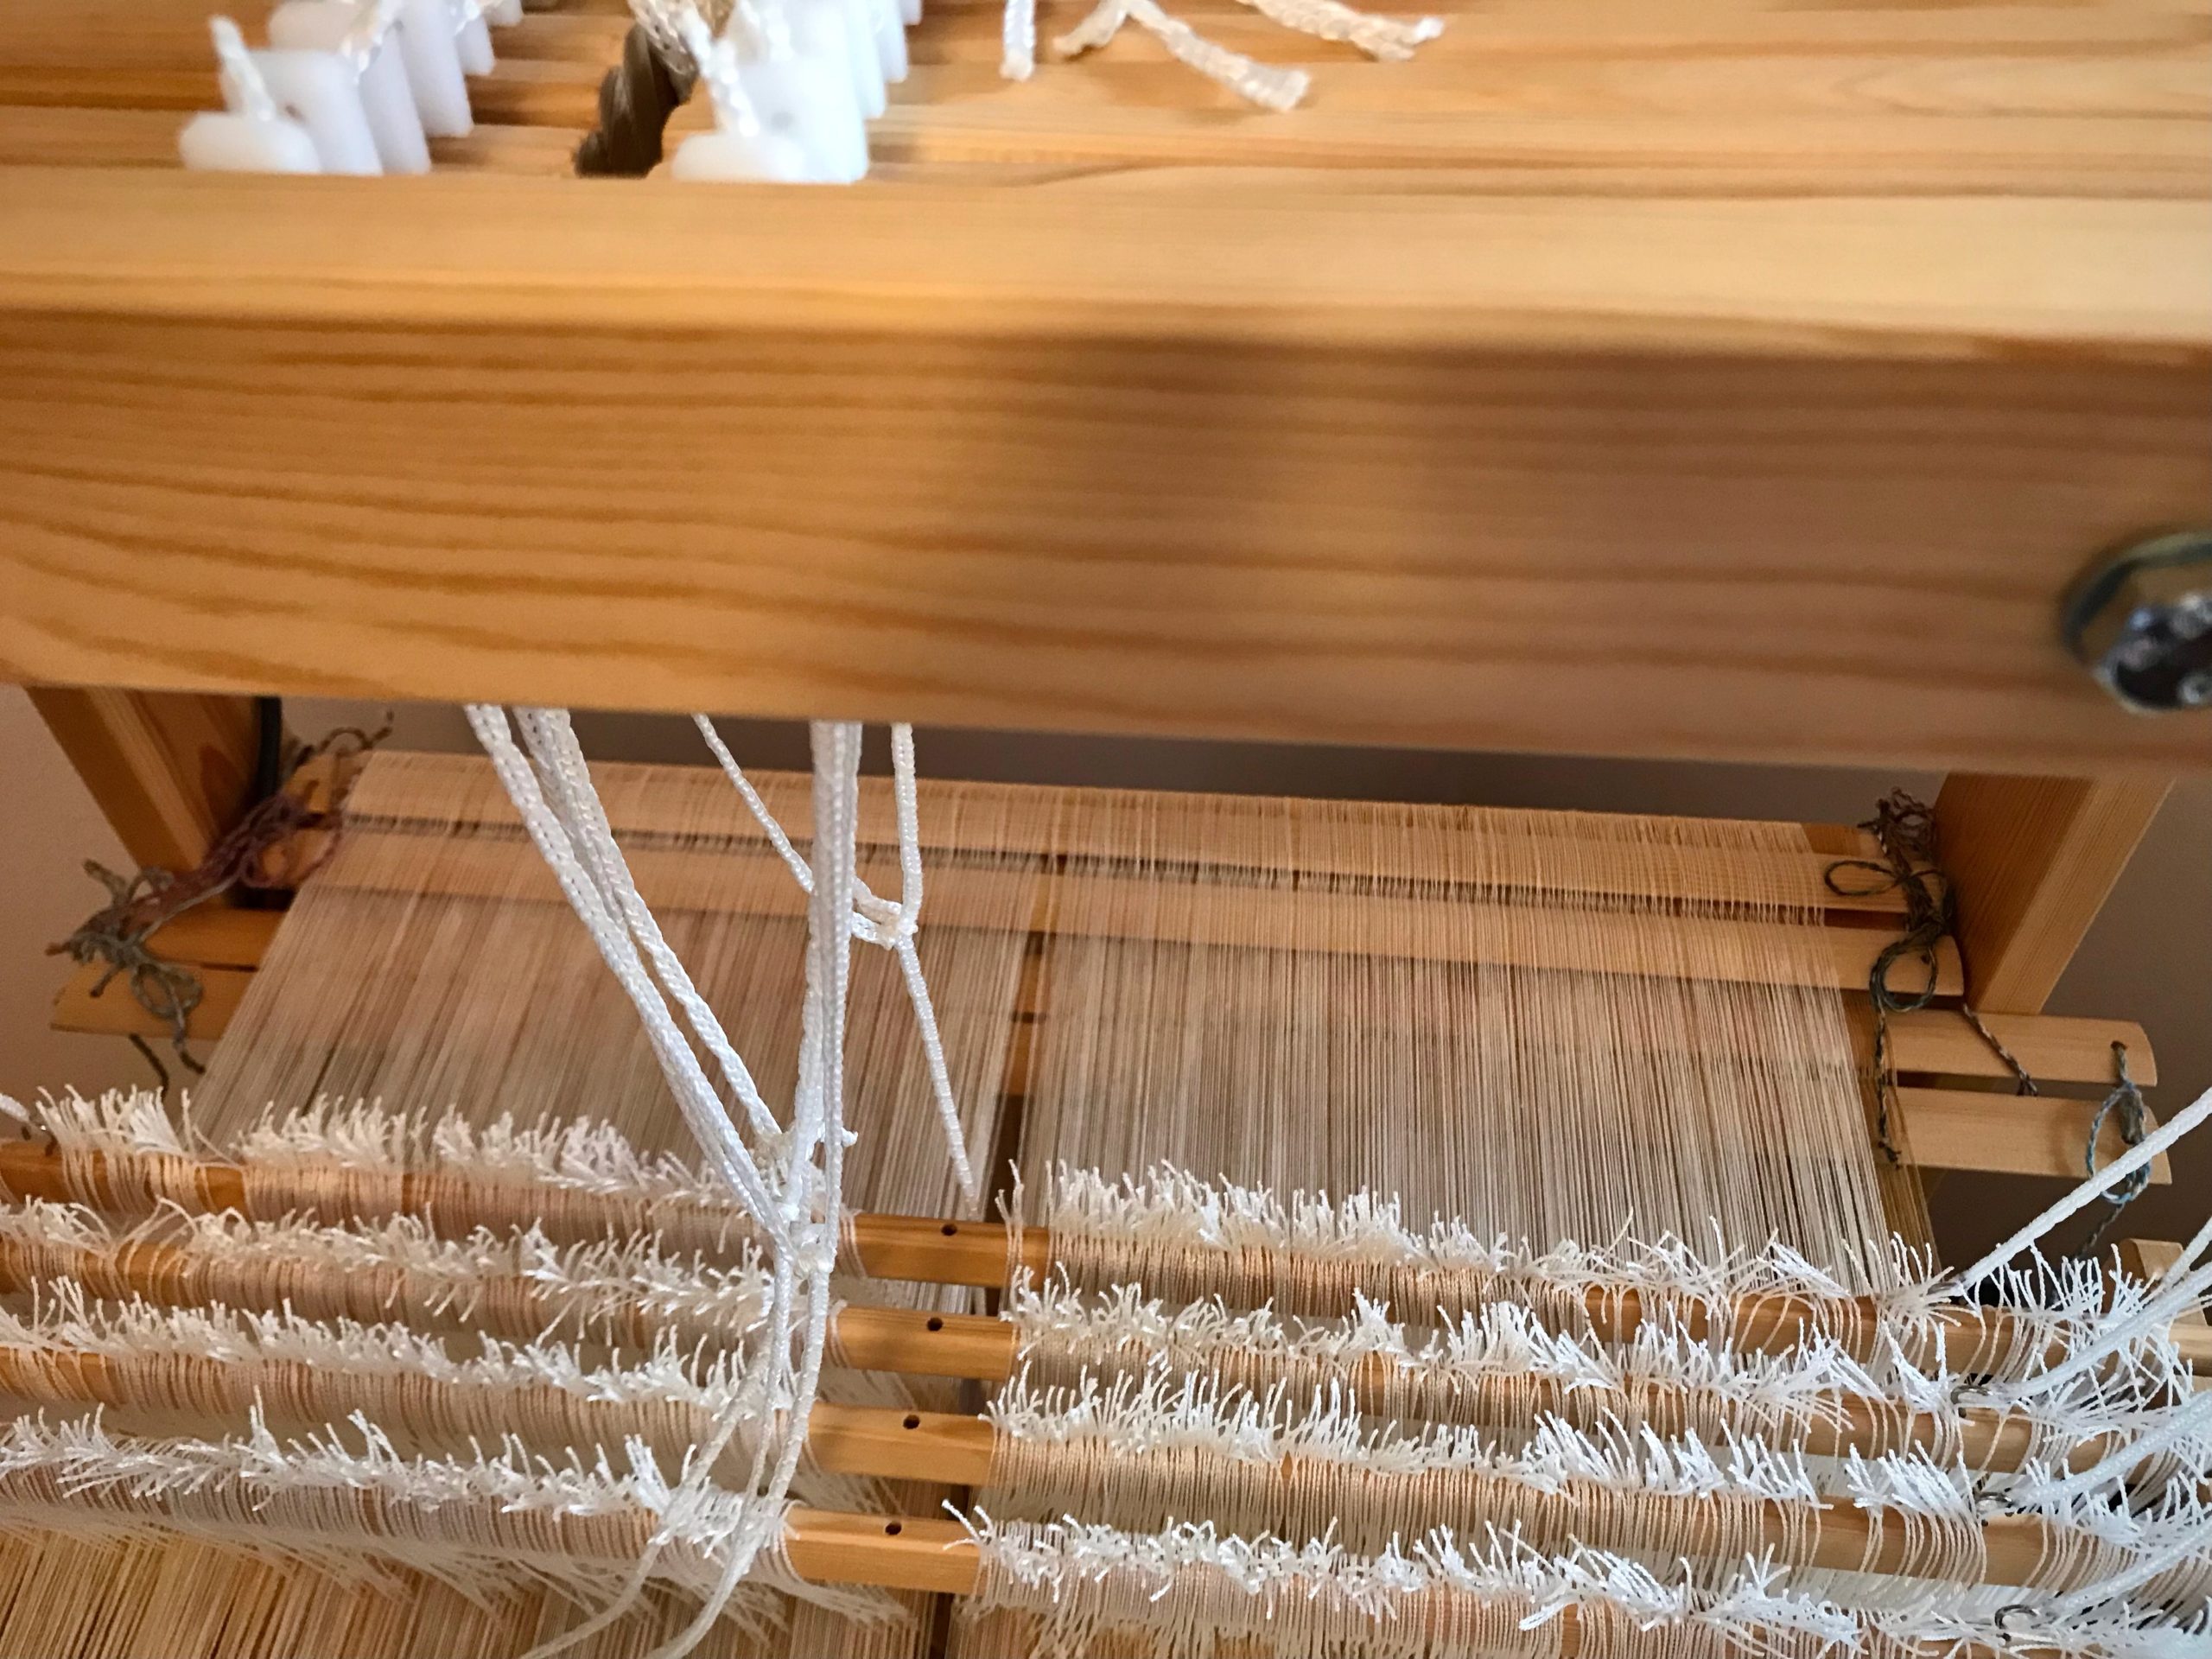
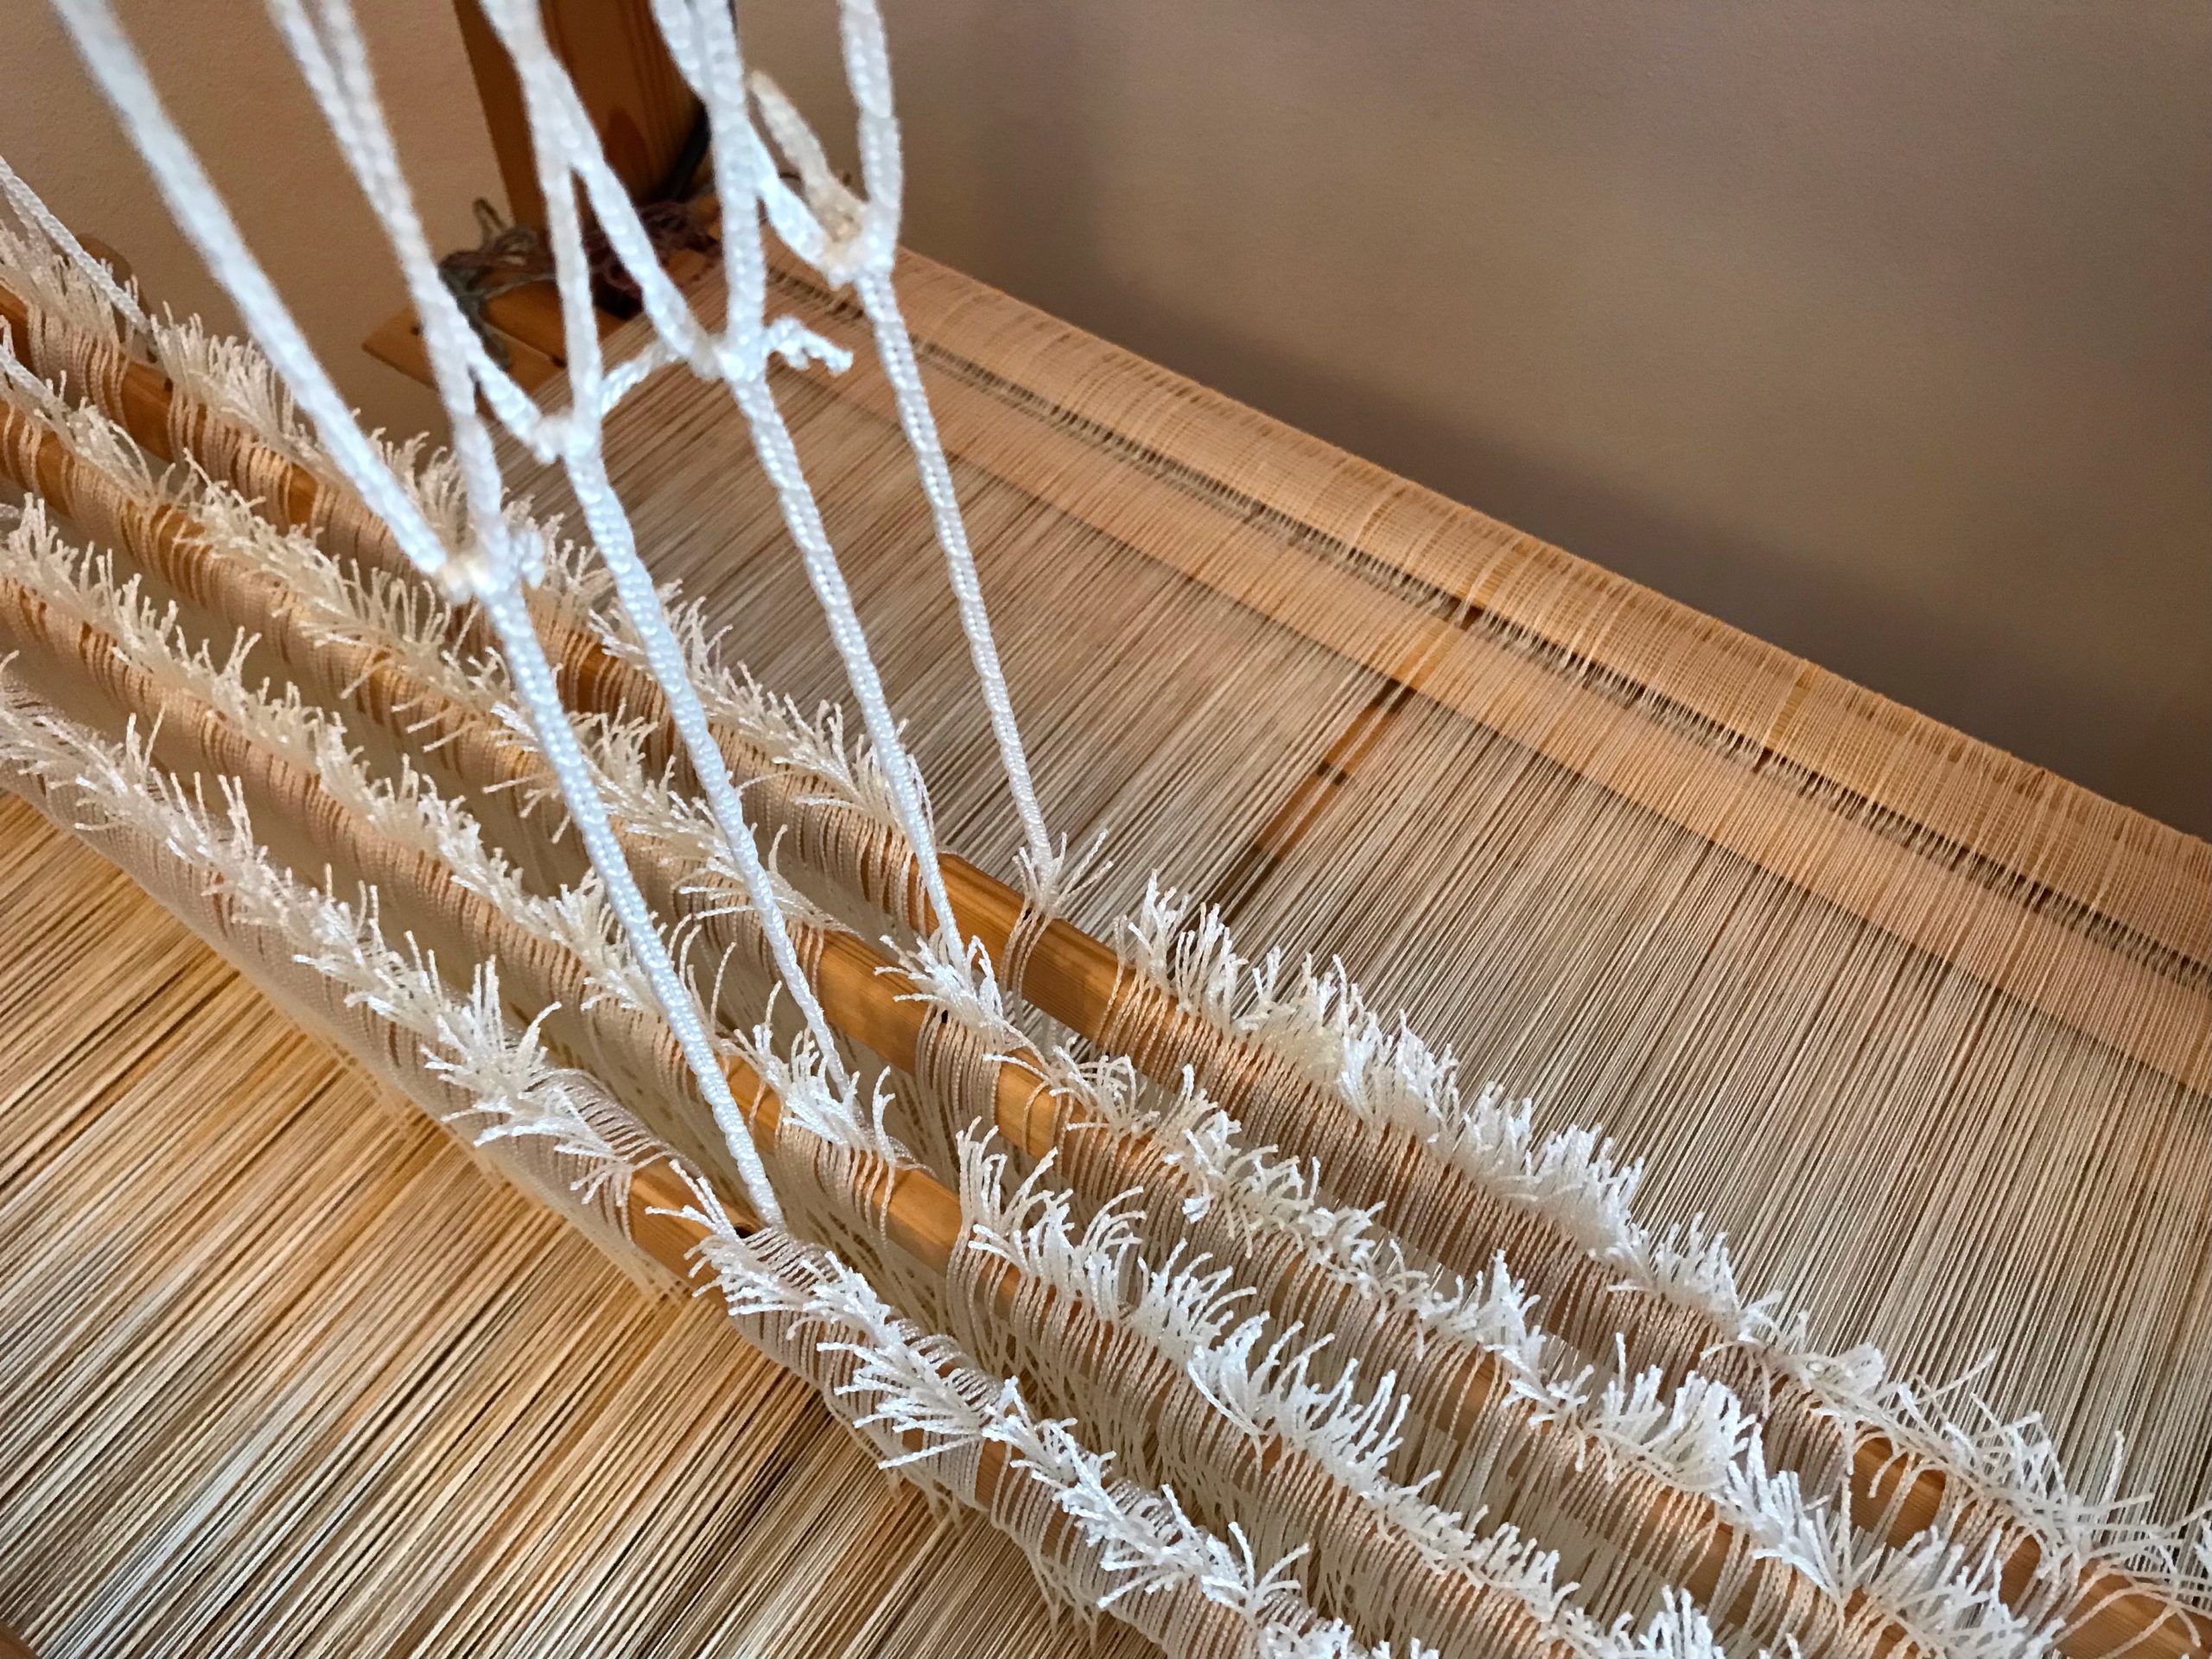
Are the cords that go to the lower lamms strictly in order?
– With horizontal countermarch, does each cord fall behind the shafts in order?
Cords from the horizontal countermarch go through the center of the warp, to be attached to lower lamms below.Make sure each cord goes behind its corresponding shaft bars to the lamms below. When attaching the cords to the lamms, make sure the cords are attached in the correct order. If loom is already tied up, follow each cord to check that it is attached to its corresponding lamm.
– With vertical countermarch, is each cord on its pulley, and connected to lamms in the right order?
Vertical countermarch has cords that go over pulleys on the side down to the lower lamms. I have to be extra careful to keep from attaching a cord to the wrong lamm.
3 Correct any misaligned cord.
Now, step on each treadle, one by one. Decent sheds that just need a little refining? Triumph!
Helpful Habit
When attaching a cord while dressing the loom, start your hand at the top of the cord and slide it down to the point of connection. This helps you take hold of the correct cord.
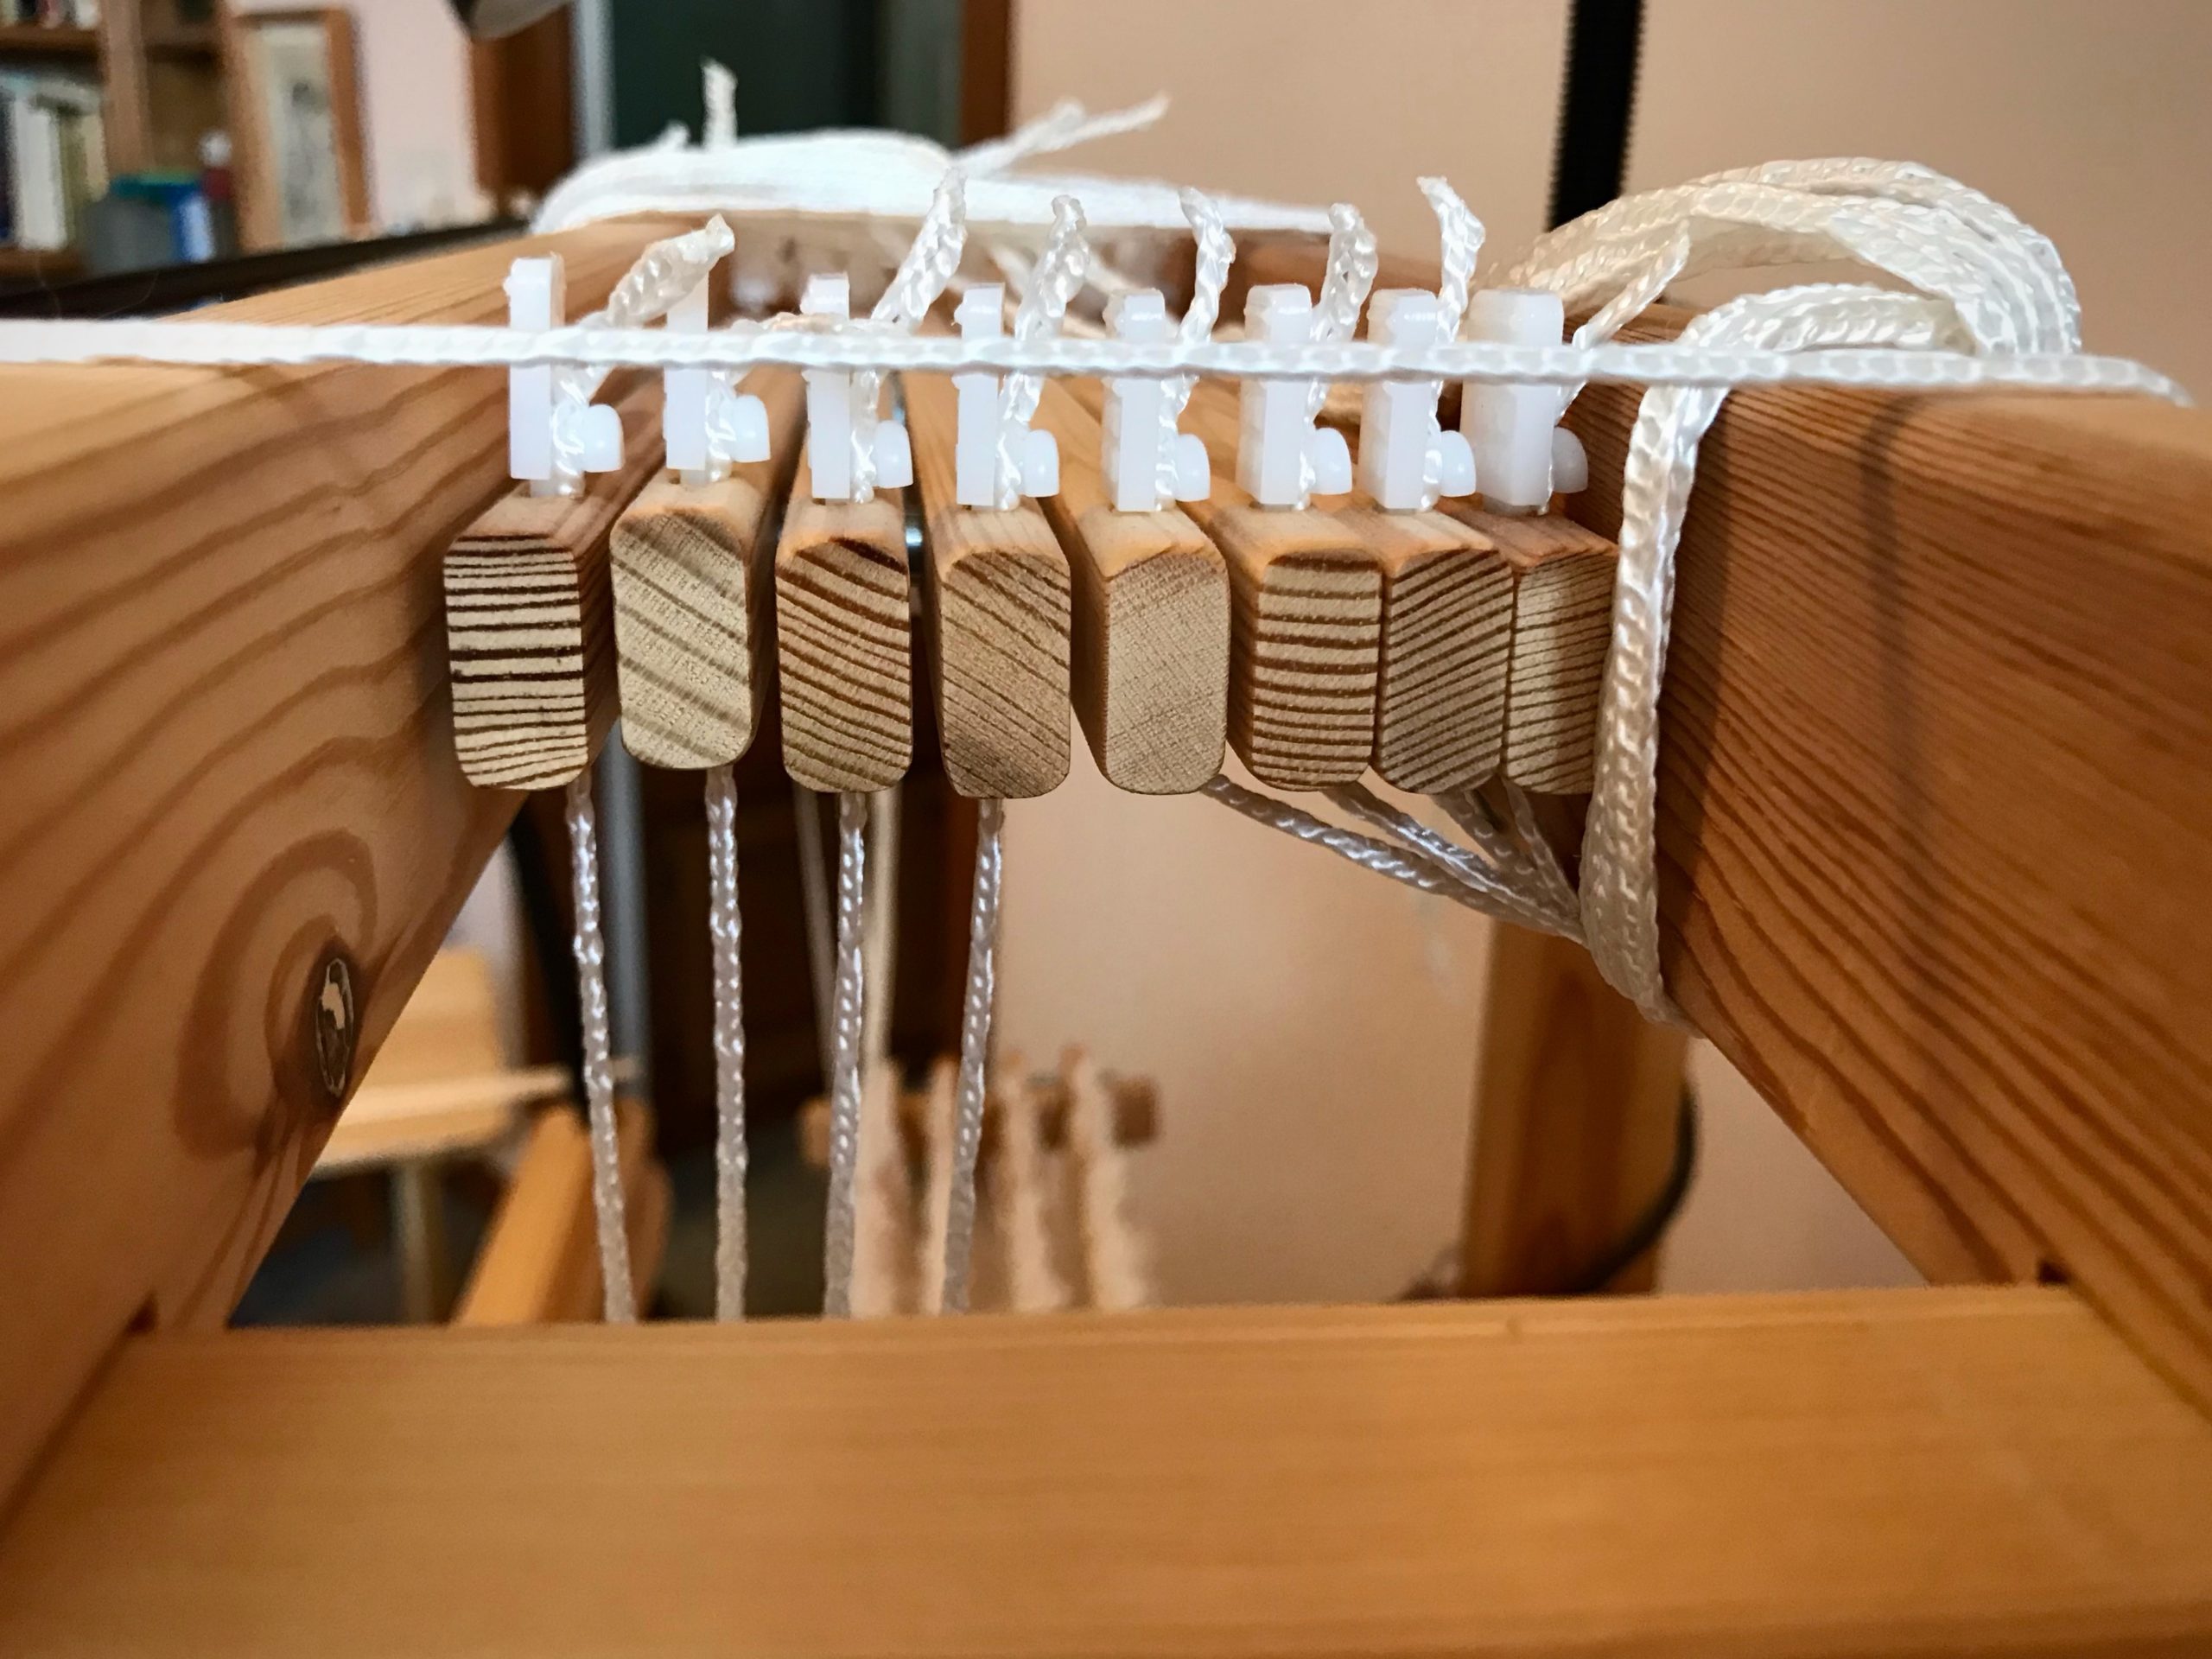
Ready to connect the shaft cords on the Glimåkra Julia, made easy by the small hooks on the shaft bars. Instead of expecting the cords to hang straight down in order, I reach my hand up to the top of the cord.Touching where the cord meets the wood, I know I have the correct cord for the shaft closest to the front of the loom. I do the same for the next cord.My hand slides down the cord and I connect the cord to the correct shaft. Now, all that’s left is tying up the treadles. Then, we weave!
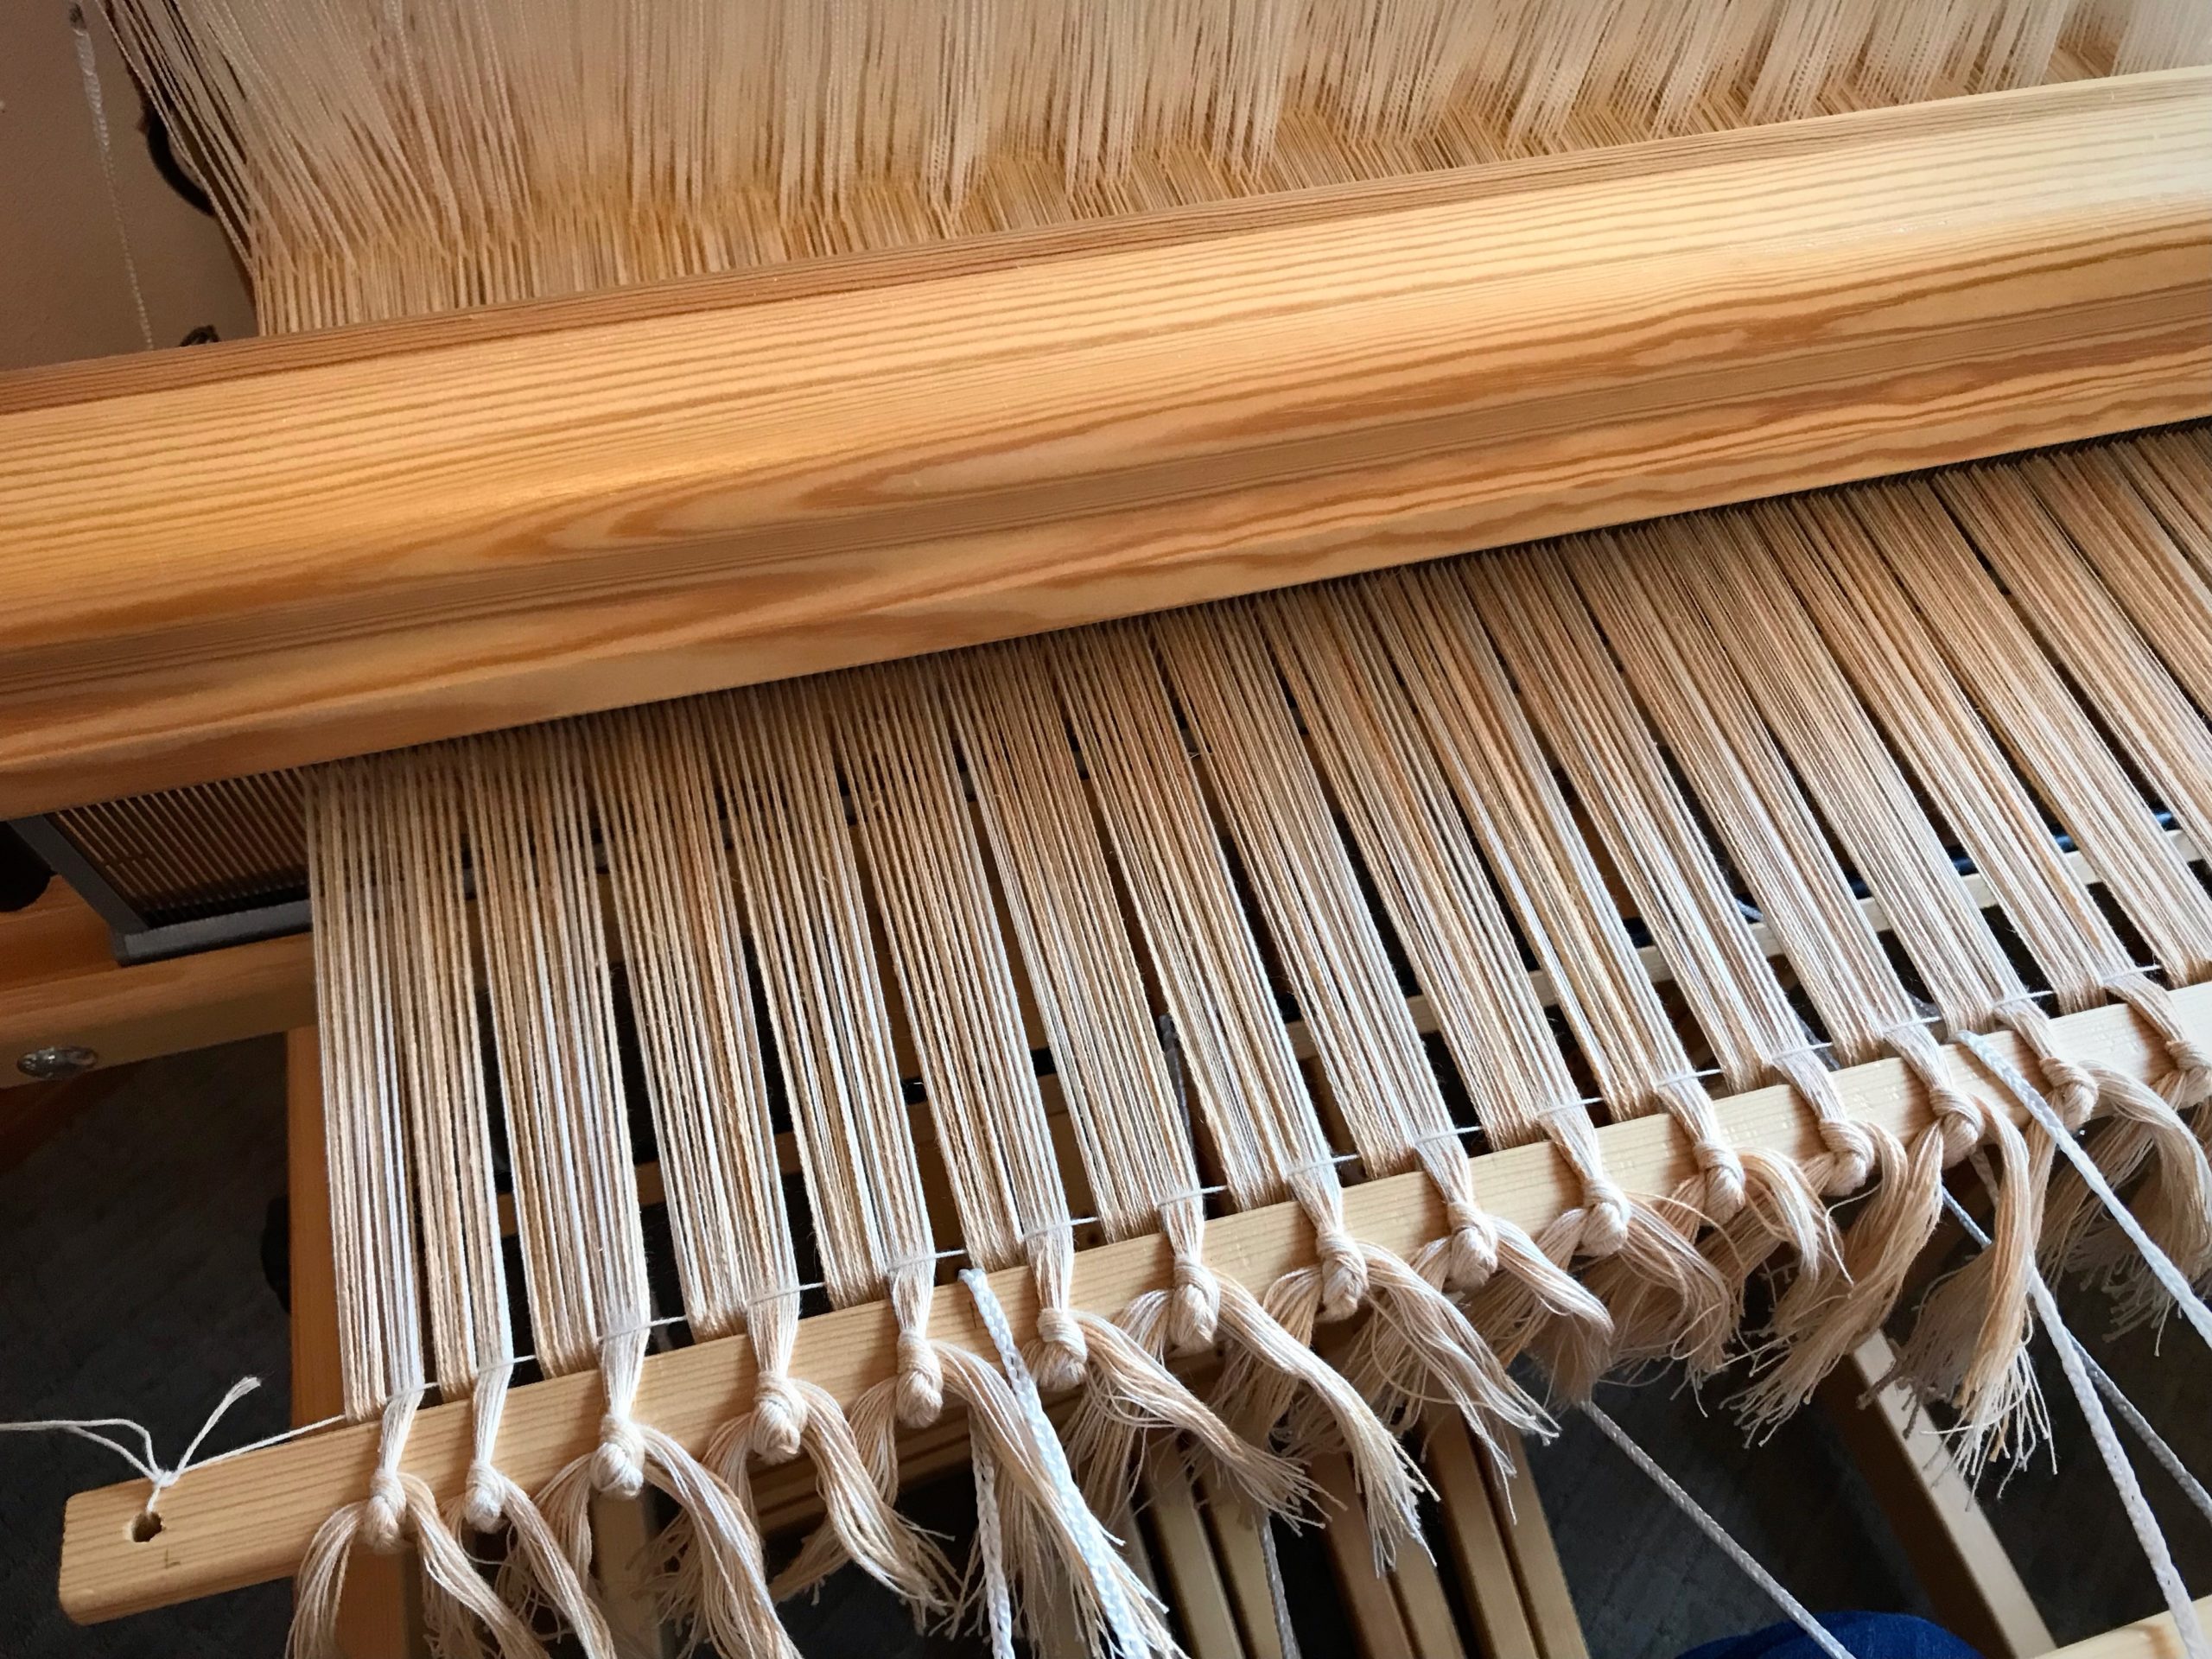
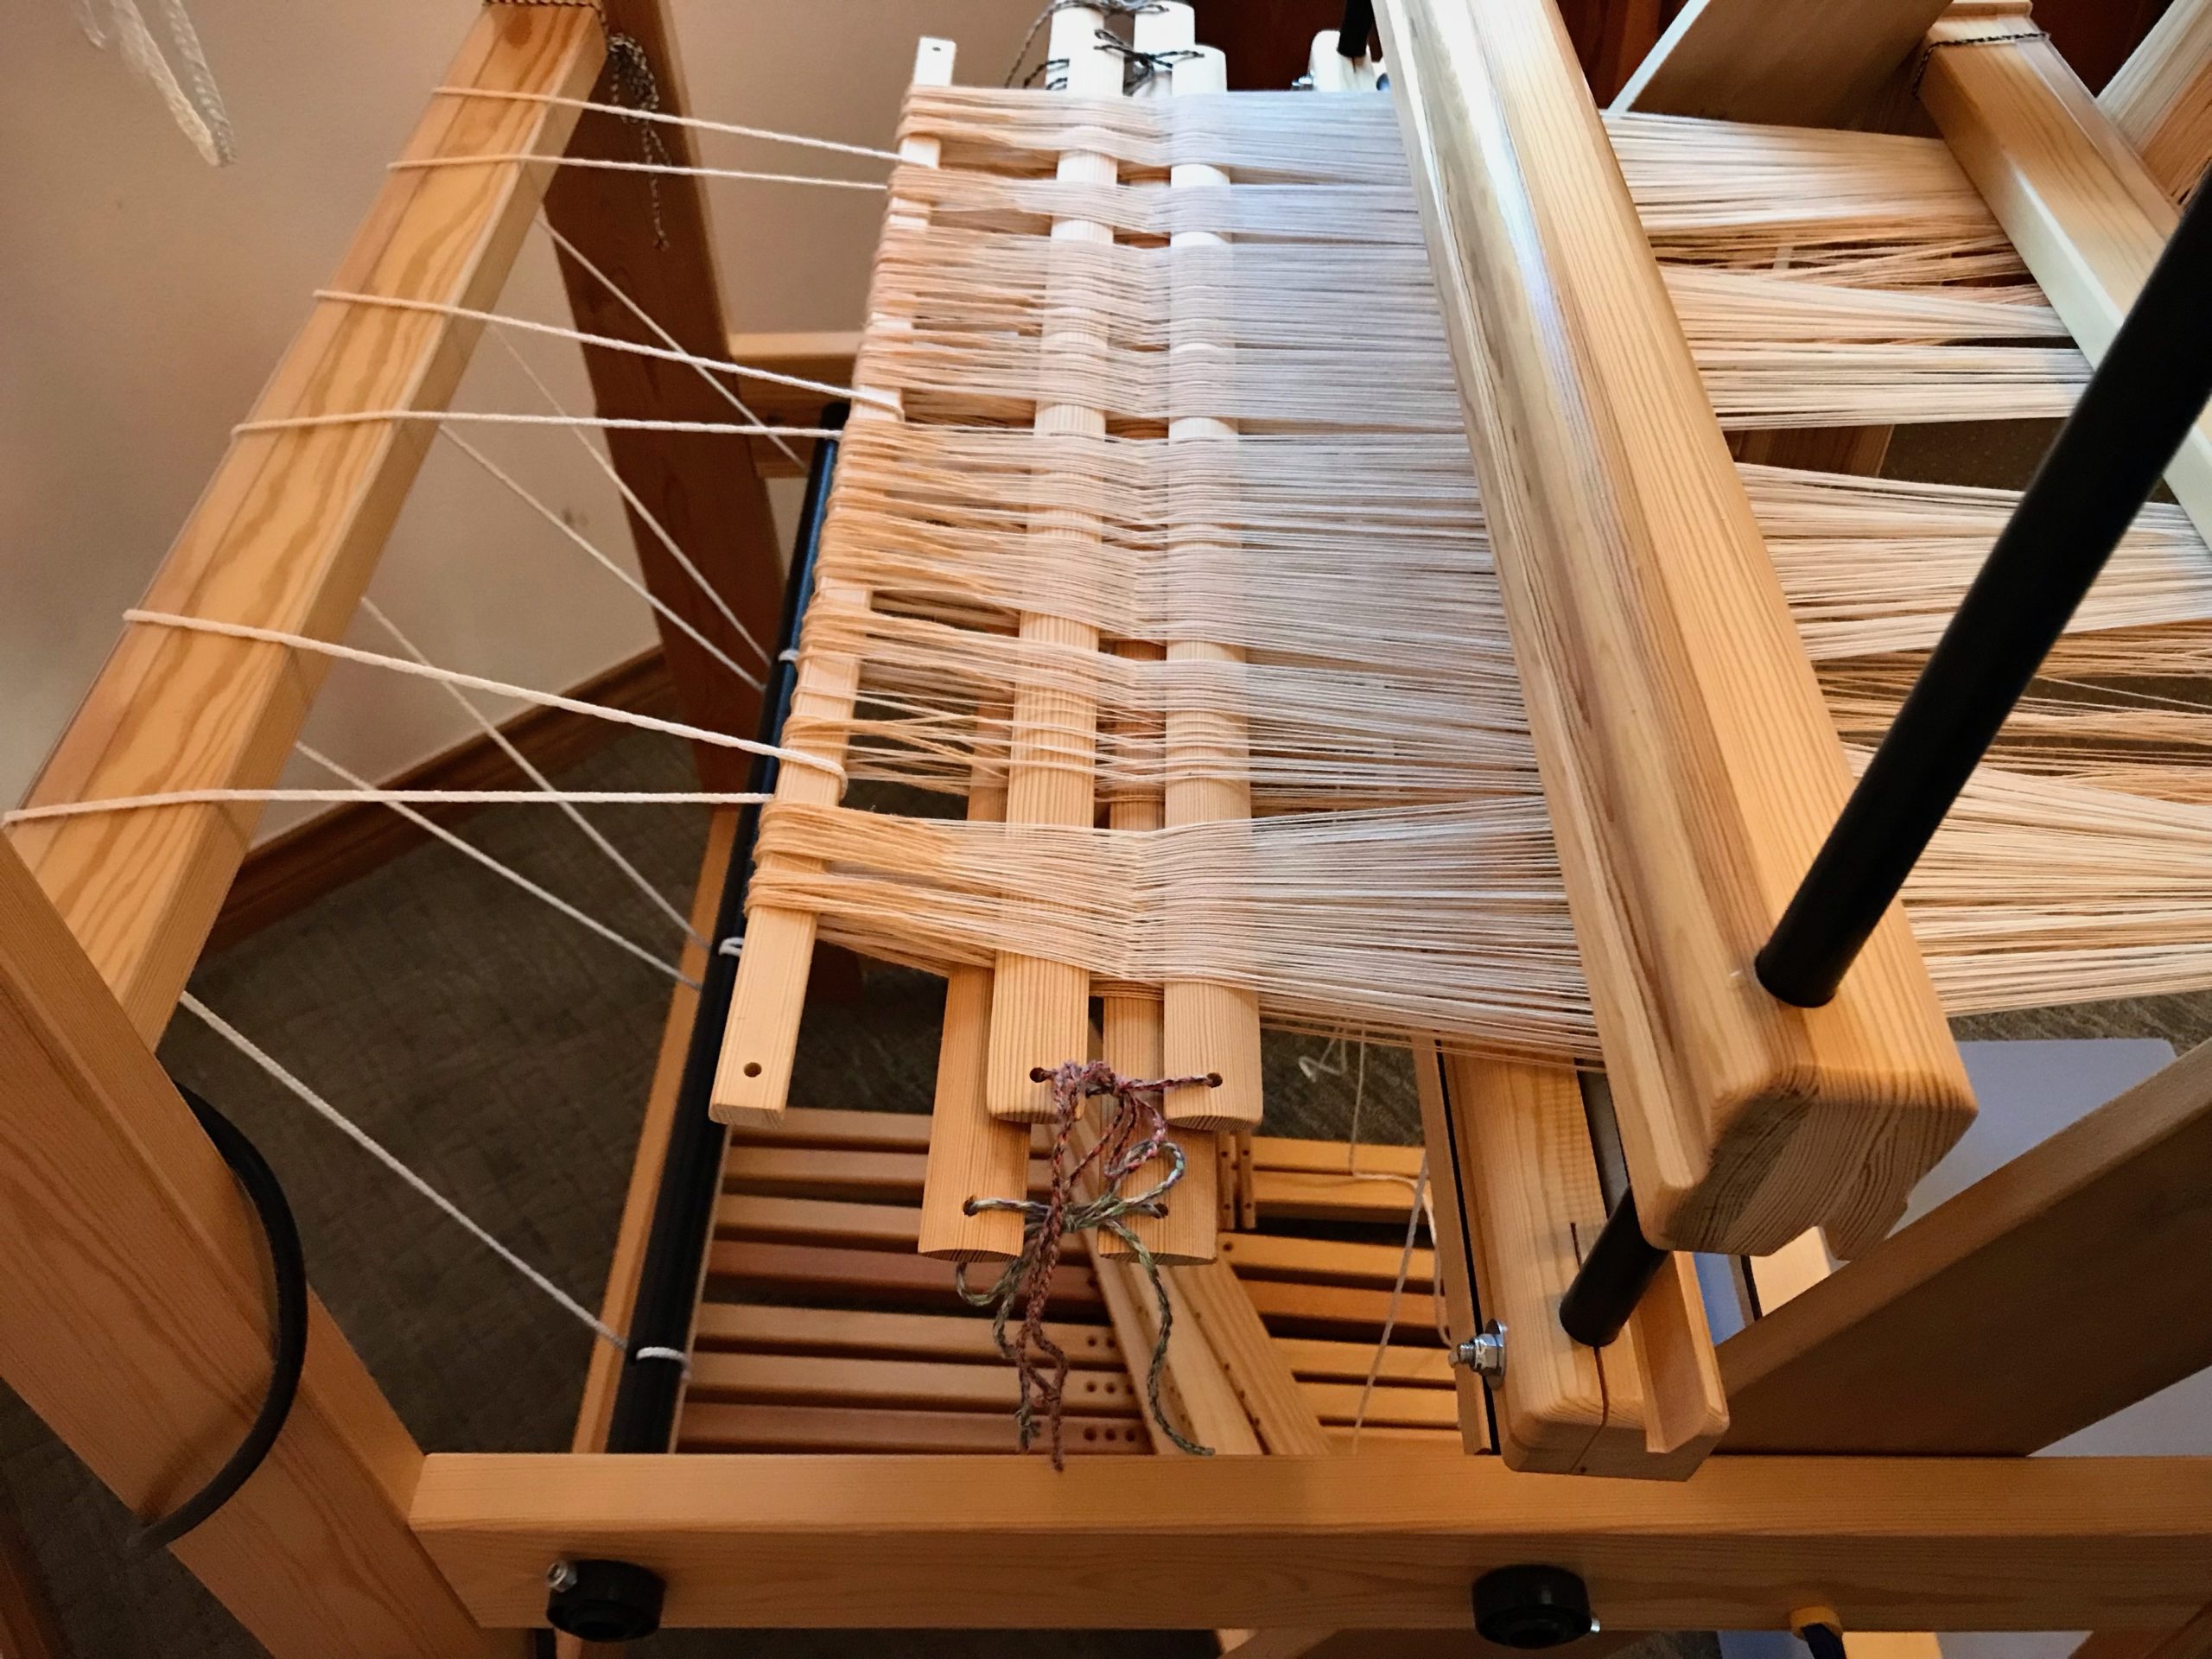
Dressing the loom with two sets of lease sticks keeps me on my toes. It means I am thinking carefully as I transfer lease sticks from in front of the reed to behind the reed. And, after beaming the warp(s), it means I am counting carefully as I put ends into threading groups of 48 threads each—32 ends of 20/2 cotton, and 16 ends of 22/2 cottolin.
Two set of lease sticks have been carefully moved from in front of the reed to behind the reed. After straightening all the warp ends, I will beam the warp.
I group ends together before threading. Then, when threading, if there is a discrepancy in the number of ends, it alerts me to find a threading error. Counting out these delicate unbleached cotton threads is challenge enough. Having the layer of cream cottolin threads underneath presents additional complexity. With all these ends, this part of the process is tedious. Still, it’s worth it if it lessens my chance of making threading errors with these 1,472 ends.
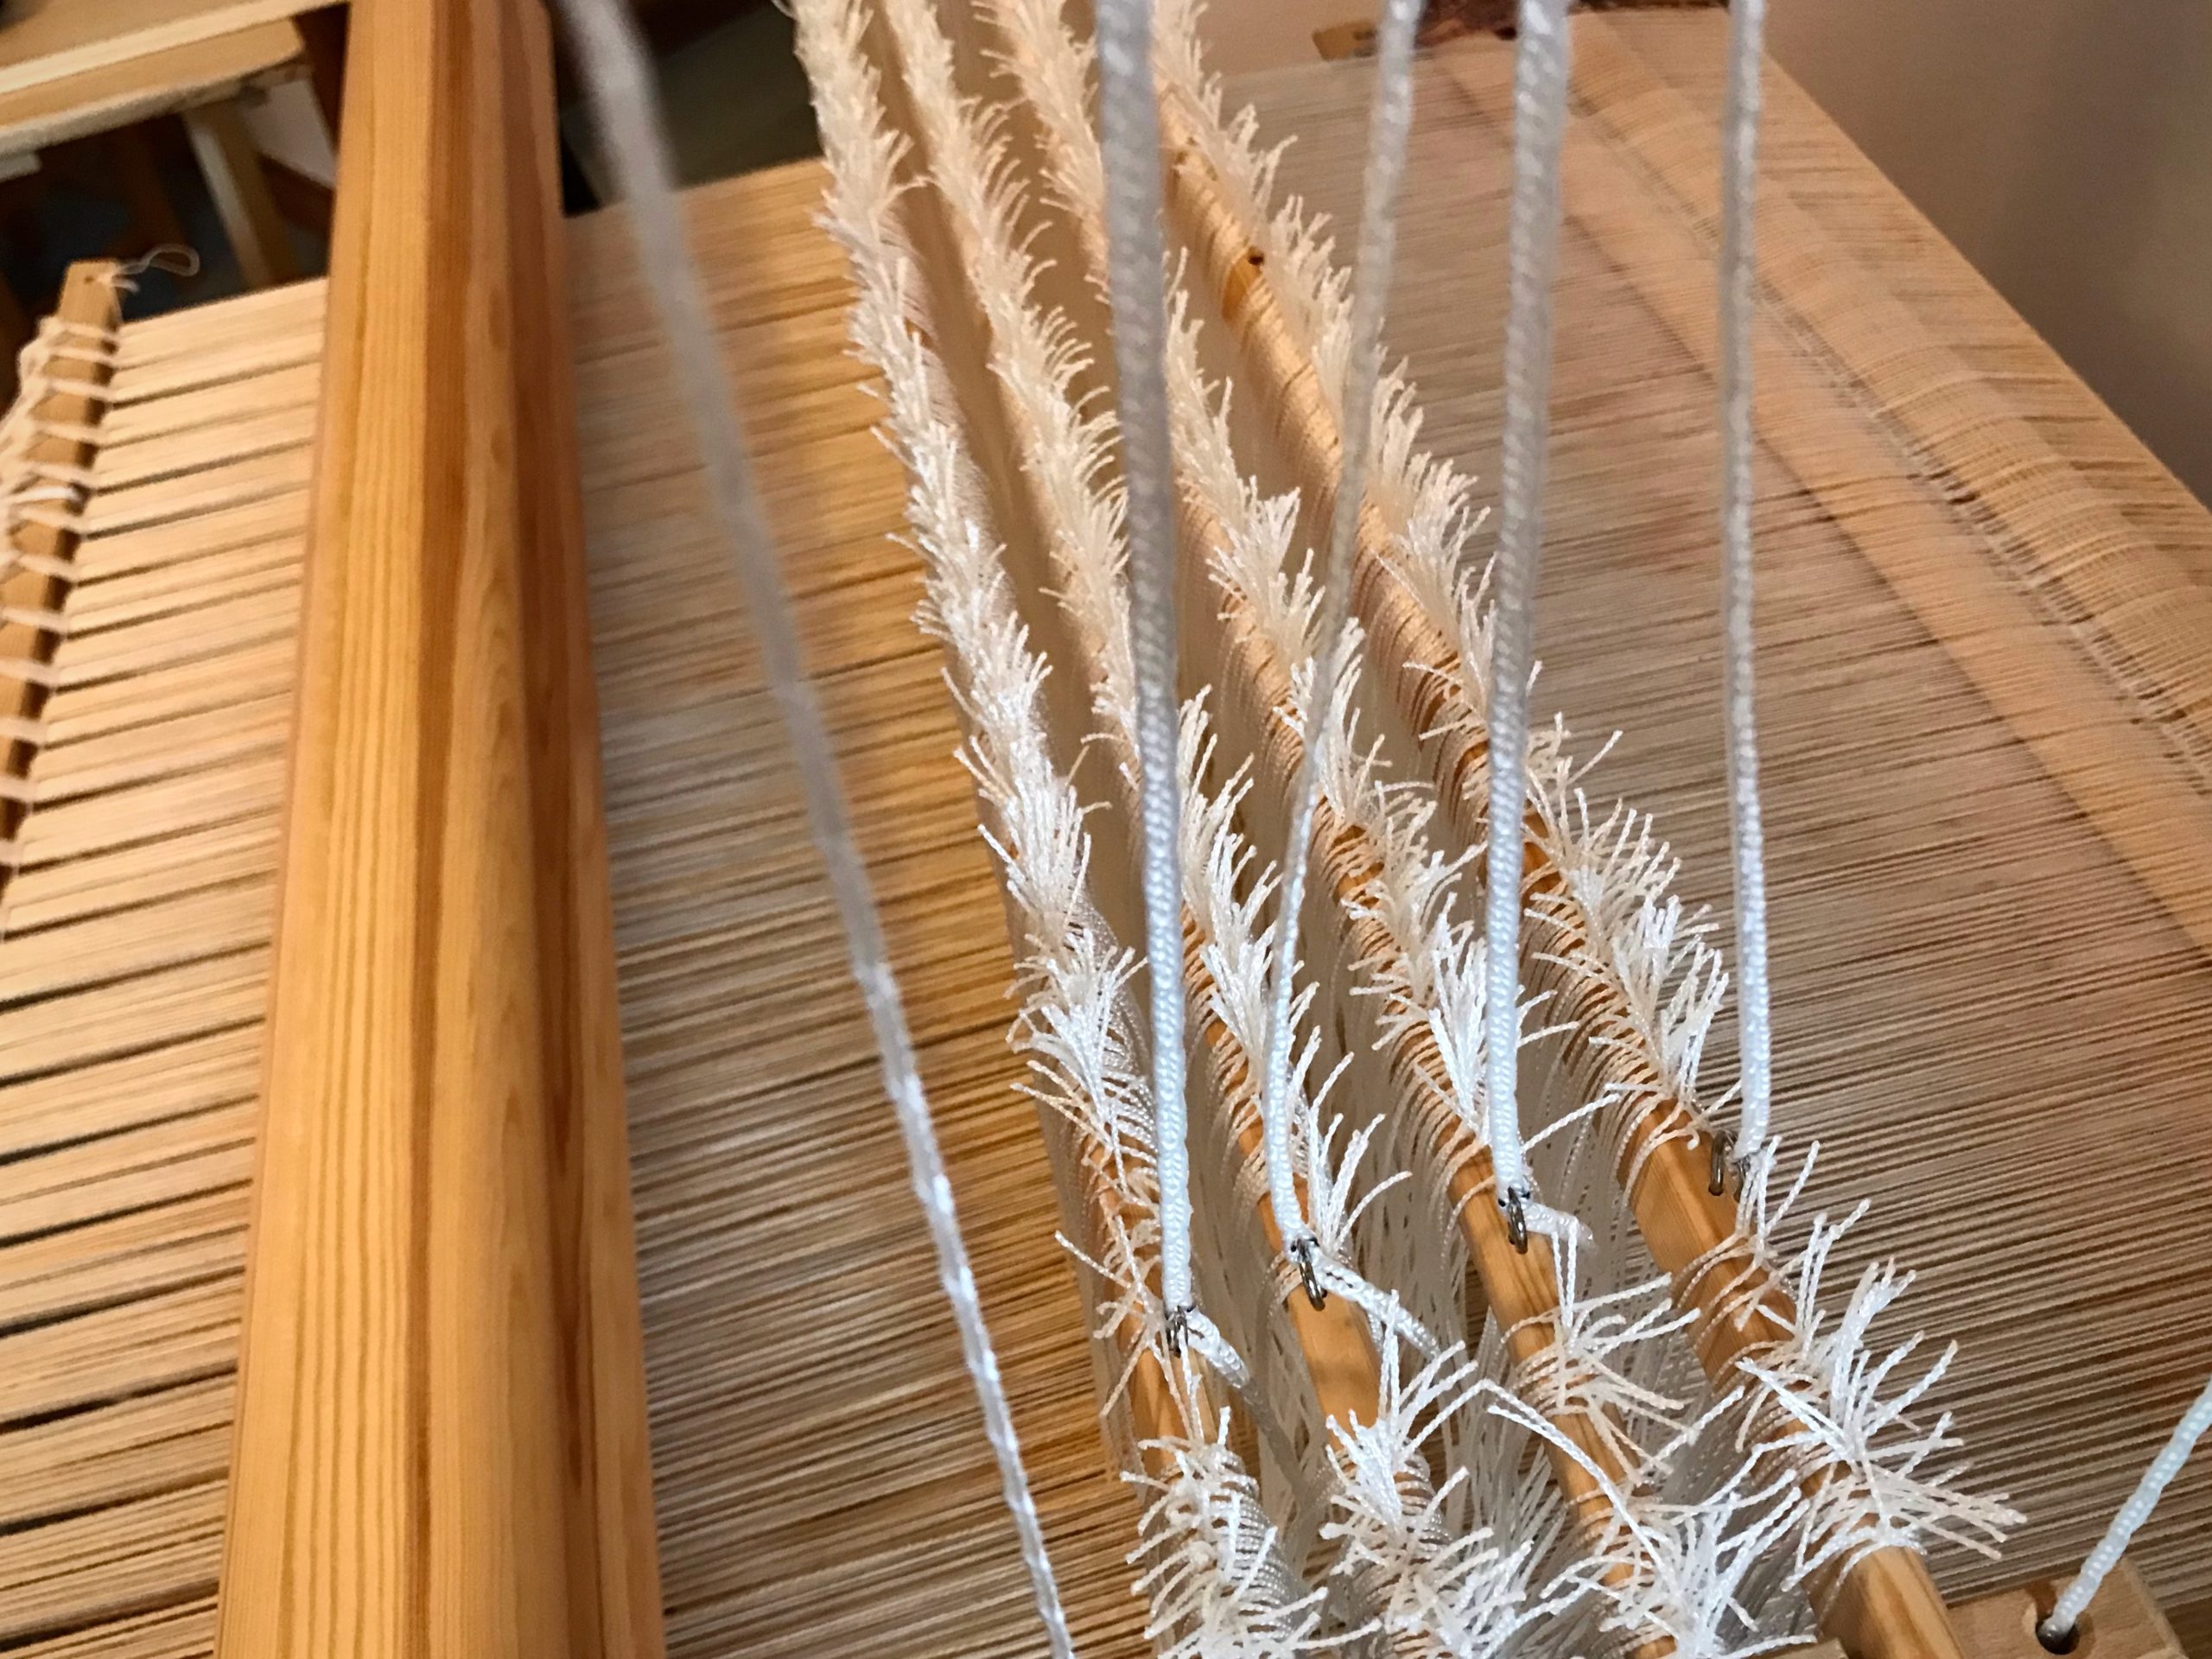
Preparation for threading. Ends are gathered into threading groups and tied together with a loose slip knot.Each set of lease sticks is tied to the back beam separately, so they can hang at different heights. The lower set is tied around the side frame and over the back beam.If I stand behind the loom, my back is in a leaning-forward position and not comfortable for long. I placed a child’s chair and cushion behind the loom. Kneeling behind the loom at this height gives me good visibility and access to the threads.View from the back of the loom. Ends are counted at the center of a pair of lease sticks. These counted ends are tied together in a loose slip knot.View from behind the loom. Loop of unbleached ends just counted lay on top to clear the view. Ends on lower pair of lease sticks are counted and tied separately. I tied the cotton threads and the cottolin threads separately to make it easier to find an error if I miscounted along the way (which, fortunately, didn’t happen).Counted ends are dropped into hanging position before moving on to the next grouping. (After taking this picture, I re-tied the lease sticks closer together, making counting easier.)Threads remain in the reed. I pull threads out of the reed when they are counted.Pretty sight of counted ends. Ready for threading!
House is a structure. Home is an atmosphere—an atmosphere of love. Three young mothers have made their houses into homes. These are the mothers of my grandchildren, and I am giving a personalized towel to each of them. The combination drawloom is my favorite tool for an undertaking like this. (Be sure to watch the video/slideshow below to see the whole process!)
First up is the Peach Jam towel to hang in my house, where all the families come for flavors of home. Next is Melody’s towel, with a whimsical cottage as Home (which can be read from front or back). Marie’s towel copies the cover of one of her favorite books, The Wise Woman. And Lindsay, a homeschool mom, has a towel that shows the wordplay humor that her family enjoys, Home’s Cool. A house is for people; come on in. A home is for family; welcome home.
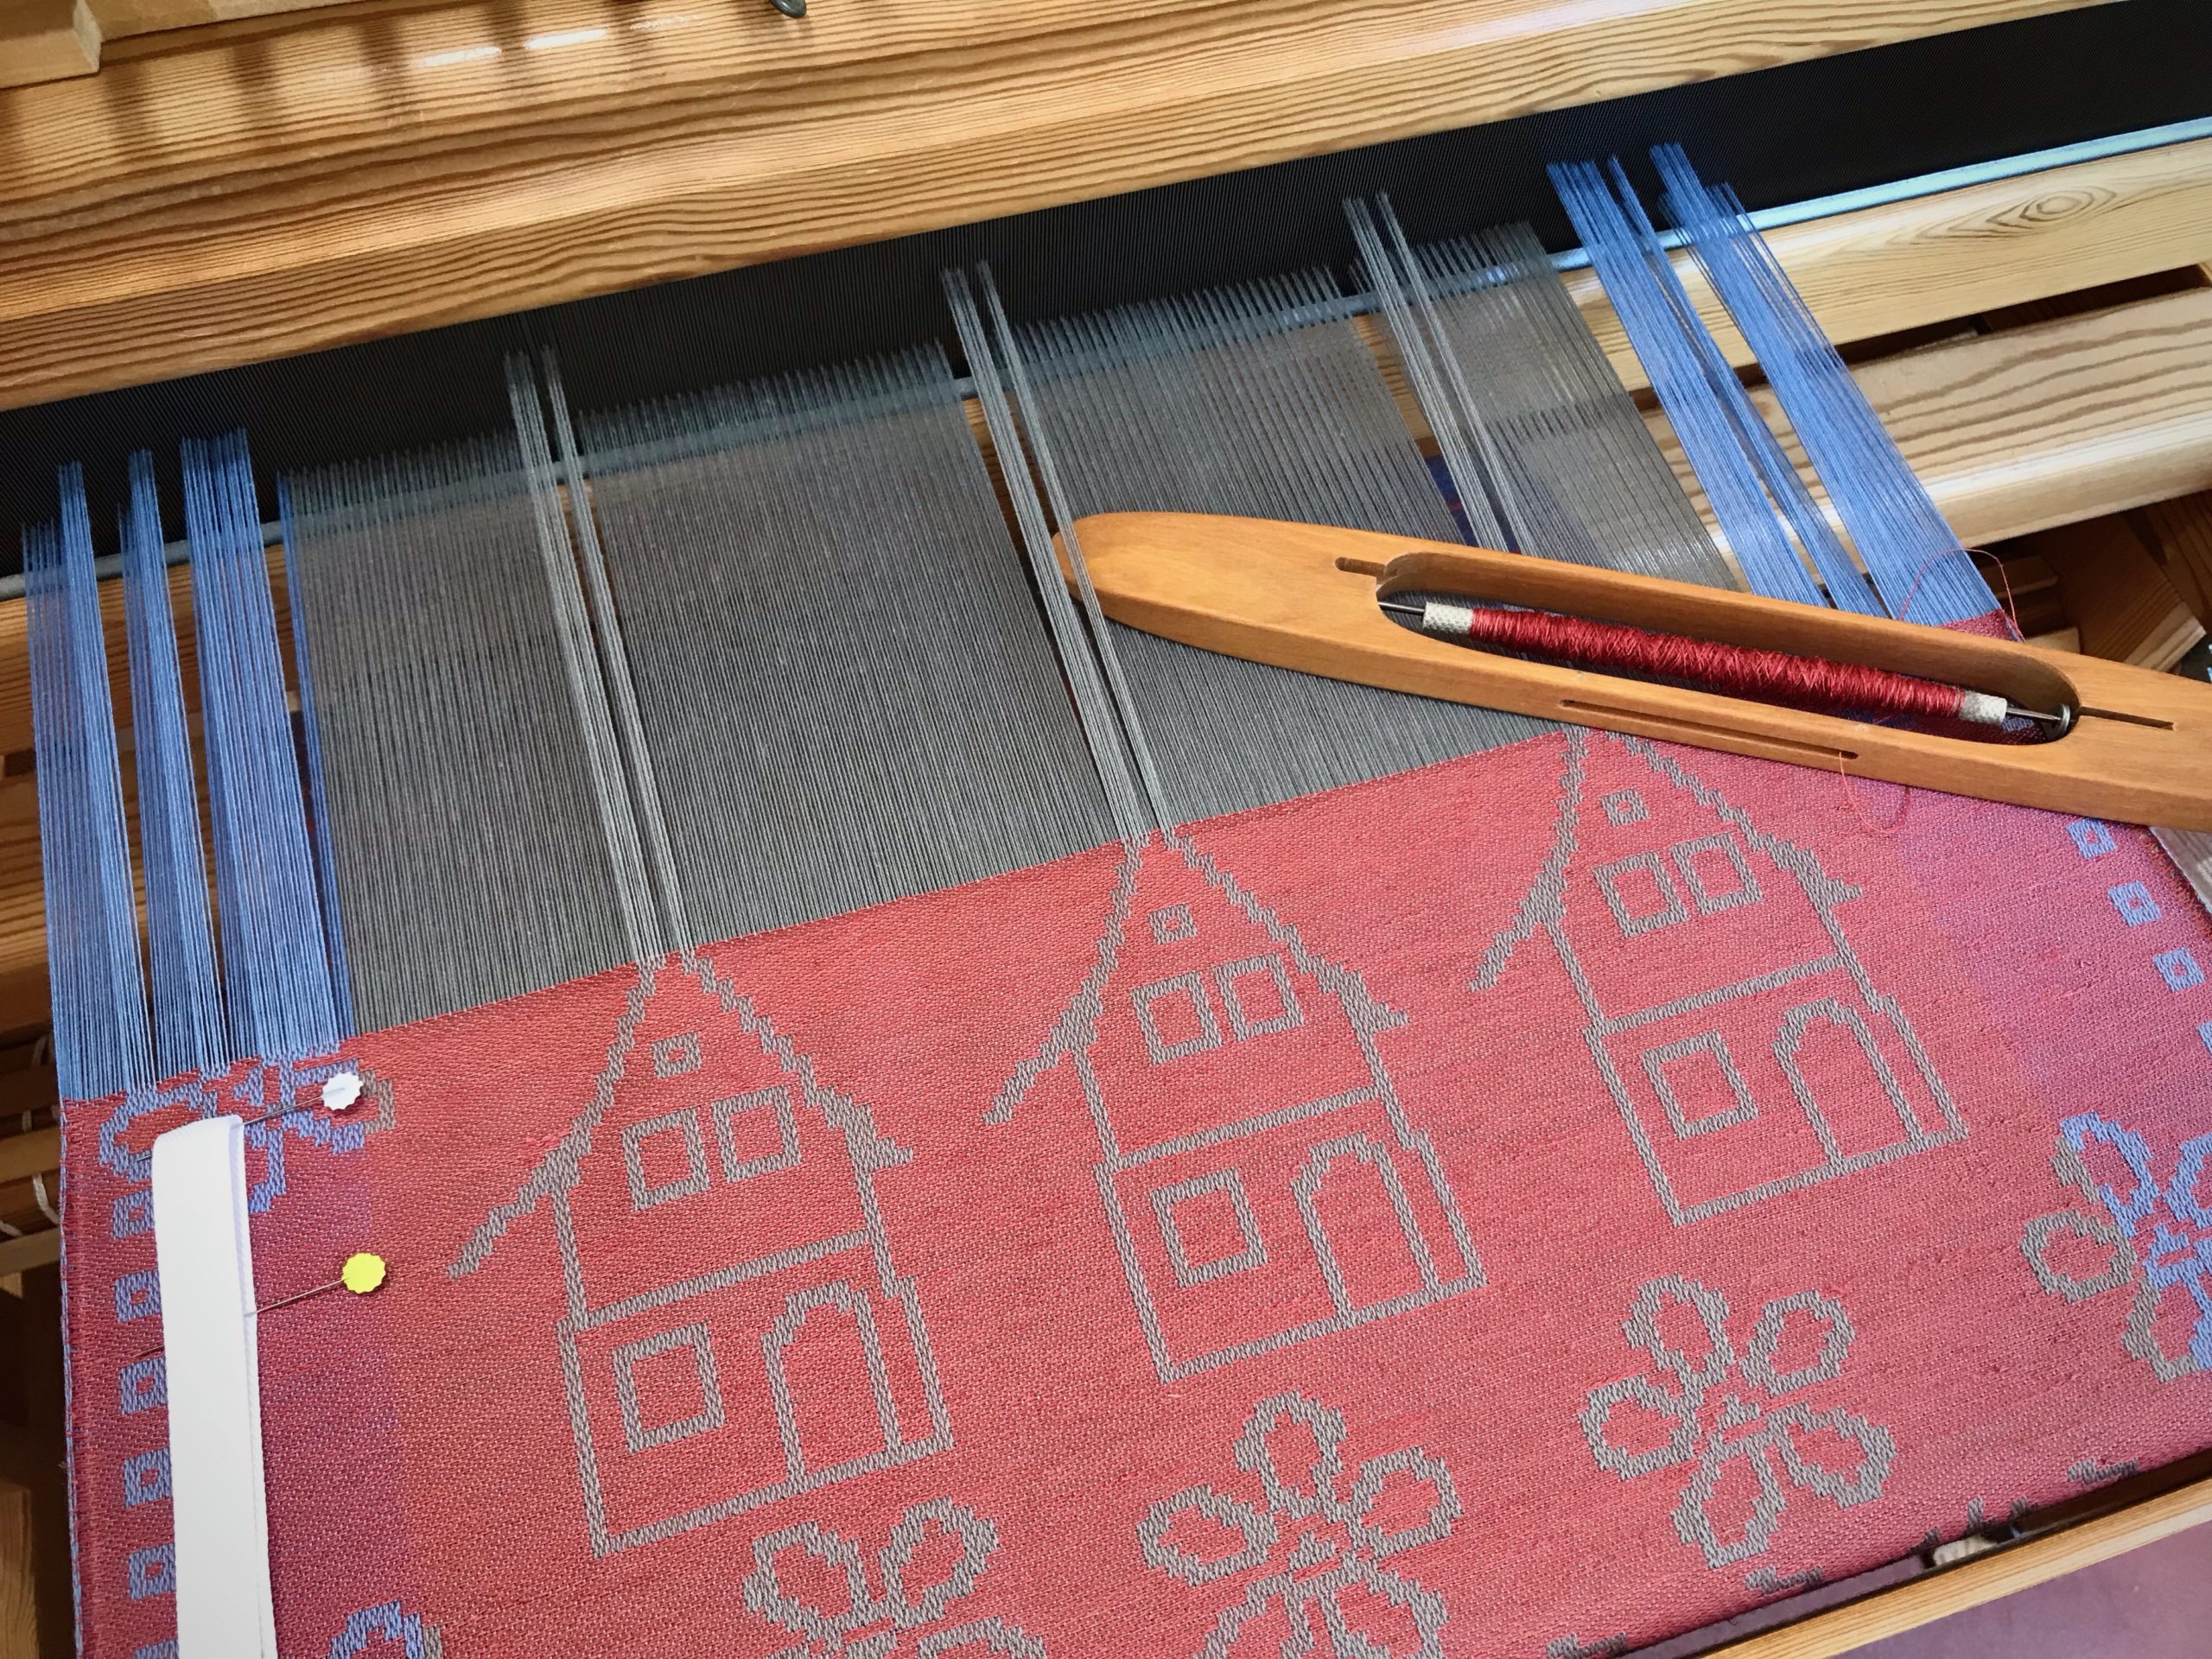
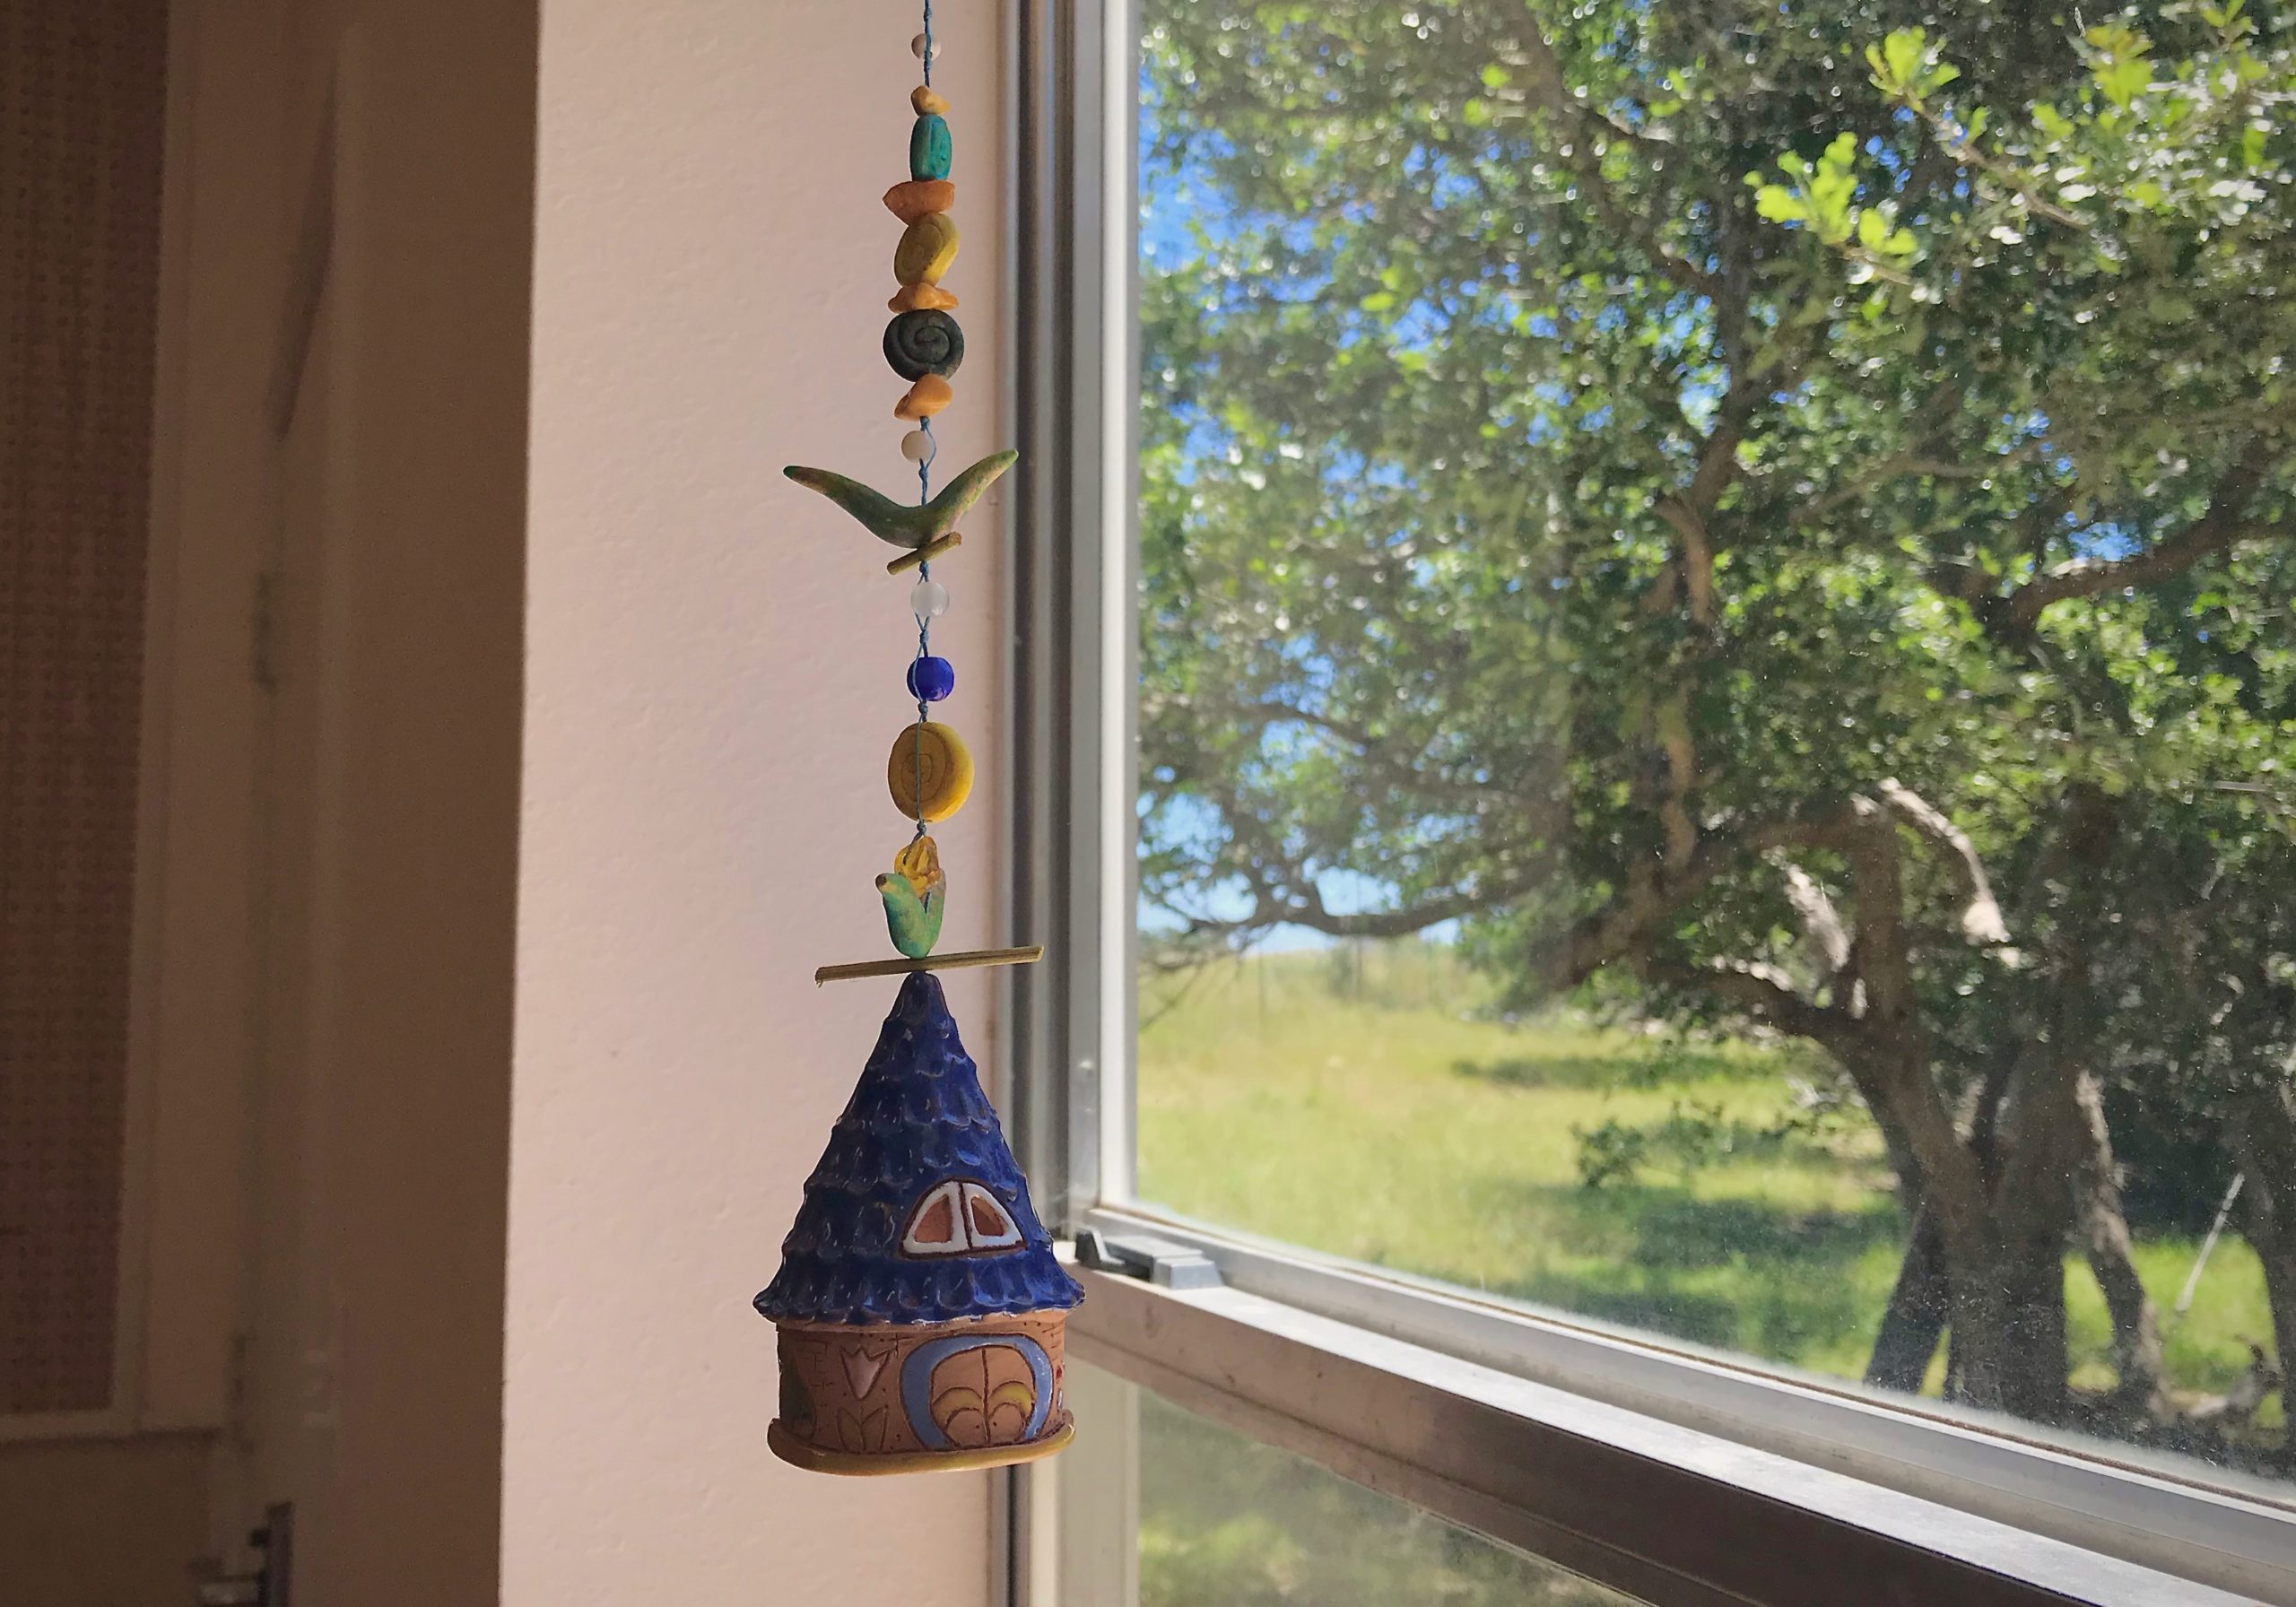
Whimsical house with whimsical flowers makes a whimsical, joyful home! Single units form the flowers under the houses. Pattern shafts hold the thread units that are raised for the three houses and the side border little squares and flowers.Melody’s towel design is derived from this ceramic bell that I brought home from my trip to Germany. Melody is especially fond of the bell, which hangs in my drawloom studio.Smoke rises from the chimney, and lush trees surround the home. There is evidence of a growing family here. Chances are, Mom and Dad are reading books by the fire. And seeds are being planted that will mature into living trees.Bells ring in the towers of the schoolhouses. Single units are used for the numbers and letters on the side borders, and for the words above the pattern-shaft schoolhouses.
Join me in watching the whole process, all the way to the finished towels (several months compressed into a few minutes):