This has been another good year! It is sweet to have friends from all over the globe who walk with me in this handweaver’s journey. Thank you for joining me here. We examine the meaning of life together, along with exploring the technical details of making cloth. I appreciate you, friend!
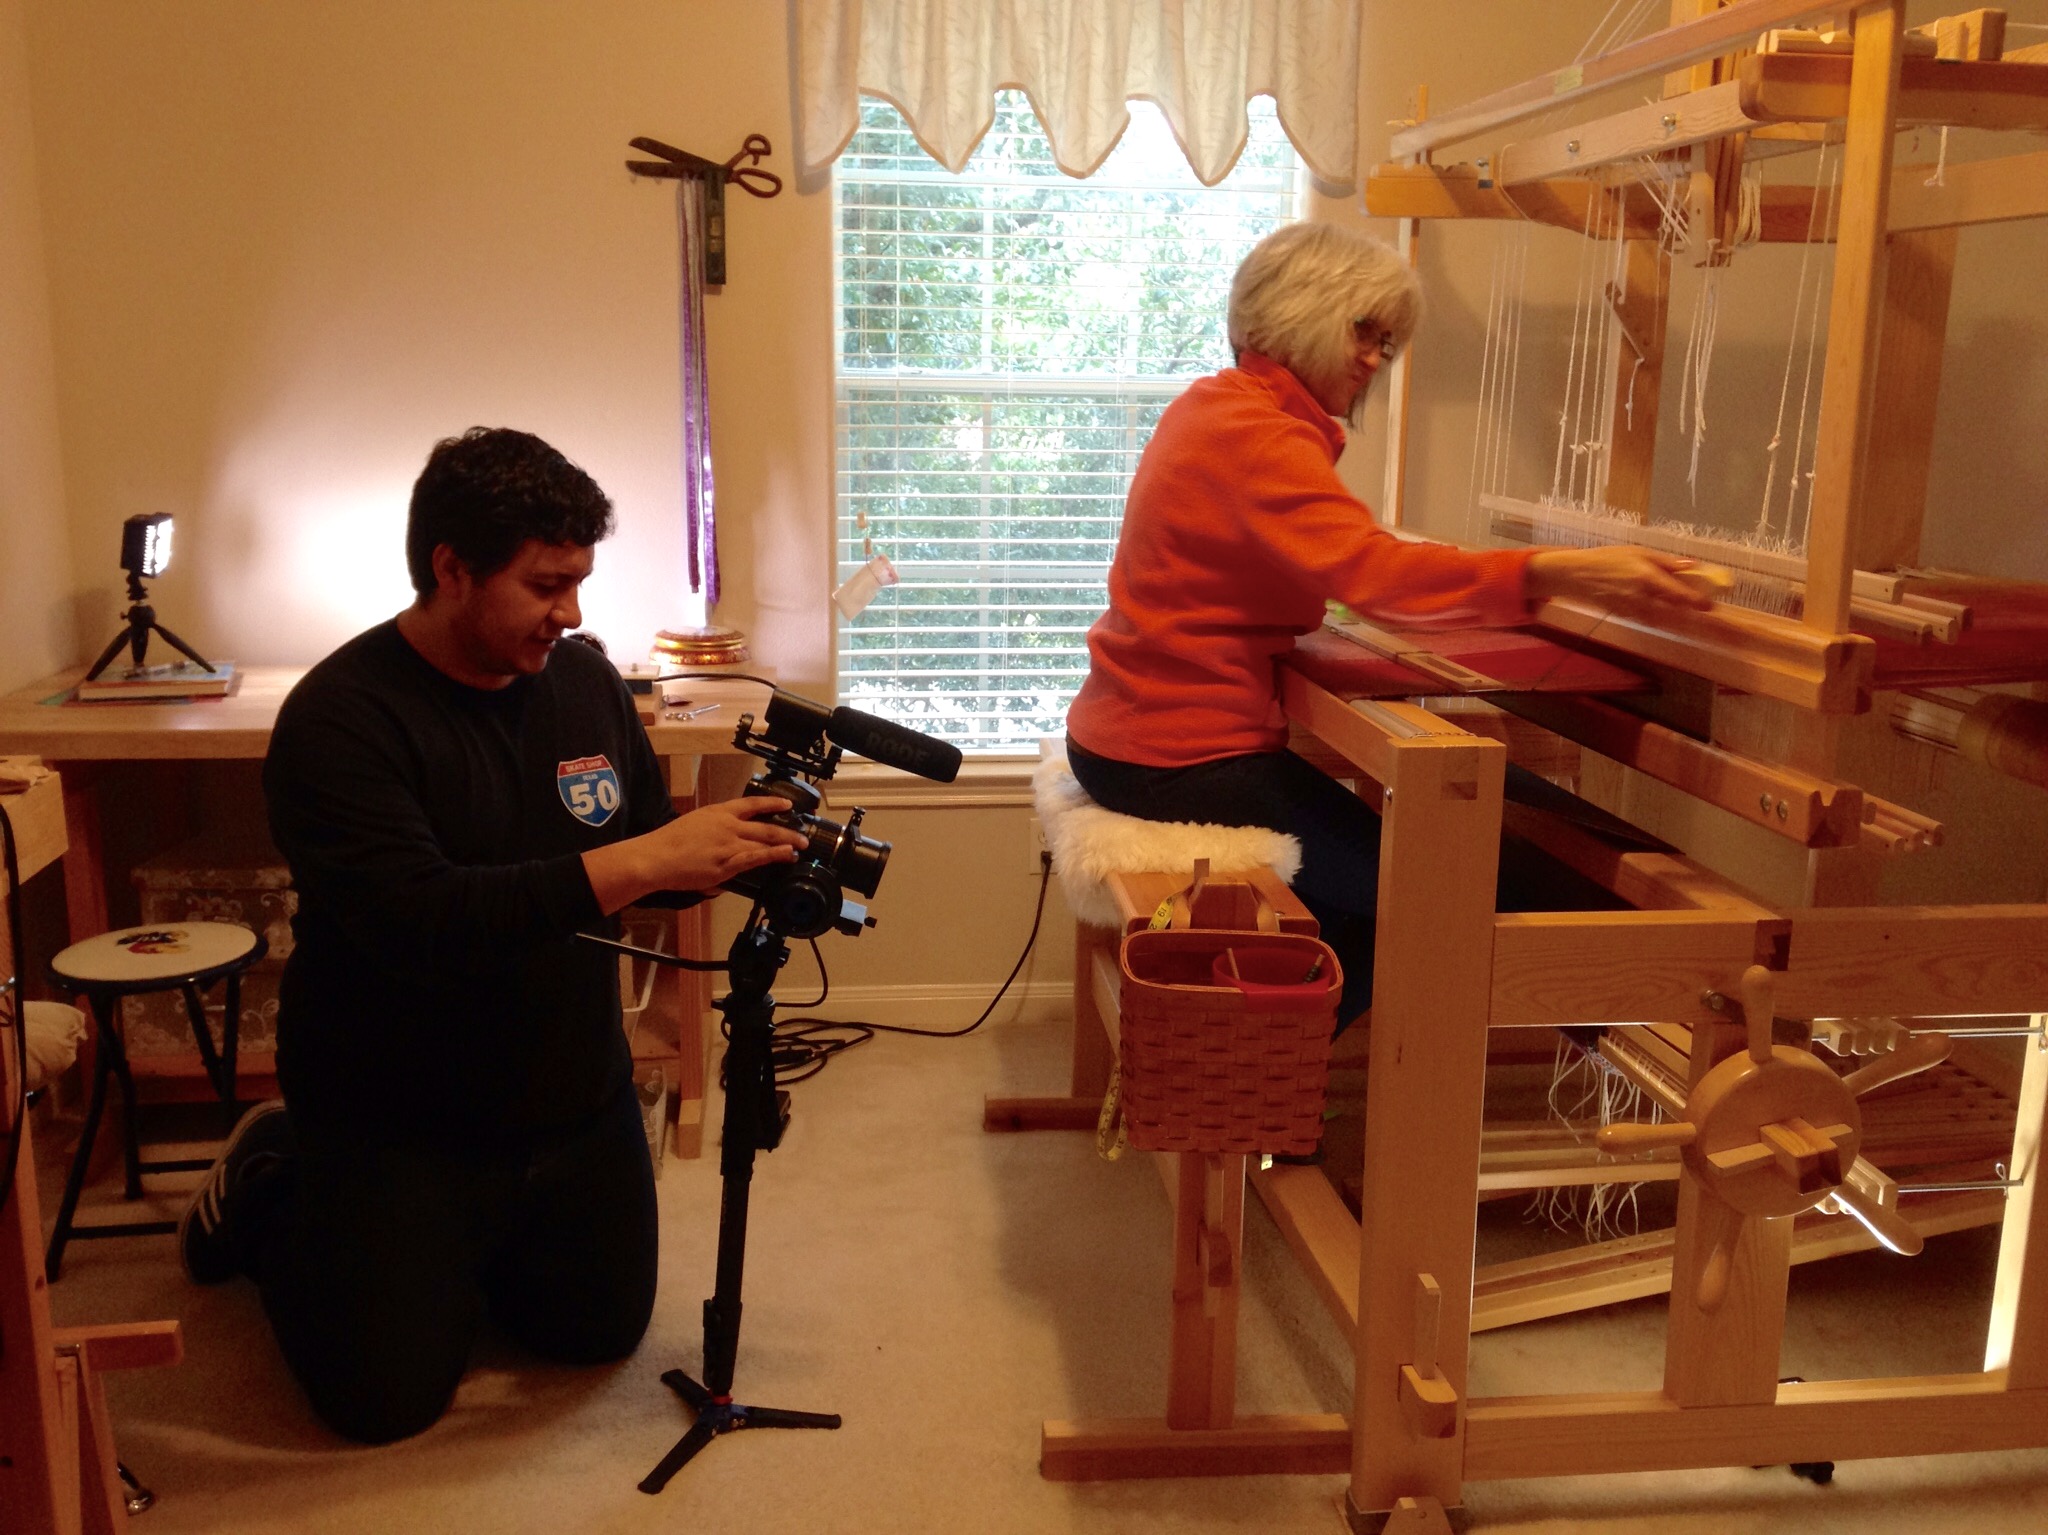
Thanks to my talented videographer son-in-law, Eddie, you now have a video that brings you into my weaving studio for a visit.
Camera, lights, filming equipment, the works! After filming many clips of weaving in action and views of yarn and threads, Eddie interviewed me with pertinent questions. He compiled and edited the best shots, and added music, to create a short video describing Warped for Good.
Come on in…
This welcome video is now at the top of the Warped for Good About page.
(If you enjoy the video, share it with friends by moving your cursor over the “paper airplane” near the top right of the video.)
May your friendships blossom throughout the coming year.
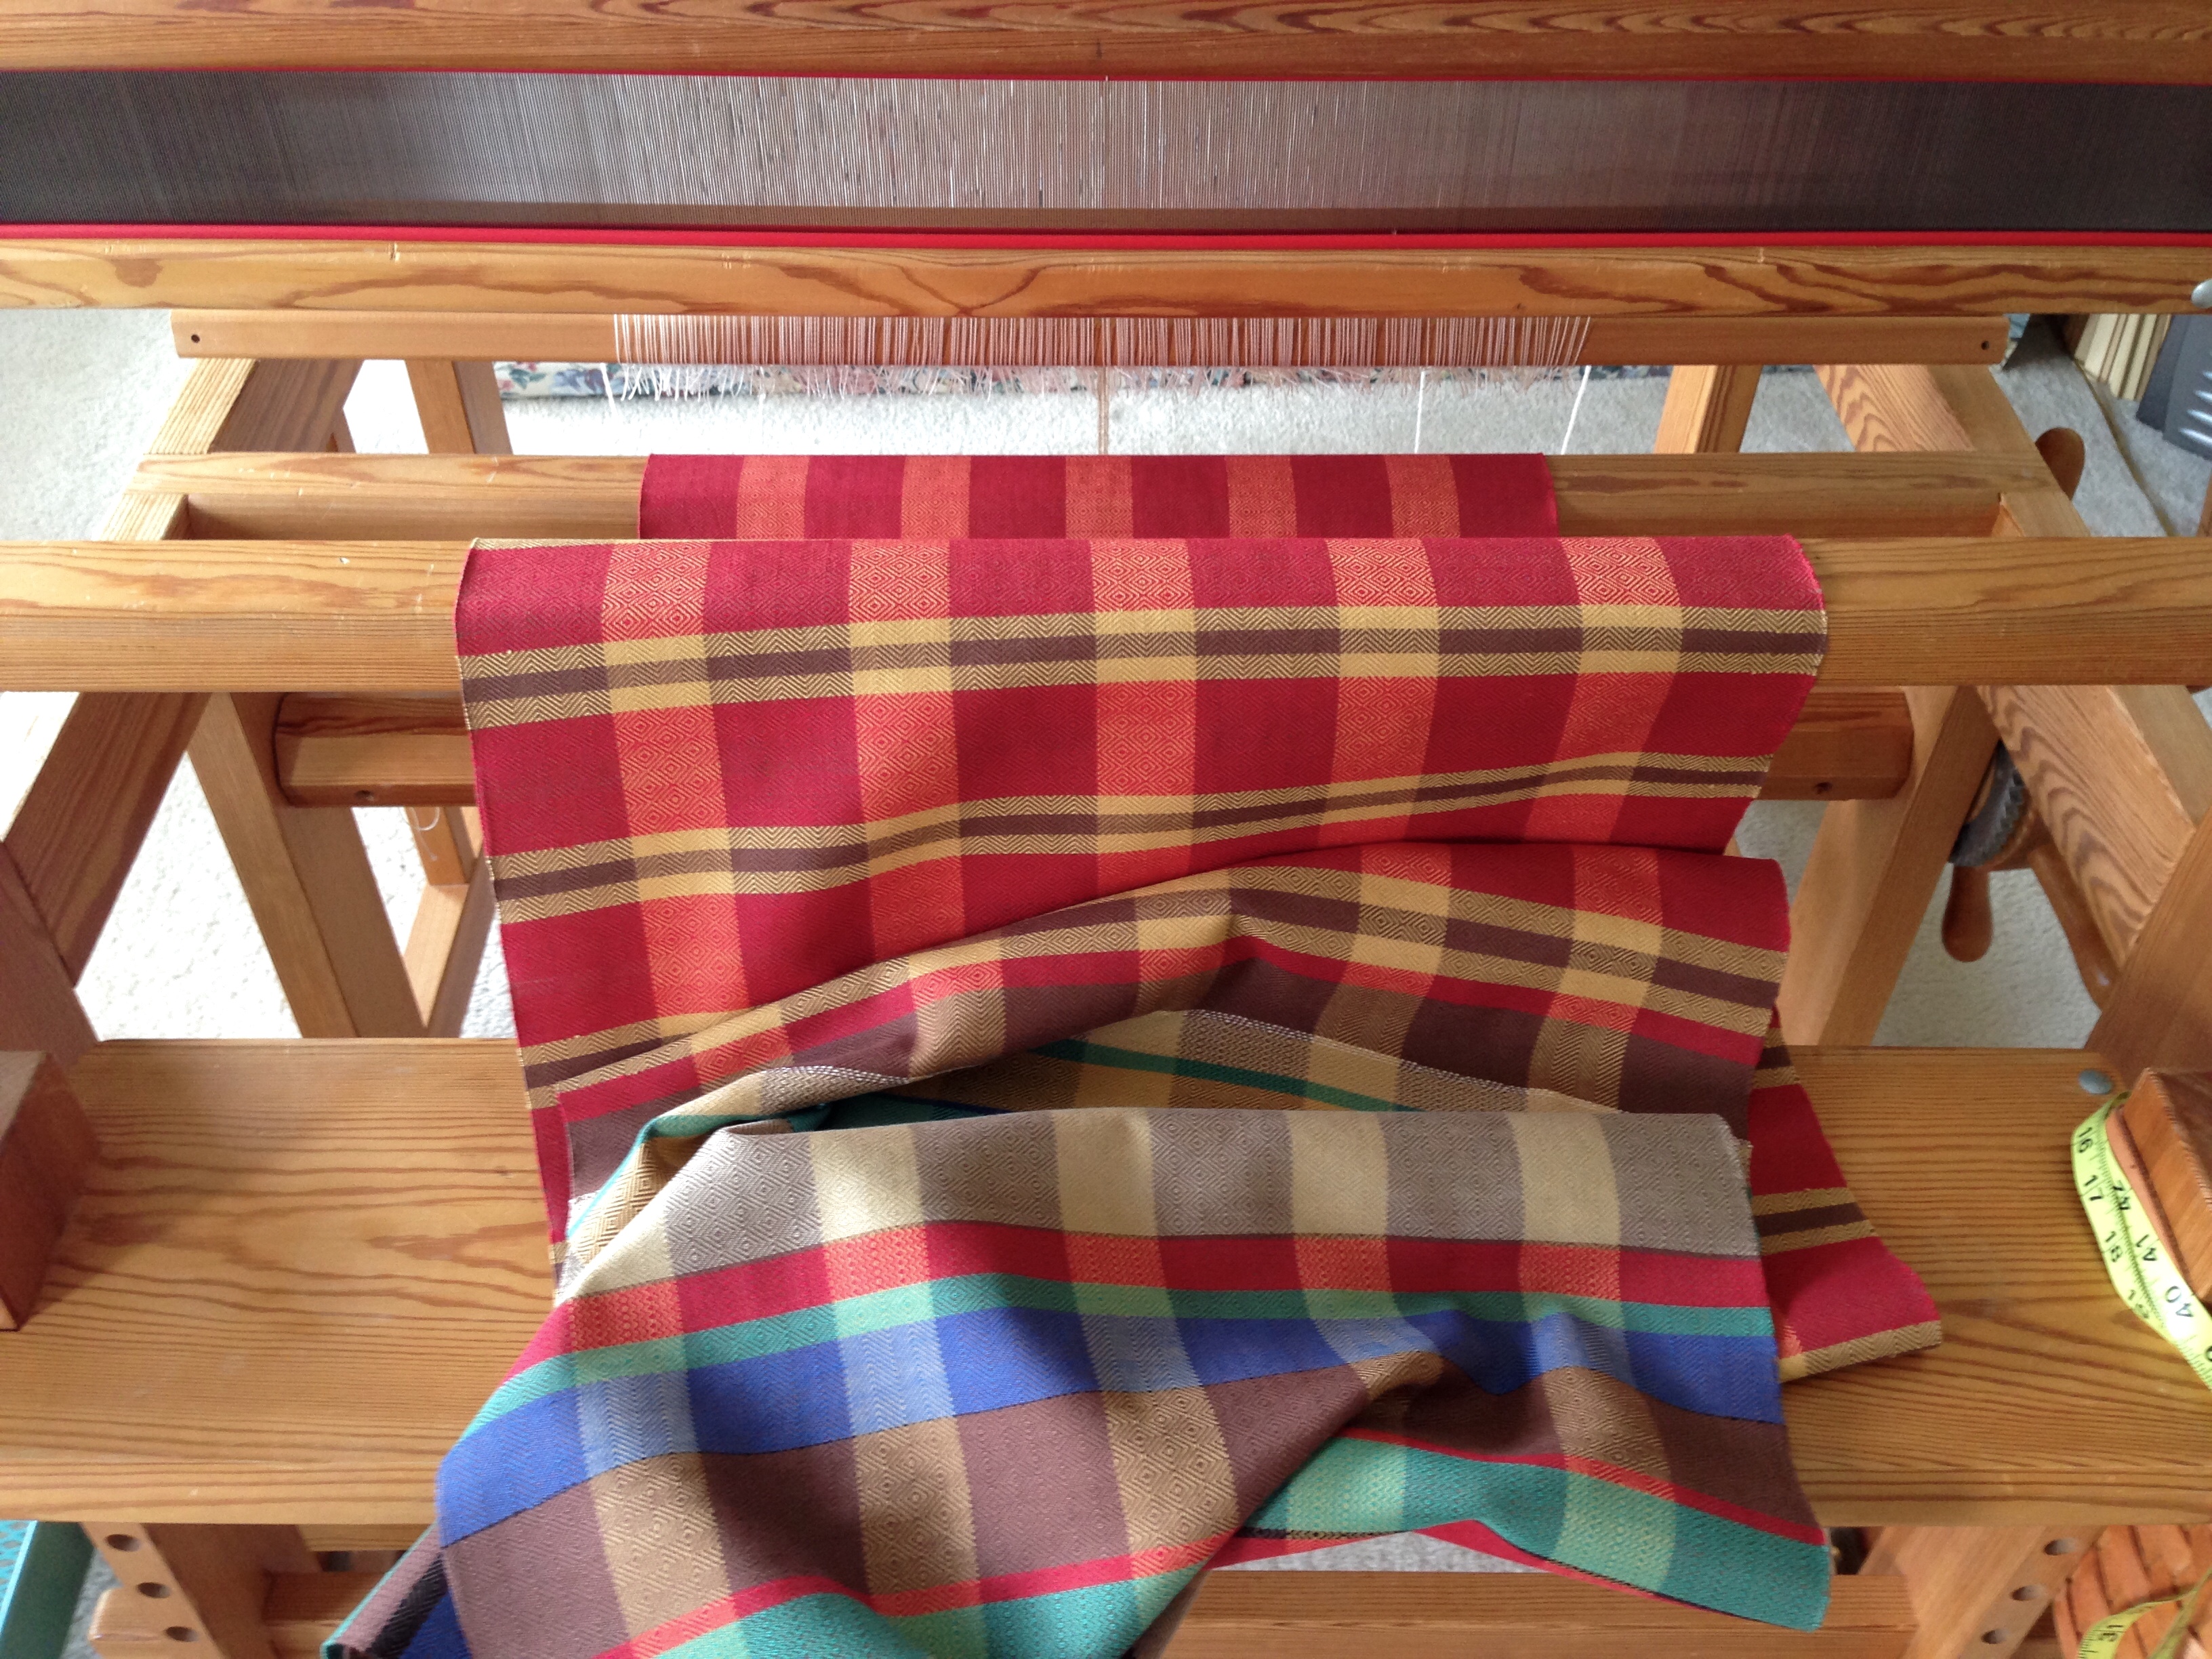
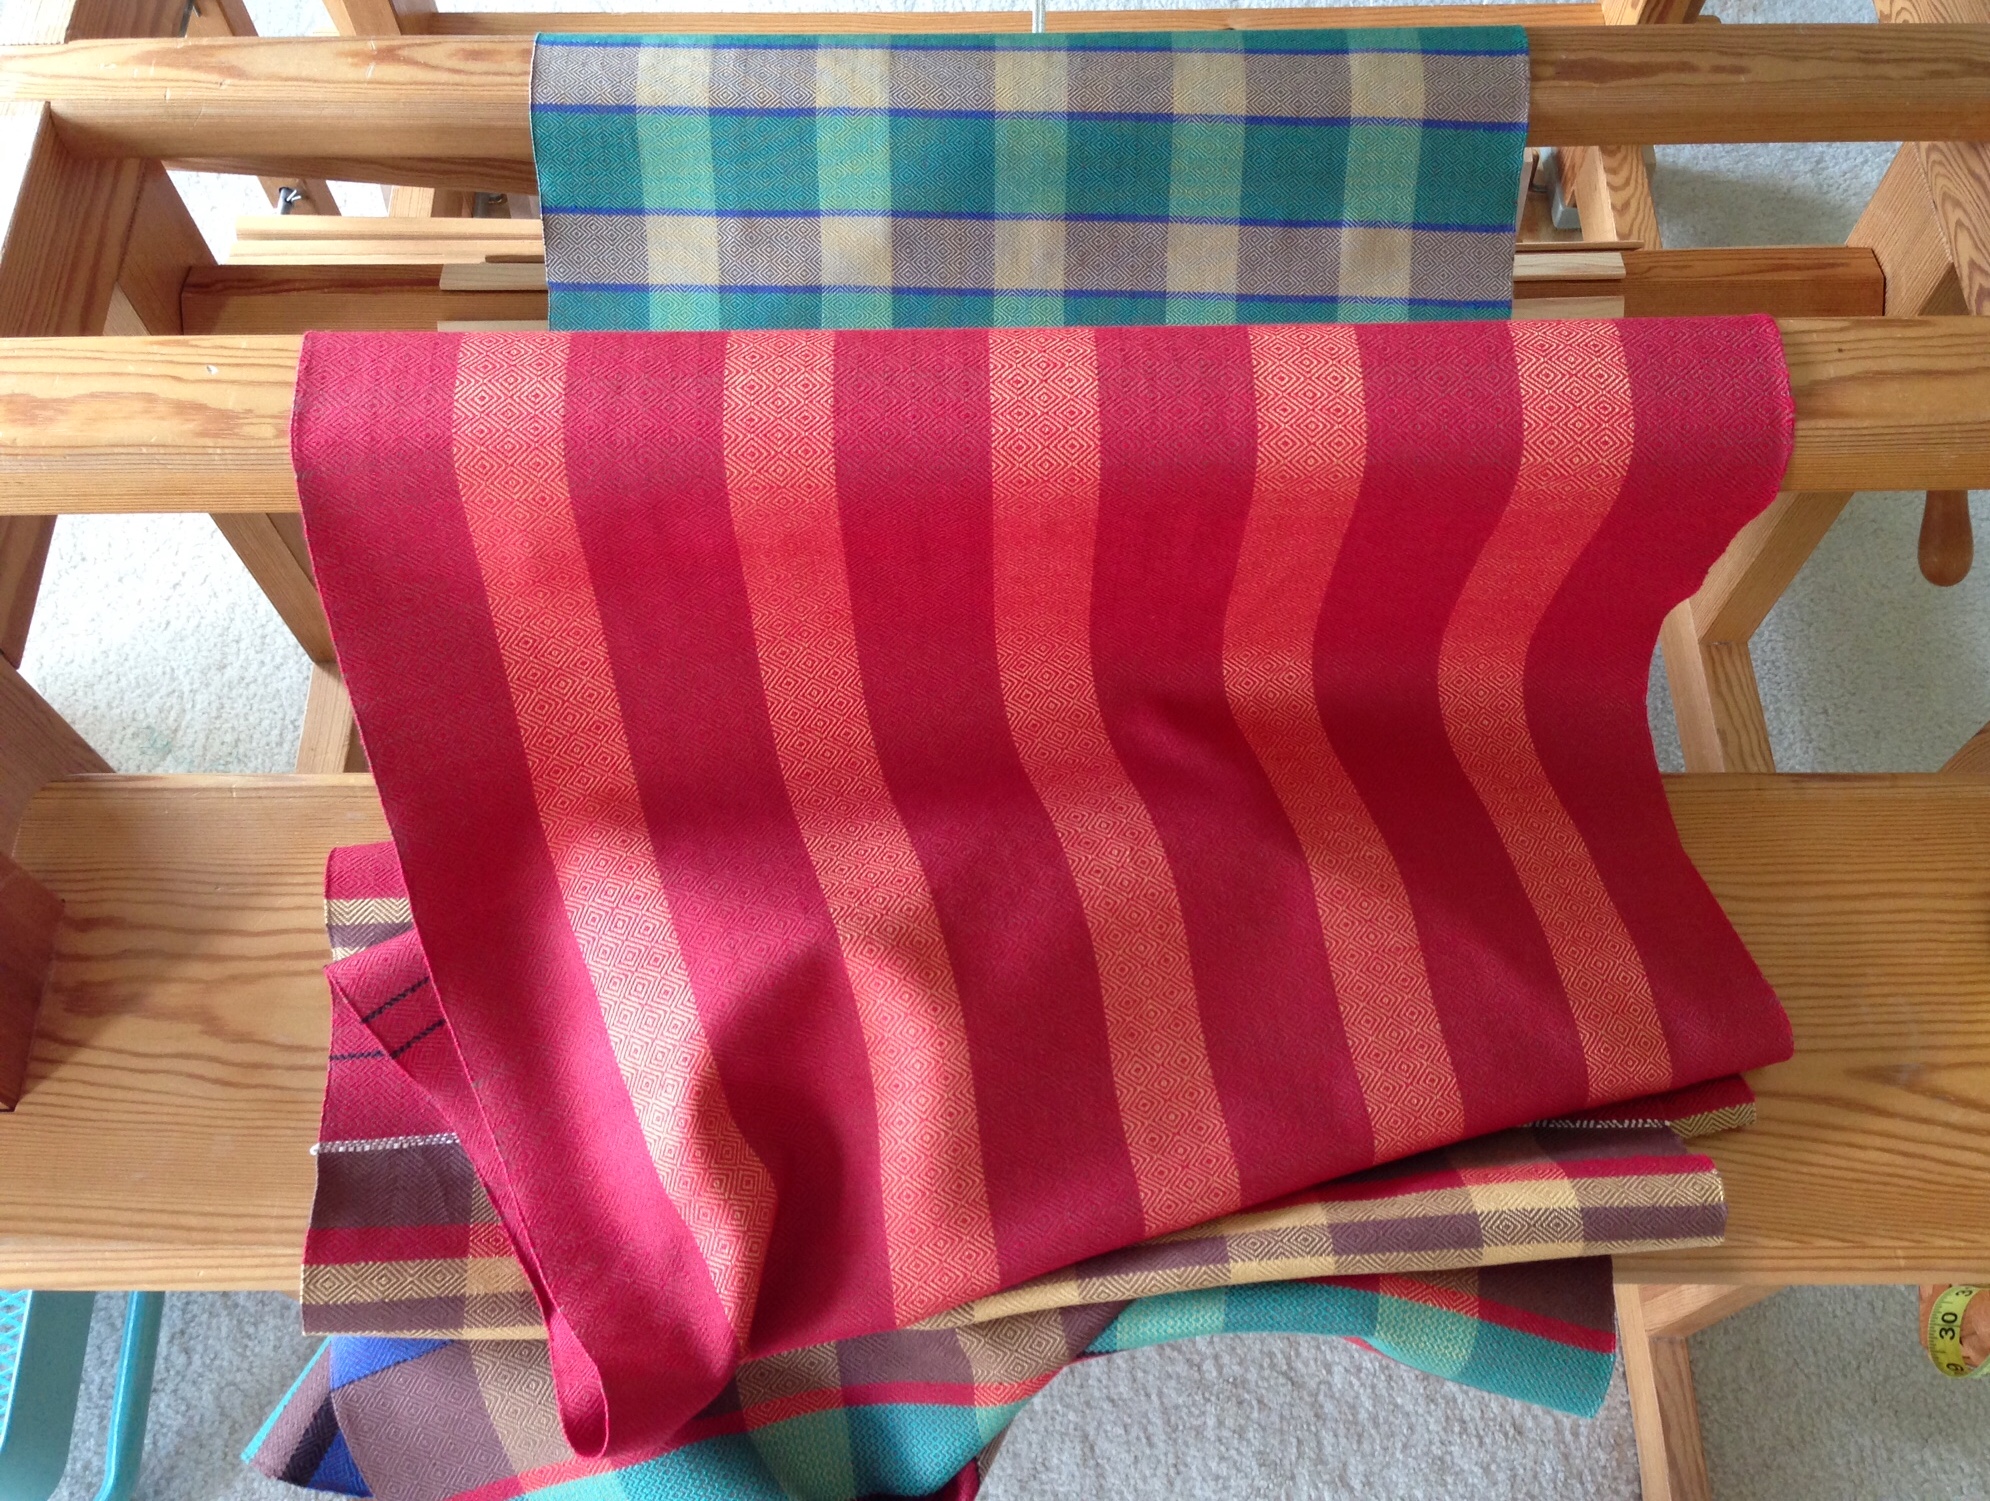
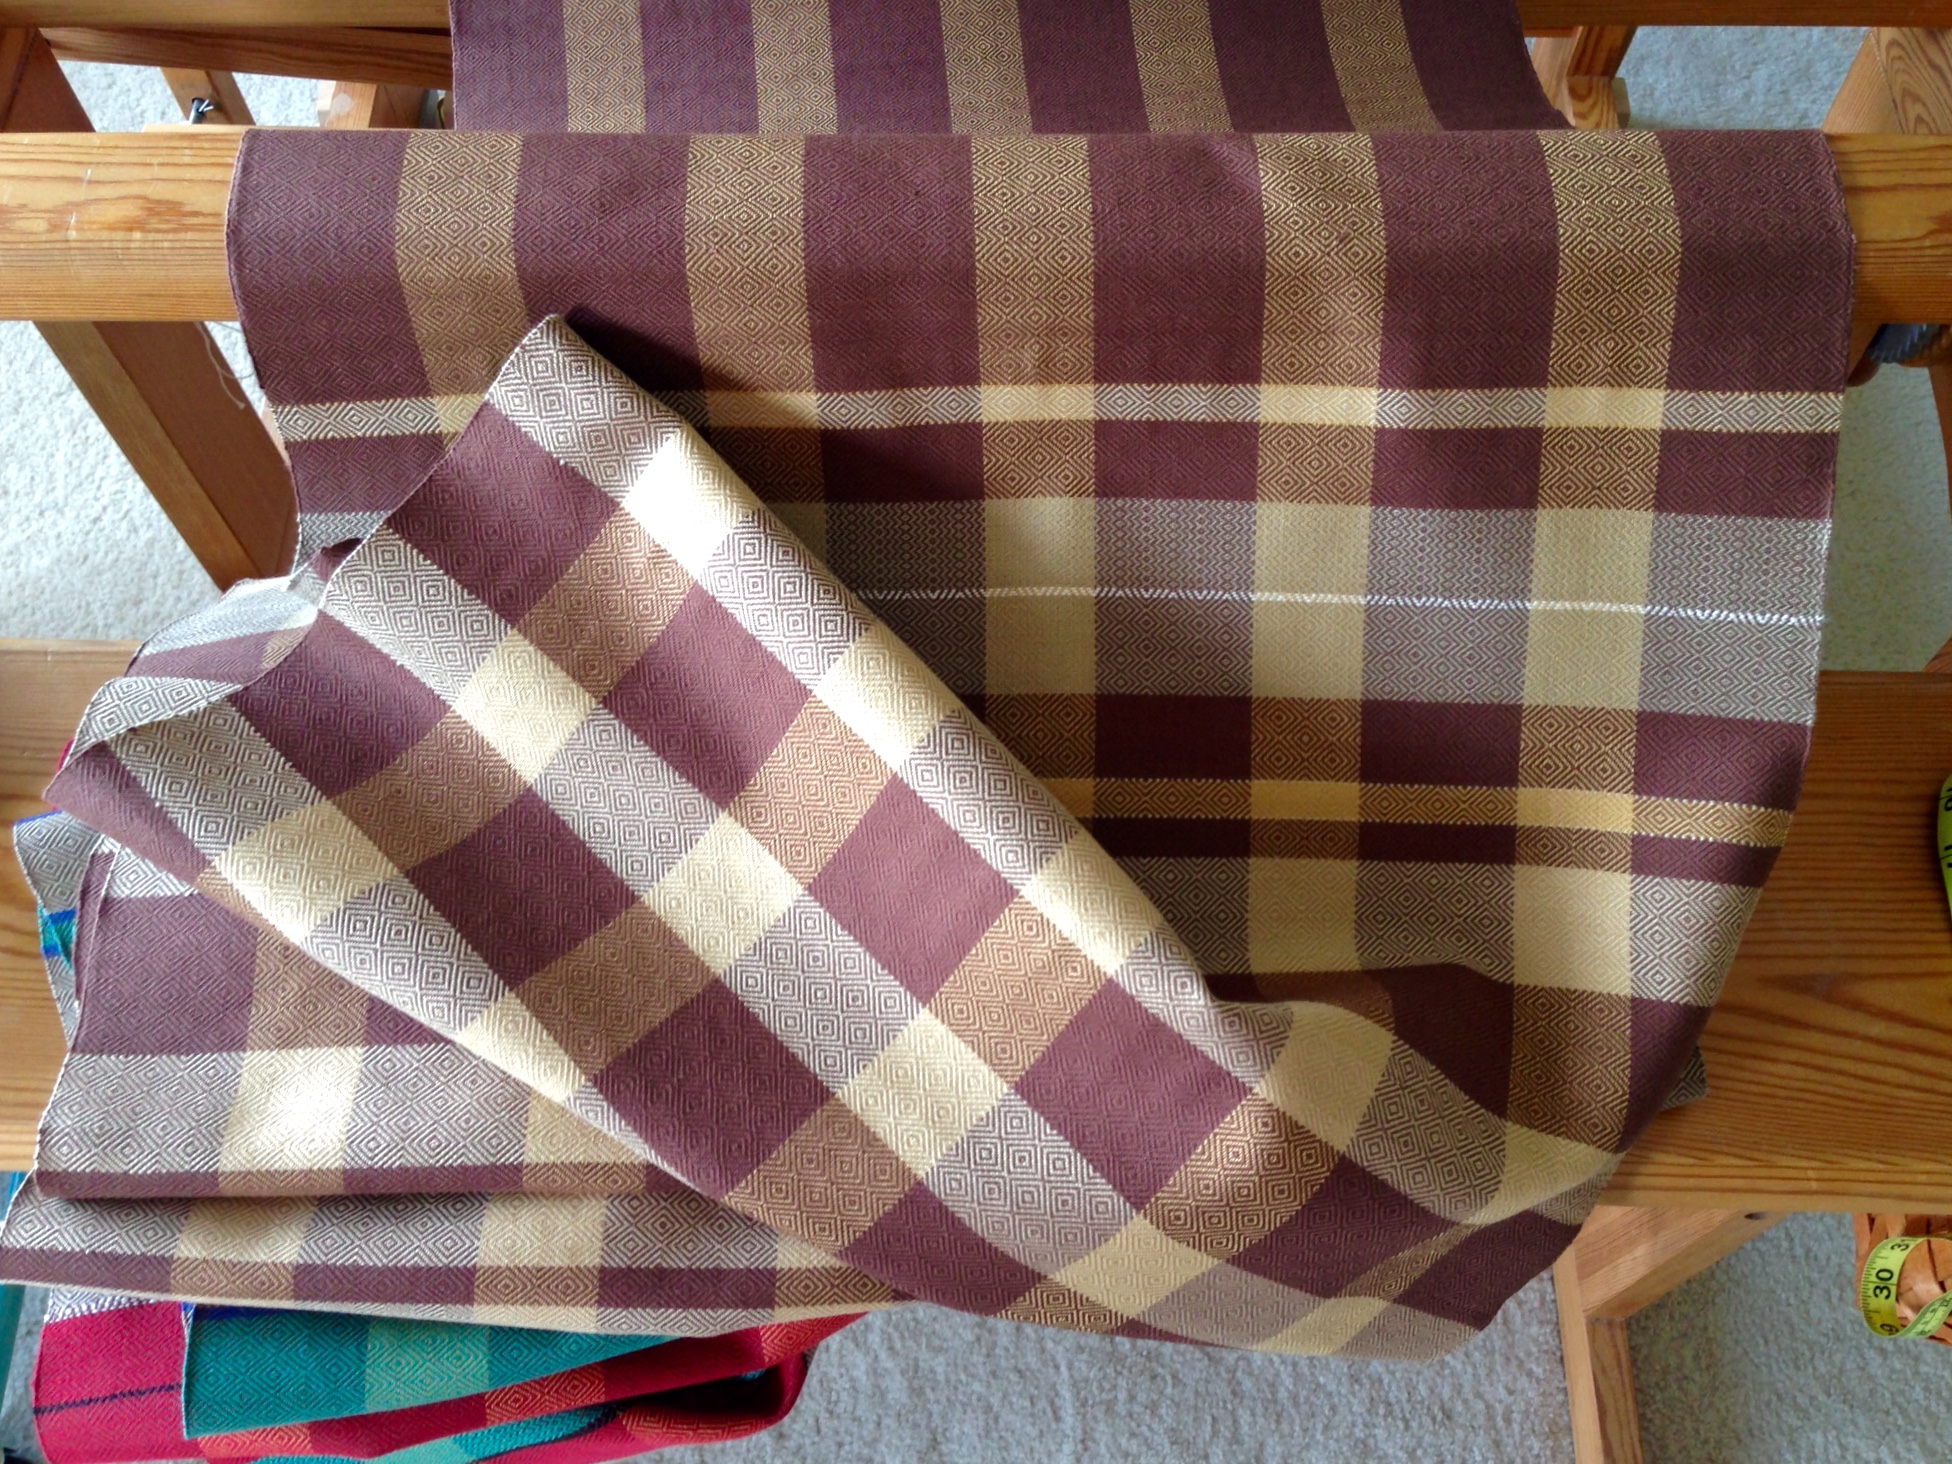
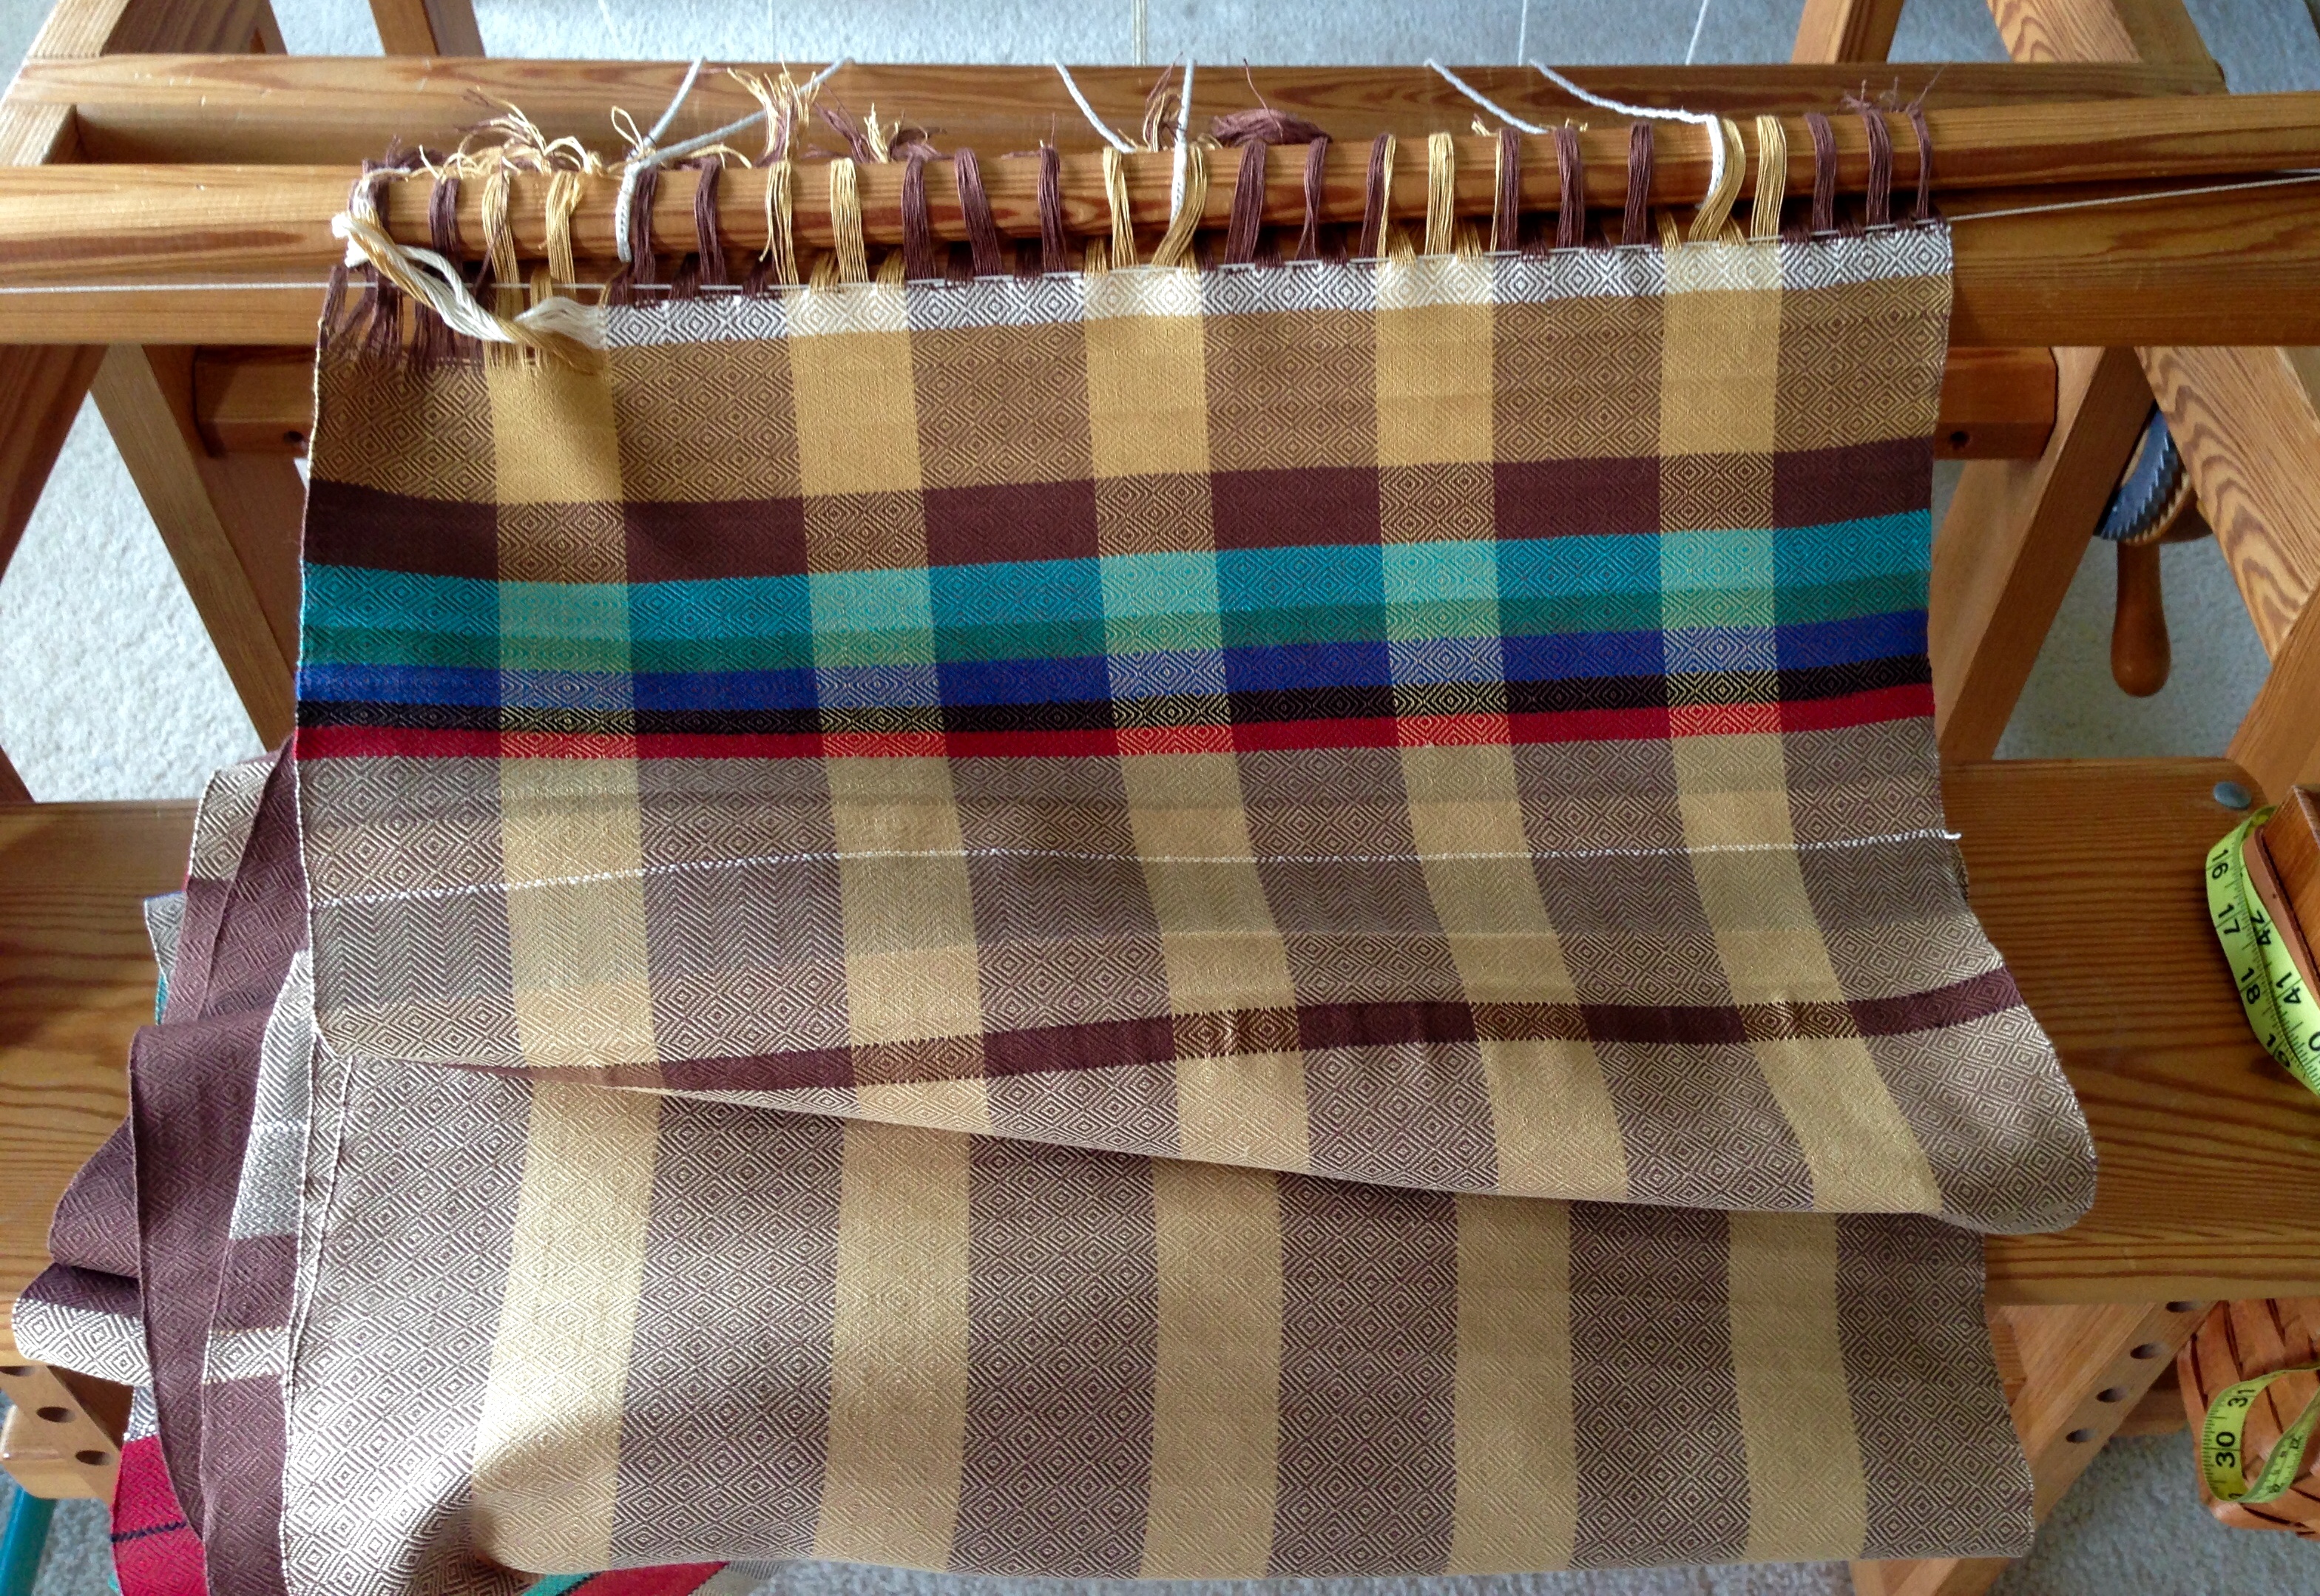
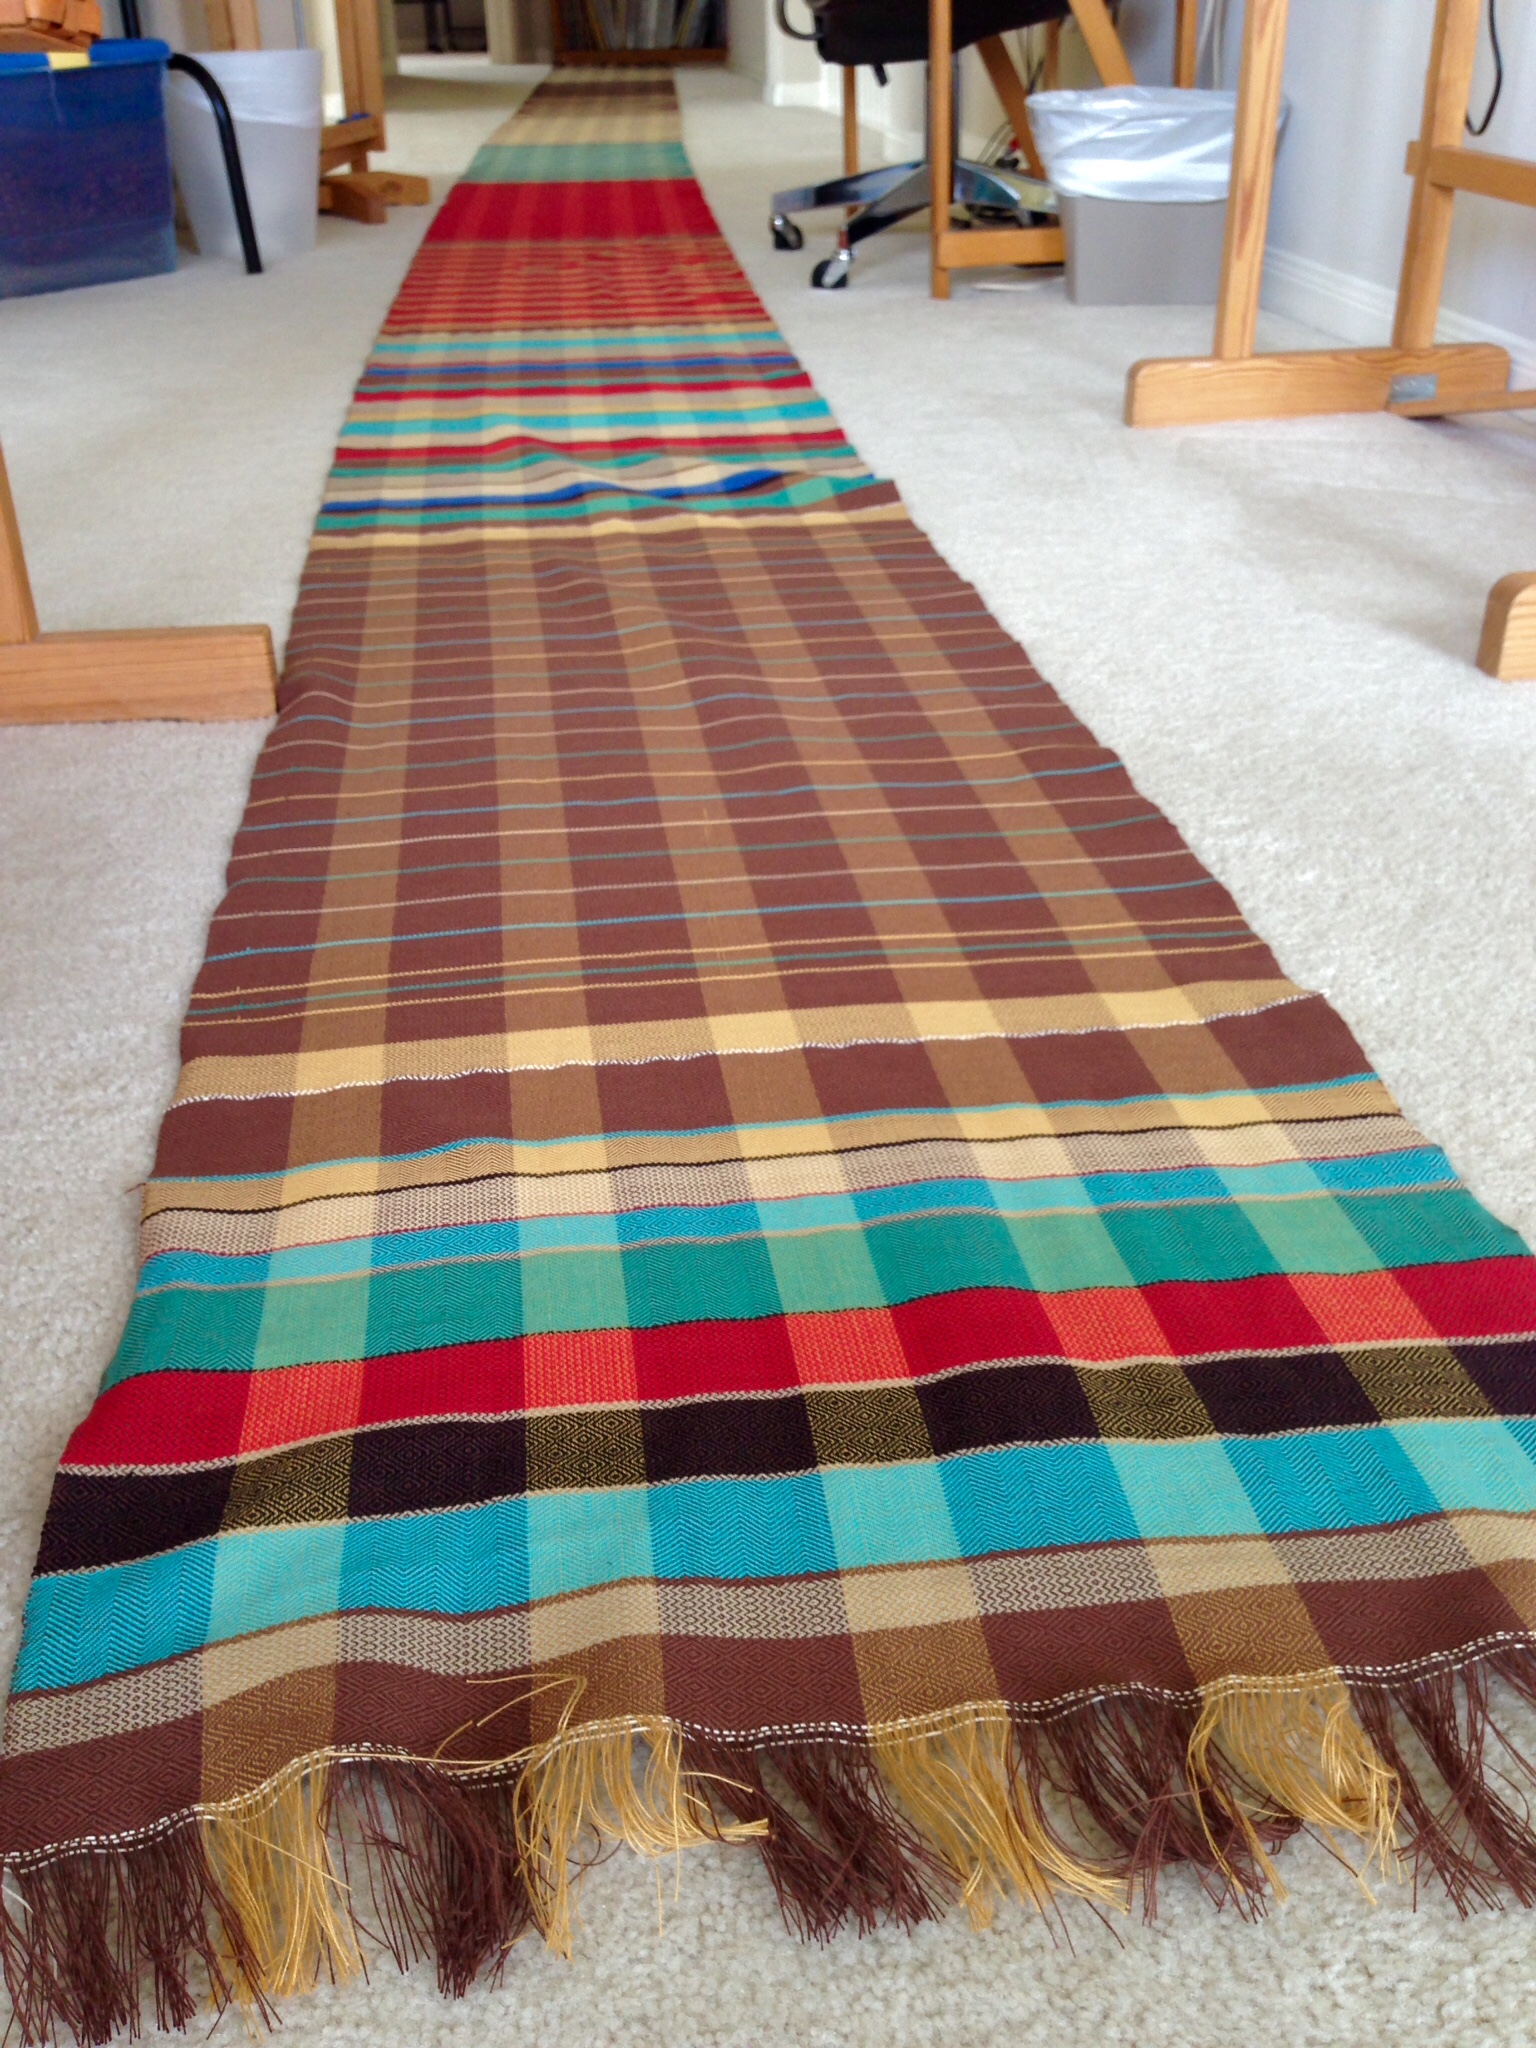
If you are a weaver, you know this thrill. I weave the very last pick, and then I hold my breath as the finished cloth is unrolled from the cloth beam. All ten meters / eleven yards of it! I don’t usually have an audience for the unrolling, but this time I want to share the experience with you, my friends.
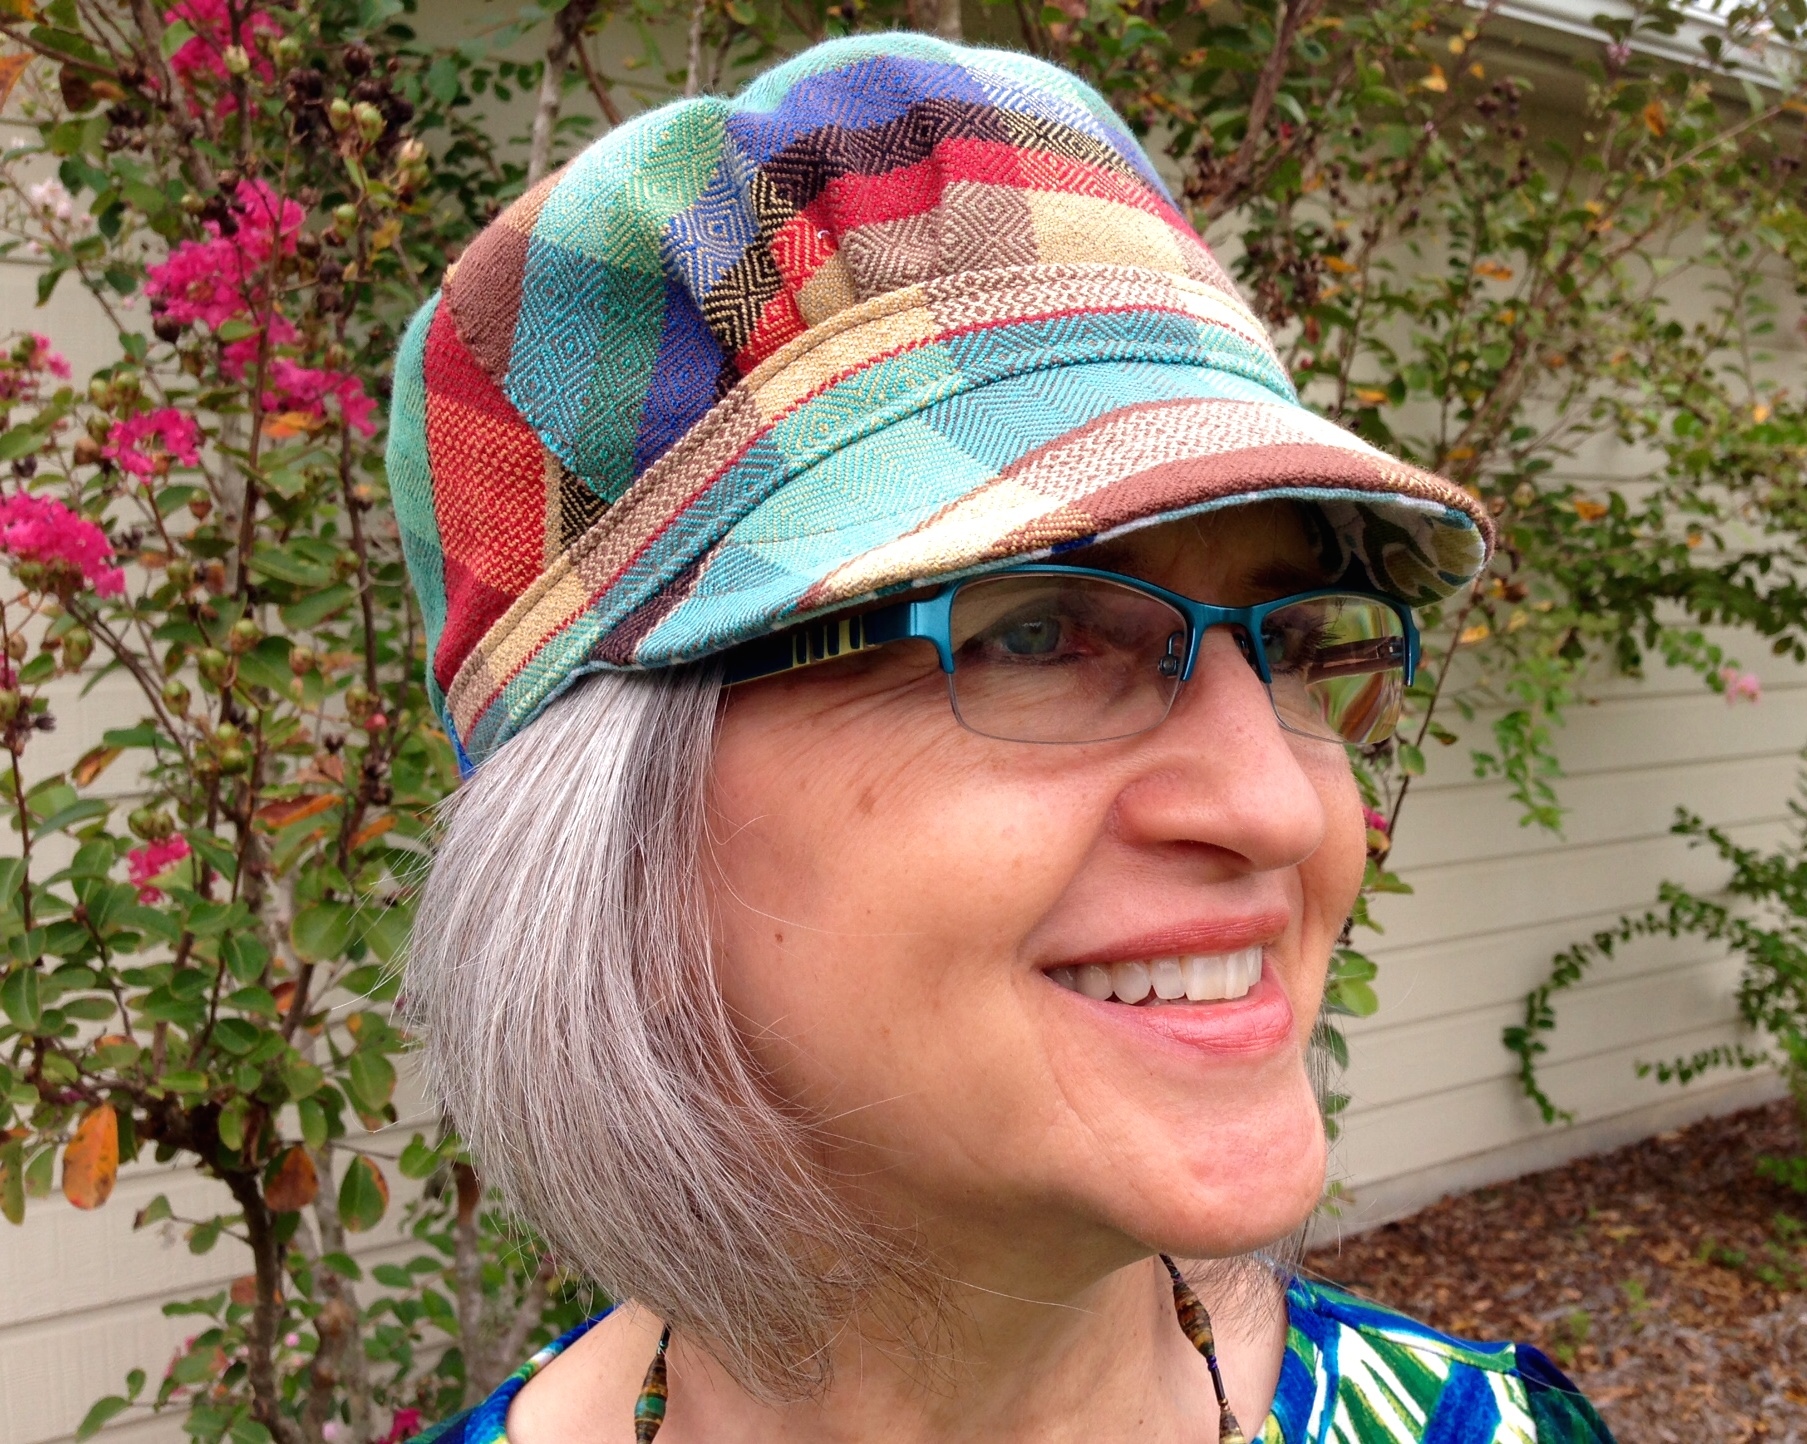
If you stay to the end, you will see the cap I made from the sample pieces at the beginning and end of the warp.
And, one more thing, I added a little 3 1/2-minute time-lapse video at the very end. I hope it makes you smile.
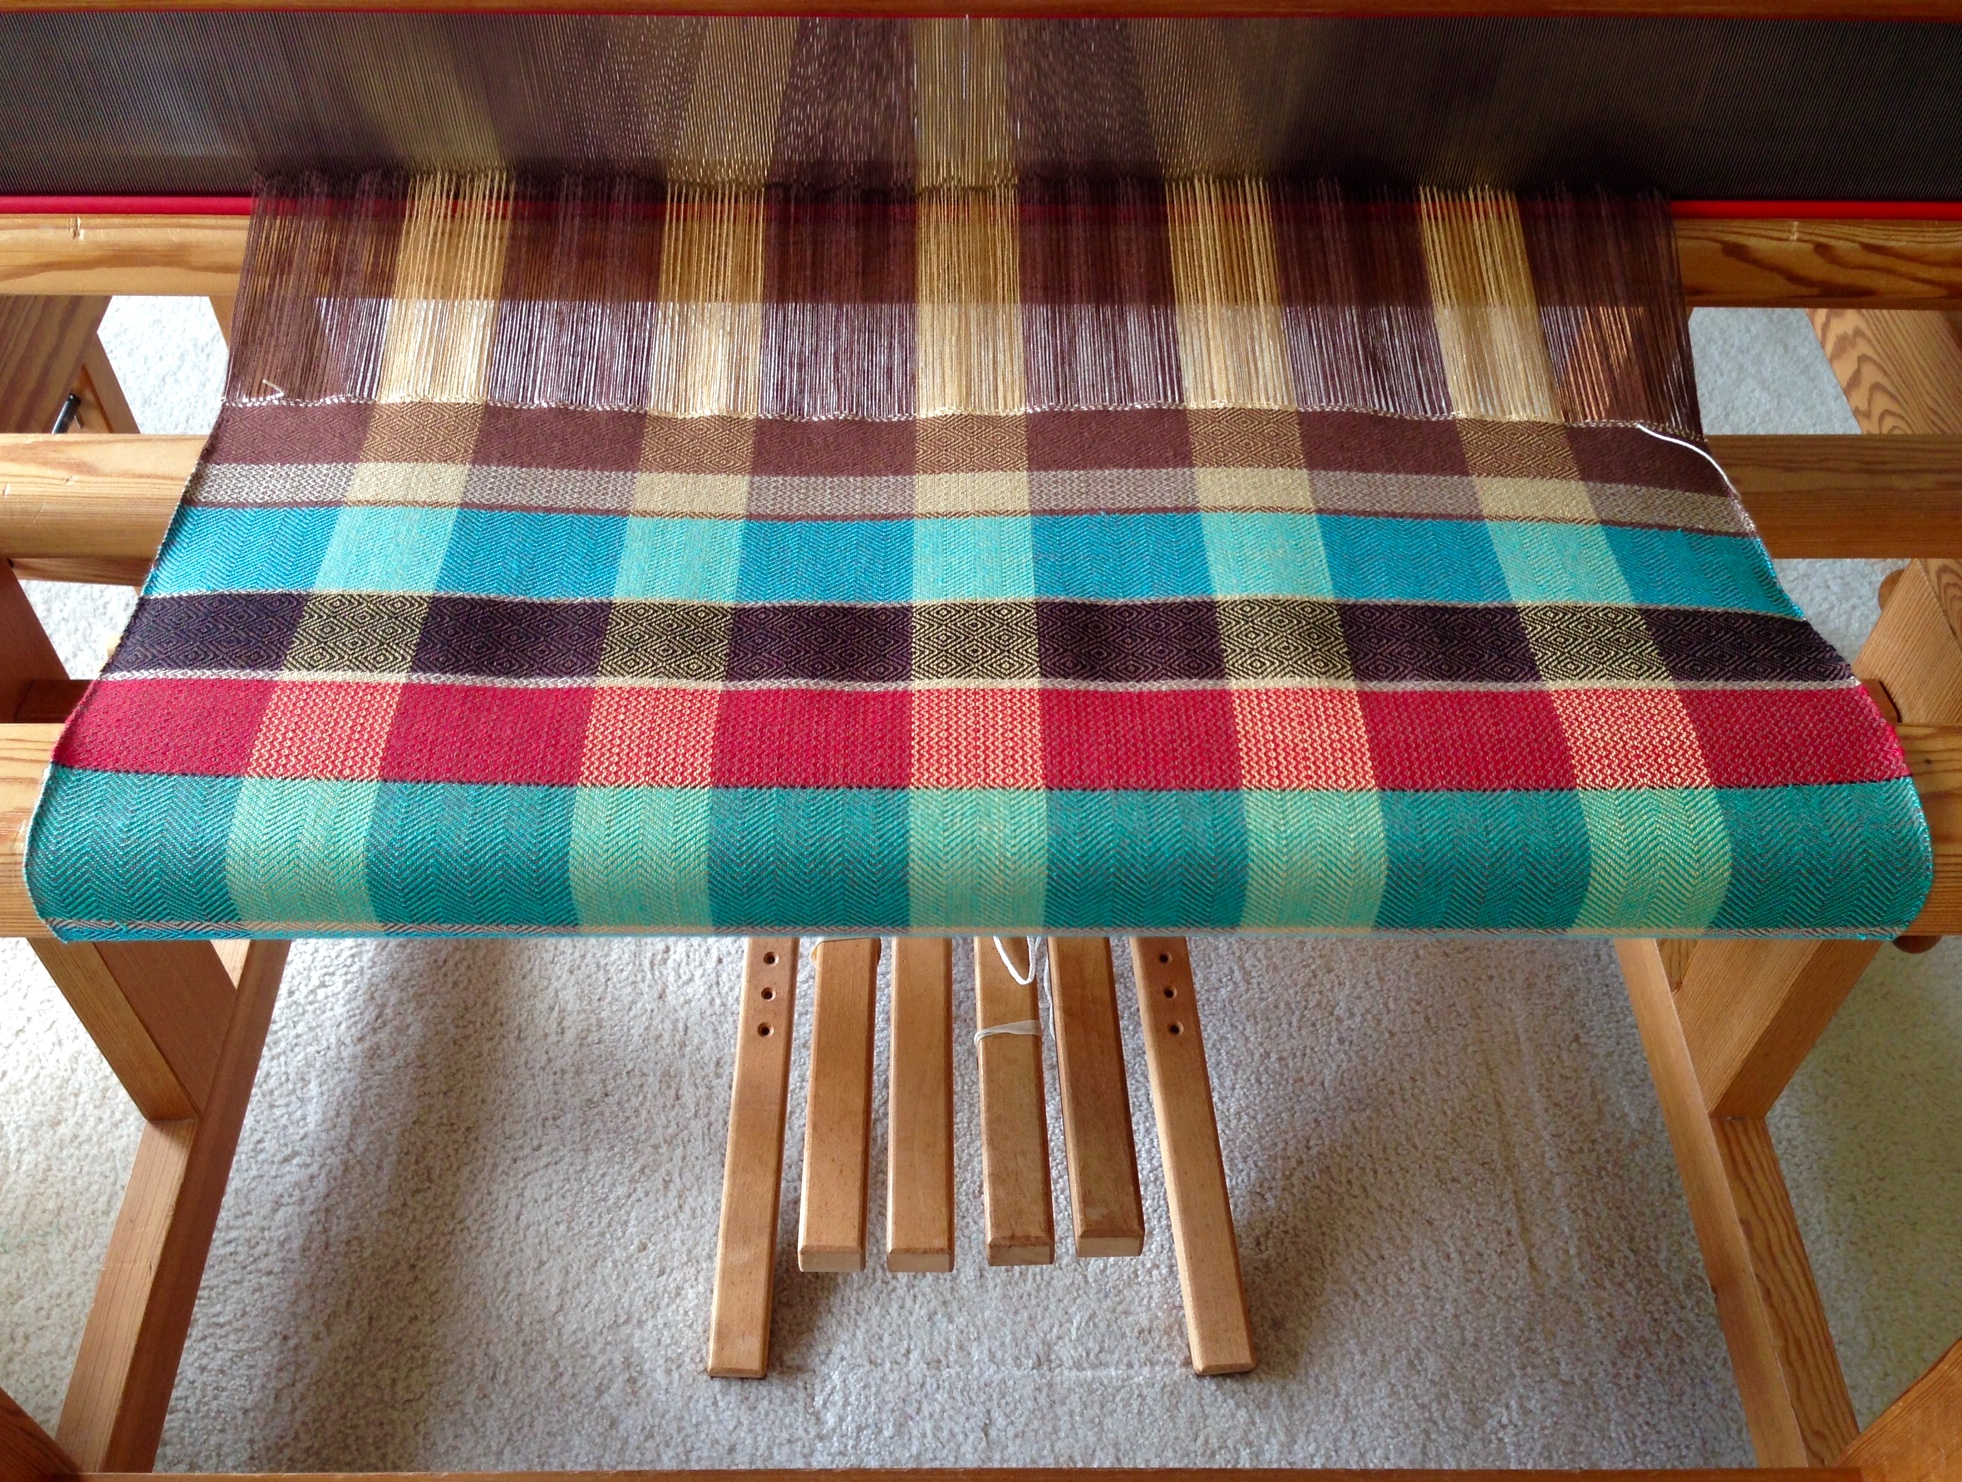
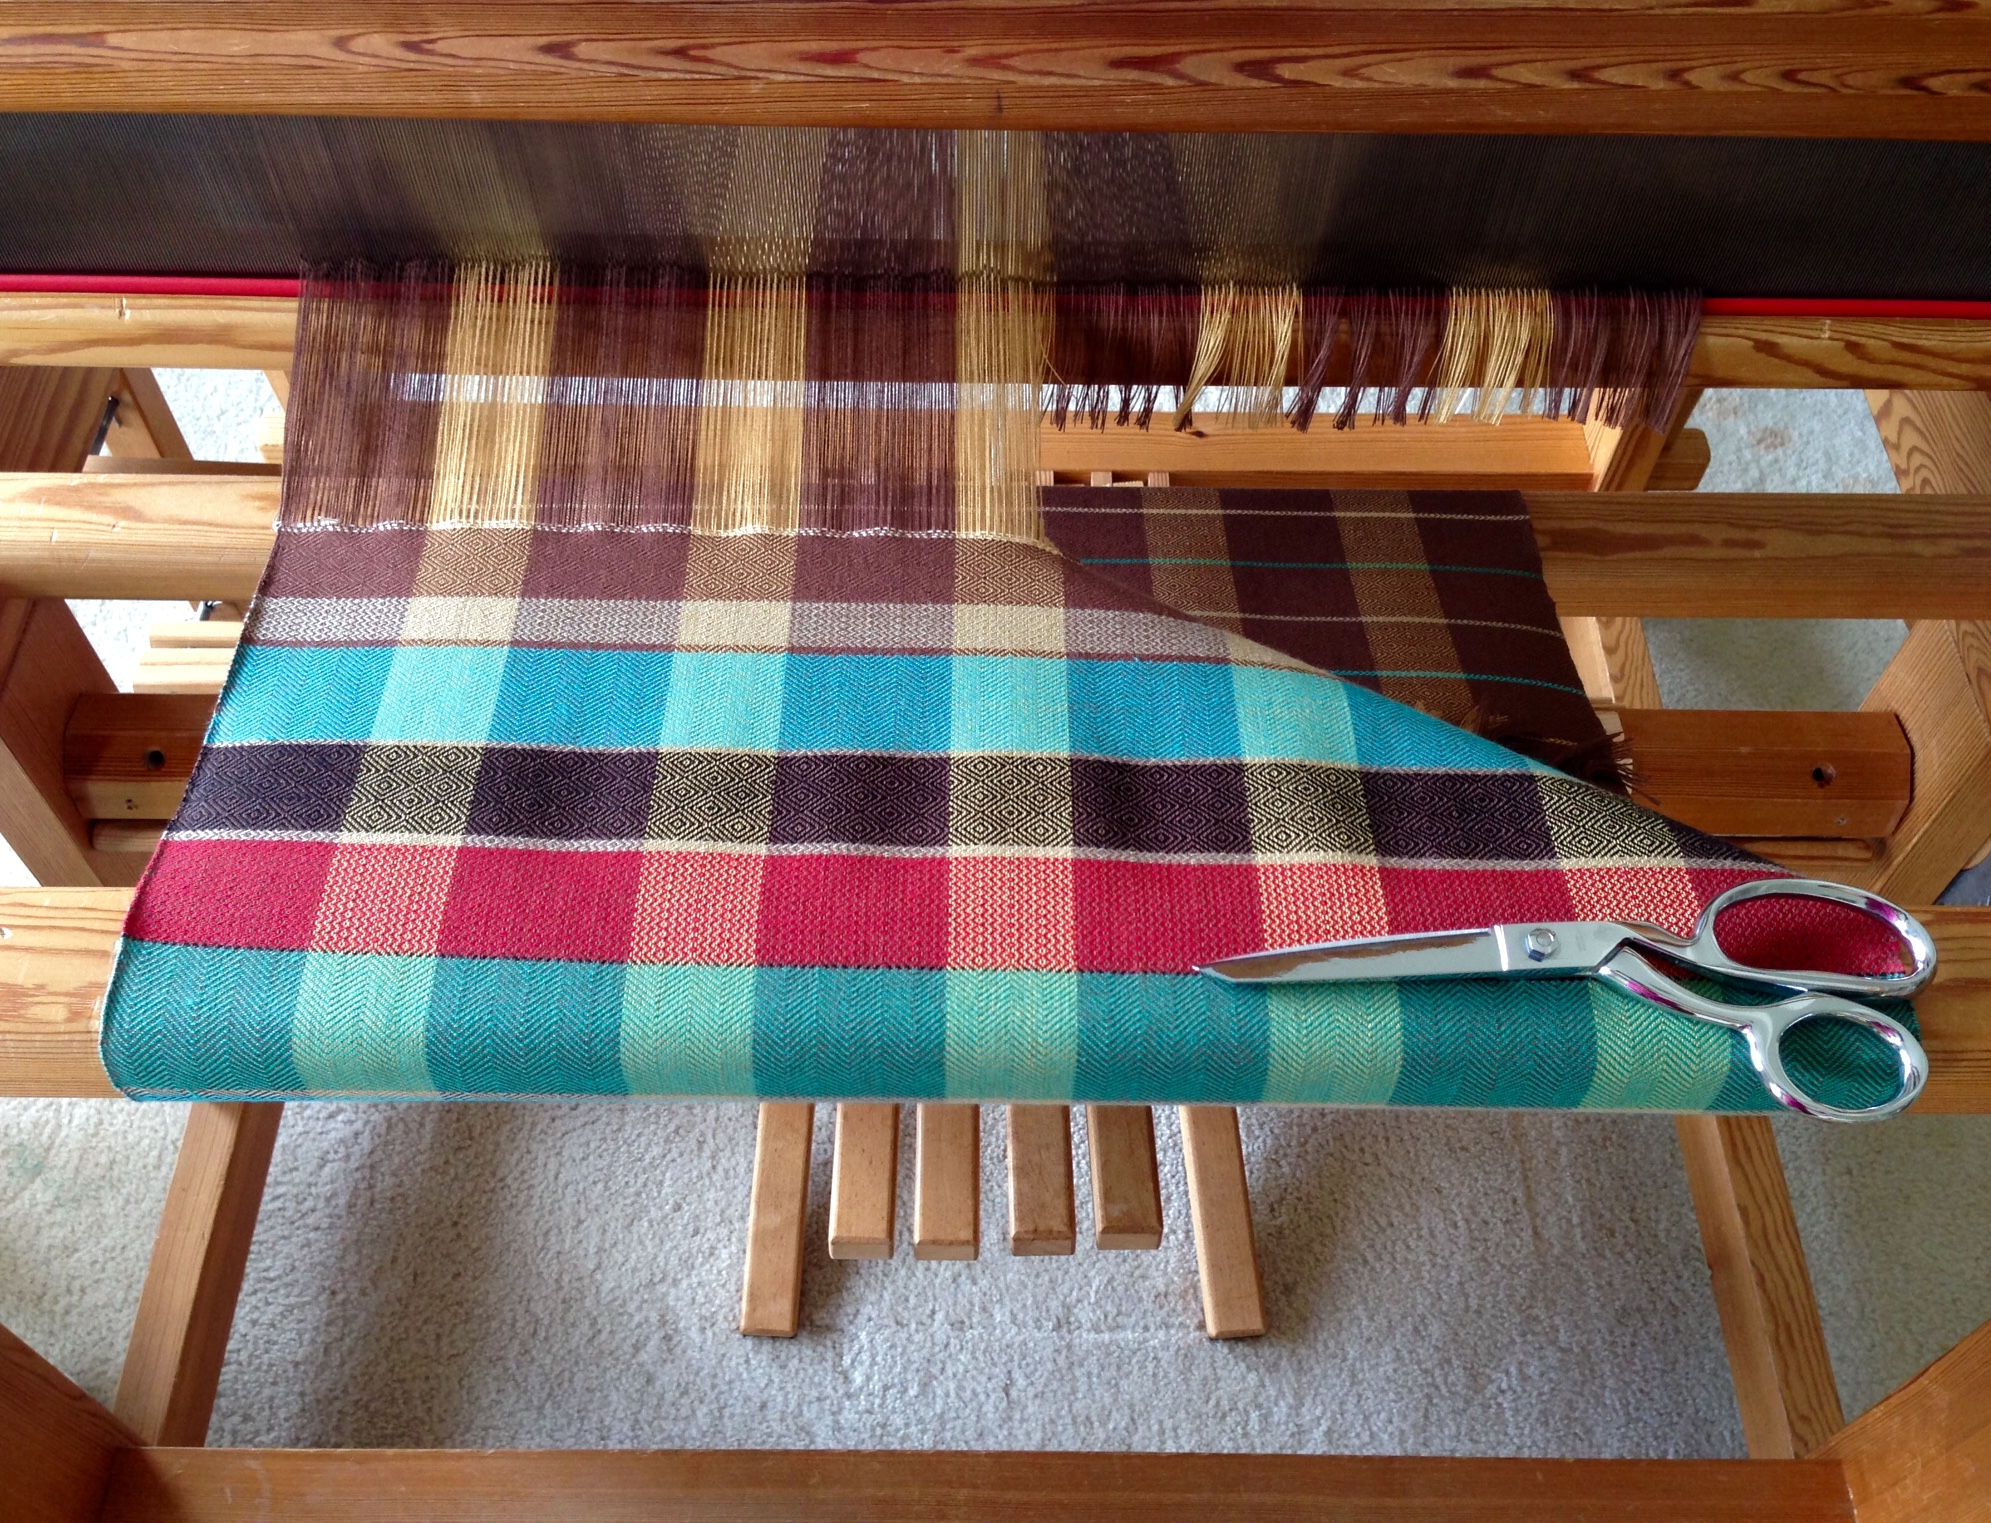
Final pick in place.Release ratchets on cloth and warp beams to loosen warp tension.Get out the big Gingher shears and start cutting.First good view of the last towel on the warp. The last shall be first…The Nine Color Towel.Keep unrolling.Still more to come..Each one is different.Seeing brown now, so we know we are getting near the end/beginning.Finally, we made it to the tie-on bar!I love the final sound–warping slats falling to the floor as the last round of cloth is pulled from the cloth beam.There it is. Now I want to get something else on the loom so I can do this all over again!Ta da!
And now I invite you to join me as I weave the Nine Color Towel. Remember that this is time lapse–I really do not weave this fast.
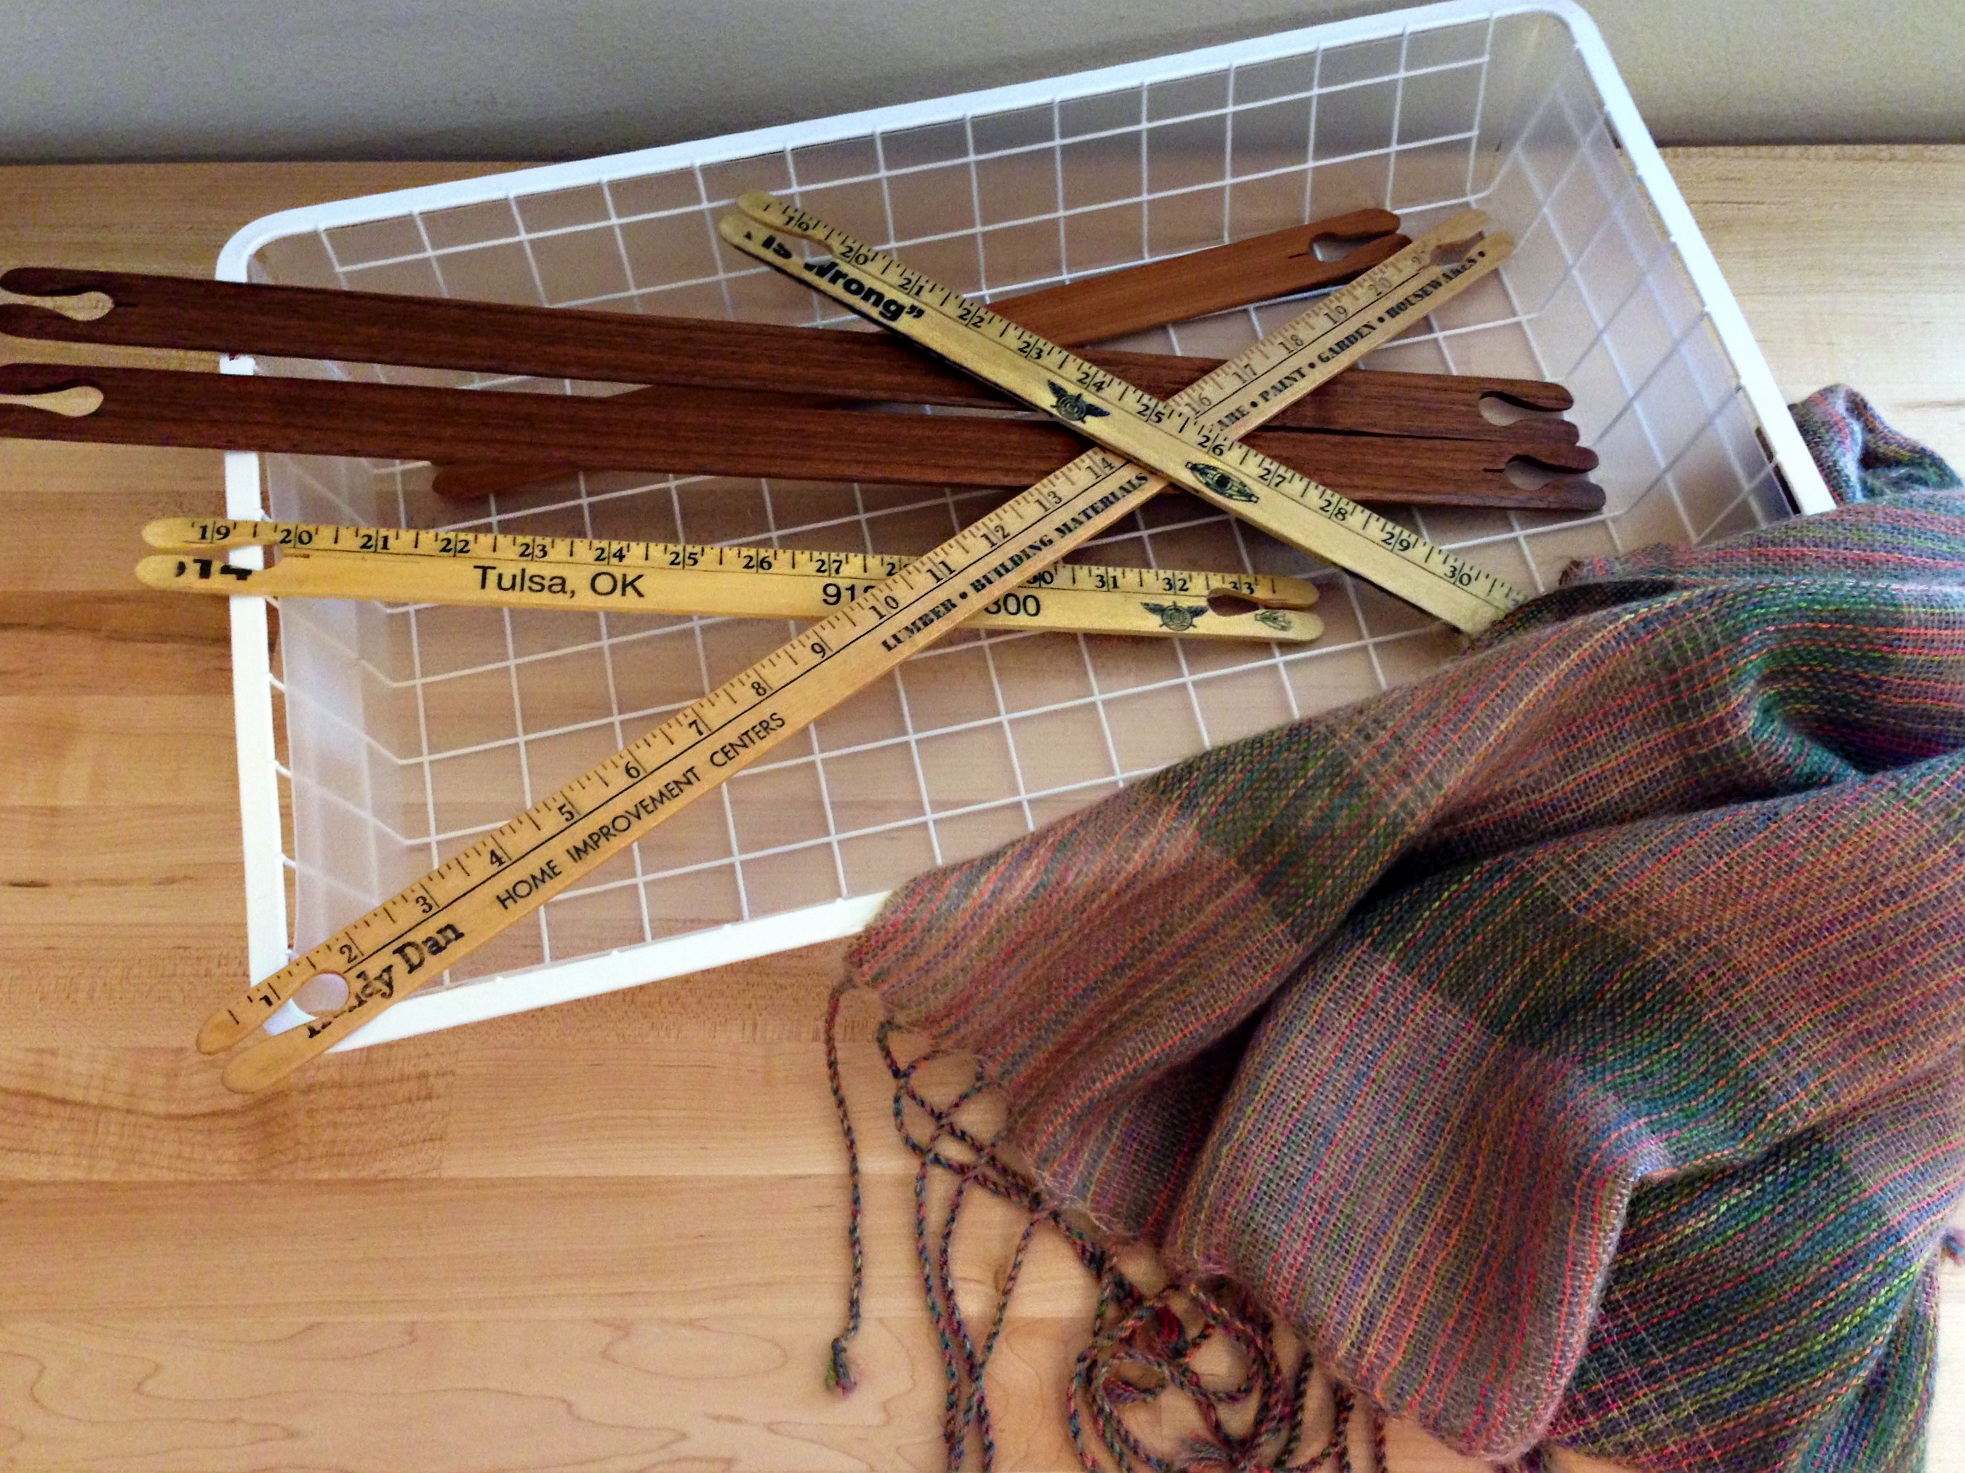
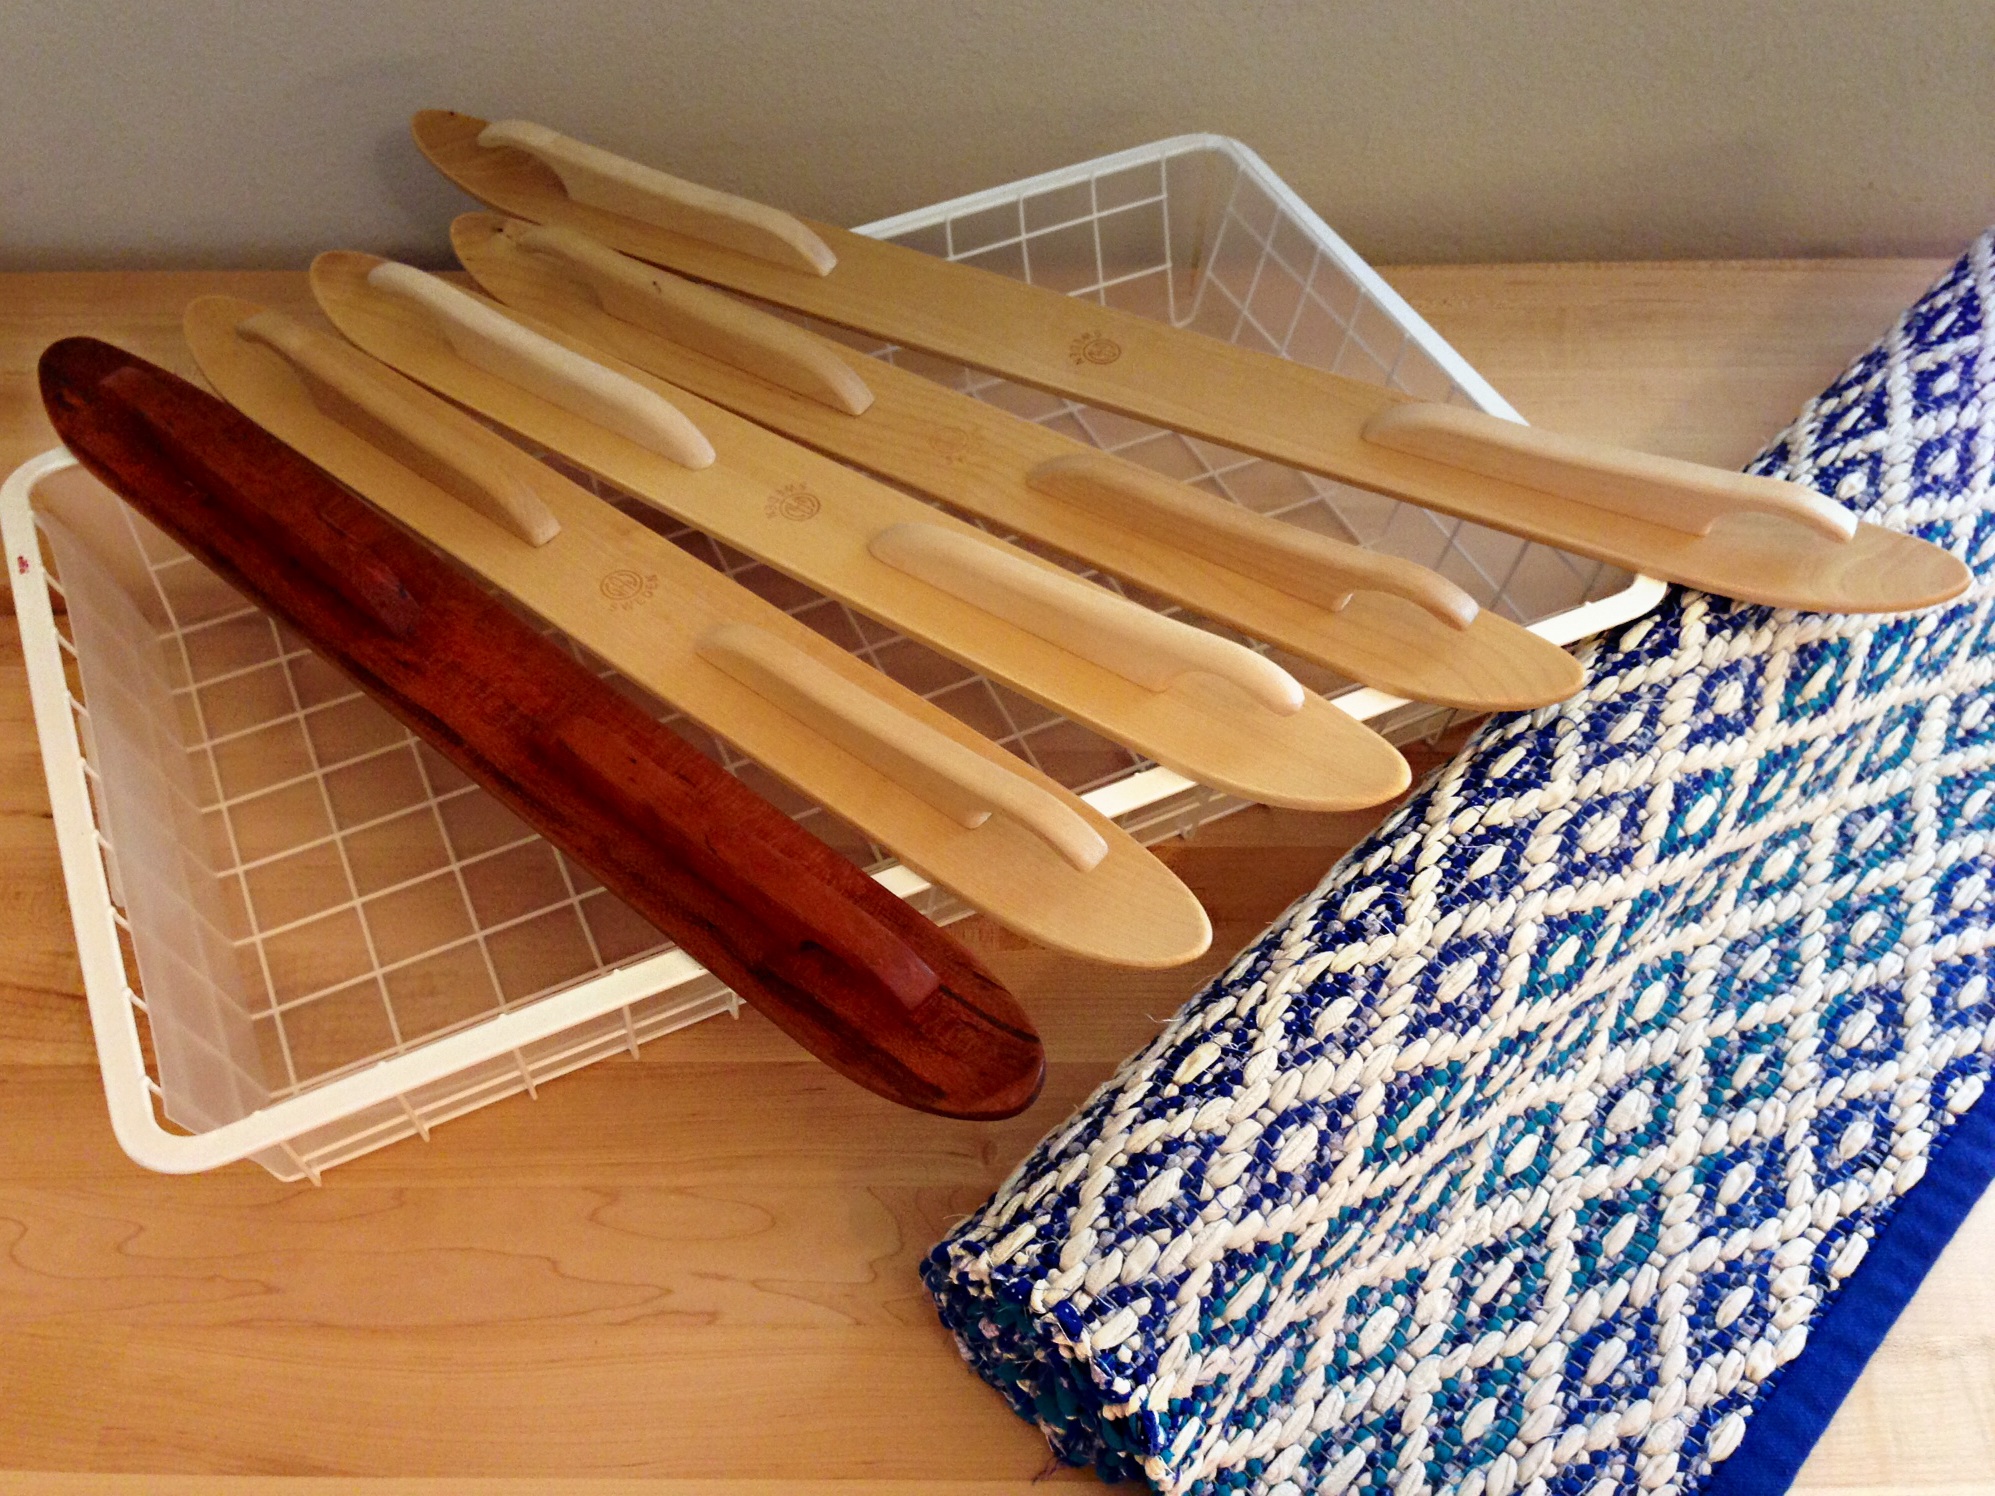
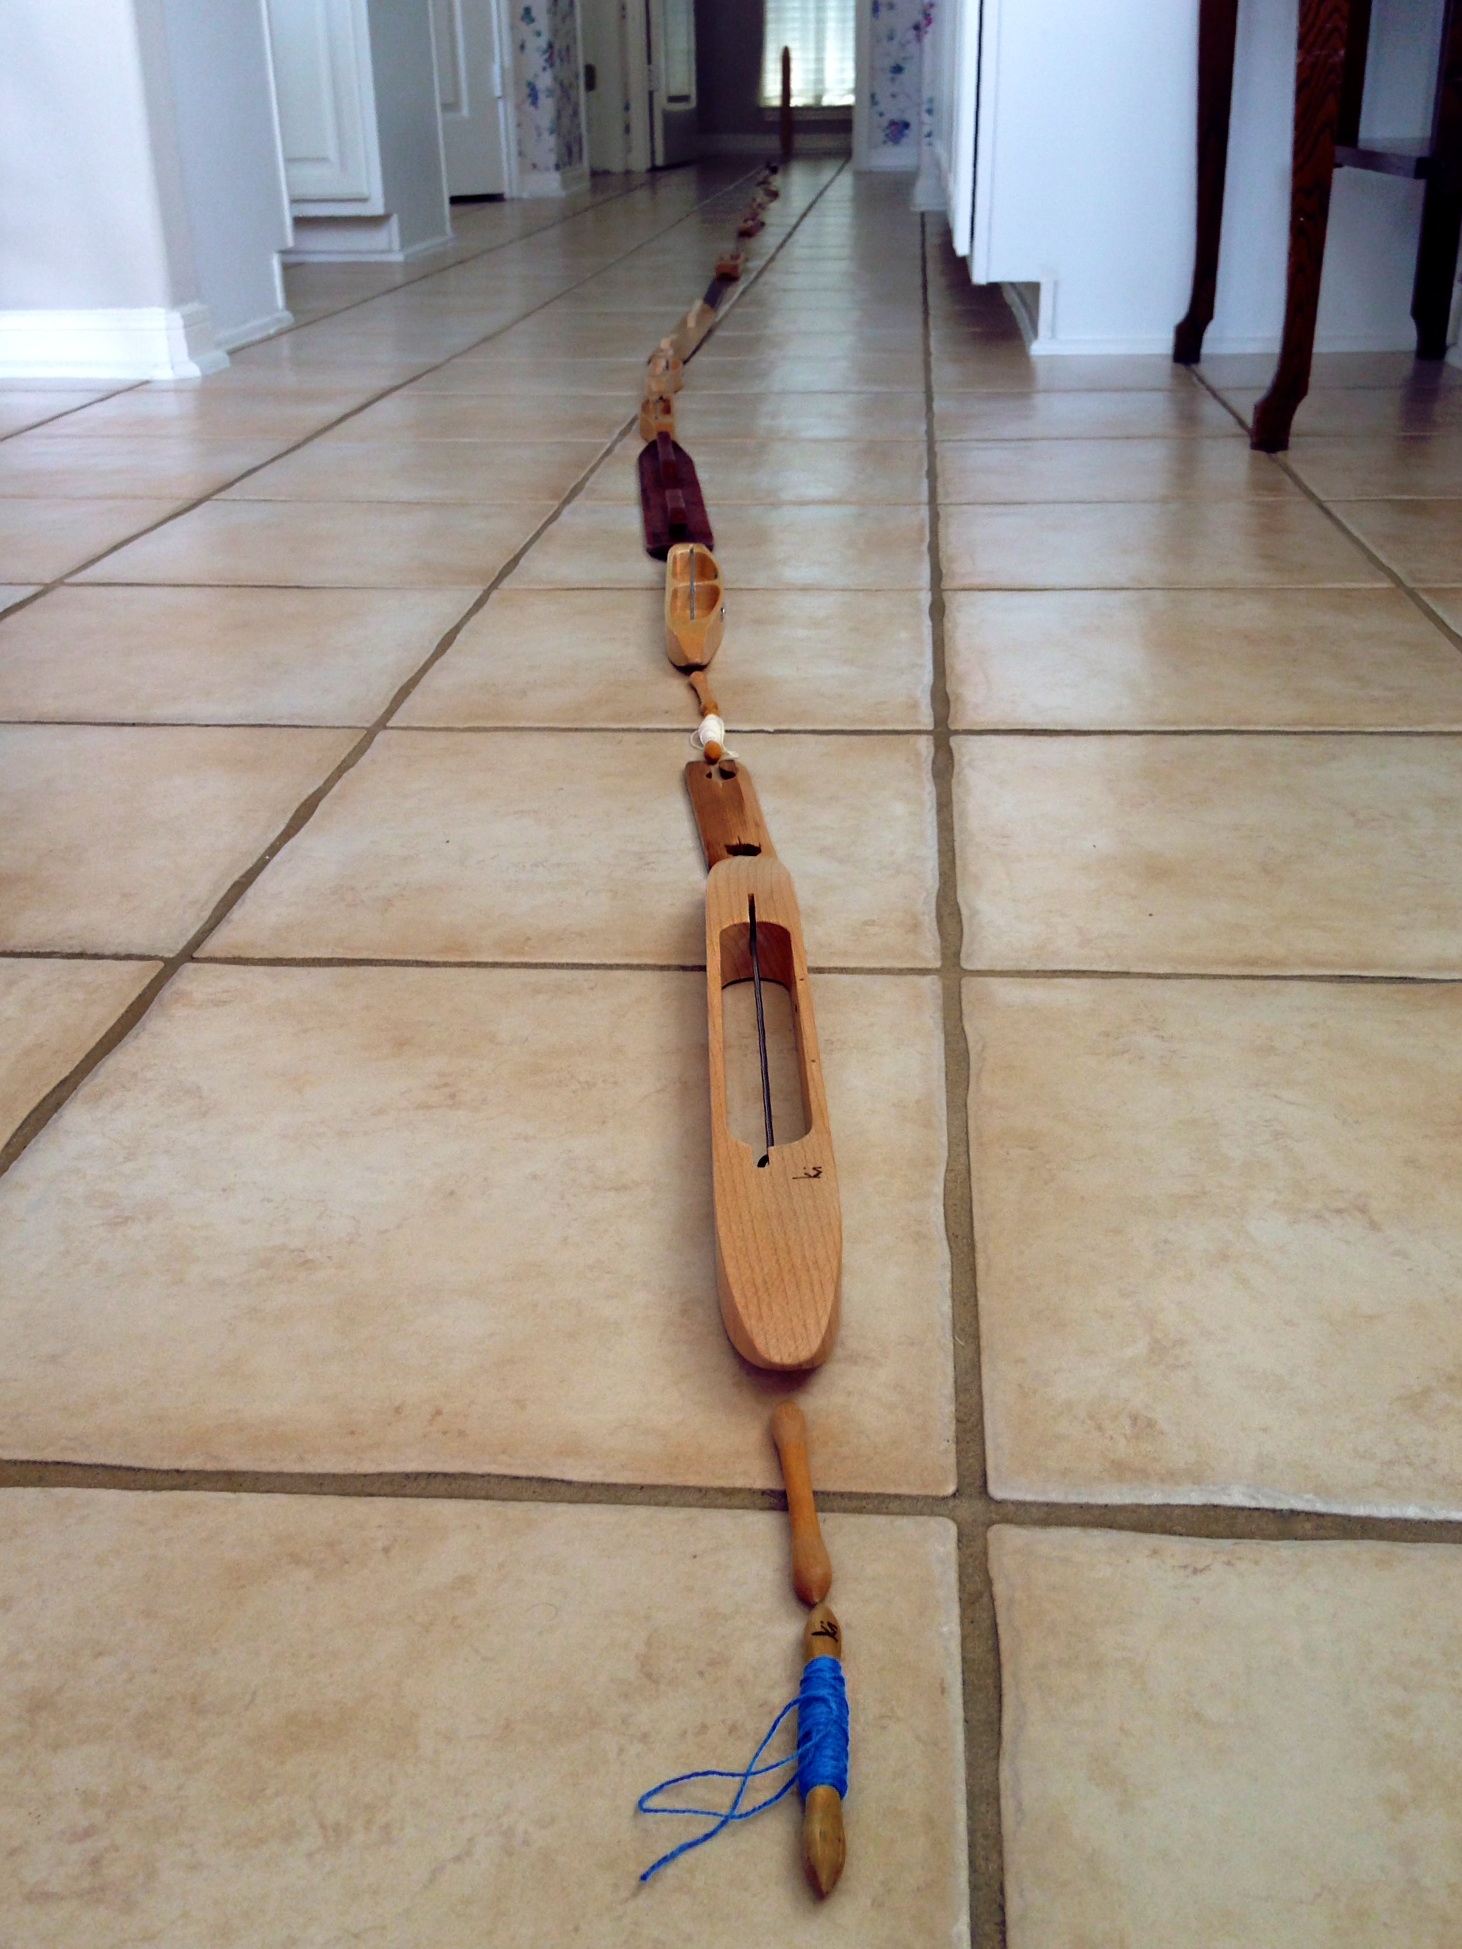
If I line up all my weaving shuttles, end to end, how far do you think they will reach? The accumulation started slowly, adding a shuttle here and there, as needed. My husband contributed to my collection by handcrafting some of the shuttles for me. “I could use a stick shuttle in such-and-such a size.”“Okay, dear,” he would say, before going out to the garage to whip up yet another yardstick shuttle for my rigid heddle loom.
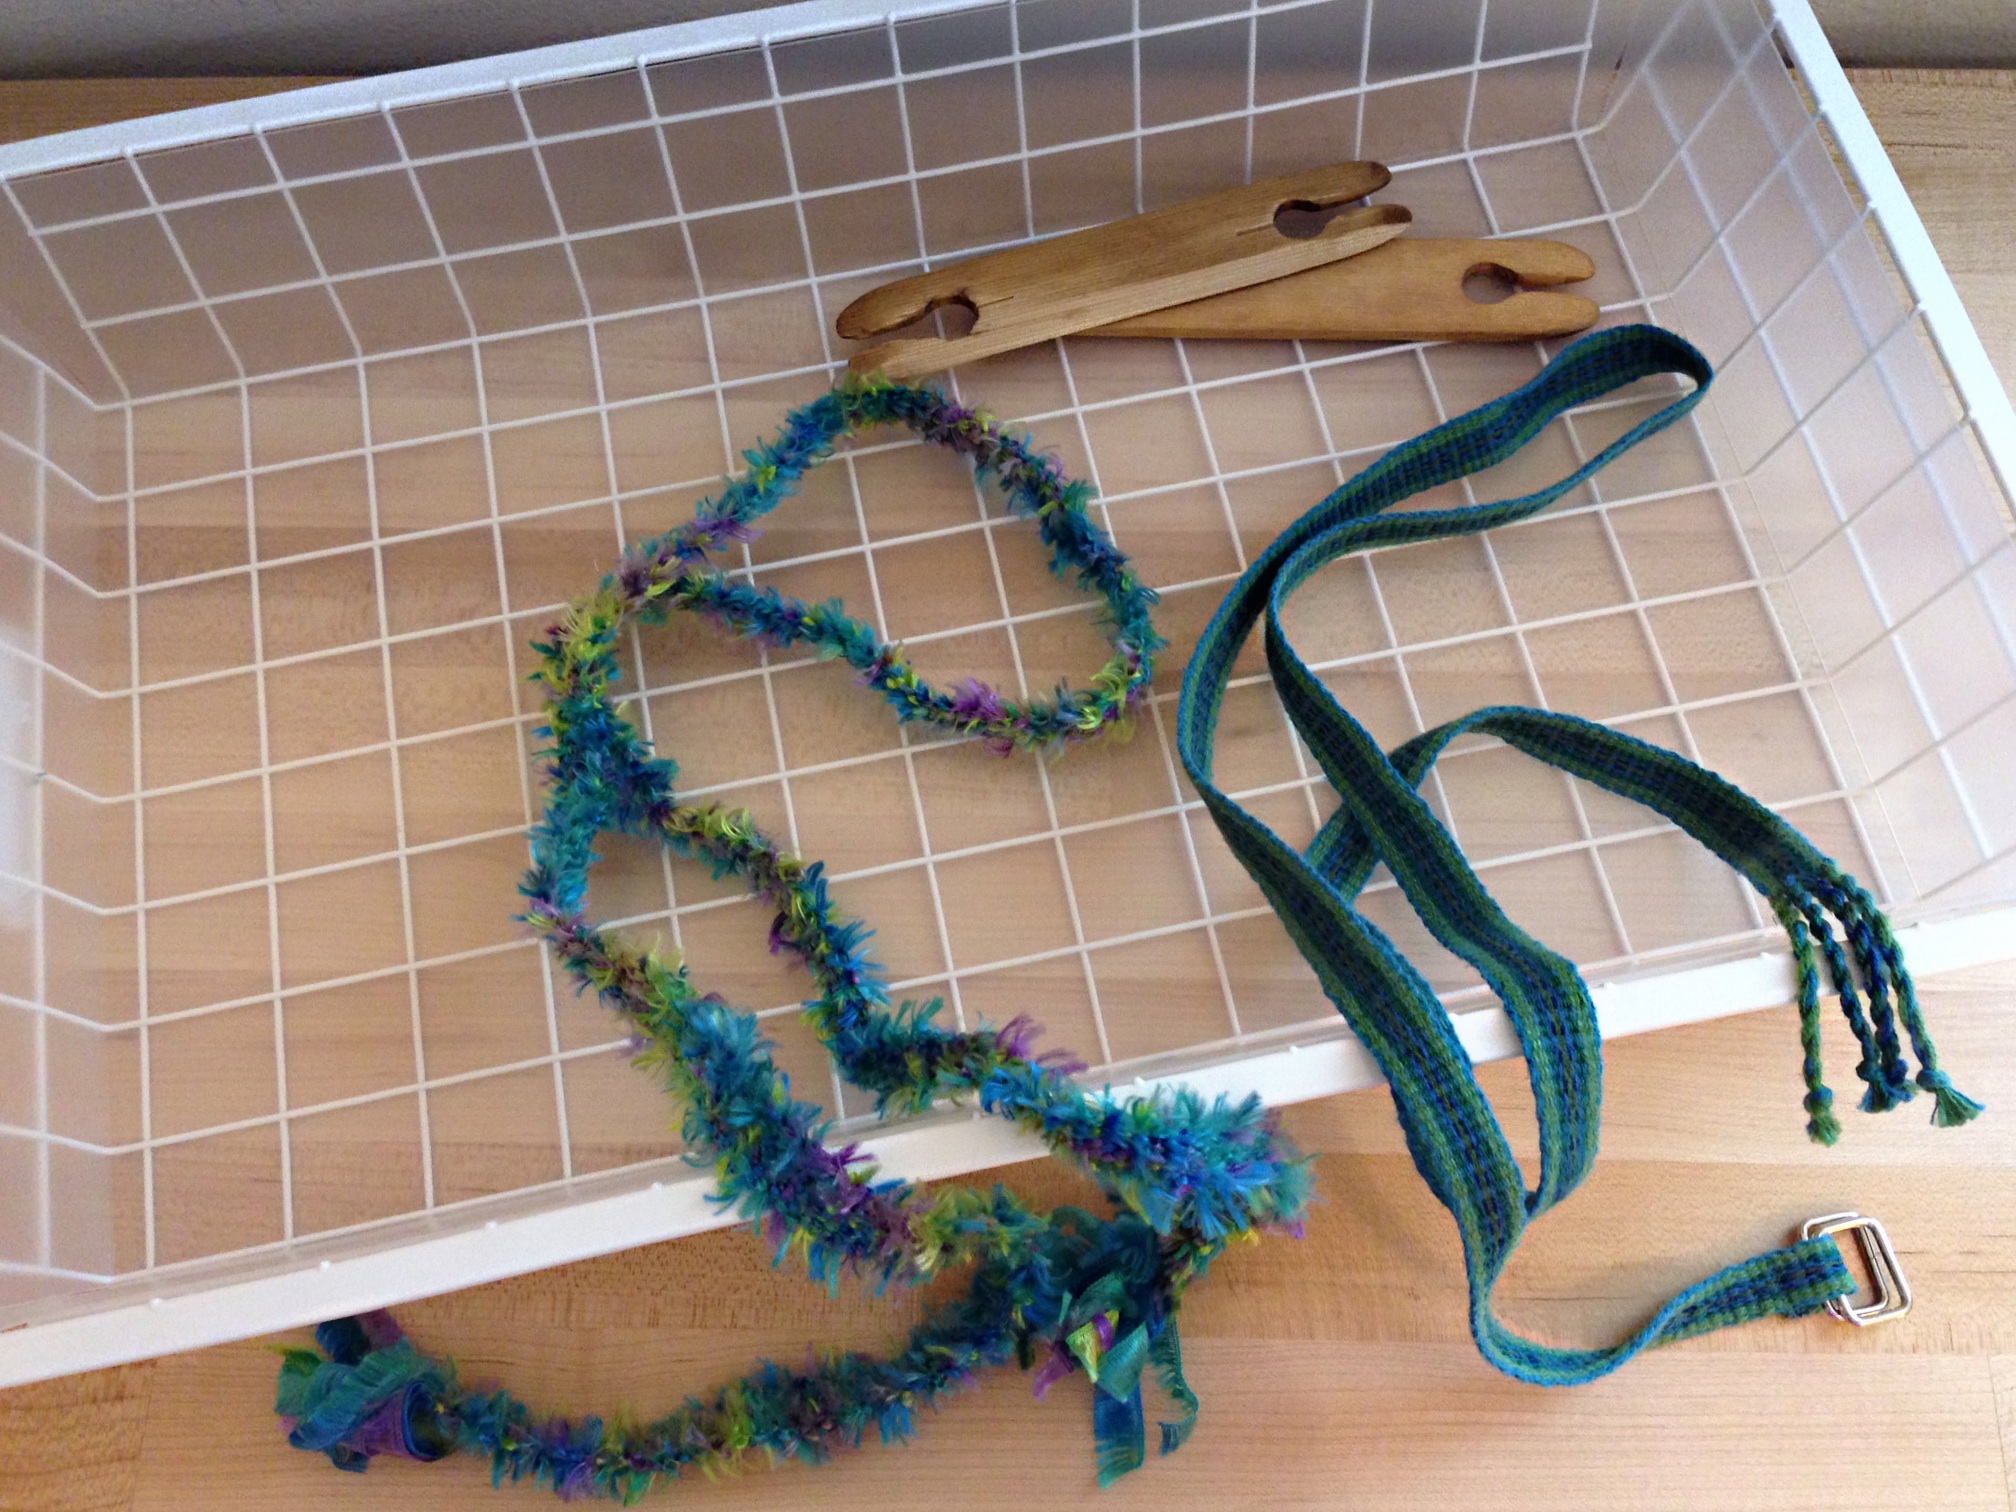
Ski shuttles are for rag weaving. Boat shuttles are for almost everything else. Most of my boat shuttles are traditional Swedish shuttles. All these fascinating shuttles, such simple tools, work the wonder of weaving.
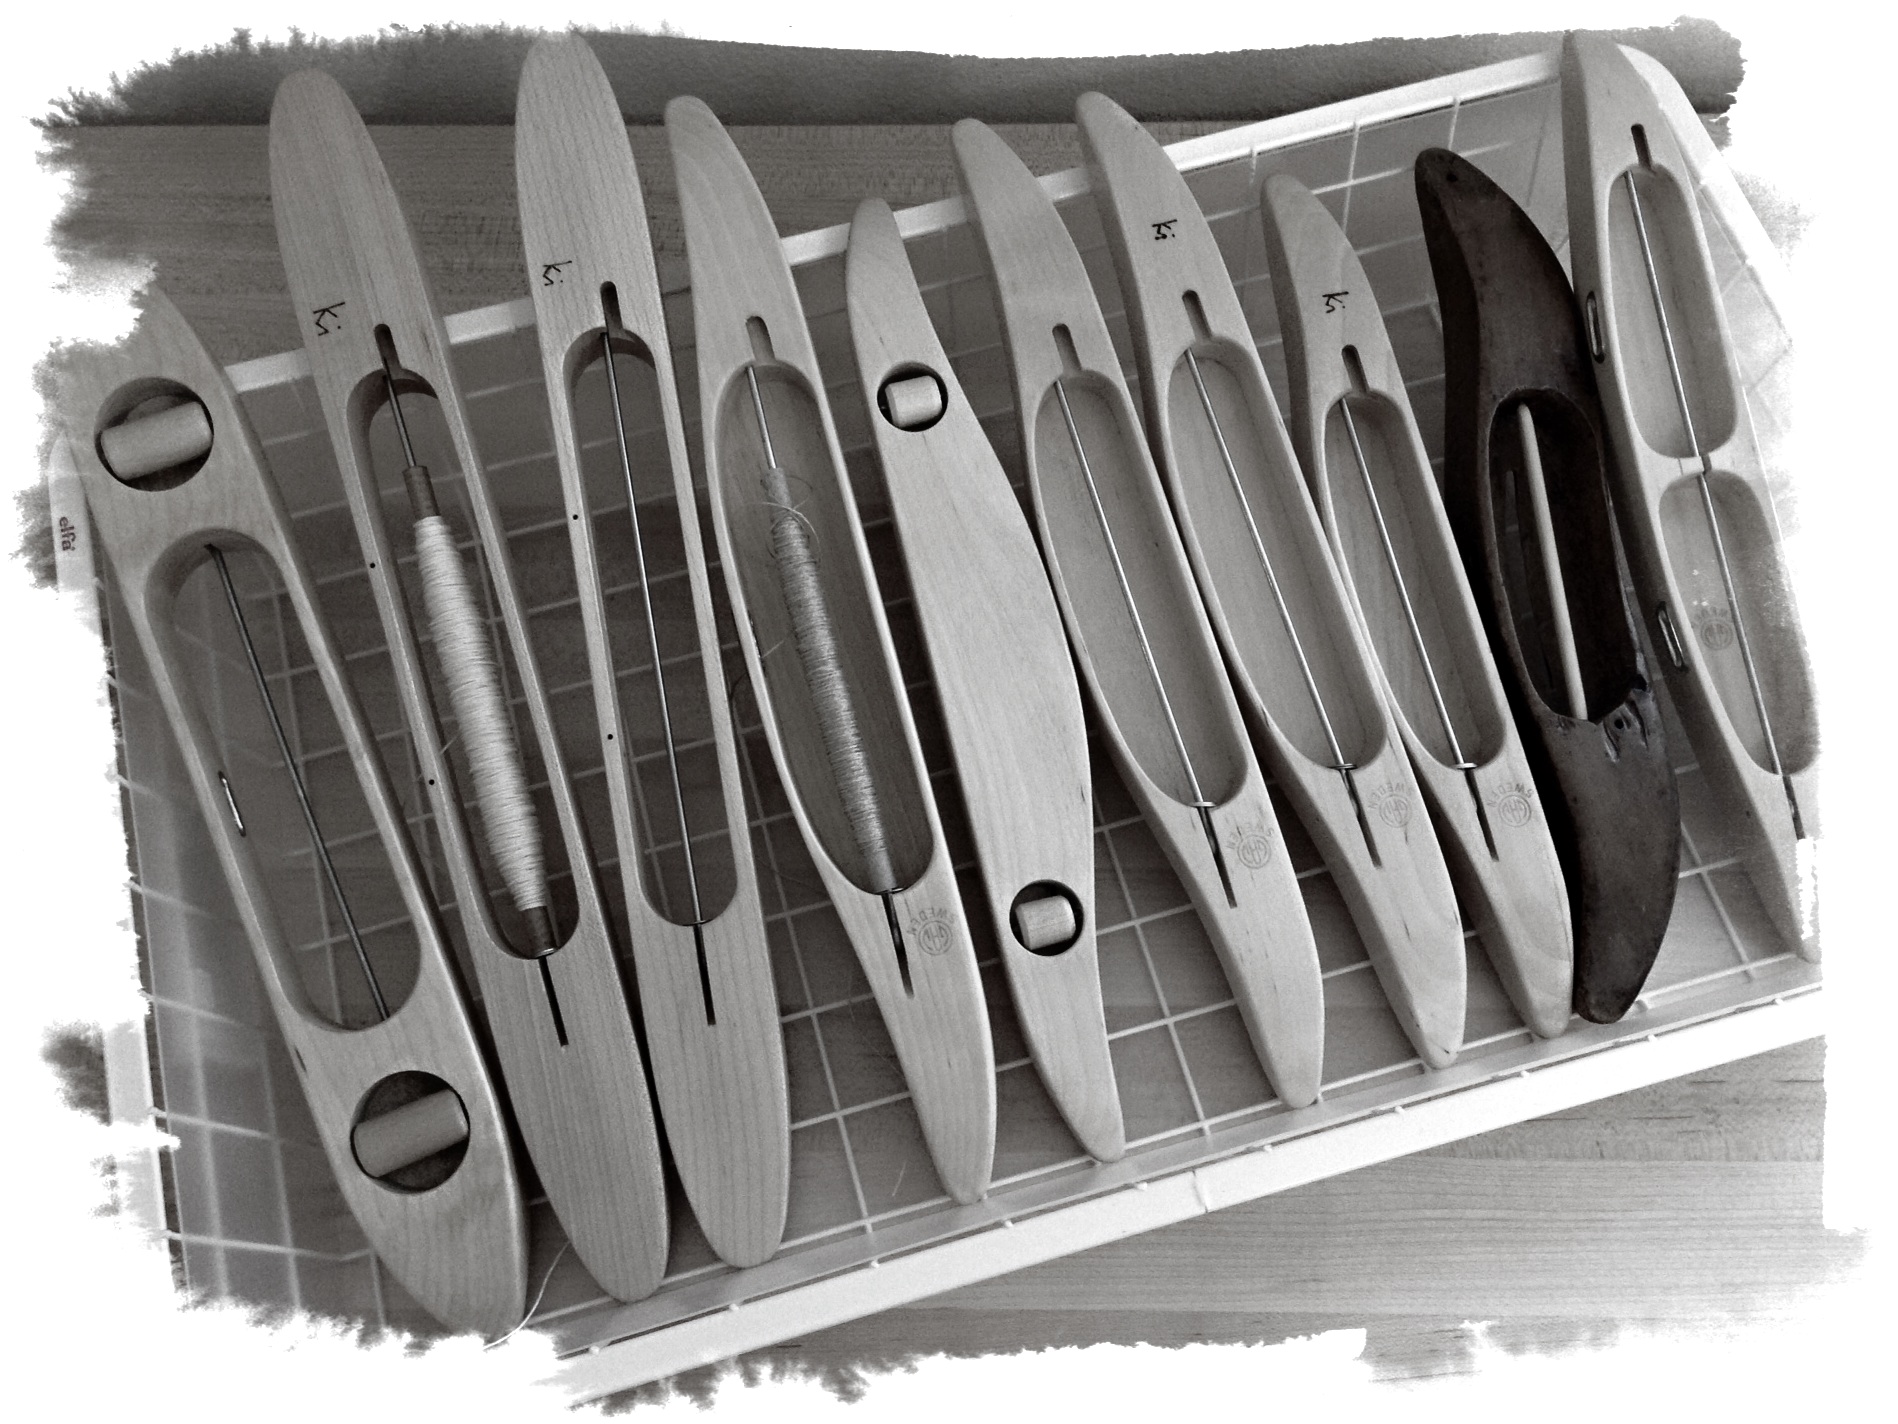
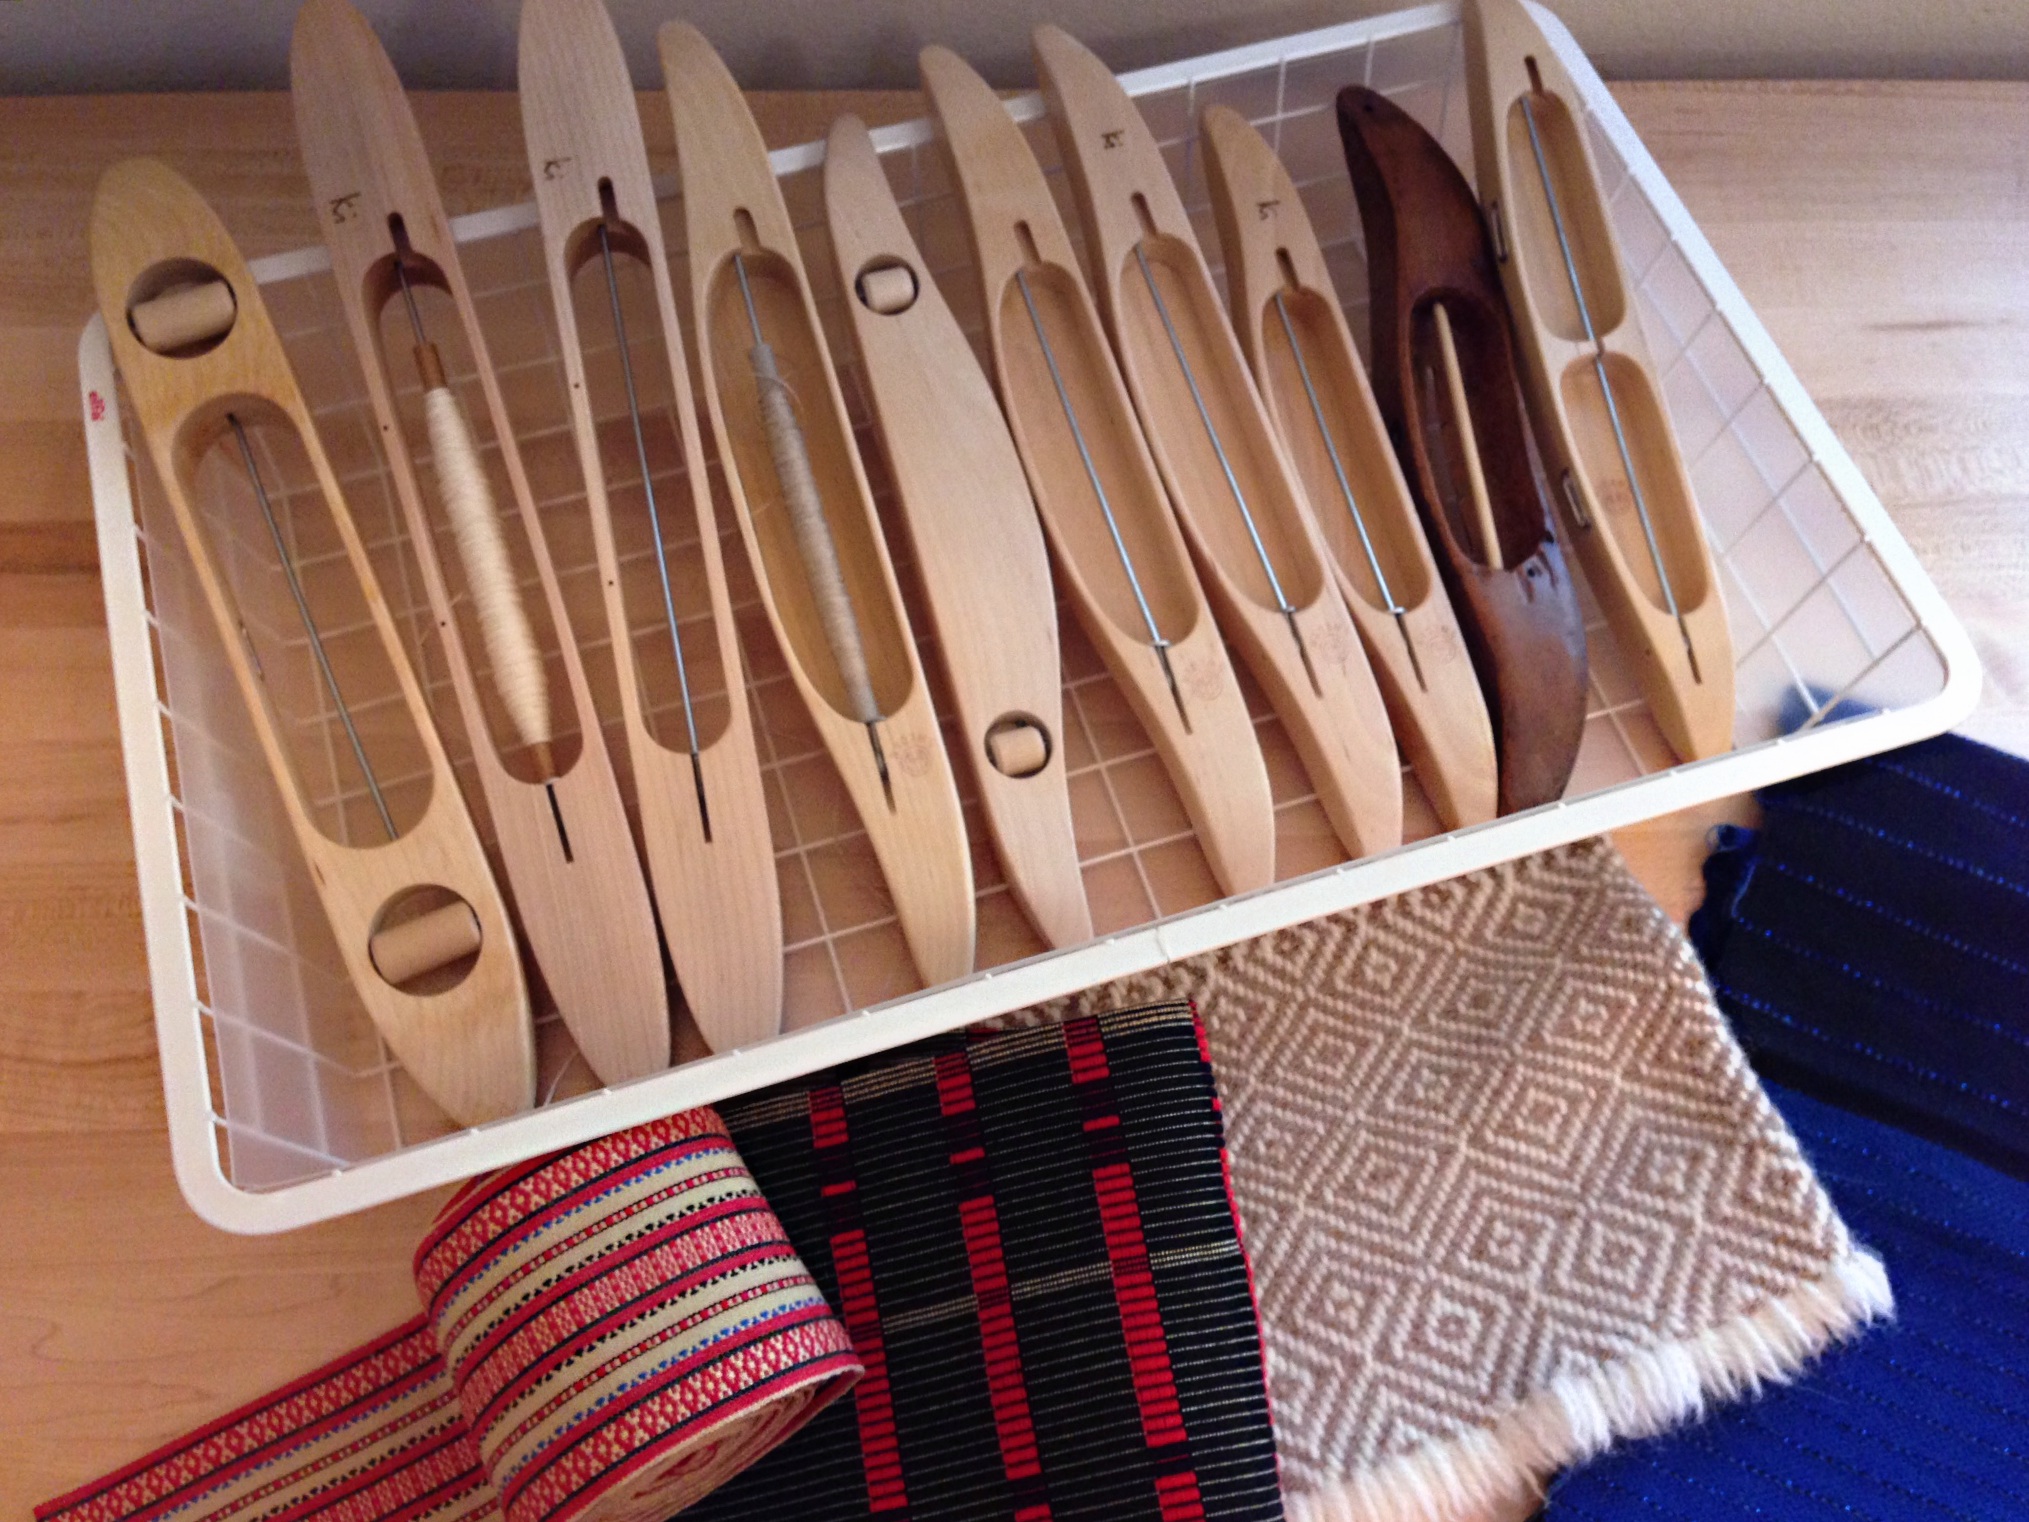
Shawl woven on 32-inch rigid heddle loom, with super kid mohair/silk and baby alpaca. Smooth, handcrafted walnut stick shuttles were used for this project.Tapered edge on pine inkle loom shuttle helps for beating in the weft. I have been known to weave with crazy novelty yarns on my inkle loom.Maple band loom shuttles, hand-carved by my husband, *live* in a small handmade bag that hangs on the back corner of the band loom. This shaped shuttle is perfect for the tricky one-handed manipulation that is needed. If they are too smooth and polished, however, they slip right out of my hand.My favorite ski shuttle is the beautiful cherry wood shuttle made by my husband, Steve. It helps to have several ski shuttles. The “Creative Expression” Rosepath Rag Rug used three shuttles at a time to get the gradient color effect.Boat shuttles eager to weave. Do you hear them? … “Pick me”…”No, pick ME!”These are a few of my favorite things. Swedish woven goods made on a Swedish loom with Swedish boat shuttles. (I’m the only thing not Swedish here.)How far will my shuttles reach? 34 1/2 feet (that’s 11 1/2 yards, or 10 1/2 meters long). I ran out of room, so the last one is standing on end.
Resourcefulness, make-do ability, outside-the-box thinking, solution-minded questions, and a little stubbornness. These are some of the best things to keep in the weaver’s toolbox. Jury rigging is an old nautical term having to do with sailors improvising the replacement of a damaged mast and sails, using only tools and materials that happen to be on hand. You could call it makeshift repairs or temporary contrivances. That describes what I did this week as I came near the end of the linen warp. And, like a sailor, I was working with wood, strings, and cloth.
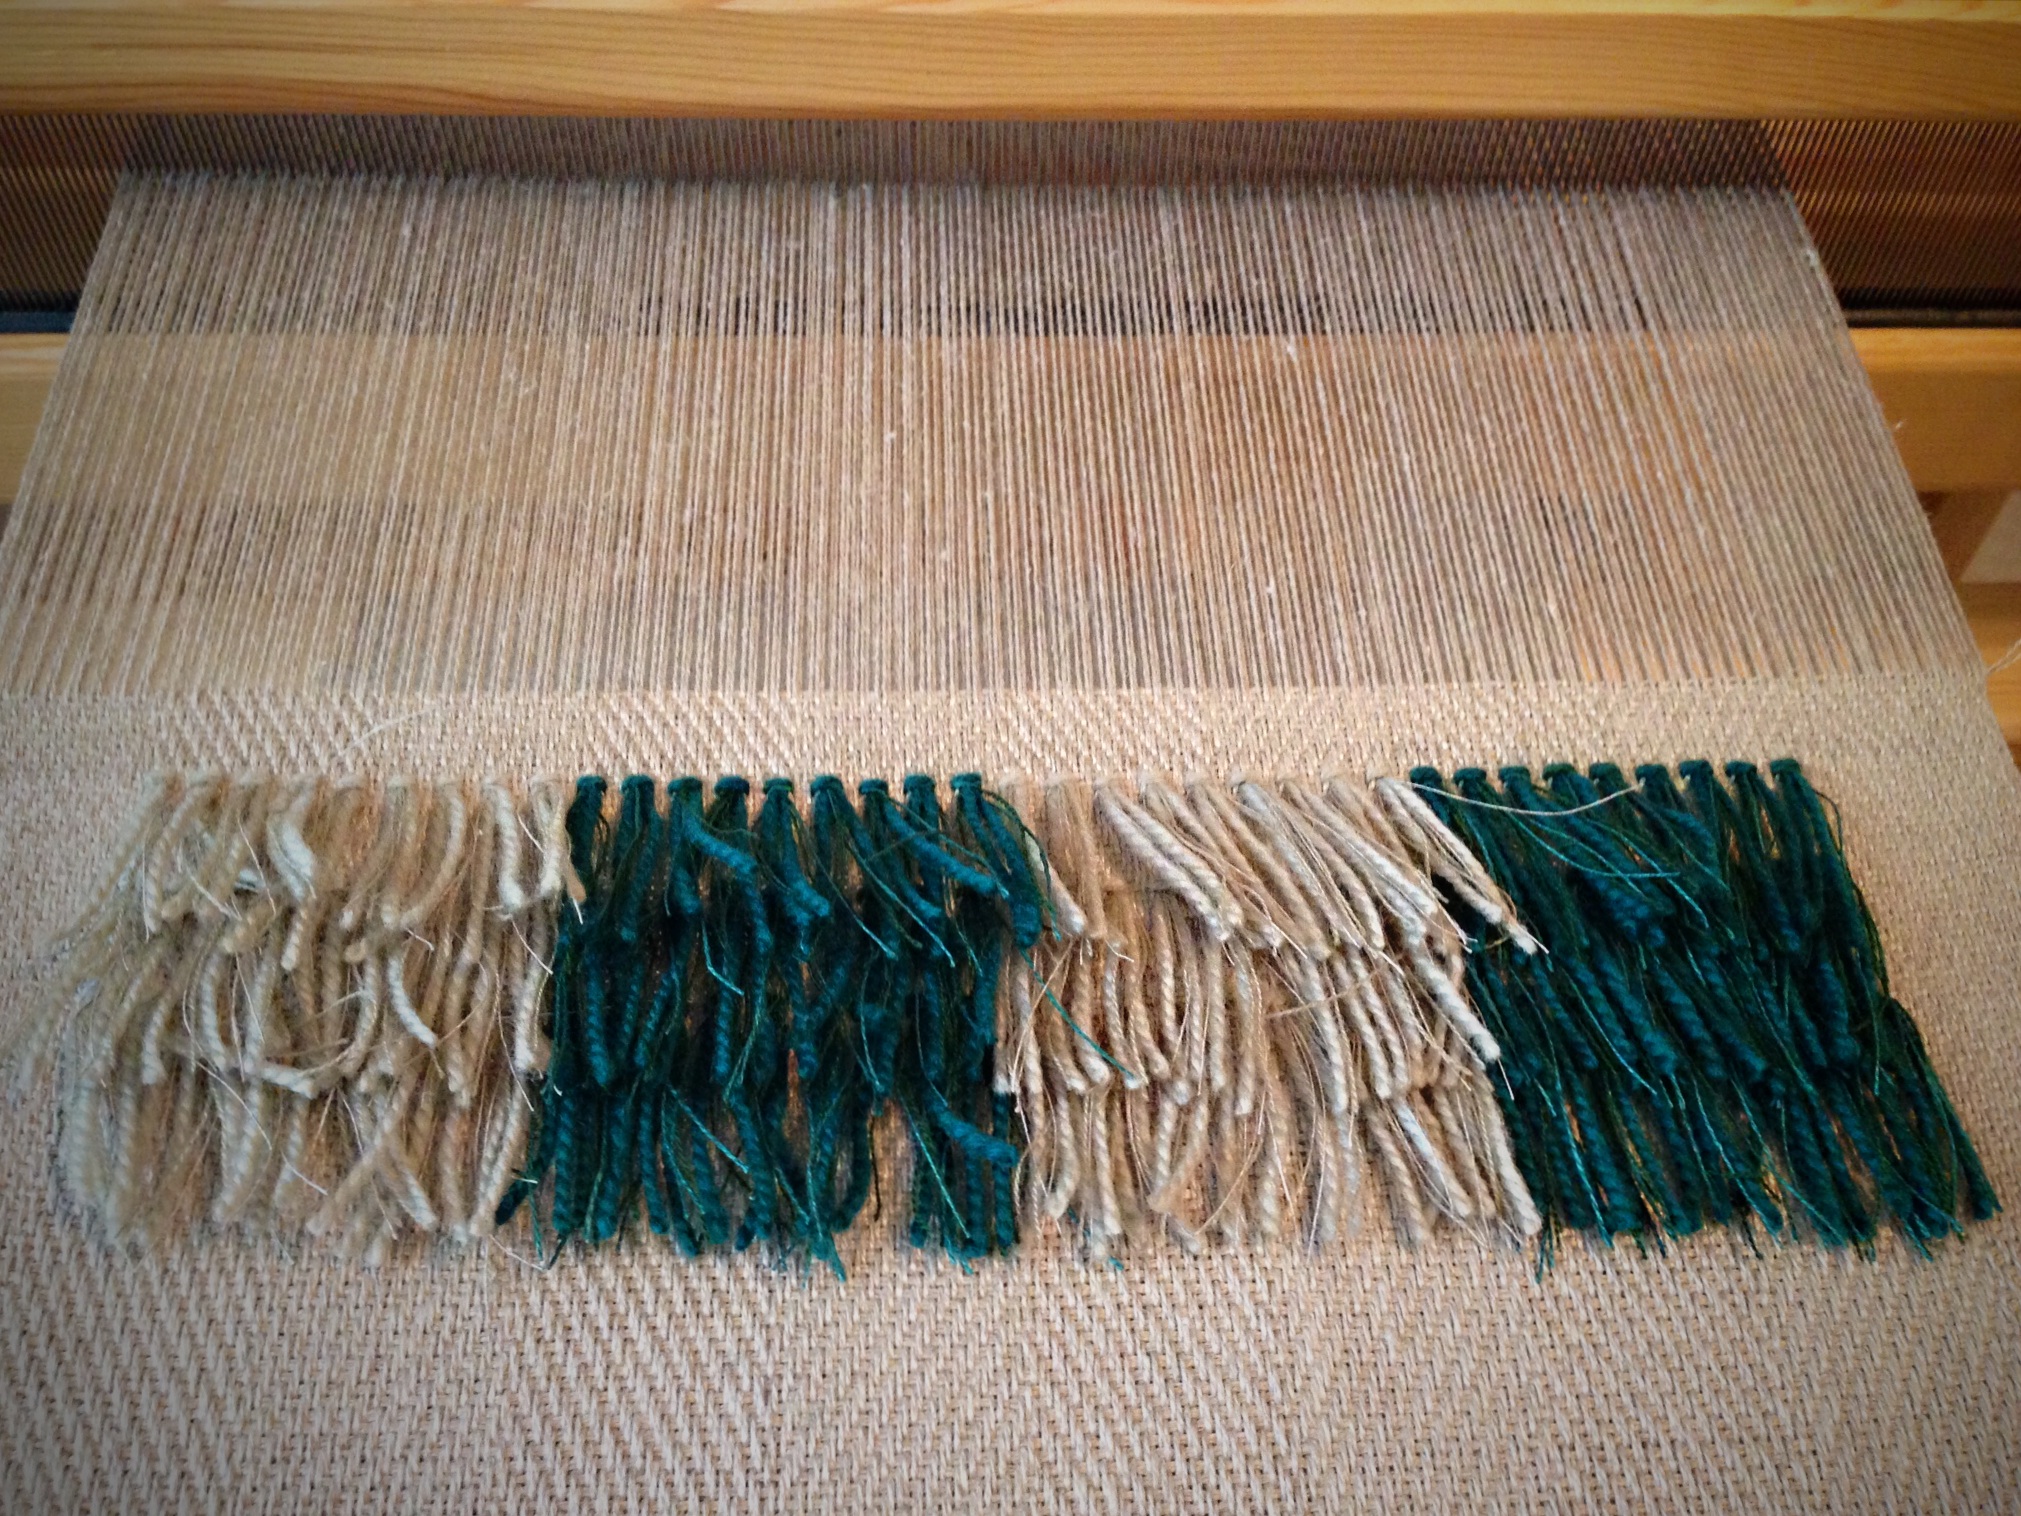
Warpends on the sides have become looser than the warp that has the rya knots in it. That’s not good. Tension needs to be even across the warp.
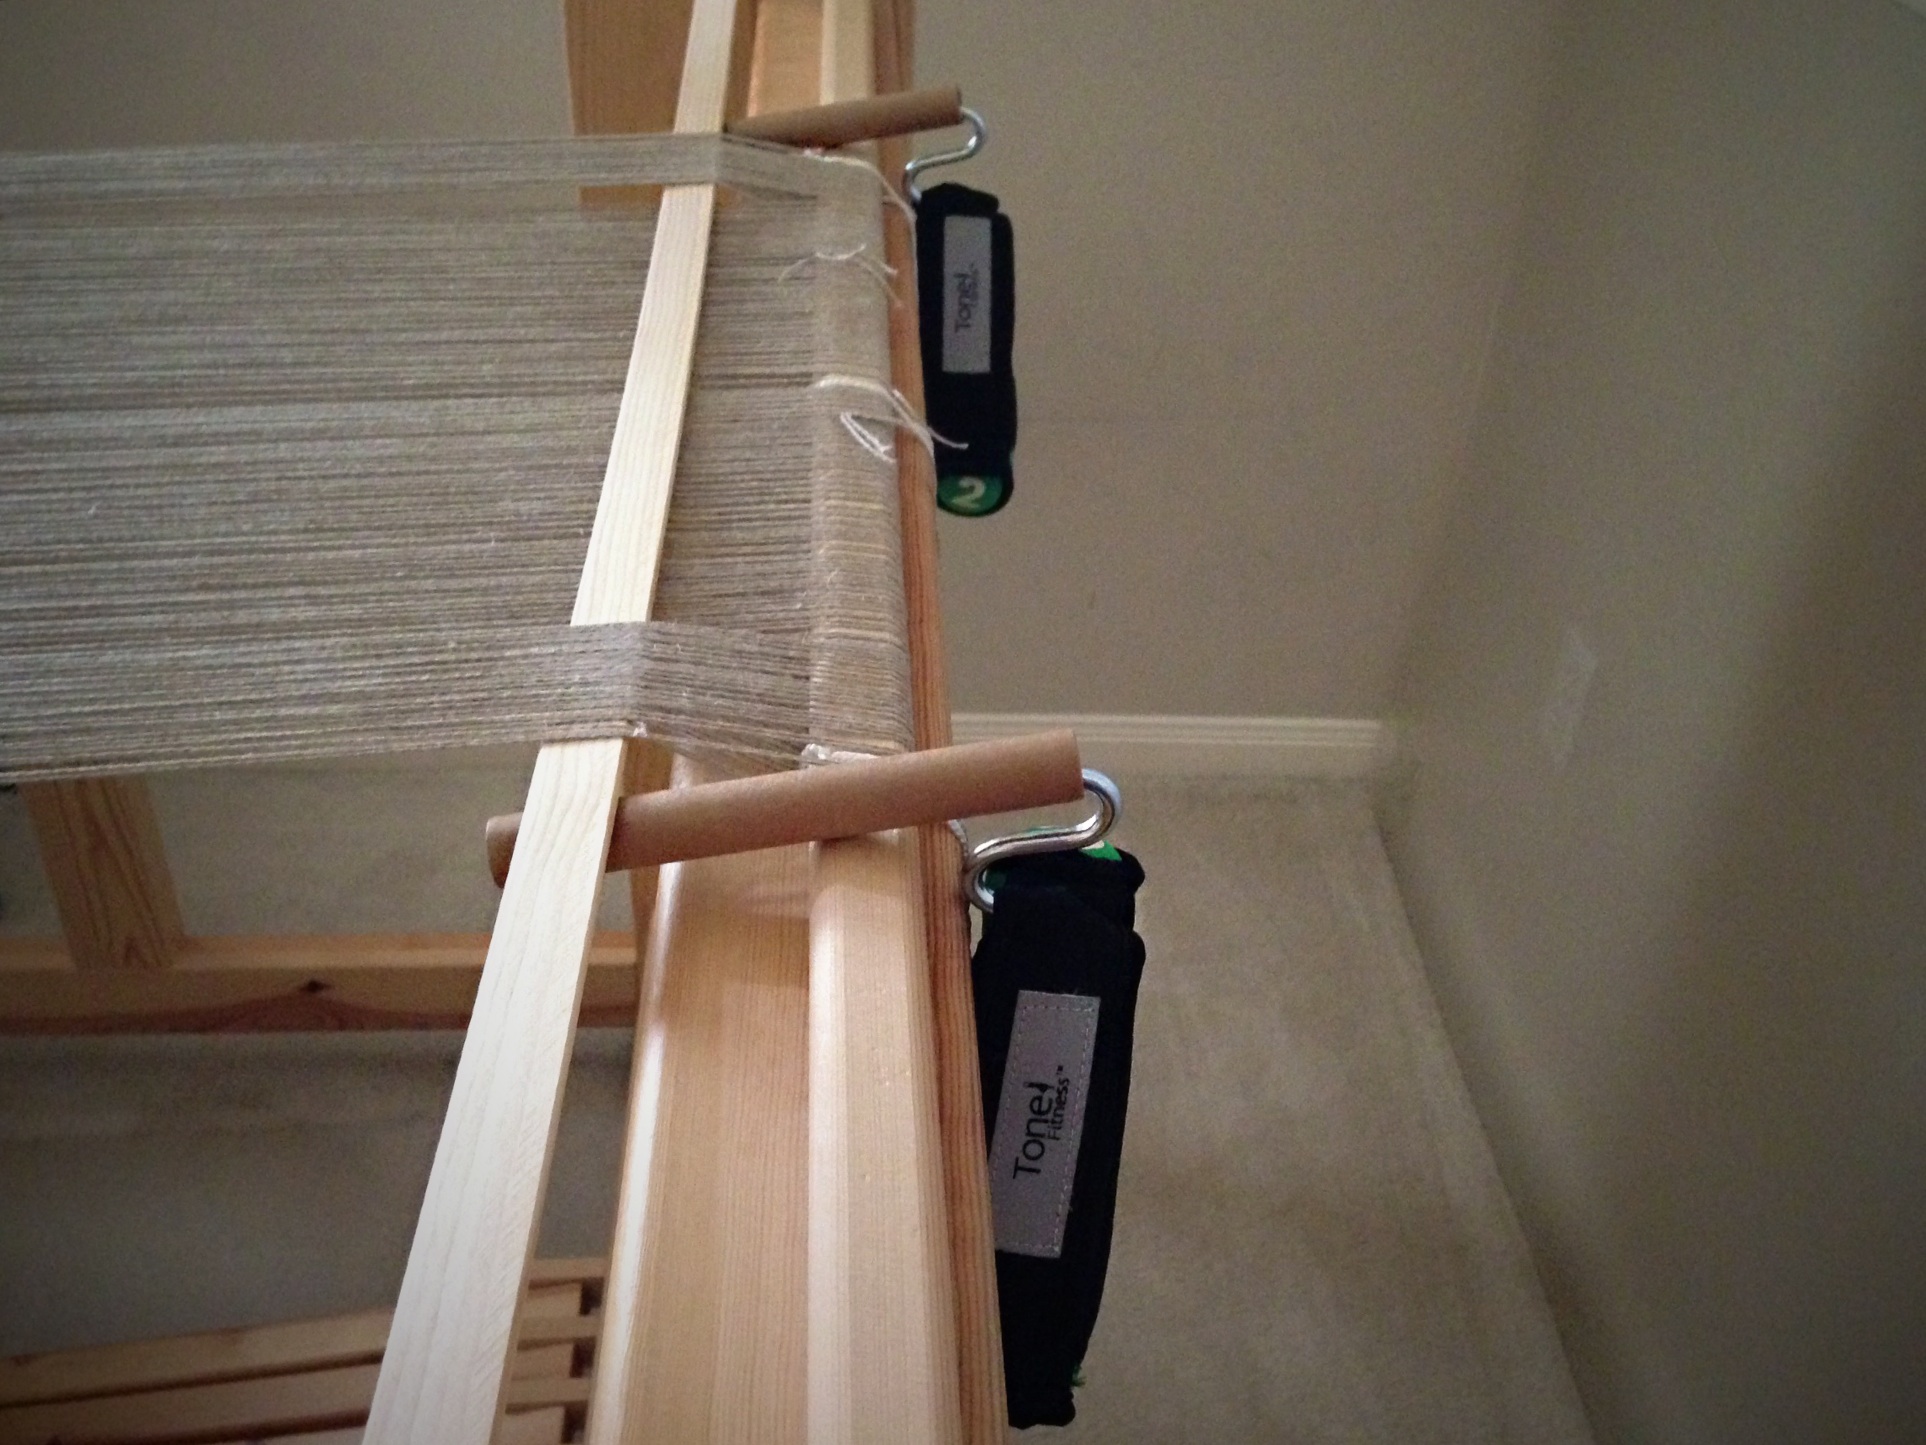
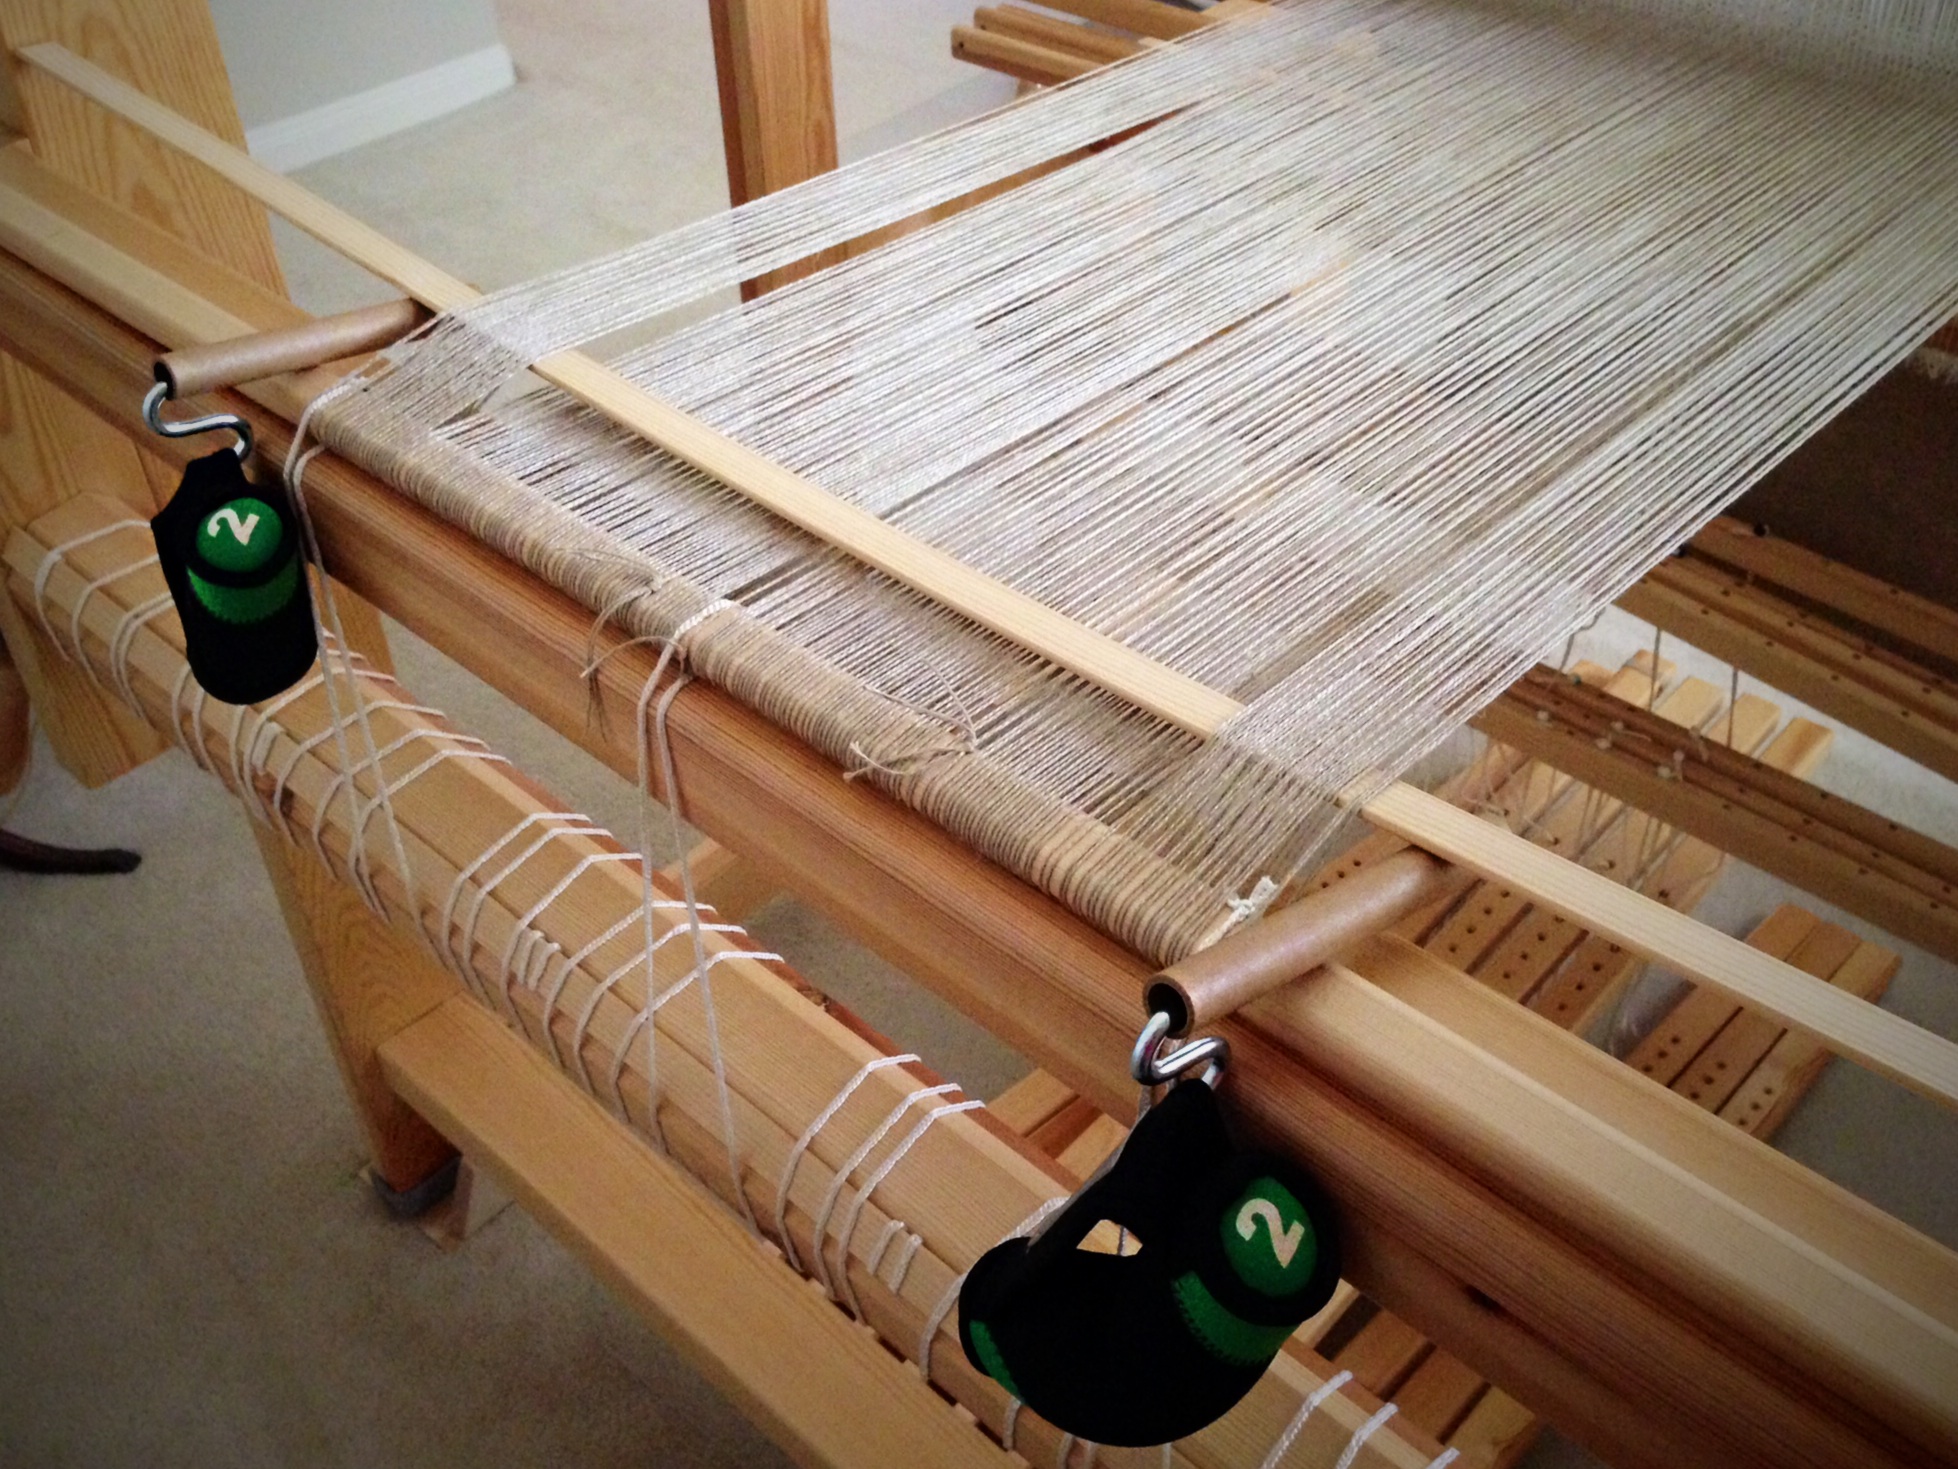
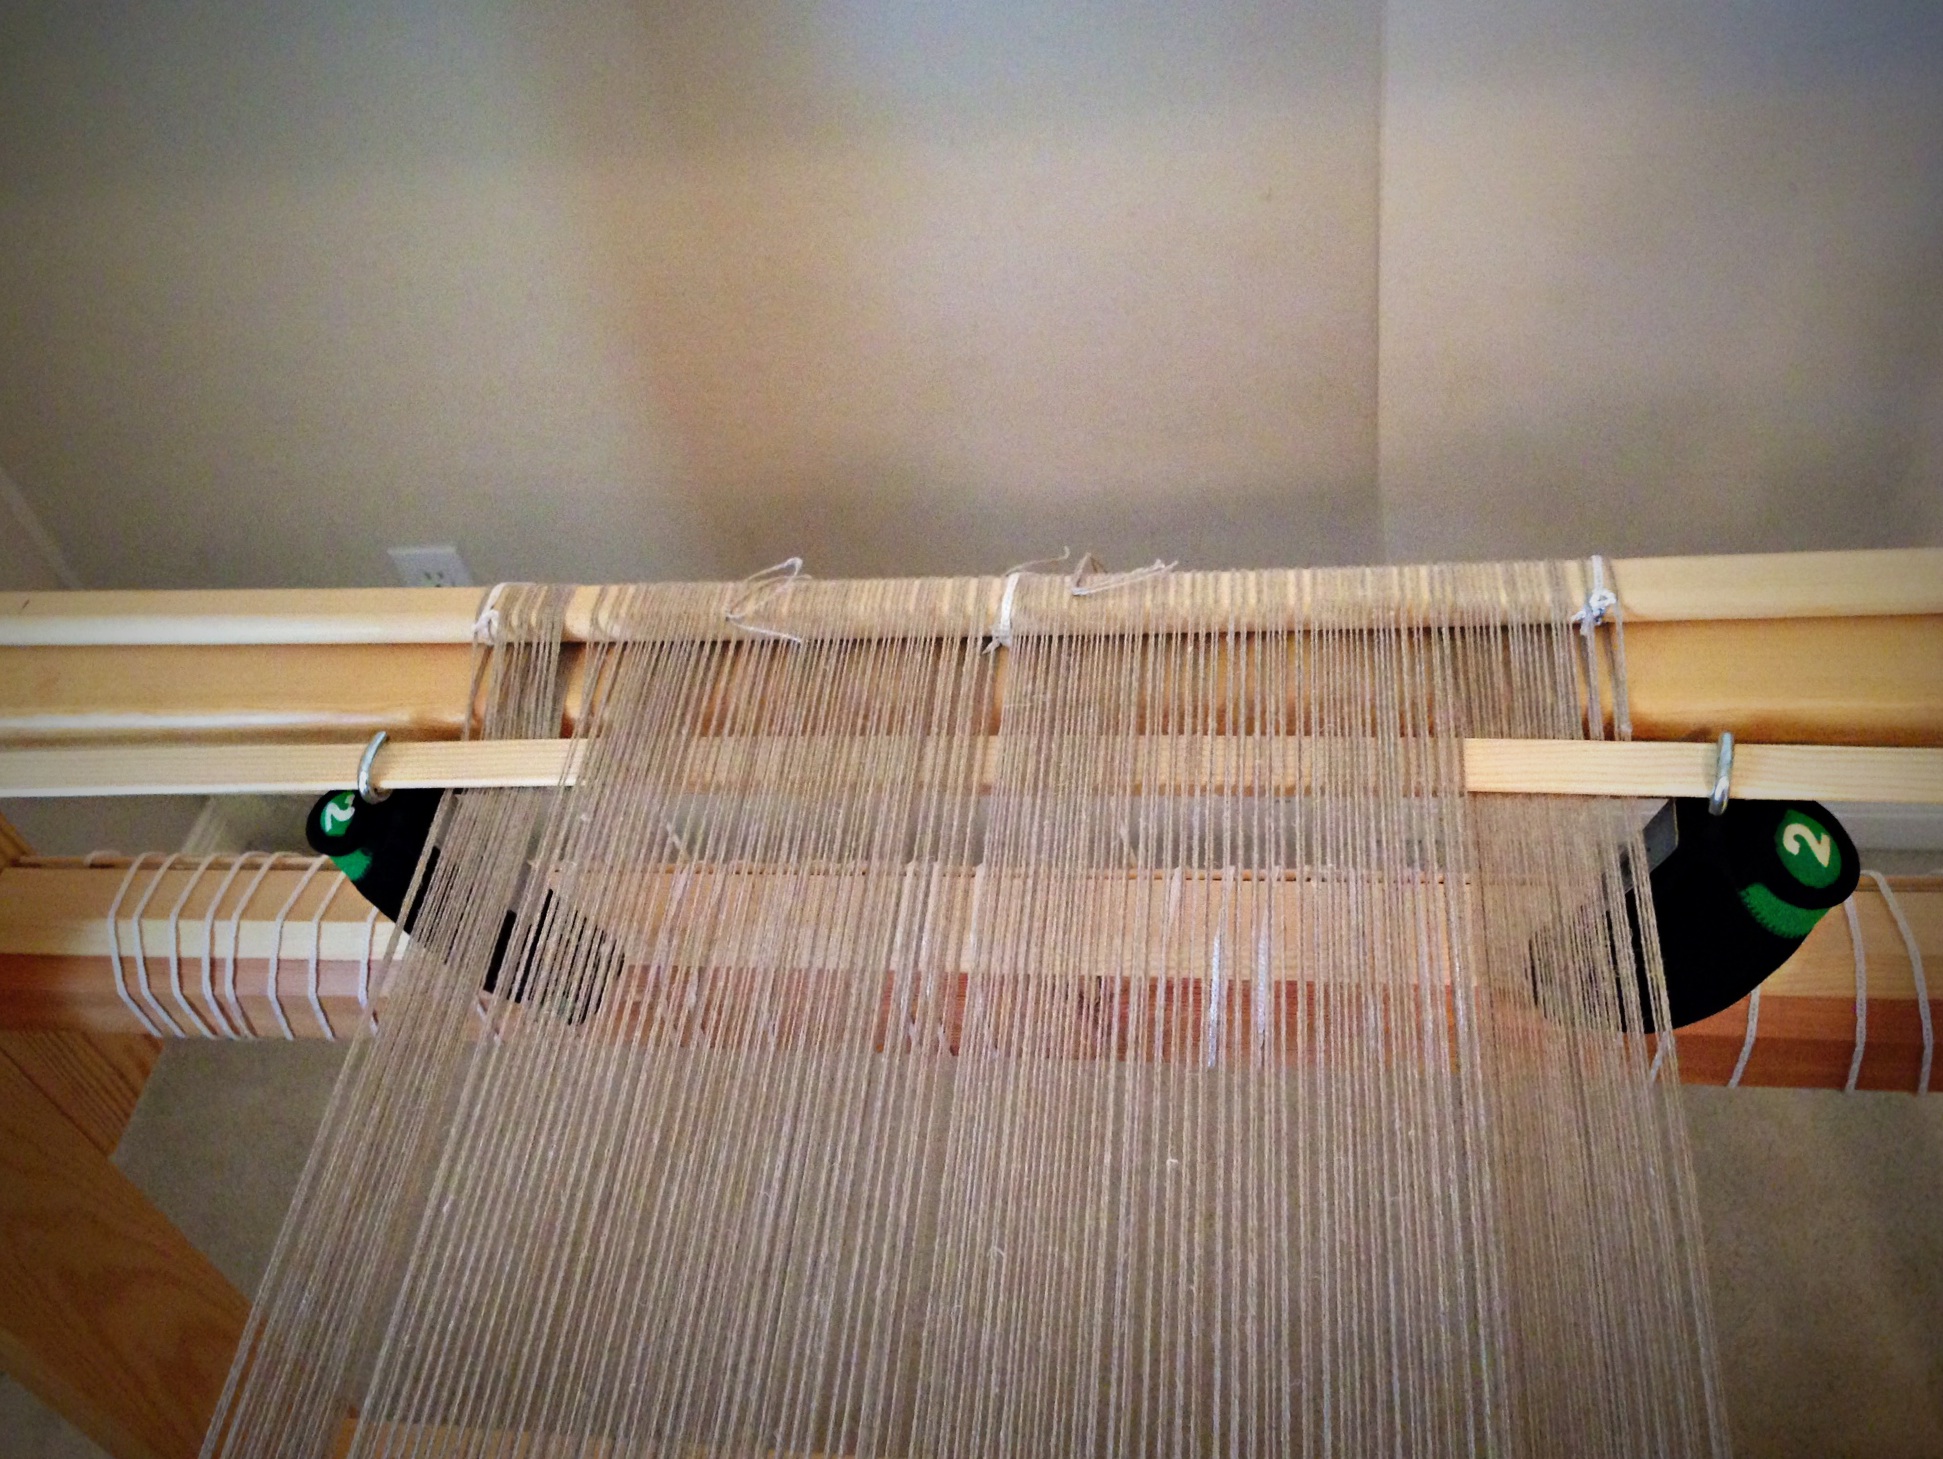
I needed to even out the tension across the warp ends, because the outer edges were not taking up at the same rate as the warp in the center, because of the rya knots. The pictures show how I jury rigged a warping slat, empty thread tubes, S-hooks, and 2-pound walking weights to adjust the tension so I could continue weaving.
Adding weight to the loose sections of the warp.Two-pound walking weights are easy to hang from S-hooks. Using empty thread spools was a short-lived solution. That had to change when I advanced the warp.Changing the slat so it is over the loose warp ends enables me to hang the weights directly on the slat with S-hooks.View from underneath, walking weights hang from warping slat to increase tension on the loose warp ends.
May you know when to make a temporary, but useful, contraption.
All the best, Karen
(~My thank-you to you, my reader friends–a discount coupon good during August 2014 toward anything in my Etsy Shop. Find the coupon code on my About Page.~)
Finish the finishing, please. I always have a pile of handwovens that need finishing. Don’t you? The finishing smorgasbord includes repairing skipped threads (unintentional floats), securing ends, fringe treatments, hemming, wet finishing, pressing, adding hanging tabs, embellishments, and more. You know you are finally finished when your handiwork is being used and enjoyed.
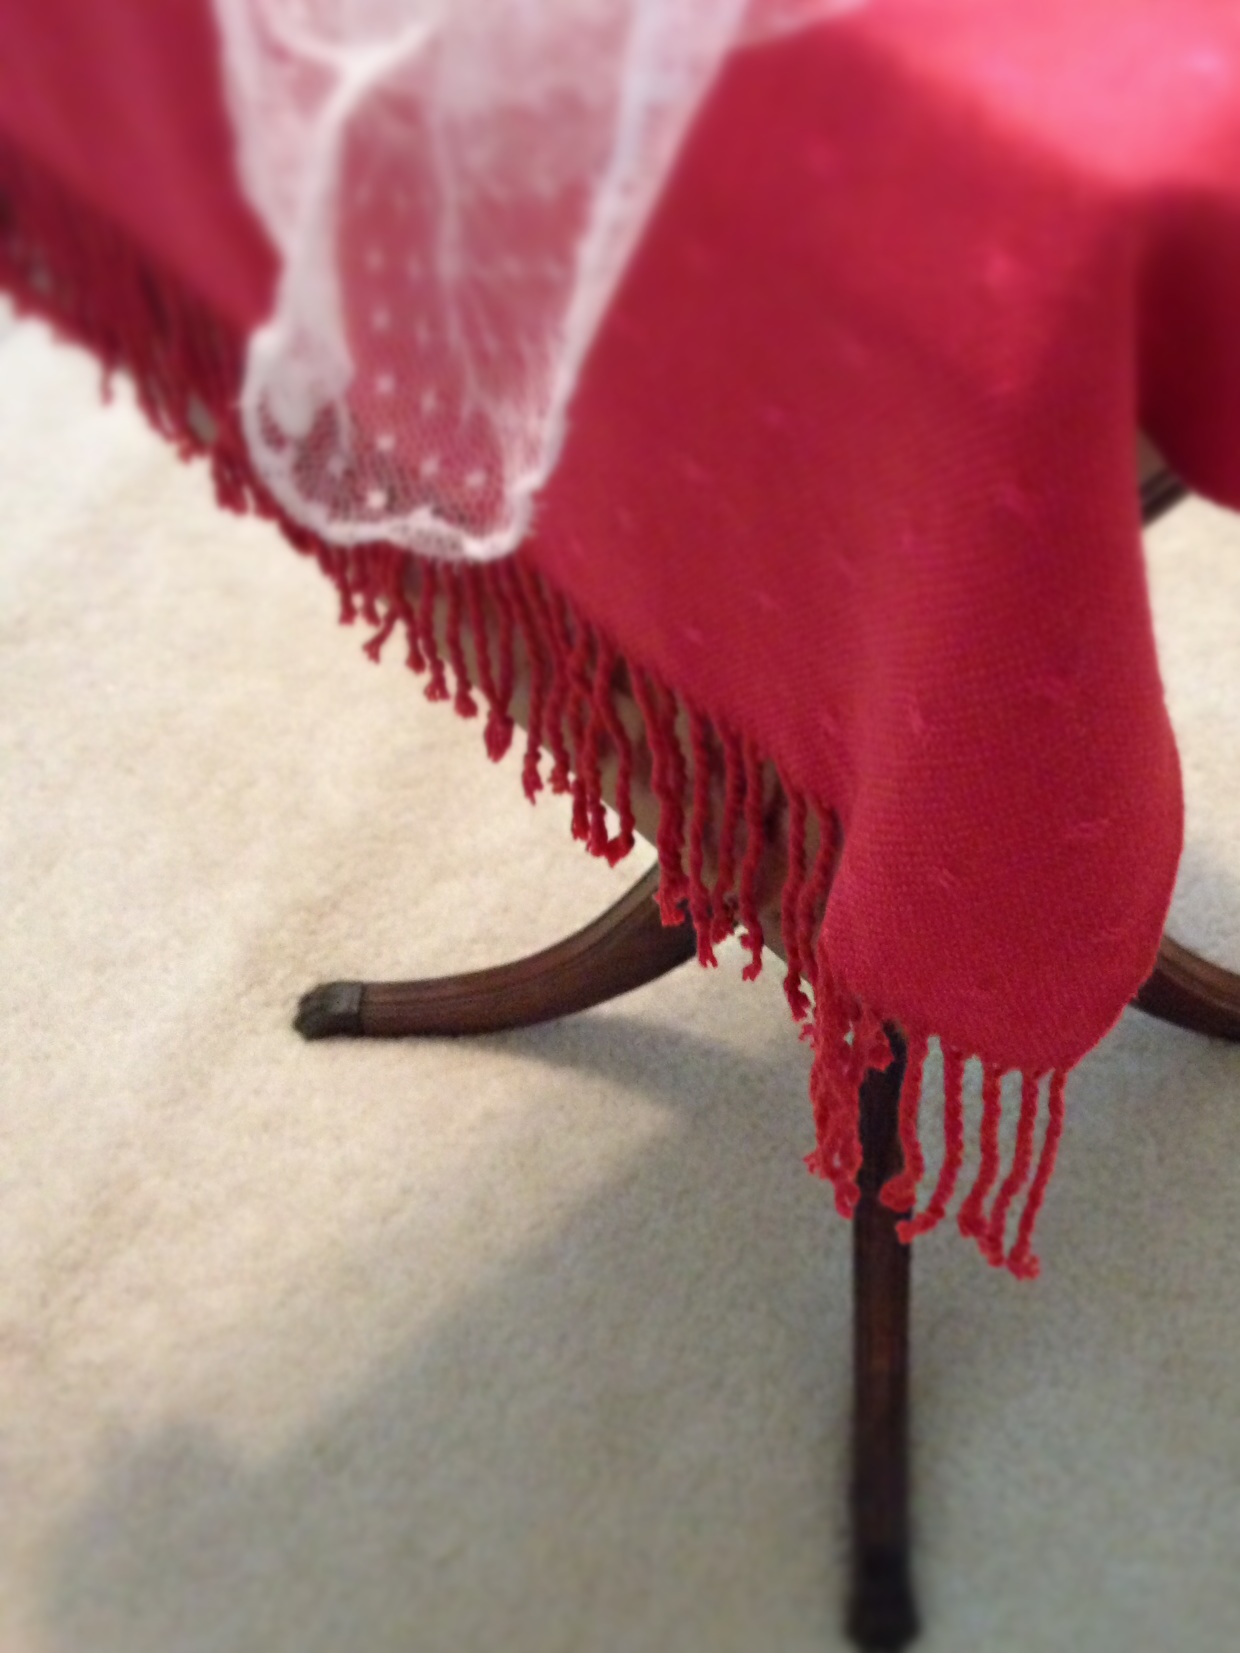
1. Twisted fringe on bamboo huck lace small tablecloth. This cloth covered an heirloom table, becoming the altar, at Melody’s wedding. (This short piece was at the end of the warp after weaving two shawls.) You can see the shawls HERE, and twisting the fringe HERE.
Twisted fringe gives an elegant finishing touch to this small huck lace table covering.
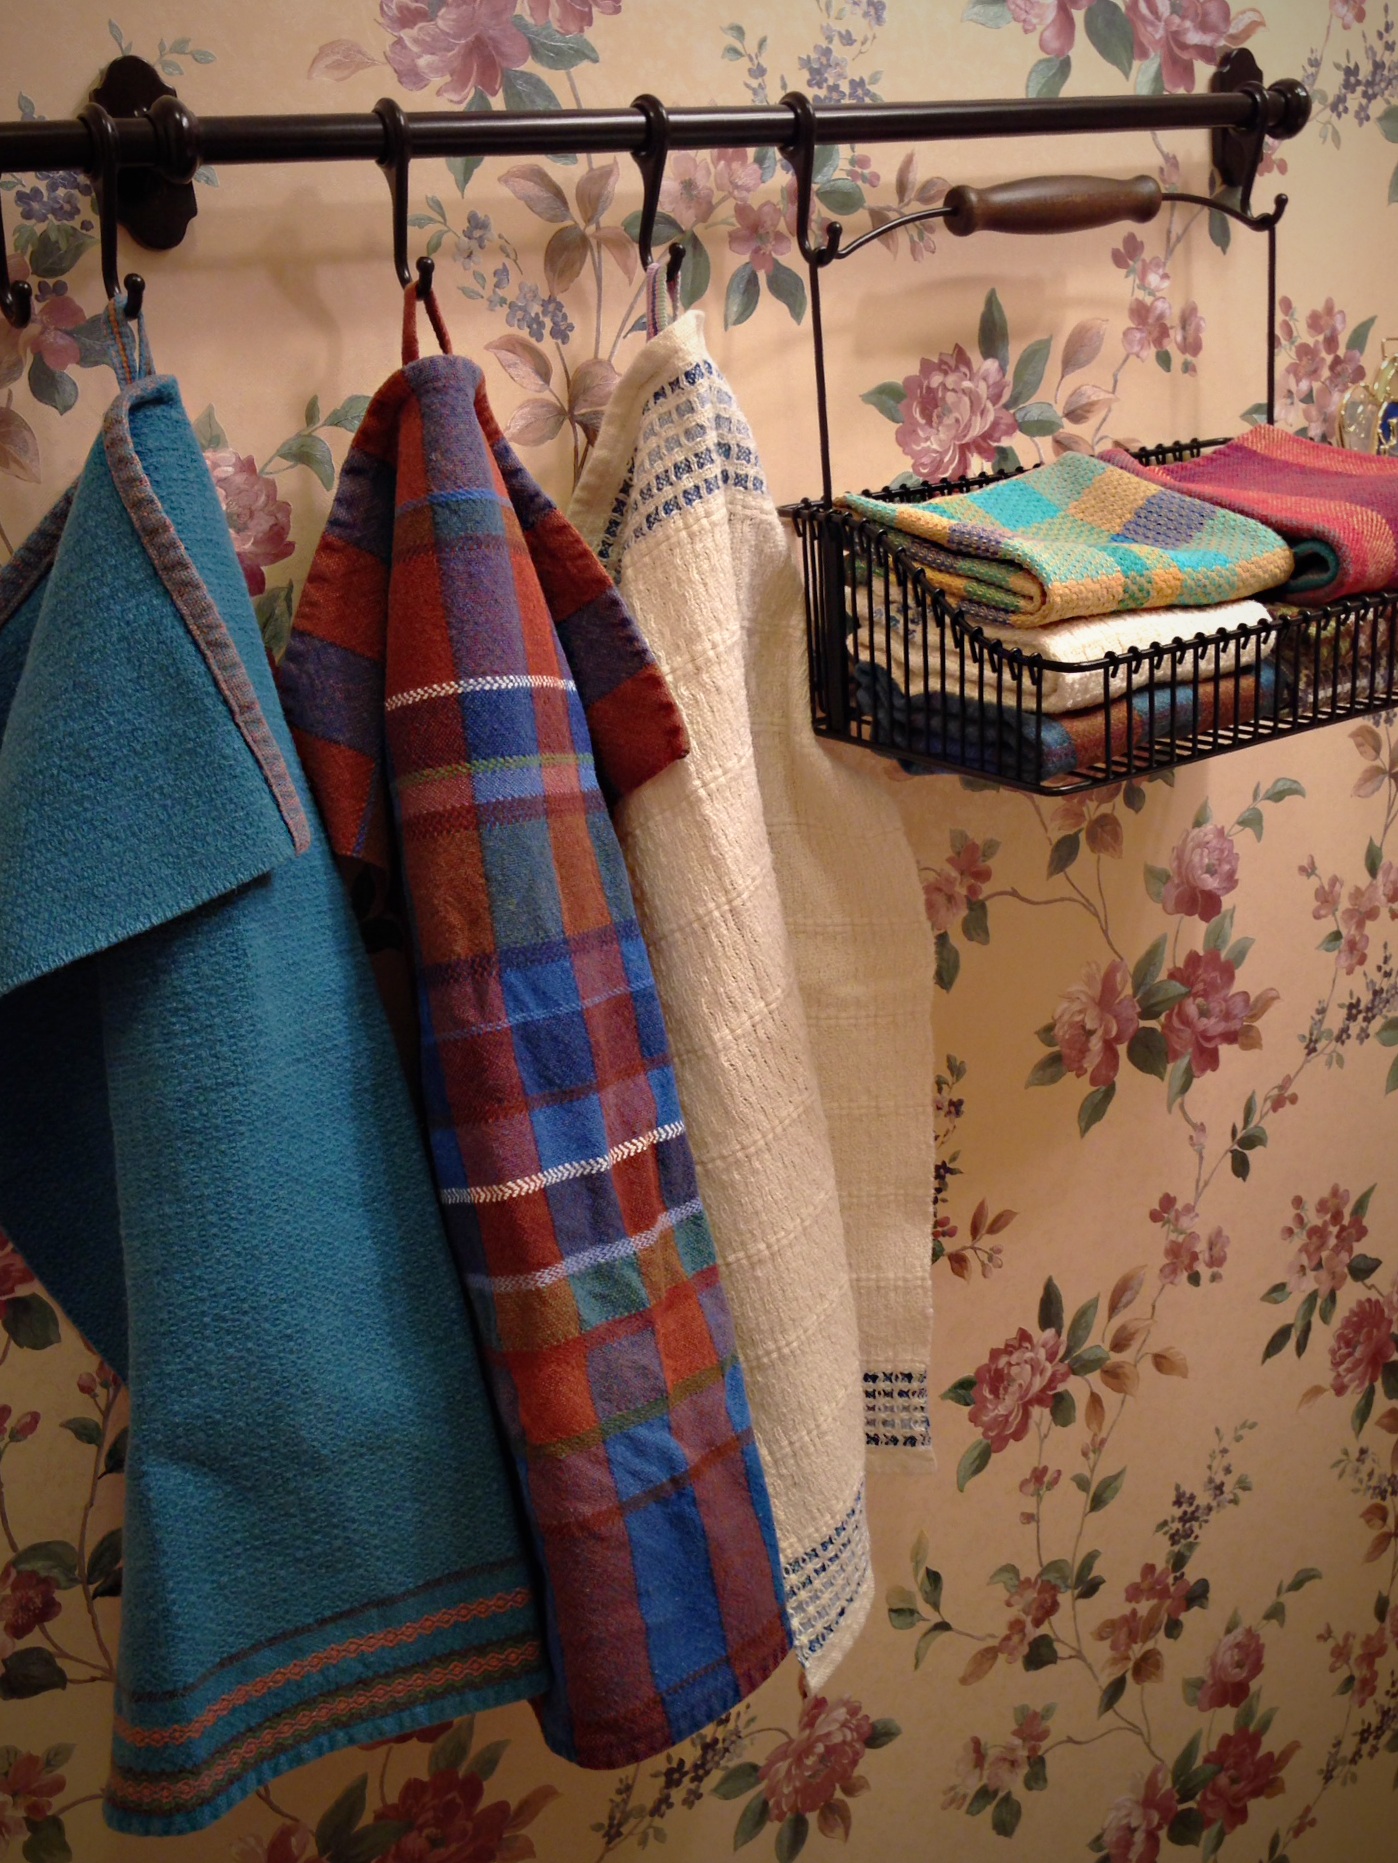
2. Added hanging tabs to handtowels. Installed Ikea rod with basket and hooks to hang handwoven handtowels in the powder room. (When you need tabs for towels, it helps to have a collection of inkle and band loombands.) You can see the most recent towels HERE – I kept one of the eight for myself; the rest became gifts.
Ikea basket and hooks hold assortment of handwoven towels for guests to use in the powder room.
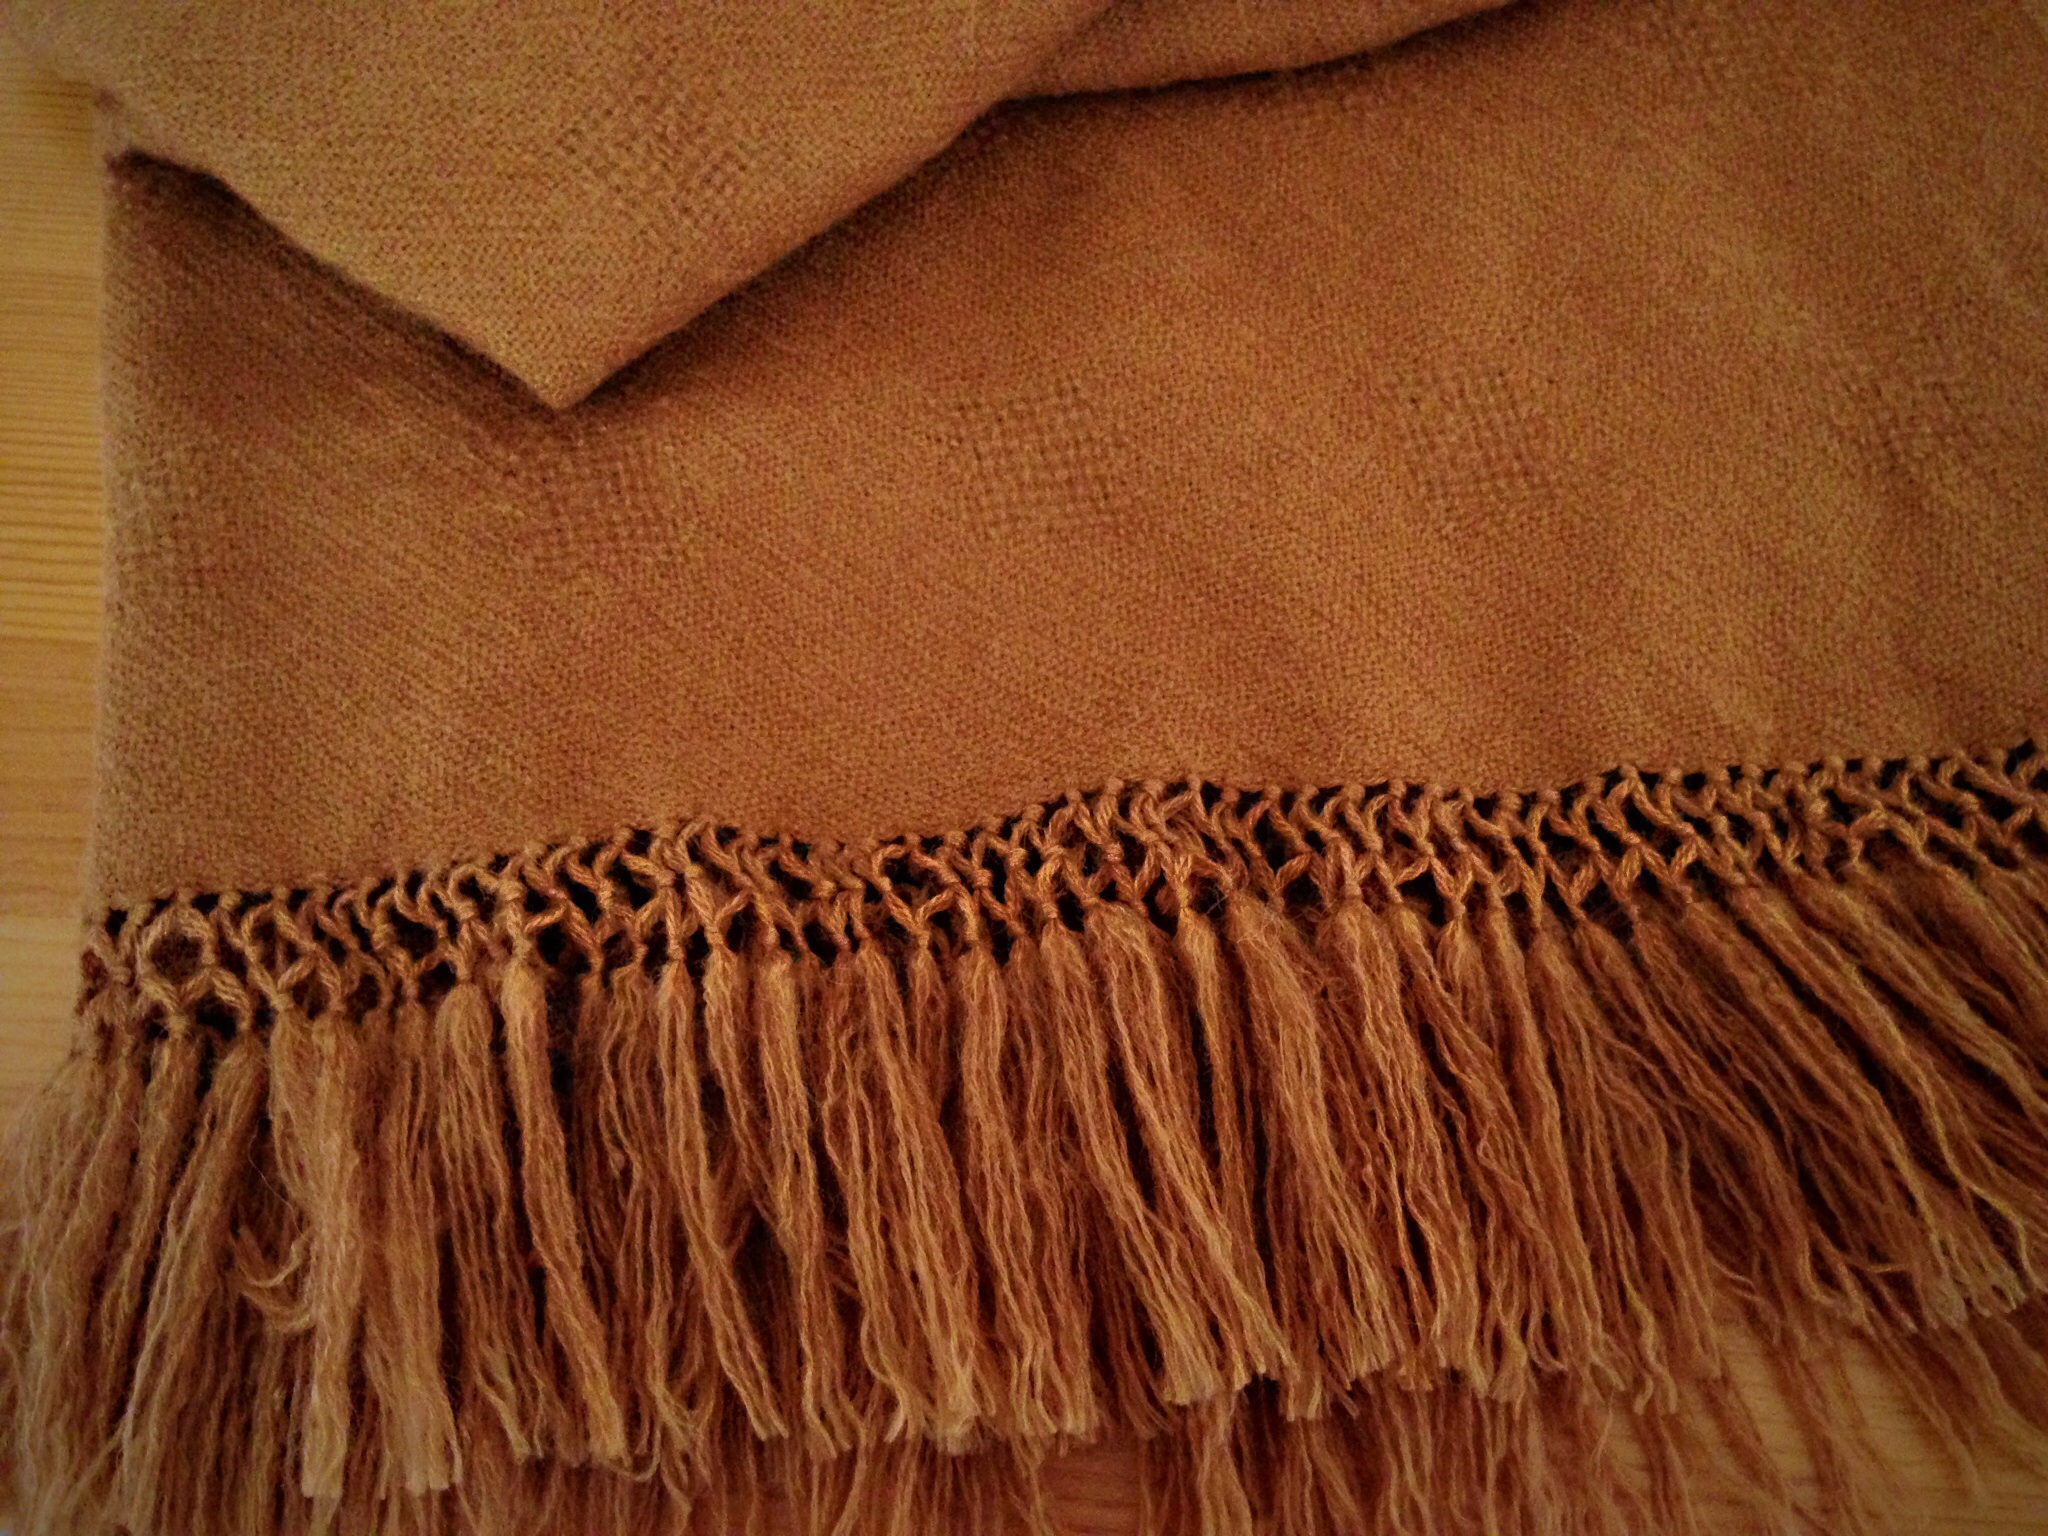
3. Untangled the fringe of alpaca/tencel throw. (A wet finishing nightmare I don’t care to repeat.) You can see what it looked like before washing HERE.
Each strand of fringe was carefully separated one-by-one after leaving the alpaca/tencel throw in the washing machine a few minutes too long. Untangling took longer than tying the lattice fringe. Hours and hours.
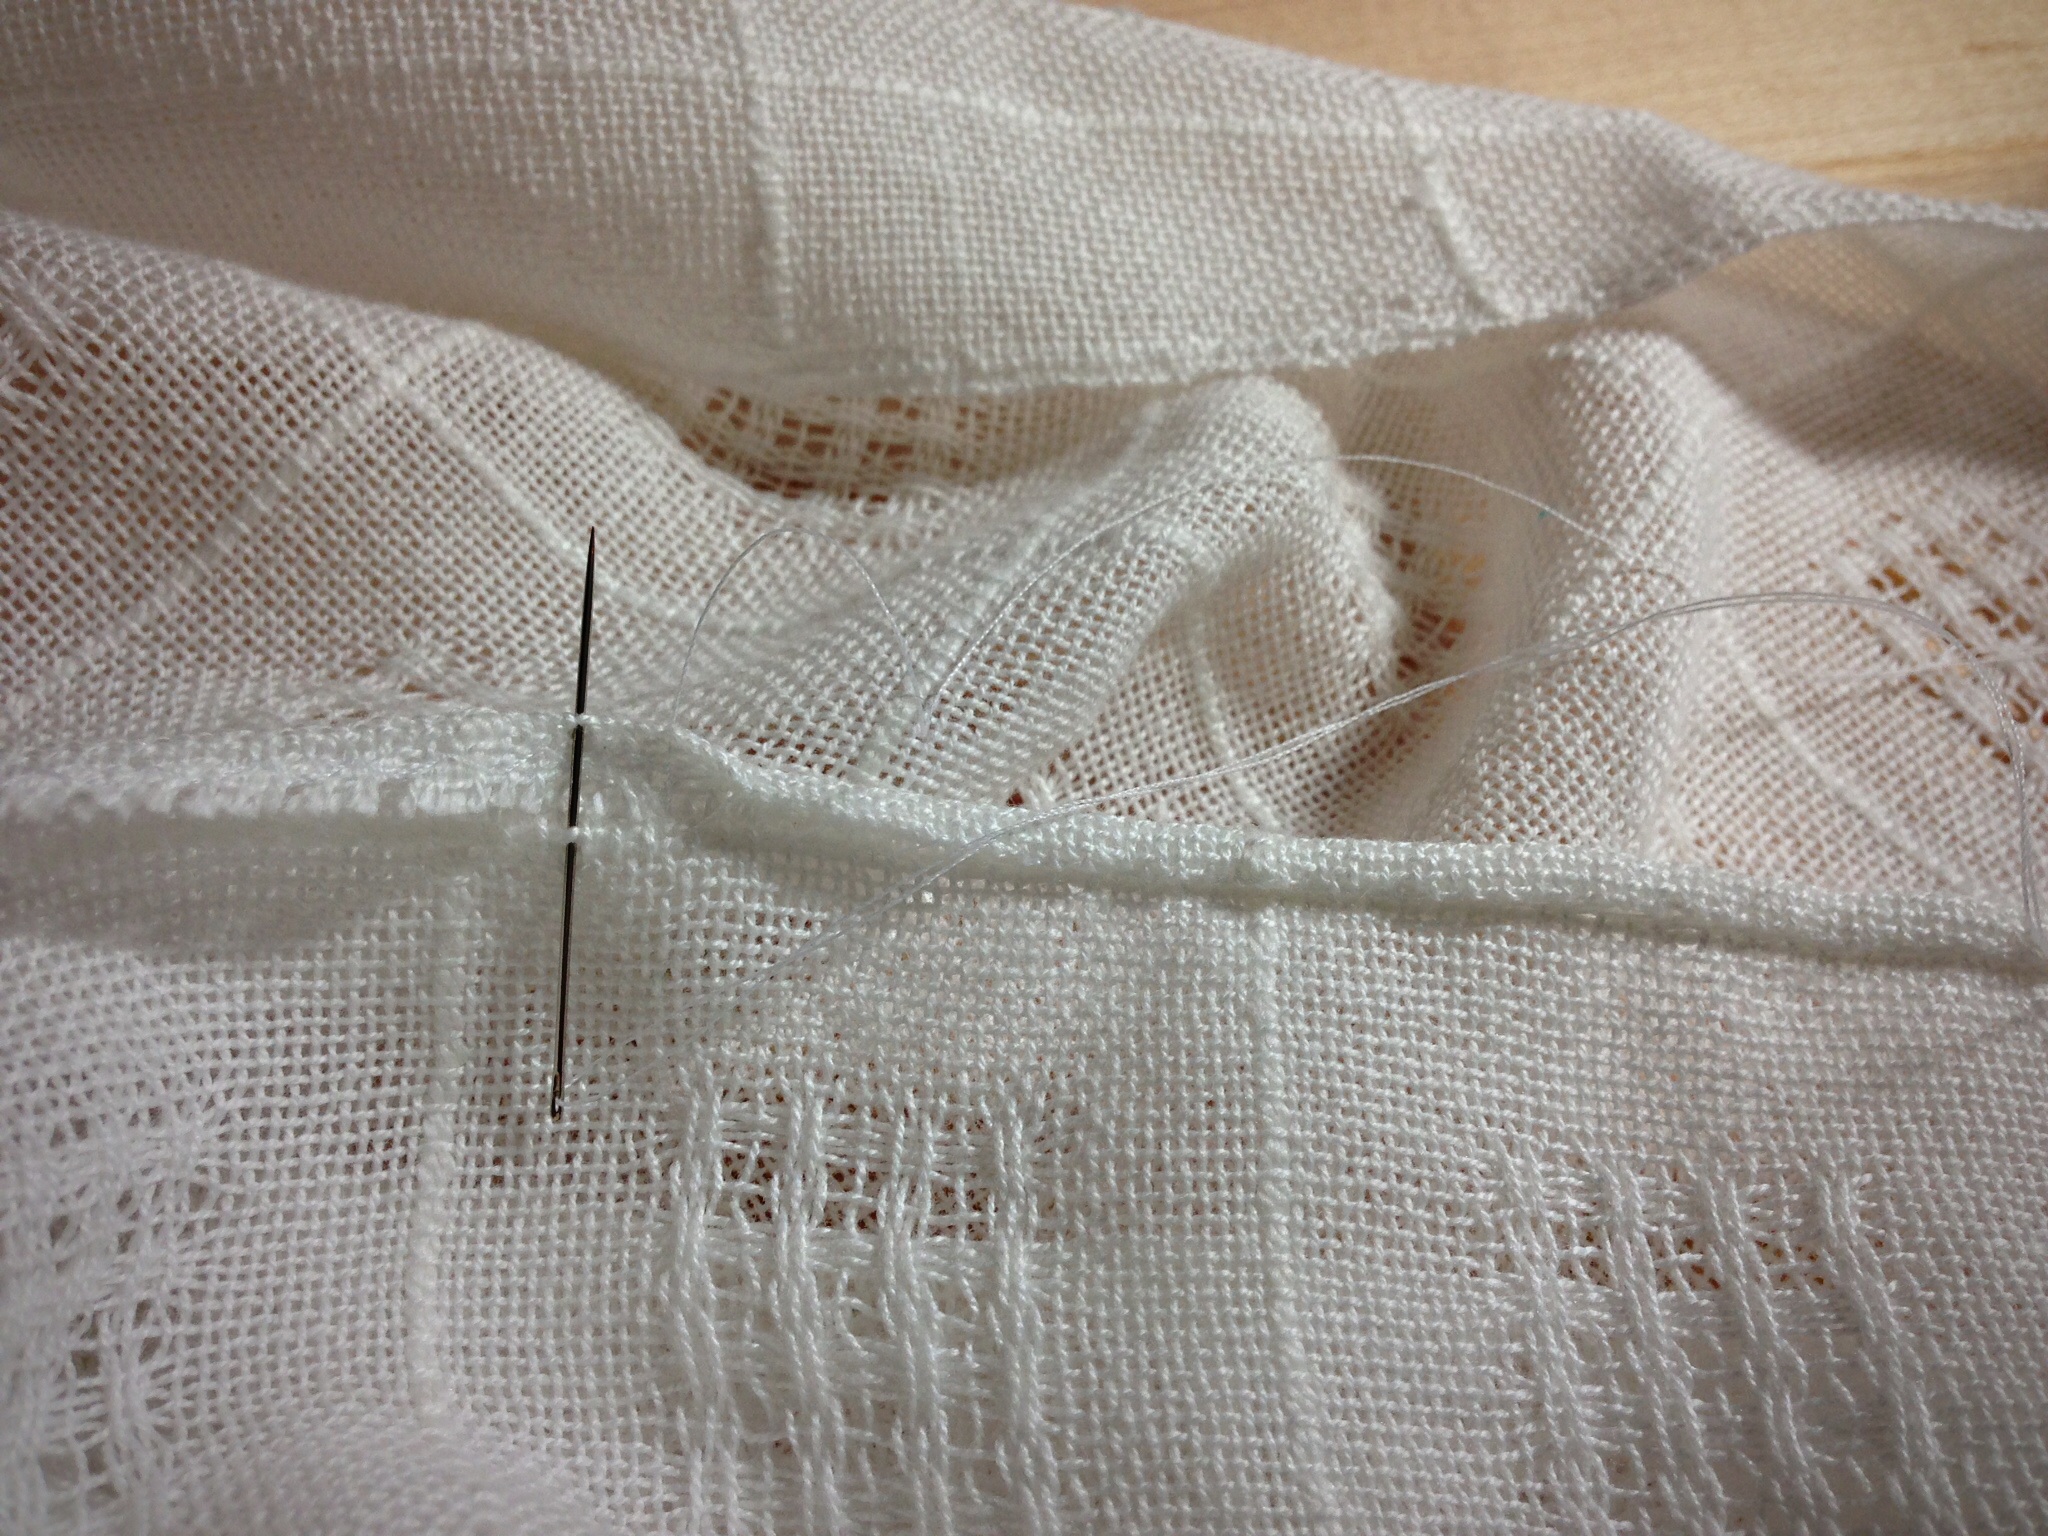
4. Hand-stitched rolled hem on Swedish lace tablecloth. (I may use this as a curtain for my weaving studio window, hung on rings with clips, on a rod.) HERE are the long curtain panels that hang on windows in my home.
Swedish lace panel can be used as a tablecloth, or a curtain, or even a light, summery shawl. The hand-stitched rolled hem gives a delicate touch to this elegant piece.Swedish lace is shown to its best advantage when light is allowed to shine through the cloth. The pressed rolled hem adds a classy touch.
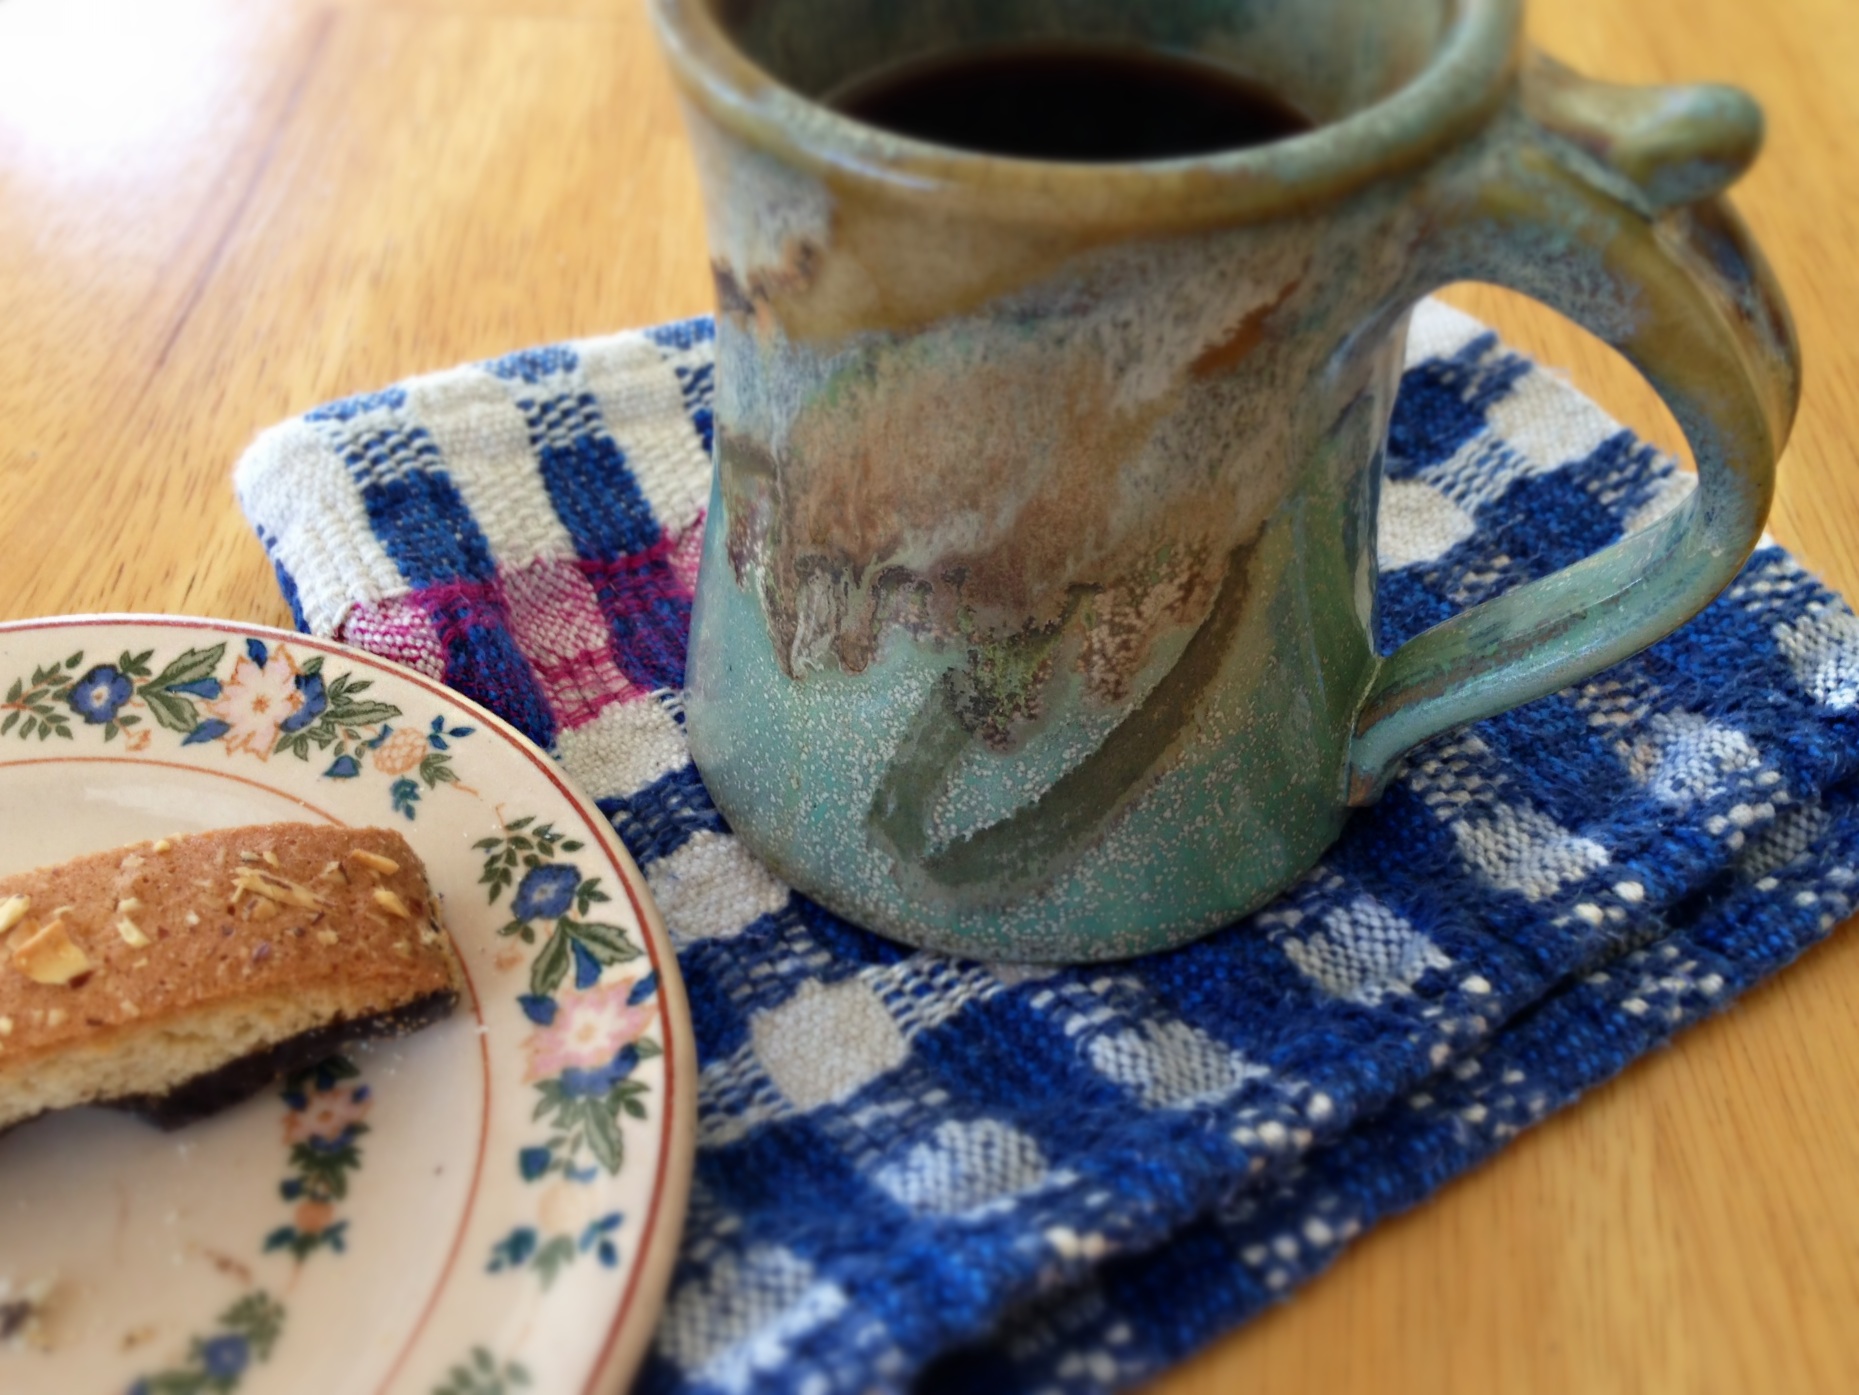
5. Hemmed small sample piece to carry around with me when I have a cup of coffee. (I grab this re-usable “scrap” instead of a paper napkin or paper towel. It also doubles as a coaster wherever I happen to sit down.) The original M’s and O’s towels are HERE; and HERE you can see what I mean about carrying my coffee cup around with me.
Scrap of handwoven fabric, from a cottolin warp of handtowels, follows my favorite coffee cup around.
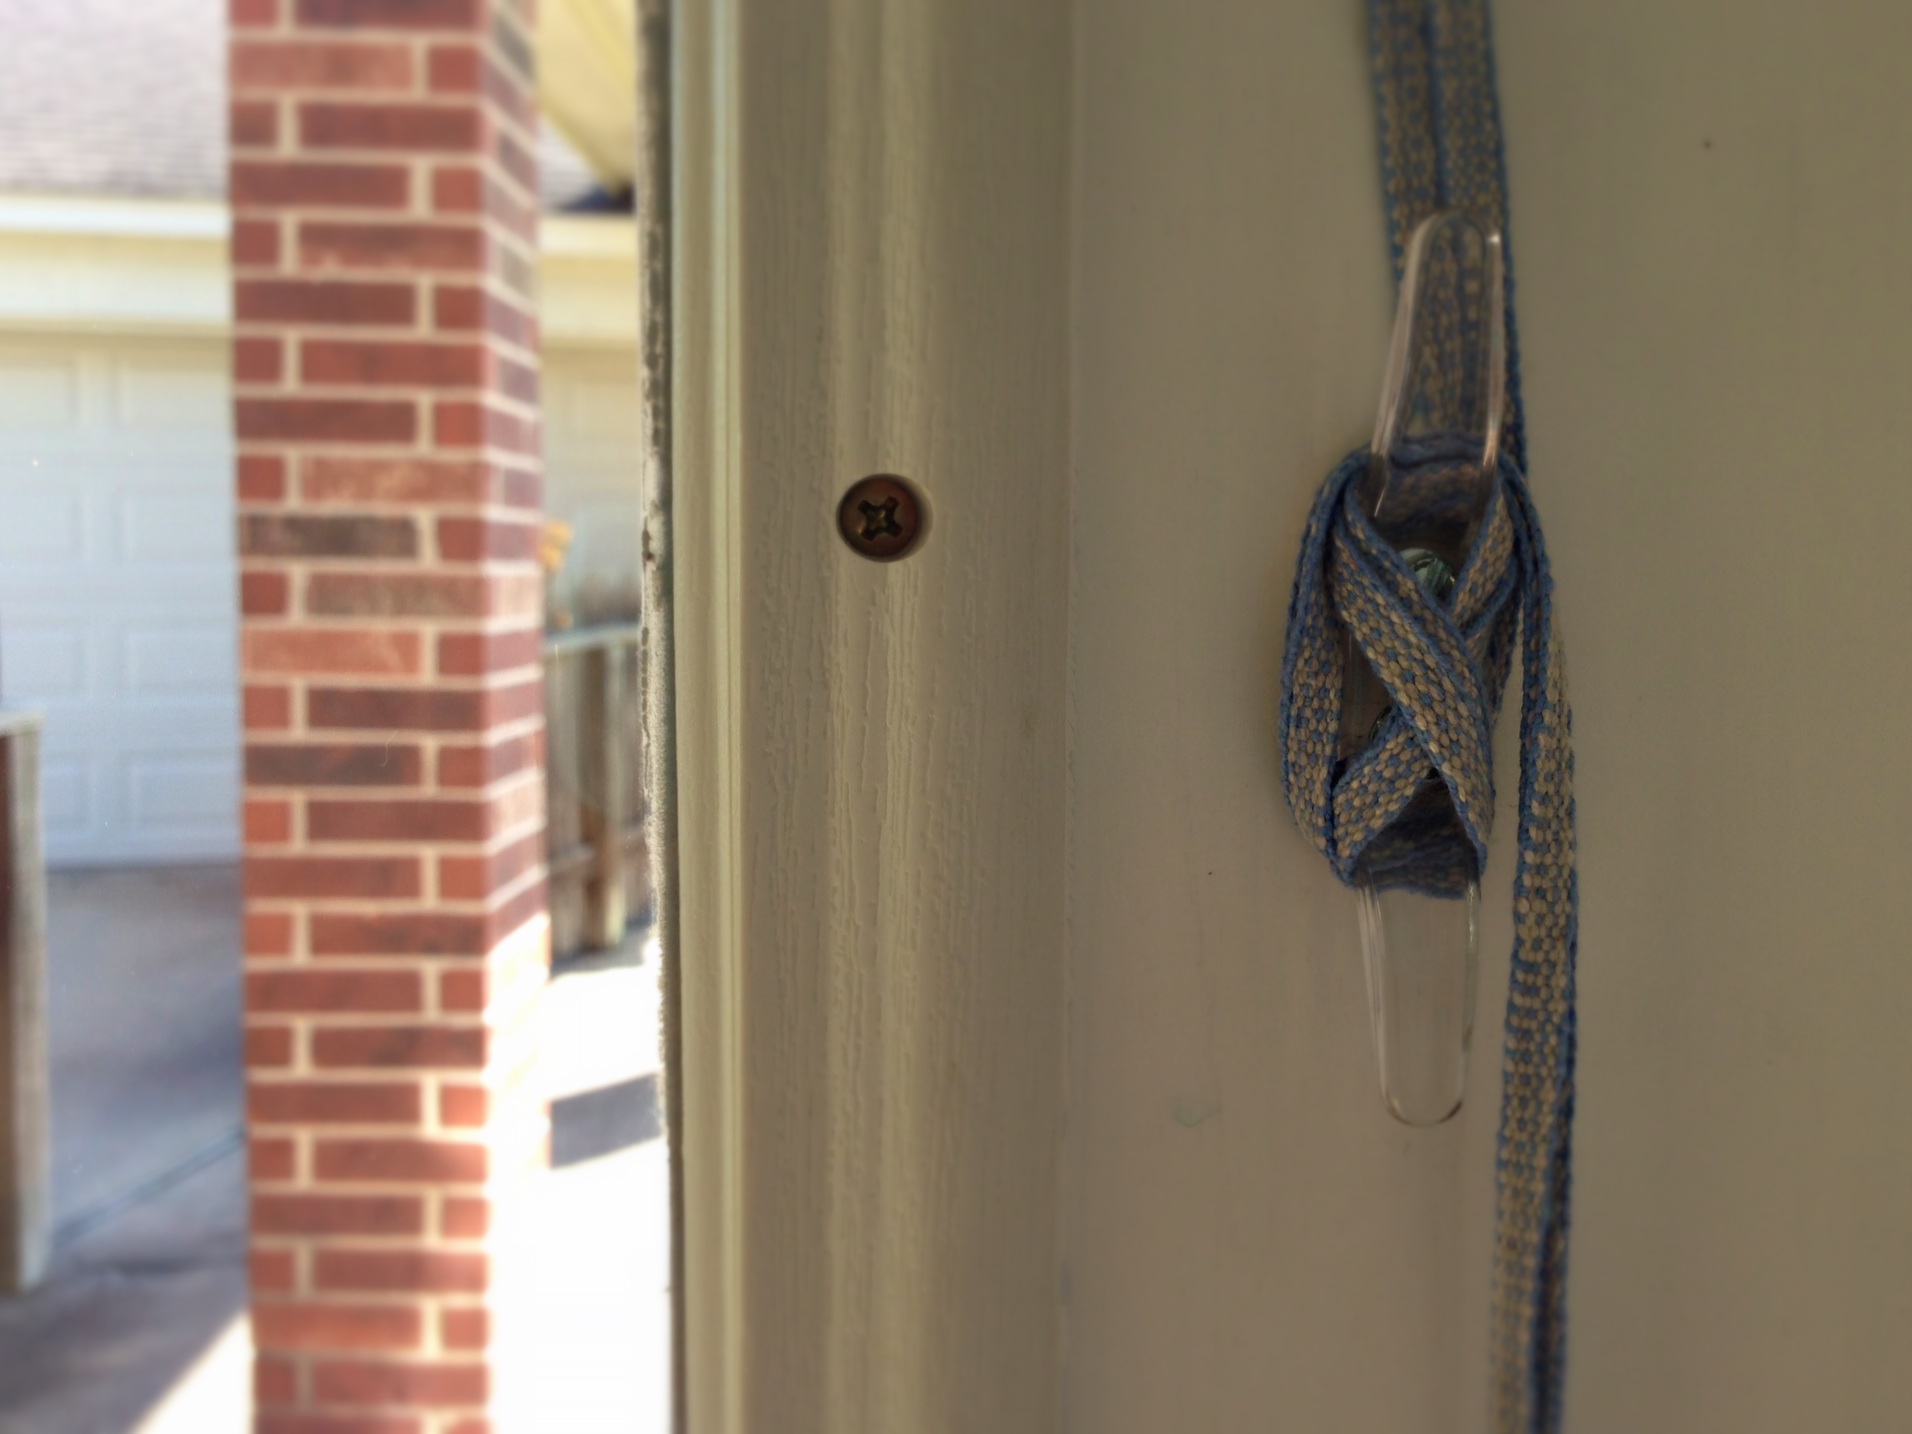
6. Replaced nylon cord on handwoven Roman shades with a cord I wove on my band loom. (The “temporary” nylon cord stayed more than a year. We now enjoy seeing this on our kitchen door every day, finally fully finished.) The only place I have a picture of the original nylon cord, and of the fabric on the loom for the Roman shades is in my Projects on Weavolution HERE. (I’m not sure if you can see it without logging in to the site.)
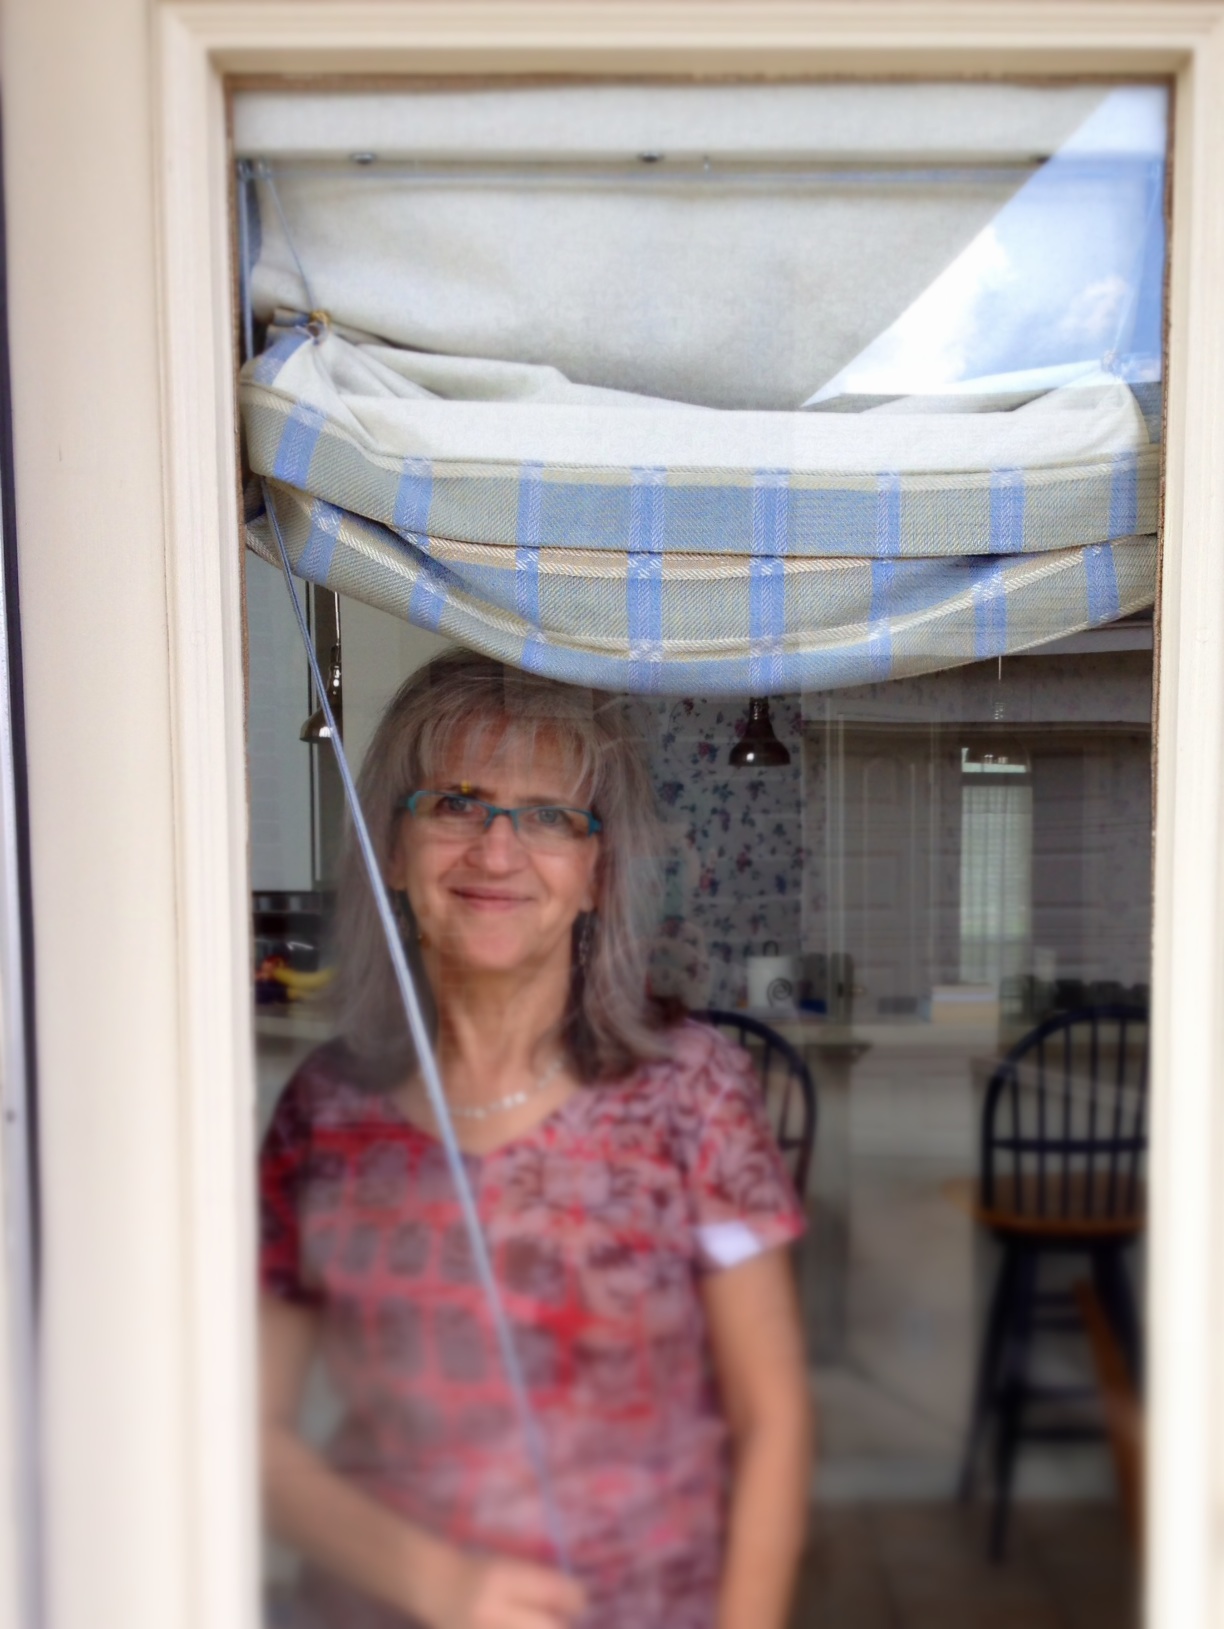
Linen and cotton threads that match the handwoven Roman shades were used to weave the pull cord. Cord woven on Glimakra two-treadle band loom.Handwoven Roman shades finally have a matching pull cord. When the shades are lowered at night, the two-block twill structure is seen covering the whole kitchen door window. Woven on 8-shaft Glimakra Standard loom.Opening the shades to start the day and welcome you. Please come in!
May you reduce your finishing pile (I know you have one).