Tools Day: Measured Weaving

How far will you travel? How will you know when you have arrived? Do you wish you could know when you are halfway there? Applied to weaving, I like to have the answers to these questions before I begin the “journey.” A pre-measured tape gives me consistency, especially important for multiple pieces in a set. The tape also acts as my “trip odometer.” I can see how far I’ve gone, and exactly how much is left to weave. It satisfies my insatiable need to know how close I am to the end. Are you like that, too?

How to Make and Use a Pre-Measured Tape

Supplies

  • Roll of 3/4″ or wider twill tape (or any cloth tape or ribbon that does not stretch, and that pins easily)
  • Tape measure with inches and/or centimeters
  • Fine tip permanent marker
  • Flat head pins
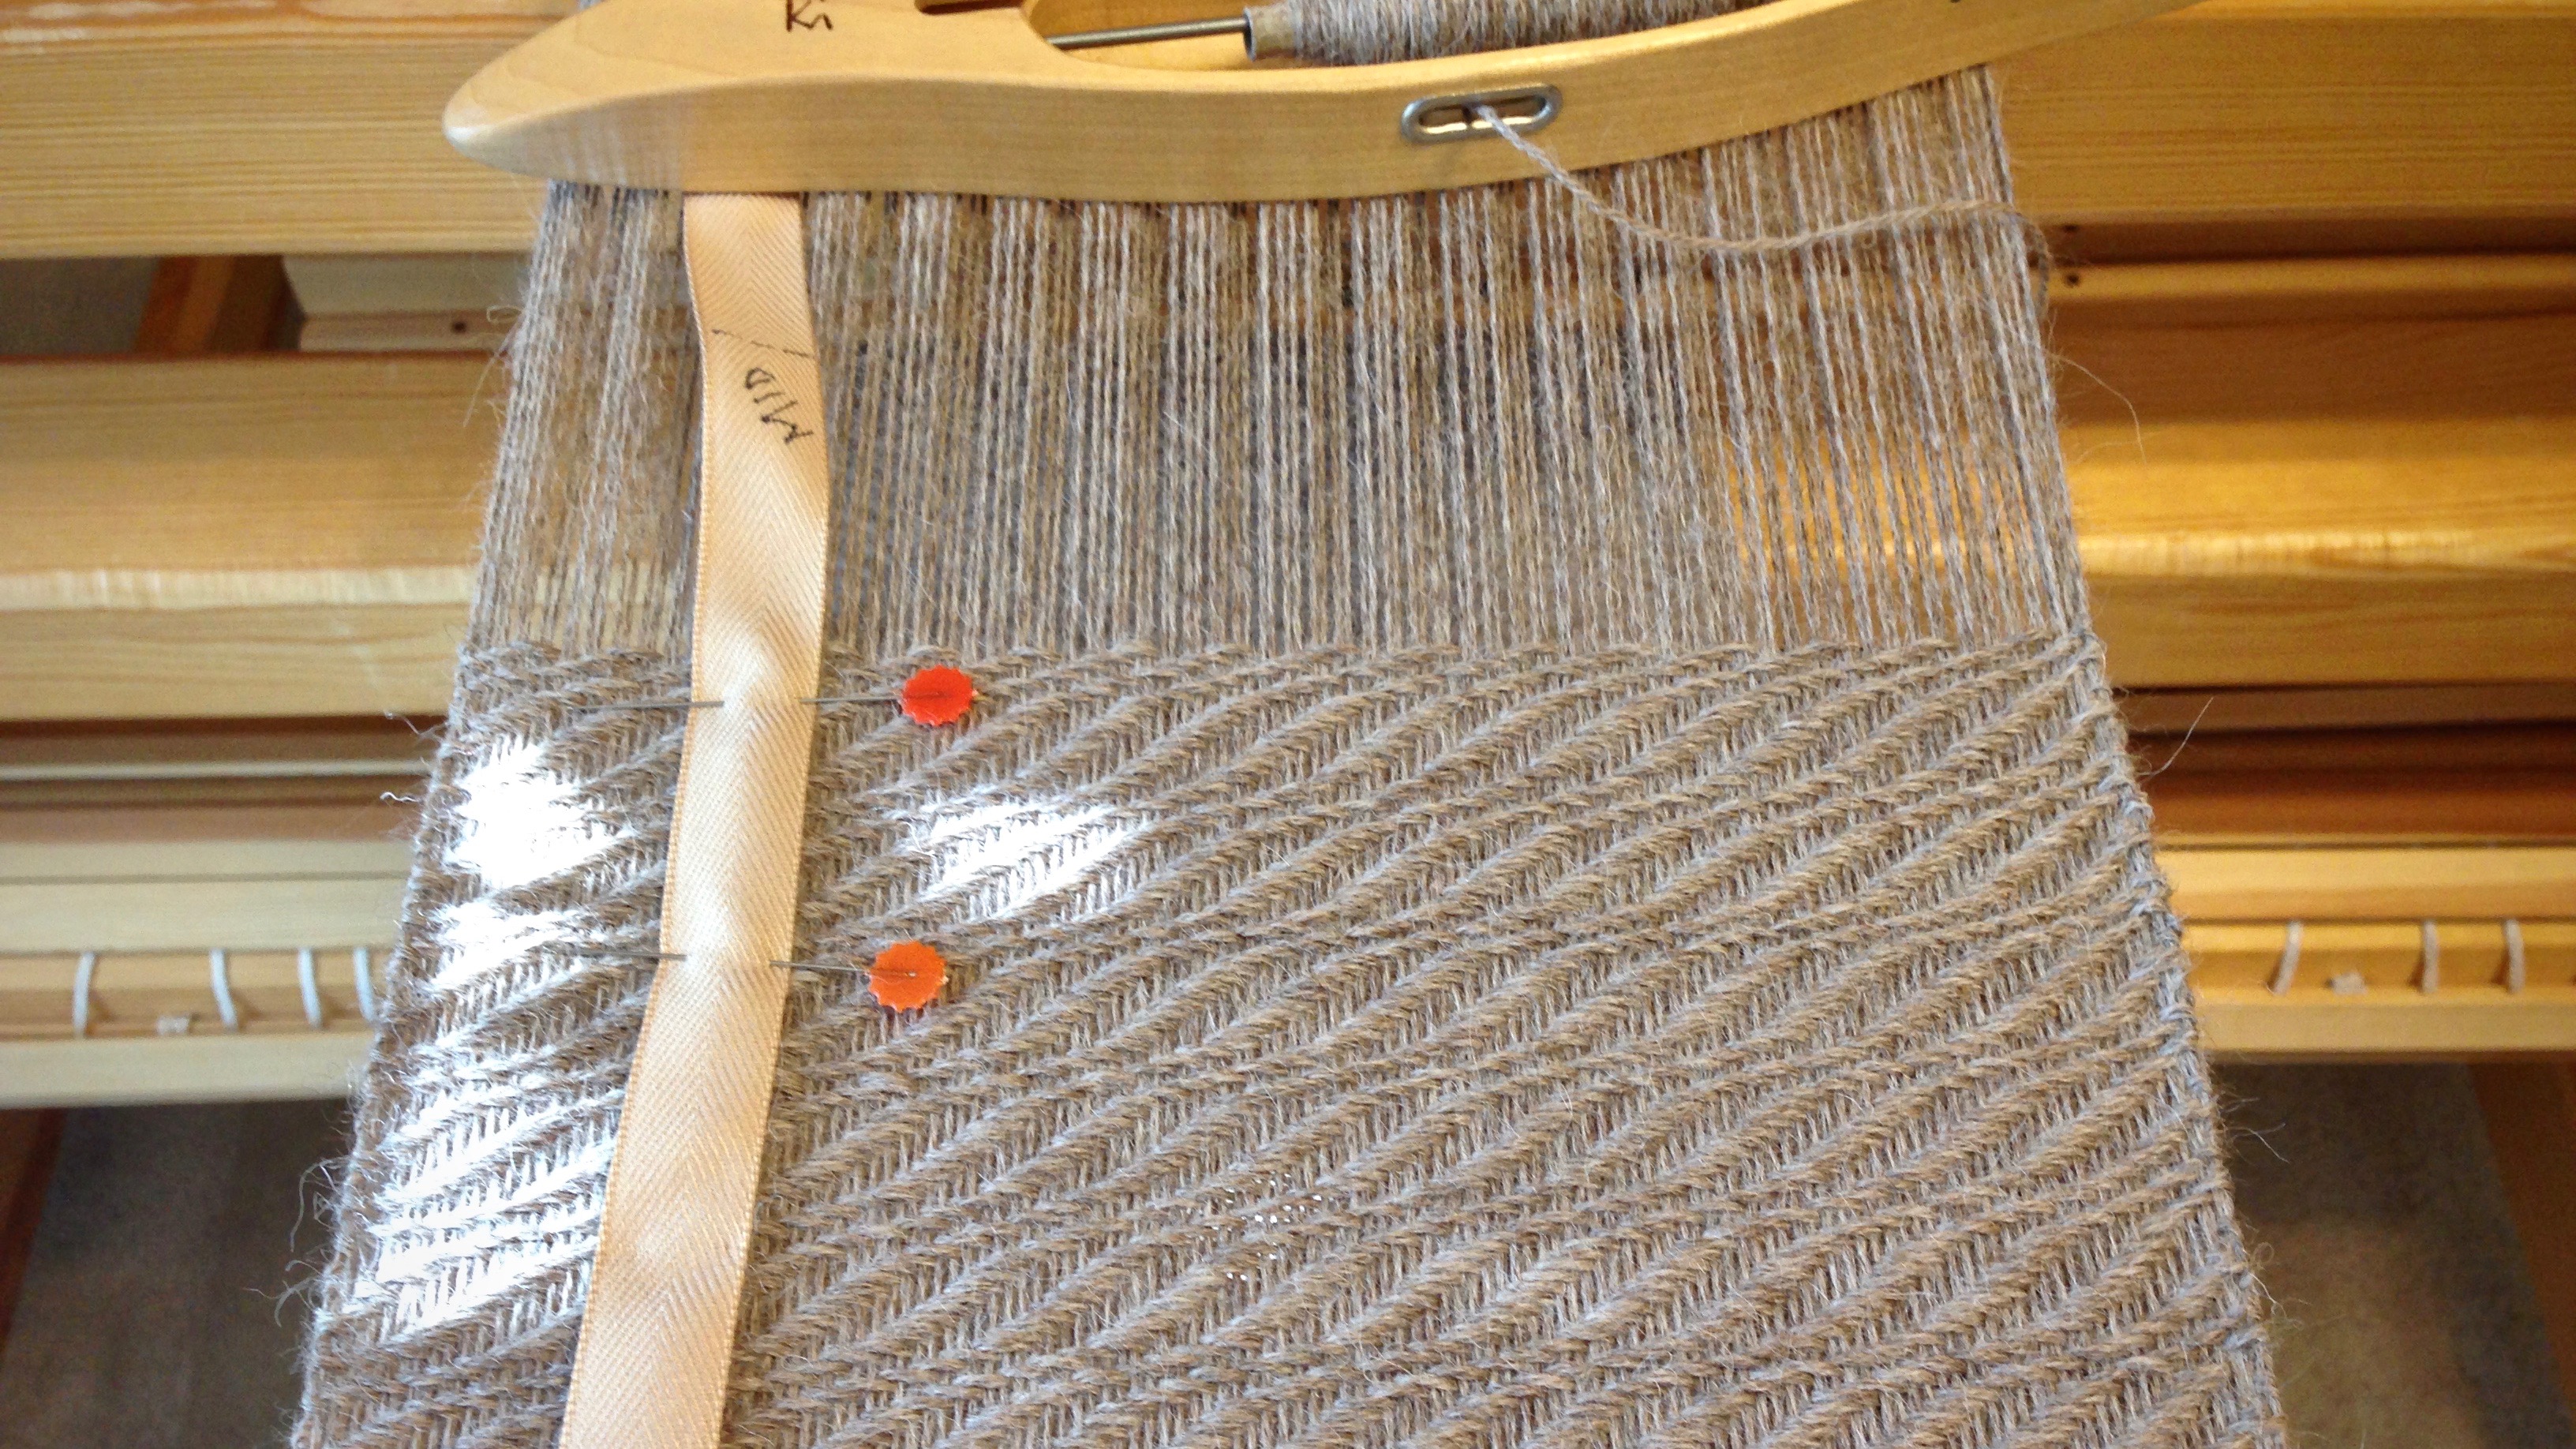
  1. Use the permanent marker to place markings on the twill tape, as measured with the tape measure. Mark the start line 1/2″ from the end of the twill tape, so that the tape can be pinned in front of the mark.
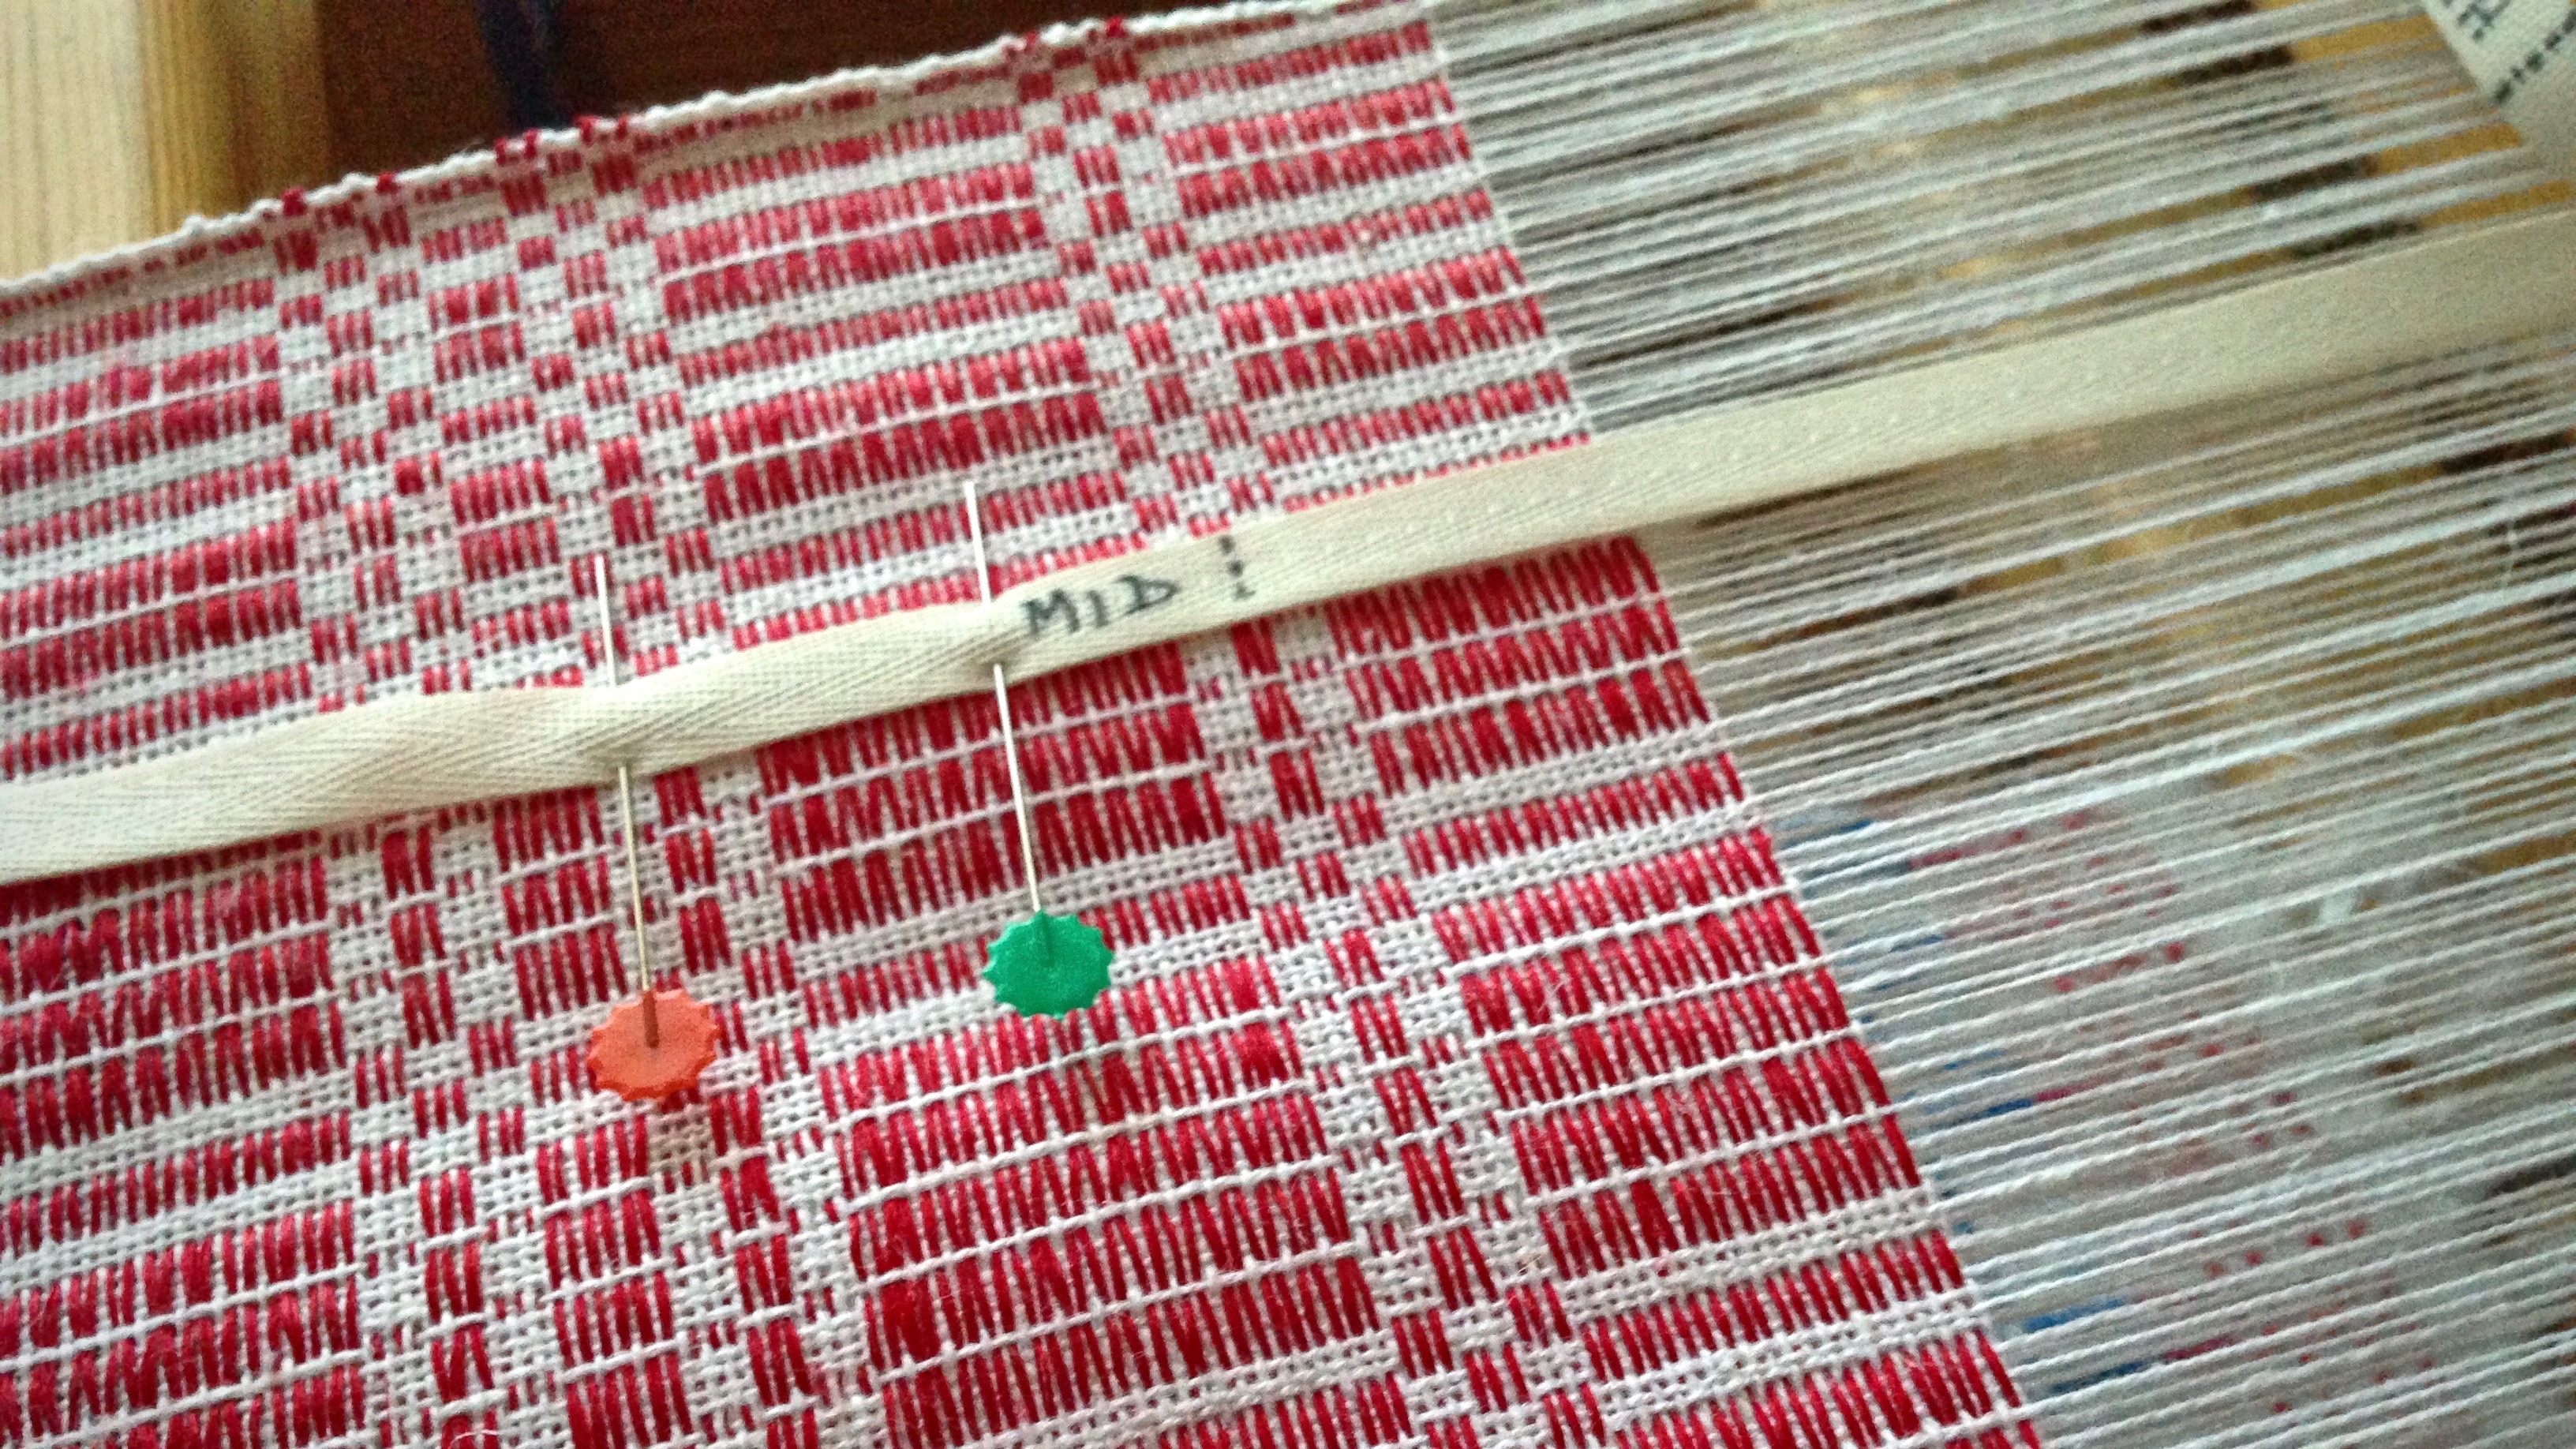
  2. After drawing a line for the starting point and ending point, draw a line at the midway point, labeled MID.
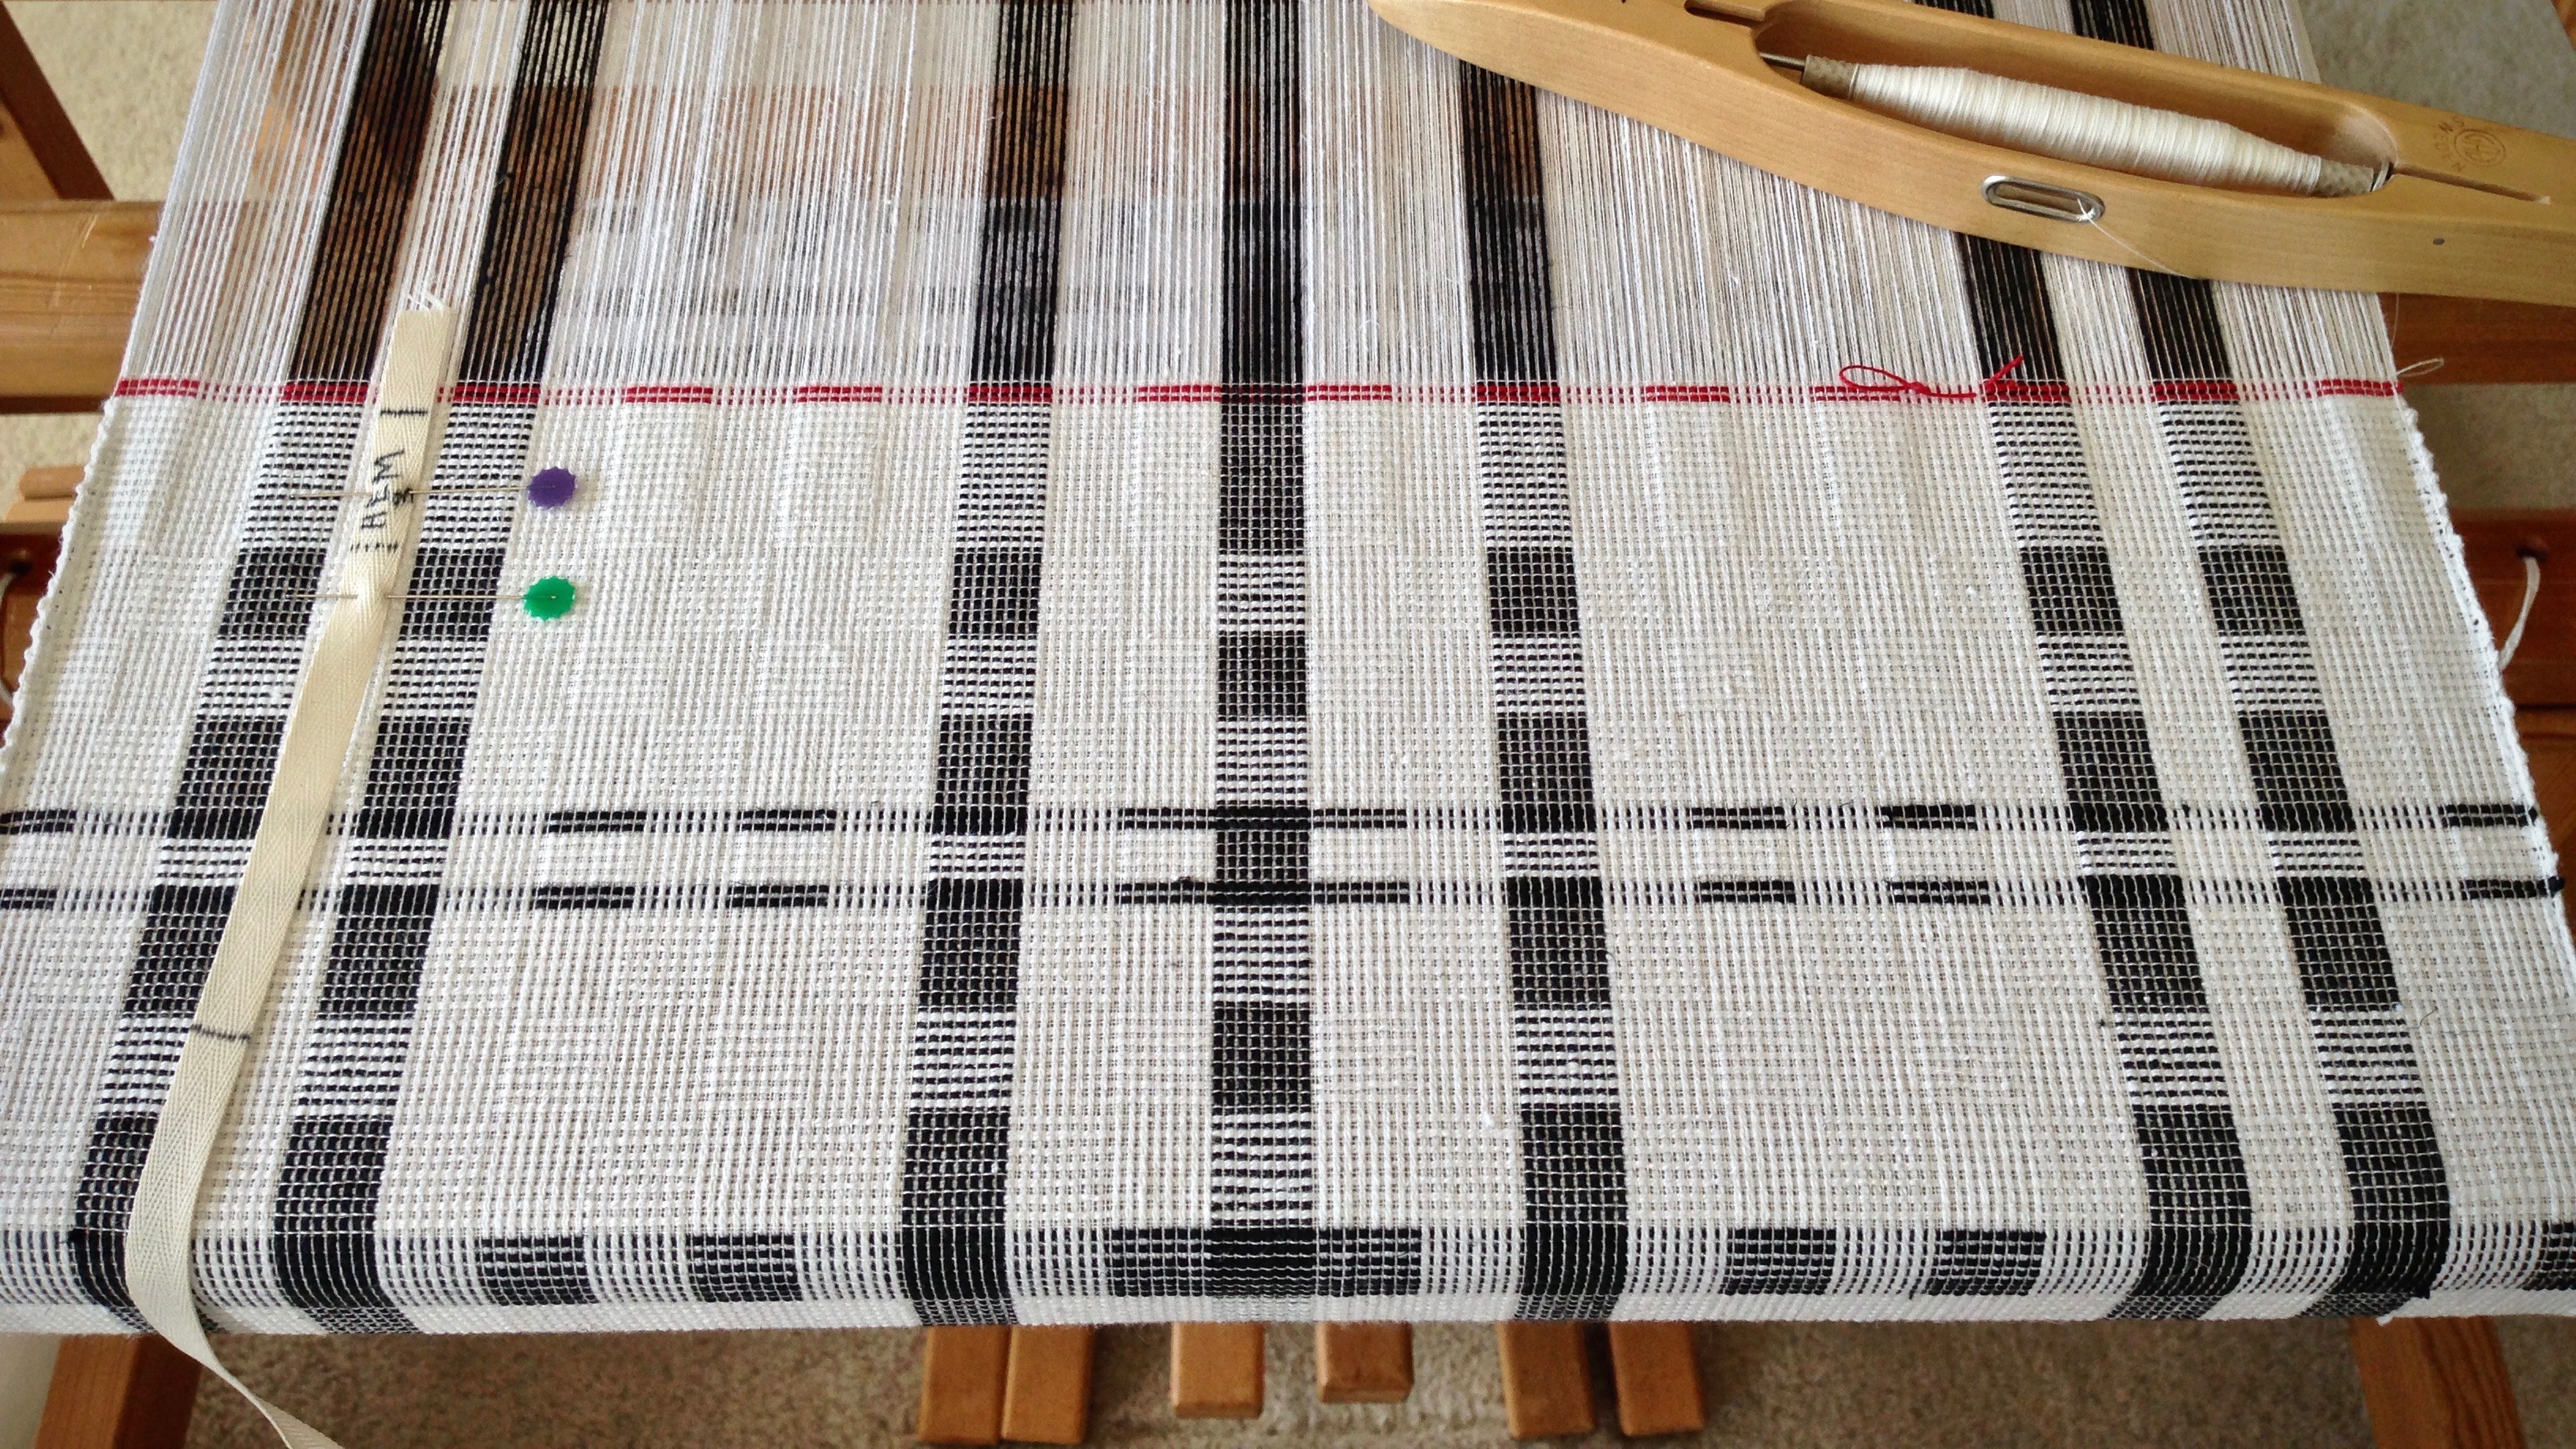
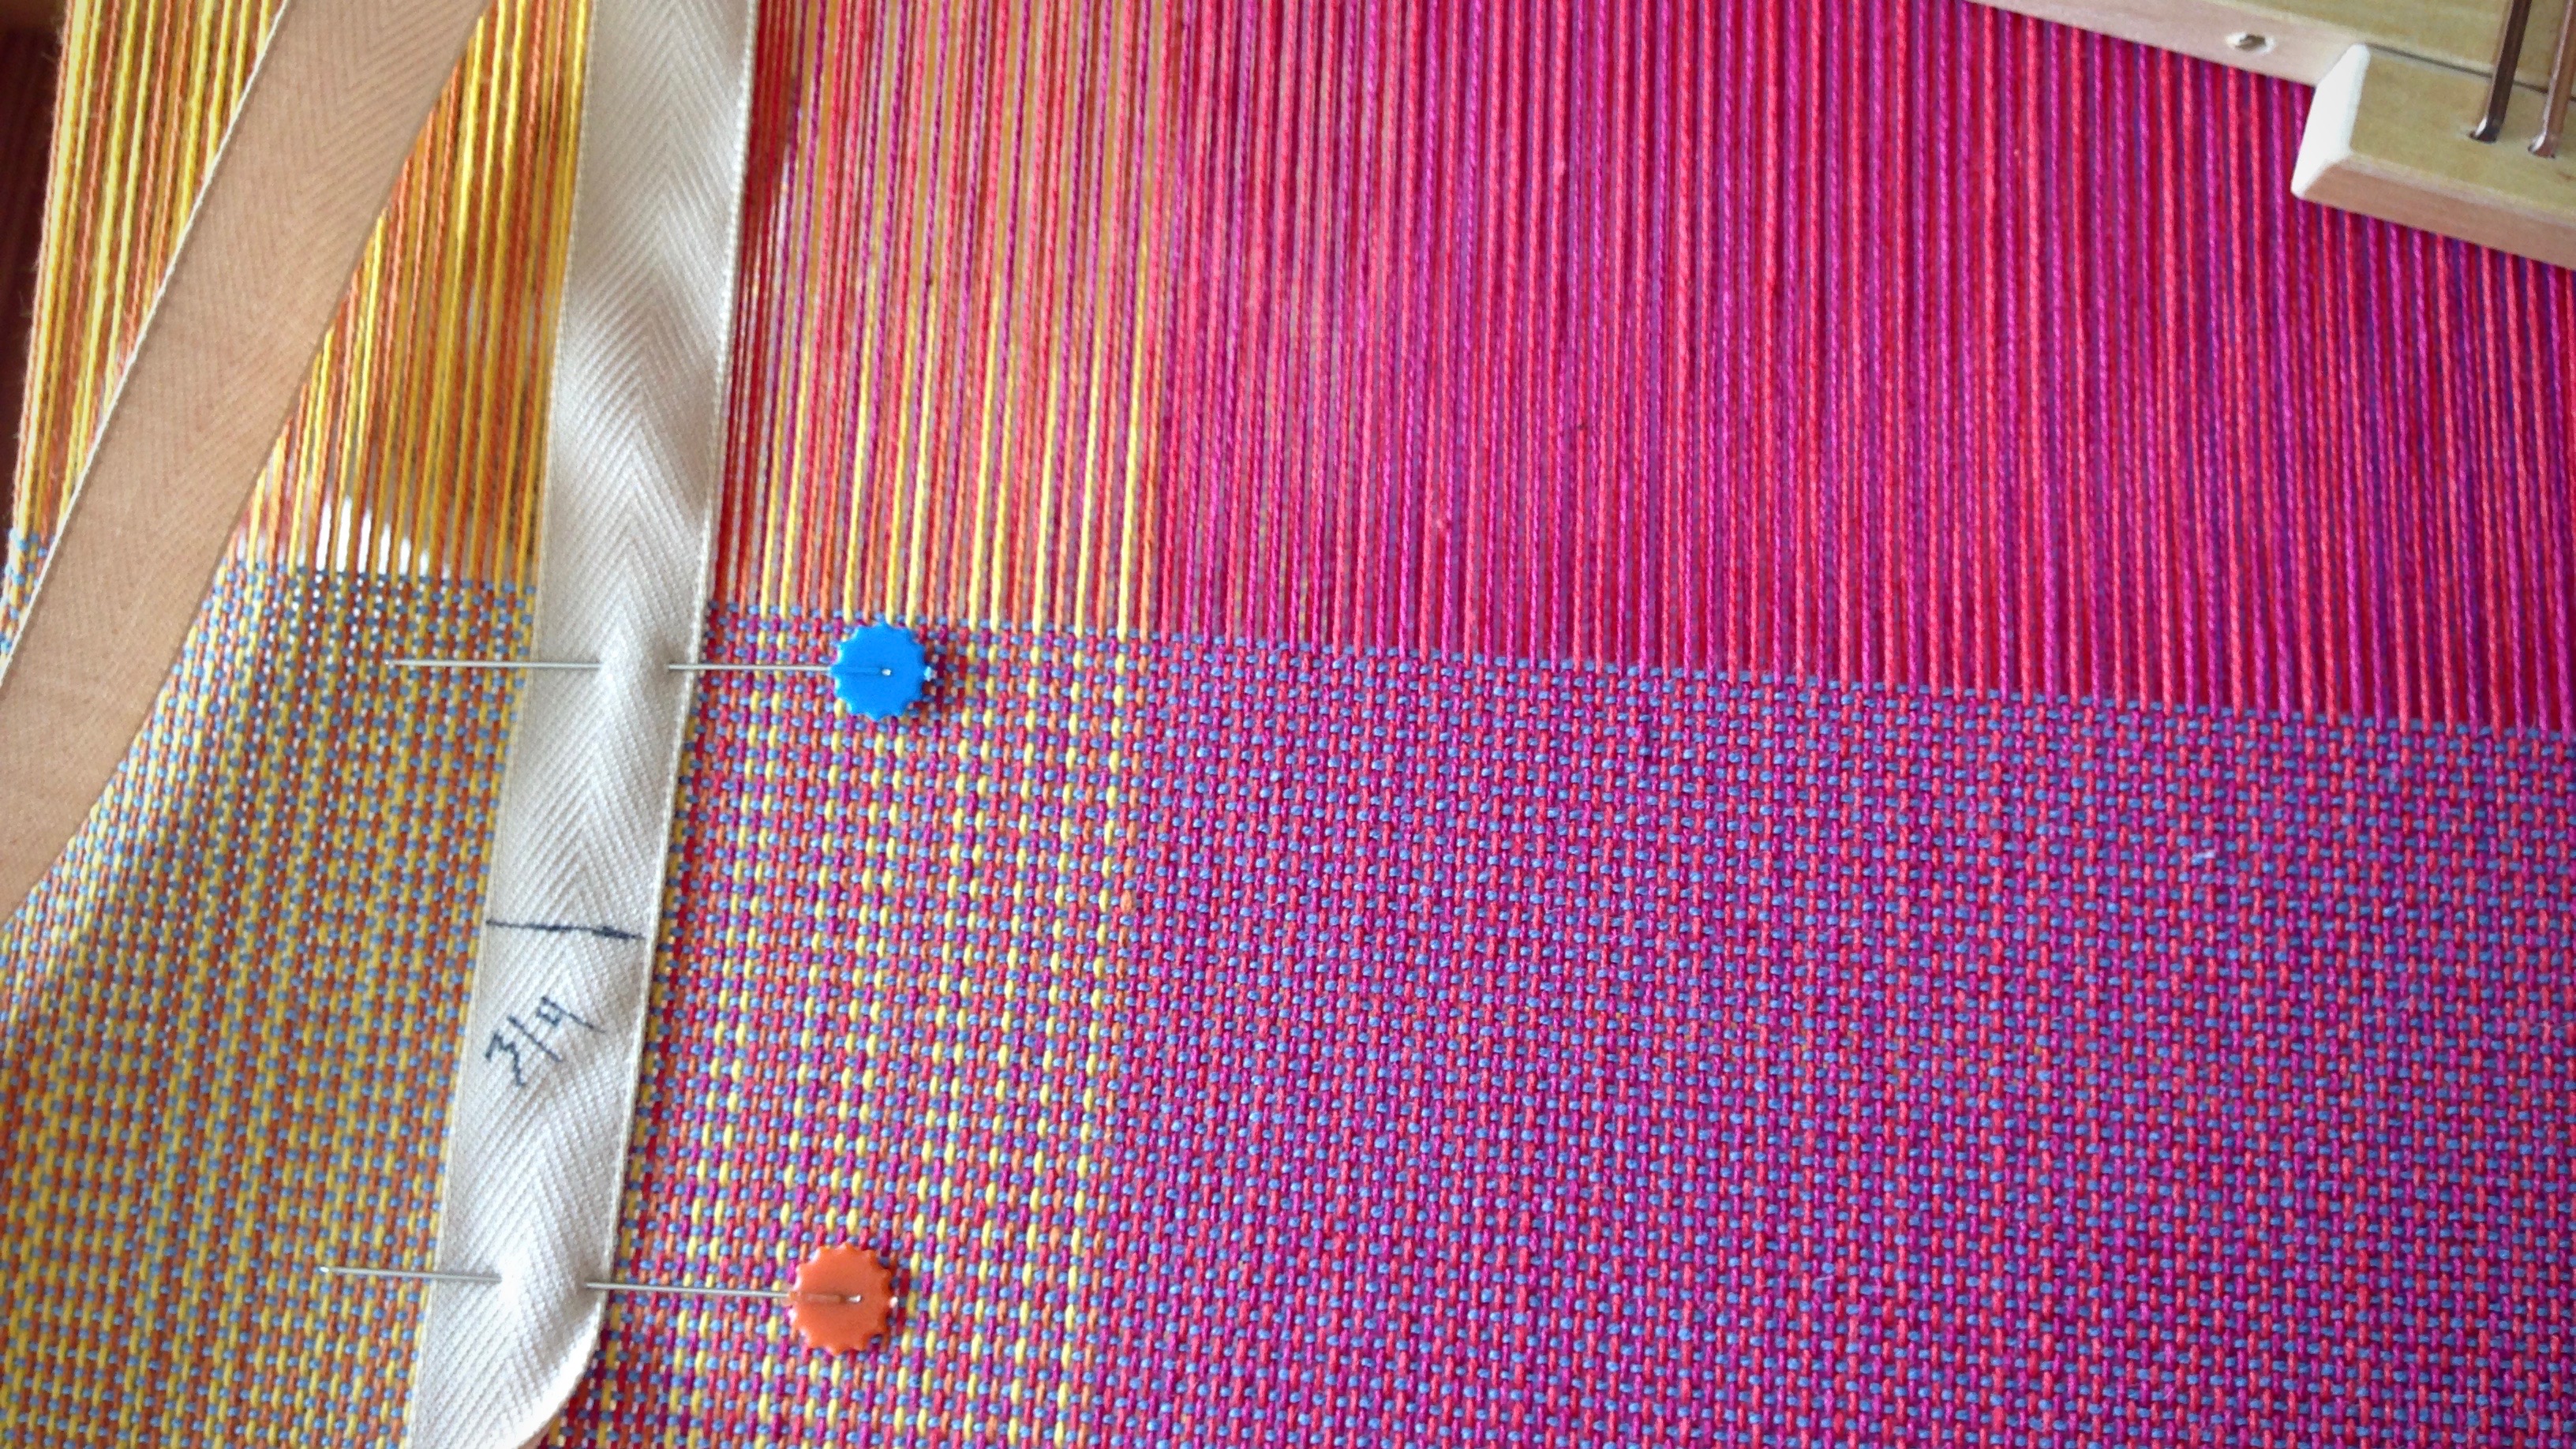
  3. Include dotted lines for hem measurements, if applicable. Write the hem measurement on the twill tape; i.,e., 3/4″ or 2 cm.
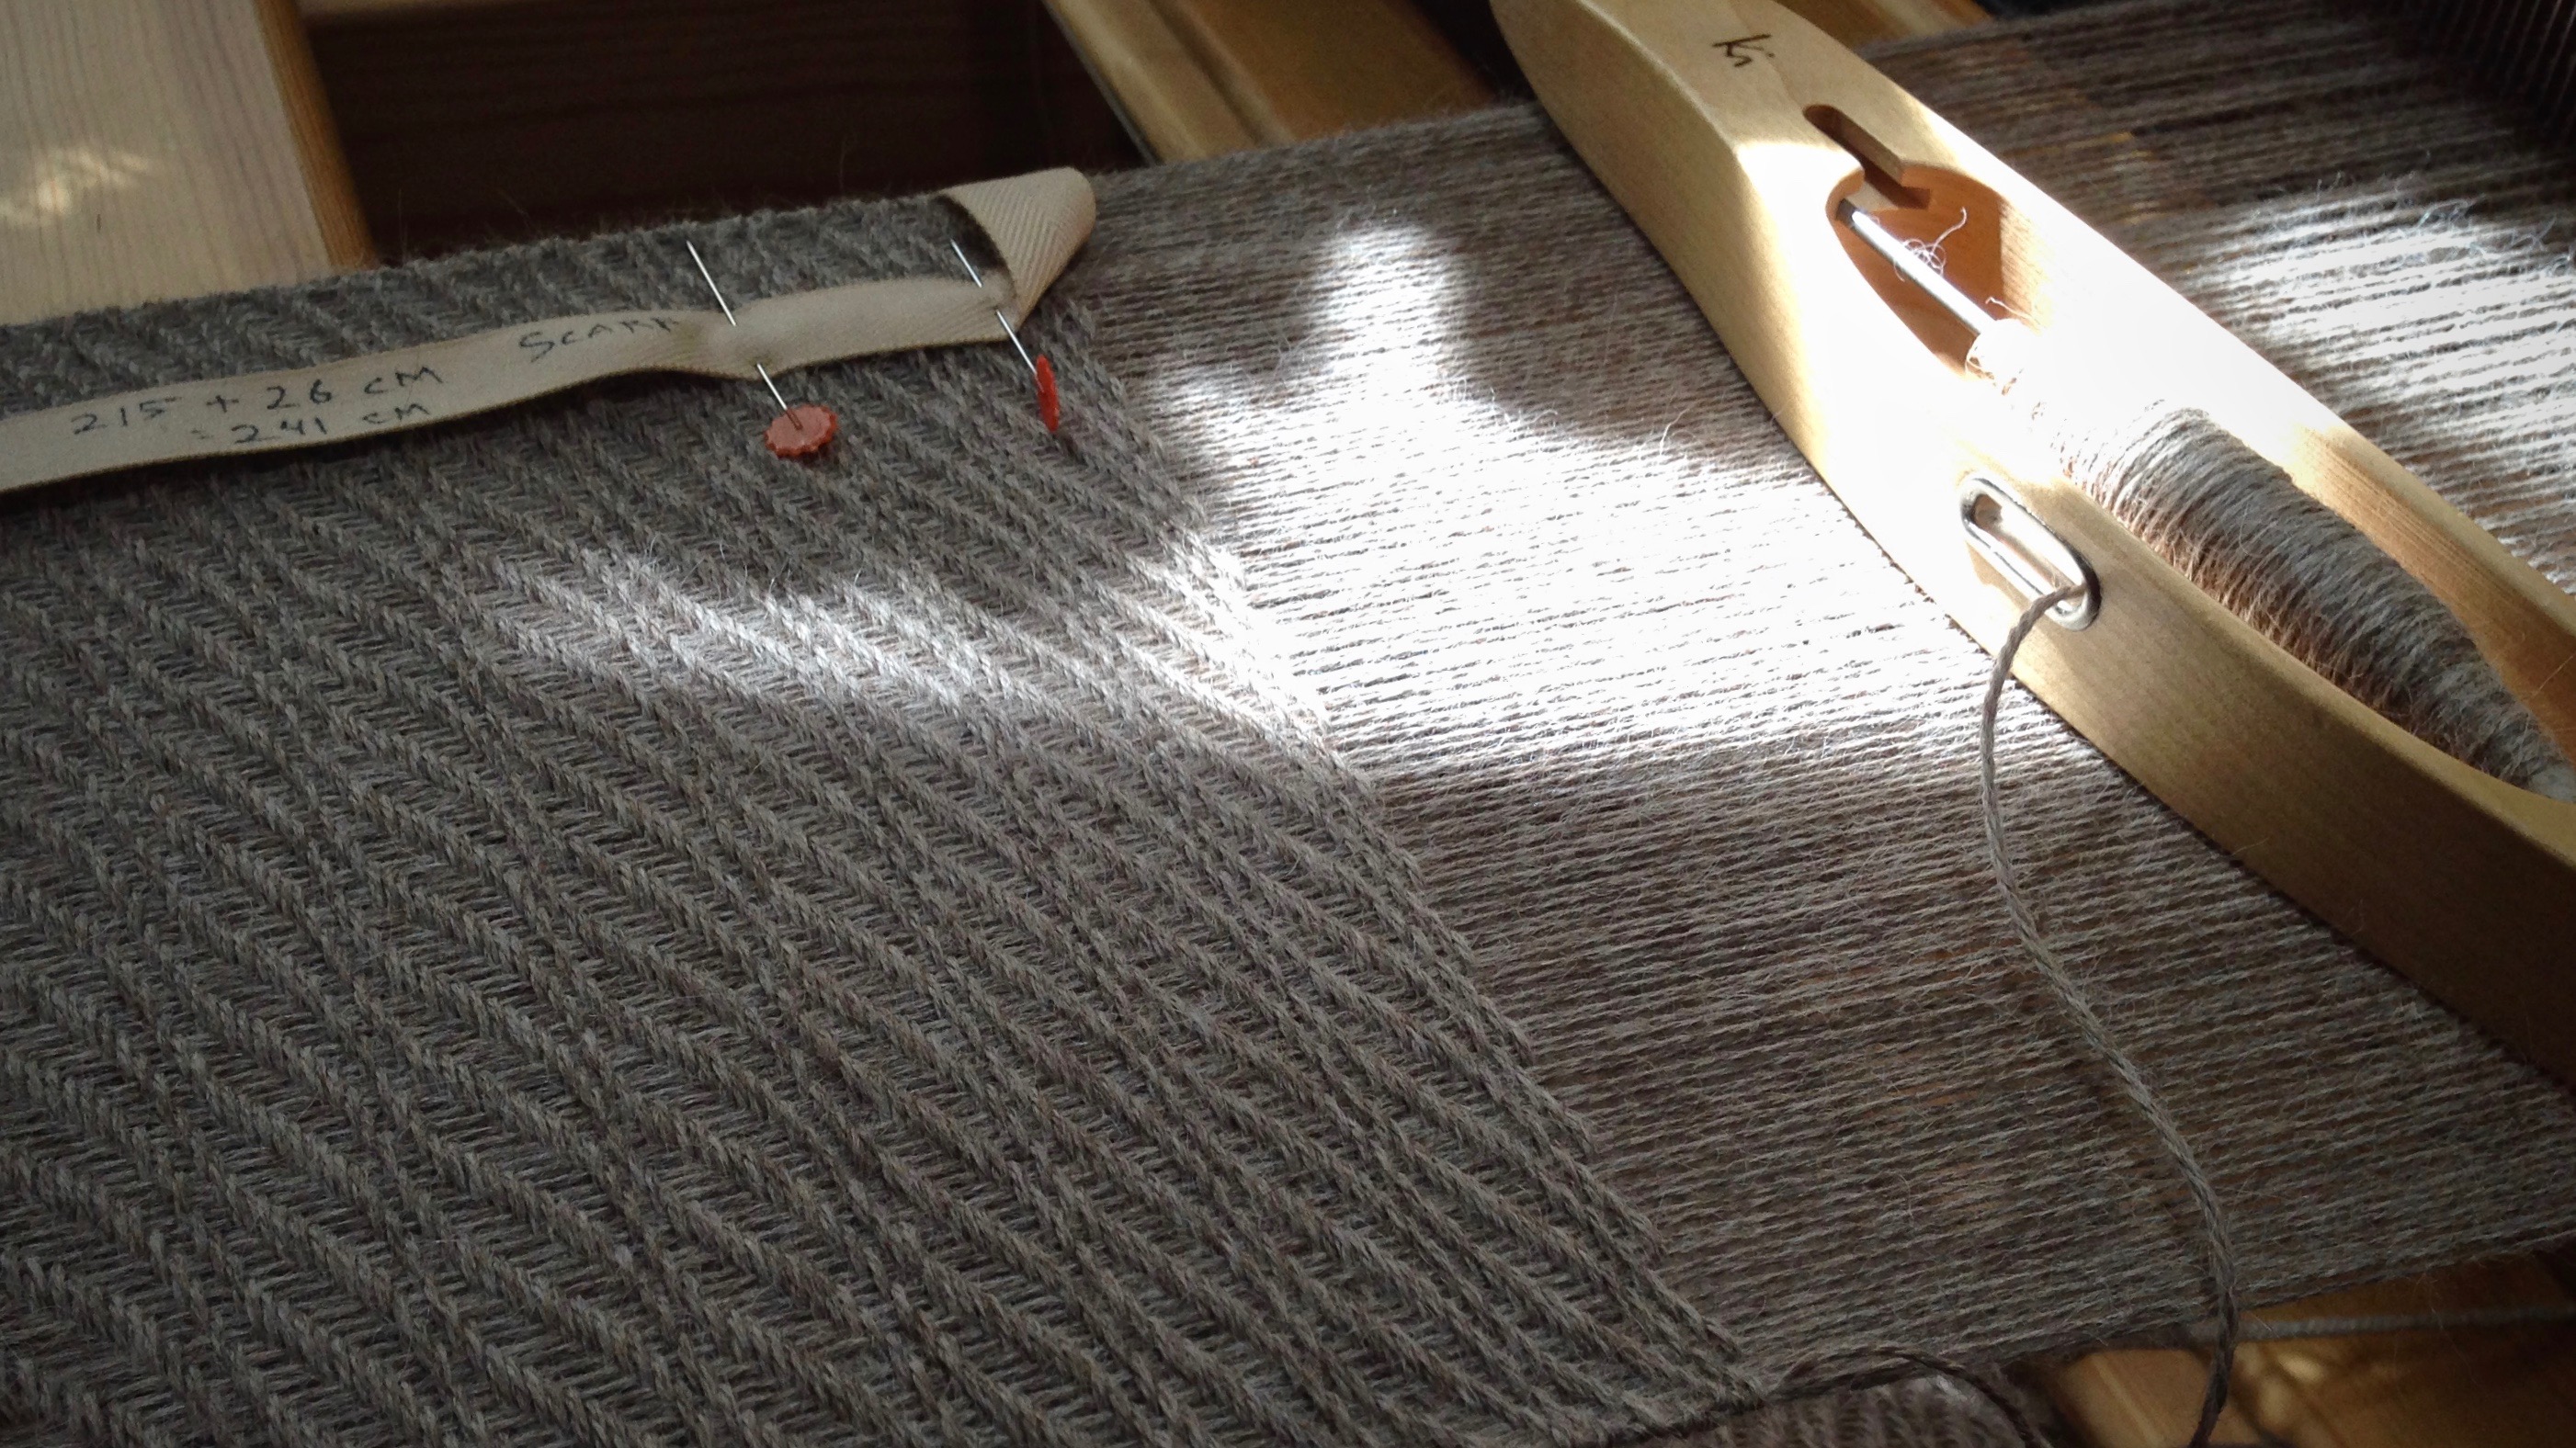
  4. Write the weaving length measurement on the twill tape. Include calculation for takeup, if desired; i.,e., 25″ + 3″.
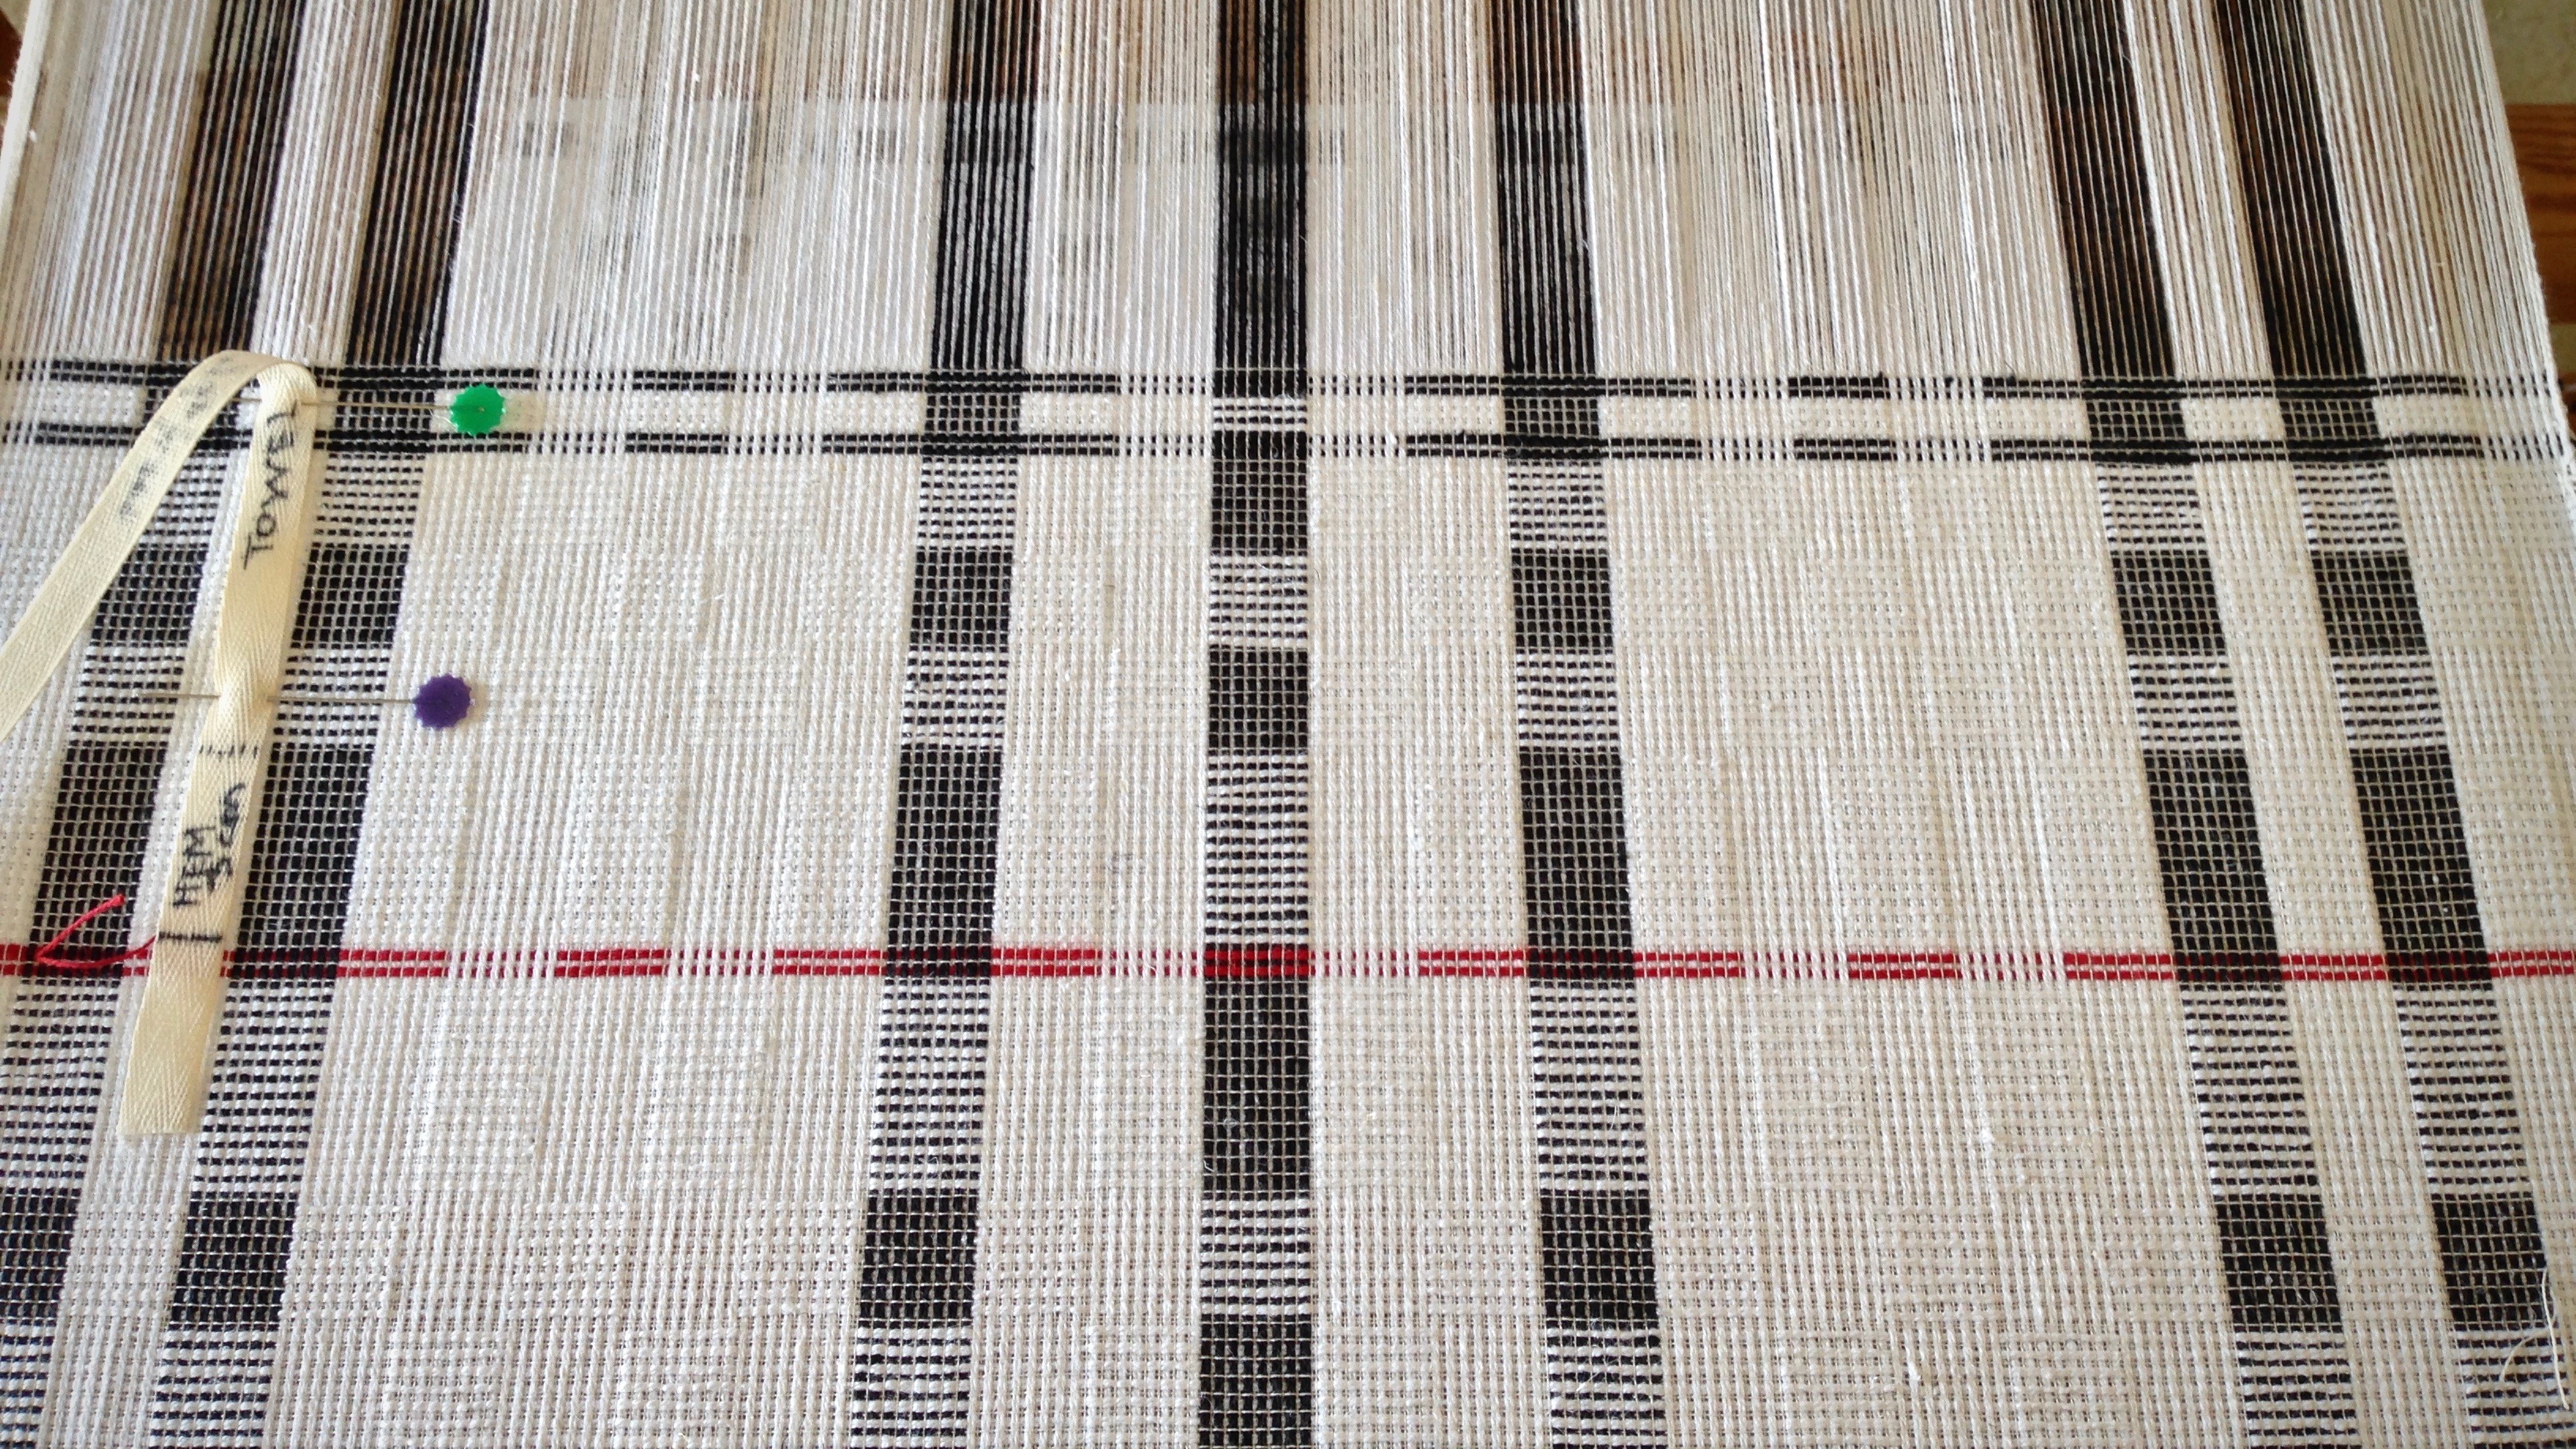
  5. Write the project or item description on the twill tape, if desired, for ease of repeat use; i.e., handtowel.
  6. Add other lines or marks, as needed, for borders, placement of weft colors, or other design elements.
  7. 1/2″ after the final marking, cut pre-measured twill tape from the roll of tape.

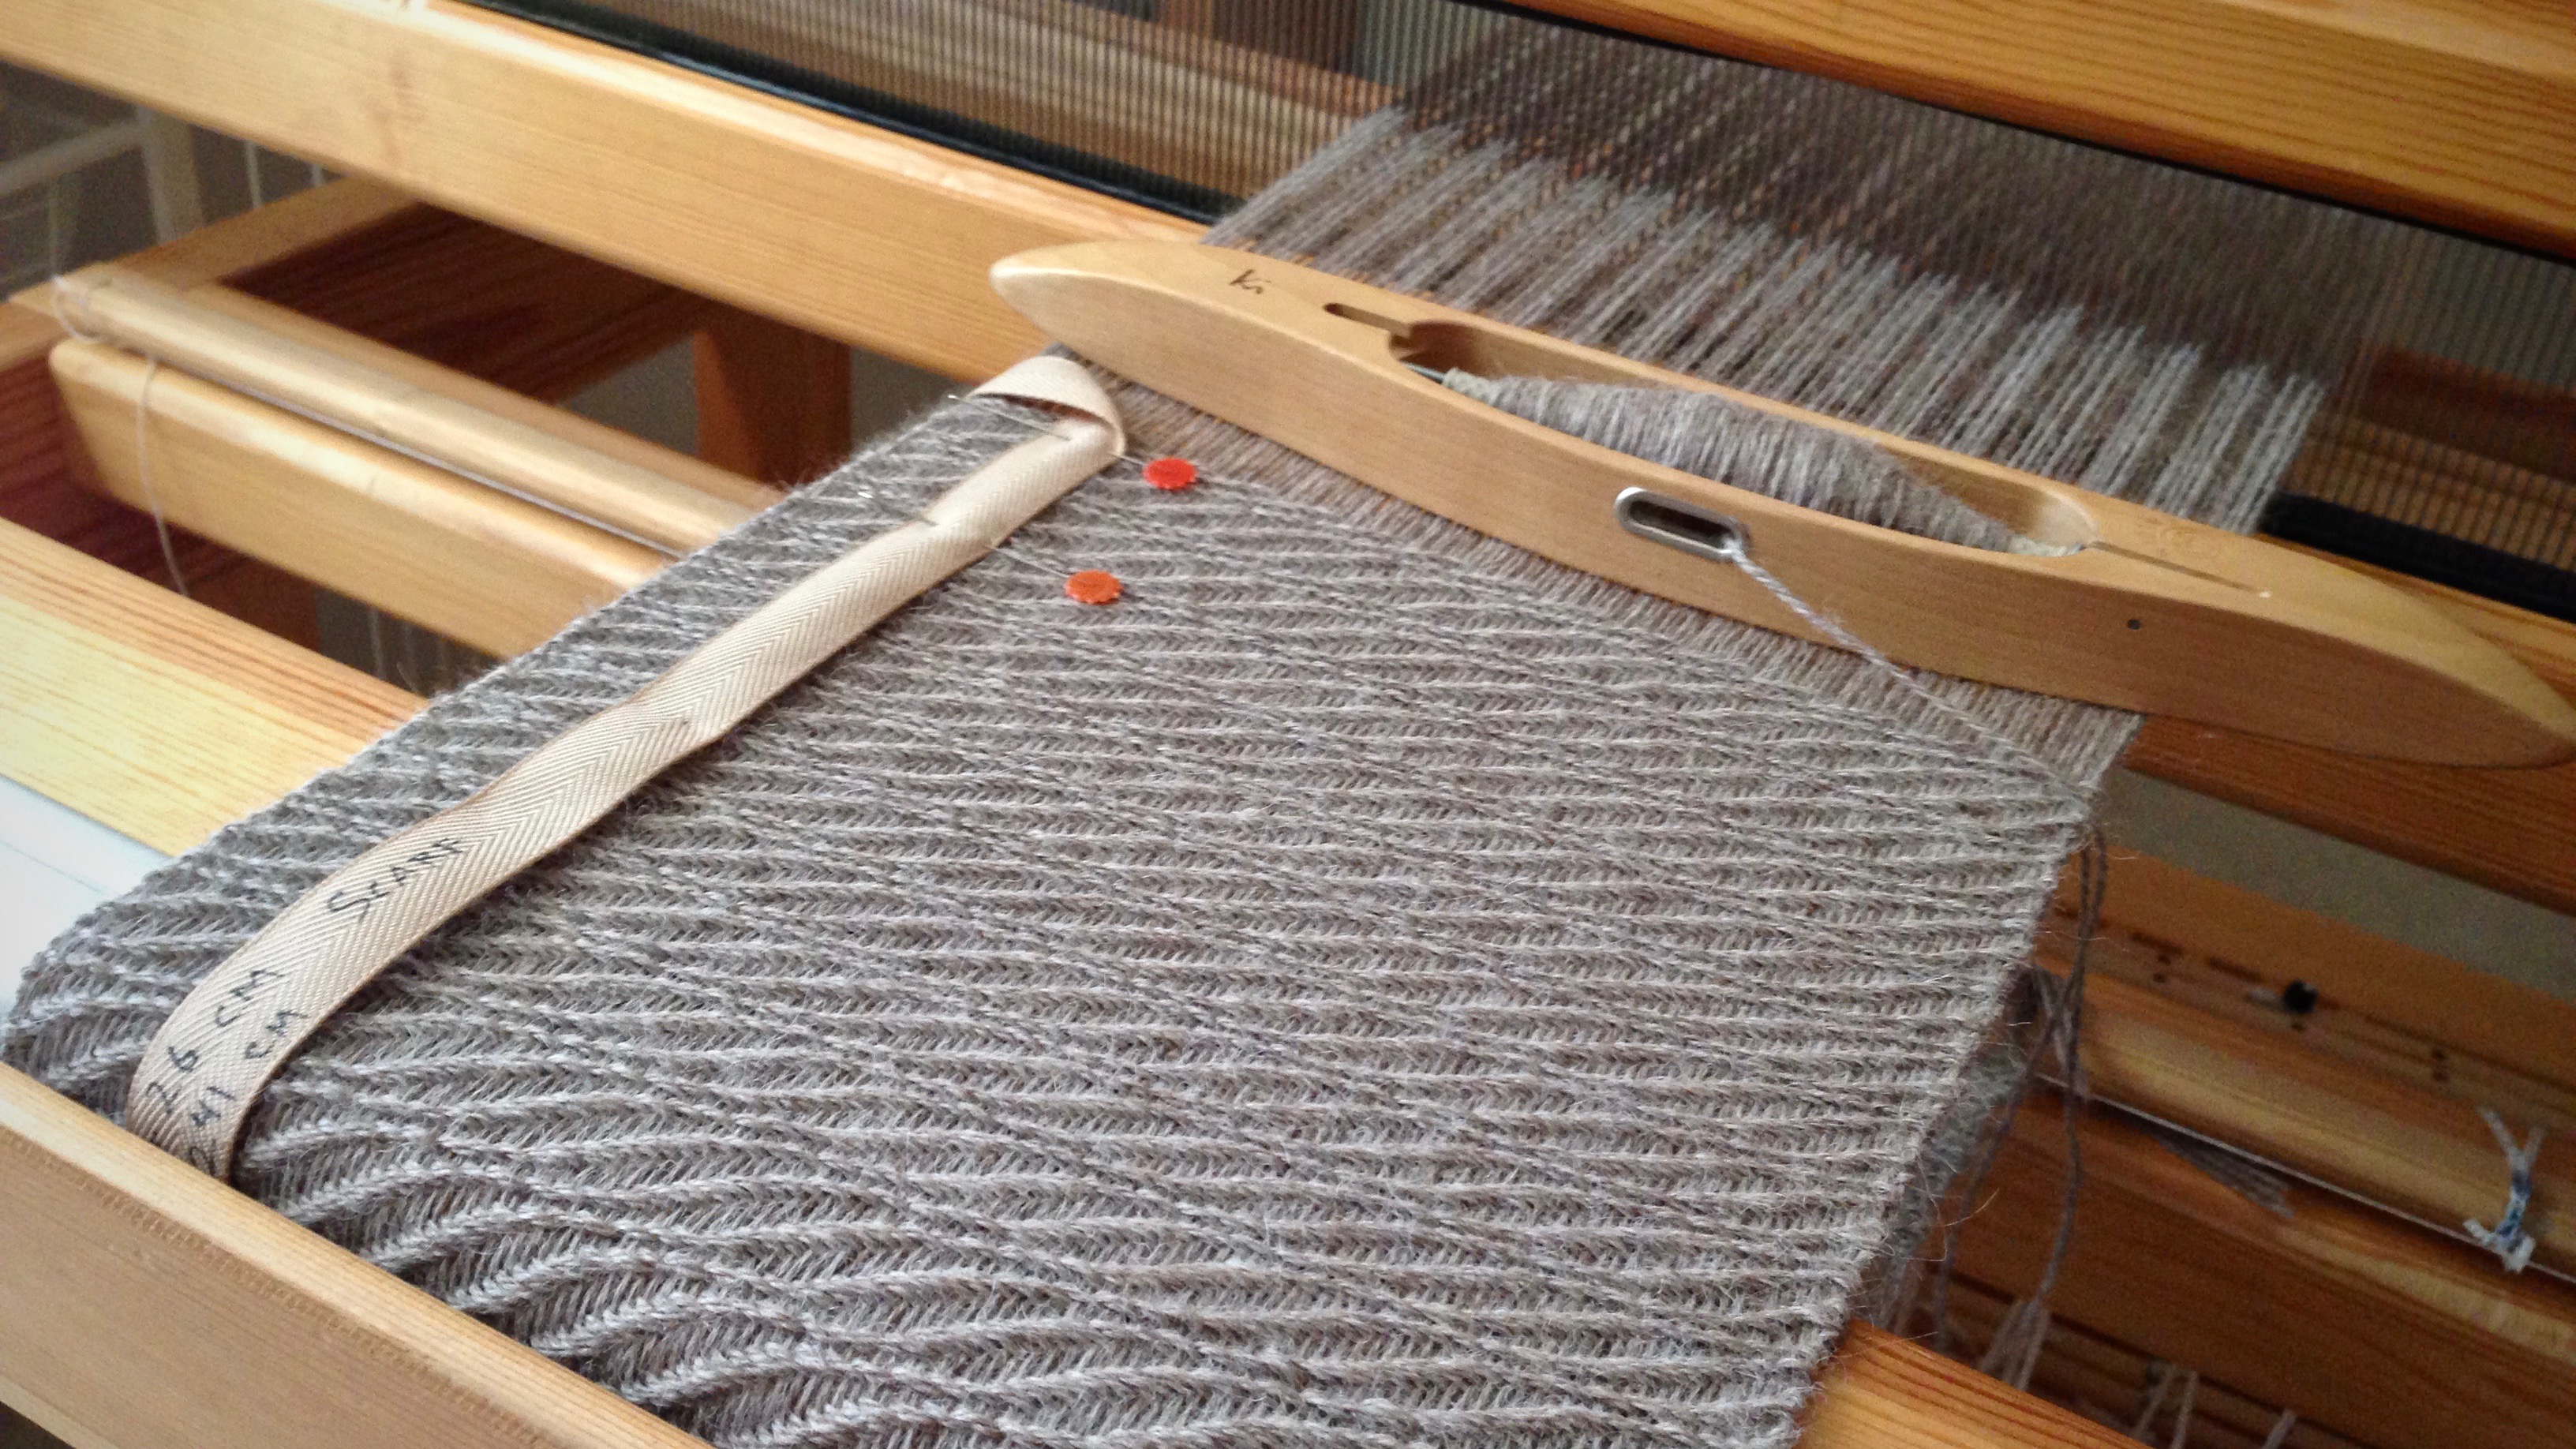
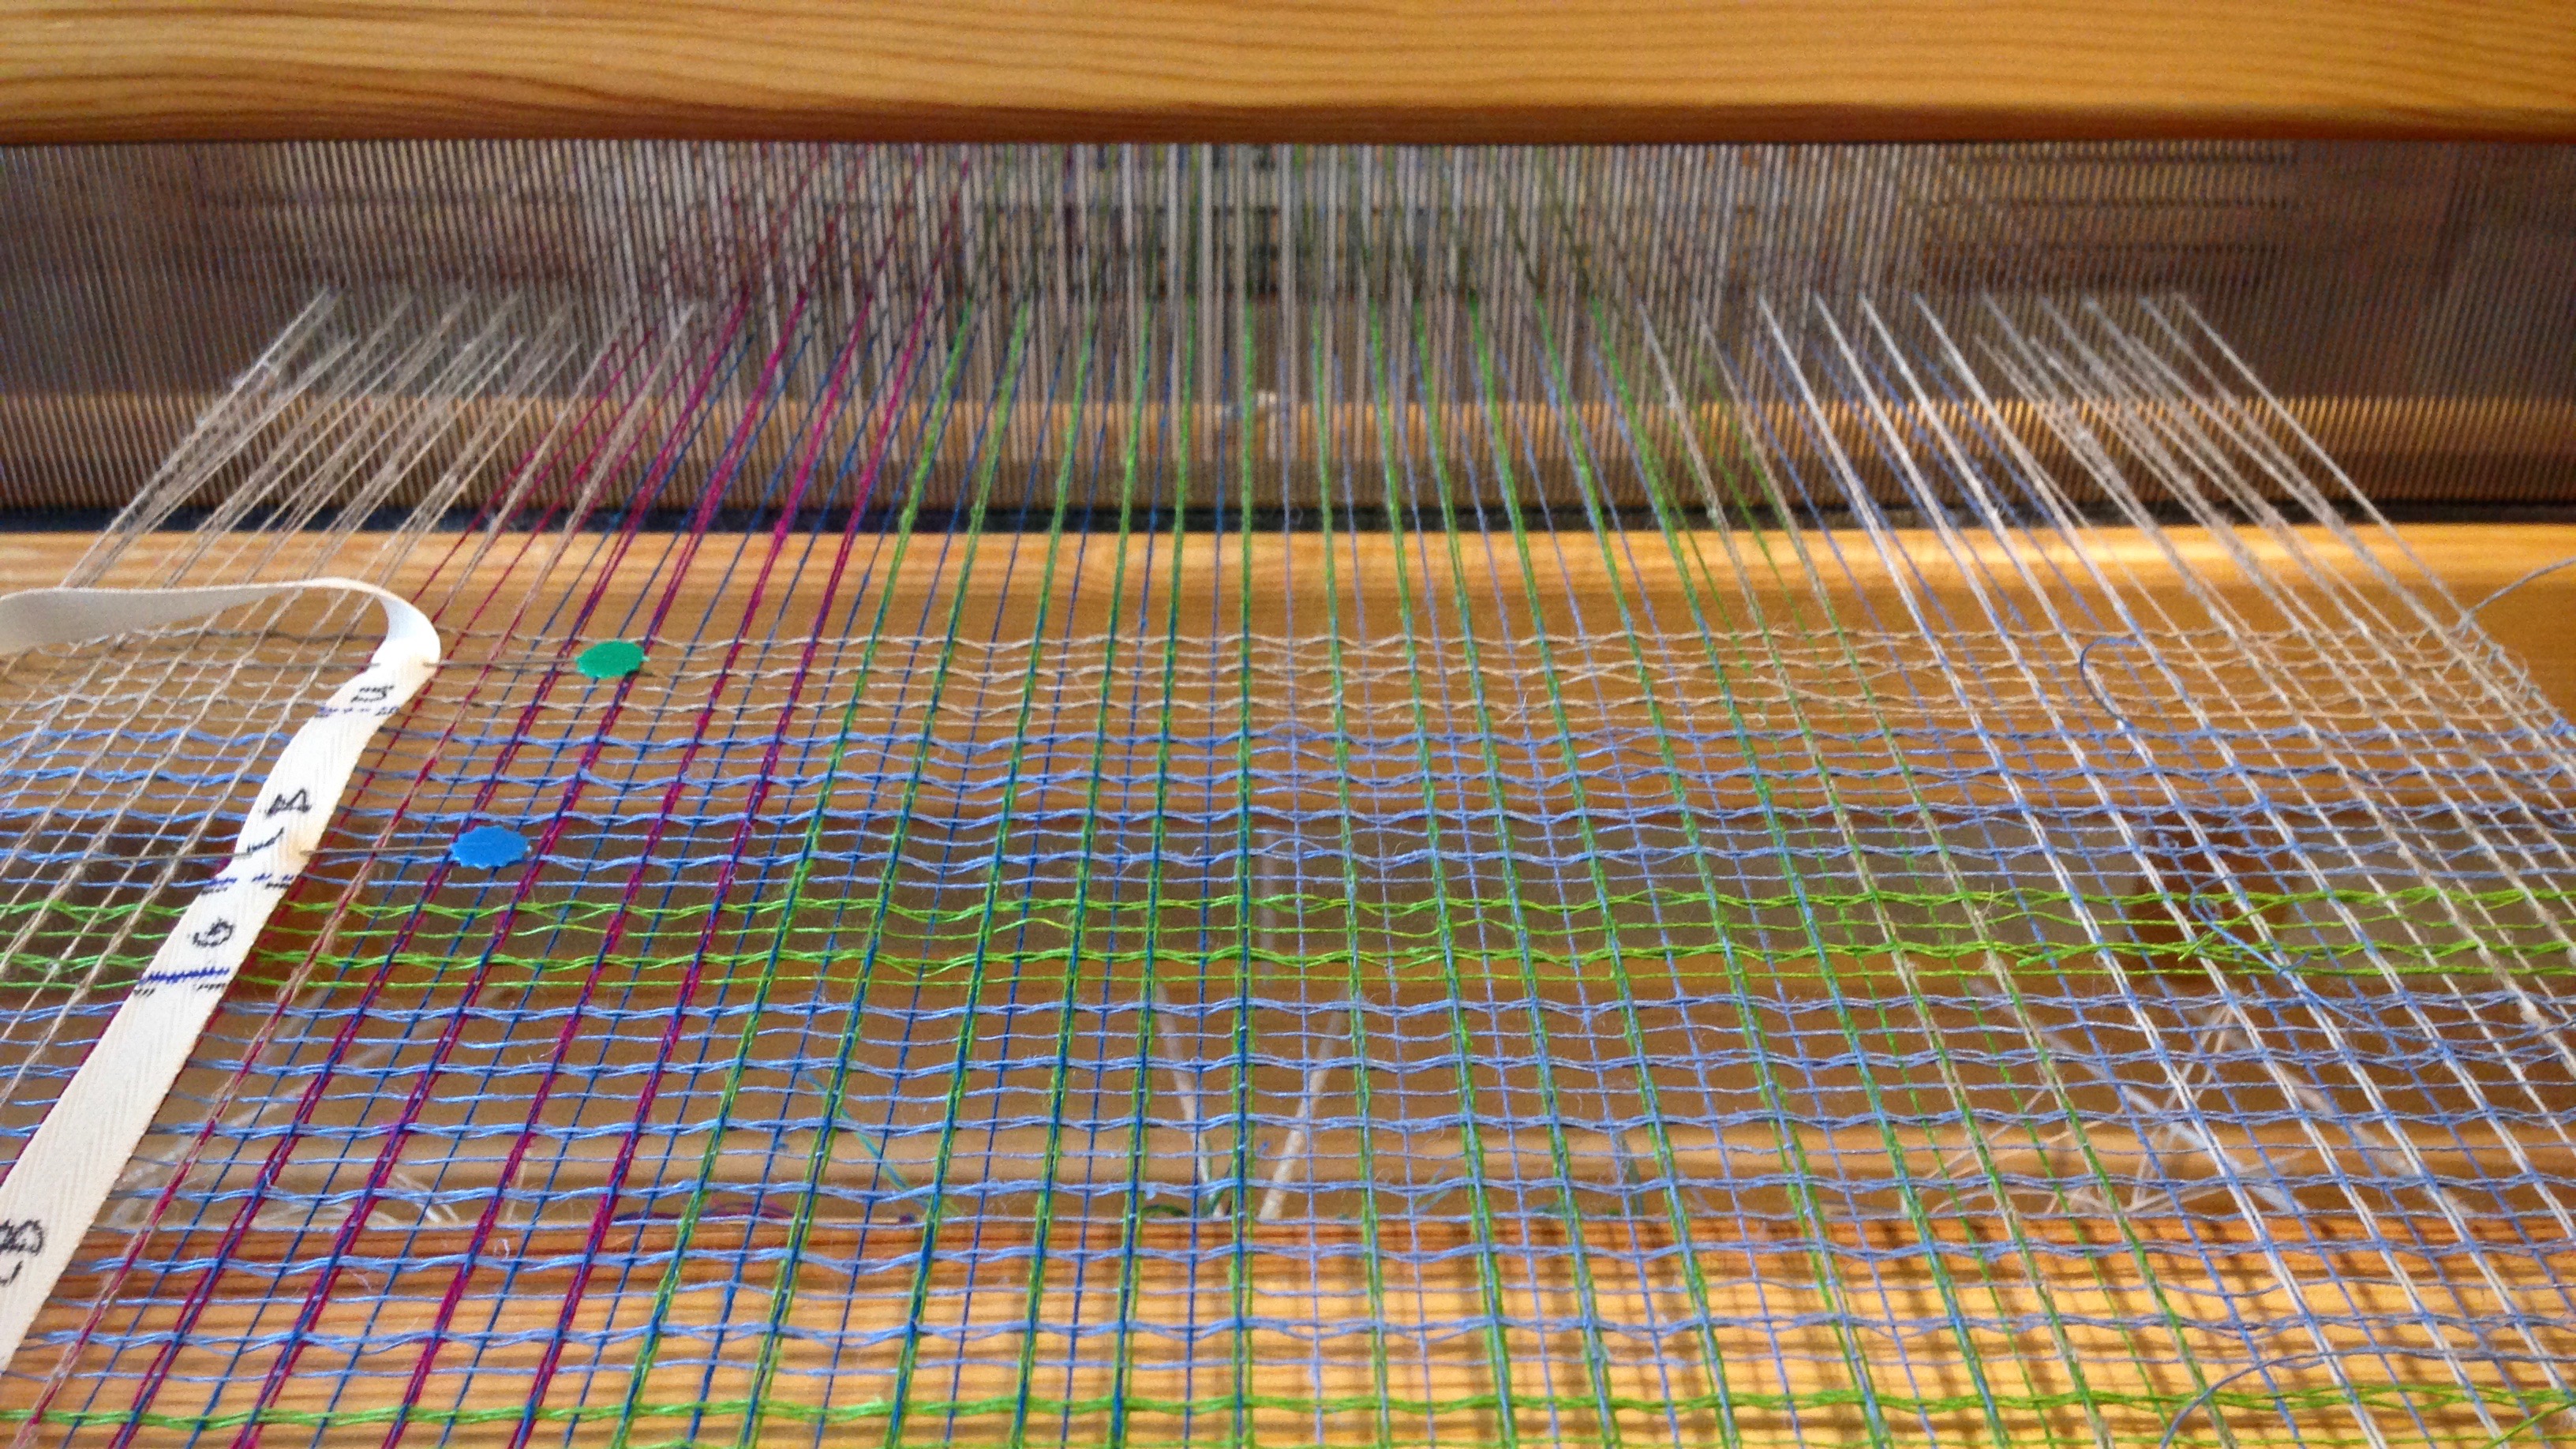
With the warp under tension, pin the pre-measured twill tape near the right or left selvedge with two flat-head pins. Match the start line of the tape with the beginning of the weaving.
Before each advancement of the warp, move the pin closest to the breast beam to a point near the fell line. In this way, have the pins leapfrog each other, moving only one pin each time. Always keep the warp under tension when moving the pins.

Red cutting lines between black and white towels.
Beginning hem, after red cutting lines between towels.
Ending hem is followed by two red picks that will become the cutting line between towels.
When the "MID" point hits right where it should!
When the “MID” point hits right where it should! Mid point marking helps to confirm that the halvdräll pattern is centered and balanced in its length.
Pre-measured twill tape marks weft color placement on linen scarves.
Weft color placement is marked on the twill tape for these linen lace scarves.
Tricks with pre-measured tape for weaving.
Five centimeters, marked at the end of the twill tape, is a handy reference for spacing the weft pattern floats in these plattväv towels.
Alpaca scarf in an interesting 8-shaft twill.
I love seeing the “MID” point on a long piece, such as this 8-shaft twill alpaca scarf.
Pre-measured twill tape helps set the pace for the weaving project.
Breaking up the length into quarters helps to set a pace for the weaving project. This baby wrap was on a time crunch, so it was helpful to know when I was getting close to the end.

May you accurately measure your ways.

Truly yours,
Karen

Slow and Gentle Weaving

One soft alpaca scarf. Slow and gentle. This weaving does not let me hurry. I don’t beat the weft; I carefully place it with the beater. For a rag rug weaver like me, accustomed to boisterous weaving, this soft weaving requires my full attention.

Alpaca scarf on the loom. Eight-shaft undulating twill.
Long alpaca scarf is nearing completion. Twill tape for measuring keeps track of the woven length. Two flat-head pins leap frog ahead each time I advance the warp.

There is no variation in this scarf. It’s the same treadling sequence, over and over. After this much repetition, it seems like I should be able to do this without thinking. But, no, I have to pay attention. If I don’t, I lose my place. Glaring mistakes all happen by accident.

Long alpaca scarf on the loom. Slow and gentle weaving.
Long scarf wraps around the cloth beam before it is complete.

We can choose what to hear. Listen wisely. Most things do not go in one ear and out the other. They go in one ear and down into our souls. Listening to gossip, for instance, seems harmless. It might even taste sweet. But what we hear affects our hearts. Listening to gossip is swallowing poison. It’s like weaving a faulty treadling sequence while being distracted. We must pay attention, or the wrong pattern will be woven into the scarf. Instead, let’s enjoy the gentle process of placing the weft and paying attention as we repeat the sequence we know is right.

May you be lifted up by what you hear.

All the best,
Karen

Wavy Twill Rythym

I’m happy when I find my weaving rhythm, and I’m almost there with this scarf. This alpaca yarn is a weaver’s dream. No warp ends are breaking, and the weft compliantly scoots into place. That means I can put most of my attention on other details.

All those "oops" as I learn the treadling at the beginning of the warp.
Getting the kinks out at the start of the warp. 1-2-3-4-5-6-7-8; 1-3-5-7; 2-4-6-8. I always plan enough warp to be able to practice first. I have plenty of “oops” in the first few inches.

This wavy 8-shaft twill has straight twill threading, which means the pattern is in the treadling. It’s not difficult treadling…once you get the hang of it. But, as usual, it takes practice. It is tricky to find and correct errors because of the subtle curve in the pattern. The more practice I get, the smoother the weaving goes, and the fewer errors I make. There is no shortcut to the kind of confidence that comes from attentive practice.

Alpaca scarf, weaving in the afternoon sun.
Weaving in the afternoon sun. Whimsically weaving a bit of sunlight into the cloth.
Alpaca scarf on the loom. 8-shaft wavy twill.
When weaving rhythm takes off, quality improves, as does weaving enjoyment.

Did you know you are gifted? There are skills and insights that come easier for you than for other people. The gifts that God put in you, that are in your DNA, set you apart. Practice them to gain confidence. Put your attention on using your gifts. You may be surprised how much your gifts bless others. Finding your rhythm is worth the effort it takes. (And, on the subject of DNA, here’s an interesting perspective from Sarah H. Jackson, Textile Artist.)

May you unwrap your gifts.

With you,
Karen

Tools Day: Texsolv Heddle Round Up

The great thing about Texsolv heddles is that they are easy to move around. If you know how to tie them together, it is simple to add heddles, remove heddles, or switch heddles to different shafts. When I’m getting ready to thread the loom, I get my box of bundled heddles and put it on the cart right beside the loom. Then, I can easily add heddles if needed. And when threading is finished, I tie any unused heddles into bundles and put them in the heddle box, ready for the next project.

Threading complete for alpaca scarves. Texsolv heddles.

Tie Texsolv Heddle Bundles on One Shaft

  • Step 1 Take a cord (I use my choke tie cords) through the heddles below the heddle eyes.

How to remove Texsolv heddles. Tutorial

  • Step 2 Wrap the cord one time around, below the heddle eyes.

Removing Texsolv heddles. How to --

  • Step 3 Cross diagonally up with the cord, and take the cord through the heddles above the heddle eyes.

How to tie up Texsolv heddles.

  • Step 4 Wrap the cord one time around, above the heddle eyes.

Tying up Texsolv heddles to remove them.

  • Step 5 Join the two ends of the cord with a bow knot.

Removing Texsolv heddles after threading is complete.


Tie Texsolv Heddle Bundles on More than One Shaft

  • Step 1 Take the cord through the heddles below the heddle eyes, right to left, one shaft at a time, front shaft to back shaft.

Removing Texsolv heddles from multiple shafts.

  • Step 2 Take the end of the cord from the back shaft, and wrap the cord around one time through the heddles, below the heddle eyes, right to left, one shaft at a time, front shaft to back shaft.

Removing Texsolv heddles from multiple shafts.

  • Step 3 Cross diagonally up with the cord, and take the cord through the heddles above the heddle eyes, from right to left, one shaft at a time, front shaft to back shaft.

How to remove Texsolv heddles. Tutorial

  • Steps 4 & 5  Wrap the cord one time around, above the heddle eyes, from right to left, one shaft at a time, front shaft to back shaft. Join the two ends of the cord with a bow knot.

Removing Texsolv heddles. How to --


Remove Heddles from Shafts

  • Step 1 Remove shaft pin from the lower shafts, and slip the bottom of the heddles off the shafts. Replace the shaft pin.

Removing Texsolv heddles.

  • Step 2 Remove shaft pin from the upper shafts, and slip the top of the heddles off the shafts. Replace the shaft pin.

Texsolv heddles are easy to move around!

  • Step 3 Place tied heddle bundles in the heddle box. Put the box away, ready for the next project.

Texsolv heddles ready for the next project!

May you always have enough heddles when and where you need them.

Loom dressing,
Karen

Autumn Alpaca

Autumn is the perfect time of year to plan alpaca scarves. This three-ply alpaca yarn is dreamy. The thing I love about winding a warp like this is the feel of the soft yarn as it goes through my fingers. This warp is going on the big loom for an eight-shaft wavy twill.

Winding a warp of alpaca yarn for scarves.
Counting cord is used to keep track of the number of ends that are wound onto the warping reel. This warp was counted 40 ends at a time.

The first pass around the warping reel must be correct, which is why I measure the distance first with a guide string. After the first pass, I simply follow the correct path around until all 136 alpaca ends have been included. I am already starting to dream about the eventual soft and cozy scarves.

100% alpaca in a 3-ply yarn, preparing warp for weaving scarves.
100% alpaca in a 3-ply yarn.

Alpaca warp chain.

Following the path of the guide string is like having faith to follow Christ. Faith grows in good soil. And there is no better soil than Christ himself. I don’t yet see the scarves, but it’s not hard for me to imagine what they will be like. I have touched the yarn, and the completed warp chain is a sweet preview. When we see what Christ has completed, faith takes root and gives us reason to trust him for everything else.

May your roots grow down into good soil.

The Three Rosepath Rag Rugs For Now have been hemmed and are listed in my Etsy shop. Take a look!

Yours,
Karen