Some things are better seen without color. Hence, an enlarged version of my lizard in black and white. Variances in value are not as easily discerned in the full-color print. These subtle value distinctions bring realism to the lizard tapestry. For this reason, I sort all the yarn into small groups of color and value, which clarifies my choices for each wool butterfly.
Lizard portrait in black and white shows nuances in color value.
Yarn Sorting Process:
1. Select yarn colors for the tapestry.
2. Group like colors together.
Wool yarn, much of which has been accumulated from previous projects.
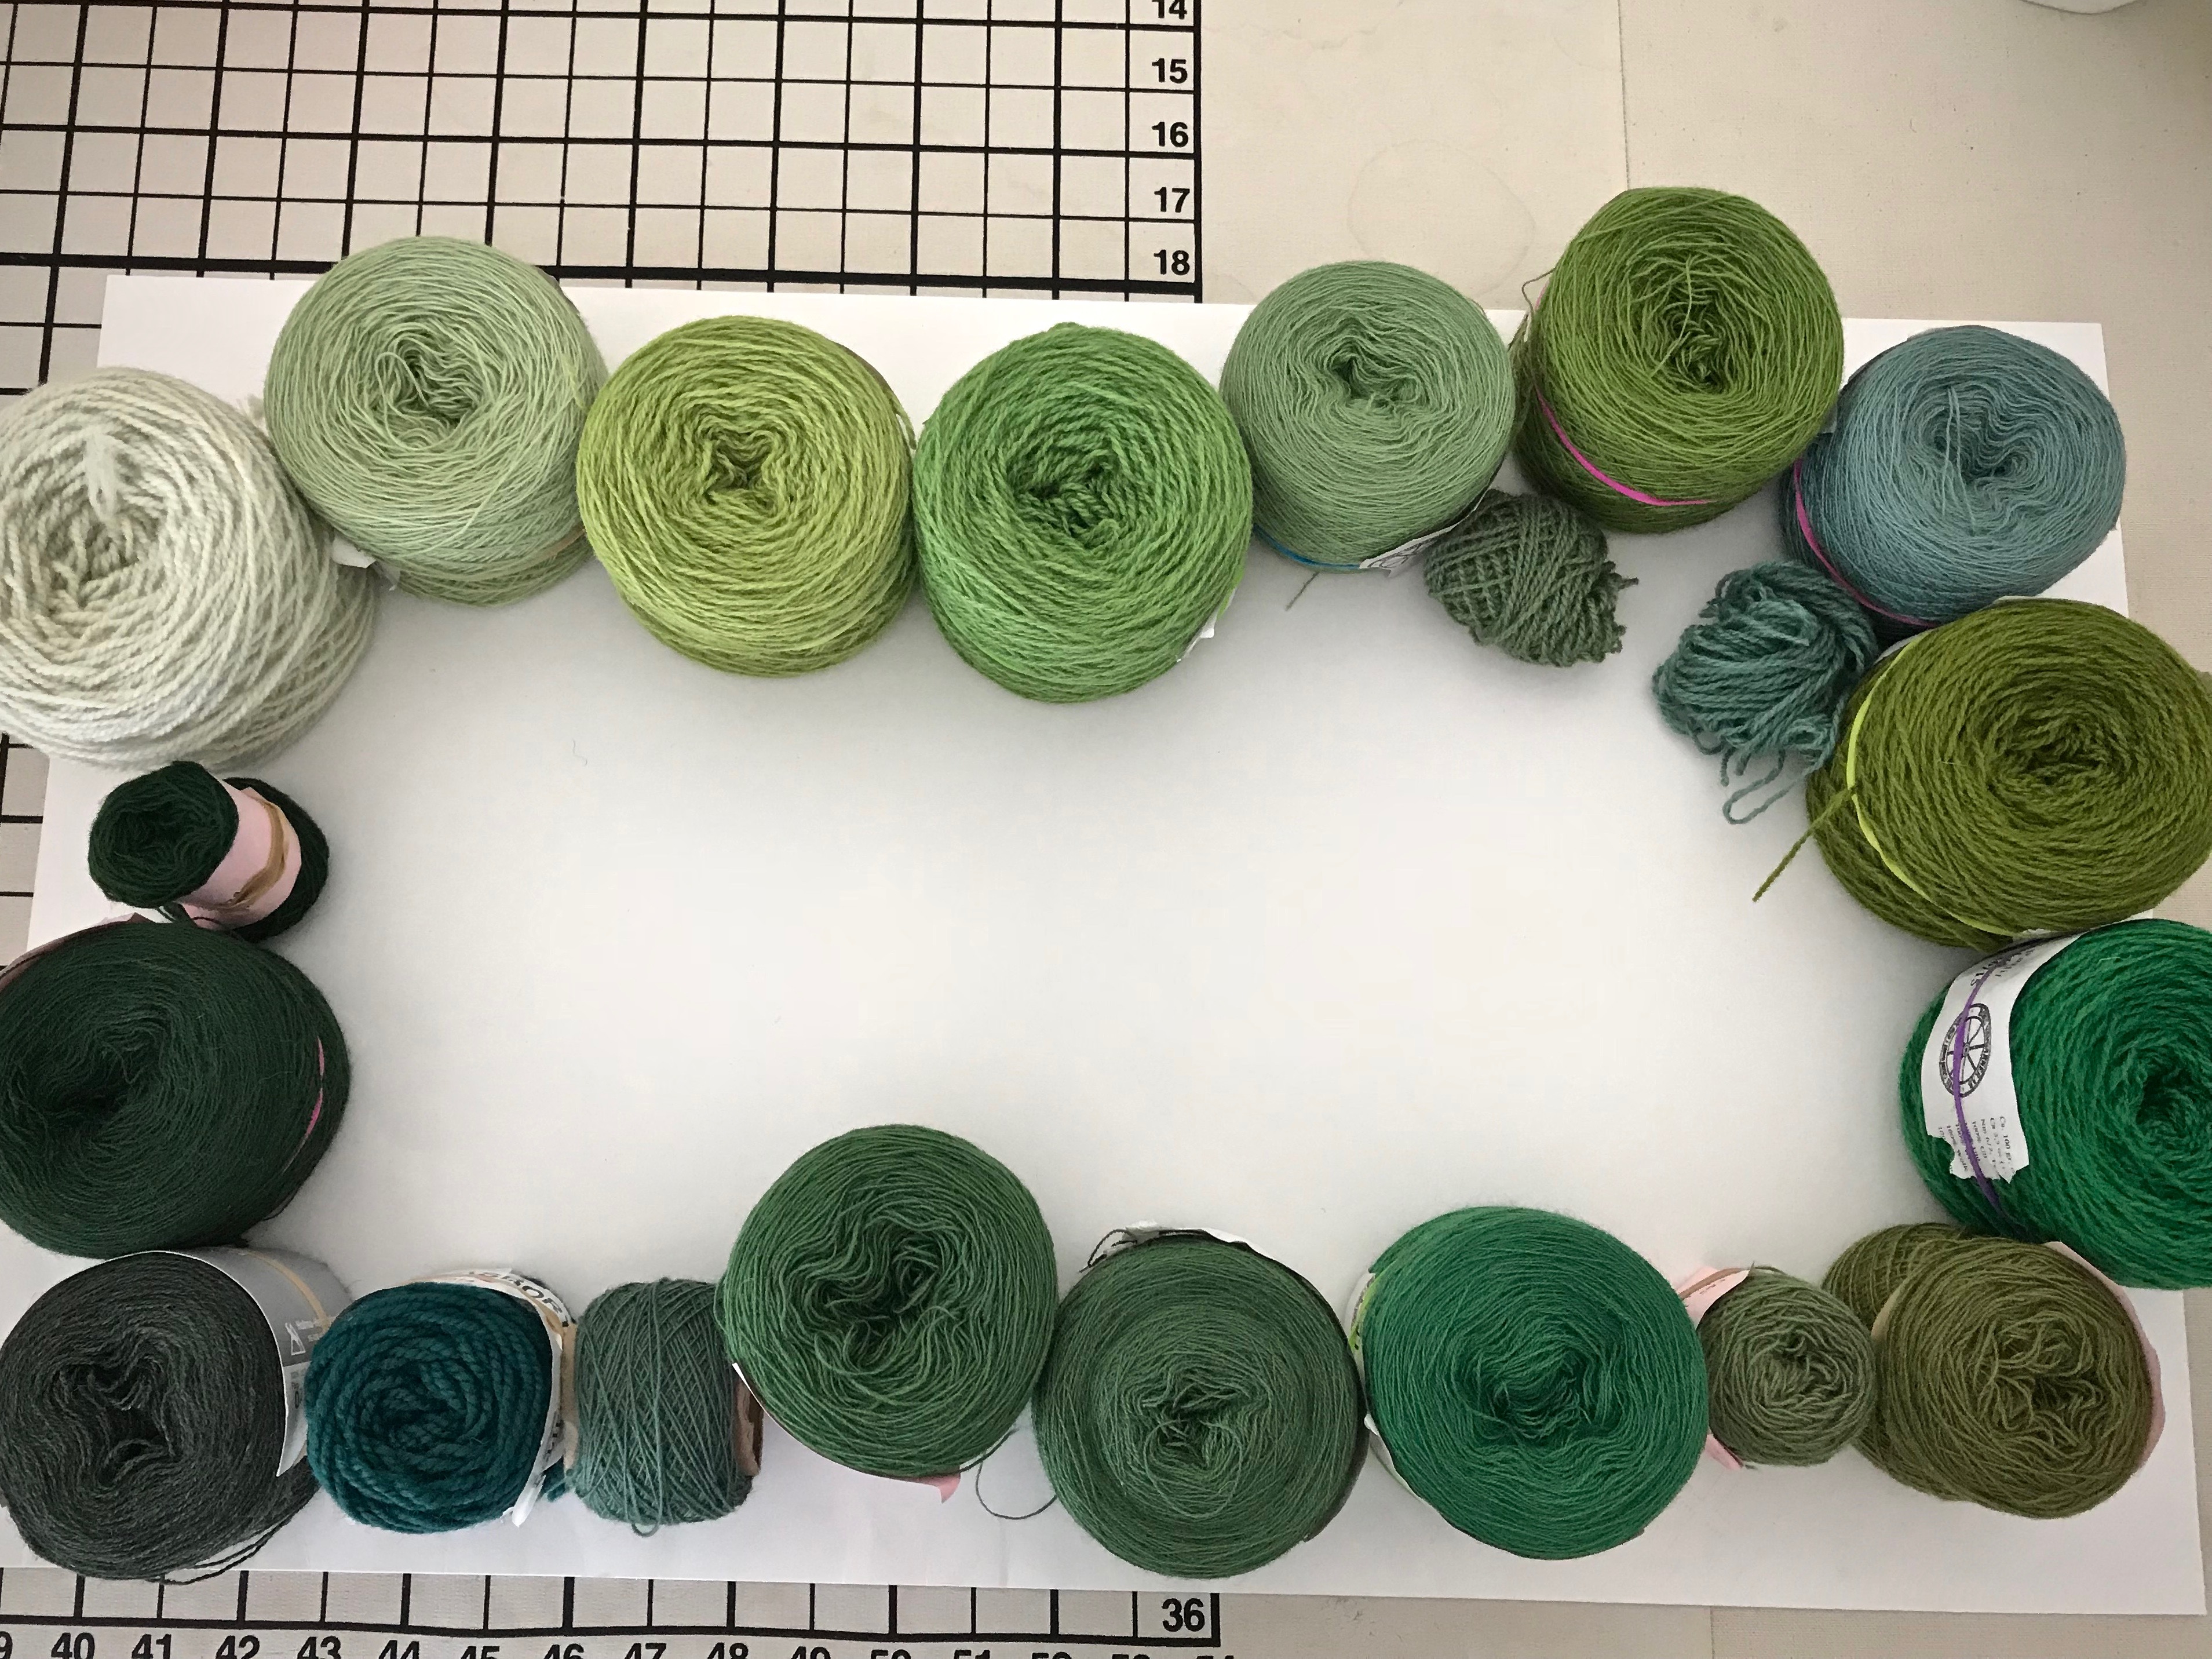
For each color group (I have seven color groups):
1. Arrange yarn on a white background in value order, from light to dark. Take a picture.
Green, from light to dark.
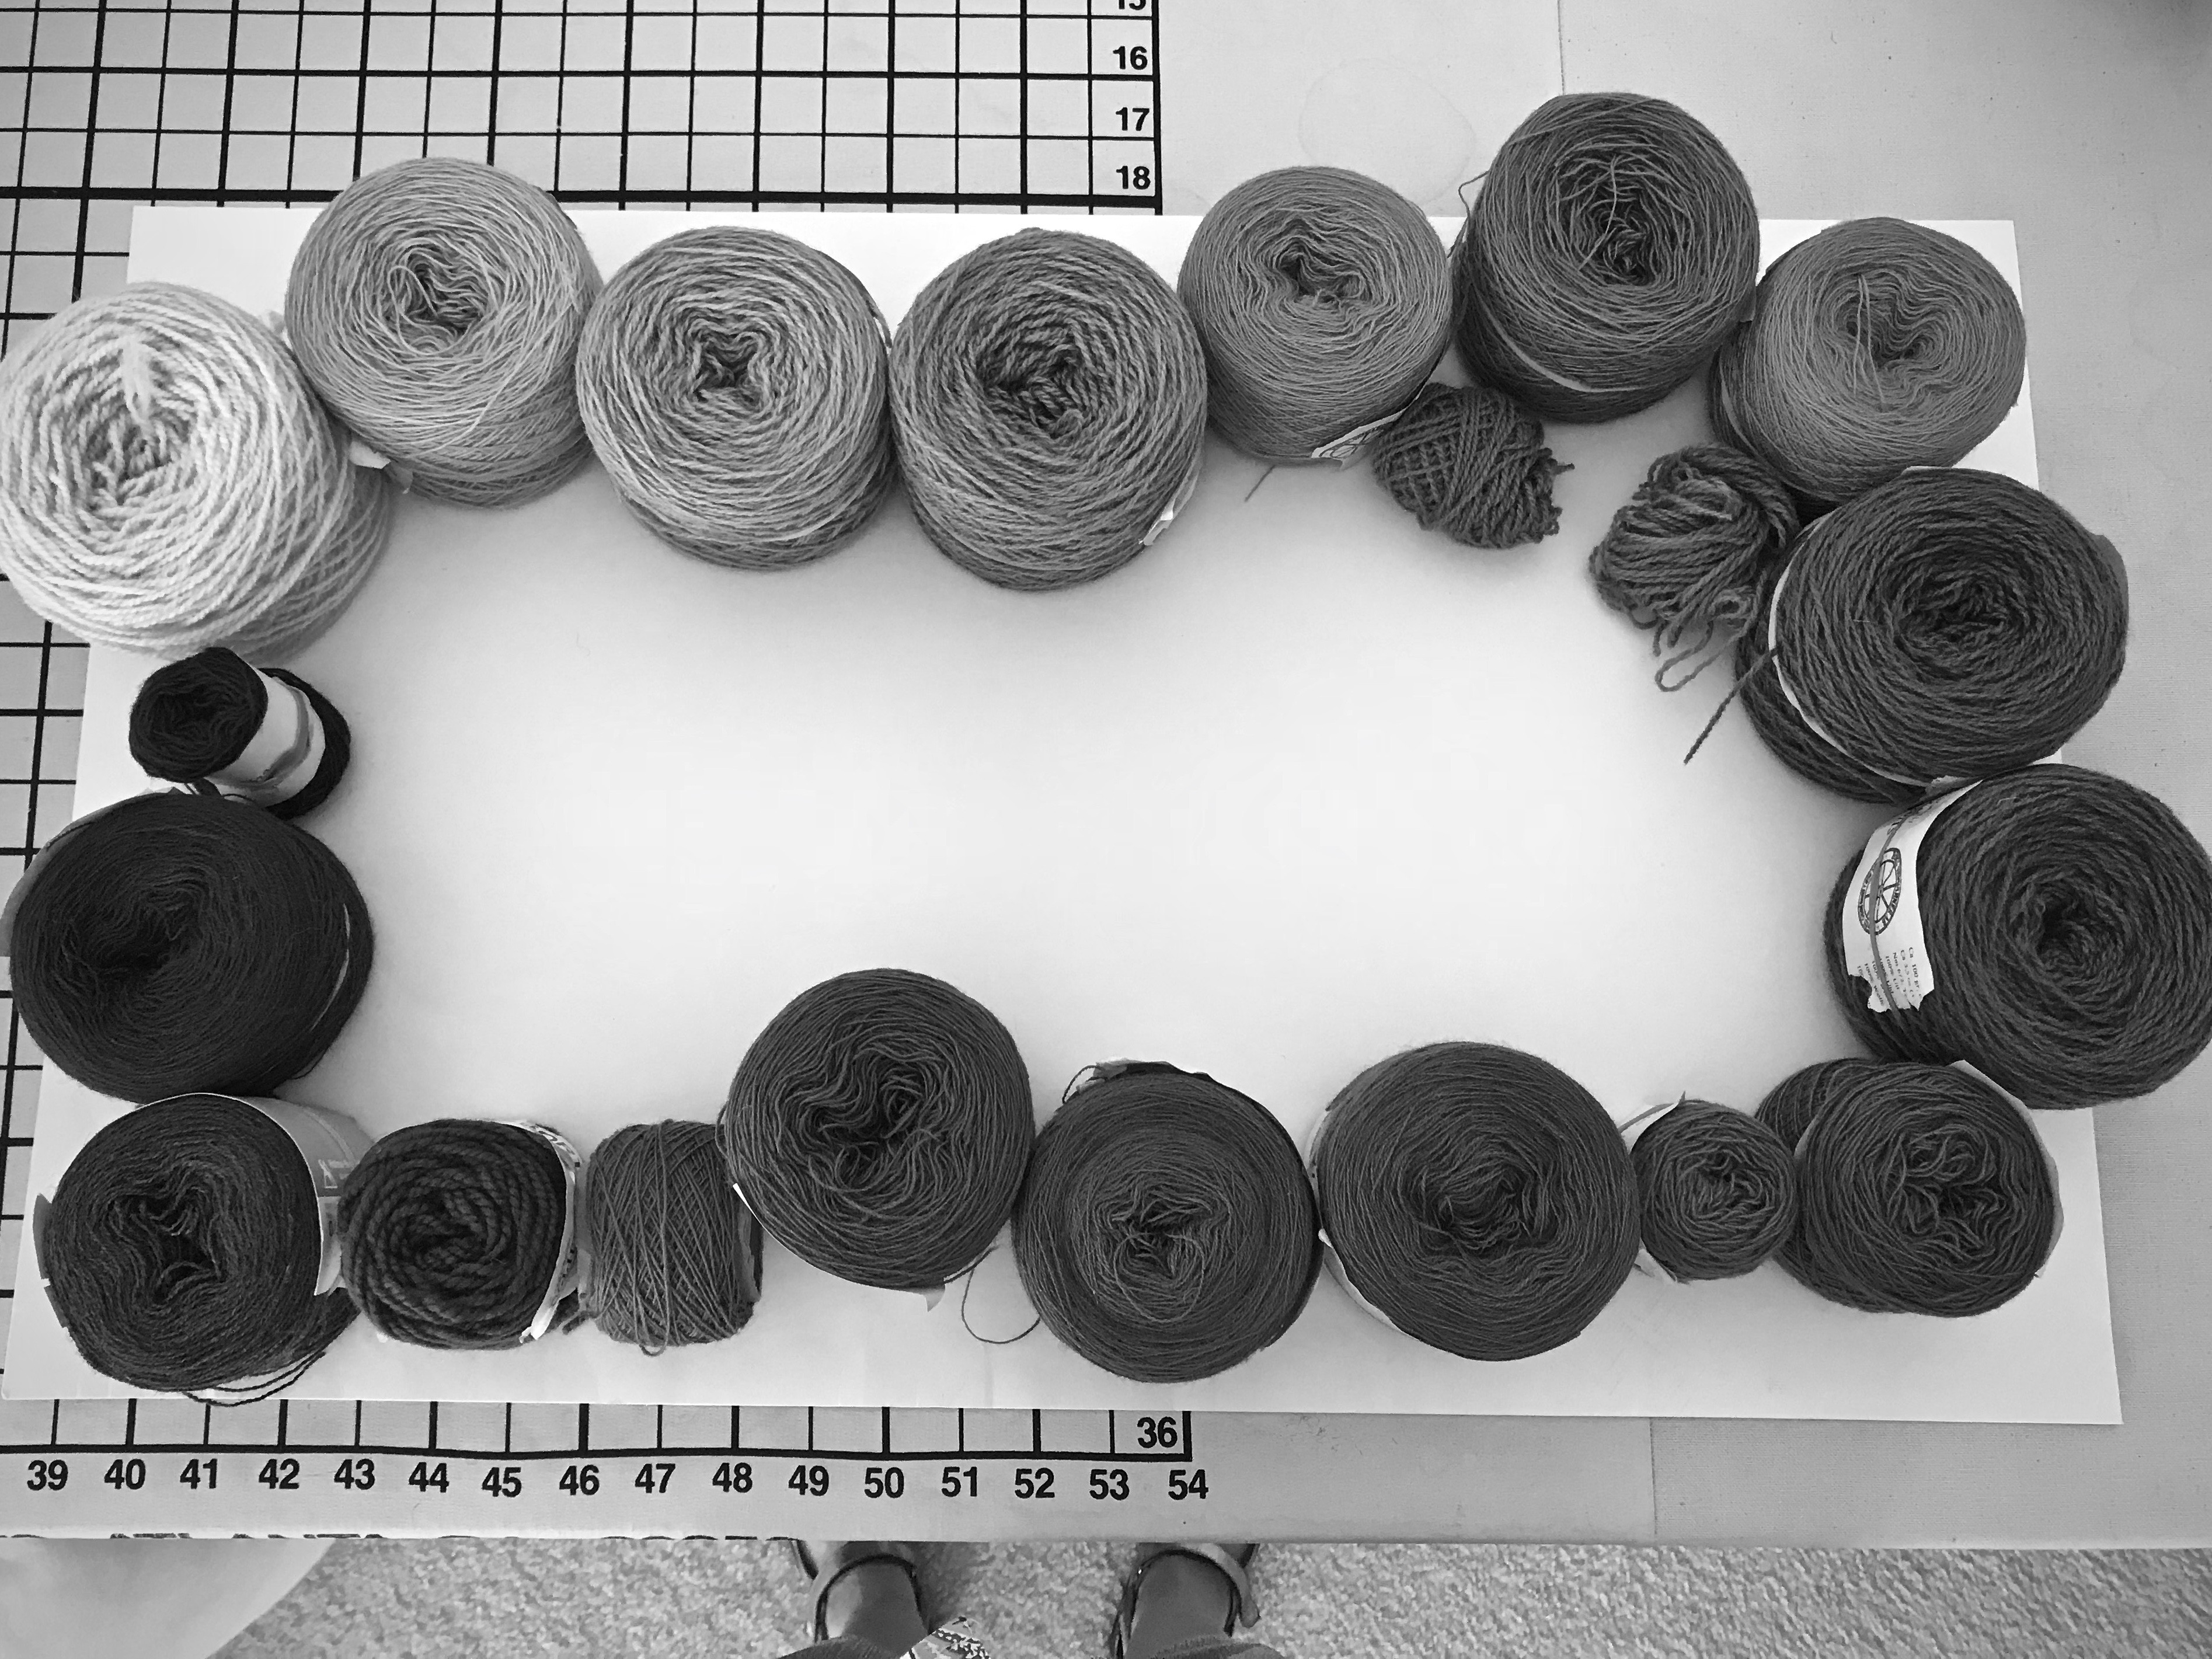
2. Take another picture using the smart phone black and white setting (“Noir” in the filters on my iPhone).
Photo shows that a couple adjustments are needed for the yarn-value order.
3. Adjust yarn to make value order corrections.
Adjustments made.
4. Divide the yarn into three value sections. 1. light, 2. medium, 3. dark.
5. Label baskets to hold each yarn section; i.e., “G 3” for green, dark.
The preparation for a project like this is immense. And tedious. But this is a weaving adventure. Indeed, the results may very well be astounding. That’s my hope.
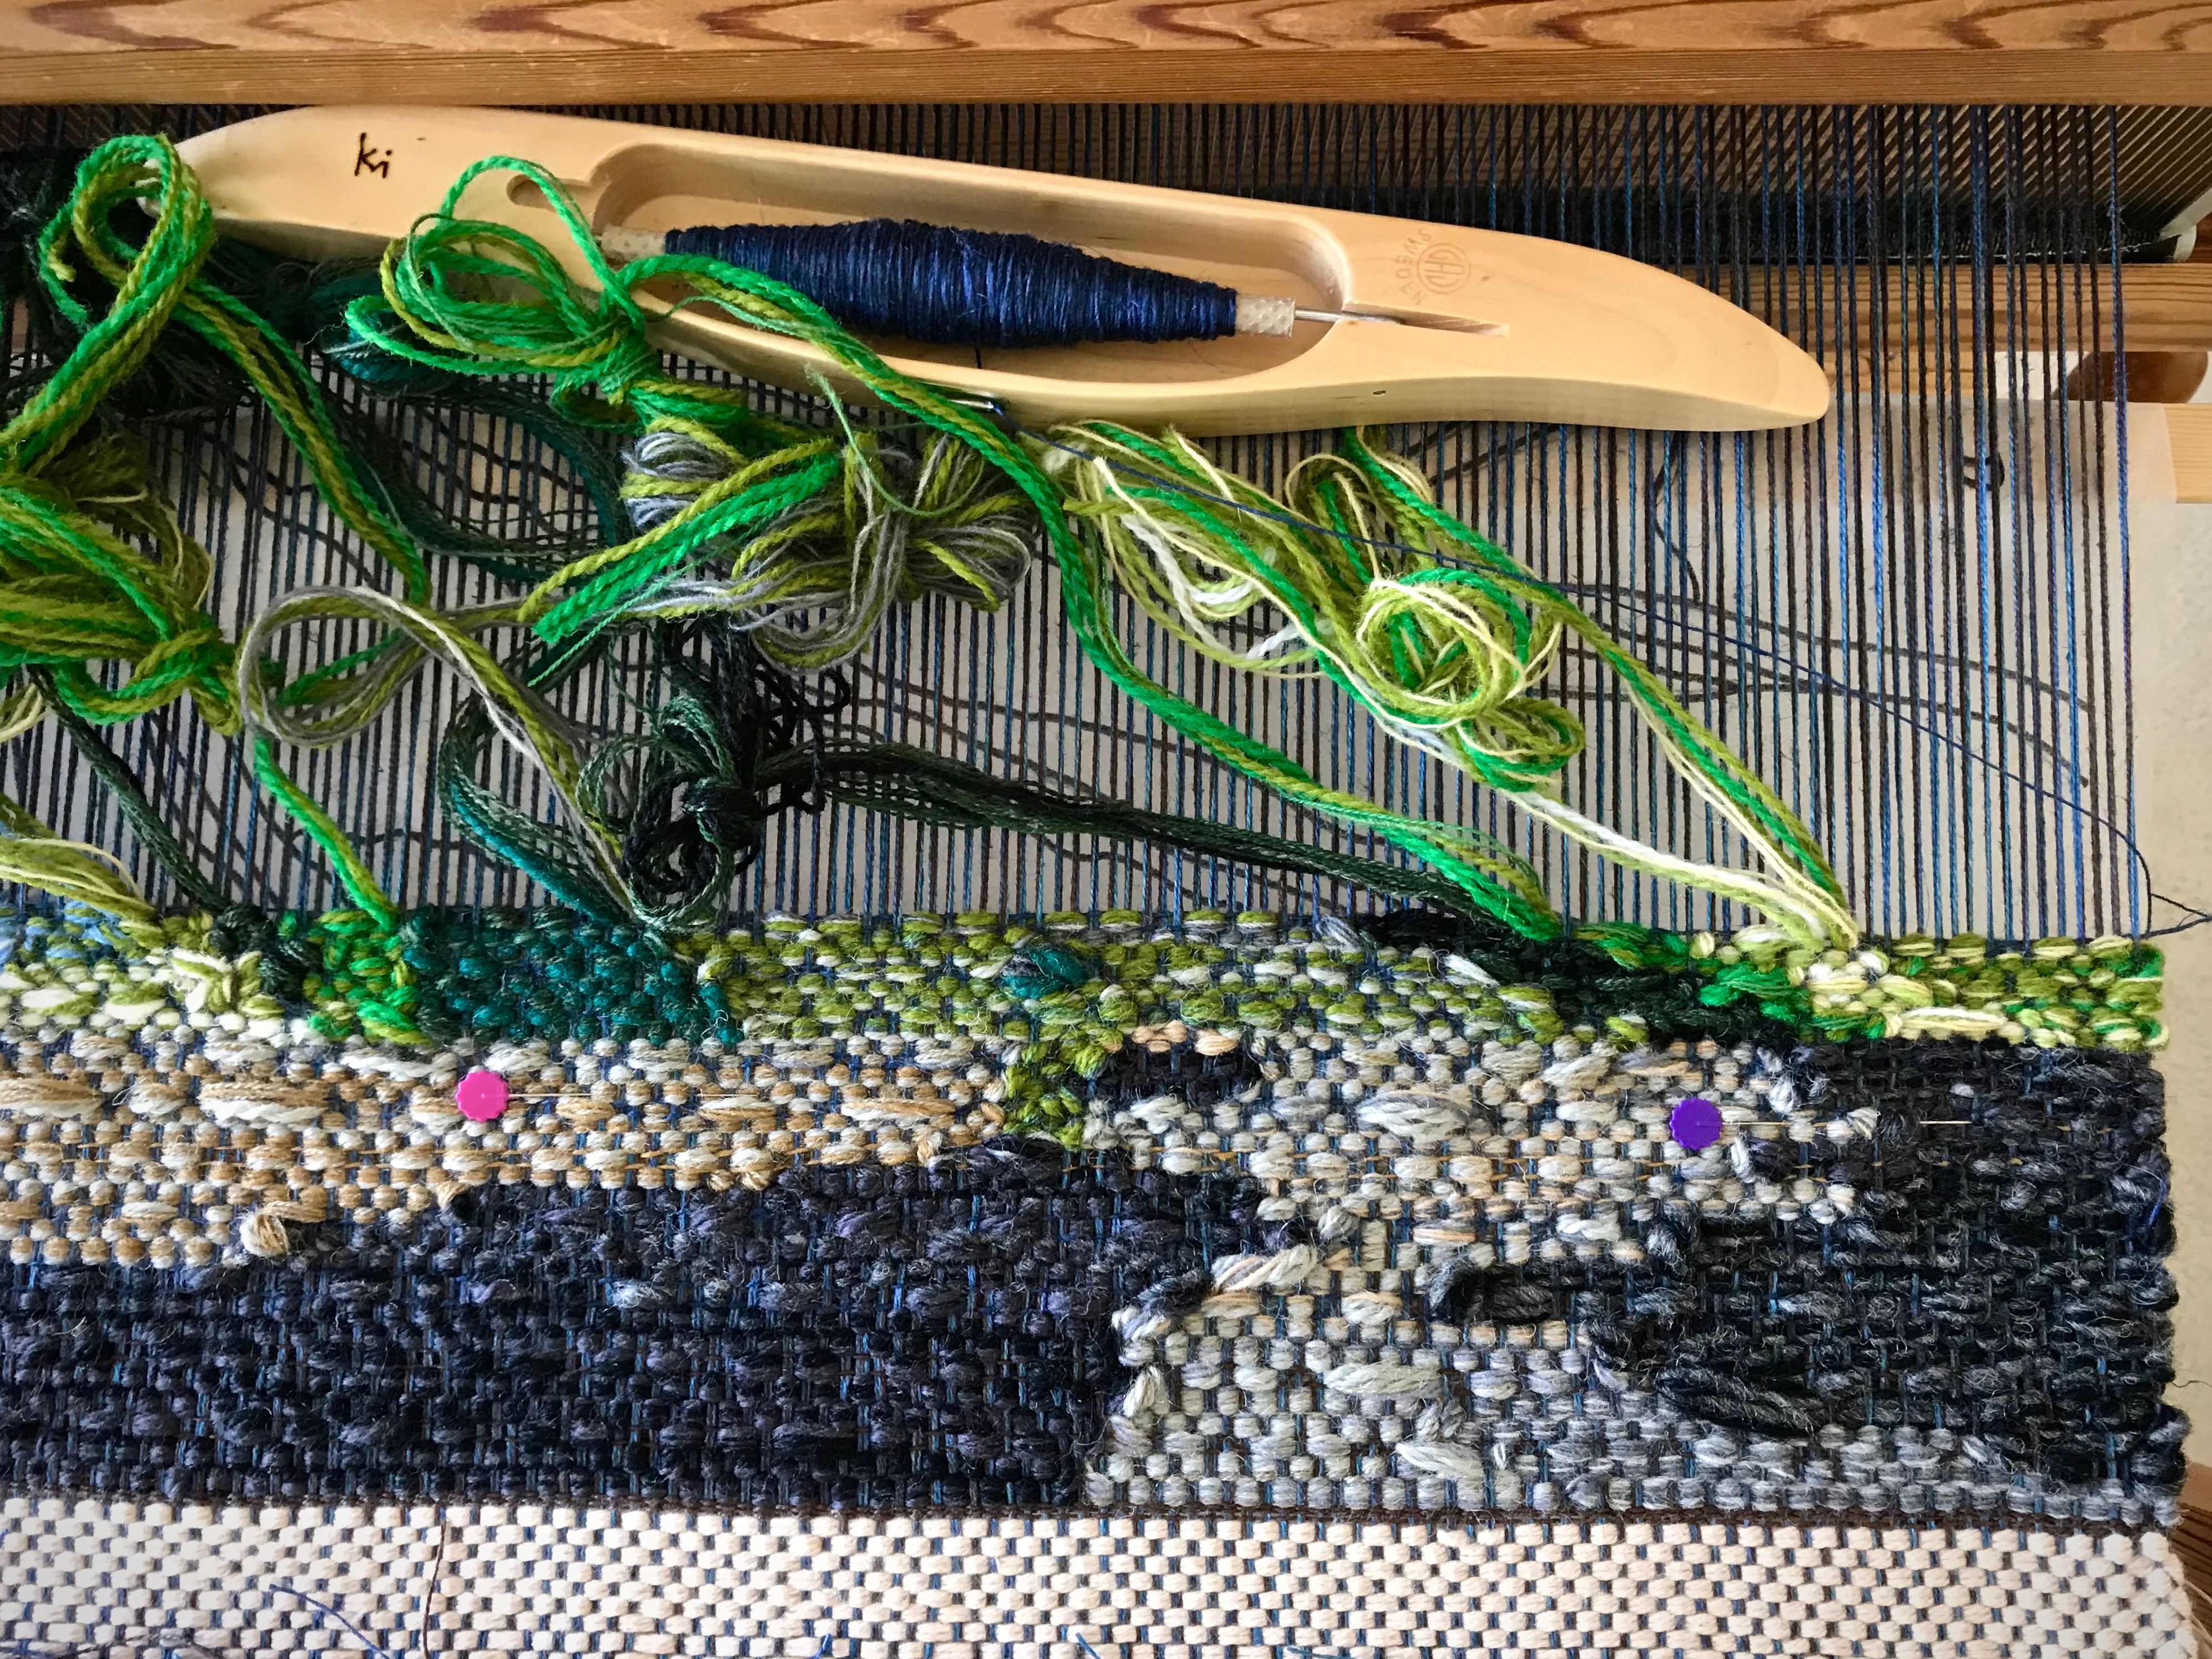
Little baskets of yarn next to the loom, sorted by color and value.
Life itself is a full color project. Immense and tedious. Rise above these earthly things. Our Grand Weaver sees the value distinctions that we miss with our natural eye. What hope this gives! Trusting him through this real life adventure brings assurance of astounding results. Setting my mind on these “above” things turns troubles into treasures whose values will be evident in the final real tapestry.
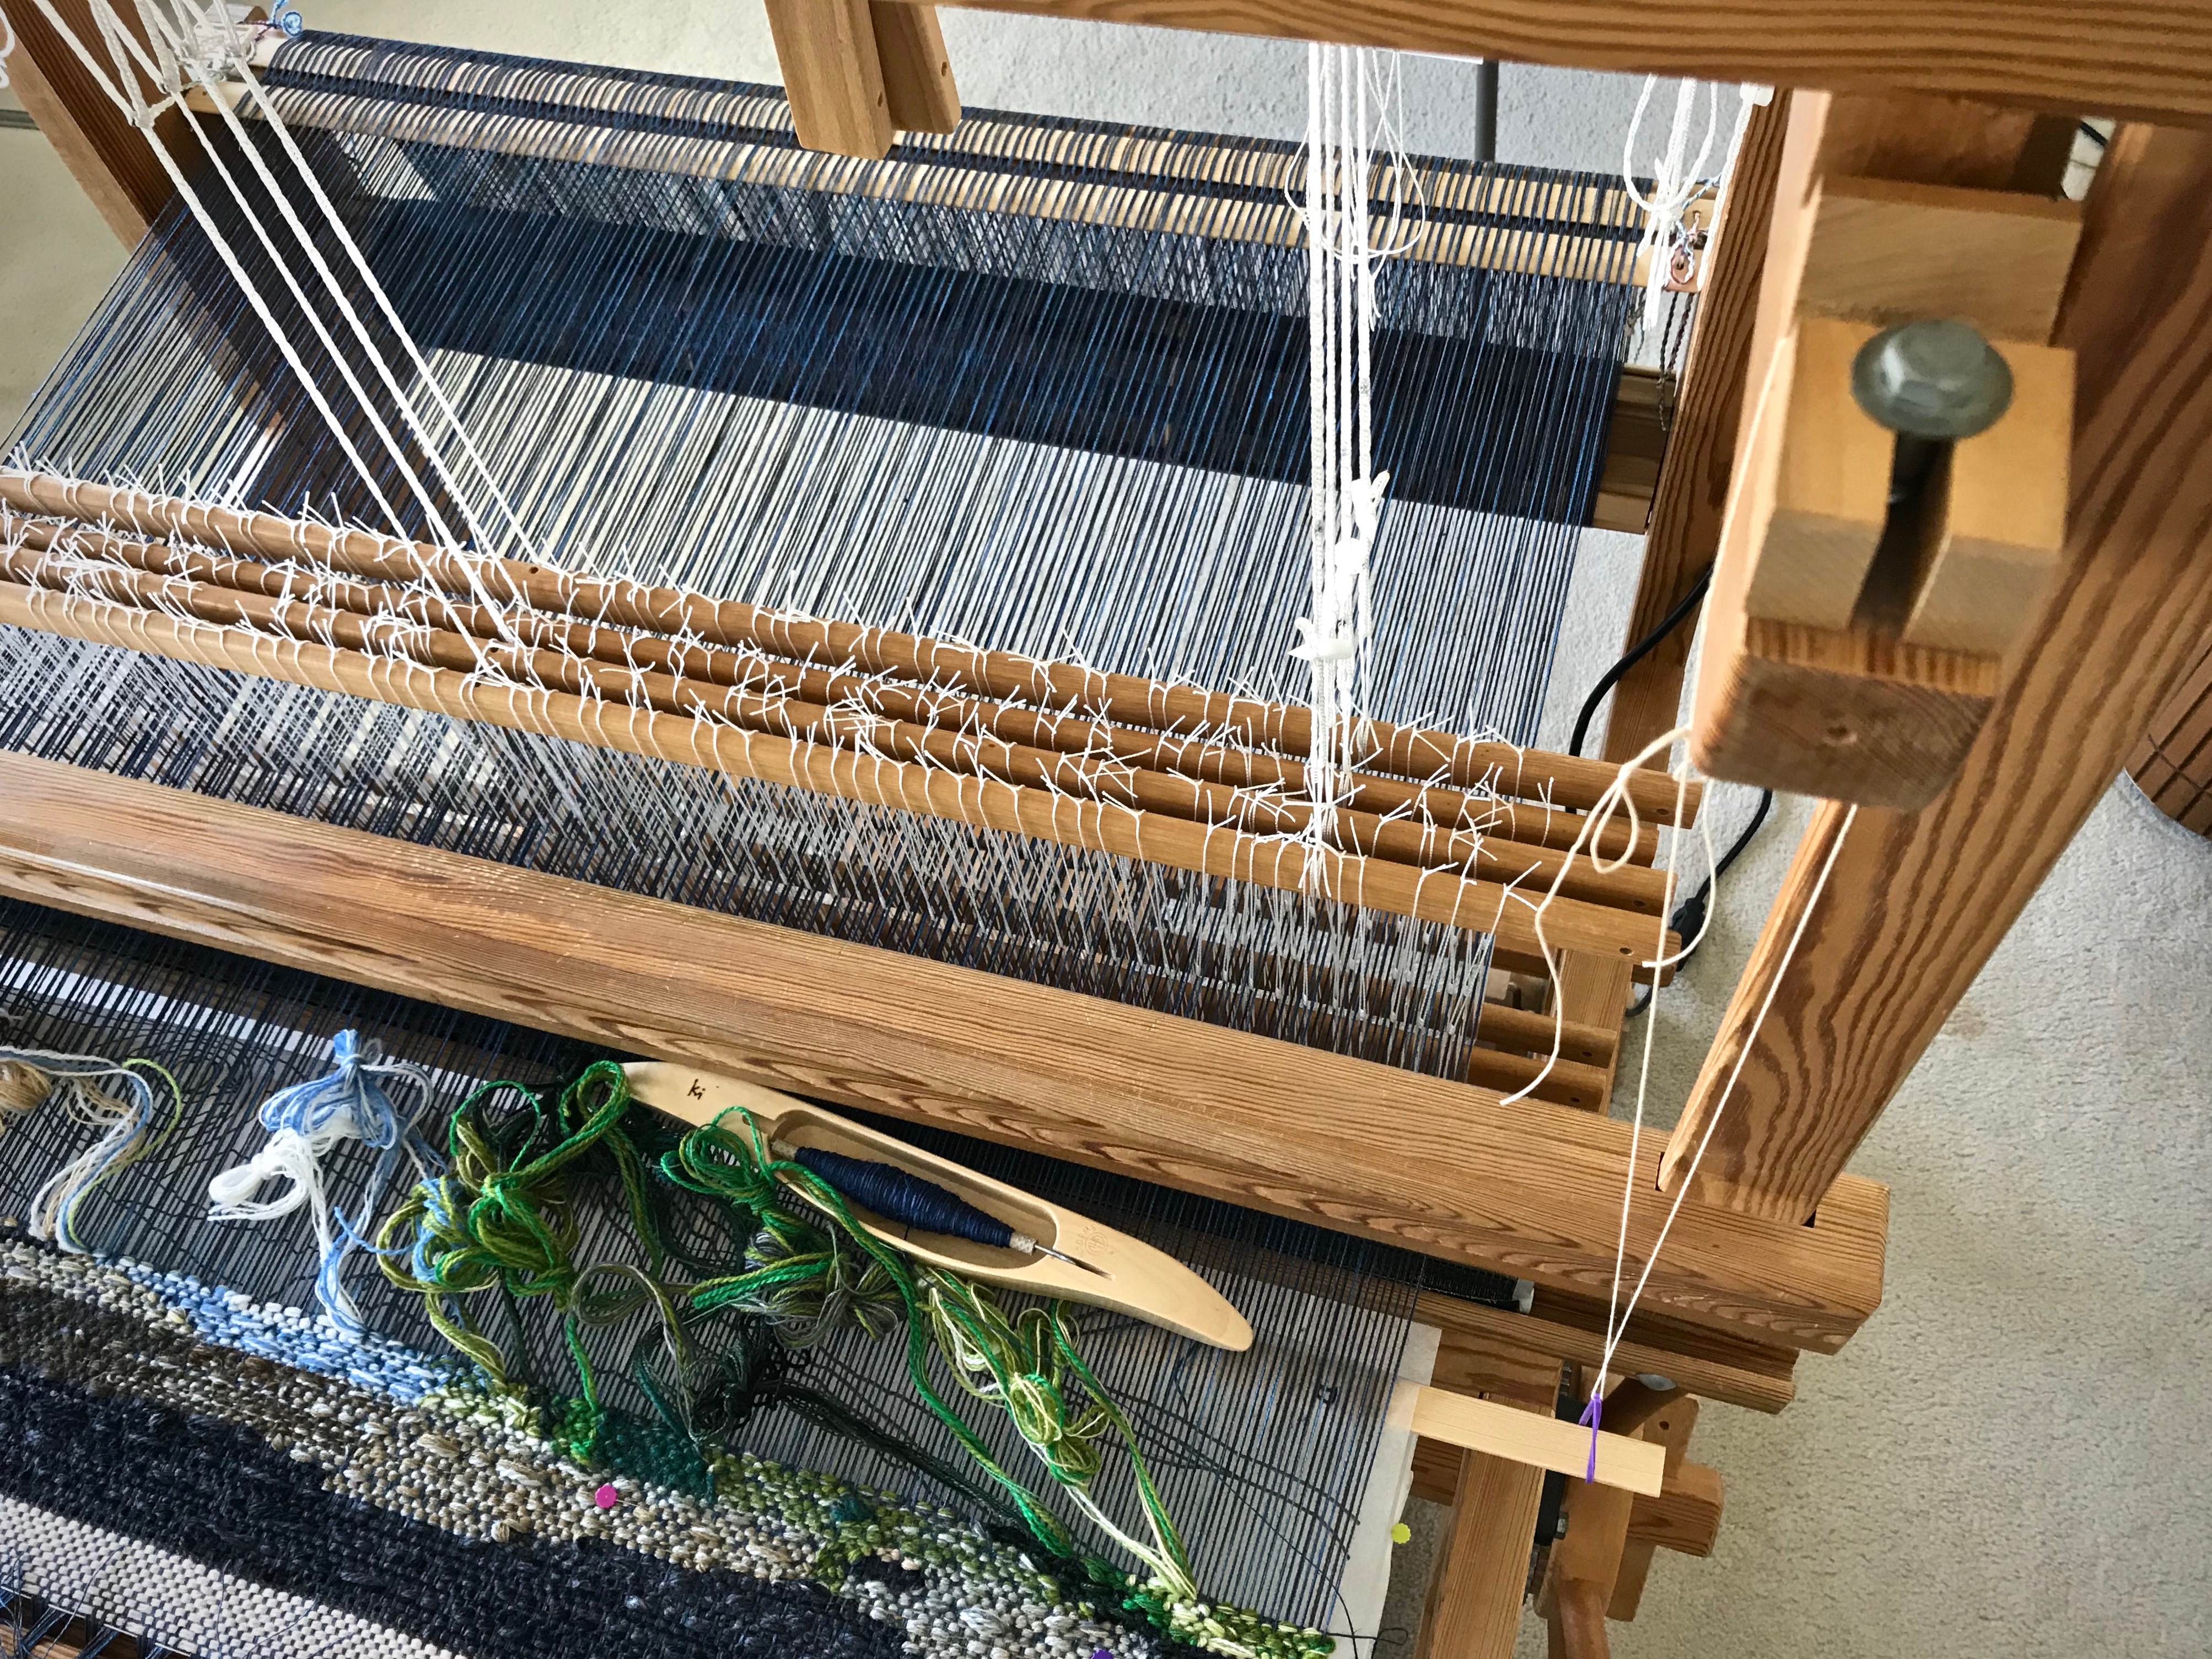
Alignment, security, and visibility are the main things I think about in regard to attaching and supporting the cartoon. In order to weave a tapestry this size, or any size for that matter, you need a good way to manage the cartoon. My cartoon is drawn onto a thin Pellon product (Pellon 830 Easy Pattern, 45″ wide) that is meant for pattern making. This material is easy to pin, doesn’t tear, and only barely wrinkles.
Alignment Align center of cartoon to center of warp.
A blue dashed line from top to bottom of the cartoon marks the center. I also have a pencil mark on the exact center of my beater. When the blue line on the cartoon is perfectly aligned with the center warp end, as seen from the mark on the beater, I know my cartoon is in the correct position.
Pencil mark on the beater is above the center warpend.
Security
Pin the cartoon in two places on each side of the woven tapestry.
This warp is too wide for me to reach all the way to pin the cartoon in the center. So, on both sides of the weaving I place one flathead pin near the selvedge, and another one as far as I can comfortably reach toward the center. I move the pins forward each time I am ready to advance the warp.
Two flat-head pins hold the cartoon under the tapestry weaving on the right-hand side.
Hang a support slat under the cartoon.
I learned this from The Big Book of Weaving, by Laila Lundell, p. 239, 2008 edition. I used this method previously for a rag rug that had a cartoon for a large inlay pattern. It also works well for holding the cartoon for a woven transparency.
Seine twine loop with rubber band hangs from beater cradle. Slat holds cartoon up against the warp.
Supplies: 12/6 cotton seine twine, 2 rubber bands, long warping slat
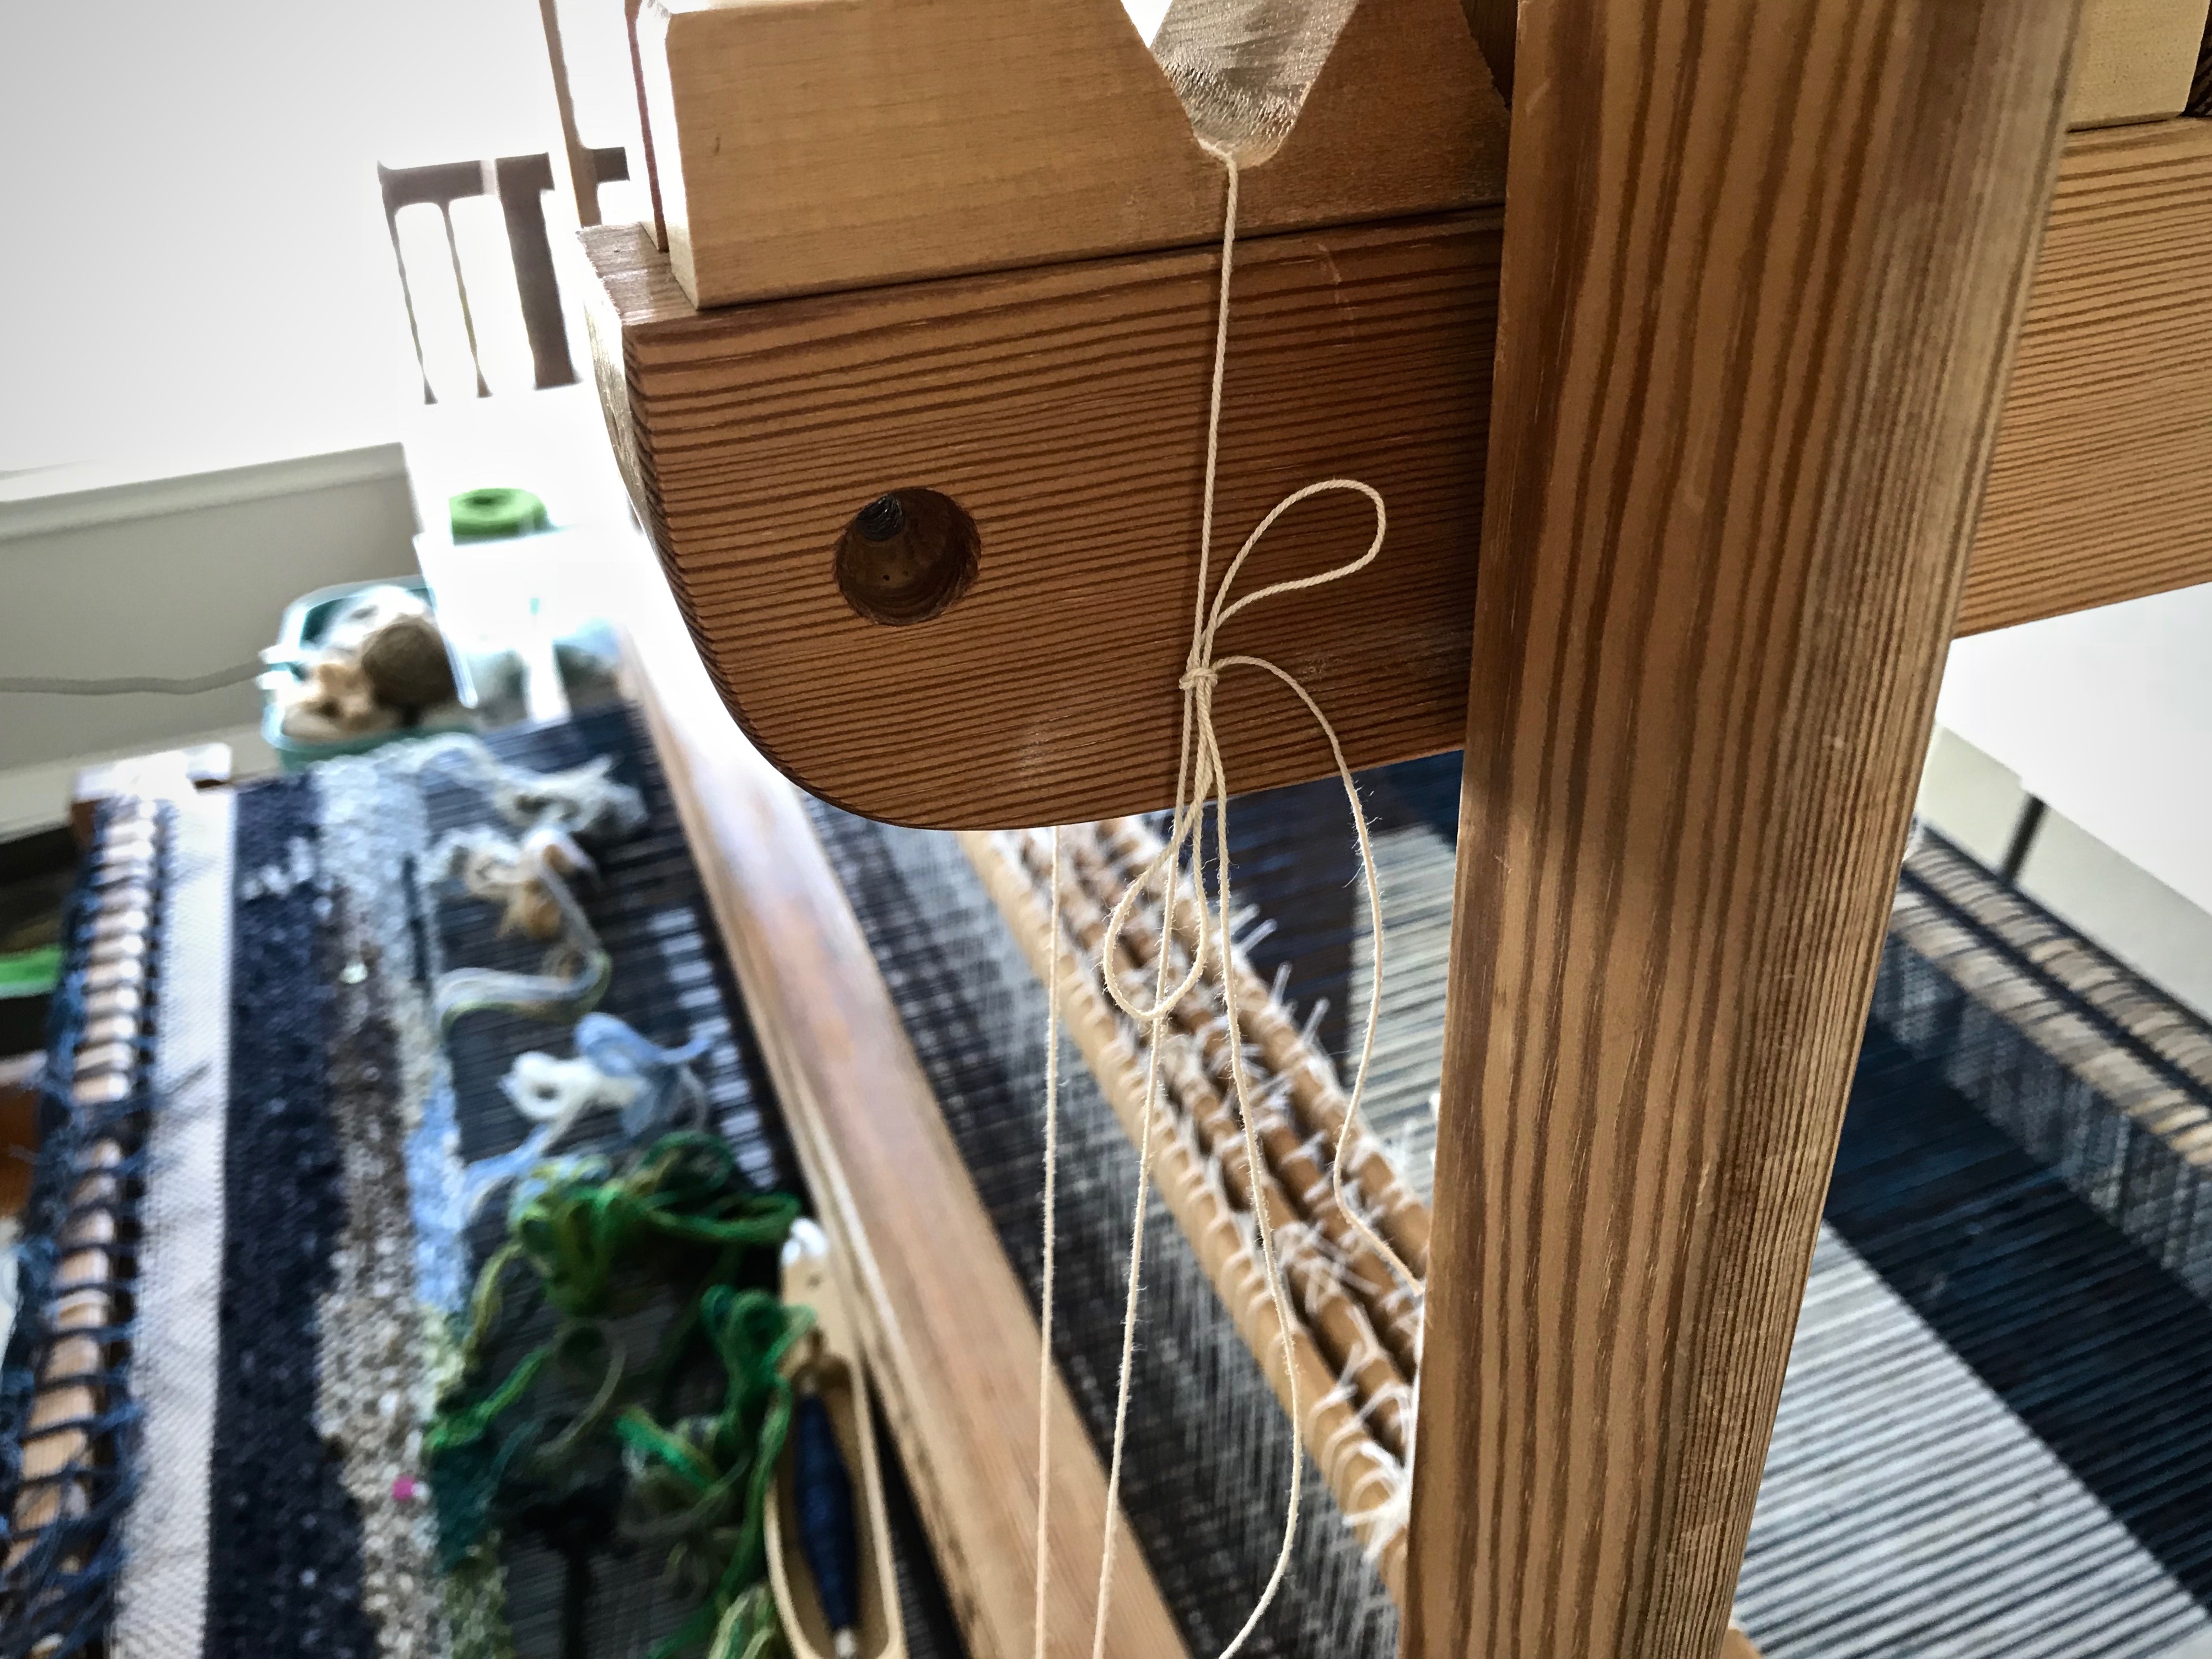
1 Make a loop with the seine twine to hang from the beater cradle to just below the warp, with a rubber band on the loop.
2 Tie the ends of the loop with a bow knot or a weaver’s tie-up knot (this useful knot is described in How to Warp Your Loom, by Joanne Hall, p. 39).
Top of loop tied in a bow knot.Weaver’s tie-up knot is perfect for this application, since it is quick and easy to undo and re-tie if repositioning is needed.
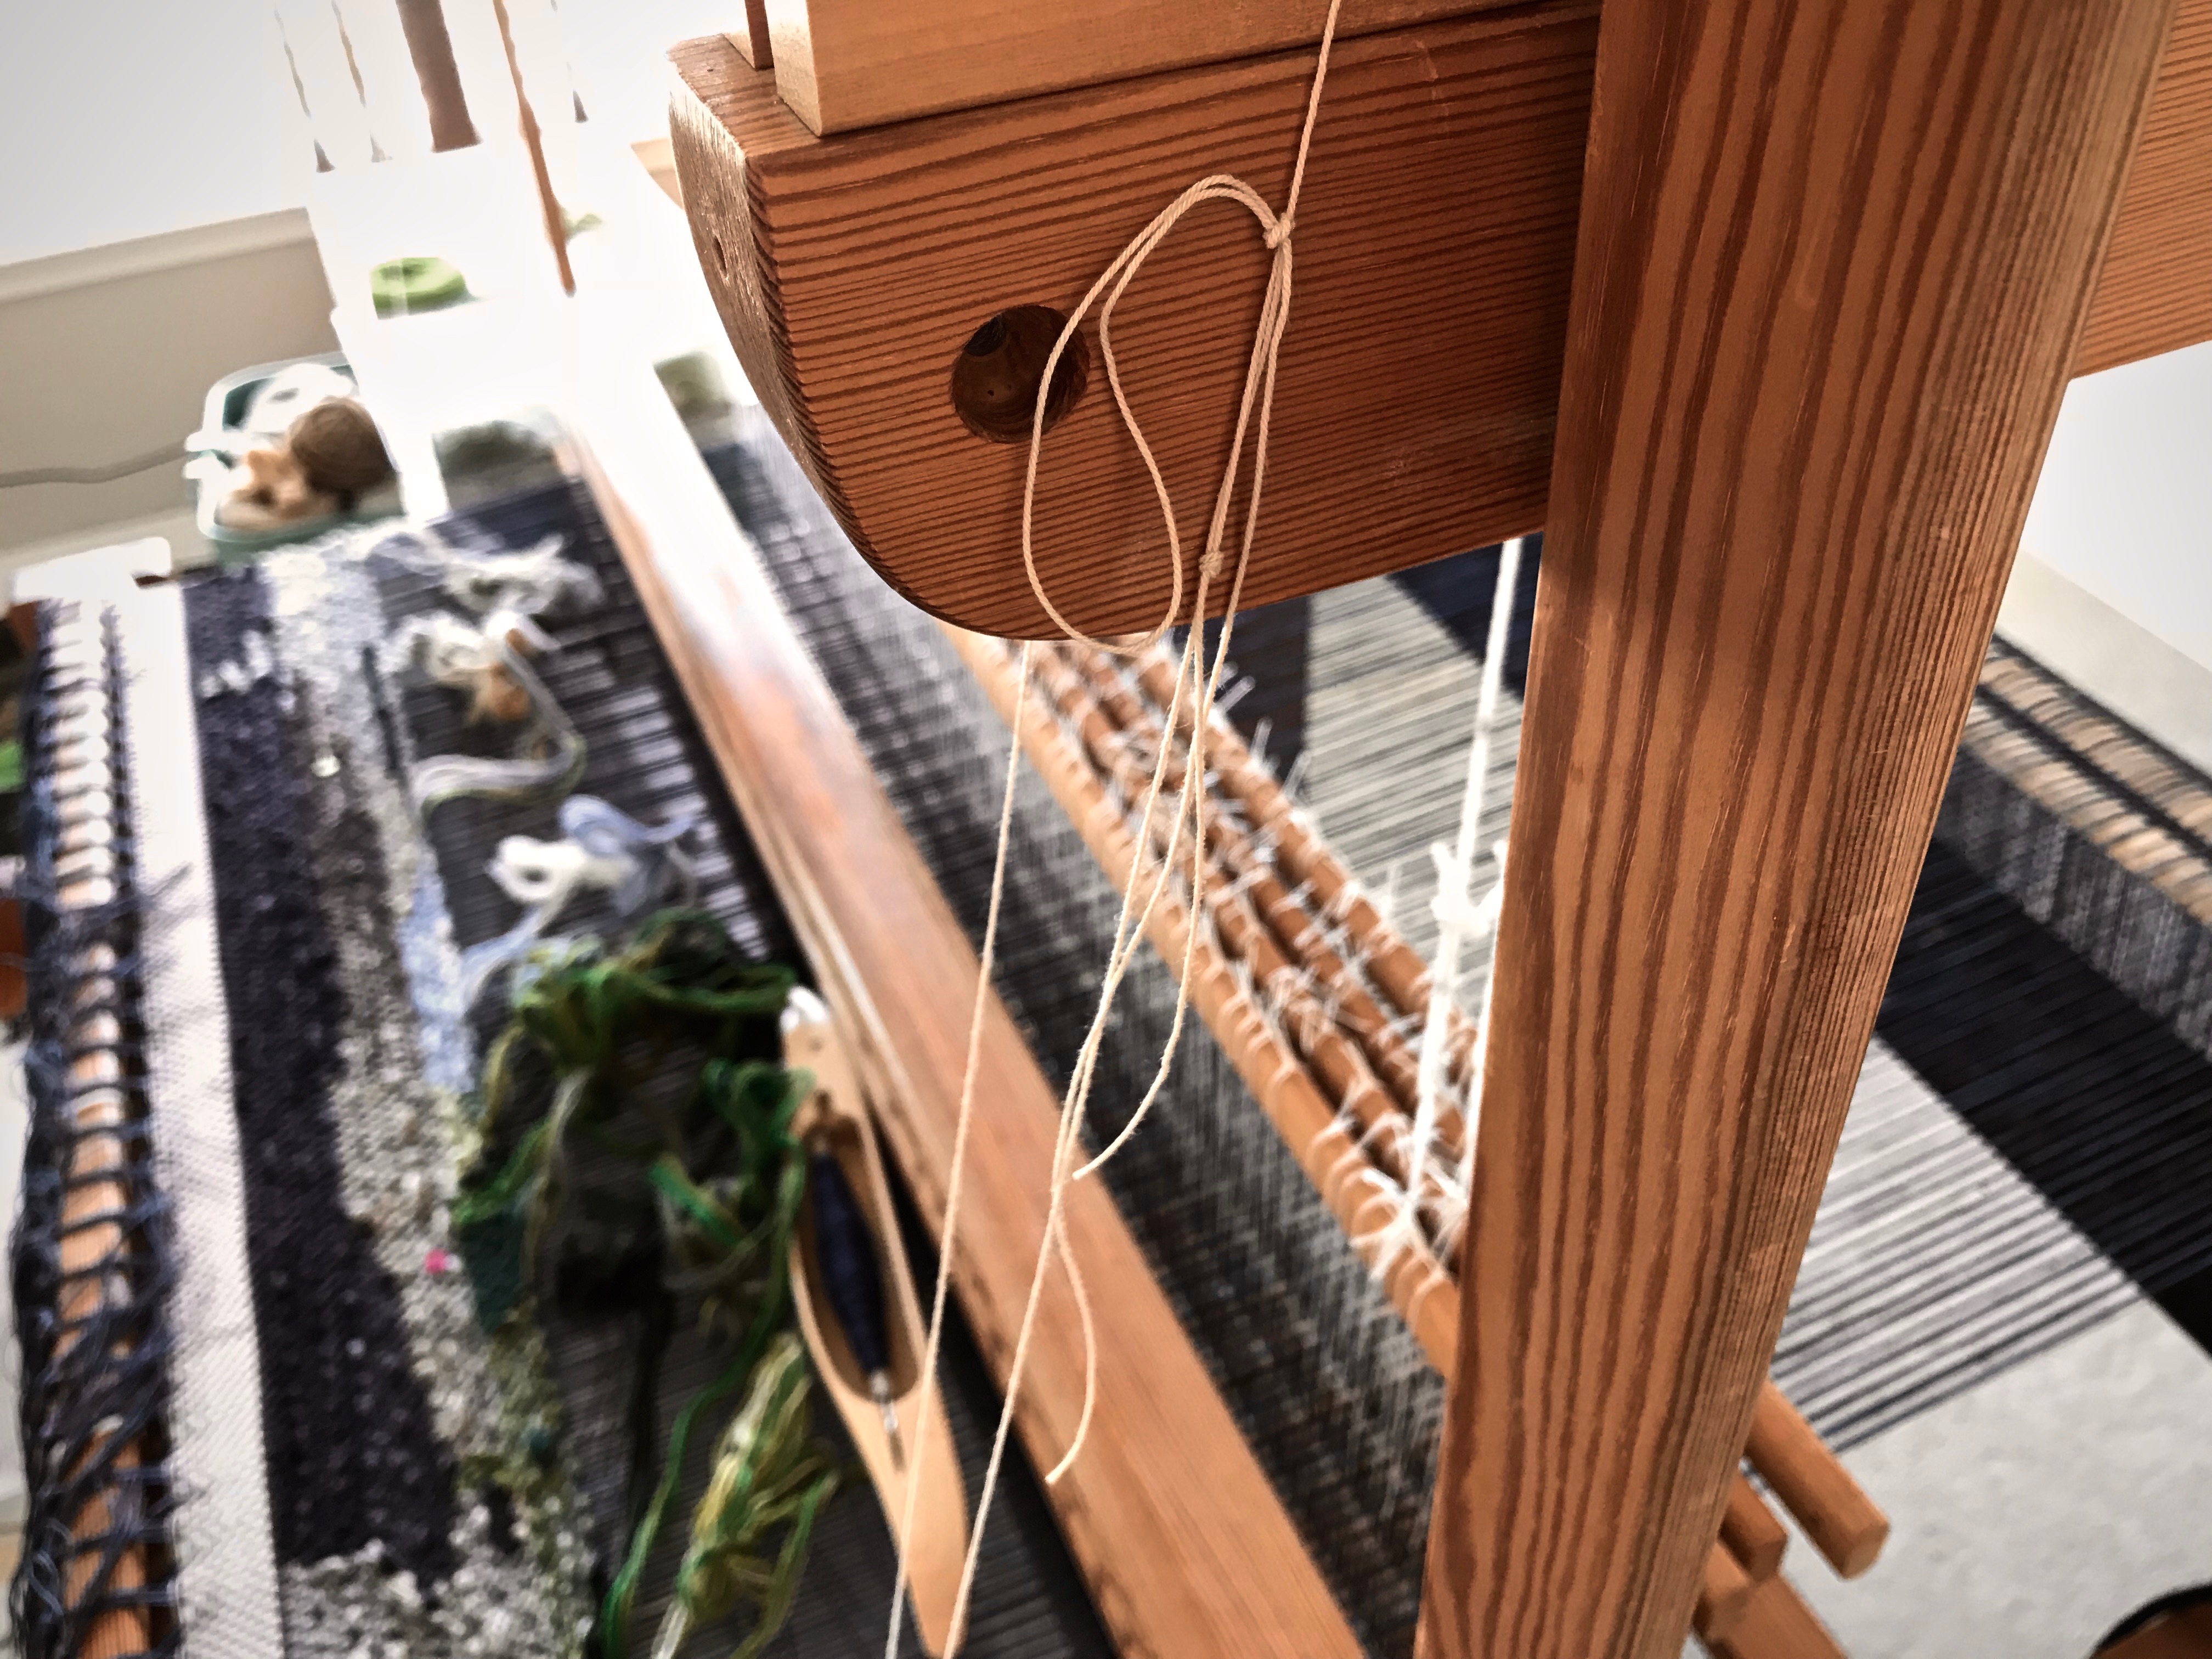
3 Make another loop the same way, with rubber band, and hang it on the other beater cradle.
4 Place the warping slat in the hanging rubber bands, underneath the cartoon.
5 Adjust the length of the loops so that the slat lightly presses up on the cartoon and the warp.
Rubber band gives flexibility to the seine twine loop that is holding up the cartoon.
Pin the rolled-up cartoon underneath.
I roll up the Pellon cartoon under the warp and pin it once on each side. As the warp and cartoon advance I can reposition the pin as needed.
Under the warp, the cartoon is loosely rolled up and pinned.
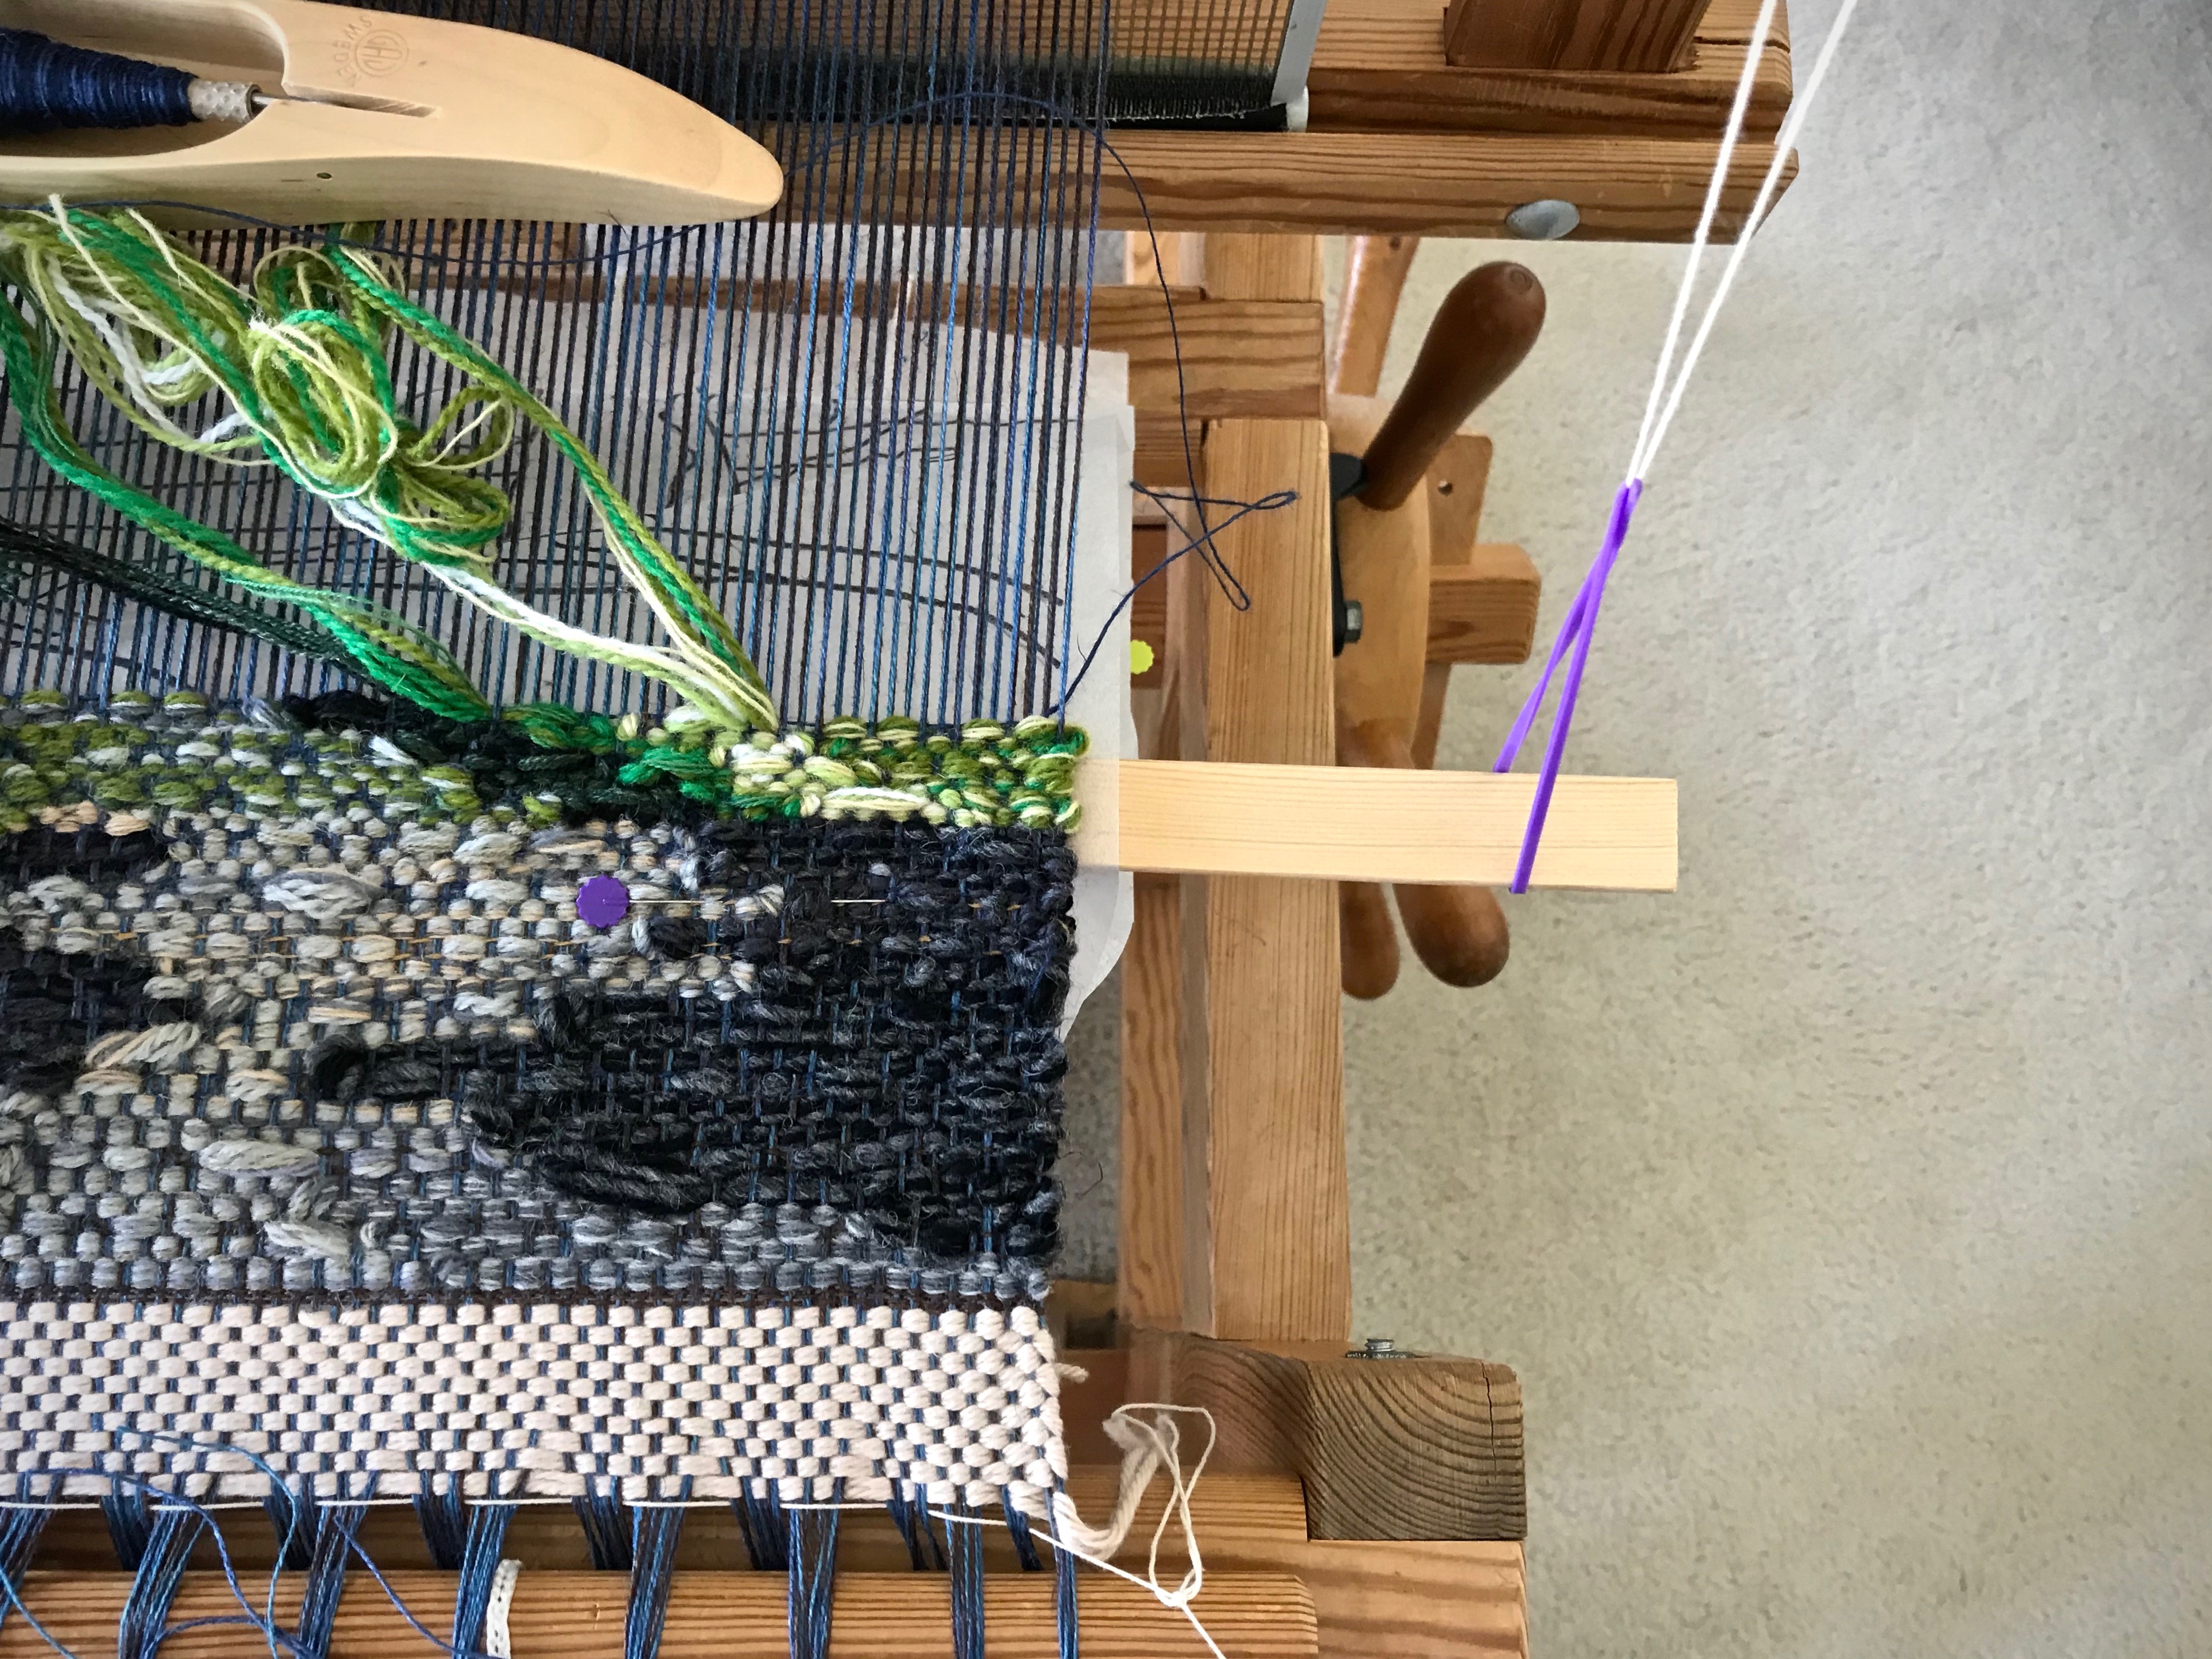
Move the slat toward the breast beam, out of the way, to beat in the weft.
Because of the rubber bands, the slat support has flexibility and does not impede the movement of the beater.
With the slat under or near the fell line, it presses the cartoon up to the warp. By doing this, I can easily see what comes next as the tapestry weaving develops row by row.
Placing the slat under the fell of the weaving raises the cartoon to visibility where it is needed most.
I wait for my ordered yarn to arrive. Meanwhile, I dream of this tapestry becoming a reality as cartoon meets wool.
May you have the alignment, security, and visibility you need.
It occurs to me that I am unnecessarily doing something the hard way. Repeatedly. For every new project, I pull out my tape measure to find the right set of lease sticks. The tape measure also helps me select the temple needed for the current weaving width. No more! I do like my tape measure, but why am I measuring these things every time? Why not measure them once and label them?
Solution
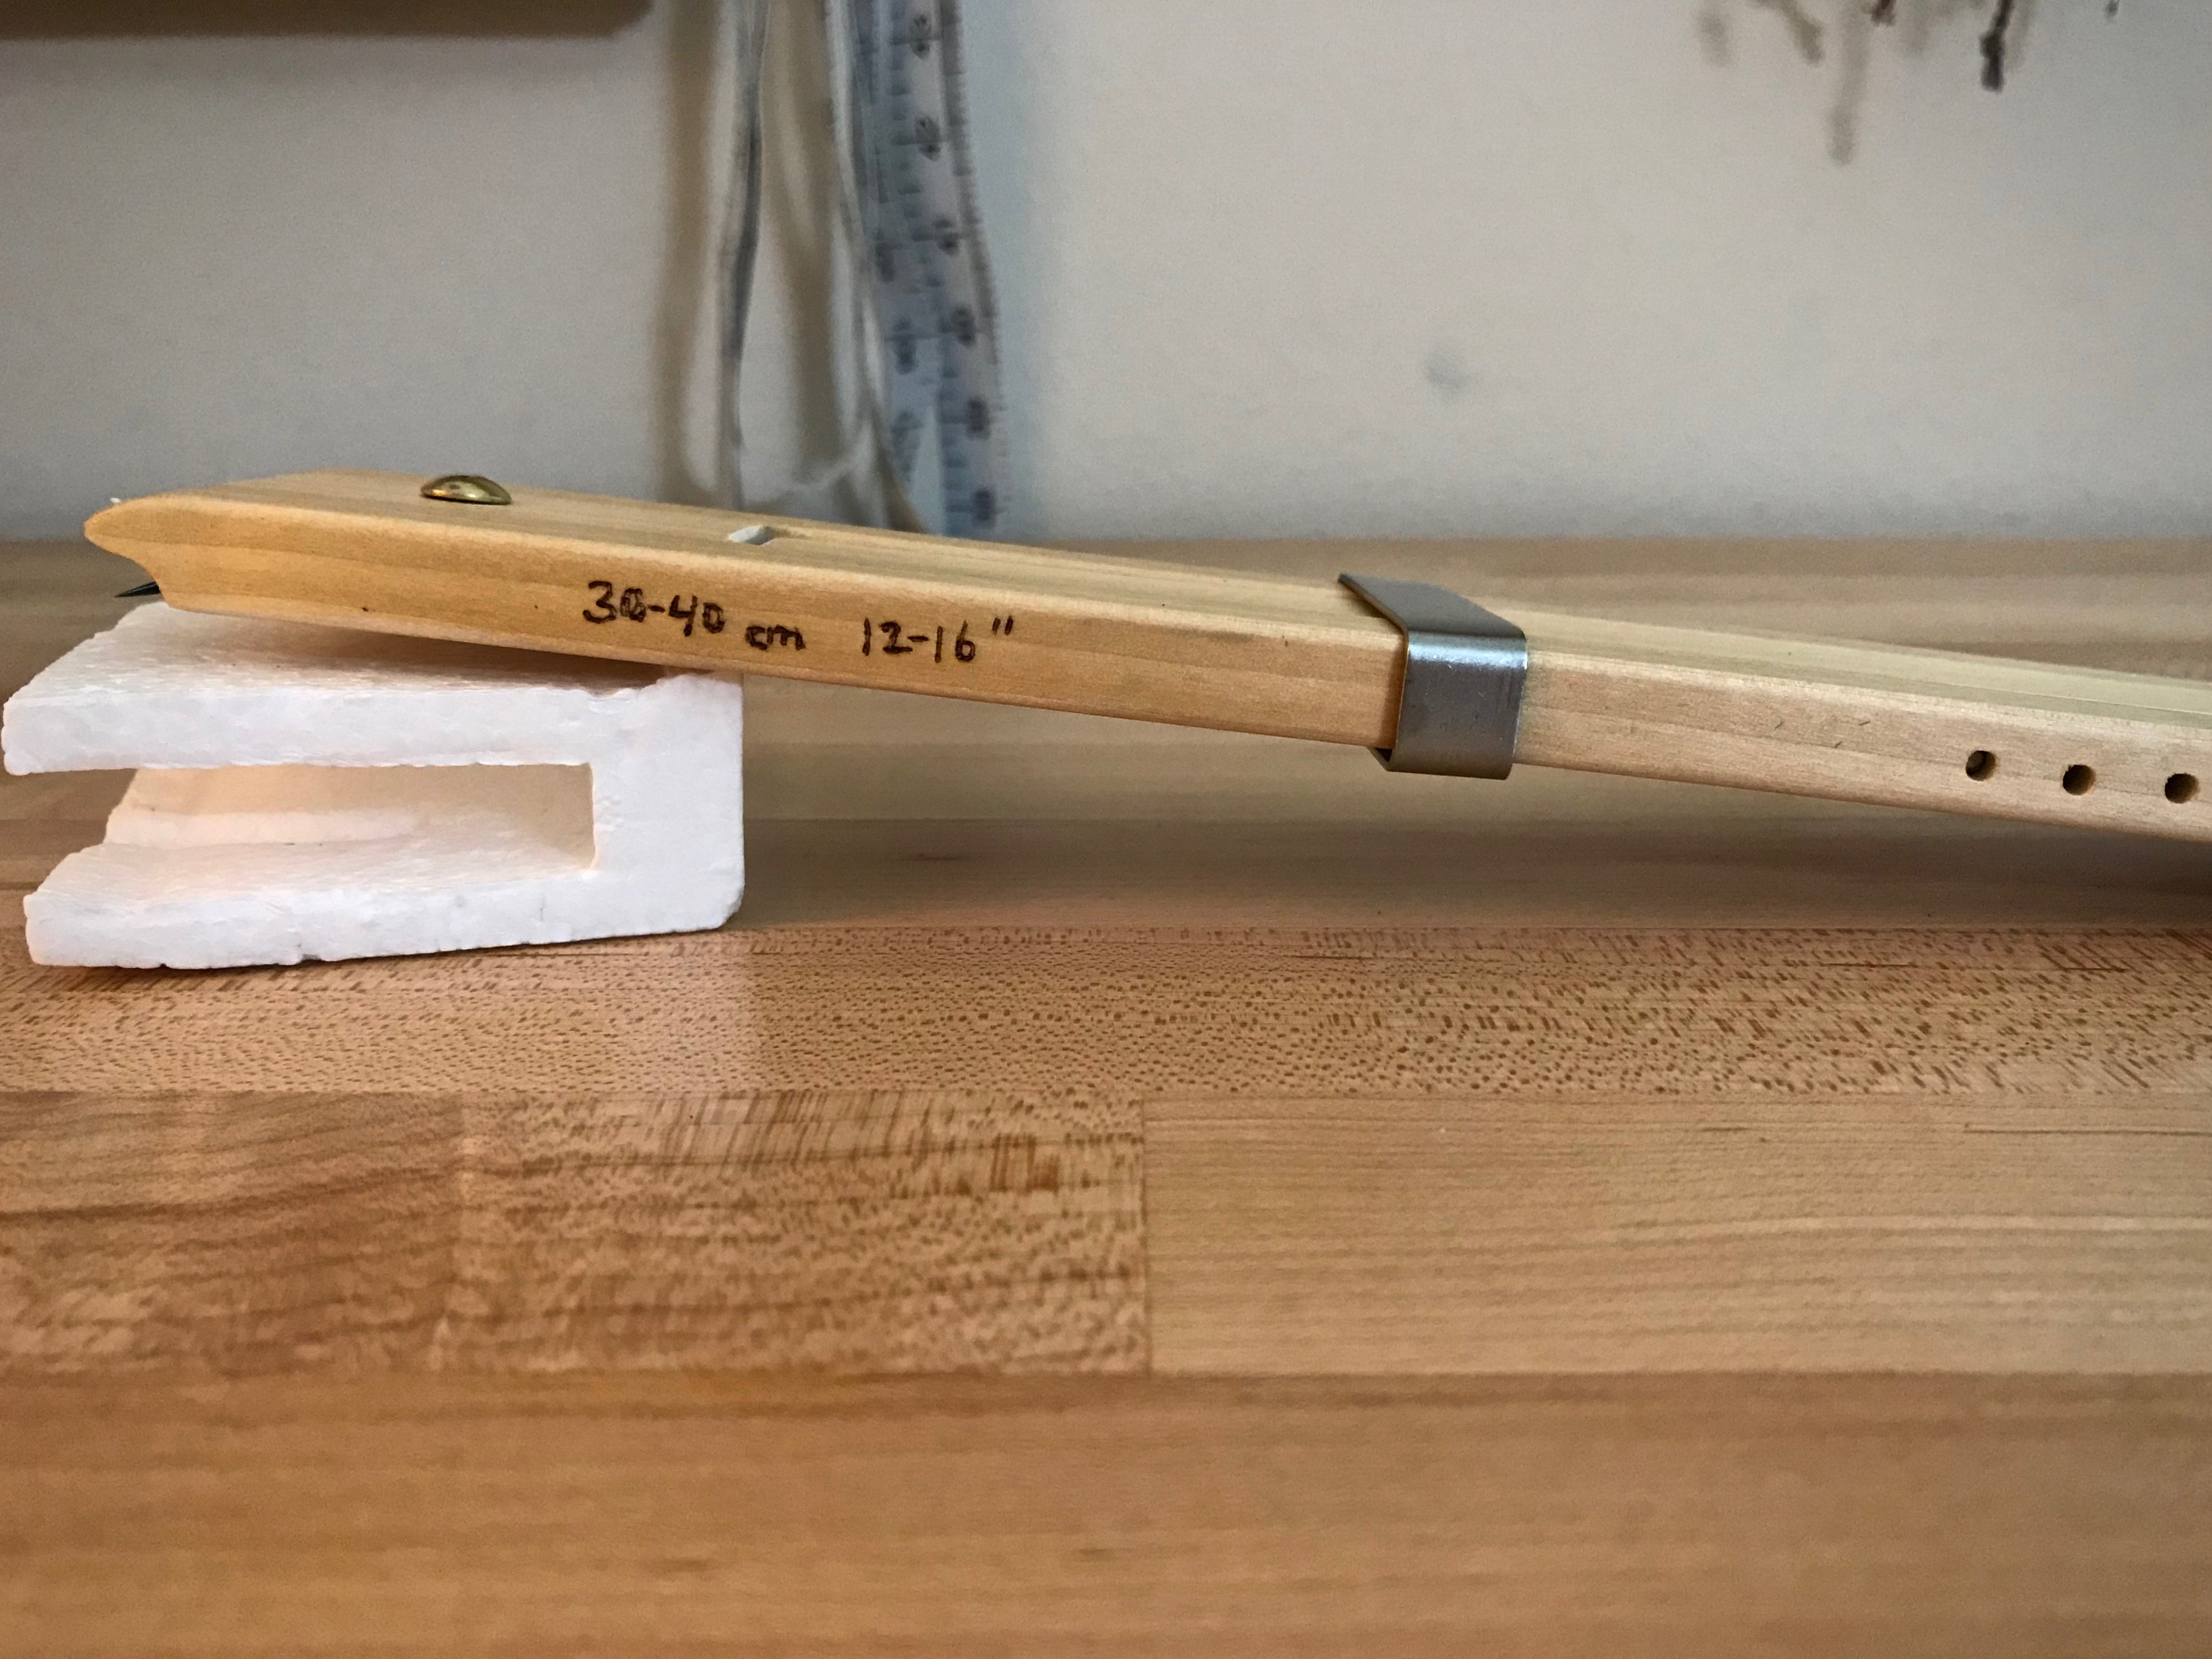
Measure the lease sticks and write the length in centimeters and in inches on one stick of each pair, in pencil.
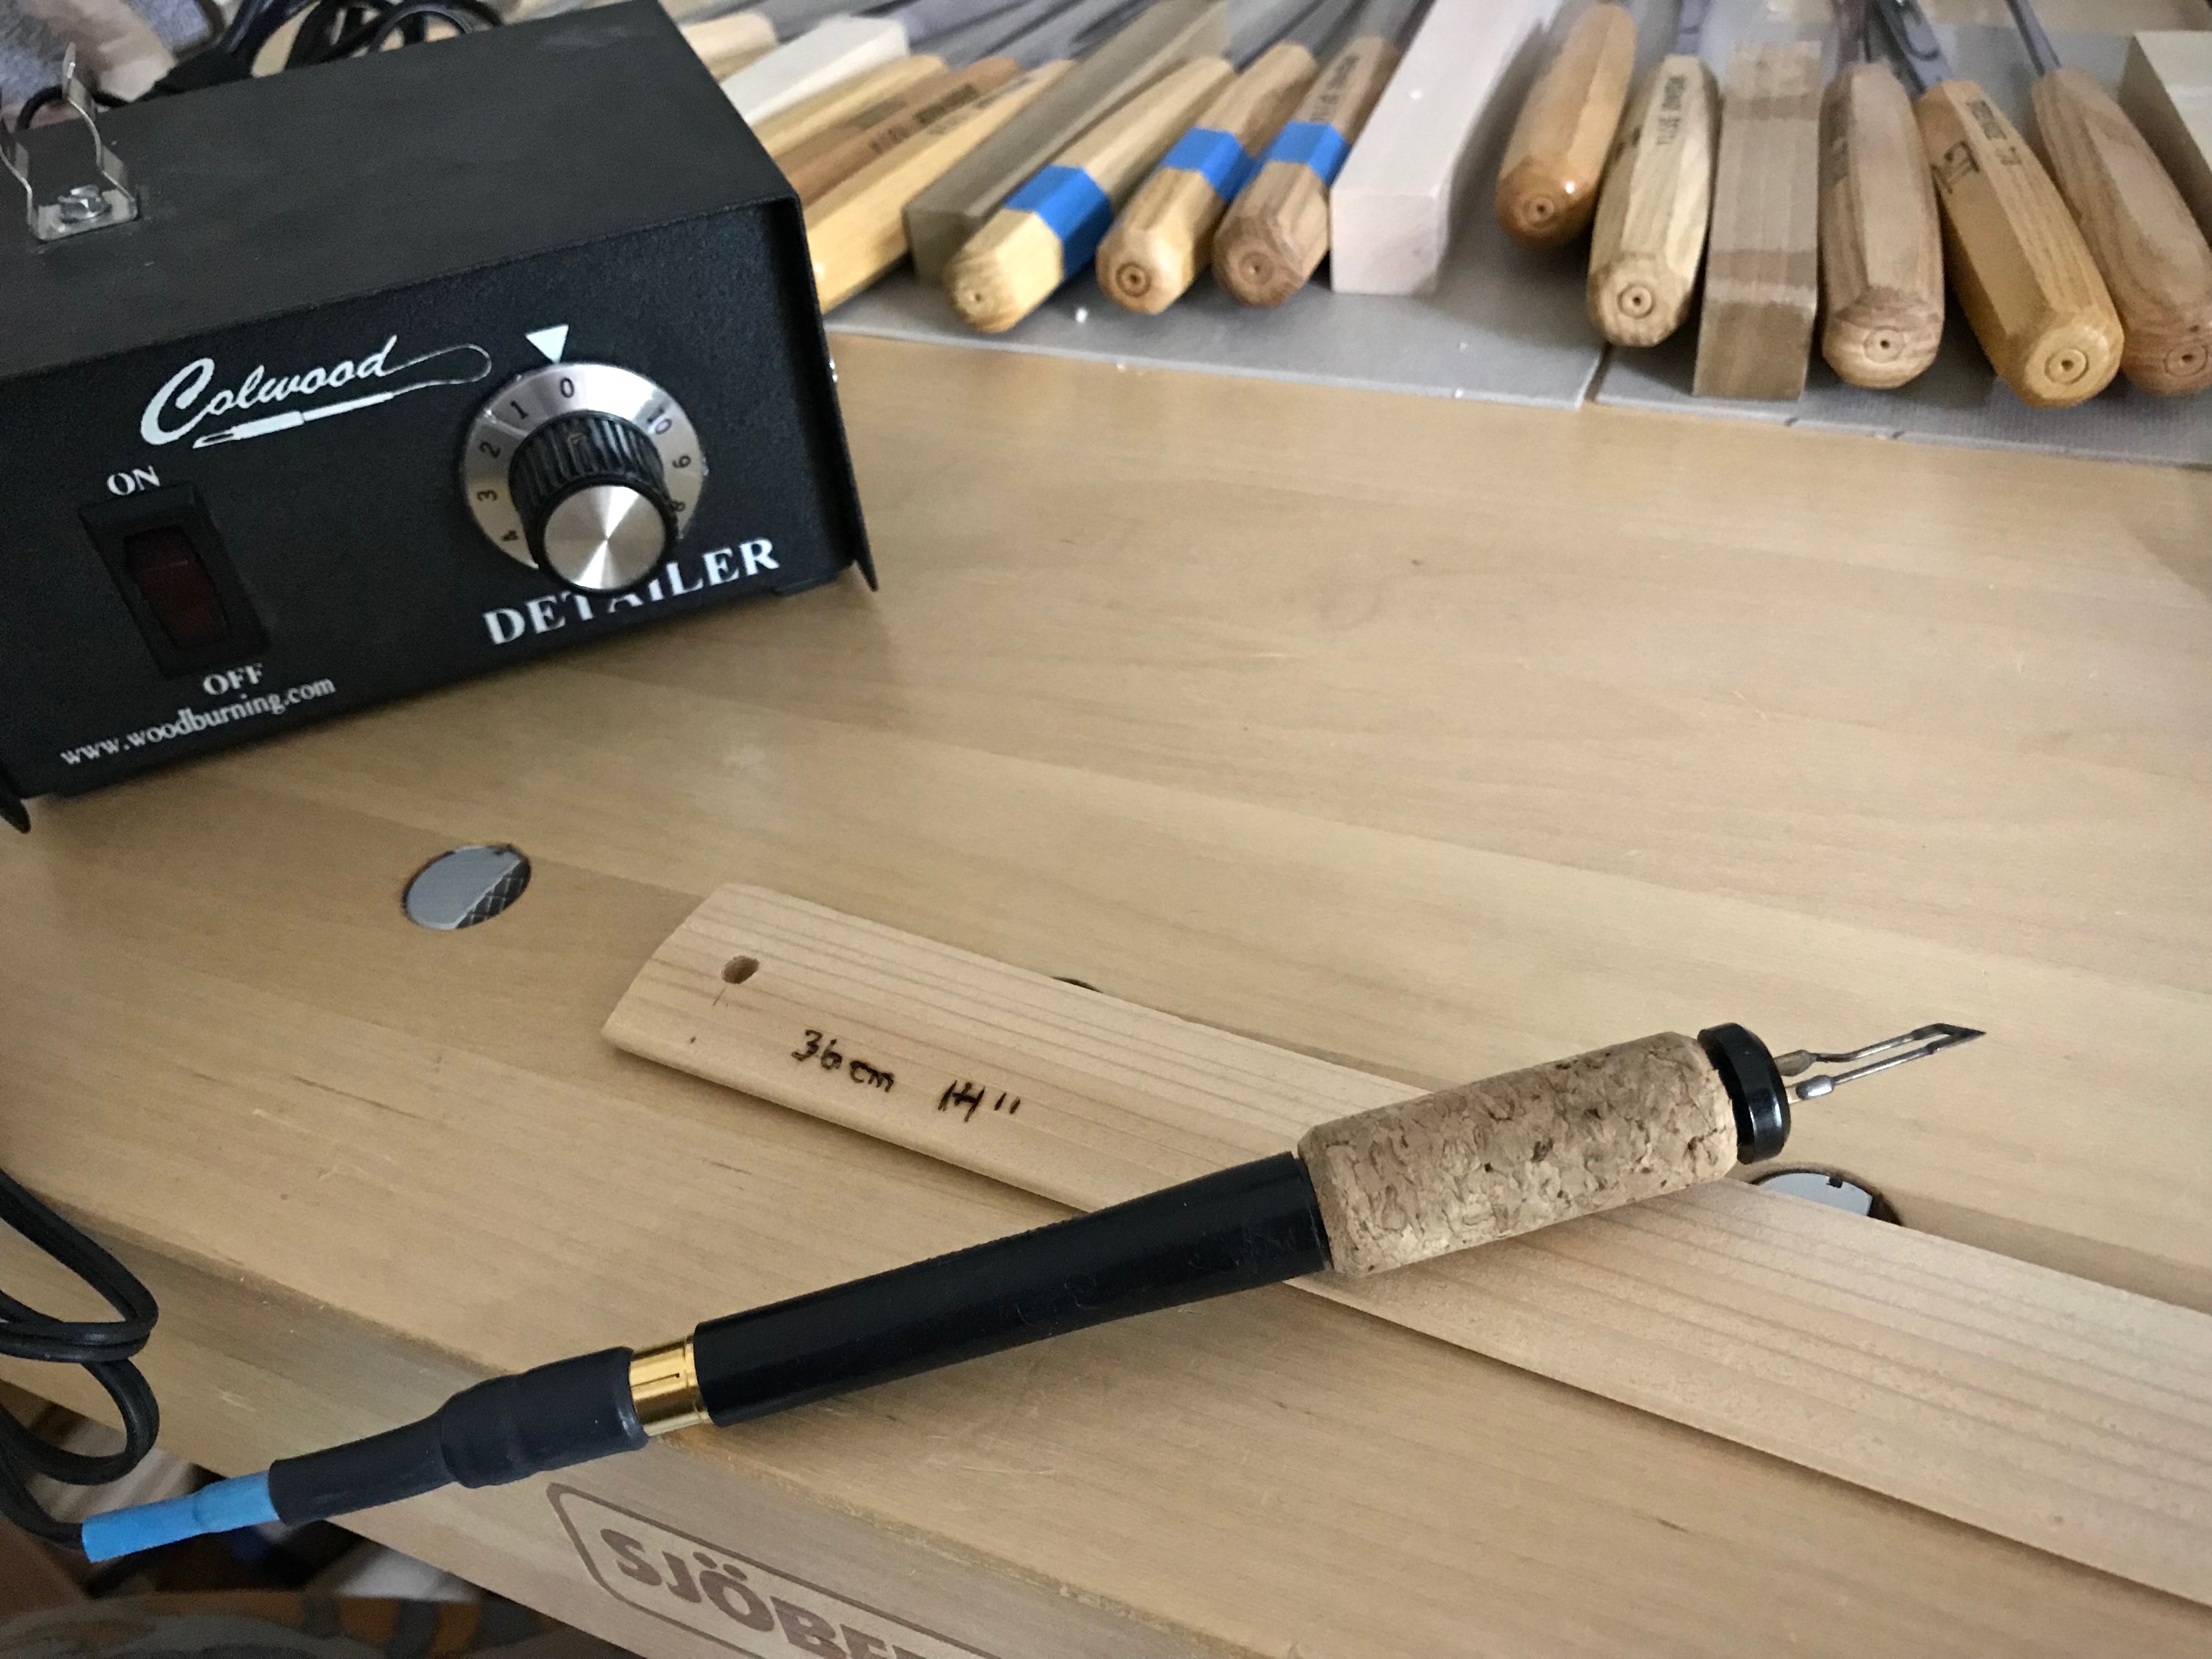
Use a wood burner to trace the pencil markings. (My husband Steve does this part for me.)
Wood burner is used to write the length measurement on the end of a lease stick. Centimeters and inches are indicated because I use metric or imperial units, depending on the project.
Thread a cord through one end of each pair of lease sticks, to keep pairs together. Hang the lease stick pairs with the measurements clearly visible.
Looped cord is threaded through the lease stick holes to provide an easy way to hang pairs together.Paired lease sticks, ready for hanging.Pairs of lease sticks hang beside my worktable in my weaving room. My ol’ Beka rigid heddle loom on the wall happens to provide just the right little hanging post for the measured lease sticks.
Look up the temple sizes on a website that sells them, and write the size range in centimeters and in inches on each temple, in pencil.
Use a wood burner to trace the pencil markings. (Steve, again.)
Range of temple widths is important information when I’m choosing a temple. Weaving width of a project must fit in that range.
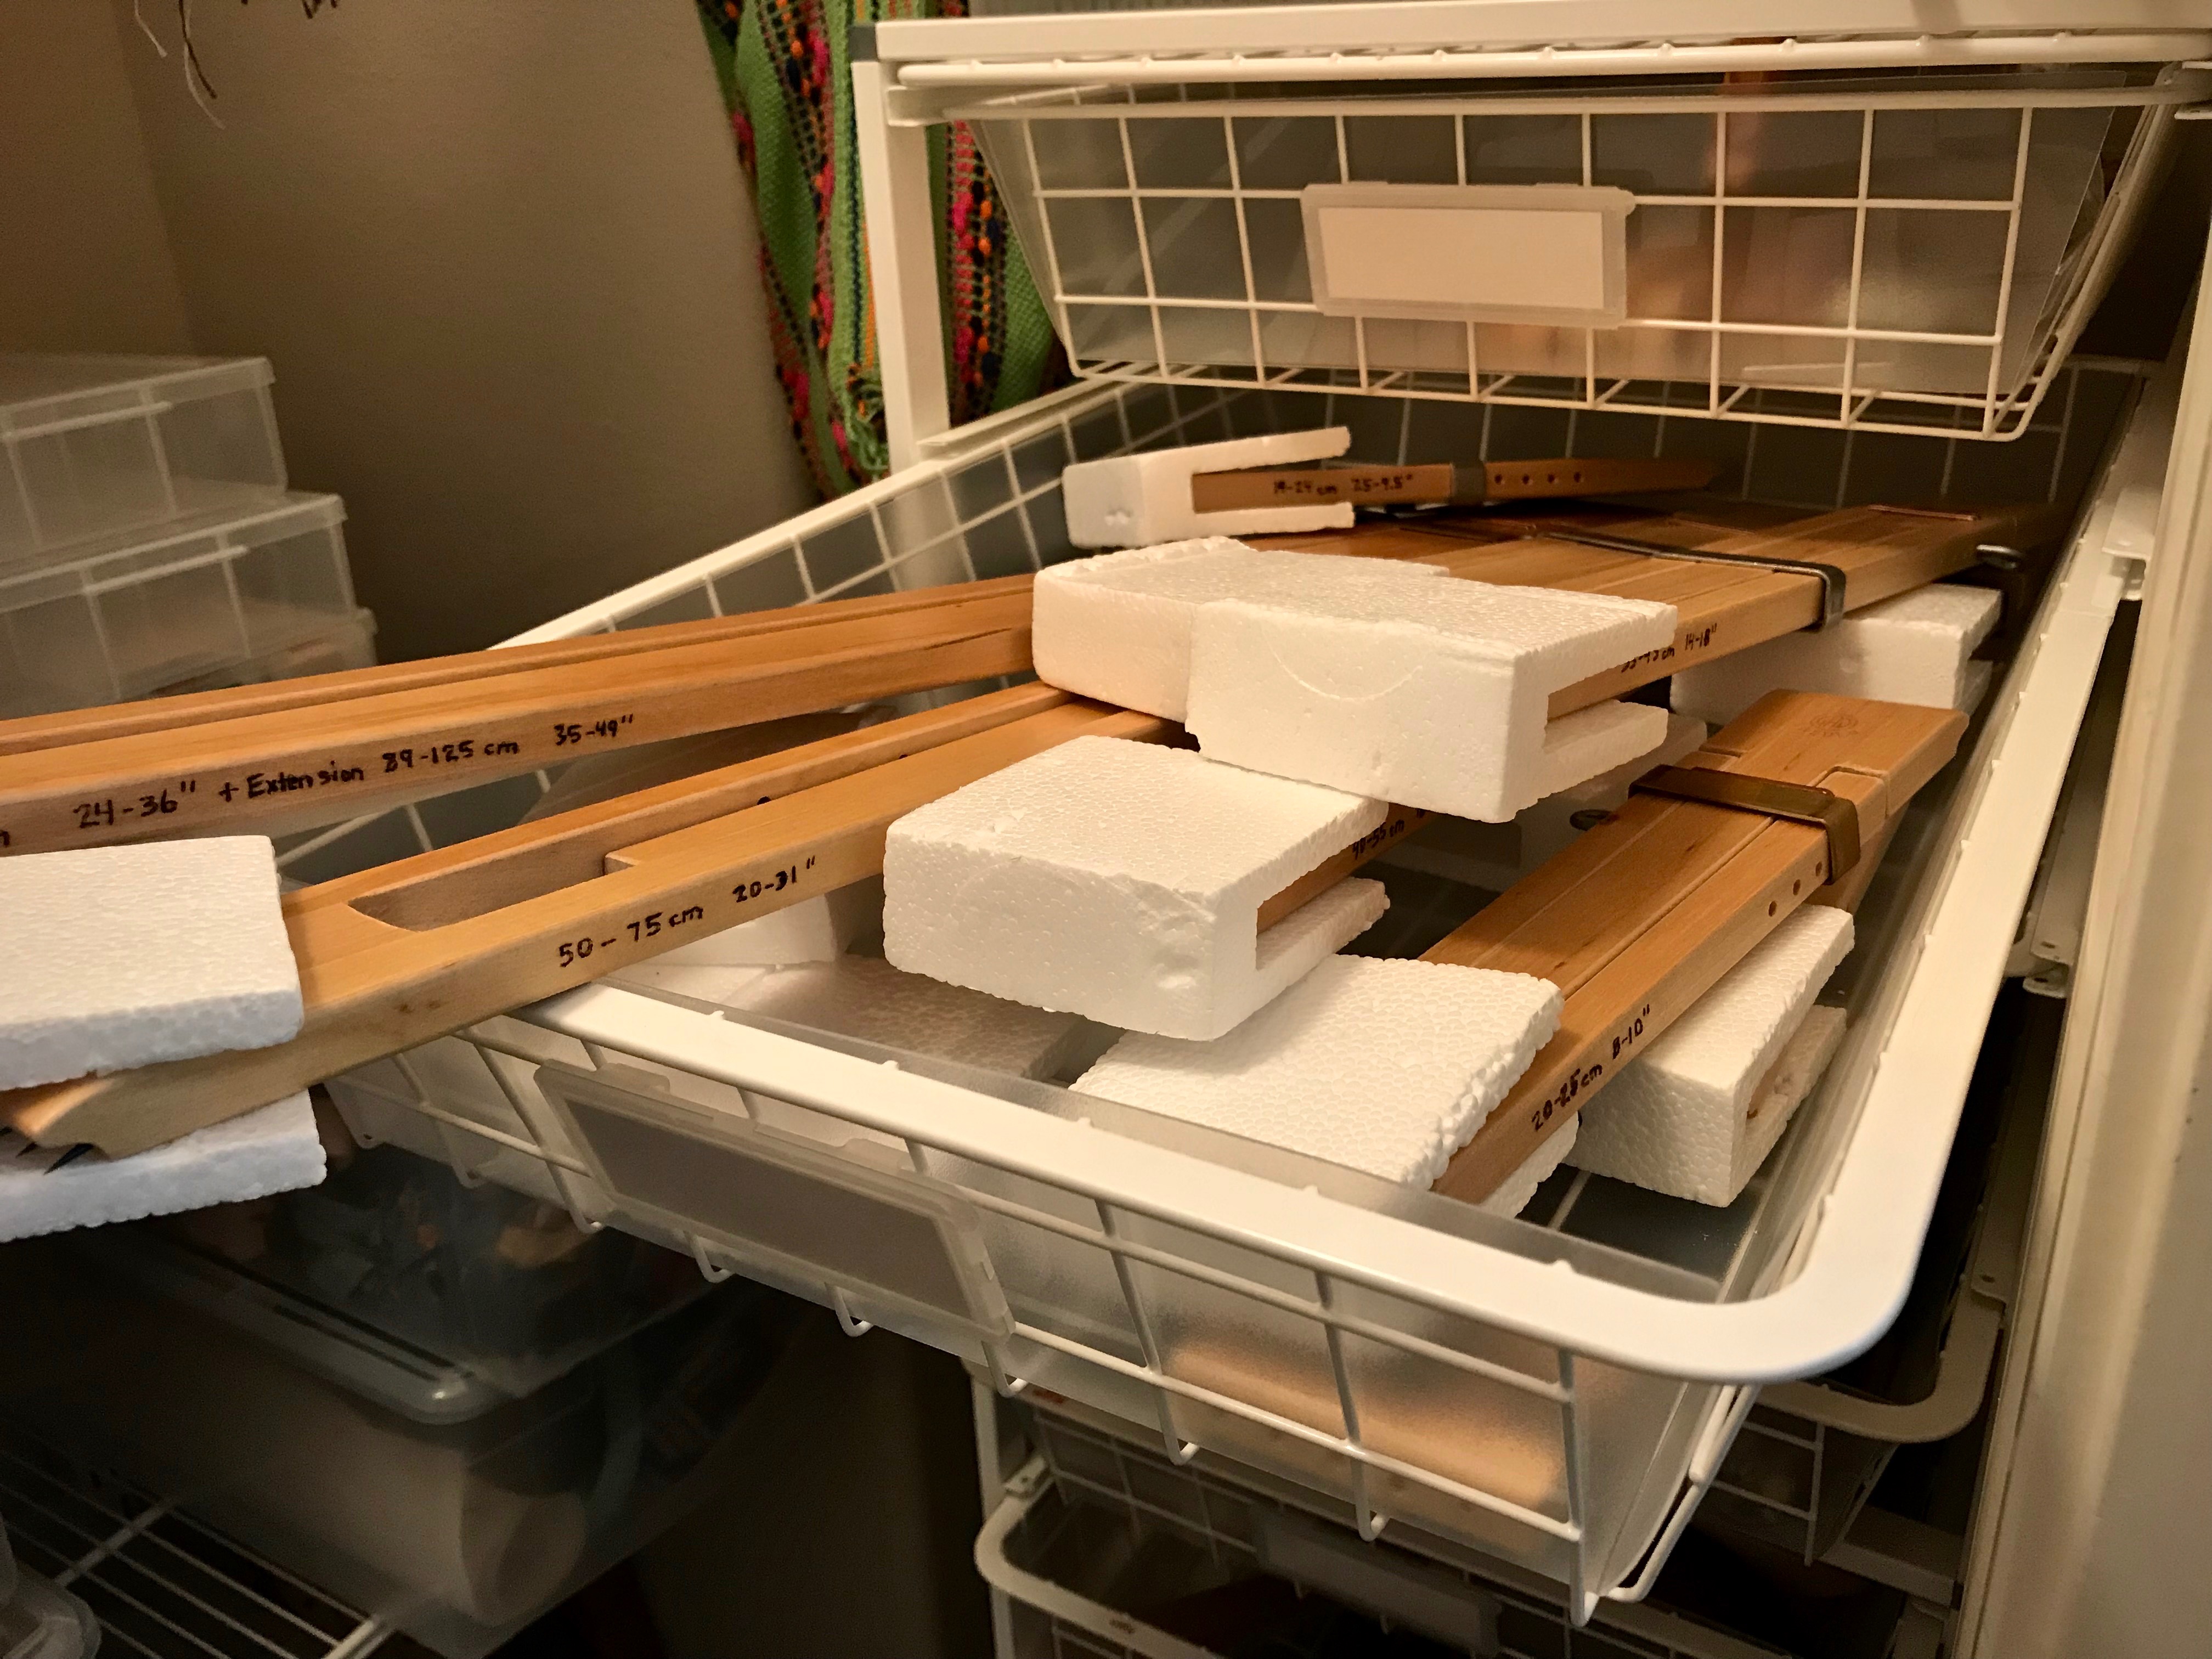
Store the temples in a manner in which the marked measurements are easily seen.
No more trying different temples to find one that fits. Now I can look at the markings and select the correct temple the first time.
Now I have permanent at-a-glance measurements for each of these frequently-used tools!
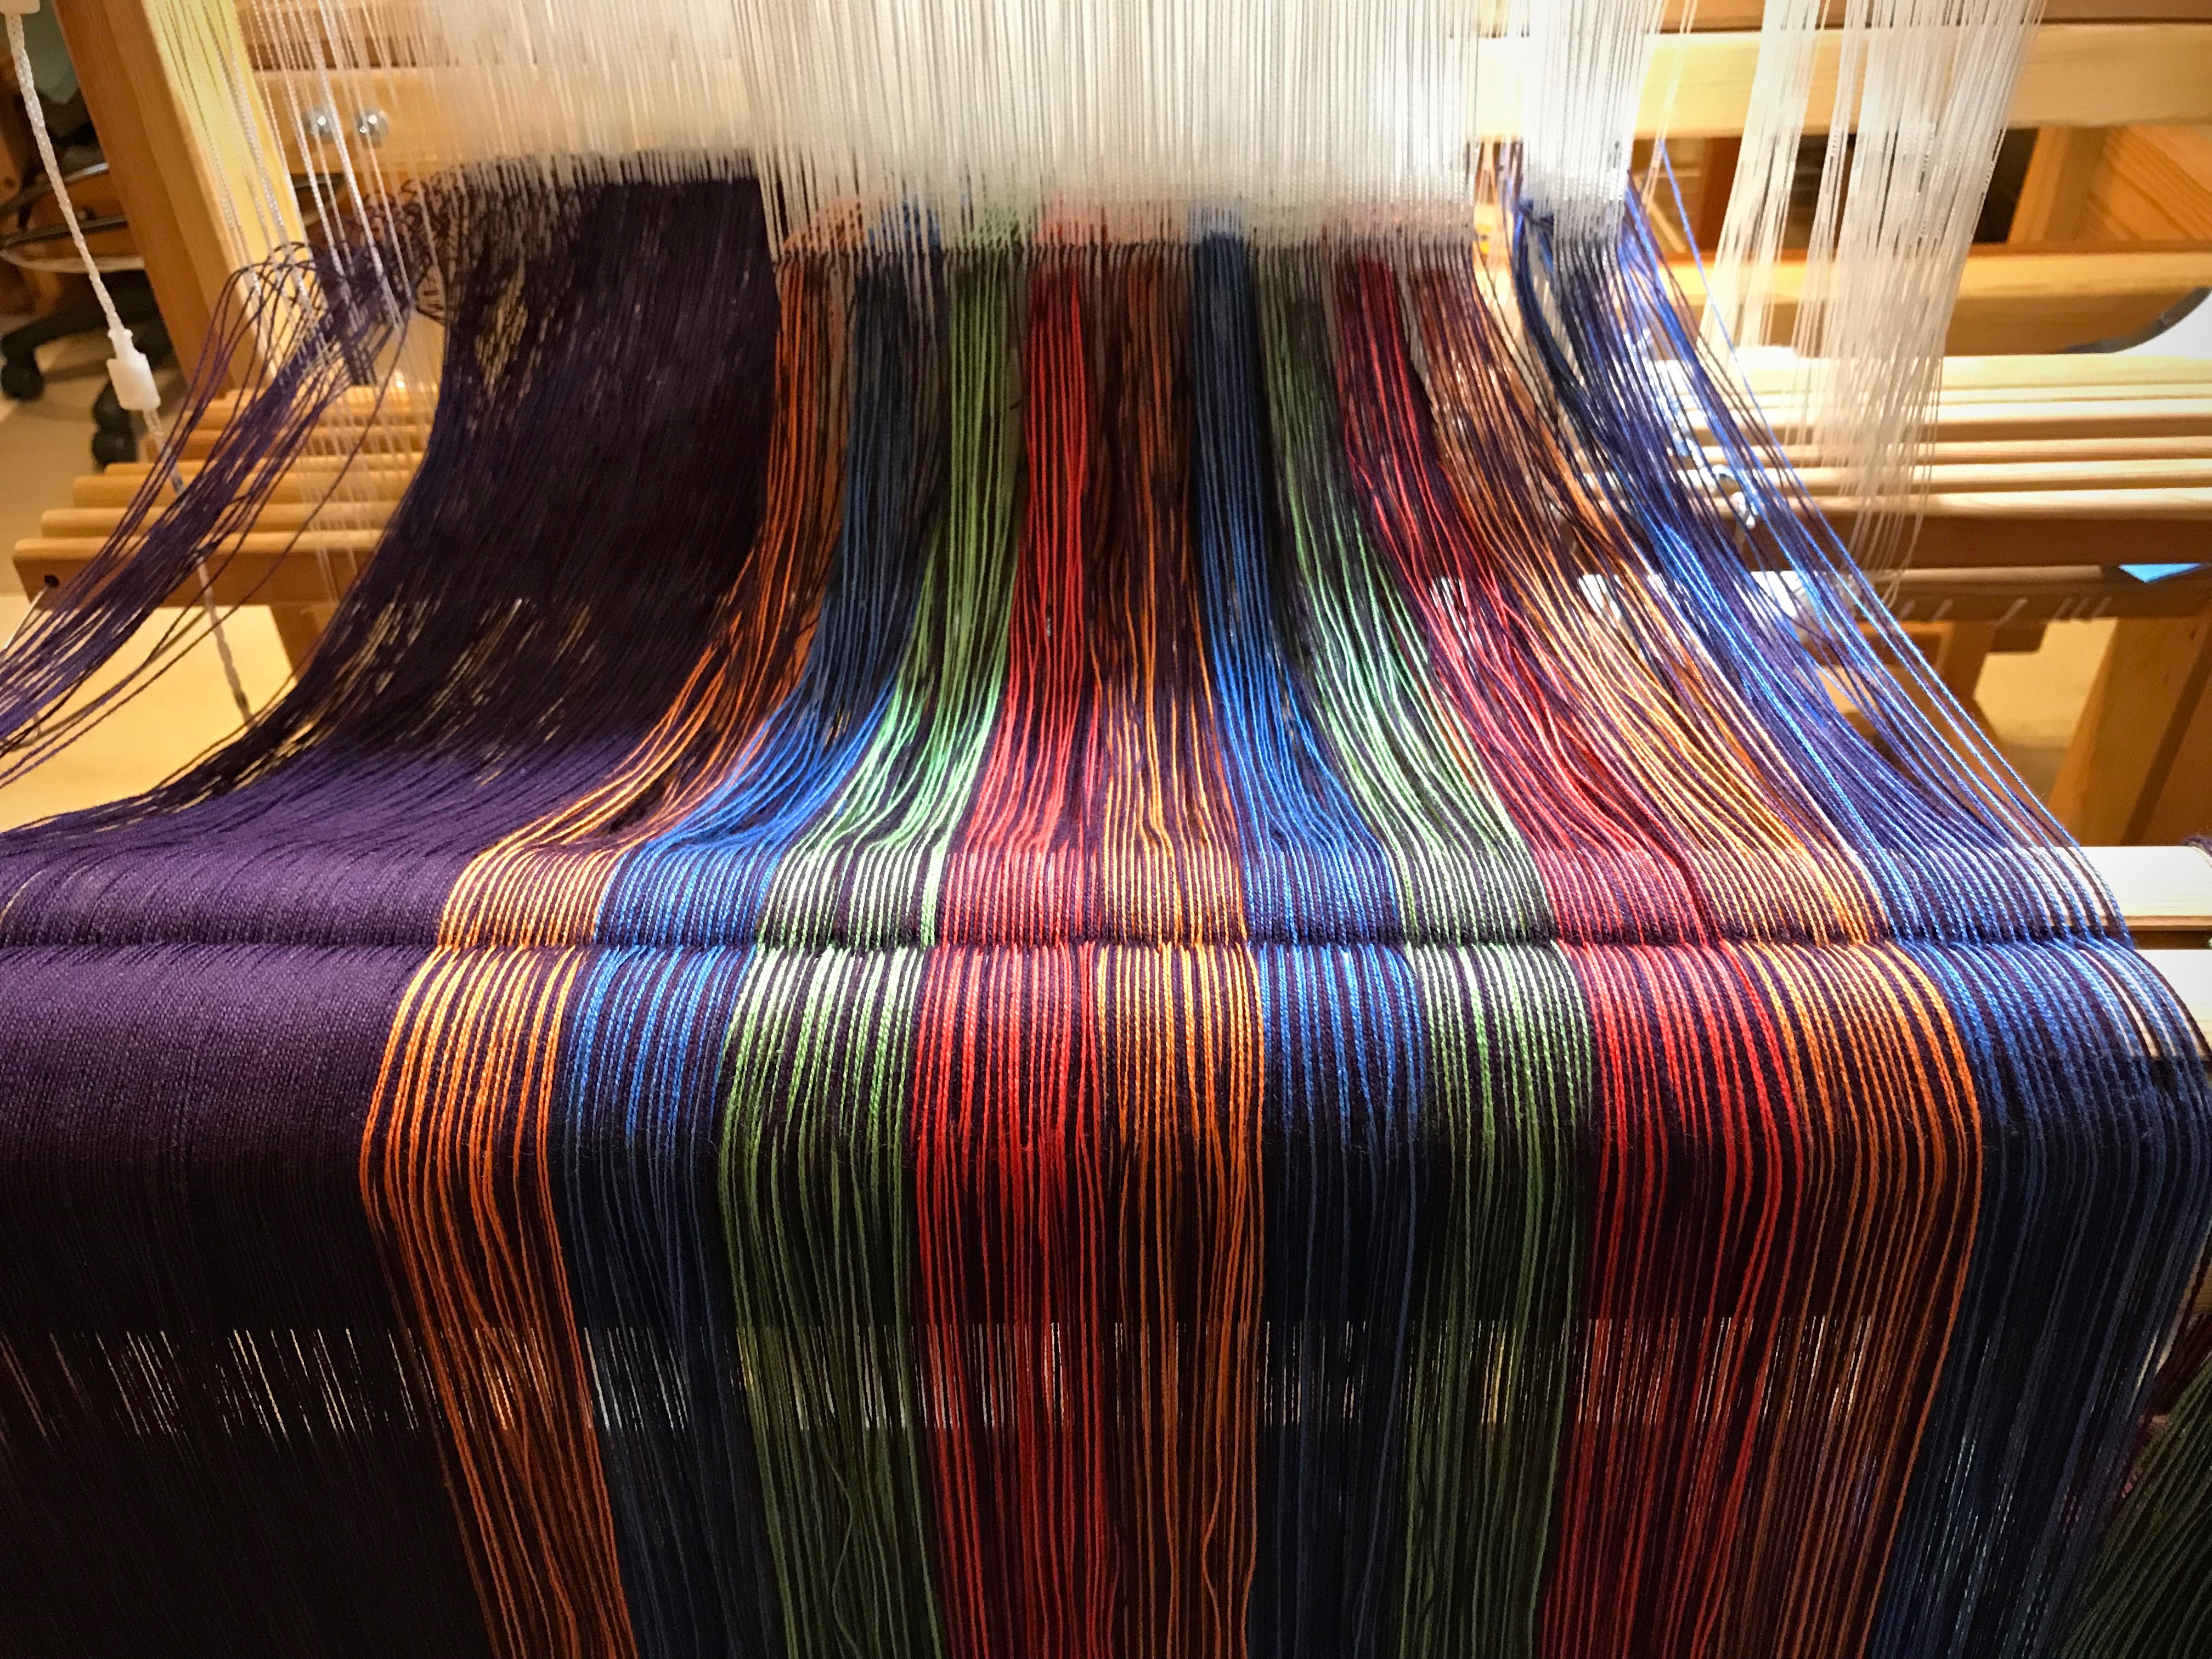
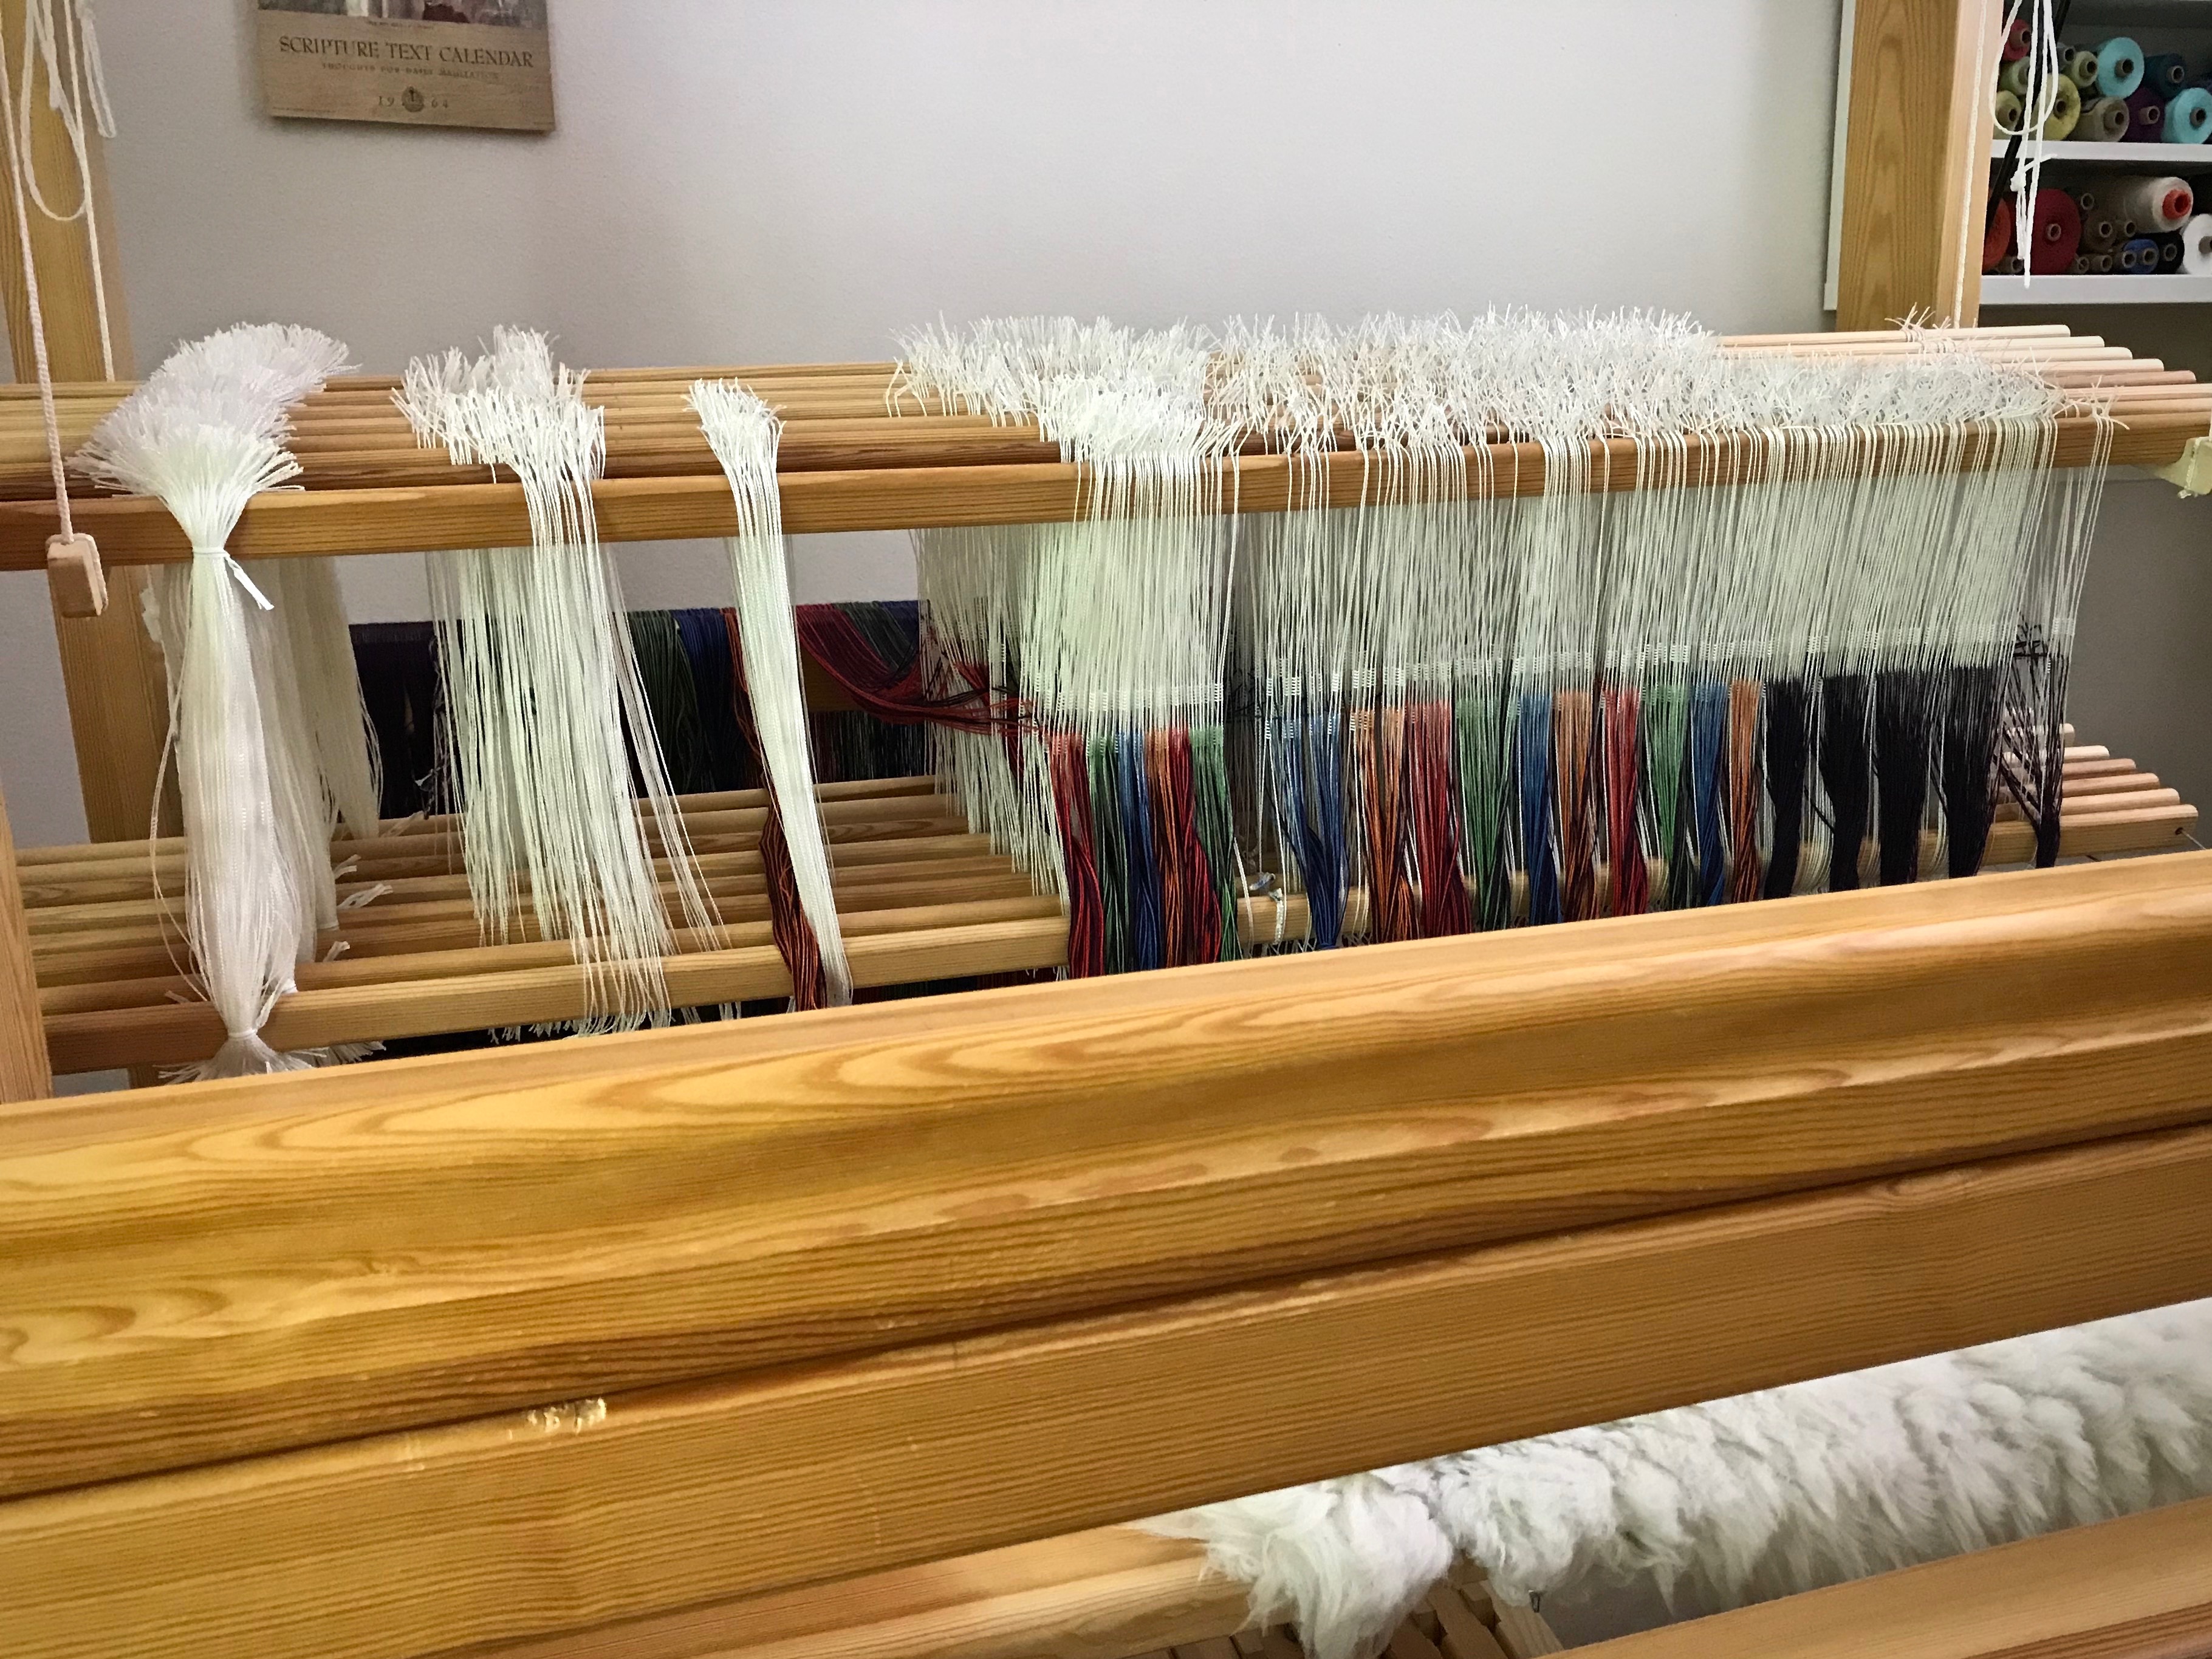
I am well into threading when I realize I neglected to take into account how many heddles I need for this project! I don’t have 2,064 even if I grab all of the heddles from the other loom. This double weave throw project is at a deadend until more heddles appear. I hurriedly place an order for more heddles…
This Glimåkra Standard is one of three looms that share my supply of Texsolv heddles.
Thankfully, the new heddles arrive quickly and the project is alive again.
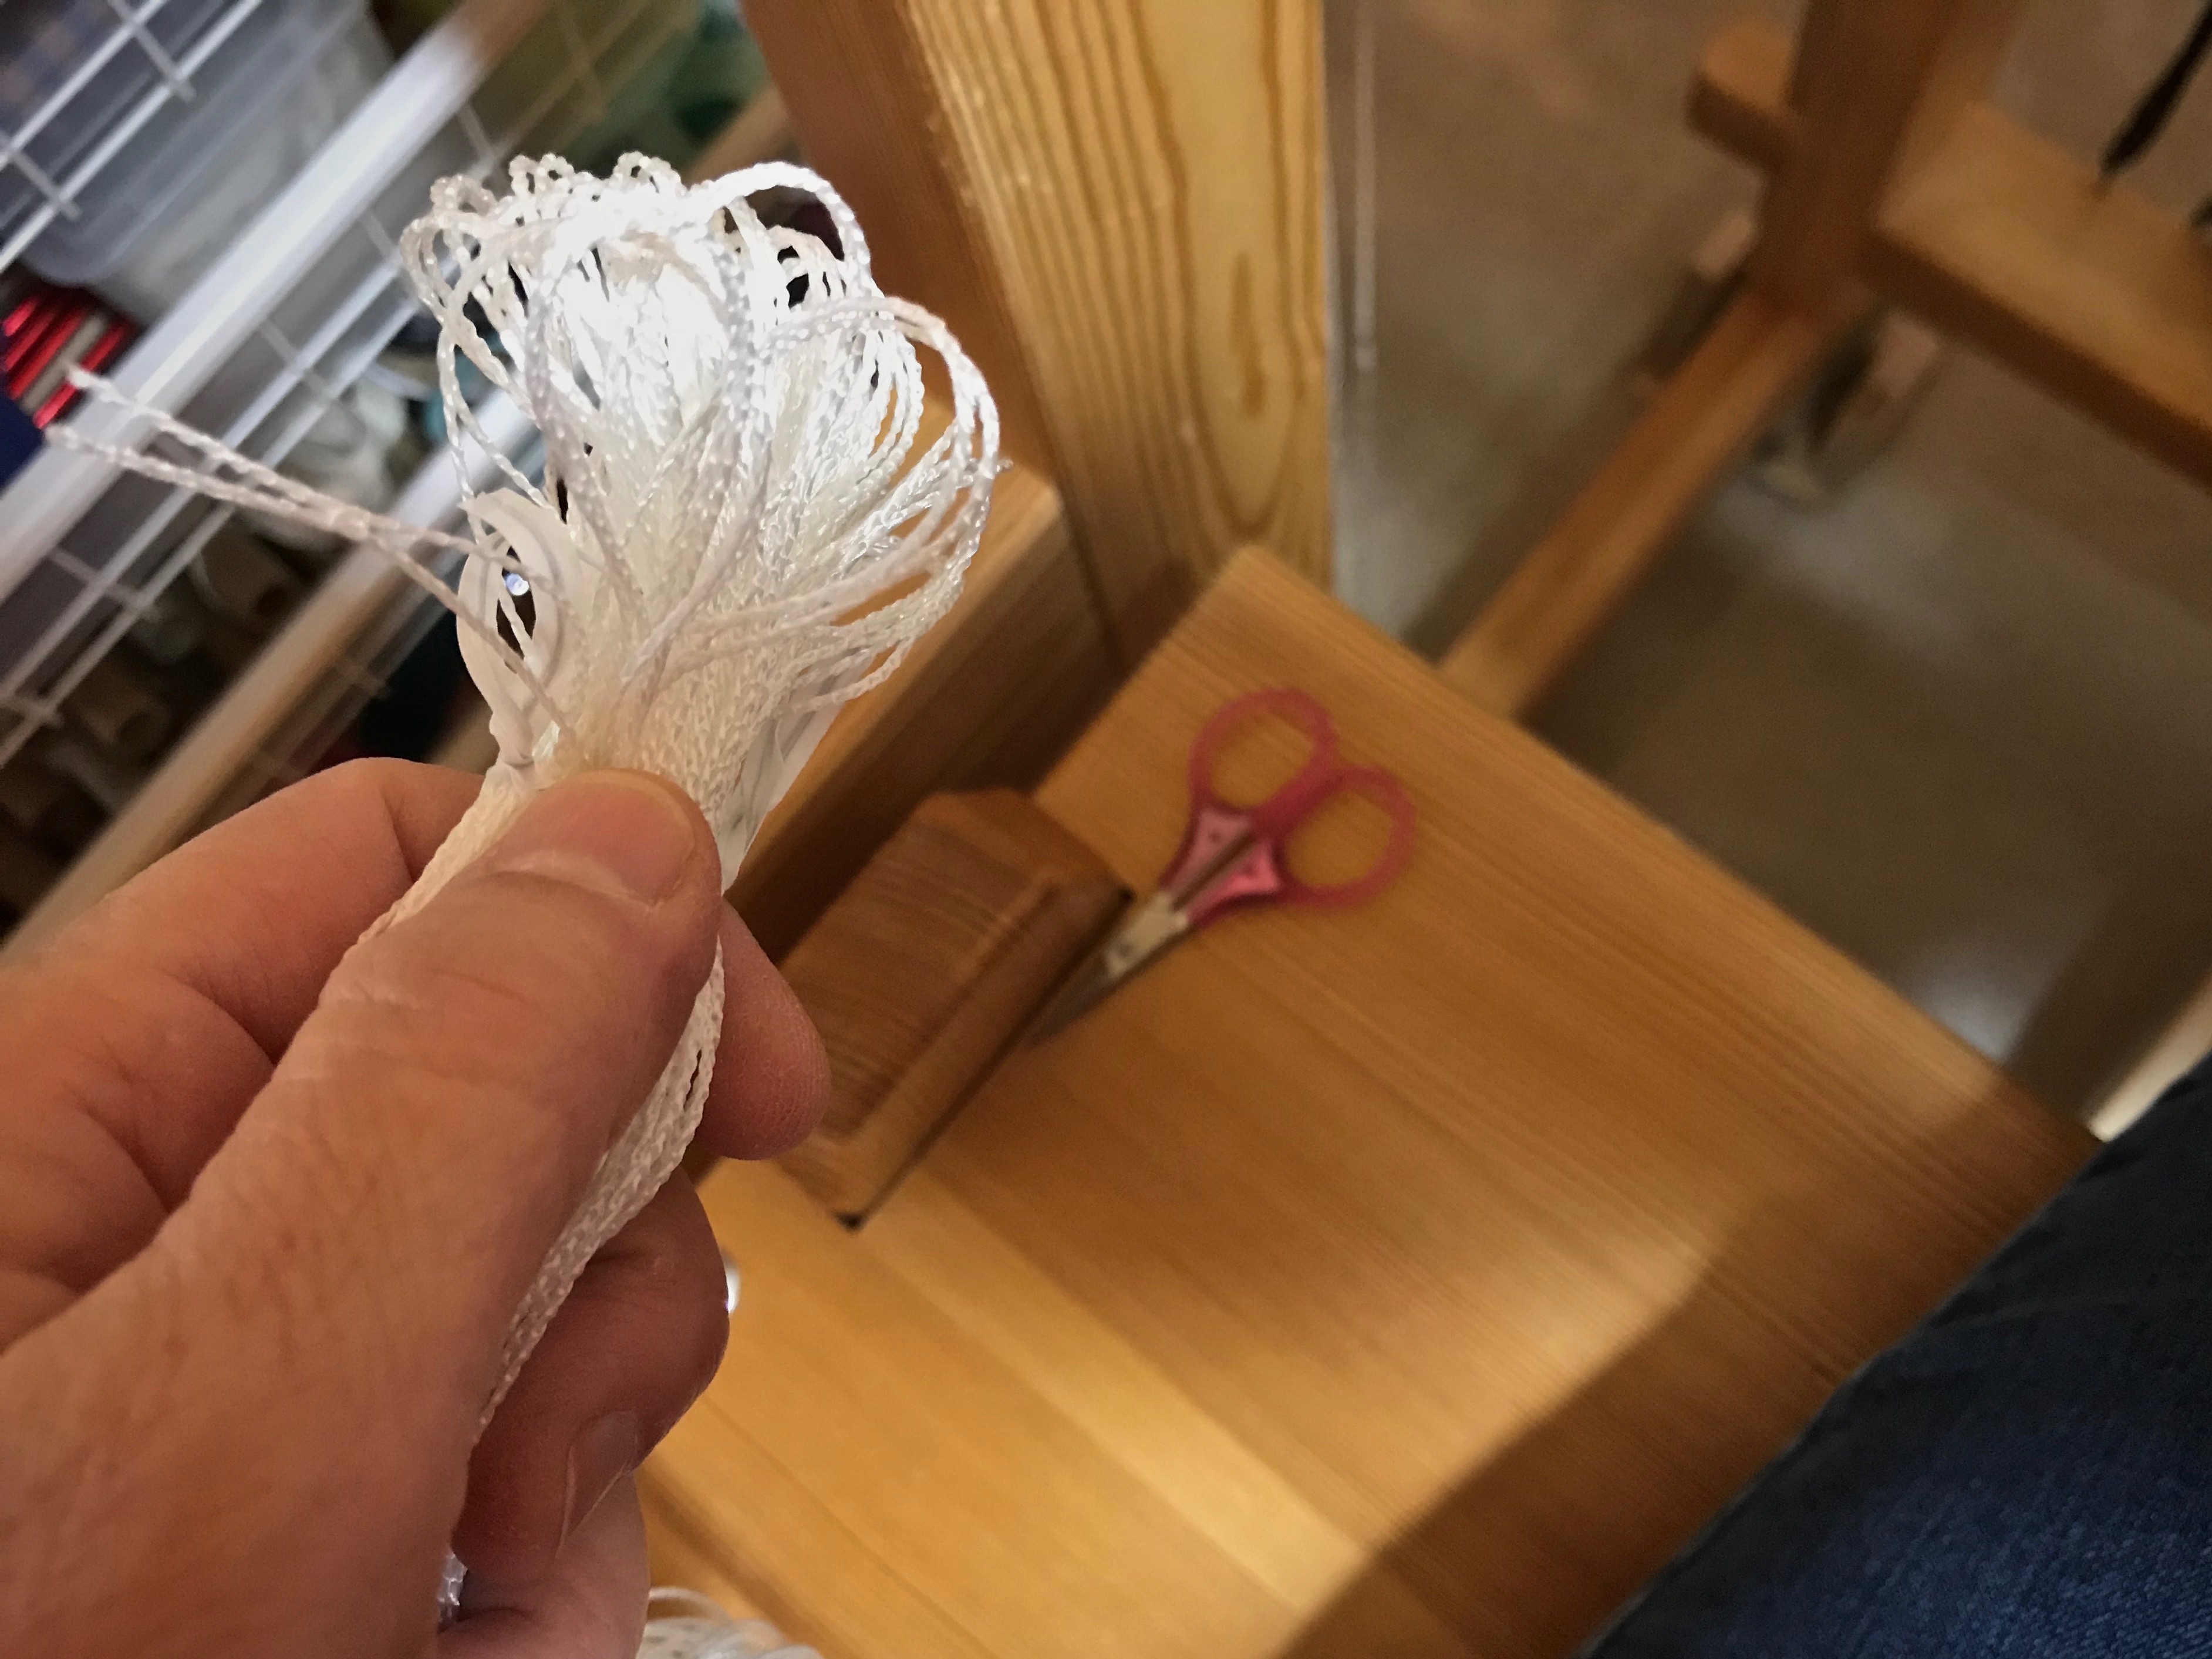
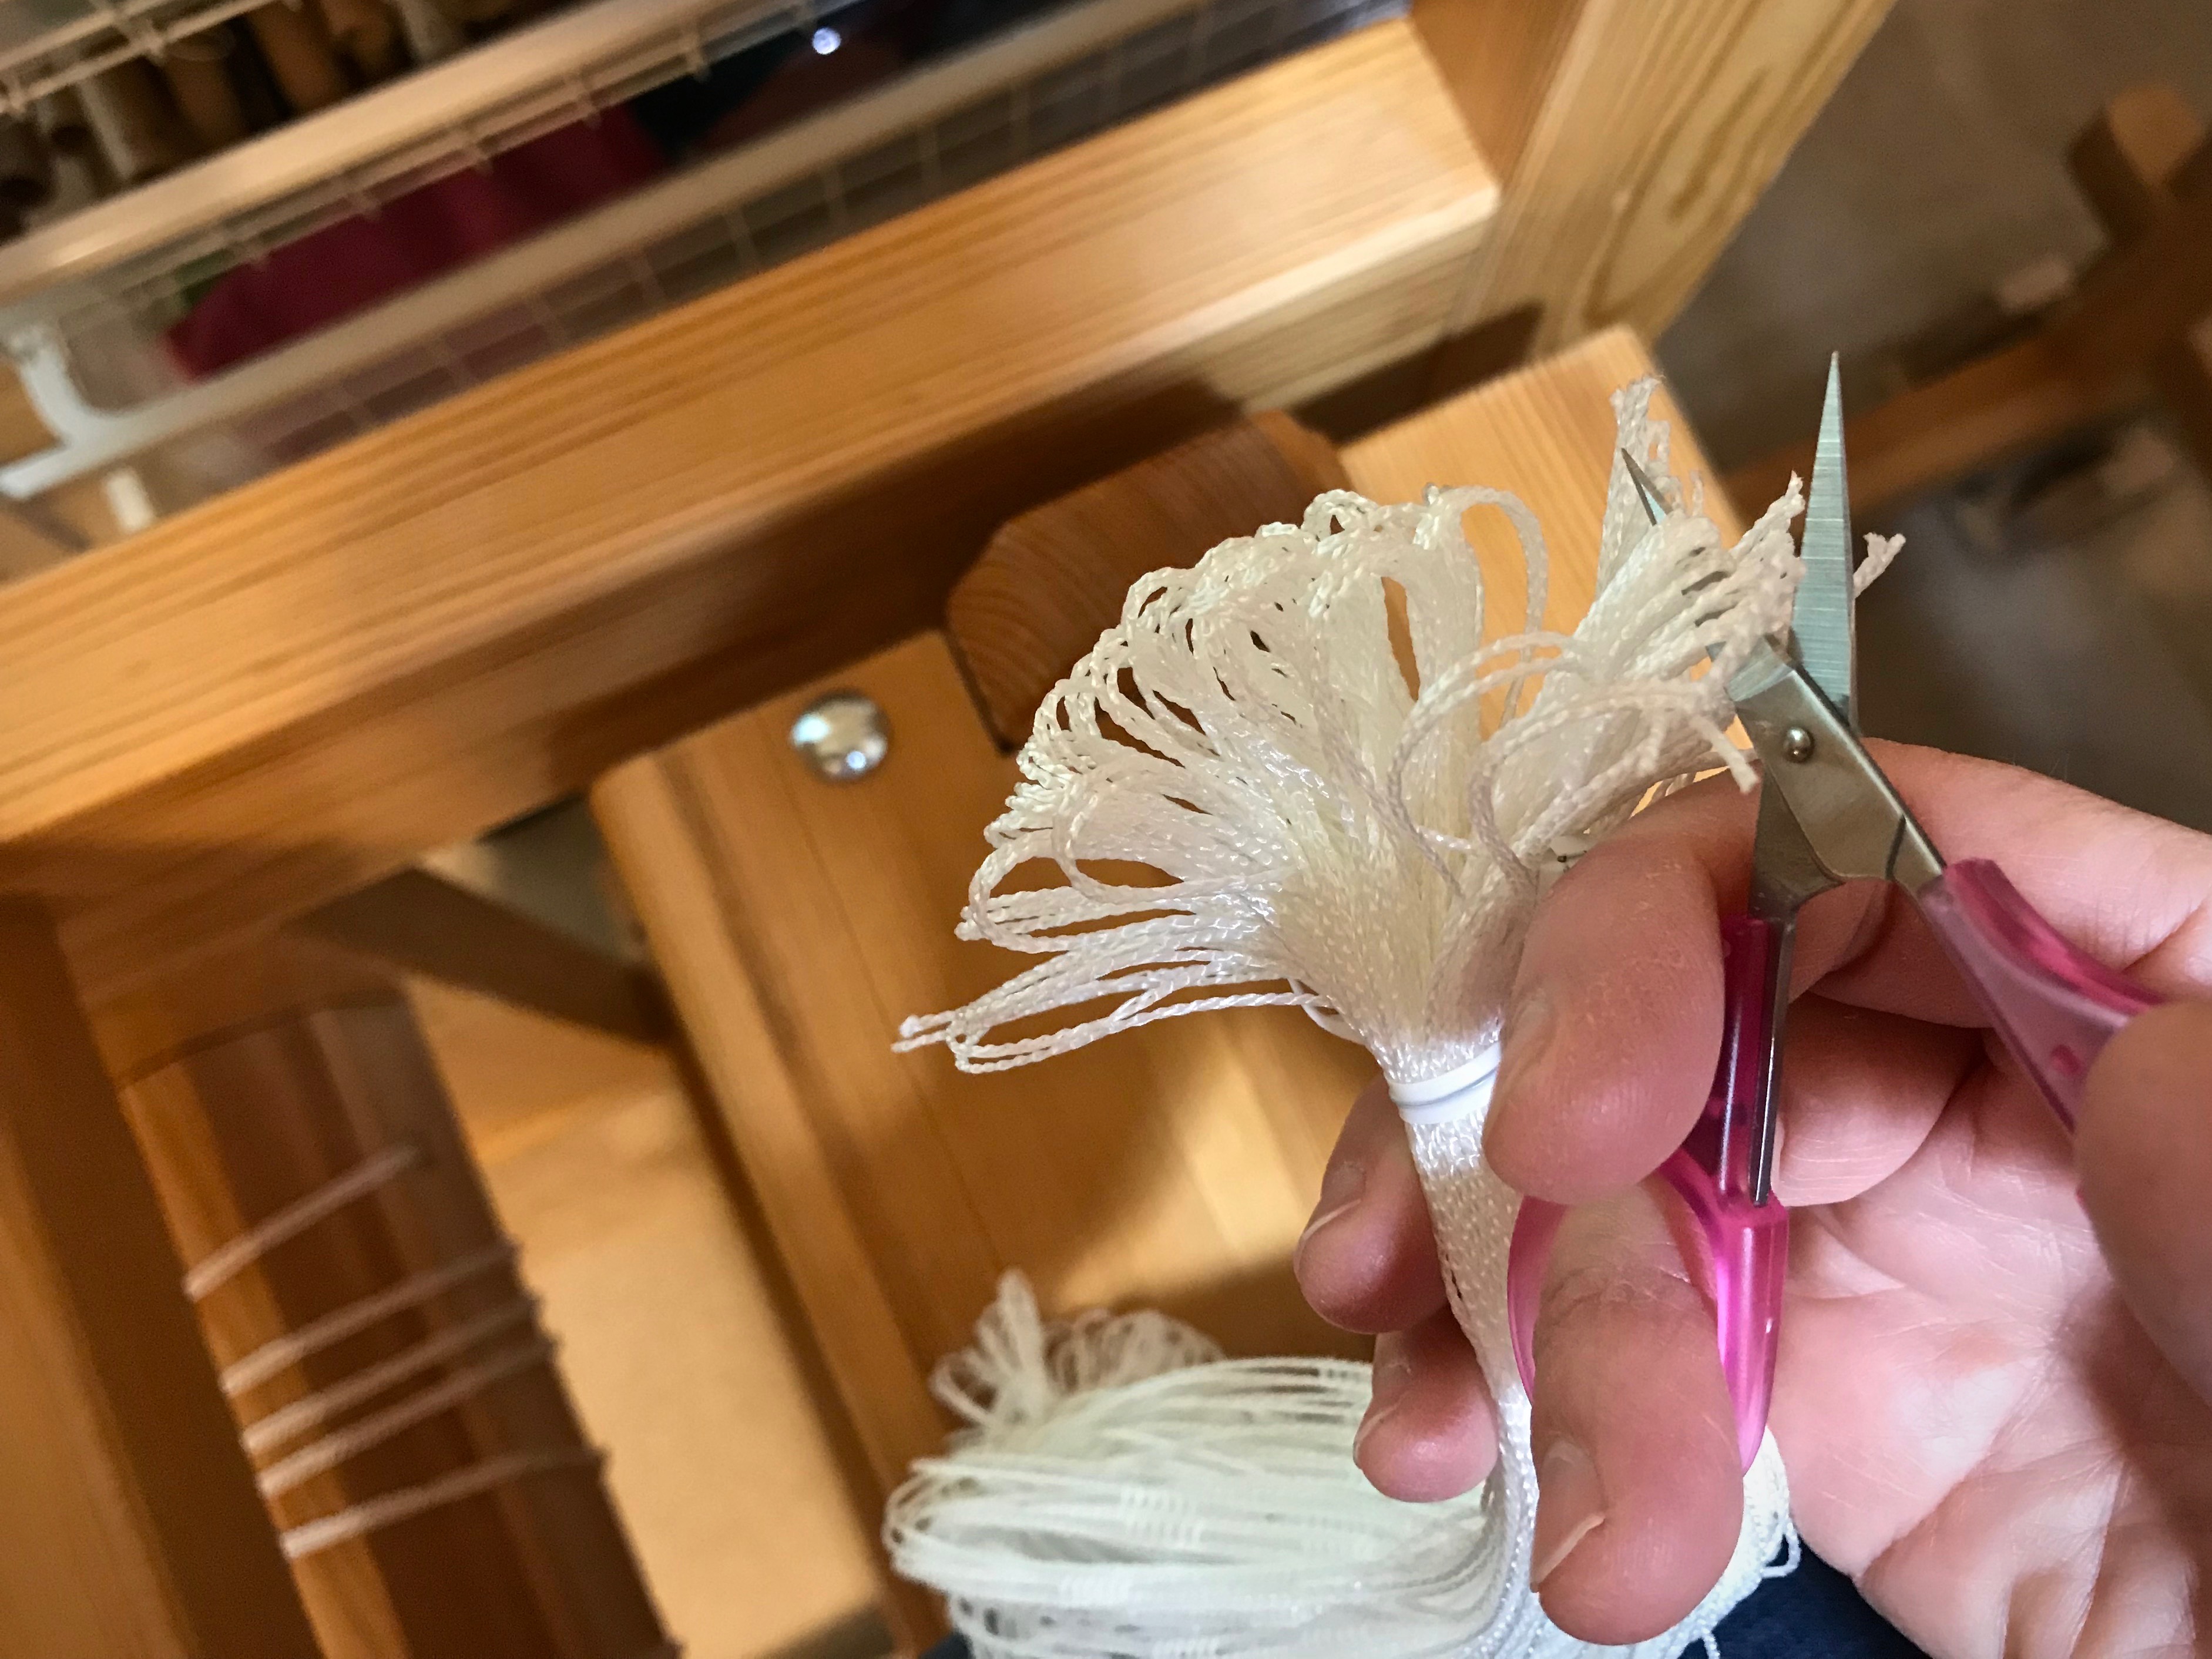
This is what 1,000 Texsolv heddles looks like! I didn’t want to run out again any time soon.Heddles come in bundles of 100, held together with twist ties. WARNING: DO NOT undo the twist ties before you put the heddles on the shaft bars. You’ll be sorry…Before putting the heddles on the shaft bars, and while they are still tied into bundles, clip the loops at each end.I clip the loops on both ends of the heddles. It is easy to move heddles wherever you want if the loops are cut, including repositioning individual heddles. (It is far easier to clip the loops while the heddles are still tied together.)There are 100 new heddles on each shaft. The heddles that are not used will be tied up and put away in my heddle box, ready for the next time I need more heddles.
Alive. This is the Easter season when we celebrate the resurrection of Jesus Christ. He died, and was made alive again! What makes it even more fantastic is what that means for us. We all have a goodness shortage. And without a source of true goodness, our lifetime self-improvement project is at a dead end. Yet, through faith in the powerful working of God, we are raised with Christ. We are made alive together with him. His true goodness becomes our living source.
Threading progresses. New bundles of heddles stand ready to be used!
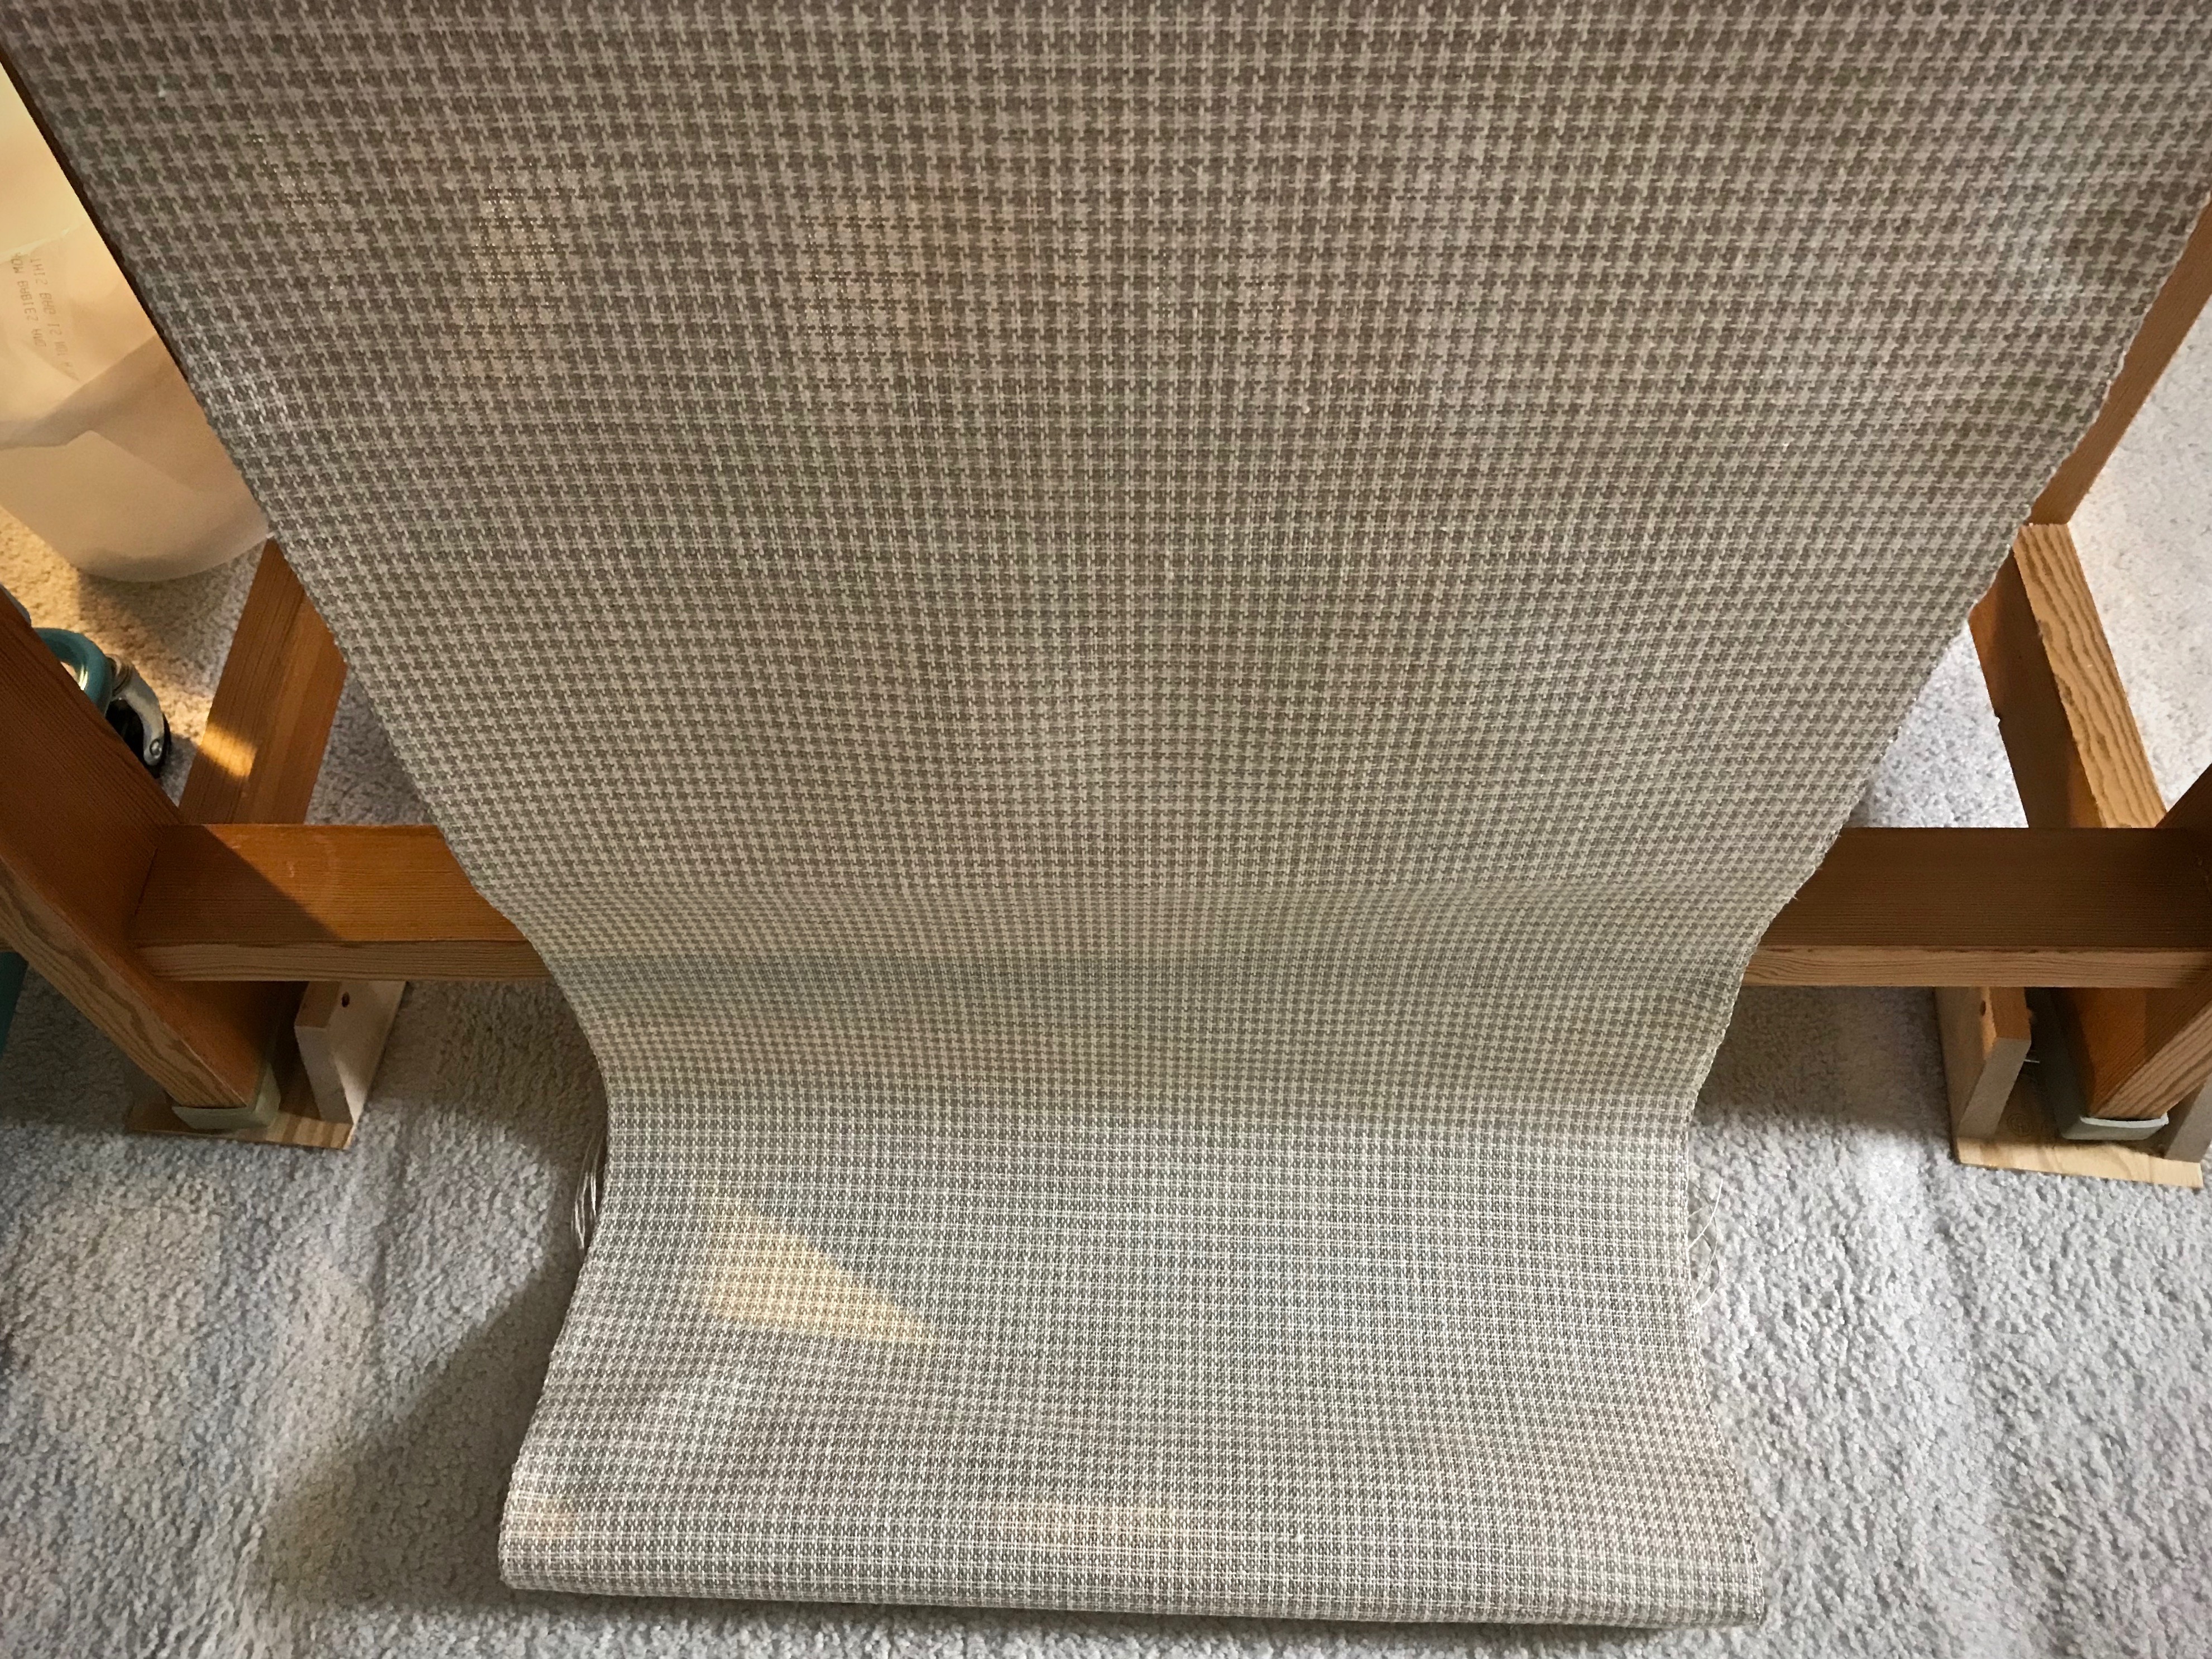
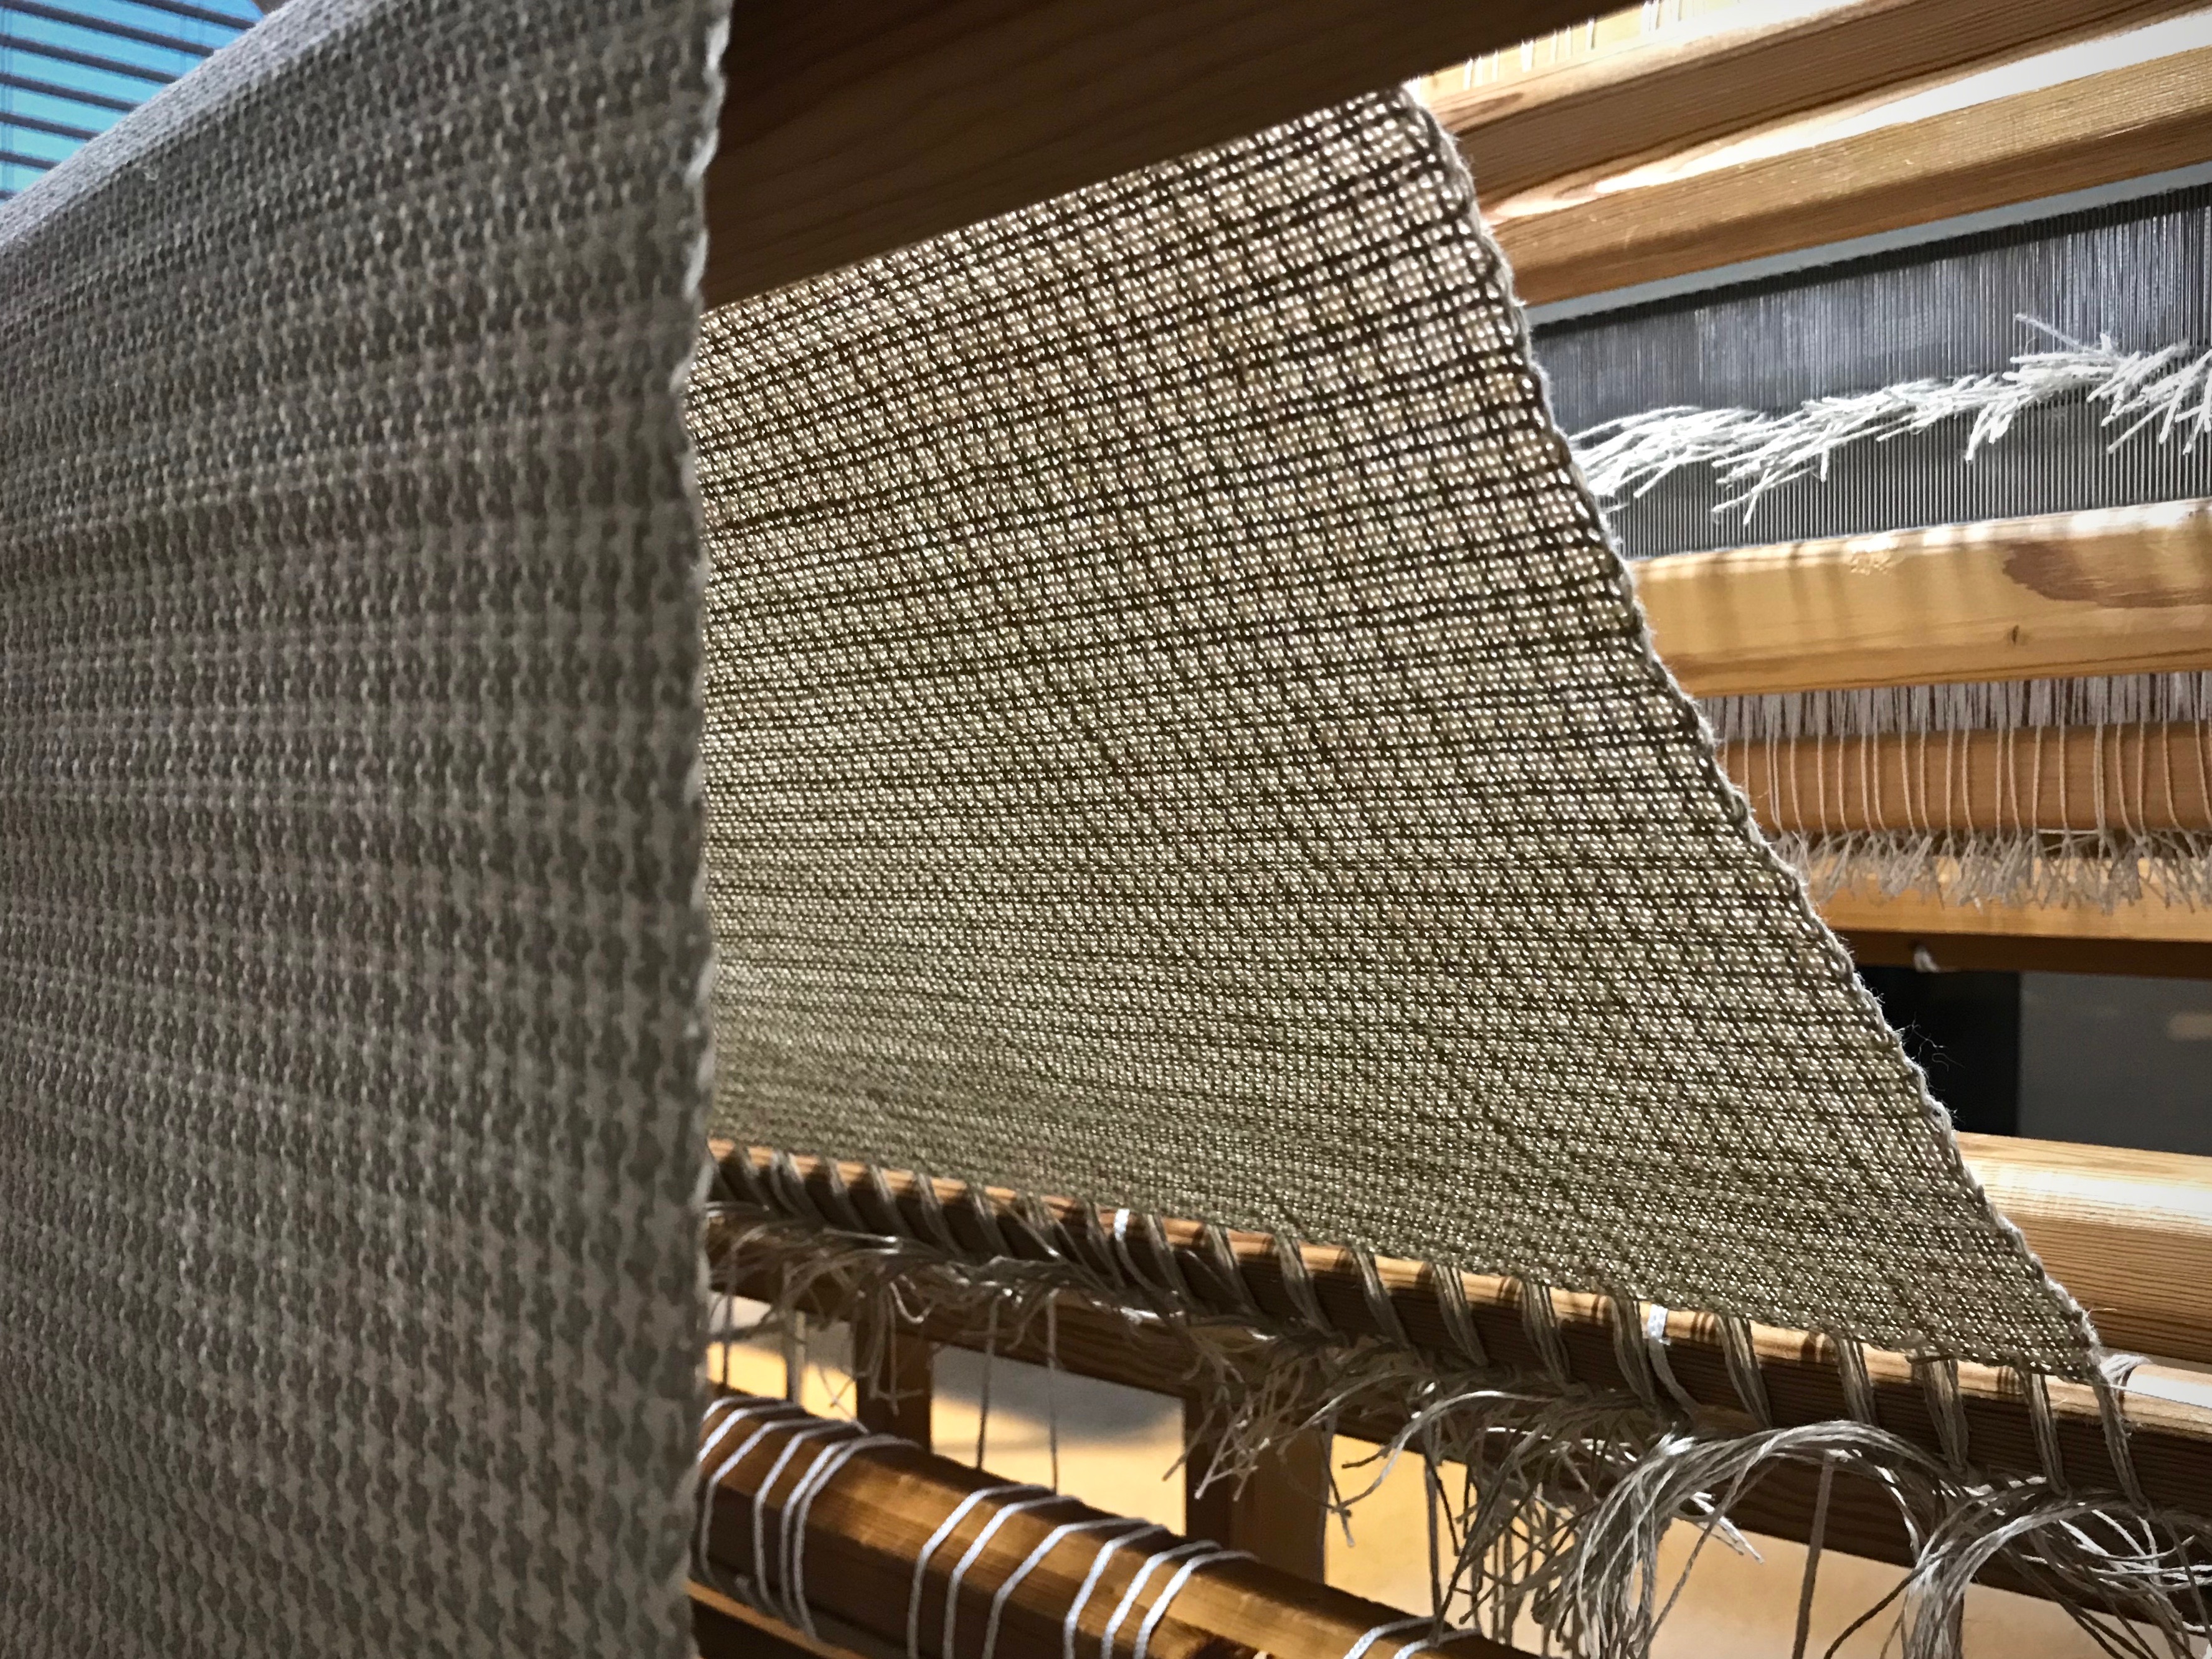
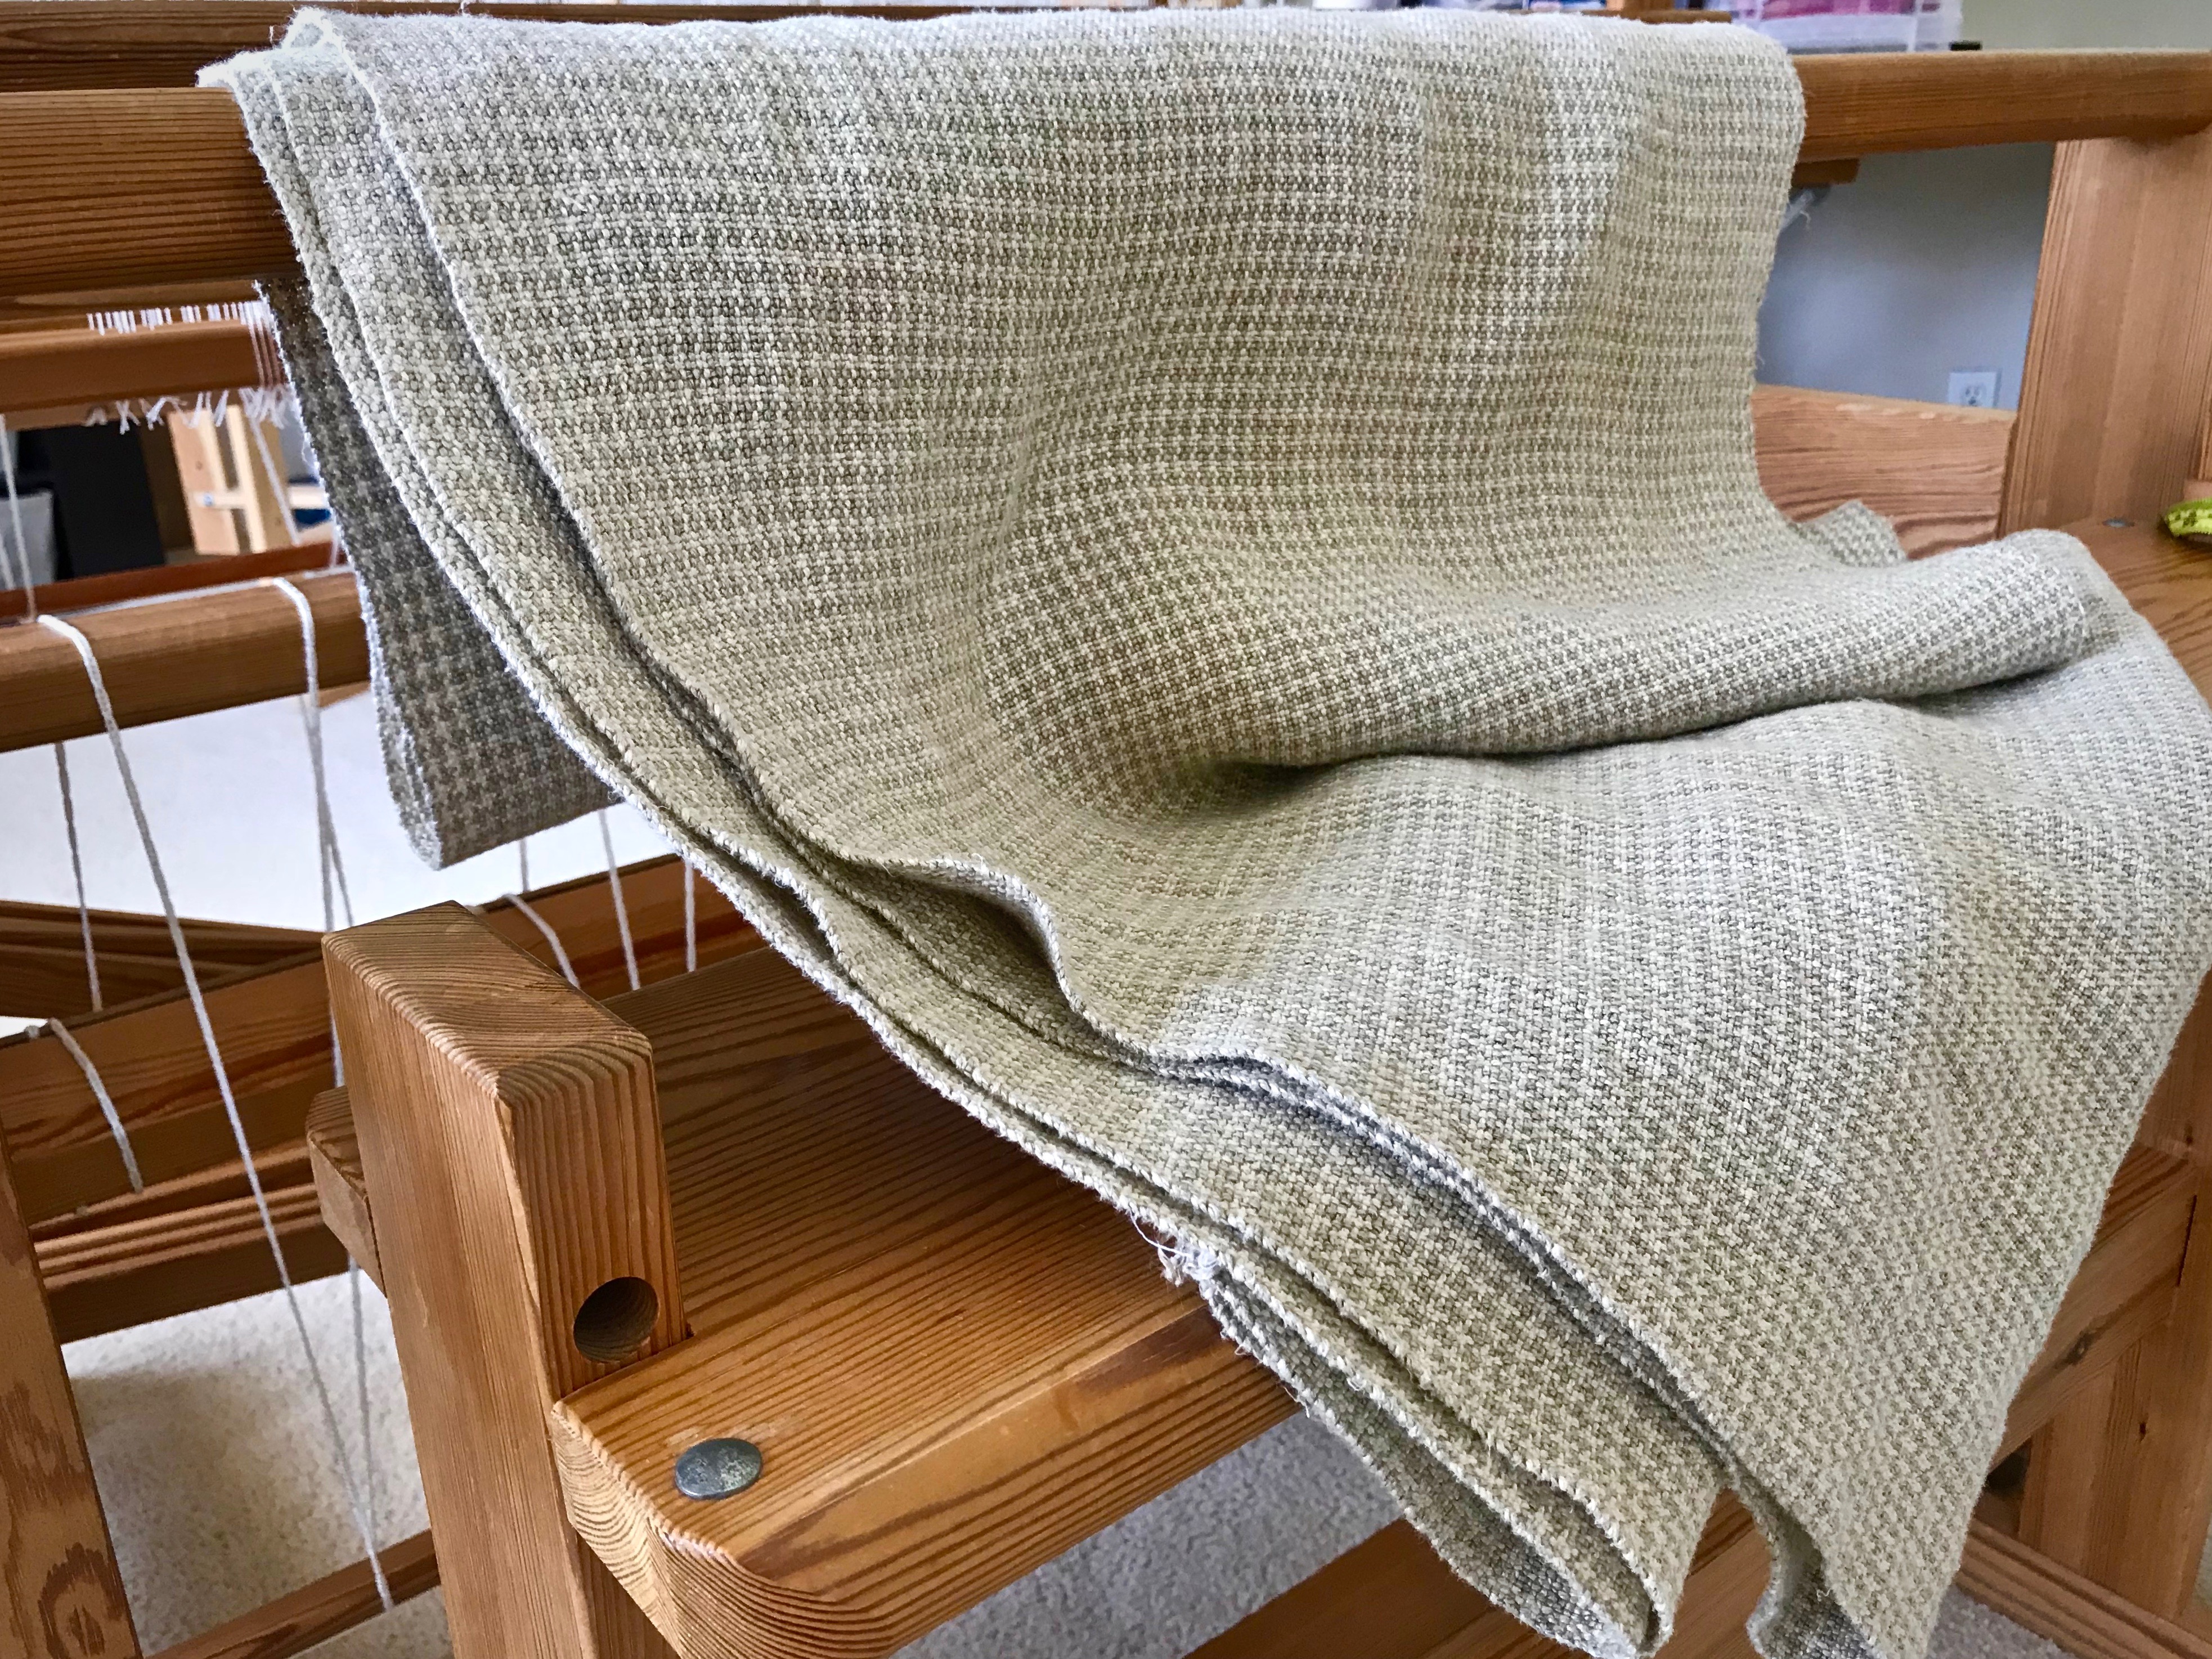
Do you dream of making upholstery fabric? I do. There are four chair seats at our Texas hill country home that I want to re-cover. Now I have custom upholstery fabric!
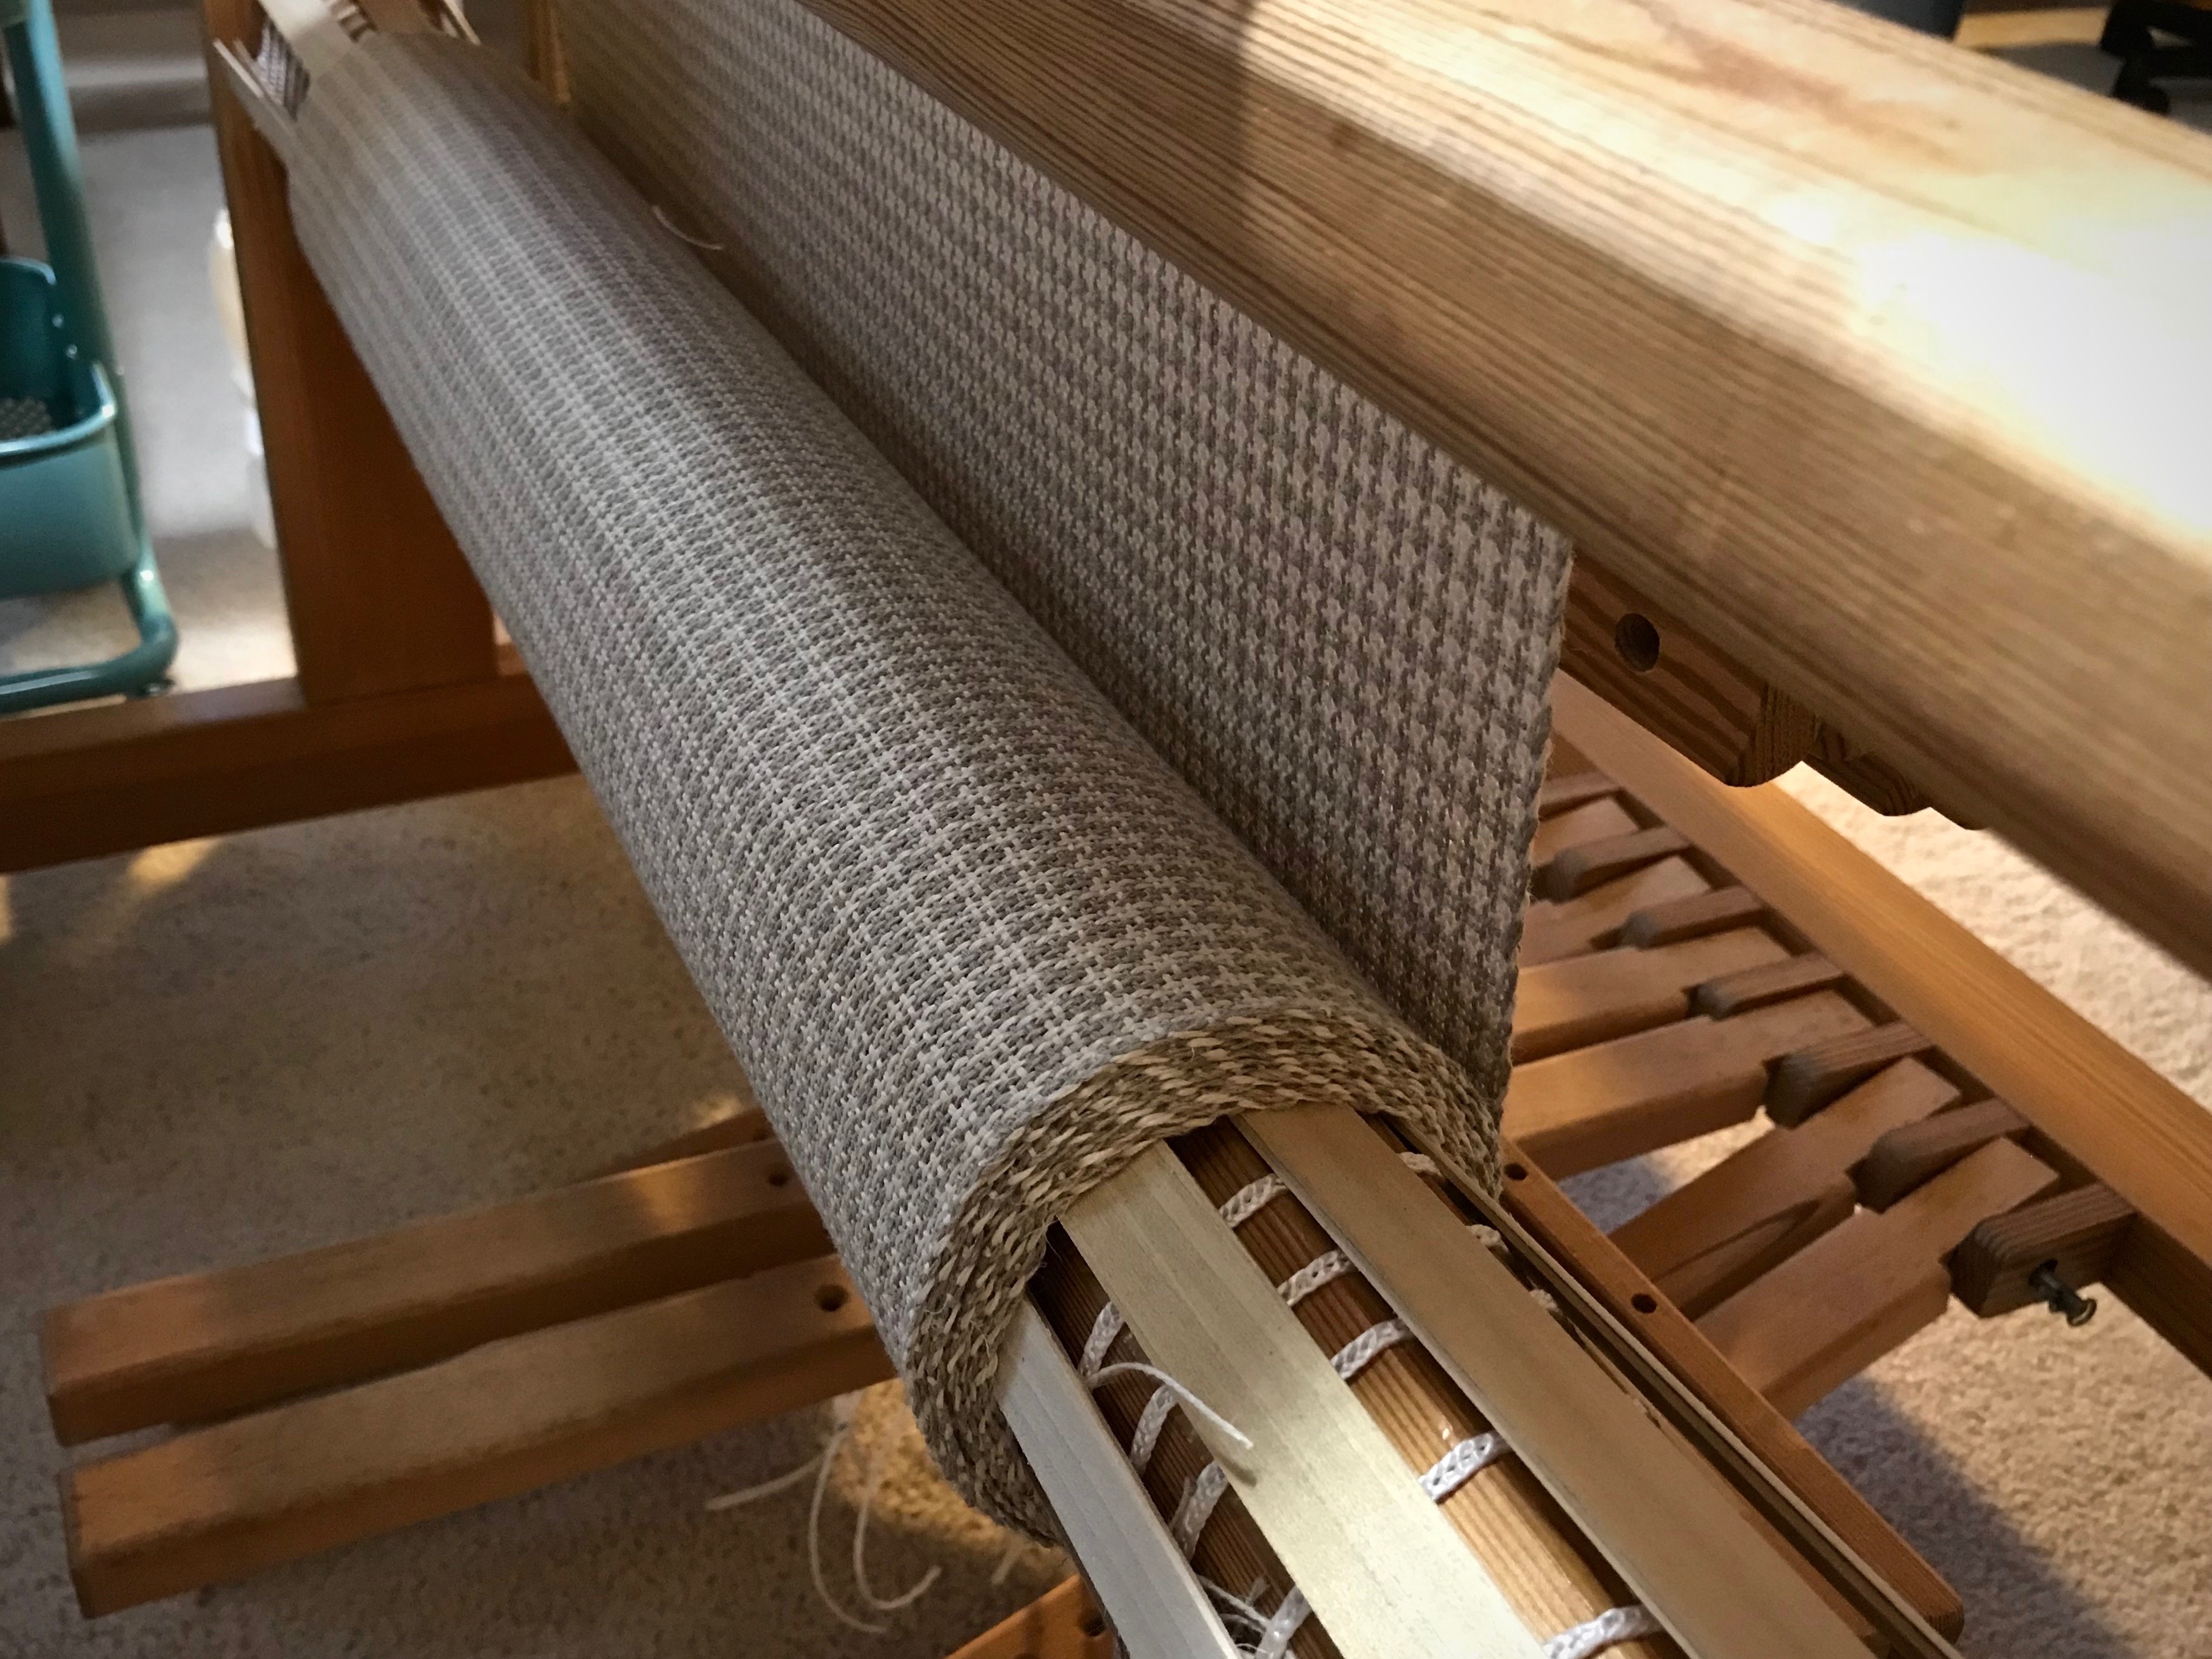
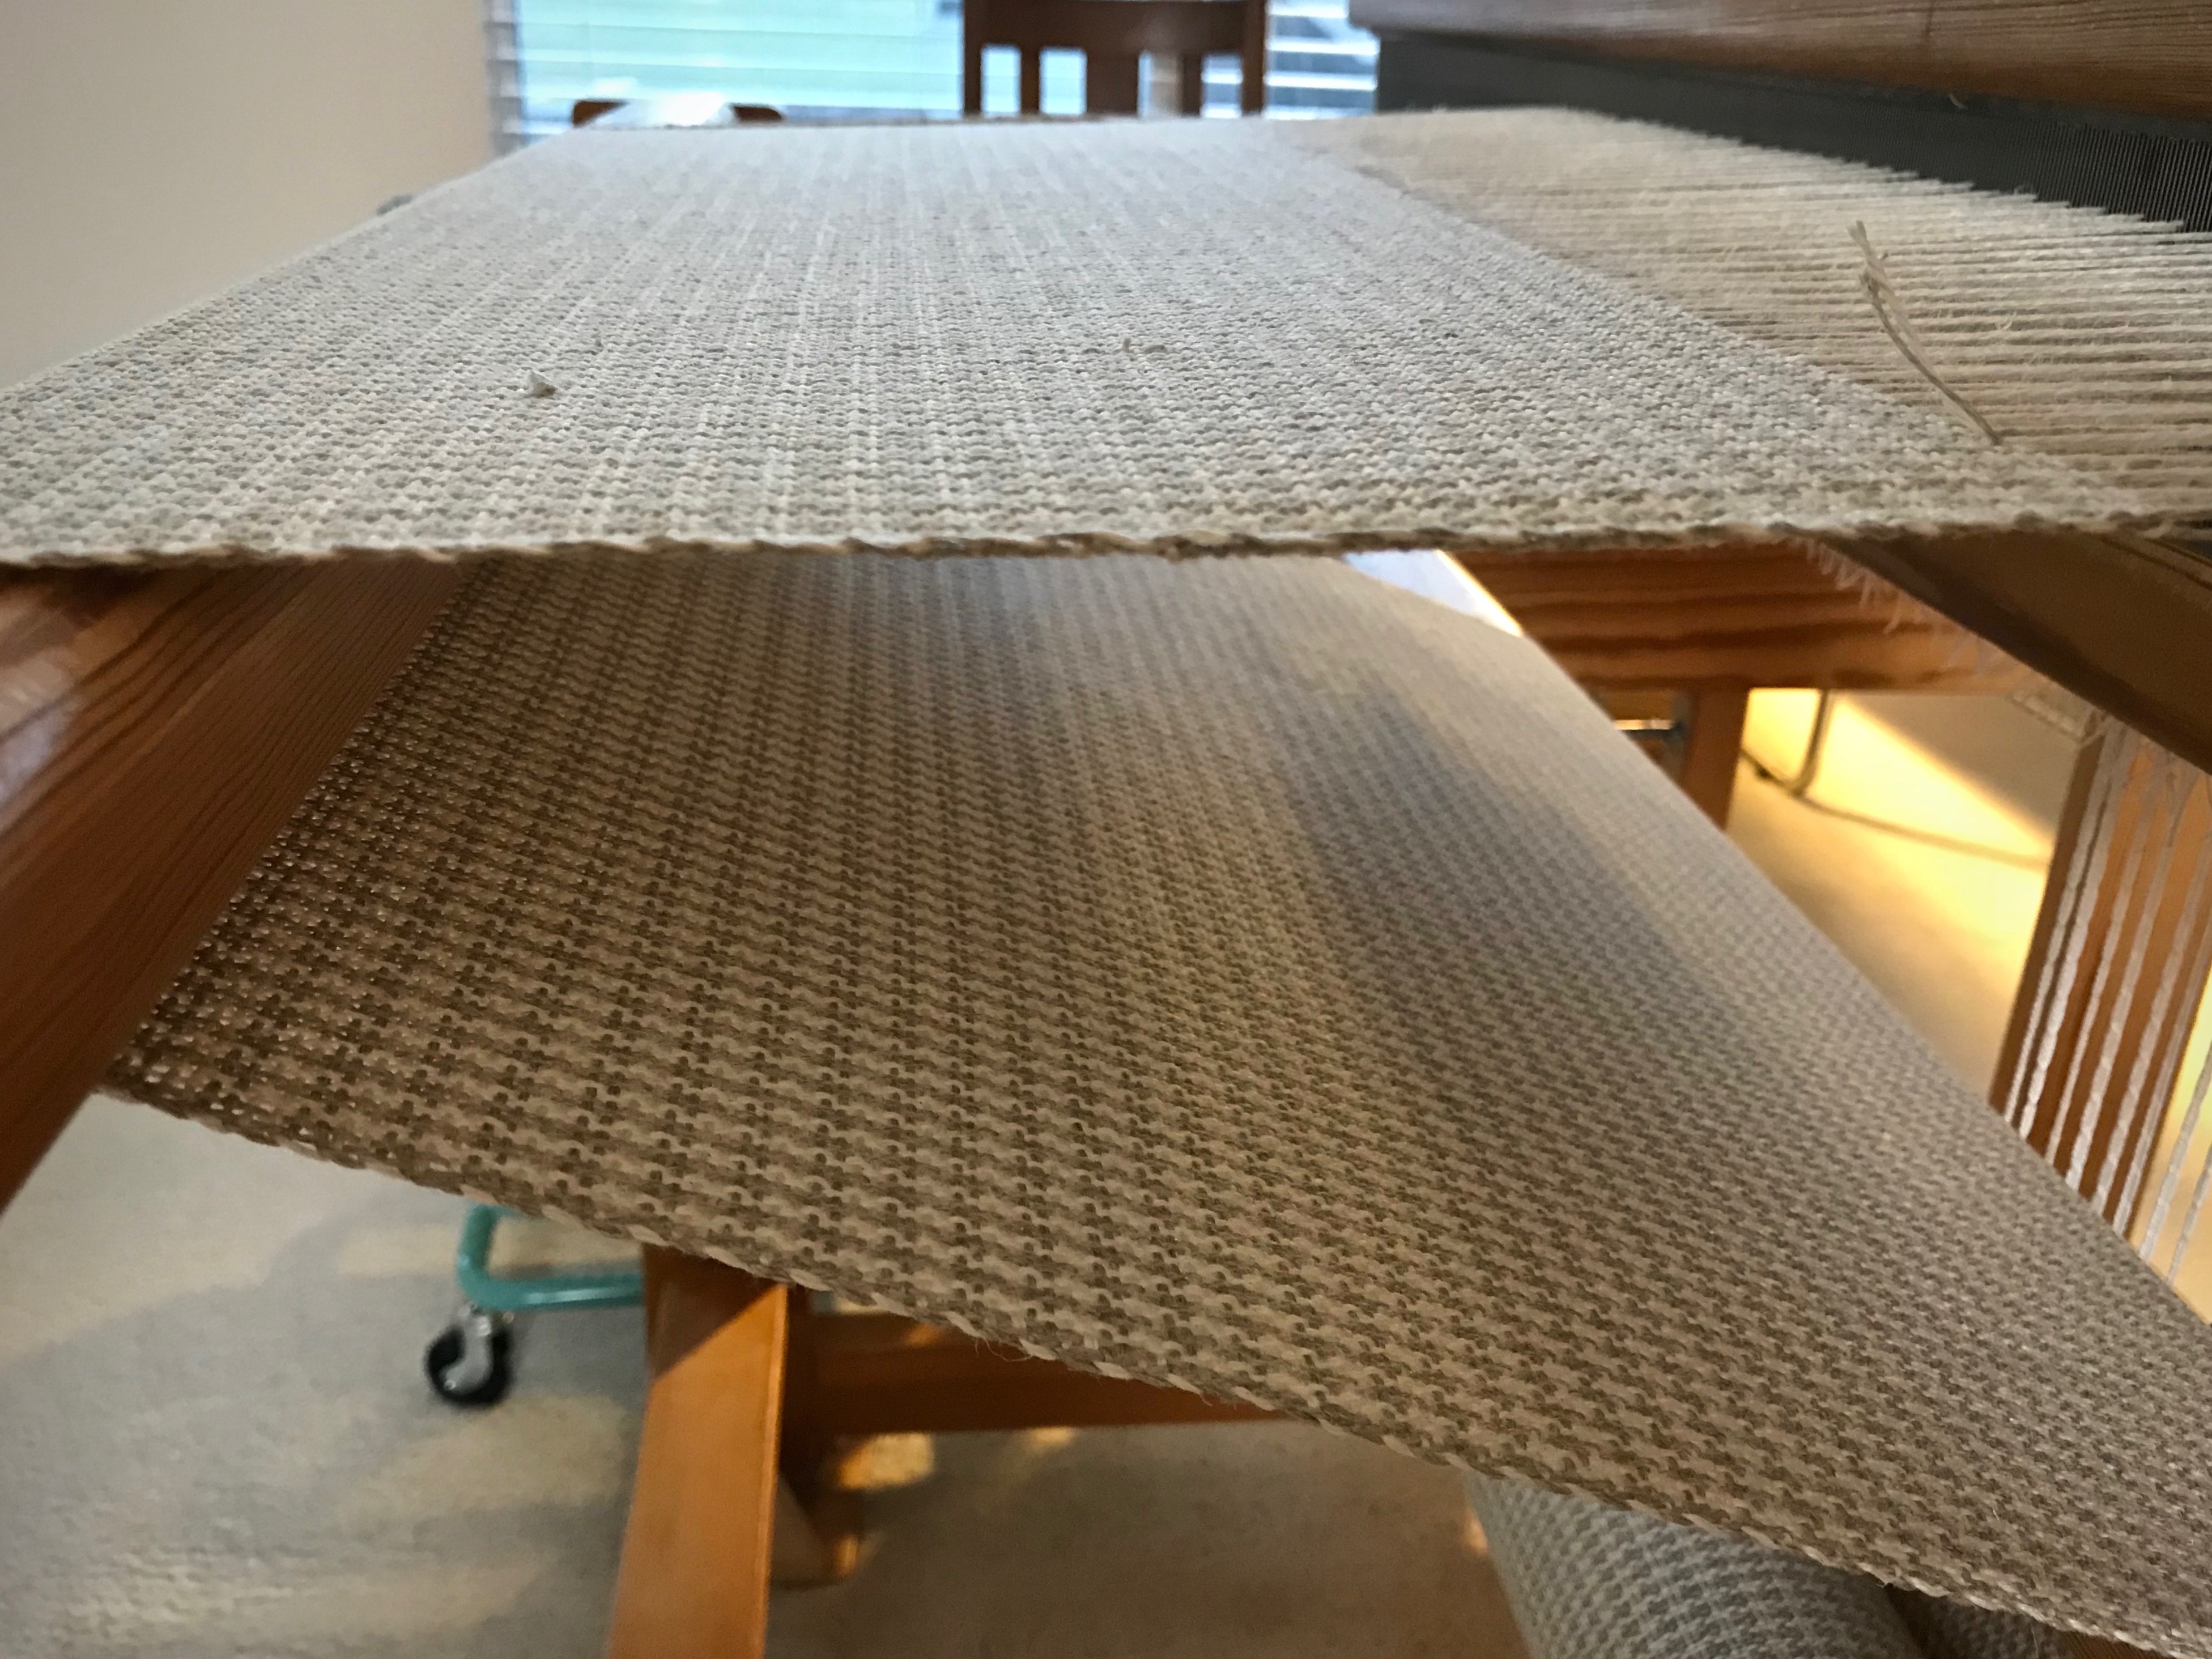
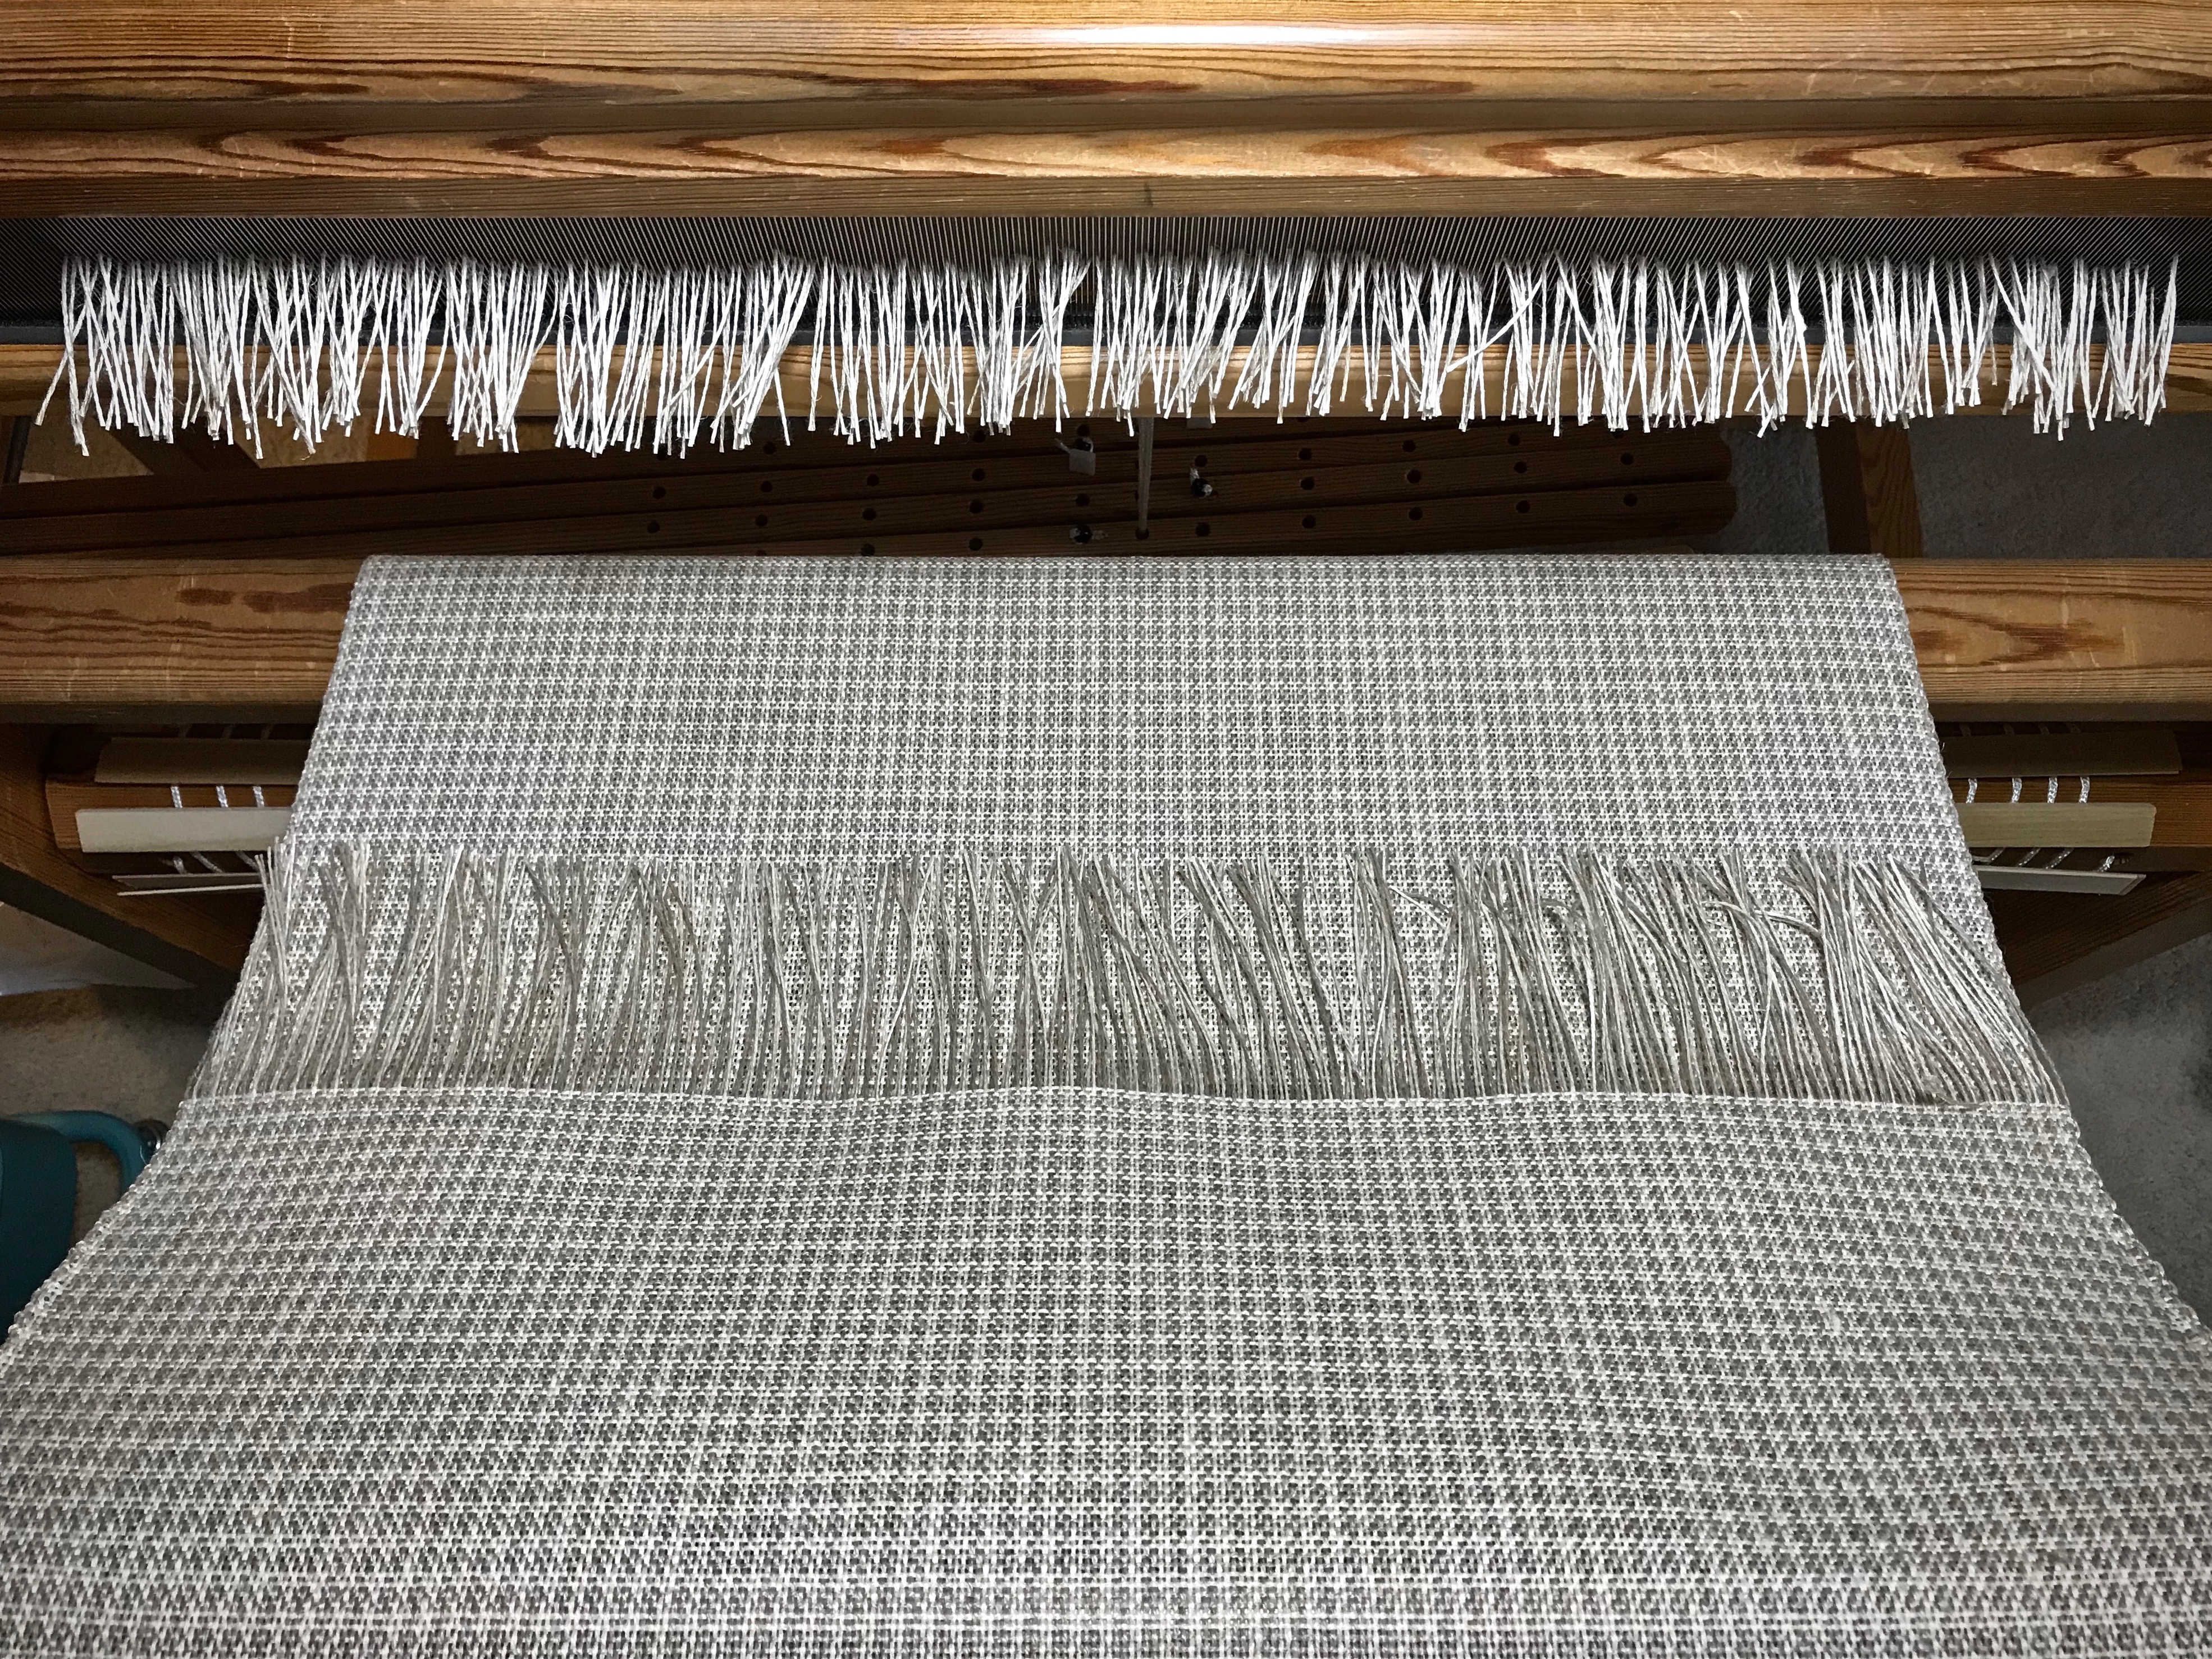
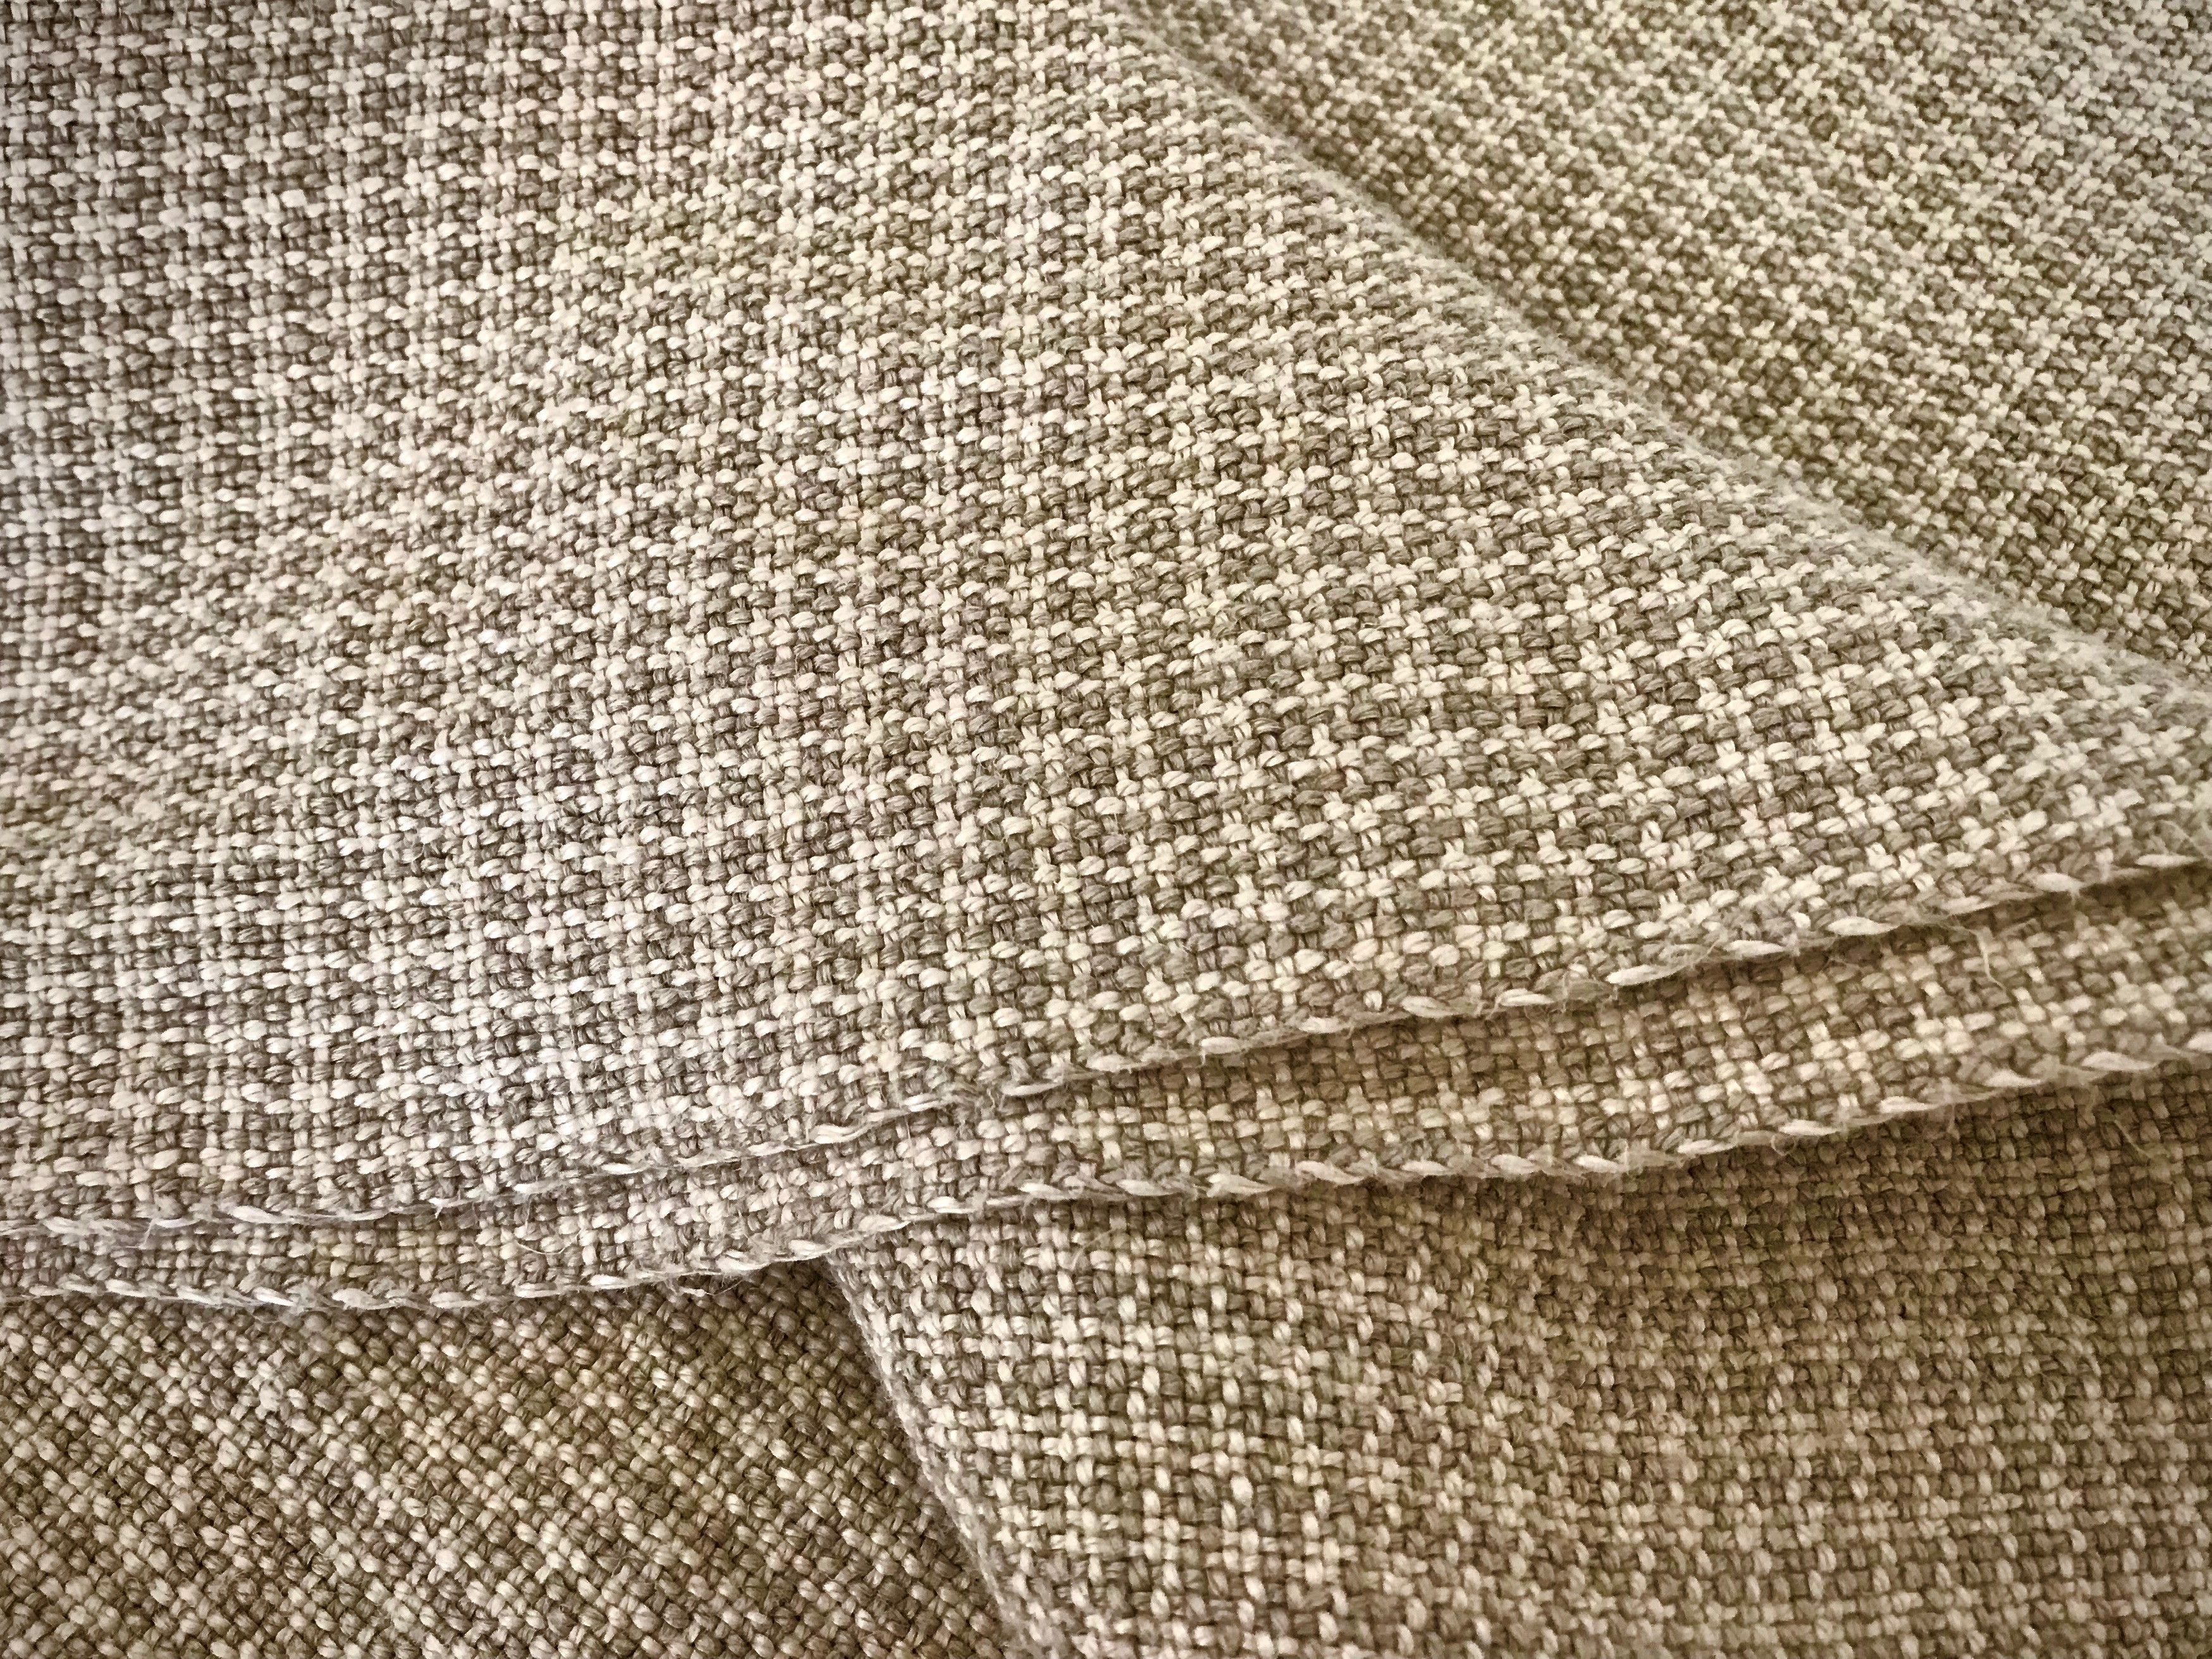
Cutting off never loses its excitement! I have one long piece of yardage, with no separations or divisions.
Just off the loom, the hefty linen fabric (8/2 linen, warp and weft) is stiff and unyielding. Will this window-screen material make suitable upholstery that’s soft enough to sit on? Yet, even in this state, the linen beckons and intrigues.
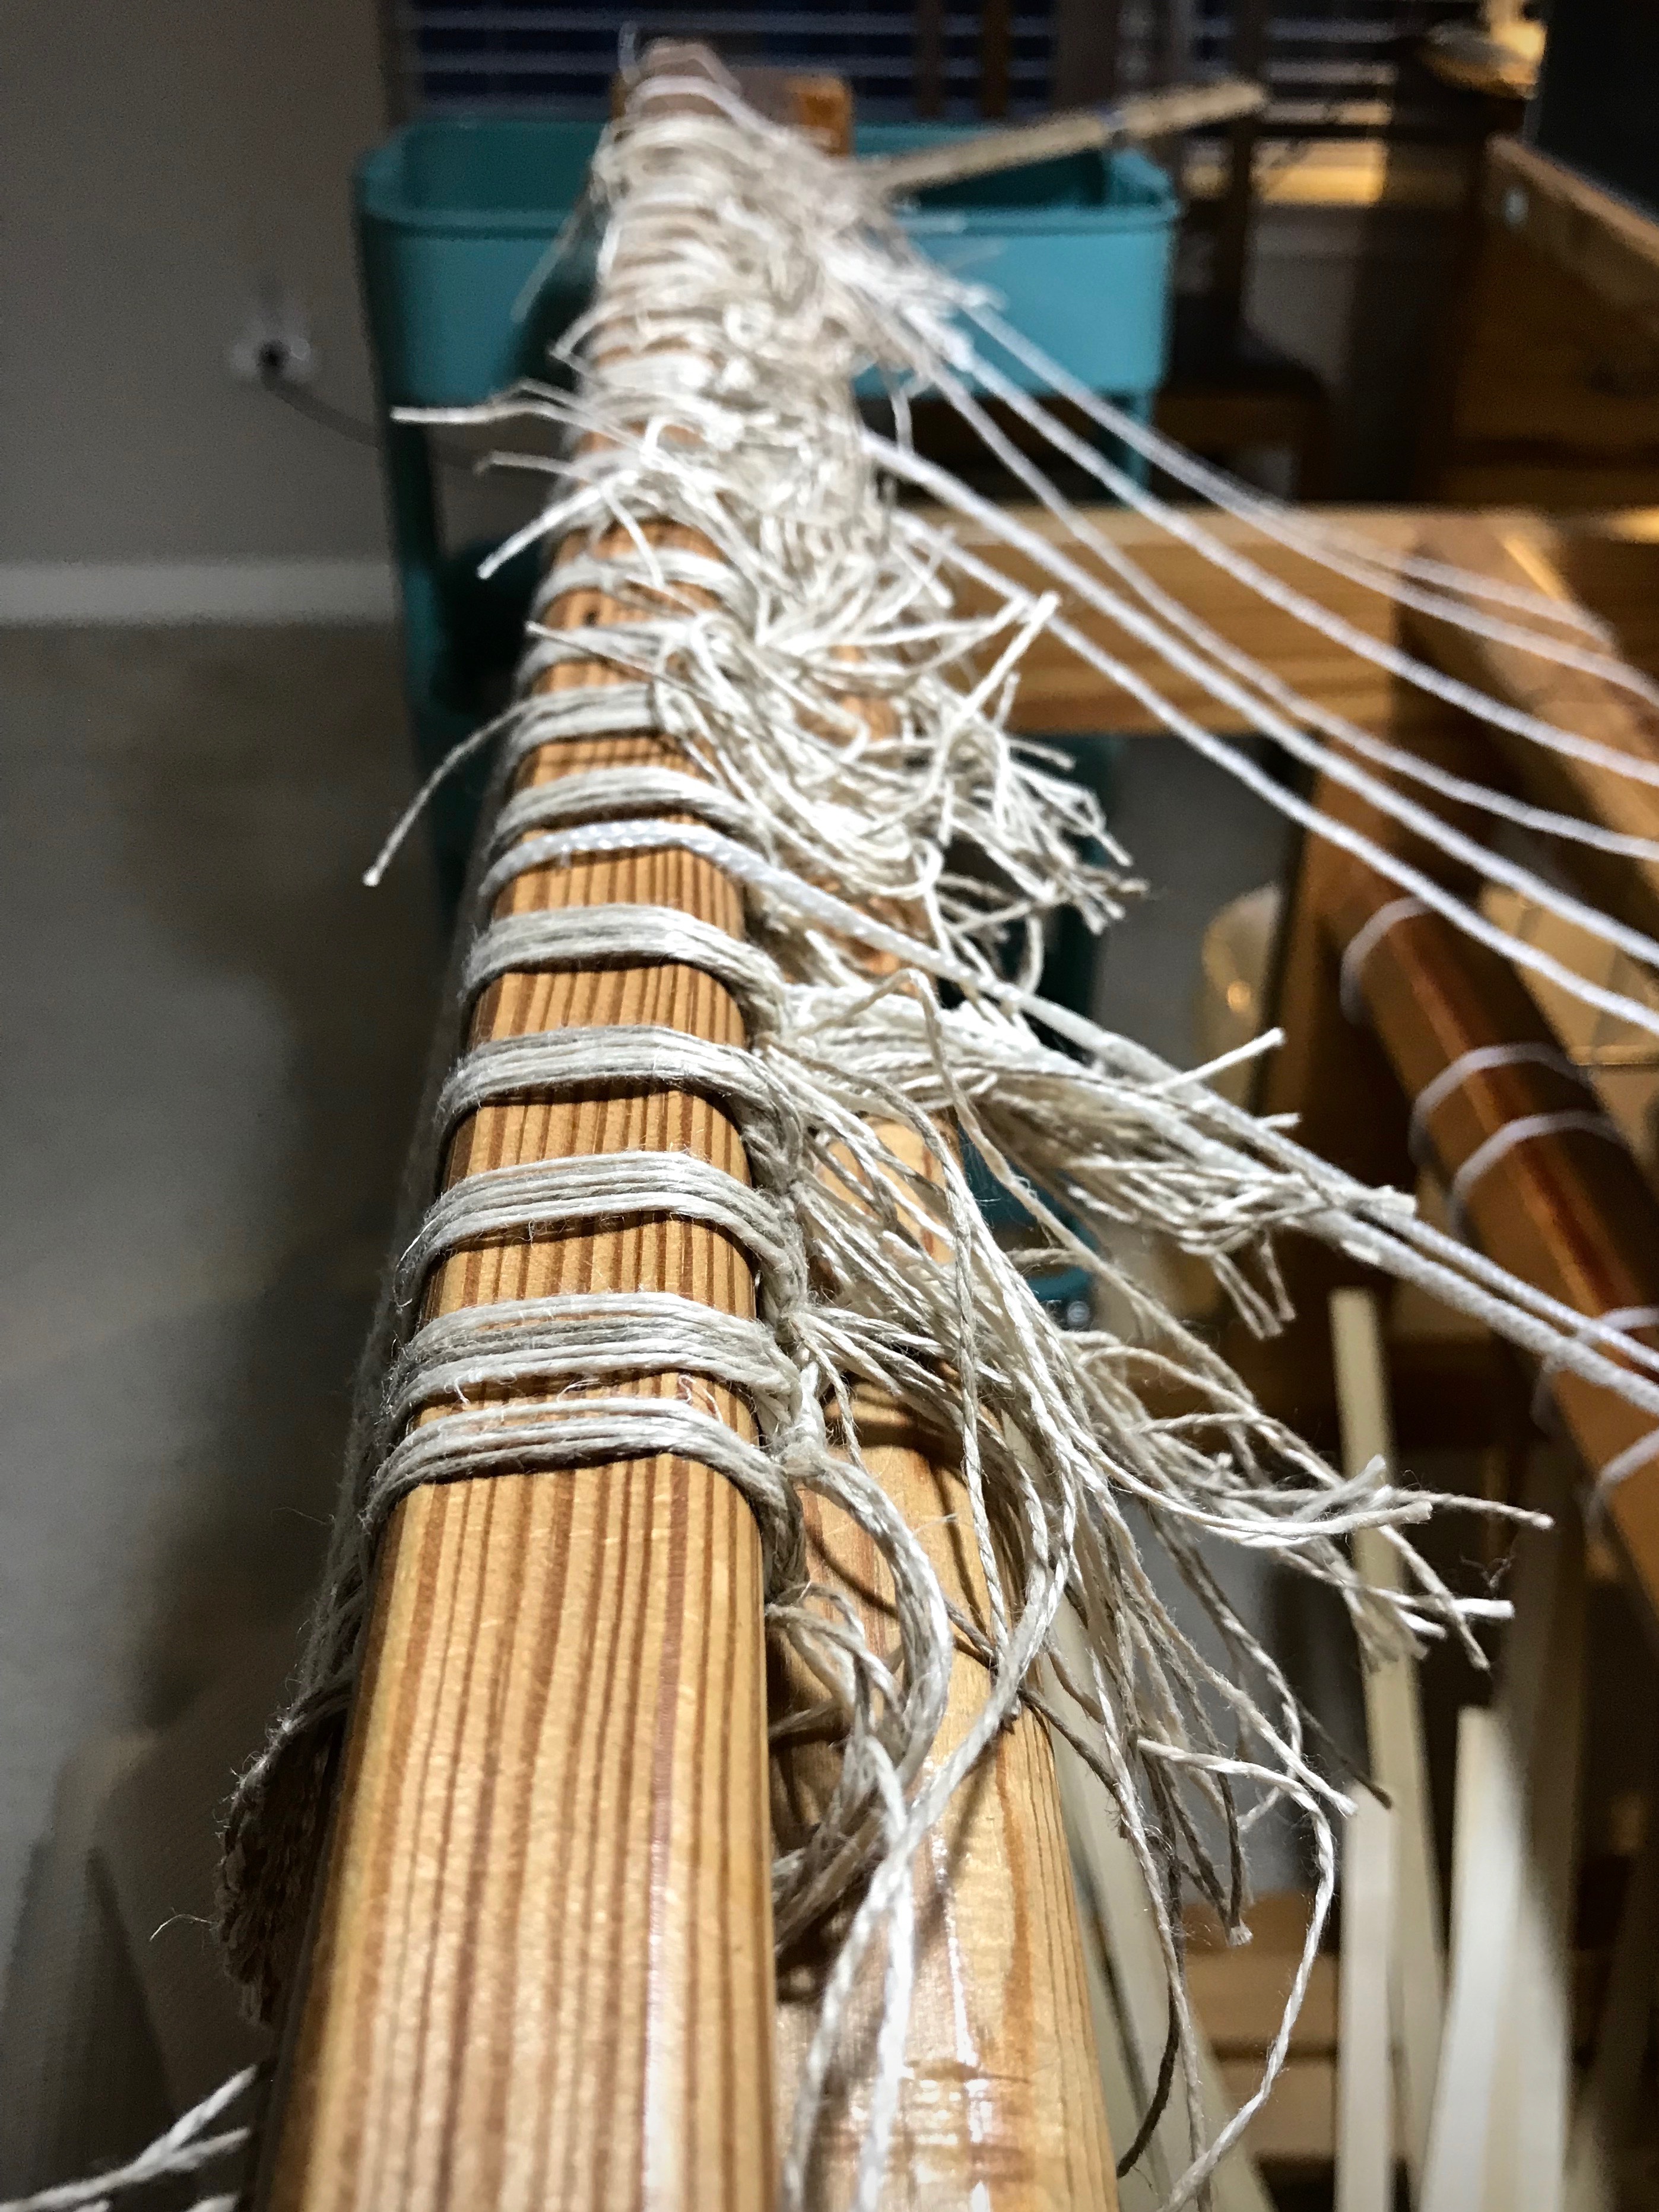
First, the edges are serged. I check for weaving errors, finding none. There are spliced warp ends in five places, which are trimmed.
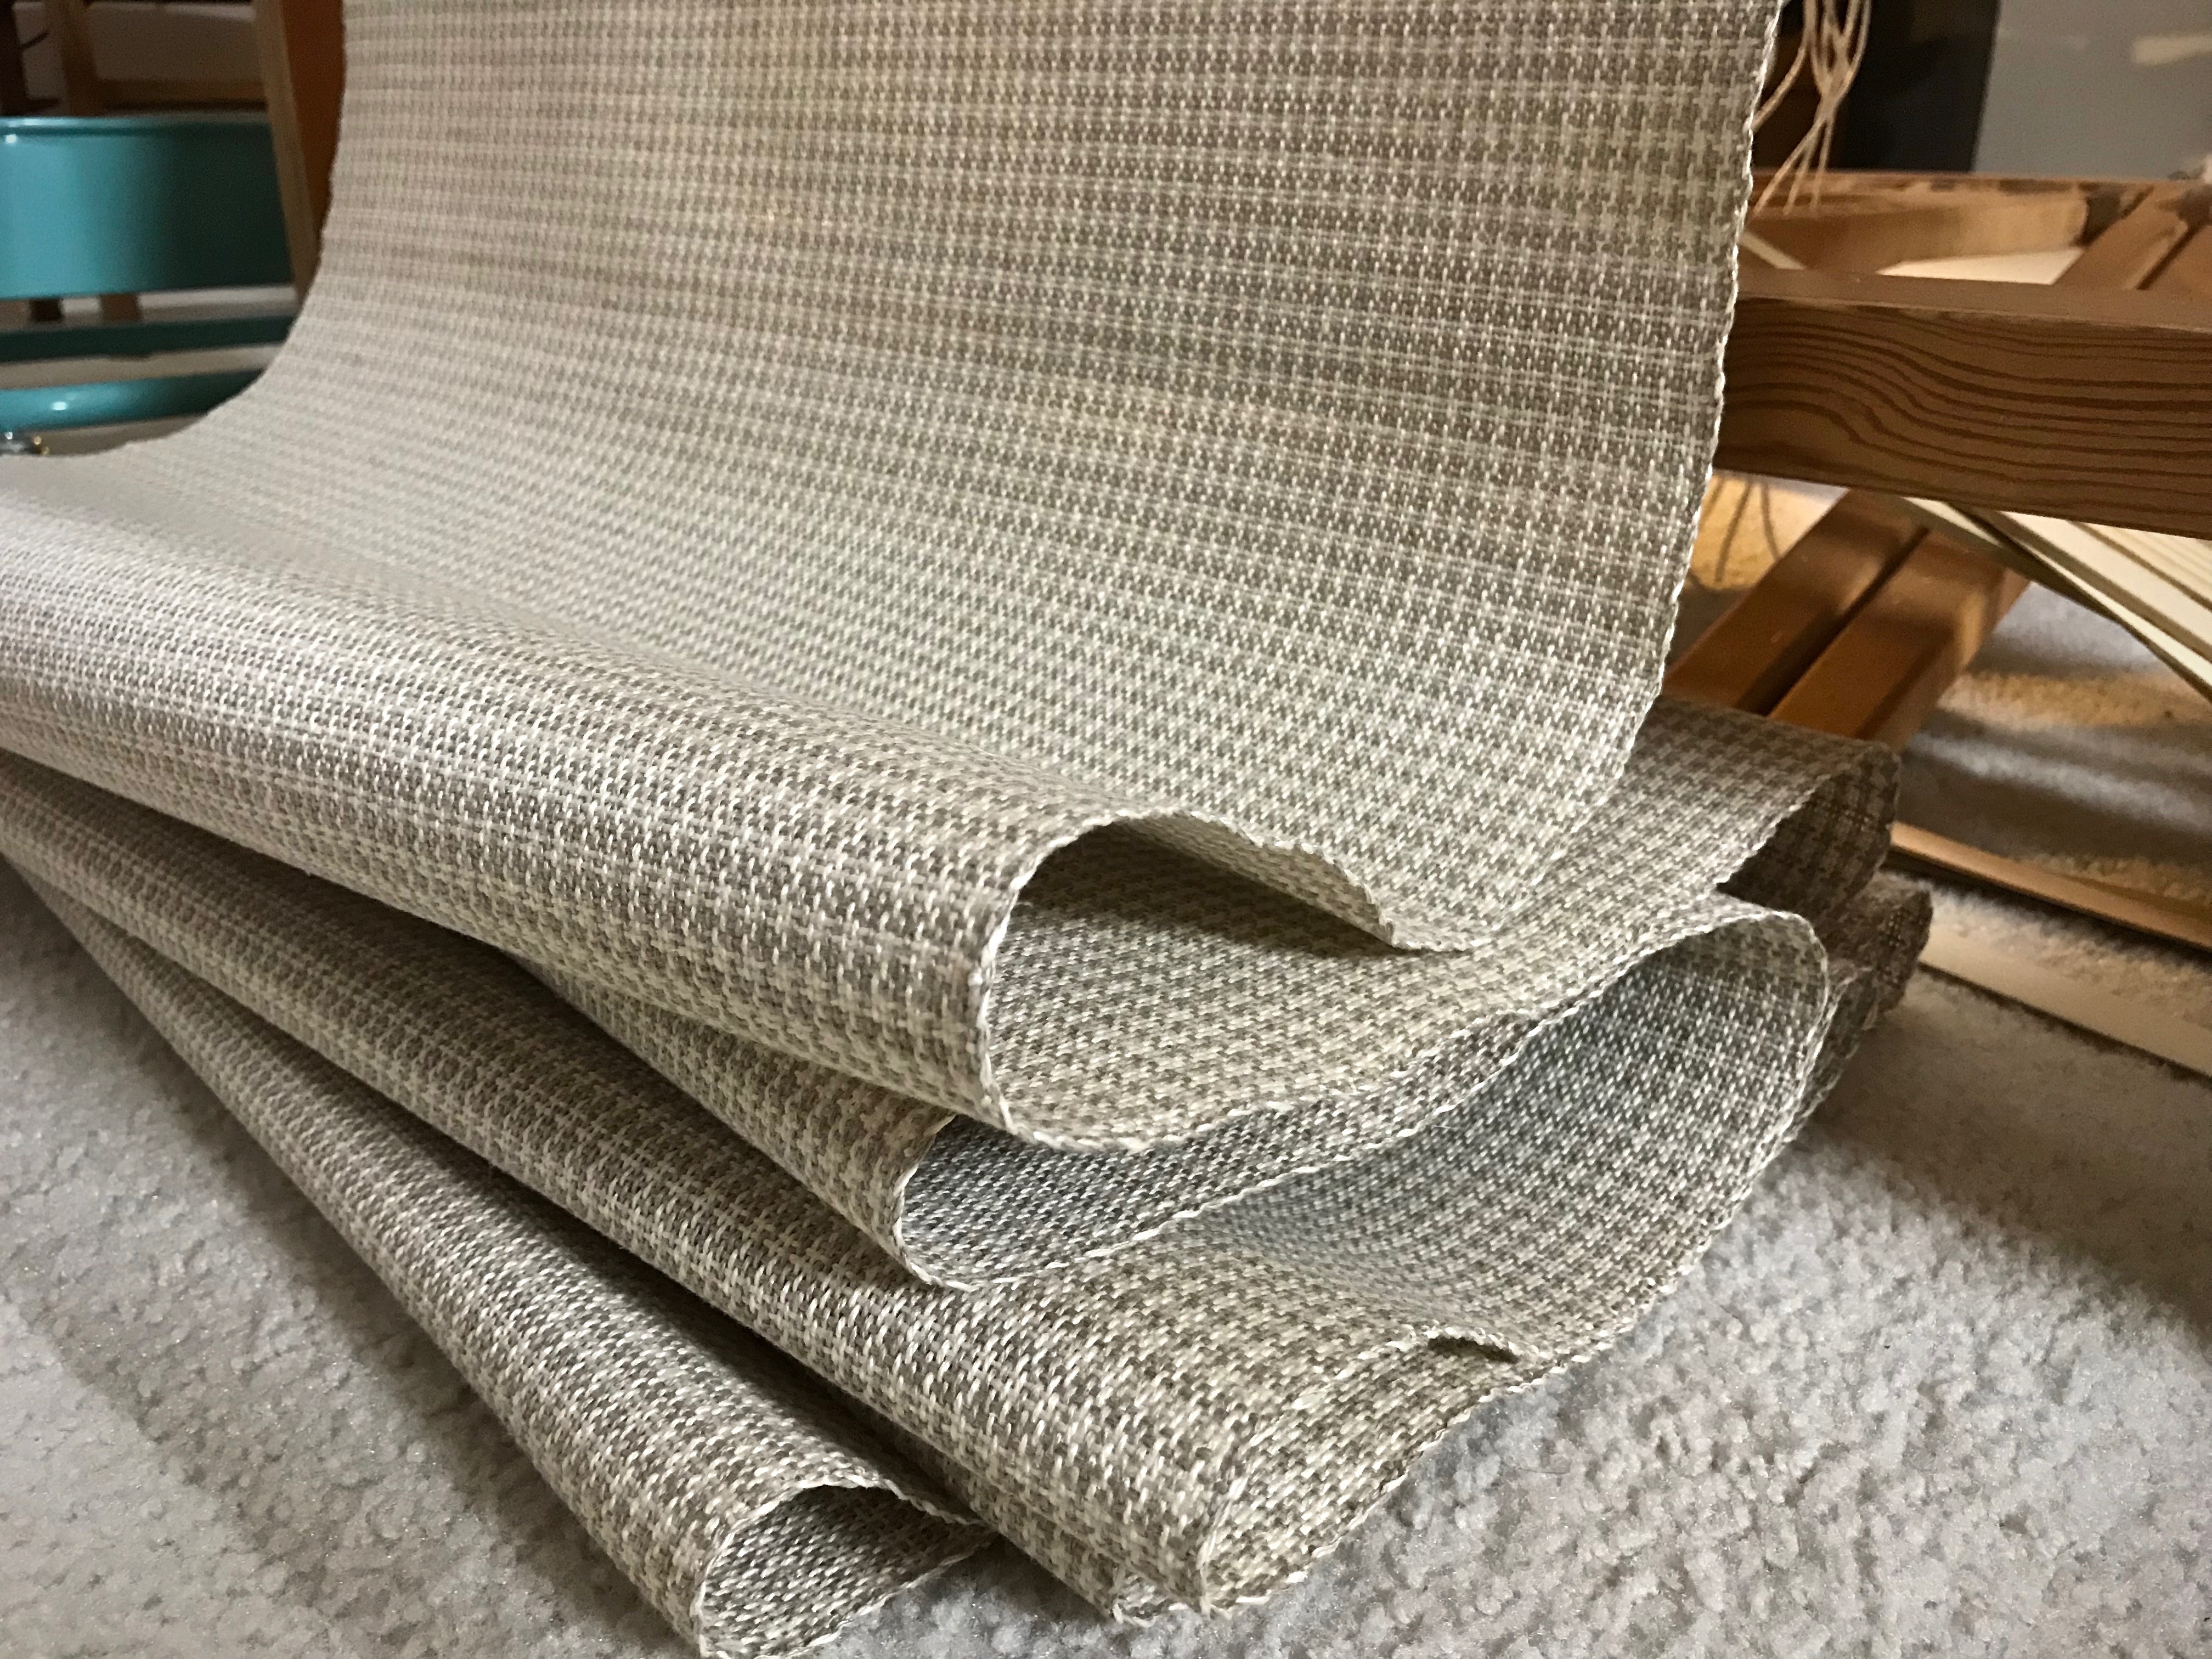
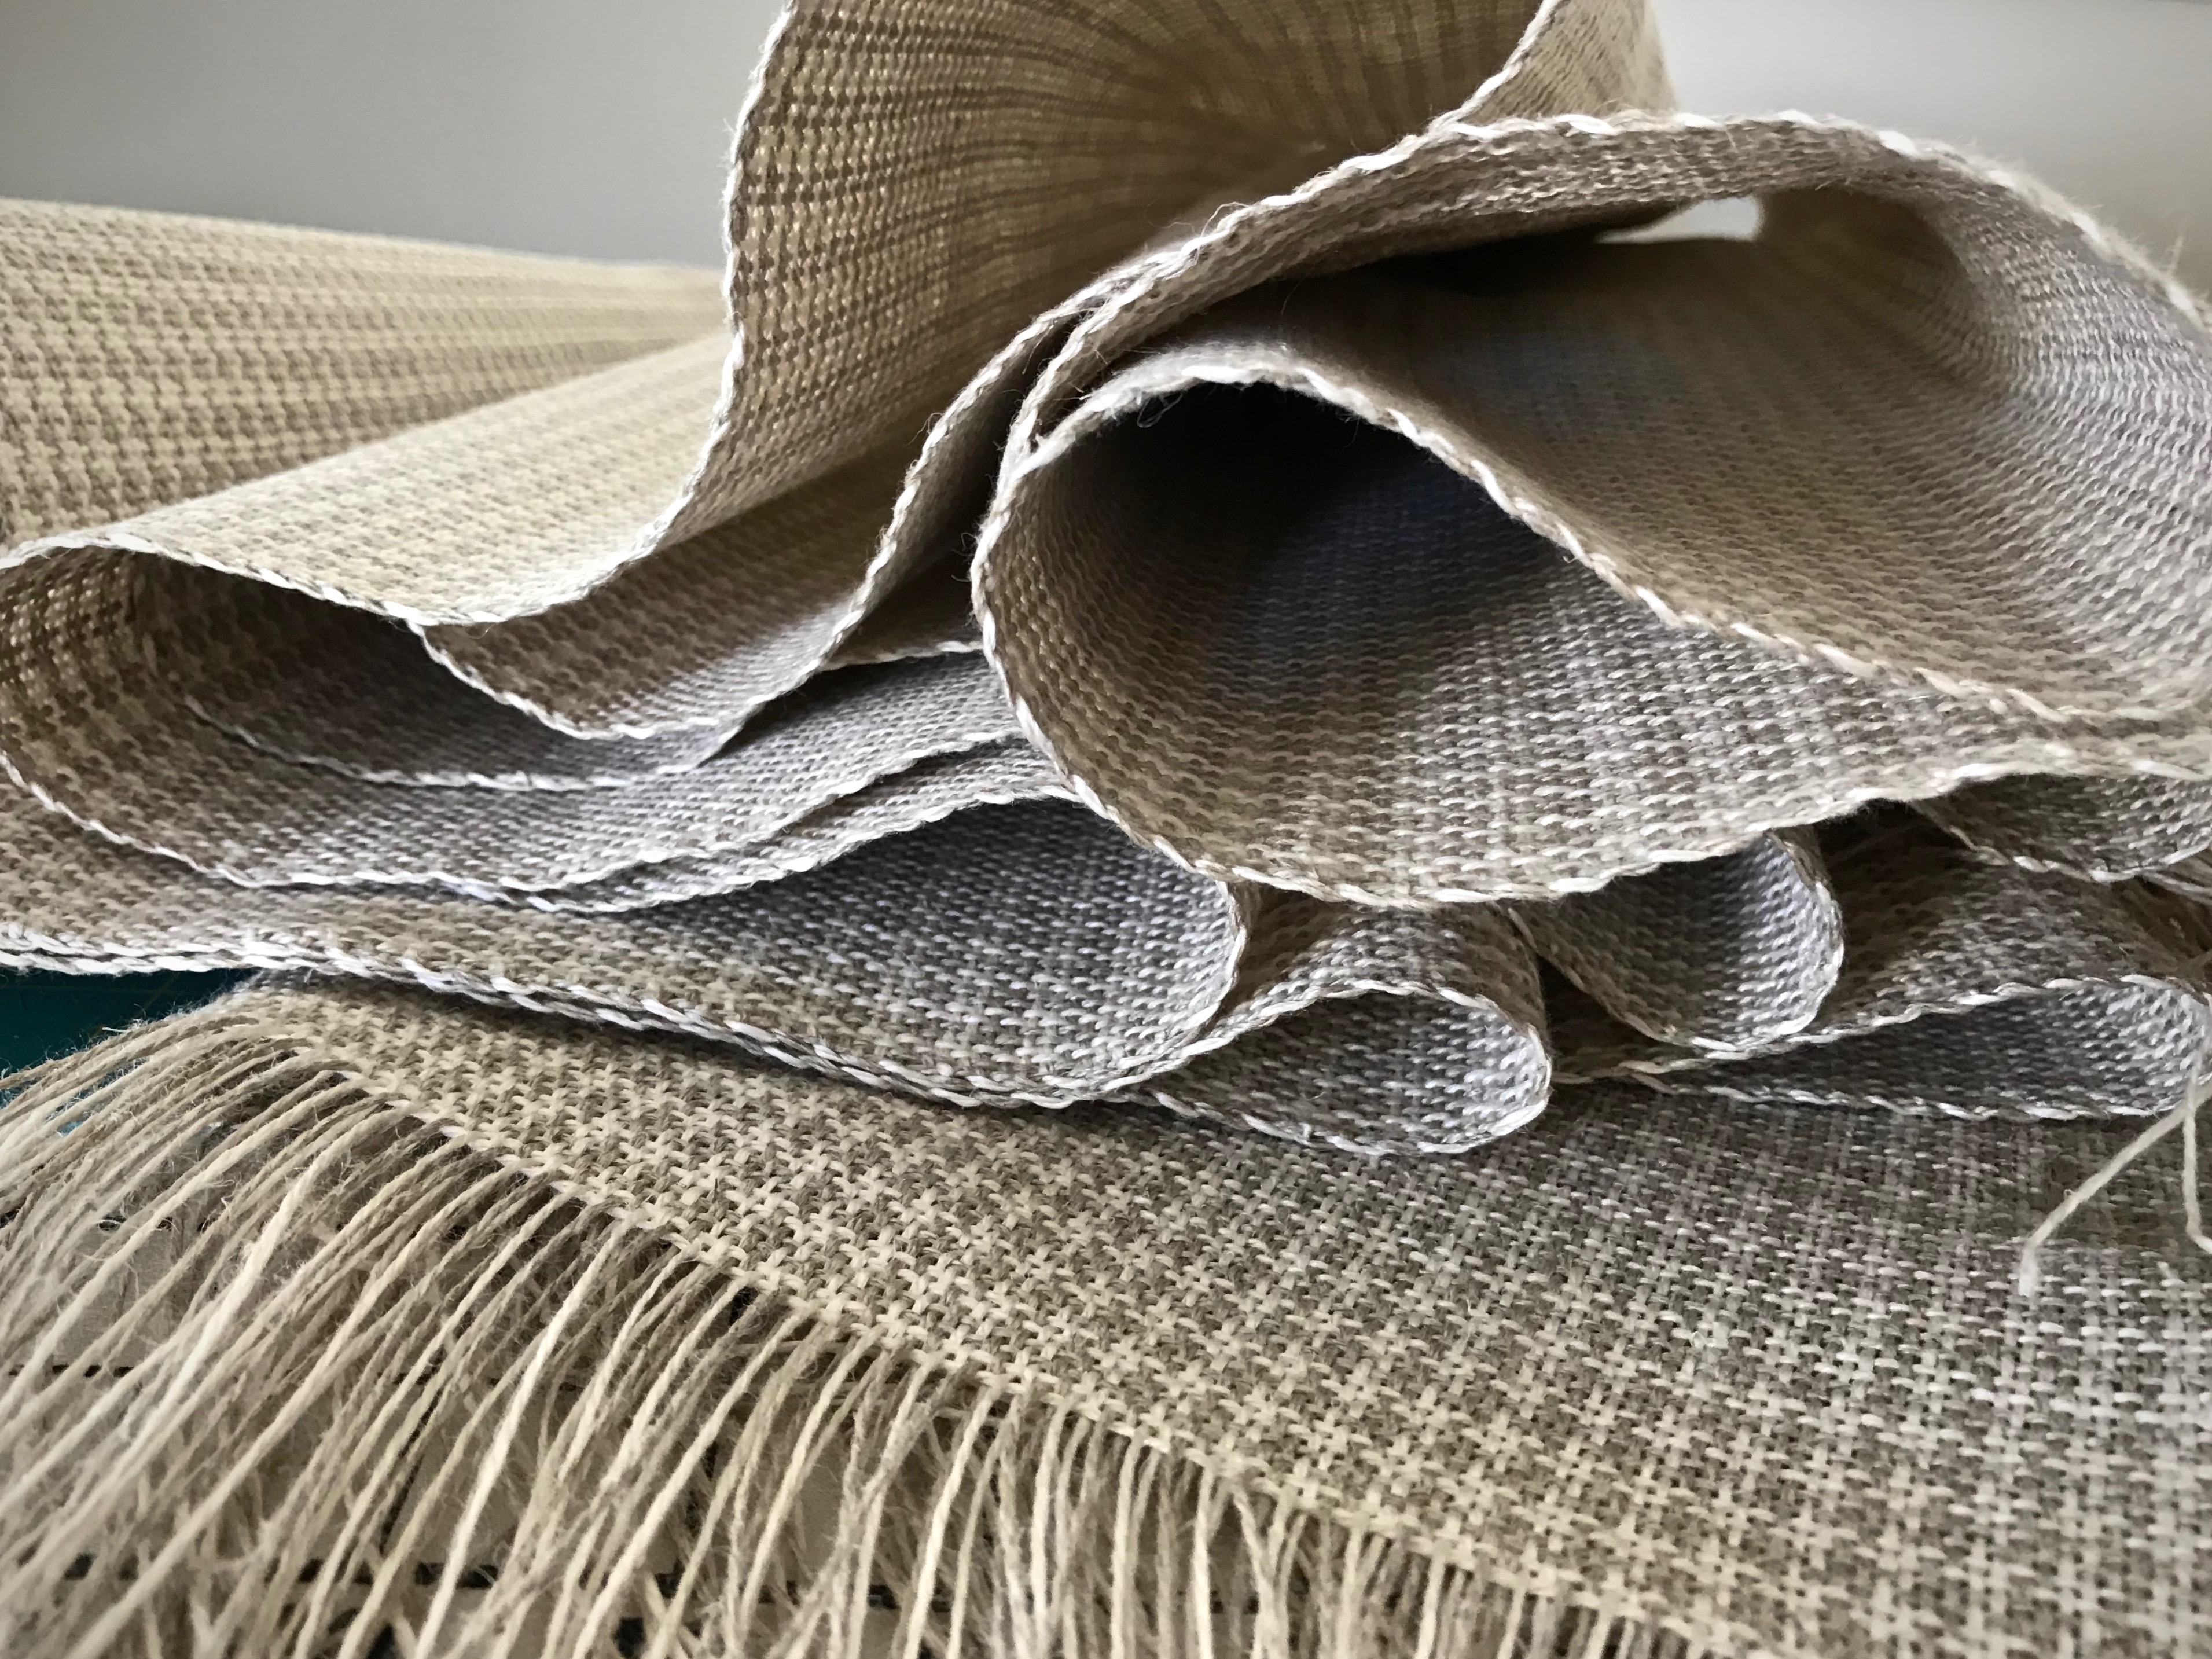
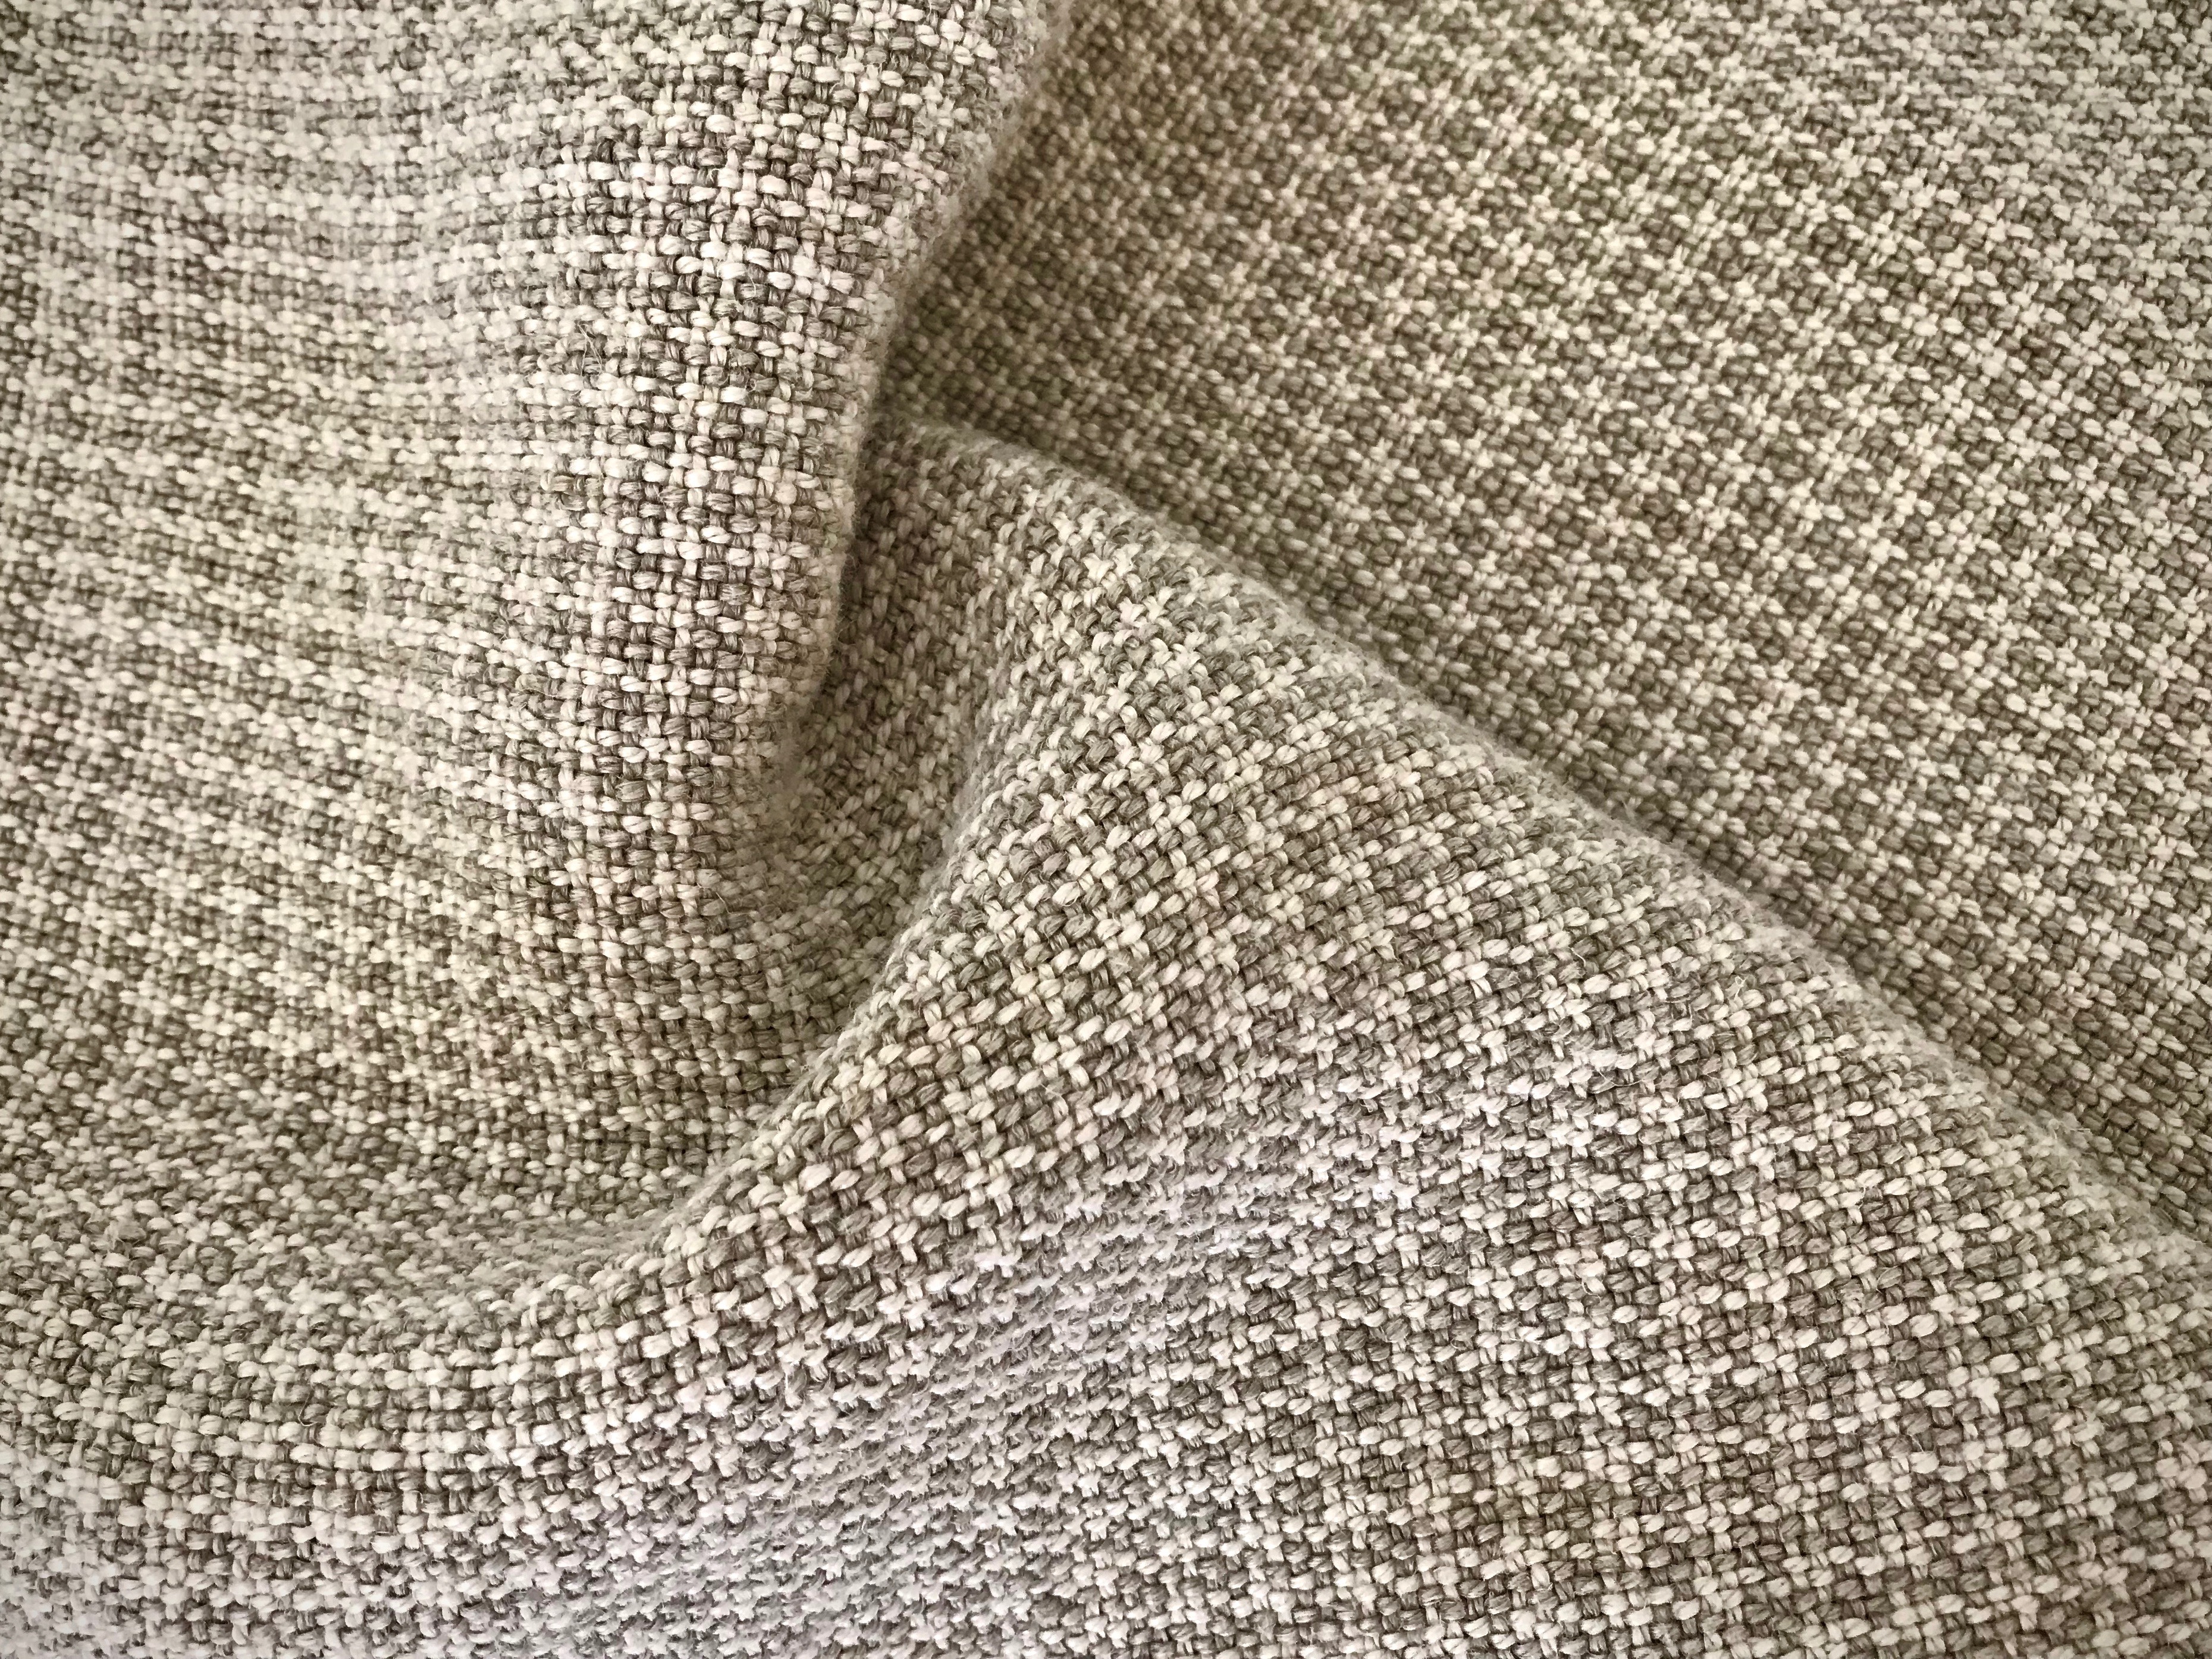
I make a large tube by basting the two ends of the yardage together, to reduce twisting in the wash. The washing machine (top loader) works as a soaking tub first. The linen slowly soaks up water in the tub, relaxing there for an hour or two. Then it’s time to wash and dry. The first time, I omit the spin cycle and remove it from the dryer while still damp, to prevent permanent creasing.
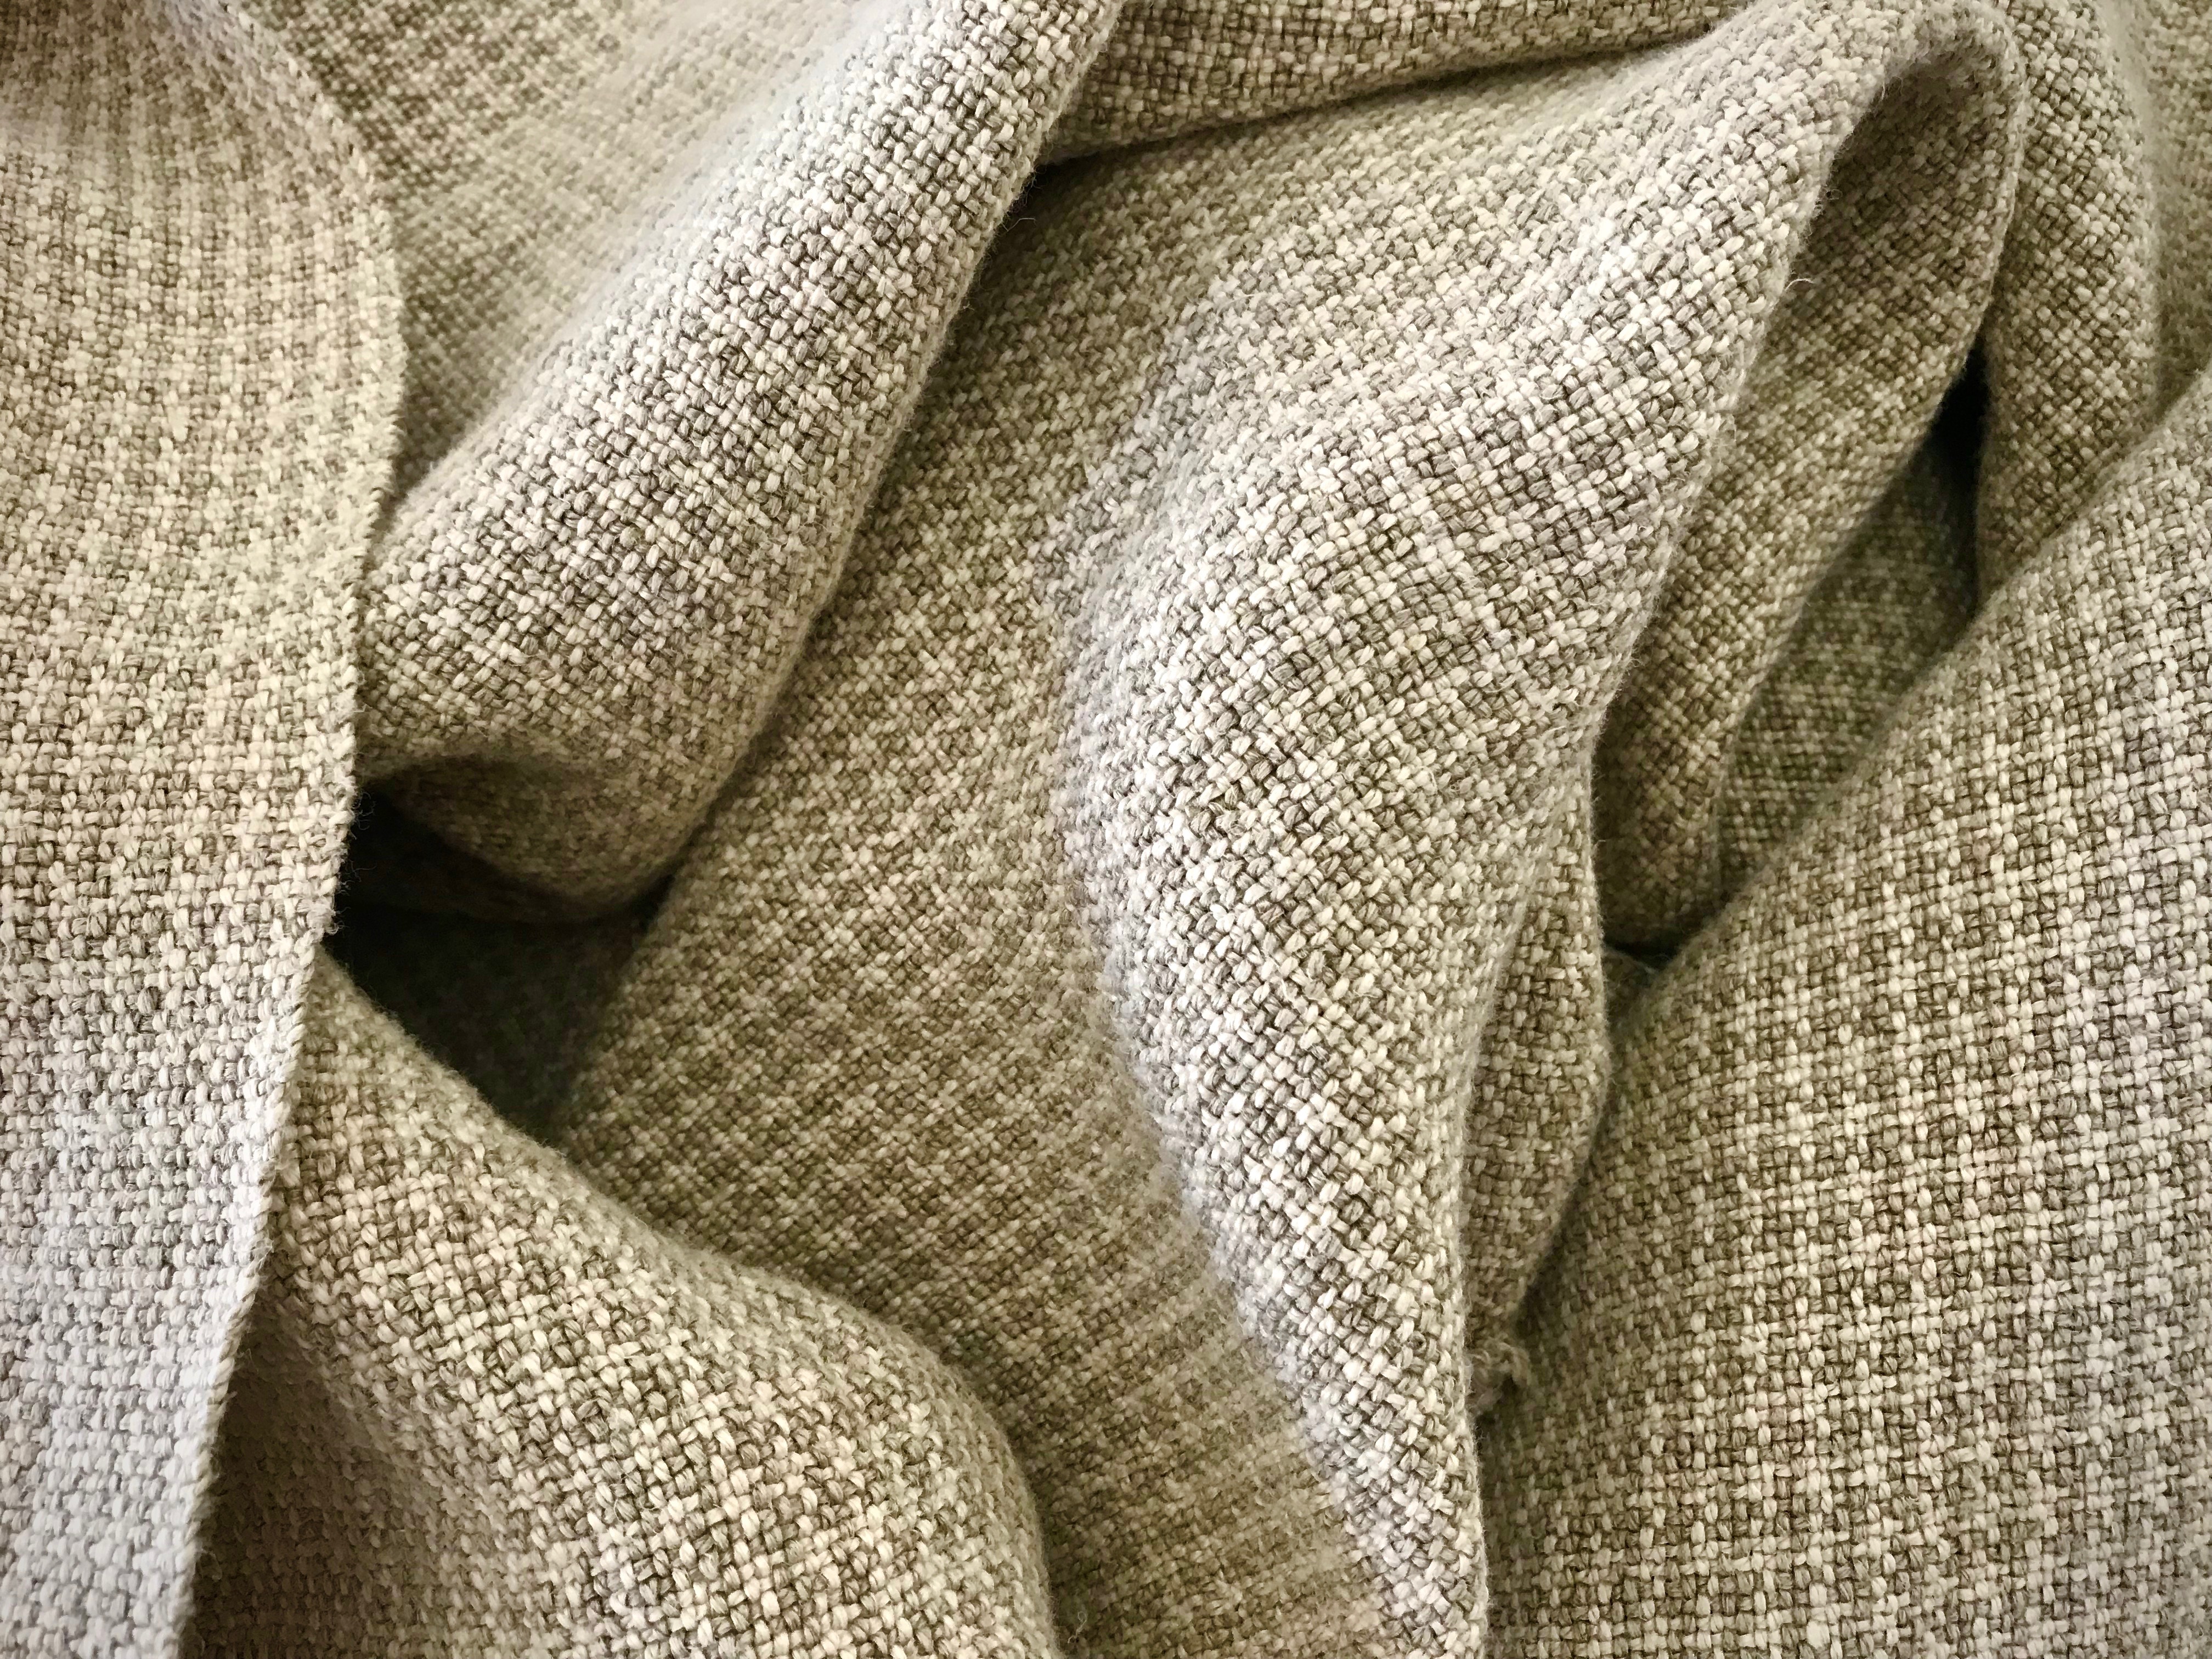
And then, I wash and dry the yardage again.
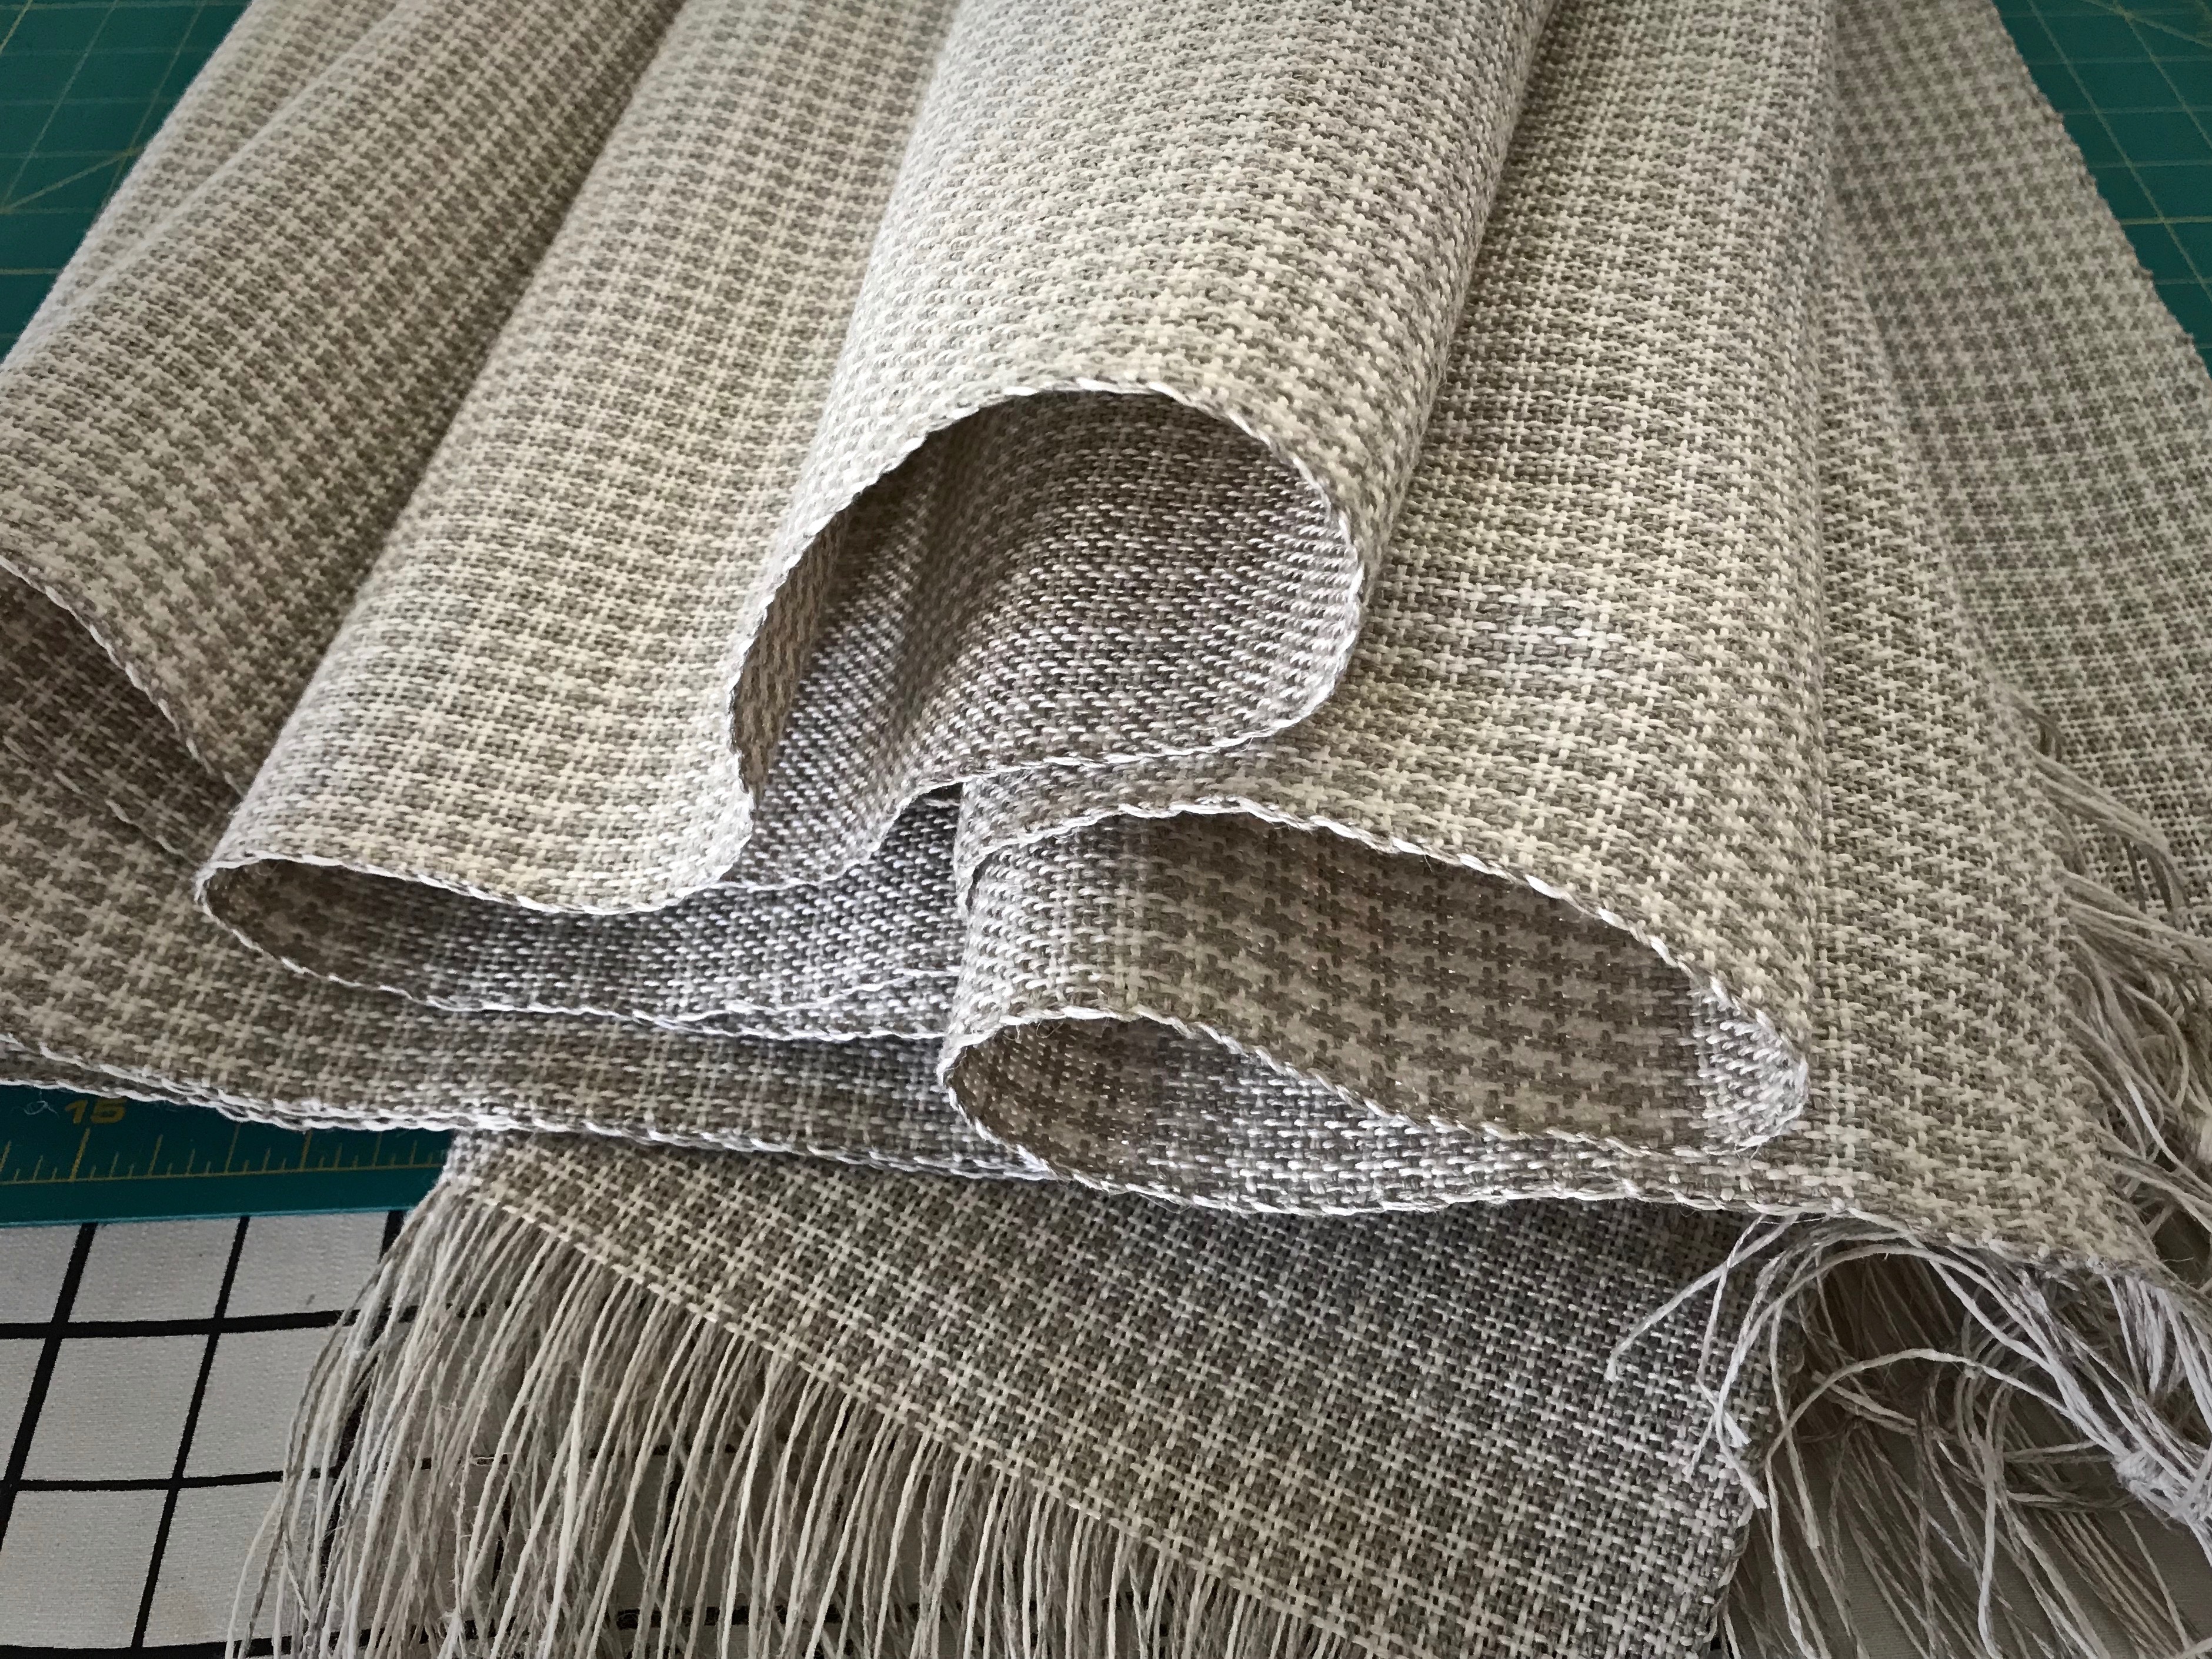
Talk about softening up! Oh, I wish you could be here to handle it with me! This is dreamy linen fabric, perfect for sitting.