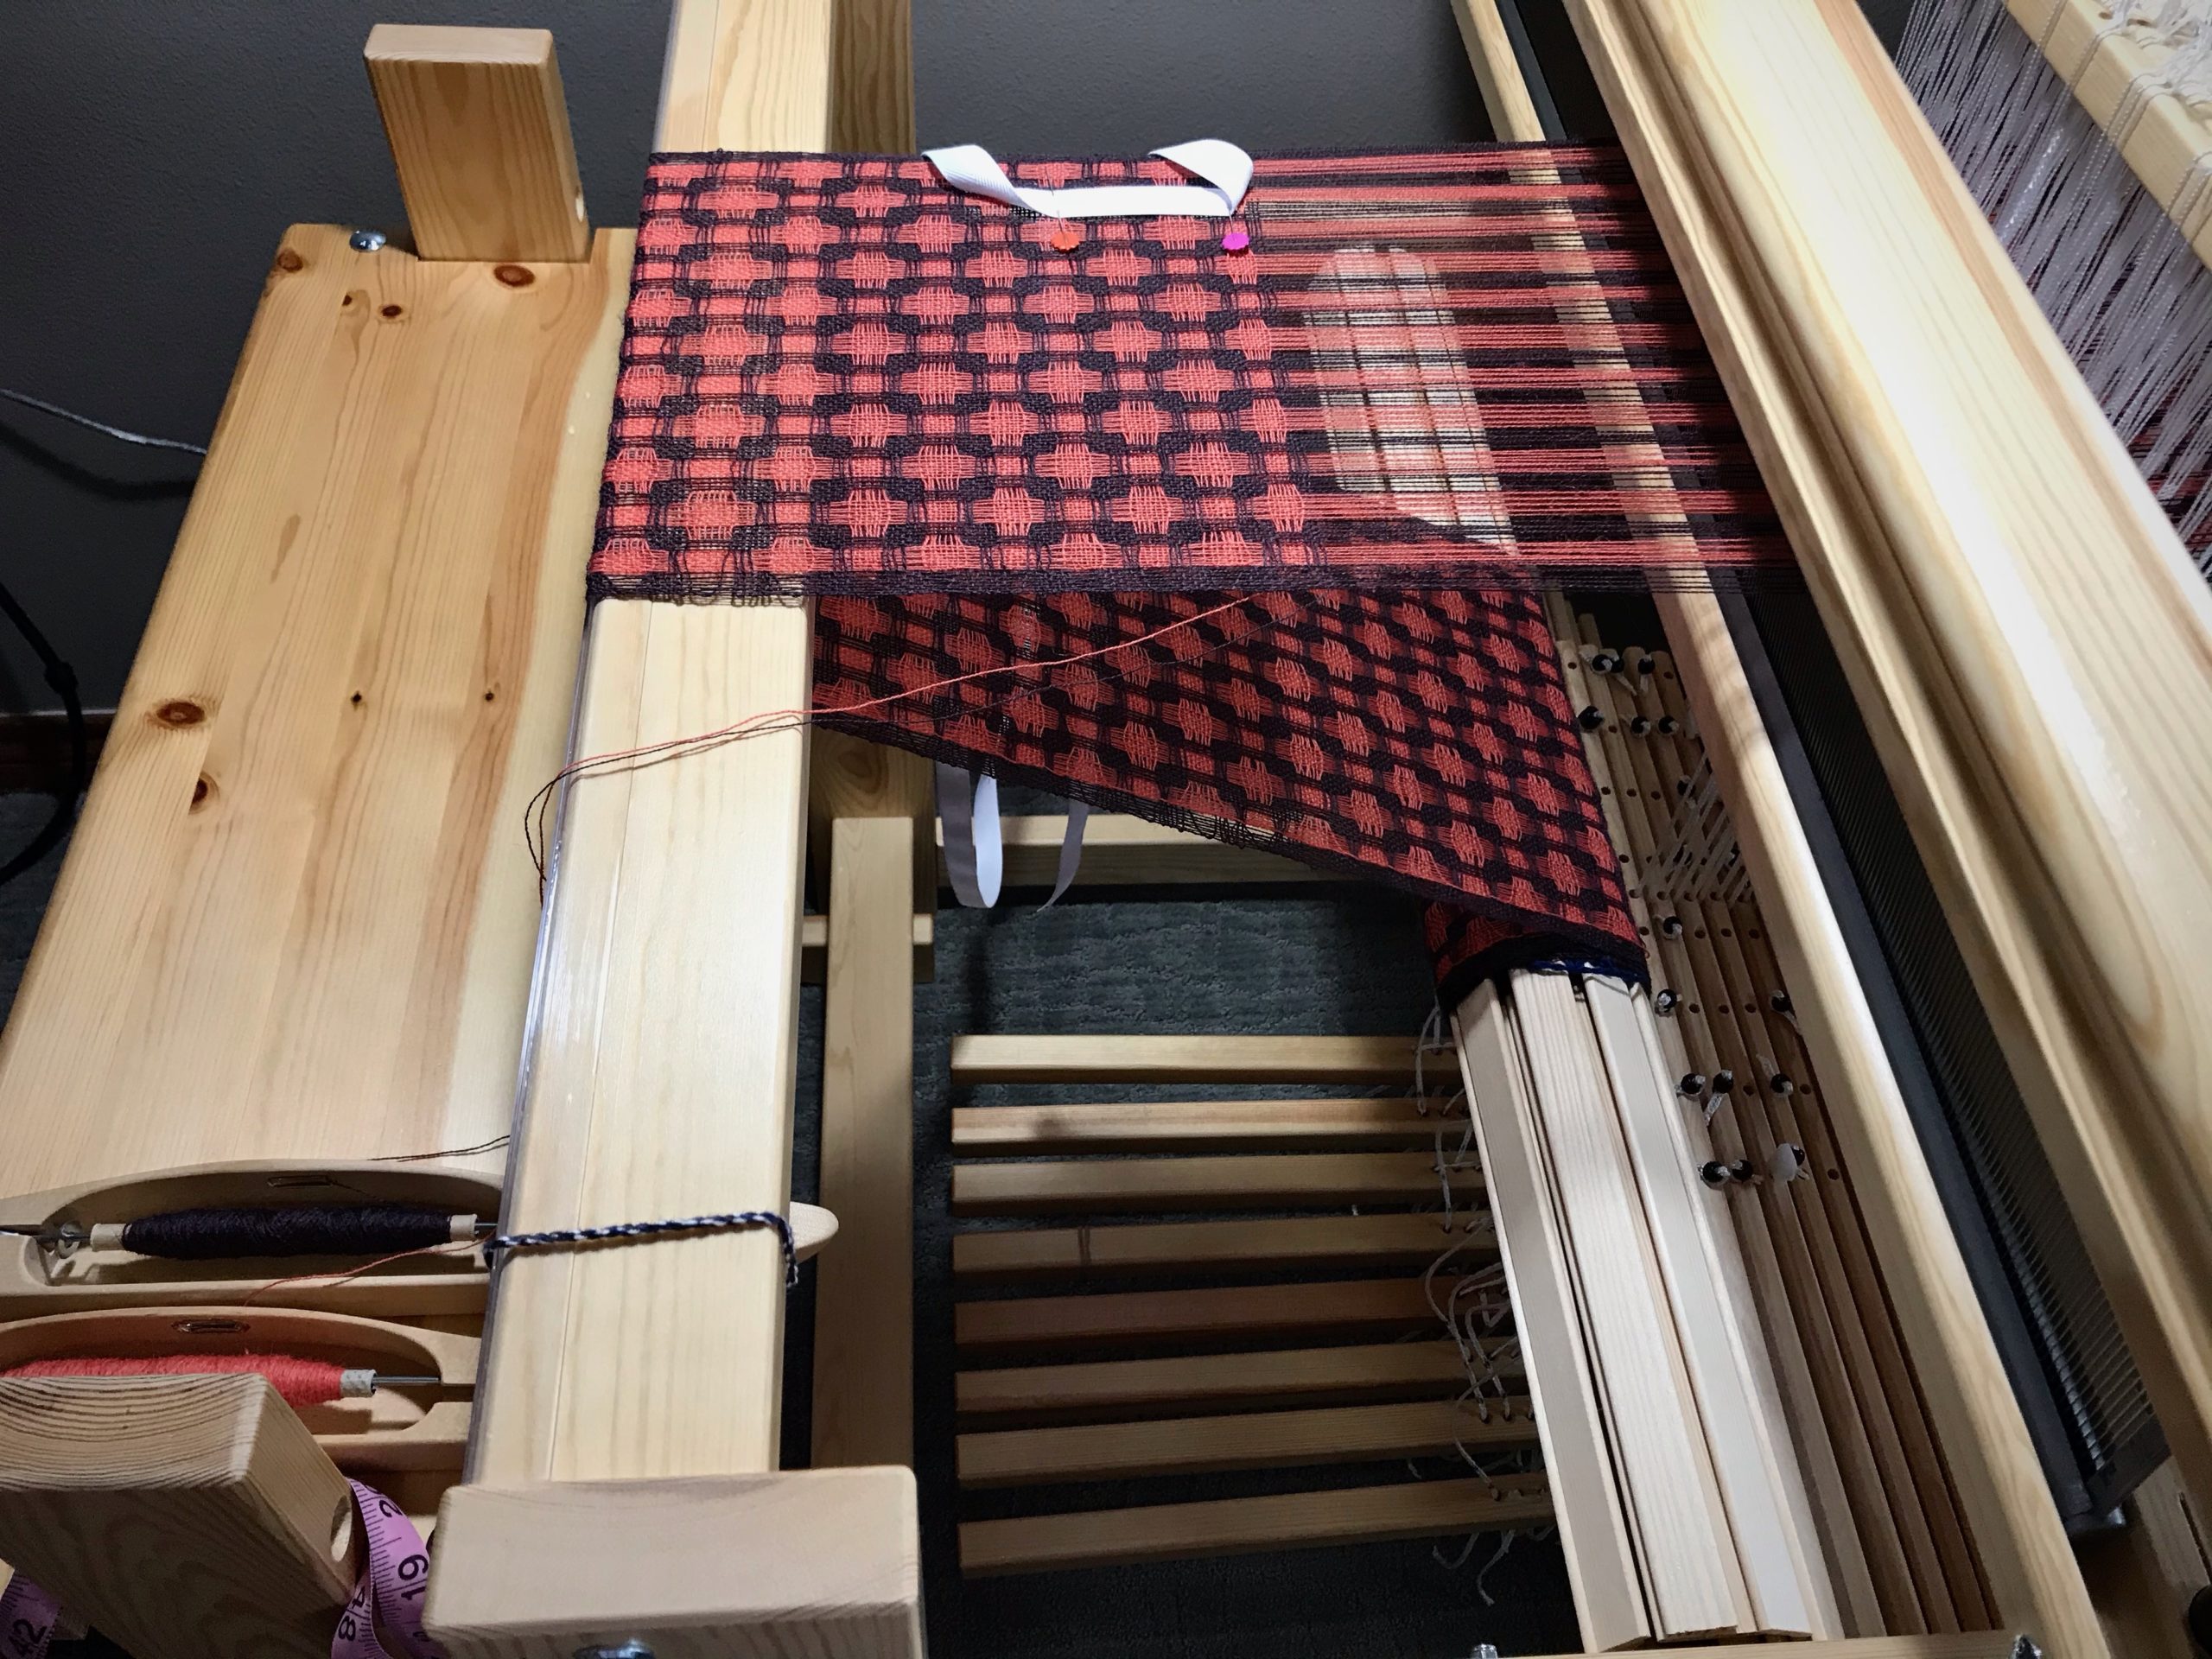
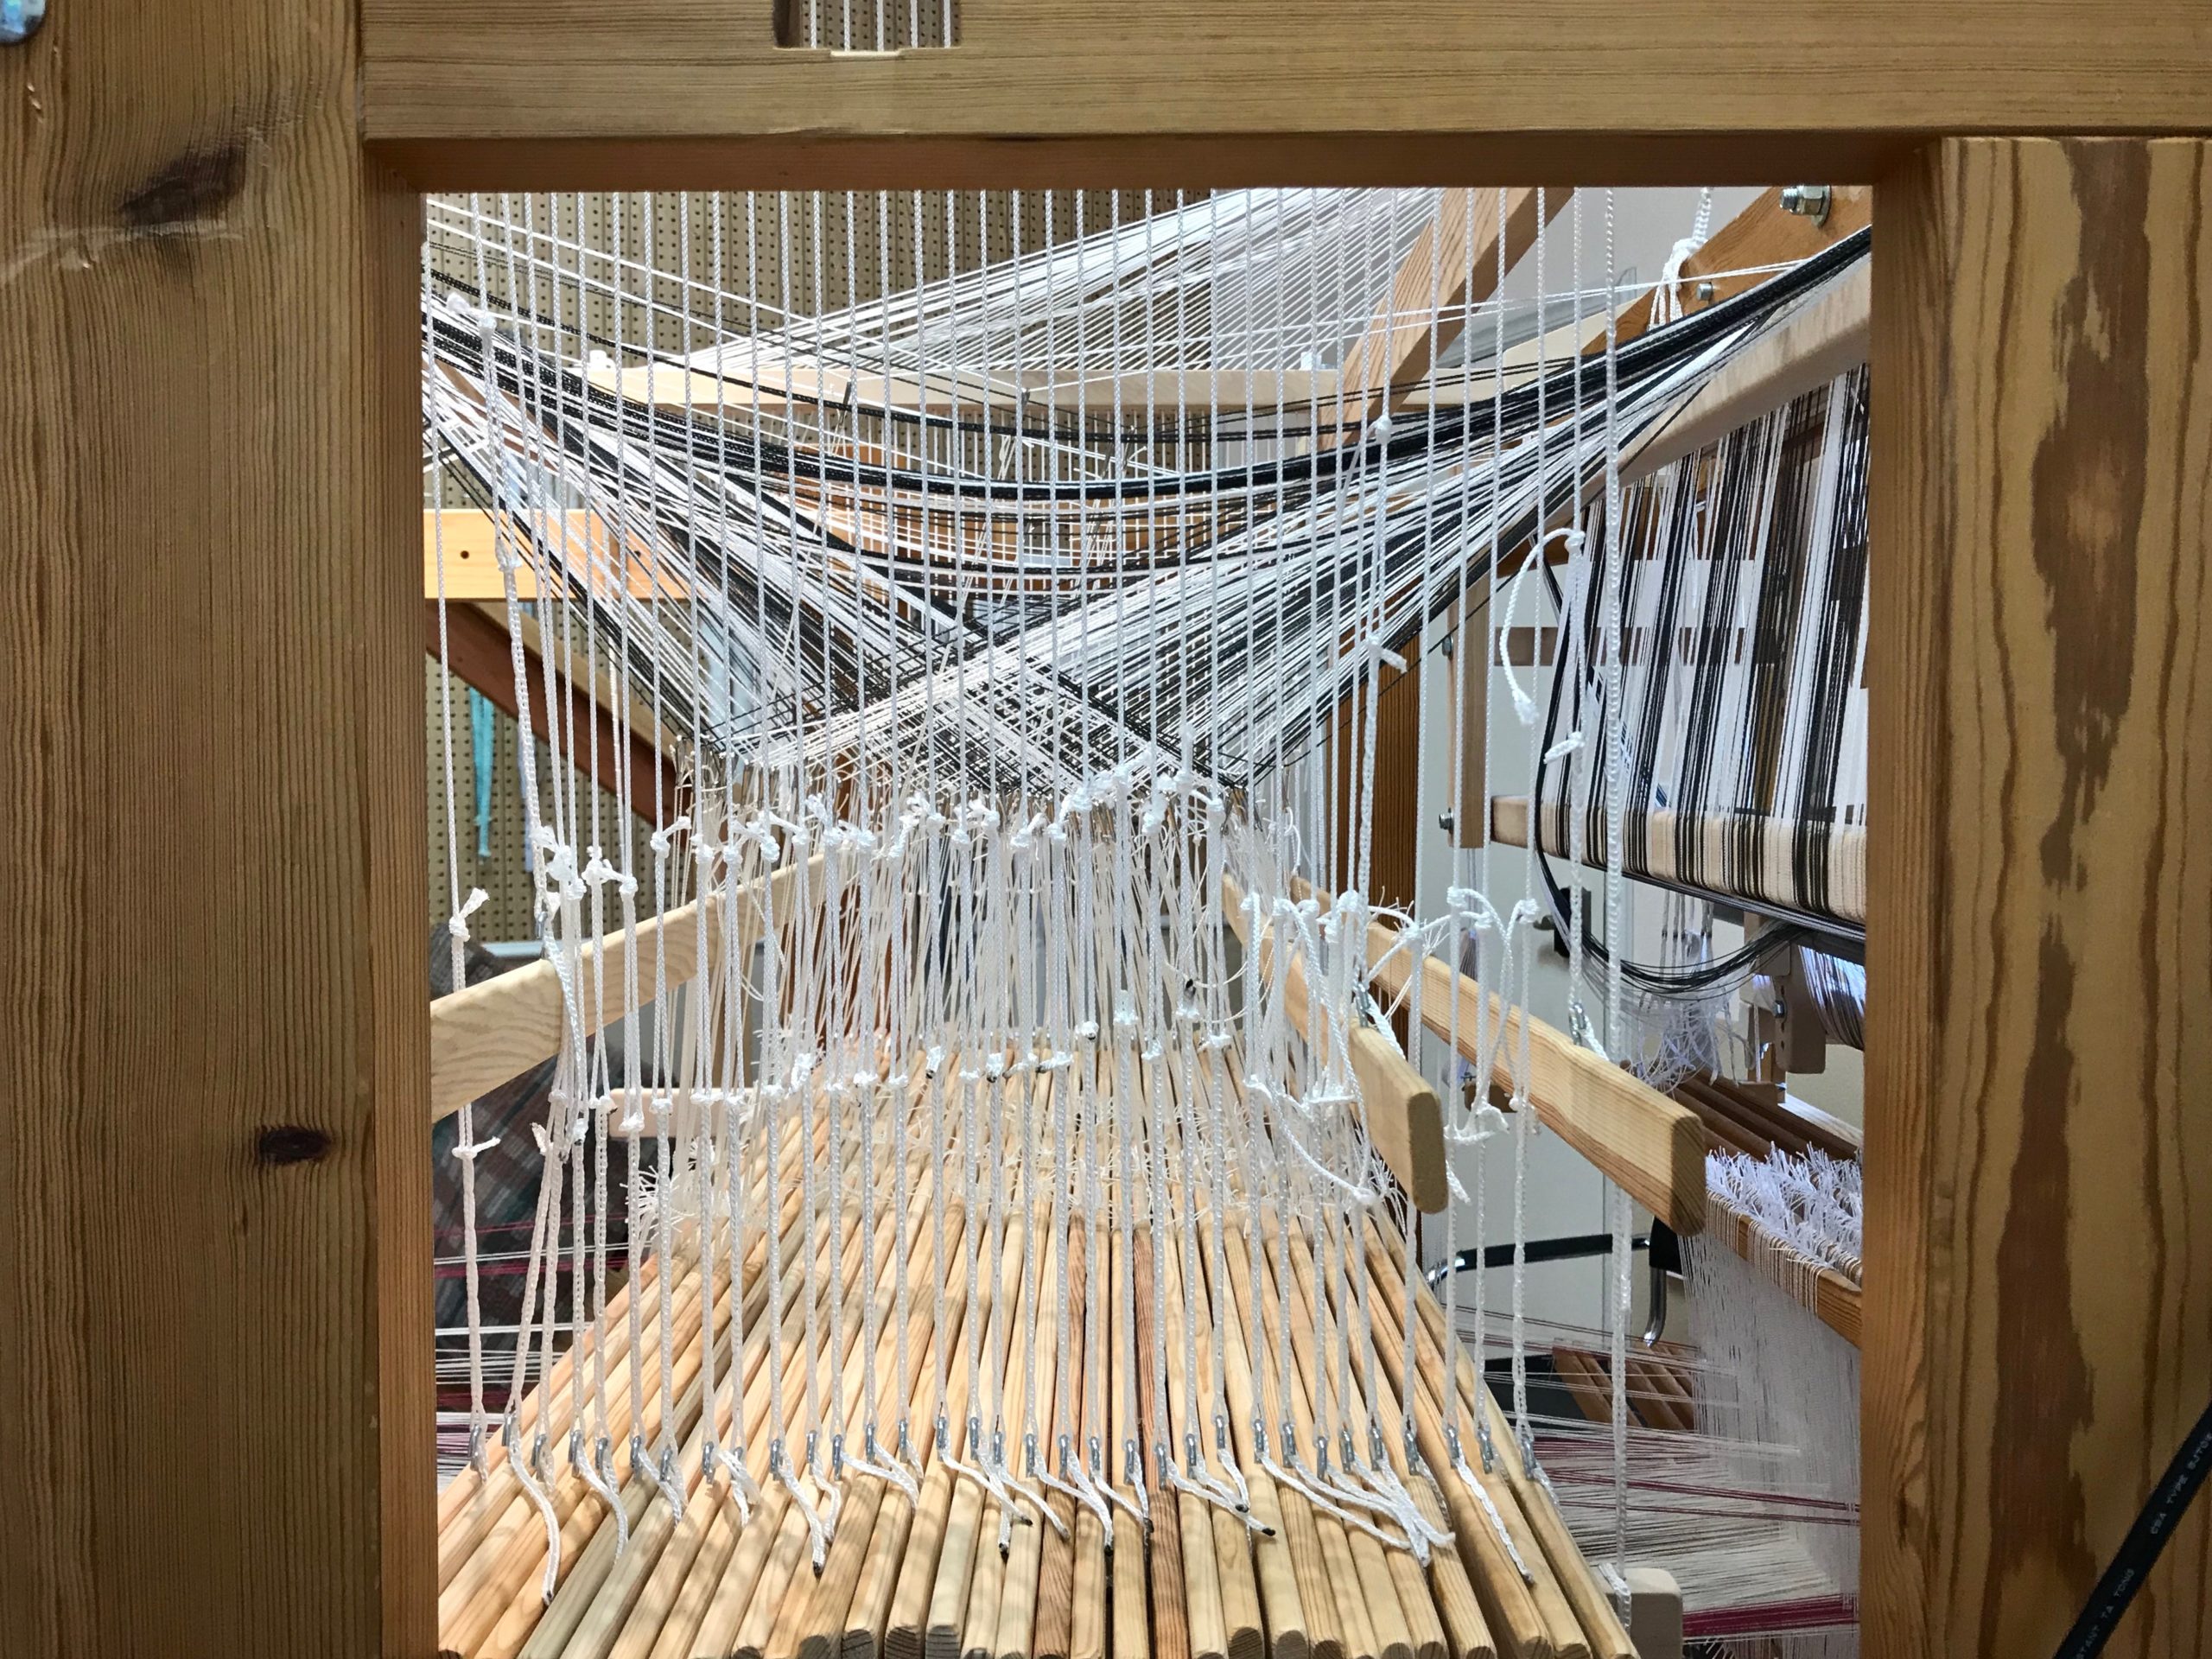
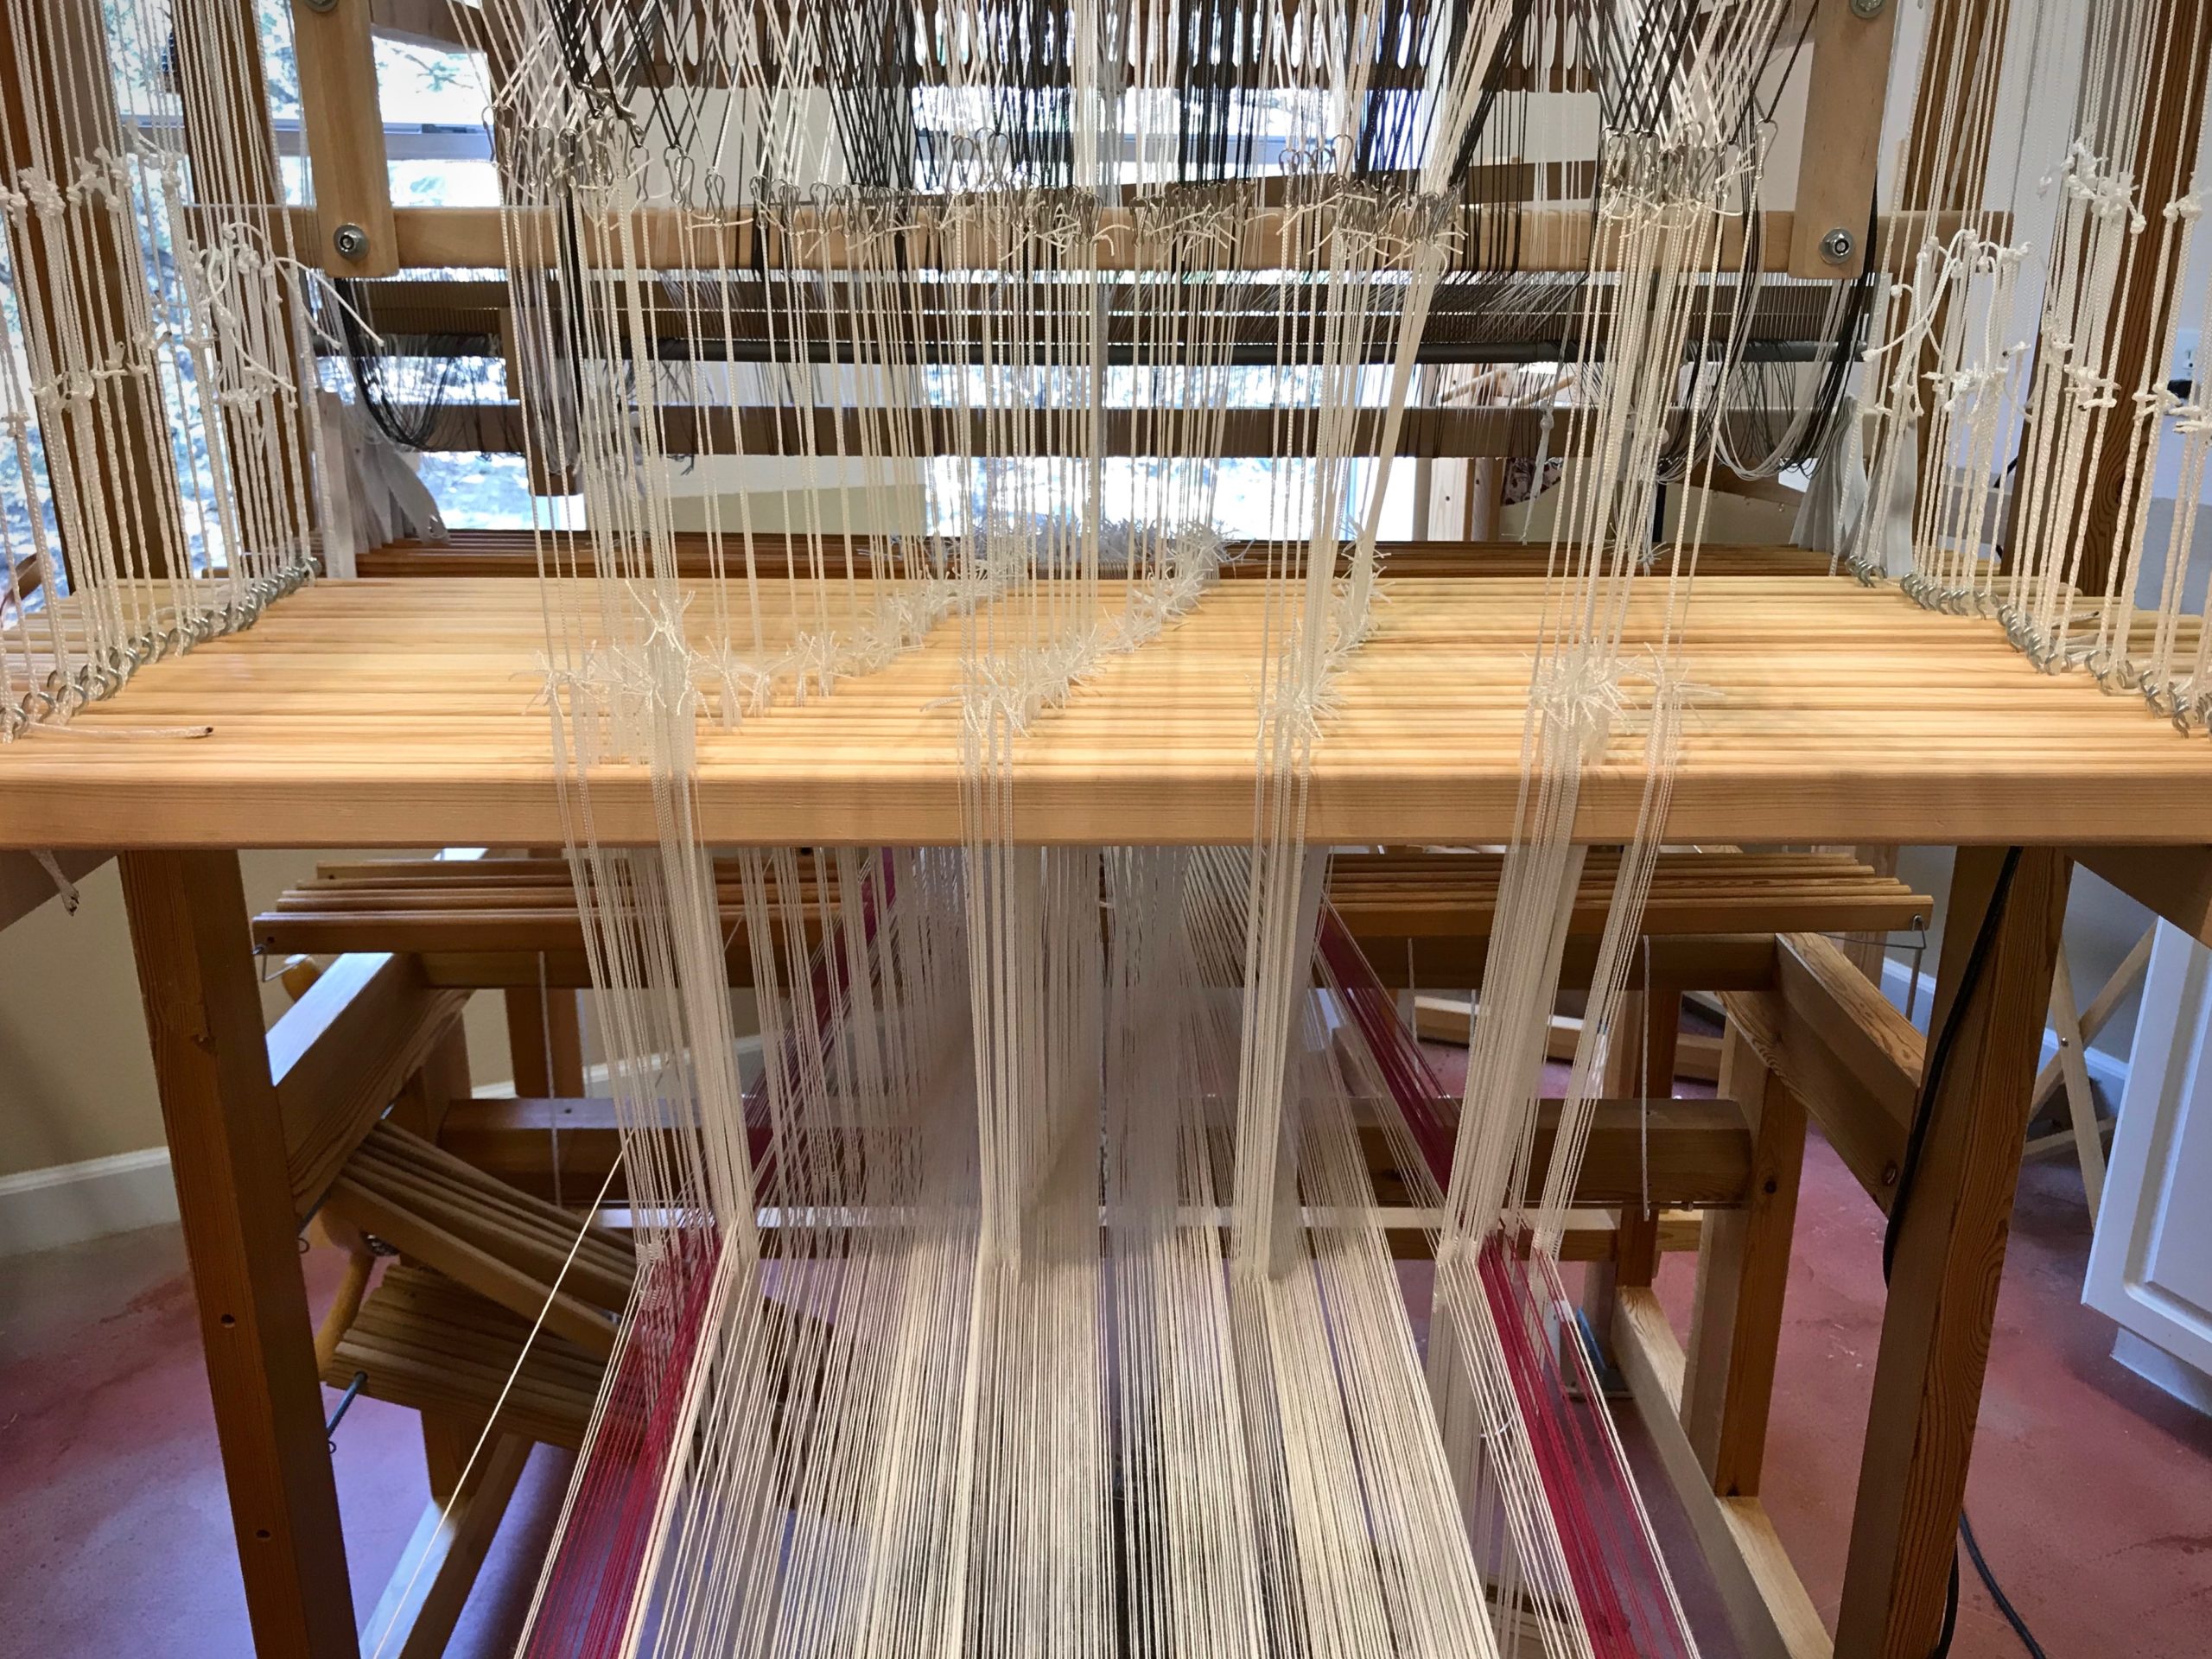
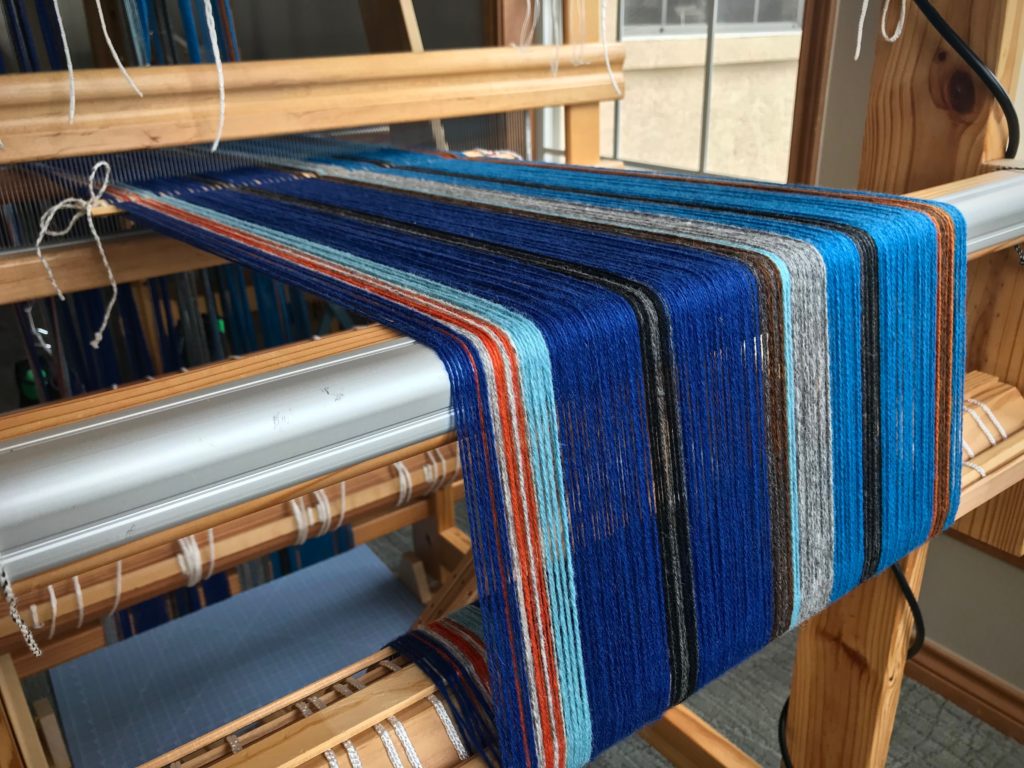
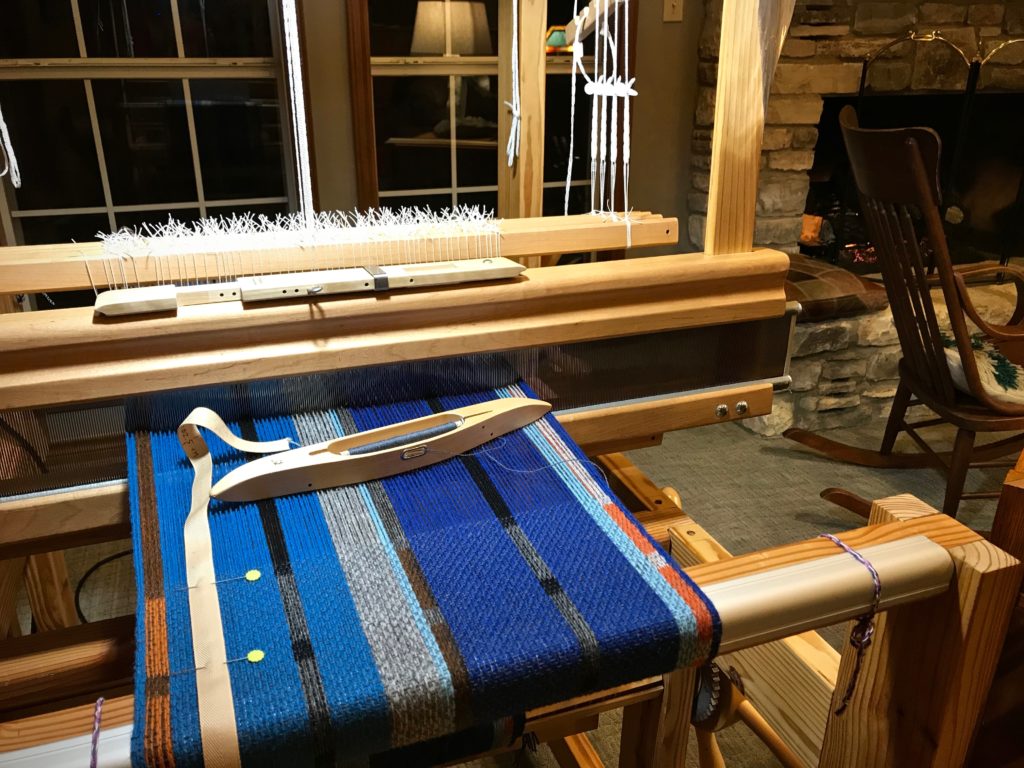
I waded into deflected double weave for the first time. It took me one full scarf to figure out what I was doing. By the second scarf, I had a much better sense of how the pattern fits together and what to do with the shuttles (most of the time). Both scarves are quite imperfect (no one will ever know…). The loom behaved perfectly, though. This is my Julia’s first project using all eight shafts. Now, I know that this sweet loom is up to any challenge I give her.
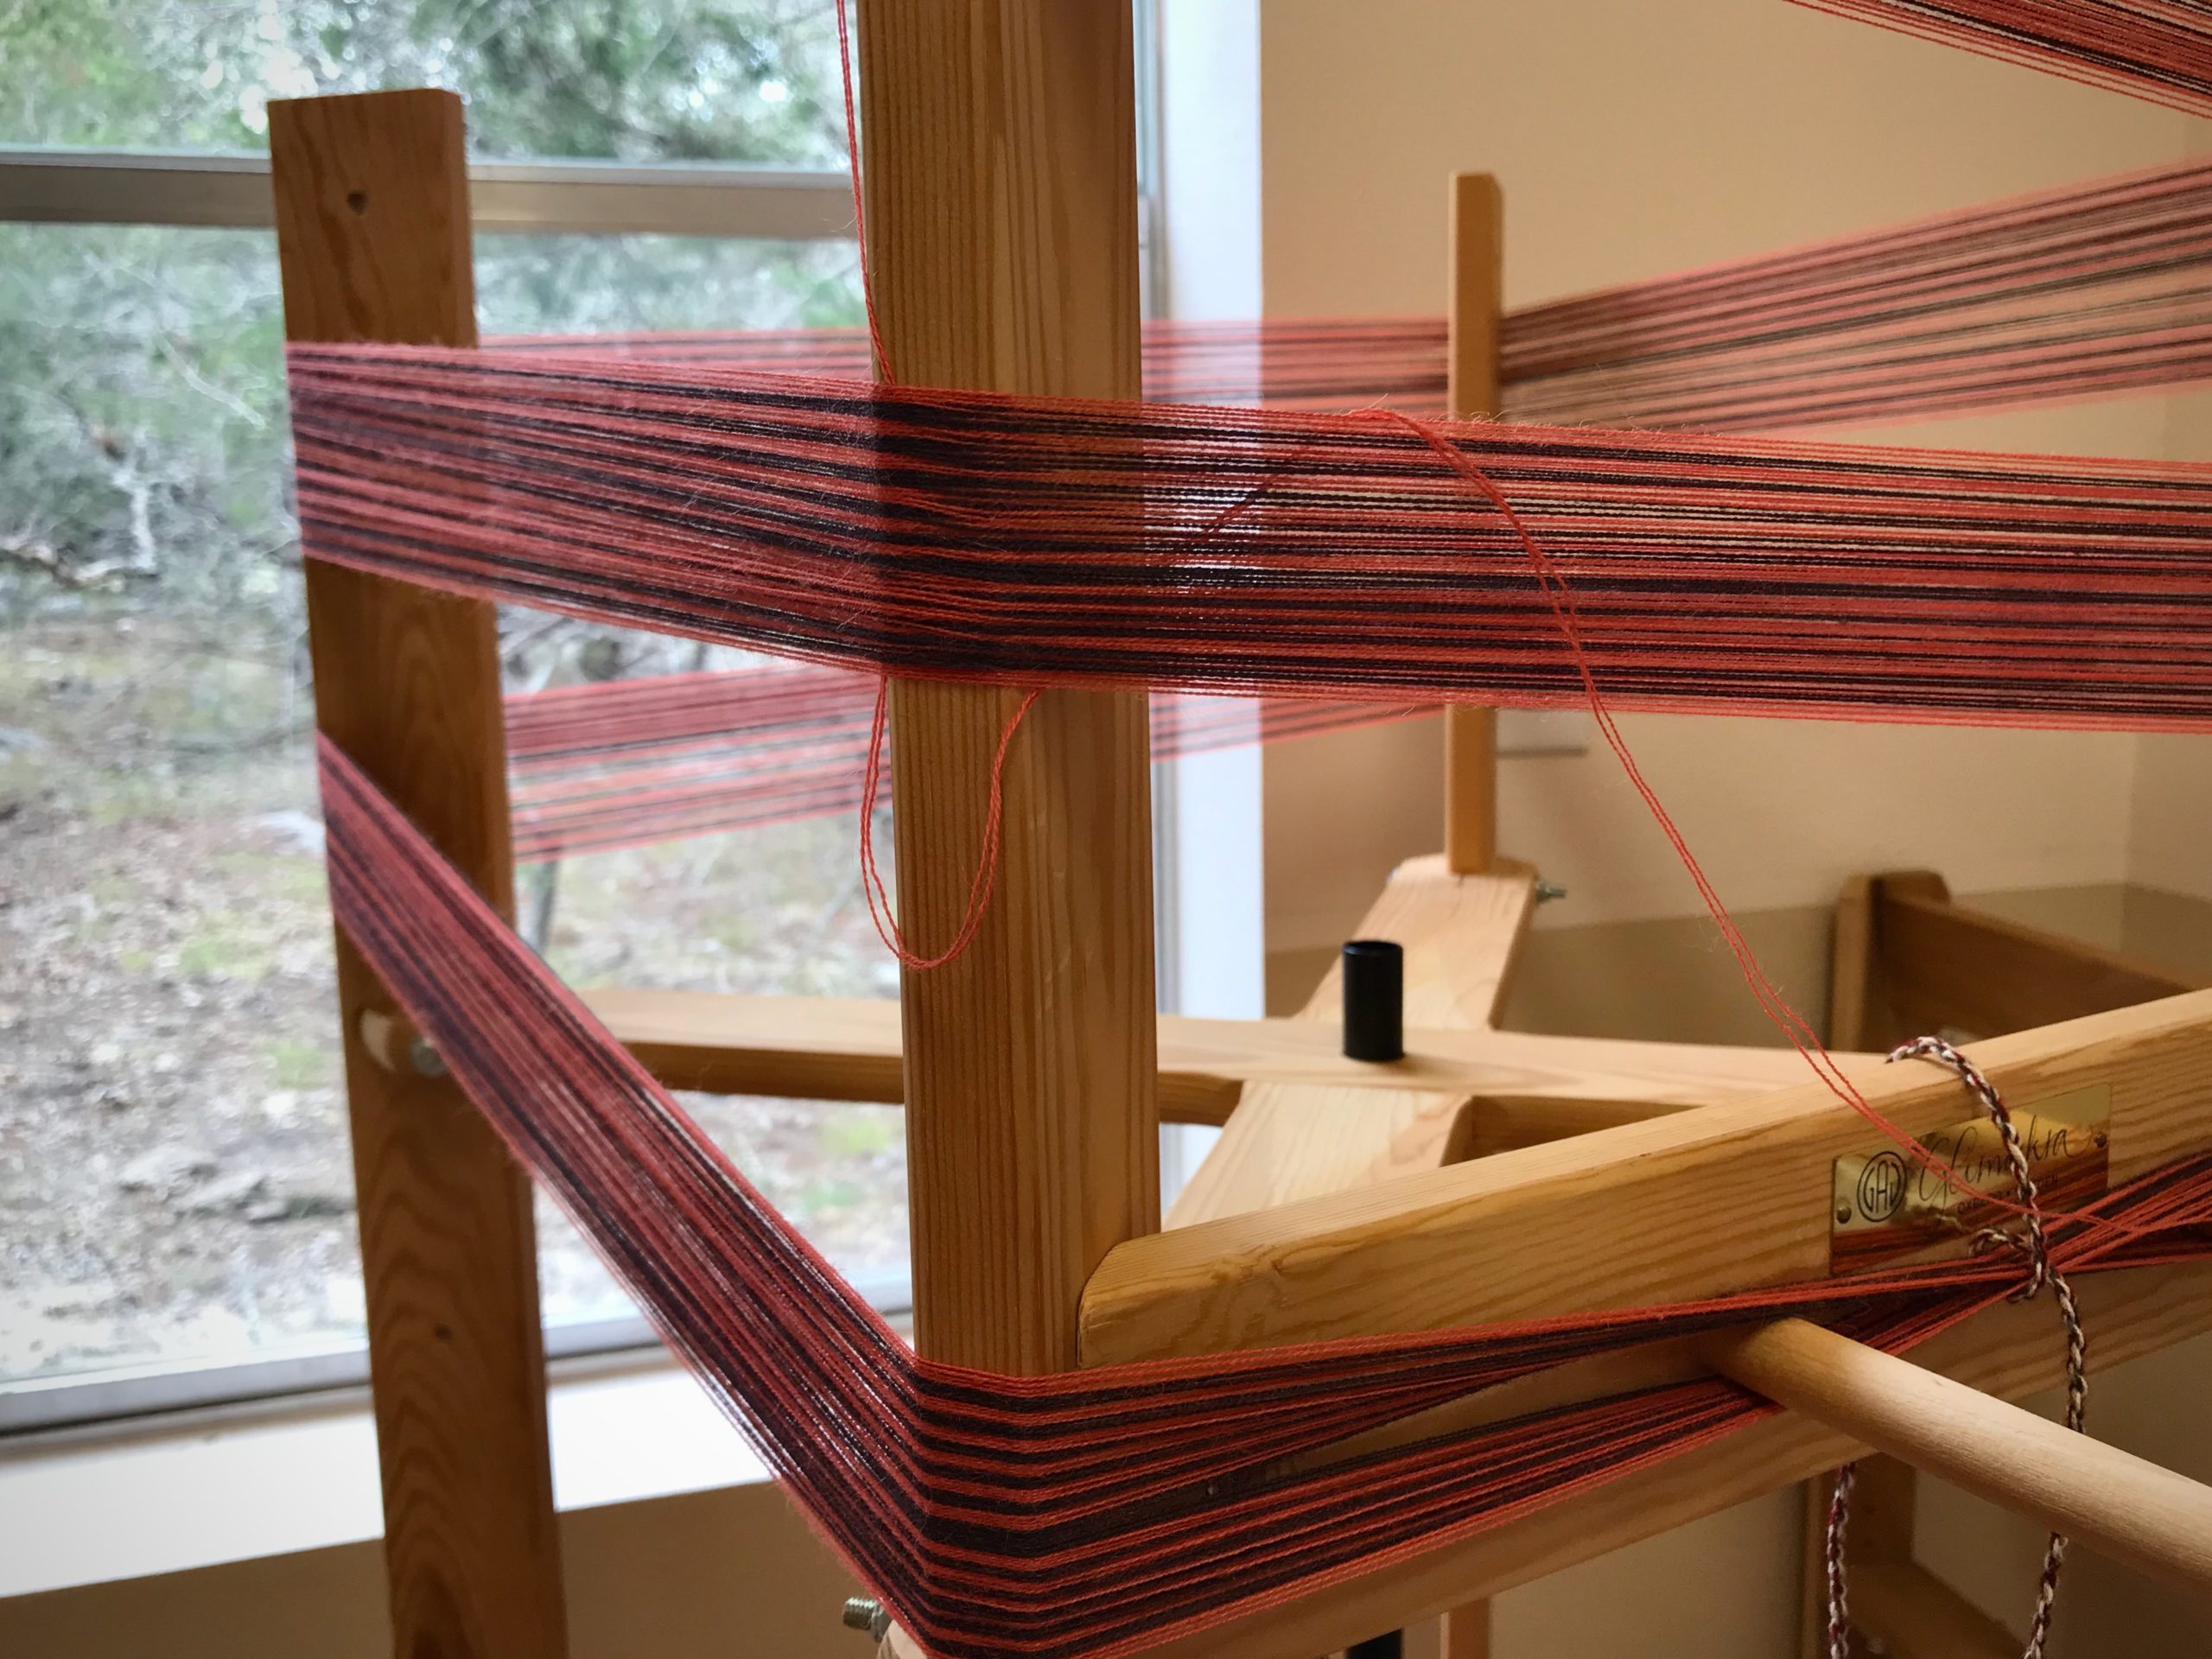
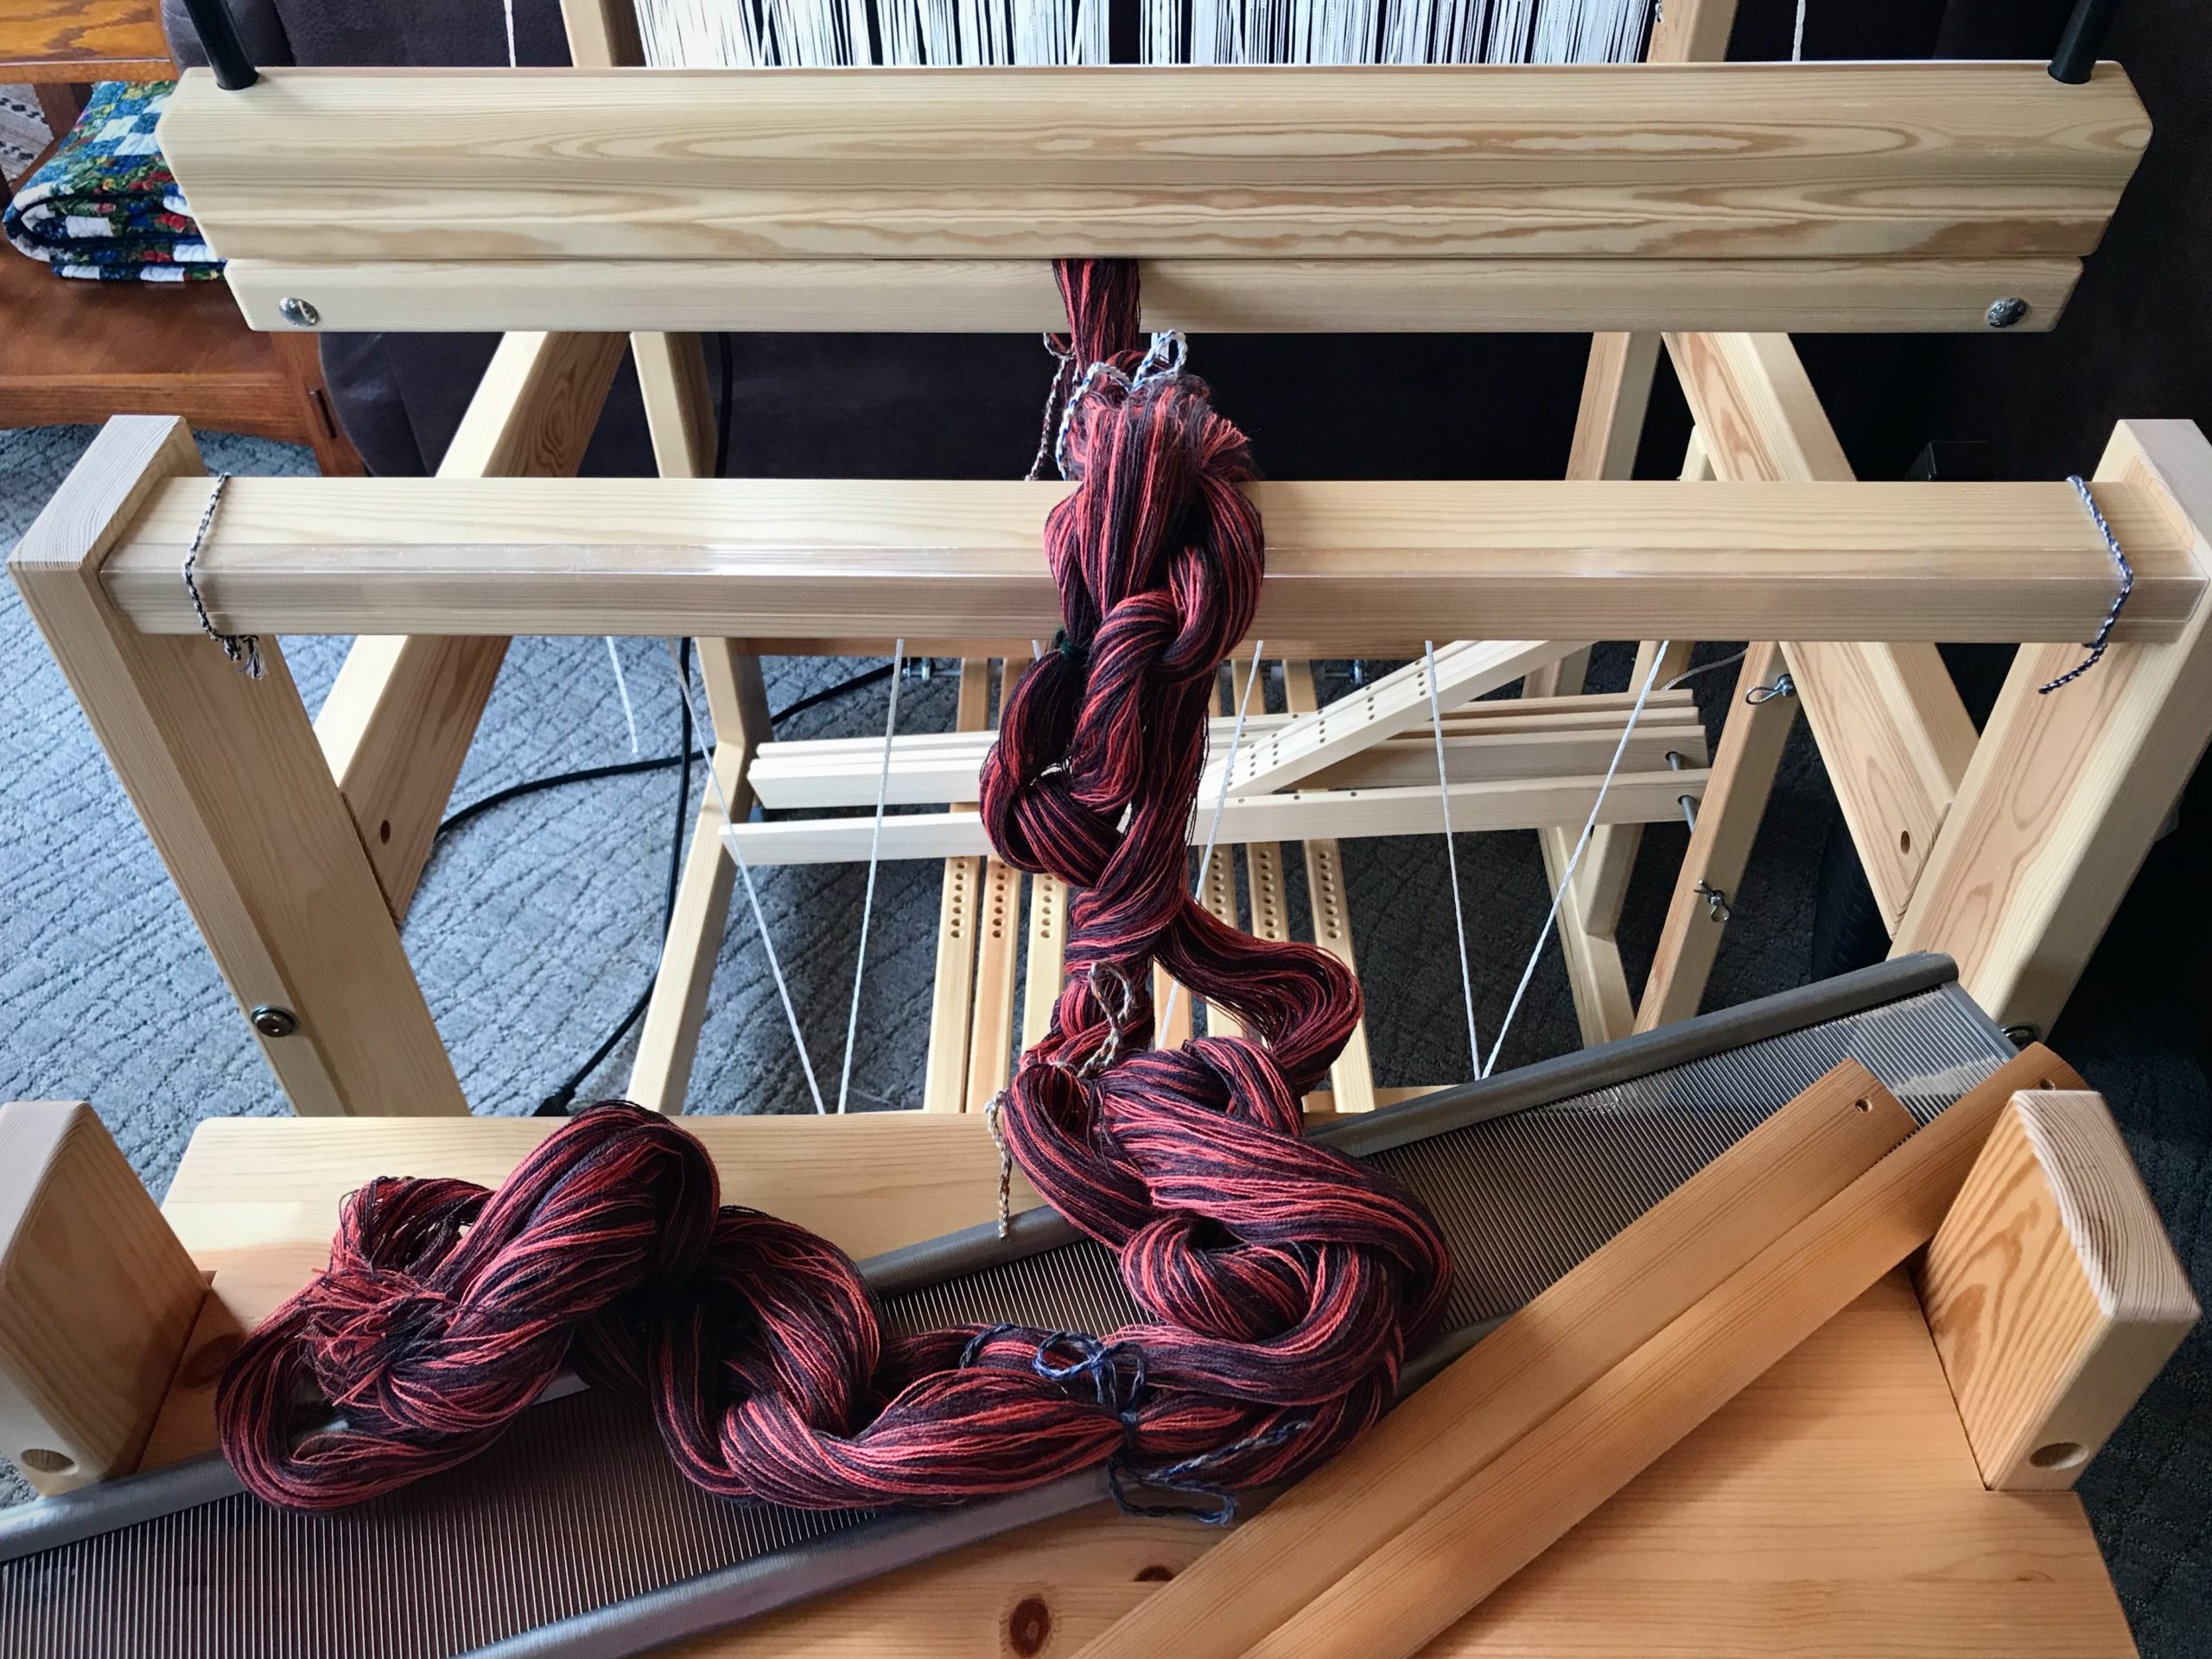
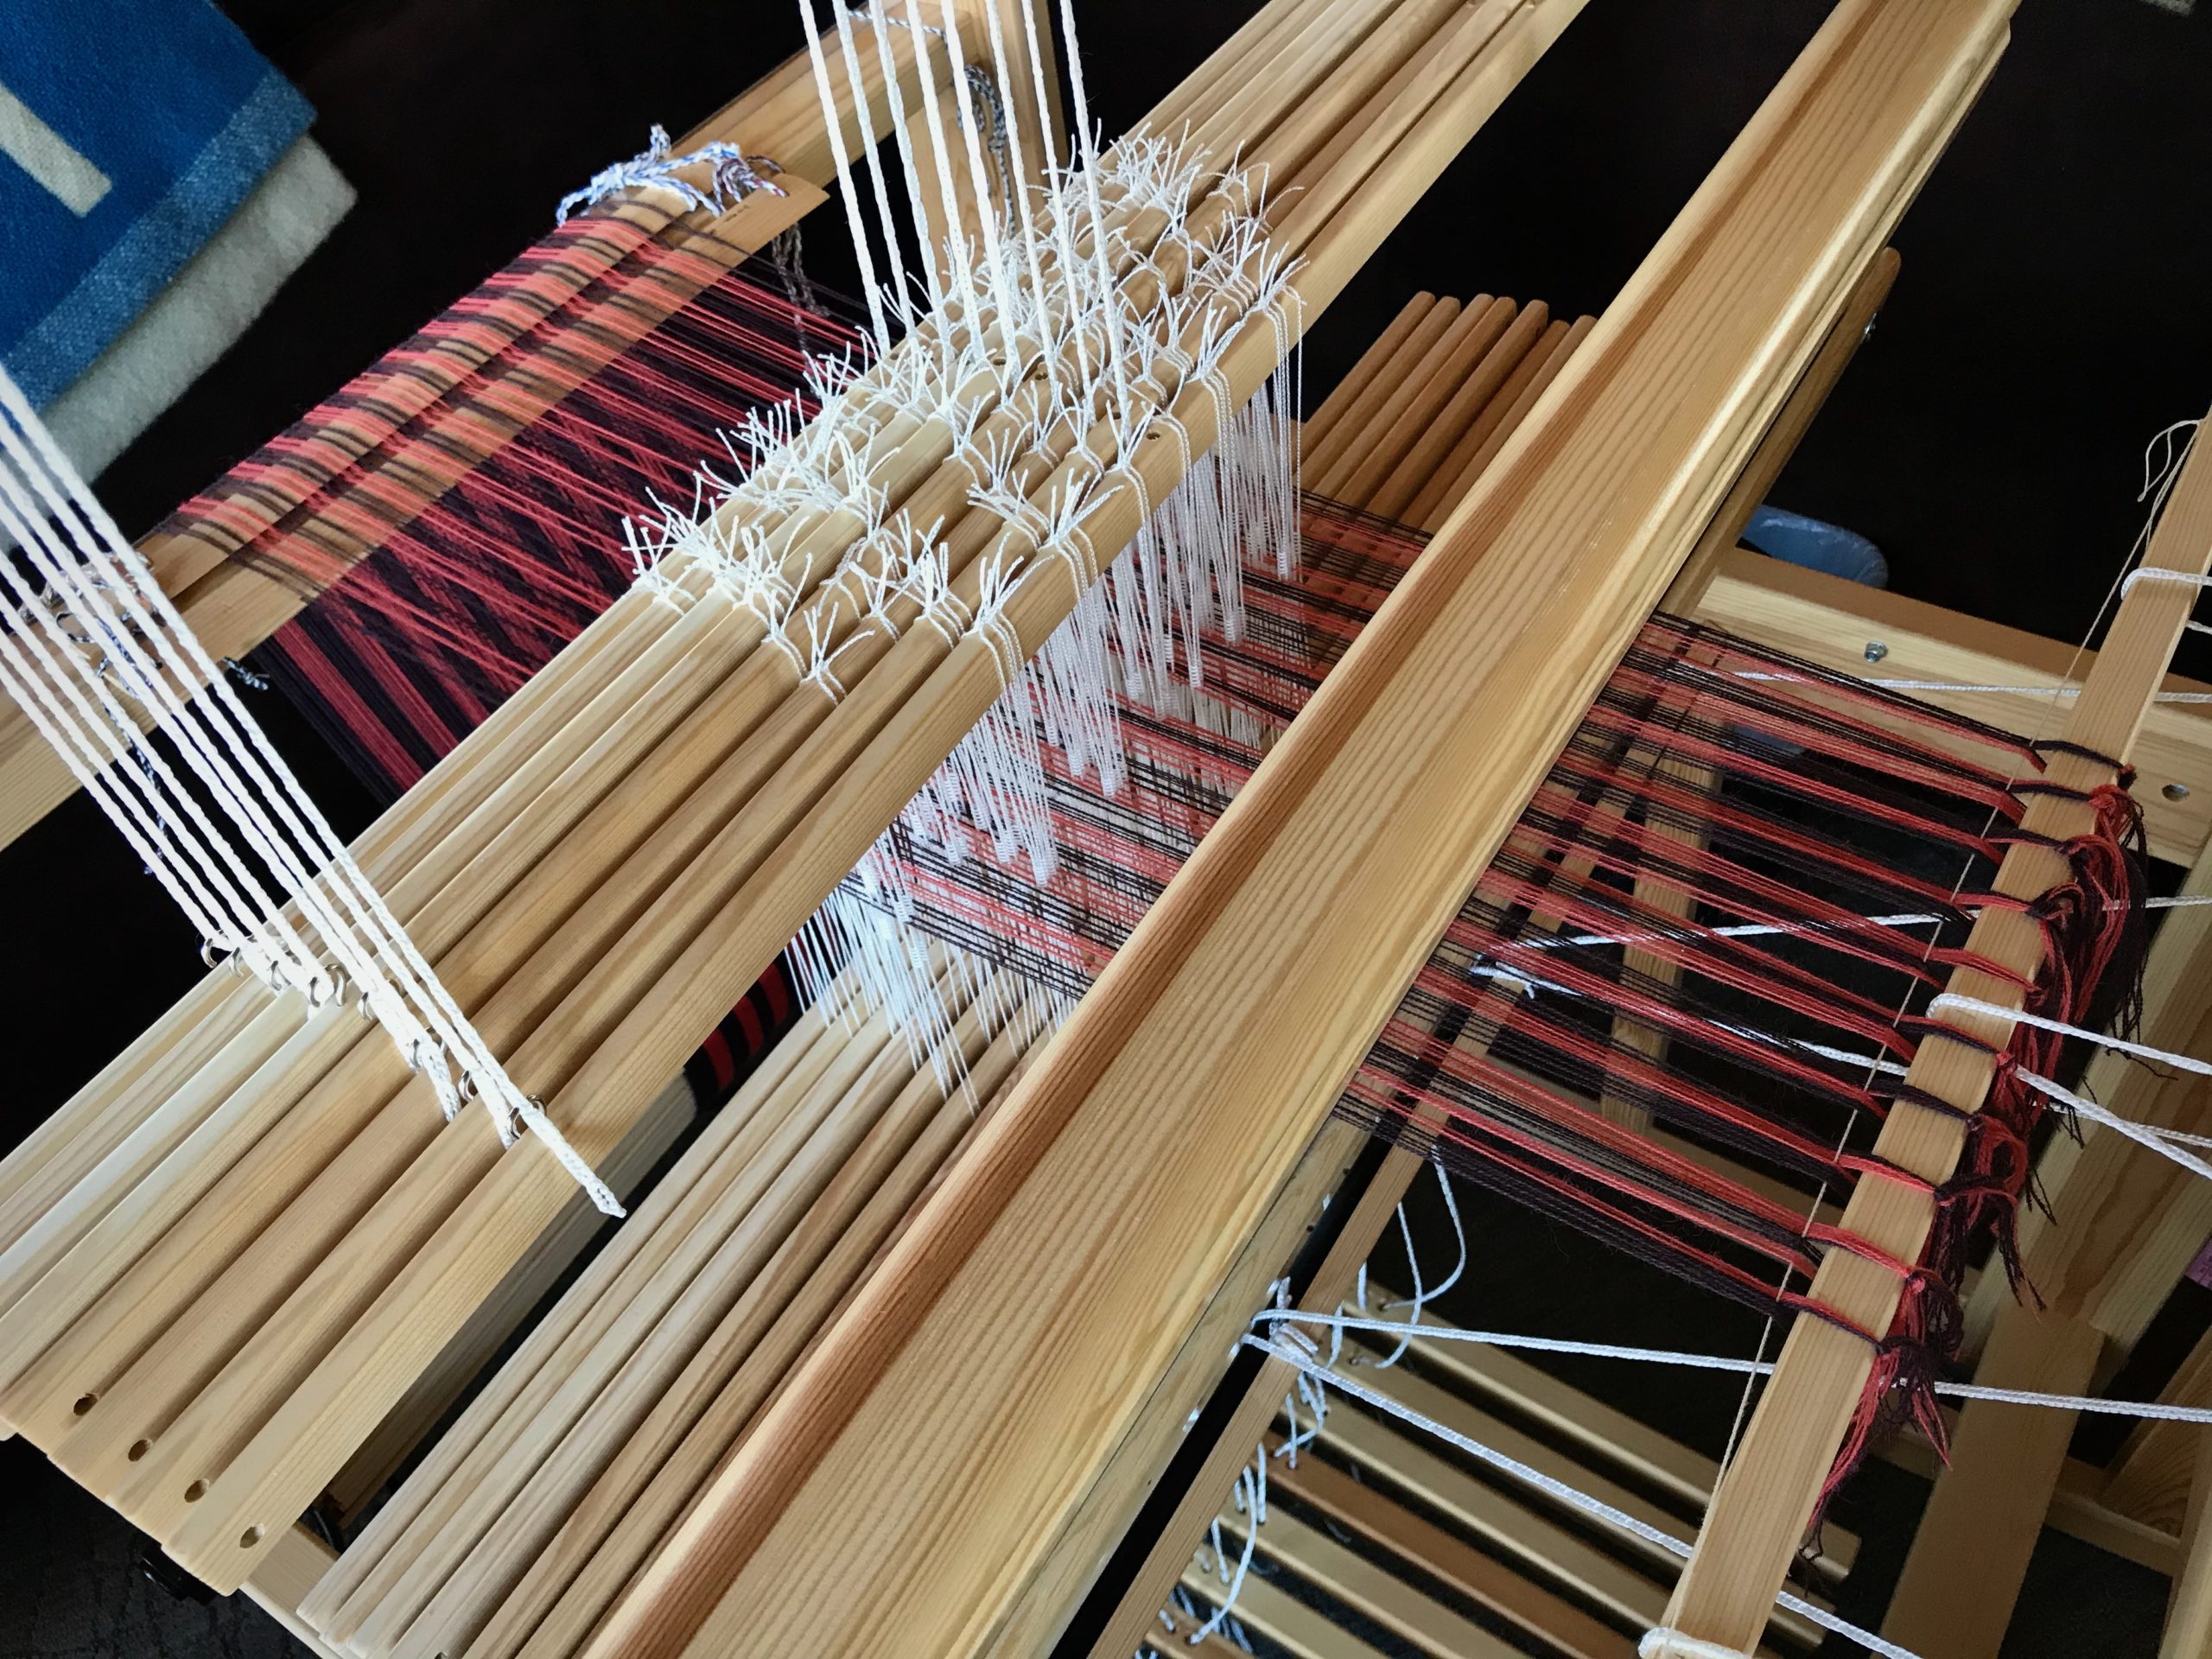
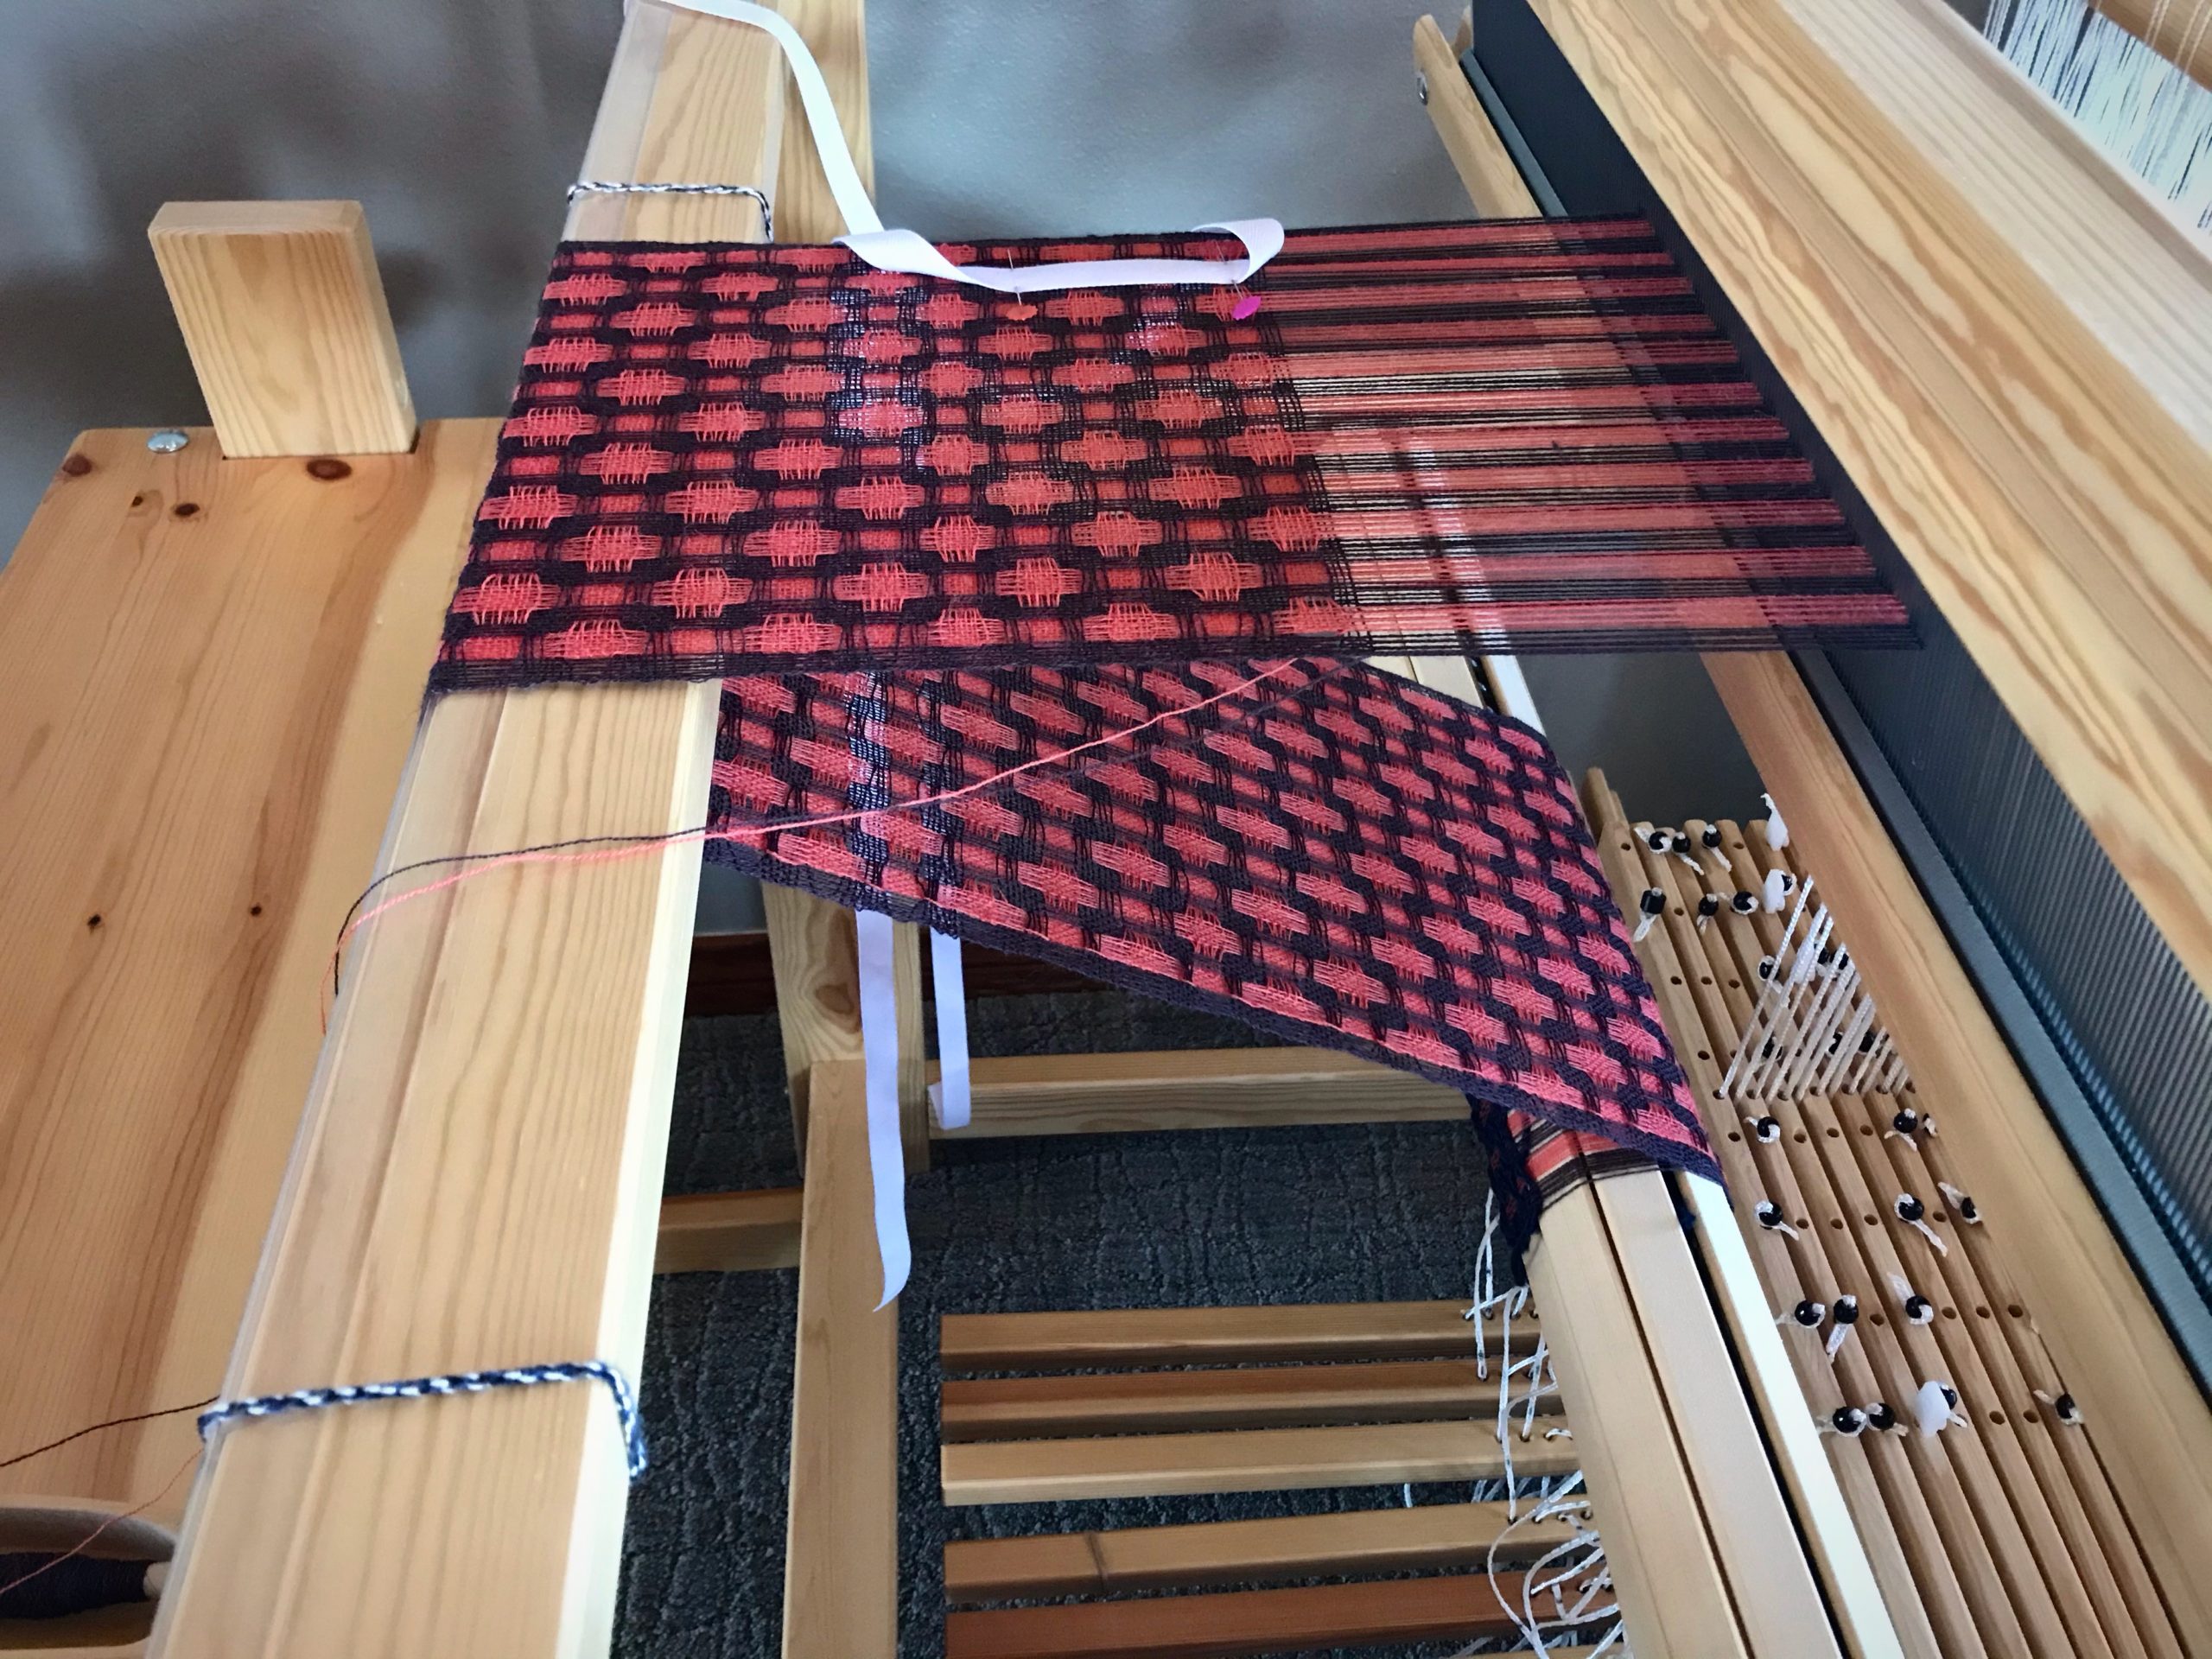
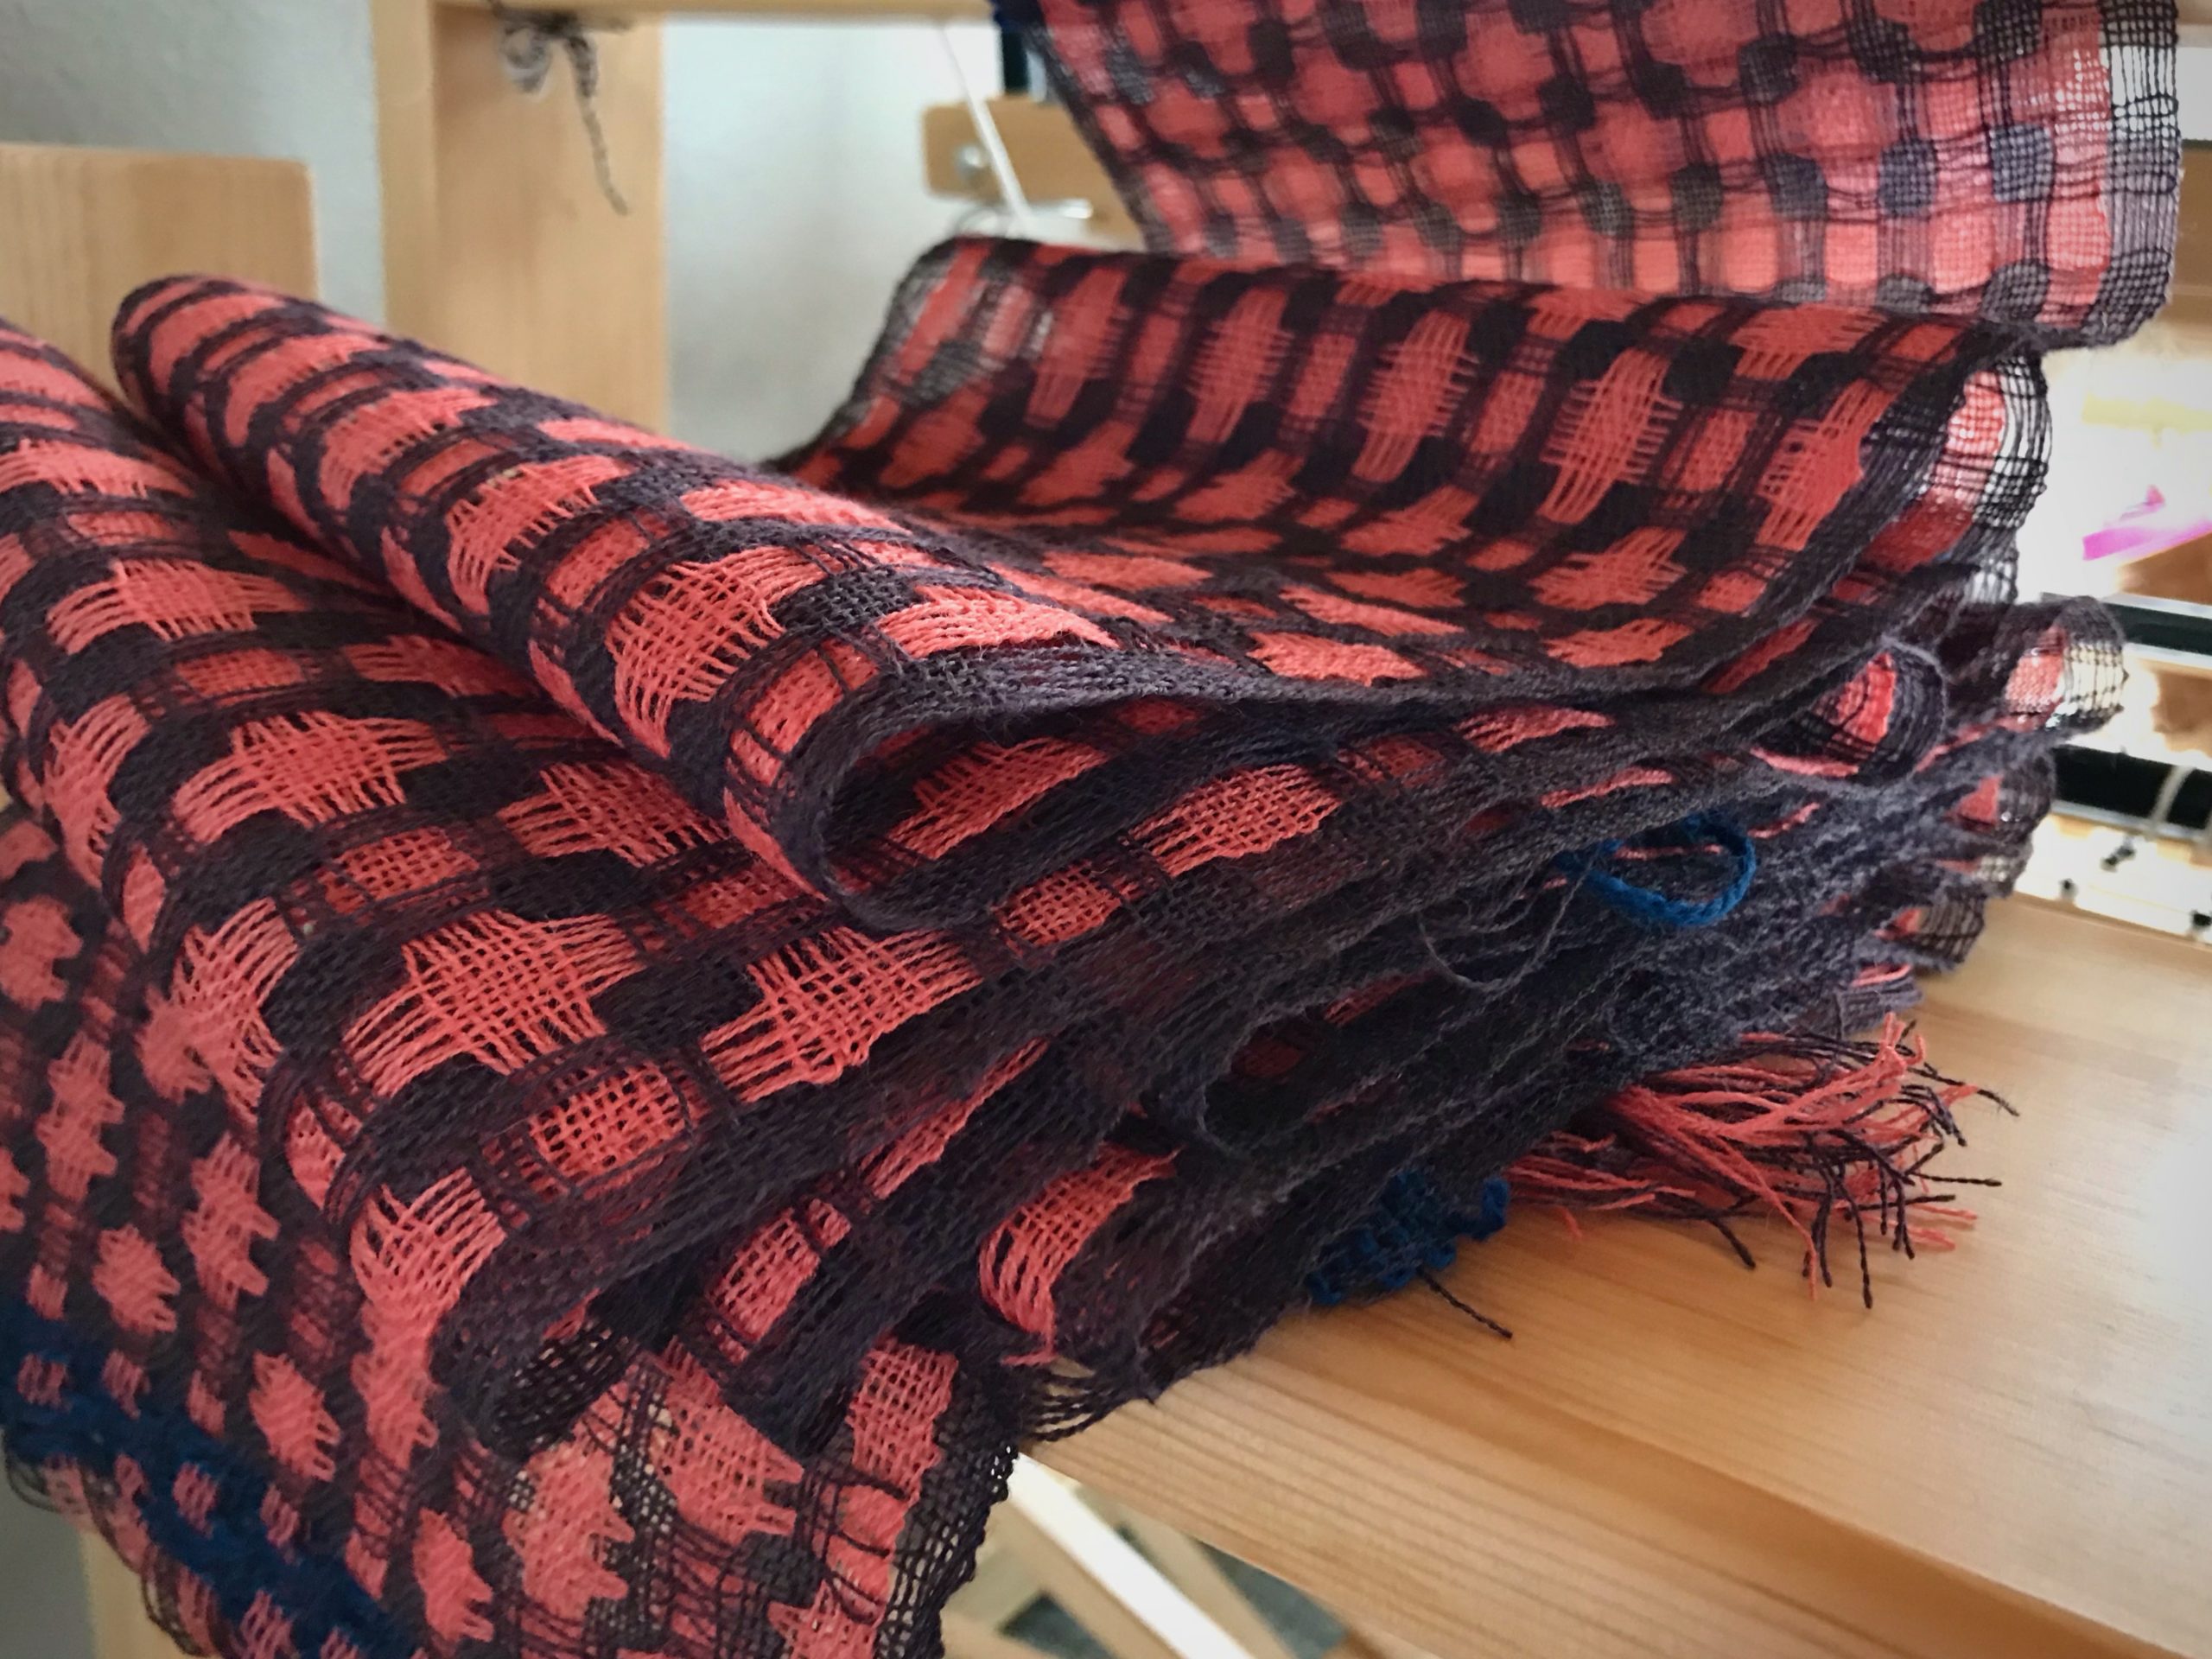
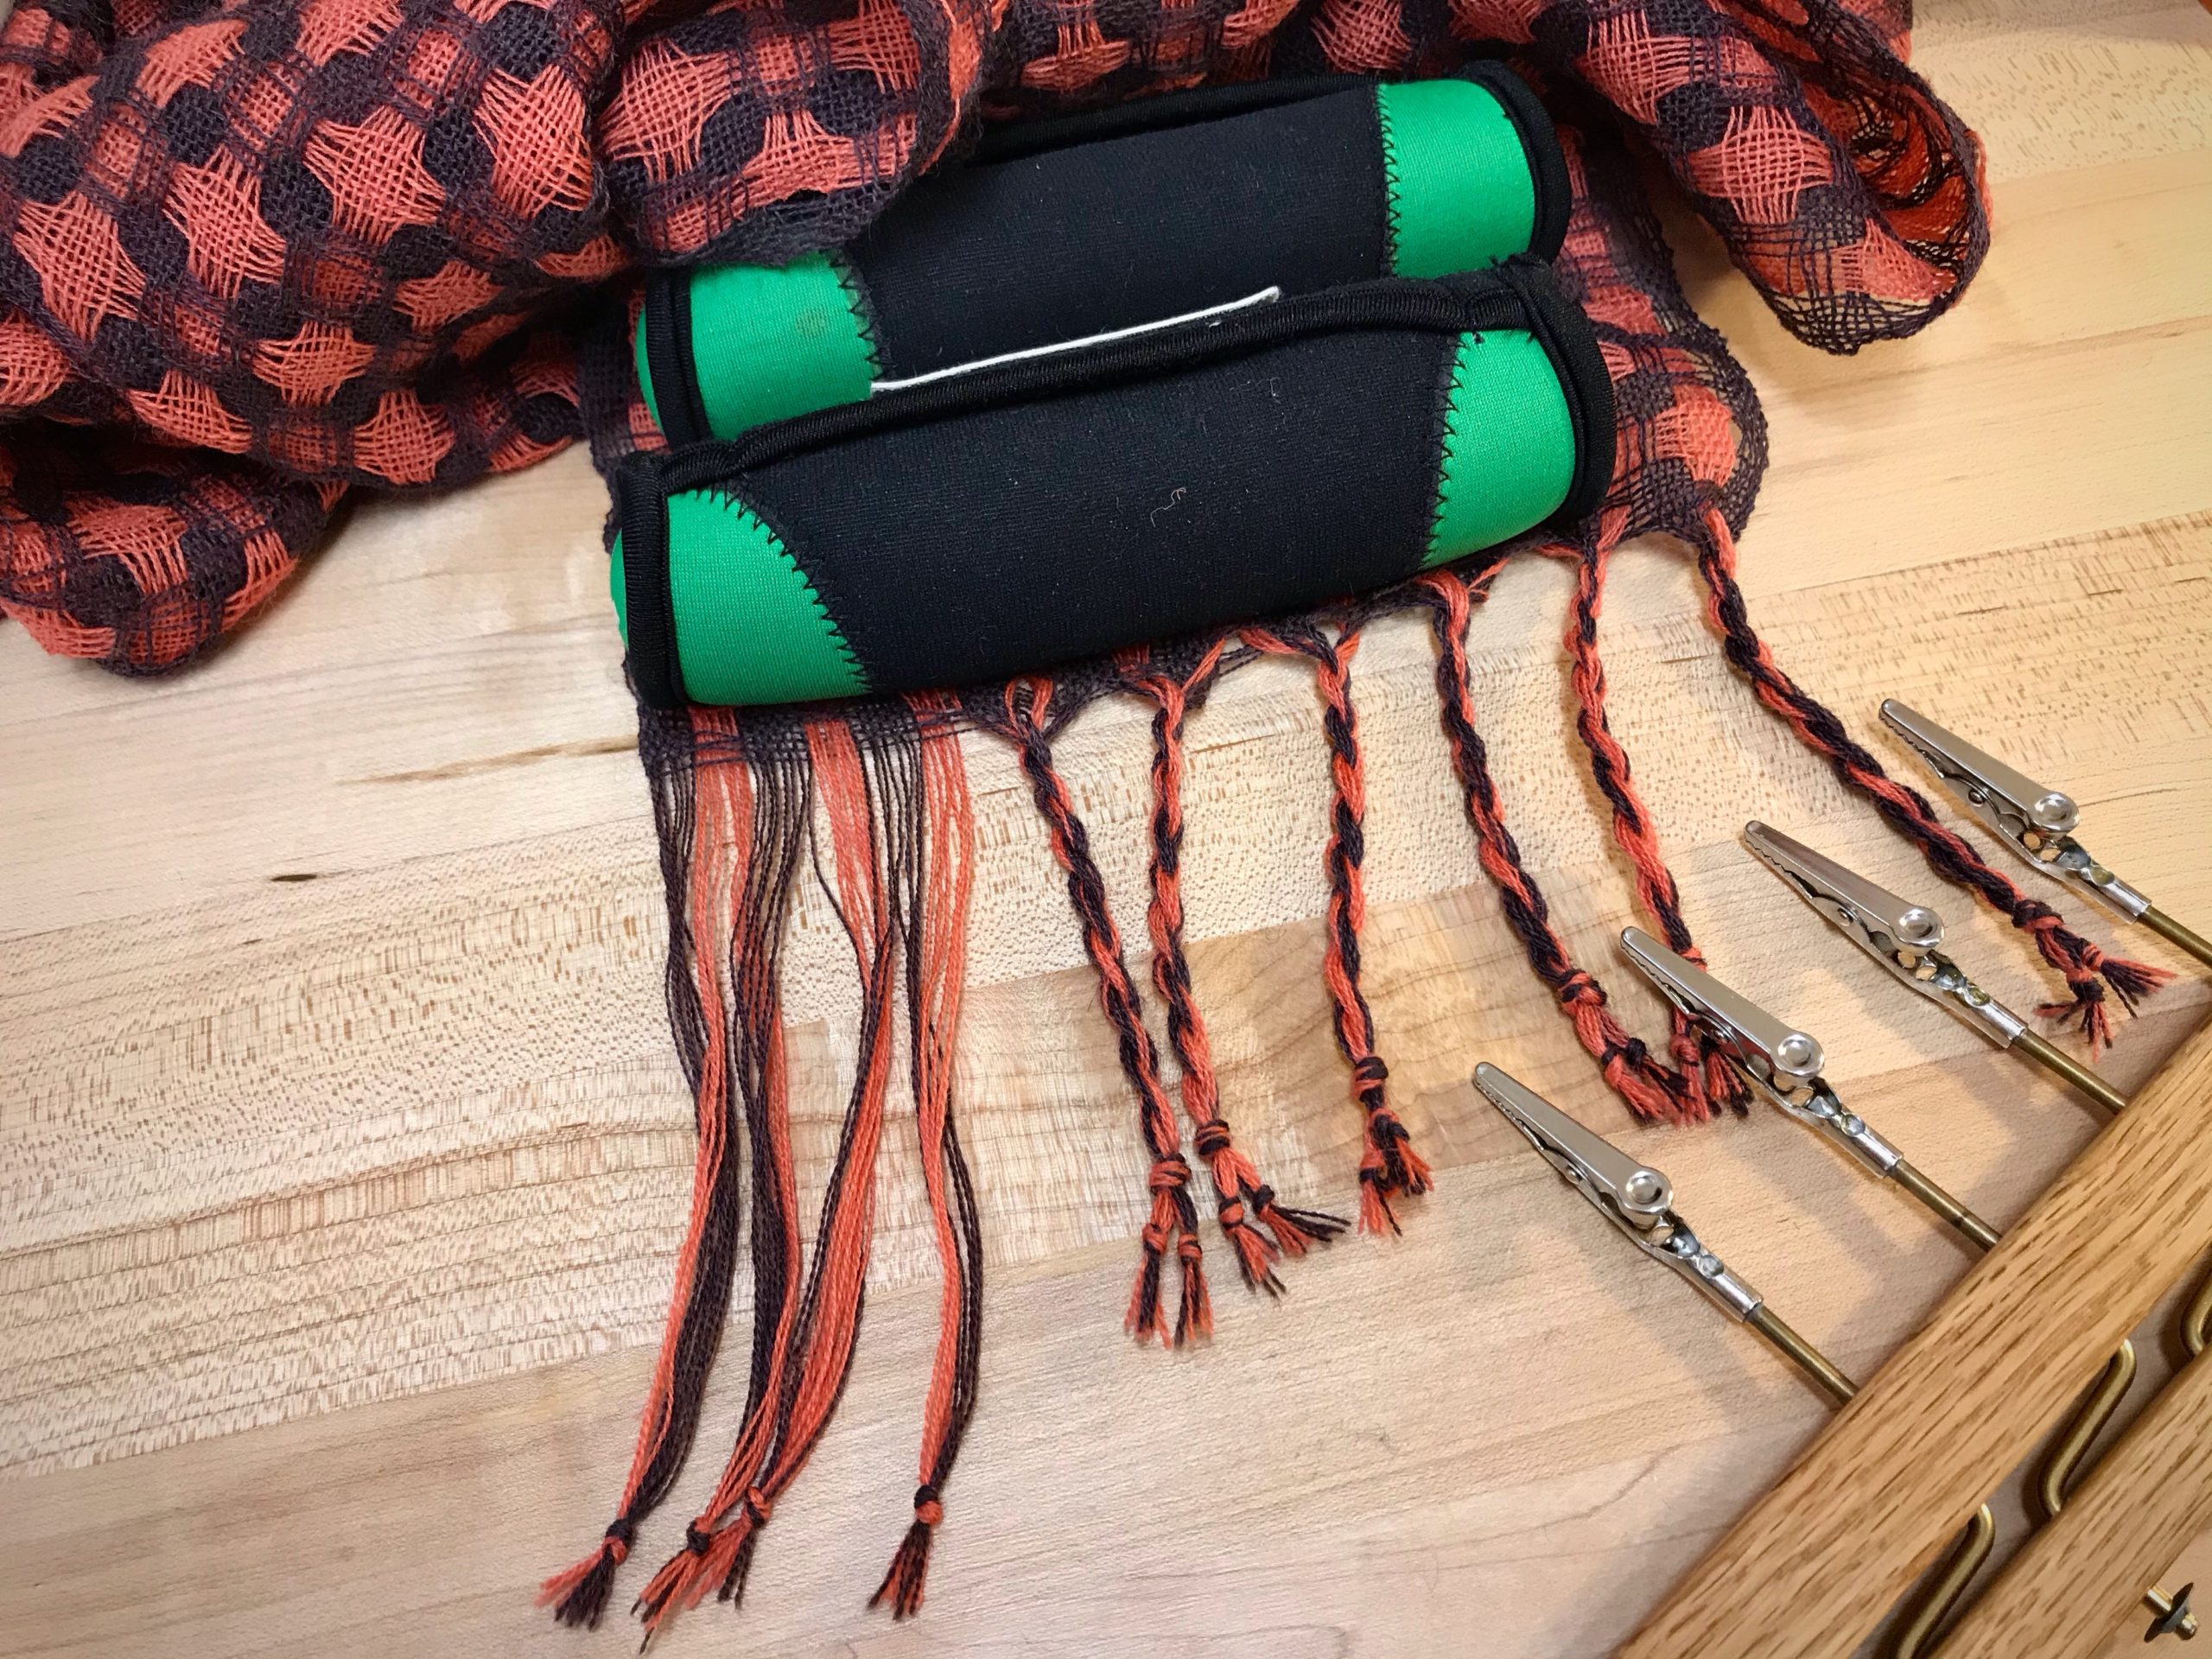
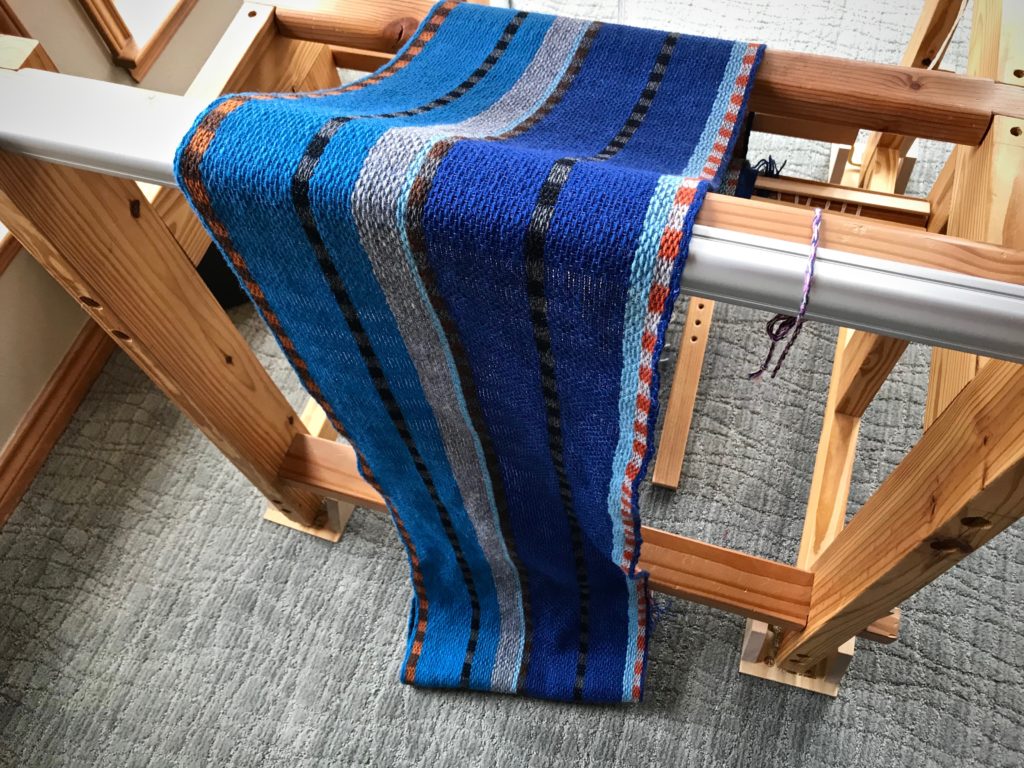
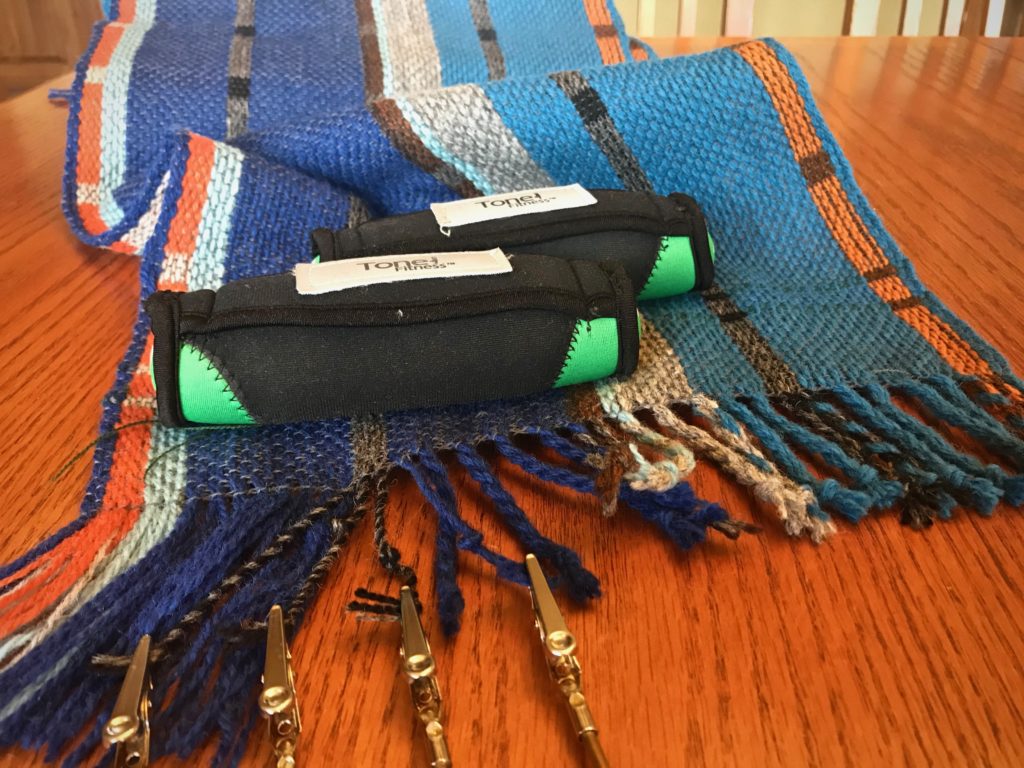
20/2 Mora wool by Borgs. Yarn is temporarily secured by pulling a loop behind the warp at the nearest upright on the warping reel.Preparing to dress the loom. The lease cross end of the warp chain is placed through the beater.Warp is beamed and tied on, and the treadles and lamms are tied up.First scarf gives me a chance to learn. Beat consistency is getting better with practice.Trickiest part about deflected double weave is understanding how the shuttles interact so that the color from one shuttle (the salmon color) never goes to the selvedge.Gaining confidence and consistency on the second scarf. Stiff Mora wool will soon soften in the wash. After cutting off, I discover that a tiny misunderstanding gave me a consistent wrong thread all along one selvedge on the back side. Maybe we should call this defective double weave. (But, really, no one will ever know.)Bundles of light and dark threads are twisted into swinging fringes before the scarves are washed.
By the way, I like the finished airy scarves, even with their flaws.
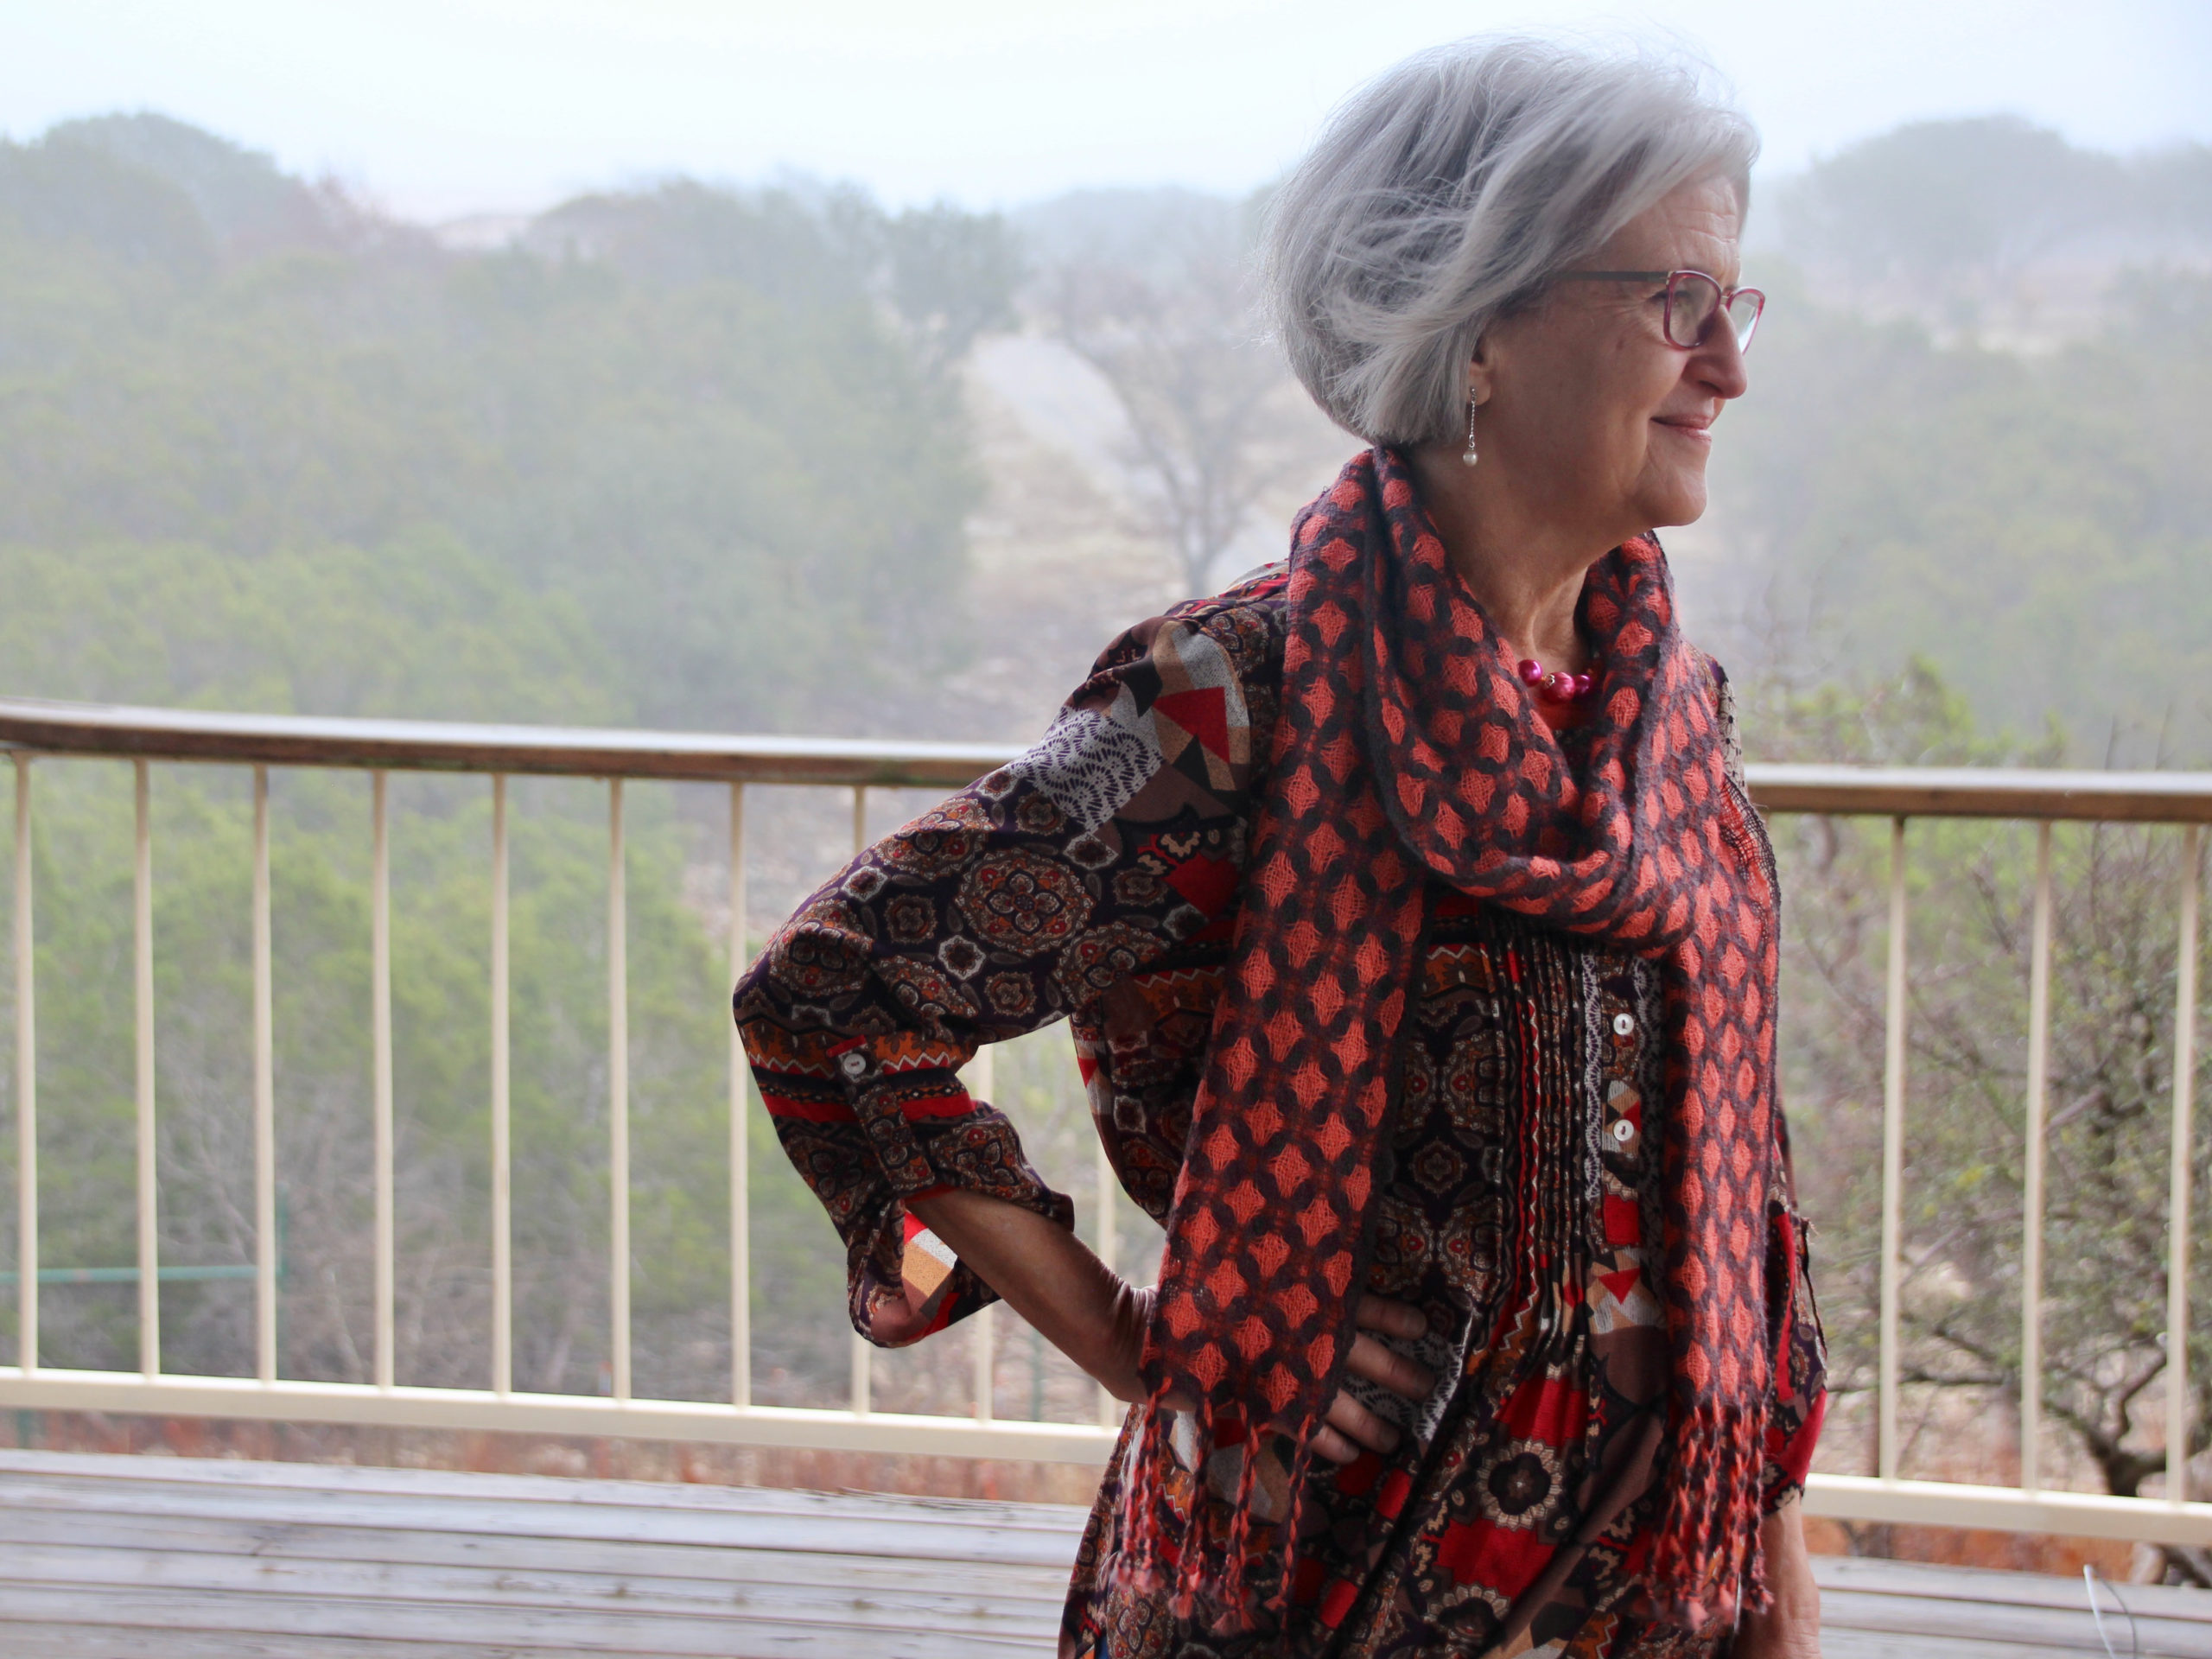
Finished scarf has delightful pattern and character. Mora wool is sufficiently softened through washing and drying, to make a supple fabric.Perfect (imperfect) scarf to brighten up a foggy day in Texas hill country.
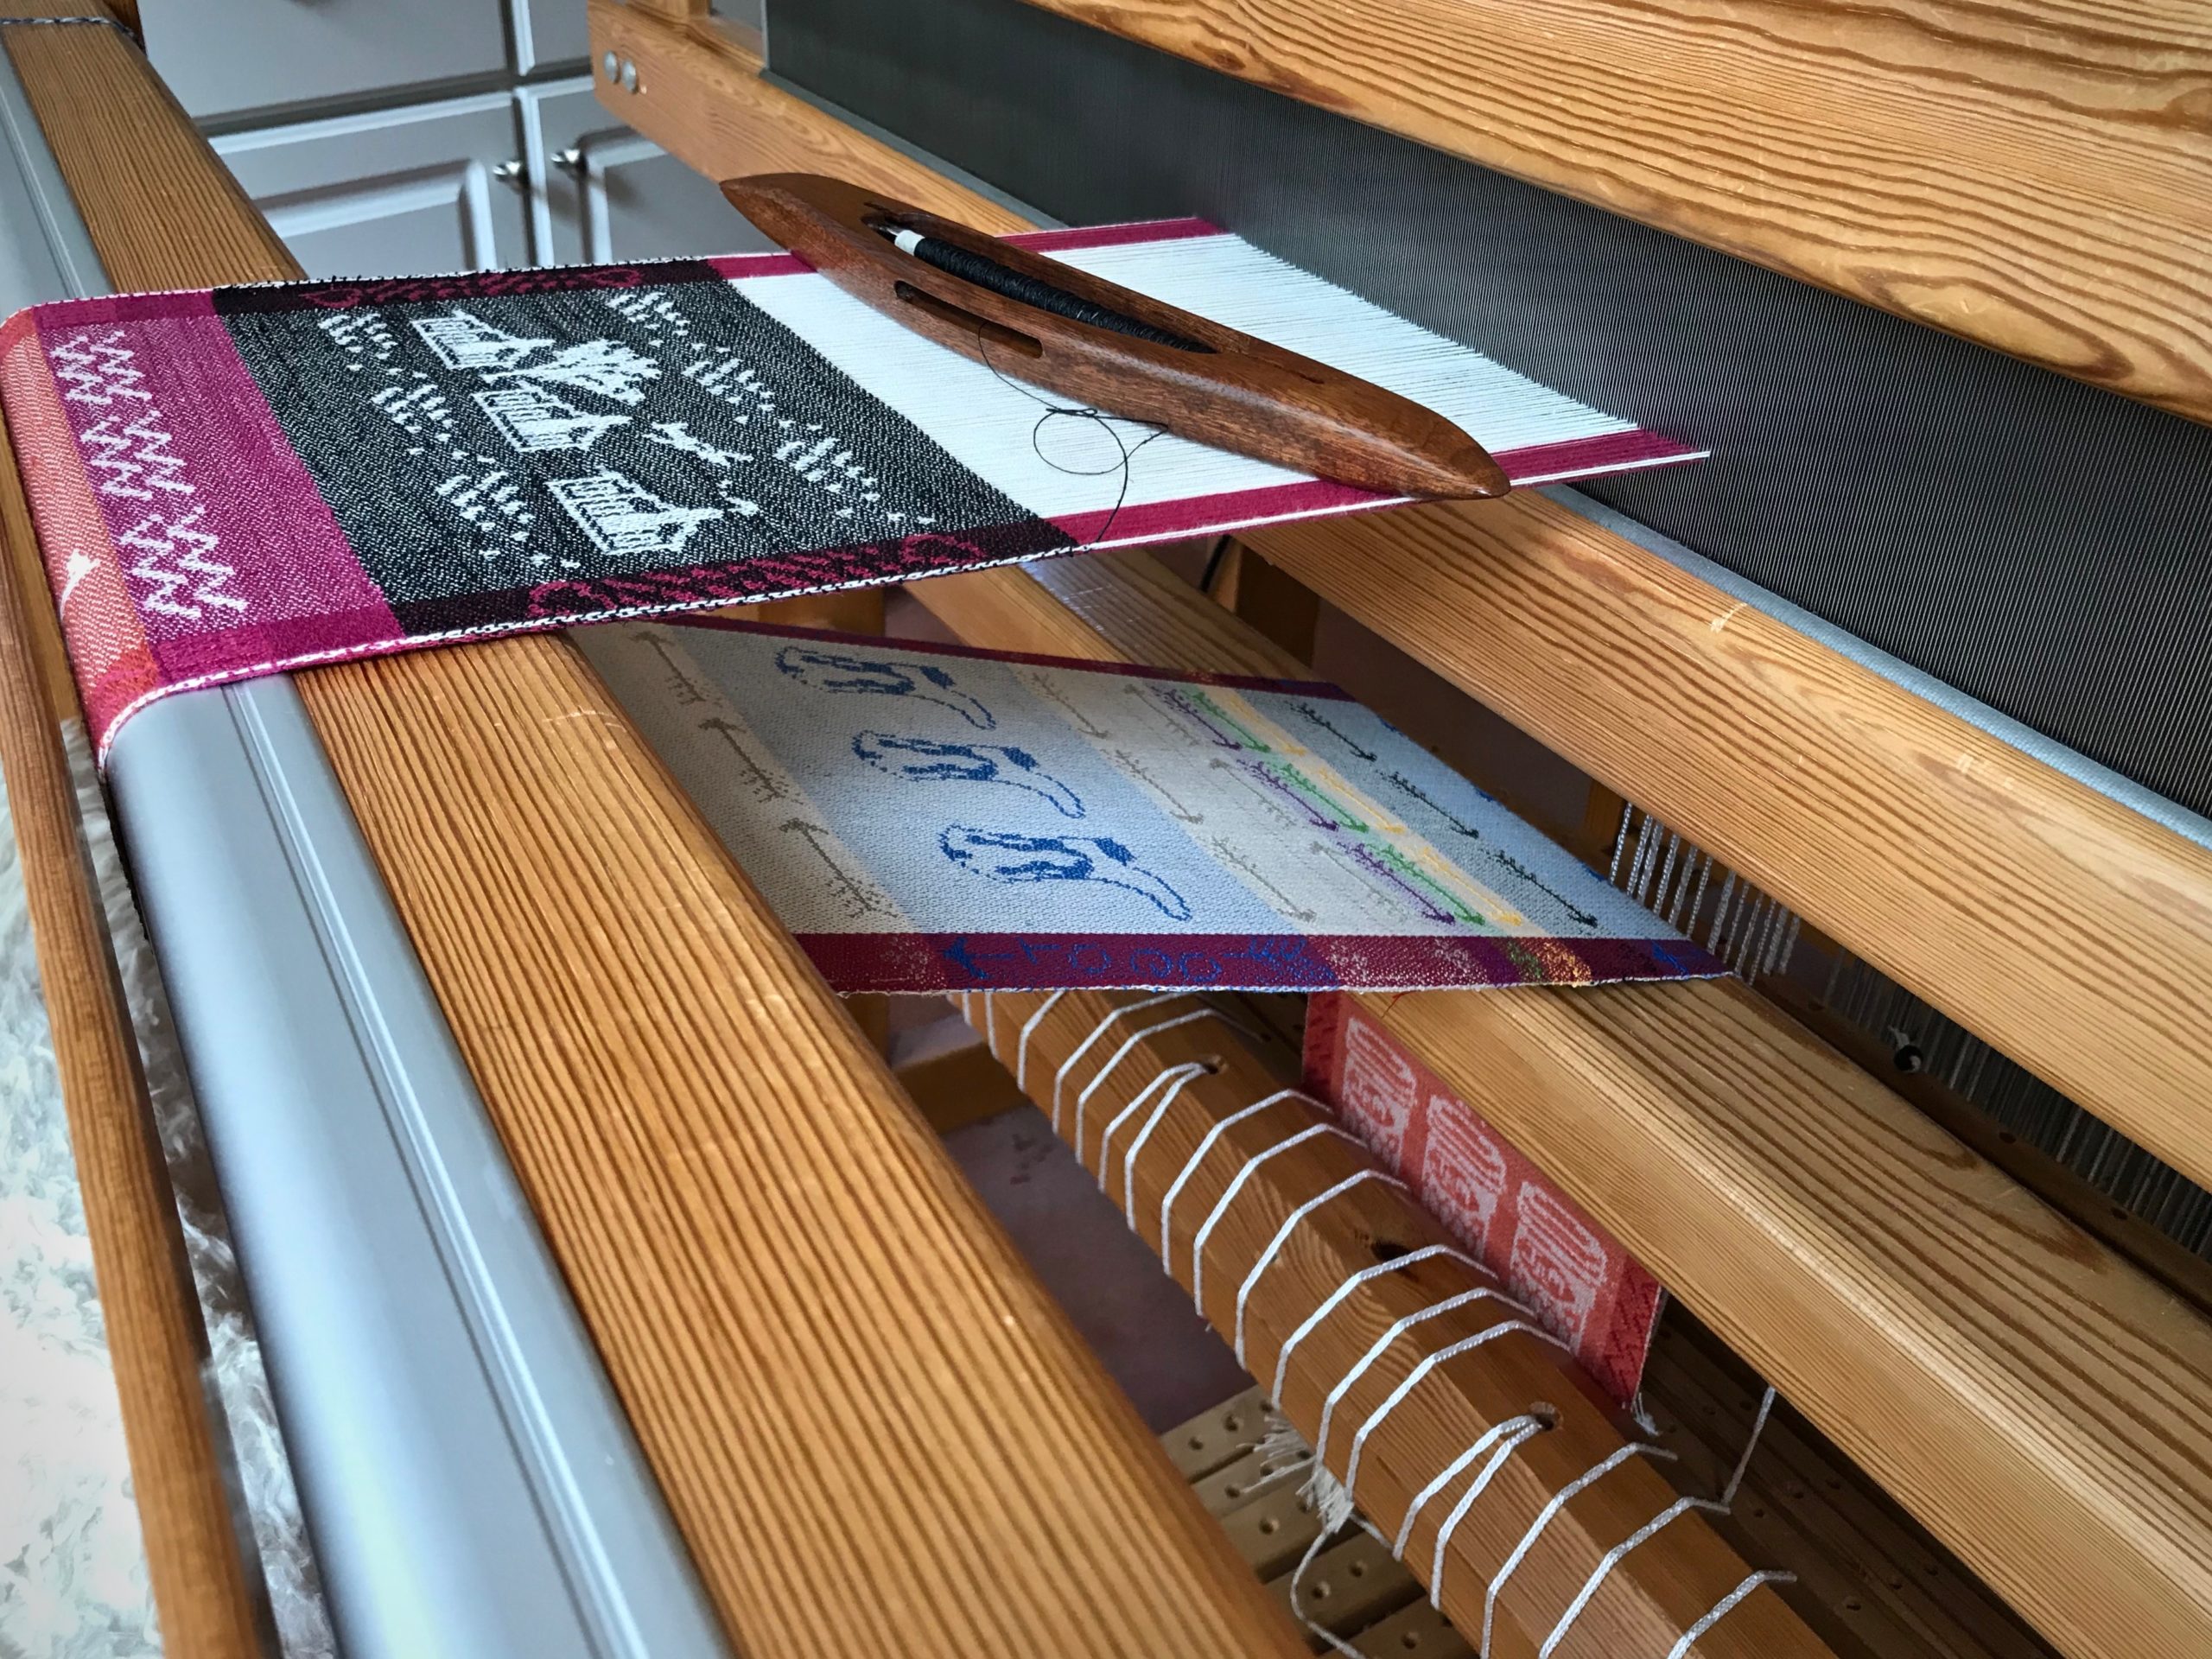
The sky is the limit! That is my conclusion after weaving a few designs using the Myrehed combination drawloom. The shaft draw and the single unit draw systems are combined on this ingenious apparatus that is attached to an otherwise ordinary loom. The shaft draw system enables me to weave repeated patterns. The single unit system enables non-repeat patterns. This narrow warp is my playground to do both.
Pattern shafts (the wood bars) and single units (with black and white draw cords) are combined for this warp. 36 pattern shafts, including the X shaft. 132 single units.Central design area uses a repeat of 30 pattern shafts threaded in a straight draw. Side borders use a repeat of 5 pattern shafts. Lift heddles and lanyard clips on the single unit draw cords attach the draw cords to the all the individual units (single units) on the pattern shafts.
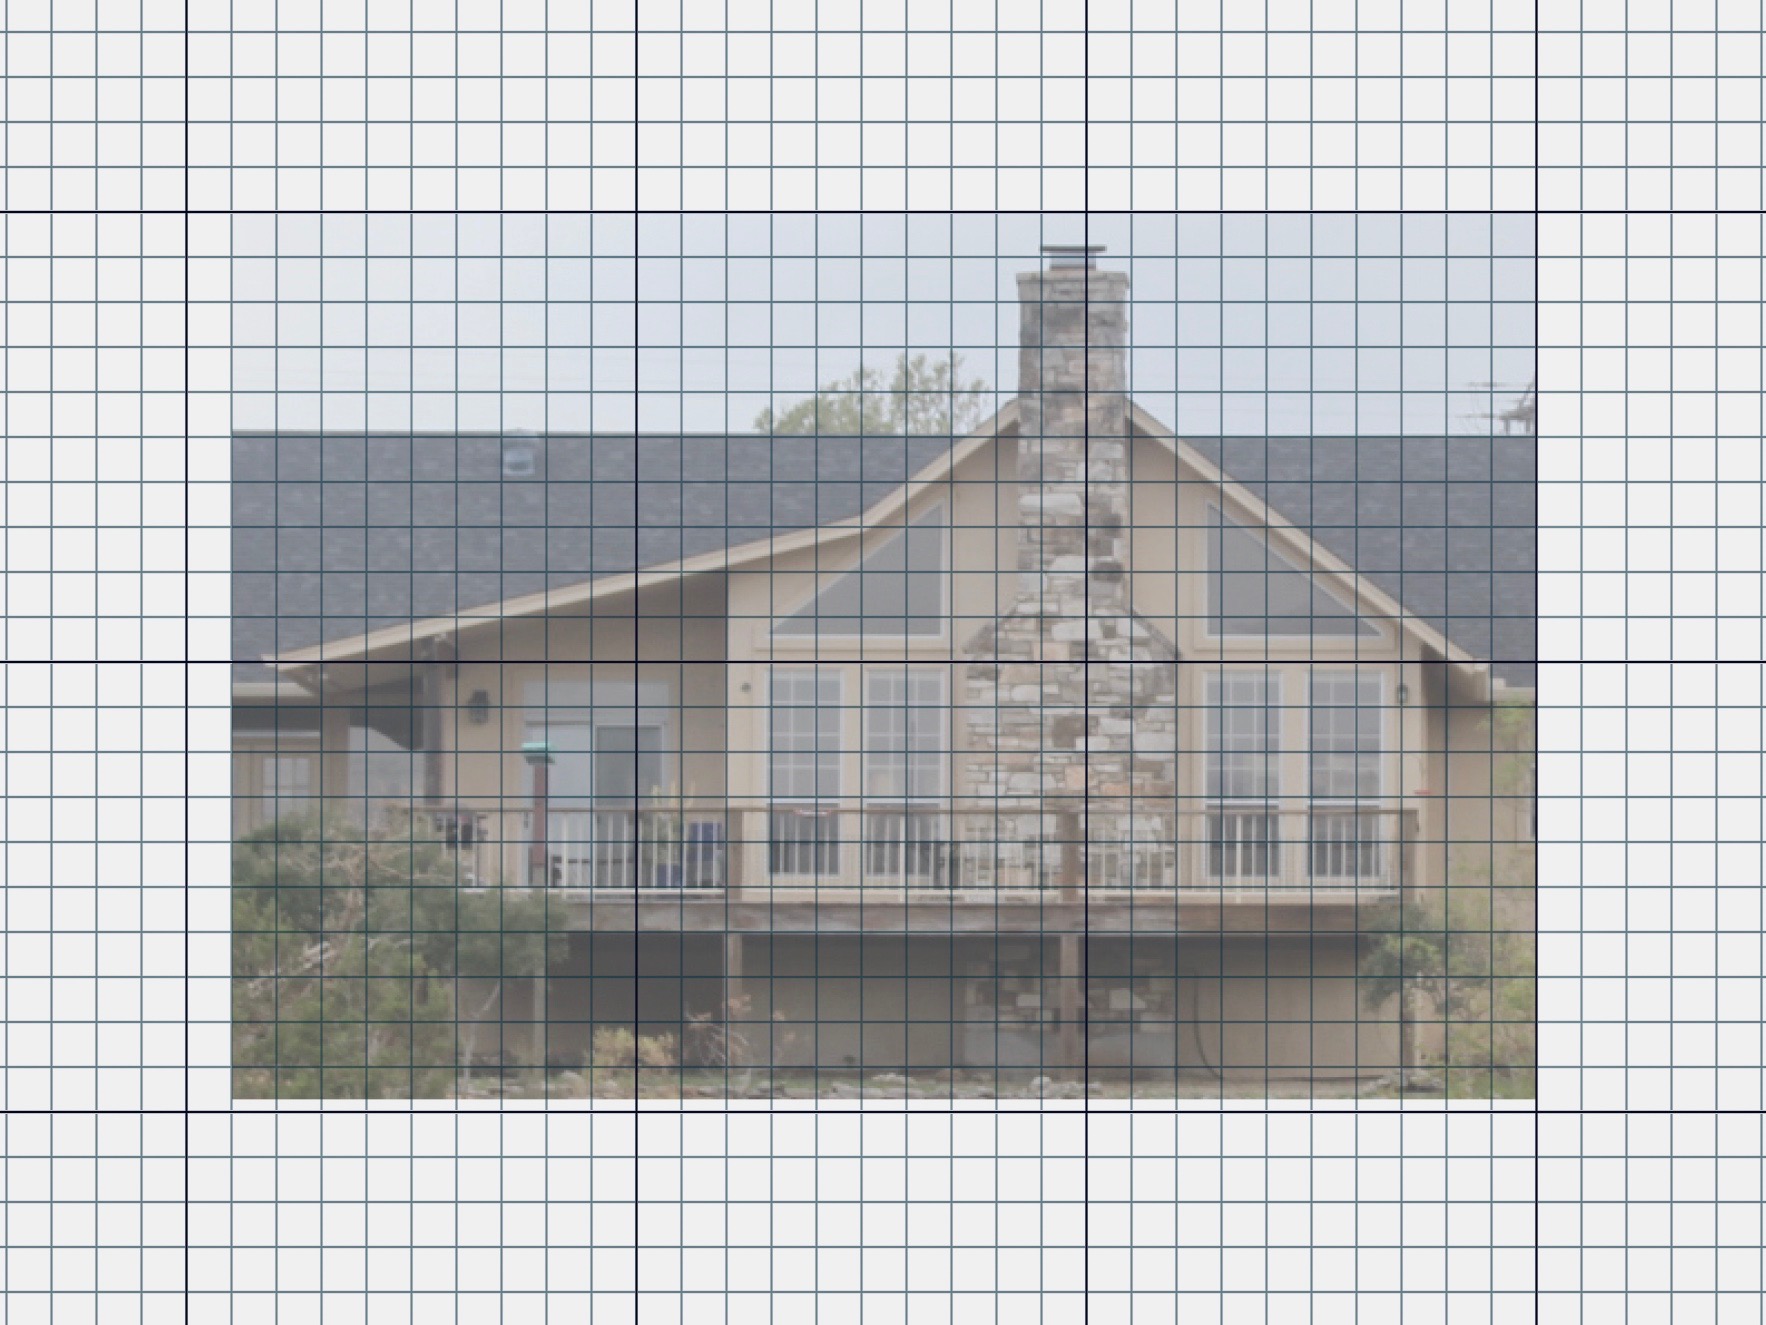
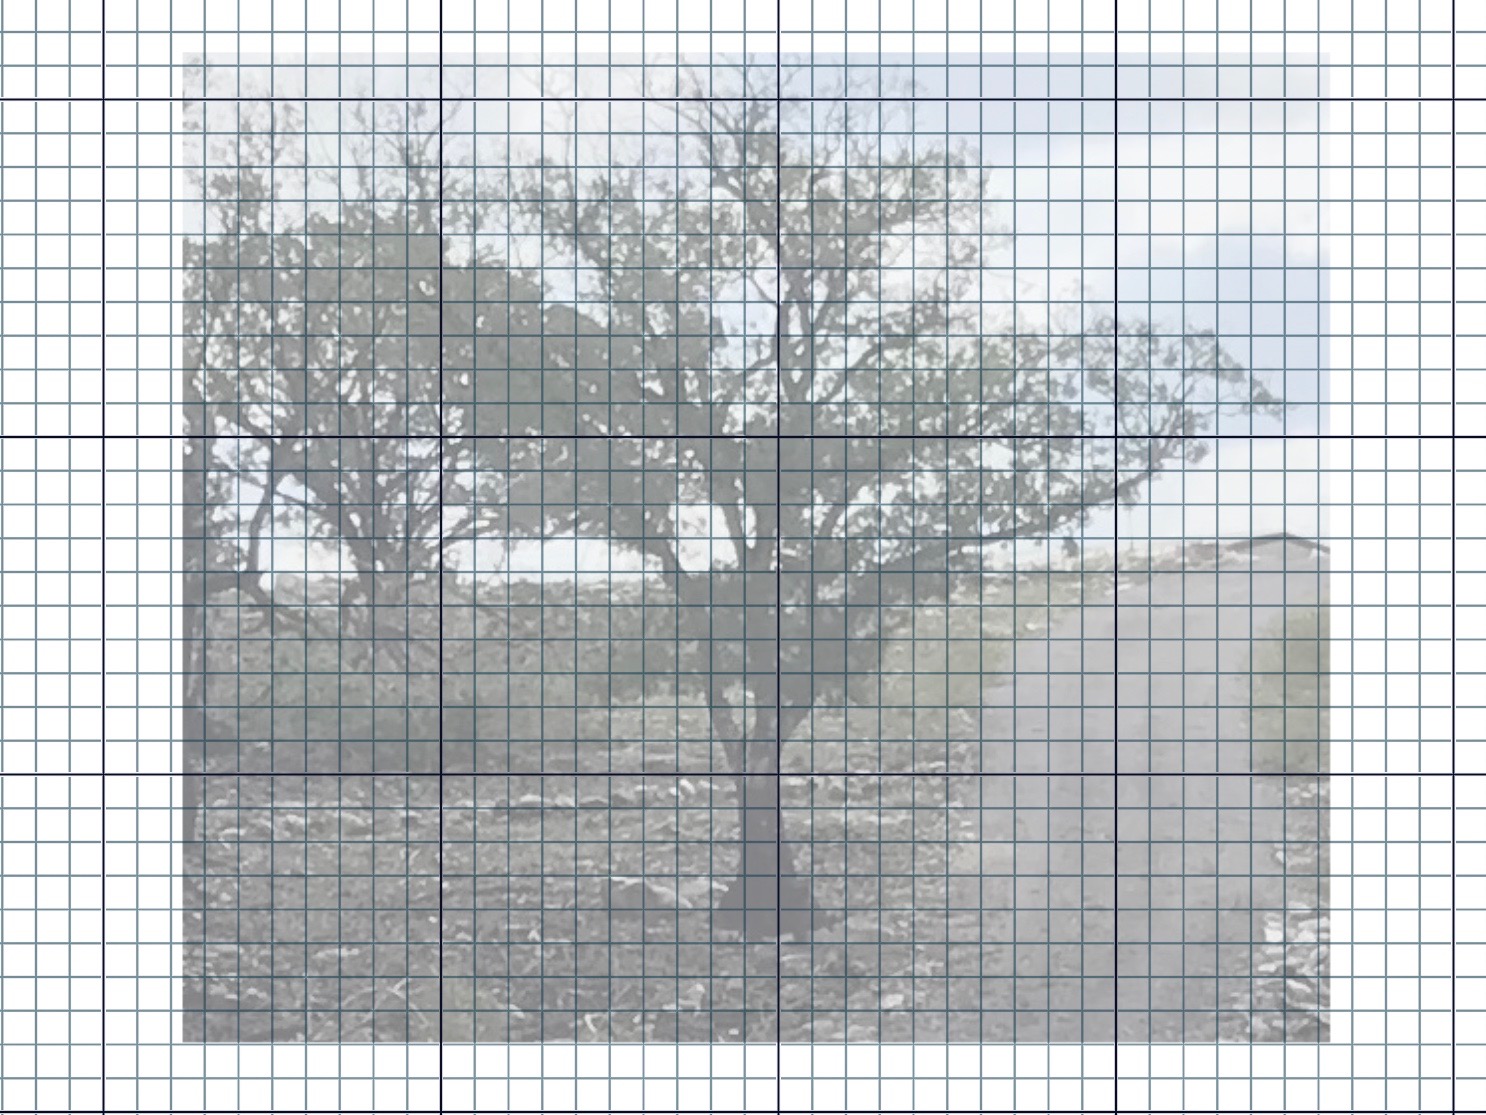
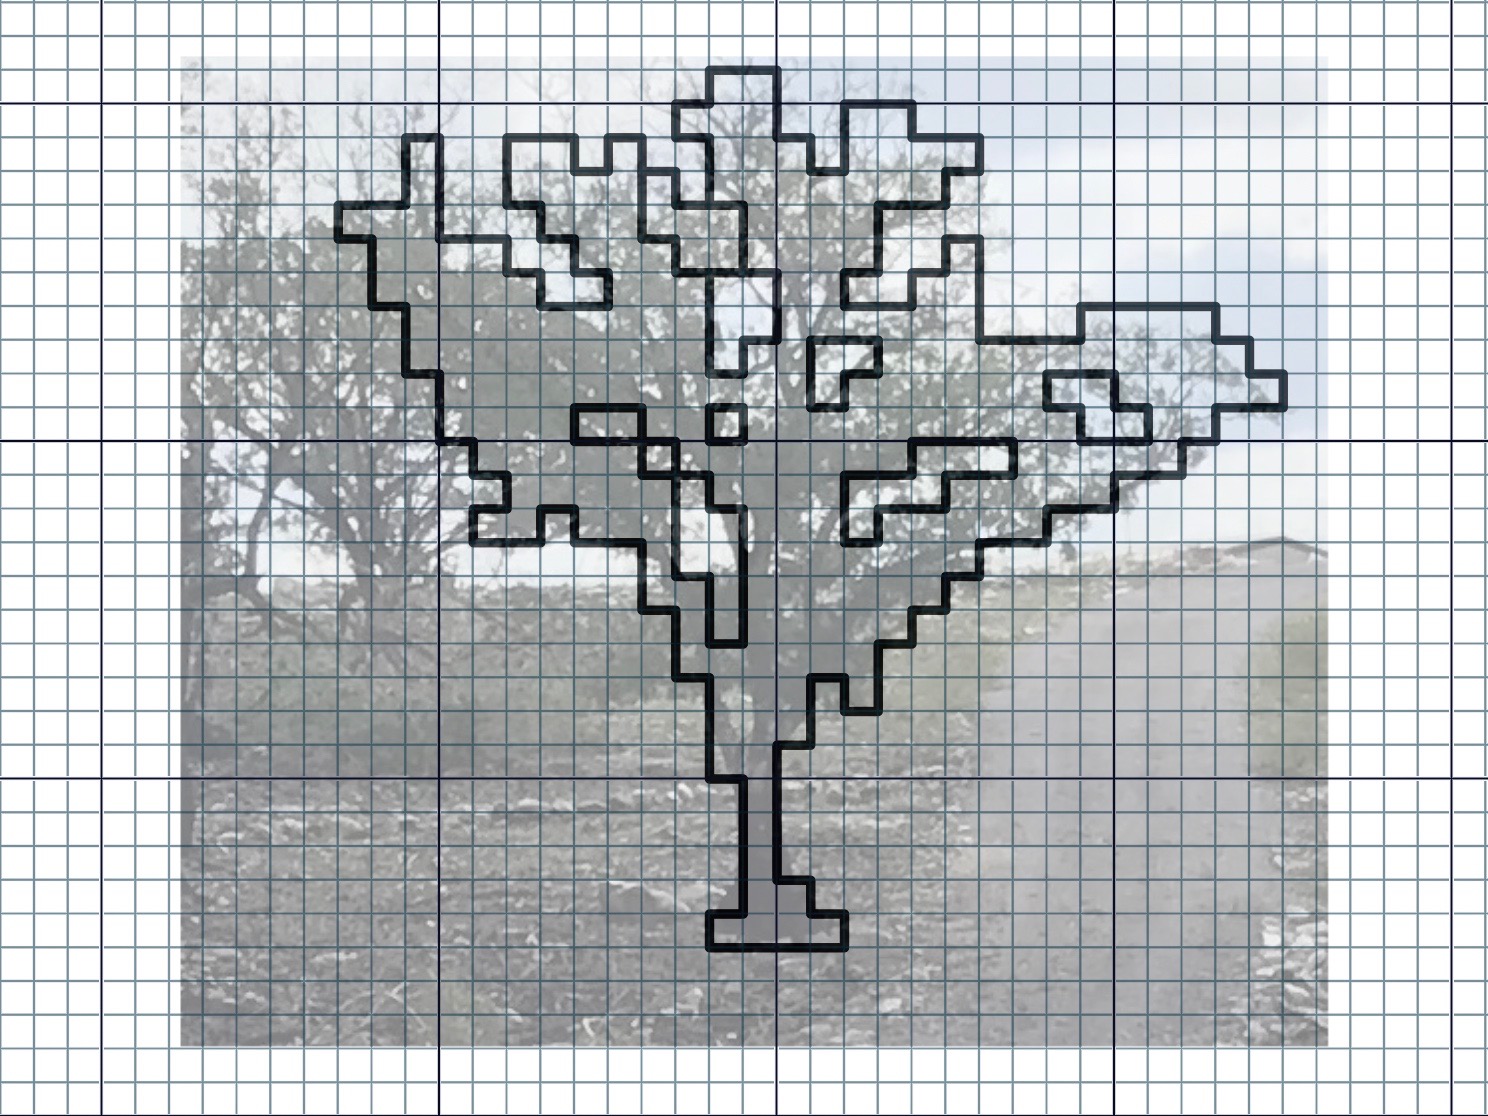
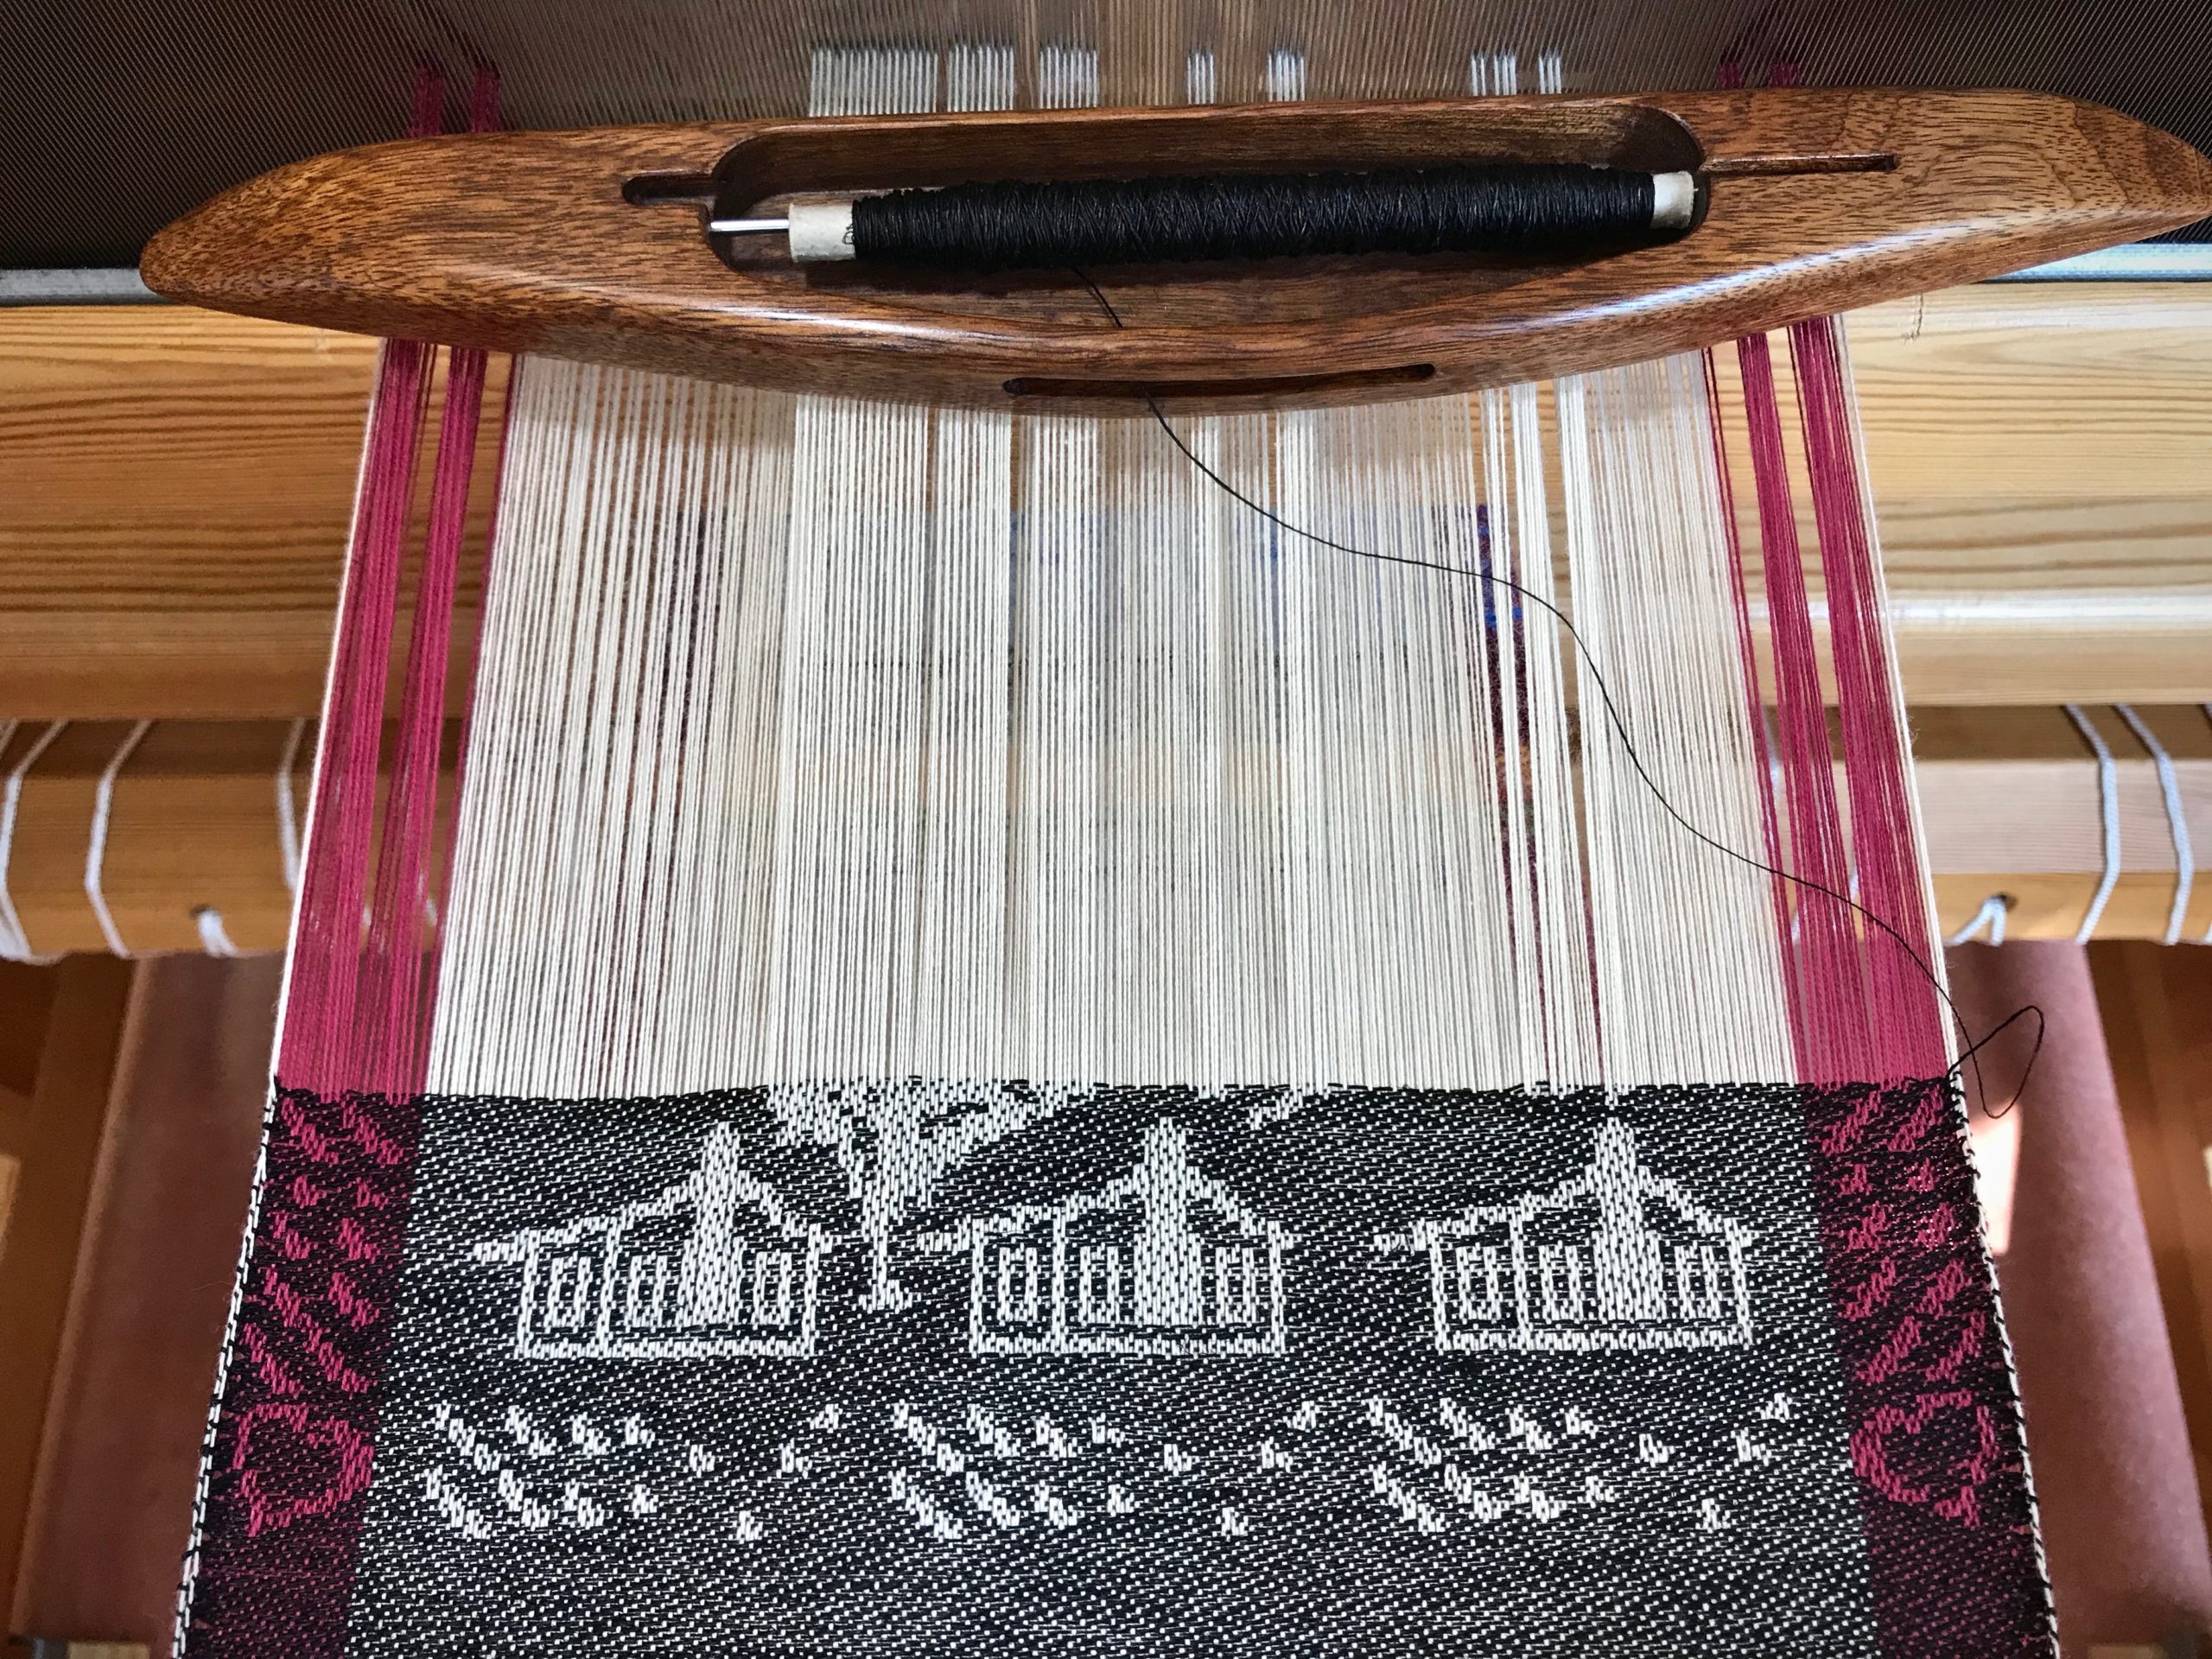
I use the computer to create designs. ”Home in Texas” shows the back of our house, with its massive stone chimney. The tree in the scene is a tracing of the oak tree that I pass as I walk up the hill to my drawloom studio. The airplane is a copy of the Mooney that our pilot friend took us in to fly over Enchanted Rock. I am delighted to discover that I can use a drawloom to bring features of personal meaning such as these to life.
Photo of our back deck. Using Affinity Photo, I set up a grid on the page to represent 30 pattern shafts. I then import my photo onto the gridded page.Simple outline is created and saved as a separate image. The filled-in outline becomes my drawloom pattern.Oak tree that I pass on the hill up to my drawloom studio. After importing the photo, I adjust the opacity to fade the picture, which makes tracing easier.I use a pen tool in Affinity Photo set at 3 pt to do the tracing. Now I can fill in the outline and copy and paste the image onto my chart that I will print and then use at the loom.Houses are woven with 30 pattern shafts. The hearts in the corners and the added details above the houses use the single unit draw cords. The tree is beginning to appear between the two houses on the left.Two draw handles are pulled for the pattern on the side borders. Single unit draw cords are pulled and held in place on the hook bar above the beater.Our Texas Home
The words of the Creator have life in them. It’s as if he puts his thoughts on the loom and weaves them into being. Let there be light! He speaks; and it is so. Listen closely. Hear the Grand Weaver say, Peace to you. And it is woven so. You are his workmanship, bringing his design to life.
More ideas are forming, even as this fabric begins to hug the cloth beam.
You could say I finished these scarves too late. Winter in Texas has come and gone. But I prefer to think of it as considerably early. When cool weather comes back around in a few months, I’ll be ready. I began with the draft for the lovely Stardust scarf, designed by Mona Nielsen, published in Happy Weaving, from VävMagasinet, p.74. I simply substituted the yarn and colors in the book with what I had on hand.
Warp is mostly 6/2 Tuna wool, with some 7.5/2 Brage wool included.Made with yarn on hand. This means that additional stripes have been added to the plan.Weaving by the fire in the middle of winter. Mora 20/2, a fine wool, is used for weft.Two scarves coming off the loom.Fringes are cut and twisted.
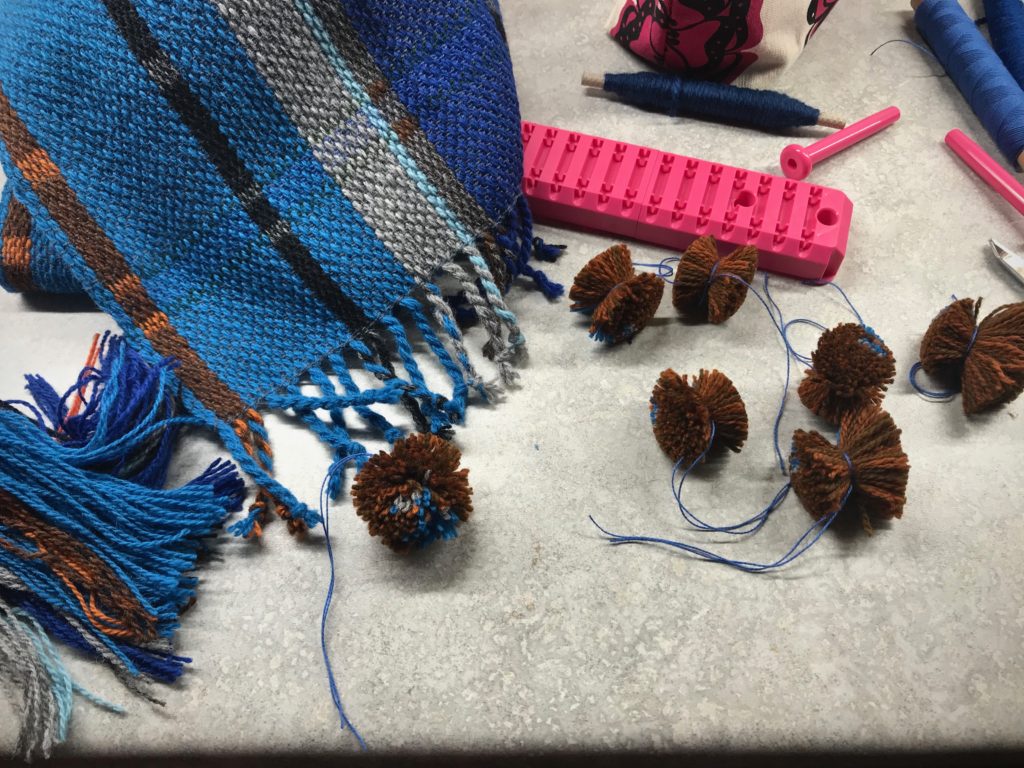
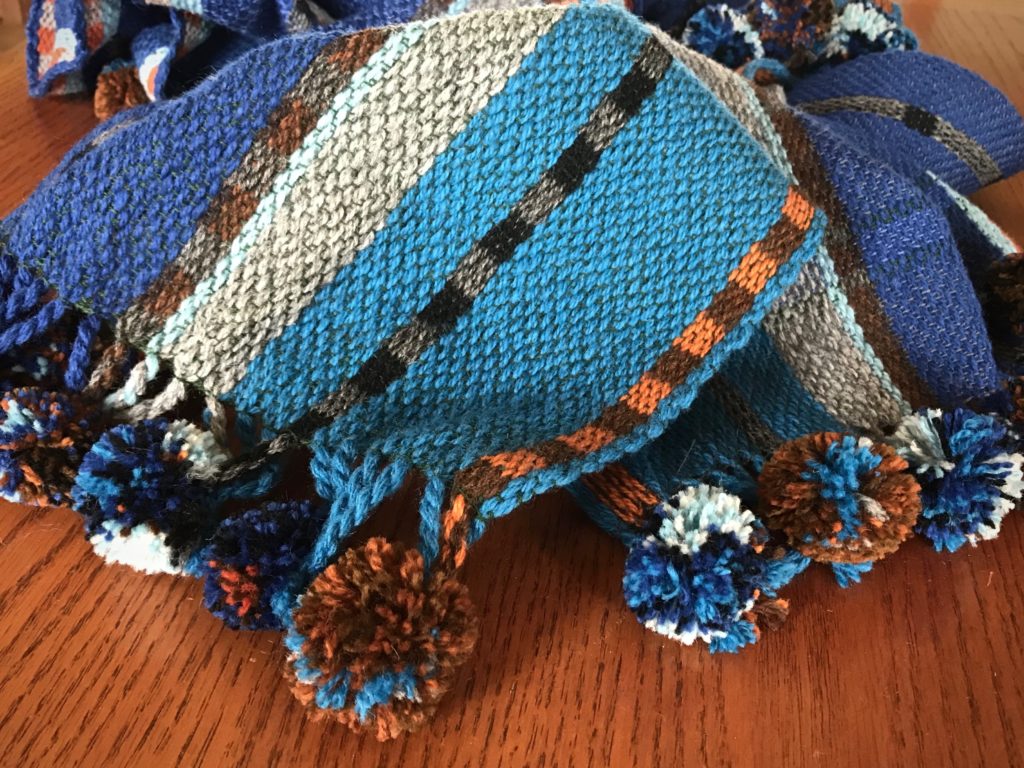
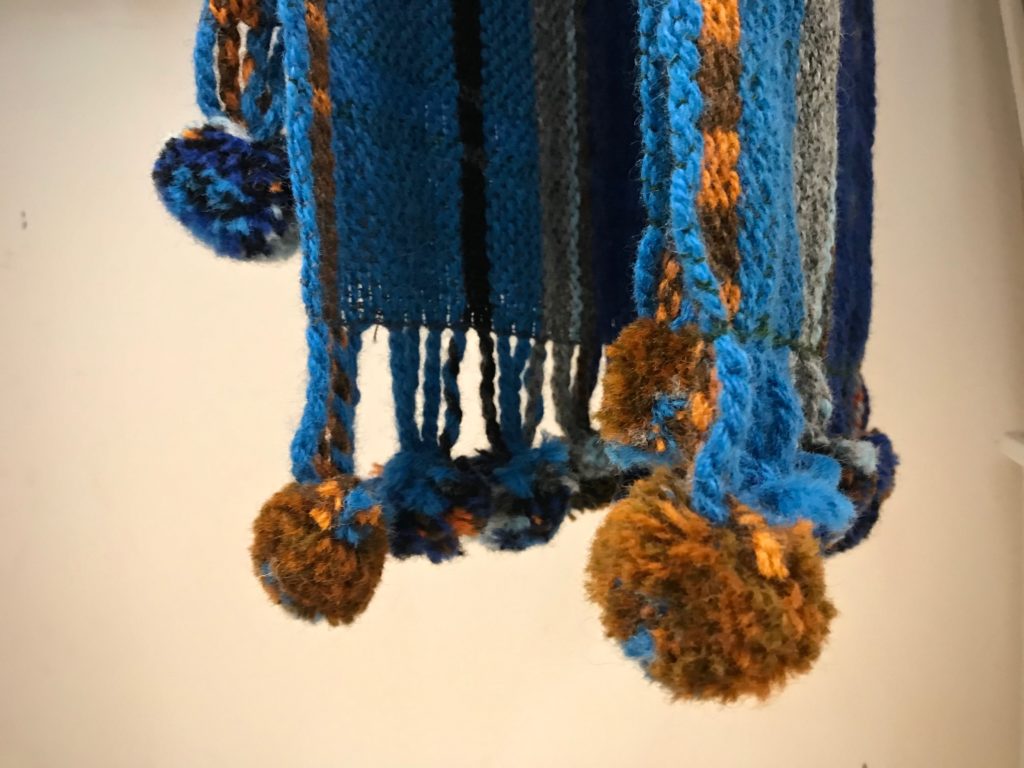
The scarves are delightful, but the icing on the cake is the addition of fluffy, furry pompoms, an embellishment with youthful flair. And that is exactly what I will put on at the first sign of autumn chill.
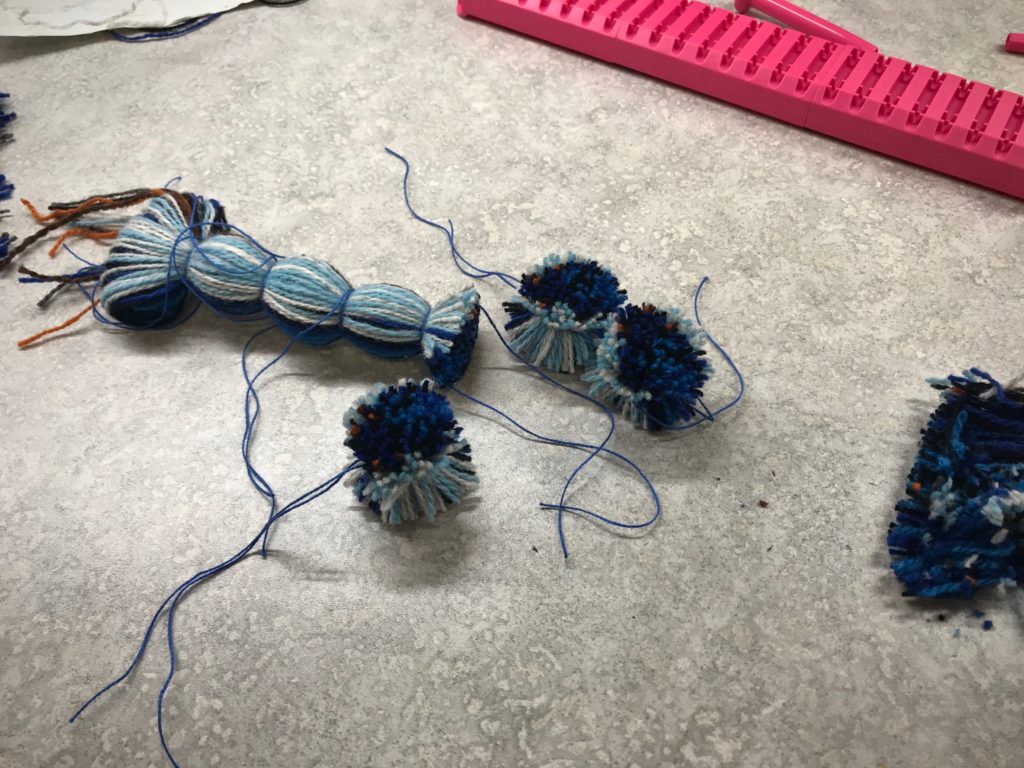
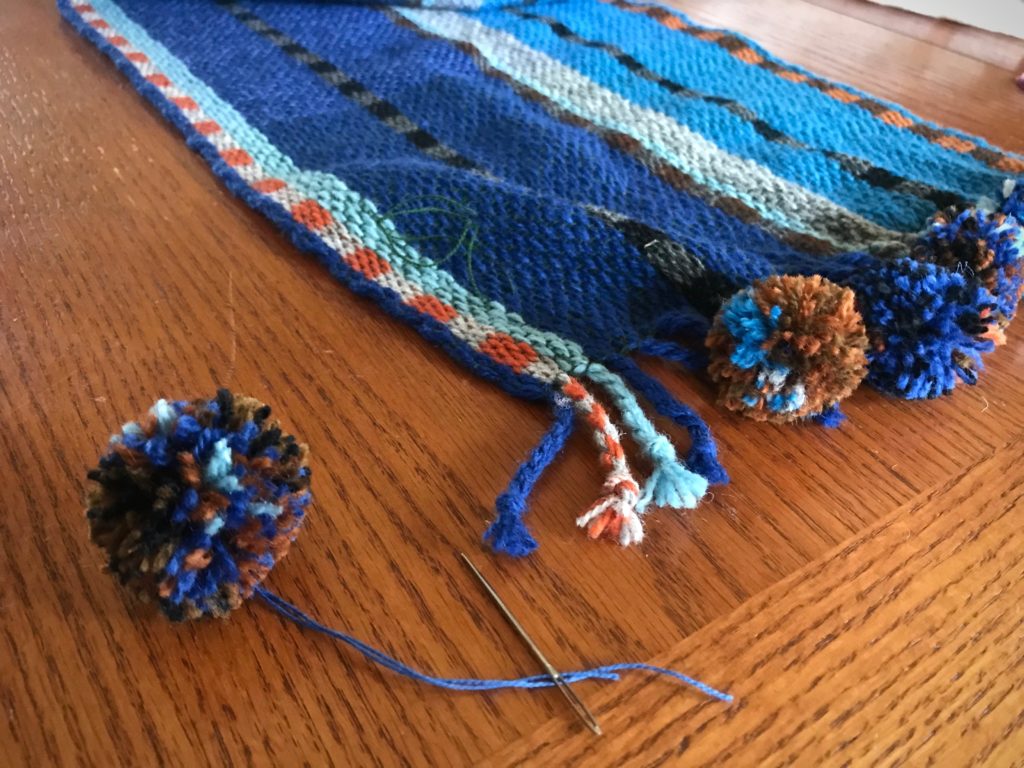
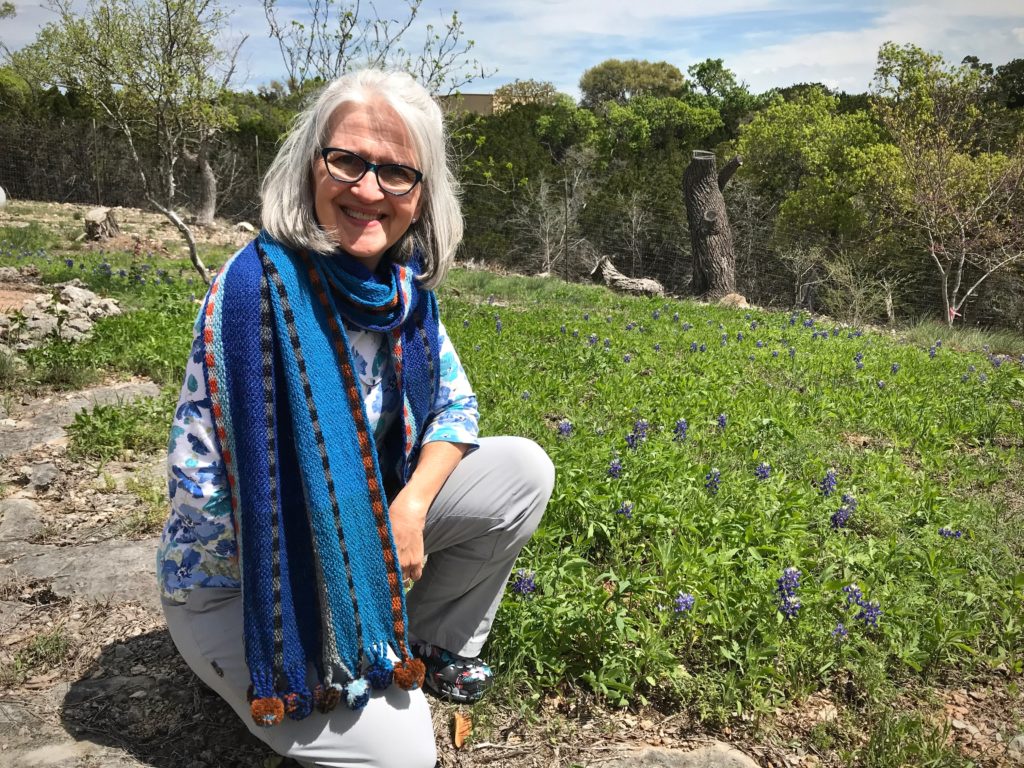
Some of the thrums are used in making pompoms.With the Pom and Tassel Maker by Red Heart I can make seven pompoms at a time. I wrapped the yarn around 100 times, making full and thick pompoms.Each furry ball is shaped and trimmed. I used 8/2 cotton for the 12″ tie around the center of the pompoms.Each pompom is stitched to 3 – 4 twisted fringes. Seven pompoms at each end of the scarf.Now, the scarves are ready for wet finishing. Notice how you can see the separate strands of yarn in the pompoms before they are washed.Scarves have been washed by hand in warm water in a large sink, with Eucalan delicate wash. I purposely gave them as much agitation as I could by hand. They are hanging to dry. Notice how the pompoms have slightly felted, making them even more soft and furry.Winter scarf amid spring bluebonnets in Texas hill country.
Some things are certain. The sun will rise tomorrow. The seasons will follow their schedule. The faithfulness of the Lord our God will never end.
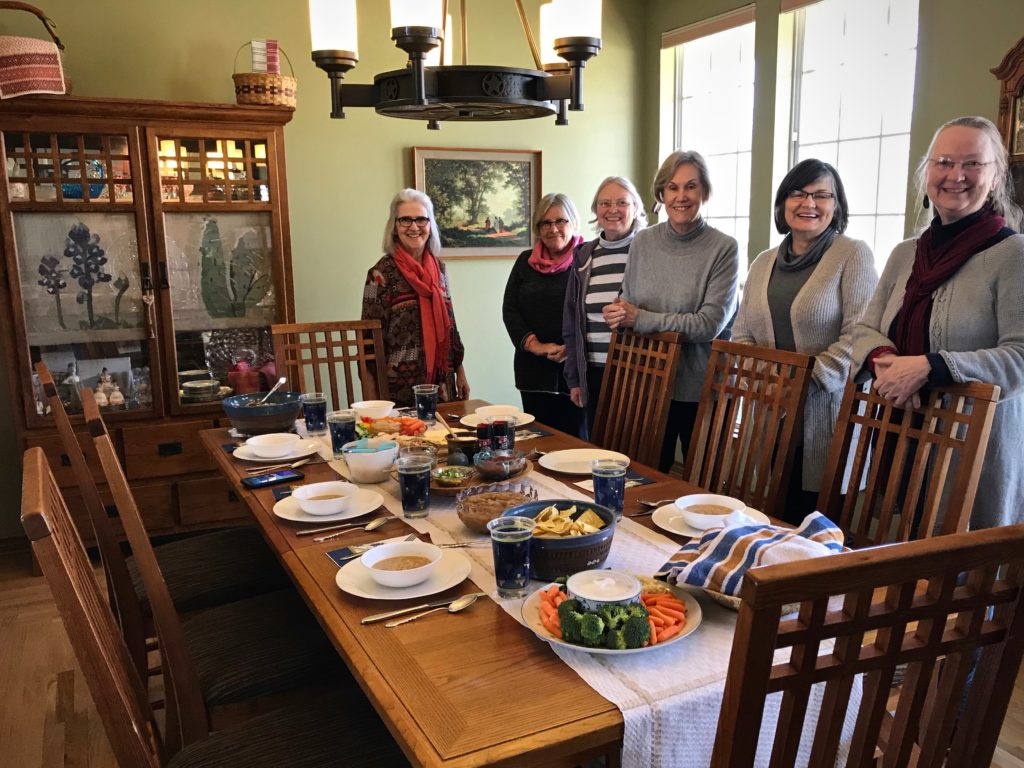
Welcome to my weaving studio, which doubles as our home, I said, as they walked up to the front door. Our luncheon guests were introduced to the weaving environment of the Texas hill country home that Steve and I enjoy. Our time together was refreshing, filled with lively conversation over a home-cooked meal, complete with discussions about looms, threads, and like-minded pleasures.
Steve and I enjoy lunch with honored guest, Joanne Hall, and a few members of the San Antonio Handweavers Guild. Karen, Janis, Joanne Hall, Henriette, Vesna, and Cindy.
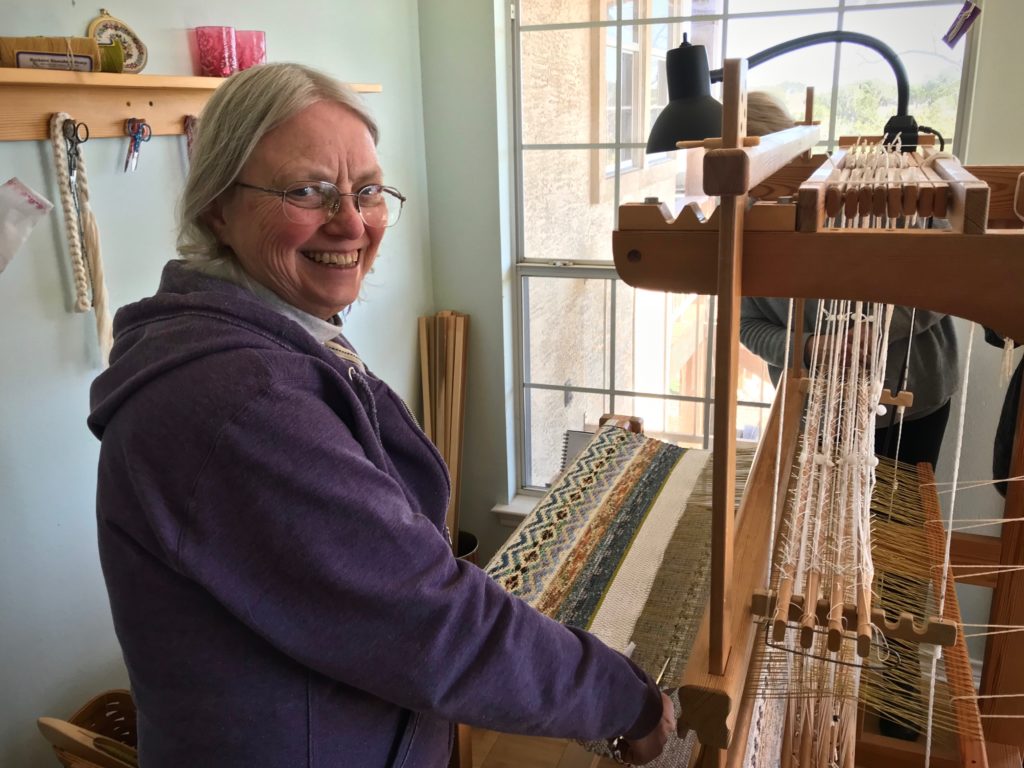
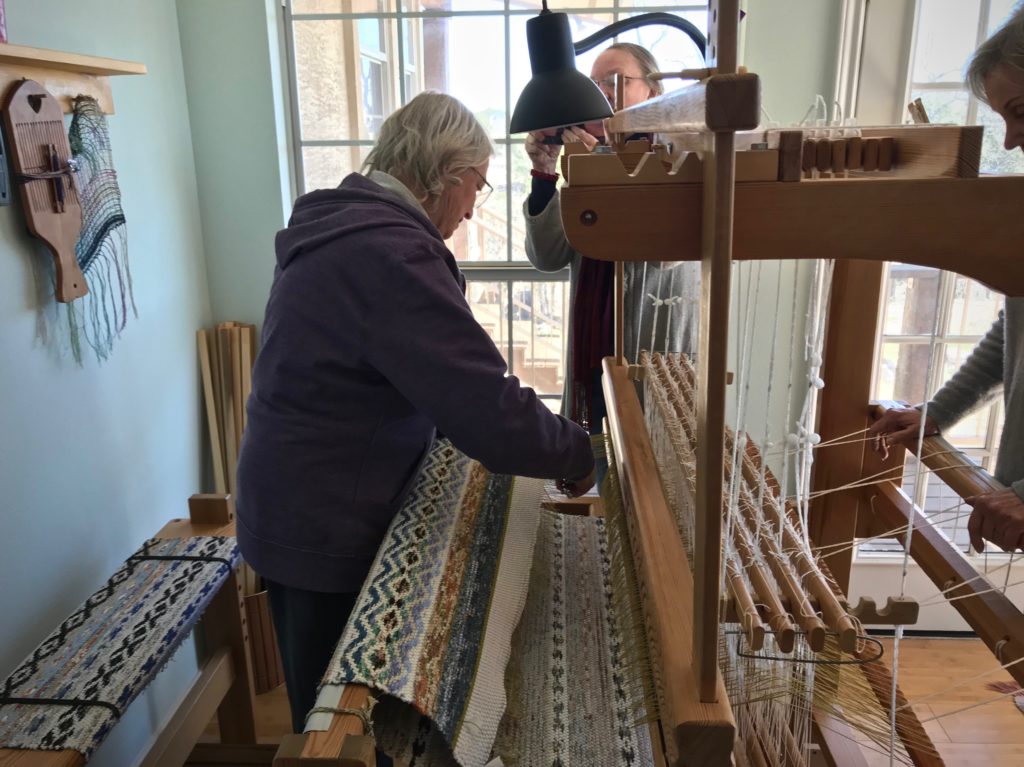
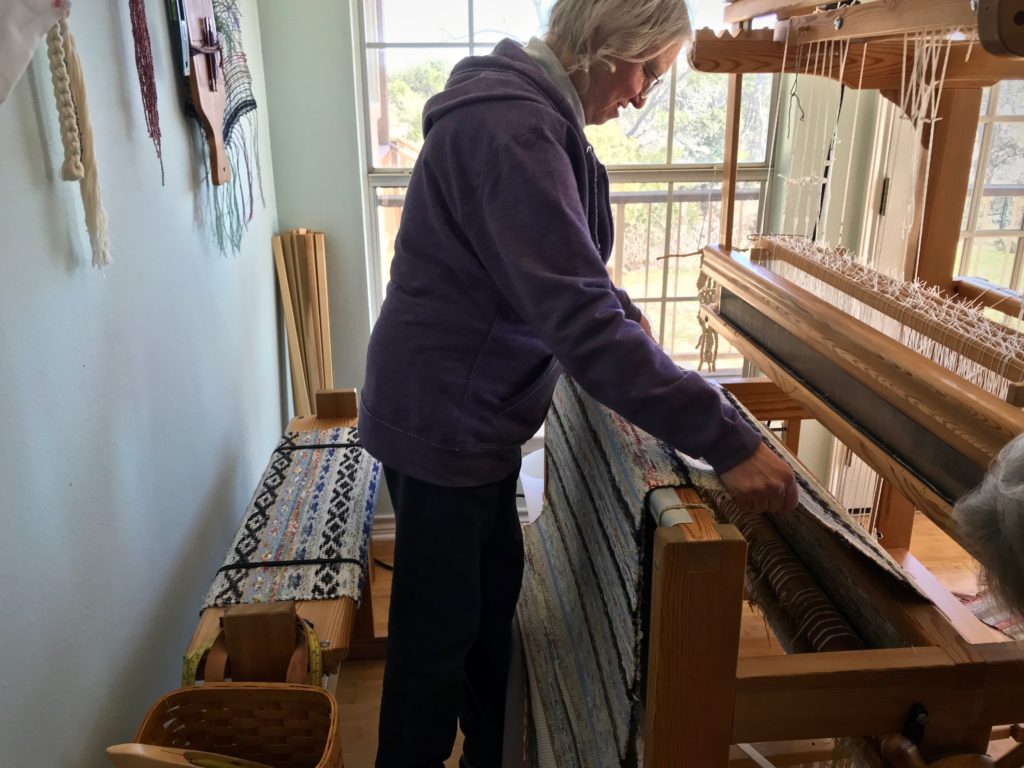
Six rosepath rag rugs encompass the cloth beam, with the back tie-on bar just inches behind the heddles. It seems only fitting that the woman who gave me my first rosepath rag-weaving experience should be given the cherished scissors for this momentous occasion. Joanne, will you do us the honor of cutting off? I couldn’t have wished for a happier ending of this warp.
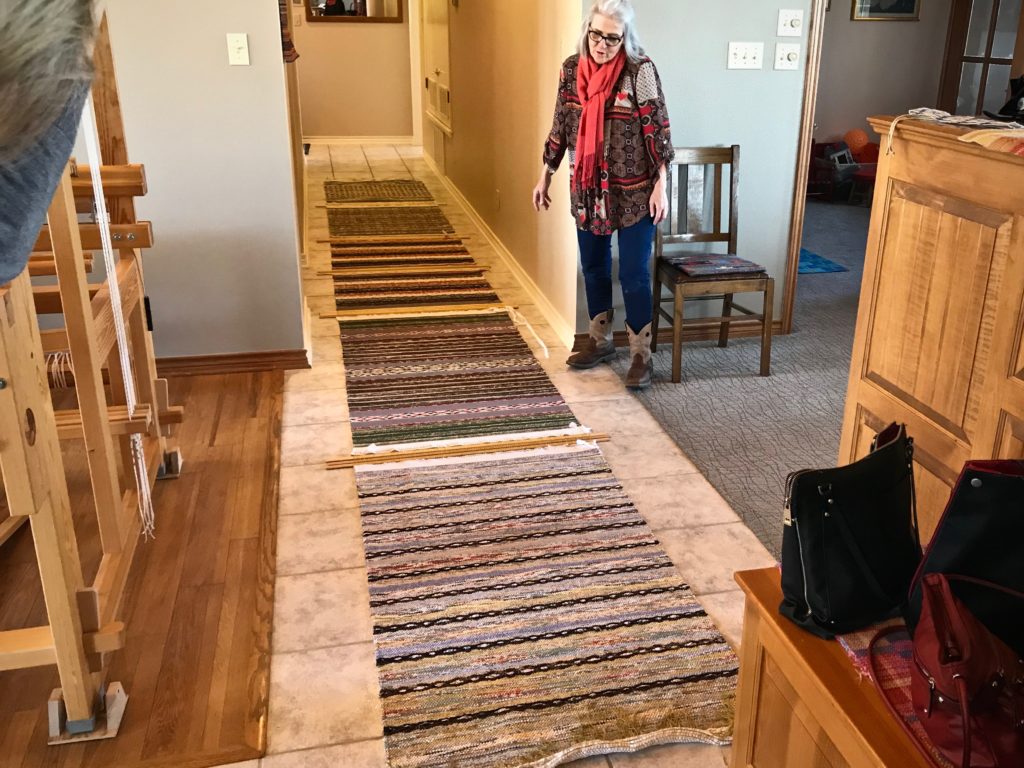
Joanne Hall, ready to cut off the rag rugs.Cutting off.Unrolling rugs from the cloth beam.Six new rosepath rag rugs, ready for finishing.
We all have wishes, some of which we make public, and some remain as closely-held secrets. It’s those deep wishes that make us who we are. God knows your name. He knows your deep desires. One day, all our secret wishes will be rolled out like a stretch of rag rugs for the Maker to examine. Amazingly, he offers grace to cover the wrongs. And He embroiders his Name on the hand-crafted souls that belong to him.
May your cloth beam keep filling up with deep-hearted wishes.
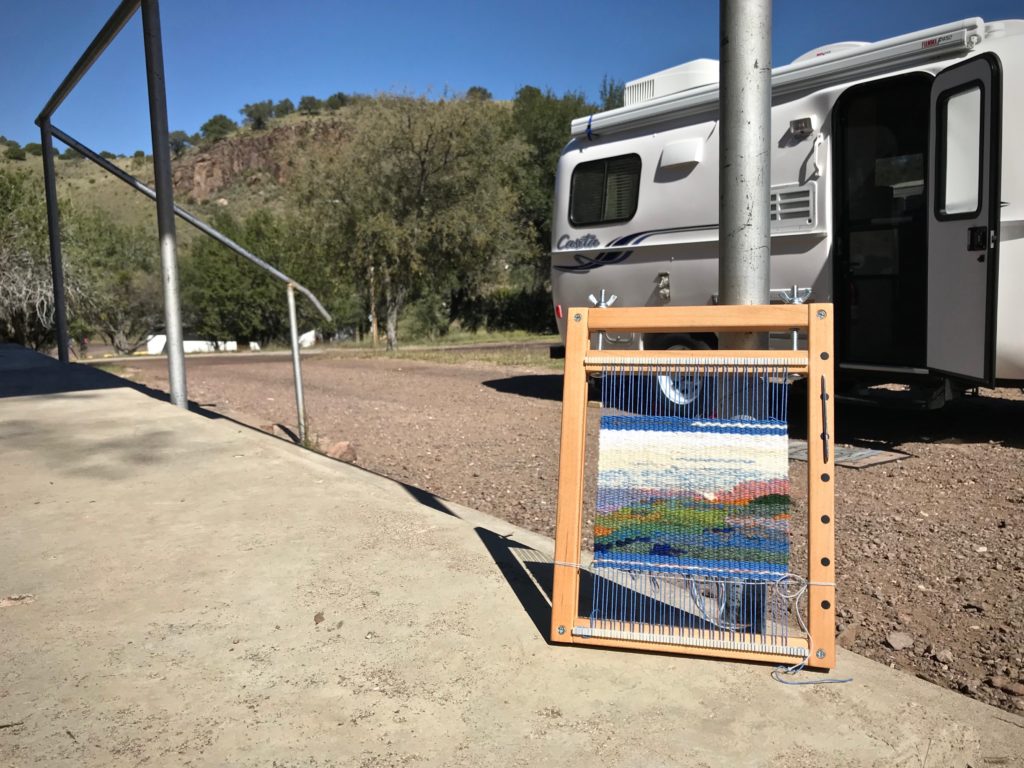
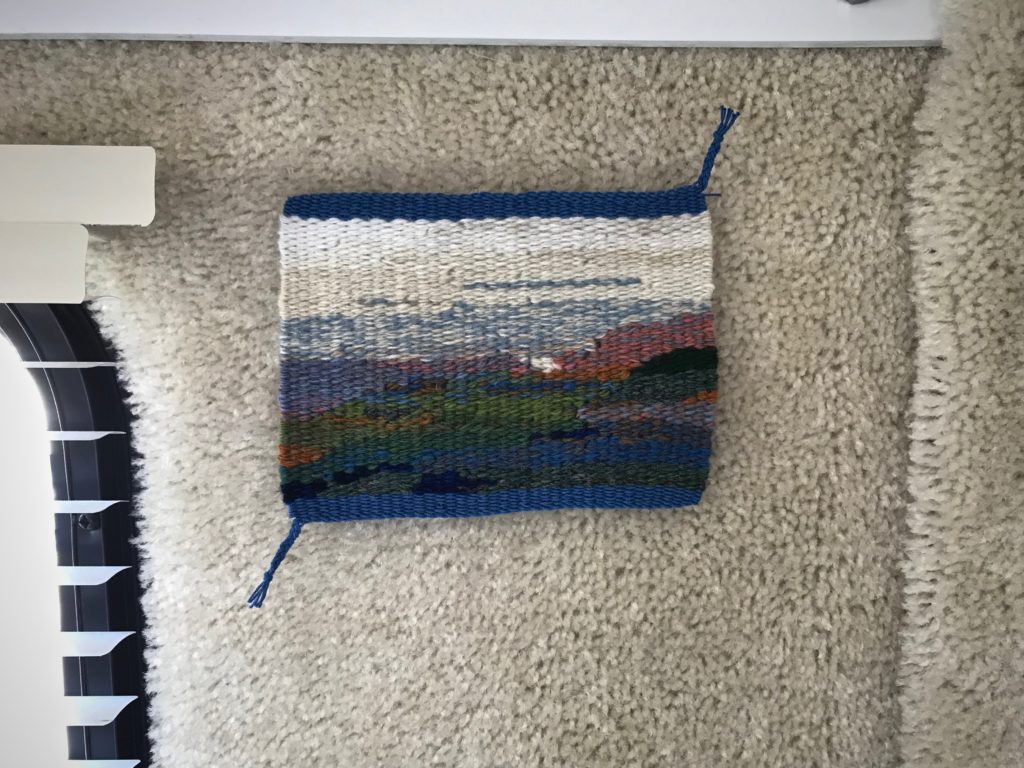
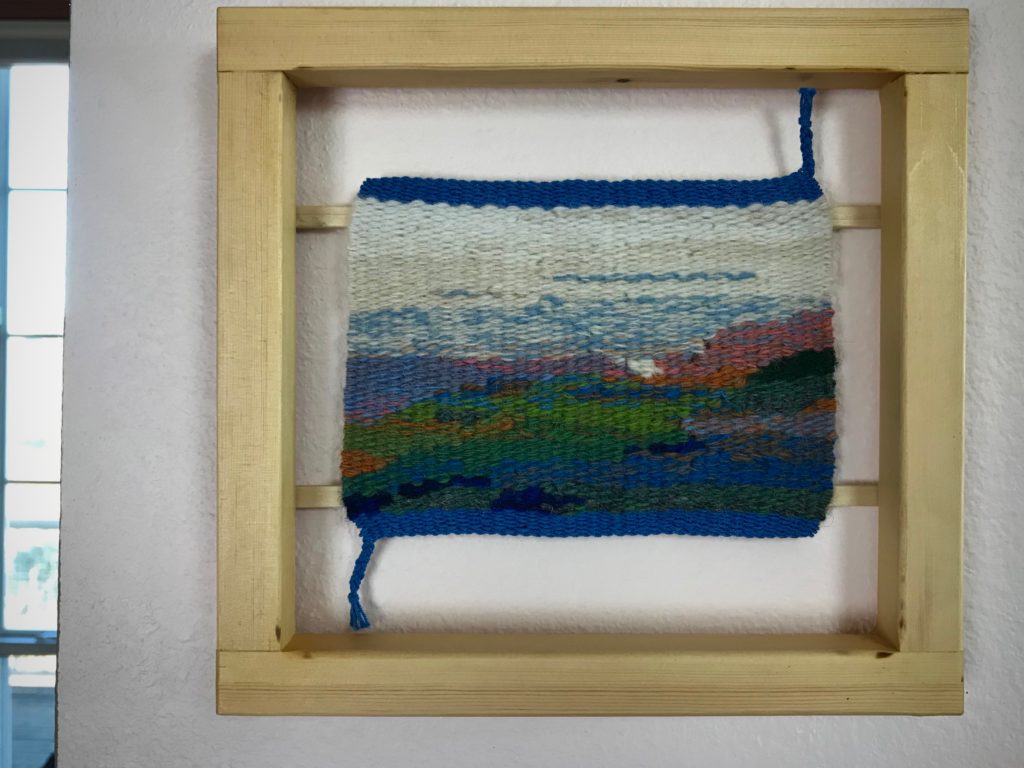
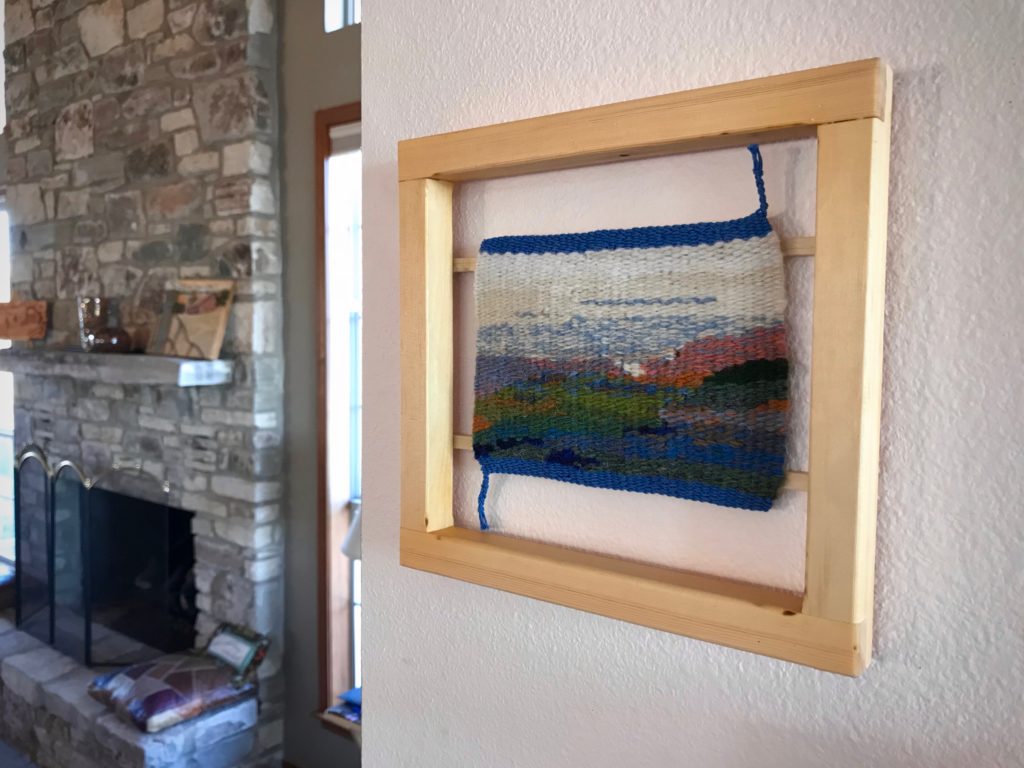
The Park ranger had told Steve and me that if we were willing to drive six more rugged miles we would witness a spectacular overview of the Fresno Canyon that few people get to see. This is an opportunity we wouldn’t dare miss. And the park ranger was right. Oh, what a view! From this high point above the valley the view is phenomenal! I welled up with emotion as I looked over the glorious beauty of God’s creation.
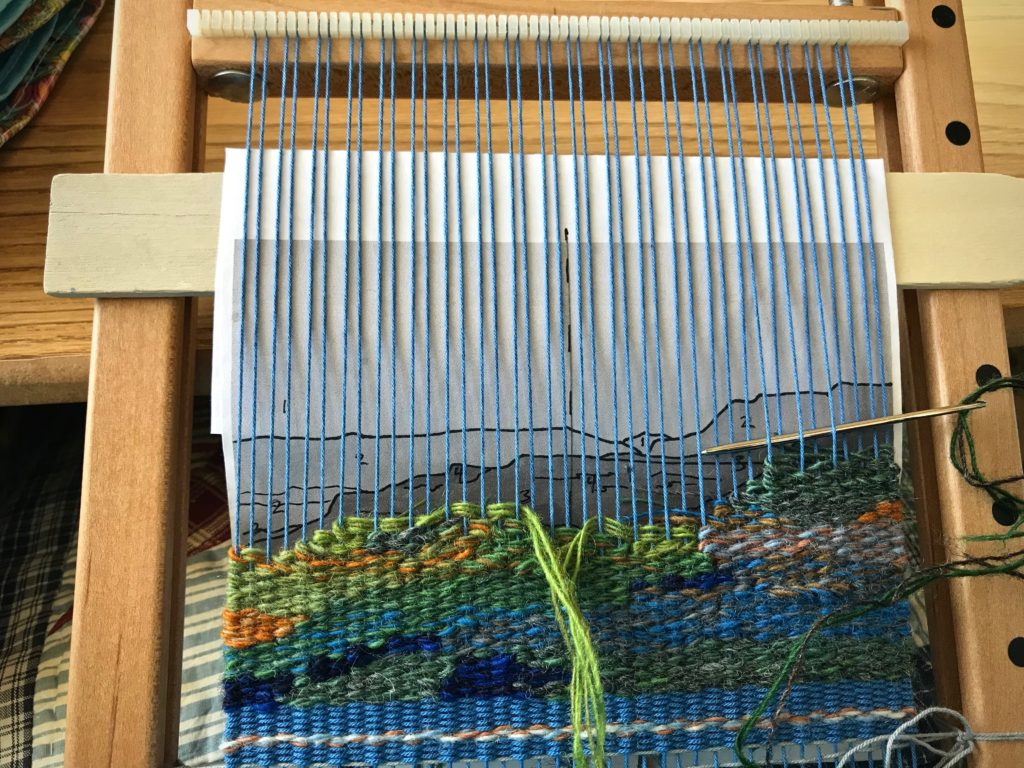
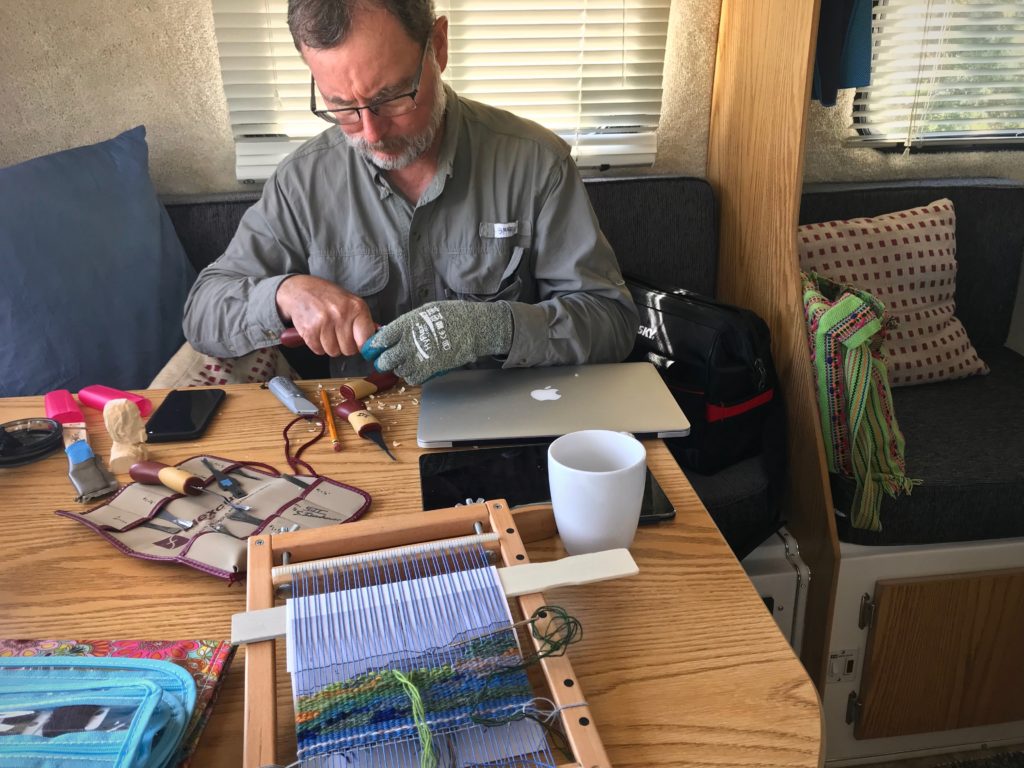
The memory of that scene is in this small tapestry. Most of my small-tapestry weaving happens when we travel, where we make even more memories, which I store up in my heart. I pull from these stored treasures to weave tapestries that reawaken the fond memories.
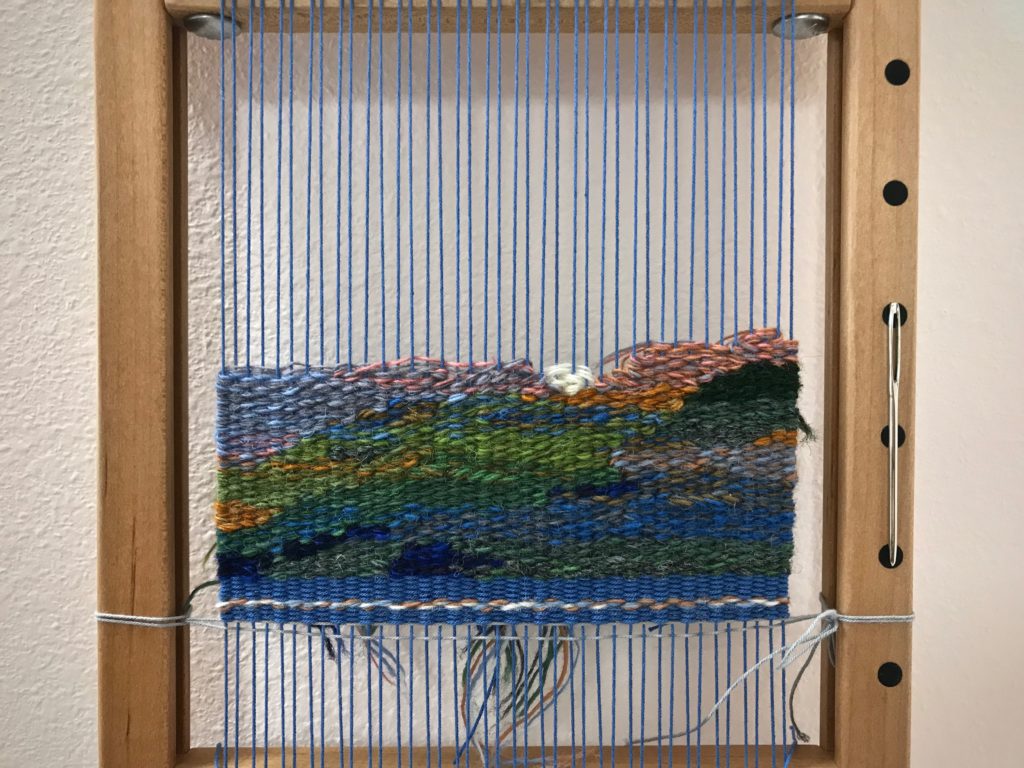
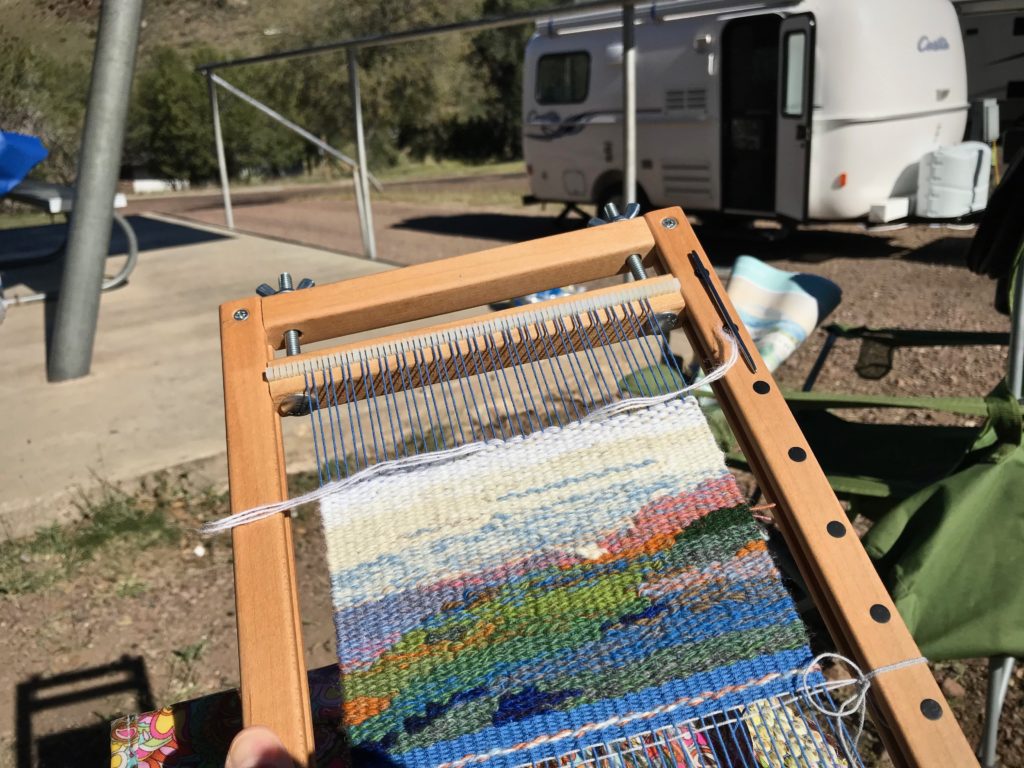
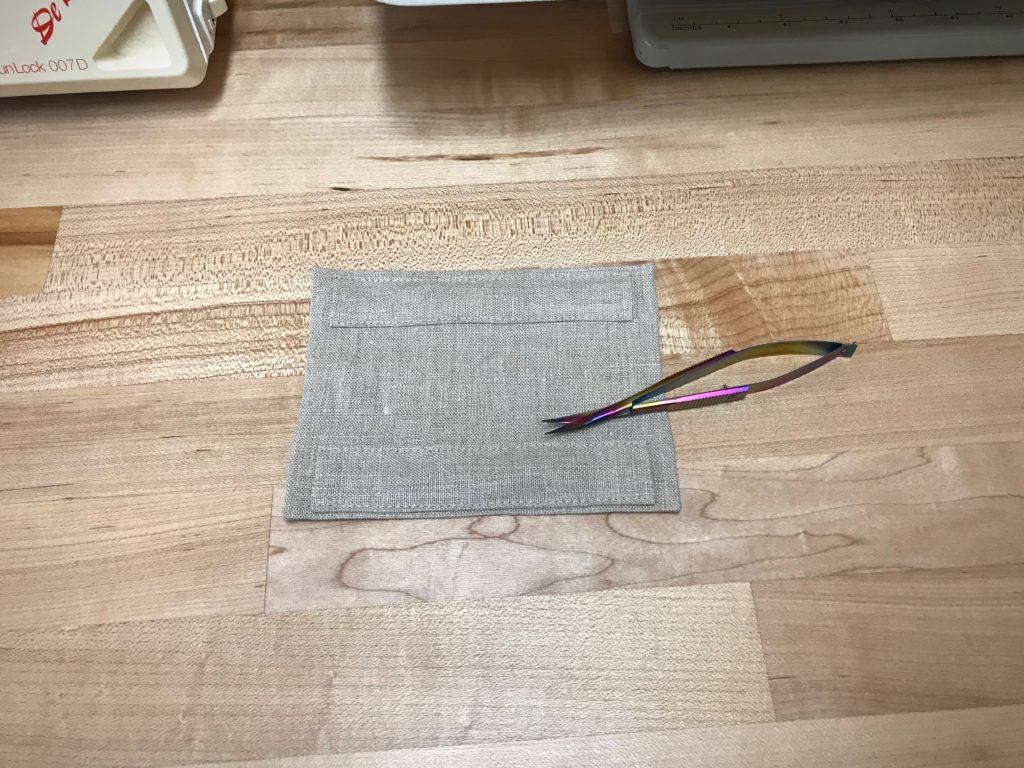
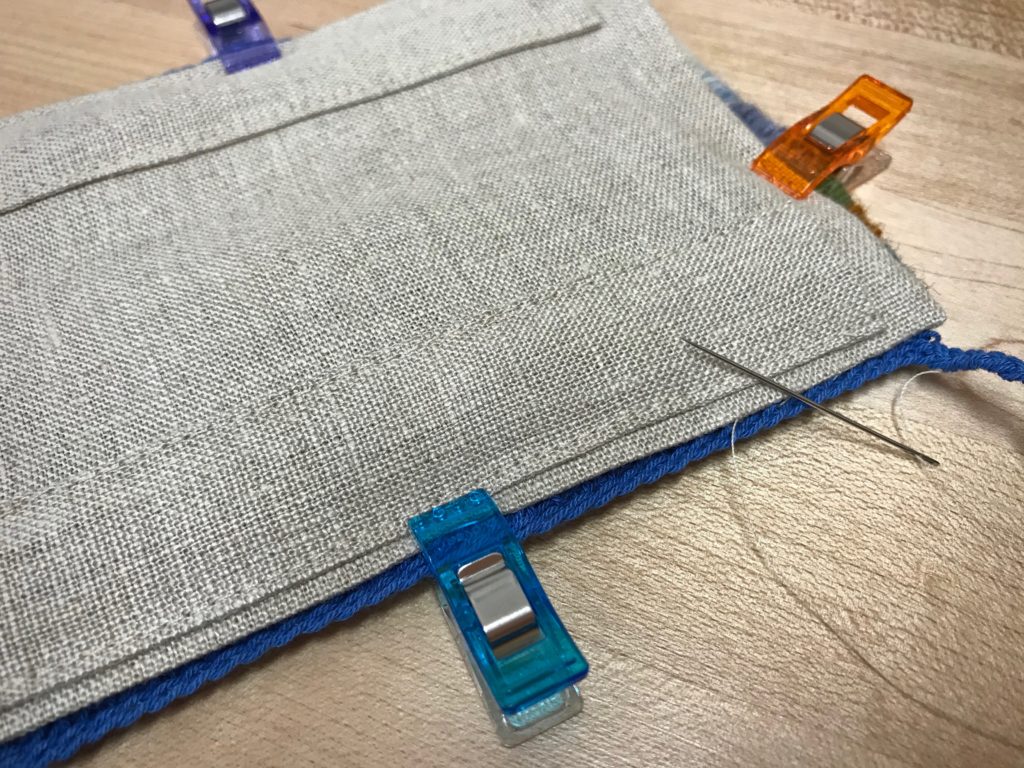
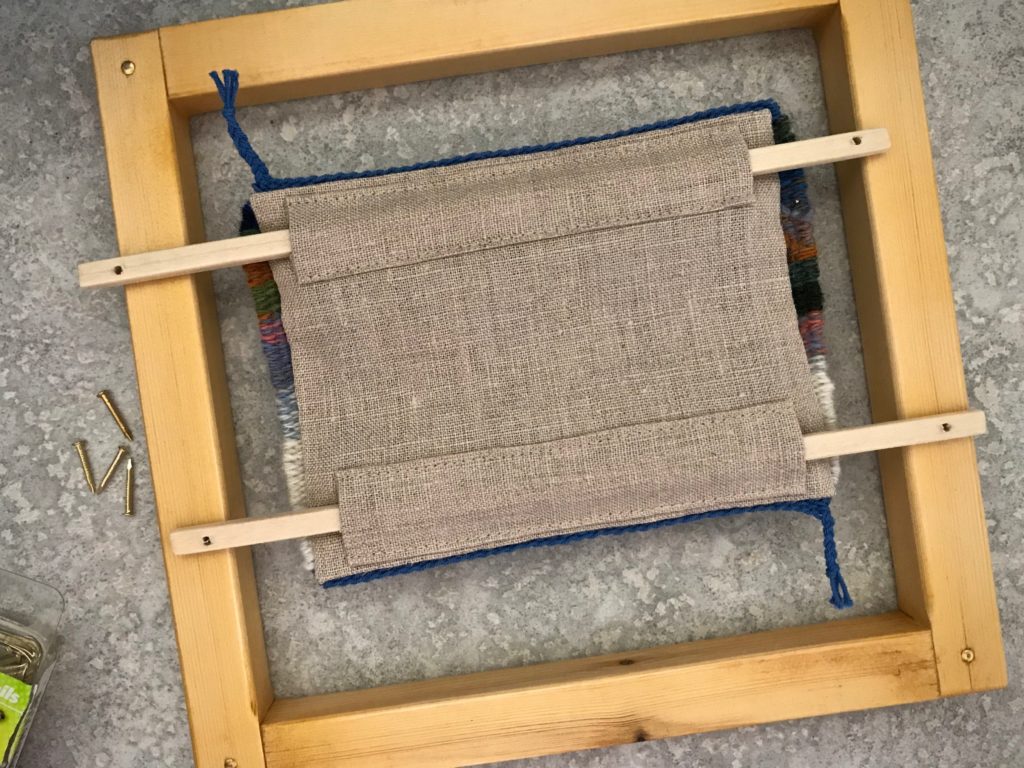
Fresno Canyon photo printed in black and white is used for the cartoon. Instead of an exact picture of the image, I aim for a representation of the memory, expressed with color.During a brief rainstorm while at Caprock Canyons State Park, Steve and I relax in the Casita with our handcrafts. Wood carving and tapestry weaving.Warp is blue 12/6 cotton. Weft is triple strands of 6/1 Fårö wool. I use the tapestry needle to weave.Weaving in the sunshine at Davis Mountains State Park after returning from a hike.Finished weaving one Texas landscape while enjoying another.Warp ends are woven and braided.Linen is cut to size and pressed. Narrow rod sleeves are sewn into place.Linen backing is hand-stitched to the back of the small tapestry.Steve designed a simple frame for the small tapestry.Finished Fresno Canyon tapestry. A treasured memory kept and framed.