Rosepath Unlimited

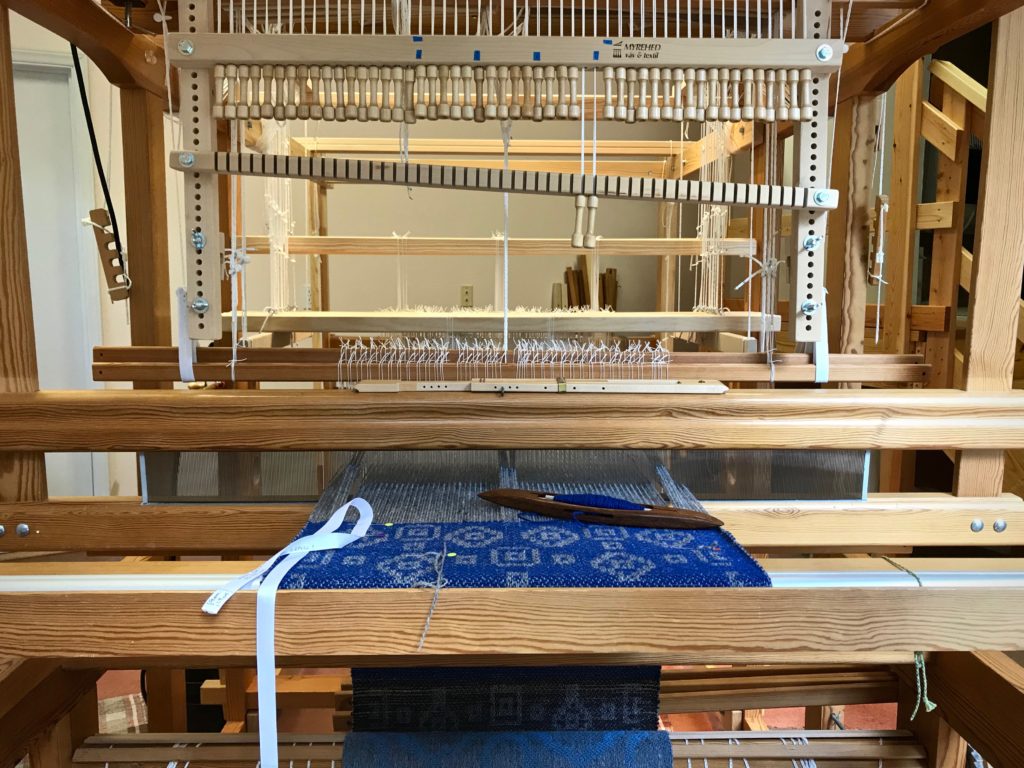
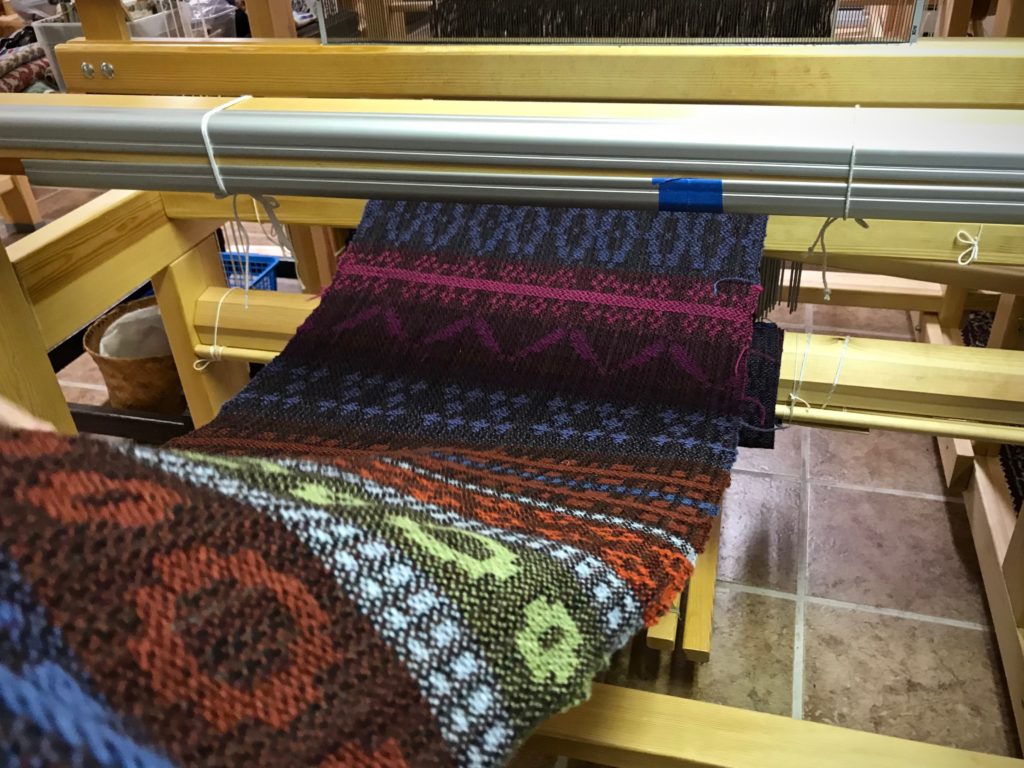
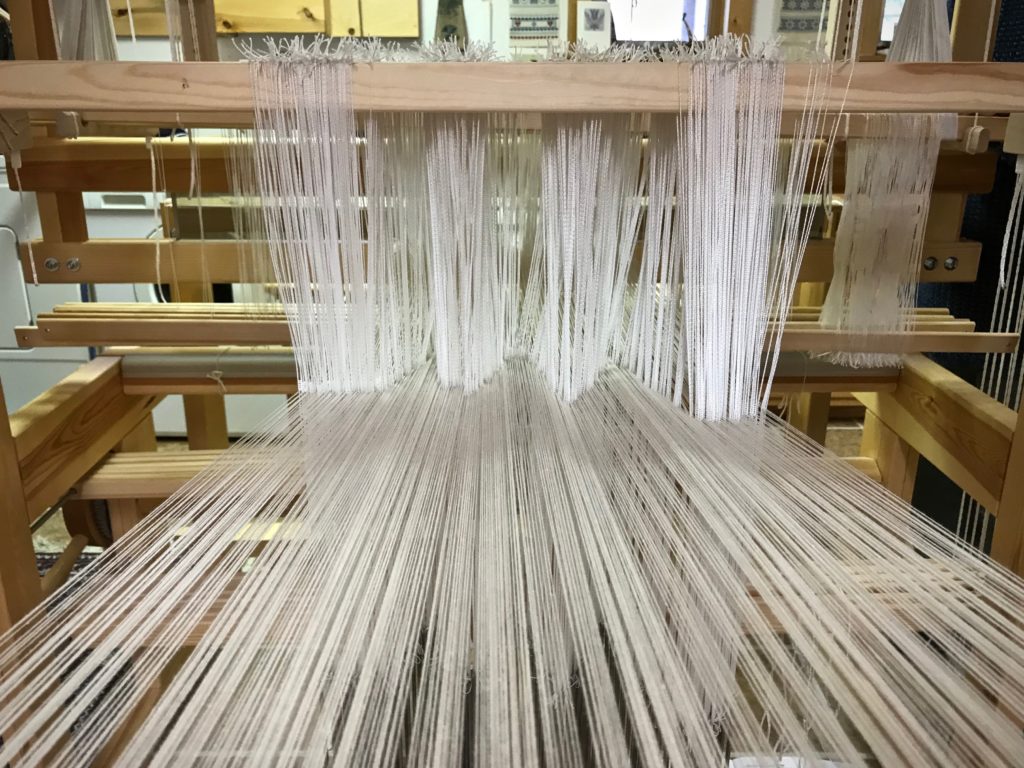
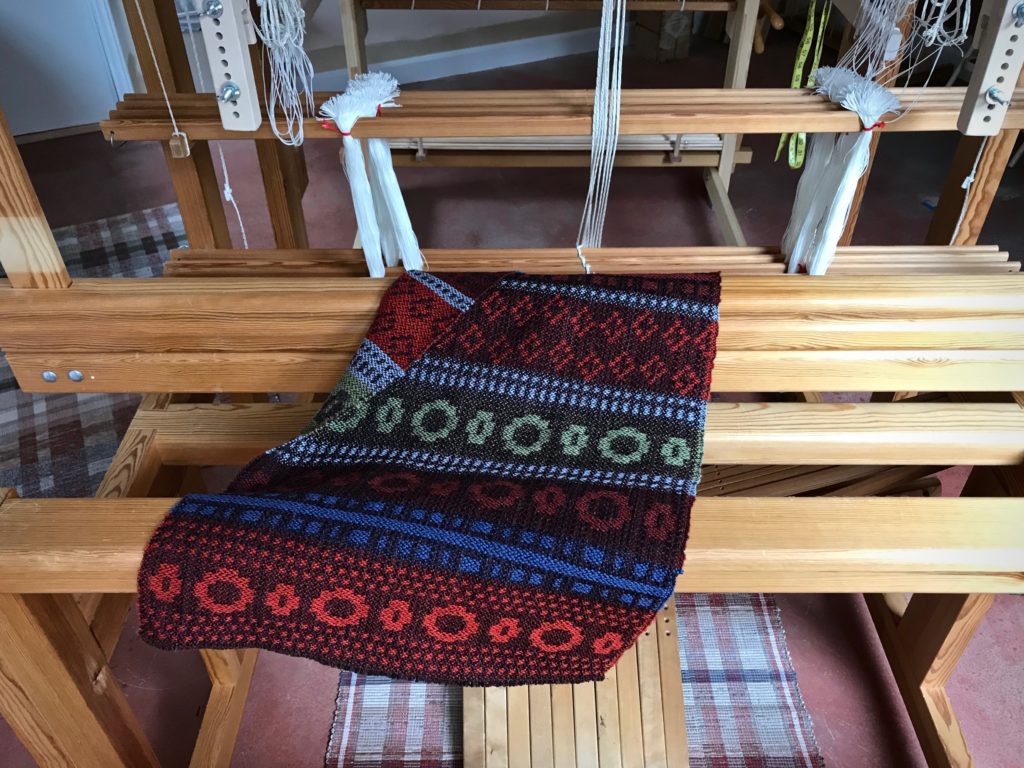
This seems unreal, like pulling an item right out of my imagination and touching it with my hands. It is exhilarating to watch a concept sketch develop into a tangible rag rug on the loom. Even though I enjoy designing at the loom, I relish the challenge of preparing a design in advance. In order to make a workable sketch I must study, think, and explore. It’s in this process that I realize the design options are limitless for rosepath rag rugs. This compels me to keep pressing in to learn and explore even more.

Beginning a new rag rug.
Hem, woven with narrow strips, follows the gold warp thread header. First wide border of the rug uses an assortment of green fabric strips.

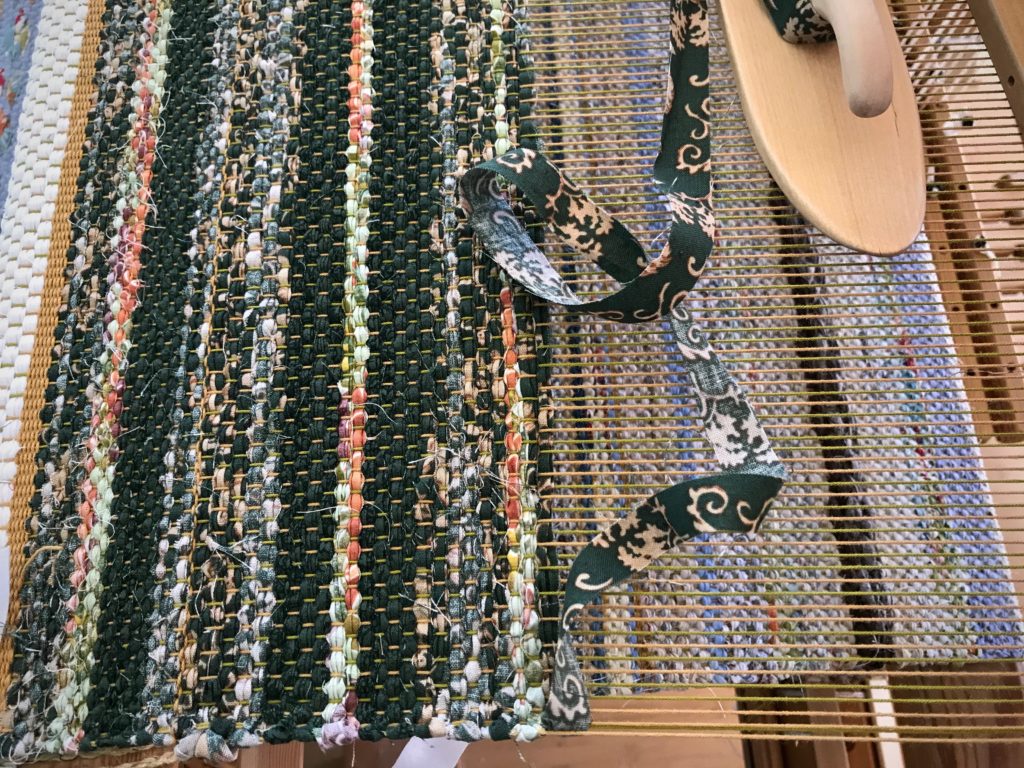
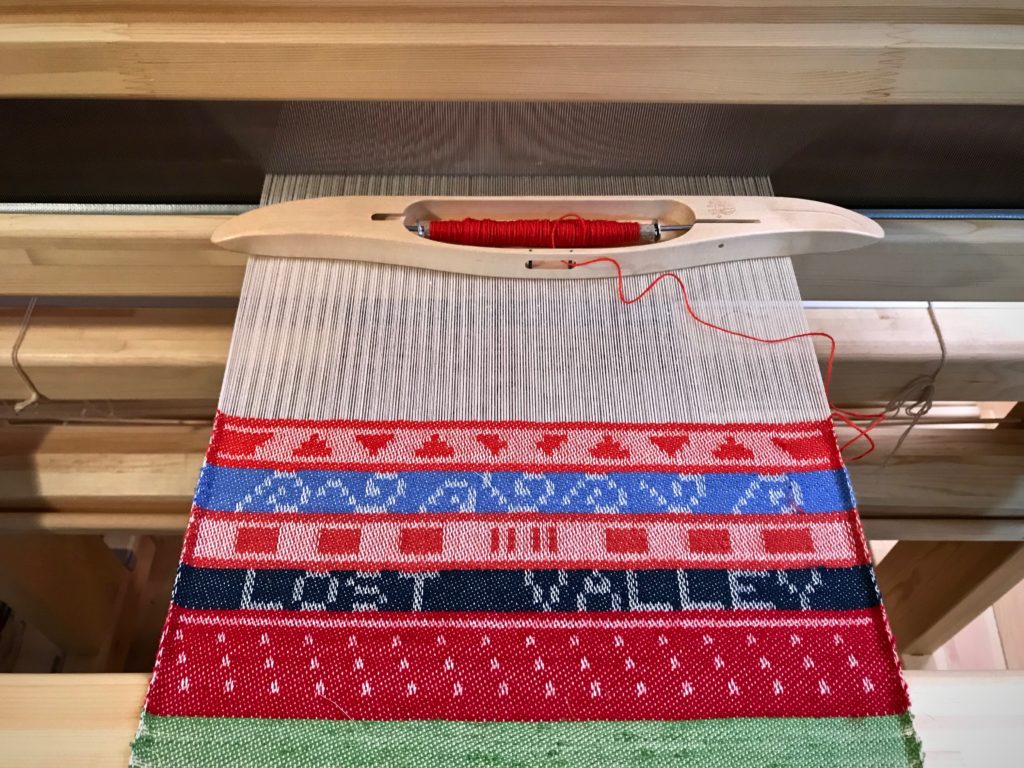
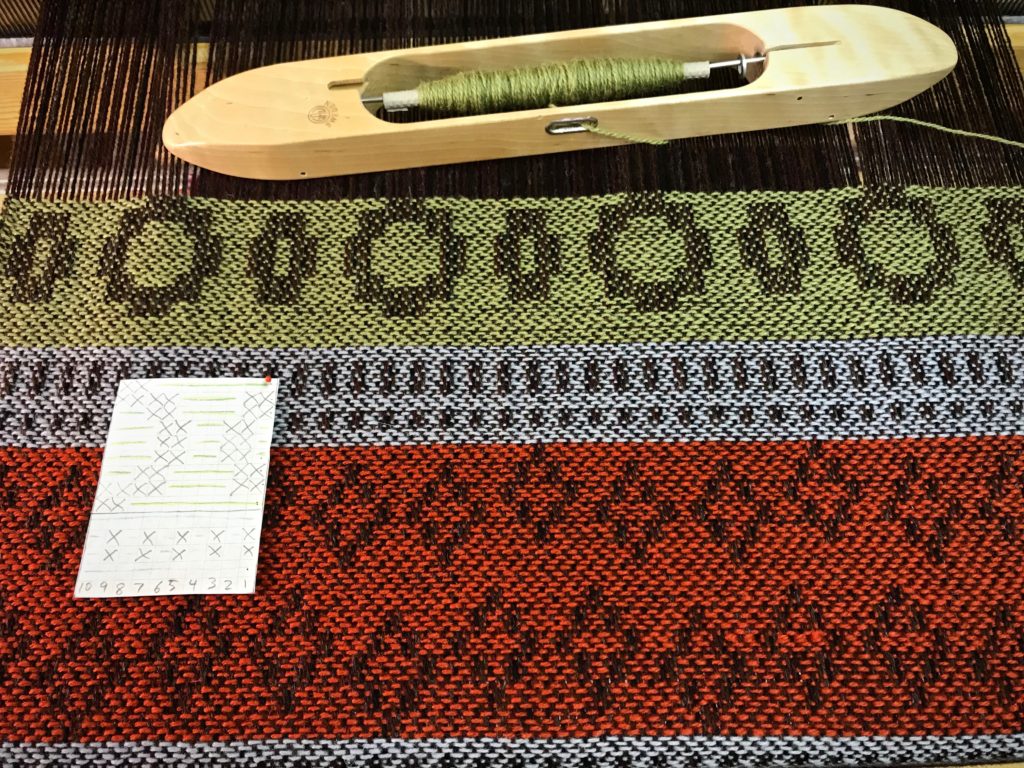
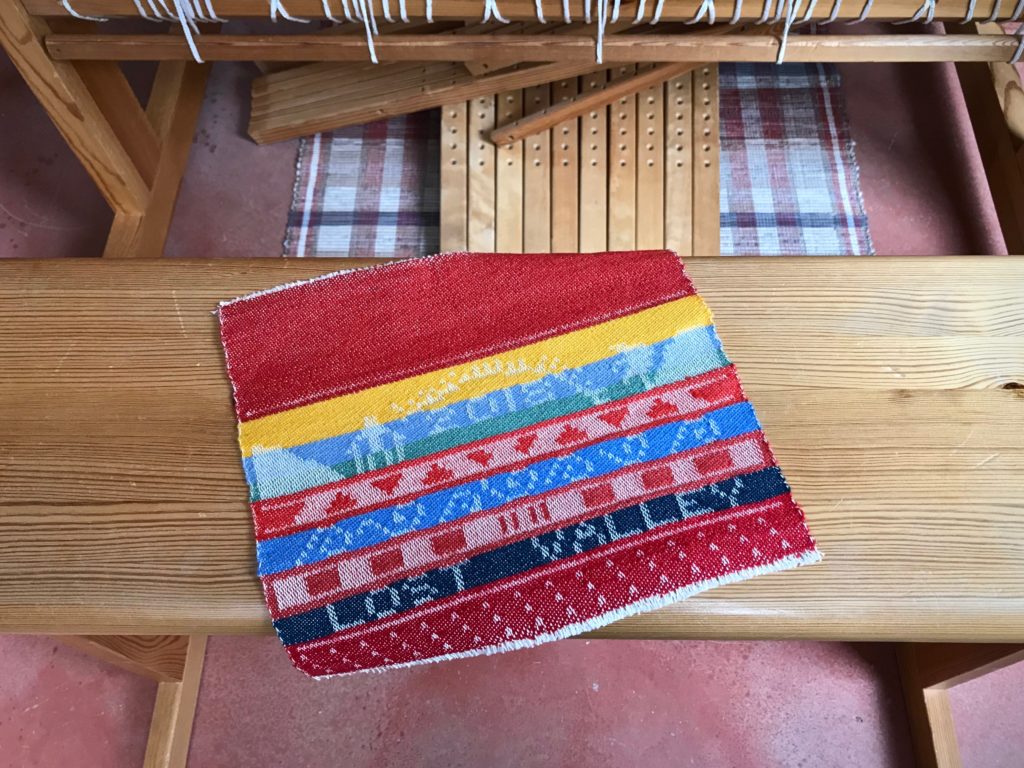
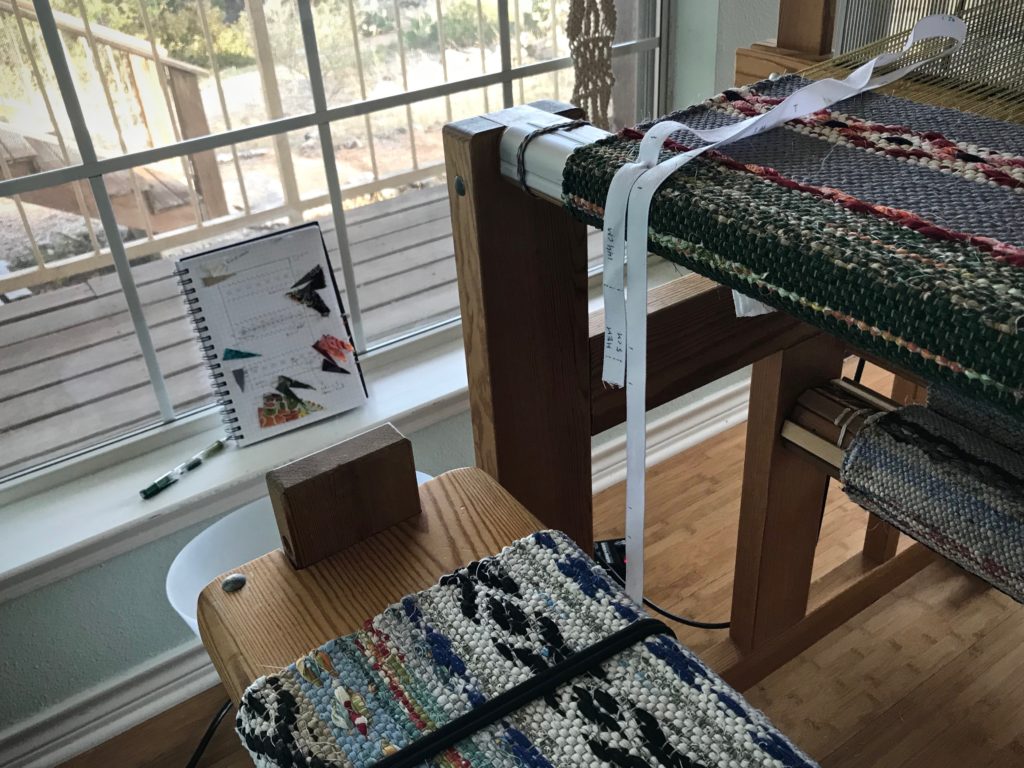
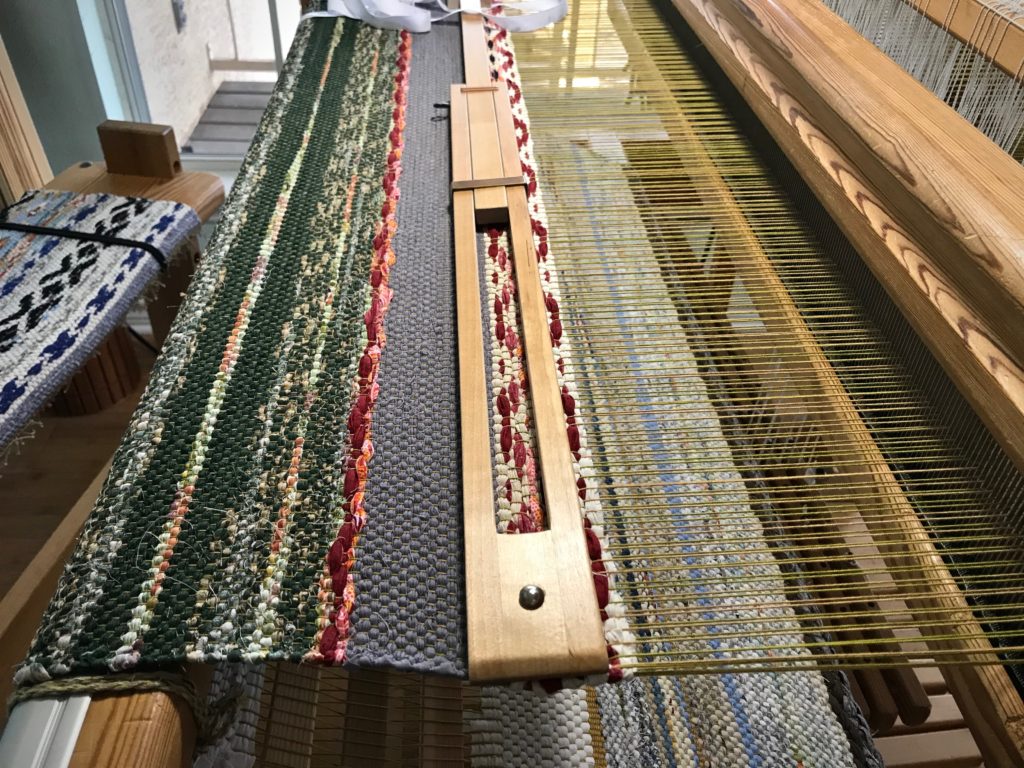
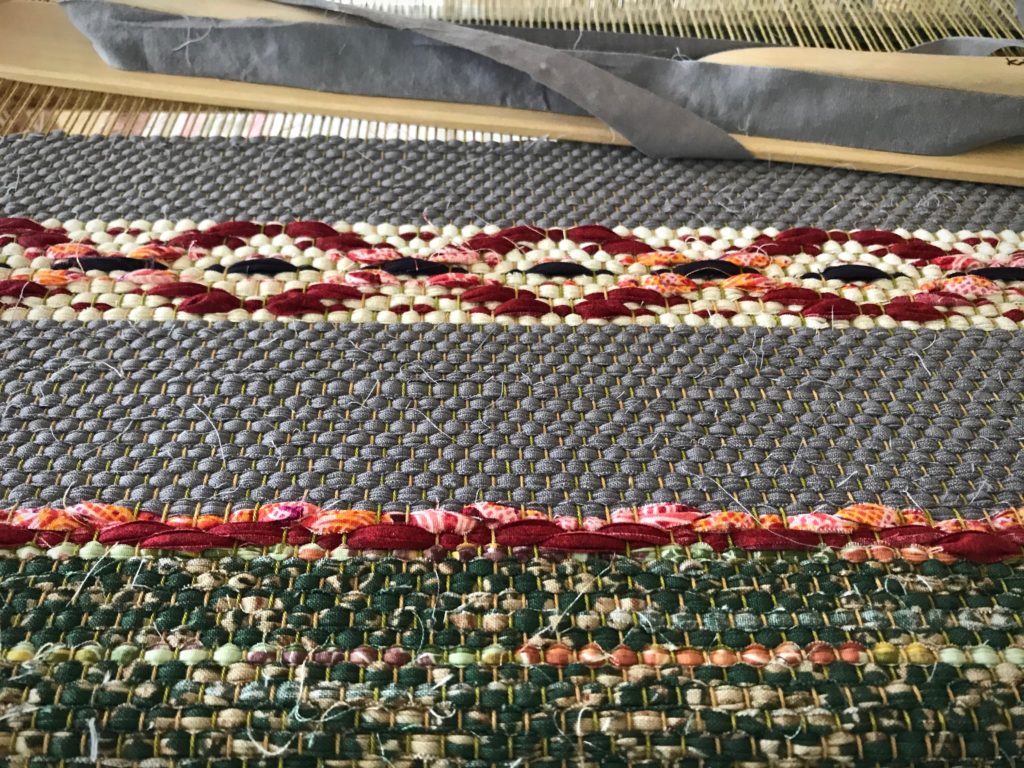
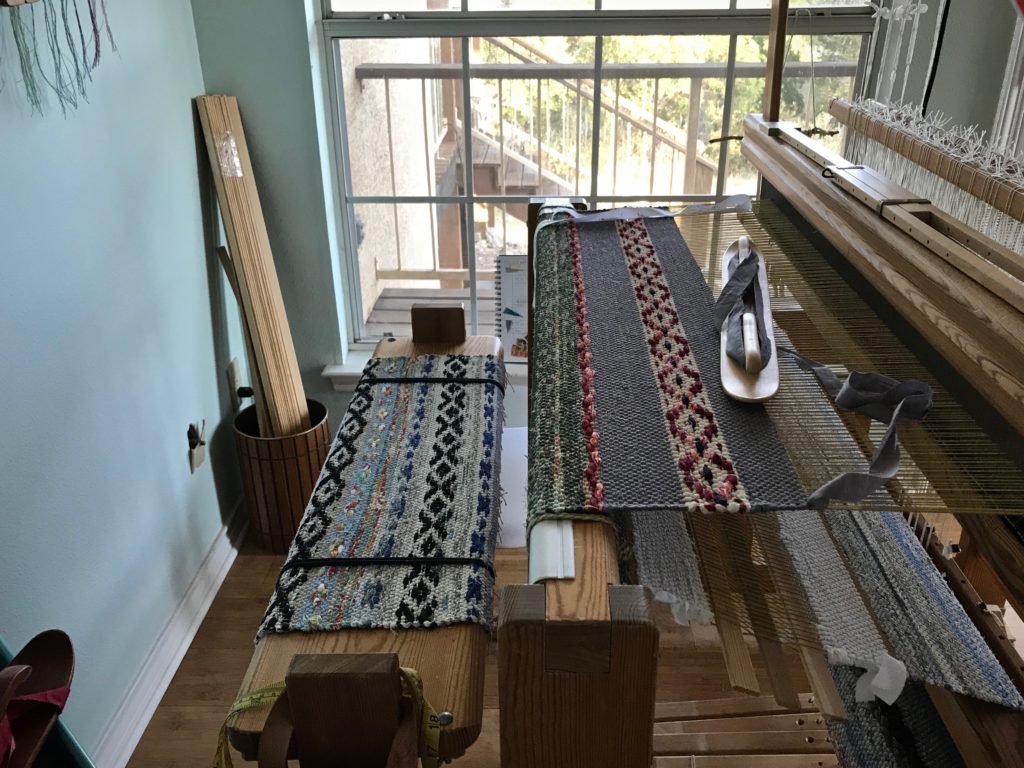
The concept sketch is a scaled-down map of the rosepath rag rug. Each square on the gridded paper represents 6 centimeters. The sketch shows me which fabrics to use where, and specifies the placement of each design element—borders, plain weave, rosepath diamonds, dashes and dots of specific colors, etc. I add notes to the page as I weave, like specific treadling sequences and measurements, so that I can mirror them on the second half of the rug.

Concept sketch by the loom is my roadmap for weaving the details.
Concept sketch sits at the windowsill by my loom. I use it as a roadmap for weaving the details.
Weaving rag rugs with a temple. Always!!
Stretched-out temple is a necessity when I weave rag rugs. The wooden Glimåkra temple is my favorite because I can place it near the fell without risk of damaging the beater. This makes it possible to move the temple frequently, adding to weaving consistency.
Designing a rosepath rag rug.
Deep purple “dots” at the center of the rosepath diamonds serve as accents among these colors for a Texas hill country home.

Nothing can measure the greatness of the Lord. His greatness is truly limitless. Greatness is compelling. We step closer to search the unsearchable, and know the unknowable. God reveals himself, sketch after sketch, until we finally realize that we need all eternity to fully know him.

Rosepath rag rug - My favorite thing to weave!
Satisfaction of watching a concept sketch become a tangible rag rug.

May your concepts become tangible.

Happy Weaving,
Karen

Process Review: Drawloom Jewels

It is exciting when Maverick walks by. Although he never comes in my drawloom studio, he does stop for a moment to look my way. You’ll see him in the slideshow video below. But what happens inside the studio is even more exciting, especially when it’s time for cutting off!

Drawloom with 16 pattern shafts.
Drawloom, set up with sixteen pattern shafts. I graph out the designs in Excel on my computer. Then, I print out the gridded pattern to use at the loom. I keep my place in the pattern with a magnet and magnet board made for cross-stitch embroidery.

This is Tuna wool, so I expect some shrinkage, but how much? I take careful measurements before and after wet finishing. Besides the main piece of fabric that I’m using for a garment, I have two sample pieces. I can experiment with the samples before wet finishing my garment fabric.

Here are my findings:
Sample 1. Hand wash and air dry.

10% shrinkage in width; 13% shrinkage in length.

Sample 2. Machine wash (3 minutes agitation on a gentle cycle, with a short spin) and machine dry (low setting) till damp, finish with air drying.

13% shrinkage in width; 14% shrinkage in length.

~How to do the shrinkage calculations~
First measurement (on the loom) minus the second measurement (after washing and drying) equals the difference. The difference divided by the first measurement equals the percentage difference.
For example, 50 cm – 43.5 cm = 6.5; 6.5 / 50 = 0.13; 13% shrinkage.

The first sample fabric is softer than the unwashed fabric, but not as soft as I’d like. The second sample fabric is beautifully soft, like a nice warm sweater. So, with confidence, I wet finish the garment fabric—with great results. It’s perfect for the fall/winter vest that I’ll soon be wearing, made from this fabric!

Wool garment fabric from a drawloom.
Like a sweater, this soft fabric will be comfortable to wear.
Making a pattern for handwoven garment fabric.
Muslin pattern for a simple vest. First, I’ll make a vest out of a wool throw, woven on my rigid heddle loom ages ago. Then, I will cut into the new drawloom fabric, with confidence about the fit.

Enjoy this photo show of the drawloom process.

May you enjoy the process you’re in.

Happy Weaving,
Karen

Weaving through The Big Book

It took me seven years of study, practice, and mistakes to complete this rigorous Swedish weaving curriculum! You have been with me through much of it right here. I’m talking about The Big Book of Weaving, by Laila Lundell. I made it through the book, sequentially, page by page, warp by warp. 43 warps in all! Remember the blue 12-shaft double-weave blanket I had on the loom in June? That is the final project in the book.

Handwoven double weave blanket. 12 shafts.
Double-weave wool fabric is ready for wet finishing, where it will be transformed into a soft, cozy blanket.

In the short video below, each completed project is presented in order in our Texas hill country home. Watch to the end to see the blue blanket in all its finished glory.

For nitty-gritty details, check out The Big Book of Weaving tab at the top of the page.

I. Secrets to success:

  • mindset of a student
  • determination
  • eyes on the goal
  • no option other than completion

One loom dedicated to the book.


II. Lessons learned:

  • technique
  • processes
  • planning
  • drafting
  • Swedish practices

Any mistake can be remedied.


III. Treasures gained:

  • patience
  • humility
  • endurance
  • focused attention
  • problem solving
  • creative freedom

Confidence.


IV. Prized perspectives:

  • new experiences
  • delight of dressing the loom
  • wonder of cloth-making
  • fresh ideas
  • joy of discovery
  • knowledge and understanding of the loom

Getting lost and absorbed in the whole process of weaving.

V. Favorite project: Old-Fashioned Weaving / Monksbelt (at 4:46 in the video)

Are we determined students of heavenly things? Oh, to know God’s will! Study what’s written, don’t lose heart, eyes on the prize, no option besides completion through Jesus Christ. One life dedicated to know him. Day by day, warp by warp, the Grand Weaver teaches us. We can know God’s will.

May you be a lifelong learner.

Happy Weaving to you,
Karen

Process Review: Casita Tapestry

This little Casita travel trailer is a good symbol of the retirement phase for Steve and me. I started the tapestry a few months before our move to Texas hill country, in anticipation of our new adventures. And then, the day after Steve retired we went to Rice, Texas and drove away with our new Casita La Perlita (Little Pearl), as if to say, “Let the adventure begin!”

Just off the loom - "La Perlita" Casita tapestry.
Just off the loom, La Perlita Casita. 37 cm x 26 cm (14 1/2″ x 10 1/4″)

Enjoy the Casita tapestry review.

May your adventures come at just the right time.

Happy journeying,
Karen

Drawlooms in Montana

Montana is beautiful, with snow-capped mountains and big-sky sunrises! It’s there that I took Joanne Hall’s fantastic drawloom class last week. My confidence level about setting up and weaving on my drawloom shot up 100 per cent! (And Steve got to experience fishing on the ice with Joanne’s husband Ed!) Please continue all the way to the end of this post to read about submitting a question for Joanne to answer.

Gorgeous Montana mountains by Joanne's weaving studio.
View from Hall Lane, in front of Joanne and Ed’s home.

Cathleen and Deborah and I wove on the shaft drawloom, the single unit drawloom, and the Julia loom set up with half-heddle sticks to weave opphämta. What joy! …even in the challenges of learning new things.

Single unit drawloom weaving.
Single unit drawloom has the capability of weaving imagery, and even words, like “Lost Valley,” the name of our Texas hill country home.
Single unit drawloom in Joanne Hall's weaving studio.
Single unit drawloom in Joanne Hall’s weaving studio.
Half-heddle sticks for weaving opphämta.
Joanne demonstrates how to use half-heddle sticks and shows us some opphämta samples.
Shaft drawloom weaving. 6/2 tuna wool warp and weft.
Pattern has Xs that show where to pull the shaft draw handles. The red dot of a straight pin keeps my place as I follow the rows from bottom to top.
Shaft drawloom in Joanne Hall's studio.
Pulled pattern shaft handles are secured in the hook bar.
Weights hang on the pattern units in the drawloom.
Normally, one two-ounce U-shaped weight hangs on each pattern unit. In this case, with 6/2 Tuna wool, two weights hang on each pattern unit.
Drawloom samplers unrolled! 6/2 tuna wool warp and weft.
Wool yardage and samplers are unrolled and cut off the 120cm Glimåkra Standard loom. Oh, the colors and patterns!

Joanne taught us how to understand patterns and drafts, and how to make our own patterns. And we dressed the drawloom—we threaded pattern heddles and ground heddles, and distributed pattern shafts. Boy, did we students make mistakes! But with quiet Joanne, there is always a way to fix anything that matters. She is a picture of grace.

Distributing pattern heddles on the drawloom.
Deb separates pattern heddles that will be placed on the next pattern shaft.
Pointed threading of pattern heddles on the drawloom.
After undoing some beginner errors, we finally have all the pattern heddles in order (pointed threading) on the eleven pattern shafts.
Weights under the drawloom.
One weight hangs on the long heddles of each six-thread pattern unit.
In the loom together! Karen (me), Cathleen, and Deborah enjoy the expertise and kindness of Joanne.
Eight-pointed star on the shaft drawloom at Joanne Hall's drawloom class.
New 16/2 cotton warp on the shaft drawloom. I emptied a few quills to weave the traditional eight-pointed star pattern. Meanwhile, Joanne watched treadles, lamms, and shafts to fine tune the sheds. Everything is just right!

Striving to look good to other people, we face unwelcome judgment. Striving to please ourselves, we face demands of perfection. But when our heart strives to please the Lord, we receive grace. Our failures fade in importance as our confidence in his faithfulness grows. Know who you are working for. The imperfect images we weave in the cloth are a humble gift of gratitude back our Grand Weaver.

Wool shaft drawloom sampler.
Wool shaft drawloom sampler, at home now in my drawloom studio.
Shaft drawloom sampler from Joanne Hall's drawloom class.
Reverse side of wool sampler was face up on the loom.
Single unit drawloom sampler.
Single unit drawloom sampler. Our Lost Valley home, with details that remind us of our 2018 transition year.
Draw cords and handles are in place on the new drawloom.
Draw cords and handles are in place. Forty more will be added soon.
Shaft drawloom is just about ready for first project!
Shaft drawloom is ready. Single unit drawloom parts will be added later.
Please excuse me now while I go wind a warp!

May your imperfections be greeted with grace.

Love and grace,
Karen

~What are your questions? Joanne has answers~

Are you curious about drawlooms? Are you considering a drawloom for yourself? Do you have a drawloom and wish you could ask an expert for help? Please put your question about drawlooms and/or drawloom weaving in the comments below, or send your question to me through Get in Touch. Joanne Hall’s answers to two selected questions will be included in next week’s post. Please submit your question by this Friday, February 8.