I have woven umpteen rag rugs. But never one like this! Eight-shaft satin on the single-unit drawloom brings its own challenges, from managing draw cords to getting a decent shed. Add rag weaving to the mix and we have a whole new experience!
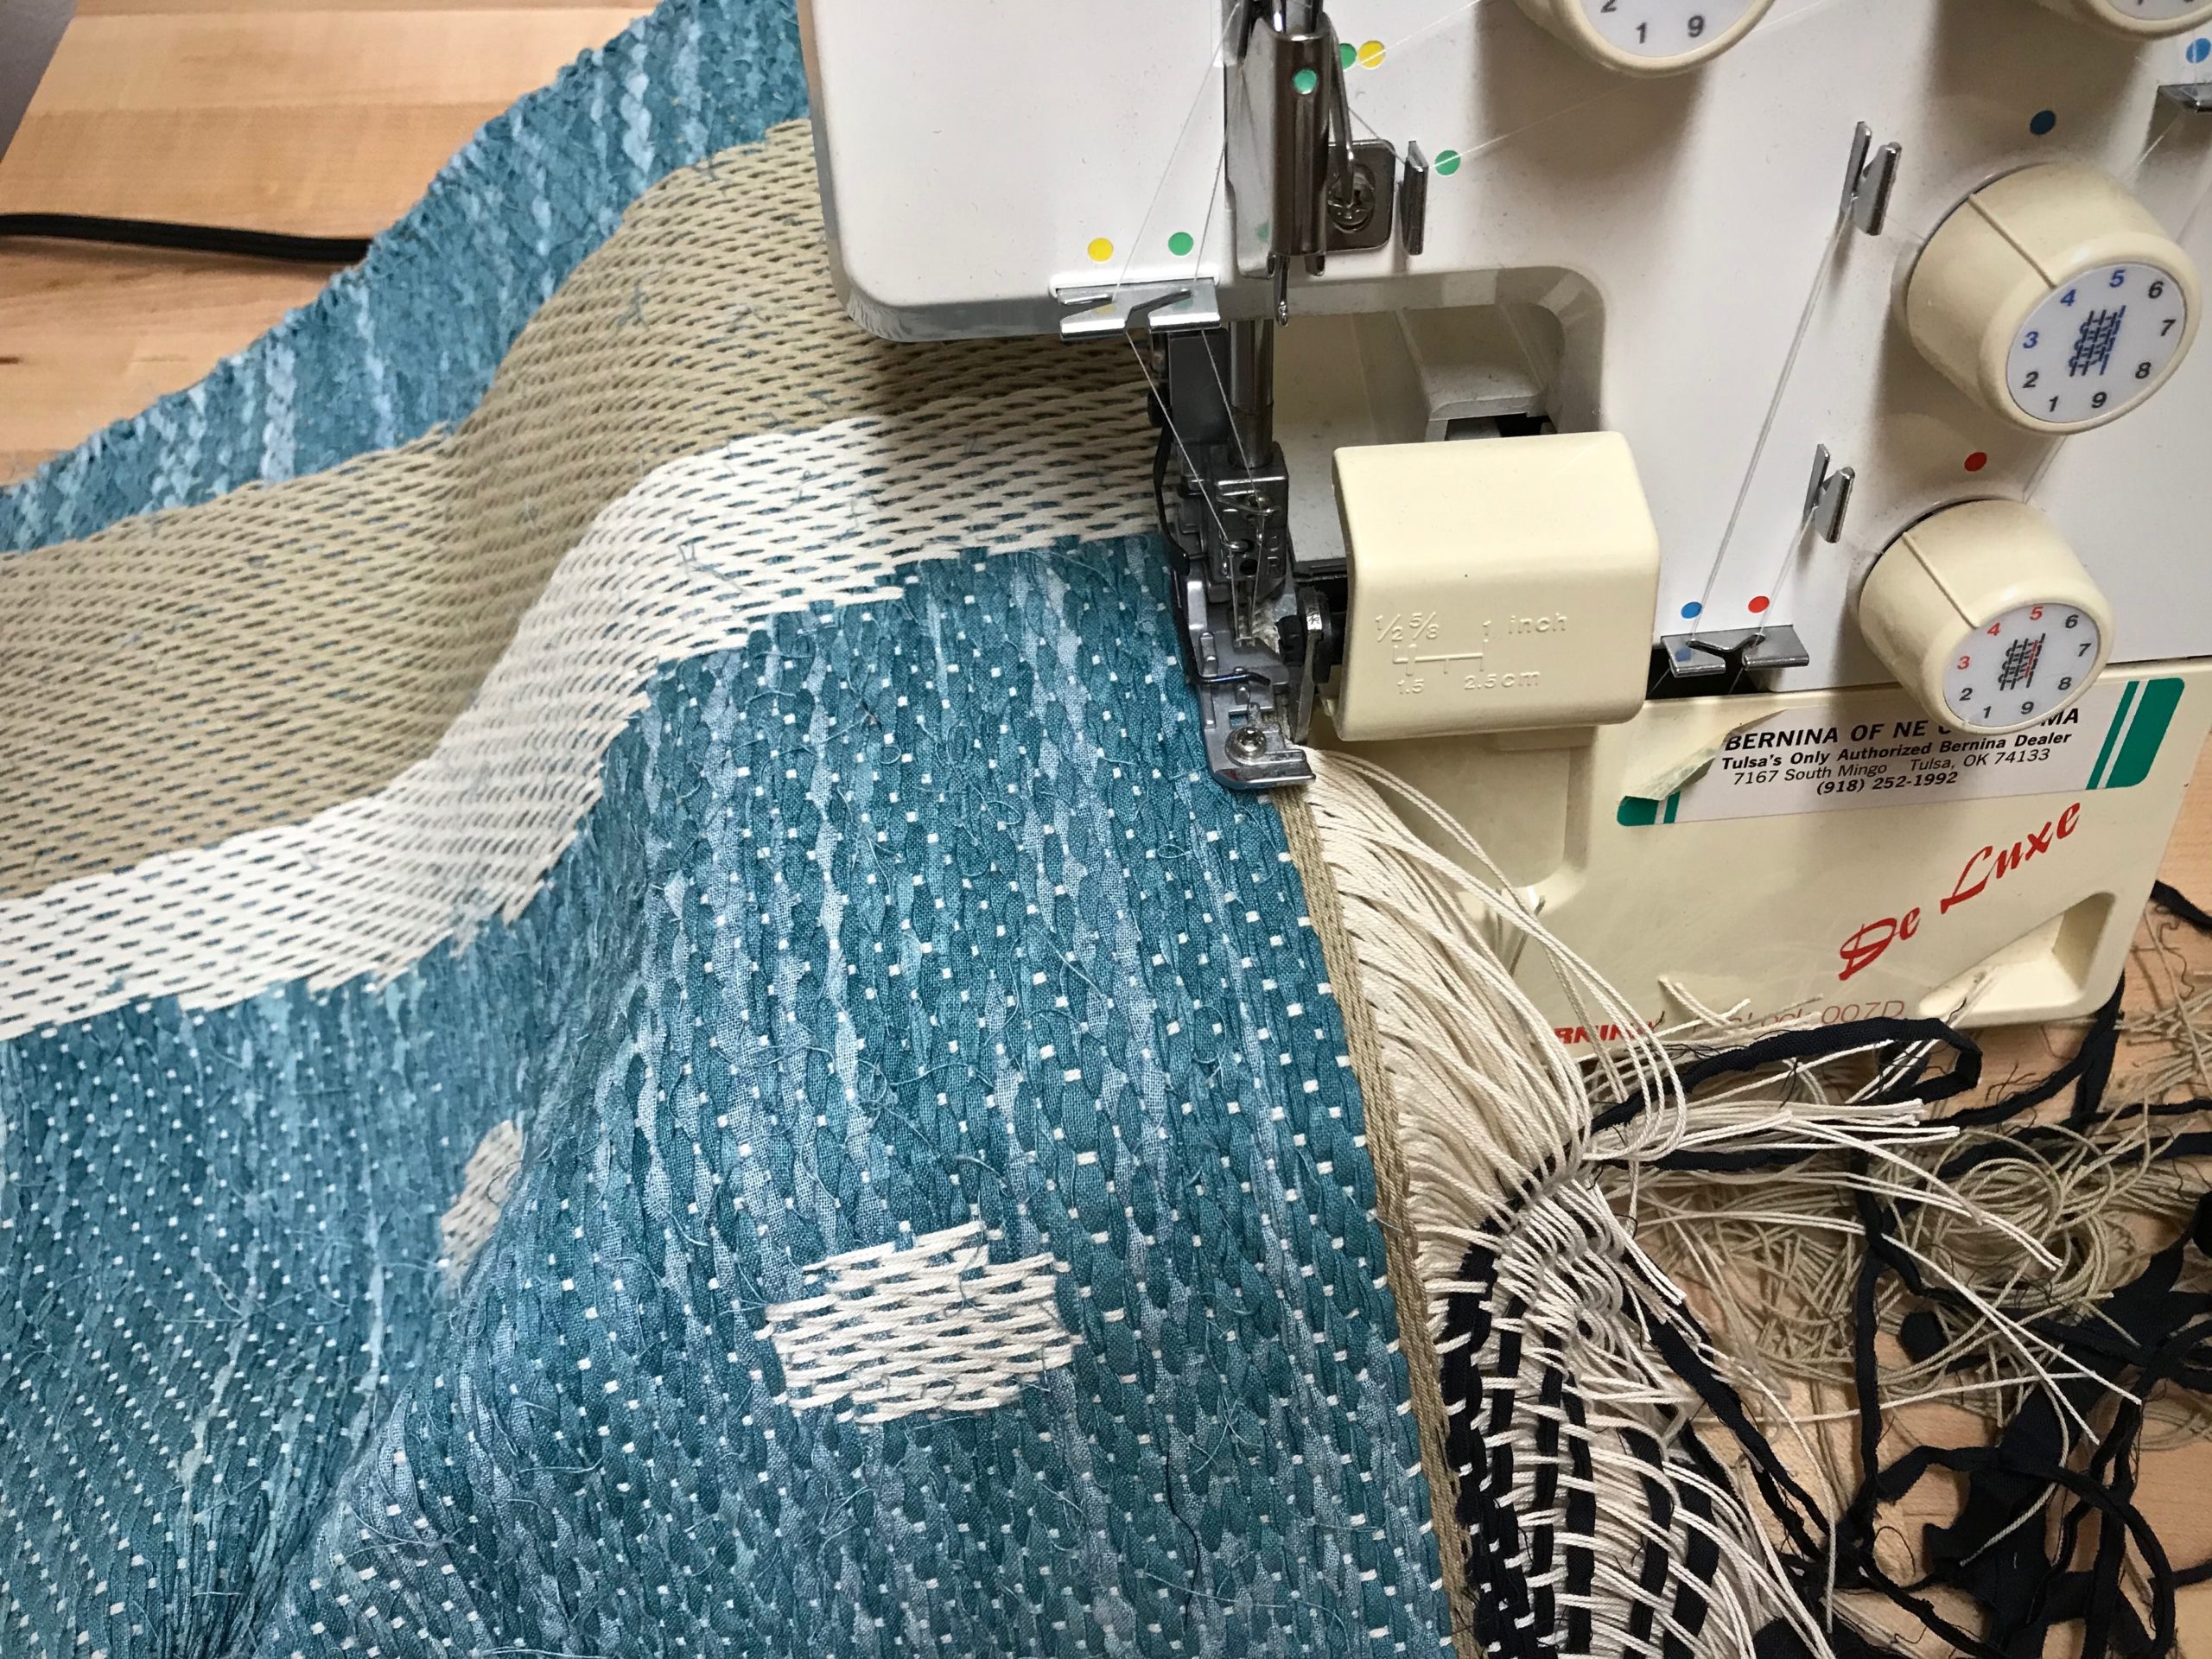
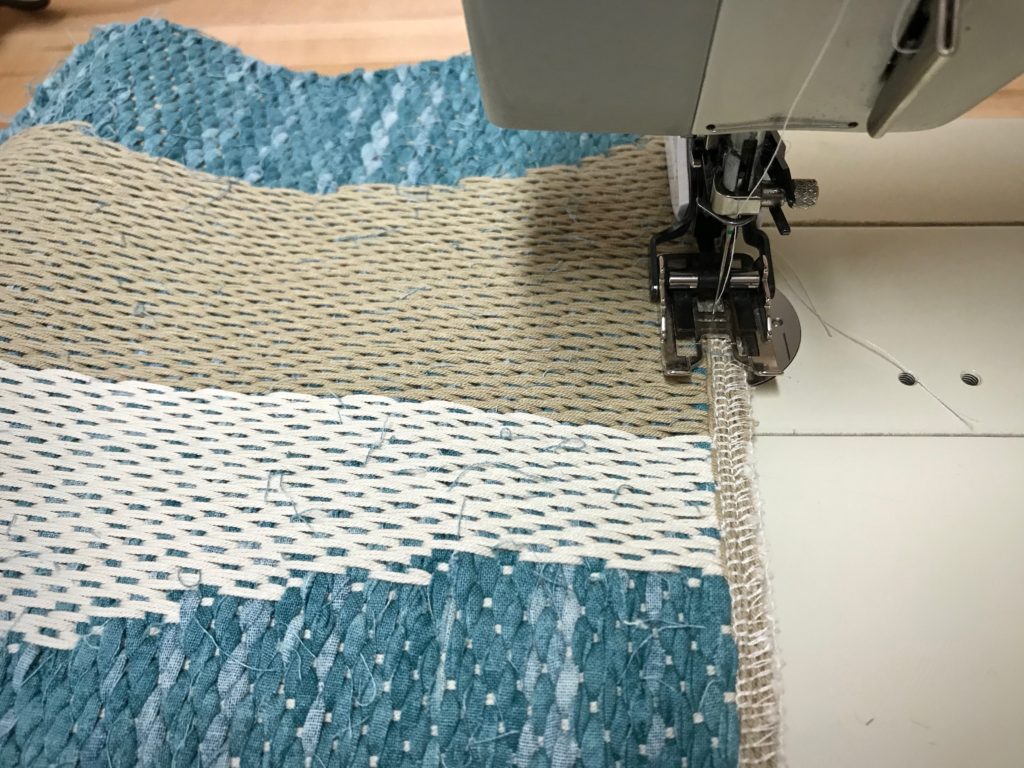
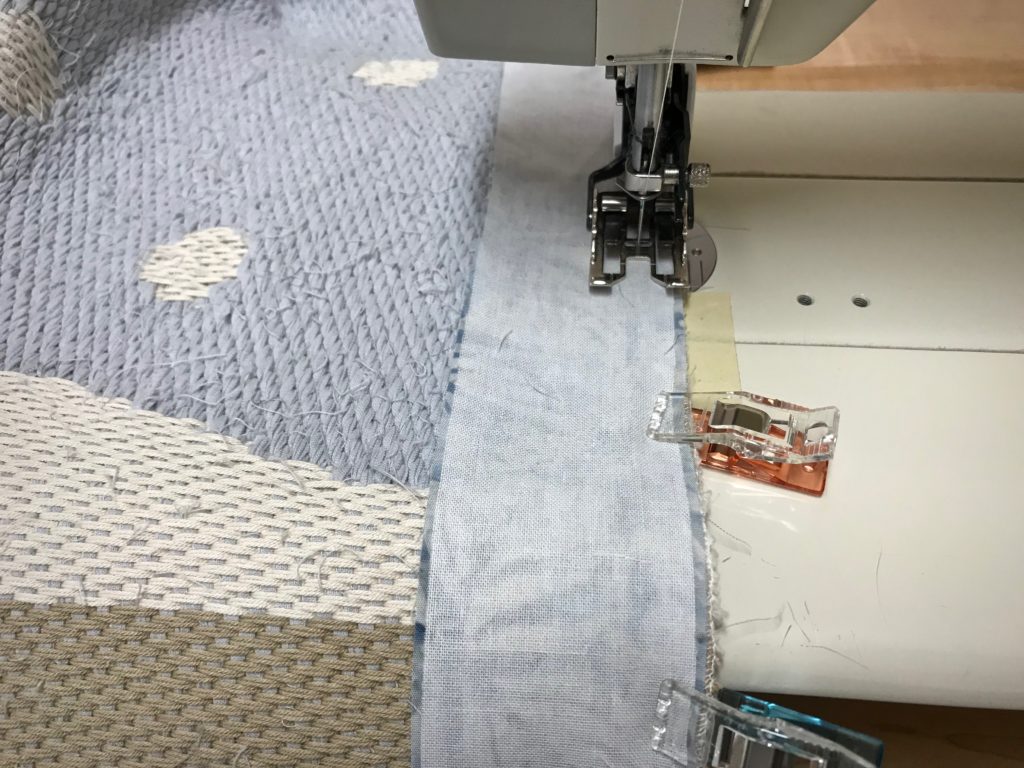
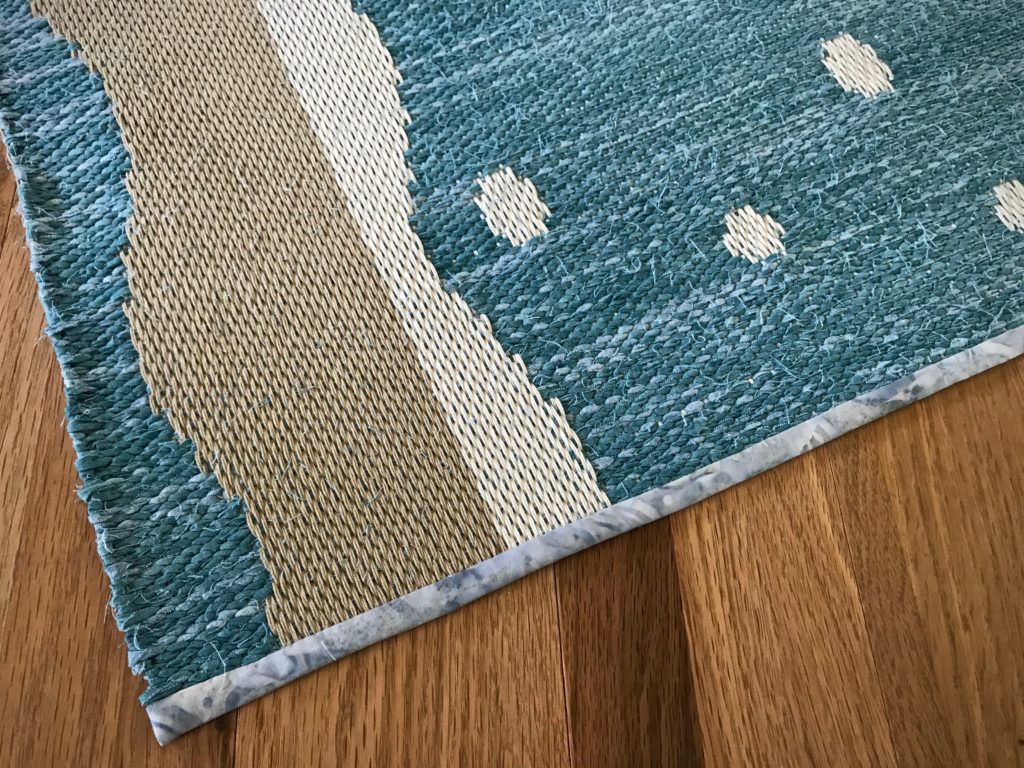
Finishing has its own set of new challenges. My go-to method of tying knots to secure warpends is unwieldy in this instance because the threads are extremely dense. By quietly doing some detail studies on a sample, I find a way to finish this unusual rug: Secure the ends with the serger. Then, sew two rows of straight stitches on the sewing machine for added security. Sew a narrow bound hem using some of the fabric that was used as weft in the rug. Steam press to finish.
Serger cuts off the ends as it overlocks the edge. I pull out the scrap header little by little just ahead of the serger needles and blade.Two rows of straight stitching.Lightweight woven fusible interfacing backs the fabric used for the narrow bound hem.My Grandma’s thimble helps me hand stitch the back side of the bound hems.Finished and pressed.Dream come true!
Stony Creek Rag Rug
(Design by Kerstin Åsling-Sundberg)
I have another rag rug to weave on this warp. It will still be a challenge. With what I’ve learned, though, I’m anticipating a satisfying weaving and finishing experience.
We know what to do in normal circumstances. It’s in unusual times that we fall into dismay. Private time with Jesus turns confidential fears to confident faith. He treats our challenges like personal detail studies, showing us the way forward. His grace enables us to conquer the next challenge with confident faith.
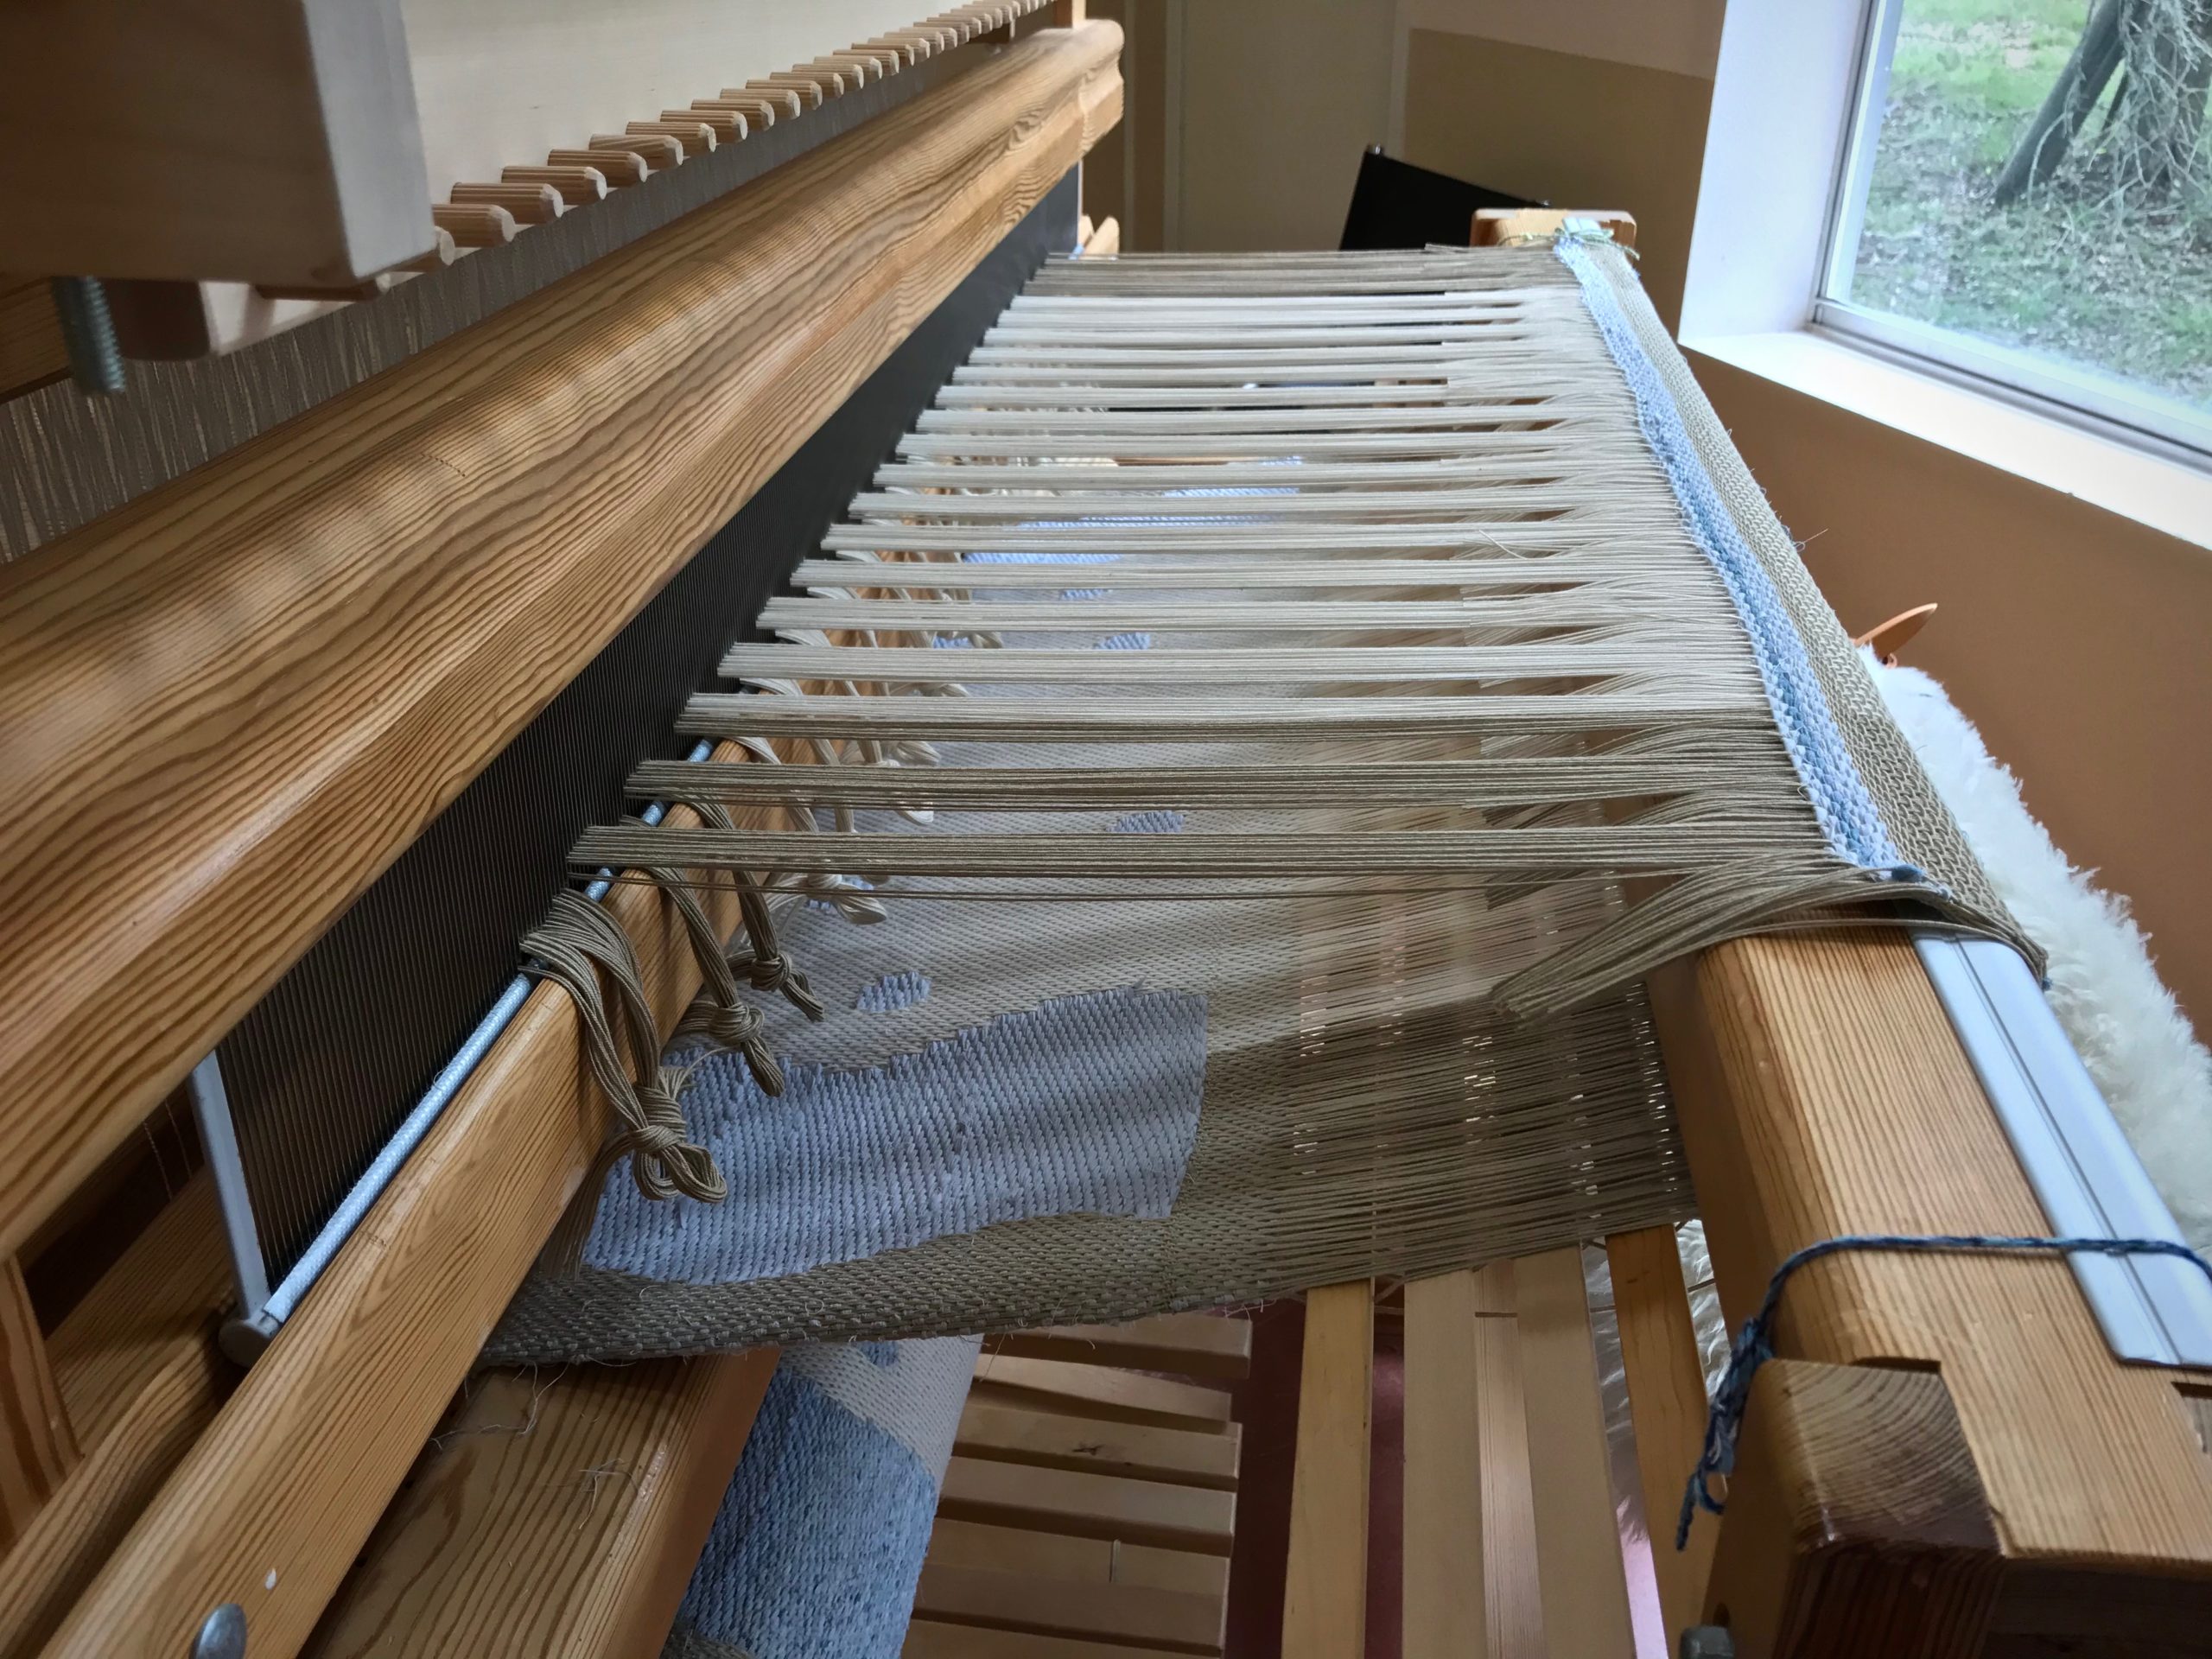
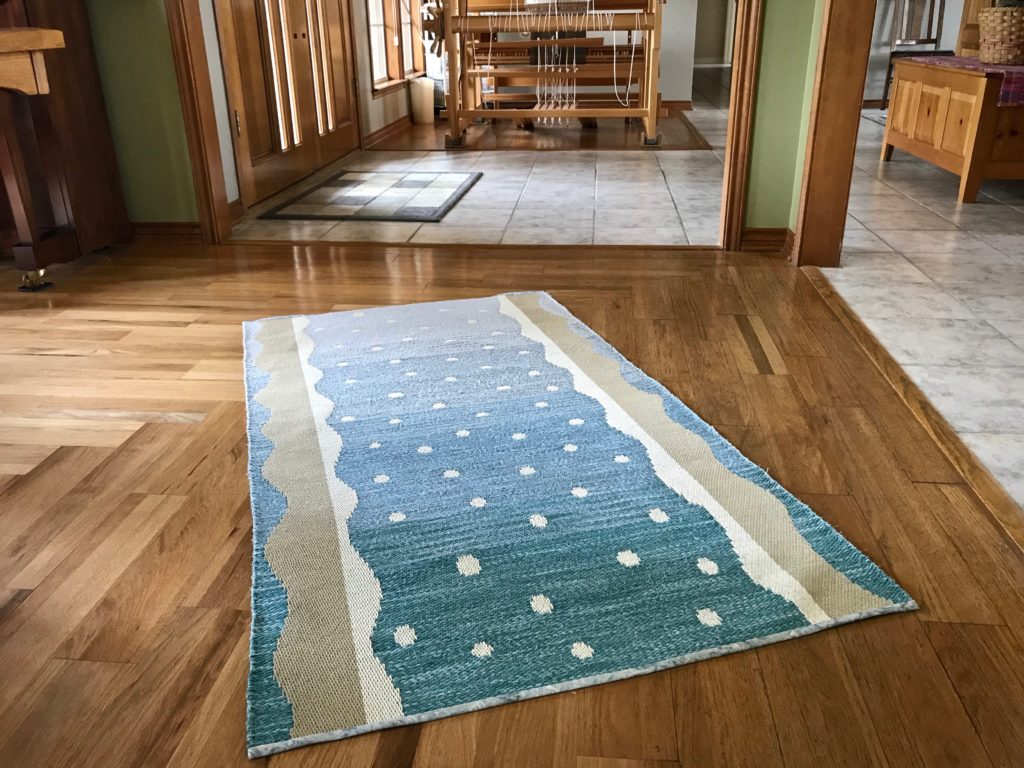
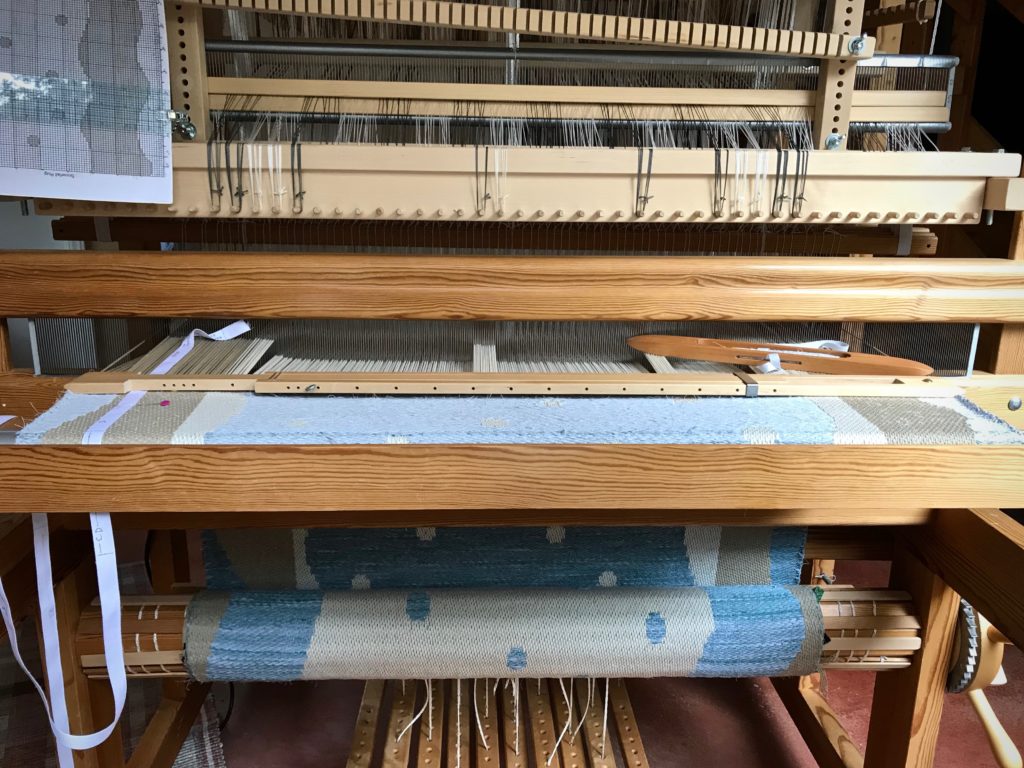
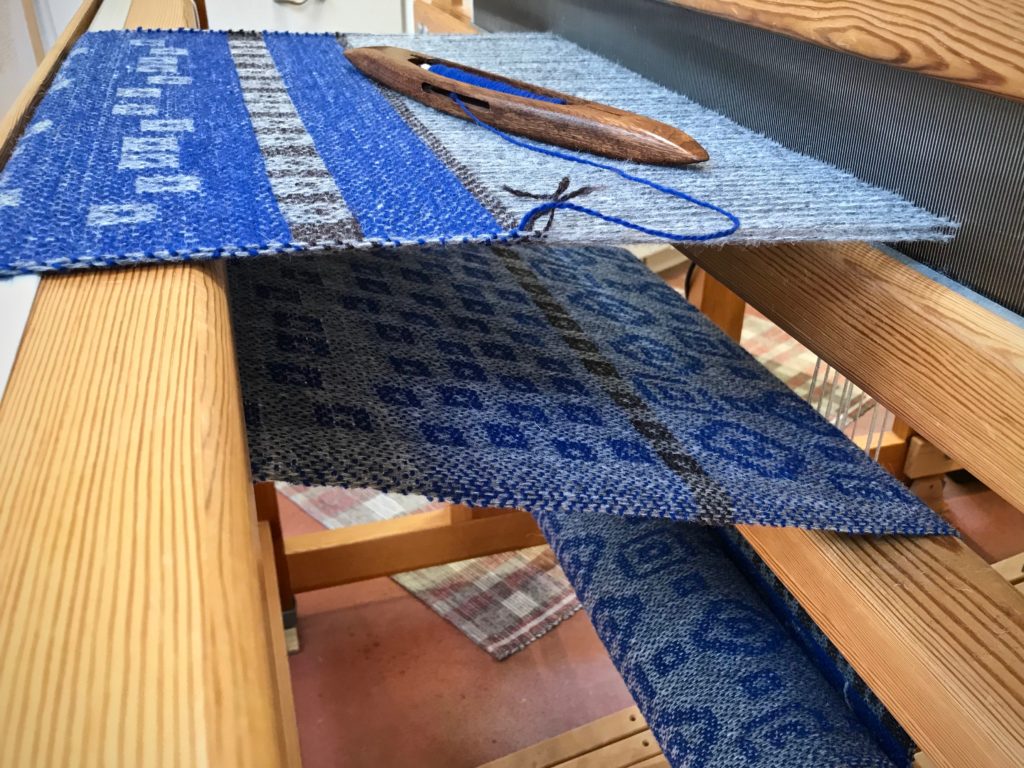
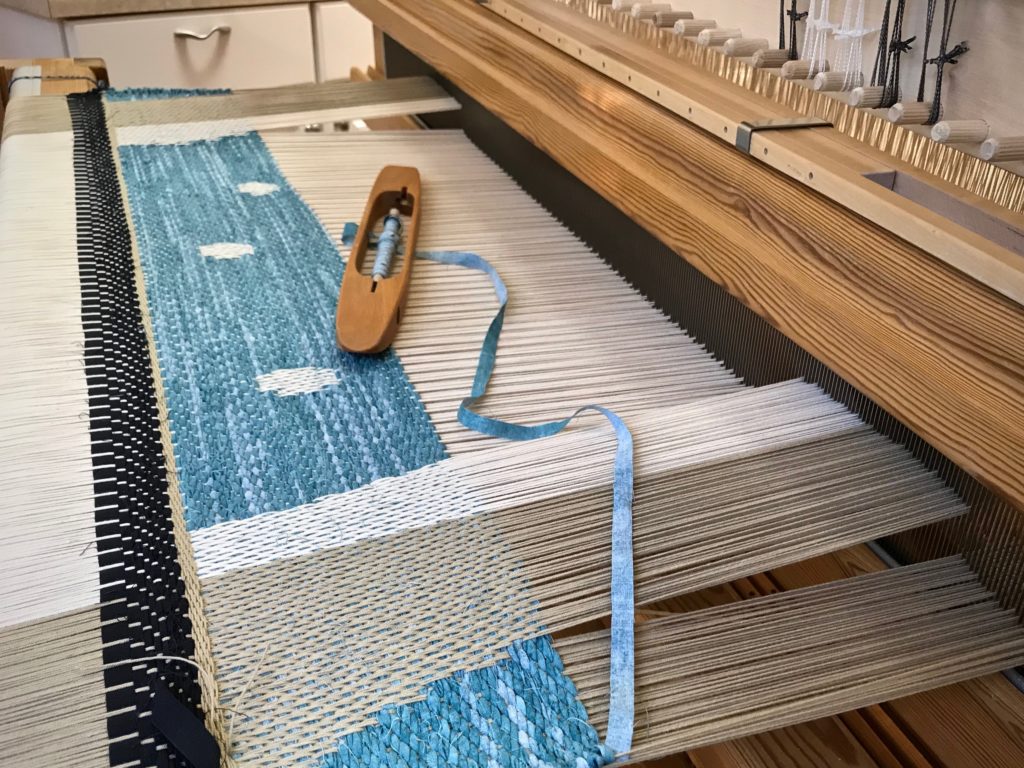
This is a huge project. Four shades of blue from dark to light span the nearly one-and-a-half-meter-long rug. I have reached the final color-transition section. I am eagerly awaiting the day this rug will be rolled out!
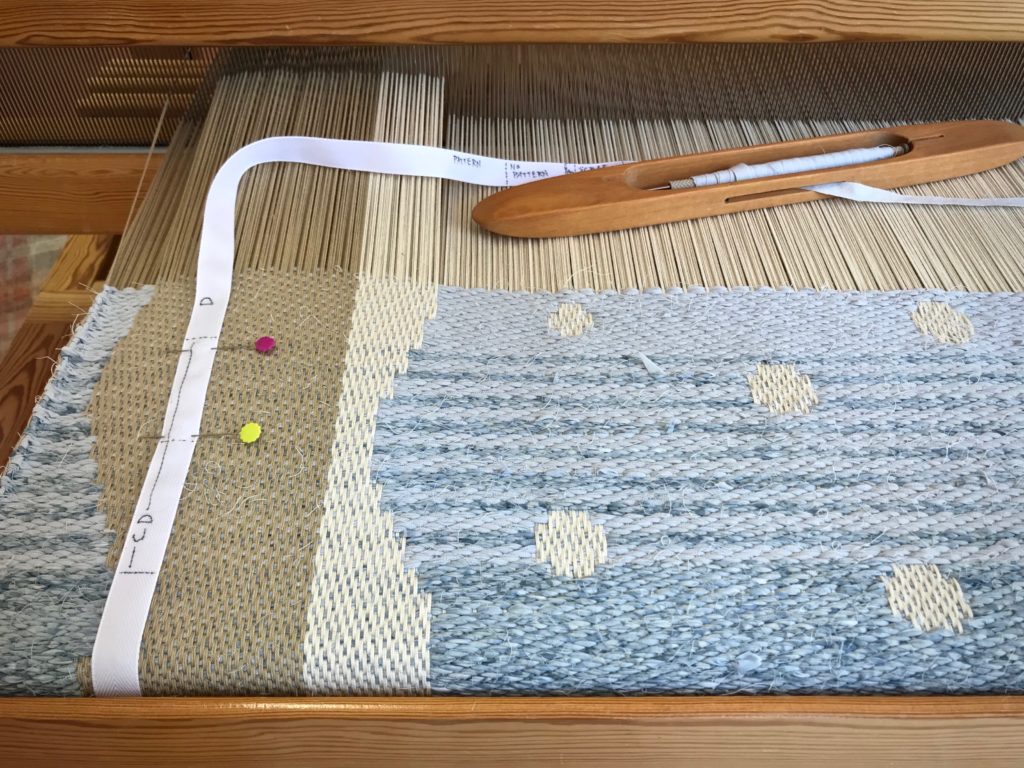
Transitioning from one color to the next.
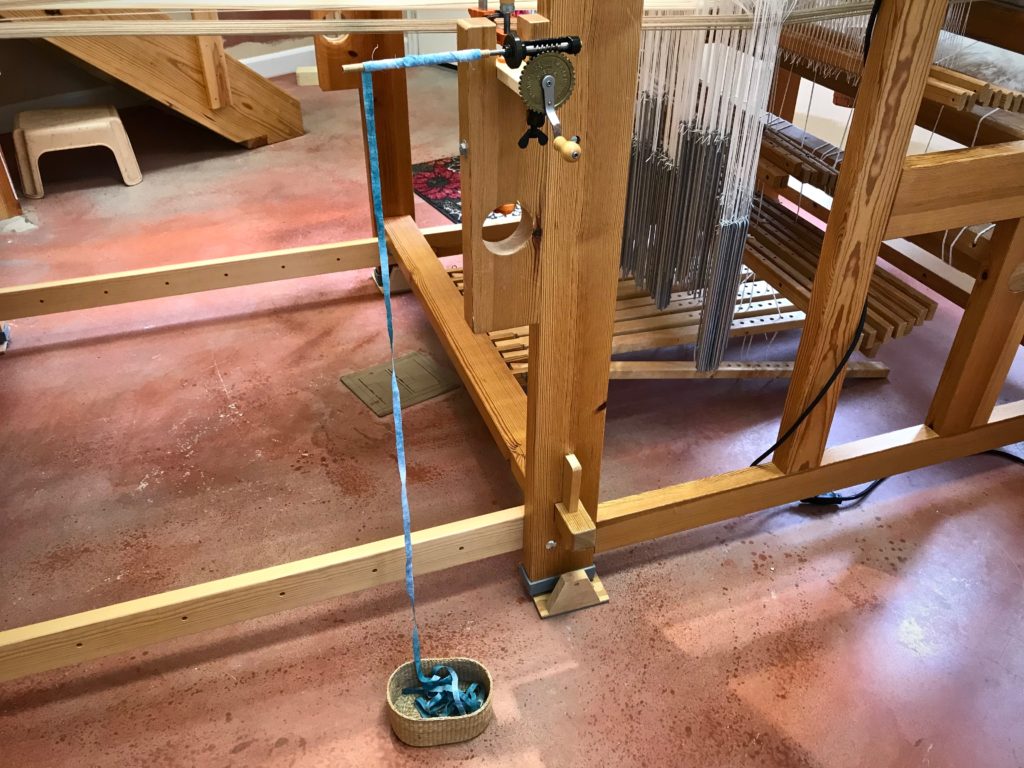
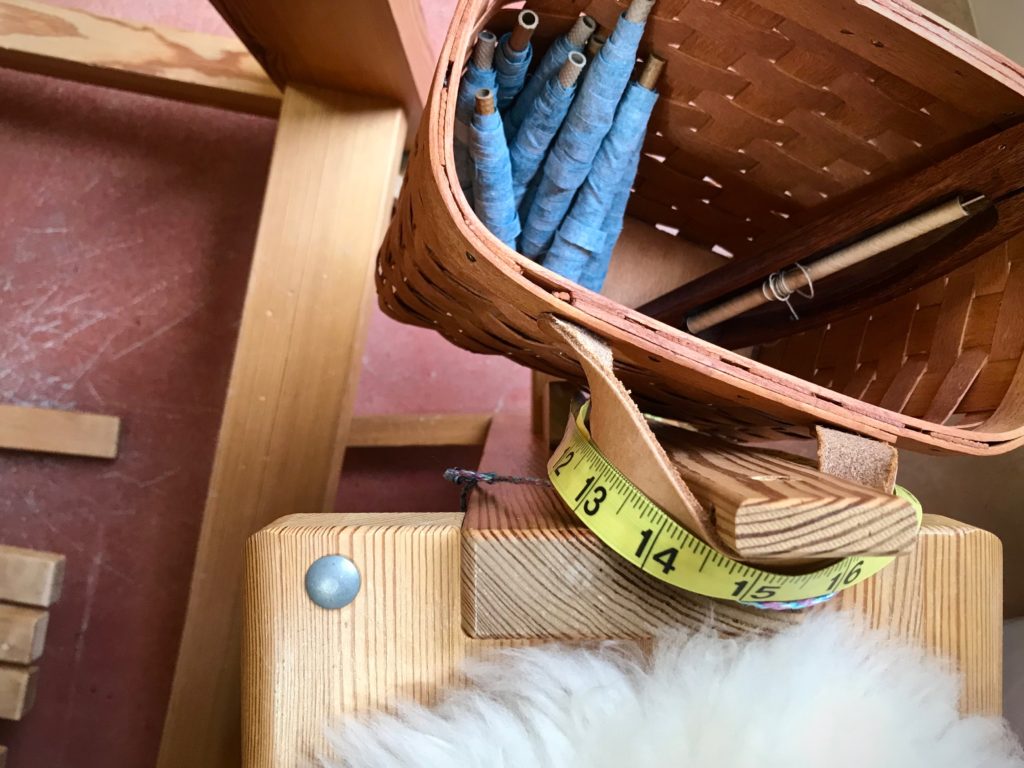
My measuring ribbon shows me where to make the color changes. I alternate two weft colors (C and D) through the transition area to blend the hues. All the while, I stop after every half-unit of four picks to manage the draw cords. A graphed chart tells me exactly which of the 164 draw cords to pull or release. In this way the graphic designs are woven into the rug, row by row. I weave in quiet, allowing me to put full attention on each move.
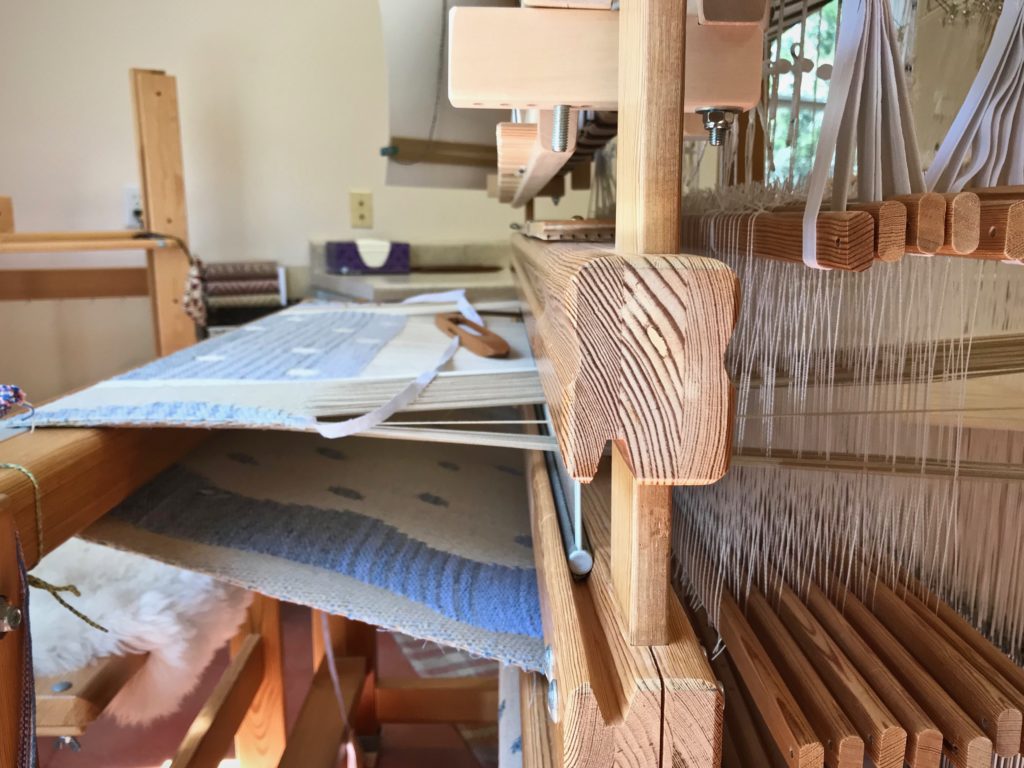
View of the underside of the rug as it goes from the breast beam to the knee beam.Draw cords are arranged by tens, alternating black cords and white cords. I pull the cords as they correspond to the prepared chart hanging at the left side of the loom.
We need hope in these unsettling times. Jesus invites us to admit our fears and failures, and put our trust in him, and follow him. And this is the message Jesus gives his followers: I am always with you. The Lord gives strength and courage. As our Grand Weaver, he has his full attention on us. So be strong and take courage.
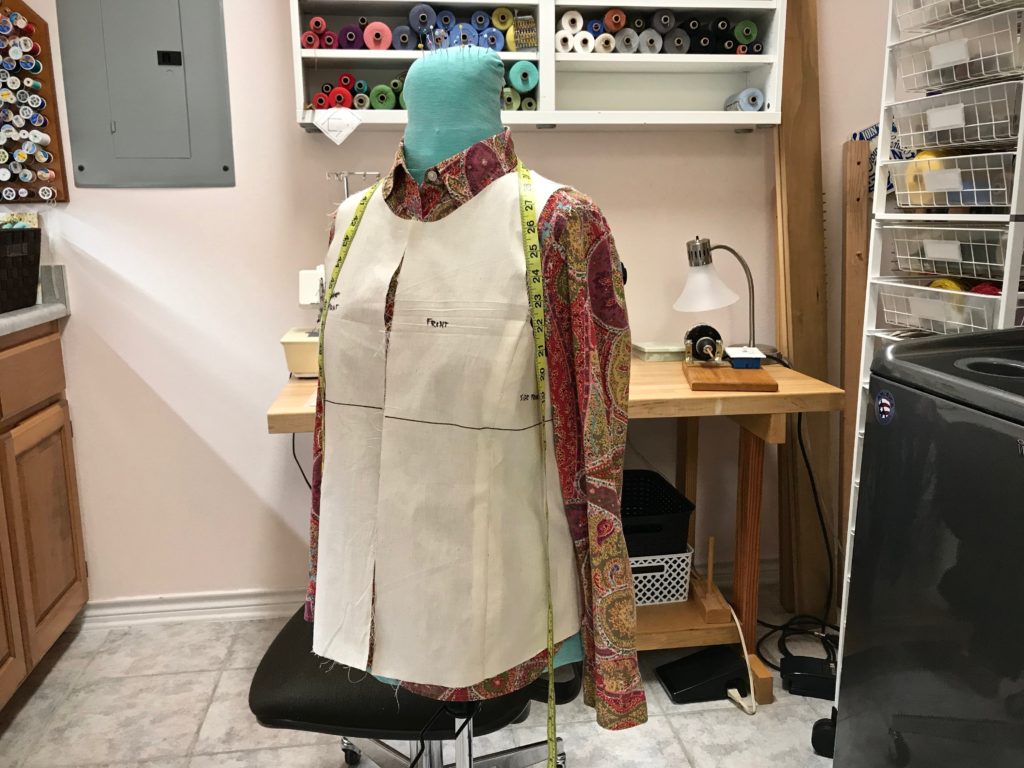
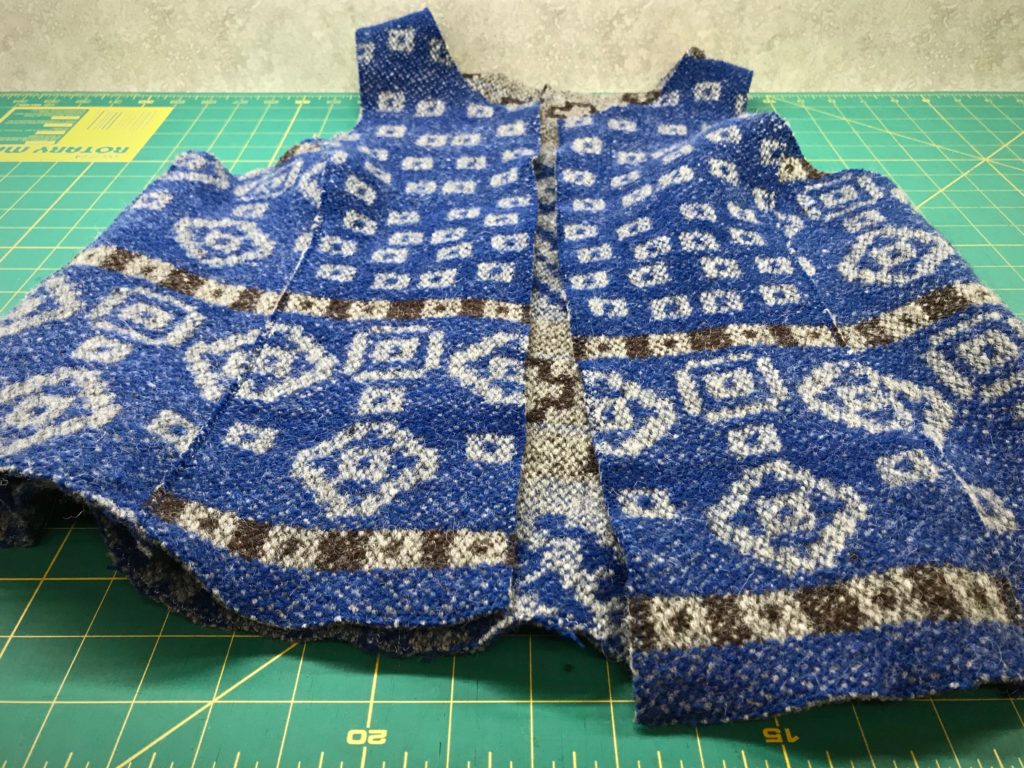
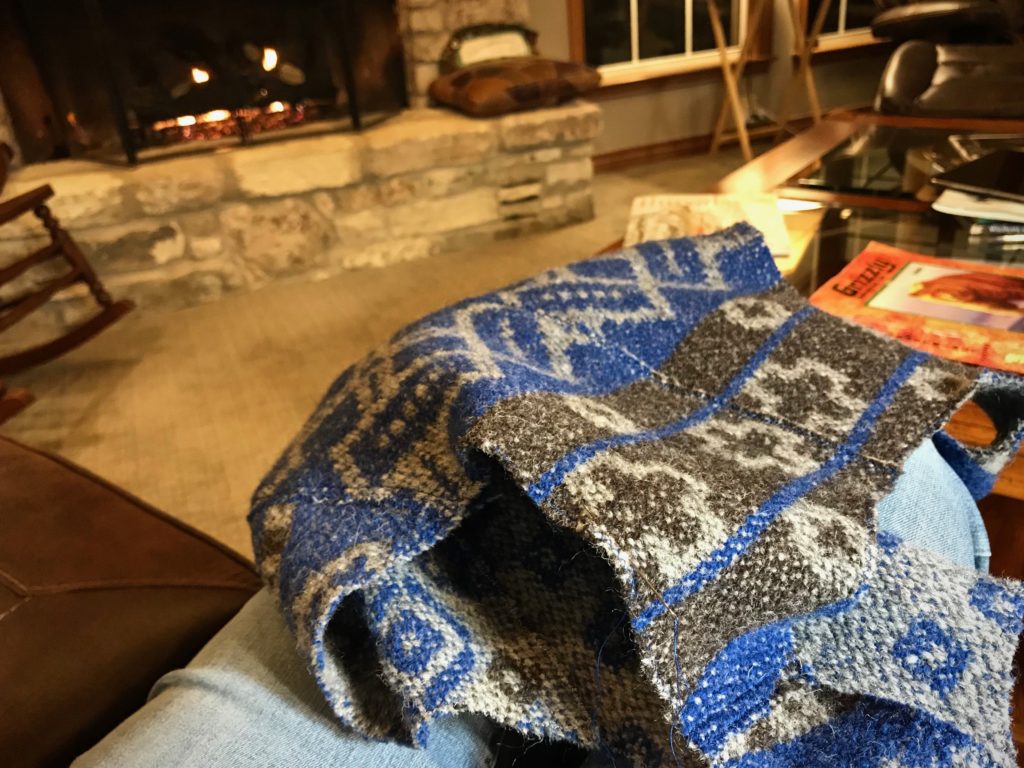
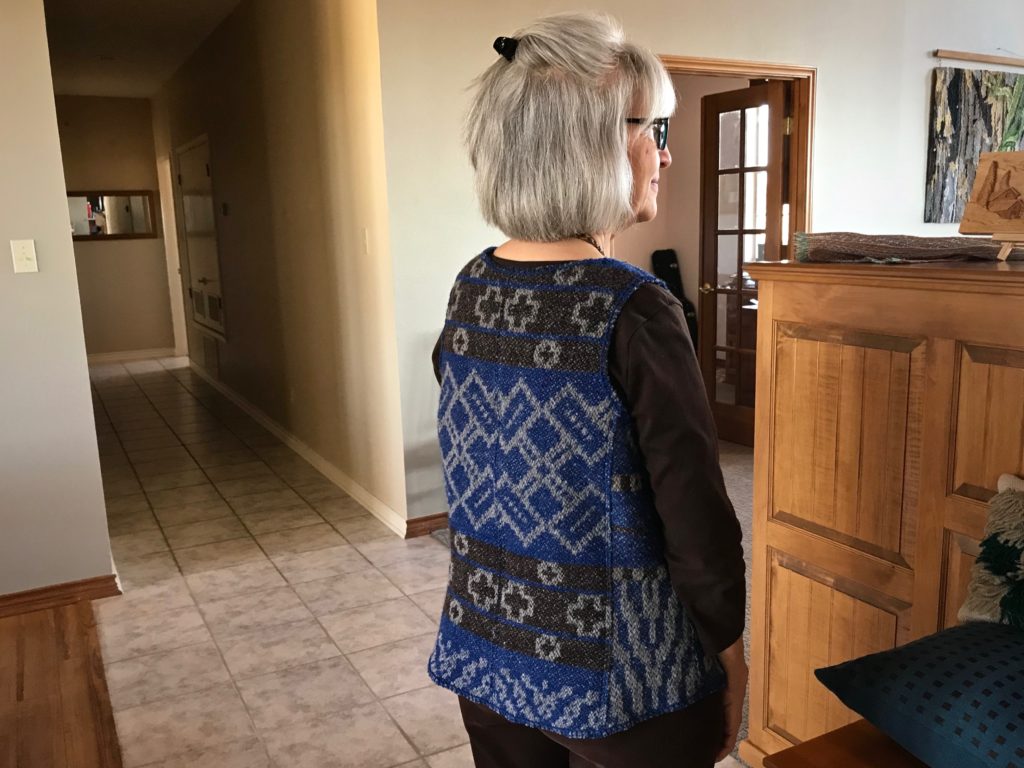
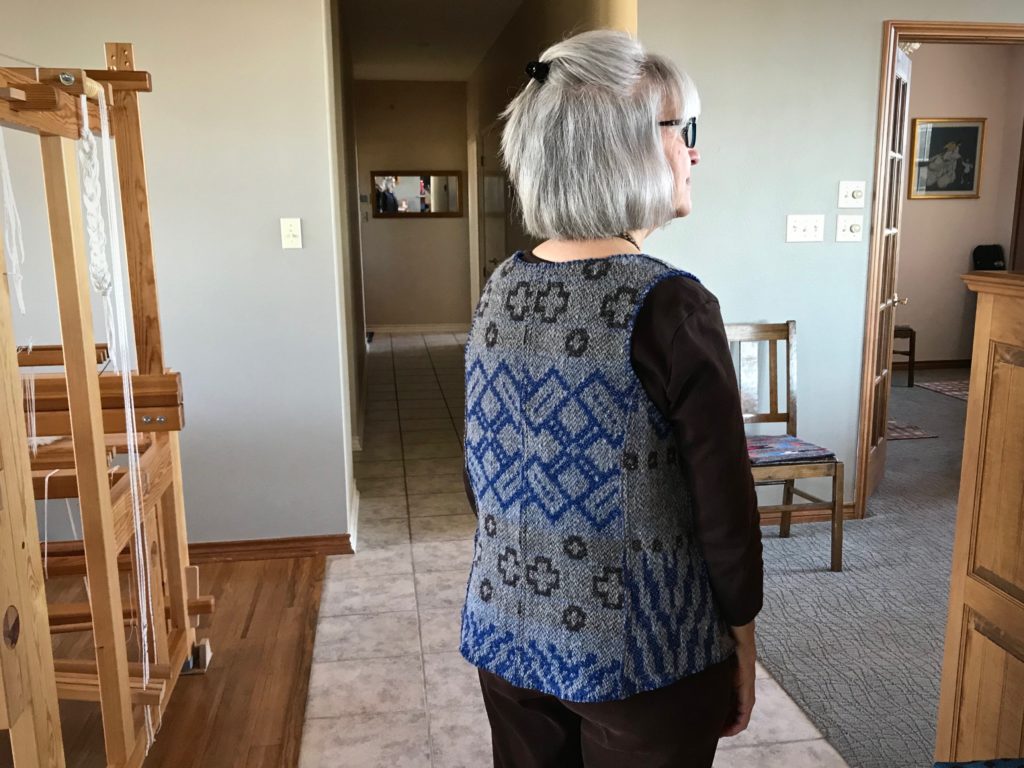
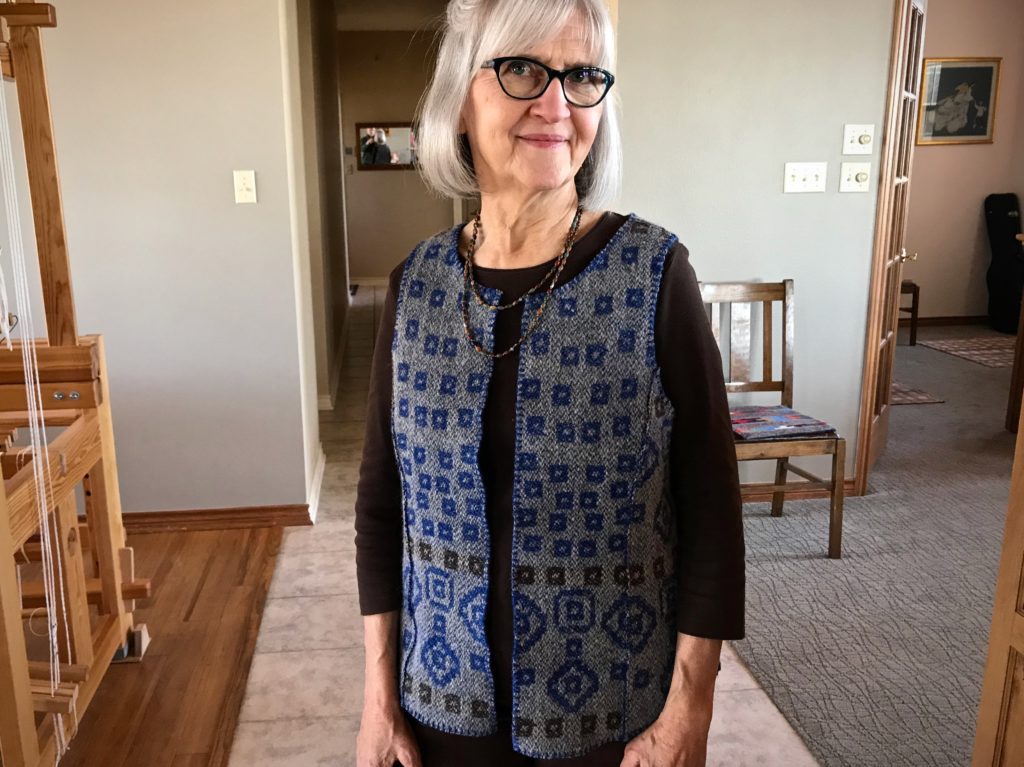
I warped the drawloom with gray 6/2 Tuna wool several months ago with the goal to make fabric for a reversible vest. The beautiful drawloom fabric turned into dreamy garment-worthy fabric after washing! (See Process Review: Drawloom Jewels)
And then I hit two huge hurdles.
Hurdle 1. Fit.
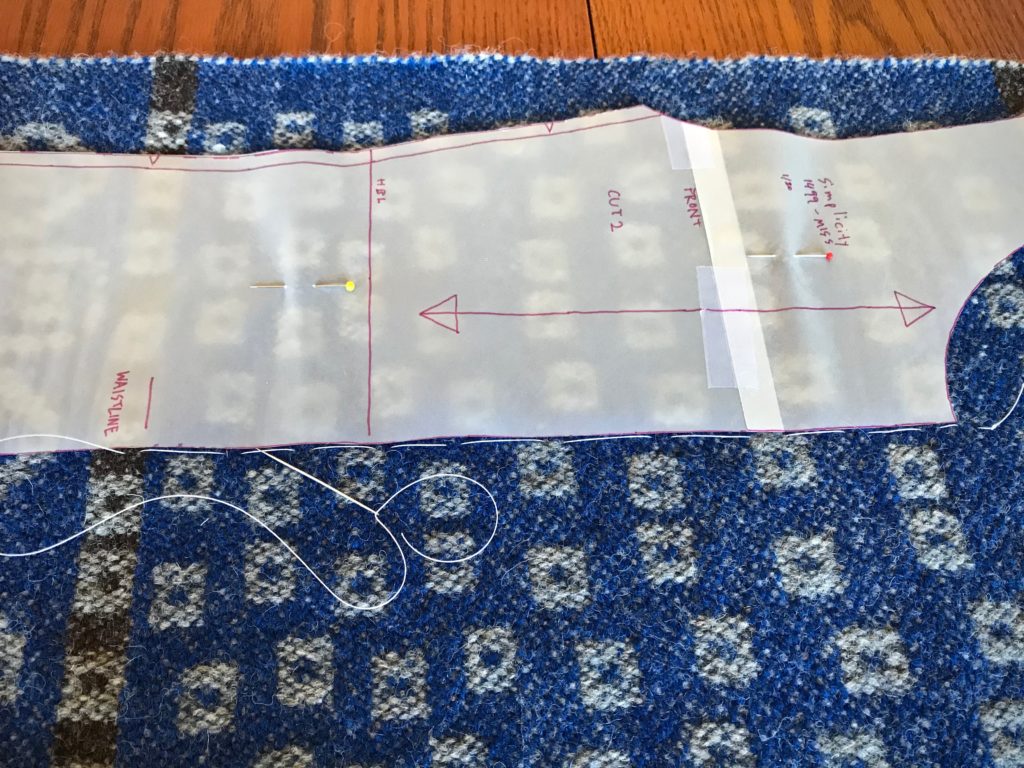
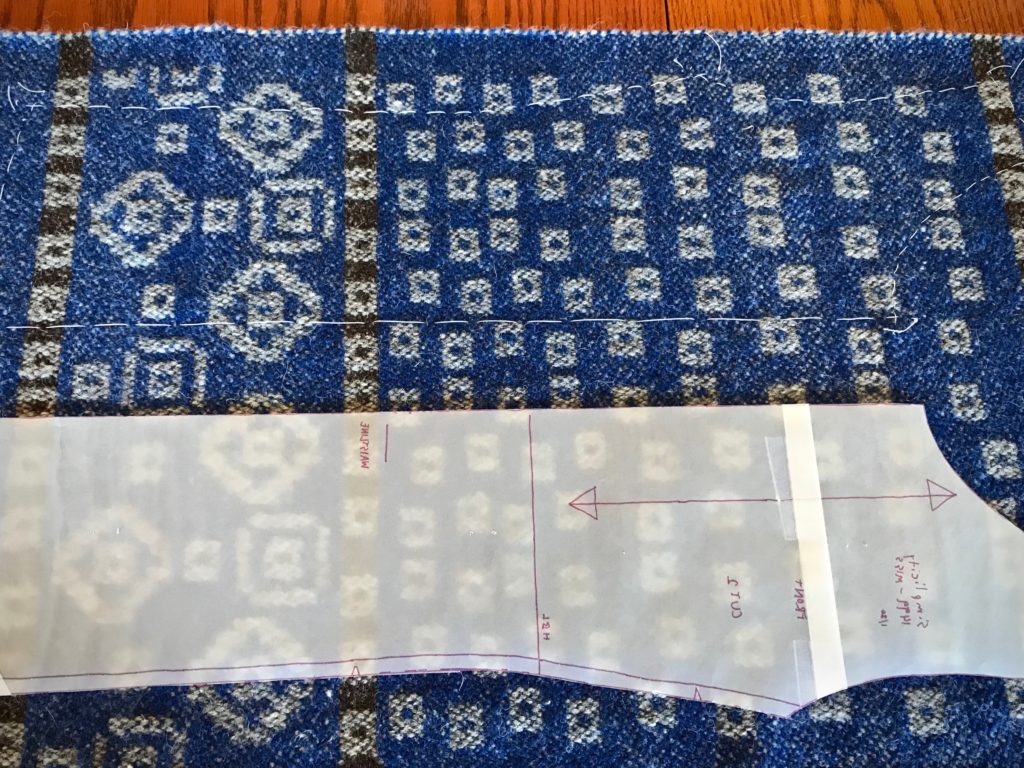
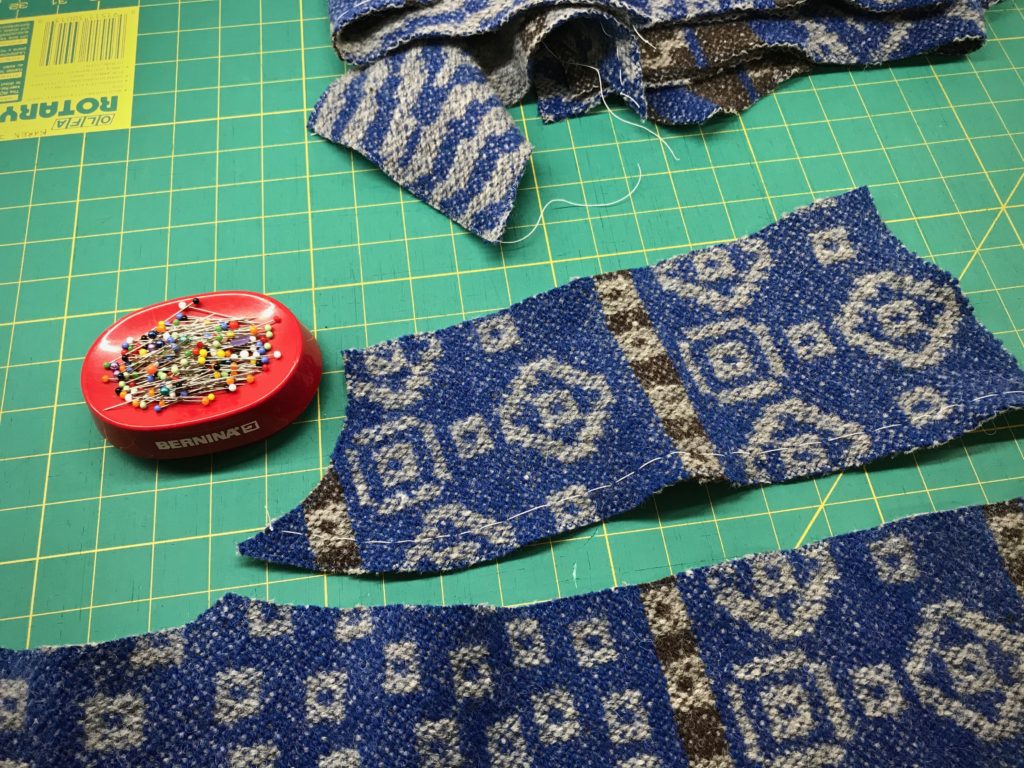
In order to cut into handwoven drawloom fabric, I need assurance that the end result will fit me. My sewing assistant helped me refine a commercial pattern.
Meet my sewing assistant, Miss Fit.
After umpteen muslins and two or three mock-ups, I finally got the fit I was after. Confidence to cut!
Hurdle 2. Garment Construction Uncertainties.
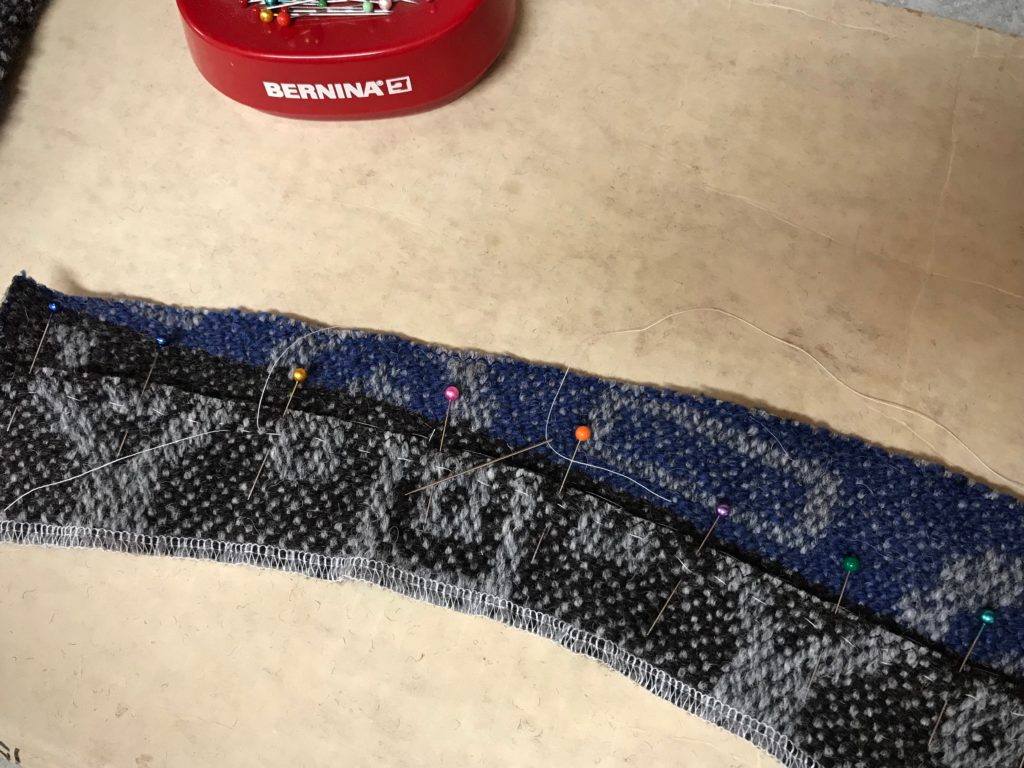
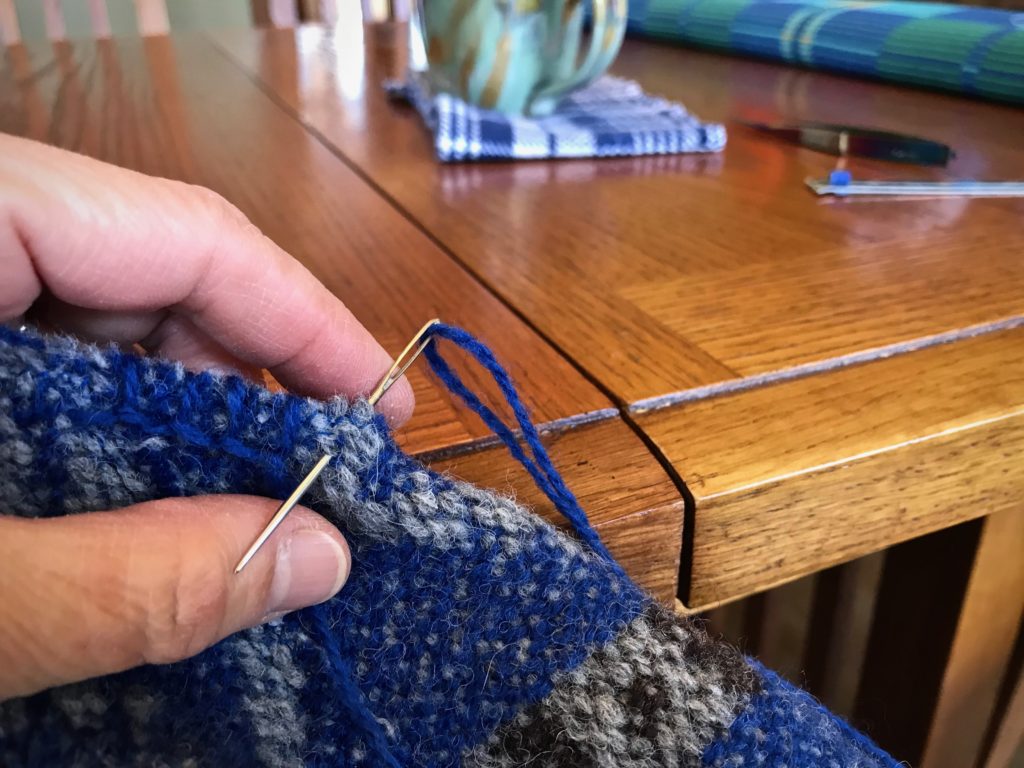
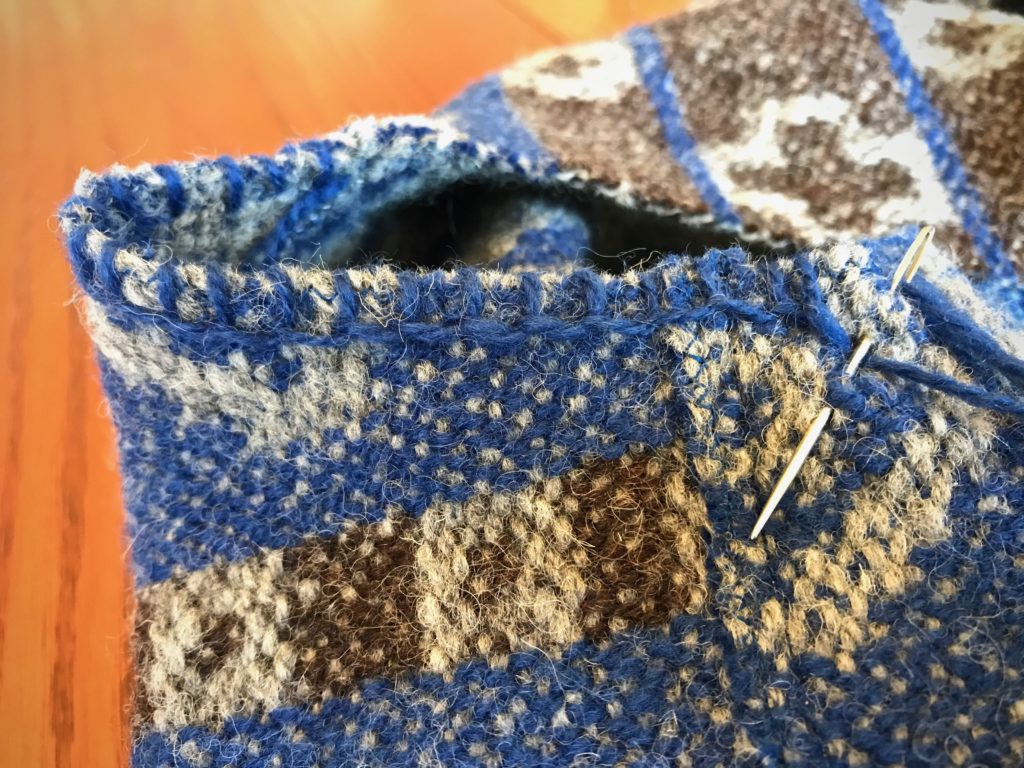
Do some detail studies, my dear friend Elisabeth said to me. Her advice got me over the insecurity hurdle. A detail study is making a small sample to test a hypothesis or answer a question. I made a list of everything I wanted to know about constructing a vest from this type of handwoven wool fabric. And then, using some of the extra fabric from the sampling at the beginning of the warp, I did a detail study for each point on the list. Twelve detail studies in all.
(If you are interested in seeing my complete list of 12 detail studies for this project, click HERE to send me an email and ask for my “Detail studies”.)
Here are a few examples of my findings:
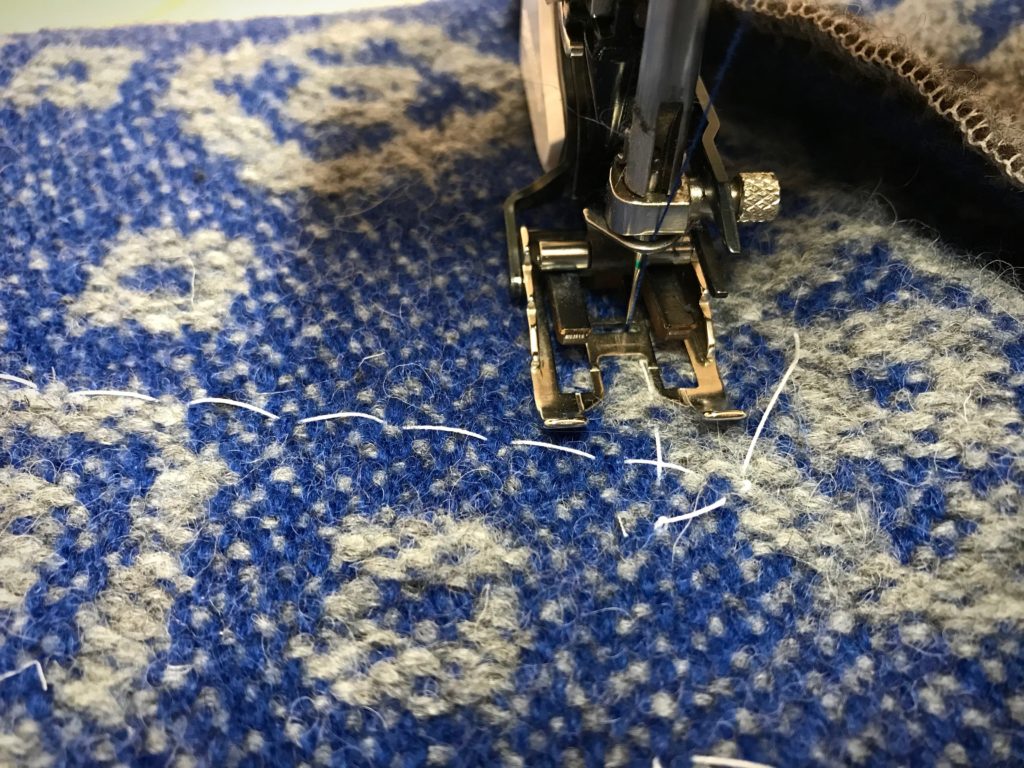
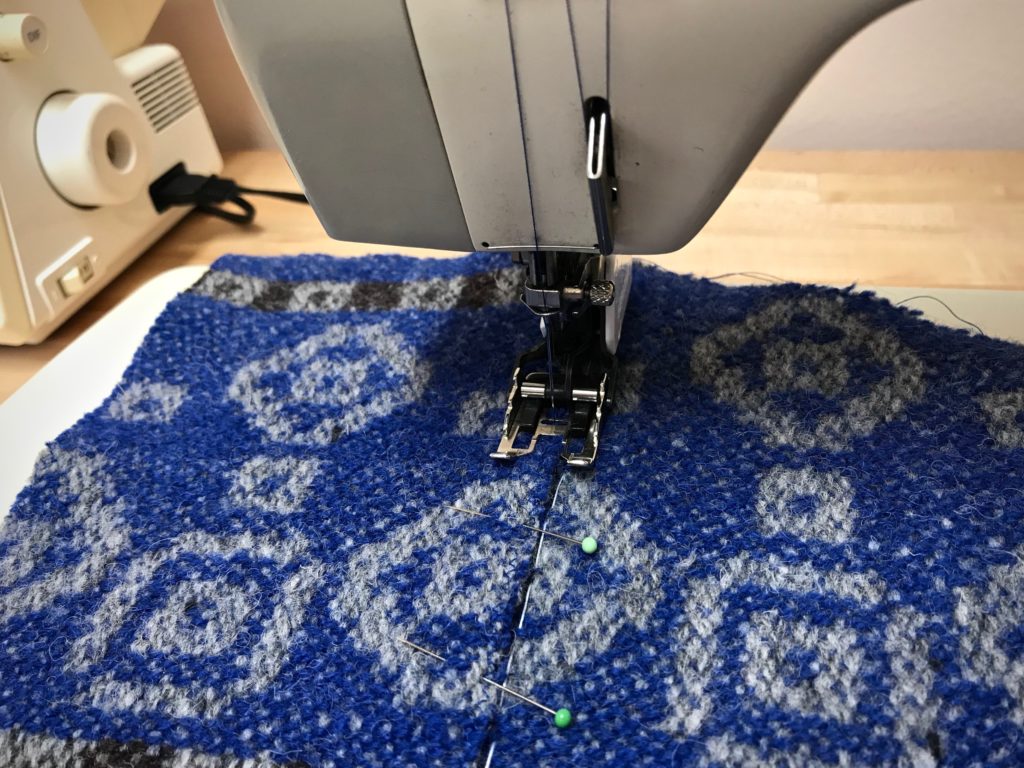
Zigzag before or after cutting? // Zigzag before cutting, stitch width 3, stitch length 2 1/2
Lapped seams? 3/8”, 1/2”, 5/8”? // Yes, lapped seams, overlap 1/2”, stitch basted line to guide placement
Neck and armhole curves – staystitch with hand running stitches or machine stitching? 1 row or 2? // Hand running stitches, 2 rows
Detail study testing lapped seams.
From the results of the detail studies I was able to compile a step-by-step garment construction plan. Confidence to sew!
Follow my process pictures of the garment construction to see the results:
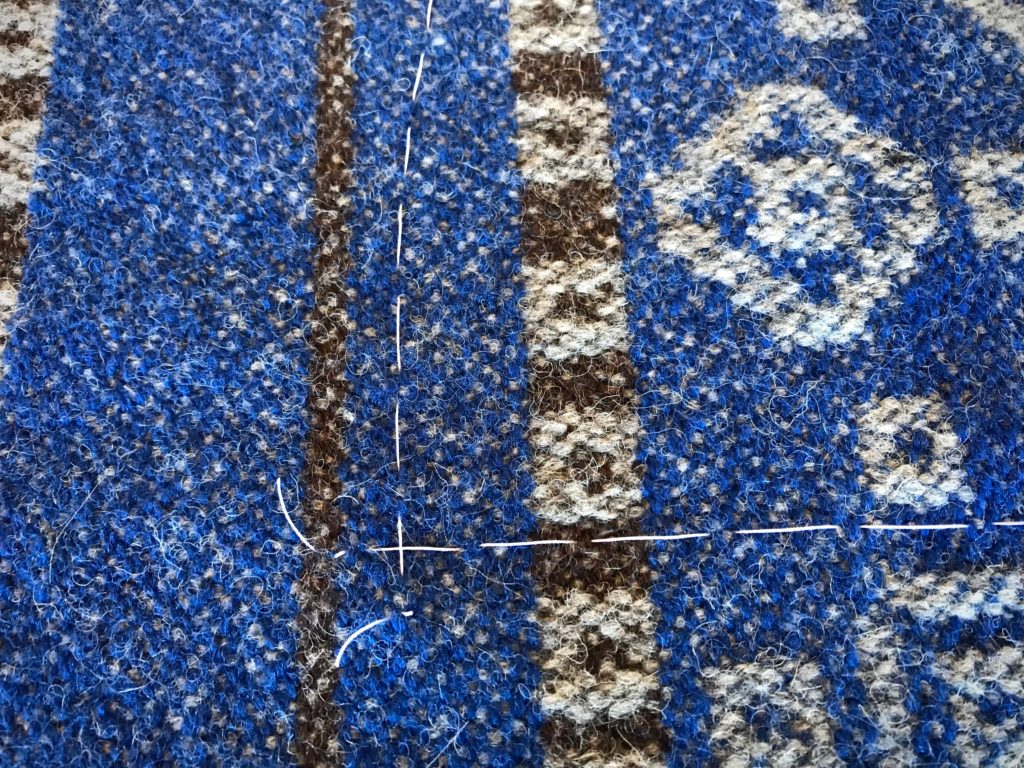
Cutting lines marked with basting stitches.Tracing paper is used for the pattern, which allows me to clearly see the placement of the pattern on the fabric.Making an X with the basting thread at the corners. This helps clarify exactly where to stitch and cut. (One of Elisabeth’s helpful tips.)Buttonhole twist thread is used for the basted lines. It makes an easy guide for the sewing machine needle to follow. The zigzag stitches are just inside the line.Basting stitch on the front side piece is a guide for positioning the lapped seam.Ready for hand work.Two rows of running stitches around the armholes and neck opening.Blanket stitch is used to embellish and strengthen the armholes, neck, front edges, and lower edge of the vest.Reverse side.
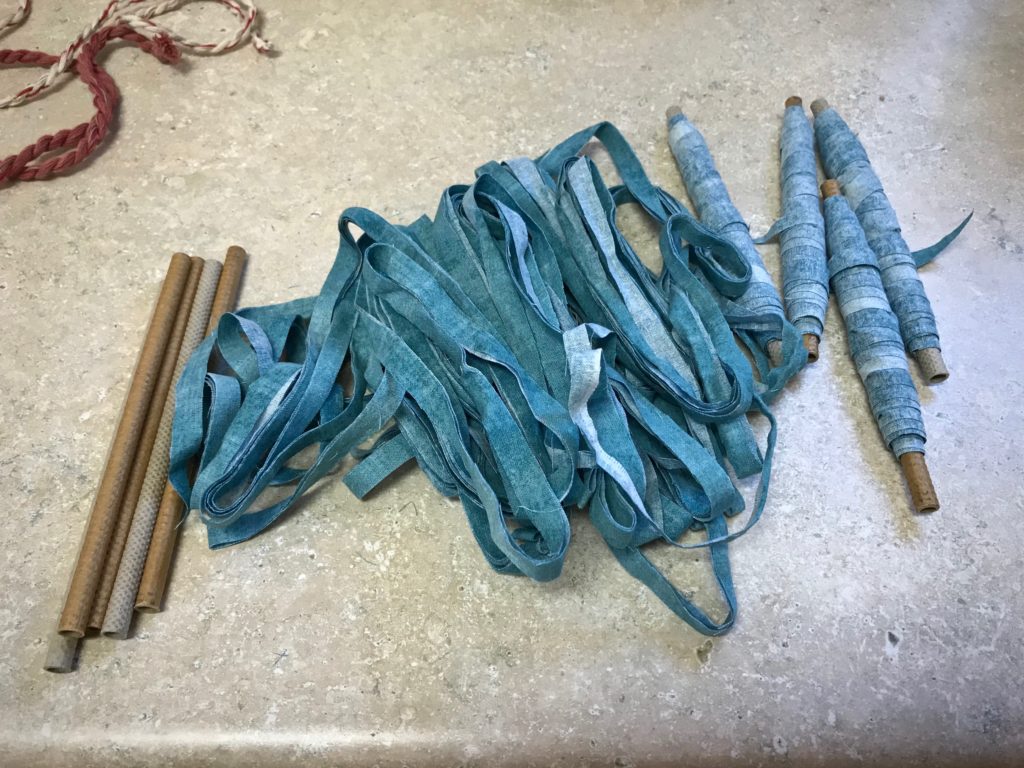
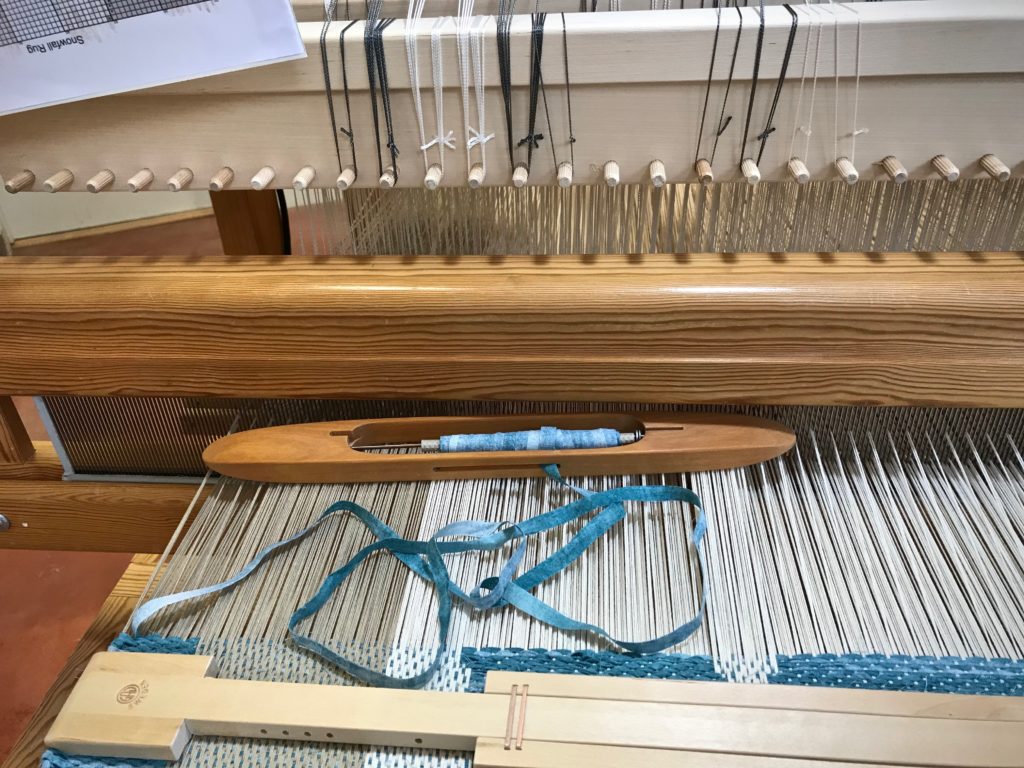
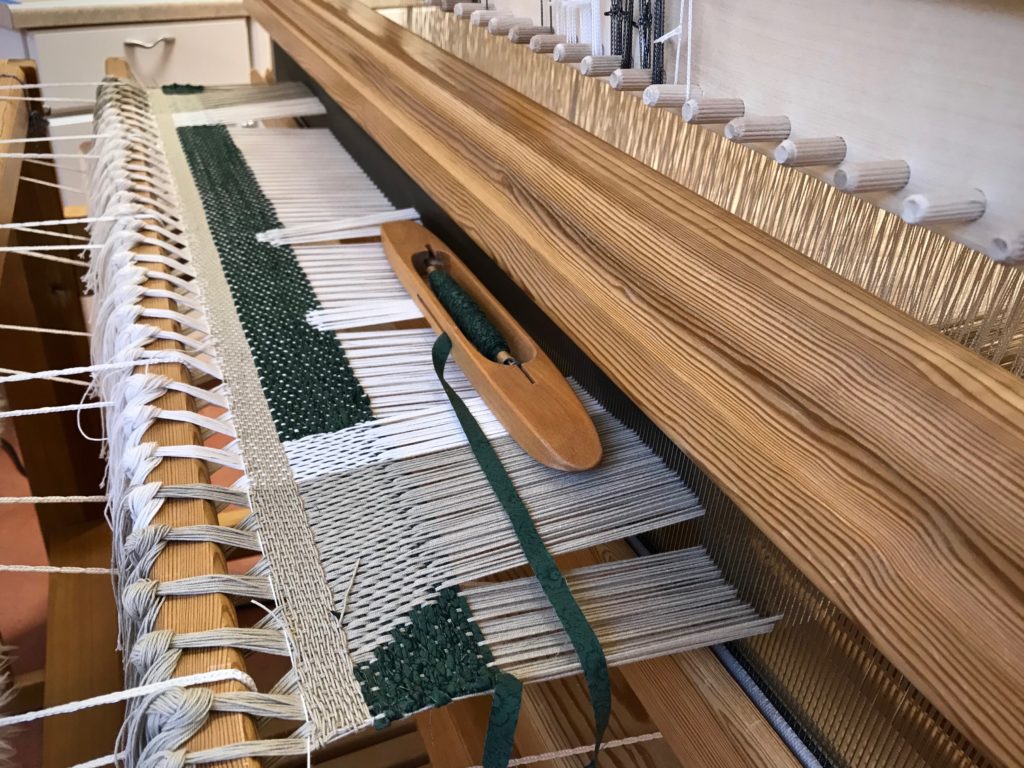
Wind very narrow fabric strips on quills and put them in a boat shuttle. It’s efficient. It’s faster to wind a quill than to load fabric on a ski shuttle. Plus, I like the advantage of sending a boat shuttle across rather than a ski shuttle. This rag rug on the drawloom has fabric strips that are only one centimeter (~3/8”) wide, instead of the usual two-centimeter-wide (~3/4”) strips for an ordinary rag rug. Grab your boat shuttle and pay attention to a few simple tips. Your very narrow fabric strips will be woven up in no time.
Tips for Using a Boat Shuttle to Weave Very Narrow Fabric Strips
Use fabric that has minimal fraying at the edges. Trim off any long threads. Loose dangling threads that are long enough to wind themselves on the quill will make you wish you had used a ski shuttle.
Wind the fabric with the right side down. Then, when the quill unrolls, the right side will be facing up.
Swedish bobbin winder is clamped to the side of the loom. A five-yard fabric strip is wound onto a quill. The right side of the fabric is against the quill.
Handle the wound quill as little as possible to prevent fraying the fabric edges. Simply wrap the tail end of the fabric strip around the filled quill. Do not wrap the end into a slip knot around the quill because the fabric will fray as you release the knot.
One long fabric strip per quill. Fabric is cut 1 cm (3/8″) wide.One fabric-filled quill covers a little more than one unit of weaving (4 picks). I keep a dozen filled quills in the basket on my loom bench so I can keep weaving as long as possible.
Unwind enough weft for the pickbefore you throw the shuttle. Pull the weft out straight from the quill. When a quill unwinds in the shed, the weft comes off at an angle. And as such, if there are any loose threads at the edges of the fabric strips, the threads will wind themselves on the quill and bind it up. And you will wish you had used a ski shuttle.
Folke Samuelson Damask Shuttle has a low profile, well-suited for the smaller sheds of the drawloom. Fabric is unrolled from the shuttle prior to the next pick.Drawloom rag rug is well underway. Single unit drawcords are pulled and held in place on the pegs above the beater. Design is Trasmatta Snöfall (Snowfall Rag Rug) by Kerstin Åsling-Sundberg, from Damast, edited by Lillemor Johansson.
Everything starts with an idea. And some of those ideas become tangible expressions of dreams come true. Who knew that a simple idea in 2012 would lead to a seven-year exploration of weaving through The Big Book of Weaving? (See Weaving through The Big Book.) Who knew that weaving on a drawloom in 2016 at Homestead Fiber Crafts would plant the idea of weaving on a drawloom of my own? (see Quiet Friday: Day at the Drawloom.) And who knew that an idea in 2013 to write about my weaving journey, calling it Warped for Good, would bring friends like you to come and enjoy the journey with me? For these things and so much more, I am truly grateful.
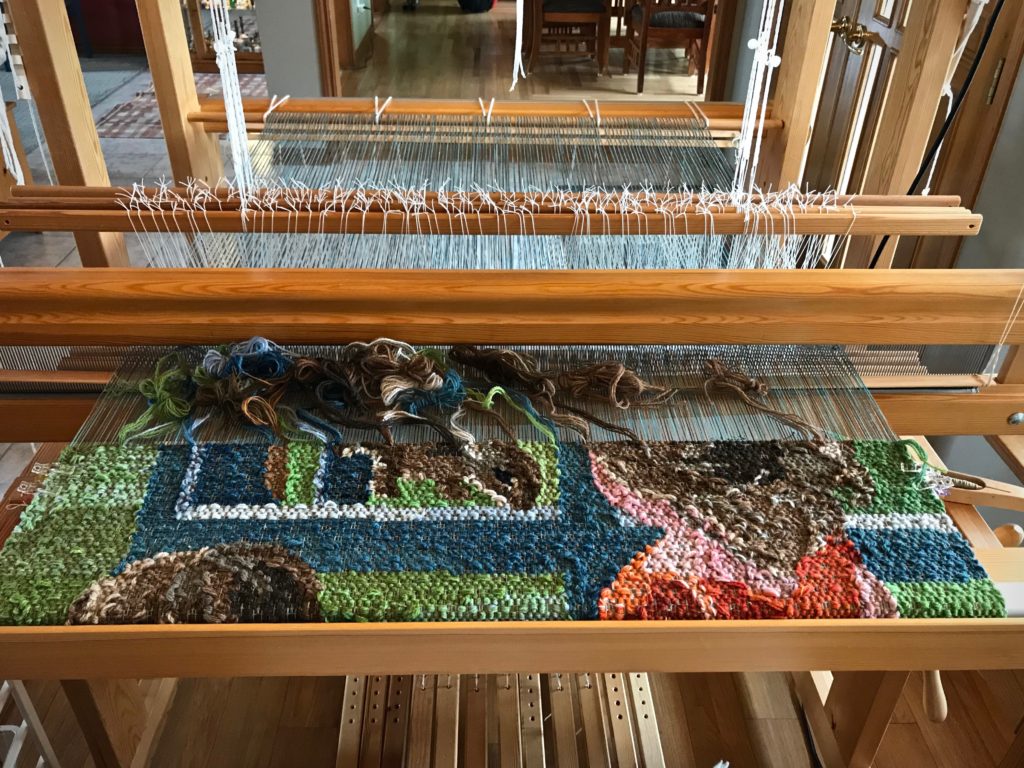
Siblings Tapestry is three centimeters away from completion.Single-unit drawloom rag rug is ten centimeters into testing everything–draw cords, sheds, shuttles. After a few more adjustments the actual rag rug weaving will commence.
Your ideas are priceless. That’s because you are priceless. You were made in God’s image, with the ability to imagine wonderful intricacies through creative thinking. In fact, you began as God’s idea. As we walk with him, we become the tangible expression of his dream come true.
Grab a cup of coffee or tea and sit here with me to reminisce over the past weaving year.