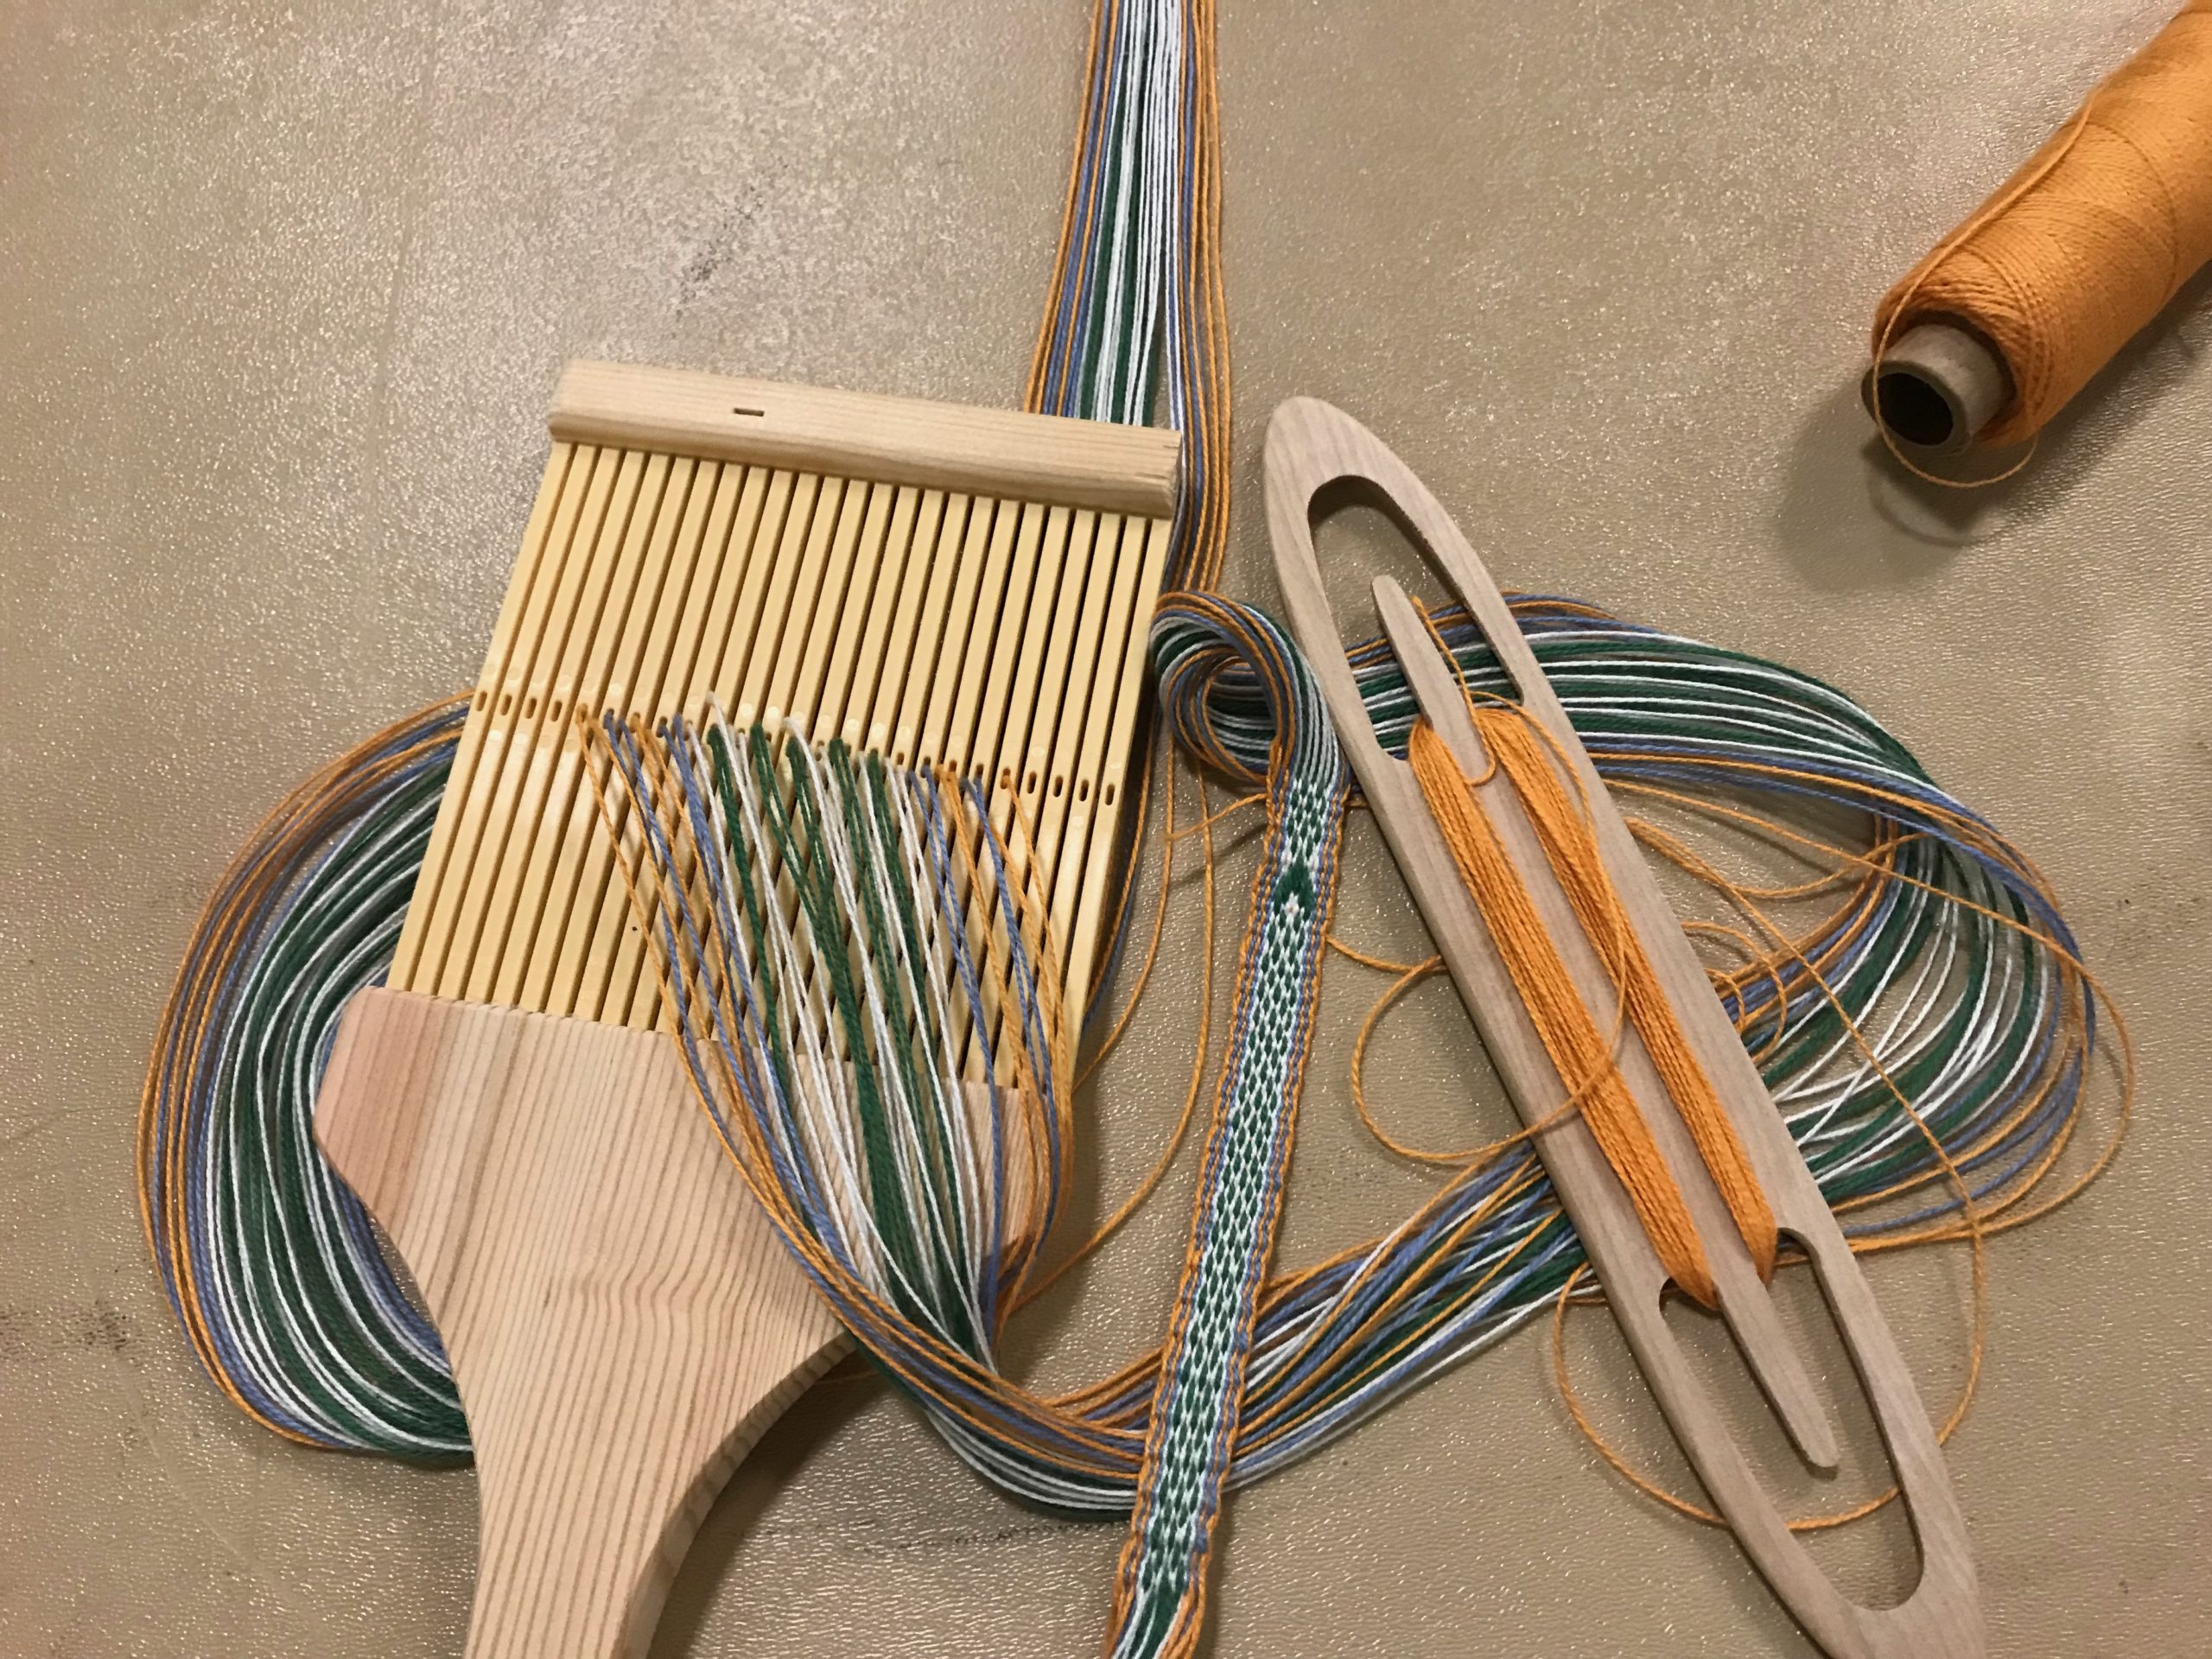
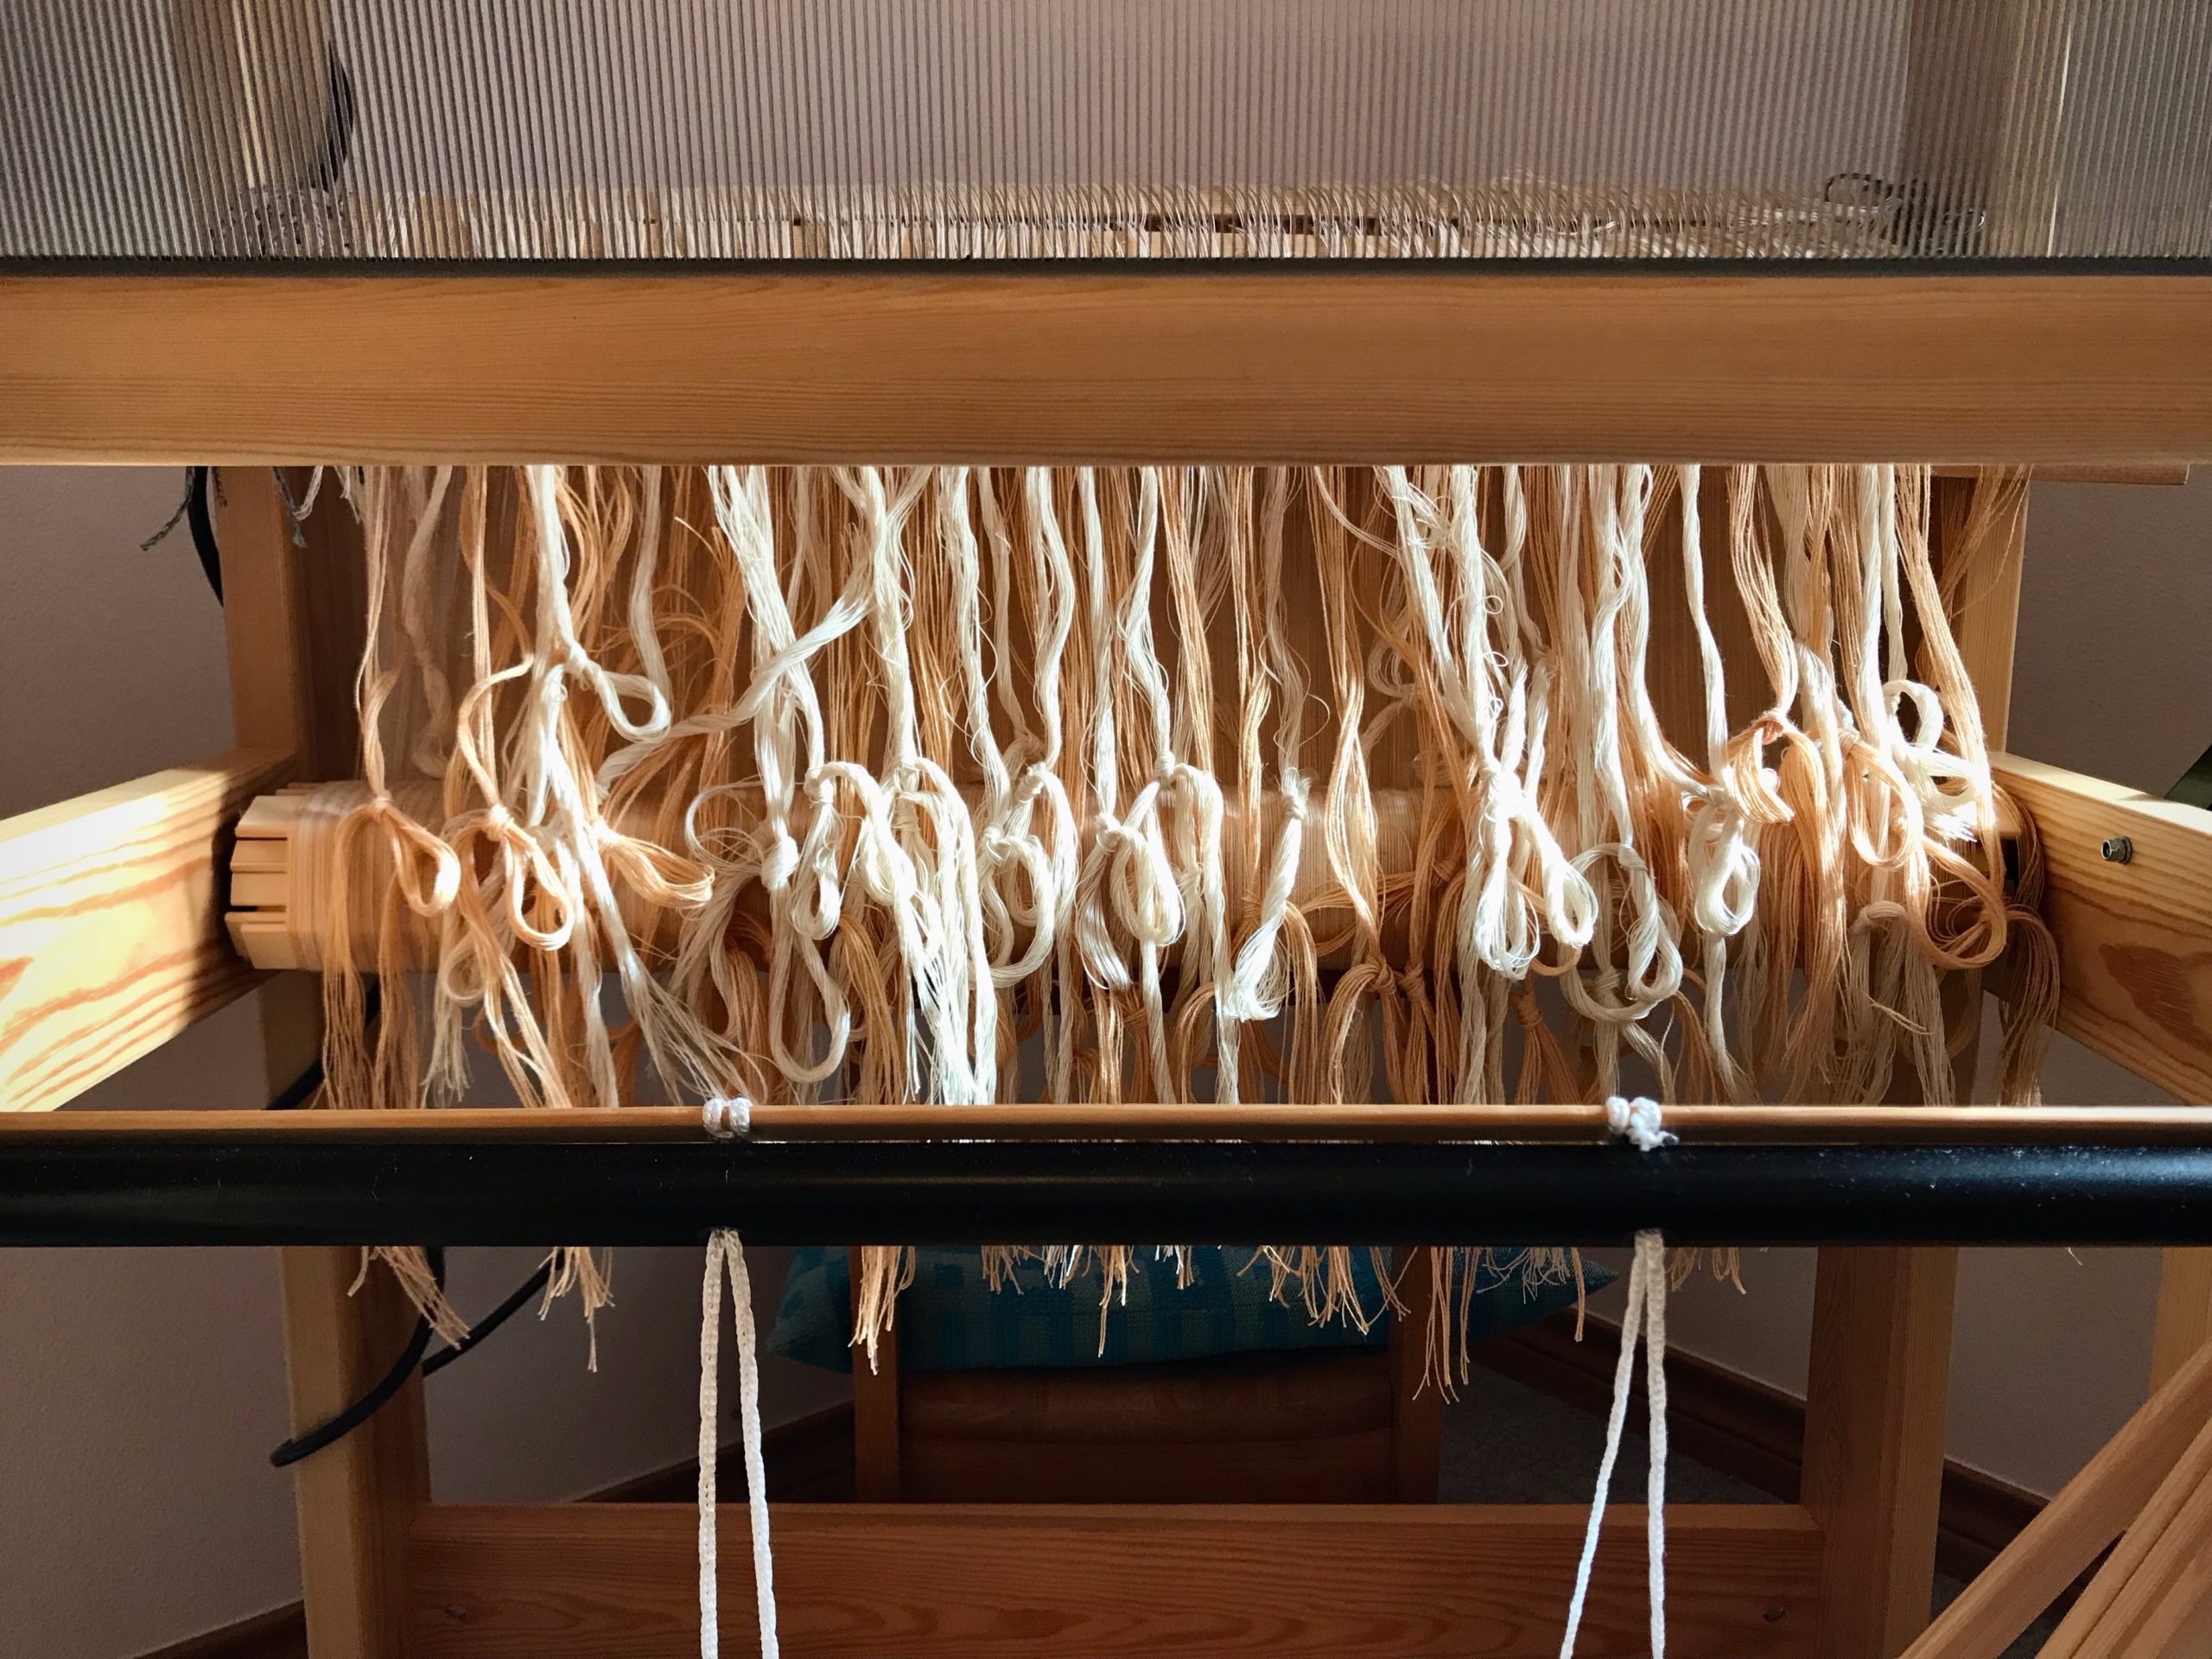
Band weaving is a simple activity that helps you notice the little things. You see how each thread falls into place. How the thread turns the selvedge corner just so. How the pattern threads stand proud in floats or hide in subtle patterns. I enjoy practicing my skills as a band weaver. And more so, now that Steve has turned his attention to making band heddles for me.
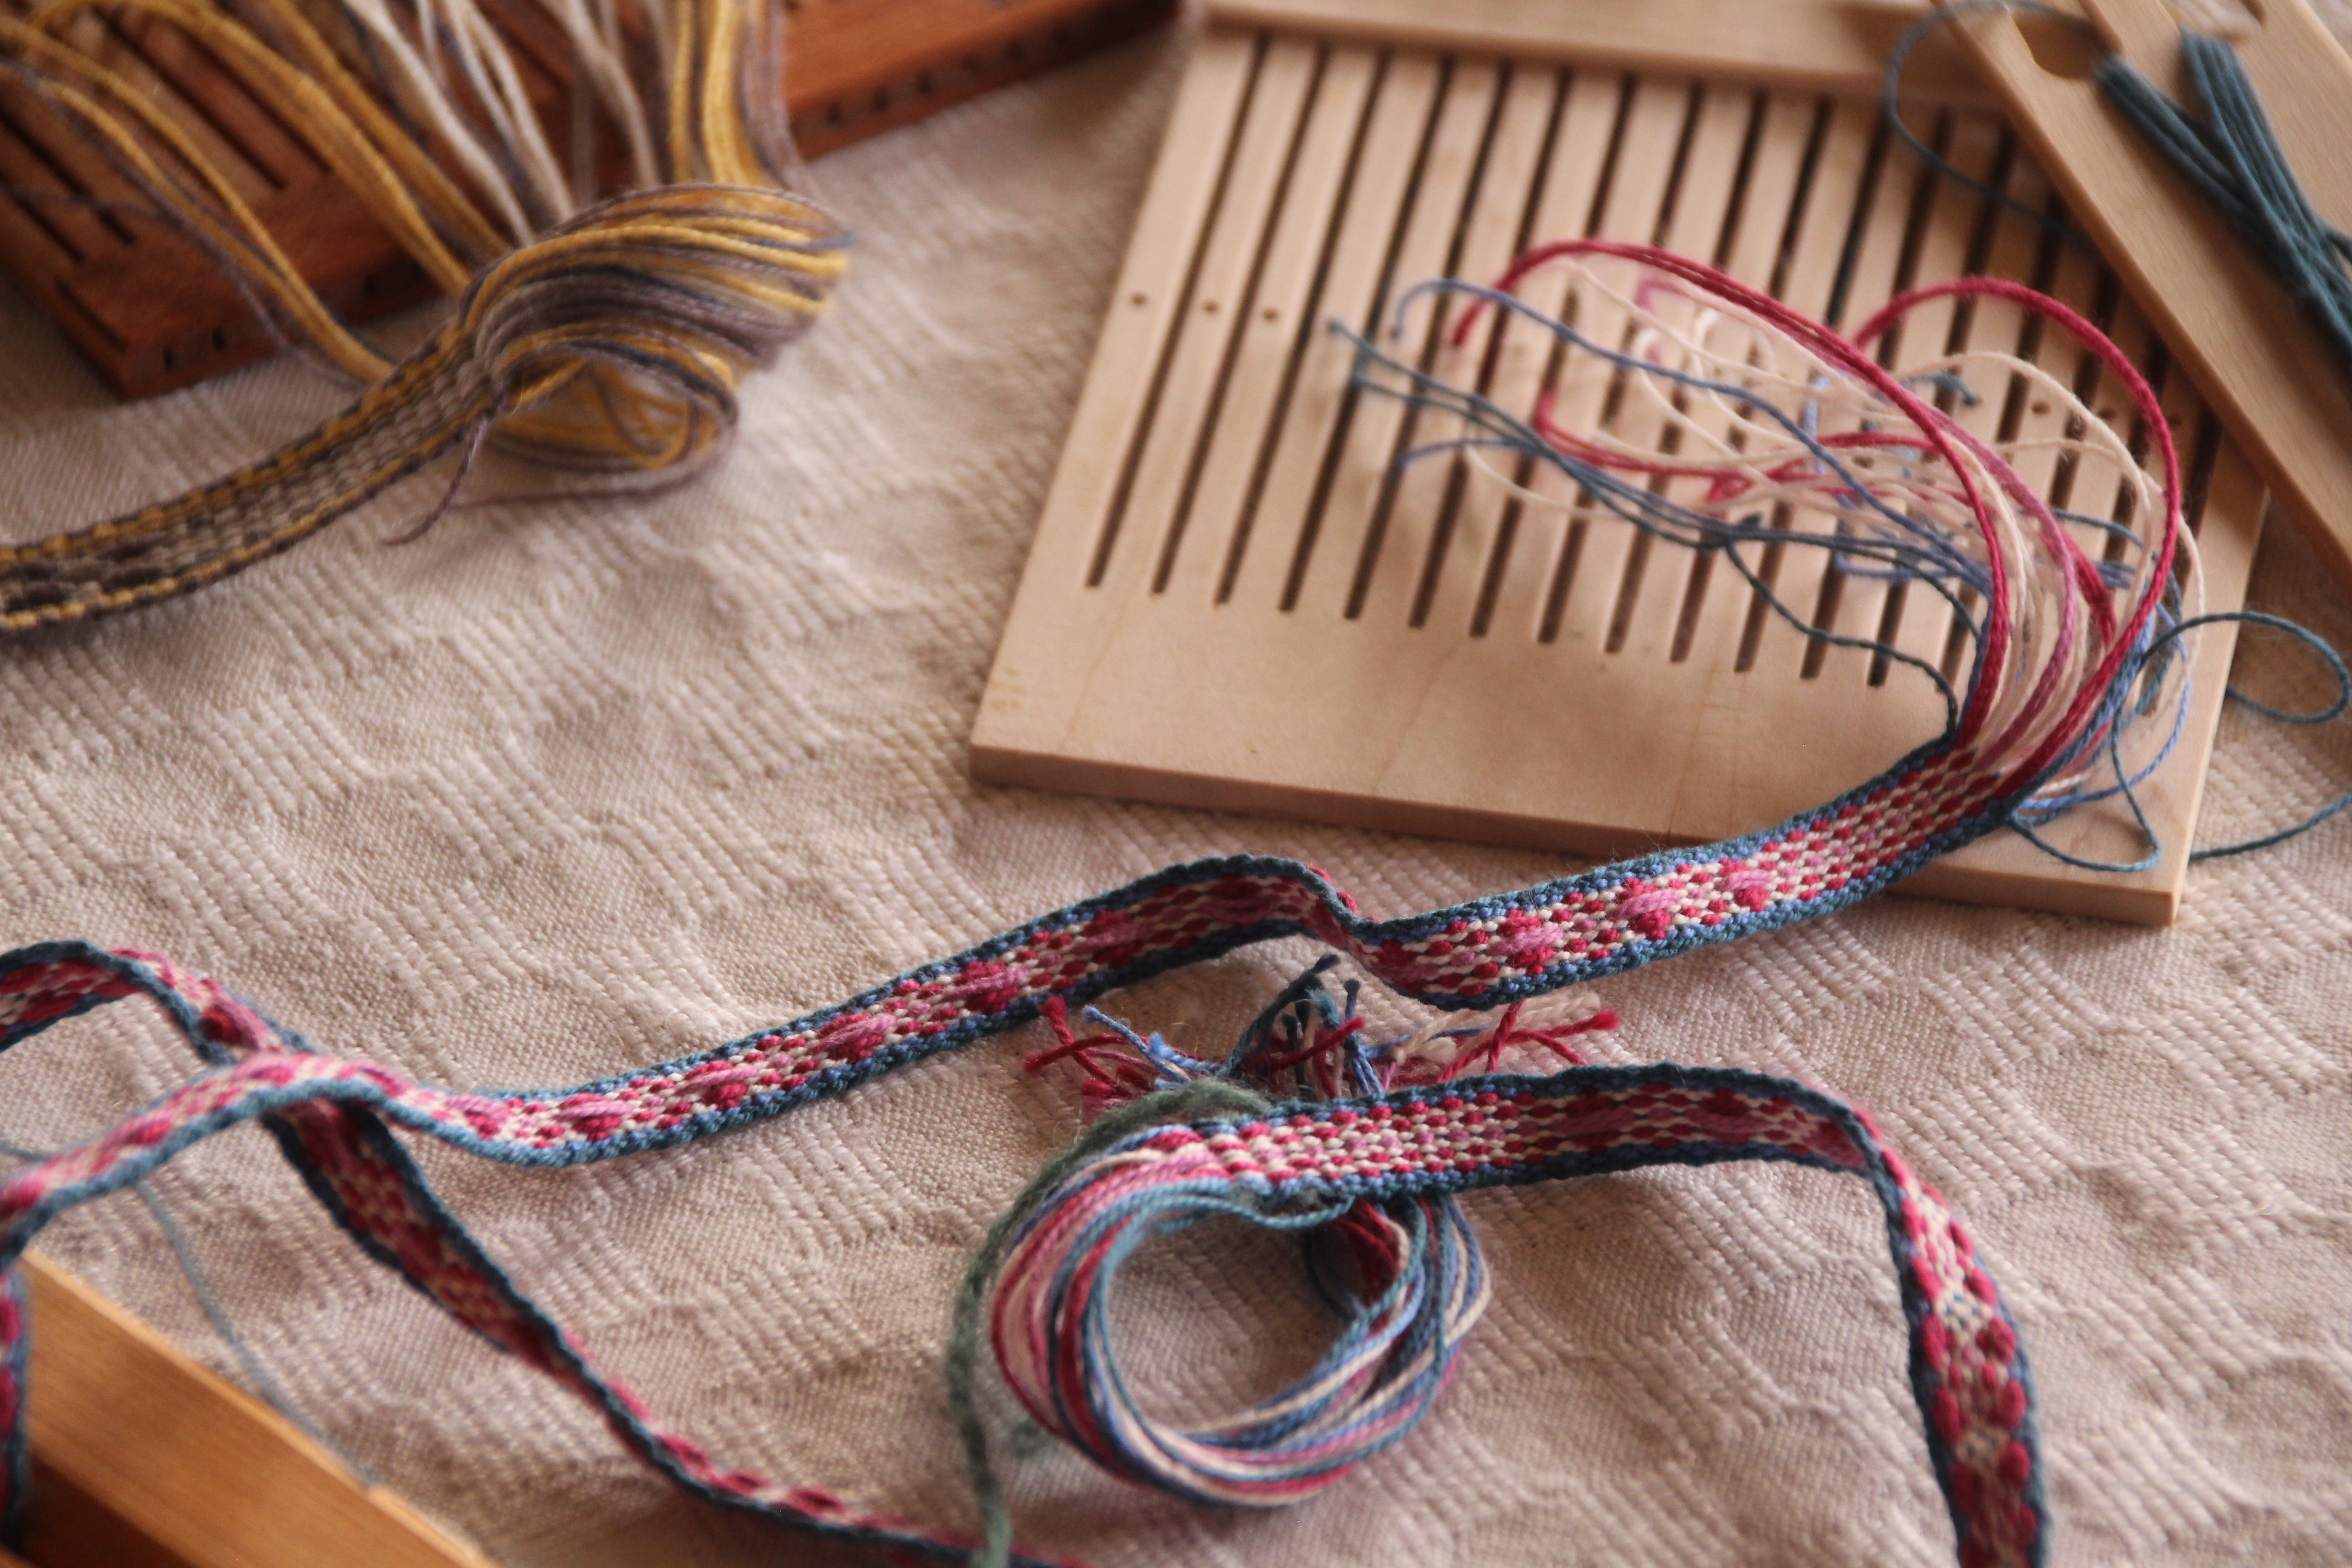
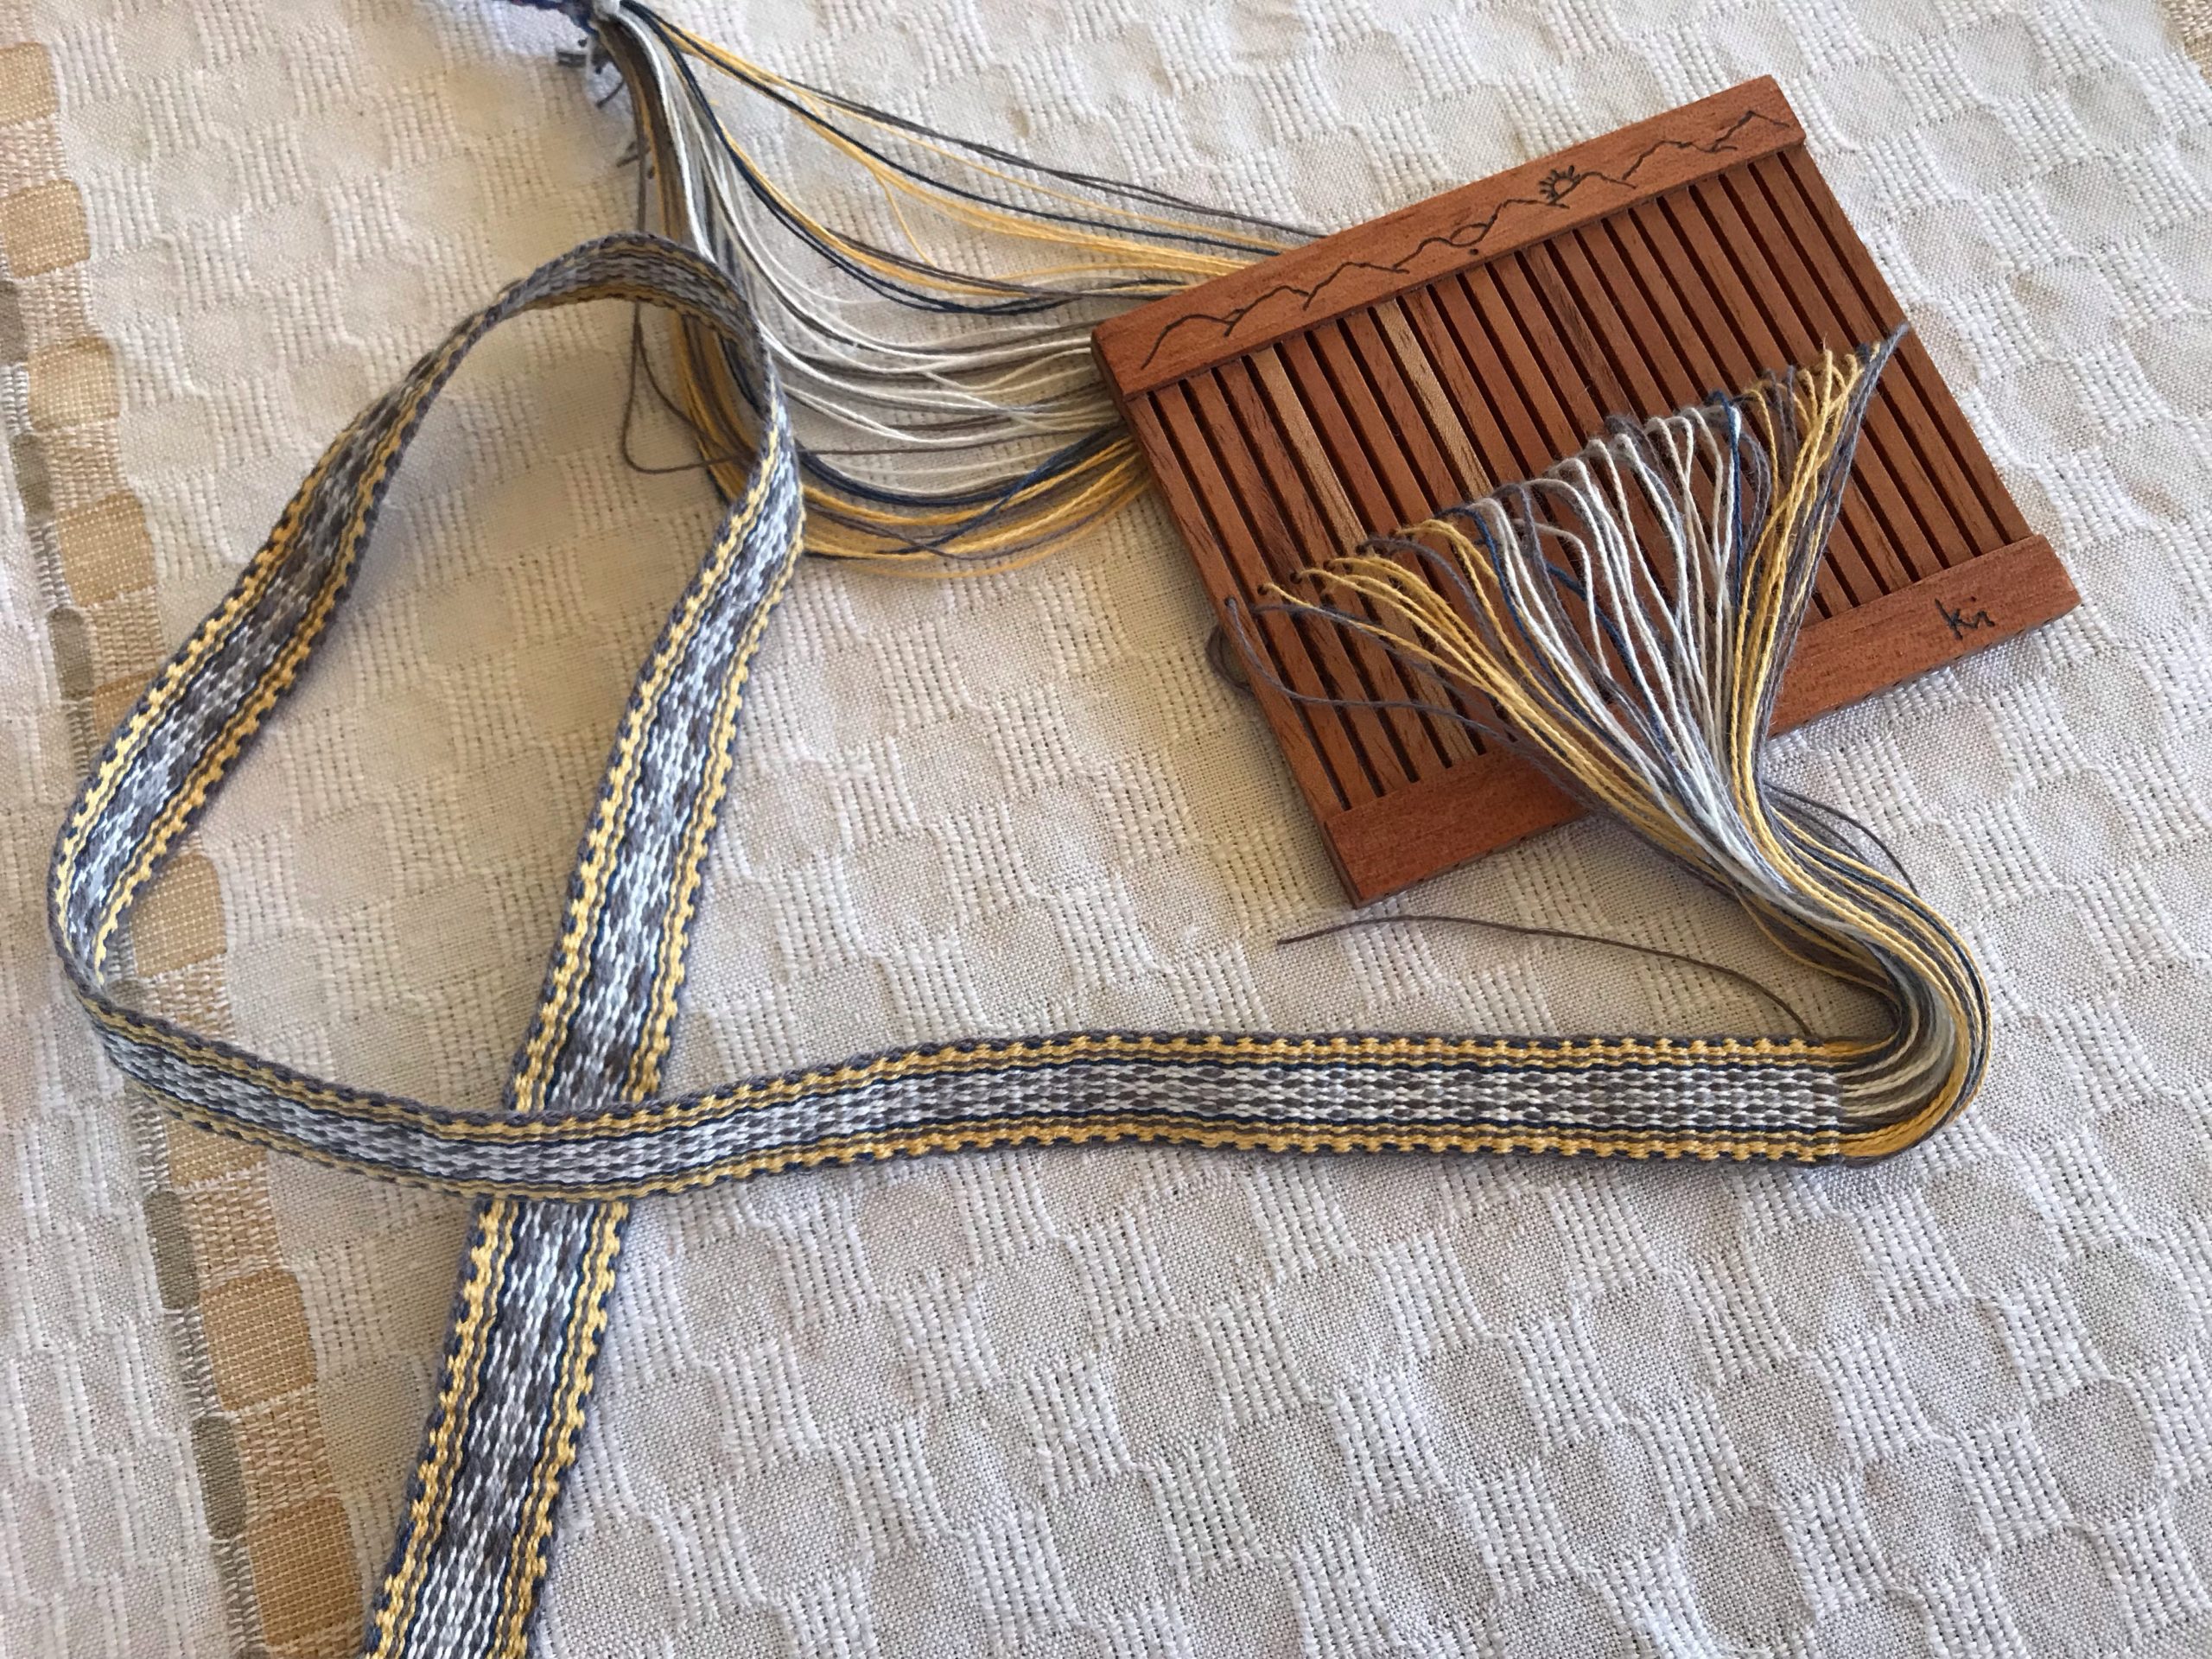
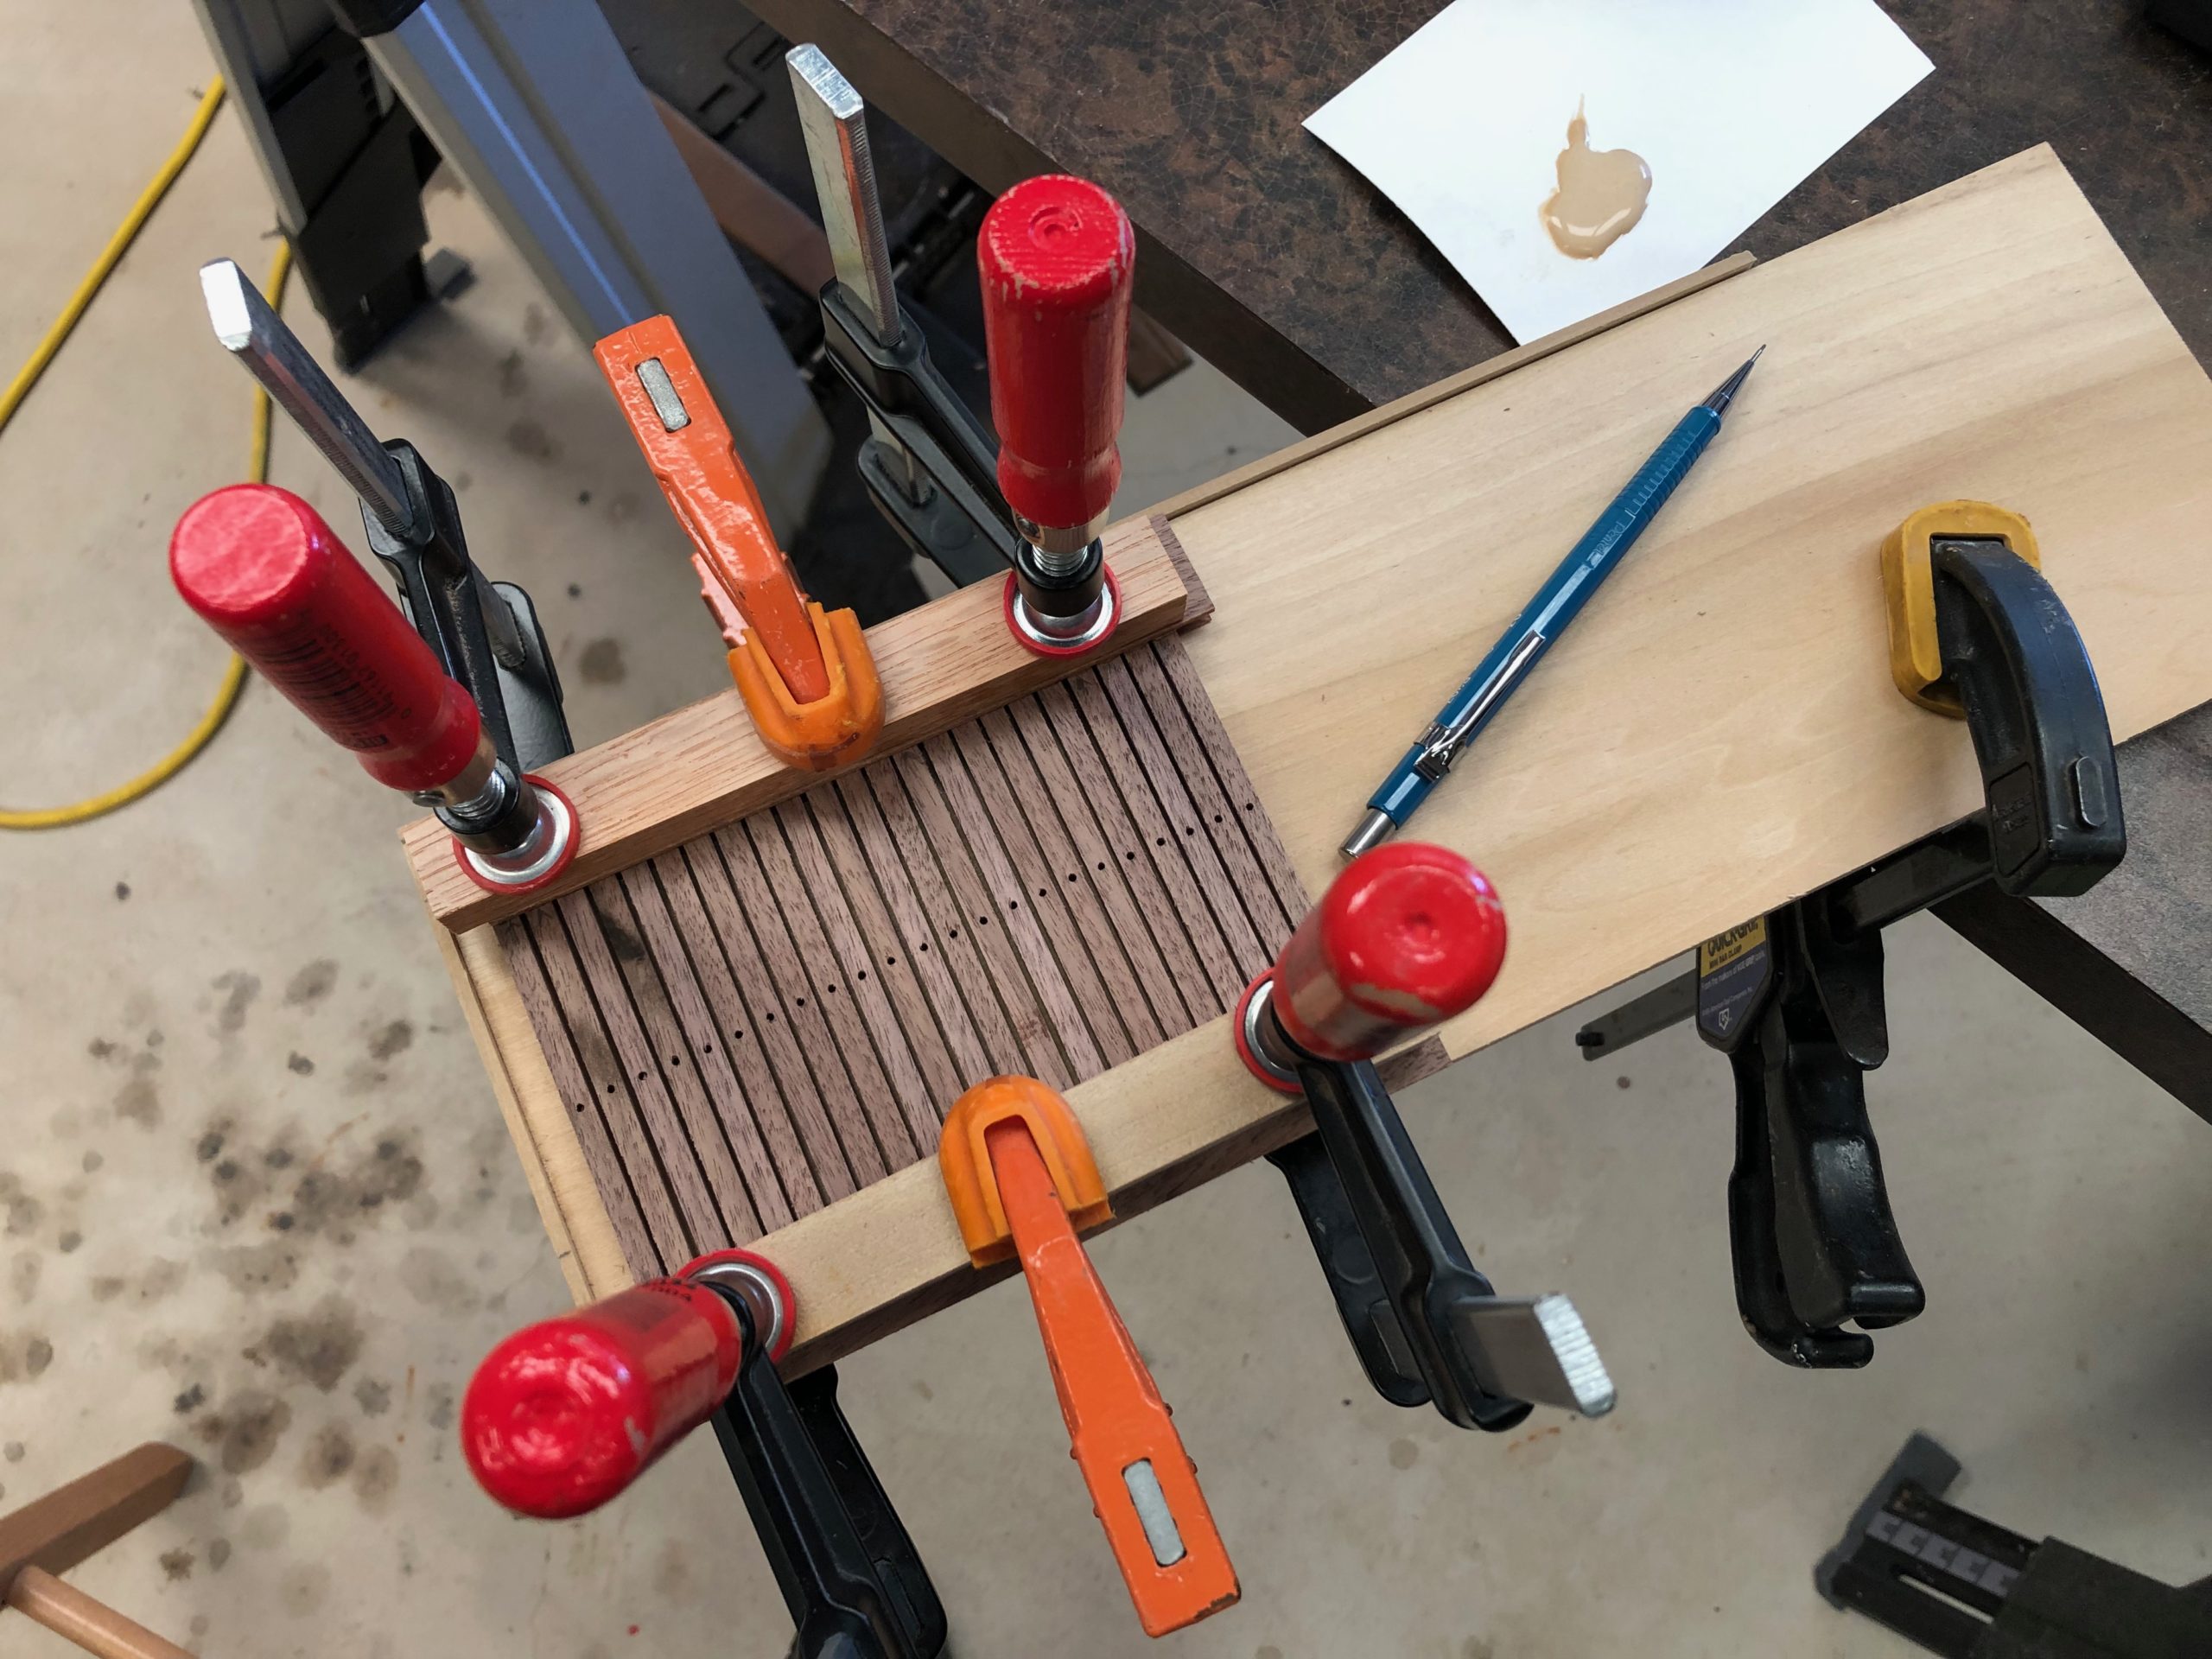
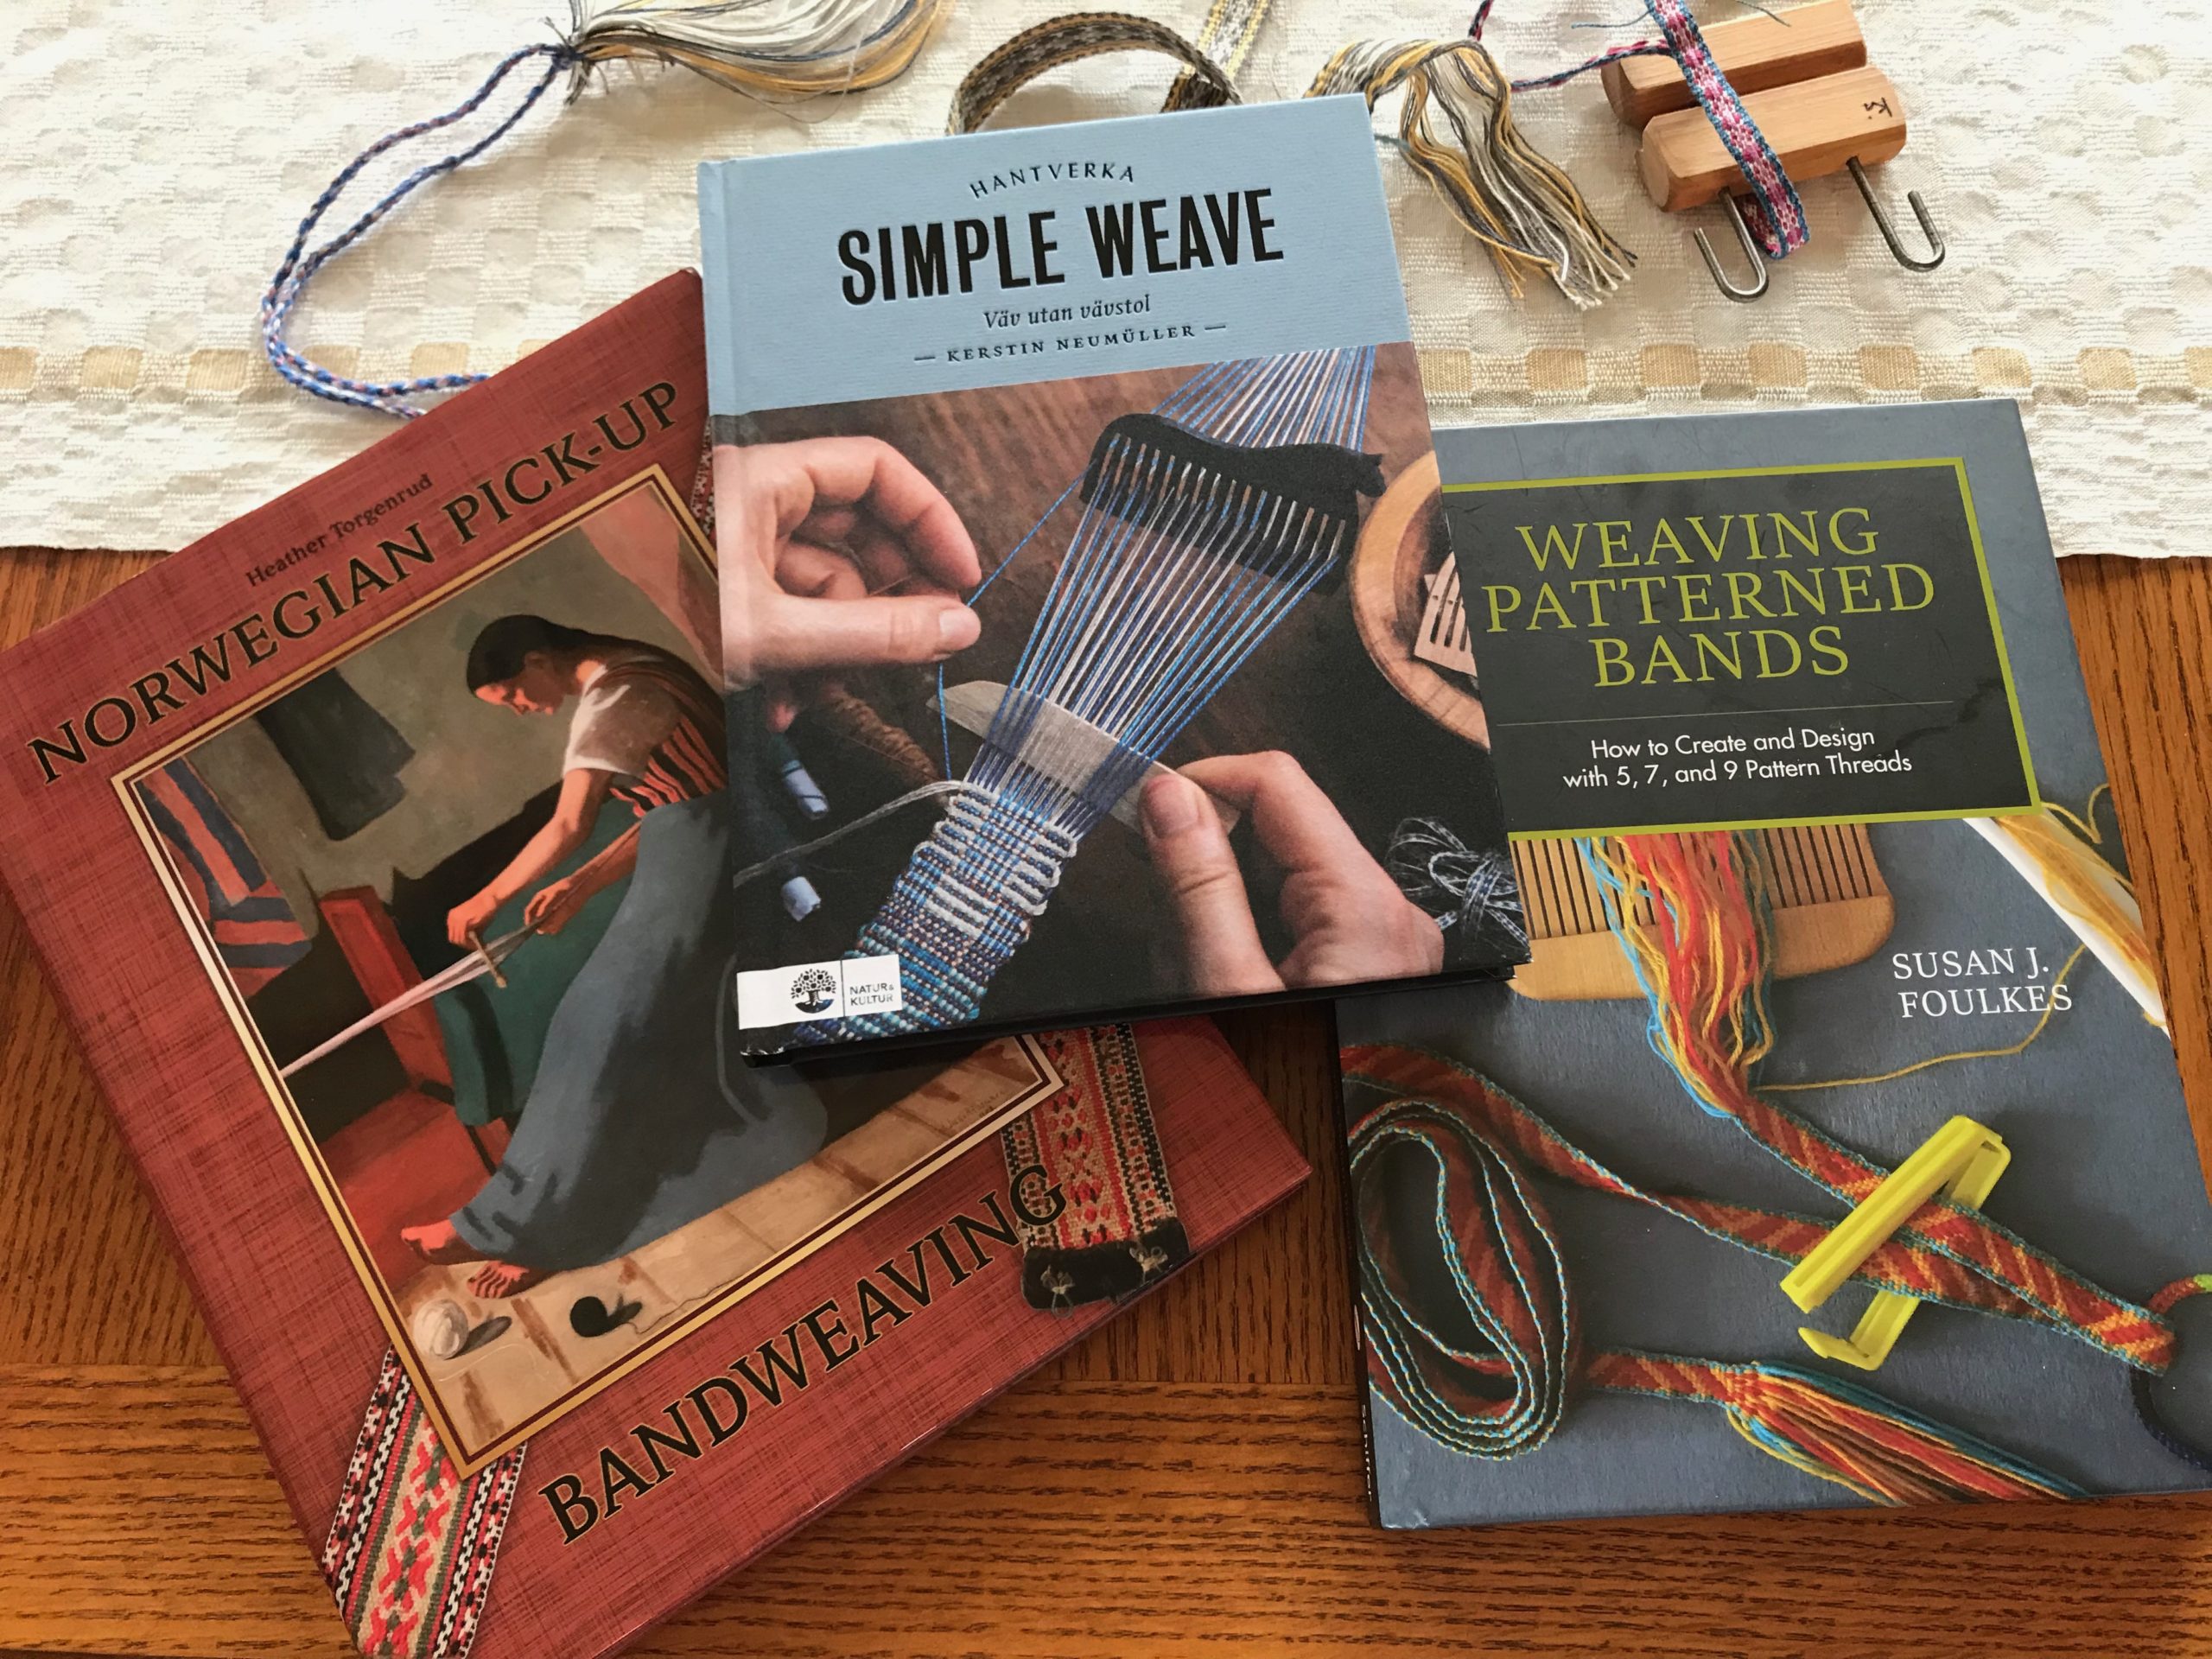
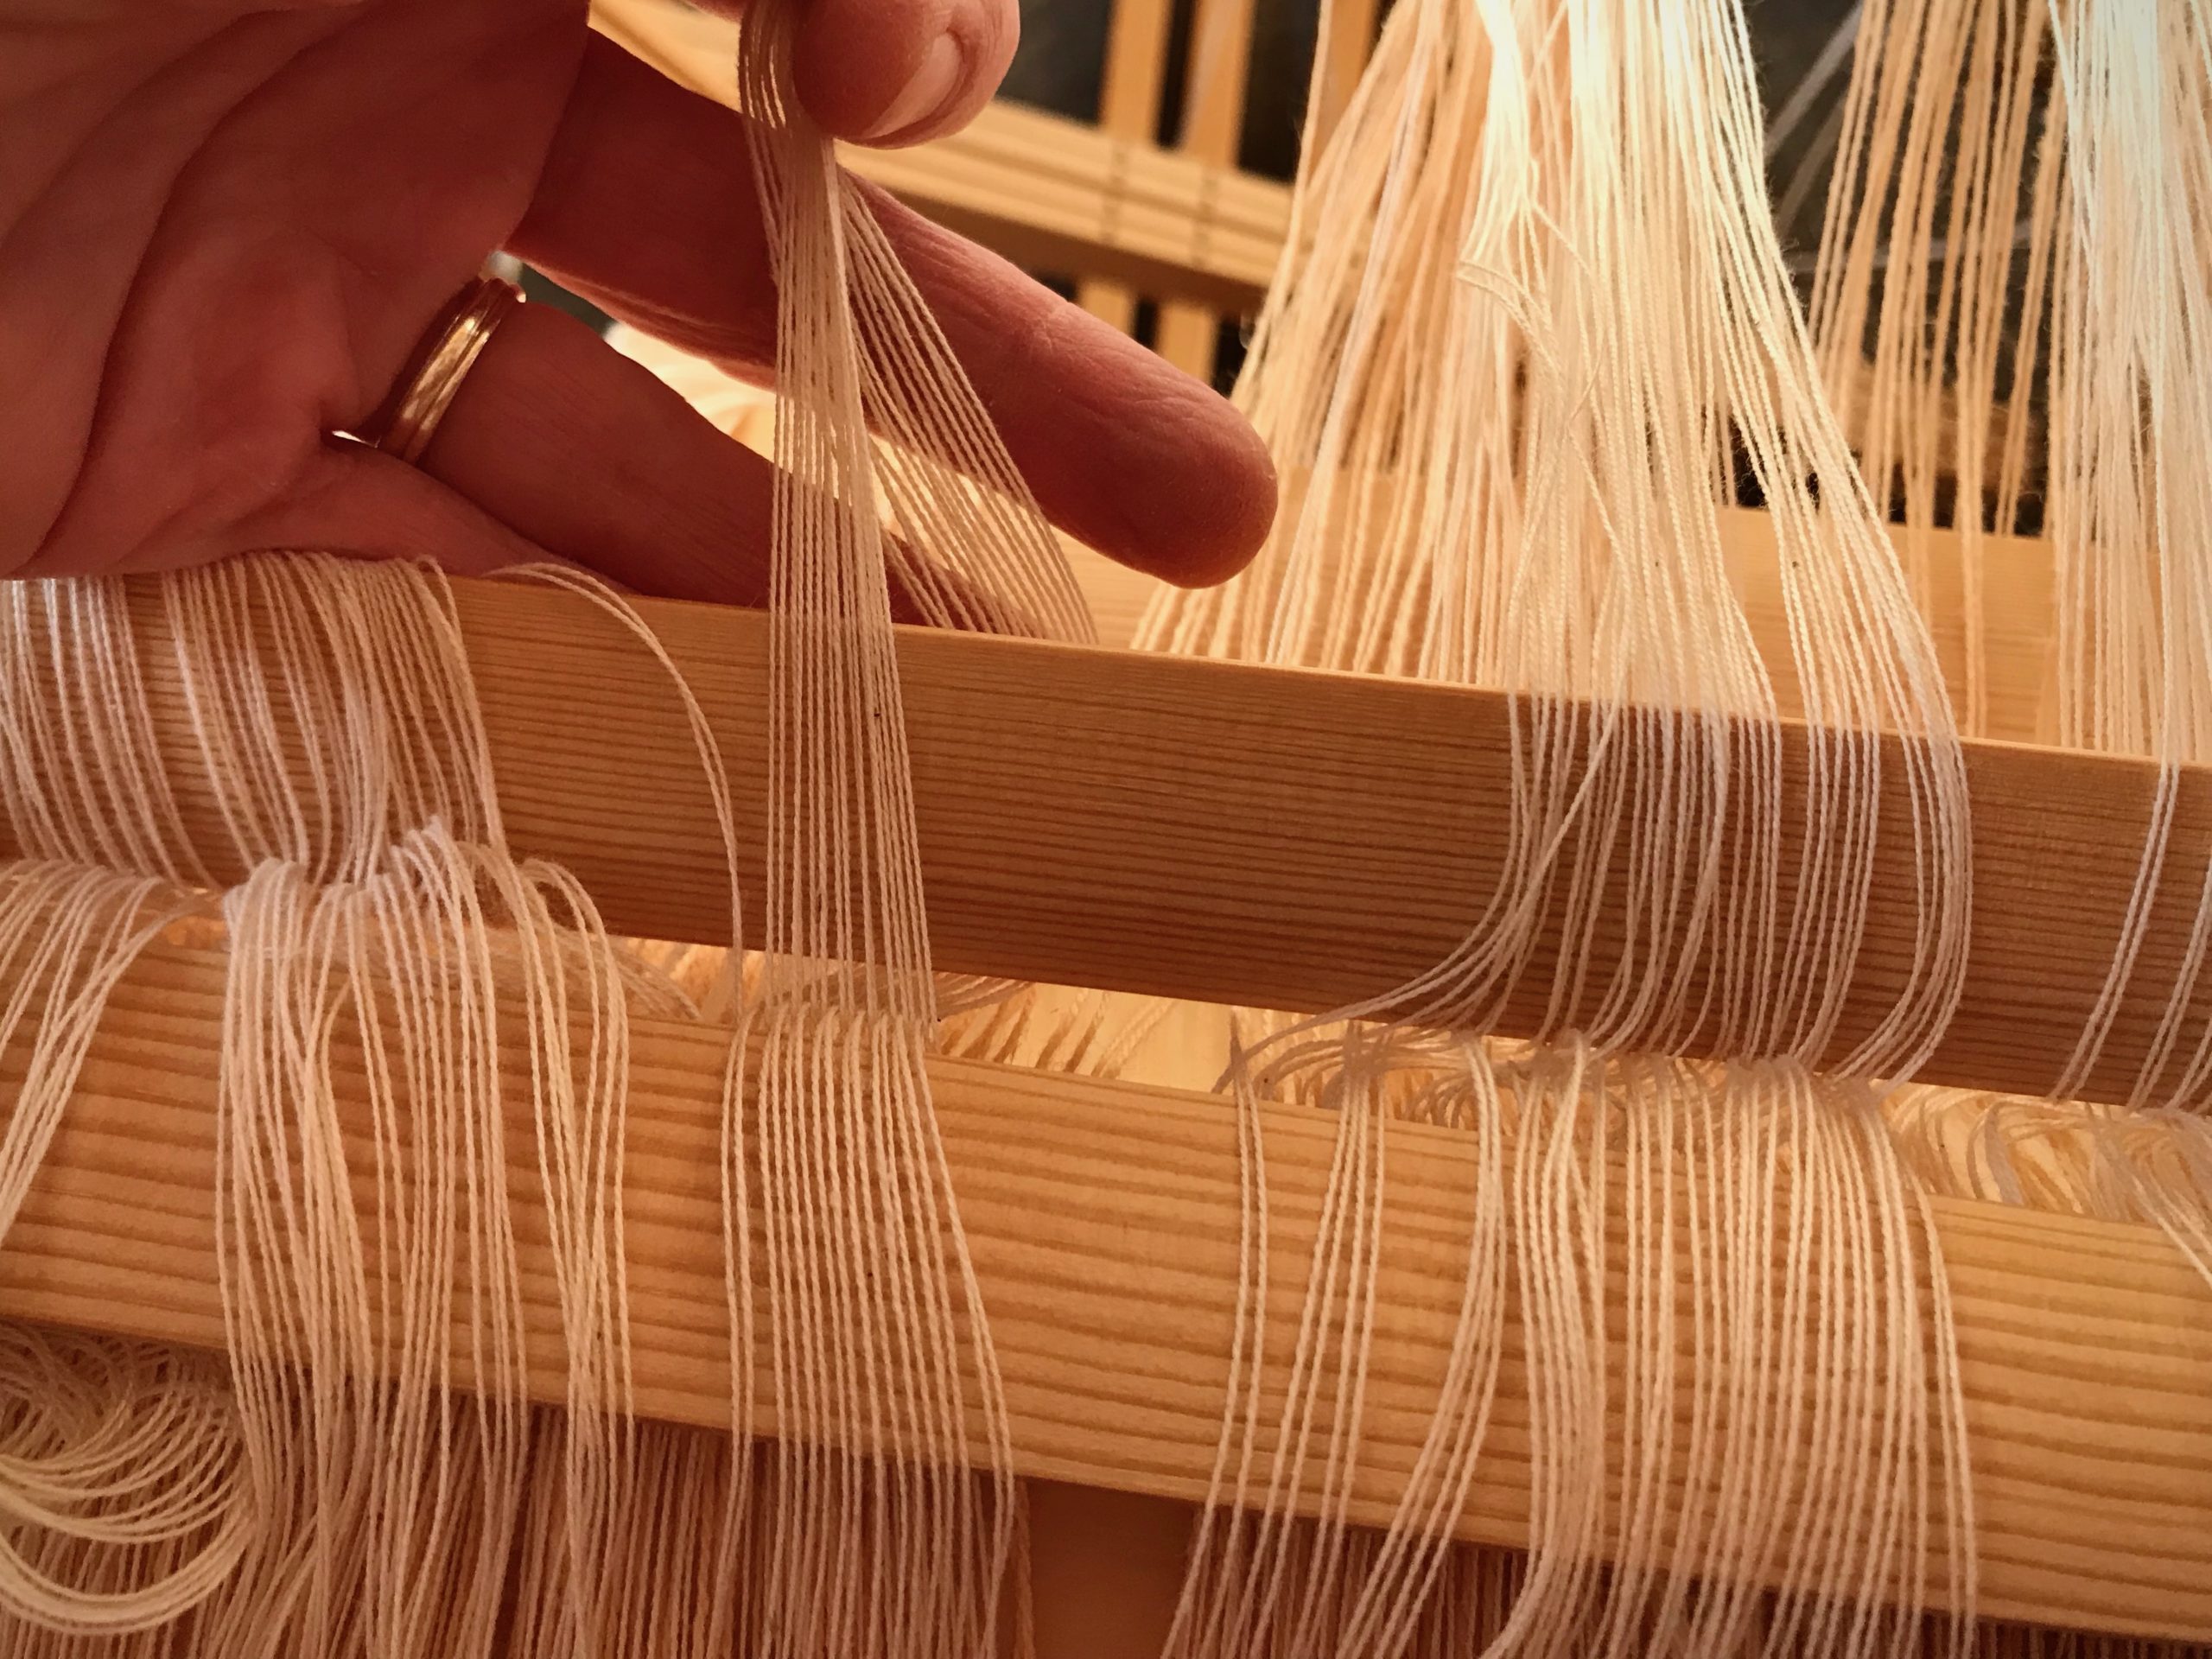
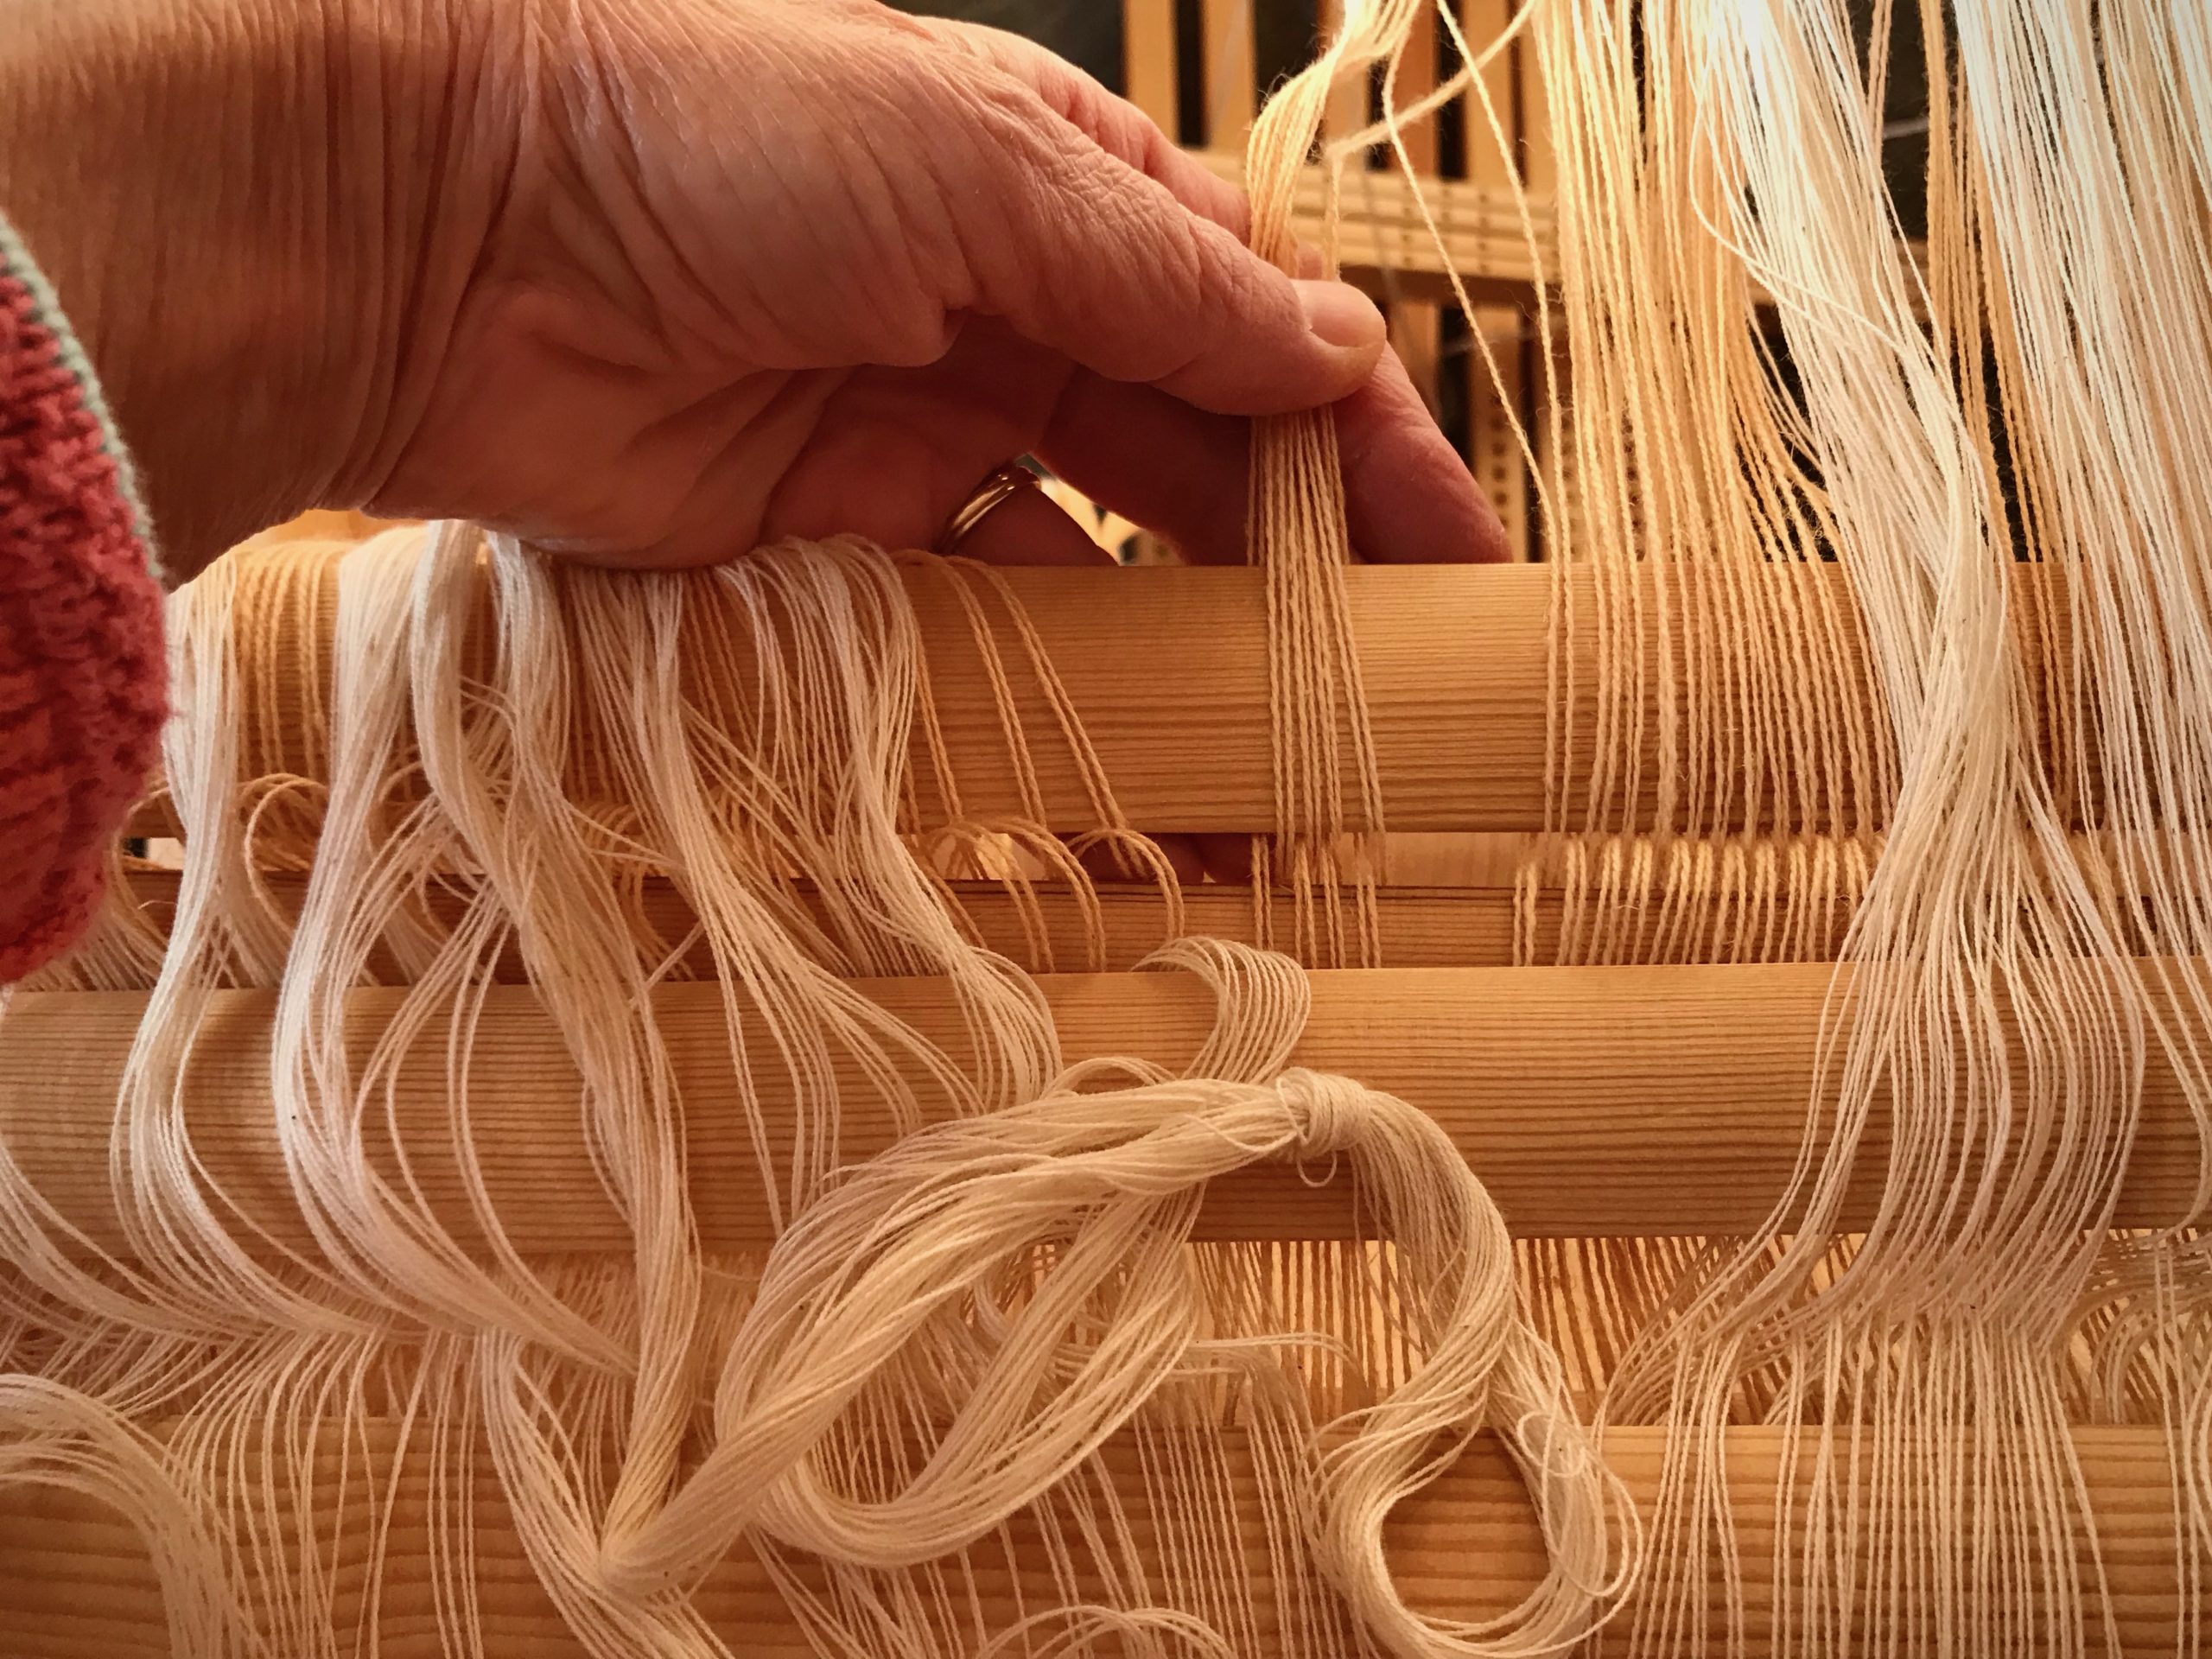
Workshop at Contemporary Handweavers of Texas Conference 2019 got me started with weaving patterned bands on a rigid heddle.First heddle by Steve is made from Soft Maple. Band has 21 ends (with 5 pattern threads, doubled). 8/2 cotton and 22/2 cottolin.Heddle made from Spanish Cedar. Wood-burned top represents the Texas Hill Country hills that we enjoy. Band has 45 ends (with 5 pattern threads, doubled), using the heddle’s full width. 8/2 cotton and 22/2 cottolin.Walnut band heddle in the making.Torgenrud, H. (2015). Norwegian pick-up bandweaving. Schiffer Publishing; Foulkes, S. (2018). Weaving Patterned Bands. How to Create and Design with 5, 7, and 9 Pattern Threads. Schiffer Publishing; Neumüller, K. (2021). Simple Weave. (Language: Swedish). Natur & Kultur, Stockholm.
Pictures in the following slideshow video tell more of the story.
Edited: Steve has compiled photo documentation of how he made my Spanish Cedar and Walnut heddles. Click HERE to send me an email requesting a PDF copy of Making a Band Heddle.
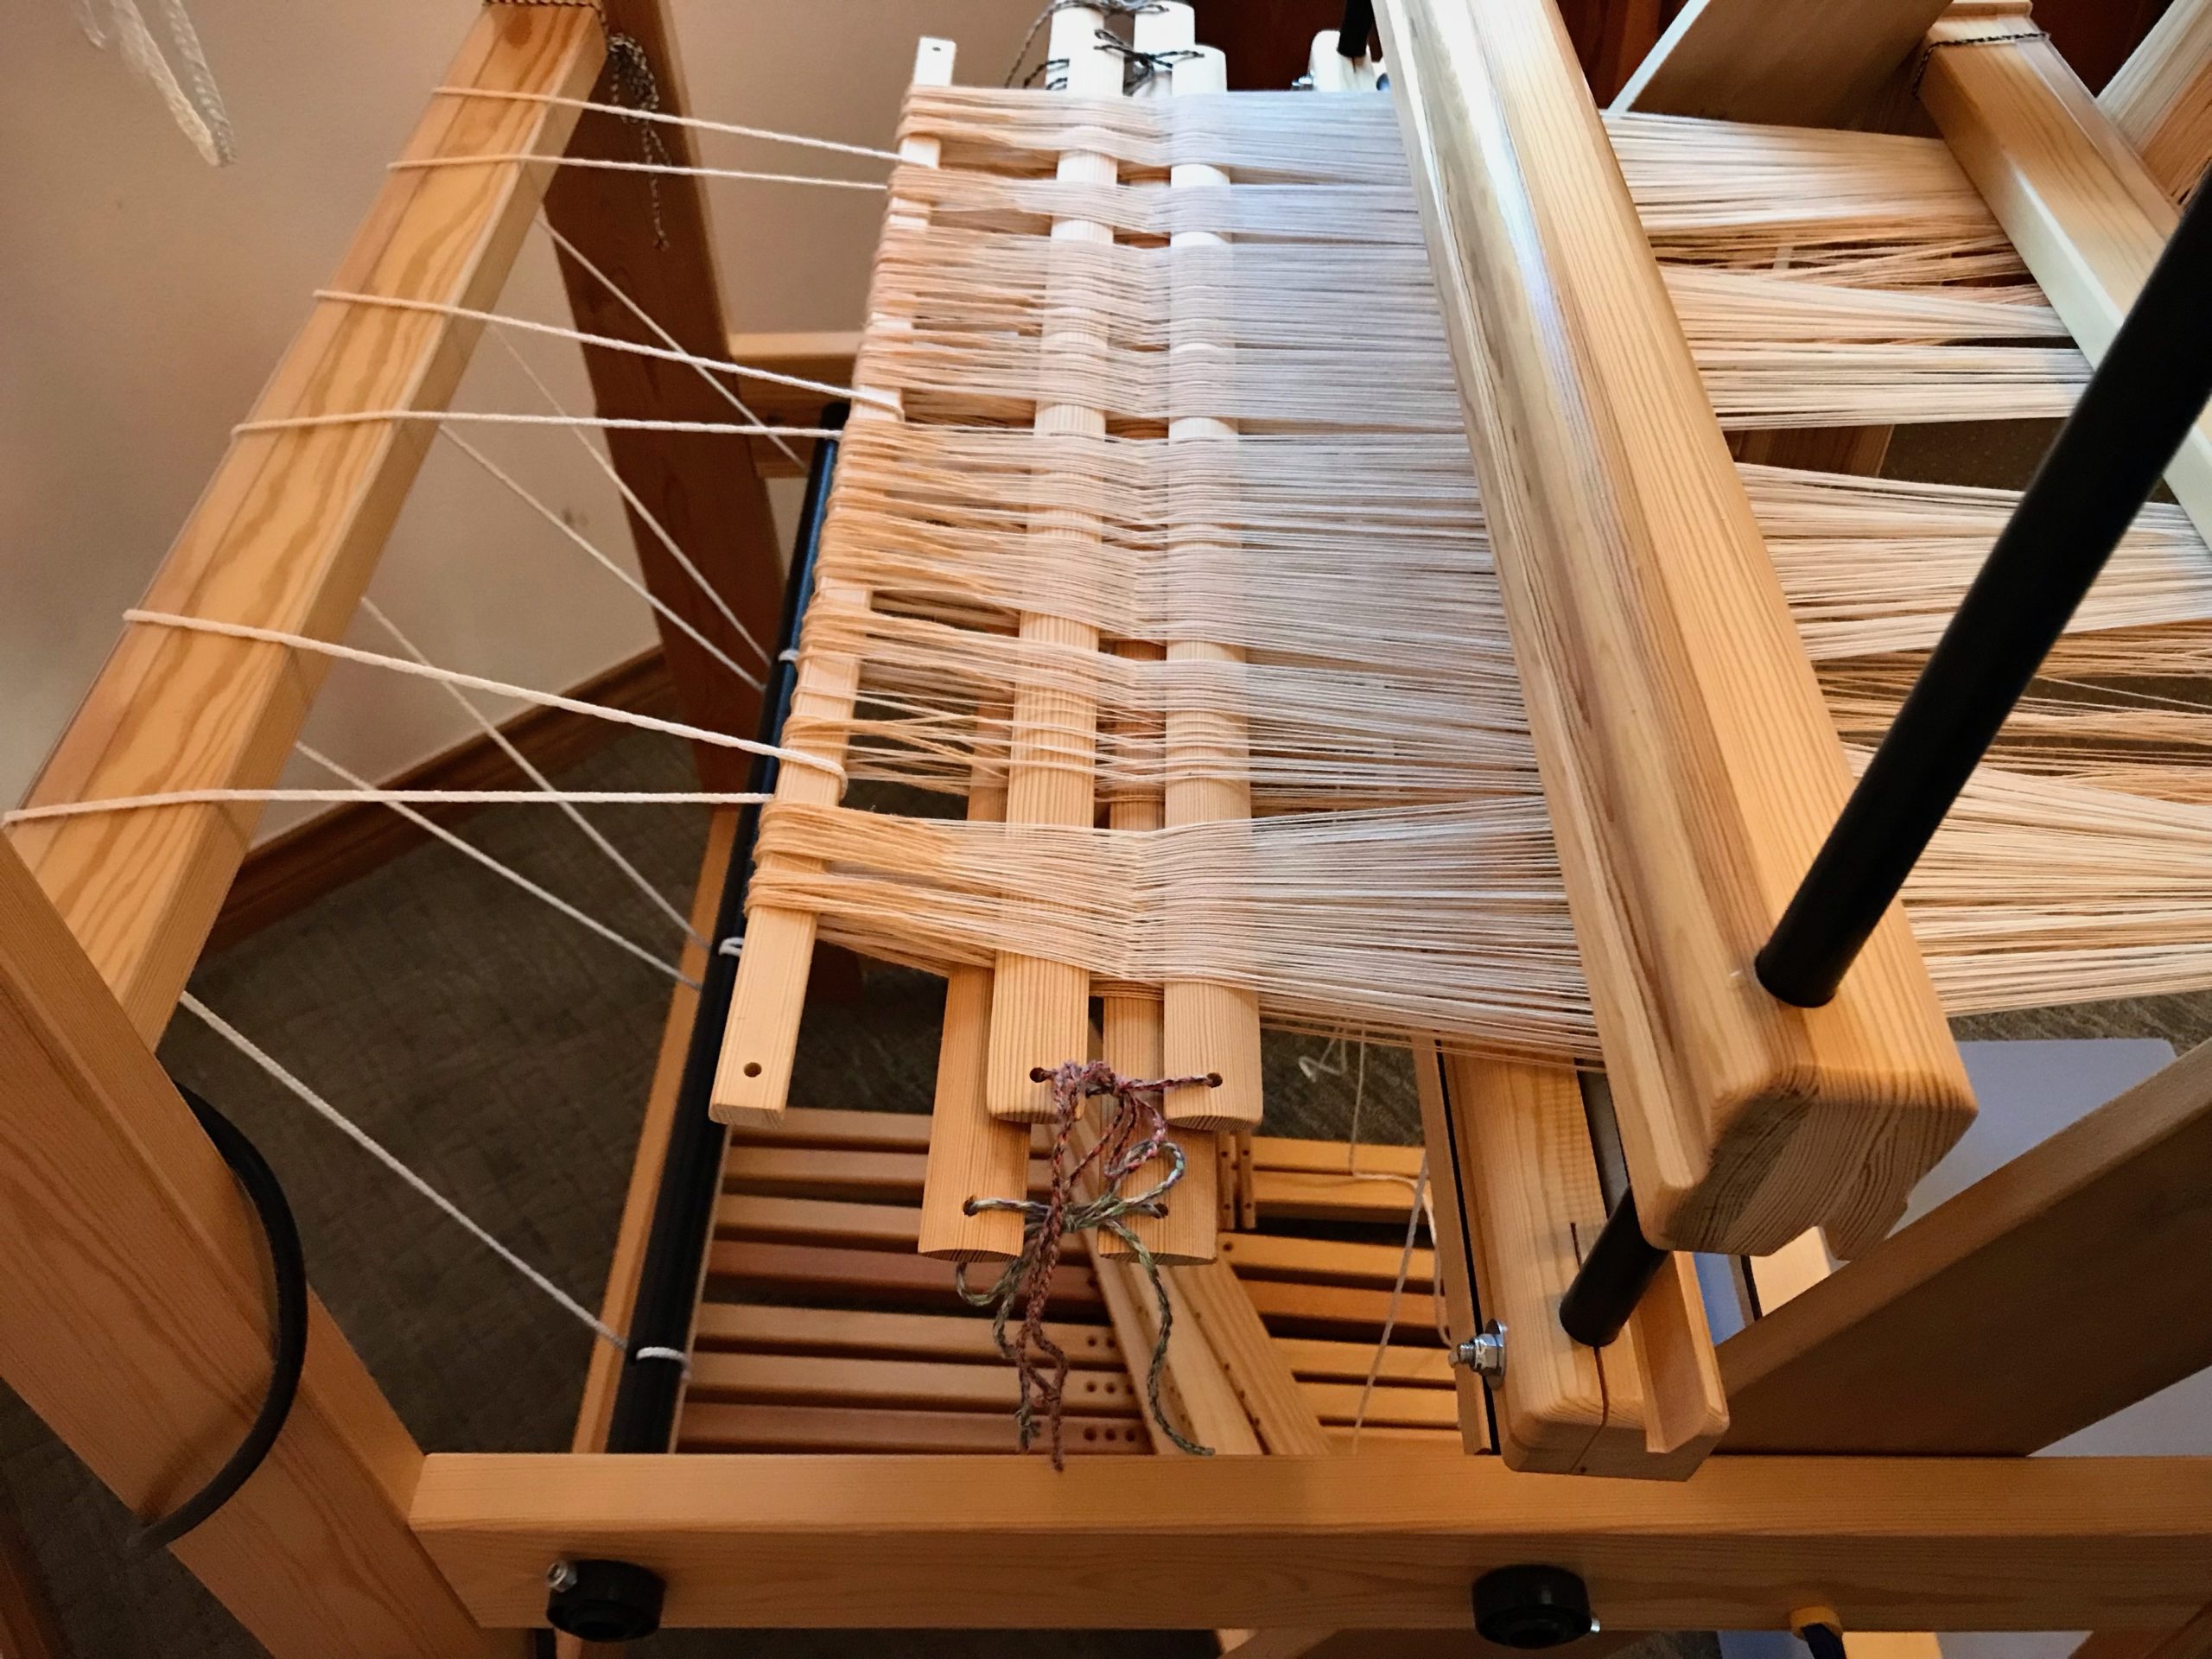
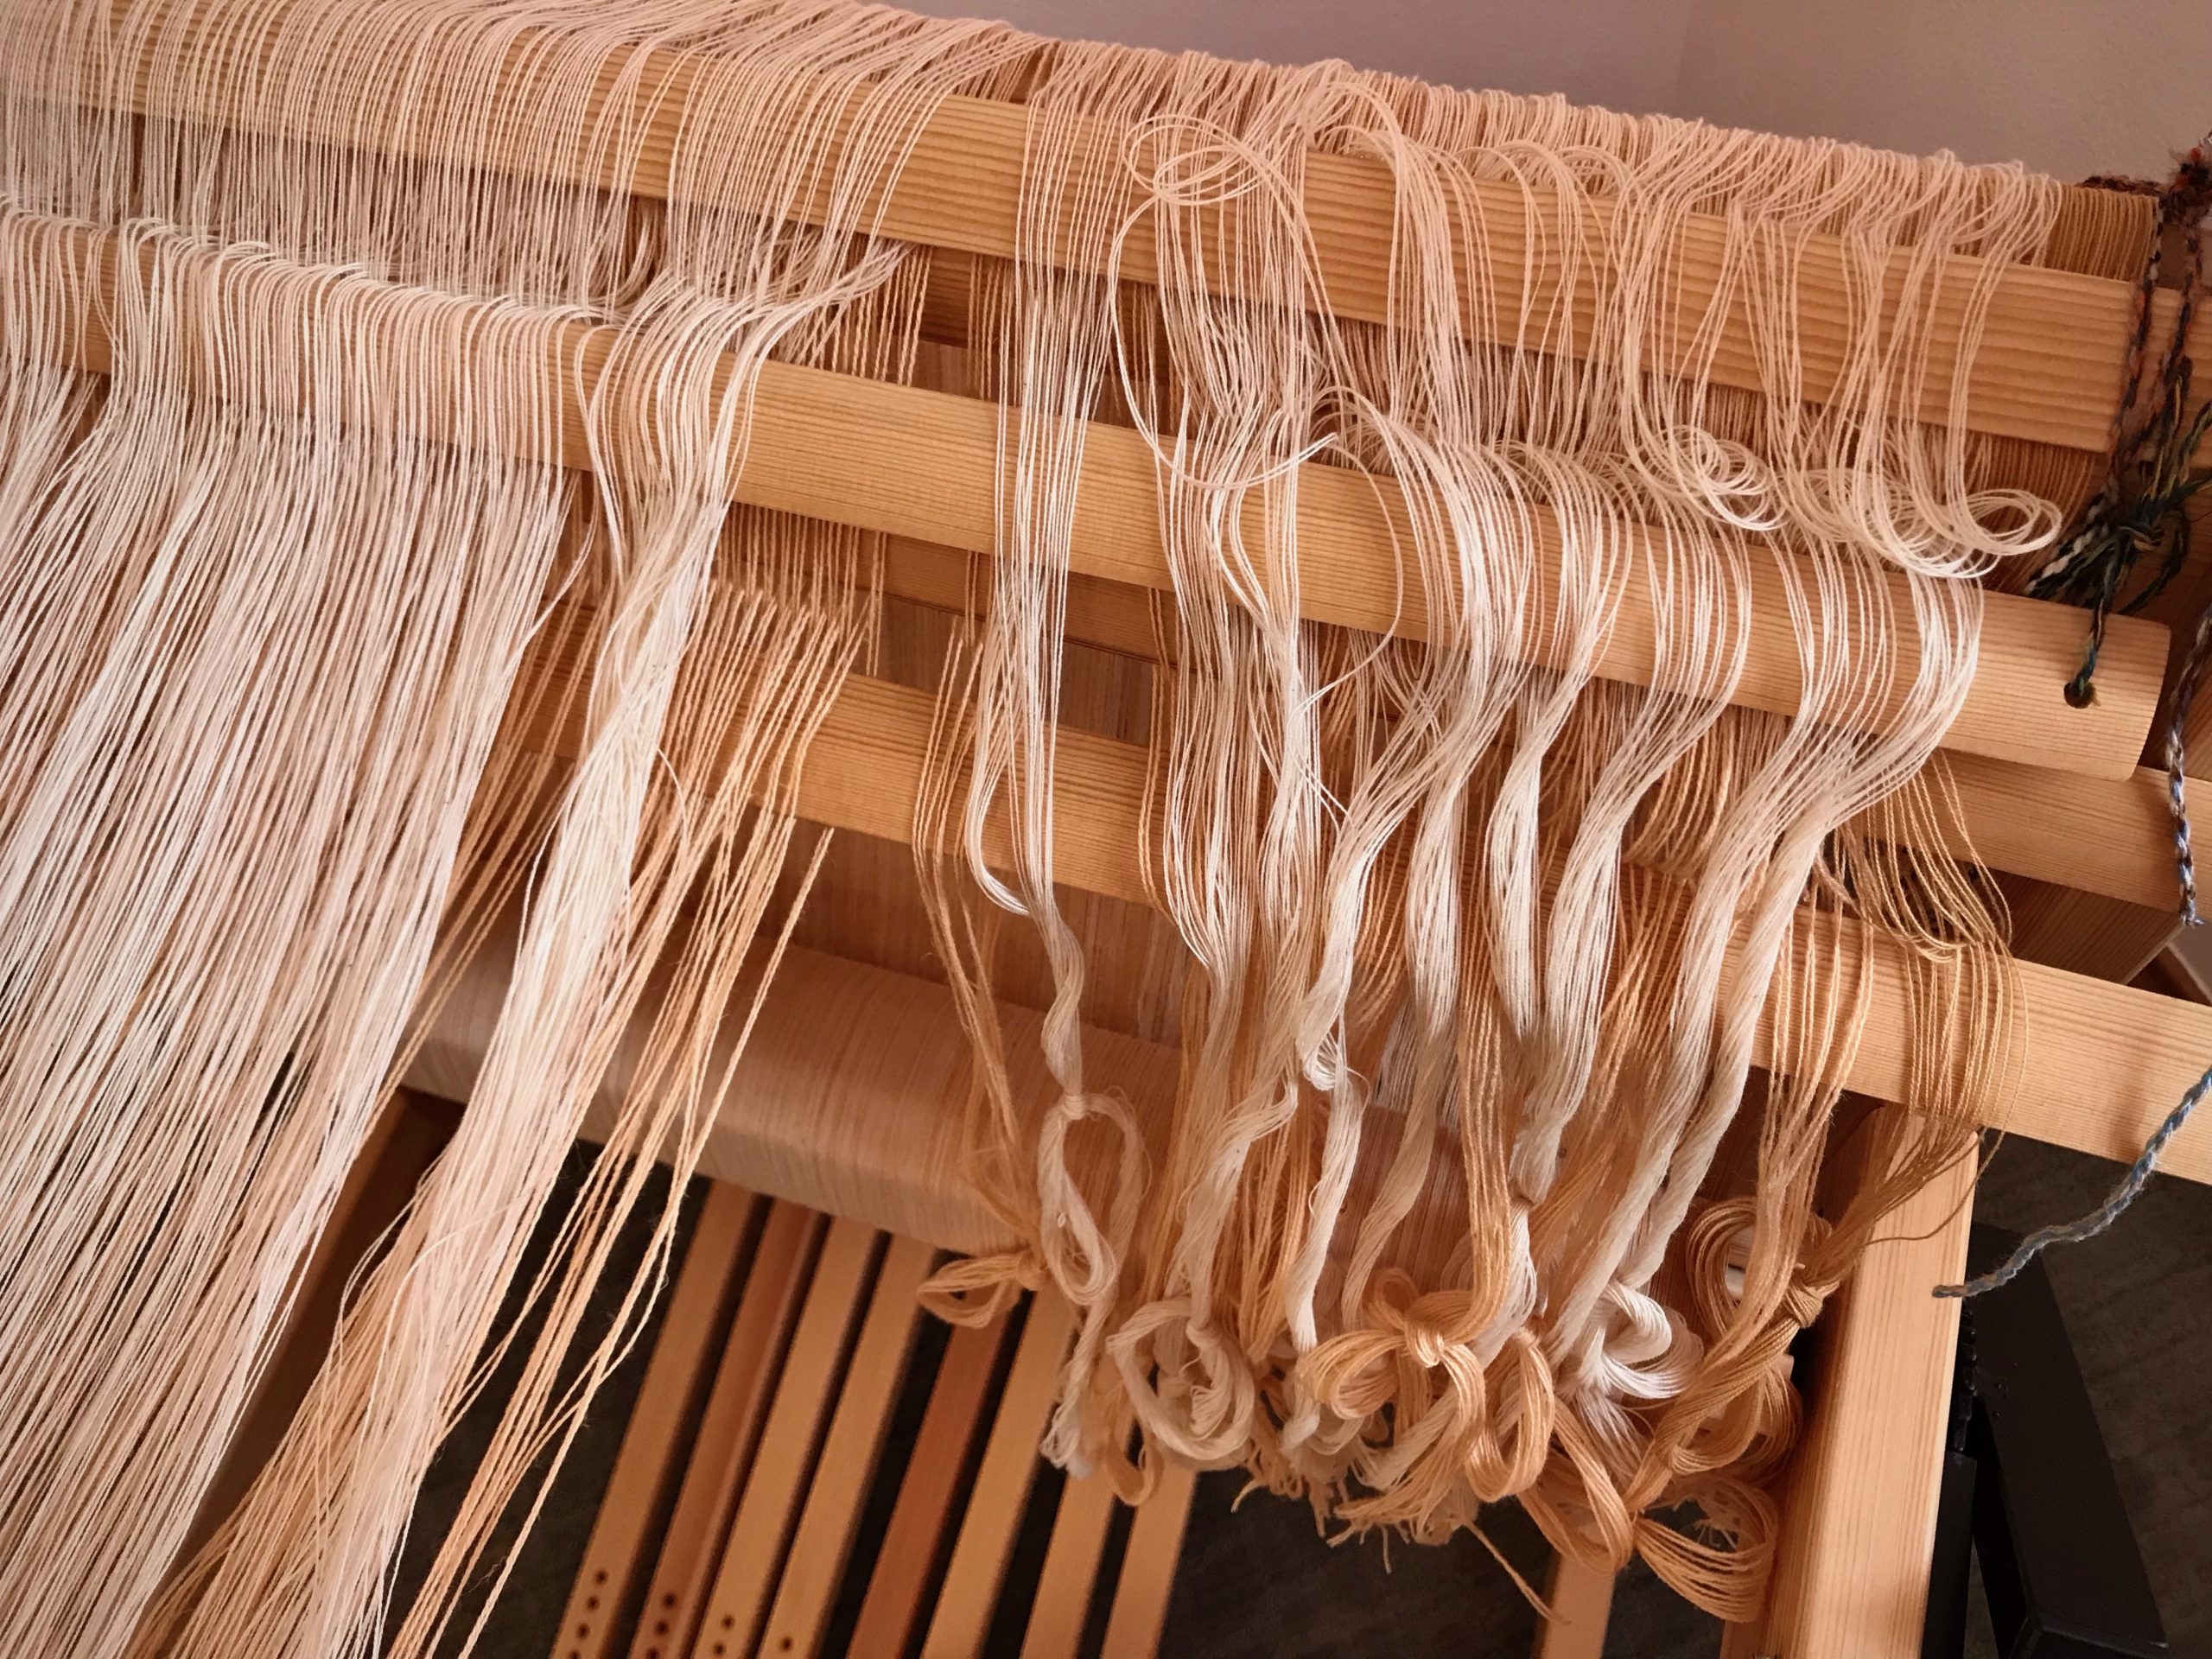
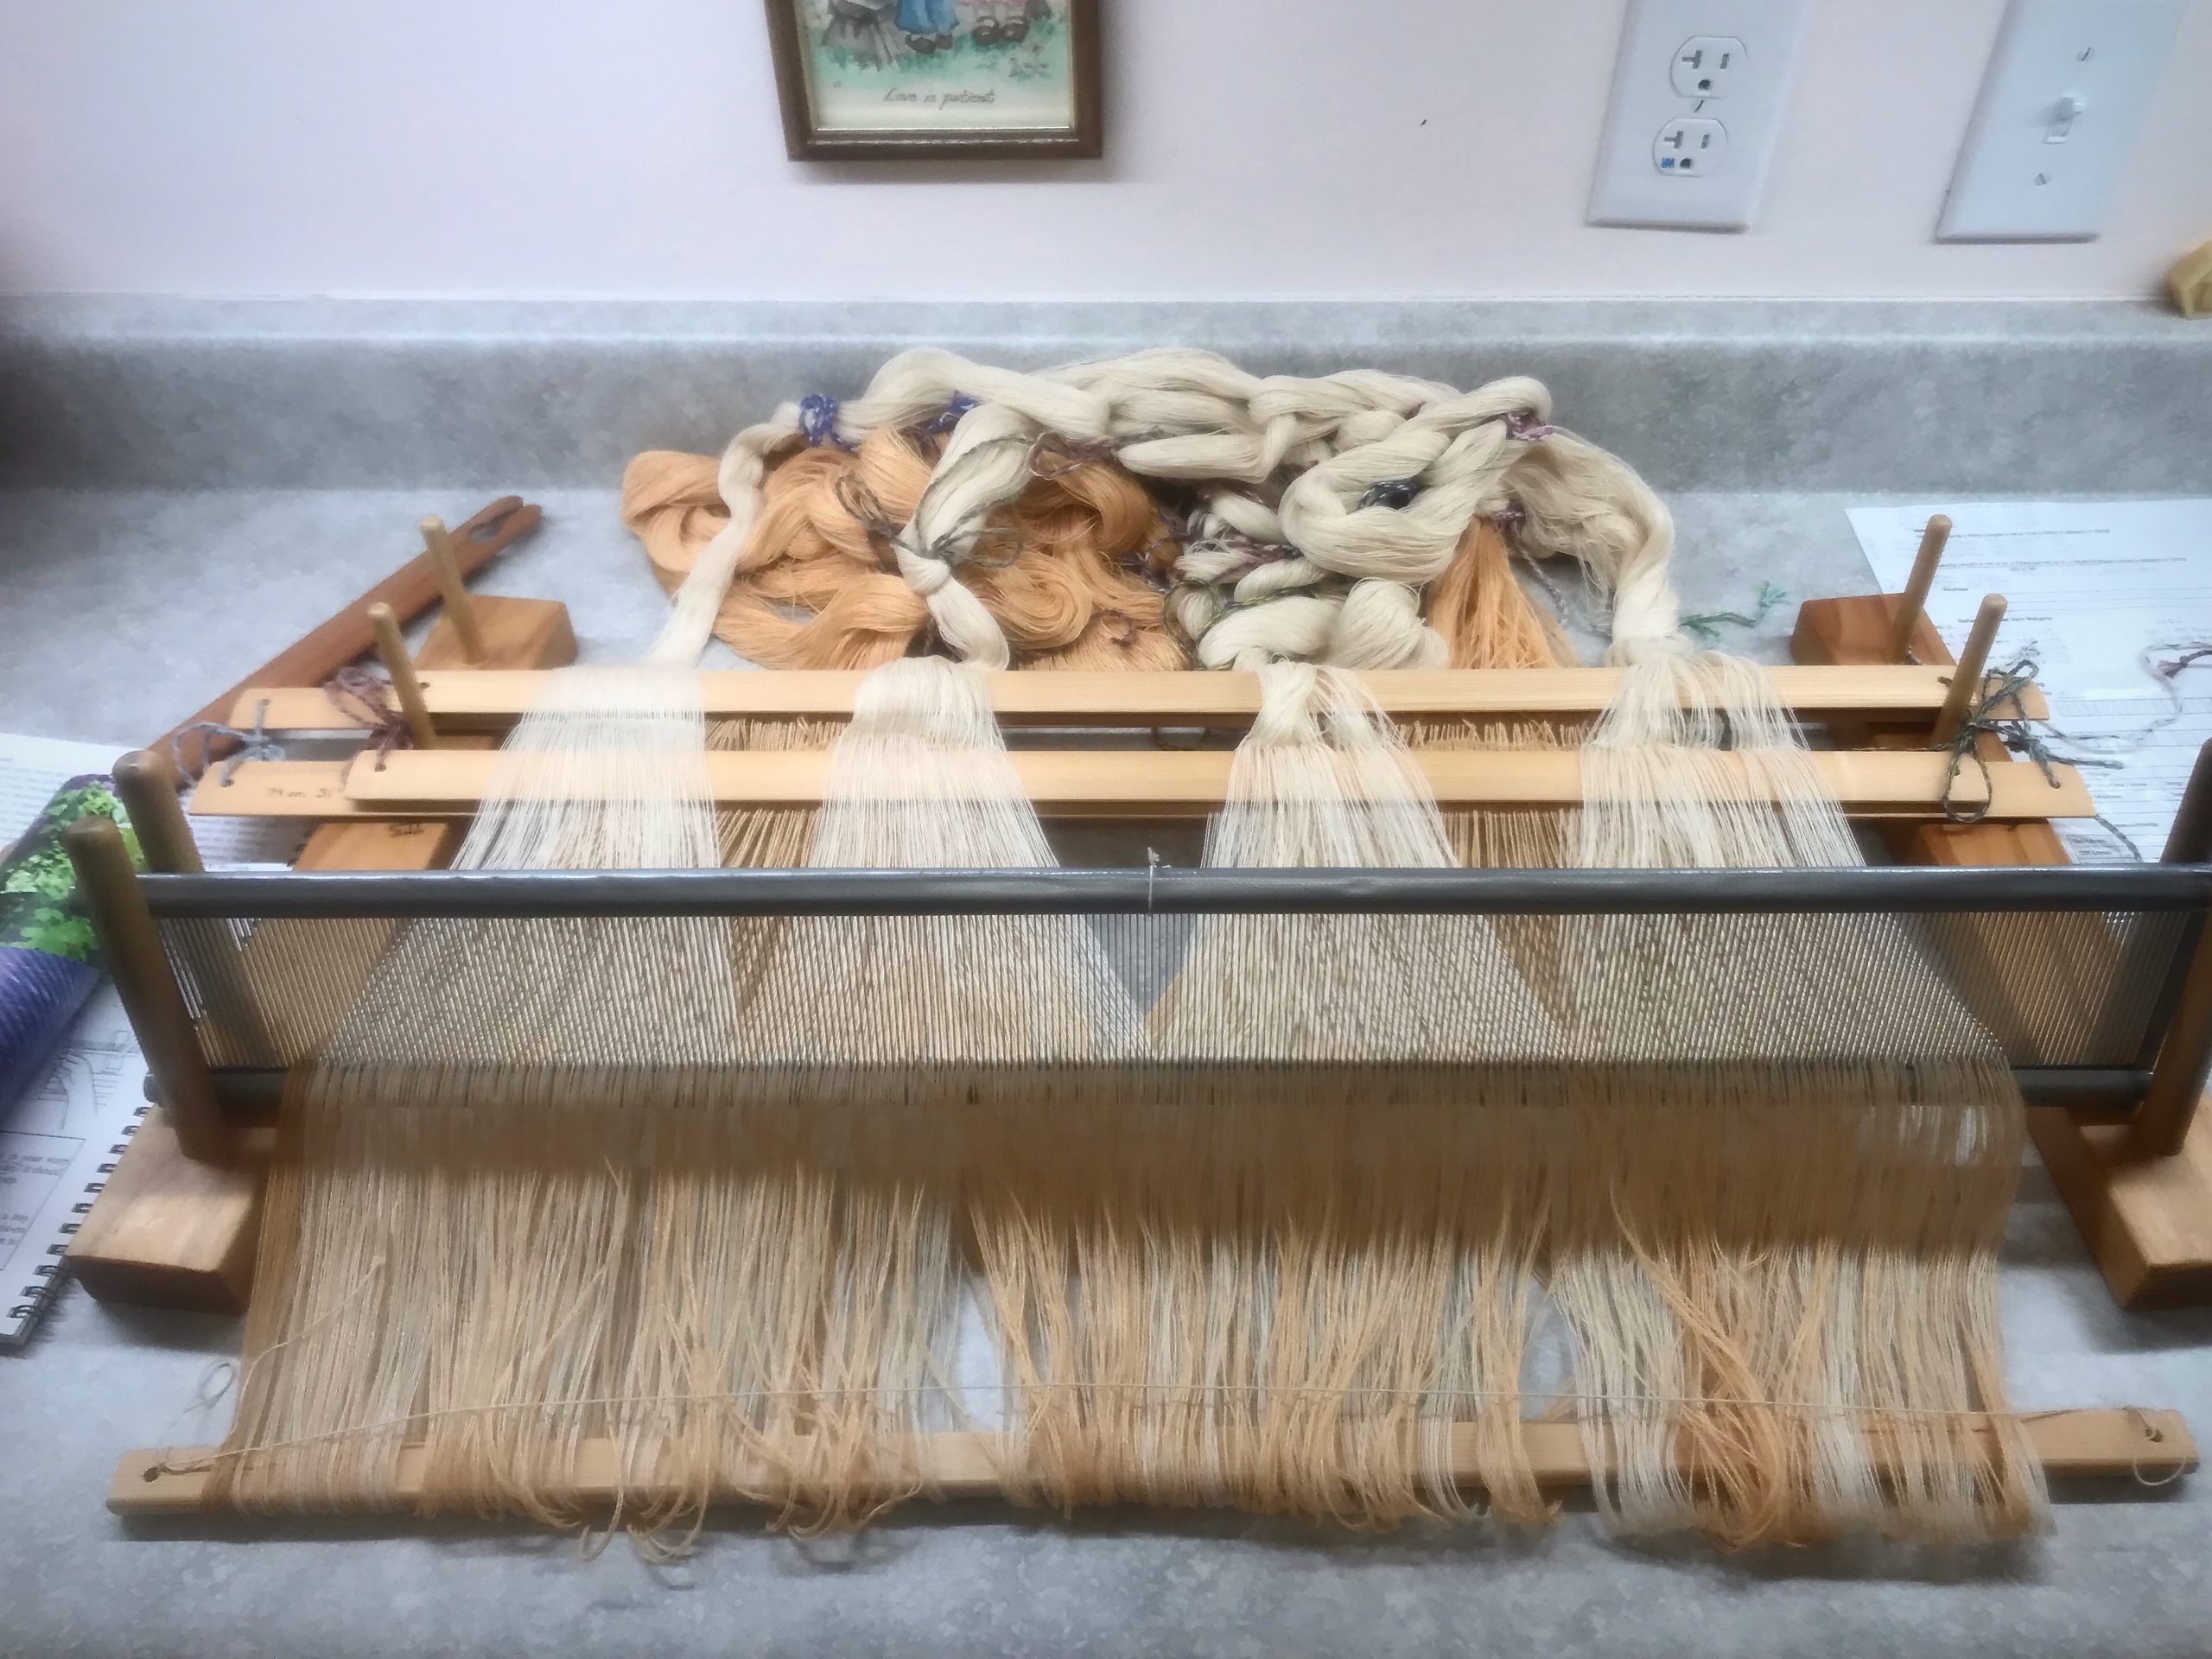
Dressing the loom with two sets of lease sticks keeps me on my toes. It means I am thinking carefully as I transfer lease sticks from in front of the reed to behind the reed. And, after beaming the warp(s), it means I am counting carefully as I put ends into threading groups of 48 threads each—32 ends of 20/2 cotton, and 16 ends of 22/2 cottolin.
Two set of lease sticks have been carefully moved from in front of the reed to behind the reed. After straightening all the warp ends, I will beam the warp.
I group ends together before threading. Then, when threading, if there is a discrepancy in the number of ends, it alerts me to find a threading error. Counting out these delicate unbleached cotton threads is challenge enough. Having the layer of cream cottolin threads underneath presents additional complexity. With all these ends, this part of the process is tedious. Still, it’s worth it if it lessens my chance of making threading errors with these 1,472 ends.
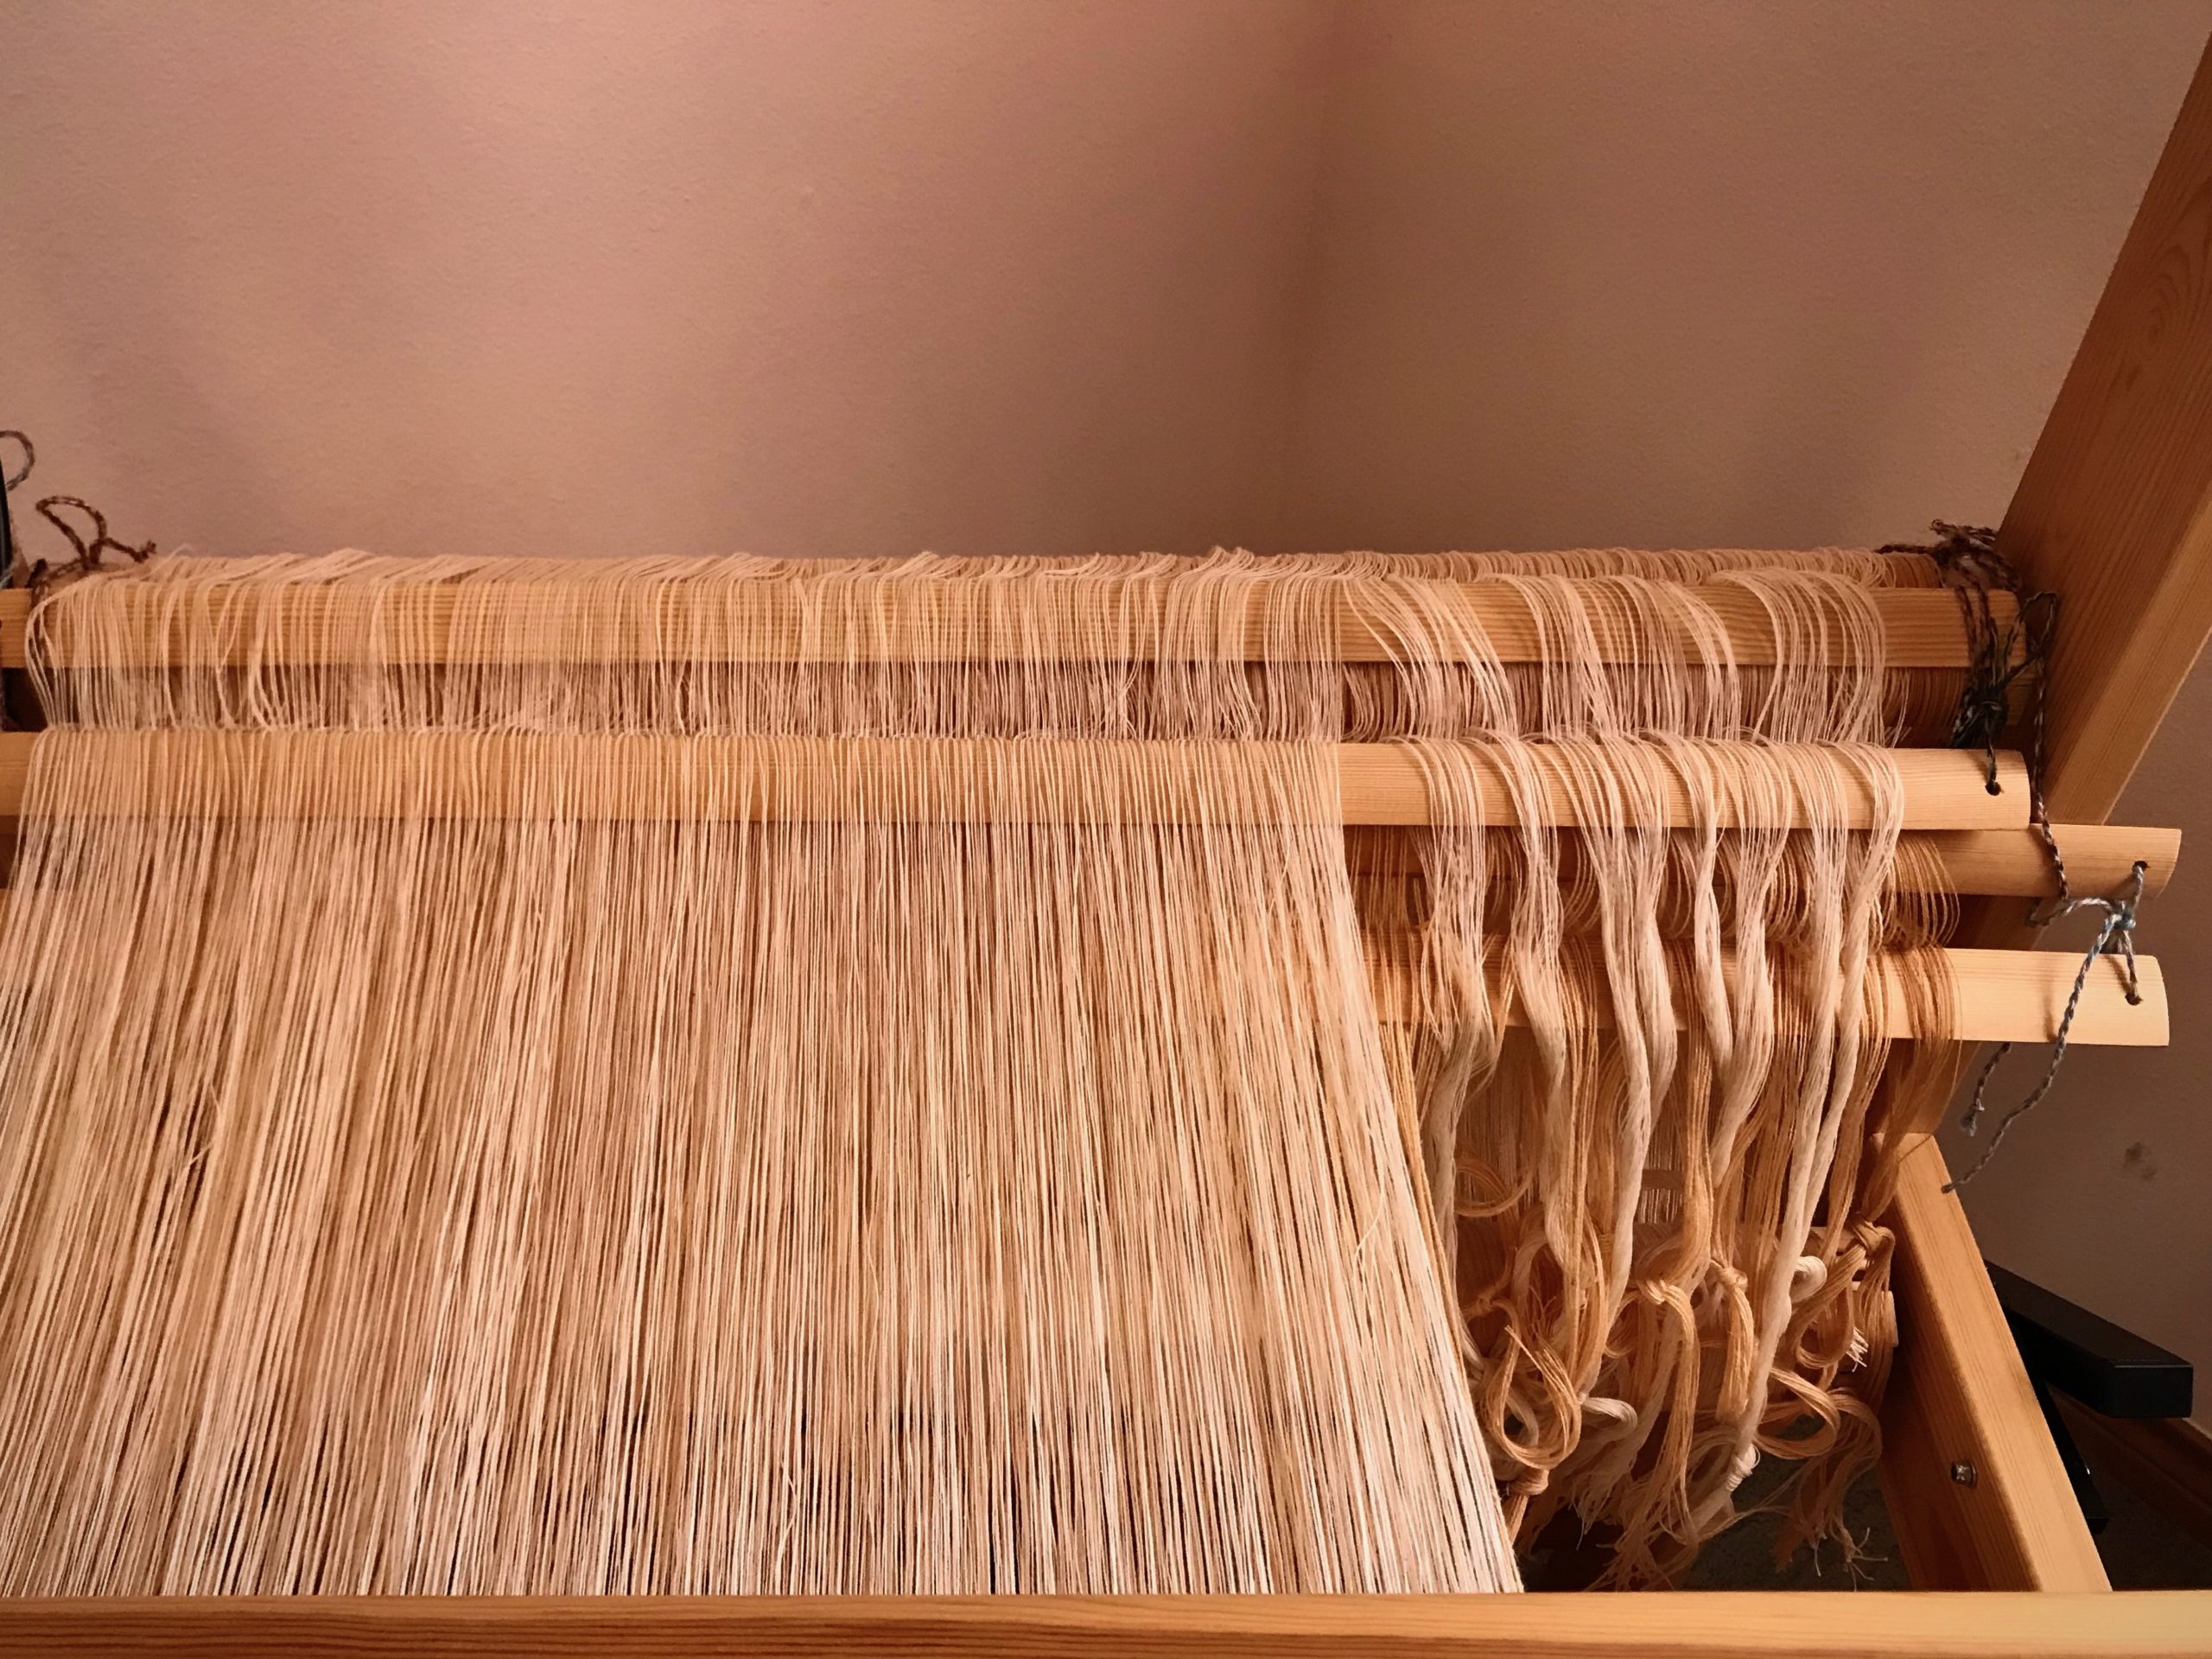
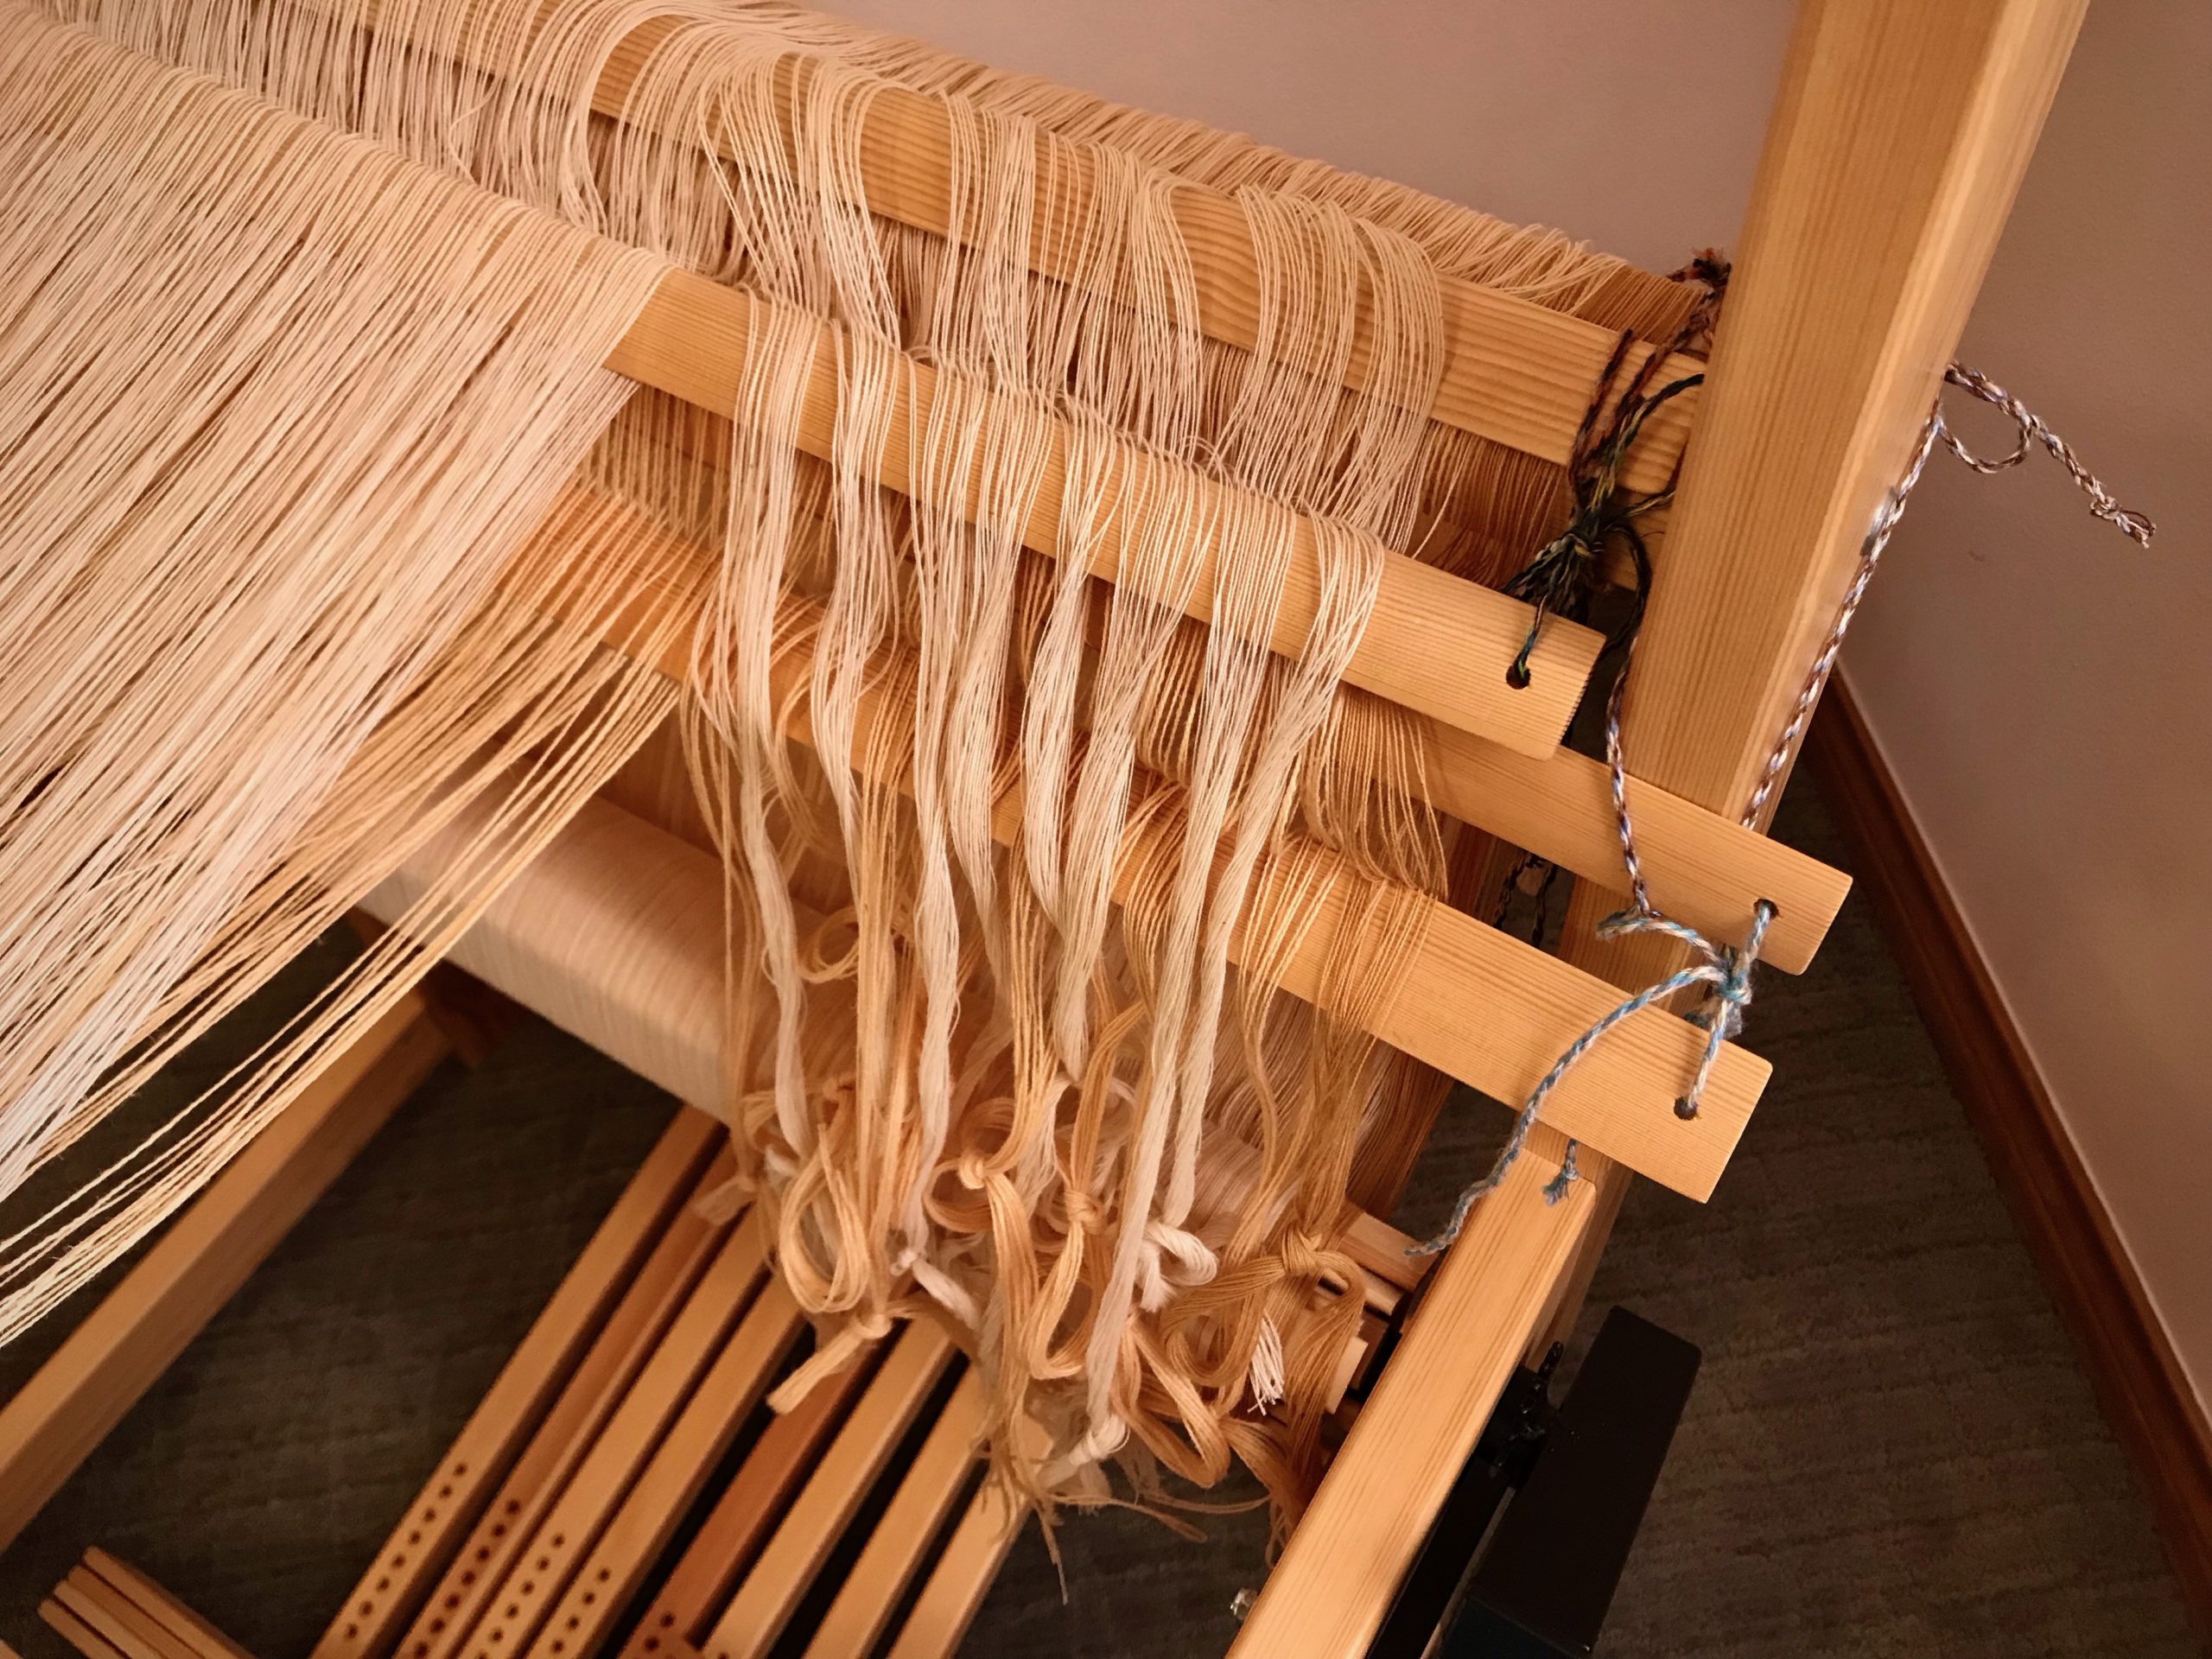
Preparation for threading. Ends are gathered into threading groups and tied together with a loose slip knot.Each set of lease sticks is tied to the back beam separately, so they can hang at different heights. The lower set is tied around the side frame and over the back beam.If I stand behind the loom, my back is in a leaning-forward position and not comfortable for long. I placed a child’s chair and cushion behind the loom. Kneeling behind the loom at this height gives me good visibility and access to the threads.View from the back of the loom. Ends are counted at the center of a pair of lease sticks. These counted ends are tied together in a loose slip knot.View from behind the loom. Loop of unbleached ends just counted lay on top to clear the view. Ends on lower pair of lease sticks are counted and tied separately. I tied the cotton threads and the cottolin threads separately to make it easier to find an error if I miscounted along the way (which, fortunately, didn’t happen).Counted ends are dropped into hanging position before moving on to the next grouping. (After taking this picture, I re-tied the lease sticks closer together, making counting easier.)Threads remain in the reed. I pull threads out of the reed when they are counted.Pretty sight of counted ends. Ready for threading!
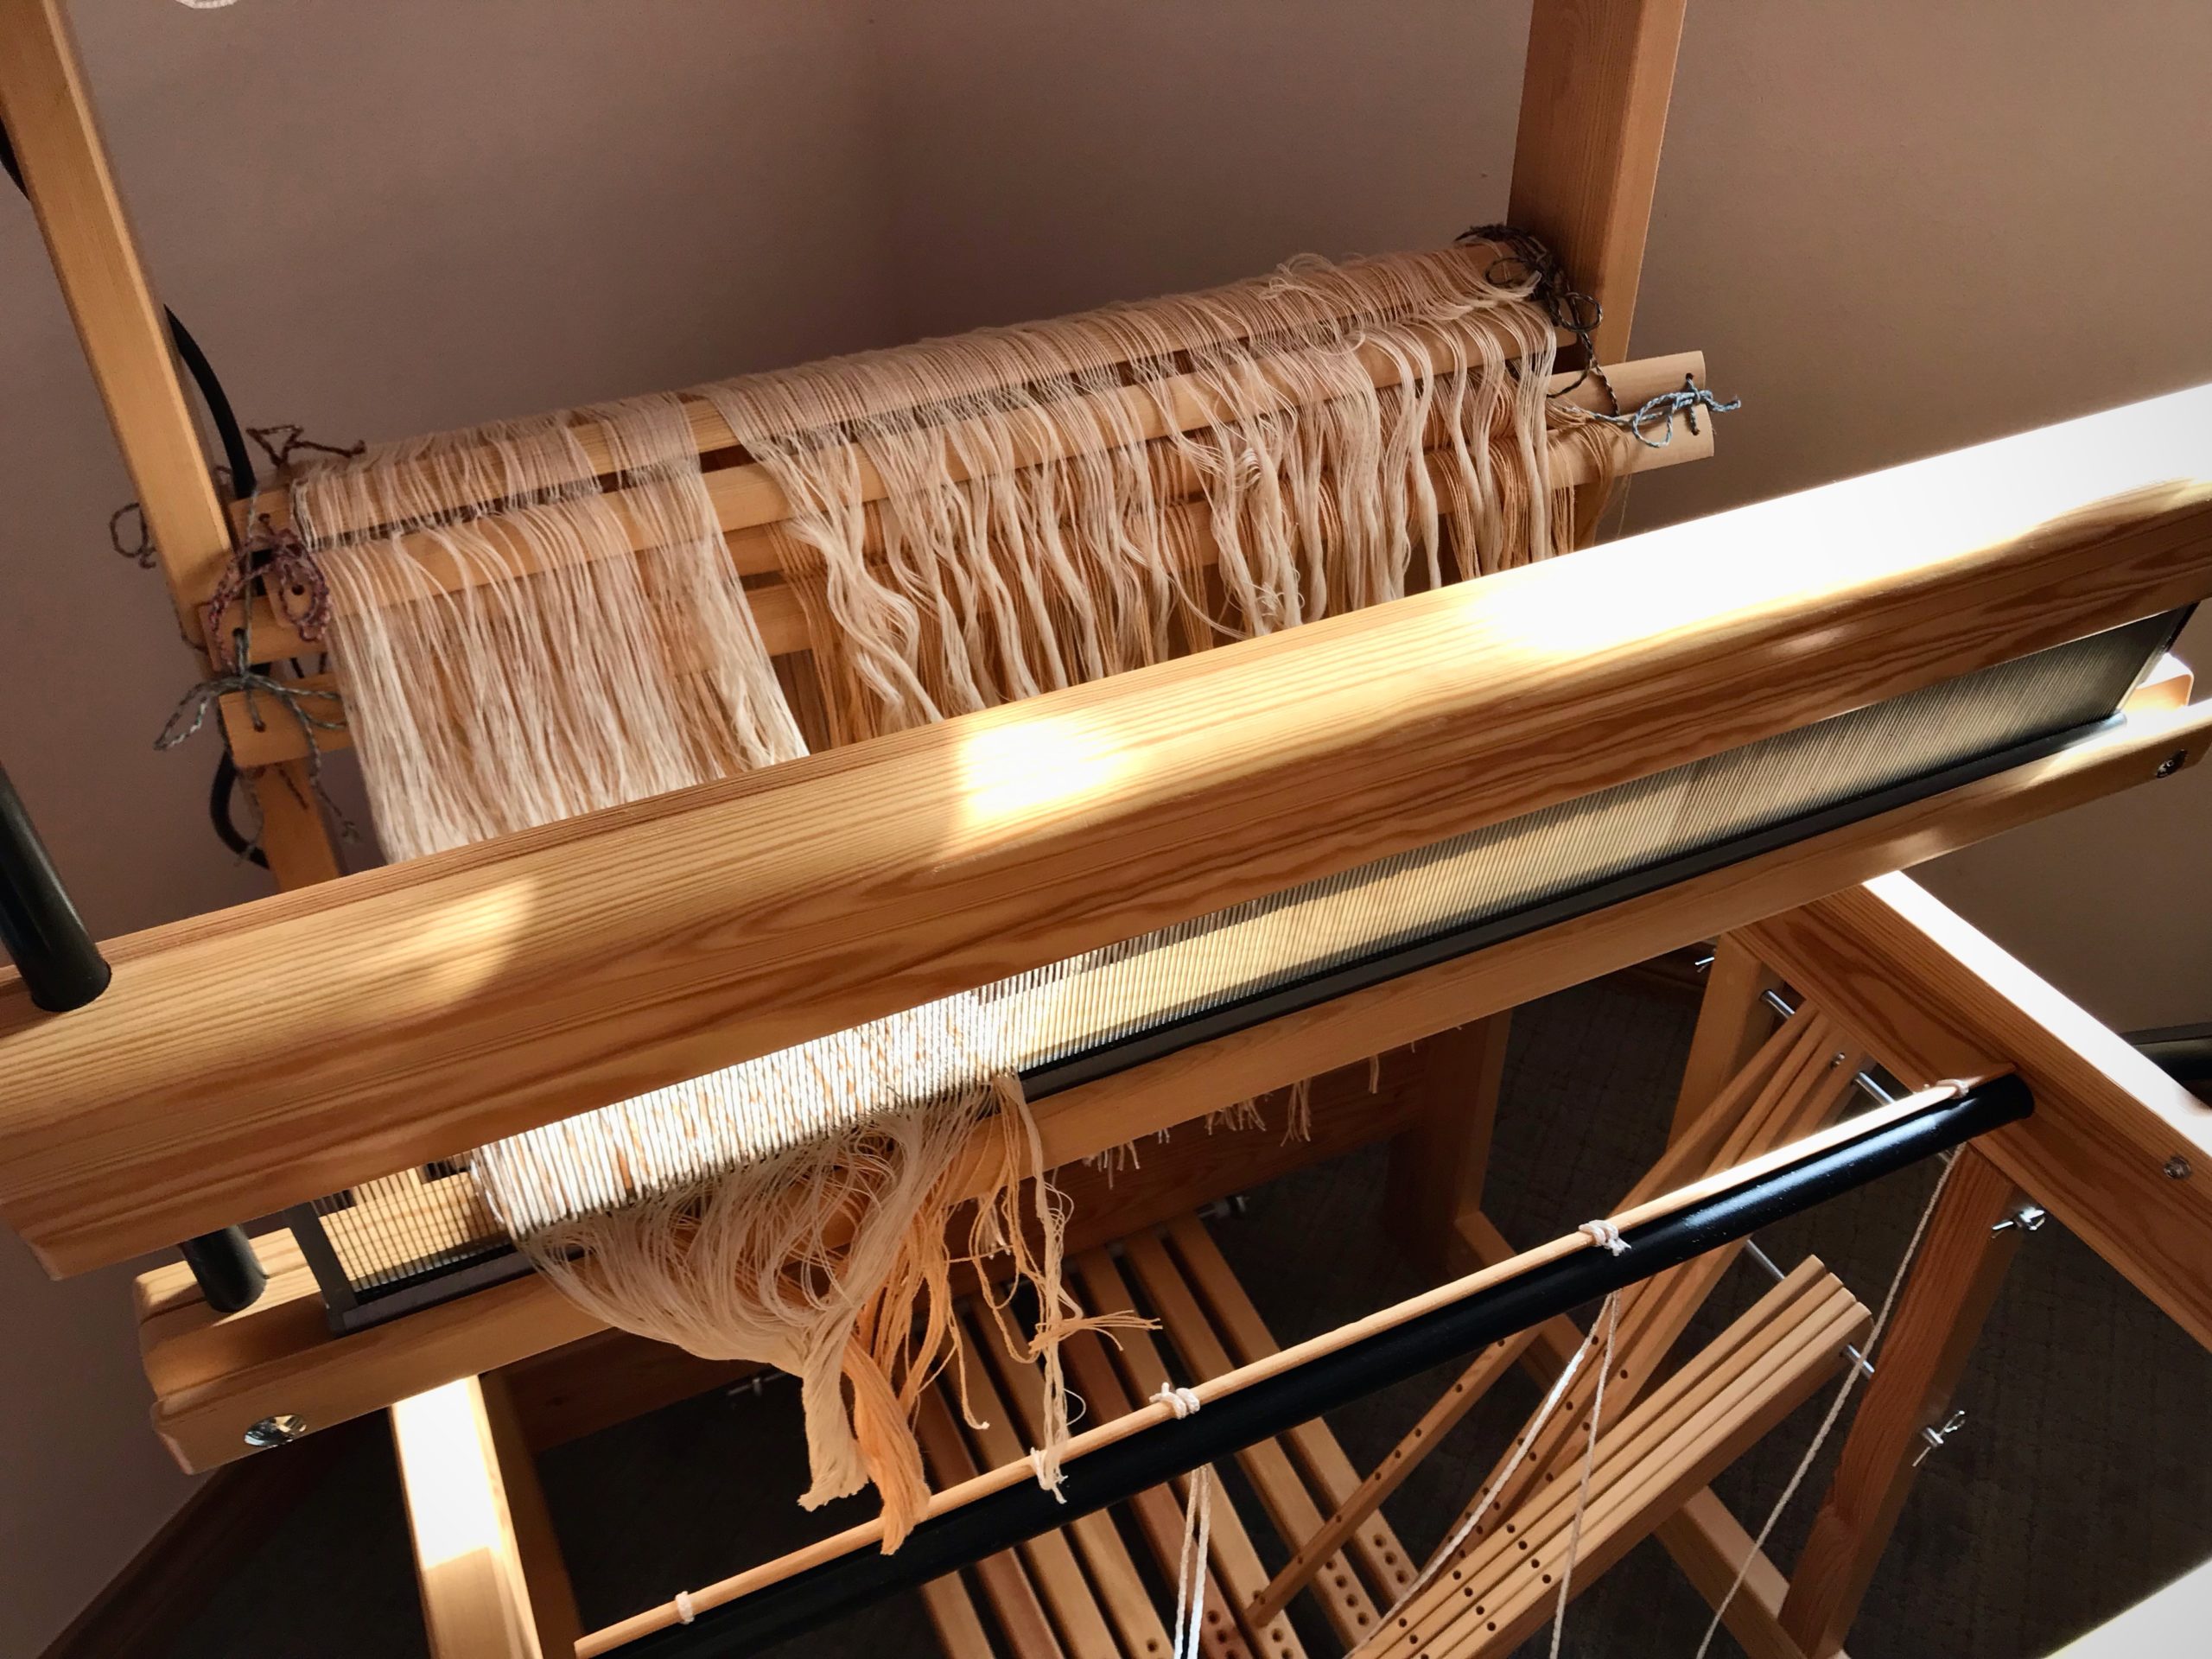
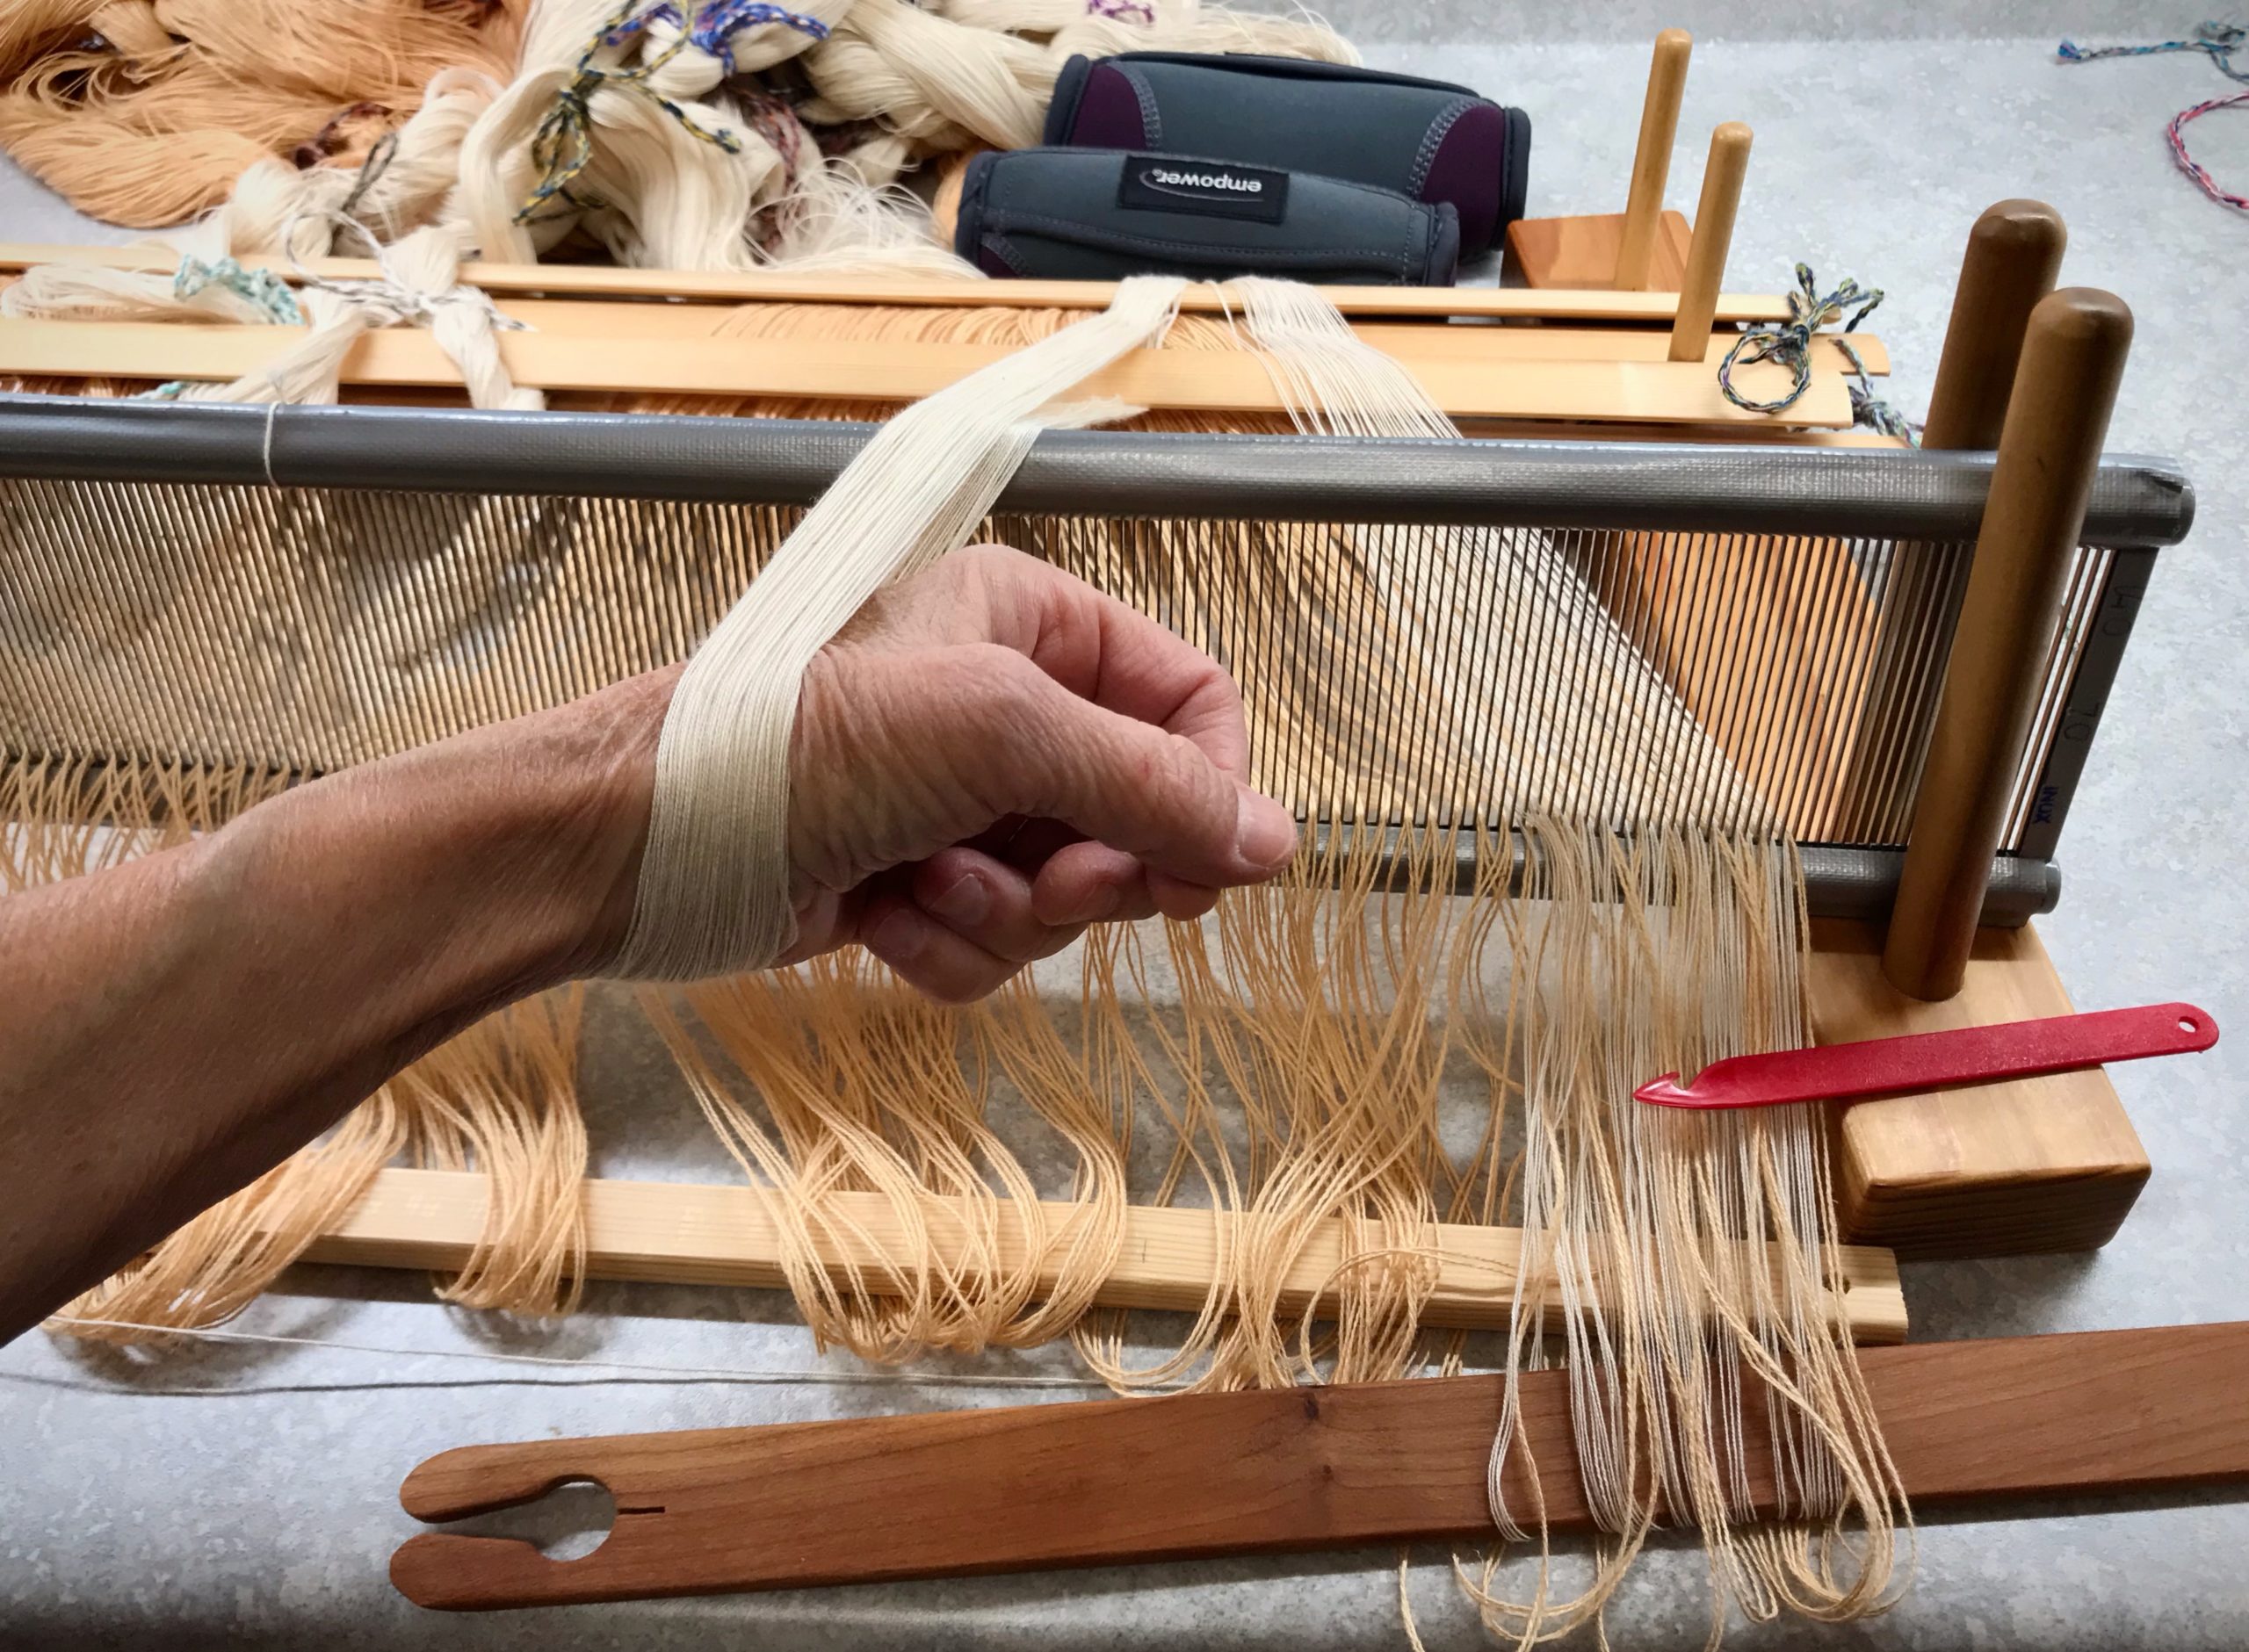
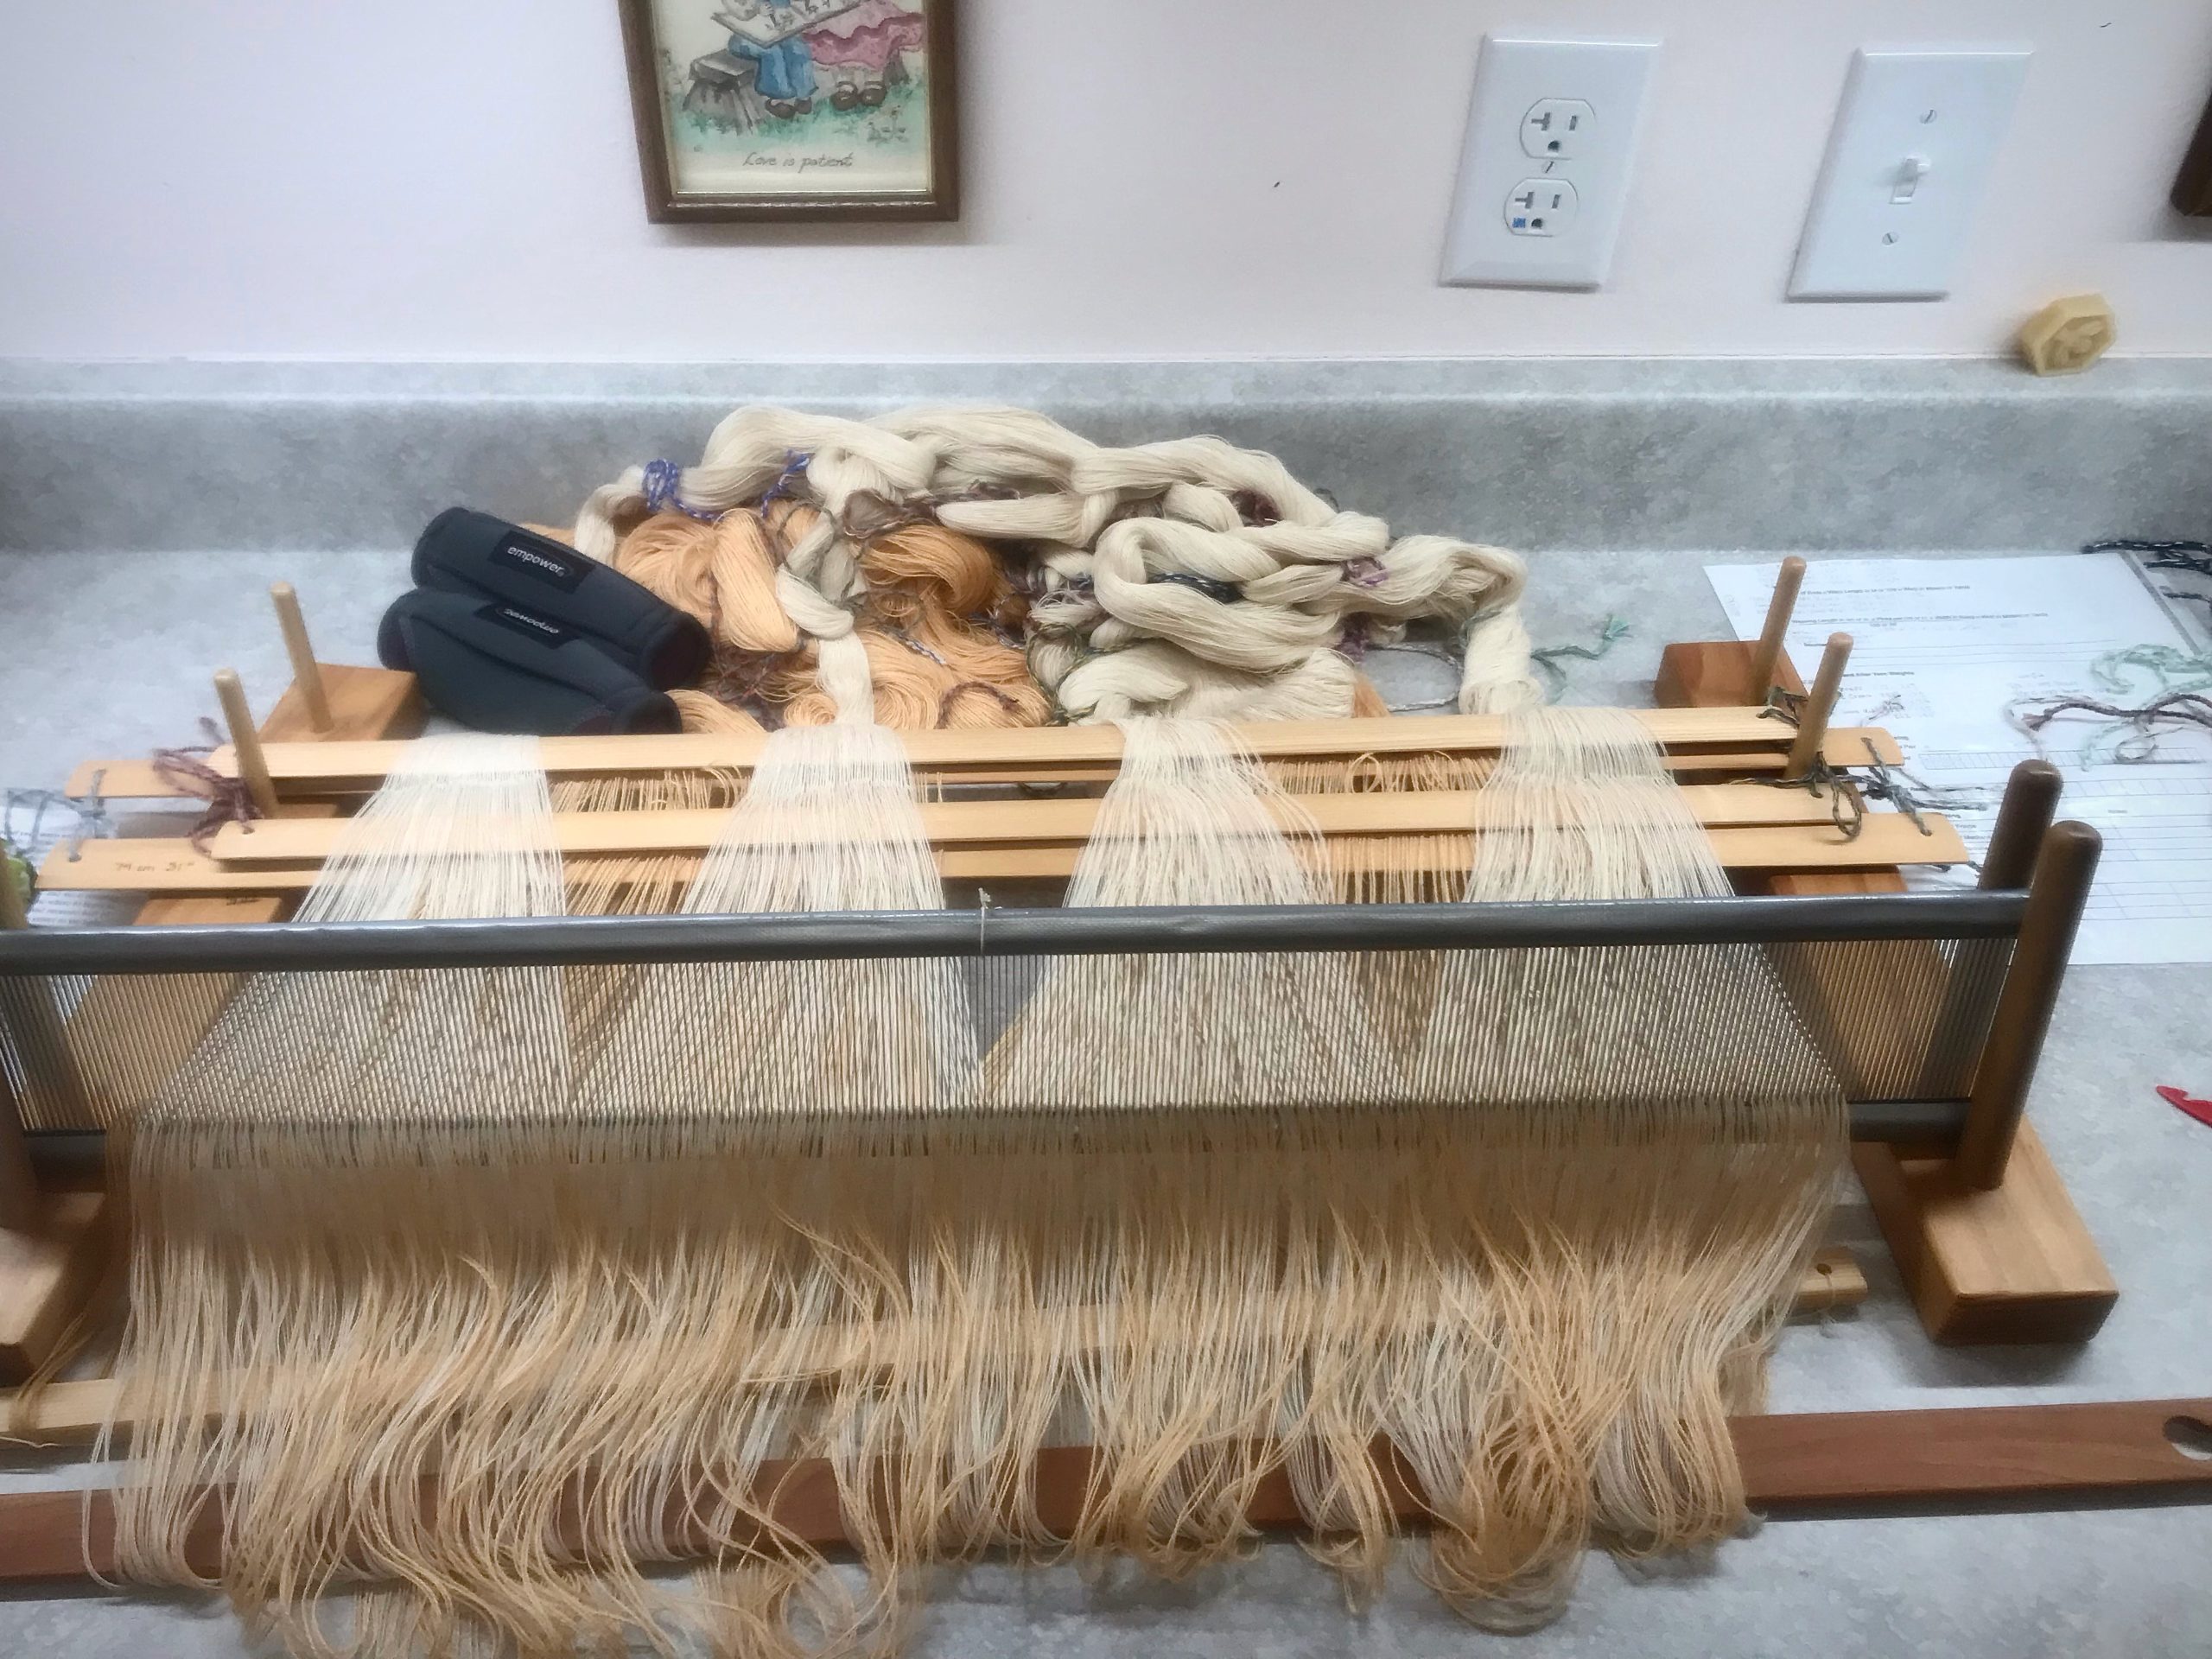
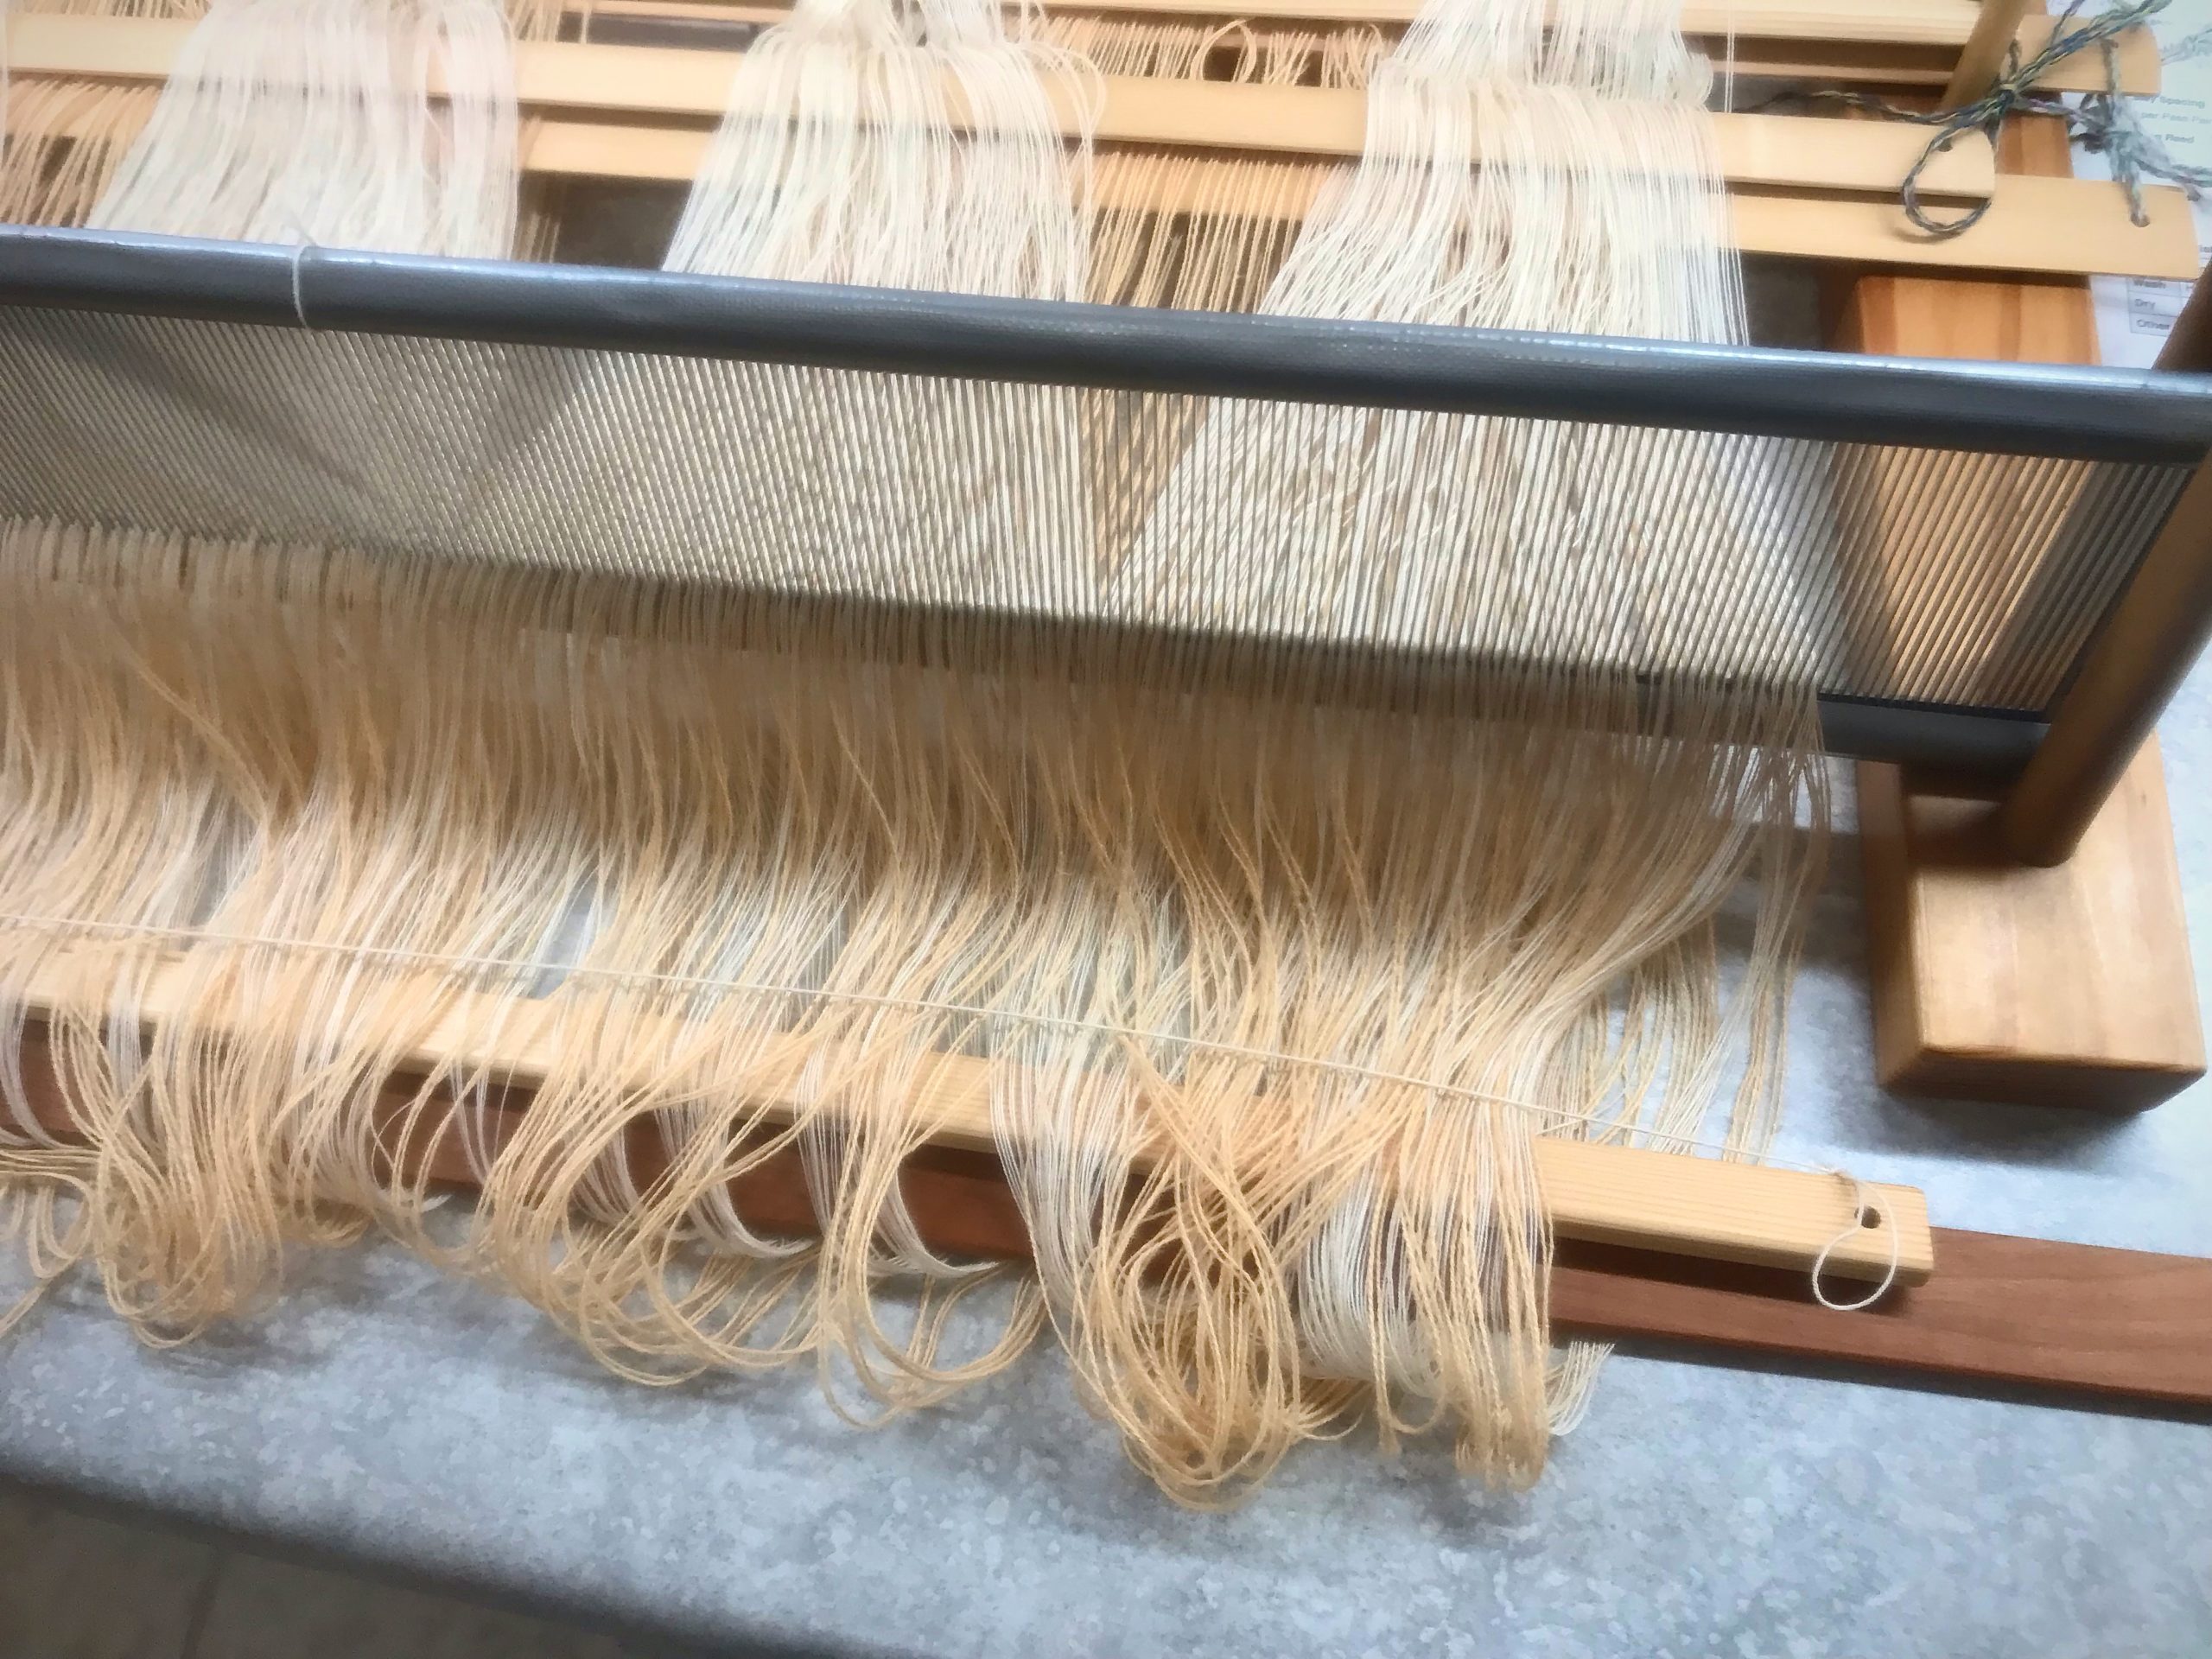
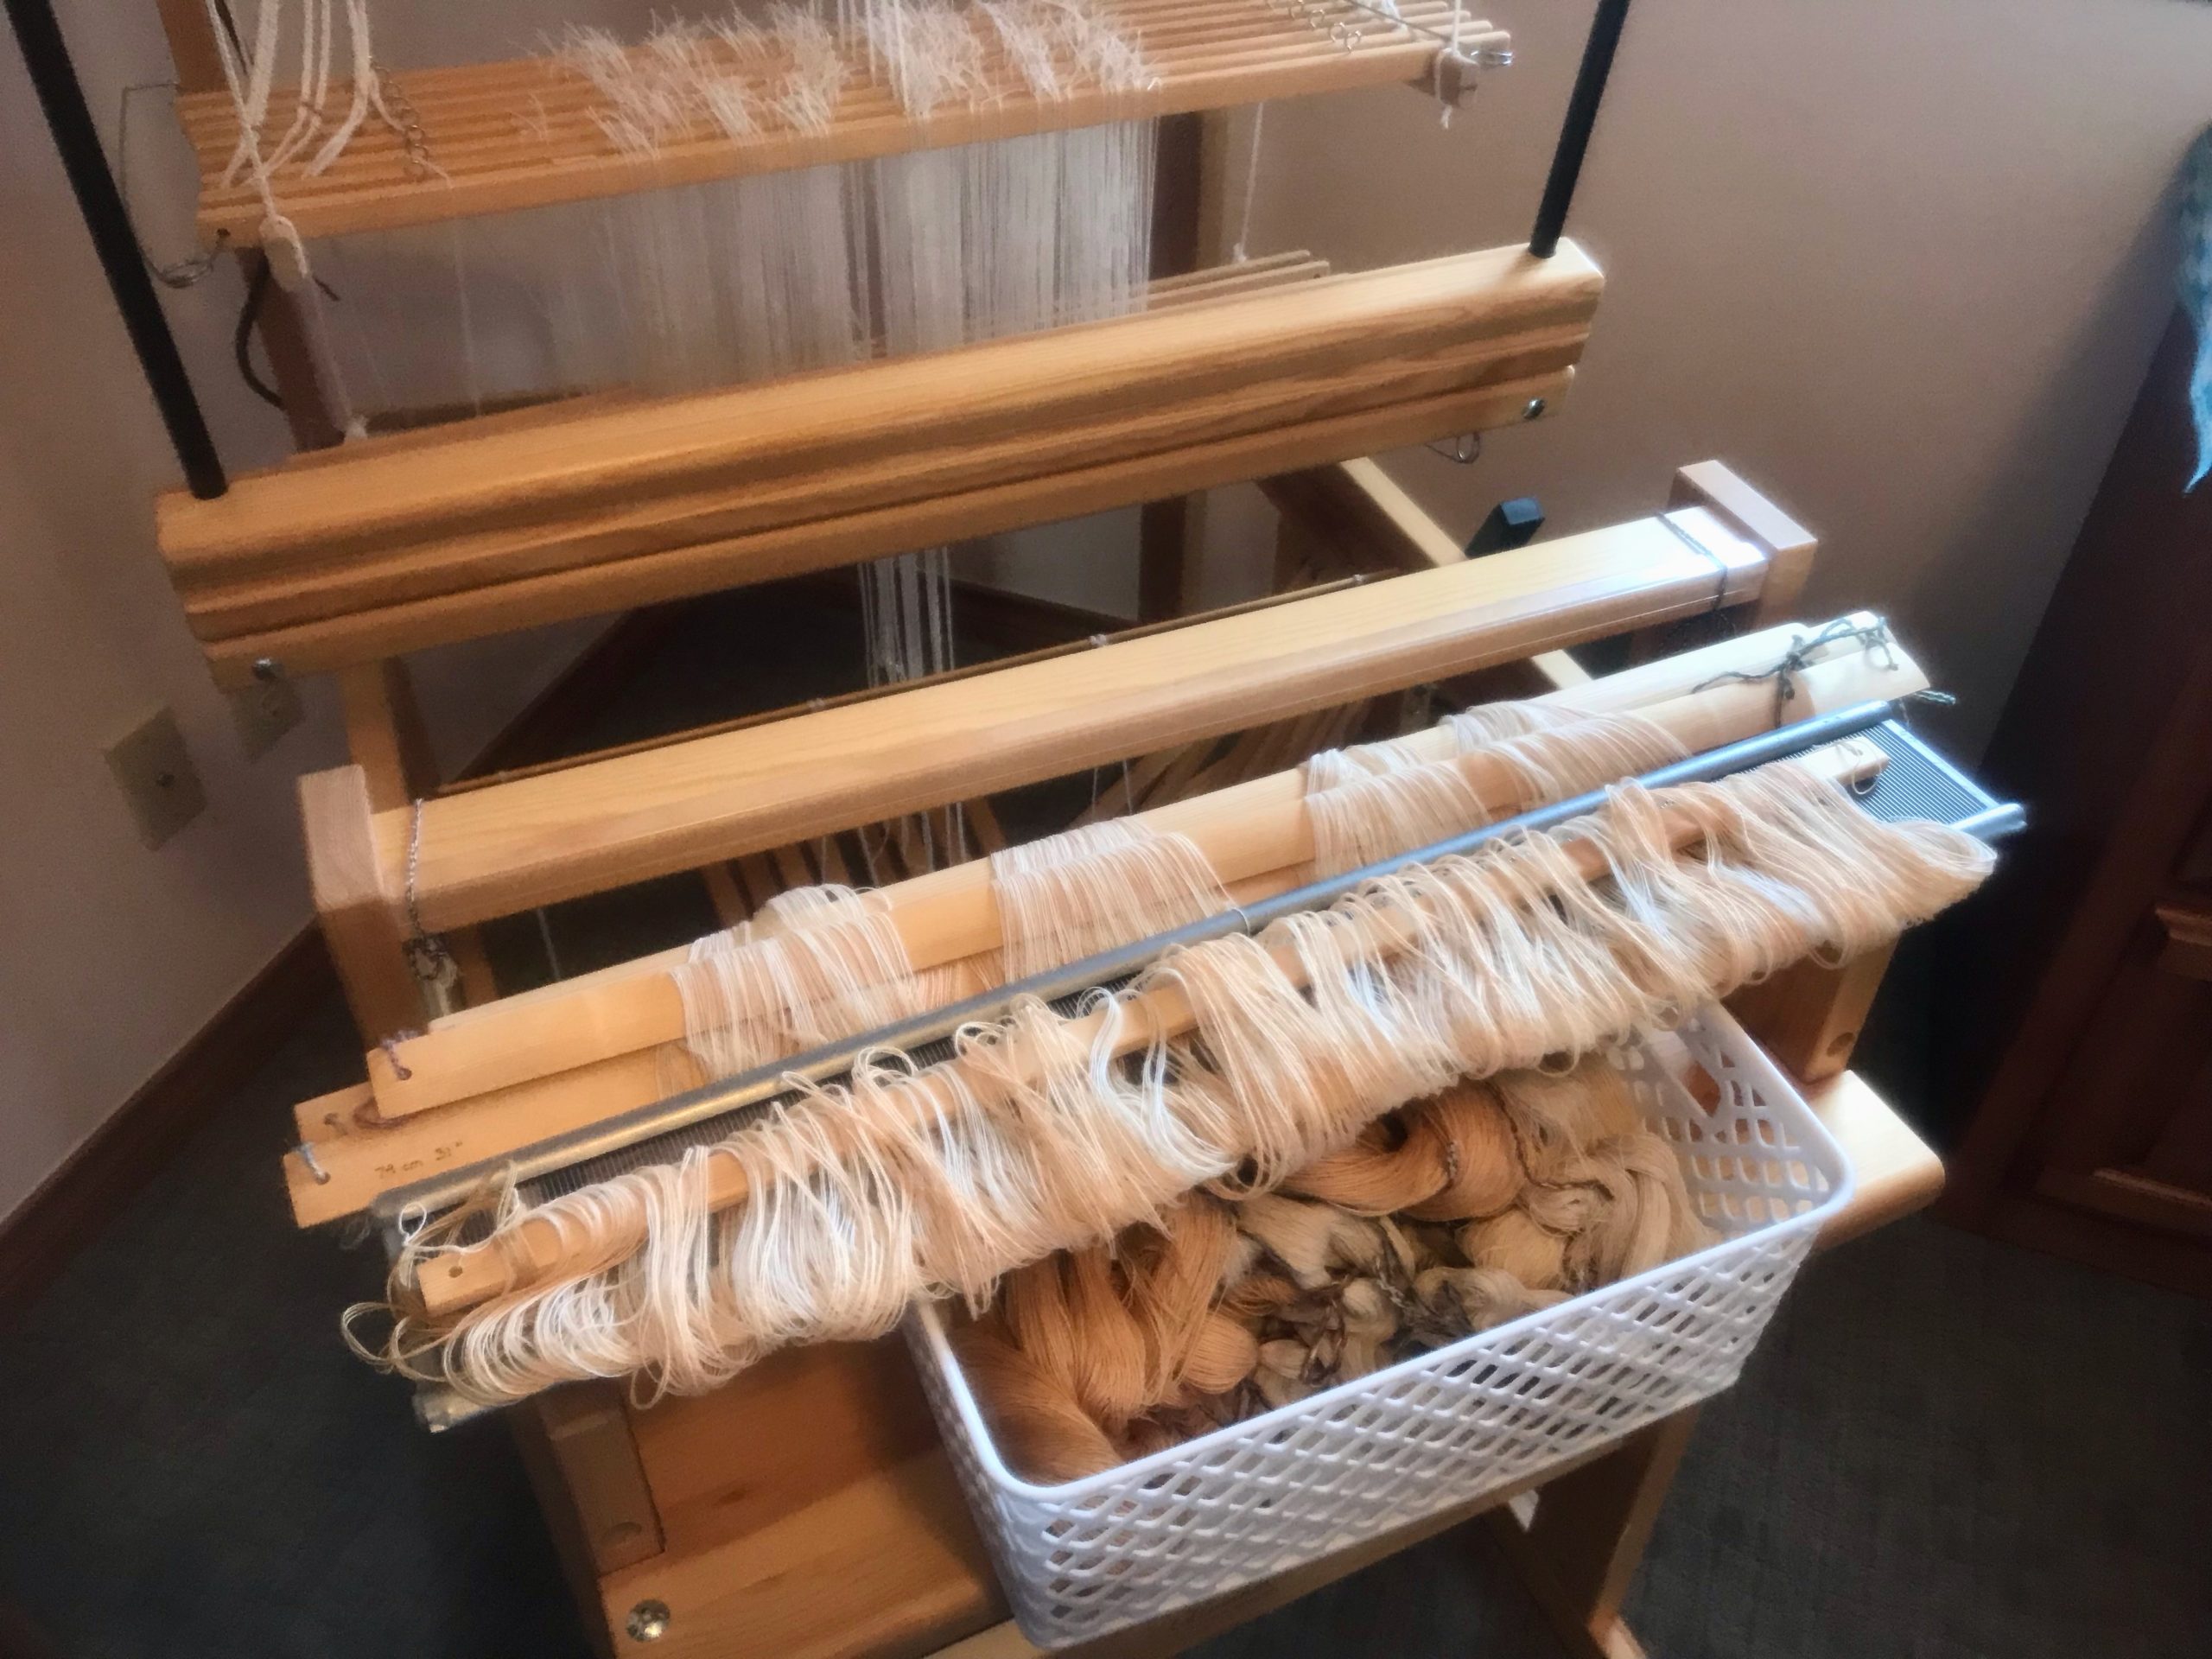
I am spreading this warp (twowarps, actually) at the worktable. One warp is 22/2 cottolin, with a narrow selvedge border of 16/2 cotton. The other warp is 20/2 cotton. This intriguing double-width project is in the Nr.3 – 2021 issue of Väv Magazine—Winnie’s Linen-Cotton Crinkly Tablecloth, by Winnie Poulsen, p.52. Despite some intrepidation, I am jumping in!
Coordinating two warps onto a single tie-on bar is tricky business. The last time I did the two-warp maneuver at the loom I nearly lost a lease crossand my sanity. The advantage of pre-sleying these warps at the table is that everything is secure. Nothing is teetering. At the worktable I can clearly see what to do for each step. Within minutes, I’m hopeful that this adventure will indeed be worth it. (Pre-sleying a warp on the table is expertly explained in Learning to Warp Your Loom, by Joanne Hall, pgs.19-20.)
Second stick holds both warps’ loops.Tie-on bar slides in and warps’ loops are secured by tying a string from one end to the other.Extra stick is removed. Two warps, each with its own set of lease sticks, have been spread in the reed. No mishaps along the way!Warp bouts are in the basket. The two sets of lease sticks, the reed, and the cloth beam tie-on bar sit on top. We’re ready to beam this warp on the Julia!
Spreading a warp (or two) is a lot like spreading hope. We come to the Lord Jesus weary, having tried hard to make things work on our own. He welcomes us with open arms and reveals the time-tested way of trusting him, one step at a time. Now, like threads being sleyed across the dents of a reed, threads of hope spread throughout our being. The threads are secured. Come weary; receive rest; spread hope.
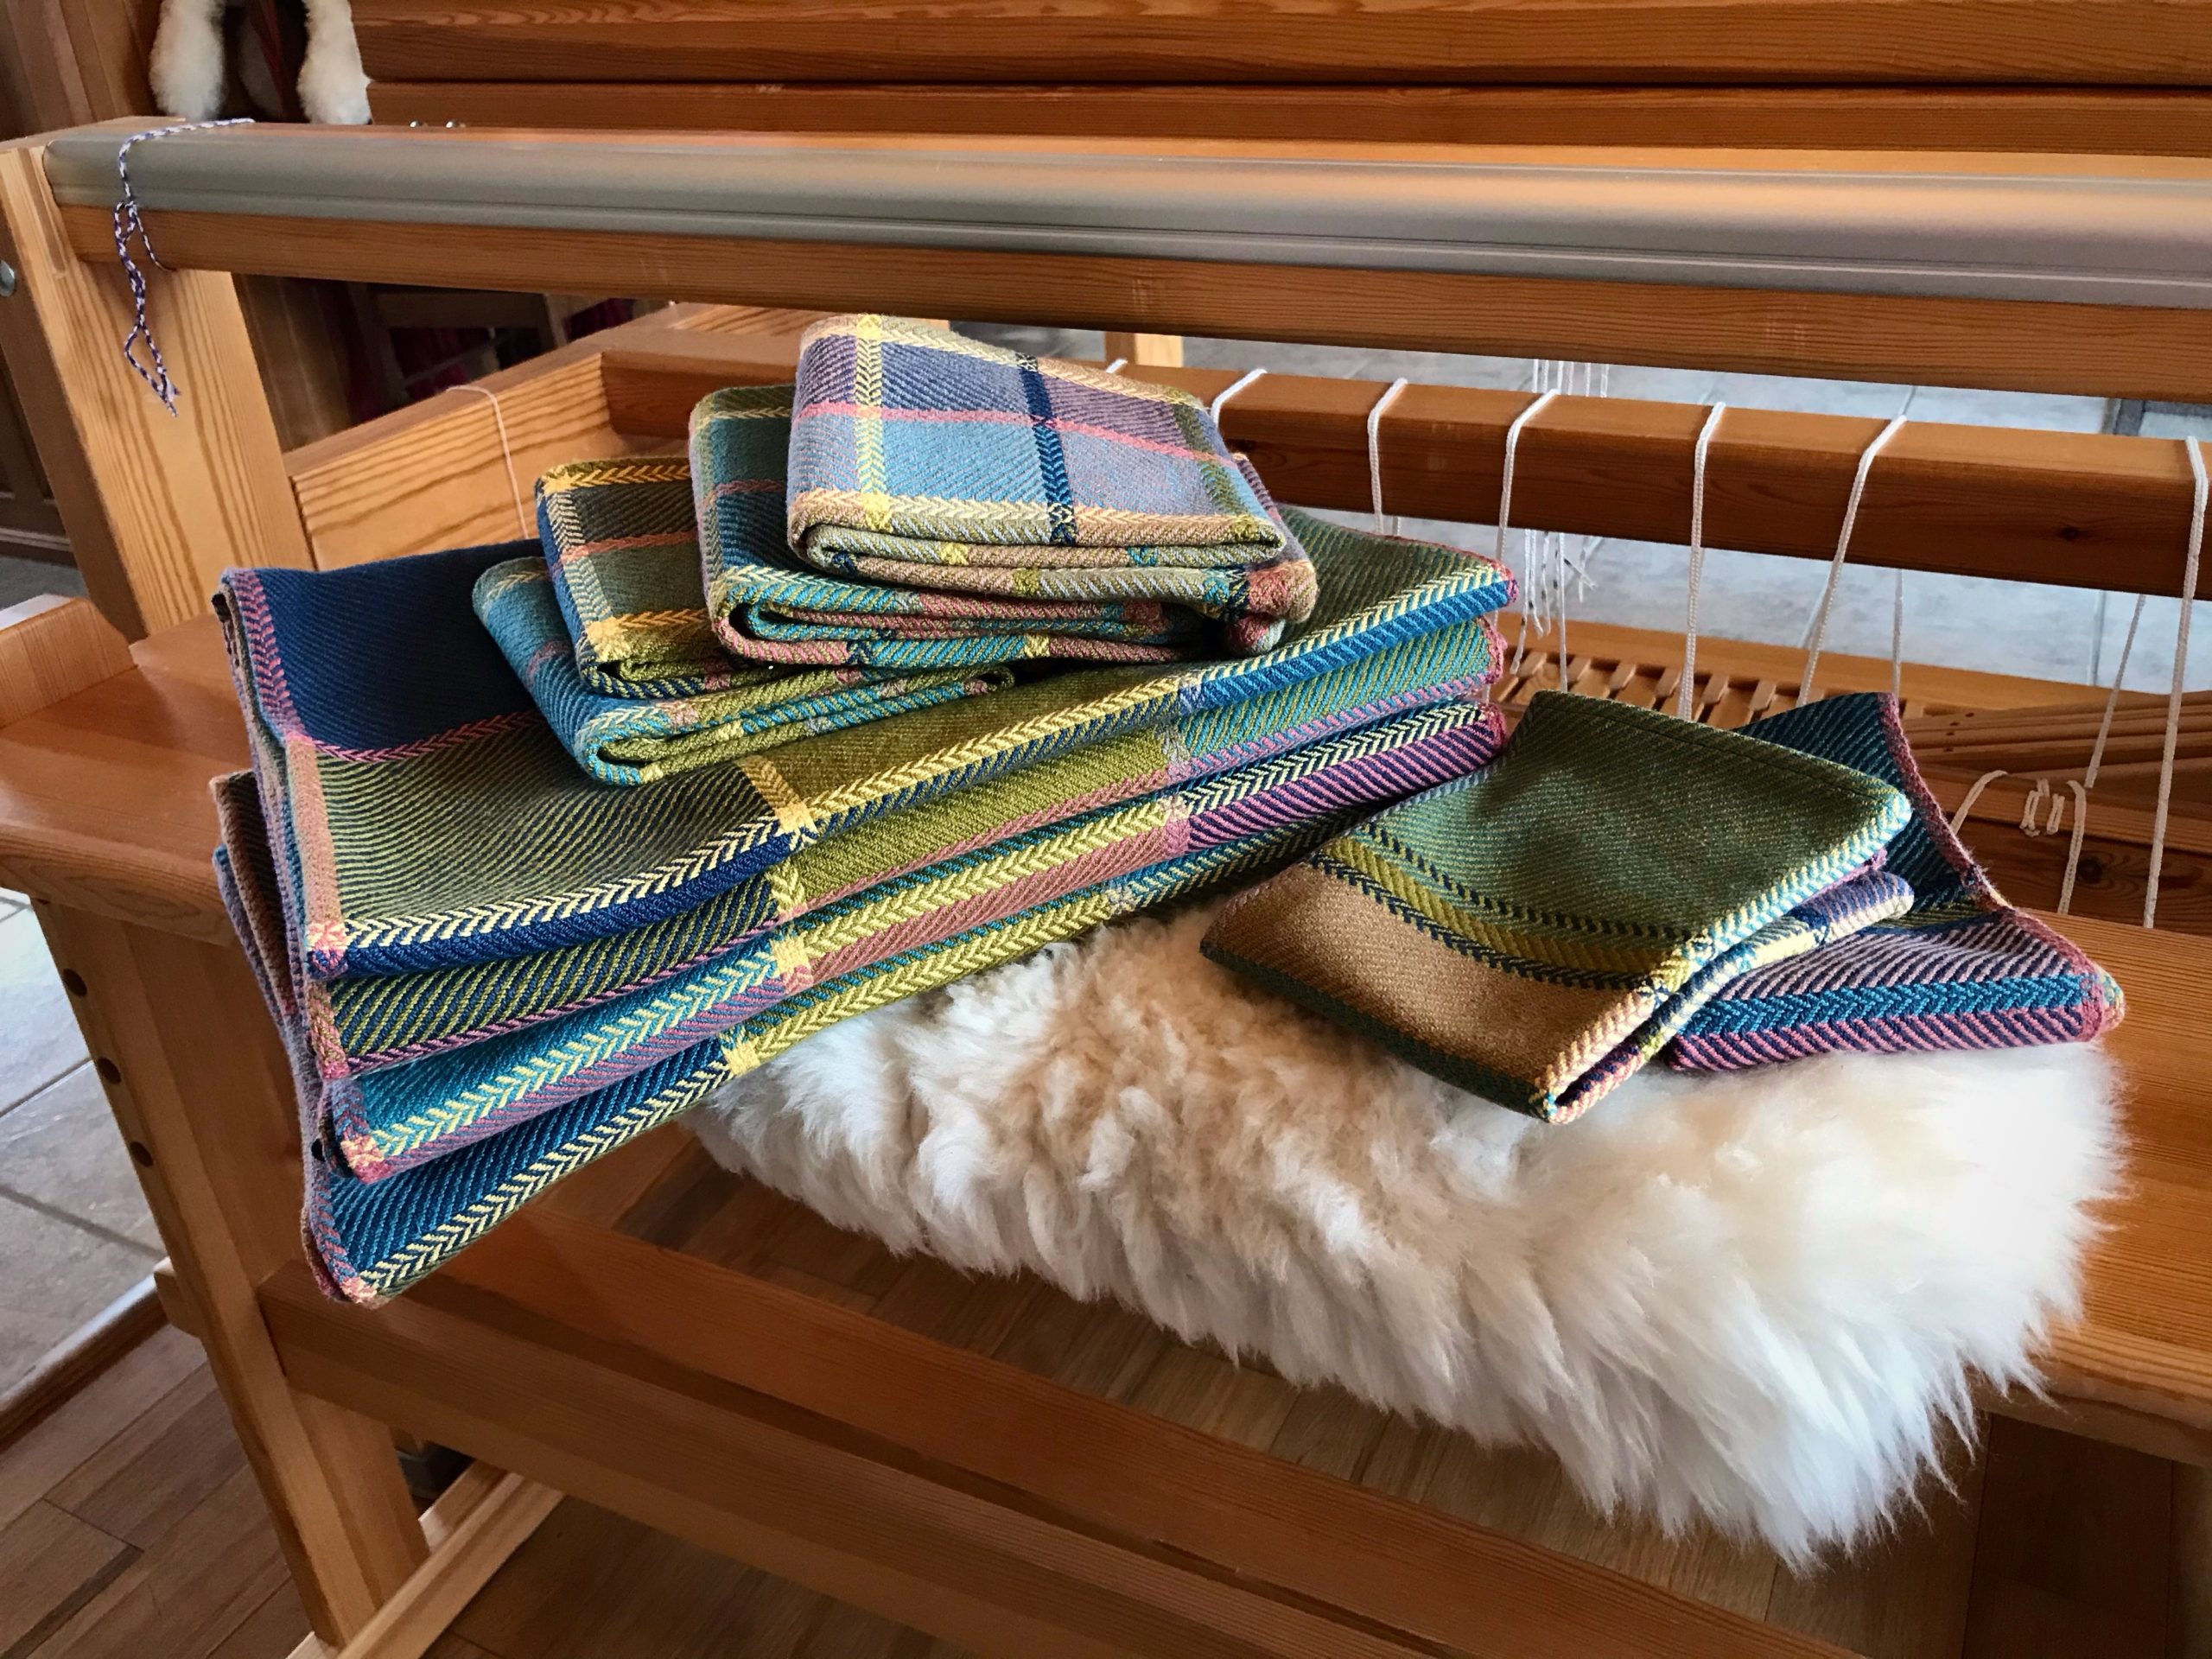
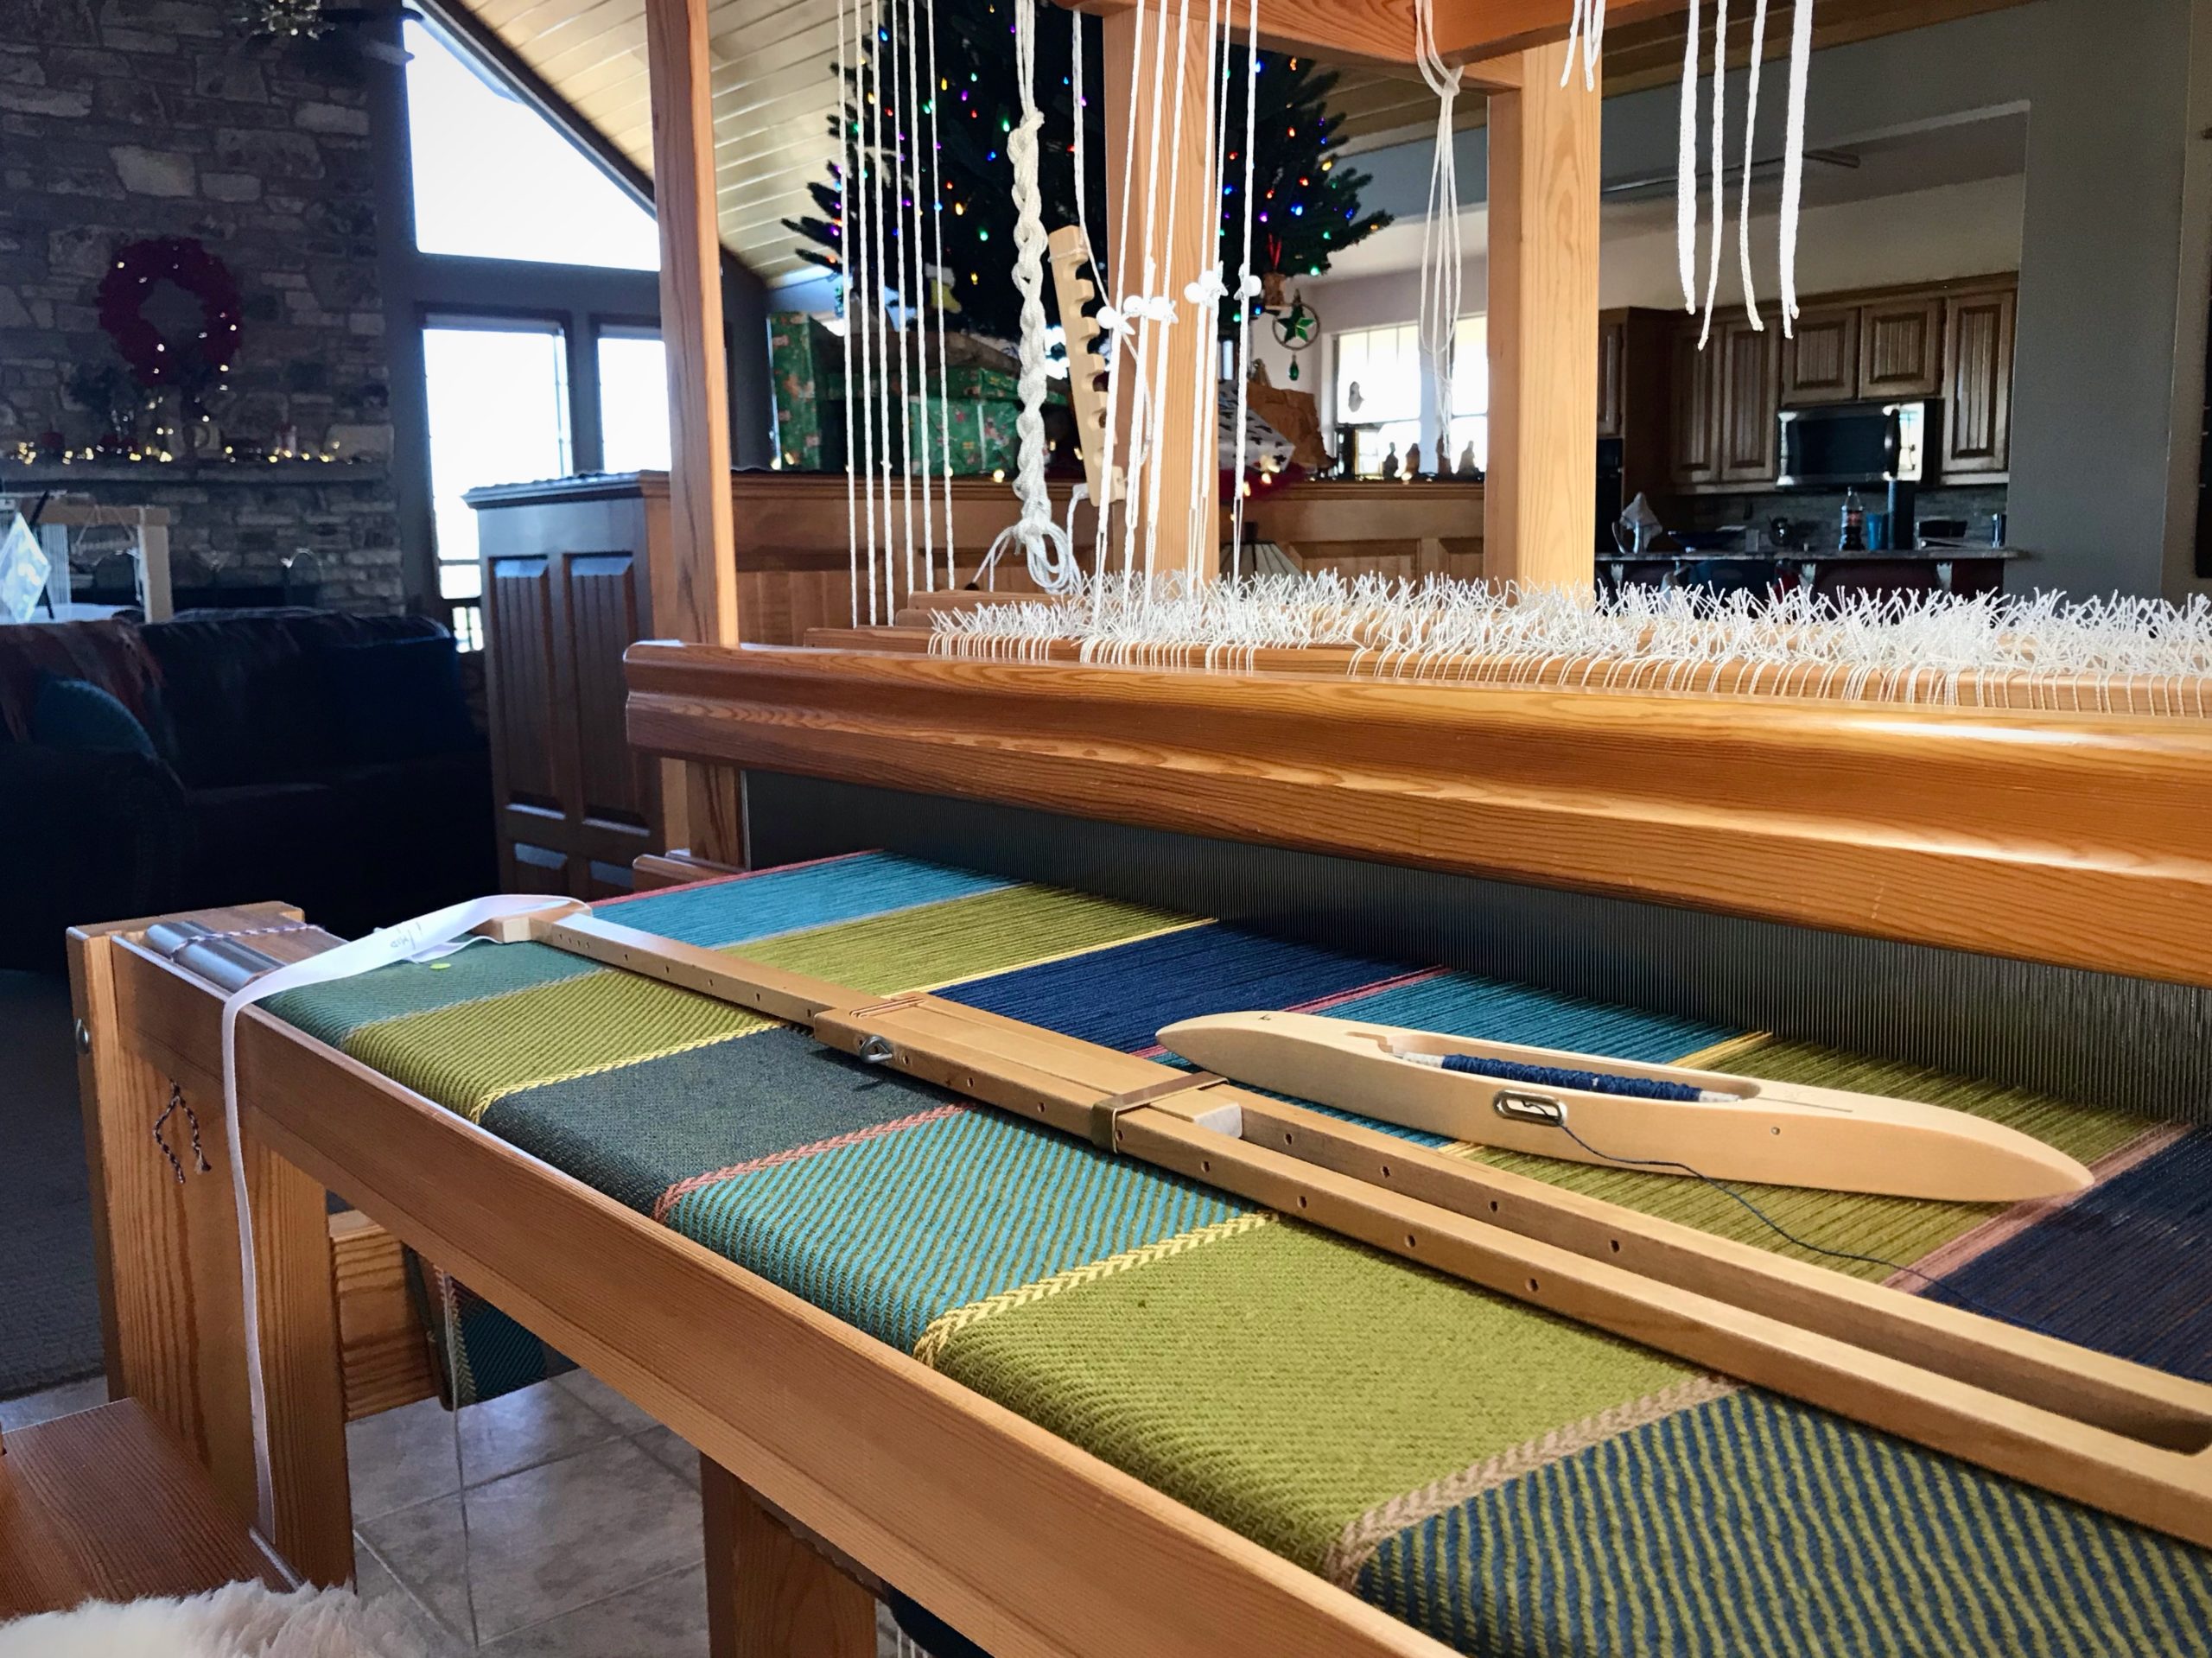
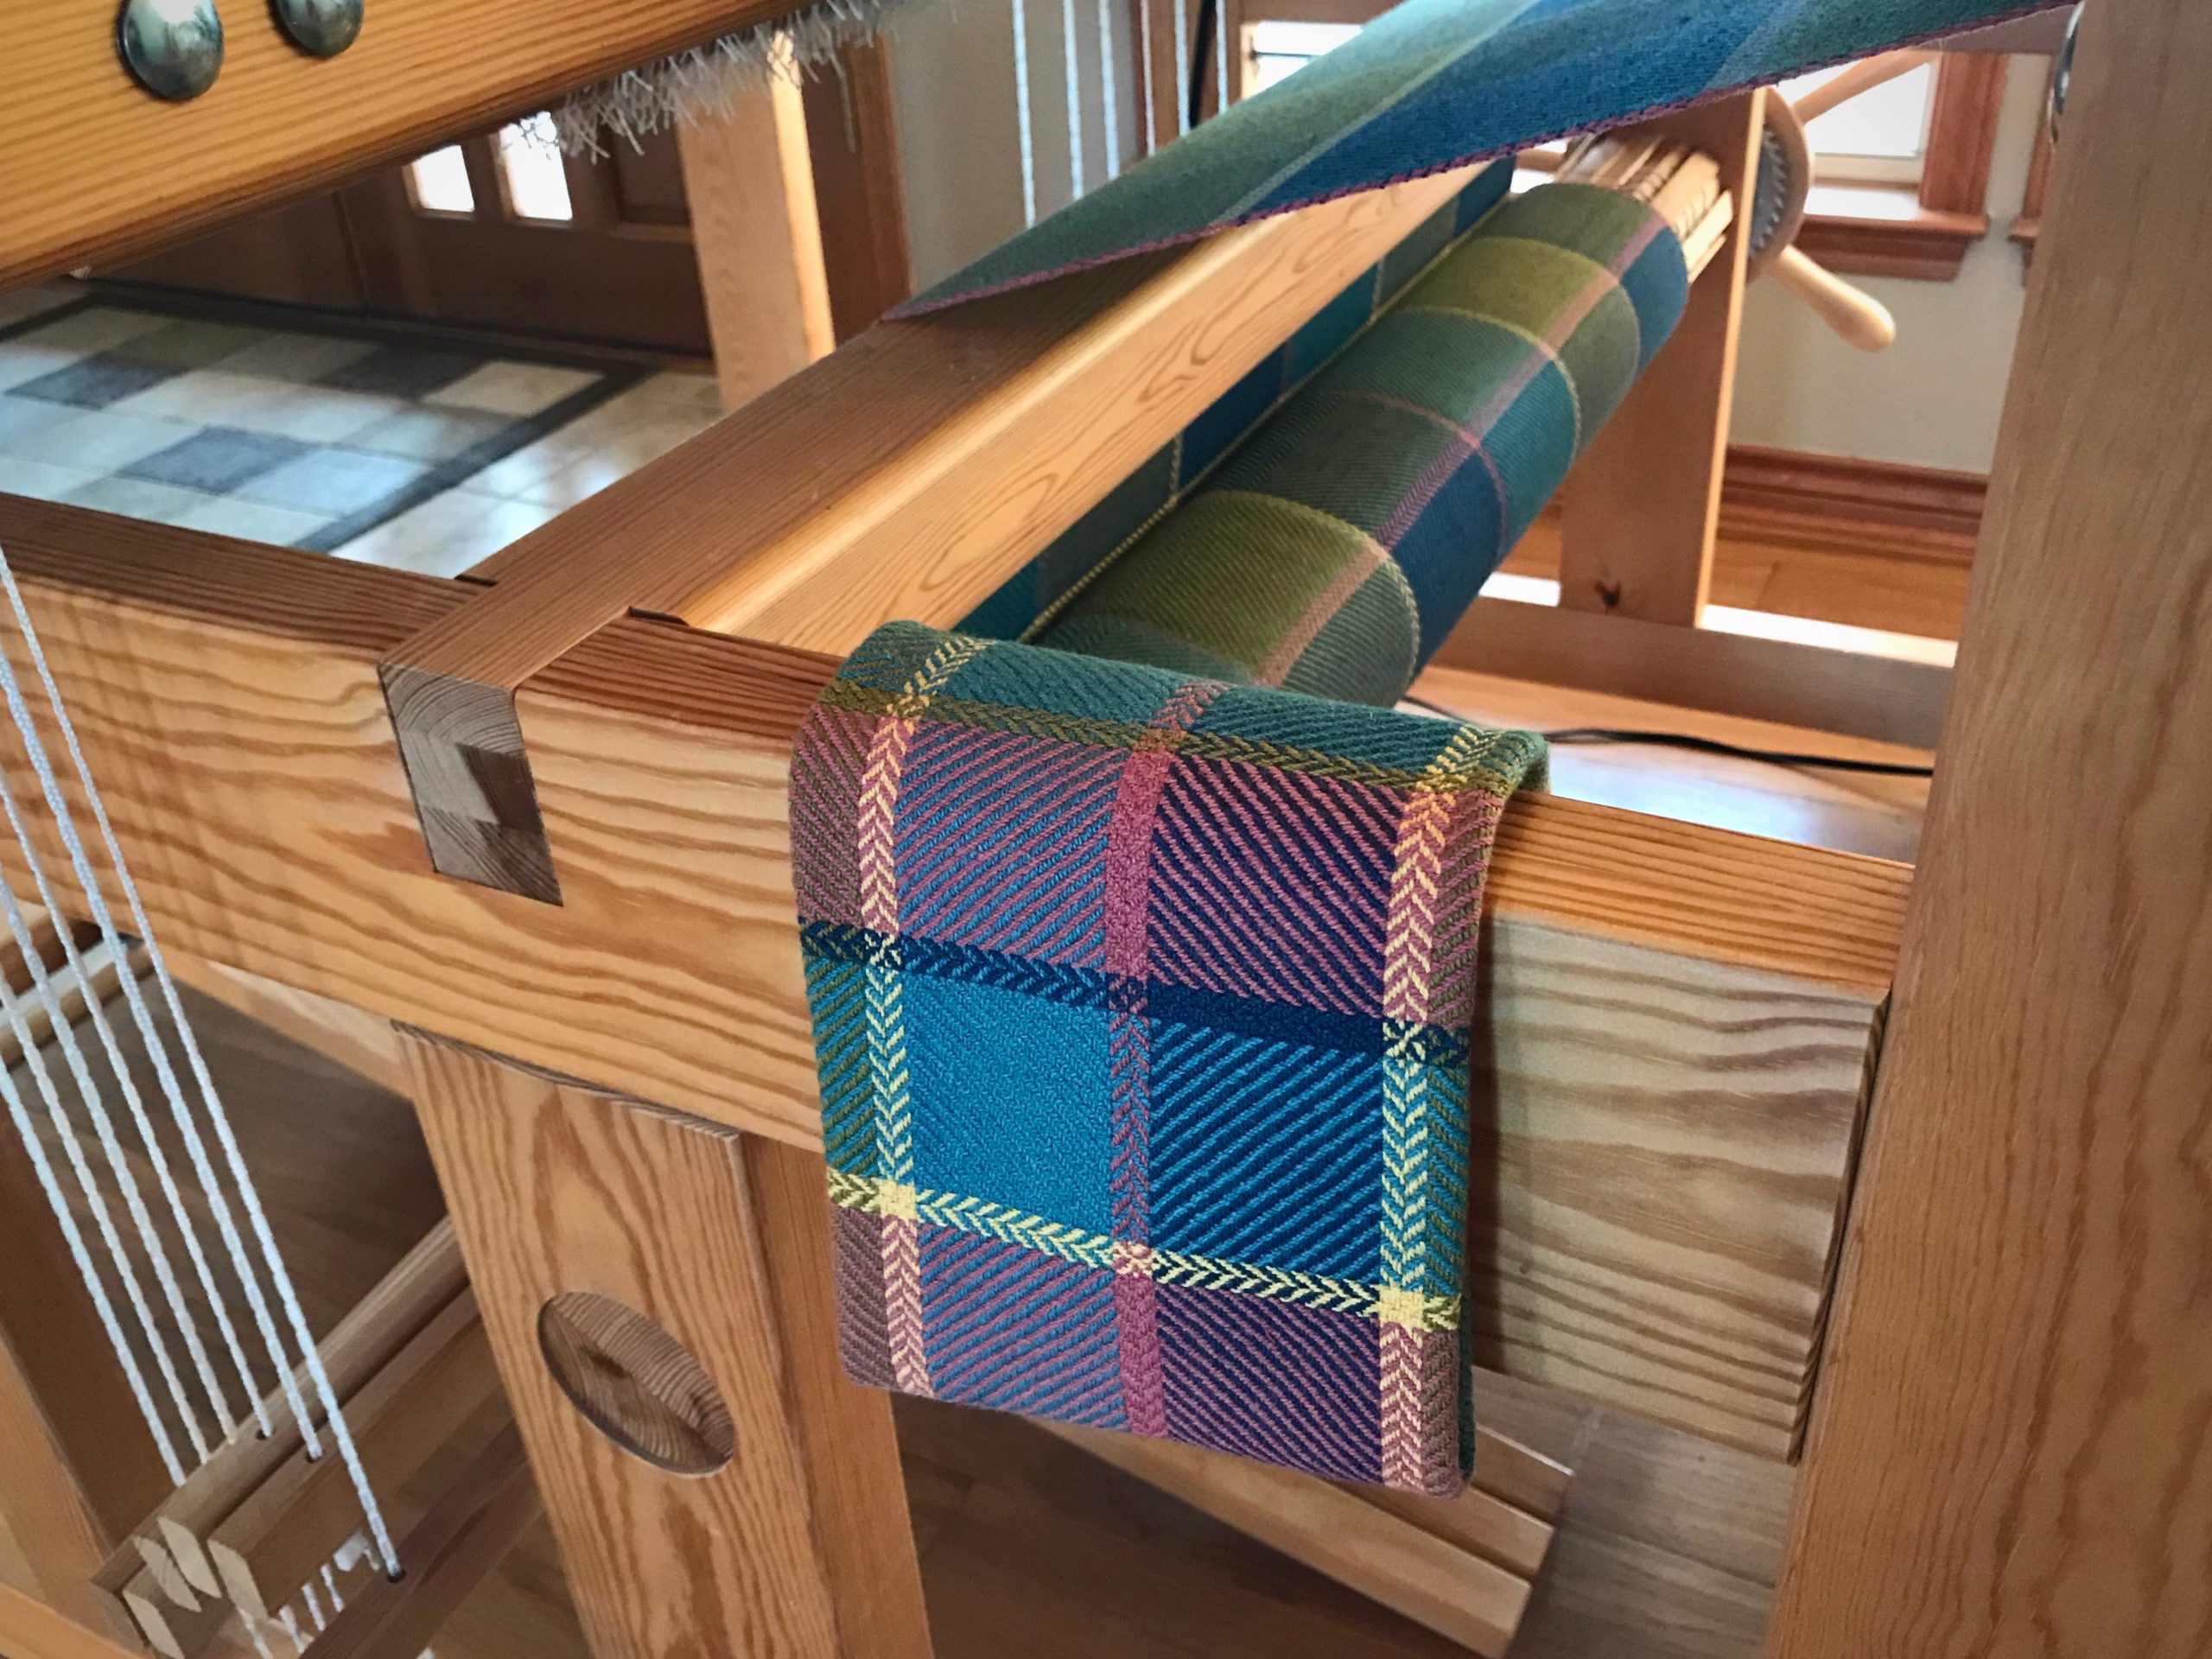
Jubilation Bath Towels are completed, just in time for Christmas! They go with the Jubilation Hand Towels I wove earlier this year, named with my father in mind. (See Process Review: Jubilation Hand Towels.) Nothing deterred my father from deep abiding joy. These bath towels are a tribute, as well, to my husband’s patience. He requested handwoven bath towels a few years ago. Laughably, my first eager attempt resulted in towels scratchy enough to be used as sandpaper back scratchers. Now, finally, we have absorbent and soft handwoven cottolin bath towels suitable for my Prince Charming.
Jubilation Bath Set. Four bath towels, four hand towels, two wash cloths. Cottolin warp and weft. Six-shaft broken and reverse twill.
Don’t you love it when the end of the warp yields bonus results? Just enough warp to make a pair of wash cloths, in which every one of the seven colors of quills was emptied. Hurrah!
Cottolin bath towel set, soft and absorbent. All quills were emptied off in the final length of warp, making colorful wash cloths.
Enjoy the start-to-finish process with me in this slideshow video:
I have an efficient way to handle weft color changes. It’s very simple. This is for those instances when I need to end one weft thread and start a new one. As a rule, I take care of weft tails as I go. I don’t want to come back to them later if I don’t have to. If I tuck in each weft tail at the beginning of the row, thickness from the extra wefts builds up at the selvedge, especially if I’m weaving horizontal stripes. The method I describe reduces the extra wefts, and eliminates having to tuck any tails in.
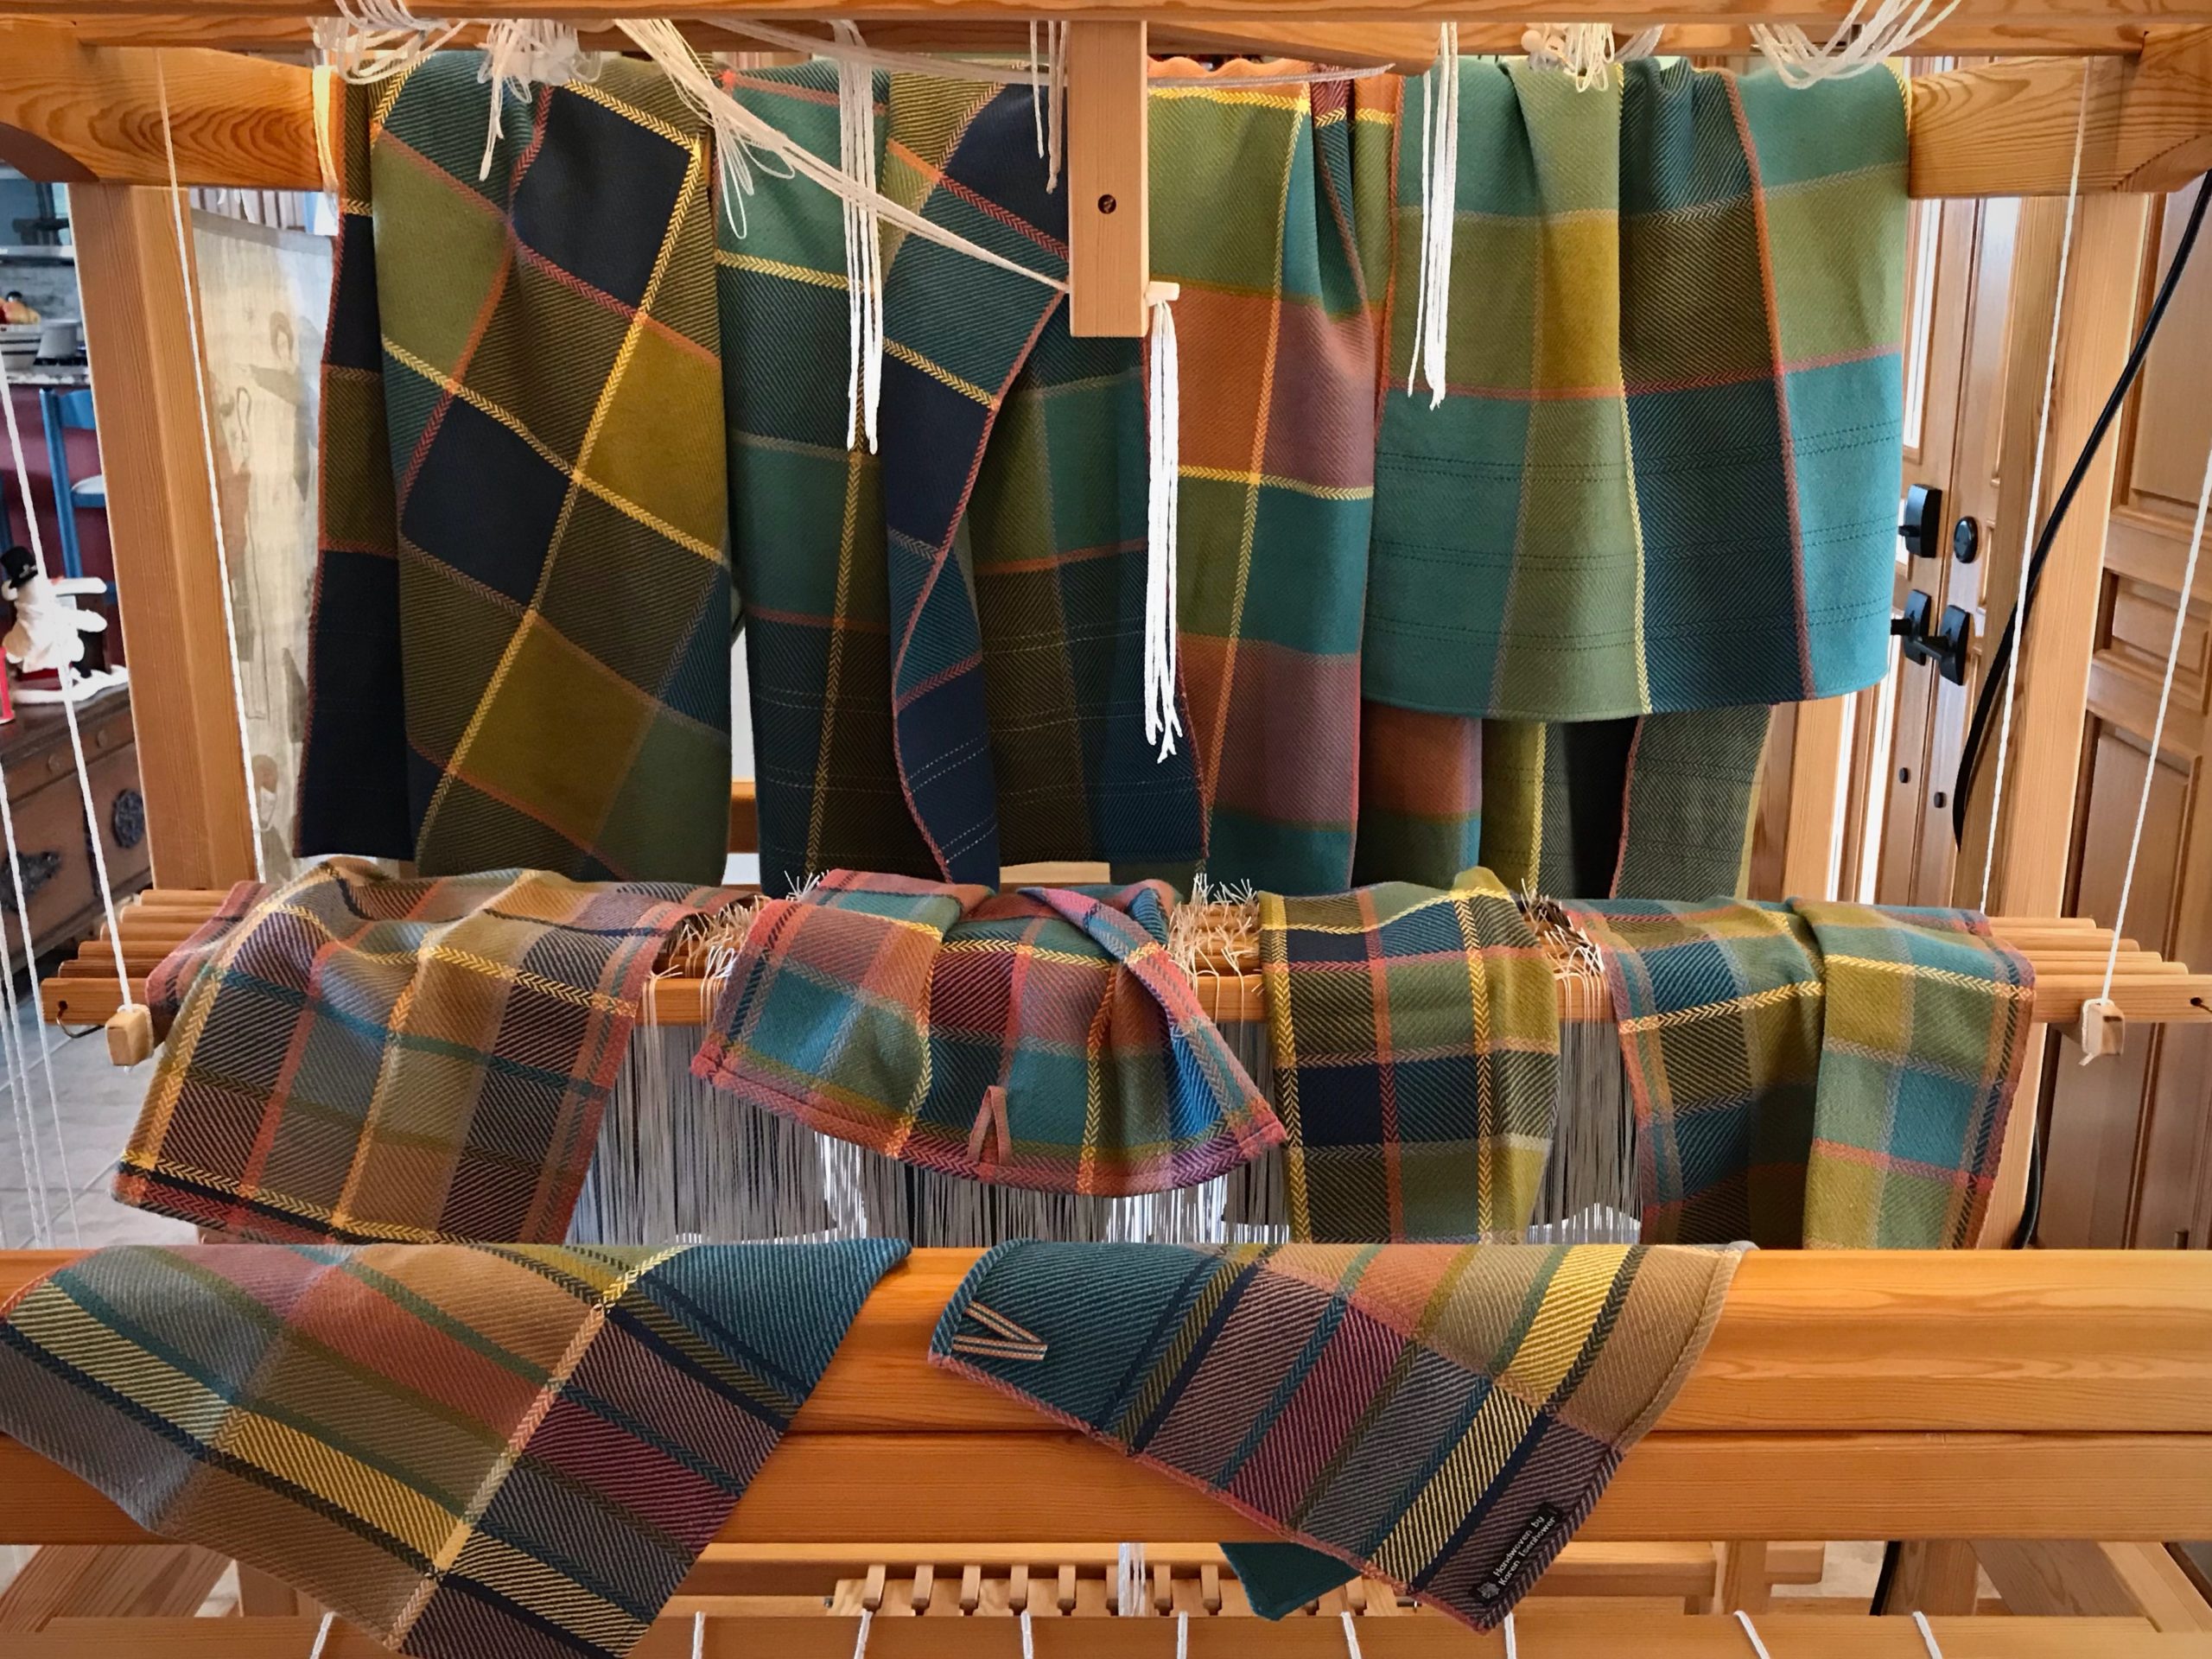
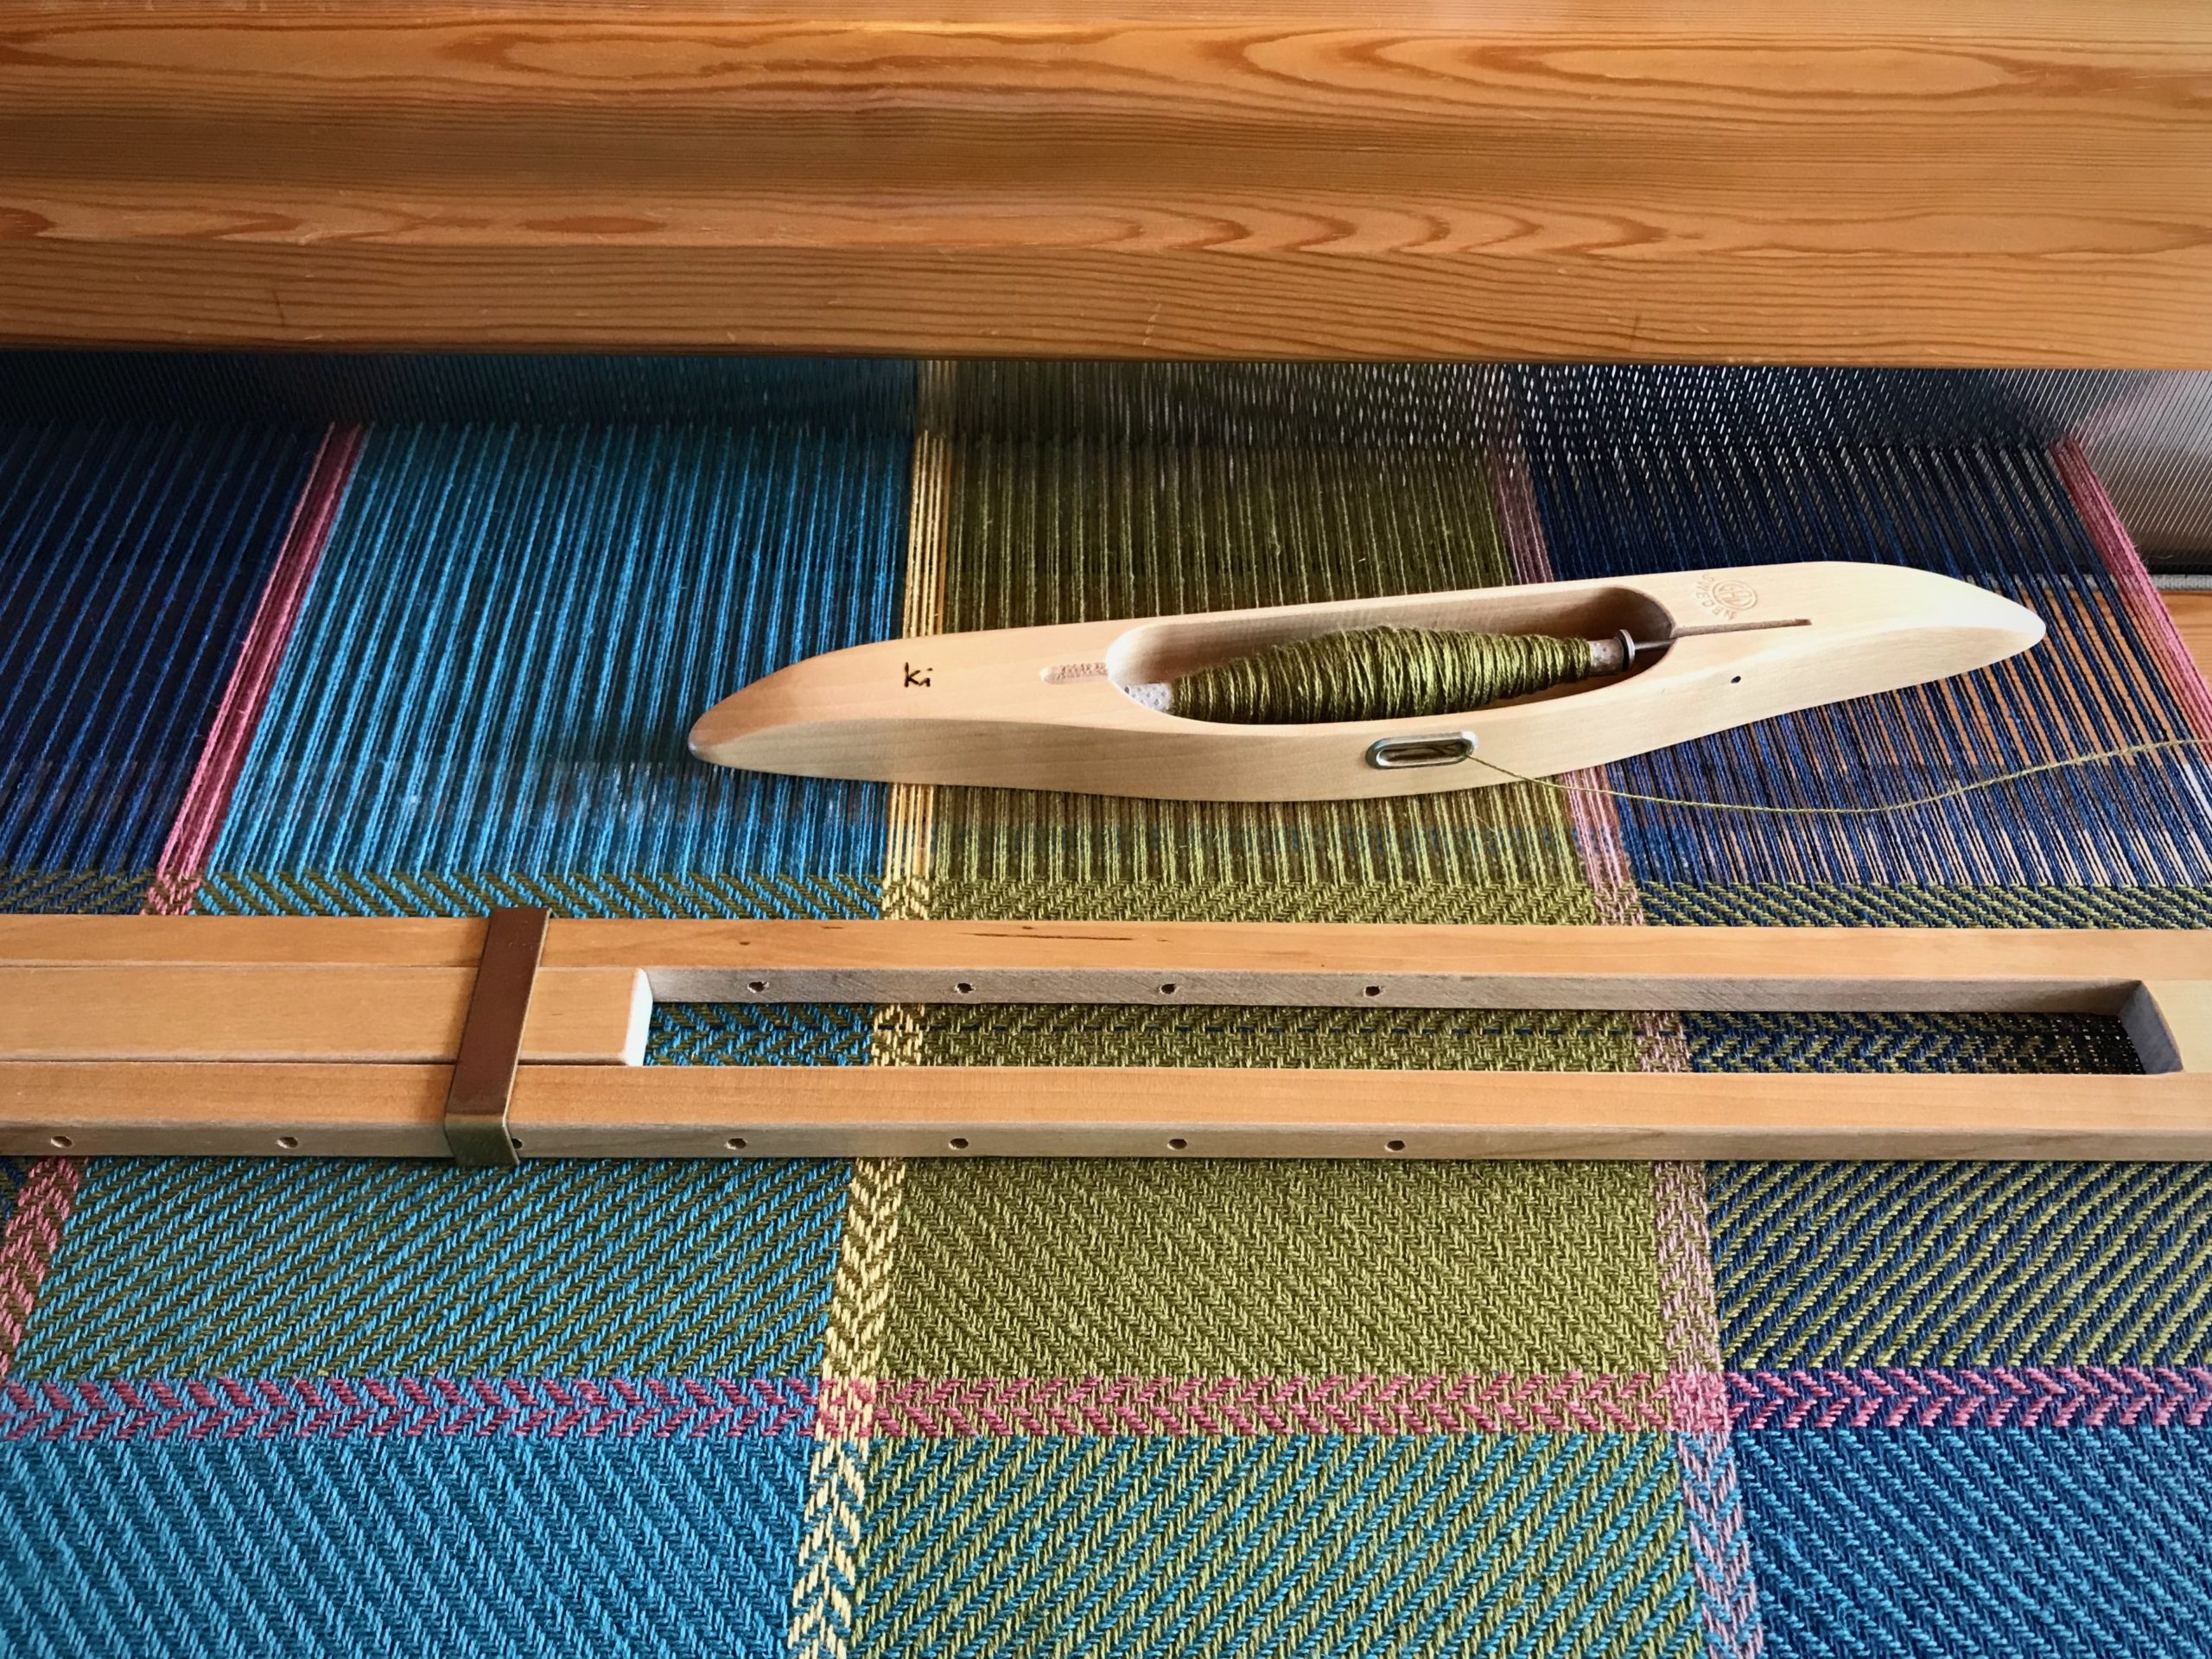
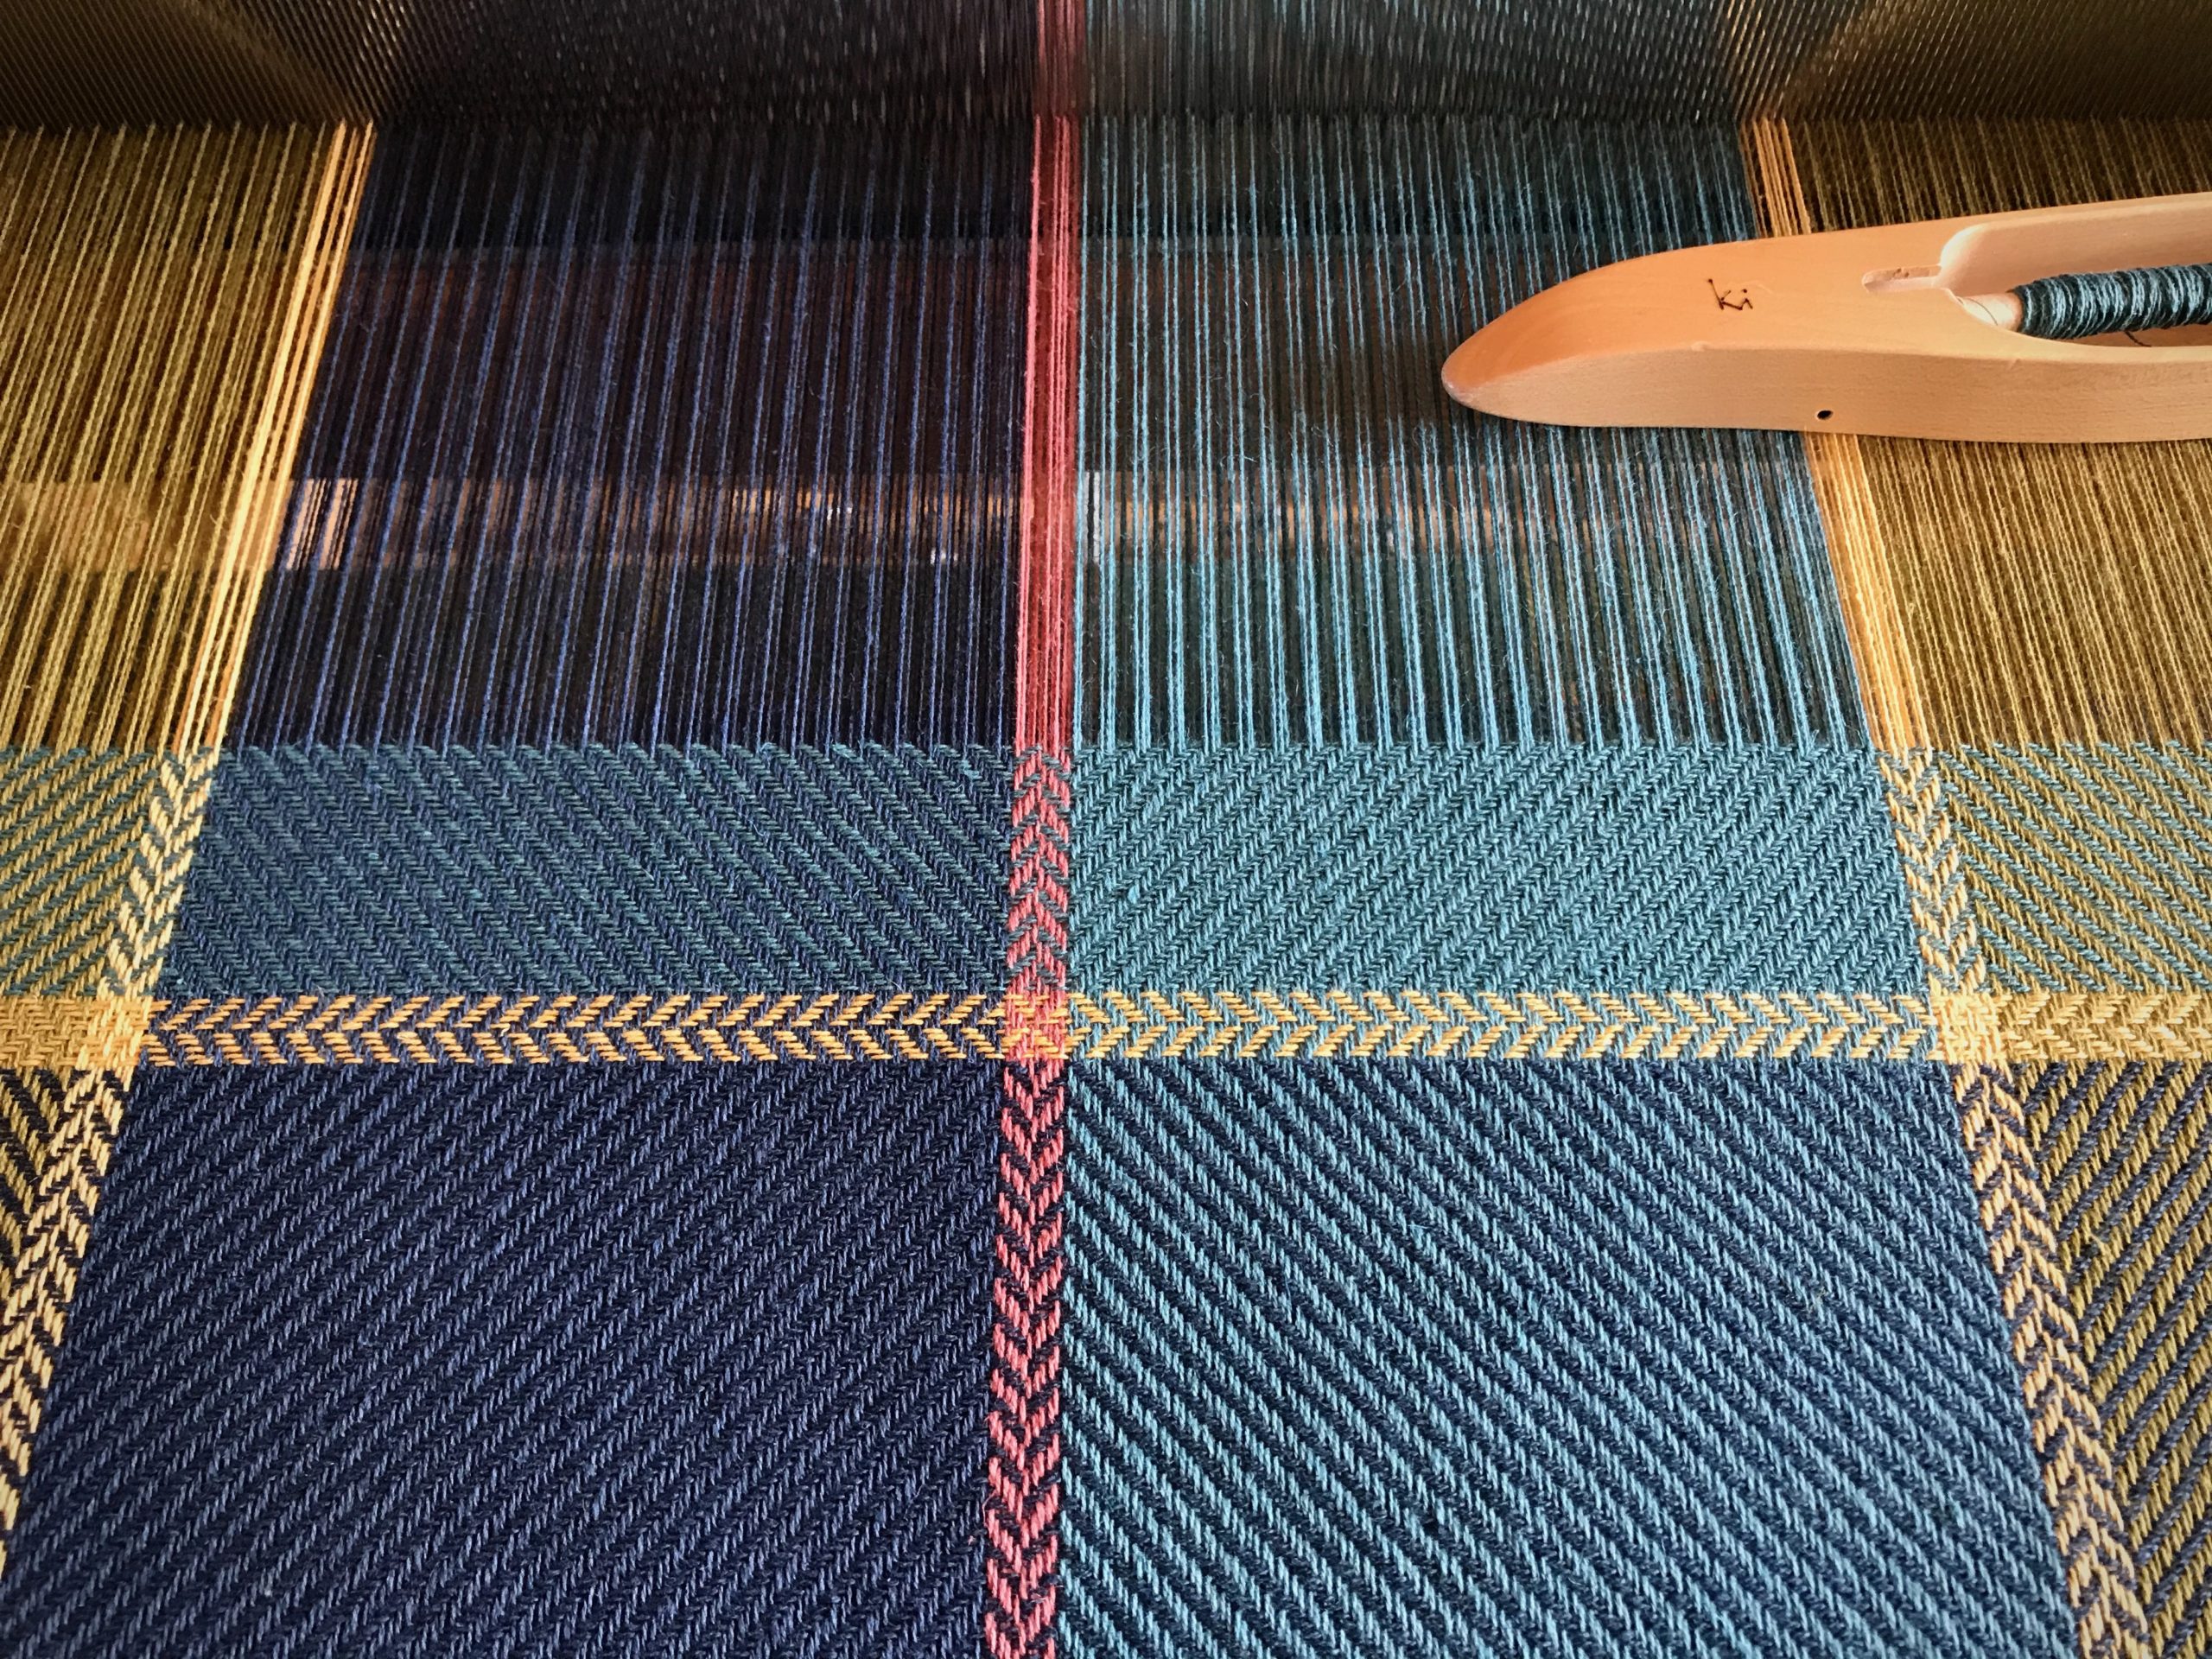
Color changes add to the movement and excitement of the design.Vertical and horizontal narrow stripes in six-shaft broken twill.
Change to the shed needed for the next color. Take the shuttle with the first color into the shed for about about 3 cm (1 1/8”), and bring the shuttle up and out through the top of the warp.
Lightly beat (tap) in the 3 cm (1 1/8”) of thread. Carefully snip off the thread close to the warp.
Weave a pick of the next color, with the end of the new thread overlapping the 3 cm (1 1/8”) of the previous color thread. Position the new thread such that the end is outside the selvedge just a hair.
Beat in the new weft and continue weaving until the next color change.
Ending the third of four bath towels.Hand towels waiting to be paired up with the bath towels…hopefully, before Christmas!
Watch this short video to see me demonstrate this method of changing the weft colors.
May your choice of weft colors give a glimpse of your best qualities.