Take a short stroll through our home and you will see and touch linen in all its superb versatility. Linen warp and weft speaks of elegance. Yet, this natural fiber is right at home with ordinary daily living. Linen, oh, how it sings!
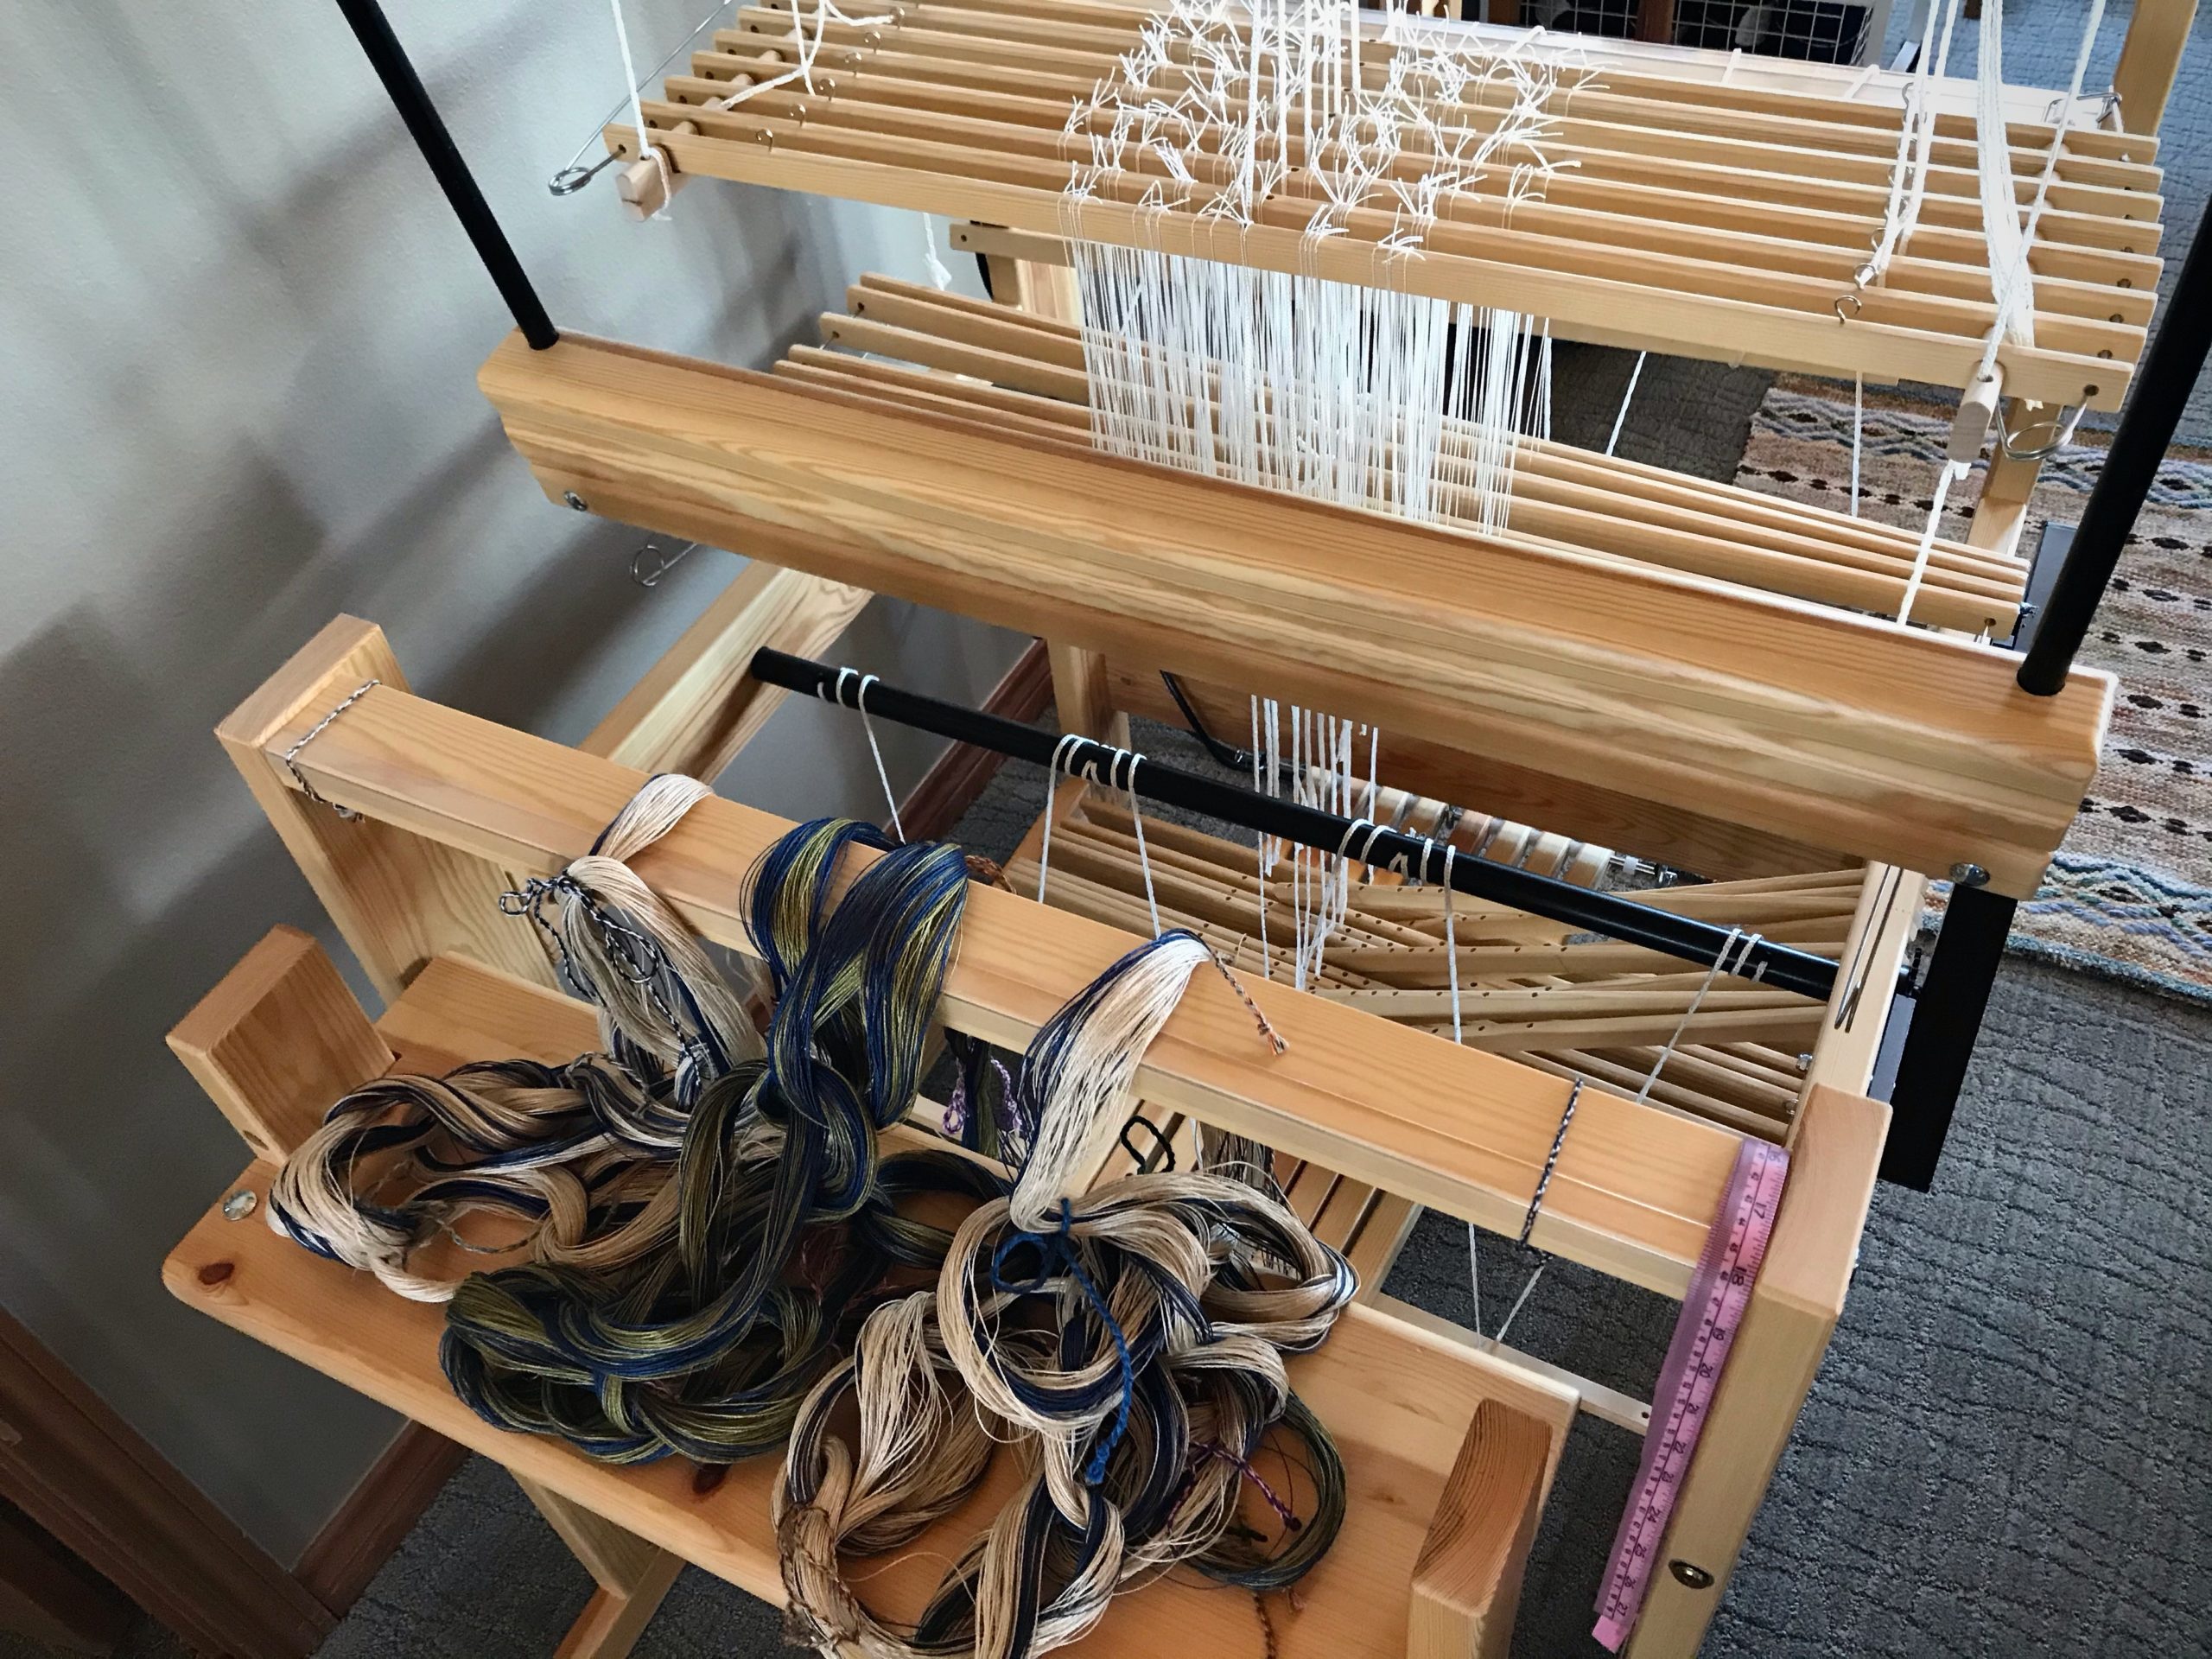
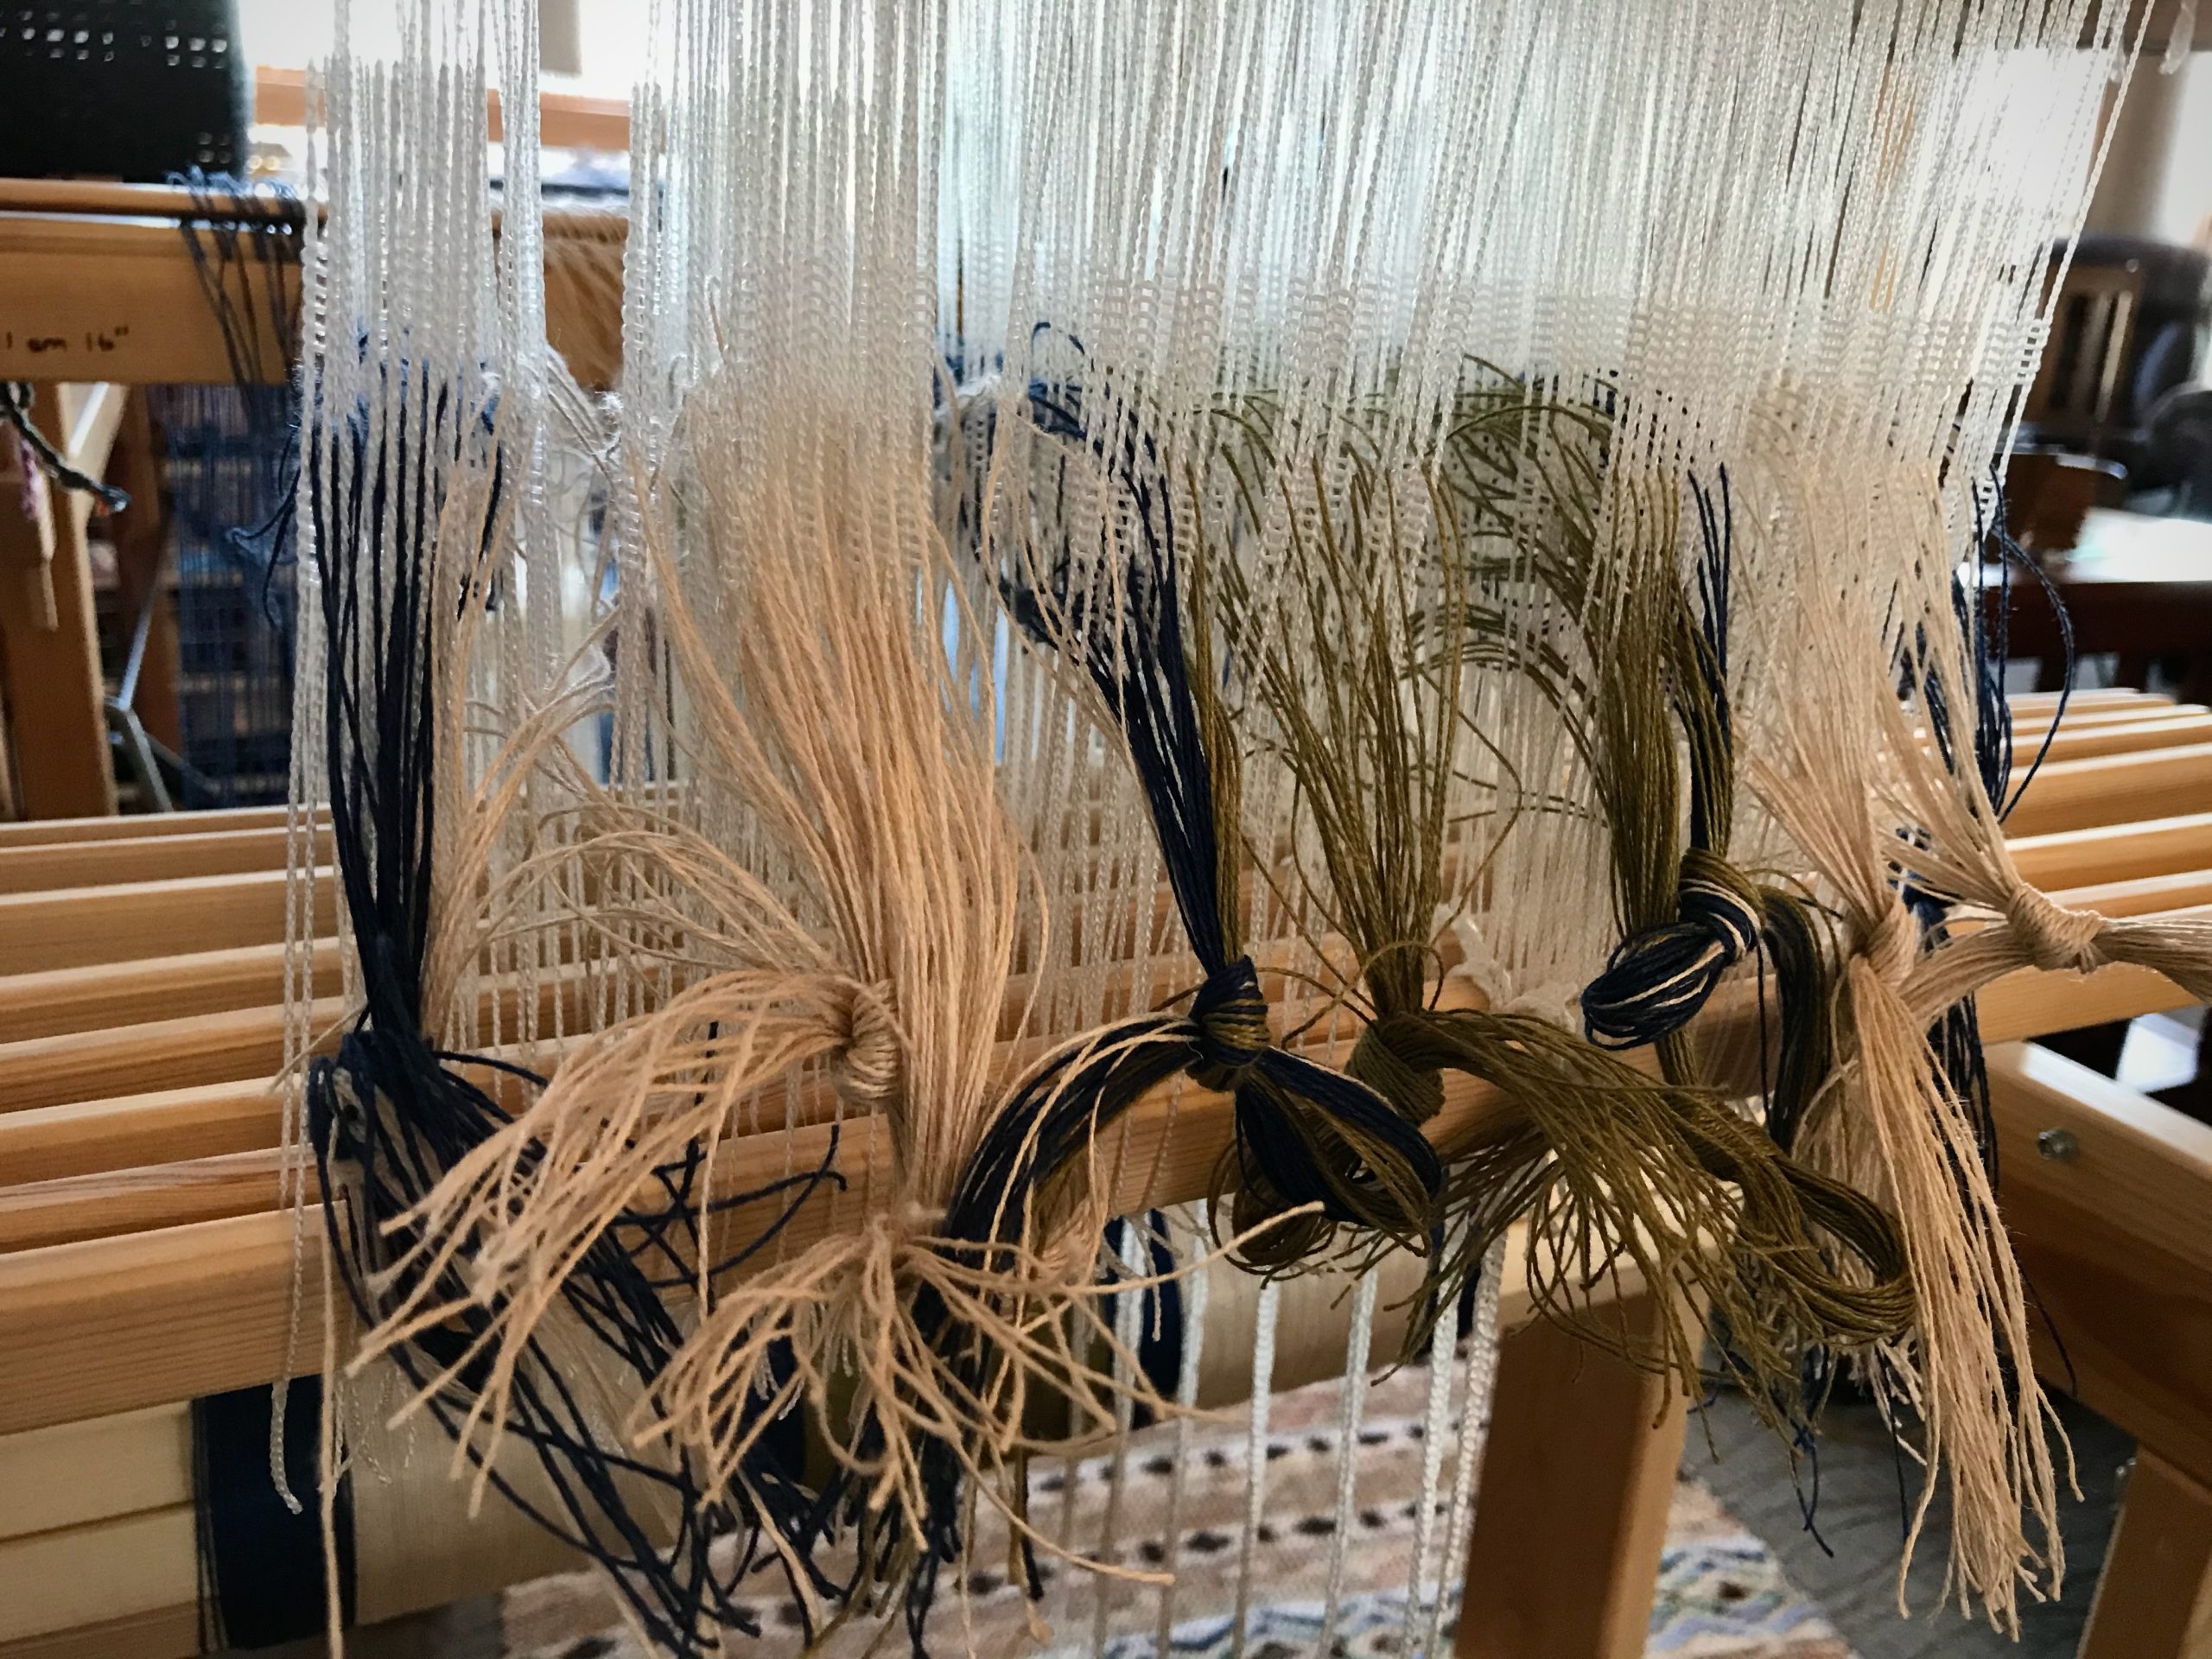
I am thrilled to be dressing the Julia now with 16/2 linen on eight shafts. We will have another linen highlight to grace our home—a table runner for our dining room table.
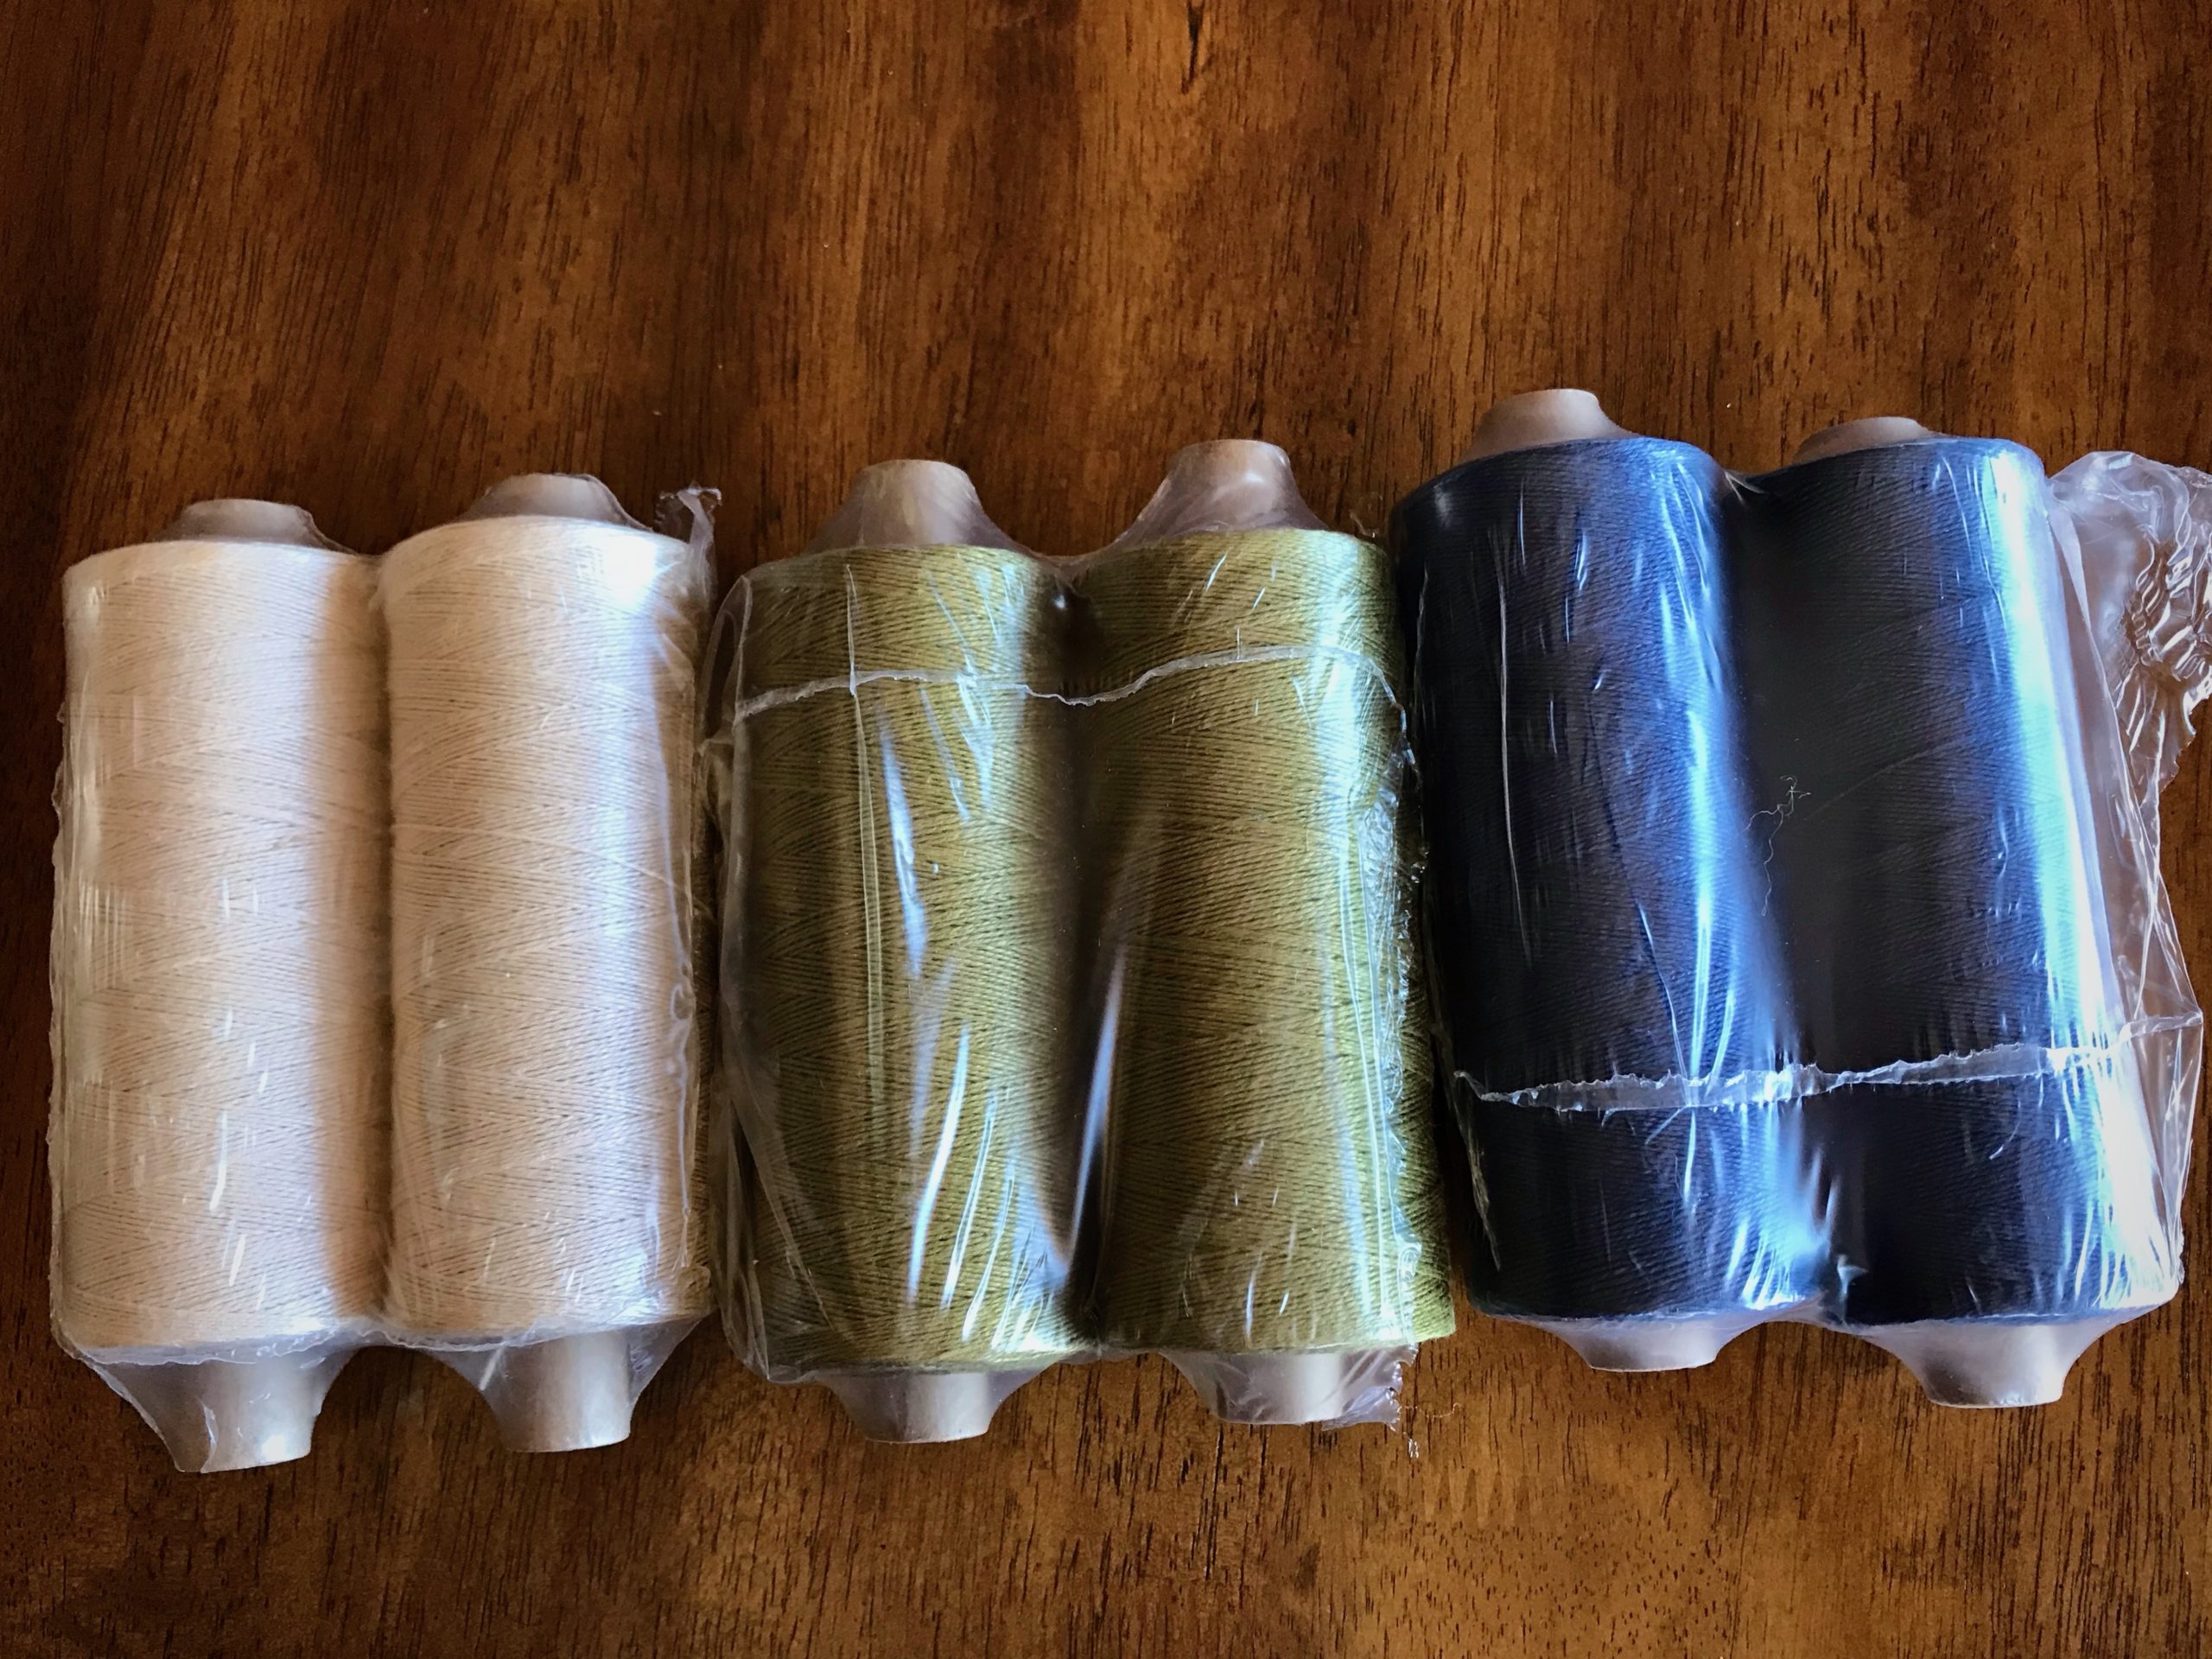
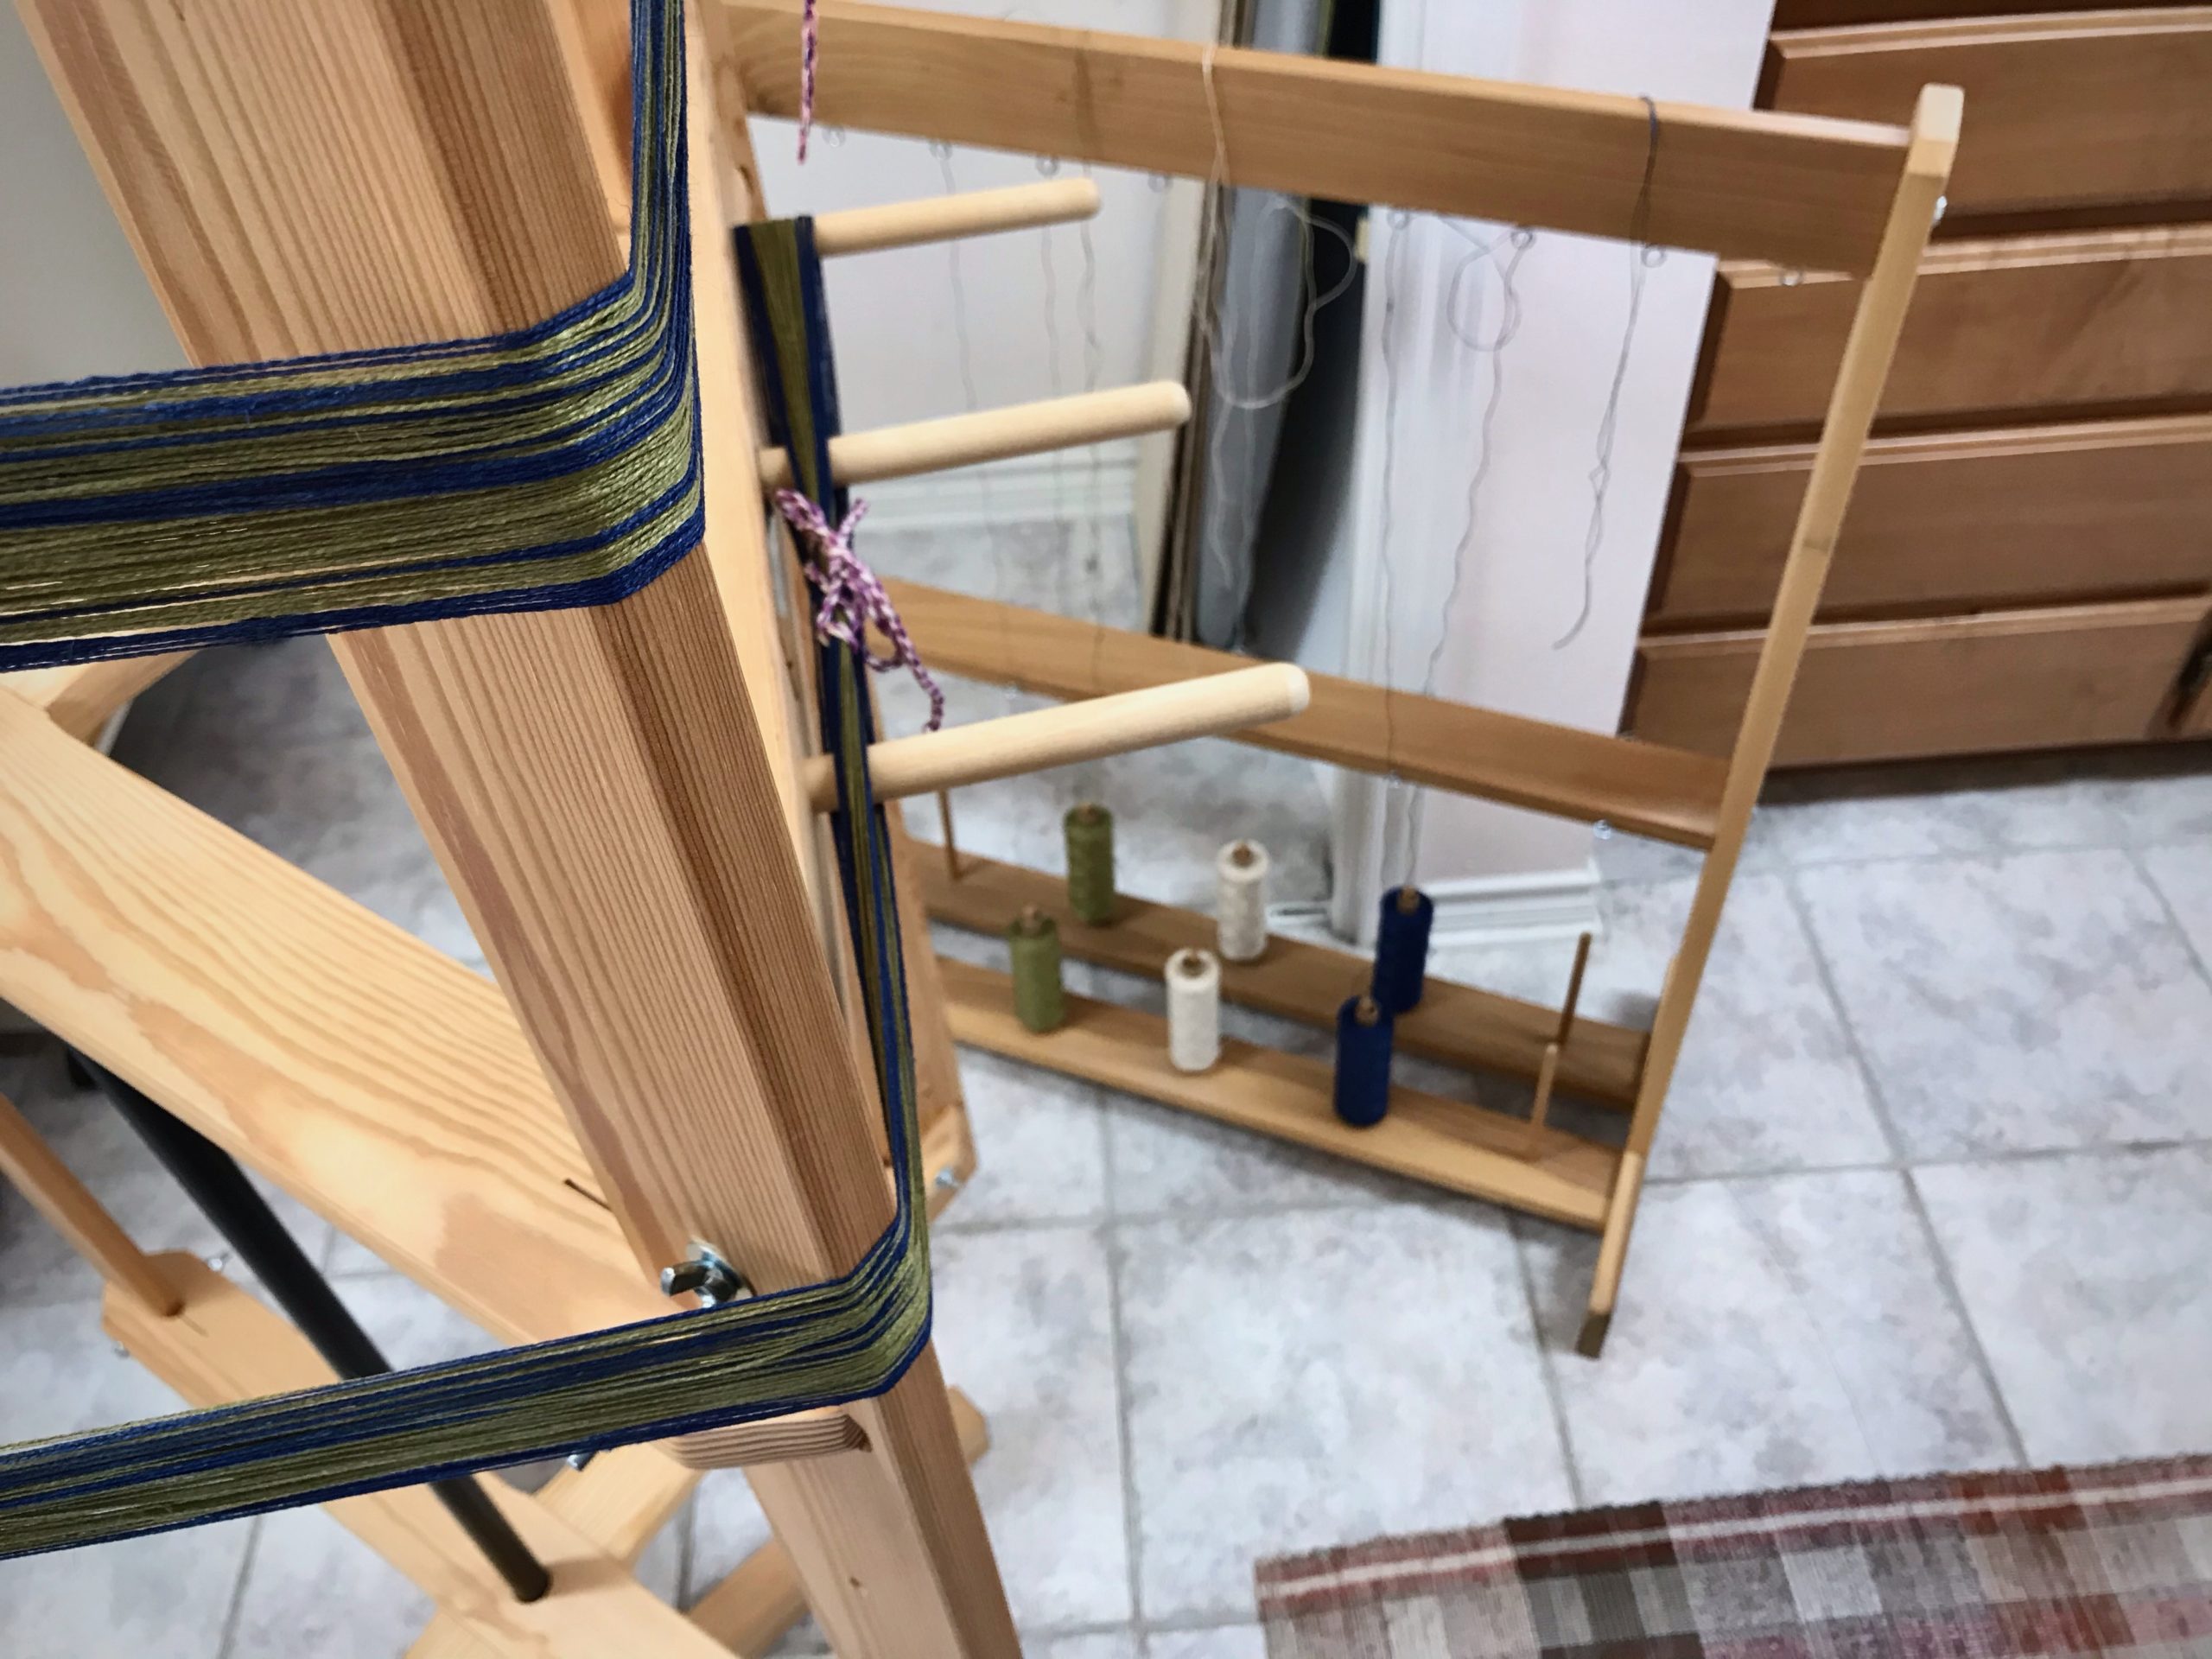
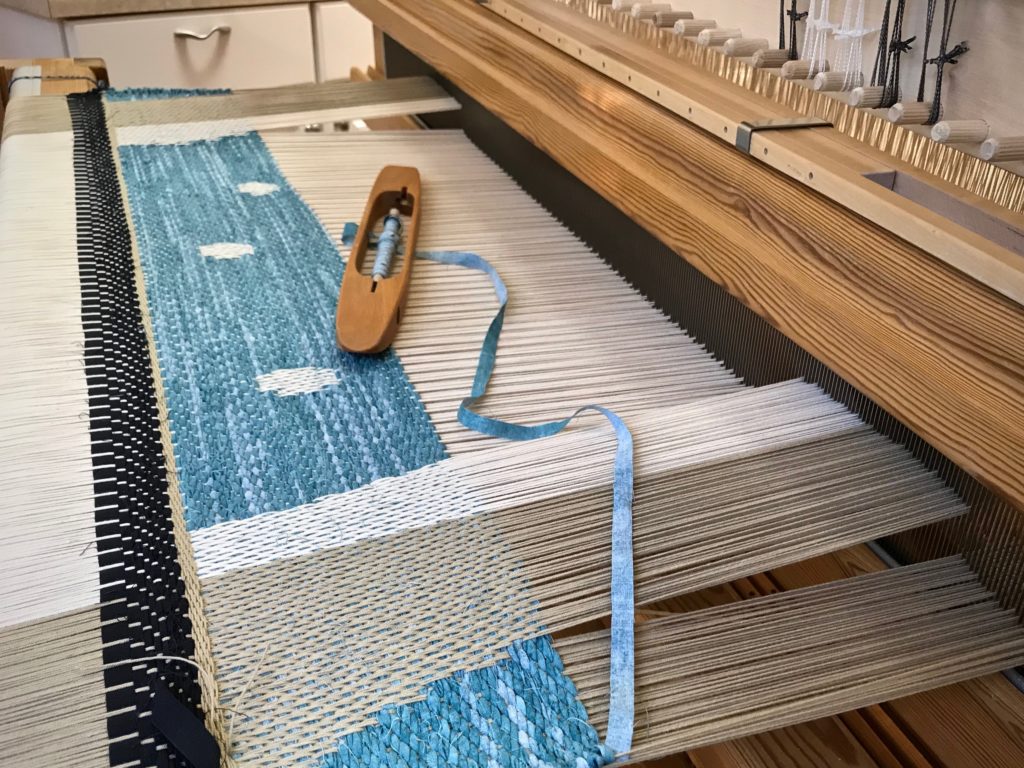
It is a happy day when new tubes of Bockens 16/2 line linen arrive at the door.Winding two threads together at a time on the warping reel.Dividing the warp into three bouts makes it easier to spread and beam the warp with even tension across the warp.Golden bleached linen is a gorgeous backdrop for the olive center section and contrasting midnight blue borders.
Is there anything more vibrant than the sheen of linen saturated with color? And, have you noticed that plain unbleached linen is anything but plain? Linen fills both ends of the spectrum—glowing exuberant color and natural wrinkled humility. Linen, oh, how it sings! There’s always room for more music in the home.
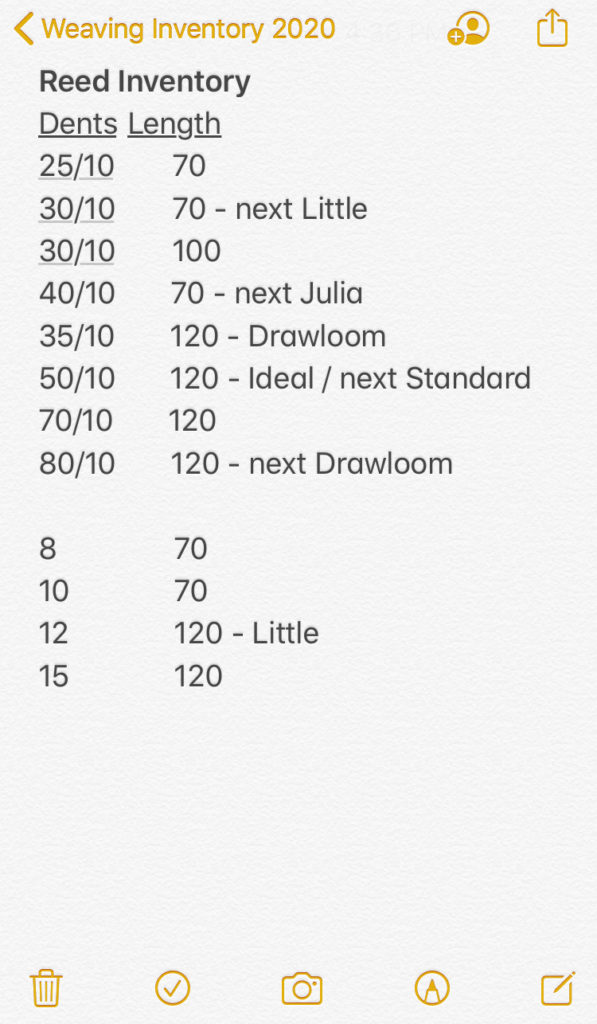
My weaving history includes very fine threads all the way to heavy-duty rug warps. As a result, I have acquired a wide selection of reeds over time. All five of my looms have beaters that will accommodate any length or height of reed. When I plan a project, one of the first things I consider is whether I have the size reed that is needed. To keep my reeds organized, I need two things. One, a simple method to manage the reeds I have, tracking the reeds as they go in and out of use. Two, a place to store all the reeds, arranged in order by dents per cm and dents per inch.
Reed Organization
Reed Inventory
I keep a list in my Notes app on my phone with the sizes and lengths of reeds that I have. If a reed is in use, I note which loom. If a reed will be needed for a planned project, I also note that. As soon as I remove a reed from the beater at the end of a project, I put the reed away and update my Reed Inventory list.
Sample Reed Inventory note. When I am planning, I look at the note on my phone to see what reeds I have that are available. “Next” reserves the reed for the loom that needs it next.
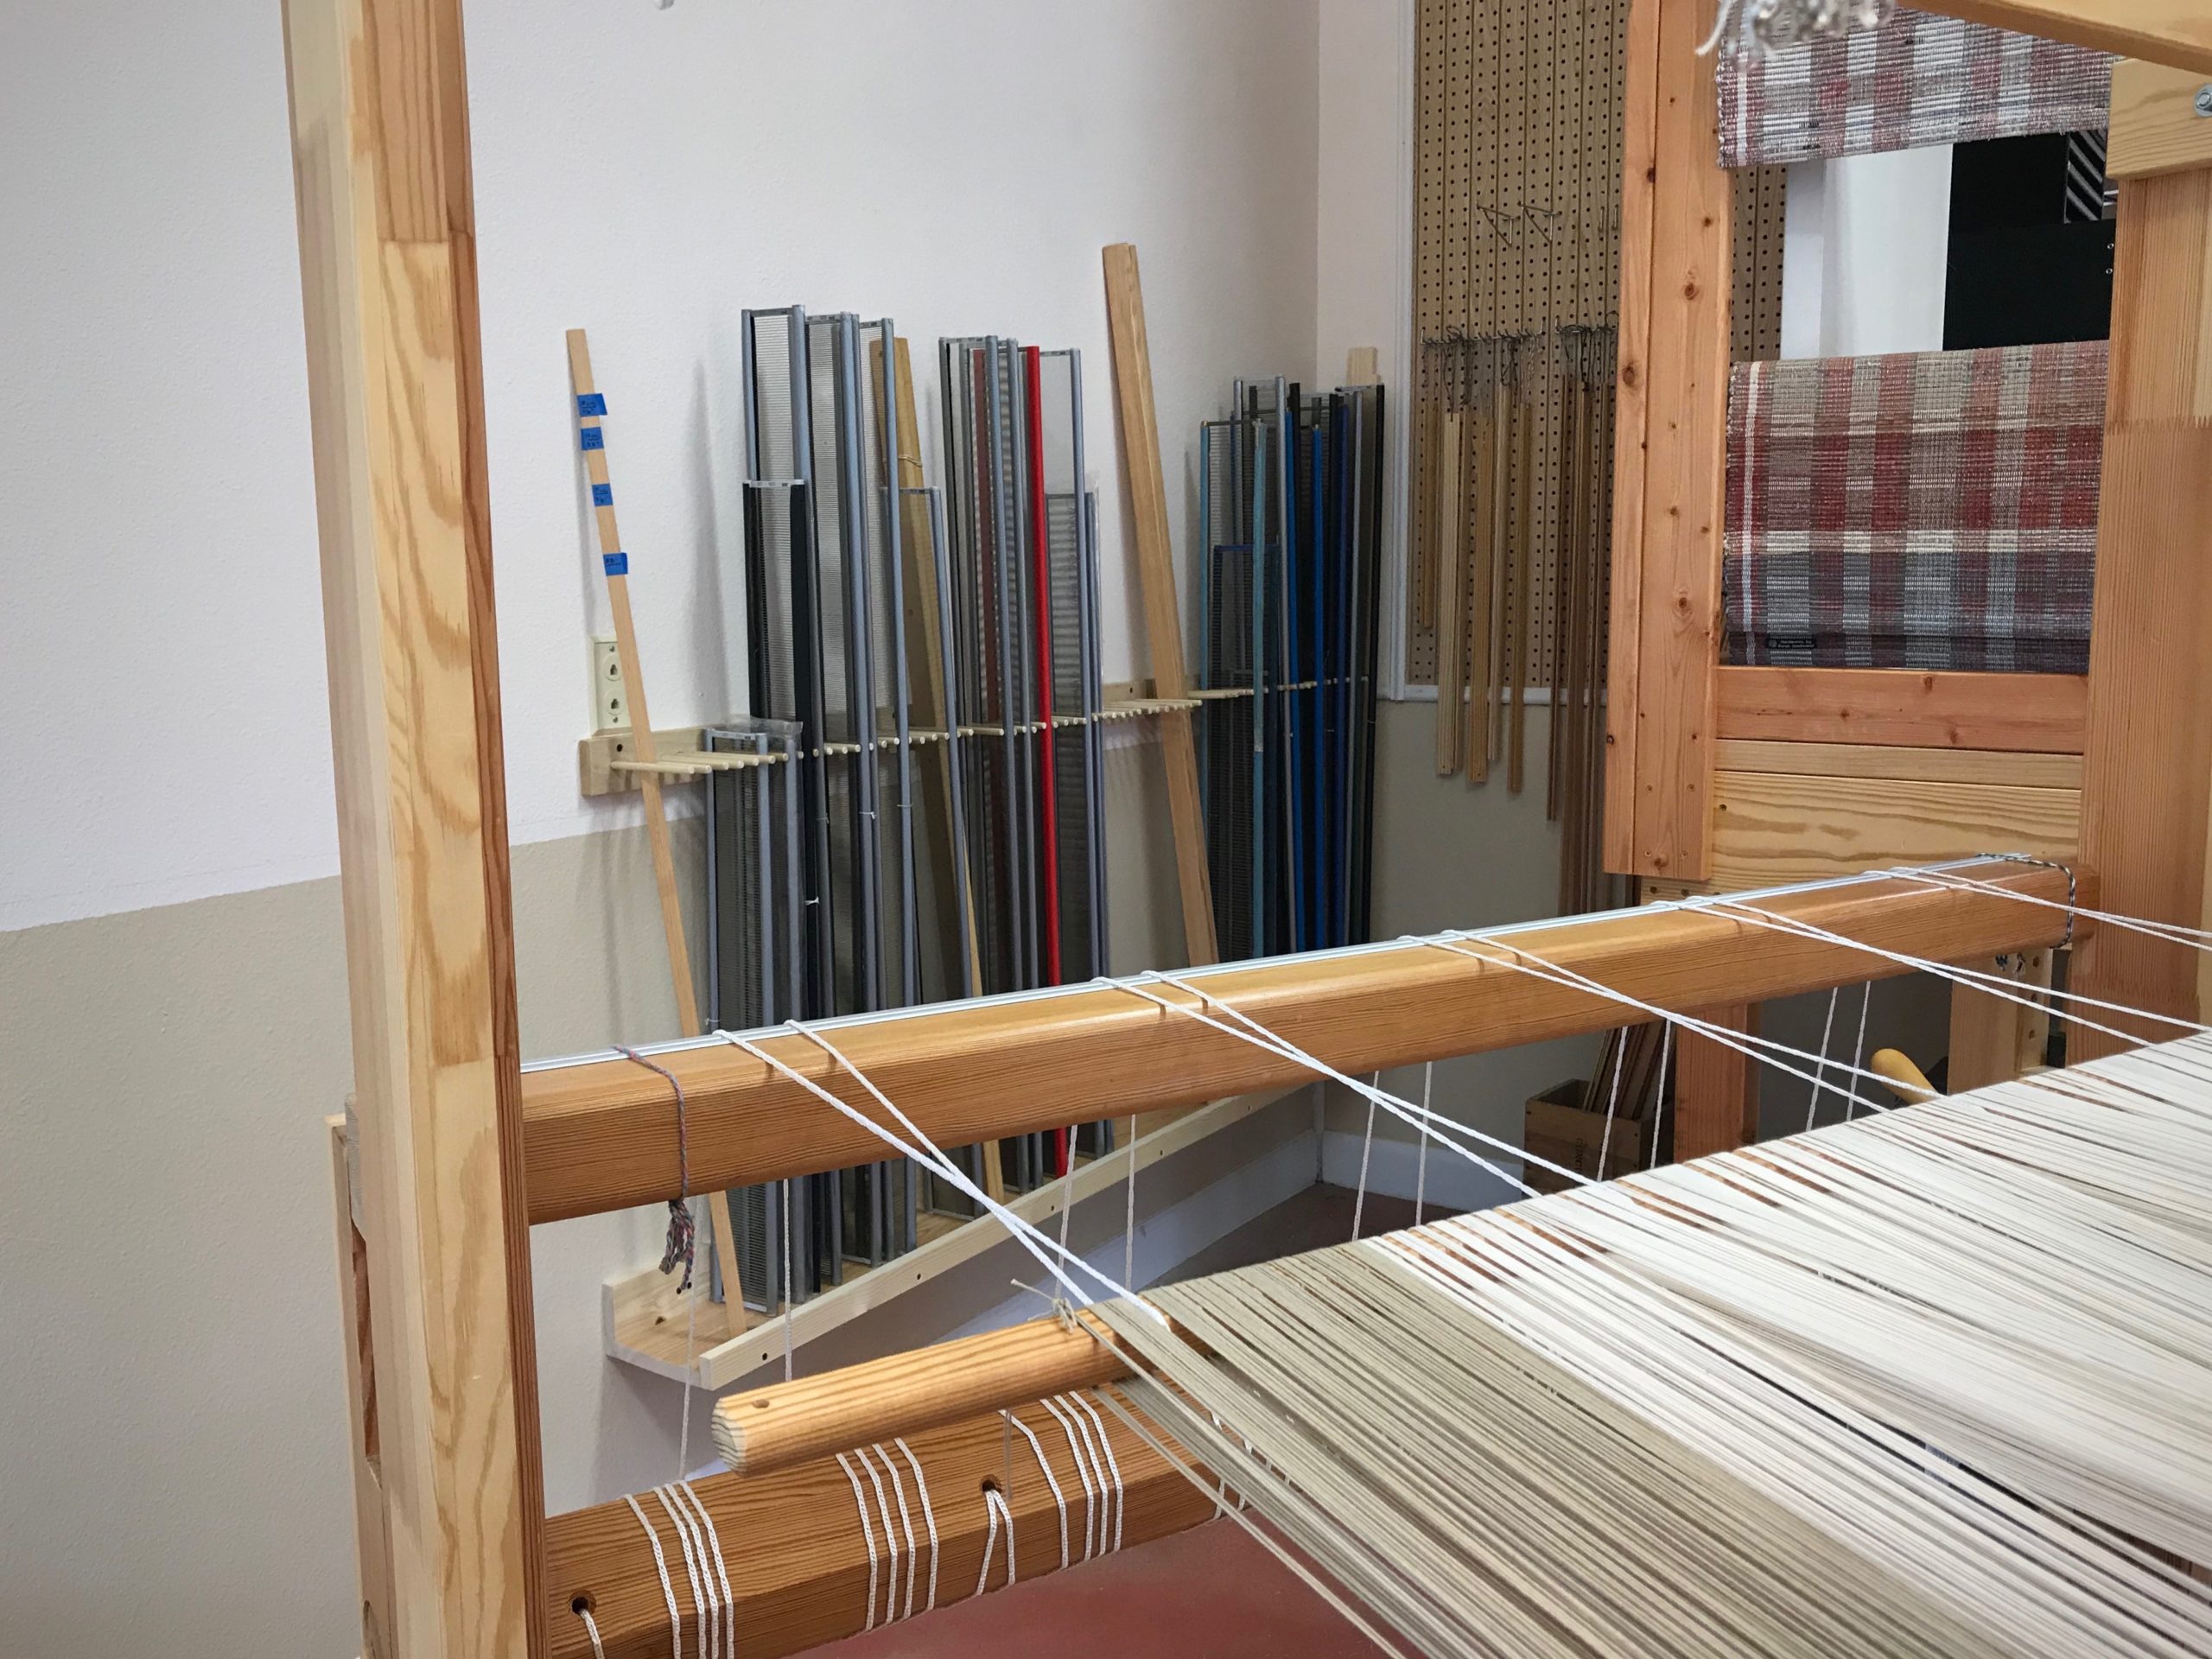
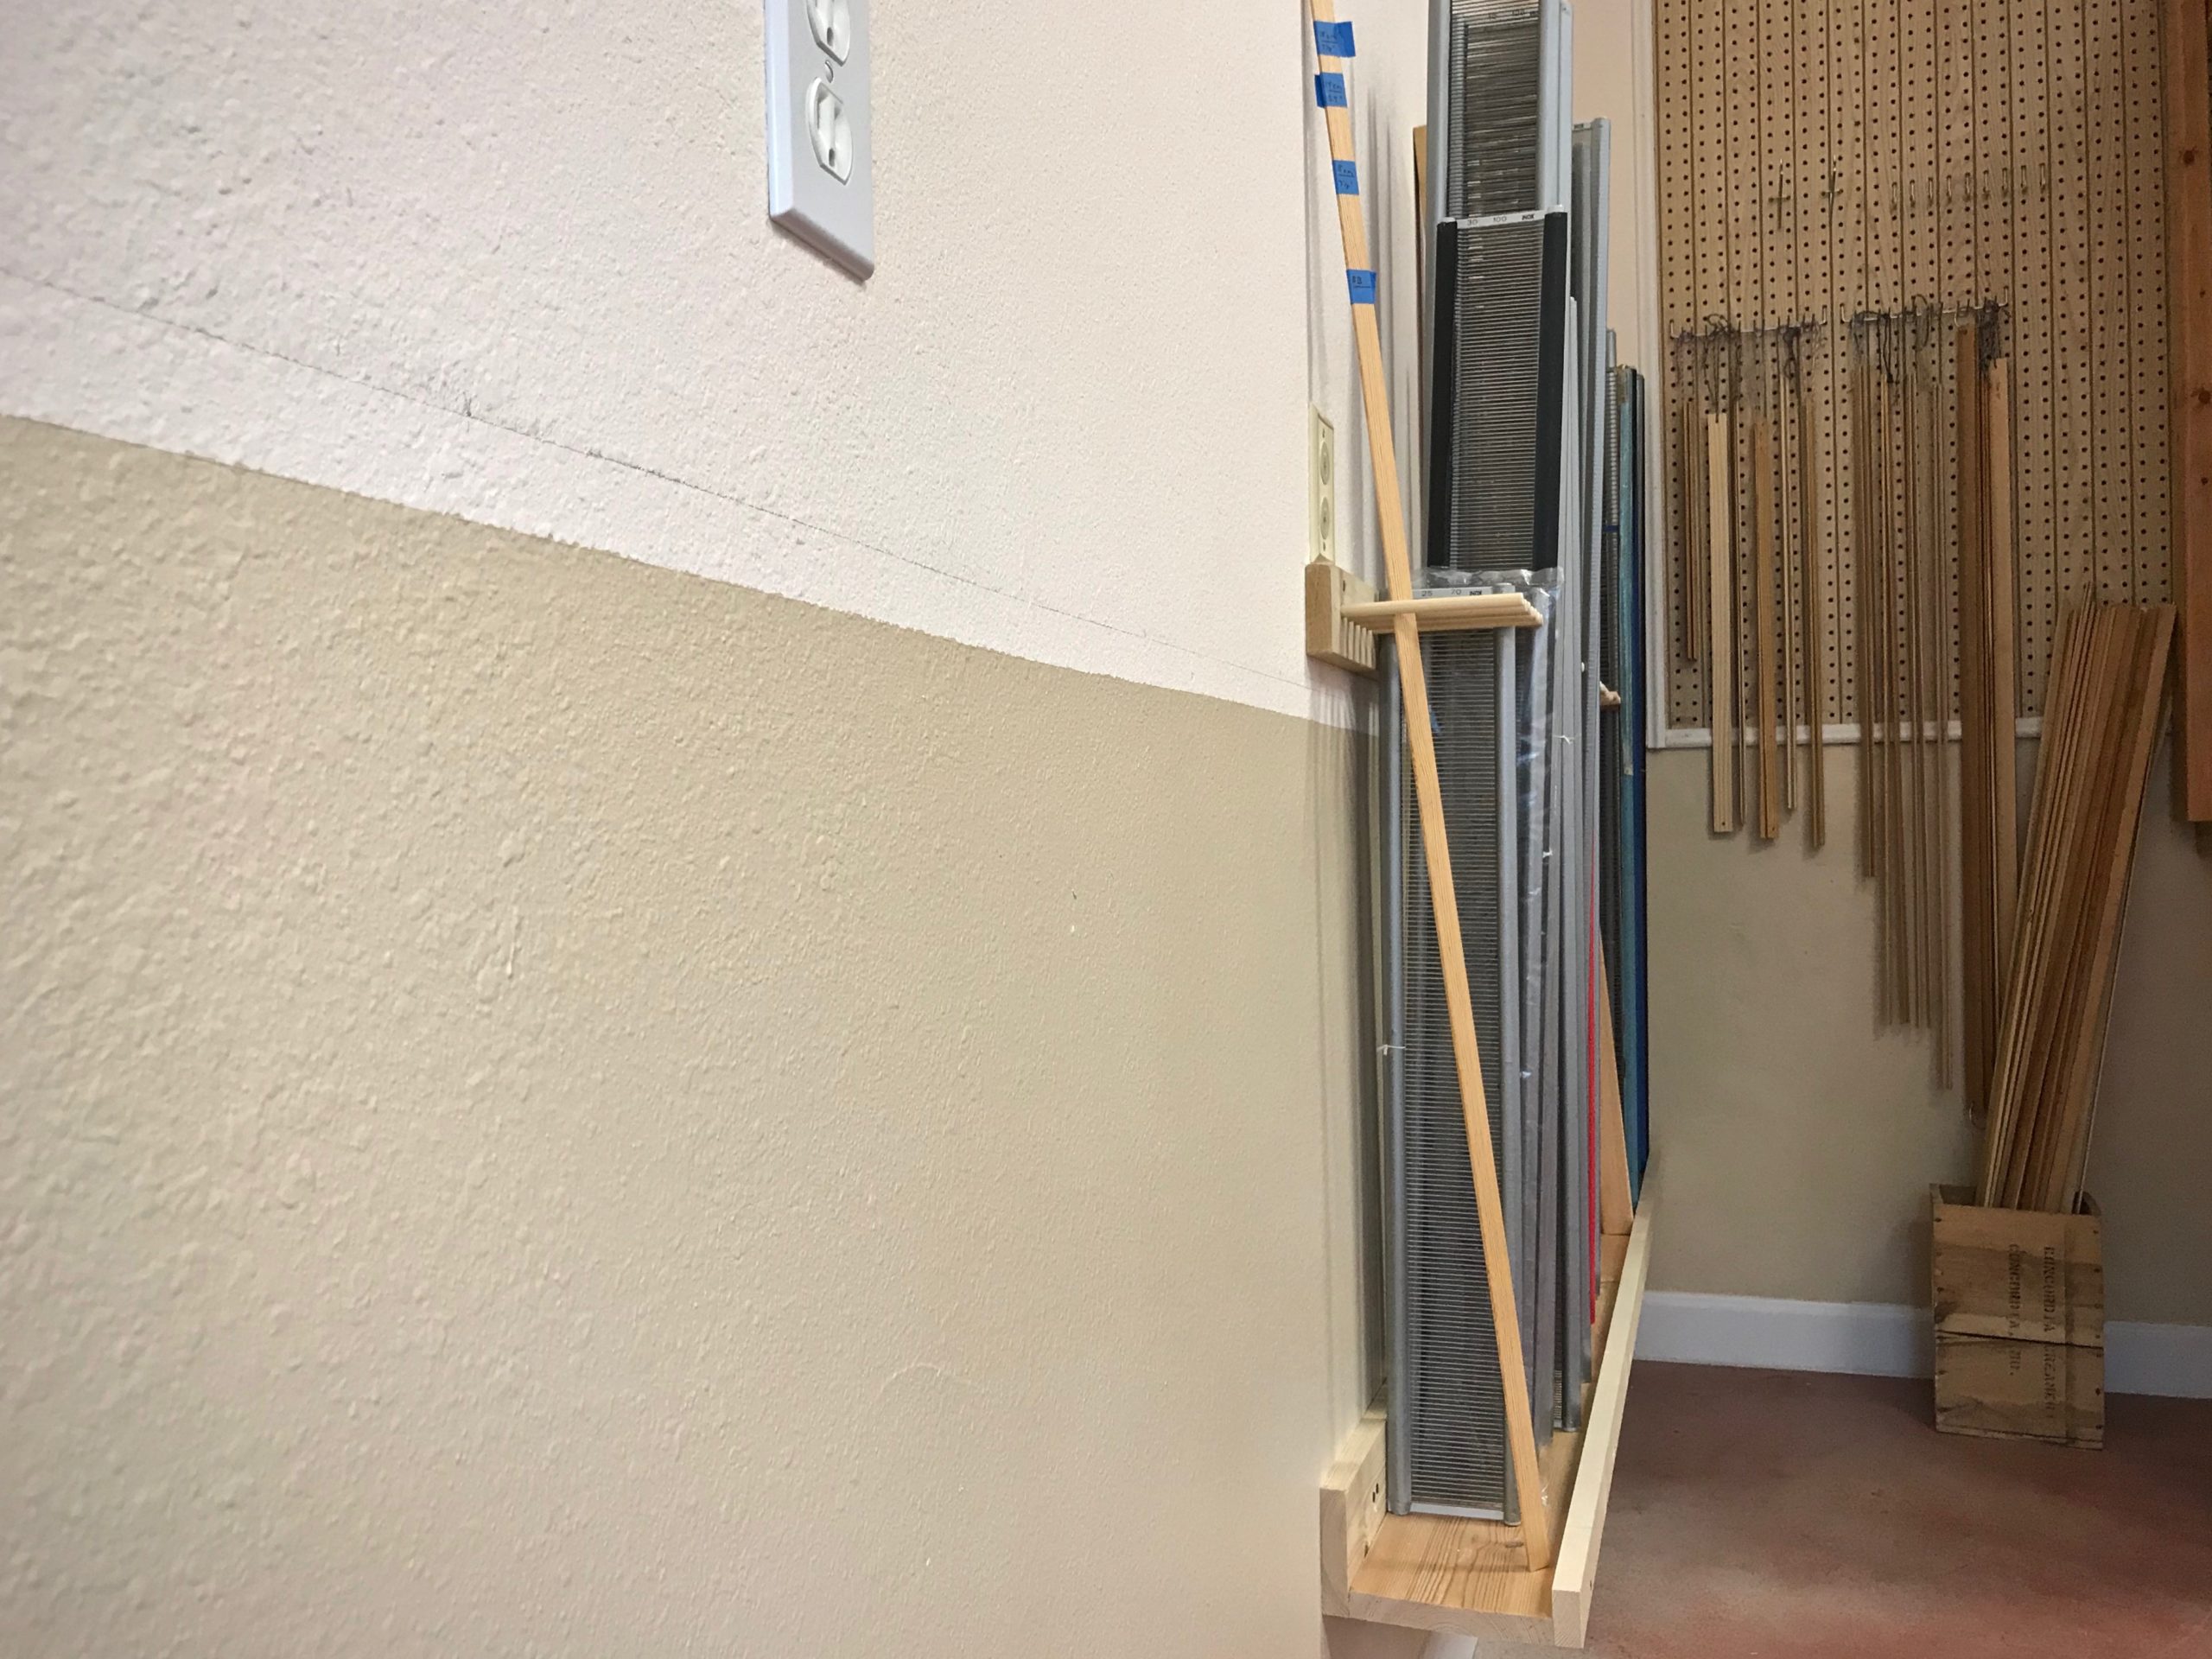
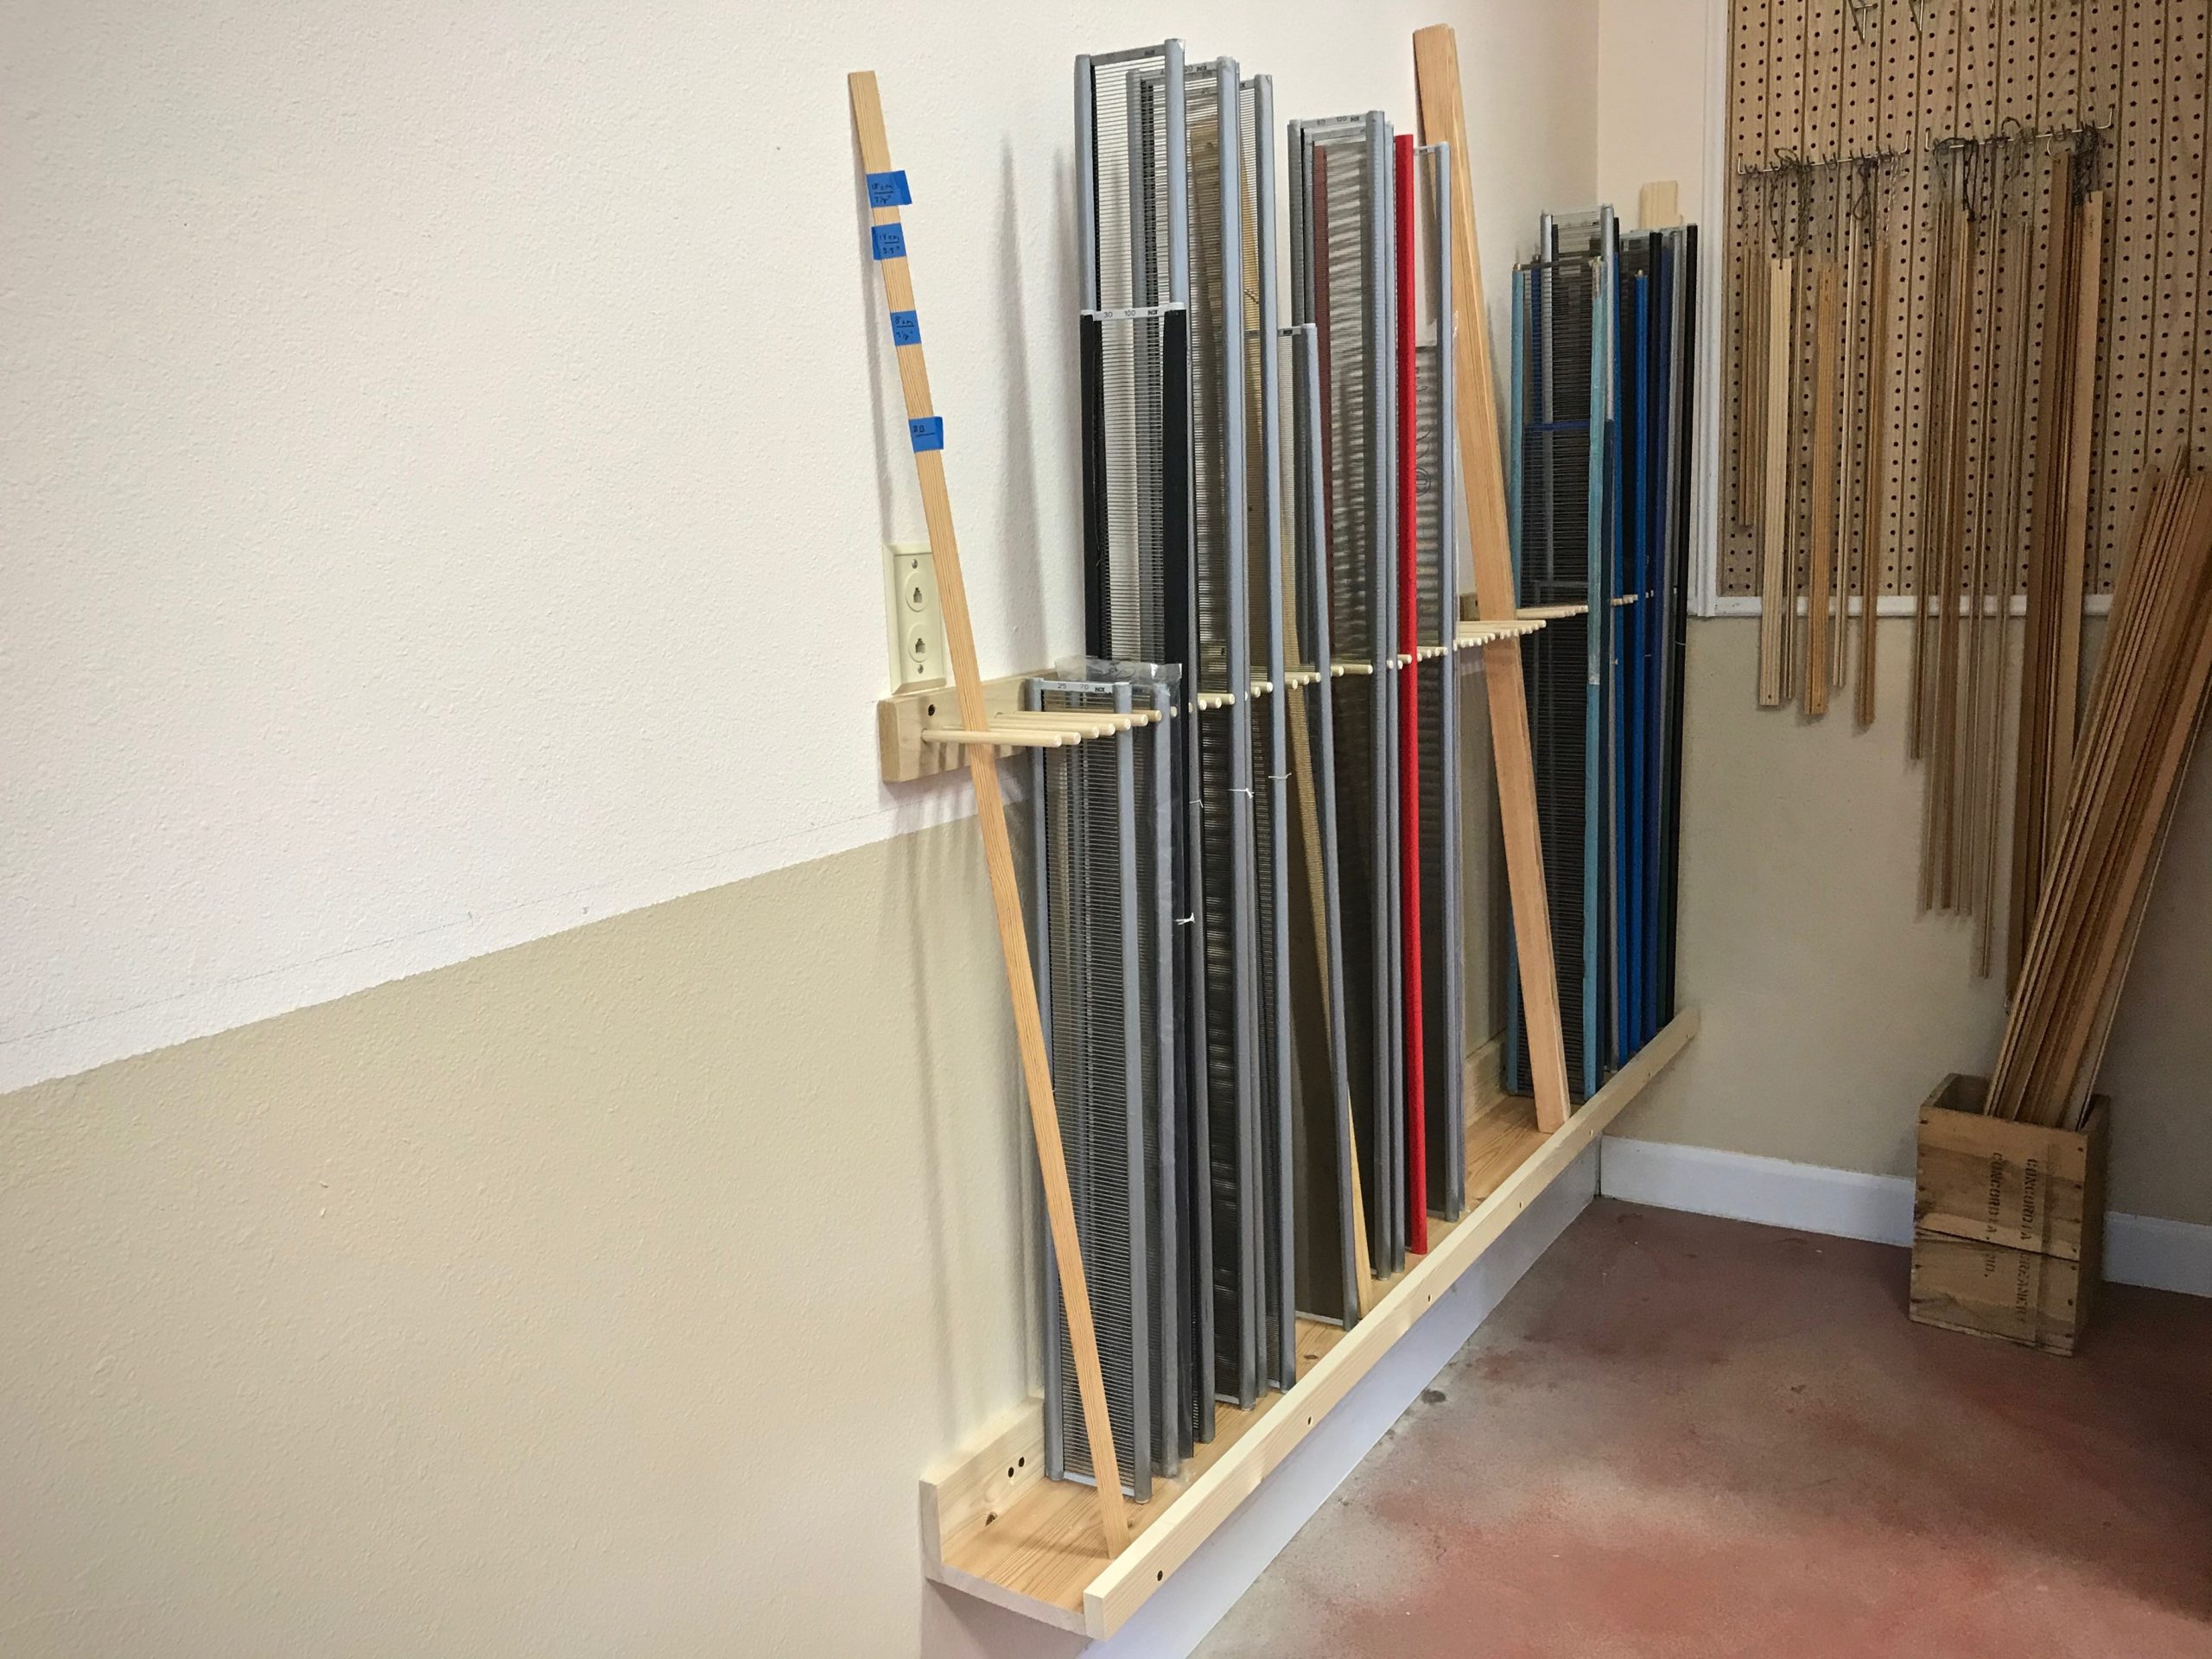
Reed Holder
Steve created a storage solution for my reeds. The holder goes along the back wall of my drawloom studio for about six feet. Here are the details, using nominal board sizes. The reeds sit on a 1” x 6” board at the base, which is supported against the wall by a 1” x 4” board. The base, with a 1” x 2” lip, sits about 12” off the ground. The reed dividers are 3/8” x 5 3/4” dowels that are sunk into a 1” x 3” board that is attached to the wall, which sets the dowels about 27” above the base.
Reed holder is fastened to the wall behind the drawloom. (Notice that the drawloom rag rug warp has come over the back beam…)The dowels are placed at a height that will hold even my shortest reeds.Reeds are in order by dent size. Metric reeds are separate from those with dents per inch.
If you would like a PDF copy of Steve’s diagram that shows all the dimensions, click HERE to send me an email request.
May you have a place for everything, and everything in it’s place.
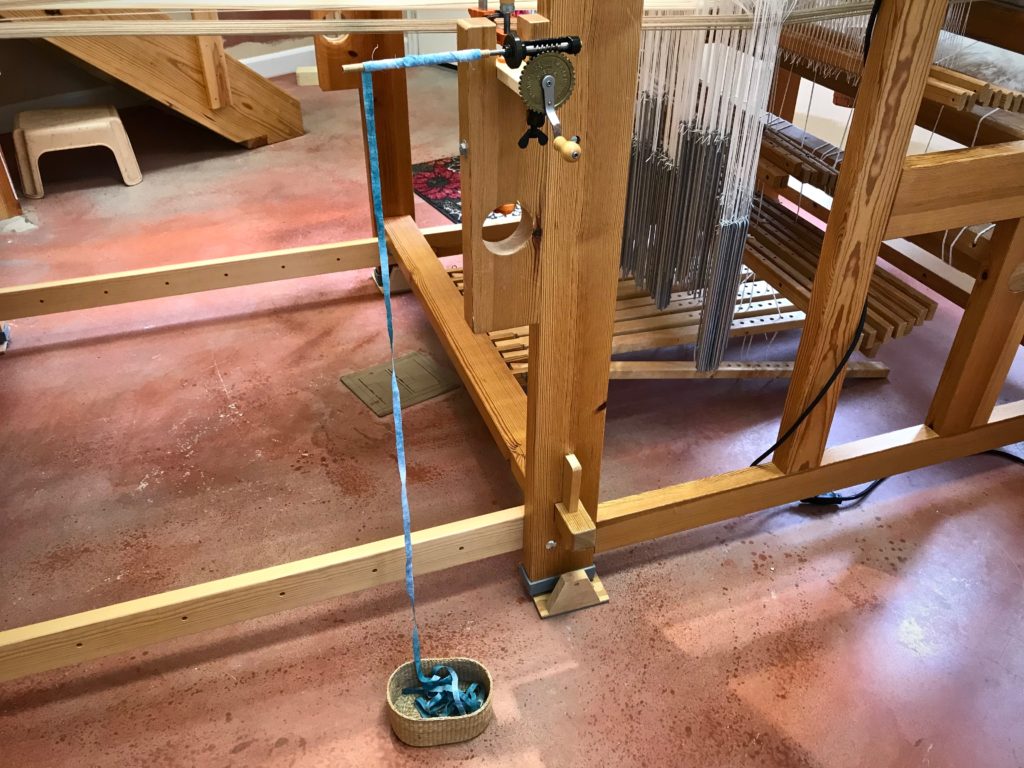
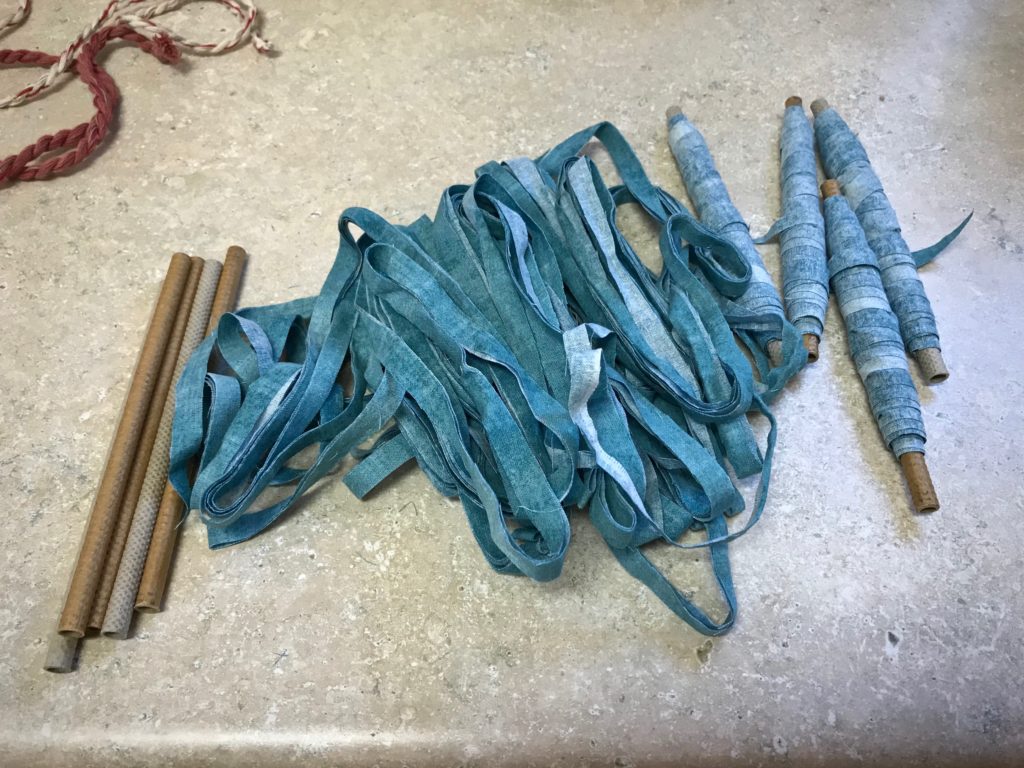
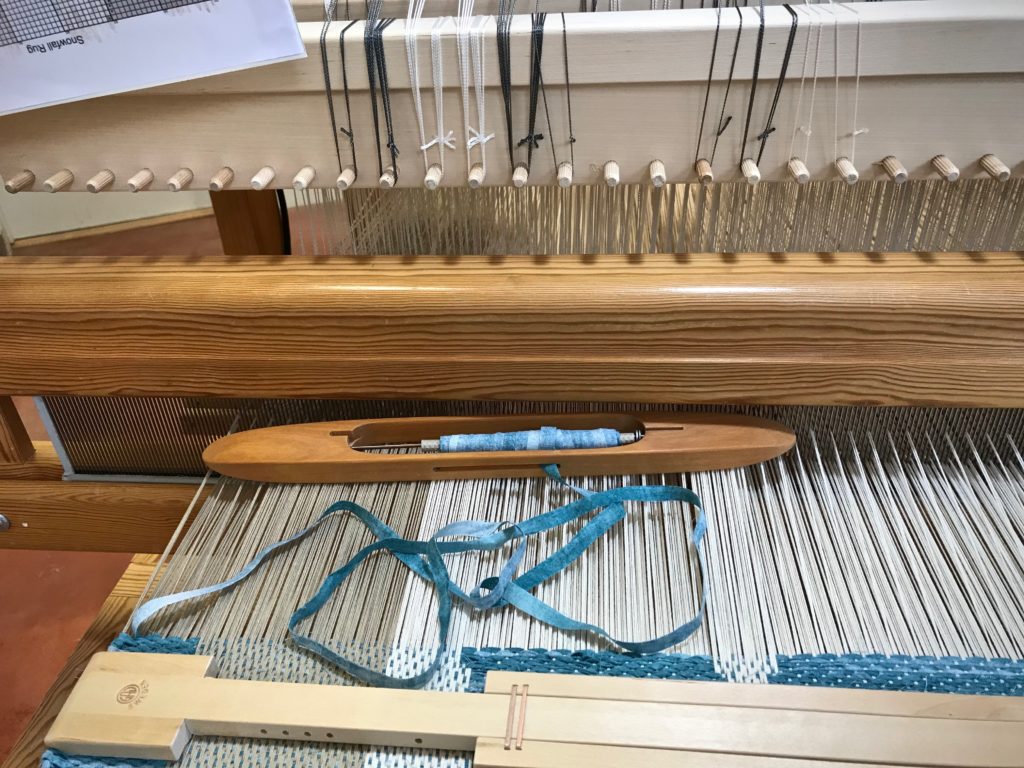
Wind very narrow fabric strips on quills and put them in a boat shuttle. It’s efficient. It’s faster to wind a quill than to load fabric on a ski shuttle. Plus, I like the advantage of sending a boat shuttle across rather than a ski shuttle. This rag rug on the drawloom has fabric strips that are only one centimeter (~3/8”) wide, instead of the usual two-centimeter-wide (~3/4”) strips for an ordinary rag rug. Grab your boat shuttle and pay attention to a few simple tips. Your very narrow fabric strips will be woven up in no time.
Tips for Using a Boat Shuttle to Weave Very Narrow Fabric Strips
Use fabric that has minimal fraying at the edges. Trim off any long threads. Loose dangling threads that are long enough to wind themselves on the quill will make you wish you had used a ski shuttle.
Wind the fabric with the right side down. Then, when the quill unrolls, the right side will be facing up.
Swedish bobbin winder is clamped to the side of the loom. A five-yard fabric strip is wound onto a quill. The right side of the fabric is against the quill.
Handle the wound quill as little as possible to prevent fraying the fabric edges. Simply wrap the tail end of the fabric strip around the filled quill. Do not wrap the end into a slip knot around the quill because the fabric will fray as you release the knot.
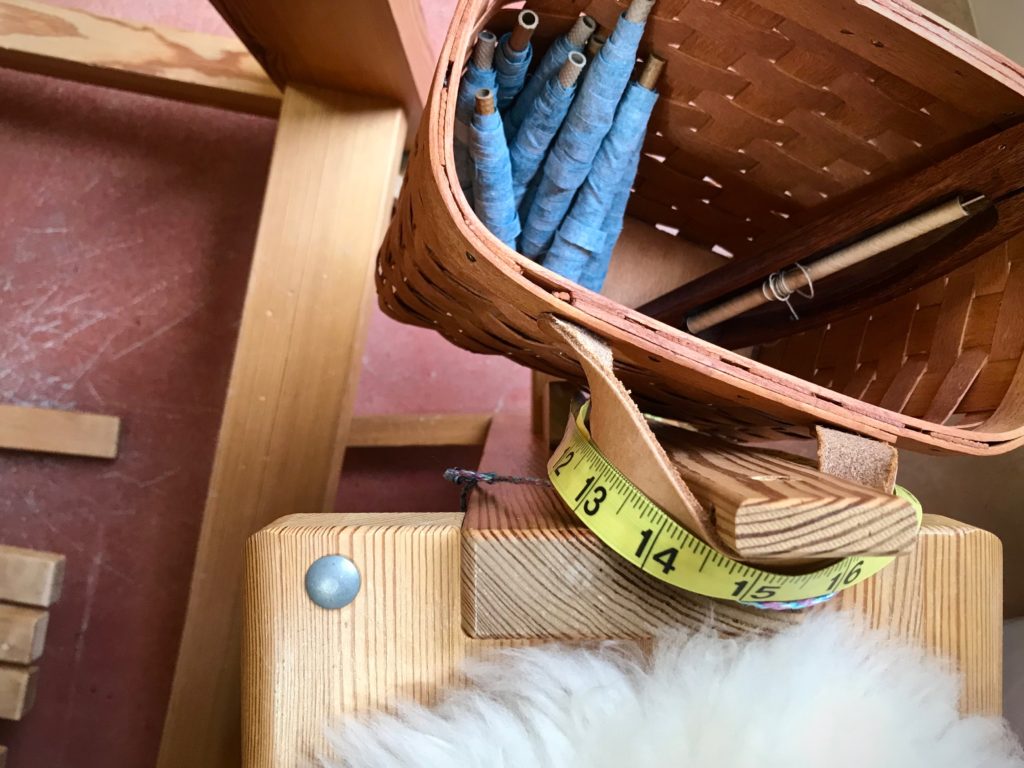
One long fabric strip per quill. Fabric is cut 1 cm (3/8″) wide.One fabric-filled quill covers a little more than one unit of weaving (4 picks). I keep a dozen filled quills in the basket on my loom bench so I can keep weaving as long as possible.
Unwind enough weft for the pickbefore you throw the shuttle. Pull the weft out straight from the quill. When a quill unwinds in the shed, the weft comes off at an angle. And as such, if there are any loose threads at the edges of the fabric strips, the threads will wind themselves on the quill and bind it up. And you will wish you had used a ski shuttle.
Folke Samuelson Damask Shuttle has a low profile, well-suited for the smaller sheds of the drawloom. Fabric is unrolled from the shuttle prior to the next pick.Drawloom rag rug is well underway. Single unit drawcords are pulled and held in place on the pegs above the beater. Design is Trasmatta Snöfall (Snowfall Rag Rug) by Kerstin Åsling-Sundberg, from Damast, edited by Lillemor Johansson.
Why sample? It means using morewarp and weft. And it means waiting longer to start to the “real” project. What do I gain from it, anyway? Is it a waste of resources and time?
I can’t imagine putting on a warp that didn’t have room up front for sampling. There’s more than one reason to put on sufficient warp to weave a sample. It makes perfect sense, especially if there is anything new or unfamiliar about your planned project.
Five Reasons to Add Extra Warp for Sampling
Sampling to test patterns, weft colors, and beat consistency, before starting on fabric for a garment.
1 Space to play. I want plenty of room to play, and to practice techniques that are new to me. 2 Room to try out designs. By weaving a portion of my designs, I am able to determine what works, and what adjustments need to be made. 3 Warp for testing weft colors. Only when woven can I see the full effect of each potential weft color. 4 Time to gain a consistent beat. When I start the main project, I want to have woven enough to be able to “feel” how firmly or softly I need to move the beater. 5 The best reason of all! It’s always good to have enough warp on the loom that you can invite friends and family to enjoy some weaving time. …Before your main project is in progress.
My weaving friend Betsy came over to see what it is like to weave on a drawloom. My daughter Melody came for a visit and wanted to see what it was like to weave on a drawloom. Garment fabric. This is to be used for two side panels of a vest I plan to make for myself.This is to be the back panel of the vest.This is the beginning of the front panels for the vest.
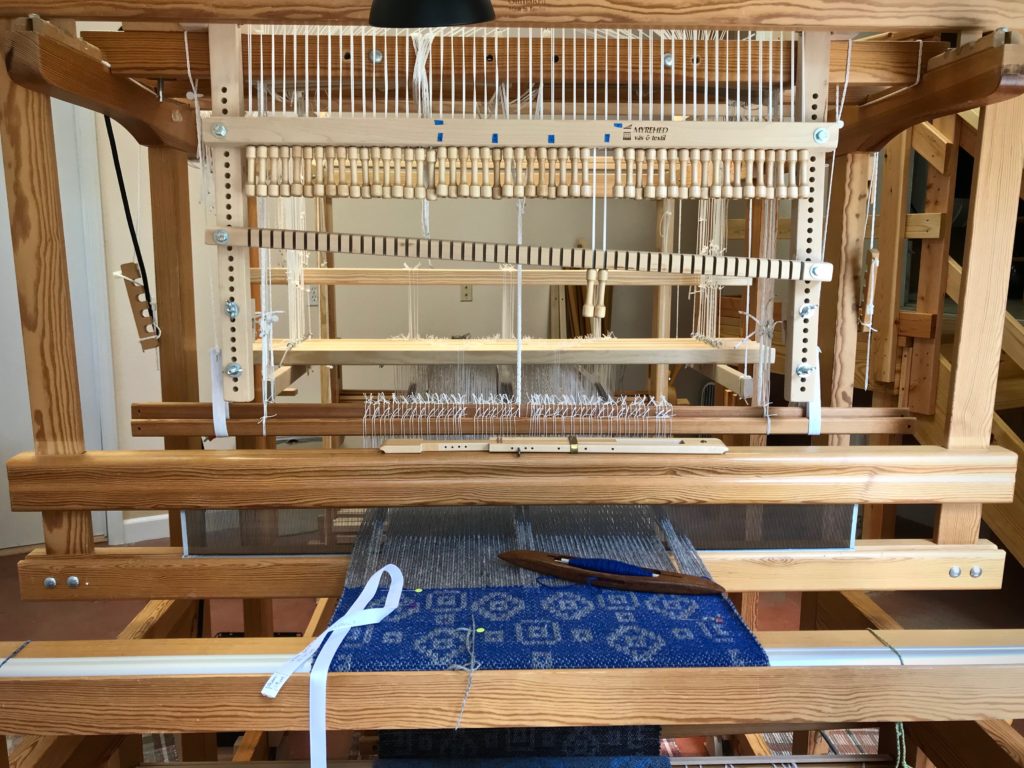
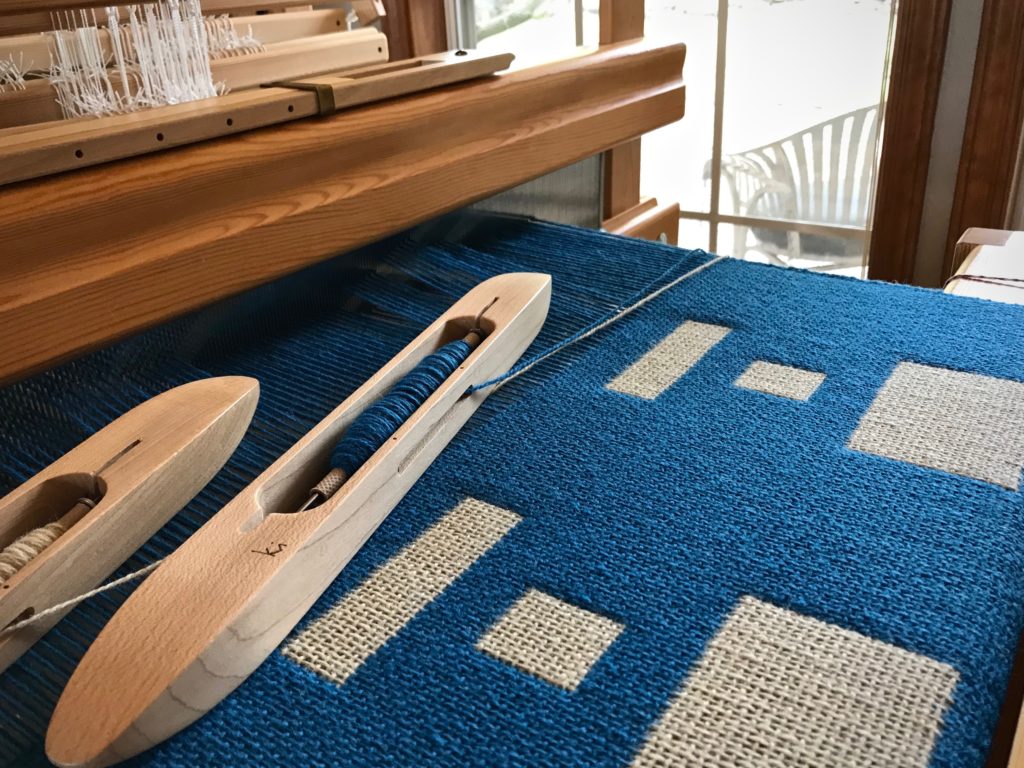
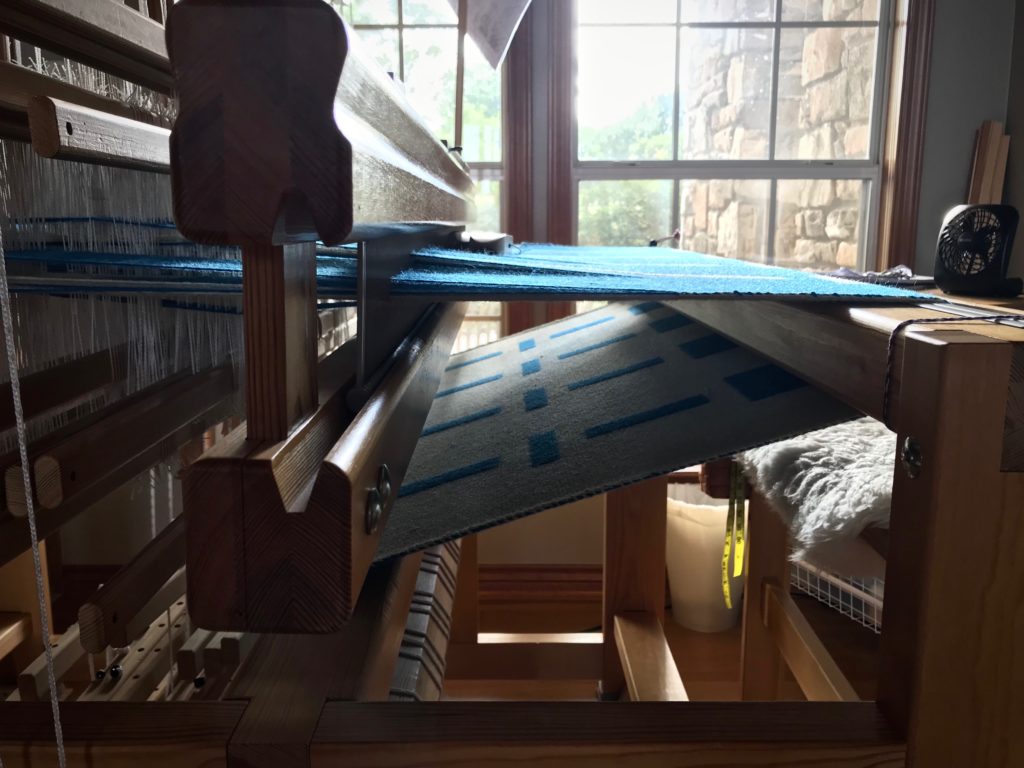
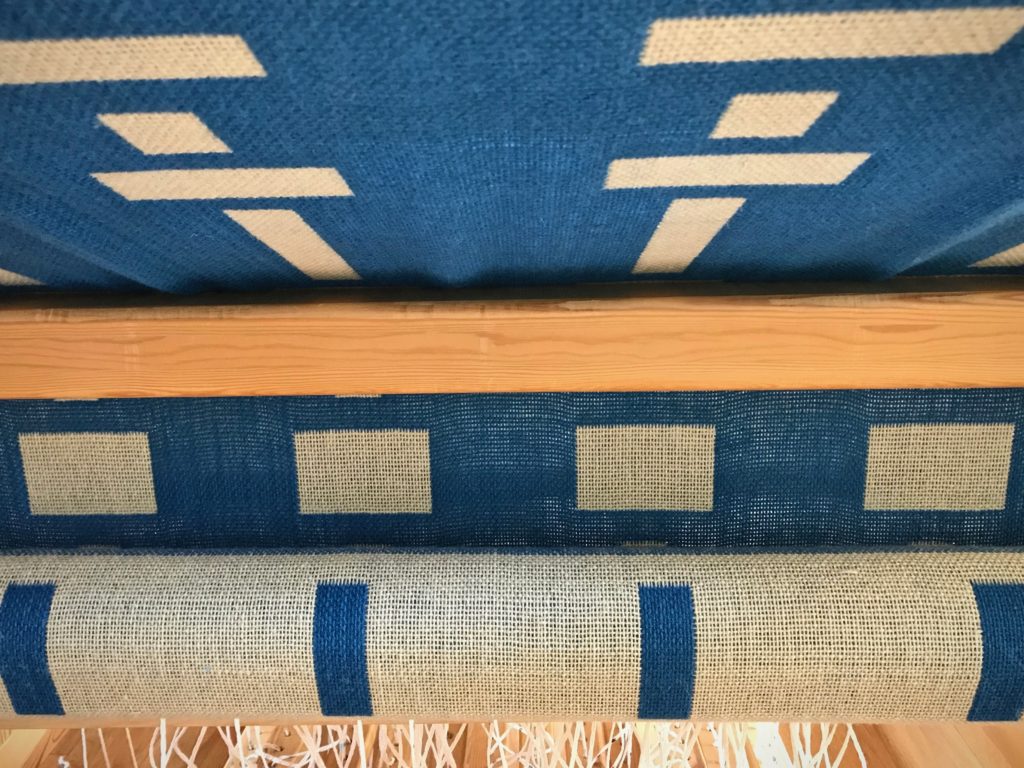
Before starting, I sketched out several versions of the finished blanket, showing different sizes and arrangements of the rectangle blocks. My favorite version is one with a random look. This twelve-shaftdouble weave has three blocks. Block 1 is a solid color across the warp. Block 2 has a narrow, vertical contrasting rectangle. Block 3 has a wide, horizontal contrasting rectangle. The warp threading determines the width of the rectangles. But the height of the rectangles is determined by the treadling pattern. I decided to use a Fibonacci sequence of numbers in random order to guide my treadling options as I weave.
Rectangles vary in size.
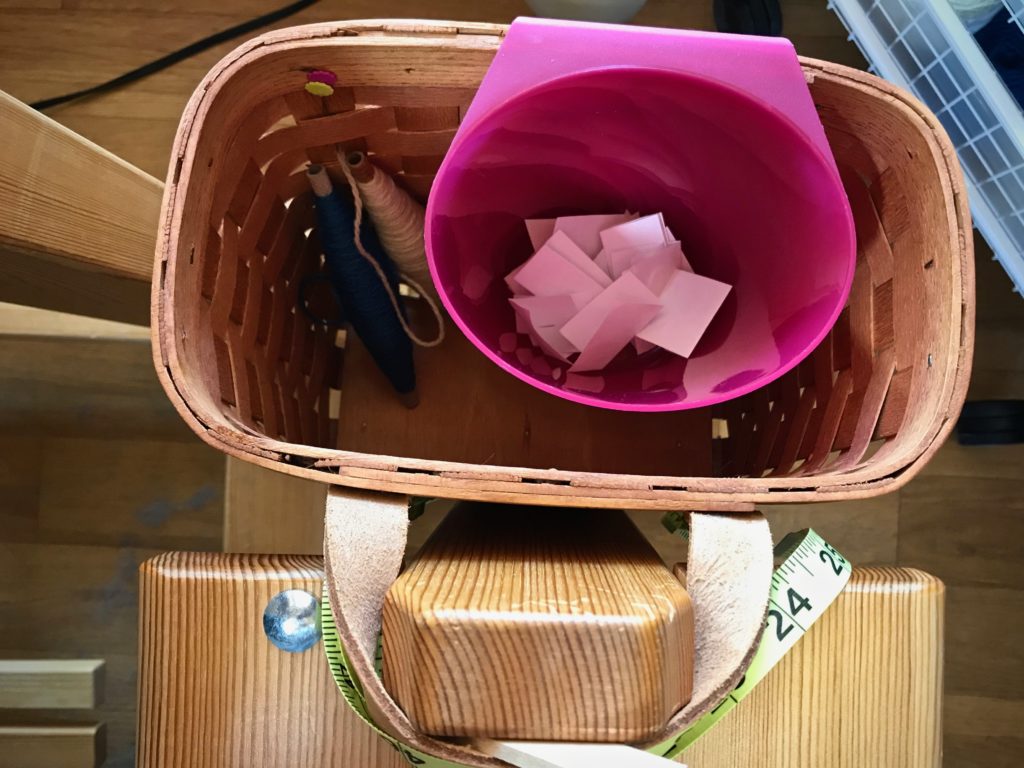
Low-Tech Random Fibonacci Sequence
1 Determine the desired range of the Fibonacci sequence. 1, 2, 3, 5, 8, 13
2 Determine the number of repeat options for each block (one repeat is 4 picks per double-weave layer).
3 Write each number of the sequence on individual squares of paper. Make three sets of these numbers. 1, 2, 3, 5, 8, 13
4 Fold each paper square in half and place in a container at the loom. Mix thoroughly.
Fibonacci numbers are ready for eyes-closed random selection.
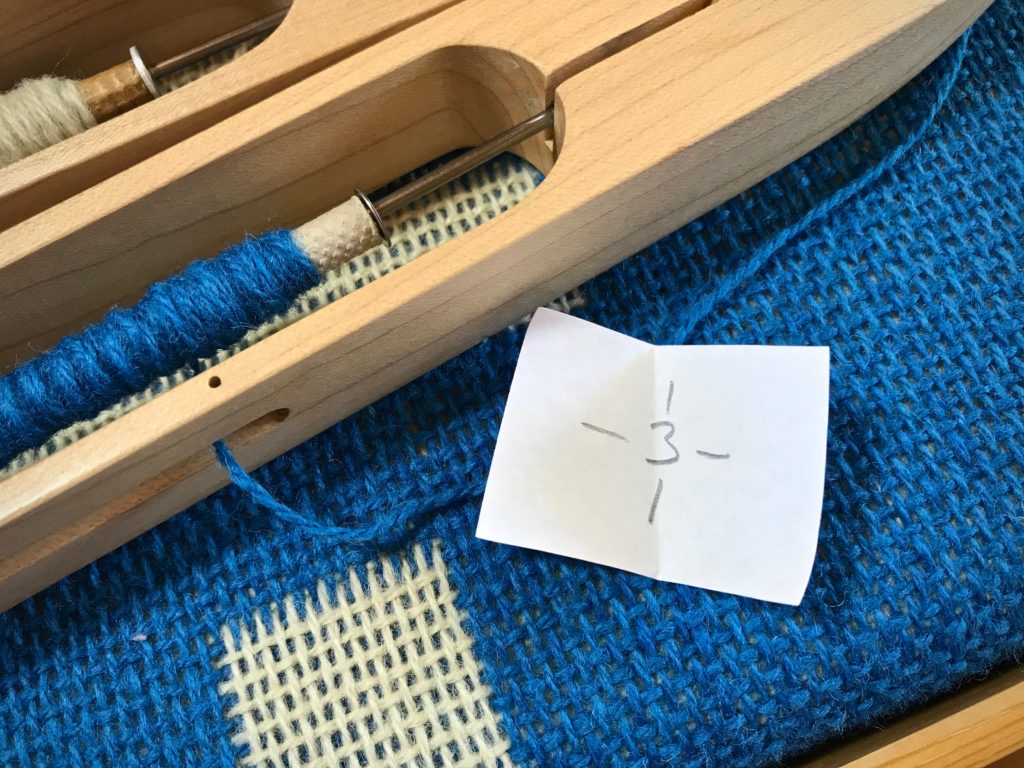
5 Randomly select a paper square to reveal the number of repeats for the next narrow or wide rectangle block.
Assignment for the next rectangle block – three repeats. The lines indicate that this number can be used for Block 2 (narrow, vertical) or Block 3 (wide, horizontal).
For this blanket I have a woven hem and border, and then two repeats of Block 1 (solid color) between alternating Block 2 (narrow) and Block 3 (wide) rectangles of varying heights.
Back side has reverse colors.Block 1 (solid blue across) stays a consistent size between the white rectangles.
Surprise is built in which makes it hard to leave the loom. “Just one more block,” I tell myself…
View of the cloth beam reveals the variety of sizes of rectangles. Eager to see it off the loom!