The computer is a worthwhile instrument for creating designs to weave. I like the flexibility and repeatability it gives me for drawloom designs. I’m also using the computer to develop the cartoon for my next pictorial tapestry. The computer work takes time—usually more time than I think it should.
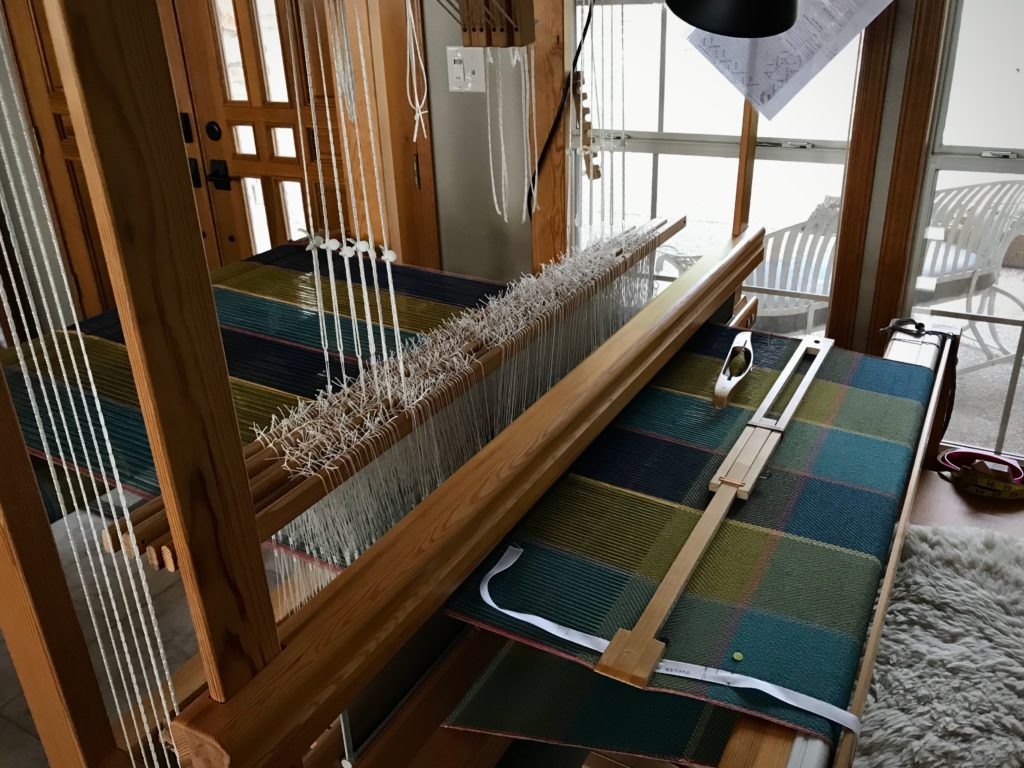
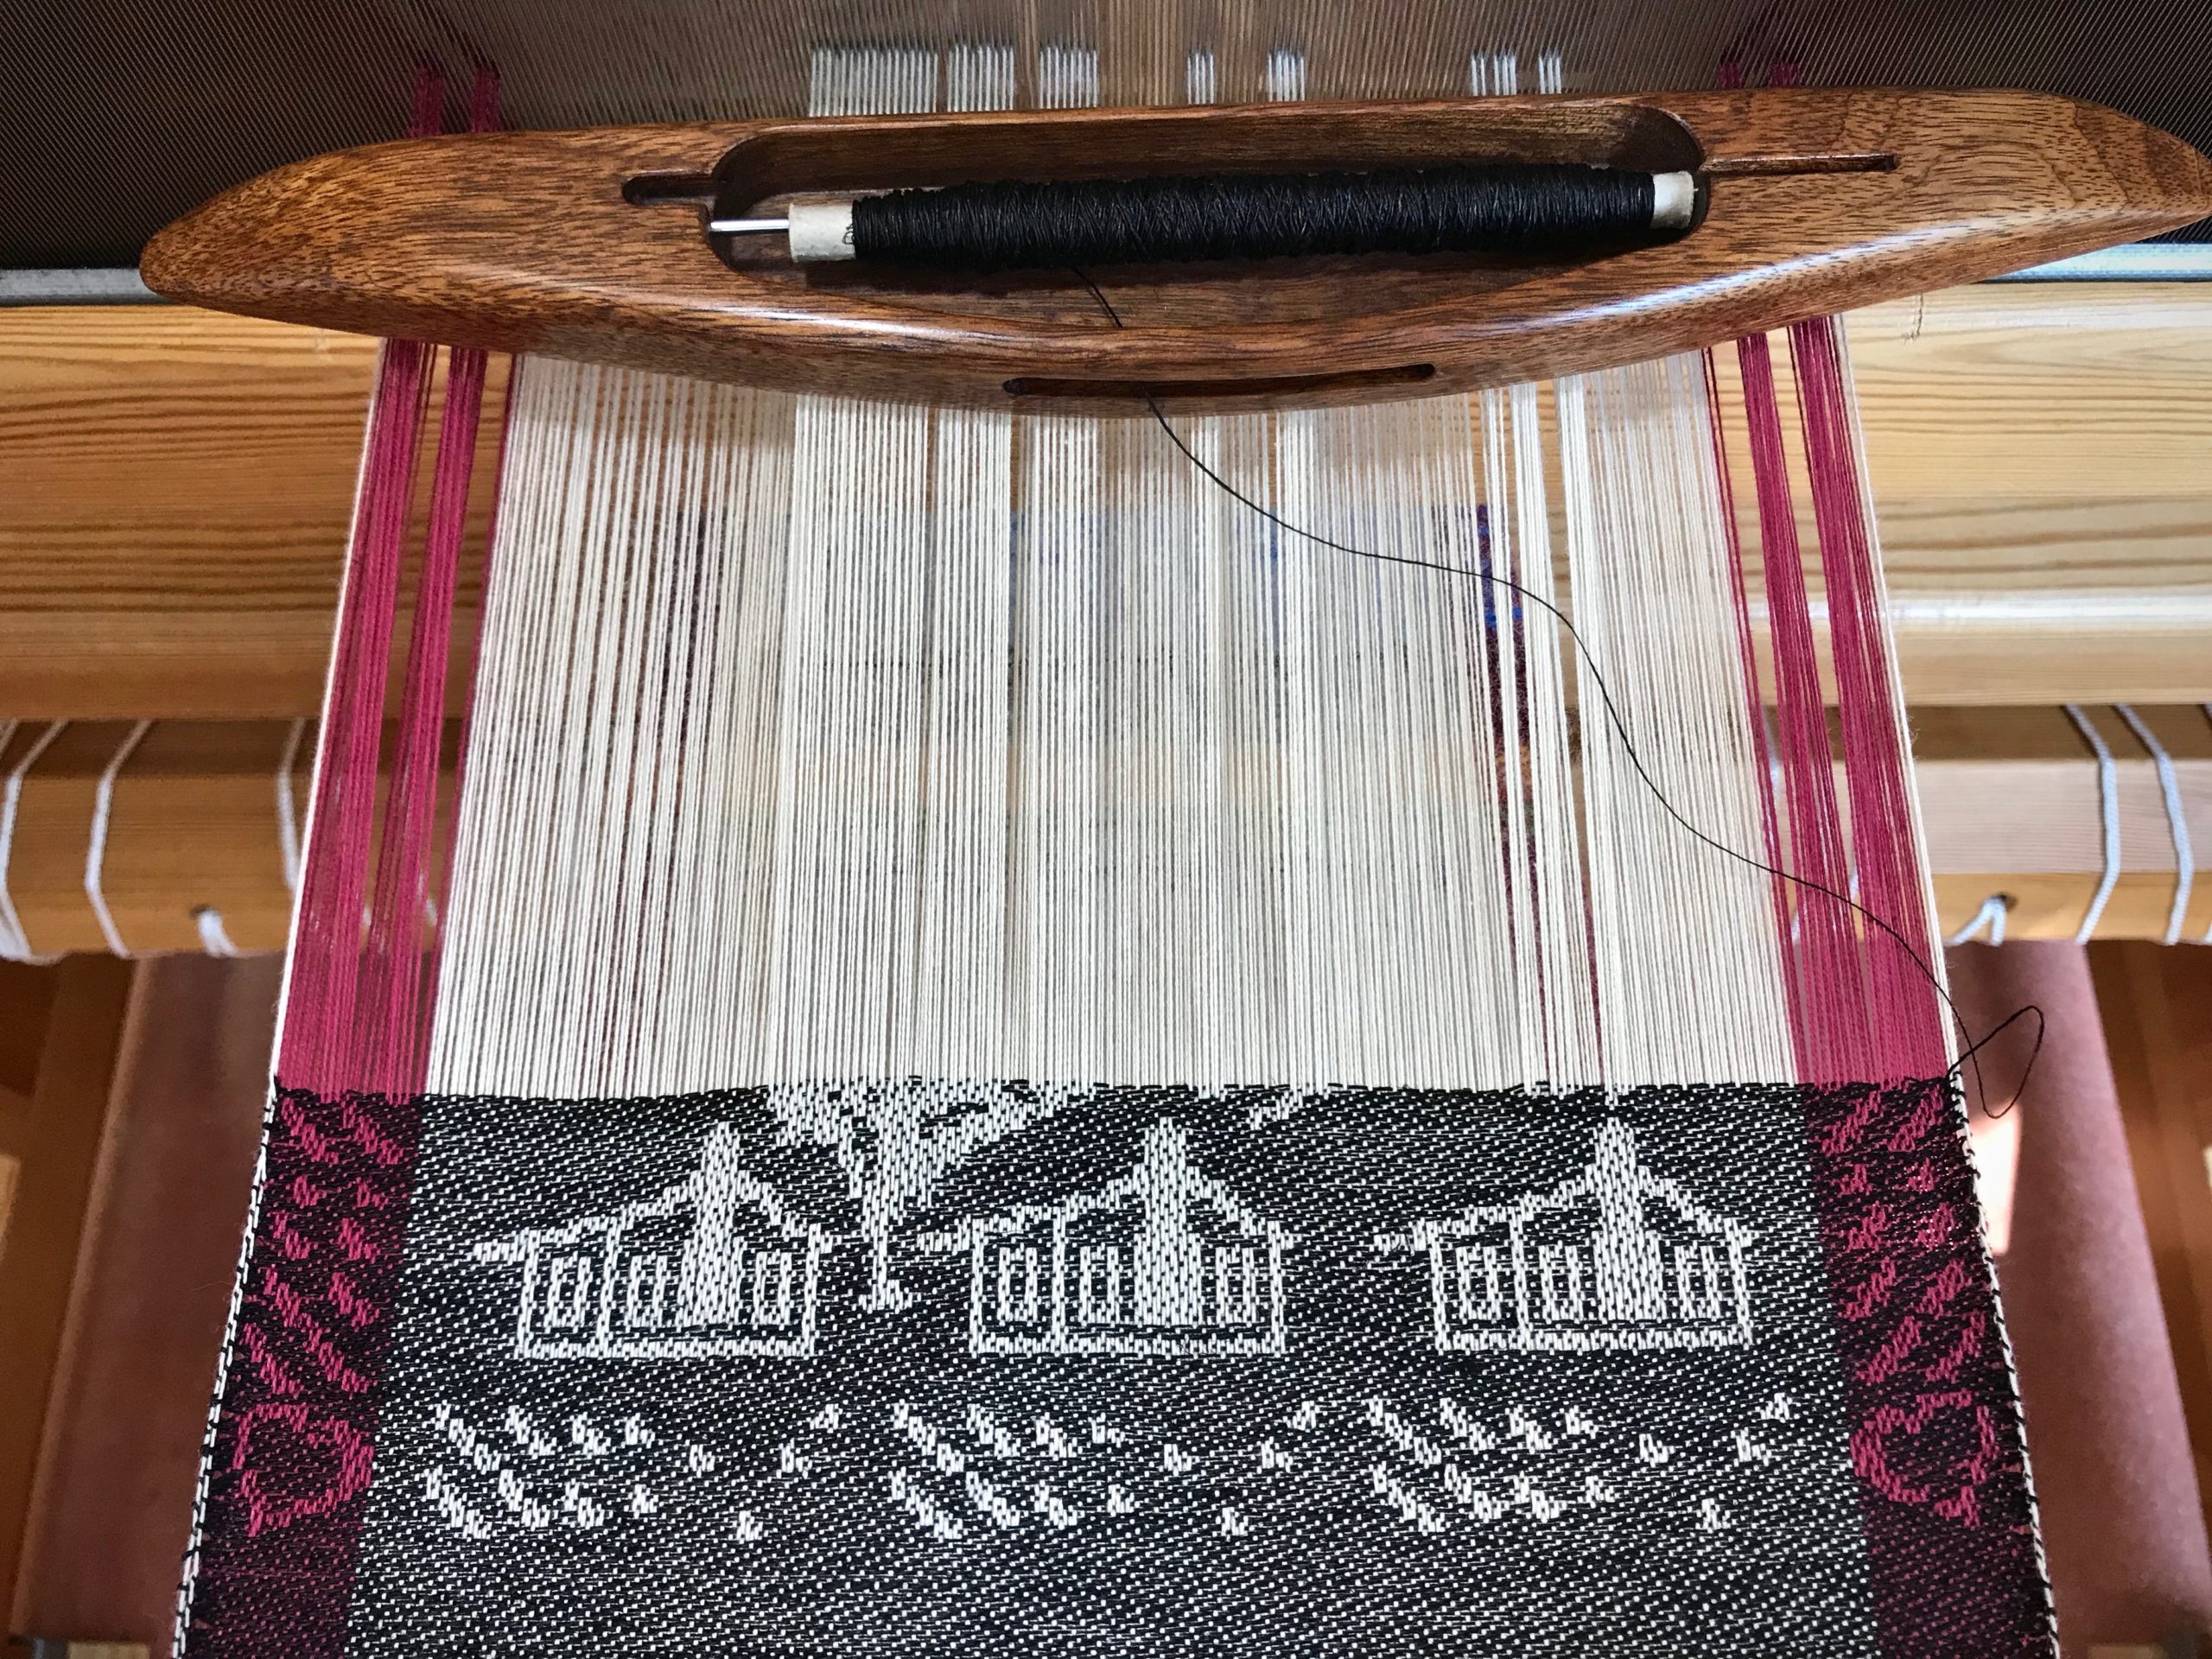
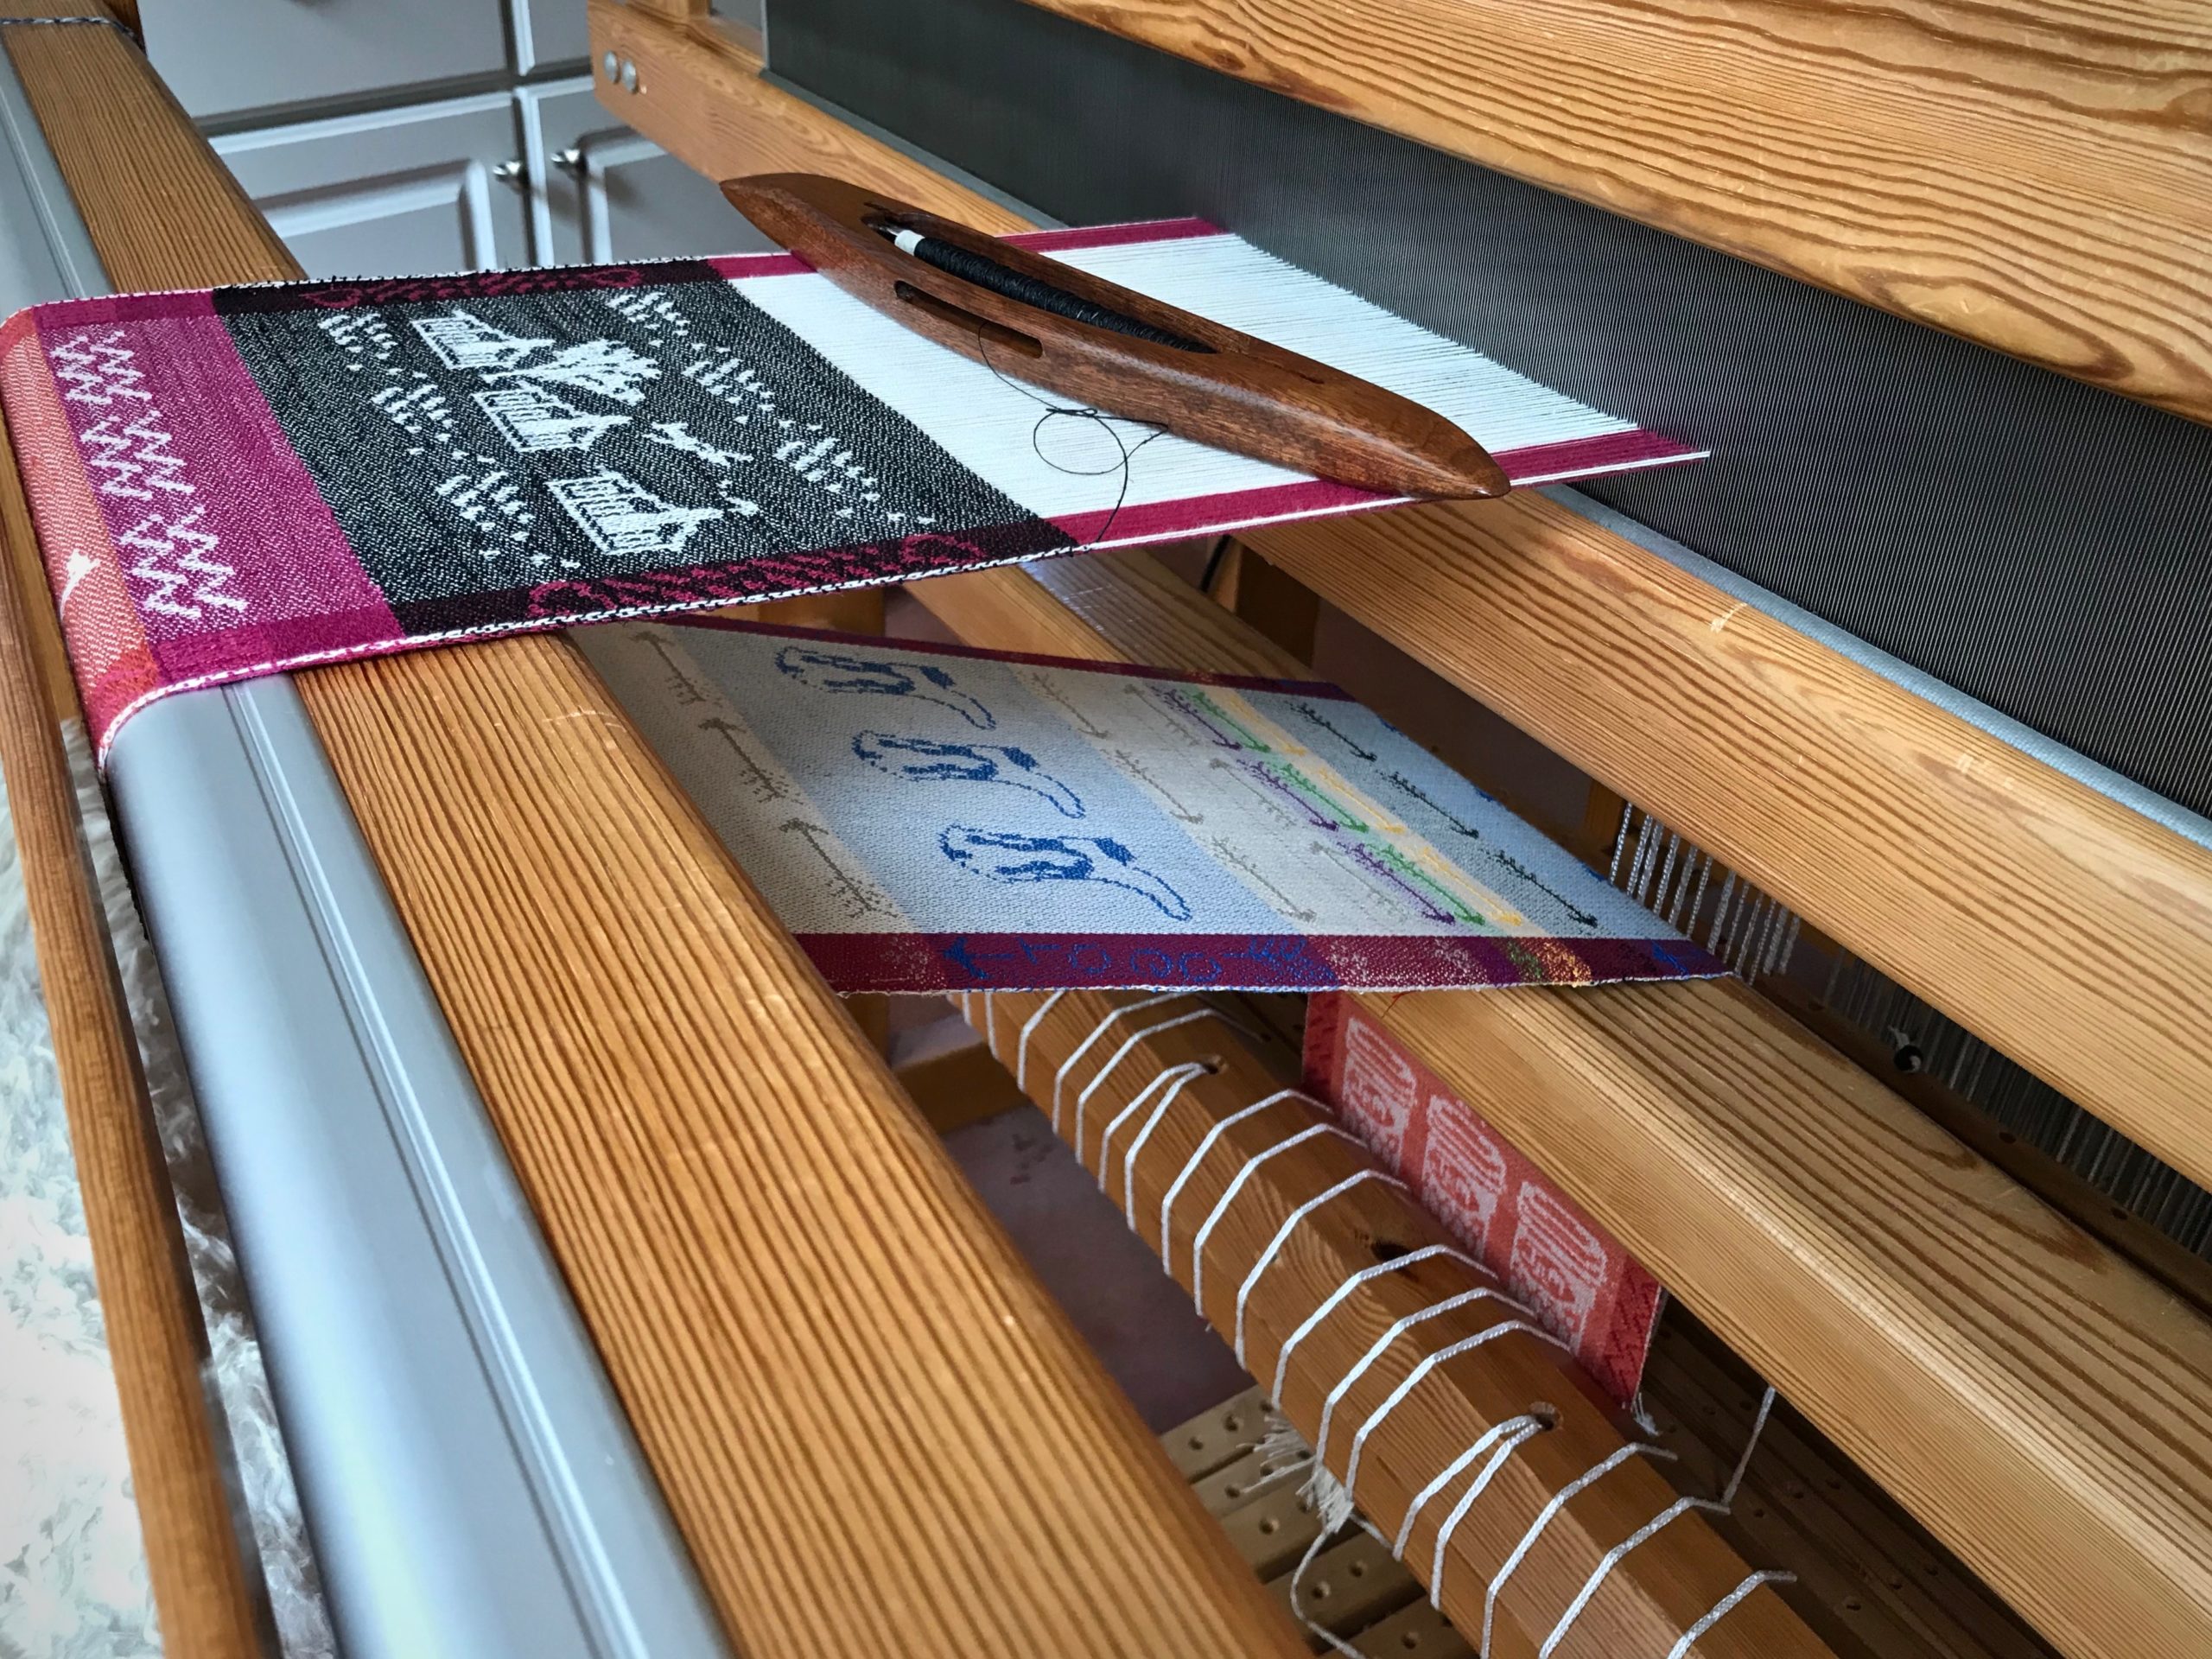
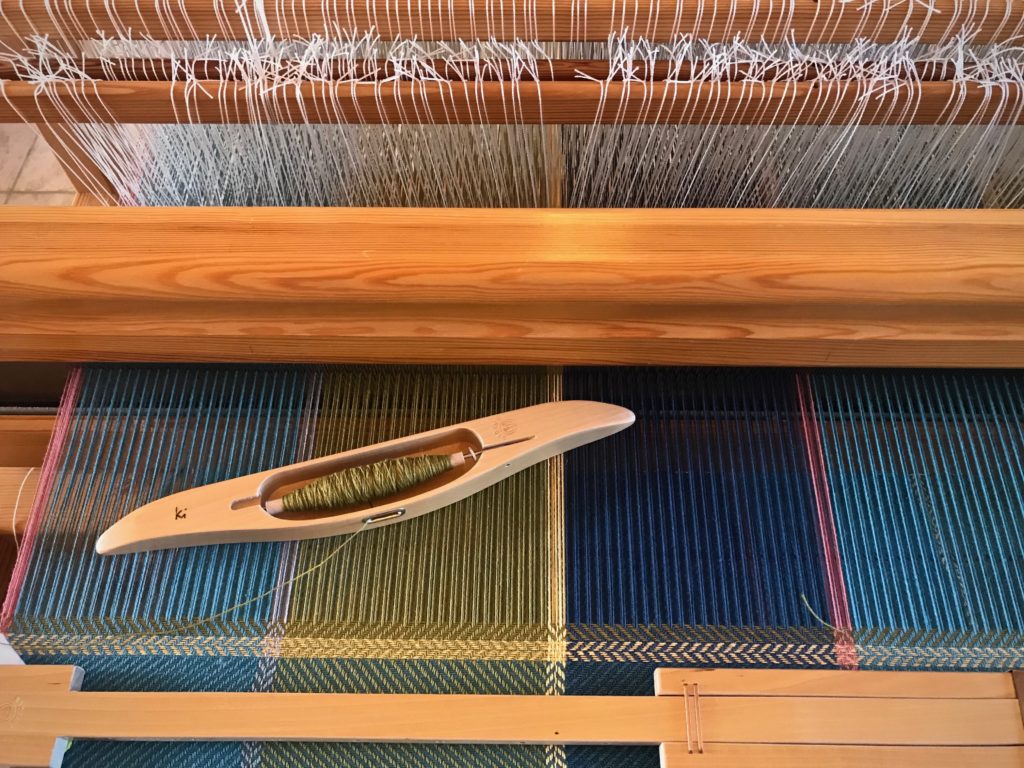
Come in our front door to see what is on the loom. Nearing the end of the first bath towel on this cottolin warp.
When I sit at the loom, though, time slips away unnoticed. This is where I’d rather be.
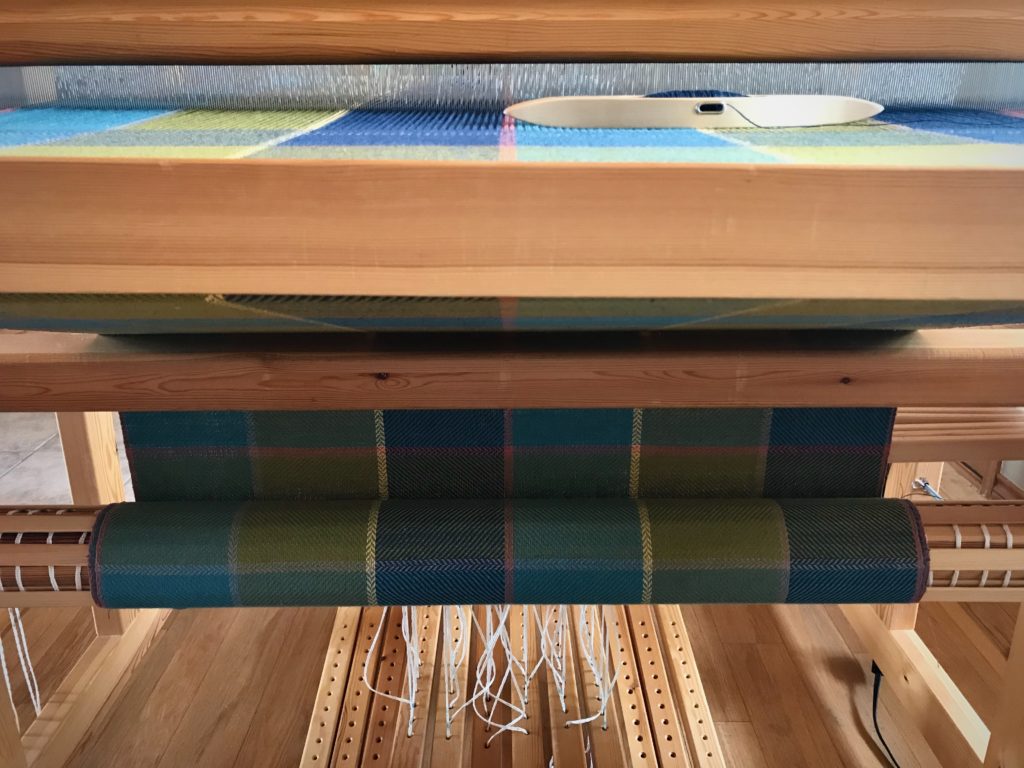
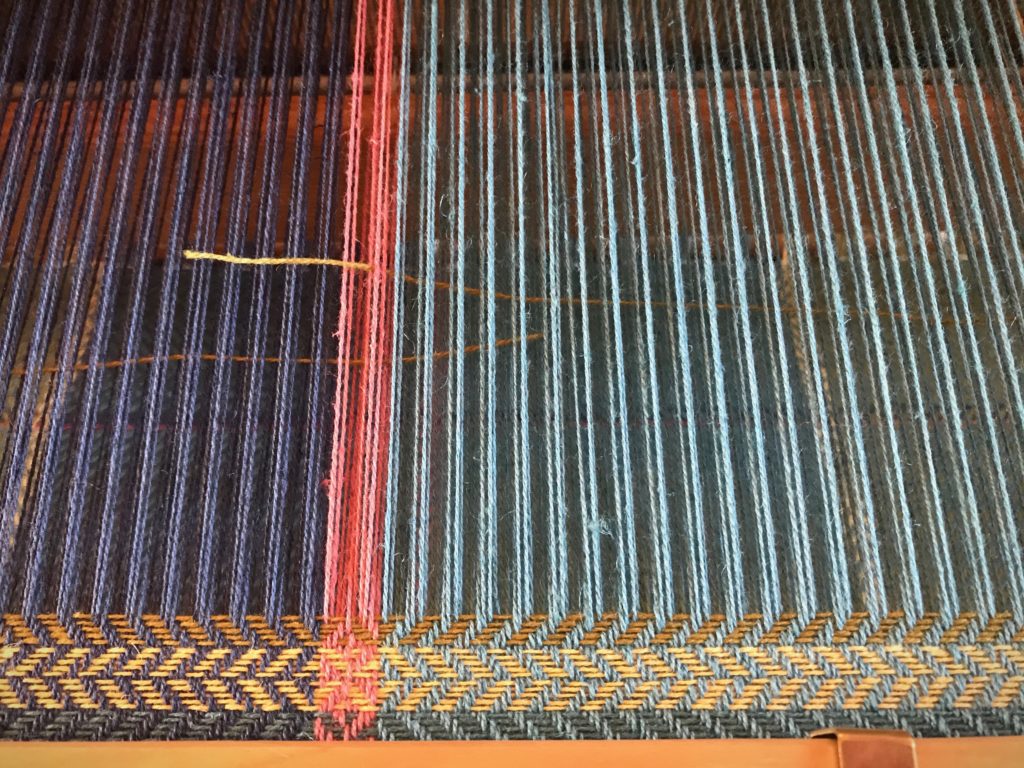
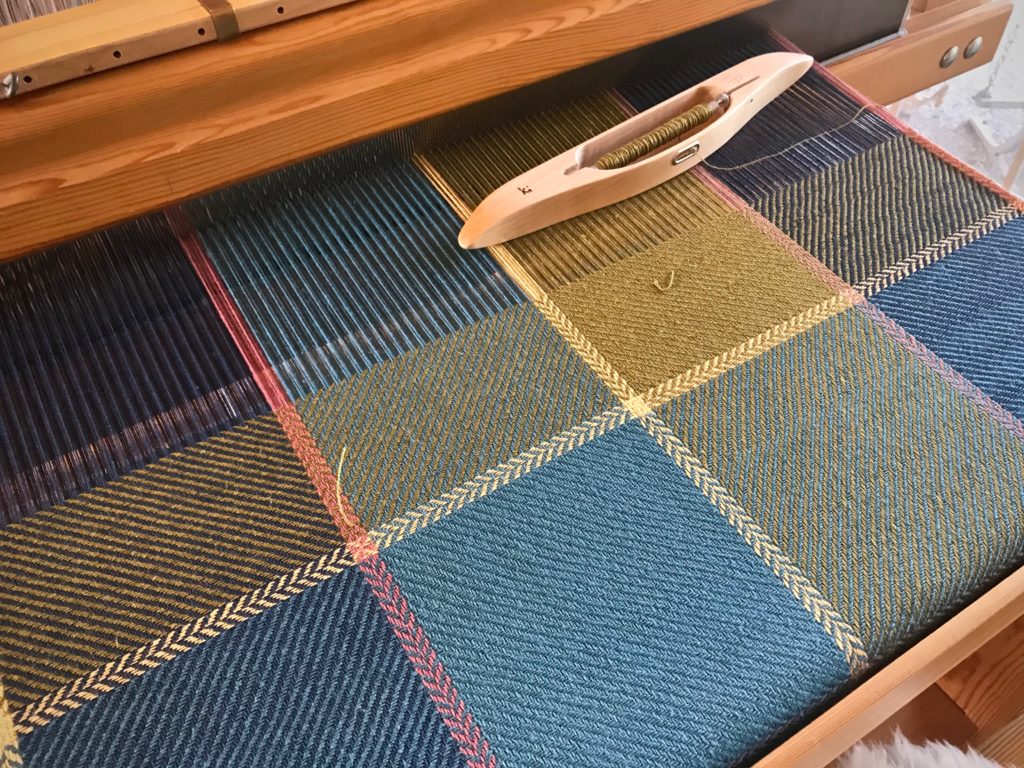
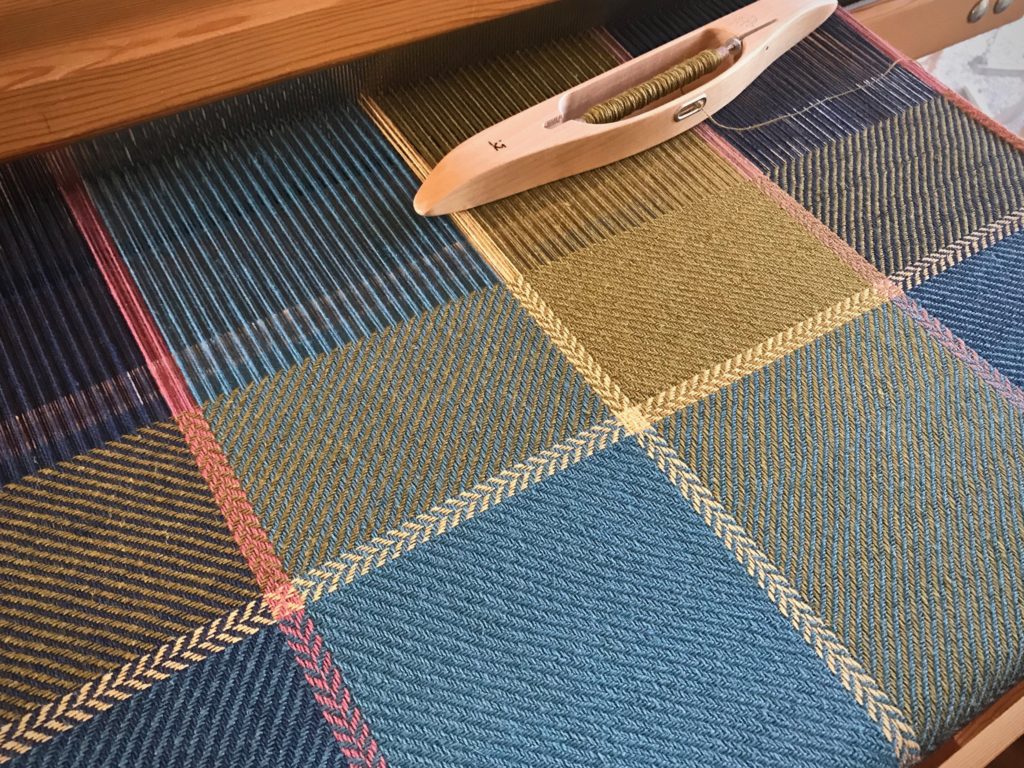
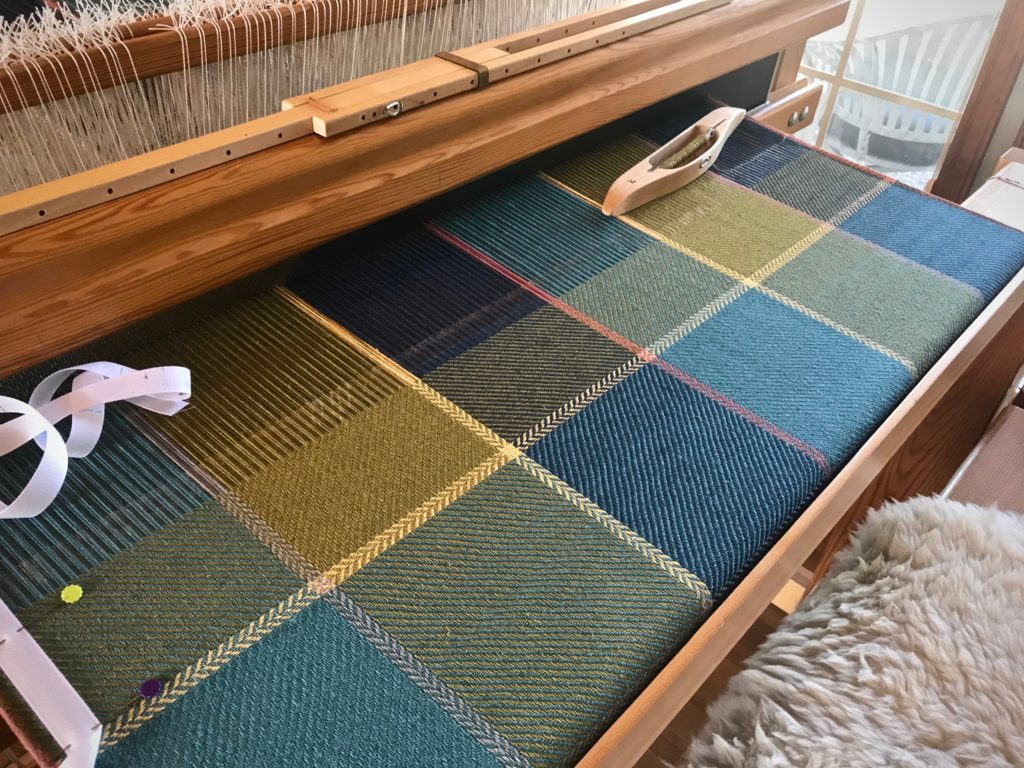
Deep borders on these towels have treadling changes and contrast-thread inlay for added interest.Red cutting line is woven between the first and second towels.First bath towel begins to wrap around the cloth beam.
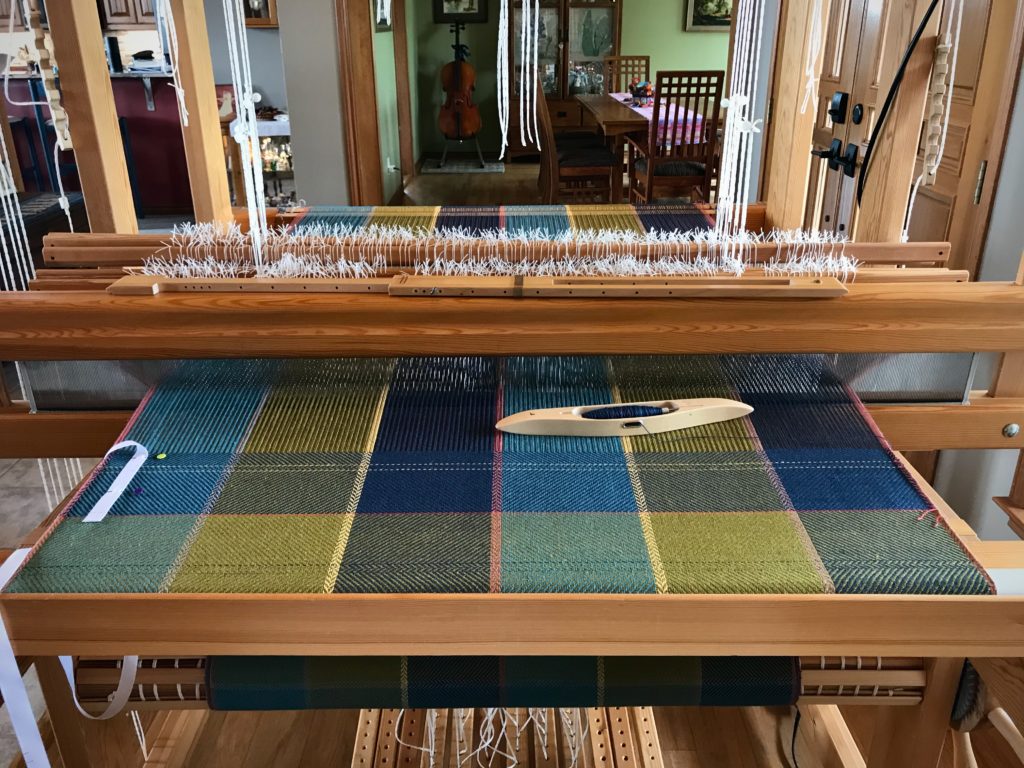
I’m starting the second of four bath towels on my Glimåkra Standard. The loom, with its colored threads and cloth, is the first thing to greet you as you come in our front door. Welcome. Let’s put the computer away for a while and simply enjoy ourselves. There’s no better time than now.
Previously woven hand towels that match these bath towels have not yet been used. They are presently folded and displayed in a pottery bowl on the dining room table in the next room.
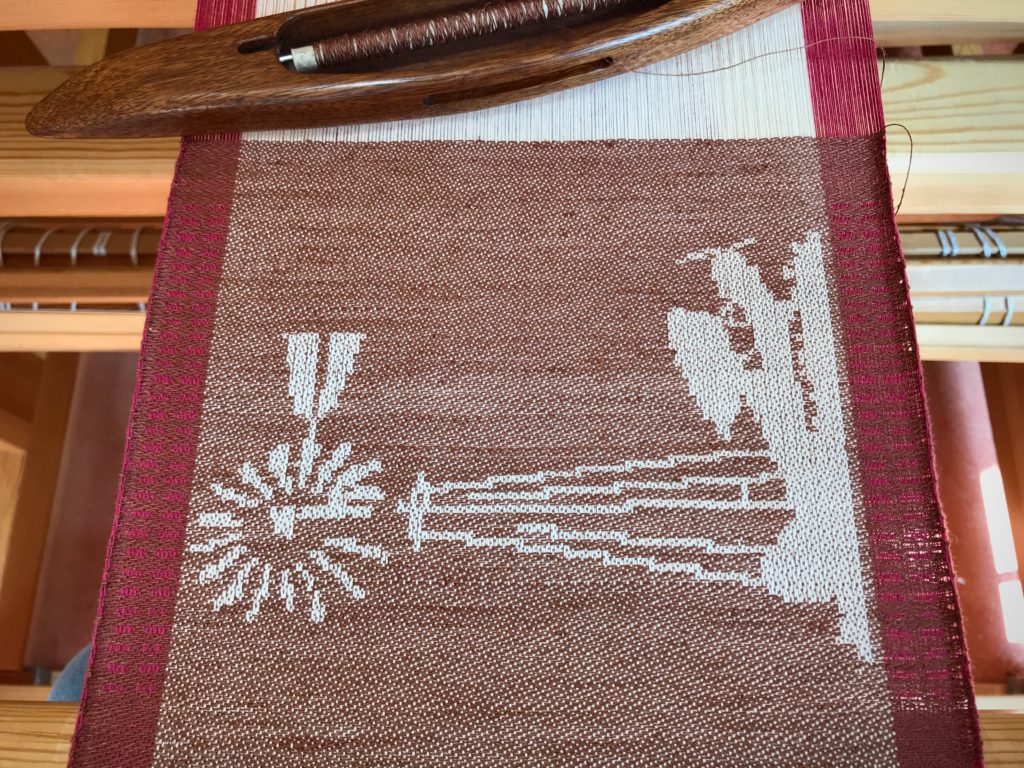
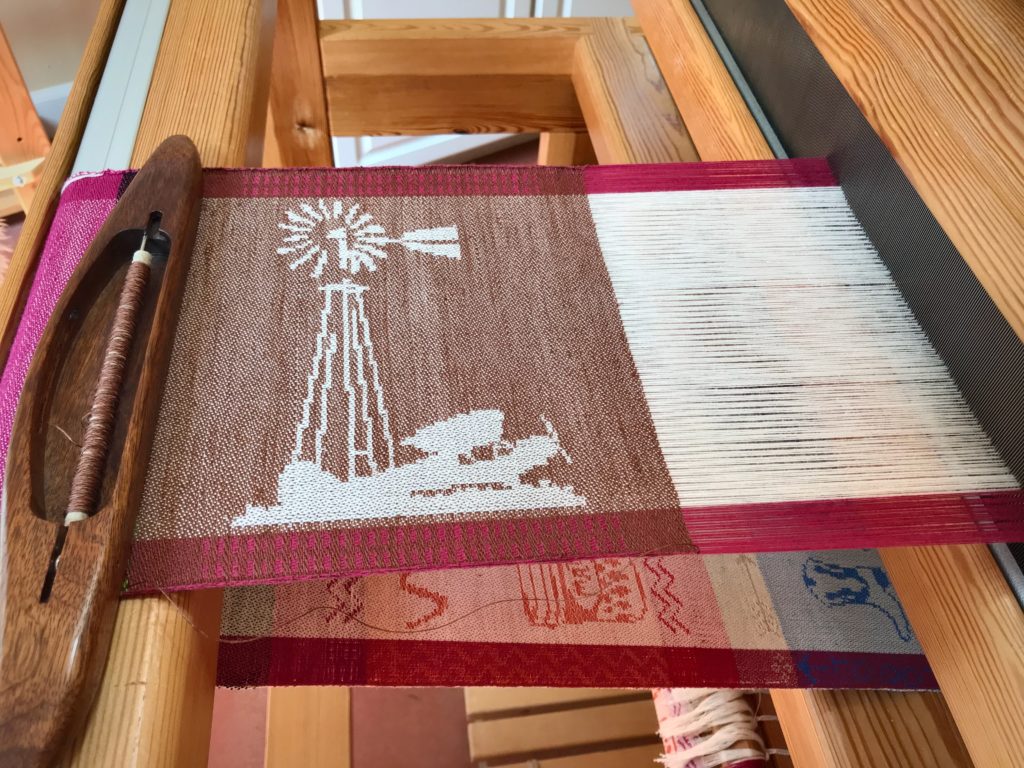
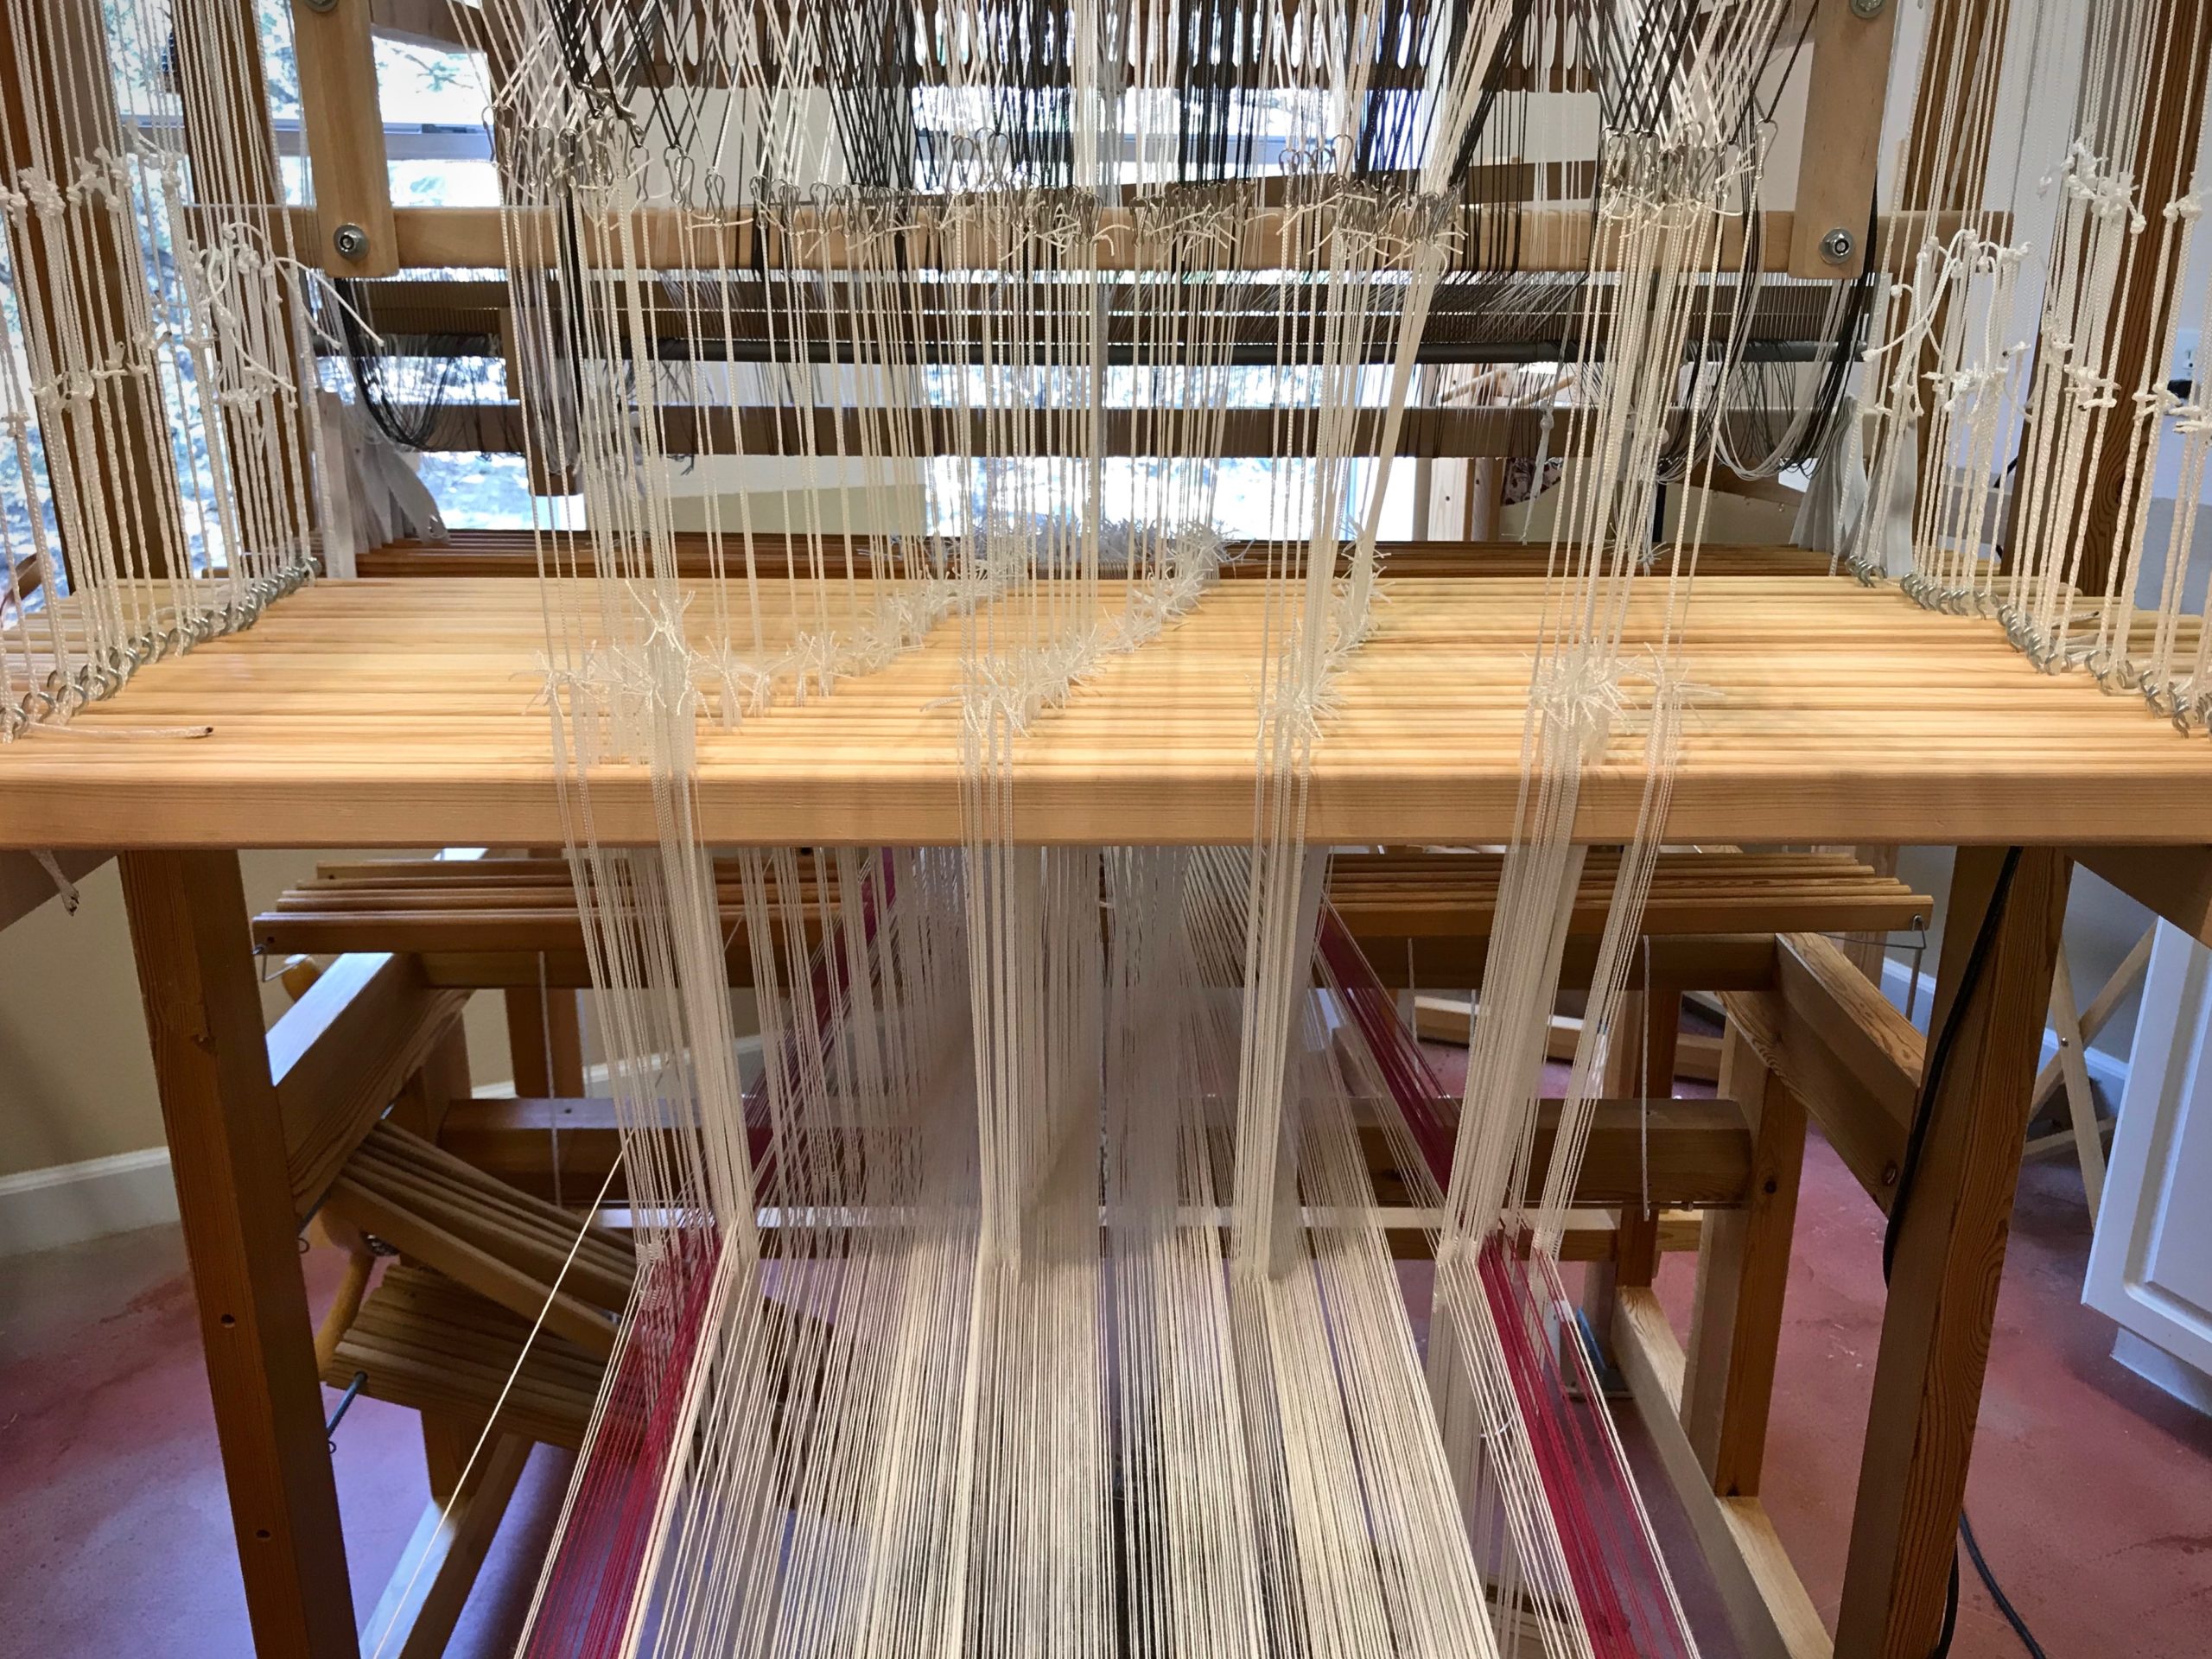
Come, look over my shoulder as I weave a windmill and taildragger image on the drawloom. The central design is woven using 103 single-unitdraw cords. I have a simple motif for the borders that uses only three pattern shafts. In the video below, watch as the three draw handles for those pattern shafts appear and disappear throughout the weaving.
Draw cords are used to raise single units of threads to create the image, one row at a time.Woven from the side.
I recorded my weaving in time-lapse form so you can watch three hours of effort compressed into three-and-a-half minutes. In the video you will see my hand pulling the draw cords, and then touching all the pulled cords from right to left to double check my work. That double checking saved me from dreaded do-overs.
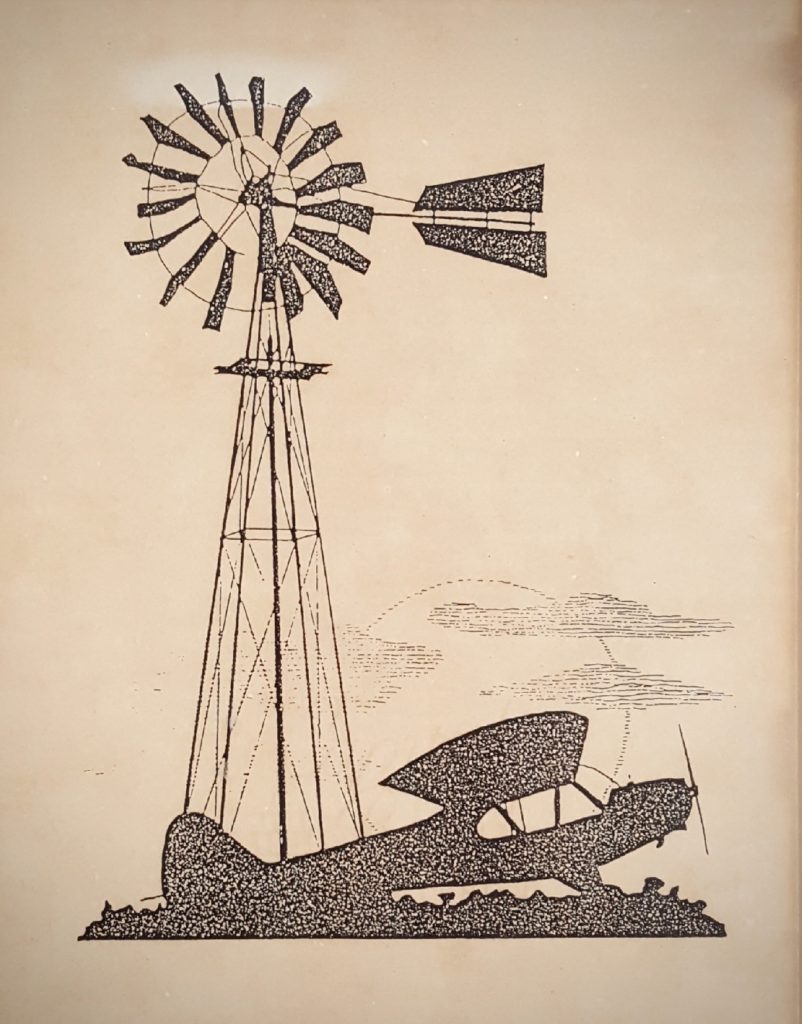
When our good friends, Jerry and Jan, saw my drawloom they brought this picture to my attention. — Forty years ago Jerry discovered the silhouetted windmill and airplane tucked away on a back page in an old issue of Flying magazine. Because of his affinity for airplanes and windmills he cut out the tiny picture and saved it. Years later, Jan found the picture and had it enlarged and framed. — After learning about my loom’s pictorial capability, Jerry and Jan wondered aloud if this special image could be woven on a drawloom…
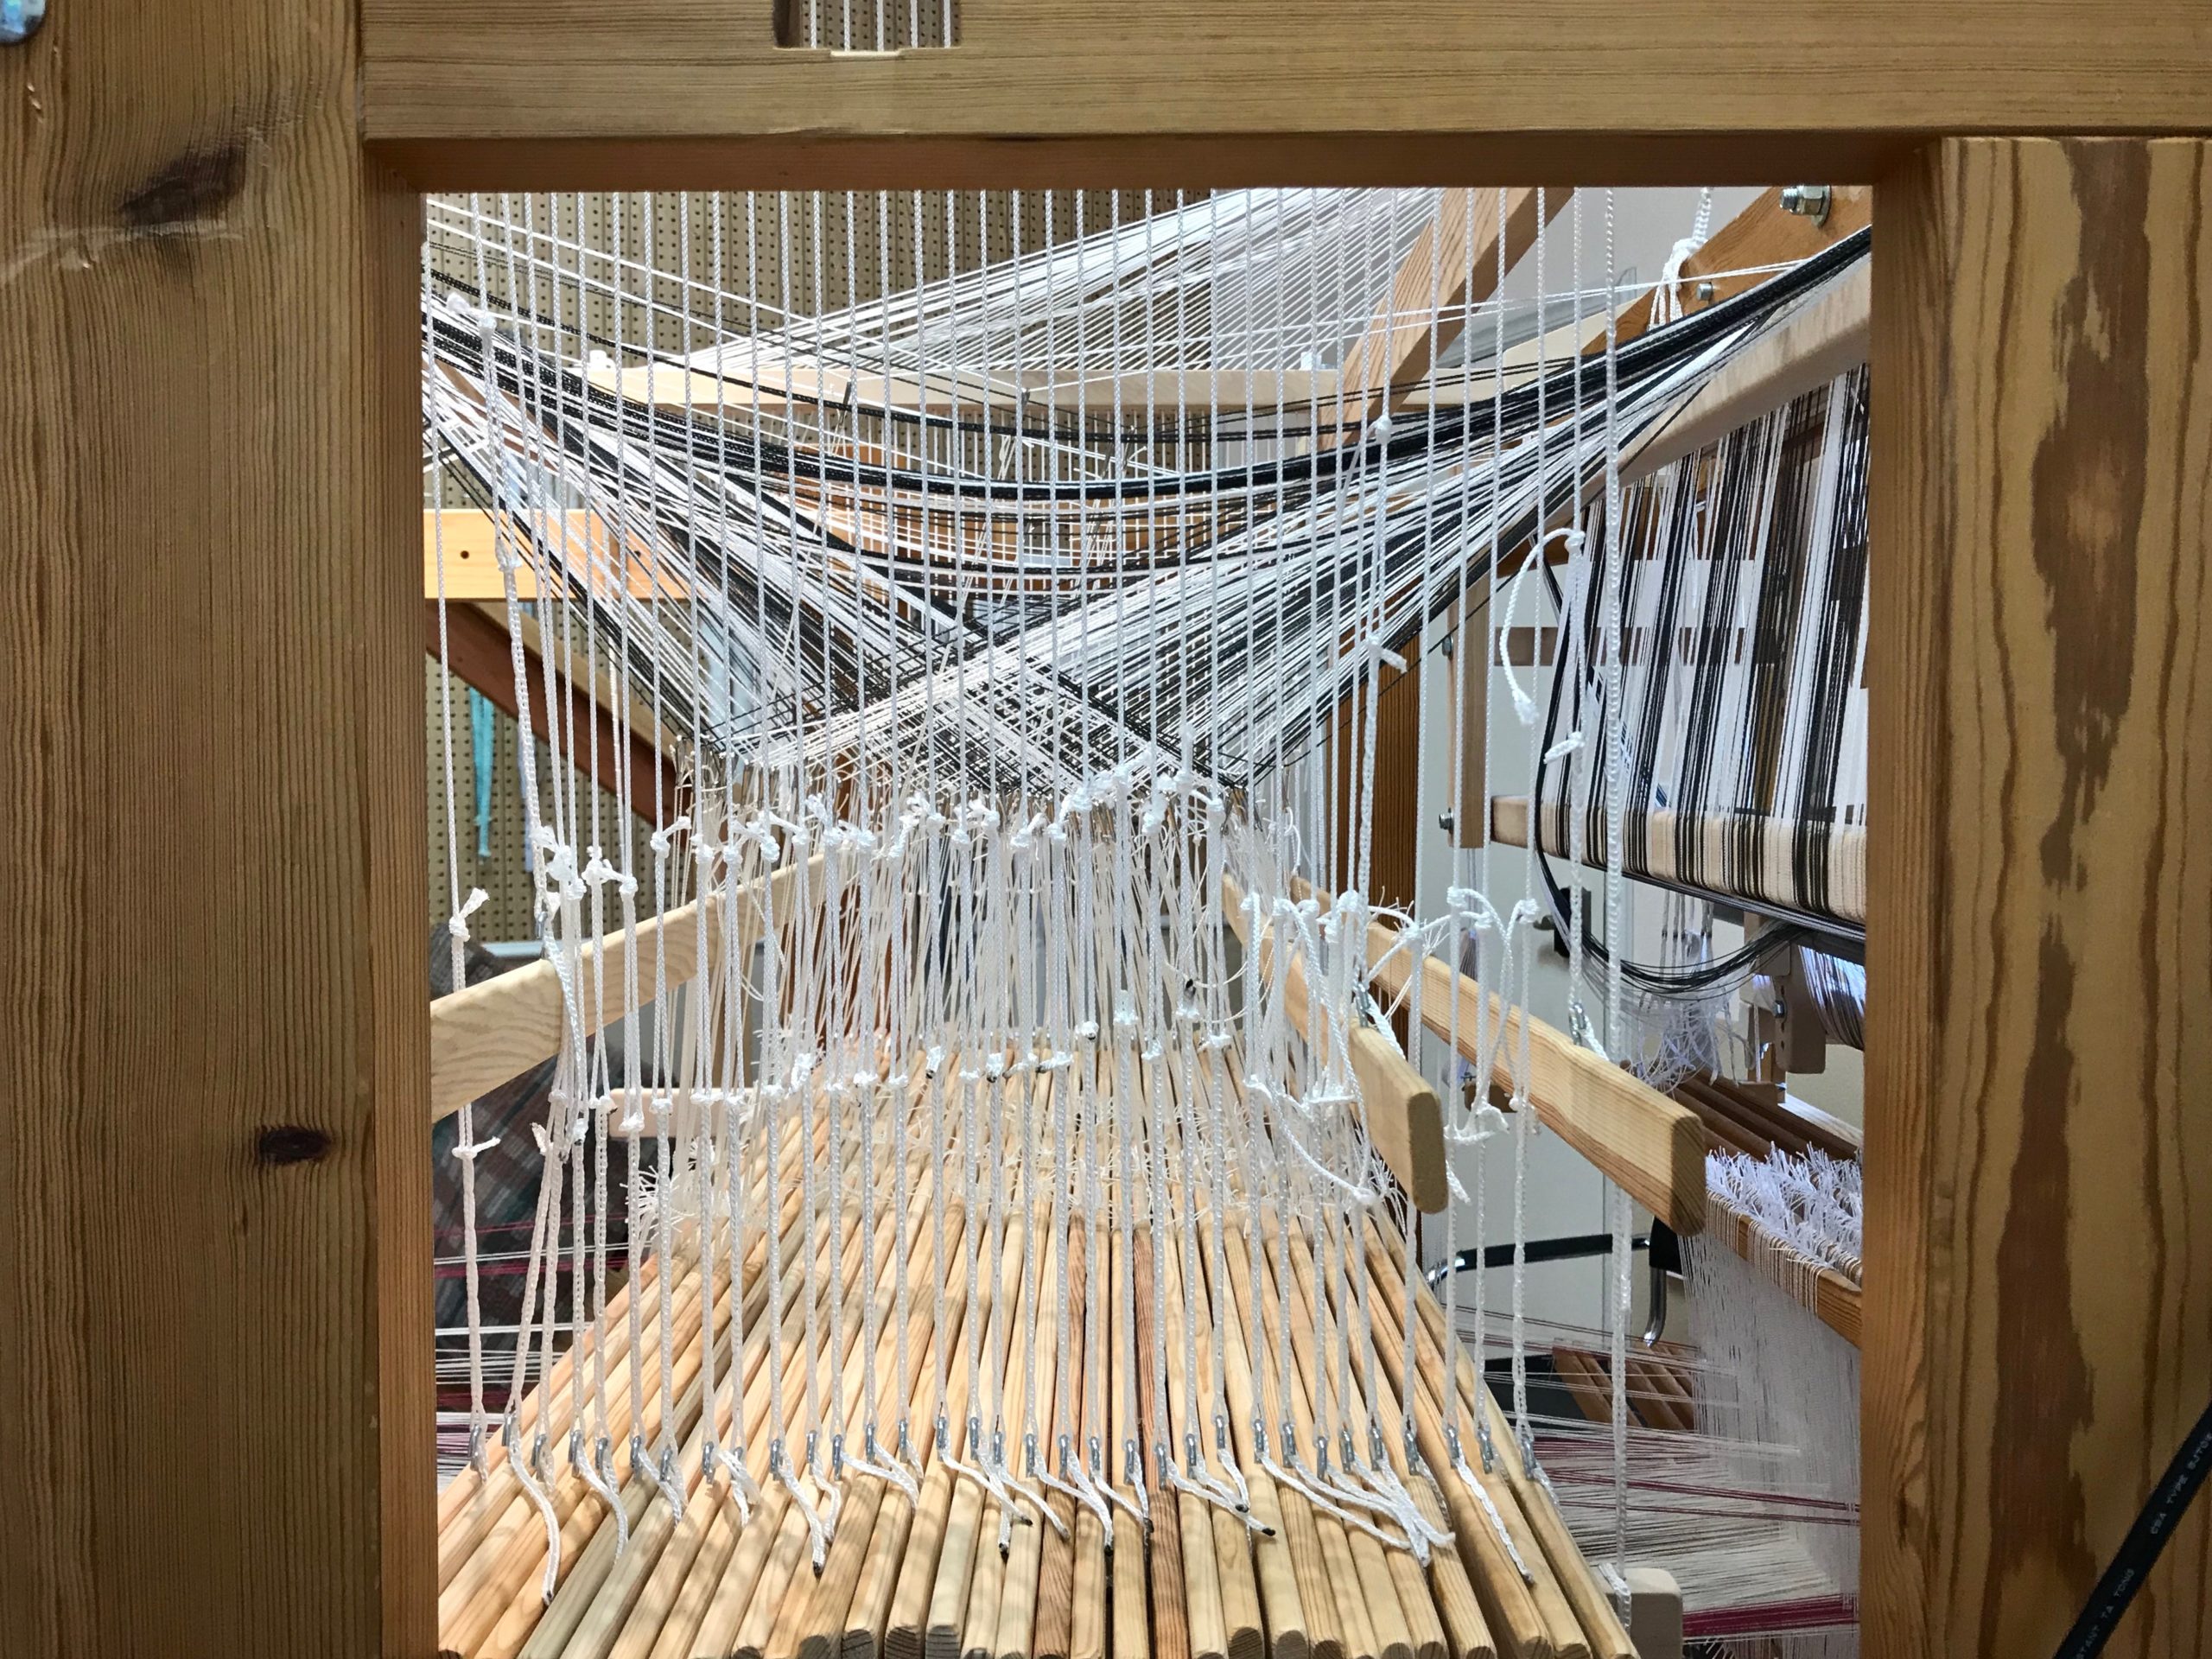
The sky is the limit! That is my conclusion after weaving a few designs using the Myrehed combination drawloom. The shaft draw and the single unit draw systems are combined on this ingenious apparatus that is attached to an otherwise ordinary loom. The shaft draw system enables me to weave repeated patterns. The single unit system enables non-repeat patterns. This narrow warp is my playground to do both.
Pattern shafts (the wood bars) and single units (with black and white draw cords) are combined for this warp. 36 pattern shafts, including the X shaft. 132 single units.Central design area uses a repeat of 30 pattern shafts threaded in a straight draw. Side borders use a repeat of 5 pattern shafts. Lift heddles and lanyard clips on the single unit draw cords attach the draw cords to the all the individual units (single units) on the pattern shafts.
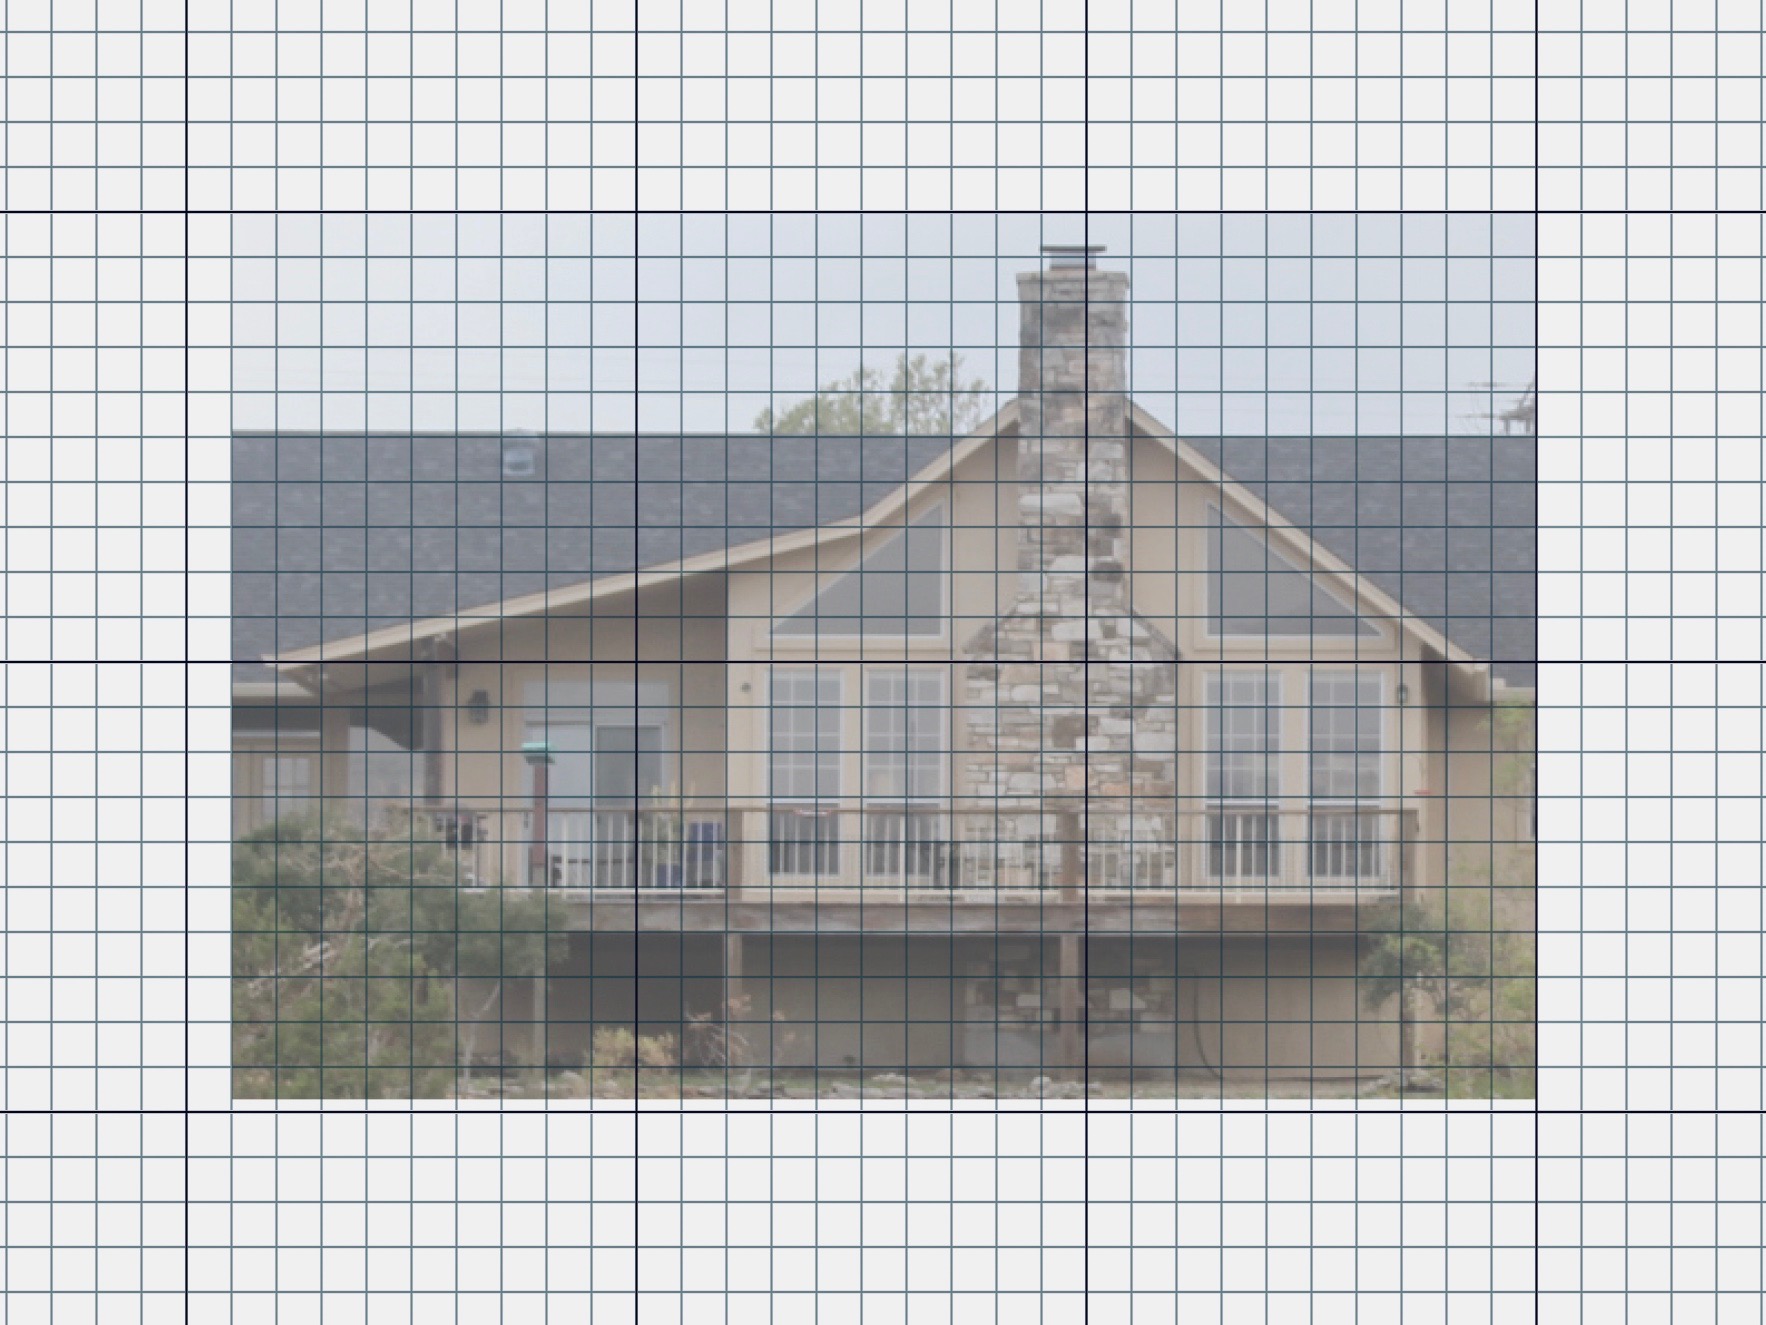
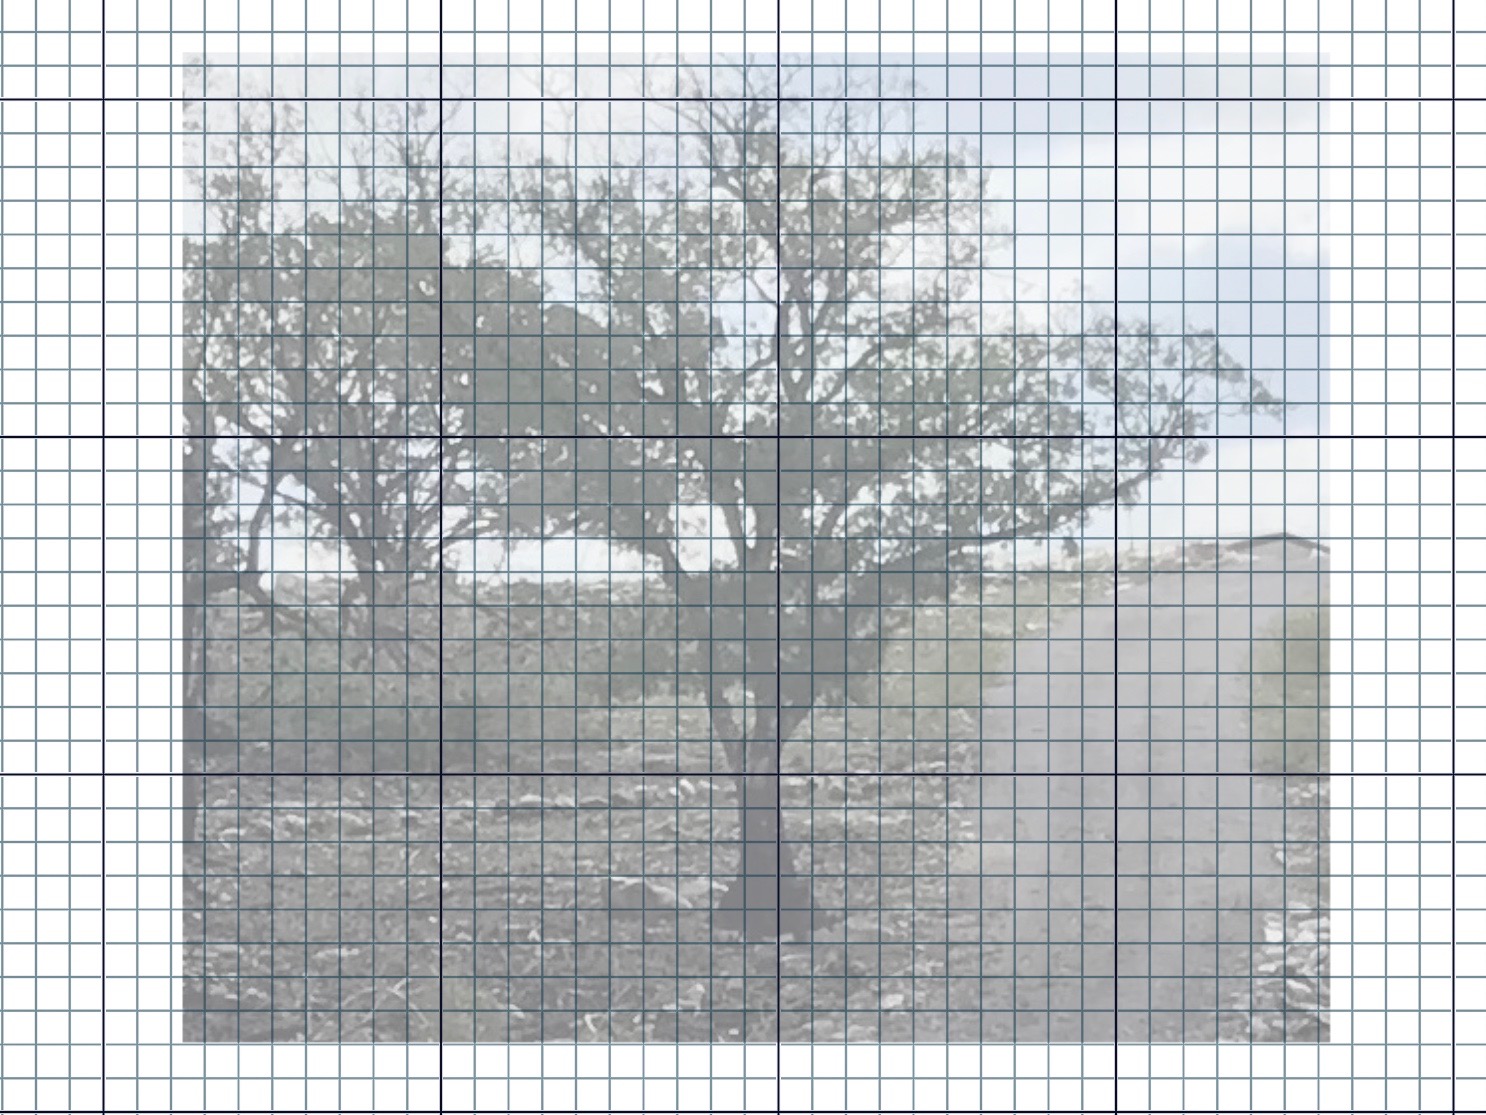
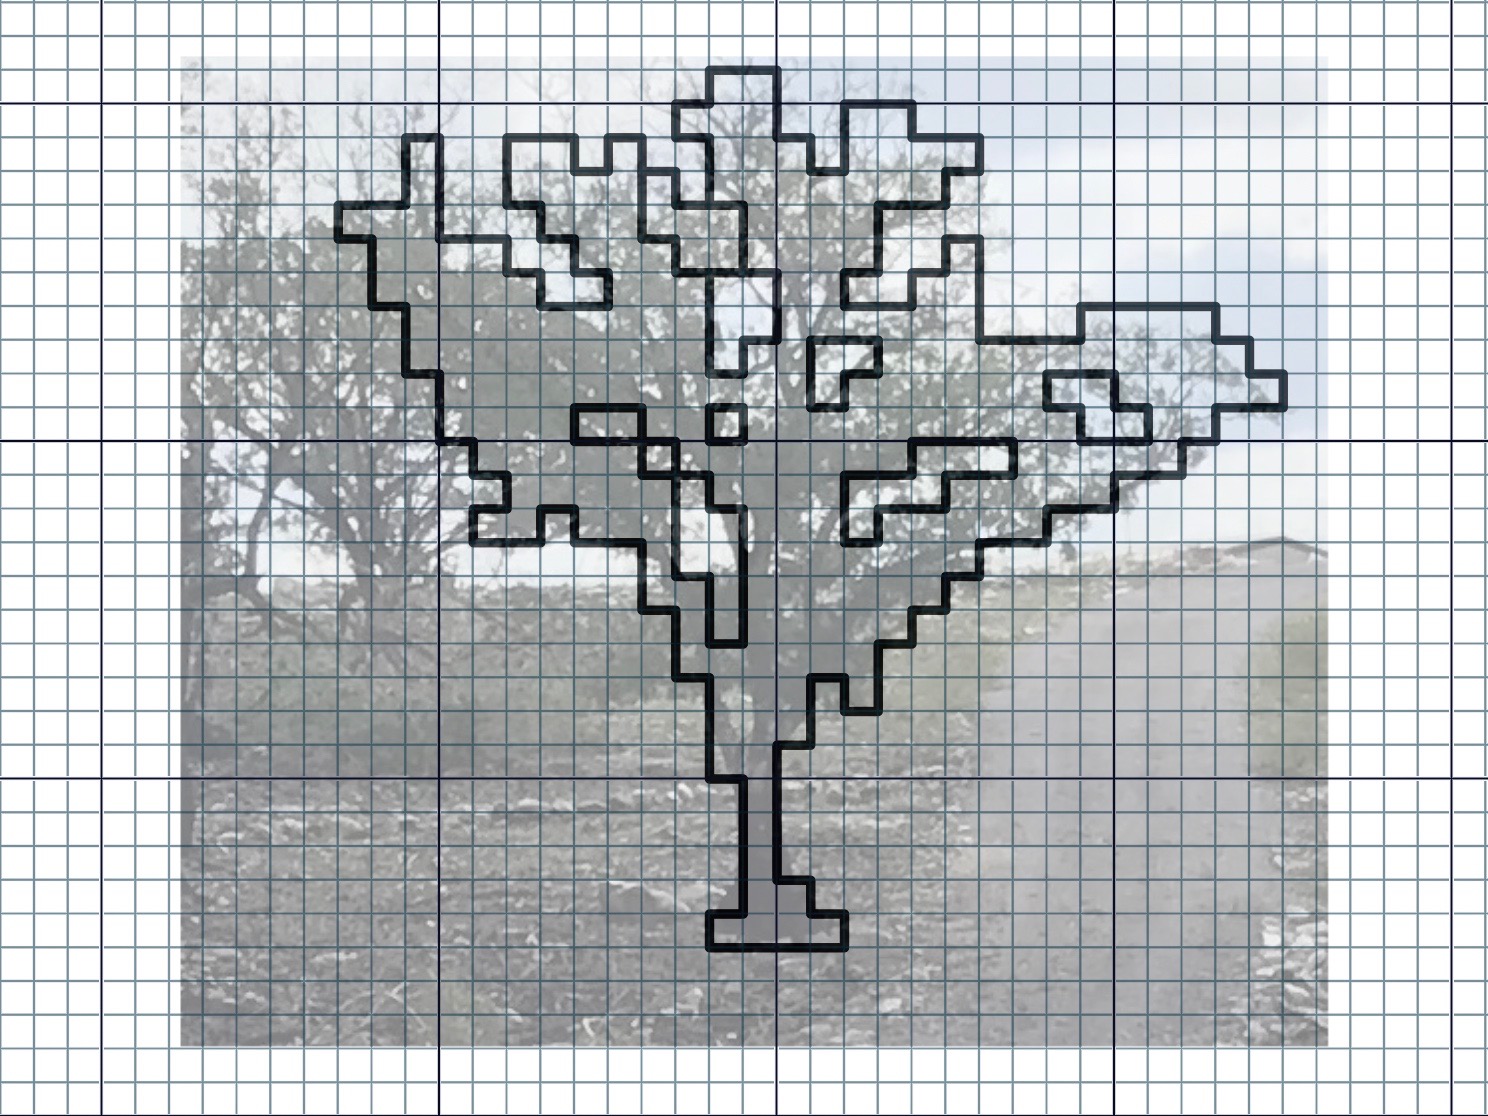
I use the computer to create designs. ”Home in Texas” shows the back of our house, with its massive stone chimney. The tree in the scene is a tracing of the oak tree that I pass as I walk up the hill to my drawloom studio. The airplane is a copy of the Mooney that our pilot friend took us in to fly over Enchanted Rock. I am delighted to discover that I can use a drawloom to bring features of personal meaning such as these to life.
Photo of our back deck. Using Affinity Photo, I set up a grid on the page to represent 30 pattern shafts. I then import my photo onto the gridded page.Simple outline is created and saved as a separate image. The filled-in outline becomes my drawloom pattern.Oak tree that I pass on the hill up to my drawloom studio. After importing the photo, I adjust the opacity to fade the picture, which makes tracing easier.I use a pen tool in Affinity Photo set at 3 pt to do the tracing. Now I can fill in the outline and copy and paste the image onto my chart that I will print and then use at the loom.Houses are woven with 30 pattern shafts. The hearts in the corners and the added details above the houses use the single unit draw cords. The tree is beginning to appear between the two houses on the left.Two draw handles are pulled for the pattern on the side borders. Single unit draw cords are pulled and held in place on the hook bar above the beater.Our Texas Home
The words of the Creator have life in them. It’s as if he puts his thoughts on the loom and weaves them into being. Let there be light! He speaks; and it is so. Listen closely. Hear the Grand Weaver say, Peace to you. And it is woven so. You are his workmanship, bringing his design to life.
More ideas are forming, even as this fabric begins to hug the cloth beam.
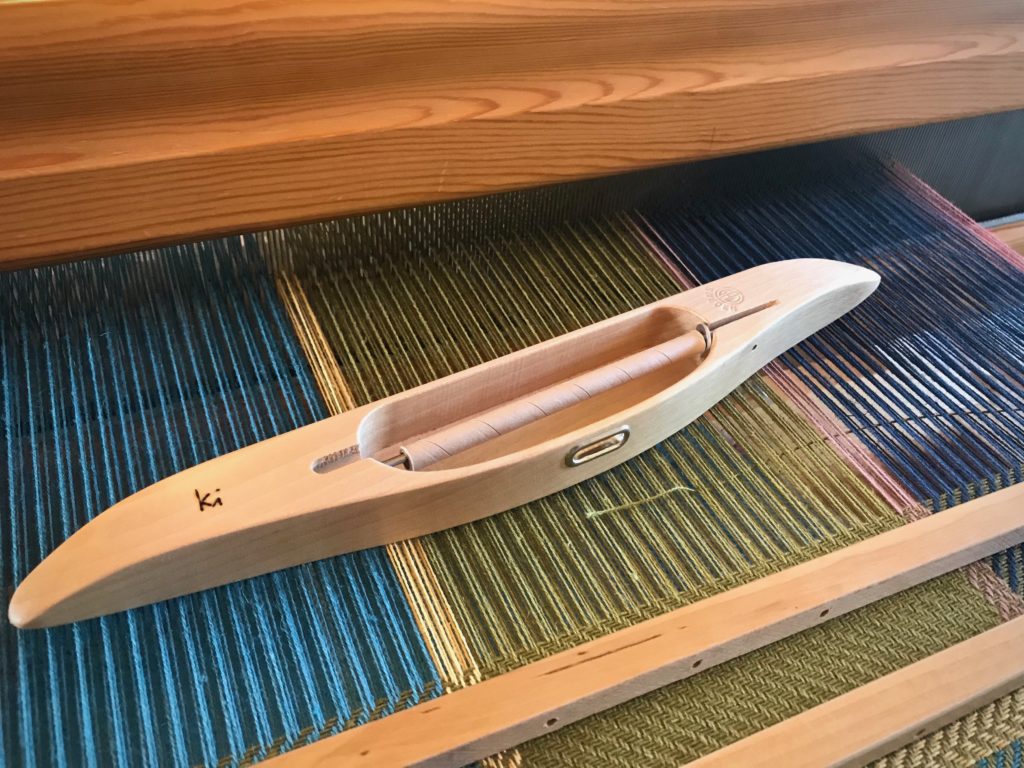
Do not overfill your quills. It may seem efficient to load the quill as much as possible so you can weave as far as possible. Like me, you may have to learn this the hard way. A too-chubby quill that has to be coaxed through the shed takes more time and effort than winding a few extra quills. So much for efficiency.
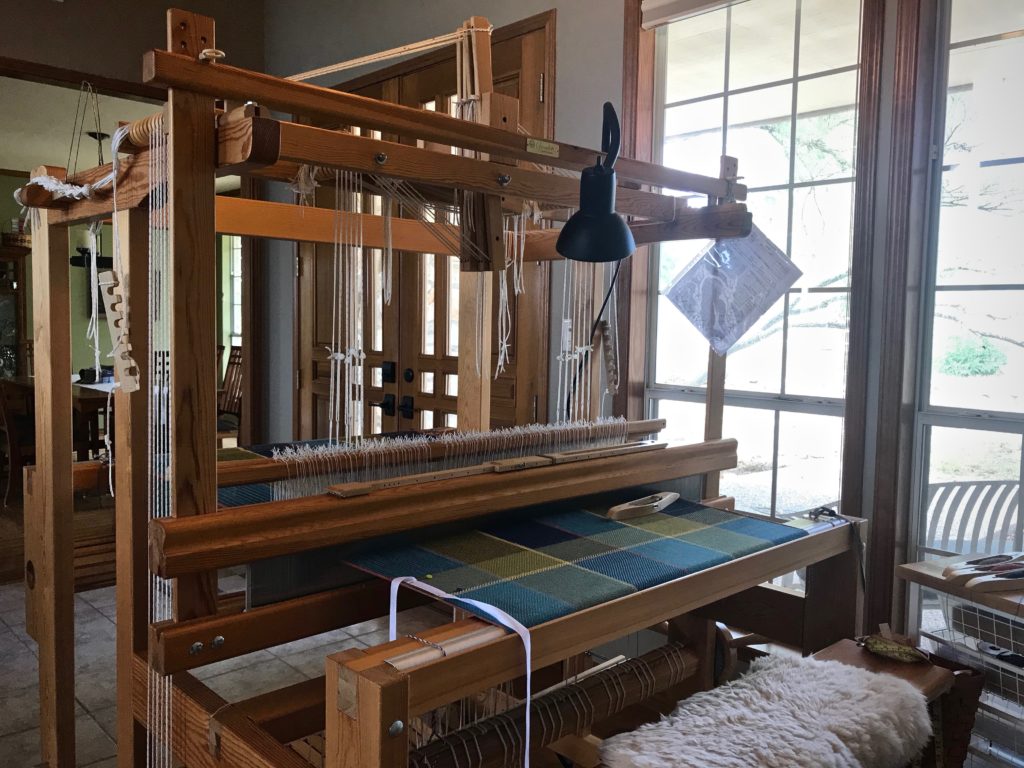
Cottolin bath towels on the Glimåkra Standard, in twill, broken twill, and reverse twill.
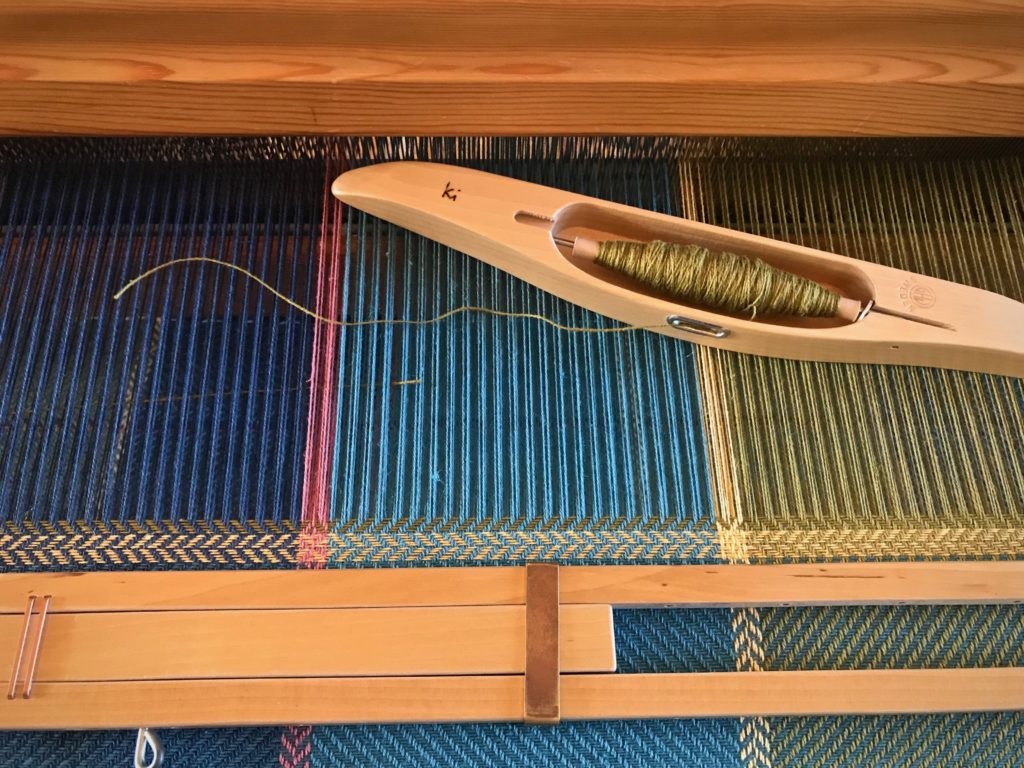
It helps to have an idea of how far the thread on a quill will go. With this information, you can wind a few in advance without ending up with an excess of wound quills at the end of your project. I like to have the next quill ready to go when I am weaving so that I can put the new quill in my shuttle and keep weaving with very little interruption. This is especially helpful when the treadling sequence is tricky, like with the reverse twill in every other large color block on these cottolin bath towels. 3-2-1-6-5-4
How to Estimate Weaving Distance for Filled Quills
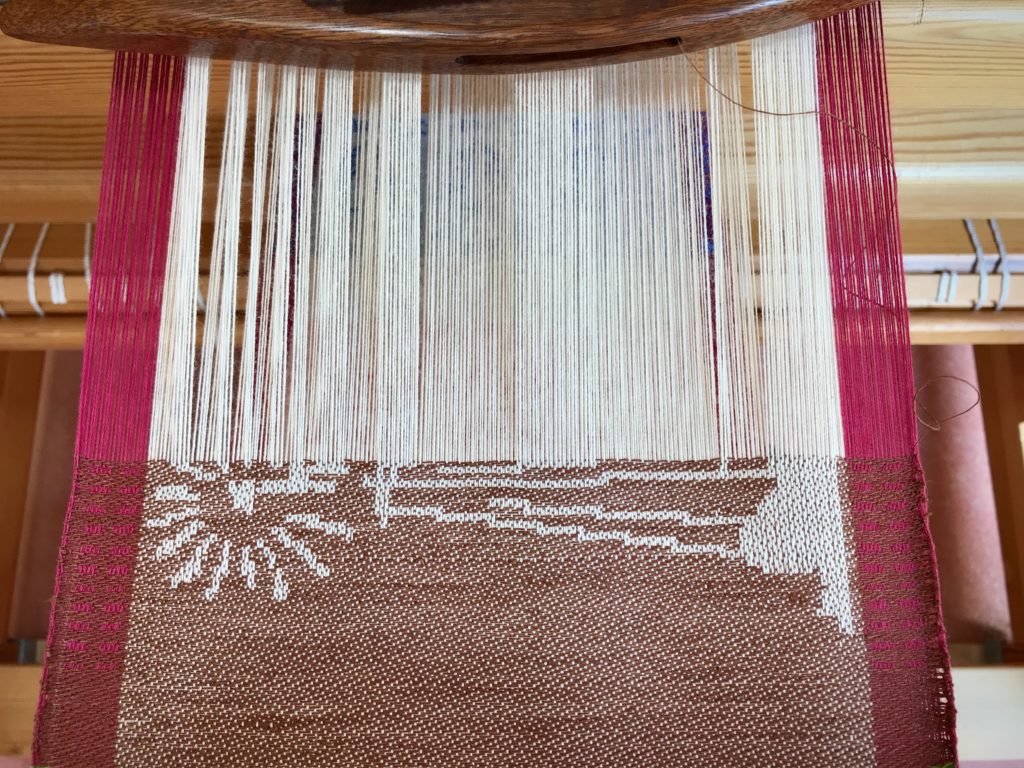
1Start a new quill, leaving a 4 – 5 cm tail on the surface of the cloth. Or, start a new quill at the beginning of a color change.
End of one thread. Ready for a new quill.With the threads overlapping in the shed, the tail of the thread on the new quill lies on the surface.
2 Weave until the quill has emptied. Leave a 4-5 cm tail on the surface of the cloth.
Quill has emptied. Tail is brought out to the surface of the cloth.
3 Replace the empty quill in the shuttle with a new quill and continue weaving 1 – 2 cm further.
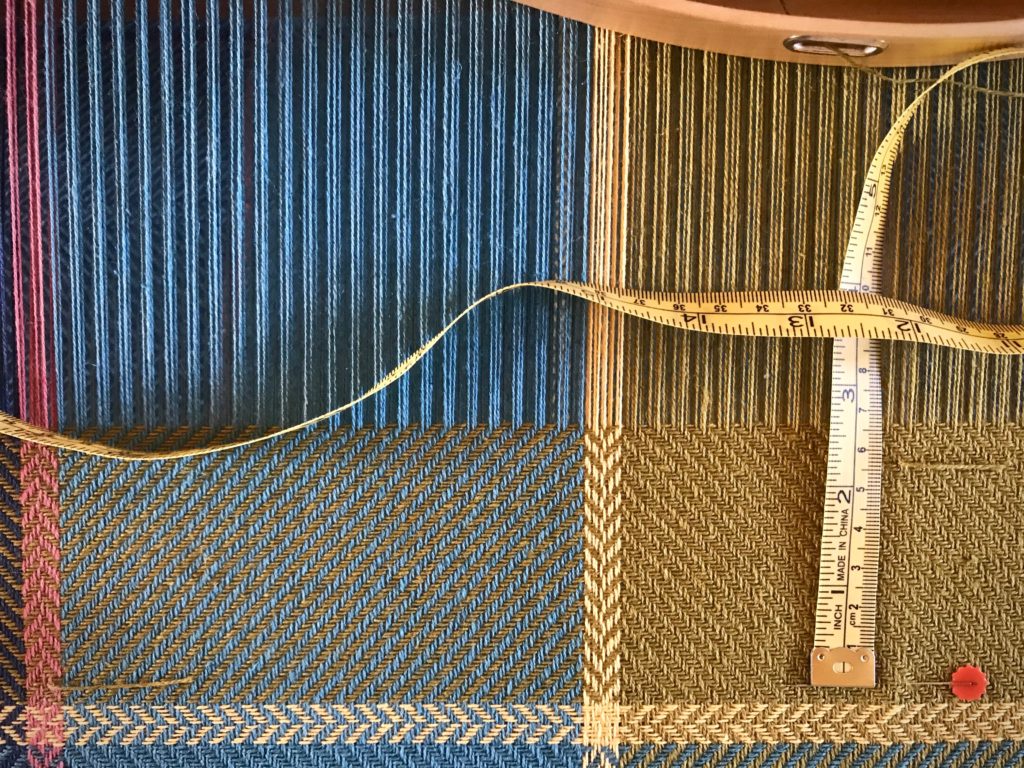
4 Measure the distance from the first weft tail, or line of color change, to the second weft tail. Place a straight pin, in line with the first weft tail, directly under the second weft tail. Measure from the pin to the second weft tail. This is the approximate weaving distance you can expect to cover with a new quill. Notate the quill’s estimated weaving distance on your project notes for future reference.
Measure the woven distance.
5 Trim the weft tails close to the surface.
6 Increase accuracy by repeating the process three times, and then use the average as your quill’s estimated weaving distance.
The large color blocks on this bath towel are 14 cm long. A single full quill will weave 5 1/2 – 6 cm; therefore, I make sure I have 2 full quills, plus at least another half-filled quill before I start a new color block section. It’s nice to be able to leave my foot on the treadle while I change out quills, so I don’t lose my place.
A warp is finished when the woven cloth has been taken to completion. At that point, the loom is free for a new warp. That is the rule I’ve given myself. If I ignore the rule and put on a new warp before its time, the unfinished cloth has a way of staying unfinished for too long.
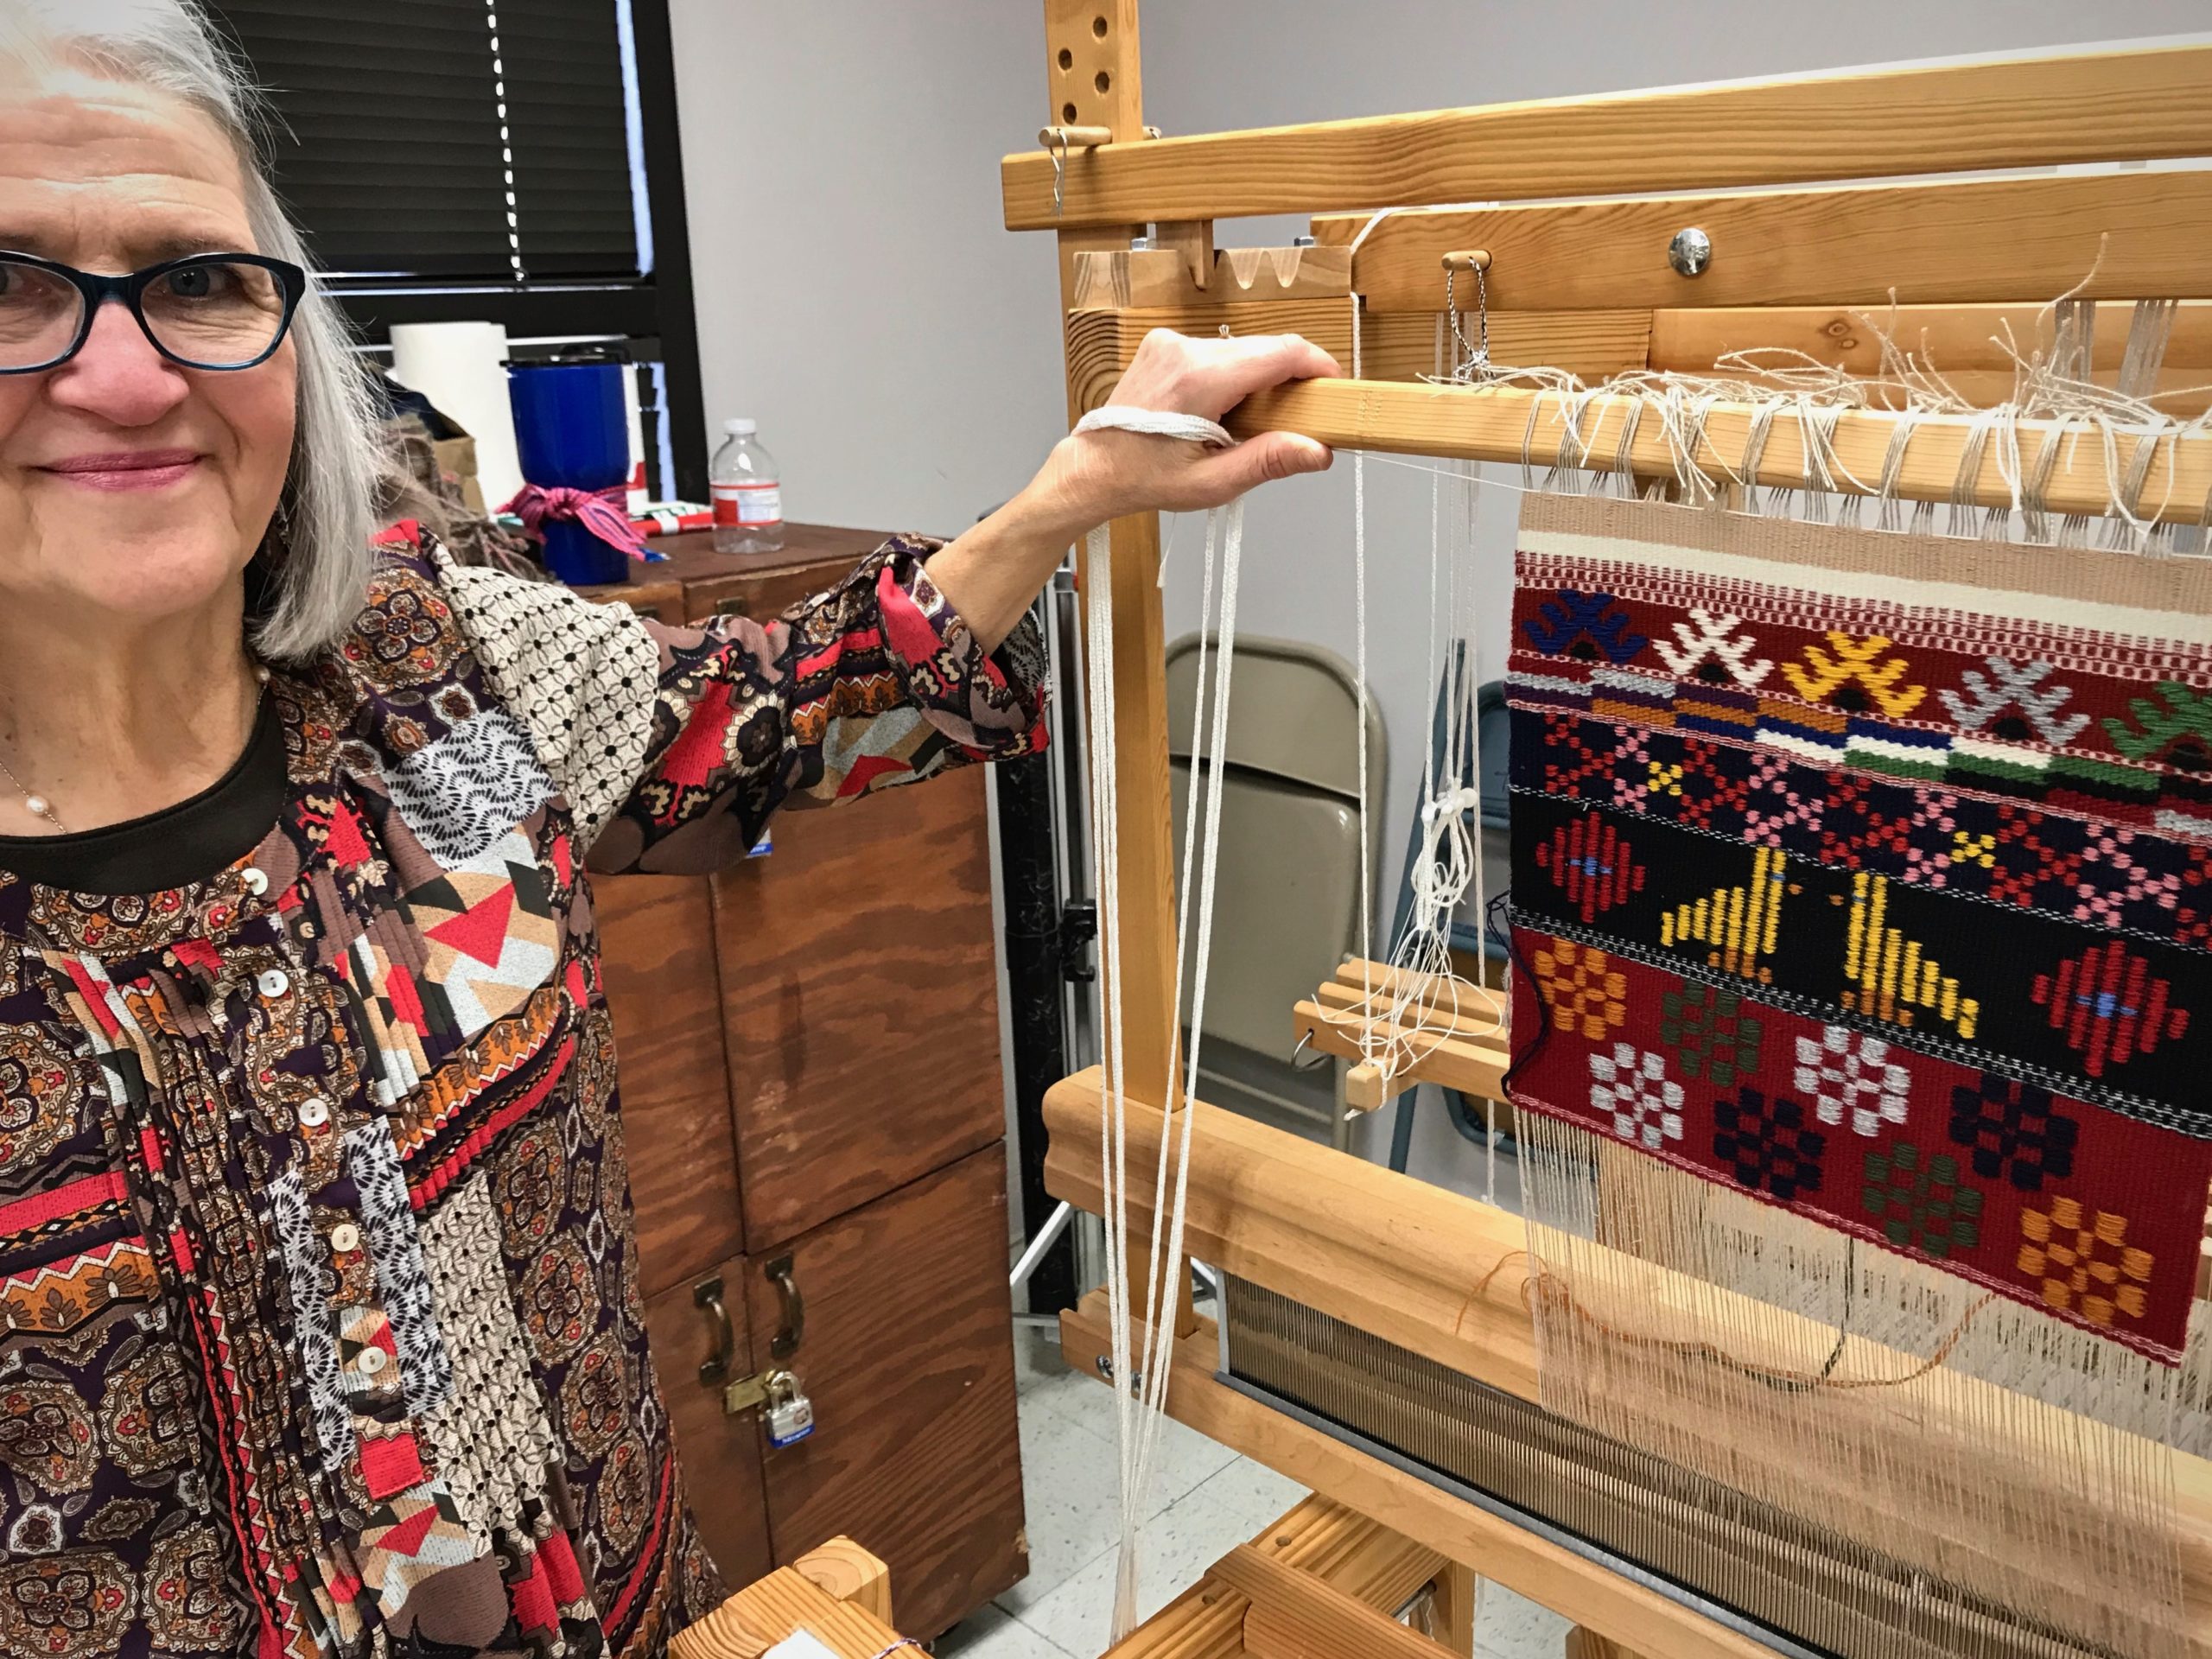
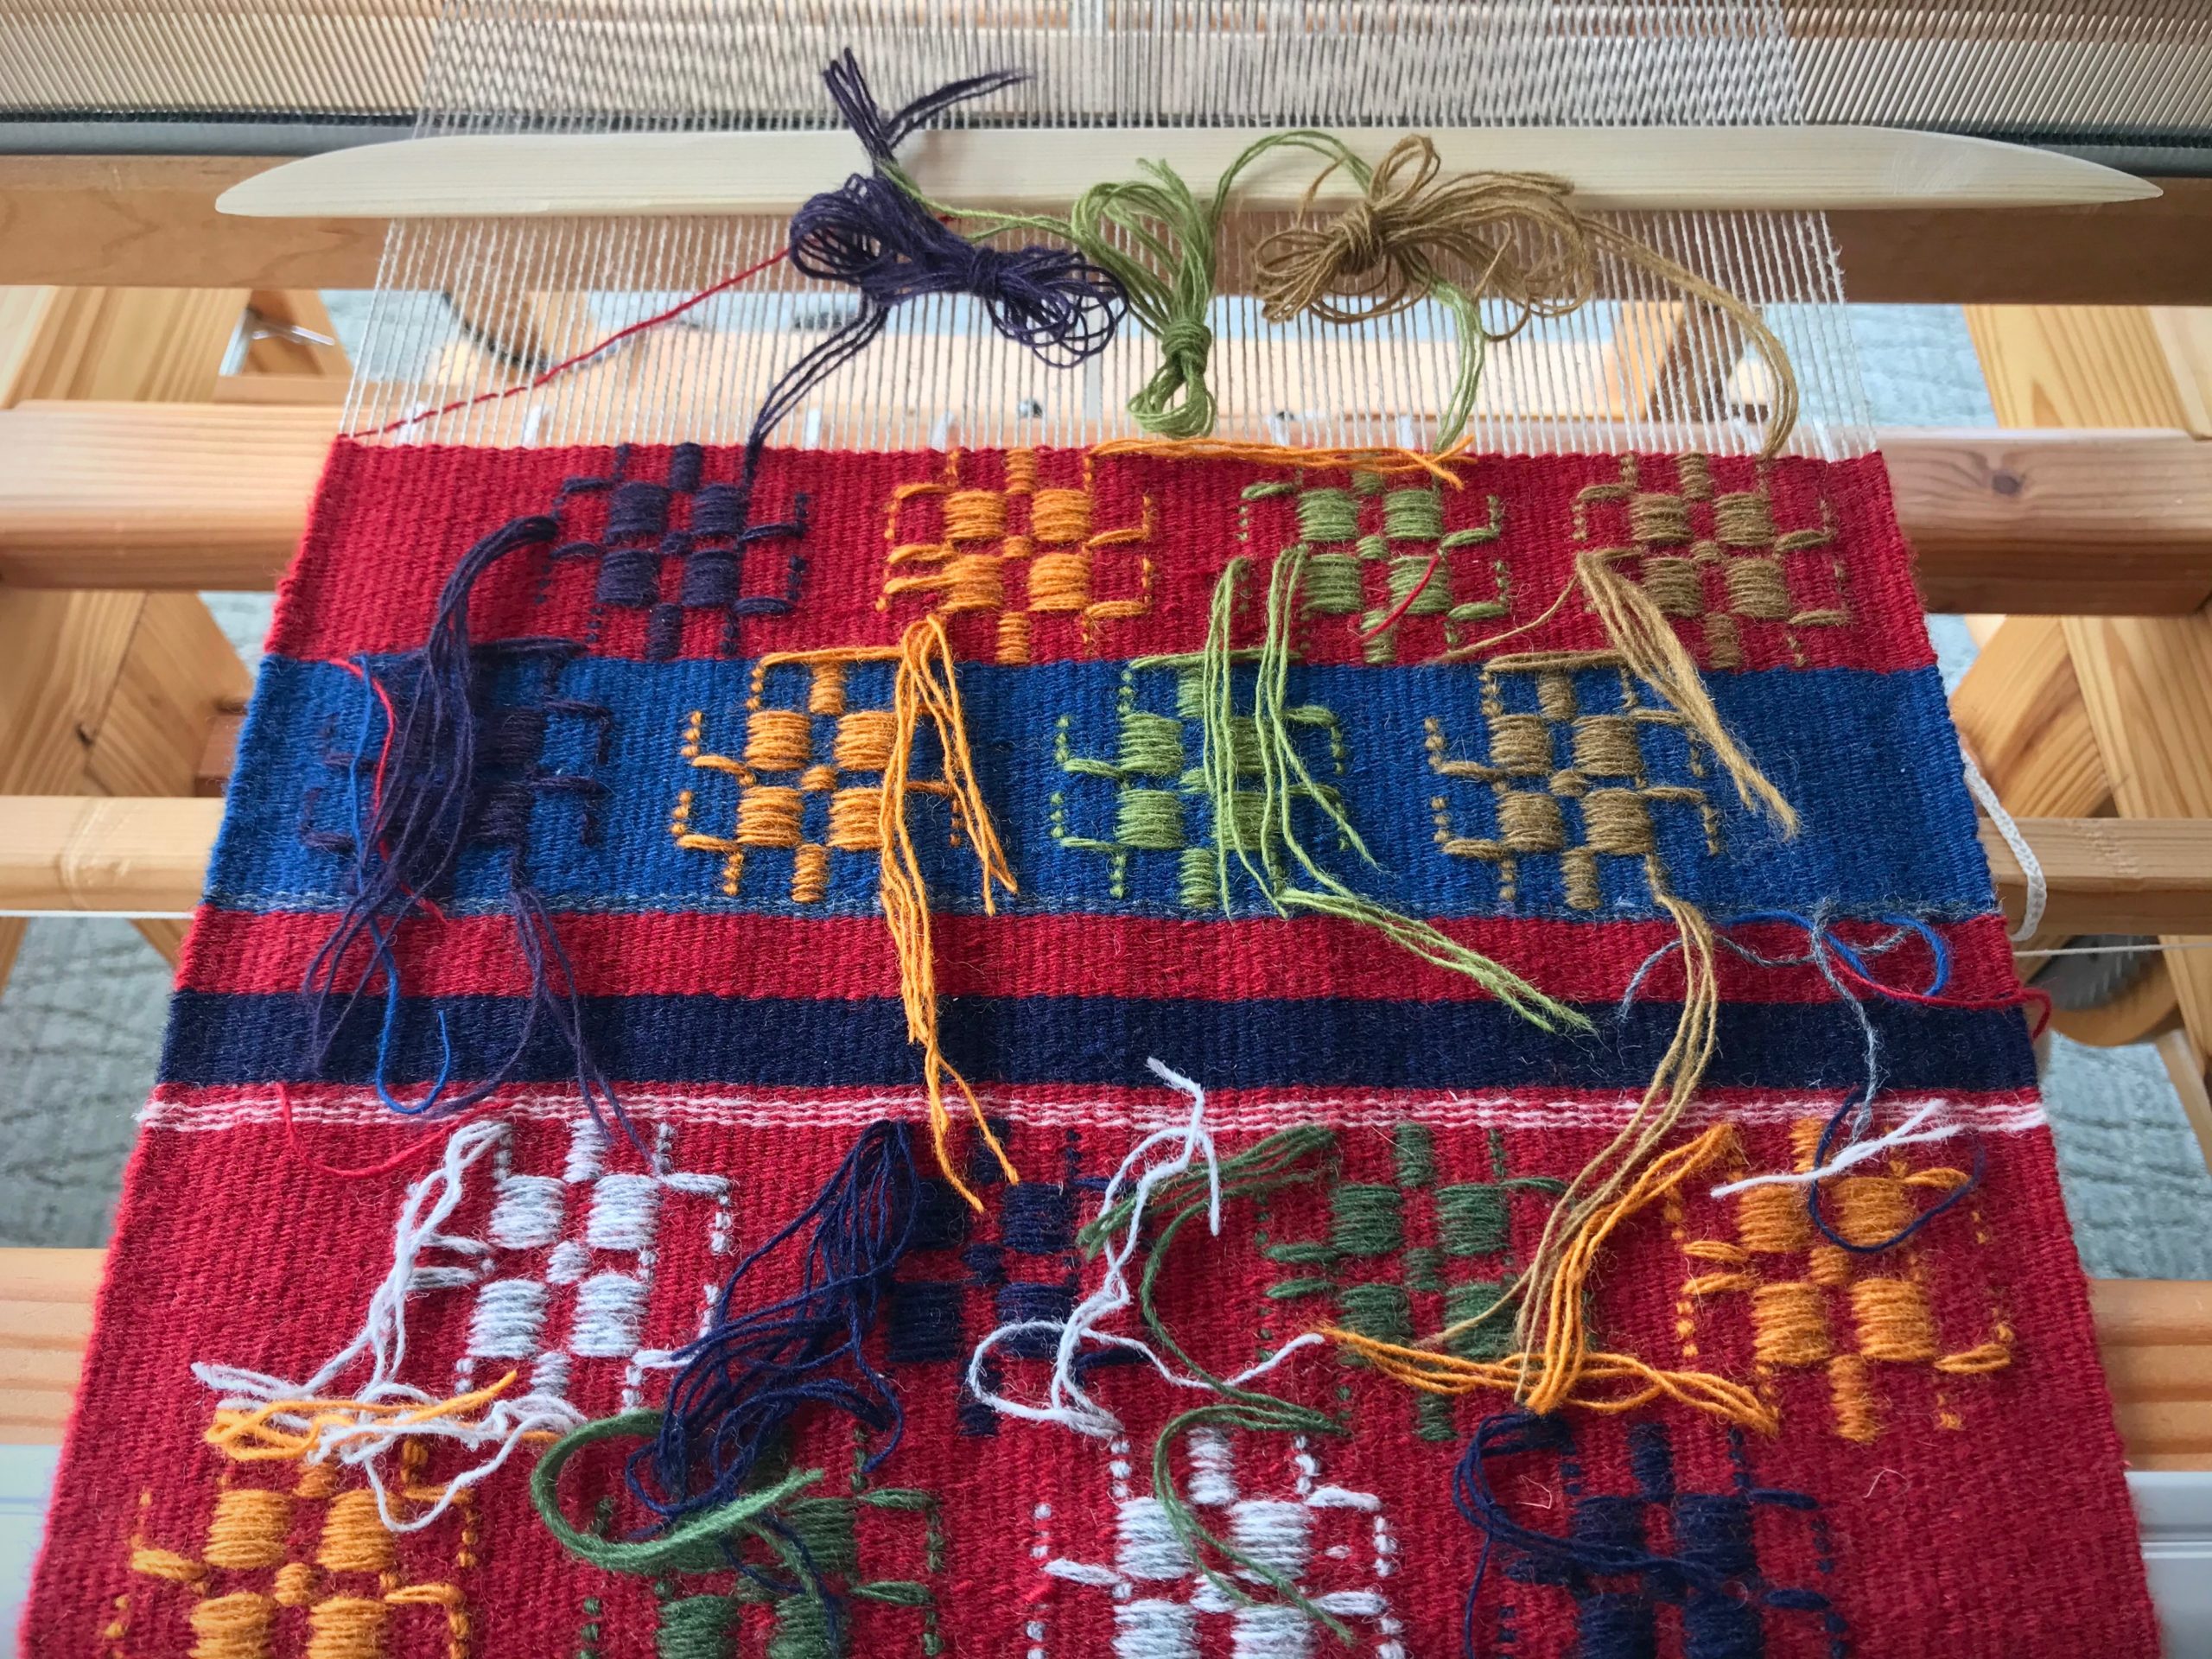
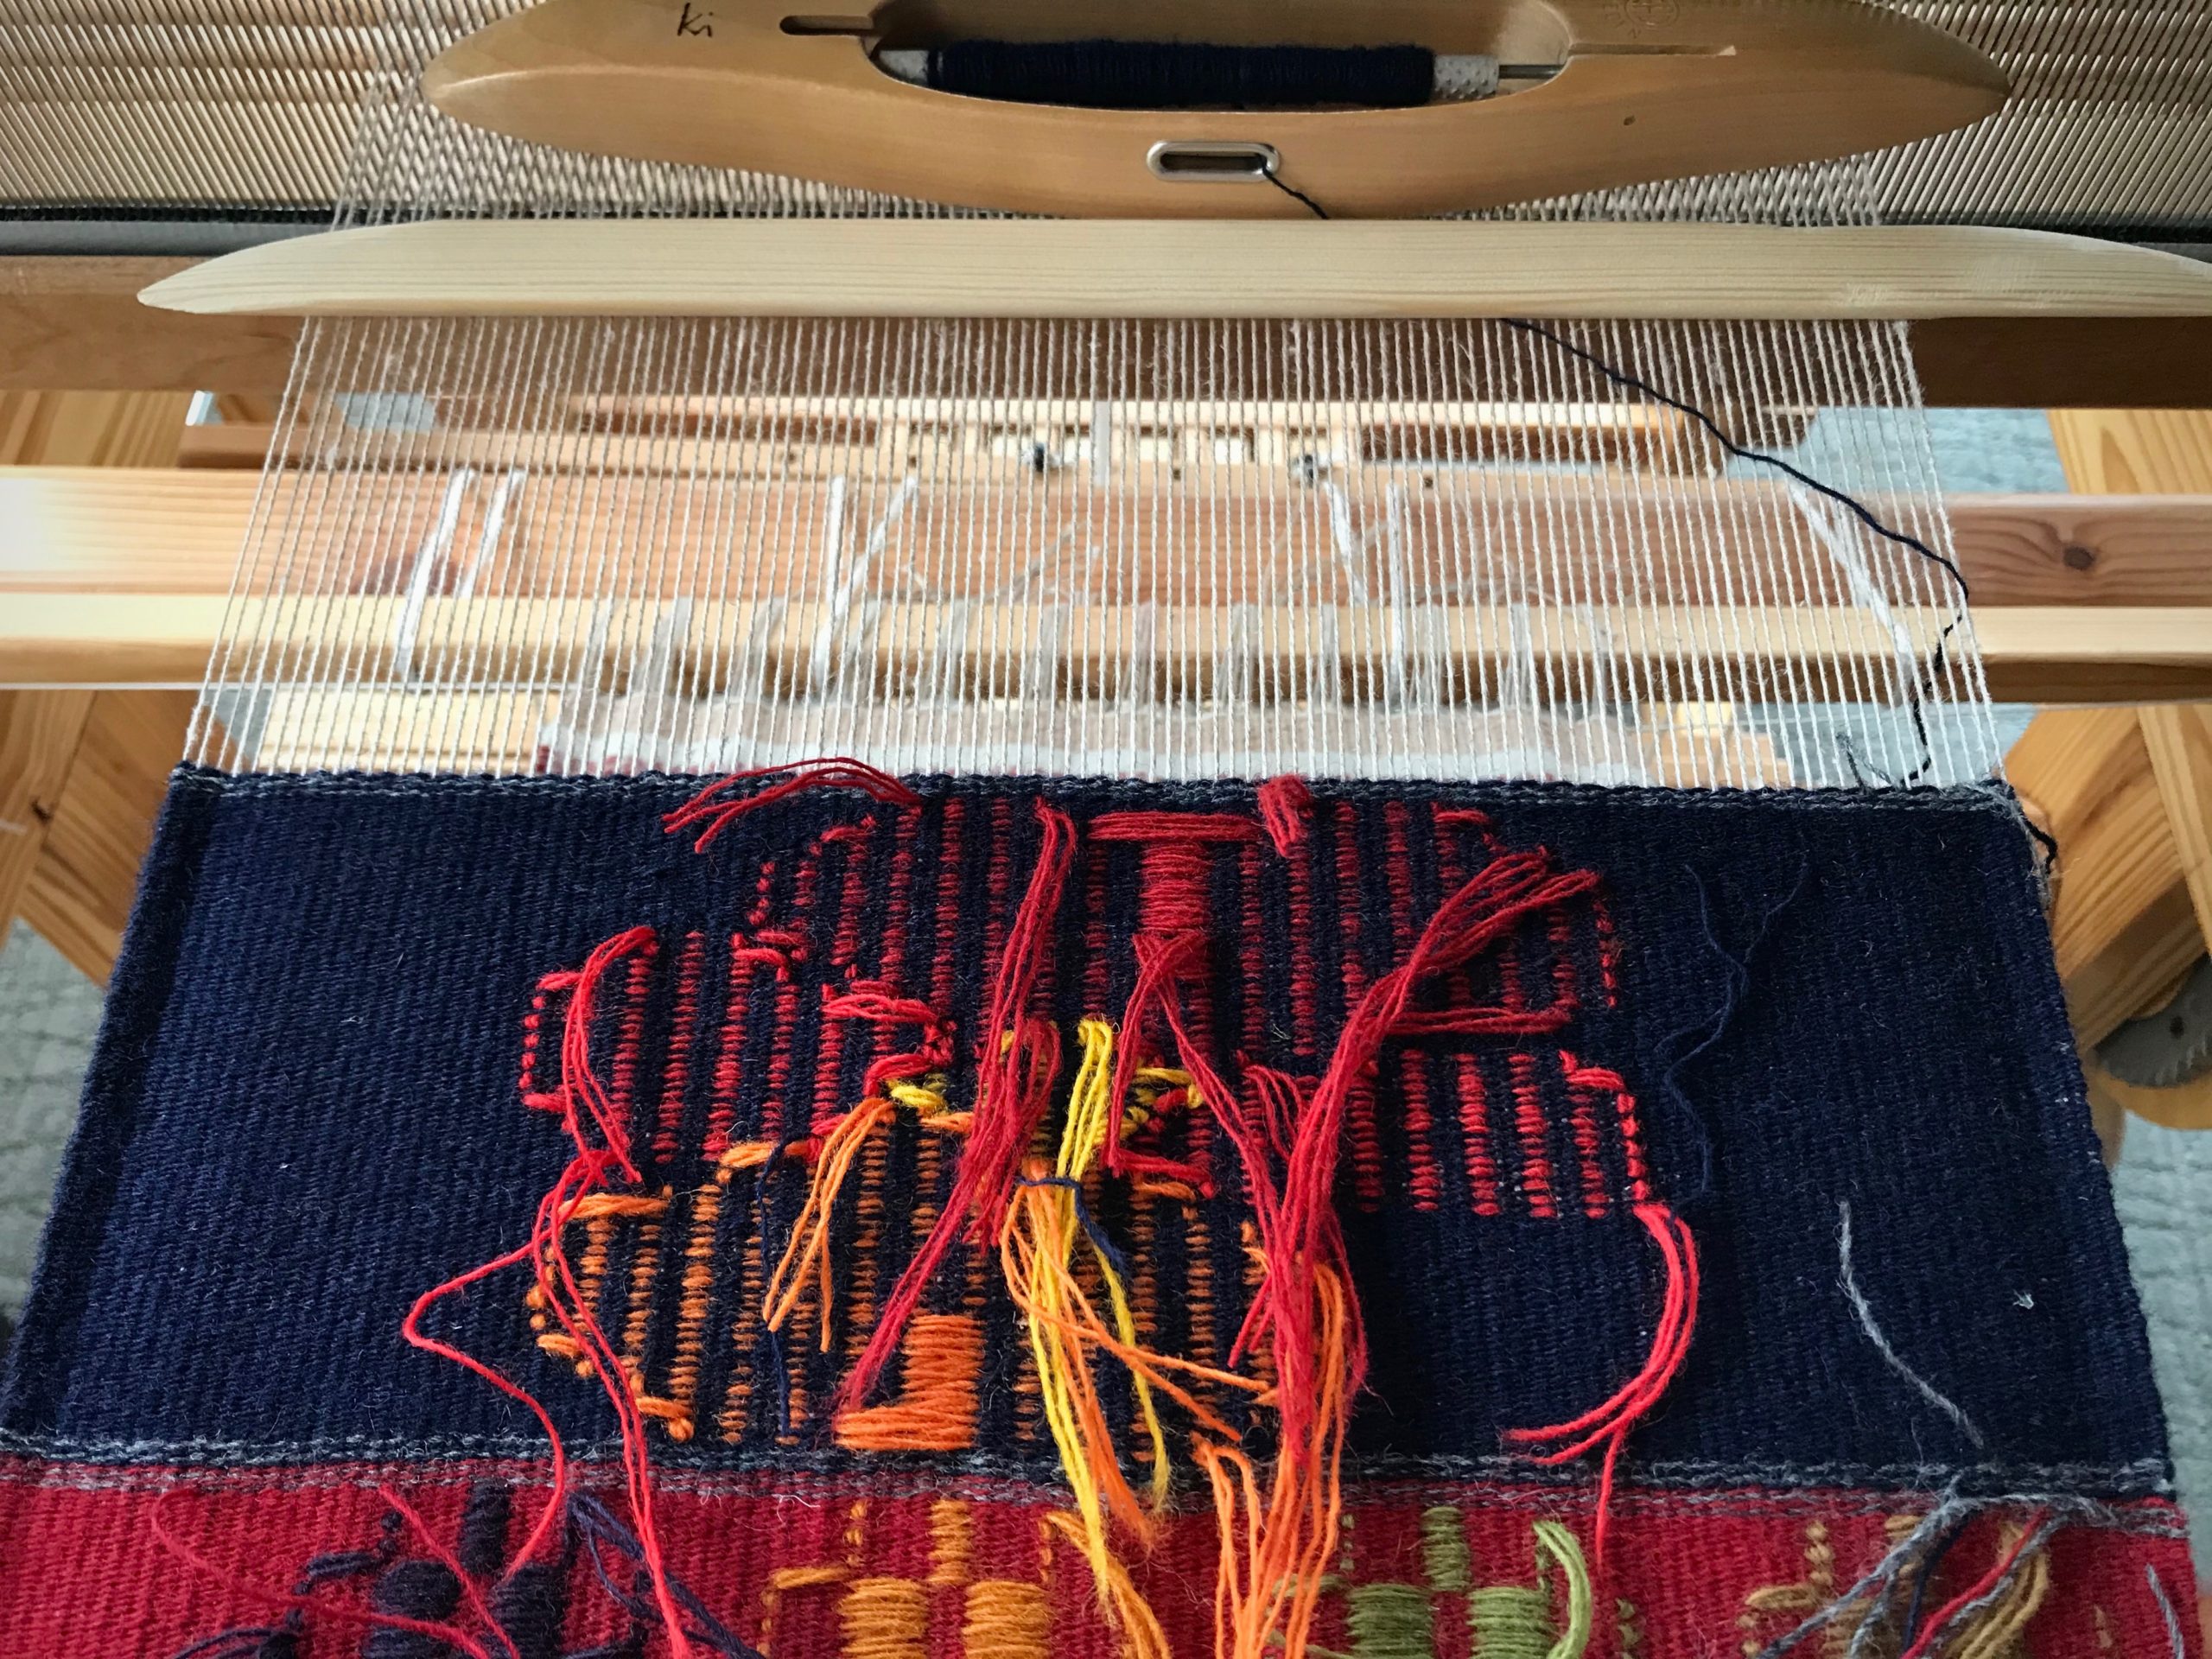
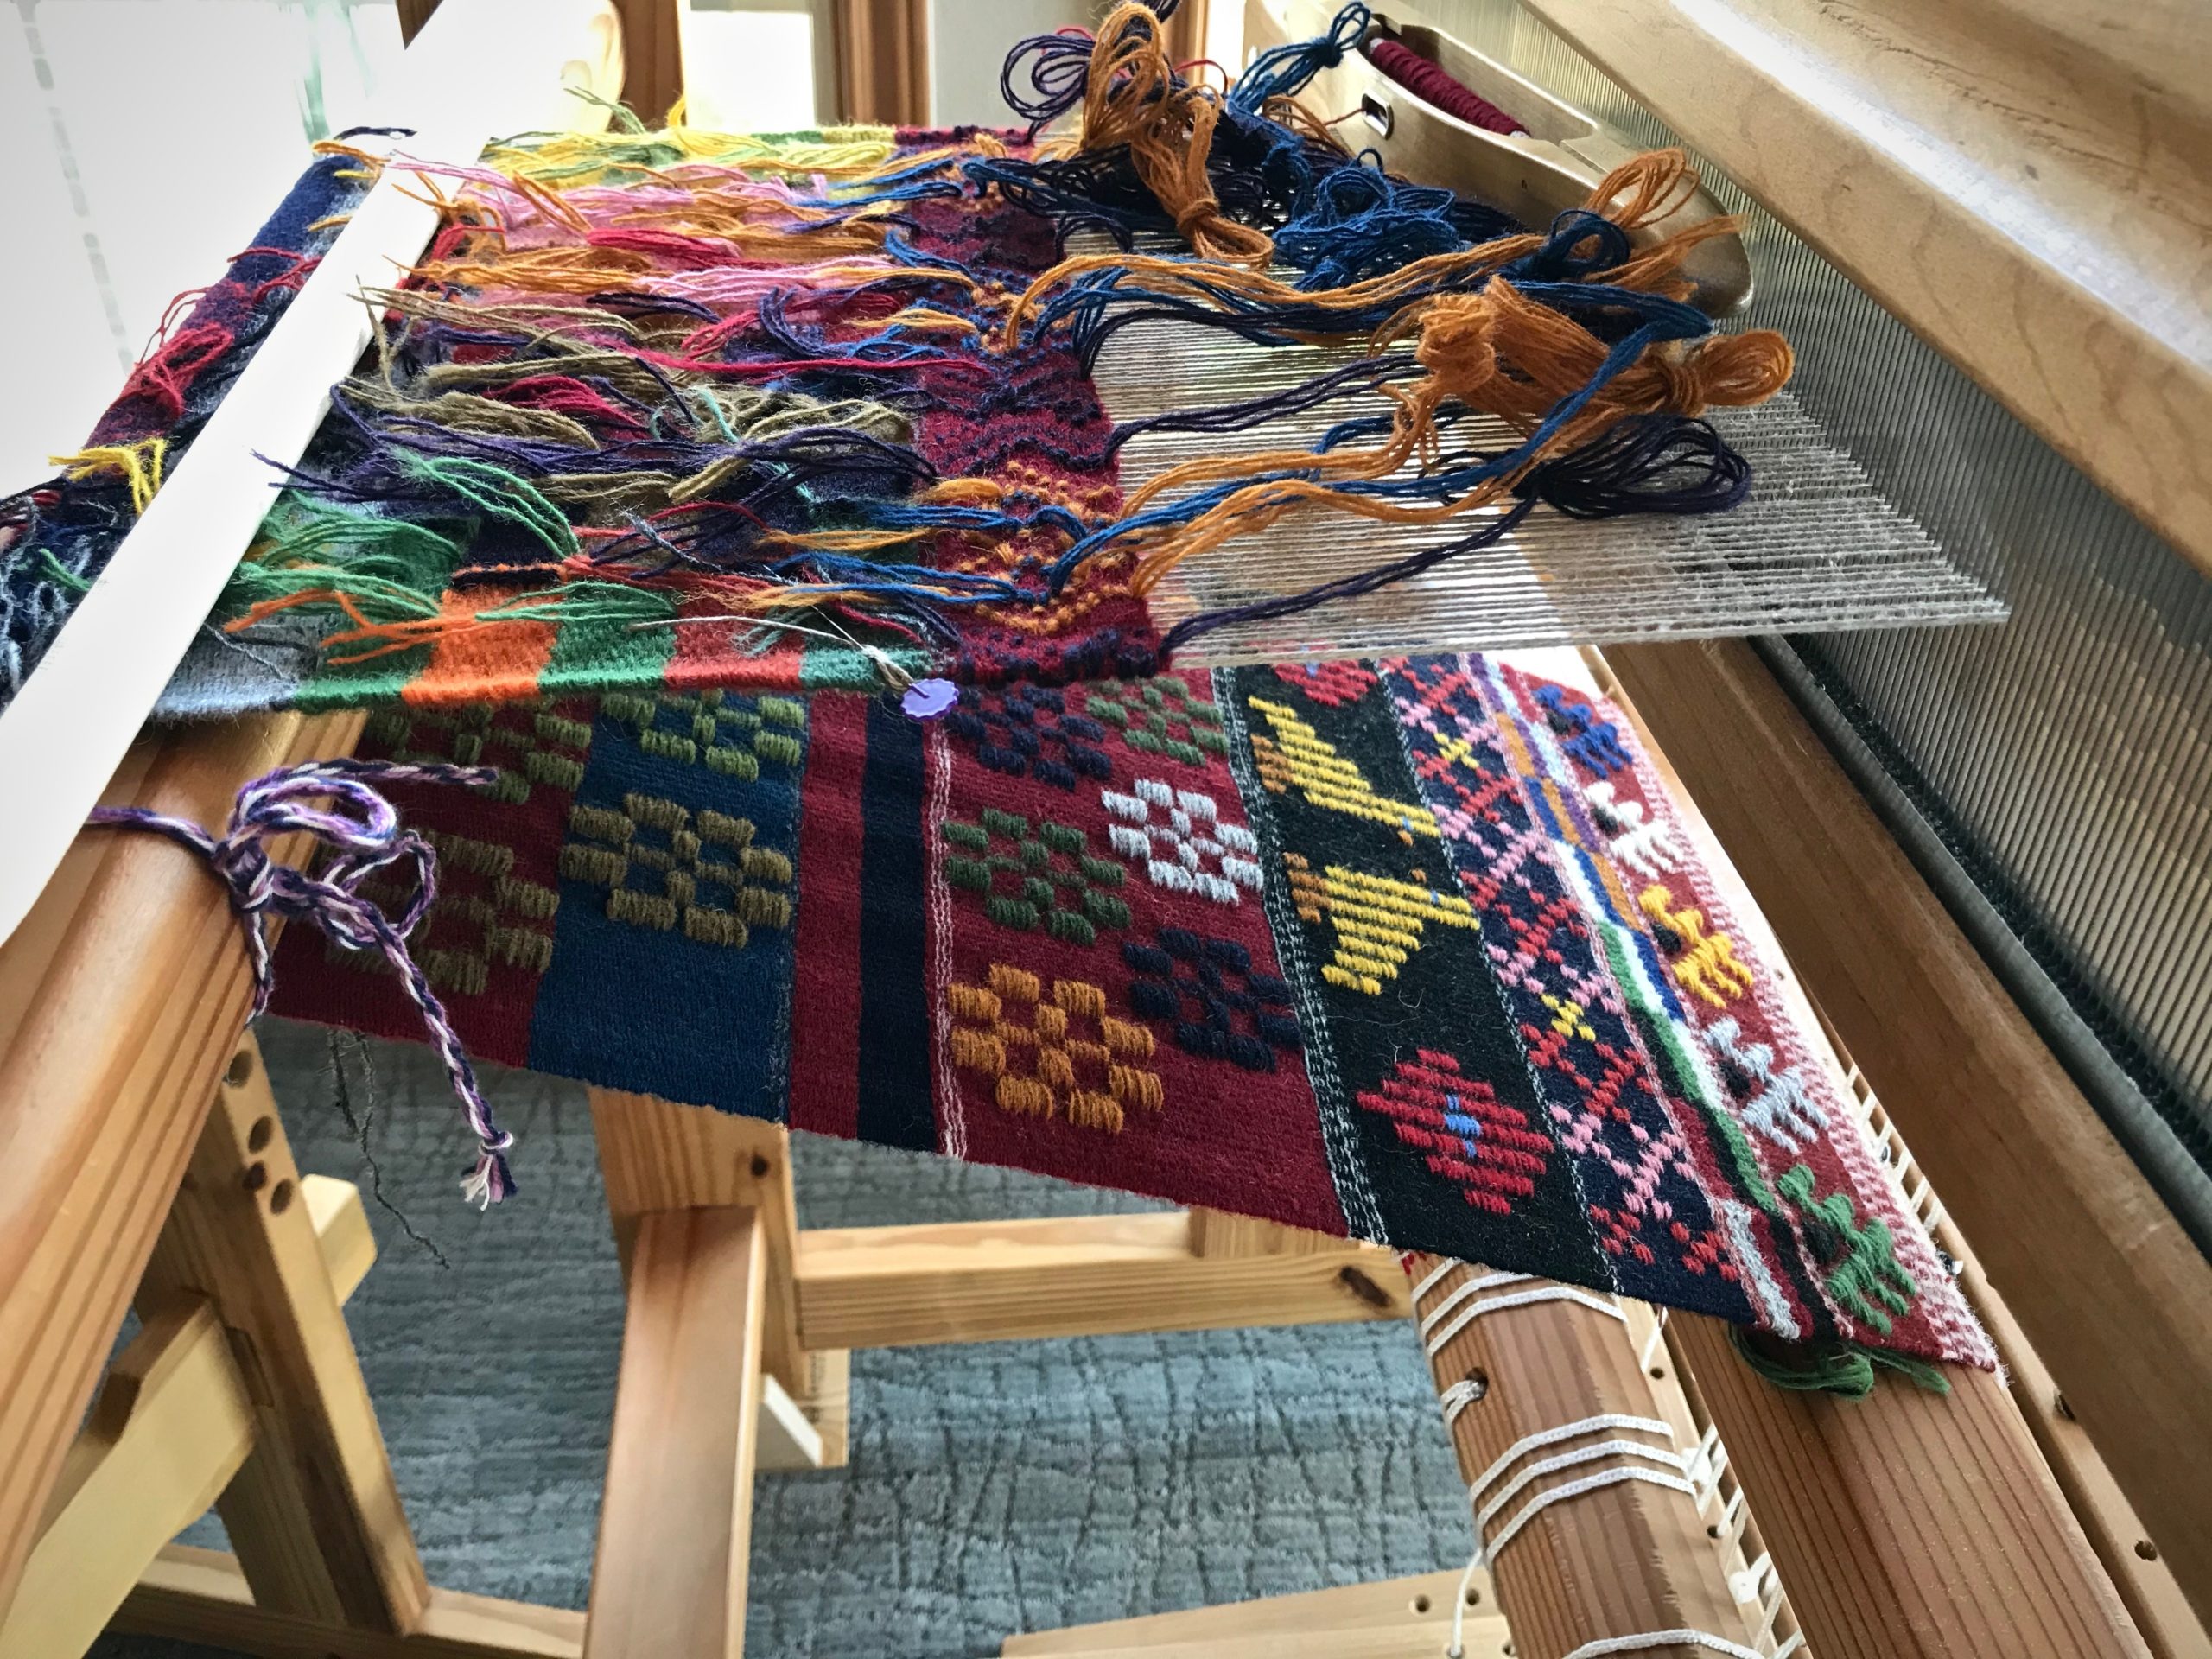
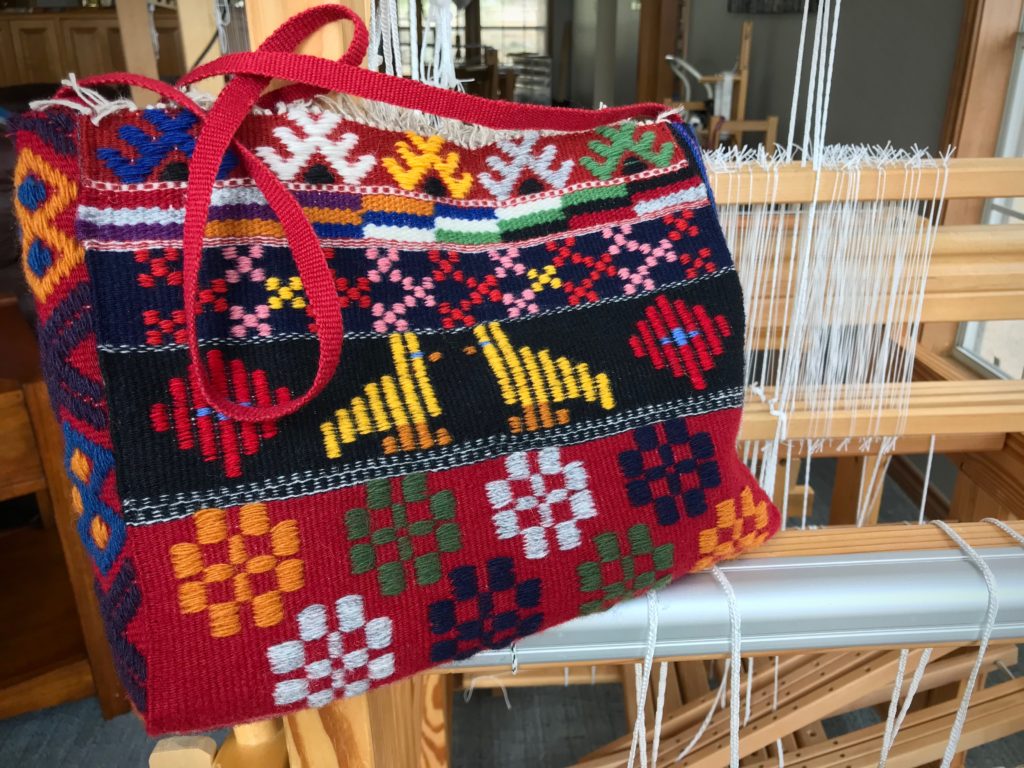
Ready to pack up after the Swedish Art Weaves workshop and take my loom back home. The Joanne Hall workshop was sponsored by the enthusiastic San Antonio Handweavers Guild a few months ago.Monksbelt pattern continued at home.Woven from the back, this dukagång pattern came from a Swedish publication I borrowed from the San Antonio Handweavers Guild library.Krabbasnår, just behind the fell line, is from a pattern in Heirlooms of Skåne, Weaving Techniques, by Gunvor Johansson.
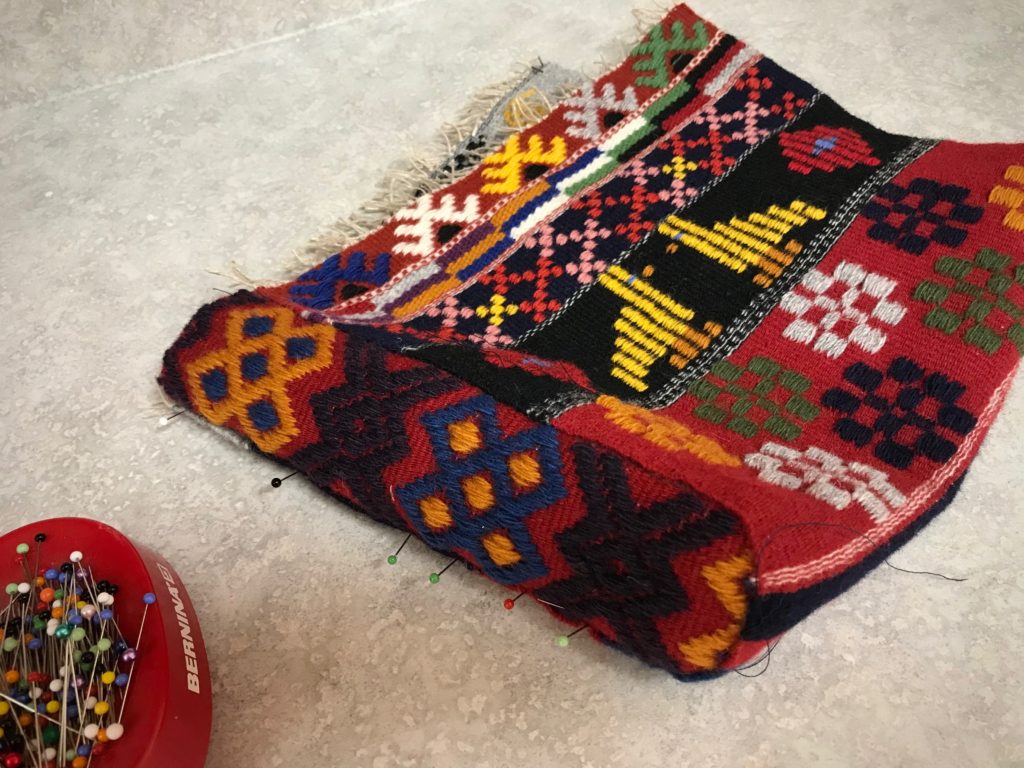
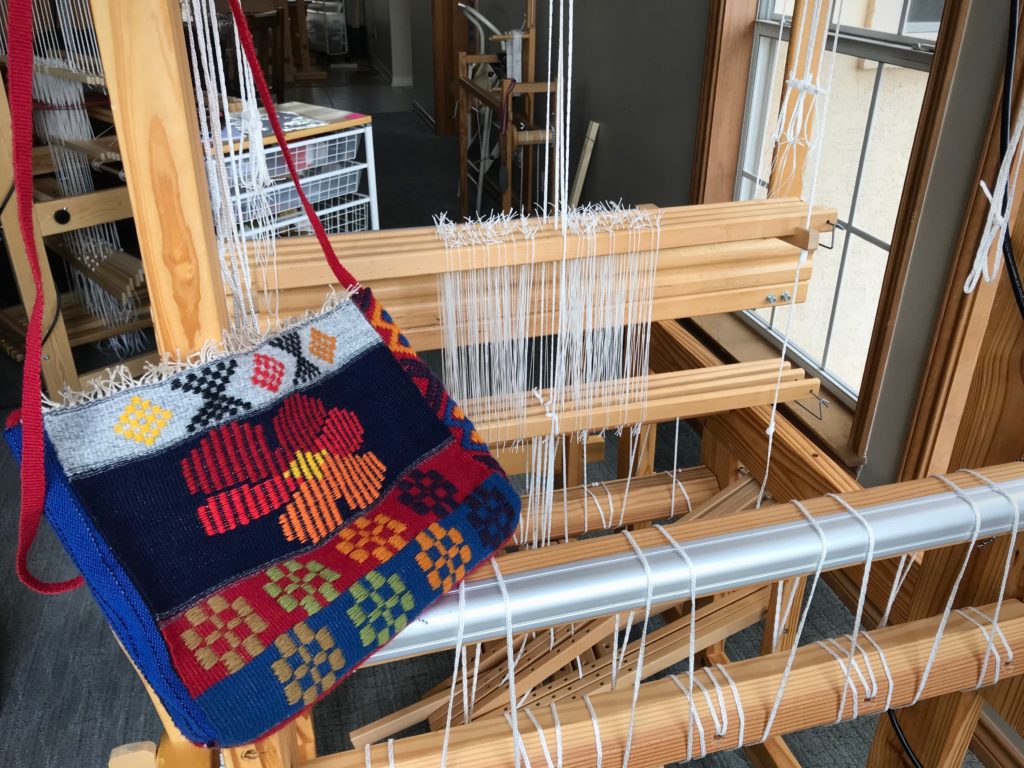
Thanks to that completion rule, I have a new bag. This fabric includes the various patterns that I wove in Joanne Hall’s workshop on Swedish Art Weaves several months ago. You will also see that I explored some patterns on my own at home. I gained two excellent outcomes from this finishing pursuit—a new bag to use, and a loom that is free for the next warp! (See the first bag here: Monksbelt Flowers on a Shoulder Bag)
Side piece, krabbasnår, is hand-stitched in place. From the top of the bag to the bottom – krabbasnår (krabba), rölakan, halvkrabba, dukagång, munkabälte (monksbelt), each section separated by plain weave stripe variations.On this side of the finished bag, from top to bottom – halvkrabba, dukagång, munkabälte. I made the hard decision to take out a section of rölakan I had woven in order to be able to put the knots from the linen warp at the top of the bag.Bag is lined and has pockets, and has a magnetic snap closure. The 6/2 Tuna wool shoulder strap was woven on my Glimåkra band loom.Now, on to the next warp!
Left to myself, I’d rather do what I want. I’d rather start a new project than bring an “old” one to completion. I’m glad my Lord is faithful with me. He completes the work that he began. The Good Shepherd tends his sheep. He leads us to the still waters of peaceful perseverance, saving us from the regret of going our own way. And we have his perfect outcome to look forward to.