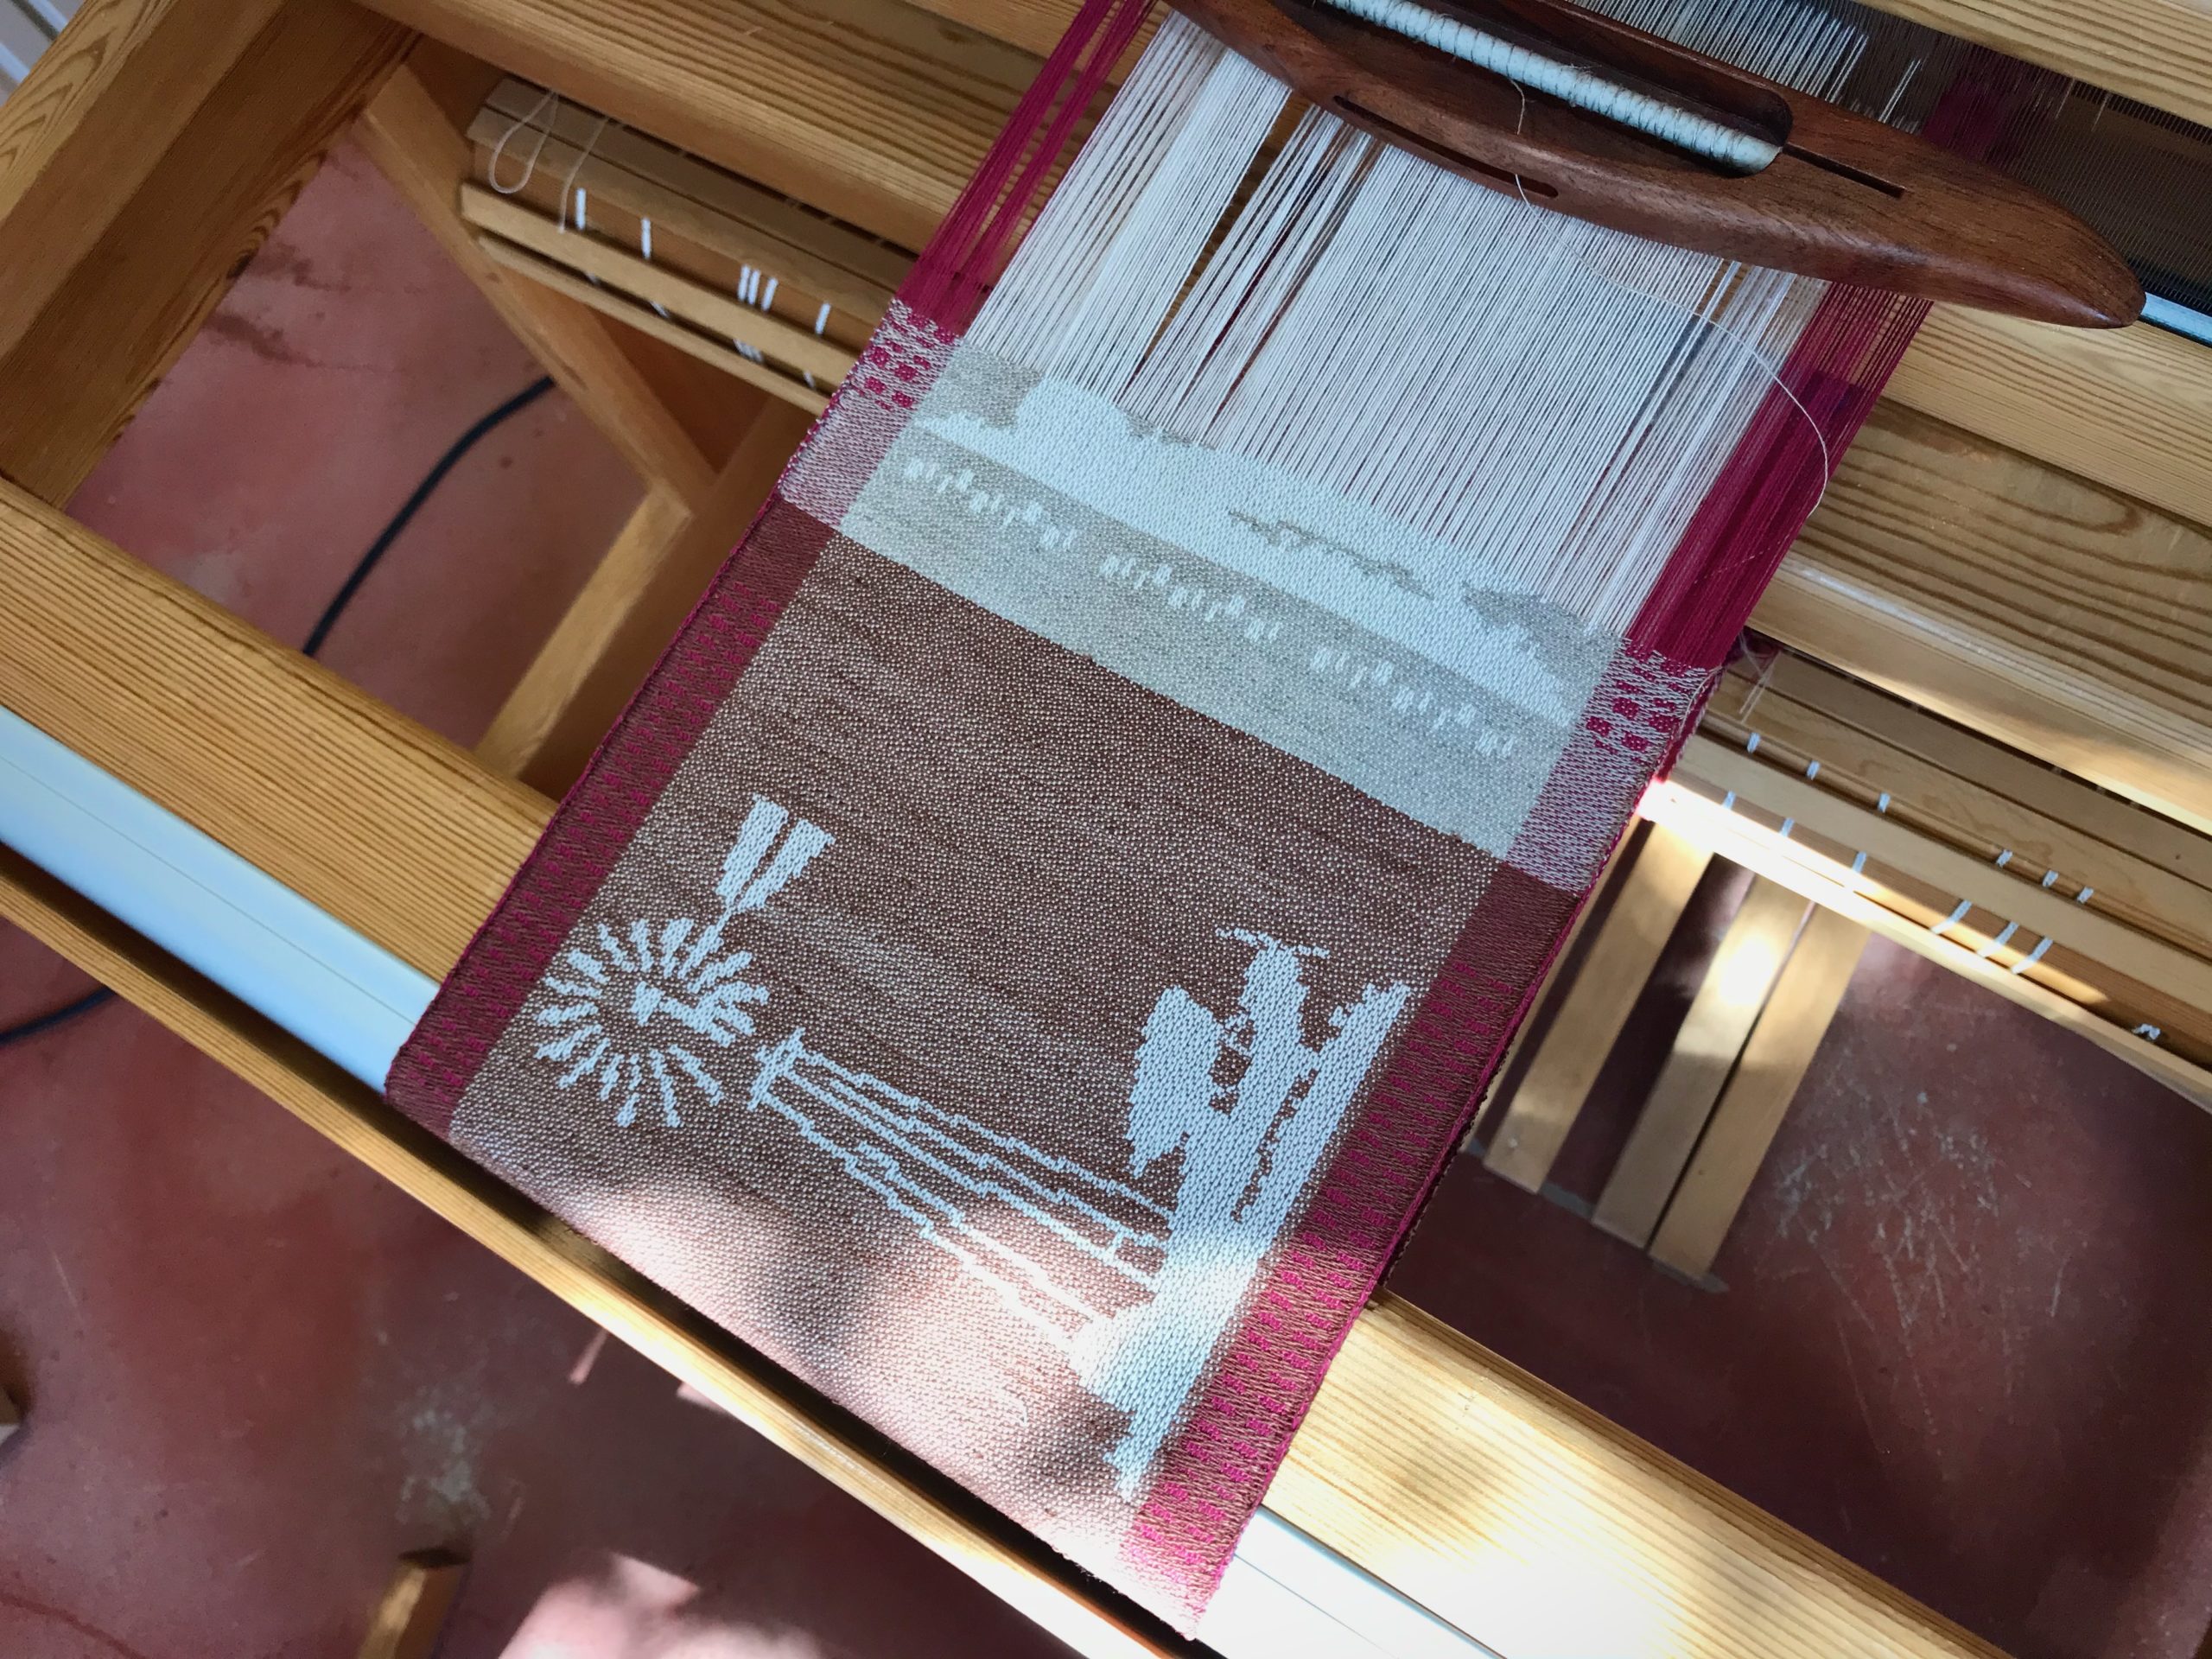
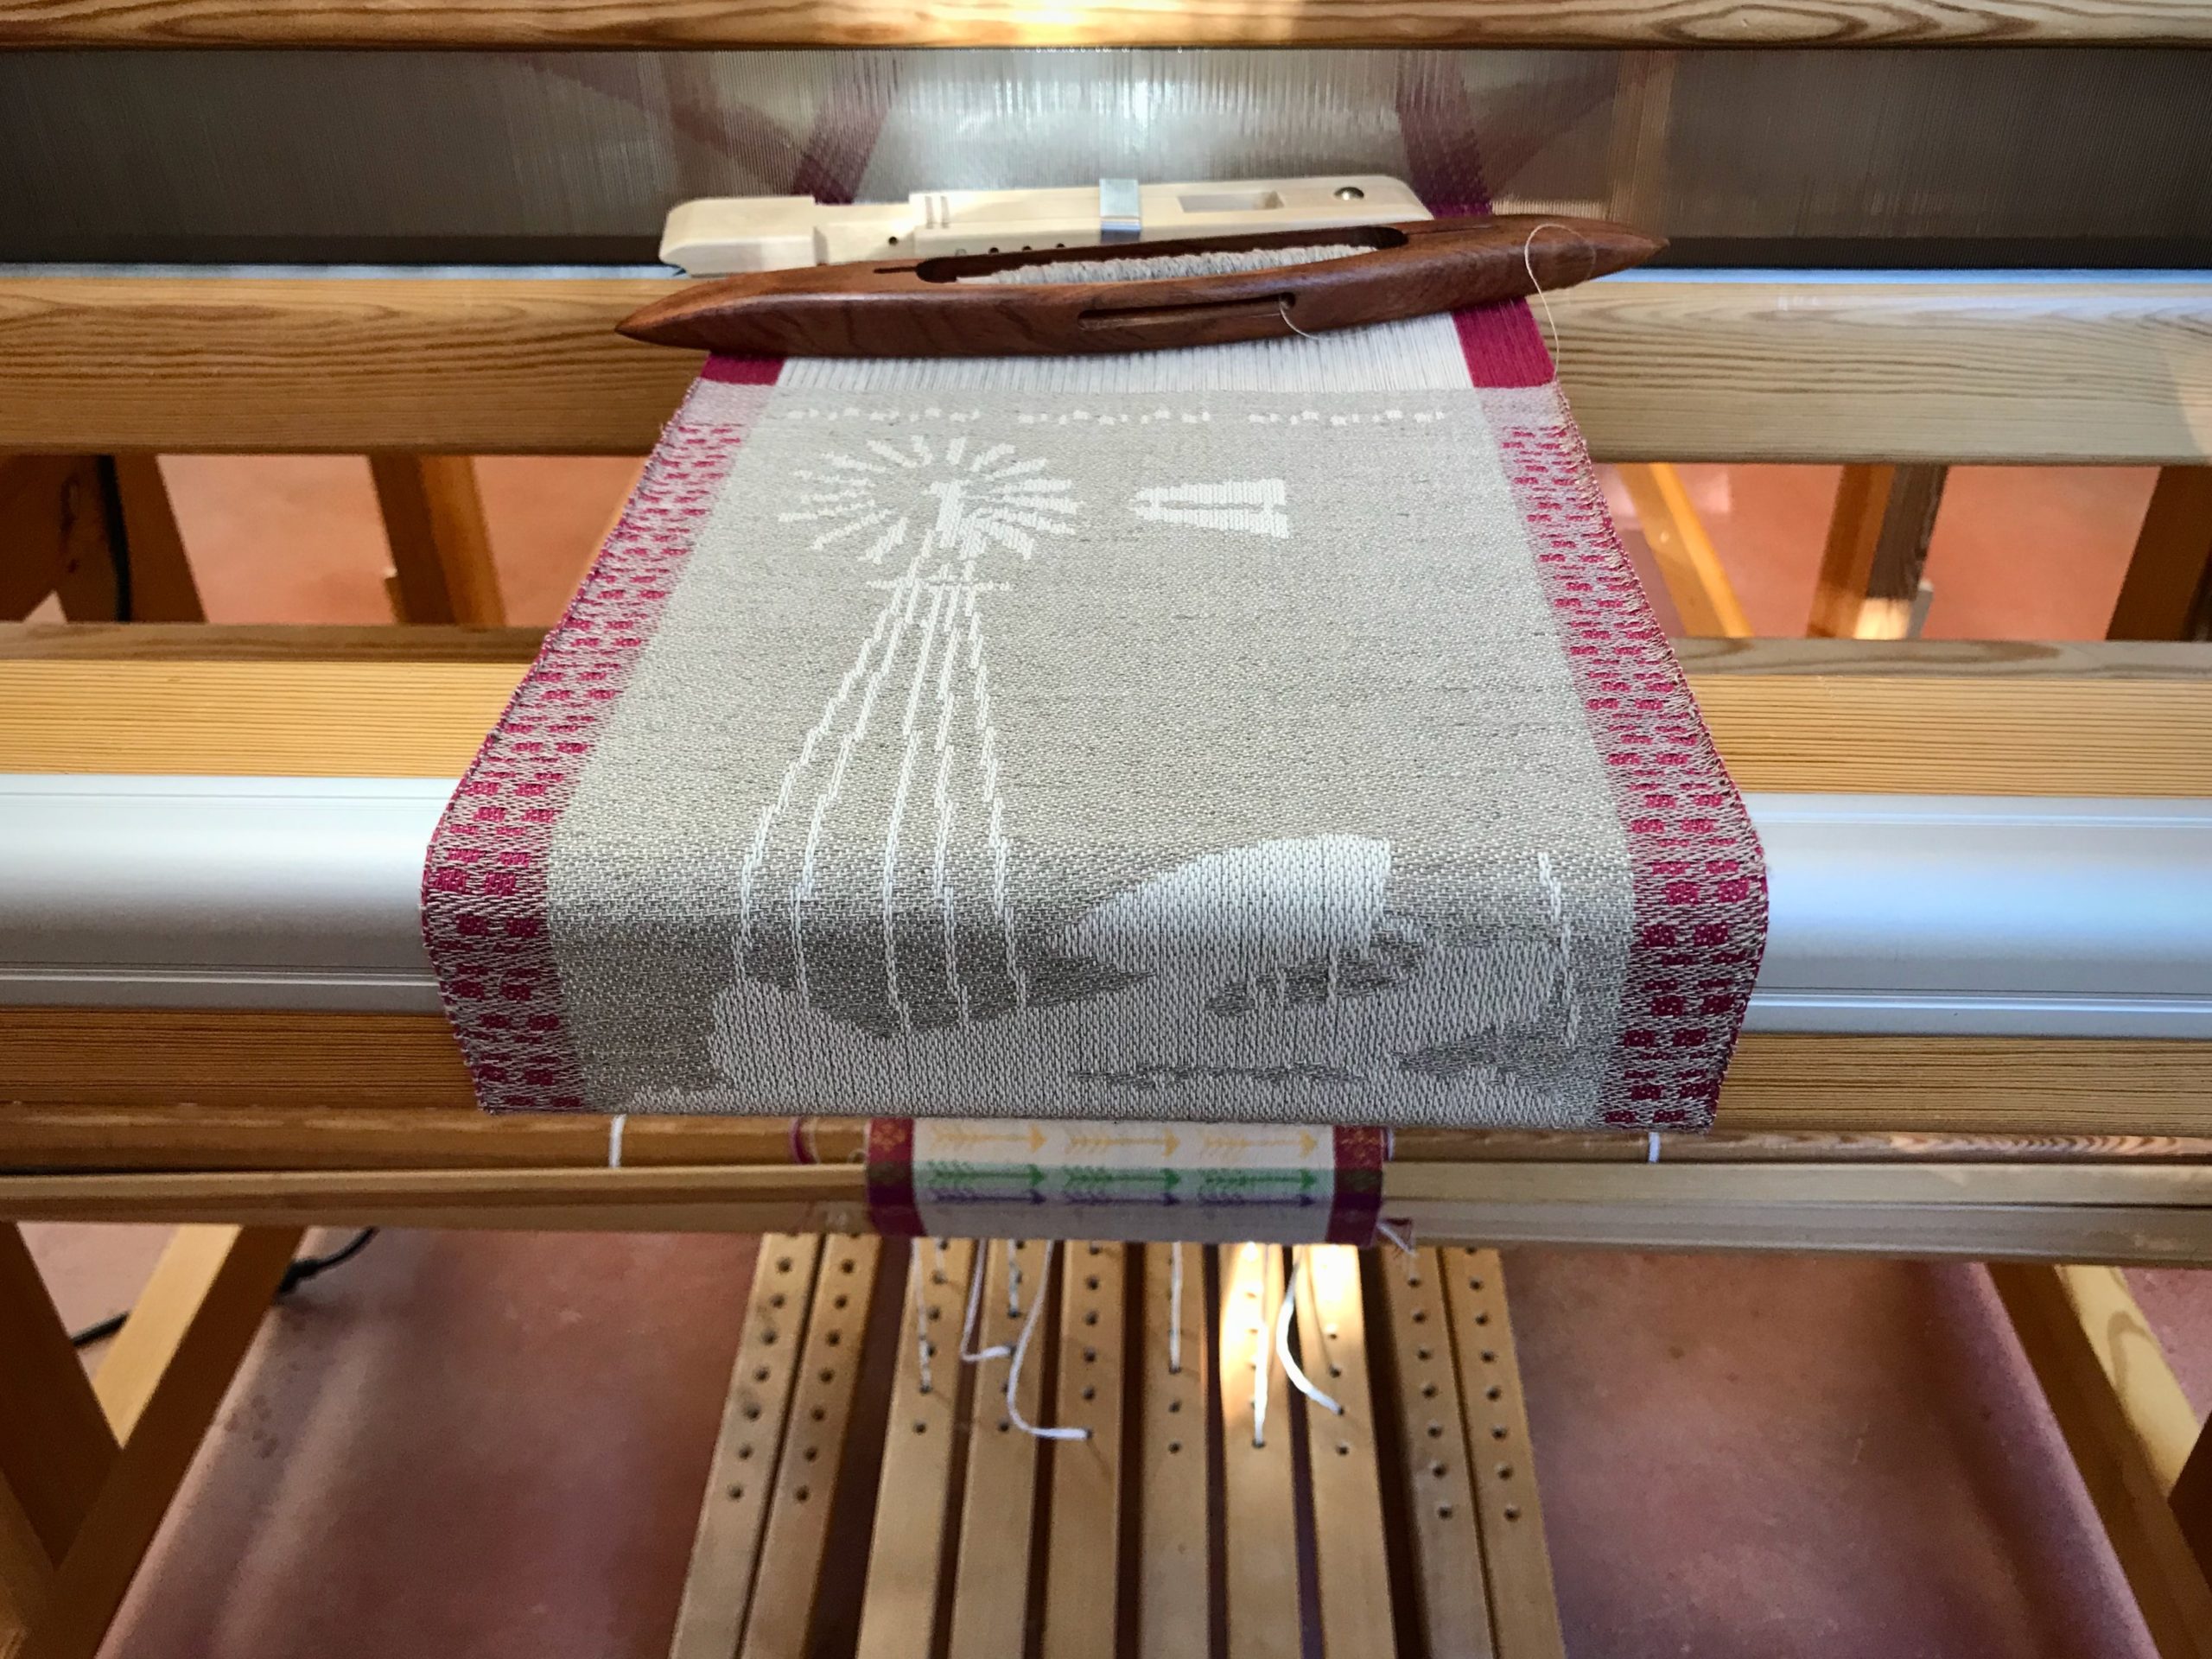
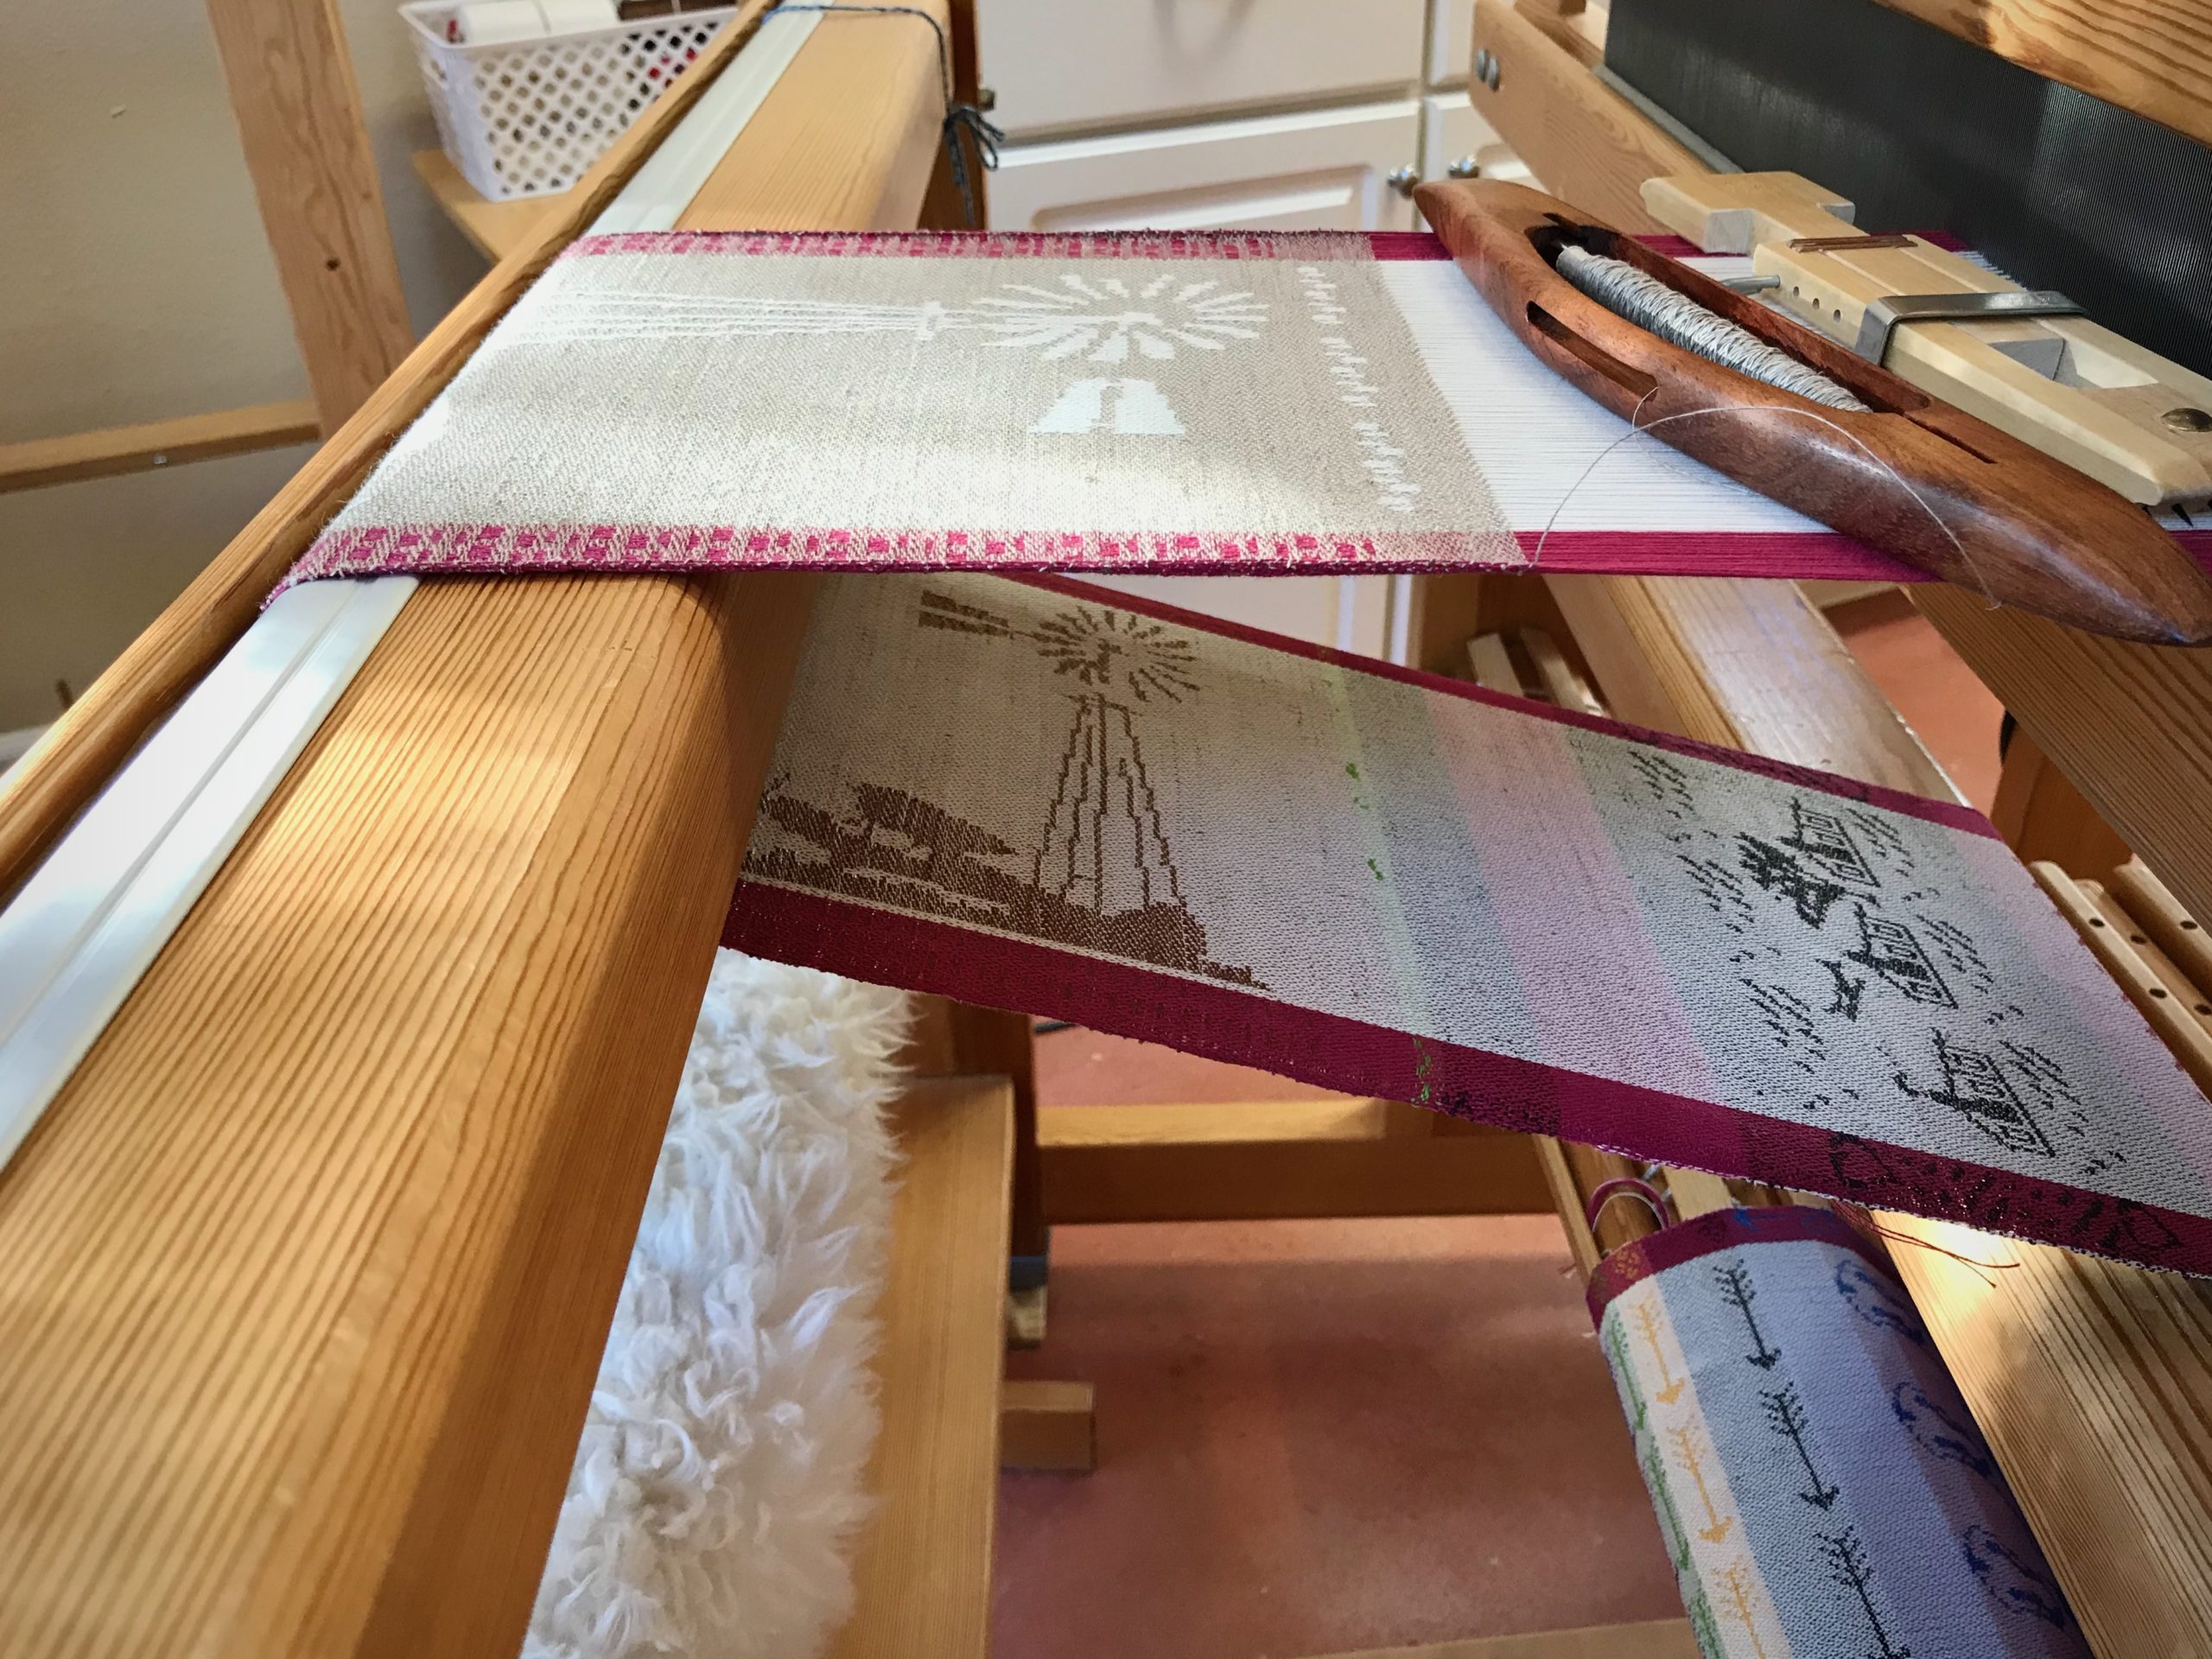
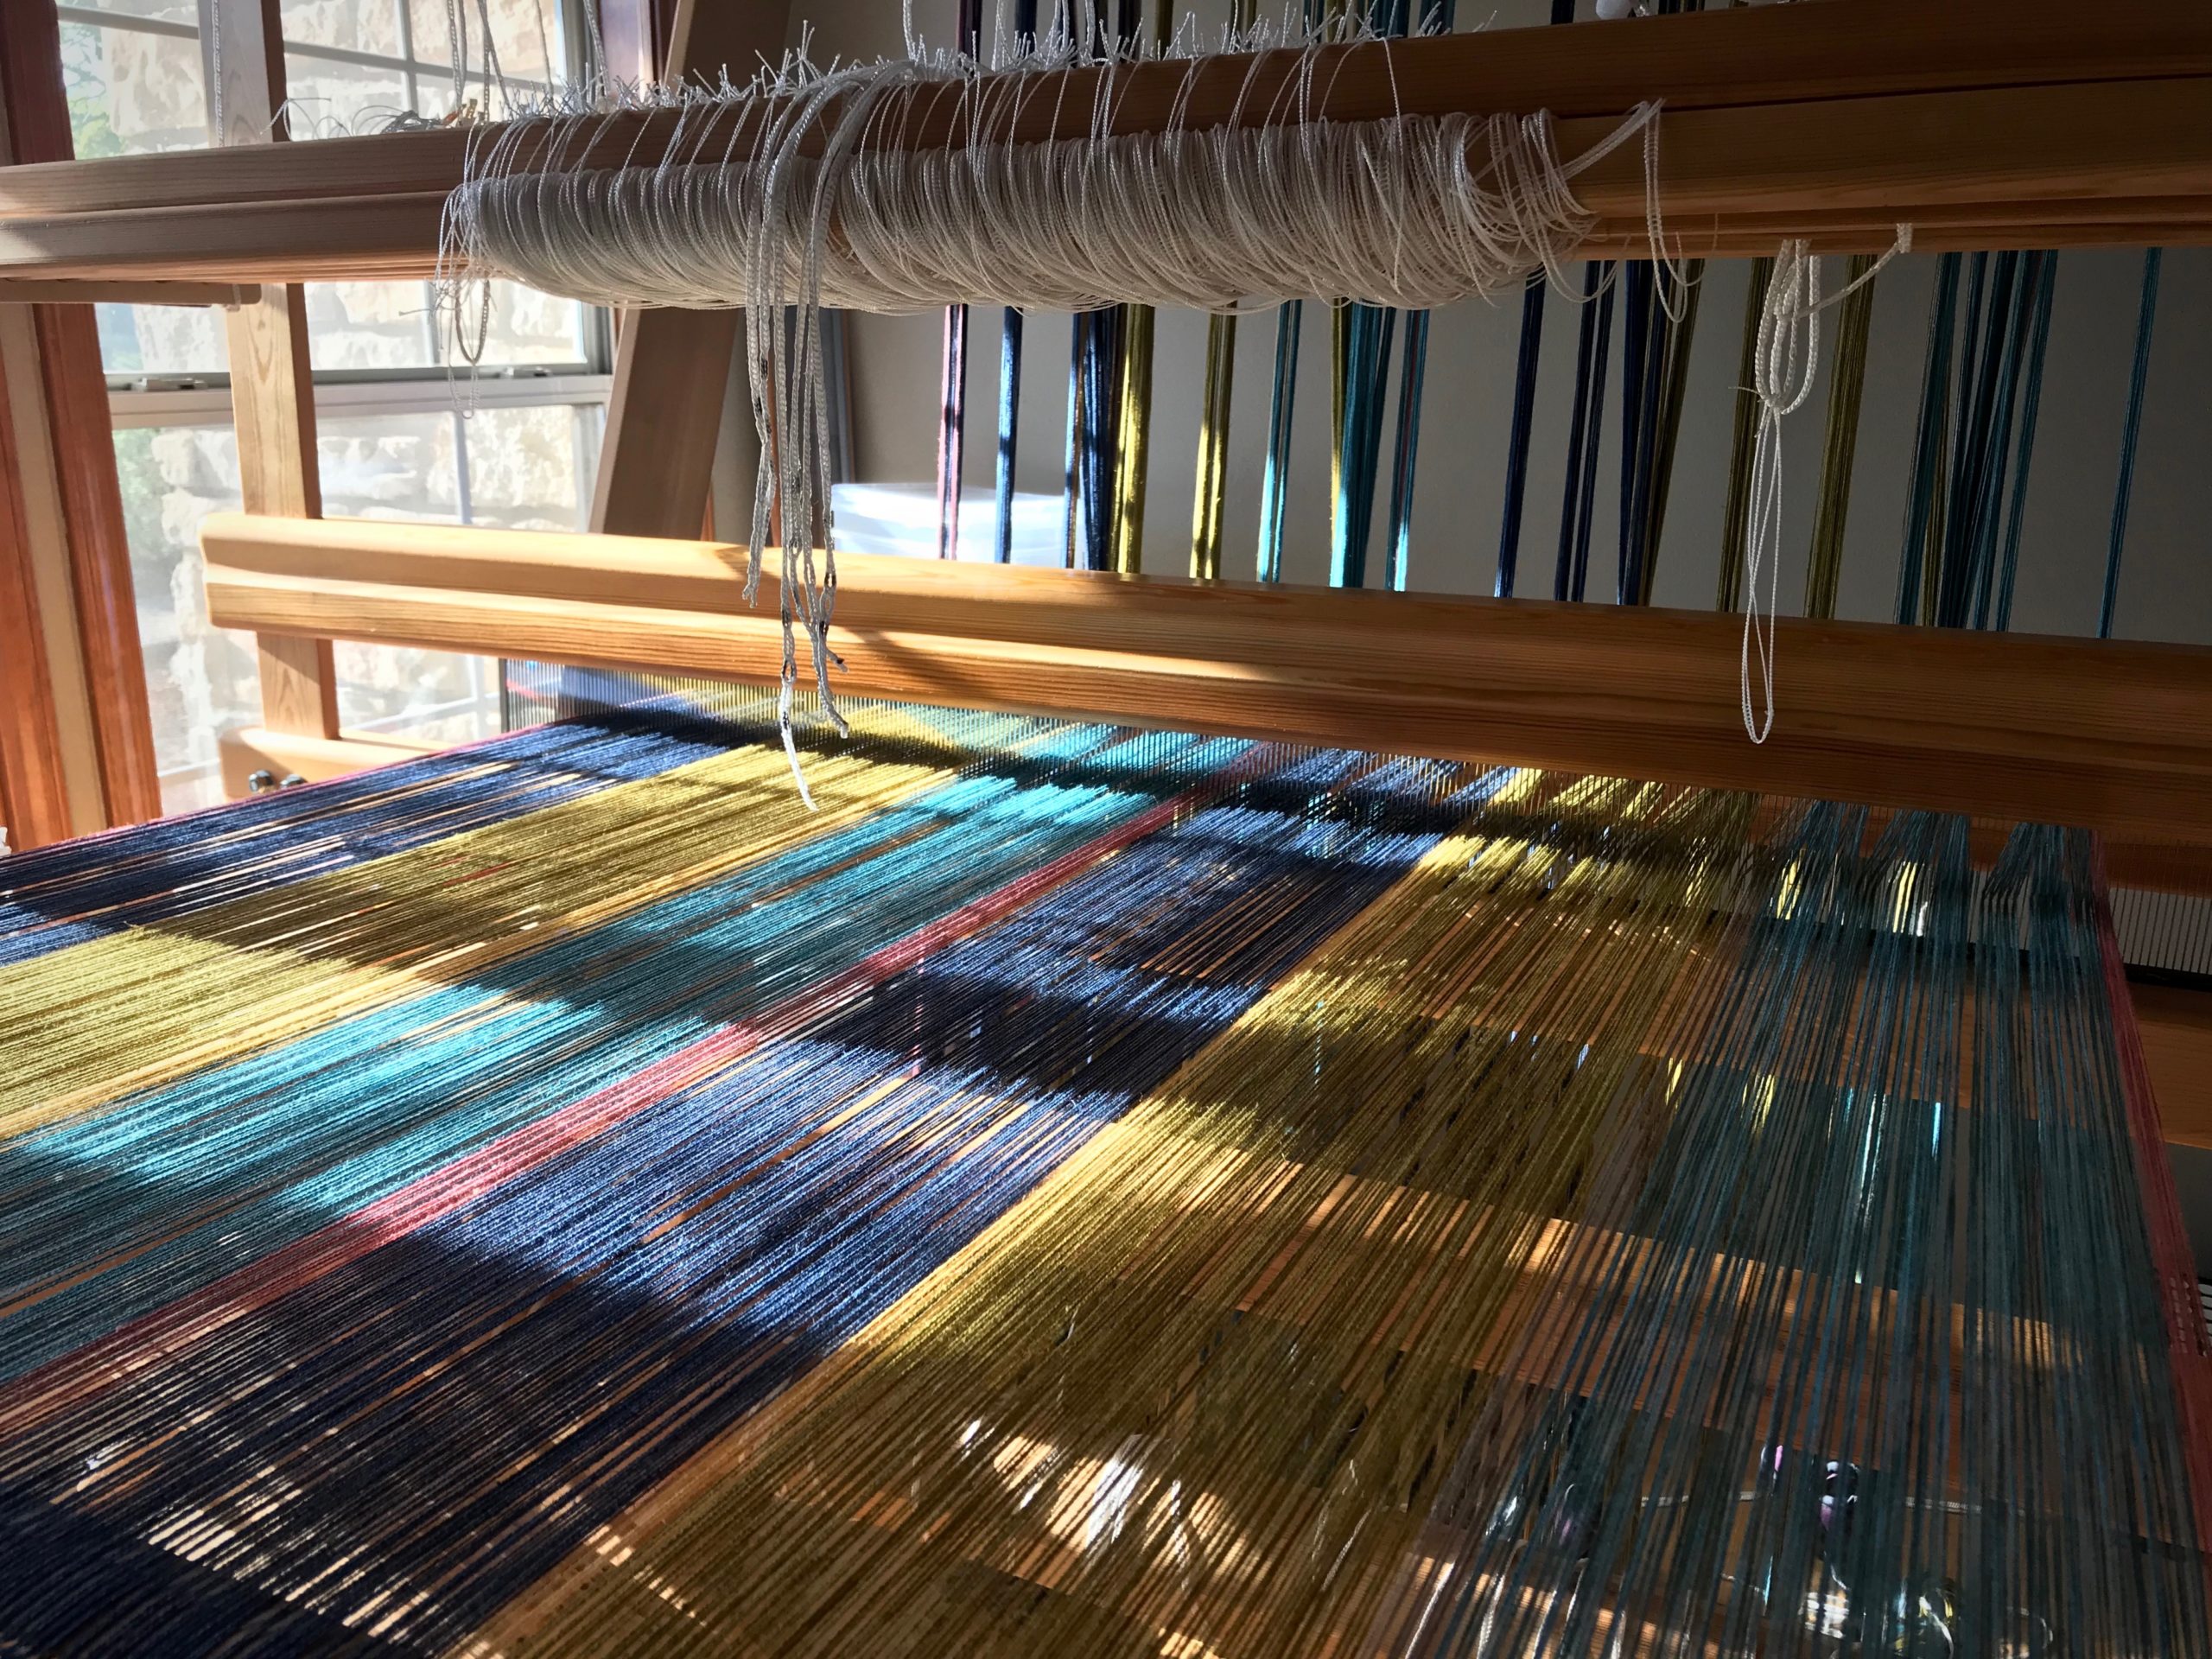
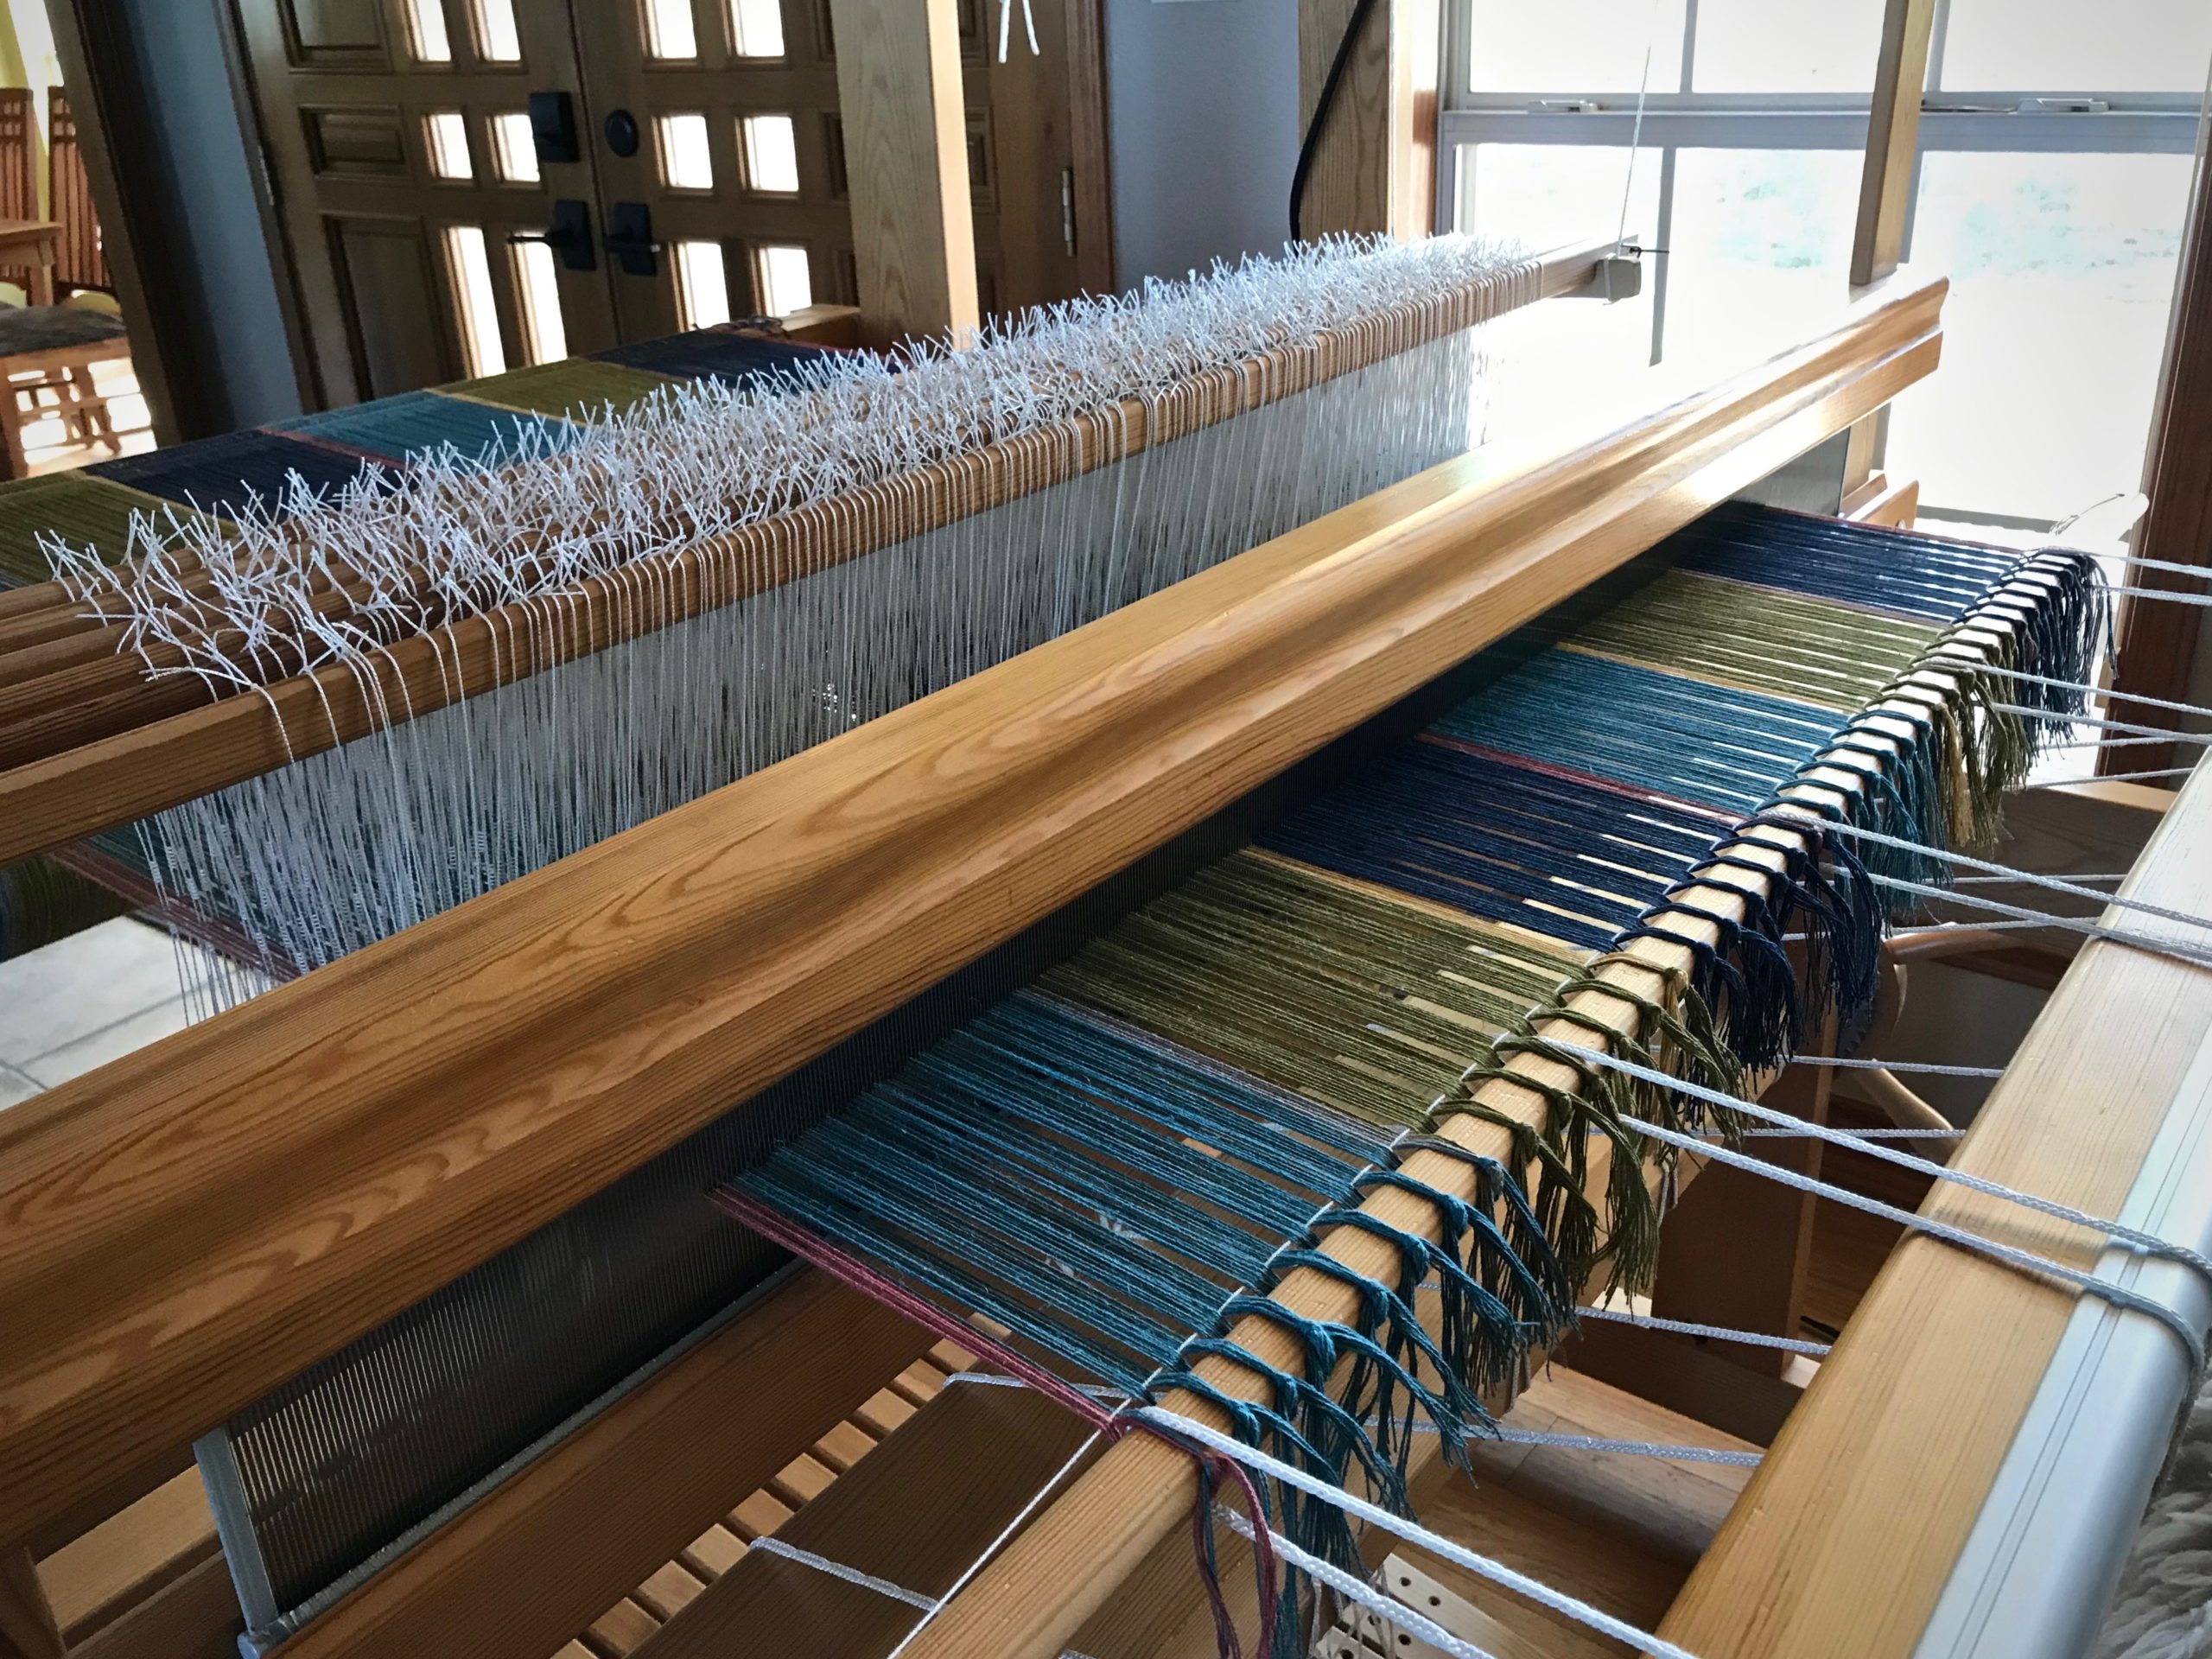
I’m curious. How much difference will it make to change the direction of the design? I wove the first Windmill and Taildragger from the side. (See Time Lapse: Windmill and Taildragger on the Drawloom.) This second one, I am weaving from bottom to top. For one thing, I know I can enlarge the image if I turn it upright, giving me more distinct details.
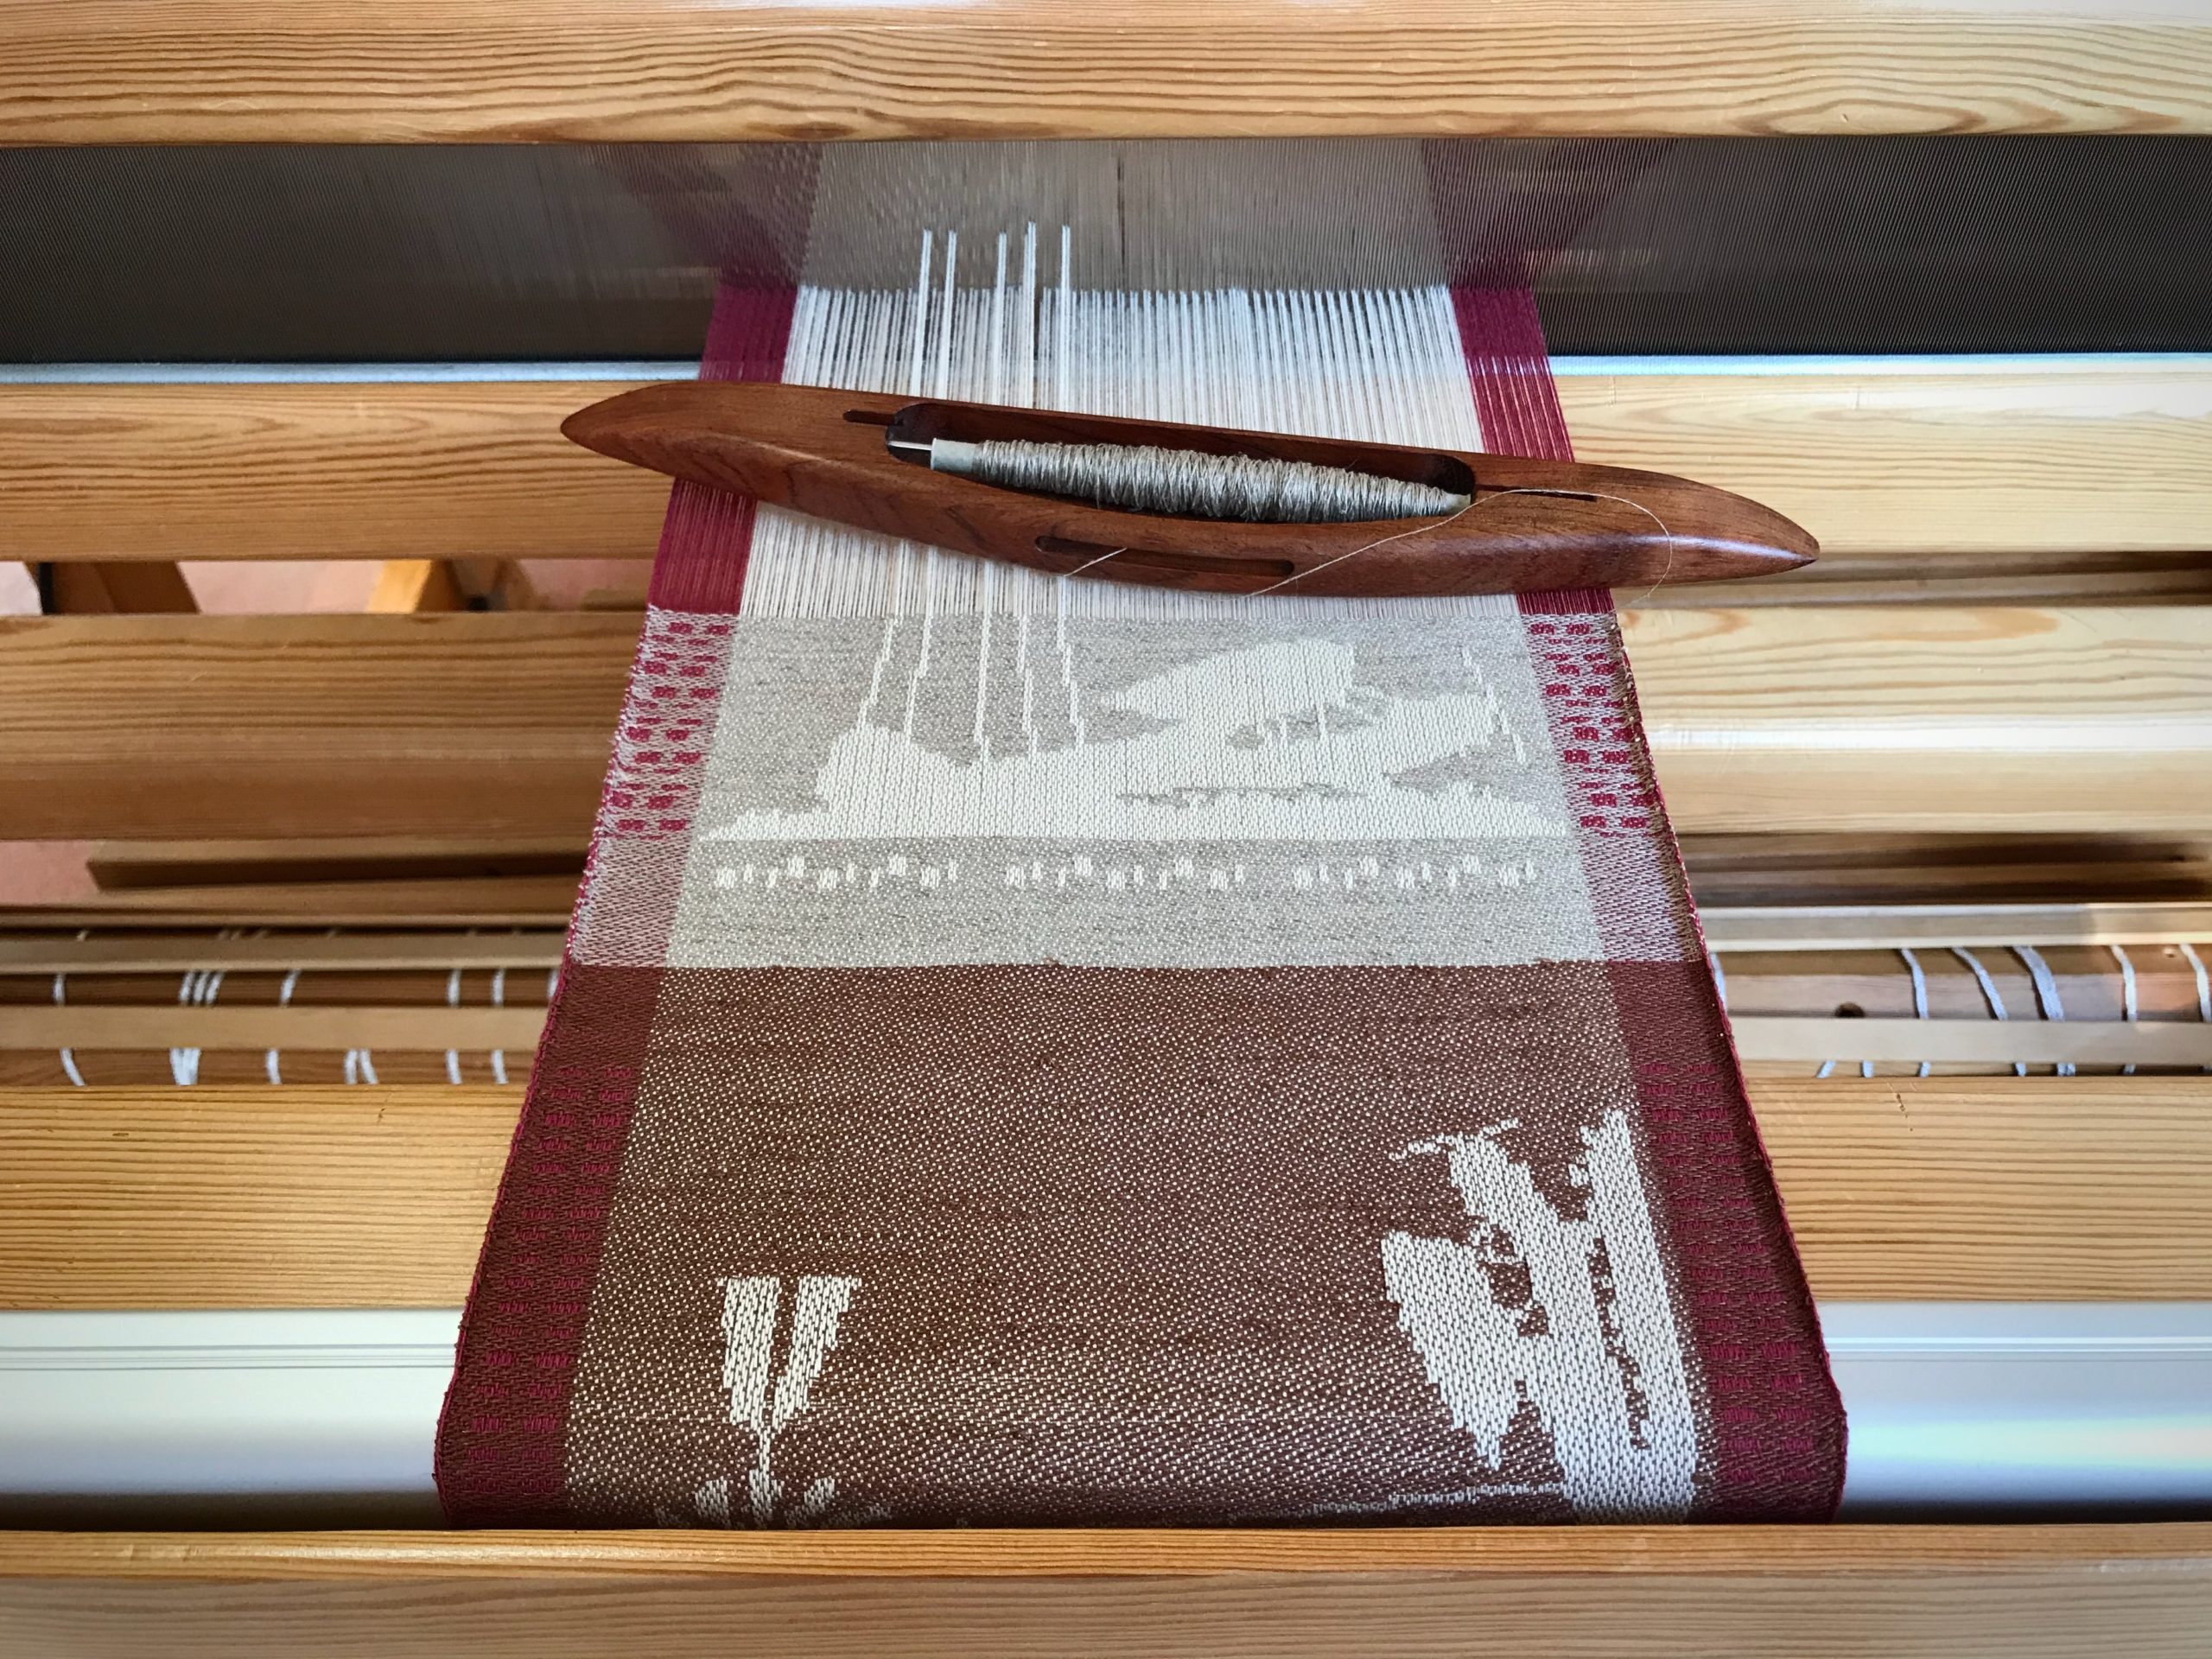
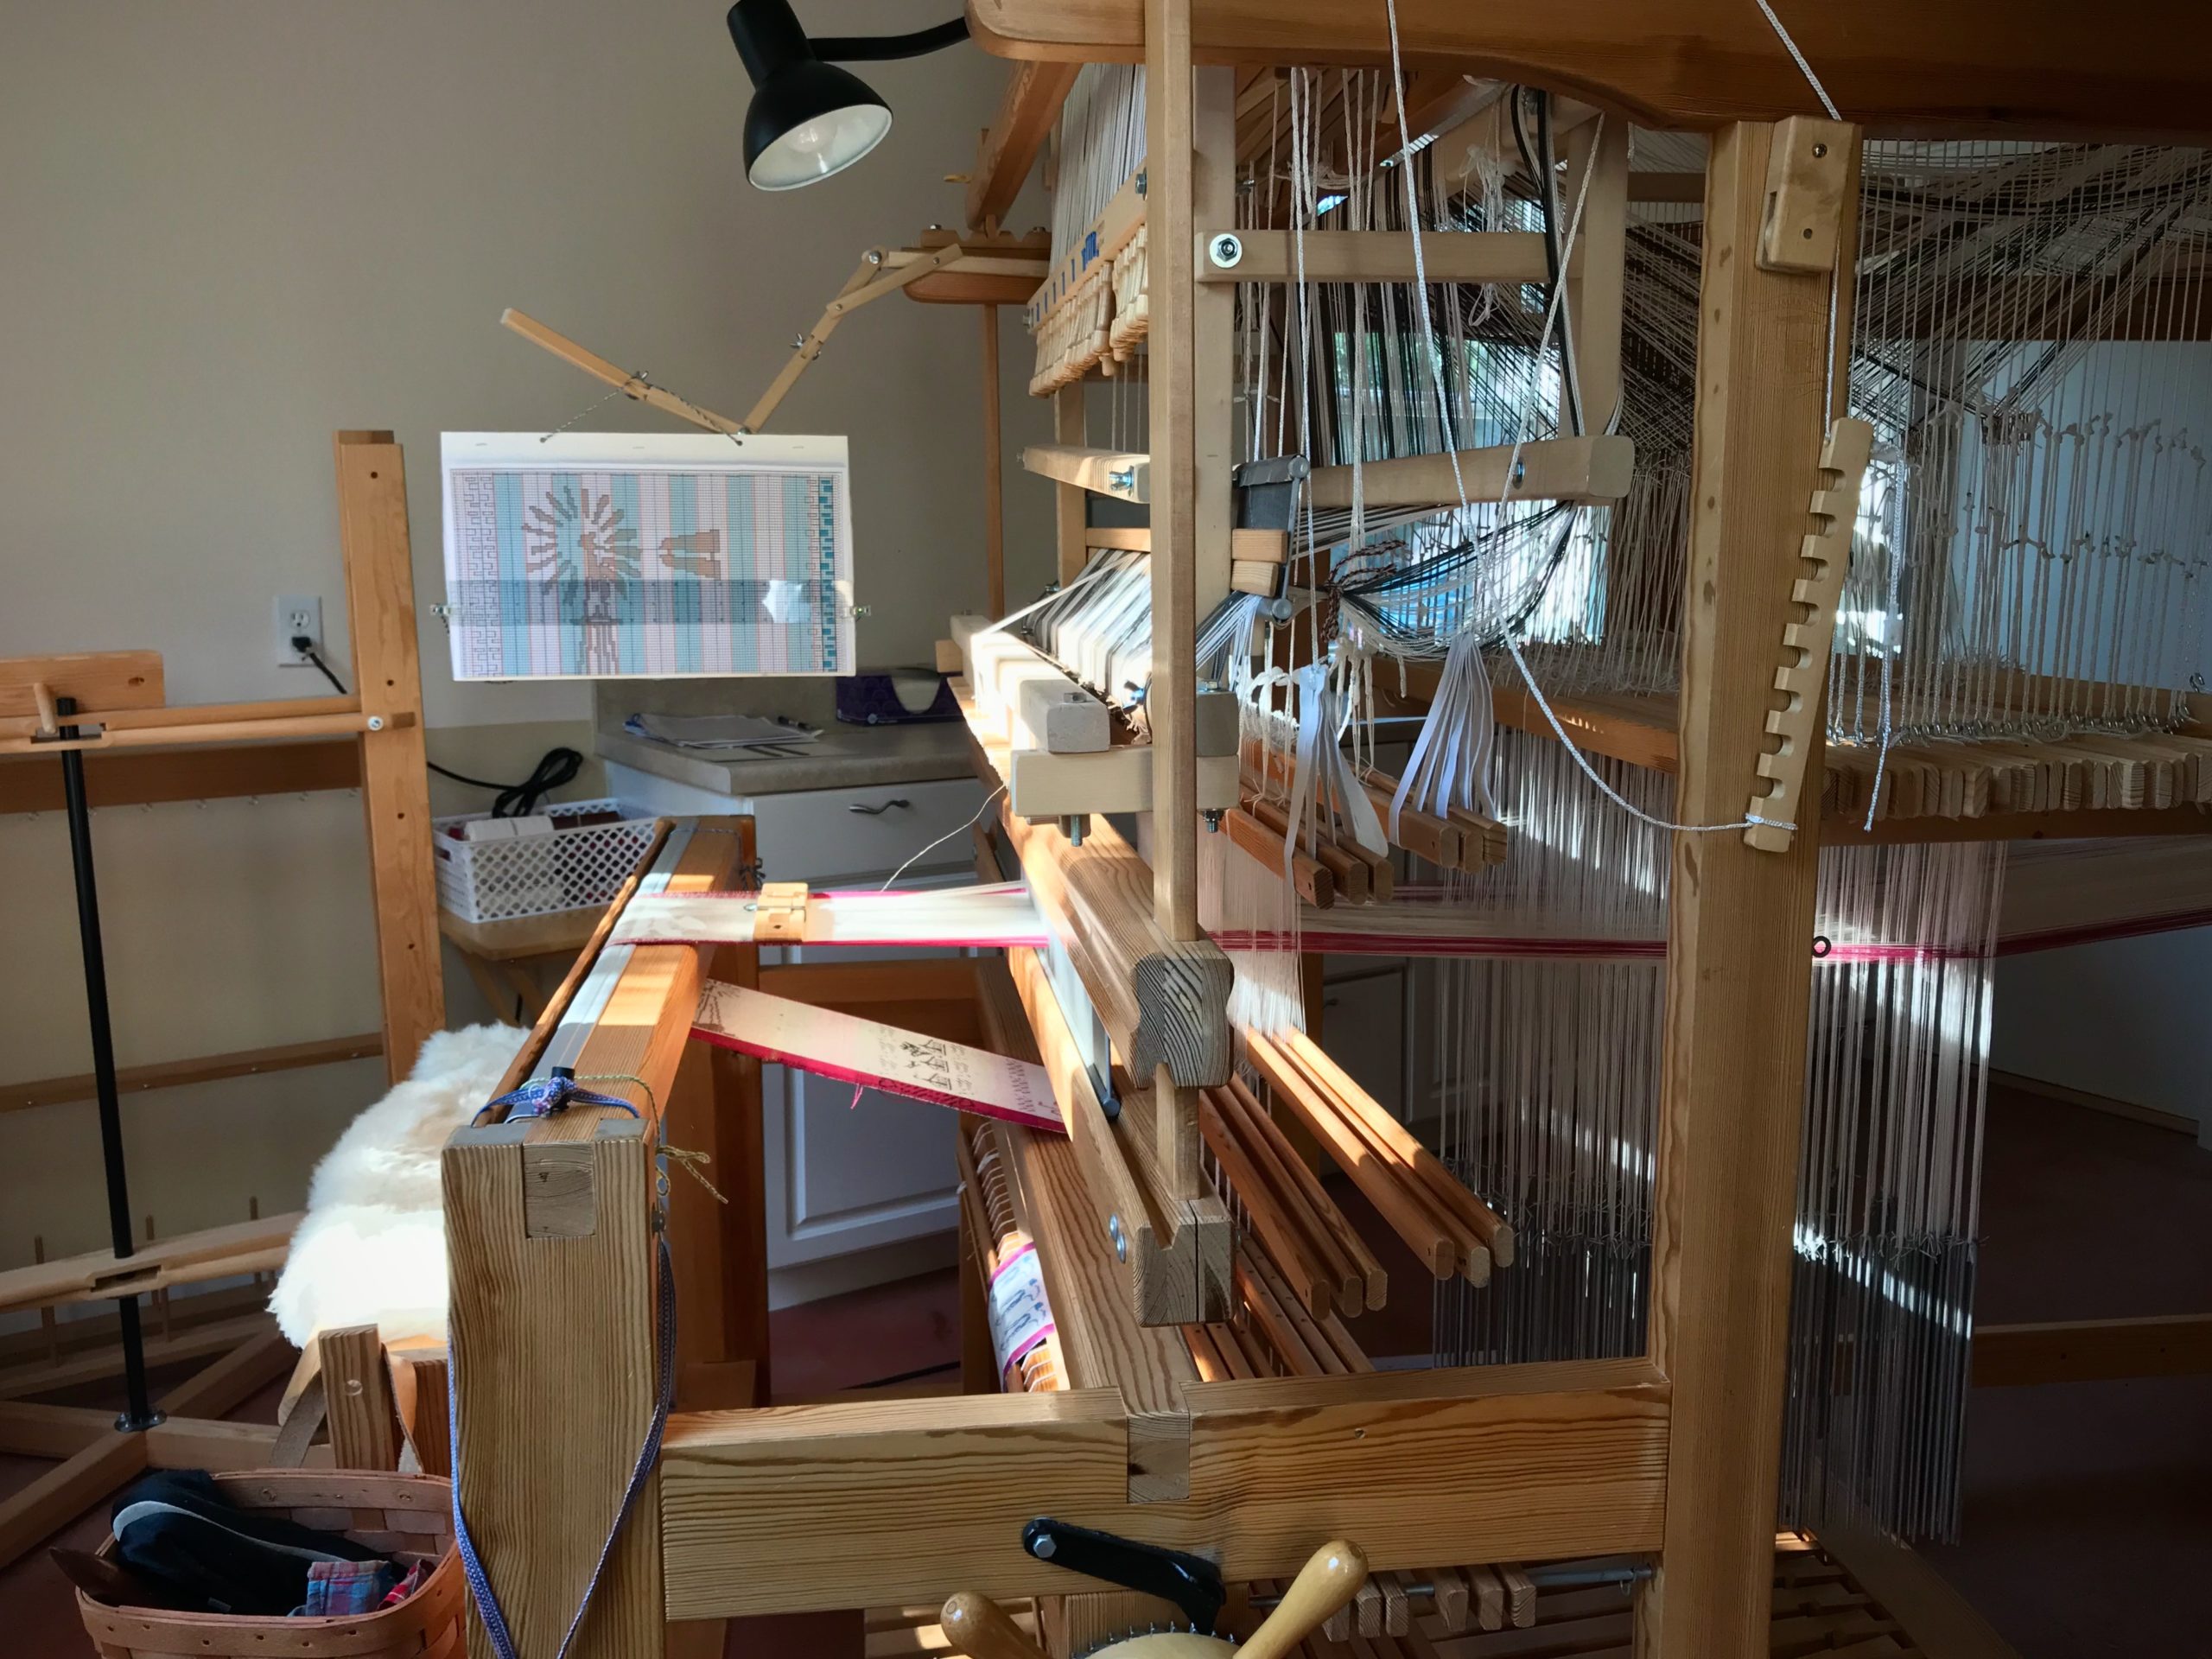
Windmill and Taildragger – Version 1, from the side. Beginning of Windmill and Taildragger – Version 2, upright.More detail is possible with the expanded size of the image. Center image and lower border use single-unitdraw cords. Five pattern shafts are used for the side borders.Temple maintains the correct weaving width. Side view of drawloom with Myrehed combination attachment.
This second Windmill and Taildragger is indeed larger, with smoother detail lines. No surprise. What does surprise me is how much simpler this one is to weave! The single-unit pulls are more manageable now that the design is turned in a lengthwise direction. Enlargement, clarity, and ease—all from a single design adjustment.
Single-unit draw cords seen in the weaving of the windmill’s blades.Windmill and Taildragger – Version 2Version 1 and Version 2 – Windmill and Taildragger
Spoken wishes express our needs. Our wishes are sincere, but hold no power in themselves. What if we turn the direction of our wishes? When we turn those expressions upward to God they become prayer. Prayer is an expression of belief. Jesus invites us to tell him our needs through prayer. Prayer enlarges and clarifies our hopes. You may be surprised how simple it is to take your needs to the Lord in prayer.
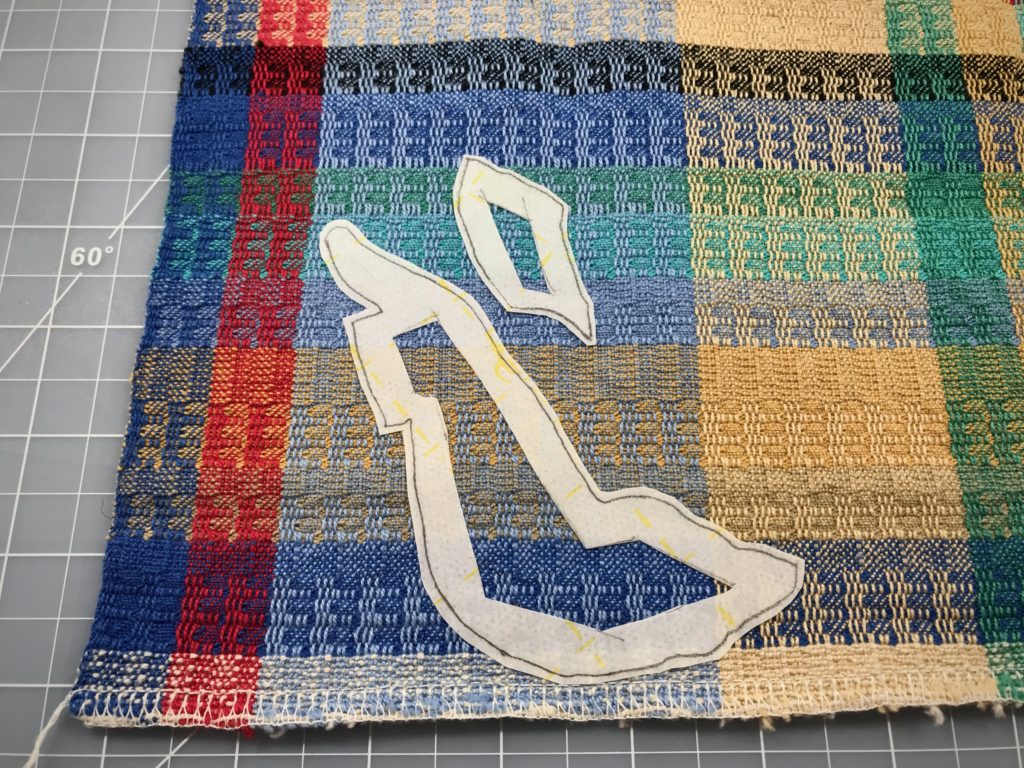
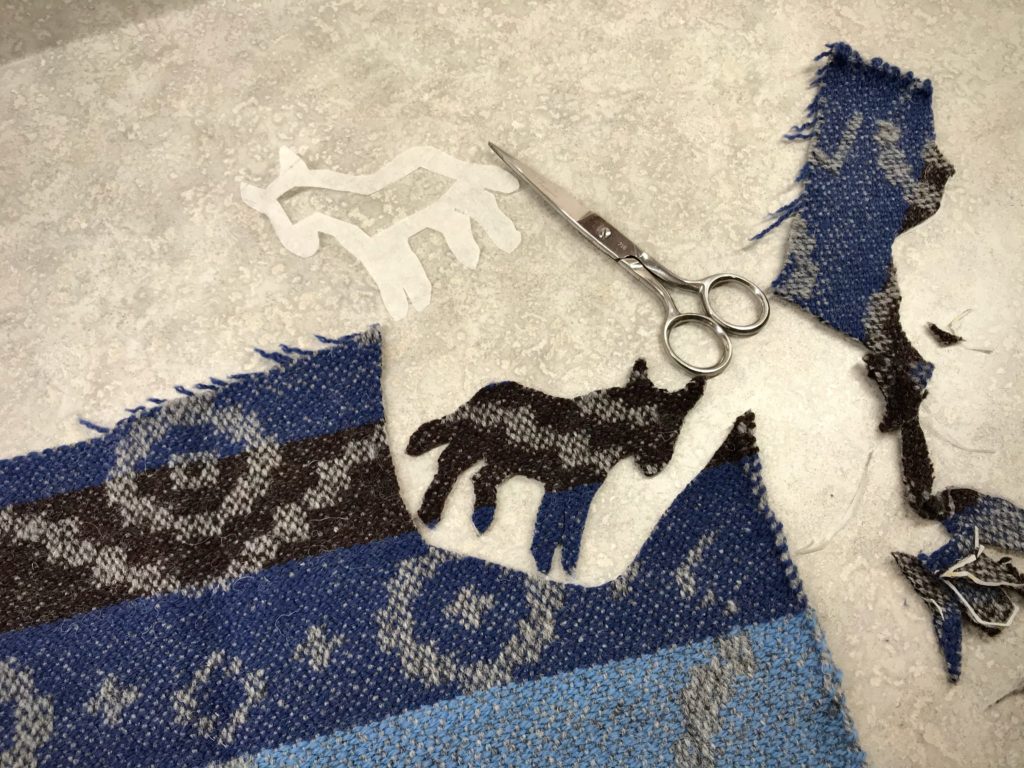
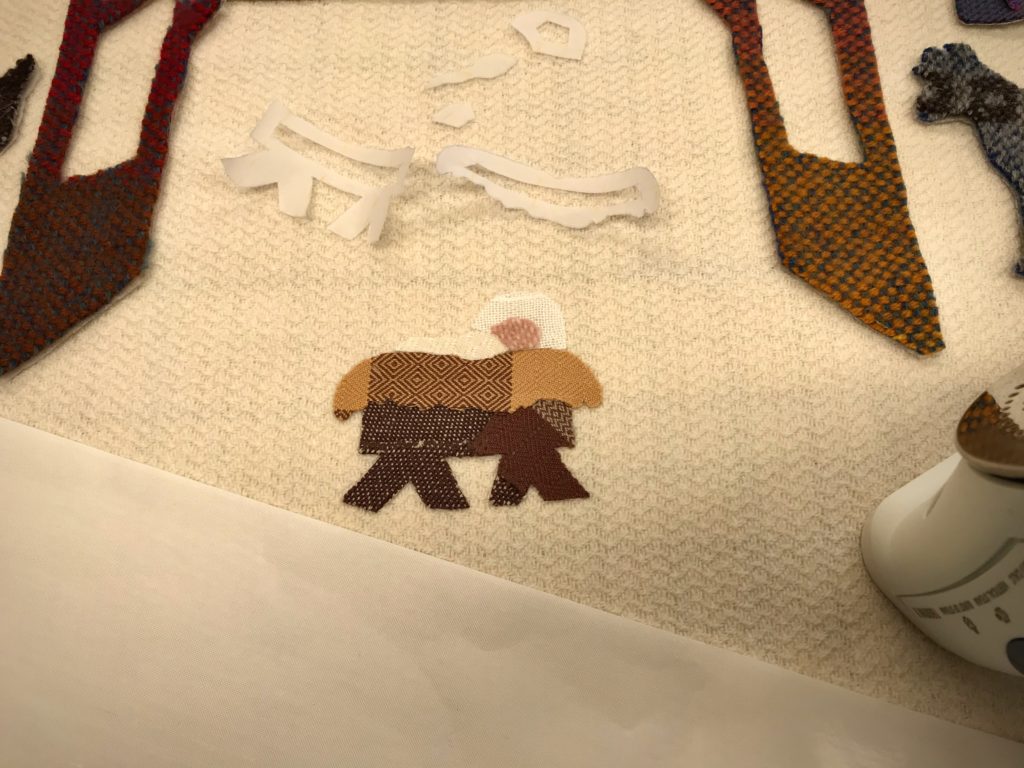
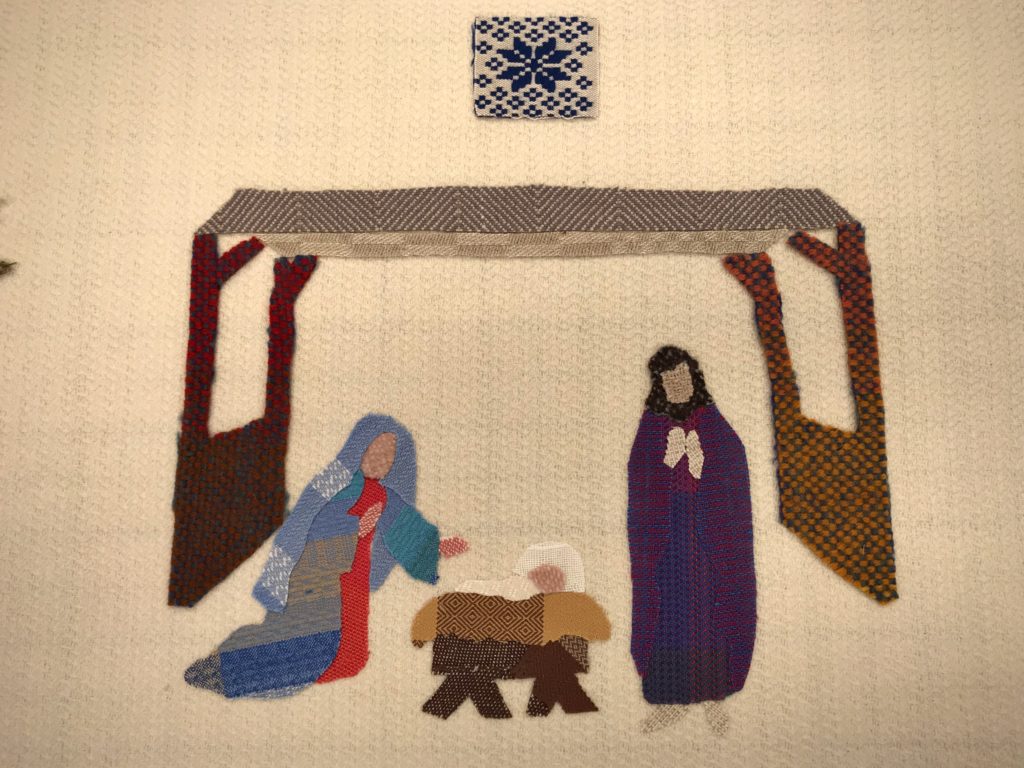
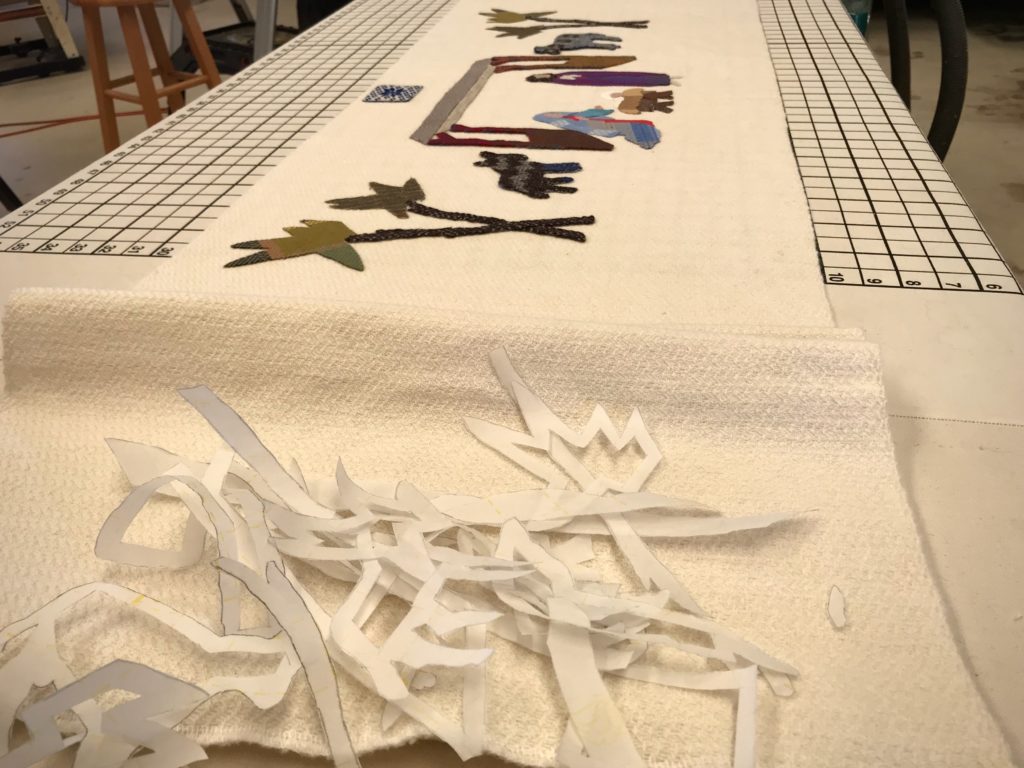
This is the Christmas-tree-skirt project. I wove 3 1/2 meters of background fabric with 8/1 Möbellåtta warp and 6/1 Fårö wool weft. Now, having sorted through all my handwoven remnants, big and small, I have colors and textures for telling the Nativity story in appliqué. My friend with appliqué experience has advised me on materials and technique, for which I am enormously grateful.
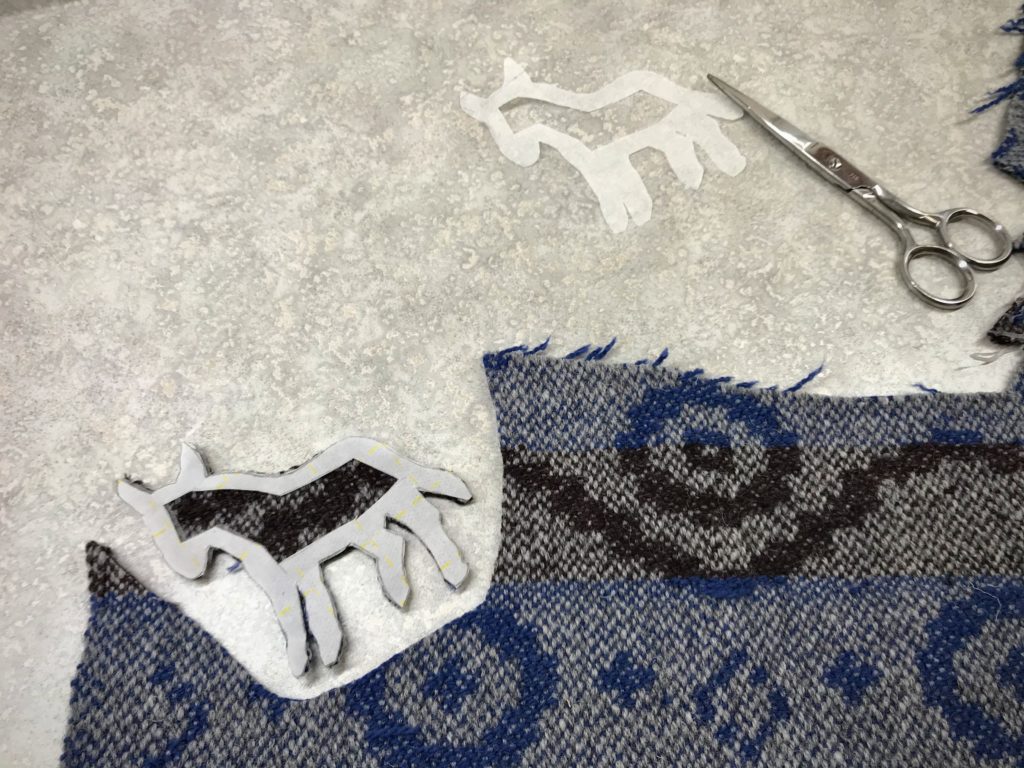
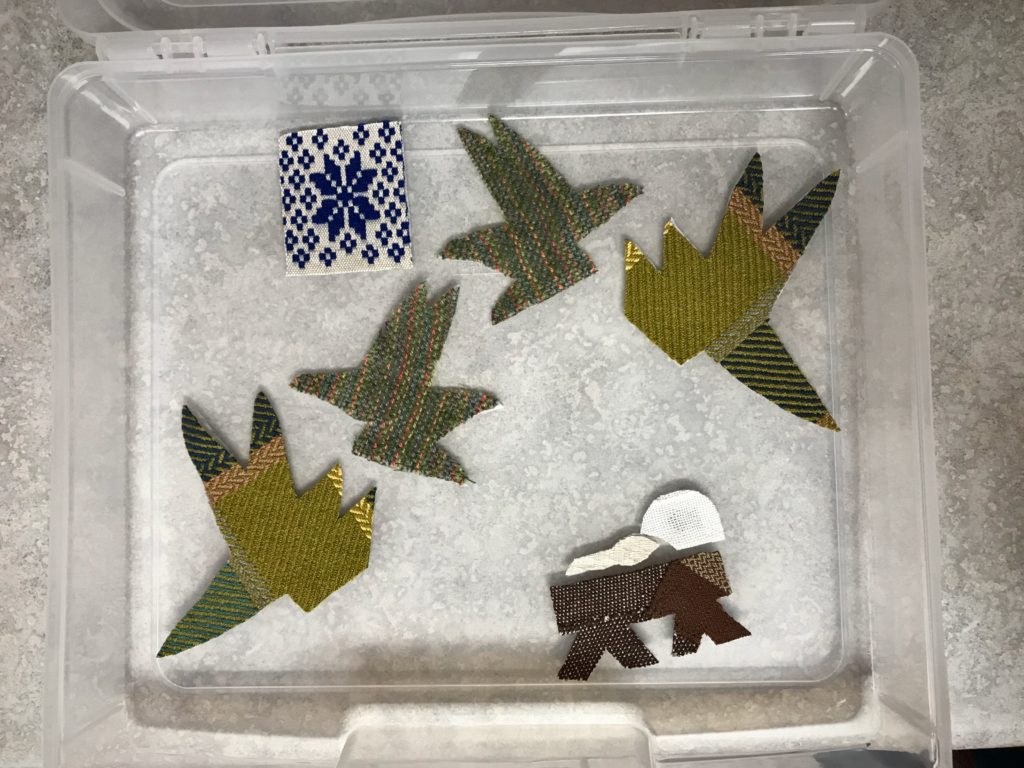
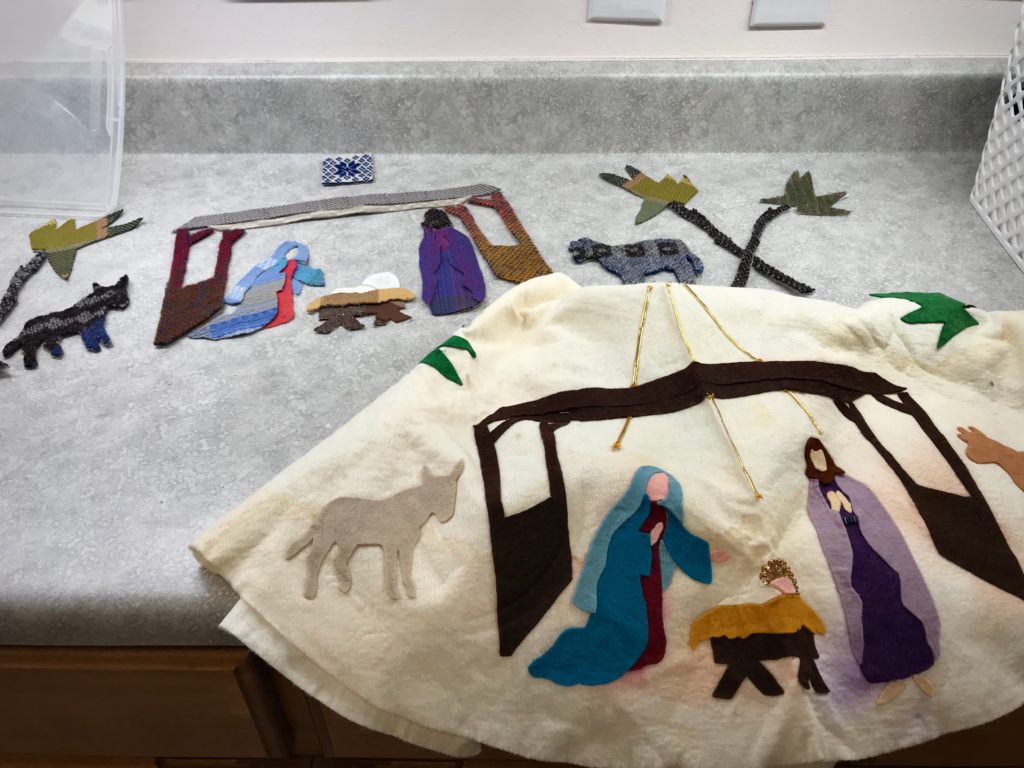
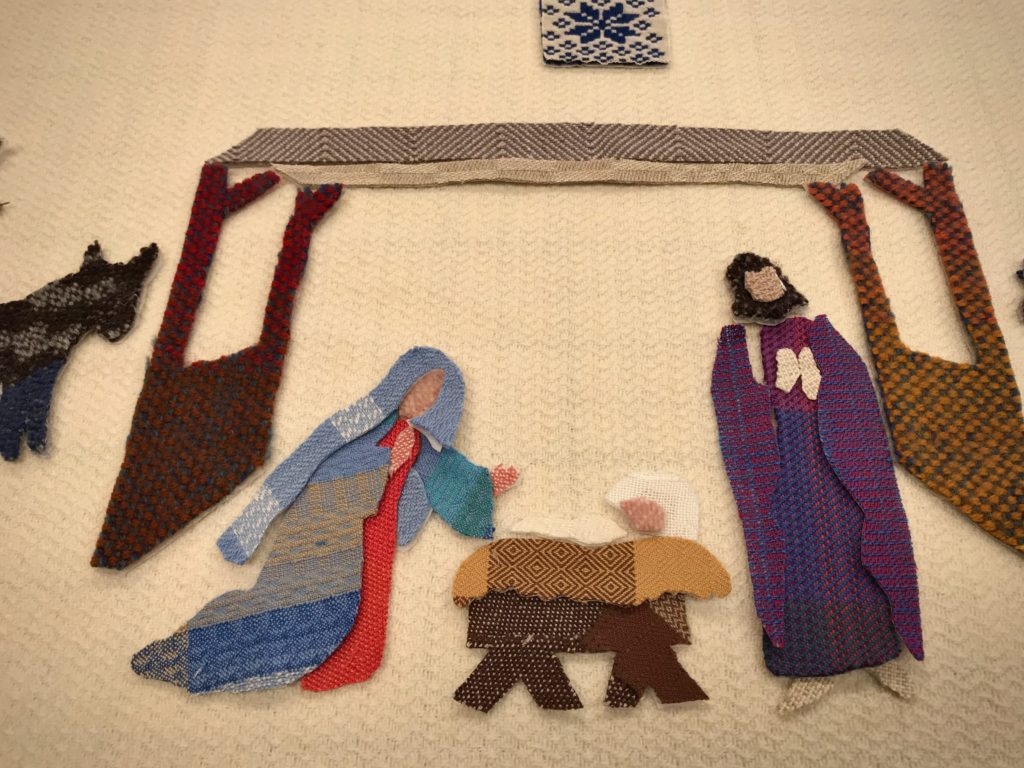
Remnant from the warp for towels I wove for my daughter becomes part of Mary’s garment.Donkey shape is cut from remnants from my wool vest project on the drawloom. Paper is on both sides of the double-sided fusible product. One side is peeled off to adhere the fusible to the back of the appliqué piece. (Always remember to draw the reverse side of the image onto the paper on the fusible.)Appliqué piece is face up, ready to be fused to the background. Blue star is from opphämta on the drawloom. Green palm trees are from a long-ago rigid heddle scarf and from a warp of cottolin towels. Manger is pieced from some of my earliest floor loom fabrics. Swaddling cloth is fine cotton M’s and O’s. Baby’s halo is from Swedish lace curtain fabric. Every piece of fabric has a story.
Using a double-sided fusible product, I carefully cut out each shape. After laying all the pieces out in the proper arrangement, I fuse them, layer by layer, to the background fabric. The Nativity narrative is formed, piece by piece. I still have handwoven remnants to add to the lower edge, and embroidery to stitch around some of the appliqué shapes. I’m hopeful to complete all of it before Christmas.
This is the felt tree skirt I saw every year around our family’s Christmas tree when I was a girl.Planning the arrangement of the appliqué pieces onto the background fabric.I start by fusing the manger into place because the head of baby Jesus is at the very center of the whole length of cloth.Wide variety of handwoven fabrics tell the Nativity story. Threads of linen, cotton, wool, and bamboo.Scraps of paper backing indicate that all the pieces have been fused into place. Next, embroidery and other handwork, while considering the meaning of Christmas.
My remnant scene tells the story of God with us. The holy babe in a pieced-together manger reminds us that God loved us by sending Jesus to our worry-ridden world. Worries are the little things and big things that we would like to control, but can’t. Can we add one moment to our lifespan by worrying? Trust in Jesus replaces worry because it puts control back in the right hands.
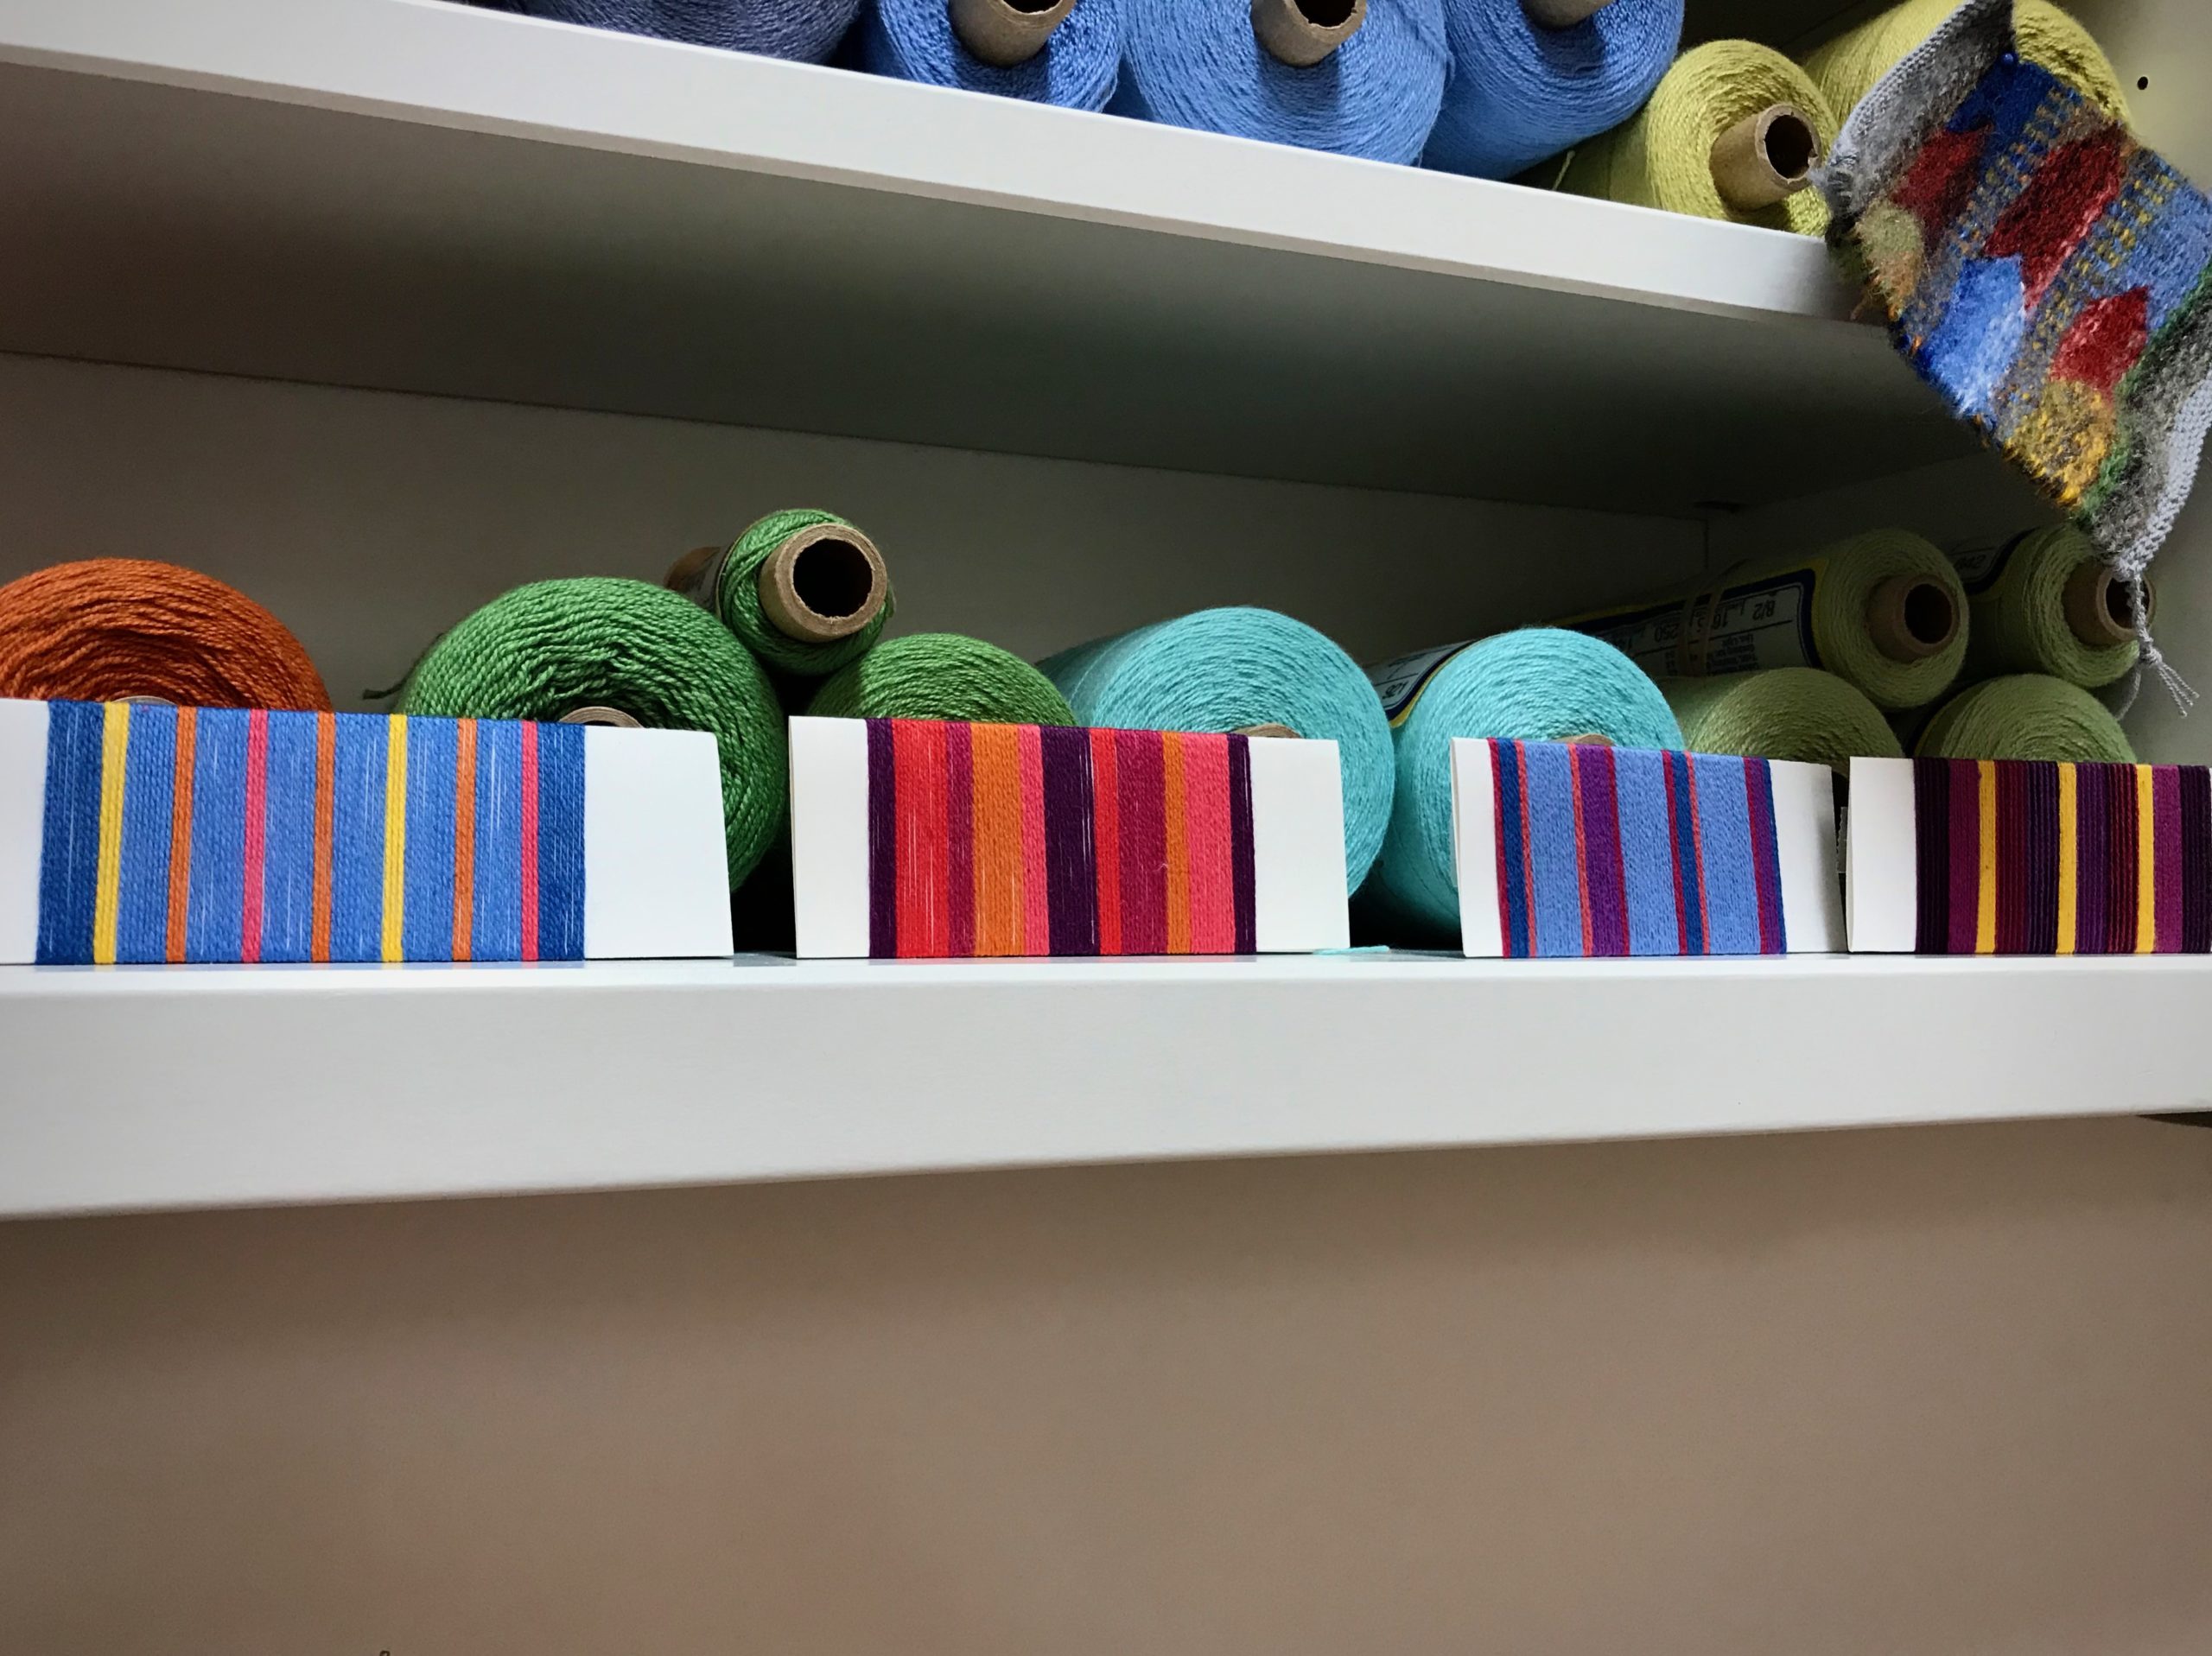
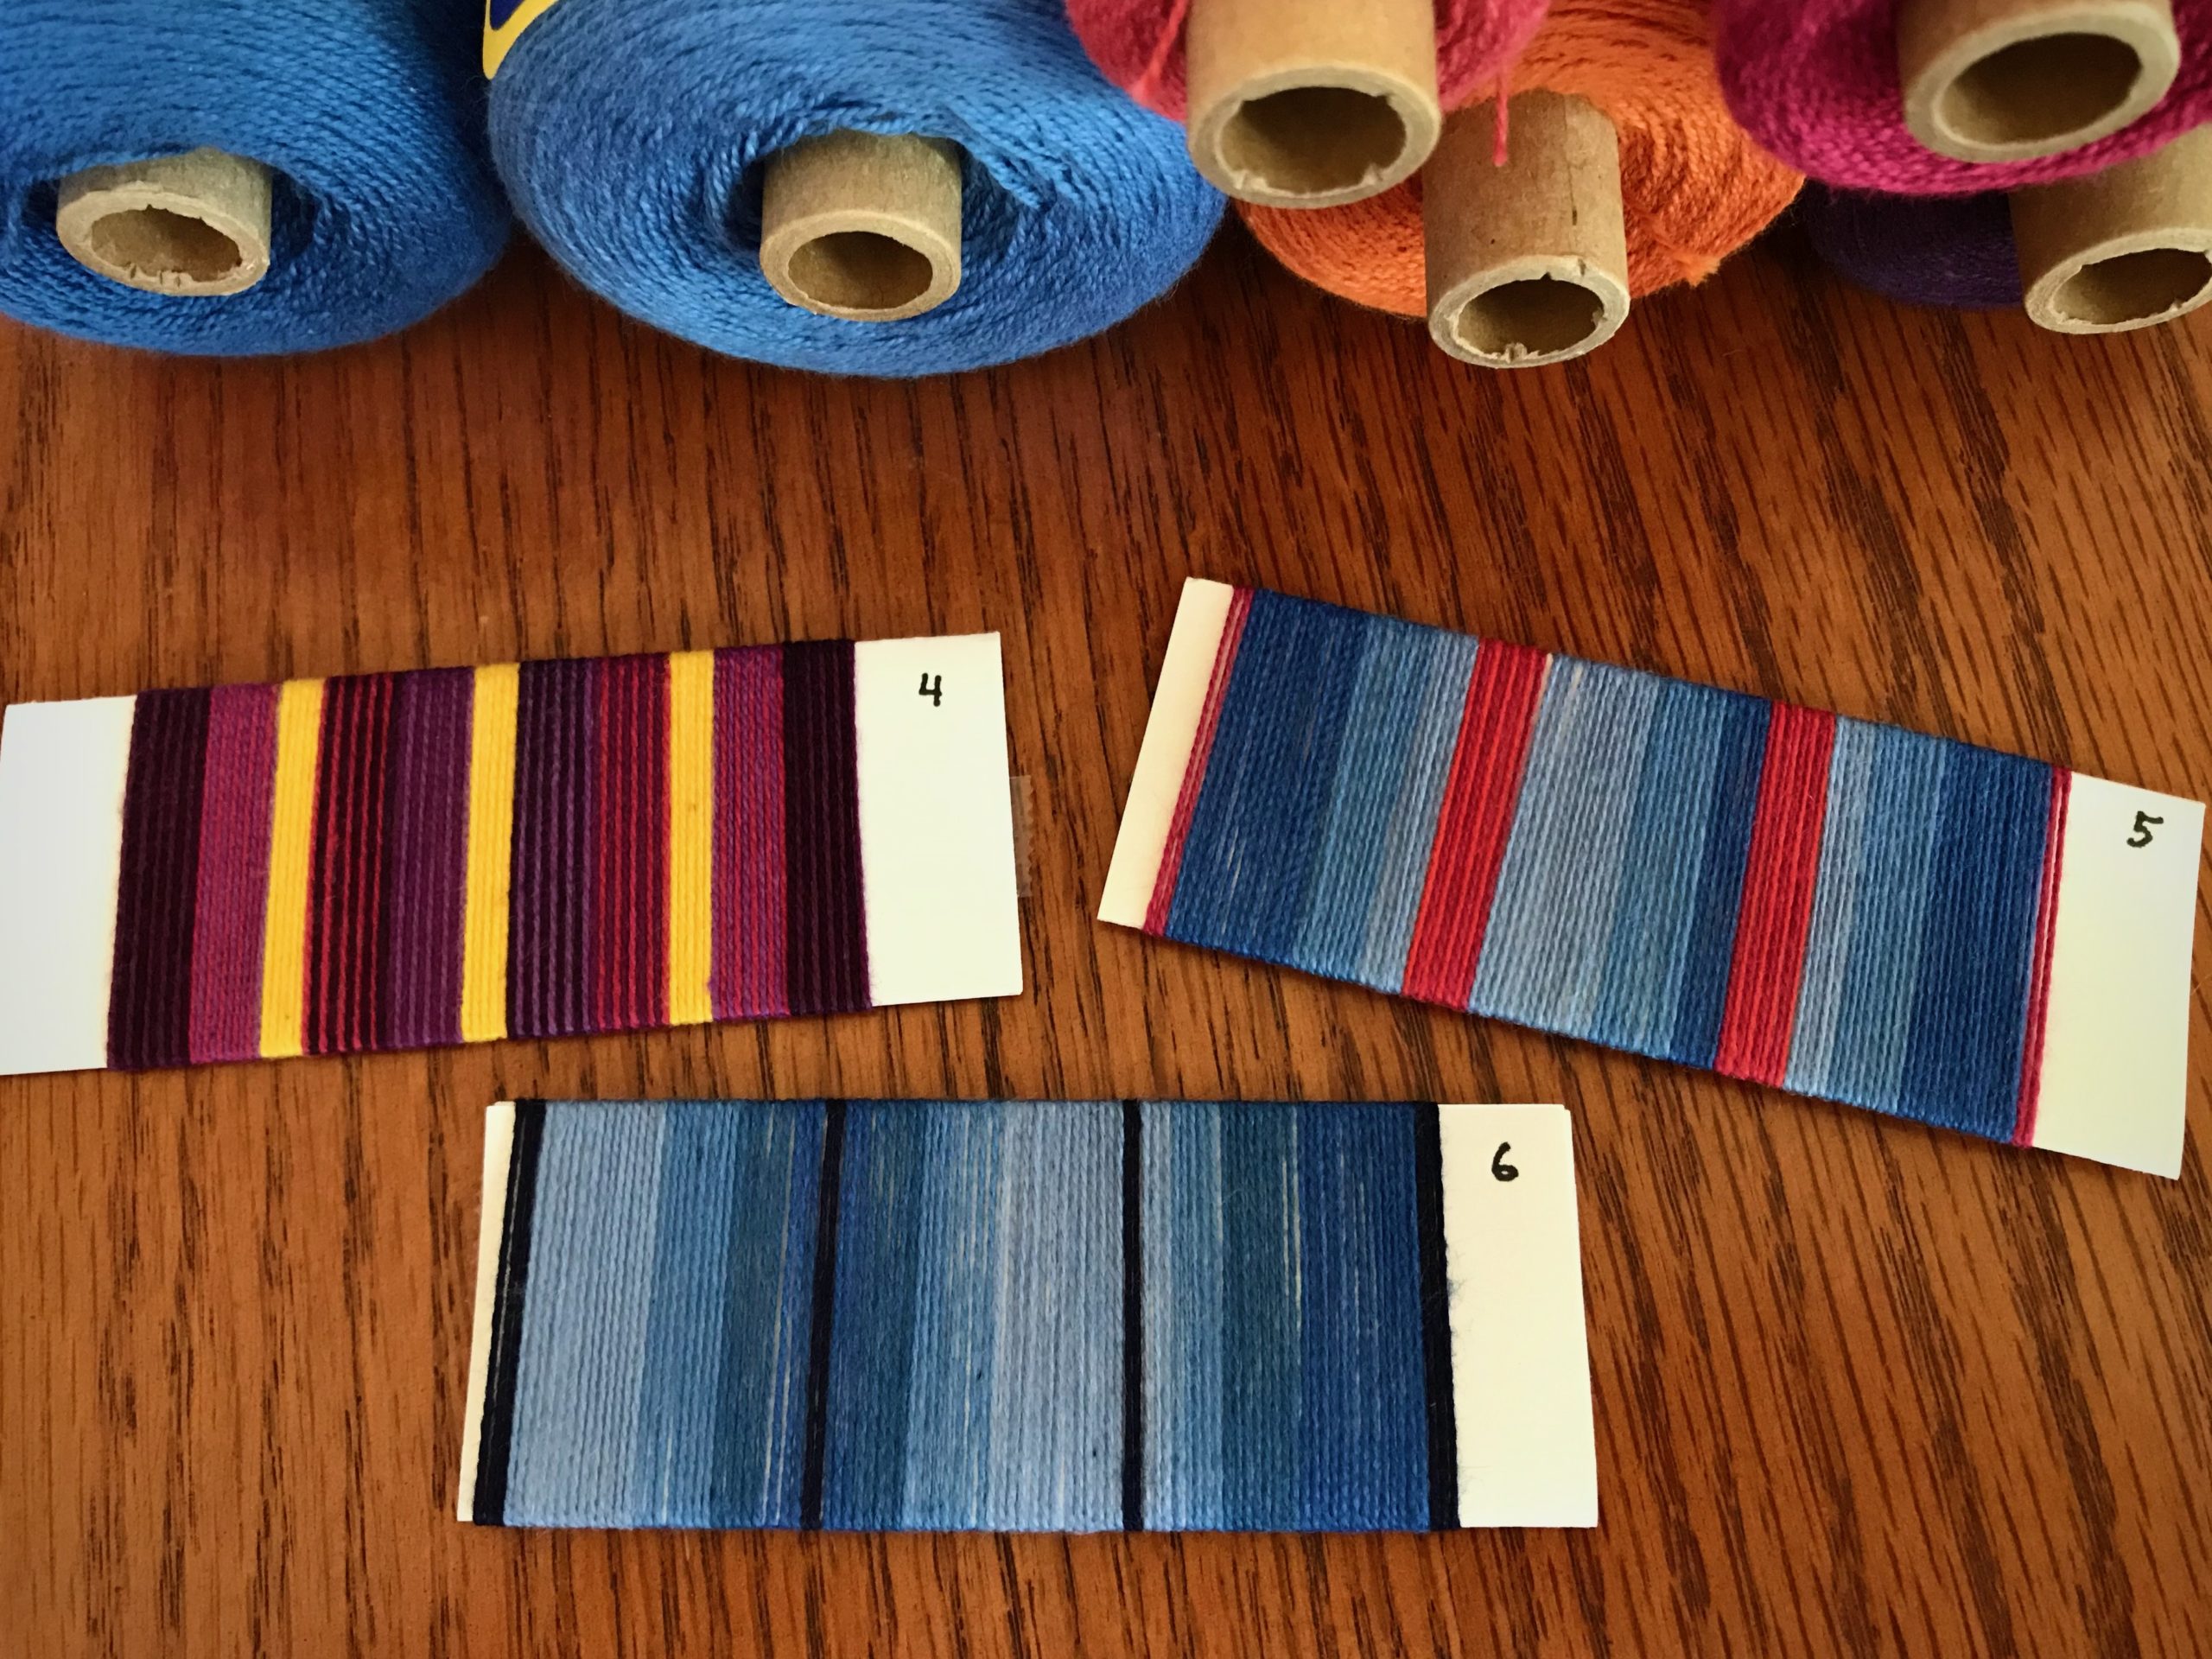
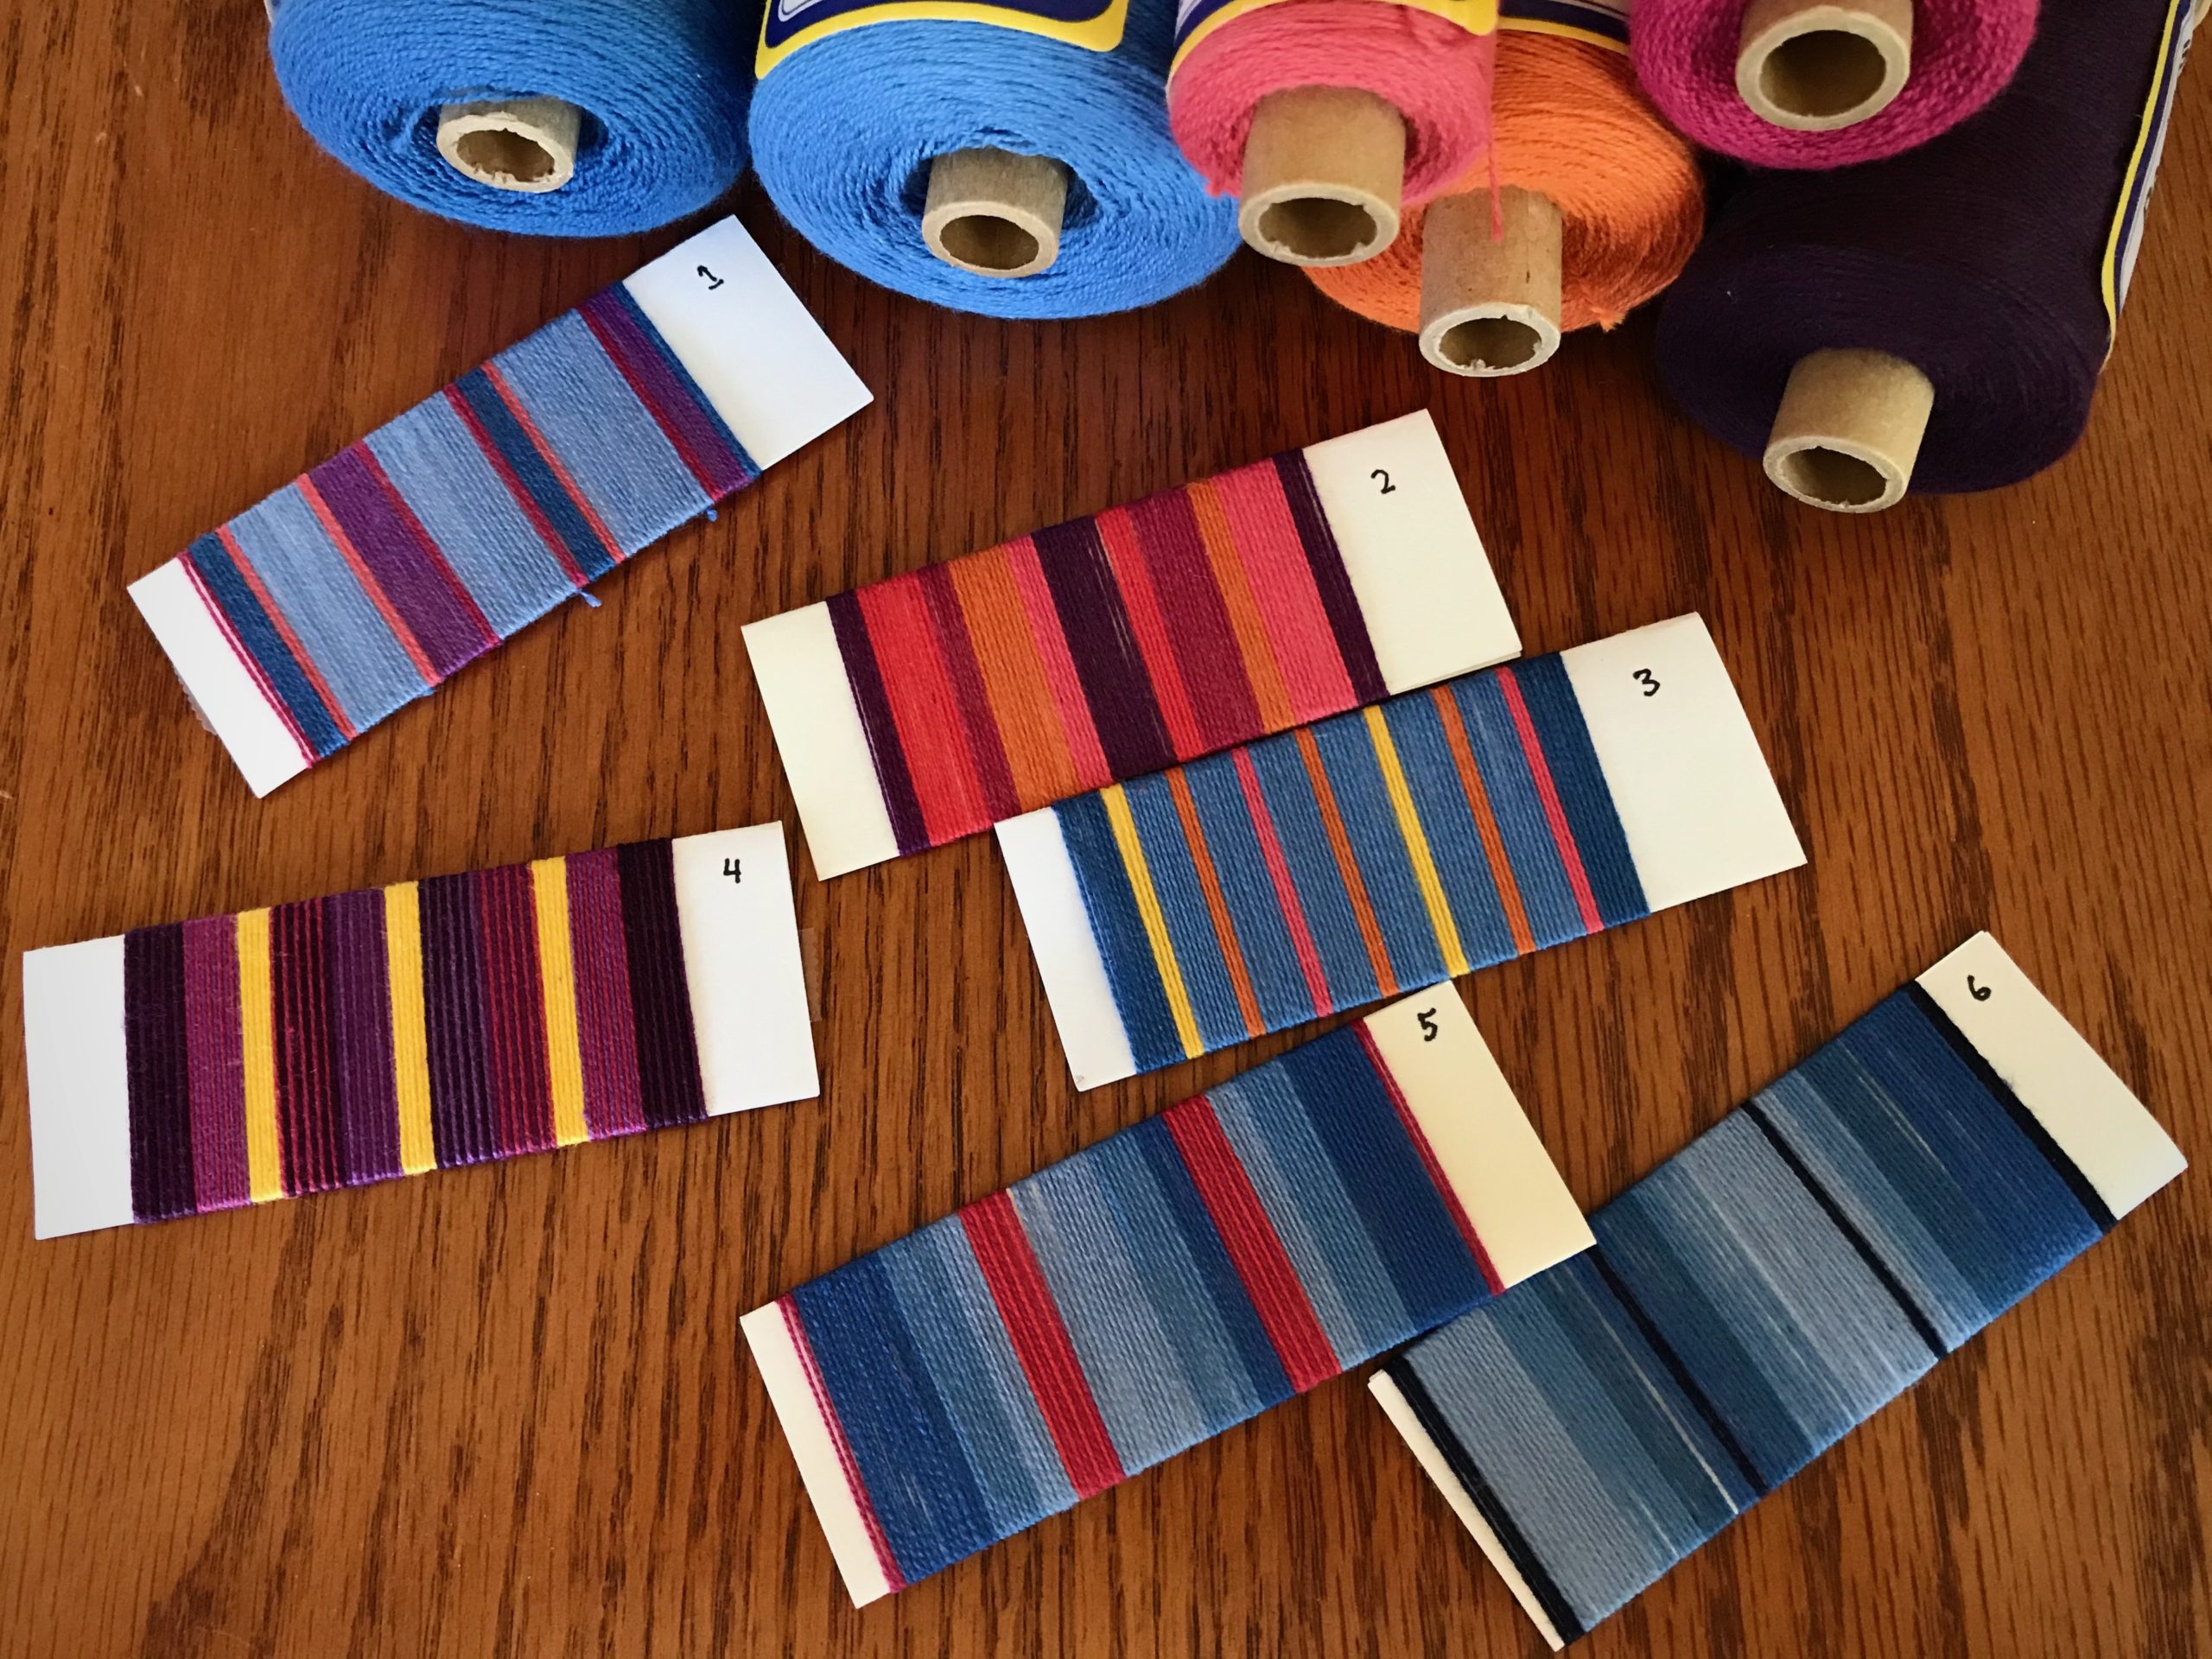
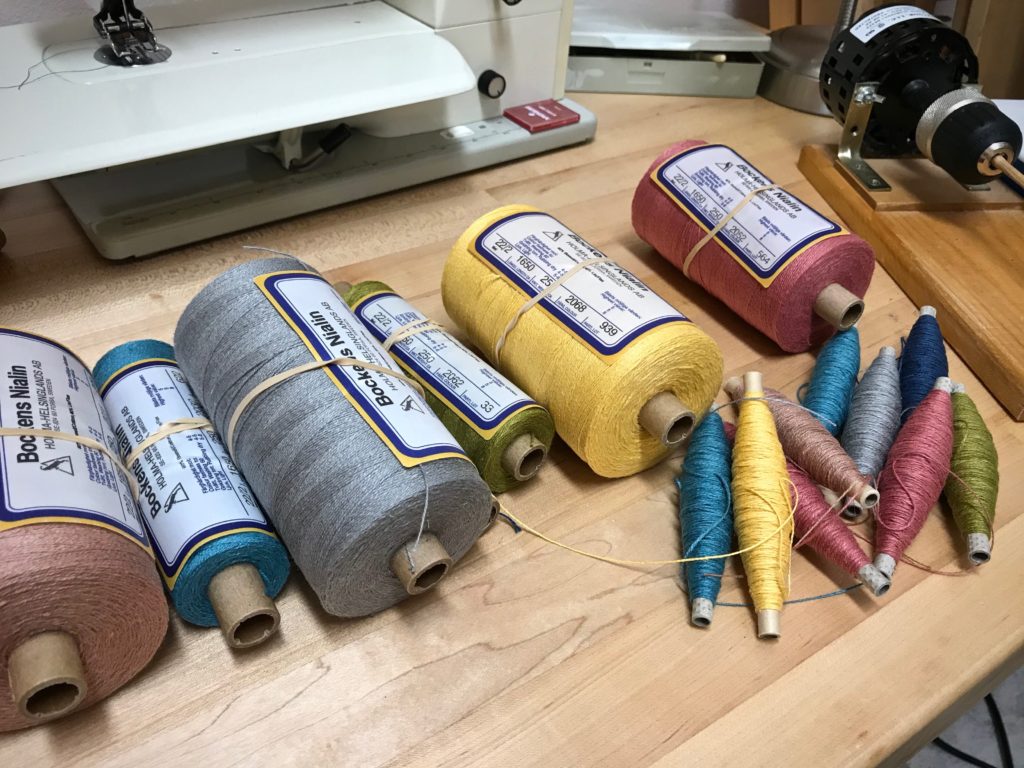
When I wrap potential warp sequences on folded index cards it brings design thoughts out into the open. It makes the ideas tangible, helping me plan a pleasing warp. For this 8/2 cotton warp I am choosing colors from the plentiful selection I already have on my shelves.
8/2 cotton left from previous projects fills the shelves. Each warp wrapping sparks ideas for more possible warps.
This warp will be woven as eight-shaft–twill yardage, about 15 1/2 inches wide. The fabric will be cut and hemmed to make colorful arm and headrest covers for my mother-in-law’s comfy off-white recliner. I will increase the width of the stripes proportionately to fill the warp width. My mother-in-law will have the final say, but if you could help her decide, which set of warp stripes would you choose? Please let us know in the comments.
What if our attitudes were made tangible? What would our thoughts look like if they were out in the open, wrapped like colored threads around our actions? With the love of Christ in us, forgiveness is the recurring thread. Forgiveness is for the undeserving. That is who we forgive. Because that is who we are when we are forgiven by God.
May the thread of forgiveness be woven in your life’s fabric.
A warp is finished when the woven cloth has been taken to completion. At that point, the loom is free for a new warp. That is the rule I’ve given myself. If I ignore the rule and put on a new warp before its time, the unfinished cloth has a way of staying unfinished for too long.
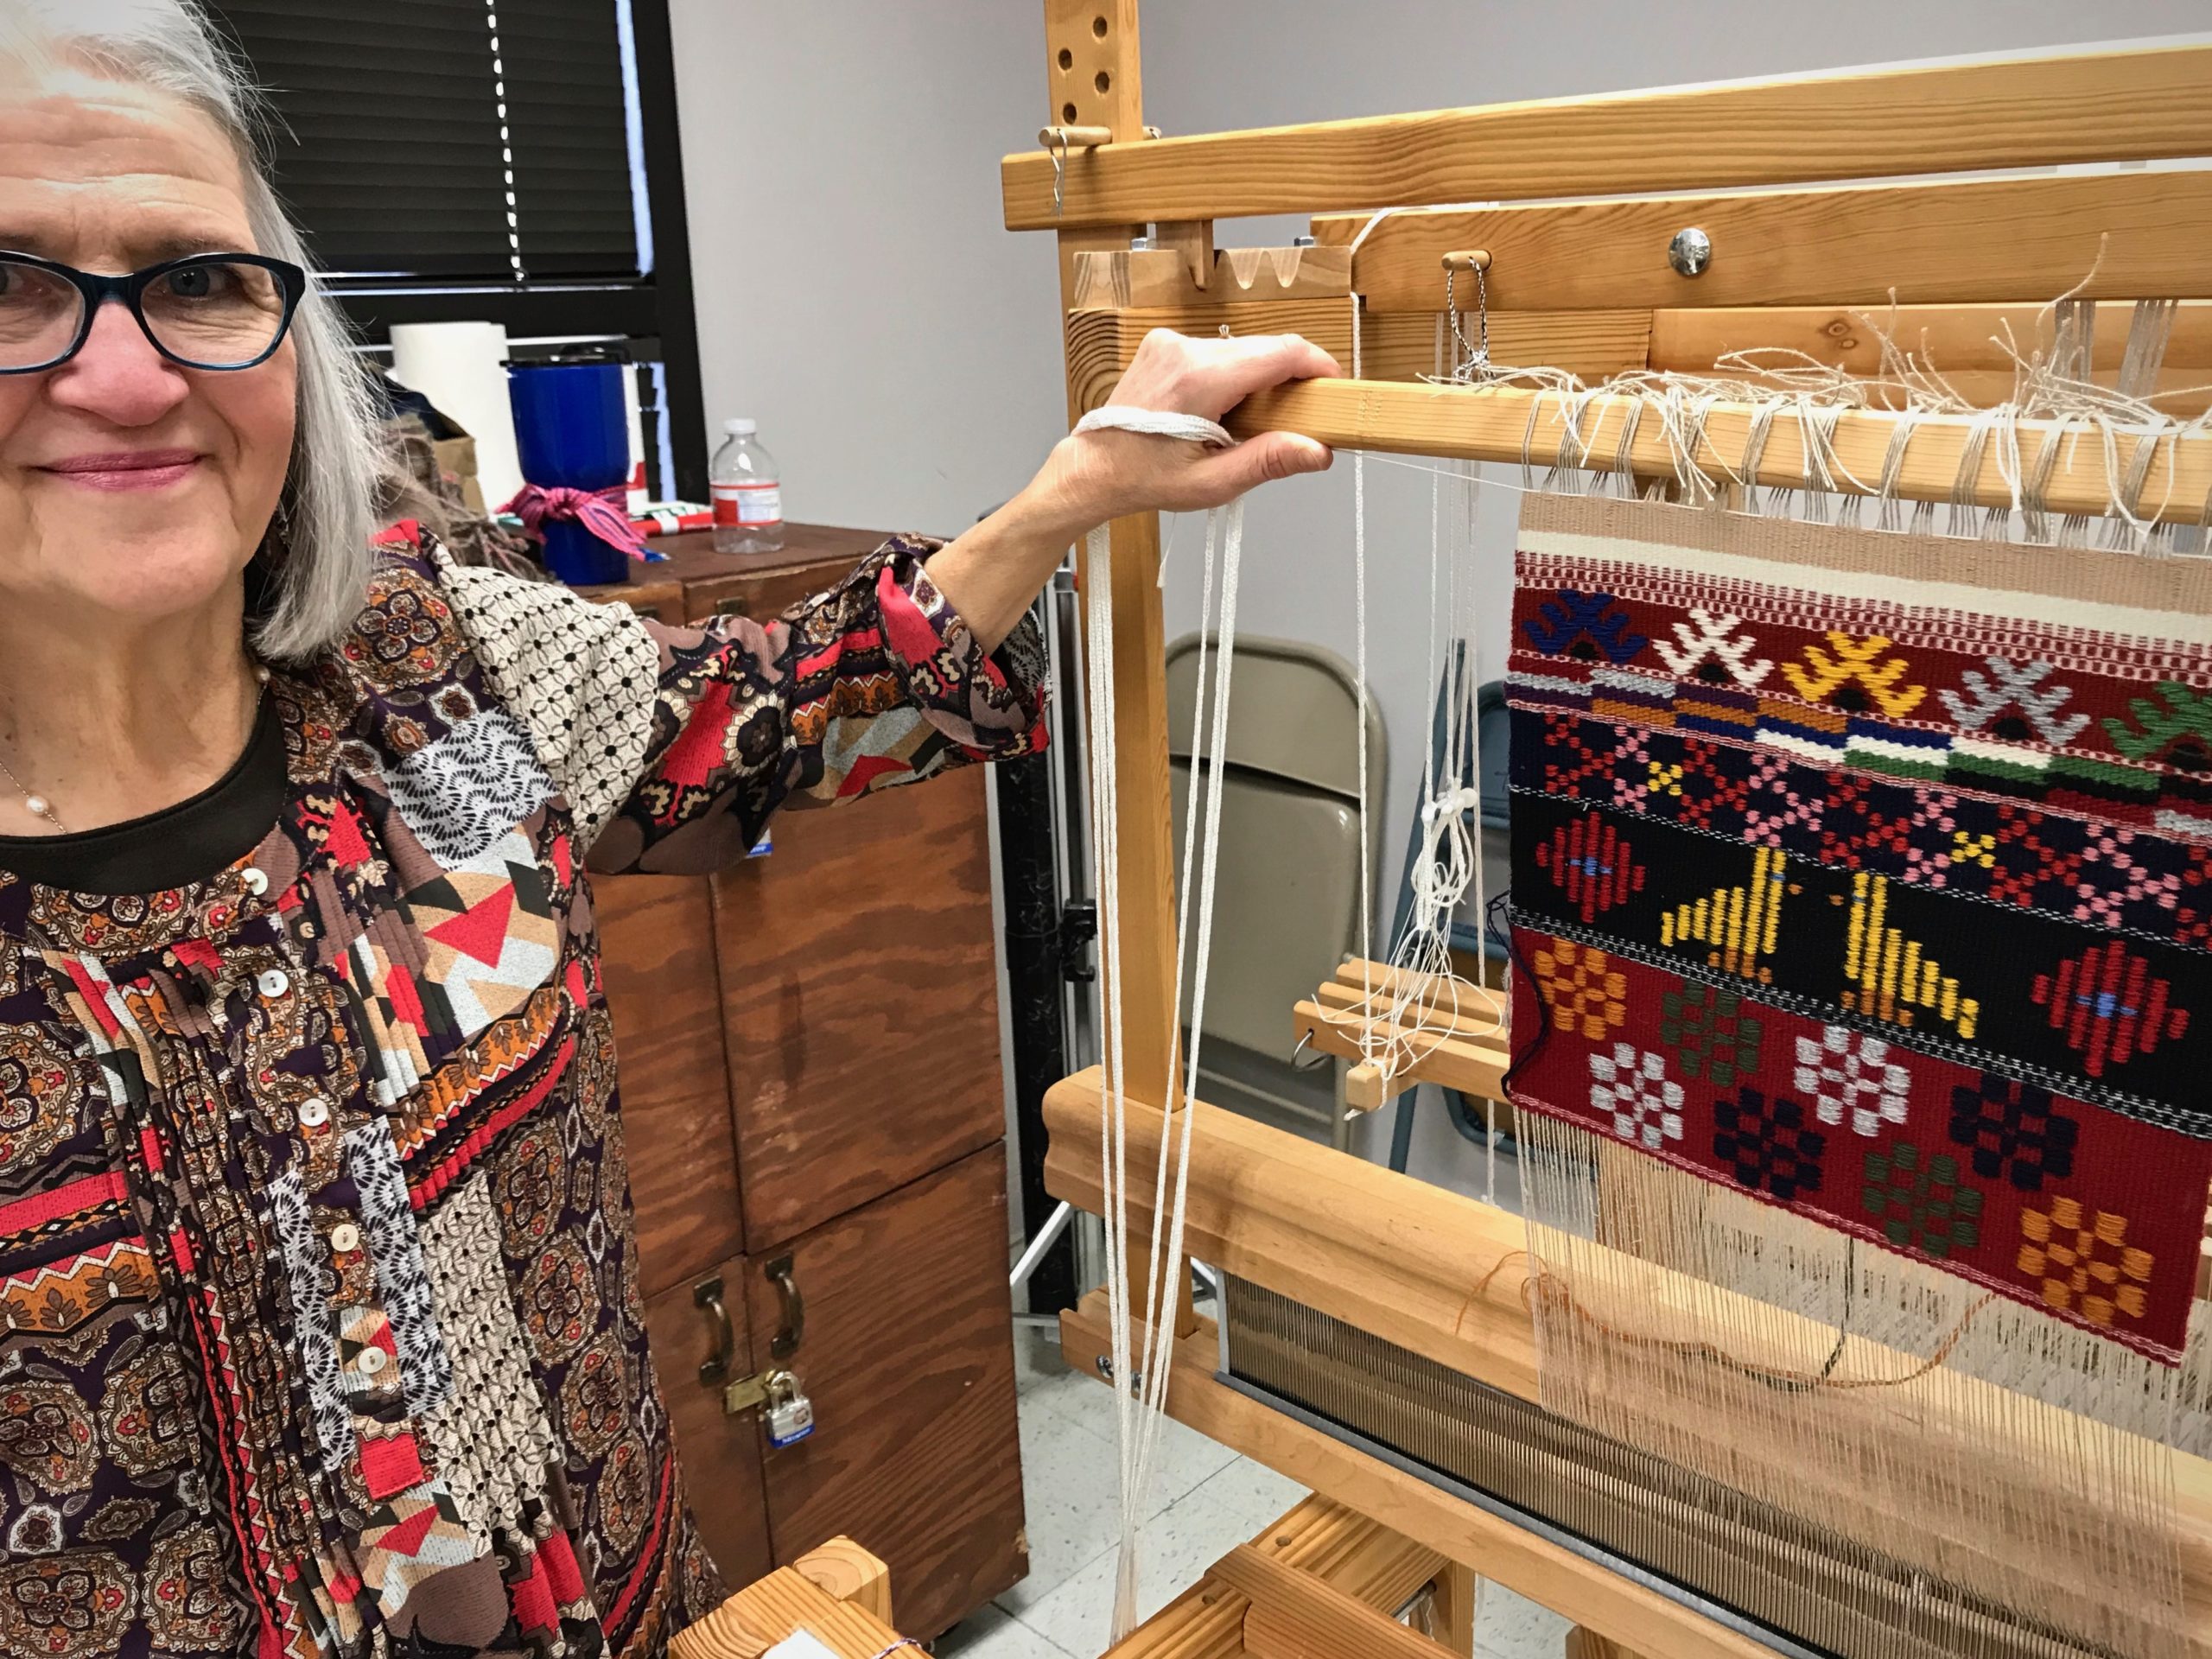
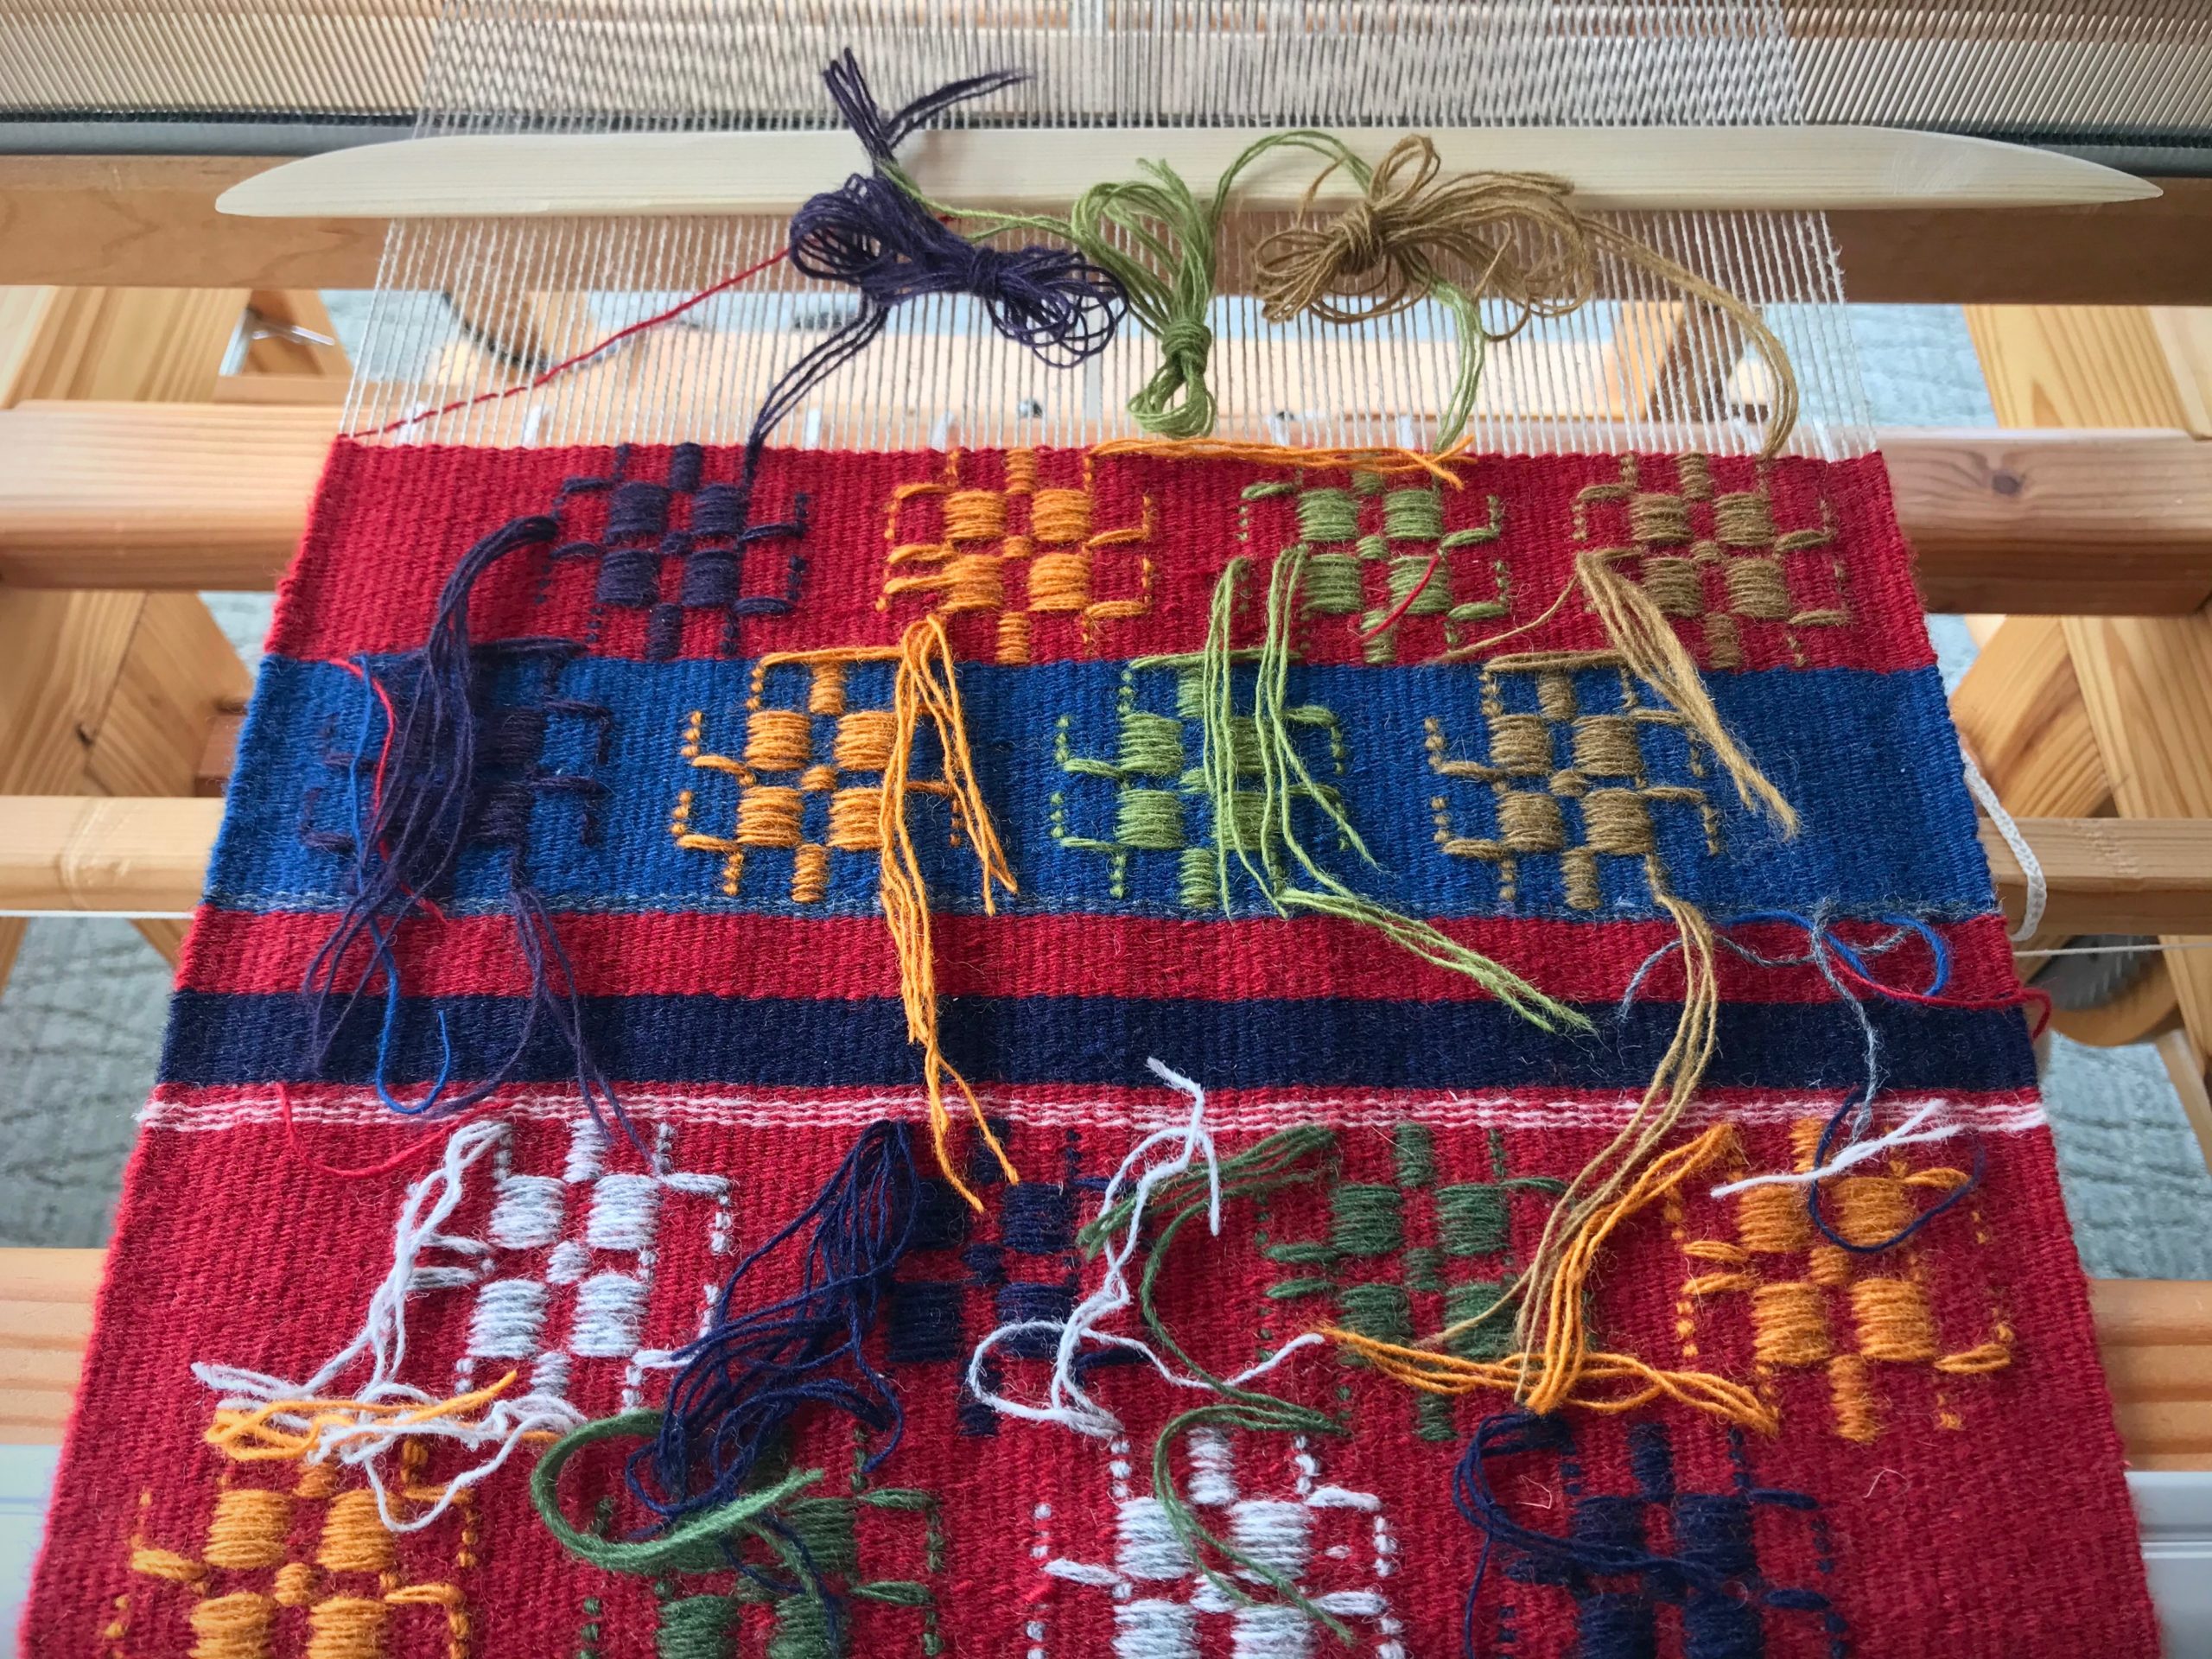
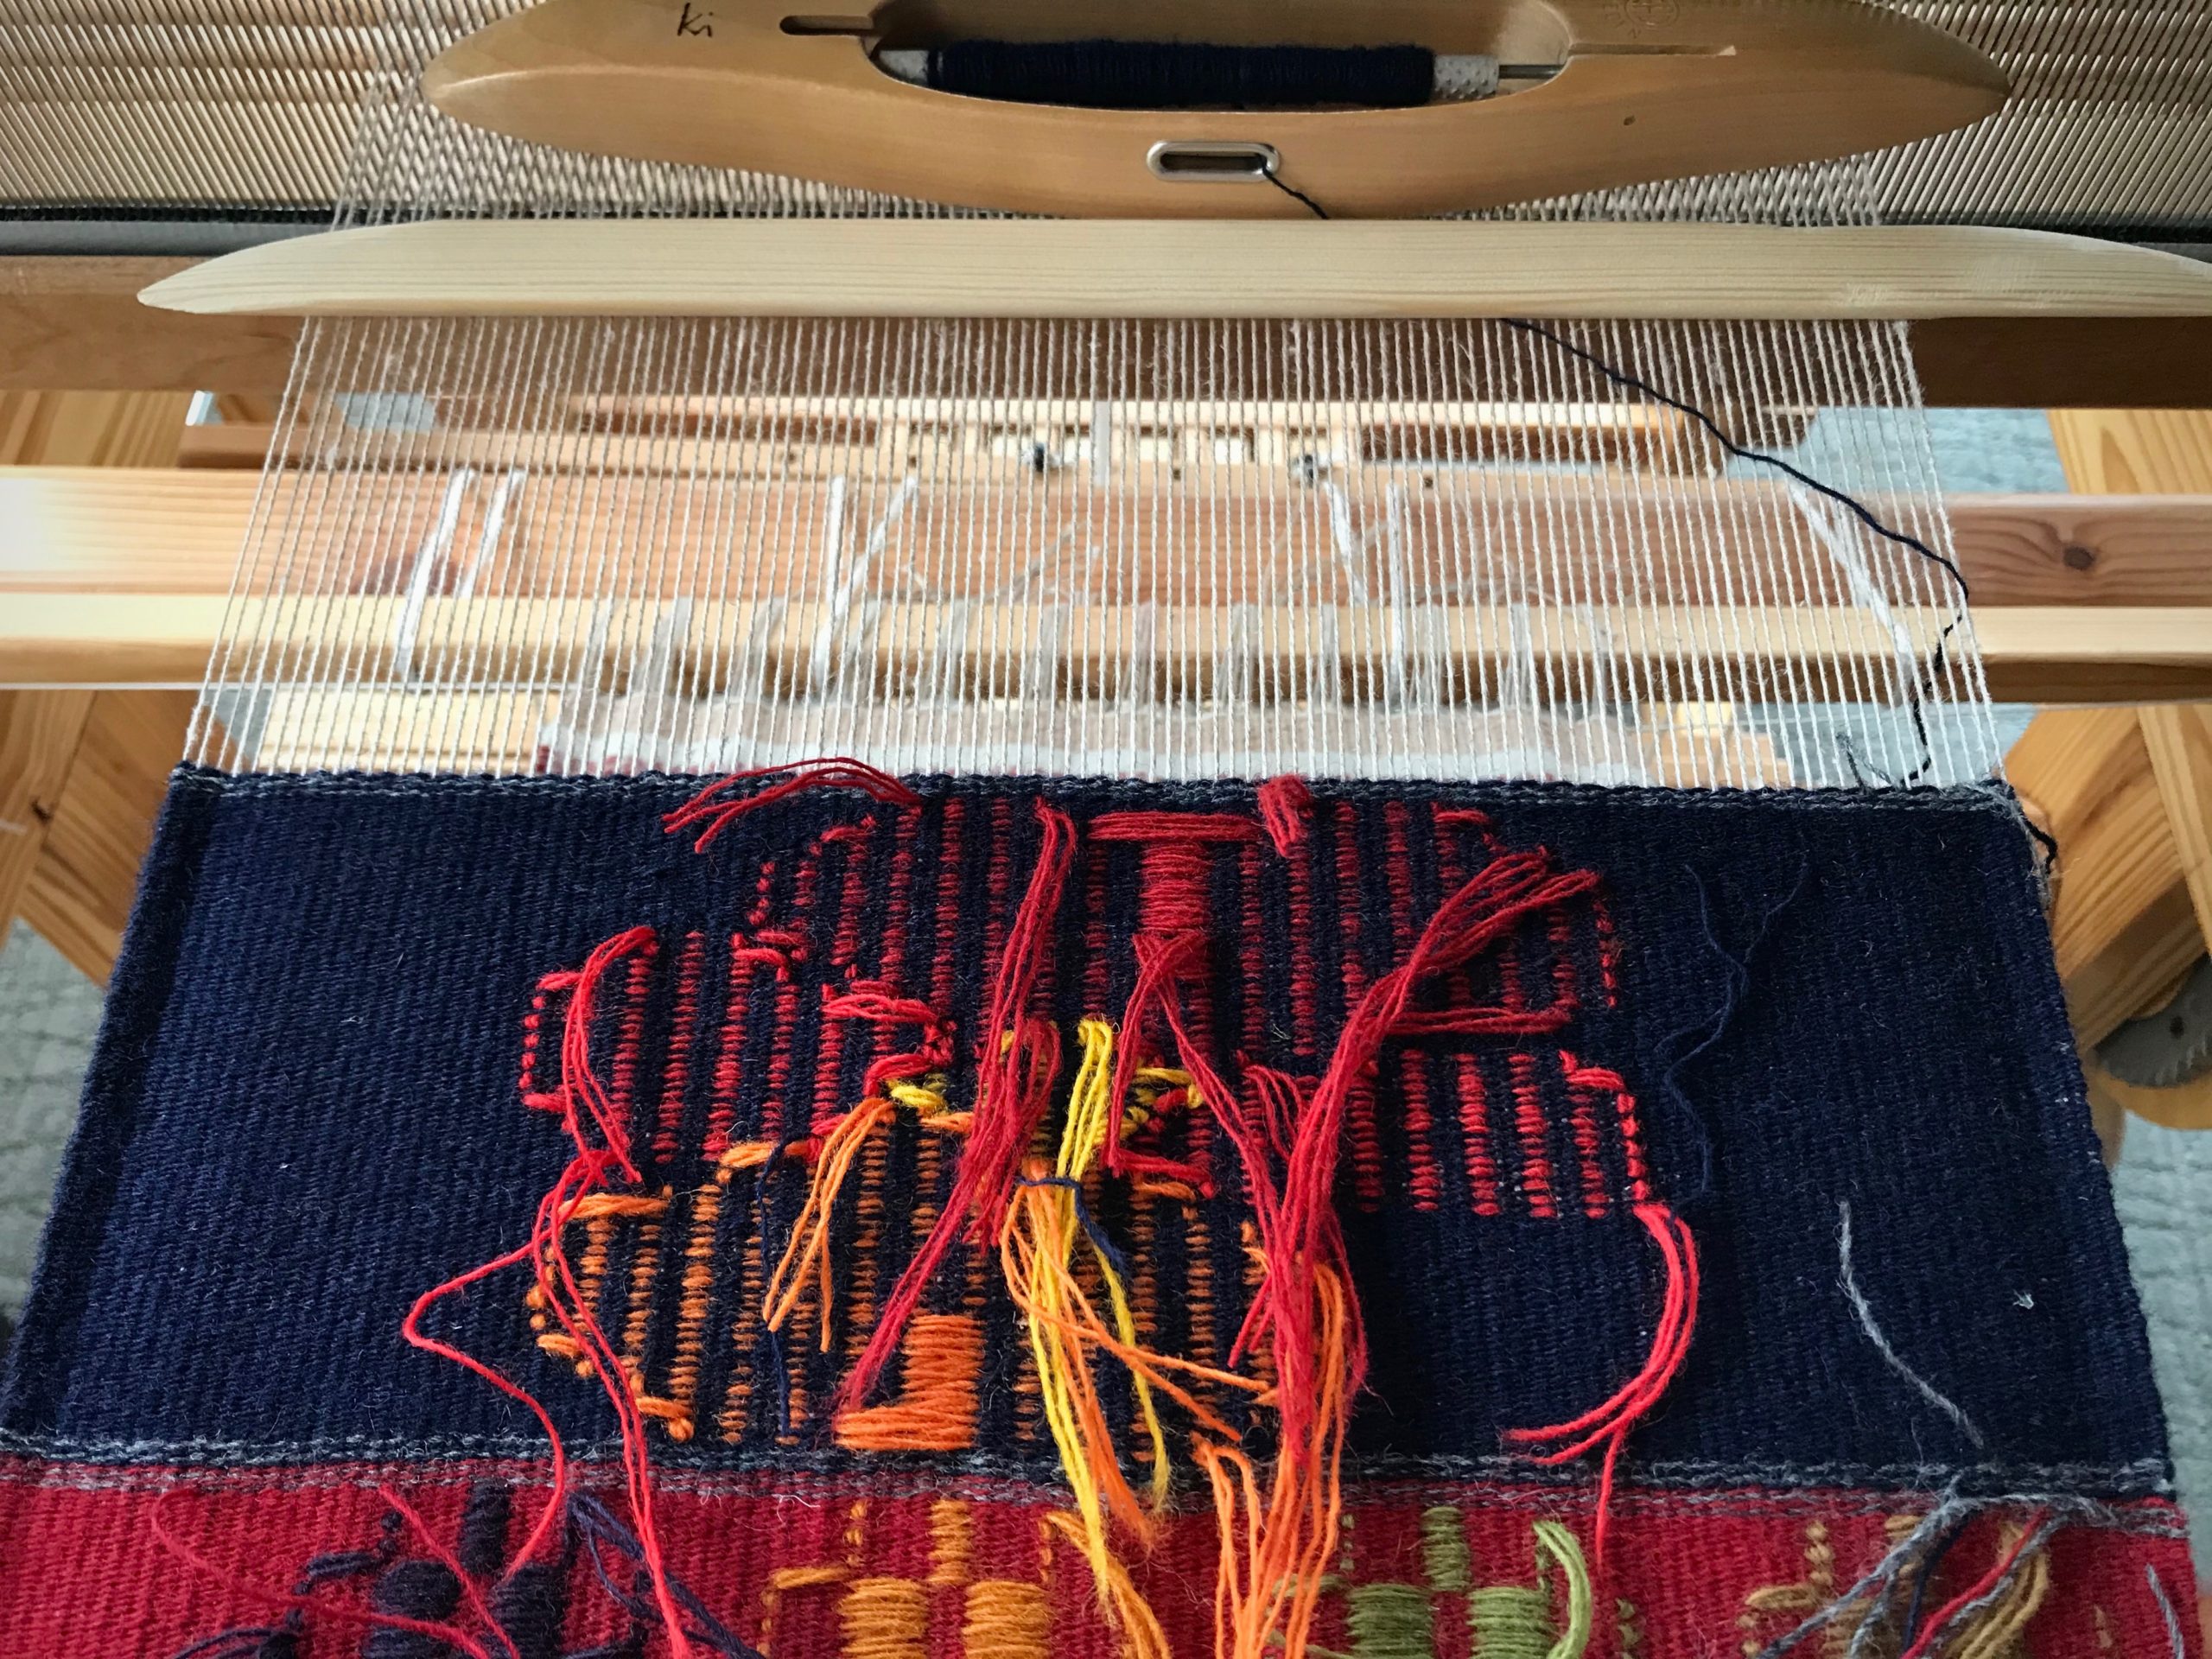
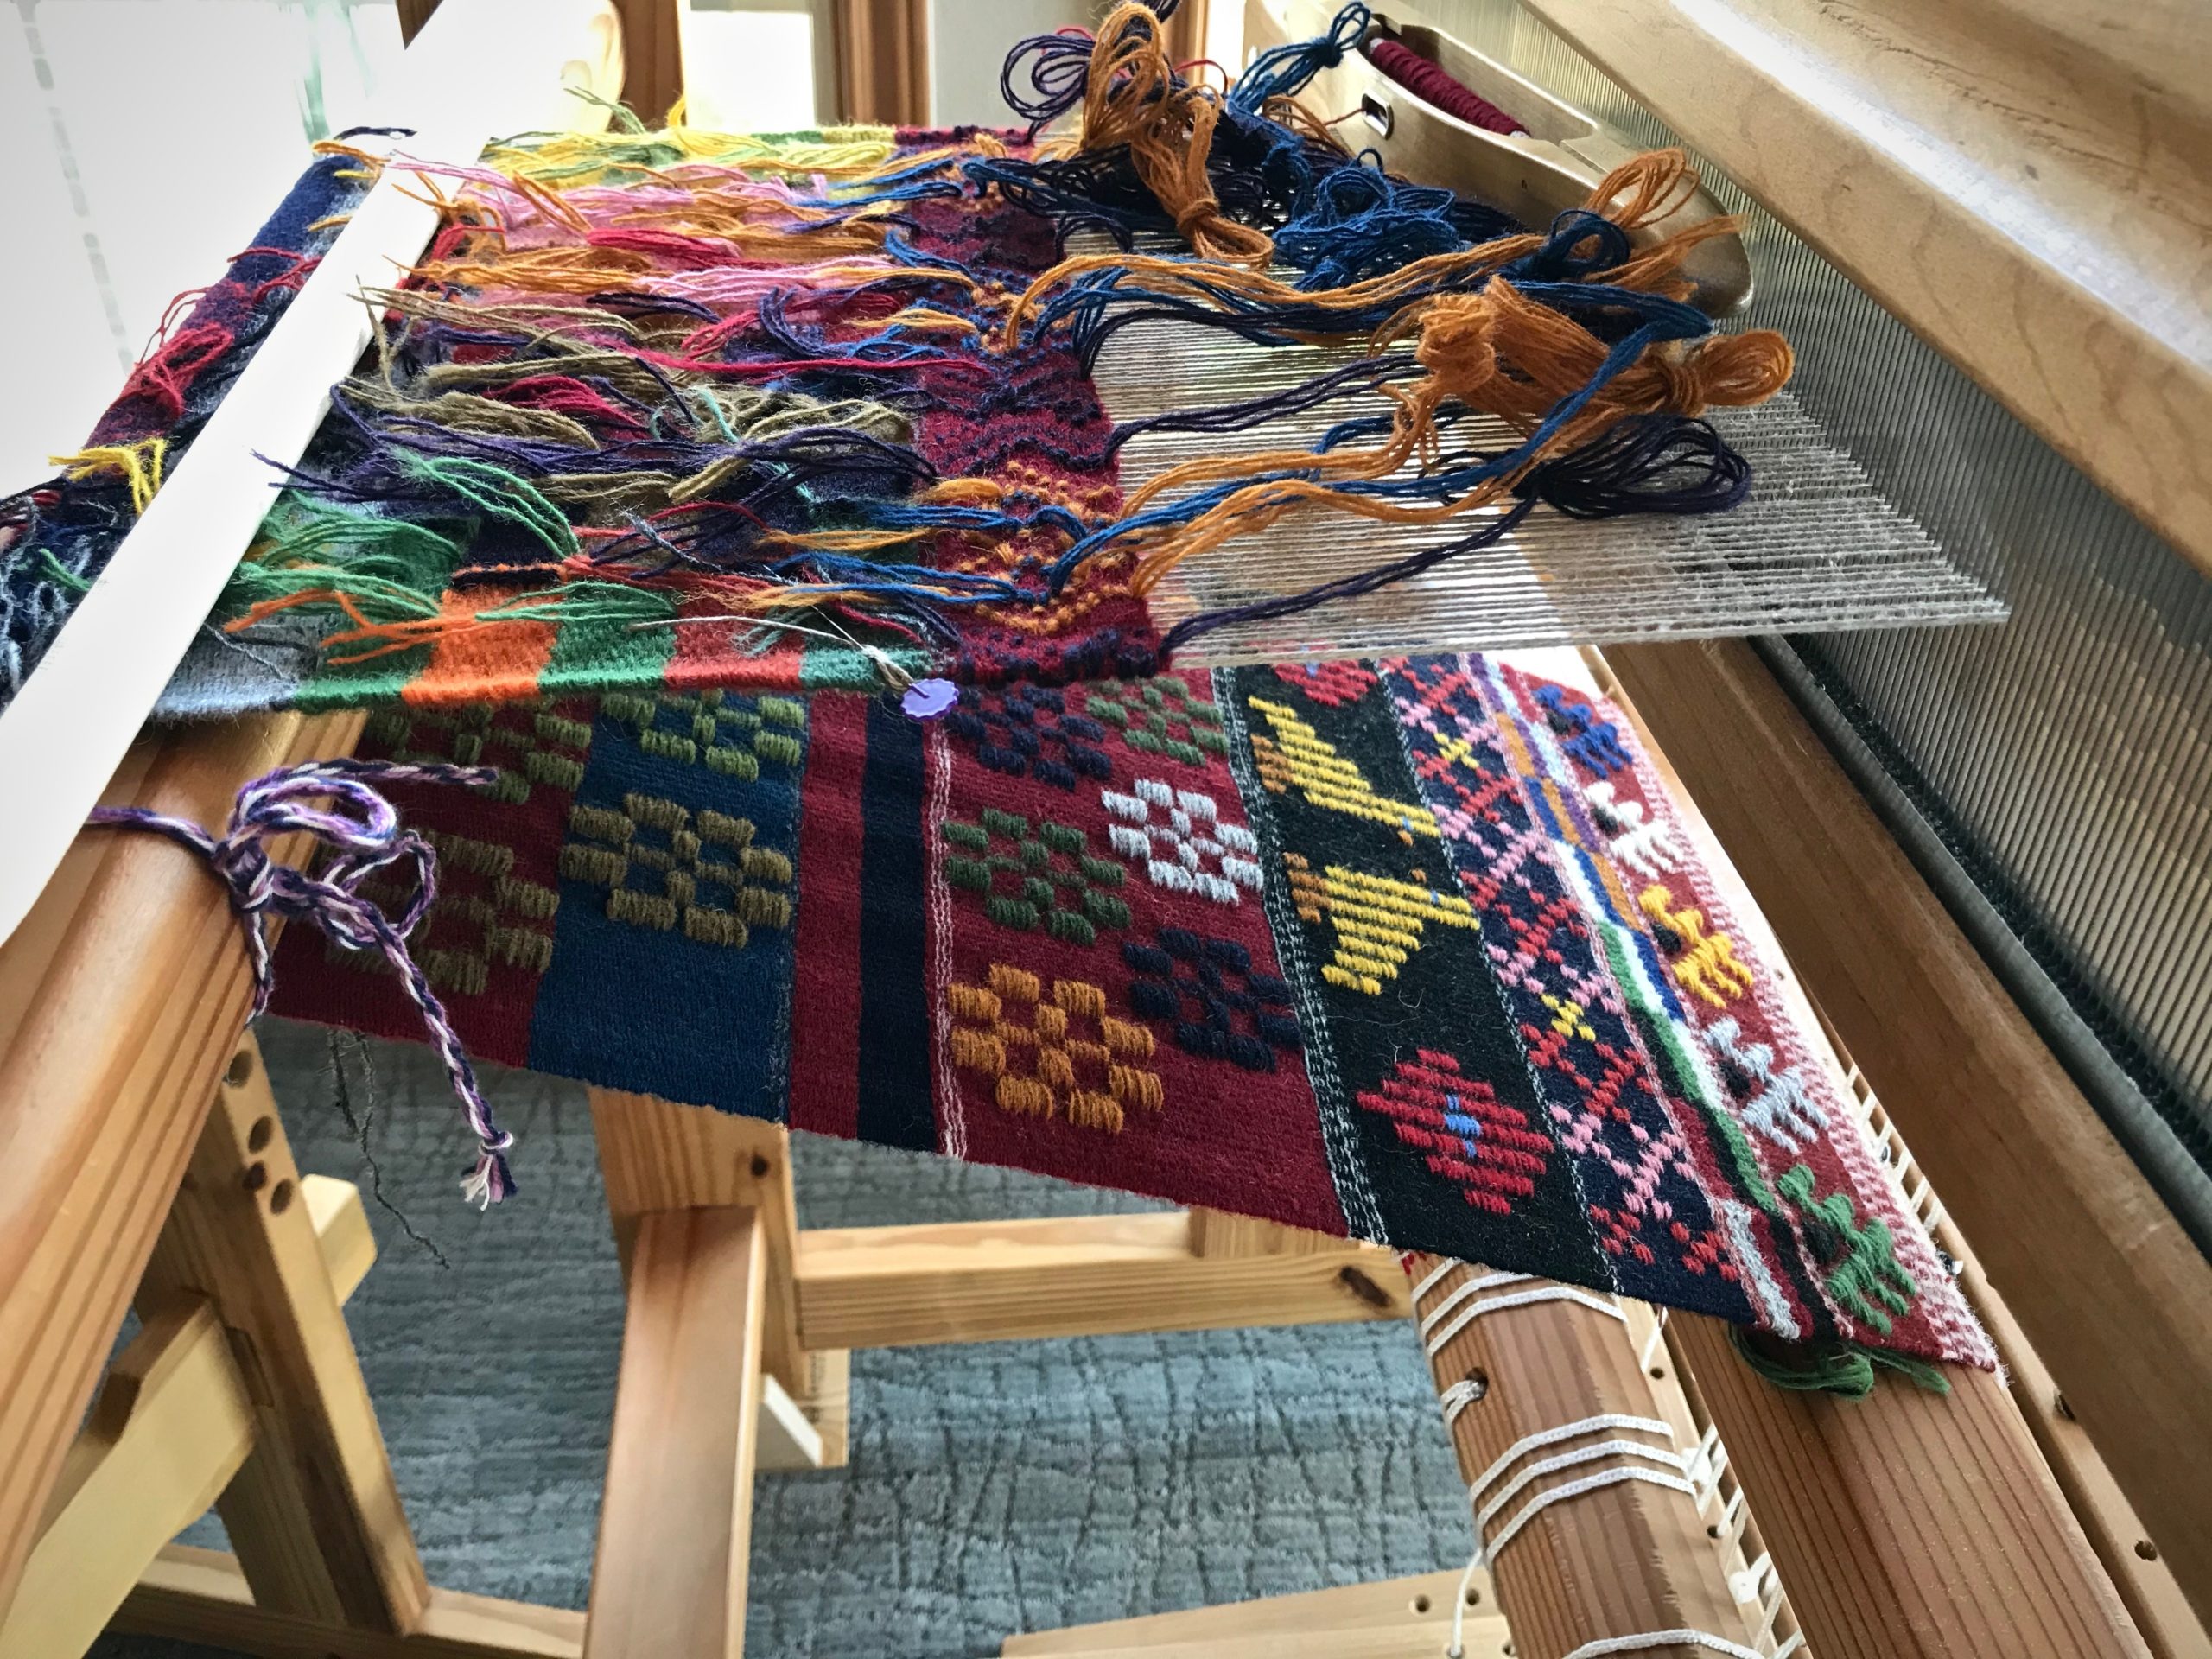
Ready to pack up after the Swedish Art Weaves workshop and take my loom back home. The Joanne Hall workshop was sponsored by the enthusiastic San Antonio Handweavers Guild a few months ago.Monksbelt pattern continued at home.Woven from the back, this dukagång pattern came from a Swedish publication I borrowed from the San Antonio Handweavers Guild library.Krabbasnår, just behind the fell line, is from a pattern in Heirlooms of Skåne, Weaving Techniques, by Gunvor Johansson.
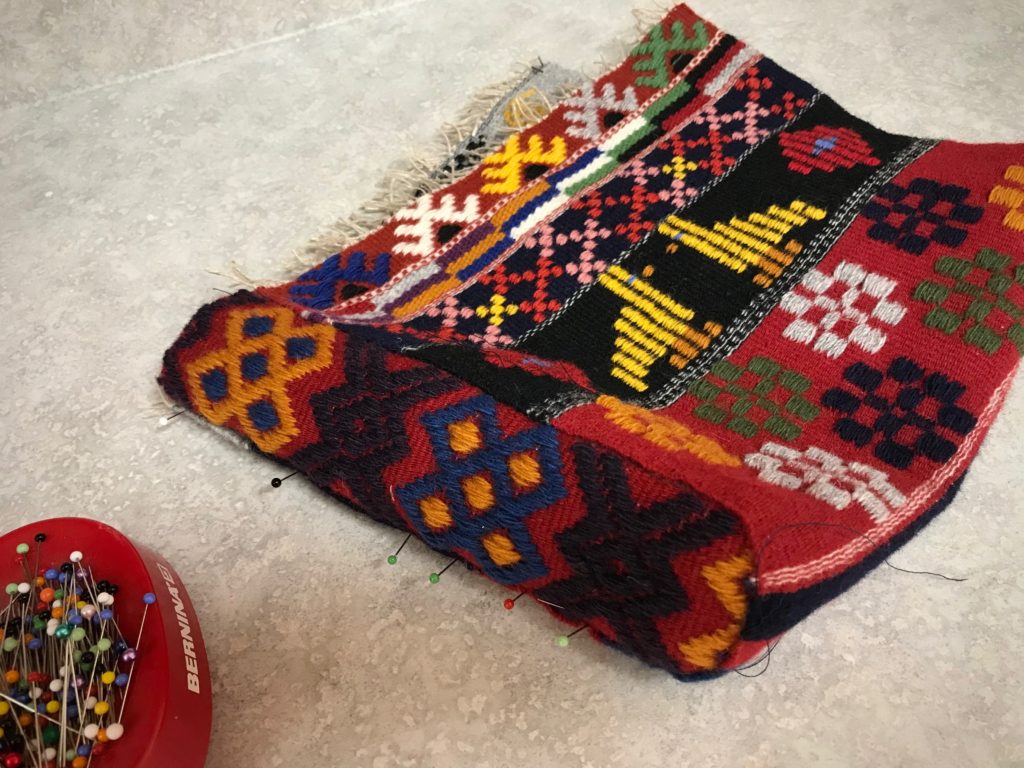
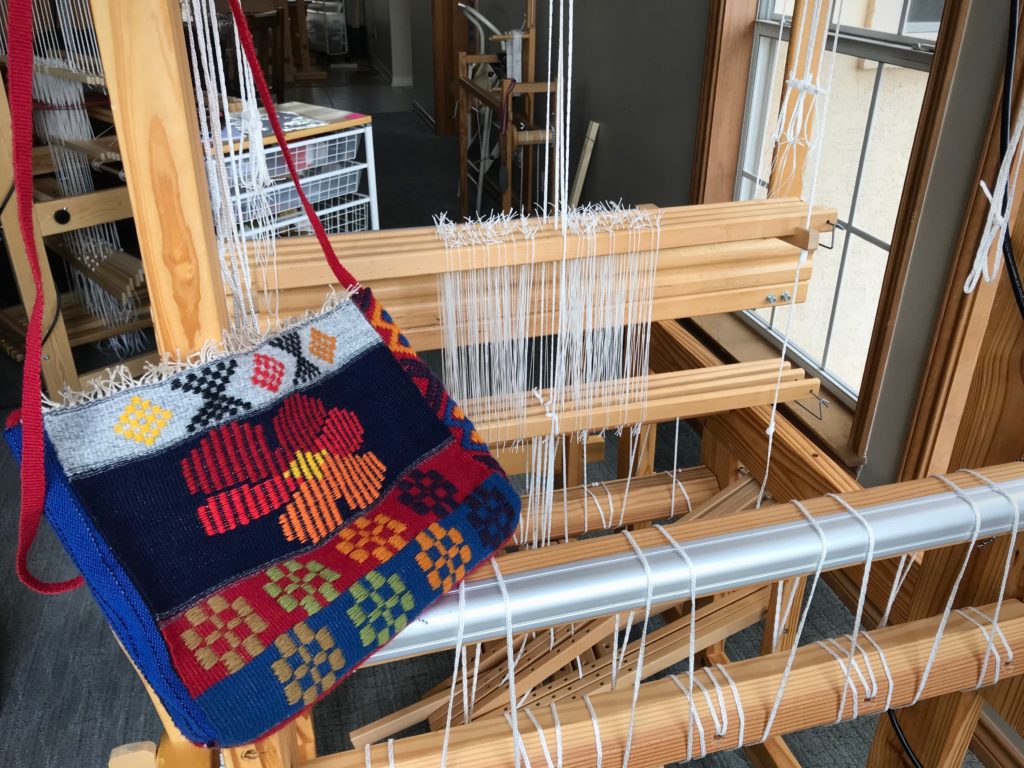
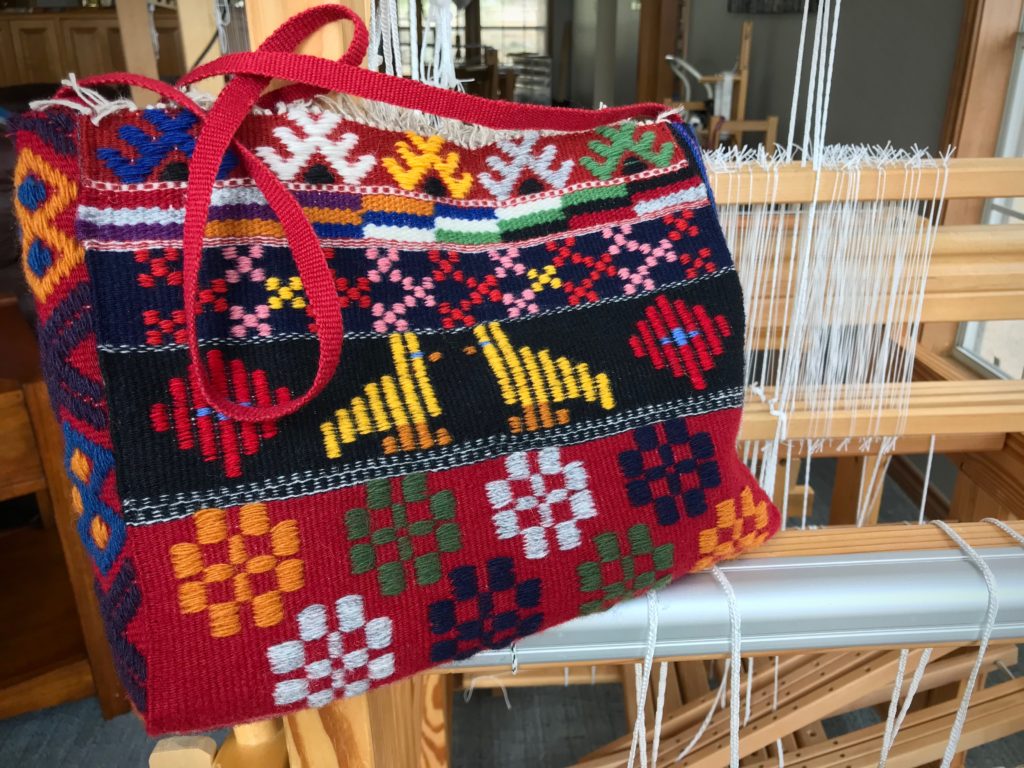
Thanks to that completion rule, I have a new bag. This fabric includes the various patterns that I wove in Joanne Hall’s workshop on Swedish Art Weaves several months ago. You will also see that I explored some patterns on my own at home. I gained two excellent outcomes from this finishing pursuit—a new bag to use, and a loom that is free for the next warp! (See the first bag here: Monksbelt Flowers on a Shoulder Bag)
Side piece, krabbasnår, is hand-stitched in place. From the top of the bag to the bottom – krabbasnår (krabba), rölakan, halvkrabba, dukagång, munkabälte (monksbelt), each section separated by plain weave stripe variations.On this side of the finished bag, from top to bottom – halvkrabba, dukagång, munkabälte. I made the hard decision to take out a section of rölakan I had woven in order to be able to put the knots from the linen warp at the top of the bag.Bag is lined and has pockets, and has a magnetic snap closure. The 6/2 Tuna wool shoulder strap was woven on my Glimåkra band loom.Now, on to the next warp!
Left to myself, I’d rather do what I want. I’d rather start a new project than bring an “old” one to completion. I’m glad my Lord is faithful with me. He completes the work that he began. The Good Shepherd tends his sheep. He leads us to the still waters of peaceful perseverance, saving us from the regret of going our own way. And we have his perfect outcome to look forward to.
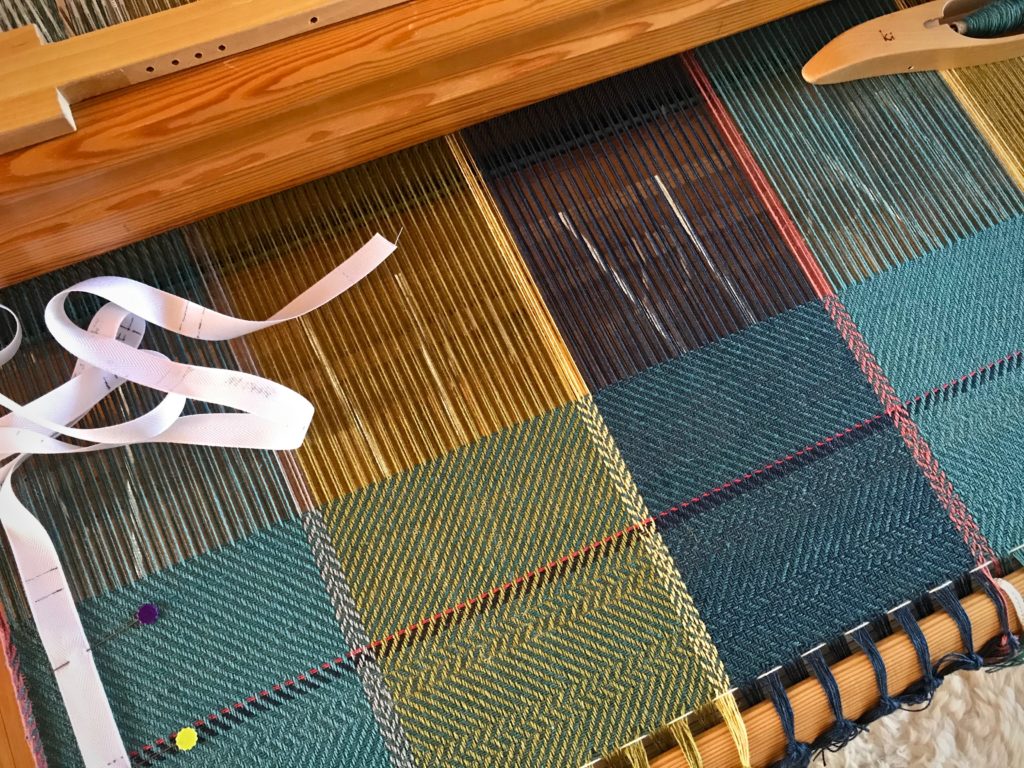
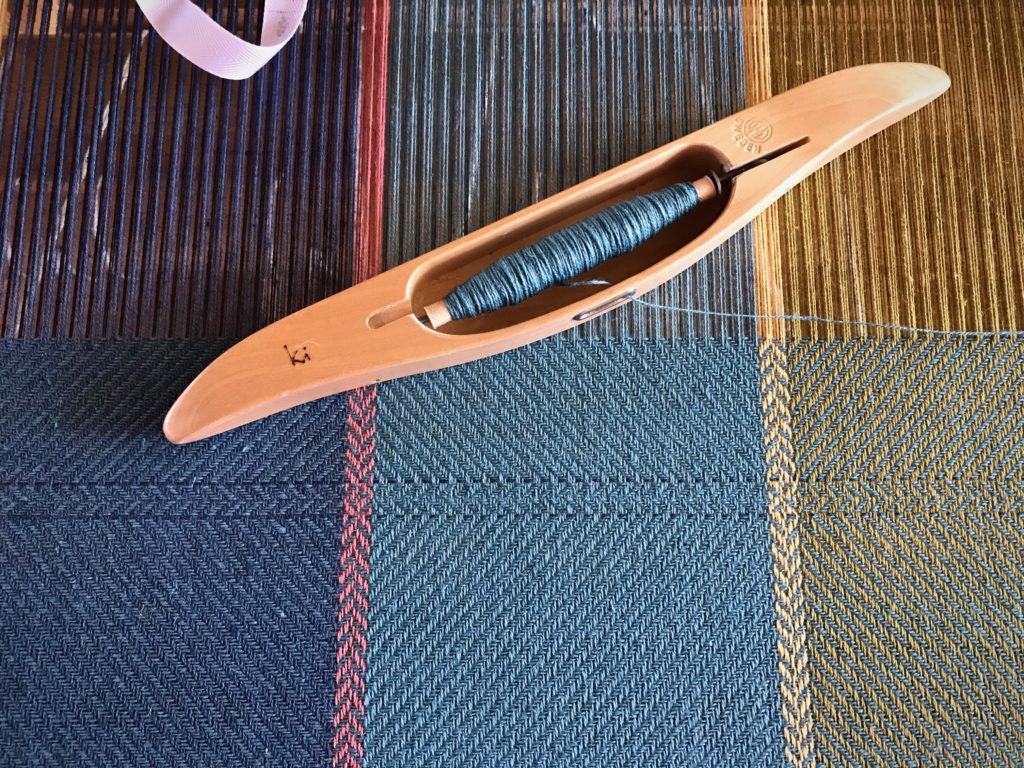
It is the smallest of details that set handwoven towels apart from ordinary towels. With that in mind, I am writing some detail notes in the margin of my project notes. Borders: Towel 1 – sea blue, apple green – contrast thread – ultramarine; Towel 2 – ultramarine, sea blue – contrast thread – maize; Towel 3 – apple green, ultramarine – contrast thread – sea blue; Towel 4 – dusty, sea blue – contrast thread – apple green.
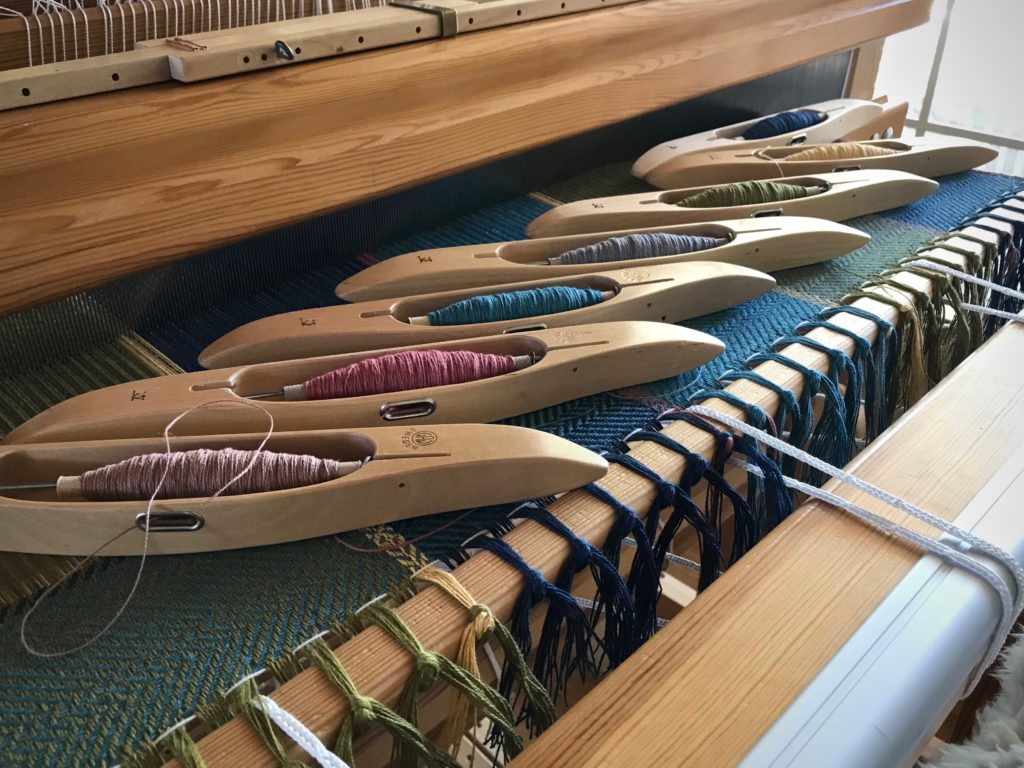
Beaming the cottolin warp for bath towels.Warp is tied on and leveling string is attached.Seven different colors of wound quills. All seven colors are in each towel, warp and weft. The weft sequence varies with each towel.One boat shuttle for each color. This reminds me of sailing with my dad and my sisters. Boat captains would vie for the regatta starting line, shouting, “Starboard!”
There are seven colors of cottolin in the warp, and the same seven colors in the weft, just like the accompanying hand towels I completed in April. (See Process Review: Jubilation Hand Towels.) Narrow warp-wise and weft-wise stripes of broken twill produce interesting patterns in the cloth. The deep borders I am planning on the bath towels give me a chance to add simple details that only a handweaver can do.
After weaving a short section to test the threading, I start the first towel. A red line, as always, denotes the cutting/starting line. I placed marks on the white ribbon at the left that show me where to place details along the length of the towel.Single ultramarine thread is laid in with the sea blue to outline a change of treadling. A simple handwoven detail.
Have you ever identified a master craftsman by the specific details that show up in the hand-crafted article? In the same way, we can recognize our Maker’s hand through the magnificence of the details we see in each other. You are his masterpiece. Hand-written instructions guide the details. When we come to the Lord as our Maker and Redeemer, we find his hand-written details woven into our hearts, something only the Grand Weaver can do.