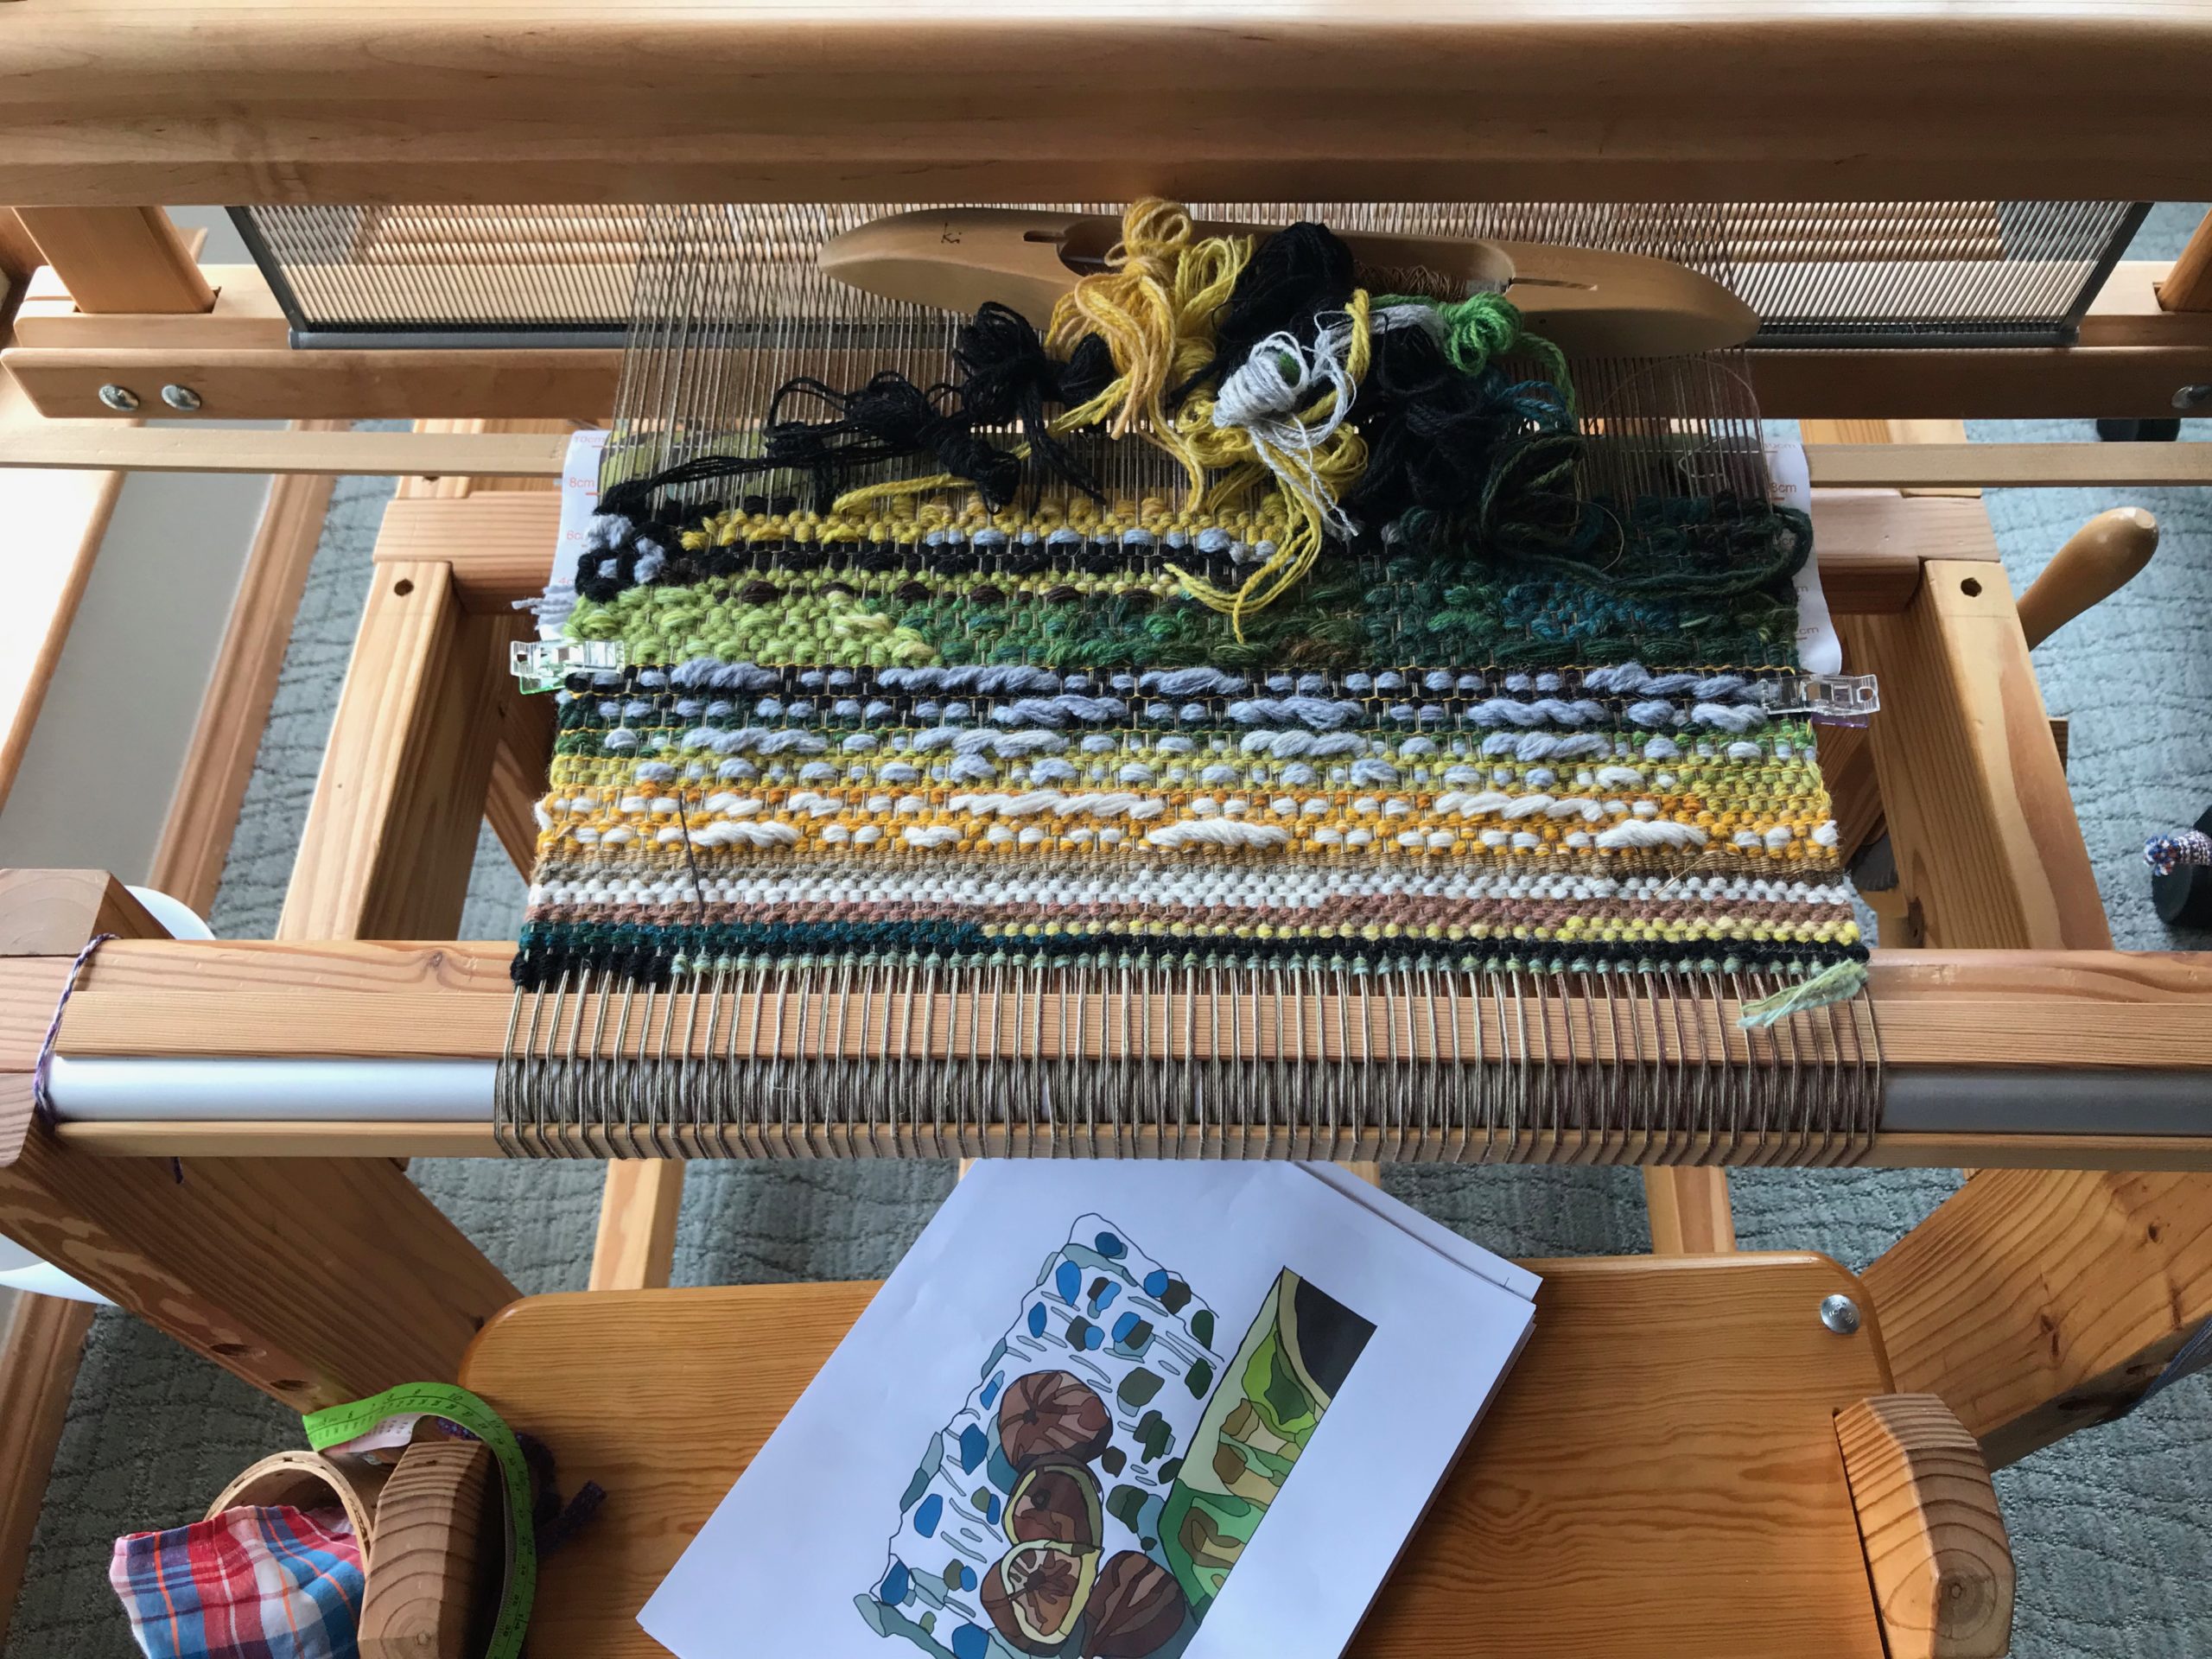
I started this warp as a place to test some tapestry techniques. I have studied, practiced, and evaluated my own results from techniques used by various tapestry artists. What I have learned is that I prefer the techniques that I am already familiar with, that I learned from my friend Joanne Hall. I am ready to dive in one more time on this warp to refine my own approach to pictorial tapestry weaving.
Tapestry tests and samples are on this warp. My mind is made up. I’m ready to start again.
This little hand-built loom has been sitting idle long enough. It’s time to start again. Starting takes courage. The cartoon is almost ready. Soon, this little loom will be back in action as my favorite place to be immersed in color and yarn.
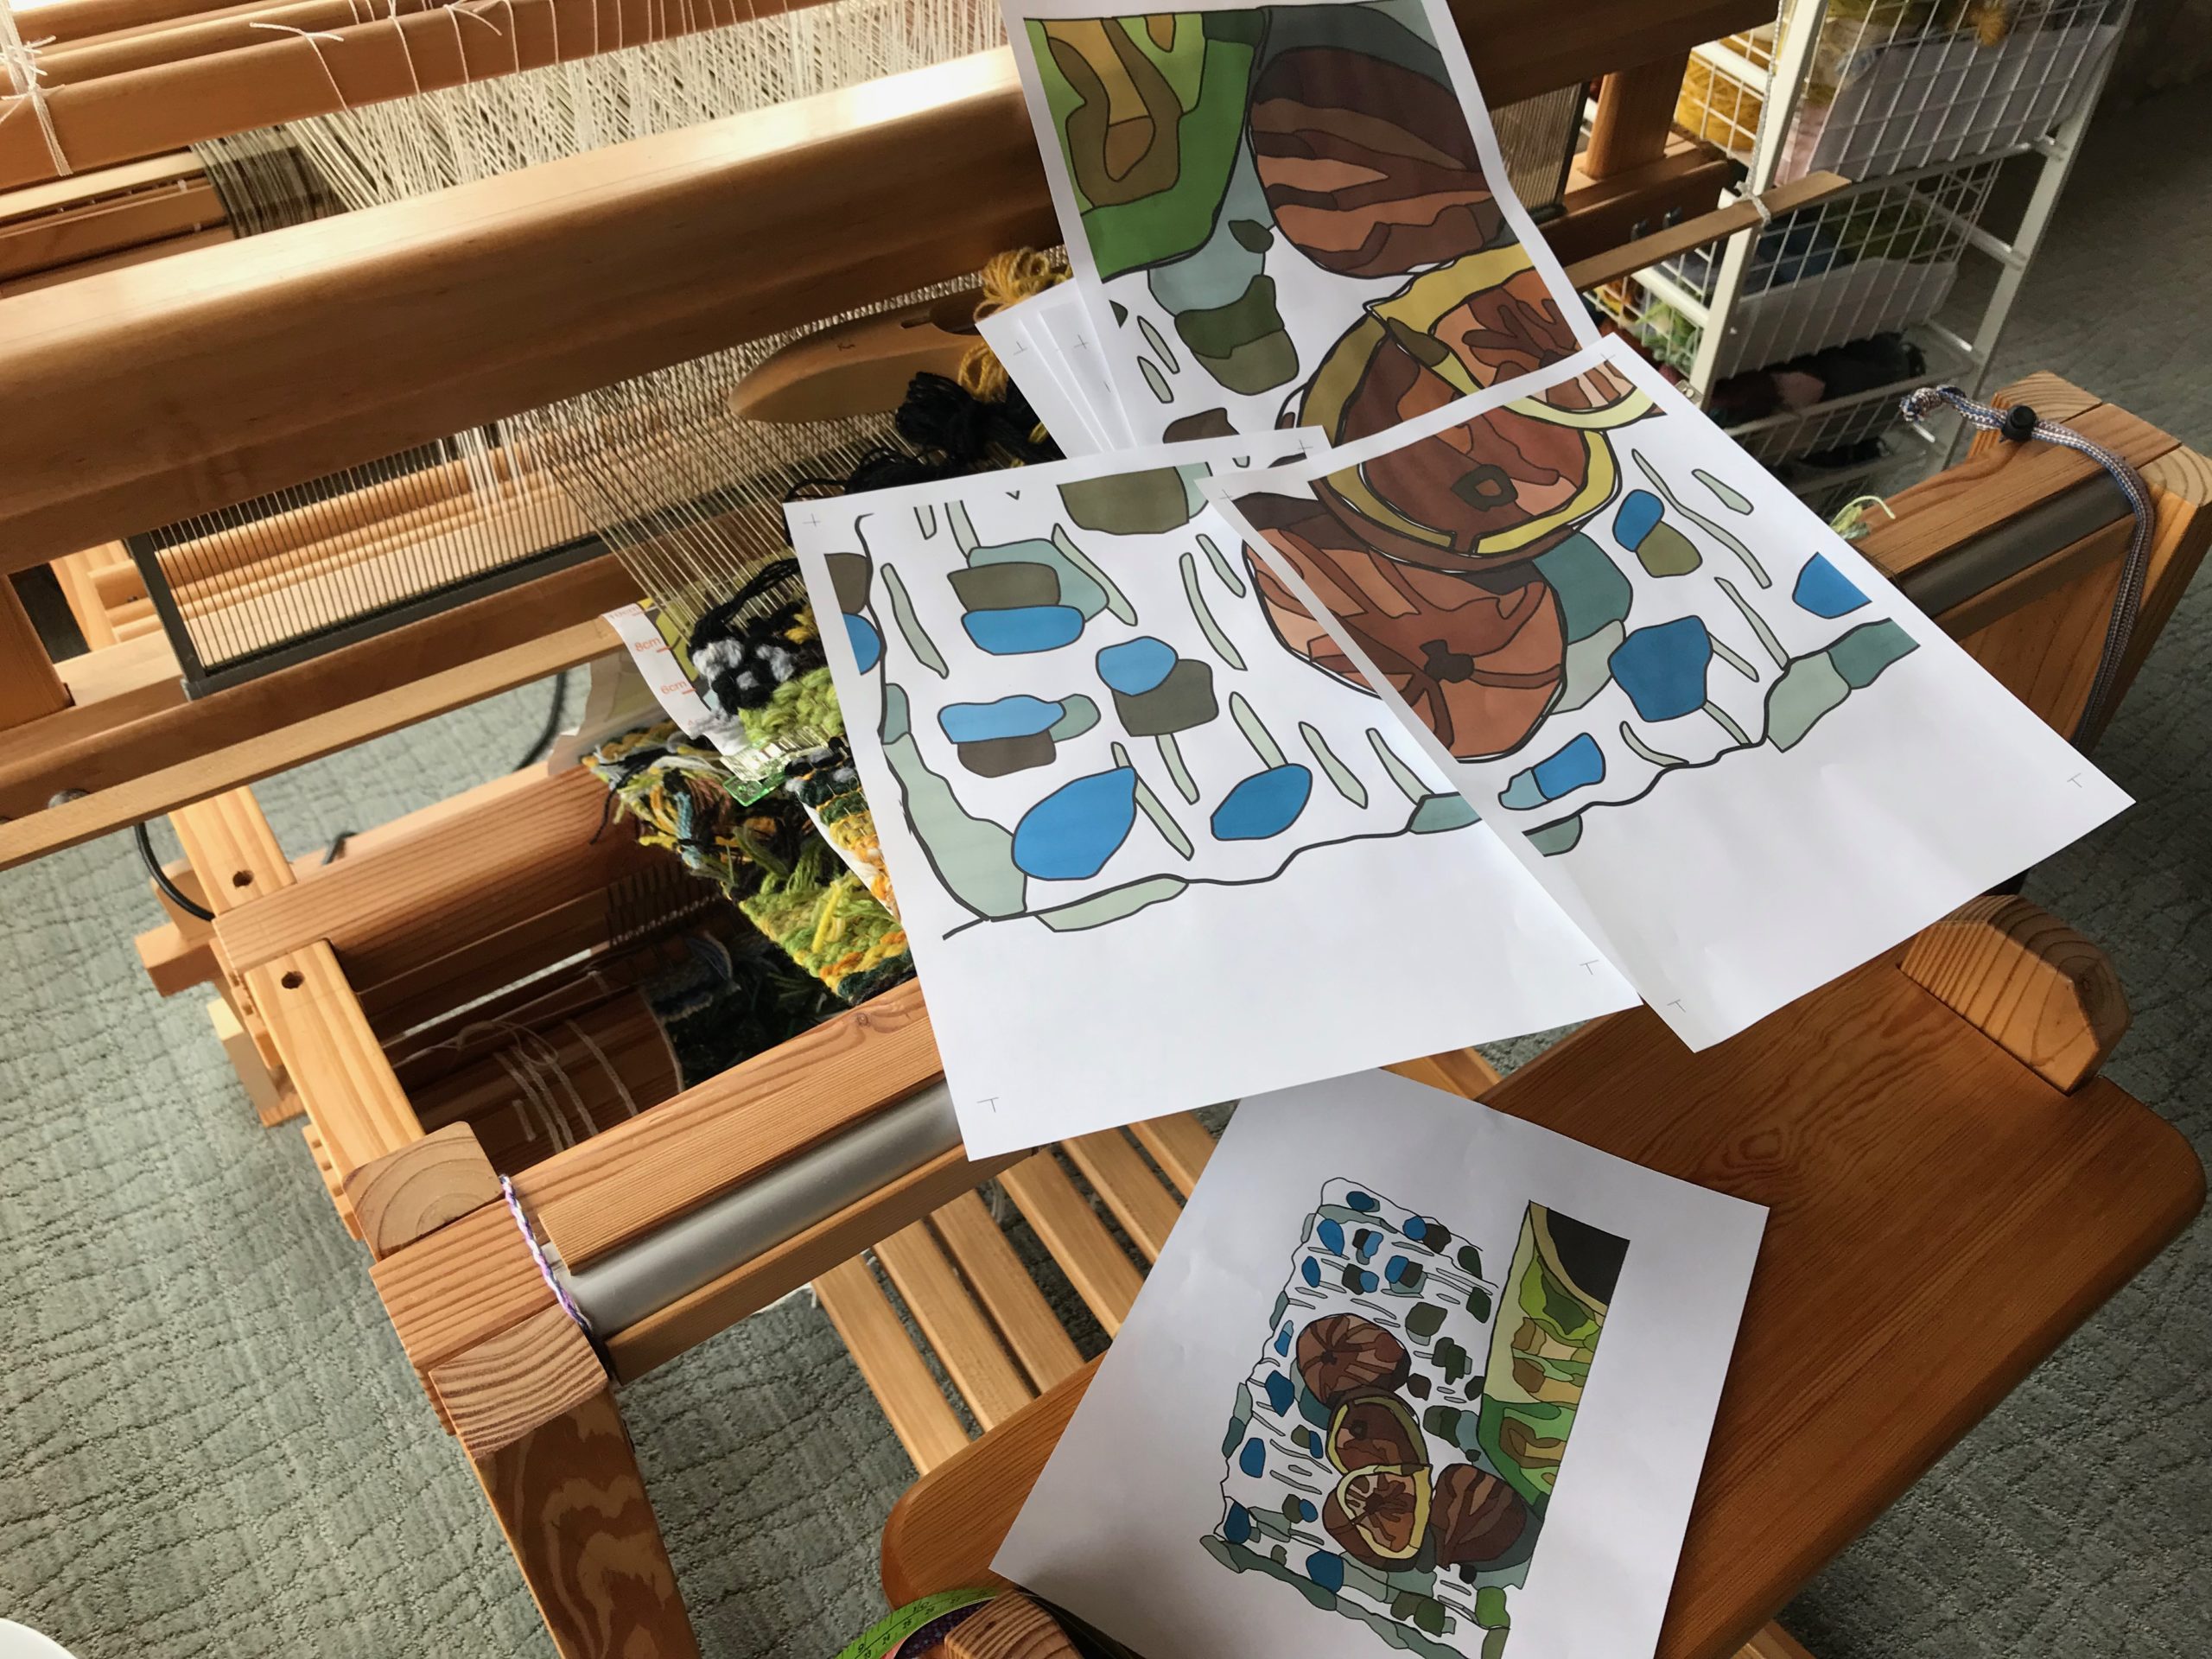
Piecing pages together to make the cartoon. Only a few more adjustments are needed in the cartoon. The cartoon is being developed from a recent watercolor sketch of morning coffee and fresh figs.
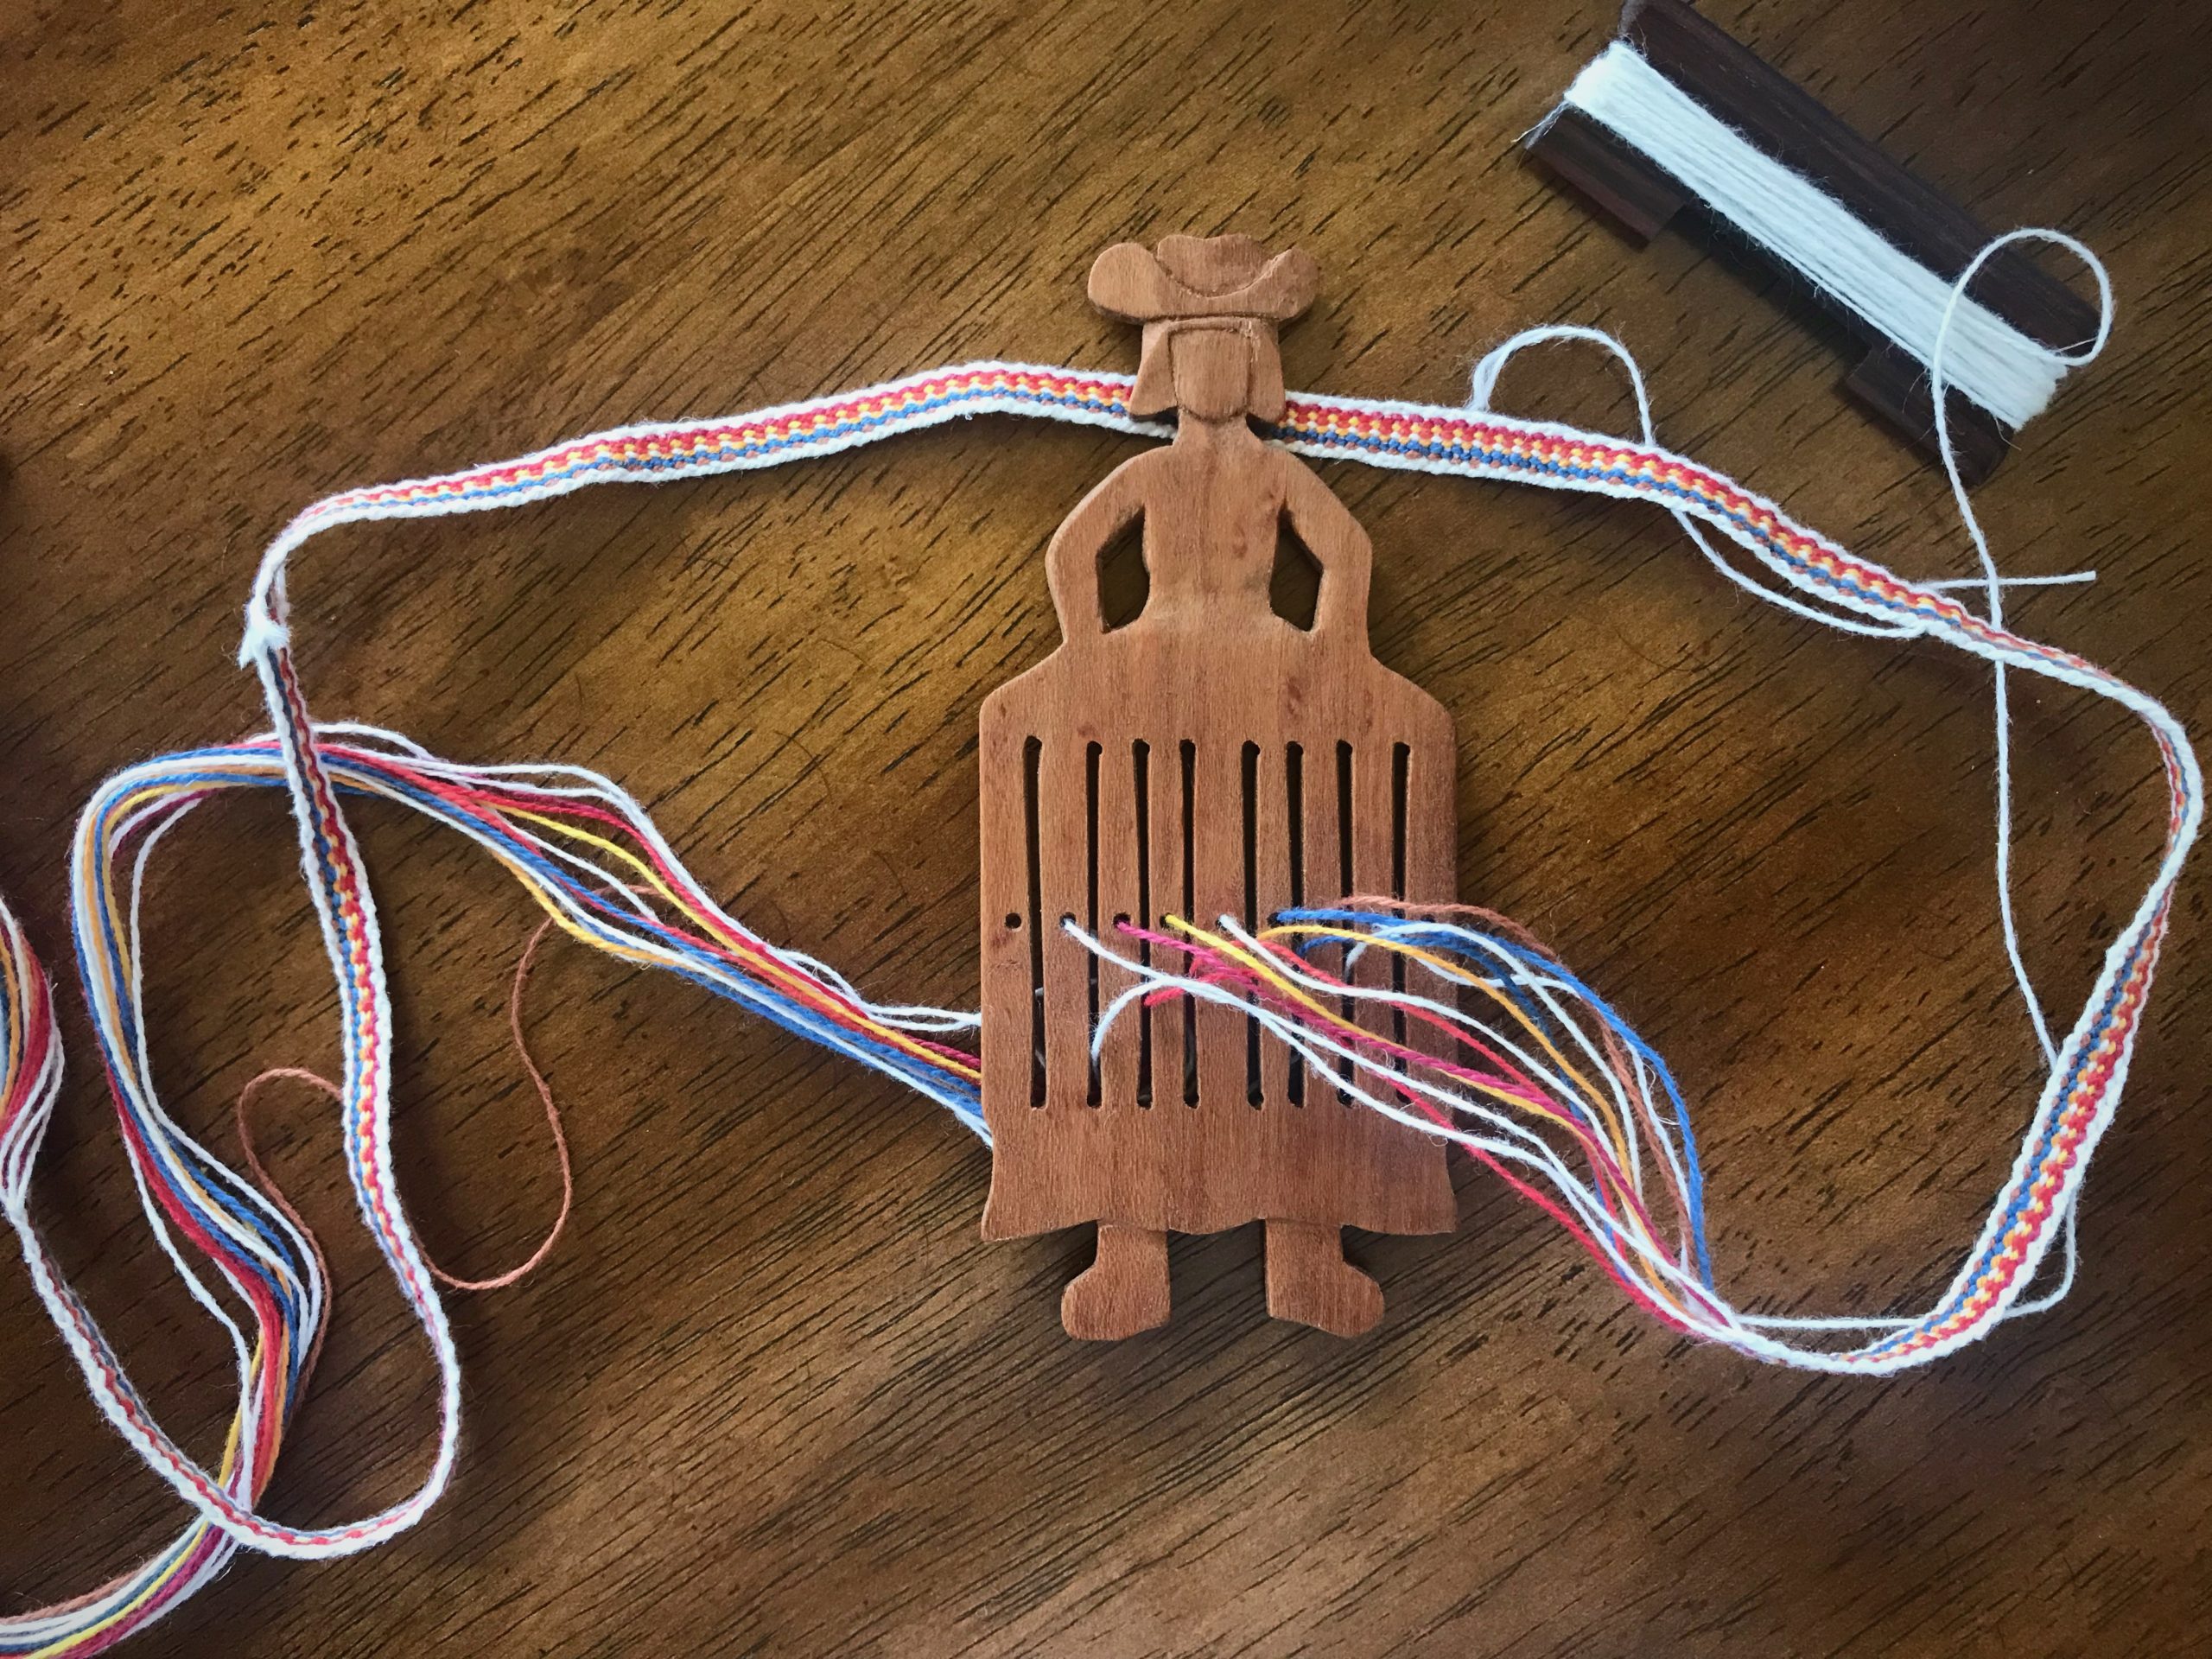
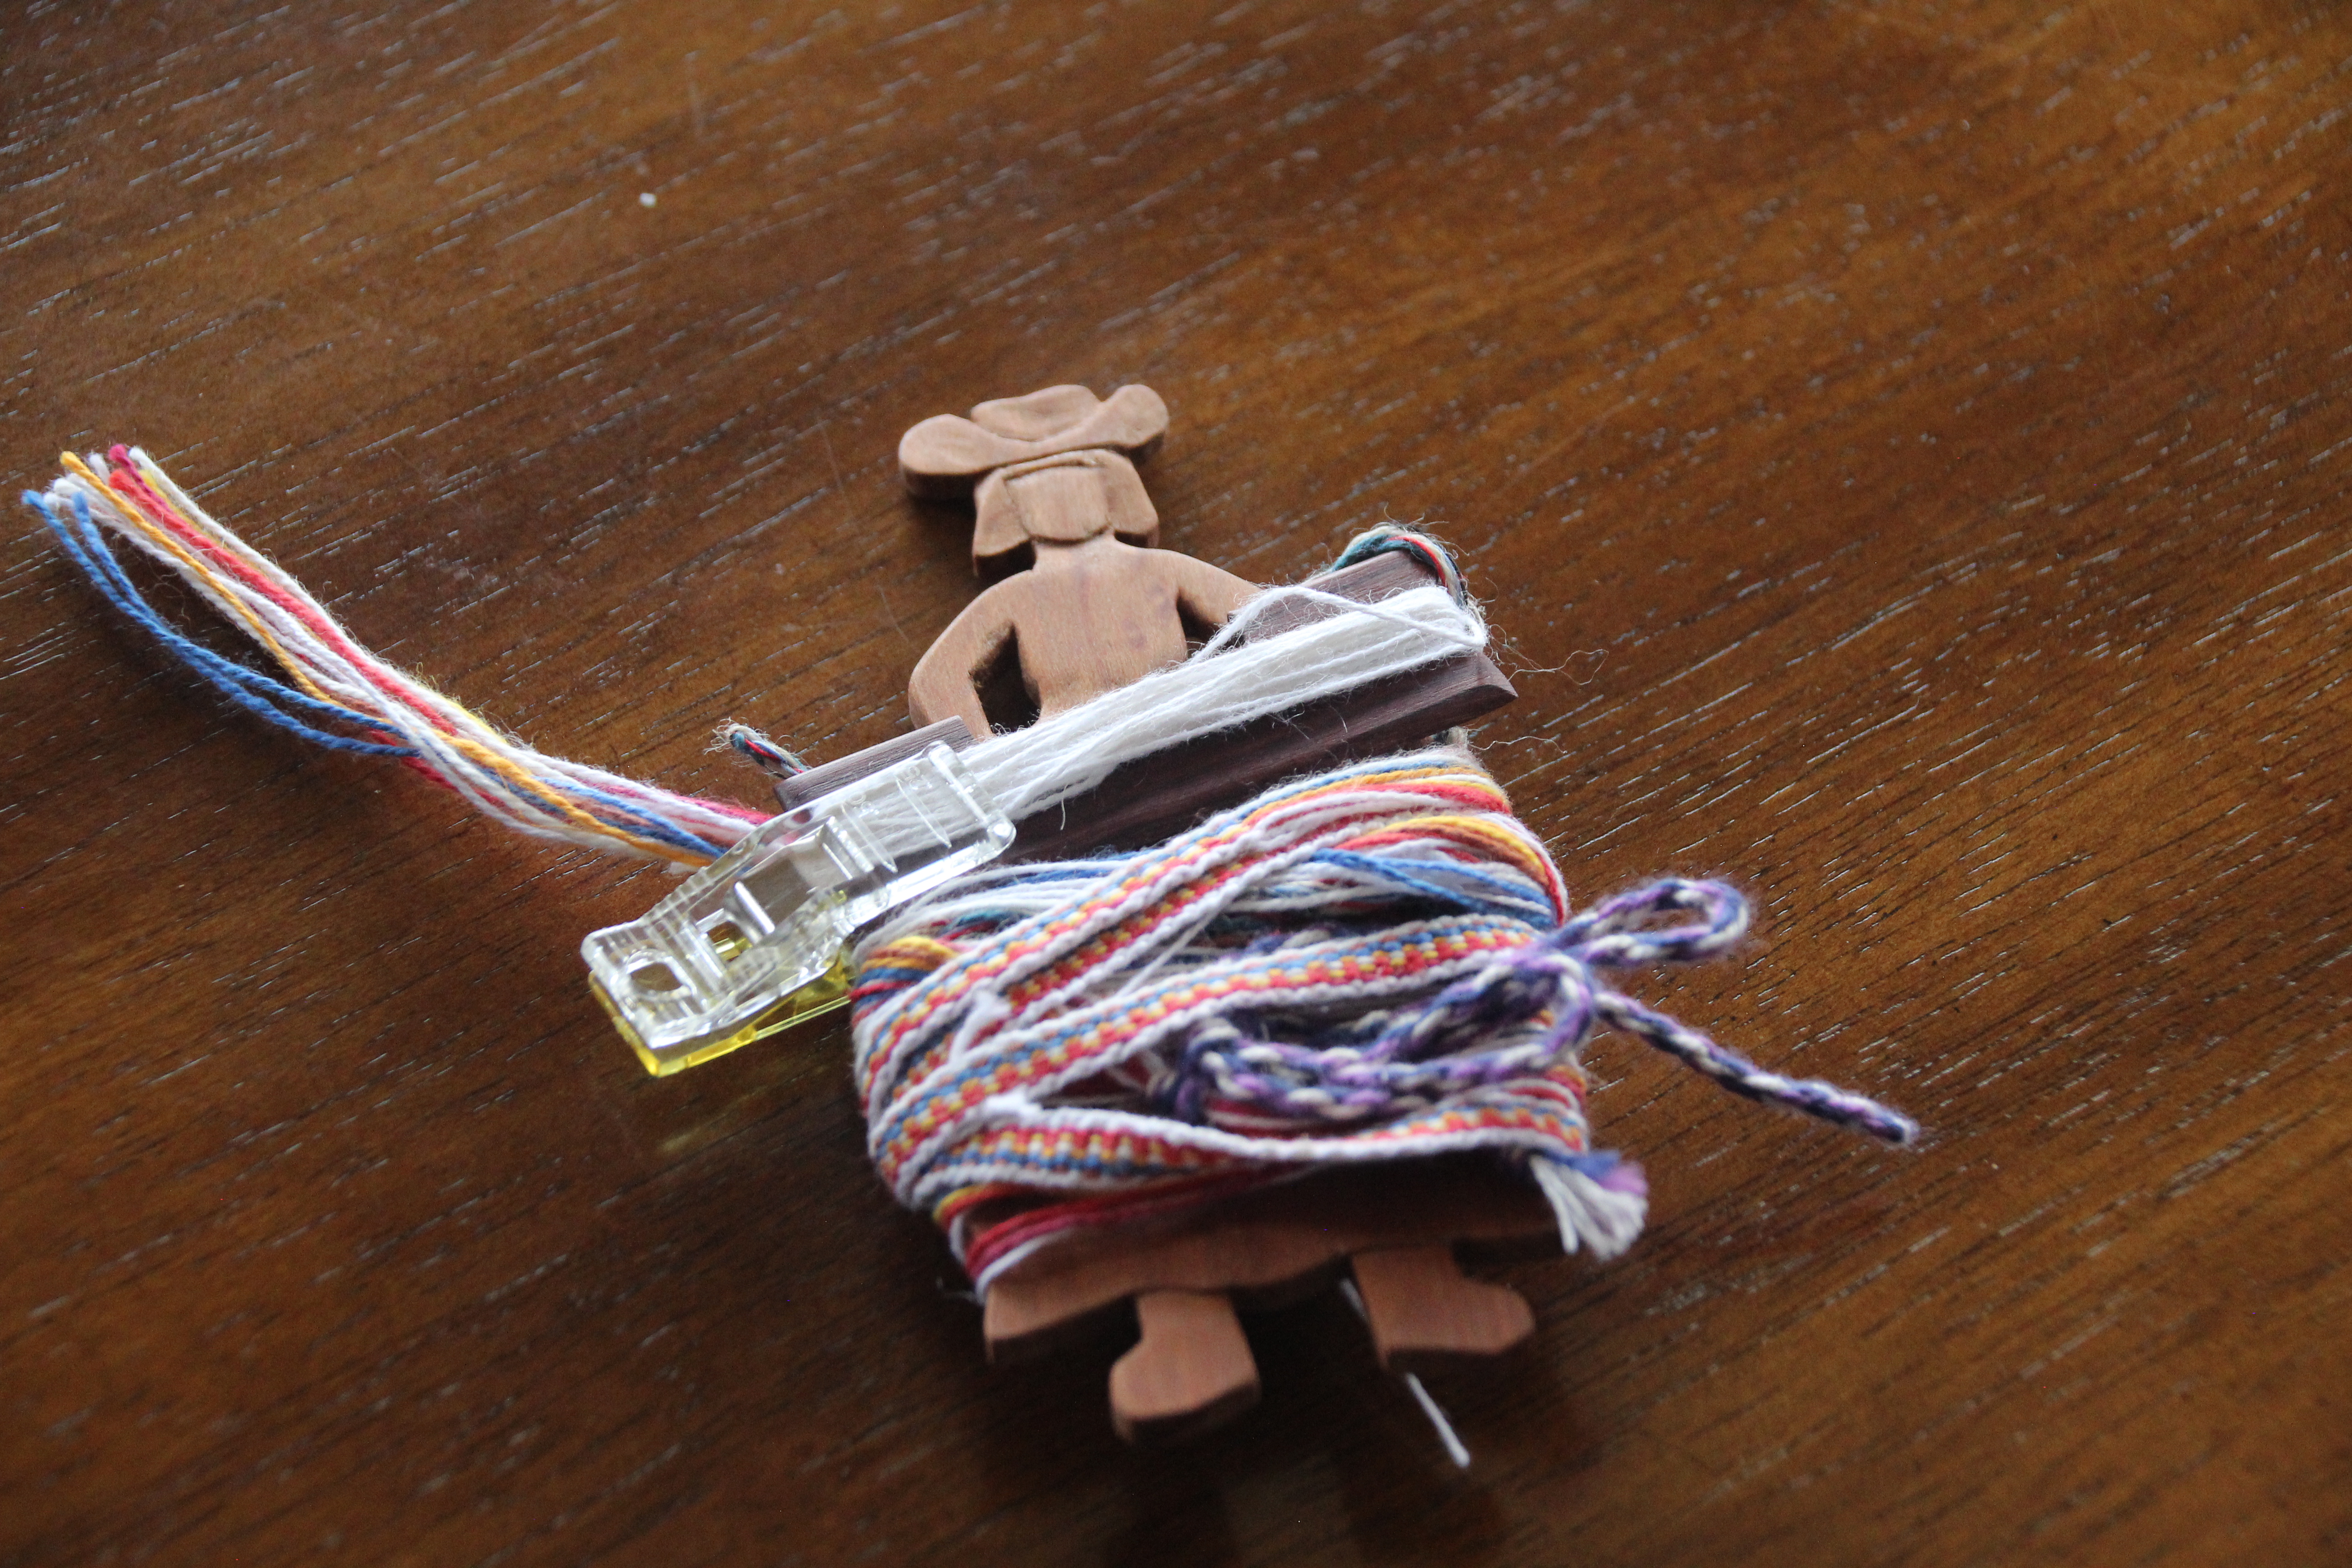
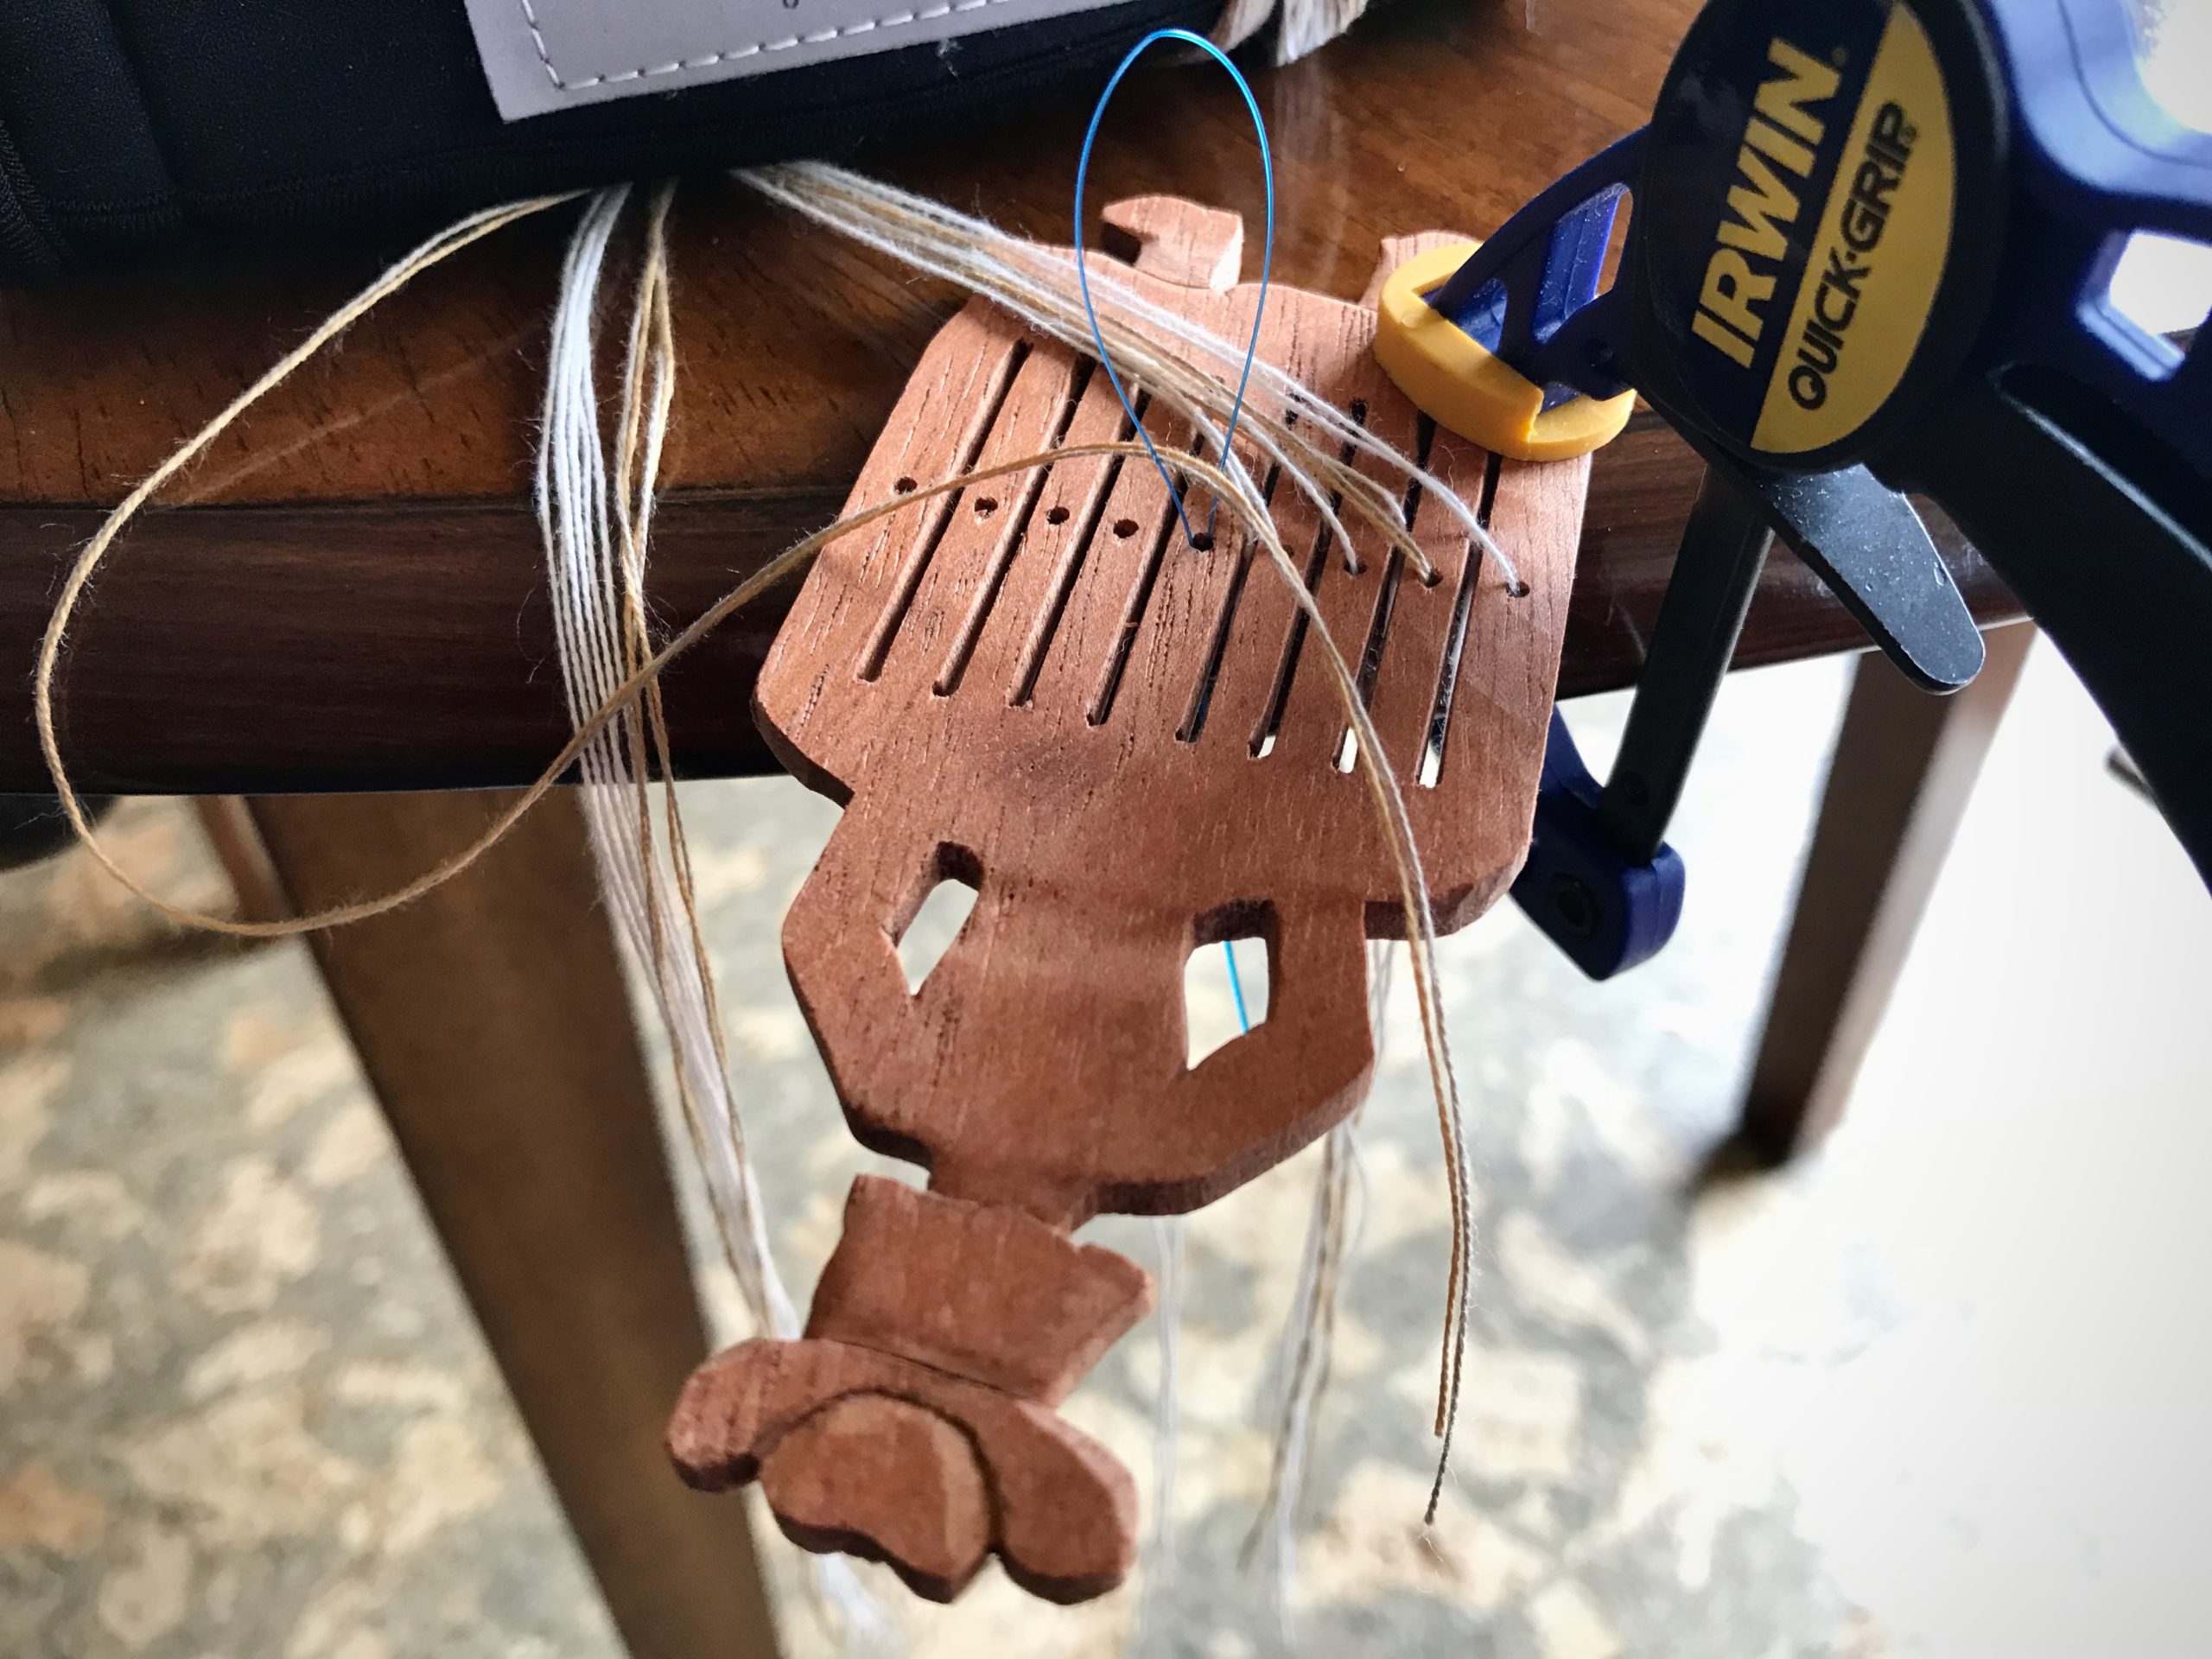
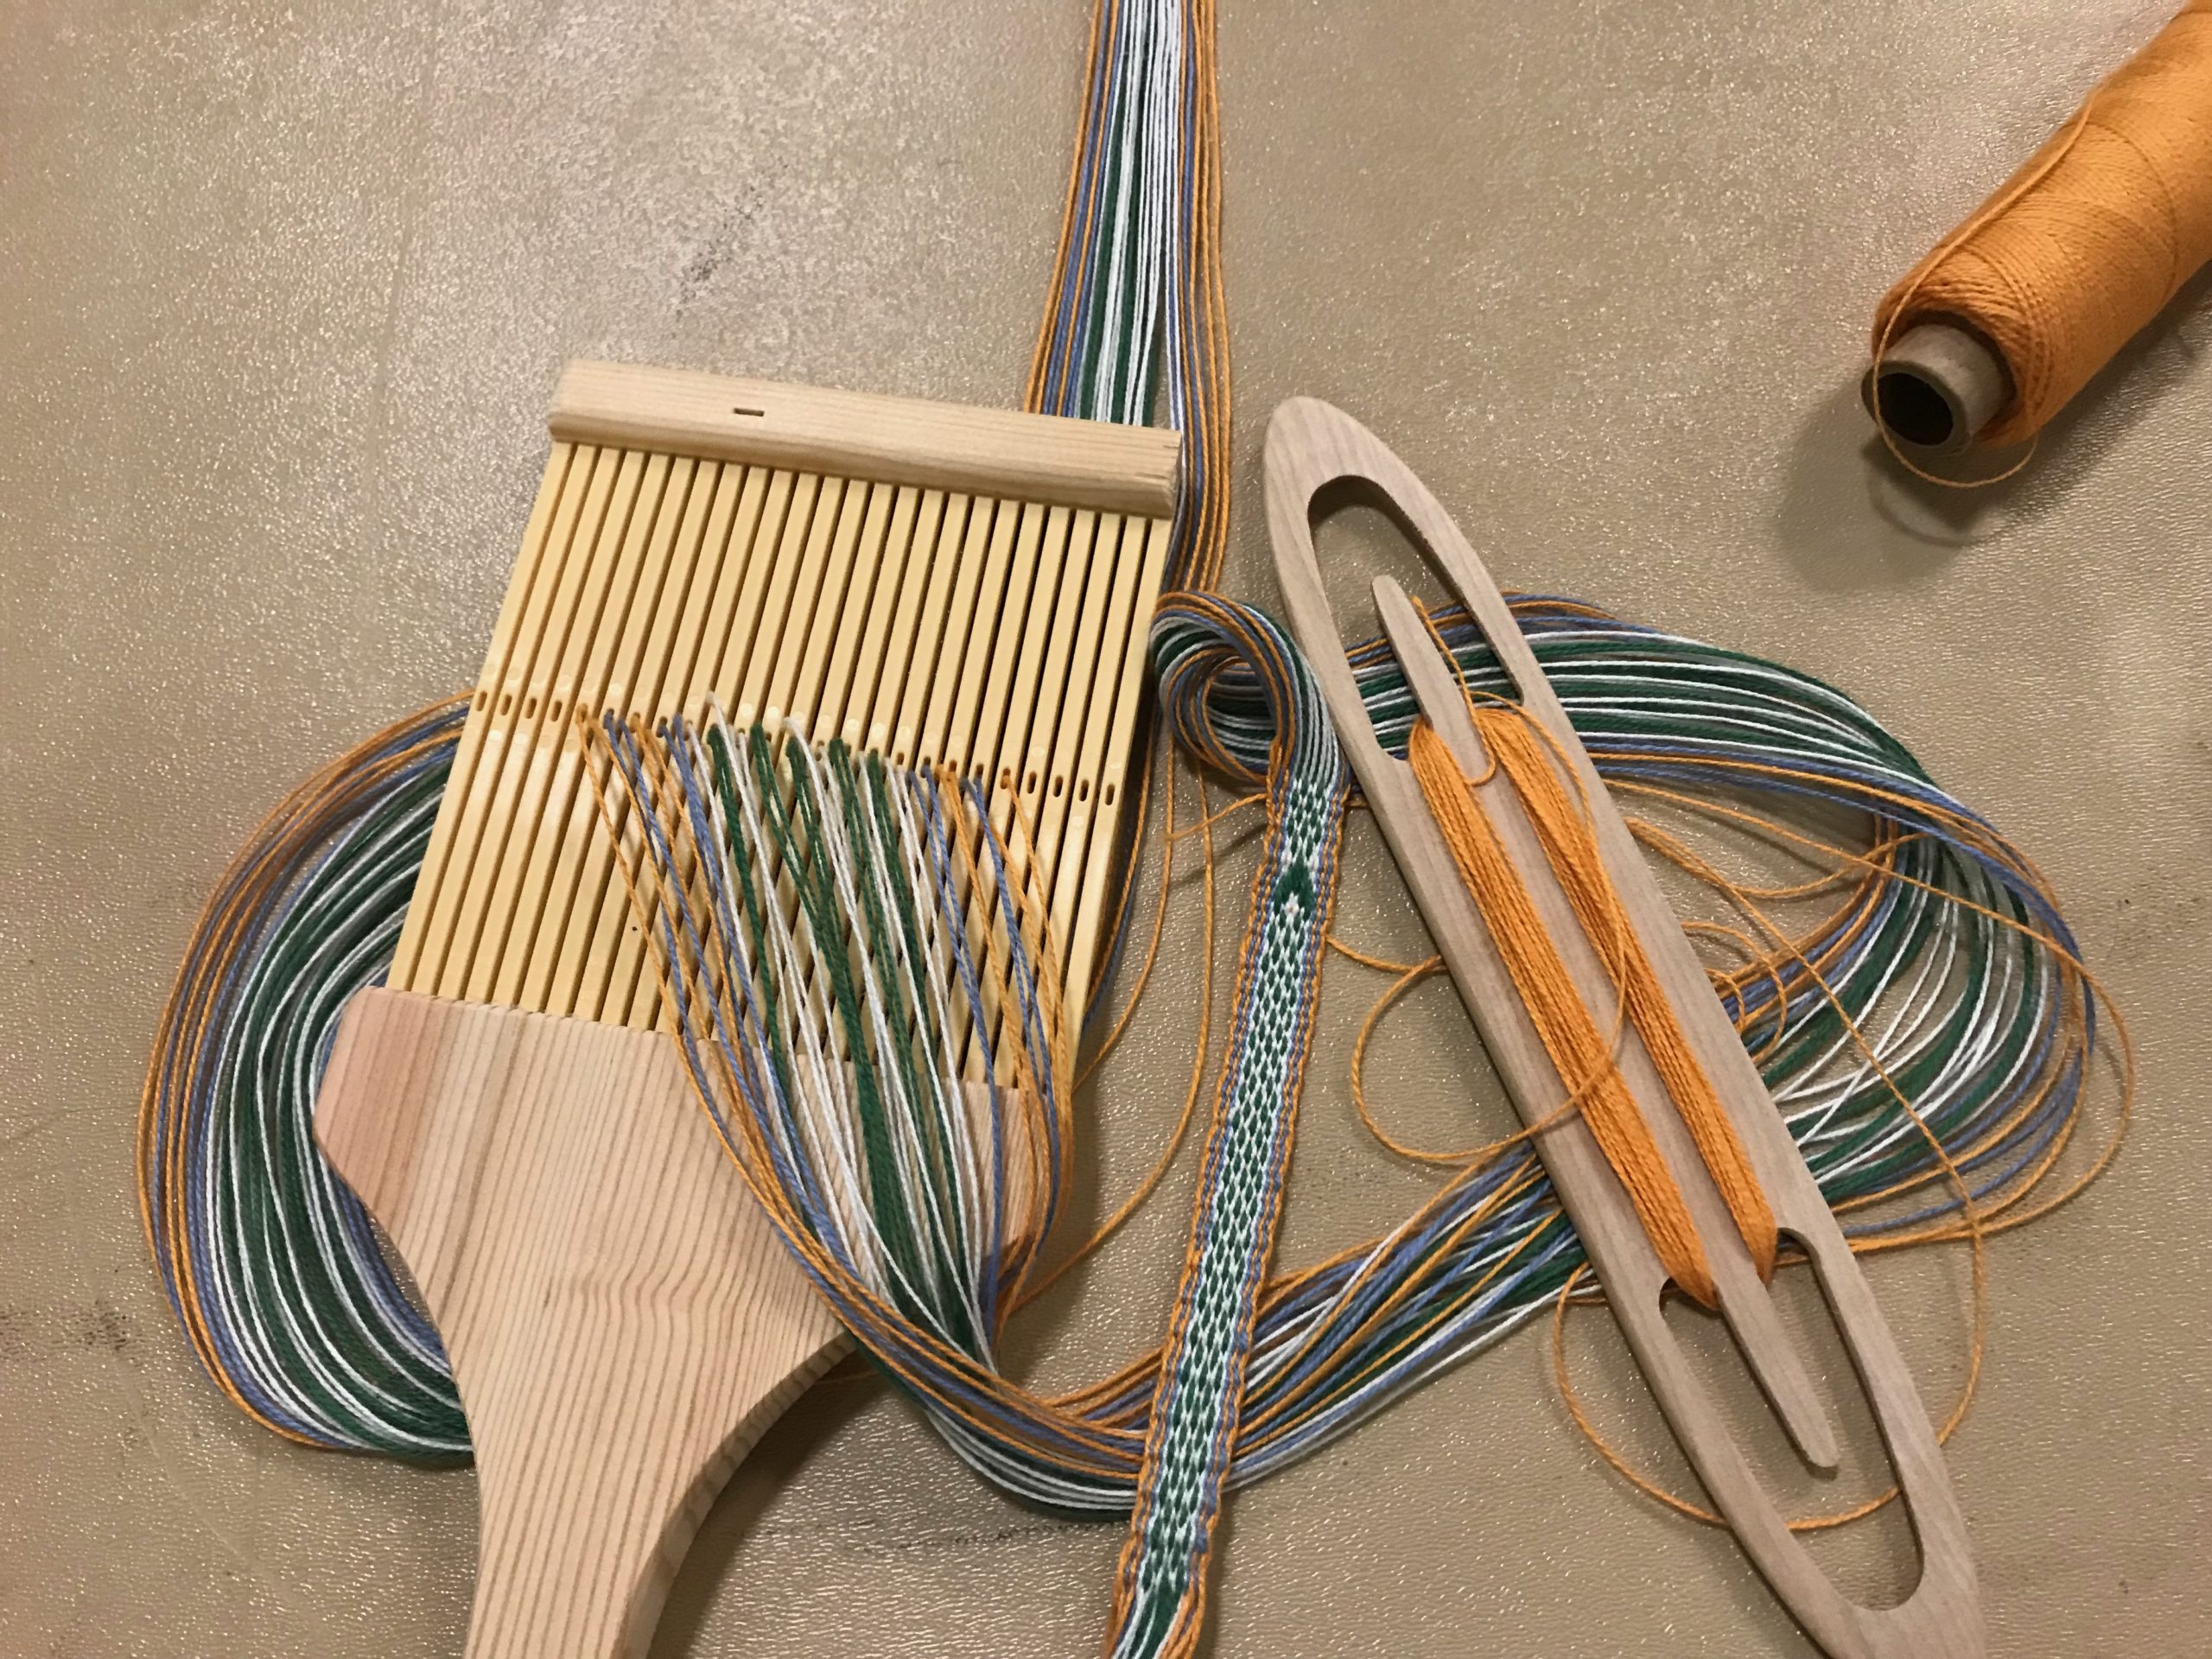
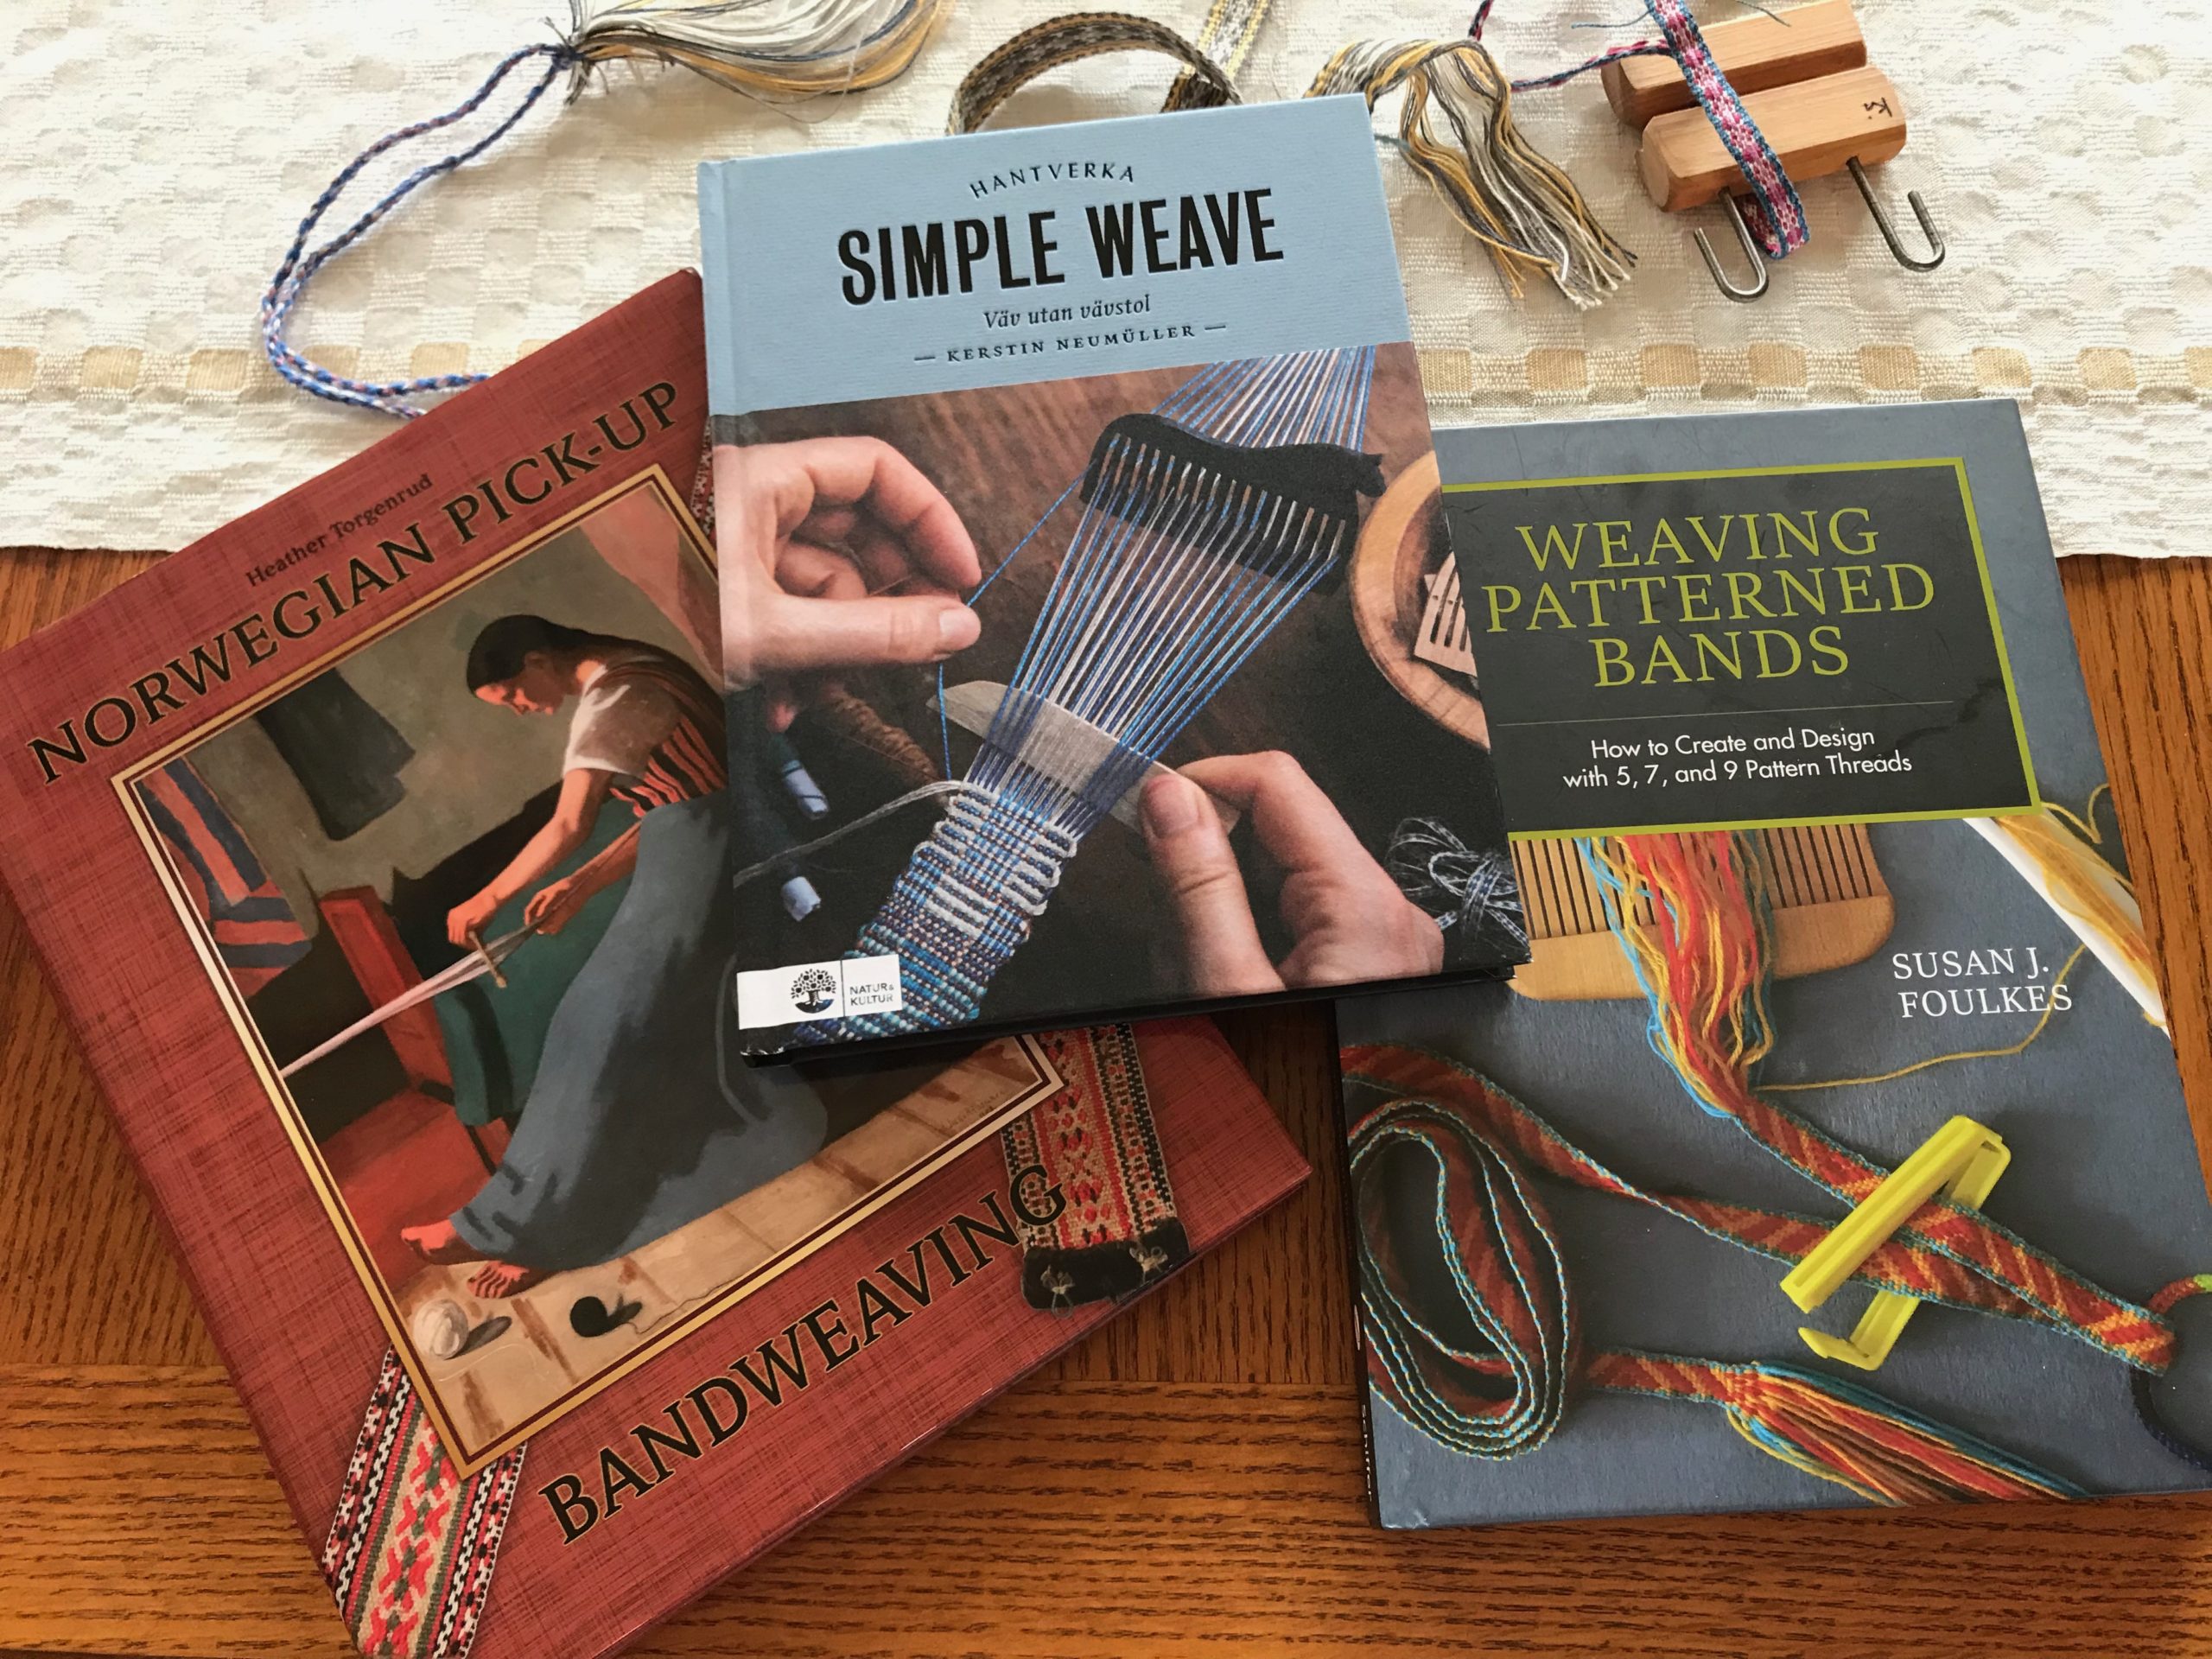
Remember the rigid heddles for band weaving that Steve made for me? (See Process Review: Heddles and Bands) Soft maple, Spanish cedar, and walnut. Steve says they are missing the “cuteness factor.” So, what does he do? He makes a cowgirl heddle out of cherry that is cute as can be!
Miss Cherry Cutie has a warp of 8/2 cotton and 22/2 cottolin, mixed in an asymmetrical design. Steve converted a little sett tool into a shuttle by bevelling the long edge and carving the sides into curves to hold the wrapped thread.
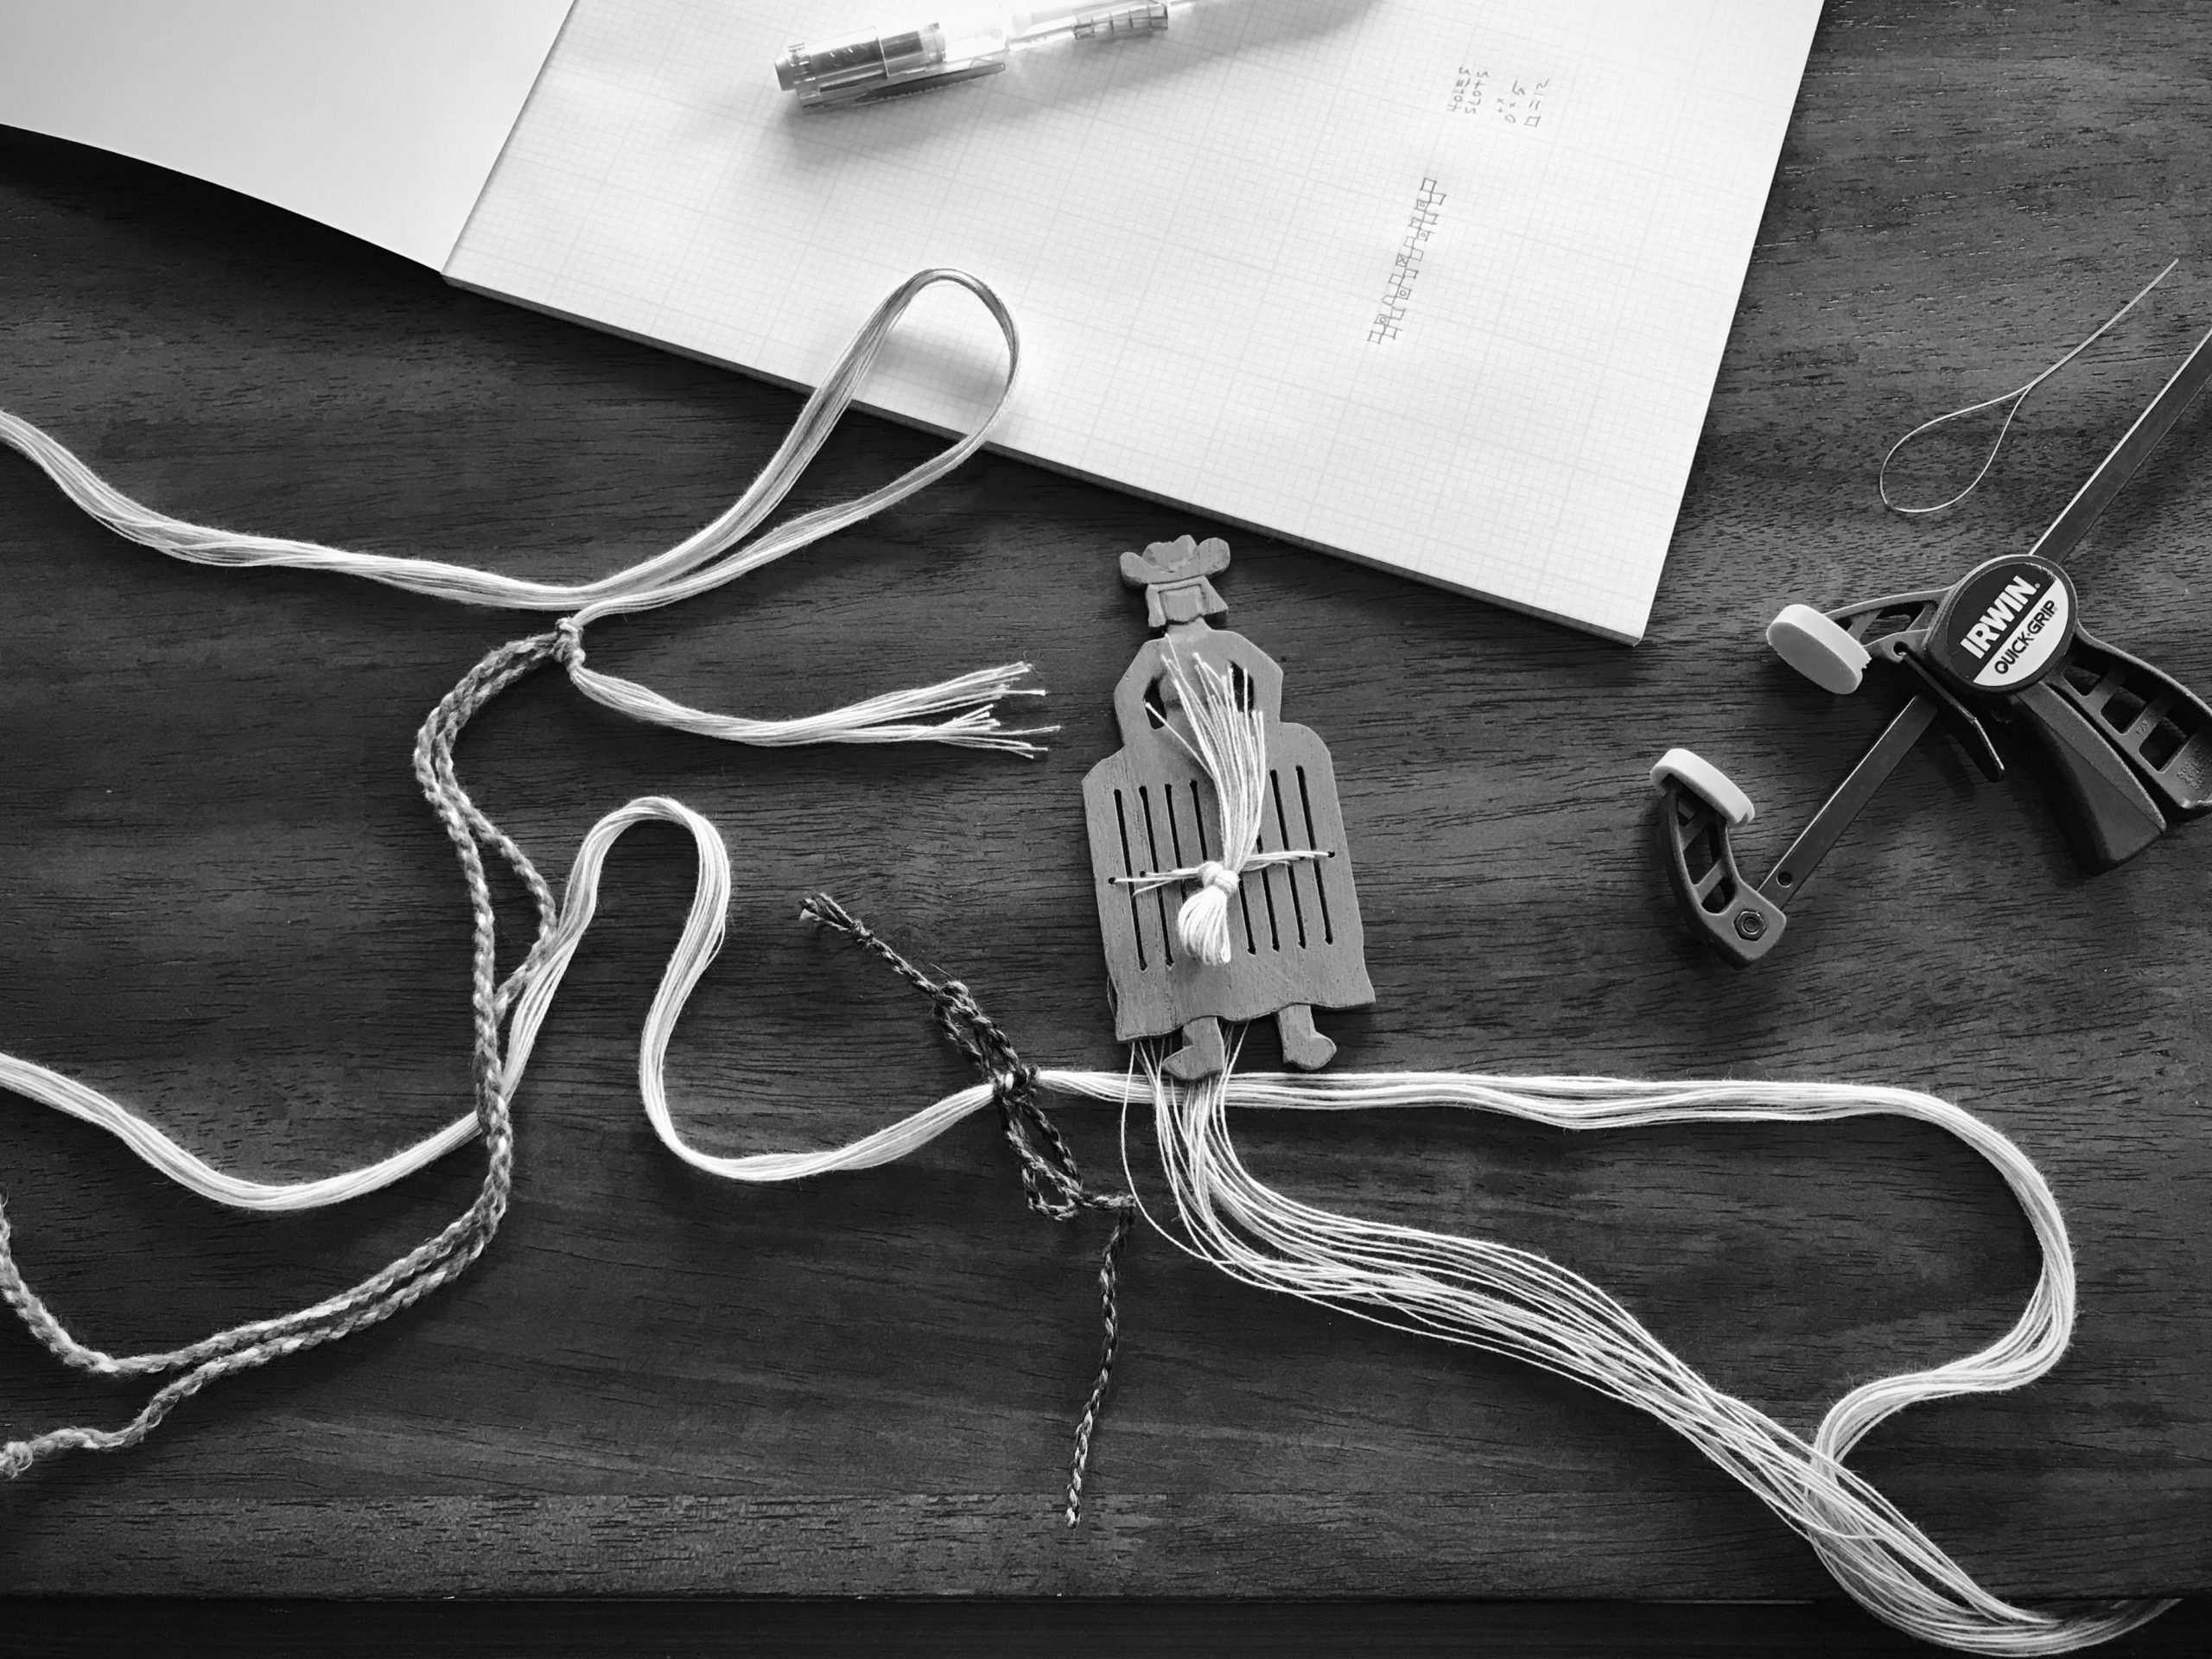
Well, Miss Cherry Cutie wants to flip over while weaving. A little quilter’s clip on the bottom adds just enough weight. Problem solved. Now Steve wants to make one that has more weight on the bottom half.
Quilter’s clip at the bottom gives Miss Cherry Cutie the balance she needs to stay upright while weaving.Quilter’s clip serves a dual purpose. Besides adding weight for balance while weaving, the clip holds everything together nicely. I can drop this small bundle in a bag, and add a belt and a band lock, and off we go!
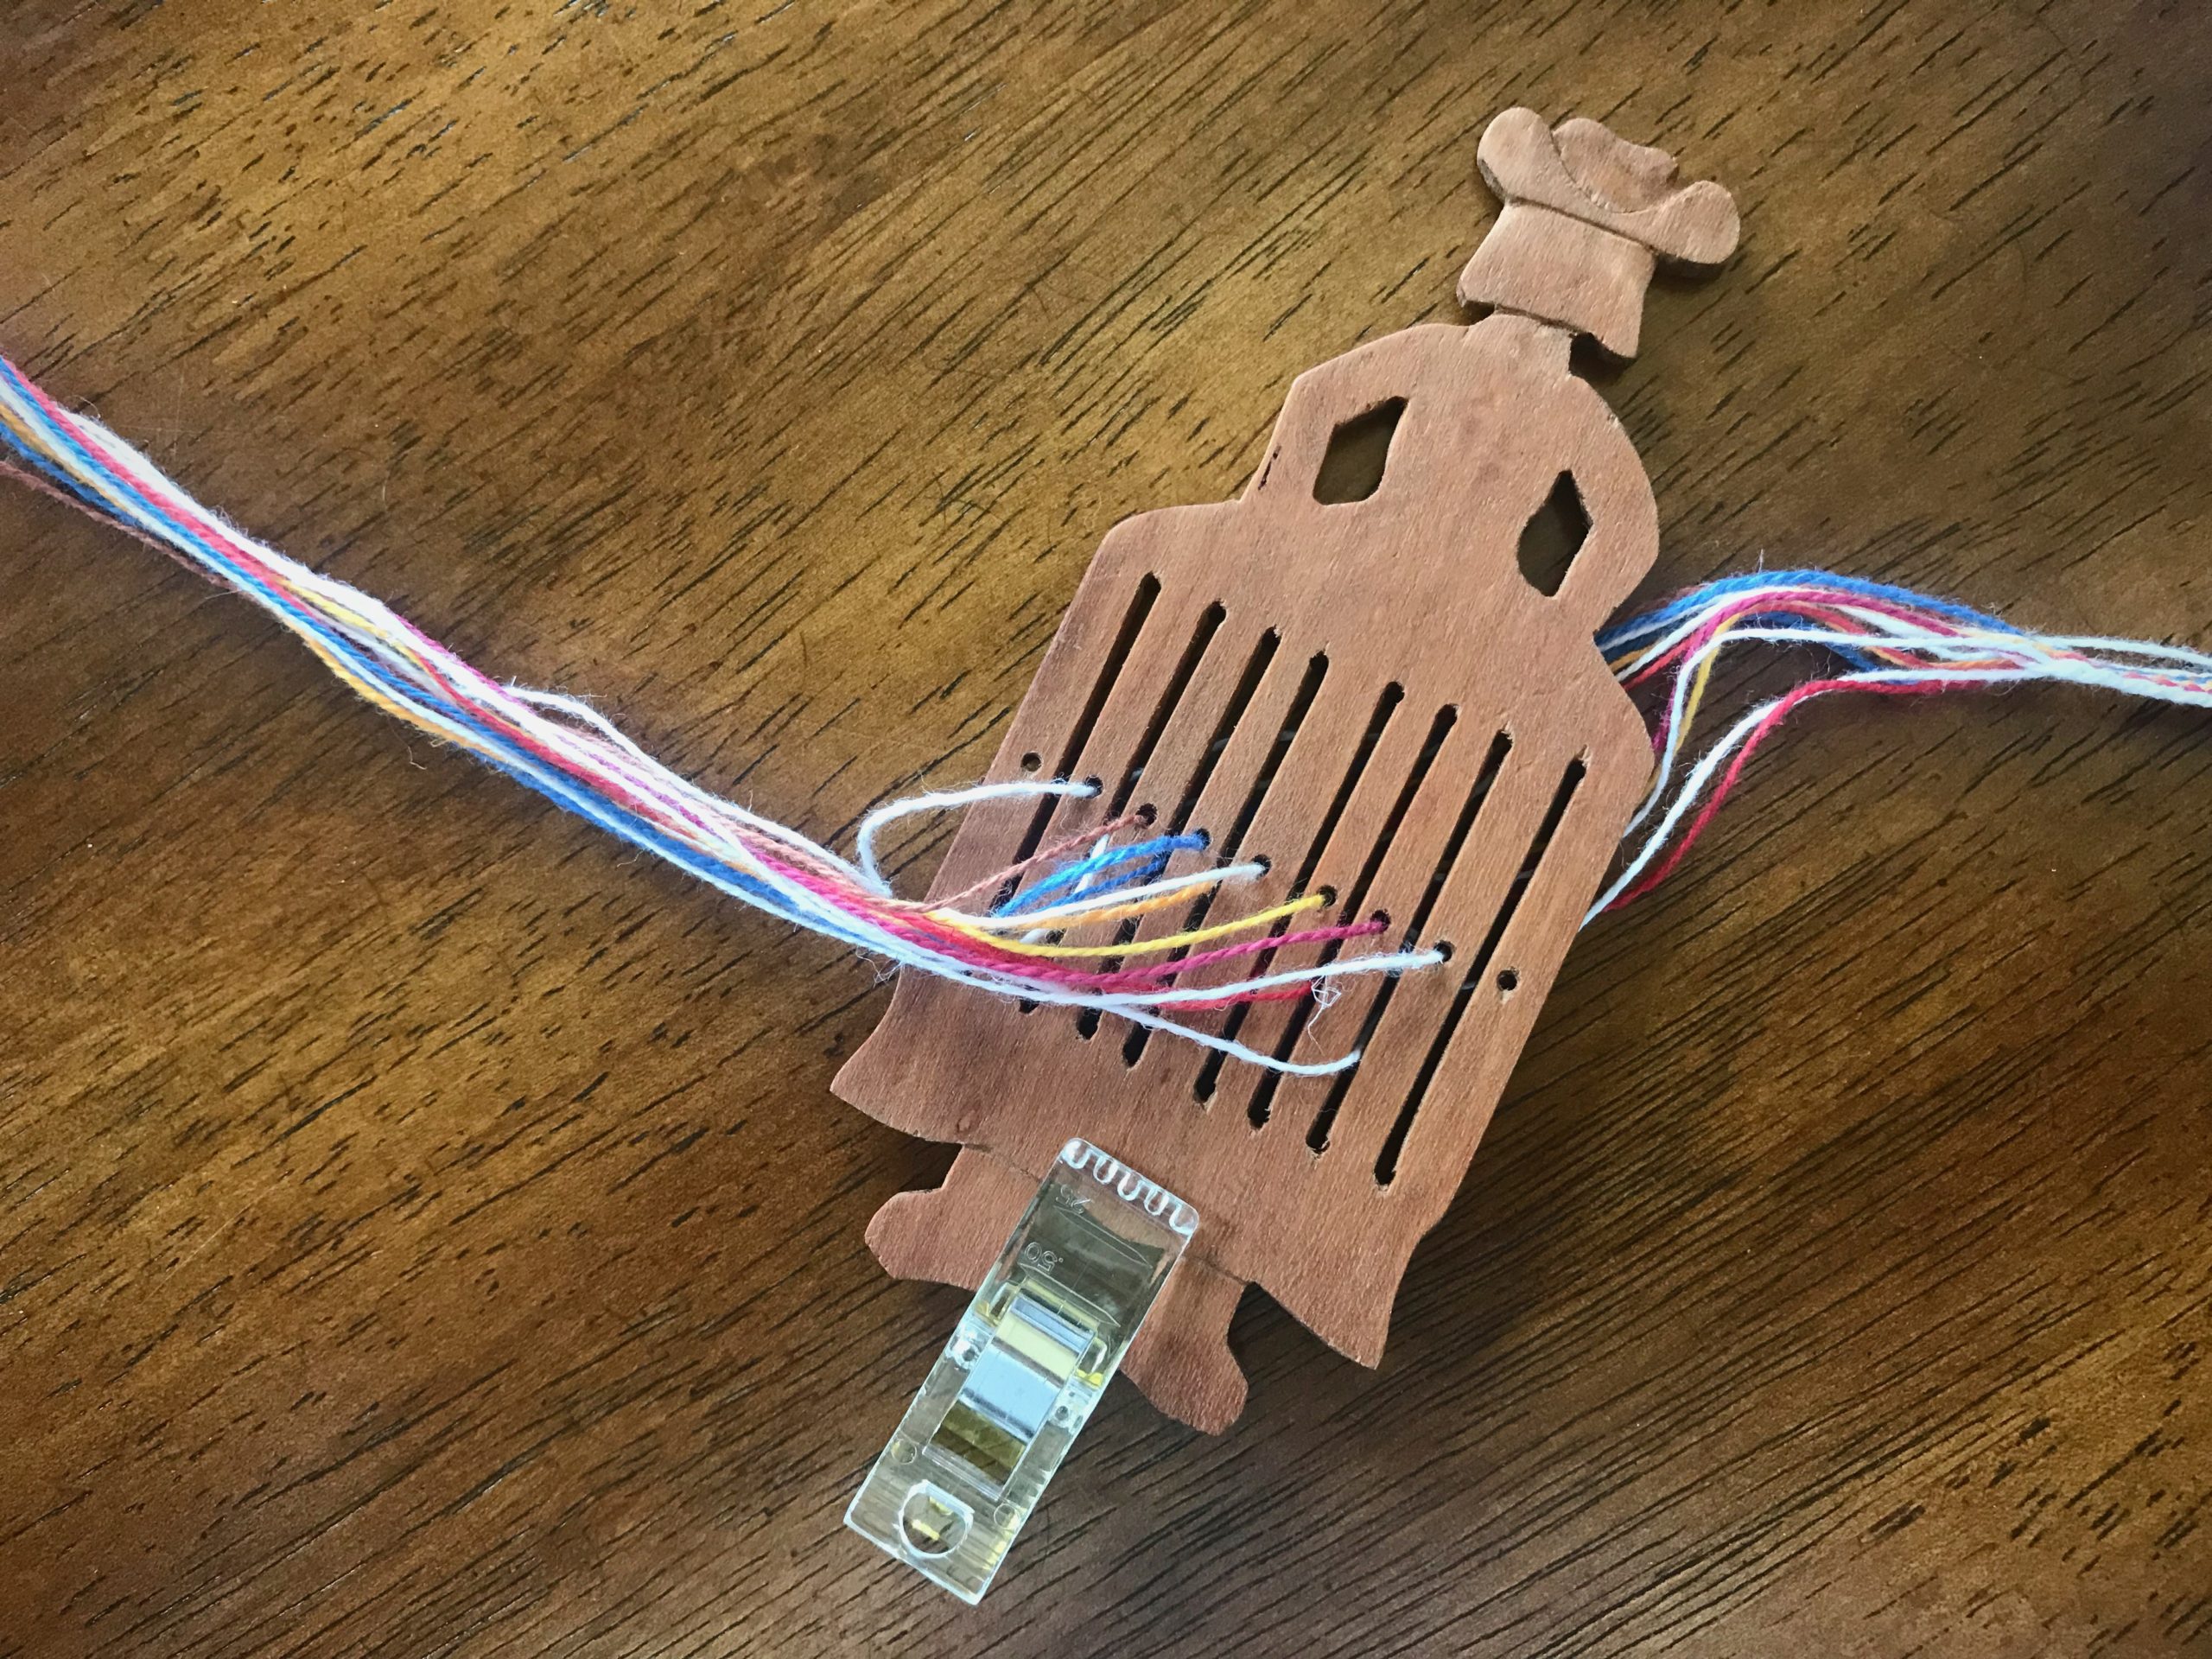
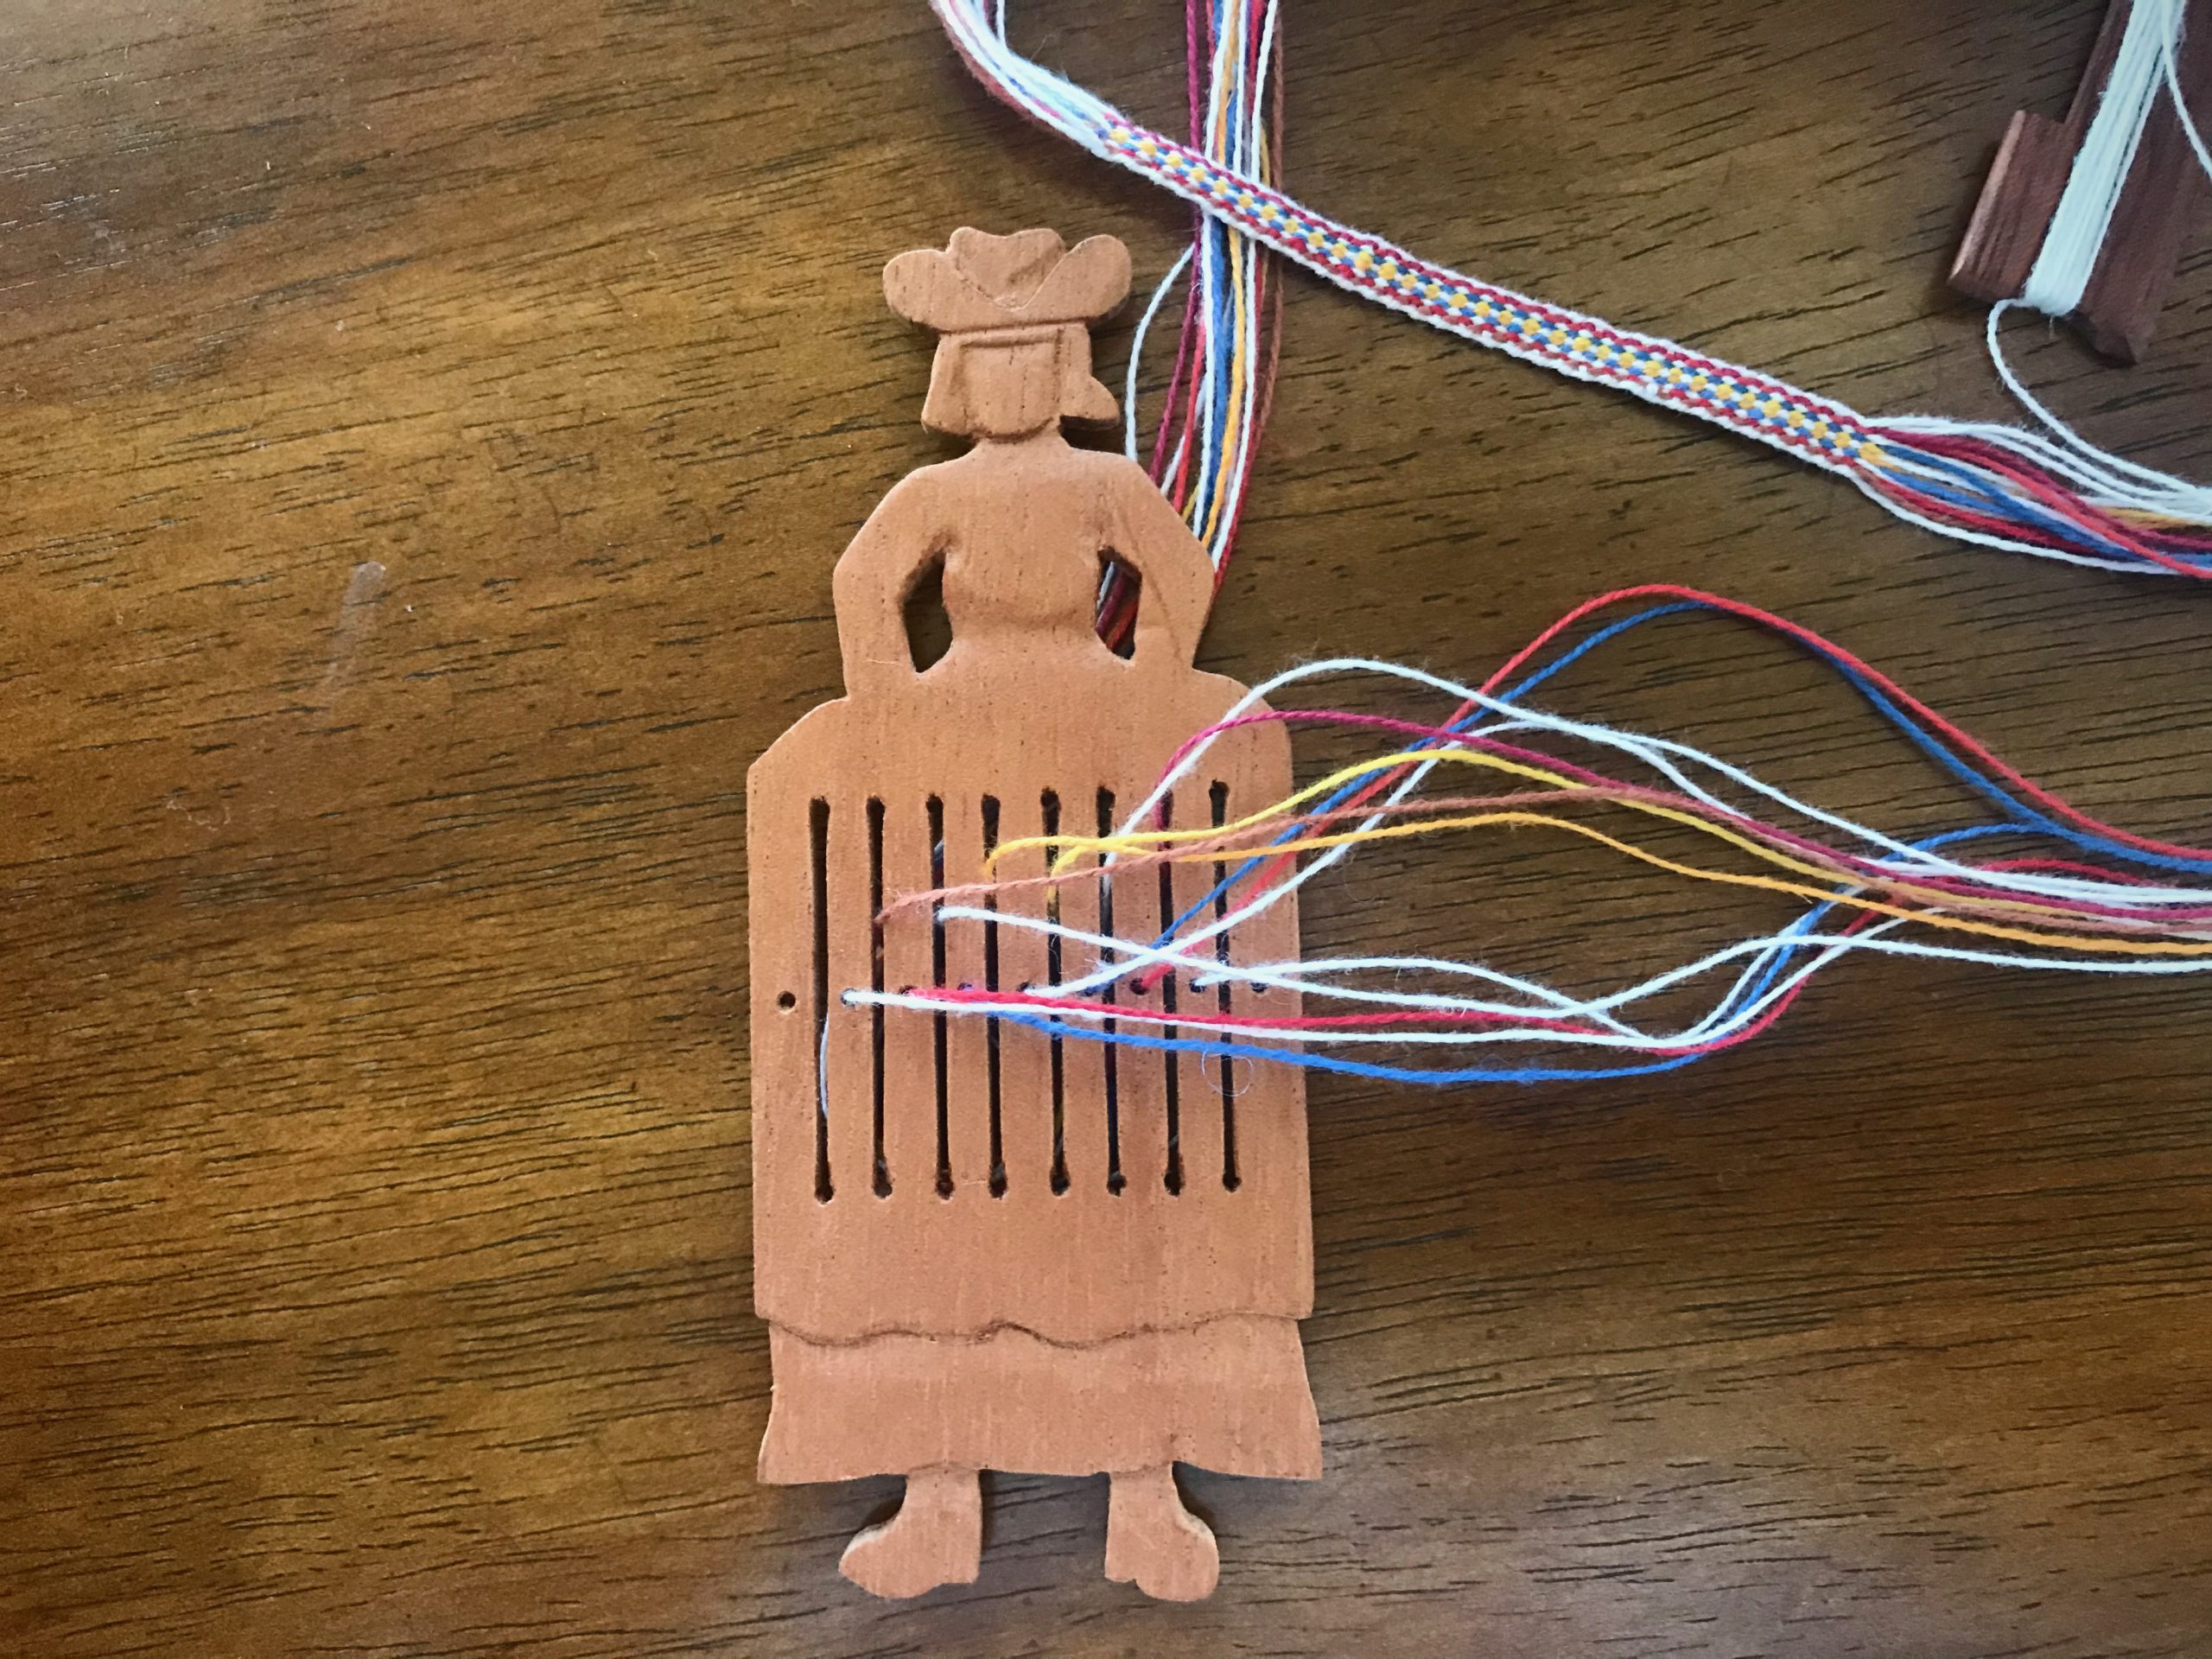
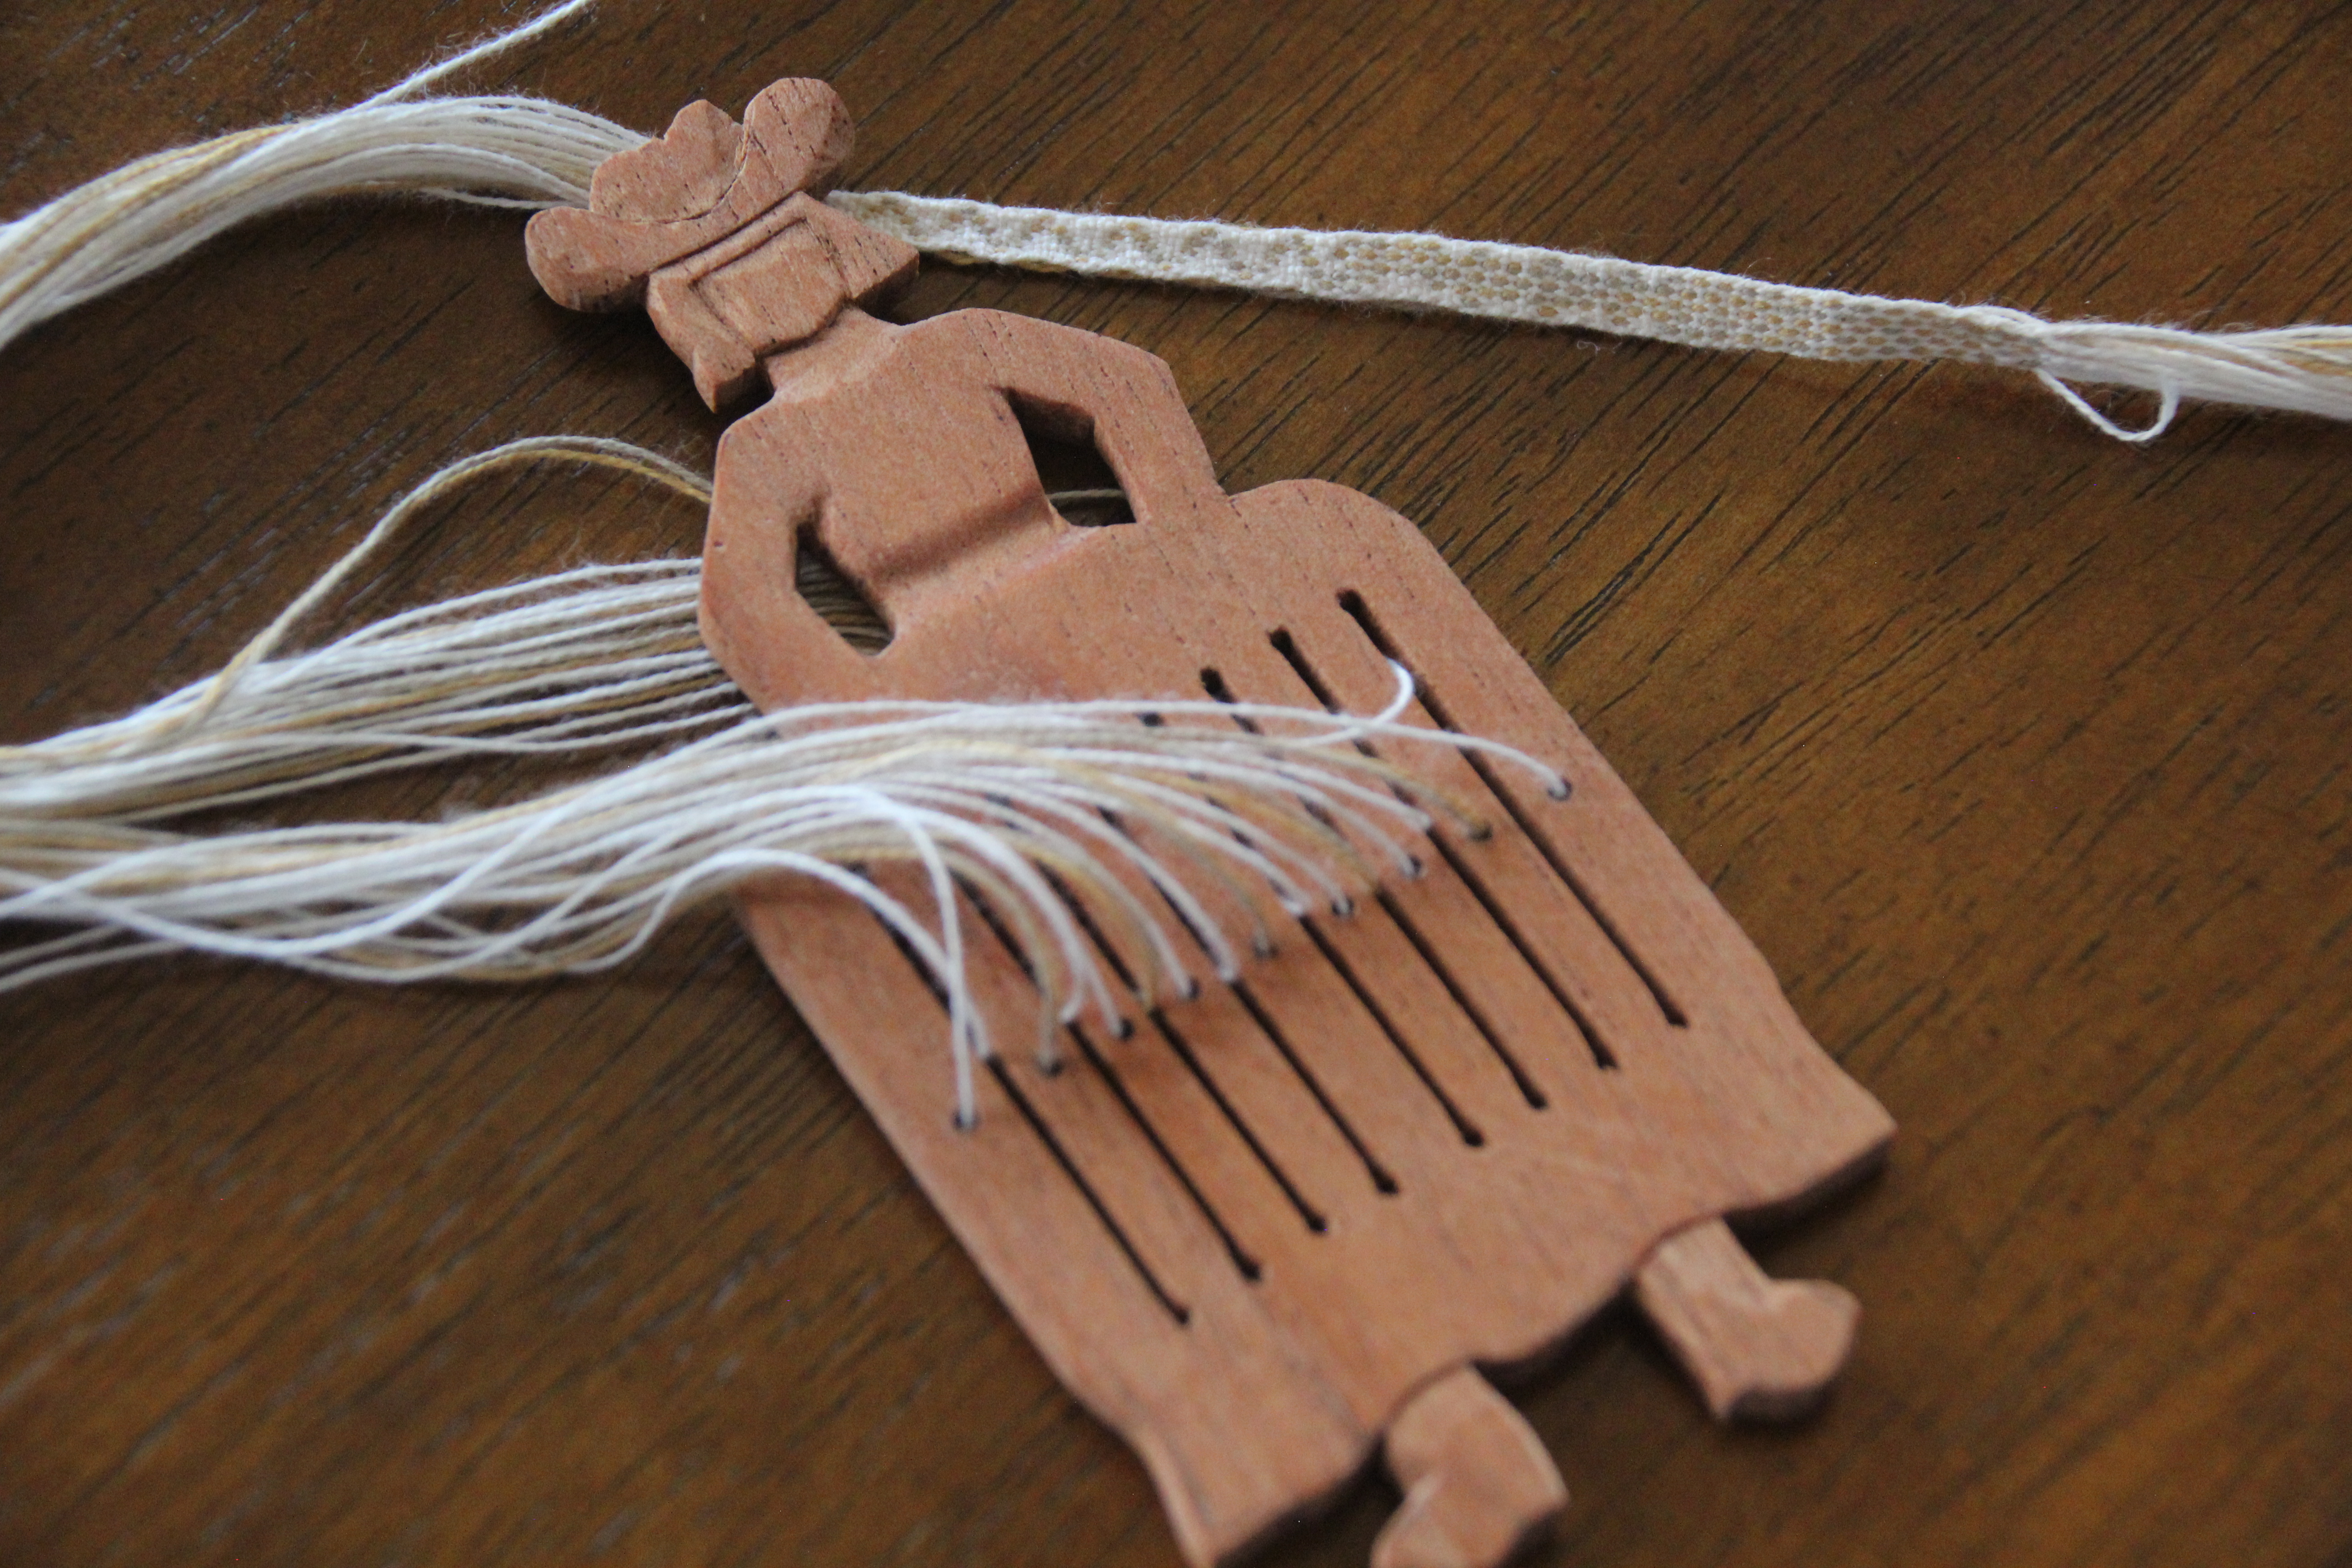
Here comes Miss Cutey II in Spanish cedar, with a longer skirt. She doesn’t tip all the way, but she does lean this way and that. The clip helps her, too. Conclusion? The shorter version, with the clip, is more compact and is our favorite design.
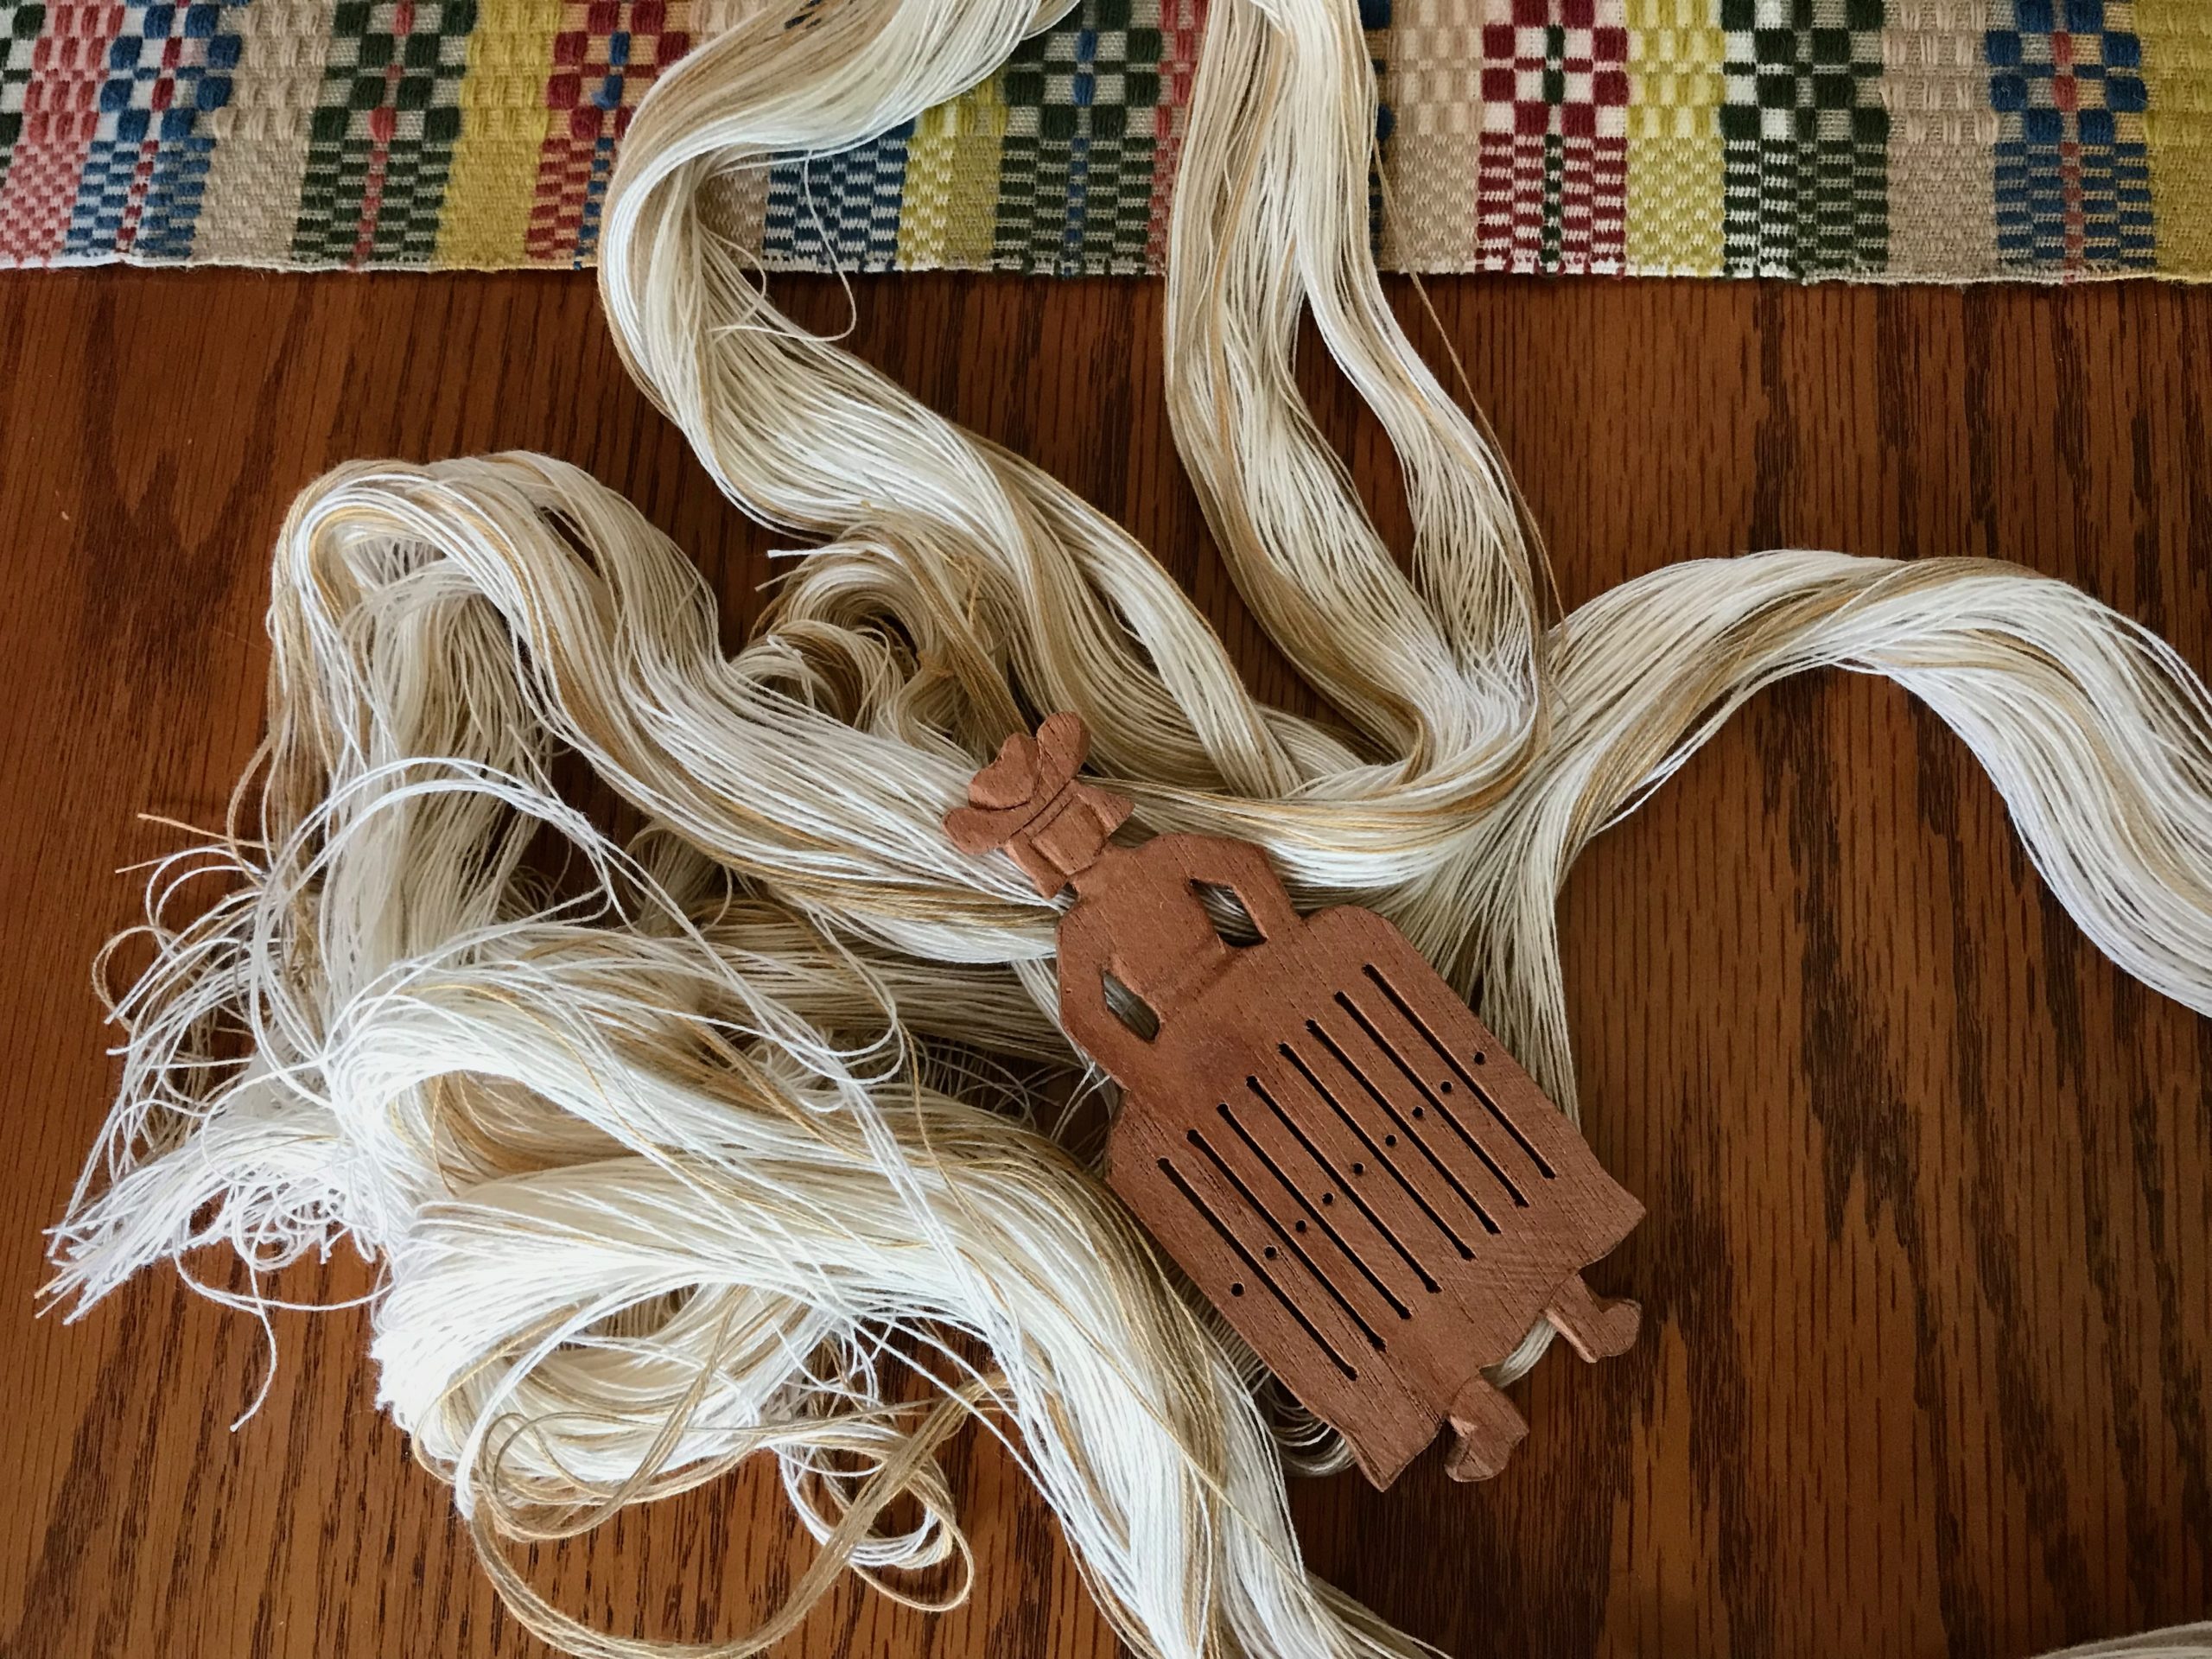
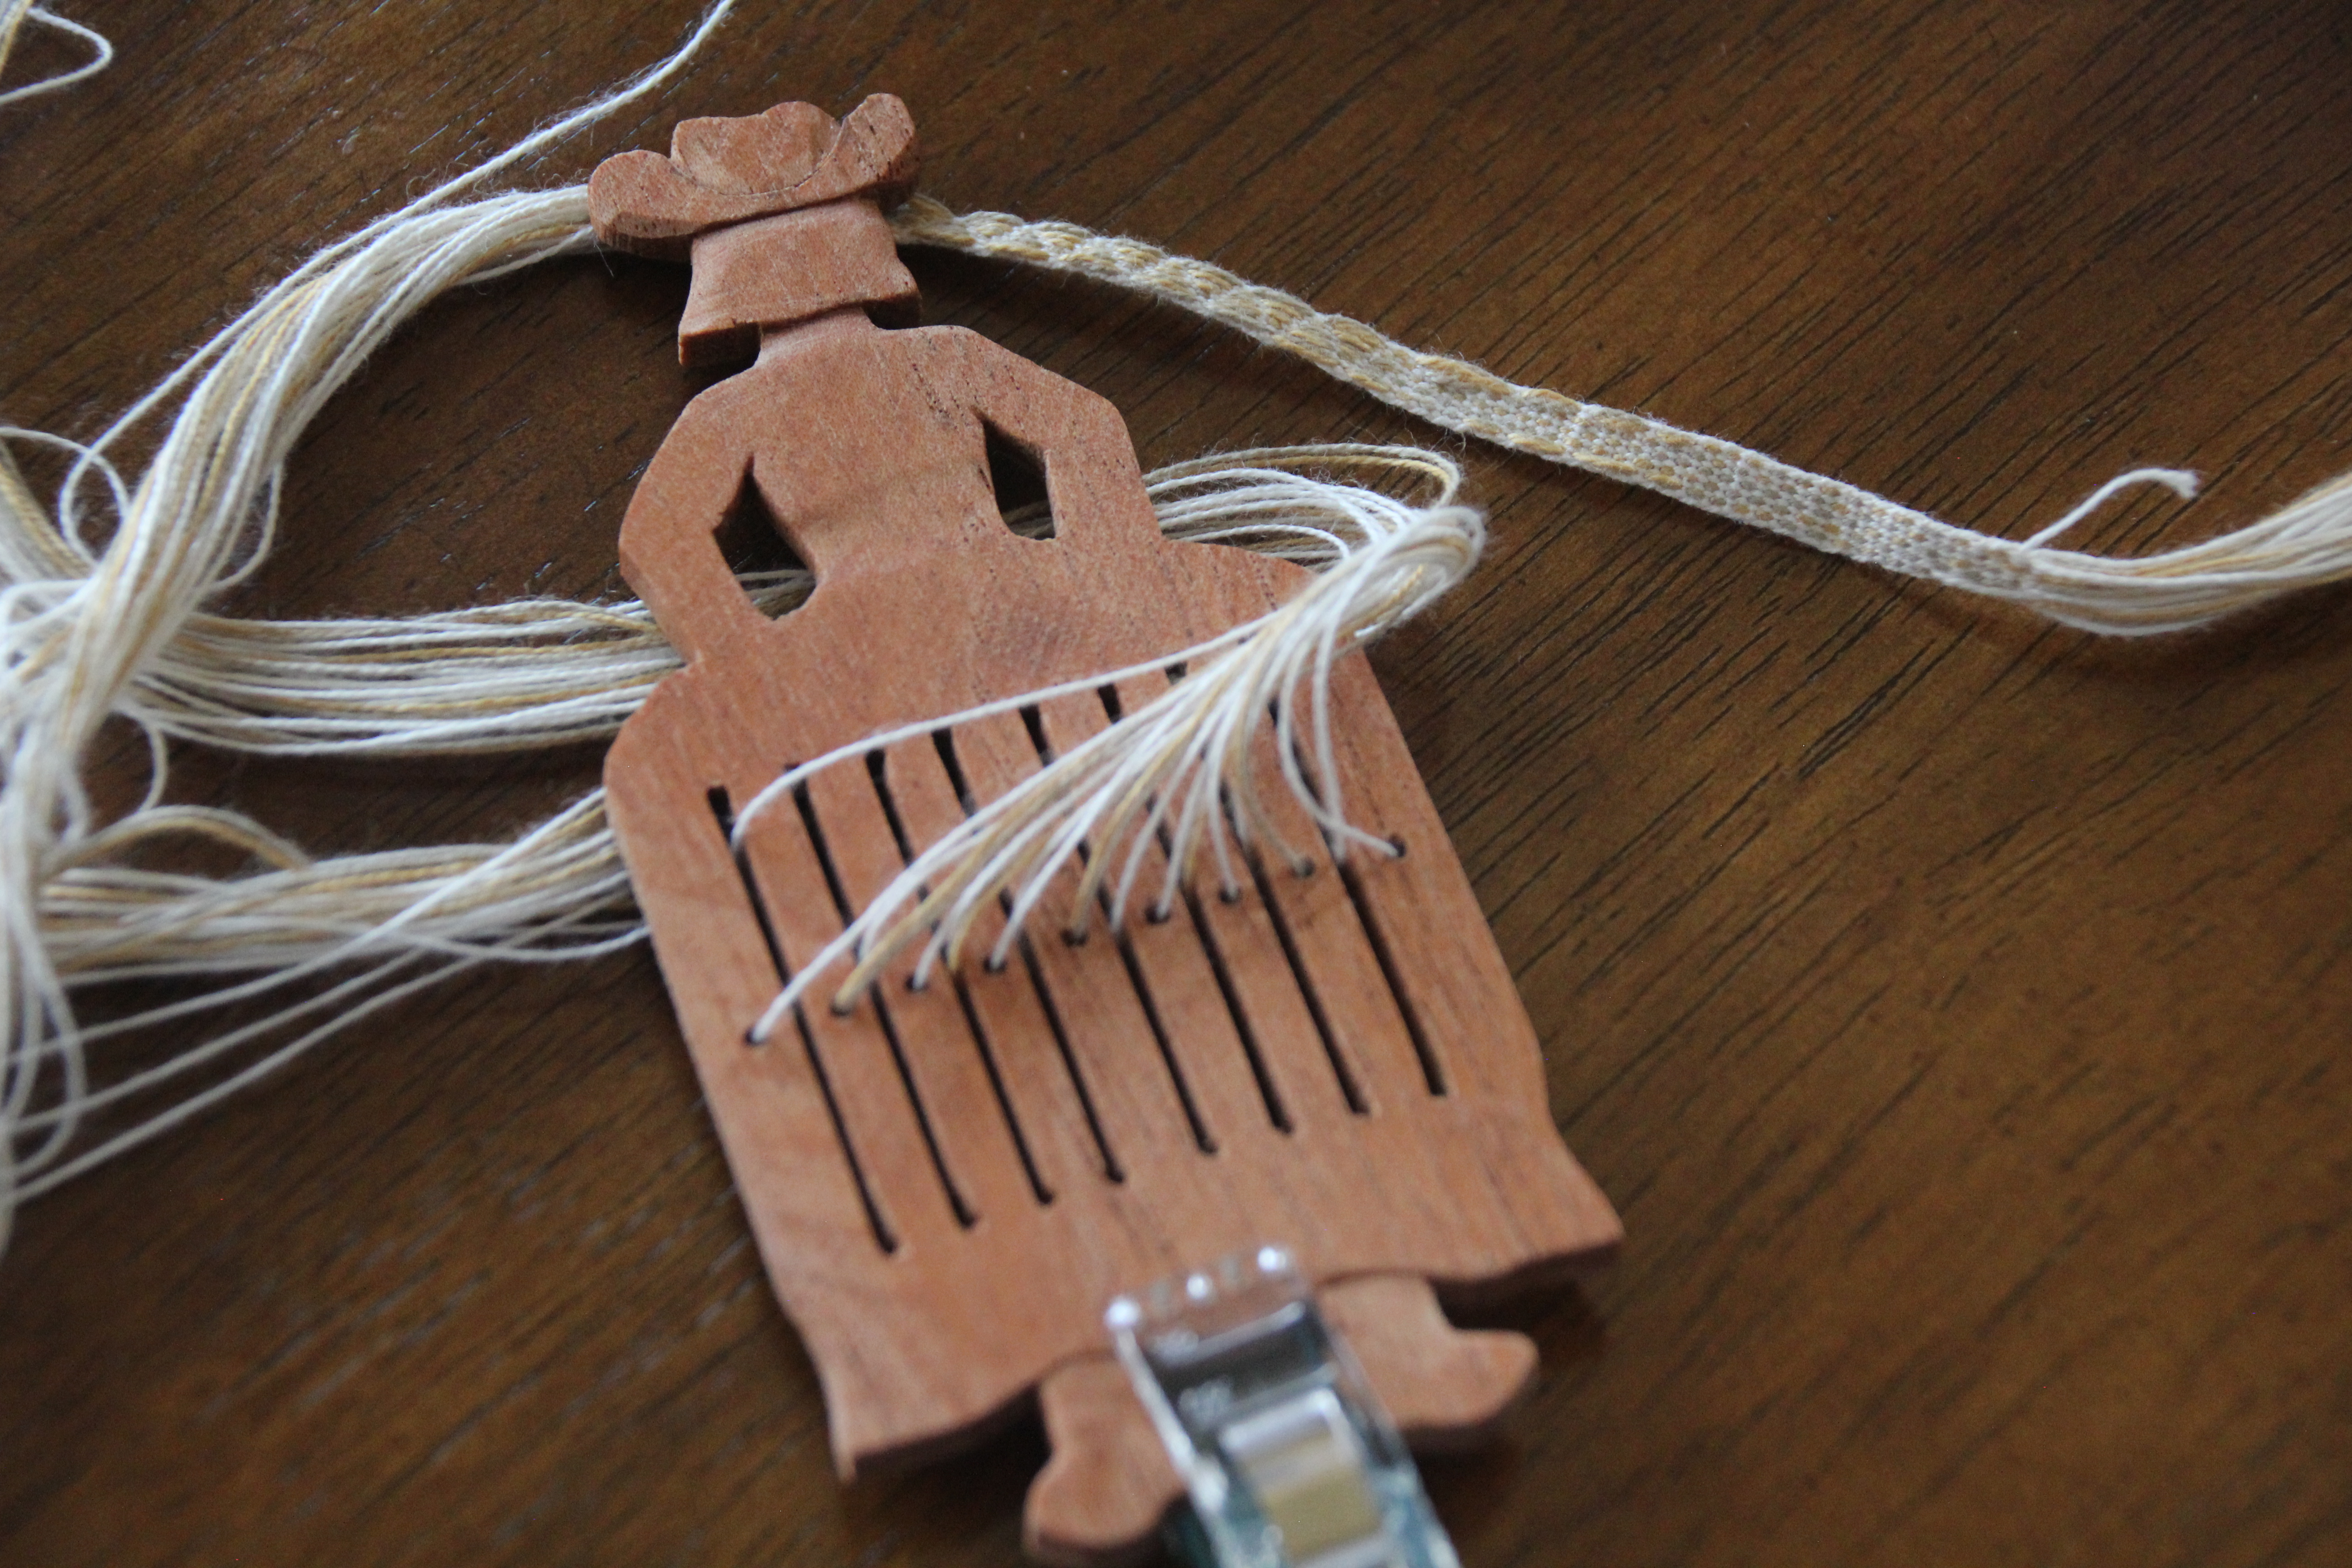
Miss Cutie II has a petticoat that hangs below her skirt. This extra length makes her a bit more stable than Miss Cherry Cutie. I cut Miss Cherry Cutie’s warp in half to give Miss Cutie II a warp. These are the same threads, but arranged in a more symmetrical order. She has her own sett tool shuttle, too.Miss Cutie II also benefits from the added weight of a quilter’s clip.
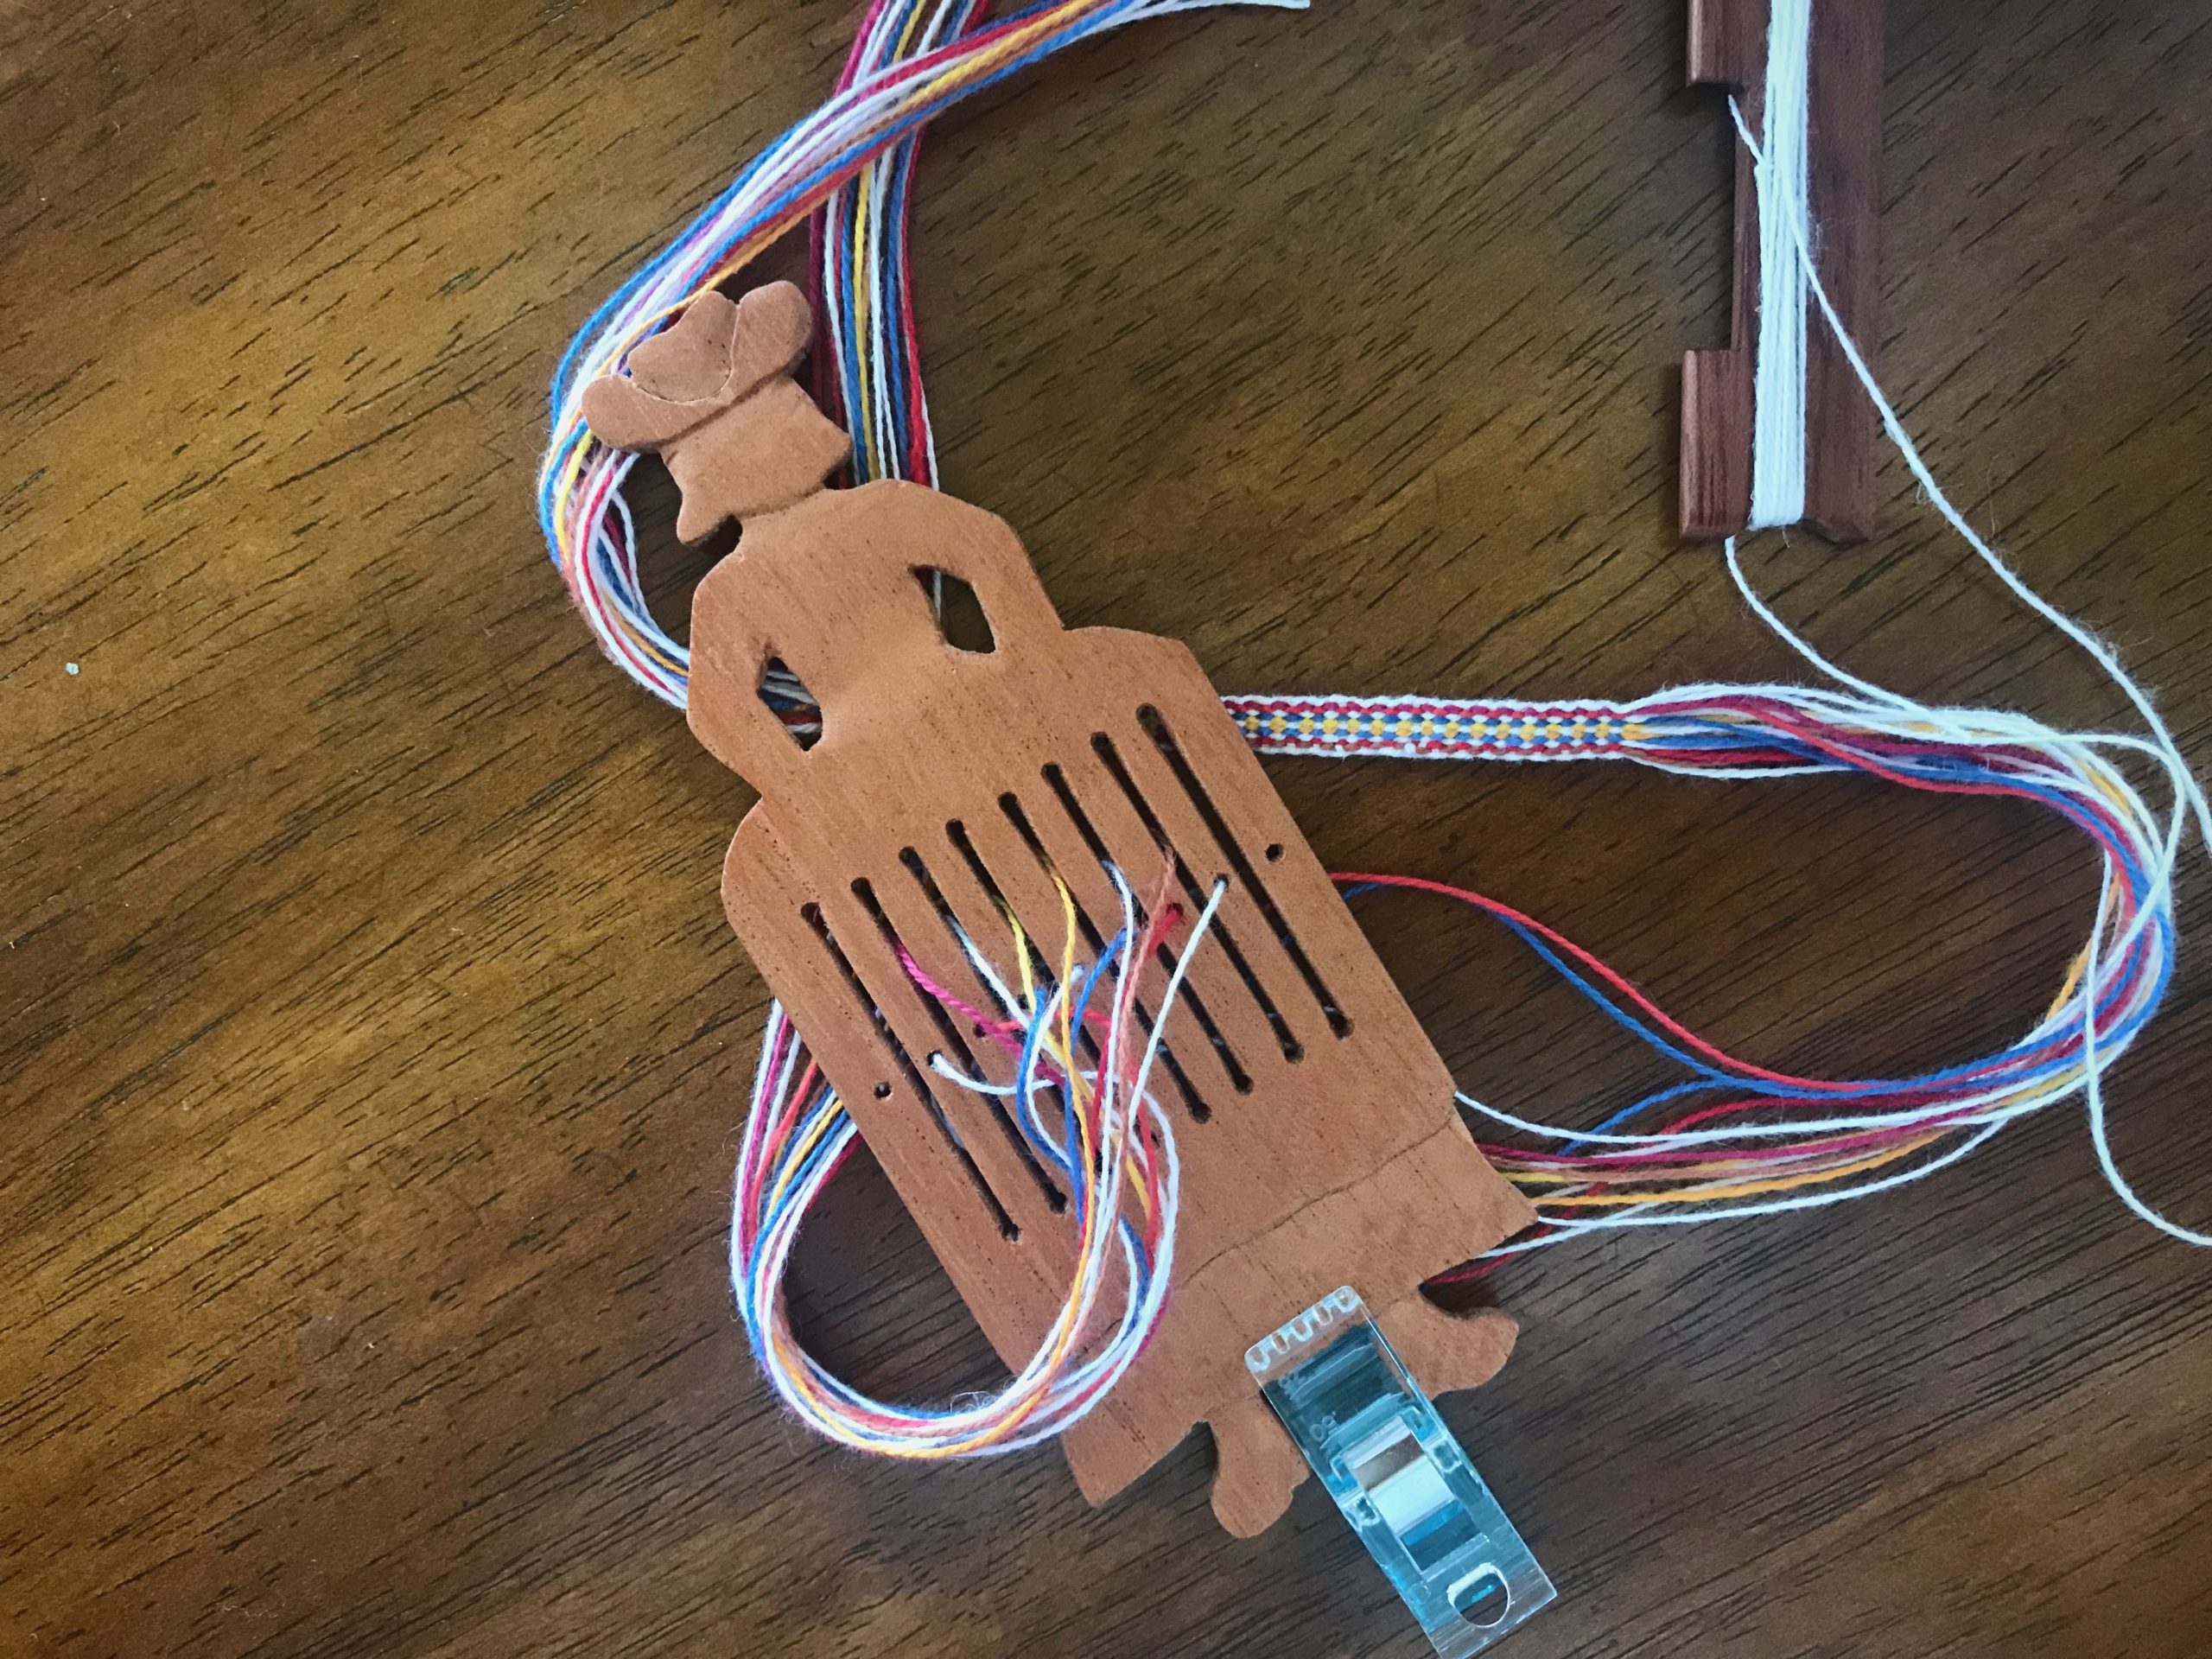
Look who shows up! Miss Cutie III in Spanish cedar. It’s time for a band weaving party, y’all!
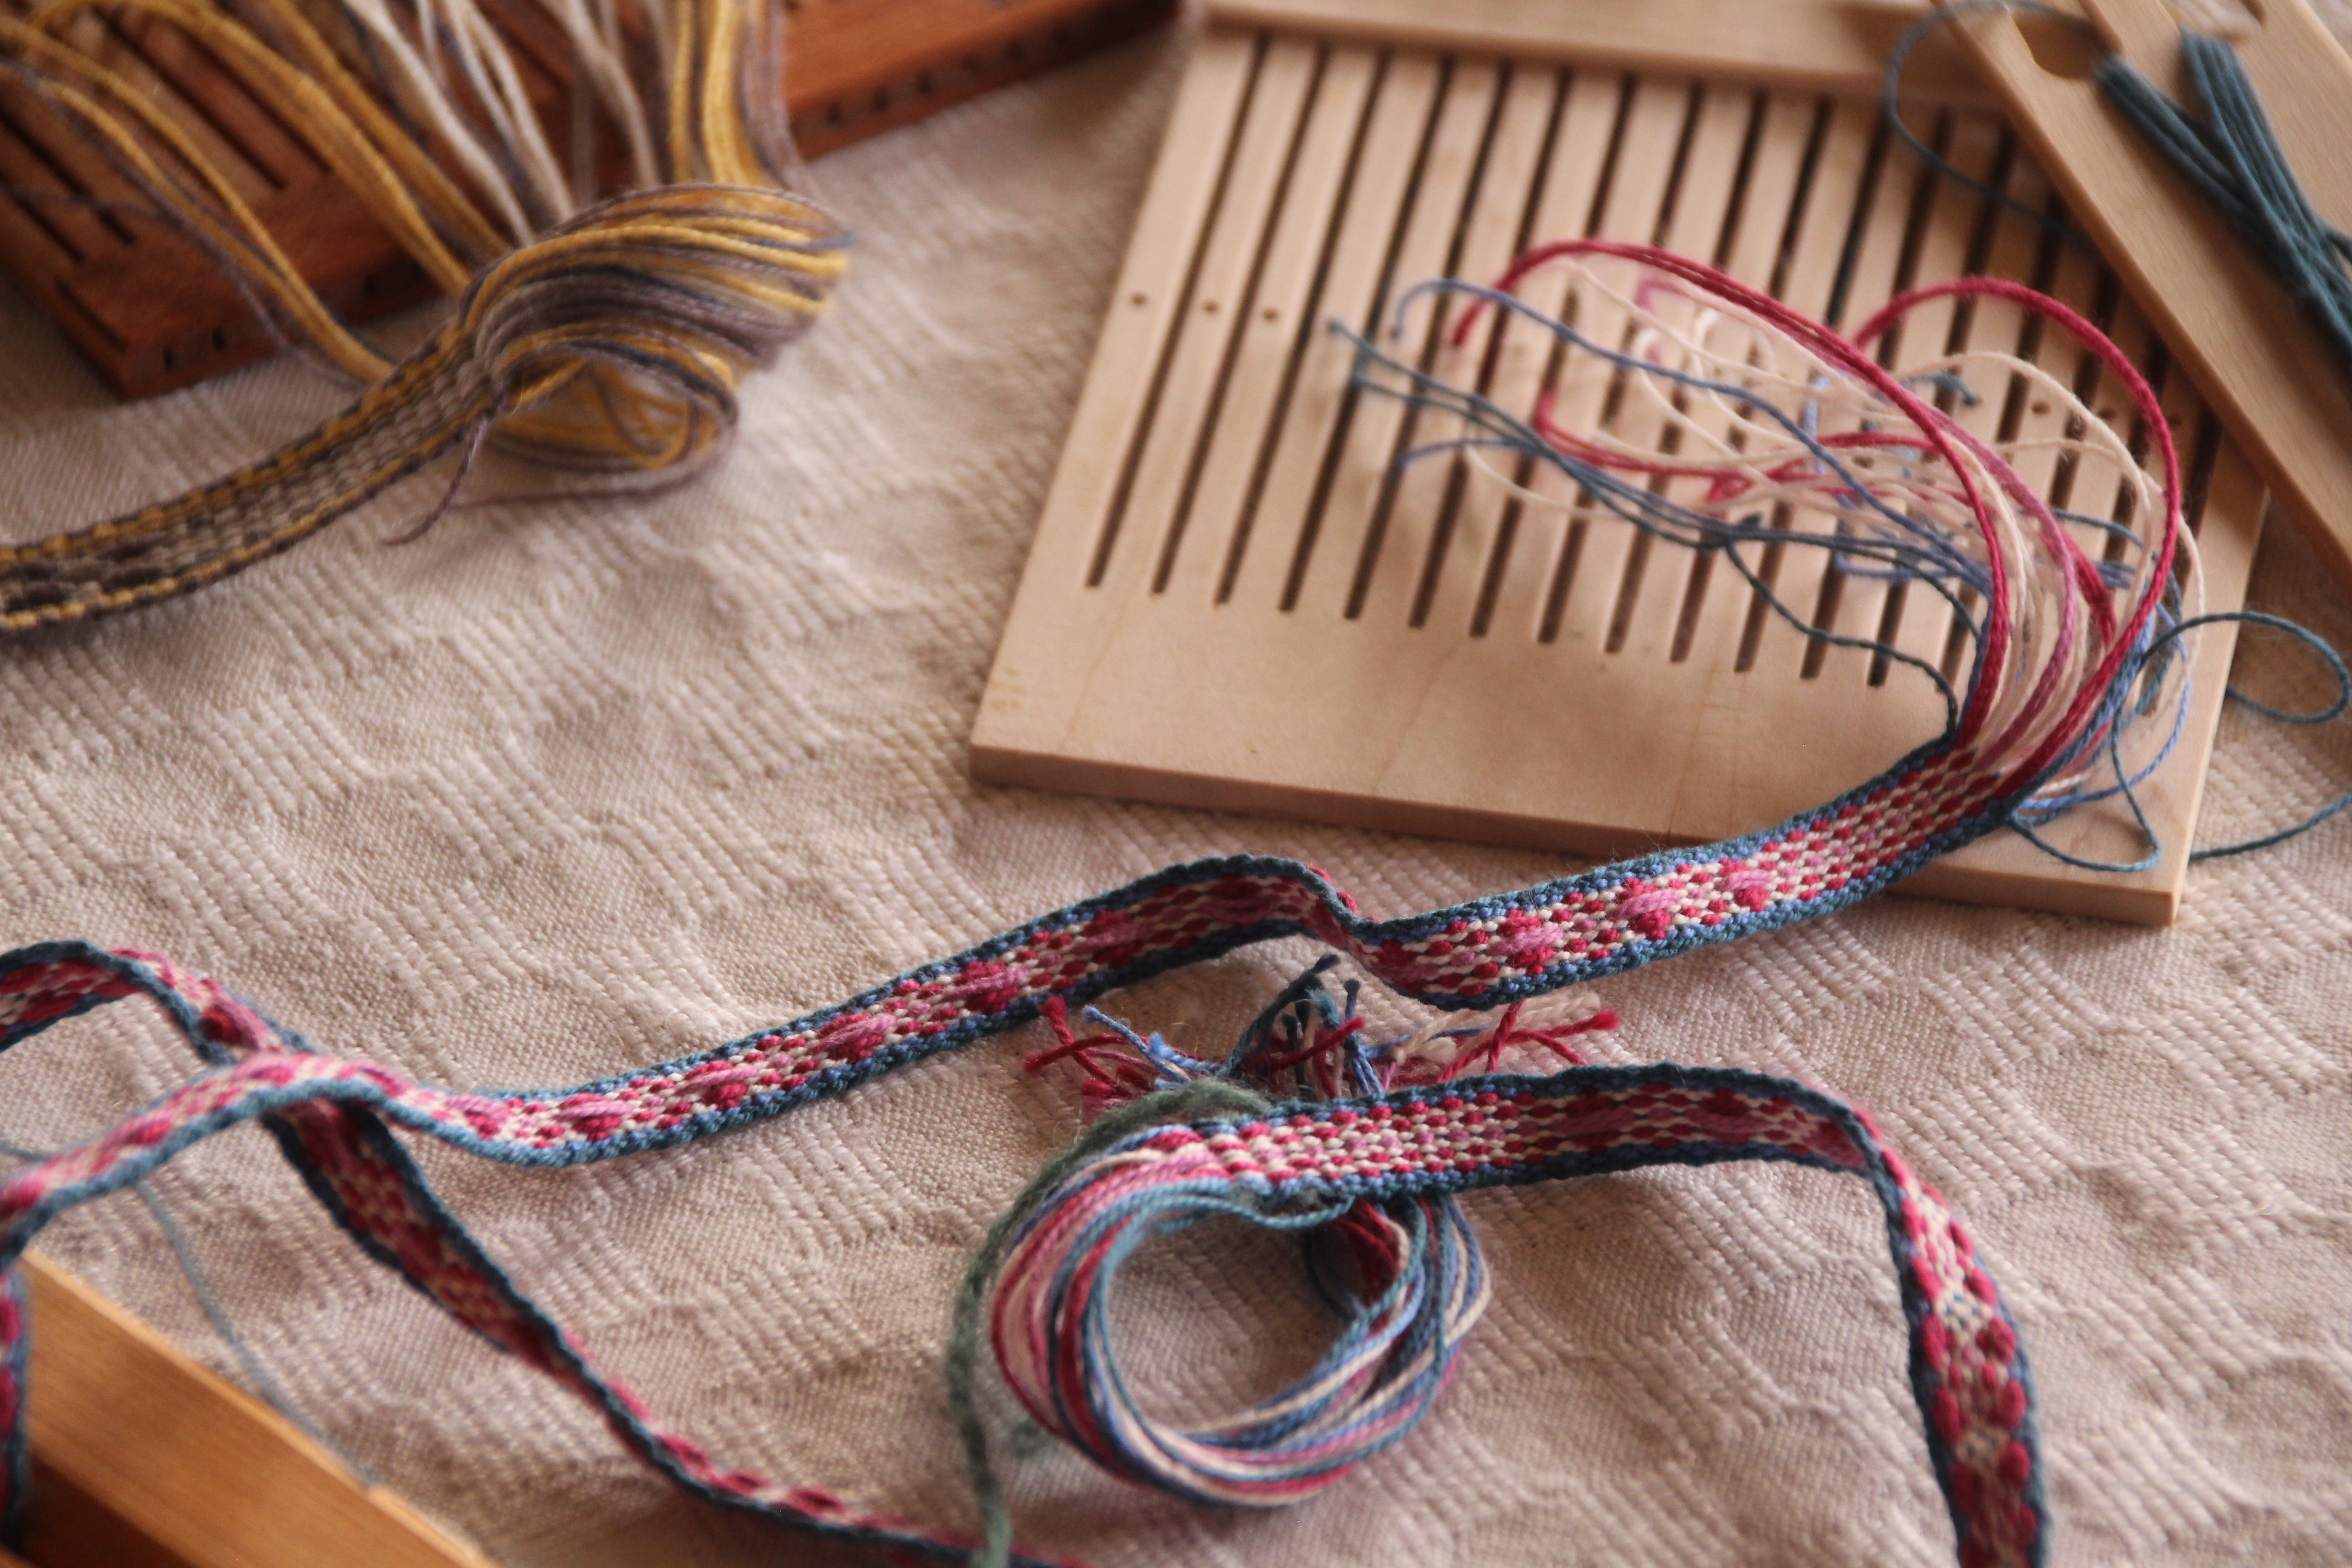
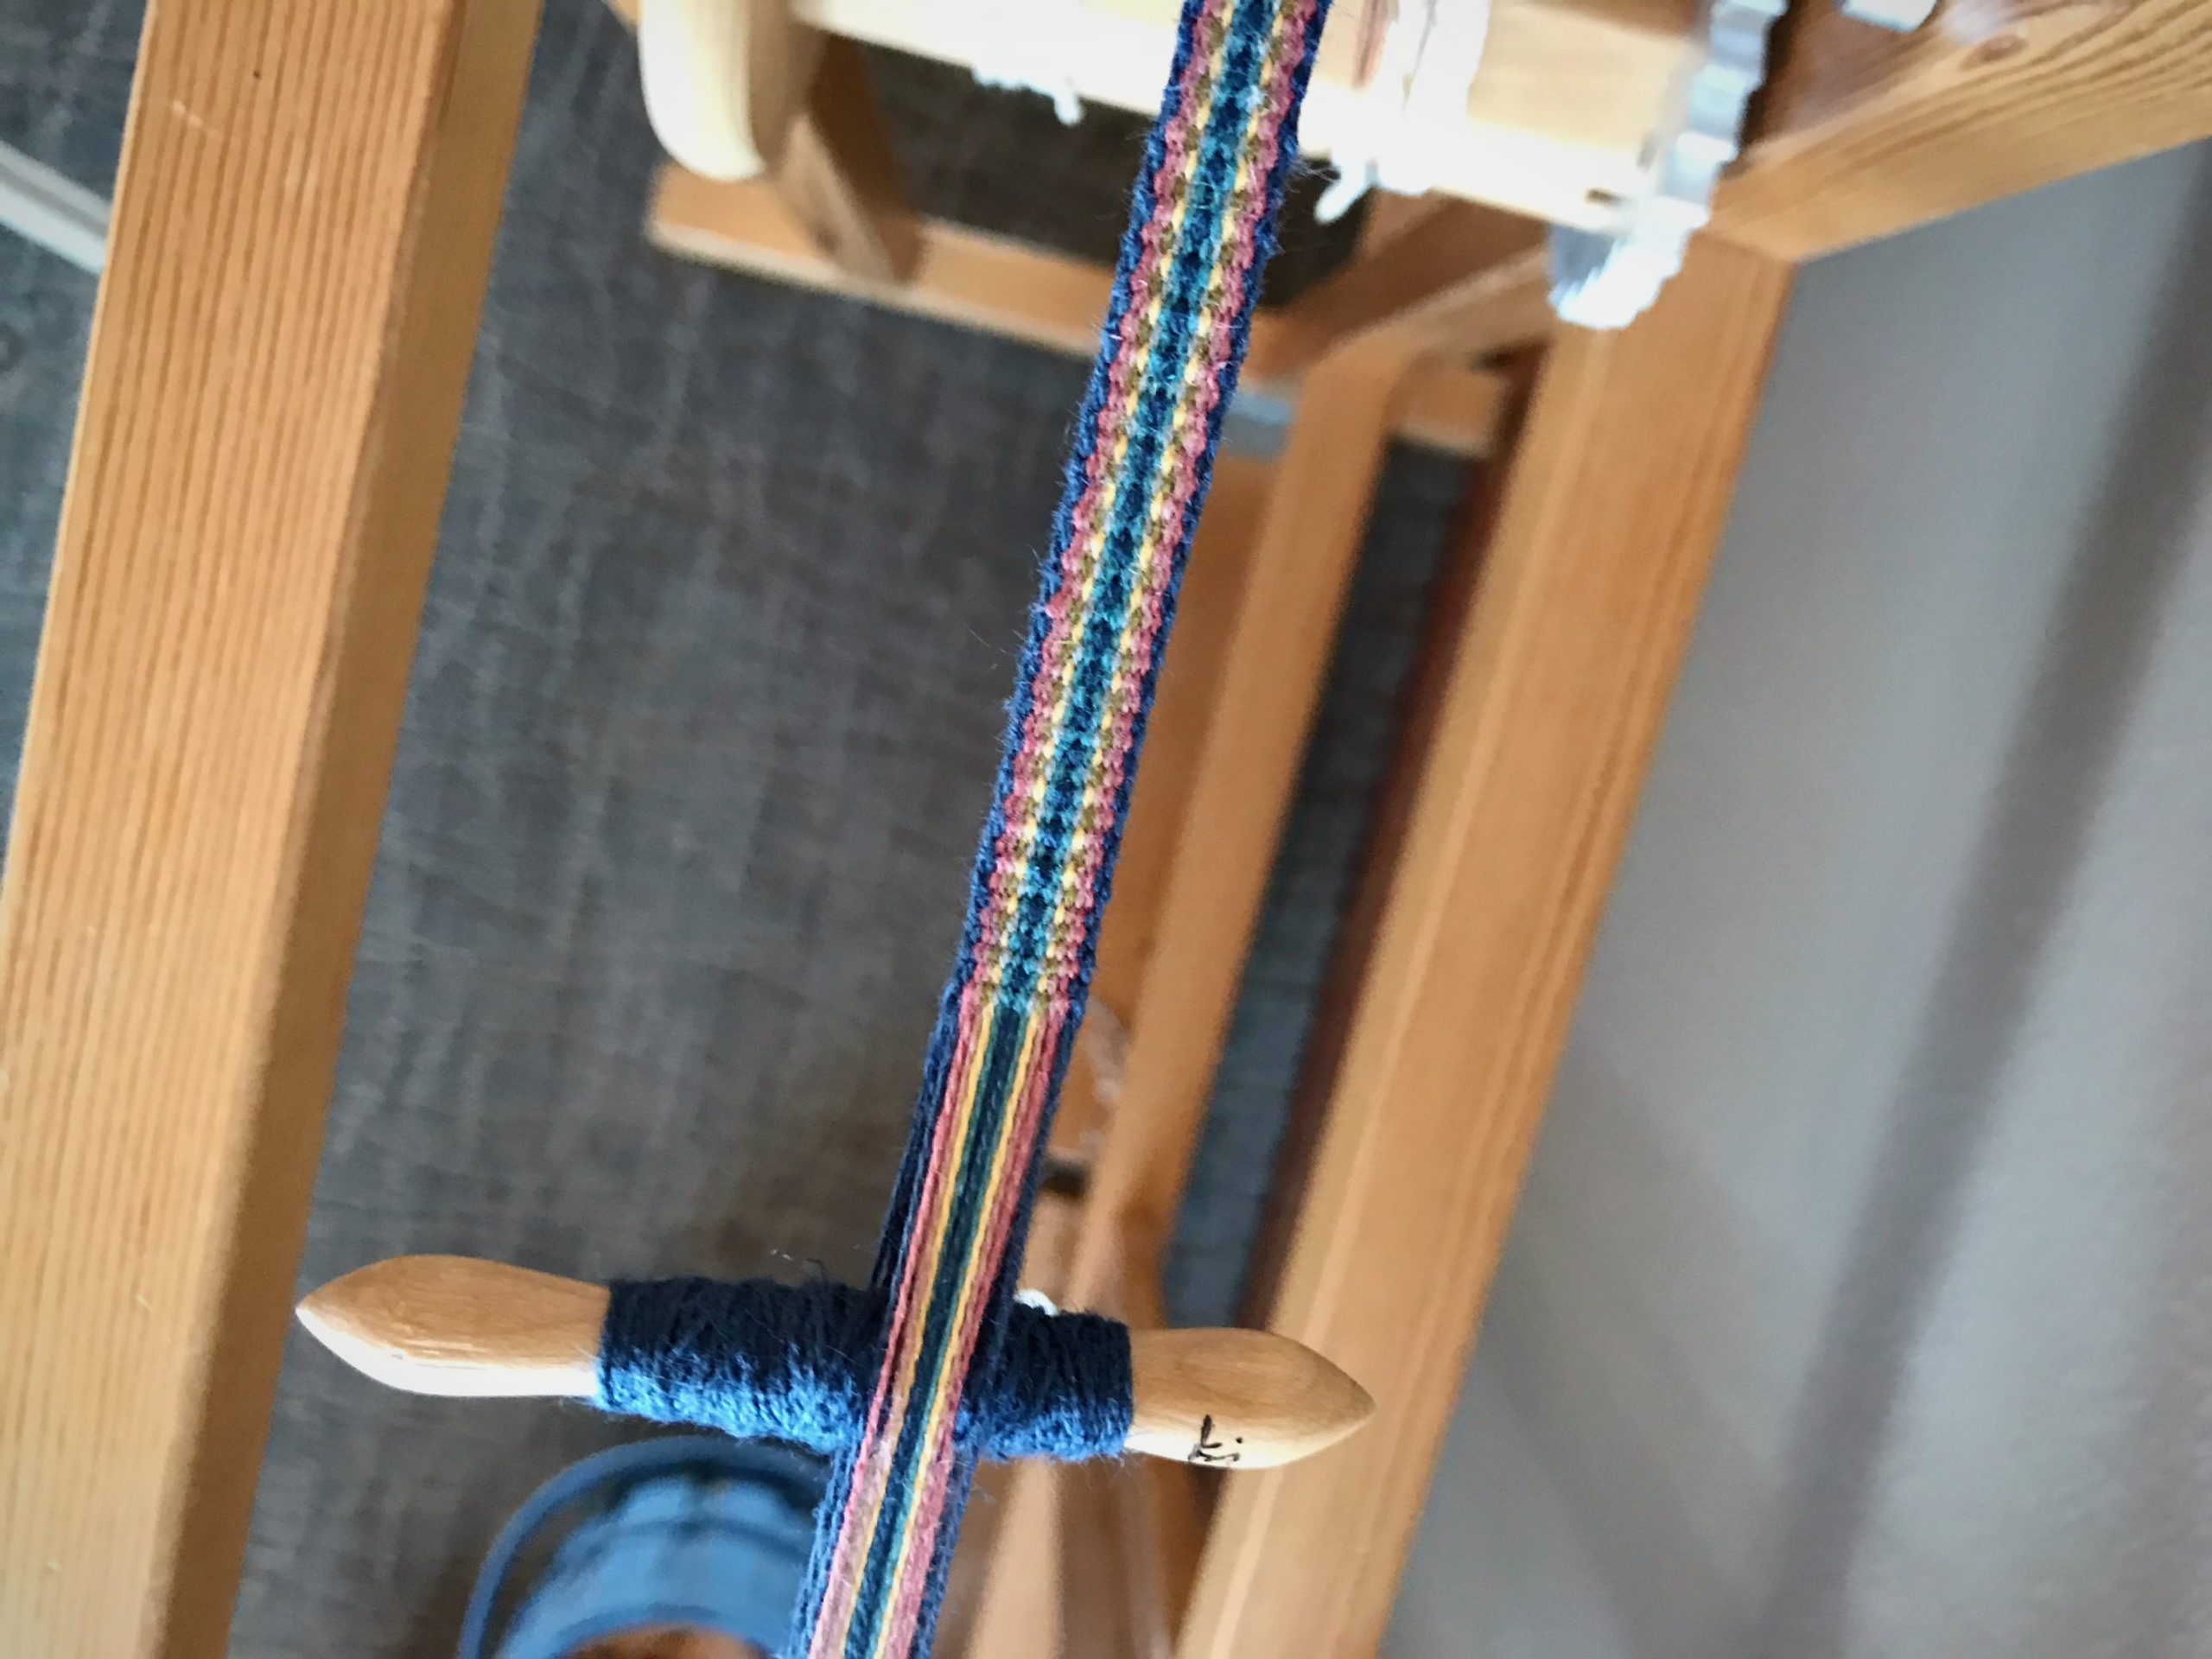
Miss Cutie III shows up unexpected. She waits to be threaded with a few ends from the thrums of the Priceless Monksbelt Runner. (See Process Review: Priceless Monksbelt and Video.)Facedown for threading, Miss Cutie III receives the 16/2 cotton threads for her warp. This warp has five doubled pattern threads.Threaded and ready for a 5-thread pick-up pattern.Narrow band, with a subtle zigzag pattern.Back of band has soft floats in triangular shapes.
Persistence comes from having an end in mind. Prayer is like that. We know our heavenly Father hears us when we pray. We know his outcome is good. Faith compels us to persist in prayer. As we do, the Lord guides our heart to align with his will. All the while, he works behind the scenes to bring his answer, which is better than anything.
Band weaving is a simple activity that helps you notice the little things. You see how each thread falls into place. How the thread turns the selvedge corner just so. How the pattern threads stand proud in floats or hide in subtle patterns. I enjoy practicing my skills as a band weaver. And more so, now that Steve has turned his attention to making band heddles for me.
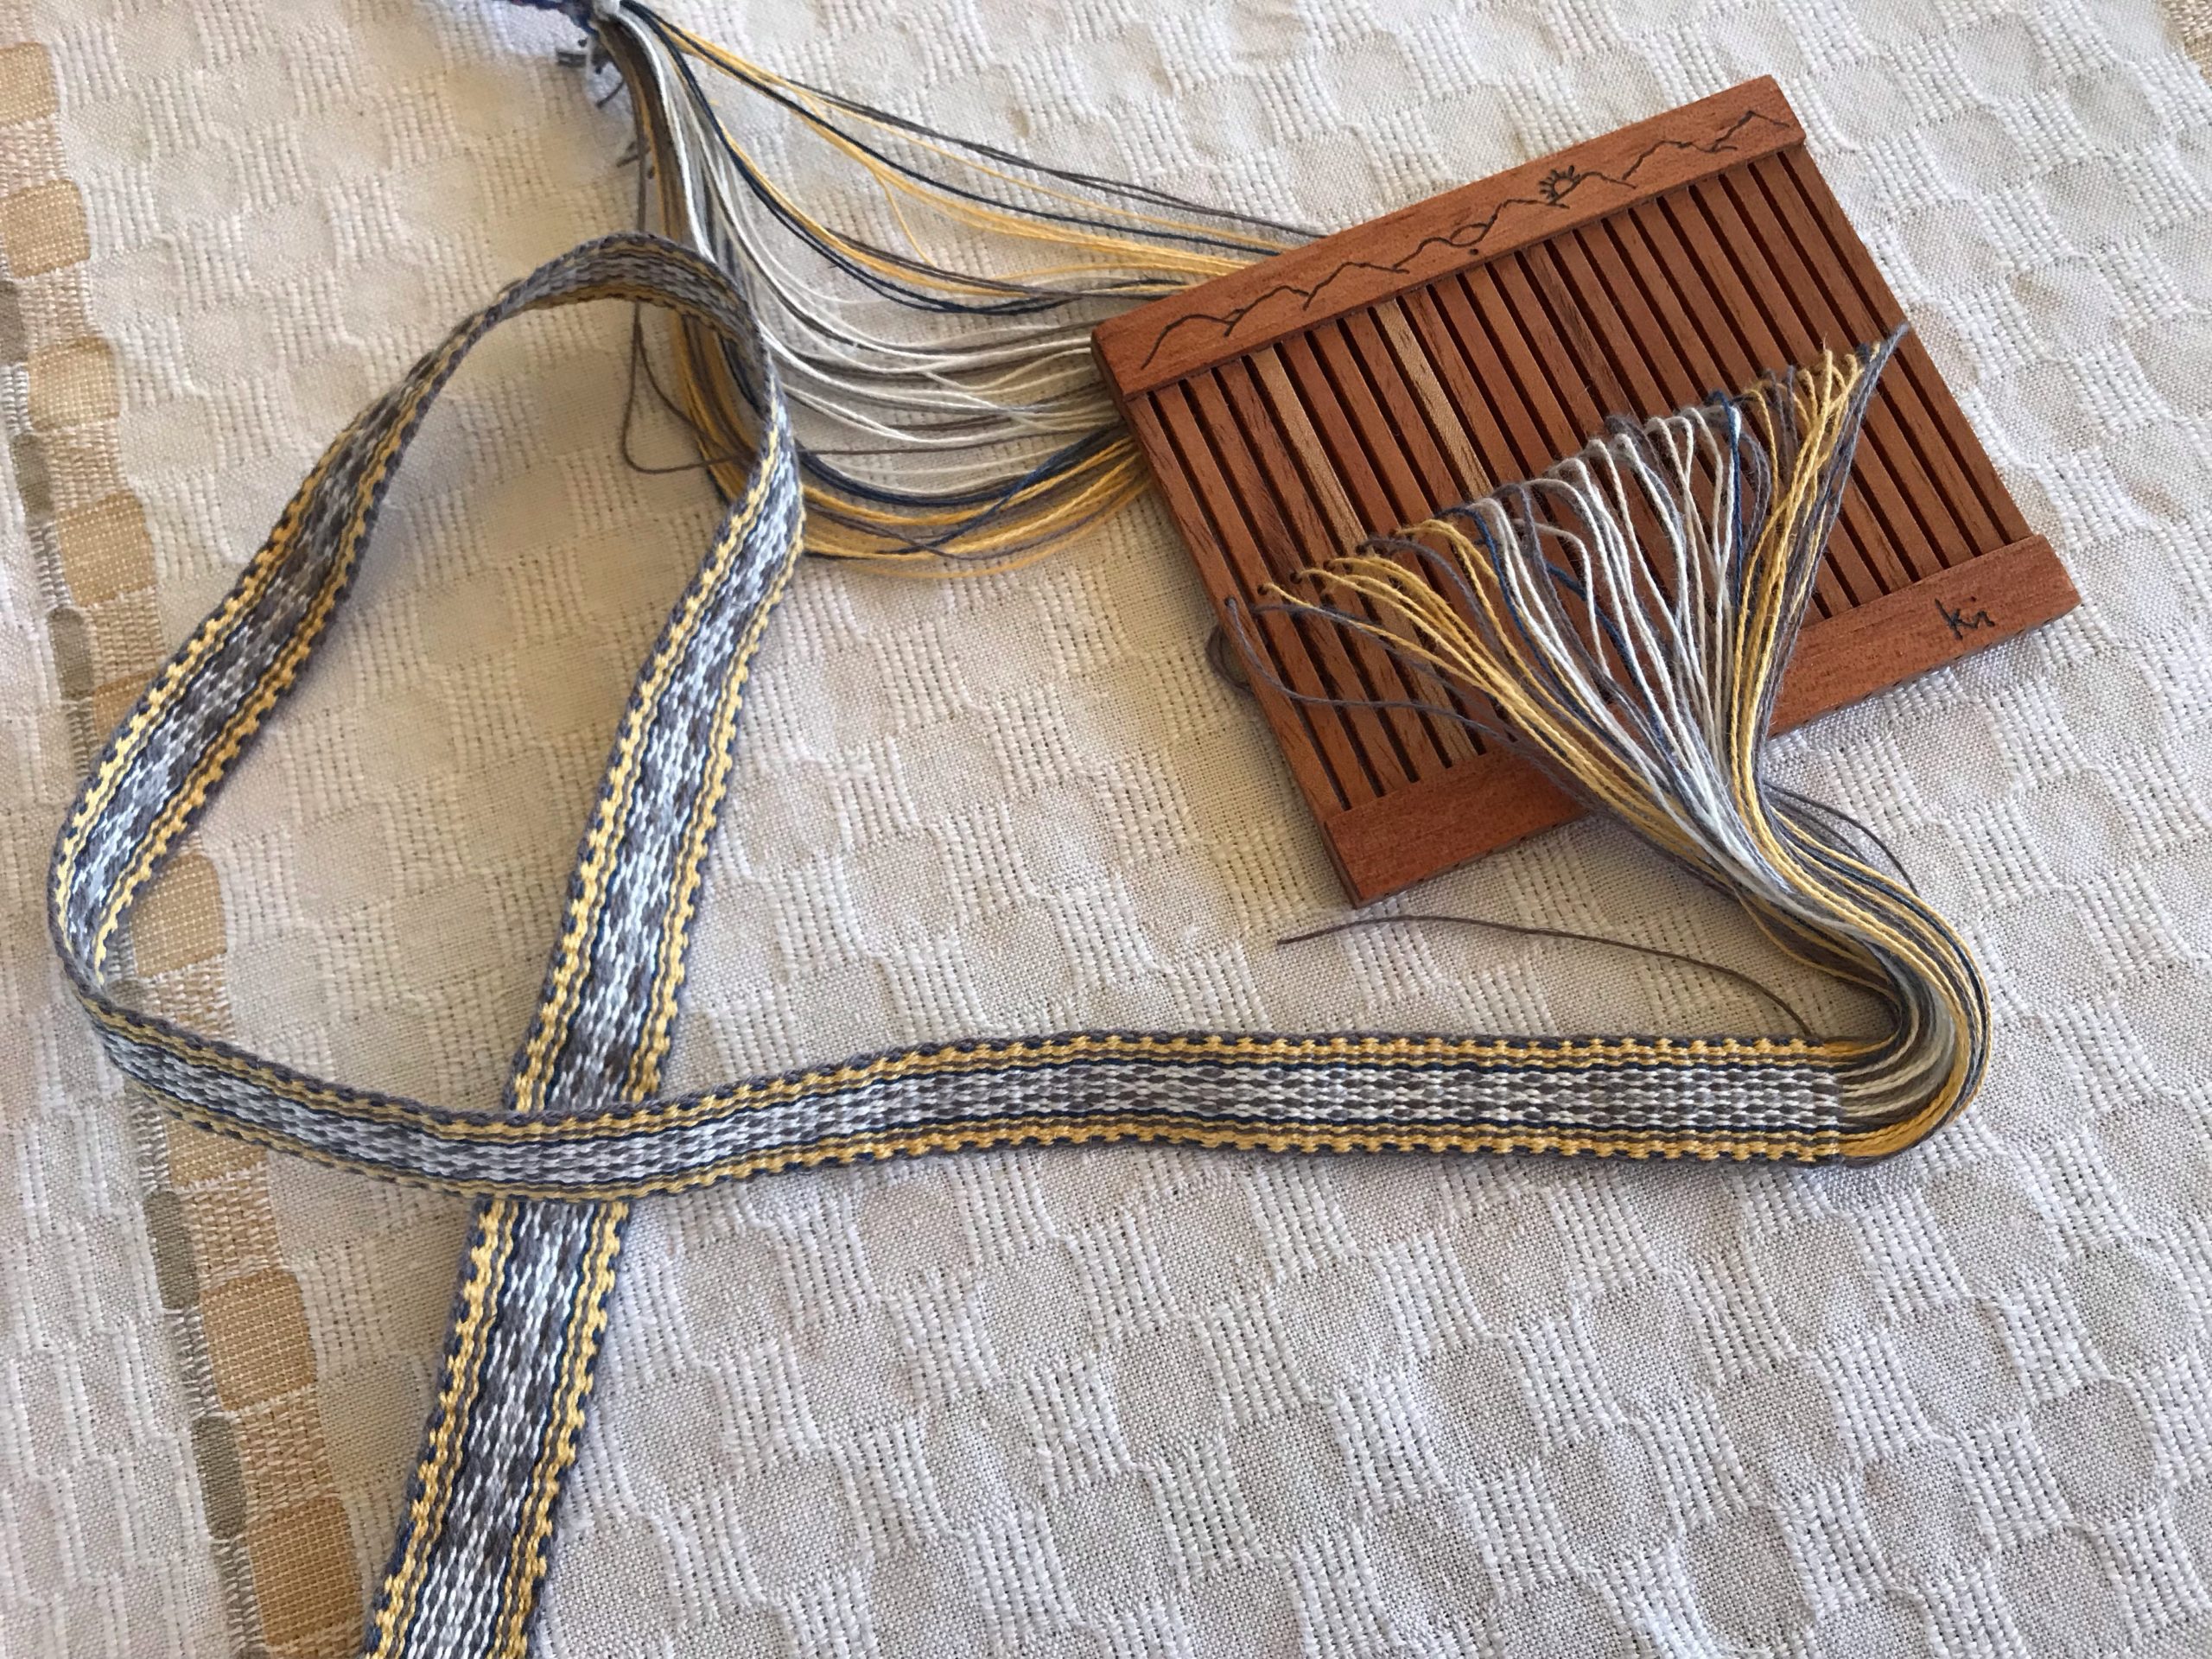
Workshop at Contemporary Handweavers of Texas Conference 2019 got me started with weaving patterned bands on a rigid heddle.First heddle by Steve is made from Soft Maple. Band has 21 ends (with 5 pattern threads, doubled). 8/2 cotton and 22/2 cottolin.Heddle made from Spanish Cedar. Wood-burned top represents the Texas Hill Country hills that we enjoy. Band has 45 ends (with 5 pattern threads, doubled), using the heddle’s full width. 8/2 cotton and 22/2 cottolin.Walnut band heddle in the making.Torgenrud, H. (2015). Norwegian pick-up bandweaving. Schiffer Publishing; Foulkes, S. (2018). Weaving Patterned Bands. How to Create and Design with 5, 7, and 9 Pattern Threads. Schiffer Publishing; Neumüller, K. (2021). Simple Weave. (Language: Swedish). Natur & Kultur, Stockholm.
Pictures in the following slideshow video tell more of the story.
Edited: Steve has compiled photo documentation of how he made my Spanish Cedar and Walnut heddles. Click HERE to send me an email requesting a PDF copy of Making a Band Heddle.
“With so many looms, how do you decide what to weave every day?,” I was asked. The answer lies in my Weaving Rhythm. I have five floor looms. I happily aspire to meet the challenge of keeping all of them active.
Glossary
Weaving Rhythm ~ A pattern created across time, through a regular succession of weaving-related tasks.
Arrange individual tasks to keep each loom consistently moving forward in the weaving continuum.
Weaving Continuum ~ The cycle for each loom that is continually repeated.
When the first few centimeters are woven on a new project, begin planning the next project. When finishing is completed for the current project, wind a new warp and dress the loom for the next project.
First Things First ~ Prioritize daily tasks to maintain the Weaving Rhythm.
Finishing
Dressing
Weaving
Do some finishing work first. Do some loom-dressing tasks next. The reward, then, is sitting at one of the dressed looms and freely weaving for the pleasure of it.
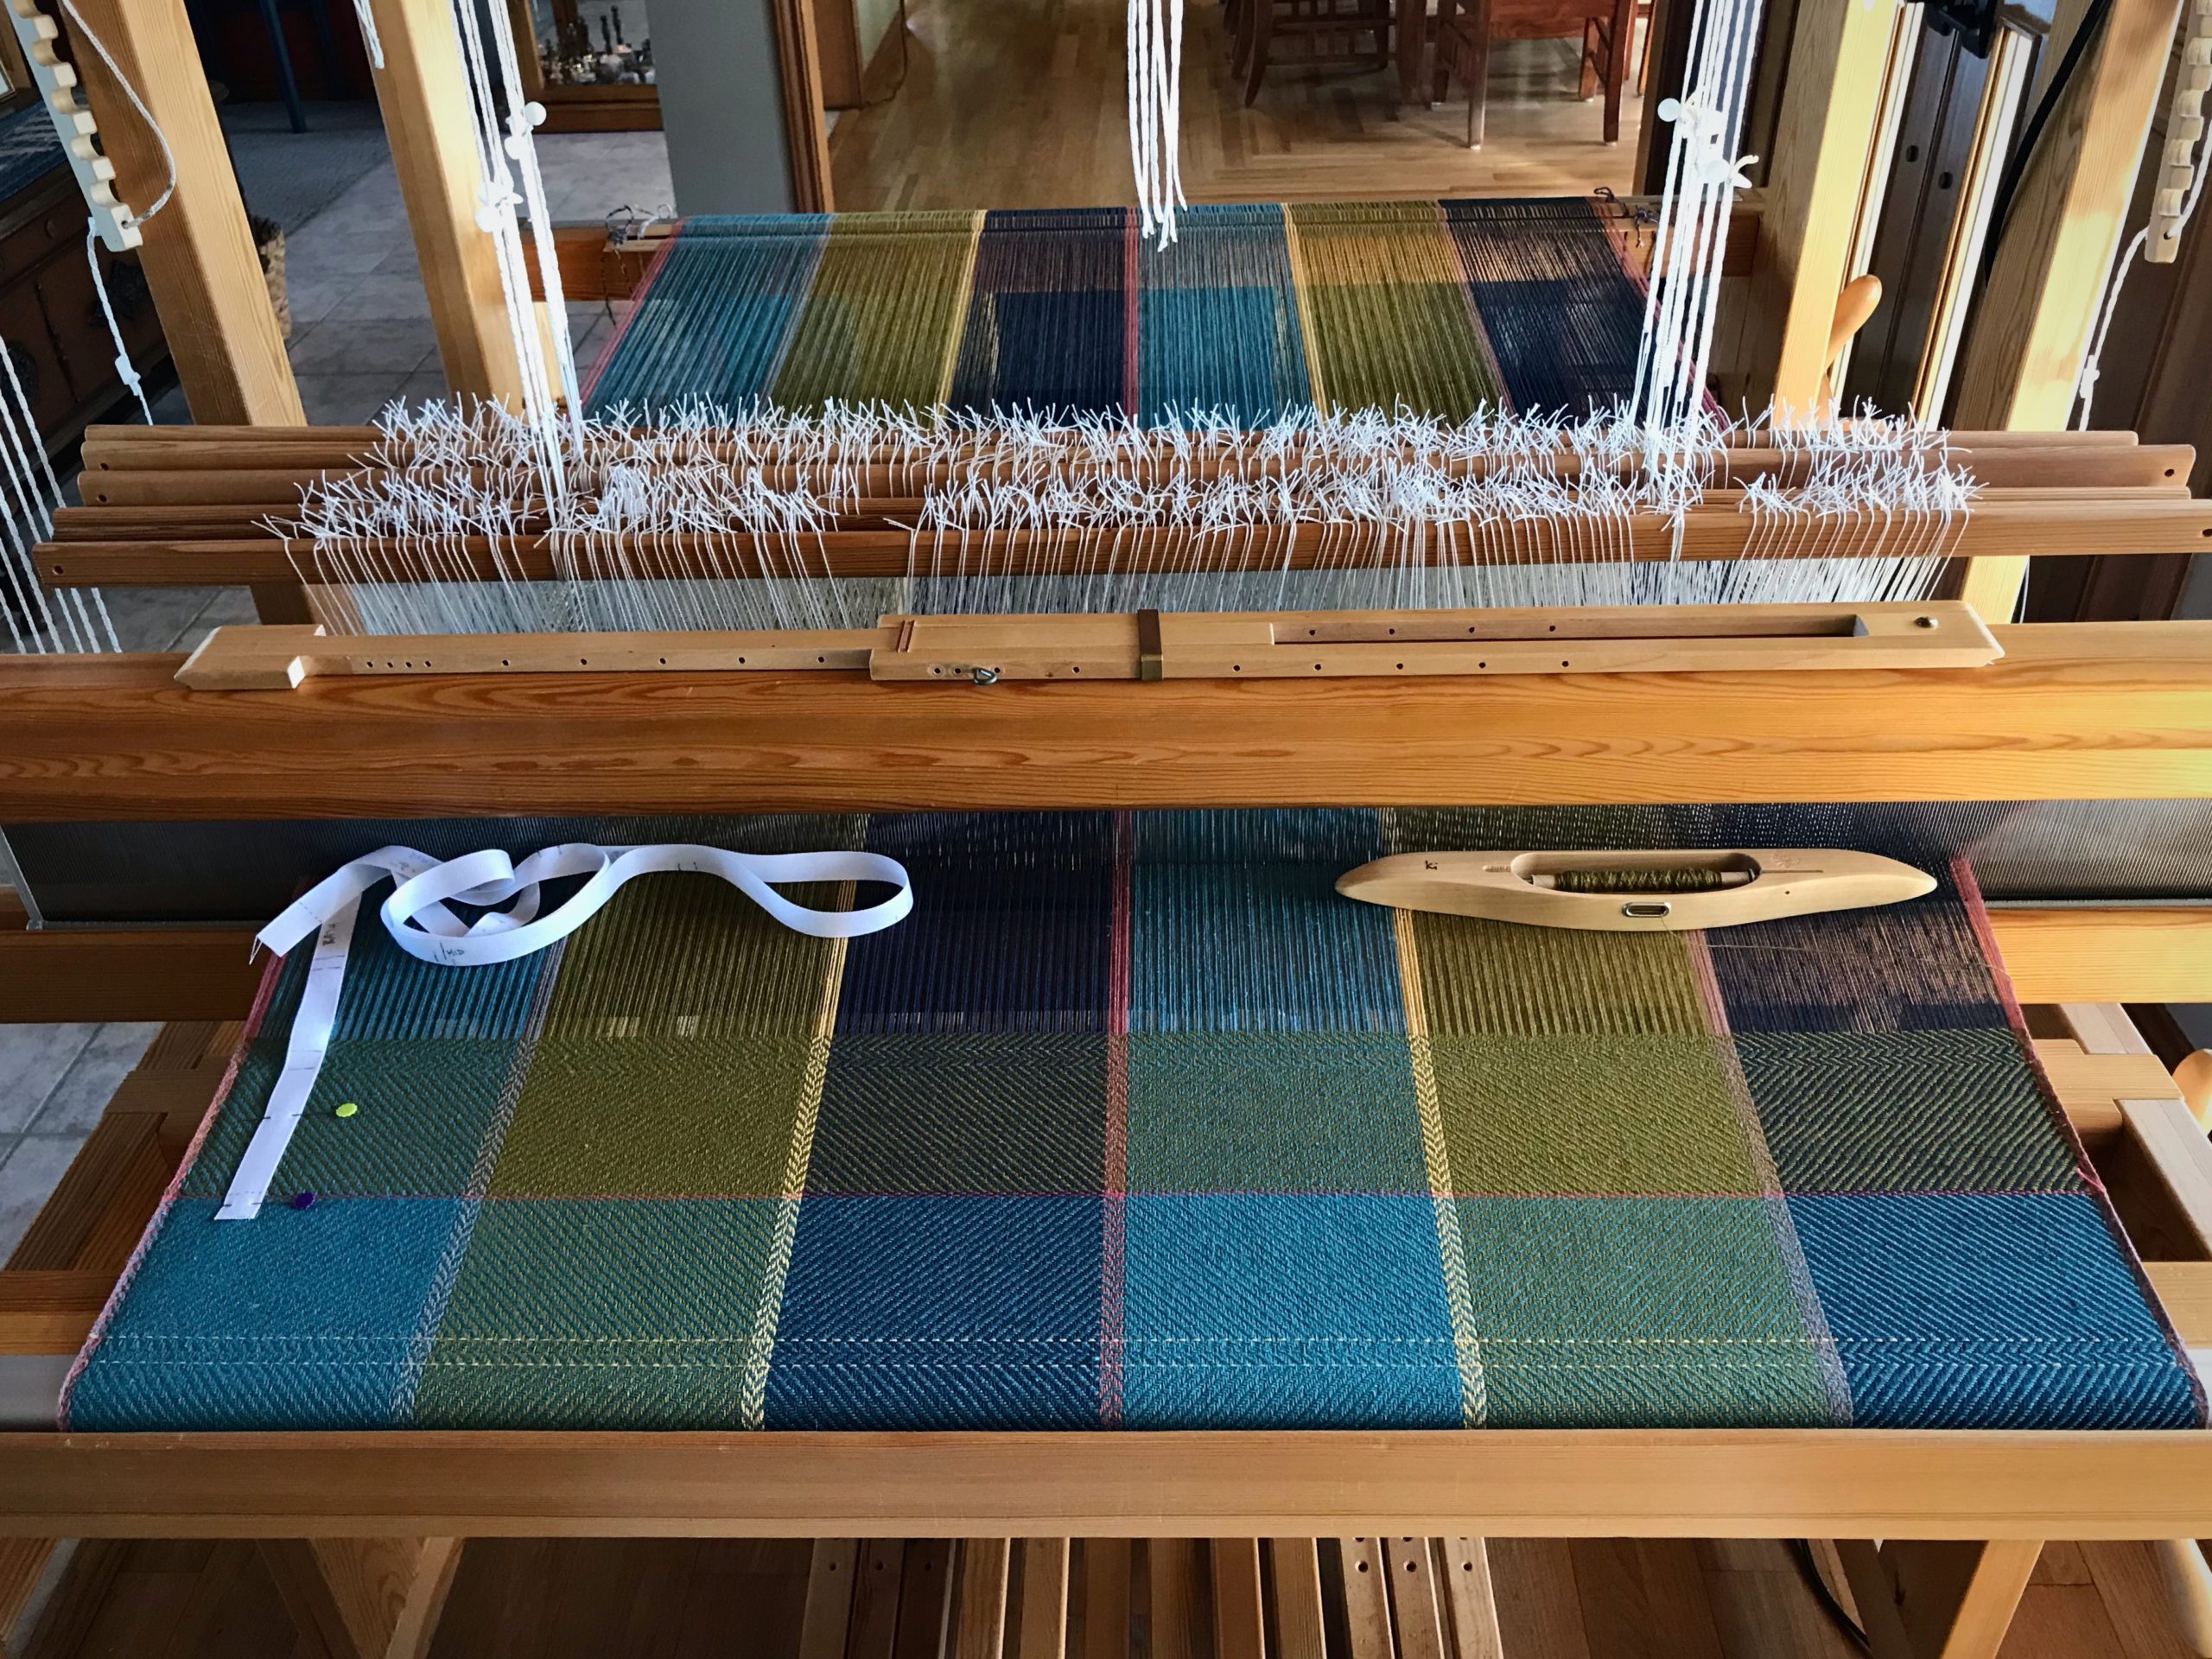
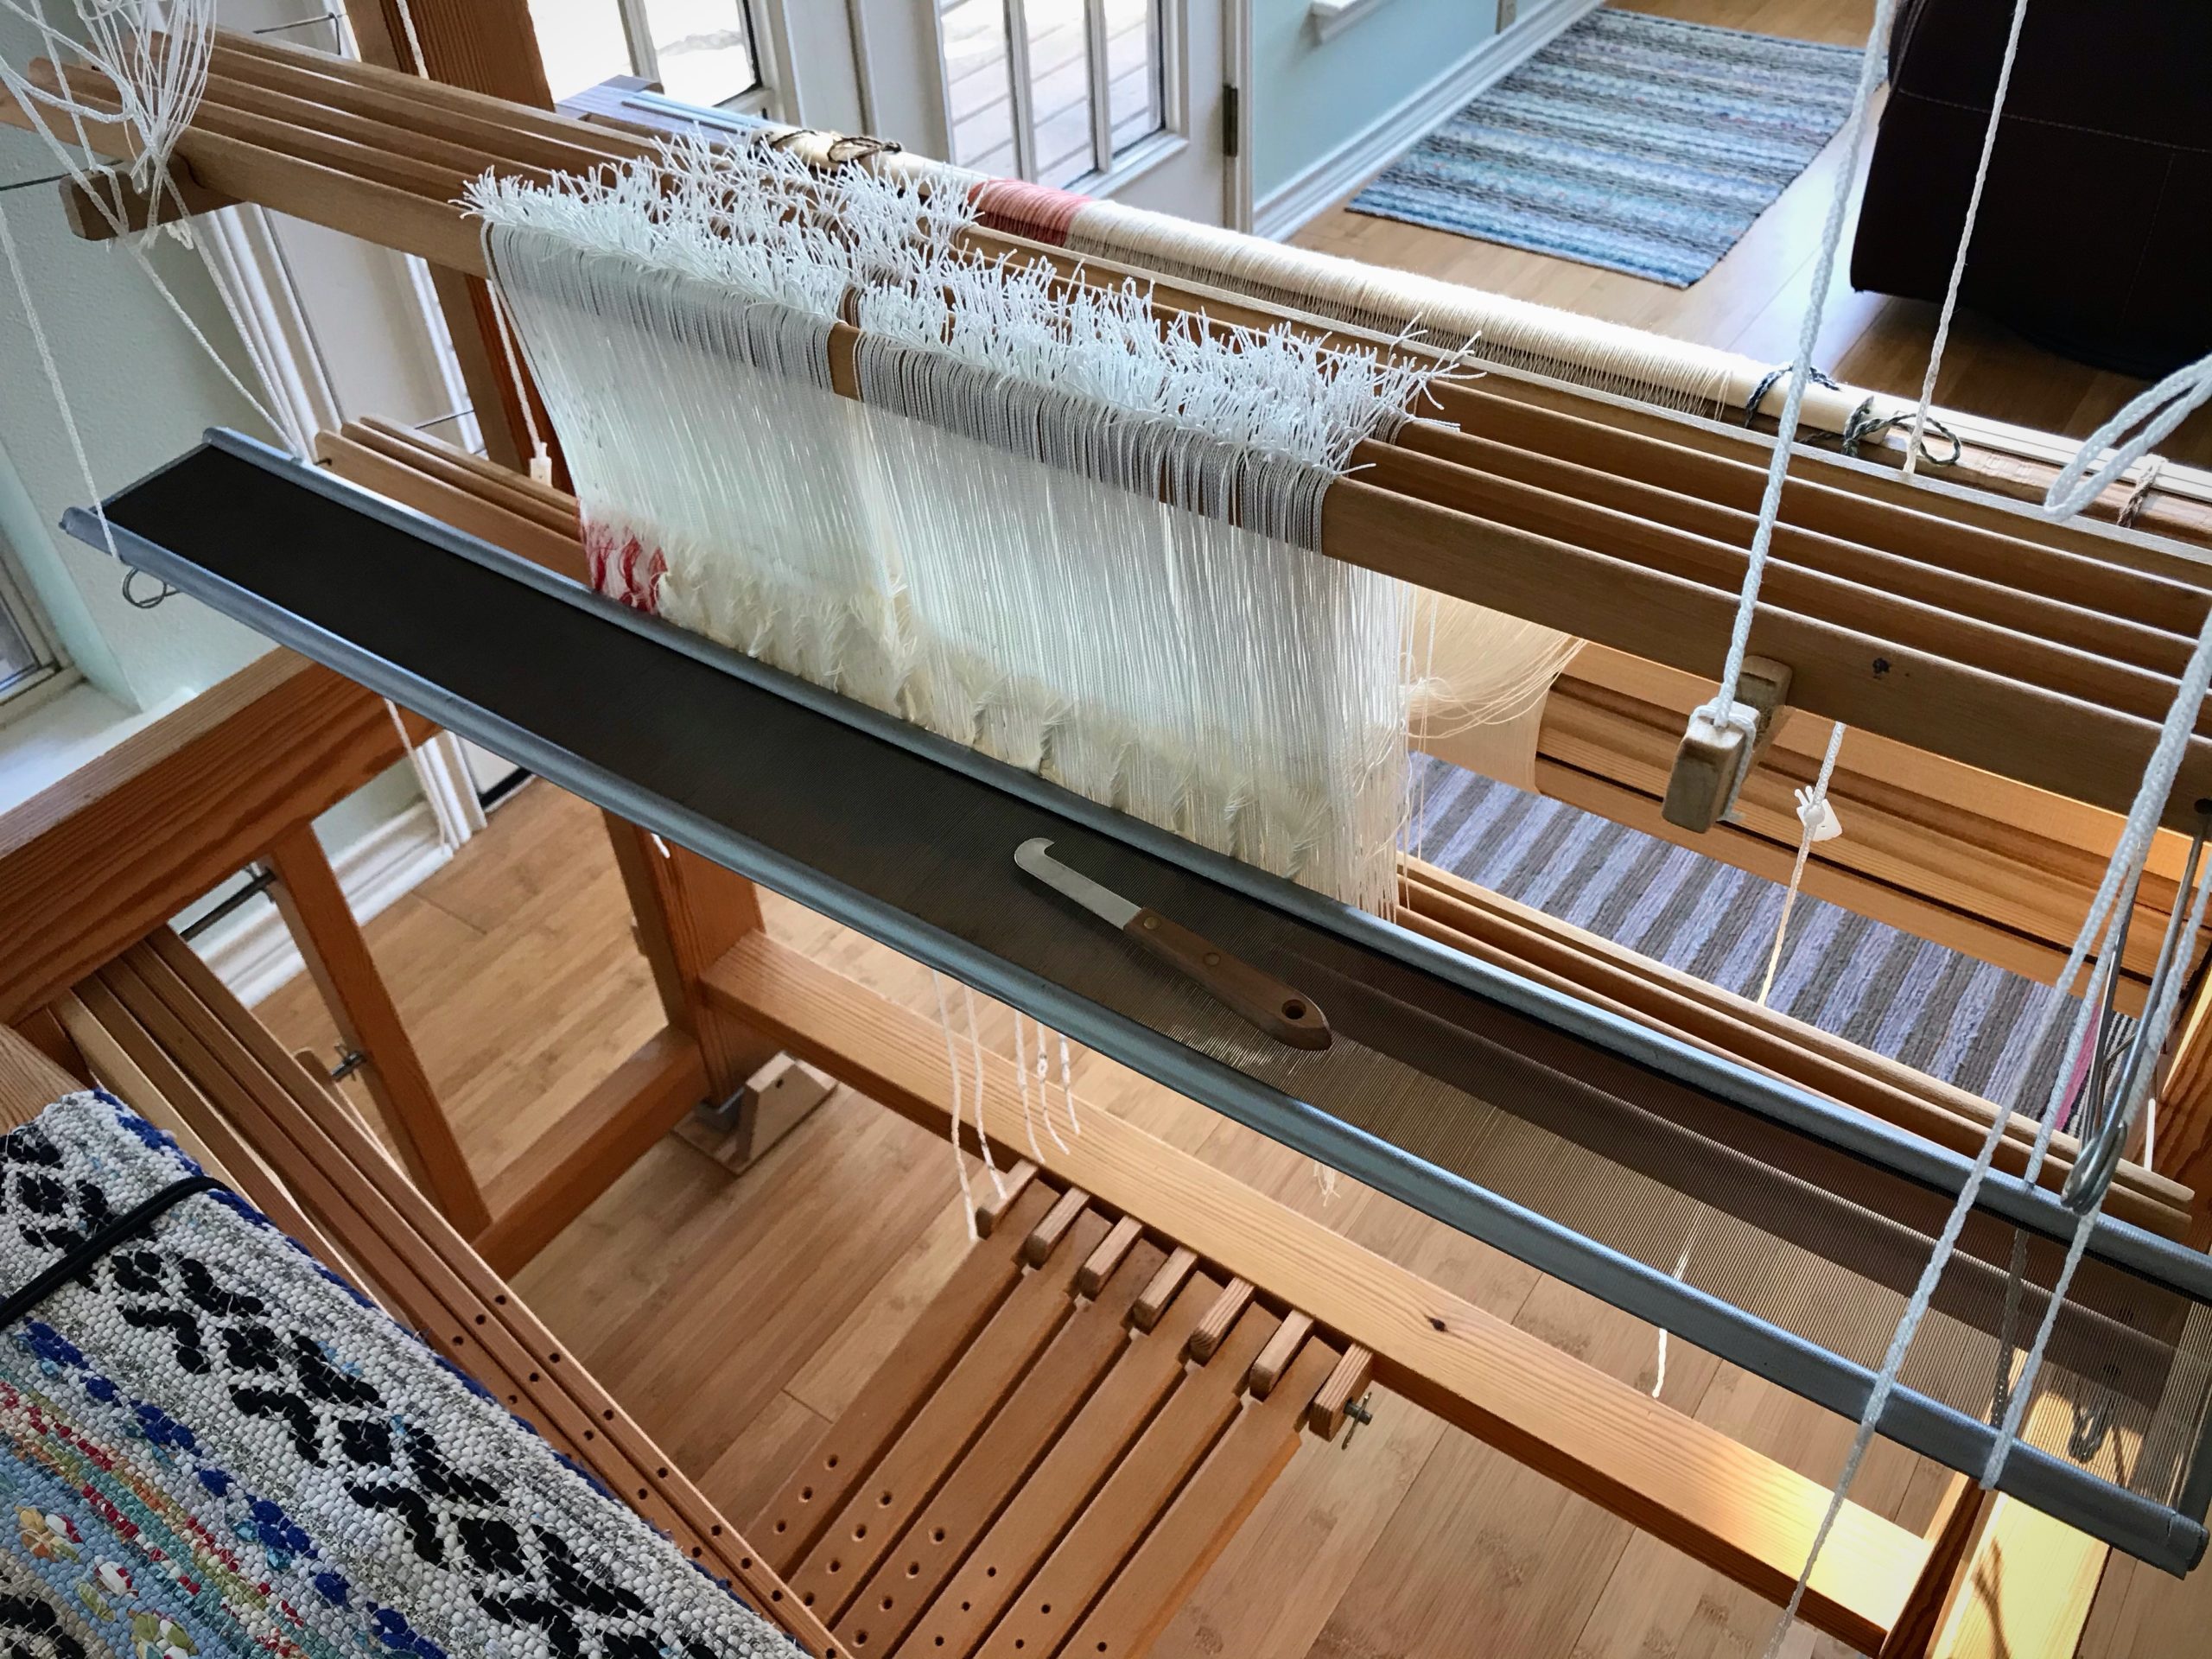
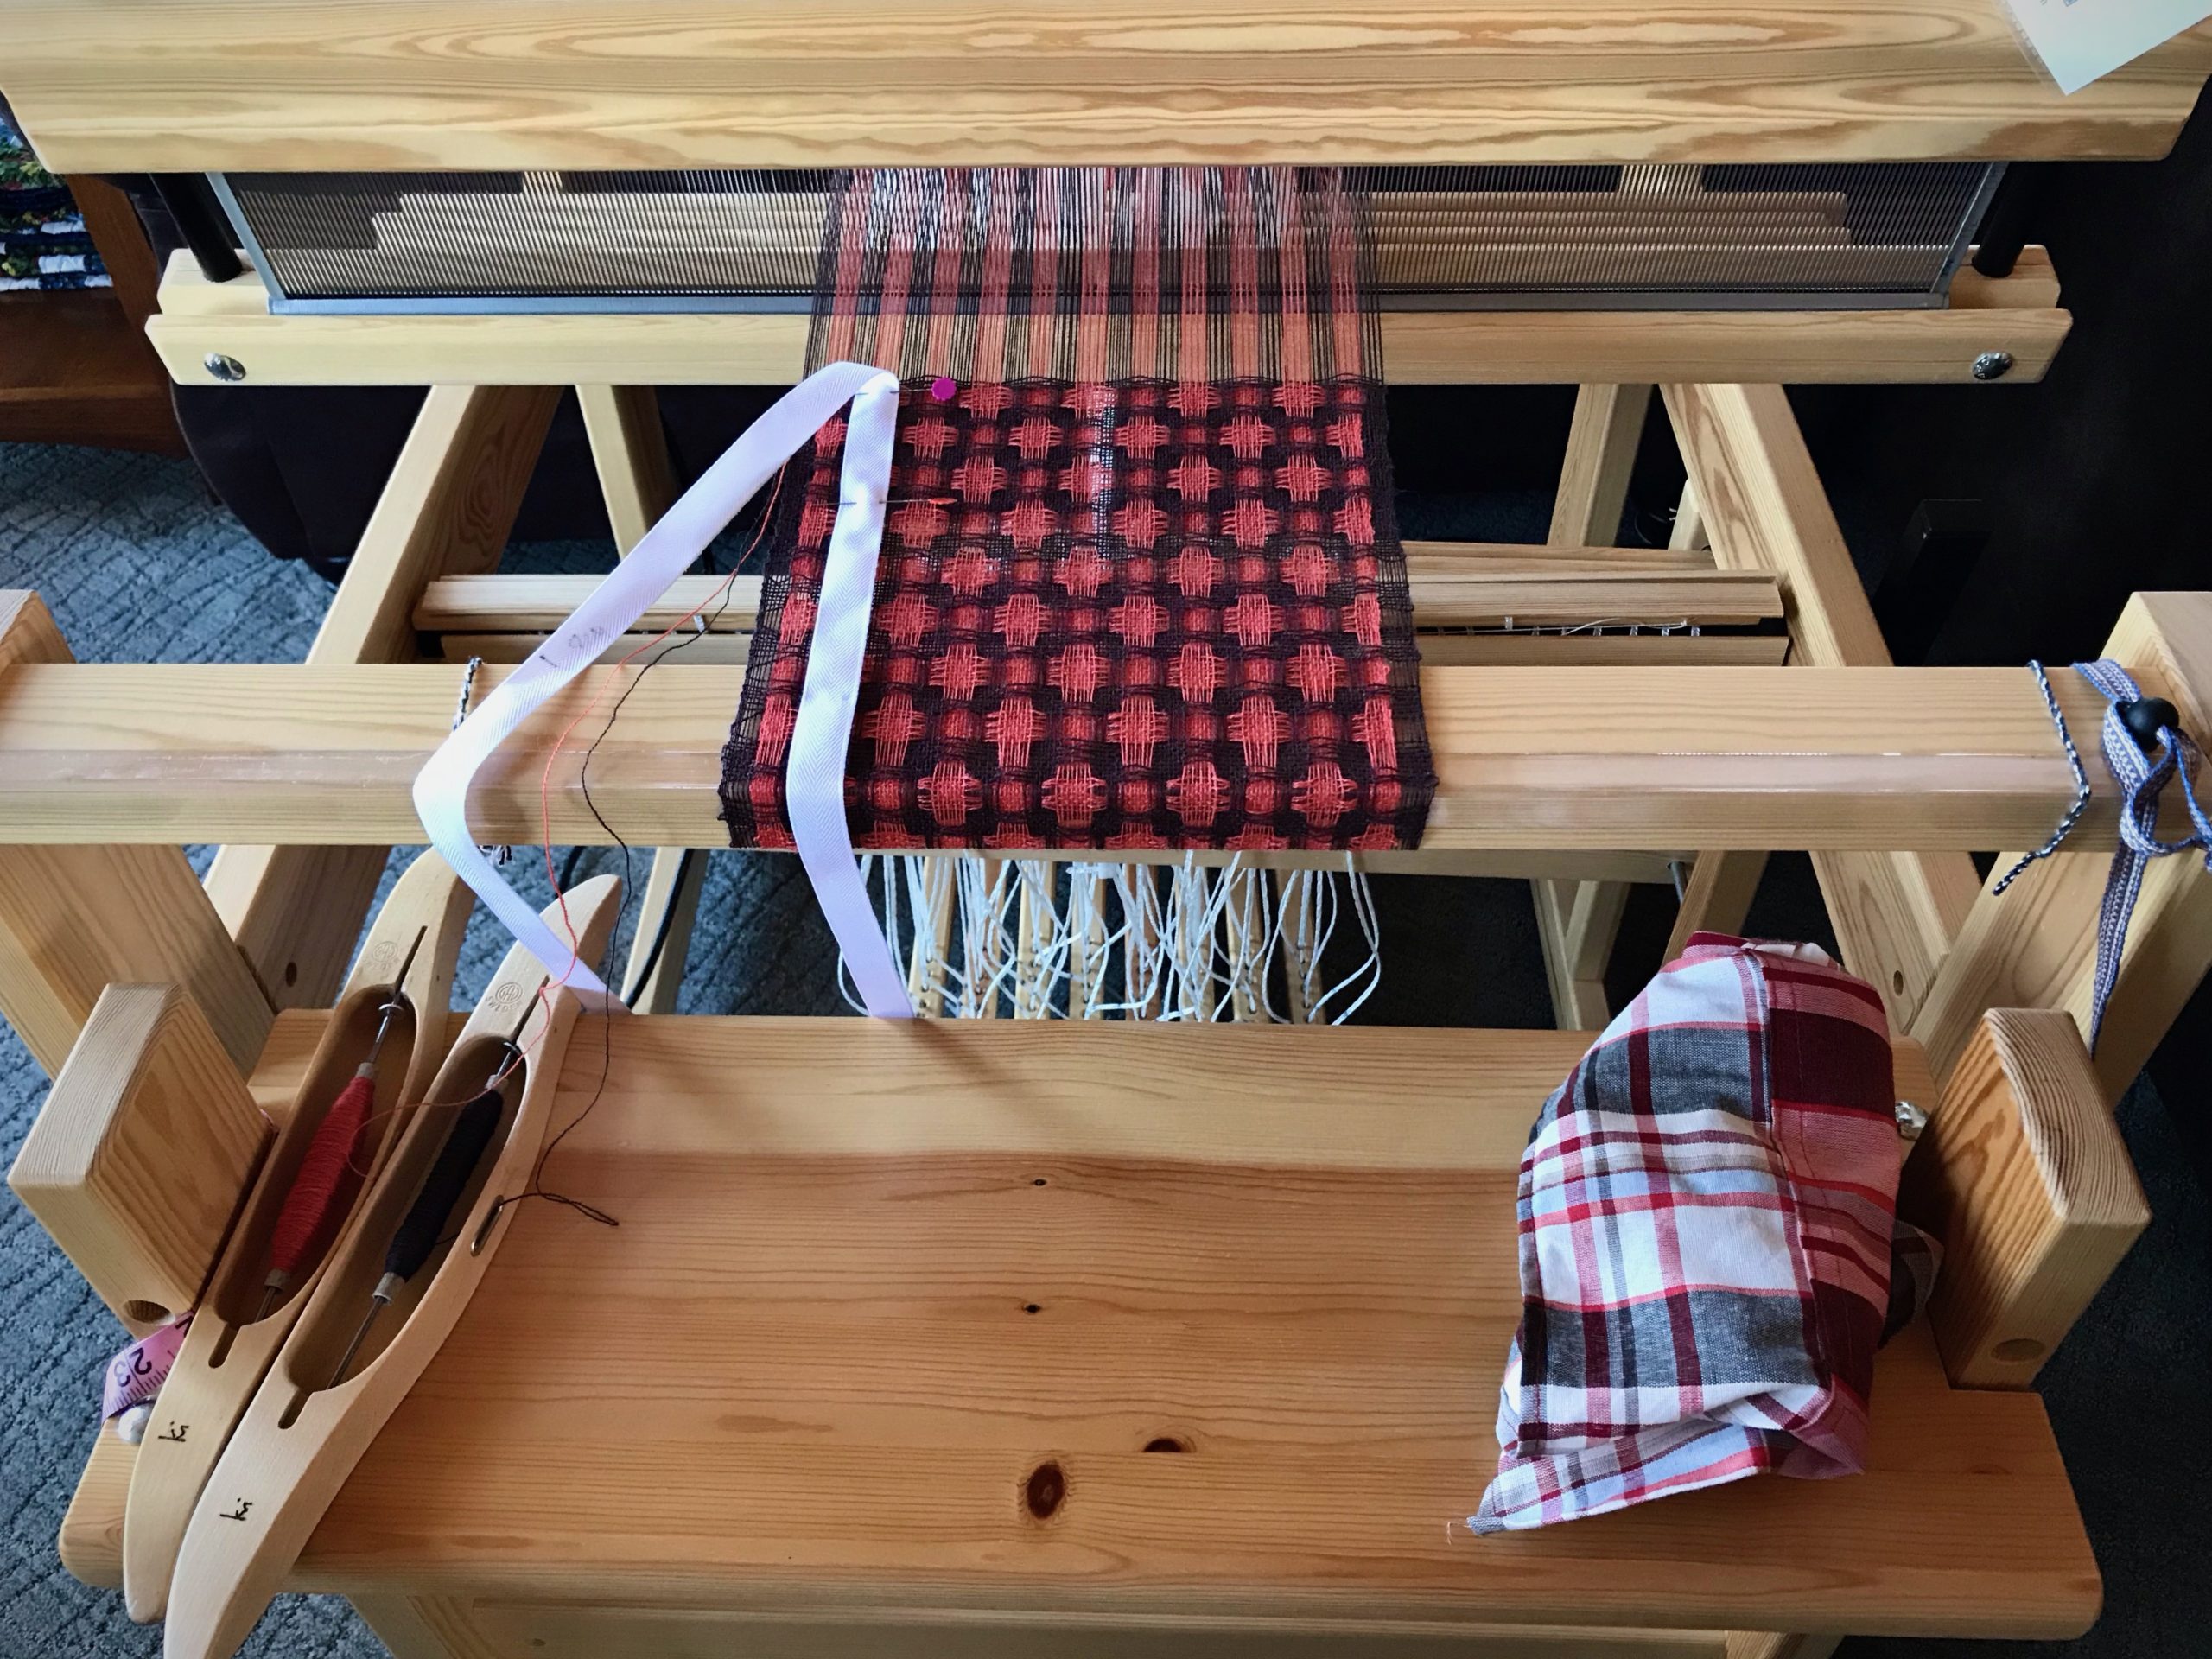
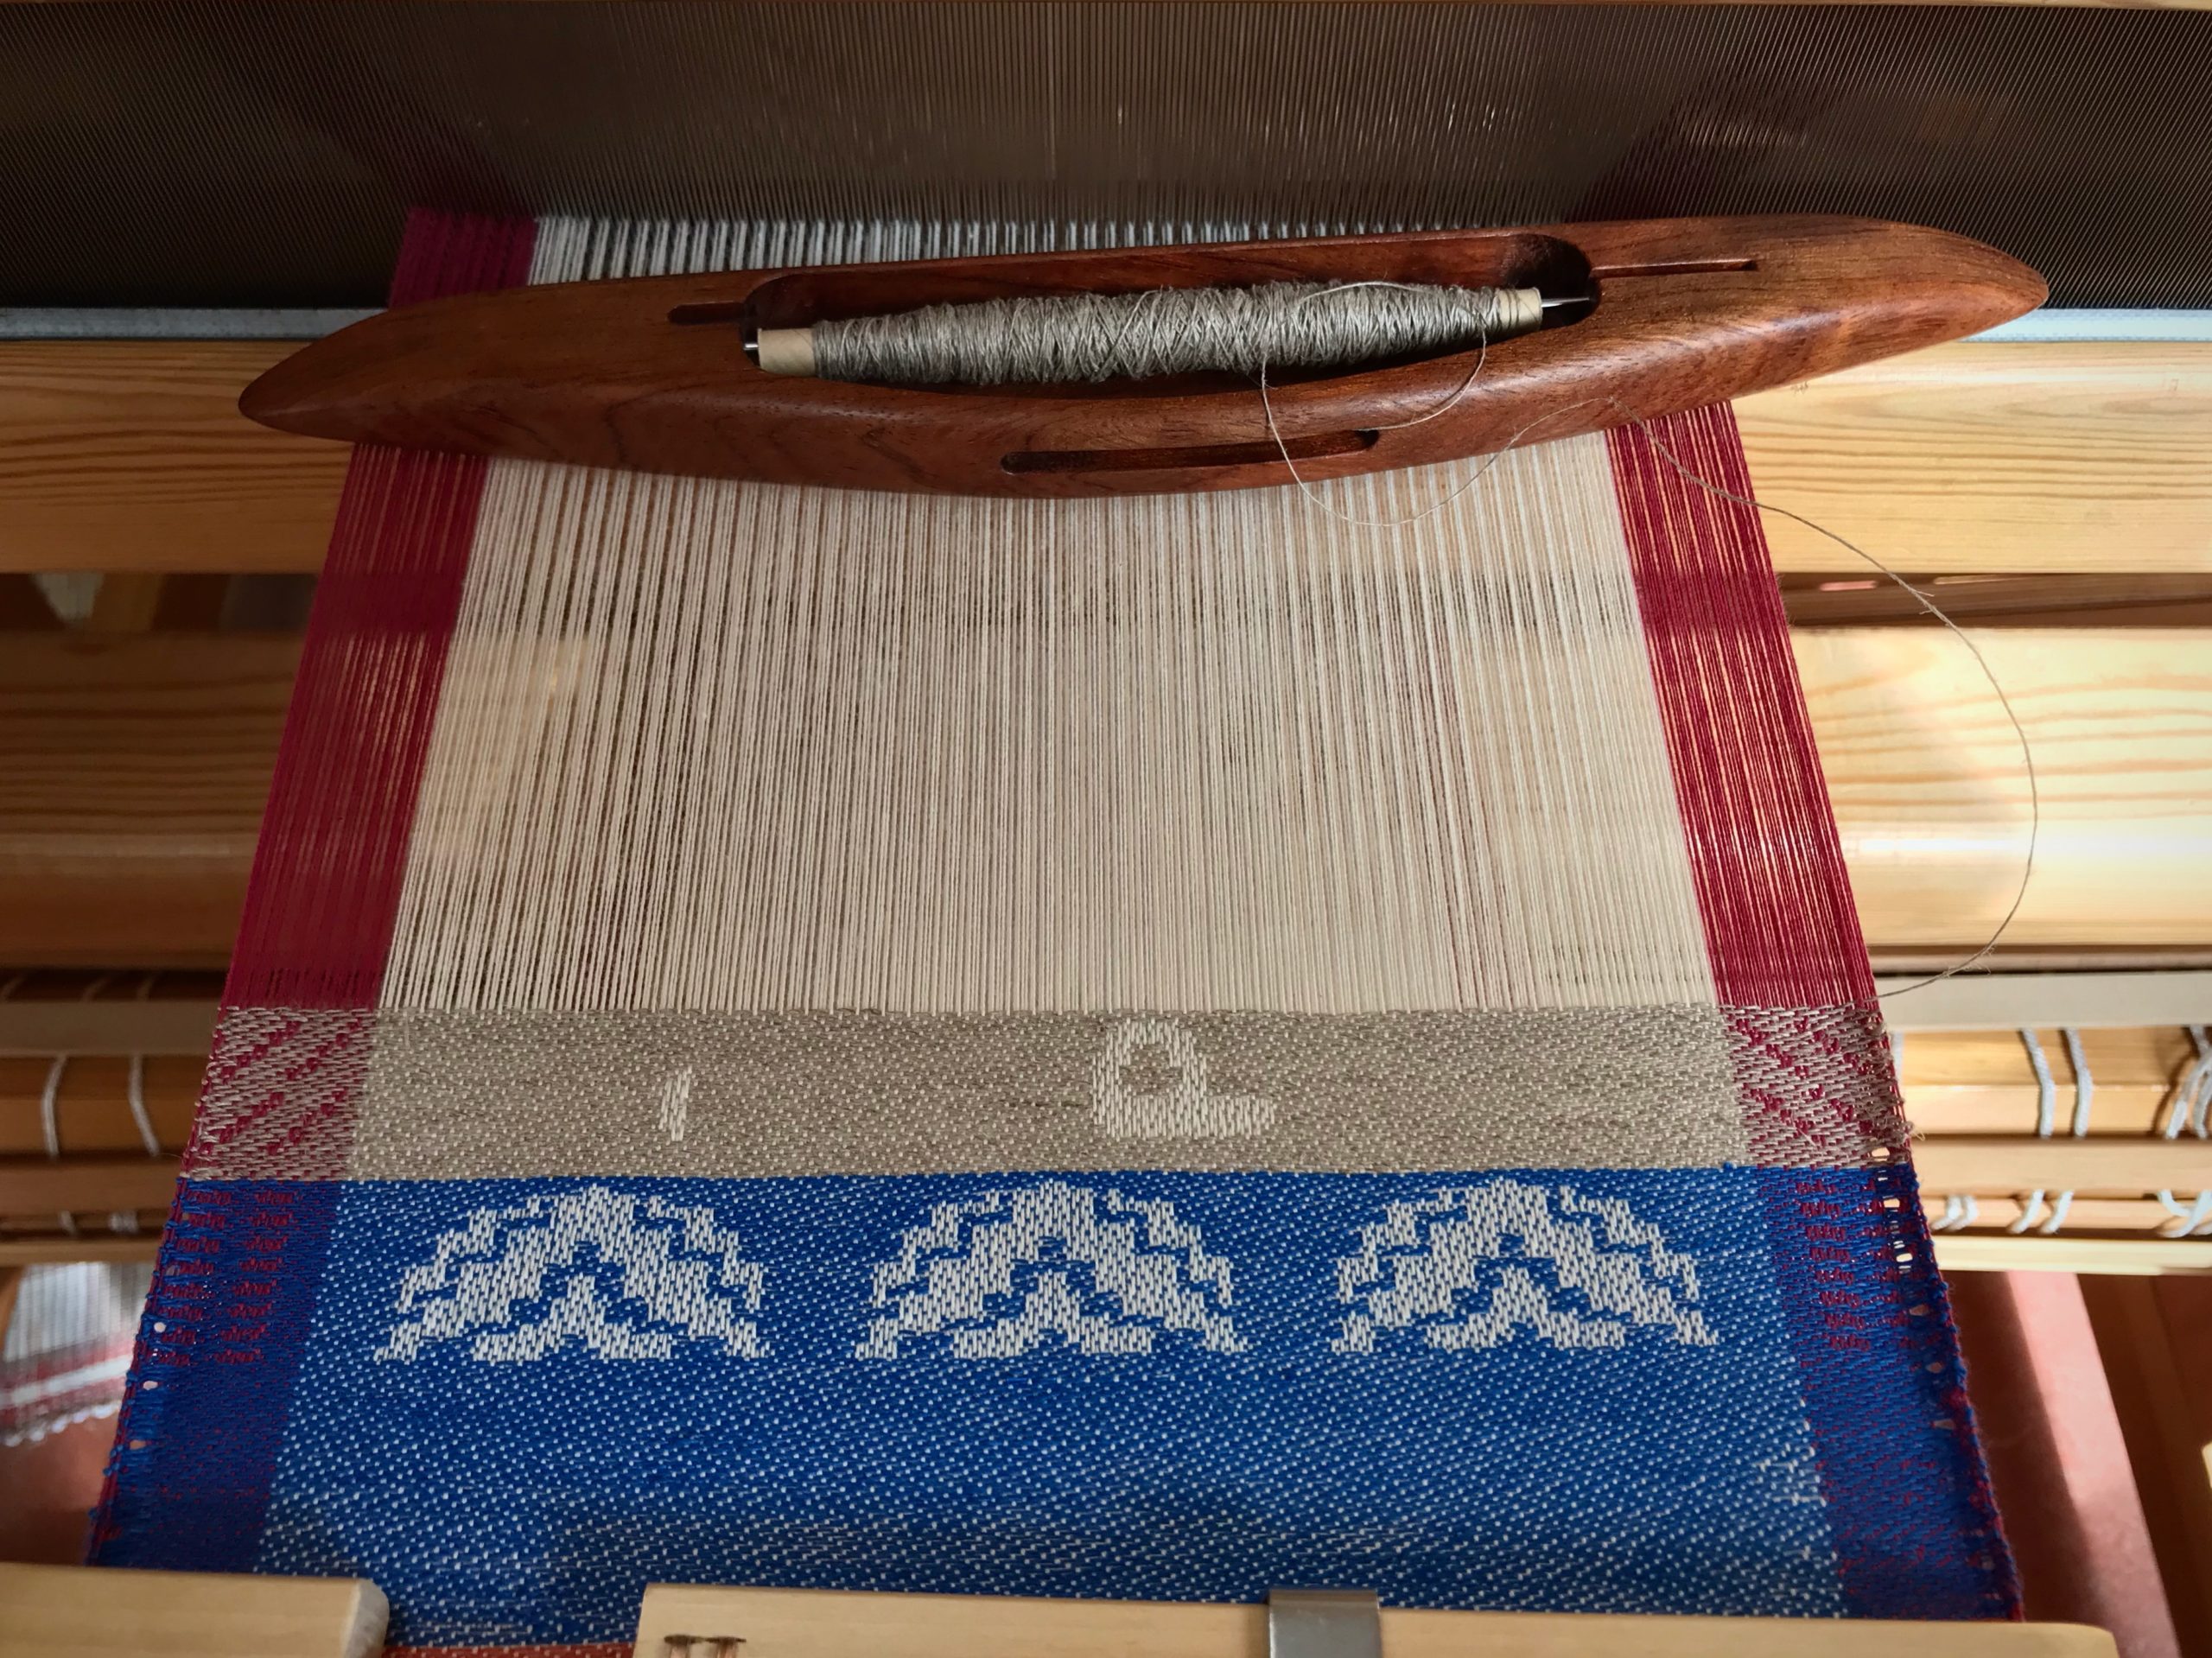
Glimåkra Standard, 120cm (47″), vertical countermarch. My first floor loom. Weaving the third of four bath towels, 6-shaft broken and reverse twill, 22/2 cottolin warp and weft.Glimåkra two-treadleband loom. Weaving hanging tabs for bath towels. 22/2 cottolin warp and weft.Glimåkra Ideal, 100cm (39″), horizontal countermarch. My second floor loom. Dressing the loom in 24/2 cotton, five-shaft huckaback, for fabric to make a tiered skirt. Ready to start sleying the reed.Loom that Steve built, 70cm (27″), horizontal countermarch. My third floor loom. Weaving the header for a pictorial tapestrysample, four-shaft rosepath, 16/2 linen warp, Tuna/Fårö wool and 6/1 tow linen weft.Glimåkra Julia, 70cm (27″), horizontal countermarch. This is my fifth (and final?) floor loom. Weaving the first of two scarves, eight-shaft deflected double weave, 8/1 Mora wool warp and weft.Glimåkra Standard, 120cm (47″), horizontal countermarch, with Myrehed combination drawloom attachment. This is my fourth floor loom. Weaving some lettering for the seventh pattern on this sample warp, six-shaft irregular satin, 16/2 cotton warp, 16/1 linen weft. 35 pattern shafts, 132 single unit draw cords.
Give Thanks ~ Live with a thankful heart.
Every day I thank the Lord for granting me the joy of being in this handweaving journey. And I thank him for bringing friends like you along with me.
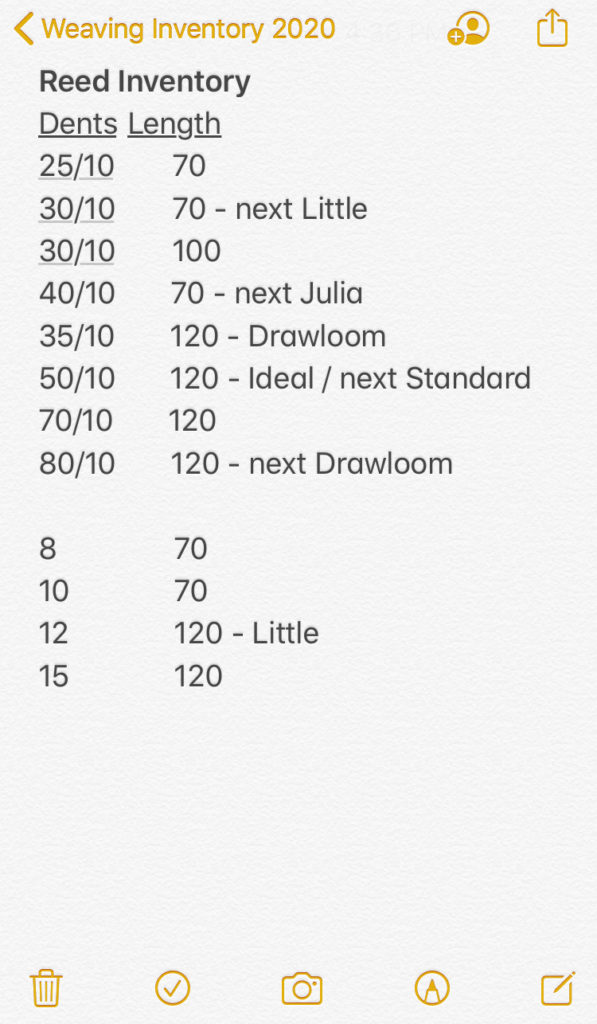
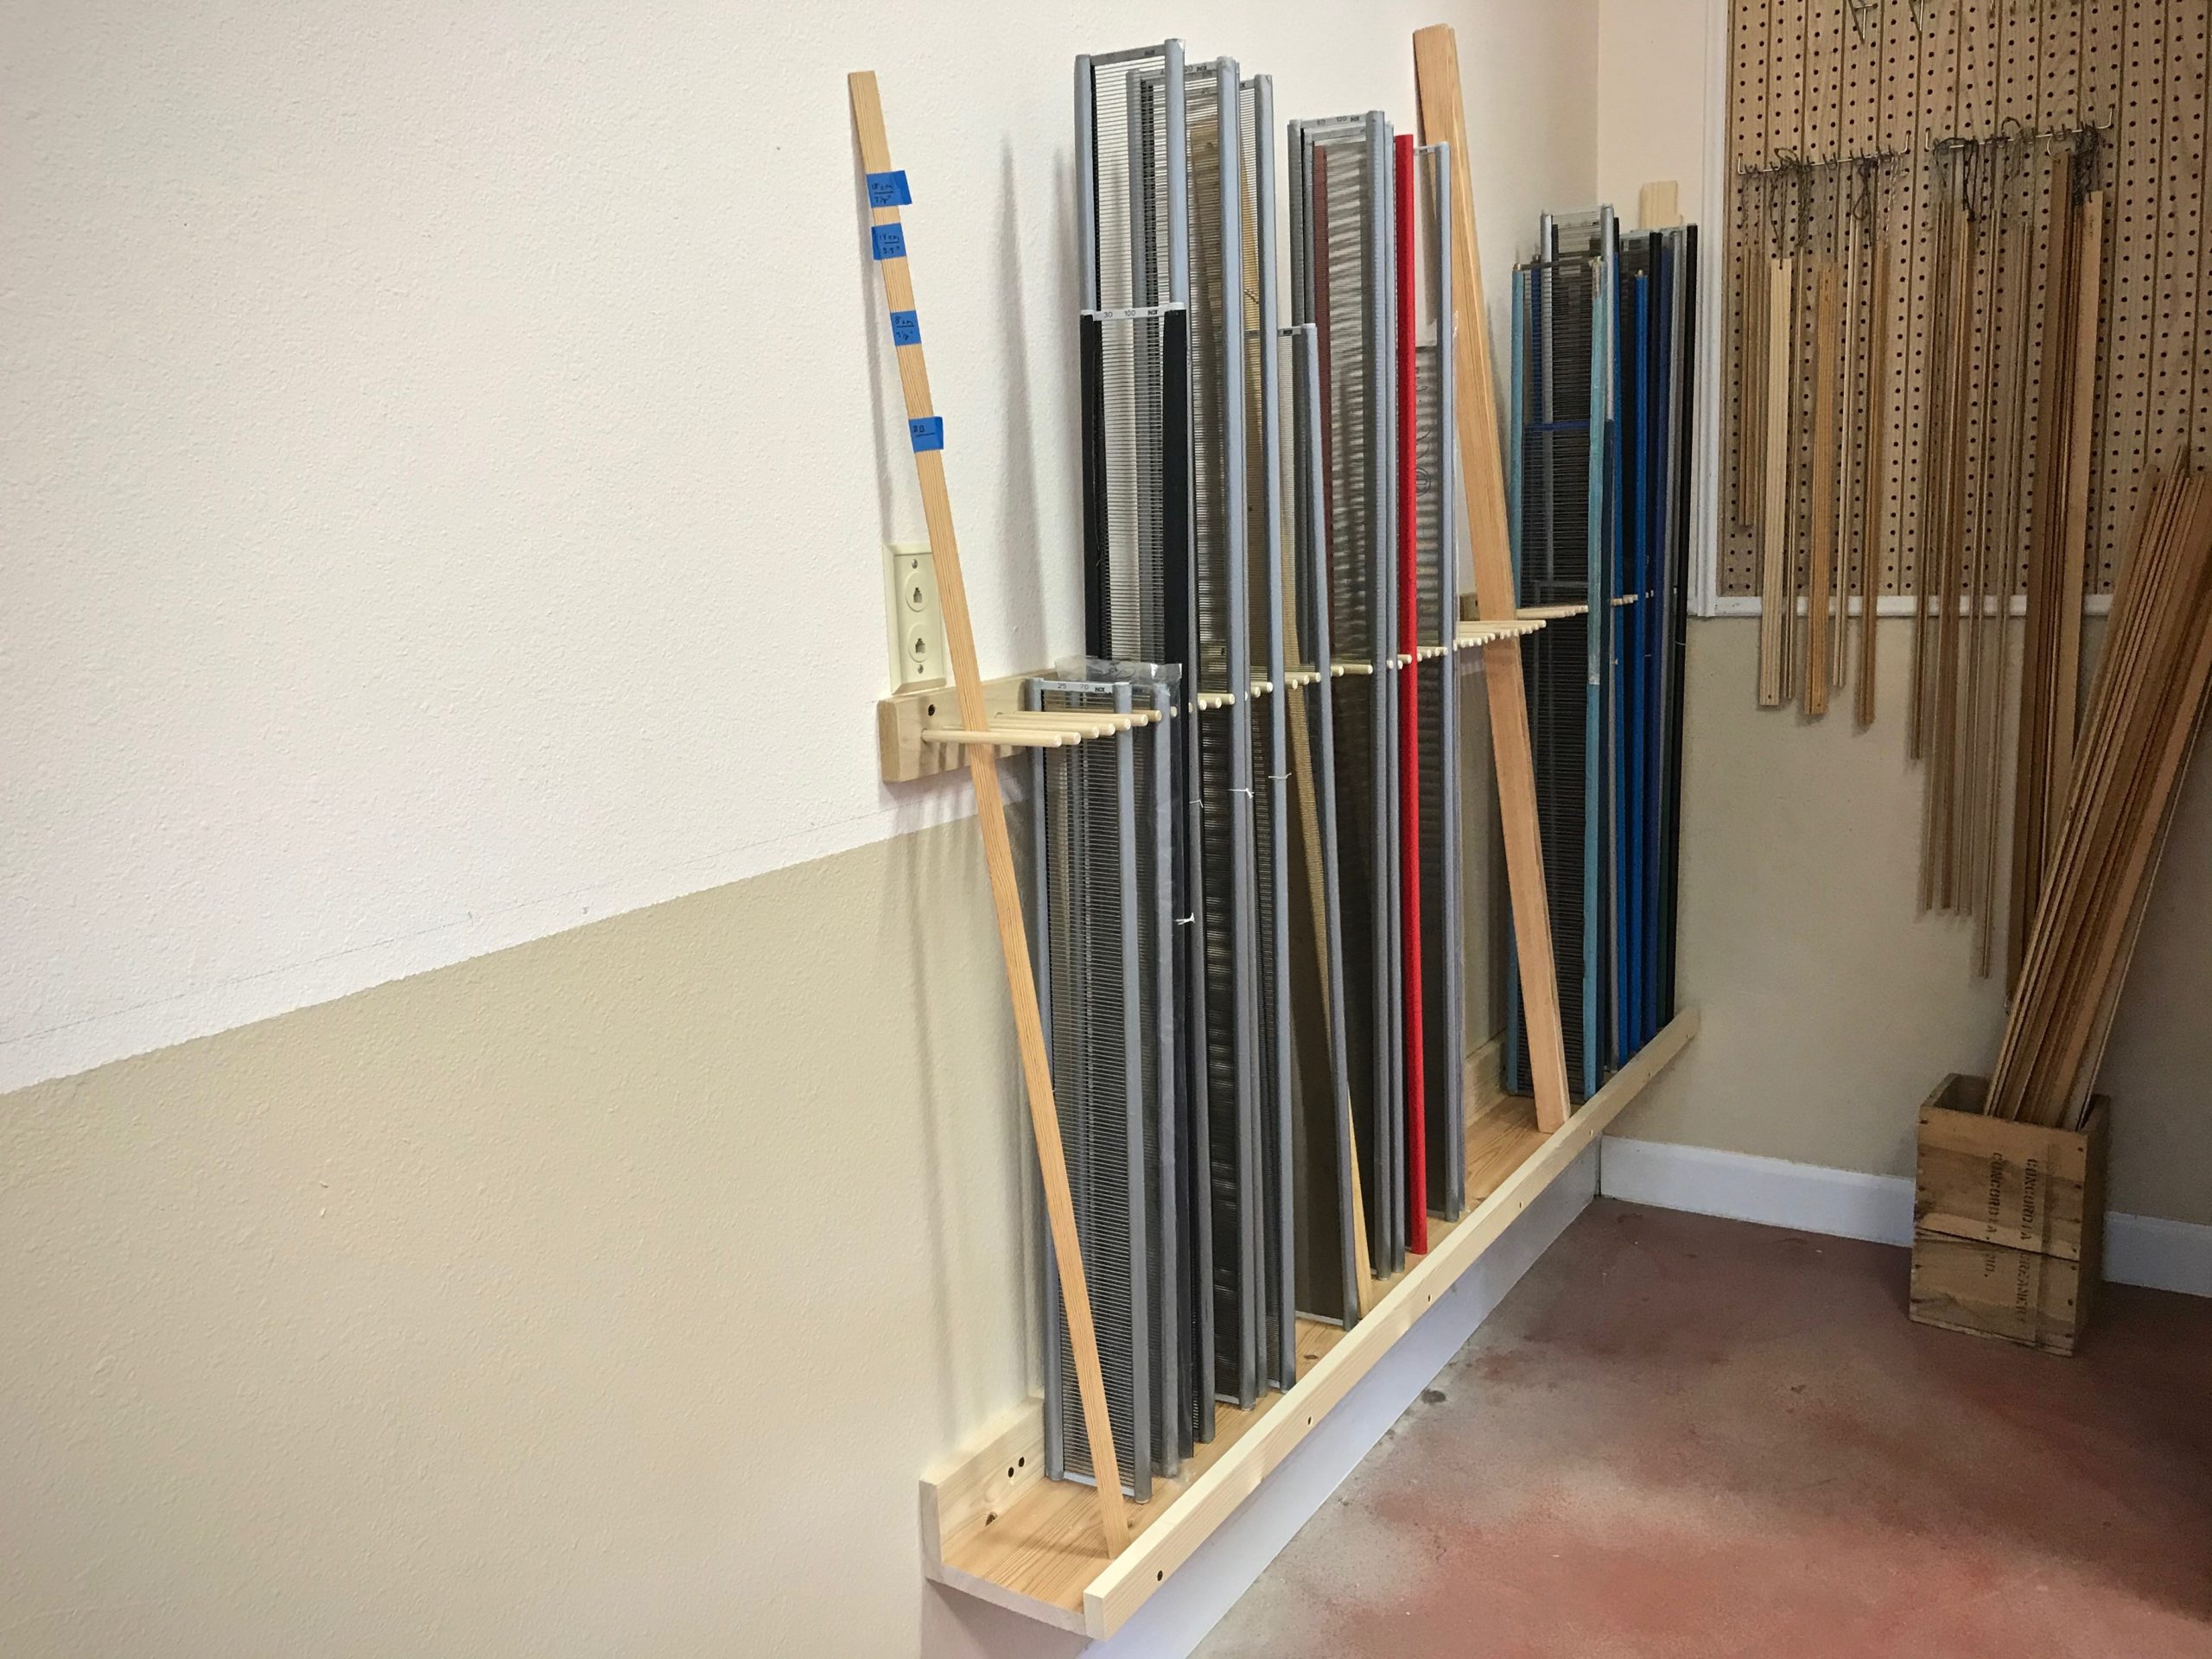
My weaving history includes very fine threads all the way to heavy-duty rug warps. As a result, I have acquired a wide selection of reeds over time. All five of my looms have beaters that will accommodate any length or height of reed. When I plan a project, one of the first things I consider is whether I have the size reed that is needed. To keep my reeds organized, I need two things. One, a simple method to manage the reeds I have, tracking the reeds as they go in and out of use. Two, a place to store all the reeds, arranged in order by dents per cm and dents per inch.
Reed Organization
Reed Inventory
I keep a list in my Notes app on my phone with the sizes and lengths of reeds that I have. If a reed is in use, I note which loom. If a reed will be needed for a planned project, I also note that. As soon as I remove a reed from the beater at the end of a project, I put the reed away and update my Reed Inventory list.
Sample Reed Inventory note. When I am planning, I look at the note on my phone to see what reeds I have that are available. “Next” reserves the reed for the loom that needs it next.
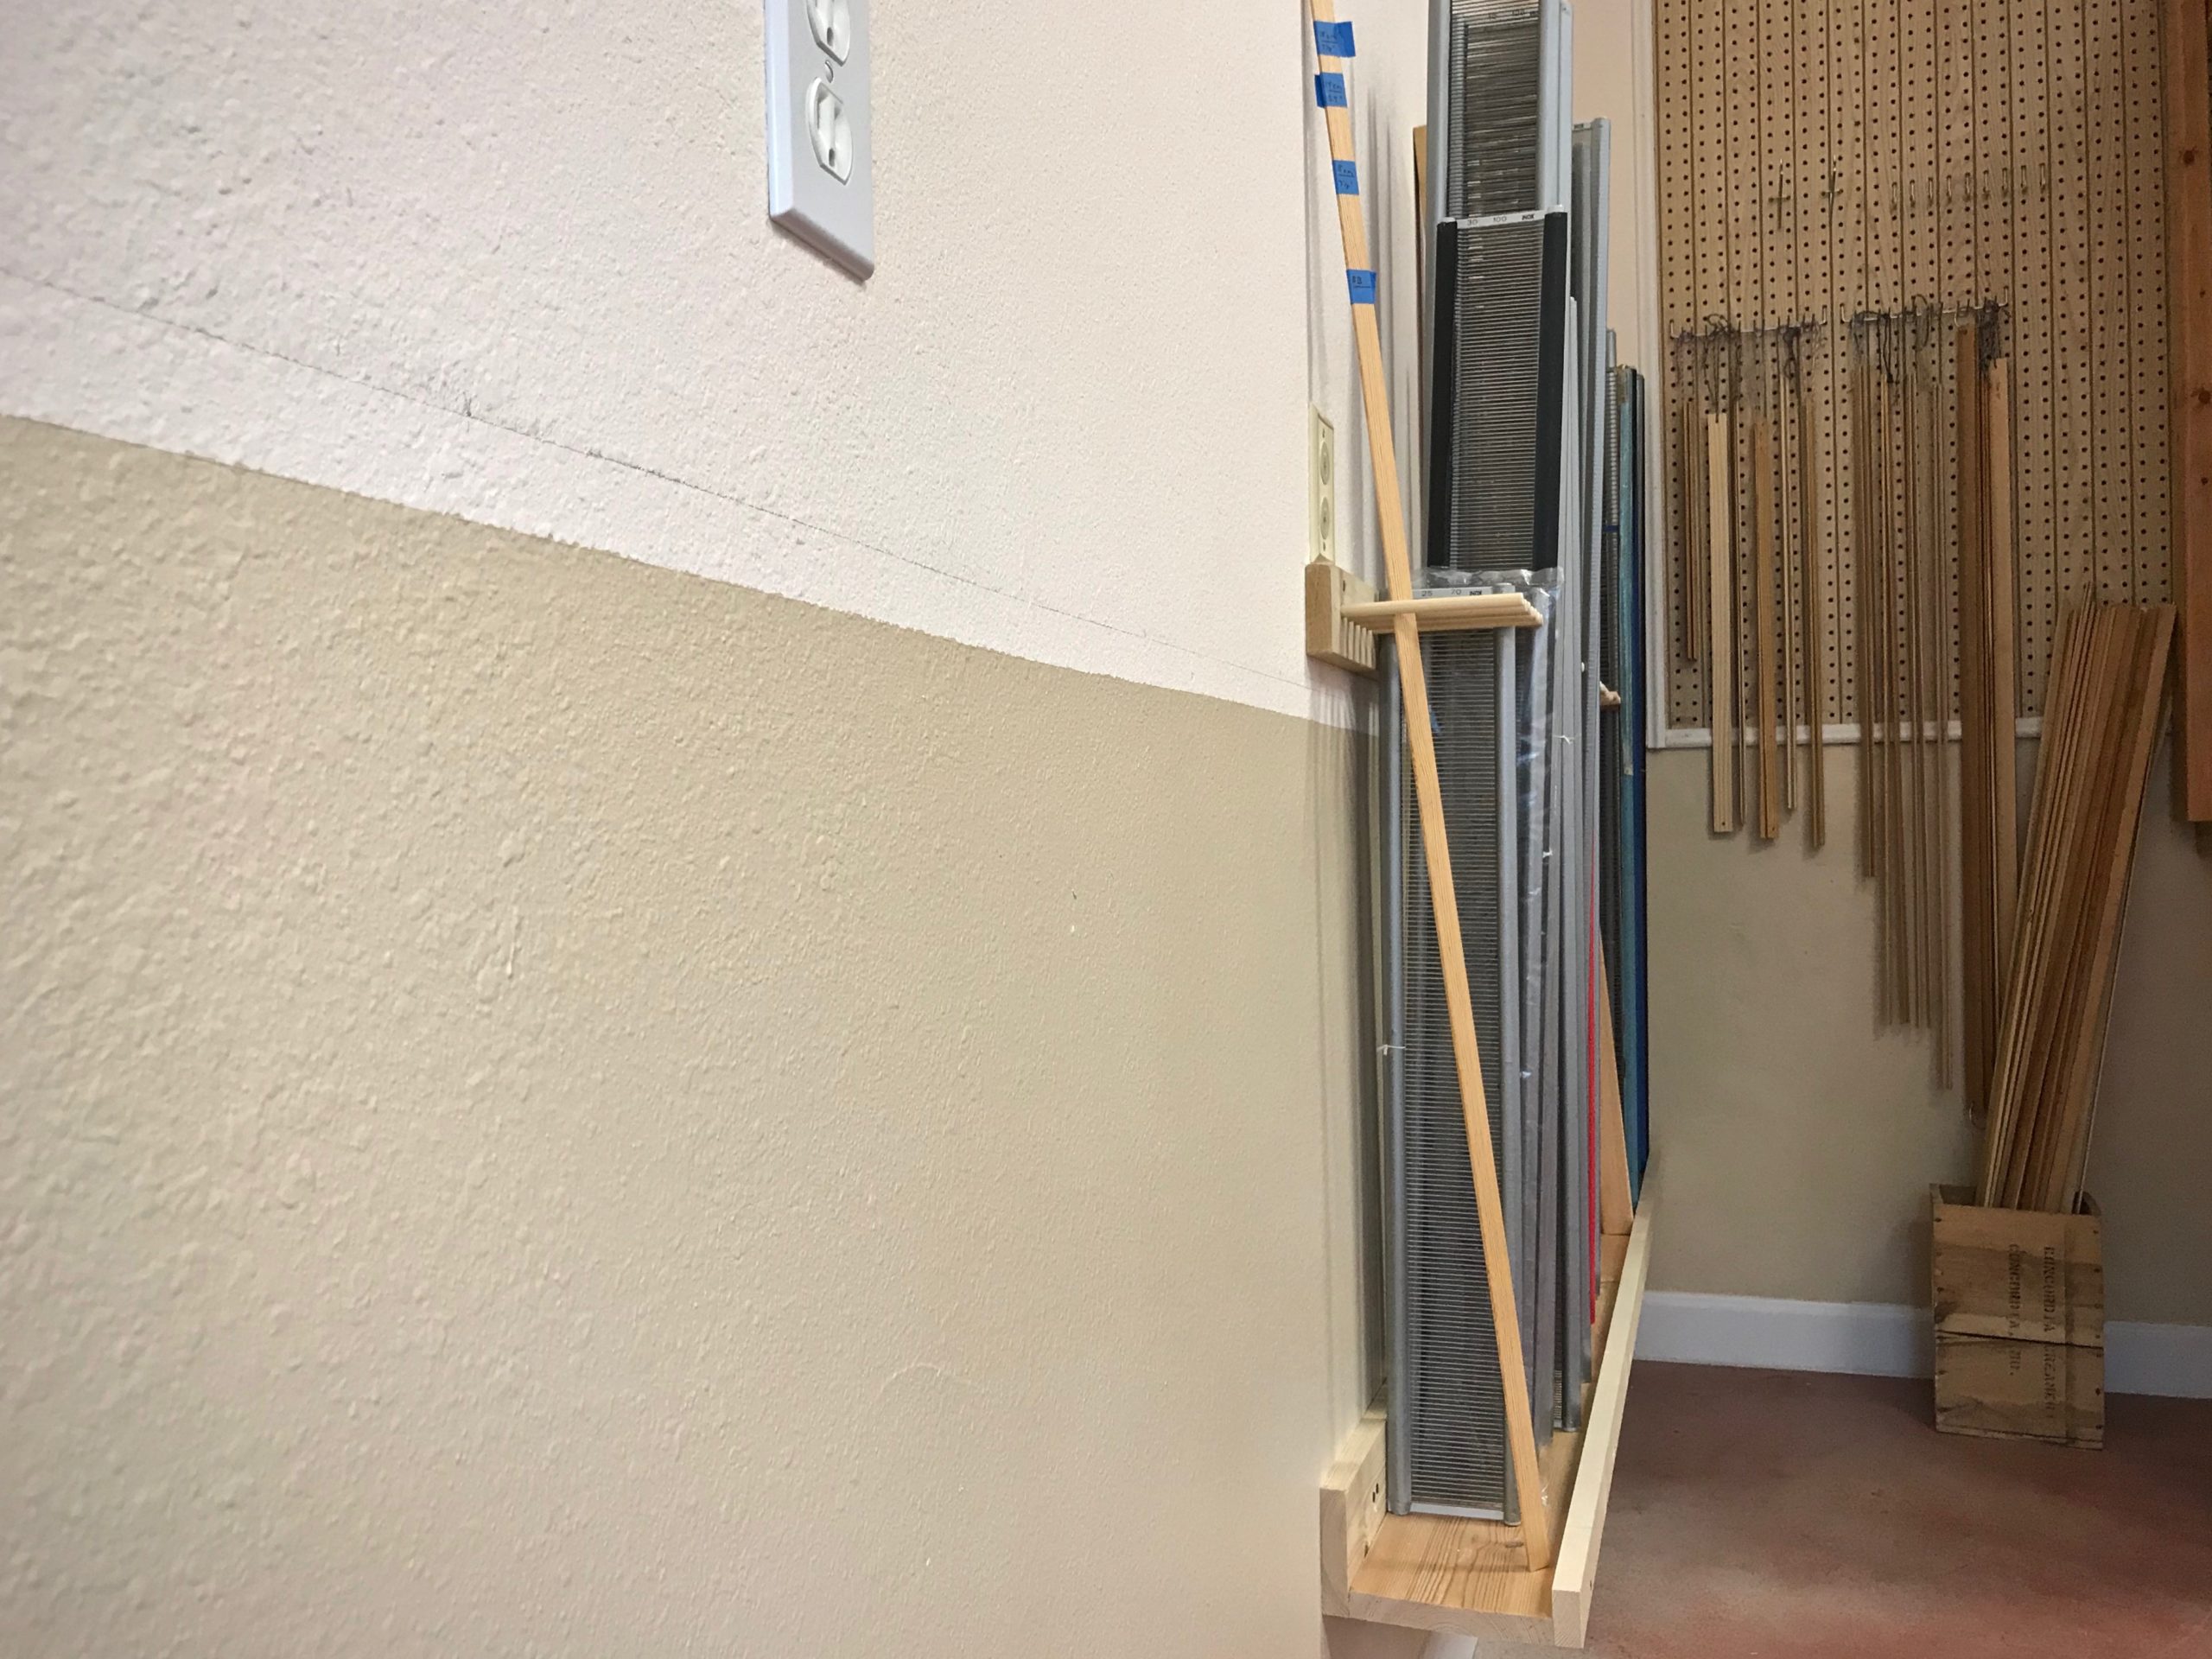
Reed Holder
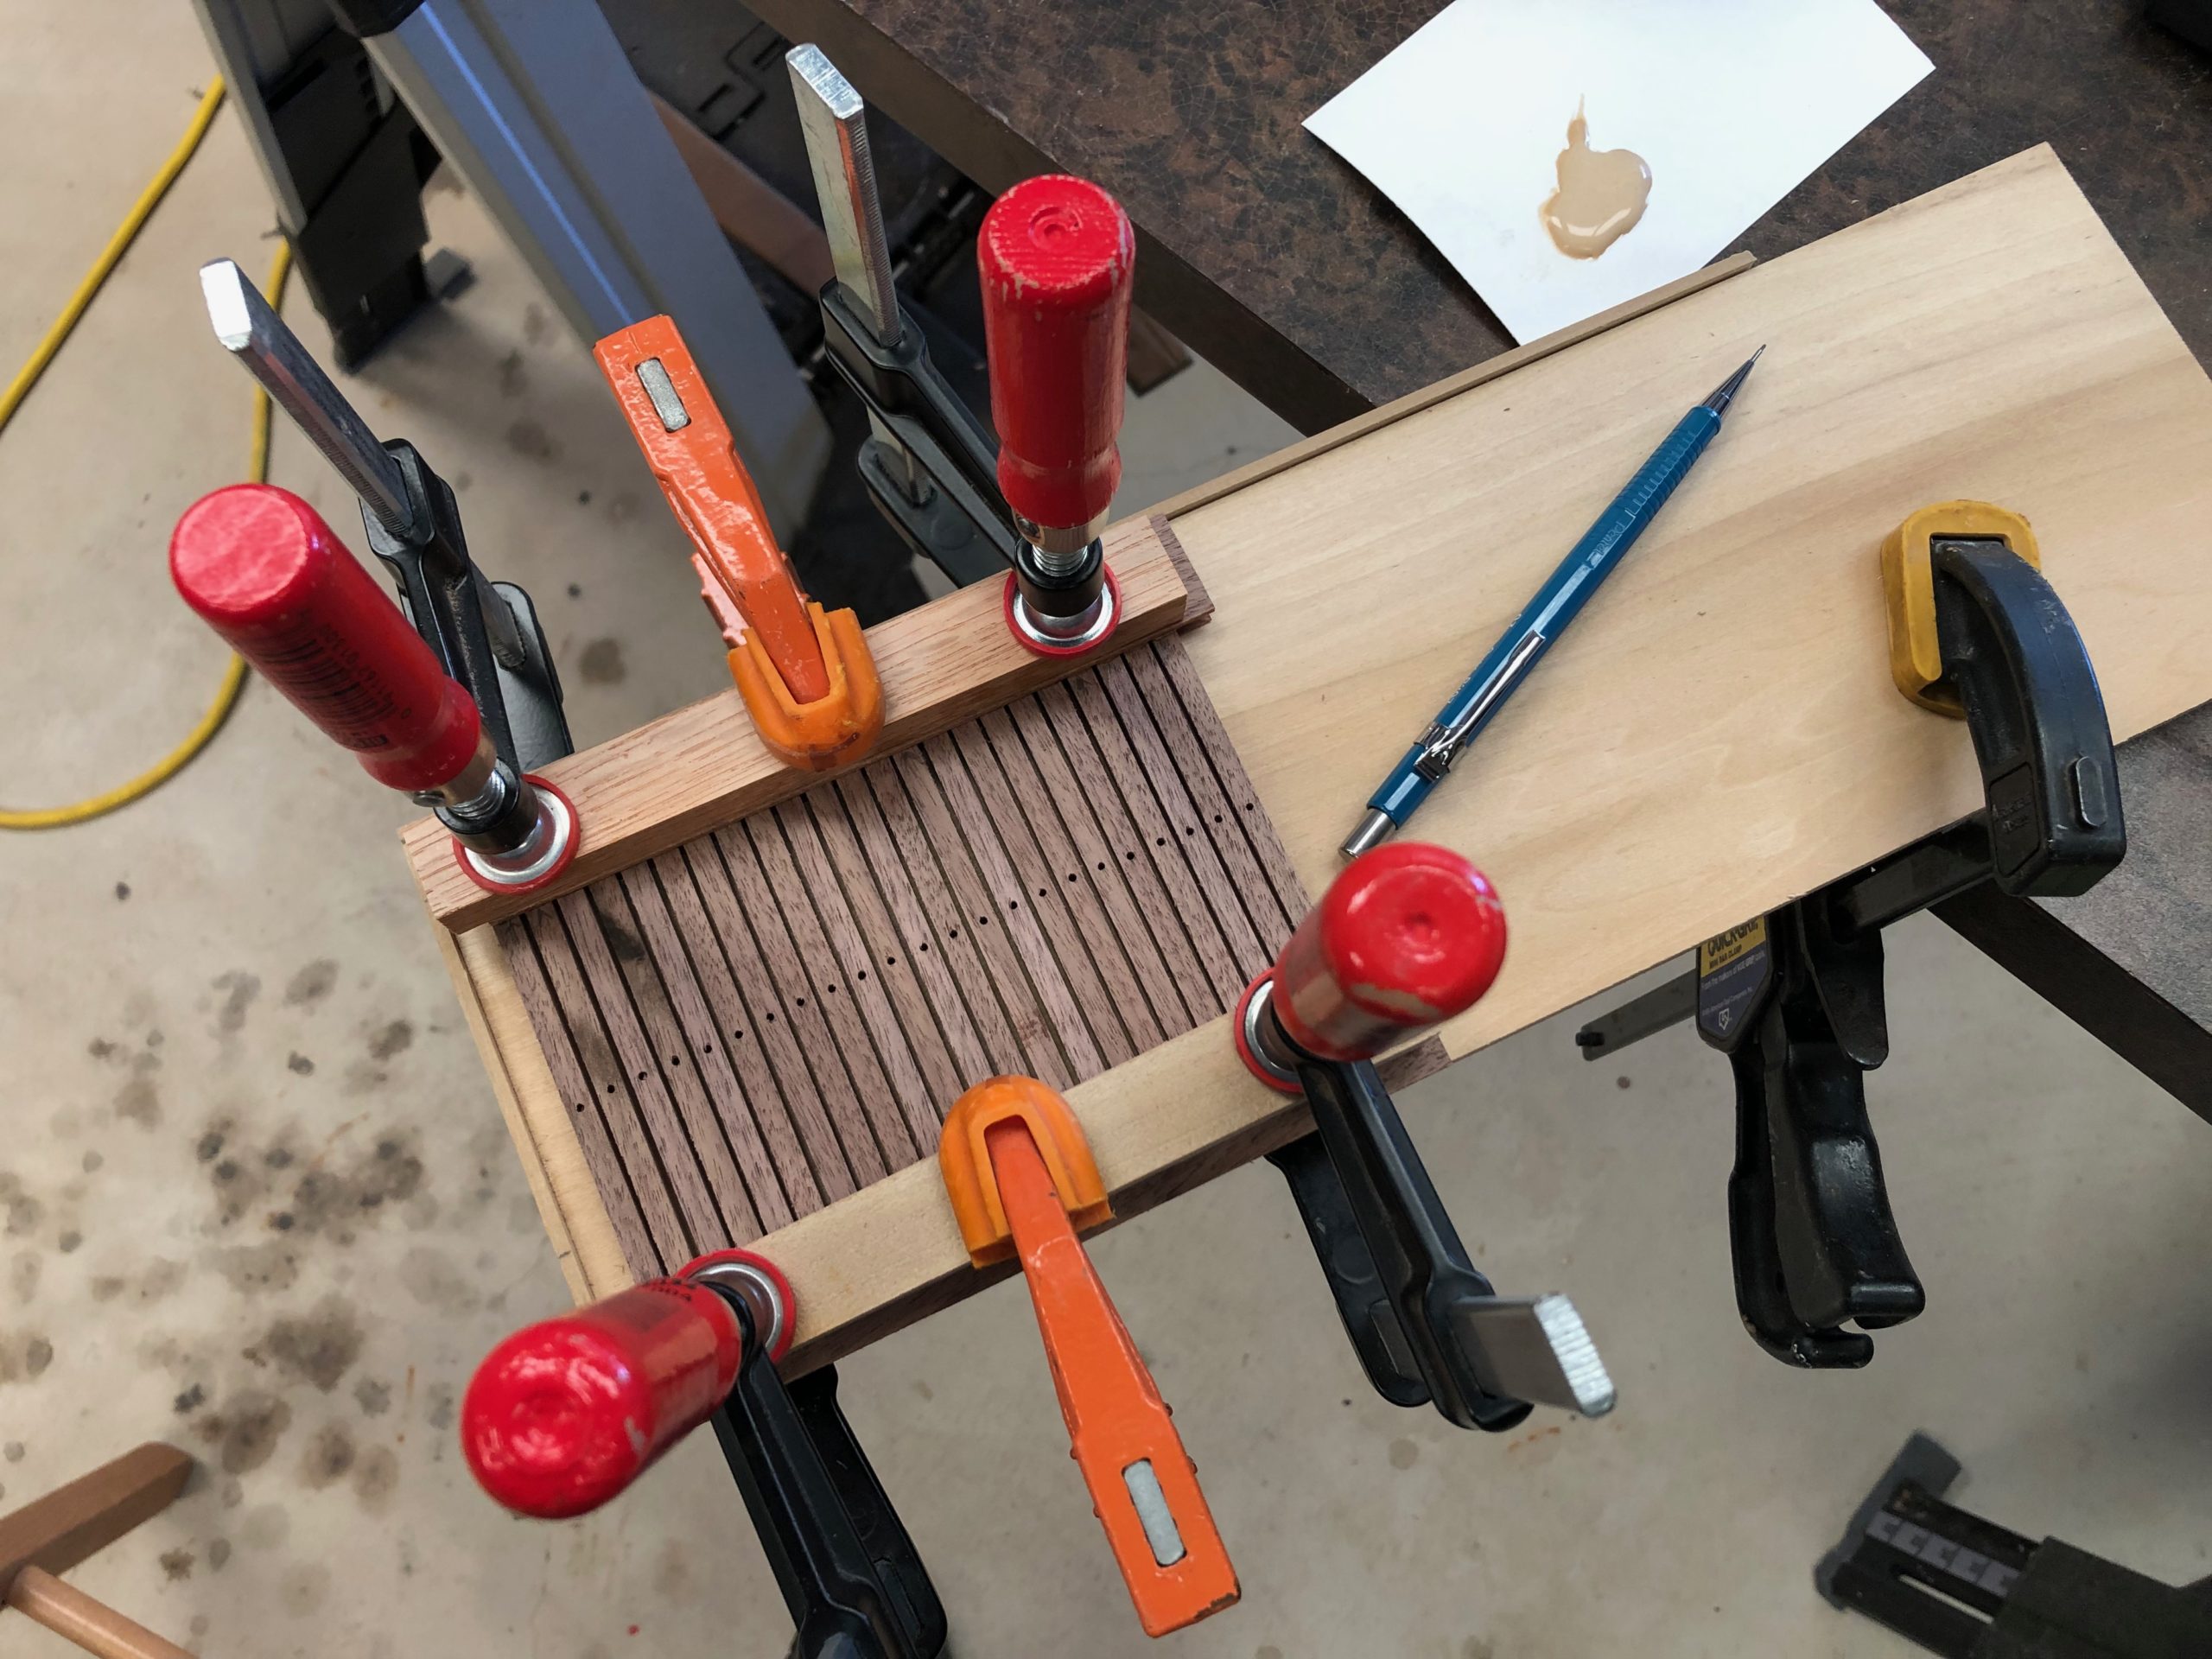
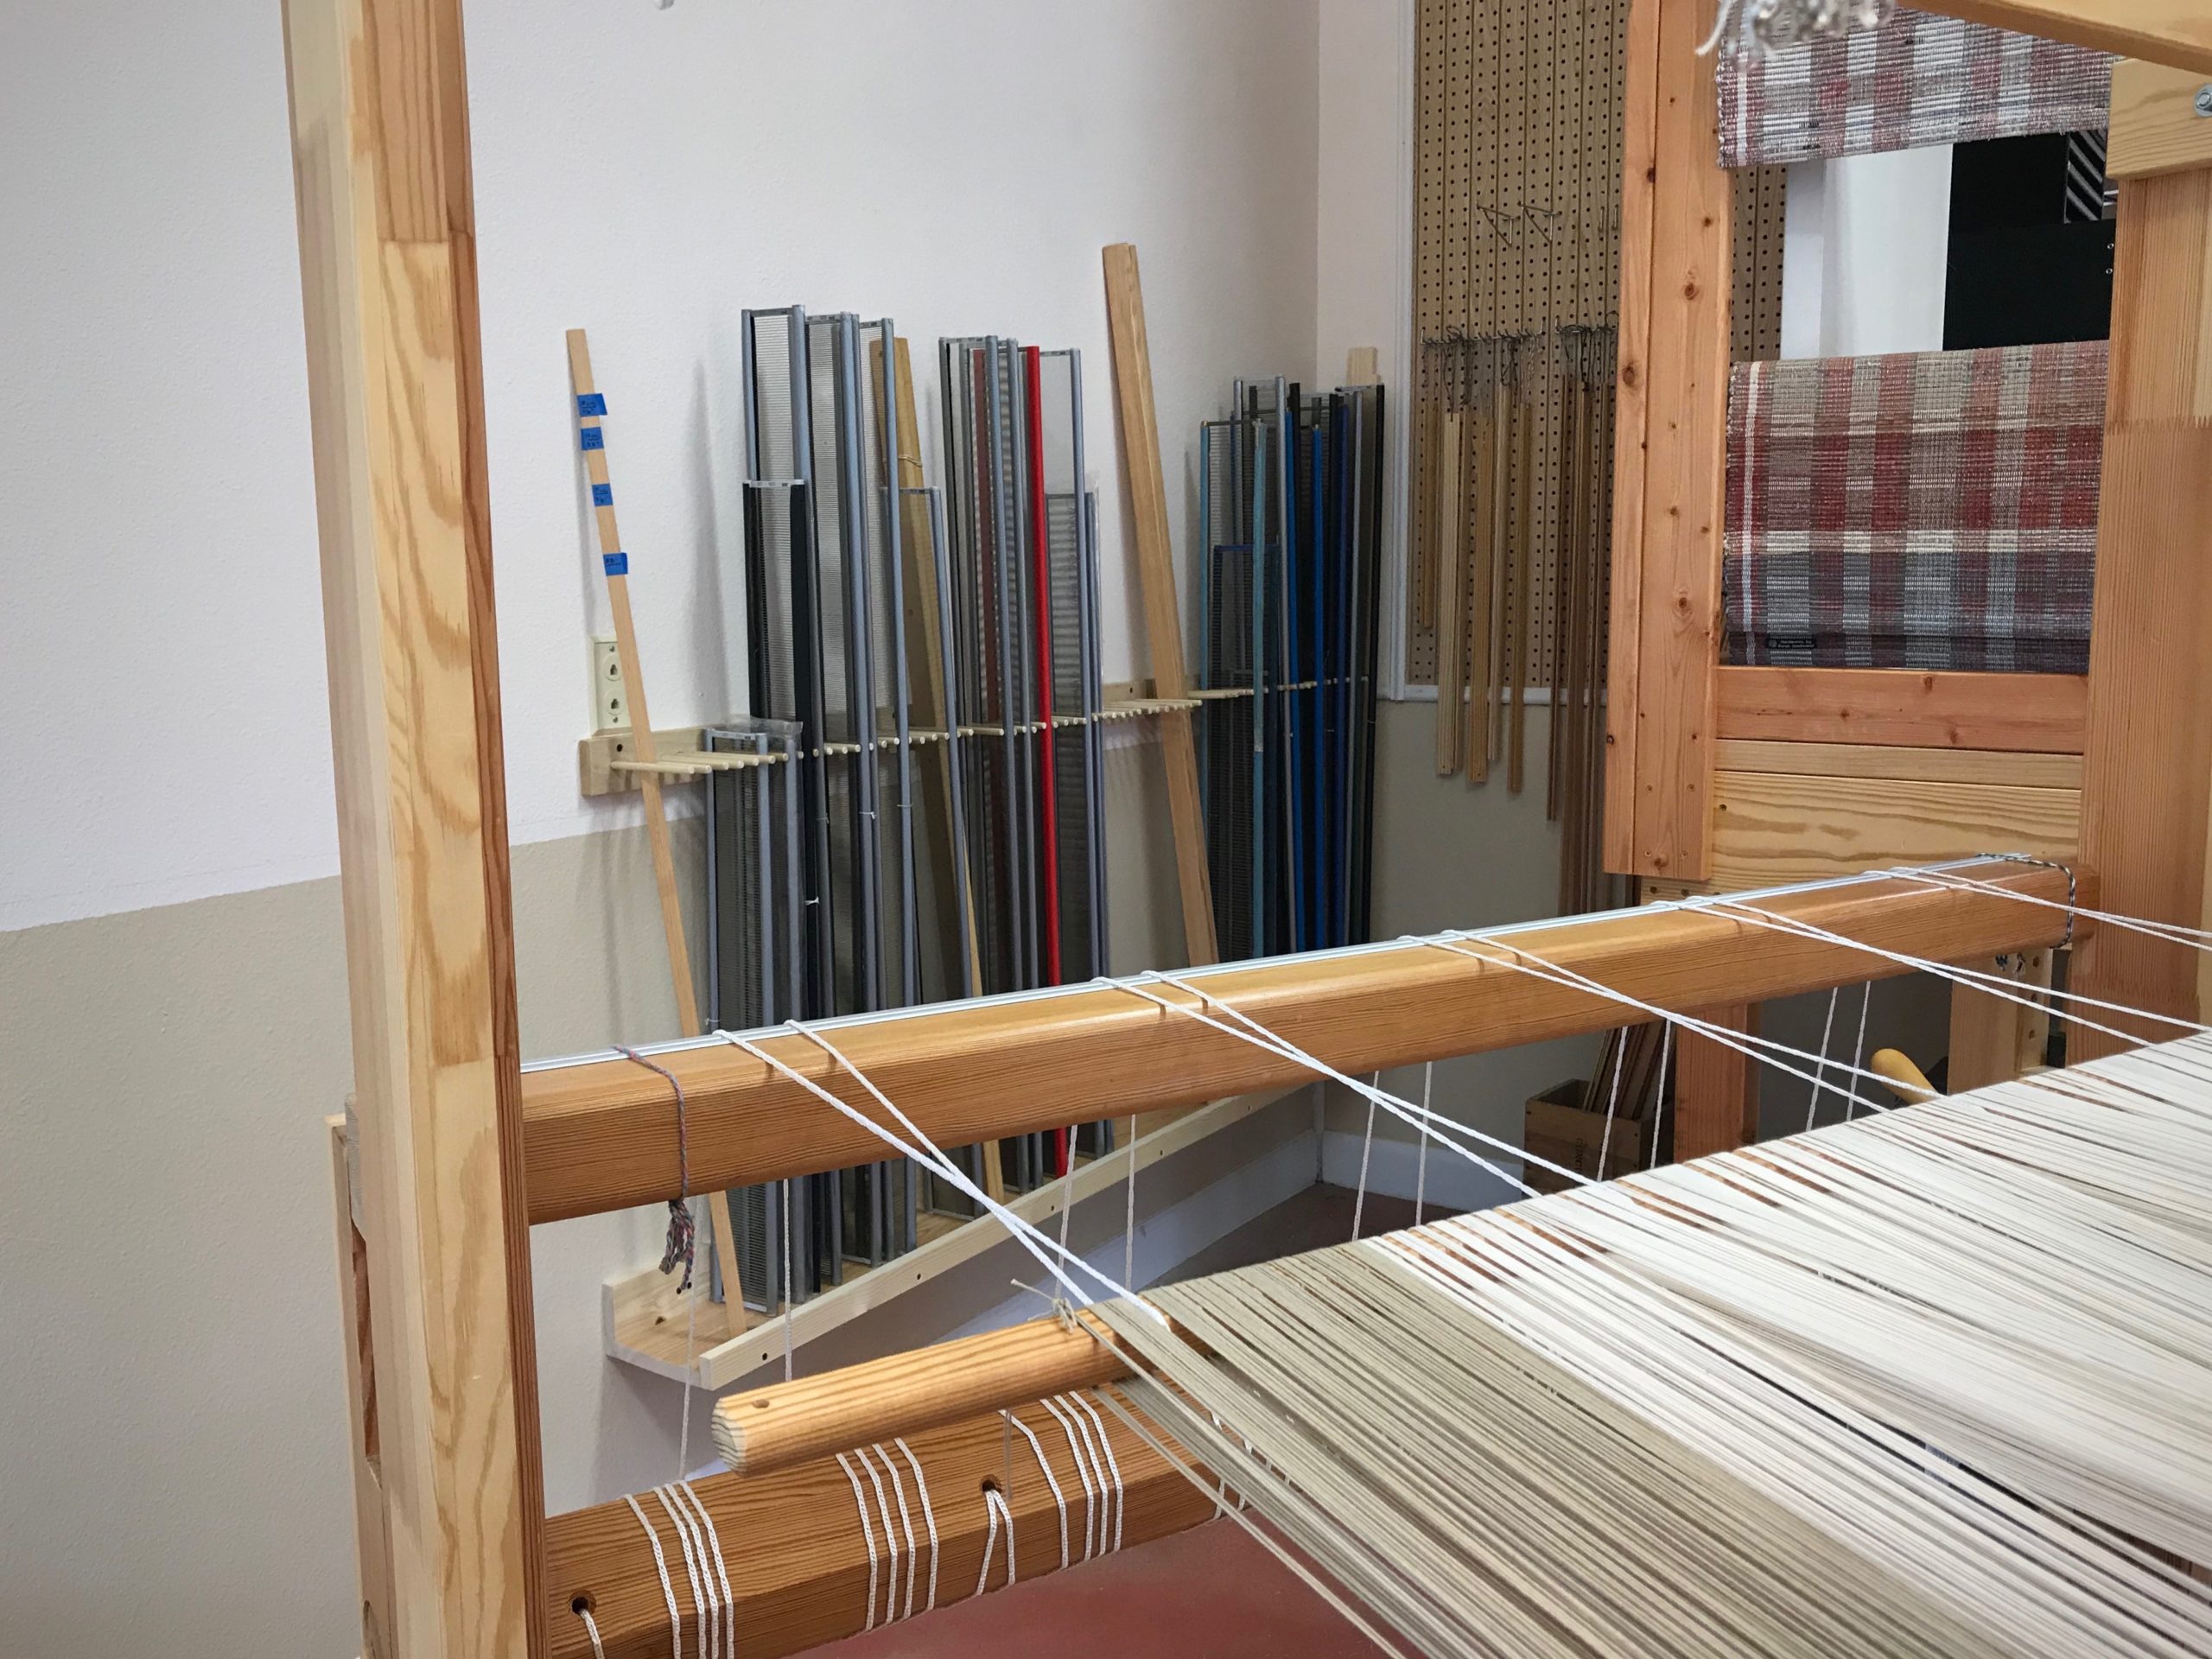
Steve created a storage solution for my reeds. The holder goes along the back wall of my drawloom studio for about six feet. Here are the details, using nominal board sizes. The reeds sit on a 1” x 6” board at the base, which is supported against the wall by a 1” x 4” board. The base, with a 1” x 2” lip, sits about 12” off the ground. The reed dividers are 3/8” x 5 3/4” dowels that are sunk into a 1” x 3” board that is attached to the wall, which sets the dowels about 27” above the base.
Reed holder is fastened to the wall behind the drawloom. (Notice that the drawloom rag rug warp has come over the back beam…)The dowels are placed at a height that will hold even my shortest reeds.Reeds are in order by dent size. Metric reeds are separate from those with dents per inch.
If you would like a PDF copy of Steve’s diagram that shows all the dimensions, click HERE to send me an email request.
May you have a place for everything, and everything in it’s place.