Home in Texas on the Drawloom

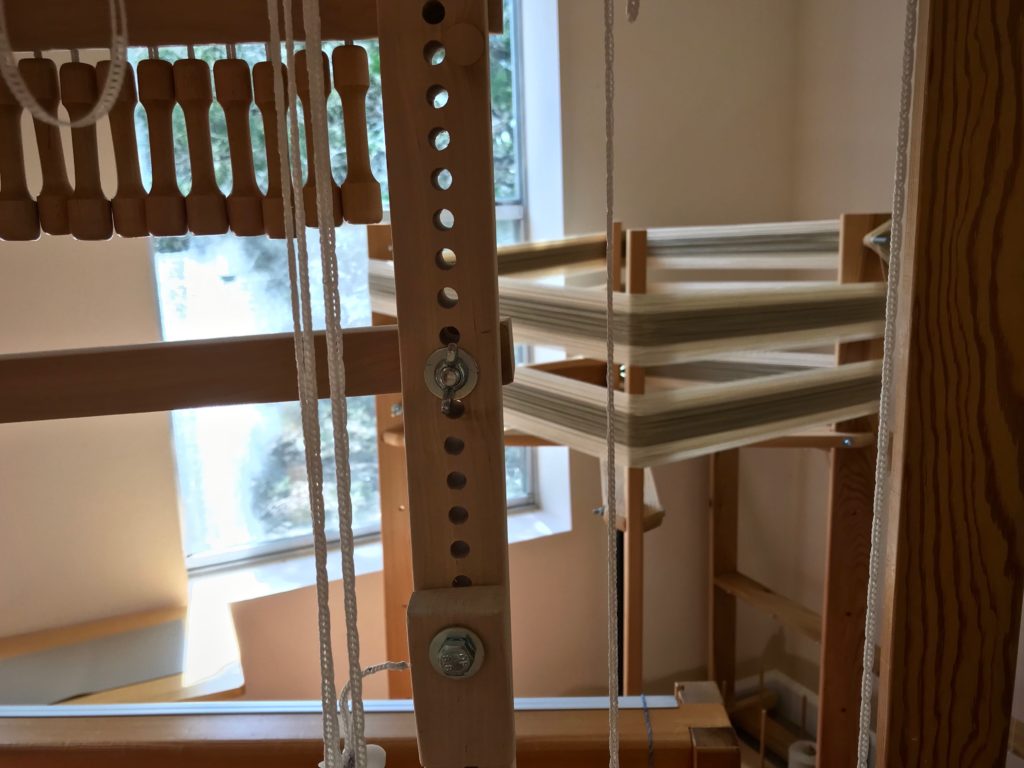
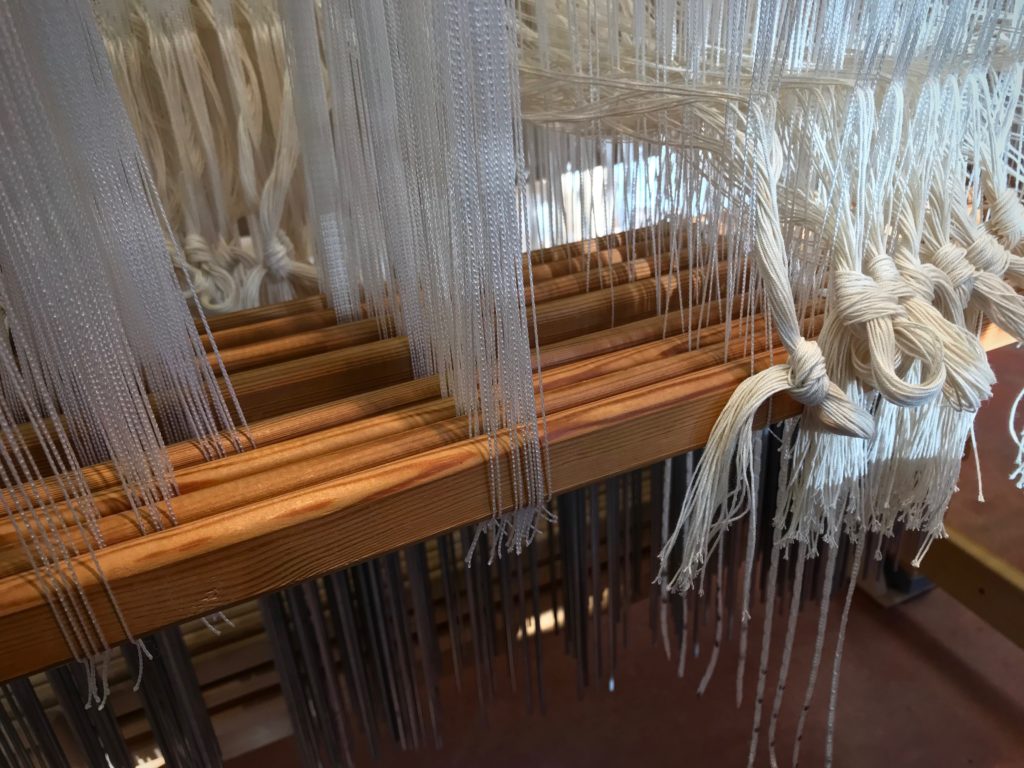
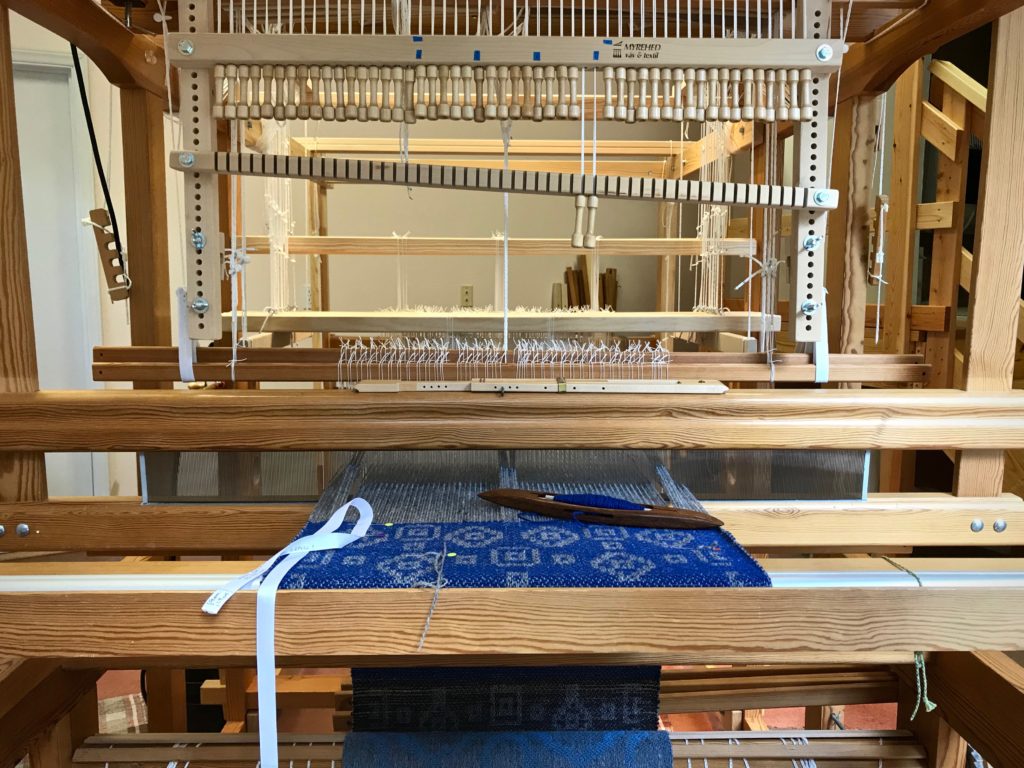
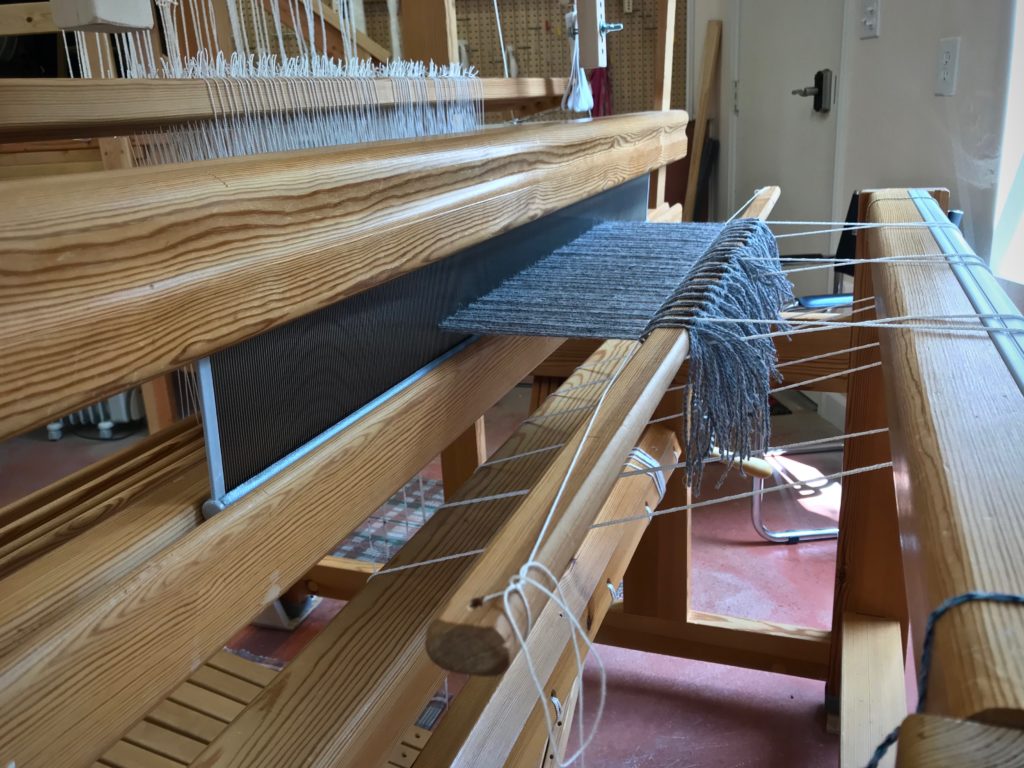
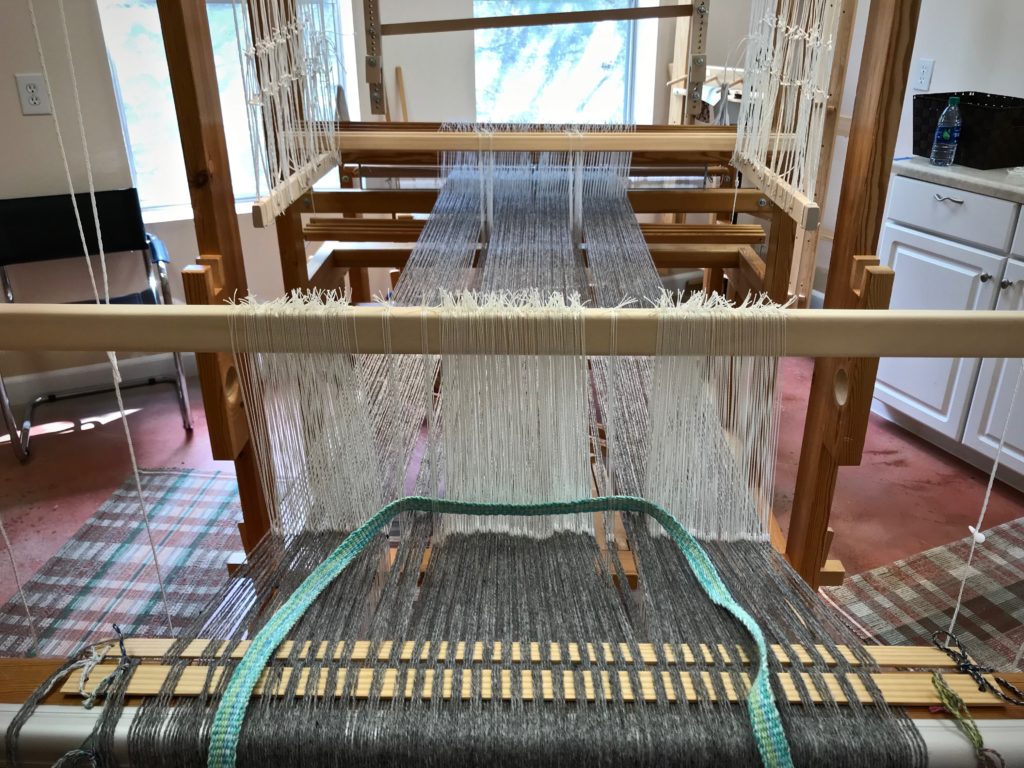
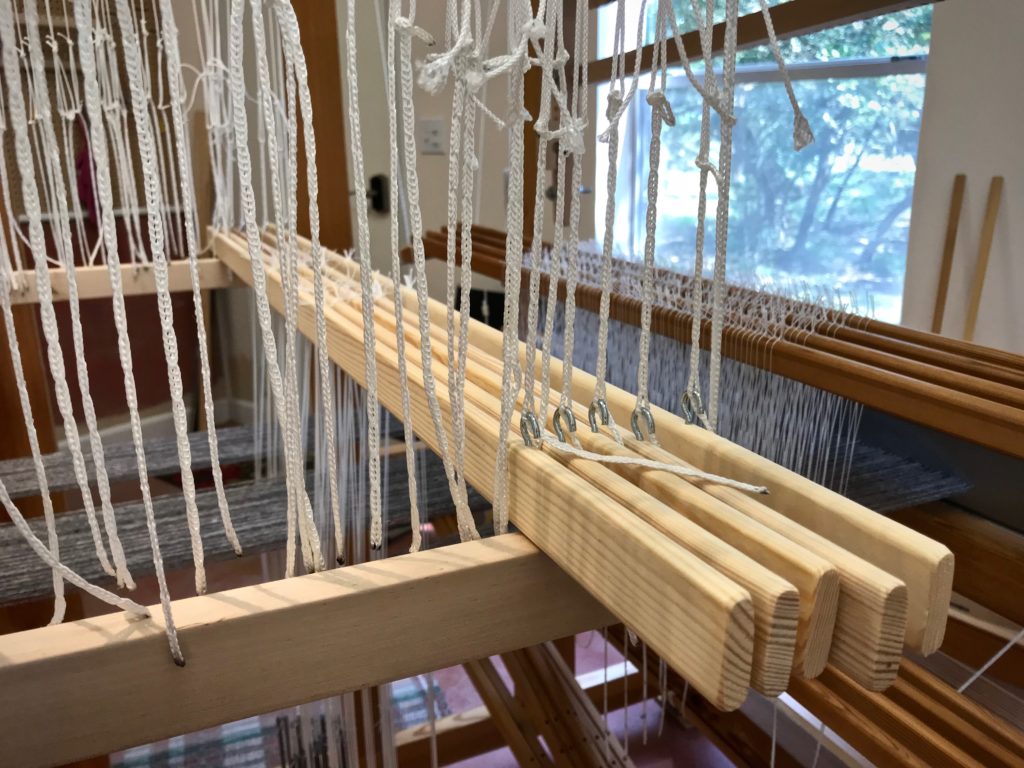
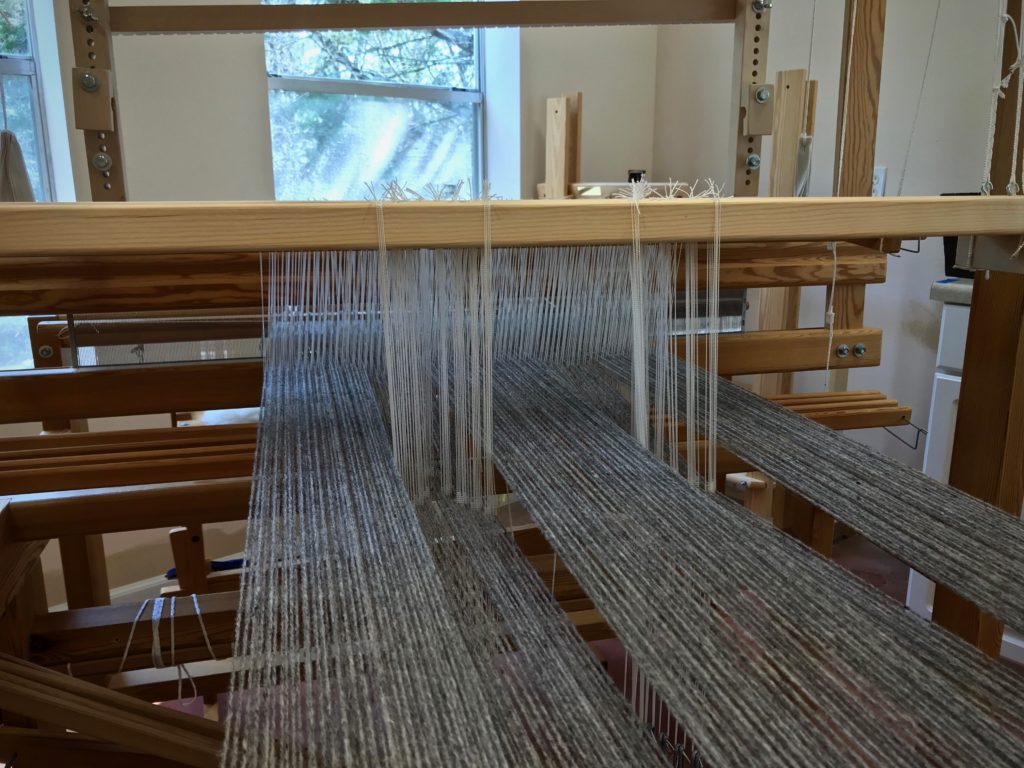
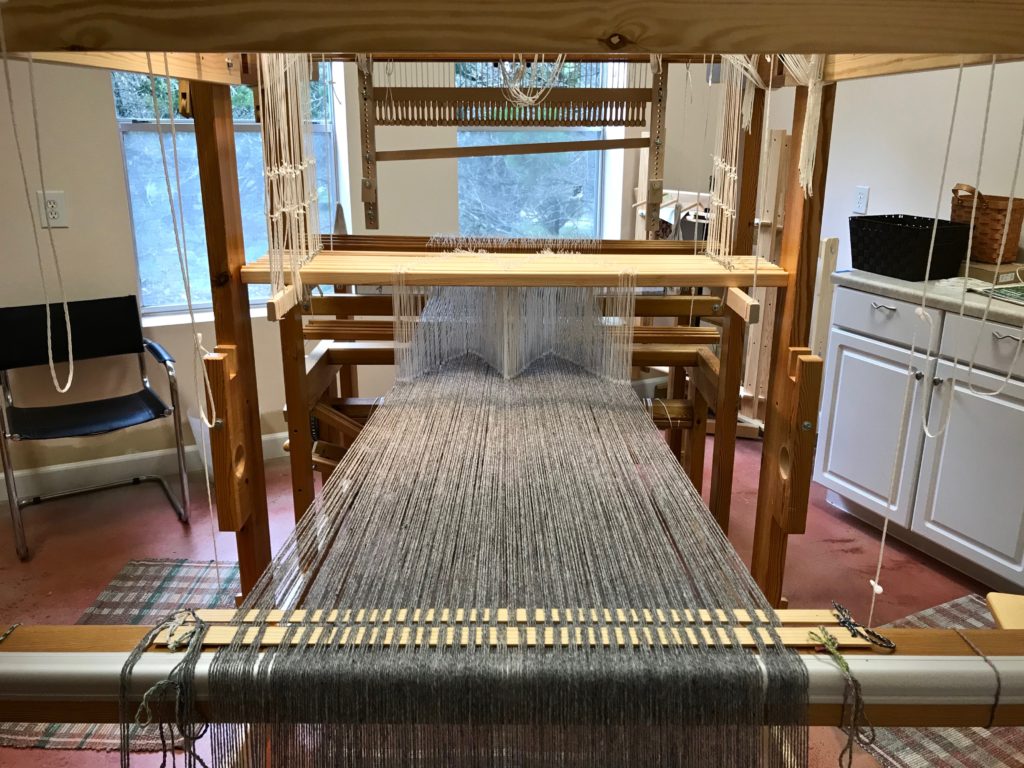
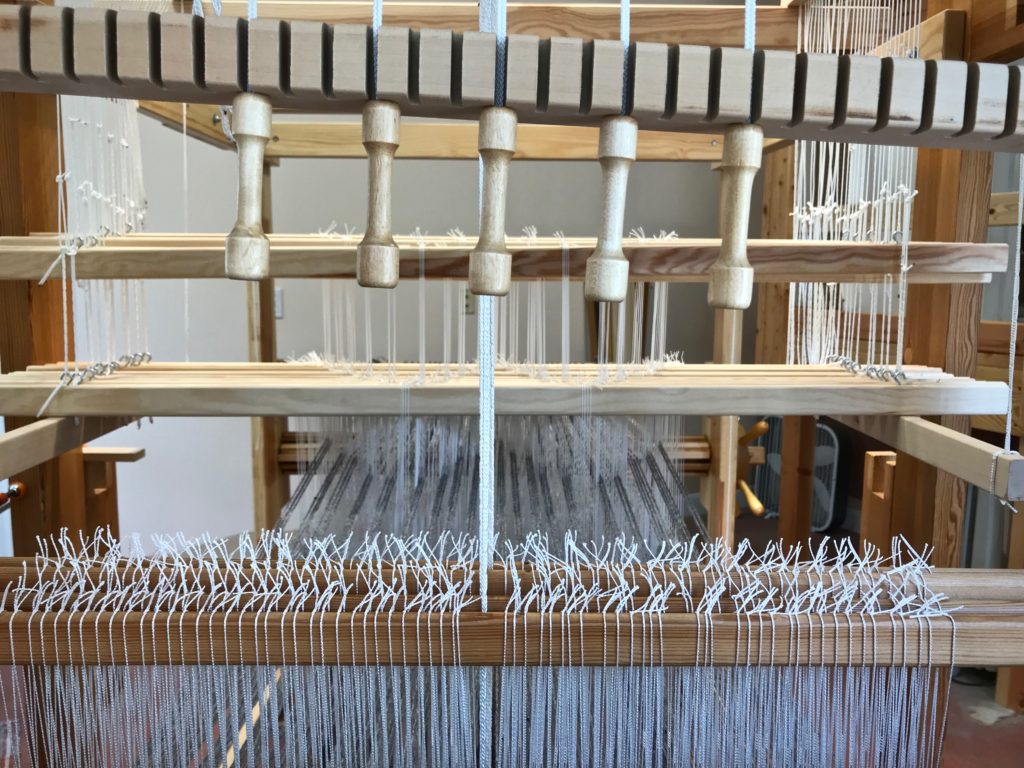
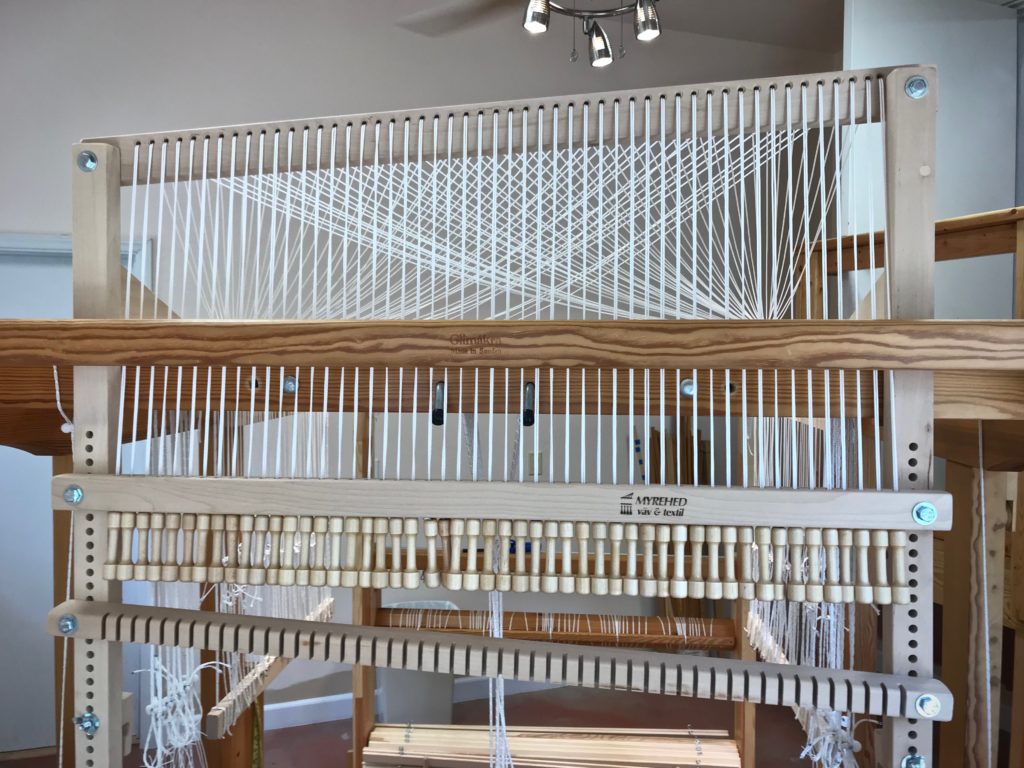
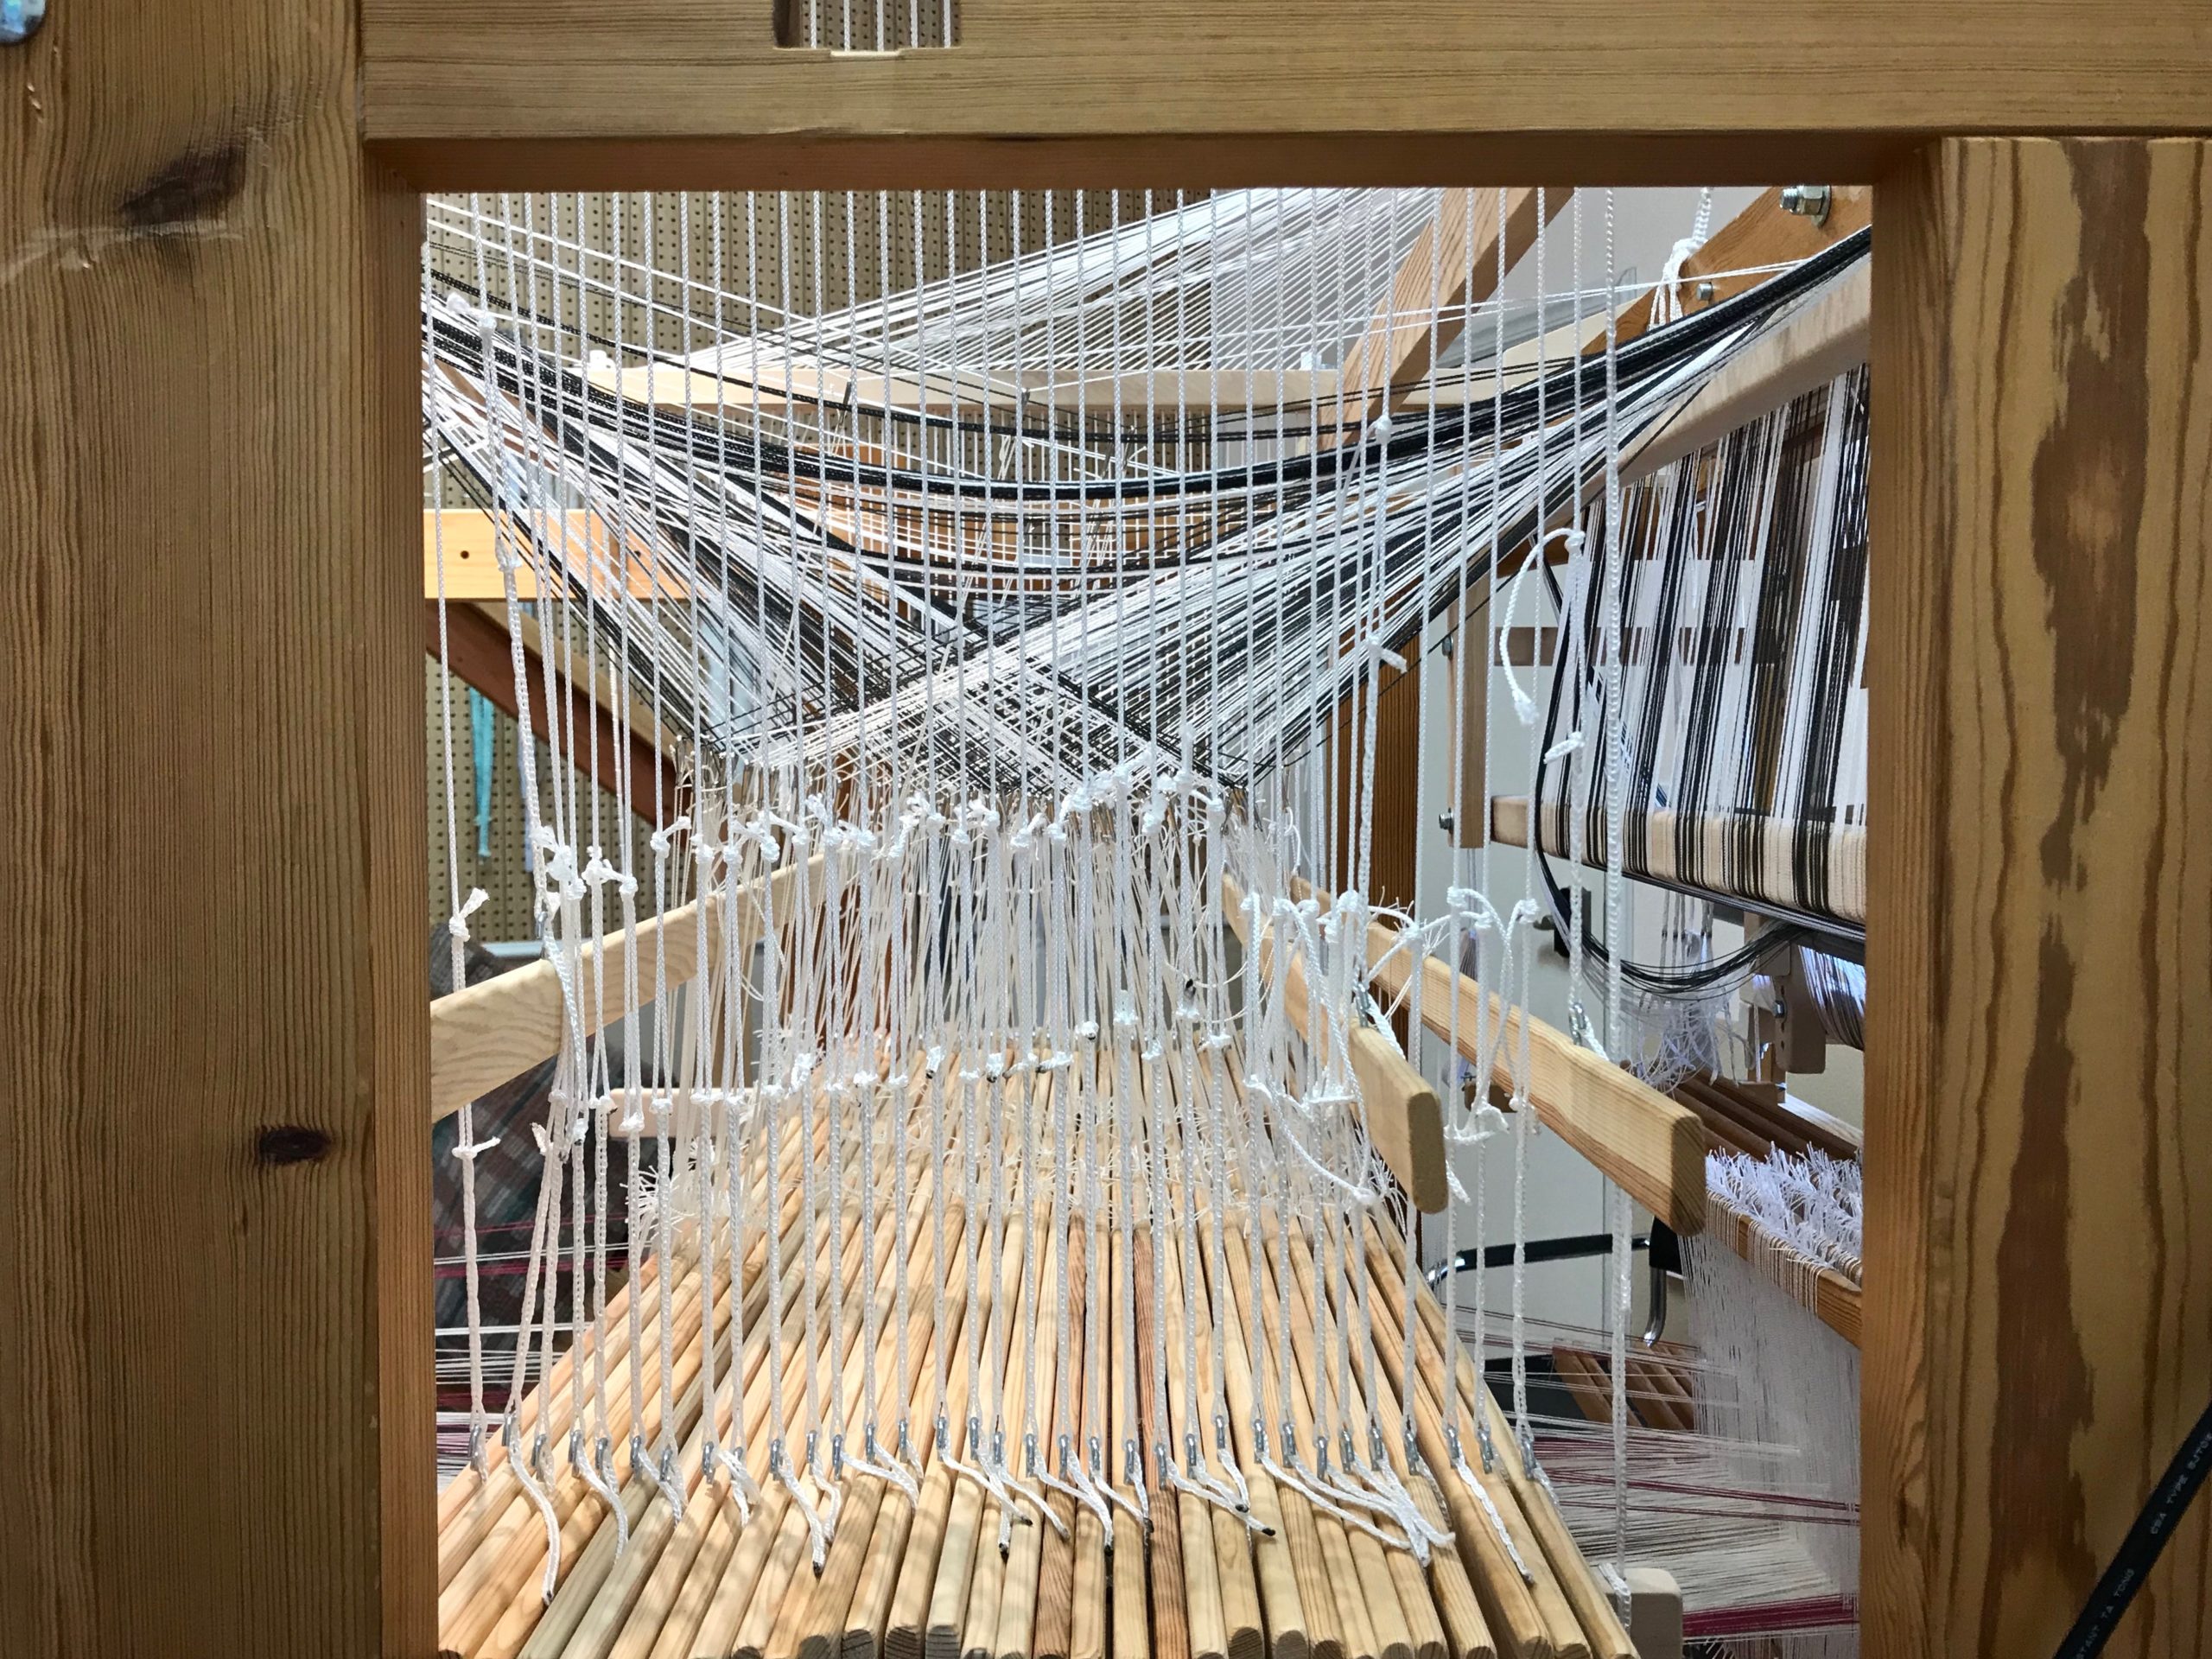
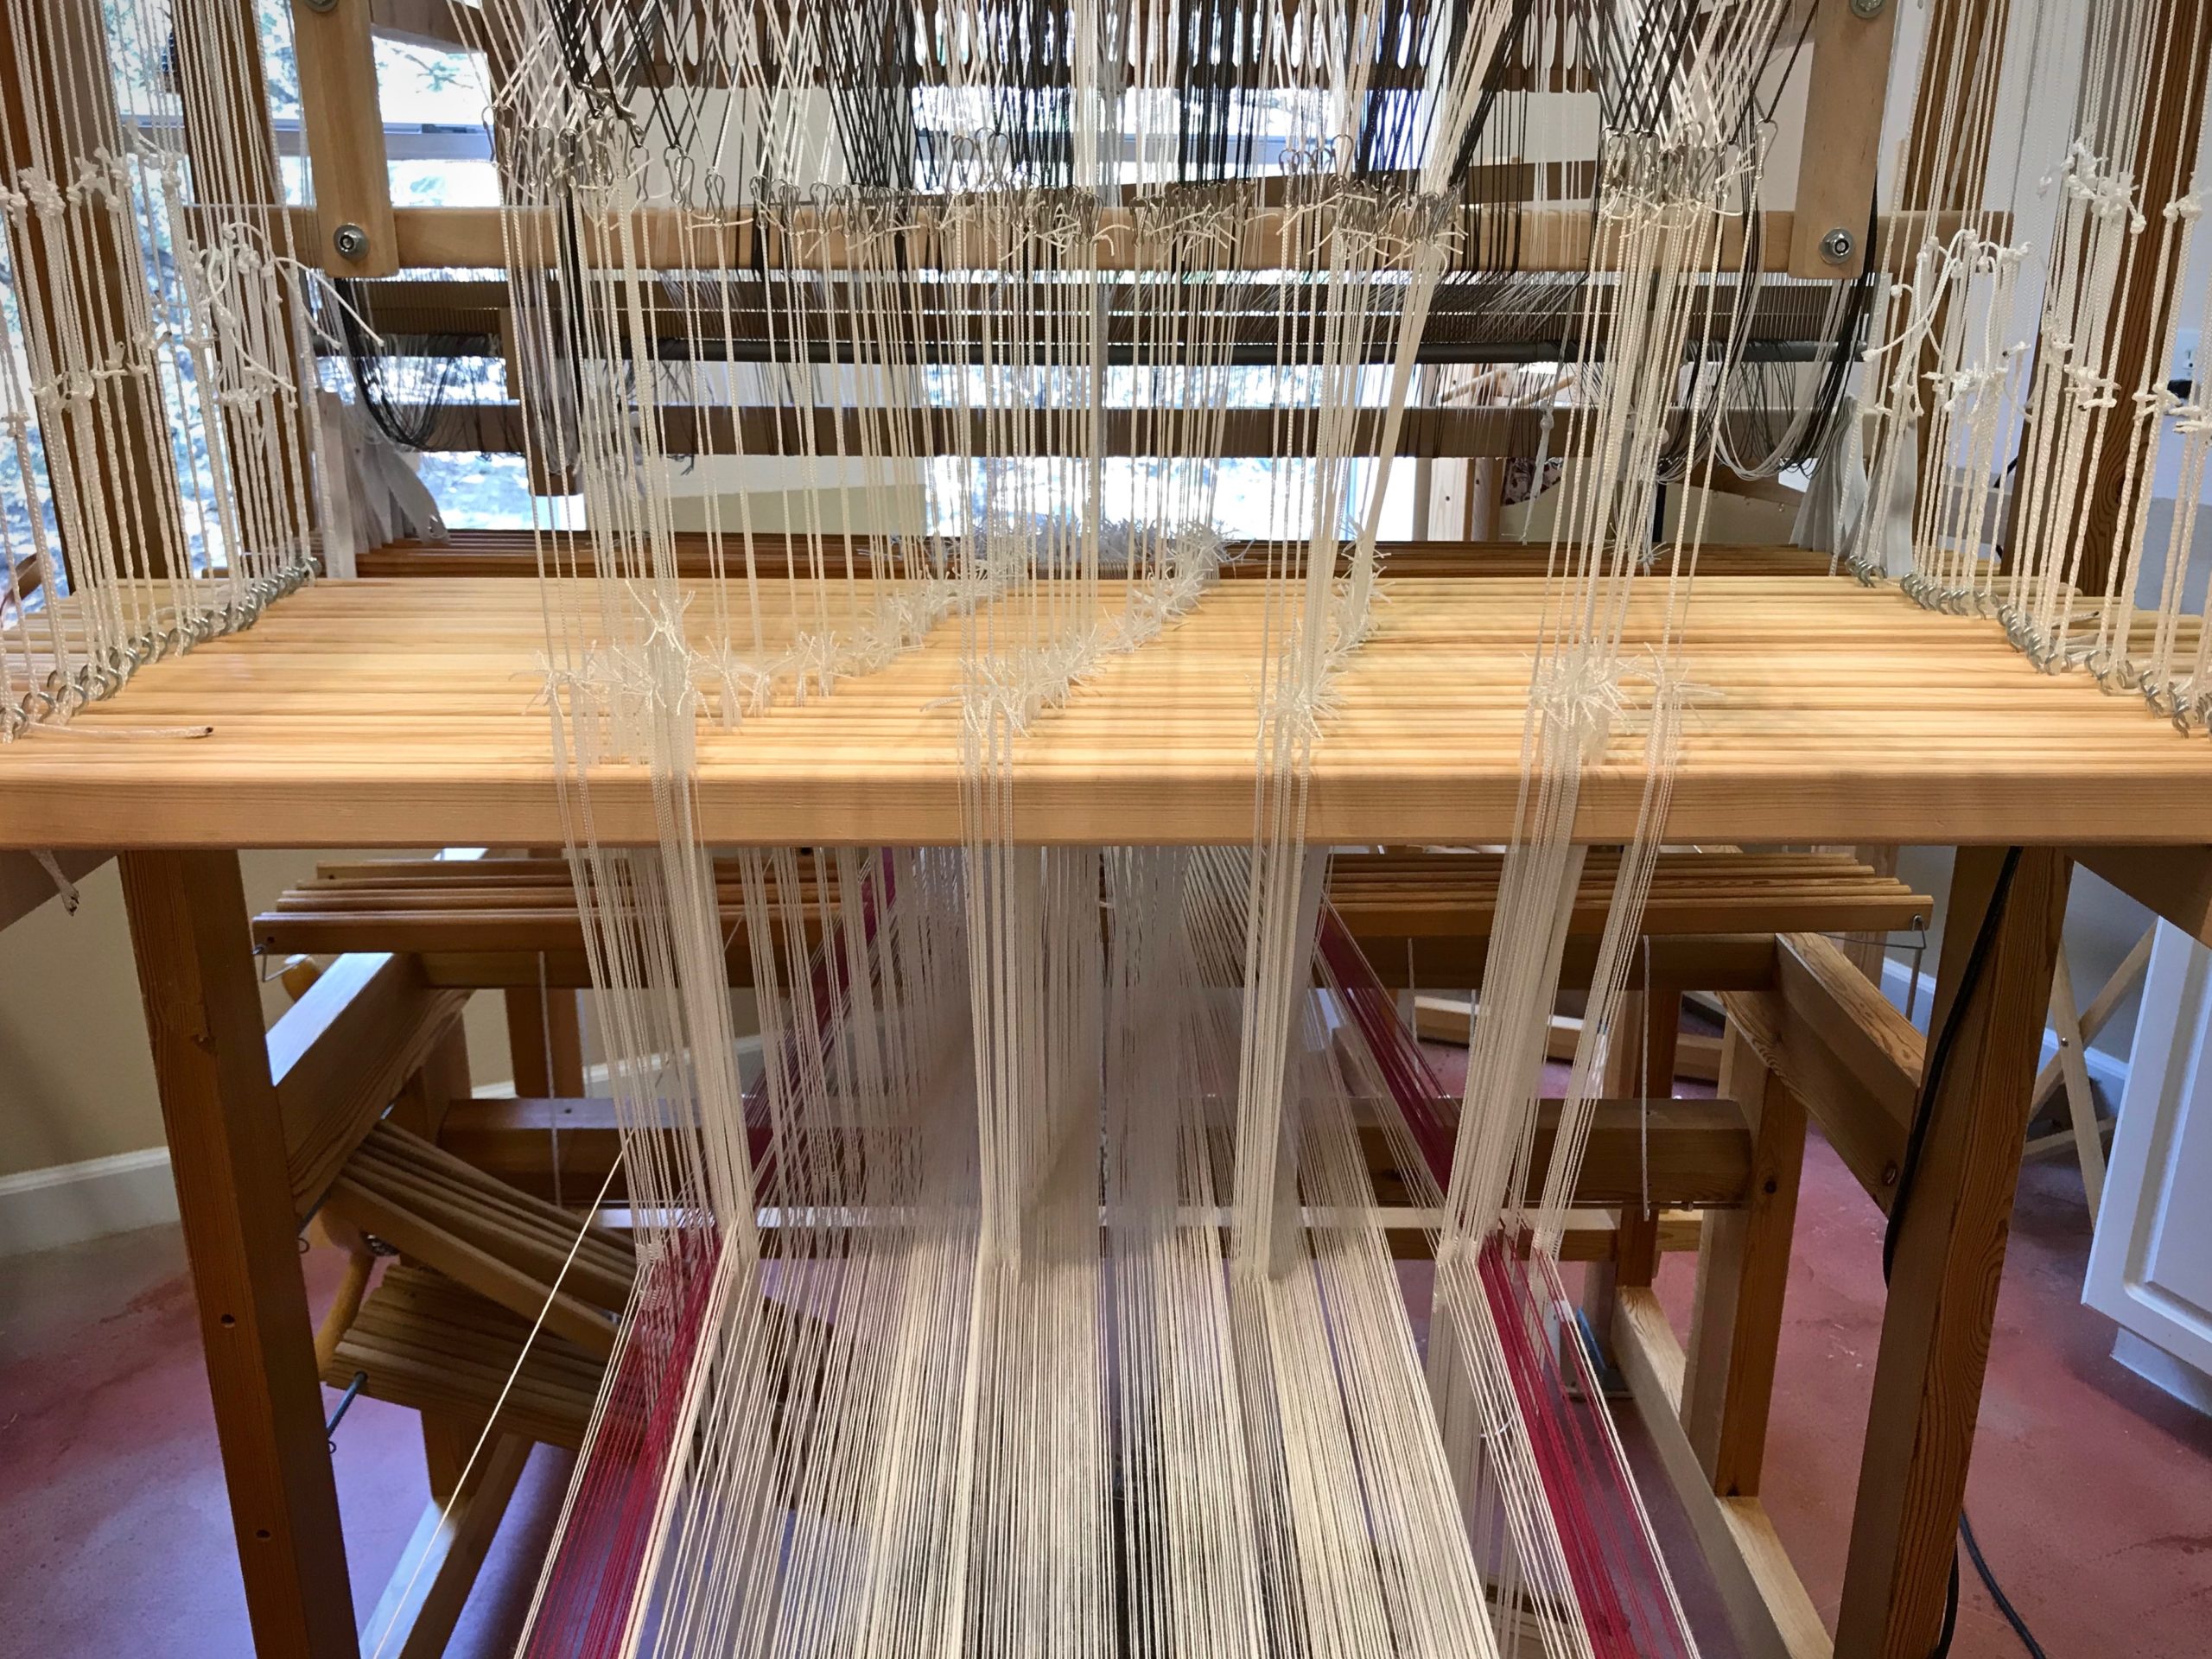
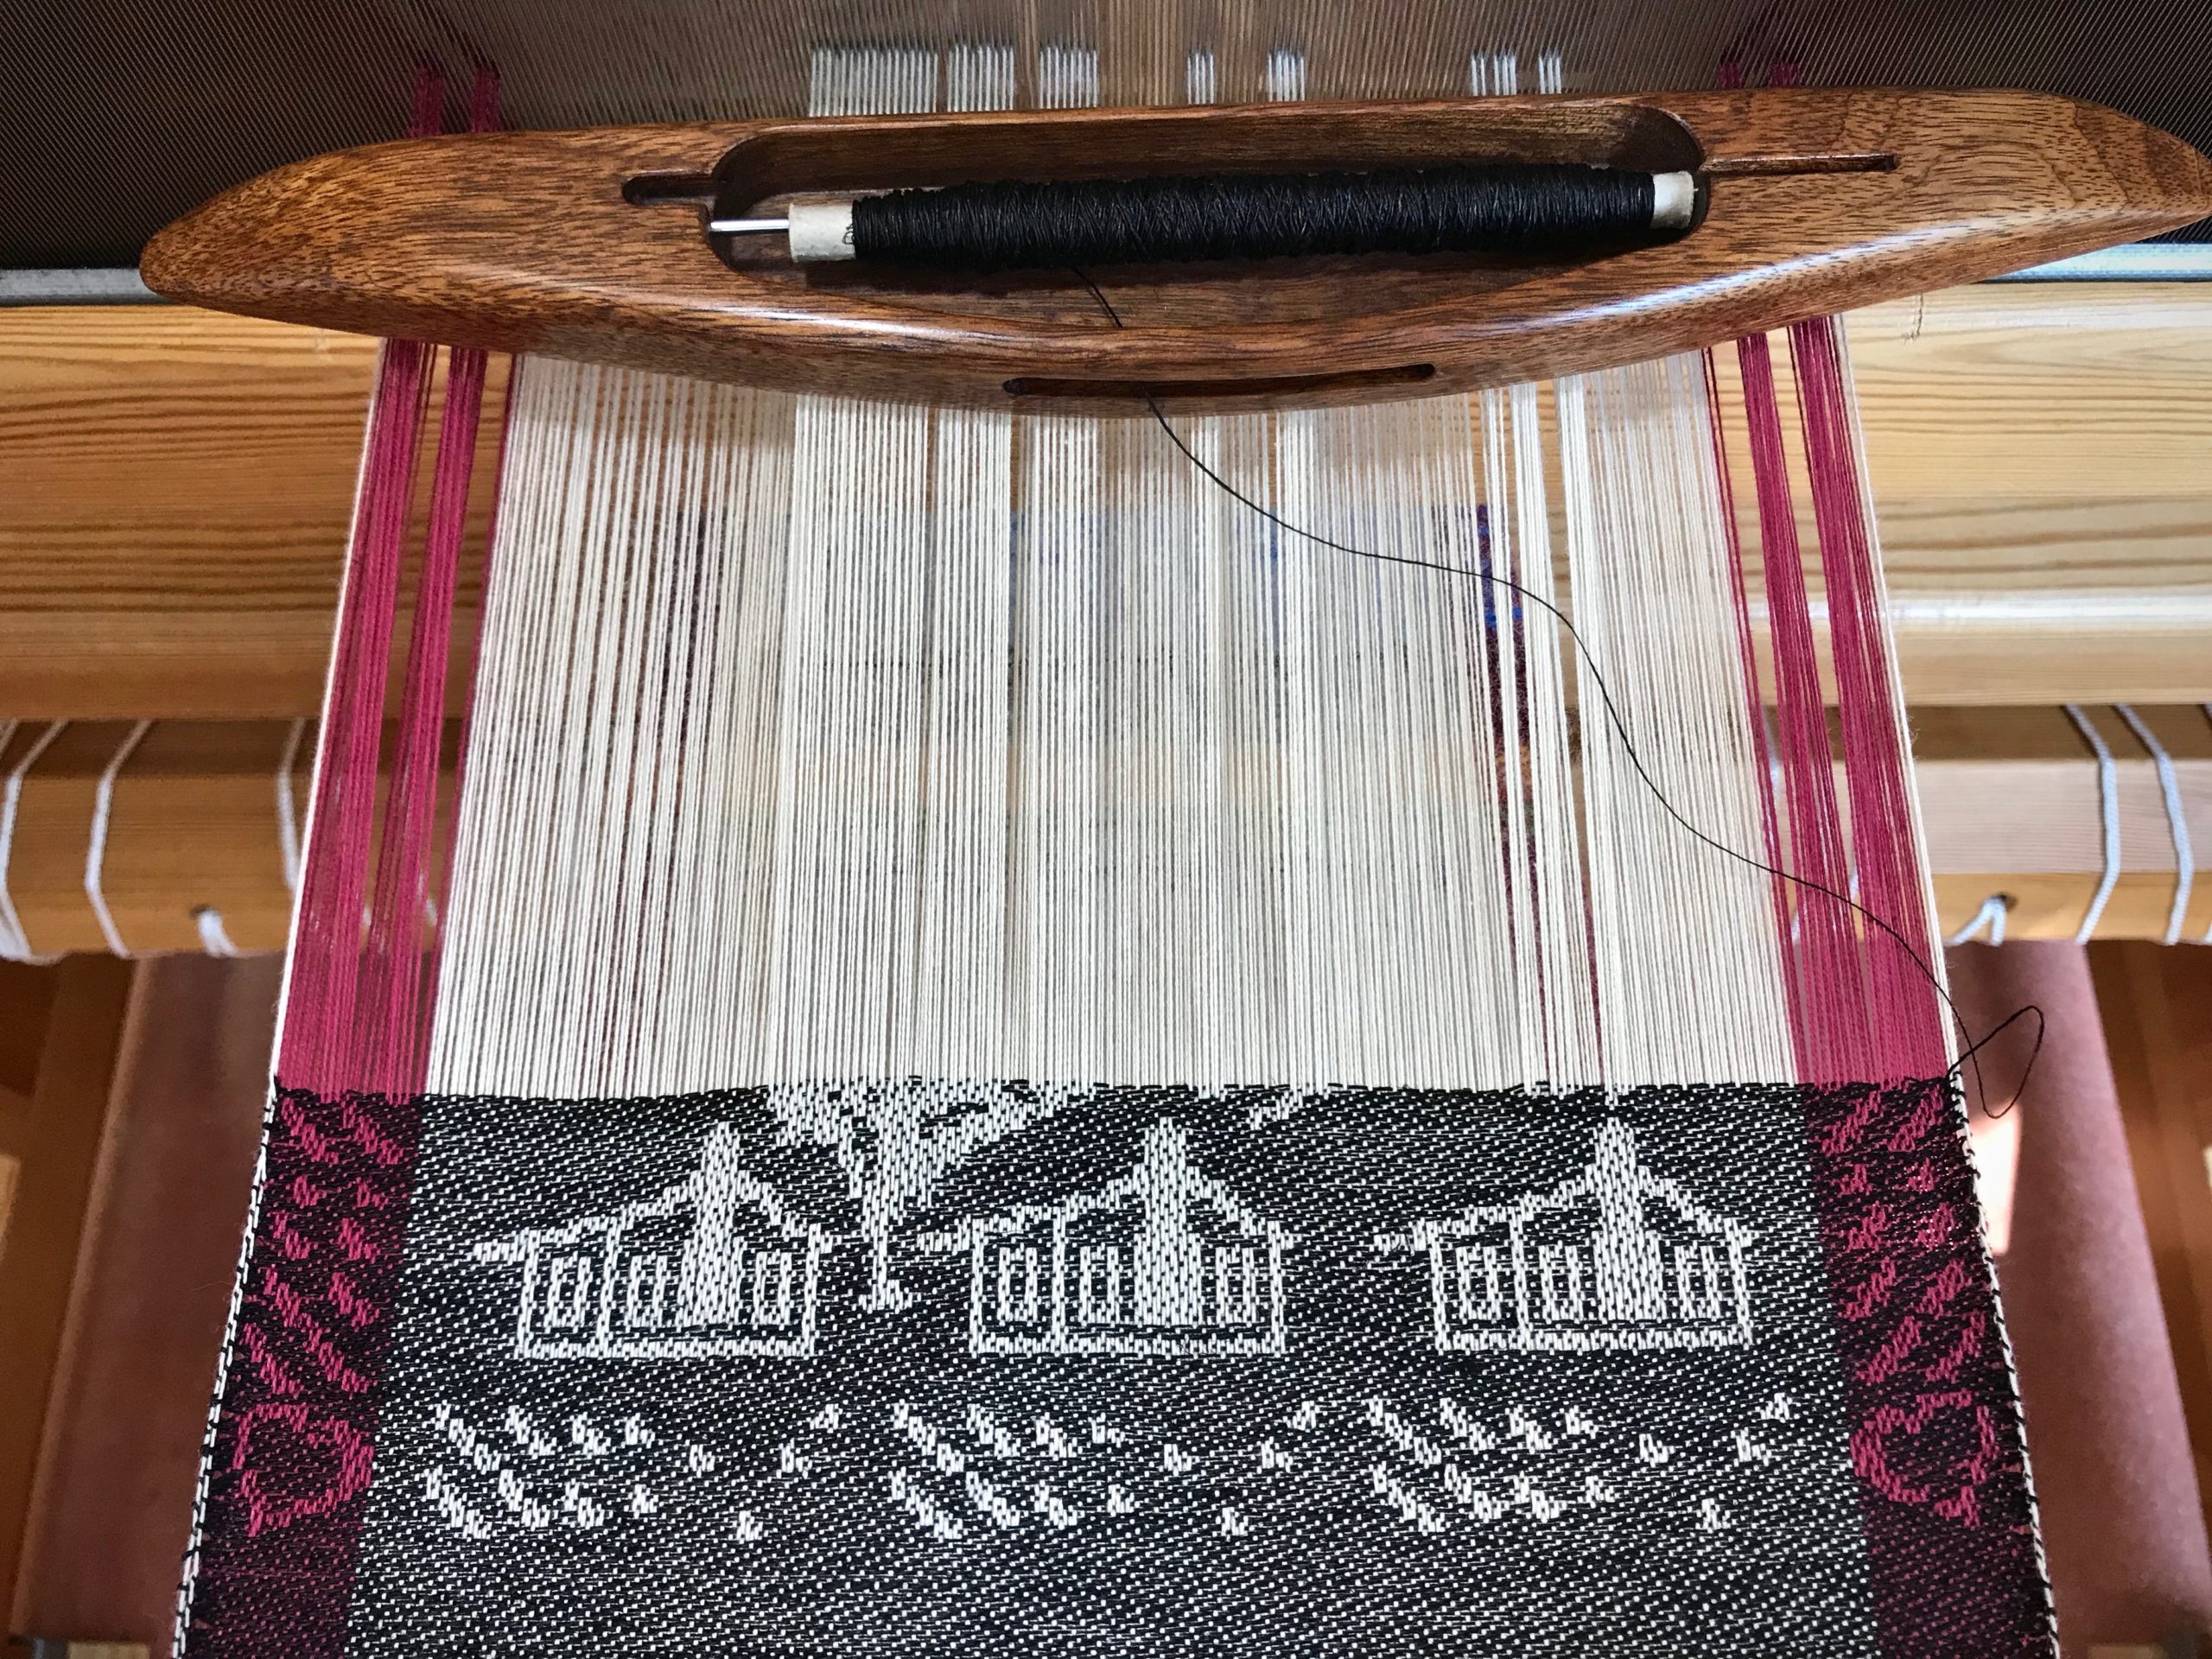
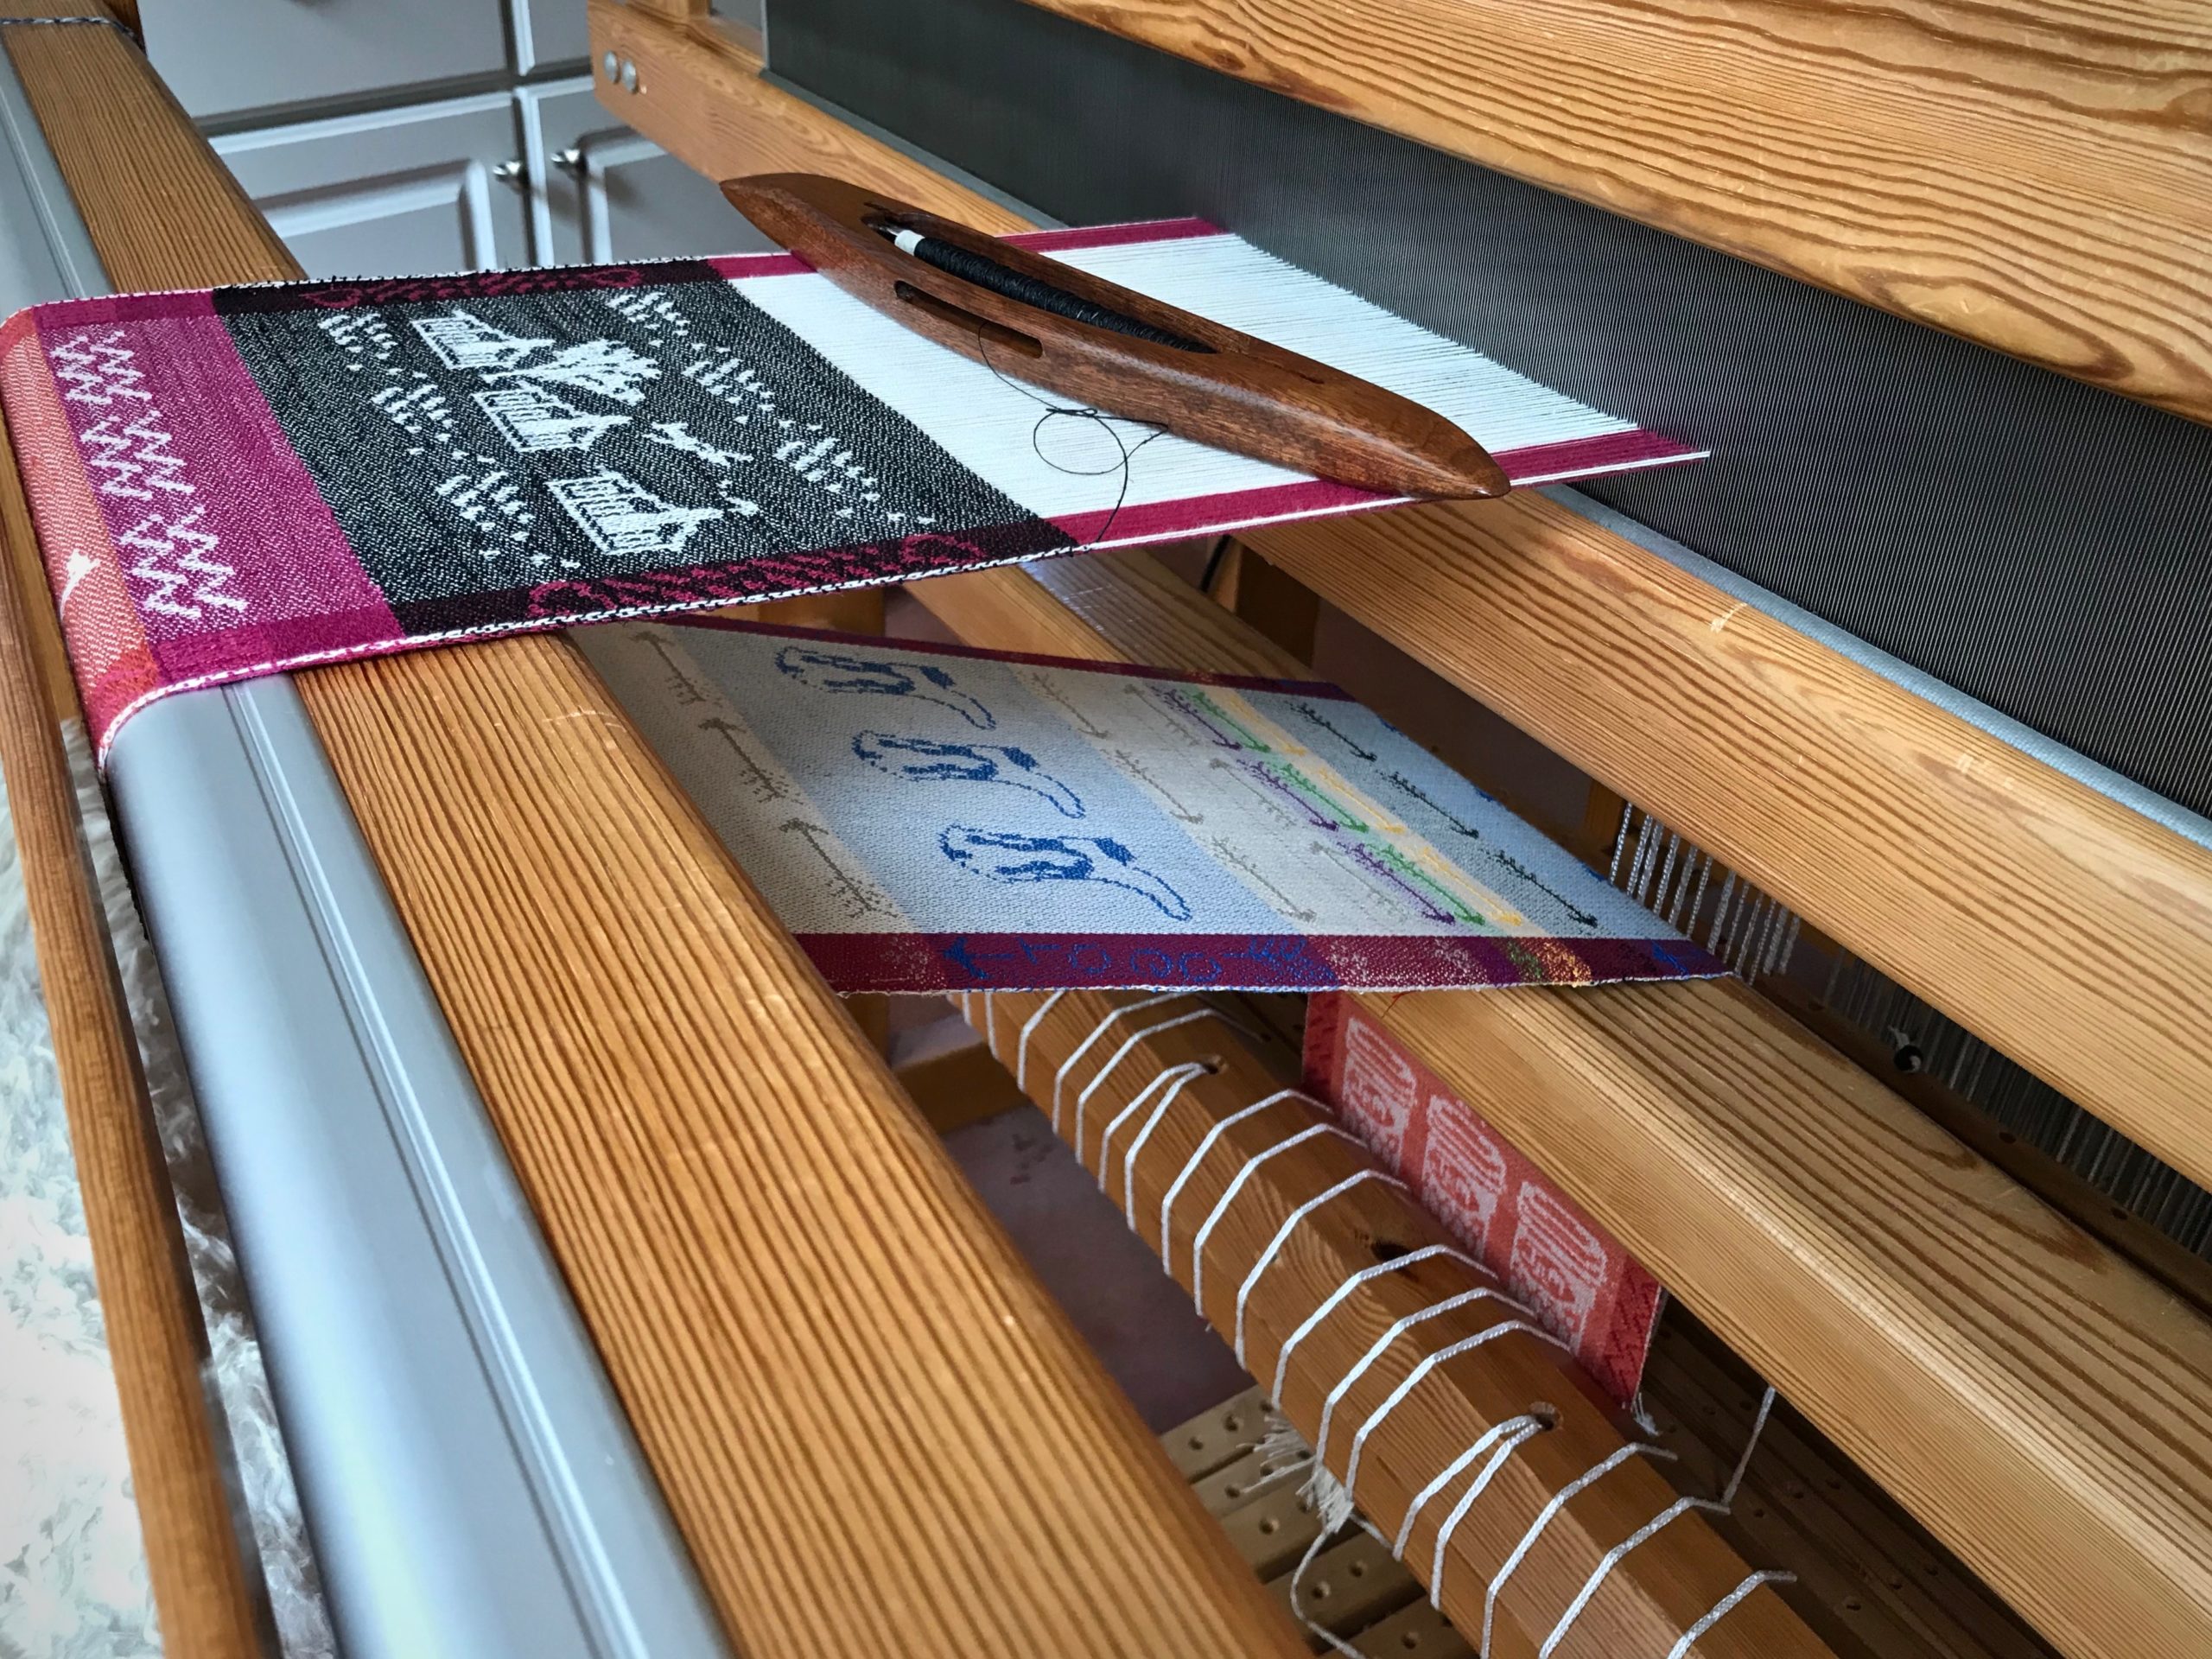
The sky is the limit! That is my conclusion after weaving a few designs using the Myrehed combination drawloom. The shaft draw and the single unit draw systems are combined on this ingenious apparatus that is attached to an otherwise ordinary loom. The shaft draw system enables me to weave repeated patterns. The single unit system enables non-repeat patterns. This narrow warp is my playground to do both.

Myrehed Combination drawloom - learning its potential.
Pattern shafts (the wood bars) and single units (with black and white draw cords) are combined for this warp. 36 pattern shafts, including the X shaft. 132 single units.
Setting up the Myrehed combination drawloom.
Central design area uses a repeat of 30 pattern shafts threaded in a straight draw. Side borders use a repeat of 5 pattern shafts. Lift heddles and lanyard clips on the single unit draw cords attach the draw cords to the all the individual units (single units) on the pattern shafts.

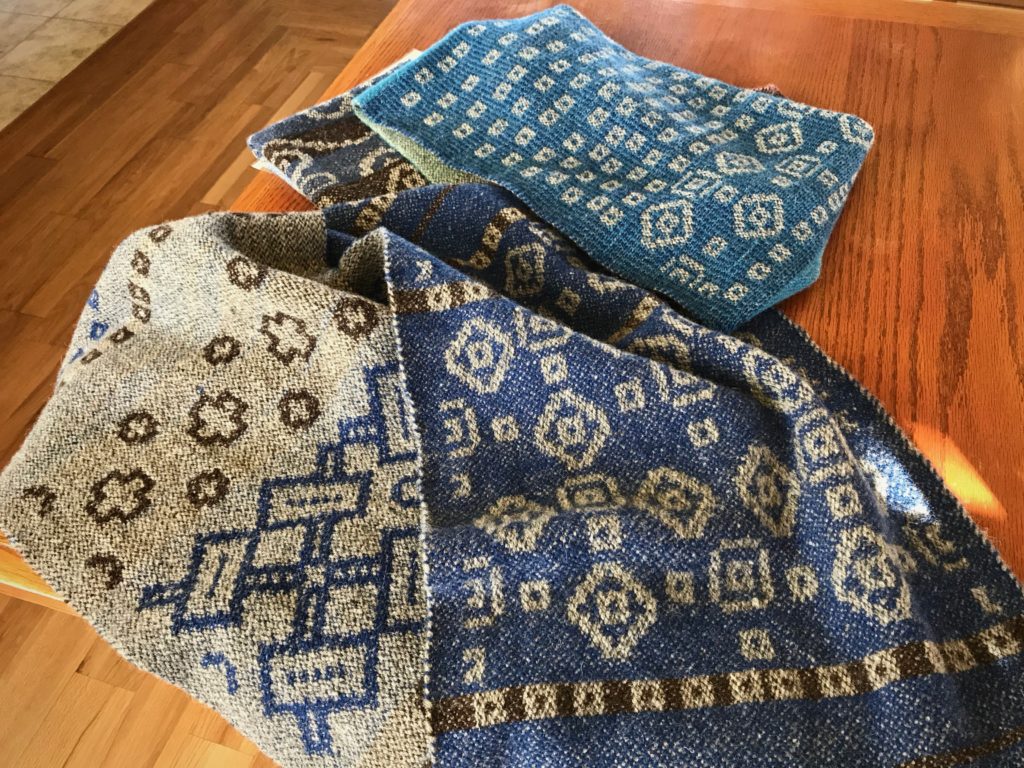
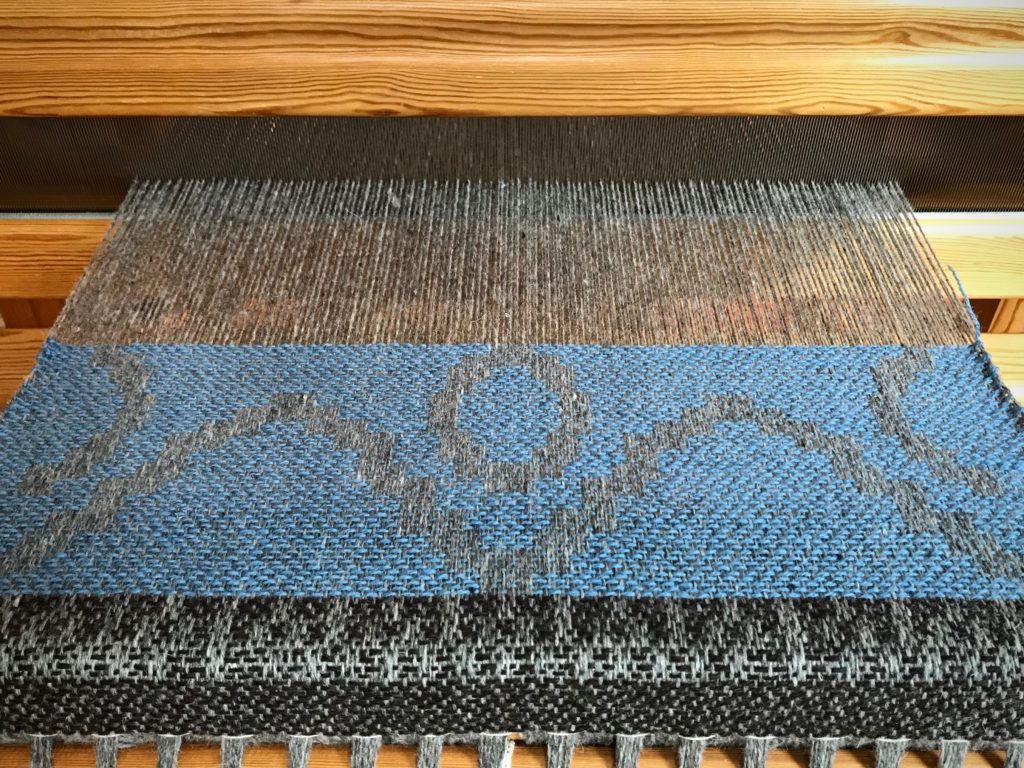
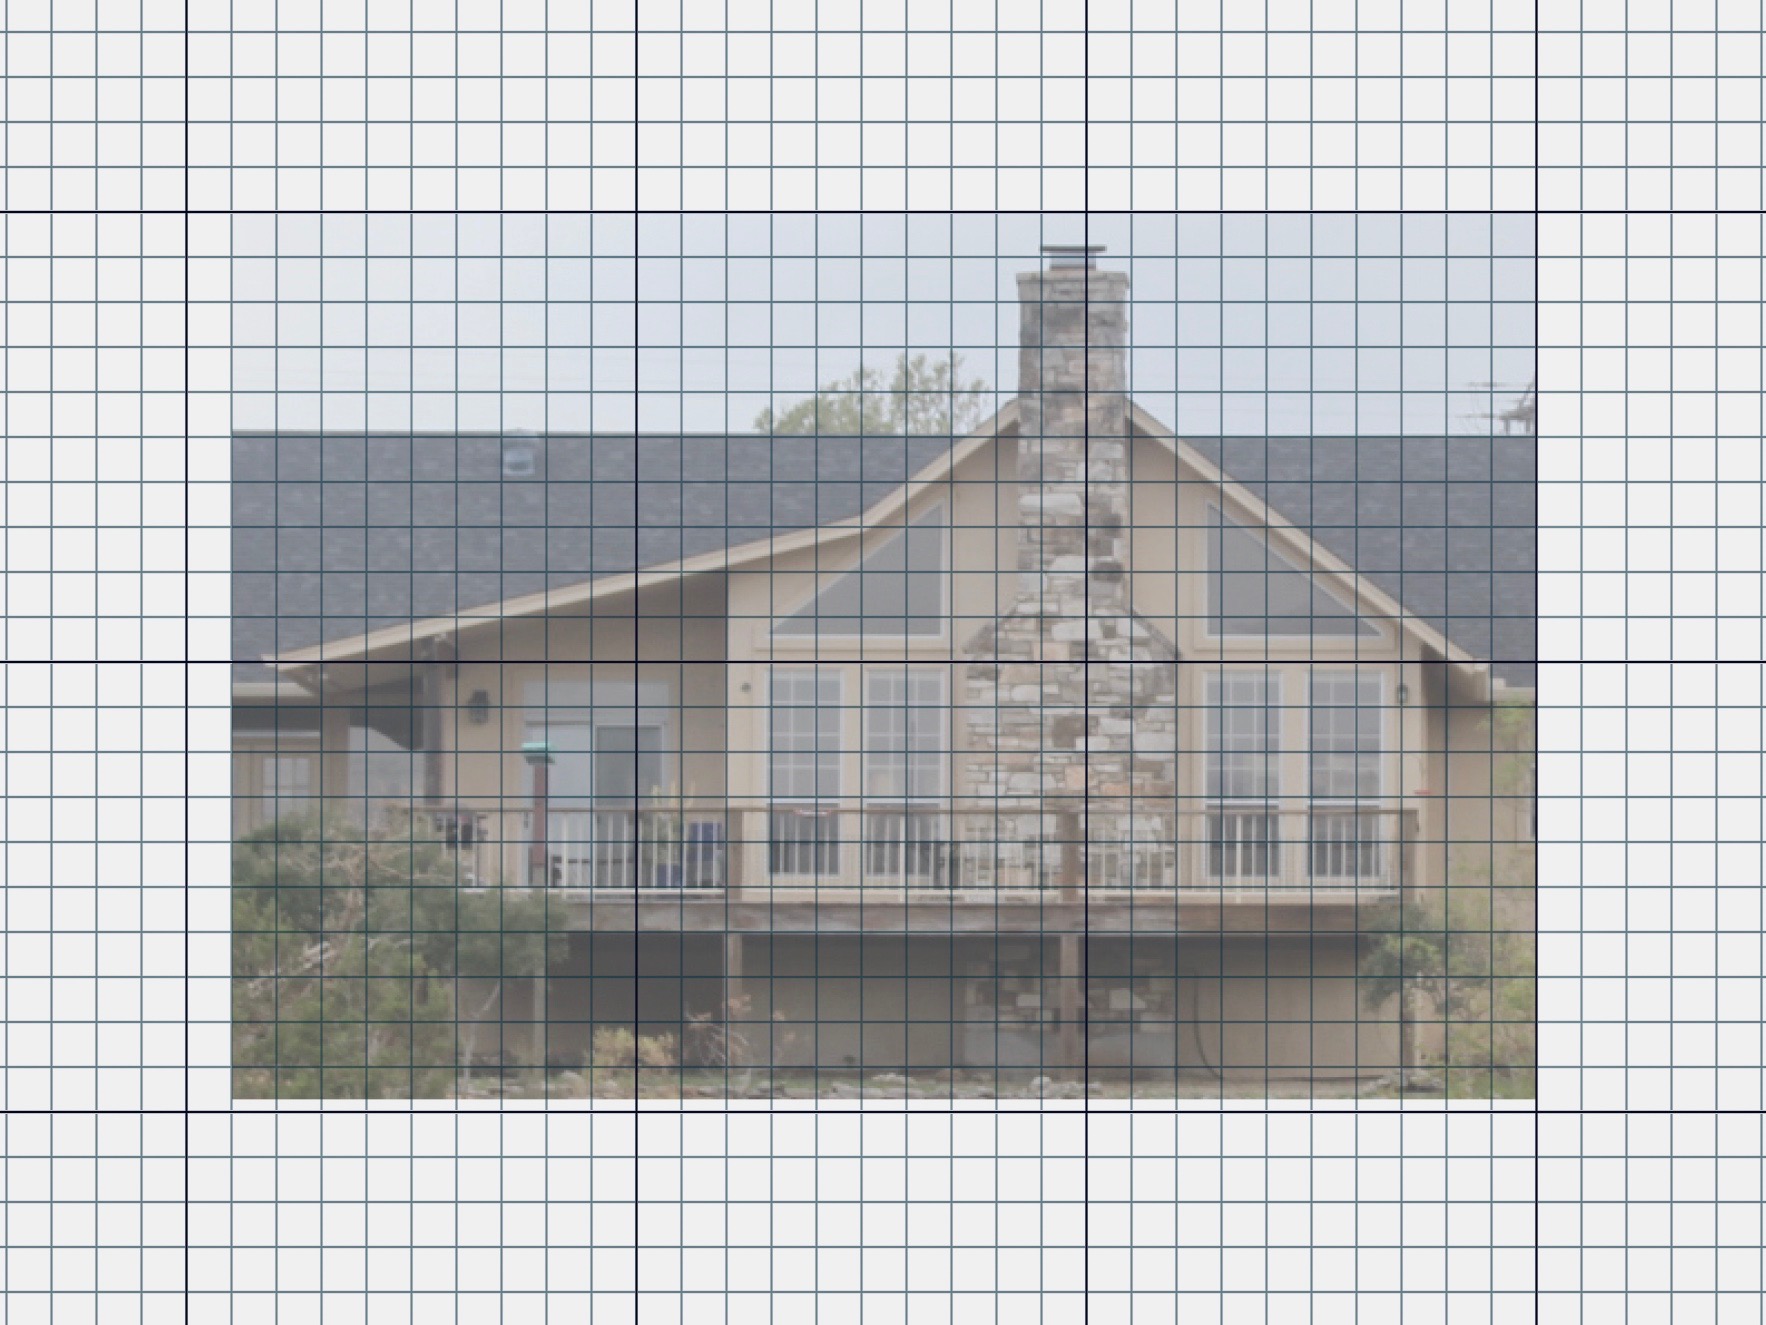
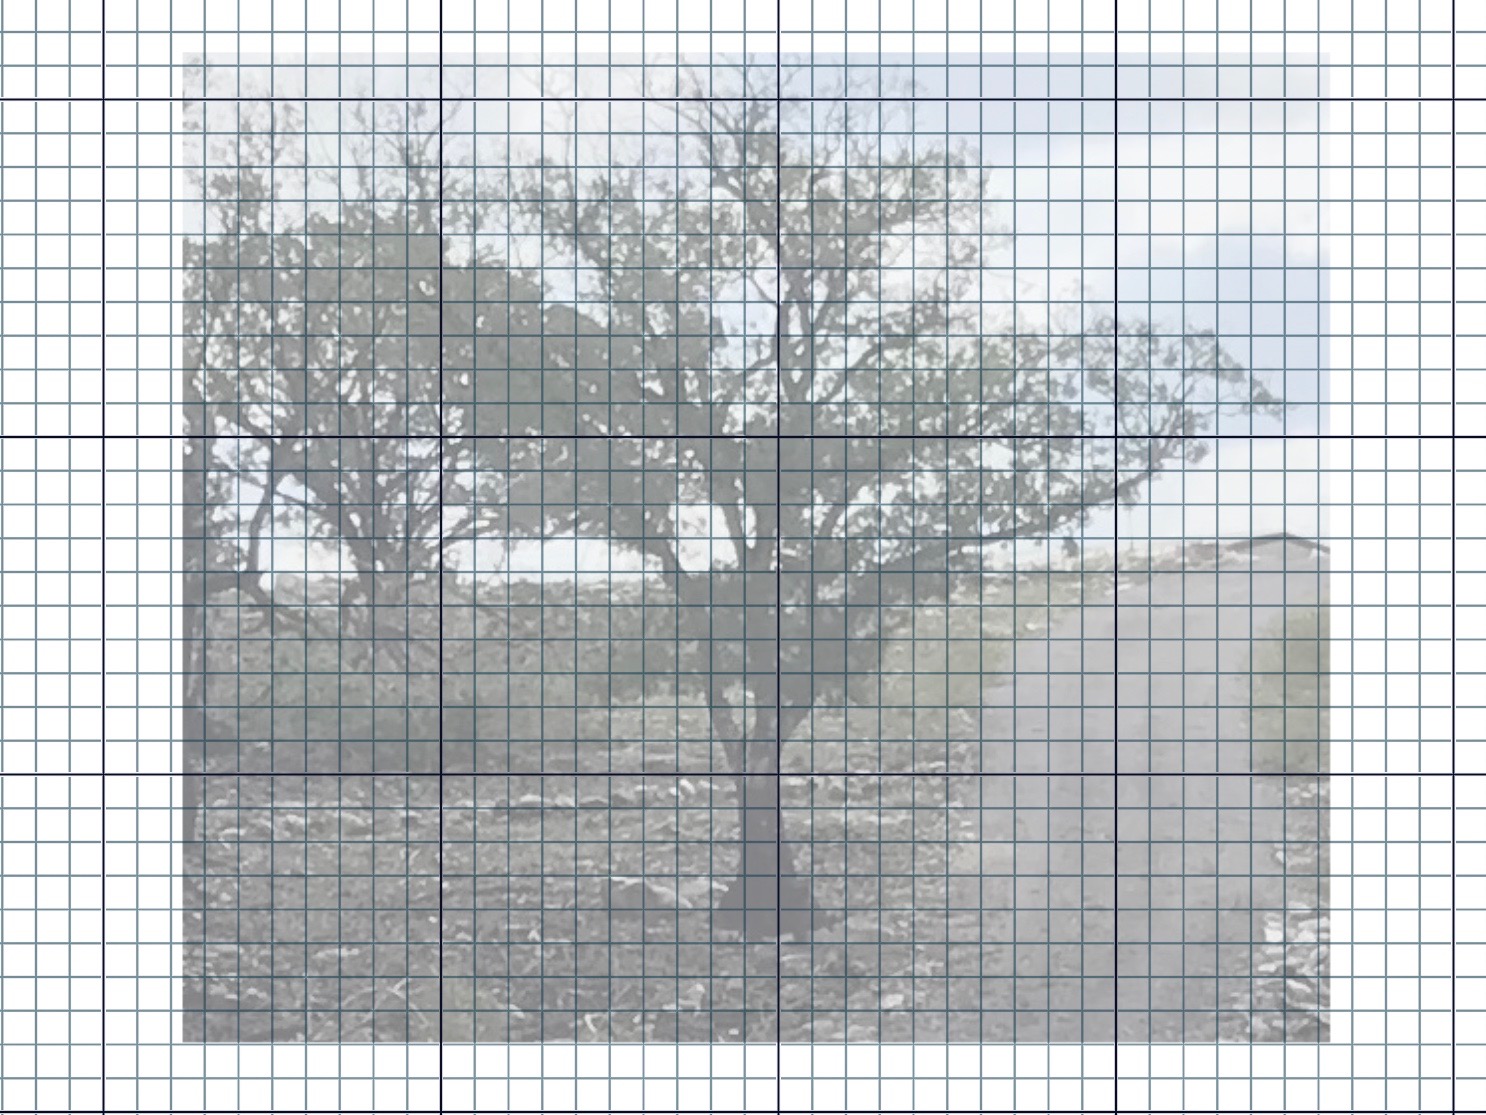
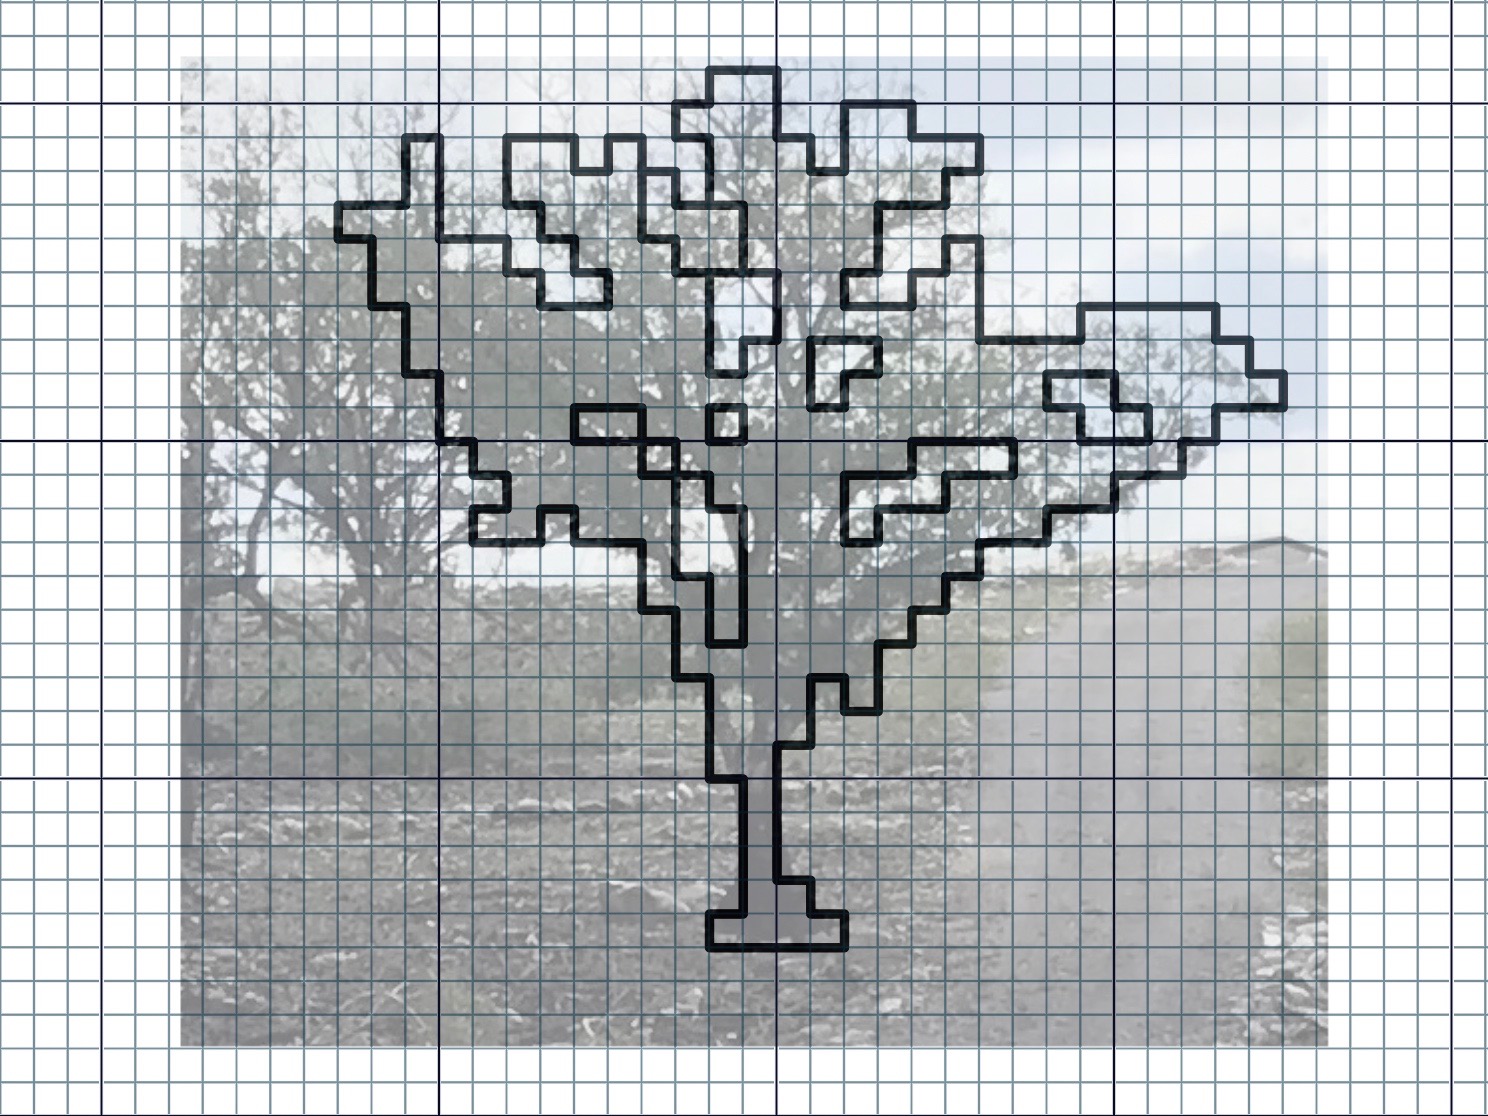
I use the computer to create designs. ”Home in Texas” shows the back of our house, with its massive stone chimney. The tree in the scene is a tracing of the oak tree that I pass as I walk up the hill to my drawloom studio. The airplane is a copy of the Mooney that our pilot friend took us in to fly over Enchanted Rock. I am delighted to discover that I can use a drawloom to bring features of personal meaning such as these to life.

Making a gridded pattern for weaving on the drawloom.
Photo of our back deck. Using Affinity Photo, I set up a grid on the page to represent 30 pattern shafts. I then import my photo onto the gridded page.
Creating a simple gridded pattern on the computer.
Simple outline is created and saved as a separate image. The filled-in outline becomes my drawloom pattern.
Creating gridded designs in Affinity Photo.
Oak tree that I pass on the hill up to my drawloom studio. After importing the photo, I adjust the opacity to fade the picture, which makes tracing easier.
Tracing a tree in Affinity Photo to make a drawloom pattern.
I use a pen tool in Affinity Photo set at 3 pt to do the tracing. Now I can fill in the outline and copy and paste the image onto my chart that I will print and then use at the loom.
Drawloom weaving, using the Myrehed Combination.
Houses are woven with 30 pattern shafts. The hearts in the corners and the added details above the houses use the single unit draw cords. The tree is beginning to appear between the two houses on the left.
Myrehed Combination drawloom.
Two draw handles are pulled for the pattern on the side borders. Single unit draw cords are pulled and held in place on the hook bar above the beater.
Our Texas Home - woven on the drawloom.
Our Texas Home

The words of the Creator have life in them. It’s as if he puts his thoughts on the loom and weaves them into being. Let there be light! He speaks; and it is so. Listen closely. Hear the Grand Weaver say, Peace to you. And it is woven so. You are his workmanship, bringing his design to life.

Experimental warp on the drawloom.
More ideas are forming, even as this fabric begins to hug the cloth beam.

May your life reveal the Creator’s design.

Happy Weaving,
Karen

Imagine Rag Rugs on the Drawloom

Rag rug weaving on the drawloom! I can only imagine the delight. In the meantime, the drawloom is getting dressed. It takes time to group the pattern heddles into units, add lingos, thread pattern shafts, thread eight ground shafts, sley the reed, move the ground shafts and pattern shafts to their positions, and tie on. After I finish all that I can think about adding all the single-unit draw cords and finish tying up. Whew!

Winding a warp for the next drawloom project.
Warping reel is in a corner of the drawloom studio. When not in use, the reel is folded up and pushed against the wall.
Warp chains of 12/6 cotton rug warp. Drawloom rag rugs!
Warp chains of 12/6 cotton rug warp.
Drawloom - rug warp is ready for threading.
Warp is beamed and ready for threading.

I became acquainted with the single-unit drawloom at Joanne Hall’s studio (see Drawlooms in Montana), but this is my first go at it on the drawloom in my studio. Because of the reward that awaits, I will gladly tackle all the tasks of dressing this loom. Weaving rag rugs on a drawloom will be phenomenal!

Pattern heddles and weights for prepping the drawloom.
Pattern heddles are hanging on the breast beam for grouping into pattern units. A lingo is hung on each unit.
Threading the drawloom.
Pattern heddles have been threaded. You can see the lingos hanging below. Ground heddles are now being threaded. Straight draw threading on eight ground shafts.

Joy sees hidden treasure. We go to great lengths to unearth high-value treasure. Jesus did this, seeing us as the reward. That’s what Christmas celebrates. Jesus left his splendor in heaven to come to earth as a baby. He entered this world and endured the worst because of the joy set before him. He did it all for the joy of having us in fellowship with God. We come to him and find that we are the Grand Weaver’s reward.

May your joy be full.

Joy to you,
Karen

Process Review: Drawloom Jewels

It is exciting when Maverick walks by. Although he never comes in my drawloom studio, he does stop for a moment to look my way. You’ll see him in the slideshow video below. But what happens inside the studio is even more exciting, especially when it’s time for cutting off!

Drawloom with 16 pattern shafts.
Drawloom, set up with sixteen pattern shafts. I graph out the designs in Excel on my computer. Then, I print out the gridded pattern to use at the loom. I keep my place in the pattern with a magnet and magnet board made for cross-stitch embroidery.

This is Tuna wool, so I expect some shrinkage, but how much? I take careful measurements before and after wet finishing. Besides the main piece of fabric that I’m using for a garment, I have two sample pieces. I can experiment with the samples before wet finishing my garment fabric.

Here are my findings:
Sample 1. Hand wash and air dry.

10% shrinkage in width; 13% shrinkage in length.

Sample 2. Machine wash (3 minutes agitation on a gentle cycle, with a short spin) and machine dry (low setting) till damp, finish with air drying.

13% shrinkage in width; 14% shrinkage in length.

~How to do the shrinkage calculations~
First measurement (on the loom) minus the second measurement (after washing and drying) equals the difference. The difference divided by the first measurement equals the percentage difference.
For example, 50 cm – 43.5 cm = 6.5; 6.5 / 50 = 0.13; 13% shrinkage.

The first sample fabric is softer than the unwashed fabric, but not as soft as I’d like. The second sample fabric is beautifully soft, like a nice warm sweater. So, with confidence, I wet finish the garment fabric—with great results. It’s perfect for the fall/winter vest that I’ll soon be wearing, made from this fabric!

Wool garment fabric from a drawloom.
Like a sweater, this soft fabric will be comfortable to wear.
Making a pattern for handwoven garment fabric.
Muslin pattern for a simple vest. First, I’ll make a vest out of a wool throw, woven on my rigid heddle loom ages ago. Then, I will cut into the new drawloom fabric, with confidence about the fit.

Enjoy this photo show of the drawloom process.

May you enjoy the process you’re in.

Happy Weaving,
Karen

Process Review: Dressing the Drawloom the Second Time

Dressing the drawloom the second time is easier than the first time. No slip ups or confusion. Just smoothly moving from one step to the next. (Read to the end to see what to expect for July.)

Winding skeins of wool yarn into balls.

With my first drawloom warp the most challenging part was distributing the pattern shafts. (See Q and A with Joanne Hall and Drawloom Dressing.) This time something clicked and the light bulb turned on. Instead of blindly following steps, I now understand what I am doing, and why. And I am having fun in the process!

Winding warp on the warping reel.
Winding the warp on the warping reel, making two bouts.
Big fat wool warp chains.
Warp chains of 6/2 Tuna wool, ready to dress the loom.
Ready to thread pattern heddles.
After beaming the warp, the loom bench is moved to the back of the loom for threading heddles. Pattern heddles first, and then, ground heddles.
Sleying the reed on the drawloom.
With the reed sleyed, it’s time to return the ground shafts to the front of the loom and put the reed in the beater.
Leveling string is doing its job!
Warp is tied on, and the leveling string is doing its job.
Distributing pattern shafts on the drawloom.
Inkle band serves to separate pattern heddles as I distribute the pattern shafts.
Adding pattern shafts to the drawloom.
Pattern shafts are resting nicely on the pattern shaft holders. Their little hooks grab the Texsolv that connects them to the draw cords and handles.
Dressing the drawloom!
Pointed threading can be seen in the arrangement of the heddles on the pattern shafts.
Dressing the drawloom!
Drawloom setup is complete except for tying up the treadles. Treadle tie-ups on a drawloom are refreshingly simple.
Testing pattern sheds on the drawloom.
Testing pattern sheds by pulling some of the draw handles. After a few small adjustments, she’s ready to weave!
Wool on the drawloom.
First sample. 6/2 Tuna wool warp and weft, 4-shaft broken twill on the ground shafts, sett is 5.5 ends per cm, 16 pattern shafts with 1 extra shaft for the edges.

Friends, It’s that time again, when Warped for Good is put on pause for the month of July.

Thank you for sharing in this journey with me!

What’s on my looms: I am near the end of the blue double weave blanket on the Standard, and I am planning a new pictorial tapestry for that loom. The drawloom is dressed and in motion. And the Ideal loom is still sitting ready for rosepath rag rugs. Also, Steve and I have a Casita trip planned that will include some leisurely backstrap band weaving.

What’s on your loom right now? Share with us in the comments.

See you the first Tuesday of August! (In the meantime catch me over on Instagram @celloweaver.)

May your second times be better than your first times.

Keep on Weaving,
Karen

Drawloom Cords and Handles

My first drawloom warp used ten pattern shafts, which was plenty. I have now installed the cords and draw handles for all fifty pattern shafts, so the sky’s the limit! (See Process Review: First Drawloom Warp)

Adding draw cords to the drawloom.
Adding draw cords. I stand on the foot beam to reach up to the top of the draw frame to pull cords through the holes.
Draw cords are added in order.

Adding all these draw cords and handles is a big job. It involves a cord threader and scissors and time—reaching, going back and forth, measuring, cutting, tying. Over and over. It’s not hard, but it seems endless. Yet for some strange reason this job is entirely enjoyable. I feel like an architect and builder, a dreamer and investor. It’s incredible to step back and see the structure that this effort has produced. And this is merely the set up. Can you imagine the weaving prospects?!

This is how we build good structures in our lives. Intentional, persistent, focused. Listen well. Over and over. The way we speak makes a difference in the way we listen. When we speak with grace, seasoned for the hearer, we ready ourselves to listen. Our cord threader is our unselfish attentiveness to pull someone else’s thoughts and questions toward our understanding. With this beautiful structure we are ready for anything. Accomplished through the grace of God, the sky’s the limit!

Drawloom ready for weaving!
Drawloom with fifty draw handles, a sight to behold.

May your words be seasoned with grace.

Getting ready,
Karen